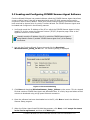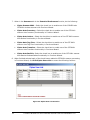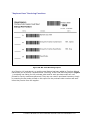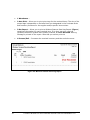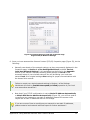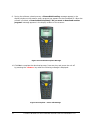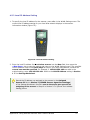
1
CIPHER Lab CPT-8061 Wireless Scanner Use and Installation Version 10.00 (or Above) Release Date: December 12, 2007 Copyrights CIPHER Lab CPT-8061 Wireless Scanner - Installation and Use Manual Copyright © 2005, 2007 New Vision Information Systems, Inc. This document is copyrighted and all rights are reserved. Printed in the United States of America. Under copyright laws, neither this documentation nor the software may be copied, photocopied, reproduced, translated, or reduced to any electronic medium or machine-readable form, in whole or part, without the prior written consent of New Vision Information Systems, Inc. or in the manner described in the New Vision Information Systems Software License Agreement. New Vision Information Systems, Inc. provides this documentation and software without warranty of any kind, either implicit or expressed, including, but not limited to, the implied warranties of merchantability or fitness for a particular purpose. New Vision Information Systems, Inc. reserves the right to review this documentation and software and to make changes in content from time to time without obligation on the part of New Vision Information Systems, Inc. to provide notification of such revisions or changes. This document contains confidential and proprietary information of New Vision Information Systems, Inc. This document is licensed by agreement and its use is subject to the terms thereof. Unauthorized copying is illegal. Unauthorized use is prohibited. Furniture Wizard™ and the Furniture Wizard logo are trademarks of New Vision Information Systems, Inc. Other trademarks are the property of their respective owners. UNITED STATES GOVERNMENT LEGEND Use, duplication, or disclosure by the U.S. Government is subject to restrictions as set forth in the license agreement and as provided in DFARS 227.7202-1(a) and 227.7202-3(a) (1995), DFARS 252.227.7013(c)(1)(ii) (OCT 1988), FAR 12.212(a) (1995), FAR 52.227-19, or FAR 52.227-14 (ALT III), as applicable. Version: 10.27 Document Revision: 1.0 New Vision Information Systems, Inc. 820 Starboard Street Chula Vista, CA 91914 Phone: (619) 869-7200 Fax: (619) 869-7210 Email: [email protected] http://www.furniturewizard.com Table of Contents Introduction ................................................................................................ 1 1.1 Overview ........................................................................................................ 1 1.2 Technical Support ............................................................................................ 2 1.3 Publications .................................................................................................... 2 1.4 Using this Manual ............................................................................................ 2 1.4.1 Assumptions .......................................................................................................... 2 1.5 Guide Conventions ..................................................................................................... 3 CPT-8061 Wireless Scanner Overview ......................................................... 5 2.1 Access Point and Wireless Scanner Components ................................................... 5 2.1.1 3560 Bluetooth Access Point Receiver ....................................................................... 6 2.1.2 CPT-8061 Charging and Communication Cradle ........................................................... 6 2.1.3 CPT-8061 Bluetooth Wireless Terminal (Scanner) ......................................................... 7 2.2 Wireless Scanner – Furniture Wizard Interface ..................................................... 8 Using Wireless Scanners with Furniture Wizard .......................................... 9 3.1 Overview ........................................................................................................ 9 3.2 Loading and Configuring CIPHER Scanner Agent Software ................................... 10 3.3 Configuring Furniture Wizard for Scanner Use .................................................... 15 3.4 Using Wireless Scanners with Furniture Wizard .................................................. 20 3.5 Taking Physical Inventory - Inventory Function (Selection 1) ............................... 24 3.6 Creating an Invoice – Sales Function (Selection 2) ............................................. 27 Listing All Scanned Items................................................................................................ 28 Transmitting Captured Data to Furniture Wizard.................................................................. 29 Changing the Item Quantity............................................................................................ 30 3.7 Retagging Items for Sales or Markdown - Tag Floor Function (Selection 3) ............. 31 3.11 Transferring Items Between Branches - Transfer Function (Selection 4) ............... 33 3.6 Receiving Purchase Orders – Receive PO Function (Selection 5)............................ 34 Label Setup .................................................................................................................. 34 Receiving Items Using the Wireless Scanner...................................................................... 39 Processing a Scanned Item that is not in Furniture Wizard .................................................. 39 Listing All Scanned Items ............................................................................................... 41 Reconciling Received Items ............................................................................................ 42 Received Items with No Associated Purchase Order ............................................................ 43 Processing Received Items ............................................................................................. 43 “Keyboard-less” Receiving Functions ................................................................................ 46 3.8 Performing Stock Checks – Stock Check Function (Selection 7)............................. 53 Appendix A: Installation and Configuration .............................................. 55 4.1 Overview ...................................................................................................... 55 4.2 Installing the Required Hardware ..................................................................... 56 4.2.1 Preparing CPT-8061 Scanner Units ........................................................................... 56 4.2.2 Installing and Configuring Access Point .................................................................... 58 4.2.2 Access Point Receiver Functions .............................................................................. 58 4.2.4 Installation and Configuration Procedures ................................................................. 59 4.3 Uploading Firmware Updates to Scanners .......................................................... 66 4.4 Pairing Wireless Scanners with Access Point ....................................................... 71 4.5 Configuring Wireless Scanners ......................................................................... 73 4.5.1 Subnet Mask Setting ............................................................................................. 76 4.5.2 Local IP Address Setting......................................................................................... 77 4.5.3 Gateway IP Address Setting .................................................................................... 78 4.5.4 DNS Server Setting ............................................................................................... 78 4.5.5 Server IP Setting .................................................................................................. 79 4.5.6 Server Port Address Setting .................................................................................... 80 Appendix B: Settings Worksheet / Miscellaneous ..................................... 81 5.1 Overview ...................................................................................................... 81 5.2 Settings Worksheet ........................................................................................ 82 Section 1 - Current Local Area Network Settings ................................................................ 82 Section 2 - Access Point Settings ..................................................................................... 82 Section 2a - Additional Access Point Settings ..................................................................... 83 Section 3 - CIPHER Scanner and Agent Port Settings .......................................................... 84 5.3 CIPHER Lab Kernel Update Procedures .............................................................. 85 5.4 Furniture Wizard Firmware Update Procedures ................................................... 90 5.5 Optimizing the Furniture Wizard Database ......................................................... 94 1 Introduction 1.1 Overview Furniture Wizard offers a complete network-based, bar-code scanning solution utilizing the CIPHER Lab CPT-8061 Wireless Terminal (referred to as a “wireless scanner” throughout this manual). Using this hand-held scanner and Furniture Wizard’s customized price tags, you can capture and manage your inventory and sales data with unparalleled ease. The state-ofthe-art Bluetooth wireless communications technology built into this sophisticated scanner allows you to easily transmit the captured information to Furniture Wizard. For instance, you can receive purchased inventory into stock without touching your computer, or you can check the in-stock status for a floor item right when a customer asks without having to leave the customer’s side. You can store a running total of items for a customer and automatically transfer the list to a sales invoice, all while helping your customer to shop. With our bar-coding solution, taking inventory couldn’t get easier — simply point the scanner at the labeled item and then scan it. Furniture Wizard automatically updates your inventory with the captured data in the scanner. Similarly, you can retag items for sales or markdown in a flash. The scanner stores a list of items you picked, and Furniture Wizard uses that data to quickly generate new tags and update your records. This guide will help you perform the installation and configuration tasks required to use the CIPHER Lab CPT-8061 wireless scanner with your Furniture Wizard software. It also includes detailed instructions on how to perform each inventory and sales function with your scanner. 1.2 Technical Support Furniture Wizard provides world-class support. Please contact us at: New Vision Information Systems 820 Starboard Street Chula Vista, California 91914 Phone: (619) 869-7200 Fax: (619) 869-7210 [email protected] 1.3 Publications Your Furniture Wizard CD-ROM contains Acrobat PDF versions of all of Furniture Wizard’s documentation. The files are located in the Documentation subdirectory. Please contact your Furniture Wizard representative to order hard copies of publications. For more complete documentation on Furniture Wizard’s many powerful features, please see this manual’s big brother, the Furniture Wizard User Guide (Furniture_Wizard_User_Guide.pdf). 1.4 Using this Manual 1.4.1 Assumptions To successfully install and configure the components required for proper operation of the wireless scanner solution, you must have access to, or know the following settings for the local area network used in conjunction with Furniture Wizard in your operations: DNS Server IP Address Default Gateway Subnet Mask To use the Bluetooth scanner functions, you should also possess a basic understanding of the inventory and sales functions in the Furniture Wizard software. 2 Furniture Wizard CPT-8061 Wireless Scanner Use and Installation v10 1.5 Guide Conventions The following information provides a formatting key to help identify information as you navigate through this Guide: Example Click OK. Purpose Within procedural (“how-to”) text, boldface words are characters you type or elements you can click. Within overview or conceptual text, bolded words may simply represent concepts that have been highlighted to emphasize their relative importance. Go to the Add User page. Within procedural text, numbered steps denote actions that should be followed in sequence. Click Save to save your work. Within procedural text, bulleted text denotes available options. Within overview or conceptual text, bulleted text also denotes supporting information that is subordinate to the major topic being discussed in the Guide. Click Cancel to exit without saving. The light bulb icon denotes a helpful tip. The information icon denotes reference material. The note icon indicates definitions or considerations that help you understand the related task. Introduction 3 2 CPT-8061 Wireless Scanner Overview 2.1 Access Point and Wireless Scanner Components Before use the Furniture Wizard wireless scanner solution, it is important to understand the individual components that comprise the system. Every component performs an important data collection or communication task; each must be properly installed and configured so they can successfully “talk” with each other. The Furniture Wizard wireless scanner solution consists of the following components: 3560 Bluetooth Access Point Receiver CPT-8061 Charging and Communication Cradle CPT-8061 Bluetooth Wireless Terminal (Scanner) 2.1.1 3560 Bluetooth Access Point Receiver To use CIPHER Lab CPT-8061wireless scanners with Furniture Wizard, you must have a 3560 Access Point receiver connected to your network. One 3560 can accommodate up to seven scanners. The primary purpose of the unit is to receive Bluetooth transmissions from the hand-held wireless scanners and then send the captured inventory or sales data to the Furniture Wizard software. Figure 1: 3560 Access Point The Access Point itself connects to a local area network using a standard RJ45 Ethernet cable. Bluetooth Receiver New Vision Information Systems does not supply this cable with the Access Point unit. 2.1.2 CPT-8061 Charging and Communication Cradle Figure 2: Cradle Used for Communications and Battery Charging 6 Furniture Wizard CPT-8061 Wireless Scanner Use and Installation v10 2.1.3 CPT-8061 Bluetooth Wireless Terminal (Scanner) The CIPHER Lab CPT-8061 Bluetooth Wireless Terminal (“wireless scanner”) is the heart of the Furniture Wizard wireless scanning solution. It is an easy-to-use hand held unit you will use to capture, and then transmit bar-code inventory and sales data, via a wireless Bluetooth interface, to the 3560 Bluetooth Access Point receiver. Access Point then passes this data on to the Furniture software, which in turn automatically updates the appropriate inventory and sales forms. (5) To scan a bar-coded item and capture data, point the top of the scanner towards the inventory item and press the yellow Scan key underneath the information window. The red button lights up when the unit is in the scanning process, and beeps when it completes scanning. (2) Information window displays menus containing configuration and scanner function selections. (4) Use the yellow Scan key to scan and capture data from bar-coded items. (3) After using the keypad to select menu options, press one of the blue Enter keys to complete the selection. (1) Power Key (6) Press the FN Alpha function key and the 0 (zero) key at the same time when transmitting captured data to Furniture Wizard. Figure 3: CIPHER Lab CPT-8061 Bluetooth Wireless Terminal (Scanner) Introduction (7) When scanner is not in use, place the bottom of the scanner in the Charging cradle. When directed, you will place the scanner into the cradle to upload interface software required for its proper operation with Furniture Wizard. 7 2.2 Wireless Scanner – Furniture Wizard Interface The following diagram illustrates how the CIPHER Labs CPT-8061 wireless scanner, Access Point and Furniture Wizard connect and interact with each other: Figure 4: Wireless Scanner - Furniture Wizard Interface 1 8 Furniture Wizard CPT-8061 Wireless Scanner Use and Installation v10 3 Using Wireless Scanners with Furniture Wizard 3.1 Overview The Furniture Wizard bar-code scanning solution utilizes the CIPHER Lab CPT-8061 hand-held scanner and Furniture Wizard’s customized tags and allows capture of inventory and sales data with unparalleled ease. The Bluetooth wireless communications technology built into the scanner allows you to easily transmit the captured information to Furniture Wizard. This section contains detailed instructions on how to perform each of the inventory and sales functions by scanning an item’s bar code with your CPT-8061 wireless scanner and transmitting the information to Furniture Wizard. Important Note!!! Prior to using the CIPHER Lab CPT-8061 hand-held scanner with the Furniture Wizard software, the necessary hardware and software components must be properly installed and configured. If your components have not been delivered pre-configured from Furniture Wizard, you must first complete all of the installation and configuration steps outlined in Appendix A: Installation and Configuration! Contact Furniture Wizard Technical Support if you need further assistance or have questions about the configuration status of your wireless scanner components. Regardless of the configuration status of your components, you must first complete the tasks outlined in Section 3.2: Loading and Configuring the CIPHER Scanner Agent Software and Section 3.3 Configuring Furniture Wizard for Scanner Use before any scanners are used with Furniture Wizard in your operations. 3.2 Loading and Configuring CIPHER Scanner Agent Software Furniture Wizard Software has created software called the CIPHER Scanner Agent that allows a user to define “ports” that will be associated with each CPT-8061 scanner being used in conjunction with Furniture Wizard. These ports collect scanner-specific information that has been received by Access Point for use by Furniture Wizard. The CIPHER Scanner Agent must be loaded and configured in the following manner: 1. Verify and record the IP Address of the PC on which the CIPHER Scanner Agent is being loaded. To do this, access the Internet Protocol (TCP/IP) Properties page. Refer to the Appendix section for more details. Manually record the IP Address of the PC on which the CIPHER Scanner Agent is being loaded in Section 3 (entitled “CIPHER Scanner Agent Ports”) of the Settings Worksheet. 2. Log into the Furniture Wizard Support site and click the Download WirelessScanner_Setup_xx.exe link. The following dialog is displayed: Figure 5: File Download Dialog 3. Click Run and download WirelessScanner_Setup_219.exe to the server. This is a zipped file that contains CIPHER Scan Agent and associated files. It is fairly large and takes several minutes to download using a high speed Internet connection. 4. Once the software has been downloaded on to the PC, click Run to launch the Wireless Scanner Setup program. 5. When the Cipher Agent Install Shield dialog appears, click Next, click I accept the terms in the license agreement, and then click Next again. 10 Furniture Wizard CPT-8061 Wireless Scanner Use and Installation v10 Figure 10: Cipher Agent Install Shield Dialog (Second Screen) 6. When the next Cipher Agent Install Shield dialog appears, enter the user name and organization, specify the user for which the application is being installed, and then click Next. Figure 11: Cipher Agent Install Shield Dialog (Third Screen) 7. When the final Cipher Agent Install Shield dialog appears, click Install to begin installation of the Cipher Scanner Agent and associated files. When all files are installed, click Finish. Chapter 3: Using Wireless Scanners with Furniture Wizard 11 Figure 12: Cipher Agent Install Shield Dialog (Final Screen) 8. After the CIPHER Scanner Agent has been completed loaded, double-click the CIPHER Scanner Agent icon on the desktop, or launch it from the Programs menu. Figure 13: CIPHER Scanner Agent Icon 9. After the CIPHER Scanner Agent launches, select Manage Scanner Ports Lists from the File menu. 12 Furniture Wizard CPT-8061 Wireless Scanner Use and Installation v10 Figure 14: Manage Scanner Port Lists - CIPHER Scanner Agent 10. When the Manage Scanner Port Lists function appears, click Add to add new scanner ports. Figure 15: Manage Scanner Port List - Add New Port Address Chapter 3: Using Wireless Scanners with Furniture Wizard 13 11. For each wireless scanner that will be used with Furniture Wizard, define a unique port number using the Enter in New Port Address function. Each port number that is defined must have a value between 1024 and 32500. This port will be assigned to specific scanners later in this chapter. If you have multiple scanners configured for you by Furniture Wizard, refer to the notes that came with your scanner as to what ports they have already been configured to use. When finished entering a scanner port, click OK. When finished defining all scanner port numbers, click OK in the Manage Scanner Port List function. Manually record the port numbers you created in the CIPHER Scanner Agent in Section 3 of the Settings Worksheet (entitled “CIPHER Scanner Agent Ports”). You will need to assign a unique port number to each CPT-8061 wireless scanner when configuring them later in this chapter! 12. The CIPHER Scanner Agent Status function displays the status of each port; it specifies if the port is idle or waiting for a connection from a wireless scanner. To exit this function, click Exit on the File menu. Figure 16: CIPHER Scanner Agent Status Function Optimizing and backing up the Furniture Wizard database is a critical task that must be performed on a daily basis. However, you must exist the Cipher Scanner Agent software or set the agent to “Sleep” before you run the Optimize All or Optimize Data functions in Furniture Wizard, or back up your data!! 14 Furniture Wizard CPT-8061 Wireless Scanner Use and Installation v10 3.3 Configuring Furniture Wizard for Scanner Use You must now enable scanner use in Furniture Wizard. This section covers how to configure the Furniture Wizard software to use captured data collected from the wireless scanners. To do this, complete the following tasks: 1. Verify and record the IP Address of the PC on which the CIPHER Scanner Agent is being loaded. To do this, access the Internet Protocol (TCP/IP) Properties page. Refer to the Appendix section for more details. 2. Launch Furniture Wizard. When in the Main Menu, double-click the Furniture Wizard logo to access the Setup & Registration function. Figure 17: Furniture Wizard Main Menu Double-click the “Wizard” Chapter 3: Using Wireless Scanners with Furniture Wizard 15 3. After double-clicking the Furniture Wizard icon on the Main Menu, the Setup & Registration function is displayed: Figure 18: Setup & Registration Function Click Advanced Setup 4. When in the Setup & Registration function, click Advanced Setup. Click OK when the warning message is displayed to access the Advance Setup function: Figure 19: Advanced Setup Function Click Extended Preferences 16 Furniture Wizard CPT-8061 Wireless Scanner Use and Installation v10 5. When in the Advanced Setup function, click Extended Preferences. The following screen is displayed: Figure 20: Extended Preferences Function Click Scanners tab 6. When in the Extended Preferences function, click the Scanners tab. The following function is displayed: Figure 21: Extended Preferences Function - Scanners tab Chapter 3: Using Wireless Scanners with Furniture Wizard 17 7. When in the Scanners tab in the Extended Preferences function, do the following: Cipher Scanner 8061 - Select the check box to enable use of the CIPHER Labs CPT-8061 wireless scanner with Furniture Wizard. Cipher Auto Inventory - Select the check box to enable use of the CPT-8061 scanner Auto Inventory functionality in Furniture Wizard. Cipher Auto Orders - Select the check box to enable use of the CPT-8061 scanner Auto Orders functionality in Furniture Wizard. Cipher Auto Tag Floor - Select the check box to enable use of the CPT-8061 scanner Auto Tag Floor functionality in Furniture Wizard. Cipher Auto Transfers - Select the check box to enable use of the CPT-8061 scanner Auto Transfers functionality in Furniture Wizard. Cipher Auto Rec PO’s - Select the check box to enable use of the CPT-8061 scanner Auto Receive Purchase Orders functionality in Furniture Wizard. 8. When finished selected each of the check boxes related to CPT-8061 scanner processing in Furniture Wizard, click Edit Cipher Users List to access the following function: Figure 22: Cipher User List Function 18 Furniture Wizard CPT-8061 Wireless Scanner Use and Installation v10 9. Use the Cipher User List function to define the users who are able to operate the Wireless scanners in your operation. For each user, enter the following information: User Name - Enter the name of the user. Password - Specify up to a five digit numeric password for this user. This is the password they will use to log on to the Firmware menu on the CPT-8061 scanner. Do not use alpha characters - they are too difficult to enter into the scanner. The passwords must be unique; no 2 accounts may have Location - Select the location (Showroom or Warehouse) in which the user can operate the scanner, or leave the field blank to allow operation in all locations. 10. When finished entering all wireless scanner users, exit each of the forms to return back to the Furniture Wizard main menu. Congratulations!!! You have successfully completed all of the tasks required to install and configure Access Point and the CPT-8061 wireless scanners so they can operate with Furniture Wizard. You can now proceed to Section 3.4 “Using Wireless Scanners with Furniture Wizard” to learn how to use hand-held scanners to capture and transmit inventory and sales data to Furniture Wizard. Chapter 3: Using Wireless Scanners with Furniture Wizard 19 3.4 Using Wireless Scanners with Furniture Wizard The Furniture Wizard bar-code scanning solution utilizes the CIPHER Lab CPT-8061 hand-held scanner and Furniture Wizard’s customized tags and allows capture of inventory and sales data with unparalleled ease. This section contains detailed instructions on how to perform each inventory and sales function with your CPT-8061 wireless scanner. Figure 23: CPT-8061 Wireless Scanner To use the CPT-8061 wireless scanner with Furniture Wizard, do the following: 1. Press the <Power> key to turn the scanner on. The Welcome to Scan-It banner appears in the information window. After approximately 30 seconds, the Scanner Password function (Figure 25) appears in the display window. <Power> Key Figure 24: Welcome Message 2. To log on to the Main Menu, enter your assigned password at Enter In User Password, followed by the <Blue Enter> key. 20 Furniture Wizard CPT-8061 Wireless Scanner Use and Installation v10 Figure 25: Scanner Password Function 3. After entering your password, the Main Menu is displayed in the scanner information window: Figure 26: Firmware Main Menu Chapter 3: Using Wireless Scanners with Furniture Wizard 21 The Firmware Main Menu contains a series of options that allow you to perform the following functions: 1 Inventory - Allows you to take a physical inventory by pointing the scanner at each labeled item and capturing the associated data. The inventory balances in Furniture Wizard are then automatically updated with the captured data. 2 Sale - Allows you to store a running total of items for a customer and automatically transfer the captured list to a sales invoice. 3 Tag Floor - Allows you to retag items for sales or markdown. The scanner stores a list of items you picked, and Furniture Wizard uses that data to quickly generate new tags. 4 Transfer - Allows you to transfer items from one branch to another. 5 Receive PO - Allows you to Receive Purchase Orders. 6 Teach - Allows you to “teach” Furniture Wizard to associate your internally-assigned bar codes for specific inventory items to the UPC (Universal Product Code) codes assigned by manufacturers to the items. This allows you to directly scan the manufacturer’s bar code labels when receiving purchased items. 7 Stock Check – Allows you to perform “hands-free” inventory stock checks in Furniture Wizard simply by scanning the labels on an item. 8 Configure - Allows you to perform scanner configuration tasks that are detailed and completed in Appendix A: Installation and Configuration. 9 Utilities - Contains utilities that are used on an infrequent basis. 4. Each of the Wireless Scanner menu functions is explained in detail in the sections that follow. In general, you will perform the following tasks to select, perform and complete a Firmware menu function: Select the desired function on the Firmware menu, followed by the <Blue Enter> key. To scan a bar-coded item and capture data, point the top of the scanner towards the bar code label on item, and then press the yellow Scan key beneath the information window. The red button above the screen lights up when the scanner is in the process of capturing data, and it beeps when it completes the data capture. After you have completed scanning of all desired inventory items, simultaneously press the <FN Alpha> and <0> keys to transmit the captured data to Furniture Wizard. Make sure you simultaneously press the <FN Alpha> and <0> keys at the same time while transmitting the captured data to Furniture Wizard! Failure to press <FN Alpha> at time of data transmission places the scanner in alpha mode, which causes only a portion of the captured data to be properly transmitted to Furniture Wizard! 22 Furniture Wizard CPT-8061 Wireless Scanner Use and Installation v10 Figure 27: Transmitting Capture Data to Furniture Wizard Simultaneously Press <FN Alpha> + <0> After the captured data has been transmitted by the scanner, it automatically appears in the appropriate Furniture Wizard form. As directed, complete any remaining data entry tasks. Chapter 3: Using Wireless Scanners with Furniture Wizard 23 3.5 Taking Physical Inventory - Inventory Function (Selection 1) The Inventory function in the scanner Main Menu (Selection 1) allows you to take a physical inventory by pointing the scanner at each labeled item and capturing the associated data. After the captured data has been transmitted to Furniture Wizard, the inventory balances are automatically updated and adjusted accordingly. Important Note!!! Although you can scan several hundred items, in practice you should only scan a limited group of items at one time. For example, you might scan one area of the warehouse and then transmit the data. You can then append a group of items to the current inventory session. To select, perform and complete this function, do the following: 1. After logging on to the scanner, press <1> (Inventory), followed by the <Blue Enter> key. 2. To scan a bar-coded item and capture data, point the top of the scanner towards the bar code label on item (Figure 42), and then press the yellow Scan key beneath the information window, making sure the red laser light is beaming across the bar code. The red button above the information window lights up when the scanner is in the process of capturing data, and it beeps when it completes the data capture. Figure 42: Small Tag 24 Furniture Wizard CPT-8061 Wireless Scanner Use and Installation v10 3. In general, the memory in the scanner unit is sufficient to store captured data for several hundred items. If you are capturing inventory data for a large number of units in a large physical space (for example, in a warehouse), transmit the captured data after completing the scan of a portion of the stored inventory. For example, transmit the captured data after you have completed scanning the northern section of a large warehouse, a corner section, etc. Do Not Attempt to Scan An Entire Store or Warehouse Branch All at Once! You should do your inventory in smaller, easier to manage segments, instead of trying to do the entire inventory branch at once. This will be easier for both you and the scanner to manage. 4. Press to view a listing of all scanned items. The total number of items scanned displays at the bottom of the scanner window. 5. To view more information about the item, press the Scroll Right key below the Backspace key to scroll right, and the Scroll Left key below the ESC key to scroll left. 6. Press to return to the single item view. The most recent item viewed is displayed. To display a different item, return to the list mode by pressing the Backspace key and use the arrow keys to select the item you want to view. 7. After you have completed scanning of all desired inventory items, simultaneously press the <FN Alpha> and <0> keys to transmit the captured data to Furniture Wizard. 8. After the scanner has transmitted the captured data, it automatically appears in the Reconcile Inventory function in Furniture Wizard (Figure 43). To complete the inventory transactions resulting from the captured data, specify the branch for which the inventory is being entered and click OK. Figure 43: Inventory Reconciliation Form Chapter 3: Using Wireless Scanners with Furniture Wizard 25 9. When using this function, Furniture Wizard also gives you the opportunity to append the scanned inventory transaction to a previous session. You would generally do this if you are performing an inventory in segments, and wish to add the transactions scanned in a later session to those scanned in an earlier session. To do this, click Yes when the Append to an Existing Inventory Session dialog box is displayed. If you do not wish to append the transaction to those scanned in an earlier session, click No. 10. Clicking Show All displays all inventory scanned, while clicking Show Differences displays discrepancies. 11. Click Reconcile Report to create a report showing the quantity in stock according to Furniture Wizard, the number scanned (actual count) and any difference between the two numbers. 12. Take the necessary steps to determine the cause of the discrepancies. 13. When you have reconciled all of the data, or if you want to reconcile all except the unresolved discrepancies, do one the following: Select the check box next to each item you want to reconcile. Click an individual item to select or “unselect” it. Click Tag All to select all items Click UnTag All to remove all check marks. 14. Click Update Inventory to update Furniture Wizard according to the reconciliation report. Any inventory items with unresolved discrepancies will still be listed in the Inventory Reconciliation function. 15. Click Exit when finished. 26 Furniture Wizard CPT-8061 Wireless Scanner Use and Installation v10 3.6 Creating an Invoice – Sales Function (Selection 2) The Sale function in the scanner Main Menu (Selection 2) allows you to create an invoice for one or more inventory items. It allows you to store a running total of items sold to a customer, and then automatically transfer the captured list to a sales invoice. This allows you to easily and quickly capture data for an inventory item as it is sold, while you continue your sales presentation to the customer. After the captured data is transmitted to Furniture Wizard, it automatically generates a sales invoice for the customer, with minimal data entry. When all purchase decisions are made, you transmit the data to your network where the invoice is created and displayed on your workstation. To select, perform and complete this function, do the following: If you transmit the information before the customer has completed their selections, subsequent invoices will be created for the additional items. 1. Turn on the scanner and enter your password when prompted. 2. After logging on to the scanner, press 2 from the menu or use the scroll keys to scroll to 2 (Sale), followed by the <Blue Enter> key. 3. To scan a bar-coded item and capture data, point the top of the scanner towards the bar code label on the sold item, and then press the yellow Scan key beneath the information window. The red button above the information window lights up when the scanner is in the process of capturing data, and it beeps when it completes the data capture. In general, they in the scanner unit is sufficient to store captured data for several hundred items; it will easily store all the required data for virtually any sales transaction. A single beep indicates that the item has been recorded. A double beep indicates that the item is part of a package. Chapter 3: Using Wireless Scanners with Furniture Wizard 27 Figure 46: Sales Scan Function 4. The value displayed in the lower right corner (in Figure 46, this is value (9)) of the Sales scan function is the quantity in stock for the specified branch in the Cipher Users List. The Cipher Users List is also where you have defined the User Name and Password for each person using the scanner. Listing All Scanned Items Before transmitting the information, you can view a list of all items you have scanned for the customer. 1. Press the Backspace key to view a list of items. The total number of items scanned and the total amount display at the bottom of the scanner window. 2. To view more information about the item, press the Scroll Right key below the Backspace key to scroll right, and the Scroll Left key below the ESC key to scroll left. Figure 29: Scroll Left / Scroll Right Keys 28 Furniture Wizard CPT-8061 Wireless Scanner Use and Installation v10 Transmitting Captured Data to Furniture Wizard 1. After all purchase decisions have been made, hold down the FN Alpha function key while simultaneously pressing the 0/* button to transmit the information to Furniture Wizard. Figure 28: Function Key 2. The transmitted sales data automatically appears in the Invoice function in Furniture Wizard (Figure 47). Figure 47: Invoice Function 3. Press the Backspace key again to return to the single item view. The most recent item viewed are displayed. 4. To display a different item, return to the List mode by pressing the Backspace key, and then use the arrow keys to select the item you wish to view. Chapter 3: Using Wireless Scanners with Furniture Wizard 29 Changing the Item Quantity You can change the quantity of a scanned item before it is transmitted. For example, if the customer decides she wants two lamps instead of one, or if the customer decides he wants one recliner rather than the other, you can delete the one already scanned. 1. Press the Scroll Up/Down keys to scroll through items. 2. When the correct record is displayed, change the quantity. 3. Press the <Blue Enter> key. If you change the quantity to 0 in order to delete the item, you will still see it displayed in the Invoice function in Furniture Wizard, but the quantity displayed is zero. You can then manually delete it from the invoice. 30 Furniture Wizard CPT-8061 Wireless Scanner Use and Installation v10 3.7 Re-tagging Items for Sales or Markdown - Tag Floor Function (Selection 3) The Tag Floor function in the scanner Main Menu (Selection 3) allows you to retag items for sales or markdown. The scanner stores a list of items you picked, and Furniture Wizard uses that data to quickly generate new tags. To select, perform and complete this function, do the following: 1. After logging on to the scanner, press <3> (Tag Floor), followed by the <Blue Enter> key. 2. To scan a bar-coded item and capture data, point the top of the scanner towards the bar code label on the item that is being retagged, and then press the yellow Scan key beneath the information window, making sure the red laser light is beaming across the bar code. The red button above the information window lights up when the scanner is in the process of capturing data. A single beep indicates that the item has been recorded. A double beep indicates that the item is part of a package. 3. Scan each item that is being retagged. In general, the memory in the scanner unit is sufficient to store captured data for several hundred items; it will easily store all the required data for virtually any retagging situation. 4. To view more information about the item, press the Scroll Right key below the Backspace key to scroll right, and the Scroll Left key below the ESC key to scroll left. 5. Press the Backspace key to return to the single item view. The most recent item viewed is displayed. To display a different item, return to the list mode by pressing the Backspace key and use the arrow keys to select the item you want to view. 6. After you have completed scanning of all inventory items that you want to place on sale, simultaneously press the <FN Alpha> and <0> keys to transmit the captured data to Furniture Wizard. The transmitted inventory data automatically appears in the On Sale function in Furniture Wizard (Figure 44). You can only access the On Sales function by clicking On Sale in the Inventory function. Chapter 3: Using Wireless Scanners with Furniture Wizard 31 Figure 44: Inventory - On Sale Function 7. Make sure there is a check in the Tagged field for each item being placed on sale. 8. The On Sale function contains the following fields or buttons that can be used to perform the following processing tasks: Set Sale Items By Discount (Retail) - Discounts all tagged items by a specific percentage. Set Sale Items By Margin (Cost) - Sets price by margin from cost. Set Sale Items By Markup (Cost) – Sets price by markup from cost. Percentage - Enter the percent of the discount. Show All - Displays all items. Show Only On Sale - Displays only sale items. Show Not On Sale - Displays only items not currently on sale. Round Retail – Rounds the retail price according to system settings. Quick Tags - Opens the Quick Tag function from which you can print floor tags. Create Tags - Prints new tags for the sale items. Invert Tagged – Selects the check box for items that are not currently selected, and clears the check box for currently selected items. Show Tagged - Displays only those items that were scanned. Tag All – Selects the check boxes for all items. UnTag All – Clears the check boxes for all items. Create New Retail Price - Use this button to create a new retail price independent of sale information. Apply Temporary Discount – Applies the price change to the sale items. Restore Original Retail Price - Click this button to restore the retail price and remove discounts. 9. You can set the sale price by discount from retail, margin on cost, or markup from cost. Enter the discount percentage into the Percentage field, then click the Apply Temporary Discount button. 10. To create the sale tags, click the Custom Tags button, select the desired label types, and then click Print. 32 Furniture Wizard CPT-8061 Wireless Scanner Use and Installation v10 3.11 Transferring Items between Branches – The Transfer Function (Selection 4) The Transfer function in the Firmware menu (Selection 4) allows you to transfer inventory items from one branch to another. The inventory balances maintained for each branch in Furniture Wizard are then automatically updated with the captured data. For example, if five sofas are being transferred from the Warehouse to the Showroom, the inventory balance maintained in Furniture Wizard for the Warehouse automatically decreases by 5, while the Showroom balance increases by 5 after the captured data for the sofa has been transmitted. To select, perform and complete this function, do the following: 1. After logging on to the scanner, press <4> (Transfer), followed by the <Blue Enter> key. 2. To scan a bar-coded item and capture data, point the top of the scanner towards the bar code label on item being transferred, and then press the yellow Scan key beneath the information window, making sure the red laser light is beaming across the bar code. The red button above the information window lights up when the scanner is in the process of capturing data, and it beeps when it completes the data capture. 3. In general, the memory in the scanner unit is sufficient to store captured data for several hundred items. If you doing a large scale transfer of inventory from one branch to another (for example, from one warehouse to another) and are moving hundreds of different items, transmit the captured data after completing the scan of a portion of the inventory being moved. 4. After you have completed scanning of all desired inventory items, simultaneously press the <FN Alpha> and <0> keys to transmit the captured data to Furniture Wizard. 5. After the scanner has transmitted the captured data, it automatically appears in the New Inventory Transfer function in Furniture Wizard (Figure 45). Figure 45: Inventory Transfer Function Chapter 3: Using Wireless Scanners with Furniture Wizard 33 3.6 Receiving Purchase Orders – Receive PO Function (Selection 5) The Receive PO function in the Firmware menu (Selection 5) allows you to receive items as they are delivered to you. Furniture Wizard then determines whether the item has been delivered in fulfillment of a purchase order, a special order, or isn’t on an existing purchase order. If the item was not delivered in response to a purchase order, Furniture Wizard lets you create a purchase order so that you can receive the item. This section of the document contains the following subsections: Label Setup Receiving Items Using the Wireless Scanner Processing a Scanned Item that is not in Furniture Wizard Listing All Scanned Items Reconciling Received Items Received Items with No Associated Purchase Order Processing Received Items “Keyboard-less” Receiving Functions Label Setup Furniture Wizard provides you with the capability of printing a variety of different types of labels (in a variety of sizes) for use during the receiving process. Prior to using the wireless scanner to perform receiving functions, you can specify, per supplier, and/or per specific inventory items, the desired sizing for each type of label. Tag sizes include label tag (Figure), 1-inch labels (Figure), large price tags (Figure ), small price tags (Figure ), sold warehouse labels (Figure) and regular warehouse labels (Figure). Sold warehouse tags contain “sold-to” customer information for received items that are fulfilling special orders, while regular warehouse tags are used to label items received into inventory (i.e., items not associated with special orders). Figure 40: Label Tag 34 Furniture Wizard CPT-8061 Wireless Scanner Use and Installation v10 Figure 40: 1” Label Tag Figure 40: Large Price Tag Chapter 3: Using Wireless Scanners with Furniture Wizard 35 Figure 40: Small Price Tags Figure 40: Sold Warehouse Tag 36 Furniture Wizard CPT-8061 Wireless Scanner Use and Installation v10 Figure 40: Standard Warehouse tag To specify label sizing at the supplier level, do the following: Figure 45: Supplier Data Entry Function – Other Tab Chapter 3: Using Wireless Scanners with Furniture Wizard 37 1. Click Supplier on the Furniture Wizard Main Menu. 2. When in the Supplier function, select the desired supplier record, and then click the Other tab. 3. In the Other tab, click the appropriate button for the desired default tag size for this supplier. Please note that this only applies to inventory you will receive for this supplier after this point; it does not retroactively apply to any items you have already received or are in stock. To apply this default label setting to existing inventory for the supplier, click Set as Default Tag Size, and then click Yes when the following dialog is displayed: Figure 45: Update All Inventory Items Dialog Once you have specified label sizing at the supplier level, you can designate item ‘exceptions’; these are items for a specific supplier for which you wish to designate a different label size. Do the following: Figure 45: Inventory Function – Misc Tab 38 Furniture Wizard CPT-8061 Wireless Scanner Use and Installation v10 1. Click Inventory on the Furniture Wizard Main Menu. When in the Inventory function, click the Misc tab. 2. When in the Inventory function, select the desired item record, and then click the Misc tab. 3. In the Misc tab, click the appropriate button for the desired default tag size, then select the item (in the Model & Description section) to which it applies. Do this for all desired items with exception label sizing. Receiving Items Using the Wireless Scanner To receive items using the wireless scanner, do the following: 1. Turn on the scanner and enter your password when prompted. 2. Select 5 from the menu or use the Scroll Up/Down keys (Receive PO). to scroll to 5 3. Point the scanner at the UPC or Furniture Wizard bar code on the item tag and press the yellow scan button, making sure the red laser light is beaming across the bar code. A single beep indicates that the item is assigned to a store inventory code. A multi-tone beep indicates that this is a new item and the UPC code has not been previously assigned to a Furniture Wizard inventory code. You can scan a Furniture Wizard tag, or the manufacturer’s bar code. 4. After all inventory items have been scanned, hold down the Function key while simultaneously pressing the 0/* button to transmit the information to Furniture Wizard. Processing a Scanned Item that is not in Furniture Wizard A multi-tone beep indicates that this is a new item and the UPC code has not been previously assigned to a Furniture Wizard inventory code. The following message appears in Furniture Wizard after you have transmitted the data: Figure 30: Furniture Wizard Error Message Chapter 3: Using Wireless Scanners with Furniture Wizard 39 To resolve this in Furniture Wizard, do the following: 1. When this message appears in Furniture Wizard, click OK. 2. The item then displays on the Cipher Data Manager function with a 0 entry in the Item Number field. Figure 31: Cipher Data Manager Function in Furniture Wizard 3. Double-click the Item Number field to access the Inventory Lookup function. Figure 32: Inventory Lookup Function 4. Double-click the Model field and enter the model number. 5. Double-click the correct record in the list. 40 Furniture Wizard CPT-8061 Wireless Scanner Use and Installation v10 6. Click the UPC/SYNC button. The following message is displayed when the record is synchronized: Figure 33: UPC/SYNC Complete Message 7. The Cipher Data Manager now displays a model item without the UPC code. Figure 34: Cipher Data Manager Function 8. Click the Exit button when finished. Listing All Scanned Items Before transmitting the information, you can view a list of all items you have scanned by doing the following: 1. Press the Backspace key to view a list of all items. The total number of items scanned displays at the bottom of the scanner window. 2. To view more information about the item, press the Scroll Right key below the Backspace key to scroll right, and the Scroll Left key below the ESC key to scroll left. Figure 35: Scroll Left / Scroll Right Keys 3. Press the Backspace key again to return to the single item view. The most recent item viewed will display. 4. To display a different item, return to the list mode by pressing the Backspace key, and then use the arrow keys to select the item you want to view. Chapter 3: Using Wireless Scanners with Furniture Wizard 41 Reconciling Received Items After the inventory data has been transmitted, the Reconcile Inventory function appears in Furniture Wizard. Figure 36: Recocile Receiving Function 1. All items you scanned are displayed in the list. If there are multiple quantities for same item, you will see the total number displayed in the Qty Scanned field in the Items Available for Processing list. 2. To display outstanding purchase orders for a specific item, click the desired item number. 3. Select the purchase order associated with this item. Any notes associated with the purchase order appear in the lower left corner of the function. 4. To remove the item from the Items Available for Processing list, click the Queue Receiving Items button. If there are multiple quantities for the same item, the quantity is reduced by one. 5. Continue this process until all inventory items have been queued. 42 Furniture Wizard CPT-8061 Wireless Scanner Use and Installation v10 Received Items with No Associated Purchase Order If no purchase order is associated with an item, it will remain in the Items Available for Processing list with no corresponding purchase order. To create a purchase order for a received item, do the following: 1. Select the Not Assigned tab in the Reconcile Inventory function. 2. Select the corresponding item in the Items to be Processed list. An arrow appears to the left of the selected item. 3. Click the Create PO button to create a purchase order for the selected item. Processing Received Items Once all inventory items have been assigned to a purchase order, you can process the received items in Furniture Wizard by doing the following: 1. Select the Items to be Processed tab in the Reconcile Inventory function. 2. Click the Process Receiving button; the Print Receiving Labels function is displayed. Figure 37: Reconcile Receiving Function 3. For each item, select one or more of the label types. You can also click Select All to select all labels or click Select None to deselect all. Chapter 3: Using Wireless Scanners with Furniture Wizard 43 4. The Reconcile Inventory function contains the following fields or buttons that can be used to perform the following label processing tasks” Select All - Select all label types for all items. Select None - Deselect all label types for all items. Update Inv Label - Update Inv Labels with current information for all selected items. Update Small - Update small labels with current information for all selected items. Update Label - Update Labels with current information for all selected items. Print Inv Label - Print inventory labels for all selected items. Print Small - Print small labels for all selected items. Print Label - Print labels for all selected items. Print All - Print all label types for all selected items. Print - Send labels to printer. Print Preview - Display a print preview screen for all selected label types and items. Inv Label – Creates a warehouse tag. If the item is sold, customer information prints on the label. Figure 38: Inventory Label 44 Furniture Wizard CPT-8061 Wireless Scanner Use and Installation v10 Small – Prints an inventory label that includes the purchase order number and associated information. Figure 39: Small Inventory Label Label – Creates a floor tag. Figure 40: Floor Tag Label 5. After selecting the desired label type, click Print. 6. Click Exit. You will be given the option to save the data. Figure 41: Floor Tag Label 7. If you want to print the label later, click Yes. Click No to print the label now and discard the information; the Inventory function is displayed. 8. Click Exit to close the Inventory function and return to the Main Menu. Chapter 3: Using Wireless Scanners with Furniture Wizard 45 “Keyboard-less” Receiving Functions Figure 40: Bar Code Receiving Report As of Version 10 (and above), an exciting new feature has been added to Furniture Wizard that allows you to perform “keyboard-less” receiving. A Bar Code Receiving Report (Figure ), containing bar coding for the purchase order and for each purchase order can now printed for use by warehouse personnel. They can now receive purchased inventory simply by scanning the bar codes printed on this report for the purchase order number and each items they receive from the supplier. 46 Furniture Wizard CPT-8061 Wireless Scanner Use and Installation v10 Figure 40: Purchase Order Function – Bar Code Report Button To print the Bar Code Receiving Report for use during inventory receiving, do the following: 1. Enter a purchase order in the normal manner in the Purchase Order function. Refer to the Furniture Wizard User Guide for more details. 2. After selecting all desired purchase order items in the Purchase Order function, click the Bar Code Report button to print the Bar Code Receiving Report for the purchase order. When the purchased items are delivered at your facilities, do the following to perform “keyboard-less” receiving: 1. Turn on the scanner and enter your password when prompted. 2. Select 5 from the menu or use the Scroll Up/Down keys to scroll to 5 (Receive PO). 3. Point the scanner at the purchase order number bar code printed on the top of the Bar Code Receiving report. If this step is not performed, Furniture Wizard will consider this to be a normal purchase receipt (not a “keyboard-less receiving session). Chapter 3: Using Wireless Scanners with Furniture Wizard 47 4. To receive each individual purchased item, point the scanner at the bar code printed on the report for the corresponding item. You must perform a separate capture equal to the quantity received for each item (for example, if a quantity of four is received for an item, you must perform a scanner capture for each quantity. You must pause for a reasonable amount of time between scanning each bar code quantity capture so that the scanner can process each received item! 5. After all inventory items have been scanned, hold down the Function key while simultaneously pressing the 0/* button. The following Print Tags menu is then displayed on the scanner. Figure 40: Print Tags Scanner Menu 6. The Print Tags scanner menu contains selections that allow you to perform the following functions: 48 Print warehouse tags for the received items. Print tags for the items. Print a Wireless Scanner Receiving Report. Process the received inventory and exit the scanner. Furniture Wizard CPT-8061 Wireless Scanner Use and Installation v10 Figure 40: “Sold” Warehouse Tag 7. To print warehouse tags for the received items, select 1 (Warehouse) on the Print Tags scanner menu. If the item is sold (special order), customer information prints on the label. If the item is not associated with order, a regular warehouse tag is printed (Figure). Figure 40: Regular Warehouse Tag Chapter 3: Using Wireless Scanners with Furniture Wizard 49 1 Warehouse –. 2 Auto Print - Allows you to print price tags for the received items. The size of the printed tags is dependent on the label sizes you designated in the Purchase Order and Inventory functions for the supplier and/or specific item number. 3 Rec Report – Allows you to print a Wireless Scanner Receiving Report (Figure ) containing information for each received item. If an item was over-received (quantity received is greater than quantity ordered, an Over Received warning message is printed on the report. Note that you cannot print the 4 Process/Exit – Processes the received inventory and then exits the menu. Figure 40: Wireless Scanner Receiving Report 50 Furniture Wizard CPT-8061 Wireless Scanner Use and Installation v10 3.7 Associating UPC and Bar Codes – Teach Function (Selection 6) The Teach function in the Firmware menu (Selection 6) allows you to “teach” Furniture Wizard to associate your internally-assigned bar codes for specific inventory items to the UPC (Universal Product Code) codes assigned by manufacturers to the items. This allows you to directly scan the manufacturer’s bar code labels when receiving purchased items. To accomplish this, do the following: 1. Turn on the scanner and enter your password when prompted. 2. Select 6 from the menu or use the Scroll Up/Down keys (Receive PO). to scroll to 5 3. Point the scanner at the UPC or Furniture Wizard bar code on the item tag and press the yellow scan button, making sure the red laser light is beaming across the bar code. A single beep indicates that the item is assigned to a store inventory code. A multi-tone beep indicates that this is a new item and the UPC code has not been previously assigned to a Furniture Wizard inventory code. Chapter 3: Using Wireless Scanners with Furniture Wizard 51 3.8 Performing Stock Checks – Stock Check Function (Selection 7) The Stock Check function in the Firmware menu (Selection 6) allows you to perform “handsfree” inventory stock checks in Furniture Wizard simply by scanning the labels on an item. To accomplish this, do the following: 1. Turn on the scanner and enter your password when prompted. 2. Select 6 from the menu or use the Scroll Up/Down keys PO). to scroll to 5 (Receive 3. Point the scanner at the UPC or Furniture Wizard bar code on the item tag and press the yellow scan button, making sure the red laser light is beaming across the bar code. A single beep indicates that the item is assigned to a store inventory code. A multi-tone beep indicates that this is a new item and the UPC code has not been previously assigned to a Furniture Wizard inventory code. Chapter 3: Using Wireless Scanners with Furniture Wizard 53 4 Appendix A: Installation and Configuration 4.1 Overview Important Note!!! You must complete the steps in this chapter only if your scanner components have not been delivered pre-configured from Furniture Wizard Software. Once you have successfully completed the tasks outlined in each section of this chapter, you can proceed to Chapter 3: Using Wireless Scanners with Furniture Wizard to learn how to use hand-held scanners to capture and transmit inventory and sales data to Furniture Wizard. Prior to using the CIPHER Lab CPT-8061 hand-held scanner with Furniture Wizard, you must first install and configure the necessary hardware and software components. This chapter leads you through the required tasks, which include installing hardware, uploading the required interface software, configuring each scanner and then enabling scanner use in Furniture Wizard. This chapter includes the following sections: 4.2 Installing the Required Hardware - This section covers the preparation and installation of Access Point and the CPT-8061 wireless scanners. 4.3 Uploading Firmware Update to Scanners - This section explains how to upload the firmware update to each wireless scanner that allows them to “talk” to Furniture Wizard. 4.4 Pairing Wireless Scanners with Access Point - This section explains how to pair each wireless scanner with each Access Point in the network. 4.5 Configuring Wireless Scanners - This section covers how to properly configure each of the wireless scanners so they can communicate with Access Point and successfully transmit collected data to Furniture Wizard. 4.6 Configuring Furniture Wizard for Scanner Use - This section covers how to configure the Furniture Wizard software to use captured data collected from the wireless scanners. 4.2 Installing the Required Hardware 4.2.1 Preparing CPT-8061 Scanner Units Prior to configuring CPT-8061 wireless scanners for use with Furniture Wizard, you must prepare each individual unit for use by installing and charging its lithium ion battery pack. While the supplied battery pack comes with an initial charge sufficient to perform some very basic tasks, it is not sufficient for extended use or for the initial software upload and configuration activities that must be performed for each unit. The battery pack must be fully recharged prior to initial use; this takes approximately 6 hours. To charge each unit and prepare it for use, perform the following tasks: 1. Unpack the wireless scanner, Charging and Communications cradle, serial cable, black power supply (labeled as a switching adapter), rechargeable lithium ion battery pack and power cord. If battery pack has not been installed, first remove the rear cover of the scanner (by depressing the black button located at the bottom of the rear cover) and install the lithium ion battery, making sure that the metal prongs on the bottom of the battery pack make firm connections with the metal contacts (located at the bottom of the scanner battery well). Replace the cover when finished. Figure 48: Rechargable Lithium Ion Battery Pack 2. Plug the cable end of the black power supply into the circular receptacle located in the lower right corner on the back of the Charging and Communications cradle. 3. Place the connector end of the AC power cord into the receptacle located on the other side of the power supply. After connecting the power cord, power supply and cradle together, plug the power cord into a standard wall outlet. 56 Furniture Wizard CPT-8061 Wireless Scanner Use and Installation v10 4. Place the CPT-8061 scanner facing forward into the large slot located at the top of the Charging and Communications cradle. The metal contacts located on the bottom of the scanner unit must make firm connection with the metal prongs located in the large slot. Leave the nylon hand cord (attached to the lower left corner of the scanner) hanging out the left side of the cradle. Figure 49: Scanner Resting in Charging Cradle 5. The battery pack must be fully charged prior to initial use; this takes approximately 6 hours. While the unit is charging in the cradle, a Charging message appears in display window on the front of the scanner; a Battery Full message displays in the window when the unit is fully charged. 6. Later in this chapter, you use the cradle to upload Scan-IT interface software into the scanner that is required for its proper operation with Furniture Wizard. To prepare the cradle for this process, do the following: Plug the flat prong end of the supplied serial cable into the flat receptacle located on the back of the Charging and Communication cradle. Plug the serial connector end of the cable into the serial port of the PC from which the software will be loaded. Once the required software has been uploaded to each scanner unit, this serial connection is not necessary for daily operation of the scanner. You may have to utilize this connection on an occasional basis to load software updates to the scanner units as they are released in the future. Important Note!!! Once you have successfully completed upload of the firmware update to each scanner, store the serial cable in a safe location and do not lose it! You will need to use it at a later date for uploading of the firmware update to each scanner when enhanced by Furniture Wizard Software! Refer to the Scanner Kernel and Firmware Update directions found in the Appendix section of this manual for details on how to update each wireless scanner when software updates are released in the future. Appendix A: Using Wireless Scanners with Furniture Wizard 57 4.2.2 Installing and Configuring Access Point After preparing each CPT-8061 wireless scanner, you must install and configure the 3560 Bluetooth Access Point receiver. The 3560 Access Point unit contains a Bluetooth radio module that acts as a bridge between the wireless scanners and your local area network, allowing them to communicate with each other using short-range wireless technology operating in the 2.4 GHz band. Each Access Point allows up to seven wireless scanner units to communicate with your local area network. More than one Access Point can be installed in your network to support use of a large number of wireless scanners. 4.2.2 Access Point Receiver Functions Figure 50: Access Point Functions 58 Furniture Wizard CPT-8061 Wireless Scanner Use and Installation v10 4.2.4 Installation and Configuration Procedures The installation and configuration tasks required for Access Point involve preparing the receiver unit, connecting it to your local area network and then configuring the unit for proper network communications. To successfully perform these tasks, you must have access to, or know the following settings for the local area network used in conjunction with Furniture Wizard in your operations: IP Address Subnet Mask Default Gateway DNS Server To install and configure Access Point on your local area network, perform each of the following tasks: 1. Unpack the Access Point receiver unit, black power supply and power cord. A standard RJ45 Ethernet network cable is required to connect the Access Point to the local area network; this cable is not supplied with the unit. Plug one end of the network cable into the receptacle labeled 10 BASE-T in the rear center of the Access Point. Plug the other end of the network cable into the network server or hub for your local area network. 2. Plug the cable end of the black power supply into the circular receptacle (labelled DC IN 9V) located in the right rear corner of the Access Point receiver. Place the connector end of the AC power cord into the receptacle located on the other side of the power supply and then plug the power cord into a standard wall outlet. 3. After connecting Access Point to your local area network and powering up the unit, it must be configured with the correct settings to allow it to properly communicate with your network. Access Point is delivered from the factory with a standard IP address of 192.168.1.1 (the default address for Linksys routers). To test for proper communications between your local area network and Access Point, you will perform the following tasks (they are explained in detail in Steps 4 through 14): Temporarily change the TCP/IP settings for your local area network to match the default settings supplied with Access Point by CIPHER Lab. Verify that Access Point and your network can “talk” with each other. Reset the TCP/IP settings for your LAN to their original settings. Configure the TCP/IP settings for Access Point so it can successfully communicate with the original settings for your LAN. Appendix A: Using Wireless Scanners with Furniture Wizard 59 4. To temporarily change the TCP/IP settings for your local area network to match the default settings supplied with Access Point by CIPHER Lab, locate the Properties page for your current network card. To do this, click Control Panel > Network Settings in the Start menu in Windows XP. Right click the icon for the local area network to which Access Point is being connected and then click Properties (Figure 51). Figure 51: Network Properties 5. When in the Local Area Connection Properties page (Figure 52), select Internet Protocol (TCP/IP) and then click OK. Figure 52: Local Area Connection Properties 60 Furniture Wizard CPT-8061 Wireless Scanner Use and Installation v10 Figure 53: Internet Protocol (TCP/IP) Properties Page Original TCP/IP Network Settings 6. Once you have accessed the Internet Protocol (TCP/IP) Properties page (Figure 53), do the following: Manually record each of the network settings, as they are presently displayed in the Properties page, in Section 1 of the Settings Worksheet (entitled “Current Local Area Network Settings”); this worksheet can be found in the Appendix section of this manual. Manually recording these settings is critical to the successful setup of your wireless network! You will be setting your local area network back to its original settings after testing for proper communications with the Access Point receiver. Failure to record your original network settings in Section 1 of the Settings Worksheet will result in possible interrupted (or failed) operation of your local area networking operations!! Note that if your TCP/IP configuration is set to Obtain IP Address Automatically or Obtain DNS Server Address Automatically (Figure 54), you will first need to re-configure your network to use static IP addresses because the scanner units require use of static IP addresses that will not change. If you are unsure of how to reconfigure your network to use static IP addresses, please contact a local network technical expert for further assistance!! Appendix A: Using Wireless Scanners with Furniture Wizard 61 Figure 54: Network Set to Obtain IP/DNS Addresses Automatically 7. Change the IP Address, Subnet Mask and Default Gateway settings to match those pictured in Figure 55 (below), and then click OK to save the new settings and exit the page. Figure 55: 62 TCP/IP Properties for Local Area Network Furniture Wizard CPT-8061 Wireless Scanner Use and Installation v10 8. After temporarily changing the TCP/IP settings in your local area network, test whether it can communicate with Access Point. To do this, click All Programs > Accessories > Command Prompt in the Start menu in Windows XP. At the Command Prompt, type Telnet 192.168.1.1. The following message is displayed if communications are successful (that is, your local area network can “see” and “talk” to Access Point): Figure 56: Successful Communications Message 9. If the communications test was successful, skip immediately to Step 10 below. If the test was not successful (that is, the network was unable to “talk” to Access Point), do the following: Reset Access Point to its original default settings then perform the tasks in Step 7 to re-test the network communications. To do this, first power down the unit by removing the power cord from the circular receptacle (labelled DC IN 9V) located in the right rear corner of the Access Point receiver. After powering off the unit, straighten a paper clip and use it to reset the unit. To do this, press one end of the paper clip into the small Reset receptacle (to the left of the 10 Base-T connector receptacle) for at least five seconds. While resetting the unit, plug the power cord back into the DC IN 9V receptacle. Once this has been completed, retest the communications. 10. Once you can successfully communicate with the Access Point, press Enter to proceed to the Cipher Lab 3560 Configuration Menu (Figure 57). Figure 57: Cipher Lab 3560 Configuration Menu Appendix A: Using Wireless Scanners with Furniture Wizard 63 11. When in the menu, enter 1 to configure Access Point. The following menu is then displayed (Figure 58): Figure 58: Access Point Configuration Settings 12. You must enter the correct network configuration settings for your Access Point receiver into this menu. Press any key to enter the following parameters; refer back to the original network settings you recorded in Section 1 of the Settings Worksheet (back in Step 4) when doing so: As you enter each of these settings into Access Point, manually record them in Section 2 of the Settings Worksheet (entitled “Access Point Settings”). You will need to enter some of these settings into each CPT-8061 wireless scanner when configuring them later in the chapter! New IP: Enter an IP address in the same range as used in your local area network; however an unused one must be specified. For example, if 192.168.254.40 was used in the original setting, enter 192.168.254.205. New Subnet Mask: Enter the original Subnet Mask setting recorded in Step 4. New Router IP: Enter the original Default Gateway setting recorded in Step 4. New Name: Enter a user-assigned name (for example, FurnWiz) for the Access Point receiver. New PIN Code: Enter a unique five digit number (no alpha characters) to password protect the IP Address and Subnet Mask settings for the Access Point. Write the PIN down and don’t loose it! Authentication: Set this to 1 (Enable). After completing all entries, press <Exit> to exit the Configuration menu, then close the Telnet session. 13. Reset the Internet Protocol (TCP/IP) Properties page for your local area network back to the original network settings you recorded in Section 1 of the Settings Worksheet. Refer to steps 4 through 6 for details on how to do this. 64 Furniture Wizard CPT-8061 Wireless Scanner Use and Installation v10 14. Test your local area network to ensure it can communicate with Access Point by doing the following: Click All Programs > Accessories > Command Prompt in the Start menu in Windows XP. At the Command Prompt, type Telnet n.n.n.n (where n.n.n.n is the IP Address assigned to Access Point in Step 12). The following message is displayed if communications are successful (that is, your local area network can “see” and “talk” to Access Point). Figure 59: Successful Communications Message 15. If the message in Figure 59 does display (that is, communications are successful), close the Telnet session. If it does not display, follow the directions in Step 8 (above). Appendix A: Using Wireless Scanners with Furniture Wizard 65 4.3 Uploading Firmware Updates to Scanners Furniture Wizard Software has also created a firmware update that is designed to reside on each wireless scanner. The firmware update allows the scanner to capture inventory and sales data and then transmit in a format that can be used in Furniture Wizard (that is, it allows the scanners to “talk” to Furniture Wizard). It must be uploaded to each CPT-8061 scanner unit via a serial port connection between the PC and the Charging and Communications cradle. After the software has been uploaded, each wireless scanner must be properly configured to work with Furniture Wizard. To upload the firmware update to each wireless scanner, perform each of the following tasks: 1. Step 6 in Section 4.2.1 (Preparing CPT-8061) provides instructions on how to connect the Charging and Communications cradle (Figure 60) to the serial port of the PC from which the firmware update will be loaded. If you have not already performed each of the tasks outlined in Step 6, they must be completed at this time. The PC can only update the software on the scanner using the serial cable and Communications cradle. Figure 60: Charging and Communications Cradle Connect serial cable between PC and serial receptacle on the back of this unit 2. Place the CPT-8061 scanner facing forward into the large slot located at the top of the Charging and Communications cradle. The metal contacts located on the bottom of the scanner unit must make a firm connection with the metal prongs located in the large slot at the top of the cradle. Leave the nylon hand cord attached to the lower left corner of the scanner) hanging out the left side of the cradle. Figure 61: Scanner Resting in Charging Cradle 66 Furniture Wizard CPT-8061 Wireless Scanner Use and Installation v10 3. To access the proper scanner menu to start the software upload process, simultaneously press the <7> and <9> keys and the <Power> key in the lower right front corner of the scanner. When the System Menu appears, press <6> (Load Program). Figure 62: Accessing Wireless Scanner Main Menu Simultaneously Press <7> + <9> + <Power> Appendix A: Using Wireless Scanners with Furniture Wizard 67 4. When the Load Program menu appears, press <1> (Cradle - IR). Figure 63: Load Program Menu Select <1> (Cradle - IR) 5. When the Baud Rate menu appears, select the fastest baud rate. In this case, press <1> (115200). Figure 64: Baud Rate Selection 68 Furniture Wizard CPT-8061 Wireless Scanner Use and Installation v10 6. When the Please Place in Cradle *Download Ready* message appears in the display window, place the scanner facing forward into the large slot at the top of the Charging and Communications cradle: Figure 65: Please Place in Cradle Message 7. Load the firmware update CD provided by Furniture Wizard Software.. 8. After loading the firmware update CD, the following communications port and baud rate information appears in the display window on the scanner. This allows you to verify previous input into the scanner. Click OK to continue the software upload process. Figure 66: COM Port Properties Dialog Appendix A: Using Wireless Scanners with Furniture Wizard 69 9. During the software upload process, a Please Wait Loading message appears in the display window on the scanner, and a progress bar appears on the connected PC. When the process is finished, a Downloaded Completely” Do you want to download another program? message appears in the display window on the scanner: Figure 67: Download Complete Message 10. Click No to complete the download process. Press any key and power the unit off by pressing the <Power> key when the following message is displayed: Figure 68: Complete - Power Off Message 70 Furniture Wizard CPT-8061 Wireless Scanner Use and Installation v10 4.4 Pairing Wireless Scanners with Access Point The next step in the installation and configuration process is to pair each wireless scanner with each Access Point receiver in your wireless scanner network. This allows a wireless scanner to successfully maintain contact with a network as it passes in and out of the communications ranges of specific Access Point units; this is of particular importance in operations with large physical spaces. 1. To access the proper scanner menu to start the pairing process, simultaneously press the <7> and <9> keys and the <Power> key in the lower right front corner of the scanner. When the System Menu appears, press <7> (Bluetooth Menu), followed by the <Blue Enter> key. Figure 69: Accessing Wireless Scanner Main Menu Simultaneously Press <7> + <9> + <Power>, When in System Menu, press <7>, followed by <Blue Enter> Appendix A: Using Wireless Scanners with Furniture Wizard 71 2. When in the Bluetooth Menu, select <5> (Pairing Test), followed by the <Blue Enter> key. Figure 70: Bluetooth Menu Press <5>, followed by <Blue Enter> 3. The scanner will now wait for a few moments while it searches for available Bluetooth (Access Point) devices. The name of the Access Point should appear up in the list of available devices in the scanner display window. 4. Select the Access Point you have just configured, and press the <Blue Enter> key. 5. You will now be presented with a menu asking for both Authentication and Access PIN. 72 Select Authentication and press the <Blue Enter> key. Press <1> to enable Authentication, then press <Esc>. Press the <Down Arrow> key to select Pin Code, and press the <Blue Enter> key. Enter the PIN code previously assigned to Access Point (in Step 4 in Section 4.2.2), then press <Esc>. You can also find the PIN code in Section 2 of the Settings Worksheet. Furniture Wizard CPT-8061 Wireless Scanner Use and Installation v10 6. The scanner will now attempt to pair itself with the Access Point. When complete, the message Pairing Successful will appear in the scanner display window. If scanner pairing fails, repeat the steps above, making sure you have enabled Authentication and you have entered the PIN code exactly as it was when it was originally entered during Access Point configuration. 7. Once the pairing process is successful, power the scanner off by pressing the <Power> key, then press the <Power> key again to turn it back on and proceed with the scanner configuration process. 4.5 Configuring Wireless Scanners After you have uploaded the Scan-IT interface software to the CPT-8061 wireless scanners and paired them with Access Point, you must now configure each scanner so it can communicate with Access Point and your local area network. To do this, perform the following tasks: 1. Press the <Power> key to turn the scanner back on. To signify that new software has been uploaded to a scanner, the unit emits three loud beeps the first time it is powered on after a software installation. The following message is also displayed in the scanner information window: Figure 71: New Program Message Displays Upon Startup after Program Installation Appendix A: Using Wireless Scanners with Furniture Wizard 73 2. To continue using the scanner, press any key to continue. The Welcome logon appears in the information window. During the initial software loading process, press the <ESC> key to access the Main Menu. Upon powering up the scanner after completing all scanner configuration tasks, this display will also contain User Name and Password fields that you will use to logon to Furniture Wizard scanning functions. They do not appear during the first time powerup after uploading the Scan-IT interface software. Figure 72: Welcome Message 3. At the Main Menu, press <6> (Configure) to access the software configuration options for the scanner. Figure 73: Main Menu Select 5 (Configure option) 74 Furniture Wizard CPT-8061 Wireless Scanner Use and Installation v10 4. The WLAN settings menu (Figure 74) contains a series of option selections that you will use to configure communications settings for the scanner unit: Figure 74: WLAN Settings Menu Select each option and enter correct LAN settings 5. You must now configure each scanner so it can successfully communicate with Access Point and your local area network by entering the following settings: Subnet Mask Local IP Address Gateway DNS Server Server IP Server Port Many of the network settings you will enter for the following menu options are dependent on your local area network, Access Point and CIPHER Scanner Agent settings you previously recorded in the Settings Worksheet when performing the tasks in Section 4.2.2 (Installing and Configuring Access Appendix A: Using Wireless Scanners with Furniture Wizard 75 Point). The text below will direct you to specific sections of the Settings Worksheet for entry of the requested values. 4.5.1 Subnet Mask Setting 1. To specify the Subnet Mask setting for the scanner, press <1> in the WLAN Settings menu. The current Subnet Mask setting setting for your local area network displays in the scanner information window (Figure 75): Figure 75: SubNet Mask Setting 2. Enter the Subnet Mask setting for the wireless scanner into the New field, then press the <Blue Enter> key to save the setting and return to the WLAN Settings menu. It must match the Subnet Mask setting previously assigned in Step 12 in Section 4.2.2 (Installing and Configuring Access Point). Use the Access Point Subnet Mask setting in Section 2 of the Settings Worksheet. 76 Furniture Wizard CPT-8061 Wireless Scanner Use and Installation v10 4.5.2 Local IP Address Setting 1. To specify the local IP address for the scanner, press <2> in the WLAN Settings menu. The current local IP address setting for your local area network displays in the scanner information window (Figure 76): Figure 76: Local IP Address Setting 2. Enter the local IP address for the wireless scanner into the New field, then press the <Blue Enter> key to save the setting and return to the WLAN Settings menu. The specified local IP address must in the same range as used in your local area network; however an unused one must be specified. For example, if 192.168.254.100 was used in the original setting, enter 192.168.254.101. Refer to the LAN IP Address setting in Section 1 of the Settings Worksheet. Record the IP address you assigned to the scanner in the Assigned Scanner IP field in Section 3 (CIPHER Scanner Agent Port Settings) of the Settings Worksheet. Record it next to the server port you will be assigning to the scanner in Step 16 in Section 2.7.6 (Server Port Address Setting) below. Appendix A: Using Wireless Scanners with Furniture Wizard 77 4.5.3 Gateway IP Address Setting 1. To specify the Gateway IP address for the scanner, press <3> in the WLAN Settings menu. The current Gateway IP address setting for your local area network displays in the scanner information window (Figure 77): Figure 77: Gateway Address Setting 2. Enter the Gateway IP address for the wireless scanner into the New field, then press the <Blue Enter> key to save the setting and return to the WLAN Settings menu. The specified Gateway IP address must match the IP address of your Access Point receiver. Use the Access Point IP Address setting in Section 2 of the Settings Worksheet. 4.5.4 DNS Server Setting 1. To specify the DNS Server setting for the scanner, press <4> in the WLAN Settings menu. The current network DNS Server setting displays in the scanner information window (Figure 78): Figure 78: DNS Server Setting 2. Enter the IP address for the DNS Server into the New field, then press the <Blue Enter> key to save the setting and return to the WLAN Settings menu. The specified DNS Server IP address must match the DNS Server setting of your local area network. Use the LAN DNS Server setting in Section 1 of the Settings Worksheet. 78 Furniture Wizard CPT-8061 Wireless Scanner Use and Installation v10 4.5.5 Server IP Setting 1. To specify the Server IP setting, press <5> in the WLAN Settings menu. The current server IP address setting displays in the scanner information window (Figure 79): Figure 79: Server IP Setting 2. Enter the IP address for the server that is running the CIPHER Scanner Agent software into the New field (refer to Section 3.2 - Loading and Configuring the CIPHER Scanner Agent Software), then press the <Blue Enter> key to save the setting and return to the WLAN Settings menu. Use the CIPHER Scanner IP Address setting in Section 3 of the Settings Worksheet. Appendix A: Using Wireless Scanners with Furniture Wizard 79 4.5.6 Server Port Address Setting 1. To specify the TCP/IP server port address for the server that is running the CIPHER Scanner Agent software, press <6> in the WLAN Settings menu. The currently assigned TCP/IP server port address setting displays in the scanner information window (Figure 80). Figure 80: Server Port Setting 2. Enter the TCP/IP server port address (of the server that is running the CIPHER Scanner Agent software) into the New field, then press the <Blue Enter> key to save the setting and return to the WLAN Settings menu. It must be a value between 1 and 65538 and must within the range of ports created in the server on which the CIPHER Scanner Agent software is being run (see Section 2.5 - Loading and Configuring CIPHER Scanner Agent Software). Use the port setting that is next to the Assigned Scanner IP address you recorded for the scanner in Section 3 of the Settings Worksheet. 3. When finished entering all required settings into the WLAN Settings menu, press the <Esc>, and then press the <Power> in the lower right front corner of the scanner to power it off. You can now proceed to Chapter 3: Using Wireless Scanners with Furniture Wizard to learn how to use hand-held scanners to capture and transmit inventory and sales data to Furniture Wizard. 80 Furniture Wizard CPT-8061 Wireless Scanner Use and Installation v10 5 Appendix B: Settings Worksheet / Miscellaneous 5.1 Overview The Appendix section contains the following sections: Settings Worksheet - Use this worksheet to record your current local area network, Access Point and server port settings. The purpose of the worksheet is to make it easier to keep track of these settings for the configuration activities you will be performing in Chapter 2 - Installation and Configuration. Scanner Firmware / Software Updates - CIPHER Labs and Furniture Wizard Software continually update the scanner firmware, interface software that allows the scanners to “talk” to Furniture Wizard. This section includes instructions on how to upload firmware and software updates when you receive them from CIPHER Labs or Furniture Wizard Software. Optimizing the Furniture Wizard Database - This section contains important information about optimizing the Furniture Wizard database when using the CIPHER Lab wireless scanners and accompanying Cipher Scanner Agent software. 5.2 Settings Worksheet Use this worksheet to record your current local area network, Access Point and CIPHER Scanner Agent server port settings. The purpose of the worksheet is to make it easier to keep track of these settings for the various configuration activities you will be performing throughout Chapter 2 - Installation and Configuration. Section 1 - Current Local Area Network Settings Record the following settings from the Internet Protocol (TCP/IP) Properties page on your Local Area Network (LAN). For more details on how to access these settings, refer to Steps 3 through 6 (in Section 4.2.2): 1 LAN IP Address: ____ . ____ . ____ . ____ 2 LAN Subnet Mask: ____ . ____ . ____ . ____ 3 LAN Default Gateway: ____ . ____ . ____ . ____ 4 LAN DNS Server: ____ . ____ . ____ . ____ Section 2 - Access Point Settings Once you have reconfigured Access Point in Step 11 in Section 4.2.2, record the following settings from the Internet Protocol (TCP/IP) Properties page on your network server or hub. For more details on how to access these settings, refer to Steps 3 through 6 in Section 4.2.2. Settings for up to five Access Point receivers can be recorded in this section. Access Point 1 82 5 Access Point IP Address: ____ . ____ . ____ . ____ 6 Access Point Subnet Mask: ____ . ____ . ____ . ____ 7 AP Name: _________________ 8 PIN Code: _________________ Furniture Wizard CPT-8061 Wireless Scanner Use and Installation v10 Section 2a - Additional Access Point Settings If you will be using more than one Access Point receiver with your local area network, record the settings for each additional unit on this page: Access Point 2 1 Access Point IP Address: ____ . ____ . ____ . ____ 2 Access Point Subnet Mask: ____ . ____ . ____ . ____ 3 AP Name: _________________ 4 PIN Code: _________________ Access Point 3 1 Access Point IP Address: ____ . ____ . ____ . ____ 2 Access Point Subnet Mask: ____ . ____ . ____ . ____ 3 AP Name: _________________ 4 PIN Code: _________________ Access Point 4 1 Access Point IP Address: ____ . ____ . ____ . ____ 2 Access Point Subnet Mask: ____ . ____ . ____ . ____ 3 AP Name: _________________ 4 PIN Code: _________________ Access Point 5 1 Access Point IP Address: ____ . ____ . ____ . ____ 2 Access Point Subnet Mask: ____ . ____ . ____ . ____ 3 AP Name: _________________ 4 PIN Code: _________________ Appendix B: Settings Worksheet / Miscellaneous 83 Section 3 - CIPHER Scanner and Agent Port Settings To use this section of the Settings Worksheet, do the following: Once you have verified the IP address of the server on which the CIPHER Scanner Agent is being loaded, record the IP address setting in the CIPHER Scanner Agent IP Address field below. For more details, refer to Step 1 in Section 3.2 - Loading and Configuring the CIPHER Scanner Agent Software. After you have created server ports in the CIPHER Scanner Agent, record them in the Port Number fields below. For more details, refer to Step 6 in Section 3.2. When each port is assigned to a specific wireless scanner, create an identification number for the scanner and record it next to the assigned port number below. For more details, refer to Step 16 in Section 4.5.6 - Server Port Address Setting. CIPHER Scanner Agent IP Address: ____ . ____ . ____ . ____ 84 1 Port Number: _______ Assigned Scanner IP: ____.____.____.____ 2 Port Number: _______ Assigned Scanner IP: ____.____.____.____ 3 Port Number: _______ Assigned Scanner IP: ____.____.____.____ 4 Port Number: _______ Assigned Scanner IP: ____.____.____.____ 5 Port Number: _______ Assigned Scanner IP: ____.____.____.____ 6 Port Number: _______ Assigned Scanner IP: ____.____.____.____ 7 Port Number: _______ Assigned Scanner IP: ____.____.____.____ 8 Port Number: _______ Assigned Scanner IP: ____.____.____.____ 9 Port Number: _______ Assigned Scanner IP: ____.____.____.____ 10 Port Number: _______ Assigned Scanner IP: ____.____.____.____ 11 Port Number: _______ Assigned Scanner IP: ____.____.____.____ 12 Port Number: _______ Assigned Scanner IP: ____.____.____.____ 13 Port Number: _______ Assigned Scanner IP: ____.____.____.____ 14 Port Number: _______ Assigned Scanner IP: ____.____.____.____ 15 Port Number: _______ Assigned Scanner IP: ____.____.____.____ Furniture Wizard CPT-8061 Wireless Scanner Use and Installation v10 5.3 CIPHER Lab Kernel Update Procedures To upload kernel updates (supplied by CIPHER Labs) to each wireless scanner, perform each of the following tasks: 1. Step 6 in Section 4.2.1 (Preparing CPT-8061) provides instructions on how to connect the Charging and Communications cradle to the serial port of the PC from which the firmware update will be loaded. If you have not already performed each of the tasks outlined in Step 6, they must be completed at this time. The PC sends the Scan-IT interface software on to each communications cradle via this serial connection. The cradle in turn “transmits” the software to the wireless scanner via an Infrared laser light emitted from a red window located in the large slot at the top of the cradle, to another red window located on the bottom of the scanner unit. 2. Place the CPT-8061 scanner facing forward into the large slot located at the top of the Charging and Communications cradle. The metal contacts located on the bottom of the scanner unit must make firm connection with the metal prongs located in the large slot at the top of the cradle. Leave the nylon hand cord (attached to the lower left corner of the scanner) hanging out the left side of the cradle. Make sure the scanner is turned off at this point! 3. Simultaneously press the <7> and <9> keys and the <Power> key in the lower right front corner of the scanner. Wait for the scanner to beep three times, then turn the scanner off by pressing the <Power> key. Figure 81: Powering the Scanner On and Off Simultaneously Press <7> + <9> + <Power>, After three beeps, turn scanner off by pressing <Power> again Appendix B: Settings Worksheet / Miscellaneous 85 4. To access the scanner Kernel menu, simultaneously press the <7> and <1> and the <Power> key in the lower right front corner of the scanner. Wait for the scanner to beep three times and then press <3> to select the Update Kernel option. Figure 82: Accessing Wireless Scanner Kernel Menu Simultaneously Press <7> + <1>, then <Power>, after three beeps, press <3> 5. When the Load Program menu appears, press <1> (Cradle-IR) to start the firmware update upload process. Figure 83: Load Program Menu Select <1> (Cradle - IR) 86 Furniture Wizard CPT-8061 Wireless Scanner Use and Installation v10 6. When the Baud Rate menu appears, select the fastest baud rate. In this case, press <1> (115200). Figure 84: Baud Rate Selection 7. When the Please Place in Cradle *Download Ready* message appears in the display window, place the scanner facing forward into the large slot at the top of the Charging and Communications cradle: Figure 85: Please Place in Cradle Message Appendix B: Settings Worksheet / Miscellaneous 87 8. Run the IRLoad.exe program from your C:\FW2000\Drivers\Cipher folder on which the serial cable is connected from the Communications cradle. Select the K8000nnn.shx file (where ‘nnn’ is the firmware release number) provided by CIPHER Labs. 9. After loading the Scan-IT software CD, the following communications port and baud rate information appears in the display window on the scanner. This allows you to verify previous input into the scanner. Click OK to continue the firmware upload process. Figure 86: COM Port Properties Dialog 10. During the software upload process, a Please Wait Loading message appears in the display window on the scanner, and a progress bar appears on the connected PC. When the process is finished, a Downloaded Completely” Do you want to download another program? message appears in the display window on the scanner: Figure 87: Downloaded Completely Message 88 Furniture Wizard CPT-8061 Wireless Scanner Use and Installation v10 11. Click No to complete the download process. Press any key and power the unit off by pressing the <Power> key when the following message is displayed: Figure 88: Complete - Power Off Message 12. After powering off the scanner, turn it back on by pressing the <Power> key. To signify that new firmware has been uploaded to a scanner, the unit emits three loud beeps the first time it is powered on after a software installation. The following message is also displayed in the scanner information window: Figure 89: New Program Message Displays upon startup after Program Installation 13. After verifying that the kernel has properly loaded, press the <Esc> key or any other key, then turn off the scanner by pressing the <Power> key. If indicated by Furniture Wizard Software, load any accompanying firmware updates using the procedures in Section 5.3.2: Furniture Wizard Firmware Update Procedures. Appendix B: Settings Worksheet / Miscellaneous 89 5.4 Furniture Wizard Firmware Update Procedures To upload firmware updates (provided by Furniture Wizard Software) to each wireless scanner, perform each of the following tasks: 1. Step 6 in Section 4.2.1 (Preparing CPT-8061) provides instructions on how to connect the Charging and Communications cradle to the serial port of the PC from which the Scan-IT interface software will be loaded. If you have not already performed each of the tasks outlined in Step 6, they must be completed at this time. The PC sends the interface software on to each communications cradle via this serial connection. The cradle in turn “transmits” the software to the wireless scanner via an Infrared laser light emitted from a red window located in the large slot at the top of the cradle, to another red window located on the bottom of the scanner unit. 2. Place the CPT-8061 scanner facing forward into the large slot located at the top of the Charging and Communications cradle. The metal contacts located on the bottom of the scanner unit must make firm connection with the metal prongs located in the large slot at the top of the cradle. Leave the nylon hand cord (attached to the lower left corner of the scanner) hanging out the left side of the cradle. 3. To access the proper scanner menu to start the software upload process, simultaneously press the <7> and <9> keys on the scanner, then press the <Power> key in the lower right front corner of the scanner. When the System Menu appears, press <6> (Load Program). Figure 90: Accessing Wireless Scanner Main Menu Simultaneously Press <7> + <9>, then <Power> 90 Furniture Wizard CPT-8061 Wireless Scanner Use and Installation v10 4. When the Load Program menu appears, press <1> (Cradle-IR). Figure 91: Load Program Menu Select <1> (Cradle - IR) 5. When the Baud Rate menu appears, select the fastest baud rate. In this case, press <1> (115200). Figure 92: Baud Rate Selection Appendix B: Settings Worksheet / Miscellaneous 91 6. When the Please Place in Cradle *Download Ready* message appears in the display window, place the scanner facing forward into the large slot at the top of the Charging and Communications cradle: Figure 93: Please Place in Cradle Message 7. Load the Scan-IT software CD provided by Furniture Wizard Software into the PC. 8. After loading the firmware update CD, the following communications port and baud rate information appears in the display window on the scanner. This allows you to verify previous input into the scanner. Click OK to continue the software upload process. Figure 94: COM Port Properties Dialog 92 Furniture Wizard CPT-8061 Wireless Scanner Use and Installation v10 9. During the software upload process, a Please Wait Loading message appears in the display window on the scanner, and a progress bar appears on the connected PC. When the process is finished, a Downloaded Completely” Do you want to download another program? message appears in the display window on the scanner: Figure 95: Download Complete Message 10. Click No to complete the download process. Press any key and power the unit off by pressing the <Power> key when the following message is displayed: Figure 96: Complete - Power Off Message Appendix B: Settings Worksheet / Miscellaneous 93 11. To signify that new software has been uploaded to a scanner, the unit emits three loud beeps the first time it is powered on after a software installation. The following message is also displayed in the scanner information window: Figure 97: New Program Message Displays upon startup after Program Installation 12. To continue using the scanner, press any key to continue. The logon appears in the information window. During the initial software loading process, press the <ESC> key to access the Main Menu. Upon powering up the scanner, this display will also contain User Name and Password fields that you will use to logon to Furniture Wizard scanning functions. Figure 98: Welcome to Scan-IT Message 5.5 Optimizing the Furniture Wizard Database Optimizing the Furniture Wizard database task that must be performed on a daily basis. However, you must exit the Cipher Scanner Agent software before you run the Optimize All or Optimize Data functions in Furniture Wizard!! 94 Furniture Wizard CPT-8061 Wireless Scanner Use and Installation v10