1
Laser Beam Printer
User's Guide
IMPORTANT:
Read this manual carefully before using your printer.
Save this manual for future reference.
ENG
LBP3200
Laser Printer
User's Guide
Manuals for the Printer
The manuals for this printer are divided as follows. Please refer to them for detailed information.
CD-ROM
Guides with this symbol are PDF manuals included on the accompanying CD-ROM.
• Installation
• Connecting to a Computer
• Printing Methods
• Basic Operations
• Troubleshooting
The printer illustration on the cover may differ slightly from your printer.
Getting Started Guide
CD-ROM
User’s Guide
(This Manual)
CD-ROM
How This Manual Is Organized
Chapter 1
Before You Start Using This Printer
Chapter 2
Loading and Delivering Paper
Chapter 3
Setting Up the Printing Environment
Chapter 4
Printing a Document
Chapter 5
Routine Maintenance
Chapter 6
Troubleshooting
Chapter 7
Appendix
Considerable effort has been made to ensure that this manual is free of inaccuracies and omissions. However, as we are constantly improving our
products, if you need an exact specification, please contact Canon.
Contents
Preface . . . . . . . . . . . . . . . . . . . . . . . . . . . . . . . . . . . . . . . . . . . . . . . . . . . . . . . . . vii
How To Use This Manual . . . . . . . . . . . . . . . . . . . . . . . . . . . . . . . . . . . . . . . . . . . vii
Symbols Used in This Manual . . . . . . . . . . . . . . . . . . . . . . . . . . . . . . . . . . . . . vii
Buttons Used in This Manual . . . . . . . . . . . . . . . . . . . . . . . . . . . . . . . . . . . . . . vii
Illustrations Used in This Manual . . . . . . . . . . . . . . . . . . . . . . . . . . . . . . . . . . . viii
Displays Used in This Manual . . . . . . . . . . . . . . . . . . . . . . . . . . . . . . . . . . . . . viii
Abbreviations Used in This Manual . . . . . . . . . . . . . . . . . . . . . . . . . . . . . . . . . . ix
Legal Notices . . . . . . . . . . . . . . . . . . . . . . . . . . . . . . . . . . . . . . . . . . . . . . . . . . . . . x
FCC (Federal Communications Commission) . . . . . . . . . . . . . . . . . . . . . . . . . . x
EMC Directive (220 - 240 V model) . . . . . . . . . . . . . . . . . . . . . . . . . . . . . . . . . . xi
Laser Safety (120 V/220 - 240 V models). . . . . . . . . . . . . . . . . . . . . . . . . . . . . xii
International Energy Star-Program . . . . . . . . . . . . . . . . . . . . . . . . . . . . . . . . . xiii
Trademarks. . . . . . . . . . . . . . . . . . . . . . . . . . . . . . . . . . . . . . . . . . . . . . . . . . . . xiii
Copyright . . . . . . . . . . . . . . . . . . . . . . . . . . . . . . . . . . . . . . . . . . . . . . . . . . . . . xiii
Disclaimers. . . . . . . . . . . . . . . . . . . . . . . . . . . . . . . . . . . . . . . . . . . . . . . . . . . . xiv
Legal Limitations on the Usage of Your Product and the Use of Images . . . . . xiv
Important Safety Instructions . . . . . . . . . . . . . . . . . . . . . . . . . . . . . . . . . . . . . . . xv
Installation . . . . . . . . . . . . . . . . . . . . . . . . . . . . . . . . . . . . . . . . . . . . . . . . . . . . xv
Power Supply . . . . . . . . . . . . . . . . . . . . . . . . . . . . . . . . . . . . . . . . . . . . . . . . . . xvi
Handling . . . . . . . . . . . . . . . . . . . . . . . . . . . . . . . . . . . . . . . . . . . . . . . . . . . . . xvii
Maintenance and Inspections . . . . . . . . . . . . . . . . . . . . . . . . . . . . . . . . . . . . . xix
Consumables . . . . . . . . . . . . . . . . . . . . . . . . . . . . . . . . . . . . . . . . . . . . . . . . . . xx
Chapter 1
Before You Start Using This Printer
Features and Benefits . . . . . . . . . . . . . . . . . . . . . . . . . . . . . . . . . . . . . . . . . . . . 1-2
Parts and Their Functions . . . . . . . . . . . . . . . . . . . . . . . . . . . . . . . . . . . . . . . . .
Front View. . . . . . . . . . . . . . . . . . . . . . . . . . . . . . . . . . . . . . . . . . . . . . . . . . . .
Rear View . . . . . . . . . . . . . . . . . . . . . . . . . . . . . . . . . . . . . . . . . . . . . . . . . . . .
Internal View. . . . . . . . . . . . . . . . . . . . . . . . . . . . . . . . . . . . . . . . . . . . . . . . . .
1-4
1-5
1-6
1-7
Plugging the Power Cord . . . . . . . . . . . . . . . . . . . . . . . . . . . . . . . . . . . . . . . . . 1-8
Turning the Printer ON/OFF . . . . . . . . . . . . . . . . . . . . . . . . . . . . . . . . . . . . . . 1-11
Turning the Printer ON . . . . . . . . . . . . . . . . . . . . . . . . . . . . . . . . . . . . . . . . . 1-11
Turning the Printer OFF . . . . . . . . . . . . . . . . . . . . . . . . . . . . . . . . . . . . . . . . 1-12
Connecting to a Computer . . . . . . . . . . . . . . . . . . . . . . . . . . . . . . . . . . . . . . . 1-13
ii
Chapter 2
Loading and Delivering Paper
Paper Requirements . . . . . . . . . . . . . . . . . . . . . . . . . . . . . . . . . . . . . . . . . . . . . .2-2
Usable Paper . . . . . . . . . . . . . . . . . . . . . . . . . . . . . . . . . . . . . . . . . . . . . . . . . .2-2
Paper Size . . . . . . . . . . . . . . . . . . . . . . . . . . . . . . . . . . . . . . . . . . . . . . . . .2-2
Paper Type . . . . . . . . . . . . . . . . . . . . . . . . . . . . . . . . . . . . . . . . . . . . . . . . .2-3
Abbreviation of Paper Size. . . . . . . . . . . . . . . . . . . . . . . . . . . . . . . . . . . . .2-5
Printable Area . . . . . . . . . . . . . . . . . . . . . . . . . . . . . . . . . . . . . . . . . . . . . . . . .2-6
Unusable Paper . . . . . . . . . . . . . . . . . . . . . . . . . . . . . . . . . . . . . . . . . . . . . . . .2-7
Storing Paper . . . . . . . . . . . . . . . . . . . . . . . . . . . . . . . . . . . . . . . . . . . . . . . . . .2-8
Paper Source . . . . . . . . . . . . . . . . . . . . . . . . . . . . . . . . . . . . . . . . . . . . . . . . . . . .2-9
Paper Source Type. . . . . . . . . . . . . . . . . . . . . . . . . . . . . . . . . . . . . . . . . . . . . .2-9
Paper Capacity for Paper Source. . . . . . . . . . . . . . . . . . . . . . . . . . . . . . . . . .2-10
Paper Delivery Area. . . . . . . . . . . . . . . . . . . . . . . . . . . . . . . . . . . . . . . . . . . . . .2-11
Paper Delivery Area Type . . . . . . . . . . . . . . . . . . . . . . . . . . . . . . . . . . . . . . .2-11
Face-down Delivery Area. . . . . . . . . . . . . . . . . . . . . . . . . . . . . . . . . . . . .2-11
Face-up Delivery Slot. . . . . . . . . . . . . . . . . . . . . . . . . . . . . . . . . . . . . . . .2-12
Paper Capacity for Paper Delivery Area . . . . . . . . . . . . . . . . . . . . . . . . . . . .2-12
Selecting the Paper Delivery Area . . . . . . . . . . . . . . . . . . . . . . . . . . . . . . . . .2-13
Switching into the Face-up Delivery Slot . . . . . . . . . . . . . . . . . . . . . . . . .2-13
Switching into the Face-down Delivery Area . . . . . . . . . . . . . . . . . . . . . .2-13
Printing on Plain Paper / Heavy Paper / Label / Transparency . . . . . . . . . . .2-14
Loading Paper . . . . . . . . . . . . . . . . . . . . . . . . . . . . . . . . . . . . . . . . . . . . . . . .2-14
Loading Paper in the Cassette . . . . . . . . . . . . . . . . . . . . . . . . . . . . . . . .2-15
Setting Paper in the Manual Feed Slot. . . . . . . . . . . . . . . . . . . . . . . . . . .2-21
Setting Printer Driver and Printing . . . . . . . . . . . . . . . . . . . . . . . . . . . . . . . . .2-23
Printing on Envelope. . . . . . . . . . . . . . . . . . . . . . . . . . . . . . . . . . . . . . . . . . . . .2-27
Loading Envelope . . . . . . . . . . . . . . . . . . . . . . . . . . . . . . . . . . . . . . . . . . . . .2-27
Loading Envelope in the Cassette . . . . . . . . . . . . . . . . . . . . . . . . . . . . . .2-28
Setting Envelope in the Manual Feed Slot . . . . . . . . . . . . . . . . . . . . . . . .2-35
Setting Printer Driver and Printing . . . . . . . . . . . . . . . . . . . . . . . . . . . . . . . . .2-37
Printing on Custom Paper . . . . . . . . . . . . . . . . . . . . . . . . . . . . . . . . . . . . . . . .2-40
Loading Custom Paper . . . . . . . . . . . . . . . . . . . . . . . . . . . . . . . . . . . . . . . . .2-40
Setting Printer Driver and Printing . . . . . . . . . . . . . . . . . . . . . . . . . . . . . . . . .2-42
Chapter 3
Setting Up the Printing Environment
Introduction . . . . . . . . . . . . . . . . . . . . . . . . . . . . . . . . . . . . . . . . . . . . . . . . . . . . .3-2
After Installing the Printer . . . . . . . . . . . . . . . . . . . . . . . . . . . . . . . . . . . . . . . .3-2
Steps for Printing to be Followed Each Time . . . . . . . . . . . . . . . . . . . . . . . . . .3-2
Required System Environment . . . . . . . . . . . . . . . . . . . . . . . . . . . . . . . . . . . .3-2
Installing the CAPT Software . . . . . . . . . . . . . . . . . . . . . . . . . . . . . . . . . . . . . . .3-4
For Windows 98/Me . . . . . . . . . . . . . . . . . . . . . . . . . . . . . . . . . . . . . . . . . . . . .3-4
Installing from the CD-ROM . . . . . . . . . . . . . . . . . . . . . . . . . . . . . . . . . . . .3-4
Installing with Plug and Play . . . . . . . . . . . . . . . . . . . . . . . . . . . . . . . . . . .3-8
iii
For Windows 2000 . . . . . . . . . . . . . . . . . . . . . . . . . . . . . . . . . . . . . . . . . . . .
Installing from the CD-ROM . . . . . . . . . . . . . . . . . . . . . . . . . . . . . . . . . .
Installing with Plug and Play. . . . . . . . . . . . . . . . . . . . . . . . . . . . . . . . . .
For Windows XP. . . . . . . . . . . . . . . . . . . . . . . . . . . . . . . . . . . . . . . . . . . . . .
Installing from the CD-ROM . . . . . . . . . . . . . . . . . . . . . . . . . . . . . . . . . .
Installing with Plug and Play. . . . . . . . . . . . . . . . . . . . . . . . . . . . . . . . . .
3-16
3-16
3-18
3-22
3-22
3-24
After Completing Installation (Canon LBP3200 Group) . . . . . . . . . . . . . . . . 3-27
Printing a Test Page . . . . . . . . . . . . . . . . . . . . . . . . . . . . . . . . . . . . . . . . . . . . . 3-31
Using the Printer on a Network . . . . . . . . . . . . . . . . . . . . . . . . . . . . . . . . . . .
Setting the Print Server . . . . . . . . . . . . . . . . . . . . . . . . . . . . . . . . . . . . . . . .
For Windows 98/Me . . . . . . . . . . . . . . . . . . . . . . . . . . . . . . . . . . . . . . . .
For Windows 2000/XP . . . . . . . . . . . . . . . . . . . . . . . . . . . . . . . . . . . . . .
Installation on the Clients . . . . . . . . . . . . . . . . . . . . . . . . . . . . . . . . . . . . . . .
Installing from [Add Printer Wizard] . . . . . . . . . . . . . . . . . . . . . . . . . . . .
Installing from [Windows Explorer]. . . . . . . . . . . . . . . . . . . . . . . . . . . . .
3-34
3-35
3-35
3-39
3-43
3-43
3-46
Uninstalling the CAPT Software . . . . . . . . . . . . . . . . . . . . . . . . . . . . . . . . . . . 3-48
Chapter 4
Printing a Document
Printing from an Application. . . . . . . . . . . . . . . . . . . . . . . . . . . . . . . . . . . . . . . 4-2
Canceling a Print Job . . . . . . . . . . . . . . . . . . . . . . . . . . . . . . . . . . . . . . . . . . . . 4-6
Specifying the Printing Preferences . . . . . . . . . . . . . . . . . . . . . . . . . . . . . . . . 4-7
For Windows 98/Me . . . . . . . . . . . . . . . . . . . . . . . . . . . . . . . . . . . . . . . . . . . . 4-7
Displaying the [Document Properties] Dialog Box from the Application. . . . 4-7
Displaying the [Printer Properties] Dialog Box from the [Printers] Folder . . . 4-9
For Windows 2000/XP . . . . . . . . . . . . . . . . . . . . . . . . . . . . . . . . . . . . . . . . . 4-10
Displaying the [Document Properties] Dialog Box from the Application. . . 4-11
Displaying the [Document Properties] Dialog Box from the [Printers] Folder . . 4-12
Displaying the [Printer Properties] Dialog Box from the [Printers] Folder . . 4-14
Using the Printing Functions . . . . . . . . . . . . . . . . . . . . . . . . . . . . . . . . . . . . .
For Windows 98/Me . . . . . . . . . . . . . . . . . . . . . . . . . . . . . . . . . . . . . . . . . . .
[Page Setup] Sheet . . . . . . . . . . . . . . . . . . . . . . . . . . . . . . . . . . . . . . . .
[Finishing] Sheet. . . . . . . . . . . . . . . . . . . . . . . . . . . . . . . . . . . . . . . . . . .
[Quality] Sheet . . . . . . . . . . . . . . . . . . . . . . . . . . . . . . . . . . . . . . . . . . . .
[General] Sheet . . . . . . . . . . . . . . . . . . . . . . . . . . . . . . . . . . . . . . . . . . .
[Details] Sheet . . . . . . . . . . . . . . . . . . . . . . . . . . . . . . . . . . . . . . . . . . . .
[Sharing] Sheet. . . . . . . . . . . . . . . . . . . . . . . . . . . . . . . . . . . . . . . . . . . .
For Windows 2000/XP . . . . . . . . . . . . . . . . . . . . . . . . . . . . . . . . . . . . . . . . .
[Page Setup] Sheet . . . . . . . . . . . . . . . . . . . . . . . . . . . . . . . . . . . . . . . .
[Finishing] Sheet. . . . . . . . . . . . . . . . . . . . . . . . . . . . . . . . . . . . . . . . . . .
[Quality] Sheet . . . . . . . . . . . . . . . . . . . . . . . . . . . . . . . . . . . . . . . . . . . .
[General] Sheet . . . . . . . . . . . . . . . . . . . . . . . . . . . . . . . . . . . . . . . . . . .
[Sharing] Sheet. . . . . . . . . . . . . . . . . . . . . . . . . . . . . . . . . . . . . . . . . . . .
[Ports] Sheet. . . . . . . . . . . . . . . . . . . . . . . . . . . . . . . . . . . . . . . . . . . . . .
[Advanced] Sheet . . . . . . . . . . . . . . . . . . . . . . . . . . . . . . . . . . . . . . . . .
iv
4-16
4-16
4-17
4-20
4-21
4-22
4-22
4-23
4-23
4-24
4-27
4-28
4-29
4-30
4-30
4-31
[Security] Sheet . . . . . . . . . . . . . . . . . . . . . . . . . . . . . . . . . . . . . . . . . . . .4-31
[Paper Selection] Sheet . . . . . . . . . . . . . . . . . . . . . . . . . . . . . . . . . . . . . .4-32
Printing Multiple Pages on One Sheet . . . . . . . . . . . . . . . . . . . . . . . . . . . . . .4-32
Scaling Print Output . . . . . . . . . . . . . . . . . . . . . . . . . . . . . . . . . . . . . . . . . . . .4-33
Scaling a Document Automatically . . . . . . . . . . . . . . . . . . . . . . . . . . . . .4-34
Scaling a Document Manually . . . . . . . . . . . . . . . . . . . . . . . . . . . . . . . . .4-35
Specifying a Custom Paper Size . . . . . . . . . . . . . . . . . . . . . . . . . . . . . . . . . .4-36
Specifying the Print Quality . . . . . . . . . . . . . . . . . . . . . . . . . . . . . . . . . . . . . .4-41
Specifying the Toner Density . . . . . . . . . . . . . . . . . . . . . . . . . . . . . . . . . . . . .4-42
Specifying the Image Refinement . . . . . . . . . . . . . . . . . . . . . . . . . . . . . . . . .4-43
Viewing the Printer Settings / Restoring the Default Settings . . . . . . . . . . . .4-44
Viewing the Printer Settings . . . . . . . . . . . . . . . . . . . . . . . . . . . . . . . . . . .4-44
Restoring the Default Settings . . . . . . . . . . . . . . . . . . . . . . . . . . . . . . . . .4-45
Printer Status Window. . . . . . . . . . . . . . . . . . . . . . . . . . . . . . . . . . . . . . . . . . . .4-46
Using the Printer Status Window . . . . . . . . . . . . . . . . . . . . . . . . . . . . . . . . . .4-46
Displaying the Printer Status Window . . . . . . . . . . . . . . . . . . . . . . . . . . . . . .4-47
Closing the Printer Status Window . . . . . . . . . . . . . . . . . . . . . . . . . . . . . . . .4-48
Setting Preferences . . . . . . . . . . . . . . . . . . . . . . . . . . . . . . . . . . . . . . . . . . .4-48
Network Printer Status. . . . . . . . . . . . . . . . . . . . . . . . . . . . . . . . . . . . . . . . . .4-50
Chapter 5
Routine Maintenance
Replacing the Toner Cartridge . . . . . . . . . . . . . . . . . . . . . . . . . . . . . . . . . . . . . .5-2
Before Replacing the Toner Cartridge . . . . . . . . . . . . . . . . . . . . . . . . . . . . . . .5-2
Replacing the Toner Cartridge . . . . . . . . . . . . . . . . . . . . . . . . . . . . . . . . . . . . .5-6
Cleaning. . . . . . . . . . . . . . . . . . . . . . . . . . . . . . . . . . . . . . . . . . . . . . . . . . . . .5-12
Precautions for Handling the Toner Cartridge . . . . . . . . . . . . . . . . . . . . . . . .5-13
Storing the Toner Cartridge . . . . . . . . . . . . . . . . . . . . . . . . . . . . . . . . . . . . . .5-15
Cleaning the Printer . . . . . . . . . . . . . . . . . . . . . . . . . . . . . . . . . . . . . . . . . . . . .5-16
Moving the Printer . . . . . . . . . . . . . . . . . . . . . . . . . . . . . . . . . . . . . . . . . . . . . . .5-18
Moving the Printer . . . . . . . . . . . . . . . . . . . . . . . . . . . . . . . . . . . . . . . . . . . . .5-19
Handling the Printer . . . . . . . . . . . . . . . . . . . . . . . . . . . . . . . . . . . . . . . . . . . . .5-22
Precautions for Handling the Printer . . . . . . . . . . . . . . . . . . . . . . . . . . . . . . .5-22
Precaution for Storing the Printer. . . . . . . . . . . . . . . . . . . . . . . . . . . . . . . . . .5-23
Chapter 6
Troubleshooting
When You Have Trouble Printing . . . . . . . . . . . . . . . . . . . . . . . . . . . . . . . . . . . .6-2
Paper Jams . . . . . . . . . . . . . . . . . . . . . . . . . . . . . . . . . . . . . . . . . . . . . . . . . . . . .6-3
Service Error Display . . . . . . . . . . . . . . . . . . . . . . . . . . . . . . . . . . . . . . . . . . . .6-14
When a Fixing Unit Error Appears . . . . . . . . . . . . . . . . . . . . . . . . . . . . . . . . .6-15
When a Scanner Error or Service Error Appears . . . . . . . . . . . . . . . . . . . . .6-16
Print Quality Problems . . . . . . . . . . . . . . . . . . . . . . . . . . . . . . . . . . . . . . . . . . .6-17
When Nothing is Printed. . . . . . . . . . . . . . . . . . . . . . . . . . . . . . . . . . . . . . . . . .6-21
v
Installation Problems. . . . . . . . . . . . . . . . . . . . . . . . . . . . . . . . . . . . . . . . . . . .
When Uninstallation Fails . . . . . . . . . . . . . . . . . . . . . . . . . . . . . . . . . . . . . . .
Uninstalling the USB Class Driver . . . . . . . . . . . . . . . . . . . . . . . . . . . . . . . .
Installing by Selecting the USB Port (Windows 98/Me Only) . . . . . . . . . . . .
Problems During Network Installation . . . . . . . . . . . . . . . . . . . . . . . . . . . . .
6-22
6-23
6-24
6-27
6-31
Miscellaneous Problems . . . . . . . . . . . . . . . . . . . . . . . . . . . . . . . . . . . . . . . . . 6-32
Chapter 7
Appendix
Specifications. . . . . . . . . . . . . . . . . . . . . . . . . . . . . . . . . . . . . . . . . . . . . . . . . . . 7-2
Hardware Specifications. . . . . . . . . . . . . . . . . . . . . . . . . . . . . . . . . . . . . . . . . 7-2
Software Specifications . . . . . . . . . . . . . . . . . . . . . . . . . . . . . . . . . . . . . . . . . 7-3
Dimensions of Each Part. . . . . . . . . . . . . . . . . . . . . . . . . . . . . . . . . . . . . . . . . . 7-4
Index . . . . . . . . . . . . . . . . . . . . . . . . . . . . . . . . . . . . . . . . . . . . . . . . . . . . . . . . . . 7-5
Location of the Serial Number . . . . . . . . . . . . . . . . . . . . . . . . . . . . . . . . . . . . . 7-8
vi
Preface
Thank you for purchasing the Canon LASER SHOT LBP3200.
Please read this manual thoroughly before operating the printer in order to familiarize
yourself with its capabilities, and to make the most of its many functions.
After reading this manual, store it in a safe place for future reference.
How To Use This Manual
Symbols Used in This Manual
The following symbols are used in this manual to explain procedures, restrictions,
handling precautions, and instructions that should be observed for safety.
WARNING
Indicates a warning concerning operations that may lead to death or
injury to persons if not performed correctly.
In order to use the printer safely, always pay attention to these warnings.
CAUTION
Indicates a caution concerning operations that may lead to injury to
persons, or damage to property if not performed correctly.
In order to use the printer safely, always pay attention to these cautions.
IMPORTANT
Indicates operational requirements and restrictions.
Be sure to read these items carefully in order to operate the printer
correctly, and to avoid damage to the printer.
NOTE
Indicates a clarification of an operation, or contains additional
explanations for a procedure.
Reading these notes is highly recommended.
Buttons Used in This Manual
The following button names are a few examples of how buttons to be pressed are
expressed in this manual:
• Buttons
on Computer Operation Screens: [Button Name]
Example:
[OK]
[Details]
vii
Illustrations Used in This Manual
Illustrations used in this manual are for the 220 V model unless otherwise specified.
For the 120 V model, a cover is attached to the face-down delivery area.
A5
B5
EXE
C
A4
LG
L
LTR
ON
OF
F
Displays Used in This Manual
Screen shots of the computer operation screen used in this manual are those taken
when the LASER SHOT LBP3200 has operated for Windows 2000.
The buttons which you should press are marked with a
as shown below.
When multiple buttons can be pressed on the screen shot of computer operation
screen, all buttons are marked. Select the button which suits your needs.
5 Click [Install a Printer Driver].
Click this button for operation.
viii
Abbreviations Used in This Manual
In this manual, product names and model names are abbreviated as follows:
Microsoft® Windows® 95 operating system:
®
®
Windows 95
Microsoft Windows 98 operating system:
Windows 98
Microsoft® Windows® Millennium Edition operating system:
Windows Me
®
®
Windows 2000
®
®
Windows XP
®
Windows®
Microsoft Windows 2000 operating system:
Microsoft Windows XP operating system:
Microsoft
operating system:
LASER SHOT LBP3200:
Windows
LBP3200
ix
Legal Notices
FCC (Federal Communications Commission)
Laser Beam Printer, Model F187900
■ 120 V model
This device complies with part 15 of the FCC Rules. Operation is subject to the following
two conditions: (1) This device may not cause harmful interference, and (2) this device
must accept any interference received, including interference that may cause undesired
operation.
This equipment has been tested and found to comply with the limits for a class B digital
device, pursuant to Part 15 of the FCC rules. These limits are designed to provide
reasonable protection against harmful interference in a residential installation. This
equipment generates, uses and can radiate radio frequency energy and if not installed
and used in accordance with the instructions, may cause harmful interference to radio
communications. However, there is no guarantee that interference will not occur in a
particular installation.
If this equipment does cause harmful interference to radio or television reception, which
can be determined by turning the equipment off and on, the user is encouraged to try to
correct the interference by one or more of the following measures:
• Reorient or relocate the receiving antenna.
• Increase the separation between the equipment and receiver.
• Connect the equipment into an outlet on a circuit different from that to which the receiver
is connected.
• Consult the dealer or an experienced radio/TV technician for help.
Use of shielded cable is required to comply with class B limits in Subpart B of Part 15 of
FCC Rules.
Do not make any changes or modifications to the equipment unless otherwise specified in
the manual. If such changes or modifications should be made, you could be required to
stop operation of the equipment.
Canon U.S.A. Inc.
One Canon Plaza, Lake Success, NY 11042, U.S.A.
Tel No. (516) 328-5600
x
■ 220 - 240 V model
This equipment has been tested and found to comply with the limits for a Class A digital
device, pursuant to Part 15 of the FCC Rules. These limits are designed to provide
reasonable protection against harmful interference when the equipment is operated in a
commercial environment. This equipment generates, uses, and can radiate radio
frequency energy and if not installed and used in accordance with the instruction manual,
may cause harmful interference to radio communications.
Operation of this equipment in a residential area is likely to cause harmful interference, in
which case the user will be required to correct the interference at his own expense.
• Use of shielded cable is required to comply with Class A limits in Subpart B of Part 15 of
FCC Rules.
Do not make any changes or modifications to the equipment unless otherwise specified in
the manual. If such changes or modifications should be made, you could be required to
stop operation of the equipment.
EMC Directive (220 - 240 V model)
"This equipment has been tested in a typical system to comply with the technical
requirements of EMC Directive."
• Use
of shielded cable is necessary to comply with the technical requirements of
EMC Directive.
The product is in conformity with the EMC directive at nominal mains input 220 240 V, 50 Hz although the rated input of the product is 220 - 240 V, 50/60 Hz.
C-tick marking
on the rating label means that we declare the product is in
conformity with the relevant requirements at nominal mains input 240 V, 50 Hz
although the rated input of the product is 220 - 240 V, 50/60 Hz.
xi
Laser Safety (120 V/220 - 240 V models)
Laser radiation could be hazardous to the human body. For this reason, laser
radiation emitted inside this printer is hermetically sealed within the protective
housing and external cover. No radiation can leak from the printer in the normal
operation of the product by the user.
This printer is classified as a Class 1 laser product under IEC60825-1:1993,
EN60825-1:1994, and as for the U.S.A., it is classified as Class 1 under the Code of
Federal Regulations, 1040.10 of Title 21.
This printer has been classified under IEC60825-1:1993, EN60825-1:1994 and
conforms to the following classes:
CLASS 1 LASER PRODUCT
LASER KLASSE 1
APPAREIL A RAYONNEMENT LASER DE CLASSE 1
APPARECCHIO LASER DI CLASSE 1
PRODUCTO LASER DE CLASE 1
APARELHO A LASER DE CLASSE 1
(220 - 240 V model only)
CAUTION
Performance of procedures other than those specified in this manual may result
in hazardous radiation exposure.
xii
International Energy Star-Program
As an ENERGY STAR Partner, Canon USA, Inc. has determined
that this product meets the ENERGY STAR Program for energy
efficiency.
The International ENERGY STAR Office Equipment Program is
an international program that promotes energy saving through the
use of computers and other office equipment.
The program backs the development and dissemination of
products with functions that effectively reduce energy
consumption. It is an open system in which business proprietors
can participate voluntarily.
The targeted products are office equipment, such as computers,
displays, printers, facsimiles, and copiers. The standards and
logos are uniform among participating nations.
Trademarks
Canon, the Canon Logo, LASER SHOT, and LBP are trademarks of Canon Inc.
Adobe® Acrobat is a trademark of Adobe Systems Incorporated.
Microsoft and Windows are trademarks of Microsoft Corporation in the U.S. and
other countries.
Other product and company names herein may be the trademarks of their
respective owners.
Copyright
Copyright 2003 by Canon Inc. All rights reserved.
No part of this publication may be reproduced or transmitted in any form or by any
means, electronic or mechanical, including photocopying and recording, or by any
information storage or retrieval system without the prior written permission of
Canon Inc.
xiii
Disclaimers
The information in this manual is subject to change without notice.
CANON INC. MAKES NO WARRANTY OF ANY KIND WITH REGARD TO THIS
MATERIAL, EITHER EXPRESS OR IMPLIED, EXCEPT AS PROVIDED HEREIN,
INCLUDING WITHOUT LIMITATION, THEREOF, WARRANTIES AS TO
MARKETABILITY, MERCHANTABILITY, FITNESS FOR A PARTICULAR
PURPOSE OF USE OR AGAINST INFRINGEMENT OF ANY PATENT. CANON
INC. SHALL NOT BE LIABLE FOR ANY DIRECT, INCIDENTAL, OR
CONSEQUENTIAL DAMAGES OF ANY NATURE, OR LOSSES OR EXPENSES
RESULTING FROM THE USE OF THIS MATERIAL.
Legal Limitations on the Usage of Your Product and the
Use of Images
Using your product to scan, print or otherwise reproduce certain documents, and
the use of such images as scanned, printed or otherwise reproduced by your
product, may be prohibited by law and may result in criminal and/or civil liability. A
non-exhaustive list of these documents is set forth below. This list is intended to be
a guide only. If you are uncertain about the legality of using your product to scan,
print or otherwise reproduce any particular document, and/or of the use of the
images scanned, printed or otherwise reproduced, you should consult in advance
with your legal advisor for guidance.
xiv
•
Paper Money
•
Travelers Checks
•
Money Orders
•
Food Stamps
•
Certificates of Deposit
•
Passports
•
Postage Stamps (canceled or
uncanceled)
•
Immigration Papers
•
Identifying Badges or Insignias
•
Internal Revenue Stamps (canceled
or uncanceled)
•
Selective Service or Draft Papers
•
Bonds or Other Certificates of
Indebtedness
•
Checks or Drafts Issued by
Governmental Agencies
•
Stock Certificates
•
Motor Vehicle Licenses and
Certificates of Title
•
Copyrighted Works/Works of Art
without Permission of Copyright
Owner
Important Safety Instructions
Please read these "Important Safety Instructions" thoroughly before operating the
printer.
As these instructions are intended to prevent injury to the user or other persons or
destruction of property, always pay attention to these instructions. Also, since it may
result in unexpected accidents or injuries, do not perform any operation unless
otherwise specified in the manual. Improper operation or use of this machine could
result in personal injury and/or damage requiring extensive repair that may not be
covered under your Limited Warranty.
Installation
WARNING
• Do not install the printer near alcohol, paint thinner, or other flammable substances.
If flammable substances come into contact with electrical parts inside the printer, it
may result in a fire or electrical shock.
• Do not place the following items on the printer. If these items come into contact with
a high-voltage area inside the printer, it may result in a fire or electrical shock.
If these items are dropped or slipped inside the printer, immediately turn OFF the
power switch a, and disconnect the USB cable b if you use it. Then, unplug the
power plug from the AC power outlet c, and contact your local authorized Canon
dealer.
- Necklaces and other metal objects
- Cups, vases, flowerpots, and other containers filled with water or liquids
b
c
a
ON
OF
F
xv
CAUTION
• Do not install the printer in unstable locations, such as unsteady platforms or
inclined floors, or in locations subject to excessive vibrations, as this may cause the
printer to fall or tip over, resulting in personal injury.
• Never block the ventilation slots on the printer. The vantilation slots are provided for
proper ventilation of working parts inside the printer. Blocking the vantilation slots
can cause the printer to overheat, resulting in a fire. Never place the printer on a soft
surface, such as a sofa or rug.
• Do not install the printer in the following locations:
- A damp or dusty location
- A location exposed to smoke and steam such as cookeries and humidifiers.
- A location exposed to rain or snow.
- A location near water faucets or water
- A location exposed to direct sunlight
- A location subject to high temperatures
- A location near open flames
• When installing the printer, gently lower the printer onto the floor or other machine to
avoid catching your hands, as this may result in personal injury.
• When connecting the USB cable, connect it properly according to this manual. If not
connected properly, this may result in malfunction or electrical shock.
• When moving the printer, follow the instructions in this manual to hold it correctly.
Failure to do so may cause you to drop the printer, resulting in personal injury.
Power Supply
WARNING
• Do not damage or modify the power cord. Also, do not place heavy objects on the
power cord, or pull on or excessively bend it, as this could cause electrical damage
and result in a fire or electrical shock.
• Keep the power cord away from a heat source; failure to do this may cause the power
cord coating to melt, resulting in a fire or electrical shock.
• Do not plug or unplug the power plug with wet hands, as this may result in electrical
shock.
• Do not plug the power cord to a multiplug power strip, as this may cause a fire or
electrical shock.
• Do not bundle up or tie the power cord in a knot, as this may result in a fire or
electrical shock.
• Insert the power plug completely into the AC power outlet, as failure to do so may
result in a fire or electrical shock.
• Do not use power cords other than the power cord provided, as this may result in a
fire or electrical shock.
• As a general rule, do not use extension cords or plug extension cords to a multiple
power strip. If extension cords must be used or plugged to a multiple power strip,
however, use them observing the following points on user's own authority. If you use
extension cords improperly, this may result in a fire or electrical shock.
xvi
- Do not connect one extension cord to another.
- Make sure that the voltage of the power plug is the one indicated in the rating label
(attached on the back of the printer) when you use the printer.
- Use an extension cord that allows the current value greater than the necessary one
indicated in the rating label (attached on the back of the printer).
- When you use an extension cord, untie the cord binding, and insert the power plug
completely into the extension cord outlet to ensure a firm connection between the
power cord and the extension cord.
- Periodically check that the extension cord is not overheated.
CAUTION
• Do not use power supplies with voltages other than those specified herein, as this
may result in a fire or electrical shock.
• Always grasp the power plug when unplugging the power cord. Pulling on the power
cord may expose or snap the core wire, or otherwise damage the power cord. If the
power cord is damaged, this could cause current to leak, resulting in a fire or
electrical shock.
• Leave sufficient space around the power plug so that it can be unplugged easily. If
objects are placed around the power plug, you will be unable to unplug it in an
emergency.
Handling
WARNING
• Do not attempt to disassemble or modify the printer. There are high-temperature and
high-voltage components inside the printer which may result in a fire or electrical
shock.
• Electrical equipment can be hazardous if not used properly. To avoid injury, do not
allow children access to the interior of any electrical product and do not let them
touch any electrical contacts or gears that are exposed.
• If the printer makes strange noises, or emits smoke, heat or unusual smells,
immediately turn OFF the power switch, and disconnect the USB cable if you use it.
Then, unplug the power plug from the AC power outlet, and contact the shop that you
purchased this printer.
• Do not use highly flammable sprays near the printer. If gas from these sprays comes
into contact with the electrical components inside the printer, it may result in a fire or
electrical shock.
• To avoid damage to the power cord and creating a fire hazard, always turn OFF the
power switch, and disconnect the USB cable when moving the printer. Otherwise, the
power cord or USB cable may be damaged, resulting in a fire or electrical shock.
xvii
• Do not drop paper clips, staples, or other metal objects inside the printer. Also, do
not spill water, liquids, or flammable substances (alcohol, benzene, paint thinner,
etc.) inside the printer. If these items come into contact with a high-voltage area
inside the printer, it may result in a fire or electrical shock. If these items are dropped
or slipped inside the printer, immediately turn OFF the power switch, and disconnect
the USB cable if you use it. Then, unplug the power plug from the AC power outlet,
and contact the shop that you purchased this printer.
• When connecting or disconnecting the USB cable while the power plug is plugged
into the AC power outlet, do not touch the metal part of the connector. This may lead
to an electrical shock.
CAUTION
• Do not place heavy objects on the printer, as they may tip over or fall resulting in
personal injury.
• Turn OFF the power switch for safety when the printer will not be used for a long
period of time such as overnight. Also, turn OFF the power switch on the right of the
printer and unplug the power plug for safety when the printer will not be used for an
extended period of time such as during consecutive holidays.
• The laser beam can be harmful to human bodies. Since radiation emitted inside the
printer is completely confined within protective housings and external covers, the
laser beam cannot escape from the printer during any phase of user operation. Read
the following remarks and instructions for safety.
- Never open covers other than those instructed in this manual.
- Do not remove the caution label attached to the cover of the laser scanner unit.
- If the laser beam escapes from the printer, exposure may cause serious damage to
your eyes.
xviii
Maintenance and Inspections
WARNING
• When cleaning the printer, first turn OFF the power switch, disconnect the USB cable,
then unplug the power plug. Failure to observe these steps may result in a fire or
electrical shock.
• Clean the printer using a slightly dampened cloth with a mild detergent mixed with
water. Do not use alcohol, benzene, paint thinner, or other flammable substances.
Check detergent for flammability prior to use. If flammable substances come into
contact with a high-voltage area inside the printer, it may result in a fire or electrical
shock.
• There are some areas inside the printer which are subject to high-voltages. When
removing jammed paper or when inspecting the inside of the printer, do not allow
necklaces, bracelets, or other metal objects to touch the inside of the printer, as this
may result in burns or electrical shock.
• Do not burn or throw a used toner cartridge into open flames, as this may cause the
toner remaining inside the cartridge to ignite, resulting in burns or a fire.
• Unplug the power plug from the AC power outlet regularly, and clean the area around
the base of the power plug's metal pins and the AC power outlet with a dry cloth to
ensure that all dust and grime is removed. If the power plug is plugged for a long
period of time in a damp, dusty, or smoky location, dust can build up around the
power plug and become damp. This may cause a short circuit and result in a fire.
CAUTION
• Never attempt to service this printer yourself, except as explained in this manual.
There are no user serviceable parts inside the printer. Adjust only those controls that
are covered in the operating instructions. Improper adjustment could result in
personal injury and/or damage requiring extensive repair that may not be covered
under your Limited Warranty.
• The fixing unit and its surroundings inside the printer may become hot during use.
When removing jammed paper or when inspecting the inside of the printer, do not
touch the fixing unit and its surroundings, as doing so may result in burns or
electrical shock.
• When removing jammed paper or replacing the toner cartridge, take care not to allow
the toner to come into contact with your hands or clothing, as this will dirty your
hands or clothing. If they become dirty, wash them immediately with cold water.
Washing with warm water will set the toner and make it impossible to remove the
toner stains.
xix
• When removing paper which has become jammed inside the printer, remove the
jammed paper gently to prevent the toner on the paper from scattering and getting
into your eyes or mouth. If the toner gets into your eyes or mouth, wash them
immediately with cold water and immediately consult a physician.
• When loading paper or removing jammed paper, take care not to cut your hands on
the edges of the paper.
• When removing a used toner cartridge from the toner cartridge slot, remove the
cartridge carefully to prevent the toner from scattering and entering your eyes or
mouth. If the toner enters your eyes or mouth, wash them immediately with cold
water and immediately consult a physician.
Consumables
WARNING
• Do not throw a used toner cartridge into open flames, as this may cause toner
remaining inside the cartridge to ignite and result in burns or a fire.
• Do not store a toner cartridge or copy paper in places exposed to open flames, as
this may cause the toner or paper to ignite and result in burns or a fire.
CAUTION
Keep toner and other consumables out of the reach of small children. If these items
are ingested, consult a physician immediately.
xx
Before You Start Using This Printer
1
CHAPTER
This chapter describes the major features and basic functions of this printer.
Features and Benefits. . . . . . . . . . . . . . . . . . . . . . . . . . . . . . . . . . . . . . . . . . . . . . . . . . . . 1-2
Parts and Their Functions. . . . . . . . . . . . . . . . . . . . . . . . . . . . . . . . . . . . . . . . . . . . . . . . . 1-4
Front View . . . . . . . . . . . . . . . . . . . . . . . . . . . . . . . . . . . . . . . . . . . . . . . . . . . . . . . . . . . . . . . . . . .1-5
Rear View . . . . . . . . . . . . . . . . . . . . . . . . . . . . . . . . . . . . . . . . . . . . . . . . . . . . . . . . . . . . . . . . . . .1-6
Internal View . . . . . . . . . . . . . . . . . . . . . . . . . . . . . . . . . . . . . . . . . . . . . . . . . . . . . . . . . . . . . . . . .1-7
Plugging the Power Cord . . . . . . . . . . . . . . . . . . . . . . . . . . . . . . . . . . . . . . . . . . . . . . . . . 1-8
Turning the Printer ON/OFF . . . . . . . . . . . . . . . . . . . . . . . . . . . . . . . . . . . . . . . . . . . . . . 1-11
Turning the Printer ON . . . . . . . . . . . . . . . . . . . . . . . . . . . . . . . . . . . . . . . . . . . . . . . . . . . . . . . .1-11
Turning the Printer OFF . . . . . . . . . . . . . . . . . . . . . . . . . . . . . . . . . . . . . . . . . . . . . . . . . . . . . . .1-12
Connecting to a Computer . . . . . . . . . . . . . . . . . . . . . . . . . . . . . . . . . . . . . . . . . . . . . . . 1-13
1-1
Features and Benefits
■ High Performance Printing System "CAPT"
1
Before You Start Using This Printer
LBP3200 is equipped with the latest CAPT (Canon Advanced Printing Technology)
software supporting Windows 98/Me and Windows 2000/XP. As this system
batch-processes the print data in a computer instead of a printer, it enables high-speed
printing, making full use of the features of a computer. It shortens the time period over
which the computer is freed. The information, such as out of paper, the remaining time of
printing and the estimated time of print completion, appears on the display in real time.
■ USB Interface Equipped as Standard
The USB (Universal Serial Bus) interface with which the peripheral devices can be
connected using one connector is equipped as standard.
■ High-speed Printing & Extra-High-definition Image Printing
18-sheet-a-minute high-speed printing minimizes your stress of waiting for print
completion. LBP3200 is equipped with a printer engine of 600 dpi resolution. By adopting
Canon's own new Automatic Image Refinement, an 2400 dpi-equivalent x 600 dpi
extra-high-definition image can be obtained. The gray scale adopting the dither method
produces delicate images such as photographs and graphics beautifully.
■ Supporting Various Networks
If you use this printer as a network printer, the status is displayed in both the server and
client computers. You can perform job operations from both of them.
■ Supporting Various Type of Materials
Various types of materials, such as plain paper, envelops (Envelope C5, Envelope
COM10, Envelope DL, Envelope Monarch), labels, transparencies, can be used for this
printer. Although this printer is for A4-size paper, its reduction mode can reduce a
document of larger size, such as A3 and B4, to A4 size to print.
It can also produce a print of custom paper size.
■ Low Power Consumption and Quick Startup
Canon's own "On-demand Fixing System" achieves low power consumption and quick
startup. This innovative technology heats the fixing heater instantaneously only at printing,
and saves warm-up time. So, LBP3200 is always in standby status and ready to print.
Furthermore, the average power consumption at standby status is only about 7 W.
■ Compact & Quiet Design
The compact design of this printer saves space in your home or office.
Quiet during print and noiseless in standby status allow you to use this printer without
concerning with neighbourhood even at night.
1-2
Features and Benefits
■ Easy Maintenance & Printer Status Window
Uniting toner with a photosensitive drum, the toner cartridge for LBP3200 can be easily
replaced.
The Printer Status Window that is displayed during print allows you to make exact
judgements by graphics and sound, improving the operability of this printer.
Before You Start Using This Printer
1
Features and Benefits
1-3
Parts and Their Functions
This section describes the name and function of each part in order for you to use
this printer properly to make full use of the functions.
Before You Start Using This Printer
1
CAUTION
Never block the ventilation slots on the printer. The vantilation slots are
provided for proper ventilation of working parts inside the printer. Blocking the
vantilation slots can cause the printer to overheat, resulting in a fire.
NOTE
For the 120 V model, a cover is attached to the face-down delivery area.
A5
B5
EXE
C
A4
LG
L
LTR
ON
OF
1-4
Parts and Their Functions
F
Front View
b
a
c
h
g
f
A5
B5
EXE
C
A4
LG
L
LTR
d
ON
OF
F
e
a Face-down Delivery Tray
Allows paper to be delivered straight.
b Face-down Delivery Area
Delivers paper with the printing surface face down.
(See p. 2-11.)
c Delivery Selection Cover
Switches between face-up delivery and face-down
delivery. (See p. 2-13.)
d Power Switch
Turns ON/OFF the printer. (See p. 1-11.)
e Cassette
Allows you to load a maximum of 250 sheets of plain
paper (64 g/m2). (See p. 2-9.)
f Manual Feed Slot
Used when printing paper one by one manually.
(See p. 2-9.)
g Paper Guide
Align this paper guide with the width of the paper so
that paper is delivered straight.
h Front Cover
Opened when replacing the toner cartridge or
removing paper jams.
Parts and Their Functions
1-5
Before You Start Using This Printer
1
Rear View
b
Before You Start Using This Printer
1
c
a
d
e
g
f
a Power Socket
Connected to the supplied power cord. (See p. 1-8.)
b Face-up Delivery Slot
Delivers paper with the printing surface face up.
(See p. 2-12.)
c Power Indicator
Lights up when the printer is ON.
d Ventilation Slot
Cools the insides of the printer. Do not block the
ventilation slot.
e USB Connector
Connected to the USB cable. The USB cable is
connected to the USB port on the computer.
(See p. 1-14.)
f Rating Label
The serial number for printer identification is
indicated on this label. The number is required for
receiving service or repairs. The current value
indicated in this rating label shows the average
power current consumption.
g Cassette Protective Cover
Prevents dirt and dust from entering into the
cassette.
1-6
Parts and Their Functions
Internal View
Before You Start Using This Printer
1
a
ON
OF
F
a Toner Cartridge Guide
When setting the toner cartridge, push it while
aligning the projection at each side of the toner
cartridge with this guide. (See p. 5-5.)
Parts and Their Functions
1-7
Plugging the Power Cord
This section describes the procedure for connecting the power cord. Before
connecting the power cord, see "Important Safety Instructions," on p. xv.
Before You Start Using This Printer
1
WARNING
• Do not damage or modify the power cord. Also, do not place heavy objects on
•
•
•
•
•
•
•
1-8
the power cord, or pull on or excessively bend it, as this could cause electrical
damage and result in a fire or electrical shock.
Keep the power cord away from a heat source; failure to do this may cause the
power cord coating to melt, resulting in a fire or electrical shock.
Do not plug or unplug the power plug with wet hands, as this may result in
electrical shock.
Do not plug the power cord to a multiplug power strip, as this may cause a fire
or electrical shock.
Do not bundle up or tie the power cord in a knot, as this may result in a fire or
electrical shock.
Insert the power plug completely into the AC power outlet, as failure to do so
may result in a fire or electrical shock.
Do not use power cords other than the power cord provided, as this may result
in a fire or electrical shock.
As a general rule, do not use extension cords or plug extension cords to a
multiple power strip. If extension cords must be used or plugged to a multiple
power strip, however, use them observing the following points on user's own
authority. If you use extension cords improperly, this may result in a fire or
electrical shock.
- Do not connect one extension cord to another.
- Make sure that the voltage of the power plug is the one indicated in the rating
label (attached on the back of the printer) when you use the printer.
- Use an extension cord that allows the current value greater than the
necessary one indicated in the rating label (attached on the back of the
printer).
- When you use an extension cord, untie the cord binding, and insert the power
plug completely into the extension cord outlet to ensure a firm connection
between the power cord and the extension cord.
- Periodically check that the extension cord is not overheated.
Plugging the Power Cord
CAUTION
• Do not use power supplies with voltages other than those specified herein, as
this may result in a fire or electrical shock.
• Always grasp the power plug when unplugging the power cord. Pulling on the
IMPORTANT
• Do not plug the power cord into the auxiliary outlet on the computer.
• One AC power outlet should be used exclusively for the printer.
• Do not connect this printer to an uninterruptible power source. This may cause printer
malfunction or breakdown at the occurrence of a power failure.
1
Make sure that the power switch is turned OFF.
The printer is OFF when "
" of the power switch is pressed.
ON
OF
2
F
Plug the supplied power cord into the power socket.
Plugging the Power Cord
1-9
1
Before You Start Using This Printer
power cord may expose or snap the core wire, or otherwise damage the power
cord. If the power cord is damaged, this could cause current to leak, resulting in
a fire or electrical shock.
• Leave sufficient space around the power plug so that it can be unplugged easily.
If objects are placed around the power plug, you will be unable to unplug it in an
emergency.
3
Plug the power plug into the AC power outlet.
Before You Start Using This Printer
1
1-10
Plugging the Power Cord
Turning the Printer ON/OFF
Turning the Printer ON
In order to use this printer, you should press " " of the power switch to turn ON the
printer. After running a self-diagnostic test, the printer will be ready to print.
IMPORTANT
• Do not turn ON the printer immediately after turning it OFF. After turning OFF the printer,
wait for 10 seconds or longer before turning it ON again.
• If the printer does not operate properly, or an error message appears in the Printer Status
Window, see "Troubleshooting," on p. 6-1.
• Before turning ON the printer, make sure that paper is not set in the manual feed slot. If
you turn ON the printer when paper is set in the manual feed slot, this may cause paper
jams.
• When you turn the printer ON for the first time after you install the printer, a blank sheet
may be delivered. However it is not abnormal.
1
Press " " of the power switch to turn ON the printer.
ON
OF
F
Turning the Printer ON/OFF
1-11
1
Before You Start Using This Printer
The power switch to turn ON or OFF the printer is located on the right side of the
printer. Be sure to observe the following instructions in order to prevent unexpected
problems.
The power indicator lights up and the printer initiates a self-diagnostic test. If no
abnormality is found out in the self-diagnostic test, the printer is ready to print.
Before You Start Using This Printer
1
Turning the Printer OFF
Follow the instruction below to turn OFF the printer.
IMPORTANT
• If the printer is used in a network, before turning OFF the printer, make sure that other
computers do not send printing data into the printer.
• If you turn OFF the printer, all print data remaining in the printer memory will be erased.
So, wait for the necessary print data to be printed before turning OFF the printer.
• Do not turn OFF the printer in the following status.
- During print
- While running a self-diagnostic test immediately after turning ON the printer
1
Press "
" of the power switch to turn OFF the printer.
ON
OF
F
IMPORTANT
The power consumption of the printer with "
1-12
Turning the Printer ON/OFF
" of the power switch pressed is 0 W.
Connecting to a Computer
WARNING
When connecting or disconnecting the USB cable while the power plug is
plugged into the AC power outlet, do not touch the metal part of the connector.
This may lead to an electrical shock.
IMPORTANT
• You can connect or disconnect the USB cable even while the computer or printer is ON.
However, do not connect or disconnect the USB cable in the following situations, as this
may result in a computer or printer glitch.
- While the computer operating system is starting up immediately after the computer is
turned ON
- During print
• If you connect or disconnect the USB cable while the computer or printer is ON, after
disconnecting the USB cable, wait for 5 seconds or longer before connecting it again. If
you connect the USB cable immediately after disconnecting it, this may result in a
computer or printer glitch.
NOTE
• The USB interface for this printer supports USB Full-Speed (USB 1.1 equivalent). For
more details, contact the store where you purchased this printer.
• When you connect this printer to a computer with a USB cable, use a computer with
manufacturer's guarantee of USB proper operation.
• If you are not sure about the USB cable that is supported by your computer, contact the
store where you purchased the computer.
Connecting to a Computer
1-13
1
Before You Start Using This Printer
This section describes how to connect the printer to a computer.
As this printer is equipped with the USB connector, you can use a USB cable to
connect to a computer.
By using a USB cable, this printer can be connected to a computer equipped with
the USB port.
1
Connect the B-type (square) end of the USB cable to the USB
connector on the rear side of the printer.
Before You Start Using This Printer
1
2
Connect the A-type (flat) end of the USB cable to the USB port
on the computer.
NOTE
After connecting the USB cable, install the software for this printer according to the
instructions on the computer screen. For more details, see "Installing the CAPT
Software," on p. 3-4.
1-14
Connecting to a Computer
Loading and Delivering Paper
2
CHAPTER
This chapter describes the types of paper that can be used with this printer, and how to load
and deliver paper.
Paper Requirements . . . . . . . . . . . . . . . . . . . . . . . . . . . . . . . . . . . . . . . . . . . . . . . . . . . . . 2-2
Usable Paper . . . . . . . . . . . . . . . . . . . . . . . . . . . . . . . . . . . . . . . . . . . . . . . . . . . . . . . . . . . . . . . .2-2
Printable Area. . . . . . . . . . . . . . . . . . . . . . . . . . . . . . . . . . . . . . . . . . . . . . . . . . . . . . . . . . . . . . . .2-6
Unusable Paper . . . . . . . . . . . . . . . . . . . . . . . . . . . . . . . . . . . . . . . . . . . . . . . . . . . . . . . . . . . . . .2-7
Storing Paper . . . . . . . . . . . . . . . . . . . . . . . . . . . . . . . . . . . . . . . . . . . . . . . . . . . . . . . . . . . . . . . .2-8
Paper Source . . . . . . . . . . . . . . . . . . . . . . . . . . . . . . . . . . . . . . . . . . . . . . . . . . . . . . . . . . 2-9
Paper Source Type . . . . . . . . . . . . . . . . . . . . . . . . . . . . . . . . . . . . . . . . . . . . . . . . . . . . . . . . . . . .2-9
Paper Capacity for Paper Source . . . . . . . . . . . . . . . . . . . . . . . . . . . . . . . . . . . . . . . . . . . . . . .2-10
Paper Delivery Area . . . . . . . . . . . . . . . . . . . . . . . . . . . . . . . . . . . . . . . . . . . . . . . . . . . . 2-11
Paper Delivery Area Type. . . . . . . . . . . . . . . . . . . . . . . . . . . . . . . . . . . . . . . . . . . . . . . . . . . . . .2-11
Paper Capacity for Paper Delivery Area . . . . . . . . . . . . . . . . . . . . . . . . . . . . . . . . . . . . . . . . . .2-12
Selecting the Paper Delivery Area . . . . . . . . . . . . . . . . . . . . . . . . . . . . . . . . . . . . . . . . . . . . . . .2-13
Printing on Plain Paper / Heavy Paper / Label / Transparency . . . . . . . . . . . . . . . . . . . . 2-14
Loading Paper . . . . . . . . . . . . . . . . . . . . . . . . . . . . . . . . . . . . . . . . . . . . . . . . . . . . . . . . . . . . . .2-14
Setting Printer Driver and Printing . . . . . . . . . . . . . . . . . . . . . . . . . . . . . . . . . . . . . . . . . . . . . . .2-23
Printing on Envelope. . . . . . . . . . . . . . . . . . . . . . . . . . . . . . . . . . . . . . . . . . . . . . . . . . . . 2-27
Loading Envelope . . . . . . . . . . . . . . . . . . . . . . . . . . . . . . . . . . . . . . . . . . . . . . . . . . . . . . . . . . .2-27
Setting Printer Driver and Printing . . . . . . . . . . . . . . . . . . . . . . . . . . . . . . . . . . . . . . . . . . . . . . .2-37
Printing on Custom Paper. . . . . . . . . . . . . . . . . . . . . . . . . . . . . . . . . . . . . . . . . . . . . . . . 2-40
Loading Custom Paper . . . . . . . . . . . . . . . . . . . . . . . . . . . . . . . . . . . . . . . . . . . . . . . . . . . . . . .2-40
Setting Printer Driver and Printing . . . . . . . . . . . . . . . . . . . . . . . . . . . . . . . . . . . . . . . . . . . . . . .2-42
2-1
Paper Requirements
Usable Paper
To ensure optimum performance, use only paper that falls within the specifications
listed below. Inappropriate paper may deteriorate print quality or result in paper
jams.
Loading and Delivering Paper
2
IMPORTANT
In the following cases, the print speed may drop in stages as the safety function that
prevents damage caused by heat becomes active.
- For continuous print on B5- or Executive-size paper, the print speed may drop down to
6 ppm.
- For continuous print on A5-size paper, the print speed may drop down to 4 ppm.
- For continuous print on Envelope C5, Envelope COM10, Envelope DL, or Envelope
Monarch, the print speed may drop down to 3 ppm.
Paper Size
The following shows the usable paper sizes. A circle mark (O) indicates that the
type can be used, and a cross mark (X) indicates that the type cannot be used.
Paper Source
Paper Size
2-2
Size
Cassette
Manual Feed
Slot
A4
210.0 mm x 297.0 mm
8.27 inch x 11.69 inch
O
O
B5
182.0 mm x 257.0 mm
7.17 inch x 10.12 inch
O
O
A5
148.0 mm x 210.0 mm
5.83 inch x 8.27 inch
O
O
Legal
215.9 mm x 355.6 mm
8.50 inch x 14.00 inch
X*
O
Letter
215.9 mm x 279.4 mm
8.50 inch x 11.00 inch
O
O
Executive
184.1 mm x 266.7 mm
7.25 inch x 10.50 inch
O
O
Paper Requirements
Paper Source
Size
Cassette
Manual Feed
Slot
Envelope C5
162.0 mm x 229.0 mm
6.38 inch x 9.02 inch
O
O
Envelope COM10
104.9 mm x 241.3 mm
4.13 inch x 9.50 inch
O
O
Envelope DL
110.0 mm x 220.0 mm
4.33 inch x 8.66 inch
O
O
Envelope Monarch
98.5 mm x 190.5 mm
3.88 inch x 7.50 inch
O
O
Width: 76.2-215.9 mm
length: 127.0-355.6 mm
X
O
Custom Paper
2
* If "LGL" is indicated in the cassette, you can load the legal-size paper in the cassette. Whether "LGL" is indicated in
the cassette or not depends on the area where you purchased this printer.
Paper Type
The following shows the usable paper types. A circle mark (O) indicates that the
type that can be used.
Paper Source
Paper Type
Printer Driver Setting
Plain paper (64 - 90 g/m2)
[Plain Paper] [Plain Paper L] *1
Cassette
Manual Feed
Slot
O
O
O*5
O
[Transparencies]
O
O
[Heavy Paper] [Heavy Paper H] *3
O*6
O
*4
O
O
Heavy paper (91-163 g/m2) [Heavy Paper] [Heavy Paper H] *2
Transparency
Label
Envelope
*1 If paper curls excessively when printed with [Plain Paper] selected, select [Plain Paper L].
*2 If print fixing is not sufficient when printed with [Heavy Paper] selected, select [Heavy Paper H].
*3 For printing on labels, select [Heavy Paper] for the paper type. If print fixing is not sufficient when printed with [Heavy
Paper] selected, select [Heavy Paper H].
*4 For printing on envelopes, select any of [Envelope C5], [Envelope COM10], [Envelope DL], or [Envelope Monarch]
for the paper size. Then, printing is performed in the appropriate print mode automatically. You do not have to set the
paper type.
*5 The heavy paper that you can load in the cassette is the one in weight of 128 g/m2 or less. Set heavy paper in weight
of 129 g/m2 or over in the manual feed slot.
*6 A label that can be loaded in the cassette is a standard type (label standard card) only.
Paper Requirements
2-3
Loading and Delivering Paper
Paper Size
■ Plain Paper
This printer can print on plain paper in width of 76.2 to 215.9 mm, in length of 127.0 to
355.6 mm, and in weight of 64 to 90 g/m2 including the standard size paper: A4, B5, A5,
Legal, Letter, and Executive.
IMPORTANT
If "LGL" is indicated in the cassette, you can load the legal-size paper in the cassette.
Whether "LGL" is indicated in the cassette or not depends on the area where you
purchased this printer.
■ Heavy Paper
2
Loading and Delivering Paper
This printer can print on heavy paper in width of 76.2 to 215.9 mm, in length of 127.0 to
355.6 mm, and in weight of 91 to 163 g/m2 including the standard size paper: A4, B5, A5,
Legal, Letter, and Executive.
IMPORTANT
• If "LGL" is indicated in the cassette, you can load the legal-size paper in the cassette.
Whether "LGL" is indicated in the cassette or not depends on the area where you
purchased this printer.
• The heavy paper that you can load in the cassette is the one in weight of 128 g/m2 or
less. Set heavy paper in weight of 129 g/m2 or over in the manual feed slot.
■ Transparency
This printer can print on A4- and Letter-size transparencies.
IMPORTANT
Thoroughly fan transparencies before loading them as they may stick to each other.
■ Label
This printer can print on A4- and Letter-size labels.
IMPORTANT
• Do not use the following types of labels. Using inappropriate labels may result in paper
jams that are difficult to clear or may result in damaging the printer.
- Peeled labels or partly used labels
- Coated labels that are easily peeled off from the backing sheet
- Labels with adhesive protruded
• A label that can be loaded in the cassette is a standard type (label standard card) only.
Set any type of labels other than the standard type (label standard card) in the manual
feed slot.
2-4
Paper Requirements
■ Envelope
This printer can print on Envelope C5, Envelope COM10, Envelope DL, and Envelope
Monarch.
IMPORTANT
• The following shows the usable envelopes for this printer.
Envelope DL
110.0 mm x 220.0 mm
(4.33 inch x 8.66 inch)
Envelope Monarch
98.5 mm x 190.5 mm
(3.88 inch x 7.50 inch)
Envelope COM10
104.9 mm x 241.3 mm
(4.13 inch x 9.50 inch)
Envelope C5
162.0 mm x 229.0 mm
(6.38 inch x 9.02 inch)
* Envelopes with a flap on the short edge cannot be used.
• Do not use the following types of envelopes. Using inappropriate envelopes may result in
paper jams that are difficult to clear or may result in damaging the printer.
- Envelopes with fasteners or snaps
- Envelopes with address windows
- Envelopes with adhesive on the surface
- Wrinkled or creased envelopes
- Poorly manufactured envelopes in which the glued parts are uneven
- Irregularly-shaped envelopes
• Before loading the envelopes, flatten the stack of envelopes to release any remaining air,
and press the fold lines at edges tightly.
• Do not print on the back of an envelope.
• Printing speed drops when printing on envelops.
Abbreviation of Paper Size
The following shows the abbreviations of the paper size that are indicated on the paper
guide.
Paper Size
Paper Guide
Legal
LGL*
Letter
LTR
Executive
EXEC
Envelope C5
ENV. ISO-C5
Envelope COM10
ENV. COM10
Paper Requirements
2-5
Loading and Delivering Paper
2
Paper Size
Envelope DL
Envelope Monarch
Paper Guide
ENV. DL
ENV. MONARCH
* "LGL" (legal size) may be indicated in the cassette depending on the area where you purchased this printer.
Printable Area
The following shows the printable area of this printer.
2
Loading and Delivering Paper
■ Plain Paper / Heavy Paper / Transparency / Label
The areas within 5 mm from all sides of paper cannot be printed on.
5 mm
5 mm
5 mm
5 mm
■ Envelope
The areas within 5 mm from all sides of an envelope cannot be printed on.
You may have to change the printable area in the application you use before printing.
(Sample : Envelope COM 10)
241.3 mm
5 mm
(9.50 inch)
5 mm
5 mm
104.9 mm
(4.13 inch)
5 mm
2-6
Paper Requirements
Unusable Paper
To avoid problems such as paper jams and other malfunctions, the following types
of paper should never be used.
Paper Requirements
2-7
2
Loading and Delivering Paper
IMPORTANT
• Paper to be easily jammed
- Too thick or thin paper
- Irregularly-shaped paper
- Wet or moist paper
- Torn or damaged paper
- Rough, extremely smooth, or glossy paper
- Paper with binding holes or perforations
- Curled or creased paper
- Specially coated paper (coated paper for ink jet printers, etc.)
- Labels with backing sheet to be easily peeled off.
- Paper that has been already printed with a copy machine or other laser printer (The
reverse side of the paper is also unusable.)
- Jagged-edged paper
- Wrinkled paper
- Paper with the corners folded
• Paper that changes its quality at a high temperature
- Paper that contains ink that melts, burns, evaporates or emits harmful gases with the
heat (approx. 170 °C or 338 °F) of the fixing unit.
- Heat-sensitive paper
- Treated color paper
- Specially coated paper (coated paper for ink jet printers, etc.)
- Paper with adhesive on its surface
• Paper that causes printer malfunctions or damages the printer
- Carbon paper
- Paper with staples, clips, ribbons or tapes
- Paper that has been already printed with a copy machine or other laser printer (The
reverse side of the paper is also unusable.)
• Paper that is difficult for the toner to fix onto
- Paper with rough surfaces
- Specially coated paper (coated paper for ink jet printers, etc.)
- Paper containing thick fibers
Storing Paper
The quality of paper may deteriorate if it is stored improperly even when the paper
meets the normal specifications. Deteriorated paper may cause misfeeds, paper
jams, or deterioration in print quality.
Observe the following guidelines for storing and handling paper:
IMPORTANT
• Store paper away from moisture since paper quality deteriorates in a moist environment.
2
• Paper wrappers help avoiding moisture and dryness. Keep paper in the wrapper until it is
Loading and Delivering Paper
ready to be used.
• Store paper on a flat surface.
• Do not store paper on the floor where water and moisture can accumulate.
• Avoid physical damage to stored paper.
• Do not store a paper stack vertically or do not pile up too many paper stacks.
• Avoid direct sunlight and a humid or dry place when storing paper.
• If the paper storage room and work area differ from each other significantly in
temperature or humidity, keep packed paper stack in the work area for at least one day
prior to printing so that it can adapt to the new environment. When paper is moved to a
location where the temperature or humidity differs significantly, the paper may curl or get
creased.
2-8
Paper Requirements
Paper Source
Paper Source Type
This printer has two paper sources: the cassette and the manual feed slot.
2
Loading and Delivering Paper
■ Standard
Paper source:
Manual feed slot
Cassette
Manual feed slot
Cassette
A5
B5
EXE
C
A4
LG
L
LTR
ON
OF
F
IMPORTANT
Before printing on paper that is fed from the cassette, make sure that paper is not set in
the manual feed slot. If paper is set in the manual feed slot, the paper in the manual feed
slot is fed first.
Paper Source
2-9
Paper Capacity for Paper Source
The following shows the paper capacity for the cassette and the manual feed slot.
Paper Source
Paper Type
Loading and Delivering Paper
2
2-10
Cassette
Manual Feed
Slot
Plain paper (64 g/m2)
Approx. 250
sheets
1 sheet
Heavy paper (128 g/m2)
Approx. 100
sheets
1 sheet
Transparency
Approx. 100
sheets
1 sheet
Label
Approx. 100
sheets
1 sheet
Envelope
Approx. 20
sheets
1 sheet
Paper Source
Paper Delivery Area
Paper Delivery Area Type
Face-down Delivery Area
Prints are delivered to the face-down delivery area with the printing surface face
down.
When delivering paper to the face-down delivery area, open the face-down delivery
tray.
IMPORTANT
The face-down delivery area becomes extremely hot while printing or immediately after
printing. When removing paper or paper jam, be careful not to touch the face-down
delivery area and its surroundings.
NOTE
Up to approximately 100 sheets of plain paper (64 g/m2) can be loaded in the face-down
delivery area.
Paper Delivery Area
2-11
2
Loading and Delivering Paper
This printer has two paper delivery areas: "face-down delivery area" and "face-up
delivery slot".
Face-up Delivery Slot
Prints are delivered to the face-up delivery slot with the printing surface face up.
The face-up delivery slot is suitable for printing on transparencies, envelopes or
labels which tend to curl, as the face-up delivery slot feeds the printed material flat.
Loading and Delivering Paper
2
IMPORTANT
• Remove paper from the face-up delivery slot each time one sheet of paper is fed.
• The face-up delivery slot becomes extremely hot while printing or immediately after
printing. When removing paper or paper jam, be careful not to touch the face-up delivery
slot and its surroundings.
Paper Capacity for Paper Delivery Area
The following shows the number of sheets that can be delivered into the face-down
delivery area and the face-up delivery slot.
Paper Type
Face-down Delivery Area
Face-up Delivery Slot
Approx. 100 sheets
1 sheet
Approx. 30 sheets
1 sheet
Transparency
Approx. 10 sheets
1 sheet
Label
Approx. 10 sheets
1 sheet
Envelope
Approx. 10 sheets
1 sheet
Plain paper (64
g/m2)
Heavy paper (128
2-12
Paper Delivery Area
Paper Delivery Area
g/m2)
IMPORTANT
The following shows the number of sheets that can be delivered into the face-down
delivery area for the 120 V model.
- Plain paper (64 g/m2)
Approx. 100 sheets
- Heavy paper (128 g/m2)
Approx. 30 sheets
- Transparency
Approx. 5 sheets
- Label
Approx. 10 sheets
- Envelope
Approx. 10 sheets
Selecting the Paper Delivery Area
Switching into the Face-up Delivery Slot
To switch into the face-up delivery slot, open the delivery selection cover by holding
the edge as shown in the figure.
Switching into the Face-down Delivery Area
To switch into the face-down delivery area, close the delivery selection cover by
holding the edge as shown in the figure.
NOTE
If the face-down delivery tray is closed, open it.
Paper Delivery Area
2-13
Loading and Delivering Paper
2
Printing on Plain Paper / Heavy Paper / Label /
Transparency
This section describes the procedure for printing on plain paper, heavy paper,
labels, and transparencies.
For instructions on printing on custom paper, see "Printing on Custom Paper," on p.
2-40.
Loading and Delivering Paper
2
Loading Paper
The paper sources in which you can load paper are the cassette and the manual
feed slot. For continuous print, load paper in the cassette.
For printing on one sheet of paper that differs in size or type from paper in the
cassette, set the paper in the manual feed slot.
IMPORTANT
• Before printing on paper that is fed from the cassette, make sure that paper is not set in
the manual feed slot. If paper is set in the manual feed slot, the paper in the manual feed
slot is fed first.
• Do not set paper in the manual feed slot while printing is being made with paper fed from
the cassette. If you do so, the paper in the manual feed slot is fed, resulting in
double-feeds or paper jams.
• Do not load jagged-edged, creased, or extremely curled paper. It may result in paper
jams or printer malfunction.
• For more details on usable paper, see "Usable Paper," on p. 2-2.
• If "LGL" is indicated in the cassette, you can load the legal-size paper in the cassette.
Whether "LGL" is indicated in the cassette or not depends on the area where you
purchased this printer.
• This printer can print on A4- and Letter-size transparencies.
• This printer can print on A4- and Letter-size labels.
• Do not use the following types of labels. Using inappropriate labels may result in paper
jams that are difficult to clear or may result in damaging the printer.
- Peeled labels or partly used labels
- Coated labels that are easily peeled off from the backing sheet
- Labels with adhesive protruded
• A label that can be loaded in the cassette is a standard type (label standard card) only.
Set any type of labels other than the standard type (label standard card) in the manual
feed slot.
• The heavy paper that you can load in the cassette is the one in weight of 128 g/m2 or
less. Set heavy paper in weight of 129 g/m2 or over in the manual feed slot.
2-14
Printing on Plain Paper / Heavy Paper / Label / Transparency
Loading Paper in the Cassette
Follow the procedure below to load paper in the cassette.
Load the paper lengthways in the cassette.
IMPORTANT
• Do not take the cassette out of the printer while printing. It may result in paper jams or
printer malfunction.
• If you refill the cassette when a few sheets of paper still remain, take out the loaded
paper once, then align the paper to be refilled and taken out paper together.
• Do not touch the black rubber pad in the cassette. If you touch it, this may result in
misfeeds.
Rubber pad
• Do not lift the cassette by holding only the rear part of the cassette. If you do so, the rear
part of the cassette may come off.
Printing on Plain Paper / Heavy Paper / Label / Transparency
2-15
Loading and Delivering Paper
2
1
Pull out the cassette.
Loading and Delivering Paper
2
2
While holding the lock release lever on the paper guide at the
rear of the cassette, slide the paper guide to the mark
indicating the desired paper size.
A4
LTR
B5
EXEC
ENV. COM10
A5
ENV. DL
ENV. ISO-C5
ENV. MONARCH
IMPORTANT
If "LGL" is indicated in the cassette, you can load the legal-size paper in the
cassette. Whether "LGL" is indicated in the cassette or not depends on the area
where you purchased this printer.
2-16
Printing on Plain Paper / Heavy Paper / Label / Transparency
NOTE
"LGL" indicated in the cassette shows legal size, "LTR" shows letter size, and
"EXEC" shows executive size.
3
While holding the lock release lever on the paper guide on
either side of the cassette, slide the paper guide to the mark
indicating the desired paper size.
The paper guides on the sides of the cassette move together.
A4 B5
LTR EXEC
A5
NOTE
"LTR" indicated in the cassette shows letter size, and "EXEC" shows executive
size.
4
Before loading transparencies or labels, fan them in small
portions and align the edges.
Thoroughly fan in small portions.
Tap the edges on a flat
surface a few times.
Printing on Plain Paper / Heavy Paper / Label / Transparency
2-17
2
Loading and Delivering Paper
When you load the legal-size paper in the cassette on which "LGL" is indicated,
slide the paper guide on either side of the cassette to "LTR".
CAUTION
Be careful not to cut your hands with the edges of the transparencies or
labels.
IMPORTANT
• Be sure to fan the transparencies or labels thoroughly before loading them. If they
are not fanned enough, this may result in double-feeds or paper jams.
• When fanning or aligning the transparencies, try to hold the edges to avoid
touching the printing surface.
• Take care not to mark or stain the printing surface of the transparencies with
fingerprints, dust, or oil. This may result in poor print quality.
• A label that can be loaded in the cassette is a standard type (label standard card)
only. Set any type of labels other than the standard type (label standard card) in the
manual feed slot.
Loading and Delivering Paper
2
5
Load the paper stack so that the rear edges touch the paper
guide.
CAUTION
When loading paper, be careful not to cut your hands with the edges of the
paper.
IMPORTANT
• Make sure that the paper guide is at the appropriate position of paper size. If the
paper guide is not adjusted properly, this may result in misfeeds.
2-18
Printing on Plain Paper / Heavy Paper / Label / Transparency
• Double-feeding may occur frequently if the cutting edges of the paper stack are not
smooth. In this case, thoroughly fan the paper stack, and then align the edges of
the paper stack on a flat surface.
NOTE
To print on letterhead paper or paper printed with a logo, load the paper so that the
printing surface faces down and the top edge comes toward the front of the
cassette.
:Feeding direction
Printing on Plain Paper / Heavy Paper / Label / Transparency
2-19
Loading and Delivering Paper
2
6
Press down the paper stack as shown in the figure, then make
sure that it does not exceed the load limit mark and that it is
loaded under the hooks on the paper guides.
Make sure that there is sufficient space between the hooks and paper stack.
Take out some paper when there is no space.
Load limit mark
Hooks
Hook
Loading and Delivering Paper
2
Load limit mark
Hook
IMPORTANT
The following shows the cassette capacity. Be sure that the paper stack does not
exceed the load limit mark of the paper guide. If the paper stack exceeds the load
limit mark, this may result in misfeeds.
- Plain paper
Approx. 250 sheets (64 g/m2)
- Heavy paper
Approx. 100 sheets (128 g/m2)
- Transparency
Approx. 100 sheets
- Label (label standard card)
Approx. 100 sheets
2-20
Printing on Plain Paper / Heavy Paper / Label / Transparency
7
Set the cassette in the printer.
Push the cassette into the printer firmly until the front surface of the cassette is
flush with that of the printer.
Setting Paper in the Manual Feed Slot
Follow the procedure below to set paper in the manual feed slot.
IMPORTANT
• In the manual feed slot, you can set only one sheet of paper at a time.
• You cannot specify multiple print copies or multiple pages when you use the manual feed
slot. If you specify multiple print copies or multiple pages using the manual feed slot, the
second sheet thereafter is fed from the cassette regardless of paper size or type.
• Do not touch the paper in the manual feed slot or pull it out while printing. This may result
in a faulty operation.
• If heavy paper in weight of 129 g/m2 or over is printed on, the print quality may
deteriorate.
1
Slide the paper guides to the mark of the desired paper size.
The paper guides move together.
ON
OF
A5
B5 EXEC
A4
F
LGL
LTR
Printing on Plain Paper / Heavy Paper / Label / Transparency
2-21
Loading and Delivering Paper
2
NOTE
"LGL" indicated in the manual feed slot shows legal size, "LTR" shows letter size,
and "EXEC" shows executive size.
2
While holding paper with your hands as shown in the figure,
slowly insert paper with the printing surface face up until it
hits on the back.
Loading and Delivering Paper
2
After paper is set, it is fed slightly.
CAUTION
When setting paper, be careful not to cut your hands with the edges of the
paper.
IMPORTANT
• Set the paper straight.
• If the paper is curled or folded at corners, flatten it before setting.
• Be sure to align the paper guides with the width of the paper. If the paper guides
are too loose or too tight, this may result in misfeeds or paper jams.
2-22
Printing on Plain Paper / Heavy Paper / Label / Transparency
NOTE
To print on letterhead paper or paper printed with a logo, set the paper so that the
printing surface faces up and the top edge comes toward the back of the manual
feed slot.
:Feeding direction
Setting Printer Driver and Printing
Follow the procedure below to set the printer driver.
1
Select [Print] in the application. Select this printer for [Name]
and click [Properties].
Printing on Plain Paper / Heavy Paper / Label / Transparency
2-23
Loading and Delivering Paper
2
2
Display the [Page Setup] sheet, then from [Page Size], select
the size of a document that you created in the application.
Loading and Delivering Paper
2
3
From [Output Size], select the size of the loaded paper as
needed.
Select [A4] or [Letter] for printing on transparencies or labels.
If the size of a document is the same as that of paper set in the cassette or
manual feed slot, select [Match Page Size].
IMPORTANT
If the settings are different between [Page Size] and [Output Size], the printer
produces an enlarged or reduced print automatically.
2-24
Printing on Plain Paper / Heavy Paper / Label / Transparency
4
From [Paper Type], select the type of paper that you loaded.
Select [Plain Paper] for using plain paper, [Heavy Paper] for heavy paper or
labels, and [Transparencies] for transparencies.
NOTE
• If paper curls excessively when printed with [Plain Paper] selected, select [Plain
Paper L].
• If print fixing is not sufficient when printed with [Heavy Paper] selected, select
[Heavy Paper H].
5
Click [OK] to close the [Properties] dialog box.
Printing on Plain Paper / Heavy Paper / Label / Transparency
2-25
Loading and Delivering Paper
2
6
Click [OK] to start printing.
Loading and Delivering Paper
2
2-26
Printing on Plain Paper / Heavy Paper / Label / Transparency
Printing on Envelope
This section describes the procedure for printing on envelopes.
Loading Envelope
For printing on one envelope that differs in type from paper in the cassette, set it in
the manual feed slot.
IMPORTANT
• Before printing on envelopes that are fed from the cassette, make sure that paper is not
set in the manual feed slot. If paper is set in the manual feed slot, the paper in the manual
feed slot is fed first.
• Do not set paper in the manual feed slot while printing is being made with envelopes fed
from the cassette. If you do so, the paper in the manual feed slot is fed, resulting in
double-feeds or paper jams.
• Printing speed drops when printing on envelops.
• The following shows the usable envelopes for this printer.
Envelope DL
110.0 mm x 220.0 mm
(4.33 inch x 8.66 inch)
Envelope Monarch
98.5 mm x 190.5 mm
(3.88 inch x 7.50 inch)
Envelope COM10
104.9 mm x 241.3 mm
(4.13 inch x 9.50 inch)
Envelope C5
162.0 mm x 229.0 mm
(6.38 inch x 9.02 inch)
* Envelopes with a flap on the short edge cannot be used.
• Do not use the following types of envelopes. Using inappropriate envelopes may result in
paper jams that are difficult to clear or may result in damaging the printer.
- Envelopes with fasteners or snaps
- Envelopes with address windows
- Envelopes with adhesive on the surface
Printing on Envelope
2-27
Loading and Delivering Paper
2
The paper sources in which you can load envelopes are the cassette and the
manual feed slot. For continuous print, load envelopes in the cassette.
- Wrinkled or creased envelopes
- Poorly manufactured envelopes in which the glued parts are uneven.
- Irregularly-shaped envelopes
• Before loading the envelopes, flatten the stack of envelopes to release any remaining air,
and press the fold lines at edges tightly.
• Do not print on the back of an envelope.
Loading Envelope in the Cassette
Follow the procedure below to load envelopes in the cassette.
2
Loading and Delivering Paper
Load envelopes lengthways in the cassette.
IMPORTANT
• Do not take the cassette out of the printer while printing. It may result in paper jams or
printer malfunction.
• If you refill the cassette when a few envelopes still remain, take out the loaded envelopes
once, then align the envelopes to be refilled and taken out envelopes together.
• Do not touch the black rubber pad in the cassette. If you touch it, this may result in
misfeeds.
Rubber pad
2-28
Printing on Envelope
• Do not lift the cassette by holding only the rear part of the cassette. If you do so, the rear
part of the cassette may come off.
1
Loading and Delivering Paper
2
Pull out the cassette.
Printing on Envelope
2-29
2
While holding the lock release lever on the paper guide at the
rear of the cassette, slide the paper guide to the mark
indicating the desired paper size.
A4
LTR
B5
EXEC
ENV. COM10
A5
ENV. DL
ENV. ISO-C5
ENV. MONARCH
Loading and Delivering Paper
2
NOTE
The following shows the abbreviations of the paper size that are indicated on the
paper guide.
Paper Size
Envelope C5
ENV. ISO-C5
Envelope COM10
ENV. COM10
Envelope DL
Envelope Monarch
2-30
Paper Guide
Printing on Envelope
ENV. DL
ENV. MONARCH
3
Place the stack of envelopes on a flat surface, flatten them to
release any remaining air, and press the fold lines at edges
tightly.
CAUTION
Be careful not to cut your hands with the edges of the envelopes.
4
5
Loosen the hard corners of the envelopes and flatten curls as
shown in the figure.
Align the edges of the envelopes on a flat surface.
Printing on Envelope
2-31
Loading and Delivering Paper
2
6
Load the envelopes so that the rear edges of the envelopes
touch the paper guide.
Loading and Delivering Paper
2
CAUTION
When loading envelopes, be careful not to cut your hands with the edges
of the envelopes.
IMPORTANT
• Make sure that the paper guide is at the appropriate position of paper size. If the
paper guide is not adjusted properly, this may result in misfeeds.
• The back of an envelope cannot be printed on.
NOTE
To print on an envelop, load the envelope so that the printing surface faces down
and the flap comes toward the left of the cassette.
:Feeding direction
2-32
Printing on Envelope
While holding the lock release lever on the paper guide at
either side of the cassette, slide the paper guide to the mark
indicating the desired envelope size.
The paper guides on the sides of the cassette move together.
2
Loading and Delivering Paper
7
IMPORTANT
Be sure to align the paper guides with the width of the envelopes. If the paper
guides are too loose or too tight, this may result in misfeeds or paper jams.
Printing on Envelope
2-33
8
Press down the envelopes as shown in the figure, then make
sure that they do not exceed the load limit mark and that they
are loaded under the hooks on the paper guides.
Make sure that there is sufficient space between the hooks and envelopes. Take
out some envelopes when there is no space.
Load limit mark
Hooks
Hook
Loading and Delivering Paper
2
Load limit mark
Hook
IMPORTANT
A maximum of approx. 20 envelopes can be loaded in the cassette. Be sure that
the envelopes do not exceed the load limit mark of the paper guide. If the
envelopes exceed the load limit mark, this may result in misfeeds.
9
Set the cassette in the printer.
Push the cassette into the printer firmly until the front surface of the cassette is
flush with that of the printer.
2-34
Printing on Envelope
Setting Envelope in the Manual Feed Slot
Follow the procedure below to set an envelope in the manual feed slot.
1
Insert about 2 cm of the edge of an envelope into the manual
feed slot a, then slide the paper guides aligning with the
width of the envelope b.
The paper guides move together.
a
b
IMPORTANT
• Be sure to align the paper guides with the width of the envelopes. If the paper
guides are too loose or too tight, this may result in misfeeds or paper jams.
Printing on Envelope
2-35
2
Loading and Delivering Paper
IMPORTANT
• In the manual feed slot, you can set only one envelope at a time.
• You cannot specify multiple print copies or multiple pages when you use the manual feed
slot. If you specify multiple print copies or multiple pages using the manual feed slot, the
second sheet thereafter is fed from the cassette regardless of paper size or type.
• Do not touch the envelope in the manual feed slot or pull it out while printing. This may
result in a faulty operation.
2
While holding the envelope with your hands as shown in the
figure, slowly insert the envelope with the printing surface
face up until it hits on the back.
Loading and Delivering Paper
2
After the envelope is set, it is fed slightly.
CAUTION
When setting the envelope, be careful not to cut your hands with the edges
of the envelope.
IMPORTANT
• Set envelops straight.
• If the envelopes are curled or folded at corners, flatten them before setting.
• The back of an envelope cannot be printed on.
NOTE
To print on an envelop, set the envelope so that the printing surface faces up and
the flap comes toward the left of the manual feed slot.
:Feeding direction
2-36
Printing on Envelope
Setting Printer Driver and Printing
Follow the procedure below to set the printer driver.
1
Select [Print] in the application. Select this printer for [Name]
and click [Properties].
Loading and Delivering Paper
2
2
Display the [Page Setup] sheet, then from [Page Size], select
the size of a document that you created in the application.
NOTE
If you select any of [Envelope C5], [Envelope COM10], [Envelope DL], [Envelope
Monarch] for [Page Size], the appropriate paper type is automatically set as long as
[Match Page Size] is selected for [Output Size]. So, you do not have to set [Paper
Type].
Printing on Envelope
2-37
3
From [Output Size], select the size of the loaded paper as
needed.
If the size of a document is the same as that of paper set in the cassette or
manual feed slot, select [Match Page Size].
Loading and Delivering Paper
2
IMPORTANT
If the settings are different between [Page Size] and [Output Size], the printer
produces an enlarged or reduced print automatically.
NOTE
If you select any of [Envelope C5], [Envelope COM10], [Envelope DL], [Envelope
Monarch] for [Output Size], the appropriate paper type is automatically set. So, you
do not have to set [Paper Type].
4
2-38
Click [OK] to close the [Properties] dialog box.
Printing on Envelope
Click [OK] to start printing.
2
Loading and Delivering Paper
5
Printing on Envelope
2-39
Printing on Custom Paper
This section describes the procedure for printing on custom paper.
Loading Custom Paper
Follow the procedure below to set custom paper. In the manual feed slot, you can
set custom paper in width of 76.2 to 215.9 mm and in length of 127.0 to 355.6 mm.
Loading and Delivering Paper
2
The paper source in which you can set custom paper is the manual feed slot only.
You cannot load custom paper in the cassette.
IMPORTANT
• Do not load jagged-edged, creased, or extremely curled paper. It may result in paper
jams or printer malfunction.
• For more details on usable paper, see "Usable Paper," on p. 2-2.
• In the manual feed slot, you can set only one sheet of paper at a time.
• You cannot specify multiple print copies or multiple pages when you use the manual feed
slot. If you specify multiple print copies or multiple pages using the manual feed slot, the
second sheet thereafter is fed from the cassette regardless of paper size or type.
• Do not touch the paper in the manual feed slot or pull it out while printing. This may result
in a faulty operation.
• If heavy paper in weight of 129 g/m2 or over is printed on, the print quality may
deteriorate.
1
Insert about 2 cm of the edge of paper into the manual feed
slot a, then slide the paper guides aligning with the width of
the paper b.
The paper guides move together.
a
2-40
Printing on Custom Paper
b
IMPORTANT
• Be sure to align the paper guides with the width of the paper. If the paper guides
are too loose or too tight, this may result in misfeeds or paper jams.
While holding paper with your hands as shown in the figure,
insert paper with the printing surface face up until it hits on
the back.
After paper is set, it is fed slightly.
CAUTION
When setting paper, be careful not to cut your hands with the edges of the
paper.
IMPORTANT
• Set the paper straight.
• If the paper is curled or folded at corners, flatten it before loading.
Printing on Custom Paper
2-41
2
Loading and Delivering Paper
2
NOTE
To print on letterhead paper or paper printed with a logo, set the paper so that the
printing surface faces up and the top edge comes toward the back of the manual
feed slot.
Loading and Delivering Paper
2
:Feeding direction
Setting Printer Driver and Printing
Follow the procedure below to set the printer driver.
1
2-42
Select [Print] in the application. Select this printer for [Name]
and click [Properties].
Printing on Custom Paper
2
Display the [Page Setup] sheet, then from [Page Size], select
the size of a document that you created in the application.
NOTE
In order to use the custom paper, you have to register the custom paper size in
advance. For instructions on registering the custom paper size, see "Specifying a
Custom Paper Size," on p. 4-36.
3
From [Output Size], select the name (size) of the set custom
paper as needed.
If the size of a document is the same as that of paper (custom paper name) set in
the manual feed slot, select [Match Page Size].
IMPORTANT
If the settings are different between [Page Size] and [Output Size], the printer
produces an enlarged or reduced print automatically.
Printing on Custom Paper
2-43
Loading and Delivering Paper
2
4
From [Paper Type], select the type of paper that you set.
Select [Plain Paper] for using plain paper, [Heavy Paper] for heavy paper.
Loading and Delivering Paper
2
NOTE
• If paper curls excessively when printed with [Plain Paper] selected, select [Plain
Paper L].
• If print fixing is not sufficient when printed with [Heavy Paper] selected, select
[Heavy Paper H].
5
2-44
Click [OK] to close the [Properties] dialog box.
Printing on Custom Paper
Click [OK] to start printing.
2
Loading and Delivering Paper
6
Printing on Custom Paper
2-45
Loading and Delivering Paper
2
2-46
Printing on Custom Paper
Setting Up the Printing
Environment
3
CHAPTER
This chapter describes the procedure for installing the printer driver in a computer and
specifying the settings when using this printer in a network environment.
Introduction . . . . . . . . . . . . . . . . . . . . . . . . . . . . . . . . . . . . . . . . . . . . . . . . . . . . . . . . . . . . 3-2
After Installing the Printer . . . . . . . . . . . . . . . . . . . . . . . . . . . . . . . . . . . . . . . . . . . . . . . . . . . . . . .3-2
Steps for Printing to be Followed Each Time . . . . . . . . . . . . . . . . . . . . . . . . . . . . . . . . . . . . . . . .3-2
Required System Environment . . . . . . . . . . . . . . . . . . . . . . . . . . . . . . . . . . . . . . . . . . . . . . . . . . .3-2
Installing the CAPT Software . . . . . . . . . . . . . . . . . . . . . . . . . . . . . . . . . . . . . . . . . . . . . . 3-4
For Windows 98/Me . . . . . . . . . . . . . . . . . . . . . . . . . . . . . . . . . . . . . . . . . . . . . . . . . . . . . . . . . . .3-4
For Windows 2000 . . . . . . . . . . . . . . . . . . . . . . . . . . . . . . . . . . . . . . . . . . . . . . . . . . . . . . . . . . .3-16
For Windows XP . . . . . . . . . . . . . . . . . . . . . . . . . . . . . . . . . . . . . . . . . . . . . . . . . . . . . . . . . . . . .3-22
After Completing Installation (Canon LBP3200 Group) . . . . . . . . . . . . . . . . . . . . . . . . . 3-27
Printing a Test Page . . . . . . . . . . . . . . . . . . . . . . . . . . . . . . . . . . . . . . . . . . . . . . . . . . . . 3-31
Using the Printer on a Network. . . . . . . . . . . . . . . . . . . . . . . . . . . . . . . . . . . . . . . . . . . . 3-34
Setting the Print Server. . . . . . . . . . . . . . . . . . . . . . . . . . . . . . . . . . . . . . . . . . . . . . . . . . . . . . . .3-35
Installation on the Clients . . . . . . . . . . . . . . . . . . . . . . . . . . . . . . . . . . . . . . . . . . . . . . . . . . . . . .3-43
Uninstalling the CAPT Software . . . . . . . . . . . . . . . . . . . . . . . . . . . . . . . . . . . . . . . . . . . 3-48
3-1
Introduction
After Installing the Printer
The following shows work that should be performed after installing the printer.
■ Installing the printer driver (See p. 3-4.)
The printer driver is software required for printing from an application you use. Specify the
print settings in the printer driver.
Setting Up the Printing Environment
3
■ Setting a network environment (See p. 3-34.)
If you operate this printer in a network using the computer's sharing function, you must
specify the settings for the computer and install the printer driver in the client computers.
Steps for Printing to be Followed Each Time
The following shows the work that should be performed each time you print.
■ Specifying printing preferences
Specify the paper size, document size, and print copies in the printer driver. If you do not
specify these printing preferences properly, you may not obtain an accurate print.
■ Performing a print job
Select the print menu from the application. This procedure differs depending on the
application you use. See the instruction manual supplied with your application.
Required System Environment
The following system environment is required to use the printer driver.
■ Operating system software environment
• Microsoft Windows 98/Me
• Microsoft Windows 2000 Server/Professional
• Microsoft Windows XP Professional/Home Edition
3-2
Introduction
- System Requirements (minimum required)
Windows 98/Me
CPU
PentiumII 300 MHz or higher
Memory (RAM)* 64 MB or more
Hard Disk
15 MB or more
Windows 2000/XP
PentiumII 300 MHz or higher
128 MB or more
15 MB or more
(PC/AT compatibles)
* As the amount of memory that can be actually used differs depending on the system configuration of your
computer or your application, the above environment does not guarantee printing in any case.
- System Requirements (recommended)
Windows 2000/XP
PentiumIII 600 MHz or higher PentiumIII 600 MHz or higher
Memory (RAM)
128 MB or more
3
256 MB or more
Setting Up the Printing Environment
Windows 98/Me
CPU
■ Interface Environment
• USB:USB Full-Speed (USB1.1 equivalent)
NOTE
When using Sound, a PC synthesizer (and the driver for PCM synthesizer) must be
installed in your computer. Do not use a PC Speaker driver (such as speaker.drv).
Introduction
3-3
Installing the CAPT Software
This section describes the procedure for installing the CAPT software when
connecting this printer to your computer directly.
IMPORTANT
• The CAPT software is required for printing with this printer. Be sure to install the CAPT
software.
• When there is not enough free hard disk space, the dialog box shown below appears
during installation.
In this case, click [OK] to stop the installation and increase the free space, then install the
CAPT software again.
Setting Up the Printing Environment
3
NOTE
When using this printer in a network, see "Using the Printer on a Network," on p. 3-34.
For Windows 98/Me
NOTE
The screen shots used in this section are from Windows Me.
Installing from the CD-ROM
1
Make sure that the power switch is turned OFF.
IMPORTANT
Do not turn ON the printer until Step 10 during installation procedure.
3-4
Installing the CAPT Software
2
Connect the printer to the computer with the USB cable.
3
Turn ON the computer and start up Windows 98/Me.
Put the supplied "User Software for LBP3200" CD-ROM into
the CD-ROM drive.
If the CD-ROM is already set in the drive, take it out and put it into again.
The CD-ROM menu will appear automatically.
NOTE
If the CD-ROM menu does not appear automatically, select [Run] under the [Start]
menu, enter "D:\English\CAP4MNU.exe", and click [OK]. (The CD-ROM drive
name is indicated as "D:" in this manual. The CD-ROM drive name may differ
depending on the computer being used.)
5
Click [Install a Printer Driver].
The dialog box for confirming the language will appear.
Installing the CAPT Software
3-5
Setting Up the Printing Environment
4
3
6
Confirm the language and click [OK].
After the preparation for installation is completed, the CAPT (Canon Advanced
Printing Technology) software installer will start up.
The [Welcome] dialog box will appear.
3
Setting Up the Printing Environment
7
Click [Next].
The [Software License Agreement] dialog box will appear.
8
3-6
Confirm the contents of the software license agreement, then
click [Yes].
Installing the CAPT Software
9
Select [Automatic Detection (recommend)] and click [Next].
10 Click [OK], then press " " of the power switch to turn ON the
printer.
ON
OF
F
Installation of the printer driver and the USB class driver will start automatically.
11 After the installation is completed, click [OK].
The installation of the USB class driver and the printer driver is completed.
Installing the CAPT Software
3-7
Setting Up the Printing Environment
3
Installing with Plug and Play
IMPORTANT
Before installing the CAPT software with Plug and Play, make sure that the printer is
properly connected to your computer and that the printer is turned ON.
1
Turn ON the computer and start up Windows 98/Me.
The [Add New Hardware Wizard] dialog box will appear.
● For Windows Me
3
Setting Up the Printing Environment
If the following dialog box appears, proceed to Step 2.
If the following dialog box appears, proceed to Step 9.
3-8
Installing the CAPT Software
● For Windows 98
If the following dialog box appears, click [Next], then proceed to Step 2.
3
2
Setting Up the Printing Environment
If the following dialog box appears, click [Next], then proceed to Step 9.
Select [Specify the location of the driver (Advanced)], then
click [Next].
If you are using Windows 98, select [Search for the best driver for your device.
(Recommended).].
The dialog box for specifying the search location will appear.
Installing the CAPT Software
3-9
3
4
Put the supplied "User Software for LBP3200" CD-ROM into
the CD-ROM drive.
Select [Search for the best driver for your device.
(Recommended).], remove a checkmark from [Removable
Media (Floppy, CD-ROM…)] and place a checkmark for
[Specify a location].
If you are using Windows 98, remove a checkmark from [Floppy disk drives] and
[CD-ROM drive], and place a checkmark for [Specify a location].
Setting Up the Printing Environment
3
5
Click [Browse], then select a folder.
If your CD-ROM drive is drive [D:], select [D:\English\WinMe], and then click
[OK].
If you are using Windows 98, and your CD-ROM drive is drive [D:], select
[D:\English\Win98], then click [OK].
3-10
Installing the CAPT Software
6
Make sure that the correct folder is displayed in [Specify a
location], and then click [Next].
7
Setting Up the Printing Environment
3
Click [Next].
Installation of the USB class driver will start.
8
Click [Finish].
Installing the CAPT Software
3-11
The printer driver will be detected automatically. Please wait until it is completed.
The [Add New Hardware Wizard] dialog box will appear.
If you are using Windows 98, click [Next].
3
Setting Up the Printing Environment
9
Select [Specify the location of the driver (Advanced)], then
click [Next].
If you are using Windows 98, select [Search for the best driver for your device.
(Recommended).].
The dialog box for specifying the search location will appear.
3-12
Installing the CAPT Software
10 If the supplied "User Software for LBP3200" CD-ROM is not in
the CD-ROM drive, put it into the CD-ROM drive.
11 Select [Search for the best driver for your device.
(Recommended).], remove a checkmark from [Removable
Media (Floppy, CD-ROM…)] and place a checkmark for
[Specify a location].
If you are using Windows 98, remove a checkmark from [Floppy disk drives] and
[CD-ROM drive], and place a checkmark for [Specify a location].
Setting Up the Printing Environment
3
12 Click [Browse], then select a folder.
If your CD-ROM drive is drive [D:], select [D:\English\WinMe], and then click
[OK].
If you are using Windows 98 and your CD-ROM drive is drive [D:], select
[D:\English\Win98].
Installing the CAPT Software
3-13
13 Make sure that the correct folder is displayed in [Specify a
location], and then click [Next].
Setting Up the Printing Environment
3
14 Click [Next].
15 Enter a new name in [Printer name] if you want to change the
printer name.
If another printer driver has been already installed in the computer, the message
<Do you want your Windows-based programs to use this printer as the default
printer?> will appear. In this case, select [Yes] or [No].
3-14
Installing the CAPT Software
16 Click [Finish].
Copying files will be started.
17 When the dialog box for completing installation appears, click
[OK].
The [Add New Hardware Wizard] dialog box will appear.
3
Setting Up the Printing Environment
18 Click [Finish].
The installation of the USB class driver and the printer driver is completed.
Installing the CAPT Software
3-15
For Windows 2000
Installing from the CD-ROM
1
Make sure that the power switch is turned OFF.
IMPORTANT
Do not turn ON the printer until Step 8 during installation procedure.
Setting Up the Printing Environment
3
2
Connect the printer to the computer with the USB cable.
3
Turn ON the computer and start up Windows 2000.
4
Log on by a user who has an administrator's permission.
NOTE
Full Control Permission is required for the installation of the printer driver.
5
Put the supplied "User Software for LBP3200" CD-ROM into
the CD-ROM drive.
If the CD-ROM is already set in the drive, take it out and put it into again.
The CD-ROM menu will appear automatically.
NOTE
If the CD-ROM menu does not appear automatically, select [Run] under the [Start]
menu, enter "D:\English\CAP4MNU.exe", and click [OK]. (The CD-ROM drive
name is indicated as "D:" in this manual. The CD-ROM drive name may differ
depending on the computer being used.)
3-16
Installing the CAPT Software
6
Click [Install a Printer Driver].
The dialog box for confirming the language will appear.
Confirm the language and click [OK].
The preparation for installation will start.
8
When the screen shown below appears, turn ON the printer.
In order to turn ON the printer, press " " of the power switch.
ON
OF
F
The installation of the printer driver and the USB class driver will start
automatically.
Installing the CAPT Software
3-17
Setting Up the Printing Environment
7
3
9
When the screen shown below appears, click [OK].
The installation of the USB class driver and the printer driver is completed.
Installing with Plug and Play
IMPORTANT
Before installing the CAPT software with Plug and Play, make sure that the printer is
properly connected to your computer and that the printer is turned ON.
Setting Up the Printing Environment
3
1
Turn ON the computer and start up Windows 2000.
2
Log on by a user who has an administrator's permission.
NOTE
Full Control Permission is required for the installation of the printer driver.
3
3-18
Click [Next].
Installing the CAPT Software
4
Select [Search for a suitable driver for my device
(recommended)], then click [Next].
NOTE
[Unknown] may be displayed as the name of the device.
5
Remove a checkmark from [Floppy disk drives] and [CD-ROM
drives], place a checkmark for [Specify a location], and then
click [Next].
Installing the CAPT Software
3-19
Setting Up the Printing Environment
3
6
7
Setting Up the Printing Environment
3
8
Put the "User Software for LBP3200" CD-ROM into the
CD-ROM drive, then click [Browse].
If your CD-ROM drive is drive [D:], select
[D:\English\Win2K_XP]. Select [CAP4STK.INF], then click
[Open].
Make sure that the selected folder is displayed in [Copy
manufacturer's files from], then click [OK].
The dialog box for completing the search for a driver file will appear.
3-20
Installing the CAPT Software
9
Click [Next].
Setting Up the Printing Environment
3
Copying files will be started.
NOTE
Click [Yes] if the [Digital Signature Not Found] dialog box is displayed.
10 When the screen shown below appears, click [OK].
The [Found New Hardware Wizard] dialog box will appear.
11 Click [Finish].
The installation of the USB class driver and the printer driver is completed.
Installing the CAPT Software
3-21
For Windows XP
Installing from the CD-ROM
1
Make sure that the power switch is turned OFF.
IMPORTANT
Do not turn ON the printer until Step 8 during installation procedure.
Setting Up the Printing Environment
3
2
Connect the printer to the computer with the USB cable.
3
Turn ON the computer and start up Windows XP.
4
Log on by a user who has an administrator's permission.
NOTE
Full Control Permission is required for the installation of the printer driver.
5
Put the supplied "User Software for LBP3200" CD-ROM into
the CD-ROM drive.
If the CD-ROM is already set in the drive, take it out and put it into again.
The CD-ROM menu will appear automatically.
NOTE
If the CD-ROM menu does not appear automatically, select [Run] under the [Start]
menu, enter "D:\English\CAP4MNU.exe", and click [OK]. (The CD-ROM drive
name is indicated as "D:" in this manual. The CD-ROM drive name may differ
depending on the computer being used.)
3-22
Installing the CAPT Software
6
Click [Install a Printer Driver].
The dialog box for confirming the language will appear.
7
Confirm the language and click [OK].
The preparation for installation will start.
8
When the screen shown below appears, turn ON the printer.
In order to turn ON the printer, press " " of the power switch.
ON
OF
F
Installation of the printer driver and the USB class driver will start automatically.
Installing the CAPT Software
3-23
Setting Up the Printing Environment
3
9
When the screen shown below appears, click [OK].
The installation of the USB class driver and the printer driver is completed.
Installing with Plug and Play
IMPORTANT
Before installing the CAPT software with Plug and Play, make sure that the printer is
properly connected to your computer and that the printer is turned ON.
Setting Up the Printing Environment
3
1
Turn ON the computer and start up Windows XP.
2
Log on by a user who has an administrator's permission.
NOTE
Full Control Permission is required for the installation of the printer driver.
3
3-24
Select [Install from a list or specific location (Advanced)], put
the supplied "User Software for LBP3200" CD-ROM into the
CD-ROM drive, then click [Next].
Installing the CAPT Software
4
Select the search method and folder to browse.
❑ Select [Search for the best driver in these locations].
❑ Remove a checkmark from [Search removable media (floppy, CD-ROM…)].
❑ Place a checkmark for [Include this location in the search].
❑ Click [Browse], then select a folder.
If your CD-ROM drive is drive [D:], select [D:\English\Win2K_XP].
❑ Click [OK].
5
Make sure that the selected folder is displayed in [Include this
location in the search], then click [Next].
The installation process will be displayed.
NOTE
Click [Continue Anyway] if the [Hardware Installation] dialog box is displayed.
Installing the CAPT Software
3-25
Setting Up the Printing Environment
3
6
When the screen shown below appears, click [OK].
The [Found New Hardware Wizard] dialog box will appear.
7
Click [Finish].
Setting Up the Printing Environment
3
The installation of the USB class driver and the printer driver is completed.
3-26
Installing the CAPT Software
After Completing Installation (Canon LBP3200 Group)
When the installation of the CAPT software is completed, the icon and folder for
[Canon LBP3200] group will be created.
■ For Windows 98/Me/2000
• The [Canon LBP3200] printer icon will be displayed in the [Printers] folder.
Setting Up the Printing Environment
3
• The shortcut of the [Canon LBP3200] folder will be displayed on the desktop.
• The [Canon LBP3200] group will be added into [Programs] under the [Start] menu.
After Completing Installation (Canon LBP3200 Group)
3-27
If you double-click the [Canon LBP3200] folder on the desktop, the icon for each of
[Canon LBP3200] group will be displayed.
Setting Up the Printing Environment
3
• Canon LBP3200 Uninstallation
Used if you want to uninstall the CAPT software from your computer.
To start up, double-click the icon. (See p. 3-48.)
• Canon LBP3200 Status Window
Shows the printer or printing status with an animation or sound.
You can pause or cancel the print job from this window.
To display the Printer Status Window, click the Printer Status Window icon
on the Windows taskbar, then click [Canon LBP3200] from the pop-up
menu. (See p. 4-46.)
• Canon LBP3200 Help
Describes the CAPT software for this printer.
To open, double-click the icon.
3-28
After Completing Installation (Canon LBP3200 Group)
■ For Windows XP
• The [Canon LBP3200] printer icon will be displayed in the [Printers and Faxes] folder.
• The shortcut of the [Canon LBP3200] folder will be displayed on the desktop.
• The [Canon LBP3200] group will be added into [All Programs] under the [Start] menu.
After Completing Installation (Canon LBP3200 Group)
3-29
Setting Up the Printing Environment
3
If you double-click the [Canon LBP3200] folder on the desktop, the icon for each of
[Canon LBP3200] group will be displayed.
Setting Up the Printing Environment
3
• Canon LBP3200 Uninstallation
Used if you want to uninstall the CAPT software from your computer.
To start up, double-click the icon. (See p. 3-48.)
• Canon LBP3200 Status Window
Shows the printer or printing status with an animation or sound.
You can pause or cancel the print job from this window.
To display the Printer Status Window, click the Printer Status Window icon
on the Windows taskbar, then click [Canon LBP3200] from the pop-up
menu. (See p. 4-46.)
• Canon LBP3200 Help
Describes the CAPT software for this printer.
To open, double-click the icon.
3-30
After Completing Installation (Canon LBP3200 Group)
Printing a Test Page
Before using the printer for the first time, be sure to print a test page using the
following procedure.
NOTE
The screen shots used in this section are from Windows 2000.
3
Display the [Printers] or [Printers and Faxes] folder.
Setting Up the Printing Environment
1
For Windows 98/Me/2000: Click the [Start] menu ➞ [Settings] ➞ [Printers].
For Windows XP Professional: Click the [Start] menu ➞ [Printers and Faxes].
For Windows XP Home Edition: Click the [Start] menu ➞ [Control Panel] ➞
[Printers and Other Hardware] ➞ [Printers and Faxes].
The [Printers] or [Printers and Faxes] folder will appear.
Printing a Test Page
3-31
2
Select the [Canon LBP3200] icon, then select [Properties]
from the [File] menu.
Setting Up the Printing Environment
3
The [Properties] dialog box for this printer will appear.
3
Click [Print Test Page] from the [General] sheet.
Printing a test page will be started.
3-32
Printing a Test Page
If the test page is printed properly, click [OK].
If you are using Windows 98/Me, click [Yes].
NOTE
If the test page is not printed properly, uninstall the CAPT software (see
"Installation Problems," on p. 6-22), restart the computer, then start the installation
procedure again.
Printing a Test Page
3-33
3
Setting Up the Printing Environment
4
Using the Printer on a Network
If you set this printer as a shared printer, you can use it from other computers to
which the printer is not connected directly.
If you share this printer in a network, make the settings below. In this manual, the
computer that is directly connected to this printer is called the "print server", and the
computers that can use this printer over the network are called "clients".
3
Setting Up the Printing Environment
Network Environments
Print Server of
Windows 98/Me
LBP3200
Local
Installation
A5
B5
EXEC
A4
LGL
LTR
ON
OFF
For Printing
Download
Installation
Windows 2000/XP
Client
Windows 98/Me
Client
Download
Installation
Network Environments
Print Server of
LBP3200
Windows 2000/XP
Local
Installation
A5
B5
EXEC
A4
LGL
LTR
ON
OFF
For Printing
Download
Installation
Windows 2000/XP
Client
Windows 98/Me
Client
Download Installation
When using the print server, perform the following settings.
3-34
Using the Printer on a Network
a Local install into the print server (Windows 98/Me ➞ p. 3-4, Windows 2000 ➞ p.
3-16, Windows XP ➞ p. 3-22)
b Print server settings (Network) (Windows 98/Me ➞ p. 3-35, Windows 2000/XP
➞ p. 3-39)
c Print server settings (Printer sharing) (Windows 98/Me ➞ p. 3-38, Windows
2000/XP ➞ p. 3-40)
d Install into clients (See p. 3-43.)
NOTE
Using this printer in your network requires that both the print server and the clients
should be using Windows 98/Me or Windows 2000/XP.
For Windows 98/Me
NOTE
The screen shots used in this section are from Windows Me.
■ Network Settings
1
Double-click [My Computer] ➞ [Control Panel] ➞ [Network].
The [Network] dialog box will appear.
2
Display the [Configuration] sheet, then click [Add].
The [Select Network Component Type] dialog box will appear.
Using the Printer on a Network
3-35
Setting Up the Printing Environment
3
Setting the Print Server
3
4
Click the [Service] icon, and then click [Add].
Select [File and printer sharing for Microsoft Networks], then
click [OK].
Setting Up the Printing Environment
3
The [Select Network Component Type] dialog box will appear first, then the
display will return to the [Network] dialog box.
5
3-36
Click [File and Print Sharing].
Using the Printer on a Network
6
7
Make sure that [I want to be able to allow others to print to my
printer(s).] is selected, then click [OK].
Display the [Access Control] sheet and select either
[Share-level access control] or [User-level access control].
Setting Up the Printing Environment
3
8
Click [OK], then restart Windows.
Using the Printer on a Network
3-37
■ Printer Sharing Settings
1
Select the [Start] menu ➞ [Settings] ➞ [Printers].
The [Printers] folder will appear.
2
Right-click [Canon LBP3200] icon, then select [Sharing] from
the pop-up menu.
Setting Up the Printing Environment
3
The [Properties] dialog box for this printer will appear.
3
3-38
Select [Shared As]. Change [Share Name] if you want to, then
enter [Comment] and [Password] as needed.
Using the Printer on a Network
NOTE
• If you have selected [User-level access control] in Step 7 of "Network Settings"
(see p. 3-37), click [Add] and select users that can use the printer.
• Do not enter blank or special characters in [Share Name].
4
Click [OK].
The printer icon changes to the printer sharing icon.
For Windows 2000/XP
NOTE
The screen shots used in this section are from Windows 2000.
■ Network Settings
1
For Windows 2000: Select the [Start] menu ➞ [Settings] ➞
[Network and Dial-up Connections].
For Windows XP: Select the [Start] menu ➞ [Control Panel] ➞
[Network and Internet Connections] ➞ [Network Connections].
For Windows 2000, the [Network and Dial-up Connections] dialog box will appear.
For Windows XP, the [Network Connections] dialog box will appear.
2
Right-click the [Local Area Connection] icon, then select
[Properties] from the pop-up menu.
The [Local Area Connection Properties] dialog box will appear.
Using the Printer on a Network
3-39
Setting Up the Printing Environment
3
3
Make sure that [File and Printers Sharing for Microsoft
Networks] is selected, then click [OK].
Setting Up the Printing Environment
3
■ Printer Sharing Settings
NOTE
For Windows XP, the sharing settings cannot be made at the default configuration (the
settings made immediately after the installation).
Printer sharing settings requires running [Network Setup Wizard] and enabling the
sharing settings.
For more details, see the Online Help on Windows.
1
For Windows 2000: Click the [Start] menu ➞ [Settings] ➞
[Printers].
For Windows XP Professional: Click the [Start] menu ➞
[Printers and Faxes].
For Windows XP Home Edition: Click the [Start] menu ➞
[Control Panel] ➞ [Printers and Other Hardware] ➞ [Printers
and Faxes].
The [Printers] or [Printers and Faxes] folder will appear.
3-40
Using the Printer on a Network
2
Right-click the [Canon LBP3200] icon, then select [Sharing]
from the pop-up menu.
Setting Up the Printing Environment
3
The [Properties] dialog box for this printer will appear.
3
Select [Shared as] (for Windows XP, [Share this printer]).
Change the share name if you want to.
NOTE
• You can also specify the sharing settings during the local installation.
• Do not enter blank or special characters in [Shared as].
Using the Printer on a Network
3-41
4
Click [Additional Drivers].
Setting Up the Printing Environment
3
The [Additional Drivers] dialog box will appear.
5
6
For Windows 2000, select [Windows 95 or 98], for Windows
XP, select [Windows 95, 98 and Me], then click [OK].
Put the supplied "User Software for LBP3200" CD-ROM into
the CD-ROM drive.
If the [Insert Disk] dialog box appears, click [OK].
3-42
Using the Printer on a Network
7
If your CD-ROM drive is drive [D:], select [D:\English\Win98],
and then click [OK].
Copying files will be started.
3
Click [Close].
The printer icon changes to the printer sharing icon.
Installation on the Clients
This section describes the download installation as a way of installing the printer
driver into clients.
NOTE
• For the clients, both Windows 98/Me and Windows 2000/XP can be used.
• If the print server is Windows 98/Me, the download installation into Windows 2000/XP
cannot be performed.
Installing from [Add Printer Wizard]
IMPORTANT
If you are using Windows 2000/XP, be sure to log on by a user who has an administrator's
permission when starting up.
NOTE
The screen shots used in this section are from Windows 2000.
Using the Printer on a Network
3-43
Setting Up the Printing Environment
8
1
From the [Start] menu, select [Settings] ➞ [Printers]. The
[Printers] folder will open. Then, double-click the [Add Printer]
icon.
For Windows XP Professional: Click the [Start] menu ➞ [Printers and Faxes] ➞
[Add a printer].
For Windows XP Home Edition: Click the [Start] menu ➞ [Control Panel] ➞
[Printers and Other Hardware] ➞ [Printers and Faxes] ➞ [Add a printer].
The [Add Printer Wizard] dialog box will appear.
2
Click [Next].
3
Select [Network printer] and click [Next].
Setting Up the Printing Environment
3
3-44
Using the Printer on a Network
4
For Windows 2000/XP, click [Next].
For Windows 98/Me, click [Browse].
5
Setting Up the Printing Environment
3
Select the directory of the print server, then click [Next].
For Windows 98/Me, proceed to Step 7.
Using the Printer on a Network
3-45
6
Select whether or not to use this printer as the default printer,
then click [Next].
Setting Up the Printing Environment
3
7
Click [Finish].
NOTE
Click [Yes] if the [Digital Signature Not Found] dialog box is displayed.
Installing from [Windows Explorer]
1
For Windows Me/2000/XP: Click the [Start] menu ➞
[Programs] ([All Programs] for Windows XP) ➞ [Accessories]
➞ [Windows Explorer].
For Windows 98: Click the [Start] menu ➞ [Programs] ➞ [Windows Explorer].
The [Windows Explorer] dialog box will appear.
3-46
Using the Printer on a Network
2
Select the print server from [My Network Places] (from
[Network Computer] for Windows 98), then double-click the
[Canon LBP3200] icon.
Or drag and drop the [Canon LBP3200] icon into the [Printers] folder.
3
The [Printers] dialog box will appear. Follow the instructions
on the screen.
Using the Printer on a Network
3-47
Setting Up the Printing Environment
3
Uninstalling the CAPT Software
Uninstalling removes the CAPT software from your computer. The CAPT software
can be uninstalled using the following procedure.
IMPORTANT
If the printer driver was installed into Windows 2000/XP logged on by a user who has an
administrator's permission, it can not be uninstalled from the computer logged on by any
other than a user who has an administrator's permission. If you want to uninstall the
printer driver from Windows 2000/XP, be sure to log on Windows 2000/XP by a user who
has an administrator's permission when starting up.
Setting Up the Printing Environment
3
1
Make sure to close all files and programs listed below.
• Help files
• Printer Status Window
• Control Panel
• Other applications
2
Open the [Canon LBP3200] folder on the desktop, double-click
the [Canon LBP3200 Uninstallation] icon.
The [Canon LBP3200 Uninstallation] dialog box will appear.
The [Canon LBP3200 Uninstallation] dialog box also appears by selecting the
[Start] menu ➞ [Programs] ([All Programs] for Windows XP) ➞ [Canon LBP3200]
and clicking [Canon LBP3200 Uninstallation].
3-48
Uninstalling the CAPT Software
Click [OK].
The uninstallation starts, and the dialog box for asking you for the restart of the
computer appears.
4
Click [OK].
Windows will restart.
NOTE
• If the CAPT software cannot be uninstalled, see "When Uninstallation Fails," on p.
6-23.
Uninstalling the CAPT Software
3-49
3
Setting Up the Printing Environment
3
Setting Up the Printing Environment
3
3-50
Uninstalling the CAPT Software
Printing a Document
4
CHAPTER
This chapter describes the procedure printing documents and the functions of this printer.
Printing from an Application . . . . . . . . . . . . . . . . . . . . . . . . . . . . . . . . . . . . . . . . . . . . . . . 4-2
Canceling a Print Job . . . . . . . . . . . . . . . . . . . . . . . . . . . . . . . . . . . . . . . . . . . . . . . . . . . . 4-6
Specifying the Printing Preferences . . . . . . . . . . . . . . . . . . . . . . . . . . . . . . . . . . . . . . . . . 4-7
For Windows 98/Me . . . . . . . . . . . . . . . . . . . . . . . . . . . . . . . . . . . . . . . . . . . . . . . . . . . . . . . . . . .4-7
For Windows 2000/XP . . . . . . . . . . . . . . . . . . . . . . . . . . . . . . . . . . . . . . . . . . . . . . . . . . . . . . . .4-10
Using the Printing Functions. . . . . . . . . . . . . . . . . . . . . . . . . . . . . . . . . . . . . . . . . . . . . . 4-16
For Windows 98/Me . . . . . . . . . . . . . . . . . . . . . . . . . . . . . . . . . . . . . . . . . . . . . . . . . . . . . . . . . .4-16
For Windows 2000/XP . . . . . . . . . . . . . . . . . . . . . . . . . . . . . . . . . . . . . . . . . . . . . . . . . . . . . . . .4-23
Printing Multiple Pages on One Sheet . . . . . . . . . . . . . . . . . . . . . . . . . . . . . . . . . . . . . . . . . . . .4-32
Scaling Print Output . . . . . . . . . . . . . . . . . . . . . . . . . . . . . . . . . . . . . . . . . . . . . . . . . . . . . . . . . .4-33
Specifying a Custom Paper Size . . . . . . . . . . . . . . . . . . . . . . . . . . . . . . . . . . . . . . . . . . . . . . . .4-36
Specifying the Print Quality . . . . . . . . . . . . . . . . . . . . . . . . . . . . . . . . . . . . . . . . . . . . . . . . . . . .4-41
Specifying the Toner Density . . . . . . . . . . . . . . . . . . . . . . . . . . . . . . . . . . . . . . . . . . . . . . . . . . .4-42
Specifying the Image Refinement . . . . . . . . . . . . . . . . . . . . . . . . . . . . . . . . . . . . . . . . . . . . . . .4-43
Viewing the Printer Settings / Restoring the Default Settings. . . . . . . . . . . . . . . . . . . . . . . . . . .4-44
Printer Status Window . . . . . . . . . . . . . . . . . . . . . . . . . . . . . . . . . . . . . . . . . . . . . . . . . . 4-46
Using the Printer Status Window . . . . . . . . . . . . . . . . . . . . . . . . . . . . . . . . . . . . . . . . . . . . . . . .4-46
Displaying the Printer Status Window . . . . . . . . . . . . . . . . . . . . . . . . . . . . . . . . . . . . . . . . . . . .4-47
Closing the Printer Status Window . . . . . . . . . . . . . . . . . . . . . . . . . . . . . . . . . . . . . . . . . . . . . . .4-48
Setting Preferences . . . . . . . . . . . . . . . . . . . . . . . . . . . . . . . . . . . . . . . . . . . . . . . . . . . . . . . . . .4-48
Network Printer Status . . . . . . . . . . . . . . . . . . . . . . . . . . . . . . . . . . . . . . . . . . . . . . . . . . . . . . . .4-50
4-1
Printing from an Application
After installing the software, now you can perform a print job.
The following instruction describes the procedure for printing from an application,
taking Acrobat Reader included in the accompanying CD-ROM as an example.
1
Set paper in the cassette or manual feed slot.
NOTE
For instructions on printing on plain paper, heavy paper, labels, and
transparencies, see "Printing on Plain Paper / Heavy Paper / Label / Transparency,"
on p. 2-14, for envelopes, see "Printing on Envelope," on p. 2-27, for custom paper,
see "Printing on Custom Paper," on p. 2-40.
Printing a Document
4
2
4-2
Open a PDF file you want to print with Acrobat Reader, then
select [Page Setup] from the [File] menu.
Printing from an Application
4
Specify the paper size of a document and printing orientation,
then click [OK].
Select [Print] from the [File] menu.
4
Printing a Document
3
The printer driver will start up, and the [Print] dialog box will appear.
Printing from an Application
4-3
5
Select [Canon LBP3200] from [Name], then specify printing
preferences.
Printing a Document
4
6
If you specify more detailed printing preferences, click
[Properties].
The [Properties] dialog box for this printer will appear.
NOTE
• The printer name displayed in this dialog box can be changed in the [Printers]
folder (for Windows XP, the [Printers and Faxes] folder).
• The procedure for displaying the printer properties dialog box may differ depending
on the application being used.
4-4
Printing from an Application
7
Specify the printing preferences in the [Page Setup],
[Finishing], and [Quality] sheets, then click [OK].
The [Print] dialog box will re-appear.
NOTE
It is recommended that you should confirm the contents in the [Page Setup] sheet
for each print job.
8
Click [OK].
The printer will start to print.
NOTE
• If any trouble occurs in printing, see Chapter 6 "Troubleshooting".
• "Using the Printing Functions," on p. 4-16 describes how to use the functions of the
printer and printer driver. By specifying the settings for the printer and printer driver
depending on your purpose, you can make the most of this printer.
Printing from an Application
4-5
Printing a Document
4
Canceling a Print Job
You can cancel, pause, or resume a print job in the Printer Status Window.
1
Start printing.
The Printer Status Window will appear.
NOTE
The Printer Status Window may not appear depending on the settings for [Display
Printer Status Window] in the [Preferences] menu. (See "Setting Preferences," on
p. 4-48.)
Printing a Document
4
2
Click the button for the desired operation on the toolbar.
● Canceling the print job
❑ Click
.
● Pausing the print job
❑ Click
.
● Resuming the print job
❑ Click
4-6
Canceling a Print Job
.
Specifying the Printing Preferences
The CAPT software for LBP3200 allows you to specify various printing preferences.
To specify the printing preferences, first display the [Printer Properties] dialog box
or the [Document Properties] dialog box. Follow the procedure below suitable for
your operating system to display the properties dialog boxes.
If you display the [Document Properties] dialog box from your application, you can
specify the settings for a particular print job.
4
If you display the [Printer Properties] dialog box from the [Printers] folder, you can
specify the initial settings for all print jobs.
Printing a Document
For Windows 98/Me
Displaying the [Document Properties] Dialog Box from the
Application
This section describes the procedure, taking Acrobat Reader included in the
accompanying CD-ROM as an example.
1
Select [Print] from the [File] menu in the application.
The [Print] dialog box will appear.
NOTE
Printing procedures differ depending on your application. For details on print jobs,
see the instruction manual supplied with your application.
Specifying the Printing Preferences
4-7
2
Confirm the printer name, and then click [Properties].
Printing a Document
4
The [Document Properties] dialog box will appear.
4-8
Specifying the Printing Preferences
Displaying the [Printer Properties] Dialog Box from the [Printers]
Folder
1
From the [Start] menu, select [Settings] ➞ [Printers].
Printing a Document
4
The [Printers] folder will appear.
2
Select the [Canon LBP3200] icon, then select [Properties]
from the [File] menu.
Specifying the Printing Preferences
4-9
The [Printer Properties] dialog box will appear.
Printing a Document
4
NOTE
The [Printer Properties] dialog box can also be opened by right-clicking the [Canon
LBP3200] icon and selecting [Properties] from the pop-up menu.
For Windows 2000/XP
If you display the [Document Properties] dialog box from your application, you can
specify the settings for a particular print job.
If you display the [Document Properties] dialog box from the [Printers] folder, you
can specify the initial settings for all print jobs.
If you display the [Printer Properties] dialog box from the [Printers] folder, you can
select the custom paper, etc.
NOTE
Full Control Permission is required to specify the settings for the [Printers] folder. If you
cannot display the [Document Properties] dialog box from the [Printers] folder, display the
dialog box from the application.
4-10
Specifying the Printing Preferences
Displaying the [Document Properties] Dialog Box from the
Application
This section describes the procedure, taking Acrobat Reader included in the
accompanying CD-ROM as an example.
1
Select [Print] from the [File] menu in the application.
2
Printing a Document
4
Confirm the printer name, and then click [Properties].
Specifying the Printing Preferences
4-11
The [Document Properties] dialog box will appear.
NOTE
The [Document Properties] dialog box can also be opened by right-clicking the
[Canon LBP3200] icon and selecting [Printing Preferences] from the pop-up menu.
Printing a Document
4
Displaying the [Document Properties] Dialog Box from the [Printers]
Folder
1
From the [Start] menu, select [Settings] ➞ [Printers].
For Windows XP Professional: Click the [Start] menu ➞ [Printers and Faxes].
For Windows XP Home Edition: Click the [Start] menu ➞ [Control Panel] ➞
[Printers and Other Hardware] ➞ [Printers and Faxes].
The [Printers] folder will appear.
4-12
Specifying the Printing Preferences
Select the [Canon LBP3200] icon, then select [Printing
Preferences] from the [File] menu.
4
Printing a Document
2
The [Document Properties] dialog box will appear.
NOTE
The [Document Properties] dialog box can also be opened by right-clicking the
[Canon LBP3200] icon and selecting [Printing Preferences] from the pop-up menu.
Specifying the Printing Preferences
4-13
Displaying the [Printer Properties] Dialog Box from the [Printers]
Folder
1
From the [Start] menu, select [Settings] ➞ [Printers].
For Windows XP Professional: Click the [Start] menu ➞ [Printers and Faxes].
For Windows XP Home Edition: Click the [Start] menu ➞ [Control Panel] ➞
[Printers and Other Hardware] ➞ [Printers and Faxes].
Printing a Document
4
The [Printers] folder will appear.
2
4-14
Select the [Canon LBP3200] icon, then select [Properties] from
the [File] menu.
Specifying the Printing Preferences
The [Printer Properties] dialog box will appear.
Specifying the Printing Preferences
4-15
4
Printing a Document
NOTE
The [Printer Properties] dialog box can also be opened by right-clicking the [Canon
LBP3200] icon and selecting [Properties] from the pop-up menu.
Using the Printing Functions
For Windows 98/Me
The [Printer Properties] dialog box and the [Document Properties] dialog box
contain the following sheets that allow you to specify the various printing functions.
You can switch among sheets by clicking the tabs.
This section describes the types of printing preferences that can be specified in
each sheet.
4
• [Document
Printing a Document
Properties] dialog box
- [Page Setup] sheet
- [Finishing] sheet
- [Quality] sheet
• [Printer Properties] dialog box
- [General] sheet
- [Details] sheet
- [Sharing] sheet
- [Page Setup] sheet
- [Finishing] sheet
- [Quality] sheet
NOTE
For more details on the operations, see the Online Help.
The Online Help can be displayed using the following procedure. Click within the Online
Help to close the displayed Online Help.
- Press the [Tab] key on your keyboard to select an item that you want to display, then
press the [F1] key.
- Right-click an item that you want to display, then click [What's This?] from the pop-up
menu.
- Click [
] (Help) on the [Titlebar], move the [?]-attached cursor to an item that you
want to display, then click it.
4-16
Using the Printing Functions
[Page Setup] Sheet
The [Page Setup] sheet allows you to specify the following printing preferences.
Printing a Document
4
■ Page Size
Display the [Page Size] pull-down menu, then select a desired page size.
The page sizes that can be selected are as follows:
• A3 (297.0 mm x 420.0 mm, 11.69 inch x 16.54 inch)
• B4 (257.0 mm x 364.0 mm, 10.12 inch x 14.33 inch)
• A4 (210.0 mm x 297.0 mm, 8.27 inch x 11.69 inch)
• B5 (182.0 mm x 257.0 mm, 7.17 inch x 10.12 inch)
• A5 (148.0 mm x 210.0 mm, 5.83 inch x 8.27 inch)
• Letter (215.9 mm x 279.4 mm, 8.50 inch x 11.00 inch)
• Legal (215.9 mm x 355.6 mm, 8.50 inch x 14.00 inch)
• Executive (184.1 mm x 266.7 mm, 7.25 inch x 10.50 inch)
• Envelope DL (110.0 mm x 220.0 mm, 4.33 inch x 8.66 inch)
• Envelope COM10 (104.9 mm x 241.3 mm, 4.13 inch x 9.50 inch)
• Envelope C5 (162.0 mm x 229.0 mm, 6.38 inch x 9.02 inch)
• Envelope Monarch (98.5 mm x 190.5 mm, 3.88 inch x 7.50 inch)
• Size 1 (Custom paper, name changeable) (See p. 4-36.)
• Size 2 (Custom paper, name changeable) (See p. 4-36.)
• Size 3 (Custom paper, name changeable) (See p. 4-36.)
Using the Printing Functions
4-17
■ Output Size
Display the [Output Size] pull-down menu, then select a desired paper size.
The paper sizes that can be selected are as follows:
• Match Page Size
• A4 (210.0 mm x 297.0 mm, 8.27 inch x 11.69 inch)
• B5 (182.0 mm x 257.0 mm, 7.17 inch x 10.12 inch)
• A5 (148.0 mm x 210.0 mm, 5.83 inch x 8.27 inch)
• Letter (215.9 mm x 279.4 mm, 8.50 inch x 11.00 inch)
• Legal (215.9 mm x 355.6 mm, 8.50 inch x 14.00 inch)
• Executive (184.1 mm x 266.7 mm, 7.25 inch x 10.50 inch)
• Envelope DL (110.0 mm x 220.0 mm, 4.33 inch x 8.66 inch)
• Envelope COM10 (104.9 mm x 241.3 mm, 4.13 inch x 9.50 inch)
4
• Envelope Monarch (98.5 mm x 190.5 mm, 3.88 inch x 7.50 inch)
Printing a Document
• Envelope C5 (162.0 mm x 229.0 mm, 6.38 inch x 9.02 inch)
• Size 2 (Custom paper, name changeable) (See p. 4-36.)
• Size 1 (Custom paper, name changeable) (See p. 4-36.)
• Size 3 (Custom paper, name changeable) (See p. 4-36.)
NOTE
• When printing on paper that is of the same size as [Page Size], select [Match Page Size].
• If you select the paper size that differs from [Page Size], the print will be automatically
reduced or enlarged to fit on the page.
• When [Page Size] is A3 or B4 size and [Match Page Size] is selected for [Output Size],
the print will be automatically reduced to A4 size (default).
• If you can specify the page size, print copies, and orientation in your application, you do
not have to specify the settings in the [Page Setup] sheet.
■ Copies
Allows you to specify the number of copies to be printed.
Click the [Copies] spin button or enter a number in the spin box. You can specify from 1 to
999 print copies.
■ Orientation
Allows you to select either portrait orientation or landscape orientation.
Click either [Portrait] or [Landscape] for [Orientation].
■ Page Layout (See p. 4-32.)
Multiple pages can be printed on one sheet of paper.
The number of pages that can be selected is 1, 2, 4, 8, or 9 (Pages per Sheet).
If you select 2, 4, 8, or 9 (Pages per Sheet), the [Page Order] pull-down menu will appear,
allowing you to specify the page order.
4-18
Using the Printing Functions
■ Manual Scaling / Page Order (See p. 4-34.)
When [1 Page per Sheet] is selected for [Page Layout], [Manual Scaling] appears. When
2, 4, 8, or 9 (Pages per Sheet) is selected for [Page Layout], [Page Order] appears.
• [Manual Scaling]: When the settings in [Page Size] and [Output Size] are different, the
scale factor will be adjusted automatically, producing an enlarged or reduced print. If you
want to specify the scale factor manually, select [Manual Scaling], then specify the value
in the spin box. You can specify from 10 to 200 %.
• [Page Order]: You can select the page order when printing multiple pages on one sheet
of paper.
■ Paper Type
Specify the type of paper to be used.
Specify as follows.
Paper Type
Printer Driver Setting
4
[Plain Paper] [Plain Paper L] *1
Heavy paper (91-163 g/m2)
[Heavy Paper] [Heavy Paper H] *2
Transparency
[Transparencies]
Label
[Heavy Paper] [Heavy Paper H] *3
Envelope
*4
Printing a Document
Plain paper (64 - 90
g/m2)
*1 If paper curls excessively when printed with [Plain Paper] selected, select [Plain Paper L].
*2 If print fixing is not sufficient when printed with [Heavy Paper] selected, select [Heavy Paper H].
*3 For printing on labels, select [Heavy Paper] for the paper type. If print fixing is not sufficient when printed with
[Heavy Paper] selected, select [Heavy Paper H].
*4 For printing on envelopes, select any of [Envelope C5], [Envelope COM10], [Envelope DL], or [Envelope
Monarch] for the paper size. Then, printing is performed in the appropriate print mode automatically. You do not
have to set the paper type.
■ Custom Paper Size (See p. 4-36.)
The dialog box shown below will appear by clicking [Custom Paper Size].
This dialog box allows you to specify the height and width of custom paper, which is
different from the standard paper.
Up to 3 custom paper sizes can be specified in the LBP3200.
Using the Printing Functions
4-19
[Finishing] Sheet
The [Finishing] sheet allows you to specify the following printing preferences.
Printing a Document
4
■ Collate
When printing multiple pages of the document in multiple copies, select whether or not to
make collated sets of copies.
When a checkmark is not placed for [Collate], the specified print copies are made for each
page.
When a checkmark is placed for [Collate], the sets of copies are collated during print.
■ Preferences
The dialog box shown below will appear by clicking [Preferences].
When a checkmark is placed for [Execute printing even when Paper Size Mismatch
detected], the print is made on the currently loaded paper, regardless of the setting in
[Output Size] on the [Page Setup] sheet.
When a checkmark is not placed, if the setting in [Output Size] for a print job to be
performed differs from the setting in [Output Size] for a print job that has been performed
most recently, a message appears on the Printer Status Window, stopping the printing
operation. However, for a print job that is performed immediately after you turn ON/OFF
the printer or you pull out and insert the cassette, a message does not appear on the
Printer Status Window and the print is made on the currently loaded paper, regardless of
the setting in [Output Size].
4-20
Using the Printing Functions
[Quality] Sheet
The [Quality] sheet allows you to specify the following printing preferences.
Printing a Document
4
■ Resolution
Allows you to specify the fineness of images.
Select [600 dpi] or [300 dpi].
■ Halftones
Allows you to select the halftone processing for printing color or gray-scale images.
[Pattern 1]
Suitable for printing general documents.
[Pattern 2]
Sharpness is applied when printing photographic image.
To print an image of a person or for emphasizing the darkness.
[Pattern 3]
Colored letters and thin lines are printed more clearly.
■ Brightness / Contrast
To specify the settings, click the spin button for [Brightness] or [Contrast]. The settings can
also be specified by dragging the slider rightward and leftward. You can specify from -80
to 80%.
■ Details
The dialog box shown below will appear by clicking [Details].
Using the Printing Functions
4-21
• To change the density settings, drag the slider for [Toner Density] rightward and leftward.
• If you place a checkmark for [Use Toner Save], you can save toner.
• If you place a checkmark for [Image Refinement], the printer will smooth jagged
characters or graphics automatically.
IMPORTANT
Using the Toner Save mode may decrease print density making printed text look patchy.
[General] Sheet
Displays the printer name. Allows you to print a test page.
Printing a Document
4
[Details] Sheet
Allows you to specify the settings for the printer port and spooling and add drivers.
4-22
Using the Printing Functions
[Sharing] Sheet
Allows you to specify whether or not to share the printer.
NOTE
When [File and printer sharing for Microsoft Networks] is not added to the network
settings, the [Sharing] sheet is not displayed. (See p. 3-35.)
For Windows 2000/XP
The [Printer Properties] dialog box and the [Document Properties] dialog box
contain the following sheets that allow you to specify the various printing functions.
You can switch among sheets by clicking the tabs.
This section describes the types of printing preferences that can be specified in
each sheet.
• [Document
Properties] dialog box
- [Page Setup] sheet
- [Finishing] sheet
- [Quality] sheet
• [Printer Properties] dialog box
- [General] sheet
- [Sharing] sheet
- [Ports] sheet
- [Advanced] sheet
- [Security] sheet
- [Paper Selection] sheet
Using the Printing Functions
4-23
Printing a Document
4
NOTE
For more details on the operations, see the Online Help.
The Online Help can be displayed using the following procedure. Click within the Online
Help to close the displayed Online Help.
- Press the [Tab] key on your keyboard to select an item that you want to display, then
press the [F1] key.
- Right-click an item that you want to display, then click [What's This?] from the pop-up
menu.
- Click [
] (Help) on the [Titlebar], move the [?]-attached cursor to an item that you
want to display, then click it.
[Page Setup] Sheet
The [Page Setup] sheet allows you to specify the following printing preferences.
Printing a Document
4
■ Page Size
Display the [Page Size] pull-down menu, then select a desired page size.
The page sizes that can be selected are as follows:
• A3 (297.0 mm x 420.0 mm, 11.69 inch x 16.54 inch)
• B4 (257.0 mm x 364.0 mm, 10.12 inch x 14.33 inch)
• A4 (210.0 mm x 297.0 mm, 8.27 inch x 11.69 inch)
• B5 (182.0 mm x 257.0 mm, 7.17 inch x 10.12 inch)
• A5 (148.0 mm x 210.0 mm, 5.83 inch x 8.27 inch)
• Letter (215.9 mm x 279.4 mm, 8.50 inch x 11.00 inch)
• Legal (215.9 mm x 355.6 mm, 8.50 inch x 14.00 inch)
• Executive (184.1 mm x 266.7 mm, 7.25 inch x 10.50 inch)
• Envelope DL (110.0 mm x 220.0 mm, 4.33 inch x 8.66 inch)
• Envelope COM10 (104.9 mm x 241.3 mm, 4.13 inch x 9.50 inch)
• Envelope C5 (162.0 mm x 229.0 mm, 6.38 inch x 9.02 inch)
• Envelope Monarch (98.5 mm x 190.5 mm, 3.88 inch x 7.50 inch)
4-24
Using the Printing Functions
• Size 1 (Custom paper, name changeable) (See p. 4-36.)
• Size 2 (Custom paper, name changeable) (See p. 4-36.)
• Size 3 (Custom paper, name changeable) (See p. 4-36.)
■ Output Size
Display the [Output Size] pull-down menu, then select a desired paper size.
The paper sizes that can be selected are as follows:
• Match Page Size
• A4 (210.0 mm x 297.0 mm, 8.27 inch x 11.69 inch)
• B5 (182.0 mm x 257.0 mm, 7.17 inch x 10.12 inch)
• A5 (148.0 mm x 210.0 mm, 5.83 inch x 8.27 inch)
• Letter (215.9 mm x 279.4 mm, 8.50 inch x 11.00 inch)
• Legal (215.9 mm x 355.6 mm, 8.50 inch x 14.00 inch)
• Executive (184.1 mm x 266.7 mm, 7.25 inch x 10.50 inch)
• Envelope COM10 (104.9 mm x 241.3 mm, 4.13 inch x 9.50 inch)
• Envelope C5 (162.0 mm x 229.0 mm, 6.38 inch x 9.02 inch)
• Envelope Monarch (98.5 mm x 190.5 mm, 3.88 inch x 7.50 inch)
• Size 1 (Custom paper, name changeable) (See p. 4-36.)
• Size 2 (Custom paper, name changeable) (See p. 4-36.)
• Size 3 (Custom paper, name changeable) (See p. 4-36.)
NOTE
• When printing on paper that is of the same size as [Page Size], select [Match Page Size].
• If you select the paper size that differs from [Page Size], the print will be automatically
reduced or enlarged to fit on the page.
• When [Page Size] is A3 or B4 size and [Match Page Size] is selected for [Output Size],
the print will be automatically reduced to A4 size (default).
• If you can specify the page size, print copies, and orientation in your application, you do
not have to specify the settings in the [Page Setup] sheet.
■ Copies
Allows you to specify the number of copies to be printed.
Click the [Copies] spin button or enter a number in the spin box. You can specify from 1 to
999 print copies.
■ Orientation
Allows you to select either portrait orientation or landscape orientation.
Click either [Portrait] or [Landscape] for [Orientation].
Using the Printing Functions
4-25
Printing a Document
4
• Envelope DL (110.0 mm x 220.0 mm, 4.33 inch x 8.66 inch)
■ Page Layout (See p. 4-32.)
Multiple pages can be printed on one sheet of paper.
The number of pages that can be selected is 1, 2, 4, 8, or 9 (Pages per Sheet).
If you select 2, 4, 8, or 9 (Pages per Sheet), the [Page Order] pull-down menu will appear,
allowing you to specify the page order.
■ Manual Scaling / Page Order (See p. 4-34.)
When [1 Page per Sheet] is selected for [Page Layout], [Manual Scaling] appears. When
2, 4, 8, or 9 (Pages per Sheet) is selected for [Page Layout], [Page Order] appears.
• [Manual Scaling]: When the settings in [Page Size] and [Output Size] are different, the
scale factor will be adjusted automatically, producing an enlarged or reduced print. If you
want to specify the scale factor manually, select [Manual Scaling], then specify the value
in the spin box. You can specify from 10 to 200 %.
• [Page Order]: You can select the page order when printing multiple pages on one sheet
of paper.
4
Printing a Document
■ Paper Type
Specify the type of paper to be used.
Specify as follows.
Paper Type
Plain paper (64 - 90
g/m2)
Printer Driver Setting
[Plain Paper] [Plain Paper L] *1
Heavy paper (91-163 g/m2)
[Heavy Paper] [Heavy Paper H] *2
Transparency
[Transparencies]
Label
[Heavy Paper] [Heavy Paper H] *3
Envelope
*4
*1 If paper curls excessively when printed with [Plain Paper] selected, select [Plain Paper L].
*2 If print fixing is not sufficient when printed with [Heavy Paper] selected, select [Heavy Paper H].
*3 For printing on labels, select [Heavy Paper] for the paper type. If print fixing is not sufficient when printed with
[Heavy Paper] selected, select [Heavy Paper H].
*4 For printing on envelopes, select any of [Envelope C5], [Envelope COM10], [Envelope DL], or [Envelope
Monarch] for the paper size. Then, printing is performed in the appropriate print mode automatically. You do not
have to set the paper type.
4-26
Using the Printing Functions
[Finishing] Sheet
The [Finishing] sheet allows you to specify the following printing preferences.
■ Collate
When printing multiple pages of the document in multiple copies, select whether or not to
make collated sets of copies.
When a checkmark is not placed for [Collate], the specified print copies are made for each
page.
When a checkmark is placed for [Collate], the sets of copies are collated during print.
■ Preferences
The dialog box shown below will appear by clicking [Preferences].
• When a checkmark is placed for [Execute printing even when Paper Size Mismatch
detected], the print is made on the currently loaded paper, regardless of the setting in
[Output Size] on the [Page Setup] sheet.
When a checkmark is not placed, if the setting in [Output Size] for a print job to be
performed differs from the setting in [Output Size] for a print job that has been performed
most recently, a message appears on the Printer Status Window, stopping the printing
operation. However, for a print job that is performed immediately after you turn ON/OFF
the printer or you pull out and insert the cassette, a message does not appear on the
Printer Status Window and the print is made on the currently loaded paper, regardless of
the setting in [Output Size].
Using the Printing Functions
4-27
Printing a Document
4
• [EMF Spooling] allows you to specify the spool file format. If a checkmark is placed, the
file is spooled in metafile format. If it is not, the file is spooled in RAW format.
If you have the printer set up as a network printer, the file is always spooled in RAW
format.
[Quality] Sheet
The [Quality] sheet allows you to specify the following printing preferences.
Printing a Document
4
■ Resolution
Allows you to specify the fineness of images.
Select [600 dpi] or [300 dpi].
■ Halftones
Allows you to select the halftone processing for printing color or gray-scale images.
[Pattern 1]
Suitable for printing general documents.
[Pattern 2]
Sharpness is applied when printing photographic image.
To print an image of a person or for emphasizing the darkness.
[Pattern 3]
Colored letters and thin lines are printed more clearly.
■ Brightness / Contrast
To specify the settings, click the spin button for [Brightness] or [Contrast]. The settings can
also be specified by dragging the slider rightward and leftward. You can specify from -80
to 80%.
4-28
Using the Printing Functions
■ Details
The dialog box shown below will appear by clicking [Details].
• To change the density settings, drag the slider for [Toner Density] rightward and leftward.
• If you place a checkmark for [Use Toner Save], you can save toner.
• If you place a checkmark for [Image Refinement], the printer will smooth jagged
characters or graphics automatically.
[General] Sheet
Displays the printer name. Allows you to print a test page.
Using the Printing Functions
4-29
4
Printing a Document
IMPORTANT
Using the Toner Save mode may decrease print density making printed text look patchy.
[Sharing] Sheet
Allows you to specify whether or not to share the printer.
NOTE
The [Sharing] sheet does not appear when the appropriate network settings is not
configured. (See p. 3-39.)
Printing a Document
4
[Ports] Sheet
Allows you to add, delete, and configure a printer port.
4-30
Using the Printing Functions
[Advanced] Sheet
Allows you to specify the detailed settings, such as the time when the printer is
available and the spooling settings.
Printing a Document
4
[Security] Sheet
Allows you to confirm the access permissions for each logged-on user.
Using the Printing Functions
4-31
[Paper Selection] Sheet
Allows you to select custom paper.
Printing a Document
4
Printing Multiple Pages on One Sheet
Multiple pages can be printed on one sheet of paper.
1
2
Display the [Page Setup] sheet.
From [Page Layout], select the page numbers to be printed on
one sheet.
The number of pages that can be selected is 1, 2, 4, 8, or 9 (Pages per Sheet).
4-32
Using the Printing Functions
3
When 2, 4, 8, or 9 (Pages per Sheet) is selected for [Page
Layout], [Page Order] appears. Select the desired page order.
NOTE
• If you select 2, 4, 8, or 9 (Pages per Sheet), [Match Page Size] is set for [Output
Size] automatically, disallowing you to select from [Output Size].
• The options under the [Page Order] pull-down menu differ depending on the
orientation and the number of pages to be printed on one sheet.
4
Confirm the settings, then click [OK].
Scaling Print Output
You can select the scale when [1 Page per Sheet] is selected for [Page Layout].
The scale factor will be adjusted automatically when [Page Size] and [Output Size]
are different.
The scale factor can be specified manually.
You can specify from 10 to 200 %.
Using the Printing Functions
4-33
Printing a Document
4
Scaling a Document Automatically
1
Display the [Page Setup] sheet.
2
Specify the document size in [Page Size].
3
Specify the paper size in [Output Size].
4
Confirm the settings, then click [OK].
Printing a Document
4
The scale factor will be set automatically depending on the sizes specified in
[Page Size] and [Output Size].
4-34
Using the Printing Functions
Scaling a Document Manually
1
Display the [Page Setup] sheet.
2
Specify the document size in [Page Size].
3
Specify the paper size in [Output Size].
4
Place a checkmark for [Manual Scaling], then specify the
value in the spin box.
Printing a Document
4
5
Confirm the settings, then click [OK].
Using the Printing Functions
4-35
Specifying a Custom Paper Size
Follow the procedure below to specify a desired paper size.
■ For Windows 98/Me
1
Display the [Page Setup] sheet.
2
Click [Custom Paper Size].
Printing a Document
4
The [Custom Paper Size Settings] dialog box will appear.
3
4-36
Specify the following items as needed.
[Custom Paper List]:
Displays the names of custom paper that are currently
registered.
[Name]:
Enter the name of the custom paper to be registered. Up to 30
characters can be entered.
As a default, [Size 1], [Size 2], and [Size 3] are registered.
Using the Printing Functions
4
[Unit]:
Specify the units (Millimeter or Inch) to be used when setting the
custom paper size.
[Paper Size]:
Specify the height and width of the custom paper size (Height
Width). Specify the custom paper size using portrait orientation
(Height
Width) within valid setting values. The valid setting
values are from 76.2 to 215.9 mm in width, and from 127.0 to
355.6 mm in height.
Confirm the settings, then click [OK].
■ For Windows 2000/XP
Display the [Printers] (Windows XP: [Printers and Faxes])
folder, then click [Server Properties] from the [File] menu.
4
The [Printer Server Properties] dialog box will appear.
2
Display the [Forms] sheet, then place a checkmark for [Create
a New Form]. Specify the following options as needed.
[Form Description for]:
Allows you to enter a custom paper name. For Windows XP,
[Form name] is displayed.
[Units]:
Select either [Metric] or [English].
[Paper Size]:
Specify the height and width of the custom paper size (Height
Width). Specify the custom paper size using portrait
orientation (Height
Width) within valid setting values. The
valid setting values are from 7.62 to 21.59 cm in width, and
from 12.70 to 35.56 cm in height.
[Printer Area Margins]:
Enter values directly. The valid setting values are more than 0.5
cm.
Using the Printing Functions
4-37
Printing a Document
1
3
4
After confirming the settings, click [Save Form], and then
click [Close].
Select the [Canon LBP3200] icon, then select [Properties]
from the [File] menu.
Printing a Document
4
The [Printer Properties] dialog box will appear.
5
4-38
Display the [Paper Selection] sheet, then select custom paper
to be changed from [Selected Paper].
Using the Printing Functions
6
Click the [Change Paper] button.
7
From [Available Paper], select custom paper to be used, then
click [OK].
Using the Printing Functions
4-39
Printing a Document
4
8
Confirm the settings, then click [OK].
Printing a Document
4
4-40
Using the Printing Functions
Specifying the Print Quality
The [Quality] sheet allows you to specify the following printing preferences.
1
Display the [Quality] sheet.
2
Printing a Document
4
Specify [Resolution].
Select [600 dpi] or [300 dpi].
3
4
Specify [Halftones].
[Pattern 1]
Suitable for a typical document.
[Pattern 2]
Prints photographs vividly.
Suitable for images in which persons are emphasized or contrast is
high.
[Pattern 3]
Prints color characters and thin lines beautifully.
Specify [Brightness] and [Contrast].
To specify the settings, click the spin button for [Brightness] or [Contrast]. The
settings can also be specified by dragging the slider rightward and leftward. You
can specify from -80 to 80 %.
5
Confirm the settings, then click [OK].
Using the Printing Functions
4-41
Specifying the Toner Density
1
Display the [Quality] sheet.
2
Click [Details].
Printing a Document
4
The [Detailed Settings] dialog box will appear.
3
To change the density settings, drag the slider for [Toner Density]
rightward and leftward.
If you place a checkmark for [Use Toner Save], you can save toner.
IMPORTANT
Using the Toner Save mode may decrease print density making printed text look
patchy.
4
4-42
Confirm the settings, then click [OK].
Using the Printing Functions
Specifying the Image Refinement
The printer detects and smoothes jagged characters or graphics automatically.
1
Display the [Quality] sheet.
2
Click [Details].
Printing a Document
4
The [Detailed Settings] dialog box will appear.
3
Place a checkmark for [Image Refinement].
4
Confirm the settings, then click [OK].
Using the Printing Functions
4-43
Viewing the Printer Settings / Restoring the Default
Settings
You can view all the printing preferences that are specified in the [Page Setup],
[Finishing], and [Quality] sheets or restore those default settings at one time.
First make sure that any one of the [Page Setup], [Finishing], or [Quality] sheet is
displayed, then follow the procedure below.
NOTE
Preview will be displayed on each sheet. You can view the print image in Preview.
Viewing the Printer Settings
4
Printing a Document
1
Click [View Settings].
The [View Settings] dialog box will appear.
By clicking the [Page Setup], [Finishing], or [Quality] tab, you can view the print
preferences specified for each sheet.
2
Click [OK].
The previous sheet will re-appear.
4-44
Using the Printing Functions
Restoring the Default Settings
To restore the default settings, click [Restore Defaults].
You can restore the default settings only in the same sheet or dialog box as
[Restore Defaults] displayed.
The default settings in the [Page Setup], [Finishing], and [Quality] sheets cannot be
restored all at once.
Printing a Document
4
Using the Printing Functions
4-45
Printer Status Window
The Printer Status Window shows the printer status of the LBP3200 (such as the
operation status and print job information) with messages, animations, sounds, and
icons.
NOTE
To activate a sound, your computer must have a PCM synthesizer, and have the driver for
PCM synthesizer installed.
Using the Printer Status Window
The functions on the Printer Status Window are the same on both Windows 98/Me
and Windows 2000/XP.
Printing a Document
4
For more details on operations, see the Online Help.
Menu Bar
Icon
Message Area
Animation
Area
Message Area
(Auxiliary)
Printed Job
Print Job Details
Waiting Job
Progress Bar
Toolbar
Job Information
Area
Status Bar
■ Menu Bar
4-46
Job Menu
Performs a print job operation (pause, resume, and cancel). The print
jobs for which you have no access permission are grayed out.
Options Menu
Allows you to specify the environment settings for the Printer Status
Window, and performs cleaning.
Help Menu
Displays the Online Help.
Printer Status Window
■ Other Functions
Displays the current printer status.
Message Area
Displays the current printer status with a short message.
Message Area
(Auxiliary)
Displays additional information when an error occurs,
etc.
Animation Area
Shows an animated graphic indicating the current printer
status. The graphic background changes from blue
(normal) to orange (when an error occurs), or to red
(when a service error occurs).
[Print Job Details]
:Progress Bar
Indicates the progress of the current print job by showing
the number of printed pages or changing graphic
background.
:Toolbar
Performs a print job operation (pause, resume, and
cancel) during print. The printing jobs for which you have
no access permission are grayed out.
:Job Information
Area
Displays a document name, user name, computer name,
remaining time, and estimated finish time for the current
printing job.
[Printed Job]
:Job Information
Area
Displays a document name, result, owner, pages, finish
time for the printed job.
[Waiting Job]
:Toolbar
Performs a print job operation (pause, resume, and
cancel) for waiting jobs. The waiting jobs for which you
have no access permission are grayed out.
:Job Information
Area
Displays a document name, status, owner, and start time
for waiting jobs.
Status Bar
Indicates how the printer is connected (Local or
Network). Instructions for operating the menu are
displayed during menu operation.
Displaying the Printer Status Window
To display the Printer Status Window, click the Printer Status Window icon on the
Windows taskbar, then click [Canon LBP3200] from the pop-up menu. When
multiple units of LBP3200 are installed, the menu for each of those units is
displayed.
The Printer Status Window appears automatically during a print job or when an
error occurs. If [When Starting Printing] is not selected for [Display Printer Status
Window] in the [Preferences] dialog box in the [Options] menu, the Printer Status
Window does not appear during a print job.
Printer Status Window
4-47
4
Printing a Document
Icon
Closing the Printer Status Window
Right-click the Printer Status Window icon on the Windows taskbar, then select
[Exits all printers' Printer Status Windows]. Then, the icon will also disappear.
Setting Preferences
The Preferences menu allows you to display the Printer Status Window
automatically, specify the sound settings and make the Printer Status Window to
monitor the printer status.
■ [Display Printer Status Window] Group
• When Starting Printing
- The Printer Status Window appears automatically each time the print starts.
4
• Only when Errors Occur
Printing a Document
- The Printer Status Window appears only when an error occurs while printing.
■ [Tone Settings] Group
• Enabled All
- A sound is played with a messaged displayed.
• Enable only when Error Occurs
- A sound is played only when an error occurs.
• Disabled
- No sound is played.
■ [Monitor Printer Status] Group
• Always
- The Printer Status Window always monitors the printer status.
• Only while Displaying Printer Status Window
- The Printer Status Window monitors the printer status only while it is displayed.
• Only while Printing
- The Printer Status Window monitors the printer status only while printing.
■ Always Display on Top
The Printer Status Window is always on top of all the other windows on the desktop.
4-48
Printer Status Window
1
Select [Preferences] from the [Options] menu.
Printing a Document
4
The [Preferences] dialog box will appear.
2
Confirm each of the settings, then click [OK].
NOTE
For detailed information on operations for the Printer Status Window, see the
Online Help.
Printer Status Window
4-49
Network Printer Status
The status of a network printer can be displayed on the client's Printer Status
Window as well as on the print server's.
If the print server is not running when the Printer Status Window starts up, the
status will be displayed automatically when the print server starts up.
• Printer
Status of Print Server
- Displays the status of the local print jobs and the client's print jobs.
- The print job can be paused, resumed and canceled in [Print Job Details] and
[Waiting Job].
- Plays a sound.
- If the print server is Windows 2000/XP, the status is not displayed if no one is
logged on.
• Client's Printer Status
- The print job can be paused, resumed, and canceled in [Print Job Details] from
the client during print.
- The print job cannot be paused, resumed and canceled in [Waiting Job].
- A sound is played only from the client whose user or computer name is verified
by the print server.
Printing a Document
4
NOTE
To display the status for a print job that is requested via a network, an environment in
which one of the following protocols can be used is required.
- TCP/IP
- NetBEUI
If the protocol you use is IPX/SPX only, the status is not displayed.
4-50
Printer Status Window
Routine Maintenance
5
CHAPTER
This chapter describes printer maintenance, such as how to replace the toner cartridge or how
to clean the printer.
Replacing the Toner Cartridge . . . . . . . . . . . . . . . . . . . . . . . . . . . . . . . . . . . . . . . . . . . . . 5-2
Before Replacing the Toner Cartridge . . . . . . . . . . . . . . . . . . . . . . . . . . . . . . . . . . . . . . . . . . . . .5-2
Replacing the Toner Cartridge . . . . . . . . . . . . . . . . . . . . . . . . . . . . . . . . . . . . . . . . . . . . . . . . . . .5-6
Cleaning . . . . . . . . . . . . . . . . . . . . . . . . . . . . . . . . . . . . . . . . . . . . . . . . . . . . . . . . . . . . . . . . . . .5-12
Precautions for Handling the Toner Cartridge . . . . . . . . . . . . . . . . . . . . . . . . . . . . . . . . . . . . . .5-13
Storing the Toner Cartridge . . . . . . . . . . . . . . . . . . . . . . . . . . . . . . . . . . . . . . . . . . . . . . . . . . . .5-15
Cleaning the Printer . . . . . . . . . . . . . . . . . . . . . . . . . . . . . . . . . . . . . . . . . . . . . . . . . . . . 5-16
Moving the Printer. . . . . . . . . . . . . . . . . . . . . . . . . . . . . . . . . . . . . . . . . . . . . . . . . . . . . . 5-18
Moving the Printer . . . . . . . . . . . . . . . . . . . . . . . . . . . . . . . . . . . . . . . . . . . . . . . . . . . . . . . . . . .5-19
Handling the Printer . . . . . . . . . . . . . . . . . . . . . . . . . . . . . . . . . . . . . . . . . . . . . . . . . . . . 5-22
Precautions for Handling the Printer . . . . . . . . . . . . . . . . . . . . . . . . . . . . . . . . . . . . . . . . . . . . .5-22
Precaution for Storing the Printer . . . . . . . . . . . . . . . . . . . . . . . . . . . . . . . . . . . . . . . . . . . . . . . .5-23
5-1
Replacing the Toner Cartridge
This section describes how to replace or handle the toner cartridge and the
precautions for storage.
IMPORTANT
The product code of the toner cartridge is indicated on the location shown in the figure.
Purchase a toner cartridge of the same product code when you need it.
Routine Maintenance
5
NOTE
With the toner cartridge for this printer, up to approx. 2500 sheets of paper (A4) can be
printed. This number of sheets is calculated assuming that a typical document (with a
printing ratio of approximately 5 % and print density set to default) is printed. The toner
consumption differs depending on document contents. As a document with few blanks,
such as graphics, consumes toner much, if you often print this type of documents, the life
of the toner cartridge is shortened.
Before Replacing the Toner Cartridge
A toner cartridge is a consumable product. If there is not sufficient toner, white
streaks may appear and the print may be too thin or uneven in lengthwise direction
of paper. In this case, follow the procedure below before replacing the toner
cartridge. You may be able to print for a while until toner runs out completely.
CAUTION
Take care not to allow the toner to come into contact with your hands or
clothing, as this will dirty your hands or clothing. If they become dirty, wash
them immediately with cold water. Washing with warm water will set the toner
and make it impossible to remove the toner stains.
5-2
Replacing the Toner Cartridge
IMPORTANT
• Do not touch the high-voltage contacts in the front cover, as this may result in damage to
the printer.
High-voltage contacts
1
Open the front cover.
When opening the front cover, put your hands into the opening on both sides of
the printer, then slowly and strongly pull it out.
Replacing the Toner Cartridge
5-3
Routine Maintenance
5
2
Take the toner cartridge out of the printer.
IMPORTANT
• Print quality may deteriorate if you touch or damage the drum inside the toner
cartridge. Be careful not to touch the drum or open the drum protective shutter. Be
careful not to hold or touch the portions that are not described in this procedure.
This may result in damage to the printer.
Routine Maintenance
5
Drum protective shutter
• Do not expose the toner cartridge to direct sunlight or strong light.
5-4
Replacing the Toner Cartridge
3
Hold the toner cartridge as shown in the figure, and gently
shake it 5 or 6 times to evenly distribute the toner inside.
Be careful not to spill the toner.
4
While aligning the projection on each side of the toner
cartridge with the toner cartridge guide, push the toner
cartridge completely.
Replacing the Toner Cartridge
5
Routine Maintenance
IMPORTANT
• If toner is not distributed evenly, this may result in a deterioration in print quality. Be
sure to carry out this procedure properly.
• Be sure to shake the toner cartridge gently; otherwise, the toner may spill out.
5-5
5
IMPORTANT
• If you cannot close the front cover, confirm that the toner cartridge is set properly. If
you close the front cover forcefully, this may cause damage to the printer.
• Do not leave the front cover open for a long time after setting the toner cartridge.
5
Routine Maintenance
Close the front cover.
If the print is too thin even after performing the operation above, replace the toner
cartridge with a new one.
Replacing the Toner Cartridge
Follow the procedure below to replace the toner cartridge with a new one.
After replacing the toner cartridge, be sure to perform cleaning. For instructions on
how to perform cleaning, see "Cleaning," on p. 5-12.
WARNING
Do not burn or throw a used toner cartridge into open flames, as this may cause
the toner remaining inside the cartridge to ignite, resulting in burns or a fire.
CAUTION
Take care not to allow the toner to come into contact with your hands or
clothing, as this will dirty your hands or clothing. If they become dirty, wash
them immediately with cold water. Washing with warm water will set the toner
and make it impossible to remove the toner stains.
5-6
Replacing the Toner Cartridge
IMPORTANT
• Use only the toner cartridge exclusive to this printer.
• Do not touch the high-voltage contacts in the front cover, as this may result in damage to
the printer.
High-voltage contacts
1
Open the front cover.
When opening the front cover, put your hands into the opening on both sides of
the printer, then slowly and strongly pull it out.
Replacing the Toner Cartridge
5-7
Routine Maintenance
5
2
Take the toner cartridge out of the printer.
3
Take a new toner cartridge out of the protective bag.
Use scissors to open the protective bag so as not to damage the toner cartridge.
Routine Maintenance
5
IMPORTANT
• Keep the protective bag for the toner cartridge. It may be required when taking out
the toner cartridge for printer maintenance.
• Print quality may deteriorate if you touch or damage the drum inside the toner
cartridge. Be careful not to touch the drum or open the drum protective shutter. Be
careful not to hold or touch the portions that are not described in this procedure.
This may result in damage to the printer.
Drum protective shutter
5-8
Replacing the Toner Cartridge
• Do not expose the toner cartridge to direct sunlight or strong light.
4
Hold the toner cartridge as shown in the figure, and gently
shake it 5 or 6 times to evenly distribute the toner inside.
IMPORTANT
• If toner is not distributed evenly, this may result in a deterioration in print quality. Be
sure to carry out this procedure properly.
• Be sure to shake the toner cartridge gently; otherwise, the toner may spill out.
5
Place the toner cartridge on a flat surface, then pull out the
sealing tape (approx. 45 cm in length) while supporting the
toner cartridge.
Fold the tab on the sealing tape as shown in the figure, and pull it out straight.
Replacing the Toner Cartridge
5-9
Routine Maintenance
5
CAUTION
If the sealing tape is pulled out forcefully or stopped at midpoint, toner
may spill out. If toner gets into your eyes or mouth, immediately wash it
away with water and consult a physician.
IMPORTANT
• Do not pull the sealing tape diagonally, upwards, or downwards. If the tape is
severed, it may become difficult to pull it out completely.
• Pull out the sealing tape completely from the toner cartridge. If any tape remains in
5
the toner cartridge, it may result in a deterioration in print quality.
Routine Maintenance
• When pulling out the sealing tape, be careful not to hold the drum protective shutter
with you hands.
Drum protective shutter
• Once you take the toner cartridge out of the protective bag, install it in the printer
as soon as possible.
• Dispose of the sealing tape according to local regulations.
5-10
Replacing the Toner Cartridge
6
While aligning the projection on each side of the toner
cartridge with the toner cartridge guide, push the toner
cartridge completely.
7
Routine Maintenance
5
Close the front cover.
Replacing the Toner Cartridge
5-11
IMPORTANT
• If you cannot close the front cover, confirm that the toner cartridge is set properly. If
you close the front cover forcefully, this may cause damage to the printer.
• Do not leave the front cover open for a long time after setting the toner cartridge.
Next, perform cleaning. See "Cleaning," on p. 5-12.
Cleaning
After replacing the toner cartridge, be sure to perform cleaning.
1
5
Routine Maintenance
2
Set blank sheet of paper (A4 or Letter size) in the manual feed
slot or cassette.
Click the icon on the taskbar and select [Canon LBP3200].
The Printer Status Window will appear.
3
Click [Options] ➞ [Cleaning].
Cleaning will start.
5-12
Replacing the Toner Cartridge
The message <Cleaning> appears on the Printer Status Window.
When paper is output and the message disappears, cleaning is completed.
IMPORTANT
• You cannot perform cleaning during print or print paused.
NOTE
It takes approximately 3 minutes to perform cleaning.
Precautions for Handling the Toner Cartridge
The toner cartridge consists of delicate parts. Handling the toner cartridge without
caution may lead to damage to the toner cartridge or a deterioration in print quality.
Be careful of the following points when removing or installing the toner cartridge.
WARNING
Do not burn or throw a used toner cartridge into open flames, as this may cause
the toner remaining inside the cartridge to ignite, resulting in burns or a fire.
CAUTION
Take care not to allow the toner to come into contact with your hands or
clothing, as this will dirty your hands or clothing. If they become dirty, wash
them immediately with cold water. Washing with warm water will set the toner
and make it impossible to remove the toner stains.
Replacing the Toner Cartridge
5-13
Routine Maintenance
5
• You cannot cancel cleaning once cleaning starts.
IMPORTANT
• Print quality may deteriorate if you touch or damage the drum inside the toner cartridge.
Be careful not to touch the drum or open the drum protective shutter. Be careful not to
hold or touch the portions that are not described in this procedure. This may result in
damage to the printer.
Drum protective shutter
• Do not expose the toner cartridge to direct sunlight or strong light.
Routine Maintenance
5
• When handling the toner cartridge, properly hold it with an arrow face up as shown in the
figure. Do not set it vertically or upside-down.
• Never attempt to disassemble or modify the toner cartridge.
• If the toner cartridge is brought to an environment where the temperature differs
•
•
•
•
5-14
extremely, condensation may occur both inside and outside of the toner cartridge. If you
are going to install in a warm room the toner cartridge that was stored in a cold place,
leave the toner cartridge stored in the protective bag for over one hour so that it can
adapt to the ambient temperature.
Be sure to use a new toner cartridge within the expiration date indicated on the package.
Using a genuine Canon toner cartridge is recommended.
Keep the toner cartridge away from the products that generate magnetic waves, such as
a display or computer.
A toner cartridge is a magnetic product. Keep the toner cartridge away from products that
may be damaged by magnetic waves, such as a floppy disk or disk drive. This may lead
to damage to data.
Replacing the Toner Cartridge
Storing the Toner Cartridge
Be careful of the following points for storing a new toner cartridge or handling the
toner cartridge that are taken out of the printer for maintenance or transportation.
■ Condensation
Even within the storable humidity range, water drops may develop both inside and outside
of the toner cartridge due to the difference in temperature. The development of water
drops is called condensation. Condensation will adversely affect the quality of the toner
cartridge.
Replacing the Toner Cartridge
5-15
5
Routine Maintenance
IMPORTANT
• Do not take a new toner cartridge out of the protective bag until it is ready to be used.
• If you take the toner cartridge out of the printer for servicing the printer or removing paper
jams, place the toner cartridge into the original protective bag, or wrap it with a thick cloth
immediately.
• Do not place it vertically or upside-down. Store the toner cartridge in the same
orientation as when installed in the printer.
• Do not store the toner cartridge in a place exposed to direct sunlight.
• Do not store the toner cartridge in a hot or humid place, or a place where the
temperature and humidity can change significantly.
• Storing temperature range: 0 to 35 °C (32 to 95 °F)
• Storing humidity range: 35 to 85 % RH (no condensation)
• Do not store the toner cartridge in a place where corrosive gases, such as ammonia, are
generated, or where a considerable amount of salt is contained in the air, or where there
is a lot of dust.
• Keep the toner cartridge out of the reach of small children.
• Keep the toner cartridge away from products that may be damaged by magnetic waves,
such as a floppy disk or disk drive.
Cleaning the Printer
While you use the printer for a long period of time, when you find dust or dirt on the
outer surfaces, clean the printer. When cleaning the printer, be careful of the
following points in order to prevent an electrical shock or printer malfunctions.
WARNING
• When cleaning the printer, first turn OFF the power switch, disconnect the USB
cable, then unplug the power plug. Failure to observe these steps may result in
a fire or electrical shock.
• Do not use alcohol, benzene, paint thinner, or other flammable substances.
Check detergent for flammability prior to use. If flammable substances come
into contact with a high-voltage area inside the printer, it may result in a fire or
electrical shock.
5
Routine Maintenance
IMPORTANT
• Be careful not to use a cleaning agent other than water or a mild detergent diluted with
water, as this may deform or crack the plastic materials in the printer.
• When using a mild detergent, be sure to dilute it with water.
• Grease or oil does not have to be applied to this printer. Be sure not to apply grease or
oil.
1
Press " " of the power switch to turn OFF the printer a,
disconnect the USB cable b, then unplug the power plug from
the AC power outlet c.
b
c
a
ON
OF
5-16
Cleaning the Printer
F
2
Firmly wring a soft cloth dampened with water or a mild
detergent diluted with water, and wipe off the dirt.
If you use a mild detergent for cleaning, be sure to wipe away the detergent with
a soft cloth dampened with water.
4
After wiping off dirt, wipe the printer with a dry cloth.
5
When the printer is completely dry, plug the power plug into
the AC power outlet, then connect the USB cable.
Cleaning the Printer
5-17
Routine Maintenance
3
Moving the Printer
When changing the location of the printer or moving the printer for maintenance, be
sure to follow the procedure below.
WARNING
To avoid damage to the power cord and creating a fire hazard, always turn OFF
the power switch, and disconnect the USB cable when moving the printer.
Otherwise, the power cord or USB cable may be damaged, resulting in a fire or
electrical shock.
CAUTION
• The 220 - 240 V model weighs approximately 6.0kg and the 120 V model weighs
approximately 6.5kg when the toner cartridge, the cassette, and the cassette
protective cover are not attached. Be careful not to hurt your back or other
portions of your body when carrying the printer.
• Be sure not to hold portions (e.g. the front or back of the printer, or paper
delivery area) other than the portions indicated when carrying the printer. If you
do so, you may drop the printer, resulting in personal injury.
Routine Maintenance
5
5-18
Moving the Printer
Moving the Printer
Follow the procedure below to transport the printer.
1
Press " " of the power switch to turn OFF the printer a,
disconnect the USB cable b, then unplug the power plug from
the AC power outlet c.
b
c
5
a
OF
Routine Maintenance
ON
F
2
Remove the power cord.
3
Close the face-down delivery tray if it is open.
Moving the Printer
5-19
4
Pull out the cassette.
5
Remove the cassette protective cover at the back of the printer.
b
Routine Maintenance
5
a
6
7
Hold the printer on both side as shown in the figure when
carrying it.
Set the printer down carefully at the installation site.
CAUTION
Set the printer down slowly and carefully. Be careful not to hurt your hands.
5-20
Moving the Printer
8
Install the cassette protective cover to the back of the printer.
a
b
9
Set the cassette in the printer.
Push the cassette into the printer firmly until the front surface of the cassette is
flush with that of the printer.
Routine Maintenance
5
10 Plug the power cord.
11 Plug the power plug into the AC power outlet.
12 Connect the USB cable.
● Transporting the Printer
When transporting the printer for reasons such as relocating, remove the toner
cartridge and store the printer and the parts in the package that they came in
with the protective materials attached in order to prevent them from being
damaged while being transported.
If the original package and packing materials are not available, find an
appropriate box and packing materials and pack the printer and the parts
appropriately.
Moving the Printer
5-21
Handling the Printer
This printer consists of various electronic and precise optical parts. Read the
following section so that you can handle the printer properly.
IMPORTANT
The methods for handling the printer are also described in "Important Safety
Instructions," on p. xv.
Precautions for Handling the Printer
Observe the precautions below so that high-quality printing can be maintained
constantly.
5
Routine Maintenance
IMPORTANT
• Do not place any heavy objects on the printer, face-down delivery tray, or cassette
protective cover, as this may cause damage to the printer.
• Do not leave the front cover open longer than required. Exposing the printer to direct
sunlight or strong light may result in a deterioration in print quality.
• Do not give vibration on the printer during print; otherwise, print quality may deteriorate.
• Do not open the front cover during print; otherwise, the printer may be damaged.
• Carefully handle the face-down delivery tray, delivery selection cover, and front cover
when opening and closing them; otherwise, the printer may be damaged.
5-22
Handling the Printer
• If you want to attach a cover to the printer, turn OFF the power switch and allow the
printer to cool down sufficiently before attaching a cover.
• If you do not plan to use the printer for a long period of time, unplug the power cord from
the AC power outlet.
• Do not use or store the printer in a room where chemicals are used.
• The face-down delivery area and face-up delivery slot become extremely hot while
printing or immediately after printing. When removing paper or paper jam, be careful not
to touch the face-down delivery area, face-up delivery slot, and their surroundings.
Precaution for Storing the Printer
If you do not plan to use the printer for a long period of time, store it in the following
environment.
• Storing
temperature range: 0 to 35 °C (32 to 95 °F)
• Storing humidity range: 35 to 85 % RH with no condensation
Handling the Printer
5-23
Routine Maintenance
5
Routine Maintenance
5
5-24
Handling the Printer
Troubleshooting
6
CHAPTER
This chapter describes the remedies for problems such as a paper jam or deterioration in print
quality.
When You Have Trouble Printing. . . . . . . . . . . . . . . . . . . . . . . . . . . . . . . . . . . . . . . . . . . . 6-2
Paper Jams. . . . . . . . . . . . . . . . . . . . . . . . . . . . . . . . . . . . . . . . . . . . . . . . . . . . . . . . . . . . 6-3
Service Error Display . . . . . . . . . . . . . . . . . . . . . . . . . . . . . . . . . . . . . . . . . . . . . . . . . . . 6-14
When a Fixing Unit Error Appears . . . . . . . . . . . . . . . . . . . . . . . . . . . . . . . . . . . . . . . . . . . . . . .6-15
When a Scanner Error or Service Error Appears . . . . . . . . . . . . . . . . . . . . . . . . . . . . . . . . . . . .6-16
Print Quality Problems . . . . . . . . . . . . . . . . . . . . . . . . . . . . . . . . . . . . . . . . . . . . . . . . . . 6-17
When Nothing is Printed . . . . . . . . . . . . . . . . . . . . . . . . . . . . . . . . . . . . . . . . . . . . . . . . . 6-21
Installation Problems . . . . . . . . . . . . . . . . . . . . . . . . . . . . . . . . . . . . . . . . . . . . . . . . . . . 6-22
When Uninstallation Fails . . . . . . . . . . . . . . . . . . . . . . . . . . . . . . . . . . . . . . . . . . . . . . . . . . . . . .6-23
Uninstalling the USB Class Driver . . . . . . . . . . . . . . . . . . . . . . . . . . . . . . . . . . . . . . . . . . . . . . .6-24
Installing by Selecting the USB Port (Windows 98/Me Only) . . . . . . . . . . . . . . . . . . . . . . . . . . .6-27
Problems During Network Installation . . . . . . . . . . . . . . . . . . . . . . . . . . . . . . . . . . . . . . . . . . . .6-31
Miscellaneous Problems. . . . . . . . . . . . . . . . . . . . . . . . . . . . . . . . . . . . . . . . . . . . . . . . . 6-32
6-1
When You Have Trouble Printing
If any problem occurs while you operate the printer, follow the flow chart shown
below to check the problem.
Printing is
impossible.
Yes
The power cord is unplugged.
The power switch is turned OFF.
(See "Turning the Printer ON/OFF,"
on P.1-11.)
NO
An error message
appears on the Printer
Status Window.
Troubleshooting
6
Print quality
deteriorates.
Follow the messages
displayed on the Printer Status
Window to remedy an error.
(See "Printer Status Window,"
on P.4-46.)
Toner density is set to light.
(See "Specifying the Toner
Density," on P.4-42.)
Toner runs low.
(See "Replacing the Toner
Cartridge," on P.5-2.)
The printer is installed in an
adverse environment.
(See the Getting Started
Guide.)
Other Problems
(See "Print Quality Problems,"
on P.6-17.)
6-2
When You Have Trouble Printing
The printer is not connected to your
computer.
(See "Connecting to a Computer," on
P.1-13.)
The printer driver is not installed
properly.
(See "Installation Problems," on P.622.)
Paper Jams
The messages shown below will appear in the Printer Status Window when a paper
jam occurs during print.
WARNING
There are some areas inside the printer which are subject to high-voltages.
When removing jammed paper or when inspecting the inside of the printer, do
not allow necklaces, bracelets, or other metal objects to touch the inside of the
printer, as this may result in burns or electrical shock.
CAUTION
• When removing jammed paper, take care not to allow the toner to come into
contact with your hands or clothing, as this will dirty your hands or clothing. If
they become dirty, wash them immediately with cold water. Washing with warm
water will set the toner and make it impossible to remove the toner stains.
• When removing paper which has become jammed inside the printer, remove the
jammed paper gently to prevent the toner on the paper from scattering and
getting into your eyes or mouth. If the toner gets into your eyes or mouth, wash
them immediately with cold water and immediately consult a physician.
• When removing jammed paper, take care not to cut your hands on the edges of
the paper.
Paper Jams
6-3
Troubleshooting
6
• The fixing unit and its surroundings inside the printer may become hot during
use. When removing jammed paper or when inspecting the inside of the printer,
do not touch the fixing unit and its surroundings, as doing so may result in
burns or electrical shock.
IMPORTANT
• Do not touch the high-voltage contacts in the front cover, as this may result in damage to
the printer.
High-voltage contacts
Troubleshooting
6
• Applying excess force may result in tearing paper or damaging the parts in the printer.
When removing the jammed paper, pull the paper in the proper direction judging from the
position of the paper.
• If paper is torn, be sure to find and remove any remaining portions.
• The error message may not disappear if you remove jammed paper without opening the
front cover. In this case, open and close the front cover.
6-4
Paper Jams
• Do not touch the transfer roller, as this may result in a deterioration in print quality.
Transfer roller
• The face-down delivery area and face-up delivery slot become extremely hot while
printing or immediately after printing. When removing paper or paper jam, be careful not
to touch the face-down delivery area, face-up delivery slot, and their surroundings.
1
Open the front cover.
When opening the front cover, put your hands into the opening on both sides of
the printer, then slowly and strongly pull it out.
Paper Jams
6-5
Troubleshooting
6
2
Take the toner cartridge out of the printer.
If you find jammed paper in this step, proceed to the next step without removing it.
IMPORTANT
• Print quality may deteriorate if you touch or damage the drum inside the toner
cartridge. Be careful not to touch the drum or open the drum protective shutter. Be
careful not to hold or touch the portions that are not described in this procedure.
This may result in damage to the printer.
Troubleshooting
6
Drum protective shutter
• Do not expose the toner cartridge to direct sunlight or strong light.
6-6
Paper Jams
3
Place the toner cartridge into the protective bag.
4
Open the delivery selection cover.
5
Troubleshooting
6
Tilt the two pressure release levers of the fixing unit toward
you to release the pressure from the fixing unit.
If you find jammed paper in this step, proceed to the next step without removing it.
Paper Jams
6-7
6
Slowly pull out the paper jammed in the printer in the
direction of the arrows.
Troubleshooting
6
IMPORTANT
If you cannot remove jammed paper easily, proceed to the next step. Do not try to
remove it forcefully.
7
6-8
Paper Jams
Slowly pull out the paper jammed in the face-up delivery slot
in the direction of the arrow.
8
9
Slowly pull out the paper jammed in the face-down delivery
area in the direction of the arrow.
Close the front cover.
Troubleshooting
6
10 Pull out the cassette.
When pulling out the cassette, be sure to pull it out slowly and completely.
Paper Jams
6-9
11 Slowly pull jammed paper in the direction of the arrow.
● When feeding paper from the cassette
❑ While putting your hand on paper as shown in the figure, slowly pull jammed
paper in the direction of the arrow.
IMPORTANT
• When removing jammed paper, be sure to put your hand on paper. If you remove
jammed paper without putting your hand on it, paper may be torn.
• Do not touch the paper feed roller. If you touch it, this may result in misfeeds.
Troubleshooting
6
Paper feed roller
● When feeding paper from the manual feed slot
❑ Slowly pull out jammed paper in the direction of the arrow.
6-10
Paper Jams
12 Return the pressure release levers of the fixing unit to the
original positions.
13 Close the delivery selection cover.
Troubleshooting
6
14 Open the front cover.
When opening the front cover, put your hands into the opening on both sides of
the printer, then slowly and strongly pull it out.
Paper Jams
6-11
15 Take the toner cartridge out of the protective bag.
16 While aligning the projection on each side of the toner
cartridge with the toner cartridge guide, push the toner
cartridge completely.
Troubleshooting
6
6-12
Paper Jams
17 Close the front cover.
If paper that you set into the manual feed slot is jammed, set paper into the
manual feed slot and perform printing operation again in this step.
18 Set the cassette in the printer.
Push the cassette into the printer firmly until the front surface of the cassette is
flush with that of the printer.
Paper Jams
6-13
6
Troubleshooting
IMPORTANT
• If you cannot close the front cover, confirm that the toner cartridge is set properly. If
you close the front cover forcefully, this may cause damage to the printer.
• Do not leave the front cover open for a long time after setting the toner cartridge.
Service Error Display
If the printer has a problem and does not work properly, the service error messages
shown below appear on the Printer Status Window.
Service Error
Cause
Remedy
A problem occurs in the
fixing unit.
Follow the instructions in (see
"When a Fixing Unit Error
Appears," on p. 6-15) to
contact the store where you
purchased this printer or your
service representative.
A problem occurs in the
scanner.
Follow the instructions in (see
"When a Scanner Error or
Service Error Appears," on p.
6-16) to turn OFF the printer,
then turn it ON again.
A problem occurs in the
printer.
Follow the instructions in (see
"When a Scanner Error or
Service Error Appears," on p.
6-16) to turn OFF the printer,
then turn it ON again.
Troubleshooting
6
6-14
Service Error Display
When a Fixing Unit Error Appears
If a fixing unit error appears, follow the instructions below to contact the store where
you purchased this printer or your service representative.
1
Press " " of the power switch to turn OFF the printer a,
disconnect the USB cable b, then unplug the power plug from
the AC power outlet c.
b
c
ON
OF
6
F
IMPORTANT
After a fixing unit error appears and you turn OFF the printer, never turn ON the
printer again.
2
Contact the store where you purchased this printer or your
service representative.
When you contact, inform them of symptoms.
Service Error Display
6-15
Troubleshooting
a
When a Scanner Error or Service Error Appears
When a scanner error or service error appears, follow the instructions below to turn
OFF the printer, then turn it ON again. The message may disappear.
1
Turn OFF the printer, wait for 10 seconds or longer, then turn
ON the printer again.
ON
ON
OF
F
ON
OF
F
OFF
6
Troubleshooting
If the error message does not appear, the printer works properly. If the error
message still appears, proceed to the next step.
2
Press " " of the power switch to turn OFF the printer a,
disconnect the USB cable b, then unplug the power plug from
the AC power outlet c.
b
c
a
ON
OF
3
F
Contact the store where you purchased this printer or your
service representative.
When you contact, inform them of symptoms.
6-16
Service Error Display
Print Quality Problems
When a problem occurs while using this printer, take the following measures
depending on the symptoms.
IMPORTANT
• If a message appears in the Printer Status Window, take remedies according to the
message.
• For details on paper jams, see "Paper Jams," on p. 6-3.
• If a symptom that is not indicated in this section occurs, if the indicated remedy does not
solve the problem, or if you cannot determine the problem, consult the store where you
purchased this printer.
White streaks appear. (The print is too thin or uneven.)
The toner in the toner cartridge runs low.
Remedy
Take the toner cartridge out of the printer, slowly shake it to evenly distribute the
toner inside. If this does not solve the problem, replace the toner cartridge with
a new one. (See "Replacing the Toner Cartridge," on p. 5-2.)
The overall print is too thin.
Cause 1
[Toner Density] is not specified properly.
Remedy
Drag [Toner Density] toward [Dark] in the printer driver.
In order to specify [Toner Density], click the [Details] button in the [Quality] sheet
to open the [Detailed Settings] dialog box.
Cause 2
[Use Toner Save] is selected.
Remedy
Remove a checkmark from [Use Toner Save] in the printer driver.
In order to specify [Use Toner Save], click the [Details] button in the [Quality]
sheet to open the [Detailed Settings] dialog box.
The overall print is too dark.
Cause 1
[Toner Density] is not specified properly.
Remedy
Drag [Toner Density] to [Light] in the printer driver.
In order to specify [Toner Density], click the [Details] button in the [Quality] sheet
to open the [Detailed Settings] dialog box.
Print Quality Problems
6-17
6
Troubleshooting
Cause
Cause 2
The printer is exposed to direct sunlight or strong light.
Remedy
Perform the same remedy as for Cause 1. If this does not solve the problem,
move the printer to a place where it will not be exposed to direct sunlight or
strong light. Alternatively, move the strong light source away from the printer.
A portion of a page is not printed.
Cause 1
The scale factor is not proper.
Remedy 1 Remove a checkmark from [Manual Scaling] in the printer driver. If you remove
the checkmark, the scale factor will be set according to [Page Size] and [Output
Size] automatically.
In order to specify [Manual Scaling], open the [Page Setup] sheet.
Remedy 2 Place a checkmark for [Manual Scaling] in the printer driver and specify an
appropriate scale factor according to the paper size to be used.
In order to specify [Manual Scaling], open the [Page Setup] sheet.
Troubleshooting
6
Cause 2
The position for loading paper is not proper.
Remedy
Load paper properly. (See "Printing on Plain Paper / Heavy Paper / Label /
Transparency," on p. 2-14, "Printing on Envelope," on p. 2-27, "Printing on
Custom Paper," on p. 2-40.)
Cause 3
A document with no margins was printed.
Remedy
The printable area of this printer is an area excluding 5mm from the upper,
bottom, right, and left of the paper sides. Therefore, you should secure a margin
of over 5 mm around the data.
Printed paper is stained with black dots.
Cause
The fixing unit is dirty.
Remedy
Perform the cleaning operation. (See "Cleaning," on p. 5-12.)
Print position is misaligned.
6-18
Cause
[Top Margin] and [Paper Position] in the application are not specified properly.
Remedy
Specify [Top Margin] and [Paper Position] in the application properly. (See
Instruction manual supplied with your application.)
Print Quality Problems
The next page is printed from half way through the previous page.
Cause
[Line Spacing] or [Lines/Page] in the application is not specified properly.
Remedy
Specify [Line Spacing] and [Lines/Page] in the application so that data fits in
one page, and print again. (See Instruction manual supplied with your
application.)
Paper comes out wrinkled.
Cause 1
Paper is not loaded in the cassette properly.
Remedy
Load paper in the cassette properly. (See "Printing on Plain Paper / Heavy
Paper / Label / Transparency," on p. 2-14, "Printing on Envelope," on p. 2-27.)
Cause 2
Paper is set in the manual feed slot diagonally.
Remedy
Set paper in the manual feed slot straight. (See "Printing on Plain Paper / Heavy
Paper / Label / Transparency," on p. 2-14, "Printing on Envelope," on p. 2-27,
"Printing on Custom Paper," on p. 2-40.)
Cause 3
Paper is damp.
Remedy
Replace paper with an unpacked stack.
Nothing is printed on paper.
Cause 1
The toner cartridge was installed with the sealing tape still attached.
Remedy
Take the toner cartridge out of the printer, pull away the sealing tape, and
reinstall the toner cartridge. (See "Replacing the Toner Cartridge," on p. 5-2.)
Cause 2
A few sheets of paper were fed at a time.
Remedy
Align the paper stack properly and load it again.
Cause 3
The front cover is not closed completely.
Remedy
Close the front cover completely.
Paper comes out completely black.
Cause
The drum in the toner cartridge has deteriorated.
Remedy
Replace the toner cartridge with a new one. (See "Replacing the Toner
Cartridge," on p. 5-2.)
Print Quality Problems
6-19
Troubleshooting
6
White dust is attached to the printed transparencies.
Cause
The transparencies were printed just after other type of paper was printed
continuously.
Remedy
If you make continuous print on other type of paper before printing on
transparencies, the transparencies may come out with chipped paper attached.
In this case, wipe and remove the chipped paper with a soft cloth.
Print is partially hollowed out.
Troubleshooting
6
Cause 1
Proper paper is not being used.
Remedy
Replace the paper with a type that can be used with this printer. (See "Paper
Requirements," on p. 2-2.)
Cause 2
Paper is damp.
Remedy
Replace paper with an unpacked stack.
Cause 3
The drum in the toner cartridge has deteriorated.
Remedy
Replace the toner cartridge with a new one. (See "Replacing the Toner
Cartridge," on p. 5-2.)
Paper curls.
6-20
Cause 1
Paper is damp.
Remedy
Replace paper with an unpacked stack.
Cause 2
Proper paper is not being used.
Remedy
Replace the paper with a type that can be used with this printer. (See "Paper
Requirements," on p. 2-2.)
Cause 3
Paper was delivered into the face-down delivery area.
Remedy
If you are using paper that curls easily, change the paper delivery area to the
face-up delivery slot. (See "Paper Delivery Area," on p. 2-11.)
Cause 4
Paper is too thin.
Remedy
Specify [Paper Type] to [Plain Paper L] in the printer driver.
In order to specify [Paper Type], open the [Page Setup] sheet.
Print Quality Problems
When Nothing is Printed
Check the following items if nothing is printed when performing a print job from the
application.
1
2
Check if an error message is displayed in the Printer Status
Window.
Print a test page.
● For Windows 98/Me
❑ Click the [Printer Properties] dialog box ➞ [General] ➞ [Print Test Page].
❑ Click the [Printer Properties] dialog box ➞ [General] ➞ [Print Test Page].
■ When the test page is printed appropriately
Printing can be performed from the CAPT software. Check your application to make sure
that all the settings are specified properly.
■ When the test page cannot be printed
Uninstall the CAPT software, reinstall it, and print a test page again. (See "Uninstalling
the CAPT Software," on p. 3-48.)
When Nothing is Printed
6-21
Troubleshooting
6
● For Windows 2000/XP
Installation Problems
If "USB Class Driver" and "LBP3200 Printer Driver" cannot be installed properly,
follow the procedure below to check problems.
The [Canon LBP3200]
folder is displayed
on the desktop.
No
No
(For Windows 98/Me)
[Canon LBP3200] is displayed in
[Add/Remove Programs]
([Add or Remove Programs]
for Windows XP).
See "Installing by Selecting the
USB Port (Windows 98/Me Only),"
on p.6-27.
No
(For Windows 2000/XP)
Cannot
uninstall.
Yes
Uninstall the CAPT software
with Uninstaller.
See "Uninstalling the CAPT
Software," on p.3-48.
Select the USB port and install
the CAPT software.
Yes
Delete [Canon LBP3200] from
[Add/Remove Programs] ([Add
or Remove Programs] for
Windows XP).
Uninstall the USB class driver.
See "Uninstalling the USB Class
Driver," on p.6-24.
See "When Uninstallation Fails," on
p.6-23.
Install the CAPT software
again.
Install the CAPT software
again.
6
Troubleshooting
See "Installing the CAPT Software,"
on p.3-4.
Cannot
install.
Uninstall the CAPT software
with Uninstaller.
Install the CAPT software
again.
See "Installing the CAPT Software,"
on p.3-4.
See "Installing the CAPT Software,"
on p.3-4.
Cannot
install.
Cannot
install.
See "Uninstalling the CAPT
Software," on p.3-48.
The [Canon LBP3200] folder is
displayed on the desktop.
No
[Canon LBP3200] is displayed in
[Add/Remove Programs] ([Add or
Remove Programs] for Windows
XP).
Yes
Uninstall the CAPT software
with Uninstaller.
Yes
Cannot
uninstall.
See "Uninstalling the CAPT
Software," on p.3-48.
Delete [Canon LBP3200] from
[Add/Remove Programs] ([Add
or Remove Programs] for
Windows XP).
See "When Uninstallation Fails," on
p.6-23.
Uninstall the USB class driver.
See "Uninstalling the USB Class
Driver," on p.6-24.
Install the CAPT software
again.
See "Installing the CAPT Software,"
on p.3-4.
6-22
Installation Problems
No
When Uninstallation Fails
If you cannot uninstall the CAPT software with Uninstaller that has been created at
the installation, or if the [Canon LBP3200] folder is not displayed on the desktop,
follow the procedure below to uninstall the CAPT software from [Add/Remove
Programs] ([Add or Remove Programs] for Windows XP).
1
Click the [Start] menu ➞ [Settings] ➞ [Control Panel] ➞ [Add/
Remove Programs].
For Windows XP: Click the [Start] menu ➞ [Control Panel] ➞ [Add or Remove
Programs].
Select [Canon LBP3200] in the [Add/Remove Programs]
dialog box (the [Add or Remove Programs] dialog box for
Windows XP), then click [Change/Remove] ([Add/Remove] for
Windows 98/Me).
6
Troubleshooting
2
NOTE
If [Canon LBP3200] is not displayed in the [Add/Remove Programs] dialog box on
Windows 2000 (the [Add or Remove Programs] dialog box for Windows XP), uninstall
the USB class driver (see "Uninstalling the USB Class Driver," on p. 6-24), then
install the CAPT software.
If [Canon LBP3200] is not displayed in the [Add/Remove Programs] dialog box on
Windows 98/Me, install the CAPT software. (See "Installing by Selecting the USB
Port (Windows 98/Me Only)," on p. 6-27.)
Installation Problems
6-23
3
Click [OK].
The uninstallation starts, and the dialog box for asking you for the restart of the
computer appears.
4
Click [OK].
Troubleshooting
6
Windows will restart.
Uninstalling the USB Class Driver
Uninstalling the USB class driver is required when you cannot install the CAPT
software properly after uninstalling it once or you cannot uninstall the CAPT
software.
1
2
Make sure that the computer is connected to the printer with
the USB cable and that the printer is turned ON.
Click the [Start] menu ➞ [Settings] ➞ [Control Panel] ➞ [Add/
Remove Programs].
For Windows XP: Click the [Start] menu ➞ [Control Panel] ➞ [Add or Remove
Programs].
6-24
Installation Problems
Make sure that [Canon LBP3200] is not displayed in the [Add/
Remove Programs] dialog box (the [Add or Remove
Programs] dialog box for Windows XP), then click [ ].
NOTE
If [Canon LBP3200] is displayed in the [Add/Remove Programs] dialog box (the
[Add or Remove Programs] dialog box for Windows XP), delete [Canon LBP3200]
in the [Add/Remove Programs] dialog box (the [Add or Remove Programs] dialog
box for Windows XP). (See "When Uninstallation Fails," on p. 6-23.)
4
Select the [Start] menu ➞ [Settings] ➞ [Control Panel], then
double-click the [System] icon.
For Windows XP Professional: Click the [Start] menu ➞ [Control Panel] ➞
[System].
For Windows XP Home Edition: Click the [Start] menu ➞ [Control Panel] ➞
[Printers and Other Hardware] ➞ [System].
Installation Problems
6-25
6
Troubleshooting
3
5
Click [Hardware] ➞ [Device Manager], then double-click
[Universal Serial Bus controllers].
For Windows 98/Me, display the [System Properties] dialog box, click the
[Device Manager] tab, and then double-click [Universal Serial Bus controllers].
6
6
Delete only the following USB class driver under [Universal
Serial Bus controllers].
Troubleshooting
For Windows 2000/XP, display [USB Printing Support], then select [Uninstall]
from the [Action] menu.
For Windows 98, select [Canon LBP3200], for Windows Me, select [Canon CAPT
USB Printer], and then click [Remove].
IMPORTANT
• If the USB class driver is under [Other Devices], the installation is not performed
properly. According to your operating system, delete any one of [Canon LBP3200],
[Canon CAPT USB Printer], or [Unknown devices].
• Never delete other devices or device drivers. If you delete them by mistake,
Windows may not operate properly.
6-26
Installation Problems
• If the USB class driver is not installed properly, [USB Printing Support] (for
Windows 2000/XP), [Canon CAPT USB Printer] (for Windows Me), and [Canon
LBP3200] (for Windows 98) are not displayed.
7
8
When the [Confirm Device Removal] dialog box appears, click
[OK].
Click [Close].
[System Properties] will close.
Disconnect the USB cable from the computer, then restart
Windows.
6
After Windows starts up again, reinstall the CAPT software. (See "Installing the
CAPT Software," on p. 3-4.)
Installing by Selecting the USB Port (Windows 98/Me Only)
If the USB port cannot be detected automatically and the CAPT software cannot be
installed properly, follow the procedure below to select the USB port and install the
CAPT software again.
1
Put the supplied "User Software for LBP3200" CD-ROM into
the CD-ROM drive.
If the CD-ROM is already set in the drive, take it out and put it into again.
The CD-ROM menu will appear automatically.
NOTE
If the CD-ROM menu does not appear automatically, select [Run] under the [Start]
menu, enter "D:\English\CAP4MNU.exe", and click [OK]. (The CD-ROM drive
name is indicated as "D:" in this manual. The CD-ROM drive name may differ
depending on the computer being used.)
Installation Problems
6-27
Troubleshooting
9
2
Click [Install a Printer Driver].
The dialog box for confirming the language will appear.
3
Confirm the language and click [OK].
6
Troubleshooting
After the preparation for installation is completed, the CAPT (Canon Advanced
Printing Technology) software installer will start up.
The [Welcome] dialog box will appear.
4
Click [Next].
The [Software License Agreement] dialog box will appear.
6-28
Installation Problems
6
Confirm the contents of the software license agreement, then
click [Yes].
Select [Select from List], then click [Next].
6
Troubleshooting
5
NOTE
If the USB class driver is not installed properly, [Select from List] is greyed out,
disabling you to select it.
Installation Problems
6-29
7
From [Port List], select a USB port that can be used with this
printer, then click [Next].
For Windows 98, select "USBPRNXX" (XX: numbers).
For Windows Me, select "USBXXX" (XXX: numbers).
8
Click [OK].
9
After installation is completed, click [Finish].
Troubleshooting
6
6-30
Installation Problems
Problems During Network Installation
The name of the print server or shared printer is not listed in the [Shared printers] list box.
Cause 1
The print server has not been started.
Remedy
Start up the print server.
Cause 2
The printer is not specified as a shared printer.
Remedy
Specify the printer as a shared printer in the [Printer Properties] dialog box.
Cause 3
The user does not have permission to access the print server or printer.
Remedy
Ask your network administrator to change user's permission.
Troubleshooting
6
Installation Problems
6-31
Miscellaneous Problems
LBP3200 does not function properly.
Cause 1
LBP3200 is not specified as the default printer.
Remedy
Specify it as the default printer.
Cause 2
The CAPT software may not be installed properly.
Remedy
In order to check if the CAPT software is installed properly, print from the
application. If the print cannot be made properly, uninstall the CAPT software
and install it again. (See "Uninstalling the CAPT Software," on p. 3-48,
"Installing the CAPT Software," on p. 3-4.)
Cannot use Adobe Type Manger (ATM) fonts.
Troubleshooting
6
Cause 1
Adobe Type Manger (ATM) is not supported.
Remedy
Use fonts that can be used with this printer.
The CD-ROM menu does not appear automatically.
Cause 1
[Always Display when CD is Inserted] in the CD-ROM menu is not selected.
Remedy
Right-click the CD-ROM drive icon in [My Computer], select [Open] to display
the CD-ROM menu manually. Select [Always Display when CD is Inserted].
Cause 2
[Auto Insert Notification] is not selected. (Windows98/Me only)
Remedy
Display the properties for the CD-ROM drive from [Device Manager] and select
[Auto Insert Notification] in the [Settings] sheet.
A "File not found on CD-ROM" error occurs when starting the CD-ROM menu.
6-32
Cause
The program is being loaded from the hard disk.
Remedy
Delete the "CAP4MNU.EXE" file from the hard disk and start the CD-ROM
menu from the accompanying "User Software for LBP3200" CD-ROM.
Miscellaneous Problems
<Specified Paper Incorrect> appears on the Printer Status Window.
Cause
The setting in [Output Size] for a print job to be performed differs from the
setting in [Output Size] for a print job that has been performed most recently.
Remedy
Check if the size of paper that is loaded in the cassette is correct, then set the
cassette into the printer again. (Printing will start automatically.) When printing
on paper that is fed from the manual feed slot, confirm the size of paper set in
the manual feed slot, then click [
] on the Printer Status Window.
Troubleshooting
6
Miscellaneous Problems
6-33
Troubleshooting
6
6-34
Miscellaneous Problems
Appendix
7
CHAPTER
This chapter describes the printer specifications and index.
Specifications . . . . . . . . . . . . . . . . . . . . . . . . . . . . . . . . . . . . . . . . . . . . . . . . . . . . . . . . . . 7-2
Hardware Specifications . . . . . . . . . . . . . . . . . . . . . . . . . . . . . . . . . . . . . . . . . . . . . . . . . . . . . . .7-2
Software Specifications . . . . . . . . . . . . . . . . . . . . . . . . . . . . . . . . . . . . . . . . . . . . . . . . . . . . . . . .7-3
Dimensions of Each Part . . . . . . . . . . . . . . . . . . . . . . . . . . . . . . . . . . . . . . . . . . . . . . . . . 7-4
Index . . . . . . . . . . . . . . . . . . . . . . . . . . . . . . . . . . . . . . . . . . . . . . . . . . . . . . . . . . . . . . . . . 7-5
Location of the Serial Number . . . . . . . . . . . . . . . . . . . . . . . . . . . . . . . . . . . . . . . . . . . . . 7-8
7-1
Specifications
Hardware Specifications
Type
Desk-top Page Printer
Printing method
Electrophoto Method (On-demand fixing)
Print speed
Plain paper (64 to 90 g/m2)
When printing A4 continuously:
18 pages/min.
* Print speed may drop in stages depending on the paper
size, paper type, print copies, and the settings of the
fixing mode. (This is because the safety function that
prevents damage caused by heat becomes active.)
Warm-up time
0 second (Less than 8 seconds when the printer ON)
First print time
Face-down delivery: 10 seconds or less (20 °C (68 °F) A4
size)
Face-up delivery:
9 seconds or less (20 °C (68 °F) A4
size)
* A period of time from when the printer receives data.
Appendix
7
Cassette
A4, B5, A5, Letter, Executive, Envelope C5, Envelope
COM10, Envelope DL, Envelope Monarch
Paper capacity: approx. 250 sheets (64 g/m2)
* If "LGL" is indicated in the cassette, you can load the
legal-size paper in the cassette. Whether "LGL" is
indicated in the cassette or not depends on the area
where you purchased this printer.
Manual
feed slot
A4, B5, A5, Legal, Letter, Executive, Envelope C5,
Envelope COM10, Envelope DL, Envelope Monarch,
Custom Paper (width: 76.2-215.9 mm, length: 127.0-355.6
mm)
Paper capacity: 1 sheet
Paper size
Output orientation
Face-down / Face-up
Output capacity
Face-down delivery area: Approx. 100 sheets (64 g/m2)
Face-up delivery slot: 1 sheet
Noise level
(Bystander position)
(Noise rating number
based on ISO9296)
7-2
Specifications
During standby: Background noise level
During print:
55dB [A] or less
Operating environment
(Printer unit only)
Operating environment temperature: 7.5 to 32.5 °C (45.5 to
90.5 °F)
Humidity: 5 to 90 % RH (no condensation)
Storage environment
(Printer unit only)
Storage environment temperature: 0 to 35 °C (32 to 95 °F)
Humidity: 35 to 85 % RH (no condensation)
Host interface
USB interface
* USB Full-Speed (USB1.1 equivalent)
Power supply
120 V 50/60 Hz (± 2 Hz)
220 - 240 V (±10%) 50/60 Hz (± 2 Hz)
120 V
Average during operation:
Average during standby:
Power consumption
(at temperature of 20 °C or
220 - 240 V
68 °F)
Average during operation:
Average during standby:
Toner
cartridge
approx. 360W
approx. 7W
Toner cartridge*1
Printable pages: approx. 2500 pages*2
*1 Purchase a toner cartridge of the same product code
when you need it. (See p. 5-2.)
*2 For A4 or Letter
120 V model
Printer unit ...approx. 6.5 kg (Excluding the toner cartridge)
Cassette........................................................ approx. 0.9 kg
Toner cartridge.............................................. approx. 0.7 kg
Weight
220-240 V model
Printer unit ...approx. 6.1 kg (Excluding the toner cartridge)
Cassette........................................................ approx. 0.8 kg
Toner cartridge.............................................. approx. 0.7 kg
Software Specifications
Item
Specifications
Printing software
CAPT (Canon Advanced Printing Technology)
Printable area
Area excluding 5mm from the upper, lower, right and left
of the paper sides.
Specifications
7-3
7
Appendix
Consumables
approx. 350W
approx. 7W
Dimensions of Each Part
■ Printer
Cassette protective cover
251
125.3*2
(mm)
*1 If "LGL" is indicated in the cassette, this length is 436mm.
*2 If "LGL" is indicated in the cassette, this length is 185 mm.
Appendix
7
7-4
Dimensions of Each Part
245
376.3*1
Face-down delivery tray
344.5
367
Cassette
(mm)
Index
A
E
Add Printer Wizard, 3-43
[Advanced] Sheet, 4-31
Envelope, 2-5, 2-6, 2-27
Brightness, 4-21, 4-28
C
Canceling a Print Job, 4-6
Canon LBP3200 Group, 3-27
CAPT (Canon Advanced Printing Technology),
3-4
Cassette, 1-5, 2-15, 2-28
Cassette Protective Cover, 1-6
Cleaning
Fixing Unit, 5-12
Printer, 5-16
Client, 3-34, 3-43
Collate, 4-20, 4-27
Contrast, 4-21, 4-28
Copies, 4-18, 4-25
Custom Paper, 2-40, 4-36
Custom Paper Size, 4-19
D
Default Settings, 4-44
Delivery Selection Cover, 1-5
Details, 4-21, 4-29
[Details] Sheet, 4-22
Dimensions of Each Part, 7-4
F
Face-down Delivery Area, 1-5, 2-11, 2-13
Face-down Delivery Tray, 1-5
Face-up Delivery Slot, 1-6, 2-12, 2-13
[Finishing] Sheet, 4-20, 4-27
Fixing Unit, 6-4
Front Cover, 1-5
G
7
[General] Sheet, 4-22, 4-29
Appendix
B
H
Halftones, 4-21, 4-28
Heavy Paper, 2-4, 2-6, 2-14
I
Image Refinement, 4-22, 4-29, 4-43
Important Safety Instructions, xv
Installation
Installation for Windows 2000, 3-16
Installation for Windows 98/Me, 3-4
Installation for Windows XP, 3-22
Installation Problems, 6-22
Installing the CAPT Software, 3-4
Index
7-5
L
Label, 2-4, 2-6, 2-14
Laser Beam, xviii
Loading Paper
Loading Custom Paper, 2-40
Loading Envelope, 2-27
Loading Plain Paper / Heavy Paper / Label /
Transparency, 2-14
Local Install, 3-35
M
Manual Feed Slot, 1-5, 2-9, 2-21, 2-35, 2-40
Manual Scaling, 4-19, 4-26
Miscellaneous Problems, 6-32
N
Appendix
7
Network, 3-34
Network Printer, 3-44, 4-50
O
Online Help, 4-16, 4-24
Orientation, 4-18, 4-25
Output Size, 4-18, 4-25
P
Page Layout, 4-18, 4-26
Page Order, 4-19, 4-26
[Page Setup] Sheet, 4-17, 4-24
Page Size, 4-17, 4-24
Paper
Paper Printable Area, 2-6
Storing Paper, 2-8
Paper Capacity for Paper Delivery Area, 2-12
Paper Capacity for Paper Source, 2-10
Paper Delivery Area, 2-11
Paper Delivery Area Type, 2-11
7-6
Index
Paper Feed Roller, 6-10
Paper Guide, 1-5, 2-16, 2-30, 2-33, 2-35, 2-40
Paper Jams, 6-3
[Paper Selection] Sheet, 4-32
Paper Size
Abbreviation of Paper Size, 2-5
Paper Size List, 2-2
Setting Paper Size, 2-24, 2-38, 2-43
Paper Source, 2-9
Paper Source Type, 2-9
Paper Type, 4-19, 4-26
Paper Type List, 2-3
Setting Paper Type, 2-25, 2-44
Parts and Their Functions, 1-4
Plug and Play
Windows 2000, 3-18
Windows 98/Me, 3-8
Windows XP, 3-24
[Ports] Sheet, 4-30
Power
Power Cord, 1-8
Power Indicator, 1-6, 1-12
Power Socket, 1-6, 1-9
Power Switch, 1-5
Turning OFF Power, 1-12
Turning ON Power, 1-11
Preferences, 4-20, 4-27
Pressure Release Lever, 6-7, 6-11
Print, 2-14, 2-27, 2-40, 4-2
Print Quality, 4-41
Print Quality Problems, 6-17
Print Server, 3-34, 3-35
Printer
Cleaning, 5-16
Moving the Printer, 5-18
Printer Parts, 1-4
Printer Problems, 6-1
Printer Driver
Installation, 3-4
Uninstallation, 3-48
Printer Port, 4-22, 4-30
Printer Properties, 4-9, 4-14
Printer Status Window, 4-46
Function, 4-47
Name, 4-46
Preferences, 4-48
[Quality] Sheet, 4-21, 4-28, 4-41
USB
USB Cable, 1-14
USB Class Driver, 3-11, 3-17, 3-23, 6-22, 6-26
USB Connection, 1-13
USB Connector, 1-6, 1-14
USB Port, 1-13
USB Printing Support, 6-26
R
V
Rating Label, 1-6
Resolution, 4-21, 4-28
Ventilation Slot, 1-6
Printing Preferences, 4-7
Printing Test Page, 3-31
Q
S
W
When Nothing is Printed, 6-21
Scaling, 4-19, 4-26, 4-33
[Security] Sheet, 4-31
Selecting the Paper Delivery Area, 2-13
Serial Number, 7-8
Service Error, 6-14
Sharing Settings, 3-38, 3-40
[Sharing] Sheet, 4-23, 4-30
Sound, 3-28, 4-46
Specifications, 7-2
System Requirements, 3-2
Appendix
7
T
Test Page, 3-31
Toner Cartridge Guide, 1-7, 6-12
Toner Density, 4-22, 4-29, 4-42
Toner Save Mode, 4-22, 4-29
Transfer Roller, 6-5
Transparency, 2-4, 2-6, 2-14
Troubleshooting Map, 6-2
U
Uninstallation, 3-48
Unusable Paper, 2-7
Usable Paper, 2-2
Index
7-7
Location of the Serial Number
A serial number consists of four-alphabetic characters and a six-digit number.
IMPORTANT
The label is required for a service engineer to check the serial number for service or
maintenance. Be sure not to peel it off.
■ Back of the printer
F187900
XXXV
50/60Hz
X.XA
No. XXXX000000
MADE IN CHINA
CF5
FC5-XXXX
Serial Number
7
Appendix
■ Packaging box (on the side)
LBP3200
8822AXXX[AA]
XXXX000000
Serial Number
7-8
Location of the Serial Number
FA7-5077 (000)
©CANON INC. 2003
MADE IN JAPAN

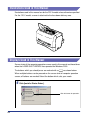
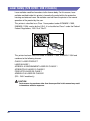
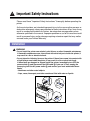
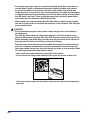
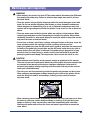

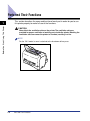
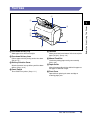
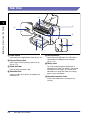
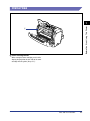
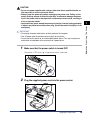
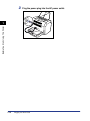
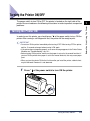
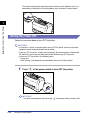
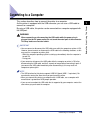
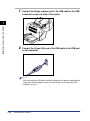
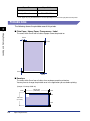
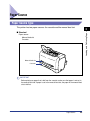
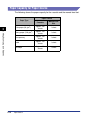

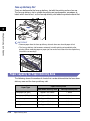
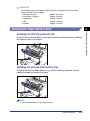
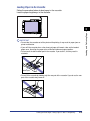

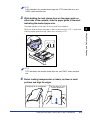
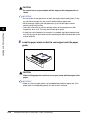
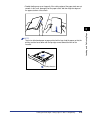
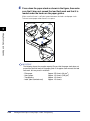
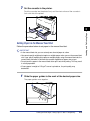

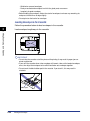
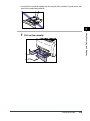
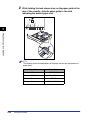
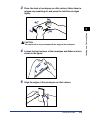
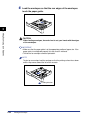
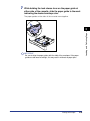
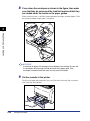


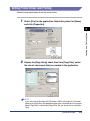
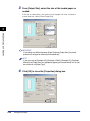
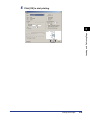
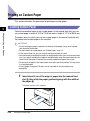
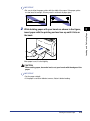
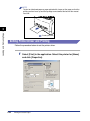
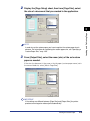
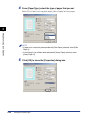


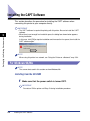
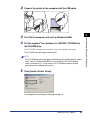

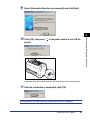
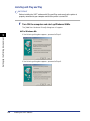
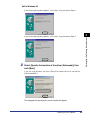
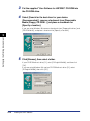

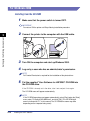
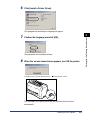
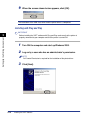
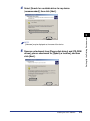
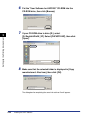
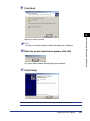
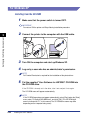
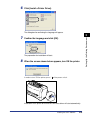
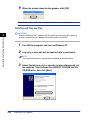
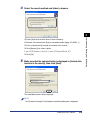
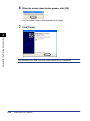
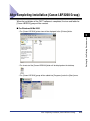
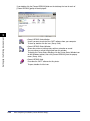
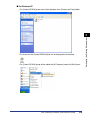
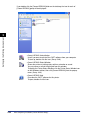
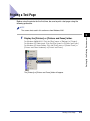
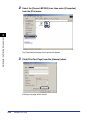
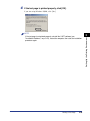
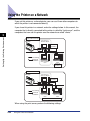
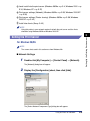
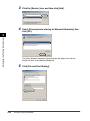
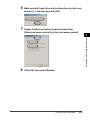
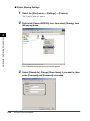
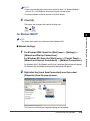

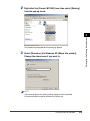
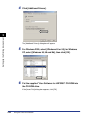
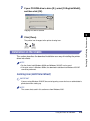

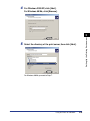
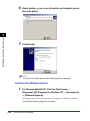
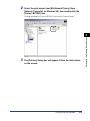
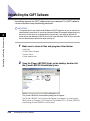
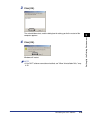

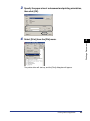
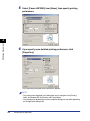
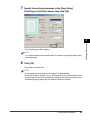
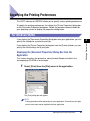
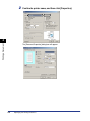
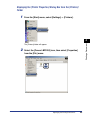
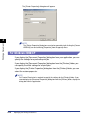
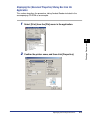
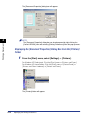
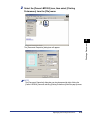
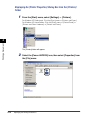
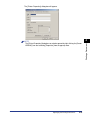
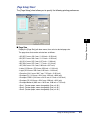
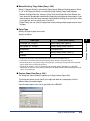
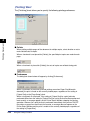
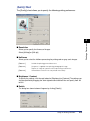
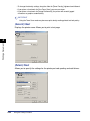
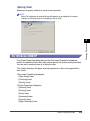
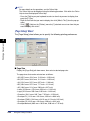


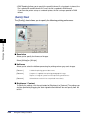
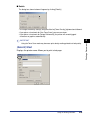
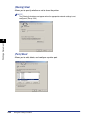
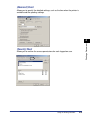
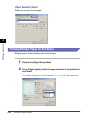
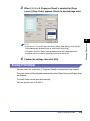
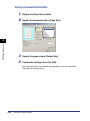
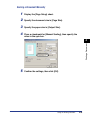
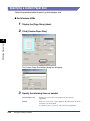
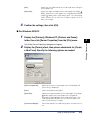
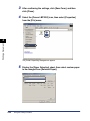
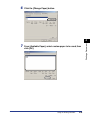

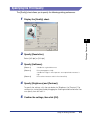

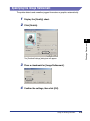
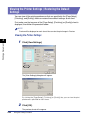

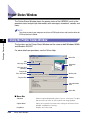
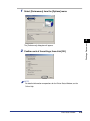
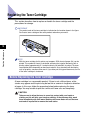
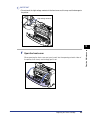
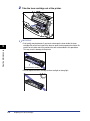
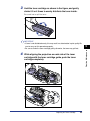
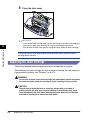

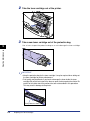
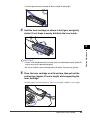
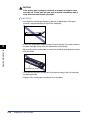
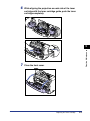
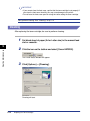

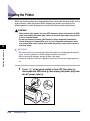
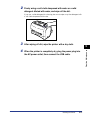

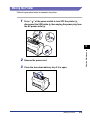
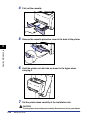
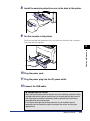

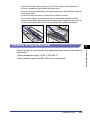

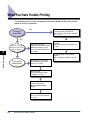
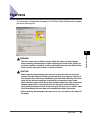
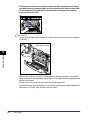

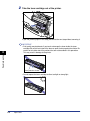
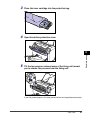
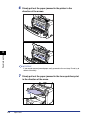
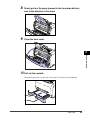
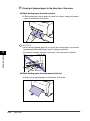
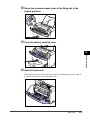
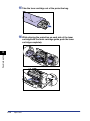
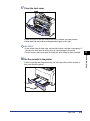
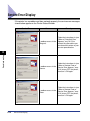
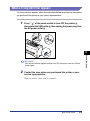
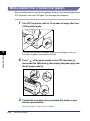

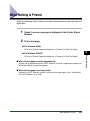
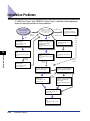
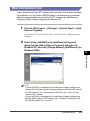
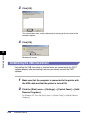
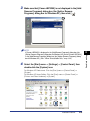
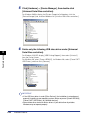
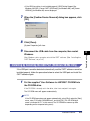
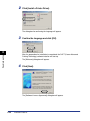
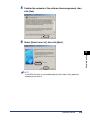
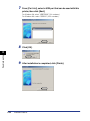


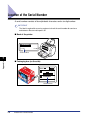

![2 Cliccate su [OK].](http://vs1.manualzilla.com/store/data/006157023_1-5e7c670791eed41ab79bb8c5559b9f3a-150x150.png)