1
Drift Innovation
X170 Action Camera
Drift Innovation
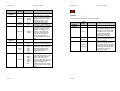
SD card insertion / removal
Taking video footage
1.
2.
This camera can take SD cards in size up to 16GB.
Insert:
1.
2.
3.
4.
3.
Turn the camera off.
Unlock the rear cover to open the camera
Insert the SD card into the SD card slot, ensuring that the SD card connect
terminals are facing up. Insert it carefully and completely until it click into place.
Close the rear cover.
4.
Taking photos
1.
2.
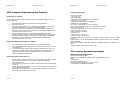
Recording Time:
3.
The available recording time is an approximation (these vary depending on the recording
conditions and the type of card):
Lo
Internal
Memory
32MB
6 mins
Med
(Approx)
2 min 25s
SD Memory Card
4GB
8GB
16GB
12 Hours
24 Hours
48 Hours
3 Hours
6 Hours
16 Hours
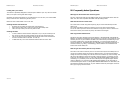
Follow the steps under 'Mounting Description' to correctly mount the camera.
Ensure that the camera has been set into the 'Video' mode using the Settings
menu.
Press the Select button on the control panel to start recording (one beeping
sound). The LED on the control panel will change from green to red to indicate
that the camera is recording.
Press the SELECT button again to stop recording (one beeping sound). The LED on
the control panel will change from red to green to indicate that the camera has
stopped recording but is still on.
Warning:
When the low battery warning appears please change the batteries in the camera to avoid
any accidental memory loss or file corruption.
Remove:
1. Turn the camera off.
2. Unlock the rear cover to open the camera
3. Push the card until it clicks and then pull the card out.
4. Close the rear cover.
Memory Type
X170 Action Camera
High
2 Hours
4 Hours
8 Hours
Follow the steps under 'Mounting Description' to correctly mount the camera.
Ensure that the camera has been set into the 'Photo' mode using the Settings
menu.
Press the SELECT button on the control panel to take a photo (one beeping
sound). The LED on the control panel will briefly change from green to red to
indicate that the camera is capturing the photo. As soon as the photo has been
captured, the LED on the control panel will change from red to green.
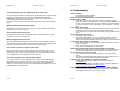
Using the remote control
1 min 45s
1.
2.
3.
4.
Ensure that the remote control has been enabled using the Settings menu.
Attached the remote control to your wrist, handlebar or jacket using the short
velcro strap. Ensure the remote control is tightly fastened so there is no risk of
losing the remote control.
If the camera is in the video mode, press the RECORD button to start recording
(one beeping sound). The green LED on the control panel will change to red. Press
the STOP button to stop recording (one beeping sound). The LED on the control
panel will change back from red to green.
If the camera is in the photo mode, press the RECORD button to capture a photo
(one beeping sound).
Note:
1. Default resolution is 720 x 480 pixels.
2. If the recording time is long, the video file may be separated into multiple files
automatically. The user does not need to monitor this process, the camera will resume
filming once the file is saved (after a couple of seconds). Please note that the time duration
needed to save video files may vary depending upon the length of the file. Please be patient
during this process.
13 of 28
14 of 28