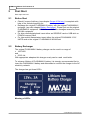
1
Manual for Flashman II
© 2008 MAYAH Communications
MAYAH, FLASHMAN II, FLASHCAST are registered Trademarks. All other trademarks are acknowledge with this.
FLASHMAN II User Manual as of System Software version 2.3.1.
Order-No. F-UM001
Revision 11/2008
© 2008 MAYAH Communications
For copying this manual, even by extract, an explicit written permission of Mayah Communications GmbH is
required.
Contents
3
List of Contents
0
6
Part I Introduction
1 What is...................................................................................................................................
FLASHMAN II
6
2 Scope ...................................................................................................................................
of Delivery
7
3 Useful ...................................................................................................................................
Accessories
8
10
Part II First Start
1 Before
...................................................................................................................................
Start
10
2 Battery
...................................................................................................................................
Recharger
10
3 Connectors
...................................................................................................................................
11
4 Buttons
...................................................................................................................................
13
5 Graphic
...................................................................................................................................
User Interface
15
6 Switching
...................................................................................................................................
On And Off
15
Part III Front panel user Interface
18
1 Main Screen
...................................................................................................................................
18
2 Control
...................................................................................................................................
keys
22
Menu key
......................................................................................................................................................... 22
Stop key
......................................................................................................................................................... 22
3 Cursor
...................................................................................................................................
keys / OK button
22
4 Function
...................................................................................................................................
keys
24
Recorder button
......................................................................................................................................................... 24
Playback button
......................................................................................................................................................... 27
Connect button......................................................................................................................................................... 28
Back light / Audio
.........................................................................................................................................................
button
33
5 Menu...................................................................................................................................
structure
Recorder
......................................................................................................................................................... 35
Tracks
.................................................................................................................................................. 35
Setup
.................................................................................................................................................. 36
Quality
Storage
Card
Monitor
........................................................................................................................................... 37
........................................................................................................................................... 39
.................................................................................................................................................. 40
......................................................................................................................................................... 41
Mixer
.................................................................................................................................................. 41
Setup
.................................................................................................................................................. 45
Audio In
........................................................................................................................................... 46
Mix Mode
........................................................................................................................................... 48
Codec
......................................................................................................................................................... 49
Status
Interface
Coding
Setup
Interface
© 2008 MAYAH Communications
34
.................................................................................................................................................. 49
........................................................................................................................................... 49
........................................................................................................................................... 52
.................................................................................................................................................. 53
........................................................................................................................................... 53
4
Manual for Flashman II
Quality
System
........................................................................................................................................... 59
......................................................................................................................................................... 62
Configs
.................................................................................................................................................. 62
LCD
.................................................................................................................................................. 64
Display
.................................................................................................................................................. 65
Miscellaneous .................................................................................................................................................. 65
Switch Off
.................................................................................................................................................. 69
72
Part IV How to use for
1 Recording
...................................................................................................................................
during Transmission
72
2 Playback
...................................................................................................................................
during Transmission
73
76
Part V Technical specifications
1 General
...................................................................................................................................
Technical Specifications
76
79
Index
© 2008 MAYAH Communications
Part
I
Introduction
6
1
Manual for Flashman II
Introduction
Enter topic text here.
1.1
What is FLASHMAN II
FLASHMAN II comprises the following general features:
· Recording
· Playback of files
· Transmission
· Recording during Transmission
· Playback during Transmission
· Mixer
· Mobile
For all the features FLASHMAN II was intent to have an 'easy to use' and
'intuitive' User Interface. However, nobody is perfect and therefore serious
suggestions to improve this user interface are highly appreciated. For this and
any other questions referring FLASHMAN II please contact [email protected].
a) Recorder
FLASHMAN II can record audio on the following media:
· Standard SD-card (see also chapter Introduction/Useful Accessories)
· Standard USB stick (see also chapter Introduction/Useful Accessories)
The audio input can be recorded from the audio inputs 1 and 2. Since
FLASHMAN II is a professional portable audio recorder the audio input supports
the features:
· Switching between line and microphone input
· Switchable high pass filter
· Switchable limiter
· Switchable attenuation of -20 dB
· Switchable phantom power of 48 Volts for condenser microphones
The recorded audio can be saved in following formats
· MPEG Layer 2; file format Digas Musifile; file name extension .msf
· MPEG Layer 3; file format BWF; file name extension .mp3
· Linear audio (PCM); file format: BWF; file name Extension .wav
· AAC; file format RAW; file name extension: .aac
· AAC (HE); file format RAW; file name extension: .aac
b) Player
FLASHMAN II can playback and transmit the recorded files. The audio can be
monitored via the headphones and the line output (see also chapter First Start/
Connectors).
c) Transmission
Besides the functionality of recording and playback of files FLASHMAN II also
© 2008 MAYAH Communications
Introduction
7
inherits some of the genes of one of the most powerful professional audio codec
CENTAURI II. Therefore live audio or recorded audio can be transmitted and
received via the following interfaces:
· Ethernet (IP-transmission)
· 3G/UMTS (optional; IP-transmission; see chapter Introduction/Useful
Accessories)
· WLAN (optional; IP-transmission; see chapter Introduction/Useful
Accessories)
d) Recording during Transmission
FLASHMAN II can also record the transmitted audio in linear format. This
enables you to protocol all your transmissions.
e) Playing during Transmission
FLASHMAN II enables to listen to an audio file while another audio is
transmitted. Listen to your lately recorded interview while transmitting a
parliament debate.
f) Mixer
The powerful mixer of FLASHMAN II enables you to mix all input and output
audio. More info about this
can be found in chapter Front panel user interface/menu/monitor/mixer.
g) Mobile
Features as
· compact size
· light weight
· powerful rechargeable battery
· support of mobile interfaces such as 3G/UMTS and WLAN
· robust housing
· professional audio input connectors (no adapter necessary)
· ergonomic design
· easy to press buttons
excel the FLASHMAN II as a true mobile device.
1.2
Scope of Delivery
· FLASHMAN II (order no. FMII)
· This manual (link: www.mayah.com/content/download/pdfs/manuals/
FLASHMAN II-man_eng.pdf)
· FLASHMAN II AC/DC international power supply (100-240 VAC, 50 - 60 Hz)
(order no. F-PSU)
· FLASHMAN II rechargeable battery (order no. F-ACC)
· FLASHMAN II battery charger (order no. F-CH)
© 2008 MAYAH Communications
8
1.3
Manual for Flashman II
Useful Accessories
Original MAYAH FLASHMAN II Accessories
· FLASHMAN II case (not available yet)
· FLASHMAN II 3G/UMTS card (Order no. F-3G)
· FLASHMAN II WLAN card (future option; not available yet)
Other FLASHMAN II Accessories
· SD/SDHC card (for recording)
· PCMCIA adapter for CF memory card (CF = Compact Flash)
· USB stick (for recording)
Notes:
· If you want to use FLASHMAN II for mobile transmission you need an 3G/
UMTS or a WLAN card.
· If you want to use FLASHMAN II for recording you need either a SD/SDHC
card, a PC memory card or an USB storage device
© 2008 MAYAH Communications
Part
II
First Start
10
2
Manual for Flashman II
First Start
Enter topic text here.
2.1
Before Start
·
·
·
·
2.2
Check if scope of delivery (see chapter Scope of Delivery) is complete with
help of the included packing list
Recharge the original FLASHMAN II battery with the original FLASHMAN II
recharger (see also chapter Battery Recharger). Please just use the original
FLASHMAN II equipment. MAYAH is not liable for damages caused by noneMAYAH equipment.
For later recording/playback insert either an SD/SDHC card or USB stick or
PCMCIA memory card
For later mobile transmission insert either the original FLASHMAN II 3G/
UMTS card or the original FLASHMAN II WLAN card
Battery Recharger
The original FLASHMAN II battery charger can be used in a range of
· 100-240V
and
· 50-60 Hz.
With appropriate adapters this charger nearly can be used world wide.
To enhance lifetime of FLASHMAN II battery it is strongly recommended first to
insert the FLASHMAN II battery and afterwards to connect the charger to the AC
electricity network.
The charger has got three LED's.
Meaning of LED's:
© 2008 MAYAH Communications
First Start
·
·
·
11
Power (Green LED):
Lights up when charger is connected to electricity network
Charging (Yellow LED):
Lights up during battery charging. When FLASHMAN II battery is fully
charged this LED is switched off.
Error (Red LED):
Lights up when charger senses an error or when no battery is placed in the
charger. Possible errors are described below.
Charger errors:
· Output voltage is out of operational range (9-12V)
· Internal temperature of charger is out of range
· Battery is faulty
2.3
Connectors
FLASHMAN II has got connectors on the top and bottom side.
Connectors on the top side
Slots
a) Slot for PCMCIA cards
In this slot the following cards can be inserted:
· FLASHMAN II 3G/UMTS card (order no. F-3G) for IP-transmission via 3G/
UMTS
· FLASHMAN II WLAN card for IP-transmission via WLAN
· PC-Memory-card (for recording)
b) Slot for SD/SDHC card
In this slot any standard SD/SDHC card can be inserted as storage device for
recording.
c) Slot for FLASHMAN II battery
Here the original FLASHMAN II battery can be inserted. This battery enables a
© 2008 MAYAH Communications
12
Manual for Flashman II
mobile use of FLASHMAN II for a period of about 5 hours, depending on type of
use.
d) Ethernet connector
The RJ45 Ethernet connector can be used for IP-transmission via LAN and WAN.
e) USB connectors
FLASHMAN II has got two USB ports.
USB A-type port
Here a USB storage device (e.g. USB stick) can be connected. Such a USB
storage device can be used as storage device for recording (instead of SD/SDHC
card or PC-Memory card).
USB mini port
This USB mini port is planned to use FLASHMAN II as a client (e.g as
professional sound card for PC).
Audio connectors on the bottom side
a) Audio inputs
Two balanced XLR inputs (female) which can be switched between line use and
microphone use. 48 Volts phantom power can be activated for condenser
microphones.
b) Audio outputs
Outputs 1 and 2 are unbalanced (!) stereo (!) outputs using a 1/4'' headphone
stereo plug each. At output 2 the volume can be set via the headphone level (see
also Front panel user interface/Functions keys/Audio button).
c) Power Supply connector (DC in)
Special Hirose HR10 port for FLASHMAN II AC/DC power supply. Just use an
original MAYAH FLASHMAN II AC/DC power supply. MAYAH is not liable for
damages caused by none-MAYAH equipment.
© 2008 MAYAH Communications
First Start
2.4
13
Buttons
Generally FLASHMAN II has got the following buttons:
· Cursor buttons/OK button
· Function buttons
· Front panel rotary knobs
· Control buttons
a) Cursor buttons / OK button
The cursor buttons enables all navigations through the menus.
With the OK button the user steps in entry fields (e.g to type in an IP-address)
and confirms the complete entry.
In edit fields the | button and the } button have got special meanings:
· Hold the | button pressed for 2 seconds changes to delete mode. First
character is deleted after 0.5 seconds but the delete speed is increased for
10% for each further character.
· Hold the } button pressed for 2 seconds changes to delete mode. First
character is deleted after 0.5 seconds but the delete speed is increased for
10% for each further character.
b) Function buttons
© 2008 MAYAH Communications
14
Manual for Flashman II
The 4 function buttons have got the following meanings:
· Recorder button
Pressing this button starts the recoding functionality of FLASHMAN II (see
also Front panel user interface/Functions keys/Recoder button)
· Playback button
Pressing this button starts the playback functionality of FLASHMAN II (see
also Front panel user interface/Functions keys/Playback button)
· Connect button
Pressing this button opens a dialog to establish or end connections (see also
Front panel user interface/Function keys/Connect button)
· Back light/audio button
Pressing this button opens a dialog to set head phone volume. Holding this
button for two seconds switches the LCD display back light on and off (see
also Front panel user interface/Function keys/Back light-audio button)
c) Control buttons
MENU
The 2 control buttons have got the following meanings:
· Stop/Escape
Pressing this button stops recoding or playback of a file. Furthermore it can
be used to escape the current control field. For more info please consult item
Front panel user interface/Control keys/Stop key.
· Menu button
© 2008 MAYAH Communications
First Start
15
Pressing this button for 2 seconds switches on the FLASHMAN II. At running
FLASHMAN II it activates the menu mode. For more info please consult item
Front panel user interface/Control keys/Menu key.
2.5
Graphic User Interface
a) Menu mode
Menu mode can be opened by pressing the menu button. In menu mode the next
menu item can be reached by pressing the menu button once again. When last
menu item is reached pressing menu button closes menu mode.
b) ESC (=)
'ESC' means to step back to the next upper level or to close current dialog.
c) Scrollbars
The scroll bar on right side indicates the position in the referring list. An empty
scroll bar means that the whole list is shown on the screen. Scrolling is done by
pressing and holding cursor buttons p and q.
d) Delete/Shift left in edit fields
In a string edit fields holding the | button pressed deletes the character left of the
cursor whereas holding the } button pressed shift right character (i.e insert
spaces).
e) Typing in strings
In a string edit field can be navigated with cursor buttons | and }. A character
can be selected with cursor buttons p and q. The succeeding character is
shown below and the preceding character is shown above the currently selected
one.
e) Navigation within screens
Elements inside of the screen can be reached by pressing the cursor buttons.
Direction of the cursor buttons corresponds to the navigation direction on screen.
2.6
Switching On And Off
To switch on FLASHMAN II press and hold the Menu key till back light is on.
To prevent accidental switch off this must be done via front panel menu item
System/Switch Off.
© 2008 MAYAH Communications
Part
III
Front panel user Interface
18
3
Manual for Flashman II
Front panel user Interface
After FLASHMAN II is booted up the following main screen is shown:
3.1
Main Screen
The main screen elements are:
a) Menu bar
The menu key enables:
· to activate/deactivate the menu mode
· to select main menu items
For more info please consult chapter Front panel user interface/Control keys/
Menu key.
© 2008 MAYAH Communications
Front panel user Interface
19
b) Playback/Recording level meter
Note:
A special sign
blinking on the left side of the screen between left level and
right level signals a overload i.e. audio is <= 0.3 dB to clipping level
it may look like that:
c) Playback/Recording state and time
For selection of the right track on the selected storage device use the | } cursor
keys. With the OK button markers can be set during recording.
The Playback state can be:
· Playing a track: u
(see also Front panel user interface/Function keys/Playback button)
· Pause the active track: ull
(see also Front panel user interface/Function keys/Playback button)
· Stop playback: ¢
(see also Front panel user interface/Control keys/Stop key)
The Recording state can be:
·
Recording:
(see also Front panel user interface/Function keys/Recorder button)
·
·
Pause recording:
© 2008 MAYAH Communications
·II
20
Manual for Flashman II
(see also Front panel user interface/Function keys/Recorder button)
·
Stop recording: ¢
· (see also Front panel user interface/Control keys/Stop key)
The displayed time can be
· elapsed time; in this case the symbol Ò is shown above
· remaining time; in this case the symbol Ñ is shown above
Note:
It can be switched between elapsed / remaining time in the menu item SYS/
Display.
Note 2:
Depending on situation the time format is
· minutes:seconds,deci seconds (<h)
or
· hours:minutes:seconds (>=h)
The progress bar shows at
· Playback mode: Percentage of elapsed time to track time
· Recording: Percentage of elapsed time to available record time.
Note:
The available recording time depends on:
- size of storage device
- max. files size (4 GB)
- bit rate
Note 2:
Since current storage devices are quite big compared to the size of audio
files, often it seems that the percentage state of the progress does not
change.
d) 3G/UMTS signal strength
Best
Good
Sufficient
Bad
Blinking symbol means "no 3G/UMTS connectivity".
e) SIP registration symbol:
This symbol is displayed when FLASHMAN II has successfully registered at a
SIP registrar. How to configure SIP is described in chapter Codec/Setup/Interface
© 2008 MAYAH Communications
Front panel user Interface
21
.
f) Framing state indicator
framed
not framed, but connected
Blinking of the framing state indicator means that FLASHMAN II is currently
connecting (connection in progress).
g) Battery state indicator: e.g.
h) Power Supply indicator:
(Battery is fully charged)
(Power Supply connected)
i) Coding status bar
The coding status bar shows the following coding parameter of FLASHMAN II
· Operational mode: mono (m) or stereo (s)
· Sample rate in kHz
· Coding algorithm e.g.
- L2 for MPEG L2
- L3 for MPEG L3
- HE for AAC (HE)
- LIN for linear
· Bit rate in kbps (only shown for MPEG algorithms)
j) Send/receive levels
Just visible if a connection is established and framed.
© 2008 MAYAH Communications
22
3.2
Manual for Flashman II
Control keys
The 2 control keys of FLASHMAN II are located below the LCD screen.
MENU
3.2.1
Menu key
The Menu key has got the following functionalities:
· Switching on FLASHMAN II
Press and hold the Menu key for approximately 2 seconds to switch on
FLASHMAN II.
· Enter menu mode
If Menu mode is deactivated it can be opened by pressing the menu button.
· Navigation in menu mode
In menu mode the next menu item can be reached by pressing the menu
button once again i.e. navigation through the menu items
- Rec (Recorder)
- Mon (Monitor)
- Cod (Codec)
- Sys (System)
· Leaving menu mode
When last menu item is reached pressing menu button closes menu mode.
3.2.2
Stop key
The Stop key has got the following functionalities:
· Stopping Recording / Playback (¢)
Stopping of Recording / Playback must be confirmed with OK button.
· Escape (=)
Stepping back to the next upper level or closing current dialog or menu.
3.3
Cursor keys / OK button
© 2008 MAYAH Communications
Front panel user Interface
23
The Cursor keys have got the following functionalities:
· Navigation inside the screens
Use the | } pq cursor keys to reach the different elements, lists and fields in
the miscellaneous setting screens.
· Selection of sub menu item
In menu mode a sub menu item can be reached with the pq cursor keys.
· Selection of track
In Main screen the right track can be chosen on the selected storage device
with the | } cursor keys.
· During playback | } cursor keys can be used to jump between markers.
· Typing in characters
In edit fields text can be edited with help of pq cursor keys.
A character can be selected with pq cursor keys. The succeeding character
is shown below and the preceding character is shown above the currently
selected one.
· Deleting character
In edit fields holding the | key pressed deletes the character left of the cursor.
· Insert spaces
In edit fields holding the } button pressed shift right character (i.e insert
spaces)..
The OK button has got the following functionalities:
· Confirmation
· Opening selected sub menu items
· Audio In interface
In menu item Monitor/Setup/Audio In with the OK button the selected audio in
can be set to
- line in level
or
- microphone level
· Marker (except AAC/AAC (HE) file formats)
In main screen markers can be set during recording and playback with OK
button.
© 2008 MAYAH Communications
24
3.4
Manual for Flashman II
Function keys
The 4 function keys of FLASHMAN II are located on left side of the LCD screen.
Pressing any function key will close all dialogs and open the screens as
described in the following sub chapters i.e. function keys have the highest input
priority.
3.4.1
Recorder button
Pressing the Recorder button immediately starts the recorder in standby mode i.
e. recorder screen is opened but recording is not started yet. Recording can be
started by pressing the recorder button (rec/pause) once again.
Storage media and audio quality / format settings can be selected via menu item
Recorder/Setup.
Recorder Screen at Recording
© 2008 MAYAH Communications
Front panel user Interface
Recorder Screen at Recording Pause
© 2008 MAYAH Communications
25
26
Manual for Flashman II
Recording functions and features:
· Pressing the Recorder button toggles between recording and rec/pause mode
· ·
·
·
·
( or II shown)
Pressing the Stop key stops recording and finalizes the recording file (n
shown)
Setting markers (except AAC/AAC (HE) file formats)
During the recording a marker can be set by pressing the OK button.
Coding settings in status bar
- Operational mode: mono (m) or stereo (s)
- Sample rate in kHz
- Coding algorithm
* L2 for MPEG L2
* L3 for MPEG L3
* HE for MPEG-4 HE AACv2
* AAC for MPEG-4 AAC Low Complexity
* LIN for linear
© 2008 MAYAH Communications
Front panel user Interface
27
- Bit rate in kbps (only shown for MPEG algorithms)
3.4.2
Playback button
Pressing the playback button starts immediately the playback of the currently
selected track.
By default the first track in MAYAH folder of the first inserted storage media is
selected.
Another track can be selected by
· pressing cursor buttons | }
· via menu item Recorder/Tracks
© 2008 MAYAH Communications
28
Manual for Flashman II
Playback functions and features:
· Pressing the Playback button toggles between play mode and play/pause
mode (u or u|| shown)
· Pressing the Stop key stops playback of file (n shown)
· Displaying markers
Markers are displayed as thin vertical lines on the progress bar.
· Play progress
Current playback position is shown as € on the progress bar.
· Coding settings in status bar
- Operational mode: Mono (m) or stereo (s)
- Sample rate in kHz
- Coding algorithm
* L2 for MPEG L2
* L3 for MPEG L3
* HE for AAC (HE)
* LIN for linear
- Bit rate in kbps (only shown for MPEG algorithms)
3.4.3
Connect button
Pressing the connect button opens a dialog with the following items:
· End Call
Disconnect a currently active connection
· Last
Possibility to establish one of the last 10 connections
· Phone book
Possibility to establish, create, edit or delete phone book entries
· Direct Dial
Possibility to establish directly IP, 3G/UMTS or WLAN (future option)
connections.
a) END (End Call)
© 2008 MAYAH Communications
Front panel user Interface
b) Last
© 2008 MAYAH Communications
29
30
Manual for Flashman II
The last 10 connections are stored. Select one with the cursor keys and establish
the referring connection with dial.
c) PH. B (Phone book)
© 2008 MAYAH Communications
Front panel user Interface
At the phone book screen up to 256 predefined phone book entries can be:
· Dialed (FLASHMAN II establishes a transmission)
· Edited
· Newly created
· Deleted
© 2008 MAYAH Communications
31
32
Manual for Flashman II
When a phone book entry is edited or newly created then the following
parameters can be set::
· Name (max. 256 chars; 8 chars recommended)
· Settings (optional parameter, usually "unused")
NOTE:
Settings are configurations as described in menu item System/Configurations
· Communication Interface (Ethernet, ISDN, 3/G/UMTS or WLAN)
· Protocol (just available if interface is selected to Ethernet, 3G/UMTS or
WLAN)
· Destination: Numbers or IP/SIP-addresses (optional)
d) DIR (Direct dial)
© 2008 MAYAH Communications
Front panel user Interface
Direct dial dialog establishes an IP connection using
· RTP
or
· SIP
via the interfaces
· Ethernet
· 3G/UMTS
· WLAN (future option)
3.4.4
Back light / Audio button
This button has two functionalities:
© 2008 MAYAH Communications
33
34
Manual for Flashman II
a) Back light
Holding of Back light/Audio button for two seconds switches the LCD display
back light on and off.
b) Headphones volume
Pressing the Back light/Audio button opens a pop-up dialog to control the
headphones volume and input mute.
Press cursor keys | } to control the volume.
Press OK key to activate / deactivate mute (both inputs).
3.5
Menu structure
The menu mode can be opened by pressing the menu key .
All settings which cannot be done by the function keys can be reached via the
menu.
© 2008 MAYAH Communications
Front panel user Interface
3.5.1
35
Recorder
Here Recording and Playback settings can be done.
3.5.1.1
Tracks
In the Tracks menu the desired track for playback can be selected out of the
following storage media devices:
· SD Card
· USB (USB storage media)
· PC Card (e.g. Compact Flash card with PCMCIA Adapter)
Furthermore the following actions can be done with the selected track:
· Pressing OK button will activate the PLAY/PAUSE icon below. To start
playback of the selected track OK button must be pressed once again.
· Delete by pressing the OK button once and then stepping to the "delete" icon
· Rename by pressing the OK button once and then stepping to the "rename"
icon
© 2008 MAYAH Communications
36
Manual for Flashman II
·
Continuous play mode can be activated and deactivated by pressing OK.
Continuous mode means that all listed tracks will be played continuously
starting from the currently selected track to the end of the list.
Also displayed is a following status information:
· audio format
· size of the selected track (file) in bytes
· length of the selected track (HH:MM:SS)
Note:
The last played or recorded track becomes a current default one for further
playback operations.
3.5.1.2
Setup
In this menu item the following recording parameters can be set:
· Quality (i.e. coding algorithm, bit rate, sample rate etc.)
· Storage (selection of the storage media)
© 2008 MAYAH Communications
Front panel user Interface
37
3.5.1.2.1 Quality
The desired recording quality can be chosen with the cursor buttons pq and
confirmed by pressing the OK button twice.
By factory default the following coding formats can be selected for recording:
·
·
·
L2 Mono:
- Algorithm: MPEG L 2
- Sample rate: 24 kHz
- Bit rate: 64 kbps
- Mode: Mono
L2 Joint Stereo:
- Algorithm: MPEG L2
- Sample rate: 32 kHz
- Bit rate: 128 kbps
- Mode: Joint stereo
L2 Stereo:
© 2008 MAYAH Communications
38
Manual for Flashman II
·
·
·
·
·
·
·
·
·
- Algorithm: MPEG L2
- Sample rate: 48 kHz
- Bit rate: 256 kbps
- Mode: stereo
L3 Mono:
- Algorithm: MPEG L3
- Sample rate: 32 kHz
- Bit rate: 64 kbps
- Mode: Mono
L3 Joint Stereo:
- Algorithm: MPEG L3
- Sample rate: 48 kHz
- Bit rate: 128 kbps
- Mode: Joint stereo
L3 Stereo:
- Algorithm: MPEG L3
- Sample rate: 48 kHz
- Bit rate: 192 kbps
- Mode: Stereo
AAC Mono:
- Algorithm: AAC (MPEG 4)
- Sample rate: 48 kHz
- Bit rate: 64 kbps
- Mode: Mono
AAC Stereo:
- Algorithm: AAC (MPEG 4)
- Sample rate: 48 kHz
- Bit rate: 128 kbps
- Mode: Stereo
AAC HE 24 Stereo:
- Algorithm: AAC (HE)
- Sample rate: 32 kHz
- Bit rate: 24 kbps
- Mode: Parametric stereo
AAC HE 64 Stereo:
- Algorithm: AAC (HE)
- Sample rate: 44.1 kHz
- Bit rate: 64 kbps
- Mode: Stereo
Linear Mono:
- Sample rate: 48 kHz
- Bit rate: 768 kbps
- Mode: Mono
Linear Stereo:
- Sample rate: 48 kHz
- Bit rate: 1,536 kbps (1.5 mbps)
© 2008 MAYAH Communications
Front panel user Interface
39
- Mode: Stereo
3.5.1.2.2 Storage
All detected storage devices are shown. Maximum 3 drives are listed:
· SD card
· USB media
· PC card
If multiple storage devices available, the desired medium for recording can be
chosen with the cursor buttons pq and confirmed by pressing OK button
twice.
The chosen storage device is indicated by a following symbol:
© 2008 MAYAH Communications
•
40
3.5.1.3
Manual for Flashman II
Card
The card menu supplies an overview (size, free space available) of all available
audio media storage devices:
· SD card
· USB (e.g. USB memory stick)
· PC card (e.g. Compact Flash card with PCMCIA slot adapter)
If storage device is not detected then it's not listed.
Card menu screen
On top the list of the available storage devices is displayed. Free space is
roughly indicated by the appropriate icons.
Exact information of the currently selected storage medium size and available
space is displayed below.
If multiple storage devices available, the desired medium can be selected with
© 2008 MAYAH Communications
Front panel user Interface
41
the cursor keys pq .
For every available storage device following utilities can be used:
· chkdisk (Check Disk utility)
This utility provides integrity check and error correction of the storage
medium. After the check it generates a report on the found and corrected file
system integrity errors.
· format (Format Disk utility)
FLASHMAN II can only save files (tracks) on a properly formatted storage
media. Usually storage media are preformatted by factory default. If this is not
the case this utility provides the possibility to format a storage media and
prepare it for use with the FLASHMAN II, as well as with any standard PC or
mobile devices.
WARNING! Format will delete any contents on the storage media.
3.5.2
Monitor
The Monitor menu supports the following:
· Gain adjustment and mixer matrix
· Configuration of audio inputs 1 and 2, as well as choosing a Mixer Mode
3.5.2.1
Mixer
The Mixer menu supports the following features:
· Gain adjustment for 2 audio inputs
· Virtual mixing console (levels & panorama)
· Saving and loading of up to 8 user mixer profiles
· Loading of up to 8 factory mixer profiles
For faster and easier control some mixer levels can be linked together. How this
can be done is determined in the Mixer Mode at menu item Monitor/Setup.
Structure of dialog and navigation
All mixer screens consist of 2 operational fields:
· mixer menu bar (below recording levels) with the entries:
- mem
- gain
- hp
- line
- rec
- send
·
level rotary knobs area
Change between the operational fields is possible with the OK button.
© 2008 MAYAH Communications
42
Manual for Flashman II
In the mixer menu bar the navigation is possible by the | } cursor keys.
In the rotary knobs' area adjustable levels and pannings can be selected with
the | } cursor keys. The currently adjustable levels and panning's are inverted
and marked by underscore.
With the pq cursor keys the level and panning adjustment can be done. The
panning or level state of the currently underlined control is shown on the right
side as a percentage.
In the diagram shown above the Left Receive level (rcvL) is set for Headphones
(hp)
When menu bar item 'mem' is selected it can be changed between factory
profiles and user profiles with the | } cursor keys.
© 2008 MAYAH Communications
Front panel user Interface
Note:
Escape to the main Mixer menu can be done by pressing ¢ | = button.
Menu items:
a) Mem
At this item 8 User mixer profiles and Factory mixer profiles can be loaded,
saved, edited or deleted.
Meaning of the Memory buttons for User profiles:
Load
Selected mixer profile becomes active
Save
Current mixer settings are saved in the currently selected mixer profile
Rename
Here the currently selected mixer profile can be renamed
Del
© 2008 MAYAH Communications
43
44
Manual for Flashman II
Clears all the settings in the currently selected mixer profile (i.e. loading such a
profile has no effect)
b) Gain Adjustment
The gain of the 2 audio inputs can be set.
c) hp (Headphones)
The level and the panning state of all possible inputs at headphones output can
be set.
Levels are shown in the upper row whereas panning's are shown in the bottom
row.
Possible inputs for headphones are:
· Audio input 1 and 2
· Decoder level (left and right)
Decoder level is the level of received audio from the other side of connection.
· Playback level (left and right)
This is the level of played files.
c) line
The level and the panning state of all possible inputs at line output can be set.
Levels are shown in the upper row whereas panning's are shown in the bottom
row.
Possible inputs for line output are:
· Audio input 1 and 2
· Decoder level (left and right)
Decoder level is the level of received audio from the other side of connection.
· Playback level (left and right)
This is the level of played files.
d) Rec
The level and the panning state of all possible inputs for recorded audio can be
set.
Levels are shown in the upper row whereas panning's are shown in the bottom
row.
Possible inputs for recording are:
· Audio input 1 and 2
· Decoder level (left and right)
Decoder level is the level of received audio from the other side of connection.
e) Send
The level and the panning state of all possible inputs for transmitted audio can
be set.
Levels are shown in the upper row whereas panning's are shown in the bottom
row.
Possible inputs for send are:
© 2008 MAYAH Communications
Front panel user Interface
·
·
Audio input 1 and 2
Playback level (left and right)
This is the level of played files.
NOTE:
Here is the full Mixer Matrix of FLASHMAN II
in1 in2 rcvL rcvR plyL plyR
hpL
hpR
lineL
lineR
recL
recR
sendL
sendR
3.5.2.2
Setup
Here the following can be set:
· Audio input mode
· Mixer Mode
© 2008 MAYAH Communications
45
46
Manual for Flashman II
3.5.2.2.1 Audio In
Audio In (Audio Input mode)
Here can be set how audio input 1 and 2 are used. It can be selected between
the inputs with the | } cursor keys.
a) Input
With OK button a dialog is opened which enables to select one of the following:
· line: line input
· mic: normal microphone input
· mic+: microphone input for high microphone levels (e.g. very loud
neighbourhood in football stadiums) or microphones with high output voltage;
in this mode microphone input is less sensitive but it can stand very high
levels.
Note:
· At line input the audio signal is attenuated before it's routed to an A/D
© 2008 MAYAH Communications
Front panel user Interface
47
converter. Therefore Gain (see Monitor/Mixer) can be set between 10.5 dBu
(left position) and 0 dBu (right position)
· At microphone input the audio signal is amplified by a pre-amp first by 46/26
dB. Afterwards the signal is attenuated before it's routed to an A/D converter.
Gain (see Monitor/Mixer) can be set approx. between -35.3 dBu (left position)
and -43.8 dBu (right position)
· Generally the mic+ input signal is treated similarly as line input signal (i.e. no
pre-amp). In opposite to line input the audio signal is amplified before it's
routed to an A/D converter. Therefore Gain (see Monitor/Mixer) can be set
between -10 dBu (left position) and 0 dBu (right position).
b) Mute Mode
FLASHMAN II supports the muting of the audio inputs 1 and 2 (see also function
key Back light / Audio).
Either
· Hold (default): an audio input can be muted when the referring function button
is hold
or
· Toggle: the muting can be toggled between 'on' or 'off' each time the referring
function button is pressed.
c) Limiter
The limiter guarantees that too high audio input levels are not just cut off (which
caused big distortions) but softly clipped.
d) HP filter
Just available for microphone input
This feature prevents that low frequencies at audio input damages audio
equipment.
e) 48 V
Just available for microphone input
48 V phantom power enables to use FLASHMAN II with condenser microphones
f) - 20 dB
Just available for microphone input (but not at mic+)
This feature enables the attenuate audio input by 20 dB.
© 2008 MAYAH Communications
48
Manual for Flashman II
3.5.2.2.2 Mix Mode
Mixer Mode
Settings done here affect the menu item Monitor/Mixer.
The mixer mode can be set to:
· All:
Change of the level/pan status of one audio output affects all audio outputs.
· Compact:
The audio outputs for 'record' and 'send' have got the same level and panning
settings. The same is true for 'hp' and 'line' outputs.
· Complete:
All mixer levels and pannings can be set independently.
Note:
All changes must be confirmed in a OK/Cancel Dialog.
© 2008 MAYAH Communications
Front panel user Interface
3.5.3
49
Codec
The codec menu supports the following features:
· Status of communication interface and coding during transmission
· Configuration of communication interfaces
· Coding settings (algorithm, sample rate, bit rate, operational mode)
3.5.3.1
Status
This screen displays the connection and coding info of the currently active
communication interface.
3.5.3.1.1 Interface
The contents of this screen depend on a last used interface or interface currently
in use.
The top line shows the interface and remains on screen all the time.
The information area below can be scrolled up and down using the cursor
buttons pq .
a) Ethernet
© 2008 MAYAH Communications
50
Manual for Flashman II
·
·
·
·
·
·
·
·
·
·
current protocol: SIP, RTP
connection time (if not connected 0)
connection quality (best, good, sufficient, bad)
local IP-address
remote IP-addr.: IP- or SIP-address of connection partner
input bit rate in kbps
output bit rate in kbps
jitter in ms
lost packets
These are packets lost during transmission and cannot be recovered.
dropped packets
These are packets received in a wrong sequence order. Since delay buffer is
not big enough these packets cannot be reordered and therefore they're
dropped. This can be improved by setting a higher delay buffer (see Codec/
Setup/Interface/Ethernet)
b) 3G/UMTS
·
·
current protocol: SIP, RTP
connection type: 3G (UMTS, HSDPA, HSUPA), GSM ( GSM, GPRS, EDGE)
NOTE:
How detailed the connection type is displayed depends on service provider
© 2008 MAYAH Communications
Front panel user Interface
·
·
·
·
·
·
·
·
·
·
·
51
connection time (if not connected 0)
connection quality (best, good, sufficient, bad)
signal strength (graphic & text)
- 3 bars: best
- 2 bars: good
- 1 bar: sufficient
- no bar: bad
- blinking: no connectivity
provider: Service provider ID
current local IP-address (as delivered by provider)
IP- or SIP-address of connection partner
input bit rate (IBR) in kbps
output bit rate (OBR) in kbps
jitter in ms
lost packets
These are packets lost during transmission and cannot be recovered.
dropped packets
These are packets received in a wrong sequence order. Since delay buffer is
not big enough these packets cannot be reordered and therefore they're
dropped. This can be improved by setting a higher delay buffer (see Codec/
Setup/Interface/Ethernet)
e) WLAN (future option)
·
·
·
·
·
·
·
·
·
·
·
current protocol: SIP, RTP
connection time (if not connected 0)
connection quality (best, good, sufficient, bad)
signal strength (graphic & text)
- 3 bars: best
- 2 bars: good
- 1 bar: sufficient
- no bar: bad
- blinking: no connectivity
current local IP-address
IP- or SIP-address of connection partner
input bit rate (IBR) in kbps
output bit rate (OBR) in kbps
jitter in ms
lost packets
These are packets lost during transmission and cannot be recovered.
dropped packets
These are packets received in a wrong sequence order. Since delay buffer is
not big enough these packets cannot be reordered and therefore they're
© 2008 MAYAH Communications
52
Manual for Flashman II
dropped. This can be improved by setting a higher delay buffer (see Codec/
Setup/Interface/Ethernet)
Note:
Parameters shown in this screen cannot be modified.
3.5.3.1.2 Coding
Here the current encoding parameters are displayed for both encoder and
decoder. It can be selected between them with | } cursor keys.
The coding status displays the following parameters for:
a) Encoder:
· Algorithm
· Sample rate
· Bit rate
· Mode
b) Decoder:
· Algorithm
· Sample rate
· Bit rate
© 2008 MAYAH Communications
Front panel user Interface
53
· Mode
Note:
Parameters shown in this screen cannot be modified.
3.5.3.2
Setup
In this setup menu the following configurations can be done
· Settings of all possible communication interfaces
· Coding settings (Quality)
3.5.3.2.1 Interface
Here all necessary configuration steps can be done for all communication
interfaces.
a) Ethernet
DHCP
DHCP (= Dynamic Host Configuration Protocol) enables FLASHMAN II to
configure its IP-settings (except of SIP) automatically with help of a DHCP server.
To enable DHCP set this parameter to 'client'.
© 2008 MAYAH Communications
54
Manual for Flashman II
Address
- sets the IP address for the appropriate interface. (e.g. 192.168.10.50) if DHCP
is deactivated.
Netmask
- sets the subnet mask for the appropriate interface. (e.g. 255.255.255.0) if
DHCP is deactivated.
Gateway
- sets the IP address of the default network Gateway (for the appropriate
interface) if DHCP is deactivated.
DNS Server
- sets the IP address of the DNS (= Domain Name System) server for the
appropriate interface if DHCP is deactivated.
Delay
- sets the size of the receive buffer in ms.
Max. possible value 5,000 ms.
Note:
RTP packets can be resorted if they are received not in the right order. The
higher the value is, the more packets can be resorted. Generally receive buffer
value should be bigger than average network jitter (see Codec/Status/Interface)
Note 2:
This delay buffer applies to all IP-based transmissions including Ethernet, 3G
and WLAN (future option) interfaces.
SIP (Session Initiation Protocol)
- configures all the parameters of SIP session.
© 2008 MAYAH Communications
Front panel user Interface
55
Globalproxy
Here the global proxy must be entered. The global proxy is responsible for how
SIP requests and messages are handled.
In this field an IP-address or a URL can be entered.
This setting is optional.
Stunserver
A STUN server (= Simple Transversal of UDP Through NATs) is necessary that a
client behind a NAT or NATs can find its public IP address. NAT stands for N
etwork Address Translation.
The public IP address is necessary since the SIP device on the other end needs
this info to find the local client.
In this field an IP-address or an URL can be entered.
This setting is optional.
Redials
Here can be set how often FLASHMAN II should try to reestablish a SIP
connection not disconnected by itself.
Account Id
Here the SIP registration profile can be selected.
Account active
Just an active profile causes a registration. However, only an inactive profile can
© 2008 MAYAH Communications
56
Manual for Flashman II
be changed.
Therefore at a new profile first ‘Active’ must be set to 'off'. After all registration
info is entered ‘Active’ must be set to 'on' to validate the registration.
Account Registrar
The Registrar is the SIP registration server which resolves the SIP address to a
real IP address. The SIP client must register itself to a Registrar first before it can
use its service.
In this field an IP-address or an URL can be entered.
The registration comprises the following access data:
- Name
- Password
- Phone Number (just necessary for a few registrars)
Account Phonenr
Here the phone number of the registration access data can be entered (max. 256
chars). This access data is just necessary for a few registrars.
Account Username
Here the name of the registration access data can be entered (max. 256 chars).
Account Password
Here the password of the registration access data can be entered (max. 256
chars).
b) 3G/UMTS
© 2008 MAYAH Communications
Front panel user Interface
57
PIN
PIN number of the SIM card must be entered
Attention!
Check if the PIN is entered correctly before insert the 3G/UMTS card.
FLASHMAN II provides the PIN to the SIM card automatically. Three false
attempts will block the SIM card.
APN (Access Point Name)
e.g. web.vodafone.de for Vodafone Germany
Technology
Here can be determined which connection type is prioritized by 3G/UMTS card.
Following selection is possible:
· GSM only: connect to GPRS/EDGE networks only
· 3G only: connect to UMTS/HSDPA/HSUPA networks only
· GSM first:: prefer GPRS/EDGE networks
· 3G first: prefer UMTS/HSDPA/HSUPA networks (default)
· No change: keep network once connected
· Auto: card decides
Domain
Here behaviour for the preferred domain inside the mobile cell can be set.
· Circuit switched only
© 2008 MAYAH Communications
58
Manual for Flashman II
·
·
·
·
·
·
Packet switched only
Any: Circuit and/or packet switched (default)
No preference
No change
Packet switched attach on demand
Packet switched detach on demand
Frequency
In different parts of the world different frequencies for 3G communication are
used. Here the appropriate frequency range can be set.
· Europe (default)
· U.S.
User
3G user identification
Password
User confirmation by password
Note:
Usually just PIN and APN must be entered.
Note 2:
If you are unsure about APN, Username and Password, please contact your
mobile service provider.
© 2008 MAYAH Communications
Front panel user Interface
3.5.3.2.2 Quality
Quality comprises the configuration of the following coding parameters:
· algorithm
· sample rate
· bit rate
· operational mode
The selected quality determines which coding settings are used at a
transmission.
By
·
·
·
·
·
default the following quality profiles are available and can be loaded:
G.711 (A-law): usually used in Europe
G.711 (µ-law): usually used in America and Japan
G.722
AptX nosync Stereo (optional):
- Algorithm: AptX no sync
- Sample rate: 48 kHz
- Bit rate: 384 kbps
- Mode: Stereo
AptX nosync Dual Mono (optional):
- Algorithm: AptX no sync
- Sample rate: 32 kHz
- Bit rate: 256 kbps
© 2008 MAYAH Communications
59
60
Manual for Flashman II
·
·
·
·
·
·
·
·
·
- Mode: Dual Mono
AptX Mono (optional):
- Algorithm: AptX
- Sample rate: 32 kHz
- Bit rate: 128 kbps
- Mode: Mono
AptX nosync Mono (optional):
- Algorithm: AptX no sync
- Sample rate: 32 kHz
- Bit rate: 128 kbps
- Mode: Mono
EaptX Stereo (optional):
- Algorithm: Enhanced AptX 16 bit
- Sample rate: 32 kHz
- Bit rate: 256 kbps
- Mode: Stereo
EaptX Mono (optional):
- Algorithm: Enhanced AptX 16 bit
- Sample rate: 48 kHz
- Bit rate: 192 kbps
- Mode: Mono
L2 Mono:
- Algorithm: MPEG L 2
- Sample rate: 24 kHz
- Bit rate: 64 kbps
- Mode: Mono
L2 Joint Stereo:
- Algorithm: MPEG L2
- Sample rate: 32 kHz
- Bit rate: 128 kbps
- Mode: Joint stereo
L2 Stereo:
- Algorithm: MPEG L2
- Sample rate: 48 kHz
- Bit rate: 256 kbps
- Mode: stereo
L3 Mono:
- Algorithm: MPEG L3
- Sample rate: 32 kHz
- Bit rate: 64 kbps
- Mode: Mono
L3 Joint Stereo:
- Algorithm: MPEG L3
- Sample rate: 48 kHz
- Bit rate: 128 kbps
- Mode: Joint stereo
© 2008 MAYAH Communications
Front panel user Interface
·
·
·
·
·
·
·
L3 Stereo:
- Algorithm: MPEG L3
- Sample rate: 48 kHz
- Bit rate: 192 kbps
- Mode: Joint stereo
AAC Mono:
- Algorithm: AAC (MPEG 4)
- Sample rate: 48 kHz
- Bit rate: 64 kbps
- Mode: Mono
AAC Stereo:
- Algorithm: AAC (MPEG 4)
- Sample rate: 48 kHz
- Bit rate: 128 kbps
- Mode: Stereo
AAC HE 24 Parametric Stereo:
- Algorithm: AAC (HE)
- Sample rate: 32 kHz
- Bit rate: 24 kbps
- Mode: parametric stereo
AAC HE 64 Stereo:
- Algorithm: AAC (HE)
- Sample rate: 44.1 kHz
- Bit rate: 64 kbps
- Mode: Stereo
Linear Mono:
- Sample rate: 48 kHz
- Bit rate: 768 kbps
- Mode: Mono
Linear Stereo:
- Sample rate: 48 kHz
- Bit rate: 1,536 kbps (1.5 mbps)
- Mode: Stereo
© 2008 MAYAH Communications
61
62
3.5.4
Manual for Flashman II
System
The system menu supports the following features:
· Saving/loading all settings of FLASHMAN II
· Configuration of some general settings which are usually set once
· Switching FLASHMAN II off
3.5.4.1
Configs
The configurations menu enables to save all current settings of FLASHMAN II in
a 'macro'. Such a macro can be used to restore easily a former scenario e.g . it is
not necessary to remember mixer, codec and other settings to reestablish the
transmission scenario to your studio last week.
Max. 50 configuration macros can be saved.
Automatically the configuration of the last connection is saved in a macro called
'last dial...'.
© 2008 MAYAH Communications
Front panel user Interface
63
A configuration can be selected with the cursor keys pq. The currently selected
configuration macro is highlighted (e.g. in picture above "03-Ethernet - Studio 1")
Following features are available:
a) Use
"Use" executes the currently selected configuration.
To prevent misuse the user will be asked if he/she really wants to execute this
configuration.
b) Rename
Rename selected configuration
c) New
Save all current settings of the FLASHMAN II in a macro. First the name of the
macro is been requested which can be 128 chars long.
© 2008 MAYAH Communications
64
Manual for Flashman II
d) Del
Deletes an already existing configuration macro in the list.
To prevent misuse the user will be asked if he/she really wants to delete this
configuration.
3.5.4.2
LCD
This menu item enables to:
· Switch on or off the back light of the front panel
Note:
In main screen holding of Back light/Audio button for two seconds also
switches the LCD display back light on and off.
· Adjust the contrast of the LCD display with the cursor buttons | }
© 2008 MAYAH Communications
Front panel user Interface
65
3.5.4.3
Display
This menu item enables to:
· Set file playback time display to "elapsed time" or "remaining time" (default)
3.5.4.4
Miscellaneous
At Miscellaneous menu item the general settings of FLASHMAN II can be set or
requested.
The different items can be selected via a list box with the cursor buttons pq .
The currently chosen item is highlighted.
The scroll bar on right side indicates the position in the referring list. An empty
scroll bar means that the whole list is shown on the screen.
The miscellaneous start screen looks like:
a) Device ID
© 2008 MAYAH Communications
66
Manual for Flashman II
This screen enables to edit the name of FLASHMAN II (max. 128 characters).
Furthermore the serial number can be requested but not changed.
b) Date & Time
This screen enables to:
· Set time
· Set date
· Set time format
Selection between:
- 12 h AM/PM
- 24 h
· Set date format
Selection between:
- YYYY-MM-DD (Year-month-day)
- MM/DD/YYYY (Month/Day/Year)
- DD.MM.YYYY (Day.Month.Year)
© 2008 MAYAH Communications
Front panel user Interface
67
c) System health
This screen informs about the following system parameters:
· Temp: System temperature
· PSU (power supply unit) informs about power supply state:
- on at AC supply
- n.a. at battery supply
· Bat: remaining battery capacity as percentage value
· Time:
- Calculated remaining battery capacity in hours and minutes at battery supply
- n.a. at AC supply
d) Versions
Here the firmware version of the FLASHMAN II is displayed.
e) Accept Mode
Here can be set if incoming calls (via Ethernet, UMTS/3G or WLAN) are
accepted
· automatically (default)
or
· manually
f) Expert Mode
Here can be set if FLASHMAN II runs in either
· Expert Mode (default)
or
© 2008 MAYAH Communications
68
Manual for Flashman II
· User Mode
In User Mode the front panel menu tree is simplified.
g) Timeouts
Here the following timeouts can be set:
· Disconnect:
This timeout defines the period (in seconds) after which a connection is
dropped if no valid framing is achieved. Ideally, it should be set higher than
the Stat. framing timeout value.
Its default value is 45 seconds.
Note:You can enter values other than those shown, but the maximum
possible value is 9,999 seconds.
· Stat. framing (usually have no meaning at IP transmissions)
This timeout defines the period (in seconds) after which FLASHMAN II
switches automatically to G.722 SRT coding at non-IP-transmissions.
· Remote control
This timeout defines the period (in seconds) after which an idle IP remote
control session is closed automatically. The default value is 100 seconds.
Note:
This timeout can be helpful if a remote session was interrupted by the
network (e.g. faulty switch) and new remote control attempts are blocked by
FLASHMAN II since it is 'convinced' it is still remote controlled (but it isn't).
· AJC
The feature AJC (= Automatic Jitter Compensation) provides an automatic
adaptation of the IP transmission to network capabilities when using the
interfaces Ethernet, 3G or WLAN (future option).The AJC optimizes the
following parameters at:
Encoder side:
The information provided by the peer via RTCP is used for evaluating the
network capabilities.
If applicable the packet size is increased first, to improve the transmission.
Please keep in mind that a bigger packet size results in less IP overhead. If
increasing packet size does not lead to satisfactory results then secondly the
encoder bit rate will be reduced automatically.
Decoder side
If necessary the audio delay is increased to adapt the transmission to given
network conditions.
Increasing the audio delay is achieved by increasing the receive buffer.
Note:
For both encoder and decoder the following parameters can be set
independently:
a) mode: AJC is switched on or off. (default: on)
b) period: Set evaluation time (by default 30 seconds)
© 2008 MAYAH Communications
Front panel user Interface
3.5.4.5
69
Switch Off
To Prevent accidental switch off this must be done via this menu item.
"Switch OFF" dialog looks like this:
Since "cancel" is the default selection just pressing the OK button (which can
happen accidentally) has no effect.
To switch off FLASHMAN II the user must first press the cursor button } to select
"OK" and then confirm this selection by pressing the OK button.
© 2008 MAYAH Communications
Part
IV
How to use for
72
4
Manual for Flashman II
How to use for
This chapters supplies recipes for special applications.
4.1
Recording during Transmission
Following steps must be done:
a) Set Mixer
To guarantee that the right audio is recorded the appropriate mixer settings
should be done at menu item Monitor/Mixer at item 'rec' if previously not
configured.
For instance:
If just the received audio should be recorded just the levels 'rcvL' and 'rcvR' must
be in a different position than 0% (left position).
Note:
© 2008 MAYAH Communications
How to use for
73
If feature 'recording during transmission' is often used a special mixer user
profile can be saved.
b) Establish connection
Establish connection by pressing the Connect button
c) Start Recording
After transmission is established the following steps must be done:
· Select the storage media at menu item Rec/Setup/Storage (if multiple storage
media are available)
· Start recording by pressing the Recorder button.
Note:
During transmission just quality 'linear 16 bit stereo' can be used.
d) Typical Applications
· Audio logging of received audio
· 3 point interview recording (remote studio, reporter, guest)
4.2
Playback during Transmission
Following steps must be done:
a) Set Mixer
To guarantee the right level ratio between live audio and playback audio the
appropriate mixer settings should be done at menu item Monitor/Mixer at item
'send' if previously not configured.
For instance:
If just a formerly recorded file should be transmitted just the levels 'plyL' and
'plyR' should be in a different position than 0% (left position).
© 2008 MAYAH Communications
74
Manual for Flashman II
Note:
If feature 'playback during transmission' is often used a special mixer user profile
can be saved.
b) Establish connection
Establish connection by pressing the Connect button
c) Start Playback
After transmission is established the following steps must be done:
· Select the right file at menu item Rec/Tracks
· After selection of the right file start playback by pressing OK button twice
Note:
During transmission just files with quality 'linear 16 bit stereo' can be used.
d) Typical Applications
· Nice background music for your live report
· An earlier recorded report can be transmitted later
© 2008 MAYAH Communications
Part
V
Technical specifications
76
5
Manual for Flashman II
Technical specifications
Enter topic text here.
5.1
General Technical Specifications
Audio Specification
A/D, D/A converter
Frequency range
Signal-to-Noise Ratio
Distortion Factor
Input Impedance
Output Impedance
L/R phase difference
Coding formats (Algorithms)
G.711
G.722
MPEG L2
MPEG L3
AAC (MPEG2)
AAC (MPEG4)
AAC (HEv2)
Linear (PCM)
Std. APT-X
Enh. APT-X
File formats
Linear (PCM), .wav
MPEG L2 "Musifile", .msf
24 Bit
<= 10 Hz to 21.4 kHz (48 kHz, -3 dB)
>= 94 dB (linear PCM)
<= 0.05%
> 10 kOhm
< 100 Ohm
< 0.5°
48 - 64 kbps, 8 kHz
48 - 64 kbps, 16 kHz
16 - 384 kbps, 8 - 48 kHz
8 - 320 kbps, 8 - 48 kHz
8 - 320 kbps, 8 - 48 kHz
8 - 320 kbps, 8 - 48 kHz
8 - 128 kbps, 24 - 48 kHz
16bit, 20 bit, 24 bit, 32 - 48 kHz
16bit, 20 bit, 24 bit, 32 - 48 kHz
16bit, 20 bit, 24 bit, 32 - 48 kHz
16bit, 20 bit, 24 bit, 32- 48 kHz, Mono, Stereo
64 - 256 kbps, 24 - 48 kHz, Mono, Joint Stereo,
Stereo
MPEG L3, .mp3
64 - 192 kbps, 32 - 48 kHz, Mono, Joint Stereo,
Stereo
AAC (coding format loas, file format raw), .aac 64 - 128 kbps, 48 kHz, Mono, Stereo
HE AACv2 (coding format loas, file format raw), 24 - 64 kbps, 32 kHz, 44.1 kHz, Stereo
.aac
Std. APT-X, .apt
16bit, 20 bit, 24 bit, 128 - 384 kbps, 32 - 48 kHz
Enh. APT-X, .apt
16bit, 20 bit, 24 bit, 192 - 384 kbps, 32 - 48 kHz
Display
LCD
Monochrome, 64x128 pixel
Audio Interfaces
Mic/Line In
2xXLR, mono, 48V phantom power, balanced
Line Out
1x 1/4" headphone plug, stereo, unbalanced
Headphones
1x 1/4" headphone plug, stereo, unbalanced
IT interfaces
Ethernet (IEEE 802.3)
10/100 Mbps, RJ45
USB
A-type
USB
mini USB
SD
card slot
PCMCIA
card slot
IP Protocols
RTP
Audio transmission
SIP
Initiation and termination of audio transmissions
FTP
File transfer, update
© 2008 MAYAH Communications
Technical specifications
HTTP
Power Supply
PSU (= Power Supply Unit)
Rechargeable Battery
Charging Station
Environmental Conditions
Temperature for continuous operation
Temperature for short term operation
Weight
Device
Battery
Power Supply
Dimensions
Width
Height
Depth
© 2008 MAYAH Communications
Web Control
external, 100-240V AC, 50-60 Hz
Lithium-Ion, 14V, 2000 mAh
5 to +35° C (41 to 95° F)
5 to 45 ° C (41 to 113° F)
0,75 kg
0,20 kg
0,15 kg
130 mm
180 mm
55 mm
77
Index
Index
-DDate 65
DHCP 53
Direct dial button 28
Display 64
Display options 65
DNS 53
-33G 53
3G/UMTS
28
-A-
-E-
AC/DC powersupply 7
Accept mode 65
Audio configuration 41
Audio In 45
Audio media storage device
Automatic accept 65
40
33
© 2008 MAYAH Communications
11
First start 10
FLASHMAN II case 8
Front panel user interface
Function buttons 13
Function keys 24
18
-GGateway 53
General settings
-CCF card 8, 35, 40
Codec configuration 49
Codec settings 53, 59
Codec status 49
Codes setup 53
Coding status 52
Communication Interface
Configurations 62
Connectors 11
Contrast 64
Control keys 22
Cursor buttons 13
Cursor keys 22
Elapsed time 65
Escape key 22
Ethenet 28
Ethernet 53
Ethernet connector
-F-
-BBack light 33
Back light /Audio button
Backlight 64
Battery charger 7
Battery recharger 10
Before start 10
Buttons 13
79
62
-H-
53
Headphones volume 33
Hirose HR10 11
How to use for 72
How to use for playback during transmission 73
How to use for record during transmission 72
HSUPA 53
-IIN/MENU button 13
Interface configuration
Interface status 49
Interfaces 11
53
80
IP
Manual for Flashman II
53
-LLEVEL/LIGHT button
13
-Mmacro 62
Main features 6
Manual accept 65
Menu 34
Menu key 22
Menu mode 22
Miscellaneous Settings
Mix mode 45
Mixer 41
Mixer profiles 41
Monitor 41
65
Name 65
Netmask 53
-O22
-P-
Scope of Delivery 7
SD card 35, 40
SD memory card 8
SDHC memory card 8
Serial number 65
SIP 53
STOP button 13
Stop key 22
Storage device 39
Switch off 69
Switching on 22
Switching On And Off 15
System health 65
System settings 62
-T-
PC card storage 35
PCMCIA memory card
Phonebook 28
Playback button 27
Playback Configuration
Playing files 27
Playing tracks 27
-QQuality
62
-S-
-N-
OK button
Rechargeable battery 7
Recharger 7, 10
Reconstruction of a former scenario
Recorder button 24
Recorder configuration 35
Recorder setup 36
Recording 24
Recording quality 37
Recording storage device 39
Remaining time 65
RTP 53
37, 53, 59
-RRebooting
8
35
Technical specification 76
Time 65
Transmission setup 49
-UUMTS 53
UMTS card 8
USB A-Type connector
USB mini port 11
USB stick 8, 40
USB storage 35
Useful Accessories 8
11
15
© 2008 MAYAH Communications
Index
-WWhat is FLASHMAN II
WLAN 28
WLAN card 8
© 2008 MAYAH Communications
6
81