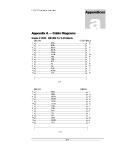
1
CENTAURI II User Manual
Copyright: 2008 Mayah Communications
MAYAH, CENTAURI, FLASHCAST are registered Trademarks. All other trademarks are acknowled with this.
CENTAURI II User Manual as of System Softwareversion 3.2.0.139.
Order-No. CIIUM001
Revision February/2008
Copyright: 2008 Mayah Communications
For copying this manual, even by extract, an explicit written permission of Mayah Communication GmbH is required.
Contents
3
List of Contents
0
Part I Introduction
9
1 Preface...................................................................................................................................
9
2 Setup/Installation
...................................................................................................................................
10
3 Scope...................................................................................................................................
of Delivery
10
4 Environment
...................................................................................................................................
and Operating Conditions
11
5 Connectors
...................................................................................................................................
11
Part II Necessary settings for framed
connections
14
1 FlashCast
...................................................................................................................................
technology and different kind of codecs
14
2 ISDN ...................................................................................................................................
Compatibility List
15
3 How to
...................................................................................................................................
get a framed ISDN connection to ..
17
another MAYAH
.........................................................................................................................................................
codec
17
SendIt
......................................................................................................................................................... 18
CDQPrima/CDQ1000/CDQ2000/CDQ2001/Telos
.........................................................................................................................................................
Zephyr
18
Telos Xstream ......................................................................................................................................................... 21
Musictaxi VP Pro
......................................................................................................................................................... 22
Musictaxi VP ......................................................................................................................................................... 23
AETA Hifiscoop/AETA
.........................................................................................................................................................
Scoopy/You Com Set 2
24
AVT/PKI telephone
......................................................................................................................................................... 26
a Glensound G.722
.........................................................................................................................................................
codec
27
AVT Magic
......................................................................................................................................................... 28
a MAYCOM Easycorder
......................................................................................................................................................... 30
a normal telephone
......................................................................................................................................................... 30
an APT-X codec
......................................................................................................................................................... 31
4 How to
...................................................................................................................................
establish IP connections
33
Configuration of
.........................................................................................................................................................
Centauri Network Card
33
Unicast versus.........................................................................................................................................................
Multicast
34
Unicast UDP
......................................................................................................................................................... 34
Unicast RTP
......................................................................................................................................................... 35
TCP
......................................................................................................................................................... 37
Multicast UDP ......................................................................................................................................................... 37
Multicast RTP ......................................................................................................................................................... 40
Http Streaming......................................................................................................................................................... 41
RTP Streaming.........................................................................................................................................................
to Ganymed 1002
42
SDP Streaming......................................................................................................................................................... 43
SAP Streaming......................................................................................................................................................... 46
SIP connections
......................................................................................................................................................... 48
MPEG Transport
.........................................................................................................................................................
Stream
52
IP Ports
......................................................................................................................................................... 56
IP Overhead
......................................................................................................................................................... 57
Optimize IP Connections
......................................................................................................................................................... 60
Winsock Error .........................................................................................................................................................
codes
62
Forward Error Correction
.........................................................................................................................................................
(FEC)
62
Copyright: 2008 Mayah Communications
4
CENTAURI II User Manual
5 How to
...................................................................................................................................
establish X.21/V.35 connections
66
X.21 versus V.35
......................................................................................................................................................... 66
X.21 clocking ......................................................................................................................................................... 66
DTE versus DCE
......................................................................................................................................................... 66
Mayah codec (DTE)
.........................................................................................................................................................
to Mayah codec (DTE)
67
MAYAH codec .........................................................................................................................................................
(DTE) to another X.21/V.35 codec
70
MAYAH codec .........................................................................................................................................................
(DCE) to MAYAH codec (DTE) via crossover cable
73
6 How to
...................................................................................................................................
establish ASI connections
ASI Basics
75
......................................................................................................................................................... 75
78
Part III Elements of Frontpanel Control
1 Preface
...................................................................................................................................
78
2 LED'S...................................................................................................................................
79
Level LED'S ......................................................................................................................................................... 79
Status LED's ......................................................................................................................................................... 80
3 Keyboard
...................................................................................................................................
Hot Keys
81
......................................................................................................................................................... 81
Function Keys ......................................................................................................................................................... 82
Arrow Keys
......................................................................................................................................................... 82
Numeric Keypad
......................................................................................................................................................... 83
4 Mask ...................................................................................................................................
Display and Key Control
84
5 Connect
...................................................................................................................................
Menu
84
Disconnect
......................................................................................................................................................... 84
Connect
......................................................................................................................................................... 84
Last
......................................................................................................................................................... 85
Phonebook
......................................................................................................................................................... 85
Session
......................................................................................................................................................... 85
Interface
......................................................................................................................................................... 85
FEC mode
......................................................................................................................................................... 86
Subcodec
......................................................................................................................................................... 86
6 Status...................................................................................................................................
Menu
Level Status
86
......................................................................................................................................................... 86
Encoder Status......................................................................................................................................................... 87
Decoder Status......................................................................................................................................................... 87
Lines Status
......................................................................................................................................................... 87
7 Presets
...................................................................................................................................
Menu
87
New Session Entry
......................................................................................................................................................... 87
Edit Session Entry
......................................................................................................................................................... 88
Delete Session.........................................................................................................................................................
Entry
88
New Phonebook
.........................................................................................................................................................
Entry
88
Edit Phonebook
.........................................................................................................................................................
Entry
89
Delete Phonebook
.........................................................................................................................................................
Entry
89
New Profile Entry
......................................................................................................................................................... 90
Edit Profile Entry
......................................................................................................................................................... 93
Delete Profile Entry
......................................................................................................................................................... 93
8 Setup...................................................................................................................................
Menu
94
Audio Encoder......................................................................................................................................................... 94
Audio Decoder......................................................................................................................................................... 98
Audio Settings
......................................................................................................................................................... 101
Audio In/Out .................................................................................................................................................. 101
Copyright: 2008 Mayah Communications
Contents
5
Mono Channel
..................................................................................................................................................
Mix
102
Analog Levels.................................................................................................................................................. 102
Audio Settings.................................................................................................................................................. 103
Digital Out Synchonisation
.................................................................................................................................................. 103
Interface
......................................................................................................................................................... 104
Communication
..................................................................................................................................................
Interface
104
ISDN
.................................................................................................................................................. 104
X.21
.................................................................................................................................................. 107
Network
.................................................................................................................................................. 108
Security
Frontpanel
.................................................................................................................................................. 111
......................................................................................................................................................... 113
Frontpanel
.................................................................................................................................................. 113
Headphone .................................................................................................................................................. 114
Levelmeter
.................................................................................................................................................. 114
Miscellaneous......................................................................................................................................................... 115
Subcodec
.................................................................................................................................................. 115
Dualmode
.................................................................................................................................................. 116
Multipoint
.................................................................................................................................................. 116
Gateway
.................................................................................................................................................. 117
Backup Mode.................................................................................................................................................. 117
Language
.................................................................................................................................................. 118
Identification .................................................................................................................................................. 118
Versions
.................................................................................................................................................. 119
Factory Default
.................................................................................................................................................. 119
Timeouts
.................................................................................................................................................. 120
Ancillary
.................................................................................................................................................. 121
Time Settings.................................................................................................................................................. 123
G.711 Options
.................................................................................................................................................. 125
Reboot
.................................................................................................................................................. 126
System Update
.................................................................................................................................................. 126
Journal
......................................................................................................................................................... 127
System Health......................................................................................................................................................... 128
Part IV Elements of Web Remote
130
1 Preface
...................................................................................................................................
130
2 First...................................................................................................................................
Steps
130
3 Login
...................................................................................................................................
131
4 Main...................................................................................................................................
Window
133
5 Main...................................................................................................................................
Menu
133
Connect Menu......................................................................................................................................................... 134
Disconnect Menu
......................................................................................................................................................... 134
Phonebook Menu
......................................................................................................................................................... 135
Mayah Website
......................................................................................................................................................... 135
6 Settings
...................................................................................................................................
Menu
136
ISDN
......................................................................................................................................................... 136
Network
......................................................................................................................................................... 138
Codec
......................................................................................................................................................... 139
Audio
......................................................................................................................................................... 143
Others
......................................................................................................................................................... 144
7 Expert
...................................................................................................................................
Menu
Profiles
Copyright: 2008 Mayah Communications
148
......................................................................................................................................................... 148
6
CENTAURI II User Manual
8 Status
...................................................................................................................................
Menu
149
Identification ......................................................................................................................................................... 149
Time
......................................................................................................................................................... 151
Software
......................................................................................................................................................... 151
Hardware
......................................................................................................................................................... 152
Health
......................................................................................................................................................... 152
9 Help...................................................................................................................................
Menu
153
Manual
......................................................................................................................................................... 153
About
......................................................................................................................................................... 153
Release Notes......................................................................................................................................................... 154
156
Part V Elements of Centauri II Remote
1 Preface
...................................................................................................................................
156
2 Language
...................................................................................................................................
Request Dialog at start
156
3 File Menu
...................................................................................................................................
159
Save Phonebook
......................................................................................................................................................... 159
Save Settings......................................................................................................................................................... 160
Load Centauri.........................................................................................................................................................
File
161
Display Log file
......................................................................................................................................................... 162
Exit
......................................................................................................................................................... 163
4 Settings
...................................................................................................................................
Menu
163
ISDN configuration
......................................................................................................................................................... 163
X.21 configuration
......................................................................................................................................................... 167
Network configuration
......................................................................................................................................................... 169
Codec configuration
......................................................................................................................................................... 171
Audio configuration
......................................................................................................................................................... 176
Ancillary Data.........................................................................................................................................................
configuration
178
SIP configuration
......................................................................................................................................................... 180
Others configuration
......................................................................................................................................................... 182
Remote settings
.........................................................................................................................................................
(manual)
187
Remote settings
.........................................................................................................................................................
(automatic)
190
5 Expert
...................................................................................................................................
Menu
192
Direct command
......................................................................................................................................................... 192
System Reset......................................................................................................................................................... 194
Time Control ......................................................................................................................................................... 195
Set IP/ISDN Password
......................................................................................................................................................... 197
Set FTP Password
......................................................................................................................................................... 198
Profiles
......................................................................................................................................................... 199
Phonebook
......................................................................................................................................................... 200
Sessions
......................................................................................................................................................... 201
ISDN Services......................................................................................................................................................... 203
Options
......................................................................................................................................................... 204
Update via RS232
......................................................................................................................................................... 211
Update via ISDN
......................................................................................................................................................... 212
Update via FTP
......................................................................................................................................................... 213
Update via Internet
......................................................................................................................................................... 214
Set Key Code......................................................................................................................................................... 215
6 Status
...................................................................................................................................
Menu
217
Identification ......................................................................................................................................................... 217
Time
......................................................................................................................................................... 219
System Software
......................................................................................................................................................... 220
Copyright: 2008 Mayah Communications
Contents
7
Hardware
......................................................................................................................................................... 222
Health
......................................................................................................................................................... 223
RTP Statistics......................................................................................................................................................... 227
7 Help...................................................................................................................................
Menu
Manual
229
......................................................................................................................................................... 229
Mayah Homepage
......................................................................................................................................................... 229
Info About
......................................................................................................................................................... 229
8 Wheel
...................................................................................................................................
button dialogs and Special Keys
231
Phonebook dialog
......................................................................................................................................................... 231
Connect dialog
......................................................................................................................................................... 232
Disconnect Dialog
......................................................................................................................................................... 237
Hot Keys
......................................................................................................................................................... 238
Short Cut Keys
......................................................................................................................................................... 238
9 Main...................................................................................................................................
Window
242
Main Window ......................................................................................................................................................... 242
Part VI Miscellaneous
247
1 Multiple
...................................................................................................................................
Centauri Control
247
2 Registry
...................................................................................................................................
Entries of Remote
248
3 Mandatory
...................................................................................................................................
Files of Remote
251
4 Command
...................................................................................................................................
Line Parameters of Remote
252
5 Helpful
...................................................................................................................................
Readmes
254
6 Most...................................................................................................................................
frequent ETSI ISDN Error Messages
255
7 Ancillary
...................................................................................................................................
Data Background
262
8 GPIO...................................................................................................................................
Interface
266
9 Backup
...................................................................................................................................
feature
268
10 Gateway
...................................................................................................................................
feature
272
11 Technical
...................................................................................................................................
specifications
277
12 Declaration
...................................................................................................................................
of Conformity Class A
278
13 Declaration
...................................................................................................................................
of Conformity Class B
279
Index
Copyright: 2008 Mayah Communications
281
Part
I
Introduction
1
Introduction
1.1
Preface
9
The devices of the
family are professional audio gateways. In
other words they are audio codecs with extensive network ability (Internet,
Intranet, LAN, WAN). They support all common coding procedures and
transmission protocols.
Similar to the introduction of the precursor, the CENTAURI, in the year 2000,
the
is his competitors ahead and offers you additional features to
be unparalleled.
The concept of the audio gateways is a new dimension in quality, handling and
Copyright: 2008 Mayah Communications
10
CENTAURI II User Manual
flexibility at audio transmissions.
The CENTAURI family offers both analogue and digital audio (compliant with
AES/3) at up to 96kHz sampling rates, with 24-bit resolution A/D and D/A
converters. Coding algorithms such as G.711, G.722, MPEG-1/2 Layer 2,
MPEG-1/2 Layer 3, MPEG-2/4 AAC, AAC (LD), AAC (HE), MP3PRO, APT-X
and Enhanced APT-X are all available, in addition to its’ ability to handle linear
audio. All of which, combined with networking via ISDN, X.21, V.35 and
Ethernet, further serve to illustrate the CENTAURI Family uniqueness.
The largest improvements to the very successful CENTAURI I are:
1.2
·
The Gateway functionality
·
The Backup functionality
·
The Point to Multipoint functionality
·
The Dual Codec functionality
·
The Multi channel functionality (e.g. 5.1 transmission)
Setup/Installation
Attention!
a) Installation in rack
When installing the
in a rack or another assembly you should make
sure that the housing rests on a guide rail or cross brace etc. so that they can
bear the weight of the device. The device must rest on a support and not just
fixed onto the front plate.
b) Connecting cables
The following should be considered to comply with declaration on conformity as
described in the chapters Miscellaneous/Declaration of Conformity Class A and
Miscellaneous/Declaration of Conformity Class B:
Connecting cables for monitor, keyboard and USB must not be connected to the
device while it is in use for normal function. This is to avoid distortion at other
devices nearby.
Connecting cables for audio, RS232, network and ISDN must have an HF-shield
and have to be connected to an appropriate device to avoid distortion at other
devices nearby.
1.3
Scope of Delivery
The scope of delivery can vary. Please consult the packing list inside of
package.
Copyright: 2008 Mayah Communications
Introduction
1.4
11
Environment and Operating Conditions
Attention!
Do not subject the device to damp (e.g. proximity to humidifiers etc.),
heat (e.g. proximity to radiators, direct sunlight) or mechanical stress
(e.g. shaking)! Make sure that the ventilation openings of the device are
not obstructed when the device is in operation, so that the air exchange
necessary for the cooling of the device is not hindered!
The detailed environment and operating conditions are to be found in the
chapter Miscellaneous/Technical Specifications.
1.5
Connectors
Note 1:
Instead of the ASI-output card a X.21/V.35 card or a second network card can be
optionally ordered.
Note 2:
The plugs for the X.21 connection does not conform to standards. Instead of the
usual 15 contacts in two rows (SubD), the socket plugs on the rear of the
CENTAURI II 3000/3001 has 26 contacts in three rows (HD). The socket plugs
can thus be used either as V.35 or X.21 connection. A corresponding cable with
Copyright: 2008 Mayah Communications
12
CENTAURI II User Manual
the necessary pin configuration can be obtained from MAYAH.
Note 3:
The connectors for monitor (VGA), keyboard (PS2) or USB are just for
maintenance purpose. For regular use nothing should be connected at these
ports.
Copyright: 2008 Mayah Communications
Part
II
14
CENTAURI II User Manual
2
Necessary settings for framed connections
2.1
FlashCast technology and different kind of codecs
Remote versus local
When dependency is set to remote,
uses FlashCast
technology at ISDN and X.21/V35 connections. FlashCast technology means
that the
analyses the data stream for header or inband
information, and uses these information to emulate the other side codec.
When dependency is set to local then
encode respectively
decode the audio data according to the codec settings (see Settings/Codec)
regardless if framing is reached or not.
However, emulating codecs can mean different behaviour depending on the
fact if
communicate with codecs using either “handshake” or not.
Furthermore not all encoded audio data includes any header or inband
information which can be evaluated by FlashCast technology.
MPEG codecs using handshake
When a connection is established between codecs using handshake, always
the codec which establishes the connection determines the parameter of the
connection. The most wide spread codecs using handshake are:
· CENTAURI (with dependency = remote)
· CENTAURI II (with dependency = remote)
· MERKII (with dependency = remote)
· Worldnet Tokyo
· SendIt
· Musictaxi
· Opticodec
For instance:
If
(1) dials to
(2), then
(1) determines
the quality of the transmission by its configuration.
MPEG codecs without handshake
MPEG codecs without handshake just pump out their audio data after the
ISDN connection is established regardless if they are called or if they initiate
the call.
The most wide spread codecs without handshake:
· CDQPrima
· CDQ2000/2001
· CDQ1000
· Telos Zephyr
· Telos Xstream
· Roadrunner
For Instance:
If a
is connected to a CDQPrima, then always the CDQPrima
Copyright: 2008 Mayah Communications
Necessary settings for framed connections
determines the settings of the connection. The
CDQPrima and follows its settings.
15
emulates the
MPEG codecs using J.52
Generally the J.52 standard comprises two main features:
· Inverse Multiplexing according to H.221 standard
· Capability exchange according to H.221 and H.242 standard
At J.52 transmissions there is a capability exchange between both codecs
after connection is established. This capability exchange guarantees that
always the maximum quality is used for encoding. This maximum quality is
determined by the maximum quality which can decoded by the other codec.
The most wide spread J.52 codecs are:
· CENTAURI
· CENTAURI II
· MERKII
· Worldnet Tokyo
· AVT Telephone
· AVT Magic
For instance:
If a
calls a AVT Magic using MPEG L2, it is possible that it
receives MPEG L3 audio data since this is the maximum quality between
these two codecs. If you want to know how to prevent this asymmetric coding,
please consult How to get a framed ISDN connection to AVT Magic.
APT-X codecs
The APT-X data stream does not include any header or inband information
which can be evaluated by the FlashCast technology. Therefore
must be configured properly for the APT-X transmission. You get more info
about at How to get a framed ISDN connection to an APT-X codec.
4SB ADPCM codecs
The 4SB ADPCM data stream does not include any header or inband
information which can be evaluated by the FlashCast technology. Therefore
must be configured properly for the 4SB ADPCM transmission.
You get more info about at
· How to get a framed ISDN connection to AETA Hifiscoop 3/AETA Scoopy/
You Com Set2
· How to get a framed ISDN connection to Musictaxi VP Pro
2.2
ISDN Compatibility List
This is just a short survey of the extensive compatibility features of the
. Please consult How to get a framed ISDN connection to.. for
more detailed information.
Copyright: 2008 Mayah Communications
16
CENTAURI II User Manual
Legend:
·:
o:
-:
<space>:
compatible
incompatible
not implemented in foreign codec
not tested yet or no need
Note :
can support the following AAC algorithms:
· AAC (MPEG2)
· AAC (MPEG4)
· AAC (LD)
· AAC (HE)
· AAC (DRM)
Note 2:
can support the following APT-X algorithms:
Copyright: 2008 Mayah Communications
Necessary settings for framed connections
·
·
·
·
·
17
Standard APT-X
Standard APT-X no sync.
Enhanced APT-X 16 bit
Enhanced APT-X 20 bit
Enhanced APT-X 24 bit
2.3
How to get a framed ISDN connection to ..
2.3.1
another MAYAH codec
Symmetric G.711/G.722/MPEG connections
Symmetric connections use the same transmission parameters for sending (i.
e. encoding) and receiving (i.e. decoding).
In this case the encoder and decoder dependency should be set to remote
and the IMUX format should be set to auto (see remote menu item Settings/
Codec). If encoder and decoder follows remote the calling
determines the parameters of this Centauri-Centauri connection. Both
CENTAURI’s communicate to each other by telegrams. These parameters are
transmitted to the called Centauri after the ‘ISDN answer delay’ timeout is
expired (see remote menu item Settings/Others). This timeout starts when the
first B-channel is established. Due to prevent that the parameters are sent out
before all B-channels are established the ‘ISDN answer delay’ timeout should
be set to min. 3000 ms.
Furthermore IMUX format auto means the following at a Centauri-Centauri
connection:
· 1 B-channel transmission: No inverse multiplexing is used
· 2 B-channel transmission: Musictaxi bonding is used
· 3 to 6 B-channel transmission: J.52 inverse multiplexing is used
Asymmetric G.722/MPEG connections
Asymmetric connections use different parameters for sending (i.e. encoding)
and receiving (i.e. decoding).
In this case the encoder and decoder dependency should be set to local and
the IMUX format should be set to auto (see remote menu item Settings/Codec
). Furthermore the encoder settings of the calling Centauri should be used as
the decoder settings of the called Centauri and vice versa.
Symmetric 4SB ADPCM connections
Configuration for mono 4SB ADPCM connections (see remote menu item
Settings/Codec):
· Encoder dependency: remote
· Encoder sample rate: 32 kHz
· Encoder bit rate: 128 kbit/s
· Encoder mode: mono
Copyright: 2008 Mayah Communications
18
CENTAURI II User Manual
· Encoder IMUX format: auto
· Decoder dependency: remote
Configuration for stereo 4SB ADPCM connections (see remote menu item
Settings/Codec):
· Encoder dependency: remote
· Encoder sample rate: 32 kHz
· Encoder bit rate: 256 kbit/s
· Encoder mode: stereo
· Encoder IMUX format: auto
· Decoder dependency: remote
Symmetric APT-X connections
If one of the APT-X algorithms is used then the following codec configuration
is necessary (see remote menu item Settings/Codec):
· Encoder dependency: remote
· Encoder bit rate: must be identical at both
· Encoder mode: must be identical at both
· Encoder IMUX format: APTX
· Decoder dependency: remote
Furthermore the ancillary data format for encoder and decoder must be set to
none, left or right and it must be identical at both
(see remote
menu item Settings/Ancillary Data).
2.3.2
SendIt
SendIt just supports symmetric ISDN connections with MPEG L2 and MPEG
L3 with 64 and 128 kbit/s. However, SendIt use the same telegram
communication like it is used between two
if dependency is
set to remote. This means that the following
settings should be
used (see remote menu item Settings/Codec):
· Encoder dependency: remote
· Encoder IMUX format: auto
· Decoder dependency: remote
Furthermore always the calling side determines the parameters of the
connection. i.e. if SendIt calls the
then SendIt determines the
transmission parameters and if
calls SendIt then the
determines the transmission parameters.
2.3.3
CDQPrima/CDQ1000/CDQ2000/CDQ2001/Telos Zephyr
is fully compatible to all algorithms used by CDQPrima,
CDQ1000, CDQ2000, CDQ2001 and Telos Zephyr except for algorithm
CCSN combined with sampling rate 24 kHz (with 48 kHz there are no
Copyright: 2008 Mayah Communications
Necessary settings for framed connections
19
problems).
Thanks to FlashCast technology mostly just the following
parameters must be set to reach a framed connection (see remote menu item
Settings/Codec):
· Encoder dependency: remote
· Encoder IMUX format: auto
· Decoder dependency: remote
Generally CDQPrima, CDQ1000, CDQ2000, CDQ2001 and Telos Zephyr are
codecs which just pump out there audio data stream without any handshaking.
This means that the
always follows the settings of these devices
regardless of which codec side establishes the connection.
Symmetric G.722 connections (only CDQPrima/CDQ1000/Telos Zephyr)
Recommended
configuration (see remote menu item Settings/
Codec):
· Encoder dependency: remote
· Encoder IMUX format: auto
· Decoder dependency: remote
Generally there are two methods to get byte framing with G.722:
· G.722 with H.221 inband signaling (G.722/H.221):
G.722/H.221 uses 1.6 kbit/s of the 64 kbit/s B-channel capacity for sending
inband information. This inband information can be evaluated for framing.
· G.722 with statistical framing (G.722/SRT):
G.722/SRT (SRT = statistical recovery timing) evaluates statistically where
every byte starts. However, this just works with real statistical signals
(music, speech etc.) but not with non-statistical signals like sine waves.
CDQPrima and CDQ1000 support G.722/H.221 and G.722/SRT whereas
Telos Zephyr just supports G.722/SRT.
The inband information of G.722/H.221 can be evaluated immediately by
Flash Cast technology and therefore
frames very quickly.
G.722/SRT does not supply any information which can be detected by Flash
Cast technology but when the G.722 SRT timeout is expired
switches automatically to G.722/SRT. The G.722/SRT timeout starts running
after an ISDN connection is established and stops if framing is reached. By
default the G.722/SRT timeout is set to 30 seconds (see remote menu item
Settings/Others). This means that usually the
needs 30 seconds
to be framed to a G.722/SRT audio stream
G.722/SRT framing can be fasten by the following
settings (see
remote menu item Settings/Codec):
· Encoder dependency: local
· Encoder algorithm: G.722
· Encoder sample rate: 16 kHz
· Encoder bit rate: 64 kbit/s
· Encoder mode: mono
Copyright: 2008 Mayah Communications
20
CENTAURI II User Manual
· Encoder IMUX format: J.52
· Decoder dependency: remote
Symmetric MPEG L2/L3 connections up to 128 kbit/s (no H.221 inverse
multiplexing)
Recommended
configuration (see remote menu item Settings/
Codec):
· Encoder dependency: remote
· Encoder IMUX format: auto
· Decoder dependency: remote
Symmetric MPEGL2 connections to CDQPrima using H.221 inverse
multiplexing
For getting a framed connection between a
and a CDQPrima
which uses H.221 inverse multiplexing different
configurations
can be used depending on which codec side establishes the calls.
If
calls a CDQPrima using H.221 inverse multiplexing the
following
configuration must be used (see remote menu item
Settings/Codec):
· Encoder dependency: remote
· Encoder algorithm: MPEG L2
· Encoder bit rate: 384 kbit/s (even if less than 384 kbit/s are used)
· Encoder IMUX format: CDQ/H.221
· Decoder dependency: remote
If a CDQPrima using H.221 inverse multiplexing calls a
then the
following configuration is also possible (besides the above mentioned):
· Encoder dependency: remote
· Encoder IMUX format: auto
· Decoder dependency: remote
Asymmetric G.722/MPEG connections (not possible with CDQ1000)
Asymmetric connections use different parameters for sending (i.e. encoding)
and receiving (i.e. decoding).
In this case the
should use the following configuration (see
remote menu item Settings/Codec):
· Encoder dependency: local
· Encoder algorithm: algorithm of the decoder of the other side codec
· Encoder sample rate: sample rate of the decoder of the other side codec
· Encoder bit rate: bit rate of the decoder of the other side codec
· Encoder mode: mode of the decoder of the other side codec
· Encoder IMUX format: auto
· Decoder dependency: local
· Decoder algorithm: algorithm of the encoder of the other side codec
· Decoder sample rate: sample rate of the encoder of the other side codec
Copyright: 2008 Mayah Communications
Necessary settings for framed connections
21
· Decoder bit rate: bit rate of the encoder of the other side codec
· Decoder mode: mode of the encoder of the other side codec
2.3.4
Telos Xstream
is compatible with the algorithms G.722, MPEG L2 and MPEG
L3 to Telos Xstream. Compatibility with AAC and AAC (LD) is under
investigation.
Symmetric G.722 connections
Recommended
configuration (see remote menu item Settings/
Codec):
· Encoder dependency: remote
· Encoder IMUX format: auto
· Decoder dependency: remote
Generally there are two methods to get byte framing with G.722:
· G.722 with H.221 inband signaling (G.722/H.221):
G.722/H.221 uses 1.6 kbit/s of the 64 kbit/s B-channel capacity for sending
inband information. This inband information can be evaluated for framing.
· G.722 with statistical framing (G.722/SRT):
G.722/SRT (SRT = statistical recovery timing) evaluates statistically where
every byte starts. However, this just works with real statistical signals
(music, speech etc.) but not with non-statistical signals like sine waves.
Telos Xstream just supports G.722/SRT.
G.722/SRT does not supply any information which can be detected by Flash
Cast technology but when the G.722 SRT timeout is expired
switches automatically to G.722/SRT. The G.722/SRT timeout starts running
after an ISDN connection is established and stops if framing is reached. By
default the G.722/SRT timeout is set to 30 seconds (see remote menu item
Settings/Others). This means that usually the
needs 30 seconds
to be framed to a G.722/SRT audio stream.
G.722/SRT framing can be fasten by the following
settings (see
remote menu item Settings/Codec):
· Encoder dependency: local
· Encoder algorithm: G.722
· Encoder sample rate: 16 kHz
· Encoder bit rate: 64 kbit/s
· Encoder mode: mono
· Encoder IMUX format: J.52
· Decoder dependency: remote
Symmetric MPEGL2/L3 connections
Recommended
configuration (see remote menu item Settings/
Codec):
Copyright: 2008 Mayah Communications
22
CENTAURI II User Manual
· Encoder dependency: remote
· Encoder IMUX format: auto
· Decoder dependency: remote
Asymmetric G.722/MPEG connections
Asymmetric connections use different parameters for sending (i.e. encoding)
and receiving (i.e. decoding).
In this case the
should use the following configuration (see
remote menu item Settings/Codec):
· Encoder dependency: local
· Encoder algorithm: algorithm of the Xstream decoder
· Encoder sample rate: sample rate of the Xstream decoder
· Encoder bit rate: bit rate of the Xstream decoder
· Encoder mode: mode of the Xstream decoder
· Encoder IMUX format: auto
· Decoder dependency: local
· Decoder algorithm: algorithm of the Xstream encoder
· Decoder sample rate: sample rate of the Xstream encoder
· Decoder bit rate: bit rate of the Xstream encoder
· Decoder mode: mode of the Xstream encoder
2.3.5
Musictaxi VP Pro
Musictaxi VP Pro just allows symmetric connections with the algorithms
G.722, MPEG L2, MPEG L3 and 4SB ADPCM.
is full compatible
to Musictaxi VP Pro except for 4SB ADPCM in stereo mode (with 4SB ADPCM
in mono mode there is no problem). With G.722, MPEG L2 and MPEG L3
connections the
configuration
· Encoder dependency: remote
· Encoder IMUX format: auto
· Decoder dependency: remote
guarantees framing since Mayah FlashCast technology makes a
emulating a Musictaxi. At Musictaxi connections always the calling side
determines the parameters of the connection. Due to guarantee this it is
recommendable to use a different
configuration if
calls the Musictaxi.
establishes a G.722/MPEG connection to Musictaxi VP Pro
Recommended
configuration (see remote menu item Settings/
Codec):
· Encoder dependency: local
· Encoder algorithm: algorithm of the connection
· Encoder sample rate: sample rate of the connection
· Encoder bit rate: bit rate of the connection
Copyright: 2008 Mayah Communications
Necessary settings for framed connections
23
· Encoder mode: mode of the connection
· Encoder IMUX format: musictaxi
· Decoder dependency: remote
Musictaxi VP Pro establishes a G.722/MPEG connection to
Recommended
configuration (see remote menu item Settings/
Codec):
· Encoder dependency: remote
· Encoder IMUX format: auto
· Decoder dependency: remote
4SB ADPCM mono connection
With 4SB ADPCM it makes no difference for the
configuration if
the
calls the Musictaxi VP Pro or vice versa.
Recommended
configuration (see remote menu item Settings/
Codec):
· Encoder dependency: remote
· Encoder algorithm: 4SB ADPCM
· Encoder sample rate: 32 kHz
· Encoder bit rate: 128 kbit/s
· Encoder mode: mono
· Encoder IMUX format: auto
· Decoder dependency: remote
2.3.6
Musictaxi VP
Musictaxi VP just allows symmetric connections with the algorithms G.722,
MPEG L2 and MPEG L3.
is fully compatible to Musictaxi VP. In
opposition to connections to Musictaxi VP Pro always the Musictaxi VP
determines the parameters of the connection regardless of the fact if
or Musictaxi calls.
establishes a G.722 connection to Musictaxi VP
Recommended
configuration (see remote menu item Settings/
Codec):
· Encoder dependency: remote
· Encoder algorithm: G.722
· Encoder sample rate: 16 kHz
· Encoder bit rate: 64 kbit/s
· Encoder mode: mono
· Encoder IMUX format: musictaxi
· Decoder dependency: remote
Musictaxi VP must be set to ‘G.722 Standby’.
Copyright: 2008 Mayah Communications
24
CENTAURI II User Manual
Musictaxi VP establishes a G.722 connection to
Recommended
configuration (see remote menu item Settings/
Codec):
· Encoder dependency: remote
· Encoder algorithm: G.722
· Encoder sample rate: 16 kHz
· Encoder bit rate: 64 kbit/s
· Encoder mode: mono
· Encoder IMUX format: J.52
· Decoder dependency: remote
MPEG connections
With MPEG connections it makes no difference for the
configuration if the
calls the Musictaxi VP or vice versa.
Recommended
configuration (see remote menu item Settings/
Codec):
· Encoder dependency: remote
· Encoder IMUX format: auto
· Decoder dependency: remote
2.3.7
AETA Hifiscoop/AETA Scoopy/You Com Set 2
can communicate with AETA Hifiscoop 3/AETA Scoopy/You
Com Set 2 with the algorithms G.722, MPEG L2, MPEG L3 (only Hifiscoop 3)
and 4SB ADPCM mono mode. The configuration AETA Hifiscoop 3/AETA
Scoopy/You Com Set 2 must be identical to get framing.
G.722
Generally there are two methods to get byte framing with G.722:
· G.722 with H.221 inband signaling (G.722/H.221):
G.722/H.221 uses 1.6 kbit/s of the 64 kbit/s B-channel capacity for sending
inband information. This inband information can be evaluated for framing.
· G.722 with statistical framing (G.722/SRT):
G.722/SRT (SRT = statistical recovery timing) evaluates statistically where
every byte starts. However, this just works with real statistical signals
(music, speech etc.) but not with non-statistical signals like sine waves.
AETA Hifiscoop 3/AETA Scoopy/You Com Set 2 supports G.722/H.221 and
G.722/SRT.
establishes a G.722 connection to AETA Hifiscoop 3/AETA
Scoopy/You Com Set 2
Recommended
configuration (see remote menu item Settings/
Codec):
· Encoder dependency: local
Copyright: 2008 Mayah Communications
Necessary settings for framed connections
·
·
·
·
·
·
25
Encoder algorithm: G.722
Encoder sample rate: 16 kHz
Encoder bit rate: 64 kbit/s
Encoder mode: mono
Encoder IMUX format: J.52
Decoder dependency: remote
AETA Hifiscoop 3/AETA Scoopy/You Com Set 2 establishes a G.722
connection to
Recommended
configuration (see remote menu item Settings/
Codec):
· Encoder dependency: remote
· Encoder algorithm: G.722
· Encoder sample rate: 16 kHz
· Encoder bit rate: 64 kbit/s
· Encoder mode: mono
· Encoder IMUX format: auto
· Decoder dependency: remote
MPEG connections
With MPEG connections it makes no difference for the
configuration if the
calls the AETA Hifiscoop 3/AETA Scoopy/
You Com Set 2 or vice versa.
Recommended
configuration (see remote menu item Settings/
Codec):
· Encoder dependency: remote
· Encoder algorithm: algorithm of AETA Hifiscoop 3/AETA Scoopy/You Com
Set 2
· Encoder sample rate: sample rate of AETA Hifiscoop 3/AETA Scoopy/You
Com Set 2
· Encoder bit rate: bit rate of AETA Hifiscoop 3/AETA Scoopy/You Com Set 2
· Encoder mode: mode of AETA Hifiscoop 3/AETA Scoopy/You Com Set 2
· Encoder IMUX format: auto
· Decoder dependency: remote
4SB ADPCM mono connection
With 4SB ADPCM mono connections it makes no difference for the
configuration if the
calls the AETA Hifiscoop 3/
AETA Scoopy/You Com Set 2 or vice versa.
Recommended
configuration (see remote menu item Settings/
Codec):
· Encoder dependency: remote
· Encoder algorithm: 4SB ADPCM
· Encoder sample rate: 32 kHz
Copyright: 2008 Mayah Communications
26
CENTAURI II User Manual
·
·
·
·
2.3.8
Encoder bit rate: 128 kbit/s
Encoder mode: mono
Encoder IMUX format: micda
Decoder dependency: remote
AVT/PKI telephone
The
is fully compatible to the old and the new AVT telephone.
The following connections are possible to the old AVT telephone (also called
PKI telephone):
· G.711
· G.722
The following connections are possible to the new AVT telephone
· G.711 (bidirectional)
· G.722 (bidirectional)
to AVT telephone)
· MPEG L2 (only in direction from
· MPEG L3
Normal telephone connection to AVT telephone
When the AVT telephone establishes the call it must be switched to G.711
mode.
When the
establishes the G.711 connection it must be told to
use telephone instead of data service. This can be done by two ways:
1) First possibility:
Set
to G.711 configuration (see remote menu item Settings/
Codec):
· Encoder dependency: remote
· Encoder algorithm: G.711
· Encoder sample rate: 8 kHz
· Encoder bit rate: 64 kbit/s
· Encoder mode: mono
· Encoder IMUX format: auto
· Decoder dependency: remote
2) Second possibility:
When a ‘-‘ is put in front of an ISDN number automatically a telephone call
gets established.
G.722, MPEG L2 and MPEG L3 mono connections
Both
and AVT telephone supports J.52. Therefore a framed
connection can be achieved with the following settings:
· Encoder dependency: remote
· Encoder algorithm: G.722, MPEG L2 or MPEG L3
· Encoder bit rate: 64 kbit/s
· Encoder mode: mono
Copyright: 2008 Mayah Communications
Necessary settings for framed connections
27
· Encoder IMUX format: auto
· Decoder dependency: remote
However, with this configuration
always receives MPEG L3
audio data because of J.52 capability exchange. Furthermore it must be
considered that the AVT telephone just can decode MPEG L2 but it cannot
encode (i.e. transmit) MPEG L2.
Therefore a symmetric G.722 connection between a
and AVT
telephone can just be achieved with the following settings:
· Encoder dependency: remote
· Encoder algorithm: G.722
· Encoder sample rate: 16 kHz
· Encoder bit rate: 64 kbit/s
· Encoder mode: mono
· Encoder IMUX format: J.52
· Decoder dependency: local
· Decoder algorithm: G.722
· Decoder sample rate: 16 kHz
· Decoder bit rate: 64 kbit/s
· Decoder mode: mono
MPEG stereo connections
Recommended
configuration (see remote menu item Settings/
Codec):
· Encoder dependency: remote
· Encoder algorithm: MPEG L2 or MPEG L3
· Encoder bit rate: 128 kbit/s
· Encoder mode: joint stereo or stereo
· Encoder IMUX format: J.52
· Decoder dependency: remote
Since the AVT telephone does not support MPEGL2 for encoding
just can receive MPEG L3 audio data. The setting IMUX format
= J.52 guarantees according to the J.52 standard that not both B-channels
gets established at the same time.
2.3.9
a Glensound G.722 codec
Generally there are two methods to get byte framing with G.722:
· G.722 with H.221 inband signaling (G.722/H.221):
G.722/H.221 uses 1.6 kbit/s of the 64 kbit/s B-channel capacity for sending
inband information. This inband information can be evaluated for framing.
· G.722 with statistical framing (G.722/SRT):
G.722/SRT (SRT = statistical recovery timing) evaluates statistically where
every byte starts. However, this just works with real statistical signals
(music, speech etc.) but not with non-statistical signals like sine waves.
Copyright: 2008 Mayah Communications
28
CENTAURI II User Manual
Usually a Glensound G.722 codec just supports G.722/SRT.
G.722/SRT does not supply any information which can be detected by Flash
Cast technology but when the G.722 SRT timeout is expired
switches automatically to G.722/SRT. The G.722/SRT timeout starts running
after an ISDN connection is established and stops if framing is reached. By
default the G.722/SRT timeout is set to 30 seconds (see remote menu item
Settings/Others). This means that usually the
needs 30 seconds
to be framed to a G.722/SRT audio stream.
G.722/SRT framing can be fasten by the following
settings (see
remote menu item Settings/Codec):
· Encoder dependency: local
· Encoder algorithm: G.722
· Encoder sample rate: 16 kHz
· Encoder bit rate: 64 kbit/s
· Encoder mode: mono
· Encoder IMUX format: J.52
· Decoder dependency: remote
2.3.10 AVT Magic
is fully compatible to AVT Magic with the algorithms G.722,
MPEG L2 and MPEG L3. Furthermore
and AVT Magic supports
J.52.
G.722 connection
Recommended
configuration (see remote menu item Settings/
Codec):
· Encoder dependency: remote
· Encoder algorithm: G.722
· Encoder sample rate: 16 kHz
· Encoder bit rate: 64 kbit/s
· Encoder mode: mono
· Encoder IMUX format: auto
· Decoder dependency: remote
MPEG L2/L3 connections with 64 kbit/s
AVT Magic always returns G.722 when the calling
uses the
following configuration:
· Encoder dependency: remote
· Encoder bit rate: 64 kbit/s
· Encoder IMUX format: auto
· Decoder dependency: remote
With this configuration the
tells the AVT Magic by J.52
Copyright: 2008 Mayah Communications
Necessary settings for framed connections
29
capability exchange that its decoder supports G.722. In this case the AVT
Magic always returns G.722 at 64 kbit/s connections to be compatible to other
G.722 codecs. Therefore the following
configuration is
necessary to get a symmetric MPEGL2/L3 connection between a
and AVT Magic.
· Encoder dependency: remote
· Encoder algorithm: MPEG L2/L3
· Encoder bit rate: 64 kbit/s
· Encoder IMUX format: J.52
· Decoder dependency: local
· Decoder algorithm: same as encoder algorithm
· Decoder bit rate: 64 kbit/s
· Decoder sample rate: same as encoder sample rate
With this configuration the
pretend just to support the decoder
settings (J.52 capability exchange) i.e. it forces the AVT Magic to send out
audio data corresponding to the
decoder configuration.
MPEG L2/L3 connections with more than 64 kbit/s
With the following
configuration a framed connection with the
AVT Magic can be achieved:
· Encoder dependency: remote
· Encoder algorithm: MPEG L2/L3
· Encoder IMUX format: auto
· Decoder dependency: remote
However, with this configuration
always receives MPEG L3
audio data because of J.52 capability exchange. If MPEG L2 should be
received by the
it must pretend just to support MPEG L2.
Therefore the following
configuration is necessary for a
symmetric MPEG L2 connection:
· Encoder dependency: remote
· Encoder algorithm: MPEG L2
· Encoder sample rate: requested sample rate
· Encoder bit rate: requested bit rate
· Encoder IMUX format: J.52
· Decoder dependency: local
· Decoder algorithm: MPEG L2
· Decoder sample rate: same as encoder sample rate
· Decoder bit rate: same as encoder bit rate
Note:
The J.52 capability exchange does not include the operational mode.
Therefore the
always follows the mode of the AVT Magic. Since
with 64 kbit/s connections operational mode is mono it is strongly
recommended that in this case the AVT Magic should be set to mono.
Copyright: 2008 Mayah Communications
30
CENTAURI II User Manual
2.3.11 a MAYCOM Easycorder
The
is compatible to the MAYCOM EASYCORDER with MPEG
L2 provided Centauri software x.2.0.5 or later is used (x = 2 for CENTAURI I
and x > 2 for Centauri II, GANYMED 1102 and MERKII).
MAYCOM Easycorder (software version 6.4B) only supports the bit rate of 64
kbps.
Recommended
configuration (see remote menu item Settings/
Codec):
· Encoder dependency: local
· Encoder algorithm: MPEG L2
· Encoder sample rate: 24 or 48 kHz (depends on the sample rate of the
EASYCORDER)
· Encoder bit rate: 64 kbit/s
· Encoder mode: mono
· Encoder IMUX format: auto
· Decoder dependency: local
· Decoder algorithm: MPEG L2
· Decoder sample rate: 24 or 48 kHz (depends on the sample rate of the
EASYCORDER)
· Decoder bit rate: 64 kbit/s
· Decoder mode: mono
2.3.12 a normal telephone
Since
has implemented the G.711 algorithm it can be used as a
telephone hybrid i.e. it can call telephones and it can be called by telephones.
A-law and µ-law
Worldwide two standards for digital telephony exists:
· A-law: Non-linear PCM coding with 13 segments; used in Europe
· µ-law: Non-linear PCM coding with 15 segments, used in North America and
Japan
supports both standards but it must be set via remote menu
item Settings/Others.
establishes a telephone connection to a telephone
For telephone connections the ISDN service speech or telephony is used
whereas for G.722, MPEG, APT and 4SB ADPCM connections the ISDN
service unrestricted digital info is necessary. Therefore the
must
be told to establish telephone connections. This can be done by two ways:
1) First possibility:
Set
to G.711 configuration (see remote menu item Settings/
Codec):
Copyright: 2008 Mayah Communications
Necessary settings for framed connections
· Encoder dependency: remote
· Encoder algorithm: G.711
· Encoder sample rate: 16 kHz
· Encoder bit rate: 64 kbit/s
· Encoder mode: mono
· Encoder IMUX format: auto
· Decoder dependency: remote
2) Second possibility:
When a ‘-‘ is put in front of an ISDN number automatically a telephone call
gets established.
A telephone calls a
Recommended
configuration (see remote menu item Settings/
Codec):
· Encoder dependency: remote
· Encoder IMUX format: auto
· Decoder dependency: remote
2.3.13 an APT-X codec
If the software plugins for APT-X algorithms are enabled (see menu item
Expert/Set Keycode) then
is fully compatible to nearly all APT
codecs.
APT codecs and their options:
Legend:
·: implemented
o: not implemented
Disclaimer:
Mayah Communications disclaims any liability for the correctness of the APT
codec options table shown below.
Since APT algorithms do not have any header or inband information which
can be evaluated by Mayah Flash Cast technology, it is mandatory that the
Copyright: 2008 Mayah Communications
31
32
CENTAURI II User Manual
follows the configuration of the other side APT codec.
Generally the following
configuration is recommended (see
remote menu item Settings/Codec):
· Encoder dependency: remote
· Encoder algorithm: APT-X algorithms used by the other side APT codec
· Encoder sample rate: sample rate used by the other side APT codec
· Encoder bit rate: bit rate used by the other side APT codec
· Encoder mode: mode used by the other side APT codec
· Encoder IMUX format: APT
· Decoder dependency: remote
Special cases:
1) MAYAH codec-MAYAH codec respectively MAYAH codec-WorldNet
Tokyo APT-X connection
If on both sides codecs system software version 2.1.0.47 (or later) is
implemented then it is no more necessary to configure the called codec to the
right APT-X settings. Using the codec settings (see menu item Settings/
Codec)
· Encoder dependency: remote
· Encoder IMUX format: auto
· Decoder dependency: remote
the calling
will tell the other CENTAURI, MERKII or Tokyo the
right APT-X parameters.
2) Glensound GSGC6
Configuration to get a framed connection to a Glensound GSGC6 using APTX:
· Encoder dependency: local
· Encoder algorithm: APT-X no sync. (i.e. Standard APT-X no sync.)
· Encoder sample rate: 16 kHz
· Encoder bit rate: 64 kbit/s
· Encoder mode: mono
· Encoder IMUX format: auto
· Decoder dependency: local
· Decoder algorithm: APT-X no sync. (i.e. Standard APT-X no sync.)
· Decoder sample rate: 16 kHz
· Decoder bit rate: 64 kbit/s
· Decoder mode: mono
3) Nica 64
Configuration to get a framed connection to a Nica 64:
· Encoder dependency: local
· Encoder algorithm: APT-X (i.e. Standard APT-X with sync.)
· Encoder sample rate: 16 kHz
· Encoder bit rate: 64 kbit/s
· Encoder mode: mono
Copyright: 2008 Mayah Communications
Necessary settings for framed connections
33
· Encoder IMUX format: auto
· Decoder dependency: local
· Decoder algorithm: APT-X (i.e. Standard APT-X with sync.)
· Decoder sample rate: 16 kHz
· Decoder bit rate: 64 kbit/s
· Decoder mode: mono
4) Nica 128
Configuration to get a framed connection to a Nica 128:
· Encoder dependency: local
· Encoder algorithm: APT-X no sync. (i.e. Standard APT-X no sync.)
· Encoder sample rate: 32 kHz
· Encoder bit rate: 256 kbit/s
· Encoder mode: dual mono
· Encoder IMUX format: APT
· Decoder dependency: local
· Decoder algorithm: APT-X no sync. (i.e. Standard APT-X no sync.)
· Decoder sample rate: 32 kHz
· Decoder bit rate: 256 kbit/s
· Decoder mode: dual mono
Note to sample rate at APT-X algorithms:
When APT-X algorithms are used then the sample rate is determined by the bit
rate and the mode. The sample rate is calculated with the following formulas:
ch:number of audio channels;1 for mono, 2 for stereo
br: bit rate
sr: sample rate
· Standard APT-X no auto sync.:
sr = br / (ch * 4)
· Standard APT-X auto sync.:
sr = br / (ch * 4)
· Enhanced APT-X 16 bit:
sr = br / (ch * 4)
· Enhanced APT-X 20 bit:
sr = br / (ch * 5)
· Enhanced APT-X 24 bit:
sr = br / (ch * 6)
2.4
How to establish IP connections
2.4.1
Configuration of Centauri Network Card
The general configuration of the electrical and optical network card of the
can be done via menu item Settings/Network.
Copyright: 2008 Mayah Communications
34
CENTAURI II User Manual
2.4.2
Unicast versus Multicast
IP point to point connections are called unicast. Multicast is used to establish
point to multi-point IP transmissions.
Unicast can use UDP and TCP as transport protocol.
UDP
unicast connections can be uni- and bidirectional.
TCP
connections are always bidirectional.
Multicast use the UDP as transport protocol.
Multicast
transmissions are always unidirectional.
More details about Multicast and its implementation in
can be
found in application note 9 on Mayah website (www.mayah.com/content/
download/pdfs/appnotes/centauri/a_n_e_009.pdf).
2.4.3
Unicast UDP
Unicast UDP connections can be established by CENTAURI’s of type 300x,
330x, 400x, MERKII and GANYMED’s 1102.
UDP (= User Datagram Protocol) is a transport protocol (ISO/OSI layer 4) with
the following features:
· connectionless (no acknowledgements of received packets)
· no flow control (sequence of IP packets is not guaranteed)
· no error control
However, at
IP connections (especially in the WAN) it is
strongly recommended to prioritize UDP to TCP since UDP prevents data
peaks caused by delayed acknowledgements.
1. Unidirectional UDP connections
Unidirectional IP connections between two
can established by
the following steps:
1.1 Codec Settings
Configure the codec settings via menu item Settings/Codec (valid for both
):
· Interface: IP
· Encoder dependency: Remote
· Decoder dependency: Remote
The establishing
determines the algorithm, the sample rate, the
bit rate and the mode of the transmission.
1.2 Establish Connection
Click the CONNECT button to open the Connect-dialog:
· Select interface to IP
· Select UDP
in the address field
· Type in the IP-address of the other
Click
the
OK-button
to
establish
connection
·
Copyright: 2008 Mayah Communications
Necessary settings for framed connections
35
2. Bidirectional UDP connections
There are two ways to establish a bidirectional UDP connection:
· Establish an unidirectional UDP connection on both
· Use a special codec configuration on the non-establishing
(just valid for MPEG connections)
2.1 Special configuration on non-establishing
Configure the codec settings via menu item Settings/Codec:
· Encoder dependency: local
· Encoder algorithm: same as encoder algorithm of the establishing Mayah
codec
· Encoder sample rate: same as encoder sample rate of the establishing
Mayah codec
· Encoder bit rate: same as encoder bit rate of the establishing Mayah codec
· Encoder mode: same as encoder mode of the establishing Mayah codec
· Decoder dependency: remote
Note:
Even though such bidirectional UDP connections can be established by one
side they must be disconnected on both sides.
3. Meaning of LED’s at UDP connections
· Lit up Connect LED:
UDP sending
· Lit up Framed LED:
UDP receiving
2.4.4
Unicast RTP
Unicast RTP connections can be established by CENTAURI’s of type 300x,
330x, 400x, MERKII and GANYMED’s 1102 using system software version
2.0.0.132 (or later).
· RTP (=Realtime Transport Protocol) protocol bases on UDP (= User D
atagram Protocol). Therefore the RTP implementation of
is an
enhancement of the UDP implementation. In opposite to the pure UDP
implementation RTP guarantees the right sequence of packets at the
receiver side.
· RTP supports the following features:
- payload-type identification
- sequence numbering
- time stamping
- source identification
· RTP is implemented according to rfc 3550 (www.ietf.org/rfc/rfc3550.txt).
If possible RTP is the recommended IP-transmission method between
Copyright: 2008 Mayah Communications
36
CENTAURI II User Manual
.
1. Unidirectional RTP connections
Unidirectional IP connections between two
can established by
the following steps:
1.1 Codec Settings
Configure the codec settings via menu item Settings/Codec (valid for both
):
· Interface: IP
· Encoder dependency: Remote
· Decoder dependency: Remote
The establishing
determines the algorithm, the sample rate, the
bit rate and the mode of the transmission.
1.2 Establish Connection
Click the CONNECT button to open the Connect-dialog:
· Select interface to IP
· Select RTP
· Type in the IP-address of the other codec in the address field
· Click the OK-button to establish connection
2. Bidirectional RTP connections
There are two ways to establish a bidirectional RTP connection:
· Establish a unidirectional RTP connection on both
· Use a special codec configuration on the establishing
2.1 Special configuration on establishing MAYAH codec
Configure the codec settings via menu item Settings/Codec:
· Encoder dependency: remote
· Decoder dependency: local
2.2 Special configuration on non-establishing MAYAH codec
Configure the codec settings via menu item Settings/Codec:
· Encoder dependency: remote
· Decoder dependency: remote
Note:
At such bidirectional RTP connections different settings for sending and
receiving can be used. The encoder settings determine which quality is sent
whereas the decoder settings determine which quality is received.
Note 2:
In opposite to bidirectional UDP connections bidirectional RTP connections
can be disconnected by one side (i.e. the establishing side) provided they
were established by one side.
3. Meaning of LED’s at RTP connections
· Lit up Connect LED:
RTP sending
· Lit up Framed LED:
Copyright: 2008 Mayah Communications
Necessary settings for framed connections
37
RTP receiving
2.4.5
TCP
Unicast TCP connections can be established by CENTAURI’s of type 300x,
330x , 400x, MERKII and GANYMED’s 1102
TCP (= Transmission Control Protocol) is a transport protocol (ISO/OSI layer
4) with the following features:
· connection based
· flow control
· error control
However, at
IP connections (especially in the WAN) it is
strongly recommended to prioritize UDP or RTP to TCP since UDP prevents
data peaks caused by delayed acknowledgements.
1. Bidirectional TCP connections
TCP connections between two
are always bidirectional. They
can by established by the following steps:
1.1 Codec Settings
Configure the codec settings via menu item Settings/Codec (valid for both
):
Interface:
IP
·
· Encoder dependency: Remote
· Decoder dependency: Remote
The establishing
determines the algorithm, the sample rate, the
bit rate and the mode of the transmission.
1.2 Establish Connection
Click the CONNECT button to open the Connect-dialog:
· Select interface to IP
· Select TCP
· Type in the IP-address of the other codec in the address field
· Click the OK-button to establish connection
2.4.6
Multicast UDP
Multicast UDP connections can be established by CENTAURI’s of type 300x,
330x, 400x, MERKII and GANYMED’s 1102.
The main difference between Unicast and Multicast is described in Multicast
versus Unicast.
The basics of Multicast are described in application note 9 on Mayah website
Copyright: 2008 Mayah Communications
38
CENTAURI II User Manual
(www.mayah.com/content/download/pdfs/appnotes/centauri/a_n_e_009.pdf).
Multicast UDP connections can be established between
· CENTAURI’s, MERK’s II and GANYMED’s 1102:
can be used as Multicast Sender and Multicast Receiver.
and GANYMED 1002
·
1. Multicast UDP connection to other CENTAURI, MERKII and GANYMED
1102
It must be distinguished between the Multicast sender and Multicast receivers.
1.1 Multicast Sender
The Multicast sender determines the quality of the Multicast stream.
1.1.1 Codec Settings
Configure the codec settings via menu item Settings/Codec:
· Encoder dependency: Local
· Decoder dependency: Remote
The audio quality of the multicast stream is determined by the encoder
settings of algorithm, sample rate, bit rate and mode of the Multicast sender.
1.1.2. Establish Connection
Click the CONNECT button to open the Connect-dialog:
· Select interface to IP
· Select UDP
· Type in the Multicast IP-address (e.g. 225.0.0.2)
Note:
A special port can be selected by the optional suffix ‘:<port number>’
(e.g. 225.0.0.2:5004)
· Click the OK-button to establish connection
1.2 Multicast Receiver
The quality of the audio received by Multicast is determined by the Multicast
Sender.
1.2.1 Codec Settings
Configure the codec settings via menu item Settings/Codec:
· Encoder dependency: Remote
· Decoder dependency: Remote
1.2.2 Establish Connection
Click the CONNECT button to open the Connect-dialog:
· Select interface to IP
· Select UDP
· Type in the Multicast IP-address (e.g. 225.0.0.2)
Note:
A special port can be selected by the optional suffix ‘:<port number>’
(e.g. 225.0.0.2:5004)
· Click the OK-button to establish connection
2. Multicast UDP connection to GANYMED 1002
Copyright: 2008 Mayah Communications
Necessary settings for framed connections
39
is the Multicast sender and GANYMED 1002 is Multicast
receiver.
2.1 Multicast sender
2.1.1 Codec Settings
Configure the codec settings via menu item Settings/Codec:
· Encoder dependency: Local
· Decoder dependency: Remote
The audio quality of the multicast stream is determined by the encoder
settings of algorithm, sample rate, bit rate and mode of the Multicast sender.
2.1.2. Establish Connection
Click the CONNECT button to open the Connect-dialog:
· Select interface to IP
· Select UDP
· Type in the Multicast IP-address
Click the OK-button to establish connection
2.2 Multicast Receiver (GANYMED 1002)
The configuration of the GANYMED 1002 must be done via direct commands
entered via a telnet session or the program twschat. The direct commands of
the GANYMED 1002 are described in the GANYMED 1002 manual.
2.2.1 Establish Connection
2.2.1.1 Create Multicast entry in GANYMED 1002
In GANYMED 1002 up to 9 Multicast entries can be stored with the command
mcast_set. The command syntax of mcast_set is:
mcast_set <param1> <param2> <param3>
param 1: entry number
param 2: IP address of
param 3: name of entry
Example:
mcast_set 1 225.0.0.2 test
2.2.1.2 Establishing Multicast connection with GANYMED 1002
A Multicast connection can be established with the command mcast_select.
The command syntax of mcast_select is:
mcast_select <param1>:<param2>
param 1: entry number
param 2: priority
Example:
mcast_select 1 1 connects the first Multicast entry of GANYMED 1002 with
the priority 1 (i.e. higher priority then other Multicast connections).
2.2.2 Disconnect Multicast connection of GANYMED 1002
The Multicast connection can be hung up with the command mcast_deselect
1.
Copyright: 2008 Mayah Communications
40
2.4.7
CENTAURI II User Manual
Multicast RTP
Multicast RTP connections can be established by CENTAURI’s of type 300x,
330x, 400x, MERKII and GANYMED’s 1102.
The main difference between Unicast and Multicast is described in Multicast
versus Unicast.
The main difference between RTP and UDP is described in Unicast RTP.
The basics of Multicast are described in application note 9 on Mayah website
(www.mayah.com/content/download/pdfs/appnotes/centauri/a_n_e_009.pdf).
Multicast RTP connections can be established between:
· CENTAURI’s, MERK’s II and GANYMED’s 1102:
can be used as Multicast Sender and Multicast Receiver.
For this the new RTP protocol implementation of
is used.
and other decoders (like Winamp 5.05):
·
is used as Multicast Sender.
and GANYMED 1002
·
1. Multicast RTP connection to other CENTAURI, MERKII and GANYMED
1102
New RTP protocol implementation is used.
1.1 Codec Settings of Multicast sender
Configure the codec settings via menu item Settings/Codec:
· Encoder dependency: Local
· Decoder dependency: Remote
The audio quality of the multicast stream is determined by the encoder
settings of algorithm, sample rate, bit rate and mode of the Multicast sender.
1.2 Codec Settings of Multicast receiver
Configure the codec settings via menu item Settings/Codec:
· Encoder dependency: Remote
· Decoder dependency: Remote
1.3. Establish Connection (Multicast Sender and Receiver)
Click the CONNECT button to open the Connect-dialog:
· Select interface to IP
· Select RTP
· Type in the Multicast IP-address (e.g. 225.0.0.2)
Note:
A special port can be selected by the optional suffix ‘:<port number>’
(e.g. 225.0.0.2:5004)
· Click the OK-button to establish connection
2. Multicast RTP connection to other decoders
Old RTP protocol implementation is used provided system software <=
Copyright: 2008 Mayah Communications
Necessary settings for framed connections
41
2.1.0.46.
2.1 Codec Settings of Multicast sender
Configure the codec settings via menu item Settings/Codec:
· Encoder dependency: Local
· Decoder dependency: Remote
The audio quality of the multicast stream is determined by the encoder
settings of algorithm, sample rate, bit rate and mode of the Multicast sender.
2.2. Establish Connection (Multicast Sender)
Click the CONNECT button to open the Connect-dialog:
· Select interface to IP
· Select RTP
· Type in the Multicast IP-address preceded with an ‘r’
Note:
Since system software version 2.1.0.47 no more ‘r’ is necessary
Note 2:
A special port can be selected by the optional suffix ‘:<port number>’
(e.g. r225.0.0.2:5004)
· Click the OK-button to establish connection
2.3 Establish Connection (other decoder)
Please consult the manual of the referring decoder for this.
Here the steps for Winamp 5.05 (just works with MPEGL2 and MPEGL3)
· Ensure that the latest ‘in_rtp.dll’ Plug in is installed
· Step to menu item <File/Play URL..>
· Type in: rtp://<Multicast IP-address>:<port number>
Example:
rtp://225.0.0.2:5004
· Click the Open-button to establish connection
2.4.8
Http Streaming
HTTP streaming means that
400x streams audio to a standard
software decoder like Microsoft Media Player 9, Real Player 10 or Winamp.
The basics of
400x HTTP streaming is described in application
notes 6 and 12 on Mayah website (www.mayah.com/content/download/pdfs/
appnotes/centauri/a_n_e_006.pdf and www.mayah.com/content/download/
pdfs/appnotes/centauri/a_n_e_012.pdf)
Useful hint how to configure the streaming audio quality directly by the
remote
If the algorithm parameter 2 of a CENTAURI-400x-HTTP-Command-File is set
to ‘none’ then the streaming quality can be set directly by menu item
Settings/Codec.
It can be switched between the four different streaming qualities by either
· menu item Settings/Others at ‘Select sub codec’
Copyright: 2008 Mayah Communications
42
CENTAURI II User Manual
or
· using at main window the short cut key combination: 'CTRL+<number of
stream>'
2.4.9
RTP Streaming to Ganymed 1002
Similar to HTTP streaming to software media players (see HTTP streaming)
also GANYMED’s 1002 can fetch audio from a CENTAURI 400x.
In this case multiple GANYMED’s 1002 can connect to the four different
qualities of CENTAURI 400x by using Unicast RTP. At side of the CENTAURI
400x the Unicast RTP stream is just multiplied.
The big advantage of this Unicast RTP streaming to GANYMED 1002
compared to Multicast is that the connections just must be established on the
GANYMED 1002 side.
1. Configuration steps on CENTAURI 400x side
Since
400x just waits for the connection requests of
GANYMED’s 1002 it is just necessary to configure the different qualities. This
is done by two steps:
1.1 Selection of sub codec
With
400x four different qualities are available since four
different sub codecs can be selected. The selection of the sub codec can be
done via remote menu item Settings/Others.
1.2 Codec settings
For the referring sub codec the streaming quality can be determined by the
codec settings. Please consider that the GANYMED 1002 just supports the
coding algorithms MPEG L2, MPEG L3, AAC (MPEG2) and linear.
Necessary codec settings via remote menu item Settings/Codec:
· Encoder dependency: Remote
· Encoder algorithm: MPEG L2, MPEG L3, AAC (MPEG2) or linear
· Decoder dependency: Remote
2. Configuration steps on GANYMED 1002 side
The configuration of the GANYMED 1002 must be done via direct commands
entered via a telnet session or the program twschat. The direct commands of
the GANYMED 1002 are described in the GANYMED 1002 manual.
2.1 Establishing RTP connection
A Unicast RTP connection can be established with the command ip_remote.
The command syntax of ip_remote is:
ip_remote <param1>:<param2>
param 1: IP address of CENTAURI 400x
param 2: IP port
The port selection determines the sub codec of the CENTAURI 400x the
GANYMED 1002 is connected to. Which port must be used depends on the
system software version:
Copyright: 2008 Mayah Communications
Necessary settings for framed connections
43
a ) Ports if system software version < x.2.0.30:
- 5004: 1.sub codec of CENTAURI 400x
- 5006: 2.sub codec of CENTAURI 400x
- 5008: 3.sub codec of CENTAURI 400x
- 5010: 4.sub codec of CENTAURI 400x
b ) Ports if system software version >= x.2.0.30:
- 5004: 1.sub codec of CENTAURI 400x
- 5014: 2.sub codec of CENTAURI 400x
- 5024: 3.sub codec of CENTAURI 400x
- 5034: 4.sub codec of CENTAURI 400x
Note:
x = 2 for CENTAURI I and x > 2 for Centauri II, GANYMED 1102 and MERKII
Example:
The command ‘ip_remote 192.168.1.99:5014’ connects to the second sub
codec of the CENTAURI 400x with the IP address 192.168.1.99 provided
system software version >= x.2.0.30.
2.2 Disconnect RTP connection
The RTP connection can be hung up with the command ip_remote off.
2.4.10 SDP Streaming
Another way to stream to software players is using a SDP file. This feature is
supported with system software version 2.1.0.50 (or later).
General
SDP stands for session description protocol. Such a SDP file includes
information such as
- type of media (audio, video etc.)
- transport protocol (e.g. RTP)
- coding format (algorithm, bit rate)
- source IP address
- destination IP address
- used port
If system software version 2.1.0.50 (or later) is used then such a SDP file is
created automatically on the
Flash card (at folder www) after a
SDP connection is established. The player can http-download and parse the
SDP file to get connection info.
More info about SDP can be found in rfc 2327 (www.ietf.org/rfc/rfc2327.txt).
Software players supporting SDP and tested with
- VLC media player (version 0.8.2)
- Quicktime (version 7.0.3)
1. Configuration steps on
1.1 Codec settings
Copyright: 2008 Mayah Communications
side
44
CENTAURI II User Manual
Configure the codec settings via menu item Settings/Codec:
· Interface: IP/RTP
· Encoder dependency: Remote
· Encoder algorithm: Algorithm supported by the other side codec
Note:
With SDP streaming the
supports the algorithms AAC
(MPEG4)
and AAC (HE)
Note 2:
The software player VLC media player (version 0.8.2) supports AAC
(MPEG4) and AAC (HE)
· Decoder dependency: Remote
1.2. Establish Connection
Click the CONNECT button to open the Connect-dialog:
· Select interface to IP
· Select SDP
· Click on IP-address field # 1 with right mouse button to open a popup menu
and select encoder or decoder
· Do not(!) check SAP
· Type in the IP-address
Note:
A special port can be selected by the optional suffix ‘:<port number>’
(e.g. 225.0.0.2:5004)
Note 2:
SDP connections can be unicast and multicast connections.
· Click the OK-button to establish connection
Note:
If system software version 2.1.0.50 (or later) is used the SDP file is created
automatically. The
name of the SDP file depends on the selected sub codec:
- sub codec 1: stream1.sdp
- sub codec 2: stream2.sdp
- sub codec 3: stream3.sdp
- sub codec 4: stream4.sdp
2. Configuration steps on software player side
How to establish such an SDP connection depends on the software player.
Therefore please consult the referring manual.
Just to give you examples here the steps to execute at VLC media player
(version 0.8.2) and at Quicktime (version 7.0.3).
VLC media player:
· Step to menu item <File/Open Network Stream ..>
· Select tab ‘Network’
· Select radio button ‘HTTP/HTTPS/FTP/MMS’
>/<name of SDP file>
· Type in at URL edit field: <IP-address of
Copyright: 2008 Mayah Communications
Necessary settings for framed connections
e.g.: 192.168.1.78/stream1.sdp
· Click the OK-button to establish connection
Quicktime:
· Step to menu item <File/Open URL ..>
· Select tab ‘Network’
· Type in at ‘Enter an Internet URL to open’: http://<IP-address of
>/<name of SDP file>
e.g.: http://192.168.1.78/stream1.sdp
· Click the OK-button to establish connection
Copyright: 2008 Mayah Communications
45
46
CENTAURI II User Manual
2.4.11 SAP Streaming
SAP streaming is more or less an enhancement of SDP streaming (see SDP
streaming). SDP and SAP streaming are supported with system software
version 2.1.0.50 (or later).
General
SAP stands for session announcement protocol. Same as SDP streaming
(see SDP streaming) a SDP file is created but additionally the SDP
information is sent to the Multicast address 224.2.127.254. The SAP decoder
Copyright: 2008 Mayah Communications
Necessary settings for framed connections
47
retrieves the SDP information from this Multicast address (and not from the
SDP Encoder). SAP announcements are sent on port 9875.
There are two advantages of SAP streaming compared to SDP streaming:
a) Since the SDP file must not be retrieved from the encoder device,
unidirectional connections are sufficient (e.g. important for satellite
transmissions).
b) At Multicast address 224.2.127.254 the SDP information of all SAP
streaming encoders is available (and not just the SDP information of one
device).
More info about SAP can be found in rfc 2974 (www.ietf.org/rfc/rfc2974.txt).
1. Configuration steps at
encoder
1.1 Codec settings
Configure the codec settings via menu item Settings/Codec:
· Interface: IP/RTP
· Encoder dependency: Remote
· Encoder algorithm: Algorithm supported by the other side codec
Note:
With SAP streaming the
supports the algorithms AAC
(MPEG4)
and AAC (HE)
· Decoder dependency: Remote
1.2. Establish Connection
Click the CONNECT button to open the Connect-dialog:
· Select interface to IP
· Select SDP
· Click on IP-address field # 1 with right mouse button to open a popup menu
and select encoder
· Check SAP
· Type in the IP-address
· Click the OK-button to establish connection
2. Configuration steps at
decoder
2.1 Codec settings
Configure the codec settings via menu item Settings/Codec:
· Interface: IP/RTP
· Encoder dependency: Remote
· Decoder dependency: Remote
2.2. Establish Connection
Click the CONNECT button to open the Connect-dialog:
· Select interface to IP
· Select SDP
· Click on IP-address field # 1 with right mouse button to open a popup menu
and select decoder
Copyright: 2008 Mayah Communications
48
CENTAURI II User Manual
· Check SAP
· After the SAP box is checked the list box of ‘#1’ is updated with the currently
available SAP streams; one of these SAP streams must be selected
· Click the OK-button to establish connection
2.4.12 SIP connections
Since
system version 3.2.0.78 SIP is supported.
1. General
The Session Initiation Protocol (SIP) has been developed by the IETF (= I
nternet Engineering Task Force) and is described in rfc 3261 (www.ietf.org/
rfc/rfc3261.txt).
This protocol can be used to establish, modify and terminate multimedia
sessions and is currently used in most Voice over IP (VoIP) and Internet
telephony applications.
As a client-server protocol, SIP is similar to HTTP and SMTP (e-mail). Its
requests and responses are text strings containing information about the
session that is to be established. SIP addresses are composed using a syntax
similar to e-mail addresses e.g. sip:[email protected].
The complete separation of signalling and transport layer (i.e. of connection
data and media data), as implemented in SIP allows the user to establish a
connection in a unified way without prior knowledge of the exact location of
other participants and not depending on the nature of the transferred data.
The SIP protocol can furthermore be used to let two devices auto-negotiate
the parameters (e.g. algorithm, sample rate,...) of the multimedia session.
The constantly growing acceptance of SIP - due to recent developments in
fields like Internet telephony and UMTS - guarantees for a steady growth and
expansion of infrastructure. Since SIP supports the negotiation of bandwidth
reservation and reservation is needed for good quality Internet telephony,
network providers will need to deploy mechanisms for bandwidth reservation
Copyright: 2008 Mayah Communications
Necessary settings for framed connections
49
in their networks – a critical need for all professional Audio-Over-IP
applications.
In addition SIP is also part of the “Next Generation Network (NGN)” as
defined by the European Telecommunications Standards Institute (ETSI) and
is thought to be a replacement for ISDN. Since ISDN will eventually disappear
in most countries the designated successor has been appointed: SIP.
2. How SIP works
2.1 Application Example
The above diagram shows two CENTAURI's II in a possible SIP scenario.
While Centauri A is at a well known fixed location with a fixed IP address (e.g.
in a control room) Centauri B is built into an OB van and therefore uses an IP
address unknown to Centauri A. A direct session establishment from Centauri
A to B (e.g. using a direct RTP connection) is therefore not possible.
To establish a session via SIP the first step to be taken is a registration of
Centauri B with a registration server. These servers are usually located at an
SIP service provider or ISP. In-house solutions (e.g. using an Asterisk
Server) are also possible.
By registering itself with the registration server the current IP address of the
mobile Centauri is mapped to a SIP address (like sip:[email protected]).
Now Centauri A can use this SIP address to connect to Centauri B. To
accomplish this Centauri A first contacts a Location Server that maps the SIP
address to the current IP address of Centauri B and redirects the call to this
IP address. Now a direct session can be established between Centauri A and
B. (For a more detailed explanation of this process please see 2.2.3) )
Copyright: 2008 Mayah Communications
50
CENTAURI II User Manual
2.2 A closer look at SIP
2.2.1 Simple Session establishment
An SIP session between two clients is established using a handshake
mechanism. Illustration 2 shows a simple call flow used to establish and
terminate a media session. After an invitation by user agent 1 (UA1) the
callee user agent 2 (UA2) tries to find the requested callee (2: 100/
Trying) and indicates the incoming call to the user (2: 180/Ringing). If the
user at UA2 accepts the call a “200/OK” message is sent and UA1
acknowledges the response with an “ACK” message. Now a direct
media connection between the two user agents is established. In some
cases (e.g. an automatic answer mode) the messages “Trying” and
“Ringing” are not sent by the user agent.
A Session Description Protocol (SDP) file is appended to messages 1
and 3 (sometimes also to message 4). With the help of these SDP files
the user agents can negotiate the parameters (algorithm, bit rate,
sample rate) to be used with the media connection. While this
mechanism is suitable and well-defined for VoIP applications, where the
number and parameters of algorithms are limited, it requires some
further improvements in order to function with a larger number of
professional algorithms.
To terminate a session, any user agent simply sends a “BYE” message
which is acknowledged by a “200/OK” message from the other end.
Then the session will be terminated.
Copyright: 2008 Mayah Communications
Necessary settings for framed connections
51
2.2.2 Call Proxying
The above example of a direct SIP session between two clients is of
course neither practical nor realistic. Most of the time, as stated in the
example given in 2.1 intermediate servers are involved in a session
establishment. One of the most common types of servers is a proxy
server. If connecting through public networks a SIP negotiation will most
probably involve one or more proxy servers.
The diagram above shows what a typical call flow including a proxy
server looks like. For reasons of simplicity the picture shows only one
proxy server between the clients, where in most public networks there
would be a chain of several proxy servers. The proxy server in this
example is able to provide a location service by the means of a
connection to a location server. When the proxy receives an “INVITE”
message it checks with the location server to find out the current location
(IP address) of the callee (UA2) and responds to the caller (UA1) with a
“100/Trying” message. In a next step the server sends the (modified)
“INVITE” message to the callee. A “180/Ringing” message received by
the proxy server from the callee is then forwarded to the caller. The
same happens to a “200/OK” message. The “ACK” message may then
be sent directly to the callee, since the caller may have learned the
current address of the callee.
Please note that from the point of view of any of the involved user agents
the session establishment is not differing from the simple call flow in
2.2.2). The proxy server (or servers) are completely transparent to the
Copyright: 2008 Mayah Communications
52
CENTAURI II User Manual
user agents.
3. Configuration steps on
side
3.1 Codec settings
Configure the codec settings via menu item Settings/Codec:
· Interface: IP/RTP
· Encoder dependency: Remote
· Encoder algorithm: Algorithm supported by the other side codec
· Decoder dependency: Remote
3.2 Establish Connection
Click the CONNECT button to open the Connect-dialog:
· Select interface to IP
· Select SIP
· Type in the SIP address
· Click the OK-button to establish connection
4. Recommendable settings for miscellaneous SIP providers
4.1 T-Online
· Registrar: tel.t-online.de
· Stun Server: stun.t-online.de
· Packet size: 156 Bytes (Configuration via menu item Settings/Network)
2.4.13 MPEG Transport Stream
Since
system version 3.2.0.92 MPEG TS is supported. This
chapter does not describe the whole MPEG TS standard but the features
supported by
.
1. General
The MPEG TS standard which was adopted as ISO/IEC 13818 – 1 defines ways
Copyright: 2008 Mayah Communications
Necessary settings for framed connections
53
of multiplexing more than one stream (audio, video and data) into one program. A
program consists of one or more Program Elementary Streams (PES), which may
or may not be MPEG encoded. The multiplexing process discerns 2 different
schemes:
1.1 Transport Stream (TS)
· intended for storage and transmission in non-error-free environments
· fixed length (188 byte)
· multiple reference clocks possible
· e.g. Broadcasting, ATM
1.2 Program Stream (PS) – not covered in this chapter
· intended for storage and transmission in error-free environments
· large/multiple length packets
· single reference clock
· e.g. DVD
Creation of transport stream in
:
Packetization of an elementary stream into TS-packets:
2. Elements of MPEG TS
Here the MPEG-2 TS terms supported by
are explained.
2.1 Packet
A packet is the basic unit of the MPEG-2 Transport Stream and consists of a
packet header, an optional adaption field and/or an optional payload field. A
packet is a cell of 188 bytes with a header size of 4 bytes and a payload/adaption
field size of 184 bytes. Stuffing of a TS-packet is possible.
Copyright: 2008 Mayah Communications
54
CENTAURI II User Manual
TS packet header:
2.2 PID (Packet/Program identifier)
The PID is used to identify distinct elementary streams within the transport
stream. The PID is a 13 bit value what allows the differentiation between a
maximum of 8192 different PID's. TS packets with a PID of 0, 1 or 2 are special
packets that include program specific information (PSI).
The PID’s in the range from hexadecimal 0 to 15 are reserved by the ISO/IEC
13818-1.
2.3 Program
A program in an MPEG-TS is defined as a collection of PID’s that are related to
each other (audio, video and data). Each Transport Stream comprises of one or
more programs. The easiest comparison of a program might be a TV or radio
channel.
At the moment
supports only one program (stereo audio channel).
2.4 Program Specific Information (PSI):
The PSI information is used by the decoder to ‘learn’ about the currently
received/decoded transport stream.
The MPEG-2 TS standard defines 4 tables from which the first 2 are currently
used in the
:
2.4.1 PAT (= Program Association Table):
The PAT contains a complete list of all programs in the transport stream along
with the PID (= Program Identifier) for the PMT (= Program Map Table) of each
program. More or less PAT is a summary of the PID’s of the PMT’s.
PAT has got the PID = 0.
2.4.2 PMT (= Program Map Table)
PMT contains information about individual programs. There is one PMT PID for
Copyright: 2008 Mayah Communications
Necessary settings for framed connections
55
each program. The PMT combines all relevant PID’s for the particular program.
You can say that the PMT provides the mapping between the program number
and the program elements that comprise them.
3. Synchronization of elementary streams
For the reconstruction of the original program the MPEG-2 TS standard
introduces mechanisms for synchronization of different streams within a program.
Therefore timestamps are inserted by the encoder. These timestamps are based
on the STC (= System Time Clock; 27 MHz) which is the reference for the
program and the master clock of the audio signal.
After multiplexing, the encoding system inserts a reference clock to regenerate
the STC on the decoding side.
3.1 PCR (= Program Clock Reference)
The PCR is the reference clock that is used to synchronize both encoder and
decoder.
The PCR information is a 42 bit value of the adaption field which includes the
PTS and DTS (see item 3.2).
The regeneration of the STC (= System Time Clock) on the receiving side
depends on transmitting PCR’s through the system. PCR’s are inserted at a
maximum interval of 100 ms and are measured in units of one period of a 27 MHz
clock.
The synchronization/regeneration of the STC on the receiving side is affected by
variable delay or jitter of the link.
3.2 PTS (= Presentation Timestamp) and DTS (= Decoding Timestamp)
The Presentation Timestamp and the Decoding Timestamp are added to the
audio frame (called Access Unit).
The PTS indicates when an audio frame should be removed from the receiver
buffer, decoded and presented, while the DTS indicates when an audio frame
should be removed from the receiver buffer and decoded.
Both PTS and DTS are entered in the bit stream at intervals not exceeding 700
ms. The timestamps are expressed in units of one period of a 90 kHz clock
(retrieved from the 27 MHz system clock). In an audio-only stream (e.g at
) the PTS is identical to the DTS.
Creation of PTS and DTS:
Copyright: 2008 Mayah Communications
56
CENTAURI II User Manual
4. Configuration steps on
side
MPEG TS connections can be configured and established via menu item Expert/Session.
2.4.14 IP Ports
Generally it be must distinguished among six kinds of ports:
1. TCP and UDP audio ports
Here the ports are determined by the first audio port. The first audio port is 2001
by default and it can be set by the direct command ‘ip_audioport’(see menu
item Expert/Direct Command).
All the default IP ports of
are listed in the appendix of the
Communication Reference Manual (www.mayah.com/content/download/pdfs/
manuals/communication-reference_man.pdf).
2. Remote control port
The remote control port is:
IP remote port := first IP audio port - 1
Therefore the default IP remote port is 2000.
3. RTP audio ports
By default the RTP audio ports are:
a) System version < x.2.0.30:
- Sub codec 1: 5004 and 5005 (for RTCP)
- Sub codec 2: 5006 and 5007 (for RTCP)
- Sub codec 3: 5008 and 5009 (for RTCP)
- Sub codec 4: 5010 and 5011 (for RTCP)
b) System version >= x.2.0.30:
- Sub codec 1: 5004 and 5005 (for RTCP)
- Sub codec 2: 5014 and 5015 (for RTCP)
- Sub codec 3: 5024 and 5025 (for RTCP)
- Sub codec 4: 5034 and 5035 (for RTCP)
Note:
x = 2 for CENTAURI and x = 3 for CENTAURI II, MERKII and GANYMED 1102
However, the RTP audio ports can be changed at establishing the connection by
enhancing the IP-address with the delimiter ‘:’ and the requested RTP port.
For instance:
225.0.0.11:5015
This establishes a connection to Multicast address 225.0.0.11 using the port
5015.
4. SAP port
SAP announcements are sent on port 9875. You can get more info about SAP at
SAP streaming.
Copyright: 2008 Mayah Communications
Necessary settings for framed connections
57
5. UDP level information
This remote control software makes
sending out its level
information at port 2060.
How to activate level display is described in help chapter of menu item <Expert/
Options> at item level meter interval.
6. UDP Scan
By default the port for UDP scan (for available
) is incremented by
every UDP scan. At first UDP scan it starts with port 2061.
However, the port for UDP scan can be set to a fixed value by a registry entry.
This not officially supported feature is described in the readme file
‘README_Static_UDP_Port.txt’. If you are interested in this file, please contact
[email protected].
2.4.15 IP Overhead
1) General
At IP-transmissions the data stream consists of
· Payload (pure audio data e.g. one or more MPEG frame)
· IP Overhead
2) IP Overhead in Bytes
The IP overhead in Byte is at :
2.1 UDP
46 Byte consisting of:
· IEEE802.3: 18 Byte
· IP: 20 Byte
· UDP: 8 Byte
2.2 RTP
58 Byte consisting of:
· IEEE802.3: 18 Byte
· IP: 20 Byte
· UDP: 8 Byte
· RTP: 12 Byte
Note:
The RTP header is 12 Byte and not 16 Byte long since no contribution source
identifiers are used.
2.3 MPEG TS
50 Byte consisting of:
· IEEE802.3: 18 Byte
· IP: 20 Byte
Copyright: 2008 Mayah Communications
58
CENTAURI II User Manual
· UDP: 8 Byte
· MPEG TS Header: 4 Byte
3) IP Overhead percentage calculation
3.1 UDP
If the packet size mode is set variable then the payload is also rounded to the
next full audio frame (MPEG) or audio block.
Here some examples for IP overhead calculation at UDP connections with
variable packet size:
Copyright: 2008 Mayah Communications
Necessary settings for framed connections
The following diagram shows the percentaged IP overhead at
- Algorithm: MPEG L3
- Sample rate: 48 kHz
- UDP
- packet size = 180 Byte (default value)
- packet size mode: var (default value)
3.2 RTP
Similar to UDP calculation but it must be considered that the size of all
headers is 58 Byte instead of 46 Byte.
Example:
Algorithm: MPEG L2
Sample rate: 48 kHz
Bit rate: 256 kbit/s
Frame length = 256/48 * 144 Byte = 768 Byte
IP Overhead = ((768 Byte + 58 Byte)/768 Byte –1) * 100 % = approx. 7.6%
3.3 MPEG TS
Each MPEG TS packet is 188 Byte long and consist of
· payload: 184 Byte
· MPEG TS Header: 4 Byte
Since
uses MPEG TS with UDP the whole overhead of one
packet is 50 Byte (see item 2.3).
3.3.1 Theoretical optimum overhead
The optimum (i.e minimum) overhead is reached if
· every MPEG frame just needs one packet (and therefore the overhead just
must be sent once for every frame)
· frame length = 184 Byte
Then the IP overhead is calculated to:
Copyright: 2008 Mayah Communications
59
60
CENTAURI II User Manual
IP Overhead = ((184 Byte + 50 Byte)/184 Byte -1 ) * 100 % = approx. 27.2 %
3.3.2 Real overhead
Since the real MPEG frame length is usually different to 184 Byte and
cannot transport part of two frames in a MPEG TS frame, the
real overhead is usually much bigger then the theoretically optimum one.
Example 1 (bad overhead):
Algorithm: MPEG L3
Sample rate: 48 kHz
Bit rate: 128 kbit/s
Frame length: 128/48 * 144 Byte = 384 Byte
Frame length of 384 Byte means that 3 MPEG TS packets are necessary to
transport one frame. This means:
IP Overhead = ((3*(MPEG TS packet + All other overheads))/384 Byte) – 1) *
100 %
= ((3*(188 Bytes + 46 Byte)/384 Byte –1) + 100% = approx.
82.8%
Example 2 (good overhead):
Algorithm: MPEG L3
Sample rate: 44.1 kHz
Bit rate: 56 kbit/s
Frame length: 56/44.1 * 144 Byte = 183 Byte
Frame length of 183 Byte means that just one MPEG TS packets is necessary
to transport one frame. This means:
IP Overhead = (((MPEG TS packet + All other overheads))/183 Byte) – 1) *
100 %
= (((188 Bytes + 46 Byte)/183 Byte –1) + 100% = approx. 27.9 %
2.4.16 Optimize IP Connections
Problems at IP-audio-connections between
the following actions:
· Increasing the IP audio delay on the decoder side
· Adapt transfer rate and duplex mode
· Adjust Type of service
· Adapt packet size
can be solved by
1. Increasing the IP audio delay on the decoder side
The IP audio delay can be set from 0 ms (default) up to 5000 ms at menu
item Settings/Network. Increasing the audio delay means that first all received
audio data is buffered before it is decoded. Such buffering helps to prevent
audio interruptions and distortions caused by jitters.
The bigger the receive buffer the more reliable the audio IP transmissions is.
On the other hand the audio delay increases.
2. Adapt transfer rate and duplex mode
Copyright: 2008 Mayah Communications
Necessary settings for framed connections
61
Sometimes interruptions or distortions of IP audio transmissions are caused
by improper auto sensing of the network equipment (switch, hub , router etc.).
In this case the transfer rate and the duplex mode should be changed ‘auto’ to
the settings of the network. This can be at menu item Settings/Network.
Example:
With some network switches it is useful to change
· transfer rate from ‘auto’ to ‘100 Mbit/s’
· duplex mode from ‘auto’ to ‘half’
3. Adjust Type of Service
supports ToS feature (Type of Service). Basic info and how to
set the ToS is described in application note 20 on Mayah Website (www.
mayah.com/content/download/pdfs/appnotes/centauri/a_n_e_020.pdf).
4. Adapt packetsize
Sometimes interruptions and distortions of IP transmissions are caused by the
fact that the upload and/or download capacity is too small. Therefore it should
be considered the really needed bit rate is higher than the bit rate of encoder
due to the IP overhead. At UDP transmissions this IP overhead does not
fluctuate and can be calculated exactly. More details about UDP/IP overhead
calculation can be found in chapter IP Overhead.
Usually the bigger packet size is the smaller the IP overhead is.
However, there is one restriction:
If the payload (audio data) plus the IP overhead is bigger than max. possible
packet size value allowed by the
network card (i.e. 1,514 Byte at
electrical
Ethernet card), then the rest of the payload is written
to next packet. This can cause very big IP overheads.
Therefore the
enables to set the IP packet size mode to variable
and fix.
4.1 IP packet size mode
The IP packet size mode can be set at menu item Settings/Network to
(provided system software version 2.2.0.0 or later is used ):
· variable (default)
This means that the payload is rounded to the next full frame or audio block
Advantage:
No fractional audio frames or blocks in the IP packets
Disadvantage:
With algorithms with no fixed frame length (e.g. AAC) it can happen that the
max. possible packet size is exceeded.
· fixed
This means that IP payload is exactly the same as the packetsize value set
in menu item Settings/Network (i.e. it is not rounded to the next full audio
frame or audio block).
Advantage:
Even with algorithms with variable frame length the packet size is fixed.
Disadvantage:
Copyright: 2008 Mayah Communications
62
CENTAURI II User Manual
IP packet can have fractional audio frames or audio blocks.
· sync.
Same as fixed but additionally packets are transmitted in synchronized
intervals.
Advantage:
Same as with fixed but additionally adaption to network equipment which
has got problems with unsynchronized packets.
Disadvantage:
Same as with fix.
2.4.17 Winsock Error codes
A list of winsock error codes can be opened with the following link:
http://help.globalscape.com/help/support/error_codes/winsock_error_codes.
htm.
2.4.18 Forward Error Correction (FEC)
Since system version 3.2.0.122 Forward Error Correction (FEC) is supported
for all RTP connections.
1. General
In real life IP transmissions IP packets can be lost since
- routers discard them since they are damaged
- routers discard them since other traffic has got higher priority
- different routing
FEC provides the possibility of error detection and/or correction by adding
redundant data. Thereby retransmission or corruption of data can often be
avoided at the cost of higher bandwidth needs and increased delay.
The FEC algorithm used by MAYAH is described in the “Pro-MPEG Code of
Practice #3 release (www.pro-mpeg.org) based on rfc 2733 (www.ietf.org/rfc/
rfc2733.txt).
Opposed to other FEC schemes used for e.g. satellite transmissions this
algorithm correct single bits inside an IP packet, but the recreation of entirely
lost IP packets. This is essential for the use in IP based networks, since due
to the nature of these networks the most common transport problem is a
complete loss of one or several successive packets (burst loss).
2. How it works
FEC generates additional packets using matrixes. Every FEC matrix has got L
columns and D rows to create additional packets, but with following
restrictions:
L x D <= 100
1 <= L <= 20
Copyright: 2008 Mayah Communications
Necessary settings for framed connections
63
4 <= D <= 20
FEC packets are generated from RTP packets by a XOR (exclusive or)
operation. Each FEC packet corresponds to one row or column.
The FEC packets are transmitted on dedicated ports in separate streams.
There is always a stream for column FEC packets (2 ports above media port;
usually port 5006), optional also row FEC packets can be sent (4 ports above
media port; usually port 5008).
Lost Packets at a RTP transmission using a FEC (4,4) matrix
Copyright: 2008 Mayah Communications
64
CENTAURI II User Manual
Recreation of lost packets in a FEC (4,4) Matrix:
As you can see in the pictures above all lost RTP media packets can be
rebuilt. Just if the referring FEC column and row misses, RTP packet
recreation is impossible.
3. Parameters
Generally a lot of matrix combinations are available. However, to enhance the
clarity
offers most typical FEC parameters described in the
diagram below.
Copyright: 2008 Mayah Communications
Necessary settings for framed connections
65
Most typical FEC Parameters
Description of FEC parameters in the diagram above:
· L,D
Number of columns (L) and rows (D)
· Mode
C: column FEC only
CR: column and row FEC
· Overhead
Overhead introduced by FEC
Example:
L=4, D=2 -> matrix size = 8 packets -> 4 column FEC packets generated
and transmitted per matrix equals 50%
· Buffer size
In order to perform the FEC operation L x D packets have to be retained in a
buffer. The above diagram presumes an MPEG TS transmission with 7
packets combined in one media packet, so that one media packet has the
size of 7 x 188 bytes = 1316 bytes. An FEC packet has the size of a media
packet plus a special FEC header of 16 bytes: 1316bytes + 16 bytes = 1332
bytes. A matrix size of 4 x 2 = 8 corresponds thus to a buffer of 8 x 1332 =
10656 bytes
· Latency
This shows what a given buffer size corresponds to at a certain line speed
(3Mbps, 10Mbps, 100Mbps). (10656bytes x 8 = 85248 bits / 3 Mbps =
0,02842s = 28,42ms)
Note:
This is just the theoretical minimum latency. Encoding time, decoding time
and decoding buffer are not evaluated. Especially in CR mode with certain
Copyright: 2008 Mayah Communications
66
CENTAURI II User Manual
patterns of packet loss the latency will be significantly higher.
· Recovery
The maximum number of IP-Packets that can be recovered. In CR mode this
value is determined by the pattern of which packets are lost.
4. Configuration steps on
side
FEC can be set at menu item Settings/Network provided
version 3.2.0.122 (or later) is installed.
2.5
How to establish X.21/V.35 connections
2.5.1
X.21 versus V.35
system
The
X.21/V.35 protocol can be set via menu item Settings/X.21.
X.21 and V.35 are both synchronous transmission standards. However, X.21
uses balanced signal and handshake lines whereas V.35 has got balanced
signal lines but unbalanced handshake lines. Therefore the range of V.35
cables is undefined whereas X.21 allows cable length up to 1 km.
Furthermore the voltage levels of X.21 and V.35 are different.
The pin layout of
X.21 and V.35 (plus pin layouts of
miscellaneous cables) is described in the CENTAURI interface manual at
chapter 1.5. This interface manual can be found at www.mayah.com/content/
download/pdfs/manuals/centauri-interface_eng.pdf.
2.5.2
X.21 clocking
X.21/V.35 clocking can be set via menu item Settings/X.21.
X.21/V.35 interface supports three clock interfaces. If these
clocking interfaces are used for input or output clocking depends on the
selected mode.
The default clocking for DTE mode is T4T1T4 whereas for DCE mode T2T4.
The meaning of the different clockings are described in the CENTAURI
interface manual at chapter 1.5.2. This interface manual can be found at www.
mayah.com/content/download/pdfs/manuals/centauri-interface_eng.pdf.
2.5.3
DTE versus DCE
supports for X.21/V.35 DTE and DCE mode. This mode can be
set via menu item Settings/X.21.
DTE (= Data Terminal Equipment) means that
gets its clocking
from the dedicated X.21/V.35 line. Usually this is the standard mode.
DCE (= Data Circuit Equipment) means that
supplies the
clocking for the X.21/V.35 dedicated line. Usually this is not the standard
mode but e.g. it can be used to connect two
back to back via
Copyright: 2008 Mayah Communications
Necessary settings for framed connections
67
X.21.
2.5.4
Mayah codec (DTE) to Mayah codec (DTE)
When two MAYAH codecs are connected via a dedicated X.21/V.35 line
usually both devices use DTE mode i.e. the clock is supplied by the dedicated
X.21/V.35 line.
1. Cables
Standard X.21 DTE cable:
Copyright: 2008 Mayah Communications
68
CENTAURI II User Manual
Standard V.35 DTE cable:
:
2. Configuration of X.21 interface
The X.21 interface settings can be configured via menu item Settings/X.21.
The following settings are recommended for X.21:
· X.21 mode: DTE
· X.21 clocking: T4 or T4T1T4
· X.21 protocol: X.21
The following settings are recommended for V.35:
· X.21 mode: DTE
· X.21 clocking: T4 or T4T1T4
· X.21 protocol: V.35
3. Configuration of Codec Settings
The codec settings can be configured via menu item Settings/Codec.
3.1 Configuration for MPEG transmissions:
· Interface: X.21/V.35
· Encoder dependency: Local (first MAYAH codec) and Remote (second
MAYAH codec)
Copyright: 2008 Mayah Communications
Necessary settings for framed connections
69
· Encoder bit rate: clock rate of X.21/V.35 line
· Decoder dependency: Remote
Note:
Unlike with ISDN and IP connections at X.21/V.35 transmissions there is no
signalling when the network layer is established. Therefore there is no
initiation point to start the normal telegram exchange between
set to remote. Thus the dependency of one
must be set to local
to pump out audio data all the time. The
set to local also
determines the algorithm, the sample rate and the mode.
3.2 Configuration for G.722 and APT-X transmissions:
· Interface: X.21/V.35
· Encoder dependency: Local (on both MAYAH codec)
· Encoder algorithm: Must be identical on all involved encoders and decoders
· Encoder sample rate: Must be identical on all involved encoders and
decoders
· Encoder bit rate: clock rate of X.21/V.35 line
· Encoder mode: Must be identical on all involved encoders and decoders
· Decoder dependency: Local (on both MAYAH codec)
· Decoder algorithm: Must be identical on all involved encoders and decoders
· Decoder sample rate: Must be identical on all involved encoders and
decoders
· Decoder bit rate: clock rate of X.21/V.35 line
· Decoder mode: Must be identical on all involved encoders and decoders
4. Establish X.21/V.35 Connection
Click the CONNECT button to open the Connect-dialog:
· Select the interface to X.21/V.35
· Select the X.21/V.35 port to:
Port 1:
Audio data stream is sent and received via X.21/V35 port 1
or
Port 2:
Audio data stream is sent and received via X.21/V35 port 2
or
Port 1 & 2:
Audio data stream is sent out via X.21/V35 port 1 and 2 simultaneously
(i.e. two audio data streams via two dedicated lines)
or
IMUX Port 1 & 2:
One audio data stream is split and sent out via X.21/V.35 port 1 and 2
using CCS inverse multiplexing.
· Click the OK-button to establish connection
Note:
Usually port 1 is selected.
Note 2:
Copyright: 2008 Mayah Communications
70
CENTAURI II User Manual
The X.21/V.35 connection must be established on both MAYAH codecs.
5. Disconnect X.21/V.35 Connection
Just press the DISCONNECT button.
Note:
The X.21/V.35 connection should be disconnected on both MAYAH codecs.
6. Auto reconnect of X.21/V.35 connections
As long as a X.21/V35 connection is not disconnected the
looks
for the appropriate clocking on the X.21/V.35 line all the time. This means that
a switched off X.21/V35 line is detected automatically by
as
soon as it is re-activated.
7. Meaning of LED’s at X.21/V.35 connections
· Blinking Connect LED:
Bit rate of
and clock rate of X.21/V.35 line does not
correspond.
· Lit up Connect LED:
Clock rate of X.21/V.35 line is detected.
· Lit up Framed LED:
Framed X.21/V.35 connection
2.5.5
MAYAH codec (DTE) to another X.21/V.35 codec
When a MAYAH codec is connected via a dedicated X.21/V.35 line to another
codec usually both devices use DTE mode i.e the clock is supplied by the
dedicated X.21/V.35 line.
1. Cables
Standard X.21 DTE cable:
Copyright: 2008 Mayah Communications
Necessary settings for framed connections
71
Standard V.35 DTE cable:
:
2. Configuration of X.21 interface
The X.21 interface settings can be configured via menu item Settings/X.21.
The following settings are recommended for X.21:
· X.21 mode: DTE
· X.21 clocking: T4 or T4T1T4
· X.21 protocol: X.21
The following settings are recommended for V.35:
· X.21 mode: DTE
· X.21 clocking: T4 or T4T1T4
· X.21 protocol: V.35
3. Configuration of Codec Settings
The codec settings can be configured via menu item Settings/Codec.
3.1 Configuration for MPEG transmissions:
· Interface: X.21/V.35
· Encoder dependency: Remote
· Encoder bit rate: clock rate of X.21/V.35 line
Copyright: 2008 Mayah Communications
72
CENTAURI II User Manual
· Decoder dependency: Remote
3.2 Configuration for G.722 and APT-X transmissions:
· Interface: X.21/V.35
· Encoder dependency: Local
· Encoder algorithm: Must be identical on all involved encoders and decoders
· Encoder sample rate: Must be identical on all involved encoders and
decoders
· Encoder bit rate: clock rate of X.21/V.35 line
· Encoder mode: Must be identical on all involved encoders and decoders
· Decoder dependency: Local
· Decoder algorithm: Must be identical on all involved encoders and decoders
· Decoder sample rate: Must be identical on all involved encoders and
decoders
· Decoder bit rate: clock rate of X.21/V.35 line
· Decoder mode: Must be identical on all involved encoders and decoders
4. Establish X.21/V.35 Connection
Click the CONNECT button to open the Connect-dialog:
· Select the interface to X.21/V.35
· Select the X.21/V.35 port to:
Port 1:
Audio data stream is sent and received via X.21/V35 port 1
or
Port 2:
Audio data stream is sent and received via X.21/V35 port 2
or
Port 1 & 2:
Audio data stream is sent out via X.21/V35 port 1 and 2 simultaneously
(i.e. two audio data streams via two dedicated lines)
or
IMUX Port 1 & 2:
One audio data stream is split and sent out via X.21/V.35 port 1 and 2
using CCS inverse multiplexing.
· Click the OK-button to establish connection
Note:
Usually port 1 is selected.
5. Disconnect X.21/V.35 Connection
Just press the DISCONNECT button.
6. Auto reconnect of X.21/V.35 connections
As long as a X.21/V35 connection is not disconnected the MAYAH codec
looks for the appropriate clocking on the X.21/V.35 line all the time. This
means that a switched off X.21/V35 line is detected automatically by the
MAYAH codec as soon as it is re-activated.
Copyright: 2008 Mayah Communications
Necessary settings for framed connections
73
7. Meaning of LED’s at X.21/V.35 connections
· Blinking Connect LED:
Bit rate of
and clock rate of X.21/V.35 line does not
correspond.
· Lit up Connect LED:
Clock rate of X.21/V.35 line is detected.
· Lit up Framed LED:
Framed X.21/V.35 connection
2.5.6
MAYAH codec (DCE) to MAYAH codec (DTE) via crossover cable
Since MAYAH codecs support DCE- and DTE-mode it is possible to simulate
an X.21 dedicated line between two MAYAH codecs without having a real
dedicated X.21 line. For this just one MAYAH codec must be set to DCE mode
to supply the clock. Furthermore a special DCE-DTE cable is necessary.
1. Cables
X.21 DCE-DTE crossover cable:
2. Configuration of X.21 interface
The X.21 interface settings can be configured via menu item Settings/X.21.
The following settings are recommended for the first MAYAH codec (DCEMAYAH codec):
· X.21 mode: DCE
· X.21 clocking: T2T4
· X.21 protocol: X.21
The following settings are recommended for the second MAYAH codec (DTEMAYAH codec):
· X.21 mode: DTE
· X.21 clocking: T4
· X.21 protocol: X.21
Copyright: 2008 Mayah Communications
74
CENTAURI II User Manual
3. Configuration of Codec Settings
The codec settings can be configured via menu item Settings/Codec.
The following settings are recommended for the first MAYAH codec (DCEMAYAH codec):
3.1 Configuration for MPEG transmissions:
The following settings are recommended for the first MAYAH codec (DCEMAYAH codec):
· Interface: X.21/V.35
· Encoder dependency: Local
· Encoder bit rate: clock rate to be tested
· Decoder dependency: Remote
The following settings are recommended for the second MAYAH codec (DTEMAYAH codec):
· Interface: X.21/V.35
· Encoder dependency: Remote
· Encoder bit rate: encoder bit rate of the DCE- MAYAH codec
· Decoder dependency: Remote
3.2 Configuration for G.722 and APT-X transmissions:
· Interface: X.21/V.35
· Encoder dependency: Local (on both MAYAH codec)
· Encoder algorithm: Must be identical on all involved encoders and decoders
· Encoder sample rate: Must be identical on all involved encoders and
decoders
· Encoder bit rate: clock rate of X.21/V.35 line (i.e. encoder bit rate of DCEMAYAH codec)
· Encoder mode: Must be identical on all involved encoders and decoders
· Decoder dependency: Local (on both MAYAH codec)
· Decoder algorithm: Must be identical on all involved encoders and decoders
· Decoder sample rate: Must be identical on all involved encoders and
decoders
· Decoder bit rate: clock rate of X.21/V.35 line (i.e. encoder bit rate of DCEMAYAH codec)
· Decoder mode: Must be identical on all involved encoders and decoders
4. Establish X.21 Connection
Click the CONNECT button to open the Connect-dialog:
· Select the interface to X.21/V.35
· Select the X.21/V.35 port to:
Port 1:
Audio data stream is sent and received via X.21/V35 port 1
or
Port 2:
Audio data stream is sent and received via X.21/V35 port 2
· Click the OK-button to establish connection
Copyright: 2008 Mayah Communications
Necessary settings for framed connections
75
Note:
Usually port 1 is selected.
Note 2:
The X.21 connection must be established on both MAYAH codecs.
5. Disconnect X.21/V.35 Connection
Just press the DISCONNECT button.
Note:
The X.21 connection should be disconnected on both MAYAH codecs.
6. Auto reconnect of X.21/V.35 connections
As long as a DCE-MAYAH codec is connected it also supplies a clock for the
DTE-MAYAH codec. The DTE-MAYAH codec looks for this clocking on its
X.21 port as long as it is connected. This means that the DTE-MAYAH codec
reconnects automatically to the DCE-MAYAH codec.
7. Meaning of LED’s at X.21/V.35 connections
· Blinking Connect LED:
the Bit rate of the DCE-MAYAH codec and the DTE-MAYAH codec does not
correspond.
· Lit up Connect LED:
After connection the bit rate of the DCE-MAYAH codec and the DTEMAYAH codec corresponds.
· Lit up Framed LED:
Simulated X.21/V.35 connection is framed.
2.6
How to establish ASI connections
2.6.1
ASI Basics
ASI stands for Asynchronous Serial Interface.
In
ASI is used to stream MPEG TS.
Mechanical and electrical specification
ASI uses BNC connectors terminated with 75 Ohms. The signalling level is
800 mV peak to peak. Maximum cable length of the BNC cables is 300
meters.
Bit structure
Every Byte is wrapped by a start and stop bit. i.e. a start bit is sent, followed
by eight data bits and terminated by a stop bit. Such a 10 bit structure is also
called 8B10 coding.
Clocking
ASI uses SDI clock described in SMPTE 259M i.e. a 27 MHz clock multiplied
Copyright: 2008 Mayah Communications
76
CENTAURI II User Manual
by 10bits. This means a maximum brutto bit rate of 270 Mbps.
If lower bit rates are used then padding bits fill up the 270 Mbps.
Applications
· STL (Studio Transmission Line)
· SNG (Satellite News Gathering) and ENG (Electronic News Gathering)
· SPTS (= single program transport stream)
· MPTS (= multiple program transport stream)
Others
Competing standard is SMPTE 305M (SDTI).
Copyright: 2008 Mayah Communications
Part
III
78
CENTAURI II User Manual
3
Elements of Frontpanel Control
3.1
Preface
All audio gateways of the
family have signal level display on the
unit front. Additionally
of type 3001, 3301 and 4001 have a
display and a keyboard. With these devices therfore you can set up a
connection to another communication partner immediately as soon as you
have unpacked such a device and connected it up to the mains and ISDN.
of type 3000, 3301 and 4001 can be just controlled via IP or
RS232 (e.g. via Web remote control or Windows remote control).
offers both analogue and digital audio (compliant with AES/3) at
up to 96kHz sampling rates, with 24-bit resolution A/D and D/A converters.
Coding algorithms such as G.711, G.722, MPEG-1/2 Layer 2, MPEG-1/2 Layer
3, MPEG-2/4 AAC, AAC (LD), AAC (HE), MP3PRO, APT-X and Enhanced
apt-X are all available, in addition to its ability to handle linear audio. All of
which, combined with networking via ISDN, X.21, V.35 and Ethernet, further
serve to illustrate the uniqueness of the Centauri family.
The biggest improvements to the very successful CENTAURI I are:
·
The Gateway functionality
·
The Backup functionality
·
The Point to Multipoint functionality
·
The Dual Codec functionality
·
The Multi channel functionality (e.g. 5.1 transmission)
Copyright: 2008 Mayah Communications
Elements of Frontpanel Control
79
Please send technical questions regarding the Centauri II and its front panel
to [email protected].
3.2
LED'S
3.2.1
Level LED'S
By the LED level meter you will receive notice about the signal strength of the
incoming and/or of the outgoing signal. The level of the level meter can be
configured via front panel menu item SETUP/FRONTPANEL/ LEVELMETER.
At audio inputs the first LED of a row lights up orange even if no audio is there.
Copyright: 2008 Mayah Communications
80
3.2.2
CENTAURI II User Manual
Status LED's
The
has three status LED columns. You are getting informed about
the system health of the system, regarding the Encoder, Decoder or the status of
the
.
Connect
codec.
Lights up when a connection is established to another
Activity/framed
another codec
Lights up when a synchronized connection is established to
ISDN IP X21 E1
the used connection will light up
Power
Lights up when the
is turned on
Alarm Lights up in case of an error (e.g.: too hot, fan error, voltage error).
Flashing when an update failed and the CENTAURI II System software was
damaged
Dual Codec Lights up when this function was activated
Multipt/cast Lights up when this function was activated
Gateway
Lights up when this function was activated
Backup
Lights up when this function was activated
Copyright: 2008 Mayah Communications
Elements of Frontpanel Control
3.3
Keyboard
3.3.1
Hot Keys
81
The hot keys F1 to F4 can be freely programmed by assigning scripts. Such a
script consists of one are more direct commands as described in the
Communication Reference manual (link:
www.mayah.com/content/download/pdfs/manuals/communication-reference_man.
pdf). The script can be created with any ASCII editor (e.g. Windows notepad).
Each command must be written in a new line.
The script must have the following names:
· F1.CAF: Script hot key F1
· F2.CAF: Script hot key F2
· F3.CAF: Script hot key F3
· F4.CAF: Script hot key F4
To validate the scripts they must be copied on the
CF-card in the
folder ACTIONS. This can be done by FTP-access to the
. The FTP
access data is by default:
· Host: <IP-address of codec>
· User-ID: Admin
· Password: Power
Copyright: 2008 Mayah Communications
82
3.3.2
CENTAURI II User Manual
Function Keys
Express Dial Key
This dialog button allows you, where ever you are in the menu, to access the dial
menu, and establish a connection.
Disconnect Key
This dialog button allows you, where ever you are in the menu, to access the
speed dial menu and hang up an existing connection.
Phone book Key
This dialog button allows you, where ever you are in the menu, to access the
phonebook, choose one and dial it.
Head phone Key
This dialog button allows you, where ever you are in the menu, to access the
headphone configuration and change the volume or the source to listen at.
3.3.3
Arrow Keys
With the UP/DOWN keys you navigate through the complete menu.
Copyright: 2008 Mayah Communications
Elements of Frontpanel Control
83
With the RIGHT-key you activate the chosen field and get the submenu. In
some menus, you will get to the ENTER-mode (e.g., IP address, Phone
Number)
With the LEFT-key you delete in the ENTER-mode or get a submenu back.
With the GLOBE-key you activate the chosen field and get the submenu. In
some menus, you will get to the ENTER-Modus (like RIGHT-key).
3.3.4
Numeric Keypad
With the numeric keypad you can enter names, phone numbers or
IP-addresses.
The input is similar to mobile phones. Just press a key as often until the needed
char is shown:
1.:/
Assigned key 1:
2AaBbCc
Assigned key 2:
3DdEeFf
Assigned key 3:
4GgHhIi
Assigned key 4:
5JjKkLl
Assigned key 5:
6MmNnOo
Assigned key 6:
7PpQqRrSs
Assigned key 7:
8TtUuVv
Assigned key 8:
9WwXxYyZz
Assigned key 9:
0 <SPACE>
Assigned key 0:
*+
Assigned key *:
#@
Assigned key #:
Hint:
By pressing 1 or 9, you can jump to the start/end of a long selective list.
Copyright: 2008 Mayah Communications
84
3.4
CENTAURI II User Manual
Mask Display and Key Control
The mask display and the key control will follow these rules:
The mask title is top left ( "Analog Levels"). It is shown inverse. The action
description is found to the right of the mask title. In Figure 1 the request is
SELECT ITEM, since no selection has been made. As soon as one of the list
items is selected with the arrow keys and activated by pressing , its name
appears in the mask top right (see Figure 2). This list item now reacts to the key
input. In order to leave this list item and save the setting made, one must press
.
After pressing the key in phone book or communication profile, the OK or
CANCEL dialogs appear. In this the OK icon is pre-selected and furnished with a
thicker outline (see Figure 3). Pressing the
key again gives positive
confirmation of the whole dialog in this case.
In all other dialogs the (also altered) setting is immediately taken over from the
dialog with .
If in the case of phone book or communication profile dialogs you leave the
dialog without making any changes, i.e. you want to quit the dialog, then press
and select the Cancel icon. When you now press
the dialog is closed
without being saved or changed. To cancel all other dialogs it is sufficient to
press .
If an arrow pointing up and/or down appears in a display, there are then other
lines above or below the lines shown that you can shift up or down using
and
and then bring onto the display.
3.5
Connect Menu
3.5.1
Disconnect
This dialog enables to terminate a connection.
3.5.2
Connect
This dialog enables to establish a connection (IP, ISDN, X.21/V.35) depending
on the selected interface. Therefore the appearance of this dialog can vary.
Copyright: 2008 Mayah Communications
Elements of Frontpanel Control
3.5.3
85
Last
This dialog enables to reestablish the last dialed connection via IP, ISDN, X.21
or V.35.
This function is similar to the Redial button on a normal telephone.
3.5.4
Phonebook
This dialog enables to dial a phone book entry.
A
·
·
·
·
phone book entry will start following macros:
Setting the encoder parameter through a profile entry
Setting the decoder parameter through a profile entry
Choosing an interface (ISDN, X.21/V.35, IP or LOOP)
Accomplishing a connection (optional) if an IP address, a number (ISDN) or a
port (X.21/V.35) is entered
Note:
If no IP-address, number or port is entered a phone book entry works as an auto
configuration script.
3.5.5
Session
This dialog enables to establish a session entry.
More info about sessions can be found in chapter Presets Menu/New Session
Entry.
3.5.6
Interface
This dialog selects which Communications Interface is to be used. The options
are:
· ISDN (if available)
· X.21/V.35 (if available)
· Net (for IP connections)
· Loop
Note:
The bit rate for ISDN connections must be divisible by 64
Copyright: 2008 Mayah Communications
86
3.5.7
CENTAURI II User Manual
FEC mode
- enables to set the FEC mode (= Forward Error Correction) for RTP/IP
connections.
More info about FEC can be found in chapter Necessary settings for framed
connections/How to establish IP connections/Forward Error Correction.
3.5.8
Subcodec
The
family can run more than 1 internal codec (so called sub
codec) for the following situations:
· CENTAURI II 4000/4001 can run 4 sub codecs for IP transmission
· CENTAURI II 3000/3001/3300/3301, GANYMED 1102 and MERKII can run 2
sub codecs in
- Dual mode (Not available for GANYMED 1102)
- Gateway Mode
- Backup Mode
Although
supports more than 1 sub codecs only one user interface
is available. This setting lets the user select which sub codec the input and the
display applies to.
3.6
Status Menu
3.6.1
Level Status
The first status dialog shows the following audio levels referring to full scale in dB
(from top to bottom):
· left encoder level (i.e. left channel of audio input)
· right encoder level (i.e. right channel of audio input)
· left decoder level (i.e. left channel of audio output)
· right decoder level (i.e. right channel of audio output)
Furthermore the following info's are given:
a) Selected interface (at bottom)
b) If a connection is active or not (at bottom).
When a connection is active then the IP-address, the number (ISDN) or the port
Copyright: 2008 Mayah Communications
Elements of Frontpanel Control
87
(X.21/V.35) is displayed.
c) Info about synchronization state of digital audio input (at top left).
means that a digital audio clock is detected
- means that a digital audio clock is detected and
locks to it
3.6.2
Encoder Status
The second status dialog can be reached with
key when the level status is
shown. At an active connection here the encoder coding settings are shown.
3.6.3
Decoder Status
The third status dialog can be reached with
key when the encoder status is
shown. At an active connection here the decoder coding settings are shown.
3.6.4
Lines Status
The fourth status dialog can be reached with
key when the decoder status is
shown. At an active ISDN or X.21/V.35 connection here the connection times of
the B-channels (ISDN) or the ports (X.21/V.35) are displayed. This dialog is not
visible if the interface is set to IP or loop.
3.7
Presets Menu
3.7.1
New Session Entry
This dialog enables to create a new session entry. The following IP sessions can
be created and established via Front panel:
· MPEG TS
· DMB
General informations about sessions can be found in chapter Necessary settings
for framed connections/How to establish IP connections/MPEG Transport Stream
.
The following parameters can be set:
a) Session name:
Copyright: 2008 Mayah Communications
88
CENTAURI II User Manual
The maximum length of a session name is 256 characters.
b) Session mode:
The session mode can be selected to:
· MPEG TS (see also chapter MPEG Transport Stream)
· DMB (= Digital Media Broadcast)
If session mode is set to ‘unused’ the session is inactive.
c) Sub codec:
Here the sub codec is selected. Every sub codec number stands for a different
destination i.e. it is assigned to a different elementary stream
Note:
· CENTAURI II 3000/3001 supports up to 2 sub codecs.
· MERKII 3000/3001 supports up to 2 sub codecs.
· GANYMED 1102 supports up to 2 sub codecs.
· CENTAURI II 4000/4001 supports up to 4 sub codecs.
d) Destination:
One destination can be set for every sub codec of a session. It can be set to:
· current setting (i.e. last IP connection)
· phone book entry
3.7.2
Edit Session Entry
This dialog enables to modify an existing session entry.
3.7.3
Delete Session Entry
Choose a session entry by using the UP/DOWN keys and confirm its deletion
with the
3.7.4
key.
New Phonebook Entry
This dialog enables to create a new phone book entry. Up to 256 phone book
entries can be made.
Copyright: 2008 Mayah Communications
Elements of Frontpanel Control
89
The following parameters can be set:
Name: The maximum length of a name you can enter are 256 chars. The display
can show about 16 chars.
EncProfile: The encoder settings of this phone book entry are chosen here.
DecProfile: The decoder settings of this phone book entry are chosen here.
Interface: The used communication interface is chosen here.
Dest: Depending the chosen interface the entry may vary:
ISDN: Up to 8 ISDN-Numbers can be entered here
X.21/V.35: These connection possibilities are given:
- Connection via Port 1: Please enter 1 at ‚1’
- Connection via Port 2: Please enter 2 at ‚2’
- Sending the signal via Port 1 and 2: Enter 1 at ‚1’ and 2 at ‚2’
IP: Enter the IP-Address or SIP-Address. For UDP-connections an u, for
TCP-connections a t, for SIP-connections sip:, for SDP-connections http:// and
for SAP-connections sap:// must precede the IP-address. Since RTP is default at
RTP isno prefix is necessary.
3.7.5
Edit Phonebook Entry
This dialog enables to modify an existing phone book entry.
3.7.6
Delete Phonebook Entry
Choose the designated phone book entry by using the UP/DOWN keys and
confirm with the RIGHT key.
Copyright: 2008 Mayah Communications
90
3.7.7
CENTAURI II User Manual
New Profile Entry
This dialog enables to create a new profile entry . Up to 256 profile entries can
be made. Profiles are used in phone book entries as encoder or decoder
settings.
The following parameters can be set:
a) Name
The profile name can be selected with a max. length of 20 chars. We suggest
that the name is based on the settings of the profile entry.
For instance:
Name "auto/l3/32/mono/64"
Auto states the IMUX Format
L3 states the algorithm (e.g. MP3)
32 states the sample rate (e.g. 32 kHz)
mono states the mode (e.g. mono)
64 states the bit rate (e.g. 64 kbit/s)
Using this name convention, will give you the most needed information in the
name.
b) Type
Sets the algorithm of the profile:
· G.711
· G.722
· MPEGL2
· MPEGL3
· MP3-Pro
· AAC (MPEG4)
· AAC (MPEG2)
· AAC (LD); optional
· AAC (HE)
· Linear
· 4SB ADPCM; optional
· Std. APT-X sync; optional
· Std. APT-X no; optional
Copyright: 2008 Mayah Communications
Elements of Frontpanel Control
·
·
·
·
91
Enh. APT-X 16 (enhanced APT-X with 16 bit); optional
Enh. APT-X 20 (enhanced APT-X with 20 bit); optional
Enh. APT-X 24 (enhanced APT-X with 24 bit); optional
AES/EBU transparent
c) Sample rate
Sets the sample rate of the profile
d) Bit rate
Sets the bit rate of the profile
e) Mode
Sets the mode of the profile to one of the following:
Standard:
· mono
· dual mono
· stereo
· joint stereo
Multi channel Audio (optional):
Multi channel can be used with all APT-X algorithms, linear, AAC (MPEG4) and
AAC (HE) provided the referring additional function is enabled. Multi channel
audio applies ADAT interface.
· 4 Channels
· 4 Channels (2CPE):
4 audio channels in CPE mode are used. CPE (= Channel Pair Element)
means that a front and rear audio channel pair is encoded. This mode is just
available for AAC (MPEG4) and AAC (HE).
· 4 Channels (MPEG):
4 audio channels are used. In this context MPEG means that a center, a right,
a left and a rear audio channel is encoded. This mode is just available for
AAC (MPEG4) and AAC (HE).
· 6 Channels:
· 8 Channels:
f) Format
The inverse multiplexing format (IMUX format) of the profile can be set here to:
· Auto
· CDQ/H.221
· Musictaxi
· J.52
· Micda
· APTX
Inverse multiplexing is needed in ISDN connections to synchronize the
B-channels. If the IMUX format is set to Auto, usually
uses the
correct IMUX format.
Copyright: 2008 Mayah Communications
92
CENTAURI II User Manual
Exception 1:
If a
establishes a connection to a CDQPrima using algorithm
MPEG L2 and the line format is H.221 then
must be configured
with:
Algorithm:
MPEGL2
Bit rate:
384 kbit/s (even if a lower bit rate is set on the CDQPrima)
IMUX Format:
CDQ/H.221
Exception 2:
If you dial to a APT-X codec then the IMUX format must be set APTX.
g) Dependency:
Choose between
Remote
Local
Remote means that the
will use FlashCast-Technology.
FlashCast Technology means at ISDN:
/
and
/SendIt-Connections
The connecting
will assign the transmission parameter.
/None-Mayah-Codec Connections
The
will analyse the data stream and emulate the receiver. If
necessary changes in the parameters will be done automatically and adjusted
best possible.
For most of the connections REMOTE will be the right choice.
h) Ancillary Data
Defines how the Encoder and Decoder embeds the ancillary data in the audio
data stream. Following settings are possible:
· CCS
· J.52
· Musictaxi
· Barco
· None (only with APT-X algorithms)
· Left (only with APT-X algorithms)
· Right (only with APT-X algorithms)
· Auto (It detects the ancillary format automatically, provided a MPEG format is
used; this does not work with APT-X ancillary data)
i) Profile Audio Type
Sets the audio type (i.e. source for Encoder and destination for Decoder) to one
Copyright: 2008 Mayah Communications
Elements of Frontpanel Control
of
·
·
·
·
93
the following:
Analog
TOSlink (i.e. optical digital input)
AES/EBU (i.e. balanced electrical input)
ADAT (ADAT interface, uses optical TOSlink port)
With ADAT the following channel combinations are possible:
· Standard:
2 channels: ADAT12, ADAT34; ADAT56 .. ADAT2324
· Multi channel:
4 channels: ADAT14, ADAT58
6 channels: ADAT16
8 channels: ADAT18
3.7.8
Edit Profile Entry
This dialog will edit an existing profile entry. Details regarding the possible
changes are shown in New Profile Entry.
3.7.9
Delete Profile Entry
This dialog will delete an existing profile entry. Choose the profile entry you want
to delete and press the
Copyright: 2008 Mayah Communications
key.
94
CENTAURI II User Manual
3.8
Setup Menu
3.8.1
Audio Encoder
The content of the dialog choice will vary the given situation. That means
that the
just shows parameters which are adjustable.
a) Encoder Type
- sets the algorithm to:
· G.711
· G.722
· MPEGL2
· MPEGL3
· MP3-Pro
· AAC (MPEG4)
· AAC (MPEG2)
· AAC (LD); optional
· AAC (HE)
· Linear
· 4SB ADPCM; optional
· Std. APT-X sync; optional
· Std. APT-X no; optional
· Enh. APT-X 16 (enhanced APT-X with 16 bit); optional
· Enh. APT-X 20 (enhanced APT-X with 20 bit); optional
· Enh. APT-X 24 (enhanced APT-X with 24 bit); optional
· AES/EBU transparent
b) Encoder Stream
This item is just available for the algorithms AAC (MPEG 4) and Linear.
Selection for AAC (MPEG 4):
· AUTO (default)
· RAW
· ADTS
· LOAS
Selection for Linear:
· AUTO (default)
· LOW-BYTE-FIRST
Copyright: 2008 Mayah Communications
Elements of Frontpanel Control
· HIGH-BYTE-FIRST
Normally AUTO is correct. The other options were implemented for
compatibility reasons to other codecs
c) Encoder Signal
This item is just available for the algorithm AAC (HE). It can be selected to:
· AUTO (default)
· IMPLICIT
· EXPLICIT-BACKWARD
· EXPLICIT-NON-BACKWARD
Normally AUTO is correct. The other options were implemented for
compatibility reasons to other codecs.
d) Encoder Sample rate
- sets sample rate
e) Encoder Bit rate
- sets bit rate
f) Encoder Mode
- sets the audio mode to:
· Mono
· Dual Mono
· Stereo
· Joint Stereo
or
· a Multi channel mode (optional)
Multi channel can be used with all APT-X algorithms, linear, AAC
(MPEG4) and AAC (HE) provided the referring additional function is
enabled. Multi channel audio applies ADAT interface.
· MC 4: 4 audio channels are used.
· MC 4 CPE: 4 audio channels in CPE mode are used. CPE (= Channel
Pair Element) means that a front and rear audio channel pair is encoded.
This mode is just available for AAC (HE) and AAC (MPEG 4).
· MC 4 MPEG: 4 audio channels are used. In this context MPEG means
that a center, a right, a left and a rear audio channel is encoded. This
mode is just available for AAC (HE) and AAC (MPEG 4).
· MC 6: 6 audio channels are used.
· MC 8: 8 audio channels are used.
g) Encoder Dependency
- sets the Encoder dependency to either:
· Remote
· Local
Copyright: 2008 Mayah Communications
95
96
CENTAURI II User Manual
Remote means that the
will use FlashCast-Technology.
Remote FlashCast Technology means at ISDN:
/
and
/SendIt-Connections
·
The connecting
will assign the transmission parameter.
/None-Mayah-Codec Connections
·
The
will analyse the data stream and emulate the receiver.
If necessary changes in the parameters will be done automatically and
adjusted best possible.
For most of the connections REMOTE will be the right choice.
h) Encoder (IMUX) Format
- sets the Encoder IMUX (Inverse Multiplexer) format to:
· Auto
· J.52
· CDQ/H.221
· MICDA
· APTX
· Musictaxi
Inverse Multiplexing is vital for the correct synchronization of the multiple
B-channels used in an ISDN transmission. If the IMUX format is set to Auto
then CENTAURI automatically uses the correct IMUX format.
Copyright: 2008 Mayah Communications
Elements of Frontpanel Control
Exception 1:
If a Centauri II is to establish a connection to a CDQ Prima set to MPEG
L2 and the line format is H.221 then Centauri must be configured with:
Algorithm:
MPEGL2
Bit rate:
384 kbit/s (even, if the Prima uses a smaller bit rate)
IMUX Format:
CDQ/H.221
Exception 2:
If you dial to a APT-X codec then the IMUX format must be set to APTX.
i) Encoder Ancillary data
Generally there are two possibilities to transmit ancillary data:
· Ancillary data transfer inside of the coded audio
In this case the ancillary data is transported inside of the audio stream. It
just works with all MPEG algorithms (MPEG L2, MPEG L3, AAC) and all
APT-X algorithms. The following selections are possible for:
MPEG L2:
- Auto
- CCS
- J.52
- Musictaxi
- Barco
All other MPEG algorithms:
- Auto
APT-X algorithms:
- None
- Left
- Right
· Ancillary data transfer with help of an extra ancillary data stream
(called TS)
This just works with RTP/IP transmissions but with all algorithms. In this
case the ancillary data format must be set to TS.
j) Encoder Bandwidth
The possible options depends on the chosen algorithm.
MPEG algorithms:
Using MPEG algorithms the bandwidth is determined by used the sub
bands. Hereby usually the optimized settings are used specified by the
coding algorithm licenser. These licensers are:
- Coding Technologies
- Fraunhofer
- Thompson
If the bandwidth is set on AUTO then the frequency range follows the
licenser advice.
If the bandwidth is set on FULL the bandwidth will be calculated by:
Bandwidth = Sample rate/2.2
Copyright: 2008 Mayah Communications
97
98
CENTAURI II User Manual
G.711:
The following settings are possible:
· Auto:
Band pass; Frequency range 300 Hz - 3.4 kHz
· Full
Low pass, 20 Hz - 3.4 kHz
k) Encoder Protection
This option handles the activation and deactivation of the encoders
CRC-protection. It works with different parameters for MPEG algorithms.
(CRC= Cycle Redundancy Check)
Three parameter can be set:
0: default
1: off
2: on
3.8.2
Audio Decoder
The content of the dialog choice will vary the given situation. That means
that the
just shows parameters which are adjustable.
a) Decoder Type
sets the algorithm to:
· G.711
· G.722
· MPEGL2
· MPEGL3
· MP3-Pro
· AAC (MPEG4)
· AAC (MPEG2)
· AAC (LD); optional
· AAC (HE)
· Linear
· 4SB ADPCM; optional
· Std. APT-X sync; optional
· Std. APT-X no; optional
· Enh. APT-X 16 (enhanced APT-X with 16 bit); optional
Copyright: 2008 Mayah Communications
Elements of Frontpanel Control
· Enh. APT-X 20 (enhanced APT-X with 20 bit); optional
· Enh. APT-X 24 (enhanced APT-X with 24 bit); optional
· AES/EBU transparent
b) Decoder Stream
This item is just available for the algorithms AAC (MPEG 4) and Linear.
Selection for AAC (MPEG 4):
· AUTO (default)
· RAW
· ADTS
· LOAS
Selection for Linear:
· AUTO (default)
· LOW-BYTE-FIRST
· HIGH-BYTE-FIRST
Normally AUTO is correct. The other options were implemented for
compatibility reasons to other codecs
c) Decoder Sample rate
sets sample rate
d) Decoder Bit rate
sets bit rate
e) Decoder Mode
sets the audio mode to:
· Mono
· Dual Mono
· Stereo
· Joint Stereo
or
· a Multi channel mode (optional)
Multi channel can be used with all APT-X algorithms, linear, AAC (MPEG4)
and AAC (HE) provided the referring additional function is enabled. Multi
channel audio applies ADAT interface.
· MC 4: 4 audio channels are used.
· MC 4 CPE: 4 audio channels in CPE mode are used. CPE (= Channel
Pair Element) means that a front and rear audio channel pair is encoded.
This mode is just available for AAC (HE) and AAC (MPEG 4).
· MC 4 MPEG: 4 audio channels are used. In this context MPEG means
that a center, a right, a left and a rear audio channel is encoded. This
mode is just available for AAC (HE) and AAC (MPEG 4).
· MC 6: 6 audio channels are used.
· MC 8: 8 audio channels are used.
Copyright: 2008 Mayah Communications
99
100
CENTAURI II User Manual
f) Decoder Dependency
sets the Decoder dependency to either:
· Remote
· Local
Remote means that the
will use FlashCast-Technology.
Remote FlashCast Technology means at ISDN:
/
and
/SendIt-Connections
·
The connecting
will assign the transmission parameter.
/None-Mayah-Codec Connections
·
The
will analyse the data stream and emulate the receiver.
If necessary changes in the parameters will be done automatically and
adjusted best possible.
For most of the connections REMOTE will be the right choice.
g) Decoder Ancillary data
Generally there are two possibilities to transmit ancillary data:
· Ancillary data transfer inside of the coded audio
In this case the ancillary data is transported inside of the audio stream. It
just works with all MPEG algorithms (MPEG L2, MPEG L3, AAC) and all
APT-X algorithms. The following selections are possible for:
MPEG L2:
- Auto
- CCS
- J.52
- Musictaxi
- Barco
All other MPEG algorithms:
- Auto
APT-X algorithms:
- None
- Left
- Right
· Ancillary data transfer with help of an extra ancillary data stream
(called TS)
This just works with RTP/IP transmissions but with all algorithms. In this
case the ancillary data format must be set to TS.
h) Decoder Protection
This option handles the activation and deactivation if the decoder can
handle CRC-protection. It works with different parameters for MPEG
algorithms. (CRC= Cycle Redundancy Check)
Three parameter can be set:
0: default
1: off
Copyright: 2008 Mayah Communications
Elements of Frontpanel Control
2: on
3.8.3
Audio Settings
3.8.3.1
Audio In/Out
a) Audio In
- sets the audio input source to one of the following:
· Analog
· TOSlink digital (i.e. optical digital input)
· AES/EBU digital (i.e. balanced electrical input) [DB-9F]
· ADAT digital (ADAT interface also uses optical port) [TOSlink]
With ADAT the following channel combinations are possible:
Standard with 2 channels:
ADAT12, ADAT34, ADAT56 .. ADAT232
Multi channel
· 4 channels: ADAT14, ADAT58
· 6 channels: ADAT16
· 8 channels: ADAT18
b) Audio Out
- sets the audio output to use one of the following:
· Analog
· TOSlink digital (i.e. optical digital output)
· AES/EBU digital (i.e. balanced electrical output) [DB-9F]
· ADAT digital (ADAT interface also uses optical port) [TOSlink]
With ADAT the following channel combinations are possible:
Standard with 2 channels:
ADAT12, ADAT34, ADAT56 .. ADAT232
Multi channel
· 4 channels: ADAT14, ADAT58
· 6 channels: ADAT16
· 8 channels: ADAT18
Note:
When Analog, TOSlink or AES/EBU is selected as audio output then
Copyright: 2008 Mayah Communications
101
102
CENTAURI II User Manual
automatically the audio signal is also output at the other two interfaces (i.e. at all
audio outputs except for ADAT).
3.8.3.2
Mono Channel Mix
In Mono mode this selects which audio channel is used.
·
·
·
3.8.3.3
Left: Only the left audio signal is used
Right: Only the right audio signal is used
Mixed: Left and Right audio signal is used (L+R-6 dB)
Analog Levels
- enables you to set the max. analog input level (i.e. level before the A/D
converter) respectively the max. analog output level (i.e. level behind the D/A
converter).
These levels are also called clipping levels.
a) In-Out
Using IN the input level can be changed. Using OUT the output level can be
changed. Both levels can be separately adjusted.
b) Level
The minimum value is 0 dBu. The maximum value depends of the implemented
audio card and may have following values:
· 18 dBu
· 22 dBu.
Copyright: 2008 Mayah Communications
Elements of Frontpanel Control
103
Using ADJUST the user can adjust the needed value with the up/down keys.
Besides ADJUST the standard values 15 dBu and 18 dBu can be selected
directly.
3.8.3.4
Audio Settings
Here some miscellaneous (but rarely used) audio settings can be done.
a) ADAT/AES Master
This item activates or deactivates the ADAT Mastermode. Turned off
digital audio is be clocked via the ADAT input interface (optical
TOSlink interface) if a clock is supplied to this interface. Turned on the
acts as the clock generator for ADAT audio interface. By default it
is turned off.
b) All SRC's off
This item enables to switch off all internal sample rate converters of
. The internal sample rate converters just must be switched off (i.e. this item must
be set to 'on') when algorithm AES/EBU transparent (optional) is used. Usually
and by default the sample converters must be switched on (i.e. this item is set to
'off') for proper operation of
.
c) AES/EBU out prof
This item enables or disables professional mode for AES/EBU output. By default
professional AES/EBU output is disabled.
3.8.3.5
Digital Out Synchonisation
defines the AES/EBU output clock source. If an ‘internal’ source is selected
different sample rates can be chosen.
Copyright: 2008 Mayah Communications
104
CENTAURI II User Manual
3.8.4
Interface
3.8.4.1
Communication Interface
With this dialog the used Communication Interface can be selected to:
· ISDN (if ISDN card is installed)
· X.21 (if X.21/V.35 card is installed)
· Net (Ethernet Interface for IP transmissions)
· Loop
Note:
At ISDN the bit rate must be divisible by 64.
3.8.4.2
ISDN
This dialog enables to configure the ISDN settings of
selection is just available if an ISDN card is installed.
. This
a) Channel
The item enables to set the MSN and/or the SPID for every available B-channel
(usually 4 or 8 B-channels are available).
MSN (= Multiple subscriber number)
In this field the MSN (D-channel protocol DSS1 or VN4) or the ID (all other Dchannel protocols) is entered.
Copyright: 2008 Mayah Communications
Elements of Frontpanel Control
105
The most common reason to use a MSN are:
· Multiple ISDN devices using the same ISDN service uses one ISDN bus (e.g.
and telephone are connected to the same ISDN bus)
is connected to a PBX (=Private Branch Exchange)
·
Note:
If a
is connected directly to an ISDN DSS1 S0 bus and no other
device shares this ISDN bus then no MSN's must be entered. 'Directly' means
that no PBX is used.
Note 2:
At D-channel protocols NI1 and 5ESS an ID must be assigned for every Bchannel.
SPID (=Service Profile Identifier)
SPID's are only in use with the D-channel protocol NI1 and 5ESS in Northern
America. At these two protocols it is mandatory to assign every B-channel a
separate SPID.
Please ask the local ISDN provider for further details.
b) Protocol
This item enables to select the D-channel protocol to:
· DSS1 (Europe)
· NI1 (North America)
· 5ESS (North America
· Jate (Japan
· VN (obsolete French national protocol; usually replaced by DSS1)
· AUSTEL (obsolete Australian national protocol; usually replaced by DSS1)
Furthermore this item enables to set:
Active layer 1 mode
- determines whether ISDN Layer 1 stays active all the time, or not.
When
is used in the Netherlands, this value should definitely be
set to ON.
Answer time
- defines the ‘telegram’ interval (used in ISDN connections) - in milliseconds. The
called
sends out its ‘telegram’ 10 times till the ISDN answer delay
expires. The default value is 5,000 ms.
Copyright: 2008 Mayah Communications
106
CENTAURI II User Manual
c) PBX (=Private Branch Exchange)
PBX and PBX digits
When
is connected to a PBX or ISDN switch, it is often necessary
to add a number for external access (e.g. 9). PBX digits determines the number
of digits BEFORE the 'additional preceding PBX number' becomes valid.
For example:
- PBX:
9
- PBX digits :
5
Entered number: 1234
Dialed number: 1234
Entered number: 01234 Dialed number: 901234
Predial
Sometimes it is necessary to use a special provider to guarantee the quality of
the ISDN service or the carriage of ISDN calls through a Gateway. Usually a
special provider can be selected by dialing a special call-by-call number before
the normal number.
This Predial Number precedes EVERY dialled number (Direct dial or Phone
book).
National
- determines how a national call is shown.
For example:
- National: 0
- identification of national call: 811551762
- number displayed: 0811551762
International
- determines how an international call is shown.
For example:
- international: 00
- identification of international call: 49811551762
- number displayed: 0049811551762
d) Redials
Redials
Copyright: 2008 Mayah Communications
Elements of Frontpanel Control
107
- defines the number of Redials which will be attempted.
A Redial will occur if the other party cannot be reached either through being
busy, if there’s no response, or if the other party disconnects/drops the call.
Redial wait
- sets the interval time between the redial attempts (in seconds).
e) Delay
- sets the audio delay applied to the ISDN interface. The maximum value is 5,000
ms.
Increasing this value can make ISDN connections more stable, by providing a
larger (longer) buffer. For instance the audio delay buffer can compensate jitter.
3.8.4.3
X.21
This dialog enables to configure the X.21/V.35 settings of
selection is just available if an X.21/V.35 card is installed.
. This
a) Interface
- selects if X.21/V.35 port 1 or 2 (if available) should be configured.
b) Mode
- sets the X.21/V.35 port Mode to either DTE or DCE.
In DTE (Data Terminal Equipment) mode,
receives its clocking
information from the network - or a dedicated line.
In DCE (Data Circuit Equipment) mode,
itself supplies the clocking
information.
In most cases, the DTE mode will be used.
c) Clocks
- sets the clocking format of the X.21/V.35 port.
In DTE mode, T4 clocking is usually used.
In DCE mode, T2T4 clocking is most commonly used.
The meaning of the different clocks is described in the Interface Manual (link:
www.mayah.com/content/download/pdfs/manuals/centauri-interface_eng.pdf).
d) Protocol
-selects the fixed line’s connection protocol to either X.21 or V.35 format.
Copyright: 2008 Mayah Communications
108
CENTAURI II User Manual
e) Dualport
When set to 'yes' then the data stream is delivered parallel to both ports.
f) Delay
- sets the audio delay applied to the X.21/V.35 interface. The maximum value is
5,000 ms.
Increasing this value can make X.21/V.35 connections more stable, by providing
a larger (longer) buffer. For instance the audio delay buffer can compensate
jitter.
3.8.4.4
Network
This dialog enables to configure one of both network cards of
. If
two network cards are installed then the first one is responsible for remote
control, the second one for audio over IP.
a) Interface
- selects the network to configure. Usually just one network card is installed.
b) Address
- sets the IP address for the appropriate interface. (e.g. 192.168.10.50)
c) Netmask
- sets the subnet mask for the appropriate interface. (e.g. 255.255.255.0)
d) Gateway
- sets the IP address of the default network Gateway (for the appropriate
interface).
e) DNS Server
- sets the IP address of the DNS (= Domain Name System) server for the
Copyright: 2008 Mayah Communications
Elements of Frontpanel Control
109
appropriate interface.
f) SNMP Server
- sets the IP address of the SNMP (= Simple Network Management Protocol)
manager. This address will be used as the destination for the SNMP traps.
g) Transferrate
- defines the transfer rate (speed) for the appropriate network interface, to either:
· Auto (i.e. auto-sensing the network data rate)
· 10 Mbit/s
· 100 Mbit/s
h) Duplex
- selects the operating mode for the appropriate interface as:
· Auto (i.e. auto-sensing of duplex mode)
· Half
· Full
i) SNMP Traps
The
· 1.0
· 2.0
· 1.1
· 2.1
can handle SNMP Traps according to SNMP version
j) Packetsize
- defines the packet size of the IP datagrams used. The maximum value is 1,514
bytes.
k) Packetsizemode
- selects the mode how
creates IP packets. There are three
possibilities:
· variable (default)
This means that the payload is rounded to the next full frame or audio block
Advantage:
No fractional audio frames or blocks in the IP packets
Disadvantage:
With algorithms with no fix frame length (e.g. AAC) it can happen that the
max. possible packet size is exceeded.
· fixed
This means that IP payload is exactly the same as the packet size value set at
item packetsize (i.e. it is not rounded to the next full audio frame or audio
block).
Advantage:
Even with algorithms with variable frame length the packet size is fix.
Copyright: 2008 Mayah Communications
110
CENTAURI II User Manual
·
Disadvantage:
IP packet can have fractional audio frames or audio blocks.
sync.
Same as fixed but additionally packets are transmitted in synchronized
intervals.
Advantage:
Same as with fixed but additionally adaptation to network equipment which
has got problems with unsynchronized packets.
Disadvantage:
Same as with fixed.
l) Audio Delay
- sets the audio delay applied to the IP interface. The maximum value is 5,000
ms. Increasing this value can make IP connections more stable, by providing a
larger (longer) buffer. For instance the audio delay buffer can compensate jitter
problems.
m) SIP (Session Initiation Protocol)
- configures all the parameters of SIP session. More details about about SIP can
be found in chapter Necessary settings for framed connection/How to establish
IP connections/IP connections.
Globalproxy
Here the global proxy must be entered. The global proxy is responsible for how
SIP requests and messages are handled.
In this field an IP-address or a URL can be entered.
This setting is optional.
Stunserver
A STUN server (= Simple Transversal of UDP Through NATs) is necessary that a
client behind a NAT or NATs can find its public IP address. NAT stands for N
etwork Address Translation.
The public IP address is necessary since the SIP device on the other end needs
this info to find the local client.
In this field an IP-address or an URL can be entered.
This setting is optional.
Account Id
Copyright: 2008 Mayah Communications
Elements of Frontpanel Control
111
Here the SIP registration profile can be selected.
Account active
Just an active profile cause an registration. However, only an inactive profile can
be changed.
Therefore at a new profile first ‘Active’ must be set to 'off'. After all registration
info is entered ‘Active’ must be set to 'on' to validate the registration.
Account Registrar
The Registrar is the SIP registration server which resolves the SIP address to a
real IP address. The SIP client must register itself to a Registrar first before it can
use its service.
In this field an IP-address or an URL can be entered.
The registration comprises the following access data:
- Name
- Password
- Phone Number (just necessary for a few registrars)
Account Phonenr
Here the phone number of the registration access data can be entered (max. 256
chars). This access data is just necessary for a few registrars.
Account Username
Here the name of the registration access data can be entered (max. 256 chars).
Account Password
Here the password of the registration access data can be entered (max. 256
chars).
3.8.4.5
Security
In this dialog security settings for
· Dial protection
· ISDN service protection can be set
a) Dial Protection
Copyright: 2008 Mayah Communications
112
CENTAURI II User Manual
Manual Accept
- determines how Incoming connections are accepted.
auto:
·
Accepts all calls that are permitted by 'Dial in protection ISDN' and/or 'Dial
Protection IP' automatically
manual:
·
Accepts all calls manually
dbpos:
·
Accepts all calls that are permitted by 'Dial in protection ISDN' and/or 'Dial
Protection IP' manually
dbneg:
·
Accepts all calls that are not permitted by 'Dial in protection ISDN' and/or
'Dial Protection IP' manually, the others are accepted automatically
Dial Protection ISDN
When 'Dial Protection ISDN' is set to On, only connections from ISDN numbers
which are stored in the Phone book will be accepted according to rules of
Manual Accept.
Dial Protection IP
When 'Dial Protection IP' is set to On, only connections from IP addresses which
are stored in the Phone book will be accepted according to rules of Manual
Accept.
b) ISDN Service protection
Copyright: 2008 Mayah Communications
Elements of Frontpanel Control
113
Here you can set which ISDN services may accept calls.
Note:
Ex-factory, the default ‘enabled’ services are::
Speech
·
Unrestricted dig. info
·
Restricted dig. info
·
3.1 kHz audio
·
7 kHz audio
·
Telephony
·
7 kHz telephony
·
You are strongly advised NOT TO CHANGE these Enabled services, as this
can restrict the ISDN functionality of your
codec.
3.8.5
Frontpanel
3.8.5.1
Frontpanel
This dialog enables to configure the back light and the contrast of the LCDdisplay of
front panel.
a) Backlight
- select if LCD back light is switched on or off.
b) Contrast
Copyright: 2008 Mayah Communications
114
CENTAURI II User Manual
- sets the LCD brightness of the LCD display. Depending on
hardware '30' or '38' are the most recommendable values.
3.8.5.2
Headphone
This dialog enables to set the source and the volume of the headphone output.
a) Source
- selects the headphone source to:
· Decoder Stereo (output audio signal)
· Decoder Left Channel (output audio signal)
· Decoder Right Channel (output audio signal)
· Encoder Stereo (input audio signal)
· Encoder Left Channel (input audio signal)
· Encoder Right Channel (input audio signal)
Note:
If a left or right item is selected the referring mono signal can be listened on both
ears.
b) Volume
- sets the headphone volume.
3.8.5.3
Levelmeter
This dialog determines what audio levels are displayed on the 8 LED level
meters of the front panel.
· None:
No audio levels are displayed
· InOut:(default value)
Different audio levels for sub codec 1 are shown:
- 4 audio input channels (row 1-4)
- 4 audio output channels (row5-6)
- Left Audio input on row 1
- Right audio input on row 2
- Left audio output on row 5
- Right audio output on row 6
· In:
Copyright: 2008 Mayah Communications
Elements of Frontpanel Control
·
·
·
·
115
Different audio input levels for sub codec 1 are shown:
- 8 audio input channels (row 1-8)
- Left Audio input on row 1
- Right audio input on row 2
Out:
Different audio output levels for sub codec 1 are shown:
- 8 audio output channels (row 1-8)
- Left Audio output on row 1
- Right audio output on row 2
INOUT2:
Different audio levels for sub codec 1 and 2 are shown:
- Left and right audio input channel of sub codec 1 (row 1-2)
- Left and right audio output channel of sub codec 1 (row 3-4)
- Left and right audio input channel of sub codec 2 (row 5-6)
- Left and right audio output channel of sub codec 2 (row 7-8)
IN4: (just available for CENTAURI II 4000/4001)
Different audio input levels for sub codec 1, 2, 3 and 4 are shown:
- Left and right audio input channel of sub codec 1 (row 1-2)
- Left and right audio input channel of sub codec 2 (row 3-4)
- Left and right audio input channel of sub codec 3 (row 5-6)
- Left and right audio input channel of sub codec 4 (row 7-8)
OUT4: (just available for CENTAURI II 4000/4001)
Different audio output levels for sub codec 1, 2, 3 and 4 are shown:
- Left and right audio output channel of sub codec 1 (row 1-2)
- Left and right audio output channel of sub codec 2 (row 3-4)
- Left and right audio output channel of sub codec 3 (row 5-6)
- Left and right audio output channel of sub codec 4 (row 7-8)
3.8.6
Miscellaneous
3.8.6.1
Subcodec
The
family can run more than 1 internal codec (so called sub
codec) for the following situations:
· CENTAURI II 4000/4001 can run 4 sub codecs for RTP/IP transmissions
· CENTAURI II 3000/3001/3300/3301, GANYMED 1102 and MERKII can run
two sub codecs in
- Dual mode (Not available for GANYMED 1102)
- Gateway Mode
- Backup Mode
Copyright: 2008 Mayah Communications
116
CENTAURI II User Manual
Although
supports two individual sub codecs only one user
interface is available. This setting lets the user select which sub codec the input
and the display applies to.
3.8.6.2
Dualmode
With ISDN
can be used as two separate mono codecs. However,
the following restrictions will apply:
Maximum sample rate:
32 kHz
·
Mode:
mono
·
Maximum bit rate :
64 kbit/s (except for MPEG L2)
·
This setting defines on which B-channel the ‘second (sub) codec’ starts to
communicate.
For example:
‘Dual mode on B-channel = 2’ means that B-channel 1 is assigned to the first
(sub)codec and all other B-channels are assigned to second one.
If dual mode at B-channel = 0 then dual mode is de-activated, and
functions as a single codec, without the above restrictions.
Note:
Dual mode just can be set if the communication interface of both sub codecs is
set to ISDN. If this is not true dual mode can not be set or does not work properly
pending on the system software version.
Note 2:
Dual mode can not be used if one the following features is active:
· Multipoint
· Gateway
· Backup Mode
3.8.6.3
Multipoint
- determines which return Channel is used on a Point-to-Multipoint transmission.
[Using ISDN, Point-to-Multipoint means that a
codec can transmit
one audio signal out to multiple ISDN destinations. However, with Point-toMultipoint (PMP)
just can decode one return channel. This option
allows you to define which of the return paths you wish to use.]
PMP functionality works with any of the following:
·
Copyright: 2008 Mayah Communications
Elements of Frontpanel Control
117
MERKII
·
Worldnet Tokyo
·
Millennium 2
·
CDQPrima
·
CDQ2000/2001
·
Note:
Even negative return channels can be selected. A negative return channel
means that all multi point locations still receives the audio but the central
does not decode any audio.
Note 2:
Multipoint can not be used if one the following features is active:
· Dual mode
· Gateway
· Backup Mode
3.8.6.4
Gateway
- enables to configure the gateway feature of the
. Gateway
functionality means that
routs received audio from one interface to
another one (e.g. MPEGL2 audio received at ISDN is sent out as MPEGL3 audio
via IP). The following parameters can be selected:
· off: Gateway functionality is disabled
· current setting: Routing to last established connection
· phone book: Routing to a phone book entry
Note:
A general description of the
gateway feature can be found at
chapter Miscellaneous/Gateway.
Note 2:
Gateway feature can not be used if one the following features is active:
· Dual mode
· Multipoint
· Backup Mode
3.8.6.5
Backup Mode
- enables to configure the backup feature of the
. Backup feature
means that
establishes automatically another connection if framing
is lost. The following parameters can be selected:
· off: Backup mode is disabled
· current setting: Backup to last established connection
· phone book: Routing to a phone book entry
Furthermore the Backup time can be set via Setup/Miscellaneous/Timeouts.
Note:
A general description of the
backup feature can be found at
chapter Miscellaneous/Backup.
Copyright: 2008 Mayah Communications
118
CENTAURI II User Manual
Note 2:
Backup mode can not be used if one the following features is active:
· Dual mode
· Multipoint
· Gateway
3.8.6.6
Language
- selects the front panel language to either:
· English
· Spanish
or
· German
3.8.6.7
Identification
Identification dialog comprises the following items:
a) ID
Here the name of the
is displayed and can be changed.
b) SN
Here the
serial number is displayed. Since usually the serial
number of the
is the MAC (= Media Access Control) address of the
first network card it is impossible to edit this serial number. If no Serial number is
displayed, it’s possible that no Ethernet card was detected during boot up. In this
case the ALARM LED of the
will light up.
Copyright: 2008 Mayah Communications
Elements of Frontpanel Control
3.8.6.8
119
Versions
- displays the versions of the different software of
.
For the regular
user just the system version is important. The
system version displays the firmware state.
3.8.6.9
Factory Default
- enables to reset miscellaneous parameters of
values. The following selection can be made:
· All (resets all categories listed below)
· System
· Encoder
· Decoder
· ISDN (if ISDN card is available)
· Audio
· IP
· X21 (if X.21/V.35 card is available)
· Common
· Phone book
· Profile
· SNMPTrap
· EventAction
· TTLOutput
· Timeouts
· Regulation
· Frontpanel
· Session
· Ports
to factory default
In the appendix of the Communication Reference manual (link:
www.mayah.com/content/download/pdfs/manuals/communication-reference_man.
pdf) it is described what parameters are really reset.
Note:
Since reset parameters are lost if they are not saved before please handle this
Copyright: 2008 Mayah Communications
120
CENTAURI II User Manual
item with care.
3.8.6.10 Timeouts
The following timeouts can be set:
a) Disconnect:
- defines the period (in seconds) after which a connection is dropped, if no valid
framing is achieved. Ideally, it should be set higher than the G.722 SRT timeout
value – its default value is 45 Seconds.
b) Stat. framing
- defines the G.722 ‘timeout’ (measured in seconds).
Generally, there are two methods to synchronize G.722 data streams.
Generally, there are two methods of determining the ‘octet-start’ (byte-start) in
G.722 data streams.
They are:
G.722 with H.221 (in-band signalling)
·
H.221 uses a small amount of the data capacity (i.e.1.6 kbit/s of 64 kbit/s)
to transmit the synchronization information in-band.
[Although G.722/H.221 is a recommended EBU standard, it’s not very
widespread!]
G.722 SRT (Statistical Recovery Timing)
·
Synchronization requires finding the start bit of every G.722 octet, and is
reached by evaluating the data pattern of the signals statistically. We
DON’T recommend that you use a pure sine wave signal whilst trying to
achieve synchronization, using G.722 coding!
codecs will auto-detect a G.722/H.221 data-stream since they
evaluate the H.221 in-band signalling information. However, as G.722 SRT
signals do not have such signalling,
only switches to the G.722
SRT setting when the ‘G.722 timer’ expires and framing has yet to be achieved.
This G.722 timer starts once the first ISDN line is connected.
It is recommended that the G.722 SRT timeout be set to ~30 Seconds. This value
is high enough not to interrupt any auto-detection process, but should still be
acceptable for framing up.
c) Remote control
- sets the remote control timeout (in seconds).
This timeout refers to any win socket IP control connection as it is e.g. used by
Copyright: 2008 Mayah Communications
Elements of Frontpanel Control
121
the
Windows remote control. It determines when
release automatically an idle win socket IP control connection. '0' means that this
timeout is deactivated.
For instance this parameter can be helpful when the IP remote control session
was temporarily interrupted by a faulty switch our router but
still
'thinks' it is IP remote controlled. If remote control timeout is set to '0'
does not release the remote control port . If it is set to 100 seconds
then a new remote control session can established when the timeout is expired.
d) Backup time
- sets the backup time as used by the Backup mode (in milli seconds).
Backup time is the time the backup event (= framing lost) must minimum last
before the backup connection is established.
3.8.6.11 Ancillary
This dialog enables to configure the [DB9-M] ancillary data port on the rear side
of
. The ancillary format is set at Setup/Audio Encoder and Setup/
Audio Decoder.
More detailed info about ancillary data transfer can be found at Miscellaneous/
Ancillary Data Background.
The following items can be set:
a) Baudrate
- defines the baud rate of the Ancillary data port.
The following baud rates are allowed:
1,200
·
2,400
·
3,600
·
4,800
·
9,600
·
14,400
·
19,200
·
38,400
·
56,00
·
57,600
·
115,200
·
Copyright: 2008 Mayah Communications
122
CENTAURI II User Manual
Note:
This setting only specifies the maximum physical value, NOT the actual amount
of ancillary data sent inside the audio data stream.
b) Databits
- sets the number of bits used to represent one single “character” of data.
The following are permissible values:
8
·
7
·
6
·
5
·
c) Parity
- sets the parity bit (used for error detection in a digital transmission path).
Definition of parity:
A technique to test the integrity of digital data by checking an extra bit that holds
a 0 or 1, depending if the data is an even number of 1 bits or an odd number of 1
bits.
The following parity values are permissible:
None
·
Odd
·
Even
·
d) Stop Bits
- sets the number of Stop bits (used to indicate the end of a byte).
The following values are permissible:
1
·
2
·
e) Handshake
- sets the mode of ancillary (auxiliary) data handshaking.
Handshaking means that signals are transmitted back and forth to control (i.e. to
start and stop) the transmission.
The following values are possible:
None
·
Xon/Xoff
·
RTS/CTS
·
DSR/DTR
·
Copyright: 2008 Mayah Communications
Elements of Frontpanel Control
123
3.8.6.12 Time Settings
This dialog enables to set
· Date & Time: setting of time, date and the referring format manually
· Timezone: configuration data for synchronization with a NTP server
a) Date & Time
For date the following formats can be selected:
· D.M.Y:
- Day-Month-Year
- e.g. 08.01.2008 for 8th of January 2008
- usually used in Mid Europe
· M/D/Y:
- Month/Day/Year
- e.g. 01/08/2008 for 8th of January 2008
- Middle Endian format
- used in USA
· Y-M-D:
- Year-Month-Day
- e.g. 2008-01-08 for 8th of January 2008
- International date format according to ISO 8601
- this is the most logic data format since chronological order corresponds to
alphabetical one
For time format it can be selected between
· 24 hour format
· 12 hour AM/PM format
b) Timezone
- sets parameters necessary for time synchronization with a NTP (= Network T
ime Protocol) server.
How such a time synchronization works with
is described in
Copyright: 2008 Mayah Communications
124
CENTAURI II User Manual
application note 21 (link: www.mayah.com/content/download/pdfs/appnotes/
centauri/a_n_e_021.pdf).
The following parameters can be set
Bias:
The bias is the difference, in minutes, between Coordinated Universal Time
(UTC) and local time. All translations between UTC and local time are based on
the following formula:
UTC = local time + bias
Standard:
The standard date specifies a system time structure that contains a date and
local time when the transition from daylight saving time to standard time occurs
on this
. If this date is not specified, the month member in the
system time structure must be zero. If this date is specified the 'day light date'
value in the time zone structure must also be specified. To select the correct day
in the month set the year member to zero, the 'day of week' member to an
appropriate weekday (usually Sunday), and the day member to a value in the
range 1 through 5. Using this notation the last Sunday in October can be
specified (5 is equal to "the last").
Daylight:
The daylight date specifies a system time structure that contains a date and local
time when the transition from standard time to daylight saving time occurs on
this
. If this date is not specified, the month member in the system
time structure must be zero. If this date is specified the 'standard date' value in
the time zone structure must also be specified. To select the correct day in the
month set the year member to zero, the 'day of week' member to an appropriate
weekday, and the day member to a value in the range 1 through 5. Using this
notation the last Sunday in March can be specified (5 is equal to "the last").
Save:
- saves the time zone settings in the internal file 'timezone.dat' and validates
them immediately. Otherwise changes of time zone settings becomes valid at
next start of
.
Copyright: 2008 Mayah Communications
Elements of Frontpanel Control
125
3.8.6.13 G.711 Options
This dialog enables to set miscellaneous parameters for G.711 use (ISDN
telephony):
The following parameters can be set:
a) G.711
North America/Japan and Europe use a different coding method for ISDN
telephony.
Thus, the following alternatives are available:
· A-law (as used in Europe – uses non linear PCM, with 13 segments)
· µ-law (as used in USA and Japan – also non-linear PCM; but 15 segments)
Note:
If G.711 law is not set properly then strong disturbances occurs at G.711
transmissions.
b) G.711 level
Sometimes G.711 signals (i.e. normal telephone signals) are over modulated and
therefore their too high audio levels can cause distortions. Therefore G.711
attenuation can be set to:
· 0 dB (no attenuation)
· 6 dB
· 12 dB
c) G.711 ISDN service
Here the service used for G.711 calls are set. It can be selected between
· Speech (default and standard)
and
· Telephony
Copyright: 2008 Mayah Communications
126
CENTAURI II User Manual
3.8.6.14 Reboot
- soft reboots the
by executing the direct command 'sys_reboot'. A
hard reboot can be done by using the power switch on the rear side.
However, the result of soft reboot and hard reboot is the same.
3.8.6.15 System Update
This dialog enables to update your
via ISDN by dialing to a MAYAH
ISDN update server. However, it is recommended to update your
via
· FTP (see menu item Elements of CENTAURI II Remote/Expert/Update via
FTP)
or
· Internet (see menu item Elements of CENTAURI II Remote/Expert/Update via
Internet)
using
Windows remote control.
Furthermore update via RS232 is possible, too (see menu item Elements of
CENTAURI II Remote/Expert/Update via RS232).
The following items can be set:
a) Address
Here the ISDN number of the MAYAH ISDN update server should be entered.
Inside Germany the number is 0811551661.
From outside Germany the syntax of the update address is:
+49811551761
whereas '+' stands for the predial number for international calls which can vary in
different countries.
For Instance:
Copyright: 2008 Mayah Communications
Elements of Frontpanel Control
127
· Update number in UK: 0049811551661
· Update number in the USA: 01149811551661
b) Start Update
Executing this item first tries to reach the MAYAH ISDN update server to retrieve
the available versions.
After retrieving the versions the connection is cut to let the user select the right
version for update. The right version must be chosen with cursor keys and
confirmed with the -key to start the update procedure. Usually an ISDN update
will take 6-10 minutes.
In versions list dialog the ISDN update can be aborted with the -key.
3.8.7
Journal
This item shows the connections of your
as listed in the internal log
files
· logact.txt
and
· logold.txt
The detailed connection info can be shown by selecting an entry with the cursor
keys and confirming the selection with the -key.
Note:
If you wish to delete the journal please connect to
via FTP and
delete the files 'LOGACT.TXT' and 'LOGOLD.TXT'. Deleting these files via the
front panel is impossible. The FTP access data is by default:
>
· Host: <IP-address of
· User ID: Admin
· Password: Power
Note 2:
Detailed log file information can be shown with help of
remote at
menu item File/Display Log File.
Copyright: 2008 Mayah Communications
128
3.8.8
CENTAURI II User Manual
System Health
- informs about the system health of the
.
The following parameters are shown:
a) Temp
- informs about the system temperature (the temperature inside chassis of
). If temperature is too high (usually > 60 °C) then an alarm is
raised.
b) CPU
CPU performance in MHz
c) Mem
RAM memory in MB
d) Fan
Revs per minute of the CPU fan. If this value is too low then an alarm is raised.
e) Flash
- indicates the capacity of the user partition of the internal
card. The user partition is assigned to drive D.
Flash
f) Free
- indicates the amount of free space on the user partition of the
Flash card.
g) Voltages
If one of the voltages is out of tolerances 'NOT OK' is shown and an alarm is
raised.
Note:
More detailed information of
health is supplied by
remote and the referring manual chapter of remote menu item Status/Health.
Copyright: 2008 Mayah Communications
Part
IV
130
CENTAURI II User Manual
4
Elements of Web Remote
4.1
Preface
Often
is controlled via an IP network. However, sometimes the
control computer does not uses Windows (95, 98, ME, NT, 2000, XP, Vista) but
another operational system as Linux, MACOS or Windows CE. In this case the
Windows remote control for
cannot be used. Therefore
has got a web browser control included. Generally it should run on
any web browser but it was tested with the following web browsers:
· Internet Explorer version 6
· Mozilla Firefox version 2.0.0.9
· Safari version 3.0.4
· Opera version 9.10
In case of Windows 95, 98, ME, NT, 2000, XP or Vista is used MAYAH
recommends to use the
Windows remote control.
4.2
First Steps
After the web browser is open type in the IP-address of your
example below it is '192.168.1.82' but by default it is '10.0.0.10'.
. In the
For web remote controlling your
in the LAN please consider that
the IP-address of your codec must correspond to the subnet mask of the local
network.
a) Changing IP address via Front panel
The IP-address and all other IP settings of
Front panel menu item Setup/Interface/Network.
can be changed via
Copyright: 2008 Mayah Communications
Elements of Web Remote
131
b) Changing IP address via RS232
If front panel control is not possible then
can be also controlled via
RS232 remote control port (rear side) with direct commands.
For RS232 control the following requirements are necessary:
· A free RS232 com port on your control computer. If no RS232 com port is
available then a USB-RS232 adapter can be used.
· An RS232 null modem cable
· any ASCII terminal program as Telix or Windows hyper terminal
The RS232 communication parameters of
by default are:
· Baud rate: 38,400
· Data Bits: 8
· Parity: no
· Stop Bits: 1
· Flow Control: no
When RS232 remote control connection is successfully established then every
pressing of the <ENTER> button on your computer keyboard will be answered
with the IP-address of
.
Now direct commands can be sent to
. All direct commands are
listed and described in the Communication Reference manual (link:
www.mayah.com/content/download/pdfs/manuals/communication-reference_man.
pdf ). However,
does have an echo at RS232 control. Therefore
you should activate the local echo on your terminal program.
The direct command for changing the IP-address is 'ip_address' (e.g. 'ip_address
192.168.1.82' sets the IP-address of your
to 192.168.1.82).
Note:
Of course the
Windows remote control also supports RS232
control.
4.3
Login
After clicking on
data.
Copyright: 2008 Mayah Communications
image you will be asked for web remote access
132
CENTAURI II User Manual
The Web remote access data of
· User Name: WebAdmin (case sensitive)
· Password: WebPower (case sensitive)
is by default:
Changing the Web control access data
The web control access data can be changed via RS232 control (see chapter
Elements of Web Remote/First steps) or a Win socket remote session using port
2000 (Telnet session with port 2000) with direct command 'web_usrpwd'.
The syntax of the command 'web_usrpwd <user name>:<password>.
For instance:
'web_usrpwd Centauri:Mayah' set the web control access data to
· User Name: Centauri
· Password: Mayah
Copyright: 2008 Mayah Communications
Elements of Web Remote
4.4
133
Main Window
After successful login the main window of
web remote is shown:
The main window of
web remote corresponds mainly to the one of
the
Windows remote. Therefore a description of the main window
elements can be found at chapter Elements of Remote Control/Main window.
However, the web remote main window does not have all elements of the main
window of Windows remote (e.g. no level meters).
4.5
Main Menu
The main menu comprises the same items as the wheel button i.e. :
· Connect
· Disconnect
· Phone book
· MAYAH Website
Copyright: 2008 Mayah Communications
134
4.5.1
CENTAURI II User Manual
Connect Menu
- enables to establish IP (Network), ISDN or X.21/V.35 connections or to set
to loop mode.
4.5.2
Disconnect Menu
- terminates an existing connection or deactivates loop mode.
Copyright: 2008 Mayah Communications
Elements of Web Remote
4.5.3
135
Phonebook Menu
- enables to:
· to execute,
· to create,
· to edit
or
· to delete
a
phone book entry.
supports up to 256 phone book entries.
4.5.4
Mayah Website
- opens your browser window and attempts to connect to the Mayah website,
www.mayah.com.
Copyright: 2008 Mayah Communications
136
CENTAURI II User Manual
4.6
Settings Menu
4.6.1
ISDN
- used to configure
ISDN settings.
The following items can be configured:
a) D-channel protocol
The D-channel protocol can be set to:
· DSS1 (Euro ISDN)
· NI1 (North America)
· 5ESS (North America)
· Jate (Japan)
· DSS1 (ext.)
· VN4 (obsolete national French protocol)
· Austel (obsolete national Australian protocol)
b) B-channel MSN/ID:
Here the MSN (D-channel protocol DSS1 or VN4) or the ID (all other D-channel
protocols) for each B-channel is entered.
The most common reason to use an MSN are:
· Multiple ISDN devices using the same ISDN service uses one ISDN bus (e.g.
and telephone are connected to the same ISDN bus)
is connected to a PBX (=Private Branch Exchange)
·
Note:
If a
is connected directly to an ISDN DSS1 S0 bus and no other
device shares this ISDN bus then no MSN's must be entered. 'Directly' means
Copyright: 2008 Mayah Communications
Elements of Web Remote
137
that no PBX is used.
Note 2:
At D-channel protocols NI1 and 5ESS an ID must be assigned for every Bchannel.
c) B-channel SPID
SPID (= Service Profile Identifier) is just available for the North American
protocols NI1 and 5ESS. However, at these two protocols the SPID must be
necessarily set for every B-channel.
d) Get Dial tone
When
is connected to a PBX or ISDN switch, it is often necessary
to add a number for external access (e.g. 9). Enter the number required via this
dialog.
Note:
This number precedes EVERY dialled number when the length of the number is
>= min. digits for external call.
e) Min. digits for ext. call
- determines the number of digits BEFORE the Get Dial tone number becomes
valid.
For example:
- Get dial tone:
9
- Min. Digits for Ext. Call: 5
Entered number: 1234
Dialed number: 1234
Entered number: 01234 Dialed number: 901234
f) Predial No.
Sometimes it is necessary to use a special provider to guarantee the quality of
the ISDN service or the carriage of ISDN calls through a Gateway. Usually a
special provider can be selected by dialing a special call-by-call number before
the normal number.
This Predial Number precedes EVERY dialled number - whether it is dialled by
the Connect or Phone book buttons, and is inserted AFTER the number supplied
by Get Dial tone.
g) Redial
- defines the number of Redials which will be attempted.
A Redial will occur if the other party cannot be reached either through being
busy, if there’s no response, or if the other party disconnects/drops the call.
h) Time Out (in sec.)
- sets the interval time between Redial attempts (measured in seconds).
Copyright: 2008 Mayah Communications
138
4.6.2
CENTAURI II User Manual
Network
- configures the electrical (RJ45) and/or optical network connections.
Note:
Every
has an ‘electrical’ network connection. The 'optical' network
card or a second 'electrical' network card is optional.
The following items can be configured:
a ) Interface
- selects which interface to configure.
Interface 1: Electrical (RJ45) network card
·
Interface 2: Optical network card
·
b) Address
- sets the IP address for the appropriate interface. (e.g. 192.168.10.50)
c) Netmask
- sets the subnet mask for the appropriate interface. (e.g. 255.255.255.0)
d) Gateway
- sets the IP address of the default network Gateway (for the appropriate
interface).
e) DNS Server
- sets the IP address of the DNS (Domain Name System) server for the
appropriate interface.
Copyright: 2008 Mayah Communications
Elements of Web Remote
139
f) SNMP Server
- sets the IP address of the SNMP (Simple Network Management Protocol)
manager.
This address will be used as the destination for the SNMP traps.
g) Transferrate
- defines the transfer rate (Speed) for the appropriate network interface, to either:
Auto (i.e. auto-sensing the network data rate)
·
10 Mbit/s
·
100 Mbit/s
·
h) Duplex
- selects the operating mode for the appropriate interface as:
Auto (i.e. auto sensing of duplex mode)
·
Half duplex
·
Full duplex
·
i) Packetsize
- defines the packet size of the IP datagrams used. The maximum value is 1,536
bytes.
j) Audio Delay
- sets the audio delay applied to the IP interface. The maximum value is 5,000
ms.
Increasing this value can make IP connections more stable, by providing a larger
(longer) buffer. For instance the audio delay buffer can compensate jitter
problems.
4.6.3
Codec
- provides access to configure the parameters of the Encoder and Decoder of
.
Copyright: 2008 Mayah Communications
140
CENTAURI II User Manual
The following items can be configured:
a) Interface
- selects which Communications Interface is to be used. The options are:
· ISDN (if available)
· X.21/V.35 (if available)
· IP
· Loop
b) Encoder/Decoder follows
- sets the Encoder/Decoder dependency to either:
· remote
· local
In ‘Remote’ mode, the
employs MAYAH’s FlashCast technology.
This means:
/
and
/SendIt transmission:
· For
The
establishing the connection dictates the parameters used.
/non
MAYAH
Codecs transmission:
·
evaluates the settings of the other codec and configure itself
accordingly.
In most ‘pratical’ cases, Remote is the optimum choice.
c) Encoder/Decoder Algorithm
- selects which algorithm is used by the Encoder and Decoder.
· G.711 (i.e. digital telephone)
· G.722
· MPEG-1/2 L2
Copyright: 2008 Mayah Communications
Elements of Web Remote
·
·
·
·
·
·
·
·
·
·
·
141
MPEG-1/2 L3
AAC
AAC (LD)
MP3 Pro
AAC (HE)
Linear
4SB ADPCM
APT-X
Enh. APT-X 16; i.e. enhanced APT-X with 16 bit
Enh. APT-X 20; i.e. enhanced APT-X with 20 bit
Enh. APT-X 24; i.e. enhanced APT-X with 24 bit
d) Encoder/Decoder Sample Rate
- sets the Encoder/Decoder Sample rate.
e) Encoder/Decoder Bit Rate
- sets the Encoder/Decoder Bit rate.
f) Encoder/Decoder Mode
- selects the audio mode to be used.
Standard:
· mono
· dual mono
· stereo
· joint stereo
Multi channel:
Multi channel can be used with all APT-X algorithms, linear, AAC (MPEG4) and
AAC (HE) provided the referring additional function is enabled (see menu item
Expert/Set Key Code). Multi channel audio applies ADAT interface.
· MC 4:
4 audio channels are used.
· MC 4 CPE:
4 audio channels in CPE mode are used. CPE (= Channel Pair Element)
means that a front and rear audio channel pair is encoded. This mode is just
available for AAC (MPEG4) and AAC (HE).
· MC 4 MPEG:
4 audio channels are used. In this context MPEG means that a center, a right,
a left and a rear audio channel is encoded. This mode is just available for
AAC (MPEG4) and AAC (HE).
· MC 6:
6 audio channels are used.
· MC 8:
Copyright: 2008 Mayah Communications
142
CENTAURI II User Manual
8 audio channels are used.
g) Encoder IMUX
- sets the Encoder IMUX (Inverse Multiplexer) format to:
· Auto
· CDQ/H.221
· Musictaxi
· J.52
· Micda
· APTX
Note:
Inverse Multiplexing is vital for the correct synchronization of the multiple Bchannels used in an ISDN transmission.
If the IMUX format is set to Auto, then
automatically uses the
correct IMUX format.
However,
Exception 1:
If a
is to establish a connection to a CDQ Prima set to MPEG L2
and the line format is H.221, then
must be configured with:
MPEGL2
· Algorithm:
Bit
rate:
384
kbit/s
(even if a lower bit rate is set on the CDQPrima)
·
CDQ/H.221
· IMUX:
Exception 2:
If you dial to a APT-X codec, then the IMUX format must be set APTX.
Copyright: 2008 Mayah Communications
Elements of Web Remote
4.6.4
Audio
- defines the most important audio parameters for the
.
The following items can be configured:
a) Audio In
- sets the Audio Input source to one of the following:
Analog XLR-3F
·
TOSlink digital (i.e. optical digital input)
·
AES/EBU digital (i.e. balanced electrical input) [DB-9F]
·
ADAT digital (ADAT interface also uses optical port) [TOSlink]
·
With ADAT the following channel combinations are possible:
1) Standard:
2 channels:ADAT12, ADAT34; ADAT56 .. ADAT2324
·
2) Multi channel:
4 channels: ADAT14, ADAT58
·
6 channels: ADAT16
·
8 channels: ADAT18
·
b) Audio Out
- sets the audio output to use one of the following:
Analog XLR-3M
·
TOSlink digital (i.e. optical digital output)
·
AES/EBU digital (i.e. balanced electrical output) [DB-9F]
·
ADAT (ADAT interface also uses optical port) [TOSlink]:
·
Copyright: 2008 Mayah Communications
143
144
CENTAURI II User Manual
With ADAT the following channel combinations are possible:
1) Standard:
2 channels:ADAT12, ADAT34; ADAT56 .. ADAT2324
·
2) Multi channel
4 channels: ADAT14, ADAT58
·
6 channels: ADAT16
·
8 channels: ADAT18
·
c) Mono Channel Mix In/Mono Channel Mix out
When in Mono mode, this selects which audio channel(s) is/are used.
Left: Only the left audio signal is used
·
Right: Only the right audio signal is used
·
Mixed:(L+R)-6 dB signal is used
·
d) Audio Level In
- sets the Input level of the A/D converter in the range of:
fsc to 0 dBu [fsc: full scale coding of A/D converter]
Usually fsc of
means 18 dBu but there are also
with
a full scale of 15 dBu or 22 dBu.
Reducing the value of Audio Level in means amplifying the input audio. This
reduces the scale range of the A/D converter. This can cause the A/D converter
to clip sooner, and thus distortion will occur earlier, when the fsc point is
reached.
e) Audio Level out
- sets the maximum possible analogue Output level in the range of:
fsc to 0 dBu [fsc: full scale coding of D/A converter]
Usually fsc of
means 18 dBu but there are also
with
a full scale of 15 dBu or 22 dBu.
Reducing the value of Audio Level out means attenuating the analog output
audio.
f) Digital Out Sync Source
- defines the AES/EBU output clock source.
Note:
If any of the ‘internal’ sources is selected, the AES/EBU Sample rate is also
affected.
4.6.5
Others
- adjusts a number of miscellaneous settings through this dialog which normally
are not altered. Note, however, that the correct configuration MUST be made for
to operate!
Copyright: 2008 Mayah Communications
Elements of Web Remote
145
The following items can be configured:
a) G.711 law
North America/Japan and Europe use a different coding method for ISDN
telephony.
Thus, the following alternatives are available:
A-law (as used in Europe – uses non linear PCM, with 13 segments)
·
µ-law (as used in USA and Japan – also non-linear PCM; but 15
·
segments)
Note:
If G.711 law is not set properly then strong disturbances occurs at G.711
transmissions.
b) G.722 SRT Timeout
- defines the G.722 ‘timeout’ (measured in Seconds).
Generally, there are two methods to synchronize G.722 data streams.
Generally, there are two methods of determining the ‘octet-start’ (byte-start) in
G.722 data streams.
They are:
G.722 with H.221 (in-band signalling)
·
H.221 uses a small amount of the data capacity (i.e.1.6 kbit/s of 64 kbit/s)
to transmit the synchronization information in-band.
[Although G.722/H.221 is a recommended EBU standard, it’s not very
widespread!]
G.722 SRT (Statistical Recovery Timing)
·
Synchronization requires finding the start bit of every G.722 octet, and is
reached by evaluating the data pattern of the signals statistically. We
DON’T recommend that you use a pure sine wave signal whilst trying to
Copyright: 2008 Mayah Communications
146
CENTAURI II User Manual
achieve synchronization, using G.722 coding!
codecs will auto-detect a G.722/H.221 data-stream since they
evaluate the H.221 in-band signalling information. However, as G.722 SRT
signals do not have such signalling,
only switches to the G.722
SRT setting when the ‘G.722 timer’ expires and framing has yet to be achieved.
This G.722 timer starts once the first ISDN line is connected.
It is recommended that the G.722 SRT timeout is set to ~30 Seconds. This value
is high enough not to interrupt any auto-detection process, but should still be
acceptable for framing up.
c) Disconnect Timeout
- defines the period (in seconds) after which a connection is dropped, if no valid
framing is achieved. Ideally, it should be set higher than the G.722 SRT timeout
value – its default value is 45 Seconds.
d) ISDN Answer Delay
- defines the ‘telegram’ interval (used in ISDN connections) - in milliseconds.
With an ISDN connection, the called
sends out its ‘telegram’ 10
times till the ISDN answer delay expires. The default value is 5,000 ms.
e) ISDN Active Layer 1
- determines whether ISDN Layer 1 stays active all the time, or not.
When
is used in the Netherlands, this value should definitely be
set to ON.
f) Dial In Protection
- selects whether Dial-in Protection is activated for:
ISDN
·
IP
·
ISDN and IP
·
When Dial-in Protection is set to On, only connections from ISDN numbers (or IP
addresses, as appropriate) which are stored in the Phone book will be accepted.
g) Accept Mode
- determines how Incoming connections are accepted.
auto:
·
Accepts all calls that are permitted by Dial in protection automatically
manual:
·
Accepts all calls manually
dbpos:
·
Accepts all calls that are permitted by Dial in protection manually
dbneg:
·
Accepts all calls that are not permitted by Dial in protection manually, the
others are accepted automatically
Copyright: 2008 Mayah Communications
Elements of Web Remote
147
h) Dual Mode At B-channel
With ISDN
can be used as two separate mono codecs. However,
the following restrictions will apply:
Maximum sample rate:
32 kHz
·
Mode:
mono
·
Maximum bit rate :
64 kbps (except for MPEG L2)
·
This setting defines on which B-channel the ‘second (sub)codec’ starts to
communicate.
For example:
‘Dual mode on B-channel = 2’ means that B-channel 1 is assigned to the first
(sub)codec and all other B-channels are assigned to second one.
If dual mode at B-channel = 0 then dual mode is de-activated, and
functions as a single codec, without the above restrictions.
Note:
Dual mode just should be set if the communication interface of both sub codecs
is set to ISDN.
i) Select Sub codec
Although at special applications (e.g. Dual mode, Backup, Gateway)
supports more than one sub code, only one input interface is
available. This setting lets the user select to which internal (sub) codec the input
and display applies to.
For dual-, backup- or gateway- mode 2 sub codecs can be selected. This differs
with a
4000/4001 which contains 4 codecs!
j) Multi Point Return Channel
- determines which return Channel is used on a Point-to-Multipoint transmission.
[Using ISDN, Point-to-Multipoint means that a
codec can transmit
one audio signal out to multiple ISDN destinations. However, with Point-toMultipoint (PMP)
just can decode one return channel. This option
allows you to define which of the return paths you wish to use.]
PMP functionality works with any of the following:
·
MERKII
·
Worldnet Tokyo
·
Millennium 2
·
CDQPrima
·
CDQ2000/2001
·
Note:
The number of possible return channels is calculated by:
number of PMP-channels = (number of B-channels*64kbit/s) /encoder bit rate
Note 2:
Even negative return channels can be selected. A negative return channel
means that all multi point locations still receives the audio but the central
does not decode any audio.
Copyright: 2008 Mayah Communications
148
CENTAURI II User Manual
k) UDP Broadcast Mode
- enables UDP broadcast mode. All UDP audio datagrams are now addressed to
the UDP “broadcast” address (255.255.255.255), and UDP broadcast reception
is enabled.
l) Backup
- enables to configure the backup feature of the
. Backup feature
means that
establishes automatically another connection if framing
is lost. Two Backup parameters can be set:
Backup time
·
The backup time can be selected in ms. Backup time is the time the
backup event (= framing lost) must minimum last before the backup
connection is established.
Note:
The permitted maximum value is 30,000 ms.
Backup connection
·
The backup connection can be selected to last or to a phone book entry.
Note:
A general description of the
backup feature can be found at
chapter Miscellaneous/Backup.
m) Gateway
- enables to configure the gateway feature of the
. Gateway
functionality means that
routs received audio from one interface to
another one (e.g. MPEGL2 audio received at ISDN is sent out as MPEGL3 audio
via IP) The following parameters can be selected:
off: Gateway functionality is disabled
·
last: Routing to last established connection
·
phone book: Routing to a phone book entry
·
The phone book entry can be selected in the right edit field by typing in the
number of the phone book entry.
Note:
A general description of the
gateway feature can be found at
chapter Miscellaneous/Gateway.
4.7
Expert Menu
4.7.1
Profiles
- enables to:
· to create,
· to edit
or
· to delete
a
profile entry.
Copyright: 2008 Mayah Communications
Elements of Web Remote
149
supports up to 256 profile entries.
Profile entries are used in phone book entries to set the encoder and decoder
settings. More about the adjustable profile parameters can be found in chapter
Elements of Front panel/Presets Menu/New Profile Entry.
4.8
Status Menu
4.8.1
Identification
- enables the
name to be assigned, and to request the
Serial Number.
Copyright: 2008 Mayah Communications
150
CENTAURI II User Manual
Items:
· Name:
This field shows the
name. Here a new
name can
be entered.
· Serial Number:
This field displays the
Serial No. Since this is the MAC
address of its Ethernet port, it is impossible to edit this.
If no S/No is displayed, it’s possible that no Ethernet card was detected
during boot up.
Copyright: 2008 Mayah Communications
Elements of Web Remote
4.8.2
Time
- enables setting the
4.8.3
time and date.
Software
- displays the
software versions.
For the regular user just the system version (firmware) is important.
Copyright: 2008 Mayah Communications
151
152
4.8.4
CENTAURI II User Manual
Hardware
- shows the hardware modules
4.8.5
has detected on boot-up.
Health
- informs the user about the following
‘health’ parameters:
· CPU performance
· RAM memory
· Capacities, partitions and free space of the internal drives located on CF-card
or disk-on-module
temperatures
·
voltages
·
fans in RPM
· State (Revs) of
Copyright: 2008 Mayah Communications
Elements of Web Remote
4.9
Help Menu
4.9.1
Manual
- jumps to English CENTAURI II web browser help (link : www.mayah.com/
content/download/pdfs/manuals/centauriII-man_eng.pdf).
4.9.2
About
- informs about web browser version and the authors.
Copyright: 2008 Mayah Communications
153
154
4.9.3
CENTAURI II User Manual
Release Notes
- shows the
· enhancements (e),
· changes (c) and
· bug fixes (b)
of the miscellaneous versions of the
web browser remote.
Copyright: 2008 Mayah Communications
Part
V
156
CENTAURI II User Manual
5
Elements of Centauri II Remote
5.1
Preface
This Remote Control Software is for use with Windows 95/98/ME/NT/2000/XP,
enabling the user to control all
parameters, such as connection
details, Phone book entries and Profiles. Some extra features like Timed
Event control, and updating via FTP or the Internet, has also been added.
The Remote Control program may be used to communicate with a
either via
· an IP connection (Win socket control connection using port 2000 by default)
or
· by RS-232 using the 9-pin cable (DB9F/DB9F Null Modem) supplied.
5.2
Language Request Dialog at start
At first start of
remote control the following dialog is shown:
This dialog enables to:
· to select the language of the remote control.
· to set the remote control parameters for
- RS232 control
- IP Control
This dialog is not shown at start if
· the ‘Don’t show again’ box was activated in a remote session before.
However, language request dialog can be reactivated for next remote
session by remote menu item <Settings/Select Language at start>.
· command line parameters with language selection are used (see chapter
Miscellaneous/Command Line parameters.
Copyright: 2008 Mayah Communications
Elements of Centauri II Remote
Note:
If command line parameters are used without language selection then a
reduced language request dialog is shown without the possibility to set
remote parameters.
Reduced language request dialog:
Elements of language request dialog:
Language
Here the language can be selected to:
· English (context sensitive help included)
· German (context sensitive help included)
· French (no context sensitive help)
· Italian (no context sensitive help)
· Rhaeto-Romanic (no context sensitive help)
Don’t show again
When this box is checked the language request is no more shown at start.
However, language request dialog can be reactivated for next remote
session by remote menu item <Settings/Select Language at start>.
Set remote parameters
When this box is checked the enhanced language request dialog is shown.
The enhanced dialog enables to set remote control parameters for RS232
and IP-control. Furthermore a desktop shortcut can be created.
Interface
Here the remote interface can be set to:
· RS232
Control via RS232 serial port (com port)
· IP
Win socket IP control connection
Port
The content of this list box is context sensitive.
Copyright: 2008 Mayah Communications
157
158
CENTAURI II User Manual
·
·
At RS232 control:
List of available RS232 Com ports of the control PC
At IP control
Number of the port of the win socket. By default this parameter is set to
2000.
IP Addr./Baudrate
The content of this list box is context sensitive.
· At RS232 control:
Here the RS232 baud rate can be set to:
- 9,600
- 19,200
- 38,400 (default and recommended)
- 57,600
- 115,200
Note:
This settings must correspond to the one of
. Therefore
usually 38,400 is the best choice.
· At IP control
Here the IP address of the
can be entered. This remote
program saves the last 200 entered IP-addresses. The last controlled IP
address in shown in the text field.
Furthermore with click of right mouse button a popup menu is shown which
starts a UDP scan. A UDP scan sends out a general broadcast
(255.255.255.255) and partial broadcasts (e.g. 10.0.0.255) to find all
MAYAH codecs in the network. The found Mayah codecs replaces the old
list. However, many networks devices (e.g. routers) blocks a broadcast.
Therefore usually just the LAN can be scanned.
Desktop shortcut
Here a desktop shortcut of
remote control can be created
automatically. The following items can be selected
· No
No desktop shortcut is selected
· Yes (no rmt params)
Just a desktop shortcut of
remote control is created but without
any command line parameters.
· Yes (rmt params)
The target property of the desktop shortcut includes command parameters for
- language selection
- remote parameters
according to the selection in this dialog.
For more info about command line parameters please consult chapter
Miscellaneous/Command Line parameters.
Copyright: 2008 Mayah Communications
Elements of Centauri II Remote
5.3
File Menu
5.3.1
Save Phonebook
159
- saves the current Profile and Phone book entries into a file (with the suffix .
ctr). This .ctr file uses
commands as described in the
Communication Reference Manual (www.mayah.com/content/download/pdfs/
manuals/communication-reference_man.pdf). These commands can also be
used in menu item Expert/Direct Command.
Save Phonebook dialog:
The .ctr file created by this menu label can be re-loaded back into a
via the menu item
Load
File.
Note:
The first two command lines of this .ctr file delete all old Profiles and Phone
book entries.
This is done to prevent any error messages being created when re-loading a .
ctr file.
Note 2:
Additionally this menu item will create the following files:
1) Readable Profile List (ASCII file)
Path:
Same as .ctr file
Name:
‘profile list’ <date> <time>’.txt’
2) Readable Phone book (ASCII file)
Path:
Same as .ctr file
Name:
‘phonebook’ <date> <time>’.txt’
3) Profile .dat file as used internally in the
Copyright: 2008 Mayah Communications
160
CENTAURI II User Manual
Path:
Path of
remote application + ‘\dat files’
Name:
‘profile.dat’
4) Phone book .dat file as used internally in
Path:
Path of
remote application + ‘\dat files’
Name:
‘phone.dat’
5.3.2
Save Settings
- saves
’s most important settings. However, which configuration
settings are stored depends on the hardware detected.
For example, the ISDN configuration will only be saved if any ISDN hardware
is detected in
.
The .ctr file created consists of
commands, as described in the
Communication Reference manual (www.mayah.com/content/download/pdfs/
manuals/communication-reference_man.pdf). These commands can also be
used via Expert/Direct Command.
Save Settings dialog:
The .ctr file created above can be re-loaded into a
File.
using Load
Note:
Exactly which configuration items are saved is determined by the following
ASCII-files:
- script_general_settings_001.txt or script_general_settings_002.txt
- script_ip_settings_001.txt or script_ip_settings_002.txt
- script_isdn_settings_001.txt or script_isdn_settings_002.txt
- script_x21_settings_001.txt or script_x21_settings_001.txt
Copyright: 2008 Mayah Communications
Elements of Centauri II Remote
161
It is MANDATORY that all these files are located in the sub directory ‘script
files’ of the Remote Control program, to prevent an error occurring.
The script files ending with ‘002.txt’ are used for
with system
software version >= 2.1.0.0.
5.3.3
Load Centauri File
- lets the user load respectively re-load .ctr, .caf and csr files.
Files with the extension .ctr and .caf are script files consisting of
commands as described in the Communication Reference Manual (www.
mayah.com/content/download/pdfs/manuals/communication-reference_man.
pdf).
Files with the extension .ctr are also created by:
· Save Phonebook or
· Save Settings
Files with extension .caf are
actions files used in
event-action-programming as described in application note 16 on Mayah
Website (www.mayah.com/content/download/pdfs/appnotes/centauri/
a_n_e_016.pdf).
Files with the extension .csr are
registry script files .You can
find more info about this in chapter Miscellaneous/ Helpful Readme Files.
Load
Copyright: 2008 Mayah Communications
File dialog:
162
5.3.4
CENTAURI II User Manual
Display Log file
This facility is ONLY AVAILABLE when communicating with
using IP.
First, it downloads the files
· logact.txt
· logold.txt
from the
Flash-card USER partition, using FTP. These files are
then interpreted, and the resulting single file is automatically saved as
lognew.txt, which is then displayed.
Display Log File dialog:
By using Expert/Options the user can determine if the displayed log file
should be ‘detailed’ or not.
The ‘normal’ default log file simply records the start and end of a
transmission.
The ‘detailed’ log records additional information about:
syncer
·
· Start and stop of the internal encoder and decoder
· Alarm indications
· Telegram informations
· Framing informations
· Update informations
Copyright: 2008 Mayah Communications
Elements of Centauri II Remote
· Any Dial in protection informations
etc.
Note:
It is possible to display the original log lines by right mouse click on the
display field. A pop up menu is open which enables the following selection:
· Log.txt (i.e. original log lines)
· Lognew.txt (i.e. interpreted log lines)
Pressing the F2 button displays the meaning of the shortcuts of the original
log lines.
5.3.5
Exit
- terminates the Remote Control program, closing the Help display as well.
When the Remote Control program is terminated, the following Registry
Entries are written back:
· Left and top position of program’s main window
[so that the Remote Control program re-starts at the same position on the
desktop.]
· Type of remote control - either RS-232 or IP
[so that the program will re-start using the same interface as the previous
time - provided no Command Line parameters are used to start the
program].
· Registry entries when RS232 control is used:
- Baud rate
- Com port
- Maximum number of com ports to scan
· Registry entries when IP control is used:
- IP address
- IP Port
- All IP addresses shown in the list box (in the program’s main remote
window) – so long as an UDP scan is NOT enabled at start-up (default)!
5.4
Settings Menu
5.4.1
ISDN configuration
- used to configure
ISDN settings. It is just available if ISDN
hardware is installed and detected otherwise, it’s greyed out.
Copyright: 2008 Mayah Communications
163
164
CENTAURI II User Manual
ISDN configuration dialog:
D-channel protocol:
The following D-channel protocols may be selected:
- DSS1 (Euro ISDN):
ISDN standard in whole Europe
- NI1:
used in North America
- 5ess:
used in North America
- Jate:
used in Japan
- VN4:
an old national French D-channel protocol
(expiring)
- Austel:
an old national Australian D-channel protocol
(expiring)
the DSS1 standard, with small modifications for
- DSS1 (ext):
Taiwan
D-channel depending settings
Part of the ISDN configuration dialog, it’s context sensitive to the selected Dchannel protocol:
Copyright: 2008 Mayah Communications
Elements of Centauri II Remote
165
DSS1, DSS1 (ext.), VN4
The user can set the MSN (Multiple Subscriber Number) to which
will respond.
There are generally only two reasons to use an MSN:
- if multiple devices with the same service using one ISDN bus
- if
is attached to PBX (Private Branch exchange)
If a single
is connected to an externally-provided S0, it’s not
necessary to add an MSN.
NI1, 5ess
With the both North American protocols NI1 and 5ess it is mandatory to enter
an ID and a SPID (=service profile identifier). These informations are supplied
by the ISDN service provider.
Note:
There are still some ISDN lines which use 56kb/s per B-channel, rather than
64kb/s: however, they are mainly in North America!
Copyright: 2008 Mayah Communications
166
CENTAURI II User Manual
Jate, Austel
With both the Jate and Austel protocols, you MUST enter an ID.
Common Settings
The following settings are available for all protocols:
Get dialtone
When
is connected to a PBX or ISDN switch, it is often
necessary to add a number for external access (e.g. 9). Enter the number
required via this dialog.
Note:
This number precedes EVERY dialled number - even those ‘dialled’ using the
Connect or Phonebook buttons on the ‘wheel’ symbol displayed in the Remote
Control program window.
Predial No.
Sometimes it is necessary to use a special provider to guarantee the quality of
the ISDN service or the carriage of ISDN calls through a Gateway. Usually a
special provider can be selected by dialing a special call-by-call number
before the normal number.
This Predial Number precedes EVERY dialled number - whether it is dialled
by the Connect or Phonebook buttons, and is inserted AFTER the number
supplied by Get Dialtone.
Min. Digits for. Ext. Call
- determines the number of digits BEFORE the Get Dialtone number becomes
valid.
For example:
Copyright: 2008 Mayah Communications
Elements of Centauri II Remote
- Get dialtone:
- Min. Digits for Ext. Call:
Entered number: 1234
Entered number: 01234
167
9
5
Dialed number: 1234
Dialed number: 901234
Timeout
- sets the interval time between Redial attempts (measured in seconds).
Note:
You can enter values other than those listed, although the maximum value is
65,535 seconds
Redial
- defines the number of Redials which will be attempted.
A Redial will occur if the other party cannot be reached either through being
busy, if there’s no response, or if the other party disconnects/drops the call.
Note:
You can enter values other than those listed, but the maximum possible value
is 65,535 attempts.
Audio delay
- sets the audio delay applied to the ISDN interface. The maximum value is
5,000 ms.
Increasing this value can make ISDN connections more stable, by providing a
larger (longer) buffer. For instance the audio delay buffer can compensate
jitter.
5.4.2
X.21 configuration
- configures
X.21/V.35 ports. Note that this is only available if
an X.21/V.35 card is installed and detected at Power-up: otherwise, the
option will be greyed out.
Copyright: 2008 Mayah Communications
168
CENTAURI II User Manual
X.21/V.35 configuration dialog:
X.21 Channel
Item to select if X.21/V.35 port 1 or 2 should be configured.
X.21 Mode
- sets the X.21/V.35 port Mode to either DTE or DCE.
In DTE (Data Terminal Equipment) mode,
receives its clocking
information from the network - or a dedicated line.
In DCE (Data Circuit Equipment) mode,
itself supplies the
clocking information.
In most cases, the DTE mode will be used.
X.21 Clocking
- sets the clocking format of the X.21/V.35 port.
In DTE mode, T4 clocking is usually used.
In DCE mode, T2T4 clocking is most commonly used.
The meaning of the different clocks is described in the Interface Manual (link:
www.mayah.com/content/download/pdfs/manuals/centauri-interface_eng.pdf).
X.21 Protocol
- selects the fixed line’s connection protocol to either X.21 or V.35 format.
Audio delay
- sets the audio delay applied to the X.21/V.35 interface. The maximum value
is 5,000 ms.
Increasing this value can make X.21/V.35 connections more stable, by
providing a larger (longer) buffer. For instance the audio delay buffer can
compensate jitter problems.
Copyright: 2008 Mayah Communications
Elements of Centauri II Remote
5.4.3
Network configuration
- configures the electrical (RJ-45) and/or optical network connections.
Note:
Every
has an ‘electrical’ network connection. The 'optical'
network card or a second 'electrical' network card is optional.
Network configuration dialog:
Interface
- selects which interface to configure.
· Interface 1: Electrical (RJ-45) network card
· Interface 2: Optical network card
Address
- sets the IP address for the appropriate interface. (e.g. 192.168.10.50)
Netmask
- sets the subnet mask for the appropriate interface. (e.g. 255.255.255.0)
Gateway
- sets the IP address of the default network Gateway (for the appropriate
interface).
Copyright: 2008 Mayah Communications
169
170
CENTAURI II User Manual
DNS Server
- sets the IP address of the DNS (Domain Name System) server for the
appropriate interface.
SNMP Manager
- sets the IP address of the SNMP (Simple Network Management Protocol)
manager.
This address will be used as the destination for the SNMP traps.
Transferrate
- defines the transfer rate (Speed) for the appropriate network interface, to
either:
· Auto (i.e. auto-sensing the network data rate)
· 10 Mbit/s
· 100 Mbit/s
Duplex
- selects the operating mode for the appropriate interface as:
· Auto (i.e. auto sensing of duplex mode)
· Half duplex
· Full duplex
Packetsize
- defines the packet size of the IP datagrams used. The maximum value is
1,536 bytes.
Audio Delay
- sets the audio delay applied to the IP interface. The maximum value is 5,000
ms.
Increasing this value can make IP connections more stable, by providing a
larger (longer) buffer. For instance the audio delay buffer can compensate
jitter problems.
Packetsize Mode
- selects the mode how
creates IP packets. This item is just
available if system software version 2.2.0.0 (or later) is implemented. There
are three possibilities:
· variable (default)
This means that the payload is rounded to the next full frame or audio block
Advantage:
No fractional audio frames or blocks in the IP packets
Disadvantage:
With algorithms with no fix frame length (e.g. AAC) it can happen that the
max. possible packet size is exceeded.
· fixed
Copyright: 2008 Mayah Communications
Elements of Centauri II Remote
171
This means that IP payload is exactly the same as the packet size value set
at item packetsize (i.e. it is not rounded to the next full audio frame or audio
block).
Advantage:
Even with algorithms with variable frame length the packet size is fix.
Disadvantage:
IP packet can have fractional audio frames or audio blocks.
· sync.
Same as fixed but additionally packets are transmitted in synchronized
intervals.
Advantage:
Same as with fixed but additionally adaptation to network equipment which
has got problems with unsynchronized packets.
Disadvantage:
Same as with fixed.
Forward Error Correction (FEC)
- creates additional redundant data which enables to recreate lost IP packets
on the receiver side. This item is just available if system software version
3.2.0.122 (or later) is implemented. FEC can be set to:
· no (default)
· lowestdelay
· lowdelay
· middledelay
· lowbitrate
· highsecurity
FEC just can be used at RTP connections.
On the one hand FEC enhances the security that transmitted packets are
received, but on the other hand it increases the overhead and the delay.
For more info about Forward Error Correction please consult chapter
Necessary settings for framed connections/How to establish IP connections/
FEC.
5.4.4
Codec configuration
- provides access to configure the parameters of the Encoder and Decoder of
.
Copyright: 2008 Mayah Communications
172
CENTAURI II User Manual
Codec configuration dialog:
Note:
The dialog is context-sensitive, and shows the ‘permissible’ settings.
The sequence of dependency is:
- Algorithm (highest priority – since it influences Sample rate, Bit rate, and
Mode)
- Sample rate (which influences Bit rate and Mode)
- Bit rate (only influences mode)
- Mode
Exceptions:
Linear:
At linear PCM coding the bit rate is determined by both the sample rate and
the mode used.
All APT-X algorithms:
For all APT-X algorithms, the sample rate is determined by the bit rate and the
Copyright: 2008 Mayah Communications
Elements of Centauri II Remote
173
mode.
Interface
- selects which Communications Interface is to be used. The options are:
· ISDN (if available)
· X.21/V.35 (if available)
· IP (not available with CENTAURI 2000/2001)
· Loop
Encoder/Decoder follows
- sets the Encoder/Decoder dependency to either:
· remote
· local
In ‘Remote’ mode, the
employs MAYAH’s FlashCast technology.
This means:
/
and
/SendIt transmission:
· For
The
establishing the connection dictates the parameters used.
/non Mayah Codecs transmission:
·
evaluates the settings of the other codec and configure itself
accordingly.
In most ‘pratical’ cases, Remote is the optimum choice.
Encoder/Decoder Algorithm
- selects which algorithm is used by the Encoder and Decoder.
· G.711 (i.e. digital telephone)
· G.722
· MPEG-1/2 L2
· MPEG-1/2 L3
3000/3001 and
· AAC (only available on
4000/4001)
· AAC (LD); must be enabled by a key code via Expert/Set Key Code
· MP3 Pro; must be enabled by a key code at via Expert/Set Key Code
· AAC (HE); must be enabled by a key code via Expert/Set Key Code
· Linear; must be enabled by a key code via Expert/Set Key Code
· 4SB ADPCM;must be enabled by a key code via Expert/Set Key Code
· APT-X; must be enabled by a key code via Expert/Set Key Code
· Enh. APT-X 16; i.e. enhanced APT-X with 16 bit; must be enabled by a key
code via Expert/Set Key Code
· Enh. APT-X 20; i.e. enhanced APT-X with 20 bit; must be enabled by a key
code via Expert/Set Key Code
· Enh. APT-X 24; i.e. enhanced APT-X with 24 bit; must be enabled by a key
code via Expert/Set Key Code
· AES/EBU transparent; must be enabled by a key code via Expert/Set Key
Code
Note:
Copyright: 2008 Mayah Communications
174
CENTAURI II User Manual
At transparent AES/EBU streaming a special clocking is necessary. Please
find more info in application note 23 on Mayah Website (www.mayah.com/
content/download/pdfs/appnotes/centauri/a_n_e_023.pdf).
· DRM; must be enabled by a key code via Expert/Set Key Code
Encoder/Decoder Stream/Signal
The algorithms AAC (MEG4), AAC (HE) and linear can also be specified more
detailed if system version is >= 2.1.0.50. For this the algorithm list box must
be right mouse clicked to open a popup menu.
Following selections are possible:
a) AAC (MPEG 4) stream format
· auto
· raw
· adts
· loas
b) AAC (HE) signal format
· auto
· implicit
· explicit-backward
· explicit-non-backward
c) Linear stream format
· auto
· low-byte-first
· high-byte-first
Encoder/Decoder Sample Rate
- sets the Encoder/Decoder Sample rate.
Encoder/Decoder Bit Rate
- sets the Encoder/Decoder Bit rate.
Encoder/Decoder Bit Resolution
At linear also the bit resolution can be specified if system version is >=
3.2.0.21. For this the bit rate list box must be right mouse clicked to open a
popup menu.
Following selections are possible:
·8
· 12
· 16 (default)
· 20
· 24
Encoder/Decoder Mode
- selects the audio mode to be used.
Copyright: 2008 Mayah Communications
Elements of Centauri II Remote
175
Standard:
· mono
· dual mono
· stereo
· joint stereo
Multi channel:
Multi channel can be used with all APT-X algorithms, linear, AAC (MPEG4)
and AAC (HE) provided the referring additional function is enabled (see menu
item Expert/Set Key Code). Multi channel audio applies ADAT interface.
· MC 4:
4 audio channels are used.
· MC 4 CPE:
4 audio channels in CPE mode are used. CPE (= Channel Pair Element)
means that a front and rear audio channel pair is encoded. This mode is just
available for AAC (MPEG4) and AAC (HE).
· MC 4 MPEG:
4 audio channels are used. In this context MPEG means that a center, a
right, a left and a rear audio channel is encoded. This mode is just available
for AAC (MPEG4) and AAC (HE).
· MC 6:
6 audio channels are used.
· MC 8:
8 audio channels are used.
Encoder IMUX
- sets the Encoder IMUX (Inverse Multiplexer) format to:
· Auto
· CDQ/H.221
· Musictaxi
· J.52
· Micda
· APTX
Note:
Inverse Multiplexing is vital for the correct synchronization of the multiple Bchannels used in an ISDN transmission.
If the IMUX format is set to Auto, then
automatically uses the
correct IMUX format.
However,
Exception 1:
If a
is to establish a connection to a CDQ Prima set to MPEG L2
and the line format is H.221, then
must be configured with:
· Algorithm: MPEGL2
384 kbit/s (even if a lower bit rate is set on the
· Bit rate:
CDQPrima)
Copyright: 2008 Mayah Communications
176
CENTAURI II User Manual
CDQ/H.221
· IMUX:
Exception 2:
If you dial to a APT-X codec, then the IMUX format must be set APTX.
5.4.5
Audio configuration
- defines the most important audio parameters for the
.
Audio configuration dialog:
Audio In
- sets the Audio Input source to one of the following:
· Analog XLR-3F
· TOSlink digital (i.e. optical digital input)
· AES/EBU digital (i.e. balanced electrical input) [DB-9F]
· ADAT digital (ADAT interface also uses optical port) [TOSlink]
With ADAT the following channel combinations are possible:
1) Standard:
· 2 channels:ADAT12, ADAT34; ADAT56 .. ADAT2324
2) Multi channel (see item mode in menu item Settings/Codec):
· 4 channels: ADAT14, ADAT58
· 6 channels: ADAT16
· 8 channels: ADAT18
Audio Out
- sets the audio output to use one of the following:
Copyright: 2008 Mayah Communications
Elements of Centauri II Remote
·
·
·
·
177
Analog XLR-3M
TOSlink digital (i.e. optical digital output)
AES/EBU digital (i.e. balanced electrical output) [DB-9F]
ADAT (ADAT interface also uses optical port) [TOSlink]:
With ADAT the following channel combinations are possible:
1) Standard:
· 2 channels:ADAT12, ADAT34; ADAT56 .. ADAT2324
2) Multi channel (see item mode in menu item Settings/Codec):
· 4 channels: ADAT14, ADAT58
· 6 channels: ADAT16
· 8 channels: ADAT18
Mono Channel Mix In/Mono Channel Mix out
When in Mono mode, this selects which audio channel(s) is/are used.
Only the left audio signal is used
· Left:
Only the right audio signal is used
· Right:
(L+R)-6 dB signal is used
· Mixed:
Digital Out Sync Source
- defines the AES/EBU output clock source.
Note:
If any of the ‘internal’ sources is selected, the AES/EBU Sample rate is also
affected.
Audio Level In
- sets the Input level of the A/D converter in the range of:
fsc to 0 dBu [fsc: full scale coding of A/D converter]
Usually fsc of
means 18 dBu but there are also
with a full scale of 15 dBu or 22 dBu.
Reducing the value of Audio Level in means amplifying the input audio. This
reduces the scale range of the A/D converter. This can cause the A/D
converter to clip sooner, and thus distortion will occur earlier, when the fsc
point is reached.
Audio Level out
- sets the maximum possible analogue Output level in the range of:
fsc to 0 dBu [fsc: full scale coding of D/A converter]
Usually fsc of
means 18 dBu but there are also
with a full scale of 15 dBu or 22 dBu.
Reducing the value of Audio Level out means attenuating the analog output
audio.
Copyright: 2008 Mayah Communications
178
5.4.6
CENTAURI II User Manual
Ancillary Data configuration
This allows you to configure the [DB-9M] RS-232 Ancillary data port on the
rear of
.
More info about ancillary data background can be found a t chapter Others/
Ancillary Data Background.
Ancillary data configuration dialog:
Using
, you can send ancillary (auxiliary) data wrapped inside
the data stream, provided one of the following algorithms are used:
· MPEG-1/2 L2
· MPEG-1/2 L3
· AAC
· AAC (LD)
· All APT-X algorithms
Restrictions:
· MPEG-1/2 L2 using the CCS Ancillary data format allows a maximum baud
rate of 2,320.
· MPEG-1/2 L2, AAC and AAC (LD) can use maximum of 10% of the audio bit
rate for ancillary data.
· MPEG-1/2 L3 can use maximum of 7 bytes per frame for ancillary data.
{1 frame has the length of [144 * (bit rate)/(sample rate)] bytes.}
Example:
+ Using MPEG L3 with a bit rate: 64 kbit/s, and a sample rate of 32 kHz
+ Maximum ancillary bit rate = (7*64)/(144*64/32) = 1,55 kbit/s
Baudrate
Copyright: 2008 Mayah Communications
Elements of Centauri II Remote
- defines the baud rate of the Ancillary data port.
Note:
This setting only specifies the maximum physical value, NOT the actual
amount of ancillary data sent inside the audio data stream.
The following baud rates are allowed:
· 1,200
· 2,400
· 4,800
· 9,600
· 19,200
· 38,400
· 57,600
· 115,200
Since system software version 2.0.0.96 additionally the following baud rates
are selectable:
· 3,600
· 7,200
· 14,400
· 56,000
Data Bits
- sets the number of bits used to represent one single “character” of data.
The following are permissible values:
·5
·6
·7
·8
Parity
- sets the parity bit (used for error detection in a digital transmission path).
Definition of parity:
A technique to test the integrity of digital data by checking an extra bit that
holds a 0 or 1, depending if the data is an even number of 1 bits or an odd
number of 1 bits.
The following parity values are permissible:
· None
· Even
· Odd
Stop Bits
- sets the number of Stop bits (used to indicate the end of a byte).
The following values are permissible:
·1
·2
Copyright: 2008 Mayah Communications
179
180
CENTAURI II User Manual
Handshake
- sets the mode of ancillary (auxiliary) data handshaking.
Handshaking means that signals are transmitted back and forth to control (i.e.
to start and stop) the transmission.
The following values are possible:
· None
· Xon/Xoff
· RTS/CTS
· DSR/DTR
Encoder/Decoder Format
- defines how the Encode and Decode embeds the Ancillary/Auxiliary data in
the audio data stream.
Following settings are possible:
· Auto:
It detects the ancillary format automatically, provided a MPEG format is
used; this does not work with APT-X ancillary data)
· CCS
· J.52
· Musictaxi
· Barco
· None (only with APT-X algorithms)
· Left (only with APT-X algorithms)
· Right (only with APT-X algorithms)
· TS (= transport stream; only with IP/RTP)
Note:
TS only available if system software >= 3.2.0.4
5.4.7
SIP configuration
This allows you to configure the settings for SIP connections (Session I
nitiation Protocol) of
.
General informations about SIP can be found in chapter Necessary settings
for framed connection/How to establish IP connections/IP connections.
Copyright: 2008 Mayah Communications
Elements of Centauri II Remote
181
SIP Settings dialog:
1) SIP Registration Settings
1.1 ID
Here the SIP registration profile can be selected.
1.2 Registrar
The Registrar is the SIP registration server which resolves the SIP address to
a real IP address. The SIP client must register itself to a Registrar first before
it can use its service.
In this field an IP-address or an URL can be entered.
The registration comprises the following access data:
- Name
- Password
- Phone Number (just necessary for a few registrars)
1.3 Name
Here the name of the registration access data can be entered (max. 256
chars).
1.4 Password
Here the password of the registration access data can be entered (max. 256
chars).
1.5 Phone number
Here the phone number of the registration access data can be entered (max.
256 chars). This access data is just necessary for a few registrars.
Copyright: 2008 Mayah Communications
182
CENTAURI II User Manual
1.6 Active
Just an active profile causes an registration. However, only an inactive profile
can be changed.
Therefore at a new profile first ‘Active’ must be set to false. After all
registration info is entered ‘Active’ must be set to true to validate the
registration.
2) Other SIP Settings
2.1 Stun Server
A STUN server (Simple Transversal of UDP Through NATs) is necessary that
a client behind a NAT or NATs can find its public IP address. NAT stands for
Network Address Translation.
The public IP address is necessary since the SIP device on the other end
needs this info to find the local client.
In this field an IP-address or an URL can be entered.
This setting is optional.
2.2 Proxy
Here the global proxy must be entered. The global proxy is responsible for
how SIP requests and messages are handled.
In this field an IP-address or an URL can be entered.
This setting is optional.
5.4.8
Others configuration
You can adjust a number of miscellaneous settings through this dialog which
normally aren’t altered. Note, however, that the correct configuration MUST be
made for
to operate!
Copyright: 2008 Mayah Communications
Elements of Centauri II Remote
183
Other settings configuration dialog:
G.711 law
North America/Japan and Europe use a different coding method for ISDN
telephony.
Thus, the following alternatives are available:
· A-law (as used in Europe – uses non linear PCM, with 13 segments)
· µ-law (as used in USA and Japan – also non-linear PCM; but 15 segments)
Note:
If G.711 law is not set properly then strong disturbances occurs at G.711
transmissions.
G.711 Attenuation
Sometimes G.711 signals (i.e. normal telephone signals) are over modulated
and therefore their too high audio levels can cause distortions. Therefore
G.711 attenuation can be set to:
· 0 dB (no attenuation)
· 6 dB
· 12 dB
G.722 SRT Timeout
- defines the G.722 ‘timeout’ (measured in Seconds).
Generally, there are two methods to synchronize G.722 data streams.
Generally, there are two methods of determining the ‘octet-start’ (byte-start) in
Copyright: 2008 Mayah Communications
184
CENTAURI II User Manual
G.722 data streams.
They are:
· G.722 with H.221 (in-band signalling)
H.221 uses a small amount of the data capacity (i.e.1.6 kbit/s of 64 kbit/s) to
transmit the synchronization information in-band.
[Although G.722/H.221 is a recommended EBU standard, it’s not very
widespread!]
· G.722 SRT (Statistical Recovery Timing)
Synchronization requires finding the start bit of every G.722 octet, and is
reached by evaluating the data pattern of the signals statistically. We DON’T
recommend that you use a pure sine wave signal whilst trying to achieve
synchronization, using G.722 coding!
codecs will auto-detect a G.722/H.221 data-stream since they
evaluate the H.221 in-band signalling information. However, as G.722 SRT
signals do not have such signalling,
only switches to the G.722
SRT setting when the ‘G.722 timer’ expires and framing has yet to be
achieved. This G.722 timer starts once the first ISDN line is connected.
It is recommended that the G.722 SRT timeout be set to ~30 Seconds. This
value is high enough not to interrupt any auto-detection process, but should
still be acceptable for framing up.
Note:
You can enter values other than those shown, but the maximum possible
value is 9,999 seconds
Disconnect Timeout
- defines the period (in seconds) after which a connection is dropped, if no
valid framing is achieved. Ideally, it should be set higher than the G.722 SRT
timeout value – its default value is 45 Seconds.
Note:
You can enter values other than those shown, but the maximum possible
value is 9,999 seconds.
ISDN Answer Delay
- defines the ‘telegram’ interval (used in ISDN connections) - in milliseconds. It
depends on the system software version how it works
system software < 2.1.0.2:
With an ISDN connection, the called
sends out a ‘telegram’
once the first B-channel is connected and the ISDN answer delay has expired.
The default value (of 3,000 ms) is usually long enough, but if there are framing
problems with multiple B-channel ISDN connections, this value can be
increased.
system software >= 2.1.0.2:
With an ISDN connection, the called
sends out its ‘telegram’ 10
times till the ISDN answer delay expires. The default value is 5,000 ms.
Note:
Copyright: 2008 Mayah Communications
Elements of Centauri II Remote
185
You can enter values other than those listed, up to the permitted maximum of
30,000 ms
ISDN Active Layer 1
- determines whether ISDN Layer 1 stays active all the time, or not.
When
is used in the Netherlands, this value should definitely be
set to ON.
Dial In Protection
- selects whether Dial-in Protection is activated for:
· ISDN
· IP
· ISDN and IP
When Dial-in Protection is set to On, only connections from ISDN numbers (or
IP addresses, as appropriate) which are stored in the Phone book will be
accepted.
Accept Mode
- determines how Incoming connections are accepted.
· auto:
Accepts all calls that are permitted by Dial in protection automatically
· manual:
Accepts all calls manually
· dbpos:
Accepts all calls that are permitted by Dial in protection manually
· dbneg:
Accepts all calls that are not permitted by Dial in protection manually, the
others are accepted automatically
Dual Mode At B-channel
With ISDN
can be used as two separate mono codecs.
However, the following restrictions will apply:
· Maximum sample rate: 32 kHz
mono
· Mode:
64 kbit/s (except for MPEG L2)
· Maximum bit rate :
This setting defines on which B-channel the ‘second (sub) codec’ starts to
communicate.
For example:
‘Dual mode on B-channel = 2’ means that B-channel 1 is assigned to the first
(sub)codec and all other B-channels are assigned to second one.
If dual mode at B-channel = 0 then dual mode is de-activated, and
functions as a single codec, without the above restrictions.
Note:
Dual mode just can be set if the communication interface of both sub codecs
is set to ISDN. If this is not true dual mode can not be set or does not work
Copyright: 2008 Mayah Communications
186
CENTAURI II User Manual
properly pending on the system software version.
Select Sub codec
Although at special applications (e.g. Dual mode, Backup, Gateway)
supports more than one sub code, only one input interface is
available. This setting lets the user select to which internal (sub) codec the input
and display applies to.
If dual-, backup or gateway-mode is used, the selected sub codec (either 1 or
2) is displayed in the main program window. This differs with a
4000/4001, which contains 4 codecs!
The sub codec can also be selected in the main window with help of short cut
keys. More info about short cut keys can be found in the help chapter Wheel
button dialog and special keys/Short Cut Keys.
Multi Point Return Channel
- determines which return Channel is used on a Point-to-Multipoint
transmission.
[Using ISDN, Point-to-Multipoint means that a
codec can
transmit one audio signal out to multiple ISDN destinations. However, with
Point-to-Multipoint (PMP)
just can decode one return channel.
This option allows you to define which of the return paths you wish to use.]
PMP functionality works with any of the following:
·
· MERKII
· Worldnet Tokyo
· Millennium 2
· CDQPrima
· CDQ2000/2001
Note:
If PMP value is not set to 0, then the PMP return is also displayed in the main
window.
If the value IS set to 0, PMP is deactivated.
The number of possible return channels is calculated by:
number of PMP-channels = (number of B-channels*64kbit/s) /encoder bit rate
Note 2:
With system software version 2.0.0.57 (or later) even negative return channels
can be selected. A negative return channel means that all multi point locations
still receives the audio but the central
does not decode any audio.
UDP Broadcast Mode
- enables UDP broadcast mode. All UDP audio datagrams are now addressed to
the UDP “broadcast” address (255.255.255.255), and UDP broadcast reception
is enabled.
Backup
- enables to configure the backup feature of the
if the referring
Copyright: 2008 Mayah Communications
Elements of Centauri II Remote
187
additional function is implemented (see menu item Expert/Set Key Code). Backup
feature means that
establishes automatically another connection if
framing is lost. Two Backup parameters can be set:
Backup time
·
In the list box the backup time can be selected in ms. Backup time is the
time the backup event (= framing lost) must minimum last before the
backup connection is established. If ‘off’ is selected the backup
functionality is switched off.
Note:
You can enter values other than those listed, up to the permitted maximum
of 30,000 ms.
Backup connection
·
In the right edit field the backup connection can be selected. If it is empty
then the last connection will be used. Additionally a phone book entry can
be selected:
- by typing in the number of the phone book entry
or
- by mouse double clicking to open the phone book
Note:
A general description of the
backup feature can be found at
chapter Miscellaneous/Backup.
Gateway
- enables to configure the gateway feature of the
if the referring
additional function is implemented (see menu item Expert/Set Key Code).
Gateway functionality means that
routs received audio from one
interface to another one (e.g. MPEGL2 audio received at ISDN is sent out as
MPEGL3 audio via IP) The following parameters can be selected:
off: Gateway functionality is disabled
·
last: Routing to last established connection
·
phone book: Routing to a phone book entry
·
The phone book entry can be selected in the right edit field:
by typing in the number of the phone book entry
·
or
by mouse double clicking to open the phone book
·
Note:
A general description of the
gateway feature can be found at
chapter Miscellaneous/Gateway.
5.4.9
Remote settings (manual)
Using this context-sensitive dialog, Remote Control’s parameters can be set
manually.
Copyright: 2008 Mayah Communications
188
CENTAURI II User Manual
Remote settings (manual) dialog:
This dialog is context sensitive.
If RS-232 is being used, the following items are displayed:
· Com port
· Baud rate
If IP is being used, the following fields are displayed:
· Port
· IP address
(this is only visible if UDP scan is disabled)
· Add
(this is only visible if UDP scan is disabled)
· Delete
· Make Valid (only visible if IP control was valid before this dialog was
opened)
Note:
By default, the Remote Control program ‘scans’ the LAN (using a ‘UDPidentify’ broadcast) at Start up for any
codecs - provided IP
control is used. However, this scan can be disabled using a Registry entry.
The list of available codecs can be increased or decreased with ‘Add
’ or ‘Delete
’.
You can select either of the two remote control ‘interfaces’:
RS232 Control
If no
codecs were detected by the Com port scan initiated when
the Remote Control program starts, you can select an alternative Com port
with this dialog.
Note:
The number of ‘available’ Com ports to be scanned can be set using the
dialog Expert/Options.
Copyright: 2008 Mayah Communications
Elements of Centauri II Remote
189
The control baud rate can only be changed if RS-232 control was active
before the dialog was opened!
The baud rate can be set to any of the following values:
· 9,600
· 19,200
· 38,400
· 57,600
· 115,200
If the baud rate is changed, and the change is confirmed by clicking OK on
the dialog, the
gets re-booted. [This is necessary to make the
‘Remote’ baud rate change valid!]
The default Baud Rate is 38,400 - recommended as a good compromise
between speed and reliability. Nevertheless, any firmware updates uploaded
using the Com Port (Expert/Update
via RS232) will be
accomplished faster using the higher speed settings.
IP Control
can (also) be controlled using IP, using Port 2000 by default.
If you wish to use IP control, you must first assign a unique IP address to the
codec (see Settings/Network). But note that the
must be accessible on the network used by the controlling PC (you can check
this by PINGing the allocated address from the PC running the program).
Some steps to follow, to ensure ‘successful’ Remote Control of
using IP:
to the network using its Ethernet (RJ45) interface
· Connect
- preferably one on your
· Assign a unique IP address to the
network!!
· Select the ‘IP’ interface (using this Remote Settings (manual) dialog)
· Enter, or select, an IP address from the ‘IP Address’ list box
will become valid ‘now’ or
· Decide if the changes to the remote
‘At Next Start’ of the
. This selection is only available if IP
control was valid before the dialog was opened. If ’At Next Start’ is
selected, you can have multiple control sessions with different
s, each one having a different IP address.
· Confirm the settings, and close the dialog by clicking on OK
Copyright: 2008 Mayah Communications
190
CENTAURI II User Manual
5.4.10 Remote settings (automatic)
- enables the user to scan
· Com ports and/or
· Local area network (LAN)
for connected
.
The remote scan starts when OK is clicked.
Remote settings (automatic) dialog:
Com Ports
- determines how many (RS-232) Com ports are to be scanned, starting with
Com1.
If the value selected is 0, the Com port scan is DISABLED.
UDP Scan
codecs, using system software version 1.1.0.44 (or later), can
be auto-discovered on the LAN by an ‘UDP-identify’ broadcast command.
Amongst other responses, the following information should be returned:
Copyright: 2008 Mayah Communications
Elements of Centauri II Remote
191
responding
· IP address of each
responding
· Serial number of each
The
name
of
each
(system
software version 1.1.0.114, or
·
later)
[Current versions of Remote Control execute the UDP scan automatically at
start-up, provided IP control is being used. However, if a
is
added or removed from the LAN, requesting a new UDP scan can be
helpful.]
This remote version executes the UDP scan automatically at start provided IP
control is used. Nevertheless if a
gets added or removed from
the LAN a new UDP scan can be helpful.
Please remember that UDP scans only occur on the LAN segment: they
cannot pass through any routers or gateways! However, you can still control
a
in the WAN - even it isn’t discovered by a UDP scan.
If UDP scan is required, please select ‘Yes’ in the appropriate field.
Current Action
- displays the ‘current action’ of the Remote Control scan. This can be helpful
during a Com port scan, when using RS-232, as it displays the settings (which
Com port, and what baud rate) are being carried out at that moment. It is less
important for the UDP scan, since this only takes a couple of seconds.
Report
- lists all the
codecs detected by the last Remote Control scan
(either by Com port or UDP). Initially, when the scan starts, the table is empty.
Should a
codec respond, then its details are added to the list.
detected through a com port:
· Com port number
· Baud rate
detected at udp scan:
· IP address
Name (system software version 1.1.0.114 or later) or
·
serial number (system software version < 1.1.0.114)
·
Change To
Before a scan starts, there’s no choice: It’s ‘No’.
However, should a
codec be detected during a network scan
(see Report), then it’s details are added to the list - provided of course, it’s not
the ‘currently controlled’
.
However, if other than ‘No’ is selected from this list (and is confirmed by
clicking OK) the Remote Control program switches control to the selected
device.
Note:
Copyright: 2008 Mayah Communications
192
CENTAURI II User Manual
Clicking OK here is context sensitive.
If ‘No’ is selected in Change to, clicking on OK starts a new UDP scan.
However, if another item is selected, the dialog closes, and control is
transferred to the selected device.
5.5
Expert Menu
5.5.1
Direct command
- enables the Remote Control program to communicate with a
using Direct Commands, as defined in the Communication Reference manual
(www.mayah.com/content/download/pdfs/manuals/communicationreference_man.pdf).
Direct command dialog:
Enter a
command in the Command field, and confirm by
clicking OK.
will execute the command and return an answer
Answer
into the
field below.
Example:
enc_algo?
[asks for the current Encoder algorithm].
The whole command set is fully described in the
Communications Reference Manual, which can be freely downloaded from the
Mayah website www.mayah.com.
However, a help function has been implemented - provided a file called ‘
Communication Reference Manual.txt’ is available in a subdirectory called
Copyright: 2008 Mayah Communications
Elements of Centauri II Remote
193
‘comref files’. The Remote Control Installation program automatically copies
this file into this location.
The file ‘Communication Reference Manual.txt’ is just an ASCII text version of
the Communications Reference Manual.
Kind of help commands:
· help:
This command returns all help categories.
(e.g. help enc: will show encoder commands)
· help ?:
This command shows all
commands.
· help <command_category>:
This shows all
commands in a command category
(e.g. ‘help_dec’: will display all decoder commands).
· help <command>:
This describes a
command.
(e.g. ‘help enc_algo’: will show the user how to set encoder algorithms, and
how to ask for the currently valid encoder algorithm).
Special mouse and shortcut key features:
· F2: Analyses where the command (entered in the command field) is used in
the
Remote and opens the appropriate chapter in this
hypertext help.
For Instance:
If F2 is pressed and in command field ‘enc_algo’ is entered then the
hypertext help chapter for menu item <Settings/Codec/Encoder algorithm>
is opened.
· Double clicking command/command category in answer field: Displays
the description of the command respectively of the command category.
· Right mouse button: Opens a pop up menu which enables to save all
entered direct commands (except for the ones ‘help’ is preceded).
Copyright: 2008 Mayah Communications
194
5.5.2
CENTAURI II User Manual
System Reset
- enables
to be reset to its default values.
System reset dialog:
The following categories can be reset:
· System
· Encoder
· Decoder
· ISDN
· Audio
· X.21
· Common
· Phonebook
· Profile
· Ancillary Data
· Timeouts
· SNMP Traps
· Event Action
Copyright: 2008 Mayah Communications
Elements of Centauri II Remote
195
· Network (only available with RS232 control)
· All
Before executing a Reset, please select/’check’ only those items which you
really want to reset.
‘Reset All’ selects ALL items, which will also cause a reset of phone book
entries and profiles.
Please consult the Communication Reference Manual, Appendix D, for a full
description of what is reset by the different items. The Communication
Reference manual can be downloaded from the Mayah website www.mayah.
com.
Note:
A Network Reset is only feasible when using RS-232 control, since resetting
this category will prevent communication because the IP address is also
reset!
5.5.3
Time Control
Time control is a new Remote Control feature, allowing the user to perform
actions at times controlled by the PC’s clock.
Time control dialog:
A new ‘timed’ event can be created by clicking ‘NEW’ to create an entry.
Existing entries can be edited by ‘double-clicking’ to select. Both actions will
Copyright: 2008 Mayah Communications
196
CENTAURI II User Manual
open the ‘Edit Time Event’ dialog.
The following items can be configured for a time event:
· Name:
Name of the timed event (maximum length is 300 characters)
· Kind:
Various kinds of timed events can be selected:
- None:
disables a timed event
- Disconnect:
executes a disconnect
- End remote:
terminates this Remote Control program
- Phone book entry:
executes a phone book entry
- Execute script file:
executes a
.ctr script file
(see Load
File)
- Log file:
creates a
log file
(see Display Log File)
· Time:
The time of day the event should occur.
· Date:
The date on which the timed event should occur.
· Interval:
This parameter determines the interval between repeated timed events. 0 to
30 days can be selected. 0 means no repetition.
· Extra info:
This field is context sensitive to the kind of timed event.
- none,
- end remote,
- disconnect: this field is disabled;
- phone book: entering this field opens the phone book dialog;
- script file: entering this field opens a dialog to select a
.ctr
Copyright: 2008 Mayah Communications
Elements of Centauri II Remote
197
script file
- log file: enter the e-mail address where the log files should be sent to,
whereas double-clicking this field opens the options dialog to enter the
necessary e-mail data (see also menu item Expert/Options)
An edited Timed Event is listed in the event table when the Edit Timed Event
dialog is closed, by clicking on OK, but NOT if “Kind = None” is selected.
A Timed Event can be erased by selecting it, and pressing the DELETE
button on your PC keyboard.
All Timed Events in the table become valid on closing the Timed Events
dialog, by clicking on OK.
5.5.4
Set IP/ISDN Password
- lets the user define a Remote Access restriction for IP and/or ISDN control.
Set IP/ISDN Password dialog:
This menu is only visible and enabled provided:
· RS232 control is used, and
· Item IP/ISDN Password is checked in menu item Expert/Options
If either IP- or ISDN-control is active, this option is NOT available but if
· Item IP/ISDN Password is checked in menu item Expert/Options and
· Remote is started with IP or ISDN control
then first a dialog asks for
· user and
· password
Both of these must be correctly entered to gain Remote Control access to a
.
The factory default setting is for both the user and password strings to be
empty.
Please note: both entries are case-sensitive!
Copyright: 2008 Mayah Communications
198
5.5.5
CENTAURI II User Manual
Set FTP Password
- sets FTP access User and Password to a
.
Set FTP password dialog:
By factory default the
Admin
· User:
· Password: Power
FTP access data is:
Please note that this FTP access data is case sensitive.
Copyright: 2008 Mayah Communications
Elements of Centauri II Remote
5.5.6
199
Profiles
- allows creation, editing or deletion of Profiles.
Profiles dialog:
Definition of Profile:
A ‘Profile’ is a macro of codec settings: they are executed by using a Phone
book entry.
Note:
Profiles cannot be executed separately, only inside Phone book entries (see
Phonebook dialog).
Ex-factory, 31 Profiles are installed in CENTAURI 200x units, with 37 in
CENTAURI 300x/330x/400x .
The maximum number of Profiles which can be stored is 256.
Functions:
Deleting a profile:
Select the Profile to remove from the list (with your mouse) and click on DEL.
Editing a profile:
Select the required Profile and double-click on it. Alternatively, press ‘E’ on
your keyboard. Both actions will open the Edit Profile dialog.
Copyright: 2008 Mayah Communications
200
CENTAURI II User Manual
Creating a new profile:
Click on NEW on the panel. This opens the Edit Profile dialog.
The dialog is closed by clicking either OK or Cancel on the dialog panel.
5.5.7
Phonebook
- enables Execute, Create, Edit or Delete on a Phone book entry.
Phonebook dialog:
The Phonebook dialog is opened either by:
· left-mouse-clicking the Phonebook wheel button or
· pressing the key board button ‘p’ (see short cut keys)
Definition of phone book entry:
A phone book entry is a macro which executes the following:
· Encoder profile entry
· Decoder profile entry
· Selection of one of the communication interfaces ISDN, X.21/V.35, IP or
loop
· Establishing a connection (optional)
Copyright: 2008 Mayah Communications
Elements of Centauri II Remote
201
Note:
If no ISDN number, no X.21/V.35 port or no IP address is entered, then a
Phone book entry will not establish any connection, but acts like an autoconfiguration script.
The factory default condition has12 phone book entries installed.
The maximum number of Phone book entries is 256.
The Phone book can be displayed in either sequential or in alphabetical order
(see alphabetic phonebook in menu item Expert/Options).
Functions:
Execution of phone book entry:
Select the appropriate phone book entry in the list, and click either the
CONNECT or the OK-button.
Deleting a phone book entry:
Select the appropriate phone book entry in the list, and click the DEL-button
Editing a phone book entry:
Select the appropriate phone book entry and either double-click on it or press
the ‘E’ button on your keyboard. This opens the Edit phonebook dialog.
Creating a new phone entry:
Click on the NEW-button. This opens the new phonebook dialog.
Display Phonebook in alphabetic order:
Right mouse click on the ‘Name’ header
Display Phonebook in sequential order:
Right mouse click on the ‘#’ header
The dialog is closed by clicking the ‘Cancel’ button.
5.5.8
Sessions
- allows creation and editing of up to 256 Sessions (1 – 256).
Since
system version 3.2.0.92 the following IP sessions can be
created and established:
· MPEG TS
· ISMA
· DMB
Copyright: 2008 Mayah Communications
202
CENTAURI II User Manual
General informations about sessions can be found in chapter MPEG
Transport Stream.
Session dialog:
Note:
Sessions use IP Phone book entries (see Phonebook dialog).
Note 2:
The number of available sub codecs determines the max. number of audio
elementary streams which can be transmitted in one session. Therefore the
number of destinations in the above shown figure is identical to the number of
sub codecs.
This means:
· CENTAURI II 3000/3001: 2 destinations
· CENTAURI II 3300/3301: 2 destinations
· MERKII: 2 destinations
· GANYMED 1102: 2 destinations
· CENTAURI II 4000/4001: 4 destinations
Functions:
Editing a session:
Select the appropriate session and double-click on it. Alternatively, press ‘E’
on your keyboard¸ or press the NEW-button. These actions will open the Edit
Copyright: 2008 Mayah Communications
Elements of Centauri II Remote
Session dialog.
Connection a session:
Click on CONNECT-button or the OK-button on the panel.
Deleting a session:
Select the appropriate session entry in the list, and click the DEL-button.
The dialog is closed by clicking Cancel on the dialog panel.
5.5.9
ISDN Services
- determines which ISDN services are accepted by
ISDN Services dialog:
Note:
Ex-factory, the default ‘enabled’ services are::
· Speech
· Unrestricted dig. info
· Restricted dig. info
· 3.1 kHz audio
· 7 kHz audio
Copyright: 2008 Mayah Communications
.
203
204
CENTAURI II User Manual
· Telephony
· 7 kHz telephony
You are strongly advised NOT TO CHANGE these Enabled services, as this
can restrict the ISDN functionality of your
codec.
5.5.10 Options
- allows the user to configure the
needs.
Remote Control to his/her
Copyright: 2008 Mayah Communications
Elements of Centauri II Remote
205
Options dialog:
The following items can be set:
· Enable Disconnect Dialog:
If this item is selected, clicking the DISCONNECT-Button in the main
window opens a disconnect dialog which allows disconnection of individual
lines. Otherwise, all lines are simultaneously disconnected by clicking
DISCONNECT.
By default, this is NOT selected, so ALL lines are disconnected when the
button is clicked.
· Enhanced Status Messages:
Copyright: 2008 Mayah Communications
206
CENTAURI II User Manual
If this is selected, enhanced Status Messages are shown for:
- File/Save Phonebook
- File/Save Settings
- Download
scripts (see menu item File/Load
File)
- Retrieving profiles (see menu item Expert/Profiles)
- Retrieving phone book (see phonebook dialog)
- Retrieving encoder, decoder, line and interface settings at main window
- ISDN error messages
Enhanced error messages consist of:
- text part (e.g. the line of
script which is being executed)
- percentage bar (e.g. how many lines of a
script have been
executed)
By default, this is not checked.
· Show Hardware Status at Start:
If this is selected, the hardware status dialog is shown when Remote Control
program starts. (see menu item Status/
Hardware).
By default, this is NOT selected.
· Enable Super User Password Dialog:
When selected, all sub-menus of the Expert menu are protected by a
SuperUser password.
The password is defined on the first appearance of the SuperUser password
dialog.
If the SuperUser password is lost or forgotten, it can be recovered by
examining the Windows registry at <HKEY_CURRENT_USER\Software
\Mayah Communications\
Remote\SuperUserPassword>.
By default, this IS selected as active.
· Enable Detailed Log File:
- selects whether Display Log File only displays log messages about
established and terminated connections, or ALL logged messages.
By default, this is NOT selected.
· Alphabetic Phonebook:
- selects whether the Phone book entries of the Phonebook dialog are listed
in numerical or alphabetic order.
Copyright: 2008 Mayah Communications
Elements of Centauri II Remote
207
By default, this is NOT selected.
· Large Main Window
If this is selected, the height and width of the Remote Control program window
is doubled.
By default, this is NOT selected
· Show Statusbars (valid next start)
- enables or disables the status bar at the bottom of most Remote Control
windows.
Note that the Remote Control program must be restarted to make any
changes occur.
By default, this is NOT selected.
This Status bar can be of assistance when observing communications
between the Remote Control program and a
.
For instance:
The status bar of the codec settings dialog (menu item Settings/Codec)
shows, on the left the last command sent to
and, on the right
the last received response from the
.
Copyright: 2008 Mayah Communications
208
CENTAURI II User Manual
· Enable Multiple
- enables control of multiple
codecs, by opening multiple
instances of the Remote Control program.
This feature is ONLY available when control is via IP.
By default, this item is NOT selected, which means that picking another
from the drop-down list in the main window, changes to
control to the new
.
Otherwise, if this item is selected, choosing another
from the
drop-down list causes a new instance of the Remote Control to open. The
new instance now controls the most recently selected
, whilst
the first instance controls the previous
.
Control of multiple
:
· IP/ISDN Password Request
- enables or disables the IP/ISDN Password functionality.
For more info about IP/ISDN password, consult Set IP/ISDN Password.
By default, this item is NOT enabled.
· UDP Scan at Start
By default, the Remote Control program ‘UDP-identify’ scans the LAN for
Copyright: 2008 Mayah Communications
Elements of Centauri II Remote
·
·
·
·
·
209
codecs - provided IP control is selected. This dialog allows
the function to be switched off.
If this ‘scan’ is disabled, the list box on the main program window shows the
IP address used in the last session, which may no longer be valid.
Stop Connect UDP
If this item is checked and the DISCONNECT-Button is pressed then at
UDP/IP- connections additionally the decoder is stopped.
By default this item is not checked.
Level meter interval (ms)
This activates or de-activates a level meter display on the main program
window - provided IP control is used. It is NOT available when RS-232
communication between PC and
is used.
If the interval is set to 0, then the level meter display is Disabled.
Otherwise,
sends its level info to the remote (by UDP) at a
rate defined by this interval value. Please remember that a short interval will
generate a high level of traffic on the network, but a large interval will mean
less reliable level info. A good compromise is 200 ms.
By default, the level meter interval is set to 0 (i.e. the level meter is deactivated).
Position of Message Box
- determines whereabouts the message box (see Enhanced Status
Messages) is displayed.
The following locations can be selected:
- Top Left:
The
message box is displayed at the top
left of the screen
- Centre: The
message box is displayed in the centre of its
“own” window
By default, the location is set to ‘Top Left’.
Max Number of Com Ports to Scan
- determines how many Com ports are scanned when the Remote Control
program is started.
When the
Remote Control program starts, it tries to connect to
a
using the following hierarchy:
- Command line parameters (see Command Line parameters)
- ‘most recent’ Remote Control parameters (e.g. Com 2 at 57,600)
- Default parameters (i.e. Com1 with 38,400)
- Com Port scan; Com port scan starts. The scan sequence always starts
with Com1.
For instance:
Number of Com ports to scan = 4, means that Com1, Com 2, Com 3 & Com
4 are all scanned.
The default setting is 1 (i.e. Com 1 will be scanned).
SMTP Host
- allows entry of the SMTP host of the e-mail system.
It is needed if the log file, produced automatically by Time Control, is to be
sent out by e-mail.
Copyright: 2008 Mayah Communications
210
CENTAURI II User Manual
·
·
·
·
By default, the entry is empty.
SMTP ID
- enters the SMTP UserID of the e-mail account. A UserID is not always
necessary for a connection to an SMTP host, but some servers do not allow
mail to be sent without a valid ID.
It is used if the log file, produced automatically by Time Control, is to be
sent out by e-mail.
By default, the entry is empty.
Own E-mail
- adds the sender’s e-mail address.
It is used if the log file, produced automatically by Time Control, is sent out
by e-mail, and the recipients need to be informed of who sent the log.
By default, the entry is empty.
Log File Path
- defines where the log files (produced by File/Display Log File are to be
stored. This path setting can be entered manually or via the dialog. The
dialog is opened by double-clicking on the Log File Path edit field.
By default, it is set to the same path as that of the
Remote
Control program.
Hot Key Grid
- defines the function of the eight hot keys in the main program window (see
hot keys).
For every hot key, there are two options:
Command:
This is where the hot key function is defined (i.e. what’s executed if the hot
key is pressed). Two kind of functionalities can be assigned:
- Direct Command (see also menu item Expert/Direct Command)
script file with the extension .ctr
The path of this script file can be entered manually, or
via a dialog which is opened by double-clicking in the
appropriate field.
Comment:
A comment can also be assigned to a hot key. This comment will be shown
when the user moves the mouse over the hot key in the main Program
window.
The comment can be any character string, with the maximum length of 256
characters.
Hot keys, to which no functionality is assigned, are disabled and greyed out.
By default, no hot keys are defined. Hot keys with no functionality are
disabled and greyed.
Any changes made to these Options dialog will become valid when OK is
clicked.
Copyright: 2008 Mayah Communications
Elements of Centauri II Remote
211
5.5.11 Update via RS232
- updates the
firmware via the RS232/Com port connection.
Dialog of Update via RS232:
Requirements:
· RS232 control
·
update file (*.upd) must be available
The current update file can be downloaded from Mayah website www.mayah.
com, or can be acquired from [email protected].
Warning:
If your
system firmware is earlier than 1.1.0.44, you must
update to system software version 1.1.0.44 first. The system software version
can be checked at menu item Status/
Software Versions.
The update file for system software version 1.1.0.44 can be acquired from
[email protected].
Ignoring this warning can result in the update corrupting the Flash card
inside the
!
Steps to execute an RS232 update:
· Click on OK
· A dialog for selecting a
update file opens
· Start the update by selecting the update file
· Update runs automatically
· When the Update finishes,
reboots automatically, to apply the
firmware.
Hint:
RS232 update can be speeded up by increasing the RS232 remote control
baud rate to 115,200, using File/Remote Settings (manual).
Copyright: 2008 Mayah Communications
212
CENTAURI II User Manual
Duration time of RS232 update:
· Remote baud rate of 38,400: Approximately 18 minutes
· Remote baud rate of 115,200: Approximately 6 minutes
Note:
Since data transfer using RS-232 is not ‘secure’ sometimes it might
sometimes be necessary to repeat the update, and thus is NOT THE
RECOMMENDED METHOD. If there is an opportunity, use IP control.
5.5.12 Update via ISDN
- updates the
firmware via ISDN.
Dialog of Update via ISDN:
Requirements:
with ISDN card
·
· At least a single ISDN S0
Hint:
If your
system firmware is earlier than v1.1.0.44, you must
update to v1.1.0.44 first! Therefore if a
with a system software
version earlier than 1.1.0.44 dials to the Mayah-ISDN-update-server first it just
can be updated to system software version 1.1.0.44. Afterwards updates to
higher system software versions are possible.
Steps to follow for an ISDN update:
· In the ‘Update Address’ field enter the number of the ISDN update server;
Copyright: 2008 Mayah Communications
Elements of Centauri II Remote
213
Mayah ISDN update server:
- within Germany: 0811551761
- within Europe: 0049811551761
- from USA: 01149811551761
· In the ‘Update Version’ list box, , please choose the correct version for your
codec.
Note:
Selecting ‘Newer’ always updates the
to the latest version
which is available on the ISDN update server.
· Click on OK
The
will dial into the Mayah ISDN update server, retrieve the
appropriate update file and loads it automatically, after which, the codec will
reboot itself to activate the new firmware.
Duration time of ISDN update:
Approximately 6 minutes
5.5.13 Update via FTP
- updates the
firmware via FTP.
Dialog of Update via FTP:
Requirements:
· IP control
·A
update file (*.upd) MUST be available
The current release can be downloaded from the Mayah website www.mayah.
com, or can be acquired from [email protected].
Warning:
If your
Copyright: 2008 Mayah Communications
system firmware is earlier than 1.1.0.44, you must
214
CENTAURI II User Manual
update to system software version 1.1.0.44 first. The system software version
can be checked at menu item Status/
Software Versions.
The update file for system software version 1.1.0.44 can be acquired from
[email protected].
Ignoring this warning can result in the update corrupting the Flash card
inside the
!
Steps to follow for FTP update:
· Click on OK
update file opens
· A dialog for selecting a
· Start the update by selecting the update file
· Update runs automatically (including rebooting of
)
Duration time of FTP update:
~1.5 minutes
5.5.14 Update via Internet
- updates the
www.mayah.com.
from an update file located on the Mayah website
Dialog of Update via Internet:
Requirements:
· IP control
· Activate connection to Internet
If this is selected, a message reminds the user that an active connection to
the Internet is necessary!
Copyright: 2008 Mayah Communications
Elements of Centauri II Remote
215
When the ‘Update via Internet’ dialog is visible, the
Remote
Control program tries to retrieve from www.mayah.com versions info about:
version
· Latest official
version
· Latest beta
version
· Latest pre
This can take a few seconds. If successful, the ‘Update Version’ list is
automatically filled out with the info on the latest official and beta releases.
Now update via internet is possible.
If it is not successful, the display shows ‘Cannot connect to Mayah homepage’
and the list remains empty and update via internet is impossible.
Steps to follow for internet update:
· Select the latest official or the latest beta version in the ‘Update Version’ list
box
· Start update by clicking OK
· Update runs automatically
Duration time of internet update:
With a fast internet access (e.g. Internet access by DSL) ~2 minutes.
5.5.15 Set Key Code
- enables the ‘additional functions’ in CENTAURI 300x, CENTAURI 330x and
CENTAURI 400x, using a key code. Previously enabled functions are also
checked.
Copyright: 2008 Mayah Communications
216
CENTAURI II User Manual
Set key code dialog:
Additional functions:
Algorithms:
· Linear: Enables linear audio via IP
· AAC (LD): Enables MPEG4 AAC Low Delay algorithm
· 4SB ADPCM: Enables 4SB ADPCM algorithm
· AAC (HE): Enables AAC (HE) algorithm
· MP3 Pro: Enables MP3 Pro algorithm
· APT-X: Enables APT-X and APT-X no sync. algorithms
· Enhanced APT-X: Enables enhanced APT-X algorithms with 16, 20 and 24
bit
· AES/EBU transparent: Enables transparent streaming of a AES/EBU digital
audio signal
· DRM: Enables AAC+SBR algorithm for DRM ( = Digital Radio Mondial); only
available for DRM Encoder
Protocols:
· SNMP: Enables Simple Network Management Protocol
· DHCP: Enables Dynamic Host Configuration Protocol
· NTP: Enables Network Time Protocol
Modes:
· MC APT: Enables multi channel mode for APT-X algorithms
Copyright: 2008 Mayah Communications
Elements of Centauri II Remote
217
· MC Linear: Enables multi channel mode for linear audio
· MC AAC (MPEG4): Enables multi channel mode for AAC (MPEG4)
algorithm
· MC AAC (HE): Enables multi channel mode for AAC (HE) algorithm
Others:
· Gateway: Enables Gateway functionality (see menu item Settings/Others)
If an item is checked it has been enabled.
How to enable additional functions:
· Contact your local dealer or Mayah communications for the key code of an
additional function
which will use the additional
· Give the Serial Number of the
function.
· Enter the key code in the edit field ‘Key Code’
· Confirm the key code by clicking OK
If this was successful, the new function is ‘checked’, and is enabled
Note:
· Additional functions are not free! Coding algorithms are licensed software,
and each key translates to a (royalty) licence payment for the use of the
algorithm.
, and can only
· Key codes are calculated using the S/No of the
be used by that unit.
Please contact your local Mayah dealer, Mayah Communications or
[email protected] to get the current prices.
5.6
Status Menu
5.6.1
Identification
- enables the
name to be assigned, and to request the
Serial Number.
Copyright: 2008 Mayah Communications
218
CENTAURI II User Manual
identification dialog:
Items:
· Name:
This field shows the
name. It is here a new
name
can be entered.
· Serial Number:
This field displays the
Serial No. Since this is the MAC address
of its Ethernet port, it is impossible to edit this.
If no S/No is displayed, it’s possible that no Ethernet card was detected during
boot up. In which case, the ALARM LED of the
will light up.
Detection of Ethernet card can be checked with Status/
Hardware.
A change of
name becomes valid after clicking the OK-button.
Copyright: 2008 Mayah Communications
Elements of Centauri II Remote
5.6.2
Time
- enables setting the
time and date.
time dialog:
Items:
Time
·
This displays
·
Date:
This displays the date of
edited.
Note:
Should the internal battery fail,
Copyright: 2008 Mayah Communications
internal clock. The setting can be edited.
internal clock. The setting can be
time and date are lost!
219
220
5.6.3
CENTAURI II User Manual
System Software
- displays the
software versions.
software dialog:
Items:
·
·
·
·
·
·
System Version:
displays the
system software version. For the normal
user this is the only important software information.
RTT 32 DLL Version:
Real time kernel version
RTIP DLL Version:
IP protocol stack version
ISDN DLL Version:
ISDN CAPI driver version (1 BRI)
ISDN DLL 4 Version respectively USB Stack Version (if system
software version >= 2.0.0.121):
ISDN CAPI driver version (4 BRI) respectively USB Stack version (if
system software version >= 2.0.0.121)
SRC DLL Version:
Sample rate converter library version
Copyright: 2008 Mayah Communications
Elements of Centauri II Remote
·
·
·
·
·
·
·
·
221
AAC (HE and MPEG4):
AAC (HE) and AAC (MPEG4) codec version. The first two fields shows
encoder version and the last two fields shows the decoder version.
AAC (MPEG2):
AAC (MPEG2) codec version. The first two fields shows encoder version
and the last two fields shows the decoder version.
AAC (LD):
MPEG-4 AAC low delay codec version. The first two fields shows encoder
version and the last two fields shows the decoder version.
MPEG L2:
MPEG Layer 2 codec version. The first two fields shows encoder version
and the last two fields shows the decoder version.
MPEG L3:
MPEG Layer 3 codec version. The first two fields shows encoder version
and the last two fields shows the decoder version.
MPEG L3 Pro:
MPEG Layer 3 Pro codec version. The first two fields shows encoder
version and the last two fields shows the decoder version.
APTX 100:
APT-X codec version. The first two fields shows encoder version and the
last two fields shows the decoder version.
4SB ADPCM:
4SB ADPCM codec version. The first two fields shows encoder version
and the last two fields shows the decoder version.
Note:
The parameters shown in this dialog can only be changed via a system software
update.
Copyright: 2008 Mayah Communications
222
5.6.4
CENTAURI II User Manual
Hardware
- shows the hardware modules
has detected on boot-up.
hardware dialog:
This dialog is also displayed when the
starts (see menu item Expert/Options).
Remote Control program
Items:
Series:
this Remote Control program is designed to control 200x, 300x, 330x and 400x
CENTAURI codecs. A special version of the Remote Control software exists for
CENTAURI 3500. For more info, please contact [email protected].
· Number of available B channels:
- only available if
has an ISDN card.
Possible values:
- CENTAURI 2000/2001: 0, 2 or 4 (i.e. 0, 1 or 2 BRI)
- CENTAURI 3000/3001: 0, 2, 4 or 8 (i.e. 0, 1, 2 or 4 BRI)
- CENTAURI 4000/4001: 0, 2, 4 or 8 (i.e. 0, 1 or 4 BRI)
- MERKII: 2, 4 or 8 (i.e. 0, 1 or 4 BRI)
- GANYMED 1102: 0
· Number of installed X.21 cards:
Possible values: 0 or 1
· Number of installed network cards:
Every CENTAURI (even a CENTAURI 2000/2001) has an electrical network
interface. In addition, there is the option of a second network card (electrical or
optical) for CENTAURI 300x, 330x and 400x models.
·
Copyright: 2008 Mayah Communications
Elements of Centauri II Remote
223
If a
has two interface cards, then the IP Remote Control will be
via the first interface (network) card, and IP audio via the second network card.
If a network card is not detected,
will show an alarm.
Possible values are:
- CENTAURI 2000/2001, MERKII, GANYMED 1102: 1
- CENTAURI 3000/3001: 1 or 2
- CENTAURI 3300/3301: 1 or 2
- CENTAURI 4000/4001: 1 or 2
· Number of installed flash cards:
Possible values: 1
· Kind of LCD displays:
Possible values:
- CENTAURI 2000, CENTAURI 3000, CENTAURI 3300, CENTAURI 4000,
GANYMED 1102: No
- CENTAURI 2001, CENTAURI 3001, CENTAURI 3301, CENTAURI 4001: ISA
or USB
- MERKII: USB
· Number of installed headphone ports:
This field just informs if one or more headphone ports are available (=1) but it
does not inform about the real number of headphone connectors.
Possible values:
- CENTAURI 2000, CENTAURI 3000, CENTAURI 3300 and CENTAURI 4000:
0
- CENTAURI 2001, CENTAURI 3001, CENTAURI 3301, CENTAURI 4001 and
MERKII: 1
Note:
The parameters shown in this dialog cannot be changed except by installing
new
hardware. Such a hardware upgrade should only be done by
the Mayah factory.
For more information, please contact your local Dealer, or Mayah
Communications, via [email protected].
5.6.5
Health
- informs the user about the following
Motherboard
·
CPU performance
·
RAM memory
·
Flash card capacities
·
temperatures
·
voltages
·
State of
fans
·
health dialog:
Copyright: 2008 Mayah Communications
‘health’ parameters:
224
CENTAURI II User Manual
With this dialog the reason for a
which are not checked cause a
alarm can be investigated. Items
alarm.
With the information shown in this dialog, you can investigate the cause of any
alarm.
Any items which are not ‘checked’ will be the cause!
Note 1:
The values (and tolerances) given below are true for most
codecs.
Nevertheless, there are exceptions. If you encounter any discrepancy, please
contact your local Dealer directly, or Mayah Communications via
[email protected].
Note 2:
The Fallback temperature is the temperature which de-activates an existing
alarm.
Note 3:
In case of a permanent alarm, please contact your local Dealer or Mayah
Communications directly via [email protected].
Items:
· Motherboard and CPU Performance:
Possible values:
Copyright: 2008 Mayah Communications
Elements of Centauri II Remote
·
·
·
·
·
·
·
·
225
- NMC board: AMD K6II (400 and 500 MHz)
- Epox board: AMD K6II (400 and 500 MHz)
- TYAN board: AMD Duron (800 MHz) and AMD Duron (1000 MHz)
- Shuttle board: Celeron (1100 and 1200 MHz)
- SOYO board: Celeron (1100 and 1200 MHz)
- VIA board: Celeron (1100, 1200 and 1300 MHz)
- DFI board: Celeron (1200 and 1300 MHz) or Pentium III (1400 MHz)
Memory:
Possible values:
- 32 MB
- 128 MB
System Disk:
- indicates the capacity of the system partition of the internal
Flash card. The system partition is assigned to Drive C.
System Disk Free:
- indicates the amount of available space on the System partition of the
Flash card. If this is less than 500kB, a
alarm is
raised.
User Disk:
- indicates the capacity of the User partition of the internal
Flash
card. The user partition is assigned to Drive D.
User Disk Free:
- indicates the amount of available space remaining on the User partition of the
Flash card. If this is less than 2 MB, an alarm is raised.
CPU Temperature:
If this value is outside its tolerance, it causes an alarm to be raised.
CPU temperature tolerances:
- AMDK6II: 70°C (fall back 65°C)
- AMD Duron (800 MHz): 90°C (fall back 85°C)
- AMD Duron 1000 MHz: 90°C (fall back 85°C)
- Intel Celeron (1100-1300 MHz): 69°C (fall back 64°C)
- Intel Pentium III (1400 MHz): 69°C (fall back 64°C)
System temperature:
If the value is outside its tolerance range, it causes an alarm to be raised.
System temperature tolerances:
- AMDK6II: 55°C (fall back 50°C)
- AMD Duron 800 MHz: 60°C (fall back 55°C)
- AMD Duron 1000 MHz: 60°C (fall back 55°C)
- Intel Celeron (1100-1300 MHz): 60°C (fall back 55°C)
- Intel Pentium III (1400 MHz): 60°C (fall back 55°C)
CPU Core Voltage:
If the value is outside its tolerance range, it causes an alarm to be raised.
CPU core voltage tolerances:
- AMDK6II: min.: 2.1V, max.: 2.3V
- AMD Duron 800 MHz: min.: 1.5V, max.: 1.7V
Copyright: 2008 Mayah Communications
226
CENTAURI II User Manual
·
·
·
·
·
- AMD Duron 1000 MHz: min.: 1.7V, max.: 1.8V
- Intel Celeron (1100-1300 MHz): min.: 1.4V, max.: 1.55V
- Intel Pentium III (1400 MHz): min.: 1.4V, max.: 1.55V
3.3Volt Voltage:
If the value is outside its tolerance range, it causes an alarm to be raised.
3.3V voltage tolerances:
- NMC-board: min.: 3.135V, max.: 3.465V
- Epox-board: min.: 3.135V, max.: 3.465V
- TYAN-board: min.: 3.135V, max.: 3.565V
- Shuttle-board: min.: 3.135V, max.: 3.565V
- SOYO-board: min.: 3.135V, max.: 3.565V
- VIA-board: min.: 3.135V, max.: 3.465V
- DFI-board: min.: 3.135V, max.: 3.465V
5Volt Voltage:
If the value is outside its tolerance range, it causes an alarm to be raised.
5V voltage tolerances:
- NMC-board: min.: 4.6V, max.: 5.25V
- Epox-board: min.: 4.6V, max.: 5.25V
- TYAN-board: min.: 4.6V, max.: 5.25V
- Shuttle-board: min.: 4.6V, max.: 5.25V
- SOYO-board: min.: 4.6V, max.: 5.25V
- VIA-board: min.: 4.6V, max.: 5.25V
- DFI-board: min.: 4.6V, max.: 5.25V
12Volt Voltage:
If the value is outside its tolerance range, it causes an alarm to be raised.
12V voltage tolerances:
- NMC-board: min.: 9V, max.: 14V
- Epox-board: min.: 9V, max.: 14V
- TYAN-board: min.: 9V, max.: 14V
- Shuttle-board: min.: 9V, max.: 14V
- SOYO-board: min.: 9V, max.: 14V
- VIA-board: min.: 9V, max.: 14V
- DFI-board: min.: 9V, max.: 14V
Minus12Volt Voltage:
If the value is outside its tolerance range, it causes an alarm to be raised.
-12V voltage tolerances:
- NMC-board: min.: -14V, max.: -9V
- Epox-board: min.: -14V, max.: -9V
- TYAN-board: min.: -14V, max.: -9V
- Shuttle-board: min.: -14V, max.: -9V
- SOYO-board: min.: -14V, max.: -9V
- VIA-board: min.: -14V, max.: -9V
- DFI-board: min.: -14V, max.: -9V
CPU Fan:
If the revs of the CPU fan runs slower than 3,500 RPM, it will generate an
alarm.
Copyright: 2008 Mayah Communications
Elements of Centauri II Remote
227
· Chassis Fan:
If the revs of the Chassis fan runs slower than 3,500 RPM, it will generate an
alarm.
Note:
The Parameters (and values) shown in this dialog cannot be changed.
5.6.6
RTP Statistics
- informs the user about the status of an RTP connection. Therefore this menu
item is just available if an RTP connection is active at
. Furthermore
system version x.2.0.93 (or later) must be installed.
Note:
x = 2 for CENTAURI and x = 3 for CENTAURI II, MERKII and GANYMED 1102
RTP statistics dialog:
Items:
· Input Bit rate (IBR)
Bit rate of payload data plus header (usually IEE802.3+IP+UDP+RTP) received
by the decoder.
This data is measured every second and the results are shown in the red graph
in the upper right chart.
· Output Bitrate (OBR)
Bit rate of payload data plus header (usually IEE802.3+IP+UDP+RTP) sent by
the encoder.
This data is measured every second and the results are shown in the green
Copyright: 2008 Mayah Communications
228
CENTAURI II User Manual
·
·
·
·
·
·
·
graph in the upper right chart.
Received Jitter (RCVJ)
Jitter of the data received by the decoder according to rfc 3550 (www.ietf.org/
rfc/rfc3550.txt).
Here jitter describes a variation of the reception period between two adjacent
packets. This value can help to set the right reception buffer at item audio
delay in menu item Settings/Network.
This data is measured every second and the results are shown in the purple
graph in the lower right chart.
Sequence Errors
Number of the packets received in the wrong order meanwhile the last minute.
At RTP usually some sequence errors can be corrected automatically
depending on the set audio delay (menu item Settings/Network). If a sequence
error can not be corrected any more it becomes a lost packet (see below).
This data is measured every second.
Lost Packets
Number of the lost packets meanwhile the last minute.
Without FEC (=Forward Error Correction) any lost packet means a data loss.
This data is measured every second.
Media Delivery Index (MDI)
The Media Delivery Index displays the DF (=Delay Factor) and the MLR (=M
edia Loss Rate) in the format [DF:MLR].
An exact description of the meaning of MDI is described in application note 24
on Mayah Website (www.mayah.com/content/download/pdfs/appnotes/centauri/
a_n_e_024.pdf).
This data is measured every second.
Listeners
Number of listeners of a RTP connection (but at most RTP connections ‘0’ is
displayed).
This data is measured every second.
Input/Output diagram
This diagram shows the time characteristics of the input bit rate (red graph) and
the output bit rate (green graph).
X-axis: seconds
Y-axis: kbps
Note:
This diagram can be saved as a bitmap file or meta file by right mouse click on
it.
Receive Jitter diagram
This diagram shows the time characteristics of the receive jitter.
X-axis: seconds
Y-axis: ms
Note:
This diagram can be saved as a bitmap file or meta file by right mouse click on
it.
Copyright: 2008 Mayah Communications
Elements of Centauri II Remote
229
Special mouse features:
· Right mouse button:
A right mouse click on the ‘Input/Output Bitrate chart’ or ‘Received Jitter
chart’ enables to save the referring graph as a bitmap file or a meta file.
5.7
Help Menu
5.7.1
Manual
- opens this Remote Control hypertext.
5.7.2
Mayah Homepage
- opens your browser window and attempts to connect to the Mayah website,
www.mayah.com.
5.7.3
Info About
- displays the following information about this Remote Control program:
· Version
· Author
· Copyright
· Latest version (provided Internet access is available)
remote info dialog:
Note:
If you have Internet access the button edit field displays the latest
remote version. Double clicking on this edit field enables you to
download it.
If this edit field has got the focus pressing the ‘?’ key opens the pdf file with
Copyright: 2008 Mayah Communications
230
CENTAURI II User Manual
the latest
release notes.
Note 2:
You can get more information about this
Remote Control by
using the right mouse button to click on the .exe file ‘
_remote.
exe’ in Windows Explorer, and selecting Properties.
Copyright: 2008 Mayah Communications
Elements of Centauri II Remote
5.8
Wheel button dialogs and Special Keys
5.8.1
Phonebook dialog
- enables Execute, Create, Edit or Delete on a Phone book entry.
Phonebook dialog:
The Phonebook dialog is opened either by:
· left-mouse-clicking the Phonebook wheel button or
· pressing the key board button ‘p’ (see short cut keys)
Definition of phone book entry:
A phone book entry is a macro which executes the following:
· Encoder profile entry
· Decoder profile entry
· Selection of one of the communication interfaces ISDN, X.21/V.35, IP or
loop
· Establishing a connection (optional)
Note:
If no ISDN number, no X.21/V.35 port or no IP address is entered, then a
Phone book entry will not establish any connection, but acts like an autoconfiguration script.
The factory default condition has12 phone book entries installed.
Copyright: 2008 Mayah Communications
231
232
CENTAURI II User Manual
The maximum number of Phone book entries is 256.
The Phone book can be displayed in either sequential or in alphabetical order
(see alphabetic phonebook in menu item Expert/Options).
Functions:
Execution of phone book entry:
Select the appropriate phone book entry in the list, and click either the
CONNECT or the OK-button.
Deleting a phone book entry:
Select the appropriate phone book entry in the list, and click the DEL-button
Editing a phone book entry:
Select the appropriate phone book entry and either double-click on it or press
the ‘E’ button on your keyboard. This opens the Edit phonebook dialog.
Creating a new phone entry:
Click on the NEW-button. This opens the new phonebook dialog.
Display Phonebook in alphabetic order:
Right mouse click on the ‘Name’ header
Display Phonebook in sequential order:
Right mouse click on the ‘#’ header
The dialog is closed by clicking the ‘Cancel’ button.
5.8.2
Connect dialog
- choose whether to connect via ISDN, to connect to dedicated X.21/V.35
lines, to establish any IP connections, or to loop the
.
Copyright: 2008 Mayah Communications
Elements of Centauri II Remote
Connect dialog:
The Connect dialog is opened by either
· clicking the Connect wheel-button or
· pressing ‘C’ on the keyboard. (see short cut keys)
Interface:
The look of the Connect dialog is context sensitive – relative to the selected
interface.
Copyright: 2008 Mayah Communications
233
234
CENTAURI II User Manual
· ISDN:
If the ISDN interface is selected, a maximum of 8 numbers can be dialled at
the same time. This depends on the number of available B-channels - see
Status/
hardware.
· X.21/V.35:
If interface X.21/V.35 is selected, the following port combinations are
available:
- Port 1: The audio stream is sent out via X.21/V.35 port 1
- Port 2: The audio stream is sent out via X.21/V.35 port 2
- Port 1 & 2: The same audio stream is sent out via both X.21/V.35 ports
- IMUX Port 1 & 2: One audio stream is sent out on X.21/V.35 port 1 and 2,
using Inverse Multiplexing.
Example:
A 128 kbit/s MPEG L2 signal is sent out via X.21/V.35 port
1 and port 2 by using 64 kbit/s at each port.
Copyright: 2008 Mayah Communications
Elements of Centauri II Remote
235
· IP:
If the IP interface is selected, the audio stream is sent out via the electrical or
optical network interface. Thus, a Destination IP address MUST be entered,
and either
- TCP,
- UDP,
- RTP,
- SDP,
- RTSP,
- SIP
must be selected.
Note (IP Port selection):
If RTP or SDP (SAP unchecked) is selected then additionally a port can be
entered. The port is delimited to the IP-address by a ‘:’ (e.g. 225.0.0.11:5008).
Which port is used by default depends on the system software version:
a ) Ports if system software version < x.2.0.30:
- 5004: 1.sub codec of CENTAURI 400x
- 5006: 2.sub codec of CENTAURI 400x
- 5008: 3.sub codec of CENTAURI 400x
- 5010: 4.sub codec of CENTAURI 400x
b ) Ports if system software version >= x.2.0.30:
- 5004: 1.sub codec of CENTAURI 400x
- 5014: 2.sub codec of CENTAURI 400x
- 5024: 3.sub codec of CENTAURI 400x
- 5034: 4.sub codec of CENTAURI 400x
Explanation:
x = 2 for CENTAURI I and x > 2 for Centauri II, GANYMED 1102 and MERKII
Note 2:
If UDP, RTP, SDP, RTSP or SIP is selected then right mouse clicking on #1
edit field opens a pop up menu which enables you to select if encoder,
decoder or both gets connected (default).
Note 3 (SDP):
SDP stands for session description protocol.
SDP also uses RTP but additionally a sdp file is created on the
Copyright: 2008 Mayah Communications
236
CENTAURI II User Manual
Flash card in the folder ‘www’. In this SDP file all necessary transmission info
for the other side codec is stored (e.g. VLC player 0.8.2 reads this file and
afterwards connects to the
).
More info about SDP can be found at chapter <Necessary settings for framed
connections>/How to establish IP connections/SDP streaming>.
Note 4 (SAP):
SAP stands for session announcement protocol.
More or less it is an enhancement of SDP but the SDP files are not
downloaded from a special device but they are available under the IP-address
224.2.127.254.
If SDP and Decoder is selected and SAP is checked then the
looks at IP-address 224.2.127.254 for session description protocols. Encoders
using SAP send their SDP files to this Multicast address. Every time the SAP
box is newly checked the list box of ‘#1’ is updated with the currently available
SAP streams.
Here the syntax of the listed SAP streams:
<IP-address of SAP encoder>:<hash id of SAP encoder> (<name of SAP
encoder>)
More info about SAP can be found at chapter <Necessary settings for framed
connections>/How to establish IP connections/SAP streaming>.
Note 5 (RTSP):
RTSP stands for real time streaming protocol.
Note 6 (SIP):
SIP stands for session initiation protocol.
More info about SIP can be found at chapter <Necessary settings for framed
connections>/How to establish IP connections/SIP connections>.
· Loop:
If the Loop interface is selected, the internal Encoder is directly connected to
Copyright: 2008 Mayah Communications
Elements of Centauri II Remote
237
the internal Decoder.
This function is for test purposes, e.g. to check the audio quality through the
Encode/Decode process.
To make a connection:
The selection of Communication interface and establishing the connection is
initiated by clicking OK.
The dialog is closed as soon as the
connects or frames-up.
5.8.3
Disconnect Dialog
- allows you to disconnect any or all ISDN lines.
Disconnect dialog:
The disconnect dialog is opened by
· Clicking the Disconnect Wheel button or
· pressing the keyboard button ‘End’ (see also short cut keys)
To disconnect:
Lines are disconnected by clicking the OK button.
Note:
By default, all lines are dropped automatically when executing a Disconnect.
However, the user can activate the Disconnect dialog by ‘checking’ the option
Enable disconnect dialog (menu item Expert/Options).
Copyright: 2008 Mayah Communications
238
5.8.4
CENTAURI II User Manual
Hot Keys
The
Remote Control program allows you to define 8 hot keys.
remote hot keys bar:
Definition of a
Remote Control hot key:
A ‘hot key’ is a button to which the user can assign a ‘special’ function - such
as:
direct command
·A
All
direct commands are described in Centauri
Communication Reference Manual (see also menu item Expert/Direct
command).
· A Centauri script file with the .ctr suffix
Furthermore, you can assign a ‘comment’ to each hot key. A ‘comment’ is a
short description of its functionality. The maximum length of a comment is 256
characters. The comment is displayed when the user moves the mouse over
it.
Assigning a function and a comment to a hot key is described at Expert/
Options on the hot key topic.
Note:
As all hot key commands and comments are written to the Windows Registry
- at <HKEY_CURRENT_USER\Software\Mayah Communications\
Remote\Hot Keys> the hot key assignments and comments can easily be copied from one PC to
another.
5.8.5
Short Cut Keys
When the
Remote Control program is running, the following
keyboard short cuts can be used:
General:
· F1: Opens the Remote Control Help at the appropriate point.
e.g. Pressing F1 at Settings/Codec/Encoder algorithm opens the Help for
Encoder/Decoder algorithm.
· F2: If a direct command is assigned to a field, pressing the F2-key will
display the
command description according to the Communication Reference Manual.
Copyright: 2008 Mayah Communications
Elements of Centauri II Remote
239
Main Window:
Phone book [same as pressing the Phone
· 'p button' opens
book section of the wheel-button] (see also wheelbuttons)
· 'c button' opens the Connect dialog [same as pressing the Connect section
of the wheel-button] (see also wheelbuttons).
· 'm button' opens Mayah homepage www.mayah.com [same as pressing the
center section of the wheel-button (see also wheelbuttons).
[same as pressing the
· 'End button disconnects the
Disconnect section of the wheel button] (see also wheelbuttons).
codecs and fills up
· 'SHIFT+U' scans the LAN (UDP) for other
the
name list.
hot key
· 'SHIFT+number' executes the appropriate
assignment (see also hot keys).
· 'CTRL+number' changes to multi point return channel <number> used if
dual mode = 0 or changes to sub-codec <number> if dual mode > 0.
· 'SHIFT+CTRL+number' changes to a negative multi point return channel
<number> used if dual mode = 0 and system software of controlled
is min. 2.0.0.57. A negative multi point return channel means
that nothing is decoded (see also multi point return channel at menu item
settings/others.
· F3 analyses the encoder, decoder and line settings
· F5 let the phone book and profiles retrieve at next phone book or profile
operation
· Right mouse button on encoder or decoder settings opens the dialog of
menu item Settings/Codec.
Info about dialog (see menu item Help Info about)
Just works with
a) Internet access
and
b) if the edit field displaying the latest version has got the focus.
Copyright: 2008 Mayah Communications
240
CENTAURI II User Manual
· Double click the latest version info field to download the latest remote
version
· ? opens the pdf file with the release notes of the latest remote version
Connect dialog:
· ‘s‘ button' and focus on encoder profile list or decoder profile list displays
the referring selected profile.
· Right mouse:
- On ‘#1’ opens a pop up menu which let the user select if encoder, decoder
or both gets connected at a UDP or RTP connection.
Phonebook dialog:
· ‘e button' allows editing the currently selected Phone book entry [same as
mouse double clicking a phone book entry] (see also Edit Phonebook)
· ‘Enter’ executes the currently selected Phone book entry [same as clicking
Connect with the mouse]
· ‘Delete’ deletes the currently selected Phone book entry [same as clicking
DEL with the mouse]
· ‘Insert’ creates a new Phone book entry [same as clicking NEW with the
mouse]
· Right mouse button:
- On ‘#’ header sorts the phone book sequentially
- On ‘Name’ header sorts phone book alphabetically
Edit phone book entry dialog:
· ‘s‘ button' and focus on encoder profile list or decoder profile list displays
the referring selected profile.
· Right mouse:
- On ‘#1’ opens a pop up menu which let the user select if encoder, decoder
or both gets connected at a UDP or RTP connection.
Profile dialog:
· ‘e button' allows editing the currently selected Profile [same as double
clicking a Profile] (see also Edit Profile)
· ‘Delete’ deletes the currently selected Profile [same as clicking DEL with
the mouse]
· ‘Insert’ creates a new Profile [same as clicking NEW with the mouse]
Direct Command dialog:
· F2: Analyses where the command (entered in the command field) is used in
the
Remote and opens the appropriate chapter in this
hypertext help.
For Instance:
If F2 is pressed and in command field ‘enc_algo’ is entered then the
hypertext help chapter for menu item <Settings/Codec/Encoder algorithm>
Copyright: 2008 Mayah Communications
Elements of Centauri II Remote
241
is opened.
· Double clicking command/command category in answer field: Displays
the description of the command respectively of the command category.
· Right mouse button: Opens a pop up menu which enables to save all
entered direct commands (except for the ones ‘help’ is preceded).
RTP Statistics dialog:
· Right mouse button: Clicking on the referring chart opens a dialog to save
the ‘Input/Output Bitrate chart’ respectively ‘Received Jitter chart’ as a
bitmap file or a meta file.
Display Log File
· Right mouse button: Clicking on display field opens a pop up menu which
let the user select if original log lines (i.e. log.txt) or interpreted ones (i.e.
lognew.txt) are shown.
All dialogs:
· ‘Enter': [same as clicking OK with the mouse]
· 'Escape’:[same as clicking Cancel with the mouse]
Copyright: 2008 Mayah Communications
242
CENTAURI II User Manual
5.9
Main Window
5.9.1
Main Window
The sections of the
Remote Control program Main Window are:
Description of main window elements:
1) LED’s
· Remote Status:
The Remote Status LED displays if remote connection is active or not.
Green LED: Remote connection is active
Red LED: No Remote communication
· Line Status:
The Line Status LED’s show which lines are connected. It depends on the
selected interface how many Line Status LED’s are displayed:
- Loop: No LED
- NET: One LED
- ISDN: Number of LED’S = Number of available B-channels
- X.21: Two LED’s
Meaning of Color:
White LED: Line is not connected
Green LED: Line is connected. The number/IP address codec is connected
to is displayed when the user moves the mouse over the referring LED.
· Alarm Status:
The Alarm Status LED shows if codec hardware alarm is active or not. The
reason for an alarm can be checked via menu item Status/ Health.
Copyright: 2008 Mayah Communications
Elements of Centauri II Remote
243
White LED: No Alarm
Red LED: Alarm is active.
· Encoder and Decoder Activity:
The Encoder respectively the Decoder Activity LED informs if encoder or
decoder is working:
White LED: Encoder respectively decoder is inactive.
Yellow LED: Encoder respectively decoder is in state ‘creating’, ‘created’ or
‘starting’.
Green LED: Encoder respectively decoder is started.
2) Labels
· Name:
The name of the codec which can be set via menu item Status/Identification.
· IP Address:
The IP address of the codec which can be set via menu item Settings/
Network.
· Connection Time
This shows the duration of the currently framed ISDN connection. However,
this is measured by the program, and can differ from the real connection
period!
If
is not connected via ISDN, the Windows clock time is
displayed.
· Interfaces:
This label informs what communication interfaces are installed and which
interface is selected:
- Light Gray:
Interface is not installed.
- Gray:
Interface is installed.
- Gray background: Interface is selected.
· Protocol:
The displayed protocol depends on the selected communication interface:
ISDN:
The D-channel protocol is displayed. The D-channel protocol can be
selected via menu item Settings/ISDN.
NET:
If no IP connection is active the standard IP protocol is displayed which can
be set via the direct command ‘ip_protocolmode’ (default value is RTP).
At IP connections the protocol can be RTP, UDP or TCP.
X.21/V.35:
Can be selected to X.21 or V.35.
· ISDN Number or IP Address of Partner:
This label displays the ISDN number or the IP address to which the line is
connected.
At ISDN the following conditions must be true:
- the feature is supported by ISDN network
and
Copyright: 2008 Mayah Communications
244
CENTAURI II User Manual
·
·
·
·
- Calling Line Identification Restriction (CLIR) is not enabled on the other
side.
If CLIR is enabled, ‘****’ is shown instead of the number.
Encoder Settings:
This shows the encoder algorithm, sample rate, bit rate and mode.
By right mouse clicking on this settings the dialog of menu item Settings/
Codec is opened.
Decoder Settings:
This shows the decoder algorithm, sample rate, bit rate and mode.
By right mouse clicking on this settings the dialog of menu item Settings/
Codec is opened.
Audio Connection Status:
The Audio status can be:
- On Air: an ISDN connection has been established and has framed
satisfactorily
- On IP: an IP connection has been established and has framed
satisfactorily
- On X.21: an X.21 connection has been established and has framed
satisfactorily
- On V.35: a V.35 dedicated line connection has been established and has
framed satisfactorily
- Loop: the internal loop connection between encoder and decoder is
established
- Framing: a temporary display whilst the of connection is evaluated
Furthermore a blue Framed LED indicates that decoder is framed.
Selected Sub codec or PMP return channel:
This displays the following info:
- Selected sub codec:
With a
4000/4001 or if dual mode is active (see menu item
Settings/Others at item Dual mode at B-channel).
- Selected Point to Multipoint (PMP return channel):
If PMP is active (see menu item Settings/Others at item Multi point return
channel).
3) Buttons and Hot Keys
· Wheel button:
(see Wheel buttons)
· Hot Keys:
(see Hot keys)
4) Others
· Main Menu
List:
·
This list shows all
which are detected by the UDP scan plus
the currently controlled unit. The
shown is the currently
Copyright: 2008 Mayah Communications
Elements of Centauri II Remote
245
controlled one.
An UDP scan is executed when the program starts, or if the shortcut SHIFT
+U is pressed (see Short cuts).
· Status Bar:
The Status bar enables you to view the communication between the
and the Remote Control program.
The second panel of the Status bar shows the last command sent to the
, whereas the third panel displays the last
response.
If Timeout is displayed in the third panel, then Remote Control access is
not available.
The status bar is not shown by default, but it can be activated in Expert/
Options at item Show Statusbars (valid next start).
· Level Meter:
This displays the Encoder and Decoder audio levels, in the following order
(left to right):
Encoder channels:
Input channels 1 to 8 are displayed. At mono or stereo operation channel 1
is the left and channel 2 the right audio channel.
Decoder channels:
Output channels 1 to 8 are displayed. At mono or stereo operation channel
1 is the left and channel 2 the right audio channel.
Note:
The Level meter display can only be displayed when using IP control. For
more info about how to activate level meter display, please go to Expert/
Options at item Level meter interval (ms).
Copyright: 2008 Mayah Communications
Part
VI
Miscellaneous
6
Miscellaneous
6.1
Multiple Centauri Control
You can control multiple
provided that:
· IP control is used
· At menu item Expert/Options the item Enable Multiple
checked.
Control of multiple
247
is
:
If the option Enable Multiple
is checked, selecting a new
in the list box will open another instance of the Remote Control
program. This new instance controls the newly-selected
, whilst
the original instance controls the original
. By opening multiple
copies of the program, multiple
can be controlled.
The second way to control multiple
is to go to Settings/
Remote Settings (manual) and to select (with IP control) the option ‘Make
Valid = Next Start’. For more information on this, please consult the
appropriate Help.
Copyright: 2008 Mayah Communications
248
6.2
CENTAURI II User Manual
Registry Entries of Remote
The most basic way to define the behaviour of the
Remote
Control program is to edit its Registry entries. However, please be aware that
only those proficient in Windows (Power Users or Administrators) should
modify Registry entries, as incorrect entries can inflict great harm to the whole
operational system.
Hint:
It is recommended to take a backup copy of the registry before making any
changes!
Snapshot of
remote registry entries:
remote control registry main path:
HKEY_CURRENT_USER\Software\Mayah Communications\
Remote
Registry entries of main path
· Baudrate: Baud rate with RS232 Remote control
Type: Character string
· ComPort: Current com port with RS232 control
Type: Character series, in capitals!
Example: COM1 for com port 1
· Form1PosLeft: Left position of remote main window at last termination of
remote
Type: DWord
· Form1PosTop: Top position of remote main window at last termination of
remote
Type: DWord
· KindOfControl
Type: DWORD
0: RS232 control
1: IP control
2: ISDN control
Note:
Copyright: 2008 Mayah Communications
Miscellaneous
·
·
·
·
This registry entry is used since remote version 2.0.0.21. It replaces the
obsolete registry entries IPControl in subdirectory IP and ISDNControl in
subdirectory ISDNControl.
LargeMainWindow:
Type: Character string; in capitals!
TRUE = large main window
FALSE = normal main window
Language:
Type: DWord; just valid in the international version
1031: German
1033: English
1036: French
1040: Italian
2064: Rhaeto-Romanic
MaxComPorts: Number of com ports to be scanned with RS232 control
Type: DWord
SuperUserPassword:
Type: Character string
Registry entries of sub directory Dialogs
Most of these the Registry entries can be set using Expert/Options
· AlphabeticPhonebook:
Type: Character string, in capitals!
TRUE = Phonebook sorted aphabetically
FALSE = Phonebook sorted sequentially
· Email Address:
Type: Character string
· EnableDetailedLogFile:
Type: Character string, in capitals!
TRUE = Detailed Log File
FALSE = Simple Log File
· EnableDisconnect:
Type: Character string, in capitals!
TRUE = Disconnect Dialog shown
FALSE = No Disconnect Dialog shown
· EnableHardwareStatus:
Type: Character string, in capitals!
TRUE = Hardware status is displayed when program starts
FALSE = Hardware status is not displayed when program starts
· EnableProgressDisplay:
Type: Character string, in capitals!
TRUE = Progress display on
FALSE = Progress display off
· EnableSuperUserPassword:
Type: Character string, in capitals!
Copyright: 2008 Mayah Communications
249
250
CENTAURI II User Manual
·
·
·
·
·
·
·
TRUE = SuperUser password request at expert menu items
FALSE = no SuperUser password request at expert menu items
ISDNMessageDuration:
Type: DWORD
Duration of the display (in ms) of ISDN error messages; default is 2000 ms
LogFilePath:
Type: Character string
Path where the log files are stored; the default is the path of
_remote.exe
MultipleCentauris:
Type: Character string, in capitals!
TRUE = Selecting another
opens a new copy of Remote
Control
FALSE = Selecting another
changes control of the current
codec
PositionMessageBox:
Type: DWORD
1:
message boxes is displayed at top left corner of screen
2.
message boxes is displayed at center of main window
ShowStatusBars:
Type: Character string, in capitals!
TRUE = Remote Control windows show status bars at bottom
FALSE = Remote Control windows do not have status bars
SMTPHost:
Type: Character string
SMTPUserID:
Type: Character string
Registry entries of sub directory IP
Settings for IP control
· Address:
Type: Character string
Current IP Address
· Address1 to Address200:
Type: Character string
IP addresses of
still be addressed; these IP addresses are
shown in the list box of the main window if no UDP scan is done
· IPControl:
Type: Character series, in capitals!
TRUE=IP Control
FALSE=RS232 Control
Note:
This registry entry is obsolete since remote version 2.0.0.21. It is replaced
by the registry entry KindOfControl in main directory of
remote registry entries.
Copyright: 2008 Mayah Communications
Miscellaneous
· IPPassword:
Type: Character string; in capitals!
TRUE=IP control with IP password request
FALSE=IP control without IP password request
· Levelinterval:
Type: DWORD
0:
No levels gets displayed at IP control
>0:
With IP control levels are displayed; update interval=
value*50ms
· Port:
Type: Character string
Port of IP remote control; default IP control port is 2000
· UDPScan:
Type: Character series, in capitals
TRUE=(default)
Remote Control performs UDP scan when
program starts
FALSE=
does not perform a UDP Scan when the program
starts
Registry entries of sub directory Last Dialed Numbers
This is where the last dialed ISDN numbers are saved as character strings;
Structure of the entries: <B channel>_<order of the numbers>
Example: 2_3: 3 rd last dialed number of the 2nd B channel
Registry entries of sub directory Last IP Addresses
This is where the last dialed IP addresses are saved as character strings.
Registry entries of sub directory Last X.21.Port
Last used port of dedicated line connections
· Last_X.21_Port:
Type: Dword;
1: Send out via port 1
2: Send out via port 2
3: Send out via port 1 & 2
4: Send out via ports 1 & 2 with Inverse Multiplexing
Registry entries of sub directory Update
· UpdateAddress:
Type: Character string
ISDN updating number
6.3
Mandatory Files of Remote
Mandatory files for
_remote.exe:
·
The execution file of the
Copyright: 2008 Mayah Communications
remote:
Remote Program
251
252
CENTAURI II User Manual
·
·
·
·
·
·
·
·
·
·
·
6.4
_remote_help_eng:
This hypertext help file
_remote_help_content:
The file for the contents of this hypertext help
Communication Reference Manual.txt:
Online Help for menu item Expert/Direct Command
Framedclick.wav:
File that simulates a relay click at framing or if framing lost
Language table.txt:
Translation file for all language versions except for standard version using
USA English
Readme.txt:
Useful hints
Script_general_settings_001.txt respectively Script_general_settings_002.
txt:
Necessary file for menu item File/Save Settings
Script_ip_settings_001.txt respectively Script_ip_settings_002.txt:
Necessary file for menu item File/Save Settings
Script_isdn_settings_001.txt respectively Script_isdn_settings_002.txt:
Necessary file for menu item File/Save Settings
Script_x21_settings_001.txt respectively Script_x21_settings_002.txt:
Necessary file for menu item File/Save Settings
Iphlpapiw95.dll
This file is just necessary if the
remote is used with Windows
95 and the file iphlpapi.dll is not found in the Windows system directory.
Command Line Parameters of Remote
The
remote can be easily started with the correct Remote
settings by using Command Line parameters.
An Example of starting the
parameters:
Remote Control with Command Line
Copyright: 2008 Mayah Communications
Miscellaneous
253
Command line parameters for RS232 control:
· 1. Parameter: rs232
· 2. Parameter: Number of the com port; e.g.: 1 for com port 1
· 3. Parameter: Used baud rate
Command line parameters for IP control:
· 1. Parameter: ip
· 2. Parameter: IP address of the controlled
· 3. Parameter: IP port (optional)
Hint how to apply command line parameters:
_remote.exe” on the desktop, by dragging
· Create a shortcut of “
it with the right mouse button from the Explorer to the Desktop
Remote Icon, and select Properties
· Right mouse click on the
· Select the shortcut tab named, and add the Command Line parameters in
the “Target:” field, after the target path.
· The full target path and the command line parameters should each be inside
quotation marks (“ “)
· There needs to be a space between the Target path and the first command
line parameter
Copyright: 2008 Mayah Communications
254
CENTAURI II User Manual
· There must be a space between each and any further command line
parameters
Example:
· Using Control settings: RS232 control via Com port 1 at baud rate 38,400
remote: C:\Mayah\
· Target location of the
_remote.exe
_remote.exe” “rs232” “1” “38400”
· Command line: “C:\Mayah\
6.5
Helpful Readmes
All the files mentioned in this chapter describe unofficial features of the
Remote program.
If you are interested in one of the Readme files, please contact
[email protected]. However, all the features described in these Readme
files are unofficial. Therefore, there is no guarantee of 100% “functionality”!
Since
remote 2.1.0.11 most of the features described in the
readme files can be downloaded as Mayah codec registry script files (file
extension .crs) via menu item File/ Load
File.
· Readme_disable_phone_profile_shortcuts.txt
- describes how keyboard shortcuts of the phone book and profiles dialog
can be disabled.
Registry script file: Registry_script_file_
disable_phone_profile_shortcuts.crs
· Readme_file_phonebook.txt:
- describes how
can use Phone book and Profile entries which
are stored in a file, instead of internally in
. For instance, this
feature means that all
codecs controlled on a LAN can use the
same Phone book.
Registry script file: Registry_script_file_phonebook.crs
· Readme_ip_logfile.txt:
- describes how to create a log file listing which PC controls which Mayah
codec. For instance, this could be used to tell any Mayah codec user on the
LAN that at that moment he/she cannot control a particular Mayah codec as
it is currently controlled by another PC. This only works if UDP scan is
disabled.
Message dialog which tells the
his/her
:
user that another PC controls
Copyright: 2008 Mayah Communications
Miscellaneous
255
Registry script file: Registry_script_ip_logfile.crs
· Readme_isdn_control.txt:
- describes how
can be controlled via ISDN.
· Readme_isdn_message_duration.txt:
- describes how to set the display time of ISDN error messages in ms.
Registry script file: Registry_script_isdn_message_duration.crs
· Readme_one_registry_for_all_users.txt:
- describes how to change the registry path of the
remote (see
also Registry Entries).
Registry script files:
a) Registry_script_root_registry_local_machine.crs
b) Registry_script_root_registry_current_config.crs
· Readme_udp_scan.txt:
- describes how the automatic UDP scan at start of
Remote
Control can be switched on or off. The UDP scan looks into the LAN for
available
. By default, the UDP scan is enabled.
· Readme_readable_settings_file.txt:
- describes how a readable ASCII settings file can be created via remote
menu item <File/Save Settings>.
Registry script file: Registry_script_readable_settings_file.crs
· Readme_position_main_window_by_command_line_parameter.txt
- describes how the position of the
remote main window can
be set by a command line parameter.
· Readme_static_udp_port.txt:
- describes how to prevent that the port of UDP scan is incremented.
Registry script file: Registry_script_static_udp_port.crs
6.6
Most frequent ETSI ISDN Error Messages
A list of most frequent ETSI ISDN Error messages/Clear Codes (in hex):
$3301: Disconnect or broken line
ISDN layer 1 failure (no ISDN line is detected). It was impossible to send and
receive message between the Mayah codec and the ISDN switching
exchange since there is no physical connection detected. Possible reasons:
Copyright: 2008 Mayah Communications
256
CENTAURI II User Manual
-
faulty ISDN cable
disconnected ISDN cable
incorrectly wired ISDN socket
incorrectly terminated network
$3302: Protocol error layer 2
Failure in the data link layer.
One possible reason was that the Mayah codecs’ D-channel protocol does not
correspond to that of the ISDN switching exchange (see also D-channel
protocol in menu item Settings/ISDN).
$3303: Protocol error layer 3
Failure in the network layer.
One possible reason was that the Mayah codecs' D-channel protocol does not
correspond to that of the ISDN switching exchange (see also D-channel
protocol in menu item Settings/ISDN).
$3480: Normal call clearing
This is no error! It just means that the
receives a disconnect
from the network according ETS 300 102-1/Q.9331.
$3481: Unallocated (unassigned) number
This cause indicates that the destination, requested by the calling user cannot
be reached because, although the number is in a valid format, it is not
currently assigned (allocated).
$3482: No route to specified transit network
This cause indicates that the equipment sending this cause has received a
request to route the call through a particular transit network which it does not
recognize. The equipment sending this cause does not recognize the transit
network either, because the transit network does not exist or because that
particular transit network, while it does exist, does not service the equipment
which is sending this cause. This cause is supported on a network-dependent
basis.
$3483: No route to destination
This cause indicates that the called user cannot be reached because the
network through which the call has been routed does not serve the destination
desired. This cause is supported on a network-dependent basis.
$3486: Channel unacceptable
This cause indicates the channel most recently identified is not acceptable to
the sending entity for use in this call.
$3487: Call awarded and being delivered in an established channel
This cause indicates that the user has been awarded the incoming call, and
Copyright: 2008 Mayah Communications
Miscellaneous
257
that the incoming call is being connected to a channel already established to
that user for similar calls (e.g. packet-mode X.25 virtual calls).
$3490: Normal call clearing
This cause indicates that the call is being cleared because one of the users
involved in the call has requested that the call be cleared.
$3491: User busy
This cause is used when the called user has indicated the inability to accept
another call.
$3492: No user responding
This cause is used when a user does not respond to a call establishment
message with either an alerting or connect indication within the prescribed
period of time allocated.
$3493: No answer from user (user alerted)
This cause is used when a user has provided an alerting indication but has
not provided a connect indication within a prescribed period of time.
$3495: Call rejected
This cause indicates that the equipment sending this cause does not wish to
accept this call, although it could have accepted the call because the
equipment sending this cause is neither busy nor incompatible.
$3496: Number changed
This cause is returned to a calling user when the called party number
indicated by the calling user is no longer assigned.
$349a: Non-selected user clearing
This cause indicates that the user has not been awarded the incoming call.
$349b: Destination out of order
This cause indicates that the destination indicated by the user cannot be
reached because the interface to the destination is not functioning correctly.
The term "not functioning correctly" indicates that a signalling message was
unable to be delivered to the remote user; e.g. a physical layer or data link
layer failure at the remote user, user-equipment off-line, etc.
$349c: Invalid number format
This cause indicates that the called user cannot be reached because the
called party number is not in a valid format or is not complete.
$349d: Facility rejected
This cause is returned when a facility requested by the user cannot be
provided by the network.
Copyright: 2008 Mayah Communications
258
CENTAURI II User Manual
$349e: Response to STATUS ENQUIRY
This cause is included in the STATUS message when the reason for
generating the STATUS message was the prior receipt of a STATUS
ENQUIRY message.
$349f: Normal, unspecified
This cause is used to report a normal event only when no other cause in the
normal class applies.
$34a2: No circuit/channel available
This cause indicates that there is no appropriate circuit/channel presently
available to handle the call.
$34a6: Network out of order
This cause indicates that the network is not functioning correctly and that the
condition is likely to last a relatively long period of time; e.g. immediately
reattempting the call is not likely to be successful.
$34a9: Temporarily failure
This cause indicates that the network is not functioning correctly and that the
condition is not likely to last a long period of time; e.g. the user may wish to try
another call attempt almost immediately.
$34aa: Switching equipment congestion
This cause indicates that the switching equipment generating this cause is
experiencing a period of high traffic.
$34ab: Access Information discarded
This cause indicates that the network could not deliver access information to
the remote user as requested; i.e. a user-to-user information, low layer
compatibility, high layer compatibility or sub address as indicated in the
diagnostic.
$34ac: Requested circuit/channel not available
This cause is returned when the circuit or channel indicated by the requesting
entity cannot be provided by the other side of the interface.
$34af: Resources unavailable, unspecified
This cause is used to report a resource unavailable event only when no other
cause in the resource unavailable class applies.
$34b1: Quality of service unavailable
This cause is used to report that the requested quality of service, as defined
in the ITU-T recommendation X.213, cannot be provided (e.g. throughput or
transit delay cannot be supported).
Copyright: 2008 Mayah Communications
Miscellaneous
259
$34b2: Requested facility not subscribed
This cause indicates that the requested supplementary service could not be
provided by the network because the user has not completed the necessary
administrative arrangements with its supporting network.
$34b9: Bearer Capability not authorized
This cause indicates that the user has requested a bearer capability which is
implemented by the equipment which generated this cause but the user is not
authorized to use.
$34ba: Bearer Capability not presently available
This cause indicates that the user has requested a bearer capability which is
implemented by the equipment which generated this cause but which is not
available at this time.
$34bf: Service or option not available, unspecified
This cause is used to report a service or option not available event only when
no other cause in the service or option not available class applies.
$34c1: Bearer capability not implemented
This cause indicates that the equipment sending this cause does not support
the bearer capability requested.
$34c2: Channel type not implemented
This cause indicates that the equipment sending this cause does not support
the channel type requested.
$34c5: Requested facility not implemented
This cause indicates that the equipment sending this cause does not support
the requested supplementary service.
$34c6: Only restricted digital information bearer capability is available
This cause indicates that one equipment has requested an unrestricted bearer
service but that the equipment sending this cause only supports the restricted
version of the requested bearer capability.
$34cf: Service or option not implemented, unspec.
This cause is used to report a service or option not implemented event only
when no other cause in the service or option not implemented class applies.
$34d1: Invalid call reference value
This cause indicates that the equipment sending this cause has received a
message with a call reference which is not currently in use on the usernetwork interface.
Copyright: 2008 Mayah Communications
260
CENTAURI II User Manual
$34d2: Identified channel does not exist
This cause indicates that the equipment sending this cause has received a
request to use a channel not activated on the interface for a call. For example,
if a user has subscribed to those channels on a primary rate interface
numbered from 1 to 12 and the user equipment or the network attempts to use
channels 13 to 30 this cause is generated.
$34d3: A suspended call exists, but this call identity does not
This cause indicates that a call resume has been attempted with a call identity
which differs from that in use for any presently suspended call(s).
$34d4: Call identity in use
This cause indicates that the network has received a call suspend request.
The call suspend request contained a call identity (including the null call
identity) which is already in use for a suspended call within the domain of
interfaces over which the call might be resumed.
$34d5: No call suspended
This cause indicates that the network has received a call resume request. The
call resume request contained a call identity information element which
presently does not indicate any suspended call within the domain of interfaces
over which calls may be resumed.
$34d6: Call having the requested call identity has been cleared
This cause indicates that the network has received a call resume request. The
call resume request contained a call identity information element which once
indicated a suspended call; however, that suspended call was cleared while
suspended (either by network timeout or by the remote user).
$34d8: Incompatible destination
This cause indicates that the equipment sending this cause has received a
request to establish a call which has a low layer compatibility, high layer
compatibility or other compatibility attributes (e.g. data rate) which cannot be
accommodated.
$34db: Invalid transit network selection
This cause indicates that a transit network identification was received, which
is of an incorrect format.
$34df: Invalid message, unspecified
This cause is used to report an invalid message event only when no other
cause in the invalid message class applies.
$34e0: Mandatory information element is missing
This cause indicates that the equipment sending this cause has received a
message which is missing an information element which must be present in
Copyright: 2008 Mayah Communications
Miscellaneous
261
the message before that message can be processed.
$34e1: Message type non-existent or not implemented
This cause indicates that the equipment sending this cause has received a
message with a message type it does not recognize either because this is a
message not defined or defined but not implemented by the equipment
sending this cause.
$34e2: Message not compatible with call state
This cause indicates that the equipment sending this cause has received a
message such that the procedures do not indicate that this is a permissible
message to receive while in the call state, or a STATUS message was
received indicating an incompatible call state.
$34e3: Information element non-existent or not implemented
This cause indicates that the equipment sending this cause has received a
message which includes information elements not recognized because the
information element identifier is not defined or it is defined but not
implemented by the equipment sending the cause. However, the information
element is not required to be present in the message in order for the
equipment sending the cause to process the message.
$34e4: Invalid information element contents
This cause indicates that the equipment sending this cause has received an
information element which it has implemented; however, one or more fields in
the information element are coded in such a way which has not been
implemented by the equipment sending this cause.
$34e5: Message not compatible with call state
This cause indicates that a message has been received which is incompatible
with the call state.
$34e6: Recovery on timer expiry
This cause indicates that a procedure has been initiated by the expiry of a
timer in association with error handling procedures.
$34ef: Protocol error, unspecified
This cause is used to report a protocol error event only when no other cause
in the protocol error class applies.
$34ff: Inter working, unspecified
This cause indicates that there has been inter working with a network which
does not provide causes for actions it takes; thus the precise cause for a
message which is being sent cannot be ascertained.
Copyright: 2008 Mayah Communications
262
6.7
CENTAURI II User Manual
Ancillary Data Background
1. General
Some audio transmissions also require the transfer of additional information
data. This additional information data is called ancillary data or auxiliary
data. Such ancillary data can be for instance RDS (= Radio Data System).
The
supports the transfer of ancillary data by two ways:
· Ancillary data transfer inside of the coded audio
· Ancillary data transfer with help of an extra ancillary data stream (called TS)
Note:
Just to prevent misunderstandings it must be emphasized that the
just transport the pure ancillary data but it cannot create,
encode or decode such ancillary data e.g.
is not a RDS encoder
or RDS decoder.
1.1 Ancillary data inside of the coded audio
Some of coding algorithms implemented in
supports the
transport of ancillary data inside of the audio data stream. These coding
algorithms are:
· All MPEG algorithms (i.e. MPEG L2, MPEG L3, MP3 Pro, all AAC
algorithms)
· All APT-X algorithms
At MPEG algorithms the ancillary data format (see menu item Settings/
Ancillary Data) must be set to the following parameters (depending on the
codec on the other side):
· Auto
· CCS (for ancillary data compatibility to CCS codecs and if MPEG L2 bit
rates >= 192 kbps are used)
· J.52
· Musictaxi
· Barco (especially for ancillary data compatibility to RE codecs).
At APT-X algorithms the ancillary data format (see menu item Settings/
Ancillary Data) must be set to the following parameters (depending on the
codec on the other side):
· Left
· Right
Advantage:
This method is supported by all communication interfaces of
(e.
g. IP, ISDN, X.21, V.35 etc.).
Disadvantage:
It just runs with the above listed coding algorithms.
Note:
A deeper view inside this matter is also supplied by application note 15 on
Mayah Website (www.mayah.com/content/download/pdfs/appnotes/centauri/
a_n_e_015.pdf)
1.2 Ancillary data transfer with help of an extra ancillary data stream
Copyright: 2008 Mayah Communications
Miscellaneous
263
(called TS)
Ancillary data can also be transported in an extra IP stream. For this the
ancillary data format must be set to ‘TS’ (see menu item Settings/Ancillary
Data). This feature is supported by system software version 3.2.0.4 (or later).
Advantage:
All coding algorithms supports ancillary data by TS.
Disadvantages:
· Ancillary data by TS just works with IP/RTP
· Increase of IP overhead.
2. Port
The
port responsible for ancillary data is located on the rear
side of
and it is labeled ‘Ancillary Data’. Physically it is just a
male DB9 socket following the RS232 standard. The physical parameters of
this port can be set in menu item Settings/Ancillary Data.
Note:
The physical parameters (e.g. baud rate) are just the parameters of the RS232
hardware and mainly they are important for hardware connected to
. However, the selected baud rate is just the max. possible one
but usually the really transmitted ancillary data baud rate is much lower.
Actually reached ancillary data baud rates are listed below.
3. Cable
The ancillary data cable used by
is just a RS232 cross cable but
in opposite to the remote cable the handshake pins should not be bridged.
Especially if the ancillary data is transported inside of the audio data and high
ancillary baud rates should be reached, handshake (especially RTS/CTS) is
strongly recommended.
Pin layout of
ancillary data cable:
4. Max. Reached Ancillary Baud rate
Copyright: 2008 Mayah Communications
264
CENTAURI II User Manual
The max reached ancillary bit rate (abr) depends on
· how big is one ancillary data block transported in one audio frame (MPEG
algorithms) respectively in one audio block (non MPEG algorithms). This
parameter is called ancillary block size (as) and it is measured in Bytes.
· Duration of one audio frame or block. This parameter is called frame
interval (fi) and it is measured in ms.
· how many frames respectively audio blocks are located in one IP packet.
This is important since one IP packet can contain several audio frames (or
audio blocks) but just one ancillary data block. This parameter is called
number of frames (nf).
Just at IP this parameter is different to 1.
The ancillary bit rate bit rate is calculated to:
abr = data volume/time to get samples = (as * 8)/(fi * nf)
At MPEG algorithms the frame interval (fi) depends on the samples per
frame (sf) and the sample rate (sr). It is calculated to:
fi = sf/sr
=> abr = (as * sr * 8)/(sf * nf)
Furthermore at MPEG algorithms the samples per frame varies at the different
coding algorithms:
· MPEG L2, MPEG L3: 1152
· AAC (MPEG 2), AAC (MPEG 4), AAC (HE): 1024
· AAC (LD): 480
4.1 Max. Reached Ancillary Baud rate at transport inside of audio data
It must be considered that usually audio data has got priority to ancillary data.
Therefore the below listed values are just the max. ones and additionally
ancillary data can also be delayed.
Table of max. reached ancillary baud rates at transport inside of audio data:
Copyright: 2008 Mayah Communications
Miscellaneous
265
4.2 Max. Reached Ancillary Baud rate at transport with help of an extra
TS stream
Here the ancillary data block has got a size of 30 Byte.
Table of misc. ancillary data rates at TS format and packet size = 1 frame
4.3 Bit rate versus Baud rate
Since often ancillary data is transported on asynchronous serial lines a start
bit and stop bit must be added to every byte to reach synchronization.
Therefore the ancillary data baud rate is 20% higher than the ancillary data bit
rate.
5. Configuration steps on Configuration steps on
side
The ancillary data can be set via menu item Settings/Ancillary Data.
Copyright: 2008 Mayah Communications
266
6.8
CENTAURI II User Manual
GPIO Interface
General
The CENTAURI II has got two GPIO interfaces (GPIO = General Purpose I
nput/Output):
· TTL I/O
The TTL I/O uses a DB25 female port.
· Opto Input Relay Output (optional)
The Opto Input Relay Output uses a DB 37 female port.
The GPIO feature of CENTAURI can be used in two different ways:
· Far end switching
The states of the inputs (i.e low or high) are transmitted to outputs of the
other side CENTAURI. The transmission of these states is done inside of
the ancillary data transport. This feature enables to switch on/off far end
devices, LEDs etc.
· Event Action Programming
One of the powerful features of CENTAURI is the event action
programming. The event action programming allows the enhanced (!) user
to adapt the CENTAURI to his/her needs. How event action works is
generally described in application note 4 on Mayah Website (www.mayah.
com/content/download/pdfs/appnotes/centauri/a_n_e_004.pdf).
The GPIO interfaces can also be used in event action programming. For
instance it is possible to control special functionality of CENTAURI just by
open or close external switches. A good example for this is described in
application note 3 on Mayah Website (www.mayah.com/content/download/
pdfs/appnotes/centauri/a_n_e_003.pdf).
All the GPIO outputs can be set with the CENTAURI command ‘TTL_IO’. The
direct commands of CENTAURI are described in the Communication
Reference Manual (www.mayah.com/content/download/pdfs/manuals/
communication-reference_man.pdf).
Differences of the GPIO interfaces
The TTL I/O interface has got 5 inputs and 5 outputs. Its pin layout is
described in the CENTAURI Interface Manual (link at www.mayah.com/
content/download/pdfs/manuals/centauri-interface_eng.pdf).
The Opto Input Relay Output interface has got 8 inputs and 8 outputs. Its pin
layout is shown below.
There are three good reasons for using the optional Opto Input Relay Output
card:
· 8 additional inputs and outputs are available for event action programming
and far end switching
· The relays are capable of switching much higher loads (1A at 24V) than the
TTL outputs which can sink only 4 mA or source just 1 mA
· Opto inputs and relay outputs are potential-free
Copyright: 2008 Mayah Communications
Miscellaneous
Pin layout of
Opto Input Relay Output interface:
Simple schematic how Opto Input works:
Copyright: 2008 Mayah Communications
267
268
6.9
CENTAURI II User Manual
Backup feature
One of the new features of
is the backup feature. System
version 3.2.0.0 (or higher) is recommended.
1. General
Backup means that
establishes automatically a fail over line
when the main line loses framing. Furthermore while fail over line is active still
the main line is watched.
switches automatically back to main
line when it reaches framing state.
In backup mode
runs two sub codecs whereas the first sub
codec is responsible for the main line and the last sub codec (usually sub
codec 2) is responsible for the fail over line.
Since backup feature runs two sub codecs it is similar to the gateway feature.
However, the main difference is that at backup the last sub codec is active
when the first sub codec is not(!) framed whereas at gateway feature the last
sub codec is active when the first sub codec is framed.
X.21 satellite line with ISDN fail over
In the diagram above an X.21 satellite transmission using MPEG L2 with a bit
rate of 256 kbps is backuped with an ISDN connection using AAC (MPEG 4)
with a bit rate of 128 kbps. Since AAC (MPEG 4) is a much more efficient
coding algorithm than MPEG L2 both main line and fail over line reaches
nearly transparent quality.
2. Parameters to set
For Backup mode two parameters must be set:
Copyright: 2008 Mayah Communications
Miscellaneous
269
2.1 Backup time
The backup time determines in ms how long the main line must be unframed
since it is switched to the fail over line. Furthermore the backup time is also
the fallback time from backup connection to main connection.
2.2 Backup connection
The backup connection can be:
· The last connection
or
· A phone book entry (recommended)
Note:
To prevent that any little framing toggle causes a switching to the backup line,
it is recommendable to set the backup time to minimum 2,000 ms. This
guarantees a stable backup behaviour.
Note 2:
When in the backup scenario a X.21/V.35 transmission is involved then the
minimum backup time must be 3,000 ms.
3. Restrictions
Theoretically any kind of transmission can be backuped with any other kind of
transmission. However, there are a few restrictions:
· If the backup line uses IP then IP/RTP must be used
· X.21/V.35 connections cannot be backuped with another X.21/V.35
connection
· Backup mode cannot be used if gateway mode, dual codec mode or point
to multipoint (PMP) is active
4. Considerations
In the following considerations it assumed that the backup line uses sub
codec 2 (which is the case for CENTAURI II 300x; CENTAURI II 330x,
MERKII and GANYMED 1102).
4.1 Last ISDN B-channels
Since there is no special parameter to determine which B-channels are
assigned to sub codec 1 (main line) and sub codec 2 (backup line) in backup
mode the last available B-channels are automatically assigned to sub codec
2. This means:
· At ISDN backup phone book entries the last ISDN numbers must be used e.
g. with a CIM40 ISDN card and a bit rate of 128 kbps the numbers must be
assigned to #8 and #7.
Copyright: 2008 Mayah Communications
270
CENTAURI II User Manual
· At a backup scenario using ISDN for fail over the ISDN cables must be
connected to the last S0 ports e.g. at a CIM40 ISDN card and a bit rate of
128 kbps the ISDN cable must be connected to S04.
Copyright: 2008 Mayah Communications
Miscellaneous
271
4.2 Different IP ports at the sub codecs
At RTP different sub codecs use different RTP ports (see also chapter
Necessary settings for framed connections/How to establish IP connections/IP
Ports). This means that e.g. sub codec 2 uses port 5014 and 5015 by default
(provided system software version >= 3.2.0.30).
However, when the backup connection should be established to sub codec 1
of another Mayah codec then the ports 5004 and 5005 must be used.
Therefore at the backup phone book entry the IP address must be look like
this:
<IP-address of other side codec>:5004
e.g. 88.217.252.72:5004
5. Useful hints
5.1 Independent testing of main line and backup line
It is strongly recommended to test independently the main line connection and
the backup line connection i.e. test of both connections with inactive backup
mode. However, the notes of item 3 and 4 should be considered.
5.2 Backup mode on both Mayah codecs
When backup line is established between the same two Mayah codecs which
are responsible for the main line then even on the none establishing Mayah
codec the backup mode should be switched on. The used backup phone book
entry should be identical to the one of the establishing Mayah codec but with
two changes:
· backup time should be about 1,000 ms less
· no numbers or IP addresses in the backup phone book entry
Copyright: 2008 Mayah Communications
272
CENTAURI II User Manual
6. Configuration
The backup mode can be configured via menu item Settings/Others.
7. Looking of Remote main window
When backup mode is active the selected sub codec is also displayed in the
main window. It can be switched between the sub codecs with the short cut
key combinations <STRG><1> (sub codec 1) and <STRG><2> (sub codec 2).
6.10
Gateway feature
One of the new features of
is the gateway feature. System
version 3.2.0.123 (or higher) is recommended. All in this chapter described
features and configuration steps refers to system version 3.2.0.123. However,
gateway feature also works with version 3.2.0.0. For more info you can also
contact [email protected].
1. General
A gateway is defined as a device that performs protocol conversion between
different types of networks or applications. A network conversion can be done
at all seven layers of the ISO/OSI reference model.
Gateway feature of
means that audio received via one
communication interface can be rerouted to another communication interface
e.g. audio received via ISDN can be IP multicasted in a LAN.
In gateway mode
runs two sub codecs. When the connection of
the sub codec 1 is framed then the gateway connection on the last sub codec
(usually sub codec 2) is established automatically.
Since gateway feature runs two sub codecs it is similar to the backup feature.
However, the main difference is that at backup the last sub codec is active
when the first sub codec is not(!) framed whereas at gateway feature the last
Copyright: 2008 Mayah Communications
Miscellaneous
273
sub codec is active when the first sub codec is framed.
Audio received via ISDN is IP-multicasted in a LAN
In the diagram above audio is received via ISDN with quality of MPEG L2, 32
kHz, 128 kbps, joint stereo. This audio is IP-multicasted to the LAN in the
quality AAC (MPEG2), 48 kHz, 128 kbps, stereo.
2. Parameters to set
For Gateway mode two kind of parameters must be set:
2.1 Gateway connection
The gateway connection is the connection to which the audio received by sub
codec 1 is routed to.
It can be:
· The last connection
or
· A phone book entry (recommended)
2.2 Audio interfaces
The audio is internally routed via the audio interfaces. Therefore the audio
output of sub codec 1 must be identical to the audio input of the gateway sub
codec (usually sub codec 2) i.e. in case of gateway mode uses a phone book
entry the audio type of the encoder profile of this phone book entry must be
the same as the audio output of sub codec 1. Therefore very often the
following configuration is used:
· Audio output of sub codec 1: adat12
· Audio type of encoder profile of gateway phone book entry: adat12
When audio should also be routed back then the audio input of sub codec 1
must correspond to the audio type of decoder profile of the gateway phone
book entry.
Copyright: 2008 Mayah Communications
274
CENTAURI II User Manual
Note:
The audio is routed in an non-decoded state i.e. even in gateway mode sub
codec 1 first decodes the audio before it routes it to the gateway sub codec
(usually sub codec 2). This means that even in gateway mode no trans coding
is used and therefore every gateway audio routing means one more coding
generation.
3. Restrictions
Theoretically any kind of transmission can be routed to any other kind of
transmission. However, there are a few restrictions:
· If the gateway sub codec uses IP then IP/RTP must be used
· X.21/V.35 connections cannot be routed to another X.21/V.35 connection
· Gateway mode cannot be used if backup mode, dual codec mode or point
to multipoint (PMP) is active
4. Considerations
In the following considerations it assumed that the gateway sub codec is sub
codec 2 (which is the case for CENTAURI II 300x; CENTAURI II 330x, MERKII
and GANYMED 1102).
4.1 Last ISDN B-channels
Since there is no special parameter to determine which B-channels are
assigned to sub codec 1 (main line) and sub codec 2 (gateway line) in
gateway mode the last available B-channels are automatically assigned to sub
codec 2. This means:
· At ISDN gateway phone book entries the last ISDN numbers must be used
e.g. with a CIM40 ISDN card and a bit rate of 128 kbps the numbers must be
assigned to #8 and #7.
Copyright: 2008 Mayah Communications
Miscellaneous
275
· At a gateway scenario using ISDN for sub codec 2 the ISDN cables must be
connected to the last S0 ports e.g. at a CIM40 ISDN card and a bit rate of
128 kbps the ISDN cable must be connected to S04.
Copyright: 2008 Mayah Communications
276
CENTAURI II User Manual
4.2 Different IP ports at the sub codecs
At RTP different sub codecs use different RTP ports (see also chapter
Necessary settings for framed connections/How to establish IP connections/IP
Ports). This means that e.g. sub codec 2 uses port 5014 and 5015 by default
(provided system software version >= 3.2.0.30).
However, when the gateway connection should be established to sub codec 1
of another Mayah codec then ports 5004 and 5005 must be used. Therefore at
the gateway phone book entry the IP address must be look like this:
<IP-address of other side codec>:5004
e.g. 88.217.252.72:5004
5. Useful hints
5.1 Independent testing of main line and gateway line
It is strongly recommended to test independently the main line connection and
the gateway line connection i.e. test of both connections with inactive gateway
mode. However, the notes of item 3 and 4 should be considered.
5.2 No ancillary data transfer
By default the ancillary data is not routed together with audio.
6. Configuration
The gateway mode can be configured via menu item Settings/Others.
7. Looking of Remote main window
When gateway mode is active the selected sub codec is also displayed in the
main window. It can be switched between the sub codecs with the short cut
key combinations <STRG><1> (sub codec 1) and <STRG><2> (sub codec 2).
Copyright: 2008 Mayah Communications
Miscellaneous
6.11
Technical specifications
Analog Audio Specifications
Connections
A/D converter
Sampling rates
Input impedance
Output impedance
Above control limit
Harmonic distortion
Signal-to-noise ratio
Speak-over
L/R phase difference
Coding algorithms
Gold-plated Neutrik® 3-pin XLR
Input: socket
Output: plug
24 bit sigma-delta
32, 44.1 and 48 kHz
>25 kOhm, symmetrical
<100 Ohm, symmetrical
Input: +18.0 dBu
Output: +18 dBu
<0.005% at 1 kHz
>95 dB
>95 dB
<0.5°
Linear
ISO/MPEG 1, 2, 2.5 Layer III
ISO/MPEG 1, 2 Layer II
CCITT G.722
CCITT G.711
AAC (MPEG 2)
AAC (MPEG4)
AAC (HE)
MP3 Pro
optional:
- 4SB ADPCM
- Standard and enhanced APT-X and
Copyright: 2008 Mayah Communications
277
278
CENTAURI II User Manual
- AAC (LD)
Data Interface Specification
Network Interface Cards
Number of B channels
Data rates
ISDN BRI (2B+D)
Up to 8
Layer III: 8 to 320 kb/s in steps of 8 kb/s
Layer II:8, 16, 24, 32, 40, 48, 56, 64, 80, 96, 112, 128, 144,
160, 192, 224, 256, 320 and 384 kb/s
G.722: 48, 56 and 64 kb/s
Additional Data Channel
Connection
Baudrate
Mode
Handshake
DB9, socket
1200, 2400, 4800, 9600, 19200, 38400, 57600 and 115200
Baud
8 data bits, 1 stop bit
Not needed
TTL interface
Connection
Function
DB25, socket
Indication, event/action progamming
Control interfaces
Keyboard
Level display
Remote control
Interfaces
Connection
Bit rates
Modus
Handshake
16 keys with cursor, dial, function and status keys
Normal and clip LEDs
Full function extent
RS232 or IP Ethernet
DB9 or RJ-45 socket
9600, 19200, 38400, 57600 or 115200 bps with RS232
control
8 data bits, 1 stop bit, no parity bit
No or XON/XOFF
General
Environmental conditions
Storage temperature
Operating temperature
Relative moisture
Electromagnetic compatibility
Power supply
Dimensions and weight
Height
Width
Depth
Net weight
6.12
-40 to +70° C (-40 to +158° F)
5 to +45° C (41 to +113° F)
20 to 80%, non-condensing
EN 50081-1, EN 50082-2
90 to 250 VAC, 47 to 65 Hz, <60 Watt
2U (3.5 in., 8.89 cm)
Rack mount: 19 inches (48.26 cm)
Table version: 17,13 inches (43.48 cm)
12.2 inches (30.99 cm)
About 14.4 lbs. (6.6 Kg)
Declaration of Conformity Class A
Declaration of Conformity in accordance with Radio and
Telecommunications Terminal Equipment Act (FTEG) and Directive
1999/5/EC (R&TTE Directive)
Copyright: 2008 Mayah Communications
Miscellaneous
MAYAH Communications GmbH, Am Soeldnermoos 17, 85399 Hallbergmoos,
Germany
declares that the product
Centauri Iii 300x, 330x, 400x (incl. ISDN Option)
Telecommunications terminal equipment with intended purpose
complies with the essential requirements of § 3 and the other relevant provisions of the
FTEG (Article 3 of the R&TTE Directive), when used for its intended purpose.
Health and safety requirements pursuant to §3(1)1.(Article3(1)a))
harmonized standards applied
EN 60950: 1992 + A1:1993
Protection requirements concerning electromagnetic compatibility §3(1)2, (Article 3(1)b))
harmonized standards applied
EN 61000-6-3:2001 +A11:2004
EN 55022:1998 Class A
EN 55024:1998+A1:2001+A2:2003
Measures for maintaining immunity
Connecting cables for monitor, keyboard and USB must not be connected to the device
while it is in use for normal function. This is to avoid distortion at other devices nearby.
Connecting cables for audio, RS232, network and ISDN must have an HF-shield and have
to be connected to an appropriate device to avoid distortion at other nearby devices.
Warning: This is a Class A product. In the domestic environment this product may cause
radio interference in which case the user may be required to take adequate measures.
harmonized standards applied
EN 61000-6-1:2001:
IEC 801-2 Level 3
IEC 801-3 Level 2
IEC 801-4 Level 2
Place & date of issue
Firm stamp
Name and signature
Hallbergmoos, 20.12.2007
6.13
Declaration of Conformity Class B
Declaration of Conformity in accordance with Radio and
Telecommunications Terminal Equipment Act (FTEG) and Directive
1999/5/EC (R&TTE Directive)
Copyright: 2008 Mayah Communications
279
280
CENTAURI II User Manual
MAYAH Communications GmbH, Am Soeldnermoos 17, 85399
Hallbergmoos, Germany
declares that the product
Centauri II 300x, 330x, 400x
Telecommunications terminal equipment with intended purpose
complies with the essential requirements of § 3 and the other relevant provisions of the
FTEG (Article 3 of the R&TTE Directive), when used for its intended purpose.
Health and safety requirements pursuant to §3(1)1.(Article3(1)a))
harmonized standards applied
EN 60950: 1992 + A1:1993
Protection requirements concerning electromagnetic compatibility §3(1)2, (Article 3(1)b))
harmonized standards applied
EN 61000-6-3:2001 +A11:2004
EN 55022:1998 Class B
EN 55024:1998+A1:2001+A2:2003
Measures for maintaining immunity
Connecting cables for monitor, keyboard and USB must not be connected to the device
while it is in use for normal function. This is to avoid distortion at other devices nearby.
Connecting cables for audio, RS232, network and ISDN must have an HF-shield and
have to be connected to an appropriate device to avoid distortion at other nearby devices.
harmonized standards applied
EN 61000-6-1:2001:
IEC 801-2 Level 3
IEC 801-3 Level 2
IEC 801-4 Level 2
Place & date of issue
Firm stamp
Name and signature
Hallbergmoos, 20.12.2007
Copyright: 2008 Mayah Communications
Index
Index
-µµ-law
125, 144, 182
-112V voltage
152, 223
-2224.2.127.254
46
-33V voltage
152, 223
-55ess 104, 136, 163
5V voltage 152, 223
-AAbout 153
Accept mode 144, 182
Accept-mode 144, 182
Activating SIP registration 108, 180
Active-layer-1 144, 182
ADAT Mastermode 103
AEQ 3001 15
AEQ 5001 15
AES/EBU transparent 103
AETA Hifiscoop 15, 24
AETA Scoopy 15, 24
AEV Millennium 15
A-law 125, 144, 182
Algorithm 139, 171
Alphabetic Phonebook 204
Analog Levels 102
Ancillary baud rate 121, 178
Ancillary data 121, 178
Copyright: 2008 Mayah Communications
Ancillary Data Background 262
Ancillary Data Baudrates 262
Ancillary data bits 121, 178
Ancillary data dialog 178
Ancillary data format 178
Ancillary handshake 121, 178
Ancillary parity 121, 178
Ancillary stop bits 121, 178
APT-X codec 15, 31
Arrow Keys of Frontpanel 82
ASI Basics 75
attenuation 182
Audio Decoder 98
Audio delay ip 108, 138, 169
Audio destination 101, 143, 176
Audio dialog 176
Audio Encoder 94
Audio In/out 101
Audio level in 143, 176
Audio level out 143, 176
Audio Levels 86
Audio routing 272
Audio source 101, 143, 176
Audio type 143, 176
Audio-level-in 143, 176
Audio-level-out 143, 176
Austel 104, 136, 163
Automatic accept 144, 182
Automatic close of remote 195
Automatic disconnect 195
Auxillary Data 262
AVT Magic 15, 28
AVT Telefon 15
AVT telephone 26
-BBacklight 113
Backup 117, 268
Backup Feature 144, 182
Backup Mode 117
BCF 31
Bias 123
Bit rate 139, 171
Bit resolution 171
Bit-rate 139, 171
281
282
CENTAURI II User Manual
Board 223
Broadcast mode
Broadcast-mode
182
182
-CCabin temperature 152, 223
caf file 161
Call-by-call 136, 163
CDQ1000 15, 18
CDQ2000 15, 18
CDQ2001 15, 18
CDQ2012 15
CDQPrima 15, 18
CENTAURI II web help 153
Centronics Port 266
Change to at automatic remote settings 190
Chassis Fan 152, 223
Clipping level A/D converter 143, 176
Codec clock 151, 219
Codec dialog 171
Codec name 149, 217
Codec serial number 149, 217
Codec software versions 151, 220
Command line parameter 252
Communcation Interface 104
Communication interface 139, 171
Communication parameters 187
Communication reference commands 192
Compatibility list 15
components 152, 222
Com-ports at automatic remote settings 190
Configuration Backup 144, 182
Configuration Gateway 144, 182
Configuration network card 33
Connect 84, 232
Connect menu 134
Connectors 11
Contrast 113
Control multiple Mayah codecs 247
CPE 171
CPU core voltage 152, 223
CPU fan 152, 223
CPU Performance 152, 223
CPU temperature 152, 223
csr file 161
ctr file 161
Current action at automatic remote settings
Cursor Keys of Frontpanel 82
190
-DDate 151, 219
Date format 123
DCE 66, 107
D-channel depending settings 104, 136, 163
D-channel-protocol 104, 136, 163
Declaration of Conformity (Class A) 278
Declaration of Conformity (Class B) 279
Decoder algorithm 139, 171
Decoder audio type 143, 176
Decoder Bit rate 98
decoder configuration 139, 171
Decoder dependency 98, 139, 171
Decoder follows 139, 171
Decoder format 98
Decoder mode 98
Decoder Protection 98
Decoder sample rate 98
Decoder signal 98
Decoder signal format 171
Decoder Status 87
Decoder stream 98
Decoder stream format 171
Decoder type 98
Define hotkeys 204
Delete Phonebook Entry 89
Delete Profile Entry 93
Delete Session Entry 88
Destination 143, 176
DFI board 223
Dial in protection 144, 182
dialtone 104, 136, 163
Digital out sync. source 103, 143, 176
Direct command dialog 192
Disconnect 84, 237
Disconnect dialog 237
Disconnect menu 134
Disconnect timeout 120, 144, 182
Display Log file 162
DMB 87, 201
DNS Server 108, 138, 169
Copyright: 2008 Mayah Communications
Index
Domain Name System 108, 138, 169
DRT128 31
DSS1 104, 136, 163
DTE 66, 107
DTE versus DCE 66
DTE/DCE 66
DTS 52
Dual mode 116, 144, 182
Dualmode 116
Dual-mode 144, 182
Duplex mode 108, 138, 169
Duplex mode adaption 60
-EEdit Phonebook Entry 89
Edit Profile Entry 93
Edit Session Entry 88
Enable detailed log file 204
Enable disconnect dialog 204
Enable IP/ISDN Password Request 204
Enable multiple codecs control 204
Enable super user password dialog 204
Encoder algorithm 139, 171
Encoder audio type 143, 176
Encoder bandwidth 94
Encoder Bit rate 94
encoder configuration 139, 171
Encoder dependency 94, 139, 171
Encoder follows 139, 171
Encoder format 94
Encoder mode 94
Encoder Protection 94
Encoder sample rate 94
Encoder signal 94
Encoder signal format 171
Encoder Status 87
Encoder stream 94
Encoder stream format 171
Encoder type 94
Enhanced status messages 204
Environment and Operational Conditions 11
Epox board 223
Exit 163
Copyright: 2008 Mayah Communications
283
-FFactory Default 119
Failover 117, 268
FEC 62, 169
FEC mode 86
Files of Remote 251
Firmware 119, 151, 220
FlashCast technology and different kind of codecs
14
Forward Error Correction 62
Frontpanel Backlight 113
Frontpanel Contrast 113
Frontpanel language 118
Frontpanel LED'S 79, 80
Frontpanel Preface 78
FTP access 81
FTP Password 198
Function Keys of Frontpanel 82
-GG.711 attenuation 125, 182
G.711 law 125, 144, 182
G.711 level 182
G.711 options 125
G.711 service 125
G.722 SRT timeout 120, 144, 182
Ganymed 1002 37, 42
Gateway 108, 117, 138, 169, 272
Gateway feature 144, 182
General Purpose Input/Ouput 266
Get dialtone 104, 136, 163
Glensound G.722 codec 27
Glensound GSGC6 31
GPIO 266
-HHardware 152
Hardware dialog 222
Headphone source 114
Headphone volume 114
Health 152, 223
Helpful readme files 254
284
CENTAURI II User Manual
Hot keys 238
Hot Keys of Frontpanel 81
How to get a framed ISDN connection to a APT
codec 31
How to get a framed ISDN connection to a
Glensound G.722 codec 27
How to get a framed ISDN connection to a MAYAH
ISDN codec 17
How to get a framed ISDN connection to a normal
telephone 30
How to get a framed ISDN connection to AETA
Hifiscoop/AETA Scoopy/You Com Set 2 24
How to get a framed ISDN connection to AVT Magic
28
How to get a framed ISDN connection to AVT
telephone 26
How to get a framed ISDN connection to
CDQPrima/CDQ2000/CDQ20017Telos Zephyr 18
How to get a framed ISDN connection to MAYCOM
EASYCORDER 30
How to get a framed ISDN connection to Musictaxi
VP 23
How to get a framed ISDN connection to Musictaxi
VP Pro 22
How to get a framed ISDN connection to SendIt
18
How to get a framed ISDN connection to Telos
Xstream 21
Http streaming 41
-IID 104, 136, 163
Identification 118, 149, 217
IMUX Format 171
Info About 229
Info about Remote 229
Info about web browser remote 153
Inofficial features 254
Installation 10
Interface 85, 139, 171
Inverse Multiplexing 171
IP 108, 232
IP Address 108, 138, 169
IP audio delay 108, 138, 169
IP Configuration 138, 169
IP Forward Error Correction 169
IP Overhead 57
IP packetsize 108, 138, 169
IP packetsize mode 108, 169
IP Password 197
IP Ports 56
IP remote control (manual) 187
IP/ISDN Password 197
IP-Address 108, 138, 169
IP-remote-control 187
ISDN 104, 232
ISDN active layer 1 144, 182
ISDN answer delay 144, 182
ISDN audio delay 163
ISDN compatibility list 15
ISDN configuration 163
ISDN dialog 163
ISDN error $3301 255
ISDN error $3302 255
ISDN error $3303 255
ISDN error $3480 255
ISDN error $3481 255
ISDN error $3482 255
ISDN error $3483 255
ISDN error $3486 255
ISDN error $3487 255
ISDN error $3490 255
ISDN error $3491 255
ISDN error $3492 255
ISDN error $3493 255
ISDN error $3495 255
ISDN error $3496 255
ISDN error $349a 255
ISDN error $349b 255
ISDN error $349c 255
ISDN error $349d 255
ISDN error $349e 255
ISDN error $349f 255
ISDN error $34a2 255
ISDN error $34a6 255
ISDN error $34a9 255
ISDN error $34aa 255
ISDN error $34ab 255
ISDN error $34ac 255
ISDN error $34af 255
ISDN error $34b1 255
ISDN error $34b2 255
ISDN error $34b9 255
Copyright: 2008 Mayah Communications
Index
ISDN error $34ba 255
ISDN error $34bf 255
ISDN error $34c1 255
ISDN error $34c2 255
ISDN error $34c5 255
ISDN error $34c6 255
ISDN error $34cf 255
ISDN error $34d1 255
ISDN error $34d2 255
ISDN error $34d3 255
ISDN error $34d4 255
ISDN error $34d5 255
ISDN error $34d6 255
ISDN error $34d8 255
ISDN error $34db 255
ISDN error $34df 255
ISDN error $34e0 255
ISDN error $34e1 255
ISDN error $34e2 255
ISDN error $34e3 255
ISDN error $34e4 255
ISDN error $34e5 255
ISDN error $34e6 255
ISDN error $34ef 255
ISDN error $34ff 255
ISDN Error messages 255
ISDN Password 197
ISDN Services 203
ISDN-active-layer-1 144, 182
ISDN-answer-delay 144, 182
ISDN-protocol 104, 163
ISDN-Redial 136, 163
ISDN-Timeout 136, 163
-JJate 104, 136, 163
Jitter 227
Jitter compensation 60
Journal 127
-KKey Control
84
Copyright: 2008 Mayah Communications
285
-LLanguage 118
Language Request 156
Language Selection 156
Large main Window 204
Last connection 85
Level LED's 79
Level meter option 204
Level Status 86
Levelmeter mode of frontpanel
Lines Status 87
Load ctr File 161
Log file 162
Log file path 204
Log Files 127
Login 131
Looking of remote 204
Lost Packets 227
114
-MMAC address 118
Main menu 133
Main window 133, 242
Mandatory Files 251
Manual 229
Manual accept 144, 182
Mask Display 84
Max. audio output level 143, 176
Max. numbers of com ports to scan 204
MAYAH codec (DTE) to another x.21/V.35 codec
70
MAYAH codec (DTE) to MAYAH codec (DCE) via
crossover cable 73
MAYAH codec (DTE) to MAYAH codec (DTE) 67
Mayah Homepage 135, 229
Mayah Website 135, 229
MAYCOM EASYCORDER 15, 30
MDI 227
Media Delivery Index 227
Media Player 41
Memory 152, 223
min-digits 136, 163
Minimal digits for external call 136, 163
286
CENTAURI II User Manual
Miscellaneous Settings 144, 182
Mix 143, 176
Mode 139, 171
Mono channel mix 102, 143, 176
Motherboard 223
MPEG Transport Stream 52
MPEG TS 52, 87, 201
MPEG TS sessions 87, 201
MS Media Player 41
MSN 104, 136, 163
Multi channel audio 171
Multi point return-channel 144, 182
Multicast RTP 40
Multicast UDP 37
Multicontrol 247
Multiple subscriber number 104, 136, 163
Multipoint 116
Musictaxi VP 15, 23
Musictaxi VP Pro 15, 22
-Nname 118, 149, 217
Netmask 108, 138, 169
Network 108, 138, 169
Network card 108, 138, 169
Network dialog 169
Network interface 108, 138, 169
Network Transferrate 108, 138, 169
New Phonebook Entry 88
New Profile Entry 90
New Session Entry 87
New start 126
NI1 104, 136, 163
Nica128 31
Nica64 31
NMC board 223
NTP 123
Numeric Keypad of Frontpanel 83
NXL 31
-OOperational Mode 139, 171
Optical Inputs 266
Optimize IP Connections 60
Options 204
Others dialog 144, 182
Own E-mail 204
-Ppacketsize 108, 138, 169
Packetsize adaption 60
Packetsize mode 108, 169
Parallel Port 266
Parity 121, 178
Password 197, 198
PBX 104, 136, 163
PCR 52
Phoebook 85
Phone book menu 135
Phonebook 200, 231
PID 52
PKI Telefon 15
PKI telephone 26
PMP 116, 144, 182
Point to Multipoint 144, 182
Point-to-Multipoint 116
Position of message box 204
Predial No. 104, 136, 163
Preface 9
Prodys Pronto 15
Profiles 148, 199
Program options 204
Prolink/DSM100 31
Provider 136, 163
PSI 52
PTS 52
-QQuicktime
43
-RRAM 152, 223
RE 661 15
Readme disable phone profile shortcuts
Readme file phonebook 254
Readme Files 254
Readme IP logfile 254
254
Copyright: 2008 Mayah Communications
Index
Readme ISDN control 254
Readme ISDN message duration 254
Readme one registry for all users 254
Readme position main window by command line
254
Readme readable settings file 254
Readme static UDP port 254
Readme UDP scan 254
Real Player 41
Reboot 126
Receive Jitter 227
Redial 85
Registry entries 248
registry script file 161
Relay Outputs 266
Remote parameters at start 156
Remote settings 156
Remote settings (automatic) 190
Remote settings (manual) 187
Remote-settings 187, 190
Report at automatic remote settings 190
Reset codec 194
rfc 2327 43
rfc 2733 62
rfc 2974 46
rfc 3261 48
rfc 3550 35
Roadrunner 15
RS232 remote settings 187
RS232-remote-settings 187
RTP 232
RTP (Multicast) 40
RTP (Unicast) 35
RTP Statistics 227
RTP streaming to Ganymed 1002 42
-SS/N 118, 149, 217
Sample rate 139, 171
Sample rate converter 103
Sample-rate 139, 171
Sampling rate 139, 171
SAP 46, 232
SAP streaming 46
Save Phonebook 159
Copyright: 2008 Mayah Communications
287
Save Settings 160
Scope of Delivery 10
Scripts 81
SDP 43, 232
SDP streaming 43
Security 111
SendIt 18
Sequence Errors 227
serial number 118, 149, 217
Session 85
session announcement protocol 46
Session description protocol 43
Session initiation protocol 48
Sessions 87, 201
Set FTP Password 198
Set IP/ISDN Password 197
Set Key Code Dialog 215
Setup of codec 10
Short cut keys 238
Show hardware at start 204
Show Statusbars 204
Shuttle board 223
Signal format 171
SIP 48
SIP Configuration 180
SIP Global Proxy 108, 180
SIP ID 108, 180
SIP Registrar 108, 180
SIP registration access name 108, 180
SIP registration access password 108, 180
SIP registration access phonenumber 108, 180
SIP registration activation 108, 180
SIP registration profile 108, 180
SIP Settings dialog 180
SIP STUN Server 108, 180
Size of main Window 204
SMTP host 204
SMTP id 204
SMTP user 204
SMTP user id 204
SNMP Manager 108, 138, 169
Software Plugins 215
Software versions 119, 151, 220
SOYO board 223
SPID 104, 136, 163
SRC switch off 103
288
CENTAURI II User Manual
Status LED's 80
Stop connect UDP 204
Stream format 171
Sub codec 115
Subcodec 86, 115, 144, 182
Subnet mask 108, 138, 169
system components 152, 222
System disk 152, 223
System disk free 152, 223
System Health 128, 152, 223
System reset dialog 194
System software 151, 220
System software version 119
System status 152, 223
System temperature 152, 223
System Update 126
-TTCP 37, 232
Technical specifications 277
telephone hybrid 15, 30
Telos Xstream 21
Telos Zephyr 18
Time 151, 219
Time Control dialog 195
Time outs 120
Time settings 123
Timeouts 120
T-Online (SIP) 48
TOS 60
Transfer rate adaption 60
TS 262
TTL I/O 266
TTL Input/Output 266
Tyan board 223
Type of Service 60
-UUDP 232
UDP (Multicast) 37
UDP (Unicast) 34
UDP broadcast mode 182
UDP scan at start 204
UDP stop connect 204
Udp-scan at automatic remote settings
Unicast RTP 35
Unicast UDP 34
Unicast versus Multicast 34
Update via FTP 213
Update via Internet 214
Update via ISDN 126, 212
Update via RS232 211
Update with null modem cable 211
User disk 152, 223
User disk free 152, 223
190
-VV.35 107, 232
V.35 channel 167
V.35 configuration 167
V.35 connection 67, 70, 73
V.35 mode 167
V.35 port 167
V35 clocking 167
Versions 119, 151, 220
VIA board 223
VLC media player 43
VN4 104, 136, 163
-WWeb browser remote release notes 154
Web control login 131
Web Remote connect menu 134
Web Remote disconnect menu 134
Web remote first steps 130
Web Remote main menu 133
Web Remote main window 133
Web Remote phone book menu 135
Web Remote Preface 130
Web Remote profiles menu 148
Why Web Remote 130
Winamp 40, 41
Windows registry 248
Windows Remote Control preface 156
Winsock error codes 62
WorldNet Chicago 31
WorldNet Milano 31
WorldNet Rio 31
Copyright: 2008 Mayah Communications
Index
WorldNet Tokyo 31
www.mayah.com 135
www.mayah.com/help 153
-XX.21 107, 232
X.21 audio delay 167
X.21 channel 167
X.21 clocking 66, 167
X.21 configuration 167
X.21 connection 67, 70, 73
X.21 dialog 167
X.21 mode 167
X.21 port 167
X.21 protocol 167
X.21 versus V.35 66
-YYou Com Reporter Set
You Com Set 2 15
You Com Set2 24
15
Copyright: 2008 Mayah Communications
289