1
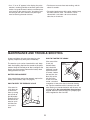
• If an “L” or an “H” appears in the display, the pulse
monitor is receiving too little or too much pulse information. Let go of the metal contacts and then place
your hands on the contacts again. Your palms must
be resting on the inner contacts and your fingers
must be touching the outer contacts.
• For the most accurate heart rate reading, wait for
about 15 seconds.
• For optimal performance of the pulse monitor, keep
the metal contacts clean. The contacts can be
cleaned with a soft cloth—do not use alcohol,
abrasives, or chemicals.
MAINTENANCE AND TROUBLE-SHOOTING
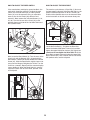
HOW TO TIGHTEN THE CRANK
Inspect and tighten all parts of the exercise cycle
regularly. Replace any worn parts immediately.
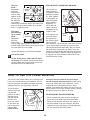
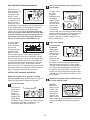
If the arms of the
Outer
Crank (22)
Bearing Nut
become loose,
they should be
tightened in order
22
to prevent excessive wear. Loosen
the two Hex Jam
53
Nuts (53) on the
left arm of the
Crank. Place the
end of a standard
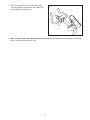
screwdriver in one of the slots in the outer bearing
nut. Tap the screwdriver with a hammer to turn the
outer bearing nut counterclockwise until the arms are
no longer loose. Do not overtighten the outer bearing nut. When the outer bearing nut is properly tightened, retighten the Hex Jam Nut.
The exercise cycle can be cleaned with a soft, damp
cloth. Avoid spilling liquid on the console or the pulse
monitor. Keep the console out of direct sunlight or the
display may be damaged. Remove the battery when
storing the exercise cycle.
BATTERY REPLACEMENT
If the console does not function properly, replace the
battery (see assembly step 1 on page 5).
HOW TO LEVEL THE EXERCISE CYCLE
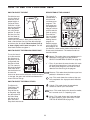
If the exercise
cycle does not
sit flat on the
floor, try turning
one or both of
the Adjustable
Endcaps (25) at
the front of the
exercise cycle
until the exercise cycle is
level.
25
11