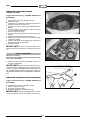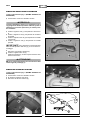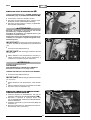
1
Manuale d'officina Manual de taller Service and repair manual aprilia part # 8140212 SR 50 963X SR 50 02%-%33! -%33!'') $) 3)#52%::! – Questo manuale fornisce le informazioni principali per le procedure di normale intervento sul veicolo. – Le informazioni e le illustrazioni che compongono questo manuale, sono aggiornate al momento della divulgazione del manuale stesso. – Questa pubblicazione è indirizzata ai Concessionari aprilia e ai loro meccanici qualificati; molte nozioni sono state volutamente omesse, perché giudicate superflue. Non essendo possibile includere nozioni meccaniche complete in questa pubblicazione, le persone che utilizzano questo manuale devono essere in possesso sia di una preparazione meccanica di base, che di una conoscenza minima sulle procedure inerenti ai sistemi di riparazione dei motoveicoli. Senza queste conoscenze, la riparazione o il controllo del veicolo potrebbe essere inefficiente o pericolosa. Non essendo descritte dettagliatamente tutte le procedure per la riparazione, e il controllo del veicolo, bisogna adottare particolare attenzione al fine di evitare danni ai componenti e alle persone. Per offrire al cliente maggiore soddisfazione dall'uso del veicolo, aprilia s.p.a. si impegna a migliorare continuamente i propri prodotti e la relativa documentazione. Le principali modifiche tecniche e modifiche alle procedure per le riparazioni del veicolo vengono comunicate a tutti i Punti Vendita aprilia e alle Filiali nel Mondo. Tali modifiche verranno apportate, nelle edizioni successive di questo manuale. Nel caso di necessità o dubbi sulle procedure di riparazione e di controllo, interpellare il Reparto aprilia Consumer Service (A.C.S.), il quale sarà in grado di fornirvi qualsiasi informazione al riguardo, oltre a fornire eventuali comunicazioni su aggiornamenti e modifiche tecniche applicate al veicolo. Per ulteriori informazioni vedi: – MANUALE D’OFFICINA MOTORE # 921 (I-UK-F-D-E); – CATALOGO RICAMBI MOTORE # 715; – CATALOGO RICAMBI MOTORE 1 # 716 V; – CATALOGO RICAMBI CICLISTICA # 515V; – CATALOGO RICAMBI CICLISTICA 1 # 516V. I seguenti messaggi di segnalazione vengono usati in tutto il manuale per indicare quanto segue: Simbolo di avviso relativo alla sicurezza. Quando questo simbolo è presente sul veicolo o nel a manuale, fare attenzione ai potenziali rischi di lesioni. La mancata osservanza di quanto riportato negli avvisi preceduti da questo simbolo può compromettere la sicurezza: vostra, altrui e del veicolo! aPERICOLO Indica un rischio potenziale di gravi lesioni o morte. aATTENZIONE Indica un rischio potenziale di lesioni leggere o danni al veicolo. IMPORTANTE Il termine “IMPORTANTE” nel presente manuale precede importanti informazioni o istruzioni. ./2-% '%.%2!,) $) 3)#52%::! /33)$/ $) #!2"/.)/ Se è necessario far funzionare il motore per poter effettuare qualche operazione, assicurarsi che questo avvenga in uno spazio aperto o in un locale ben ventilato. Non fare mai funzionare il motore in spazi chiusi. Se si opera in uno spazio chiuso, utilizzare un sistema di evacuazione dei fumi di scarico. aPERICOLO I fumi di scarico contengono ossido di carbonio, un gas velenoso che può provocare la perdita di conoscenza e anche la morte. Far funzionare il motore in uno spazio aperto o, se si opera in uno spazio chiuso, utilizzare un sistema di evacuazione dei fumi di scarico. La ditta aprilia s.p.a. si riserva il diritto di apportare modifiche in qualsiasi momento ai propri modelli, fermo restando le caratteristiche essenziali qui descritte e illustrate. I diritti di memorizzazione elettronica, di riproduzione e di adattamento totale o parziale, con qualsiasi mezzo sono riservati per tutti i Paesi. La citazione di prodotti o servizi di terze parti è solo a scopo informativo e non costituisce nessun impegno. aprilia s.p.a. non si assume la responsabilità riguardo le prestazioni o l’uso di questi prodotti. #!2"52!.4% Operare in uno spazio ben ventilato. Tenere sigarette, fiamme o fonti di scintille lontano dalla zona di lavoro e dalla zona in cui il carburante viene conservato. aPERICOLO Il carburante è altamente infiammabile e in alcune condizioni diventa esplosivo. TENERE LONTANO DALLA PORTATA DEI BAMBINI. Prima edizione: maggio 1997 Seconda edizione: giugno 1999 Ristampa: #/-0/.%.4) !$ !,4% 4%-0%2!452% Prodotto e stampato da: editing division Soave (VERONA) - Italia Tel. +39 - 045 76 11 911 Fax +39 - 045 76 12 241 E-mail: [email protected] www.stp.it per conto di: aprilia Consumer Service s.p.a. via Noalese, 156 - 30036 Santa Maria di Sala (VE) - Italia Tel. +39 - 041 57 86 101 Fax +39 - 041 57 86 100 www.aprilia.com aPERICOLO Il motore e i componenti dell’impianto di scarico diventano molto caldi e rimangono caldi per un certo periodo anche dopo che il motore è stato spento. Prima di maneggiare questi componenti, indossare guanti isolanti o attendere fino a che il motore e l’impianto di scarico si sono raffreddati. 1 SR 50 /,)/ -/4/2% %3!534/ 02%#!5:)/.) % ).&/2-!:)/.) '%.%2!,) Quando si esegue la riparazione, lo smontaggio e il rimontaggio del veicolo attenersi scrupolosamente alle seguenti raccomandazioni. aPERICOLO Utilizzare guanti in lattice per le operazioni di manutenzione che prevedono il contatto con l’olio. L’olio esausto del motore, se viene ripetutamente lasciato a contatto con la pelle per periodi prolungati, può causare il cancro della pelle. Sebbene questo sia improbabile, a meno che non si maneggi olio esausto quot i d ia n am e nt e , si c o ns i gl i a di l a va r e l e m an i accuratamente con acqua e sapone nel caso venga maneggiato. aPERICOLO Per qualsiasi tipo di operazione è vietato l'uso di viva fiamma. Prima di iniziare qualsiasi intervento di manutenzione o ispezione al veicolo, arrestare il motore e togliere la chiave, attendere che motore e impianto di scarico si siano raffreddati, sollevare possibilmente il veicolo, con apposita attrezzatura, su pavimento solido e in piano. Porre particolare attenzione alle parti ancora calde del motore e dell'impianto di scarico, in modo tale da evitare ustioni. Il veicolo è costruito con parti non commestibili; non mordere, succhiare, masticare o ingerire nessuna parte dello stesso per nessun motivo. Se non espressamente descritto, il rimontaggio dei gruppi segue in senso inverso le operazioni di smontaggio. L’eventuale sovrapposizione di operazioni nei vari rimandi ad altri capitoli deve essere interpretata con logica, evitando così rimozioni non necessarie di componenti. Non utilizzare mai il carburante come solvente per la pulizia del veicolo. Scollegare il cavo negativo (–) della batteria, in caso si debbano eseguire saldature elettriche. Quando due o più persone lavorano contemporaneamente, prestare attenzione alla sicurezza di ciascuno. TENERE LONTANO DALLA PORTATA DEI BAMBINI. ,)15)$/ &2%.) aATTENZIONE Il liquido freni può danneggiare le parti verniciate, in plastica o in gomma. Quando si effettuano interventi sull’impianto frenante, posare un panno da officina pulito su detti componenti. TENERE LONTANO DALLA PORTATA DEI BAMBINI. ,)15)$/ 2%&2)'%2!.4% In alcune condizioni, il glicole etilenico contenuto nel liquido refrigerante del motore è infiammabile e la sua fiamma è invisibile, ma ci si può bruciare ugualmente. PRIMA DELLO SMONTAGGIO – Rimuovere lo sporco, il fango, la polvere e i corpi estranei dal veicolo prima dello smontaggio dei componenti. – Impiegare, dove previsto, gli attrezzi speciali progettati per questo veicolo. aPERICOLO Non versare il liquido refrigerante del motore sull’impianto di scarico o sui componenti del motore. Potrebbero essere abbastanza caldi da provocare l’accensione del liquido refrigerante, che brucia con fiamma invisibile. Il liquido refrigerante (glicole etilenico) può provocare irritazione della pelle e se ingerito è velenoso. SMONTAGGIO DEI COMPONENTI – Contrassegnare le posizioni su tutti i giunti di connessioni (tubi, cavi, ecc.) prima di dividerli e identificarli con segni distintivi differenti. Ogni pezzo va segnato chiaramente per poter essere identificato in fase di installazione. – Pulire e lavare accuratamente i componenti smontati, con detergente a basso grado di infiammabilità. – Tenere insieme le parti accoppiate tra di loro, perché si sono "adattate" l'una all'altra in seguito alla normale usura. Alcuni componenti devono essere utilizzati assieme oppure sostituiti completamente. – Tenersi lontani da fonti di calore. TENERE LONTANO DALLA PORTATA DEI BAMBINI. Non rimuovere il tappo di riempimento quando il motore è caldo. Il liquido refrigerante è sotto pressione e potrebbe causare ustioni. )$2/'%./ %$ %,%442/,)4! $%,,! "!44%2)! aPERICOLO La batteria emette gas esplosivi; tenere sigarette, fiamme e fonti di scintille lontano dalla batteria stessa. Assicurarsi che ci sia una ventilazione adeguata quando si attiva o si ricarica la batteria. La batteria contiene acido solforico (elettrolita). Il contatto con la pelle o con gli occhi può provocare gravi ustioni. Si raccomanda di indossare indumenti protettivi e uno schermo per il viso. In caso di contatto dell’elettrolita con la pelle, risciacquare immediatamente con abbondante acqua. In caso di contatto dell’elettrolita con gli occhi, risciacquare con abbondante acqua per almeno 15 minuti e consultate immediatamente un medico. L’elettrolita è velenoso. In caso di ingestione, bere grandi quantità di acqua o latte e poi latte di magnesia od olio vegetale e consultare immediatamente un medico. TENERE LONTANO DALLA PORTATA DEI BAMBINI. 2 SR 50 RIMONTAGGIO DEI COMPONENTI 53/ $%, -!.5!,% aATTENZIONE NORME PER LA CONSULTAZIONE – Questo manuale è suddiviso in capitoli, per ognuno dei quali corrisponde una categoria di componenti principali. Per la consultazione, fare riferimento all'indice generale, pag. 12 (INDICE GENERALE). – Se non espressamente descritto, il riassemblaggio dei gruppi segue in senso inverso le operazioni di smontaggio. – I termini “destra” e “sinistra” sono riferiti al pilota seduto sul veicolo in normale posizione di guida. – Consultare il libretto “USO E MANUTENZIONE” per l’uso del veicolo e le normali operazioni di manutenzione. Non riutilizzare mai un anello elastico, quando viene smontato deve essere sostituito con uno nuovo. Quando si monta un anello elastico nuovo, fare attenzione a non allontanare le sue estremità più dello stretto necessario per infilarlo sull’albero. Dopo il montaggio di un anello elastico, verificare che sia completamente e saldamente inserito nella sua sede. Non utilizzare aria compressa per la pulizia dei cuscinetti. IMPORTANTE I cuscinetti devono ruotare liberamente, senza impuntamenti e/o rumorosità, altrimenti devono essere sostituiti. ★ – Utilizzare esclusivamente RICAMBI ORIGINALI aprilia. – Attenersi all'impiego dei lubrificanti e del materiale di consumo consigliato. – Lubrificare le parti (quando è possibile) prima di rimontarle. – Nel serraggio di viti e dadi, iniziare con quelli di diametro maggiore oppure quelli interni, procedendo in diagonale. Eseguire il serraggio con passaggi successivi, prima di applicare la coppia di serraggio. – Sostituire sempre le guarnizioni, gli anelli di tenuta, gli anelli elastici, gli anelli O-Ring (OR) e le copiglie con altri nuovi. Pulire tutti i piani di giunzione, i bordi dei paraolio e le guarnizioni prima del rimontaggio. Applicare un leggero velo di grasso a base di litio sui bordi dei paraolio. Rimontare i paraolio e i cuscinetti con il marchio o numero di fabbricazione rivolti verso l'esterno (lato visibile). Quando si montano i cuscinetti, lubrificarli abbondantemente. – Controllare che ogni componente sia stato montato in modo corretto. – Dopo un intervento di riparazione o di manutenzione periodica, effettuare i controlli preliminari e collaudare il veicolo in una proprietà privata o in una zona a bassa intensità di circolazione. Le operazioni precedute da questo simbolo devono essere ripetute dal lato opposto del veicolo. In questo manuale le varianti sono indicate con i seguenti simboli: _ & 1 2 3 versione accensione automatica luci (Automatic Switch-on Device) opzionale versione con raffreddamento a liquido versione catalitica versione con freno a tamburo VERSIONE: I U A P " B D F E G O C J S 3 Italia Regno Unito Austria Portogallo Finlandia Belgio Germania Francia Spagna Grecia Olanda Svizzera Danimarca Giappone Singapore V % K M R Q ^ Í ° Î [ ` Ñ Polonia Israele Corea del Sud Malaysia Cile Bermuda Stati Uniti d’America Australia Brasile Repubblica del Sud Africa Nuova Zelanda Canada Croazia Slovenia SR 50 02,/'/ -%.3!*%3 $% 3%'52)$!$ – Este manual suministra las informaciones principales para los procedimientos de intervención corriente. – Las informaciones y las ilustraciones que forman parte de este manual, están puestas al día en el momento de la divulgación del mismo. – Esta publicación se dirige a los Concesionarios aprilia y a sus mecánicos calificados. Muchas nociones han sido omitidas voluntariamente, porque consideradas superfluas. Como no se han podido incluir nociones mecánicas completas en esta publicación, las personas que utilizan este manual deben poseer tanto una preparación mecánica básica, como de un conocimiento mínimo de los procedimientos inherentes a los sistemas de reparación de los vehículos de motor. Sin estos conocimientos, la reparación o el control del vehículo podría ser ineficiente o peligrosa. Como no se describen detalladamente todos los procedimientos para la reparación y el control del vehículo, es preciso que ponga particular cuidado a fin de evitar daños a los componentes y a las personas. Para ofrecer al cliente una mayor satisfacción al utilizar el vehículo, aprilia s.p.a. se compromete a mejorar continuamente sus propios productos y la documentación correspondiente. Las principales modificaciones técnicas y modificaciones de los procedimientos para las reparaciones del vehículo se comunican a todos los Puntos de Ventas aprilia y a las Sucursales en el Mundo. Dichas modificaciones serán realizadas en las ediciones siguientes de este manual. En caso de necesidad o dudas sobre los procedimientos de reparación y de control, diríjase al Departamento aprilia Consumer Service (A.C.S.), que le podrá proporcionar cualquier información al respecto, así como eventuales comunicaciones sobre actualizaciones y modificaciones técnicas aplicadas al vehículo. – Para otras informaciones véanse: – MANUAL DE TALLER MOTOR # 921 (I-UK-F-D-E); – CATALOGO REPUESTOS MOTOR # 715; – CATALOGO REPUESTOS MOTOR 1 # 716; – CATALOGO REPUESTOS PARTE CICLO # 515V. – CATALOGO REPUESTOS PARTE CICLO 1 # 516V. La empresa aprilia s.p.a. se reserva el derecho de aportar modificaciones a sus propios modelos en cualquier momento, guardando siempre las características esenciales descritas e ilustradas en este manual. A todos los países se les reserva los derechos de memorización electrónica, de reproducción y de adaptación total y parcial, con cualquier medio. El hecho de citar productos o servicios por cuenta ajena tiene el solo fin de informar y no constituye ningún compromiso. aprilia no se hace cargo de ninguna responsabilidad en cuanto a las prestaciones o al uso de estos productos. Los mensajes de aviso abajo descritos se utilizan en todo el manual para indicar lo siguiente: de aviso relativo a la seguridad. Cuando aSímbolo este símbolo está presente en el vehículo o en el manual, tenga cuidado con los riesgos potenciales de lesiones. La inobservancia de lo indicado en los avisos precedidos por este símbolo puede perjudicar la seguridad: ¡de Usted, de los demás y del vehículo! aPELIGRO Indica un riesgo potencial de lesiones graves o muerte. aATENCION Indica un riesgo potencial de lesiones ligeras o daños al vehículo. IMPORTANTE El término “IMPORTANTE” en el presente manual precede importantes instrucciones o información. A todos los países se les reserva los derechos de memorización electrónica, de reproducción y de adaptación total y parcial, con cualquier vehículo. ./2-!3 '%.%2!,%3 $% 3%'52)$!$ /8)$/ $% #!2"/./ Si es necesario hacer funcionar el motor para poder efectuar alguna operación, asegúrese de que esto se realice en un espacio abierto o en un local bien ventilado. No haga funcionar nunca el motor en espacios cerrados. Si actúa en un espacio cerrado, utilice un sistema de evacuación de los humos de escape. aPELIGRO Los humos de escape contienen óxido de carbono, un gas venenoso que puede ocasionar la pérdida del conocimiento y aun la muerte. Haga funcionar el motor en un espacio abierto o, si actúa en un espacio cerrado, utilice un sistema de evacuación de los humos de escape. #/-"534)",% Actúe en un espacio bien ventilado. Mantenga cigarrillos, llamas o fuentes de chispas lejos de la zona de trabajo y de la zona en la cual se conserva el combustible. aPELIGRO El combustible es muy inflamable y en algunas condiciones se vuelve explosivo. Primera edición: mayo 1997 Segunda edición: junio 1999 MANTENGASE LEJOS DEL ALCANCE DE LOS NIÑOS. Nueva edición: #/-0/.%.4%3 ! 4%-0%2!452!3 %,%6!$!3 Producido e impreso por: editing division Soave (VERONA) - Italia Tel. +39 - 045 76 11 911 Fax +39 - 045 76 12 241 E-mail: [email protected] www.stp.it aPELIGRO El motor y los componentes de la instalación de escape se vuelven muy calientes y quedan calientes durante cierto periodo de tiempo aun tras haber apagado el motor. Antes de manejar estos componentes, lleve guantes aislantes o espere a que el motor y la instalación de escape se hayan enfriado. por parte de: aprilia Consumer Service s.p.a. via Noalese, 156 - 30036 Santa Maria di Sala (VE) - Italia Tel. +39 - 041 57 86 101 Fax +39 - 041 57 86 100 www.aprilia.com 4 SR 50 02%#!5#)/.%3 % ).&/2-!#)/.%3 '%.%2!,%3 !#%)4% -/4/2 '!34!$/ aPELIGRO Durante la reparación, el desmontaje y el reensamblaje del vehículo aténgase escrupulosamente a las recomendaciones siguientes. Utilice guantes de látex para las operaciones de mantenimiento que implican el contacto con el aceite. El aceite gastado del motor, si lo se deja repetidamente en contacto con la piel durante largos periodos de tiempos, puede producir el cáncer de la piel. Aunque esto sea improbable, a menos que se maneje diariamente aceite gastado , se aconseja que se lave las manos con agua y jabón tras haberlo manejado. aPELIGRO Para cualquier tipo de operación se prohíbe el uso de llama viva. Antes de empezar cualquier intervención de mantenimiento o inspección del vehículo, pare el motor y quite la llave, espere a que el motor y la instalación de escape se hayan enfriado, luego levante, si posible, el vehículo sobre un piso sólido y llano por medio del equipo apropiado. Tenga particular cuidado con las piezas aún calientes del motor y de la instalación de escape, a fin de evitar ustiones. El vehículo está fabricado con piezas no comestibles; no muerda, chupe, mastique ni trague ninguna parte del mismo por ninguna razón. De no resultar expresamente descrito, los grupos deben ser instalados siguiendo el orden inverso de las operaciones realizadas para el desmontaje. La eventual superposición de operaciones en las diferentes remisiones a otros capítulos debe interpretarse con lógica, evitando así el inútil desmontaje de componentes. No utilice nunca el combustible como disolvente para la limpieza del vehículo. Si se deben realizar soldaduras eléctricas, desconecte el cable negativo (-) de la batería. Cuando dos o más personas trabajan simultáneamente, ponga atención en la seguridad de cada una de ellas. MANTENGASE LEJOS DEL ALCANCE DE LOS NIÑOS. ,)15)$/ &2%./3 aATENCION El líquido frenos puede dañar las piezas pintadas, de plástico o goma. Durante las intervenciones en la instalación de frenado, ponga un paño limpio de taller sobre dichos componentes. MANTENGASE LEJOS DEL ALCANCE DE LOS NIÑOS. ,)15)$/ 2%&2)'%2!.4% En algunas condiciones, el glicol etilénico contenido en el líquido refrigerante del motor es inflamable y su llama es invisible, pero es posible quemarse igualmente. aPELIGRO No vierta el líquido refrigerante del motor en la instalación de escape o en los componentes del motor, ya que éstos podrían estar suficientemente calientes para producir el encendido del líquido refrigerante que, al quemarse, emite una llama invisible. ANTES DEL DESMONTAJE – Elimine la suciedad, el barro, el polvo y los cuerpos extraños del vehículo antes de desmontar los componentes. – Utilice, donde previsto, las herramientas especiales proyectadas para este vehículo. El líquido refrigerante (glicol etilénico) puede causar irritación de la piel y si es tragado es venenoso. MANTENGASE LEJOS DEL ALCANCE DE LOS NIÑOS. No quite el tapón de llenado cuando el motor está caliente. El líquido refrigerante está bajo presión y podría ocasionar ustiones. DESMONTAJE DE LOS COMPONENTES – Marque las posiciones en todos los empalmes de conexión (tubos, cables, etc.) antes de dividirlos e identificarlos con signos distintivos diferentes. Cada pieza debe ser marcada claramente para poderla identificar en fase de instalación. – Limpie y lave esmeradamente los componentes desmontados, utilizando un detergente con un bajo grado de inflamabilidad. – Mantenga unidas las piezas acopladas entre ellas, ya que se han “adaptado” la una a la otra a consecuencia del desgaste normal. Unos componentes deben ser utilizados juntos o sustituidos completamente. – Manténgase lejos de las fuentes de calor. ()$2/'%./ 9 %,%#42/,)4/ $% ,! "!4%2)! aPELIGRO La batería emite gases explosivos; mantenga cigarrillos, llamas y fuentes de chispas lejos de la batería misma. Al activar o recargar la batería, asegúrese de que la ventilación sea adecuada. La batería contiene ácido sulfúrico (electrolito). El contacto con la piel o con los ojos puede ocasionar graves lesiones. Se recomienda que lleve vestidos de protección y una máscara para la cara. En caso de que el electrolito llegue a contacto con la piel, enjuague de inmediato con mucha agua. Si el electrolito llega a contacto con los ojos, enjuague con mucha agua durante por lo menos 15 minutos y diríjase inmediatamente a un médico. El electrolito es venenoso. De ingerirlo, beba una gran cantidad de agua o leche, siga con leche de magnesia o aceite vegetal, luego diríjase enseguida a un médico. MANTENGASE LEJOS DEL ALCANCE DE LOS NIÑOS. 5 SR 50 REENSAMBLAJE DE LOS COMPONENTES 53/ $%, -!.5!, aATENCION NORMAS PARA LA CONSULTA No reutilice nunca un anillo elástico: una vez desmontado debe ser sustituido con otro nuevo. Durante la instalación de un anillo elástico nuevo, ponga cuidado con no alejar sus extremidades más de lo estrictamente necesario para introducirlo en el árbol. Tras haber instalado un anillo elástico, compruebe que esté introducido completa y firmemente en su alojamiento. – Este manual está subdividido en capítulos, a cada uno de los cuales corresponde una categoría de componentes principales. Para su consulta haga referencia al índice general, pág. 13 (INDICE GENERAL). – De no resultar expresamente descrito, hay que realizar la instalación de los grupos siguiendo en orden contrario las operaciones que se han efectuado para el desmontaje. – Los términos “derecha” e “izquierda” se refieren al piloto sentado sobre el vehículo en la posición normal de conducción. – Para las operaciones de normal mantenimiento y uso del vehículo, consulte el manual de “USO Y MANTENIMIENTO”. No utilice aire comprimido para la limpieza de los cojinetes. IMPORTANTE Los cojinetes deben girar libremente, sin atascamientos y/o ruidos; en caso contrario deben ser sustituidos. – Utilice exclusivamente REPUESTOS ORIGINALES aprilia. – Aténgase al empleo de los lubricantes y del material de consumo aconsejado. – Lubrique las piezas (cuando es posible) antes de instalarlas. – Para apretar los tornillos y las tuercas, empiece por los de diámetro mayor o por los interiores y prosiga diagonalmente. Apriételos con pasadas sucesivas antes de aplicar el par de apriete. – Sustituya siempre las juntas, los aros tóricos, los anillos elásticos, los anillos O-Ring (OR) y las clavijas con otros nuevos. Limpie todas las superficies de unión, los bordes de los sellos de aceite y las juntas antes de la instalación. Aplique una sutil capa de grasa a base de litio sobre los bordes de los sellos de aceite. Vuelva a instalar los sellos de aceite y los cojinetes con la marca o el número de fabricación hacia el exterior (lado visible). Al montar los cojinetes, lubríquelos abundantemente. – Controle que cada componente esté montado correctamente. – Tras una operación de reparación o de mantenimiento periódico, realice los controles preliminares y pruebe el vehículo en una propiedad privada o en una zona con una baja intensidad de circulación. ★ Hay que repetir las operaciones precedidas por este símbolo en el lado opuesto del vehículo. En este manual las variantes están indicadas con los siguientes símbolos: versión encendido automático luces _ (Automatic Switch-on Device) opcional & 1 versión con refrigeración por líquido 2 versión catalítica 3 versión con freno de tambor VERSIÓN: I Italia U Reino Unido A Austria P Portugal " Finlandia B Bélgica D Alemania F Francia E España G Grecia O Holanda C Suiza Dinamarca J Japón S Singapur 6 V Polonia % Israel K Corea del Sur M Malasia R Chile Q Bermudas - Estados Unidos de América ^ Australia Í Brasil ° República del Suráfrica Î Nueva Zelanda [ Canadá ` Croacia Ñ Eslovenia SR 50 &/2%7/2$ 3!&%49 7!2.).'3 – This manual supplies the main information for normal servicing procedures. – The information and illustrations contained in this manual are updated to the moment of its publication. – This publication is intended for the aprilia Dealers and their qualified engineers; many notions were voluntarily omitted, because they were considered superfluous. Since it is not possible to include complete mechanical information in this publication, the persons using this manual must have a basic mechanical training and a basic knowledge of the procedures regarding motor vehicles repair systems. Without this knowledge, the repair or servicing of the vehicle may be ineffective or even dangerous. The manual does not describe all the procedures for the repair and servicing of the vehicle in detail, therefore it is important to be particularly careful, in order to avoid any damage to components and persons. In order to grant its customers more and more satisfaction in the use of the vehicle, aprilia s.p.a. will keep improving its products and the relevant documentation. The main technical modifications and the modifications in the vehicle repair procedures are communicated to all aprilia Outlets and Branches the world over. These modifications will be described in the successive editions of this manual. In case of need or in case there are any doubts regarding the repair and servicing procedures, contact the aprilia Consumer Service (A.C.S.), which will give you any information required and will also inform you about any updating and technical modifications of the vehicle. For further information, refer to: – ENGINE SERVICE AND REPAIR MANUAL # 921 (I-UK-F-D-E); – ENGINE SPARE PARTS CATALOGUE # 715; – ENGINE SPARE PARTS CATALOGUE 1 # 716; – “CHASSIS PARTS” SPARE PARTS CATALOGUE # 515V. – “CHASSIS PARTS” SPARE PARTS CATALOGUE 1 # 516V. The following precautionary warnings are used throughout this manual in order to convey the following messages: warning. When you find this symbol on aSafety the vehicle or in the manual, be careful to the po- tential risk of personal injury. Non-compliance with the indications given in the messages preceded by this symbol may result in grave risks for your and other people’s safety and for the vehicle! aWARNING Indicates a potential hazard which may result in serious injury or even death. aCAUTION Indicates a potential hazard which may result in minor personal injury or damage to the vehicle. NOTE The word “NOTE” in this manual precedes important information or instructions. '%.%2!, 3!&%49 25,%3 #!2"/. -/./8)$% If it is necessary to let the engine run in order to carry out some work, make sure that the area in which you are operating is properly ventilated. Never run the engine in enclosed spaces. If it is necessary to work indoors, use an exhaust evacuation system. aWARNING The exhaust fumes contain carbon monoxide, a poisonous gas that can cause loss of consciousness and even death. Run the engine in an open area or, if it is necessary to work indoors, use an exhaust evacuation system. aprilia s.p.a. reserves the right to modify its models at any time, without prejudice to the main characteristics here described. All rights as to electronic storage, reproduction and total or partial adaptation, with any means, are reserved for all Countries. The mention to products or services supplied by third parties is made only for information purposes and it isn't binding in any case. aprilia takes no responsibility as to the performance or use of said products. '!3/,).% Work in a well ventilated area. Keep cigarettes, flames or sparks away from the work area and from the place where gasoline is stored. aWARNING Gasoline is extremely flammable and becomes explosive under certain conditions. First edition: may 1997 Second edition: june 1999 KEEP AWAY FROM CHILDREN. Reprint: Produced and printed by: editing division Soave (VERONA) - Italy Tel. +39 - 045 76 11 911 Fax +39 - 045 76 12 241 E-mail: [email protected] www.stp.it On behalf of: aprilia Consumer Service s.p.a. via Noalese, 156 - 30036 Santa Maria di Sala (VE) - Italia Tel. +39 - 041 57 86 101 Fax +39 - 041 57 86 100 www.aprilia.com (/4 #/-0/.%.43 aWARNING The engine and the components of the exhaust system become very hot and remain hot for some time after the engine has been stopped. Before handling these components, wear insulating gloves or wait until the engine and the exhaust system have cooled down. 7 SR 50 53%$ %.').% /), 02%#!54)/.3 !.$ '%.%2!, ).&/2-!4)/.3 aWARNING Follow with care these recommendations when repairing, disassembling and reassembling the vehicle. Use latex gloves for the maintenance operations that require contact with used oil. Used engine oil may cause skin cancer if repeatedly left in contact with the skin for prolonged periods. Although this is unlikely unless you handle used oil on a daily basis, it is advisable to thoroughly wash your hands with soap and water after handling used oil. aWARNING The use of naked flames is forbidden for any type of operation. Before commencing any service or inspection operation on the vehicle, switch off the engine and remove the key, wait until the engine and the exhaust system have cooled down and, if possible, raise the vehicle with the suitable equipment onto firm flat ground. In order to avoid burns, be careful not to touch any parts of engine or exhaust system which have not cooled down completely. The vehicle is constructed of inedible parts. Do not bite, suck, chew or swallow any part of the vehicle for any reason whatever. If not expressly described, the reassembly of the units is carried out by reversing the order of operations. Handle fuel with the greatest caution. Never use fuel as a solvent for cleaning the vehicle. Disconnect the negative cable (–) from the battery when electric welding. When two or more persons are working together, make sure that each is working in safe conditions. KEEP AWAY FROM CHILDREN. "2!+% &,5)$ aCAUTION The brake fluid can damage painted, plastic or rubber parts. When performing maintenance operations on the braking system, put a clean shop towel on these parts. KEEP AWAY FROM CHILDREN. #//,!.4 In certain conditions, the ethylene glycol contained in the engine coolant is flammable: its flame is invisible, but you can be burned anyway. BEFORE DISASSEMBLY aWARNING – Remove any dirt, mud, dust and foreign matters from the vehicle before disassembling the components. – Use, when necessary, the special tools designed for this vehicle. Avoid spilling the engine coolant on the exhaust system or on the engine components. They may be hot enough to cause the coolant to ignite and burn without a visible flame. The coolant (ethylene glycol) can cause skin irritation and is poisonous if swallowed. DISASSEMBLING THE COMPONENTS – Before disconnecting the joints (pipes, cables, etc.), mark the positions on all of them and mark them with different distinguishing signs. Each piece must be marked clearly, in order not to have problems during installation. – Clean and wash carefully any disassembled parts with low inflammability detergents. – Keep the parts that are used in pairs together, since they have adapted to each other following the normal wear. Some components must be used together or replaced completely. – Keep away from heat sources. KEEP AWAY FROM CHILDREN. Do not remove the radiator cap when the engine is hot. The coolant is under pressure and may cause burns. "!44%29 (9$2/'%. '!3 !.$ %,%#42/,94% aWARNING The battery gives off explosive gases; keep cigarettes, flames and sparks away from the battery. Provide adequate ventilation when operating or recharging the battery. The battery contains sulphuric acid (electrolyte). Contact with the skin or the eyes may cause serious burns. It is advisable to wear protective clothing and a face shield. In case of contact with the skin, flush immediately with plenty of water. In case of contact with the eyes, flush with plenty of water for at least 15 minutes and consult a doctor without delay. The electrolyte is poisonous. If the electrolyte is accidentally swallowed, drink large quantities of water or milk and then milk of magnesia or vegetable oil and consult a doctor without delay. KEEP AWAY FROM CHILDREN. 8 SR 50 REASSEMBLING THE COMPONENTS (/7 4/ 53% 9/52 3%26)#% !.$ 2%0!)2 -!.5!, aCAUTION ADVICE FOR CONSULTATION Never use a circlip twice. When a circlip is removed, it must be replaced with a new one. When assembling a new circlip be careful not to stretch its ends more than strictly necessary to put it on the shaft. After installing a circlip, make sure that it is completely and firmly inserted in its seat. – This manual is divided into chapters, each one of which corresponds to a category of main components. To consult them, see the general index, p. 14 (TABLE OF CONTENTS). – If not expressly indicated otherwise, for the reassembly of the units repeat the disassembly operations in reverse order. – The terms “right” and “left” are referred to the rider seated on the vehicle in the normal riding position. – For normal maintenance operations and for the use of the vehicle, consult the “USE AND MAINTENANCE” manual. Do not use compressed air to clean the bearings. NOTE The bearings must rotate freely, without halting a/o noise otherwise they must be replaced. – Use only original aprilia SPARE PARTS. – Use the recommended lubricants. – Whenever possible, lubricate the parts before reassembly. – When tightening screws and nuts, begin with those having greater diameters or with inner ones, proceeding diagonally. Tighten screws or nuts in successive passages before applying driving torque. – Always replace gaskets, grommets, circlips, O-rings and split pins with new ones. Before the assembly, clean all the connection surfaces, the oil seal edges and the gaskets. Apply a thin layer of lithium-based grease on the oil seal edges. Put back the oil seals and the bearings with the mark or serial number facing towards the outside (visible side). When installing the bearings, lubricate them abundantly. – Make sure that each component has been reassembled correctly. – After a repair or periodic maintenance operation, carry out the preliminary checks and test the vehicle in a private area or, in any case, in a low-traffic area. ★ The operations preceded by this symbol must be repeated on the opposite side of the vehicle. In this manual the various versions are indicated by the following symbols: light switching version _ automatic (Automatic Switch-on Device) & optional 1 liquid-cooled version 2 catalytic version 3 drum brake version VERSION: I U A P " B D F E G O C J S Italy United Kingdom Austria Portugal Finland Belgium Germany France Spain Greece Holland Switzerland Denmark Japan Singapore NOTE V Poland % Israel K South Korea M Malaysia R Chile Q Bermuda - United States of America ^ Australia Í Brazil ° South Africa Î New Zealand [ Canada ` Croatia Ñ Slovenia Remember: 1 mile = 1,6 km 1 km = 0.625 mile. 9 SR 50 #/..%44/2) %,%442)#) L’operazione di scollegamento di due connettori elettrici deve essere svolta nel modo seguente: – Se presenti, premere sugli appositi agganci di sicurezza. aATTENZIONE Per disinserire i due connettori non tirare i cavi. – Afferrare i due connettori e disinserirli tirando in senso opposto uno all’altro. – In presenza di sporcizia, ruggine, umidità, ecc… pulire accuratamente l’interno del connettore utilizzando un getto d’aria in pressione. – Accertarsi che i cavi siano correttamente aggraffati ai terminali interni ai connettori. IMPORTANTE I due connettori hanno un solo senso di inserimento, presentarli all’accoppiamento nel giusto senso. – inserire successivamente i due connettori accertandosi del corretto accoppiamento (se presenti gli appositi agganci di sicurezza si udirà il tipico “click”). 30%#)&)#(% '%.%2!,) $%,,% #/00)% $) 3%22!'')/ In tabella sono riportate le coppie di serraggio standard per viti e bulloni con filettatura metrica ISO. Per giunti o accoppiamenti specifici del veicolo in oggetto vedi pag. 17 (COPPIE DI SERRAGGIO). Filettatura vite o bullone Chiave Coppia di serraggio M6 Nm kgm 10 6 0,6 M8 12 15 1,5 M 10 14 30 3,0 M 12 17 55 5,5 M 14 19 85 8,5 M 16 22 130 13,0 Se non diversamente specificato, le coppie di serraggio sono riferite a filettature pulite, asciutte e a temperatura ambiente. IMPORTANTE Per evitare possibili deformazioni e/ o accoppiamenti imperfetti procedere al serraggio delle viti o dei bulloni come di seguito descritto: ◆ Avvitare manualmente tutti gli elementi di fissaggio. ◆ Applicando metà della coppia di serraggio prevista, serrare gli elementi diametralmente opposti: (A) e (B); (C) e (D). ◆ Ripetere la precedente operazione applicando la coppia di serraggio prevista. IMPORTANTE In questo modo la pressione esercitata dagli elementi di fissaggio sarà uniformemente distribuita sulla superficie del giunto. 10 SR 50 #/.%#4/2%3 %,%#42)#/3 %,%#42)#!, #/..%#4/23 La operación de desconexión de dos conectores eléctricos debe realizarse del modo siguiente: The disconnection of two electrical connectors must be carried out by proceeding as follows: – Si están presentes, presione los enganches de seguridad correspondientes. – Press the appropriate safety couplings, if provided. aCAUTION aATENCION Do not pull the cables to disconnect the two connectors. Para desconectar los dos conectores no tire de los cables. – Grasp the two connectors and disconnect them by pulling in opposite directions. – If dirt, rust, dampness, etc. can be noticed, carefully clean the inside of the connector by means of a pressurized air jet. – Make sure that the cables are correctly crimped to the terminals positioned inside the connectors. – Agarre los dos conectores y tire de ellos, el uno en el sentido opuesto respecto al otro, para desconectarlos. – En caso de suciedad, herrumbre, humedad, etc... limpie esmeradamente el interior del conector utilizando un chorro de aire bajo presión. – Asegúrese de que los cables estén engrapados correctamente en los terminales interiores de los conectores. NOTE The two connectors have one insertion direction only, therefore it is important to couple them in the correct direction. IMPORTANTE Los dos conectores tienen un solo sentido de introducción y deben ser orientados hacia el punto de acoplamiento en el sentido correcto. – Insert the two connectors, making sure that the coupling direction is correct (if the appropriate safety couplings are provided, the typical “click” sound will be heard). – introduzca sucesivamente los dos conectores y asegúrese de que el acoplamiento sea correcto (si los enganches de seguridad están presentes, se oirá el típico “click”). %30%#)&)#!#)/.%3 '%.%2!,%3 $% ,/3 0!2%3 $% !02)%4% '%.%2!, 30%#)&)#!4)/.3 /& 4(% $2)6).' 4/215%3 En la tabla se indican los pares de apriete estándar para tornillos y pernos con rosca métrica ISO. Para empalmes o acoplamientos específicos del vehículo en cuestión, véase pág. 17 (PARES DE APRIETE). Rosca tornillo o perno Llave M6 M8 The following table indicates the standard driving torques for screws and bolts with metric ISO thread. For specific joints or couplings of the vehicle, see p. 17 (DRIVING TORQUE). Par de apriete Nm kgm 10 6 0,6 12 15 Screw or bolt thread Spanner 1,5 M6 Driving torque Nm kgm 10 6 0.6 12 15 1.5 M 10 14 30 3,0 M8 M 12 17 55 5,5 M 10 14 30 3.0 M 14 19 85 8,5 M 12 17 55 5.5 M 16 22 130 13,0 M 14 19 85 8.5 M 16 22 130 13.0 Salvo especificaciones diferentes, los pares de apriete se refieren a roscas limpias, secas y a temperatura ambiente. If not specified otherwise, the indicated driving torques are valid for clean and dry threads, at room temperature. IMPORTANTE Para evitar posibles deformaciones y/o acoplamientos imperfectos, apriete los tornillos o los pernos del modo descrito a continuación: NOTE In order to avoid any deformation and/or imperfect coupling, tighten the screws or bolts by proceeding as described below: ◆ Atornille manualmente todos los elementos de fijación. ◆ Aplicando mitad del par de apriete previsto, apriete los elementos diametralmente opuestos: (A) y (B); (C) y (D). ◆ Repita la operación precedente aplicando el par de apriete previsto. – Manually screw all the fastening elements. – Applying half the prescribed driving torque, tighten the elements that are diametrically opposite each other: (A) and (B); (C) and (D). – Repeat the previous operation by applying the prescribed driving torque. IMPORTANTE De este modo la presión ejercida por NOTE In this way the pressure exerted by the fastening elements will be uniformly distributed on the joint surface. los elementos de fijación estará distribuida uniformemente sobre la superficie del empalme. 11 SR 50 INDICATORI DI DIREZIONE ANTERIORI............................... 86 SOSTITUZIONE LAMPADINE ................................................. 86 RIMOZIONE INDICATORE COMPLETO ................................. 86 INDICATORI DI DIREZIONE POSTERIORI ............................ 88 SOSTITUZIONE LAMPADINE ................................................. 88 RIMOZIONE INDICATORE DI DIREZIONE COMPLETO ........ 88 FANALE POSTERIORE .......................................................... 90 SOSTITUZIONE LAMPADINE ................................................. 90 RIMOZIONE FANALE POSTERIORE ..................................... 90 SOSTITUZIONE LAMPADINA LUCE TARGA ................ 92 CRUSCOTTO .......................................................................... 92 SOSTITUZIONE LAMPADINE ................................................. 92 RIMOZIONE CRUSCOTTO COMPLETO ................................ 94 RIMOZIONE VETRO CRUSCOTTO ........................................ 94 SUPPORTI COMANDI ELETTRICI ......................................... 94 RIMOZIONE COMANDI MANUBRIO ....................................... 94 LIQUIDO FRENI - raccomandazioni ...................................... 96 FRENI A DISCO .................................................................... 100 #/.42/,,/ ...................................................................... 100 RABBOCCO .......................................................................... 102 FRENO POSTERIORE A TAMBURO ............................ 104 REGOLAZIONE ..................................................................... 104 RUOTA ANTERIORE ............................................................ 106 RIMOZIONE .......................................................................... 106 CONTROLLO......................................................................... 106 RIMONTAGGIO ..................................................................... 108 RUOTA POSTERIORE .......................................................... 110 RIMOZIONE .......................................................................... 110 INGRASSAGGIO PERNO CAMMA FRENO POSTERIORE .................................... 112 PINZE FRENO ....................................................................... 114 RIMOZIONE PINZA FRENO ANTERIORE ............................ 114 RIMOZIONE PINZA FRENO POSTERIORE ......................... 116 PASTIGLIE FRENO .............................................................. 118 VERIFICA USURA PASTIGLIE ............................................. 118 SOSTITUZIONE PASTIGLIE FRENO .................................... 118 SPURGO ARIA IMPIANTO FRENANTE ............................... 120 GANASCE FRENO ........................................................ 122 VERIFICA USURA GANASCE ....................................... 122 SOSTITUZIONE GANASCE ........................................... 122 TRASMISSIONE.................................................................... 124 CONTROLLO LIVELLO OLIO TRASMISSIONE .................... 124 SOSTITUZIONE OLIO TRASMISSIONE ............................... 126 CONTROLLO ASSE FULCRO MOTORE ............................. 128 RUOTE / PNEUMATICI ......................................................... 128 ISPEZIONE RUOTE .............................................................. 128 PNEUMATICI ......................................................................... 130 PRESSIONE DI GONFIAGGIO PNEUMATICI ....................... 132 CANNOTTO STERZO ........................................................... 134 CONTROLLO GIOCO CUSCINETTI ..................................... 134 REGOLAZIONE GIOCO CUSCINETTI .................................. 134 RIMOZIONE CUSCINETTI CANNOTTO STERZO ................ 136 FORCELLA ANTERIORE ..................................................... 138 CONTROLLO LIVELLO OLIO FORCELLA ............................ 138 RIMOZIONE FORCELLA COMPLETA .................................. 138 RIMOZIONE GRUPPO STELO-PORTARUOTA (con forcella installata) ........................................................... 140 SMONTAGGIO STELO-PORTARUOTA ................................ 140 SOSPENSIONE POSTERIORE............................................. 142 RIMOZIONE .......................................................................... 142 SILENZIATORE DI SCARICO ............................................... 142 RIMOZIONE .......................................................................... 142 FILTRO ARIA ........................................................................ 144 RIMOZIONE .......................................................................... 144 PULIZIA ................................................................................. 144 INTERRUTTORE DI ACCENSIONE / BLOCCASTERZO ..... 144 RIMOZIONE .......................................................................... 144 BATTERIA ............................................................................. 146 CONTROLLO LIVELLO ELETTROLITA ................................ 148 RICARICA BATTERIA ........................................................... 148 LUNGA INATTIVITÀ DELLA BATTERIA ................................ 150 MOTORE ............................................................................... 152 RIMOZIONE MOTORE DAL TELAIO .................................... 152 MOTORE (versione con raffreddamento a liquido) .... 156 RIMOZIONE MOTORE DAL TELAIO ............................. 156 BIELLETTA ATTACCO MOTORE ........................................ 158 RIMOZIONE .......................................................................... 158 IMPIANTO ELETTRICO ........................................................ 162 INDICE................................................................................... 162 ).$)#% '%.%2!,% PREMESSA ...............................................................................1 MESSAGGI DI SICUREZZA ......................................................1 NORME GENERALI DI SICUREZZA .........................................1 OSSIDO DI CARBONIO .............................................................1 CARBURANTE ...........................................................................1 COMPONENTI AD ALTE TEMPERATURE ................................1 OLIO MOTORE ESAUSTO ........................................................2 LIQUIDO FRENI .........................................................................2 LIQUIDO REFRIGERANTE ........................................................2 IDROGENO ED ELETTROLITA DELLA BATTERIA ...................2 PRECAUZIONI E INFORMAZIONI GENERALI ..........................2 USO DEL MANUALE .................................................................3 CONNETTORI ELETTRICI .......................................................10 SPECIFICHE GENERALI DELLE COPPIE DI SERRAGGIO ...10 CARATTERISTICHE TECNICHE .............................................15 COPPIE DI SERRAGGIO .........................................................17 TABELLA LUBRIFICANTI.........................................................18 RICERCA GUASTI ...................................................................20 PROGRAMMA DI MANUTENZIONE .......................................29 DATI DI IDENTIFICAZIONE .....................................................30 UBICAZIONE ELEMENTI PRINCIPALI ...................................30 UBICAZIONE STRUMENTI ......................................................32 STRUMENTI E INDICATORI ....................................................32 ACCELERATORE ....................................................................32 VERIFICA FUNZIONAMENTO COMANDO ACCELERATORE .................................................32 ACCELERATOR ......................................................................33 REGOLAZIONE DEL MINIMO ..................................................34 REGOLAZIONE COMANDO ACCELERATORE ......................36 CARENATURE.........................................................................38 RIMOZIONE MANIGLIA PASSEGGERO .................................38 RIMOZIONE PORTATARGA ....................................................38 RIMOZIONE PROTEZIONE INFERIORE CODONE ................38 RIMOZIONE CODONE .............................................................38 RIMOZIONE COPERCHI D’ISPEZIONE DESTRO E SINISTRO ..................40 RIMOZIONE CHIUSURA SCUDO INFERIORE ........................40 RIMOZIONE SCUDO ANTERIORE INTERNO .........................42 RIMOZIONE COFANO ANTERIORE .......................................42 RIMOZIONE PEDANA POGGIAPIEDI .....................................44 RIMOZIONE PARAFANGO ANTERIORE ................................44 RIMOZIONE SPECCHIETTI RETROVISORI ...........................46 RIMOZIONE COPRIMANUBRIO ANTERIORE ........................46 RIMOZIONE VANO PORTACASCO completo di sella .......................................................................48 RIMOZIONE CHIUSURA SCUDO ANTERIORE ......................48 RIMOZIONE PARAFANGO POSTERIORE ..............................50 RIMOZIONE CHIUSURA CODONE .........................................50 RIMOZIONE SCUDO ANTERIORE ESTERNO ........................52 RIMOZIONE SCUDO INFERIORE ...........................................52 SERBATOIO CARBURANTE ..................................................54 CARBURANTE .........................................................................54 CONTROLLO RUBINETTO CARBURANTE ............................56 SVUOTAMENTO DEL CARBURANTE DAL SERBATOIO .......56 RIMOZIONE RUBINETTO CARBURANTE ..............................58 CONTROLLO SONDA LIVELLO CARBURANTE .....................60 RIMOZIONE SONDA LIVELLO CARBURANTE .......................60 RIMOZIONE SERBATOIO CARBURANTE COMPLETO .........60 SERBATOIO OLIO MISCELATORE ........................................62 CONTROLLI .............................................................................62 SVUOTAMENTO ......................................................................62 RIMOZIONE .............................................................................62 SPURGO OLIO MISCELATORE ..............................................64 IMPIANTO DI RAFFREDDAMENTO ................................66 LIQUIDO REFRIGERANTE ...............................................66 CONTROLLO E RABBOCCO ...............................................68 LIQUIDO REFRIGERANTE SCARICO IMPIANTO DI RAFFREDDAMENTO ................70 SOSTITUZIONE LIQUIDO REFRIGERANTE ....................72 SPURGO IMPIANTO DI RAFFREDDAMENTO .................74 RIMOZIONE RADIATORE ................................................76 RIMOZIONE POMPA LIQUIDO REFRIGERANTE ............76 RIMOZIONE VASO DI ESPANSIONE ...............................78 RIMOZIONE TERMISTORE TEMPERATURA LIQUIDO REFRIGERANTE ..............................................................78 LAMPADINE ............................................................................80 FANALE ANTERIORE .............................................................80 REGOLAZIONE VERTICALE FASCIO LUMINOSO .................80 REGOLAZIONE ORIZZONTALE FASCIO LUMINOSO (paesi dove previsto) ................................................................82 SOSTITUZIONE LAMPADINE FANALE ANTERIORE .............84 SOSTITUZIONE LAMPADINE FANALE ANTERIORE .................................84 RIMOZIONE FANALE ANTERIORE .........................................86 1 1 1 1 AC%-_ 3 3 3 1 1 1 1 1 1 1 C%-_ 12 3 3 1 SR 50 INDICADORES DE DIRECCION DELANTEROS ..................... 87 SUSTITUCION BOMBILLAS .................................................... 87 DESMONTAJE INDICADOR COMPLETO................................ 87 INDICADORES DE DIRECCION TRASEROS ......................... 89 SUSTITUCION BOMBILLAS .................................................... 89 DESMONTAJE INDICADOR DE DIRECCION COMPLETO .............................. 89 FARO TRASERO ..................................................................... 91 SUSTITUCION BOMBILLAS .................................................... 91 DESMONTAJE FARO TRASERO ............................................ 91 SUSTITUCION BOMBILLA LUZ MATRICULA ................................. 93 SALPICADERO ....................................................................... 93 SUSTITUCION BOMBILLAS SALPICADERO .......................... 93 DESMONTAJE SALPICADERO COMPLETO .......................... 95 DESMONTAJE CRISTAL SALPICADERO ............................... 95 SOPORTES MANDOS ELECTRICOS ..................................... 95 DESMONTAJE MANDOS MANILLAR ...................................... 95 LIQUIDO FRENOS - recomendaciones .................................. 97 FRENOS DE DISCO .............................................................. 101 CONTROL .............................................................................. 101 RELLENO .............................................................................. 103 FRENO TRASERO DE TAMBOR ................................... 105 AJUSTE FRENO .................................................................... 105 RUEDA DELANTERA ............................................................ 107 DESMONTAJE ....................................................................... 107 CONTROL .............................................................................. 107 INSTALACION ....................................................................... 109 RUEDA TRASERA ................................................................ 111 DESMONTAJE ....................................................................... 111 ENGRASE PERNO LEVA FRENO TRASERO ............... 113 PINZAS FRENO ..................................................................... 115 DESMONTAJE PINZA FRENO DELANTERO ........................ 115 DESMONTAJE PINZA FRENO TRASERO ............................ 117 PASTILLAS DE FRENO ........................................................ 119 COMPROBACION DESGASTE PASTILLAS .......................... 119 SUSTITUCION PASTILLAS FRENO ...................................... 119 PURGA AIRE INSTALACION DE FRENADO ........................ 121 ZAPATAS FRENO .......................................................... 123 COMPROBACION DESGASTE ZAPATAS ..................... 123 SUSTITUCION ZAPATAS ............................................... 123 TRANSMISION ...................................................................... 125 CONTROL NIVEL ACEITE TRANSMISION ............................ 125 SUSTITUCION ACEITE TRANSMISION ................................ 127 CONTROL DEL EJE TRANSMISION MOTOR ...................... 129 RUEDAS / NEUMATICOS...................................................... 129 INSPECCION RUEDAS ......................................................... 129 NEUMATICOS ....................................................................... 131 PRESION DE HINCHADO NEUMATICOS ............................. 133 MANGUITO DIRECCION ....................................................... 135 CONTROL JUEGO COJINETES ............................................ 135 AJUSTE JUEGO COJINETES ................................................ 135 DESMONTAJE COJINETES MANGUITO DIRECCION .......... 137 HORQUILLA DELANTERA ................................................... 139 CONTROL NIVEL ACEITE HORQUILLA ................................ 139 DESMONTAJE HORQUILLA COMPLETA ............................. 139 DESMONTAJE GRUPO BOTELLA (con horquilla instalada) .. 141 DESMONTAJE BOTELLA ...................................................... 141 SUSPENSION TRASERA ...................................................... 143 DESMONTAJE ....................................................................... 143 SILENCIADOR DE ESCAPE ................................................. 143 DESMONTAJE ....................................................................... 143 FILTRO AIRE ......................................................................... 145 DESMONTAJE ....................................................................... 145 LIMPIEZA .............................................................................. 145 INTERRUPTOR DE ENCENDIDO / SEGURO DE DIRECCION ..................................................... 145 DESMONTAJE ....................................................................... 145 BATERIA ............................................................................... 147 CONTROL NIVEL ELECTROLITO ......................................... 149 RECARGA BATERIA.............................................................. 149 LARGA INACTIVIDAD DE LA BATERIA ................................. 151 MOTOR .................................................................................. 153 DESMONTAJE MOTOR DEL BASTIDOR .............................. 153 MOTOR (versión con refrigeración por líquido) .......... 157 DESMONTAJE MOTOR DEL BASTIDOR ............................. 157 ELEMENTO DE CONEXION MOTOR .................................... 159 DESMONTAJE ....................................................................... 159 INSTALACION ELECTRICA .................................................. 163 INDICE ................................................................................... 163 ).$)#% '%.%2!, PRÓLOGO ................................................................................. 4 NORMAS GENERALES DE SEGURIDAD ................................ 4 MENSAJES DE SEGURIDAD ................................................... 4 OXIDO DE CARBONO .................................................................4 COMBUSTIBLE ............................................................................ 4 COMPONENTES A TEMPERATURAS ELEVADAS....................4 ACEITE MOTOR GASTADO........................................................5 LIQUIDO FRENOS .......................................................................5 LIQUIDO REFRIGERANTE ..........................................................5 HIDROGENO Y ELECTROLITO DE LA BATERIA ......................5 PRECAUCIONES E INFORMACIONES GENERALES ...............5 USO DEL MANUAL ................................................................... 6 CONECTORES ELECTRICOS ..................................................11 ESPECIFICACIONES GENERALES DE LOS PARES DE APRIETE ...................................................11 FICHA TECNICA ..................................................................... 15 PARES DE APRIETE .................................................................17 TABLA LUBRICANTES ..............................................................18 IDENTIFICACION DE LAS AVERIAS ...................................... 23 PROGRAMA DE MANTENIMIENTO ....................................... 29 FICHA DE RECONOCIMIENTO............................................... 31 UBICACION ELEMENTOS PRINCIPALES ............................. 31 UBICACION INSTRUMENTOS ................................................ 33 INSTRUMENTOS E INDICADORES ........................................ 33 ACELERADOR ........................................................................ 33 COMPROBACION FUNCIONAMIENTO MANDO ACELERADOR ......................... 33 AJUSTE DEL RALENTI............................................................ 35 AJUSTE MANDO ACELERADOR ............................................ 37 CARENADOS .......................................................................... 39 DESMONTAJE ASA PASAJERO ............................................. 39 DESMONTAJE PORTAMATRICULA ....................................... 39 DESMONTAJE PROTECCION INFERIOR COLIN ................... 39 DESMONTAJE COLIN ............................................................. 39 DESMONTAJE TAPAS DE INSPECCION DERECHA E IZQUIERDA ........................................................ 41 DESMONTAJE COBERTURA ESCUDO INFERIOR ................ 41 DESMONTAJE ESCUDO DELANTERO INTERIOR................. 43 DESMONTAJE CARENADO FRONTAL .................................. 43 DESMONTAJE ESTRIBO ........................................................ 45 DESMONTAJE GUARDABARROS DELANTERO ................... 45 DESMONTAJE RETROVISORES ............................................ 47 DESMONTAJE CUBREMANILLAR .......................................... 47 DESMONTAJE VANO PORTACASCO equipado con sillín ...... 49 DESMONTAJE TAPA ESCUDO DELANTERO ........................ 49 DESMONTAJE GUARDABARROS TRASERO ........................ 51 DESMONTAJE COBERTURA COLIN ...................................... 51 DESMONTAJE ESCUDO DELANTERO EXTERIOR ............... 53 DESMONTAJE ESCUDO INFERIOR ....................................... 53 DEPOSITO COMBUSTIBLE .................................................... 55 COMBUSTIBLE ....................................................................... 55 CONTROL GRIFO COMBUSTIBLE ......................................... 57 EVACUACION DEL COMBUSTIBLE DEL DEPOSITO............. 57 DESMONTAJE GRIFO COMBUSTIBLE .................................. 59 CONTROL SONDA NIVEL COMBUSTIBLE ............................. 61 DESMONTAJE SONDA NIVEL COMBUSTIBLE ...................... 61 DESMONTAJE DEPOSITO COMBUSTIBLE COMPLETO ....... 61 DEPOSITO ACEITE MEZCLADOR ......................................... 63 CONTROLES ........................................................................... 63 VACIADO ................................................................................. 63 DESMONTAJE ......................................................................... 63 PURGA ACEITE MEZCLADOR................................................ 65 INSTALACION DE REFRIGERACION ............................. 67 LIQUIDO REFRIGERANTE ............................................... 67 CONTROL Y RELLENO LIQUIDO REFRIGERANTE ........ 69 DESCARGA INSTALACION DE REFRIGERACION ................ 71 SUSTITUCION LIQUIDO REFRIGERANTE ............................ 73 PURGA INSTALACION DE REFRIGERACION ................. 75 DESMONTAJE RADIADOR .............................................. 77 DESMONTAJE BOMBA LIQUIDO REFRIGERANTE ........ 77 DESMONTAJE DEPOSITO DE EXPANSION ................... 79 DESMONTAJE TERMISTOR TEMPERATURA LIQUIDO REFRIGERANTE ................... 79 BOMBILLAS ............................................................................ 81 FARO DELANTERO ................................................................ 81 REGULACION VERTICAL HAZ LUMINOSO............................ 81 REGULACION HORIZONTAL HAZ LUMINOSO (países donde está previsto) .................................................... 83 SUSTITUCION BOMBILLAS FARO DELANTERO ................... 85 SUSTITUCION BOMBILLAS FARO DELANTERO .................................... 85 DESMONTAJE FARO DELANTERO........................................ 87 1 1 1 AC%-_ 3 3 3 1 1 1 1 1 1 C%-_ 13 3 3 SR 50 FRONT DIRECTION INDICATOR ............................................ 87 CHANGING THE BULBS ......................................................... 87 REMOVING THE WHOLE INDICATOR ................................... 87 REAR DIRECTION INDICATOR .............................................. 89 CHANGING THE BULBS ......................................................... 89 REMOVING THE COMPLETE DIRECTION INDICATOR ......... 89 REAR LIGHT ........................................................................... 91 CHANGING THE BULBS ......................................................... 91 REMOVING THE REAR LIGHT ............................................... 91 CHANGING THE NUMBER PLATE BULB ............... 93 DASHBOARD .......................................................................... 93 CHANGING THE BULBS ......................................................... 93 REMOVING THE COMPLETE DASHBOARD .......................... 95 REMOVING THE DASHBOARD GLASS .................................. 95 ELECTRIC CONTROL SUPPORTS ........................................ 95 REMOVING THE HANDLEBAR CONTROLS........................... 95 BRAKE FLUID - recommendations ....................................... 97 DISC BRAKES ...................................................................... 101 CHECKING ............................................................................ 101 TOPPING UP ......................................................................... 103 REAR DRUM BRAKE ..................................................... 105 ADJUSTING THE BRAKE ...................................................... 105 FRONT WHEEL ..................................................................... 107 DISASSEMBLY ...................................................................... 107 CHECKING ............................................................................ 107 REASSEMBLY ....................................................................... 109 REAR WHEEL ....................................................................... 111 DISASSEMBLY ...................................................................... 111 GREASING THE REAR BRAKE CAM PIN .................. 113 BRAKE CALIPERS ............................................................... 115 REMOVING THE FRONT BRAKE CALIPER .......................... 115 REMOVING THE REAR BRAKE CALIPER ............................ 117 BRAKE PADS ....................................................................... 119 CHECKING WEAR OF THE BRAKE PADS ........................... 119 CHANGING THE BRAKE PADS ............................................ 119 BLEEDING THE BRAKING SYSTEM .................................... 121 BRAKE SHOES .............................................................. 123 CHECKING THE SHOE WEAR ....................................... 123 CHANGING THE SHOES ............................................... 123 TRANSMISSION .................................................................... 125 CHECKING THE TRANSMISSION OIL LEVEL ...................... 125 CHANGING THE TRANSMISSION OIL ................................. 127 CHECKING THE ENGINE FULCRUM AXIS .......................... 129 WHEELS / TYRES ................................................................. 129 INSPECTING THE WHEELS ................................................. 129 TYRES ................................................................................... 131 TYRE PRESSURE ................................................................. 133 STEERING TUBE .................................................................. 135 CHECKING THE BEARING SLACK ....................................... 135 ADJUSTING THE BEARING SLACK ..................................... 135 REMOVING THE STEERING TUBE BEARINGS ................... 137 FRONT FORK ........................................................................ 139 CHECKING THE FORK OIL LEVEL ....................................... 139 REMOVING THE COMPLETE FORK..................................... 139 REMOVING THE TUBE/WHEEL-HOLDER UNIT (with installed fork) ......... 141 DISASSEMBLING THE TUBE/WHEEL-HOLDER .................. 141 REAR SUSPENSION ............................................................. 143 REMOVAL ............................................................................. 143 EXHAUST SILENCER ........................................................... 143 DISASSEMBLY ...................................................................... 143 AIR CLEANER ....................................................................... 145 REMOVAL ............................................................................. 145 CLEANING THE AIR FILTER ................................................. 145 IGNITION SWITCH / STEERING LOCK ................................ 145 REMOVAL ............................................................................. 145 BATTERY .............................................................................. 147 CHECKING THE ELECTROLYTE LEVEL .............................. 149 RECHARGING THE BATTERY .............................................. 149 LONG INACTIVITY OF THE BATTERY ................................. 151 ENGINE ................................................................................. 153 REMOVING THE ENGINE FROM THE FRAME..................... 153 ENGINE (liquid-cooled version) ................................... 157 REMOVING THE ENGINE FROM THE FRAME .................... 157 ENGINE CONNECTION LINK ............................................... 159 REMOVAL ............................................................................. 159 ELECTRICAL SYSTEM ......................................................... 163 CONTENTS ........................................................................... 163 4!",% /& #/.4%.43 FOREWORD...............................................................................7 SAFETY WARNINGS .................................................................7 GENERAL SAFETY RULES.......................................................7 CARBON MONOXIDE ..................................................................7 GASOLINE ...................................................................................7 HOT COMPONENTS....................................................................7 USED ENGINE OIL ......................................................................8 BRAKE FLUID ..............................................................................8 COOLANT ....................................................................................8 BATTERY HYDROGEN GAS AND ELECTROLYTE ...................8 PRECAUTIONS AND GENERAL INFORMATIONS.....................8 HOW TO USE YOUR SERVICE AND REPAIR MANUAL ..................................9 ELECTRICAL CONNECTORS ...................................................11 GENERAL SPECIFICATIONS OF THE DRIVING TORQUES ....................................................11 TECHNICAL DATA ..................................................................15 DRIVING TORQUE ...................................................................17 LUBRICANT CHART ................................................................19 TROUBLESHOOTING ..............................................................26 REGULAR SERVICE INTERVALS CHART..............................29 IDENTIFICATION DATA...........................................................31 ARRANGEMENT OF THE MAIN ELEMENTS ..........................31 ARRANGEMENT OF THE INSTRUMENTS..............................33 INSTRUMENTS AND INDICATORS .........................................33 CHECKING THE OPERATION OF THE ACCELERATOR CONTROL .......................................33 IDLING ADJUSTMENT .............................................................35 ADJUSTING THE ACCELERATOR CONTROL ........................37 FAIRINGS.................................................................................39 REMOVING THE PASSENGER GRAB HANDLE .....................39 REMOVING THE NUMBER PLATE-HOLDER ..........................39 REMOVING THE LOWER GUARD OF THE REAR PART OF THE FAIRING ..................................39 REMOVING THE REAR PART OF THE FAIRING ....................39 REMOVING THE RIGHT AND LEFT INSPECTION COVERS ..41 REMOVING THE LOWER SHIELD COVER .............................41 REMOVING THE FRONT INNER SHIELD ................................43 REMOVING THE FRONT COVER ............................................43 REMOVING THE FOOTBOARD ...............................................45 REMOVING THE FRONT MUDGUARD....................................45 REMOVING THE REAR-VIEW MIRRORS ................................47 REMOVING THE HANDLEBAR COVER ..................................47 REMOVING THE CRASH HELMET COMPARTMENT complete with saddle.................................................................49 REMOVING THE FRONT SHIELD COVER ..............................49 REMOVING THE REAR MUDGUARD ......................................51 REMOVING THE COVER OF THE REAR PART OF THE FAIRING ..................................51 REMOVING THE FRONT OUTER SHIELD ..............................53 REMOVING THE LOWER SHIELD ...........................................53 FUEL TANK .............................................................................55 FUEL ........................................................................................55 CHECKING THE VACUUM TAP ...............................................57 DRAINING THE FUEL TANK ....................................................57 REMOVING THE VACUUM TAP ..............................................59 CHECKING THE FUEL LEVEL GAUGE UNIT ..........................61 REMOVING THE FUEL LEVEL GAUGE UNIT ..........................61 REMOVING THE COMPLETE FUEL TANK ..............................61 2 STROKE OIL TANK ..............................................................63 CHECKING ...............................................................................63 DRAINING ................................................................................63 REMOVAL ................................................................................63 BLEEDING THE 2 STROKE OIL TANK ....................................65 COOLING SYSTEM ..........................................................67 COOLANT .........................................................................67 CHECKING THE COOLANT LEVEL ............................................................69 AND TOPPING UP DRAINING THE COOLANT SYSTEM ......................................71 CHANGING THE COOLANT ....................................................73 BLEEDING THE COOLANT SYSTEM ...............................75 REMOVING THE RADIATOR ............................................77 REMOVING THE COOLANT PUMP ..................................77 REMOVING THE EXPANSION TANK ...............................79 REMOVING THE COOLANT TEMPERATURE TERMISTOR ................79 BULBS .....................................................................................81 HEADLIGHT BULBS ................................................................81 ADJUSTING THE VERTICAL HEADLIGHT BEAM ...................81 HORIZONTAL ADJUSTMENT OF THE HEADLIGHT BEAM (for the countries where required)..............................................83 CHANGING THE HEADLIGHT BULBS .....................................85 CHANGING THE HEADLIGHT BULBS ........85 REMOVING THE HEADLIGHT .................................................87 1 AC%-_ 3 3 3 1 1 1 1 1 1 1 1 C%-_ 14 3 3 SR 50 #!2!44%2)34)#(% 4%#.)#(% &)#(! 4%#.)#! 4%#(.)#!, $!4! DIMENSIONI / MEDIDAS / DIMENSIONS Lunghezza max. / Longitud máx. / Max. length 1790 mm Lunghezza max (con prolunga parafango posteriore) / Longitud máx. (con prolongación guardabarros trasero) / Max. length (with rear mudguard extension) 1880 mm Larghezza max. / Anchura máx. / Max. width 720 mm Altezza max. al cupolino / Altura máx. (hasta la cúpula). / Max. height (front part of the fairing included) Altezza alla sella / Altura hasta el sillín / Seat height 1160 mm 830 mm Interasse / Distancia entre los ejes / Distance between centres 1250 mm Altezza libera minima dal suolo / Altura libre mínima del suelo / hMin. ground clearance 160 mm Peso in ordine di marcia / Peso en orden de marcha / Weight ready for starting 94 kg Peso in ordine di marcia Peso en orden de marcha 99 kg 1/ 1 / Weight ready for starting 1 MOTORE / MOTOR / ENGINE Marca / Marca / Type MINARELLI - 2 tempi - ad accensione comandata / MINARELLI - explosión 2 tiempos / 2-stroke with controlled ignition Numero cilindri / Número cilindros / Number of cylinders Monocilindrico orizzontale / Monocilíndrico horizontal / 1 Cilindrata complessiva / Cilindrada total / Total displacement 49,26 cm # Alesaggio - corsa / Diámetro - carrera / Bore - stroke 40 mm - 39,2 mm Rapporto di compressione / Relación de compresión / Compression ratio 12,5 ± 0,5:1 Avviamento / Arranque / Starting elettrico + kick starter / eléctrico + pedal de arranque / electric + kick starter Frizione / Embrague / Clutch centrifuga / centrífugo / centrifugal Cambio / Cambio / Change gear variatore continuo automatico / variador continuo automático / automatic stepless variator Raffreddamento / Refrigeración / Cooling ad aria forzata / por aire forzado / with forced air Raffreddamento a liquido / por líquido / liquid cooled 1 / Refrigeración 1 / Cooling 1 CAPACITÀ / CAPACIDAD / CAPACITY 8L Carburante (inclusa riserva) / Combustible (reserva incluida) / Fuel (reserve included) 2L Riserva carburante / Reserva combustible / Fuel reserve Olio trasmissione / Aceite transmisión / Transmission oil 110 cm# Olio miscelatore (inclusa riserva) / Aceite mezclador (reserva incluida) / 2 stroke oil (reserve included) Riserva olio miscelatore / Reserva aceite mezclador / 2 stroke oil reserve Liquido refrigerante Líquido refrigerante Coolant 1 1/ 1/ Posti / Asientos / Seats 1,6 L 0,5 L 1,2 L (50% antigelo + 50% acqua) / 1,2 L (50% anticongelante + 50% agua) / 1,2 L (50% antifreeze + 50% water) # 1 (2 nei paesi dove è previsto il trasporto del passeggero) / # 1 (2 en los países donde está previsto el transporte del pasajero) (2) / 1 (2 in the countries where this is allowed) Max carico veicolo (pilota + bagaglio) / Máx. carga vehículo (piloto + equipaje)) 105 kg / Vehicle max. load (driver + luggage)) 180 kg (nei paesi dove è previsto il trasporto del passeggero) / (en los países donde está previsto el transporte del pasajero) / (in the countries where this is allowed) Max carico veicolo (pilota + passeggero + bagaglio) / Máx. carga vehículo (piloto + pasajero + equipaje)/ Vehicle max. load (driver+passenger+luggage) TRASMISSIONE / TRANSMISION / TRANSMISSION Variatore / Variador / Speed change gear continuo automatico / continuo automático / automatic and stepless Primaria / Primaria / Primary a cinghia trapezoidale / por correa trapezoidal / V-belt Rapporti / Relaciones / Ratios minimo per cambio continuo: 2,6 massimo per cambio continuo: 0,862 / mínima para cambio continuo: 2,6 máxima para cambio continuo: 0,862 / minimum for stepless change: 2.6 maximum for stepless change: 0.862 Secondaria / Secundaria / Secondary a ingranaggi / por engranajes / with gears 15 SR 50 CARBURATORE / CARBURADOR / CARBURETTOR Modello / Modelo / Model – standard / estándar / standard: Dell’Orto PHBN 12 – in alternativa / alternativo / alternative: TEI KEI TK3AA Diffusore / Difusor / Choke tube Ø12 mm ALIMENTAZIONE / ALIMENTACION / FUEL SUPPLY Carburante / Combustible / Fuel U Carburante U U benzina super DIN 51600 (4 Stars ), numero di ottano minimo 98 (N.O.R.M.) e 88 (N.O.M.M.) / gasolina super DIN 51 600 (4 Stars ), número octano mínimo 98 (N.O.R.M.) y 88 (N.O.M.M.) / premium grade petrol (4 Stars ) according to the DIN 51600 standard, min. O.N. 98 (N.O.R.M.) and 88 (N.O.M.M.) 2 / Combustible 2/ Fuel 2 benzina super senza piombo DIN 51607, numero di ottano minimo 95 (N.O.R.M.) e 85 (N.O.M.M.) / gasolina super sin plomo DIN 51 607, número octano mínimo 95 (N.O.R.M) y 85 (N.O.M.M.) / unleaded petrol according to the DIN 51607 standard, min. O.N. 95 (N.O.R.M.) and 85 (N.O.M.M.) TELAIO / BASTIDOR / FRAME Tipo / Tipo / Type monotrave sdoppiato a doppia culla / monoviga desdoblada de doble cuna / one-beam, split in two cradles SOSPENSIONI / SUSPENSIONES / SUSPENSIONS Anteriore / Delantera / Front forcella telescopica a funzionamento idraulico / horquilla telescópica con funcionamiento hidráulico / hydraulically operated telescopic fork Escursione / Carrera / Stroke 90 mm Posteriore / Trasera / Rear monoammortizzatore idraulico / monoamortiguador hidráulico / hydraulic mono-shock absorber Escursione / Carrera / Stroke 75 mm FRENI / FRENOS / BRAKES Anteriore / Delantero / Front Posteriore a disco Ø190 mm con trasmissione idraulica / de disco Ø 190 mm con transmisión hidráulica / disc brake, Ø190 mm with hydraulic transmission 3 / Trasero 3/ Rear 3 a tamburo Ø110 con trasmissione meccanica / de tambor Ø 110 mm con transmisión mecánica / drum brake, Ø110 mm, with mechanic transmission Posteriore / Trasero / Rear a disco Ø190 mm con trasmissione idraulica / de disco Ø 190 mm con transmisión hidráulica / disc brake, Ø190 mm with hydraulic transmission RUOTE / RUEDAS / WHEELS CERCHI / LLANTAS / RIMS in lega / de aleación / alloy Anteriore / Delantera / Front 3,50 x 13" Posteriore / Trasera / Rear 3,50 x 13" PNEUMATICI / NEUMATICOS / TYRES Tubeless Anteriore / Delantero / Front 130/60 - 13" - 53J Posteriore / Trasero / Rear 130/60 - 13" - 53J PRESSIONE DI GONFIAGGIO STANDARD / PRESION DE HINCHADO ESTANDARD / STANDARD INFLATION PRESSURE Anteriore / Delantero / Front 170 kPa (1,7 bar) Posteriore / Trasero / Rear 190 kPa (1,9 bar) PRESSIONE DI GONFIAGGIO CON PASSEGGERO (nei paesi dove è previsto il trasporto del passeggero) / PRESION DE HINCHADO CON PASAJERO (donde está previsto el transporte del pasajero) / INFLATION PRESSURE WITH PASSENGER (where drive with passenger is allowed) Anteriore / Delantero / Front 170 kPa (1,7 bar) Posteriore / Trasero / Rear 210 kPa (2,1 bar) ACCENSIONE / ENCENDIDO / IGNITION Tipo / Tipo / Type C.D.I. a scarica capacitiva / C.D.I. / C.D.I. Anticipo di accensione / Adelanto de encendido / Spark advance 14° ± 2° prima del P.M.S. / 14°± 2∞° antes P.M.S. / 14° ± 2° before T.D.C. Candela standard / Bujía estándard / Standard spark plug NGK BR7 HS Candela standard NGK BR8 HS 1 / Bujía estándard 1/ Standard spark plug 1 Distanza elettrodi candela / Distancia electrodos bujía / Spark plug gap 0,5 ÷ 0,6 mm # giri del motore al regime minimo / # revoluciones del motor al ralentí / Engine idle rpm 1800 ± 100 giri/min / 1800 ± 100 rpm / 1800 ± 100 rpm 16 SR 50 IMPIANTO ELETTRICO / INSTALACION ELECTRICA / ELECTRIC SYSTEM Batteria / Batería / Battery 12 V - 4 Ah Fusibile / Fusible / Fuse 7,5 A Generatore (a magnete permanente) / Generador (de magneto permanente) / Generator (with permanent magnet) 12 V - 85 W Lampadine luce anabbagliante / Bombillas luz de cruce / Low beam bulbs 12 V - 15 W Lampadina luce anabbagliante/abbagliante / Bombilla luz de cruce/luz larga / Low/high beam bulb C%-_ C%-_ Lampadina luce di posizione anteriore / Bombilla luz de posición delantera / Front parking light bulb 12 V - 35/35 W 12 V - 3 W Lampadine indicatori di direzione / Bombilla indicadores de dirección / Direction indicator bulbs 12 V - 10 W Lampadine luce di posizione posteriore / Bombilla luz de posición trasera / Rear parking light bulbs 12 V - 5 W Lampadine luce di arresto posteriore / Bombillas luz de parada trasera / Rear stoplight bulbs 12 V - 10 W Lampadine luce targa / Bombilla luz matrícula / Number plate bulb 12 V - 3 W AC%-_ Lampadine illuminazione cruscotto / Bombillas alumbrado sapilcadero / Dashboard bulbs 12 V - 1,2 W Spia luce anabbagliante / Luz testigo luz de cruce / Low beam warning light 12 V - 1,2 W Spia luce abbagliante / Luz testigo luz larga / High beam warning light 12 V - 1,2 W C%-_ Spia indicatore di direzione / Luz testigo indicador de dirección / Direction indicator warning light 12 V - 2 W Spia riserva olio miscelatore / Luz indicadora reserva aceite mezclador / 2 stroke oil reserve warning light 12 V - 2 W Spia riserva carburante / Luz testigo reserva combustible / Low fuel warning light 12 V - 1,2 W #/00)% $) 3%22!'')/ 0!2%3 $% !02)%4% $2)6).' 4/215% .M KGM Dado ruota anteriore / Tuerca rueda delantera / Front wheel pin nut 50 5 Dado ruota posteriore / Tuerca rueda trasera / Rear wheel nut 110 11 Vite fissaggio bielletta-telaio / Tornillo de fijación biela-bastidor / Connection link-frame fastening screw 50 5 Dado perno silent-block / Tuerca perno silent block / Silent-block pin nut 42 4,2 Dado fissaggio motore-bielletta / Tuerca fijación motor-biela / Engine-connection link fastening nut 50 5 Vite fissaggio manubrio / Tornillo fijación manillar / Handlebar fastening screw 50 5 2,5 Vite fissaggio pinza freno anteriore / Tornillo fijación pinza freno delantero / Front brake caliper fastening screw 25 Vite fissaggio pinza freno posteriore / Tornillo fijación pinza freno trasero / Rear brake caliper fastening screw 27 2,7 Vite serraggio morsetto forcella - perno ruota anteriore / Tornillo apretamiento abrazadera horquilla - perno rueda delantera / front wheel fork - pin clamp fastening screw 12 1,2 4 ÷ 12 0,4÷1,2 Vite superiore fissaggio ammortizzatore / Tornillo superior fijación amortiguador / Shock absorber fastening upper screw 50 5 Vite inferiore fissaggio ammortizzatore / Tornillo inferior fijación amortiguador / Shock absorber fastening lower screw 25 2,5 Vite fissaggio marmitta-cilindro / Tuerca fijación silenciador de escape-cilindro / Silencer-cylinder fastening screw 12 1,2 Vite fissaggio marmitta-motore / Tuerca fijación silenciador de escape-motor / Silencer-engine fastening screw 25 2,5 Valvola di sfiato pinza freno / Válvula de purga pinza freno / Brake caliper air valve 17 SR 50 4!"%,,! ,5"2)&)#!.4) 0 Olio miscelatore (consigliato): 0 GREEN HIT. Olio trasmissione (consigliato): F.C., SAE 75W - 90. In alternativa all’olio consigliato, si possono utilizzare olî di marca con prestazioni conformi o superiori alle specifiche A.P.I. GL-4. In alternativa all’olio consigliato, utilizzare olî di marca con prestazioni conformi o superiori alle specifiche ISO-L-ETC++, A.P.I. TC++. Olio forcella (consigliato): olio per forcelle F.A. 5W oppure F.A. 20W. F.A. 5W e da F.A. 20W, si posQualora si intendesse disporre di un comportamento intermedio tra quelli offerti da sono miscelare i prodotti come sotto indicato: SAE 10W F.A. 5W 67% del volume, + F.A. 20W 33% del volume F.A. 5W 33% del volume, + F.A. 20W 67% del volume SAE 15W 0 0 0 0 0 0 0 0 0 Cuscinetti e altri punti di lubrificazione (consigliato): AUTOGREASE MP. In alternativa al prodotto consigliato, utilizzare grasso di marca per cuscinetti volventi, campo di temperatura utile -30 °C…+140 °C, punto di gocciolamento 150 °C…230 °C, elevata protezione anticorrosiva, buona resistenza all’acqua e all’ossidazione. Protezione poli batteria: Grasso neutro oppure vaselina. Grasso spray per catene (consigliato): CHAIN SPRAY. 0 Liquido per freni (consigliato): 0 F.F., DOT 5 (Compatibile DOT 4). aPERICOLO Impiegare solo liquido freni nuovo. Liquido refrigerante motore (consigliato) 1: 0 ECOBLU -40 °C. aPERICOLO Impiegare solo antigelo e anticorrosivo senza nitrito, che assicuri una protezione almeno ai -35 °C. 4!",! ,5"2)#!.4%3 0 Aceite transmisión (aconsejado): F.C., SAE 75W - 90. Alternativamente al aceite aconsejado pueden utilizarse aceites de marca con prestaciones conformes o superiores a las especificaciones A.P.I. GL -4. 0 GREEN HIT. Aceite mezclador (aconsejado): Alternativamente al aceite aconsejado pueden utilizarse aceites de marca con prestaciones conformes o superiores a las especificaciones ISO-L ETC ++, A.P.I. TC ++. 0 0 F.A. 5W o F.A. 20W. Aceite horquilla (aconsejado): aceite para horquillas F.A. 5W y por En caso de que se quiera utilizar una conducta intermedia entre las ofrecidas por mezclarse los productos según lo indicado a continuación: SAE 10W F.A. 5W 67% del volumen, + F.A. 20W 33% del volumen. SAE 15W F.A. 5W 33% del volumen, + F.A. 20W 67% del volumen. 0 0 0 0 0 0 F.A. 20W, pueden 0 Cojinetes y otros puntos de lubricación (aconsejado): AUTOGREASE MP. Alternativamente al producto aconsejado, utilice grasa de marca para cojinetes rodantes, campo de temperatura útil -30 °C…+ 140 °C, punto de goteo 150 °C…230 °C, elevada protección antioxidante, buena resistencia al agua y a la oxidación. Protección polos batería: Grasa neutra o vaselina. Grasa spray para cadenas (aconsejada): Líquido para frenos (aconsejado): 0 CHAIN SPRAY. 0 F.F., DOT 5 (Compatible DOT 4). aPELIGRO Utilice sólo líquido frenos nuevo. Líquido refrigerante del motor (aconsejado) 1: 0 ECOBLU -40 °C. aPELIGRO Utilice sólo anticongelante y antioxidante sin nitrito que garantice una protección por lo menos a los -35 °C. 18 SR 50 ,5"2)#!.4 #(!24 0 Transmission oil (recommended): F.C., SAE 75W - 90. As an alternative to the recommended oil, it is possible to use high-quality oils with characteristics in compliance with or superior to the A.P.I. GL4 specifications. 0 2 stroke oil (recommended): GREEN HIT. Use high-quality oils with characteristics in compliance with or superior to the ISO-L-ETC++, A.P.I. TC++ specifications. 0 0 Fork oil (recommended): F.A. 5W or F.A. 20W fork oil. If you need an oil with intermediate characteristics in comparison with the two recommended products, these can be mixed as indicated below: F.A. 5W 67% of the volume, + F.A. 20W 33% of the volume. SAE 10W SAE 15W F.A. 5W 33% of the volume, + F.A. 20W 67% of the volume. 0 0 0 0 0 Bearings and other lubrication points (recommended): AUTOGREASE MP. As an alternative to the recommended product, use high-quality grease for rolling bearings, working temperature range -30 °C…+140 °C, dripping point 150 °C…230 °C, high protection against corrosion, good to water and oxidation resistance. Protection of the battery poles: neutral grease or vaseline. Spray grease for chains (recommended): Brake fluid (recommended): 0 CHAIN SPRAY. 0 F.F., DOT 5 (DOT 4 compatible). aWARNING Use new brake fluid only. Engine coolant (recommended) 1: 0 ECOBLU -40 °C. aWARNING Use only antifreeze and anticorrosive without nitrite, ensuring protection at -35 °C at least. 19 SR 50 2)#%2#! '5!34) ), -/4/2% ./. 3) !66)! / 3) !66)! #/. $)&&)#/,4 #!53! 2)-%$)/ 1.1 Il carburante non arriva al carburatore – Manca il carburante nel serbatoio. – Tubo del carburante o filtro del carburatore intasati. – Valvola a spillo intasata o bloccata. – Sfiato tappo serbatoio intasato. – Cattivo funzionamento rubinetto carburante. – Tubo della depressione danneggiato. 1.2 Candela umida. – Sfiato vaschetta carburatore intasato. – Minimo grasso. – Elemento del filtro dell’aria intasato. 1.3 La scintilla della candela non scocca oppure è debole. – Candela difettosa. – Cavo della candela difettoso. – Accensione difettosa o in corto circuito. – Contatti di accoppiamento o terminali allentati o difettosi. 1.4 Perdita di compressione motore. – Segmenti del pistone usurati o incollati. – Guarnizione della testa danneggiata. 1.5 Il motore si avvia ma si ferma subito. – Fase di accensione impropria. – Collettore aspirazione rotto. – Carburatore difettoso. – Controllare il livello del carburante nel serbatoio. – Pulire o sostituire il tubo e il filtro. – – – – Pulire o sbloccare Pulire lo sfiato Sostituire. Sostituire. – Pulire lo sfiato. – Regolare il regime minimo. – Pulire il filtro. – – – – Sostituire. Controllare ed eventualmente sostituire. Controllare. Controllare, serrare ed eventualmente sostituire. – Sostituire. – Sostituire. – Ripetere la fase. – Controllare ed eventualmente sostituire. – Controllare ed eventualmente sostituire. !, -/4/2% -!.#! 0/4%.:! #!53! 2)-%$)/ 2.1 La ruota non gira liberamente. – Attrito tra ruota e freno. 2.2 2.3 2.4 2.5 – Controllare l’impianto frenante e l’allineamento della ruota. – Sostituire. – Cuscinetto della ruota usurato o danneggiato. Pressione dei pneumatici troppo bassa. – Pneumatico bucato. – Valvola del pneumatico difettosa. La velocità non aumenta sufficientemente. – Filtro aria intasato. – Flusso del carburatore limitato. – Silenziatore intasato. Carburatore intasato. – Frequenza del servizio di manutenzione insufficiente. Candela sporca. – Frequenza del servizio di manutenzione della candela insufficiente. – Uso di candela con grado termico non corretto. – Riparare ed eventualmente sostituire. – Riparare ed eventualmente sostituire. – Pulire. – Pulire il carburatore. – Pulire. – Provvedere alla manutenzione più frequentemente. – Pulire più frequentemente. Controllare la distanza degli elettrodi. – Sostituire con una con grado termico appropriato. 2.6 Il motore si surriscalda. – Depositi eccessivi nella camera di combustione. – Qualità del carburante. – Miscela carburante-aria troppo povera. 2.7 Il motore è rumoroso (battito interno). – Fasce elastiche usurate. – Miscela carburante-aria troppo povera. – Depositi eccessivi nella camera di combustione. – Fase di accensione troppo anticipata. – Pulire la camera di combustione – Usare esclusivamente carburante consigliato – Regolare la carburazione – – – – 20 Sostituire. Usare carburante consigliato. Pulire la camera di combustione. Regolare. SR 50 &5.:)/.!-%.4/ )22%'/,!2% ! "!33! 6%,/#)4 #!53! 2)-%$)/ 3.1 Fase di accensione non corretta. 3.2 Regolazione del carburatore non corretta. – Miscela carburante-aria troppo povera. – Miscela carburante-aria troppo ricca. 3.3 Infiltrazioni d’aria nel collettore aspirazione carburante. – Carburatore allentato. – Collettore aspirazione carburante difettoso. 3.4 Scintilla della candela debole o intermittente. – Statore o bobina difettosi. – Controllare la fase di accensione. – Correggere la miscelazione. – Correggere la miscelazione. – Fissare bene. – Sostituire. – Sostituire. &5.:)/.!-%.4/ )22%'/,!2% !$ !,4! 6%,/#)4 #!53! 2)-%$)/ 4.1 Flusso del carburante limitato. – Mancanza carburante. – Tubo del carburante intasato. – Filtro del carburante intasato. – Cattivo funzionamento del rubinetto carburante. – Tubo della depressione danneggiato. 4.2 Getto intasato. – – – – – – Rifornire il serbatoio di carburante. Pulire o sostituire. Pulire o sostituire. Sostituire. Sostituire. Pulire. 3#!23! -!./62!"),)4 #!53! 2)-%$)/ 5.1 Sterzo pesante. – Errata regolazione della ghiera di sterzo, gioco insufficiente (eccessivo precarico). – Cuscinetti della testa dello sterzo danneggiati. – Cannotto della forcella piegato. 5.2 Una delle due ruote sfarfalla. – Gioco eccessivo dei cuscinetti della ruota anteriore. – Cerchio deformato. – Cuscinetti del perno del motore eccessivamente usurati. – Telaio deformato. 5.3 Il veicolo tira da una parte. – Steli della forcella deformati. – Bielletta attacco motore deformata. – Telaio deformato. 5.4 Il veicolo vibra. – Controllare usura silent-block bielletta. – Controllare molla fine corsa bielletta. – Allentare e regolare. – Sostituire. – Sostituire. – Sostituire cuscinetti. – Sostituire. – Sostituire. – Sostituire. – Sostituire. – Sostituire. – Sostituire. – Sostituire. – Sostituire. 21 SR 50 ), -/4/2% 3) 3522)3#!,$! 1 #!53! 2)-%$)/ 6.1 Impianto di raffreddamento difettoso. – Liquido refrigerante insufficiente. – Pacco lamelle del radiatore ostruito da sporcizia o materiale estraneo. – Passaggi liquido refrigerante ostruiti. – Aria nel circuito di raffreddamento. – Pompa liquido refrigerante difettosa. – Impiego di liquido refrigerante improprio. – Aggiungere liquido refrigerante. – Pulire. – – – – Pulire. Spurgare. Sostituire. Cambiare il liquido. ), -/4/2% ./. 2)%3#% ! %.42!2% ). 4%-0%2!452! #!53! 1 2)-%$)/ 7.1 Condizioni ambientali particolari. – Temperatura ambiente estremamente fredda. 7.2 Impianto di raffreddamento difettoso. – Termostato bloccato in posizione aperta. – Montare schermo protettivo sul radiatore. – Pulire o sostituire. 22 SR 50 )$%.4)&)#!#)/. $% ,!3 !6%2)!3 %, -/4/2 ./ !22!.#! / !22!.#! #/. $)&)#5,4!$ #!53! 2%-%$)/ 1.1 El combustible no llega al carburador. – Falta el combustible en el depósito. – Tubo del combustible o filtro del carburador atascados. – Válvula de aguja atascada o bloqueada. – Purgador tapón depósito atascado. – Mal funcionamiento grifo combustible. – Tubo de la depresión dañado. 1.2 Bujía húmeda. – Purgador recipiente carburador atascado. – Mezcla de ralentí demasiado rica. – Elemento del filtro del aire atascado. 1.3 La chispa de la bujía no se produce o es débil. – Bujía defectuosa. – Cable de la bujía defectuoso. – Encendido defectuoso o en cortocircuito. – Contactos de acoplamiento o terminales aflojados o defectuosos. 1.4 Pérdida de compresión motor. – Segmentos del émbolo desgastados o pegados. – Junta de la culata dañada. 1.5 El motor arranca pero se para enseguida. – Fase de encendido incorrecta. – Colector aspiración roto. – Carburador defectuoso. – Controle el nivel del combustible en el depósito. – Limpie o sustituya el tubo y el filtro. – – – – Limpie o desbloquee. Limpie el purgador. Sustituya. Sustituya. – Limpie el purgador. – Regule el ralentí. – Limpie el filtro. – – – – Sustituya. Controle y eventualmente sustituya. Controle y repare. Controle, apriete y eventualmente sustituya. – Sustituya. – Sustituya. – Repita la fase. – Controle y eventualmente sustituya. – Controle y eventualmente sustituya. &!,4! 0/4%.#)! !, -/4/2 #!53! 2%-%$)/ 2.1 La rueda no gira libremente. – Roce entre rueda y freno. – Controle la instalación de frenado y la alineación de la rueda. – Sustituya. – Cojinete de la rueda desgastado o dañado. 2.2 Presión de los neumáticos demasiado baja. – Neumático pinchado. – Válvula del neumático defectuosa. 2.3 La velocidad no aumenta suficientemente. – Filtro aire atascado. – Flujo del carburador limitado. – Silenciador atascado. 2.4 Carburador atascado. – Repare y eventualmente sustituya. – Repare y eventualmente sustituya. – Limpie. – Limpie el carburador. – Limpie. 23 SR 50 #!53! 2%-%$)/ 2.5 Bujía sucia. – Escasa frecuencia del servicio de mantenimiento de la bujía. – Uso de bujía con grado térmico incorrecto. 2.6 El motor se sobrecalienta. – Incrustaciones excesivas en la cámara de combustión. – Calidad del combustible. – Mezcla combustible-aire demasiado pobre. 2.7 El motor es ruidoso (sacudida interior). – Segmentos de émbolo desgastados. – Mezcla combustible-aire demasiado pobre. – Incrustaciones excesivas en la cámara de combustión. – Fase de encendido demasiado anticipada. – Limpié más frecuentemente. Controle la distancia de los electrodos. – Sustituya con otra con grado térmico adecuado. – Limpie la cámara de combustión. – Use exclusivamente combustible aconsejado. – Regule la carburación. – Sustituya. – Use combustible aconsejado. – Limpie la cámara de combustión. – Regule. &5.#)/.!-)%.4/ )22%'5,!2 ! "!*! 6%,/#)$!$ #!53! 2%-%$)/ – Controle la fase de encendido. 3.1 Fase de encendido incorrecta. 3.2 Regulación del carburador incorrecta. – Mezcla combustible-aire demasiado pobre. – Corrija la mezcla. – Mezcla combustible-aire demasiado rica. – Corrija la mezcla. 3.3 Infiltraciones de aire en el colector aspiración combustible. – Carburador aflojado. – Fije bien. – Colector aspiración combustible defectuoso. – Sustituya. 3.4 Chispa de la bujía débil o intermitente. – Estator o bobina defectuosos. – Sustituya. &5.#)/.!-)%.4/ )22%'5,!2 ! 6%,/#)$!$ %,%6!$! #!53! 2%-%$)/ 4.1 Flujo del combustible limitado. – Falta de combustible. – Tubo del combustible atascado. – Filtro del combustible atascado. – Mal funcionamiento del grifo combustible. – Tubo de vacío dañado. 4.2 Surtidor atascado. – – – – – – 24 Llene el depósito con combustible. Limpie o sustituya. Limpie o sustituya. Sustituya. Sustituya. Limpie. SR 50 %3#!3! -!.)/"2!"),)$!$ #!53! 2%-%$)/ 5.1 Dirección pesada. – Incorrecta regulación de la tuerca de dirección, juego insuficiente (precarga excesiva). – Cojinetes del pivote de la dirección dañados. – Pivote de la horquilla doblado. 5.2 Una de las dos ruedas oscila. – Juego excesivo de los cojinetes de la rueda delantera. – Llanta deformada. – Cojinetes del eje de la rueda trasera excesivamente desgastados. – Bastidor deformado. 5.3 El vehículo tira hacia un lado. – Barras de la horquilla deformadas. – Elemento de conexión enganche motor deformado. – Bastidor deformado. 5.4 El vehículo vibra. – Controle desgaste silent-block elemento de conexión. – Controle el muelle de tope del elemento de conexión. %, -/4/2 3% 3/"2%#!,)%.4! – Afloje y regule. – Sustituya. – Sustituya. – Sustituya cojinetes. – Sustituya. – Sustituya. – Sustituya. – Sustituya. – Sustituya. – Sustituya. – Sustituya. – Sustituya. 1 #!53! 2%-%$)/ 6.1 Instalación de refrigeración defectuosa. – Líquido refrigerante insuficiente. – Grupo láminas del radiador atascado por suciedad o por material extraño. – Pasajes líquido refrigerante atascados. – Aire en el circuito de refrigeración. – Bomba líquido refrigerante defectuosa. – Uso de líquido refrigerante no adecuado. – Añada líquido refrigerante. – Limpie. – – – – Limpie. Purgue. Sustituya. Cambie el liquido. %, -/4/2 ./ #/.3)'5% !,#!.:!2 ,! 4%-0%2!452! #!53! 1 2%-%$)/ 7.1 Especiales condiciones del ambiente. – Temperatura ambiente muy fría. – Instale el elemento de protección sobre el radiador. 7.2 Instalación de refrigeración defectuosa. – Termostato bloqueado en posición de abertura total. – Limpie o sustituya. 25 SR 50 42/5",%3(//4).' %.').% $/%3.4 34!24 /2 )3 $)&&)#5,4 4/ 34!24 #!53% 2%-%$9 1.1 Fuel doesn’t reach carburettor. – No fuel in the tank. – Fuel pipe or carburettor filter clogged. – Needle valve either clogged or blocked. – Clogged tank bleed plug. – Vacuum tap malfunctions. – Damaged vacuum pipe. 1.2 Wet spark plug. – Clogged carburettor float chamber bleed. – Idling rpm too high (idling mixture too rich). – Clogged air filter element. 1.3 Ignition spark doesn’t flash or is weak. – Defective spark plug. – Defective spark plug cable. – Ignition defective or in short circuit. – Connecting contacts or terminals loose or defective. 1.4 Engine compression loss. – Piston segments worn or stuck. – Damaged head gasket. 1.5 Engine starts, but stops immediately. – Incorrect ignition phase. – Broken intake manifold. – Defective carburettor. – – – – – – Check the fuel level in the tank. Clean or change the pipe and the filter. Clean or release. Clean the bleed plug. Change. Change. – Clean the bleed. – Adjust the idling rpm. – Clean the filter. – – – – Change. Check and, if necessary, change. Check and repair. Check, tighten and, if necessary, change. – Change. – Change. – Repeat the ignition stroke. – Check and, if necessary, change. – Check and, if necessary, change. %.').% ,!#+3 0/7%2 #!53% 2%-%$9 2.1 Wheel doesn’t rotate freely. – Friction between wheel and brake. 2.2 2.3 2.4 2.5 – Check the braking system and the alignment of the wheel. – Change. – Wheel bearing worn or damaged. Tyre pressure too low. – Punctured tyre. – Defective tyre valve. Insufficient speed increase. – Clogged air filter. – Limited carburettor flow. – Clogged silencer. Clogged carburettor. – Service interval too long. Dirty spark plug. – Insufficient spark plug service interval. – Repair and, if necessary, change. – Repair and, if necessary, change. – Clean. – Clean the carburettor. – Clean. – Service more frequently. – Clean more frequently. Check the gap between the electrodes. – Replace with a spark plug with proper heat rating. – Spark plug heat rating incorrect. 2.6 Engine overheating. – Heavy deposits in the combustion chamber. – Fuel quality. – Too weak fuel-air mixture. 2.7 The engine is noisy (rattles). – Worn piston rings. – Too weak fuel-air mixture. – Heavy deposits in the combustion chamber. – Excessively advanced ignition stroke. – Clean the combustion chamber. – Use the recommended type of fuel only. – Adjust the carburation. – – – – 26 Change. Use the recommended fuel. Clean the combustion chamber. Adjust. SR 50 )22%'5,!2 &5.#4)/.).' !4 ,/7 30%%$ #!53% 2%-%$9 3.1 Incorrect ignition stroke. 3.2 Incorrect adjustment of the carburettor. – Too weak fuel-air mixture. – Too strong fuel-air mixture. 3.3 Air infiltration in the fuel intake manifold. – Loose carburettor. – Defective fuel intake manifold. 3.4 Weak or intermittent spark. – Defective stator/coil. – Check the ignition stroke. – Correct the mixture. – Correct the mixture. – Tighten properly. – Change. – Change. )22%'5,!2 &5.#4)/.).' !4 ()'( 30%%$ #!53% 2%-%$9 4.1 Limited fuel flow. – No fuel. – Clogged fuel pipe. – Clogged fuel filter. – Vacuum tap malfunctions. – Damaged vacuum pipe. 4.2 Clogged jet. – – – – – – Refuel. Clean or change. Clean or change. Change. Change. Clean. 5.34!",% -!./%562!"),)49 #!53% 2%-%$9 5.1 Heavy steering. – Wrong adjustment of the steering ring, insufficient clearance (excessive preload). – Damaged steering head bearings. – Bent fork rod. 5.2 One of the two wheels wobbles. – Excessive clearance of the front wheel bearings. – Deformed rim. – Excessively worn engine pin bearings. – Deformed frame. 5.3 Vehicle pulls. – Deformed fork stems. – Deformed engine connection link. – Deformed frame. 5.4 Vehicle vibrates. – Check the wear of the connection link silentblocks. – Check the spring at the end of stroke of the connection element. – Loosen and adjust. – Change. – Change. – – – – Change the bearings. Change. Change. Change. – Change. – Change. – Change. – Change. – Change. 27 SR 50 %.').% /6%2(%!43 1 6.1 Cooling system defective. – Insufficient coolant. – Radiator fin unit clogged by dirt or foreign matters. – Coolant passages clogged. – Air in the cooling circuit. – Coolant pump faulty. – Unsuitable coolant. – Add coolant. – Clean. – – – – Clean. Bleed the circuit. Change. Change coolant. %.').% $/%3 ./4 2%!#( 4(% 2)'(4 4%-0%2!452% 7.1 Particular environmental conditions. – Room temperature too cold. 7.2 Cooling system defective. – Thermostat locked in total opening position. 1 – Install protection screen on radiator. – Clean or change. 28 SR 50 02/'2!--! $) -!.54%.:)/.% 02/'2!-! $% -!.4%.)-)%.4/ 2%'5,!2 3%26)#% ).4%26!,3 #(!24 Componenti / Componentes / Components Fine rodaggio / Fin rodaje / After running-in (500 km) Ogni 4000 km o 8 mesi / Cada 4000 km o 8 meses / Every 4000 km or 8 months Ogni 8000 km o 16 mesi / Cada 8000 km o 16meses / Every 8000 km or 16 months Ammortizzatore posteriore / Amortiguador trasero C C / Rear shock absorber Batteria - Livello elettrolita / Batería-Nivel C C electrolito / Battery-electrolyte level Candela / Bujía / Spark plug C C S Carburatore - regime minimo / CarburadorR C régimen ralentí / Carburettor - idling Cinghia di trasmissione / Correa de transmisión / C Driving belt Cuscinetti cannotto sterzo / Cojinetes manguito C C dirección / Steering column bearings Cuscinetti ruote / C Cojinetes ruedas / Wheel bearings Disincrostazione terminale di scarico / Desincrustación terminal de escape / Removal of P deposits from the exhaust Filtro aria / Filtro aire / Air cleaner C P Funzionamento acceleratore / Funcionamiento C C acelerador / Accelerator operation Funzionamento bloccaggio freni / Funcionamiento bloqueo frenos / C C Brake locking operation Impianti frenanti / C C Sistemas de frenado / Braking systems Ingrassaggio perno camma freno posteriore / Engrase perno leva freno trasero / C Rear brake cam pin greasing Interruttore luce stop / C Interruptor luz stop / Stop light switch Liquido freni / Líquido frenos / Brake fluid ogni anno: S / cada año: S / every year: S Liquido refrigerante / ogni 2000 km: C - ogni 2 anni: S / cada 2000 km: C - cada 2 año : S / Líquido refrigerante / Coolant every 2000 km: C / every 2 years: S Olio miscelatore / Aceite mezclador / Stroke oil ogni 500 km: C / Cada 500 km: C / every 500 km: C Olio trasmissione / ogni 3000 km o 6 mesi: C / ogni 12000 km o 2 anni: S / Aceite transmisión / S cada 3000 km o 6 meses: C / cada 12000 km o 2 años: S / Transmission oil every 3000 km or 6 months: C every 12000 km or 2 years: S Orientamento fanale anteriore - funzionamento / Orientación faro delantero - funcionamiento / C Light direction - operation Ruote/pneumatici - pressione di gonfiaggio / Ruedas/neumáticos - presión de hinchado / ogni mese: R / cada mes: R / every month: R Wheels/tyres - inflation pressure Serraggio dadi, bulloni, viti / Apretamiento tuercas, pernos, tornillos / C C Nut, bolt, screw tightening Sospensione anteriore / C C Suspensión delantera / Front suspension Spia riserva olio miscelatore / Luz indicadora reserva aceite mezclador / C C 2 stroke oil reserve warning light Spurgo liquido freni / Purga líquido frenos / Brake C fluid bleeding Tubazione carburante / C Tubo combustible / Fuel pipe Tubazione olio miscelatore / Tubo aceite mezclador / C C 2 stroke oil pipe Usura ganasce freno posteriore / Desgaste zapatas freno trasero / C C Rear brake shoe wear Usura pastiglie freni / ogni 2000 km: C / Desgaste pastillas frenos / C cada 2000 km: C / Brake pad wear every 2000 km: C C= Controllare, pulire, regolare, lubrificare o sostituire se necessario / Controle y limpie, regule, lubrique o sustituya si es necesario / check, clean, adjust, lubricate or change, if necessary P= pulire / limpie / clean S= sostituire / sustituya / change R= regolare / regule / adjust. Eseguire le operazione di manutenzione più frequentemente se il veicolo viene utilizzato in zone piovose, polverose o su percorsi accidentati / Realice las operaciones de mantenimiento más frecuentemente si se utiliza el vehículo en zonas lluviosas, polvorientas o sobre recorridos accidentados / Carry out the maintenance operations more frequently if you use the vehicle in rainy and dusty areas or on uneven ground 3 1 3 29 SR 50 $!4) $) )$%.4)&)#!:)/.% Il numero di telaio può essere usato per l’acquisto di parti di ricambio. IMPORTANTE L’alterazione dei numeri di identificazione può far incorrere in gravi sanzioni penali e amministrative, in particolare l’alterazione del numero di telaio comporta l’immediata decadenza della garanzia. .5-%2/ 4%,!)/ Il numero del telaio è stampigliato sul tubo centrale del telaio. Per la lettura è necessario rimuovere il coperchietto (1). .5-%2/ -/4/2% Il numero di motore è stampigliato sul supporto inferiore ammortizzatore posteriore. 5")#!:)/.% %,%-%.4) 02).#)0!,) ,%'%.$! 2) Tappo serbatoio olio miscelatore 3) Serbatoio olio miscelatore 4) Interruttore accensione / bloccasterzo 5) Coperchio di ispezione destro 6) Portafusibili 7) Avvisatore acustico 8) Batteria 9) Chiusura scudo inferiore 10) Gancio antifurto 11) Cavalletto centrale ,%'%.$! 12) Tappo vaso di espansione liquido refrigerante 1 13) Gancio portaborse 14) Vano batteria / kit attrezzi 15) Serbatoio carburante 16) Tappo serbatoio carburante 17) Serratura sella 18) Tappo carico olio trasmissione 19) Tappo scarico olio trasmissione 20) Pedale avviamento 21) Filtro aria 22) Coperchio di ispezione sinistro 30 SR 50 &)#(! $% 2%#/./#)-)%.4/ )$%.4)&)#!4)/. $!4! El número del bastidor puede utilizarse para la compra de repuestos. The frame number can be used for the purchase of spare parts. IMPORTANTE La alteración de los números de identificación puede provocar graves sanciones penales y administrativas; en particular, la alteración del número del bastidor produce la anulación inmediata de la garantía. NOTE Do not alter the identification numbers if you do not want to incur severe penal and administrative sanctions. In particular, the alteration of the frame number results in the immediate invalidity of the guarantee. .5-%2/ "!34)$/2 &2!-% .5-"%2 El número del bastidor está impreso en el tubo central del bastidor. Para leerlo hay que quitar la tapa (1). The frame number is stamped on the central tube of the frame. To be able to read it, it is necessary to remove the cover (1). .5-%2/ -/4/2 %.').% .5-"%2 El número del motor está impreso en el soporte inferior amortiguador trasero. The engine number is stamped on the lower support of the rear shock absorber. 5")#!#)/. %,%-%.4/3 02).#)0!,%3 !22!.'%-%.4 /& 4(% -!). %,%-%.43 0)% $% ,! ),5342!#)/. +%9 2) Tapón depósito aceite mezclador 3) Depósito aceite mezclador 4) Interruptor de encendido/seguro de dirección 5) Tapa de inspección derecha 6) Portafusibles 7) Bocina 8) Batería 9) Tapa escudo inferior 10) Gancho antirrobo 11) Caballete central 2) 2 stroke oil tank plug 3) 2 stroke oil tank 4) Ignition switch/steering lock 5) Right inspection cover 6) Fuse carrier 7) Horn 8) Battery 9) Lower shield cover 10) Anti-theft hook 11) Centre stand 0)% $% ,! ),5342!#)/. +%9 12) Tapón depósito de expansión líquido refrigerante 1 13) Gancho portabolsos 14) Vano batería/kit herramientas 15) Depósito combustible 16) Tapón depósito combustible 17) Cerradura sillín 18) Tapón de llenado aceite transmisión 19) Tapón de vaciado aceite transmisión 20) Pedal de arranque 21) Filtro aire 22) Tapa de inspección izquierda 12) Coolant expansion tank plug 1 13) Bag hook 14) Battery/tool kit compartment 15) Fuel tank 16) Fuel tank plug 17) Saddle lock 18) Transmission oil filling cap 19) Transmission oil drain plug 20) Kick starter 21) Air cleaner 22) Left inspection cover 31 SR 50 5")#!:)/.% 3425-%.4) ,%'%.$! 1) 2) 3) 4) 5) 6) 7) 8) 9) 10) 10a) 10b) 10c) 11) 12) 13) Interruttore indicatori di direzione (c) Pulsante avvisatore acustico (f) Leva per l’avviamento a freddo (e) Leva freno posteriore Specchietto retrovisore sinistro Strumenti e indicatori Specchietto retrovisore destro Leva freno anteriore Manopola acceleratore Interruttore luci (b - •) (non presente _) Interruttore luci (a - b - •) C % (non presente _) Deviatore luci (a - b) _ (non presente _ nella versione -) Interruttore arresto motore (n - m) Pulsante di avviamento (r) Interruttore accensione / bloccasterzo (n - m - s) Deviatore luci (a - b) - 3425-%.4) % ).$)#!4/2) ,%'%.$! 14) 15) 16) 17) 18) 19) 20) 20a) Indicatore livello carburante (g) Tachimetro Contachilometri Indicatore temperatura liquido refrigerante (h) 1 Spia indicatori di direzione (c) colore verde Spia riserva olio miscelatore (j) colore rosso Spia luce anabbagliante (b) colore verde Spia luce abbagliante (a) colore blu C%-_ 21) Spia riserva carburante (g) colore giallo ambra !##%,%2!4/2% 6%2)&)#! &5.:)/.!-%.4/ #/-!.$/ !##%,%2!4/2% Leggere attentamente pag. 1 (NORME GENERALI DI SICUREZZA). aPERICOLO L’utilizzo del veicolo con il cavo acceleratore danneggiato, eccessivamente piegato o attorcigliato può impedire il funzionamento regolare dell’acceleratore e causare la perdita di controllo del veicolo stesso durante la guida. Verificare che la rotazione del manubrio non modifichi il regime di giri minimo del motore e che la manopola acceleratore, una volta rilasciata, ritorni dolcemente e automaticamente in posizione di riposo. Se necessario: IMPORTANTE Per la lubrificazione dei componenti utilizzare lubrificante specifico reperibile in commercio. ◆ ◆ Verificare il corretto posizionamento e la lubrificazione dei componenti: – guaina; – registro manopola (22); – registro carburatore (23); – attacchi cavo (estremità); – comando acceleratore. Controllare il regime minimo, vedi pag. 34 (REGOLAZIONE DEL MINIMO). Controllare la regolazione comando acceleratore, vedi sopra (VERIFICA FUNZIONAMENTO COMANDO ACCELERATORE). 32 SR 50 5")#!#)/. ).3425-%.4/3 !22!.'%-%.4 /& 4(% ).3425-%.43 ,%9%.$! 1) 2) 3) 4) 5) 6) 7) 8) 9) 10) 10a) 10b) 10c) 11) 12) 13) +%9 Interruptor indicadores de dirección (c) Pulsador bocina (f) Palanca para el arranque en frío (e) Palanca freno trasero Retrovisor izquierdo Instrumentos e indicadores Retrovisor derecho Palanca freno delantero Puño de gas Interruptor luces (b - •) (no presente _) Interruptor luces (a - b - •) C % (no presente _) Desviador luces ( b - a ) _ (no presente _ en la versión -) Interruptor de parada motor (n - m) Pulsador de arranque (r) Interruptor de encendido/seguro de dirección (n - m - s) Desviador luces ( b - a ) - 1) Direction indicator switch (c) 2) Horn push button (f) 3) Cold start lever (e) 4) Rear brake lever 5) Left rear-view mirror 6) Instruments and indicators 7) Right rear-view mirror 8) Front brake lever 9) Throttle grip 10) Headlight switch (b - •) (not provided for _) 10a) Headlight switch (a - b - •) C % (not provided for _) 10b) Dimmer switch ( b - a ) _ (_ not provided in the - version) 10c) Engine stop switch (n - m) 11) Start push button (r) 12) Ignition switch/steering lock (n - m - s) 13) Dimmer switch ( b - a ) - ).3425-%.4/3 % ).$)#!$/2%3 ).3425-%.43 !.$ ).$)#!4/23 ,%9%.$! 14) 15) 16) 17) 18) 19) 20) 20a) 21) Indicador nivel combustible (g) Velocimetro Cuentakilómetros Indicador temperatura léiquido refrigerante (h) 1 Luz testigo indicadores de dirección (c) color verde Luz indicadora reserva aceite mezclador (j) color rojo Luz testigo luces de cruce (b) color verde Luz testigo luz larga (a) color azul C % - _ Luz testigo reserva combustible (g) color amarillo ámbar +%9 14) 15) 16) 17) 18) 19) 20) 20a) 21) Fuel level indicator (g) Speedometer Total kilometres odometer Coolant temperature indicator (h) 1 Green direction indicator warning light (c) Red 2 stroke oil reserve warning light (j) Green low beam warning light (b) Blue high beam warning light (a) C % - _ Amber low fuel warning light (g) !##%,%2!4/2 !#%,%2!$/2 #(%#+).' 4(% /0%2!4)/. /& 4(% !##%,%2!4/2 #/.42/, #/-02/"!#)/. &5.#)/.!-)%.4/ -!.$/ !#%,%2!$/2 Carefully read page 7 (GENERAL SAFETY RULES). Lea con cuidado pág. 4 (NORMAS GENERALES DE SEGURIDAD). aWARNING aPELIGRO The use of the vehicle with damaged, excessively bent or twisted accelerator cable may hinder the regular operation of the accelerator and make you lose control of the vehicle while riding. El empleo del vehículo con el cable del acelerador dañado, excesivamente curvado o pellizcado puede impedir el funcionamiento regular del acelerador y causar la pérdida de control del vehículo mismo durante la conducción. Compruebe que la rotación del manillar no modifique el ralentí del motor y que el puño de gas, una vez soltado, regrese suave y automáticamente a la posición de reposo. Si es necesario: IMPORTANTE Para la lubricación de los componentes utilice un lubricante específico que se encuentra en comercio. ◆ Compruebe la correcta instalación y la lubricación de los componentes: – vaina; – regulador manecilla (22); – regulador carburador (23); – empalmes cable (extremidad); – mando acelerador. ◆ Controle el ralentí, véase pág. 35 (AJUSTE DEL RALENTI). Controle el ajuste del mando acelerador, véase arriba (COMPROBACION FUNCIONAMIENTO MANDO ACELERADOR). Make sure that the rotation of the handlebar does not modify the engine idle speed and that the throttle grip returns smoothly and automatically to its original position after being released. If necessary, proceed as follows: NOTE For the lubrication of the components use the specific lubricant available on the market. ◆ Check the correct position and the lubrication of the following components: – sheath; – throttle grip adjuster (22); – carburettor adjuster (23); – cable couplings (ends); – accelerator control. ◆ Check the idle speed, see p. 35 (IDLING ADJUSTMENT). Check the accelerator control adjustment, see above (CHECKING THE OPERATION OF THE ACCELERATOR CONTROL). 33 SR 50 2%'/,!:)/.% $%, -).)-/ Leggere attentamente pag. 1 (NORME GENERALI DI SICUREZZA). IMPORTANTE Prima di intervenire, effettuare la verifica funzionamento comando acceleratore, vedi pag. 32 (VERIFICA FUNZIONAMENTO COMANDO ACCELERATORE) Eseguire la regolazione del minimo dopo i primi 500 km e ogni qualvolta risulti irregolare. Per effettuare questa operazione: Percorrere qualche chilometro, sino al raggiungimento della temperatura normale di funzionamento, quindi arrestare il motore. ◆ Posizionare il veicolo sul cavalletto centrale. ◆ Rimuovere il coperchio di ispezione sinistro, vedi pag. 40 (RIMOZIONE COPERCHI D’ISPEZIONE DESTRO E SINISTRO). ◆ Collegare un contagiri elettronico al cavo candela. ◆ Avviare il motore. ◆ Il regime di rotazione minimo del motore dovrà essere di circa 1800 ± 100 giri/min, in questo caso la ruota posteriore non viene posta in rotazione dal motore. Se necessario: Intervenire sulla vite di registro (1) posta sul carburatore. ◆ AVVITANDO (senso orario) il numero di giri aumenta. SVITANDO (senso antiorario) il numero di giri diminuisce. Agendo sulla manopola dell'acceleratore, accelerare e decelerare qualche volta per controllare il corretto funzionamento e se il minimo resta stabile. ◆ IMPORTANTE Non intervenire sulla vite regolazione aria, onde evitare variazioni sulla taratura della carburazione. 34 SR 50 !*534% $%, 2!,%.4) )$,).' !$*534-%.4 Lea con cuidado pág. 4 (NORMAS GENERALES DE SEGURIDAD). Carefully read page 7 (GENERAL SAFETY RULES). NOTE Before carrying out any operation, check the correct functioning of the accelerator control, see p. 33 (CHECKING THE OPERATION OF THE ACCELERATOR CONTROL). IMPORTANTE Antes de actuar, compruebe el funcionamiento del mando acelerador, véase pág. 33 (COMPROBACION FUNCIONAMIENTO MANDO ACELERADOR). NOTE Ajuste el ralentí tras los primeros 500 km y cada vez que resulte irregular. ◆ ◆ ◆ ◆ ◆ Remember: 1 mile = 1.6 km 1 km = 0.625 miles Adjust the idling after the first 500 km and every time it is irregular. Para realizar esta operación: Recorra algunos kilómetros hasta alcanzar la temperatura normal de funcionamiento, luego pare el motor. Coloque el vehículo sobre el caballete central. Saque la tapa de inspección izquierda, véase pág. 41 (DESMONTAJE TAPAS DE INSPECCION DERECHA E IZQUIERDA). Conecte un cuentarrevoluciones electrónico al cable bujía. Ponga en marcha el motor. To carry out this operation, proceed as follows: Drive for a few miles until the engine reaches the normal running temperature, then stop the engine. ◆ Position the vehicle on the centre stand. ◆ Remove the left inspection cover, see p. 41 (REMOVING THE RIGHT AND LEFT INSPECTION COVERS). ◆ Connect an electronic revolution counter to the spark plug cable. ◆ Start the engine. ◆ El régimen mínimo de las revoluciones del motor tendrá que ser de unas 1800 ± 100 rpm; en este caso la rueda trasera no debe girar impulsada por el motor. The minimum speed of the engine (idling) must be about 1800 ± 100 rpm; in this case the engine does not make the rear wheel rotate. ◆ Si es necesario: Actúe sobre el tornillo de regulación (1) colocado sobre el carburador. If necessary: ◆ Act on the adjusting screw (1) positioned on the carburettor. ATORNILLANDO (en sentido horario) el número de las revoluciones aumenta. By SCREWING IT (clockwise), you increase the engine rpm. DESTORNILLANDO (en sentido antihorario) el número de las revoluciones disminuye. By UNSCREWING IT (anticlockwise), you decrease the engine rpm. ◆ ◆ Actuando sobre el puño de gas, acelere y decelere algunas veces para controlar el funcionamiento correcto y si el ralentí queda estable. IMPORTANTE Twist the throttle grip, accelerating and decelerating a few times to make sure that it functions correctly and to check if the idling speed is constant. NOTE No actúe sobre el tornillo de regulación aire para evitar variaciones en la regulación de la carburación. Do not act on the air adjusting screw, to avoid variations of the carburation setting. 35 SR 50 2%'/,!:)/.% #/-!.$/ !##%,%2!4/2% Leggere attentamente pag. 1 (NORME GENERALI DI SICUREZZA). IMPORTANTE Prima di intervenire, effettuare la verifica funzionamento comando acceleratore, vedi pag. 32 (VERIFICA FUNZIONAMENTO COMANDO ACCELERATORE). Il comando acceleratore deve avere un gioco di circa 2-3 mm, misurabili sulla manopola. Per la regolazione del gioco: Posizionare il veicolo sul cavalletto centrale. Sfilare la cuffia di protezione (1). Allentare il dado (2). Agire sul registro manopola (3). ◆ ◆ ◆ ◆ Al termine della regolazione: Serrare il dado (2), bloccando il registro (3) e posizionare la cuffia di protezione (1). ◆ Se con il registro manopola (3) non si ottiene il gioco indicato, proseguire operando sul registro carburatore (2). Per accedere al registro carburatore: Rimuovere parzialmente il vano portacasco, vedi pag. 48 (RIMOZIONE VANO PORTACASCO completo di sella). ◆ Per la regolazione: IMPORTANTE Non intervenire sulla cuffia di protezione cavo avviamento a freddo (4). ◆ ◆ ◆ Sfilare la cuffia di protezione (5). Allentare il dado (6). Agire sul registro carburatore (7). Al termine della regolazione: Serrare il dado (6), bloccando il registro (7) e posizionare la cuffia di protezione (5). ◆ aPERICOLO Dopo aver completato la regolazione, verificare che la rotazione del manubrio non modifichi il regime di giri minimo del motore e che la manopola acceleratore, una volta rilasciata, ritorni dolcemente e automaticamente in posizione di riposo. 36 SR 50 !*534% -!.$/ !#%,%2!$/2 !$*534).' 4(% !##%,%2!4/2 #/.42/, Lea con cuidado pág. 4 (NORMAS GENERALES DE SEGURIDAD). Carefully read page 7 (GENERAL SAFETY RULES). IMPORTANTE Before carrying out any operation, check the correct functioning of the accelerator control, see p. 33 (CHECKING THE OPERATION OF THE ACCELERATOR CONTROL). NOTE Antes de actuar, compruebe el funcionamiento del mando acelerador, véase pág. 33 (COMPROBACION FUNCIONAMIENTO MANDO ACELERADOR). The ideal slack of the accelerator control should be approximately 2-3 mm and can be measured on the throttle grip. El mando acelerador debe tener un juego de unos 2-3 mm, que se pueden medir en la manecilla. Para ajustar el juego: ◆ Coloque el vehículo sobre el caballete central. ◆ Extraiga el elemento de protección (1). ◆ Afloje la tuerca (2). ◆ Actúe sobre el regulador manecilla (3). To adjust the slack, proceed as follows: ◆ Position the vehicle on the centre stand. ◆ Withdraw the protection element (1). ◆ Loosen the nut (2). ◆ Act on the throttle grip adjuster (3). Al término del ajuste: ◆ Apriete la tuerca (2), bloqueando el regulador (3) e instale el elemento de protección (1). After the adjustment: ◆ Tighten the nut (2), locking the adjuster (3) and put back the protection element (1). Si con el regulador manecilla (3) no se obtiene el juego indicado, prosiga operando sobre el regulador carburador (2). If the prescribed slack cannot be obtained by means of the throttle grip adjuster (3), act on the carburettor adjuster (2). Para acceder al regulador carburador: ◆ Desmonte parcialmente el vano portacasco, véase pág. 49 (DESMONTAJE VANO PORTACASCO equipado con sillín). To reach the carburettor adjuster: ◆ Partially remove the crash helmet compartment, see p. 49 (REMOVING THE CRASH HELMET COMPARTMENT complete with saddle). Para el ajuste: For the adjustment: IMPORTANTE No intervenga en el elemento de protección cable arranque en frío (4). ◆ ◆ ◆ NOTE Do not tamper with the protection element of the cold start cable (4). Extraiga el elemento de protección (5). Afloje la tuerca (6). Actúe sobre el regulador carburador (7). ◆ ◆ ◆ Al término del ajuste: ◆ Apriete la tuerca (6), bloqueando el regulador (7) e instale el elemento de protección (5). Withdraw the protection element (5). Loosen the nut (6). Act on the carburettor adjuster (7). After the adjustment: ◆ Tighten the nut (6), locking the adjuster (7) and put back the protection element (5). aPELIGRO aWARNING Una vez finalizado el ajuste, compruebe que la rotación del manillar no modifique el ralentí del motor y que el puño de gas, una vez soltado, regrese suave y automáticamente a la posición de reposo. After the adjustment, make sure that the rotation of the handlebar does not modify the engine idle speed and that the throttle grip returns smoothly and automatically to its original position after being released. 37 SR 50 Ci #!2%.!452% Leggere attentamente pag. 1 (NORME GENERALI DI SICUREZZA). 2)-/:)/.% -!.)',)! 0!33%''%2/ ◆ ◆ ◆ ◆ ◆ Posizionare il veicolo sul cavalletto centrale. Sollevare la sella. Svitare e togliere le due viti (1). Svitare e togliere le due viti (2). Rimuovere la maniglia passeggero (3). 2)-/:)/.% 0/24!4!2'! ◆ ◆ ◆ Posizionare il veicolo sul cavalletto centrale. ★ Svitare e togliere le due viti (4). Rimuovere parzialmente il portatarga senza forzare i cavi elettrici. IMPORTANTE Non scollegare i due connettori elettrici indicatori di direzione. ◆ ◆ Scollegare il connettore elettrico principale. Rimuovere completamente il portatarga (5) completo di fanale e indicatori di direzione posteriori. 2)-/:)/.% 02/4%:)/.% ).&%2)/2% #/$/.% ◆ ◆ ◆ Posizionare il veicolo sul cavalletto centrale. Rimuovere il portatarga, vedi pag. 38 (RIMOZIONE PORTATARGA). ★ Svitare e togliere la vite (6). aATTENZIONE Maneggiare con cura. Nel rimontaggio inserire correttamente le linguette (9) e gli agganci (8). ◆ Abbassare la parte posteriore della protezione (7), arretrarla e liberarla dagli agganci (8) quindi sfilarla dalle linguette d’incastro (9). 2)-/:)/.% #/$/.% ◆ ◆ ◆ ◆ ◆ Posizionare il veicolo sul cavalletto centrale. Sollevare la sella. Rimuovere la maniglia passeggero, vedi pag. 38 (RIMOZIONE MANIGLIA PASSEGGERO). Rimuovere la protezione inferiore codone, vedi pag. 38 (RIMOZIONE PROTEZIONE INFERIORE CODONE). ★ Sollevare la parte anteriore della protezione in gomma (10) e toglierla. IMPORTANTE Nel rimontaggio riposizionare correttamente la protezione in gomma. ◆ ★ Svitare e togliere le tre viti superiori (11). aATTENZIONE Maneggiare con cura. Non danneggiare i componenti in plastica, quelli verniciati e le due linguette di incastro anteriori (12). ◆ ◆ ★ Sfilare la linguetta d’incastro anteriore (12). Allargare moderatamente la parte anteriore codone, sfilarlo posteriormente e rimuoverlo. 38 SR 50 #!2%.!$/3 &!)2).'3 Lea con cuidado pág. 4 (NORMAS GENERALES DE SEGURIDAD). Carefully read page 7 (GENERAL SAFETY RULES). 2%-/6).' 4(% 0!33%.'%2 '2!" (!.$,% $%3-/.4!*% !3! 0!3!*%2/ ◆ ◆ ◆ ◆ ◆ ◆ ◆ ◆ ◆ ◆ Coloque el vehículo sobre el caballete central. Levante el sillín. Destornille y quite los dos tornillos (1). Destornille y quite los dos tornillos (2). Saque el asa pasajero (3). 2%-/6).' 4(% .5-"%2 0,!4%(/,$%2 $%3-/.4!*% 0/24!-!42)#5,! ◆ ◆ ◆ ◆ ◆ ◆ Coloque el vehículo sobre el caballete central. ★ Destornille y quite los dos tornillos (4). Saque parcialmente el portamatrícula sin forzar los cables eléctricos. Position the vehicle on the centre stand. ★ Unscrew and remove the two screws (4). Partially remove the number plate-holder without forcing the electric cables. NOTE Do not disconnect the two electric connectors of IMPORTANTE No desconecte los dos conectores eléctricos indicadores de dirección. ◆ ◆ Position the vehicle on the centre stand. Raise the saddle. Unscrew and remove the two screws (1). Unscrew and remove the two screws (2). Remove the passenger grab handle (3). the direction indicators. ◆ ◆ Desconecte el conector eléctrico principal. Saque completamente el portamatrícula (5) equipado con faro e indicadores de dirección traseros. Disconnect the main electric connector. Remove the number plate-holder (5) completely, together with the rear light and the rear direction indicators. $%3-/.4!*% 02/4%##)/. ).&%2)/2 #/,). 2%-/6).' 4(% ,/7%2 '5!2$ /& 4(% 2%!2 0!24 /& 4(% &!)2).' ◆ ◆ ◆ ◆ ◆ Coloque el vehículo sobre el caballete central. Desmonte el portamatrícula, véase pág. 39 (DESMONTAJE PORTAMATRICULA). ★ Destornille y quite el tornillo (6). ◆ aCAUTION aATENCION Handle with care. Upon reassembly, insert the tangs (9) and the couplings (8) correctly. Maneje con cuidado. Durante la instalación introduzca correctamente las lengüetas (9) y los enganches (8). ◆ Position the vehicle on the centre stand. Remove the number plate-holder, see p. 39 (REMOVING THE NUMBER PLATE-HOLDER). ★ Unscrew and remove the screw (6). ◆ Baje la parte trasera de la protección (7), muévala hacia atrás, liberándola de los enganches (8), luego extráigala de las lengüetas de acoplamiento (9). Lower the rear part of the guard (7), move it backwards and release it from the couplings (8), then withdraw it from the tangs (9). $%3-/.4!*% #/,). 2%-/6).' 4(% 2%!2 0!24 /& 4(% &!)2).' ◆ ◆ ◆ ◆ ◆ ◆ ◆ ◆ Coloque el vehículo sobre el caballete central. Levante el sillín. Desmonte el asa pasajero, véase pág. 39 (DESMONTAJE ASA PASAJERO). Desmonte la protección inferior colín, véase pág. 39 (DESMONTAJE PROTECCION INFERIOR COLIN). ★ Levante la parte delantera de la protección de goma (10) y quítela. ◆ ◆ IMPORTANTE Durante la instalación coloque correctamente la protección de goma. ◆ NOTE Upon reassembly, position the rubber guard correctly. ★ Destornille y quite los tres tornillos superiores (11). ◆ aATENCION ★ Unscrew and remove the three upper screws (11). aCAUTION Maneje con cuidado. No dañe los componentes de plástico, los pintados y las dos lengüetas de acoplamiento delanteras (12). ◆ ◆ Position the vehicle on the centre stand. Raise the saddle. Remove the passenger grab handle, see p. 39 (REMOVING THE PASSENGER GRAB HANDLE). Remove the lower guard of the rear part of the fairing, see p. 39 (REMOVING THE LOWER GUARD OF THE REAR PART OF THE FAIRING). ★ Raise the front part of the rubber guard (10) and remove it. Handle with care. Avoid damaging the plastic or painted components and the two front tangs (12). ★ Extraiga la lengüeta de acoplamiento delantera (12). ◆ ◆ Ensanche moderadamente la parte delantera del colín, extráigala hacia atrás y sáquela. 39 ★ Withdraw the front tang (12). Slightly separate the front element of the rear part of the fairing, withdraw it from behind and remove it. SR 50 2)-/:)/.% #/0%2#() $Ø)30%:)/.% $%342/ % 3).)342/ Leggere attentamente pag. 1 (NORME GENERALI DI SICUREZZA). aATTENZIONE Maneggiare con cura i componenti in plastica e quelli verniciati, non strisciarli o rovinarli. ◆ ◆ ◆ ◆ Posizionare il veicolo sul cavalletto centrale. Rimuovere il coperchio vano batteria/kit attrezzi (1). Rimuovere il vano kit attrezzi (2). Svitare e togliere le due viti (3). IMPORTANTE Eseguire le seguenti operazioni dal lato del coperchio ispezione da rimuovere. ◆ Svitare e togliere la vite (4) e la vite attacco codone (5). IMPORTANTE Nel rimontaggio avvitare la vite attacco codone (5) (di diametro inferiore) nella sede appropriata. ◆ Sollevare moderatamente il coperchio di ispezione (6) liberarlo dall’incastro con il pianale poggiapiedi e sfilarlo lateralmente. IMPORTANTE Nel rimontaggio inserire la parte posteriore del coperchio di ispezione nel codone facendo combaciare la sede (7) con la parte finale codone (8). Nei punti (9) e (10) il coperchio di ispezione sinistro deve sormontare il coperchio di ispezione destro. Se rimossi entrambi i coperchi di ispezione, rimontare prima il destro e poi il sinistro. 2)-/:)/.% #()5352! 3#5$/ ).&%2)/2% Leggere attentamente pag. 1 (NORME GENERALI DI SICUREZZA). ◆ Posizionare il veicolo sul cavalletto centrale. aPERICOLO Lasciar raffreddare il motore e il silenziatore sino al raggiungimento della temperatura ambiente, prima di effettuare le successive operazioni, per evitare possibili scottature. ◆ ◆ ◆ ◆ ◆ ◆ Svitare e togliere la vite (11). ★ Sollevare la parte posteriore del tappeto poggiapiedi (12). ★ Svitare e togliere la vite superiore (13). ★ Svitare e togliere la vite posteriore (14). ★ Sfilare la linguetta d’incastro laterale (15). Sfilare le due linguette d'incastro anteriori (16) e rimuovere la chiusura scudo inferiore. 40 SR 50 $%3-/.4!*% 4!0!3 $% ).30%##)/. $%2%#(! % ):15)%2$! 2%-/6).' 4(% 2)'(4 !.$ ,%&4 ).30%#4)/. #/6%23 Lea con cuidado pág. 4 (NORMAS GENERALES DE SEGURIDAD). Carefully read page 7 (GENERAL SAFETY RULES). aCAUTION aATENCION Handle the plastic or painted components with care and avoid scraping or damaging them. Maneje con precaución los componentes de plástico y los pintados para no rayarlos o dañarlos. ◆ ◆ ◆ ◆ ◆ ◆ ◆ ◆ Coloque el vehículo sobre el caballete central. Quite la tapa vano batería/kit herramientas (1). Saque el vano kit herramientas (2). Destornille y quite los dos tornillos (3). NOTE Carry out the following operations on the side of the inspection cover to be removed. IMPORTANTE Realice las siguientes operaciones desde el lado de la tapa de inspección que hay que desmontar. ◆ ◆ Destornille y quite el tornillo (4) y el tornillo de anclaje del colín (5). ◆ Durante la instalación introduzca la parte trasera de la tapa de inspección en el colín de manera que la sede (7) se junte perfectamente con la parte final de el colín (8). In points (9) and (10) the left inspection cover must overlap the right ispection cover. If both inspection covers have been removed, reassemble first the right and then the left cover. En los puntos (9) y (10) la tapa de inspección izquierda ha de apoyarse sobre la tapa de inspección derecha. En caso de que se quiten las dos tapas de inspección, hay que instalar antes la derecha y luego la izquierda. 2%-/6).' 4(% ,/7%2 3()%,$ #/6%2 Carefully read page 7 (GENERAL SAFETY RULES). $%3-/.4!*% #/"%2452! %3#5$/ ).&%2)/2 ◆ Lea con cuidado pág. 4 (NORMAS GENERALES DE SEGURIDAD). Position the vehicle on the centre stand. aWARNING Before performing the following operations, let the engine and the exhaust silencer cool down until they reach room temperature, in order to avoid burns. Coloque el vehículo sobre el caballete central. aPELIGRO ◆ ◆ ◆ ◆ ◆ ◆ Deje enfriar el motor y el silenciador hasta alcanzar la temperatura ambiente, antes de efectuar las sucesivas operaciones, para evitar posibles quemaduras. ◆ ◆ ◆ ◆ ◆ ◆ Slightly raise the inspection cover (6), release it from the footrest and withdraw it sidewards. NOTE Upon reassembly, insert the rear part of the inspection cover in the rear part of the fairing, making the seat (7) coincide with the end of the rear part of the fairing (8). Levante moderadamente la tapa de inspección (6) soltándola del empalme con el estribo y extráigala lateralmente. IMPORTANTE ◆ Unscrew and remove the screw (4) and the screw (5) of the rear part of the fairing. NOTE Upon reassembly, fit the screw (5) (with shorter diameter) of the rear part of the fairing in the relevant seat. IMPORTANTE Durante la instalación atornille el tornillo de anclaje del colín (5) (de diámetro inferior) en su sede correspondiente. ◆ Position the vehicle on the centre stand. Remove the battery/tool kit compartment cover (1). Remove the tool kit compartment (2). Unscrew and remove the two screws (3). Destornille y quite el tornillo (11). ★ Levante la parte trasera de la alfombra estribo (12). ★ Destornille y quite el tornillo superior (13). ★ Destornille y quite el tornillo trasero (14). ★ Extraiga la lengüeta de acoplamiento lateral (15). Extraiga las dos lengüetas de acoplamiento delanteras (16) y saque la cobertura escudo inferior. 41 Unscrew and remove the screw (11). ★ Lift the rear part of the footboard mat (12). ★ Unscrew and remove the upper screw (13). ★ Unscrew and remove the rear screw (14). ★ Withdraw the side tang (15). Withdraw the two front tangs (16) and remove the lower shield cover. SR 50 2)-/:)/.% 3#5$/ !.4%2)/2% ).4%2./ Leggere attentamente pag. 1 (NORME GENERALI DI SICUREZZA). IMPORTANTE Rimuovere la chiave dall’interruttore di accensione. ◆ ◆ ◆ ◆ ◆ ◆ ◆ ◆ Posizionare il veicolo sul cavalletto centrale. ★ Svitare e togliere le due viti (1). ★ Rimuovere il tappeto poggiapiedi (2). Svitare e togliere le due viti di fissaggio gancio portaborse (3). Rimuovere il gancio portaborse (4). Svitare e togliere la vite (5). ★ Svitare e togliere le tre viti (6). ★ Svitare e togliere la vite (7). aATTENZIONE Operare con cautela. Non danneggiare le linguette e/o le relative sedi d’incastro. Maneggiare con cura i componenti in plastica e quelli verniciati, non strisciarli o rovinarli. ◆ Sfilare e rimuovere lo scudo anteriore interno ruotandolo verso la sella. 2)-/:)/.% #/&!./ !.4%2)/2% Leggere attentamente pag. 1 (NORME GENERALI DI SICUREZZA). ◆ ◆ ◆ ◆ ◆ Posizionare il veicolo sul cavalletto centrale. ★ Ruotare completamente il manubrio a destra, svitare e togliere la vite (8). Rimuovere la protezione (9). ★ Svitare e togliere la vite (10). Rimuovere il cofano anteriore (11), sfilandolo verso l’alto. IMPORTANTE Nel rimontaggio inserire correttamente nelle apposite sedi, prima la linguetta d'incastro inferiore (12) e in seguito le quattro (due 1) linguette d’incastro laterali (13). 42 SR 50 $%3-/.4!*% %3#5$/ $%,!.4%2/ ).4%2)/2 2%-/6).' 4(% &2/.4 )..%2 3()%,$ Lea con cuidado pág. 4 (NORMAS GENERALES DE SEGURIDAD). Carefully read page 7 (GENERAL SAFETY RULES). IMPORTANTE NOTE Extraiga la llave del interruptor de ◆ ◆ ◆ ◆ encendido. ◆ ◆ ◆ ◆ ◆ ◆ ◆ ◆ Coloque el vehículo sobre el caballete central. ★ Destornille y quite los dos tornillos (1). ★ Saque la alfombra descansapiés (2). Destornille y quite los dos tornillos de sujeción gancho portabolsos (3). Desmonte el gancho portabolsos (4). Destornille y quite el tornillo (5) con su arandela correspondiente. ★ Destornille y quite los tres tornillos (6). ★ Destornille y quite el tornillo (7). ◆ ◆ ◆ ◆ Position the vehicle on the centre stand. ★ Unscrew and remove the two screws (1). ★ Remove the footrest mat (2). Unscrew and remove the two fastening screws (3) of the bag hook. Remove the bag hook (4). Unscrew and remove the screw (5) with the relevant washer. ★ Unscrew and remove the three screws (6). ★ Unscrew and remove the screw (7). aCAUTION aATENCION Proceed with care. Do not damage the tangs and/or their seats. Opere con precaución. No dañe las lengüetas y/o las correspondientes sedes de acoplamiento. Handle the plastic or painted components with care and avoid scraping or damaging them. Maneje con precaución los componentes de plástico y los pintados para no rayarlos o dañarlos. ◆ Remove the key from the ignition switch. ◆ Extraiga y saque el escudo delantero interior girándolo hacia el sillín. Withdraw and remove the front inner shield, rotating it toward the saddle. $%3-/.4!*% #!2%.!$/ &2/.4!, 2%-/6).' 4(% &2/.4 #/6%2 Lea con cuidado pág. 4 (NORMAS GENERALES DE SEGURIDAD). Carefully read page 7 (GENERAL SAFETY RULES). ◆ ◆ ◆ ◆ ◆ ◆ ◆ Coloque el vehículo sobre el caballete central. ★ Gire del todo el manillar a la derecha, destornille y quite el tornillo (8). Extraiga la protección (9). ★ Destornille y quite el tornillo (10). Extraiga el carenado frontal (11), extrayéndolo hacia arriba. ◆ ◆ ◆ Position the vehicle on the centre stand. ★ Rotate the handlebar completely rightwards, unscrew and remove the screw (8). Remove the protection (9). ★ Unscrew and remove the screw (10). Remove the front cover (11), by pulling it upwards. NOTE Upon reassembly, correctly insert the lower tang (12) and successively the four (two 1) side tangs (13) in their seats. IMPORTANTE Durante la instalación introduzca correctamente en sus sedes correspondientes la lengüeta de acoplamiento inferior (12) y sucesivamente las cuatro (dos 1) lengüetas de acoplamiento laterales (13). 43 SR 50 2)-/:)/.% 0%$!.! 0/'')!0)%$) Leggere attentamente pag. 1 (NORME GENERALI DI SICUREZZA). ◆ ◆ ◆ Rimuovere i coperchi di ispezione, vedi pag. 40 (RIMOZIONE COPERCHI D’ISPEZIONE DESTRO E SINISTRO). Rimuovere lo scudo anteriore interno, vedi pag. 42 (RIMOZIONE SCUDO ANTERIORE INTERNO). Scollegare il cavo negativo (–) e poi quello positivo (+) dalla batteria. aPERICOLO Nel rimontaggio, collegare prima il cavo positivo (+) e poi quello negativo (–). ◆ Scollegare il tubetto di sfiato batteria. aATTENZIONE Maneggiare con attenzione la batteria. Non capovolgerla e non fare fuoriuscire il liquido elettrolita. ◆ ◆ ◆ ◆ ◆ Rimuovere la batteria, vedi pag. 148 (CONTROLLO LIVELLO ELETTROLITA). ★ Svitare e togliere le due viti (1), recuperando le relative rondelle. ★ Svitare e togliere la vite (2), recuperando la bussola. ★ Svitare e togliere la vite (3). ★ Svitare e togliere la vite (4) e la vite posteriore (5). IMPORTANTE Maneggiare con cura. Non forzare lo scudo inferiore. ◆ ◆ ★ Rimuovere lo scudo inferiore, vedi pag. 52 (RIMOZIONE SCUDO INFERIORE); svitare e togliere la vite (6). Rimuovere la pedana poggiapiedi dalla sua sede. 2)-/:)/.% 0!2!&!.'/ !.4%2)/2% ◆ ◆ ◆ Posizionare il veicolo sul cavalletto centrale. ★ Svitare e togliere la vite (7). ★ Svitare e togliere la vite (8). IMPORTANTE Nel rimontaggio controllare il corretto posizionamento del gommino portadado montato sul parafango. ◆ ◆ Rimuovere dalla sede parafango il gommino tubo freno anteriore e il gommino cavo rinvio tachimetro/contachilometri. Rimuovere il parafango sfilandolo dalla parte anteriore. 44 SR 50 $%3-/.4!*% %342)"/ 2%-/6).' 4(% &//4"/!2$ Lea con cuidado pág. 4 (NORMAS GENERALES DE SEGURIDAD). Carefully read page 7 (GENERAL SAFETY RULES). ◆ ◆ ◆ ◆ Desmonte las tapas de inspección, véase pág. 41 (DESMONTAJE TAPAS DE INSPECCION DERECHA E IZQUIERDA). Desmonte el escudo delantero interior, véase pág. 43 (DESMONTAJE ESCUDO DELANTERO INTERIOR). Desconecte el cable negativo (–), luego el positivo (+) de la batería. ◆ ◆ aWARNING aPELIGRO Upon reassembly, connect first the positive cable (+) and then the negative cable (–). Durante la instalación, conecte antes el cable positivo (+), luego el negativo (–). ◆ ◆ aCAUTION Handle the battery with care. Do not overturn it and take care not to let the electrolyte flow out. Maneje con precaución la batería. No la vuelque y no deje salir el líquido electrólito. ◆ ◆ ◆ ◆ Extraiga la batería, véase pág. 149 (CONTROL NIVEL ELECTROLITO). ★ Destornille y quite los dos tornillos (1), recuperando las arandelas correspondientes. ★ Destornille y quite el tornillo (2), recuperando el casquillo. ★ Destornille y quite el tornillo (3). ★ Destornille y quite el tornillo (4) y el tornillo trasero (5). ◆ ◆ ◆ ◆ ◆ Maneje con cuidado. No fuerce el escudo inferior. ◆ ★ Aleje lo suficiente el escudo inferior, véase pág. 53 ◆ (DESMONTAJE ESCUDO INFERIOR); destornille y quite el tornillo (6). Saque el estribo de su sede. ◆ ◆ ◆ ◆ ◆ Coloque el vehículo sobre el caballete central. ★ Destornille y quite el tornillo (7). ★ Destornille y quite el tornillo (8). ★ Shift the lower shield as much as necessary, see p. 53 (REMOVING THE LOWER SHIELD); unscrew and remove the screw (6). Remove the footboard from its seat. Position the vehicle on the centre stand. ★ Unscrew and remove the screw (7). ★ Unscrew and remove the screw (8). NOTE Upon reassembly, make sure that the nut-holding rubber element on the mudguard is correctly positioned. IMPORTANTE Durante la instalación controle la correcta colocación del elemento de goma portatuerca montado en el guardabarros. ◆ Handle with care. Do not force the lower shield. 2%-/6).' 4(% &2/.4 -5$'5!2$ $%3-/.4!*% '5!2$!"!22/3 $%,!.4%2/ ◆ Extract the battery, see page 149 (CHECKING THE ELECTROLYTE LEVEL). ★ Unscrew and remove the two screws (1), taking the washers. ★ Unscrew and remove the screw (2), taking the bush. ★ Unscrew and remove the screw (3). ★ Unscrew and remove the screw (4) and the rear screw (5). NOTE IMPORTANTE ◆ ◆ ◆ Disconnect the battery breather pipe. Desconecte el tubo de purga batería. aATENCION ◆ Remove the inspection covers, see p. 41 (REMOVING THE RIGHT AND LEFT INSPECTION COVERS). Remove the front inner shield, see p. 43 (REMOVING THE FRONT INNER SHIELD). Disconnect first the negative cable (–) and then the positive cable (+) from the battery. ◆ Saque de la sede guardabarros el elemento de goma tubo freno delantero y el elemento de goma cable transmisión velocímetro/cuentakilómetros. Saque el guardabarros extrayéndolo hacia atrás. ◆ 45 Remove the rubber element of the front brake pipe and of the odometer/speedometer control cable from the seat on the mudguard. Remove the mudguard by withdrawing it from the front part. SR 50 2)-/:)/.% 30%##()%44) 2%42/6)3/2) Leggere attentamente pag. 1 (NORME GENERALI DI SICUREZZA). ◆ Posizionare il veicolo sul cavalletto centrale. IMPORTANTE Raggruppare separatamente i componenti dello specchio sinistro e destro. ◆ Rimuovere il coperchietto (1). aATTENZIONE Sostenere lo specchio retrovisore (2) per evitarne la caduta accidentale. ◆ ◆ ◆ Svitare la vite (3). Rimuovere lo specchio retrovisore (2). Rimuovere la guarnizione (4). 2)-/:)/.% #/02)-!.5"2)/ !.4%2)/2% Leggere attentamente pag. 1 (NORME GENERALI DI SICUREZZA). ◆ ◆ Posizionare il veicolo sul cavalletto centrale. Rimuovere gli specchietti retrovisori, vedi sopra (RIMOZIONE SPECCHIETTI RETROVISORI). IMPORTANTE Sostenere il cupolino (5) per evitarne la caduta accidentale. ◆ ★ Svitare e togliere le due viti (6). aATTENZIONE Maneggiare con cura i componenti in plastica e quelli verniciati, non strisciarli o rovinarli. ◆ ◆ ◆ Rimuovere il cupolino (5). ★ Svitare e togliere la vite (7). ★ Ruotare completamente il manubrio a destra, svitare e togliere la vite (8) (di diametro inferiore) e le viti (9) (10) e (11). IMPORTANTE Nel rimontaggio avvitare le viti (8) (di diametro inferiore) nelle sedi appropriate. ◆ ◆ Ruotare il manubrio in posizione centrale, sfilare anteriormente il coprimanubrio inferiore (12) e rimuoverlo. ★ Scollegare i due terminali elettrici (13). aATTENZIONE Il coprimanubrio superiore (14) (completo di interruttori, strumenti e indicatori) rimane collegato al cavo contachilometri e ai cavi elettrici, che ne impediscono la completa rimozione. Operare con cautela per non danneggiare i componenti. ◆ Facendo attenzione ai due attacchi interruttori (15), sollevare e ruotare in avanti il coprimanubrio superiore, quindi appoggiarlo allo scudo anteriore. IMPORTANTE Nel rimontaggio, posizionando il coprimanubrio superiore, passare i cavi dei terminali elettrici (13) dietro e sotto il manubrio. 46 SR 50 $%3-/.4!*% 2%42/6)3/2%3 2%-/6).' 4(% 2%!26)%7 -)22/23 Lea con cuidado pág. 4 (NORMAS GENERALES DE SEGURIDAD). ◆ Carefully read page 7 (GENERAL SAFETY RULES). Coloque el vehículo sobre el caballete central. ◆ IMPORTANTE Reúna y guarde separadamente los NOTE Group the components of the right and left mirror componentes del retrovisor izquierdo y derecho. ◆ Position the vehicle on the centre stand. separately. Quite la tapa (1). ◆ Remove the cover (1). aATENCION aCAUTION Aguante el retrovisor (2) para que no caiga accidentalmente. ◆ ◆ ◆ Support the rear-view mirror (2), to prevent it from accidentally falling down. Destornille el tornillo (3). Extraiga el retrovisor (2). Quite la junta (4). ◆ ◆ ◆ $%3-/.4!*% #5"2%-!.),,!2 2%-/6).' 4(% (!.$,%"!2 #/6%2 Lea con cuidado pág. 4 (NORMAS GENERALES DE SEGURIDAD). ◆ ◆ Carefully read page 7 (GENERAL SAFETY RULES). Coloque el vehículo sobre el caballete central. Desmonte los retrovisores, véase arriba (DESMONTAJE RETROVISORES). ◆ ◆ IMPORTANTE Aguante la cúpula (5) para que no caiga accidentalmente. ◆ ◆ Handle the plastic or painted components with care and avoid scraping or damaging them. Extraiga la cúpula (5). ★ Destornille y quite el tornillo (7). ★ Gire del todo el manillar a la derecha, destornille y quite el tornillo (8) (de diámetro inferior) y los tornillos (9) (10) y (11). ◆ ◆ ◆ IMPORTANTE Durante la instalación atornille los tornillos (8) (de diámetro inferior) en sus sedes correspondientes. ◆ ★ Unscrew and remove the two screws (6). aCAUTION Maneje con precaución los componentes de plástico y los pintados para no rayarlos o dañarlos. ◆ Position the vehicle on the centre stand. Remove the rear-view mirrors, see above (REMOVING THE REAR-VIEW MIRRORS). NOTE Support the front part of the fairing (5), to prevent it from accidentally falling down. ★ Destornille y quite los dos tornillos (6). aATENCION ◆ ◆ ◆ Unscrew the screw (3). Remove the rear-view mirror (2). Remove the gasket (4). Remove the front part of the fairing (5). ★ Unscrew and remove the screw (7). ★ Rotate the handlebar completely to the right, unscrew and remove the screw (8) (with shorter diameter) and the screws (9) (10) and (11). NOTE Upon reassembly, fit the screws (8) (with shorter diameter) in the relevant seats. Gire el manillar en posición central, extraiga hacia adelante el cubremanillar inferior (12) y sáquelo. ★ Desconecte los dos terminales eléctricos (13). ◆ ◆ Rotate the handlebar in central position, withdraw the lower handlebar cover (12) from the front and remove it. ★ Disconnect the two electric terminals (13). aATENCION aCAUTION El cubremanillar superior (14) (equipado con interruptores, instrumentos e indicadores) queda conectado al cable cuentakilómetros y a los cables eléctricos que impiden su completo desmontaje. Proceda con cuidado para no dañar los componentes. ◆ The upper handlebar cover (14) (complete with switches, instruments and indicators) remains connected with the speedometer cable and with the electric cables, which makes it impossible to remove it completely. Proceed with care in order to avoid damaging the components. Poniendo cuidado en las dos conexiones interruptores (15), levante y gire hacia adelante el cubremanillar superior, luego apóyelo en el escudo delantero. ◆ IMPORTANTE Durante la instalación, al colocar el cubremanillar superior, pase los cables de los terminales eléctricos (13) por detrás y por debajo del manillar. Paying attention to the two switch connections (15), lift the upper handlebar cover and rotate it forwards, then rest it on the front shield. NOTE Upon reassembly, when positioning the upper handlebar cover, pass the electric terminal cables (13) behind and under the handlebar. 47 SR 50 2)-/:)/.% 6!./ 0/24!#!3#/ COMPLETO DI SELLA Leggere attentamente pag. 1 (NORME GENERALI DI SICUREZZA). ◆ ◆ ◆ ◆ ◆ ◆ ◆ ◆ ◆ ◆ ◆ Posizionare il veicolo sul cavalletto centrale. Sollevare la sella Togliere dal vano portacasco eventuali oggetti (casco, kit attrezzi, libretto di istruzioni ecc.). Rimuovere il codone, vedi pag. 38 (RIMOZIONE CODONE). Svitare e togliere le viti (1) all’interno del vano portacasco, recuperando la rondella. Svitare e togliere la vite (2). Rimuovere il coperchio (3) dal vano sensore livello carburante. Sfilare il tubo sfiato serbatoio carburante (4). Scollegare il connettore elettrico (5) del sensore livello carburante e sfilarlo. Liberare dalla fascetta i tubi dell’impianto carburante e quelli dell’impianto olio miscelatore. Abbassare la sella. IMPORTANTE Sul vano portacasco rimangono installati il serbatoio olio miscelatore e il serbatoio carburante. aATTENZIONE Operare con cautela. Non forzare e danneggiare i tubi degli impianti carburante e olio miscelatore. ◆ Sollevare il vano portacasco (completo di sella) e rimuoverlo parzialmente. IMPORTANTE Per la rimozione totale del vano portacasco (completo di sella) rimuovere: il serbatoio olio miscelatore, vedi pag. 62 (SERBATOIO OLIO MISCELATORE - RIMOZIONE) e il serbatoio carburante, vedi pag. 60 (RIMOZIONE SERBATOIO CARBURANTE COMPLETO). 2)-/:)/.% #()5352! 3#5$/ !.4%2)/2% Leggere attentamente pag. 1 (NORME GENERALI DI SICUREZZA). ◆ ◆ ◆ ◆ Posizionare il veicolo sul cavalletto centrale. Svitare e togliere la vite (6). ★ Svitare e togliere la vite (7). Rimuovere la chiusura scudo anteriore (8). IMPORTANTE Nel riassemblaggio inserire correttamente nelle apposite sedi le due linguette d’incastro (9). 48 SR 50 $%3-/.4!*% 6!./ 0/24!#!3#/ EQUIPADO CON SILL®N 2%-/6).' 4(% #2!3( (%,-%4 #/-0!24-%.4 COMPLETE WITH SADDLE Lea con cuidado pág. 4 (NORMAS GENERALES DE SEGURIDAD). Carefully read page 7 (GENERAL SAFETY RULES). ◆ ◆ ◆ ◆ ◆ ◆ ◆ ◆ ◆ ◆ ◆ ◆ ◆ ◆ Coloque el vehículo sobre el caballete central. Levante el sillín. Quite del vano portacasco eventuales objetos (casco, kit herramientas, manual de instrucciones, etc.). Desmonte el colín, véase pág. 39 (DESMONTAJE COLIN). Destornille y quite los tornillos (1) dentro del vano portacasco, recuperando la arandela. Destornille y quite el tornillo (2). Saque la tapa (3) del vano sensor nivel combustible. Extraiga el tubo purga depósito combustible (4). Desconecte el conector eléctrico (5) del sensor nivel combustible y extráigalo. Quite la abrazadera de los tubos de la instalación combustible y de los de la instalación aceite mezclador. Baje el sillín. ◆ ◆ ◆ ◆ ◆ ◆ ◆ Position the vehicle on the centre stand. Raise the saddle. Remove any object from the crash helmet compartment (crash helmet, tool kit, use and maintenance manual, etc.). Remove the rear part of the fairing, see p. 39 (REMOVING THE REAR PART OF THE FAIRING). Unscrew and remove the screw (1) positioned inside the crash helmet compartment, taking the washer. Unscrew and remove the screws (2). Remove the cover (3) from the fuel level sensor compartment. Withdraw the fuel tank breather pipe (4). Disconnect the electric connector (5) from the fuel level sensor and withdraw it. Release the pipes of the fuel system and of the 2 stroke oil system from the clamp. Lower the saddle. IMPORTANTE En el vano portacasco quedan insta- ◆ lados el depósito aceite mezclador y el depósito combustible. NOTE The 2 stroke oil tank and the fuel tank remain installed on the crash helmet compartment. aATENCION aCAUTION Opere con precaución. No fuerce y dañe los tubos de las instalaciones combustible y aceite mezclador. ◆ Proceed with care. Avoid forcing and damaging the fuel system and 2 stroke oil pipes. Levante el vano portacasco (equipado con sillín) y sáquelo parcialmente. ◆ IMPORTANTE Para poder sacar del todo el vano portacasco (equipado con sillín), quite: el depósito aceite mezclador, véase pág. 63 (DEPOSITO ACEITE MEZCLADOR - DESMONTAJE) y el depósito combustible, véase pág. 61 (DESMONTAJE DEPOSITO COMBUSTIBLE COMPLETO). Lift the crash helmet compartment (complete with saddle) and remove it partially. NOTE For the complete removal of the crash helmet compartment (complete with saddle), remove the 2 stroke oil tank, see p. 63 (2 STROKE OIL TANK - REMOVAL), and the fuel tank, see p. 61 (REMOVING THE COMPLETE FUEL TANK). $%3-/.4!*% 4!0! %3#5$/ $%,!.4%2/ 2%-/6).' 4(% &2/.4 3()%,$ #/6%2 Lea con cuidado pág. 4 (NORMAS GENERALES DE SEGURIDAD). Carefully read page 7 (GENERAL SAFETY RULES). ◆ ◆ ◆ ◆ ◆ ◆ ◆ ◆ Coloque el vehículo sobre el caballete central. Destornille y quite el tornillo (6). ★ Destornille y quite el tornillo (7). Desmonte tapa escudo delantero (8). Position the vehicle on the centre stand. Unscrew and remove the screws (6). ★ Unscrew and remove the screws (7). Remove the front shield cover (8). NOTE Upon reassembly, fit the tangs correctly in the appropriate seats. IMPORTANTE Durante la instalación introduzca correctamente las lengüetas de acoplamiento en los alojamientos correspondientes. 49 SR 50 2)-/:)/.% 0!2!&!.'/ 0/34%2)/2% Leggere attentamente pag. 1 (NORME GENERALI DI SICUREZZA). ◆ Posizionare il veicolo sul cavalletto centrale. aPERICOLO Lasciare raffreddare il motore e il silenziatore sino al raggiungimento della temperatura ambiente, prima di effettuare le successive operazioni, per evitare possibili scottature. ◆ ◆ ◆ ◆ Svitare e togliere la vite (1) recuperando le due bussole. Svitare e togliere la vite (2) recuperando la rondella e la bussola. Svitare e togliere le due viti (3) recuperando le rondelle e le bussole. Svitare e togliere la vite (4) recuperando la rondella speciale. IMPORTANTE Porre attenzione al posizionamento della rondella speciale della vite (4), per il successivo rimontaggio. ◆ ◆ ◆ Rimuovere il coperchio variatore (5). Svitare e togliere le due viti (6). Sollevare il parafango, ruotare la parte anteriore verso destra e rimuoverlo. aATTENZIONE 2 Porre la massima attenzione nella rimozione della staffa supporto parafango (7). 2)-/:)/.% #()5352! #/$/.% Leggere attentamente pag. 1 (NORME GENERALI DI SICUREZZA). ◆ ◆ ◆ Posizionare il veicolo sul cavalletto centrale. ★ Svitare e togliere le due viti (8). Rimuovere la chiusura codone (9). 50 SR 50 $%3-/.4!*% '5!2$!"!22/3 42!3%2/ 2%-/6).' 4(% 2%!2 -5$'5!2$ Lea con cuidado pág. 4 (NORMAS GENERALES DE SEGURIDAD). Carefully read page 7 (GENERAL SAFETY RULES). ◆ ◆ Coloque el vehículo sobre el caballete central. aWARNING aPELIGRO Before performing the following operations, let the engine and the exhaust silencer cool down until they reach room temperature, in order to avoid burns. Deje enfriar el motor y el silenciador hasta alcanzar la temperatura ambiente, antes de efectuar las sucesivas operaciones, para evitar posibles quemaduras. ◆ ◆ ◆ ◆ ◆ Destornille y quite el tornillo (1) recuperando los dos casquillos. Destornille y quite el tornillo (2) recuperando la arandela y el casquillo. Destornille y quite los dos tornillos (3) recuperando las arandelas y los casquillos. Destornille y quite el tornillo (4) recuperando la arandela especial. ◆ ◆ ◆ Unscrew and remove the screw (1), taking the two bushes. Unscrew and remove the screw (2), taking the washer and the bush. Unscrew and remove the two screws (3), taking the washers and the bushes. Unscrew and remove the screw (4), taking the special washer. NOTE Be careful of the position of the special washer of the screw (4), to avoid any problem in the reassembly. IMPORTANTE Ponga cuidado en colocar la arandela especial del tornillo (4), para no confundirse durante la sucesiva instalación. ◆ ◆ ◆ Position the vehicle on the centre stand. ◆ ◆ ◆ Saque la tapa variador (5). Destornille y quite los dos tornillos (6). Levante el guardabarros, gire la parte delantera hacia la derecha y sáquelo. Remove the speed variator cover (5). Unscrew and remove the two screws (6). Raise the mudguard, rotate its front part rightwards and remove it. aCAUTION 2 Be extremely careful when removing the mud- aATENCION 2 Durante el desmontaje del estribo soporte guar- guard support bracket (7). dabarros (7) ponga el máximo cuidado. $%3-/.4!*% #/"%2452! #/,). 2%-/6).' 4(% #/6%2 /& 4(% 2%!2 0!24 /& 4(% &!)2).' Lea con cuidado pág. 4 (NORMAS GENERALES DE SEGURIDAD). Carefully read page 7 (GENERAL SAFETY RULES). ◆ ◆ ◆ Coloque el vehículo sobre el caballete central. ★ Destornille y quite los dos tornillos (8). Saque la tapa inferior del colín (9). ◆ ◆ ◆ 51 Position the vehicle on the centre stand. ★ Unscrew and remove the two screws (8). Remove the cover of the rear part of the fairing (9). SR 50 2)-/:)/.% 3#5$/ !.4%2)/2% %34%2./ Leggere attentamente pag. 1 (NORME GENERALI DI SICUREZZA). IMPORTANTE Per la rimozione parziale NON ESEGUIRE le operazioni contrassegnate dal simbolo “8”. aPERICOLO 8 Sistemare un supporto adeguato sotto il veicolo in modo da impedirne la caduta ◆ ◆ ◆ ◆ ◆ ◆ ◆ ◆ ◆ 8 Posizionare il veicolo sul cavalletto centrale sopra una pedana elevatrice, con la ruota anteriore sporgente oltre il bordo pedana. 8 Alzare la pedana, a 50-60 cm dal suolo, per poter agevolmente sfilare lo scudo anteriore esterno dalla forcella (dopo aver eseguito le seguenti operazioni). Rimuovere lo scudo anteriore interno, vedi pag. 42 (RIMOZIONE SCUDO ANTERIORE INTERNO). ★ Scollegare i due terminali dell’indicatore di direzione anteriore. 8 Rimuovere la ruota anteriore, vedi pag.106 (RUOTA ANTERIORE - RIMOZIONE). 8 Rimuovere il parafango anteriore, vedi pag. 44 (RIMOZIONE PARAFANGO ANTERIORE). ★ Svitare e togliere le tre viti (1). ★ Svitare e togliere la vite (2). ★ Svitare e togliere la vite (3). aATTENZIONE Maneggiare con cura i componenti in plastica e quelli verniciati, non strisciarli o rovinarli. aATTENZIONE Per la rimozione parziale: posizionare un panno di protezione sul parafango anteriore. ◆ ◆ Rimuovere parzialmente lo scudo anteriore esterno e appoggiarlo sul panno. 8 Rimuovere lo scudo anteriore esterno sfilandolo dalla forcella. 2)-/:)/.% 3#5$/ ).&%2)/2% ◆ ◆ ◆ ◆ Rimuovere la chiusura scudo inferiore, vedi pag. 40 (RIMOZIONE CHIUSURA SCUDO INFERIORE). ★ Svitare e togliere le tre viti (1). ★ Svitare e togliere la vite (2). ★ Svitare e togliere la vite (4) recuperando la rondella. aATTENZIONE Maneggiare con cura i componenti in plastica e quelli verniciati, non strisciarli o rovinarli. ◆ Rimuovere lo scudo inferiore dalla sua sede. 52 SR 50 $%3-/.4!*% %3#5$/ $%,!.4%2/ %84%2)/2 2%-/6).' 4(% &2/.4 /54%2 3()%,$ Lea con cuidado pág. 4 (NORMAS GENERALES DE SEGURIDAD). NOTE For the partial removal, DO NOT PERFORM the operations marked with "8". Carefully read page 7 (GENERAL SAFETY RULES). IMPORTANTE Para el desmontaje parcial NO REA- aWARNING LICE las operaciones marcadas con el símbolo “8”. 8 Place a proper support under the vehicle, in order to prevent it from falling down. aPELIGRO 8 Ponga un soporte adecuado por debajo del vehículo para impedir que caiga. ◆ ◆ ◆ ◆ ◆ ◆ ◆ ◆ ◆ ◆ 8 Coloque el vehículo encima del caballete central sobre una superficie de elevación, de forma que la rueda delantera sobresalga del borde de la superficie misma. 8 Levante la superficie a una altura de 50-60 cm del suelo, para poder extraer fácilmente el escudo delantero exterior de la horquilla (tras haber realizado las operaciones siguientes). Desmonte el escudo delantero interior, véase pág. 43 (DESMONTAJE ESCUDO DELANTERO INTERIOR). ★ Desconecte los dos terminales del indicador de dirección delantero. 8 Desmonte la rueda delantera, véase pág. 107 (RUEDA DELANTERA - DESMONTAJE). 8 Desmonte el guardabarros delantero, véase pág. 45 (DESMONTAJE GUARDABARROS DELANTERO). ★ Afloje y quite los tres tornillos (1). ★ Afloje y quite el tornillo (2). ★ Afloje y quite el tornillo (3). ◆ ◆ ◆ ◆ ◆ ◆ ◆ ◆ aCAUTION Handle the plastic or painted components with care and avoid scraping or damaging them. aATENCION Maneje con precaución los componentes de plástico y los pintados para no rayarlos o dañarlos. aCAUTION For the partial removal: put a cloth on the front mudguard to protect it. aATENCION Para el desmontaje parcial: coloque un paño de protección sobre el guardabarros delantero. ◆ ◆ ◆ ◆ 8 Position the vehicle on the centre stand on a lifting platform, with the front wheel protruding from the platform edge. 8 Raise the platform at 50-60 cm from the ground, in order to be able to withdraw the front outer shield from the fork (after performing the following operations). Remove the front inner shield, see p. 43 (REMOVING THE FRONT INNER SHIELD). ★ Disconnect the two terminals of the front direction indicator. 8 Remove the front wheel, see p. 107 (FRONT WHEEL - DISASSEMBLY). 8 Remove the front mudguard, see p. 45 (REMOVING THE FRONT MUDGUARD). ★ Unscrew and remove the three screws (1). ★ Unscrew and remove the screw (2). ★ Unscrew and remove the screw (3). Saque parcialmente el escudo delantero exterior y apóyelo sobre el paño. 8 Saque el escudo delantero exterior extrayéndolo de la horquilla. Partially remove the front outer shield and put it on the cloth. 8 Remove the front outer shield by withdrawing it from the fork. 2%-/6).' 4(% ,/7%2 3()%,$ $%3-/.4!*% %3#5$/ ).&%2)/2 Carefully read page 7 (GENERAL SAFETY RULES). Lea con cuidado pág. 4 (NORMAS GENERALES DE SEGURIDAD). ◆ ◆ ◆ ◆ ◆ ◆ ◆ ◆ Desmonte la cobertura escudo inferior, véase pág. 41 (DESMONTAJE COBERTURA ESCUDO INFERIOR). ★ Destornille y quite los tres tornillos (1). ★ Destornille y quite el tornillo (2). ★ Destornille y quite el tornillo (4) recuperando la arandela. aCAUTION Handle the plastic or painted components with care and avoid scraping or damaging them. aATENCION Maneje con precaución los componentes de plástico y los pintados para no rayarlos o dañarlos. ◆ Remove the lower shield cover, see p. 41 (REMOVING THE LOWER SHIELD COVER). ★ Unscrew and remove the three screws (1). ★ Unscrew and remove the screw (2). ★ Unscrew and remove the screw (4), taking the washer. ◆ Saque el escudo inferior de su sede. 53 Remove the lower shield from its seat. SR 50 3%2"!4/)/ #!2"52!.4% Leggere attentamente pag. 1 (NORME GENERALI DI SICUREZZA). #!2"52!.4% aPERICOLO Il carburante utilizzato per la propulsione dei motori a scoppio è estremamente infiammabile e può divenire esplosivo in determinate condizioni. È opportuno effettuare il rifornimento e le operazioni di manutenzione in una zona ventilata e a motore spento. Non fumare durante il rifornimento e in vicinanza di vapori di carburante, evitando assolutamente il contatto con fiamme libere, scintille e qualsiasi altra fonte che potrebbe causarne l’accensione o l’esplosione. Evitare inoltre la fuoriuscita di carburante dal bocchettone, in quanto potrebbe incendiarsi al contatto con le superfici roventi del motore. Nel caso in cui involontariamente venisse versato del carburante, controllare che la zona sia completamente asciutta, prima dell’avviamento del veicolo. Il carburante si dilata al calore e sotto l’azione dell’irraggiamento solare. Perciò non riempire mai il serbatoio sino all’orlo. Chiudere accuratamente il tappo al termine dell’operazione di rifornimento. La benzina è velenosa e cancerogena e contiene sostanze chimiche che causano malformazioni fetali e altri problemi nella procreazione. Nel caso in cui venga versata benzina sui vestiti o sulla pelle, lavare immediatamente con acqua e sapone e cambiarsi. Nel caso in cui la benzina dovesse venire a contatto con gli occhi o essere ingerita, contattare immediatamente un medico. Non cercare mai di aspirare benzina succhiando con la bocca. In caso di ribaltamento, il veicolo perderà benzina, che è facilmente infiammabile. Fiamme o scintille possono essere causa di incendio e conseguentemente non solo distruggere il veicolo, ma anche l'edificio in cui si trova e provocare gravi lesioni o morte. NON DISPERDERE IL CARBURANTE NELL’AMBIENTE. TENERE LONTANO DALLA PORTATA DEI BAMBINI. 54 SR 50 $%0/3)4/ #/-"534)",% &5%, 4!.+ Lea con cuidado pág. 4 (NORMAS GENERALES DE SEGURIDAD). Carefully read page 7 (GENERAL SAFETY RULES). &5%, #/-"534)",% aWARNING aPELIGRO The fuel used for internal combustion engines is extremely inflammable and in particular conditions it can become explosive. It is important to carry out the refuelling and the maintenance operations in a wellventilated area, with the engine off. Do not smoke while refuelling or near fuel vapours, in any case avoid any contact with naked flames, sparks and any other heat source to prevent the fuel from catching fire or from exploding. Further, prevent fuel from flowing out of the fuel filler, as it could catch fire when getting in contact with the red-hot surfaces of the engine. In case some fuel has accidentally been spilt, make sure that the area has completely dried and before starting the vehicle verify that there is no fuel inside the fuel filler neck. Since petrol expands under the heat of the sun and due to the effects of sun radiation, never fill the tank to the brim. Screw the plug up carefully after refuelling. Avoid any contact of the fuel with the skin and the inhalation of vapours; do not swallow fuel or pour it from a receptacle into another by means of a tube. Petrol is poisonous and carcinogenic and contains chemical substances that cause birth defects and other reproductive problems. If petrol should be accidentally spilt on the skin or clothes, immediately wash it off with soap and water and change clothes. In case of contact with the eyes, or in case of swallowing, contact a doctor without delay. Never try to siphon petrol by sucking it with your mouth. In case of overturning, the vehicle will leak petrol, which is extremely flammable. Flames or sparks may cause a fire, which could not only destroy the vehicle, but also the building in which it is, and cause serious injuries or even death. El combustible utilizado para la propulsión de los motores de explosión es muy inflamable y puede volverse explosivo en algunas condiciones. Es oportuno reponer gasolina y realizar las operaciones de mantenimiento en una zona ventilada y con el motor apagado. No fume durante la provisión de gasolina y cerca de los vapores del combustible; de todas formas evite absolutamente el contacto con llamas libres, chispas y cualquier otra fuente que podría causar el encendido o la explosión. Además, evite la salida del combustible de la boca de llenado, ya que podría incendiarse al llegar a contacto con las superficies muy calientes del motor. En caso de que se vertiera accidentalmente algo de gasolina, controle que la zona esté completamente seca; antes de arrancar asegúrese de que no haya quedado nada de combustible en el manguito de la boca de llenado. La gasolina se dilata con el calor y bajo la acción de los rayos solares. Por lo tanto no llene nunca el depósito hasta el tope. Una vez que se haya terminado la operación de provisión de gasolina, cierre con cuidado el tapón. La gasolina es venenosa y cancerígena y contiene sustancias químicas que causan malformaciones fetales y otros problemas en la procreación. De verter gasolina sobre los vestidos o la piel, lávese de inmediato con agua y jabón y cámbiese. Si la gasolina llegara a contacto con los ojos o fuera tragada, diríjase de inmediato a un médico. No trate nunca de aspirar gasolina chupando con la boca. En caso de vuelco, el vehículo perderá gasolina que puede inflamarse fácilmente. Llamas o chispas pueden causar incendios y, por consiguiente, destruir no sólo el vehículo, sino también el edificio en que se encuentra y ocasionar lesiones graves o la muerte. DO NOT DISPOSE OF FUEL IN THE ENVIRONMENT. NO ESPARZA EL COMBUSTIBLE EN EL AMBIENTE. KEEP AWAY FROM CHILDREN. MANTENGASE LEJOS DEL ALCANCE DE LOS NIÑOS. 55 SR 50 #/.42/,,/ 25").%44/ #!2"52!.4% Leggere attentamente pag. 54 (SERBATOIO CARBURANTE). ◆ ◆ ◆ ◆ ◆ Rimuovere parzialmente il vano portacasco, vedi pag. 48 (RIMOZIONE VANO PORTACASCO completo di sella). Scollegare il tubo carburante (1) dal carburatore e posizionare l’estremità liberata in un recipiente. Riposizionare il vano portacasco in sede. Con il comando acceleratore rilasciato, far girare il motorino d’avviamento e controllare che il flusso del carburante sia regolare. Se il flusso risulta irregolare o nullo: A) Verificare l’integrità del tubo di depressione (2), se necessario pulirlo o sostituirlo. B) Verificare l’integrità del tubo carburante (1) se necessario pulirlo o sostituirlo. C) Scollegare il tubo di depressione (2) dal carburatore inserire una siringa nell’estremità liberata e aspirare. Il carburante dovrebbe defluire dall’estremità libera del tubo carburante (1). D) Rimuovere il rubinetto carburante (3), vedi pag. 58 (RIMOZIONE RUBINETTO CARBURANTE). Controllare che il filtro sul rubinetto sia libero da depositi o impurità; se necessario pulirlo. Se nessuna di queste operazioni dà esito positivo, sostituire il rubinetto carburante. 365/4!-%.4/ $%, #!2"52!.4% $!, 3%2"!4/)/ Leggere attentamente pag. 54 (SERBATOIO CARBURANTE). ◆ Arrestare il motore e attendere che il veicolo si sia raffreddato. ◆ Per lo svuotamento del carburante dal serbatoio, utilizzare una pompa manuale o un sistema simile. Per lo svuotamento completo del carburatore: ◆ Rimuovere il coperchio di ispezione sinistro, vedi pag. 40 (RIMOZIONE COPERCHI D’ISPEZIONE DESTRO E SINISTRO). ◆ Rimuovere la cassa filtro completa, vedi pag. 144 (FILTRO ARIA - RIMOZIONE). ◆ Posizionare l’estremità libera del tubo (4) all’interno di un contenitore. ◆ Aprire lo sfiato del carburatore allentando la vite di spurgo (5) posta sotto la vaschetta. Quando tutto il carburante, contenuto nel carburatore sarà uscito: ◆ Avvitare la vite di spurgo (5) sino alla chiusura dello sfiato. IMPORTANTE Avvitare accuratamente la vite di spurgo (5), per evitare perdite di carburante dallo sfiato carburatore al momento del rifornimento. 56 SR 50 #/.42/, '2)&/ #/-"534)",% #(%#+).' 4(% 6!#55- 4!0 Lea con cuidado pág. 55 (DEPOSITO COMBUSTIBLE). Carefully read p. 55 (FUEL TANK). ◆ ◆ ◆ ◆ ◆ ◆ Desmonte parcialmente el vano portacasco, véase pág. 49 (DESMONTAJE VANO PORTACASCO equipado con sillín). Desconecte el tubo combustible (1) del carburador y coloque la extremidad suelta en un recipiente. Vuelva a colocar el vano portacasco en su sede. Con el mando acelerador suelto, haga girar el motor de arranque y controle que el flujo del combustible sea regular. Si el flujo resulta irregular o nulo: A) Compruebe la integridad del tubo de vacío (2) y, si fuera necesario, límpielo o sustitúyalo. B) Compruebe la integridad del tubo combustible (1) y, si fuera necesario, límpielo o sustitúyalo. C) Desconecte el tubo de vacío (2) del carburador, introduzca una jeringa en la extremidad suelta y aspire. El combustible debería salir de la extremidad suelta del tubo combustible (1). D) Desmonte el grifo combustible (3), véase pág. 59 (DESMONTAJE GRIFO COMBUSTIBLE). Controle que en el filtro del grifo no haya incrustaciones o impurezas y, si necesario, límpielo. Si ninguna de estas operaciones tiene éxito: sustituya el grifo combustible. ◆ ◆ ◆ ◆ Remove the crash helmet compartment, see p. 49 (REMOVING THE CRASH HELMET COMPARTMENT complete with saddle). Disconnect the fuel pipe (1) from the carburettor and put its free end into a receptacle. Put back the crash helmet compartment in its seat. With released twist grip, let the starter run and make sure that the fuel flow is regular. If the flow is irregular, or if there is no flow: A) Check the condition of the vacuum pipe (2) and if necessary clean or change it. B) Check the condition of the fuel pipe (1) and if necessary clean or change it. C) Disconnect the vacuum pipe (2) from the carburettor, insert a syringe in the free end and suck. The fuel should flow out of the free end of the fuel pipe (1). D) Remove the vacuum tap (3), see p. 59 (REMOVING THE VACUUM TAP). Make sure that the cock filter is free from deposits or impurities and, if necessary, clean it. If none of these operations is successful, change the vacuum tap. $2!).).' 4(% &5%, 4!.+ %6!#5!#)/. $%, #/-"534)",% $%, $%0/3)4/ Carefully read page 55 (FUEL). Lea con cuidado pág. 55 (DEPOSITO COMBUSTIBLE). ◆ ◆ ◆ ◆ Pare el motor y espere a que el vehículo se haya enfriado. Vacíe el depósito del combustible utilizando una bomba manual o un sistema semejante. Stop the engine and wait until it has cooled down. Empty the fuel tank by means of a manual pump or a similar system. To empty the carburettor completely, proceed as follows: ◆ Remove the left inspection cover, see p. 41 (REMOVING THE RIGHT AND LEFT INSPECTION COVERS). ◆ Remove the filter casing, see p. 145 (AIR CLEANER REMOVAL). ◆ Put the free end of the pipe (4) into a receptacle. ◆ Open the carburettor breather by loosening the drain screw (5) positioned under the float chamber. Para vaciar del todo el carburador: ◆ Desmonte la tapa de inspección izquierda, véase pág. 41 (DESMONTAJE TAPAS DE INSPECCION DERECHA E IZQUIERDA). ◆ Saque la caja filtro completa, véase pág. 145 (FILTRO AIRE - DESMONTAJE). ◆ Coloque la extremidad suelta del tubo (4) dentro de un recipiente. ◆ Abra el respiradero del carburador aflojando el tornillo de purga (5) colocado debajo del tanque. When all the fuel has flowed out: ◆ Tighten the drain screw (5) until the breather has closed. NOTE Tighten the drain screw (5) carefully, to avoid fuel leaks from the carburettor breather pipe during the refuelling. En cuanto haya salido todo el combustible contenido en el carburador: ◆ Atornille el tornillo de purga (5) hasta cerrar el respiradero. IMPORTANTE Atornille con cuidado el tornillo de purga (5) para evitar pérdidas de combustible del respiradero carburador cuando reposta. 57 SR 50 2)-/:)/.% 25").%44/ #!2"52!.4% ◆ Rimuovere la protezione inferiore codone, vedi pag. 38 (RIMOZIONE PROTEZIONE INFERIORE CODONE). aATTENZIONE Non disperdere il carburante nell’ambiente. ◆ ◆ ◆ ◆ Svuotare completamente il serbatoio carburante, vedi pag. 56 (SVUOTAMENTO DEL CARBURANTE DAL SERBATOIO). Recuperare il carburante in una tanica, tapparla e sistemarla in un luogo sicuro. Scollegare dal rubinetto carburante (1) il tubo carburante (2) e il tubo di depressione (3). Allentare la fascetta (4). aATTENZIONE Non danneggiare il filtro sul rubinetto nella rimozione. ◆ Sfilare e rimuovere il rubinetto. IMPORTANTE Rimontare il rubinetto carburante nella stessa posizione per evitare curve anomale o strozzature dei tubi (2 - 3). 58 SR 50 $%3-/.4!*% '2)&/ #/-"534)",% 2%-/6).' 4(% 6!#55- 4!0 ◆ ◆ Desmonte la protección inferior de el colín, véase pág. 39 (DESMONTAJE PROTECCION INFERIOR COLIN). aATENCION aCAUTION No esparza el combustible en el ambiente. ◆ ◆ ◆ ◆ Do not dispose of fuel in the environment. Vacíe del todo el depósito combustible, véase pág. 57 (EVACUACION DEL COMBUSTIBLE DEL DEPOSITO). Recupere el combustible en un bidón, tápelo y póngalo en un lugar seguro. Desconecte del grifo combustible (1) el tubo combustible (2) y el tubo de vacío (3). Afloje la abrazadera (4). ◆ ◆ ◆ ◆ aATENCION Drain the fuel tank completely, see p. 57 (DRAINING THE FUEL TANK). Put the fuel in a container, plug it and store it in a safe place. Disconnect the fuel pipe (2) and the vacuum pipe (3) from the vacuum tap (1). Loosen the clamp (4). aCAUTION Durante el desmontaje, no dañe el filtro del grifo. ◆ Remove the lower guard of the rear part of the fairing, see p. 39 (REMOVING THE LOWER GUARD OF THE REAR PART OF THE FAIRING). During disassembly, do not damage the filter on the vacuum tap. Extraiga y saque el grifo. IMPORTANTE Vuelva a montar el grifo combustible en la misma posición para evitar curvas anómalas o estrangulaciones de los tubos (2 - 3). ◆ Withdraw and remove the vacuum tap. NOTE Reassemble the vacuum tap in its original position, to avoid irregular curves or narrowing of the pipes (2 - 3). 59 SR 50 #/.42/,,/ 3/.$! ,)6%,,/ #!2"52!.4% Per il controllo della sonda livello carburante vedi pag. 180 (INDICATORE LIVELLO CARBURANTE). 2)-/:)/.% 3/.$! ,)6%,,/ #!2"52!.4% Leggere attentamente pag. 54 (SERBATOIO CARBURANTE). ◆ ◆ ◆ ◆ ◆ Rimuovere il vano portacasco, vedi pag. 48 (RIMOZIONE VANO PORTACASCO completo di sella). Svitare e togliere la vite (1). Rimuovere il coperchio (2). Scollegare il connettore elettrico sonda livello carburante (3). Svitare e togliere i quattro dadi (4) con relative rondelle. aATTENZIONE Maneggiare con cura. Non danneggiare la sonda nella rimozione. ◆ Sollevare e sfilare la sonda livello carburante (5) dal serbatoio. aPERICOLO Tappare la sede sonda sul serbatoio carburante impedendo l’entrata d’impurità, di corpi estranei e l’uscita di vapori di carburante. 2)-/:)/.% 3%2"!4/)/ #!2"52!.4% #/-0,%4/ ◆ ◆ ◆ ◆ ◆ ◆ ◆ ◆ ◆ ◆ Svuotare completamente il serbatoio carburante, pag. 56 (SVUOTAMENTO DEL CARBURANTE DAL SERBATOIO). Recuperare il carburante in una tanica, tapparla e sistemarla in un luogo sicuro. Scollegare dal rubinetto carburante (6) il tubo carburante (7) e il tubo di depressione (8). Scollegare il connettore elettrico (3) della sonda livello carburante (5). Svitare e togliere il tappo carburante (9). Rimuovere la guarnizione in gomma (10). Svitare e togliere le tre viti (11) e recuperare le rondelle. Rimuovere parzialmente il vano portacasco, vedi pag. 48 (RIMOZIONE VANO PORTACASCO completo di sella). Rimuovere il serbatoio carburante. Avvitare il tappo carburante (9). 60 SR 50 #/.42/, 3/.$! .)6%, #/-"534)",% #(%#+).' 4(% &5%, ,%6%, '!5'% 5.)4 Para el control de la sonda nivel combustible, véase la pág. 180 (INDICADOR NIVEL COMBUSTIBLE). For the checking of the fuel level gauge unit, see p. 180 (FUEL LEVEL INDICATOR). $%3-/.4!*% 3/.$! .)6%, #/-"534)",% 2%-/6).' 4(% &5%, ,%6%, '!5'% 5.)4 Lea con cuidado pág. 55 (DEPOSITO COMBUSTIBLE). ◆ ◆ ◆ ◆ ◆ ◆ Carefully read p. 55 (FUEL TANK). Desmonte el vano portacasco, véase pág. 49 (DESMONTAJE VANO PORTACASCO equipado con sillín). Destornille y quite el tornillo (1). Saque la tapa (2). Desconecte el conector eléctrico sonda nivel combustible (3). Destornille y quite las cuatro tuercas (4) con correspondientes arandelas. ◆ ◆ ◆ ◆ aCAUTION aATENCION Handle with care. Avoid damaging the gauge unit during the removal. Maneje con cuidado. Durante el desmontaje no dañe la sonda. ◆ ◆ Levante y extraiga la sonda nivel combustible (5) del depósito. Plug the gauge unit seat on the tank, to avoid any accidental introduction of impurities and foreign matters and the exit of fuel vapours. Tape la sede sonda en el depósito combustible para impedir la entrada de impurezas, de cuerpos extraños y la salida de vapores de combustible. 2%-/6).' 4(% #/-0,%4% &5%, 4!.+ $%3-/.4!*% $%0/3)4/ #/-"534)",% #/-0,%4/ ◆ ◆ ◆ ◆ ◆ ◆ ◆ ◆ ◆ Raise the fuel level gauge unit (5) and withdraw it from the tank. aWARNING aPELIGRO ◆ Remove the crash helmet compartment, see p. 49 (REMOVING THE CRASH HELMET COMPARTMENT complete with saddle). Unscrew and remove the screw (1). Remove the cover (2). Disconnect the electric connector of the fuel level gauge unit (3). Unscrew and remove the four nuts (4) with the relevant washers. ◆ Vacíe del todo el depósito combustible, pág. 57 (EVACUACION DEL COMBUSTIBLE DEL DEPOSITO). Recupere el combustible en un bidón, tápelo y póngalo en un lugar seguro. Desconecte del grifo combustible (6) el tubo combustible (7) y el tubo de vacío (8). Desconecte el conector eléctrico (3) de la sonda nivel combustible (5). Destornille y quite la tapa combustible (9). Extraiga y saque la junta de goma (10). Destornille y quite los tres tornillos (11) y recupere las arandelas. Desmonte parcialmente el vano portacasco, véase pág. 49 (DESMONTAJE VANO PORTACASCO equipado con sillín). Saque el depósito combustible. Enrosque el tapón combustible (9). ◆ ◆ ◆ ◆ ◆ ◆ ◆ ◆ ◆ 61 Drain the fuel tank completely, see p. 57 (DRAINING THE FUEL TANK). Put the fuel in a container, plug it and store it in a safe place. Disconnect the fuel pipe (6) and the vacuum pipe (7) from the vacuum tap (8). Disconnect the electric connector (3) of the fuel level gauge unit (5). Unscrew and remove the fillercap (9). Withdraw and remove the rubber gasket (10). Unscrew and remove the three screws (11) and take the washers. Partially remove the crash helmet compartment, see p. 49 (REMOVING THE CRASH HELMET COMPARTMENT complete with saddle). Remove the fuel tank. Tighten the fillercap (9). SR 50 in 3%2"!4/)/ /,)/ -)3#%,!4/2% Leggere attentamente pag. 1 (NORME GENERALI DI SICUREZZA). aATTENZIONE Lavare accuratamente le mani dopo aver maneggiato l’olio. Non disperdere l’olio nell’ambiente. TENERE LONTANO DALLA PORTATA DEI BAMBINI. aPERICOLO In caso di esaurimento dell’olio, il motore potrebbe grippare. Questo può essere causa di ribaltamento o altri incidenti e conseguentemente di gravi lesioni o morte. #/.42/,,) ◆ ◆ Controllare lo stato di efficienza della sonda livello olio (1), vedi pag. 179 (CONTROLLO DEL SENSORE LIVELLO OLIO). Controllare ed eventualmente lavare con benzina il filtro (2) e l’elemento filtrante, liberandoli da eventuali depositi e impurità. 365/4!-%.4/ ◆ ◆ ◆ Rimuovere il codone, vedi pag. 38 (RIMOZIONE CODONE). Togliere il tappo serbatoio (3). Posizionare sotto l’attacco filtro (2), un recipiente con capacità non inferiore a 2 L, per il recupero dell’olio. IMPORTANTE Premunirsi di fascetta stringitubo a cacciavite, da sostituire all’originale (di tipo speciale senza vite). ◆ Tranciare la fascetta (4) del filtro (2). IMPORTANTE Nel rimontaggio sostituire la fascetta con una nuova. ◆ Scollegare il filtro (2) dal serbatoio olio miscelatore (5). aATTENZIONE Sistemare e fissare il filtro (2) verticalmente in modo tale che non fuoriesca l’olio residuo rimasto nella tubazione (6). ◆ Recuperare l’olio nel recipiente di raccolta e tapparlo. 2)-/:)/.% ◆ ◆ ◆ ◆ ◆ ◆ Svuotare completamente il serbatoio olio miscelatore (5), vedi sopra (SVUOTAMENTO). Scollegare i connettori elettrici (7) della sonda livello olio miscelatore (1). Togliere il tappo serbatoio (3). Sfilare e rimuovere la guarnizione in gomma (8). Svitare le due viti (9) recuperando le rondelle. Sfilare il serbatoio dal vano portacasco e rimuoverlo. aATTENZIONE Nel rimontaggio, dopo il riempimento del serbatoio, effettuare lo spurgo olio miscelatore, vedi pag. 64 (SPURGO OLIO MISCELATORE). 62 SR 50 $%0/3)4/ !#%)4% -%:#,!$/2 342/+% /), 4!.+ Lea con cuidado pág. 4 (NORMAS GENERALES DE SEGURIDAD). Carefully read page 7 (GENERAL SAFETY RULES). aCAUTION aATENCION Carefully wash your hands after handling the oil. Do not dispose of the oil in the environment. Lave con mucho cuidado las manos tras haber manejado el aceite. No esparza el aceite en el ambiente. KEEP AWAY FROM CHILDREN. MANTENGASE LEJOS DEL ALCANCE DE LOS NIÑOS. aWARNING aPELIGRO If the mixer oil runs out, the engine may seize. This may cause the overturning of the vehicle or other accidents, with consequent risk of serious injuries or even death. Si se agotara el aceite, el motor podría agarrotarse. Esto puede causar el bloqueo de la rueda trasera u otros accidentes y, por consiguiente, lesiones graves o la muerte. #(%#+).' #/.42/,%3 ◆ ◆ ◆ Controle el estado de eficiencia de la sonda nivel aceite (1), véase pág. 179 (CONTROL DEL SENSOR NIVEL ACEITE). Controle y, si necesario, lave con gasolina el filtro (2) y el elemento filtrante, eliminando todas las incrustaciones e impurezas. ◆ $2!).).' ◆ 6!#)!$/ ◆ ◆ ◆ ◆ ◆ Desmonte el colín, véase pág. 39 (DESMONTAJE COLIN). Quite el tapón depósito (3). Coloque un recipiente con capacidad no inferior a 2 L por debajo del empalme filtro (2), para recuperar el aceite. Remove the rear part of the fairing, see p. 39 (REMOVING THE REAR PART OF THE FAIRING). Remove the tank cap (3). Position a container with at least 2 L capacity under the filter coupling (2), to gather the oil. NOTE Get a screwdriver-type pipe clamp, to replace the original one (special type without screw). ◆ IMPORTANTE Prepare una abrazadera de destornillador para sustituirla la original (de tipo especial sin tornillo). ◆ Check the efficiency of the oil level gauge (1), see p. 179 (CHECKING THE OIL LEVEL SENSOR). Check and if necessary wash the filter (2) and the filtering element with petrol, removing any deposit and impurity. Cut the clamp (4) of the filter (2). NOTE Upon reassembly, replace the clamp with a new one. ◆ Corte la abrazadera (4) del filtro (2). Disconnect the filter (2) from the 2 stroke oil tank (5). IMPORTANTE aCAUTION Durante la instalación sustituya la abrazadera con una nueva. ◆ Position and fix the filter (2) vertically, so that the residual oil left in the pipe (6) cannot flow out. Desconecte el filtro (2) del depósito aceite mezclador (5). aATENCION ◆ Instale y fije el filtro (2) verticalmente de modo que el aceite residual que ha quedado en los tubos (6) no se salga. ◆ 2%-/6!, ◆ Recupere el aceite en el recipiente de recogida y tápelo. ◆ $%3-/.4!*% ◆ ◆ ◆ ◆ ◆ ◆ Gather the oil in the container and plug it. ◆ ◆ ◆ ◆ Vacíe del todo el depósito aceite mezclador (5), véase pág. 63 (VACIADO). Desconecte los conectores eléctricos (7) de la sonda nivel aceite mezclador (1). Quite el tapón depósito (3). Extraiga y saque la junta de goma (8). Destornille los dos tornillos (9), recuperando las arandelas. Extraiga el depósito del vano portacasco y sáquelo. Drain the 2 stroke oil tank (5) completely, see p. 63 (DRAINING). Disconnect the electric connectors (7) of the 2 stroke oil level gauge (1). Remove the tank cap (3). Withdraw and remove the rubber gasket (8). Unscrew the two screws (9), taking the washers. Withdraw the tank from the crash helmet compartment and remove it. aCAUTION Upon reassembly, fill the tank and bleed the 2 stroke oil, see p. 65 (BLEEDING THE 2 STROKE OIL TANK). aATENCION Durante la instalación, tras haber llenado el depósito, realice la purga aceite mezclador, véase pág. 65 (PURGA ACEITE MEZCLADOR). 63 SR 50 3052'/ /,)/ -)3#%,!4/2% IMPORTANTE Spurgare l’impianto dell’olio miscelatore ogniqualvolta si esaurisce completamente l’olio contenuto nel serbatoio o viene scollegato il tubo di alimentazione olio per la rimozione del serbatoio. aATTENZIONE Lavare accuratamente le mani dopo aver maneggiato l’olio. Non disperdere l’olio nell’ambiente. TENERE LONTANO DALLA PORTATA DEI BAMBINI. ◆ ◆ ◆ ◆ ◆ ◆ ◆ ◆ ◆ ◆ ◆ ◆ Posizionare il veicolo sul cavalletto centrale. Riempire completamente il serbatoio olio miscelatore. Rimuovere il silenziatore di scarico, vedi pag. 142 (SILENZIATORE DI SCARICO). Rimuovere il coperchio d’ispezione destro, vedi pag. 40 (RIMOZIONE COPERCHI D’ISPEZIONE DESTRO E SINISTRO). Rimuovere la chiusura scudo inferiore, vedi pag. 40 (RIMOZIONE CHIUSURA SCUDO INFERIORE). Svitare e togliere la vite (1), la vite (2) e la vite (3). Rimuovere il convogliatore aria (4) dalla sua sede. 1 Svitare e togliere le due viti (5). 1 Svitare e togliere le tre viti (6). 1 Rimuovere il carter portapompa (7) dalla sua sede. Posizionare sotto il veicolo, in corrispondenza della vite di spurgo olio (8), un recipiente per la raccolta dell’olio. Svitare e togliere la vite di spurgo olio (8) e attendere la fuoriuscita dell’olio dal foro. aATTENZIONE È importante aspettare la completa fuoriuscita dell’aria, in quanto il funzionamento del motore con aria nell’impianto dell’olio miscelatore, potrebbe causare gravi danni al motore stesso. ◆ ◆ Quando l’olio in uscita sarà privo di bollicine d’aria, avvitare e serrare la vite di spurgo olio (8). Controllare il livello olio miscelatore e rabboccare se necessario. 64 SR 50 052'! !#%)4% -%:#,!$/2 ",%%$).' 4(% 342/+% /), 4!.+ IMPORTANTE NOTE Purgue la instalación del aceite mezclador cada vez que el aceite contenido en el depósito acaba completamente o que se desconecta el tubo de alimentación aceite para desmontar el depósito. Bleed the 2 stroke oil system whenever the 2 stroke oil tank is completely empty or the oil supply pipe is disconnected to remove the tank. aCAUTION aATENCION Carefully wash your hands after handling the oil. Do not dispose of the oil in the environment. Lave con cuidado las manos tras haber manejado el aceite. No esparza el aceite en el ambiente. KEEP AWAY FROM CHILDREN. MANTENGASE LEJOS DEL ALCANCE DE LOS NIÑOS. ◆ ◆ ◆ ◆ ◆ ◆ ◆ ◆ ◆ ◆ ◆ ◆ ◆ ◆ ◆ Coloque el vehículo sobre el caballete central. Llene del todo el depósito aceite mezclador. Quite el silenciador de escape, véase pág. 143 (SILENCIADOR DE ESCAPE). Desmonte la tapa de inspección derecha, véase pág. 41 (DESMONTAJE TAPAS DE INSPECCION DERECHA E IZQUIERDA). Desmonte la cobertura escudo inferior, véase pág. 41 (DESMONTAJE COBERTURA ESCUDO INFERIOR). Destornille y quite el tornillo (1), el tornillo (2) y el tornillo (3). Desmonte el encauzador de aire (4) de su sede. 1 Destornille y quite los dos tornillos (5). 1 Destornille y quite los tres tornillos (6). 1 Quite el protector de bomba (7) de su sede. Ponga por debajo del vehículo, en correspondencia con el tornillo de purga aceite (8), un recipiente para recoger el aceite. Destornille y quite el tornillo de purga aceite (8) y espere que el aceite se salga del orificio. ◆ ◆ ◆ ◆ ◆ ◆ ◆ ◆ ◆ aCAUTION It is important to wait until all the air has come out, since the engine running with air in the 2 stroke oil system can seriously damage the engine itself. aATENCION Es importante que el aire se salga del todo, en cuanto el funcionamiento del motor con presencia de aire en la instalación del aceite mezclador, podría causar graves daños al mismo. ◆ ◆ ◆ ◆ Position the vehicle on the centre stand. Fill the 2 stroke oil tank completely. Remove the exhaust silencer, see p. 143 (EXHAUST SILENCER). Remove the right inspection cover, see p. 41 (REMOVING THE RIGHT AND LEFT INSPECTION COVERS). Remove the lower shield cover, see p. 41 (REMOVING THE LOWER SHIELD COVER). Unscrew and remove the screw (1), the screw (2) and the screw (3). Remove the air conveyor (4) from its seat. 1 Unscrew and remove the two screws (5). 1 Unscrew and remove the three screws (6). 1 Remove the pump case (7) from its seat. Position a container under the vehicle, in correspondence with the oil drain screw (8), in order to gather the oil. Unscrew and remove the oil drain screw (8) and wait until the oil flows out of the hole. En cuanto el aceite en salida resulte sin burbujas de aire, atornille y apriete el tornillo de purga aceite (8). Controle el nivel aceite mezclador y rellene, si es necesario. 65 When no more air bubbles can be seen in the outflowing oil, screw and tighten the oil drain screw (8). Check the 2 stroke oil level and top up, if necessary. SR 50 )-0)!.4/ $) 2!&&2%$$!-%.4/ ,)15)$/ 2%&2)'%2!.4% 1 1 aATTENZIONE Non utilizzare il veicolo se il livello del liquido refrigerante è al di sotto del livello minimo. Controllare ogni 2000 km e dopo lunghi viaggi il livello del liquido refrigerante; sostituirlo ogni 2 anni. aPERICOLO Il liquido refrigerante è nocivo se ingerito; il contatto con la pelle o gli occhi potrebbe causare irritazioni. Se il liquido venisse a contatto con la pelle o gli occhi, risciacquare a lungo con acqua abbondante e consultare il medico. Se ingerito, provocare il vomito, sciacquare bocca e gola con abbondante acqua e consultare immediatamente un medico. NON DISPEDERE IL LIQUIDO NELL’AMBIENTE. TENERE LONTANO DALLA PORTATA DEI BAMBINI. Porre attenzione a non versare il liquido refrigerante sulle parti roventi del motore; potrebbe incendiarsi emettendo fiamme invisibili. Nel caso di interventi di manutenzione, si consiglia l’utilizzo di guanti in lattice. La soluzione di liquido refrigerante è composta da 50% di acqua e 50% di antigelo. Questa miscela è ideale per la maggior parte di temperature di funzionamento e garantisce una buona protezione contro la corrosione. È conveniente mantenere la stessa miscela anche nella stagione calda perché si riducono così le perdite per evaporazione e la necessità di frequenti rabbocchi. In questo modo diminuiscono i depositi di sali minerali, lasciati nel radiatore dall'acqua evaporata e si mantiene inalterata l'efficienza del sistema di raffreddamento. Nel caso in cui la temperatura esterna sia al di sotto dei zero gradi centigradi, controllare frequentemente il circuito refrigerante aggiungendo, se necessario, una concentrazione maggiore di antigelo (fino a un massimo del 60%). Per la soluzione refrigerante utilizzare acqua distillata, per non rovinare il motore. aPERICOLO Non togliere il tappo del vaso di espansione a motore caldo, perché il refrigerante è sotto pressione e a temperatura elevata. IMPORTANTE Liquido refrigerante del motore (consigliato): vedi pag. 18 (TABELLA LUBRIFICANTI). aPERICOLO Impiegare solo antigelo e anticorrosivo senza nitrito, che assicuri una protezione almeno ai -35 °C. 66 SR 50 ).34!,!#)/. $% 2%&2)'%2!#)/. ,)15)$/ 2%&2)'%2!.4% 1 1 #//,).' 3934%#//,!.4 1 1 aATENCION aCAUTION No utilice el vehículo si el nivel del líquido refrigerante está por debajo del nivel mínimo. Do not use the vehicle if the coolant is below the minimum prescribed level. Controle cada 2000 km y tras largos viajes el nivel del líquido refrigerante; sustitúyalo cada 2 años. Check the coolant level every 2000 km and after long rides; change it every 2 years. aPELIGRO aWARNING El líquido refrigerante es nocivo si es tragado; si llega a contacto con la piel o con los ojos podría causar irritaciones. The coolant is noxious: do not swallow it; if the coolant gets in contact with the skin or the eyes, it can cause serious irritations. Si el líquido llegara a contacto con la piel o los ojos, lávelos con mucha agua y diríjase a un médico. De tragarlo accidentalmente, produzca el vómito, enjuáguese la boca y la garganta con mucha agua y diríjase inmediatamente a un médico. If the coolant gets in contact with your skin or eyes, rinse with plenty of water and consult a doctor. If it is swallowed, induce vomit, rinse mouth and throat with plenty of water and consult a doctor without delay. NO ESPARZA EL LÍQUIDO EN EL AMBIENTE. DO NOT DISPOSE OF THE COOLANT IN THE ENVIRONMENT. MANTENGASE LEJOS DEL ALCANCE DE LOS NIÑOS. KEEP AWAY FROM CHILDREN. Tenga cuidado con no verter el líquido refrigerante sobre las piezas candentes del motor; podría incendiarse emitiendo llamas invisibles. Be careful not to spill the coolant on the red-hot parts of the engine: it may catch fire and send out invisible flames. En caso de intervenciones de mantenimiento, se aconseja use guantes de látex. In case maintenance operations are to be performed, it is advisable to use latex gloves. La solución del líquido refrigerante está compuesta por 50% de agua y por 50% de anticongelante. Esta mezcla es ideal para casi todas las temperaturas de funcionamiento y garantiza una buena protección contra la corrosión. The coolant is made up of 50% water and 50% antifreeze. This mixture is ideal for most running temperatures and ensures good protection against corrosion. It is advisable to keep the same mixture also in the hot season, since in this way losses due to evaporation are reduced and it is not necessary to top up very frequently. The mineral salt deposits left in the radiator by evaporated water are thus reduced and the efficiency of the cooling system remains unchanged. Se aconseja mantenga la misma mezcla incluso durante la temporada calurosa porque, de tal forma, se reducen las pérdidas por evaporación y la necesidad de frecuentes rellenos. De tal manera disminuyen las incrustaciones de sales minerales, dejadas en el radiador por el agua evaporada y se conserva inalterada la eficiencia del sistema de refrigeración. If the outdoor temperature is below 0°, check the cooling circuit frequently and if necessary increase the antifreeze concentration (up to maximum 60%). For the cooling solution use distilled water, in order not to damage the engine. En caso de que la temperatura exterior esté por debajo de cero grados centígrados, controle frecuentemente el circuito de refrigeración añadiendo, si necesario, una mayor concentración de anticongelante (hasta un máximo de 60%). Para la solución refrigerante use agua destilada, para no dañar el motor. aWARNING Do not remove the expansion tank cap when the engine is hot, since the coolant is under pressure and its temperature is high. aPELIGRO No quite el tapón del depósito de expansión con el motor aún caliente, porque el líquido refrigerante está bajo presión y a temperatura elevada. NOTE Engine coolant (recommended): see page 19 (LUBRICANT CHART). aWARNING IMPORTANTE Líquido refrigerante del motor (aconsejado): véase pág. 18 (TABLA LUBRICANTES). Use only antifreeze and anticorrosive without nitrite, in order to ensure protection at -35 °C at least. aPELIGRO Utilice sólo anticongelante y antioxidante sin nitrito que garantice una protección por lo me-nos a los -35 °C. 67 SR 50 #/.42/,,/ % 2!""/##/ ,)15)$/ 2%&2)'%2!.4% 1 Leggere attentamente pag. 1 (NORME GENERALI DI SICUREZZA) e pag. 66 (LIQUIDO REFRIGERANTE 1). aATTENZIONE Non utilizzare il veicolo se il livello del liquido refrigerante è al di sotto del livello minimo. ◆ ◆ ◆ Posizionare il veicolo sul cavalletto centrale. Rimuovere il cofano anteriore (1), vedi pag. 42 (RIMOZIONE COFANO ANTERIORE). Verificare che il livello del liquido, contenuto nel vaso di espansione (2), sia compreso tra i riferimenti “MIN” e “MAX” (vedi figura). aPERICOLO Non togliere il tappo di riempimento dal vaso di espansione a motore caldo, perché il refrigerante è sotto pressione e a temperatura elevata. Al contatto con la pelle o i vestiti può causare serie ustioni e/o danni. Agire con cautela, lasciare sfiatare l’eventuale pressione presente nell’impianto. ◆ ◆ ◆ ◆ In caso contrario, svitare e togliere il tappo di riempimento (3). Rabboccare sino a che il livello del liquido raggiunge approssimativamente il livello “MAX”. Non superare tale livello, altrimenti si avrà una fuoriuscita del liquido durante il funzionamento del motore. Avvitare il tappo di riempimento (3). Riposizionare il cofano anteriore (1). aATTENZIONE Nel caso di consumo eccessivo di liquido refrigerante e nel caso in cui il vaso di espansione rimanga vuoto, controllare che non ci siano perdite nel circuito. 68 SR 50 #/.42/, 9 2%,,%./ ,)15)$/ 2%&2)'%2!.4% #(%#+).' 4(% #//,!.4 ,%6%, !.$ 4/00).' 50 1 1 Lea con cuidado pág. 4 (NORMAS GENERALES DE SEGURIDAD) y pág. 67 (LIQUIDO REFRIGERANTE 1). Carefully read page 7 (GENERAL SAFETY RULES) and page 67 (COOLANT 1). aATENCION aCAUTION No utilice el vehículo si el nivel del líquido refrigerante está por debajo del nivel mínimo . Do not use the vehicle if the coolant is below the minimum prescribed level. ◆ ◆ ◆ ◆ ◆ Coloque el vehículo sobre el caballete central. Saque el carenado frontal (1), véase pág. 43 (DESMONTAJE CARENADO FRONTAL). Controle que el nivel del líquido, contenido en el depósito de expansión (2), esté comprendido entre las referencias “MIN” y “MAX” (véase figura). ◆ Position the vehicle on the centre stand. Remove the front cover (1), see p. 43 (REMOVING THE FRONT COVER). Make sure that the level of the fluid contained in the expansion tank (2) is included between the “MIN” and “MAX” notches (see figure). aPELIGRO aWARNING No quite el tapón del depósito de expansión con el motor aún caliente, porque el líquido refrigerante está bajo presión y a temperatura elevada. Si llega a contacto con la piel o con la ropa puede causar graves quemaduras y/o daños. Do not remove the expansion tank cap when the engine is hot, since the coolant is under pressure and its temperature is high. If it gets in contact with the skin or with clothes, it may cause severe burns and/or damages. Actúe con cuidado y purgue la eventual presión presente en la instalación. Proceed with care, releasing any residual pressure that may be present in the system. ◆ ◆ ◆ ◆ ◆ ◆ ◆ En caso contrario, desenrosque y quite el tapón de llenado (3). Rellene hasta que el nivel del líquido alcance aproximadamente el nivel “MAX”. No supere este nivel, porque en caso contrario puede haber una salida del líquido durante el funcionamiento del motor. Enrosque el tapón de llenado (3). Vuelva a colocar el capó delantero (1). ◆ If not, unscrew and remove the filling cap (3). Top up until the fluid reaches approx. the “MAX” notch. Do not exceed this level, otherwise the fluid will flow out of the tank when the engine is running. Put back the filling cap (3). Put back the front cover (1). aCAUTION In case of excessive consumption of coolant and in case the expansion tank remains empty, make sure that there are no leaks in the circuit. aATENCION En caso de un excesivo consumo de líquido refrigerante y en caso de que el depósito de expansión quede vacío, controle que no haya pérdidas en el circuito. 69 SR 50 3#!2)#/ )-0)!.4/ $) 2!&&2%$$!-%.4/ 1 Leggere attentamente pag. 1 (NORME GENERALI DI SICUREZZA) e pag. 66 (LIQUIDO REFRIGERANTE 1). aPERICOLO Arrestare il motore e attendere che motore e impianto di scarico si siano raffreddati. ◆ ◆ Posizionare il veicolo sul cavalletto centrale. Rimuovere il cofano anteriore (1), vedi pag. 42 (RIMOZIONE COFANO ANTERIORE). aPERICOLO Non togliere il tappo di riempimento dal vaso di espansione a motore caldo, perché il refrigerante è sotto pressione e a temperatura elevata. Al contatto con la pelle o i vestiti può causare serie ustioni e/o danni. Agire con cautela, lasciare sfiatare l’eventuale pressione presente nell’impianto. ◆ ◆ Svitare e togliere il tappo di riempimento (2) dal vaso di espansione (3). Posizionare un contenitore con capacità non inferiore a 1,2 L sotto al raccordo tubo (4). IMPORTANTE Premunirsi di fascette stringitubo a cacciavite, da sostituire alle originali (di tipo speciale senza vite). ◆ ◆ ◆ Tranciare la testa della fascetta stringitubo (5). Sfilare dall'attacco il tubo (4) e lasciar defluire completamente, nel contenitore, il liquido refrigerante. Travasare il liquido fuoriuscito in un recipiente di raccolta per il recupero liquidi. aPERICOLO Il liquido refrigerante è nocivo: NON INGERIRE. TENERE LONTANO DALLA PORTATA DEI BAMBINI. NON DISPERDERE IL LIQUIDO NELL'AMBIENTE. Sistemare il recipiente in un luogo sicuro. ◆ ◆ ◆ Sostituire la fascetta stringitubo (5) con una nuova a cacciavite. Ricollegare il tubo (4) all’attacco inferiore pompa liquido refrigerante. Serrare la nuova fascetta stringitubo. 70 SR 50 $%3#!2'! ).34!,!#)/. $% 2%&2)'%2!#)/. $2!).).' 4(% #//,!.4 3934%- 1 Carefully read page 7 (GENERAL SAFETY RULES) and page 67 (COOLANT 1). Lea con cuidado pág. 4 (NORMAS GENERALES DE SEGURIDAD) y pág. 67 (LIQUIDO REFRIGERANTE 1). aWARNING aPELIGRO Stop the engine and wait until the engine and the exhaust system have cooled down. Pare el motor y espere a que el motor y el sistema de escape se hayan enfriado. ◆ ◆ ◆ ◆ Coloque el vehículo sobre el caballete central. Saque el carenado frontal (1), véase pág. 43 (DESMONTAJE CARENADO FRONTAL). Do not remove the expansion tank cap when the engine is hot, since the coolant is under pressure and its temperature is high. If it gets in contact with the skin or with clothes, it may cause severe burns and/or damages. No quite el tapón de llenado del depósito de expansión con el motor caliente, porque el líquido refrigerante está bajo presión y a temperatura elevada. Si llega a contacto con la piel o con la ropa puede causar graves quemaduras y/o daños. Proceed with care, releasing any residual pressure that may be present in the system. Actúe con cuidado y purgue la eventual presión presente en la instalación. ◆ ◆ Destornille y quite el tapón de llenado (2) del depósito de expansión (3). Coloque un recipiente con capacidad no inferior a 1,2 L, por debajo del empalme tubo (4). ◆ Prepare unas abrazaderas de destornillador para sustituirlas a las originales (de tipo especial sin tornillo). ◆ original ones (special type without screw). ◆ ◆ Corte la cabeza de la abrazadera 5). Extraiga del empalme el tupo (4) y deje salir del todo el líquido refrigerante en el recipiente. Vierta el líquido que ha salido en un recipiente de recogida para la recuperación de líquidos. ◆ aWARNING aPELIGRO ◆ ◆ ◆ Cut the head of the pipe clamp (5). Withdraw the pipe (4) from the coupling and let the coolant drip completely into the container. Put the coolant in another container for the collection of fluids. The coolant is noxious: DO NOT SWALLOW. KEEP AWAY FROM CHILDREN. DO NOT DISPOSE OF THE COOLANT IN THE ENVIRONMENT. Keep the container in a safe place. El líquido refrigerante es nocivo: NO LO TRAGUE. MANTENGASE LEJOS DEL ALCANCE DE LOS NIÑOS. NO ESPARZA EL LIQUIDO EN EL AMBIENTE. Coloque el recipiente en un lugar seguro. ◆ Unscrew and remove the filling cap (2) from the expansion tank (3). Put a container with at least 1.2 L, capacity under the pipe fitting (4). NOTE Get screwdriver-type pipe clamps, to replace the IMPORTANTE ◆ ◆ Position the vehicle on the centre stand. Remove the front cover (1), see p. 43 (REMOVING THE FRONT COVER). aWARNING aPELIGRO ◆ 1 Sustituya la abrazadera (5) con otra nueva de destornillador. Conecte el tubo (4) en el empalme inferior bomba líquido refrigerante. Apriete la nueva abrazadera. ◆ ◆ 71 Replace the pipe clamp (5) with a new, screwdrivertype pipe clamp. Reconnect the pipe (4) to the lower coupling of the coolant pump. Tighten the new pipe clamp. SR 50 3/34)45:)/.% ,)15)$/ 2%&2)'%2!.4% 1 Leggere attentamente pag. 1 (NORME GENERALI DI SICUREZZA) e pag. 66 (LIQUIDO REFRIGERANTE 1). aATTENZIONE Non utilizzare il veicolo se il livello del liquido refrigerante è al di sotto del livello minimo. ◆ ◆ ◆ ◆ Scaricare l’impianto di raffreddamento, vedi pag. 70 (SCARICO IMPIANTO DI RAFFREDDAMENTO 1). Versare nel vaso di espansione (1) 1,1 L di liquido refrigerante, vedi pag. 18 (TABELLA LUBRIFICANTI) e pag. 15 (CARATTERISTICHE TECNICHE). Rabboccare sino a che il livello del liquido raggiunge approssimativamente il livello “MAX”. Non superare tale livello, altrimenti si avrà una fuoriuscita del liquido durante il funzionamento del motore. Reinserire il tappo di riempimento (2). 72 SR 50 3534)45#)/. ,)15)$/ 2%&2)'%2!.4% 1 #(!.').' 4(% #//,!.4 Lea con cuidado pág. 4 (NORMAS GENERALES DE SEGURIDAD) y pág. 67 (LIQUIDO REFRIGERANTE 1). 1 Carefully read page 7 (GENERAL SAFETY RULES) and page 67 (COOLANT 1). aATENCION aCAUTION No utilice el vehículo si el líquido refrigerante está por debajo del nivel mínimo. Do not use the vehicle if the coolant is below the minimum prescribed level. ◆ ◆ ◆ ◆ ◆ Descargue la instalación de refrigeración, véase pág. 71 (DESCARGA INSTALACION DE REFRIGERACION 1). Vierta en el depósito de expansión (3) 1,1 L de líquido refrigerante, véase pág. 18 (TABLA LUBRICANTES) y pág. 15 (FICHA TECNICA). Rellene hasta que el nivel del líquido alcance aproxima-damente el nivel “MAX”. No supere este nivel, porque en caso contrario puede haber una salida del líquido durante el funcionamiento del motor. Vuelva a poner el tapón de llenado (2). ◆ ◆ ◆ ◆ 73 Drain the cooling system, see p. 71 (DRAINING THE COOLANT SYSTEM 1). Put 1.1 L of coolant in the expansion tank (3), see p. 19 (LUBRICANT CHART) and p. 15 (TECHNICAL DATA). Top up until the coolant reaches the “MAX” level approximately. Do not exceed this level, otherwise the coolant will overflow while the engine is running. Put back the filling cap (2). SR 50 3052'/ )-0)!.4/ $) 2!&&2%$$!-%.4/ 1 Leggere attentamente pag. 1 (NORME GENERALI DI SICUREZZA) e pag. 66 (LIQUIDO REFRIGERANTE 1). ◆ ◆ Controllare il livello liquido refrigerante, vedi pag. 68 (CONTROLLO E RABBOCCO LIQUIDO REFRIGERANTE 1). Rimuovere il coperchio di ispezione destro, vedi pag. 40 (RIMOZIONE COPERCHI D’ISPEZIONE DESTRO E SINISTRO). aPERICOLO I gas di scarico sono nocivi alla salute. Non far funzionare il motore in luoghi chiusi o poco aerati. ◆ ◆ Avviare il motore e lasciarlo girare al regime minimo. Posizionare un contenitore sotto il motore per raccogliere il liquido refrigerante fuoriuscito dallo sfiato (1). aPERICOLO Il liquido refrigerante è sotto pressione, allentare lentamente e con moderazione lo sfiato testa motore (1) per evitare schizzi di liquido pericolosi. ◆ Allentare lo sfiato testa motore (1); lasciar defluire una modica quantità di liquido e le eventuali bolle d'aria, quindi serrare lo sfiato testa motore (1). IMPORTANTE Per i veicoli dotati di carburatore riscaldato, eseguire le operazioni contrassegnate dal simbolo “✱”. ◆ ✱ Togliere il tappo (2); lasciare defluire una modica quantità di liquido e le eventuali bolle di aria, quindi riposizionare il tappo (2). ◆ ◆ ◆ Controllare il livello del liquido nel vaso di espansione (3) e ripristinarlo a livello “MAX”. Non superare tale livello, altrimenti si avrà una fuoriuscita del liquido durante il funzionamento del motore. Rimontare il coperchio di ispezione destro, vedi pag. 40 (RIMOZIONE COPERCHI D’ISPEZIONE DESTRO E SINISTRO). Riposizionare il cofano anteriore (4), vedi pag. 42 (RIMOZIONE COFANO ANTERIORE). aPERICOLO Nel caso di consumo eccessivo di liquido refrigerante e nel caso in cui il vaso di espansione rimanga vuoto, controllare che non ci siano perdite nel circuito. Il liquido refrigerante è nocivo: NON INGERIRE. NON DISPERDERE IL LIQUIDO NELL'AMBIENTE. TENERE LONTANO DALLA PORTATA DEI BAMBINI. aATTENZIONE Impiegare solo antigelo e anticorrosivo senza nitrito, che assicuri una protezione almeno ai -35 °C. 74 SR 50 052'! ).34!,!#)/. $% 2%&2)'%2!#)/. ",%%$).' 4(% #//,!.4 3934%- 1 Carefully read page 7 (GENERAL SAFETY RULES) and page 67 (COOLANT 1). Lea con cuidado pág. 4 (NORMAS GENERALES DE SEGURIDAD) y pág. 67 (LIQUIDO REFRIGERANTE 1). ◆ ◆ ◆ Controle el nivel del líquido refrigerante, véase pág. 69 (CONTROL Y RELLENO LIQUIDO REFRIGERANTE 1) Quite la tapa de inspección derecha, véase pág. 41 (DESMONTAJE TAPAS DE INSPECCION DERECHA E IZQUIERDA). ◆ aWARNING aPELIGRO ◆ ◆ The coolant is under pressure, therefore loo-sen the engine head air screw (1) slowly and carefully, in order to avoid dangerous splashes. aPELIGRO ◆ rettor, carry out the operations marked with “✱”. ◆ ◆ ✱ Quite el tapón (2); deje salir una reducida cantidad de líquido y las eventuales burbujas de aire, luego vuelva a colocar el tapón (2). ◆ ◆ ◆ Loosen the engine head air screw (1); let a small quantity of coolant and any air bubble flow out, then tighten the engine head air screw (1). NOTE For the vehicles provided with warmed carbu- Afloje el purgador culata motor (1); deje salir una reducida cantidad de líquido y las eventuales burbujas de aire, luego apriete el purgador de la culata motor (1). IMPORTANTE En los vehículos equipados con carburador calentado, realice las operaciones marcadas con el símbolo “✱”. ◆ Start the engine and let it idle. Put a container under the engine to collect the coolant that flows out of the air screw (1). aWARNING Ponga en marcha el motor y déjelo girar al ralentí. Coloque un recipiente por debajo del motor para recoger el líquido refrigerante que ha salido de el purgador (1). El líquido refrigerante está bajo presión, afloje despacio y moderadamente el purgador culata motor (1) para evitar peligrosos chorros de líquido. ◆ Check the coolant level, see p. 69 (CHECKING THE COOLANT LEVEL AND TOPPING UP 1). Remove the right inspection cover, see p. 41 (REMOVING THE RIGHT AND LEFT INSPECTION COVERS). The exhaust gases are noxious for the health. Do not let the engine run in close or badly ventilated places. Los gases de escape perjudican la salud. No deje el motor en marcha en lugares cerrados o no muy ventilados. ◆ ◆ 1 ◆ Controle el nivel del líquido en el depósito de expansión (3) y rellene hasta alcanzar el nivel “MAX”. No supere este nivel, porque en caso contrario habrá una salida del líquido durante el funcionamiento del motor. Vuelva a instalar la tapa de inspección derecha, véase pág. 41 (DESMONTAJE TAPAS DE INSPECCION DERECHA E IZQUIERDA). Vuelva a poner el carenado frontal (4) véase pág. 43 (DESMONTAJE CARENADO FRONTAL). ◆ ✱ Remove the plug (2); let a small quantity of coolant and any air bubbles flow out, then put back the plug (2). Check the coolant level in the expansion tank (3) and top up until it reaches the “MAX” mark. Do not exceed this level, otherwise the coolant will overflow while the engine is running. Put back the right inspection cover, see p. 41 (REMOVING THE RIGHT AND LEFT INSPECTION COVERS). Put back the front cover (4), see p. 43 (REMOVING THE FRONT COVER). aWARNING In case of excessive consumption of coolant and in case the expansion tank remains empty, make sure that there are no leaks in the circuit. The coolant is noxious: DO NOT SWALLOW. aPELIGRO DO NOT DISPOSE OF THE COOLANT IN THE ENVIRONMENT. En caso de un excesivo consumo de líquido refrigerante y en caso de que el depósito de expansión quede vacío, controle que no haya pérdidas en el circuito. El líquido refrigerante es nocivo: NO LO TRAGUE. KEEP AWAY FROM CHILDREN. aCAUTION Use only antifreeze and anticorrosive without nitrite, ensuring protection at -35 °C at least. NO ESPARZA EL LIQUIDO EN EL AMBIENTE. MANTENGASE LEJOS DEL ALCANCE DE LOS NIÑOS. aATENCION Utilice sólo anticongelante y antioxidante sin nitrito, que garantice una protección por lo menos a los -35 °C. 75 SR 50 2)-/:)/.% 2!$)!4/2% 1 Leggere attentamente pag. 1 (NORME GENERALI DI SICUREZZA) e pag. 66 (LIQUIDO REFRIGERANTE 1). ◆ ◆ Scaricare completamente il liquido refrigerante, vedi pag. 70 (SCARICO IMPIANTO DI RAFFREDDAMENTO 1). Rimuovere parzialmente lo scudo anteriore esterno, vedi pag. 52 (RIMOZIONE SCUDO ANTERIORE ESTERNO). IMPORTANTE Premunirsi di fascette stringitubo a cacciavite, da sostituire alle originali (di tipo speciale senza vite). ◆ Tranciare la testa delle fascette stringitubo (1), (2), (3) e (4). IMPORTANTE Nel rimontaggio sostituire le fascette stringitubo (1), (2), (3) e (4) con delle nuove. ◆ ◆ Sfilare dagli attacchi radiatore: – il tubo di mandata (5); – il tubo di ritorno (6); – il tubo di sfiato (7); – il manicotto (8). ★ Svitare e togliere le due viti (9). aATTENZIONE Operare con attenzione. Non danneggiare le alette radiatore. ◆ Rimuovere il radiatore (10). 2)-/:)/.% 0/-0! ,)15)$/ 2%&2)'%2!.4% ◆ 1 Scaricare l'impianto di raffreddamento, vedi pag. 70 (SCARICO IMPIANTO DI RAFFREDDAMENTO 1) (escludendo le ultime quattro operazioni). IMPORTANTE Premunirsi di fascette stringitubo a cacciavite da sostituire alle originali (di tipo speciale). ◆ Tranciare la testa della fascetta (11). IMPORTANTE Nel rimontaggio sostituire la fascetta (11) con una nuova. aATTENZIONE Apporre un contrassegno sul tubo (12) per evitare lo scambio nel rimontaggio. ◆ ◆ Scollegare dall'attacco pompa il tubo (12). Rimuovere la pompa liquido refrigerante, vedi MANUALE D’OFFICINA MOTORE # 921 (I-UK-F-D-E). 76 SR 50 $%3-/.4!*% 2!$)!$/2 1 2%-/6).' 4(% 2!$)!4/2 1 Lea con cuidado pág. 4 (NORMAS GENERALES DE SEGURIDAD) y pág. 67 (LIQUIDO REFRIGERANTE 1). Carefully read page 7 (GENERAL SAFETY RULES) and p. 67 (COOLANT 1). ◆ ◆ ◆ Descargue del todo el líquido refrigerante, véase pág. 71 (DESCARGA INSTALACION DE REFRIGERACION 1). Desmonte parcialmente el escudo delantero exterior, véase pág. 53 (DESMONTAJE ESCUDO DELANTERO EXTERIOR). ◆ NOTE Get screwdriver-type pipe clamps, to replace the original ones (special type without screw). IMPORTANTE Prepare unas abrazaderas de destornillador para sustituirlas a las originales (de tipo especial sin tornillo). ◆ ◆ Upon reassembly, replace the pipe clamps (1), (2), (3) and (4) with new ones. Corte la cabeza de las abrazaderas (1), (2), (3) y (4). ◆ Durante la instalación sustituya las abrazaderas (1), (2), (3) y (4) con otras nuevas. ◆ Extraiga de los tubos del radiador: – el tubo de impulsión (5); – el tubo de retorno (6); – el tubo de purga (7); – el manguito (8). ★ Destornille y quite los dos tornillos (9). ◆ aCAUTION aATENCION ◆ ◆ Desmonte el radiador (10). $%3-/.4!*% "/-"! ,)15)$/ 2%&2)'%2!.4% ◆ 1 Descargue la instalación de refrigeración, véase pág. 71 (DESCARGA INSTALACION DE REFRIGERACION 1) (excluyendo las últimas cuatro operaciones). 1 Drain the cooling system, see p. 71 (DRAINING THE COOLANT SYSTEM 1) (excluding the last four operations). NOTE Get screwdriver-type pipe clamps to replace the original ones (special type). ◆ Cut the clamp head (11). NOTE Upon reassembly, replace the clamp (11) with a new one. aCAUTION Corte la cabeza de la abrazadera (11). Mark the pipe (12) in order to avoid any confu-sion during the reassembly. IMPORTANTE Durante la instalación sustituya la abrazadera (11) con otra nueva. ◆ ◆ aATENCION Marque el tubo (12) con una señal para que no se confunda al instalarlo. ◆ ◆ Remove the radiator (10). 2%-/6).' 4(% #//,!.4 05-0 IMPORTANTE Prepare unas abrazaderas de destornillador para sustituirlas a las originales (de tipo especial). ◆ Withdraw the following elements from the radiator couplings: – delivery pipe (5); – return pipe (6); – breather pipe (7); – sleeve (8). ★ Unscrew and remove the two screws (9). Proceed with care. Do not damage the radiator fins. Opere con precaución. No dañe las aletas del radiador. ◆ Cut the head of the pipe clamps (1), (2), (3) and (4). NOTE IMPORTANTE ◆ Drain the coolant completely, see p. 71 (DRAINING THE COOLANT SYSTEM 1). Partially remove the front outer shield, see p. 53 (REMOVING THE FRONT OUTER SHIELD). Desempalme el tubo (12) de la bomba. Saque la bomba líquido refrigerante, véase MANUAL DE TALLER MOTOR # 921 (I-UK-F-D-E). 77 Disconnect the pipe (12) from the pump coupling. Remove the coolant pump, see ENGINE SERVICE AND REPAIR MANUAL # 921 (I-UK-F-D-E). SR 50 2)-/:)/.% 6!3/ $) %30!.3)/.% 1 Leggere attentamente pag. 1 (NORME GENERALI DI SICUREZZA) e pag. 66 (LIQUIDO REFRIGERANTE 1). ◆ ◆ ◆ Posizionare il veicolo sul cavalletto centrale. Rimuovere lo scudo anteriore interno, vedi pag. 42 (RIMOZIONE SCUDO ANTERIORE INTERNO). Rimuovere il cofano anteriore, vedi pag. 42 (RIMOZIONE COFANO ANTERIORE). aATTENZIONE Sfilando il manicotto (1) fuoriuscirà, dal vaso di espansione (2), il liquido refrigerante. Prevedere un contenitore, con capacità circa 1 L, per recuperare il liquido in uscita. Posizionare, sotto il vaso di espansione, un panno assorbente per raccogliere il liquido refrigerante eventualmente sparso. IMPORTANTE Premunirsi di fascette stringitubo a cacciavite, da sostituire all’originale (di tipo speciale senza vite). ◆ Tranciare la testa della fascetta (3). IMPORTANTE Nel rimontaggio sostituire la fascetta con una nuova. ◆ ◆ Sfilare, dall’attacco vaso di espansione, il manicotto (1). Infilare prontamente, sotto al vaso di espansione, il contenitore e recuperare il liquido refrigerante. aPERICOLO Il liquido refrigerante è nocivo: NON INGERIRE. NON DISPERDERE IL LIQUIDO NELL'AMBIENTE. Sistemare il contenitore in un luogo sicuro. TENERE LONTANO DALLA PORTATA DEI BAMBINI. ◆ Tranciare la testa della fascetta (4). IMPORTANTE Nel rimontaggio sostituire la fascetta con una nuova. ◆ ◆ ◆ Sfilare, dall’attacco vaso di espansione, il tubo di sfiato (5). Svitare e togliere le due viti (6), recuperando le rondelle. Rimuovere il vaso di espansione (2). 2)-/:)/.% 4%2-)34/2% 4%-0%2!452! ,)15)$/ 2%&2)'%2!.4% 1 ◆ ◆ ◆ ◆ Scaricare l’impianto di raffreddamento, vedi pag. 70 (SCARICO IMPIANTO DI RAFFREDDAMENTO 1). Rimuovere il coperchio di ispezione destro, vedi pag. 40 (RIMOZIONE COPERCHI D’ISPEZIONE DESTRO E SINISTRO). Scollegare il terminale (7) (cavo bianco/blu (Bi/B)) dal termistore (8). Rimuovere il termistore (8), vedi MANUALE D’OFFICINA MOTORE # 921 (I-UK-F-D-E). 78 SR 50 $%3-/.4!*% $%0/3)4/ $% %80!.3)/. 2%-/6).' 4(% %80!.3)/. 4!.+ 1 Carefully read page 7 (GENERAL SAFETY RULES) and p. 67 (COOLANT 1). Lea con cuidado pág. 4 (NORMAS GENERALES DE SEGURIDAD) y pág. 67 (LIQUIDO REFRIGERANTE 1). ◆ ◆ ◆ ◆ ◆ Coloque el vehículo sobre el caballete central. Desmonte el escudo delantero interior, véase pág. 43 (DESMONTAJE ESCUDO DELANTERO INTERIOR). Desmonte el capó delantero, véase pág. 43 (DESMONTAJE CARENADO FRONTAL). ◆ By withdrawing the pipe (1), you will make the coolant flow out of the expansion tank (2). Prepare a container with about 1 L. capacity to gather the outflowing coolant. Put a cloth under the expansion tank, to absorb the coolant that may drip on the floor. Al extraer el manguito (1) saldrá del depósito de expansión (2) el líquido refrigerante. Prepare un recipiente con capacidad de alrededor de 1 L para recuperar el líquido que va a salir. Coloque, por debajo del depósito de expansión, un paño absorbente para recoger el líquido refrigerante en caso de que éste se derrame. NOTE Get screwdriver-type pipe clamps, to replace the original ones (special type without screw). IMPORTANTE Prepare unas abrazaderas de destornillador para sustituirlas a la original (de tipo especial sin tornillo). ◆ one. Corte la cabeza de la abrazadera (3). ◆ Durante la instalación sustituya la abrazadera con una nueva. ◆ Cut the head of the clamp (3). NOTE Upon reassembly, replace the clamp with a new IMPORTANTE ◆ Position the vehicle on the centre stand. Remove the front inner shield, see p. 43 (REMOVING THE FRONT INNER SHIELD). Remove the front cover, see p. 43 (REMOVING THE FRONT COVER). aCAUTION aATENCION ◆ 1 ◆ Extraiga el manguito (1) del empalme depósito de expansión. Ponga rápidamente el recipiente por debajo del depósito de expansión y recupere el líquido refrigerante. Withdraw the pipe (1) from the expansion tank coupling. Promptly put the container under the expansion tank and gather the coolant. aWARNING The coolant is noxious: DO NOT SWALLOW IT. DO NOT DISPOSE OF THE COOLANT IN THE ENVIRONMENT. Put the container in a safe place. aPELIGRO El líquido refrigerante es nocivo: NO LO TRAGUE. NO ESPARZA EL LIQUIDO EN EL AMBIENTE. Coloque el recipiente en un lugar seguro. KEEP AWAY FROM CHILDREN. MANTENGASE LEJOS DEL ALCANCE DE LOS NIÑOS. ◆ ◆ NOTE Upon reassembly, replace the clamp with a new Corte la cabeza de la abrazadera (4). one. IMPORTANTE Durante la instalación sustituya la abrazadera con una nueva. ◆ ◆ ◆ ◆ ◆ Extraiga el tubo de purga (5) del empalme depósito de expansión. Destornille y quite los dos tornillos (6), recuperando las arandelas. Saque el depósito de expansión (2). ◆ 1 1 ◆ ◆ ◆ Withdraw the breather pipe (5) from the expansion tank coupling. Unscrew and remove the two screws (6), taking the washers. Remove the expansion tank (2). 2%-/6).' 4(% #//,!.4 4%-0%2!452% 4%2-)34/2 $%3-/.4!*% 4%2-)34/2 4%-0%2!452! ,)15)$/ 2%&2)'%2!.4% ◆ Cut the head of the clamp (4). ◆ Descargue la instalación de refrigeración, véase pág. 71 (DESCARGA INSTALACION DE REFRIGERACION 1). Quite la tapa de inspección derecha, véase pág. 41 (DESMONTAJE TAPAS DE INSPECCION DERECHA E IZQUIERDA). Desconecte el terminal (7) (cable blanco/azul marino (Bi/B)) del termistor (8). Desmonte el termistor (8), véase MANUAL DE TALLER MOTOR # 921 (I-UK-F-D-E). ◆ ◆ ◆ 79 Drain the cooling system, see p. 71 (DRAINING THE COOLANT SYSTEM 1). Remove the right inspection cover, see p. 41 (REMOVING THE RIGHT AND LEFT INSPECTION COVERS). Disconnect the terminal (7) (white/blue (Bi/B) cable) from the thermistor (8). Remove the thermistor (8), see ENGINE SERVICE AND REPAIR MANUAL # 921 (I-UK-F-D-E). SR 50 ,!-0!$).% Leggere attentamente pag. 1 (NORME GENERALI DI SICUREZZA). aATTENZIONE Prima di sostituire una lampadina, posizionare l’interruttore di accensione su “m” e attendere qualche minuto per permettere il raffreddamento della stessa. Sostituire la lampadina indossando guanti puliti o usando un panno pulito e asciutto. Non lasciare impronte sulla lampadina, in quanto potrebbero causare il surriscaldamento e quindi la rottura. Se si tocca la lampadina con le mani nude, pulirla con alcool dalle eventuali impronte, per evitare che si danneggi. NON FORZARE I CAVI ELETTRICI. Carburante e altre sostanze infiammabili non devono essere avvicinati ai componenti elettrici. &!.!,% !.4%2)/2% 2%'/,!:)/.% 6%24)#!,% &!3#)/ ,5-)./3/ Per una verifica rapida del corretto orientamento del fanale anteriore, porre il veicolo a dieci metri di distanza da una parete verticale, accertandosi che il terreno sia piano. Accendere la luce anabbagliante, sedersi sul veicolo e verificare che il fascio luminoso proiettato sulla parete sia di poco al di sotto della retta orizzontale del proiettore (circa 9/10 dell’altezza totale). Per effettuare la regolazione del fascio luminoso: Per le versioni C % è necessario rimuovere il cofano anteriore. IMPORTANTE ◆ ◆ ◆ - _ non Rimuovere il cofano anteriore, vedi pag. 42 (RIMOZIONE COFANO ANTERIORE). Agire con un cacciavite sull’apposita vite (1). C % - _ Agire con un cacciavite sull’apposita vite (2). AVVITANDO (senso orario) il fascio luminoso si alza. SVITANDO (senso antiorario) il fascio luminoso si abbassa. 80 SR 50 "/-"),,!3 "5,"3 Lea con cuidado pág. 4 (NORMAS GENERALES DE SEGURIDAD). Carefully read page 7 (GENERAL SAFETY RULES). aCAUTION aATENCION Before changing a bulb, turn the ignition switch to position “m” and wait a few seconds in order to allow the bulb to cool down. Change the bulb wearing clean gloves or using a clean and dry cloth. Antes de sustituir una bombilla, ponga el interruptor de encendido en “m” y espere unos minutos para permitir la refrigeración de la misma. Sustituya la bombilla utilizando guantes limpios o un trapo limpio y seco. Do not leave fingerprints on the bulb, since these may cause its overheating and consequent breakage. If you touch the bulb with bare hands, remove any fingerprints with alcohol, in order to prevent it from blowing. No deje huellas sobre la bombilla, ya que podrían causar el sobrecalentamiento y, en consecuencia, la rotura. Si toca la bombilla con las manos sin protección, límpiela con alcohol de eventuales huellas, para evitar que se funda. DO NOT FORCE THE ELECTRIC CABLES. NO FUERCE LOS CABLES ELECTRICOS. Fuel and other flammable substances must be kept away from the electrical components. El combustible y otras sustancias inflamables no deben ser acercados a los componentes eléctricos. (%!$,)'(4 "5,"3 &!2/ $%,!.4%2/ !$*534).' 4(% 6%24)#!, (%!$,)'(4 "%!- 2%'5,!#)/. 6%24)#!, (!: ,5-)./3/ Para comprobar rápidamente la orientación correcta del faro delantero coloque el vehículo a diez metros de distancia de una pared vertical, asegurándose de que el suelo esté llano. Encienda la luz de cruce, siéntese sobre el vehículo y compruebe que el haz luminoso proyectado en la pared esté muy poco por debajo de la línea recta horizontal del proyector (unos 9/10 de la altura total). Para regular el haz luminoso: Para las versiones C no hace falta desmontar el carenado frontal. IMPORTANTE ◆ ◆ ◆ To rapidly check the correct direction of the beam, place the vehicle on flat ground, 10 m away from a wall. Turn on the low beam, sit on the vehicle and make sure that the beam projected on the wall is slightly under the horizontal line of the headlight (about 9/10th of the total height). To adjust the headlight beam: For the versions C % - _ it is not necessary to remove the front cover. NOTE %-_ ◆ Saque el carenado frontal, véase pág. 43 (DESMONTAJE CARENADO FRONTAL). Actúe con un destornillador sobre el tornillo correspondiente (1). C % - _ Actúe con un destornillador sobre el tornillo correspondiente (2). ◆ ◆ Remove the front cover, see p. 43 (REMOVING THE FRONT COVER). Act on the suitable screw (1) by means of a screwdriver. C % - _ Act on the suitable screw (2) by means of a screwdriver. By TURNING IT CLOCKWISE, you set the beam upwards. ATORNILLANDO (sentido horario) el haz luminoso se levanta. By TURNING IT ANTICLOCKWISE, you set the beam downwards. DESTORNILLANDO (en sentido antihorario) el haz luminoso baja. 81 SR 50 2%'/,!:)/.% /2)::/.4!,% &!3#)/ ,5-)./3/ PAESI DOVE PREVISTO IMPORTANTE I termini “destra” e “sinistra” sono riferiti al pilota seduto sul veicolo in normale posizione di guida. È possibile modificare l’orientamento orizzontale da 1° a 4° sia a destra che a sinistra. Le figure (esclusa la B) sono riferite all’orientamento verso destra. Spessori e viti di regolazione vengono forniti in kit e sono alloggiati nel vano portacasco/portadocumenti. Per la modifica, operare come segue: ◆ Rimuovere la chiusura scudo anteriore, vedi pag. 48 (RIMOZIONE CHIUSURA SCUDO ANTERIORE). ◆ Rimuovere lo scudo anteriore interno, vedi pag. 42 (RIMOZIONE SCUDO ANTERIORE INTERNO). ◆ Svitare e togliere la vite (1). ◆ Svitare e togliere le tre viti (2). aATTENZIONE Maneggiare con cura. Non forzare i cavi elettrici. ◆ Rimuovere parzialmente il fanale anteriore (3). Esistono quattro gruppi di spessori, per quattro diversi gradi di regolazione. Ogni spessore riporta la denominazione del tipo (es.: UPPER PIV.) e del gruppo (es.: 3°) (vedi tabella). Grado di regolazione Gruppo 1° 2° 3° 4° Spessore UPPER PIV. 1 UPPER PIV. 2 UPPER PIV. 3 UPPER PIV. 4 Vite 4,2 x 20 4,2 x 20 4,2 x 20 4,2 x 20 Spessore UPPER OUT 1 UPPER OUT 2 UPPER OUT 3 UPPER OUT 4 Vite 4,2 x 20 4,2 x 25 4,2 x 25 4,2 x 30 Spessore LOWER 1 LOWER 2 LOWER 3 LOWER 4 Vite 4,2 x 20 4,2 x 25 4,2 x 25 4,2 x 30 In base al difetto dell’orientamento, scegliere: – il gruppo necessario alla regolazione; – il verso dell’orientamento (destro o sinistra). IMPORTANTE Utilizzare spessori e viti del medesimo gruppo. ◆ ◆ ◆ Inserire gli spessori sulle sedi viti fanale come indicato nelle figure A e B: – orientamento verso destra figura A; – orientamento verso sinistra figura B. Posizionare il fanale anteriore (3) in sede. Avvitare la vite (1) in basso a sinistra. IMPORTANTE Sostituire le viti (2) con le viti specifiche per ogni spessore. Recuperare le viti (2) e conservarle con il kit. ◆ ◆ ◆ ◆ ◆ ◆ Avvitare le tre viti (specifiche per ogni spessore) (vedi tabella). Serrare le quattro viti. Verificare il corretto orientamento orizzontale del fascio luminoso. Rimontare lo scudo anteriore interno, vedi pag. 42 (RIMOZIONE SCUDO ANTERIORE INTERNO) . Rimontare la chiusura scudo anteriore, vedi pag. 48 (RIMOZIONE CHIUSURA SCUDO ANTERIORE). Verificare il corretto orientamento verticale del fascio luminoso. 82 SR 50 2%'5,!#)/. (/2):/.4!, (!: ,5-)./3/ PA®SES DONDE EST¢ PREVISTO (/2):/.4!, !$*534-%.4 /& 4(% (%!$,)'(4 "%!FOR THE COUNTRIES WHERE REQUIRED IMPORTANTE Los términos “derecha” e “izquierda” se refieren al piloto sentado sobre el vehículo en la posición normal de conducción. Es posible modificar la orientación horizontal de 1° a 4° tanto a la derecha como a la izquierda. Las figuras (B excluida) se refieren a la orientación hacia la derecha. Los espesores y los tornillos de regulación se suministran en el kit y están alojados en el vano portacasco/portadocumentos. NOTE The terms “right” and “left” are referred to the rider seated on the vehicle in the normal riding position. It is possible to modify the horizontal position from 1° to 4° both rightwards and leftwards. The figures (B excluded) refer to the rightward position. Shims and adjusting screws are supplied in kit and are housed in the crash helmet / glove compartment. To adjust the beam, proceed as follows: ◆ Remove the front shield cover, see p. 49 (REMOVING THE FRONT SHIELD COVER). ◆ Remove the front inner shield, see p. 43 (REMOVING THE FRONT INNER SHIELD). ◆ Unscrew and remove the screw (1). ◆ Unscrew and remove the three screws (2). Para la modificación, actúe del modo siguiente: ◆ Desmonte la tapa escudo delantero, véase pág. 49 (DESMONTAJE TAPA ESCUDO DELANTERO). ◆ Desmonte el escudo delantero interior, véase pág. 43 (DESMONTAJE ESCUDO DELANTERO INTERIOR). ◆ Destornille y quite el tornillo (1). ◆ Destornille y quite los tres tornillos (2). aCAUTION aATENCION Handle with care. Do not force the electric wires. Maneje con cuidado. No fuerce los cables eléctricos. ◆ ◆ Desmonte parcialmente el faro delantero (3). Partially remove the headlight (3). There are four groups of shims, for four different degrees of adjustment. Each shim is marked with the type identification code (for example: UPPER PIV.) and with the group number (for example: 3rd) (see table below). Existen cuatro grupos de espesores, para cuatro grados de regulación diferentes. Cada espesor se caracteriza por el nombre del tipo (p.ej.: UPPER PIV.) y del grupo (p.ej.: 3°) (véase tabla). Grado de regulación Adjustment degree Grupo 1° 2° 3° 4° Gruop 1st 2nd 3rd 4th Espesor UPPER PIV. 1 UPPER PIV. 2 UPPER PIV. 3 UPPER PIV. 4 Shim UPPER PIV. 1 UPPER PIV. 2 UPPER PIV. 3 UPPER PIV. 4 Tornillo 4,2 x 20 4,2 x 20 4,2 x 20 4,2 x 20 Screw 4,2 x 20 4,2 x 20 4,2 x 20 4,2 x 20 Espesor UPPER OUT 1 UPPER OUT 2 UPPER OUT 3 UPPER OUT 4 Shim UPPER OUT 1 UPPER OUT 2 UPPER OUT 3 UPPER OUT 4 Tornillo 4,2 x 20 4,2 x 25 4,2 x 25 4,2 x 30 Screw 4,2 x 20 4,2 x 25 4,2 x 25 4,2 x 30 Espesor LOWER 1 LOWER 2 LOWER 3 LOWER 4 Shim LOWER 1 LOWER 2 LOWER 3 LOWER 4 Tornillo 4,2 x 20 4,2 x 25 4,2 x 25 4,2 x 30 Screw 4,2 x 20 4,2 x 25 4,2 x 25 4,2 x 30 Según el defecto de la orientación, elija: – el grupo necesario para la regulación; – la dirección de la orientación (derecha o izquierda). According to the beam adjustment to be carried out, choose: – the group necessary for the adjustment; – the direction (to the right or to the left). IMPORTANTE Utilice espesores y tornillos del mismo grupo. ◆ Introduzca los espesores en los alojamientos tornillos faro según lo indicado en las figuras A y B: – orientación hacia la derecha figura A; – orientación hacia la izquierda figura B. ◆ Coloque el faro delantero (3) en su alojamiento. ◆ Atornille el tornillo (1) en la parte inferior izquierda. NOTE ◆ ◆ ◆ IMPORTANTE Sustituya los tornillos (2) con los tornillos específicos para cada espesor. Recupere los tornillos (2) y guárdelos con el kit. ◆ Atornille los tres tornillos (específicos para cada espesor) (véase tabla). ◆ Apriete los cuatro tornillos. ◆ Compruebe la correcta orientación horizontal del haz luminoso. ◆ Vuelva a instalar el escudo delantero interior, véase pág. 43 (DESMONTAJE ESCUDO DELANTERO INTERIOR). ◆ Vuelva a instalar la tapa escudo delantero, véase pág. 49 (DESMONTAJE TAPA ESCUDO DELANTERO). ◆ Compruebe la correcta orientación vertical del haz luminoso. Use shims and screws of the same group. Insert the shims in the headlight screw seats as indicated in figures A and B: – rightwards (figure A); – leftwards (figure B). Position the headlight (3) in its seat. Tighten the lower left screw (1). NOTE Replace the screws (2) with the specific screws corresponding to each shim. Take the screws (2) and keep them in the kit. ◆ Screw the three screws (specific for each shim) (see table). ◆ Tighten the four screws. ◆ Make sure that the horizontal adjustment of the headlight beam is correct. ◆ Put back the front inner shield, see p. 43 (REMOVING THE FRONT INNER SHIELD). ◆ Put back the front shield cover, see p. 49 (REMOVING THE FRONT SHIELD COVER). ◆ Make sure that the vertical adjustment of the headlight beam is correct. 83 SR 50 3/34)45:)/.% ,!-0!$).% &!.!,% !.4%2)/2% Leggere attentamente pag. 80 (LAMPADINE). Nel fanale anteriore sono alloggiate: ◆ Due lampadine luce anabbagliante. Per la sostituzione: Rimuovere lo scudo anteriore interno, vedi pag. 42 (RIMOZIONE SCUDO ANTERIORE INTERNO). ◆ Spostare con le mani la cuffia (1) della lampadina da sostituire. ◆ Ruotare in senso antiorario la linguetta di ritegno (2) situata posteriormente al portalampade. ◆ Estrarre la lampadina e sostituirla con una dello stesso tipo. ◆ 3/34)45:)/.% ,!-0!$).% &!.!,% !.4%2)/2% C%-_ Leggere attentamente pag. 80 (LAMPADINE). Nel fanale anteriore sono alloggiate: ◆ Una lampadina luce di posizione (7). ◆ Una lampadina luce anabbagliante/abbagliante (5). LAMPADINA ANABBAGLIANTE/ABBAGLIANTE Per la sostituzione: Rimuovere lo scudo anteriore interno, vedi pag. 42 (RIMOZIONE SCUDO ANTERIORE INTERNO). ◆ Spostare con le mani la cuffia (3). ◆ Ruotare in senso antiorario il portalampade (4) ed estrarlo dalla sede. ◆ Premere moderatamente e ruotare in senso antiorario la lampadina luce anabbagliante/abbagliante (5), estrarla e sostituirla con una dello stesso tipo. ◆ LAMPADINA DI POSIZIONE Per la sostituzione: aATTENZIONE Per estrarre il portalampada non tirare i cavi elettrici. ◆ ◆ Afferrare il portalampada luce di posizione (6), tirare e disinserirlo dalla sua sede. Sfilare la lampadina di posizione (7) e sostituirla con una dello stesso tipo. 84 SR 50 3534)45#)/. "/-"),,!3 &!2/ $%,!.4%2/ #(!.').' 4(% (%!$,)'(4 "5,"3 Carefully read p. 81 (BULBS). Lea con cuidado pág. 81 (BOMBILLAS). The headlight contains: ◆ Two low beam bulbs. En el faro delantero están alojadas: ◆ Dos bombillas luz de cruce. To change the bulbs, proceed as follows: ◆ Remove the front inner shield, see p. 43 (REMOVING THE FRONT INNER SHIELD). ◆ Manually move the protection element (1) of the bulb to be changed. ◆ Rotate the check tang (2) positioned at the rear of the bulb socket anticlockwise. ◆ Extract the bulb and replace it with a new one of the same kind. Para sustituirlas: ◆ Saque el escudo delantero interior, véase pág. 43 (DESMONTAJE ESCUDO DELANTERO INTERIOR). ◆ Desplace con las manos el elemento de protección (1) de la bombilla que hay que sustituir. ◆ Gire en sentido antihorario la lengüeta de retención (2) colocada detrás del casquillo portalámparas. ◆ Extraiga la bombilla y sustitúyala con otra del mismo tipo. #(!.').' 4(% (%!$,)'(4 "5,"3 3534)45#)/. "/-"),,!3 &!2/ $%,!.4%2/ C%-_ C%-_ Carefully read p. 81 (BULBS). Lea con cuidado pág. 81 (BOMBILLAS). The headlight contains: ◆ One parking light bulb (7). ◆ One low/high beam bulb (5). En el faro delantero están alojadas: ◆ ◆ Una bombilla luz de posición (7). Una bombilla luz de cruce/luz larga (5). LOW/HIGH BEAM BULB To change it, proceed as follows: ◆ Remove the front inner shield, see p. 43 (REMOVING THE FRONT INNER SHIELD). ◆ Manually move the protection element (3). ◆ Rotate the bulb socket (4) anticlockwise and extract it from its seat. ◆ Slightly press the low/high beam bulb (5) and rotate it anticlockwise, extract it and replace it with a new one of the same kind. BOMBILLA LUZ DE CRUCE/LUZ LARGA Para la sustitución: ◆ ◆ ◆ ◆ Saque el escudo delantero interior, véase pág. 43 (DESMONTAJE ESCUDO DELANTERO INTERIOR). Desplace con las manos el elemento de protección (3). Gire en sentido antihorario el casquillo portalámparas (4) y extráigalo de su sede. Presione moderadamente y gire en sentido antihorario la bombilla luz de cruce/luz larga (5), extráigala y sustitúyala con otra del mismo tipo. PARKING LIGHT BULB To replace the bulb: BOMBILLA LUZ DE POSICION aCAUTION Para la sustitución: Do not pull the electric wires to extract the bulb socket. aATENCION Para extraer el casquillo portalámparas no tire de los cables eléctricos. ◆ ◆ ◆ ◆ Agarre el casquillo portalámparas luz de posición (6), estírelo y desconéctelo de su sede. Extraiga la bombilla de posición (7) y sustitúyala con otra del mismo tipo. 85 Grasp the bulb socket (6), pull it and take it out of its seat. Withdraw the parking light bulb (7) and replace it with a new one of the same type. SR 50 2)-/:)/.% &!.!,% !.4%2)/2% ◆ ◆ ◆ ◆ ◆ Rimuovere lo scudo anteriore interno, vedi pag. 42 (RIMOZIONE SCUDO ANTERIORE INTERNO). Svitare e togliere le tre viti (1). ★ Spostare con le mani la cuffia (2). ★ Scollegare i connettori elettrici (3). ★ Svitare e togliere le due viti (4). IMPORTANTE Per facilitare l’operazione sterzare a sinistra la ruota anteriore e operare dal lato sinistro. aATTENZIONE Maneggiare con cura. Non danneggiare lo schermo protettivo. ◆ Rimuovere il fanale (5) completo di portalampada, sfilandolo posteriormente. ).$)#!4/2) $) $)2%:)/.% !.4%2)/2) 3/34)45:)/.% ,!-0!$).% Leggere attentamente pag. 80 (LAMPADINE). ◆ ◆ ◆ Posizionare il veicolo sul cavalletto centrale. Svitare e togliere le due viti (6). Rimuovere lo schermo protettivo (7). aATTENZIONE Nel riassemblaggio, serrare con cautela e moderatamente le due viti (6), onde evitare di danneggiare lo schermo protettivo. ◆ ◆ Premere moderatamente la lampadina (8) e ruotarla in senso antiorario. Estrarre la lampadina dalla sede. IMPORTANTE Inserire la lampadina nel portalampada facendo coincidere i due piolini guida con le rispettive guide sul portalampada. ◆ Installare correttamente una lampadina dello stesso tipo. 2)-/:)/.% ).$)#!4/2% #/-0,%4/ ◆ ◆ ◆ Posizionare il veicolo sul cavalletto centrale. Svitare e togliere le due viti (6). Rimuovere lo schermo protettivo (7). aATTENZIONE Nel riassemblaggio, serrare con cautela e moderatamente le due viti (6) onde evitare di danneggiare lo schermo protettivo. Maneggiare con cura. Non forzare i cavi elettrici. ◆ ◆ Estrarre l’indicatore (9) quanto basta per scollegarne i due terminali elettrici. Rimuovere l’indicatore completo di lampadina. 86 SR 50 $%3-/.4!*% &!2/ $%,!.4%2/ 2%-/6).' 4(% (%!$,)'(4 ◆ ◆ ◆ ◆ ◆ ◆ Desmonte el escudo delantero interior, véase pág. 43 (DESMONTAJE ESCUDO DELANTERO INTERIOR). Destornille y quite los tres tornillos (1). ★ Desplace con las manos el elemento de protección (2). ★ Desconecte los conectores eléctricos (3). ★ Destornille y quite los dos tornillos (4). ◆ ◆ ◆ ◆ NOTE To facilitate this operation, steer the front wheel to the left and work on the left side. IMPORTANTE Para facilitar la operación, gire a la izquierda la rueda delantera y opere en el lado izquierdo. aCAUTION aATENCION Handle with care. Do not damage the protection screen. Maneje con precaución. No dañe la pantalla de protección. ◆ ◆ Remove the front inner shield, see p. 43 (REMOVING THE FRONT INNER SHIELD). Unscrew and remove the three screws (1). ★ Move the protection element (2) with your hands. ★ Disconnect the electric connectors (3). ★ Unscrew and remove the two screws (4). Saque el faro (5) equipado con casquillo portalámparas, extrayéndolo hacia atrás. Remove the headlight (5) complete with bulb socket by withdrawing it from behind. &2/.4 $)2%#4)/. ).$)#!4/2 ).$)#!$/2%3 $% $)2%##)/. $%,!.4%2/3 #(!.').' 4(% "5,"3 3534)45#)/. "/-"),,!3 Carefully read p. 81 (BULBS). Lea con cuidado pág. 81 (BOMBILLAS). ◆ ◆ ◆ ◆ ◆ ◆ Coloque el vehículo sobre el caballete central. Destornille y quite los dos tornillos (6). Extraiga la pantalla de protección (7). aCAUTION aATENCION Upon reassembly, tighten the two screws (6) carefully, in order not to damage the protection screen. Durante el montaje, apriete con cuidado y moderadamente los dos tornillos (6) para no dañar la pantalla de protección. ◆ ◆ ◆ ◆ Presione moderadamente la bombilla (8) y gírela en sentido antihorario. Extraiga la bombilla de su sede. pins coincide with the relevant guides on the socket. ◆ Introduzca la bombilla en el casquillo portalámparas haciendo coincidir las dos espigas guías con las correspondientes guías sobre el casquillo portalámparas. ◆ ◆ ◆ Instale correctamente una bombilla del mismo tipo. Upon reassembly, tighten the two screws (6) carefully, without exerting too much pressure, in order to avoid damaging the protection screen. Handle with care. Do not force the electric cables. Durante el montaje apriete con cuidado y moderadamente los dos tornillos (6) para no dañar la pantalla de protección. ◆ ◆ Maneje con cuidado. No fuerce los cables eléctricos. ◆ Position the vehicle on the centre stand. Unscrew and remove the two screws (6). Remove the protection screen (7). aCAUTION Coloque el vehículo sobre el caballete central. Destornille y quite los dos tornillos (6). Extraiga la pantalla de protección (7). aATENCION ◆ Correctly install a bulb of the same type. 2%-/6).' 4(% 7(/,% ).$)#!4/2 $%3-/.4!*% ).$)#!$/2 #/-0,%4/ ◆ ◆ ◆ Press the bulb (8) slightly and turn it anticlockwise. Remove the bulb from its seat. NOTE Insert the bulb in the socket making the two bulb IMPORTANTE ◆ To change the bulbs, proceed as follows: Unscrew and remove the two screws (6). Remove the protection screen 7). Extraiga el indicador (9) lo suficiente para desconectar los dos terminales eléctricos. Extraiga el indicador junto con la bombilla. 87 Extract the indicator (9) as much as necessary to disconnect its two electric terminals. Remove the indicator complete with bulb. SR 50 ).$)#!4/2) $) $)2%:)/.% 0/34%2)/2) 3/34)45:)/.% ,!-0!$).% Leggere attentamente pag. 80 (LAMPADINE). ◆ ◆ Posizionare il veicolo sul cavalletto centrale. Svitare e togliere la vite (1). IMPORTANTE Nella rimozione dello schermo protettivo, procedere con cautela, per non spezzare il dente d’innesto. ◆ ◆ ◆ ◆ Rimuovere lo schermo protettivo (2). Premere moderatamente la lampadina (3) e ruotarla in senso antiorario. Estrarre la lampadina dalla sede. Installare correttamente una lampadina dello stesso tipo. IMPORTANTE Se il portalampada (4) fuoriuscisse dalla sua sede, reinserirlo correttamente, facendo coincidere l’apertura raggiata del portalampada con la sede della vite. Nel riassemblaggio, posizionare correttamente lo schermo protettivo nella sua sede. Serrare con cautela e moderatamente la vite (1) onde evitare di danneggiare lo schermo protettivo. 2)-/:)/.% ).$)#!4/2% $) $)2%:)/.% #/-0,%4/ ◆ ◆ Posizionare il veicolo sul cavalletto centrale. Svitare e togliere la vite (1). IMPORTANTE Nella rimozione dello schermo protettivo, procedere con cautela, per non spezzare il dente d’innesto. ◆ Rimuovere lo schermo protettivo (2). IMPORTANTE Nel riassemblaggio, posizionare correttamente lo schermo protettivo nella sua sede. Serrare con cautela e moderatamente la vite (1) onde evitare di danneggiare lo schermo protettivo. Maneggiare con cura. Non forzare i cavi elettrici. ◆ Estrarre il portalampada (4) quanto basta per scollegarne i due terminali elettrici (5). IMPORTANTE Nel rimontaggio, far coincidere l’apertura raggiata del portalampada con la sede della vite (1). ◆ Svitare la vite (6) e recuperare il relativo dado. aATTENZIONE Maneggiare con cura. Non forzare i cavi elettrici. ◆ Rimuovere il supporto indicatore (7) e sfilarlo dai cavi (8). 88 SR 50 2%!2 $)2%#4)/. ).$)#!4/2 ).$)#!$/2%3 $% $)2%##)/. 42!3%2/3 #(!.').' 4(% "5,"3 3534)45#)/. "/-"),,!3 Carefully read page 81 (BULBS). Lea con cuidado pág. 81 (BOMBILLAS). ◆ ◆ ◆ ◆ Coloque el vehículo sobre el caballete central. Destornille y quite el tornillo (1). NOTE While removing the indicator lens, proceed care- IMPORTANTE fully in order not to break it. Al desmontar la pantalla de protección, actúe con cuidado para no dañar el diente de acoplamiento. ◆ ◆ ◆ ◆ ◆ ◆ ◆ ◆ Quite la pantalla de protección (2). Presione moderadamente la bombilla (3) y gírela en sentido antihorario. Extraiga la bombilla de su sede. Instale correctamente una bombilla del mismo tipo. sert it again correctly, making the opening of the bulb socket itself coincide with the seat of the screw. Upon reassembly, correctly position the indicator lens in its seat. Tighten the screw (1) carefully, without exerting too much pressure, in order to avoid damaging the indicator lens. Si el casquillo portalámparas (4) ha salido de su sede, vuelva a introducirlo correctamente haciendo coincidir la abertura de radios del casquillo portalámparas con la sede del tornillo. Durante el montaje, coloque correctamente la pantalla de protección en su sede. Apriete con cuidado y moderadamente el tornillo (1) para no dañar la pantalla de protección. 2%-/6).' 4(% #/-0,%4% $)2%#4)/. ).$)#!4/2 ◆ ◆ $%3-/.4!*% ).$)#!$/2 $% $)2%##)/. #/-0,%4/ Coloque el vehículo sobre el caballete central. Destornille y quite el tornillo (1). ◆ correctly in its seat. Tighten the screw (1) moderately and with care, to avoid damaging the protection screen. Handle with care. Do not force the electric cables. Quite la pantalla de protección (2). IMPORTANTE Durante el montaje, coloque correctamente la pantalla de protección en su sede. Apriete con cuidado y moderadamente el tornillo (1) para no dañar la pantalla de protección. Maneje con precaución. No fuerce los cables eléctricos. ◆ Upon reassembly, make the bulb socket opening coincide with the seat of the screw (1). ◆ Extraiga el casquillo portalámparas (4) lo suficiente para desconectar los dos terminales eléctricos (5). Unscrew the screw (6) and take the relevant nut. aCAUTION Durante la instalación, haga coincidir la abertura de radios del casquillo portalámparas con la sede del tornillo (1). Handle with care. Do not force the electric cables. Destornille el tornillo (6) y recupere la tuerca correspondiente. ◆ aATENCION Maneje con precaución. No fuerce los cables eléctricos. ◆ Extract the bulb socket (4) as much as necessary to disconnect the two electric terminals (5). NOTE IMPORTANTE ◆ Remove the protection screen (2). NOTE Upon reassembly, position the protection screen Al desmontar la pantalla de protección, actúe con precaución para no dañar el diente de acoplamiento. ◆ Position the vehicle on the centre stand. Unscrew and remove the screw (1). NOTE When removing the protection screen, proceed with care, in order not to break the cog. IMPORTANTE ◆ Remove the indicator lens (2). Press the bulb (3) slightly and turn it anticlockwise. Remove the bulb from its seat. Correctly install a new bulb of the same type. NOTE If the bulb socket (4) has gone out of its seat, in- IMPORTANTE ◆ ◆ Position the vehicle on the centre stand. Unscrew and remove the screw (1). Saque el soporte indicador (7) y extráigalo de los cables (8). 89 Remove the indicator support (7) and withdraw it from the cables (8). SR 50 &!.!,% 0/34%2)/2% 3/34)45:)/.% ,!-0!$).% Leggere attentamente pag. 80 (LAMPADINE). Il fanale posteriore è composto da due unità. In ciascuna unità sono alloggiate: ◆ Una lampadina di posizione (1). ◆ Una lampadina luce freno (2). Per la sostituzione: Svitare e togliere la vite (3). ◆ IMPORTANTE Nella rimozione dello schermo protettivo, procedere con cautela, per non spezzare il dente d’innesto. ◆ ◆ ◆ Rimuovere lo schermo protettivo (4). Solo per la lampadina luce freno (2), premere moderatamente la lampadina e ruotarla in senso antiorario. Estrarre la lampadina dalla sede. IMPORTANTE Inserire la lampadina nel portalampada facendo coincidere i due piolini guida con le rispettive guide sul portalampada. ◆ Installare correttamente una lampadina dello stesso tipo. IMPORTANTE Nel riassemblaggio, posizionare correttamente lo schermo protettivo nella sua sede. Serrare con cautela e moderatamente la vite (3) onde evitare di danneggiare lo schermo protettivo. 2)-/:)/.% &!.!,% 0/34%2)/2% IMPORTANTE Il fanale posteriore è composto da due unità. Le operazioni sono riferite a una sola unità. ◆ ◆ Rimuovere il portatarga, vedi pag. 38 (RIMOZIONE PORTATARGA). Svitare e togliere le due viti (5). aATTENZIONE Maneggiare con cura. Non forzare i cavi elettrici. ◆ ◆ Rimuovere parzialmente l’unità interessata (6). Scollegare i terminali lampadina luce freno (7). aATTENZIONE Per estrarre il portalampada non tirare i cavi elettrici. ◆ ◆ Afferrare il portalampada luce di posizione, tirare e disinserirlo dalla sua sede. Rimuovere l’unità interessata (6). 90 SR 50 &!2/ 42!3%2/ 2%!2 ,)'(4 3534)45#)/. "/-"),,!3 #(!.').' 4(% "5,"3 Lea con cuidado pág. 81 (BOMBILLAS). Carefully read p. 81 (BULBS). El faro trasero se compone de dos unidades. En cada una de éstas están alojadas: The rear light comprises two units. Each unit contains: ◆ One parking light bulb (1). ◆ One stoplight bulb (2). ◆ ◆ Una bombilla de posición (1). Una bombilla luz freno (2). To change them, proceed as follows: ◆ Unscrew and remove the screw (3). Para la sustitución: ◆ Destornille y quite el tornillo (3). NOTE While removing the protection screen, proceed carefully in order not to break the cog. IMPORTANTE Durante el desmontaje de la pantalla de protección, actúe con cuidado para no quebrar el diente de acoplamiento. ◆ ◆ ◆ ◆ ◆ ◆ Desmonte la pantalla de protección (4). Sólo para la bombilla luz freno (2), presione moderadamente la bombilla y gírela en sentido antihorario. Extraiga la bombilla de su sede. NOTE Insert the bulb in the socket, making the two bulb pins coincide with the relevant guides on the socket. IMPORTANTE ◆ Introduzca la bombilla en el casquillo portalámparas haciendo coincidir las dos espigas guía con las correspondientes guías sobre el casquillo portalámparas. ◆ Upon reassembly, correctly position the protection screen in its seat. Tighten the screw (3) carefully, without exerting too much pressure, in order to avoid damaging the protection screen. Instale correctamente una bombilla del mismo tipo. 2%-/6).' 4(% 2%!2 ,)'(4 NOTE The rear light consists of two units. The following operations refer to one unit only. $%3-/.4!*% &!2/ 42!3%2/ ◆ IMPORTANTE El faro trasero se compone de dos unidades. Las operaciones se refieren a una sola unidad. ◆ ◆ Desmonte el portamatrícula, véase pág. 39 (DESMONTAJE PORTAMATRICULA). Destornille y quite los dos tornillos (5). Handle with care. Do not force the electric cables. aATENCION ◆ ◆ To extract the bulb socket, do not pull the electric cables. aATENCION ◆ Partially remove the unit (6). Disconnect the brake light bulb terminals (7). aCAUTION Saque parcialmente la unidad correspondiente (6). Desconecte los terminales bombilla luz freno (7). ◆ Para extraer el casquillo portalámparas no tire de los cables eléctricos. ◆ Remove the number plate-holder, see p. 39 (REMOVING THE NUMBER PLATE-HOLDER). Unscrew and remove the two screws (5). aCAUTION Maneje con precaución. No fuerce los cables eléctricos. ◆ ◆ Correctly install a new bulb of the same type. NOTE IMPORTANTE Durante el montaje, coloque correctamente la pantalla de protección en su sede. Apriete con cuidado y moderadamente el tornillo (3) para no dañar la pantalla de protección. ◆ Remove the protection screen (4). For the stoplight bulb (2) only, slightly press the bulb and rotate it anticlockwise. Remove the bulb from its seat. ◆ Sujete el casquillo portalámparas luz de posición, estírelo y extráigalo de su sede. Saque la unidad correspondiente (6). 91 Grasp the parking light bulb socket, pull and remove it from its seat. Remove the unit (6). SR 50 3/34)45:)/.% ,!-0!$).! ,5#% 4!2'! AC%-_ Per la sostituzione: aATTENZIONE Per estrarre il portalampada non tirare i cavi elettrici. ◆ ◆ Afferrare il portalampada (1) dall’interno chiusura codone, tirarlo ed estrarlo dalla sede. Sfilare e sostituire la lampadina con una dello stesso tipo. #253#/44/ 3/34)45:)/.% ,!-0!$).% Leggere attentamente pag. 80 (LAMPADINE). Nel cruscotto sono alloggiate: ◆ Le lampadine spie. ◆ Le luci di illuminazione cruscotto. Per la sostituzione: Rimuovere il coprimanubrio, pag. 46 (RIMOZIONE COPRIMANUBRIO ANTERIORE) senza scollegarlo dai cavi elettrici e dal cavo contachilometri. ◆ LAMPADINE SPIE Estrarre il portalampada interessato: ◆ Pos. Colore 2 Indicatori di direzione (c) verde 3 Riserva olio miscelatore (j) rosso 4 Luce anabbagliante (b) verde 4 C%-_ 5 ◆ Spia Luce abbagliante (a) blu Riserva carburante (g) giallo ambra Sfilare e sostituire la lampadina con una dello stesso tipo. LUCI DI ILLUMINAZIONE CRUSCOTTO Estrarre il portalampada della parte del cruscotto in cui si è riscontrato l’abbassamento luminoso: ◆ Pos. ◆ Zona illuminata 6 Parte destra superiore 7 Parte sinistra superiore 8 Parte destra inferiore Sfilare e sostituire la lampadina con una dello stesso tipo. 92 SR 50 3534)45#)/. "/-"),,! ,5: -!42)#5,! AC%-_ #(!.').' 4(% .5-"%2 0,!4% "5," Para la sustitución: To change the bulb: AC%-_ aATENCION aCAUTION Para extraer el casquillo portalámparas no tire de los cables eléctricos. Do not pull the electric wires to extract the bulb socket. ◆ ◆ ◆ Agarre el casquillo portalámparas (1) desde el interior de la tapa de la cola, estírelo y extráigalo de su sede. Extraiga y sustituya la bombilla con otra del mismo tipo. ◆ 3!,0)#!$%2/ Grasp the bulb socket (1) from the inside of the rear part of the fairing cover, pull it and remove it from its seat. Withdraw the bulb and replace it with a new one of the same type. $!3("/!2$ 3534)45#)/. "/-"),,!3 3!,0)#!$%2/ #(!.').' 4(% "5,"3 Lea con cuidado pág. 81 (BOMBILLAS). Carefully read page 81 (BULBS). En el salpicadero están alojadas: The dashboard contains: ◆ The warning light bulbs; ◆ The dashboard lighting bulbs; ◆ ◆ Las bombillas luces de aviso. Las luces de alumbrado salpicadero. To change the bulbs, proceed as follows: ◆ Remove the handlebar cover, see p. 47 (REMOVING THE HANDLEBAR COVER), without disconnecting it from the electric wires and from the speedometer cable. Para sustituirlas: ◆ Desmonte el cubremanillar, pág. 47 (DESMONTAJE CUBREMANILLAR) sin desconectarlo de los cables eléctricos y del cable cuentakilómetros. LUCES DE AVISO ◆ Extraiga el casquillo portalámparas correspondiente: Pos. ◆ Luz de aviso Color 2 Indicadores de dirección (c) verde 3 Nivel aceite mezclador (j) 4 Luz de cruce (b) 4 Luz larga (a) C % - _ 5 Reserva combustible (g) WARNING LIGHT BULBS ◆ Extract the relative bulb socket: Pos. rojo verde azul marino 2 Direction indicators (c) 3 stroke oil reserve (j) 4 Low beam (b) 4 amarillo ámbar 5 ◆ Extraiga y sustituya la bombilla con otra del mismo tipo. Low fuel (g) green red green blue amber Extract the bulb and replace it with one of the same type. Pos. ◆ High beam (a) C % - _ Colour DASHBOARD LIGHTING BULBS ◆ Extract the bulb socket of the dashboard part in which there has been a light decrease: LUCES DE ALUMBRADO SALPICADERO ◆ Extraiga el casquillo portalámparas de la parte del salpicadero donde se ha notado la disminución de luz: Pos. Warning light Lit part Zona alumbrada 6 upper right part 6 Parte derecha arriba 7 upper left part 7 Parte izquierda arriba 8 lower right part 8 Parte derecha abajo ◆ Extraiga y sustituya la bombilla con otra del mismo tipo. 93 Extract the bulb and replace it with one of the same type. SR 50 2)-/:)/.% #253#/44/ #/-0,%4/ ◆ ◆ ◆ ◆ ◆ ◆ Svitare e togliere le quattro viti (1) che fissano la mascherina (2) del cruscotto. Rimuovere il coprimanubrio, vedi pag. 46 (RIMOZIONE COPRIMANUBRIO ANTERIORE). Scollegare i due connettori elettrici (3) e (4). Scollegare il cavo tachimetro/contachilometri (5) dal cruscotto. Svitare e togliere le due viti (6). Rimuovere il cruscotto completo (7). 2)-/:)/.% 6%42/ #253#/44/ aATTENZIONE Maneggiare con cura. Non rovinare il vetro o gli agganci nello smontaggio. ◆ Agire sui due ganci (8) e rimuovere il vetro (9). IMPORTANTE Se necessario estrarre e sostituire la guarnizione (10) vetro cruscotto. 3500/24) #/-!.$) %,%442)#) 2)-/:)/.% #/-!.$) -!.5"2)/ ◆ Rimuovere il coprimanubrio, vedi pag. 46 (RIMOZIONE COPRIMANUBRIO ANTERIORE). IMPORTANTE Le operazioni sono riferite alla rimozione di un solo supporto. aATTENZIONE Contrassegnare i connettori elettrici, lato interessato, (come da tabella) per poterli ricollegare correttamente. Lato sinistro Pos. A Pulsante avvisatore acustico (f) B Interruttore indicatori di direzione (c) B destro Deviatore luci (a - b) - C Pulsante di avviamento (r) D Interruttore luci (a - •) (non presente _) D C % (non presente _) D Interruttore arresto motore (n - m) - D ◆ ◆ ◆ Descrizione Interruttore luci (a - b - •) Deviatore luci (a - b) _ (non presente _ nella versione -) Scollegare i due connettori elettrici (lato interessato). Svitare e togliere le due viti (11). Rimuovere il supporto comando elettrico completo di comandi. 94 SR 50 $%3-/.4!*% 3!,0)#!$%2/ #/-0,%4/ 2%-/6).' 4(% #/-0,%4% $!3("/!2$ ◆ ◆ ◆ ◆ ◆ ◆ ◆ Destornille y quite los cuatro tornillos (1) que fijan el cubresalpicadero (2). Desmonte el cubremanillar, véase pág. 47 (DESMONTAJE CUBREMANILLAR). Desconecte los dos conectores eléctricos (3) y (4). Desconecte el cable velocímetro/cuentakilómetros (5) del salpicadero. Destornille y quite los dos tornillos (6). Saque el salpicadero completo (7). ◆ ◆ ◆ ◆ ◆ $%3-/.4!*% #2)34!, 3!,0)#!$%2/ Unscrew and remove the four screws (1) that fasten the dashboard frame (2). Remove the handlebar cover, see p. 47 (REMOVING THE HANDLEBAR COVER). Disconnect the two electric connectors (3) and (4). Disconnect the speedometer/odometer cable (5) from the dashboard. Unscrew and remove the two screws (6). Remove the complete dashboard (7). 2%-/6).' 4(% $!3("/!2$ ',!33 aATENCION aCAUTION Maneje con precaución. Durante el desmontaje no deteriore el cristal o los enganches. Handle with care. Do not damage the glass or the hooks during the disassembly. ◆ ◆ Actúe sobre los dos ganchos (8) y saque el cristal (9). IMPORTANTE Si es necesario, extraiga y sustituya la junta (10) cristal salpicadero. Act on the two hooks (8) and remove the glass (9). NOTE If necessary, extract the dashboard glass gasket (10) and change it. 3/0/24%3 -!.$/3 %,%#42)#/3 %,%#42)# #/.42/, 3500/243 $%3-/.4!*% -!.$/3 -!.),,!2 2%-/6).' 4(% (!.$,%"!2 #/.42/,3 ◆ ◆ Desmonte el cubremanillar, véase pág. 47 (DESMONTAJE CUBREMANILLAR). Remove the handlebar cover, see p. 47 (REMOVING THE HANDLEBAR COVER). IMPORTANTE Las operaciones se refieren al desmontaje de un solo soporte. NOTE The operations described refer to the removal of aATENCION aCAUTION Marque los conectores eléctricos, en el lado correspondiente (según la tabla) para poder volver a conectarlos correctamente. Mark the electric connectors, on the side on which you are working, in order to be able to reconnect them correctly. Lado izquierdo Pos derecho Pulsador bocina (f) B Interruptor indicadores de dirección (c) ◆ ◆ Side left Pulsador de arranque (r) D Interruptor luces (a - •) (no presente _) D Interruptor luces (a - b - •) C % (no presente _) D Interruptor de parada motor ( n - m) - Pos. right Horn push button (f) B Direction indicator switch (c) Start push button (r) D Light switch (a - • ) (not provided for _) D D ◆ Desconecte los dos conectores eléctricos (lado correspondiente). Destornille y quite los dos tornillos (11). Saque el soporte mando eléctrico equipado con mandos. ◆ ◆ 95 Dimmer switch ( b - a ) - C D Desviador luces ( b - a ) _ (no presente _ en la versión -) Description A B Desviador luces ( b - a ) - C D ◆ Descripción A B one support only. Light switch (a - b - • ) C % (not provided for _) Engine stop switch (n - m) - Dimmer switch ( b - a ) _ (_ not provided in the - version) Disconnect the two electric connectors (on the side on which you are working). Unscrew and remove the two screws (11). Remove the electric control support complete with controls.