1
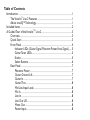
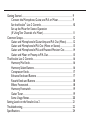
Vocal Harmony and
Effects Processor
Owner’s
Manual
WARNING FOR YOUR PROTECTION
PLEASE READ THE FOLLOWING:
KEEP THESE INSTRUCTIONS
HEED ALL WARNINGS
FOLLOW ALL INSTRUCTIONS
the apparatus shall not be exposed to dripping or splashing liquid
and no object filled with liquid, such as vases, shall be placed
on the apparatus.
CLEAN ONLY WITH A DRY CLOTH.
DO NOT BLOCK ANY OF THE VENTILATION OPENINGS. INSTALL IN ACCORDANCE
WITH THE MANUFACTURER’S INSTRUCTIONS.
DO NOT INSTALL NEAR ANY HEAT SOURCES SUCH AS RADIATORS, HEAT
REGISTERS, STOVES, OR OTHER APPARATUS (INCLUDING AMPLIFIERS) THAT
PRODUCE HEAT.
ONLY USE ATTACHMENTS/ACCESSORIES SPECIFIED BY THE MANUFACTURER.
UNPLUG THIS APPARATUS DURING LIGHTNING STORMS OR WHEN UNUSED FOR
LONG PERIODS OF TIME.
Do not defeat the safety purpose of the polarized or grounding-type plug. A
polarized plug has two blades with one wider than the other. A grounding
type plug has two blades and a third grounding prong. The wide blade or
third prong are provided for your safety. If the provided plug does not fit
your outlet, consult an electrician for replacement of the obsolete outlet.
Protect the power cord from being walked on or pinched particularly at
plugs, convenience receptacles, and the point where they exit from the
apparatus.
Use only with the cart stand, tripod bracket, or table specified by the manufacture, or sold with the apparatus. When a cart is used, use caution when
moving the cart/apparatus combination to avoid injury from tip-over.
Refer all servicing to to qualified service personnel. Servicing is required
when the apparatus has been damaged in any way, such as power-supply
cord or plug is damaged, liquid has been spilled or objects have fallen into
the apparatus, the apparatus has been exposed to rain or moisture, does not
operate normally, or has been dropped.
POWER ON/OFF SWITCH: The Power switch used in this piece of equipment
DOES NOT break the connection from the mains.
MAINS DISCONNECT: The plug shall remain readily operable. For rack-mount
or installation where plug is not accessible, an all-pole mains switch with a
contact separation of at least 3 mm in each pole shall be incorporated into
the electrical installation of the rack or building.
DECLARATION OF CONFORMITY
Manufacturer’s Name:
Manufacturer’s Address:
DigiTech®
8760 S. Sandy Parkway
Sandy, Utah 84070, U.S.A.
declares that the product:
Product name:
Product option:
Vocalist® Live 2
all (requires Class II power adapter that conforms
to the requirements of EN60065, EN60742, or equivalent.)
conforms to the following Product Specifications:
Safety
EMC
EN 60065
EN 55103-1
EN 55103-2
Supplementary Information:
The product herewith complies with the requirements of the Low
Voltage Directive 73/23/EEC and the EMC Directive 89/336/EEC as
amended by Directive 93/68/EEC.
Vice-President of Engineering - MI 8760 S. Sandy Parkway
Sandy, Utah 84070, U.S.A.
Date: February 1, 2007
European
Contact:
Your local DigiTech Sales and Service Office or
Harman Music Group
8760 South Sandy Parkway
Sandy, Utah, 84070 U.S.A.
Ph: (801) 566-8800
Fax: (801) 568-7583
Warning
For your protection, please read the following:
Important Safety Instructions
1.
2.
3.
4.
5.
6.
Read these instructions.
Keep these instructions.
Heed all warnings.
Do not use this apparatus near water.
Clean only with dry cloth.
Do not block any ventilation openings. Install in accordance with the manufacturer’s instructions.
7. Do not install near any heat sources such as radiators,
heat registers, stoves, or other apparatus (including
amplifiers) that produce heat.
8. Protect the power cord from being walked on or
pinched particularly at plugs, convenience receptacles,
and the point where they exit from the apparatus.
9. Unplug this apparatus during lightning storms or
when unused for long periods of time.
10. No user serviceable parts inside. Refer all servicing
to qualified service personnel. Servicing is required
when the apparatus has been damaged in any way,
such as power-supply cord or plug is damaged, liquid
has been spilled or objects have fallen into the apparatus, the apparatus has been exposed to rain or
moisture, does not operate normally, or has been
dropped.
11. WARNING: To reduce the risk of fire or electric
shock, do not expose this apparatus to rain or
moisture.
12. Refer to labels on the unit, including bottom cover, or
other markings and pertinent information.
Warranty
We at DigiTech® are very proud of our products and back up each one we sell with the following warranty:
1. The warranty registration card must be mailed within ten days after purchase date to validate this
warranty.
2. DigiTech warrants this product, when used solely within the U.S., to be free from defects in materials and
workmanship under normal use and service.
3. DigiTech liability under this warranty is limited to repairing or replacing defective materials that show
evidence of defect, provided the product is returned to DigiTech WITH RETURN AUTHORIZATION,
where all parts and labor will be covered up to a period of one year. A Return Authorization number may
be obtained from DigiTech by telephone. The company shall not be liable for any consequential damage as a
result of the product’s use in any circuit or assembly.
4. Proof-of-purchase is considered to be the burden of the consumer.
5. DigiTech reserves the right to make changes in design, or make additions to, or improvements upon this
product without incurring any obligation to install the same on products previously manufactured.
6. The consumer forfeits the benefits of this warranty if the product’s main assembly is opened and tampered
with by anyone other than a certified DigiTech technician or, if the product is used with AC voltages outside
of the range suggested by the manufacturer.
7. The foregoing is in lieu of all other warranties, expressed or implied, and DigiTech neither assumes nor
authorizes any person to assume any obligation or liability in connection with the sale of this product. In no
event shall DigiTech or its dealers be liable for special or consequential damages or from any delay in the
performance of this warranty due to causes beyond their control.
NOTE: The information contained in this manual is subject to change at any time without notification. Some
information contained in this manual may also be inaccurate due to undocumented changes in the product or
operating system since this version of the manual was completed. The information contained in this version of
the owner’s manual supersedes all previous versions.
Table of Contents
Introduction............................................................................................................ 1
The Vocalist® Live 2 Features...................................................................... 1
About musIQTM Technology......................................................................... 1
Included Items......................................................................................................... 2
A Guided Tour of the VocalistTM Live 2.............................................................. 3
Overview......................................................................................................... 3
Quick Start...................................................................................................... 3
Front Panel...................................................................................................... 4
Indicator LEDs (Guitar Signal, Phantom Power,Vocal Signal)...... 5
Guitar Tuner LEDs................................................................................. 5
Knobs....................................................................................................... 5
Select Buttons........................................................................................ 6
Rear Panel........................................................................................................ 7
Phantom Power..................................................................................... 7
Guitar Ground Lift................................................................................ 7
Guitar In.................................................................................................. 7
Guitar Thru............................................................................................. 8
Mic/Line Input Level.............................................................................. 8
Mic In....................................................................................................... 8
Line In...................................................................................................... 8
Line Out L/R........................................................................................... 8
Mono Out ............................................................................................. 8
Power Input............................................................................................ 8
Getting Started....................................................................................................... 9
Connect the Microphone, Guitar, and P.A. or Mixer.............................. 9
Set the Vocalist® Live 2 Controls................................................................ 10
Set up the Mixer for Stereo Operation
(If Using Two Channels of a Mixer)............................................................ 11
Common Setups..................................................................................................... 12
Guitar and Microphone In/Guitar Amp and P.A. Out (Mono)............. 12
Guitar and Microphone In/P.A. Out (Mono or Stereo)......................... 13
Guitar and Microphone In/P.A. and Powered Monitor Out................. 14
Guitar and Mixer or Preamp in/P.A. Out.................................................. 15
The Vocalist Live 2 Controls................................................................................ 16
Harmony Mix Knob...................................................................................... 16
Harmony Select Buttons.............................................................................. 16
Compressor Knob......................................................................................... 17
Enhance Knob and Buttons......................................................................... 17
Reverb Knob and Buttons........................................................................... 18
Effects Footswitch.......................................................................................... 18
Harmony Footswitch.................................................................................... 19
Guitar Tuner.................................................................................................... 19
Some Usage Notes........................................................................................ 20
Setting Levels on the Vocalist Live 2.................................................................. 21
Troubleshooting...................................................................................................... 22
Specifications........................................................................................................... 24
Introduction
Congratulations on your purchase of the Vocalist™ Live 2. The Vocalist Live 2 is the world’s first
processor that automatically generates live multi-part vocal harmony by analyzing guitar chord
progressions. Armed with patent pending musIQ™ Harmony Technology (which includes both
musIQ note detection and musIQ harmony generation), the VL-2 gives you accurate vocal harmonies even with complicated songs because only Vocalist Live tracks guitar chords, along with your
voice.
The Vocalist® Live 2 Features
•
•
•
•
•
•
•
•
musIQ harmony technology.
One or two voices of automatic harmony with selectable voicings (Unison 1, Unison 2, High,
Higher, Low, Lower), generated based on incoming music from your guitar.
Selection of lead voice effects (Reverb, Compressor, and Enhance effects).
Built-in guitar tuner.
Built-in microphone preamp.
Next-generation vocal pitch detection, pitch shifting, and humanization processing.
+48V phantom power.
24-bit/44.1kHz audio quality.
About musIQTM Technology
musIQ is a revolutionary technology that eliminates the need to enter key and scale information into the product as it listens to the notes/chords played on a guitar and makes sure that the
harmony voices fit with the music. Real-time processing discerns the individual notes and key
signatures that are played to automatically generate appropriate vocal harmonies that complement the lead vocal. With musIQ, you can focus on your live singing and playing performance, and
discard song programming once and for all.
Included Items
Before you get started, please make sure that the following items have been included:
•
•
•
•
The Vocalist® Live 2
PS0913B Power Supply
This owner’s manual
Warranty Card
The utmost care was taken while your Vocalist Live 2 was being manufactured. Everything should
be included and in perfect working order. If anything is missing, contact the factory at once. Please
help us become acquainted with you and your needs by completing your warranty card or registering online at www.digitech.com. It is your safeguard should a problem arise with your Vocalist
Live 2.
Important safety tip: Always turn on amplifiers AFTER all other connections are made to the
Vocalist Live 2 and AFTER the Vocalist Live 2 is powered up.
A Guided Tour of the Vocalist® Live 2
Overview
The Vocalist® Live 2 is a revolutionary voice processor that creates musically correct harmonies
for your singing voice that automatically change to fit with the current guitar chord and key of the
music you have been playing.
Quick Start
It’s a good idea to read this brief manual completely, but if you want to start using the Vocalist Live
2 right away, go to the Getting Started section on page 9.
For more information on what the knobs and buttons do, refer to The Vocalist Live 2 Controls
section on page 16.
To find out about using the tuner, see the Guitar Tuner section on page 19.
To locate and identify the various controls, inputs, and outputs, see the Front Panel and Rear Panel
sections on pages 4 and 7.
Front Panel
1
2
3
4
5
6
1.
Indicator LEDs (Guitar Signal, Phantom Power, Vocal Signal)
2.
Guitar Tuner LEDs
3.
Knobs
The indicator LEDs show the status of Phantom power (off or on) and the incoming signal
levels for the guitar and microphone. The Guitar Signal and Vocal Signal LEDs light
green when a signal is present, amber when the incoming signal is approaching clip (overload), and red when the incoming signal clips. For more information, see Setting Levels on
the Vocalist® Live 2 on page 21.
When the guitar tuner is active, the letter and # LEDs indicate what note is being played.
If the # LED lights up in addition to a letter LED, that means the note is a sharp note (like
A#). The bar of eleven LEDs shows whether the note being played is slightly sharp (right of
triangle), slightly flat (left of triangle), or in tune (directly below triangle).
Compressor
Adding the right amount of compression smooths out incoming vocal dynamics and creates
a more even vocal performance. Turn this knob clockwise to increase compression, or counter-clockwise to decrease compression. See page 17 for more information about compression.
Reverb
Sets the amount of reverb that is applied to the incoming microphone signal. Turn this knob
clockwise to increase reverb, or counter-clockwise to decrease reverb. Select the type of
reverb with the Reverb buttons, described on page 18.
Enhance
Enhance effects apply equalization and “sweetening” effects to the lead microphone signal
that improve intelligibility and presence. Turn this knob clockwise to increase Enhance effects,
or counter-clockwise to decrease Enhance effects. Select the type of Enhance effect with the
Enhance buttons, described on page 17.
Harmony Mix
Adjusts the level of the harmony vocals relative to the incoming lead vocal (your voice). Turn
this knob clockwise to increase harmony levels and decrease the lead vocal, or counterclockwise to decrease harmony levels and increase the lead vocal.
4.
Select Buttons
These enable and disable reverbs, effects, and harmonies. See the following pages for more
information:
Reverb - Page 18.
Enhance - Page 17.
Harmony - Page 16.
5.
Harmony Footswitch
6.
Effects/Tuner Footswitch
Press this footswitch to enable or disable the vocal harmonies.
Press this footswitch to enable or disable any selected effects (reverb, compressor, etc.). Press
and hold this footswitch to enable the guitar tuner. Press the Effects/Tuner Footswith again to
disable the guitar tuner. See page 19 for more information about the guitar tuner.
Note: It is important that your guitar is properly tuned in order to get the best
sounding harmonies. Alternate tunings such as DADGAD are fine, as long as the
tuning system used specifies a frequency of 440 Hz for A (A440), and it is based
on the chromatic scale (12 notes per octave). Micro-tonal scales are not supported.
Rear Panel
2 3 4
1
Phantom Power
Mic In
Mic/Line
Input Level
Guitar In Guitar Thru
Guitar
Ground Lift
OFF ON
Mono Out
Line In
L
1.
5
Phantom Power
6
7
Line Out
8
musIQ is a trademark
of 3dB Research
9VAC
1.3A
R
9
10
Enables 48 volt phantom power on the XLR mic input.
Note: Phantom power is normally only needed with condenser microphones and should
never be used with ribbon microphones. To avoid damaging the microphone, please consult
your microphone documentation to ensure phantom power is applied only when appropriate.
2.
Guitar Ground Lift
3.
Guitar In
Eliminates most “hum” problems. If you hear a humming sound or buzz coming from your
amp or P.A., try pressing this button.
Connect a guitar directly to this high-impedance input. Note that there is no loss of quality
between the Guitar in and Guitar Thru jacks.
4.
Guitar Thru
5.
Mic/Line Input Level
6.
Mic In
7.
Line In
8.
Line Out L/R
9.
Mono Out
Connect a guitar amplifier or powered speaker directly to this output.
This knob adjusts the gain of the Mic and Line inputs. Turn clockwise to increase gain, or
counter-clockwise to decrease gain. If the Vocal Signal LED is turning red while you sing,
you need to decrease the Mic gain.
Connect a dynamic or condenser microphone to this XLR input. This input is the lead voice
for the Vocalist® Live 2.
Connect a line input source (mixer, mic preamp, etc.) to this input. When connected to a
source, this input is the lead voice for the Vocalist Live 2, and disables the Mic In XLR input.
Connect these balanced/unbalanced outputs to a mixer, powered speakers or P.A. system
if a stereo mix is desired. Only vocal, harmonies, and vocal effects are heard from the Line
Outputs. Harmonies sent through these outputs are panned slightly to the left (Line Out
L) and right (Line Out R).
Connect this XLR balanced output to a powered speaker or mixer if a mono mix is desired.
Only vocal, harmonies, and vocal effects are heard from this output.
10. Power Input
Connect only the DigiTech® PS0913B power supply to this jack.
Getting Started
Before connecting the Vocalist® Live 2, make sure that the power to your amplifier is off and that
the Vocalist Live 2 is plugged into the wall and powered on. There is no power switch on the Vocalist Live 2. To turn the Vocalist Live 2 on or off, connect or disconnect the included PS0913B power
supply from the Power Input jack.
Connect the Microphone, Guitar, and P.A. or Mixer
1.
Plug a microphone into the Vocalist Live 2 Mic In jack.
2.
If you need phantom power, press the Phantom Power switch on the Vocalist Live 2 back
panel. The Phantom Power LED will illuminate.
Note: Phantom power is normally only needed with condenser microphones, and should
never be used with ribbon microphones. To avoid damaging the microphone, please consult
your microphone documentation to ensure phantom power is applied only when appropriate.
3.
Plug your guitar into the Vocalist Live 2 Guitar In jack.
4.
Make sure your guitar amplifier is turned off and the volume level is turned all the way down.
5.
Connect the Vocalist Live 2 Guitar Thru to your amplifier’s input or the P.A. system.
6.
Make sure your P.A. or mixer is turned off and the volume levels are turned all the way down.
7.
Plug the Vocalist Live 2 Left and Right Line Outputs into your P.A. system or mixer. Or, if
you are only using a single channel or mono amplification system, plug only the Vocalist Live 2
Mono output into the P.A. system or mixer.
Set the Vocalist® Live 2 Controls
1.
Turn the Compressor, Reverb, and Enhance knobs all the way down (counter-clockwise).
2.
Turn the Harmony Mix knob to the 11 o’clock position.
3.
Power up the Vocalist® Live 2 by connecting the PS0913B power supply.
4.
Press the High button so that it is lit.
5.
Press the Harmony Footswitch so that the Harmony LED just above it is lit.
Adjust Levels and Tune Your Guitar
10
1.
Observe the Guitar Signal LED while playing your guitar. Adjust the output level of your
guitar until the Guitar Signal LED lights green or amber most of the time. (For more information about setting levels, see page 21.)
2.
Perform the obligatory “Check 1-2” or sing into the mic while gradually turning up the Vocalist Live 2 Mic/Line Input Level knob until the Vocal Signal LED lights amber most of the
time. (For more information about setting levels, see page 21.)
3.
Press and hold the Effects Footswitch until the Tuning LEDs light up. Tune
each string until the center (green LED below the triangle) LED illuminates for each string,
indicating it’s in tune.
Note: It is important that your guitar is properly tuned in order to get the best
sounding harmonies. Alternate tunings such as DADGAD are fine, as long as the
tuning system used specifies a frequency of 440 Hz for A (A440), and it is based
on the chromatic scale (12 notes per octave). Micro-tonal scales are not supported.
4.
Turn on your amplifier and gradually turn it up until you reach a comfortable listening level.
5.
Turn on your P.A. system and gradually turn it up until you reach a comfortable listening level.
6.
While playing a chord on your guitar, sing a note.You should hear your guitar and your voice,
plus a harmony voice. If not, repeat the steps above or consult the Troubleshooting section on
page 22.
Set up the Mixer for Stereo Operation (If Using Two Channels of a Mixer)
1.
Turn the Vocalist® Live 2 Mic/Line Input Level knob completely counter-clockwise.
2.
Set the mixer channels’ faders to 0dB.
3.
Set the mixer’s master fader to its minimum position (no output signal).
4.
Set the pan controls on the selected mixer channels hard left and hard right.
5.
While singing, gradually turn up the Vocalist Live 2’s Mic/Line Input Level knob until the
Vocal Signal LED lights amber most of the time, and red during the loudest parts only. (For
more information about setting levels, see page 21.)
6.
Gradually bring the mixer’s master fader up until you reach your desired level.
11
Common Setups
There are several ways to set up the VocalistTM Live 2. Some useful setups are shown here.
Guitar and Microphone In/Guitar Amp and P.A. Out (Mono)
Guitar amp
4
6
4
2
6
4
8 2
0
Aux 1 10
4
0
6
0
0 +1
L/R
4
0
6
0
6
L/R
L/R
8
L/R
Pan
+3
Mute
L/R
+10
+10
+10
+10
+10
+10
+10
+5
+5
+5
+5
+5
+5
+5
+5
0
0
0
0
0
0
0
0
-5
-5
-5
-5
-5
-5
-5
-5
-10
-10
-10
-10
-10
-10
-10
-10
-20
-20
-20
-20
-20
-20
-20
-20
-30
-
-30
-
-30
-
-30
-
-30
-
-30
-
-30
-
-30
-
2
3
4
5
+2
Mic In
+4
-5
+5
+10
1
0 +1
-2
+3 -3
Mute
Phantom Power
6
Aux 2 10
-1
+2
+4 -4
-5
+5
0
0 +1
-2
+3 -3
Pan
Aux 1 10
4
Aux 2 10
-1
+2
+4 -4
-5
Mute
0
6
8 2
0
0 +1
-2
+3 -3
+5
6
8
Aux 1 10
4
Aux 2 10
-1
+2
Pan
Mute
4
8 2
0
0 +1
+4 -4
-5
+5
6
8 2
Aux 1 10
4
Aux 2 10
-1
-2
+3 -3
L/R
4
8 2
0
+2
Pan
6
8 2
Aux 1 10
4
8 2
0 +1
+4 -4
-5
+5
Mute
L/R
0
6
Aux 2 10
-2
+3 -3
Pan
Mute
6
8 2
Aux 1 10
4
-1
+2
+4 -4
-5
+5
0
0 +1
-2
+3 -3
Pan
0
6
Aux 2 10
-1
+2
+4 -4
-5
Mute
L/R
0
0 +1
-2
+3 -3
+4 -4
+5
4
8 2
Aux 2 10
-1
+2
Pan
6
8 2
Aux 1 10
4
8 2
Aux 2 10
-1
-5
Mute
0
6
8 2
0
-2
-4
4
8 2
Aux 1 10
4
2
-3
6
8 2
Pan
+5
Mic/Line
Input Level
Guitar In Guitar Thru
Guitar
Ground Lift
OFF ON
Line In
6
L
Mixer/
P.A. system
12
Line Out
R
Mono Out
musIQ is a trademark
of 3dB Research
9VAC
1.3A
Guitar and Microphone In/P.A. Out (Mono or Stereo)
4
6
4
2
OFF ON
Line Out
R
Mono
or
Stereo
Pan
4
4
6
8
+4 -4
Pan
+4
-5
+5
Mute
Mute
Mute
Mute
Mute
Mute
L/R
L/R
L/R
L/R
L/R
L/R
+10
+5
+10
+5
0
+10
+5
0
+10
+5
0
+10
+5
0
+5
0
0
0
-5
-5
-5
-5
-5
-5
-10
-10
-10
-10
-10
-10
-20
-20
-20
-20
-20
-20
-20
-30
-
-30
-
-30
-
-30
-
-30
-
-30
-
-30
-
-30
-
3
4
5
+5
+5
-5
-10
-20
2
Pan
+10
-5
-10
1
+2
+3
L/R
+10
0 +1
-2
+3 -3
-5
+5
Aux 2 10
-1
+2
+4 -4
Pan
8
0
0 +1
-2
+3 -3
-5
+5
6
Aux 1 10
4
Aux 2 10
-1
+2
0
6
8 2
0
0 +1
+4 -4
Pan
6
Aux 1 10
4
Aux 2 10
-1
-2
+3 -3
-5
+5
0
6
8 2
0
+2
8 2
Aux 1 10
4
8 2
0 +1
+4 -4
-5
+5
6
8 2
0
6
Aux 2 10
-1
-2
+3 -3
Mute
0
9VAC
1.3A
Pan
4
Aux 1 10
4
0
+2
+4 -4
-5
+5
6
8 2
0
8 2
0 +1
-2
+3 -3
L/R
+5
musIQ is a trademark
of 3dB Research
Pan
4
8 2
6
Aux 2 10
-1
+2
+4 -4
-5
+5
6
Aux 1 10
4
0
0 +1
-2
+3 -3
Mute
+10
Mono Out
Line In
L
Pan
4
Aux 2 10
-1
+2
0
6
8 2
0
0 +1
+4 -4
-5
6
Aux 1 10
4
Aux 2 10
-1
-2
+3 -3
-4
0
6
8 2
0
0 +1
+2
8 2
Aux 1 10
4
Aux 2 10
-1
Guitar In Guitar Thru
Guitar
Ground Lift
0
6
8 2
0
-2
-3
Mic In
4
8 2
Aux 1 10
4
Mic/Line
Input Level
6
8 2
0
2
Phantom Power
6
Mixer/
P.A. system
13
Guitar and Microphone In/P.A. and Powered Monitor Out
4
6
4
2
Line In
L
Powered monitor
14
Line Out
R
4
6
4
8 2
0
6
4
0
0 +1
6
4
6
Aux 1 10
4
6
8
Aux 2 10
-1
+2
0
6
8 2
0
0 +1
-2
8
Aux 1 10
4
Aux 2 10
-1
+2
0
6
8 2
Aux 2 10
-1
-2
8 2
Aux 1 10
4
8 2
0
+2
8 2
Aux 1 10
4
8 2
0 +1
-2
6
8 2
0
6
Aux 2 10
-1
+2
0
0 +1
-2
Aux 2 10
-1
+2
0 +1
-2
+2
+3 -3
+3 -3
+3 -3
+3 -3
+3 -3
+3
+4 -4
+4 -4
+4 -4
+4 -4
+4 -4
+4
Pan
-5
+5
Pan
Mute
Pan
Pan
Pan
Pan
L/R
+10
+5
0
-5
+5
Mute
L/R
+10
+5
0
-5
+5
Mute
L/R
+10
+5
0
-5
+5
Mute
L/R
+10
+5
0
-5
+5
Mute
L/R
+10
+5
0
-5
+5
Mute
L/R
+10
+5
9VAC
1.3A
6
Aux 1 10
4
0
0 +1
-2
+3 -3
+4 -4
-5
musIQ is a trademark
of 3dB Research
4
Aux 2 10
-1
+2
0
6
8 2
0
0 +1
+4 -4
+10
Mono Out
6
Aux 1 10
4
Aux 2 10
-1
-2
+3 -3
-4
L/R
OFF ON
0
6
8 2
0
+2
8 2
Aux 1 10
4
8 2
0 +1
-3
Mute
Guitar In Guitar Thru
Guitar
Ground Lift
0
6
Aux 2 10
-1
Mic In
4
8 2
Aux 1 10
4
0
-2
Mic/Line
Input Level
6
8 2
0
2
Phantom Power
+5
0
0
Pan
-5
+5
+5
0
-5
-5
-5
-5
-5
-5
-5
-5
-10
-10
-10
-10
-10
-10
-10
-20
-20
-20
-20
-20
-20
-20
-20
-30
-
-30
-
-30
-
-30
-
-30
-
-30
-
-30
-
-30
-
2
3
4
5
+5
L/R
-10
1
Pan
Mute
+10
6
Mixer/
P.A. system
Guitar and Mixer or Preamp in/P.A. Out
4
6
4
2
OFF ON
4
6
4
2
6
4
8 2
0
0
6
0
0 +1
-3
Pan
Pan
Mute
Mute
Mute
Mute
Mute
L/R
L/R
L/R
L/R
L/R
L/R
+10
+10
+5
0
+10
+5
0
+10
+5
0
+10
+5
0
+5
0
0
-5
-5
-5
-5
-5
-10
-10
-10
-10
-10
-20
-20
-20
-20
-20
-20
-30
-
-30
-
-30
-
2
-30
-
3
-30
-
4
-30
-
5
6
+10
+5
0
+10
+5
0
+10
+5
0
+5
0
0
+10
+5
0
-5
-5
-5
-5
-5
-5
-10
-10
-10
-10
-10
-10
-20
-20
-20
-20
-20
-20
-30
-
-30
-
-30
-
-30
-
-30
-
-30
-
-30
-
1
2
3
4
5
6
Mixer/
P.A. system
+2
Pan
+5
0
-5
-10
-20
-30
-
+10
+5
0
-5
-20
-30
-
+5
-5
-10
-20
1
+10
+5
-10
-20
+10
-5
-10
-30
-
+10
-5
-10
8
Mute
+5
L/R
8
L/R
+10
Mute
L/R
+3
Mute
0
Mute
L/R
+4
L/R
+5
Mute
L/R
6
-5
+5
Mute
+10
Mute
L/R
6
+3 -3
Pan
Mute
L/R
+5
0 +1
-2
+4 -4
-5
+5
Mute
L/R
Pan
Aux 2 10
-1
+3 -3
Pan
0
+2
R
+3
+4
-5
+5
Aux 1 10
4
8 2
0 +1
-2
+4 -4
-5
+5
0
6
Aux 2 10
-1
+2
+3 -3
Pan
4
8 2
0
0 +1
-2
+4 -4
-5
+5
6
Aux 1 10
4
Aux 2 10
-1
+2
0
6
8 2
0
0 +1
+3 -3
Pan
4
Aux 1 10
4
Aux 2 10
-1
-2
+4 -4
-5
+5
6
8 2
0
6
8 2
0
+2
+3 -3
Pan
4
Aux 1 10
4
8 2
0 +1
-2
+4 -4
-5
+5
6
8 2
0
6
Aux 2 10
-1
+2
+4 -4
-5
+5
4
8 2
0
0 +1
-2
+3 -3
+4 -4
-5
6
Aux 1 10
4
Aux 2 10
-1
+2
0
6
8 2
0
0 +1
-2
+3 -3
-4
4
Aux 1 10
4
Aux 2 10
-1
+2
0
6
8 2
Aux 2 10
-1
8 2
Aux 1 10
4
8 2
0
-2
6
8 2
Aux 1 10
4
2
Line Out
8
+2
+3 -3
Pan
Mute
0
9VAC
1.3A
8
6
0 +1
-2
+4 -4
-5
+5
Aux 2 10
-1
+2
+3 -3
Pan
0
0 +1
-2
+4 -4
-5
+5
6
Aux 1 10
4
Aux 2 10
-1
+2
0
6
8 2
0
0 +1
+3 -3
Pan
4
Aux 1 10
4
Aux 2 10
-1
-2
+4 -4
-5
+5
6
8 2
0
6
8 2
0
+2
+3 -3
Pan
4
Aux 1 10
4
8 2
0 +1
-2
+4 -4
-5
+5
6
8 2
0
6
Aux 2 10
-1
+3 -3
Pan
4
Aux 1 10
4
0
+2
+4 -4
-5
+5
6
8 2
0
8 2
0 +1
-2
L/R
+5
musIQ is a trademark
of 3dB Research
+3 -3
Pan
4
8 2
6
Aux 2 10
-1
+2
+4 -4
-5
+5
6
Aux 1 10
4
0
0 +1
-2
Mute
+10
Mono Out
Line In
L
Pan
4
Aux 2 10
-1
+2
0
6
8 2
0
0 +1
+4 -4
-5
6
Aux 1 10
4
Aux 2 10
-1
-2
+3 -3
-4
0
6
8 2
0
+2
8 2
Aux 1 10
4
8 2
0 +1
-3
Guitar In Guitar Thru
Guitar
Ground Lift
0
6
Aux 2 10
-1
Mic In
4
8 2
Aux 1 10
4
0
-2
Mic/Line
Input Level
6
8 2
0
2
Phantom Power
Mixer/Preamp
15
The Vocalist® Live 2 Controls
Harmony Mix Knob
This adjusts the mix of lead vocal (your voice) and the harmony voices. If you turn this knob all the
way to the left, you’ll only hear your voice. If you turn it all the way to the right, you’ll only hear
the harmonies the Vocalist® Live 2 produces when you sing.
Typically, you’ll want to set this knob near the 11 o’clock position, making the harmonies slightly
quieter than your voice. This is usually the best mix for enhancing a song chorus with vocal harmonies. For quieter “ghost” harmonies, turn the Harmony knob counter-clockwise. For harmonies
that are louder than the lead vocal, turn the Harmony knob clockwise.
Harmony Select Buttons
These select the harmony voices that are added to your voice. A harmony can be either higher, on
pitch (Unison), or lower than your voice.
The six Harmony Select buttons on the front panel are arranged as two vertical columns
of three buttons each. The harmony voices you can choose are:
16
Column 1
Column 2
High = a third above
Higher = a fifth above
Unison 1
Unison 2
Low = a third below
Lower = a fifth below
When Unison 1 is on (and Unison 2 is off), it doesn’t track notes in a chromatic scale, so it
produces a tight double sound, even if you’re singing slightly out of pitch. When Unison 2 is on
(and Unison 1 is off), it tracks chromatic notes. This can help you sing on pitch better. When both
Unison voices are selected at the same time, neither tracks a chromatic scale, and they are slightly
detuned to provide a thicker unison effect.
You can select one or two harmony voices at any time. The harmony voices have pitch and time
decoupling, as well as a slight “gender” effect, to distinguish them from the lead vocal.
If two Harmony Select buttons are lit and a third one is pressed, the most recently selected one of the current two is kept. No more than two Harmony Select buttons may be
lit at any given time.
Note: The terms “fifth” and “third” are used somewhat loosely. Harmonies produced are usually
centered around musical fifths and thirds, but may vary slightly depending on the chords and chord
progressions.
Compressor Knob
The Compressor knob adjusts the amount of compression applied to the incoming vocal.
Compression tends to smooth out the vocal performance, and results in a more even tone for the
lead vocal. Turning this control all the way to the left defeats the compressor, turning it all the way
to the right provides maximum compression.
Warning: Because increasing compression amplifies lower signal levels, turning the Compressor knob too high may result in feedback depending on your P.A. volume levels, speaker placement, and other possible factors that are beyond the scope of this manual.
Enhance Knob and Buttons
Enhance effects apply EQ and filtering to the incoming vocal signal, which adds presence and polish
to your voice. There are three kinds of Enhance effects:
17
Resonance - Enhances deeper voices by adding low and mid-frequency filters.
Clarity - Enhances all voices by adding mid-frequency filters.
Shine - Adds extra sheen to voices by emphasizing high frequencies.
Press an Enhance button to select it. Turn the Enhance knob clockwise to increase the
amount of filtering applied to your voice, or turn it counter-clockwise to reduce the amount of
filtering.
Reverb Knob and Buttons
Using reverb on an incoming voice gives the listener a sense that the material is being performed
in an actual room or hall. It is this similarity to actual acoustic spaces that makes reverberation a
useful tool in live music. The Vocalist® Live 2 features three reverbs to add depth and warmth to
your vocal performance.
Studio - simulates a studio plate reverb with fairly short decay and lots of diffusion.
Room - simulates a mid-sized room with about one second of decay.
Hall - simulates a large performance hall with several seconds of decay and high diffusion.
Press a Reverb button to select it. Turn the Reverb knob clockwise to increase the amount
of reverb, or turn it counter-clockwise to reduce the amount of reverb.
Effects Footswitch
This footswitch turns the Compressor, Reverb, and Enhance effects on or off. While each of these
three effects can be turned on or off and adjusted individually, the Effects footswitch activates
or deactivates all of them simultaneously.
18
When the LED above the Effects footswitch is illuminated, the effects are on. When the LED
is turned off, the effects are turned off.
Harmony Footswitch
This footswitch turns the harmonies on or off. While one or two harmonies can be selected with
the Harmony Select buttons, the HARMONY footswitch activates or deactivates any
selected harmonies simultaneously.
When the LED above the HARMONY footswitch is illuminated, the harmonies are on. When the
LED is turned off, the harmonies are turned off.
Guitar Tuner
Since the Vocalist® Live 2 relies on accurate incoming notes to generate its harmony voicings, it
is imperative that your guitar be in tune. The integrated digital tuner of the Vocalist Live 2 makes
tuning your guitar fast and easy. To activate the guitar tuner, simply press and hold the Effects footswitch until the Tuner LEDs illuminate.
The Effects LED flashes to indicate that the tuner is turned on. To begin tuning, play a note on
your guitar. The Display shows the note being played. The Tuner LEDs indicate whether you are
sharp or flat. The right five LEDs indicate the note is sharp and should be tuned down. The left
five LEDs indicate the note is flat and should be tuned up. The center green LED below the green
triangle indicates the note is in tune. The guitar signal output is muted while the tuner is active.
Exit the tuner by pressing the Effects footswitch.
Tip: The Vocalist Live 2 “remembers” about 30 seconds of music while you play to determine
the proper harmonies. Entering and exiting the tuner clears this memory. This can be useful when
you’re switching between songs with radically different chord progressions.
19
Some Usage Notes
•
•
•
20
The guitar signal is only present in the Guitar Thru jack. It is not present in the Line Out
or Mono Out jacks. This enables you to process your guitar using other guitar pedals and
effects.
Do not hook up any other effects pedals to your guitar prior to plugging it into the Vocalist
Live 2, as this could affect vocal harmony generation. The only thing between your guitar and
the Vocalist Live 2 should be the guitar cable. Use the Guitar Thru to connect your effects
and stomp boxes.
Both the Mono Out and stereo L/R Line Outs can be used simultaneously, allowing you
to monitor vocals locally using the Mono Out while sending a stereo feed to the main
mixer/P.A.
Setting Levels on the Vocalist® Live 2
Setting the Vocal Level
It is recommended you set your vocal level by adjusting the Mic/Line Input Level knob on the
rear panel so that the Vocal Signal LED is amber during loud vocal sections and only briefly
turns red on the very loudest vocal sections. The Vocalist® Live 2 will normally prevent the vocal
harmonies from clipping, even when the LED is red, but for optimum voice quality the LED should
turn red only briefly or not at all.
Setting the Guitar Level
Ideally the Guitar Signal LED should be green or amber while playing. There is no guitar input
level control, but most electric guitars send their signal at a level appropriate for the Vocalist Live
2. If you have a volume control on your guitar (for example, an acoustic guitar with a pre-amp built
in), you should adjust the volume so that the Guitar Signal LED is green or amber most of the
time while playing.
21
Troubleshooting
I don’t hear any sound coming from the Vocalist® Live 2.
•
Make sure the power supply is plugged in to both the Vocalist Live 2 and the power outlet.
•
Make sure the guitar amp, P.A. system, or mixer is plugged in and turned on.
•
Make sure the guitar amp, P.A. system, or mixer volume levels aren’t turned all the way down.
•
Make sure the guitar volume isn’t turned all the way down, and the microphone isn’t turned
off (if it has an on/off switch).
•
Make sure the Mic/Line Input Level knob isn’t turned all the way down.
•
Make sure all the cables are completely plugged into their proper places (see pages 9 through
15 for instructions and diagrams).
The harmonies aren’t tracking properly.
•
Tune the guitar with the Vocalist Live 2 tuner (see page 19).
•
Make sure you’re not in Tuner mode while singing.
The guitar signal is too quiet.
•
Turn up the volume on your guitar.
•
Make sure the guitar cable is properly connected to the guitar and the Vocalist Live 2.
The guitar signal is too loud.
•
Turn down the volume on your guitar.
The lead vocal is too quiet.
•
Turn up the Mic/Line Input Level knob.
•
If you’re using a P.A. system or mixer, turn up the channel that the Vocalist Live 2 is connected
to, or turn up the master level (volume) controls.
•
Try singing closer to the microphone.
22
The lead vocal is too loud.
•
Turn down the Mic/Line Input Level knob.
•
If you’re using a P.A. system or mixer, turn down the channel that the Vocalist® Live 2 is connected to, or turn down the master level (volume) controls.
I don’t hear any harmonies.
•
Make sure the Harmony footswitch is pressed so that the LED just above it is lit.
•
Make sure the Harmony Mix knob is set somewhere between the 11 o’clock position and the
5 o’clock position.
The harmonies are too loud.
•
Turn the Harmony Mix knob counter-clockwise to lower the harmony level and increase the
lead vocal level.
The harmonies are too quiet.
•
Turn the Harmony Mix knob clockwise to increase the harmony level and decrease the lead
vocal level.
23
Specifications
24
A/D/A Converter: Sampling Frequency: Simultaneous Harmonies: Dimensions: Unit Weight: 24-bit high performance audio
44.1 kHz
2
8.25” Length x 9.375” Width x 2.125” Height
2.3 lbs.
Analog Input Connections
Guitar Input: Guitar Input Impedance: Line In: Mic Input Impedance
1/4” Unbalanced (TS)
3 Megohms
1/4” Line Unbalanced (TS)
1000 Ohms
Analog Output Connections
Left/Right Outputs: Mono Output: Left/Right Output Impedance: Mono Output Impedance: Maximum Output: 1/4” Balanced/Unbalanced
XLR
500 Ohms per side
1000 Ohms per side
+14dBu Unbalanced, +20dBu Balanced
Power Requirements
US and Canada: Japan: Europe: UK: 120 VAC, 60 Hz Adapter: PS0913B-120
100 VAC, 50/60 Hz Adapter: PS0913B -100
230 VAC, 50 Hz Adapter: PS0913B -230
240 VAC, 50 Hz Adapter: PS0913B -240
25
DigiTech®
8760 South Sandy Parkway
Sandy, Utah 84070
PH (801) 566-8800
FAX (801) 566-7005
www.digitech.com
Made in China
Printed 2/2007
DigiTech Vocalist® Live 2 Owner’s Manual 18-0476-A
©2006 Harman International Industries, Incorporated, all rights reserved.
DigiTech and Vocalist are trademarks of Harman International Industries, Inc.
musIQTM is a trademark of 3dB Research Ltd.