1
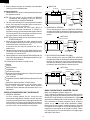
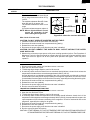
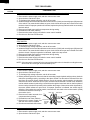
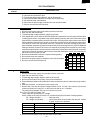
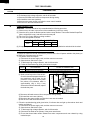
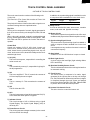
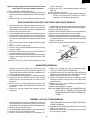
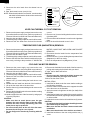
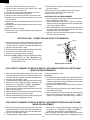
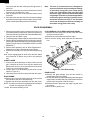
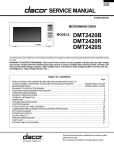
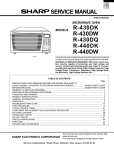
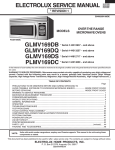
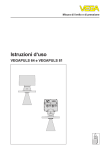
PMOR30B
PMOR30R
PMOR30S
7. Re-install the wire leads to the hole of the hood duct.
8. Connect the wire leads to the fan motor and chassis
support, referring to the pictorial diagram.
9. Refer to procedure of "OUTER CASE REMOVAL". And
reverse their procedure. And re-install the outer case.
Coil
Shaft
Groove joint pliers
Shaft
Stator
Gap
Bracket
These are the positions
that should be pinched
with pliers.
Axis
Rotor
Rear View
Stator
Table
Center of
bracket
Rotor
Side View
TURNTABLE MOTOR REMOVAL
1. Disconnect the power supply cord.
2. Open the door and block it open.
3. Remove the three (3) screws holding the base cover to
the oven cavity.
4. Open the base cover from the oven cavity by pulling down.
5. Disconnect the wire leads from the turntable motor.
6. Remove one (1) screw holding turntable motor to the
oven cavity.
7. Now the turntable motor is free.
STIRRER MOTOR REMOVAL
5. Disconnect the wire leads from the stirrer motor.
6. Remove the two (2) screws holding the stirrer motor to
the waveguide of the oven cavity.
7. Remove the stirrer motor from the waveguide.
8. Now, the stirrer motor is free.
9. When installing the stirrer motor, the shaft of stirrer motor
must be inserted to the stirrer fan shaft. Refer to the
procedure of "STIRRER COVER AND STIRRER FAN
INSTALLATION".
1. Disconnect the power supply cord and remove the oven
from wall and remove outer case. (Refer to procedure of
"Removal of Oven from Wall" and Outer case Removal")
2. Open the door and block it open.
3. To discharge high voltage capacitor, wait for 60 seconds.
4. Remove the hood fan motor and the hood duct from the
oven cavity, referring to the procedure of " HOOD FAN
MOTOR, HOOD DUCT AND OVEN LAMP SOCKET
REMOVAL".
STIRRER COVER AND STIRRER FAN INSTALLATION
1. Put the stirrer fan on the stirrer cover to match the stirrer
fan shaft to the center of the stirrer support.
2. Insert the shaft of stirrer fan to the shaft of stirrer motor.
3. Insert the cutout of stirrer cover to the tabs on the ceiling.
4. Install the stirrer cover to the oven cavity, and secure it
by one canoe clip.
Shaft
Stirrer Fan
Stirrer Cover
Canoe Clip
OVEN LAMP REMOVAL
1. Disconnect the power supply cord.
2. Remove one (1) screw holding the hood exhaust louver
to oven cavity front flange.
3. Remove the hood exhaust louver from the oven by
pushing the right and left tabs of the hood exhaust louver.
(Refer to procedure of "HOOD EXHAUST LOUVER
4.
5.
6.
7.
REMOVAL")
Lift the oven lamp cover up.
Now, the oven lamp and the socket are found.
Screw the oven lamp off from the lamp socket.
Now, the oven lamp is free.
CONTROL PANEL ASSEMBLY, CONTROL UNIT AND KEY UNIT REMOVAL
1. Disconnect the power supply cord.
2. Open the door and block it open.
3. Remove one (1) screw holding the hood exhaust louver
to oven cavity front flange.
4. Remove the hood exhaust louver from the oven by
pushing the right and left tabs of the hood exhaust louver.
(Refer to procedure of "HOOD EXHAUST LOUVER
REMOVAL")
5. Remove one (1) screw holding the control panel to the
oven cavity front face plate.
6. Release the control panel from the oven cavity front face
plate by lifting it up.
37