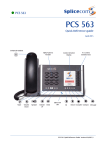
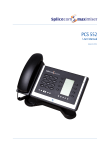
Download iPCS for iPhone & iPad
Transcript
iPCS for iPhone & iPad User Manual April 2013 iPCS for iPhone & iPad User Manual Document No. 023 Version No. v3.2/0413/2 © Copyright SpliceCom Ltd SpliceCom Ltd The Hall Business Centre, Berry Lane Chorleywood, Herts WD3 5EX Tel: 01923 287700 Website: www.splicecom.com iPCS for iPhone & iPad User Manual Contents Introduction ..................................................................................................................................................... 1 About this manual .................................................................................................................................................. 1 How iPCS will operate ............................................................................................................................................ 1 Feature Highlights .................................................................................................................................................. 3 The PCS range ........................................................................................................................................................ 4 Basic Call Handling .......................................................................................................................................... 5 Make a Call ............................................................................................................................................................. 5 Answer a Call .......................................................................................................................................................... 6 End a Call ................................................................................................................................................................ 7 Mute a call .............................................................................................................................................................. 7 Using Speaker Phone ............................................................................................................................................ 7 Place a call on hold ................................................................................................................................................ 8 Transfer a Call ......................................................................................................................................................... 8 Parking a call........................................................................................................................................................... 9 Conference Call .................................................................................................................................................... 10 Using Contacts ..................................................................................................................................................... 11 Viewing your Calls History.............................................................................................................................. 13 Identifying the type of call ................................................................................................................................... 13 Call Info Screen .................................................................................................................................................... 13 Missed Incoming Calls ......................................................................................................................................... 14 Redial a number ................................................................................................................................................... 14 Dial a previous caller ............................................................................................................................................ 15 Users Directory .............................................................................................................................................. 16 Search the Users directory ................................................................................................................................... 16 Make a call to a User ........................................................................................................................................... 17 Transfer a call to a User ....................................................................................................................................... 17 Receiving a call from a colleague ....................................................................................................................... 17 Departments.................................................................................................................................................. 18 Working as a member of a Department ............................................................................................................. 18 Make a call to a Department ............................................................................................................................... 18 Transfer a call to a Department ........................................................................................................................... 19 Contacts Directory ......................................................................................................................................... 20 Search the Contacts directory.............................................................................................................................. 20 Make a call to a Contact ...................................................................................................................................... 21 Transfer a call to a Contact .................................................................................................................................. 21 Receiving a call from a Contact ........................................................................................................................... 22 Favourites ...................................................................................................................................................... 23 View your Favourites ............................................................................................................................................ 23 Make a call using a Favourite .............................................................................................................................. 24 Transfer a call using a Favourite .......................................................................................................................... 24 Call Pick up ........................................................................................................................................................... 24 Grouping Favourites ............................................................................................................................................ 24 Contents iPCS for iPhone & iPad User Manual v3.2/0413/2 i iPCS for iPhone & iPad User Manual Prioritising Favourites ........................................................................................................................................... 25 Quick Settings ............................................................................................................................................... 27 Do Not Disturb ..................................................................................................................................................... 27 Call Forwarding..................................................................................................................................................... 28 Out of Office Message ........................................................................................................................................ 30 Voicemail ....................................................................................................................................................... 32 Receiving a Message ........................................................................................................................................... 32 Viewing your voicemail messages ...................................................................................................................... 32 Message Info Screen ........................................................................................................................................... 33 Listen to a message ............................................................................................................................................. 33 Ring back a caller ................................................................................................................................................. 34 Message Handling ............................................................................................................................................... 34 Voicemail Settings ................................................................................................................................................ 35 Recording a Greeting ........................................................................................................................................... 36 Voicemail for Departments.................................................................................................................................. 38 iPCS Configuration ......................................................................................................................................... 40 Turn on or off the iPCS......................................................................................................................................... 40 Icons in Brief .................................................................................................................................................. 41 Index.............................................................................................................................................................. 44 ii Contents iPCS for iPhone & iPad User Manual v3.2/0413/2 iPCS for iPhone & iPad User Manual Introduction About this manual This manual contains all that you need to know to operate your iPCS application via an iPhone or iPad, which being run via a SpliceCom maximiser system using version 3.2 software. This manual assumes that the iPCS software has been loaded and configured on your iPhone or iPad by your system administrator. If this is not the case please refer to your system administrator for further assistance. How iPCS will operate The iPCS software will be configured to log on to the maximiser system via your User account and therefore will become your telephone. If you are logged on to a telephone in the office at your desk, for example, this will be logged out and all your calls will be routed to your iPCS. Please ensure that you do not have any forwarding set to the mobile you are using to run iPCS. (Please refer to the Call Forwarding section from page 28 for further details.) When you make a call via your iPCS utilising a Wi-Fi zone you must stay within that zone for the duration of the call. If you leave the Wi-Fi zone the phone will automatically select 3G as your data connection and iPCS calls will then be made over that service. Having re-entered a Wi-Fi zone the next call will be made or received over that service. If you need to move between a Wi-Fi and 3G service a call can be parked and then when the 3G connection has been established the call can then be picked up from the park slot. (Please refer to the Parking a call section from page 9 for further details.) If you use the iPCS in a 3G environment the iPCS can get disconnected if the 3G signal becomes poor. This will mean that the iPCS is no longer logged on to the maximiser system and will make three attempts to reconnect. If after three attempts a connection is not made it will try to connect every 5 minutes from then on. If you are on a call via your iPCS and you receive a call via your GSM network, this call will take priority over the iPCS call. The iPCS call will be automatically put on hold. Once the GSM call has been completed or rejected the iPCS call will resume automatically. This functionality is controlled by the iOS operating system which dictates that GSM calls will take priority over all other calls. Your User Account You are a “user” of the SpliceCom maximiser telephone system and as such you have a User account on the system. Your User name will be used to identify you as you make, receive and transfer calls. Each of your colleagues will also have a User account and will be identified in the same way, by their User name. A list of the Users of your maximiser system can be viewed via the Contacts screen as explained in the Users Directory section from page 16. As a User on the system you will be given an extension number, eg 2021, and possibly a DDI number, eg 01632 563862. So that when a colleague rings your extension number or an external contact rings your DDI number these will be routed to your User account. Your DDI number may also be the number that is presented as your CLI when you make a call, please refer to your system administrator for further details. Introduction iPCS for iPhone & iPad User Manual v3.2/0413/2 1 iPCS for iPhone & iPad User Manual Your User account will store all of your User settings, such as Favourites, forwarding, DND, and so on, so that when you log on to the telephone on your desk or your iPCS or another handset on your telephone system these settings will always be available to you. Opening the iPCS application Tap the iPCS icon on your Home screen to open the application The Favourites screen will be displayed. The buttons at the bottom of the screen will give you access to your speed dials, your calls history, the system directories, the keypad and some of your User settings. Further details on these facilities will be covered in the relevant section of this manual. 2 Introduction IPCS for iPhone & iPad User Manual v3.2/0413/2 iPCS for iPhone & iPad User Manual Feature Highlights Access to the System Database iPCS gives you access to a database of information stored on your maximiser system. This database provides directories of telephone numbers to help you to quickly and easily make and transfer calls. Parking a Call All calls received by your extension can be put on hold and the call remains in your control. However, another way to place a call on hold is to park the call into one of the system areas (or Park Slot). You can use this method to place a call on hold while you deal with another call or as a way of transferring the call as your colleagues will be able to pick up the call if they have access to the same park slot. Favourites As well as access to the directories stored on the telephone system’s database you can also set up your own list of “favourite” numbers that you regularly call or transfer calls to. Your Favourites will also act as Busy Lamp Fields indicating when internal extensions are engaged or receiving calls and allow you to pick up a call ringing on a colleague’s extension. For further details on how to set these up please refer to your system administration. Once configured your Favourites will then be displayed within the Favourites screen on your iPCS. Voicemail The SpliceCom maximiser system provides standard voicemail functionality which can be enabled on your system and for you as a User allowing your callers to leave a message if you are unable to deal with a call. iPCS allows you to manage these messages. Quick Setting iPCS gives you the ability to set Do Not Disturb, Follow Me and an Out of Office message on your User account via the Settings screen. Introduction iPCS for iPhone & iPad User Manual v3.2/0413/2 3 iPCS for iPhone & iPad User Manual The PCS range From affordable entry-level phones, through IP terminals that unify advanced telephony and IT applications at the desktop, to native IP Phone applications that run on Smart Phones, Tablets, PCs and Macs; in SpliceCom’s comprehensive PCS telephony family you’ll find the product that’s the ideal match for every specific business requirement - whatever it may be. Designed to complement other market leading and stylish IT equipment on your desktop, SpliceCom’s PCS 552, PCS 56x, PCS 57xG & PCS 58xG IP Phones combine looks, intelligence and desirability in equal measure. The world’s slimmest desktop IP phones provide easy access to the benefits delivered by maximiser, SpliceCom’s range of innovative and award-winning Unified Communications platforms. All PCS 5xx IP phones have large graphical displays, intuitive multi-functional context sensitive keys, and bold instantly recognisable icons to provide the ease-of-use associated with mobile phones, so delivering the ultimate business telephony user experience. The IP 530 is SpliceCom's entry-level IP Phone, designed to work with maximiser to address everyday business telephony needs. The PCS 520 is a display phone with pre-configured system access keys, desktop paging and combined Do Not Disturb/Message Waiting LED, with the entry-level PCS 505 completing SpliceCom’s range of desktop phones. SpliceCom’s iPCS is a native IP Phone application for Smart Phones and Tablets, allowing a mobile device to operate as a highly functional system phone extension. This makes it an ideal maximiser Office Mobility solution for the replacement of existing DECT wireless systems, or as an alternative for SIP/WiFi phones. Navigate is a Phone Partner application, delivering powerful personal call management features via Windows 7 & Windows 8 PCs for users of SpliceCom’s broad range of PCS IP Phones, or existing 3rd party analogue telephones. Providing point and click access to both commonly used and advanced maximiser telephony & integrated Microsoft features, Navigate provides a single intuitive interface to manage business communications for all employees across an organization, irrespective of their role. Navigate can also be used as an IP Softphone with the addition of an associated licence, with PCS 60 offering similar functionality for Apple Mac OS X users and those running versions of Microsoft operating systems prior to Windows 7. 4 Introduction IPCS for iPhone & iPad User Manual v3.2/0413/2 iPCS for iPhone & iPad User Manual Basic Call Handling Make a Call 1. 2. 3. 4. Tap at the bottom of the screen The keypad will be displayed Enter the number you wish to dial (internal or external number) Tap and the number will be dialled You can use the Backspace button number you have entered to make changes to the Please note: “Connected” will be displayed at the top of the screen to indicate that your iPCS is connected to the maximiser system. If you wish to make a call by looking up the number in the system directories please refer to the Using Contacts section from page 11. The Callling… screen will be displayed indicating that the call is being dialled. If you have started to make a call, change your mind and wish to stop the call tap . Call Options Once the call is answered the call options are displayed. Basic Call Handling IPCS for iPhone & iPad User Manual v3.2/0413/2 5 iPCS for iPhone & iPad User Manual Entering additional digits You may be required to enter further digits once a call has been made when, for example, presented with an auto attendant, this can be done as follows. 1. 2. 3. 4. Within the Call options tap the Keypad button The Keypad will be displayed Enter the number(s) required Each number will flash as you enter it. Tap the Back button to return to the Call screen when finished Answer a Call If iPCS is open and active: 1. When you receive a call the caller’s number or name will be displayed in the Call screen. 2. Tap to answer the call Please note that if the CLI received with the call is matched in the system directories the User’s or Contact’s name will be displayed. If iPCS is open but in the background: 1. When you receive a call the caller’s number (and name) will be displayed in a banner at the top of the screen 2. Tap the banner to answer the call If the iPCS is open but the iPhone/iPad is locked: 1. When you receive a call the caller’s name (if available) and number will be displayed in a banner in the middle of the screen 2. Drag the “slide to answer” button to answer the call Please note, in the two scenarios above, if the CLI received with the call is matched in the system directories the User’s or Contact’s name will also be displayed. 6 Basic Call Handling iPCS for iPhone & iPad User Manual v3.2/0413/2 iPCS for iPhone & iPad User Manual Call Options Once the call is answered the call options are displayed. Reject a call If iPCS is open and active: 1. If you do not wish to answer a call, tap 2. The call will be passed to your Forward on Busy number (if set), or voicemail (if enabled), or cancelled If you do not answer a call it will be passed to your Forward on No Answer number (if set), or voicemail (if enabled) or will continue to ring until the caller hangs up. The amount of time the call will ring before going to your Forward on No Answer number or voicemail will be dependent on the time set on your User account, please refer to your system administrator for further details. Please note that this will be your voicemail on the maximiser system, not the voicemail service provide by your iPhone. End a Call Tap Mute a call The Mute facility will allow you to prevent a caller from hearing, for example, your conversation with another colleague. You will be able to hear the caller but they will not be able to hear you. 1. Tap the Mute button 2. The Mute button will be displayed with a red circle to indicate that Mute is enabled. Tap the button to return to your caller. Using Speaker Phone The Speaker Phone facility will enable you to operate your iPCS hands free as follows. 1. Tap the Speaker button 2. The Speaker Phone button will be displayed with a red circle to indicate that the speaker is on Tap the button to turn off the speaker. Basic Call Handling IPCS for iPhone & iPad User Manual v3.2/0413/2 7 iPCS for iPhone & iPad User Manual Place a call on hold 1. Tap the Hold button 2. Your call is put on hold and you are presented with the keypad so that you can make another call if necessary. External callers will be played “music on hold” if configured on your maximiser system. (Please refer to your system administrator for further details.) To retrieve the call, tap the Back button to return to your caller. Transfer a Call 1. 2. 3. 4. 5. 6. or 5. Place the call on hold - tap the Hold button Via the keypad displayed, enter the number to be dialled (internal or external number) Tap Wait for the call to be answered and announce the caller Tap the Transfer button You will no longer have control of the call To clear the current call and return to the original caller tap or wait for the other end to hang up. or 5. To return to the original call and place the second call on hold, tap the Switch button 6. Use the Switch button to toggle between the two calls, 7. Finally, select tap the Transfer button to connect the two calls (regardless of which call you are currently connected to). or 5. Tap to clear the call you are currently connected to and return to the other call or wait for the other end to hang up If you wish to transfer a call to number stored in the system directories, such as another colleague, external contact etc, please refer to the Transfer a call via Contacts section from page 12 for further details. 8 Basic Call Handling iPCS for iPhone & iPad User Manual v3.2/0413/2 iPCS for iPhone & iPad User Manual Parking a call The Park facility on a maximiser system allows calls to be put on hold in a system area, rather than on your phone. Either, a colleague can pick up the call (if they have access to the same park slot), or you can pick up the call when you wish to return to the caller. This is useful as another method to transfer a call, or if you wish to deal with other calls while a call is on hold. By default, you will be given access to Park slots 1, 2, 3 and 4 via the four Park buttons displayed in the Favourites screen. By default, all your colleagues using iPCS, Navigate, PCS 60 or a PCS 58x/57x/56x will also have access to these same park slots. (This default configuration may be different on your system, please refer to your system administrator for further details.) A call will remain parked for 5 minutes (default), after this time the call will be represented to your extension and you can answer the call in the normal way. Park a call 1. Tap at the bottom of the screen 2. Tap the Park button you wish to use 3. The call will be parked in this slot and external callers will be played the “music on hold” configured on your system 4. The caller’s number or name (if the CLI received is matched in the system directories) will be displayed beside the Park icon You can now continue with other calls or other work. You or a colleague will be able to pick up the call when ready. Pick up a parked call 1. Tap at the bottom of the screen 2. Tap the Park button displaying the call you wish to pick up 3. You are now connected to the call Transfer a parked call 1. Make a call to the intended recipient of the parked call (internal or external number) 2. Place the call on hold 3. Tap at the bottom of the screen 4. Tap the relevant Park button to un-park the original call Basic Call Handling IPCS for iPhone & iPad User Manual v3.2/0413/2 9 iPCS for iPhone & iPad User Manual 5. To connect the two calls tap the Transfer button . You will no longer have control of the calls. For further information on transferring calls please refer to page 8. Please note: If a colleague needs to pick up a parked call via an analogue handset and does not have the use of Navigate or PCS 60, please refer to your system administrator for the relevant short code he/she should use. If a call parked by a colleague is not accessible via your Park buttons, your Park slots may have been configured differently or you may be operating within a different “Company” to your colleague. Please refer to your system administrator for further details. If you belong to a “Company” on the maximiser system, this Company may be configured with a different Park Timeout to the default 5 minutes. Please refer to your system administrator for further details. By default the four Park buttons displayed are configured to access Park slots 1, 2, 3 and 4. However if you wish to access alternative Park slots in order to create either group or “private” park slots, buttons to access other Park Slots, eg Park slot 5, or Park slot 7, 60, 123 etc, can be created for you. Please refer to your system administrator for further details. If you do not use the Park facility and wish to remove the Park buttons please refer to your system administrator for further details. Conference Call The conferencing facility allows you to create a 3-way conversation between yourself and two internal and/or external calls. (Please note that this feature must be enabled on your telephone system. Please refer to your system administrator if this feature is not available.) Creating a conference call 1. Make a call to the first number required (internal or external), or you may have already received a call from the first member of the conference 2. Placed this call on hold - tap the Hold button 3. Make a call to the second number required (internal or external) 4. Once the call has been answered tap the Conference button 5. You are now in a 3-way conference with your two calls, as shown by the In Conference button . Cancel a conference call You may wish to cancel the conference and return to a 2-way conversation with your calls as follows. 1. Tap the In Conference button 2. You will return to the caller that you were last speaking to before creating the conference. The other caller will be put on hold. Use the Switch button to toggle between the two calls. The two calls can be connected via the Transfer button or ended in the normal way. You can return to a conference with your two calls at any time by selecting Conference button 10 . Basic Call Handling iPCS for iPhone & iPad User Manual v3.2/0413/2 iPCS for iPhone & iPad User Manual If you tap while on a conference you will hang up the caller that you were last speaking to before creating the conference, and return to a 2-way conversation with the other call. If one of the conference members hangs up you will return to a 2-way conversation with the other call. Using Contacts The maximiser system directories provide access to a database of contact information that is stored centrally on your telephone system. Your system administrator is responsible for the maintenance of this database and will be able to assist you with your queries. There are three directories that can be searched: Users provides a list of the User accounts on your telephone system allowing you to quickly and easily call a colleague. Please refer to the Users Directory section from page 16 for further details. Departments provides a list of Departments configured on your maximiser system that will allow your call to be routed efficiently to a group of Users. Please refer to the Departments section from page 18 for further details. Contacts provides a list of external contacts entered on your telephone system allowing you to quickly and easily make calls to customers, suppliers, etc. When you search the directories for a Contact, the search will be made within the Name and Company fields of each entry. Please refer to the Contacts Directory section from page 20 for further details. Please note that iPCS will not search within the Contacts stored on your iPhone or iPad. Search the Directories The system directories can be accessed via Basic Call Handling IPCS for iPhone & iPad User Manual v3.2/0413/2 at the bottom of the screen. 11 iPCS for iPhone & iPad User Manual 1. Tap in the search field at the top of the screen 2. Using the onscreen keyboard displayed enter the name or number of the User or Department or Contact you wish to view 3. As you start typing the list of the records matching the text you have entered will be displayed. You can use the Backspace button on the keyboard to make changes to the text you have entered in the search field. You can use the Delete button , on the right hand side of the search field, to remove all the text you have entered and start again. You can drag the screen to scroll up and down to view all the entries displayed. This will hide the keyboard. If you wish to hide the keyboard once you have entered the text required, tap at the top right of the screen or at the bottom right of the keyboard. The keyboard will return when you tap in the search field again. Once the record you require is displayed, tap on this record to display the details stored for this entry. Tap at the top of the screen to return to the search screen Make a call via Contacts 1. Tap at the bottom of the screen 2. Using the search facility described above find the number you wish to dial 3. Tap on the number you wish to dial and the call will be made. Transfer a call via Contacts 1. Place the call on hold - tap the Hold button 2. 3. 4. 5. 6. Tap at the bottom of the screen Using the search facility described above find the number you wish to dial Tap on the number you wish to dial and the call will be made. Wait for the call to be answered and announce the caller To connect the two calls, tap the Transfer button . You will no longer have control of the calls. Please note that if you wish to continue talking to the caller while searching for the number ignore step 1. The caller will be put on hold once you make the call in step 3. For further information on transferring a call please refer to page 8. 12 Basic Call Handling iPCS for iPhone & iPad User Manual v3.2/0413/2 iPCS for iPhone & iPad User Manual Viewing your Calls History All calls received or made by your extension will be logged and can be viewed via at the bottom of the screen. The History screen will also display voicemail messages you have received, if relevant (please refer to the Voicemail section from page 32 for further details). Entries are listed in date and time order with the newest at the top. The time and date of each call will be displayed; together with the caller’s or recipient’s name (if recognised by the system) and the caller’s number (if received) or the number you dialled. Identifying the type of call Signifies an answered incoming call Signifies an unanswered (or missed) incoming call (up to 10 displayed, then the oldest will be deleted) Signifies an answered outgoing call Signifies an unanswered outgoing call Signifies a new or unread voicemail message Signifies an old or read voicemail message Call Info Screen Tap the call you wish to view and the call’s Info screen will be displayed as follows. Tap to return to the History screen. Calls History iPCS for iPhone & iPad User Manual v3.2/0413/2 13 iPCS for iPhone & iPad User Manual Missed Incoming Calls When a call has been received that you did not answer the History button will be displayed with the number of calls that you have missed. The iPCS icon on your home screen will also display the number of calls you have missed. Once you have viewed the missed call, by viewing the History screen, the number of missed calls will disappear. (If this number does not disappear, this means you have received a new voicemail message and this number of new messages will not disappear until you have listened to the messages. Please refer to the Voicemail section from page 32 for further details.) All your calls will be listed by default, however if you wish to view just your missed calls and voicemail messages tap the Missed button at the top of the screen. Tap the All button to return to viewing all your calls. Redial a number When you make a call the details of the call are logged and can be viewed via your calls history. This information enables you to redial the number quickly and easily. 1. Tap 2. The and icons indicate a number you have previously dialled 3. Tap the call displaying the number you wish to redial 4. The call’s Info screen will be displayed 5. Tap and the number will be dialled 14 Calls History IPCS for iPhone & iPad User Manual v3.2/0413/2 iPCS for iPhone & iPad User Manual Dial a previous caller When you receive a call the details of the call are logged and can be viewed via your calls history. This information enables you to ring back the caller quickly and easily. 1. Tap 2. 3. 4. 5. The and icons indicate an incoming call Tap the call displaying the number you wish to dial The call’s Info screen will be displayed Tap and the number will be dialled If the caller’s number was withheld or not received by the system, this facility will not be available. The call will logged either as PRIVATE, or no name or number will be displayed with the call. Calls History iPCS for iPhone & iPad User Manual v3.2/0413/2 15 iPCS for iPhone & iPad User Manual Users Directory The Users directory allows you to quickly and easily call a colleague without having to remember their extension number. You and your colleagues can also store up to 4 external numbers in your User accounts - mobile number, home number and two spare numbers, please refer to system administrator for further details. When you search for a colleague’s entry within the User directory these numbers will also be displayed (if entered). This makes it easy for you to call or transfer calls to these numbers. (Please note that these fields when configured must only contain external numbers, and must not contain internal extension numbers.) Please refer to the Your User Account section from page 1 for further details. Search the Users directory The Users directory can be accessed via at the bottom of the screen. 1. Tap in the search field at the top of the screen 2. Using the onscreen keyboard displayed enter the name or extension number of the User you wish to view 3. As you start typing the list of the records matching the text you have entered will be displayed. You can use the Backspace button on the keyboard to make changes to the text you have entered in the search field. You can use the Delete button , on the right hand side of the search field, to remove all the text you have entered and start again. If you wish to hide the keyboard once you have entered the text required, tap at the top right of the screen or at the bottom right of the keyboard. The keyboard will return when you tap in the search field again. Once the User you require is displayed, tap on this record to display the details stored for this entry. Tap 16 at the top of the screen to return to the search screen Users Directory iPCS for iPhone & iPad User Manual v3.2/0413/2 iPCS for iPhone & iPad User Manual Make a call to a User 1. Tap at the bottom of the screen 2. Using the search facility described on the previous page find the User you wish to dial 3. Tap on the number you wish to dial and the call will be made. Transfer a call to a User 1. 2. 3. 4. 5. Place the call on hold Using the search facility described on the previous page find the User you wish to dial Tap on the number you wish to dial and the call will be made. Wait for the call to be answered and announce the caller To connect the two calls, tap the Transfer button . You will no longer have control of the calls. Please note that if you wish to continue talking to the caller while searching for the User ignore step 1. The caller will be put on hold once you make the call in step 3. For further information on transferring a call please refer to page 8. Receiving a call from a colleague If a colleague rings you from their extension or via a number stored in their User account, such as their mobile number, their User name will be displayed within your iPCS. This enables you to answer and deal with the call in the appropriate manner. Users Directory iPCS for iPhone & iPad User Manual v3.2/0413/2 17 iPCS for iPhone & iPad User Manual Departments Departments are a feature of the maximiser system that allows calls to be routed efficiently to a group of Users by dialling one number either internally or externally. The following describes the usage of iPCS when Departments are used on your maximiser system. Working as a member of a Department Due to your role in your company you may have been placed in a Group on the maximiser system. For example, if you are part of a Sales team you may be placed in a Sales Group, or part of a Reception team or part of a Support team you may have been placed in a Group. The purpose of creating Groups on your system is to ensure the efficient handling of incoming calls. For example, you may wish to ensure all incoming calls to Reception are shared among several colleagues to ensure the calls are answered quickly, or you may wish to ensure that support calls are shared equally among the Support team. A Department determines the routing of a call to your Group and your system administrator will inform you if you will be receiving Department calls and how that Department is configured. Wrap Up Time A Department can be configured with a Wrap Up time whereby at the end of each call received for the Department you will not receive any further calls until this time has expired. The purpose of this feature is to give you time to complete any administrative tasks, such as completing a contact report, updating a database, and so on. Please refer to your System Administrator for further information. Calls History The History screen can also display the incoming answered and missed calls received for a Department. Your system administrator can configure this facility for you, if not already available. (Please refer to the Viewing your Calls History section from page 13 for further details.) This facility will also give you access to voicemail messages for the Department, please refer to the Voicemail section from page 32 for further information. If this facility has been configured for you, the iPCS icon and History button will also indicate when a Department call has been missed, together with the number of new voicemail messages. Make a call to a Department You may wish to talk to any available member of, for example, the Personnel department or Support team. Rather than ringing one member of that department only to find they are not available and then having to ring another extension, etc. you could ring the relevant Department, if set up. Your call will be answered by any available member of this Department saving you time. 1. 2. 3. 4. 18 Tap at the bottom of the screen The keypad will be displayed Enter the extension number of the Department you wish to dial. Tap and the number will be dialled. Departments IPCS for iPhone & iPad User Manual v3.2/0413/2 iPCS for iPhone & iPad User Manual Alternatively, you can use Contacts: 1. Tap at the bottom of the screen 2. Tap in the search field at the top of the Contacts screen 3. Using the onscreen keyboard displayed enter the name of the Department you wish to dial 4. As you start typing the list of the records matching the text you have entered will be displayed. 5. Once the Department you require is displayed, tap on this record to display the details stored for this entry. 6. Tap on the extension number and the call will be made. Transfer a call to a Department 1. 2. 3. 4. 5. 6. Place the call on hold - tap the Hold button Via the keypad displayed, enter the extension number of the Department to be dialled Tap Wait for the call to be answered and announce the caller Tap the Transfer button You will no longer have control of the call Alternatively, you can use Contacts: 1. Place the call on hold - tap the Hold button 2. 3. 4. 5. 6. Tap at the bottom of the screen Tap in the search field at the top of the Contacts screen Using the onscreen keyboard displayed enter the name of the Department you wish to dial As you start typing the list of the records matching the text you have entered will be displayed. Once the Department you require is displayed, tap on this record to display the details stored for this entry. 7. Tap on the extension number and the call will be made. 8. Wait for the call to be answered and announce the caller 9. To connect the two calls, tap the Transfer button . You will no longer have control of the calls. Please note that if you wish to continue talking to the caller while using Contacts ignore step 1. The caller will be put on hold once you make the call in step 7. For further information on transferring a call please refer to page 8. Departments iPCS for iPhone & iPad User Manual v3.2/0413/2 19 iPCS for iPhone & iPad User Manual Contacts Directory A database of external Contacts such as customers, suppliers, etc can be stored on the maximiser system. Your system administrator is responsible for the maintenance of this database. The purpose of the Contacts database is to match the incoming number of an external call and to display the name of the caller if a match is found, and to enable you to make external calls to regular contacts quickly and easily. Up to 5 telephone numbers can be stored for each Contact - the main Telephone Number, Mobile Number, Home Number, and two Spare numbers. If you wish to dial a Contact on any of these numbers you can search for their entry within the directory and tap on the number, as explained below. When a company has a large DDI number range a Contact can be created that will match any incoming call from this company so that you and your colleagues are always aware when a call is received from this company. Please refer to your system administrator for further details. Search the Contacts directory The Contacts directory can be accessed via at the bottom of the screen. 1. Tap in the search field at the top of the screen 2. Using the onscreen keyboard displayed enter the name or number of the Contact you wish to view 3. As you start typing the list of the records matching the text you have entered will be displayed. You can use the Backspace button on the keyboard to make changes to the text you have entered in the search field. You can use the Delete button , on the right hand side of the search field, to remove all the text you have entered and start again. You can drag the screen to scroll up and down to view all the entries displayed. This will hide the keyboard. If you wish to hide the keyboard once you have entered the text required, tap at the top right of the screen or at the bottom right of the keyboard. The keyboard will return when you tap in the search field again. 20 Contacts iPCS for iPhone & iPad User Manual v3.2/0413/2 iPCS for iPhone & iPad User Manual Once the Contact you require is displayed, tap on this record to display the details stored for this entry. Tap at the top of the screen to return to the search screen Make a call to a Contact 1. Tap at the bottom of the screen 2. Using the search facility described on the previous page find the Contact you wish to dial 3. Tap on the number you wish to dial and the call will be made. Transfer a call to a Contact 1. Place the call on hold 2. 3. 4. 5. 6. Tap at the bottom of the screen Using the search facility described on the previous page find the Contact you wish to dial Tap on the number you wish to dial and the call will be made. Wait for the call to be answered and announce the caller To connect the two calls, tap the Transfer button . You will no longer have control of the calls. Please note that if you wish to continue talking to the caller while searching for the Contact ignore step 1. The caller will be put on hold once you make the call in step 3. For further information on transferring a call please refer to page 8. Contacts IPCS for iPhone & iPad User Manual v3.2/0413/2 21 iPCS for iPhone & iPad User Manual Receiving a call from a Contact If the incoming number of an external call is matched within the Contacts database the name of the caller will be displayed enabling you identify the call and answer the call in the appropriate manner. 22 Contacts iPCS for iPhone & iPad User Manual v3.2/0413/2 iPCS for iPhone & iPad User Manual Favourites You can have your own personal list of regularly used telephone numbers (internal or external) stored in your User account. These are displayed and accessed within the Favourites button at the bottom left of the screen. Please refer to your system administrator for further details on how to set these up. Favourites enable you to quickly and easily make calls, transfer calls and pick up calls. Favourites set up for internal extensions will also act as Busy Lamp Fields (BLF) in other words they will indicate when that User is on the phone, and can be used for call pick up. Both facilities are explained below. Please note: if a telephone number entered in a Favourite is also stored in the Contacts, Users or Departments directory, when a call is made to or received from this number, the text entered in the Description field of the Favourite will be displayed with the call in preference to the name used in the corresponding Contact, User or Department directory entry. View your Favourites Tap the Favourites button at the bottom of the screen. The Favourites screen will be displayed. You can drag the screen to scroll up and down to view all the entries displayed. This will hide the keyboard. A Favourite displayed for an internal extension will act as a Busy Lamp Field: An internal Favourite displayed with a green icon indicates that your colleague’s extension is free An internal Favourite displayed with a red icon indicates that your colleague is currently on a call. An internal Favourite flashing between a yellow and red icon indicates that either the User’s extension is currently ringing or there are calls queuing for that Department. The number of calls waiting to be answered will be displayed. You can pick up a call ringing for this extension or Department – tap on the Favourite. Favourites iPCS for iPhone & iPad User Manual v3.2/0413/2 23 iPCS for iPhone & iPad User Manual Make a call using a Favourite 1. Tap at the bottom of the screen 2. Tap the Favourite required and a call to this number will be made automatically If you select a Favourite where the internal extension is busy you will be passed to the colleague’s Forward on Busy number (if set) or to their voicemail (if enabled) or the call will be cancelled. Transfer a call using a Favourite 1. Tap at the bottom of the screen 2. Tap the Favourite required 3. The original call will be placed on hold and a call will be made to the telephone number stored with the Favourite 4. Wait for the call to be answered 5. When ready select the Transfer button to transfer the original call. For further information on transferring a call please refer to page 8. Call Pick up You can pick up a call ringing on another extension via the Favourites screen. This is useful if, for example, you wish to answer your colleague’s phone when they are not at their desk or you wish to assist with answering calls to a Department. You do not have to be a member of the Department to pick up a Department call. 1. A Favourite displaying a flashing yellow/red icon indicates that the relevant extension has a call waiting to be answered. 2. Tap the Favourite 3. The call will be answered by your extension Please note: If you pick up a ringing call while you are on a call your original call will be put on hold. You will return to the original call when the second call is ended. If you do not wish your colleagues to pick up calls ringing on your phone via their Favourites, please contact your system administrator who can configure this for you. Grouping Favourites If you have multiple Favourites you may wish to organise them into Favourite Groups to make them easier to find. For example, you may wish to separate your personal Favourites from your business Favourites, or organise your Favourites by project or department, eg Exhibition, Directors, and so on. Please refer to your system administrator for further details. 24 Favourites IPCS for iPhone & iPad User Manual v3.2/0413/2 iPCS for iPhone & iPad User Manual Once a Favourite group has been set up within your User account this will be displayed within the Favourites screen with the Group icon . Tap on this Group to view and use the Favourites stored within this group. Tap screen. at the top left of the screen to return to the Favourites Prioritising Favourites All Favourites and Favourite Groups will be displayed in alphabetical order by default. However if you wish to display your Favourites in a different sequence a display order number can be assigned to a Favourite and Favourite Group. The following diagrams demonstrate a Favourite and a Favourite group that have been configured to appear at the top of the list, and Favourites within a Favourite group configured into specific order. Favourites iPCS for iPhone & iPad User Manual v3.2/0413/2 25 iPCS for iPhone & iPad User Manual Please refer to your system administrator for further details on this facility. 26 Favourites IPCS for iPhone & iPad User Manual v3.2/0413/2 iPCS for iPhone & iPad User Manual Quick Settings The maximiser system gives you the ability to configure features such as forwarding, do not disturb, and an Out of Office Message on your extension. iPCS enables you to configure these facilities via the Quick Settings screen. Please note that these settings are stored in your User account and therefore will travel with you when you log on to another handset. Your Quick Settings can be accessed by selecting the Settings button at the bottom of the screen. Do Not Disturb The Do Not Disturb facility allows you set your extension as permanently busy. This useful if, for example, you are in a meeting and do not wish to be disturbed. You may wish to turn on Do Not Disturb but still receive a call from a colleague or an external number. This is useful if you are expecting an urgent or important call but do not wish to be disturbed by other calls. The relevant number can be set as a Do Not Disturb Exception, please refer to your system administrator for further details. Quick Setting iPCS for iPhone & iPad User Manual v3.2/0413/2 27 iPCS for iPhone & iPad User Manual Turn on Do Not Disturb 1. Tap the Settings button at the bottom of the screen 2. Slide the Do Not Disturb button to On The Settings button at the bottom of the screen will indicate that Do Not Disturb is turned on. Your calls will be automatically passed to your Forward on Busy number, if configured, or to voicemail, if enabled, or cancelled. Calls will be logged in your Missed Calls list. When a colleague uses the Users directory, via Navigate, PCS 60, or a PCS 56x, 57x or 58x, to find your entry they will be informed you have DND set. Turn off Do Not Disturb 1. Tap the Settings button at the bottom of the screen 2. Slide the Do Not Disturb button to Off Call Forwarding The Call Forwarding facility on the maximiser system enables you to forward calls to a colleague or to your mobile, for example, when you are out of the office, not at your desk or on another call to ensure your callers can reach you wherever you are or to ensure your calls are dealt with by another member of staff. The following describe how to set your Follow Me facility via Quick Settings on your iPCS. For details on setting Forward on No Answer and Forward on Busy please refer to your system administrator. Using Follow Me This facility allows you to configure your extension so that your calls follow you to an internal extension or to an external number so that when you are, for example, working at another desk, working at home, or using your mobile etc, your calls will still reach you. You could also use this feature when you are, for example, on holiday and wish all your calls to be diverted to your assistant or another colleague. The iPCS enables you to set Follow Me to one of your personal numbers (Home, Mobile, Spare1 and Spare2) which must have been previously configured in your User account. Please refer to your system administrator for details on how to enter these numbers. If you wish to set Follow Me to a colleague via their internal extension number please refer to your system administrator for further details or set this via voicemail (please refer to the Voicemail Settings section from page 35 for further details). Turn on Follow Me 1. Tap the Settings button 2. Tap the Divert Mode option 28 at the bottom of the screen Quick Settings IPCS for iPhone & iPad User Manual v3.2/0413/2 iPCS for iPhone & iPad User Manual 3. From the Divert Mode screen select one of the following: Personal – all calls to your extension and direct line number will be forwarded Dual Personal – all calls to your extension and direct line number will be forwarded, however your extension will also ring. This will ensure that you can pick up the call wherever you are. All – all calls to your extension, direct line number and any Department calls will be forwarded Dual All – all calls to your extension, direct line number and any Department calls will be forwarded, however your extension will also ring. This will ensure that you can pick up the call wherever you are. A tick will be displayed beside the option selected. 4. Tap the Settings button at the top left hands side of the screen 5. Note that the Divert Mode is now set to the option that you selected above 6. From the Settings screen tap Divert To 7. From the Divert To screen select either Mobile, Home, Spare1 or Spare2. (These must have been previously configured in your User account.) A tick will be displayed beside the option selected. Please note: Ensure that you do not have any forwarding set to the mobile you are using to run iPCS. Quick Setting iPCS for iPhone & iPad User Manual v3.2/0413/2 29 iPCS for iPhone & iPad User Manual To return to the Settings screen, tap the Settings button at the top left hand side of the screen. Note that the Divert To option is now set to the option selected above. Turn off Follow Me 1. Tap the Settings button at the bottom of the screen 2. Tap the Divert Mode option 3. From the Divert Mode screen tap None A tick will be displayed beside None. To return to the Settings screen, tap the Settings button at the top left hand side of the screen. Note that the Divert To option is now set to None. You do not need to change the Divert To setting as you may wish to use this option again. Out of Office Message When you are unable to answer your phone you may wish to inform your colleagues of your whereabouts. An Out of Office Message can be configured and this will be displayed on your colleagues’ Navigate, PCS 60, PCS 56x, 57x or 58x when they attempt to call you. Setting an Out of Office Message 1. Tap the Settings button at the bottom of the screen 2. Tap the Out of Office option 30 Quick Settings IPCS for iPhone & iPad User Manual v3.2/0413/2 iPCS for iPhone & iPad User Manual 3. From the Out of Office screen select one of the following: In Meeting At Lunch On Holiday Off Site A tick will be displayed beside the option selected. To return to the Settings screen, tap the Settings button at the top left hand side of the screen. Note that the Out of Office option is now set to the option selected above. Please note that if voicemail is enabled on your User account, when you set an Out of Office message your voicemail greeting will also change. Your callers will be played the In Meeting greeting, the At Lunch greeting, the On Holiday greeting or the Off Site greeting depending on the Out of Office message selected. By default, this will be your Permanent Greeting. However you can record a specific greeting for each Out of Office message as described in the Recording a Greeting section from page 36. Turn off the Out of Office message 1. 2. 3. 4. Tap the Settings button at the bottom of the screen Tap the Out of Office option From the Out of Office screen select In the Office A tick will be displayed beside this option To return to the Settings screen, tap the Settings button Note that the Out of Office option is now set to In the Office. Quick Setting iPCS for iPhone & iPad User Manual v3.2/0413/2 at the top left hand side of the screen. 31 iPCS for iPhone & iPad User Manual Voicemail The voicemail facility allows your callers to leave you a message if you are on the phone or do not answer a call. Your system administrator can enable this facility for you, if not already available. If your colleagues have voicemail enabled, you will automatically transfer to their voicemail if they are busy or do not answer their phone. Further information on using voicemail is available in the Understanding Voicemail document obtainable via the SpliceCom website or your system administrator. Receiving a Message If you are busy on a call or do not answer your phone the caller will be automatically passed to your voicemail and will be able to leave a message. By default, your extension will ring for 20 seconds before your extension is considered not answered. Your system administrator will be able to tell you if this default setting has been changed. When a caller has left a message the History button will display this as a missed call. The iPCS icon on your home screen will also display the number of voicemail messages you have received. The History button and iPCS icon on your home screen will display the number of missed calls and new voicemail messages you have received. The number of missed calls will disappear once you have viewed these in the History screen, the number of voicemail messages will disappear once you have listened to the messages. Divert an incoming call to voicemail If the iPCS is open and active, and you do not wish to answer an incoming call and wish to route the caller to your voicemail, tap Busy set). , and the call will be passed to your voicemail (unless you have Forward on Viewing your voicemail messages Your voicemail messages can be viewed via the History screen – tap the History button this screen. to access This icon signifies a new or unread voicemail message This icon signifies an old or read voicemail message 32 Voicemail iPCS for iPhone & iPad User Manual v3.2/0413/2 iPCS for iPhone & iPad User Manual All your calls will be listed by default, however if you wish to view just your missed calls and voicemail messages tap the Missed button at the top of the screen. Tap the All button to return to viewing all your calls. Message Info Screen Tap the message you wish to view and the Info screen will provide the following information. Tap to return to the History screen. Listen to a message 1. Tap 2. Your messages will be listed in your calls history. 3. You can drag the screen to scroll up and down to view all the entries displayed. 4. 5. 6. 7. 8. A new message will be indicated by a blue icon displaying a closed envelope Tap the message to view the message’s Info screen Tap This message will be played to you. Tap End when finished Voicemail IPCS for iPhone & iPad User Manual v3.2/0413/2 33 iPCS for iPhone & iPad User Manual The message will now be displayed in your calls history with a blue icon displaying an open envelope icon , as this is now an old message and will be deleted after 7 days unless manually saved. A message is marked as old after listening to the first 10 seconds. Ring back a caller After receiving a message from a caller you may wish to ring them back. The number that was received with the original call will be shown within the Info screen and the Call button will enable you to speed dial this number. 1. 2. 3. 4. Tap Your messages will be listed in your calls history. Tap the message required to view the message’s Info screen Tap the Call button Please note that if the caller’s number has been withheld or not received by the system this facility will not be available. The Number field within the Info screen will indicate if the caller’s telephone number has been received. Message Handling While a message is being played there are various options available to you to help you manage your messages. To access these options tap the Keypad button 34 and use the keypad as follows: 1 Play the Help messagethen return to your previous position 2 Skip forward in the message by 2 seconds 3 Delete the message you are currently listening to 4 Play the previous message Voicemail iPCS for iPhone & iPad User Manual v3.2/0413/2 iPCS for iPhone & iPad User Manual 5 Forward the message you are currently listening to 1 Forward message to another voicemail box with a message attached 2 Forward message to another voicemail box 3 Forward message to email 0 To cancel 6 Play the next message 7 Save the message you are currently listening to 8 Skip back in the message by 2 seconds 9 Play the source of the call for the message you are currently listening to. (This feature will only be available if the caller’s CLI has been presented with the call.) 0 Play old messages Settings Delete a message 1. While listening to a message tap the Keypad button 2. On the keypad displayed tap 3 3. The message will be deleted Save a message Once you have listened to a new message it becomes an old message and will be deleted after 7 days. If you wish to keep the message for a longer period you can manually save the message as follows: 1. While listening to a message tap the Keypad button 2. On the keypad displayed tap 7 3. The message will be deleted Further information on message handling within voicemail is available in the Understanding Voicemail document obtainable via the SpliceCom website or your system administrator. Voicemail Settings Facilities that can be configured via voicemail are available via Settings as follows. 1. While listening to a message tap the Keypad button 2. On the keypad displayed tap the asterisks (*) 3. The following options will be played to you: 1 2 3 4 Repeat the options Record a greeting Select Forwarding Add a voice tag Voicemail IPCS for iPhone & iPad User Manual v3.2/0413/2 35 iPCS for iPhone & iPad User Manual 5 Change your access code 6 Record extra greetings For further details on using these options please refer to the Understanding Voicemail document obtainable via the SpliceCom website or your system administrator. Recording a Greeting Recording a Greeting You have the facility to record up to 6 voicemail greetings. These can all be recorded via the keypad while you are listening to a message. Daily Greeting This is the default greeting that is played to callers until you record a Permanent Greeting described below. You would typically record a daily greeting that would inform your callers of your whereabouts on a particular day, for example – “You have reached Alice Barker’s voicemail on Tuesday, 4 July. I am currently in a meeting until 11 o’clock. Please leave a message and I will call you on my return.” Permanent Greeting Your permanent greeting would be typically more generic which can be used on any day, for example – “You have reached Alice Barker’s voicemail. Sorry I am unable to take your call. Please leave a message and I will get back to you as soon as possible.” If you record a permanent greeting the daily greeting is deleted at 1 am and the permanent greeting is then used until a new daily greeting is recorded. Out of Office Greetings The remaining four greetings are used with the relevant Out of Office message as described in the Out of Office Message section from page 30. Please note that your Permanent greeting will be used until you record a new Out of Office greeting. In Meeting The In Meeting greeting will be used when you have selected the In Meeting Out of Office message on your extension. At Lunch The At Lunch greeting will be used when you have selected the At Lunch Out of Office message on your extension. On Holiday The On Holiday greeting will be used when you have selected the On Holiday Out of Office message on your extension. Off Site The Off Site greeting will be used when you have selected the Off Site Out of Office message on your extension. Recording a Daily Greeting You can record a daily greeting as follows: 1. While listening to a message tap the Keypad button 2. On the keypad displayed tap the asterisks (*), and the Settings options will be played to you. 3. Press 2 4. Your current daily greeting will be played 36 Voicemail iPCS for iPhone & iPad User Manual v3.2/0413/2 iPCS for iPhone & iPad User Manual 5. “Speak greeting after the tone followed by hash or silence” will be played 6. Record the greeting you require, and press hash (#) when you have finished 7. The new greeting will be played back. 8. The following options will be listed: 1 Repeat the options 2 Re-record the greeting 3 Delete the greeting (this will restore the previous greeting or return to the default message.) 7 Save the greeting (and return to the previous menu) or hang up 0 Discard the greeting (your new greeting will not be saved and you will be returned to the previous menu) 9. Select the option required Please note: You can also record your daily greeting via the Extra Greetings option which is accessed by pressing *, then 6 and then 2. You can then follow the instructions from step 3 above. You can record your daily greeting via a short code (eg *59). This will take you directly to your voicemail and to the Record a Greeting section in Settings. You can then follow the instructions from step 4 above. Please refer to your system administrator for further details. If you have recorded a permanent greeting your daily greeting will be deleted at 1 am and your permanent greeting will be used until you record a new daily greeting. Recording a Permanent Greeting You can record a permanent greeting as follows: 1. While listening to a message tap the Keypad button 2. On the keypad displayed tap the asterisks (*), and the Settings options will be played to you. 3. Press 6 4. Press 3 5. Your current permanent greeting will be played 6. “Speak greeting after the tone followed by hash or silence” will be played 7. Record the greeting you require, and press hash (#) when you have finished 8. The new greeting will be played back. 9. The following options will be listed: 1 Repeat the options 2 Re-record the greeting 3 Delete the greeting (this will restore the previous greeting or return to the default message.) 7 Save the greeting (and return to the previous menu) or hang up 0 Discard the greeting (your new greeting will not be saved and you will be returned to the previous menu) 10. Select the option required Voicemail IPCS for iPhone & iPad User Manual v3.2/0413/2 37 iPCS for iPhone & iPad User Manual Please note: You can record your permanent greeting via a short code (eg *60). This will take you directly to your voicemail and to the Record a Greeting section in Settings. You can then follow the instructions from step 5 above. Please refer to your system administrator for further details. Once you have recorded a permanent greeting your daily greeting will be deleted at 1 am and your permanent greeting will be used until you record a new daily greeting. Recording an Out of Office greeting When you have set an Out of Office message, as described in the Out of Office Message section from page 30, and a caller is passed to your voicemail, the relevant voicemail greeting is played. These greetings can be recorded as follows: 1. While listening to a message tap the Keypad button 2. On the keypad displayed tap the asterisks (*), and the Settings options will be played to you. 3. Press 6 4. Press 4 5 6 7 to record an In Meeting greeting to record an At Lunch greeting to record an On Holiday greeting to record an Off Site greeting 5. Your current Out of Office greeting will be played, or if this is the first time you are recording this particular Out of Office greeting your permanent greeting will be played 6. “Speak greeting after the tone followed by hash or silence” will be played 7. Record the greeting you require, and press hash (#) when you have finished 8. The new greeting will be played back. 9. The following options will be listed: 1 Repeat the options 2 Re-record the greeting 3 Delete the greeting (this will restore the previous greeting or return to the default message.) 7 Save the greeting (and return to the previous menu) or hang up 0 Discard the greeting (your new greeting will not be saved and you will be returned to the previous menu) 10. Select the option required Voicemail for Departments Each Department can be configured to use the voicemail service provided by the maximiser system. If voicemail has been enabled, a call to a Department will automatically pass to voicemail after the time specified by the Department’s configuration on the system. Please refer to your system administrator for further details. 38 Voicemail iPCS for iPhone & iPad User Manual v3.2/0413/2 iPCS for iPhone & iPad User Manual Listen to a message for a Department Your History screen can give you access to voicemail messages received for a Department. Your system administrator can configure this facility for you, if not already available. You can retrieve and handle the messages in the same way as your personal messages. Please note that if you are able to access Department voicemail messages via your iPCS, answered and missed calls for the Department will also be displayed in your call history. Please refer to the Viewing your Calls History section from page 13 for further details. Voicemail IPCS for iPhone & iPad User Manual v3.2/0413/2 39 iPCS for iPhone & iPad User Manual iPCS Configuration The Setting button as follows: at the bottom of the screen will display the Mobility Server settings for your iPCS Turn on or off the iPCS If you wish to disable the iPCS during a period when you are not using this service and wish to ensure the iPCS does not attempt to connect to the maximiser system you can disable this service. 1. Tap 2. Slide the Enable button to Off 3. The Status field will display Offline Your calls will be routed to your Forward on No Answer number (if set), or to voicemail (if enabled) or cancelled. When you wish to use iPCS again, slide the Enable button to On. Wait for the Status field to display Connected and you will then be able to make and receive calls via your iPCS as normal. iPCS will make three attempts to connect to the maximiser system. If after three attempts a connection is not made it will try to connect every 5 minutes from then on. If a connection is not made “Logged Out” or “Connect Error” will be displayed in the Status field. If you close the iPCS app via the iPhone/iPad’s multitasking bar this will also disable the iPCS service. 40 iPCS Configuration iPCS for iPhone & iPad User Manual v3.2/0413/2 iPCS for iPhone & iPad User Manual Icons in Brief Main Bar Display your Favourites and Park slots Display your calls history Search and speed dial numbers stored in the maximiser’s central system database Display the keypad and make a call Access to Quick Settings and the iPCS system set up. Calls – keypad displayed Backspace – correct the number entered Make a call to the number entered Outgoing call End the current call Mute the call The current call is muted and the caller will not be able to hear you Speaker phone – use hands free to make the call The speaker is currently enabled Incoming call Answer the call Cancel the incoming call. The call will be passed to your Forward on Busy number (if set), or voicemail (if enabled), or cancelled. On a call Mute the call The current call is muted and the caller will not be able to hear you Speaker phone – use hands free during the call The speaker is currently enabled Put the call on hold Display the keypad to enable you to enter additional digits when using an auto attendant, for example Icons in Brief IPCS for iPhone & iPad User Manual v3.2/0413/2 41 iPCS for iPhone & iPad User Manual End the current call Keypad – while on a call Return to the previous screen While a call is on hold – keypad displayed Return to the caller on hold Backspace – correct the number entered Make a call to the number entered Multiple calls Conference – create a conference between yourself and the two calls currently on your phone In Conference – you have created a conference with yourself and the two calls on your phone Switch – toggle between the two calls currently on your phone Transfer – connected the two calls currently on your phone Favourites Available park slot A call is parked in this park slot Tap the Favourite to ring this number This internal extension number is available to take calls. Tap the Favourite to ring this number. This internal extension number is busy. Tap this Favourite to be passed to the colleague’s Forward on Busy number (if set) or to their voicemail (if enabled), otherwise the call will be cancelled. There is a call ringing on this internal extension number. Tap the button to pick up the call. There is a call queuing for this Department. Tap the button to pick up the first call in the queue. Favourites group – tap this group to view and use the Favourites stored in this group. Return to the Favourites screen – displayed when viewing a Favourites group History Signifies an answered incoming call 42 Icons in Brief iPCS for iPhone & iPad User Manual v3.2/0413/2 iPCS for iPhone & iPad User Manual Signifies an unanswered (or missed) incoming call (up to 10 displayed, then the oldest will be deleted) Signifies an answered outgoing call Signifies an unanswered outgoing call Signifies a new or unread voicemail message Signifies an old or read voicemail message All - view all your calls history Missed – view just your missed calls and voicemail messages Call the number displayed – available when viewing a call’s or message’s Info screen Play the voicemail message – displayed when viewing a message’s Info screen Return to the History screen – displayed when viewing a call’s or message’s Info screen Contacts Backspace – make changes to the text you have entered Delete – remove all the text you have entered and start again Hide the keyboard Hide the keyboard Return to the search screen – displayed while viewing a Contact’s info screen Settings Return to the Settings screen – displayed when viewing a Settings option Icons in Brief IPCS for iPhone & iPad User Manual v3.2/0413/2 43 iPCS for iPhone & iPad User Manual Index answer a call, 6 answered call call options, 5, 7 at lunch greeting, 36 auto attendant entering numbers while on a call, 6 busy lamp field favourites, 23 call forwarding, 28 call options, 5, 7 call pick up, 24 calls history, 13 departments, 18 missed calls, 14 redial a number, 14 ring back a caller, 15 voicemail, 33 calls list, 13 cli matching, 6, 20 via a favourite, 23 conferencing cancel a conference call, 10 create a conference call, 10 contacts, 11 contacts directory, 20 departments directory, 19 make a call to a contact, 21 make a call to a department, 18 make a call to a user, 17 receiving a call from a contact, 22 users directory, 16 contacts directory, 11, 20 make a call to a contact, 21 transfer a call to a contact, 21 daily greeting, 36 departments, 18 calls history, 18 groups, 18 make a call to a department, 18 transfer a call to a department, 19 voicemail, 38 wrap up time, 18 departments directory, 11 directories, 11 divert calls, 28 do not disturb, 27 end a call, 7 favourite groups, 24 favourites, 23 busy lamp field, 23 call pick up, 24 cli matching, 23 favourite groups, 24 44 make a call using a favourite, 24 prioritising favourites, 25 transfer a call using a favourite, 24 follow me, 28 forward on busy, 28 forward on no answer, 28 forwarding calls, 28 grouping favourites, 24 groups, 18 hands free, 7 hang up a call, 7 history, 13 hold, 8 icons in brief, 41 in meeting greeting, 36 iPCS configuration, 40 software version, 40 make a call, 5 to a contact, 21 to a department, 18 to a user, 17 using a favourite, 24 using the system directories, 12 via contacts, 12 missed calls, 14 department calls, 18 mobility server, 40 mute a call, 7 off site greeting, 36 on holiday greeting, 36 out of office greetings, 36, 38 out of office message, 30 park a call pick up a parked call, 9 transfer a parked call, 9 PCS range, 4 permanent greeting, 36, 37 pick up a call, 24 prioritising favourites, 25 quick settings, 27 call forwarding, 28 divert calls, 28 do not disturb, 27 follow me, 28 out of office message, 30 record a daily greeting, 36 record a permanent greeting, 37 record an out of office greeting, 38 recording a greeting, 36 redial a number, 14 reject a call, 7 ring back a caller calls history, 15 Index iPCS for iPhone & iPad User Manual v3.2/0413/2 iPCS for iPhone & iPad User Manual voicemail, 34 settings, 35, 40 software version, 40 software version, 40 speaker phone, 7 system directories, 11 transfer a call, 8 to a contact, 21 to a department, 19 to a user, 17 using a favourite, 24 using the directories, 12 via contacts, 12 user account, 1 user configuration, 27 Index iPCS for iPhone & iPad User Manual v3.2/0413/2 users directory, 11, 16 make a call to a user, 17 transfer a call to a user, 17 voicemail, 3, 32 delete a message, 35 departments, 38 divert incoming call to voicemail, 32 listen to a message, 33 message handling, 34 receive a message, 32 record a greeting, 36 ring back a caller, 34 save a message, 35 wrap up time, 18 45 SpliceCom Britain’s leading developer of telephone systems The Hall Farm Business Centre, Berry Lane, Chorleywood, Hertfordshire WD3 5EX Tel: 01923 287700 Fax: 01923 287722 Email: [email protected] Website: www.splicecom.com


