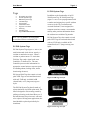
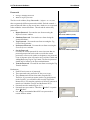
1
ES 2100 / ES 2200 / IS 3200 / BR 4200 User Manual 800-356-2671 | Accutech | www.accutech-ics.com Version 2.4 June 2011 DOC.970002 ICS/ACCUTECH LIMITED WARRANTY Innovative Control Systems, Inc. (ICS) warrants its Accutech™ equipment (Product) against defect in materials and workmanship under normal use for one (1) year from the date of product shipment. Defective equipment will be either repaired or replaced at ICS’ discretion, free of charge to the Customer during the warranty period. ICS will supply labor depending on contract to repair or replace defective equipment, free of charge, during the warranty period only if ICS or an ICS-certified subcontractor hired by ICS installed such equipment. In addition, ICS warrants its Accutech™ LC 1200 / ES 2200 / IS 3200 / BR 4200 System Tags against defects in materials and workmanship under normal use and service for a period of one (1) year from the date of shipment. If a Tag fails during the warranty period due to defects in material and workmanship, ICS will at its sole discretion, repair or replace the Tag with like quality product free of charge, although overnight shipping charges may apply. Broken BR Tag clasps or broken LT/SB/CB Tag strap slots are not covered by warranty. Returned merchandise will only be accepted within 30 days of shipping with a valid Return Merchandise Authorization (RMA) number that is requested for full credit towards your account (less a 25% restocking fee) if the product is returned unused, in its original packaging, and not damaged. No product will be accepted for credit after 30 days from shipment date. All Tag sales are final. Furthermore, the express limited warranty of ICS shall be the sole and exclusive warranty of ICS, and ICS hereby disclaims all other warranties, express, implied or statutory, including but not limited, all other implied warranties of merchantability or fitness for a particular purpose. In no way should ICS be liable for special, incidental, or consequential damages. ICS reserves the right to change such limited warranty from time to time upon thirty (30) days written notice. Computers and monitors provided by ICS shall not be submitted for repair to ICS but instead shall be submitted directly to their respective manufacturer and serviced under their inherent manufacturer warranty policy present at the time of purchase. Customer shall be responsible for registering any and all warranty requirements. ICS assumes no responsibility if any Product shall fail to function during any warranty period by reason of any one or more of the following causes: Abuse or misuse of the Product or failure to operate the Product in accordance with operating instructions or specifications. Improper preventive maintenance of the Product. Alteration or modification of the Product not specifically approved in writing by ICS. Improper installation, repair, modification, or servicing the Product performed by any unauthorized service personnel. Equipment or cabling damaged by unauthorized personnel knowingly or unknowingly. Use or operation of the Product in conjunction with any accessories or auxiliary equipment not specifically approved in writing by ICS. Acts of God, including, but not limited to, natural disaster, fire, explosions, flood, accidents and the like. 24-hour, 7-days-a-week, 365-days-a-year over the phone technical support at 1-800-356-2671 User Manual Preface IMPORTANT FCC & DOC INFORMATION Note: This equipment has been tested and found to comply with the limits for a Class B digital device, pursuant to Part 15 of the FCC Rules. These limits are designed to provide reasonable protection against harmful interference in a residential installation. This equipment generates, uses and can radiate radio frequency energy and, if not installed and used in accordance with the instructions, may cause harmful interference to radio communications. However, there is no guarantee that interference will not occur in a particular installation. If this equipment does cause harmful interference to radio or television reception, which can be determined by turning the equipment off and on, the user is encouraged to try to correct the interference by one or more of the following measures: Reorient or relocate the receiving antenna. Increase the separation between the equipment and receiver. Connect the equipment into an output on a circuit different from that to which the receiver is connected. Consult the dealer or an experienced radio/TV technician for help. Canadian D.O.C. Statement This digital apparatus does not exceed the Class B limits for radio noise emissions from digital appartus as set out in the radio interference regulations of the Canadian Department of Communications. Le present appareil numerique n,emet pas de bruits radiolectriques depassant les limits appliques aux appereils numeriques de Class B prescrites dans le rglement sur le brouillage radiolectrique dicte par le ministere des Communications du Canada. FCC ID/DOC for the ES Sensor: FCC ID/DOC for the ES Controller: FCC ID: JM7-IGWT-662002 Canada IC: 2683A-662002 FCC ID: JM7-ITYS-700035 Canada 2683 102 312 This device complies with Part 15 of the FCC rules. Operation is subject to the following two conditions: (1) This device may not cause harmful interference, and (2) this device must accept any interference received, including interference that may cause undesired operation. This device complies with Part 15 of the FCC rules. Operation is subject to the following two conditions: (1) This device may not cause harmful interference, and (2) this device must accept any interference received, including interference that may cause undesired operation. FCC ID/DOC for the Zone/Auxiliary Receiver: FCC ID/DOC for the S-TAD: FCC ID: JM7-IGWT-660076 Canada IC: 2683A-660076 This device complies with Part 15 of the FCC rules. Operation is subject to the following two conditions: (1) This device may not cause harmful interference, and (2) this device must accept any interference received, including interference that may cause undesired operation. FCC ID: JM7-IGWT-662008 Canada IC: 2683A-662008 This device complies with Part 15 of the FCC rules. Operation is subject to the following two conditions: (1) This device may not cause harmful interference, and (2) this device must accept any interference received, including interference that may cause undesired operation. Preface User Manual IMPORTANT: Keep all Televisions, Computers, X-ray equipment, etc. at least 10 feet away from the ES Receiver. This includes equipment located on the other side of walls and doors. Picture the area around the monitored zone as a big globe with the receive antenna as the center. Keep all sources of interference outside this globe. IMPORTANT NOTICE: Do not store ES Sensor(s) within 3 feet of ANY of the sources of electrical noise listed on this page. These sources can reduce sensor activation. This activation can lead to possible undesirable responses from the system. Common Sources of Interference Include: Television Sets Computer Monitors Medical Monitoring Equipment Electric Motors Electrical Distribution Panels and Transformers Fluorescent Lighting Some Electronic Washers and Dryers X-ray and other Imaging Equipment Unshielded Computer Cables Contents Chapter 1: The Accutech Systems ES 2200 System IS 3200 System BR 4200 System Cut Band System Alarms How Accutech Systems Work Addressing Alarms Escorting Chapter 4: The S-TAD 1-1 1-2 1-2 1-2 1-3 1-3 1-4 1-6 2-2 2-2 2-2 2-2 2-3 2-3 2-3 2-4 2-4 2-5 2-5 2-6 2-6 2-7 2-7 2-7 2-7 2-7 2-8 2-8 2-8 2-9 2-9 2-9 2-9 2-9 2-10 2-10 2-10 2-10 2-10 2-11 2-11 Chapter 3: Tags ES 2200 System Tags IS 3200 System Tags BR 4200 System Tags Cut Band System Tags Tag Barcodes Visual Pulse LED LED Tag Attaching Tags Tag and Band Maintenance 4-1 4-1 4-2 4-3 4-3 4-3 4-4 Chapter 5: The Keypad Chapter 2: System Components Controller Receiver Keypad Magnetic Switch Passive Infrared Reader (PIR) Tx Wand Antenna Tri-Axis Antenna ES 2200 System Tags IS 3200 System Tags BR 4200 System Tags Cut Band System Tags Secure Tag Activator/Deactivator (S-TAD) PC Tag Test Station (TTS) Accutech Software Multiplexer Power Supply Auxiliary Receiver (BR 4200 only) Graphic Display Panel (GDP) Staff Alert Panel (SAP) Magnetic Locks Elevator Deactivation Circuitry Automatic Door Deactivation Band Alarm Lockdown Fire Panel Interface (FPI) Local Alarm Multi-Tone Local Alarm (MTLA) Central Alarm Speakers Voice Alarm Strobe Light Push Button Override (PBO) Timer Powering the S-TAD On/Off Unlocking the S-TAD Activating/Deactivating Tags Programming Mode Enable/Disable Band Alarm Sounder Set Unlock Timeout Summary of LEDs 3-1 3-1 3-2 3-2 3-3 3-3 3-4 3-6 3-10 Keypad Operation Initiating a Keypad Reset/Escort Programming the master code Programming user codes Deleting user codes Resetting the master code Adjusting the Keypad Escort Time 5-1 5-1 5-2 5-3 5-3 5-4 5-4 Chapter 6: The Accutech Software Overview Configuration and System Type Opening/Viewing multiple areas The Environment Passwords Event Preferences User Codes Alarm events Clearing Alarms Suite Setup Floor to Floor Tag Discrimination Tag Control Tag Test Station (TTS) Tag Transfer Reports Software FAQ 6-1 6-2 6-2 6-5 6-8 6-10 6-13 6-15 6-17 6-18 6-19 6-19 6-22 6-25 6-28 6-33 Chapter 7: Facility Performance Testing Testing Tags Zone Functions Tested Test Equipment Required Zone, Lock Test Zone, Egress Test (3000 and 3101 Locks) Zone, Delayed Egress Test (3101) Zone, Hallway Test Zone, Elevator Deactivation Test Door Ajar Test Loiter Test System Supervisor Test (Tx) System Supervisor Test (Rx) Fire Panel Interface (FPI) Test Band Alarm Test (BR 4200 Systems only) FAQ Glossary Index 800-356-2671 | Accutech | www.accutech-ics.com 7-1 7-1 7-1 7-2 7-3 7-3 7-4 7-5 7-5 7-6 7-7 7-7 7-7 7-8 F-1 G-1 I-1 User Manual Chapter 1: The Accutech Systems IMPORTANT: No Security System can replace human vigilance. Creating a safe environment requires the combined efforts of nursing, physicians, security, and patients. Global policies, procedures, and processes on patient care should be discussed and disseminated. Education, communication, and coordination are key. No level of security can replace an informed and knowledgeable staff. Any electronic or physical security system should be considered as a supplemental deterrent, but by no means an end-all. User Manual The Accutech Systems ES 2200 System IS 3200 System BR 4200 System Cut Band System Alarms How Accutech Systems Work Addressing Alarms Escorting Throughout this manual, when referring to the various applications of the system, the term “Tag” is used to represent all possible applications of the system (i.e., a resident, a patient, an infant, pediatrics, or an asset). Furthermore, the terms “ingress” and “egress” will be encountered. They are another way of saying “coming and going” or “entering and exiting” respectively. The ES 2200 System is our platform system from which all Accutech System’s are built. Each subsequent system adds on to the system before. Each system can be easily upgraded as facility needs change and technology advances. ES 2200 System The function of the ES 2200 System is to alert facility personnel of the possible egress of a monitored resident. The ES 2200 can be utilized for special care residents suffering from wandering malady or tendencies of straying into unauthorized areas or leaving a facility, pediatric patients, asset security, and/or infant security. The system is designed so that each monitored zone is a standalone system. The Accutech Systems 1-1 The ES 2200 System works with ES 2200 System Tags (LT/SB22) and consists of: a Controller a Transmit Antenna* a Receiver a Magnetic Switch (door zones) or a Passive Infrared Reader (PIR) (hallway and elevators zones) a Keypad a Local Alarm* * Multiple options are available for these components. In most cases a Tx Wand Antenna is used for the Transmit Antenna, however, in special circumstances a variation of the Tx Wand antenna can be used. Furthermore, there are various options available for a Local Alarm. When a Tag enters a monitored zone, the system can automatically: lock doors deactivate elevators sound alarms flash strobe lights trigger visual displays (e.g., SAPs, GDPs, as well as PCs in IS 3200 and BR 4200 Systems) The Controller can be mounted on the wall near the point of egress or can be mounted out of sight in an utility or equipment closet. A Tx Wand Antenna is mounted on the wall at the point of egress. The Receiver is mounted internally (inside the Controller) when the Controller is located at the zone or externally (near the monitored zone) when the Controller is located remotely. 1-2 The Accutech Systems Virtually any hallway, doorway, stairwell, or elevator can be made to sense a Tag and then trigger audial and/or visual alarms to prompt a staff response. All cable used in Accutech Systems is plenumrated. By adding options, most egress opportunities can be eliminated without restricting staff, visitors, and non-monitored residents movement. Additional options that further enhance your ability to prevent unescorted egress include: Magnetic Lock(s) Elevator Deactivation Unit(s) Central Alarm Door Ajar alarm Loiter alarm Staff Alert Panels (SAPs) Graphic Displays Panels (GDPs) Secure Tag Activator/Deactivator (STAD) STADs are capable of reading a Tag’s low battery indicator and can assist in finding lost Tags. However, ES 2200 Tags and/or VP conversion Tags do not support the low battery indicator. IS 3200 System The IS 3200 System is the ES 2200 System plus: a computer(s) the Accutech Software a Tag Test Station a Multiplexer(s) a Power Supply(s) The IS 3200 System uses IS 3200 System Tags (LT/SB32) that are placed on the monitored resident or asset. Once assigned, the computer associates a name, room number, and any other pertinent information about the resident/asset with that Tag. BR 4200 System User Manual The BR 4200 System is intended for infant security. The function of the BR 4200 System is to alert facility personnel of the possible abduction of an infant. The BR 4200 System is the IS 3200 System plus: BR 4200 Auxiliary Receivers (as needed) The BR 4200 System uses BR 4200 System Tags (BR42) that are placed on infants. In addition to the functionality of IS 3200 System Tags, BR 4200 System Tags feature Intelli-Band Technology, which will trigger alarms (audial and/or visual) if the band is removed or tampered with. Additional optional alarms (local or central) can announce when a band alarm incident has occurred. Cut Band System The function of the Cut Band System is to alert facility personnel of the possible adduction of a child. The Cut Band System is the BR 4200 System with Cut Band Tags, which will trigger alarms (visual and/or audial) if the band is cut. User Manual Alarms Egress Door Ajar (Optional) Loiter (Optional) Supervisor Band Alarm (BR 4200 systems only) NOTE: In this manual, Egress alarms are referred to as “Alarms.” Other alarm types are referred to by name (i.e., Door Ajar, Loiter, Supervisor, Band Alarm). Egress An alarm (i.e., an Egress alarm) occurs whenever a Tag enters a monitored zone and the door is opened or a PIR is tripped. Door Ajar (Optional) A Door Ajar alarm occurs when a door is open for longer than the preset time (adjustable). Loiter (Optional) A Loiter alarm occurs when a Tag lingers in a monitored zone for longer than the preset time (adjustable). Supervisor A Supervisor alarm occurs when the performance of the system has been altered due to tampering or inadvertent acts such as cut wires, antenna damage, or interference. Band Alarm (BR 4200 systems only) A Band Alarm occurs when a BR42 Tag band is loosened, cut, saturated, removed, or tampered with. The Accutech Systems 1-3 How Accutech Systems Work Double-conditioning Door zones Elevator zones Hallway zones This section explains how Accutech Systems react to a Tag entering a monitored door, elevator, or hallway as well as alarm definitions. Double conditioning At most zones, two conditions are required to generate an alarm. For example, at a door zone, a Tag must be detected in the zone and the door opened or, in hallway zones, a Tag must be detected in the zone and PIR detection to generate an alarm. Double conditioning (set during installation) helps prevent nuisance alarms. Door zones When a Tag enters a monitored door zone, the system will detect the Tag. At that moment (provided the door is closed, has a Magnetic Lock(s), and the Lock is unobstructed) the Magnetic Lock will energize, locking the door. The Lock will remain locked for as long as the Tag is in the monitored zone. When the Tag leaves the monitored zone, the door will unlock after an adjustable period of time (unless it is set to latch when an alarm occurs). Egress If a Tag enters a monitored door zone with or without a Magnetic Lock(s) and the door is already open (or is opened while the Tag is in the zone), the Accutech System will go into alarm. 1-4 The Accutech Systems Loiter An optional Loiter function is available to alert staff personnel if a Tag is lingering in a monitored zone. The time setting is adjustable (10-110 seconds) and is factory set for approximately 15 seconds. Door Ajar An optional Door Ajar function is also available to alert staff personnel if the door in a monitored zone has been held open for too long. The time range can be set for immediate or from 10 to 110 seconds and is factory set for approximately 15 seconds. Elevator zones Elevator Deactivation Circuitry restricts the wearer of a Tag from using an elevator. Egress If a Tag enters a monitored elevator zone, the elevator’s call button on that floor will be deactivated (Call buttons on other floors are unaffected and no one is restricted from coming to the floor). When a Tag is in the zone and the elevator doors are closed, the doors will remained closed. When a Tag is in the zone (or approaches the zone) and the elevator doors are open, the doors will remain open and an alarm will sound. If the elevator car is en route to the floor when a Tag approaches the zone, the elevator will arrive on the floor, the door(s) will open, and the system will alarm. User Manual Hallway zones Egress If a Tag enters a monitored hallway zone, the system will detect the Tag and the PIR will detect motion. The system can then sound alarms, trigger visual displays and, in special circumstances, lock nearby doors. Addressing Alarms Addressing Egress alarms Addressing Door Ajar alarms Addressing Loiter alarms Addressing Supervisor alarms Addressing Band Alarms (BR 4200 systems only) NOTE: Whenever an alarm occurs, always go to the alarm location to address the alarm. Addressing Egress alarms An Egress alarm occurs whenever a Tag enters a monitored zone and the door is opened or a PIR is tripped. When an Egress alarm occurs: 1. Go to the alarm location and take appropriate action. 2. After taking appropriate action, you may clear the alarm by entering a valid code into the zone Keypad and, if necessary, clear the alarm on the PC. User Manual Addressing Door Ajar alarms A Door Ajar alarm occurs when a door is open for longer than the preset allotted time. When a Door Ajar alarm occurs: 1. Go to the alarm location and check to see if the door is propped open or not completely closed. 2. Close the door completely. 3. The system may automatically reset or, if necessary, enter a valid code into the zone Keypad and/or clear the alarm on the PC. Addressing Loiter alarms A Loiter alarm occurs when a Tag lingers in a monitored zone for longer than the preset allotted time. When a Loiter alarm occurs: 1. Go to the alarm location and check the following: a. If a person is loitering in that zone’s Tx Activation Field? b. Is a Tag from an adjacent room being activated by this zone? If so, call your service technician for help in addressing this issue. c. Is there is a misplaced Tag in the zone? 2. After removing the cause, the system may automatically reset or, if necessary, enter a valid code into the Keypad and/or clear the alarm on the PC. Addressing Supervisor alarms A Supervisor alarm occurs when the performance of the system has been altered due The Accutech Systems 1-5 to tampering or inadvertent acts such as cut wires, antenna damage, or interference. When a Supervisor alarm occurs: 1. Go to the alarm location and look for visible damage to the Accutech equipment. 2. Check for and remove any objects near the zone equipment that may be causing interference (metal carts, monitors or other medical equipment as well as personnel using wireless communication devices). 3. If you locate and correct the cause, the Supervisor alarm will cease. If necessary, clear the alarm on the PC. 4. If not, call your service technician for further assistance. NOTE: Receiver-related supervise events can be reset by the Keypad for the duration of the supervise interval. This will silence the alarm for up to 16 hours. Addressing Band Alarms (BR 4200 systems only) A Band Alarm occurs when a BR42 Tag band is loosened, cut, saturated, removed or tampered with. When a Band Alarm occurs: 1. Locate and assure the safety of the infant. 1-6 The Accutech Systems 2. After locating the infant, if you can find no obvious reason for the alarm, check the following: a. Is the band snug around the infant’s extremity and the conductive fiber stripes are in good contact with the infant’s skin? If not, snug up the band. b. Is excess band material properly trimmed? If not, trim appropriately. c. Is the band wet? If so, replace the band. d. Is the Cam Lock completely closed? If not, snap it closed. 3. After verifying the above, enter a valid code into any Keypad and, if necessary, clear the alarm on the PC. Escorting DISCLAIMER: The following instructions are intended as a guidance document only. Each facility should review these recommendations and modify as necessary to meet their own unique security requirements. NOTICE: While escorting Tags, be aware of “tailgating.” Tailgating is the practice of Tags lingering near a monitored zone (usually an exit point) until an authorized escort passes through the zone then immediately following behind through the zone. To prevent tailgating, be aware of all traffic near a monitored zone and once you are through the monitored zone wait until the escort time has timed-out before proceeding. User Manual To escort Tags through a monitored zone, use the following instructions: 1. Enter a valid code into the zone’s Keypad. This will invoke the Keypad’s Escort function. The Keypad’s Escort function will allow the Tag to pass through the monitored zone for the designated Escort time. The duration of the Escort function is adjustable from 0 to 98 seconds (factory set at 15 seconds). 2. Escort the Tag through the zone. NOTE: For slower moving residents, you may have to invoke the Escort function again. However, if this is the case, an alarm may sound. Therefore, take into consideration the Escort time duration at that zone. If the door handles slow moving residents often, consider extending the Escort time or using a wheelchair to escort residents. 3. To prevent tailgating, once you are through the zone wait until the escort time has timed-out before proceeding (the green LED will extinguish). User Manual Chapter 2: System Components User Manual System Components This section contains a brief description and a simple graphic (not to scale) for each component and its role in the Accutech System. NOTE: Accutech reserves the right to substitute comparable components. Since each facility’s system is unique to its particular needs, check off the components that your system has. ALL SYSTEMS COMPONENTS: Controller Receiver Keypad Magnetic Switch (with Door zones) Passive Infrared Reader (PIR) (with Elevator and Hallway zones) System Components 2-1 ALERT PANELS: Graphic Display Panel (GDP) Staff Alert Panel (SAP) RESTRAINTS: Magnetic Lock, 3000 Series Magnetic Lock, 3101 Series (Delayed Egress) Elevator Deactivation Automatic Door Deactivation Band Alarm Lockdown Fire Panel Interface (FPI) (required for systems with Magnetic Locks and/or Elevator Deactivation) ALARMS: Tx Wand Antenna Tri-Axis Antenna TAGS: ADDITIONAL OPTIONS: TRANSMIT ANTENNA: ES 2200 System Tags (LT/SB22) IS 3200 System Tags (LT/SB32) BR 4200 System Tags (BR42) Cut Band Tags TESTERS: Secure Tag Activator/Deactivator (S-TAD) Tag Activator/Deactivator (TAD) IS 3200 and BR 4200 COMPONENTS: PC Tag Test Station (TTS) Accutech Software Multiplexer Power Supply Auxiliary Receivers (BR 4200 only) Local Alarm Multi-Tone Local Alarm Central Alarm Speakers Voice Alarm Strobe Light Push Button Override (PBO) Timer 2-2 System Components User Manual Controller The Controller (Figure 2.1) coordinates and controls all of the devices and functions of the Accutech Security System. Figure 2.1 The Controller Receiver The Receiver (Figure 2.2) picks up the signal from an activated Tag and relays it to the Controller and the Multiplexer. Receivers can be internally or remotely mounted near a monitored zone. Figure 2.2 Receiver Keypad The Keypad (Figure 2.3) is used to escort residents or infants through a monitored zone and to reset zone equipment once an alarm has occurred. Figure 2.3 Keypad Magnetic Switch The Magnetic Switch (Figure 2.4) is used on a door when alarm activation is not desired unless the door is opened. Figure 2.4 Magnetic Switch User Manual System Components 2-3 Passive Infrared Reader (PIR) A Passive Infrared Reader (PIR) (Figure 2.5) is a device that uses a infrared sensor to monitor doors, hallways, corridors, and passageways. Figure 2.5 Passive Infrared Reader (PIR) Like the Magnetic Switch, the PIR is used in areas where alarm activation is not desired immediately upon Tag detection. It can also be used in hallways or other areas where a Magnetic Switch would not be feasible. Tx Wand Antenna The Tx Wand Antenna (Figure 2.6) generates a Tag-activating signal near a monitored zone. This signal is referred to as the “Tx Activation Field.” Figure 2.6 Tx Wand Antenna Tri-Axis Antenna The Tri-Axis Antenna (Figure 2.7) is a variation of the Tx Wand antenna. Figure 2.7 Tri-Axis Antenna 2-4 System Components User Manual ES 2200 System Tags The ES 2200 System Tag (Figure 2.8) is a small wristwatch-sized device that is worn by a resident or attached to an asset. Two models are available: LT = Long Term resident care SB = Slotted Back; to be used on infants and assets LT22 or When the Tag enters a monitored zone, the system detects the Tag and responds by sending a signal via the Receiver to the Controller. This information is processed by the Controller for appropriate control action or response at the zone. Tags are attached to residents/assets with a nylon-mesh-reinforced vinyl band. SB22 Figure 2.8 ES 2200 System Tag (band not shown) IS 3200 System Tags In addition to the look and functionality of ES 2200 System Tags, IS 3200 System Tags (Figure 2.9) are assigned to a specific resident or asset (via the Tag Test Station and a computer with the Accutech Software). The computer then associates a name, room number, and any other helpful comments about the resident or asset with that Tag. LT32 or SB32 Figure 2.9 IS 3200 System Tag (band not shown) When the Tag enters a monitored zone, the system detects the Tag and responds by sending a signal via the Receiver to the Controller and the Multiplexer. This information is processed by the Controller for appropriate control action or response at the zone while the Multiplexer sends the information to a computer with the Accutech Software and/or to Graphic Display Panels (GDPs). This information is processed by the Controller and the Multiplexer for appropriate control action or response at the zone. Tags are attached to residents/assets with a nylon-mesh-reinforced vinyl band. User Manual System Components 2-5 BR 4200 System Tags In addition to the functionality of an IS 3200 System Tag, the BR 4200 System Tag (Figure 2.10) will alarm if the band is loosened, cut, saturated, removed or tampered with. BR 4200 System Tags are attached to infants with a conductive-fiberstriped cloth band. BR42 Figure 2.10 BR 4200 System Tag (band not shown) Cut Band Tag Similar to the functionality of a BR 4200 System Tag, Cut Band Tags (Figure 2.11) will alarm if the band is cut and is designed for use in pediatrics applications. Cut Band Tags are attached to patients with a band (Figure 2.13) and plastic covers (Figure 2.14), are activated/deactivated using an S-TAD unit, and contain a visual pulse LED. Using plastic covers with a Cut Band Tag will significantly reduce the need for sanitizing the Tag between applications. Figure 2.11 Cut Band Tag Figure 2.13 Cut Band band Figure 2.14 Plastic Covers 2-6 System Components User Manual Secure Tag Activator/Deactivator (S-TAD) The S-TAD (Secure Tag Activator/Deactivator) is used to check the functionality of an Accutech Tag. Accutech Tags operate by internal battery. Over the course of normal operation, Tags eventually lose battery power and the Tags will need to be replaced. The S-TAD is used to determine if a Tag has sufficient battery power to respond to an activating signal. Figure 2.15 S-TAD Tag Activator/Deactivator (TAD) TAD (Tag Activator/Deactivator) is used to check the functionality of an Accutech Tag. Accutech Tags operate by internal battery. Over the course of normal operation, Tags eventually lose battery power and the Tags will need to be replaced. The TAD is used to determine if a Tag has sufficient battery power to respond to an activating signal. The TAD was replaced by the S-TAD in late 2008. Figure 2.16 The TAD PC Figure 2.17 PC A PC (Figure 2.17) is required for IS 3200 and BR 4200 Systems. The Accutech Software is installed on each monitoring PC and is used to display incoming event information. Using the facility’s floor plan as the background, zone-specific icons (i.e., doors, elevators, stairwells, hallways, and BR 4200 Auxiliary Receivers) are placed at each monitored zone’s location and become animated when an alarm occurs. User Manual System Components 2-7 Tag Test Station (TTS) The Tag Test Station (TTS) (Figure 2.18) is used for Tag assignments, checking for low Tag battery, and verifying the Tag number. Figure 2.18 Tag Test Station Accutech Software Figure 2.19 Accutech Software example The Accutech Software (Figure 2.19) is installed on each monitoring PC and is used to display incoming event information. Using the facility’s floor plan as the background, zone-specific icons (i.e., doors, elevators, stairwells, hallways, and BR 4200 Auxiliary Receivers) are placed at each monitored zone’s location and become animated when an alarm occurs. Multiplexer The Multiplexer (Figure 2.20) relays event information sent from the Controller and Receivers to Graphic Display Panels (GDPs) and to PCs with the Accutech Software. Figure 2.20 Multiplexer Power Supply The inclusion of multiple peripherals into the Accutech System may require more power than the Controller can provide. In these cases, a Power Supply (Figure 2.21) is added to the system to meet the additional power requirements. Figure 2.21 Power Supply Auxiliary Receiver The Auxiliary Receiver (Figure 2.22) picks up the signal from an activated Tag and relays it to the Controller and the Multiplexer. Figure 2.22 Auxiliary Receiver 2-8 System Components User Manual Graphic Display Panel (GDP) The Graphic Display Panel (GDP) (Figure 2.23) provides the staff with a visual representation of the floor being monitored. GDPs are custom-made to a facility’s floor plan and notify staff when an alarm or event occurs in a monitored zone through a piezo buzzer and alarm-specific LEDs. Figure 2.23 Graphic Display Panel (GDP) Staff Alert Panel (SAP) The Staff Alert Panel (SAP) (Figure 2.24) notifies staff when an alarm condition occurs in a monitored zone through a piezo buzzer and alarm-specific LEDs. Figure 2.24 Staff Alert Panel (SAP) Magnetic Locks Magnetic Locks (Figure 2.25) prevent unescorted egress. The 3000 Series Magnetic Lock features: 1500-pound holding force 12V to 24V AC/DC Unlocks instantly if the facility’s fire panel is activated The 3101 Series Magnetic Lock features: Figure 2.25 Magnetic Locks 1200-pound holding force 12V AC/DC Unlocks instantly if the facility’s fire panel is activated NFPA101 Life Safety Code conformity (Delay Egress Circuitry) a selectable nuisance delay an Accutech-exclusive electromagnetic coil an Accutech-exclusive firmware chip Elevator Deactivation Circuitry Figure 2.26 Elevator Deactivation Circuitry Elevator Deactivation Circuitry (Figure 2.26) is designed to prevent someone (or an asset) wearing an Accutech tag from using an elevator to leave a monitored floor. Using Relays enclosed in the Elevator Deactivation Relay Cabinet, the Elevator Company is able to interface with the Accutech System. User Manual System Components 2-9 Automatic Door Deactivation Figure 2.27 Automatic Door Deactivation In automatic door applications (doors that open via a motion sensor or push paddle) (Figure 2.27), the Accutech System can deactivate this feature when a Tag enters a monitored zone’s Tx Activation Field. Band Alarm Lockdown Band Alarm Lockdown (Figure 2.28) can engage specific facility Magnetic Locks when a Band Alarm occurs. Figure 2.28 Band Alarm Lockdown Fire Panel Interface (FPI) Figure 2.29 Fire Panel Interface (FPI) The Fire Panel Interface (FPI) (Figure 2.29) ensures that in the event of a fire alarm, the Magnetic Locks and Elevator Deactivation Circuitry will disengage. Although the restraint systems are disengaged, the system’s visual and audial alarms will remain active. Local Alarm The Local Alarm (Figure 2.30), a sounder, is intended to attract attention near the monitored zone. Figure 2.30 Local Alarm Multi-Tone Local Alarm (MTLA) The Multi-Tone Local Alarm (MTLA) (Figure 2.31) can use 8 tone variations to attract attention near the monitored zone. Figure 2.31 Multi-Tone Local Alarm 2-10 System Components User Manual Central Alarm Figure 2.32 Central Alarm The Central Alarm (Figure 2.32) is a multi-tone alert. It consists of a tone generator that drives Speakers (up to 5) located throughout a facility. There are eight different tones available. You may choose to assign a separate tone for each zone, share the same tone for adjacent zones, or use one tone for all zones. Speakers Figure 2.33 Speakers The 8-ohm Speakers (Figure 2.33) provided by Accutech are used in conjunction with the Central Alarm. Voice Alarm Figure 2.34 Voice Alarm The Voice Alarm (Figure 2.34), located at a monitored zone, will repeat a recorded message (up to 20 seconds) continuously when an alarm occurs. Strobe Light A Strobe Light (Figure 2.35) can be used as another alarm notification device. Figure 2.35 Strobe Light Push Button Override (PBO) The Push Button Override (PBO) (Figure 2.36) triggers the Keypad’s Escort function; this option allows free access through a monitored door from the non-Keypad side of the door. Figure 2.36 Push Button Override (PBO) Timer A Timer (Figure 2.37) allows the user to engage or disengage certain system functions on a time schedule. Figure 2.37 Timer example User Manual Chapter 3: Tags User Manual IS 3200 System Tags Tags Tags 3-1 ES 2200 System Tags IS 3200 System Tags BR 4200 System Tags Cut Band Tags Tag barcodes Visual Pulse LED Tag base color chart LED Tag Attaching Tags Tag and Band Maintenance Note: The Tag Model CB’s Pod (plastic covers) has not been evaluated by UL. ES 2200 System Tags In addition to the functionality of an ES 2200 System Tag, IS 3200 System Tags (Figure 3.1 and 3.2) are preprogrammed with a number and assigned to a specific resident or asset (via the Tag Test Station and Accutech Software). Once assigned, the computer associates a name, room number and any other pertinent information about the resident/asset with that Tag number. IS 3200 System Tags also contain a visual pulse LED. Tags are activated/deactivated with an S-TAD unit. Available in SB (slotted back) or LT (long term) tag case styles. ES 2200 System Tags (Figure 3.1 and 3.2) are small wristwatch-sized devices worn by a resident or attached to an asset. When a resident or patient enters a Tx Activation Field, the Tag sends a signal to the zone Controller, via the Receiver. The zone Controller processes this information for appropriate control action or response (such as sounding alarms, locking doors, and/or deactivating elevators). ES System 2200 Tags also contain a visual pulse LED. Tags are activated/deactivated with an S-TAD unit. Available in SB (slotted back) or LT (long term) tag case styles. Figure 3.1 SB Tag case style The ES 2200 System Tag band is made of nylon-reinforced vinyl with nylon mesh. The band is designed to resist tearing caused by pulling or chewing on the band. However, if the band becomes frayed or torn it will need to be replaced. In long-term applications, the band should be replaced periodically for cleanliness. Figure 3.2 LT Tag case style 3-2 Tags User Manual BR 4200 System Tags In addition to the functionality of an IS 3200 System Tag, BR 4200 System Tags (Figure 3.3) will alarm if the band is removed or tampered with in any way. BR 4200 System Tags also contain a visual pulse LED. Tags are activated/deactivated with an S-TAD unit. BR 4200 System Tags are attached to infants with a conductive-fiber-striped cloth band. Figure 3.4 Cut Band Tag Figure 3.5 Cut Band Band Figure 3.3 BR 4200 System Tag Cut Band Tags Similar to the functionality of a BR 4200 System Tag, Cut Band Tags (Figure 3.4) will alarm if the band is cut, removed, or tampered with in any way and is designed for use in pediatric applications. Cut Band Tags also contain a visual pulse LED. The band (Figure 3.5) accommodates various wrist/ankle lengths. Using a pod (Figure 3.6) with a Cut Band Tag will significantly reduce the need for sanitizing the Tag between applications and is water-resistant during use. Figure 3.6 Cut Band Pod User Manual Tags 3-3 Tag barcodes Visual Pulse LED Tag barcodes (Figure 3.7) contain a Tag’s manufacturing history. The Visual Pulse LED indicates the Tag’s current mode (see Table 3.1) Table 3.1 Visual Pulse LED status LED Light Pattern off on Tag LED Status LT, SB Tags None Tag is off. Active, not in zone Active, in zone Figure 3.7 Tag barcode example BR, CB Tags The coding scheme is as follows: None Tag is off. Active, not in zone, non-Band Alarm M-WWYY-TSSS Active, in zone (may be in Band Alarm) Active, not in zone ”M” is the manufacturer designator. Band Alarm mode, ”WWYY” is the date code. (“1706” would mean the 17th week of 2006) Tag base color chart ”T” is the tag type designator. 1 is for CB (Cut Band) Tag tops are smoke-colored while the Tag base color will vary based upon Tag type (see Table 3.2). 2 is for BR (Band Removal) Table 3.2 Tag base color chart 3 is for LT (Long Term) 4 is for SB (Slotted Back) ”SSS” is the serial number for that tag type manufactured during that week. Tag Type CB SB LT BR Base Color White Gray Gray Yellow 3-4 Tags User Manual LED Tag Verifying Proper Zone Coverage Identifying Foreign Tag-Activating Sources DISCLAIMER: Due to each facility’s unique environment, an LED Tag cannot give an exact measurement of zone coverage; it can only give an estimation of zone coverage. Furthermore, at this time, the LED Tag is not able to test Auxiliary Band Alarm Receivers. Verifying Proper Zone Coverage An LED Tag (Figure 3.8) is used to verify proper zone coverage during installation, adjustment, or testing of a monitored zone. Proper zone coverage fully protects the intended area (door, elevator, hallway, or any other passageway) without extending into other areas (in front, in back, on sides, above, and beneath the intended area). Monitored zones emit a Tag-activating signal called the Tx Activation Field. When a Tag enters a zone’s Tx Activation Field, the system will detect the Tag and take appropriate action response. An LED Tag can detect a zone’s Tx Activation Field without causing alarms making it a quick and easy way to verify proper zone coverage. This is not only useful in ensuring complete zone coverage but also in locating areas where a Tx Activation Field may be extending into common areas and causing nuisance alarms. To verify proper zone coverage with an LED Tag, use the following instructions: 1. Using an S-TAD, activate the LED Tag. 2. With the LED Tag in your hand, slowly approach each zone at various angles and orientations. The LED Tag’s LED will illuminate when it detects the zone’s Tx Activation Field. Figure 3.8 The LED Tag User Manual Tags 3-5 3. If you find that a zone’s coverage is at unacceptable levels (too small, too big, extends too far in one direction), look for factors that may be affecting the zone (food carts, medical equipment, and/or building construction). 4. If you cannot locate any immediate causes, contact your system maintenance technician for further assistance. 5. When finished, deactivate the LED Tag using an S-TAD. Identifying Foreign Tag-Activating Sources In addition to verifying proper zone coverage, an LED Tag (Figure 3.3) can be used to identify foreign Tag-activating sources to help preserve your Tags’ battery life and prevent nuisance alarms. Monitored zones emit a Tag-activating signal called the Tx Activation Field. When a Tag enters a zone’s Tx Activation Field, it is activated. The system detects the activated Tag and takes appropriate action response. However, there are sources that can activate a Tag other than a Tx Activation Field. When Tags are activated by these “foreign” sources, battery life is depleted and/or nuisance alarms can be caused. Therefore, identifying these sources will prolong Tags battery life and prevent nuisance alarms. To identify activating sources with an LED Tag, use the following instructions: 1. Using an S-TAD, activate the LED Tag. 2. With the LED Tag in your hand, slowly investigate each area for possible activating sources*. The LED Tag’s LED will illuminate when it detects an activating source. Note each activating source and keep Tags away from those sources. 3. When finished, deactivate the LED Tag using an S-TAD. *Some activating sources can be: Computer Monitors Unshielded computer cables Television Sets Medical Monitoring equipment X-ray and other imaging equipment Fluorescent Lighting Wireless Communication Devices 3-6 Tags User Manual Attaching Tags Attaching LT/SB Tags Attaching BR42 Tags Attaching Cut Band Tags with Pod Removing a Cut Band Tag with Pod Attaching LT/SB Tags Note: LT (Long Term) Tags are used for resident care. SB (Slotted Back) Tags are used on small infants and assets. All Tag bands are for one-time use only. For cleanliness and sanitary reasons, Accutech recommends replacing applied bands on a semi-monthly basis with a maximum of one month between changes. Figure 3.9: LT Tag with band 1. For LT Tags, with the snaps pointing in the same direction as the Accutech logo, slide the plastic band through the Slot. (see Figure 3.9) 2. Adjust the band length to the nearest accommodating hole for a comfortable fit around the patient’s extremity. Note: Once the band is secured it cannot be adjusted. Figure 3.10: LT Tag with band 3. Put the male part of the Snap through the selected hole (see Figure 3.10). 4. Fold over the female part of the Snap and secure to the male part by squeezing until they snap together. 5. Using scissors, carefully trim any excess band material (see Figure 3.11). Figure 3.11: LT Tag with band secured 6. Using an S-TAD, activate the Tag. 7. Follow the same procedure for SB Tags. (see Figure 3.12) Figure 3.12. SB Tag with band secured User Manual Tags 3-7 Attaching BR42 Tags NOTE: The Soft Bracelet has conductive fiber stripes (Figure 3.13) that must be in contact with both the infant’s skin and the gold contacts on the Tag (Figure 3.14). The band must be routed properly through the Tag case for the system to function properly. Tags are typically attached to a wrist or ankle. For smaller infants, placing the Tag around the thigh is also acceptable. All Tag bands are for one-time use only. For cleanliness and sanitary reasons, Accutech recommends replacing applied bands on a semi-monthly basis with a maximum of one month between changes. Figure 3.13 The Soft Bracelet 1. Unsnap the Cam Lock (Figure 3.14). 2. Hold the Tag in your left hand with the Slot to the right and the Cam facing up. 3. With the conductive fiber stripes facing the Tag, slide the pointed end of the band up through the Slot from underneath until the folded end is snug next to the Slot (Figure 3.15). Figure 3.14 Tag with Cam Lock open 4. Push the pointed end of the band (with the conductive fiber stripes facing the gold contacts on the Tag) through the Cam Lock opening and form a 2-inch loop with the band (Figure 3.16). Figure 3.15 BR42 Tag with band inserted 5. Slip the 2-inch loop over the infant’s extremity and cinch the band until it is snug around the infant’s extremity. 6. Make sure the conductive fiber stripes are in good contact with the infant’s skin. 7. Snap the Cam Lock closed. NOTE: Make sure the band is still snug around the infant’s extremity. If necessary, gently pull the band snug while the Cam Lock is closed. Be careful not to overtighten; the Cam Lock must be opened to loosen the band. Figure 3.16 BR42 Tag with band in place 8. Using scissors, carefully trim any excess band material so that the band does not protrude beyond the end of the Tag case (Figure 3.17). 9. Using an S-TAD, activate the Tag. Figure 3.17 BR42 Tag with band in place 3-8 Tags User Manual Attaching Cut Band Tags with Pod Note: All Tag bands are for one-time use only. For cleanliness and sanitary reasons, Accutech recommends replacing applied bands on a semi-monthly basis with a maximum of one month between changes. 1. OPTIONAL: Write the date when the band was applied on the provided date lines (__/__/__) located next to the Accutech logo on the Cut Band. For cleanliness and sanitary reasons, Accutech recommends replacing applied bands on a semi-monthly basis with a maximum of one month between changes. Writing the date will aid in this schedule. Figure 3.18 Remove the coupon along the perforated line and save for later use. Figure 3.19 Slide the snap band through the Tag slot. Determine which holes to use (with or without pod) 2. Using safety scissors, remove the coupon from the snap band along the perforated line. Retain the coupon (Figure 3.18). 3. With the Accutech name facing up, slide the 3hole tab section of the snap band through the Tag slot until the Tag is against the Tag stops (Figure 3.19). If not using a Pod, skip steps 3 & 4 and proceed to Step 5. 4. OPTIONAL: Remove the top pod cover (the large cover) from the cover strip and align it with the top of the Tag (the side of the Tag that has the Accutech logo) so that the two arrows on the top pod cover point in the direction of the 3-hole tab section. Being careful not to touch the adhesive on the gasket, push the Tag into the cover until the Tag is completely inside the cover and the snap band is touching the adhesive gasket. 5. OPTIONAL: Remove the bottom pod cover (the smaller cover) from the cover strip and place it over the bottom side of the Tag so that the two arrows on the bottom cover point in the direction of the 3-hole tab section. Using your thumb and forefinger, squeeze and run them along all fours sides of the two pod pieces to ensure a tight gasket seal. 6. Using the coupon, thread the male snaps through the selected snap band holes (with pod or no pod) of the 3-hole tab section from the bottom side up (Figure 3.20). Figure 3.20 Determine band length needed and select holes. Position the coupon. User Manual Tags 3-9 7. Wrap and overlap the band around the patient’s wrist/ankle to determine the band length needed and the holes to use by lining up the two male snaps from the 3-hole tab section with two overlapping holes from the band length section. A properly fit snap band will not fall off the patient nor will it restrict movement or blood flow. 8. Fold over the coupon’s female snaps onto the male snaps to secure the band. Press firmly on each snap. Once locked together, the coupon snaps cannot be adjusted. (Figure 3.21) 9. Carefully cut any excess band length material and discard it. 10. Using an S-TAD (Secure Tag Activator/Deactivator), activate the Tag. The Tag’s red LED will blink rapidly to indicate that the Tag is active. Removing a Cut Band Tag with Pod 1. Turn off the Tag with an S-TAD. 2. Carefully cut off the band from the patient’s extremity. 3. If present, separate and remove the top and bottom plastic covers from around the Tag. 4. Remove any residue left over from the plastic cover gasket before pulling the band out of the Tag slot. Failure to remove residue may result in residue buildup inside the Tag slot rendering the Tags unusable. Figure 3.21 Secure the snap band by folding over the female snaps onto the male snaps. Carefully cut any excess band length material. Using an S-TAD activate the Tag. 3-10 Tags Tag and Band Maintenance Testing Tags Cleaning Tags Cleaning Bands Storing Tags Storing Bands Testing Tags Accutech Tags operate by internal battery. Over the course of normal operation, Tags eventually lose battery power and the Tags will need to be replaced. The Tag battery is not replaceable. For maximum protection of residents or assets, Accutech recommends that Tags be tested on a weekly basis. There are many ways that you can test Tags: Enter a monitored zone (Software will report.) With a S-TAD With a TAD The Keypad’s Auxiliary LED (Yellow) will light when a Tag is detected (Optional; additional wire required). Check Visual Pulse LED if present BR and CB Tags only - Remove Band Alarm band or Cut Band band (alarm will sound). Cleaning Tags All Tags are reusable but they must be cleaned and sanitized between applications. In long-term applications, periodically replace the bands and clean the Tags. There are a few methods that can be used to clean and sanitize Tags: HOWEVER, DO NOT: DO NOT submerge Tags in water DO NOT soak Tags in water DO NOT submerge Tags in cleaning solutions DO NOT soak Tags in cleaning solutions User Manual DO NOT use solvents DO NOT use abrasive cleaners or cloths DO NOT put Tags in an AutoClave DO NOT put Tags in a dishwasher DO NOT steam clean Tags DO NOT put Tags in a washing machine or dryer Acceptable Tag Cleaning Methods: Antibacterial wipes (wipe only, DO NOT soak) Hydrogen peroxide (wipe only from cloth, DO NOT submerge or soak) Cleaning Bands All Tag bands are for one-time use only. For cleanliness and sanitary reasons, Accutech recommends replacing applied bands on a semi-monthly basis with a maximum of one month between changes. Storing Tags To preserve battery life, Tags must be turned off with an S-TAD during storage or periods of non-use. BR and CB Tags must be deactivated to prevent alarms when not use. In addition, Tags should be stored away from sources of electrical noise (see example list below) and stored in a clean plastic container with lid. Do not store Tags within 3 feet of any of the following sources of electrical noise: Computer monitors Unshielded computer cables Television sets Medical Monitoring Equipment X-ray and other imaging equipment Fluorescent Lighting Storing Bands Extra Tag bands should be stored in clean and dry environment. User Manual Chapter 4: The S-TAD User Manual The S-TAD Powering the S-TAD On/Off Unlocking the S-TAD Activating/Deactivating Tags Programming Mode Note: The S-TAD has not been evaluated by UL. The S-TAD (Secure Tag Activator/Deactivator) is used to check the functionality of an Accutech Tag. Accutech Tags operate by internal battery. Over the course of normal operation, Tags eventually lose battery power and the Tags will need to be replaced. The Tag battery is not replaceable. The S-TAD is used to determine if a Tag has sufficient battery power to respond to an activating signal. The S-TAD requires a 9-volt lithium battery to operate. Powering the S-TAD On/Off The S-TAD includes a built-in power saving feature that automatically turns off the S-TAD after a period of inactivity. 1. Press the Power/Clear button The Power/Clear LED illuminates (solid green with wink). The LED will remain lit for 1 minute. While nearing the 1 minute mark, the LED will begin to pulse until the LED turns faster pulsing red and then extinguishes while powering off the S-TAD. To extend the length of time, press the Power/Clear button again anytime before the LED turns off. Each press will extend by 1 minute (up to 5 minutes maximum). 2. Conversely you may manually power off the S-TAD by pressing and holding the Power/Clear button until the LED turns solid red then let go and the Power LED will extinguish. The S-TAD 4-1 Unlocking the S-TAD For added security, access to activating/deactivating Tags is locked via 4-digit user codes. See Programming Mode for more information about user codes. 1. Press the Power/Clear button. The Power/Clear LED illuminates (solid green with wink). 2. Using the number keypad, enter a valid 4-digit user code. Entering a valid code will illuminate the Enter LED (solid green) for about 5 seconds. Once the Enter LED illuminates, press the Enter button again. The WAIT LED will illuminate (red) for 2 seconds to confirm activation/deactivation action. The Enter LED will then remain lit for 1 minute for the purpose of activating/deactivating Tags. Notes: • The default user code is 7139. See the Programming Mode section to change the default user code. • Entering an invalid code will illuminate the Enter LED red. Verify your user code is valid. Press Power/Clear before reentering your code to clear any inadvertent previous entries. • Once lit, each time you press the Enter button will extend the Enter LED life briefly (up to 1 minute by default). • Pressing the Power/Clear button will clear out the user code. Otherwise, after 1 minute of inactivity the Enter LED will extinguish automatically. 4-2 The S-TAD Activating/Deactivating Tags The S-TAD can activate and deactivate Tags preserving Tag battery life and preventing nuisance alarms. ACTIVATING 1. Unlock the S-TAD using your unique 4-digit user code. 2. On the back of the S-TAD, place the inactive Tag in the correct orientation within the Tag receptacle. On the front of the S-TAD, the Tag graphic’s LED is off (just like the physical Tag’s LED is off). 3. Press the Enter button (green LED lit). The Wait LED will illuminate (red) for 2 seconds. The Tag graphic’s LED on the S-TAD will illuminate (pulsing yellow) indicating the Tag is active (just like the physical Tag’s LED will illuminate). 4. If a Low Tag Battery condition is detected, the Low Tag Battery LED will illuminate red. 5. If a band alarm condition is detected, the Band LED will illuminate red. Likewise, if a band compromise condition is detected, the Band LED will illuminate half green and half red. Note: Band alarm, band compromise, and cut band conditions always take precedence over a Low Tag Battery condition, therefore, be sure to handle the band-sensing Tag appropriately to truly check for a Low Tag Battery condition. User Manual 6. The S-TAD will still detect active Tags and Low Battery conditions in the area even after the Enter LED extinguishes. However, you will have to unlock the STAD again to be able to activate/deactivate a Tag. Remember the S-TAD will automatically lock after 1 minute of inactivity (by default). DEACTIVATING 1. Unlock the S-TAD using your unique 4-digit user code. 2. On the back of the S-TAD, place the active Tag in the correct orientation within the Tag receptacle. On the front of the S-TAD, the Tag graphic’s LED will be pulsing yellow (just like the physical Tag’s LED will be pulsing). 3. Press the Enter button (green LED lit). The Wait LED will illuminate (red) for 2 seconds. The Tag graphic’s LED on the S-TAD will extinguish indicating the Tag is deactivated (just like the physical Tag’s LED will extinguish). Figure 6.9 S-TAD Tag Orientation User Manual Programming Mode While in programming mode, the Enter button’s LED winks quickly. In addition, the Enter button LED will also indicate if a programming step was completed successfully. If the Enter button LED flashes green slowly the operation completed correctly. 3 flashes on the first entry, 5 flashes on the verify entry. If the Enter button LED flashes red or yellow, an entry error has occurred. If an entry error occurs, press the Power/Clear button to cancel out and start over. To enter programming mode: 1. Press: Enter, Enter, Master Code, Enter, Enter Note: 198237645 is the default master code. 2. While in programming mode, the Enter button’s green LED winks quickly. To exit programming mode: 1. Press: Power/Clear 2. Press: 0, Enter, 0, Enter Programming mode exits and the Enter button LED extinguishes. The S-TAD 4-3 Enable/Disable Band Alarm Sounder: 1. Enter Programming Mode 2. Press: 4, Enter, 4, Enter (3 slow green flashes) 3. Press: 0 to disable Band Alarm sounder, then Enter or Press: 1 to enable Band Alarm sounder, then Enter (5 slow green flashes confirms) 4. Exit Programming Mode Set Unlock Timeout: 1. Enter Programming Mode 2. Press: 5, Enter, 5, Enter (3 slow green flashes) 3. Press: 1 through 5 for 1 to 5 minute timeout (5 slow green flashes confirms 4. Exit Programming Mode To change the master code: 1. Enter Programming Mode 2. Press: 1, Enter, 1, Enter (3 slow green flashes) 3. Press: The current 9-digit master code to change, then Enter (1 slow green flash if correct) 4. Press: New 9-digit master code, then Enter (1 slow green flash if correct) 5. Press: Same new 9-digit master code to verify, then Enter (5 slow green flashes confirms) 6. Exit Programming Mode 4-4 The S-TAD To add a user code: 1. Enter Programming Mode 2. Press: 2, Enter, 2, Enter (3 slow green flashes) 3. Press: 4 digit user code to add, then Enter (1 slow green flash if correct) Note: Maximum 121 codes. 4. Press: same 4-digit user code to verify, then Enter (5 slow green flashes confirms) 5. Repeat steps 3 & 4 to add another code. When finished, exit Programming Mode. User Manual Summary of LEDs WAIT LED Tag is in the process of being turned on or off or during S-TAD unlocking. LOW TAG BATTERY LED A low tag battery is detected. Replace Tag. TAG LED An active Tag is nearby. To delete a user code: 1. Enter Programming Mode 2. Press: 3, Enter, 3 Enter (3 slow green flashes) 3. Press: 4 digit user code to delete, then Enter (1 slow green flash if correct) 4. Press: same 4-digit user code to verify, then Enter (5 slow green flashes confirms) 5. Repeat steps 3 & 4 to delete another code. When finished, exit Programming Mode BAND LED A Band Alarm condition is detected. POWER/CLEAR LED S-TAD is powered. ENTER LED S-TAD unlocked. User Manual Cleaning and Care The S-TAD should be cleaned periodically using antibacterial wipes (wipe, do not soak). Do not use any abrasive cleaners or cloths. When not in use the S-TAD should be stored in a clean and dry environment. The S-TAD requires a 9-volt lithium battery to operate. Remove the protective boot to access the battery compartment. Using the embossed orientation guide, replace the 9-volt lithium battery as needed. The S-TAD 4-5 User Manual Chapter 5: The Keypad User Manual The Keypad Keypad Operation Initiating a Keypad Reset/Escort Programming the master code Programming user codes Deleting user codes Resetting the master code Adjusting the Keypad Escort Time The Keypad 5-1 Keypad Operation The Keypad has three LED indicators. See Table 5.1 for their functions during normal operation. Table 5.1 Keypad LED Indicators LED Status Function Green Off Zone Ready On* Keypad Reset or Escort Time initiated Off No Power or No Tag On Power indicator or Tag in Zone indicator (dependant on installation) Off Zone Normal NOTE: Consult the manufacturer’s manual for complete information about the Keypad. The Keypad provided by Accutech (the Visonic Ltd. CL-8A; Figure 5.1) is used to escort residents through a monitored zone and to reset zone equipment once an alarm has occurred. Yellow Red On Alarm * During programming, the green LED functions differently. Initiating a Keypad Reset/Escort Figure 5.1 The Keypad Programming the Keypad is, in simple terms, providing it with a set of instructions on how to react in various contingencies. The Keypad must be programmed as soon as all installation and wiring have been completed. Later on, as changes take place, partial or full reprogramming may be carried out as many times as necessary. The Keypad’s EEPROM memory can store up to 56 different 1-8 digit user codes, each assigned to an authorized individual user or to a group of users. To initiate a Keypad Reset or the Escort function, enter a valid user code and press the [#] key. The green LED will light. Keypad Resets are used to reset zone equipment after an alarm has been addressed. When you initiate a Keypad Reset, all zone equipment and alarms will be reset. However, if the alarm condition is not properly corrected, the alarm will resume. The Keypad’s Escort function is used to escort Tags through a monitored zone without triggering alarms. When you initiate the Escort function, for the duration of the Escort time, you will be able to escort the Tag through the door, hallway, or use an elevator without triggering alarms. 5-2 The Keypad User Manual Programming the master code The master code controls access to the Keypad’s programming menu. The factory default master code is [1][2][3][4], but after subsequent programming, this default code will be automatically superseded by user code No. 1, which becomes the real master code. The master code (User code No. 01) must be tightly controlled at all times to prevent unauthorized changes in the Keypad’s programming; do not use this code for day-today Keypad operation. WARNING: It is dangerous to continue using the factory default master code [1][2][3][4] for day-today Keypad operation! It is mandatory to set a new master code, which will be used for programming purposes only and not for everyday requirements. When programming note that: The [#] key functions like an “enter” key. In any Keypad operation, if any code is entered 3 times or more incorrectly, the Keypad will lockout for 10 minutes (indicated by a green blinking LED). If you make an error while programming, press [*] to return to the programming menu. To program the master code, use the following instructions: 1. Invoke the programming menu by entering [*][*][master code][*][*]. At this point we shall assume that the factory default of [1][2][3][4] is still valid (Figure 5.2). When the programming menu is active, the green LED flashes slowly, approximately once every two seconds. Figure 5.2 Entering the Programming Menu example 2. Enter [1] to select user code programming. The green LED begins to flash rapidly (approximately 5 times per second) indicating that the Keypad is ready to receive data. 3. Enter [0][1], followed by [#] for user code number 1. The green LED lights steadily for two seconds and then returns to rapid flashing indicating that the step has been completed successfully 4. Enter the code to be used as the master code followed by [#] (see Figure 5.3 for example). The green LED lights steadily for two seconds and then returns to rapid flashing. Figure 5.3 Code example 5. Repeat the user code followed by [#]. The green LED will acknowledge as in the previous step. 6. Now select which outputs will be tripped by the new master code, select [3] for all outputs followed by [#]. The green LED lights steadily for two seconds and then flashes slowly, indicating that the new master code has been programmed successfully and that User Manual the Keypad has returned to the programming menu. 7. Press [#] to exit the programming menu and return the Keypad to normal operation. Programming user codes 1. Prepare a list of user codes you want to program. 2. Invoke the programming menu by entering [*][*][master code][*][*]. When the programming menu is active, the green LED flashes slowly, approximately once every two seconds. 3. Press [1] to select user code programming. The green LED begins to flash rapidly (approximately 5 times per second) indicating that the Keypad is ready to receive data. 4. Enter the user number (02 through 52) followed by [#]. For example, to program user code number 2 you enter [0][2] followed by [#]. The green LED lights steadily for two seconds and then returns to rapid flashing indicating that the step has been completed successfully. 5. Enter the code assigned to this user followed by [#] (see Figure 5.3 for example). The green LED lights steadily for two seconds and then returns to rapid flashing. 6. Repeat the user code followed by [#]. The green LED will acknowledge as in the step above. 7. Now select which outputs will be tripped by the user code, select [3] for all outputs followed by [#]. The green LED lights steadily for two seconds and The Keypad 5-3 then flashes slowly, indicating that the new user code has been programmed successfully and that the Keypad has returned to the programming menu. 8. Repeat steps 3 through 7 to program the next user code or press [#] to exit the programming menu and return the Keypad to normal operation. Deleting user codes To delete individual or all user codes, use the following instructions: 1. Invoke the programming menu by entering [*][*][master code][*][*]. When the programming menu is active, the green LED flashes slowly, approximately once every two seconds. 2. Enter [4] to select the user code deleting function. The green LED will respond by flashing rapidly indicating that the Keypad is ready to receive data. 3. Enter the user number whose code you wish to delete (02 through 56), or enter [*][*] to delete all user codes and then press [#]. The green LED will light steadily for 2 seconds and then will resume rapidly flashing. NOTE: The master code cannot be deleted in this manner. 4. Enter the [master code] once more, followed by [#]. The green LED will 5-4 The Keypad User Manual light steadily for 2 seconds and will return to slow flashing 5. Repeat steps 2-5 to delete another user code or press [#] to exit the programming menu and return the Keypad to normal operation. Resetting the master code NOTE: The following operation should only be performed by authorized personnel. If you forget the master code, you will need to reset the Keypad to the factory default master code of [1][2][3][4] and then assign a new master code. NOTE: This operation is time-sensitive. Please read through all the instructions before beginning. To reset the master code, use the following instructions: 1. Open the Keypad’s case, revealing the printed circuit board. 2. Install the jumper across the two pins labeled JP2. 3. Using a screwdriver or jumper wire, momentarily short circuit the pins labeled JP1. 4. Wait ten seconds, remove the jumper from JP2, and immediately enter [1][2][3][4][#]. The green LED will light steadily for two seconds and then start flashing slowly, indicating that the programming menu is active. NOTE: The master code is temporarily reverted to default [1][2][3][4]. However, all other data programmed previously remains intact. 5. Program a new master code immediately (see page 5-2) and record it in a secure place. Adjusting the Keypad Escort Time To adjust the Keypad Escort Time, use the following instructions: 1. Invoke the programming menu by entering [*][*][master code][*][*]. When the programming menu is active, the green LED flashes slowly, approximately once every two seconds. 2. Enter [2] to select the relay timer function. The green LED will respond by flashing rapidly, indicating that the Keypad is ready to receive data. 3. Enter the escort time (two digits, from 01-98 seconds) and then press the [#] key. For example to set the escort time for 15 seconds, enter [1][5] followed by [#]. The green LED will light steadily for 2 seconds and then will resume rapid flashing. 4. Press [#] to exit the programming menu and return the Keypad to normal operation. 5. To verify the new escort time, enter a valid user code to initiate the Escort function. The green LED will illuminate for the duration of the Escort time. User Manual Chapter 6: The Accutech Software User Manual The Accutech Software 6-1 The Accutech Software IMPORTANT: Accutech Security Systems are NOT computer-dependent. The Software is for reporting purposes only and does not affect nor control the physical Accutech Security System. The following chapter details Accutech Software version 5.1 (build 50083). Software features will vary depending upon your version number, build, and system type. Versions prior to build 50083 may not contain all the features listed here. Consult your original documentation in these instances. Overview Configuration and System Type Opening the Accutech Software Viewing Multiple Areas Closing the Accutech Software The Environment Menu shortcut buttons Icons Passwords Event Preferences Designating a WAV file for an alarm event User Codes Alarm events Suite Setup Floor to Floor Discrimination Tag Control Tag Test Station (TTS) Tag Transfer Reports Software FAQ This chapter contains an overview of the Accutech Software and instructions for common operations. For the most current information see the Accutech Software Help program (Help menu, Help Topics). Overview The Accutech Software is installed on each monitoring PC and is used to display incoming event information. Using the facility’s floor plan as the background, zone-specific icons (i.e., doors, elevators, stairwells, hallways, and BR 4200 Auxiliary Receivers) are placed at each monitored zone’s location and become animated when an alarm occurs. Floor plans can be monitored locally or remotely. Customizable event handling (displaying, logging, clearing) Password protected operations Tags are assigned to specific patients, residents, infants, or assets. Customizable printable Reports (sort by start/end date, event type, zone, and/or patient) Floor-to-Floor Tag discrimination capability Figure 6.1 To find out your software version number, select “About Accutech…” from the Help menu. 6-2 The Accutech Software User Manual Configuration and System Type The configuration (set during installation) and the system type determine which operations are available within the Accutech Software. Software configurations: System Types: Local Remote Local/Remote Legacy (LG) IS 3200 (IS) BR 4200 (BR) Depending upon your software configuration and system type, some menus (e.g., Setup menu) and options (e.g., Event Preferences window) may be grayed out. Additional differences between configurations are listed in Table 6.1. Table 6.1 Configuration abilities Houses the software database Local Remote x x Ability to view multiple floor plans Ability to clear alarm events locally Optional Ability to clear alarm events remotely Ability to set/change Event Preferences Ability to set/change Passwords Local/Remote x x Optional Optional Optional Optional x x Local Only Remote only Local Only Ability to Assign Tags (Tag Control) x x x Ability to generate Reports x x x Opening the Accutech Software To open the Accutech Software on a Local PC, use the following instructions: 1. Double-click the Accutech icon (Figure 6.2) on the Desktop. The Accutech Software launches with the Local Area floor plan displayed. Figure 6.2 Accutech icon User Manual The Accutech Software 6-3 To open the Accutech Software on a Local/Remote PC, use the following instructions: 1. Double-click the Accutech icon (Figure 6.2) on the Desktop. The Local Area? dialog box appears. (Figure 6.3) 2. If you wish to view the Local area, click “Yes” The Accutech Software launches with the Local Area floor plan displayed. 3. If you do not wish to view the Local area, click “No” The Select Remote Area dialog box appears (Figure 6.4). 4. Select the desired area path and click “OK” The Accutech Software launches with the selected floor plan displayed. NOTE: If the Remote Area is not accessible, the Remote Area Inaccessible dialog box will appear (Figure 6.5). If “Cancel” is selected, the Program Shell (Figure 6.6) will be displayed. To open the Accutech Software on a Remote PC, use the following instructions: 1. Double-click the Accutech icon (Figure 6.2) on the Desktop. The Select Remote Area dialog box appears. (Figure 6.4) Figure 6.3 Local Area? dialog box Figure 6.4 Select Remote Area dialog box Figure 6.5 Remote Area Inaccessible dialog box 2. Select the desired area path and click “OK” The Accutech Software launches with the selected floor plan displayed. NOTE: If the Remote Area is not accessible, the Remote Area Inaccessible dialog box will appear (Figure 6.5). If “Cancel” is selected, the Program Shell (Figure 6.6) will be displayed. Figure 6.6 The Program Shell 6-4 The Accutech Software User Manual Viewing Multiple Areas You can monitor more than one area at a time simultaneously by opening multiple areas. This operation is only available on Local/Remote and Remote software configurations assuming computers are networked and communicating. To view multiple areas, use the following instructions: 1. Open an area (see Opening the Accutech Software on page 6-2). 2. From the File menu, select Open New Area… The Select Remote Area dialog box appears (Figure 6.4). 3. Select the desired area and click “OK” The two areas are automatically cascaded with the newly opened area on top. NOTE: If you attempt to open an area that is already displayed, you will receive an error message (Figure 6.7). 4. To change the layout of the two areas, move and resize the areas manually or use the Window menu to tile the areas horizontally (Tile Horz) or vertically (Tile Vert). Closing the Accutech Software For security reasons, it is strongly advised that the Accutech Software never be closed (or minimized). Nonetheless, you must close all remote areas before you can close the Accutech Software (Figure 6.8). Figure 6.7 Area already open message Closing the Software in no way disables the system or alarms. However, alarm events will not be logged when the software is closed. If the Local PC shuts down, an alert message (Figure 6.9) will appear on all Remote PCs indicating that the Local PC is not available. No alarms will be displayed on any Remote PC until the software on the Local PC is enabled. It is strongly recommended that the Local PC be investigated immediately to determine the cause of the shutdown and to be sure it is back on-line. There is no need to re-launch the Remote PC Software; it will enable itself automatically once the Local PC is restored. However, there will be no notification on the Remote PC(s) to indicate the Local PC is back on-line. Figure 6.8 Close all areas message box Figure 6.9 Local area down message example User Manual The Accutech Software 6-5 Figure 6.10 The Environment The Environment The Accutech Software environment (Figure 6.10) is the primary user interface. Title bar - Displays the name of the Facility or area currently being displayed in the Program Shell. Menu bar - Contains menu options organized under topics (File, Reports, Transfers, Setup, Window, and Help). The options available in the Menus will vary depending on your Software’s configuration (Local, Remote, or Local/Remote). Menu shortcut buttons – Shortcut buttons that mirror the menu bar options Floor Plan window - Displays the Facility’s floor plan with architectural-specific icons to represent types of monitored zones. Event dialog box - If an event is set to “Alarm” in Event Preferences, that event’s information (Alarm Type, Tag number, Assigned name, Room number, and Zone name) will appear here when it occurs. Status bar - If an event type is set to “Log and Status” in Event Preferences, that event type’s information (Alarm Type, Tag number, Tag name, Room number, and Zone name) will appear here when it occurs and will be displayed for approximately 20 seconds. If left unattended, events set to “Log and Status” will only be displayed once every 3 minutes. 6-6 The Accutech Software User Manual Menu shortcut buttons Shortcut buttons that mirror menu bar options. Icon Links to… Alternative Text File > Open New Area… Open New Area File > Close Area Close Area Reports > Report Generator… Reports Transfers > CheckOut… Transfer CheckOut Transfers > Pending… Pending Transfers Transfers > CheckIn… Transfer CheckIn Setup > Tag Control… Tag Control Setup > Event Preferences… Event Preferences Setup > Local Passwords… Local Passwords Setup > User Codes User Codes Setup > Remote Passwords… Remote Passwords Setup > Suite Control… Suite Setup Window > Cascade Cascade Window > Tile Horz Tile Horz Window > Tile Vert Tile Vert Help > Help Topics Help Topics Help > About Accutech About User Manual The Accutech Software 6-7 Icons The Accutech Software uses architectural-specific icons to represent monitored zones in the Floor plan window (Table 6.2). Icons are dormant until an event triggers them into active state. When alarming, icons cycle between dormant, transitional, and active state. If a dormant icon is clicked on, the zone number and name will appear in a dialog box; this is the ID state. If an active icon is clicked on, the Alarm Information dialog box appears. Table 6.2 Icon States Icon Icon State Dormant Left Door Right Door Double Door Elevator Laundry Window Tall Hallway Wide Hallway Tag Test Station Band Alarm Transitional Active ID 6-8 The Accutech Software User Manual Passwords Setting or changing Passwords What if I forget a password? The Passwords window (Setup, Passwords…) (Figure 6.11-6.12) uses tabs to separate the different passwords available. Each tab controls a password that will allow or deny access into a window or to a requested action within the Accutech Software. The tabs and the actions they protect are: Report Password – Prevents the user from accessing the Report Generator window Shutdown Password – Prevents the user from closing the Accutech Software Tags Password – Prevents the user from accessing the Tag Control Dialog window Preferences Password – Prevents the user from accessing the Event Preferences window Service Password – Overrides the current password for access into areas that are password protected or can be used to override the current password in a Passwords window to designate a new password if one is forgotten. Also will restrict access to Suite Control and Adding/Removing Tags in Tag Control. The Service password should only be known by the System Administrator. Transfer Password – Prevents the user from accessing the Tag Transfer windows Figure 6.11 Passwords window (Local) Figure 6.12 Passwords window (Remote) Furthermore, Each PC has its own set of passwords. These passwords only protect the PC they were set on. They do not restrict actions from other networked PCs. Therefore, if you restrict an action (such as Tag Assignments) on the Local PC, you will still be able to assign Tags on the Remote PC(s). For complete restriction of an action, passwords must be set at both the Local PC and the Remote PC(s). Passwords are also masked (Figure 6.13). Passwords are case sensitive. Therefore, “Bluebird” is separate from “bluebird.” It is strongly recommended that all PCs use passwords to restrict software actions. Figure 6.13 Masked password User Manual The Accutech Software 6-9 Setting or changing Passwords To set or change a Password, use the following instructions: 1. From the Setup menu, select Local Passwords… or Remote Passwords… depending on the type of software installed. The Change Local Passwords or Change Remote Passwords window appears. (Figure 6.11 or 6.12) 2. Select the desired Password tab 3. In the Current text box, enter the current password. NOTE: During initial setup, the “Current” text box is empty. Simply enter the desired password in the “New” and “Confirm New” text boxes to set a password for the selected tab. Only the Service password is given a “Current” password by default installation; all others are intentionally left blank. 4. In the New text box, enter the new password. NOTE: Remember passwords are case sensitive. 5. In the Confirm New text box, enter the new password. NOTE: If you wish not to have the desired option password protected, leave the New and Confirm New text boxes blank. 6. Click “Apply” A confirmation dialog box appears. (Figure 6.14) 7. Click “OK” 8. When you are finished, click “OK” to exit the Passwords window. What if I forget a password? If you forget a password, you will need to contact your System Administrator to use the Service Password. Figure 6.14 Password Changed dialog box example 6-10 The Accutech Software User Manual Event Preferences Event Preferences Table Setting Event Preferences NOTE: This operation may be password protected. Reminder: The Accutech software is for reporting purposes only and does not affect nor control the physical Accutech Security System. Alarm events must be addressed at the affected zone and may require a Keypad Reset to be cleared. After the causing condition has been addressed at the zone, clear the alarm event from the PC. The Set Event Preferences window (Setup, Event Preferences…) (Figure 6.15) controls how the Accutech Software will react to nine specific alarm events (Door Alarm, Band Alarm, Band Compromise, Loiter, Door Ajar, Battery Low, Supervisor, Tag Beacon, Hub Supervision). The alarm events available will vary depending on your system type. The options selected within the Set Event Preferences window (Figure 6.15) determine how event information is: shown (where/how) stored (logged) cleared These options are set in each alarm event’s tab of the Set Event Preferences window. Select or de-select the options to create the desired results for each of the six events (see Table 6.3) Table 6.3 Event Preferences Option Ignore and Discard Just Log the Event Log and Status Alarm Result The event does NOT appear. The event is NOT logged. The event does NOT appear. The event is logged. The event appears in the Status bar for 20 seconds. The event is logged. The zone icon becomes active. The event appears in the Event dialog window. The event is logged. Manually Clear The event must be cleared by either a zone reset or by the local PC. When the Manually Clear option is selected, you must select one of the checkbox options otherwise an active icon alarm cannot be cleared. Allow Clear by Zone Reset The alarm event will be cleared from the PC when the affected zone is reset. Allow Clear at Local Computer The alarm event can be cleared from the PC after the affected zone is reset. Automatically Clear The event will be cleared automatically after the predetermined delay time. With Delay X Seconds When the Automatically Clear option is selected, this will determine the time delay before the event is cleared. User Manual Setting Event Preferences NOTE: Depending on your system type, some options may be grayed out. Event Preferences cannot be changed on Remote configurations. To set Event Preferences, use the following instructions: 1. From the Setup menu, select Event Preferences… The Set Event Preferences window appears (Figure 6.15). 2. Select the tab of the desired alarm type you wish to set preferences for. 3. Select or deselect the radio button and checkboxes as desired. Refer to Table 6.3 for each option’s result. 4. Click “Apply” 5. Repeat for other alarm event types as desired. 6. When finished, click “OK” to exit the Set Event Preferences window. Figure 6.15 Set Event Preferences window The Accutech Software 6-11 6-12 The Accutech Software User Manual Designating a WAV file for an alarm event During an alarm event, the appropriate zone icon becomes active and plays a short WAV sound file. The default sound is “Windows XP Ding.wav.” However, you may to select a specific alarm sound (WAV file) for each alarm event type. Sound files should be about 1 second in length as the sound notification will continue and repeat for the duration of the alarm event. If more than one alarm event occurs and two different alarm WAV files are selected, the alarm sounds will alternate. Custom WAV files are not provided, however, MS Windows’ inherent media folder is available at C:\WINDOWS\Media. To designate an alarm sound for an alarm event: Figure 6.16 Alarm Sound option 1. From the Setup menu, select the Set Event Preferences… 2. For each alarm event, an Alarm Sound option is available. (Figure 6.16) Note: If no sound is selected (empty), Windows XP Ding.wav will be used by default. 3. Browse to the location of the WAV file you wish to use. (Figure 6.17) Figure 6.17 Select Alarm Sound file 4. The WAV file location will now appear in the Alarm Sound field (Figure 6.18). 5. Select APPLY 6. Repeat as desired for other alarm events. 7. Click OK to exit. Figure 6.18 Alarm Sound selected User Manual The Accutech Software 6-13 User Codes Creating a User Code Setting Code Controlled Features User Codes are available for accountability for the following software operations: Adding Tags (in Tag Control) Removing Tags (in Tag Control) Assigning Tags (in Tag Control) Editing Tags (in Tag Control) Reassigning Tags (in Tag Control) Unassigning Tags (in Tag Control) Clearing Alarms Clearing All Alarms Tag Transfer Tag Suppression (future enhancement) Enabling User Codes will prompt the user for a User Code before allowing access to or completing a software operation (Figure 6.19). The User Codes dialog boxes are password protected using the Service Password. Figure 6.19 User Code prompt Setting Code Controlled Features Note: The User Codes dialog boxes are password protected using the Service Password. 1. From the Setup menu, select User Codes… The User Codes dialog box appears (Figure 6.20) 2. Select the Code Controlled Features button The User Code Controlled Features window appears (Figure 6.21) Figure 6.20 User Codes 3. Select the features as desired. Selected features will require a User Code with sufficient privileges to access or complete. 4. Click OK to exit. Figure 6.21 Enter User Code information 6-14 The Accutech Software User Manual Creating a User Code 1. From the Setup menu, select User Codes… The User Codes dialog box appears (Figure 6.22) 2. Select the New User button The Enter User Code Information window appears (Figure 6.23). Figure 6.22 User Codes 3. Complete the fields as desired and select the allowed operations for this user. Note: User Codes can be up to 4 digits. No characters are allowed. Furthermore, “0001” and “1” is the same user code. 4. When finished, click OK. The newly created user code is shown in the User Code dialog box (Figure 6.24). 5. You can edit the user’s allowed operations using the Edit User Info button. Figure 6.23 Enter User Code information 6. You can remove the user using the Remove User button. 7. Click Done to exit. Figure 6.24 User Codes User Manual The Accutech Software 6-15 Alarms events Alarm events What happens when an alarm event occurs? What happens when multiple alarm events occur? Clearing an alarm event Clearing multiple alarm events The alarm events available will depend upon your system type: Door Alarm (BR 4200, IS 3200, Legacy) Occurs when a Tag is in a monitored zone and a second condition met (e.g., door is opened). Loiter (BR 4200, IS 3200) Occurs if a detected Tag has low battery. Door Ajar (BR 4200, IS 3200) Occurs when a monitored door is ajar. Supervisor (BR 4200, IS 3200) Band Alarm (BR 4200) Occurs if BR42 Tag band or is loosened, cut, saturated, removed, or tampered with. Occurs if a Cut Band Tag band is cut or removed Occurs when a Tag remains in a monitored zone longer than the preset time permitted. Battery Low (BR 4200, IS 3200) Band Compromise (BR 4200) Occurs if a BR42 Tag band is shorted Occurs when there is a problem with the physical security equipment (e.g., de-tuning of Tx antenna from a nearby metal object). Tag Beacon Future enhancement What happens when an alarm event occurs? What happens when an alarm event occurs depends on the settings specified in Event Preferences (Setup, Event Preferences…) for that specific alarm event. If the alarm event is set to Alarm: the zone icon will become active and the name of the zone will appear below the active icon (Figure 6.25) the event will appear in the Event dialog box (Figure 6.26) the event will be logged the PC will ping If the alarm event is set to Log and Status: the event will appear in the Status bar for approximately 20 seconds (Figure 6.26) Figure 6.25 Single Alarm example Figure 6.26 Example of a single alarm in Event dialog box and an alarm in Status bar 6-16 The Accutech Software User Manual What happens when multiple alarm events occurs? What happens when multiple alarm events occurs depends on the settings specified in Event Preferences (Setup, Event Preferences…) for those specific alarm events. If the alarm event is set to Alarm: the zone icon will become active and the name of the zone will appear below the active icon (Figure 6.27) the event will appear in the Event dialog box (Figure 6.28) the event will be logged the PC will ping Events that are set to appear in the Event dialog box will appear in descending order (most current on top of list). When more than 3 events occur at the same time, a scroll bar will appear on the right side of the Event dialog box for navigation (Figure 6.28). If the affected zone is completely out of the current visible area of the floor plan when an event is received and the event type is set to “Alarm” in Event Preferences, the software automatically adjusts itself so that the zone is visible on the screen. Figure 6.27 Multiple Alarms example If the alarm event is set to Log and Status: the event will appear in the Status bar for approximately 20 seconds (Figure 6.26) If more than one event occurs at the same time the events will toggle within the Status bar Figure 6.28 Multiple alarms in Event dialog box User Manual The Accutech Software 6-17 Clearing an alarm event Reminder: The Accutech software is for reporting purposes only and does not affect nor control the physical Accutech Security System. Alarm events must be addressed at the affected zone and may require a Keypad Reset to be cleared. After the causing condition has been addressed at the zone, clear the alarm event from the PC. To clear an alarm from the Event Dialog box, use the following instructions: 1. Highlight the alarm in the Event Dialog box and select the Clear button (Figure 6.29) to clear each alarm separately. To clear an alarm from the active icon, use the following instructions: 1. Left-click on the active icon. The Alarm Information dialog box appears. (Figure 6.30) 2. In the Alarm Information dialog box, review the Alarm Type, Location, Time, Tag Assignment, and Comments (if present). The optional Notes text box is available for adding details about the cause of the alarm event. After entering text be sure to select the Clear Alarm button (and not the Done button). Text entered here will be associated with the alarm event in Reports. NOTE: If more than one event occurs at that zone, the “Next” and “Clear All” buttons will also appear in the Alarm Information dialog box. These buttons allow you to cycle through all of the events happening at that zone and/or clear all events at that zone simultaneously (Figure 6.32). 3. Go to the Alarm location and take appropriate action to address the situation. Figure 6.29 Event Dialog box Clear button Figure 6.30 Alarm Information dialog box 4. After taking appropriate action, you may clear the alarm by clicking “Clear Alarm” in the Alarm Information dialog box The Please Confirm dialog box appears (Figure 6.31). 5. In the Please Confirm dialog box, click “Yes” The alarm is cleared and the icon is dormant. Figure 6.31 Please Confirm dialog box Clearing multiple alarm events If multiple alarms occur at the same zone, a “Clear All” option (Figure 6.32) will appear in the Alarm Information dialog box. Figure 6.32 Clear All example 6-18 The Accutech Software User Manual Suite Setup Suite setup should be performed at initial installation or when there are changes to the Accutech network. Multiple zones equal an area. Multiple areas equal a Suite. Access to Suite Setup can be password protected. The Suite Tool: verifies network connections displays what Tags are currently contained in each area enables Tag Transfer functionality To setup a Suite, refer to Figures 6.33-6.36 and use the following instructions: 1. On the Main PC, from the Setup menu, select Suite Control... The Suite Tool window appears. 2. In the Areas in the Suite text field enter areas using the following format: [computer name:701:area name] Note: Separate additional areas using a [;] (semi-colon). 3. Select Verify Suite to confirm. 4. Click Done to exit. Figure 6.33 Suite Tool window Figure 6.35 Second floor added and verified Figure 6.34 Tags (1-10) added to first floor and verified Figure 6.36 Suite Tool is unable to connect to the Second Floor. The network connection must be re-established before setup can continue. User Manual The Accutech Software 6-19 Floor to Floor Tag Discrimination To eliminate crosstalk (multiple reporting of the same alarm event in vertically stacked zones) Floor-to-Floor Tag Discrimination was introduced. The software achieves Floor-to-Floor Tag Discrimination (filtered alarm event reporting) by differentiating Tags between areas. Each area’s Tag Control (Setup>Tag Control) specifies which Tags’ alarm events will be displayed in that area. When a Tag alarm event occurs, all associated Tag information will be displayed along with the alarm event. Tags not specified in an area’s Tag Control will be displayed as “Out of Area”. All detected alarm events will register and display on monitoring PCs regardless of their designated area. Tag Control Adding Tags Removing Tags Assigning a Tag Unassigning a Tag Reassigning a Tag Editing Patient/Asset Info Adding Tags: 1. Adding Tags can be password protected via the Service Password. 2. From the Setup menu, select Tag Control The Tag Control Dialog box appears (Figure 6.37). 3. Select New Tag(s) The Add Tag(s) to Area window appears (Figure 6.38). Figure 6.37 Tag Control Dialog 4. From this window you can add Tags to the area by individual Tag number, a list of individual Tags numbers, or a range of Tag numbers. Enter the desired Tags and click Add Tag(s) NOTE: Tag numbers 1 through 254 are available for use. Tag number 255 is designated for a Testing Tag only. Figure 6.38 Add Tag(s) to Area 6-20 The Accutech Software 5. If the PC is part of a suite (see page 6-18), the software will check other areas for the same Tag numbers. If a Tag is found to be in another area an error message will appear (Figure 6.39). 6. If the PC is unable to verify the Tag numbers are not present in another area (due to a network problem) an error message for each Tag number not verified will appear (Figure 6.40). 7. Click Done The Tags will appear in the Tag Control Dialog box available for assignment. NOTE: You can sort the Tags contained in the Tag Control dialog box by All, Assigned, or Unassigned. User Manual Figure 6.39 Duplicate Tag number in suite Figure 6.40 Unable to confirm Tag in suite Removing Tags: 1. Removing Tags can be password protected via the Service Password. Tags removed from the system will not appear in Tag Control and will not be available for assignment. 2. From the Tag Control Dialog window, select the Tag and select Remove Tag. 3. You will be prompted with a confirmation. Click OK to remove the Tag from the Tag Control Dialog window. Assigning Tags: 1. From the Setup menu, select Tag Control… The Tag Control Dialog box will appear. 2. Select the desired Tag and select Assign Patient/Asset... The Enter Patient Information window will appear (Figure 6.41). 3. Complete the fields as desired and click OK. NOTE: The Last Name and Room fields are required. 4. The Select Existing Patient button allows for easy reassignment of a previously assigned patient. Select a patient from the list and click OK. That patient's information will be recalled and assigned to the Tag number. Figure 6.41 Add Tag(s) to Area User Manual The Accutech Software 6-21 Unassigning Tags: 1. From the Setup menu, select Tag Control The Tag Control Dialog box will appear. 2. Select the desired Tag and select Unassign Patient/Asset... You will be prompted with a confirmation (Figure 6.42). 3. Select Yes The Tag is unassigned. Figure 6.42 Add Tag(s) to Area Reassigning Tags: 1. From the Setup menu, select Tag Control The Tag Control Dialog box will appear. 2. Select the desired Tag and select Reassign Patient/Asset... The Enter Tag Number window appears. 3. Enter the Tag number to which you want to assign the patient. 4. Click OK You will be prompted with a confirmation. 5. Click Yes The Tag is reassigned to the desired number. Editing Patient Information: 1. From the Setup menu, select Tag Control The Tag Control Dialog box will appear. 2. Select the desired Tag and select Edit Patient/Asset Info. The Enter Patient Information window will appear (Figure 6.43). 3. Make the desired changes and click OK. The information is changed. Figure 6.43 Enter Patient Information 6-22 The Accutech Software User Manual Tag Test Station (TTS) Verifying a Tag Test Station (TTS) Status (Enabling/Disabling) Low Battery Indicator Assigning a Tag via a TTS Unassigning a Tag via a TTS Verifying a Tag Test Station (TTS) Status (Enabling/Disabling) All Tag Test Stations (TTS) icons are enabled by default. However, it is not recommended to have more than one TTS enabled at a time on any one PC, therefore, only enable the TTS icon that directly corresponds to the TTS associated with that particular PC. Figure 6.44 TTS icon To verify the status of a TTS icon, use the following instructions: 1. Right-click on the TTS icon (Figure 6.44). A dialog box appears displaying the current status of the TTS icon and asks if you wish to change the status. (Figure 6.45) Figure 6.45 TTS Status dialog box (Depends on status of TTS) 2. If you wish to change the status, click “Yes” A confirmation box appears. (Figure 6.46) 3. Click “OK” Low Battery Indicator During the assignment process, a TTS will automatically check for a low battery condition. If a low battery condition is detected a small animation will appear (Figure 6.47). Figure 6.46 Confirmation box (Depends on status of TTS) Selecting the low battery animation will display a warning message to remove the Tag from active use and replace with another Tag (Figure 6.48). Figure 6.47: Low battery indication Figure 6.48: Remove from active use User Manual The Accutech Software 6-23 Assigning a Tag via a TTS Assigning a Tag via a Tag Test Station (TTS) is the preferred method of Tag Assignment since it automatically checks for duplicate Tag numbers, checks for low battery conditions, and verifies the Tag number. To assign a Tag via a TTS, use the following instructions: 1. If possible, properly attach the Tag to baby and using an S-TAD, activate the Tag. Then cart baby in bassinet near the TTS to get a valid read. (Otherwise hold the gold tabs on the sides of the Tag or loop the band around a finger to avoid nuisance Band Alarms and using an S-TAD, activate the Tag and place the Tag near the TTS to get a valid read.) 2. The Reader Head Tag Status dialog box automatically appears on the PC screen displaying the Tag number and current status. (Figure 6.49) 3. If the Tag is already assigned (Figure 6.50) or is Out of Area (Figure 6.51), verify that this is the correct Tag for assignment. If everything checks out, you will first need to unassign the Tag before you can assign it: a. In the Reader Head Tag Status dialog box, click “Unassign Tag” A confirmation dialog box appears. (Figure 6.52) b. Click “Yes” The Reader Head Tag Status dialog box now reads “currently unassigned.” (Figure 6.49) 4. To assign the Tag, in the Reader Head Tag Status dialog box, click “Assign Tag” The Enter Patient Information window appears. (Figure 6.53) 5. Enter the appropriate information and click “OK” NOTE: Patient and Room are required fields. The Reader Head Tag Status dialog box appears with the new assigned information displayed. (Figure 6.50) Figure 6.49: The Reader Head Tag Status dialog box (Tag unassigned) Figure 6.50: The Reader Head Tag Status dialog box (Tag assigned) Figure 6.51: The Reader Head Tag Status dialog box (Tag Out of Area) Figure 6.52: Confirm unassignment Figure 6.53: Enter Patient Information 6-24 The Accutech Software 6. In the Reader Head Tag Status dialog box, click “Done” The Remove Tag From Reader dialog box appears. (Figure 6.54) 7. Click “OK” User Manual Figure 6.54: Remove Tag From Reader 8. Return baby in bassinet to its original location. (Or transport the Tag and properly attach to baby.) Unassigning a Tag via a TTS To unassign a Tag with a TTS, use the following instructions: 1. Using an S-TAD, turn off the Tag and remove from the patient, resident, or asset. 2. Take the Tag to a TTS. 3. Using an S-TAD, turn on the Tag and touch the active Tag to the TTS. The Reader Head Tag Status dialog box automatically appears on the PC screen displaying the Tag number and current status (Figure 6.55). NOTE: If you are assigning a BR42 Tag, remember to hold the gold tabs on the sides of the Tag to avoid nuisance Band Alarms). 4. Verify this is the correct Tag for unassignment by checking patient, infant, and/or asset inventory. 5. Using an S-TAD, deactivate and properly store the Tag. 6. Click “Unassign Tag” A confirmation box appears (Figure 6.52). 7. Click “Yes” The Reader Head Tag Status dialog box now reads “currently unassigned.” (Figure 6.49) 8. Click “Done” to exit the Tag Assignments window. The Remove Tag From Reader dialog box appears (Figure 6.54). 9. Click “OK” Figure 6.55 The Reader Head Tag Status dialog box (Tag assigned) User Manual The Accutech Software 6-25 Tag Transfer Transferring a Patient Cancel a Transfer Transfer Timeout Tag Transfer allows for the transfer of Tag information between areas in a Suite. At no time is the protection of the system compromised. Any alarm event will register and display before, during, or after a Tag Transfer. Figure 6.56 Prescribe Patient Transfer Transferring a Patient: 1. On the Origin PC, from the Transfers menu, select “CheckOut…” The Prescribe Patient Transfer window appears (Figure 6.56). 2. From the Patient drop-down menu, select a Patient to be transferred Note: Only assigned Tags are available for Transfer. Figure 6.57 Start Transfer confirmation 3. Enter the desired the Transit Time Note: Minimum 5 minutes, maximum 60 minutes. If a transfer does not arrive within this time, a Transfer Timeout alert will occur (see page 6-27). 4. Enter your name in the Initiated by text field. Note: The text entered here will be associated with the transfer in Reports. Figure 6.58 Pending Transfers 5. From the Destination Area drop-down menu, select a destination area. Note: The origin area is also available as a destination area for short-term absences such as to trip to X-ray. Figure 6.59 Incoming Notification 6. Optional: Enter the intended destination room number or name 7. Select “Start Transfer” A confirmation window appears (Figure 6.57). The Patient is moved into the Pending Transfers and the Destination Area will be notified of the incoming transfer (Figures 6.58-6.59). 8. After the patient has successfully been physically transferred to the destination, on the Destination PC, under the Transfers menu, select “CheckIn“ The CheckIn Transfer Dialog is displayed (Figure 6.60). Figure 6.60 CheckIn Transfer 6-26 The Accutech Software User Manual 9. Select a patient being transferred. 10. Enter your name in the Accepted by text field. Note: If the destination room was not entered previously, enter it now in the To Room text field. The text and room entered here will be associated with the transfer in Reports. Figure 6.61 Transfer successful confirmation 11. Select “Check In This Patient” The Patient is transferred to the Destination PC database, removed from the Origin PC database, and removed from the Pending Transfers. All new alarm events generated from the Patient will be logged in the Destination Area database. All previous alarm events records will remain in the Origin Area. The Origin Area will be notified of the successful transfer (Figure 6.61). Canceling a Transfer: An outgoing Transfer can be cancelled from the Pending Transfers window. 1. From the Transfers menu, select Pending… The Pending Transfers window appears (Figure 6.62). 2. Select the Patient Transfer you wish to cancel, enter your name in the Canceled by text field, and select a reason from the Reason pull-down menu (Figure 6.63). Note: The text and reason entered here will be associated with the cancelled transfer in Reports. Figure 6.62 Pending Transfers 3. Select “Cancel Transfer” A confirmation window appears (Figure 6.64). 4. Select “Yes” The transfer is cancelled, the patient is returned to the Origin area database, and the Destination Area is notified of the cancellation. Figure 6.63 Cancel reason pull-down list Figure 6.64 Cancel confirmation User Manual The Accutech Software 6-27 Transfer Timeout A Transfer Timeout occurs when a Transfer does not reach the Destination Area within the allotted time. Once a Timeout has occurred, the user must extend, cancel, or accept the Transfer. When a decision is made regarding a Transfer time, the corresponding area’s timeout notification will disappear to avoid duplicate action. Therefore, the first response takes precedence. 1. When a Transfer Timeout occurs, both the Origin and Destination Areas are notified simultaneously. 2. At the Origin Area the Outgoing Transfer Timeout window appears (Figure 6.65). From this window the Origin Area can extend the transfer time or cancel the transfer. Figure 6.65 Outgoing Transfer Timeout a. To extend the transfer time, enter your name in the Action Taken by text field, enter an extend time (1 to 30 minutes), and click “Extend Time”. b. To cancel the transfer, enter your name in the Action Taken by text field, select a reason, and click “Cancel Transfer”. 3. At the Destination Area the Incoming Transfer Timeout window appears (Figure 6.66). From this window, the Destination Area can extend the transfer or accept the transfer. a. To extend the transfer time, enter your name in the Action Taken by text field, enter an extend time (5 to 30 minutes), and click “Extend Time”. b. To accept the transfer, enter your name in the Action Taken by text field and click “Accept Transfer”. Figure 6.66 Incoming Transfer Timeout 6-28 The Accutech Software User Manual Reports Report Types The Report Generator window Report Type Definitions Generating a Report Reports are a detailed account of events. Reports contain the characteristics of an event such as the time and location it occurred. Some reasons you may want to generate a Report include: Keeping Quality Assurance Records Identifying high traffic areas to combat nuisance alarms Identifying excessive Loiter or Band Alarm counts that may indicate areas of overlap Report Types Each Report type has its own characteristics. For each Report Type’s characteristics, see Table 6.4. For an explanation of each Report Type, see Report Type Definitions on the next page. Table 6.4 Report Type Characteristics Report Type Date Time Zone Patient Info Type Alarm Journal x x x x x Alarm Summary x Auto Clear Activity x x x x x Band Compromise x x x x x Band Alarms x x x x x x x Door Ajar Events x x x Door Alarm Journal x x x Door Alarm Summary x Loiter Journal x Loiter Summary x Supervisor x Battery Warnings Day x x Tag # x x x x x x x x x x x Duration x x x Occurrence x x System Availability Tag Assignments Tag Beacon Transfers x x n/a Patient Name, Tag Number, Origin, Destination, Initiated by, Ended by, Start Time, End Time, Time Allowed, Time Required, Status (see Figure 6.62 for example) User Manual The Report Generator window The Report Generator window (Reports, Report Generator…) (Figure 6.67) selects the parameters of a Report. After selecting the desired parameters and clicking “Run Report”, the Report will be displayed here. Once a Report is run, the result window cannot be cleared. The next Report generated will replace the existing Report. Note: With the Current Only checkbox selected (by default), Reports will only query events for currently assigned Tags in Tag Control. With the Current Only checkbox empty, Reports will query all logged events in the database’s history. Figure 6.67 The Report Generator window The Accutech Software 6-29 6-30 The Accutech Software User Manual Report Type Definitions The type of Report that will be generated is chosen through the Report Type pull-down menu (Figure 6.68) in the Report Generator window. Alarm Journal – displays specifics of all alarm types (the Day, Date, Time, Location, Assignment, event type, and Tag number) within the specified dates. Alarm Summary – displays general information of all alarms except the event type (the Date, Location, and Total Number of Occurrences) within the specified dates. Auto Clear Activity – displays what events were cleared automatically (the Date, Time, Location, Tag Assignment, and Tag number) within the specified dates. This option is set in Event Preferences. Band Compromise – displays the Date, Time, Location, Patient Name, and Tag number of each Band Compromise alarm within the specified dates. Band Alarms – displays the Date, Time, Location, Patient Name, and Tag number of each Band Alarm within the specified dates. Battery Warnings – displays any low Tag batteries detected (the Date and Tag number) within the specified dates. Door Ajar Events – displays the Date, Time and Location of each Door Ajar event within the specified dates. Door Ajar Journal – displays specifics of Door Ajar events (the Day, Date, Time, Location, Assignment, event type, and Tag number) within the specified dates. Door Ajar Summary – displays general information of Door Ajar events (the Date, Location, and Total Number of Occurrences) within the specified dates. Loiter Journal – displays specifics of each Loiter alarm (the Day Date, Time, Location, Tag Assignment, and Tag number) within the specified dates. Loiter Summary – displays general information about Loiter alarms (the Date, Location, and Total Number of Occurrences) within the specified dates. Supervisor Events – displays the Date, Time and Location of each Supervisor event within the specified dates. Supervisor events occur when the zone protection has been compromised. System Availability – displays when the Accutech Software was opened (started), closed (stopped) and how long the software was available for system logging (duration). No alarms are logged when the software is closed. Tag Assignments – displays all currently assigned Tags. Tag Supervision Alarms – future enhancement. Transfers – displays details of a transfer - Patient Name, Tag Number, Origin, Destination, Initiated by, Ended by, Start Time, End Time, Time Allowed, Time Required, Status Tag Database Events – displays changes to Tag Control (Date, Time, Tag Number, Patient Name, Room Number, Event) Tag Beacon Time – future enhancement. Hub Supervision Alarms – future enhancement. Figure 6.68 Report Type pull-down menu User Manual The Accutech Software 6-31 Generating a Report NOTE: This operation can be password protected. Before you generate a Report you must define its parameters. To generate a Report, use the following instructions: 1. From the Report menu, select Report Generator… The Report Generator window appears. (Figure 6.67) 2. In the Report Generator window, click “Start: DD Month YYYY” The Pick Start Date window appears. (Figure 6.69) *Default is the yesterday’s date. 3. In the Pick Start Date window, select the desired Month, Year, and Date and click “OK” 4. In the Report Generator window, click “End: DD Month YYYY” The Pick End Date window appears. (Figure 6.70) *Default is the today’s date. 5. In the Pick End Date window, select the desired Month, Year, and Date and click “OK” 6. From the Report Type pull-down menu, select the desired option *Default is “Alarm Journal” Figure 6.69 Pick Start Date window 7. From the Zone pull-down menu, select the desired option *Default is “Any” 8. From the Patient pull-down menu, select the desired option *Default is “Any” 9. From the List by pull-down menus, select the desired options *Defaults are “Date” and “Descending” 10. Click “Run Report” The selected information appears in the scroll window (see Figure 6.71 for examples). 11. To print the displayed report, click “Print Report” Figure 6.70 Pick End Date window 6-32 The Accutech Software User Manual 12. If desired, generate additional reports with different parameters Note: Once a Report is run, the result window cannot be cleared. The next Report generated will replace the existing Report. 13. When finished, click “Done” to exit the Report Generator window Alarm Journal report example #1 Alarm Journal report example with User Codes and Notes included Tag Database Events report example Transfer report example Figure 6.71 Report examples User Manual Software FAQ If the PC shuts down, is the physical security also disabled (e.g., Door Locks)? No. The Accutech Software and physical security are separate entities; if the PC should be disabled for any reason, the physical security will NOT be affected. If the Local PC shuts down, will all Remote PCs shut down as well? No. If the Local PC shuts down, an alert message will appear on the Remote PCs indicating that the Local PC is not available and you will not be able to view events from that area. NOTE: There is no need to re-launch the Remote PC Software; it will enable itself automatically once the Local PC is restored. There will be no notification on the Remote PC(s) to indicate the Local PC is back on-line. Can I put the Accutech software on my Network Server? No. The Accutech Software is not recommended to be run on a publicly accessed network server or domain; however, the software is designed to be run over a dedicated LAN. If the domain backbone is utilized for network connectivity, the Accutech Network should be placed on a secured segment of the domain with limited access. For more information about installing the Accutech software in a network environment, please contact your Accutech representative. Can I run additional programs or perform other tasks while the Accutech Software is active? No. The PC should be used solely for Accutech Security purposes. The Accutech Software 6-33 Can I have a screensaver or Energy Saving Features? No. For security reasons, the software should always be visible. I am unable to clear an alarm. Are you on a Remote PC? The ability to clear alarms remotely requires a special configuration set at the time of installation. Go to a Local PC to clear the alarm. Is an option for clearing alarms selected for that alarm type in Event Preferences? Clearing alarms locally is determined in Event Preferences for each alarm type (page 6-10). When Manually Clear is selected for an alarm type, you MUST select at least one checkbox option (“Allow Clear by Zone Reset” or “Allow Clear at Local Computer”) otherwise an active icon alarm can never be cleared from the PC. Can I change/modify the floor plan and icons? No. The floor plan and icons are encoded during installation. If changes to your facility floor plan are necessary due to expansion or otherwise, contact your Accutech Representative. If I change a password on one PC, will that password be changed on all PCs? No. Passwords are only effective on the PC they are set on. My Tag Test Station (TTS) isn’t recognizing Tags. Make sure the TTS is enabled on the PC. See page 6-22. User Manual Chapter 7: Facility Performance Testing User Manual Facility Performance Testing Zone Functions Tested Test Equipment Required Zone, Lock Test Zone, Egress Test (3000 and 3101 Magnetic Locks) Zone, Delayed Egress Test (3101 Magnetic Locks only) Zone, Hallway Test Zone, Elevator Deactivation Test Door Ajar Test Loiter Test System Supervisor Test (Tx) System Supervisor Test (Rx) Fire Panel Interface (FPI) Test Band Alarm Test (BR 4200 Systems only) NOTE: These tests should only be performed by trained personnel. This document defines the recommended periodic testing procedures for the Accutech security systems. Accutech recommends that these tests be performed (at the minimum) on a monthly basis. DISCLAIMER: This chapter is intended as a guidance document only. Each facility should review these recommendations and modify as necessary to meet their own unique security requirements. Periodic testing of these critical performance functions can help prevent undetected security system failures. Facility Performance Testing 7-1 Zone Functions Tested Accutech systems respond to RF signals generated by the Tags. Most conditions occur at a monitored zone, although, Band Alarms can occur anywhere. In addition, the Accutech System monitors non-Tag-related zone functions such as Door Ajar and Supervisor. The RF signals we will be concerned with during these tests are: Zone – triggered when a Tag approaches or lingers at a doorway, an elevator, or other monitored zone Band Alarm (BR 4200 Systems only) – triggered when a BR 42 Tag band is loosened, cut, saturated, removed, or tampered with. Each exit point around the area of protection should be evaluated to determine: if doors lock and/or elevators disable when a Tag approaches if alarms are generated due to passage of a Tag through an exit point if Band Alarm functions are operating correctly (BR 4200 Systems only) if events are correctly logged in the system computer(s) when chosen in the software to do so Test Equipment Required You will need to designate Tags to be used solely for testing purposes only. For ES 2200 and IS 3200 Systems, designate one Tag for testing zone alarms. For BR 4200 Systems, you can designate one Tag for testing zone alarms and Band Alarms or designate one Tag for each alarm test. 7-2 Facility Performance Testing For IS 3200 and BR 4200 Systems, Tags designated for testing purposes should be assigned on the system under the patient names “Test Tag – Zone” and “Test Tag – Band Alarm” and the numbers 255 and 254 respectively, so that it will be clear to anyone viewing the alarm pop-up messages or alarm reports that these events were related to system testing. Zone, Lock Test When a Tag approaches a monitored door zone equipped with Locks, the Lock should engage. When the Tag leaves the monitored zone, the Lock should disengage. This test will evaluate this operation. NOTE: In the event of a fire, all Locks are disabled and the door can be opened immediately. Test results should be written down and kept in a test log. Make your own, or use the included, to ensure that every monitored zone is tested. These test reports should become part of your permanent quality assurance records. 1. Notify staff and security that you will be testing zone performance and alarms may be generated. They should pay special attention to traffic during this time. 2. While not in a monitored zone, use an S-TAD to activate the test Tag. 3. Hold the test Tag in your hand and approach each monitored door zone. 4. Each door should lock as you approach. NOTE: You may be able to hear the lock “click” as it changes states. Otherwise, For 3000 Series Magnetic Locks, you can push on the door to verify the Lock is engaged. For 3101 Series Magnetic User Manual Locks, the LED will turn from green to red when the Lock is engaged. However, do not open the door; this test is intended only for verifying that a door locks when a Tag approaches. If you wish to verify the operation of Delayed Egress Circuitry for 3101 Locks, see page 7-3. 5. As you approach each zone, try varying your approach angle (i.e., straight on, from the sides, down low, etc.). Make sure there is adequate coverage from all angles leading to the monitored zone. 6. Record the results (pass or fail). 7. If the test fails to lock the door: a. Notify staff and security of the vulnerable area. b. Check for visible damage or tampering to the zone equipment. c. Have a maintenance technician verify power to the zone equipment. d. Have a maintenance technician verify the FPI is set properly. e. Call your Accutech Representative. 8. To reset the Lock, deactivate the test Tag or leave the monitored zone. Depending upon your settings, the Lock may disengage itself automatically. Otherwise enter a Keypad Reset code. User Manual Zone, Egress Test (3000 and 3101 Magnetic Locks) Most monitored door zones equipped with Locks are configured to generate an alarm if a Tag is detected in the zone and the door is open. This test will evaluate this operation. For hallways zones, see page 7-4. NOTE: In the event of a fire, all Locks are disabled and the door can be opened immediately. This test should be conducted selectively; create a rotating schedule to test a different set of zones each time that periodic testing is conducted. Test results should be written down and kept in a test log. Make your own, or use the included, to ensure that every monitored zone is tested. These test reports should become part of your permanent quality assurance records. 1. Notify staff and security that you will be testing zone performance and alarms will be generated. They should pay special attention to traffic during this time. 2. Prop the door open. 3. While not in the zone, use an S-TAD to activate the test Tag. 4. Approach the door. An alarm should sound. 5. Verify that the central computer correctly logged this alarm and that any networked computer also sees the alarm. 6. Record the results (pass or fail). Facility Performance Testing 7-3 7. If the test fails to cause an alarm: a. Notify staff and security of the vulnerable area. b. Check for visible damage or tampering to the zone equipment. c. Have a maintenance technician verify power to the zone equipment d. Have a maintenance technician verify the FPI is set properly e. Call your Accutech Representative. 8. To reset the zone, enter a Keypad reset, deactivate the test Tag, and close the door completely, and if necessary, clear the alarm on the PC. Zone, Delayed Egress Test (3101 Magnetic Locks only) Delayed Egress Circuitry is a feature of the Accutech 3101 Magnetic Lock that, due to fire and life safety codes, allows free egress through a door after 15 seconds (plus a 1 to 3 second nuisance delay) of constant force is applied. This test will evaluate this operation. NOTE: In the event of a fire, Delayed Egress Circuitry is disabled and the door can be opened immediately. This test should be conducted selectively; create a rotating schedule to test a different set of zones each time that periodic testing is conducted. Test results should be written down and kept in a test log. Make your own, or use the included, to ensure that every monitored zone is tested. These test reports should become part of your permanent quality assurance records. 7-4 Facility Performance Testing 1. Notify staff and security that you will be testing zone performance and alarms will be generated. They should pay special attention to traffic during this time. 2. While not in the zone, use an S-TAD to activate the test Tag. User Manual d. Have a maintenance technician verify the FPI is set properly. e. Call your Accutech Representative. 9. To reset the zone, enter a Keypad reset, deactivate the test Tag, close the door completely, and, if necessary, clear the alarm on the PC. 3. Approach the door. Zone, Hallway Test 4. The Lock should engage. NOTE: The LED on the Lock will turn from green to red when the Lock is engaged. Two conditions are required to generate an alarm at a hallway zone: Tag detection and PIR detection. This test will evaluate this operation. 5. Remember once the Lock is engaged, in order to open the door, you have invoke the Delayed Egress Circuitry feature. To do this, press on the door for the duration of the nuisance delay (1 to 3 seconds) and the delayed egress countdown (15 to 30 seconds) then the Lock will disengage and you can open the door. NOTE: During the delayed egress countdown the Lock’s piezo will beep. After you open the door, the Lock’s piezo will sound continuously. 6. Verify that the central computer correctly logged this alarm and that any networked computer also sees the alarm. 7. Record the results (pass or fail). 8. If the test fails to cause an alarm: a. Notify staff and security of the vulnerable area. b. Check for visible damage or tampering to the zone equipment. c. Have a maintenance technician verify power to the zone equipment. 1. Notify staff and security that you will be testing zone performance and alarms will be generated. They should pay special attention to traffic during this time. 2. Using an S-TAD, activate the test Tag. 3. Enter the monitored hallway zone and move in the path of the PIR. An alarm should be generated and an alarm may sound. 4. Verify this alarm is logged on the central computer and any other remote computers networked to it. 5. Record the results (pass or fail). 6. If the test fails to cause an alarm: a. Notify staff and security of the vulnerable area. User Manual Facility Performance Testing 7-5 b. Check for visible damage or tampering to the zone equipment. a. Notify staff and security of the vulnerable area. c. Have a maintenance technician verify power to the zone equipment b. Check for visible damage or tampering to the zone equipment. d. Call your Accutech Representative. c. Have a maintenance technician verify power to the zone equipment 7. To reset the zone, enter a Keypad reset, deactivate the test Tag, and, if necessary, clear the alarm on the PC. Zone, Elevator Deactivation Test When a Tag approaches an elevator zone the elevator call buttons will be disabled. This test will evaluate this operation. 1. Notify staff and security that you will be testing zone performance and alarms will be generated. They should pay special attention to traffic during this time. 2. Using an S-TAD, activate the test Tag. 3. Enter the elevator zone. The zone’s response will depend on the state of the elevator door(s): a. Elevators with door(s) open will disable as you approach and an alarm will sound. The car will not be able to leave the floor. b. Elevators with door(s) closed will have their call button(s) disabled. c. Elevators en route will arrive, open, and then an alarm will sound. The car will not be able to leave the floor. 4. Verify this alarm is logged on the central computer and any other remote computers networked to it. 5. Record the results (pass or fail) 6. If the test fails to cause an alarm: d. Have a maintenance technician verify the FPI is set properly e. Call your Accutech Representative. 7. To reset the zone, deactivate the test Tag and, if necessary, enter a Keypad reset and clear the alarm on the PC. Door Ajar Test This test will evaluate the Door Ajar feature. 1. Notify staff and security that you will be testing zone performance and alarms will be generated. They should pay special attention to traffic during this time. 2. Without a Tag in the zone, prop the door open. 3. Depending upon the time delay setting, the door should register a Door Ajar alarm after the predetermined time. 4. Record and verify the time setting. 7-6 Facility Performance Testing User Manual 5. If Door Ajar is set in Event Preferences to “Log and Status” or “Alarm”, verify that the central computer correctly logged this alarm and that any networked computer also sees the alarm. 6. If Loiter is set in Event Preferences to “Log and Status” or “Alarm”, verify this alarm is logged on the central computer and any other remote computers networked to it. 6. Record the results (pass or fail). 7. Record the results (pass or fail) 7. If the test fails to cause a Door Ajar alarm: 8. If the test fails to cause a Loiter alarm: a. Notify staff and security of the vulnerable area. b. Check for visible damage or tampering to the zone equipment. c. Have a maintenance technician verify power to the zone equipment d. Call your Accutech Representative. 8. To reset the zone, close the door completely. Depending on settings, the system may reset automatically or, if necessary, enter a Keypad reset and clear the alarm on the PC. Loiter Test This test will evaluate the Loiter feature 1. Notify staff and security that you will be testing zone performance and alarms will be generated. They should pay special attention to traffic during this time. 2. Using an S-TAD, activate the test Tag. 3. Enter a monitored zone and linger there. NOTE: Be sure the door stays closed. 4. Depending upon the time delay settings, the zone should register a Loiter alarm after the predetermined time. 5. Verify and record the time setting. a. Notify staff and security of the vulnerable area. b. Check for visible damage or tampering to the zone equipment. c. Have a maintenance technician verify power to the zone equipment d. Call your Accutech Representative. 9. To reset the zone, deactivate the test Tag and, if necessary, enter a Keypad reset and clear the alarm on the PC. 10. Depending on settings, the system may reset automatically or, if necessary, enter a Keypad reset and clear the alarm on the PC. User Manual Facility Performance Testing 7-7 System Supervisor Test (Tx) System Supervisor Text (Rx) This test will evaluate the System Supervisor Test through a Tx wand antenna. Each time a Tag is detected in a zone (as has been the case in each of the previous tests) the Zone Receiver functionality is tested. Notify staff and security that you will be testing zone performance and alarms will be generated. They should pay special attention to traffic during this time. 1. Place a 4”x4”x2” electrical box (or an equivalent piece of metal) next to the Tx Wand Antenna. This will simulate a damaged antenna. 2. A Supervisor alarm should register and an alarm may sound. 3. Verify the alarm is logged on the central computer and any other remote computers networked to it. 4. Record the results (pass or fail). 5. If the test fails to cause a Supervisor alarm: a. Notify staff and security of the vulnerable area. b. Check for visible damage or tampering to the zone equipment. c. Have a maintenance technician verify power to the zone equipment d. Call your Accutech Representative. 6. Remove the electrical box away (or equivalent) from the Tx Wand Antenna. The Supervisor alarm will cease. If necessary, clear the alarm on the PC. In addition, Receivers are self-tested on a predetermined interval (set during installation). Therefore, it is not necessary to perform a test dedicated to testing the System Supervisor through Zone Receivers. However, if you would prefer to do so, consult your system maintenance technician for assistance. Fire Panel Interface (FPI) Test State codes require that all Lock and Elevator Deactivation Circuitry be wired into a facility’s fire alarm system. In Accutech Systems this is done via the Fire Panel Interface (FPI). This is done so in the case of a fire, any Lock or Elevator Deactivation unit disengages, allowing free egress or ingress. For more information on this policy, check your local codes. This test should be performed concurrently with your facility’s fire alarm test. 1. Using an S-TAD, activate a test Tag. 2. Activate your facility’s fire alarm. NOTE: The LED on the FPI enclosure will blink. 3. Proceed to each zone to be tested and verify that doors are unlocked and egress is possible. Elevators should be inoperable due to the fire alarm. 4. Record the results (pass or fail). 7-8 Facility Performance Testing 5. If a zone fails to disengage during the fire alarm, call your system service technician immediately for further assistance. 6. After your facility’s fire alarm has been reset the FPI may automatically reset or press the Reset button on the outside of the FPI enclosure to reset the FPI and engage all restraints. NOTE: The Reset button on the FPI enclosure will not work during the fire alarm. You must reset the fire alarm first and then reset the FPI. 7. Return to each tested zone with the test Tag and verify that doors now lock and elevators disable as you approach. 8. Using an S-TAD, deactivate the test Tag. User Manual Band Alarm Test (BR 4200 Systems only) For this test you will need a BR42 Tag to evaluate the Band Alarm function. Test results should be written down and kept in a test log. Select different locations within the protected area(s) each time you conduct this test so that you will evaluate all Receivers in the system on a rotating basis. Remember to test both Auxiliary and Zone Band Alarm Receivers. IMPORTANT: Band Alarms can be generated anywhere within a facility, not just at exit points. Repeat this test multiple times varying your position each time within an area to assure there is no place where a BR42 Tag can be removed without being detected. This includes bathrooms, visiting areas, storage rooms, and laundry rooms. 1. Notify staff and security that you will be testing zone performance and alarms will be generated. They should pay special attention to traffic during this time. 2. With the cloth band, place the BR42 test Tag snugly around your index finger. 3. Using an S-TAD, activate BR42 test Tag. Proceed to the area to be tested, remove the Tag from your finger and place it loosely in the palm of your hand. A Band Alarm should be generated. NOTE: If you are testing near a Zone Receiver you may also generate Loiter alarms during this test. User Manual 4. Verify that the central computer correctly logged this alarm and that any networked computer also sees the alarm. 5. Record the results (pass or fail). 6. If the test fails to cause a Band Alarm: a. Notify staff and security of the vulnerable area. b. Check for visible damage or tampering to the zone equipment. c. Have a maintenance technician verify power to the zone equipment d. Call your Accutech Representative. 7. To clear the alarm, deactivate the BR42 test Tag, enter a Keypad reset and, if necessary, clear the alarm on the PC. Facility Performance Testing 7-9 7-10 Facility Performance Testing User Manual NOTE: Copy this form for future use. FACILITY PERFORMANCE TEST LOG Facility Name: Date Floor Page __ of __ Zone Name/Type Test Performed Results (P/F) Comments Signature User Manual Glossary G-1 Glossary Accutech Software The Accutech Software displays incoming event information from monitored zones in real-time on a PC screen using the facility’s custom floor plan as the background. Event information is stored in a database and can be viewed as a printable Report. The Accutech Software is separate from and does not affect nor control the physical Accutech Security System or any of its components. Auxiliary BR Receiver Used for complete facility-wide Band Alarm coverage, an external Receiver that only detects Band Alarm events. Band Alarm An alarm condition that occurs when an Accutech BR42 Tag is loosened, cut, saturated, removed or tampered with. BR 4200 System A complete infant security system featuring Intelli-Band Technology. BR 4200 System Tag A small wristwatch-sized device that is worn by an infant. In addition to the functionality of an IS 3200 System Tag, the BR 4200 System Tag features Intelli-Band Technology, which will alarm if the band is removed or tampered with. Case sensitive A program’s ability to distinguish between uppercase (capital) and lowercase (small) letters. Programs that distinguish between uppercase and lowercase are said to be case sensitive. Central Alarm A tone generator than can drive up to 5 speakers. Controller The Controller coordinates and controls all of the devices and functions of the Accutech Security Systems. Delayed Egress Circuitry A feature of the Accutech 3101 Magnetic Lock that, due to fire and life safety codes, allows free egress through a door after 15 seconds of constant force. In the event of a fire alarm, the Delayed Egress Circuitry is disabled. Door Ajar alarm An alarm condition that occurs when a door is open longer than the preset time allowed. Double conditioning A characteristic of a zone that requires two conditions to be met (such as Tag detection and PIR detection) before an alarm is generated. G-2 Glossary User Manual Egress alarm An alarm condition that occurs when a Tag is in the Tx Activation Field and a door is opened (or PIR detection). Elevator Deactivation Circuitry Circuitry that deactivates an elevator’s call button(s) when a Tag is a monitored elevator zone. ES 2200 System A complete wanderer, asset, or infant security system. ES 2200 System Tag A small wristwatch-sized device worn by a resident, infant, or attached to an asset. Escort Function A function of the Keypad used to escort Tags through a monitored zone without triggering alarms. Fire Panel Interface (FPI) A FPI ties Accutech Security System components into the facility’s fire panel. Required if the system includes Magnetic Locks and/or Elevator Deactivation Circuitry. In the event of a fire, Magnetic Locks and Elevator Deactivation Circuitry are disabled. However, if there is still power to the system, the alarms will still sound. Floor-to-Floor Tag discrimination Set during installation, Floor-to-Floor Tag discrimination allows the software to be configured so that predetermined ranges of Tags can be designated to individual floors, thus when alarms occur they only appear on PCs associated with that floor (This aids in reducing nuisance alarms from bleed through especially in stacked zones). Regardless of what the PCs are configured to see, zones will function as usual (i.e., locking doors and/or sounding alarms if applicable). Graphic Display Panel (GDP) A display panel, which provides staff with a representation of the floor being monitored. GDPs are custom-made to a facility’s floor plan and notify staff when an alarm condition occurs in a monitored zone through a piezo buzzer and alarm-specific LEDs. Intelli-Band Technology A feature of BR42 Tags, which will alarm if the band is loosened, cut, saturated, removed, or tampered with. IS 3200 System A complete wanderer, asset, or infant security system. IS 3200 System Tag A small wristwatch-sized device that is worn by a resident, an infant, or attached to an asset. They are assigned to a specific resident or asset (via the Tag Test Station and Accutech Software). Once assigned, the computer associates a name, room number, and any other pertinent information about the resident/infant/asset with that Tag. User Manual Glossary G-3 Keypad A Keypad is used to reset zone equipment once an alarm has been addressed (Keypad Reset) or to escort Tags through a monitored zone without triggering alarms (Keypad Escort). The Keypad is also capable of providing visual indicators for Tag detection, alarms, and escort time. Keypad Reset A feature of the Keypad that is used to reset zone equipment after an alarm has been addressed. LED Tag A Tag designed to verify proper zone coverage (without causing alarms) during installation, adjustment, or testing of a monitored zone. Local Alarm A single-tone sounder mounted at a monitored zone to attract attention during alarms. Loiter Alarm An alarm condition that occurs when a Tag lingers in the Tx Activation Field for longer than the preset time. LT “Long Term”, a Tag classification Magnetic Lock A device using a magnetic coil and plate to lock a door when a Tag is detected in the monitored door zone. Magnetic Switch A device that monitors a door’s position (open or closed). A Magnetic Switch is used on a door when alarm activation is not desired unless the door is opened when a Tag in the monitored door zone. Masking In PIR applications, limiting the infrared beam by placing stripes of tape over the lens. In Software applications, during text insertion into a field, characters are replaced with symbols (usually asterisks “*”) for privacy. Master Code User Code Number 1 for the Keypad, used for Keypad programming purposes only. Monitored Zone Any door, hallway, stairwell, elevator, or other passageway that has a Controller, Tx antenna, and Zone Receiver associated to it. Multiplexer A device that relays event information from the Controller to SAPs, GDPs and/or the Accutech Software. Nuisance Alarms Undesired alarm activation stemming from such things as the mishandling of Tags, improper storage of Tags, slow patient transferring, and/or Loiter alarm time being too brief (passersby causing alarms). G-4 Glossary User Manual Passive Infrared Reader (PIR) A device that uses an infrared light to detect motion. Push Button Override (PBO) A switch (push button) that triggers the Keypad’s Escort function. Program Shell An application of the Software that houses the displayed monitored area. Receiver A device that detects the signal of an activated Tag, usually mounted in the Controller above the drop ceiling or on the wall next to the door being monitored. For centrally located systems, the Receiver is mounted separately at the door. A short rubber duck antenna protrudes from the cover. SB “Slotted Back”, a Tag classification S-TAD Used to check the functionality of an Accutech Tag. Accutech Tags operate by internal battery. Over the course of normal operation, Tags eventually lose battery power and the Tags will need to be replaced. The S-TAD is used to determine if a Tag has sufficient battery power to respond to an activating signal. Secure Tag Activator/Deactivator. Staff Alert Panel (SAP) A display panel used to indicate to staff where an Alarm, Door Ajar, Loiter, or Supervise warning condition has occurred; it employs bi-color LEDs, a Piezo Buzzer, and digital logic to control its outputs. Supervisor A built-in self-diagnostic circuit of the Controller that continuously monitors the Tx Activation Field and periodically simulates a Tag in the zone. Tag See ES 2200 System Tag, IS 3200 System Tag, or BR 4200 System Tag Tag Test Station (TTS) A TTS is used in conjunction with the Accutech Software for Tag assignments. Tx Wand Antenna A device that generates a Tag-activating radio frequency signal. This signal is referred to as a “Tx Activation Field.” Tx Activation Field A radio frequency field created by a Tx antenna to detect Tags. Doors, hallways, elevators, stairwells, and other passageways that have a Tx Activation Field are commonly referred to as a “monitored zone.” User Manual Index I-1 Index ALARMS Band Alarm Addressing Door ajar alarm Egress alarm Loiter alarm Supervisor alarm 1-3 1-4 1-3 1-3 1-3 1-3 Automatic Door Deactivation 2-9 Auxiliary Receiver 2-7 Band Alarm 1-3 Band Alarm Lockdown 2-9 BR 4200 System BR 4200 System Tags 1-2 3-2 Central Alarm 2-10 HOW ACCUTECH SYSTEMS WORK Door zones Elevator zones Hallway zones 1-3 1-3 1-4 1-4 IS 3200 System IS 3200 System Tags 1-2 3-1 KEYPAD Adjusting the Keypad Escort Time Deleting user codes Escort function Initiating a Keypad Reset/Escort Keypad Operation Master Code Programming the master code Programming user codes Resetting the master code 5-4 5-3 5-1 5-1 5-1 5-2 5-2 5-3 5-4 LED Tag Verifying Proper Zone Coverage Identifying Tag-Activating Sources 3-4 3-4 3-5 Local Alarm 2-9 Loiter alarm 1-3 Lost Tags 4-2 Magnetic Locks 2-8 Magnetic Switch 2-2 Controller 2-2 Cut Band System Cut Band System Tags 1-2 3-2 Door ajar alarm 1-3 Double Conditioning 1-3 Egress alarm 1-3 Elevator Deactivation Circuitry 2-8 MASTER CODE ES 2200 System ES 2200 System Tags 1-1 3-1 5-2 Multiplexer 2-7 Escorting 1-6 Multi-Tone Local Alarm (MTLA) 2-9 ESCORT FUNCTION 5-1 Passive Infrared Reader (PIR) 2-3 Facility Performance Testing Band Alarm Test Door Ajar Test Fire Panel Interface (FPI) Test Loiter Test System Supervisor Test Test Equipment Required Zone, Egress Alarm Test (3000 Series Magnetic Lock) Zone, Egress Alarm Test (3101 Series Magnetic Lock) Zone, Elevator Deactivation Test Zone, Hallway Test Zone, Lock Test 7-1 7-8 7-5 7-7 7-6 7-7 7-1 Power Supply 2-7 7-3 7-5 7-4 7-2 Fire Panel Interface (FPI) 2-9 Graphic Display Panel (GDP) 2-8 7-3 Push Button Override Receiver 2-10 2-2 Index I-2 SOFTWARE Alarm Information dialog box Alarm Journal Alarm Summary Alarm events Allow Clear at Local Computer Allow Clear by Zone Reset Auto Clear Activity Band Alarm Band Compromise Battery Low Battery Warnings Clearing an alarm Clearing Multiple Alarms Closing the Accutech Software Configuration and System Type Configuration differences Door Ajar Events Door Ajar Journal Door Ajar Summary Editing Tag information Enabling/Disabling TTS icons Enter Patient Information dialog box Environment Event dialog box Event Preferences FAQ Floor to Floor Tag Discrimination Floor Plan window Generating a Report Icons Log and Status Loiter Journal Loiter Summary Low Battery Indicator Menu bar Opening the Accutech Software Overview Passwords Changing Forgotten Types Setting Pick End Date window Pick Start Date window Preferences password Printing a Report Program Shell Reader Head Tag Status dialog box Remote Area Inaccessible dialog box Report Generator window Report password Report Type Definitions Reports Generating Printing Saving Types Select Remote Area dialog box Service password Set Event Preferences dialog box Shutdown password Status bar Suite Setup Suite Tool Supervisor User Manual 6-17 6-30 6-30 6-15 6-11 6-11 6-30 6-15, 6-30 6-15, 6-30 6-22 6-30 6-17 6-17 6-4 6-2 6-2 6-30 6-30 6-30 6-21 6-22 6-20 6-5 6-5 6-10 6-33 6-19 6-5 6-29 6-7 6-10 6-30 6-30 6-22 6-5 6-2 6-1 6-8 6-9 6-9 6-8 6-9 6-31 6-31 6-8 6-31 6-3 6-22 6-3 6-29 6-8 6-30 6-28 6-31 6-31 6-30 6-30 6-3 6-8 6-11 6-8 6-5 6-18 6-18 6-15 Supervisor Events System Availability Tag Assignments Tag Beacon Tag Control Adding Tags Removing Tags Assigning a Tag Unassigning a Tag Reassigning a Tag Editing Patient/Asset Info Tags password Tag Test Station (TTS) Enabling/Disabling Low Battery Indicator Assigning a Tag via a TTS Unassigning a Tag via a TTS Tag Transfer Transferring a Patient Cancel a Transfer Transfer Timeout User Codes Title bar Viewing Multiple Areas Speakers Staff Alert Panel (SAP) Strobe Light 6-30 6-30 6-30 6-30 6-19 6-19 6-20 6-20 6-21 6-21 6-21 6-8 6-22 6-22 6-22 6-23 6-24 6-25 6-25 6-26 6-27 6-13 6-5 6-4 2-10 2-8 2-10 Supervisor alarm 1-3 System Components 2-1 S-TAD (Secure Tag Activator/Deactivator) Activating/Deactivating Tags Cleaning and Care Enable/Disable Band Alarm Sounder LEDS Master Code Powering the S-TAD On/Off Programming Mode Unlocking Unlock Timeout User Code 4-1 4-2 4-5 4-3 4-4 4-3 4-1 4-3 4-1 4-3 4-4 TAGS Attaching Cut Band Tags BR42 Tags LT/SB Tags Cleaning Removing Cut Band Tags Storing Testing 3-8 3-7 3-6 3-10 3-9 3-10 3-10 Tag Test Station (TTS) Timer Tri-Axis Antenna Tx wand antenna Voice Alarm 2-7 2-10 2-3 2-3 2-10