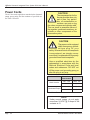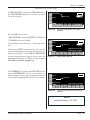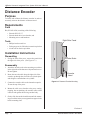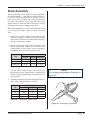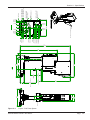
1
Intelligent Assembly Solutions iQ Series ULTRASONIC INTEGRATED PRESS SYSTEM i 220 AUTOMATED HAND PROBE PRESS User's Manual This User's Manual Covers These Models 20122XC0P3 20121XC0P3 20122XC0P5 20121XC0P5 20242XC0P3 20242XC0P5 Dukane Part No. 403–594-00 Dukane Intelligent Assembly Solutions • 2900 Dukane Drive • St. Charles, Illinois 60174 USA • TEL (630) 797–4900 • FAX (630) 797–4949 products are manufactured in ISO registered facilities ISO 9001 Dukane www.dukane.com/us iQ Series Ultrasonic Integrated Press System i 220 User’s Manual Copyright © 2014 Dukane Intelligent Assembly Solutions 2900 Dukane Drive St. Charles, IL 60174 USA Notice of Rights: All rights reserved. No part of this manual including the interior design, cover design and icons may be reproduced, transmitted or utilized in any form or by any means, electronic, mechanical, photocopying, recording, or by any information storage and retrieval system, without written permission from Dukane Corporation. Notice of Liability: The information contained in this manual is distributed on an “As is” basis, without warranty. While every precaution has been taken in the preparation of this manual, Dukane Corporation shall not have any liability to any person or entity with respect to any liability, loss, or damage caused or alleged to be caused directly or indirectly by the instructions contained in this manual, or by the hardware products described herein. Specifications subject to change without notice. This user’s manual documents product features, hardware, and controls software available at the time this user's manual was published. Printed in the United States of America. Dukane Part Number: 403-594-00 Dukane ultrasonic equipment is manufactured under one or more of the following U.S. Patents: 3,780,926 3,825,481 4,131,505 4,277,710 5,798,599 5,880,580 6,984,921, 7,225,965, 7,475,801, and 8,052,816 Page ii Dukane Manual Part No. 403-594-00 Revision History Revision Number Revision SummaryDate - 00 Original release. Dukane Manual Part No. 403-594-00 June 5, 2014 Page iii iQ Series Ultrasonic Integrated Press System i 220 User’s Manual This page intentionally left blank Page iv Dukane Manual Part No. 403-594-00 Contents Section 1- Introduction . . . . . . . . . . . . . . . . . . . . . . . . 1 General User Information . . . . . . . . . . . . . . . . . . . . . . . . . . . . . 3 Press System Overview . . . . . . . . . . . . . . . . . . . . . . . . . . . . . . . 4 Section 2 - Health and Safety . . . . . . . . . . . . . . . . . . . 5 General Considerations . . . . . . . . . . . . . . . . . . . . . . . . . . . . . . 7 Plastics Health Notice . . . . . . . . . . . . . . . . . . . . . . . . . . . . . . . . 8 Electrical Safety . . . . . . . . . . . . . . . . . . . . . . . . . . . . . . . . . . . . . 8 Pneumatic Safety . . . . . . . . . . . . . . . . . . . . . . . . . . . . . . . . . . . 10 Lifting the Equipment . . . . . . . . . . . . . . . . . . . . . . . . . . . . . . . . 11 Section 3 - Installation . . . . . . . . . . . . . . . . . . . . . . . 13 Before Installation . . . . . . . . . . . . . . . . . . . . . . . . . . . . . . . . . 15 Install the Press System . . . . . . . . . . . . . . . . . . . . . . . . . . . . 17 Rear Layout Overview . . . . . . . . . . . . . . . . . . . . . . . . . . . . . . 18 Connecting Press Cables . . . . . . . . . . . . . . . . . . . . . . . . . . . 27 Flange Template . . . . . . . . . . . . . . . . . . . . . . . . . . . . . . . . . . 32 Section 4 - Controls . . . . . . . . . . . . . . . . . . . . . . . . . 33 Front Panel Controls . . . . . . . . . . . . . . . . . . . . . . . . . . . . . . . . Screen Basics . . . . . . . . . . . . . . . . . . . . . . . . . . . . . . . . . . . . . Press Controls . . . . . . . . . . . . . . . . . . . . . . . . . . . . . . . . . . . . . Press Ergonomic Base . . . . . . . . . . . . . . . . . . . . . . . . . . . . . . 35 40 41 45 Press Start-up Sequence . . . . . . . . . . . . . . . . . . . . . . . . . . . . . Stopping the Weld Cycle . . . . . . . . . . . . . . . . . . . . . . . . . . . . . Using the Menus . . . . . . . . . . . . . . . . . . . . . . . . . . . . . . . . . . . Alarms . . . . . . . . . . . . . . . . . . . . . . . . . . . . . . . . . . . . . . . . . . . 49 50 51 69 Section 5 - Operation . . . . . . . . . . . . . . . . . . . . . . . . 47 Section 6 - Options . . . . . . . . . . . . . . . . . . . . . . . . . . 71 Overview . . . . . . . . . . . . . . . . . . . . . . . . . . . . . . . . . . . . . . . . . 73 Power Inlet Options . . . . . . . . . . . . . . . . . . . . . . . . . . . . . . . . . 74 Distance Encoder . . . . . . . . . . . . . . . . . . . . . . . . . . . . . . . . . . 76 Continued Dukane Manual Part No. 403-594-00 Page v iQ Series Ultrasonic Integrated Press System i 220 User’s Manual Continued from Previous Page Contents Section 7 - Acoustic Stack/Fixture Setup . . . . . . . . 79 Overview . . . . . . . . . . . . . . . . . . . . . . . . . . . . . . . . . . . . . . . . . 81 Stack Description . . . . . . . . . . . . . . . . . . . . . . . . . . . . . . . . . . Changing Stack Components . . . . . . . . . . . . . . . . . . . . . . . . . Stack Assembly and Torque Values . . . . . . . . . . . . . . . . . . . . Fixture Installation . . . . . . . . . . . . . . . . . . . . . . . . . . . . . . . . . . 82 83 85 87 Reconditioning Stack Components . . . . . . . . . . . . . . . . . . . . . 94 Section 8 - Stack Maintenance . . . . . . . . . . . . . . . . . 91 Inspection of the Acoustic Stack Components . . . . . . . . . . . . 93 Section 9 - System Maintenance . . . . . . . . . . . . . . . 97 Section 10 - Contacting Dukane . . . . . . . . . . . . . . . 101 Section 11 - Specifications . . . . . . . . . . . . . . . . . . . 105 Drawings . . . . . . . . . . . . . . . . . . . . . . . . . . . . . . . . . . . 107-109 Weights, Dimensions, Operating Environment . . . . . . . . . . 110 Compressed Air Requirements . . . . . . . . . . . . . . . . . . . . . . . AC Power Requirements . . . . . . . . . . . . . . . . . . . . . . . . . . . . Models, Ultrasonic Pressure . . . . . . . . . . . . . . . . . . . . . . . . . Replacement and Repair Parts Lists . . . . . . . . . . . . . . . . . . . Regulatory Agency Compliance . . . . . . . . . . . . . . . . . . . . . . 111 111 112 113 114 Appendix A - List of Figures . . . . . . . . . . . . . . . . . . . . . . . . . . 117 Section 12 - Appendices . . . . . . . . . . . . . . . . . . . . . 115 Appendix B - List of Tables . . . . . . . . . . . . . . . . . . . . . . . . . . 120 Index . . . . . . . . . . . . . . . . . . . . . . . . . . . . . . . . . . . 121 Continued Page vi Dukane Manual Part No. 403-594-00 This page intentionally left blank Dukane Manual Part No. 403-594-00 Page vii iQ Series Ultrasonic Integrated Press System i 220 User’s Manual This page intentionally left blank Page viii Dukane Manual Part No. 403-594-00 Section 1 - Introduction SECTION 1 Introduction General User Information . . . . . . . . . . . . . . . 3 Read the Manual First. . . . . . . . . . . . . . . . . . 3 Notes, Cautions, Warnings . . . . . . . . . . . . . . . 3 Drawings and Tables . . . . . . . . . . . . . . . . . . . 3 Press System Overview. . . . . . . . . . . . . . . . 4 Dukane Manual Part No. 403-594-00 Page 1 iQ Series Ultrasonic Integrated Press System i 220 User’s Manual This page intentionally left blank Page 2 Dukane Manual Part No. 403-594-00 Section 1 - Introduction General User Information Read This Manual First Before operating your ultrasonic system, read this User’s Manual to become familiar with the equipment. This will ensure correct and safe operation. The manual is organized to allow you to learn how to safely operate this equipment. The examples given are chosen for their simplicity to illustrate basic operation concepts. This manual provides information to set up and operate Dukane’s iQ Series Ultrasonic Integrated Press System, i220. Models are listed in Section 11 - Specifications. NOTE Note statements provide additional information or highlight procedures. Notes, Cautions and Warnings Throughout this manual we use NOTES to provide information that is important for the successful application and understanding of the product. A NOTE block is shown to the right. In addition, we use special notices to make you aware of safety considerations. These are the CAUTION and WARNING blocks as shown here. They represent increasing levels of important information. These statements help you to identify and avoid hazards and recognize the consequences. One of three different symbols also accompany the CAUTION and WARNING blocks to indicate whether the notice pertains to a condition or practice, an electrical safety issue or an operator protection issue. Drawings and Tables The figures and tables are identified by the section number followed by a sequence number. The sequence number begins with one in each section. The figures and tables are numbered separately. The figures use Arabic sequence numbers (e.g. –1, –2, –3) while the tables use Roman sequence numerals (e.g. –I, –II, –III). As an example, Figure 3–2 would be the second illustration in section three while Table 3–II would be the second table in section three. Dukane Manual Part No. 403-594-00 CAUTION Caution statements identify conditions or practices that could result in damage to the equipment or other property. WARNING Warning statements point out conditions or practices that could result in personal injury or loss of life. Condition or Practice Electrical Safety Issue Operator Protection (hearing) Page 3 iQ Series Ultrasonic Integrated Press System i 220 User’s Manual Press System Overview An iQ Series Ultrasonic Integrated Press System combines the iQ generator and press (with thruster, switches, controls, and cables) in one unit. In addition, a complete system for welding would include a transducer, booster, horn, and fixture. The i220 generator has rugged internal ultrasonic circuitry and ensures a continuous resonant frequency lock at the start of each weld. This generator will operate at the same international line voltage input specifications as the other generators of this product family. It also includes an RFI line filter that passes FCC and strict CE test specifications for global applications. Page 4 Dukane Manual Part No. 403-594-00 Section 2 - Health and Safety SECTION 2 Health and Safety General Considerations . . . . . . . . . . . . . . . . 7 Plastics Health Notice. . . . . . . . . . . . . . . . . 8 Electrical Safety . . . . . . . . . . . . . . . . . . . . . . . . . . . . . . 8 Domestic Power Grounding . . . . . . . . . . . . . . . . . . . . . . . 9 International Power Grounding . . . . . . . . . . . . . . . . . . . . 9 Pneumatic Safety . . . . . . . . . . . . . . . . . . . . . . . . . . . 10 Lifting the Equipment . . . . . . . . . . . . . . . . . . . . . . . . . . 11 Dukane Manual Part No. 403-594-00 Page 5 iQ Series Ultrasonic Integrated Press System i 220 User’s Manual This page intentionally left blank Page 6 Dukane Manual Part No. 403-594-00 Section 2 - Health and Safety General Considerations Please observe these health and safety recommendations for safe, efficient, and injury-free operation of your equipment. Proper Installation - Operate system components only after they are properly installed. No Unauthorized Modifications - Do not modify your system in any way unless authorized to do so by Dukane Corporation. Unauthorized modifications could cause equipment damage and/or injury to the operator. In addition, unauthorized modifications will void equipment warranty. Keep the Cover On - Do not remove any equipment cover unless directed to do so by Dukane Corporation. The integrated generator produces hazardous electrical voltages which could cause injury. Grounded Electrical Power - Operate this equipment only with a grounded electrical connection. See Electrical Safety for grounding instructions, Page 8. Comply with Regulations - You may be required to add accessories to bring the system into compliance with applicable regulations (OSHA in the USA) for machine guarding and noise exposure. Use Eye Protection - Wear ANSI approved safety impact goggles. Acoustic Stack Hazard - When an acoustic stack (transducer, booster, horn and tip) is energized by the ultrasound signal, it presents a potential hazard. Stay clear of an energized stack. System Abort Switch - Install a system abort switch at each operator station when ultrasonic plastic assembly equipment is used with automatic material handling equipment in an automated system. Foot Switch - Do not use a foot switch. Using a foot switch in place of the optical touch finger switches (activation switches) violates OSHA regulations. NOTE These recommendations apply to the welding system. System in this manual refers to a complete group of components associated with the welding of parts, also known as an ultrasonic assembly system. A typical i220 system consists of the i220, a press with a thruster, switches, controls, cables, a transducer, booster, horn, and a fixture. WARNING Any fixture manufactured by a third party must comply with all OSHA and ANSI requirements. All fixtures must be guarded as necessary. Dukane Corporation does not assume any responsibility or liability for fixtures manufactured by the customer or any third party manufacturer. WARNING Never operate the generator with the cover off. This is an unsafe practice and may cause injury. CAUTION At some time you may be asked to remove equipment covers by the Dukane Service Dept. personnel. Before doing so, disconnect the unit electrically from the incoming line AC power. If the unit is a press/ thruster, lock the Air Lockout Valve, located on the rear panel, in its closed position. Continued Dukane Manual Part No. 403-594-00 Page 7 iQ Series Ultrasonic Integrated Press System i 220 User’s Manual Continued from Previous Page General Considerations Pre-trigger - The pre-trigger feature starts the horn vibrating before contacting the part to be welded. System Electrical Cabling - Electrical power must be off when connecting or disconnecting electrical cables. Do Not Wear Loose Clothing or Jewelry - They can become caught in moving parts. Stay Alert - Watch what you are doing at all times. Use common sense. Do not operate the press when you are tired or distracted from the job at hand. Do not Operate the Equipment - Your judgement or reflexes could be impaired while taking prescription medications. If so, do not operate the equipment. Be familiar with warning labels and recommended activity restrictions that accompany your prescription medications. If you have any doubt, do not operate the equipment. Plastics Health Notice Certain plastic materials, when being processed, may emit fumes and/or gases that may be hazardous to the operator’s health. Proper ventilation of the work station should be provided where such materials are processed. Inquiries should be made to the U.S. Department of Labor concerning OSHA regulations for a particular plastic prior to processing with Dukane ultrasonic equipment. Electrical Safety The iQ Series press provides the operating power and power returns. Make sure the press is grounded properly. In addition to the safety considerations, proper grounding is essential for the effective suppression of RFI (Radio Frequency Interference). Every press contains a RFI filter which blocks noise on the AC power line from entering the control circuitry. This filter also prevents ultrasonic RFI from being fed back into the AC power line. If you experience problems with RFI from the press, run an additional grounding wire from the press base grounding stud to the nearest grounded metal pipe or equivalent earth ground by means of a ground clamp. Use at least 14 AWG wire for the connection to the press base. CAUTION Parts being joined ultrasonically will at times vibrate at audible frequencies. Wear ear protectors to reduce annoying or uncomfortable sounds. In addition, ultrasound baffles, sound enclosures, or materials that absorb sound may be located to surround the system. Ultrasound pressure level could exceed 110dB. See Ultrasonic Pressure, Table 11-VI, Page 112. WARNING Keep head, hands, limbs and body at least six inches (152 mm) away from an operating press/ thruster. A vibrating, descending horn can cause burns and/or crushing injuries. CAUTION When making cable connections to system equipment or disconnecting cables from system equipment, make sure electrical power to the system is turned off, and AC power cords are removed from their receptacles. After the cables have been securely connected and the connections and cable routing checked a final time, the power may be restored. Continued Page 8 Dukane Manual Part No. 403-594-00 Section 2 - Health and Safety Continued from Previous Page Domestic Power Grounding For safety, the power cords used on this product have a three-wire, grounding-type power cord. Figure 2-1 illustrates the appropriate electrical outlet to use with the power cord that is included with systems shipped to North America. CAUTION If you have a two-prong electrical receptacle, we strongly recommend that you replace it with a properly grounded three-prong type. Have a qualified electrician replace it following the National Electric Code and any local codes and ordinances that apply. See Figures 2–1 and 2–2. Approved 2 pole, 3 wire grounding receptacle HUBBELL No. 5652 or equivalent to NEMA 6–15R or 6–20R Figure 2–1 Example of 220/240 Volt, Grounded, 3-Prong Receptacle International Power Grounding The power cable normally provided for international use is compatible with the power outlet used in many Continental European countries (Refer to Figure 2–2.) However, if your application requires another type of power cord, check with your equipment supplier, and follow local regulations concerning proper wiring and grounding. Grounding Contacts CAUTION If there is any question about the grounding of your receptacle, have it checked by a qualified electrician. Do not cut off the power cord grounding prong, or alter the plug in any way. If an extension cord is needed, use a three-wire cord that is in good condition. The cord should have an adequate power rating to do the job safely. It must be plugged into a grounded receptacle. Do not use a two-wire extension cord with this product. 100/120 Volt Systems (North America or Japan) Typical Outlet Provided Cable Figure 2–2 International 220/240V Grounding Dukane Manual Part No. 403-594-00 The power cord (including strain relief) supplied with the 100/120 AC systems is permanently attached to the rear of the press. Units with this power cord are for use in North America or Japan. Page 9 iQ Series Ultrasonic Integrated Press System i 220 User’s Manual Pneumatic Safety A safety isolation lockout valve is installed in series with the compressed air filter and is capable of isolating the compressed air supply from the pneumatic cylinder on the press. This device complies with OSHA regulations. Always isolate and lockout the compressed air when performing any maintenance on the press. The isolation lockout valve is shown in Figure 2–4. CAUTION Lockout valve must be closed and secured with a padlock before servicing the press. Filter Service Indicator Green = Filter Element is OKAY; Red = Replace Filter Element Filtered Air to Press Compressed Air Filter Safety Isolation Lockout Valve Compressed Air In Figure 2–3 Page 10 Compressed Air Filter Dukane Manual Part No. 403-594-00 Section 2 - Health and Safety Lifting the Equipment How to Lift Safely Use a mechanical lifting device to safely lift this system. The iQ Series Ultrasonic Integrated Press System i220 is too heavy to lift manually. When lifting anything follow these common sense steps: CAUTION Use a mechanical lift device to assist in safely lifting system components. • Before lifting any equipment, take a moment to think about what you're going to do. • Examine the object for sharp corners, slippery spots or other potential hazards. Know your limit and don’t try to exceed it. NOTE • Ask for help if needed, and make any adjustments to the lifting device. • Know where you are going to set the item down, and make sure that placement area and your path are free of obstructions. Equipment weights are shown in Section 11 - Specifications, Table 11-I. • Lift the equipment with the mechanical lift device, and move the equipment carefully. Dukane Manual Part No. 403-594-00 Page 11 iQ Series Ultrasonic Integrated Press System i 220 User’s Manual This page intentionally left blank Page 12 Dukane Manual Part No. 403-594-00 Section 3 - Installation SECTION 3 Installation Before Installation. . . . . . . . . . . . . . . . . . 15 Install the Press System. . . . . . . . . . . . . . . 17 Unpacking . . . . . . . . . . . . . . . . . . . . . . . 17 Rear Layout Overview. . . . . . . . . . . . . . . . . 18 A.C. Power Inlet Panel . . . . . . . . . . . . . . 19 System I/O Panel. . . . . . . . . . . . . . . . . 20 Base/Abort Connector (J6) . . . . . . . . . . . . 24 Ground Detect (J2) . . . . . . . . . . . . . . . . 24 EtherNet (J9) . . . . . . . . . . . . . . . . . . . 24 USB (J3) . . . . . . . . . . . . . . . . . . . . . 24 Base Connections. . . . . . . . . . . . . . . . . . . 25 RFI Grounding. . . . . . . . . . . . . . . . . . . . . 26 Connnecting Press Cables . . . . . . . . . . . . . . 27 Install the Press without Machine Base . . . . . . . . 30 Automation System . . . . . . . . . . . . . . . . . . 31 Flange Template. . . . . . . . . . . . . . . . . . . . 32 Dukane Manual Part No. 403-594-00 Page 13 iQ Series Ultrasonic Integrated Press System i 220 User’s Manual This page intentionally left blank Page 14 Dukane Manual Part No. 403-594-00 Section 3 - Installation Before Installation As you plan for the installation of your system, consider these important subjects as listed below: • When to use lockout / tagout devices • Lifting the equipment safely - See Section 2 Health and Safety, Page 11. • Utilities • Placement WARNING Electrical safety hazards exist inside the i220 presschassis. Before making any internal adjustments to the i220 press, apply a lockout/tagout (LOTO) device to the i220 press chassis. When to Use Lockout / Tagout Devices Figure 3-1 Lockout Device In Open Position, Unlocked The typical kind of LOTO device for an i220 press is a clam shell type device (with lockout capability). The LOTO device is placed over the plug end of the electrical cord. This effectively prevents access to the energy isolation point. See the example of one such device in the figure above. The figure to the right shows the lockout device in the closed, locked position. Dukane Manual Part No. 403-594-00 Figure 3-2 Bottom Lockout Device In Closed Position, Locked Continued Page 15 iQ Series Ultrasonic Integrated Press System i 220 User’s Manual Continued from Previous Page Lockout/Tagout Procedure to use BEFORE making any internal adjustments to the i220 press: 1. Push the press AC power switch/breaker to the OFF position. 2. Unplug the press electrical cord from its source. 3. Authorized personnel apply a lockout/tagout (LOTO) device to the plug end of the press electrical cord. Using a typical clam shell type LOTO device: 1) Open the clam shell. 2) Place the electrical cord plug end inside the shell. 3) Close the shell. 4) Secure the shell with its lock, and lock it. 4. Wait a minimum of five minutes for the press to discharge its electrical energy. 5. After taking these steps, make the necessary adjustments. Utilities Provide for electricity to meet the equipment specifications as shown in Section 11, Specifications. CAUTION If transducer cooling air is used, this compressed air must be clean, dry and oil free. Any particulate, oil contamination or moisture can coat or clog the transducer. This can result in premature failure of the transducer. Air pressure is determined by the application, transducer power draw and ambient air temperature. Placement Assuming the press is being put back into service. Check that enough space has been set aside for the installation. Equipment dimensions are shown in Section 11, Specifications. Procedure to use AFTER making any internal adjustments to the i220 press: 1. Authorized personnel remove the lockout/tagout device from the plug end of the electrical cord. Using a typical clam shell type LOTO device: 1) Unlock the protective shell. 2) Open the shell, exposing the electrical cord end. 3) Remove the LOTO device, and set it aside. 2. Plug the press electrical cord into its AC power source. 3. Push the press AC power switch/breaker to the ON position. Page 16 Dukane Manual Part No. 403-594-00 Section 3 - Installation Install the Press System The integrated press system consists of an iQ generator, a thruster, an ergonomic base and a support package. It is assembled at the factory for shipment. Unpacking The press system is secured to a wooden pallet and covered with a wooden crate. Components inside the crate are secured with metal bands, and with additional packing materials to give reinforcement when needed. Before unpacking the press, take care and use mechanical assistance to move it close to the location where it will be installed. 1. Carefully remove the wooden crate from the base to expose the contents. 2. Remove the packing material, and temporarily set aside any other system components, leaving the press on the shipping base. 3. Inspect the assembly for any damage before placing it in position. Moving the Press into Place Do not lift the press by hand. Use mechanical means to put the press into place. To place the press on the work area, use a pallet lift platform or equivalent. Raise the assembly until the bottom edge of the base is even with the top of the work area as shown in Figure 3-14. Then, carefully slide the press system on to the work area. Dukane Manual Part No. 403-594-00 CAUTION CAUTION DO NOT LIFT the p r e s s manually. Lifting and/or moving the press manually could result in perManuallymeans lifting the sonal injury. Use mechanical press system could to move and place theresult press. in injury See Section 2, Health and Safety, Page 11 on safe lifting practices. Page 17 iQ Series Ultrasonic Integrated Press System i 220 User’s Manual Rear Layout Overview System I/O Panel I/O panel components: • J1 - System I/O See Pages 19-23. See Page 24. } • J6 - Base Abort • J2 - Ground Detect • J9 - EtherNet (DUKANE USE ONLY) • J3 - USB (DUKANE USE ONLY) See Page 19. AC Power Inlet Panel • Power Switch / Circuit Breaker Used to switch system power ON and OFF. • IEC Power Inlet Connector Attaches to an IEC style power cord. • Chassis Grounding Stud Chassis connection for a protective earth ground. See Page 25. Base Connections • Base Grounding Stud • J35 - Base Interface Connector Figure 3-3 Press Rear View Page 18 Dukane Manual Part No. 403-594-00 Section 3 - Installation AC Power Inlet Panel The standard AC power inlet panel is described here. IEC AC Power Inlet Connector The IEC AC power inlet connector mounted on the system AC power inlet panel requires a properly configured IEC compliant power cord, which enables worldwide system operation by simply changing the power cord. Chassis Grounding Stud The chassis grounding stud is used to attach a protective earth ground to the press. This will aid in the suppression of electrical interference or radio frequency interference (RFI) that is common in an industrial environment. The chassis ground stud is shown in Figure 3-3. Proper system grounding is discussed on Page 9, and see Page 26 for RFI Grounding. The 240VAC i220 systems include a 16/20 amp rated IEC inlet. 120VAC systems include a non-detachable power cord. An appropriately rated power cord must be securely attached to the welding system’s IEC inlet connector. If the correct power cord configuration is not included with the system for the local AC power outlet at your location, an appropriate IEC power cord should be available from a local electrical parts supplier. Note that the system undervoltage lockout will inhibit system operation if a North American power cord configured for 120V is connected to the system. A minimum of 200V is required for the system to operate. Power Switch/Circuit Breaker The power switch/circuit breaker has a rocker type actuator switch that will activate or deactivate the AC power to the system. The power ON position is marked with the internationally recognized I symbol, the power OFF position is marked with the 0 symbol. This power switch also integrates an appropriately sized over-current protection circuit breaker function in the press. If an over-current condition trips the circuit breaker, it will automatically switch to the OFF position. If the overload current that caused the circuit breaker to trip is due to a transient condition, the circuit breaker can be reset by switching the actuator back to the ON position. If when resetting the circuit breaker after it has tripped, it immediately trips again, there is likely an internal system malfunction that will require service. Do not repeatedly try to reset the circuit breaker. If it trips, this will only cause more damage to the press. Continued Dukane Manual Part No. 403-594-00 Page 19 iQ Series Ultrasonic Integrated Press System i 220 User’s Manual Continued from Previous Page System I/O Panel The standard system I/O panel is described here. System I/O Panel Connectors (5) et tec De J3 US B nd Eth e J9 J2 J6 Ba s Gr ou eA bo rt I/O Sy ste m J1 The SYSTEM INPUTS/OUTPUTS connector mounted on the system I/O panel (See Figure 3-5.) includes connections for all of the basic system control input and output signals that will typically be associated with an automated control system. t System I/O Connector (J1) rN See Figure 3-4. The cable attached to this connector includes all of the available system control signals, which will be controlled by an output card or output port on the automation controller. The user can determine which signals to use for each welding application, but with an automatic control system there must be at least one connection to this connector in order to activate the ultrasound output. Most of the digital output status signals on this connector, are isolated PHOTOMOS relays (signals are not referenced to generator chassis ground). When an output is active, these relays are closed (the output is connected to Isolated Common). This configuration supports PNP and NPN automation inputs, depending on how the common is terminated. The maximum current is 400mA sourced from a 24VDC supply. All of the input signals on this connector are electrically isolated (signals are NOT referenced to chassis ground) and can be driven from an automation controller output that is either sinking (NPN) or sourcing (PNP), depending upon how the isolated common connection is terminated. Signals are activated when the voltage difference between the signal and the isolated common pin is 24V. Figure 3-4 System I/O Panel (Standard Panel Shown) 13 11 9 7 5 3 1 All inputs sink or source 10mA of current from a 24VDC power supply. Note that a simple switch closure (relay contact) connected to a control input can not activate the input without adding an external power supply to power the input. Adding jumper connections to pins available on the System I/O connector, can configure switch closure inputs to operate referenced to press chassis ground (non-isolated), without adding a separate power supply, if desired. Refer to Application Note AN515 (i220 Integrated Press - Automation Interface) at http://www.dukane.com/us/ DL_ApplData.asp for wiring diagrams of example applications. Page 20 25 Figure 3–5 23 21 19 17 15 DB-25F, Press Input/Output Cable Connector (J1) Continued Dukane Manual Part No. 403-594-00 Section 3 - Installation Continued from Previous Page Pin Signal Name Cable Color Code Description 1 Solenoid Output BLK Non-isolated active low digital output that is active from start of a cycle to end of Hold (referenced to chassis ground). 2 In Cycle Status Output WHT Isolated output referenced to Output Common that is active from start of a cycle to end of Hold. 3 Front Panel Lockout Input RED Isolated input refrenced to Input Common that locks the front panel user interface. 4 READ RELAY NO Output GRN Isolated output that is referenced to READY RELAY Common that is active when the press is ready to start a cycle. 5 READY RELAY Common ORN Common for READY RELAY NO Output 6 Not Used BLU 7 Not Used WHT/BLK 8 +22VDC Power Supply RED/BLK +22VDC for customer automation controls. Limited to 500mA total for both pins. 9 +22VDC Power Supply GRN/BLK +22VDC for customer automation controls. Limited to 500mA total for both pins. 10 Bad Part Status Output ORN/BLK Isolated output referenced to Output Common that activates when bad part limit(s) are exceeded. 11 Top of Stroke Status Output BLU/BLK Isolated input referenced to Input Common that resets the Any Fault or System Overload status outputs. 12 Not Used BLK/WHT 13 Hold Status Output RED/WHT Isolated output referenced to Output Common that indicates when in the Hold part of a weld cycle. 14 System latch Reset GRN/WHT Isolated input referenced to Input Common that resets the Any Fault or System Overload status outputs. 15 Input Common BLU/WHT Isolated input Common 16 +22VDC Power Ground BLK/RED +22VDC Power Ground (also chassis ground) 17 +22VDC Power Ground WHT/RED +22VDC Power Ground (also chassis ground) 18 +22VDC Power Ground ORN/RED +22VDC Power Ground (also chassis ground) 19 Ultrasound Active Status BLU/RED Isolated output referenced to Output Common that indicates ultrasound is being output. 20 System Ready Status RED/GRN Isolated output referenced to Output Common that is active when the press is ready to start a cycle. 21 Any Fault Status ORN/GRN Isolated output referenced to Output Common that is active when the any fault/alarm is detected. 22 Output Common BLK/WHT/RED Isolated Output Common. 23 Output Common WHT/BLK/RED Isolated Output Common. 24 U/S Activate Common RED/BLK/WHT Isolated U/S Activate/Cycle Start. 25 U/S Activate/Cycle Start Input GRN/BLK/WHT Isolated input referenced to Isolated U/S Activate/Cycle Start Input Common that starts a cycle when activated. Table 3-I System Input/Output Connector Signals (J1) Continued Dukane Manual Part No. 403-594-00 Page 21 iQ Series Ultrasonic Integrated Press System i 220 User’s Manual Continued from Previous Page System I/O Signal Descriptions (J1) Pin 10 (Bad Part Status Output) Pin 1 (Solenoid Output) This pin is a non-isolated digital active low status output that is active from start of a cycle to end of Hold (referenced to chassis ground). Pin 2 (In Cycle Status Output) Pin 2 is an isolated digital NPN/PNP status output referenced to Output Common that is active from start of a cycle to end of Hold. Pin 3 (Front Panel Control Lock Input) Pin 3 is used to lock the front panel user interface, so an operator cannot change any welding configuration parameters that are stored in memory. The user can use the interface controls to view welding information, but no changes are allowed. Deactivation of this signal allows normal operation, without any lockout restrictions. Pin 4 (READY RELAY NO Output) Pin 4 is the normally open contact of the Ready Relay that is connected to the Ready Relay Common pin when the system is ready to begin a weld cycle. This output will be an open circuit when the welding process controller determines that the next welding cycle cannot be started. This will occur if the system is in cycle, a system fault is active, or the system is off line, but not as a result of a process fault like Overload. Pin 5 (READY RELAY Common) Pin 5 is the Ready Relay common pin. Pin 6 (Not Used) Pin 7 (Not Used) Pin 8 (+22VDC Power Supply) Pin 10 is an isolated digital NPN/PNP status output that activates, either momentarily or until the start of the next welding cycle, when the welding parameters recorded during the previous welding cycle are outside of the programmed bad part limits. This output will be an open circuit when a bad part has not been detected. Pin 11 (Top of Stroke Status Output) Pin 11 is an isolated digital NPN/PNP status output that activates when the press/thruster head is in the top of stroke position. This output will be an open circuit when the press/thruster head is not at the top of stroke position. Pin 12 (Not Used) Pin 13 (Hold Status Output) Pin 13 is an isolated digital NPN/PNP status output that actives when the press is in the Hold portion of the weld. This output will be an open circuit when the not in Hold. Pin 14 (System Latch Reset Input) Pin 14 is used to reset the Any Fault or System Overload status outputs (See Status Output descriptions.). If a fault occurs during a weld cycle, these outputs will normally remain active until the next weld cycle is initiated. Activating this input will reset the status output faults and may simplify automation programming. Pin 15 (Input Common) Pin 15 is electrically isolated from chassis ground. Using isolated sourcing (PNP) output drivers, this common line would be connected to isolated ground potential. Using isolated sinking (NPN) output drivers, this common line would be connected to the isolated positive supply voltage output. This pin can supply +22VDC. Pin 9 (+22VDC Power Supply) This pin can supply +22VDC. Page 22 Dukane Manual Part No. 403-594-00 Section 3 - Installation Pin 16 (+22VDC Power Ground) Pin 22 (Output Common) Pin 17 in the 22VDC return and is tied to the system chassis ground. Pin 22 is electrically isolated from chassis ground. This common line should be connected to the negative output of a user-provided isolated 24VDC power supply for a PLC sourcing input card. For a PLC Sinking input card this line is connected to the positive output of the isolated 24VDC power supply. Pin 18 (+22VDC Power Ground) Pin 23 (Output Common) Pin 16 in the 22VDC return and is tied to the system chassis ground. Pin 17 (+22VDC Power Ground) Pin 18 in the 22VDC return and is tied to the system chassis ground. Pin 19 (Ultrasound Active Status) Pin 19 is a digital NPN/PNP status output that activates when the system is delivering ultrasonic power to the load attached to the ultrasound output connector. This output will be an open circuit when the ultrasound output is off. Pin 20 (System Ready Status Output) This status output signal will activate only when the system is ready to activate ultrasound or begin a weld cycle. Pin 22 is a digital status output that activates when a weld processing cycle is completed and the welding process control system is ready to start the next welding cycle. This output will be an open circuit when the welding process controller determines that the next welding cycle cannot be started. This includes system faults or off line active, but not a process fault like Overload. Pin 21 (Any Fault Status Output) Pin 23 is electrically isolated from chassis ground. This common line should be connected to the negative output of a user-provided isolated 24VDC power supply for a PLC sourcing input card. For a PLC Sinking input card this line is connected to the positive output of the isolated 24VDC power supply. Pin 24 (Ultrasound Activation/Cycle Start Common) Pin 24 is electrically isolated from chassis ground. Using sourcing (PNP) output drivers, this common line would be connected to the automation system ground potential. Using sinking (NPN) output drivers, this common line would be connected to the automation system positive supply voltage output. Pin 25 (Ultrasound Activation/ Cycle Start Input) Pin 25 is used to start a weld cycle. Depending on the welding process controller setup, this input signal could be activated momentarily to start a welding cycle. Pin 21 is a digital NPN/PNP status output that activates whenever any fault condition is detected that inhibits ultrasound output and normal system operation. This output will be an open circuit when no system fault conditions are detected. In the case of an overload, this output stays active until the start of the next cycle or until cleared using the front panel keypad or system input Pin 12 (System Latch Reset input). Faults that will activate the Any Fault output: • Overload (Average, Peak, or Frequency) • Overtemperature Fault • System Power Fault Continued Dukane Manual Part No. 403-594-00 Page 23 iQ Series Ultrasonic Integrated Press System i 220 User’s Manual Base/Abort Connector (J6) The Base/Abort connector accepts the operate and emergency stop signals from the optical operate switches and abort switch on the base (J35 - Base Interface Connector). If you are using custom automation, you may have separate operate and abort switches, but these still connect to the Base/Abort Connector (J6). See Installing the Press System Without its Machine Base on Page 30. Ground Detect (J2) To activate Ground Detect connect a ground cable to J2, and make sure the feature is activated by using the Weld menu. Generally the Ground Detect feature is used to sense when the horn contacts an electrically isolated anvil. Ground Detect Input is connected to the electrically isolated anvil. When the horn, which is always at ground potential, contacts the anvil, the ground detect input is activated. The weld portion of the cycle is then terminated. The system will not start a new cycle until the ground detect input is deactivated. Isolate the fixture as it is fastened to the press base plate by completing the three numbered steps shown in Figure 3-6 below. The horn is ground and acts as a switch closure when it touches the fixture. Horn 2 2 With all electrical power to the system turned off, connect a wire from the fixture directly to J2 using a banana clip. Screw 3 Fixture Base Plate Use plastic insulating washers with the bolts used to fasten the fixture to the base plate. Center the washers and bolts so the bolts will not touch the insides of the fixture holes. 1 Install a plastic insulator between the fixture and the base plate. Figure 3-6 Ground Detect Fixture Installation EtherNet (J9) (Dukane Use Only) USB (J3) (Dukane Use Only) Page 24 Dukane Manual Part No. 403-594-00 Section 3 - Installation Base Connections Grounding Stud This connector is shown as A in Figure 3-7. Use this base connector to insure proper grounding. See RFI grounding below, and the grounding material on Page 9. J35 - Ergonomic Base Connector This connector is shown as B in Figure 3-7. It is used to interface the base controls and display to the Base/Abort connector (J6) on the thruster. See Figure 3-4 for the J6 location. B A Figure 3-7 Dukane Manual Part No. 403-594-00 Press Base Rear - Grounding Stud and J35 the Base Interface Connector Page 25 iQ Series Ultrasonic Integrated Press System i 220 User’s Manual RFI Grounding The i220 Press provides the operating power and power returns. Make sure the press is grounded properly. In addition to the safety considerations, proper grounding is essential for the effective suppression of RFI (Radio Frequency Interference). Every press contains a RFI filter which blocks noise on the AC power line from entering the control circuitry. This filter also prevents ultrasonic RFI from being fed back into the AC power line. If you experience problems with RFI from the press, run an additional grounding wire from the press base grounding stud to the nearest grounded metal pipe or equivalent earth ground by means of a ground clamp. Use at least 14 AWG wire for the connection to the press base. CAUTION To minimize electrical noise and eliminate ground currents, ground the chassis as shown. Use a STAR configuration (illustrated below). Do not DAISY CHAIN the grounds. Chassis Grounding Stud Recommended protective earth ground connection wire color: green or green with yellow stripe. Earth Ground Page 26 Fixed Probe Mount or 2nd Chassis Grounding Stud #14 Gauge Stranded or Solid Wire 3rd Chassis Grounding Stud Dukane Manual Part No. 403-594-00 Connecting Press Cables J6 J1 Sy ste m The press is not equipped with its own source of compressed air, or electrical power. The end user supplies compressed air, electrical power, and system I/O connections needed for end user applications. I/O Ba se J2 Ab J9 Grou ort n J3 Ethe d De r US Net tect B Section 3 - Installation Figure 3-8 to the right indicates locations for press connections. Basic Connections 1. Ground the press chassis with the supplied 14-Gauge wire, and attach it to the grounding stud. See Figure 3-xx. 2. Connect compressed air to the air supply source connector. This is a 1/4 NPT threaded receptacle for a compressed air supply that provides the thruster with the required pressure of 80-110 psi (5.4 - 7.5 atmospheres) to operate the pneumatic system. See the CAUTION about compressed air on the next page. Filtered Air to Thruster This connector is attached to a safety isolation lockout valve and then to an air filter. (See Pneumatic Safety, Page 10.) Air Filter 3. Base/Abort Cable (J6) - Connect this cable to the press base plate connector (J35) or automation equipment. 4. Connect the A.C. power cord to the IEC power inlet connector on the press, and plug the other end into an approved AC outlet. Additional Connections In addition to basic connections listed above: • Provide for other System I/O Panel connections as A.C. Power Cord needed. These include: J1 - System I/O; J2 - Ground Detect; J9 - EtherNet (DUKANE USE ONLY); and, J3 - USB (DUKANE USE ONLY). Air Supply Source Grounding Stud Figure 3-8 Press Connections Dukane Manual Part No. 403-594-00 Page 27 iQ Series Ultrasonic Integrated Press System i 220 User’s Manual Power Cords The AC line cords supplied are matched to the ultrasonic output power rating and the continent of specified use. See Table 3-II below. CAUTION The compressed air for the thruster must be clean, dry and oil free. Any particulate, oil contamination or moisture can coat or clog the valves, sensors and cylinder walls. This can result in premature failure of the regulator, pressure transducer, air cylinder or other components of the pneumatic system. CAUTION The power cord is equipped with a three-prong, grounded-type plug for your safety. Whenever a two-slot receptacle is encountered, we strongly recommend that it is replaced with a properly grounded three-lead receptacle. Have a qualified electrician do the replacement in accordance with the National Electrical Code and local codes and ordinances. DO NOT cut off the power cord grounding prong or alter the plug in any way. Continent of Use North America Continental Europe Table 3-II Power Cord Part Number Power 200 - 1110 240V, 15A 200 - 1541 240V, 10A 200 - 1111 240V, 16A 200 - 1542 240V, 10A Power Cords NOTE Under normal usage, do not apply more than 24 VDC @ 2 Amps to the contacts at J1. Page 28 Dukane Manual Part No. 403-594-00 Section 3 - Installation Press Height Adjustment The height of the thruster on the column is adjustable. Adjustment is made by first turning the two handles located on the right rear side of the press. • To loosen the grip on the column, turn the handles counterclockwise, as shown in Figure 3-10a. The counterbalance spring on the column supports the weight of the thruster while the handles are loose. Depending on horn weight, the press may rise up unexpectedly, so be careful to avoid injury. • Adjust the column to the desired height. • Turn the handles clockwise, as shown in Figure 3-10b, until tight. • To rotate the handles out of the way without loosening or tightening, pull the handles outward, rotate and release, as shown in Figure 3-11. Counterbalance Spring Support Housing Thruster Height Adjustment Handles Figure 3-9 Example of Press Placement CAUTION Exercise caution if a thruster is not installed on the support housing. The counterbalance spring on the unloaded housing may cause the assembly to rise up unexpectedly when the height adjustment handles are loosened. (a) – Loosen (b) – Tighten Figure 3-10 Using Handles to Make Adjustments Figure 3-11 To Relocate Handles Dukane Manual Part No. 403-594-00 Page 29 iQ Series Ultrasonic Integrated Press System i 220 User’s Manual Installing the Press System without Machine Base Configuration of the press system without its machine base, means that installation is somewhat different from a machine base equipped press. There are three primary differences : 1) Securing the Base Flange - In this case, the base flange will have to be secured to a rigid, level stationary structure. We recommend using socket-head cap screws M12 -1.75 with a minimum length of 40 mm for securing the flange to the supporting structure. We recommend a minimum of 1 inch (25.4 mm) full thread engagement of the cap screws into the supporting structure. Depending upon the thickness and material of the supporting structure, longer screws and/ or additional hardware may be required. A full scale flange template is provided for locating and drilling holes in the supporting structure. The template is Figure 3-20 on the next page. 2) Operate and E-STOP Signals - Because there is no machine base as the press is equipped in its standard configuration, operate and emergency stop signals will not be generated by the optical switches and the E-STOP/Abort switch that are parts of the standard press base. These signals will be generated by user-supplied external sources. Connect a Dukane cable - Part Number 200-1546-xxM - from the J6 connector on the System I/O Panel to usersupplied automation equipment. See Automation System for more information about the user-supplied requirements for this connection on the next page. Page 30 Dukane Manual Part No. 403-594-00 Section 3 - Installation Automation System User-supplied automation equipment connects to the press System I/O Panel through: • J1, a 25-pin connector, and • J6, a 9-pin connector. J1 - User-supplied external controls provide the press with input/output signals that direct operation of the press. Table 3-I - System Input/Output Connector Signals - shows the 25-pin connector's input and output signal names. See Pages 21-23 for signal descriptions. J6 - Attach the finished end (9-pin female connector) of Dukane cable Part Number 200-1546-xxM** to J6 on the Press System I/O Panel. With the open end of the cable the user can make connections from user-supplied equipment to provide for the functions the Dukane cable typically has. See the table below. Pin No. Type Function Signal Description 1 Input Activation Switch 1 N.O. Normally Open (N.O.) dry contact closure to Pin 7 2 Input Activation Switch 2 N.O. Normally Open (N.O.) dry contact closure to Pin 7 3 Input Hardware Abort Power In Normally Closed (N.C.) emergency switch contact 4 Input Software Abort Normally Open (N.O.) dry contact closure to ground 5 Ground Internal Ground Internal Ground (Gnd) 6 Input Activation Switch 1 N.C. Normally Closed (N.C.) dry contact closure to Pin 7 7 +22VDC Switch Power Out Power for switches when abort inactive. 8 Input Activation Switch 2 N.C. Normally Closed (N.C.) dry contact closure to Pin 7 9 +22VDC Hardware Abort Power Out Normally Closed (N.C.) emergency switch contact Table 3-III Dukane Cable 200-1546-00 Signals ** xxM = A value representing cable length in Meters. This number is typically determined when ordering the equipment. Dukane Manual Part No. 403-594-00 Page 31 iQ Series Ultrasonic Integrated Press System i 220 User’s Manual FRONT 7.75 inches (196.85 mm) 3.023 inches (76.783 mm) 3.875 inches (98.425 mm) 2.625 inches (66.675 mm) 2.00 inches (50.80 mm) 1.50 inches (38.10 mm) 2.625 inches (66.675 mm) 2.25 inches (57.15 mm) 2.25 inches (57.15 mm) Figure 3-12 Flange Template REAR No Scaling - Actual Size Flange Template Page 32 Dukane Manual Part No. 403-594-00 Section 4 - Controls SECTION 4 Controls Front Panel Controls. . . . . . . . . . . . . . . . 35 System Operating Mode Keys. . . . . . . . . . . . 36 Navigation Keys. . . . . . . . . . . . . . . . . . . . 37 Soft Keys Bordering the Display . . . . . . . . . . . 37 Hot Keys. . . . . . . . . . . . . . . . . . . . . . . . 38 System Power Output Level. . . . . . . . . . . . . . 39 Screen Basics. . . . . . . . . . . . . . . . . . . . 40 Press Controls. . . . . . . . . . . . . . . . . . . . 41 Manual Thruster Controls . . . . . . . . . . . . . . . 41 Indicators . . . . . . . . . . . . . . . . . . . . . . . 43 Press Ergonomic Base . . . . . . . . . . . . . . . 45 Dukane Manual Part No. 403-594-00 Page 33 iQ Series Ultrasonic Integrated Press System i 220 User’s Manual This page intentionally left blank Page 34 Dukane Manual Part No. 403-594-00 Section 4 - Controls Front Panel Controls This section introduces the iQ Series ultrasonic integrated press system control panel and LCD display with this NOTE information: Do not touch the display. Touch only the keys that are on the front panel. • Functions of the panel components shown in Figure 4-1 below are discussed. Cleaning - If the display is dirty, clean it by first putting a mild cleaning solution on a clean, soft cloth. Then, gently wipe the cloth over the screen. • These screen basics are introduced: — Making selections, — Interpreting on-screen arrows, — Taking a look at setup identification. Press Controls See Page 44 PRESSURE MECHANICAL STOP DOWN SPEED WELD POWER Hot Keys (8) TRIGGER ABORT POWER, ABORT, TRIGGER LEDs AMP PRE WELD POST WELD WELD LIMITS SETUP INFO Key ENTER Navigation Keys (4) OFFLINE CAN ENTER Key 2 1 8 8 4 4 5 0 0 2 3 6 5 1 3 7 6 7 Dukane Manual Part No. 403-594-00 LIVE INFO ONLINE Figure 4-1 Front Panel Controls OPERATE L CE TEST CANCEL Key Page 35 iQ Series Ultrasonic Integrated Press System i 220 User’s Manual System Operating Mode Keys ON LINE - After AC power has been activated and the press is operating normally, ON LINE is the normal operating mode. The press can produce ultrasound signals in this mode. The word, Online appears in a white outlined box in the upper right of the display. TEST - After AC power has been activated and the press Operating Mode Indicator Online condition shown AUTO 01 PROCESS STATISTICS SETUP #01 PART COUNT: WELD TIME : ENERGY: PEAK POWER : DISTANCE ONLINE 0 0.000s 0J 0W 0in is operating normally, in the ON LINE mode, the TEST key can be pushed. This activates a momentary ultrasound pulse allowing the operator to test system function. The display will show the real time settings for Amplitude, Power, Operating Frequency, and Distance (does not appear if distance is not supported). This information is useful in troubleshooting. While pushing the TEST key, look at the System Power Output Level bar graph (See Figure 4-3.) There should be at least one segment lit. IMPORTANT - If more than three segments are lit, with no load applied to the ultrasonic stack, make sure the stack is properly assembled and not damaged. During normal operation, the peak level LED segment remains lit (approximately 1 second) until the next cycle begins. Figure 4-2 Display Detail, Operating Mode Indicator CAUTION If a transducer is not connected to the ultrasound output connector, the system should be set to the OFFLINE mode. Do not activate the ultrasound output without a transducer connected. Make sure that the stack is properly assembled before it is connected to the system. The horn should never come in direct contact with a metal fixture or anvil with ultrasound activated. OFFLINE - After AC power has been activated and the press is operating normally, the OFFLINE key may be pressed to put the press into the offline mode. In this mode the press can not generate an ultrasound signal. System Power Output Level Bar Graph AUTO 01 SETUP #01 However the press can still run a cycle while OFFLINE. PART COUNT: This can be useful to check the rest of the mechanical WELD TIME : ENERGY: weld setup including the speed, air pressure and trigger PEAK POWER : DISTANCE point settings. PROCESS STATISTICS The word, Offline appears in a white outlined box in the display's upper right corner. Page 36 ONLINE 0 0.000s 0J 0W 0in Figure 4-3 Display Detail, Power Output Level Dukane Manual Part No. 403-594-00 Section 4 - Controls Navigation Keys (4) ENTER Key Press ENTER to confirm and store a selection in memory. Example: After entering a time value, press ENTER. CANCEL Key Press the CANCEL key to stop editing a value without saving changes to the value or to leave secondary menu screens. INFO Key Press the INFO key, and the menu shown to the right in Figure 4-5 appears. O + Moving the Cursor - Press the left and right navigation ( ) keys to move the display’s cursor left or right respectively. Press the up and down navigation keys ( + or - ) to scroll through menu lists. Also, use the keys to move to a digit and change the value of a selected digit with the + or - keys. INF ENTER L CE N CA Navigation Key (4) Figure 4-4 Navigation Keys (4), with Enter, Info and Cancel SYSTEM INFO INFO MENU ONLINE REGIONAL SETTINGS ADVANCED SETTINGS AMP PRE WELD POST SETUPS OPERATE LIVE WELD WELD LIMITS SETUP Figure 4-5 Info Menu Display NOTE For more information about the INFO menus, please see Section 5 - Operation. Soft Keys Bordering the Display (3) Use the three keys bordering the left side of the display to make selections from the choices shown on the display. Not all keys will be active on any given screen. Example: For the display shown in Figure 4-6 below, two of the three soft keys are active: Weld, and Afterburst. ONLINE Active Keys AMPLITUDE 100% WELD AFTERBURST AMP Figure 4-6 Active Soft Keys, Example Dukane Manual Part No. 403-594-00 PRE WELD PRESS ENTER TO ACCEPT PRESS CANCEL TO ABORT POST SETUPS OPERATE LIVE WELD WELD LIMITS SETUP Continued Page 37 iQ Series Ultrasonic Integrated Press System i 220 User’s Manual Hot Keys (8) Each of the eight hot keys under the display, when pressed, brings up one of these portions of the menu: • AMP - Adjust amplitude for Weld, Pre-Trigger and Afterburst portions of the weld cycle. • PRE-WELD - Select operating Mode; enable or disable Pre-Trigger; and, select Trigger type, trigger maximum time, and trigger delay. • WELD - Choose weld type (time, energy, distance, position or ground detect). • POST WELD - Set parameters for Hold and Afterburst parts of the cycle. • LIMITS - Set which weld characteristics to be displayed, and which will have their bad part part limits enabled. • SETUPS - This is a display only screen showing the setup (weld parameters). • OPERATE - This is a display-only screen showing cycle data from the last cycle. Only those selected to be displayed or have process limits set will be shown. • LIVE - This is a display-only screen showing real time Amplitude, Power, Operating Frequency, and Position. (If position is not supported, it is not displayed.) NOTE The white bar along the bottom of the LCD display is positioned above the Hot Key menu that is being displayed. See the next section, OPERATION for more detail on the functions of these hot key sub-menus. Page 38 Dukane Manual Part No. 403-594-00 Section 4 - Controls System Power Output Level (Bar Graph) A bar graph displays the percentage of ultrasonic power being drawn by the load. See Figure 4-7 to the right. AUTO 01 Peak Detect Feature To indicate the maximum peak power achieved during a weld cycle, the segment in the bar graph corresponding PROCESS to the peak level remains on (for about oneSTATISTICS second) after the weld cycle has been completed. Bar Graph Power Scaling Power scaling is related to amplitude. At 100% amplitude the whole graph is lit, and the press is operating at 100% power. At 50% amplitude the entire graph is lit, and the press is operating at 50% power. If the amplitude setting is lowered, the graph rescales automatically according to the revised amplitude. Example: With a 1200W press, at 50% amplitude, if the whole graph is lit, that represents 600W. System Power Output Level Bar Graph SETUP #01 PART COUNT: WELD TIME : ENERGY: PEAK POWER : DISTANCE ONLINE 0 0.000s 0J 0W 0in Figure 4-7 Display Detail, Power Output Level CAUTION If there is an overload fault verify that the ultrasonic stack is not damaged. Power LED The front panel POWER LED glows after the rear panel AC power switch/circuit breaker is turned ON: On start-up, the light flashes GREEN for a few seconds, and then turns steady GREEN. This indicates AC power has activated the press. NOTE Go to Section 5 - Operation, Start-up Sequence for an explanation of the press start-up sequence. When the AC power switch is turned to the OFF position, the front panel POWER LED goes out indicating the press no longer has power. Dukane Manual Part No. 403-594-00 Page 39 iQ Series Ultrasonic Integrated Press System i 220 User’s Manual Screen Basics Making Selections Figure 4-8 below shows there are several ways to show that an item has been selected: • An area of white highlights a selected item. • The cursor shows what digit is selected. Cursor shows selected digit under Distance below. DISTANCE 0.0000 in White area highlights selected item TIME ENERGY > DISTANCE POSITION GROUND DETECT MAX TIME 30.000s PRESS ENTER TO ACCEPT PRESS CANCEL TO ABORT AMP PRE WELD POST SETUP OPERATE LIVE WELD WELD LIMITS SETUPS Figure 4-8 Making Selections Interpreting On-screen Arrows Arrows pointing up and down, give visual cues that more text is available in the direction the arrow points. An example is shown below in Figure 4-9. For this screen, the + and - (up or down) navigation keys are used to move in the direction of the on-screen arrow. Display arrow points in direction of more text RESTORE DEFAULTS AMP >ADV PROCESS CONTROL PRE WELD FREQUENCY TRACKING FREE RUN FREQUENCY FREQ LOCK AND HOLD SYSTEM FREQ LIMITS RAMP UP TIME RAMP DOWN TIME ONLINE DISABLED 20055Hz DISABLED NORMAL 0.150s 0.000s POST SETUPS OPERATE LIVE WELD WELD LIMITS SETUP Figure 4-9 Arrows Indicate Direction of More Text Page 40 Dukane Manual Part No. 403-594-00 Section 4 - Controls Press Controls This section describes the manual controls, indicators and features of the Press/Thruster System. If desired, the controls on the front of the thruster can be used to manually set parameters for a given process. Features used on the control panel are: • Indicators associated with the controls to provide a visual indication of the control settings. • Metric measurements Manual Thruster Controls NOTE Total Stroke = 7 inches (177.800mm) This is the thruster's maximum available distance of travel. Refer to Figure 4-10 for the location of the controls. Mechanical Stop Adjustment The function of the mechanical stop is to halt the downstroke at a predetermined point. It is used in two ways: • To stop the downstroke at a particular depth of travel relative to the fixture/anvil. • To prevent the horn from contacting the fixture when there is no part present. This prevents possible damage to the horn and/or fixture. Never allow the horn to contact the fixture while ultrasonic power is applied to the horn. Metal–to–metal contact can void the horn and/or tooling warranty. CAUTION Do not allow the horn to contact the fixture while ultrasonic power is applied to the horn. Metal–to–metal contact can void the horn and/or tooling warranty. The Mechanical Stop position may be locked by tightening the lock screw located on the left side of the press. Once locked, it will be difficult or impossible to turn the Mechanical Stop Adjustment Knob on the front panel. Down Speed Adjustment This control adjusts the downward velocity of the press/ thruster slide assembly. Turning the knob clockwise decreases the speed. Turning it counterclockwise increases the speed of descent. There is a locking ring at the base of the Down Speed knob to lock the knob and prevent it from turning. Weld (Pressure Regulator) The weld (pressure regulator) knob is used to set the amount of air pressure applied to the air cylinder during the press downstroke, the weld, and the hold cycle. Dukane Manual Part No. 403-594-00 Continued Page 41 iQ Series Ultrasonic Integrated Press System i 220 User’s Manual Mechanical Stop Adjust Pressure Gauge PRESSURE MECHANICAL STOP Down Speed Adjust Weld DOWN SPEED WELD POWER TRIGGER ABORT See Section 5, Operation for detail about the LCD front display. AMP PRE WELD POST WELD WELD LIMITS SETUP OPERATE LIVE INFO ONLINE ENTER OFFLINE TEST Thruster Height Adjustment Locking Handle Trigger Control Knob 2 1 0 8 8 4 4 5 6 5 0 2 3 3 1 7 6 7 Figure 4-10 Press Controls and Indicators - Front View Page 42 Dukane Manual Part No. 403-594-00 Section 4 - Controls Continued from Page 41 Trigger Control Setting the trigger control determines the amount of preload or force on the part before turning on the ultrasonics. (Numbers displayed are for reference only.) 9 8 4 0 1 0 2 3 5 6 7 The numbers on the scale give the operator only a relative reading. A higher setting indicates more preload force (on the part before the ultrasound signal is turned on). A lower setting means less force. 2 4 5 6 To make adjustments, grasp the inner knob, and turn it to make adjustments. This knob can be turned as many as nine revolutions. Each revolution advances the outer dial one number in the direction the knob was turned. A lever between the scales locks the control in position. 1 3 See Figure 4-11 for trigger knob detail. Locking Lever 7 8 A pressure switch in the slide assembly closes when a specific amount of force applied to the horn is reached. The trigger control adjusts the amount of force needed to close that pressure switch. When the switch closes, the ultrasound signal starts, and the horn begins to vibrate. Figure 4-11 Trigger Control Knob Indicators Pressure Gauge The pressure gauge shows the amount of air pressure applied to the upper portion of the air cylinder for the weldand-hold operation. Stroke Position Indicator Flag The stroke position indicator flag is not preset prior to press operation. It moves with the slide assembly as the assembly moves down and up. Mechanical Stop Indicator Flag This setting indicates where the downstroke will end. Continued Dukane Manual Part No. 403-594-00 Page 43 iQ Series Ultrasonic Integrated Press System i 220 User’s Manual Continued from Previous Page Loosen or tighten the mechanical stop lock with a M5 Hex wrench. Mechanical Stop Indicator Flag Slot Figure 4-12 Stroke Position Indicator Flag Slot Press Left Side View with Detail Continued Page 44 Dukane Manual Part No. 403-594-00 Section 4 - Controls Press Ergonomic Base The ergonomic base, shown in Figure 4-13, consists of a base plate, cycle activation switches (black finger switches), abort switch (red palm switch). At the back of the base is a cable connector for an interface between the i220 thruster and the base front panel. Base Plate The machined base plate is bolted to the top of the ergonomic base. It has drilled and tapped holes that line up with leveling screws in the fixtures to allow easy fixture leveling for alignment with the horn. For details on the alignment and leveling of the base plate, see Section 7: Acoustic Stack/Fixture Setup. Dimly Lit Red LED Figure 4-14 Right Operate Switch in Standby Mode, One LED Dimly Lit NOTE The actual amount of force applied to the part depends on the following four factors: • The setting of the regulator(s) • The area of the air cylinder • The mass of the horn used • The surface area of the horn Right Operate Switch Left Operate Switch Lower Fixture E–Stop Switch Figure 4-13 Ergonomic Base Controls Dukane Manual Part No. 403-594-00 Brigtly Lit Red LEDs Figure 4-15 Right Switch in Operate Mode, Both LEDs Brightly Lit WARNING Any modifications to the Activation Switch (also known as the Operate Switch) circuit must comply with all OSHA and ANSI requirements. Compliance with all local building and electrical codes is also required. Dukane Corporation does not assume any responsibility or liability for circuitry modifications made by the customer or by any third party manufacturer. Page 45 iQ Series Ultrasonic Integrated Press System i 220 User’s Manual Activation (Operate) Switches Located on either side of the base are two optical (RUN) switches. These are shown in Figure 4-13. These switches use Infrared (IR) sensors. They comply with OSHA and CE safety standards. Both switches are identical. Each optical–touch switch has a small red LED that is dimly illuminated whenever the power is on, as shown in Figure 4-14. When the operator places a finger in the tray, the LED brightens and a second LED in the opposite corner of the tray illuminates to indicate the switch has been activated as shown in Figure 4-15. Both switches must be activated simultaneously to initiate a weld cycle. Emergency Stop (Abort) Switch A red Emergency–Stop (E-STOP) switch is located in the center of the base as shown in Figure 4-13. The emergency stop switch must be in its reset position before the operate switches will function. To reset the Emergency Stop, twist the large red button about 45 degrees to the right, which will cause the button to spring out. This is shown in Figure 4-16. The abort switch applies 24 VDC power to the thruster/ press. Pressing the abort switch causes the press to: • Immediately turn off the ultrasound, • Remove electrical power from the press, and • Initiate a software abort sequence. POWER eset Twist to R E IN CYCL ABORT Figure 4-16 Setting and Resetting the E–STOP WARNING Any modifications to the Emergency Stop Switch (also known as the E-STOP or Abort Switch) circuit must comply with all OSHA and ANSI requirements. Compliance with all local building and electrical codes is also required. Dukane Corporation does not assume any responsibility or liability for circuitry modifications made by the customer or by any third party manufacturer. Front Panel Status LEDs The function of these LEDs is to indicate the status conditions of the press: • POWER - A green POWER status light indicates • ABORT - When the E-STOP (abort_ switch is pushed • TRIGGER - The blue Trigger light comes on when- that power is applied to the press, and it is ready for operation. in, the red ABORT status indicator illuminates. Press operation is no longer possible. ever Ultrasound turns on. It is activated by the Trigger Switch or at the beginning of the weld cycle if "Pretrigger" is enabled. Page 46 Dukane Manual Part No. 403-594-00 Section 5 - Operation SECTION 5 Operation Press Start-up Sequence . . . . . . . . . . . . . . . . . . . . . 49 Stopping the Weld Cycle . . . . . . . . . . . . . . . . . . . . . . 50 Using the Menus . . . . . . . . . . . . . . . . . . . . . . . . . . . . 51 AMP . . . . . . . . . . . . . . . . . . . . . . . . . . . . . . . . . . . . . . . . 52 PRE-WELD . . . . . . . . . . . . . . . . . . . . . . . . . . . . . . . . . . 53 WELD . . . . . . . . . . . . . . . . . . . . . . . . . . . . . . . . . . . . . . . 55 POST-WELD . . . . . . . . . . . . . . . . . . . . . . . . . . . . . . . . . 56 LIMITS . . . . . . . . . . . . . . . . . . . . . . . . . . . . . . . . . . . . . . 57 SETUP . . . . . . . . . . . . . . . . . . . . . . . . . . . . . . . . . . . . . . 58 OPERATE . . . . . . . . . . . . . . . . . . . . . . . . . . . . . . . . . . . . 59 LIVE . . . . . . . . . . . . . . . . . . . . . . . . . . . . . . . . . . . . . . . . 60 Using the INFO Menus . . . . . . . . . . . . . . . . . . . . . . . . . . 62 Alarms . . . . . . . . . . . . . . . . . . . . . . . . . . . . . . . . . . . . 69 Dukane Manual Part No. 403-594-00 Page 47 iQ Series Ultrasonic Integrated Press System i 220 User’s Manual This page intentionally left blank Page 48 Dukane Manual Part No. 403-594-00 Section 5 - Operation Press Start-up Sequence 1) Press the rear panel AC breaker switch to ON. See Figure 5-1. (ON) 2) The front panel POWER light (See Figure 5-2.) will flash GREEN a few times, then will glow a steady (OFF) GREEN. The display's initial screen identifies the Dukane iQ Figure 5–1 Rear Panel AC Breaker Switch Integrated Press and its major components. The start-up sequence ends when the OPERATE screen is displayed. NOTE Press, acoustic stack, and tooling will require their own individual adjustments as those components are integrated into your particular system. Helpful information on a wide variety of assembly equipment, processes and techniques can be found at the Dukane website: http://www.dukane.com/us/PPL_upa.htm Power On Light POWER ABORT TRIGGER CA NC EL Figure 5–2 Front Panel with Power On Light Dukane Manual Part No. 403-594-00 Page 49 iQ Series Ultrasonic Integrated Press System i 220 User’s Manual Stopping the Weld Cycle Normal Conditions The cycle stops when the programmed welding cycle ends. Emergency Conditions Manual System Do one of these things: 1) Press the red Emergency Off (E-STOP) switch (also called the Abort switch.) located on the press base. 2) Press the OFFLINE front panel key to stop the ultrasound signal. This may be done under any condition. OR, 3) If the press front panel power light is on (GREEN), move the rear panel AC breaker switch to the OFF position. The front panel power light will go out as power is cut off. Automated System Customer-supplied external controls provide the means to stop the cycle for an automated system. The 200-1546-xxM cable can be used to connect these external controls to the I/O panel at connector J6. See Page 30 for more information. Page 50 Dukane Manual Part No. 403-594-00 Section 5 - Operation Using the Menus The figure below provides an overview for the menu structure and a beginning page number reference for the item. The user can access the menus through the front panel eight hot keys and through the INFO key. Menu Access Hot Keys Page 52 AMP Start Weld INFO Page 62 System Info Afterburst Regional Settings Operating Mode Page 54 PRE-WELD Pre-trigger Advanced Settings Trigger Time Energy Page 56 WELD Distance Position Ground Detect Hold Page 57 POST-WELD Page 58 LIMITS Page 59 SETUP Display Only Real time Setup parameters. Page 60 OPERATE Display Only Real time Process Characteristics. Page 61 LIVE Figure 5-3 Afterburst From the available process characteristics: Select the ones to display, and the ones for which limits are to be set - for bad parts. Display Only - Amplitude, Power, Operating Frequency, Distance. i220 Integrated Press Menu Overview Dukane Manual Part No. 403-594-00 Continued Page 51 iQ Series Ultrasonic Integrated Press System i 220 User’s Manual Continued from Previous Page NOTE For all menus - When a button is pressed to access the menu, the last parameter accessed will be selected and ready to change if applicable. Example: If the PRE WELD button is pressed, and the Trigger Distance value was the setting last accessed in that menu, then Trigger Distance is selected and ready to change. NOTE On screen Prompts - Watch for and follow on screen prompts where they appear. Example: In Figure 5-4 below the prompts are: PRESS ENTER TO ACCEPT, or PRESS CANCEL TO ABORT AMP The menu in Figure 5-4 is the default display showing WELD with its amplitude value highlighted, and ready to be changed. This is true for either operating MODE: Automated Press or Manual Press. ONLINE AMPLITUDE This is the only available menu IF: PRESS ENTER TO ACCEPT PRESS CANCEL TO ABORT • Trigger is either Momentary or Maintained, • Pre-trigger is disabled, and • Postweld characteristics are disabled. If AFTERBURST is enabled in the POST WELD menu, then the AFTERBURST soft key is also displayed as shown in Figure 5-5 to the right. The parameter value last accessed will be highlighted and ready to change. 100% WELD AMP Figure 5-4 PRE WELD POST SETUPS OPERATE LIVE WELD WELD LIMITS SETUP Setting Weld Amplitude ONLINE AMPLITUDE 100% WELD AFTERBURST PRESS ENTER TO ACCEPT PRESS CANCEL TO ABORT PRE WELD POST SETUP OPERATE LIVE WELD WELD LIMITS SETUPS AMP Figure 5-5 Setting Weld Amplitude with Afterburst Enabled Continued Page 52 Dukane Manual Part No. 403-594-00 Section 5 - Operation Continued from Previous Page If PRE-TRIGGER is enabled in the PRE-WELD menu, then PRE-TRIGGER amplitude is available. See Figure 5-9 on the next page. Online PRE-TRIGGER AMPLITUDE 100% WELD AMP Figure 5-6 PRE WELD POST SETUP OPERATE LIVE WELD WELD LIMITS SETUPS Setting Weld Amplitude, Pre-Trigger Available Press the AMP soft key when: • PRE-TRIGGER is enabled for START OF CYCLE, and • TRIGGER selection is POWER. Then the display shown in Figure 5-7 to the right will be seen. This menu has START as the top soft key. The value last accessed is highlighted and ready to be changed. In the example shown in Figure 5-7, that is WELD > AMPLITUDE. For more information about Trigger by Power, refer to our Application Note 506 on the Dukane website at: http:// www.dukane.com/us/DL_ApplData.asp If AFTERBURST is enabled in the POST WELD menu, then the AFTERBURST soft key is also displayed as shown in Figure 5-8 to the right. The parameter value last accessed will be highlighted and will be ready to change. ONLINE START AMPLITUDE 100% WELD PRESS ENTER TO ACCEPT PRESS CANCEL TO ABORT AMP Figure 5-7 PRE WELD POST SETUP OPERATE LIVE WELD WELD LIMITS SETUPS Setting Weld Amplitude ONLINE START AMPLITUDE WELD AFTERBURST AMP Figure 5-8 PRE WELD PRESS ENTER TO CHANGE POST WELD WELD LIMITS SETUPS SETUP OPERATE LIVE Setting Weld Amplitude with Afterburst Enabled NOTE Amplitude Range = 20 -100% Dukane Manual Part No. 403-594-00 Page 53 iQ Series Ultrasonic Integrated Press System i 220 User’s Manual PRE-WELD The PRE WELD menu is shown in Figure 5-9. The selected mode is highlighted (MANUAL PRESS). To change to a different mode, move arrow to desired mode, and press ENTER. MODE MANUAL PRESS PRESS MANUAL AUTOMATED PRESS ONLINE PRE-TRIGGER TRIGGER AMP Figure 5-9 PRE WELD PRESS ENTER TO SELECT POST SETUP OPERATE LIVE WELD WELD LIMITS SETUPS Pre Weld Menu, Mode is Manual Press The PRE WELD menu shown in Figure 5-10 shows the PRE-TRIGGER menu. MODE The two choices are DISABLED and START OF CYCLE. PRE-TRIGGER ONLINE DISABLED START OF CYCLE TRIGGER AMP PRE WELD PRESS ENTER TO CHANGE POST WELD WELD LIMITS SETUPS SETUP OPERATE LIVE Figure 5-10 Pre Weld Menu, Pre-Trigger Menu The PRE WELD menu shown in Figure 5-11 shows the PRE-TRIGGER menu with START OF CYCLE selected as the pre-trigger TYPE. The PRE WELD menu shown in Figure 5-12 shows the PRE-TRIGGER menu with START OF CYCLE selected as the pre-trigger TYPE. In addition, pre-trigger amplitude can be adjusted. In the example shown in the figure, 20% can be raised by pressing the + (plus) key. (Since amplitude range is 20% -100% this value can not be lower than 20%.) and lowered by pressing the - (minus) key. Once the amplitude value has been decided, press ENTER to accept it, or press CANCEL to abort and return to the previous amplitude value. ONLINE MODE TYPE AMPLITUDE START OF CYCLE 20% PRE-TRIGGER TRIGGER AMP PRE WELD PRESS ENTER TO CHANGE POST SETUP OPERATE LIVE WELD WELD LIMITS SETUPS Figure 5-11 Pre Weld Menu, Pre-Trigger Menu, Start of Cycle Selected as Type ONLINE MODE TYPE AMPLITUDE START OF CYCLE 20% 20% PRE-TRIGGER TRIGGER AMP PRE WELD PRESS ENTER TO ACCEPT PRESS CANCEL TO ABORT POST SETUP OPERATE LIVE WELD WELD LIMITS SETUPS Figure 5-12 Pre Weld Menu, Pre-Trigger Menu, Amplitude Adjustment Continued Page 54 Dukane Manual Part No. 403-594-00 Section 5 - Operation Continued from Previous Page The PRE-WELD menu with the TRIGGER menu selected shows three types of trigger from which to select: MAINTAINED, MOMENTARY, and POWER. ONLINE MODE PRE-TRIGGER TRIGGER AMP PRE WELD MAINTAINED MOMENTARY POWER PRESS ENTER TO SELECT POST WELD WELD LIMITS SETUPS OPERATE LIVE Figure 5-13 Pre Weld Menu, Trigger Menu The TRIGGER menu with MAINTAINED trigger method selected is shown in Figure 5-14. Select MAX TIME and enter a value (seconds) to set the maximum time from start of cycle to trigger activation. If this time is exceeded a Fault occurs and the cycle is terminated. ONLINE MODE TYPE MAX TIME PRE-TRIGGER TRIGGER If MOMENTARY is selected as trigger type, a value for MAX TIME is entered as well. MAINTAINED 0.000s AMP PRE WELD PRESS ENTER TO SELECT POST SETUP OPERATE LIVE WELD WELD LIMITS SETUPS Figure 5-14 Pre Weld Menu, Maintained Trigger Selected ONLINE MODE The menu display seen in Figure 5-15 at the right shows that the TRIGGER type selected is POWER. With POWER as trigger type, AMPLITUDE, POWER (Watts), and MAX TIME need to be entered. PRE-TRIGGER TRIGGER AMP PRE WELD TYPE AMPLITUDE POWER MAX TIME POWER 100% 0W 0.000s PRESS ENTER TO CHANGE POST WELD WELD LIMITS SETUPS SETUP OPERATE LIVE Figure 5-15 Pre Weld Menu, Trigger Selected is Power Dukane Manual Part No. 403-594-00 Page 55 iQ Series Ultrasonic Integrated Press System i 220 User’s Manual WELD The menu shown in Figure 5-16 at the right appears with three choices for weld parameter. > TIME TIME 0.000s ENERGY GROUND DETECT In this case, distance is not supported by the press. ONLINE USE +/- TO SELECT PRESS ENTER TO CHANGE AMP PRE WELD POST SETUP OPERATE LIVE WELD WELD LIMITS SETUPS Figure 5-16 Weld Menu, Mode: Manual/Automated Press, Distance not Supported ENERGY has been selected, and a value for energy will be entered. ENERGY 0J MAX TIME ONLINE TIME > ENERGY GROUND DETECT 0.000s PRESS ENTER TO ACCEPT PRESS CANCEL TO ABORT PRE WELD AMP POST SETUP OPERATE LIVE WELD WELD LIMITS SETUPS Figure 5-17 Weld Menu, Mode: Manual/Automated Press, Energy Selection The menu shown in Figure 5-18 at the right appears for either operating mode, and when DISTANCE is supported by the press. TIME 0.000s > TIME ENERGY DISTANCE POSITION GROUND DETECT ONLINE ||||| USE +/- TO SELECT PRESS ENTER TO CHANGE AMP PRE WELD POST WELD WELD LIMITS SETUPS SETUP OPERATE LIVE Figure 5-18 Weld Menu, Mode: Manual/Automated Press, Distance is Supported The menu shown in Figure 5-19 at the right appears when the ENERGY value is being entered. (Range in Joules: 0-99999.9) MAX TIME, a secondary parameter, must be programmed in its range of 0-30.00 seconds. This is the maximum length of the weld and when reached will stop the weld portion of the cycle. This does not result in a fault. ENERGY 0J MAX TIME 30.000s TIME > ENERGY ONLINE ||||| DISTANCE POSITION GROUND DETECT PRESS ENTER TO ACCEPT PRESS CANCEL TO ABORT AMP PRE WELD POST WELD WELD LIMITS SETUPS SETUP OPERATE LIVE Figure 5-19 Weld Menu, Mode: Manual/Automated Press, Energy Entry NOTE Weld Time: Range is 0-30 seconds. Page 56 Dukane Manual Part No. 403-594-00 Section 5 - Operation POST-WELD The POST WELD menu seen in Figure 5-20, shows the display with the mode set either to MANUAL PRESS or AUTOMATED PRESS. ONLINE HOLD AFTERBURST DISABLED TIME DISABLED DISABLED USE +/- TO SELECT PRESS ENTER TO CHANGE AMP PRE WELD POST SETUPS OPERATE LIVE WELD WELD LIMITS SETUP Figure 5-20 Post Weld Menu ONLINE HOLD When TIME has been selected as the HOLD control method, the menu appears as shown in Figure 5-21 to the right. Note that TIME is highlighted, ready to be changed. AFTERBURST DISABLED TIME 0.000s HO PRESS ENTER TO ACCEPT PRESS CANCEL TO ABORT AMP PRE WELD Figure 5-21 Post Weld Menu, Time Setting AM ONLINE HOLD The menu in Figure 5-22 at the right shows that AFTERBURST is disabled. AFTERBURST DISABLED AFTERBURST PRESS ENTER TO CHANGE AMP PRE WELD POST SETUPS OPERATE LIVE WELD WELD LIMITS SETUP Figure 5-22 Post Weld Menu, Afterburst Disabled The menu to the right in Figure 5-23 is displayed when AFTERBURST is enabled. AFTERBURST Values for afterburst amplitude, afterburst delay and afterburst duration should be entered. Figure 5-23 shows the entry box for afterbust amplitude is highlighted. Dukane Manual Part No. 403-594-00 ONLINE HOLD AFTERBURST AMPLITUDE DELAY DURATION ENABLED 100% 0.000s 0.000s ||||| PRESS ENTER TO ACCEPT PRESS CANCEL TO ABORT AMP PRE WELD AF POST SETUP OPERATE LIVE WELD WELD LIMITS SETUPS POST WELD WELD LIMITS SETUPS SETUP OPERATE LIVE Figure 5-23 Post Weld Menu, Afterburst Enabled Page 57 iQ Series Ultrasonic Integrated Press System i 220 User’s Manual LIMITS The LIMITS menu seen in Figure 5-24, illustrates the display that is shown when either in MANUAL PRESS or AUTOMATED PRESS mode. In the example shown to the right, the DISPLAY soft key was pressed to select ENABLED. Press the key again to select DISABLED. When the BAD soft key is pressed (in the menu shown in Figure 5-24 above), the display will appear as it does in Figure 5-25 to the right. BAD DISABLED The LIMITS menu shown in Figure 5-26 allows setting upper and lower limits. Use the soft keys to highlight the parameter value to be changed. Press DONE to return to the main LIMITS menu. ONLINE ENERGY WELD DISTANCE WELD END POSITION DISPLAY ENABLED AMP PRE WELD POST SETUP OPERATE LIVE WELD WELD LIMITS SETUPS Figure 5-24 Limits Menu DISABLED WELD TIME BAD PART LIMIT ONLINE ENABLED AMP Selecting ENABLED will change the menu to what is shown in Figure 5-26. DOWNSTROKE TIME > TIME PRE WELD POST SETUPS OPERATE LIVE WELD WELD LIMITS SETUP Figure 5-25 Limits Menu, Bad Soft Key Pressed UPPER LIMIT 30.000s WELD TIME BAD PART LIMIT ONLINE LOWER LIMIT 0.000s DONE AMP PRE WELD POST SETUPS OPERATE LIVE WELD WELD LIMITS SETUP Figure 5-26 Limits Menu, Setting Upper and Lower Limits The example menu shown in Figure 5-27 appears when BAD PART LIMITS are enabled for TIME. BAD ENABLED DOWNSTROKE TIME > TIME ONLINE ENERGY WELD DISTANCE WELD END POSITION DISPLAY ENABLED AMP PRE WELD POST WELD WELD LIMITS SETUPS SETUP OPERATE LIVE Figure 5-27 Limits Menu, Bad Parts Limits Enabled for Time NOTE The Limits menu items, Weld Distance and Weld Position would not appear in units that do not support distance. Page 58 Dukane Manual Part No. 403-594-00 Section 5 - Operation SETUP SETUP provides a monitoring function only. Press the SETUP menu soft key to review characteristics of the current press setup. MODE PRE-TRIGGER TRIGGER WELD ENERGY HOLD AFTERBURST Figure 5-28 displays a typical setup. AMP PRE WELD AUTOMATED PRESS START OF CYCLE 21% POWER 125W 4.000s 10.0 J 0.500s 100% TIME 0.551s 75% 0.250s 0.250s ONLINE POST WELD WELD LIMITS SETUP OPERATE LIVE Figure 5-28 Setup, Typical Display Dukane Manual Part No. 403-594-00 Page 59 iQ Series Ultrasonic Integrated Press System i 220 User’s Manual OPERATE Online/Offline/E-Stop Status ONLINE PART COUNT DOWNSTROKE TIME WELD TIME ENERGY DISTANCE END POSITION AMP PRE WELD System Power Output Level 0 0.000s 0.000s 0.0J 0.0000in 0.0000in POST SETUPS OPERATE LIVE WELD WELD LIMITS SETUP Process Characteristics with Corresponding Values Figure 5-29 Operate Screen When the press is powered up, there is an initial screen that shows system information. That is followed by the Operate screen as shown in Figure 5-29 above. This is a display only screen. The values displayed are from the last weld cycle. The operator can access this screen by pressing the OPERATE hot key. The process characteristics shown in Figure 5-48 above are the ones where part limits have been enabled, or are those that have been selected to display. As an example, here is a list of all possible characteristics that a distance press could have. (If distance is not supported, then the distance related characteristics would not be available.) Weld Time Peak Power Energy Weld Distance Weld End Position Page 60 Dukane Manual Part No. 403-594-00 Section 5 - Operation LIVE When the LIVE hot key is pressed, the display as shown in Figure 5-30 to the right is seen. This is also called the Live Data screen. The screen shows the current value of the parameters shown. These values are shown regardless of whether the press is in cycle or not. ONLINE AMPLITUDE POWER OPERATING FREQUENCY DISTANCE AMP PRE WELD 100% 0W 19,900Hz 0.0000in POST SETUPS OPERATE LIVE WELD WELD LIMITS SETUP Figure 5-30 Live Data Screen If distance is not supported, it would not be displayed. IN CYCLE When the LIVE hot key has been pressed, and the press is in cycle, the screen shown in Figure 5-31 is displayed. The screen shows the current value of the parameters shown. If DISTANCE is not supported, it would not be displayed. IN CYCLE AMPLITUDE POWER OPERATING FREQUENCY DISTANCE AMP PRE WELD ONLINE 100% 0W 19,900Hz 0.0000in POST SETUPS OPERATE LIVE WELD WELD LIMITS SETUP Figure 5-31 In Cycle Screen TEST When the TEST soft key has been pressed, and the press is online, the screen shown in Figure 5-32 is displayed. The screen shows the current value of the parameters shown. If DISTANCE is not supported, it would not be displayed. TEST AMPLITUDE POWER OPERATING FREQUENCY DISTANCE AMP PRE WELD ONLINE 100% 0W 19,900Hz 0.0000in POST SETUPS OPERATE LIVE WELD WELD LIMITS SETUP Figure 5-32 Test Screen Dukane Manual Part No. 403-594-00 Page 61 iQ Series Ultrasonic Integrated Press System i 220 User’s Manual Using the INFO Menus Press the INFO key, and the menu shown to the right in Figure 5-33 appears. ONLINE INFO MENU SYSTEM INFO REGIONAL SETTINGS ADVANCED SETTINGS AMP PRE WELD POST SETUP OPERATE LIVE WELD WELD LIMITS SETUPS Figure 5-33 Info Menu Display SYSTEM INFO - To display information about the press hardware, press the SYSTEM INFO button. Figure 5-34 shows an example display of that information. l ONLINE DUKANE CORPORATION/IAS DIVISION iQ LE SERIES ULTRASONIC GENERATOR Model# 20222XCOP5 Serial# 236853 Front Panel Code v1.00.00 20140123075953 Motherboard Code vXX.XX.XX 20140110152148 www.dukane.com/us Boot Code: MB v1.00 / 20140115120055 AMP PRE WELD POST SETUPS OPERATE LIVE WELD WELD LIMITS SETUP Figure 5-34 System Info REGIONAL SETTINGS - Pressing the REGIONAL SETTINGS button allows setup for LANGUAGE (Figure 5-35), and it allows setup for UNITS. LANGUAGE REGIONAL SETTINGS MENU ONLINE ENGLISH FRENCH GERMAN CZECH UNITS BACK Figure 5-35 Regional Settings, Language Menu UNITS - To set up preference for units press the INFO key, go to the REGIONAL SETTINGS MENU, and then to the UNITS key. See Figure 5-36. LANGUAGE REGIONAL SETTINGS MENU ONLINE IMPERIAL METRIC UNITS BACK AMP PRE WELD POST SETUPS OPERATE LIVE WELD WELD LIMITS SETUP Figure 5-36 Regional Settings, Units Menu Continued Page 62 Dukane Manual Part No. 403-594-00 Section 5 - Operation Continued from Previous Page ADVANCED SETTINGS - This part of the INFO menu gives access to the two sub-menus, Adv Process Control, and Miscellaneous and their menu items as shown below in Figure 5-37. • Adv Process Control • Miscellaneous WARNING Frequency Tracking Free Run Frequency Freq Lock and Hold System Freq Limits Ramp Up Time Ramp Down Time Modifying Advanced Settings may damage the unit or ultrasonic stack. Buzzer Latch on Bad Part Restore Factory Defaults Figure 5-37 Advanced Settings Menu Overview Pressing the ADVANCED SETTINGS button brings up the ADV PROCESS CONTROL sub-menu first. See Figure 5-38. RESTORE DEFAULTS AMP >ADV PROCESS CONTROL PRE WELD FREQUENCY TRACKING FREE RUN FREQUENCY FREQ LOCK AND HOLD SYSTEM FREQ LIMITS RAMP UP TIME RAMP DOWN TIME ONLINE DISABLED 20055Hz DISABLED NORMAL 0.150s 0.000s POST SETUPS OPERATE LIVE WELD WELD LIMITS SETUP Figure 5-38 Advanced Process Control Menu Continued Dukane Manual Part No. 403-594-00 Page 63 iQ Series Ultrasonic Integrated Press System i 220 User’s Manual Continued from Previous Page If the RESTORE DEFAULTS key is pressed while the Adv Process Control menu is displayed, the screen shown at right (Figure 5-39) is seen. ONLINE YES NO AMP ARE YOU SURE YOU WANT TO RESTORE ALL ADVANCED PROCESS CONTROL SETTINGS TO DEFAULT VALUES? PRE WELD POST SETUPS OPERATE LIVE WELD WELD LIMITS SETUP Figure 5-39 Restore Defaults, Adv Process Controls If the defaults are restored, the display with the confirmation message shown in Figure 5-40 at right is shown for 5 seconds. ONLINE ADVANCED PROCESS CONTROL SETTINGS HAVE BEEN RESTORED TO DEFAULT VALUES After that, the display will once again appear as it does in Figure 5-38. AMP PRE WELD POST SETUPS OPERATE LIVE WELD WELD LIMITS SETUP Figure 5-40 Restore Defaults, Confirmed, Advanced Process Control Continued Page 64 Dukane Manual Part No. 403-594-00 Section 5 - Operation Continued from Previous Page Adv Process Control Sub-menu Items The six sub-menu items and their corresponding displays are shown (See Figure 5-41.) and described below and on the next page: 1) Frequency Tracking When enabled, at the end of each cycle the operating frequency is applied to the Free Running Frequency setting. It’s based on a 16 point average. Therefore, after 16 cycles, the actual operating frequency will be the Free Running Frequency setting. If the press has not been cycled for a minimum of 5 minutes, the press will request that the stack be scanned in order to verify the optimum Free Running Frequency setting. For more information about Frequency Tracking, refer to our Application Note 513 on the Dukane website at: http://www.dukane.com/us/DL_ApplData.asp 2) Free Run Frequency Free run is the frequency at which the press drives the ultrasound output pulses until a valid feedback signal is detected. Typically this value should be below the operating frequency of the stack Use the Scan feature to determine the optimum Free Run Frequency. TRACKING ENABLED TRACKING DISABLED FREE RUN 20000 Hz SCAN ENABLE Dukane Manual Part No. 403-594-00 ONLINE FREE RUN FREQUENCY FREQ LOCK AND HOLD SYSTEM FREQ LIMITS RAMP UP TIME RAMP DOWN TIME DISABLED 20055Hz DISABLED NORMAL 0.150s 0.000s ADV PROCESS CONTROL FREQUENCY TRACKING > FREE RUN FREQ FREQ LOCK AND HOLD SYSTEM FREQ LIMITS RAMP UP TIME RAMP DOWN TIME DISABLED 20000Hz DISABLED NORMAL 0.150s 0.000s DISABLE LIMITS NORMAL ADV PROCESS CONTROL ONLINE ONLINE 0° 20000Hz DISABLED NORMAL 0.150s 0.000s ONLINE FREQUENCY TRACKING FREE RUN FREQ FREQ LOCK AND HOLD > SYSTEM FREQ LIMITS RAMP UP TIME RAMP DOWN TIME 0° 20000Hz DISABLED NORMAL 0.150s 0.000s TIME 0.150s ADV PROCESS CONTROL FREQUENCY TRACKING FREE RUN FREQ FREQ LOCK AND HOLD SYSTEM FREQ LIMITS > RAMP UP TIME RAMP DOWN TIME ONLINE TIME 0.000s ADV PROCESS CONTROL LOWER 19400Hz When > is next to RAMP DOWN TIME, and the down key (minus) is pressed, the next sub-menu for Miscellaneous replaces the Adv Process Control sub-menu. > FREQUENCY TRACKING ADV PROCESS CONTROL FREQUENCY TRACKING FREE RUN FREQ > FREQ LOCK AND HOLD SYSTEM FREQ LIMITS RAMP UP TIME RAMP DOWN TIME UPPER 20400Hz Moving to the Next Sub-menu ADV PROCESS CONTROL > FREQUENCY TRACKING FREE RUN FREQ FREQ LOCK AND HOLD SYSTEM FREQ LIMITS RAMP UP TIME RAMP DOWN TIME 0° 20000Hz DISABLED NORMAL 0.150s 0.000s ONLINE 0° 20000Hz DISABLED NORMAL 0.150S 0.000s Figure 5-41 Advanced Process Control Sub-menu Items Continued Page 65 iQ Series Ultrasonic Integrated Press System i 220 User’s Manual Continued from Previous Page Scan Stack To scan the stack: Scroll to Free Run Frequency in the displayed list and select the Scan Stack soft key. Follow the displayed instructions. See Figure 5-42 to the right. When scan is complete, the scan results appear as in the example shown in Figure 5-43. For more detail on the Scan Stack feature please refer to our website to download: Application Note 512 at http://www.dukane.com/us/ DL_ApplData.asp 3) Freq Lock and Hold When frequency lock and hold is disabled the frequency of the stack is tracked by changing the frequency of the ultrasound driving pulses to match the feedback signal frequency. When enabled the frequency of the feedback is tracked until lock is achieved then it is ignored and the ultrasound output remains at a fixed frequency until the end of the weld. SCAN STACK SCAN ONLINE Online PRESS SCAN TO TEST STACK FOR OPTIMAL FREQUENCY, PRESS BACK TO RETURN TO PREVIOUS SCREEN BACK AMP Figure 5-42 SCAN BACK AMP Figure 5-43 PRE WELD POST SETUPS OPERATE LIVE WELD WELD LIMITS SETUP Scan Stack - 1 FREQUENCY CHECK ONLINE Online PRESS SCAN TO TEST STACK FOR OPTIMAL FREQUENCY, PRESS BACK TO RETURN TO PREVIOUS SCREEN RESONANT FREQUENCY = 20096 PRE WELD POST SETUPS OPERATE LIVE WELD WELD LIMITS SETUP Scan Stack - 2 Enable or Disable this feature. 4) System Freq Limits Limits can be: Wide, Normal, Narrow, or Manual. Wide - In wide mode the upper and lower frequency limits are set to the maximum and minimum allowed frequencies. Normal - In Normal mode the upper and lower frequency limits equal the free run frequency plus or minus 500Hz. Narrow - In Narrow mode the upper and lower frequency limits equal the free run frequency plus or minus 200Hz. Normal, Narrow, or Wide - Enter Upper and Lower Limits within prescribed frequency limitations. Manual - In Manual mode the user sets the upper and lower frequency limits. To be valid, the settings must be within the maximum and minimum values allowed and at least 25Hz greater than the "upper" free run frequency and 25Hz less than "lower" free run frequency. Manual - Enter Upper and Lower Limits NOTE Why System Frequency Limits Modes Might be Chosen Wide - This mode is primarily used for testing "bare" transducers (no booster or horn attached). Normal - This mode is the one most often used covering a wide variety of horns. Narrow - This mode is used when the acoustic stack has known unwanted frequencies that are close to the main operating frequency. Manual - This mode allows for a frequency range to include only frequencies that are wanted, and excluding unwanted frequencies. Continued Page 66 Dukane Manual Part No. 403-594-00 Section 5 - Operation Continued from Previous Page 5) Ramp Up Time Ramp up time increases the amplitude linearly in the programmed time period at the start of the weld, from zero to the programmed amplitude level. This brings the stack up to operating amplitude smoothly preventing shock stress. NOTE Larger, high amplitude horns may require a longer ramp up time to properly start. Factory setting is 0.150 seconds. Range is 0.000 to 1.250 seconds. 6) Ramp Down Time Ramp down time decreases the amplitude linearly to zero in the programmed time period following the end of the weld, when ultrasound is shutting off. Factory setting is 0.000 seconds. Range is 0.000 to 0.250 seconds. NOTE Ramp Down Time Ramp Down Time extends the service life of complex acoustic stacks by minimizing stresses encountered during the process of shutting off the ultrasound. It is especially recommended for very large horns, or when the ultrasound is shut off in air. Continued Dukane Manual Part No. 403-594-00 Page 67 iQ Series Ultrasonic Integrated Press System i 220 User’s Manual Continued from Previous Page Miscellaneous Sub-menu Items The three sub-menu items and their corresponding displays are shown to the right in Figure 5-44. DISABLE ENABLE 1) Buzzer Set the audible buzzer to sound: At Top of Stroke - Enable or Disable, or At Trigger - Enable or Disable 2) Latch on Bad Part Enable or Disable this feature. When Latch on Bad Part is enabled, the cycle stops when a bad part is detected. The operator must deal with this before a new weld cycle can begin. DISABLE ENABLE DISABLE 3) Restore Factory Defaults Press the RESTORE soft key to erase ALL setups and factory defaults. ENABLE ONLINE MISCELLANOUS BUZZER At TOP OF STROKE AT TRIGGER LATCH ON BAD PART RESTORE FACTORY DEFAULTS DISABLED DISABLED DISABLED DISABLED MISCELLANOUS BUZZER At TOP OF STROKE AT TRIGGER > LATCH ON BAD PART RESTORE FACTORY DEFAULTS DISABLED DISABLED DISABLED DISABLED MISCELLANOUS BUZZER At TOP OF STROKE AT TRIGGER LATCH ON BAD PART > RESTORE FACTORY DEFAULTS DISABLED DISABLED DISABLED DISABLED > ONLINE ONLINE ONLINE YES An intermediate display prompts confirmation with a YES or NO. NO WARNING: ALL SETUPS WILL BE ERASED AND FACTORY DEFAULTS WILL BE RESTORED. ARE YOU SURE YOU WANT TO PROCEED? ONLINE If YES is chosen, then another message is displayed as shown to the right. FACTORY DEFAULTS HAVE BEEN RESTORED. Figure 5-44 Miscellaneous Sub-menu Items Page 68 Dukane Manual Part No. 403-594-00 Section 5 - Operation ALARMS Terminology: Alarm refers to any fault, or error the press might produce. An alarm condition may occur. Figure 5-45 shows the format for a typical alarm display. The list below gives general reference information for each alarm condition. FREQUENCY OVERLOAD FAULT 1 ONLINE FAULT ID # Uxxx SERIAL # xxxxxx VISIT WWW.DUKANE.COM/EASYFAULT FOR FAULT AND TROUBLESHOOTING TIPS, OR CONSULT YOUR MANUAL PRESS ENTER TO CLEAR AMP PRE WELD POST SETUP OPERATE LIVE WELD WELD LIMITS SETUPS Figure 5-45 Alarm Message Screen FAULTS: U100 Configura3on Fault (Default Setup Corrupted, Model Number Incorrect, Serial Number Incorrect, Feedback Scaling Incorrect, etc) U103 Hardware Fault (Hardware Changed, Remote Amp Card removed?) U104 Frequency Overload Fault 1 (Lock (PLL Lock Fail)Fail) Lost) U105 Frequency Overload Fault 2 ((Lock PLL Lock Lost) U106 PPeak OS Peak Overload Fault Overload Fault PROCESS ERRORS: U107 NEG Peak Overload Fault U400 Weld Limits enabled for con3nuous Opera3on U108 Average Overload Fault U401 Weld Time set to Zero U109 Bad Current Loop Fault U402 Weld Power set to Zero U110 Power not OK Fault U403 Weld Energy set to Zero U111 Over Temperature Fault U404 Weld Distance set to Zero Exceeded) U112 Frequency Overload Fault 3 (Limit (PLL Limit Exceeded) U405 Weld Posi3on set to Zero INITIATE ERRORS: U406 Max Trigger Time set to Zero U300 Operate Switch 1 Pressed before Cycle Start U407 Forced Shutdown Fault U301 Operate Switch 2 Pressed before Cycle Start U408 Trig Lost Early Fault U302 Auto In switch closed at End of Cycle U409 Trig Lost Weld Fault U304 Trigger switch closed before Cycle Start U410 Pre-‐trigger Overtravel Fault U305 Pre-‐trigger switch closed before Cycle Start U412 Max Pre-‐trigger Time exceeded U306 End Weld input enabled before Cycle Start U413 Max Trigger Time exceeded U307 Ground Detect input enabled before Cycle Start U414 Max Trigger Delay Time exceeded U308 Generator or Press Not Ready Table 5-I Alarm Messages Dukane Manual Part No. 403-594-00 Page 69 iQ Series Ultrasonic Integrated Press System i 220 User’s Manual This page intentionally left blank Page 70 Dukane Manual Part No. 403-594-00 Section 6 - Options SECTION 6 Options Overview . . . . . . . . . . . . . . . . . . . . . . . . . . . . . . . . . . 73 Power Inlet Options . . . . . . . . . . . . . . . . . . . . . . . . . . 74 Distance Encoder . . . . . . . . . . . . . . . . . . . . . . . . . . . 76 Dukane Manual Part No. 403-594-00 Page 71 iQ Series Ultrasonic Integrated Press System i 220 User’s Manual This page intentionally left blank Page 72 Dukane Manual Part No. 403-594-00 Section 6 - Options Overview This section of the User’s Manual provides a general overview of some options/upgrades for the i220 Integrated Press, all of which are subject to availability. These options/upgrades are: • Power Inlet • Distance Encoder Additional Options Dukane can provide high-quality automation equipment for efficient handling and assembly of parts. This equipment is tailored specifically to your needs. Some of the available options include pick and place automation, rotary tables, in-line indexing, conveyors, and walking beams. Dukane can also provide standard and custom sound enclosures. The additional options are not covered in this manual due to their specialized applications. Contact your local Dukane representative for more specific information, or visit the Dukane website: www.dukane.com/us/PCU_custom.htm Dukane Manual Part No. 403-594-00 Page 73 iQ Series Ultrasonic Integrated Press System i 220 User’s Manual Power Inlet Options 120V Systems for North America and Japan 120V systems for North America and Japan have a fixed (non-detachable) power cord. This option is available on presses with power ratings of 1200 watts or less and with operating frequencies of 20kHz, 30kHz, or 40kHz. See Table 11-II in Section 11, Specifications. CAUTION If you have a two-prong electrical receptacle, we strongly recommend that you replace it with a properly grounded three-prong type. Have a qualified electrician replace it following the National Electric Code and any local codes and ordinances that apply. Electrical Safety 120V Power Ground For safety, the power cords used on all Dukane products have a three-prong, grounding-type plug. Approved 2 pole, 3 wire grounding receptacle HUBBELL No. 5262 or equivalent to NEMA 5–15R or 5–20R Figure 6 - 1 Page 74 Example of 120 Volt, Grounded, 3-Prong Receptacle CAUTION If there is any question about the grounding of your receptacle, have it checked by a qualified electrician. Do not cut off the power cord grounding prong, or alter the plug in any way. If an extension cord is needed, use a three-wire cord that is in good condition. The cord should have an adequate power rating to do the job safely. It must be plugged into a grounded receptacle. Do not use a two-wire extension cord with this product. Dukane Manual Part No. 403-594-00 Section 6 - Options AC Power Inlet Panel The optional AC power inlet panel is described here. AC Power Cord An AC power cord is appropriately rated and can be permanently mounted at A in Figure 6-2 to the power inlet panel. Power Switch/Circuit Breaker The power switch/circuit breaker (B in Figure 6-2) has a rocker type actuator switch that will activate or deactivate the AC power to the system. The power ON position is marked with the internationally recognized I symbol, the power OFF position is marked with the 0 symbol. This power switch also integrates an appropriately sized overcurrent protection circuit breaker function in the press. If an over-current condition trips the circuit breaker, it will automatically switch to the OFF position. If the overload current that caused the circuit breaker to trip is due to a transient condition, the circuit breaker can be reset by switching the actuator back to the ON position. If when resetting the circuit breaker after it has tripped, it immediately trips again, there is likely an internal system malfunction that will require service. Do not repeatedly try to reset the circuit breaker. If it trips, this will only cause more damage to the press B A C Figure 6 - 2 120VAC Power Inlet Panel Chassis Ground Stud The chassis ground stud is used to attach a protective earth ground to the generator. This will aid in the suppression of electrical interference or radio frequency interference (RFI) that is common in an industrial environment. The chassis ground stud is C in Figure 6-2. Proper system grounding is discussed on Page 9. Dukane Manual Part No. 403-594-00 Page 75 iQ Series Ultrasonic Integrated Press System i 220 User’s Manual Distance Encoder Purpose To install and calibrate the distance encoder in order to accurately measure the distance of thruster travel. Requirements Parts Kit (P/N 438-1026) consisting of the following: • Encoder P/N 625-37, • Encoder head cable cover bracket, and • Mounting screws and hardware. Tools Right Side Panel • Phillips-head screwdriver • Feeler gauge set (0-.050 inches) or metric equivalent • 6 inch ruler or metric equivalent Installation Instructions Dismantling 1. Facing the front of the press, remove the panel from the right side of the press. (See Figure 6-3.) Encoder Scale Reassembly 1. Attach the encoder scale to the mounting screw holes in the right side of the thruster with pan-head screws. Do not tighten. 2. Route the encoder cable along the right side of the encoder, up through the slot in the air cylinder plate and along the counterbalance air cylinder. 3. Connect the encoder cable to the internal receptacle J5 near the top of the press. Encoder Head Figure 6-3 Distance Encoder Mounting 4. Mount the cable cover bracket to the press casting, trapping, but not pinching, the encoder cable so that it doesn't rub against the moving encoder body. 5. Gently slide the encoder head down until the mounting screw holes in the press support base appear in the head’s mounting slots. Continued Page 76 Dukane Manual Part No. 403-594-00 Section 6 - Options Continued from Previous Page Reassembly 6. Center the screw holes in the mounting slots. Secure the encoder head with the two pan-screws but do not tighten them yet. Alignment The purpose of this alignment is to set the internal reference mark for the encoder. This reference mark resets the distance register in the press after each thruster cycle and ensures repeatable distance measurements from cycle to cycle. Moving Encoder Scale .039 in (1 mm) Gap 1. Check the position of the encoder scale’s mounting hole slots using the 6" ruler. Measure the distance from the center of the screw to the edge of the slot in both directions. When the screws are centered horizontally, carefully tighten the screws. Stationary Encoder Head 2. Measure a vertical distance of 1.375 inches (34.92 mm) up from the bottom edge of the encoder scale, as shown in Figure 6-4. 3. Adjust the bottom edge of the encoder head to align to this distance and tighten the screws on the encoder head. 4. Push in the ABORT button (on the press base). Turn on the press, and then press the LIVE hot key on the front panel. 5. Set the air pressure to the desired level. 6. Perform the following procedure to test the encoder for the proper setting: 1.375” Figure 6-4 Distance Encoder Alignment WARNING Keep hands and clothing away from an activated press. • Pull out the ABORT button (on the press base). Allow the thruster to return to top of stroke. • If the encoder position reads -0.06" to 0.30", then the encoder is set correctly. • Secure the two screws. Proceed to Step 7. Continued Dukane Manual Part No. 403-594-00 Page 77 iQ Series Ultrasonic Integrated Press System i 220 User’s Manual Continued from Previous Page Alignment 7. Set the gap between the encoder scale and head, using the feeler gauge .039 inch (1 mm) blade. 8. Measure the gap at the top and bottom of the stroke. Allowable tolerance, as specified by the encoder manufacturer, is ±.005. This is a range of from .034 to .044 inches (.864 to 1.12 mm). 9. Tighten all the screws and check the measurements again. 10. Replace the press/thruster right side panel. Page 78 Dukane Manual Part No. 403-594-00 Section 7 - Acoustic Stack/Fixture Setup SECTION 7 Acoustic Stack/Fixture Setup Overview . . . . . . . . . . . . . . . . . . . . . . 81 Stack Description. . . . . . . . . . . . . . . . . . 82 Changing Stack Components. . . . . . . . . . . . 83 Stack Removal . . . . . . . . . . . . . . . . . . . . 83 Stack Disassembly . . . . . . . . . . . . . . . . . . 84 Removing a Detachable Tip. . . . . . . . . . . . . . 84 Stack Assembly and Torque Values. . . . . . . . . . 85 Installing a Detachable Tip . . . . . . . . . . . . . . 86 Installing the Stack . . . . . . . . . . . . . . . . . . 86 Fixture Installation. . . . . . . . . . . . . . . . . . 87 Fixture Alignment . . . . . . . . . . . . . . . . . . . 87 Fixture Leveling. . . . . . . . . . . . . . . . . . . . 88 Dukane Manual Part No. 403-594-00 Page 79 iQ Series Ultrasonic Integrated Press System i 220 User’s Manual This page intentionally left blank Page 80 Dukane Manual Part No. 403-594-00 Section 7 - Acoustic Stack/Fixture Setup Overview A Dukane iQ i220 integrated press can be used to assemble an unlimited variety of parts for every conceivable market segment, including automotive, medical, appliance, consumer, packaging and toy industries. Various techniques and processes, such as welding, staking, swaging, inserting, and spot welding can be used for the different applications. This variety is made possible through the interchange of some system components. Of these components, the horn and fixture are usually custom-made for each application, and the booster that is selected for a job depends on the required horn output amplitude. Also, the press/thruster controls are specifically adjusted for each application. This section provides instructions for setting up these components of the system in a new installation or when changing applications. Dukane Manual Part No. 403-594-00 Page 81 iQ Series Ultrasonic Integrated Press System i 220 User’s Manual Stack Description The acoustic stack shown in Figure 7-1 consists of three parts: • • • Transducer Booster Horn The transducer and the booster are normally shipped assembled and installed in the press. The horn and/or the fixture may be shipped separately. The stack is easily removed from or installed in the press/ thruster. This makes it possible to change the horn or booster. It also makes it easier to perform regular inspections and/or maintenance of the stack components. TRANSDUCER Contact Button BOOSTER Transducer Housing Anti–Rotation Pins Mounting Stud Mounting Ring HORN Spanner Wrench Hole (Typical) Figure 7-1 Stack Components Page 82 Dukane Manual Part No. 403-594-00 Section 7 - Acoustic Stack/Fixture Setup Changing Stack Components Stack Removal Before removing the stack, perform the following steps: 1. Activate the E-STOP (Abort) switch on the front of the press base. 2. Power down the press. These two steps are necessary to ensure that no power will be accidently applied while removing the stack. 3. While supporting the stack with one hand, loosen the two or four socket-head screws that secure the stack access door. 4. If the door has two screws, swing it open. If it has four screws, remove it completely. 5. Pull the stack forward and down until the transducer clears the electrical contact. Refer to Figure 7-2. 6. Lift the stack out of the housing. CAUTION The stack access door on the press/thruster holds the stack components in the stack housing. Hold the stack by the HORN or the exposed part of the BOOSTER when removing or installing the access door. This will prevent the stack from falling out and being damaged. NOTE When changing or inspecting any of the stack components, ALWAYS remove the stack from the thruster. CAUTION There may be an electrical charge stored in the transducer. To avoid any electrical shock, do not touch the contact button when removing the stack. Figure 7-2 Stack Removal Dukane Manual Part No. 403-594-00 Page 83 iQ Series Ultrasonic Integrated Press System i 220 User’s Manual Stack Disassembly To separate the stack component carefully follow the instructions below: 1. Use the two spanner wrenches (wrench A and B) provided with the press. Place wrench A on the component to be removed (Refer to Figure 7-3) and wrench B on the one next to it. Turn wrench A in the direction indicated. A B Once the component is loose, it can be removed by hand. 2. To maintain structural integrity, NEVER hold a transducer by the housing or the booster by the mounting rings while separating components. Doing so will result in damage to the unit. 3. Use only the tools recommended by Dukane. NEVER clamp a horn, booster, or transducer in a vise or use tools such as pliers, visegrips, etc. Doing so will result in scratches and/or gouges, resulting in stress areas on the surface. This condition will affect the stack operation and could lead to failure of each stack component. Figure 7-3 Disassembling Components CAUTION To avoid possible injury, press down on the spanner wrench with the palm of the hand. Removing a Detachable Tip If the horn has a detachable tip, do the following: 1. Use a spanner wrench to hold the horn, as shown in Figure 7-4. 2. Turn a properly sized open end wrench to loosen the tip. NEVER clamp the horn or use a vise to hold it. Figure 7-4 Tip Removal Page 84 Dukane Manual Part No. 403-594-00 Section 7 - Acoustic Stack/Fixture Setup Stack Assembly Before assembling a stack, inspect all of the components for possible damage — especially the surfaces that are to be joined. Look for non-flat surfaces (concave, convex), stress cracks, chips, or gouges. Any of these irregularities will affect the operation of the stack and could cause further damage. Contact the Dukane Ultrasonics Tooling Department concerning a damaged component. When the components have been inspected and are found to be free of any damage, continue with the following steps: 1. Inspect the contact surfaces for smoothness and cleanliness. Pitting or a buildup of old grease and dirt on the surface will interfere with the transfer of energy from one component to another. 2. Remove any foreign matter from the threaded stud and the mating hole. Tighten the stud in the stack component that is most distant from the transducer according to the following stud torque values: Stud Thread Size inch-lbs foot-lbs Torque Nt-meters 1/2 in. x 20 12-18 1 - 1.5 1.4 - 2 3/8 in. x 24 12-18 1 - 1.5 1.4 - 2 M8 x 1.25 12-18 1 - 1.5 1.4 - 2 Table 7-I Stud Torque Values 3. Coat one of the contact surfaces with a thin coat of high-pressure grease. A small packet is supplied with the system. We recommend Dow–Corning #4 (or #111 as an alternate). NOTE Do not apply any grease or lubricant to the stud. 4. Thread the components together and tighten (Refer to Table 7-II) by applying torque as follows: Torque Stack kHz inch-lbs foot-lbs 15 540 45 61 20 420 35 47.5 30 216 18 24.4 40 216 18 24.4 Nt-meters Table 7-II Horn/Booster Torque Values Figure 7-5 Assembling Components Dukane Manual Part No. 403-594-00 Page 85 iQ Series Ultrasonic Integrated Press System i 220 User’s Manual Installing a Detachable Tip If the horn has a detachable tip, do the following: 1. Inspect the surfaces of the tip and the horn for any stress cracks, chips or gouges. NOTE Do not apply any lubricant to the tip threads. 2. Coat one of the contact surfaces with a thin coat of high-pressure grease or lubricant. We recommend Dow–Corning #4 (or #111 as an alternate). 3. Thread the tip into the horn. To tighten the tip, use the open-end wrench for the tip and a spanner wrench to hold the horn, as shown in Figure 7-6. Tighten the tip to the following specifications: Figure 7-6 Tip Assembly Tip Stud Thread Size Torque inch-lbs foot-lbs Nt-meters 1/2 in. x 20 360 30 40.7 3/8 in. x 24 336 28 37.9 5/16 in. x 24 300 25 33.9 1/4 in. x 28 240 20 27.1 Table 7-III Replaceable Tip Torque Values Installing the Stack 1. With the stack at the angle shown in Figure 7-7, rest the booster mounting ring on the pin of the stack housing. 2. Brace the stack at point A in Figure 7-7, and swing the stack to a vertical position. The ultrasound contact button on the transducer should snap under the electrical contact leaf of the housing. 3. While still supporting the stack in this vertical position, install the stack access door, and thread the two or four socket-head bolts (that hold the door closed) into their holes. A 4. If the horn is not properly aligned with the fixture, rotate the stack to align the horn with the fixture. 5. Finish tightening the socket head bolts until snug. DO NOT OVER-TIGHTEN! Figure 7-7 Stack Installation NOTE When all door screws are tightened, a small gap between the door and stack housing is normally present. Page 86 Dukane Manual Part No. 403-594-00 Section 7 - Acoustic Stack/Fixture Setup Fixture Installation There are three steps involved in installing a fixture. • Aligning the fixture with the horn, • Leveling the fixture to provide the necessary support, and • Rigidly securing the fixture to the mounting surface. Fixture Alignment To safely align the fixture under the horn, use the following procedure. (Refer to Figure 7-8.) 1. Depress the E-STOP (Abort) switch. This allows the acoustic stack assembly to be lowered by hand and prevents the system from accidentally cycling. 2. Turn off the power to the generator to prevent accidental ultrasound operation. 3. Place the fixture, with parts, under the horn. 4. Initially align the two slots in the fixture over two of the seven mounting holes on the base plate. 5. Install the two hold-down bolts with washers, and finger tighten. WARNING Any fixture manufactured by a third party must comply with all OSHA and ANSI requirements. All fixtures must be guarded as necessary. Dukane Corporation does not assume any responsibility or liability for fixtures manufactured by the customer or any third party manufacturer. Fixture Hold Down Bolts Fixture Leveling Screws (Hex socket set screws) Fixture Holes for 3–Hole Mounting Fixture (12" x 14") Holes for 4–Hole Mounting Fixture (9" x 9") Figure 7-8 Fixture/Base Layout Continued Dukane Manual Part No. 403-594-00 Page 87 iQ Series Ultrasonic Integrated Press System i 220 User’s Manual Continued from Previous Page Fixture Alignment 6. Place a part in the fixture. 7. Grasping the horn firmly, pull the acoustic stack assembly down until the horn is as close to the part as necessary to align the fixture. 8. Align the fixture with the horn, and tighten the holddown bolts, or cap screws, to prevent the fixture from moving. 9. Adjust the mechanical stop of the press so that the horn stops above the fixture. This prevents pinch points and avoids horn damage if the acoustic stack assembly descends when a part is not in the fixture. NOTE The fixture should be flat on the base. If the fixture is equipped with leveling jack screws, adjust the screws so that they do not interfere with seating of the fixture on the base plate. Fixture Leveling For most applications, the fixture must be mounted so that the contacting surfaces on the horn are parallel to the contacted surfaces on the plastic part. This ensures that a consistent, even weld will result. To level the fixture, do the following: 1. Place a part in the fixture. 2. Loosen (turn counterclockwise) the hold-down bolts or cap screws and the four leveling jack screws on the fixture plate. Refer to Figure 7-9. 3. Pull the acoustic stack assembly down to the fixture. Allow the horn and the part to align. 4. Turn the four jack screws clockwise until a slight resistance is felt. Refer to Figure 7-10. NOTE Some applications may require the horn to be a few thousandths of an inch from contact with the fixture. Special applications may require the Mechanical (MEC) stop to be lowered so the horn makes contact with the fixture or anvil. When this is required, a ground-detect circuit is needed to terminate the weld cycle. 5. Tighten the hold-down cap screws by turning them clockwise until a firm resistance is felt. NOTE Do not overtighten the cap screws. This may flex the fixture plate. Figure 7-9 Loosening the Hold–Down Cap Screws and Jack Screws Figure 7-10 Tightening the Hold–Down Cap Screws and Jack Screws Continued Page 88 Dukane Manual Part No. 403-594-00 Section 7 - Acoustic Stack/Fixture Setup Continued from Previous Page Fixture Leveling 6. If any readjustment is necessary, loosen the hold-down screws first. Then readjust the jack screws. The following procedure may be helpful in leveling the fixture in some applications. To perform this procedure, use a piece of carbon paper and a piece of white paper. 1. Place a sample part in the fixture. 2. Place a piece of white paper on top of the sample part. 3. Place a piece of carbon paper, carbon side down, on top of the white paper. 4. Enter the following parameters into the press: Weld Time = 0.05 Hold Time = 0.00 System parameters = Use default settings. See examples on Application Setup Worksheet. 5. Set pressure to a value from 20 to 40 psi. 6. Set the trigger control on the thruster so that the pressure switch closes after some pressure is applied. 7. Press the ONLINE button on the front panel. 8. Cycle the equipment by activating both finger switches on the base or by triggering the automation switch. When one cycle is completed, the pressure developed between the horn and the sample part will have left marks from the carbon paper on the white paper. If the fixture is not level, the carbon markings will be darker in some areas than in others. All carbon markings will be uniform when all adjustments have been made properly. Adjust the leveling of the fixture and repeat this procedure as necessary until you are confident that the fixture is level. Dukane Manual Part No. 403-594-00 Page 89 iQ Series Ultrasonic Integrated Press System i 220 User’s Manual This page intentionally left blank Page 90 Dukane Manual Part No. 403-594-00 Section 8 - Stack Maintenance SECTION 8 Stack Maintenance Inspection of the Acoustic Stack Components . . . . . 93 Reconditioning Stack Components . . . . . . . . . . . . . . 94 Torque Values . . . . . . . . . . . . . . . . . . . . . . . . . . . . . . . . 95 Dukane Manual Part No. 403-594-00 Page 91 iQ Series Ultrasonic Integrated Press System i 220 User’s Manual This page intentionally left blank Page 92 Dukane Manual Part No. 403-594-00 Section 8 - Stack Maintenance Inspection of the Acoustic Stack Components It is essential that the mating faces between an ultrasonic transducer/booster and a booster/horn be absolutely flat and parallel. If there is any air gap, there will be a loss in power output and efficiency. Coupling may be so poor as to prevent the startup of vibration from the stack, due to the excessive power draw at the mating surfaces. The condition of excessive crowning, or uneven contact surfaces, is normally made evident by a burnished appearance around the bolt hole areas of the contact surfaces. This condition indicates that contact between the parts occurs only at the burnished areas and not across the full faces of the mating surfaces. See Figure 8-1. The following flatness tolerances are specified for Dukane transducers, boosters, and horns used in 20 kHz applications: Transducer .0005 inch Booster .0005 inch Horn .0005 inch Burnished Area Figure 8-1 Crown To check if there may be a flatness problem, first disassemble the stack and look at the mating surfaces. If there are burnished areas at the periphery of a contact surface, that surface may be crowned in the center. Place a straight edge along the face. Refer to Figure 8-2. If light can be seen along the edges, it is crowned. The surface may also be depressed in the bolt area. Refer to Figure 8-3. In this case, there will be contact only at the peripheral edges and light will be visible beneath the straight edge in the center region. Example of Burnished Area Straight Edge Gap Figure 8-2 Example of Crowning Gap Straight Edge Figure 8-3 Dukane Manual Part No. 403-594-00 Example of Center Depression Page 93 iQ Series Ultrasonic Integrated Press System i 220 User’s Manual Reconditioning Stack Components To restore the interface to the proper condition, do the following: 1. Disassemble the transducer/booster/horn stack and wipe interfaces with a clean cloth or paper towel. 2. Examine all interfaces. If any interface is corroded or shows a dark, hard deposit, it should be reconditioned. 3. If the interfaces appear to be in good condition, go to Step 11. NOTE The operating efficiency of the equipment will be greatly affected if the mating interfaces of the transducer/booster/horn stack are not flat, make poor contact with each other, or become corroded. A poor contact condition wastes power output, makes tuning difficult, can affect the noise level, and can cause possible heat damage to the transducer. 4. If necessary, remove the mounting studs. CAUTION 5. Tape a clean sheet of #400 grit (or finer) silicon carbide wet-or-dry paper to a clean, smooth, flat surface. A piece of plate glass is usually suitable. Use extreme care to avoid tilting the part. Loss of flatness of interface surfaces may render the welding system inoperative. 6. Hold the part to be conditioned at its lower end with your thumb over a spanner wrench hole. Carefully stroke the part once in one direction (toward you) across the abrasive paper, as shown in Figure 8- 4. Do not apply downward pressure. The component’s weight alone provides sufficient pressure. Perform a second stroke. 7. Rotate the part 120° (1/3 rotation) to the next spanner wrench hole. Repeat the procedure outlined in Step 6. 8. Rotate the part the remaining 120° and repeat. Be certain to perform the same number of strokes at each orientation: Two strokes per rotation. Figure 8-4 9. Before reinserting a stud in any horn, perform the following for proper engagement of the threads: a. Visually inspect and clean the stud. b. Clean the threaded hole using a clean cloth or towel. c. Tighten the stud to the torque specifications listed in Table 7-I. Method of Component Resurfacing CAUTION Use extreme care to avoid multiple strokes at each 1/3 rotation of the part. Loss of flatness and perpendicularity of the interface surface to the centering axis of the part may render the welding system inoperative. Continued Page 94 Dukane Manual Part No. 403-594-00 Section 8 - Stack Maintenance Continued from Previous Page Reconditioning Stack Components 10.Reexamine the interface surface and repeat Steps 6 through 9 until most of the contaminate has been removed. This should not take more than 2 or 3 complete rotations of the part being reconditioned. 11. Reassemble and install the stack, using the procedure in Section 7 of this manual. Recheck the power supply tuning. Torque Values See Section 7, Acoustic Stack/Fixture Setup for torque values: Table 7-I - Stud Torque Values Table 7-II - Horn/Booster Torque Values Table 7-III - Replaceable Tip Torque Values Dukane Manual Part No. 403-594-00 NOTE Thread deformation may occur if the studs are overtightened. Removal of the stud could damage the threads in the horn. If this occurs, re-tap the horn threads and replace the stud with a new one. Use studs recommended by Dukane. NOTE Overtightening stack components may result in horn/ booster studs loosening and unexplained overloads. Page 95 iQ Series Ultrasonic Integrated Press System i 220 User’s Manual This page intentionally left blank Page 96 Dukane Manual Part No. 403-594-00 Section 9 - System Maintenance SECTION 9 System Maintenance Press Six-Month Periodic Maintenance . . . . . . . . . . . 99 Dukane Manual Part No. 403-594-00 Page 97 iQ Series Ultrasonic Integrated Press System i 220 User’s Manual This page intentionally left blank Page 98 Dukane Manual Part No. 403-594-00 Section 9 - System Maintenance Press Six-Month Periodic Maintenance 1. Disconnect the press AC power cord from the AC line receptacle. Then, remove the thruster left and right side covers. 2. Check that all socket-head cap screws in the press/ thruster are tight. Check the air cylinder mounting. 3. Wipe or blow away all dirt and grease in the press/ thruster. 4. Wipe away all excess oil and any dirt accumulation, especially at the exhaust openings in the transducer housing. There should be very little, if any, oil accumulation at the air exhaust opening. We recommend that no oil get into the press/thruster pneumatics. Regular accumulation of oil at the air exhaust opening means that some oil is getting into the pneumatics. To rectify this problem, route the air for the press/thruster through an “oil mist reclassifier”. 5. Check the press/thruster slide operation for smooth downward motion. Wipe away any accumulated grease, but do not apply any solvents. If movement is not smooth, the lower bearing may be greased with AFB lithium grease in the standard grease fitting provided. 6. Ensure that all wire and cable connections are secure in the press/thruster and are not rubbing or showing wear. If they do show wear or rubbing then reroute to eliminate the problem. 7. Remount and secure the press/thruster covers and reconnect the press AC power cord to the AC line receptacle. Dukane Manual Part No. 403-594-00 Page 99 iQ Series Ultrasonic Integrated Press System i 220 User’s Manual This page intentionally left blank Page 100 Dukane Manual Part No. 403-594-00 Section 10 - Contact Dukane SECTION 10 Contacting Dukane Dukane Manual Part No. 403-594-00 Page 101 iQ Series Ultrasonic Integrated Press System i 220 User’s Manual This page intentionally left blank Page 102 Dukane Manual Part No. 403-594-00 Section 10 - Contact Dukane Contacting Dukane Identify Equipment When contacting Dukane about a service–related problem, be prepared to give the following information: • Model number, line voltage and serial number. • Alarm indicators from the press display. • Software version. • Problem description and steps taken to resolve it. Many problems can be solved over the telephone, so it is best to call from a telephone located near the equipment. Intelligent Assembly Solutions Mailing Address: Dukane Ultrasonics 2900 Dukane Drive St. Charles, IL 60174 US Phone: (630) 797–4900 E-mail: [email protected] Fax: Main (630) 797–4949 Service & Parts (630) 584–0796 Website The website has information about our products, processes, solutions, and technical data. Downloads are available for many kinds of literature. Here is the address for the main website: www.dukane.com/us/ You can locate your local representative at: www.dukane.com/us/sales/intsales.htm Dukane Manual Part No. 403-594-00 Page 103 iQ Series Ultrasonic Integrated Press System i 220 User’s Manual This page intentionally left blank Page 104 Dukane Manual Part No. 403-594-00 Section 11 - Specifications SECTION 11 Specifications Layout Drawing . . . . . . . . . . . . . . . . . . . . . . . . . . . . 107 Pneumatic Schematic . . . . . . . . . . . . . . . . . . . . . . . 108 Electrical Schematic . . . . . . . . . . . . . . . . . . . . . . . . 109 Weights, Dimensions, Operating Environment . . . . . 110 Compressed Air Requirements . . . . . . . . . . . . . . . . . 111 AC Power Requirements . . . . . . . . . . . . . . . . . . . . . . 111 Models, Ultrasonic Pressure . . . . . . . . . . . . . . . . . . . 112 Replacement and Repair Parts . . . . . . . . . . . . . . . . . 113 Regulatory Agency Compliance . . . . . . . . . . . . . . . . 114 Dukane Manual Part No. 403-594-00 Page 105 iQ Series Ultrasonic Integrated Press System i 220 User’s Manual This page intentionally left blank Page 106 Dukane Manual Part No. 403-594-00 Section 11 - Specifications HANDLES: ADJUSTABLE FRAME-SUPPORT HEIGHT 0 18.6 [472] 2.25 [57.1] 2.63 [66.7] 3.50 [88.9] ISOMETRIC VIEW 3.50 [88.9] 6.00 [152.4] 6.61 [167.9] 8.1 [206] 12.38 [314.3] 15.40 [391.1] 14.38 [365.1] 10.88 [276.2] 9.35 [237.5] 8.2 [208] 4.92 [125.0] 3.50 [88.9] 0 4.92 [125.0] 5.4 [138] 3.50 [88.9] 60.0 [1524] MAX 44.5 [1131] 6.16 [157] WEIGHT: 240 LBS 530 KG 27.3 [694] 24.8 [631] 12.374 [314] INCHES [mm] 33.8 [860] TYPICAL BOOSTER 1.2 [29] 4.69 [119] MAX PART HEIGHT + FIXTURE 15.0 [381] 7.00 MAX. [178] STROKE TYPICAL HORN 5.3 [135] 8.5 [216] 8.1 [207] 7.0 [178] 20.0 [508] 3.80 [96] TYPICAL HORN Page 107 Dukane Manual Part No. 403-594-00 COLUMN MOUNTING HOLES 6X M12x1.75x .8 [25] ULTRASOUND STACK CENTER FIXTURE PLATE MOUNTING HOLES 8X M10x1.5x .5 [13] 2.63 [66.7] 2.25 [57.2] BASE DETAIL Layout - i220 Press System Figure 11-1 12.00 [ 304.8]B.C. (REF.) 9.84 [ 249.9]B.C. (REF.) 7.00 [ 177.8]B.C. (REF.) 2X .50 [ 12.7] 8.1 [206] 6.61 [167.9] 6.00 [152.4] iQ Series Ultrasonic Integrated Press System i 220 User’s Manual C-BAL CYL #10-32 3" 6 1/8 3 TEE 15" 1.5" TEE 20" 1 E AIR FILTER R1/P1 4 REGULATOR E E 11" 9 3" 6 7 E GAUGE 1/8 1/8 5 5/16 30" E 8 5/16 52" BLUE E EB 3 EA 5 P1 COOLING LINE TO XDCR MAIN VALVE E 4A 2B 2 SAFETY E LOCKOUT 5" E MAIN CYLINDER E 5 AIR INLET CHECK VALVE 30" 15" E 3 E E FLOW CONTROL E CUSTOMER SUPPLY AIR LINE PROVISION FOR 1/4" AIR LINE INLET. 1/4 NPT FEMALE THREAD ON CHECK VALVE. ADJUSTABLE FLOW NOTES: 1) SUPPLY MIN. 60 PSI CLEAN, DRY AIR 2) SUPPLY MIN. .5 SCFM FOR CYCLE RATE OF 2 CYCLES/MINUTE 3) ALL TUBING 1/4" DIA. UNLESS NOTED. 4) SEE TUBING KIT FOR MORE DETAILS ON TUBING. 12 TUBE NUMBERS CIRCLED. 430-07-0030 TUBING KIT Figure 11-2 Page 108 Pneumatic Schematic Dukane Manual Part No. 403-594-00 Section 11 - Specifications 680-986-015 240V CIRCUIT BREAKER TRANSDUCER GND J3 J1 J9 J3 P3 J1 200-1545-02M BASEPLATE CABLE J2 BASEPLATE J6 GROUND DETECT RECEPTACLE ETHERNET RECEPTACLE USB RECEPTACLE J2 J4 P1 USER I/O 680-403 TRIGGER SWITCH 200-1911 200-1910 680-9029 MEMBRANE SW 200-1912 J5 ENCODER 1 2 3 P11 110-4974 CONTROLLER PCB P12 +24V GND 200-1913 PRESS RETRACTED SWITCH SIG P14 P4 4 5 6 7 RED DOWN VALVE P6 110-4972 FRONT PANEL PCB 430-03-0026 MAIN SOL. VALVE UP VALVE 8 9 10 11 12 13 14 15 16 17 18 19 20 21 22 23 24 25 BLK P4 1 BRN +24 TRIG TRIG TOS GND 4 5 HOT 2 GRN/YEL BLU BRN GRN/YEL BLU 1 2 3 BRN BLU BLK BLK BRN E302 1 2 6 7 8 L +24 S3 SW E301 P201 FAN P201 FAN N P102 G 1 2 3 U/S OUTPUT 110-4978 RFI PCB GENERATOR PCB G N L P101 BRN BLU GRN/YEL 286-59 FAN +24 S1 +24 S2 7 8 GROUND +22V SOURCE Safety SW1 Input 1 - N.O. Safety SW1 Relay - C.T. Safety SW1 Input 2 - N.C. Safety SW2 Input 1 - N.O. GND 22V Power GND 22V Power /E-STOP STATUS +22V PRESS E-STOP 110-4993 +22V SOURCE 5 P2 /E-STOP STATUS BASE PLATE D-SUB CONNECTOR 9 +22V PRESS E-STOP 1 4 SAFETY SWITCH #1 OUTPUT N.O. 3 1 3 4 2 9 SAFETY SWITCH #1 OUTPUT N.C. +22V_SSW SAFETY SWITCH #2 OUTPUT N.O. 6 Safety SW2 Relay - C.T. Safety SW2 Input 2 - N.C. 1 P1 J1 1 3 2 4 2 J3 3 P3 4 1 4 3 YELLOW - Relay C.T. BLACK - Relay N.O. BROWN - V+ BLUE V- WHITE - Relay N.C. YELLOW - Relay C.T. N.O. SAFETY SWITCH 2 430-03-0059 LEFT SIDE N.C. N.O. N.C. N.O. SAFETY SWITCH 1 430-03-0059 RIGHT SIDE N.C. E-STOP SWITCH 680-1019 N.C. 5 WHITE - Relay N.C. BLACK - Relay N.O. 1 BLUE V- BROWN - V+ 3 2 1 4 3 2 5 5 4 2 2 J4 3 P4 4 1 5 PRESS STATUS PCB 10 SAFETY SWITCH #2 OUTPUT N.C. GROUND 2 7 5 6 8 625-37 DISTANCE ENCODER (OPTIONAL) Page 109 Dukane Manual Part No. 403-594-00 GENERATOR 680-986-010 120V CIRCUIT BREAKER INPUT POWER 100-120 VAC OR 200-240 VAC ELETRICAL SCHEMATIC 43I220/340 Electric Schematic i220 Figure 11-3 4 1 2 3 RED BLK RED BLK GENERATOR 200-1888 iQ Series Ultrasonic Integrated Press System i 220 User’s Manual Weights Press System Model 20122XC0P3 Pounds Kilograms 530 240 Shipping: Add 25 pounds (11.3 Kg) to unit weight for packing materials. Table 11- I Weights Dimensions NOTE A representative model was used in the weights and dimensions tables. Your model's weight and dimensions may vary somewhat from what is shown here. in (mm) Press (includes base and column) Model Number 20122XC0P3 Height Width Depth 60 (1,524) 20 (508) 27 (685.80) NOTE: Add 4" (100 mm) behind the press for air input line and cable connections. Table 11- II Dimensions Operating Environment Operate the equipment within these guidelines: Temperature: 40°F to 100°F (+5°C to +38°C) Air Particulates: Keep the equipment dry. Minimize exposure to moisture, dust, dirt, smoke and mold. Humidity: 5% to 95% Non–condensing @ +5°C to +30°C Non Operating storage guidelines: Temperature: -4°F to 158°F (-20°C to +70°C) Air Particulates: Keep the equipment dry. Minimize exposure to moisture, dust, dirt, smoke and mold. Humidity: 5% to 95% Non–condensing @ 0°C to +30°C Page 110 Dukane Manual Part No. 403-594-00 Section 11 - Specifications Compressed Air Requirements For all press/thruster models, Dukane recommends 60-110 psi of clean, dry air. Maximum available clamping pressure: Model Force Generated at 110 psi (lb) Standard Air Cylinder Diameter (in) 20122XC0P3 540 2.50 Table 11- III Clamping Pressure NOTE A representative model was used in the compressed air requirements table. Your model's force and air cylinder diameter may vary somewhat from what is shown here. AC Power Requirements The AC line voltage and current needed depend on whichever press has been chosen for your system. See the table below. Operating Frequency Press Model Number Overload Power Ratings (Watts) Input AC Power Requirements Nominal AC Volt @ Maximum RMS Current 20kHz 20122XC0P3 1200 100-120V 50/60 Hz @ 15 Amps 20kHz 20121XC0P3 1200 200-240V 50/60 Hz @ 8 Amps 20kHz 20122XC0P5 1200 100-120V 50/60 Hz @ 15 Amps 20kHz 20121XC0P5 1200 200-240V 50/60 Hz @ 8 Amps 20kHz 20242XC0P3 2400 200-240V 50/60 Hz @ 15 Amps 20kHz 20242XC0P5 2400 200-240V 50/60 Hz @ 15 Amps Table 11- IV North America/ Japan AC Outlet Rating 15 Amps AC Power Requirements NOTES: An X used above in the Model Numbers is a “wildcard” character meaning any valid character code combination. Maximum line current requirement is specified at the minimum nominal AC line voltage and the rated power level. WARNING Never operate the generator at voltages lower than 100V. Current will exceed the rating and cause a shock hazard. Dukane Manual Part No. 403-594-00 Page 111 iQ Series Ultrasonic Integrated Press System i 220 User’s Manual Models - iQ Series Integrated Press System i220 Model Number Description 20121XC0P3 iQ Integrated 20kHz 1200 W 120V System with Time and Energy 20122XC0P3 iQ Integrated 20kHz 1200 W 220V System with Time and Energy 20121XC0P5 iQ Integrated 20kHz 1200 W 120V System with Time, Distance and Energy 20122XC0P5 iQ Integrated 20kHz 1200 W 220V System with Time, Distance and Energy 20242XC0P3 iQ Integrated 20kHz 2400 W 240V System with Time and Energy 20242XC0P5 iQ Integrated 20kHz 2400 W 240V System with Time, Distance and Energy Table 11-V Model Number Descriptions Ultrasonic Pressure Ultrasonic Pressure iQ Generator Models - kHz Useful Beam 20 360 degrees Ultrasonic Pressure @ Operator's Position - dB 140 Ultrasonic Pressure 1 m from the Equipment- dB 130 Table 11–VI iQ Generator Ultrasonic Pressure NOTE All measurements taken with Data Physics Dynamic 4-Channel Signal Analyzer with calibrated 377C01 Microphone and 426B02 Preamplifier. Page 112 Dukane Manual Part No. 403-594-00 Section 11 - Specifications Replacement and Repair Parts - iQ Series i220 Press System Replacement Parts Part Number 474-33 Model Part Description 43i220 High pressure grease packet X 403-594-XX User's Manual iQ Series Ultrasonic Integrated Press System i220 X 430-03-0026 iQ main valve assembly X Transducer X One set of external system cables X 110-3122B Various 721-31-00056 Transducer door hex key 43Q220/43Q340 721-68 Table 11-VII X 43i220 Spanner wrench X System Replacement Parts X = available O = unavailable Repair Parts List Part Number 430-03-0026 Model Part Description 43i220 iQ main valve assembly X 804-33 Primary air cylinder, 2 1/2 " bore X 7" X 804-52 Air pressure regulator X 804-63 Counter balance air cylinder 9/16" bore X 11" X 625-37 Optical distance encoder (when optional encoder feature is installed) X Table 11-VIII Replacement Parts NOTE Dukane recommends that a spare horn and booster for each product application be on hand. Dukane Manual Part No. 403-594-00 Page 113 iQ Series Ultrasonic Integrated Press System i 220 User’s Manual Regulatory Agency Compliance UL FCC The iQ i220 Integrated Press complies with the following Federal Communications Commission regulations. • The limits for FCC measurement procedure MP-5, “Methods of Measurement of Radio Noise Emissions from ISM Equipment”, pursuant to FCC Title 47 Part 18 for Ultrasonic Equipment. CE Marking This mark on your equipment certifies that it meets the requirements of the EU (European Union) concerning interference causing equipment regulations. CE stands for Conformité Europeéne (European Conformity). The equipment complies with the following CE requirements. • T h e E M C D i r e c t i v e 2 0 0 4 / 1 0 8 / E C for Heavy Industrial — EN 61000-6-4: 2001 EN 55011: 2003 EN 61000-6-2: 2005 EN61000–4–2 EN61000–4–3 EN61000–4–4 EN61000–4–5 EN61000–4–6 EN61000–4–8 EN61000–4–11 • The Low Voltage Directive 2006/95/EC. • The iQ i220 Integrated Press complies with these standards: Underwriters Laboratories: UL 61010-1:2012, and National Standards of Canada: CAN/CSA C22.2 No. 61010-1-12:2012 as verified by TÜV Rheinland. The Machinery Directive 2006/42/EC. EN 60204: 2006 Safety of Machinery - Electrical Equipment of Machines Part 1: General Requirements. IP (International Protection) Rating The iQ i220 Integrated Press has an IP rating from the IEC (International Electrotechnical Commission). The rating is IP2X, in compliance with finger-safe industry standards. Page 114 CAUTION DO NOT make any modifications to the press or associated cables as the changes may result in violating one or more regulations under which this equipment is manufactured. Dukane Manual Part No. 403-594-00 Section 12 - Appendices SECTION 12 Appendices Appendix A, List of Figures . . . . . . . . . . . . . . . . . . . . 117 Appendix B, List of Tables . . . . . . . . . . . . . . . . . . . . 120 Dukane Manual Part No. 403-594-00 Page 115 iQ Series Ultrasonic Integrated Press System i 220 User’s Manual This page intentionally left blank Page 116 Dukane Manual Part No. 403-594-00 Section 12 - Appendices Appendix A No.Description List of Figures Page 2-1 Example of 220/240 Volt, Grounded, 3-Prong Receptacle...............................................9 2-2 International 220/240V Grounding...................................................................................9 2-3 Compressed Air Filter.....................................................................................................10 3-1 Lockout Device In Open Position, Unlocked..................................................................15 3-2 Bottom Lockout Device In Closed Position, Locked.......................................................15 3-3 Press Rear View.............................................................................................................18 3-4 System I/O Panel (Standard Panel Shown)...................................................................20 3-5 DB-25M, Press Input/Output Cable Connector (J1).......................................................20 3-6 Ground Detect Fixture Installation..................................................................................24 3-7 Press Base Rear - Grounding Stud and J35 Base Interface Connector........................25 3-8 Press Connections.........................................................................................................27 3-9 Example of Press Placement.........................................................................................29 3-10 Using Handles to Make Adjustments..............................................................................29 3-11 To Relocate Handles......................................................................................................29 3-12 Flange Template.............................................................................................................32 4-1 Front Panel Controls......................................................................................................35 4-2 Display Detail, Operating Mode Indicator.......................................................................36 4-3 Display Detail, Power Output Level................................................................................36 4-4 Navigation Keys (4) with Enter, Info and Cancel............................................................37 4-5 Info Menu Display...........................................................................................................37 4-6 Active Soft Keys, Example.............................................................................................37 4-7 Display Detail, Power Output Level................................................................................39 4-8 Making Selections..........................................................................................................40 4-9 Arrows Indicate Direction of More Text...........................................................................40 4-10 Press Controls and Indicators - Front View....................................................................42 4-11 Trigger Control Knob......................................................................................................43 4-12 Press Left Side View with Detail.....................................................................................44 4-13 Ergonomic Base Controls...............................................................................................45 4-14 Right Operate Switch in Standby Mode, One LED Dimly Lit..........................................45 4-15 Right Switch in Operate Mode, Both LEDs Brightly Lit...................................................45 4-16 Setting and Resetting the E-STOP.................................................................................46 Continued Dukane Manual Part No. 403-594-00 Page 117 iQ Series Ultrasonic Integrated Press System i 220 User’s Manual Appendix A No.Description List of Figures Page 5-1 Rear Panel AC Breaker Switch......................................................................................49 5-2 Front Panel with Power On Light....................................................................................49 5-3 i220 Integrated Press Menu Overview...........................................................................51 5-4 Setting Weld Amplitude..................................................................................................52 5-5 Setting Weld Amplitude with Afterburst Enabled............................................................52 5-6 Setting Weld Amplitude, Pre-Trigger Available...............................................................53 5-7 Setting Weld Amplitude..................................................................................................53 5-8 Setting Weld Amplitude with Afterburst Enabled............................................................53 5-9 Pre Weld Menu, Mode is Manual Press.........................................................................54 5-10 Pre Weld Menu, Pre-Trigger Menu.................................................................................54 5-11 Pre Weld Menu, Pre-Trigger Menu, Start of Cycle Selected as Type ...........................54 5-12 Pre Weld Menu, Pre-Trigger Menu, Amplitude Adjustment............................................54 5-13 Pre Weld Menu, Trigger Menu.......................................................................................55 5-14 Pre Weld Menu, Maintained Trigger Selected................................................................55 5-15 Pre Weld Menu, Trigger Selected is Power....................................................................55 5-16 Weld Menu, Mode: Manual/Automated Press, Distance Not Supported........................56 5-17 Weld Menu, Mode: Manual/Automated Press, Energy Selection...................................56 5-18 Weld Menu, Mode: Manual/Automated Press, Distance Is Supported..........................56 5-19 Weld Menu, Mode: Manual/Automated Press, Energy Entry.........................................56 5-20 Post Weld Menu.............................................................................................................57 5-21 Post Weld Menu, Time Setting.......................................................................................57 5-22 Post Weld Menu, Afterburst Disabled.............................................................................57 5-23 Post Weld Menu, Afterburst Enabled.............................................................................57 5-24 Limits Menu....................................................................................................................58 5-25 Limits Menu, Bad Soft Key Pressed...............................................................................58 5-26 Limits Menu, Setting Upper and Lower Limits................................................................58 5-27 Limits Menu, Bad Parts Limits Enabled for Time............................................................58 5-28 Setup, Typical Display....................................................................................................59 5-29 Operate Screen..............................................................................................................60 5-30 Live Data Screen............................................................................................................61 5-31 In Cycle Screen..............................................................................................................61 5-32 Test Screen....................................................................................................................61 5-33 Info Menu Display...........................................................................................................62 Continued Page 118 Dukane Manual Part No. 403-594-00 Section 12 - Appendices Appendix A No.Description List of Figures Page 5-34 System Info....................................................................................................................62 5-35 Regional Settings, Language Menu...............................................................................62 5-36 Regional Settings, Units Menu.......................................................................................62 5-37 Advanced Settings Menu Overview...............................................................................63 5-38 Advanced Process Control Menu...................................................................................63 5-39 Restore Defaults, Adv Process Controls........................................................................64 5-40 Restore Defaults, Confirmed..........................................................................................64 5-41 Advanced Process Control Sub-menu Items.................................................................65 5-42 Scan Stack - 1................................................................................................................66 5-43 Scan Stack - 2................................................................................................................66 5-44 Miscellaneous Sub-menu Items.....................................................................................68 5-45 Alarm Message Screen..................................................................................................69 6-1 Example of 120 Vol, Grounded, 3-Prong Receptacle.....................................................74 6-2 120VAC Power Inlet Panel.............................................................................................75 6-3 Distance Encoder Mounting...........................................................................................76 6-4 Distance Encoder Alignment..........................................................................................77 7-1 Stack Components.........................................................................................................82 7-2 Stack Removal...............................................................................................................83 7-3 Disassembling Components...........................................................................................84 7-4 Tip Removal...................................................................................................................84 7-5 Assembling Components...............................................................................................85 7-6 Tip Assembly..................................................................................................................86 7-7 Stack Installation............................................................................................................86 7-8 Fixture/Base Layout.......................................................................................................87 7-9 Loosening the Hold-Down Cap Screws and Jack Screws.............................................88 7-10 Tightening the Hold-Down Cap Screws and Jack Screws.............................................88 8-1 Example of Burnished Area............................................................................................93 8-2 Example of Crowning.....................................................................................................93 8-3 Example of Center Depression......................................................................................93 8-4 Method of Component Resurfacing................................................................................94 11-1 Layout - i220 Press System.........................................................................................107 11-2 Pneumatic Schematic...................................................................................................108 11-3 Electric Schematic i220................................................................................................109 Dukane Manual Part No. 403-594-00 Page 119 iQ Series Ultrasonic Integrated Press System i 220 User’s Manual Appendix B No.Description List of Tables Page 3-I System Input/Output Connector Signals (J1).................................................................21 3-II Power Cords...................................................................................................................28 3-III Dukane Cable 200-1546-00 Signals..............................................................................31 5-I Alarm Messages.............................................................................................................69 7-I Stud Torque Values........................................................................................................85 7-II Horn/Booster Torque Values...........................................................................................85 7-III Replaceable Tip Torque Values......................................................................................86 11-IWeights........................................................................................................................110 11-IIDimensions...................................................................................................................110 11-III Clamping Pressure....................................................................................................... 111 11-IV AC Power Requirements.............................................................................................. 111 11-V Model Number Descriptions.........................................................................................112 11-VI iQ Generator Ultrasonic Pressure................................................................................112 11-VII System Replacement Parts..............................................................................................113 11-VIII Repair Parts...................................................................................................................113 Page 120 Dukane Manual Part No. 403-594-00 Section 13 - Index SECTION 13 Index Dukane Manual Part No. 403-594-00 Page 121 iQ Series Ultrasonic Integrated Press System i 220 User’s Manual This page intentionally left blank Page 122 Dukane Manual Part No. 403-594-00 Section 13 - Index Index A Acoustic Stack/Fixture Setup 79 Fixture Installation 87 Fixture Alignment 87 Fixture Leveling 88 Installing a Detachable Tip 86 Installing the Stack 86 Removing a Detachable Tip 84 Stack Assembly 85 Stack Description 82 Stack Disassembly 84 AC Power Inlet Panel 19 Chassis Grounding Stud 19 IEC AC Power Inlet Connector 19 Power Switch/Circuit Breaker 19 Advanced Process Control Buzzer 68 Free Run Freq 65 Freq Lock and Hold 66 Phase Shift 65 Ramp Down Time 67,?68 Ramp Up Time 67 Restore Factory Defaults 68 System Freq Limits 66 Agency Compliance IP (International Protection) Rating 114 ALARMS 69 Amplitude 36,?38 AMP 52 Power Scaling 39 Range 53 B Base Plate 45 C CE Marking 114 Connecting Cables 27 Connecting Generator Cables 27 Connector Ergonomic Base Connector 25 Controls 33 Generator Front Panel Controls Hot Keys 38 Dukane Manual Part No. 403-594-00 Navigation Keys 37 Power On Light 39 Soft Keys 37 System Operating Mode Keys 36 System Power Output Level 39 Manual Thruster Controls Down Speed Adjustment 41 Press Controls 41 Press Ergonomic Base 45 Emergency Stop (Abort) Switch 46 Screen Basics 40 Interpreting On-screen Arrows 40 Thruster Indicators Mechanical Stop Indicator Flag 43 Pressure Gauge 43 Slow Speed Indicator Flag (Optional) 43 Stroke Position Indicator Flag 43 D Distance Encoder 76 Drawings and Tables 3 Dukane 101 Address 103 Contacting 101 E-mail 103 Fax 103 Intelligent Assembly Solutions 103 Mailing Address 103 Phone 103 Website 103 E Electrical Safety 8 100/120 Volt Systems 9 Domestic Power Grounding 9 International Power Grounding 9 E-mail 103 Emergency Stop (Abort) Switch 46 F FCC 114 Fixture Alignment 87 Flange Template 32 Free Run Freq 65 Freq Lock and Hold 66 Continued Page 123 iQ Series Ultrasonic Integrated Press System i 220 User’s Manual G L General User Information 3 Drawings and Tables 3 Notes, Cautions and Warnings 3 Read This Manual First 3 Generator Features Process Limits 4 Generator Menu Overview 51 List of Figures 117 H N Health and Safety 5 General Considerations 7 No Unauthorized Modifications 7 How to Lift Safely 11 Plastics Health Notice 8 Recommendations 7 Hot Keys 38 Navigation Keys 37 Notes, Cautions and Warnings 3 I Installation 13 Before Installation 15 When to Use Lockout / Tagout Devices 15 Connecting Cables 27 Placement 16 Rear Panel 18 AC Power Inlet Panel 19 Chassis Grounding Stud 19 IEC AC Power Inlet Connector 19 Power Switch/Circuit Breaker 19 System I/O Panel 20,?25 System Inputs Connector 20,?24 Unpacking 17 Utilities 16 Installing the Press System 17 Placement 17 Press Height Adjustment 29 Without Machine Base 30 Introduction 1 General User Information 3 Key Generator Features 4 Press System Overview 4 IP (International Protection) Rating 114 M Maintenance Six-Month Periodic Maintenance 99 Menus 51 O Operate TEST 61 Using the Menus IN CYCLE 61 LIVE 61 Operation 47 ALARMS 69 Stopping the Weld Cycle 50 Using the Menus 51 AMP 52 Generator Menu Overview 51 INFO 62 ADVANCED SETTINGS 63 REGIONAL SETTINGS 62 SYSTEM INFO 62 UNITS 62 LIMITS 58 OPERATE 60 POST-WELD 57 PRE-WELD 54 SETUPS 59 WELD 56 Options 71 AC Power Inlet Panel 75 Distance Encoder 76 Power Inlet Options 74 Continued Page 124 Dukane Manual Part No. 403-594-00 Section 13 - Index P Phase Shift 65 Press Controls 41 Manual Thruster Controls 41 Press Ergonomic Base 45 Press Height Adjustment 29 Press System Overview 4 Process Limits 4 R Ramp Down Time 67 Ramp Up Time 67 Rear Panel AC Breaker Switch 49 Rear Panel Layout 18 Rear Panel AC Breaker Switch 49 Reconditioning Stack Components 94 Regulatory Agency Compliance 114 Regulatory Agency Compliance CE Marking 114 FCC 114 IP (International Protection) Rating 114 Replacement Parts 112,?113 RFI Grounding 26 System Maintenance 97 System Power Output Level 39 System Status I/O Auto Start Input 68 T TEST 61 Torque Values 95 U Using the Menus 51 Utilities 16 W Weld Weld Cycle MAX TIME 56 Stopping 50 S Screen Basics 40 Setup Stack/Fixture 79 Soft Keys 37 Specifications 105 AC Power Requirements 111 Compressed Air Requirements 111 Dimensions 110 Electric Schematic 220 109 Layout - 220 Thruster 107 Operating Environment 110 Pneumatic Schematic (All iQ LE Presses) 108 Ultrasonic Pressure 112 Weights 110 Stack Maintenance 91 Inspection of the Acoustic Stack Components 93 Reconditioning Stack Components 94 Stopping the Weld Cycle 50 System Freq Limits 66 System Inputs Connector 20,?24 System I/O Panel 20,?25 System Inputs Connector 20,?24 Continued Dukane Manual Part No. 403-594-00 Page 125 iQ Series Ultrasonic Integrated Press System i 220 User’s Manual This page intentionally left blank Page 126 Dukane Manual Part No. 403-594-00 Dukane ISO ISO CERTIFICATION Dukane chose to become ISO 9001 certified in order to demonstrate to our customers our continuing commitment to being a quality vendor. By passing its audit, Dukane can assure you that we have in place a well–defined and systematic approach to quality design, manufacturing, delivery and service. This certificate reinforces Dukane's status as a quality vendor of technology and products. To achieve ISO 9001 certification, you must prove to one of the quality system registrar groups that you meet three requirements: 1.Leadership 2.Involvement 3. Quality in Line Organizations and Quality System Infrastructure. The ISO 9001 standard establishes a minimum requirement for these requirements and starts transitioning the company from a traditional inspection–oriented quality system to one based on partnership for continuous improvement. This concept is key in that Dukane no longer focuses on inspection, but on individual processes. Dukane's quality management system is based on the following three objectives: 1. Customer oriented quality. The aim is to improve customer satisfaction. 2. Quality is determined by people. The aim is to improve the internal organization and cooperation between staff members. 3. Quality is a continuous improvement. The aim is to continuously improve the internal organization and the competitive position. ISO 9001 CERTIFIED Dukane products are manufactured in ISO registered facilities. View the Dukane ISO certificate of compliance at: http://www.dukane. com/ISORegistrationCertificate.pdf Please refer to our website at: www.dukane.com/us/sales/intsales.htm to locate your local representative. iQ Series Ultrasonic Integrated Press System i 220 User's Manual Part No. 403 – 594– 00 www.dukane.com/us Printed in the United States of America Dukane Intelligent Assembly Solutions • 2900 Dukane Drive St. • Charles, Illinois 60174 USA • TEL (630) 797-4900 • FAX (630) 797–4949