1
Contents
Index
Creating A Button
Editing A Button
Creating Custom Calculators
Introduction to PentaCalc
Using PentaCalc Pro
Graphing Calculator
Financial Calculators
10-Key Calculator
Scientific Calculator
Unit Conversions
Programming Calculator
Statistics Calculator
First-Time Setup
[%+] Add-on Percentage
If you need more help...
New in PentaCalc Pro
Removing PentaCalc Pro
How To Use The Manual
System Requirements
Auto Decimal
Discount Percentage
Subtotal
Total
Grand Total
Gross Profit Margin
MS
MT
M+
MTax
Tax Rate
Line Feed
Manual Decimal
Selecting a Calculator
Creating a Calculator
Editing A Calculator
Deleting a Calculator
Deleting a Button
Using Number Buttons
Creating a Graph
Modifying a Graph
Printing a Graph
Copying a Graph
Time Value of Money Calculator
Cash Flow Calculator
Depreciation Calculator
Business Calculator
Bonds and Notes
Complex numbers
Logarithmic, Exponential, and Hyperbolic Functions
Number Of Payments
Nominal Annual Interest Rate
Payment Amount
Present Value
Future Value
Table
Payments Per Year
Tape Display Overview
Entry Notations
Common Operations
Base Conversions
Total Number Of Payments
Interest
Principle
Balance
Next Set Of Payments
Begin or End
Menu Items
PentaCalc Contents
Standard Calculator
Time Value of Money Overview
When to Use Time Value of Money
Basic TVM Calculations
Old
Amortizations
When to Use the Cash Flow Calculator
Cash Flow Signs and Numbers
Entering Cash Flows
Viewing and Editing Cash Flows
Flow
Number of Times
New
Periodic Interest Rate
Net Present Value
Net Uniform Series
Net Future Value
Internal Rate of Return
Total of Cash Flows
Cash Flow Calculations
Calculating Percentages (Business)
Calculating Depreciation
Interest Rate Conversions
Anatomy of a Bond
Bond Pricing
Par Value
Maturity Date
Call Provisions
Coupon Interest Rate
Yield To Call
Durations
Zero Coupon Bonds
Bonds and Notes Overview
Notes
Bond Calculations
Annual / Semi Annual
Calendar Basis Buttons
Settlement
Maturity
Yield to Maturity
Price
Coupon
Interest Accrued
Bond Total
Duration
Yield To Call
Call Price
Call Date
Statistics Overview
Entering Data
Importing Data
Viewing and Editing the List
Single Variable Statistics
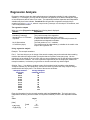
Regression Analysis
X
New
Y
Sum of X
Sum of Squares of X
Sum of Product of x and y
Sum of y
Sum of y Squared
Mean of x
Sample Standard Deviation of x
Standard Error
Mean of y
Sample Deviation of y
Mdn of x
Population Standard Deviation of x
r
Mdn x
Population Standard Deviation of y
Min x
Max x
Slope
Min y
Max y
Rng x
Sort x
Y Intp
Rng y
Sort y
X'
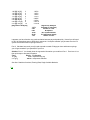
Regression Analysis
Y'
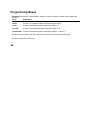
Programming Overview
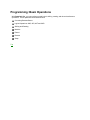
Programming: Basic Operations
Word Size
Programming Bases
Programming Sign
Carry and Overflow Flags
Converting Between Bases
Logical Operations
Shifting and Rotating
Modulus
Extend
Reverse
Swap
And
Carry
Overflow
Sign
Word Size
OR
NOT
XOR
SL/ASL
ROL
ROLC
SR/ASR
ROR
RORC
Mod
Ext
Rev
Swap
Bases
Units Overview
Converting Between Two Units of the Same Type
Using Units in Calculations
Creating Units
Unit Composition
Creating a Unit Button
Editing a Unit Conversion Factor
Creating a New Base
Configuring Smart Units
Sin
Cos
Tan
Angle Mode Box
Pi
Sin
Cos
Tan
n!
Conj
Ln
Log
y to the xth power
Im
Re
e•
10
xth root of y
R->P
P->R
Sinh
Cosh
Tanh
Abs
Arq
Sinh
Cosh
Tanh
Sign
,
Trigonometric functions
Rectangular and Polar Conversions
10-key Overview
Configuring the 10-key Calculator
Calculating Totals
Memory Functions
Calculating Percentages (10-key)
Calculating Tax
Calculating Gross Profit Margins
Viewing a Graph
Locking/Unlocking a Button
Using Operator Buttons
Creating Operator Buttons
Editing Operator Buttons
Practice Using Operator Buttons
Activate / Deactivate Dialog
Button Text Colors Dialog
Configure Warning Messages Dialog
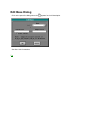
Configure Fractions Dialog
Configure 10-key Dialog
Configure Dialog
Edit Base Dialog
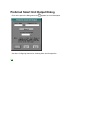
Preferred Smart Unit Output Dialog
Smart Units Level Dialog
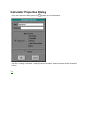
Calculator Properties Dialog
List of Calculators
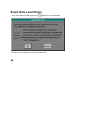
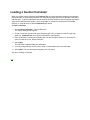
Loading a Custom Calculator
Interface Overview
About the Tape
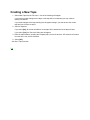
Creating a New Tape
Opening the Tape
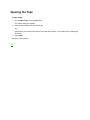
Saving the Tape
Printing the Tape
Resizing the Interface
Using the Tape Display
Adding Memos
Comments Field
Numbers Field
Operators Field
Entering Numbers
Editing Memos
Editing Numbers
Using and Editing the Operator Field
Changing the Insertion Point
Calculator Appearance
Background Bitmaps
Button Bitmaps
Changing Button Text Colors
Changing the Scale
Other Bases
Feet / Inches Base
Time Bases
Algebraic Notation
Reverse Polish Notation (RPN)
10-key Notation
Using PentaCalc with Any Windows Application
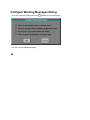
Setting Warning Messages
Using the Keyboard
Changing the Decimal Point
Doing Arithmetic
Clipboard Support
Fractions
New
%Chg
Total
Part
%Total
Cost
Mrk%
Sell
Nom%
Eff%
P/Yr
%Cst and %Sel
Per and Con
Item Counter
Rounding
Straight line
Original Cost
Salvage factor
Expected Life (Years)
Table
Hot-key
Clipboard
Factor%
Ÿ
Using the H:M:S for Angle Calculation Calculations
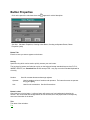
Button Properties
Button Title
Hot-key
Number:
Button Locked
Title
Hot-key
Locked
Menu
Display
Base Denominator
Messages
Button Properties (Units)
Long Name
Conversion
Comp
Exact factor
Conversion
Base
Composition
Level 3: Try harder to find a match by converting bases to their S.I. compositions.
Level 2: Try to find a match by converting units to their bases.
Level 1: Convert if they match the composition of another unit.
Don't convert at all, display as a combination.
[Xmin][Xmax]
Grid On/Off
[Ymin] [Ymax]
[
Scale +/Print
Copy
Unit Name
Composition
Search
Preferred
Main Menu
Tape Display
Entry Display
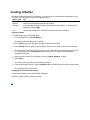
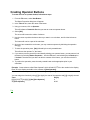
Creating A Button
Buttons are the building blocks of calculators. You may create your own buttons and add them to any
calculator. All buttons fall into one of three different types:
Button Type Use
Number
Used for constant buttons and storage registers.
Operator
You may assign a series of numbers and operators to this button. It will become an
operator like [+] or [TAN] .
Unit
Used for unit conversions. See Unit Conversions for more information.
Creating a button
To create a new button, follow these steps:
1. From the File menu, select New Button...
The Button Properties dialog box will appear.
2. In the Title edit box, enter the name you want to appear on the button.
3. In the Hot-Key edit box, specify a hot-key which can be used to quickly execute your new button.
The hot-keys for buttons are limited to any key on the keyboard, except extended keys such as F1F12, insert, delete, etc. PentaCalc Pro will also accept ctrl + any key not on the extended
keyboard as a hot-key.
4. Select the type of button you would like to create: Number, Operator, or Unit.
5. Select [OK].
The mouse cursor will change to the outline of a button.
6. Place the new button outline on one of PentaCalc Pro's calculators and click the left mouse button.
The new button will be set in place.
Using special characters with buttons
Please see the manual for the list of special characters.
See Also: Editing a Button, Deleting a Button
Top
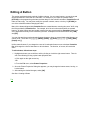
Editing A Button
This section explains the basic method of editing a button. As you create buttons, you may drag and
drop those buttons to more than one calculator. For example, if you create an operator button
[STICKS] on the programming calculator and then drag it to the scientific calculator, PentaCalc Pro will
make an exact copy. You may then modify the operator contents, name, or hot-key of [STICKS] on
one of the calculators without changing the other.
Many of the buttons shipped with PentaCalc Pro are created buttons, meaning they were "built" using
the tools provided by PentaCalc Pro. For example, all of the unit conversion buttons are created
buttons. All other buttons are hard-coded, meaning they are programmed into PentaCalc Pro as part
of the application and may not be modified by the user. Examples of hard-coded buttons are [TAN]
and [PV].
You can drag and drop most hard-coded buttons; however, there are several hard-coded buttons you
cannot move. These are 0-9, [ ( ], [ ) ], [SWAP], [DROP], [=], [Enter], [ / ], [ . ], [ : ], [Time], [Date],
[Graph] and [‚]
Unlike created buttons, if you change the name of a hard-coded button on one calculator PentaCalc
Pro will change the name of that button on all calculators. The function, of course, will remain the
same.
To edit a button, follow these steps:
1. Highlight the button you would like to edit by clicking on it with the right mouse button. Then do
one of the following to bring up the button properties box:
a. Click again on the right mouse key.
-ORb. From the File menu, select Button Properties...
2. Once the "Button Properties" dialog box appears, you may change the buttons name, hot-key, or
Locked status.
3. After making the desired changes, select [OK].
See Also: Creating a Button
Top
Creating Custom Calculators
PentaCalc Pro makes it easy to create or modify your own calculators and buttons. You can add
buttons to an existing calculator or create your own calculator and buttons. You can even drag and
drop buttons from existing calculators into your new creation. For example, if you use certain buttons
from the scientific and financial calculator on a regular basis, you can create your own calculator with
these buttons. In addition, you can create a calculator with your favorite engineering, scientific, or
business formulas.
The building blocks of PentaCalc Pro are the individual calculators supplied by Headgate or built by
you. The ability to create new calculators gives you ultimate flexibility to customize PentaCalc Pro
exactly the way you like. Once you create a calculator, it will automatically appear on the Calc menu
and may be loaded and used like any other calculator.
Click on one of the topics below for more information:
Creating a Calculator
Editing a Calculator
Deleting a Calculator
Creating a Button
Editing a Button
Locking/Unlocking a Button
Deleting a Button
Using Storage Buttons
Using Operator Buttons
Top
Introduction to PentaCalc
Welcome to PentaCalc Pro for Windows. PentaCalc Pro, the second generation of PentaCalc, is a
product that has been enhanced as a result of hundreds of suggestions from PentaCalc users.
PentaCalc Pro is a comprehensive Windows based application used for everyday quick or in-depth
calculations. You can customize PentaCalc Pro to your own personal style, including creating your
own calculators.
What's New in PentaCalc Pro
How To Use The Manual
System Requirements
First-time Setup
Removing PentaCalc Pro
If You Need More Help...
Top
Using PentaCalc Pro
The purpose of the following choices is to acquaint you with the differences between PentaCalc Pro
and a handheld calculator and to explain some of PentaCalc Pro's functions that are similar to other
calculators you may have used in the past.
Selecting a Calculator
Interface Overview
Entry Notations (Algebraic, RPN and 10-key)
Common Operations
Base Conversions
Unit Conversions
Setting Warning Messages
Using PentaCalc Pro with Any Windows Application
Top
Graphing Calculator
Click on the part of the calculator where the
the calculator for detailed information.
appears for a brief description or select a topic below
We all have heard that "a picture is worth a thousand words". PentaCalc Pro makes it easy for you to
graph expressions or equations. Click on one of the following to learn more about:
Creating a Graph
Viewing a Graph
Modifying a Graph
Printing a Graph
Copying a Graph
Top
Financial Calculators
PentaCalc Pro comes with a robust set of tools for calculating almost any type of financial problem. To
use one of the financial calculators, you may select it from the Financial submenu of the Calc menu.
Click on one of the following topics to learn more about the calculator:
Time Value of Money
Cash Flow
Depreciation
Business
Bond
Top
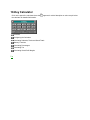
10-Key Calculator
Click on the part of the calculator where the
the calculator for detailed information.
appears for a brief description or select a topic below
Overview
Configuring the Calculator
Calculating Subtotals, Totals and Grand Totals
Memory Functions
Calculating Percentages
Calculating Tax
Calculating Gross Profit Margins
Top
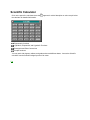
Scientific Calculator
Click on the part of the calculator where the
the calculator for detailed information.
appears for a brief description or select a topic below
Trigonometric functions
Logarithmic, Exponential, and Hyperbolic Functions
Rectangular and Polar Conversions
Complex numbers
You may work with degrees, radians, and grads and several different bases. Access the Scientific
calculator from the Scientific subgroup on the Calc menu.
Top
Unit Conversions
The unit conversion capabilities of PentaCalc Pro are comprehensive and flexible. The unit
conversions calculator actually consists of over forty different calculators, each of which represent a
different type of unit. Within each unit calculator, there are buttons representing each unit within the
type found on that calculator. For example, Length is a unit type, and meters, feet, and inches are units
within the type. If you are not able to find a particular unit, you can create a new unit or unit type.
In addition to being able to create your own units, PentaCalc Pro contains Smart Units which
automatically perform dimensional analysis of units. PentaCalc Pro's Smart Units will convert the units
to the appropriate number of significant digits, making sure your data is always accurate. Click on one
of the topics below:
Overview
Creating Units
Configuring Smart Units
Top
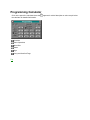
Programming Calculator
Click on the part of the calculator where the
the calculator for detailed information.
Overview
Basic Operations
Word Size
Bases
Sign
Carry and Overflow Flags
Top
appears for a brief description or select a topic below
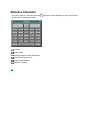
Statistics Calculator
Click on the part of the calculator where the
the calculator for detailed information.
Overview
Entering Data
Importing Data From Other Applications
Viewing and Editing the List
Single Variable Statistics
Regression Analysis
Top
appears for a brief description or select a topic below
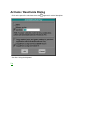
First-Time Setup
The first time you run PentaCalc Pro, A "First-time Setup" box will be displayed. You have the
following options:
Activate/Deactivate key: You may select a key or key combination to bring PentaCalc Pro to the
top of the desktop instantly. For more information on this feature, see Clipboard support for
PentaCalc Pro.
Run PentaCalc Pro automatically when you start your machine: We recommend you select
this option which allows PentaCalc Pro to load as a minimized icon when you start your machine.
This will make PentaCalc Pro instantly accessible by pressing a user defined hot-key. PentaCalc
Pro is designed to use a very small fraction of your system resources and memory. This allows
you to have PentaCalc Pro running at all times with insignificant degradation to your system's
performance.
Replace the Windows calculator with PentaCalc Pro: If you select this option, all applications
that would normally run the Windows calculator, such as Quicken or Managing Your Money, will
run PentaCalc Pro instead.
Entry Mode: You may select Algebraic, RPN or 10-key entry notation. If you select 10-key,
PentaCalc Pro will also be set to Fixed 2 display format.
[%+] Add-on Percentage
Computes the percentage of a number with an add-on.
Top
If you need more help...
Using On-line Help
You'll find on-line help useful in PentaCalc Pro. Help appears in a separate window with its own menu
bar and controls. There are two ways to display the Help window:
Press F1
PentaCalc Pro's context-sensitive help feature can be accessed at any time by pressing F1. The
cursor will change to a question mark and arrow. You may then choose the calculator button or menu
item you wish to know more about by clicking on it with the mouse.
Choose a command from the Help menu. The Help menu offers several options:
Get Help On... performs the same function as pressing the F1 key.
Contents displays the contents of PentaCalc Pro topics. To view help for a particular topic, click
the word or phrase.
How to use Help provides information about using the Microsoft Windows help system. To view
help for a particular topic, click the word or phrase.
About PentaCalc Pro gives the version number and other information about PentaCalc Pro.
Technical support
If you are unable to find the answer to your question using the manual or the on-line help system there
are several methods of contacting Headgate technical support.
Telephone
It is Headgate's policy to provide unlimited free telephone technical support. You may call Headgate
technical support Mon-Fri between 8:00 a.m. and 5:00 p.m. Mountain Standard Time. You may also
fax your questions directly to Headgate technical support at the fax number listed below.
Technical Support Numbers: PH: (801) 693-3246
Fax: (801) 298-9169
Top
New in PentaCalc Pro
If you have used PentaCalc, you will notice that we have added several new features to PentaCalc
Pro. The following new features give you greater flexibility to calculate the way you like:
You can now custom build your own calculator by simply dragging and dropping buttons to a new
calculator that you create. You may also build your own custom buttons with functions that are
unique to the work you do every day.
The tape display and keyboard are resizable with four different scales to make PentaCalc Pro as
big or as small as you want regardless of what video resolution you are running. The tape also
keeps a record of all operations making editing and recalculating even easier.
All calculator interfaces may "stick together" so you can have many or few showing at any given
time.
You'll now find a Quick Copy/Paste feature that automatically takes the number in the display and
inserts it at the cursor position of the previous application. You may also use Quick Copy/Paste to
copy a number from any application and paste it into PentaCalc Pro's display. This means no
more cumbersome and lengthy hot-key combinations to copy to and paste from the clipboard.
Just for fun, we have added texture mapping. It is possible to create a wood calculator with granite
or marble buttons. We have also included many other textures for u to use.
As the most comprehensive and flexible Windows based calculator on the market, PentaCalc Pro
now has unlimited user defined hot-keys to instantly bring PentaCalc Pro to the front of your
desktop.
PentaCalc Pro gives you the choice between Algebraic, RPN or 10-key notation in any calculator.
The graphing feature makes it possible to plot a graph of any one variable expression and then
print or copy the image to the clipboard. This feature is perfect for making your next report or
presentation a little more clear.
We have increased the number of functions on the existing PentaCalc calculators and added a few
extra calculators as well:
The scientific calculator now has rectangular-polar conversions and complex numbers.
New financial calculators include bonds, depreciation, interest rate conversions, markup/markdown
and percentage calculations.
The 10-key calculator has been expanded to include all functions found on regular desk-top adding
machines such as: round up/down and 5/4 rounding; negative numbers in red, gross profit margin,
grand total, memory registers and item counters.
The statistics calculator now includes common two variable statistics, including linear regression
analysis.
The selection of units in the unit conversion calculator has been expanded along with the addition
of Smart Units that automatically keep track of your unit dimensional analysis. You will no longer
need to cancel units when working with units of different dimensions. PentaCalc Pro also allows
you to add units and change values (a handy feature for currency conversions).
The new programming calculator contains all logical operations and numerical bases, essential
tools for any programmer.
Top
Removing PentaCalc Pro
If you need to remove all or some of PentaCalc Pro, use the uninstall application. Uninstall will remove
the files you specify and make the following changes:
Remove modifications (if any) made to the AUTOEXEC.BAT and WIN.INI files during installation.
Rename the Windows calculator if you chose to have PentaCalc Pro replace the Windows
calculator on installation.
Delete the PentaCalc Pro directory (usually C:\PCALCPRO) and all of its files.
Removes the PENTACALC PRO group from the program manager.
To uninstall PentaCalc Pro:
1. Start Windows.
2. Insert the PentaCalc Pro program disc into CD/DVD drive.
3. Choose Run... from the program manager File menu and choose UNINSTAL in the "Run" dialog
box. Then click [OK].
4. Follow the on screen instructions to complete the uninstall process.
Top
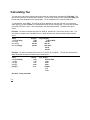
How To Use The Manual
Conventions
The PentaCalc Pro User's Manual uses consistent visual cues and standard text formats to help you
locate and interpret information easily. These conventions are explained as follows.
This
Represents
[Button]
Any button on PentaCalc Pro's interface and dialog boxes.
Bold
Menu titles or items and text within a dialog box.
small caps
Special keys on an extended keyboard, such as function keys, return, insert, etc. For
example, the Insert key is shown as insert.
Note
Additional information, such as exceptions to a general rule, or more technical detail for
advanced users.
Tip
Helpful suggestions and shortcuts.
Caution!
Alert you to potential loss of information.
If you don't read manuals
If you do not normally read manuals may we suggest you at least skim Introduction to PentaCalc Pro,
Using PentaCalc Pro, and Creating Calculators. These three topics provide information on what
makes PentaCalc Pro unique from a handheld calculator. We specifically recommend you also do the
following:
Learn about the Quick Copy/Paste feature in PentaCalc Pro. This feature will allow you to copy a
number from the display in PentaCalc Pro and paste it into your previous application with a single
keystroke. It is also possible to copy a highlighted number from any application, and paste it into
PentaCalc Pro with a single keystroke.
If you intend to use only a few features from several of PentaCalc Pro's calculators consider
building your own custom calculator by dragging and dropping the buttons you use most often onto
a newly created calculator.
If you find that PentaCalc Pro doesn't have a particular function you would like, consider making
your own button to perform that function. See Creating Calculators for more information.
Become familiar with the fractions capabilities and the other bases. You will probably find that you
have many uses for these features. See Using PentaCalc Pro for more information.
If you work with units, PentaCalc Pro's Smart Units are cutting edge and introduce a whole new
dimension to making calculations with units. See Unit Conversions for more information.
Top
System Requirements
To run PentaCalc Pro for Windows you will need the following:
MS Windows Version 3.1, 95, 98, ME, 2000, XP, Vista
Personal Computer using 80286, Pentium 4, Core 2 Duo or higher microprocessor
Internet Access or CD / DVD Drive
Hard disk with at least 2.5 MB (Megabyte) free space
Mouse
Top
Auto Decimal
PentaCalc Pro will automatically enter the decimal place to as many decimal places as specified in the
Fixed... item from the Option menu.
Discount Percentage
Computes the percentage of a number with a discount.
Subtotal
Computes and prints to the tape the current running total. Also annotates the tape with an item count.
Total
Computes and prints to the tape the current running total, clears the running total, and prints a blank line
feed to the tape. Also annotates the tape with an item count.
Grand Total
Computes and prints to the tape the current grand total of all totals previously performed, and prints a
blank feed line. To clear the grand total register, press [GT] twice or press [AC].
Gross Profit Margin
Calculates the selling price and profit (or loss) amount on an item when its cost and gross profit (or loss)
margin are known.
MS
Displays and prints the current value in memory, but does not clear the memory.
MT
Displays and prints the current value in memory, and then clears the memory.
M+
Adds the currently displayed value to the memory. If a multiplication or division operation is pending,
pressing [M+] completes the operation and adds the result to memory.
MSubtracts the currently displayed value from memory. If a multiplication or division operation is pending,
pressing [M-] completes the operation, and subtracts the result from memory.
Tax
Computes and prints to the tape the tax on the running total. You must then press [+] or [-] to affect the
running total.
Top
Tax Rate
Stores the tax rate as a percentage.
Line Feed
Feeds one line to the tape. You may also select Line Feed from the Edit menu. When adding a Line
Feed to the tape, you can click on the line feed space, and add a comment across the entire tape.
Manual Decimal
If Manual Decimal is selected, you must enter the decimal point manually.
Top
Selecting a Calculator
PentaCalc Pro consists of a multitude of different calculators which fall into two main categories:
The default calculators that ship with PentaCalc Pro which have been "hard coded" and may not
be modified.
The custom calculators that you build yourself to fit your specific calculating needs. Some custom
calculators shipped with PentaCalc Pro were built by Headgate. For example, all of the unit
conversion calculators have been built by Headgate using tools provided by PentaCalc Pro.
You may select any calculator from the Calc menu. The Calc menu is divided into five different
submenus: Financial, Scientific, 10-key, Unit Conversions and Misc. It is also possible for a
calculator to not be in a subgroup, but on the Calc menu itself.
Once you select a calculator, it will appear on the desktop available for use. It may also be attached to
other calculators, or act as a template or source of buttons for other custom calculators you may want
to build. PentaCalc Pro has two calculators that are global, meaning any time PentaCalc Pro is
running they will be active. They are the display interface, and the standard calculator. PentaCalc Pro
also allows one additional calculator to be active at the same time. It is possible to have several
calculators displayed on your screen at the same time, but only the two global and one other calculator
may be active at the same time. This way more than one calculator can have the same keyboard hotkeys and not interfere with each other. You may quickly change the active calculator by pressing the
hot-key of another. Hot-keys for individual calculators are located to the right of the title on each
calculator.
Accessing calculators
If you wish to use a calculator shipped with PentaCalc Pro, you can activate it by selecting it from the
Calc menu or by pressing its hot-key. If you build your own custom calculator, PentaCalc Pro will
automatically save and add it to the Calc menu list in the category you specify. However, you may wish
to borrow custom created calculators from a friend or colleague. PentaCalc Pro has a method of
importing a calculator and adding it to your Calc menu list.
Top
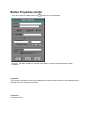
Creating a Calculator
To create a new calculator follow these steps:
1. From the File menu select New Calculator...
The Calculator Properties dialog box will appear.
2. In the Title edit box, enter a name for the new calculator.
This name will appear in the calculator's title bar.
3. In the Hot-key edit box, specify a hot-key which can be used to make your new calculator active
when PentaCalc Pro is running.
The hot-key will appear in the title bar to the right of the calculator name. You may specify a large
assortment of keys for the hot-key. For example you may select any single letter, such as "g", "u",
or "w". Or you may select either shift or ctrl and any other key such as shift+u or ctl+F3.
PentaCalc Pro won't allow you to enter an invalid hot-key. It will prompt you to choose another
hot-key if your entry is used by another calculator, the menus, or other Windows functions.
4. Click the preferred box to select where you want the new calculator to appear on the Calc menu.
You have six choices: Financial, Scientific, 10-key, Unit Conversions, Misc., and Top Level.
If you choose any one of the first five choices, the new calculator will appear in the respective
menu group. If you select the last choice, Top Level, the new calculator will appear at the bottom
of the Calc menu. You may want to specify the Top Level for a calculator you will be using
frequently; this way, you will not have to go through the extra work to find it in one of the five
subgroups. Do not select the Locked option; this option prevents you from adding buttons to your
new calculator. The Locked feature is explained in the Editing a Calculator's Properties topic.
5. After you have entered the name, hot-keys, and menu group, select [OK].
The new calculator will appear on your screen with the name you had specified in the Title edit box.
To bring up the calculator in the future, use its hot-key, or select it from the Calc menu.
Top
Editing A Calculator
You may edit any calculator's name, hot-keys, Calc menu placement, or lock status. To change the
properties of an existing calculator, follow these steps:
1. Make sure the calculator you wish to edit is active by clicking on its title bar using it's hot-key, or
selecting it from the Calc menu. (You can tell a calculator is active when its title bar is highlighted.)
2. From the File menu, select Calculator Properties...
The Calculator Properties dialog box will appear. Here you may edit any property. A complete
explanation of this dialog box, except the Locked feature, is provided in the Creating a Calculator
topic. You may select Locked to make it impossible to inadvertently change buttons on the
calculator. If Locked is checked, you cannot move buttons on or off the calculator, or change any
of the button properties. You may, however, change the contents (anything stored in a number
button) of a button. For example, you can continue to store numbers in memory buttons.
3. After making the desired changes, select [OK].
Top
Deleting a Calculator
It is possible to delete any calculator by following these steps:
1. Make sure the calculator you wish to delete has is active by clicking on the title bar.
2. Delete all buttons from the calculator. For more information on deleting buttons see the Deleting
Buttons topic.
3. Select Delete Calculator from the Edit menu.
The selected calculator will be deleted.
See Also: Creating a Calculator
Top
Deleting a Button
You may delete a button by following these steps:
1. Using your right mouse button, click on the button you want to delete.
2. Press the delete key on your computer keyboard .
-orSelect Delete Button from the Edit menu.
See Also: Creating a Button
Top
Using Number Buttons
Using PentaCalc Pro, you have the ability to create unlimited number buttons, which you may use as
storage or constant buttons. Number buttons are generally used to temporarily store numbers. They
may be left blank or given a name, such as Mem 1, Mem 2, etc. A constant button generally stores a
number that is infrequently changed. An example may be Pi or Avogadro's number.
A number button behaves on the tape as a variable if it is given a name. For example, if you create a
button and call it "Mem1", each time you press [Mem1], Mem 1 will appear on the tape but the number
stored in [Mem1] will be used in the calculation. Thus, if you recalculate the tape and have 3 stored in
[Mem1], then 3 will be used in the calculation for [Mem1]. If you then store 5 in [Mem1], 5 will be used
in the recalculation of the tape.
Creating storage and constant buttons
To create and use a storage or constant button follow these steps:
1. From the File menu select New Button....
The Button Properties dialog box will appear.
2. In the Title edit box, enter the name of the button.
If you leave the Title edit box blank the number stored in the button becomes the name of the
button.
3. In the Hot-key edit box enter a hot-key.
The Hot-key field allows you to create a keyboard accelerator for the newly created button. If it is
left blank, PentaCalc Pro will attempt to assign a hot-key for you.
4. Using your mouse, click on the box to the left of Number.
This will indicate to PentaCalc Pro that you want to create a number button.
5. Select [OK].
The cursor will become the outline of a button.
6. Use the cursor to position the button where you would like it on a calculator and click the left mouse
button.
The button will be a part of the calculator.
7. Once you have created the new button enter in the display, the number you wish to store.
8. Press the newly created button.
This will store the number "in" the button.
9. To recall your stored number for use in a calculation, press the newly created button.
The number will appear if you did not give the button a name. If the button has a name, press [Rcl]
followed by the button and the actual number will appear.
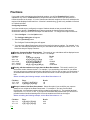
Practicing with number buttons
Example: Calculate the number of days between today and Christmas.
Part 1: Create a button with today's date.
You will need to create room for your new buttons. You may either create a new calculator or extend
the sides of an existing calculator. In the example below, we extended the bottom of the standard
calculator.
1. Create a new number button and enter "Today" for the title.
2. From the Option menu, select Dates.
[.] will change to [/] on the standard calculator.
3. Enter todays date. (if today were July 17, 1994 enter 7 [/] 17 [/] 94).
4. Select [Today]. This will store the date you entered in [Today].
-orPress the [Date] button on the standard calculator and the date will be printed on the tape from
your computer's system clock.
Part 2: Create a button with the date of Christmas.
1. Follow the Creating a Button section and enter "Christmas" for the title.
2. Enter 12 [/] 25 [/] 94 (or the current year).
3. Select [Christmas]. This will store 12/25/1994 (or the date you entered) in [Christmas].
Part 3: Calculate the number of days between today and Christmas.
Enter
Display
[Christmas] [-]
[Today] [=] -or- [Date] [=]
Christmas
161
Top
Creating a Graph
Once you have generated a graph with PentaCalc Pro, it is possible to resize and scale it to gain
information about its maxima or minima. [Graph] is located on the standard calculator.
To create a graph of an expression you must:
1. Start the expression with [{ }].
2. Enter the expression the same way you would calculate it and substitute a dummy variable in the
place of a value.
The dummy variable is represented on the x-axis and the result of the expression is represented on
the y-axis.
You may create a new number button to serve as the dummy variable if it has a name. For
example you could create a new number button and name it "X".
-ORYou may use a memory button from the standard calculator as a variable such as: [M1], [M2] or
[M3].
3. End the expression with [{ }].
4. Press [Graph] on the standard calculator.
PentaCalc Pro will look up the tape from the current insertion point until it finds the first expression
contained within two curly brackets and will graph that expression.
Example: Graph the expression "sin x + 4."
Solution: Select Radians from the Option menu. If you plot the function in degrees it will come out
rather flat. Use [{ }] to signify the start of the expression and [{ }] to signify the end. We will use [M1]
from the standard calculator for our dummy variable.
Enter
[{ }] [M1] [sin] [+] 4 [=] [{_}] [Graph]
Display
{
M1Sin
+
4.00=
}
Graph
A window with a graph of the expression will appear.
See Also: Graphing Calculator, Modifying a Graph, Viewing a Graph
Top
Modifying a Graph
You may edit a function and regraph at any time. Once a graph is plotted, the function will remain on
the tape between curly brackets ({ }). You may modify any part of the function and the graph will
automatically change.
Example: Graphing and editing a function.
Part 1: Graph the function: z½ - 14z¼ + 63z» - 106z + 56 = 0
Solution: In this example we created a new number button called "z" and placed it at the bottom of the
standard calculator. You may substitute [M1] for "z" if you desire.
Enter
Display
[{_}] [z] [y•] 4 [-] 14 [x] [z] [y•] 3 [+] 63 [x]
[z] [x»] [-] 106 [x] [z] [+] 56 [=] [{_}] [Graph]
63
56
Part 2: Graph the equation above with each z coefficient divided by four.
The new equation is: 0.25z½ - 3.5z¼ + 15.75z» - 26.5z + 14 = 0
Solution: You may graph this new equation one of two ways.:
Enter the new expression.
-OREdit the tape from Part 1 of this example by highlighting and changing the coefficient for each z
variable.
If you chose to modify the existing expression, you should first highlight and delete the entire last line
which has the graph operator. This will prevent PentaCalc Pro from executing the graph command
and regenerating the graph after you change each coefficient. If you decide to edit the tape follow
these steps:
1. You may add the .25 coefficient at the top of the tape by setting the insertion point below the left
curly bracket and entering .25 [x].
2. Press Enter.
3. Edit each coefficient using standard Windows editing functions.
4. Return the insertion point to the bottom of the tape by selecting Restore Insertion Point from the
Edit menu.
5. Press [Graph].
The graph will appear.
See Also: Graphing Calculator, Creating a Graph, Viewing a Graph
Top
Printing a Graph
You may print a graph at any time by following these steps:
1. Click [Print] on the graph window.
The "Select Printer" dialog box appears showing a combo box with the default printer selected.
2. To print to a printer other than the one currently displayed, select the drop down button, and then
the new printer.
3. To change various configurations on the current printer (such as the number of copies and/or
layout format), select [Setup].
4. When you have selected the printer and setup, select [OK].
See Also: Graphing Calculator, Creating a Graph, Viewing a Graph
Top
Copying a Graph
PentaCalc Pro allows you to copy the graph as a bitmap image to the clipboard, and paste it into any
application that supports bitmap images.
To copy a graph, do the following:
1. Generate a graph.
2. Select [Copy] on the graph interface.
The graph will be copied to the clipboard.
3. Open your target application.
4. Select Paste from the Edit menu on your target application.
The graph will be pasted in your application.
See Also: Graphing Calculator, Creating a Graph
Top
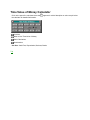
Time Value of Money Calculator
Click on the part of the calculator where the
the calculator for detailed information.
appears for a brief description or select a topic below
Overview
When to Use Time Value of Money
Basic Calculations
Amortizations
See Also: Cash Flow, Depreciation, Business, Bonds
Top
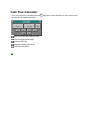
Cash Flow Calculator
Click on the part of the calculator where the
the calculator for detailed information.
When to Use the Cash Flow Calculator
Cash Flow Signs and Numbers
Entering Cash Flows
Viewing and Editing Cash Flows
Cash Flow Calculations
Top
appears for a brief description or select a topic below
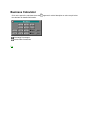
Depreciation Calculator
Click on a button for a brief description or select a topic below for detailed information
Calculating Depreciation
Top
Business Calculator
Click on the part of the calculator where the
the calculator for detailed information.
Calculating Percentages
Interest Rate Conversions
Top
appears for a brief description or select a topic below
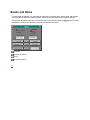
Bonds and Notes
To make bond calculations, you may input the settlement (purchase) date, maturity date, and call date
in the field directly below the respective label. Select the coupon payments and calendar basis by
checking the appropriate radio box. Click on the part of the calculator where the
description or select a topic below the calculator for detailed information.
Overview
Anatomy of a Bond
Notes
Bond Calculations
Top
appears for a brief
Complex numbers
Complex numbers are ordered pairs of numbers which are represented by two real numbers enclosed
within parentheses. The complex numbers are separated by the non-radix character. The radix in the
United States is usually represented by a period; therefore, we will represent the non-radix character
with a comma. For example, an acceptable number is (2.341, 7.814). If you are not familiar with
complex numbers, you may want to think of them as two-dimensional vectors or point coordinates.
Most of PentaCalc Pro's complex number functions compute results that are meaningful in ordinary
two-dimensional geometry, as well as for complex numbers. However, PentaCalc Pro has some
limitations. You cannot assign units to or use fractions with complex numbers. The complex number
(x,y) as entered in PentaCalc Pro can have one of four different meanings.
A complex number z in rectangular notation, where x is the real part of z, and y is the imaginary
part.
A complex number z in polar notation, where x is the real part of z, and y is the polar angle.
The coordinates of a point in two dimensions, in rectangular coordinates, where x is the abscissa or
horizontal coordinate, and y is the ordinate or vertical coordinate.
The coordinates of a point in two dimensions, in polar coordinates, where x is the radial coordinate,
and y is the polar angle.
Top
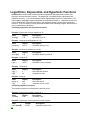
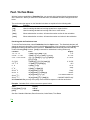
Logarithmic, Exponential, and Hyperbolic Functions
PentaCalc Pro contains both common and natural logarithmic and exponential functions, and
hyperbolic functions and their inverses. The buttons [e•] and [Ln] compute exponentials and
logarithms to base e. (e is a transcendental number approximately equal to 2.71828182846.) The
buttons [10•] and [Log] compute exponentials and logarithms to base 10. Hyperbolic functions are
certain combinations of exponential functions, with properties similar to those of the trigonometric
functions. They are useful for solving differential equations and evaluating integrals, and have other
uses in mathematics and physics.
Calculating logarithmic and exponential functions
Example: Compute the common logarithm of 45.
Enter
Display
Description
45 [Log]
1.65
calculates log of 45
Example: Compute the antilogarithm of 2.34.
Enter
Display
Description
2.34 [10•]
218.78
calculates antilog of 2.34
Example: Compute the natural log of 29.46.
Enter
Display
Description
29.46 [Ln]
3.38
calculates natural log of 29.46
Example: Compute e5.
Enter
5 [e•]
Display
Description
148.41
calculates e to the 5th power
Example: Compute 43.
Enter
4 [y•]
3 [=]
Display
Description
4
64
enters the base number
computes the cube
Example: Compute .
Enter
Display
Description
298 [†…]
7 [=]
298
2.25
enters the radical
computes 7th root of 298
Calculating Hyperbolic functions
The following examples are calculated to 4 decimal places.
Example: Compute the hyperbolic tangent of .5.
Enter
Display
Description
.5 [Tanh]
.4621
calculates Tanh
Example: Compute the inverse hyperbolic cosine of 4,000.
Enter
4,000 [Cosh€]
Top
Display
Description
8.9872
calculates inverse Cosh
Number Of Payments
Stores the number of payments to be amortized and calculates the amortization schedule.
Nominal Annual Interest Rate
Stores or calculates the nominal annual interest rate as a percentage. Nominal interest rate is an annual
rate that is compounded periodically. Be sure to enter a percentage as 8.25% not .0825.
Payment Amount
Stores or calculates the amount of each periodic payment. The payments are the same amount, and no
payments are skipped. Payments can occur at the beginning or end of each period.
Present Value
Stores or calculates the present value of the series of future cash flows. To the lender or borrower, PV is
the amount of the loan. To an investor, PV is the initial investment. PV always occurs at the beginning of
the first period.
Future Value
Stores or calculates the future value-the amount of the final cash flow, or the compounded value of the
series of previous cash flows. Future Value always occurs at the end of the last period.
Table
Creates an amortization table.
Payments Per Year
Stores the number of payments or compounding periods per year. The value must be an integer between
1 and 999. The default is 12.
Top
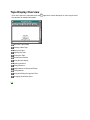
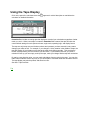
Tape Display Overview
Click on the part of the calculator where the
the calculator for detailed information.
About the Tape Display
Creating a New Tape
Saving the Tape
Opening the Tape
Printing the Tape
Resizing the Interface
Using the tape display
Entering Numbers
Editing Numbers
Adding Memos to Numerical Entries
Editing Memos
Using and Editing the Operator Field
Changing the Insertion Point
Top
appears for a brief description or select a topic below
Entry Notations
PentaCalc Pro has three different entry notations:
Algebraic
The most common notation found on handheld calculators and PentaCalc Pro's default.
RPN
Reverse Polish Notation is a popular entry notation on Hewlett-Packard handheld
calculators.
10-key
Emulates the desktop tape adding machines you may be used to.
Top
Common Operations
Click on one of the topics below:
Using the Keyboard
Changing the Decimal Point
Doing Arithmetic
Clipboard Support
Fractions
Top
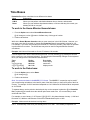
Base Conversions
PentaCalc Pro provides the ability to operate in one of seven bases. You can use the time bases to
calculate days between dates or what day of the week a particular day falls on in the future. In fact, you
can even calculate the standard deviation of a list of binary numbers.
Converting numbers between the different bases is very easy:
1. Select the desired base from the Option menu.
2. Enter numbers and perform operations.
3. Change to a new base by selecting it from the Option menu and the number in the display will be
converted.
Select one of the following topics for more information about each base:
Time Bases
Feet / Inches Bases
Other Bases
See also: Unit Conversions, Using HMS in Angle Calculations.
Top
Total Number Of Payments
Stores or calculates the total number of payments (or compounding periods). N can be expressed in any
unit of time, such as years, months, or days.
Interest
Displays the amount of the payments applied toward interest.
Principle
Displays the amount of payments applied toward principle.
Balance
Displays the balance of the loan.
Next Set Of Payments
Calculates the amortization schedule for the next set of payments using the stored value of [#Pmt].
Begin or End
Radio buttons used to determine if payments occur at the beginning or ending of each period.
Top
Menu Items
File
New Tape
Open Tape
Save Tape
Save Tape As...
Print Tape
New Calculator
New Button
Import Calculator
Calculator Properties
Button Properties
Edit
Copy
Paste
Delete
Delete Button
Delete Calculator
Set Insertion Point
Restore Insertion Point
Line Feed
Calc
Financial
Scientific
10-Key
Unit Conversions
Miscellaneous
Standard
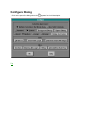
Option
Configure
The following simply set the calculator to the named mode:
Degrees
Radians
Grads
Standard
Fixed
Scientific
Engineering
Decimal
Binary
Octal
Hexadecimal
Hours-Minutes-Seconds
Dates
Feet-Inches
Algebraic
10-key Notation
RPN
Top
PentaCalc Contents
Introduction to PentaCalc
Using PentaCalc Pro
Creating Custom Calculators
Graphing Calculator
Financial Calculator
10-key Calculator
Scientific Calculator
Unit Conversions Calculator
Programming Calculator
Statistics Calculator
Menu Items
Overview of Calculators
Top
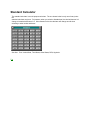
Standard Calculator
The standard calculator is a multi-purpose calculator. The one shown below is only one of many looks
the
standard calculator may have. For instance, when you switch to Hexadecimal, the decimal buttons 0-9
change to hexadecimal buttons 0-F. Other buttons on the the calculator will change as well when
switching to other modes and bases.
See Also: Feet / Inches Base, Time Bases, Other Bases, RPN, Algebraic.
Top
Time Value of Money Overview
The time value of money (TVM) calculator bases its computations on compound interest, taking into
account that interest, added to the principal at specific compounding periods, also earns interest. Many
TVM problems are compound interest calculations, such as:
Savings accounts
Mortgages
Pension funds
Leases
Retirement accounts
Annuities
Amortization calculations determine the amounts applied toward principal and interest in a payment or
series of payments.
Top
When to Use Time Value of Money
TVM is used specifically when there is a series of cash flows and one of the following situations occurs:
The dollar amount is the same for each payment. (When the cash flow varies, use PentaCalc
Pro's cash flow calculator.)
The payments are at regular intervals.
Payment periods coincide with the compounding periods.
See Also: Cash Flows and Signs of Numbers
Top
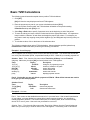
Basic TVM Calculations
The following general instructions explain how to perform TVM calculations.
1. Click [AC].
[AC] will clear the entry display as well as all TVM registers.
2. Enter the payments per year for your current calculation and select [P/Yr].
If you do not enter a new number, the TVM calculator will default to the previous setting.
PentaCalc Pro ships with [P/Yr] at 12.
3. Select Beg or End mode to specify if payments occur at the beginning or end of the period.
4. To store the values you know, enter the number and click the appropriate button. It is important to
keep in mind the "direction" of cash flows and assign the proper sign to them. For example, you
may want to mark any outgoing money with a negative sign, and designate any incoming money as
positive.
5. To calculate a value, click on the button of the unknown value.
The following examples show various TVM calculations. Unless otherwise specified, please keep
PentaCalc Pro in End mode while performing the following calculations.
Example 1: Home Mortgage
Part 1: Suppose you are buying a home for $100,000 with $5,000 down. You need a loan for $95,000
over a 30 year amortization period, compounded monthly at 8.5%. What will your monthly payment be?
Solution: Part 1. First, from the Calc menu select Time Value of Money from the Financial
subgroup. Make sure you select [AC] to clear all values in the TVM registers.
Enter
12 [P/Yr]
12 [X] 30 [=]
[Sto] [N]
8.5 [I%Yr]
95000 [PV]
[Pmt]
Display
12.00P/Yr
360.00
360.00N
8.50I%Yr
95,000.00Pv
-730.47
Description
change to 12 payments per year
number of months in 30 years
enters 360 months
enters interest rate
enters loan amount
displays payment amount
Part 2: You decide you can only afford a payment of $700.00. What will the interest rate need to
be to give you this new payment?
Solution: Part 2.
Enter
Display
Description
700 [±] [Pmt]
[I%Yr]
-700.00Pmt
8.04
enters new payment
shows new interest rate
Example 2: Car Loan
Part 1: Your current car has decided that a new car is in your near future. After a careful examination
of your budget, you have decided you cannot afford a down payment; however, you can afford a
monthly payment of $289.00. The current interest rate on a "nothing down, drive it off the lot today"
deal is 10.5% over 5 years. How much can you afford for a new car?
Solution: Part 1. First, from the Calc menu select Time Value of Money from the Financial subgroup.
Make sure you select [AC] to clear all values in the TVM registers. If necessary, enter 12 and select
[P/Yr] to change to 12 payments per year.
Enter
12 [X] 5 [=]
[Sto] [N]
10.5 [I%Yr]
289 [±] [Pmt]
[PV]
Display
60.00
60.00N
10.50I%Yr
-289.00Pmt
13445.68PV
Description
number of months in 5 years
enters 60 months
stores the interest rate
stores your maximum payment
maximum amount you can afford
Part 2: After shopping around, you find a "killer deal," with an interest rate of 4.5% and nothing down.
However, you need to pay off the loan in 3 years instead of 5. If you take this offer, how much can you
afford?
Solution: Part 2.
Enter
Display
Description
[AC]
3 [x] 12 [=]
[Sto] [N]
4.5 [I%Yr]
289 [±] [Pmt]
[PV]
0.00
36.00
36.00N
4.5I%Yr
-289.00Pmt
9715.29
clears the display
number of months in 3 years
enters the number of periods
enters new interest rate
stores your maximum payment
maximum amount you can afford
Part 3: After looking around the car lot, you find a great car for $7,500 with an interest rate of 4.5%
over 3 years. What is your monthly payment?
Enter
Display
Description
[AC]
3 [x] 12 [=]
[Sto] [N]
4.5 [I%Yr]
7500 [PV]
[Pmt]
0.00
36.00
36.00N
4.5I%Yr
7500.00PV
9715.29PMT
clears the display
number of months in 3 years
enters the number of periods
enters new interest rate
maximum amount you can afford
your monthly payment
Example 3: IRA Investment
Note: This problem is designed to be solved consecutively through each of the four parts. Please do
not select [AC] between parts.
Part 1: You have just turned 30 and decide it is time to start thinking about retirement. You want to
calculate what your IRA will be worth in 30 years when you turn age 60. You plan to invest $2,000 per
year in the account, and expect to earn 12.5% on your money.
Solution: Part 1. First, from the Calc, menu select Time Value of Money from the Financial subgroup.
Make sure you select [AC] to clear all values in the TVM registers
Enter
Beg
1 [P/Yr]
30 [N]
12.5 [I%Yr]
2000 [±][PV]
[FV]
Display
0.00
1P/Yr
30.00N
12.5I%Yr
-2,000.00PMT
598,379.49PMT
Description
changes to Beg mode
changes to one payment per year
enters the number of periods
enters interest rate
enters IRA contribution
value of IRA at age 60
Part 2: In addition to making your yearly IRA investments, you will be rolling over $7,354 from your
401k plan from a previous employer. With the 401k rollover, what will your retirement savings be worth
in 30 years?
Solution: Part 2. Since all cash outflows are negative, you will enter the $7,354 from your 401k plan as
a negative value in the present value button.
Enter
Display
Description
-7.354PV
850,204.75
7354 [±] [PV]
[FV]
enters value of 401k rollover
retirement value at age 60
Part 3: You decide you want to have one million dollars in the account when you turn age sixty. At
what interest rate will you need to invest your IRA at to reach this goal?
Solution: Part 3. Since all cash inflows are positive, you will enter the $1,000,000 you expect to receive
as a positive value in [FV].
Enter
1000000
[I%Yr]
Display
Description
1,000,000FV
13.23
retirement value at age 60
interest rate needed to reach goal
Part 4: You reach age sixty and believe you will live another 25 years. You want to die broke. You
have also moved your IRA into lower risk investments and are now earning 8% per year. You want to
know how much you can take out each month for the next 25 years.
Solution: Part 4. Since all cash outflows are negative, you will enter the $1,000,000 total from your
retirement savings as a negative value in the present value button. You will press [Pmt] to find out how
much monthly spending money you will have.
Enter
8 [I%Yr]
12 [P/Yr]
12 [x] 25 [=]
[Sto] [N]
1000000 [±] [PV]
0 [FV]
[PMT]
Display
8.00I%
12.00P/Yr
300.00
300.00N
-1,000,000.00PV
0.00FV
7,667.05
Description
enters interest rate
enters new payment/yr
number of months left
enters months
enters PV
amount to die with
monthly money
If you press [Table], an annuity table will appear, showing how much of your monthly spending money
is coming from principal, and how much is coming from interest.
See Also: TVM Overview, TVM Calculator
Old
Stores or calculates the old number.
Top
Amortizations
The amortization portion of TVM is used to calculate the following values for a single loan payment or
series of loan payments:
The balance of the loan after the payment(s) are made.
The amount of the payment(s) applied toward interest.
The amount of the payment(s) applied toward principal.
Calculating an amortization table
You may need to calculate an amortization table for your house or car. You may perform these
calculations by following these steps:
1. Select [AC] to clear the TVM variables.
2. If necessary, change the number of payments per year by entering a value and selecting [P/Yr].
3. Enter the annual interest rate and select [I%Yr].
4. Enter the amount of the loan (the principal) and select [PV].
5. Enter the amount of the periodic payments (make sure to change the sign if necessary) and select
[Pmt].
6. Enter the number of payments to be amortized and select [#Pmt].
7. To display the amount applied toward principal, select [Prin].
8. Select [Bal] or [Int] to display the loan balance or interest paid.
9. To continue calculating the schedule for subsequent payments, do one of the following:
a. Enter the number of succeeding payments to be amortized and select [#Pmt].
-ORb. Select [Next] to use the previously stored value for [#Pmt].
10. Select one or all of the [Bal], [Int], and [Prin] keys to see the balance, interest, and principal for
this period.
Example: Amortization schedule for a home mortgage.
You have just purchased a home and have a 30 year mortgage at 9.5%, with a loan balance of
$75,000. You want to know how much of the loan you will pay during the first two years of the loan.
You also would like to generate an amortization table for the mortgage.
Solution: First, from the Calc menu select Time Value of Money from the Financial subgroup. Make
sure you select [AC] to clear all values in the TVM registers. If necessary, enter 12 and select [P/Yr] to
change to 12 payments per year. You will also want to be sure End mode is checked.
Enter
12 [˜] 30 [=]
[N]
9.5 [I%Yr]
75000 [PV]
[Pmt]
12 [#Pmt]
[Int]
Display
360
360N
9.5I%
75,000PV
-630.64Pmt
12#Pmt
-7105.21Int
Description
total months in 30 years
enters total months
stores interest rate
stores amount of loan
payment amount
displays payments
1st year's interest
[Prin]
[Bal]
[Next]
[Int]
[Prin]
[Bal]
-462.48Print
74537.52Bal
13-24#Pmt
-7059.31Int
-508.38Prin
74029.14Bal
1st year's principal
balance after 1st year
displays payments
2nd year's interest
2nd year's principal
balance after 2nd year
To generate an amortization table for this example, select [Table]. An amortization table will appear on
the tape. You may print the amortization table directly from PentaCalc Pro, or copy part or all of it to
another application via the clipboard for further editing or printing.
See Also: TVM Calculator
Top
When to Use the Cash Flow Calculator
Use the cash flow calculator when you need to calculate the following:
The internal rate of return (IRR%) of the cash flows.
The net present value (NPV), net uniform series (NUS), and net future value (NFV) for a specified
interest rate.
Top
Cash Flow Signs and Numbers
In cash flow calculations, money received is a positive number, and money paid out is a negative
number. The sign used on a particular cash flow depends on your point of view. A loan is an initial
positive cash flow for the borrower, and initial negative cash flow for the lender.
Situations where there are no consecutive, equal cash flows, are called simple cash flows. An example
of a simple cash flow would be $400, $800 and $250 in three consecutive periods. Consecutive, equal
cash flows are called grouped cash flows. An example of a grouped cash flow would be if you had a
$700.00 cash flow per period two or more periods.
See Also: Cash Flow Calculator, Cash Flow Calculations, Entering Cash Flow
Top
Entering Cash Flows
To enter cash flows on the tape:
1. Select Cash Flow from the Financial subgroup on the Calc menu.
2. Make sure your cash flows are occurring at regular intervals, and at the end of each period. If one
or more periods are skipped, set their flows equal to 0. If consecutive, equal cash flows occur, you
can group them to make entering data easier.
3. Enter the value of the initial cash flow and press [Flow].
Remember to use [±] if necessary to change the sign on the initial cash flow.
4. Enter the first cash flow and press [Flow].
If the flow occurs only one time, go directly to step 6.
5. Enter the number of consecutive occurrences for flow 1 and press [# Times].
6. Enter the second cash flow, and press [Flow]. You may then continue to enter flow values. When
you have entered all the flows, you may perform calculations on the list at any time.
See Also: Cash Flow Calculator, Cash Flow Calculations
Top
Viewing and Editing Cash Flows
Editing a number or flow
All cash flow numbers are stored in a list on the tape. You may edit individual numbers by using
standard Windows editing conventions of highlighting, modifying, or deleting text. Once you have made
your desired changes, press enter on your keyboard and PentaCalc Pro will calculate the changes.
Inserting a cash flow
1. To insert a cash flow, select Set Insertion Point from the Edit menu.
2. Use the cursor to click between two cash flows where you would like the new cash flow to occur.
-ORYou may set the insertion point by clicking on the right mouse button with the cursor on the line where
you would like the new insertion point to appear below.
3. Once the new insertion point is set, you may enter the new cash flow.
4. To return the insertion point to the bottom of the tape, select Restore Insertion Point from the Edit
menu
-ORRight click the mouse on the bottom entry of the tape.
Deleting a cash flow
You may delete a cash flow by using the cursor to highlight the entire cash flow line, and pressing
delete on your keyboard.
-ORYou may select Delete from the Edit menu.
Top
Flow
Enters the initial cash flow, and subsequently is used to enter the current cash flow.
Number of Times
Enters the numbers of times for the current cash flow.
New
Starts a new cash flow table.
Periodic Interest Rate
Stores the periodic interest rate expressed as a percentage (sometimes called the discount rate, cost of
capital, or required rate of return).
Net Present Value
Calculates the net present value (the present value of a series of cash flows plus the initial cost of the
investment computed for a specific periodic interest rate).
Net Uniform Series
Calculates the net uniform series (the dollar amount of regular, equal cash flows having a present value
equivalent to the net present value).
Net Future Value
Calculates the net future value of a series of cash flows by finding the future value of the net present
value.
Internal Rate of Return
Calculates the internal rate of return (the interest or discount rate at which the net present value of the
cash flows equals 0). For conventional investments, the investment is attractive if the IRR% is greater
than the cost of capital.
Total of Cash Flows
Calculates the sum of the cash flows.
Top
Cash Flow Calculations
It is possible to have more than one cash flow table on the tape at any time, but calculations are done
on the most recent table. You may perform calculations on any cash flow table by setting the insertion
point below the table you wish to perform calculations on. In addition, the insertion point doesn't need
to be exactly after the most recent table. Once a cash flow list has been entered, there are several
different calculations that you can perform on the list.
To calculate:
The sum of the cash flows, select [Total]. This will sum the entire cash flow list.
The internal rate of return (IRR%), select [IRR%]. This function calculates the periodic interest
rate(s), which gives a net present value of zero for the cash flow
Note that PentaCalc Pro only calculates a periodic rate of return. To calculate the annual rate of
return, multiply the periodic rate by the number of periods per year. PentaCalc Pro may generate more
than one solution with this method if you have more than one sign change. In fact, the number of
possible solutions is equal to the number of sign changes in the list of cash flows.
The net present value (NPV), net uniform series (NUS), and/or net future value (NFV), follow these
steps:
1. Enter the periodic interest rate as a percentage, and select [I%].
2. Select either [NPV], [NUS], or [NFV] to obtain the respective answer. The net present value is the
present value of all future cash flows discounted at the cost of capital (I%). The net uniform series
is the dollar amount of regular, equal cash flows which equal the net present value. The net future
value is the future value of the net present value at I%.
Example: Calculate the IRR%, NPV, NUS, and NPV of a "Cash Cow".
Your good friend approaches you about funding his latest "Cash Cow" investment scheme. This
investment involves some great "retirement land" (with lots of water for golf courses and duck ponds) in
Florida. He is asking for an initial investment of $250,000. (Your current nest egg is held in high grade
government and corporate bonds, earning 8% a year.) He "promises" to pay you nothing at the end of
the first year, $30,000 at the end of the 2nd, 3rd, and 4th years, and the big payoff of $400,000 at the
end of the 5th year when phase five is completed and the last retirement unit is sold. You consider this
a somewhat risky proposition and require at least a 20% per year return on your investment to do this
kind of deal. Do you take your friend up on the investment?
Enter
250000 [±] [Flow]
0 [Flow]
30000 [Flow]
3 [# Times]
400000 [Flow]
20 [I%]
[NPV]
[NUS]
[NFV]
[IRR%]
Display
Flow#
Initial flow
1
Amount
-250,000.00
0.00
#Times
1.0
1.00
2
3
30,000
400,000
20.00
-36,586.93
-12,233.93
-91,040.00
15.85
3.00
1.00
I%
NPV
NUS
NFV
IRR%
Based on the above calculations, your good friend will need to find someone else to invest in his cash
cow because you were not able to meet your investment objectives for this type of investment.
See Also: Cash Flow Calculator, Entering Cash Flow.
Top
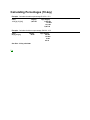
Calculating Percentages (Business)
You may use PentaCalc Pro for various business percentage problems. Each percentage problem
consists of three variables. If you know any two variables, you may solve for the third. Once you have
selected the business calculator, store the known values by keying in the number and pressing the
appropriate button. Once you have entered two variables, press the third button and the answer will
appear in the display
Markup on Cost
Example: The Flower Stand.
You have decided to open a flower stand during the peak flower buying season. You would like to
markup the flowers 80%. You buy roses for $.25 each. What should be your selling price marked up
as a percentage of cost? You must first select the %Cst option on the business calculator.
Enter
.25 [Cost]
80 [Mar%]
[Sell]
Display
0.25Cost
80.00Mar%
Sell
0.45
Markup on Price
Example: The Pet Rock is back.
It is time to revive the pet rock. You are confident you can sell a Pet Rock for $12.99, and you have a
friend with a warehouse full of them. He will sell them to you for $1.99 each. What is your markup as a
percent of the selling price? You must first select the %Sel button on the business calculator.
Enter
1.99 [Cost]
12.99 [Sell]
[Mar%]
Display
1.99Cost
12.99Sell
Mar%
84.68
Percent change
Example: Real estate is on the rise.
Last year you had your house appraised at $127,000; this year, it was appraised at $184,000. What is
the percent change between the two years?
Enter
127000 [Old]
184000 [New]
[%Chg]
Display
127,000.00Old
184,000.00New
%Chg
44.88
Percent of Total
Example: Spring has sprung.
It is time to spray fertilizer on your lawn. The fertilizer manufacturer suggests you prepare a mixture
that is 22% fertilizer concentrate of the total mixture. You want to prepare 5 gallons of the mixture.
How many gallons of concentrate do you need?
Enter
Display
22 [% Total]
22.00%Total
5 [Total]
5.00Total
[Part]
Part
See Also: Business Calculator
Top
Calculating Depreciation
To calculate the depreciation for an asset:
1. From the Calc menu select Depreciation from the Financial subgroup.
2. Enter the depreciable-cost basis of the asset at time of purchase, and press [Original Cost].
3. Forecast the salvage value, and store it in [Salvage Value].
4. Store the expected life of the asset in [Expected Life (Years)].
This entry must be in years.
5. Select either Straight Line, Sum of Years Digits, or Declining Balance methods.
If you select Declining Balance you will also need to enter the factor percentage in [Factor%].
[Factor%] will automatically appear once Declining Balance is selected.
6. Select [Table], and a depreciation table for the asset will appear on the tape. The depreciation
table is divided into three columns labeled P.D.A., A.D.A., and A.B.V. which stand for Periodic
Depreciation Amount, Accumulated Depreciation Amount, and Asset Book Value respectively.
7. If you desire to calculate a depreciation table using another method for the same asset, select the
new depreciation method and select [Table].
Example: The boss goes fishing.
Your company has just purchased a single engine turboprop amphibious floatplane to serve as a
company shuttle between two plants, and as an executive transport (the boss mentioned something
about some good fishin' holes in Alaska, this is where the floats come in handy). The initial purchase
price is $1,233,000, which is to be depreciated over 14 years. Its salvage value is estimated to be
$635,000.
Generate depreciation tables for the aircraft using Straight Line, Sum of the Years Digits, and Declining
Balance methods. Use 200% of the Straight Line depreciation for the Declining Balance calculation.
Enter
1233000 [Original Cost]
14 [Expected Life (Years)]
635000 [Salvage Value]
Declining Balance (button)
200 [Factor%]
[Table]
Straight Line [Table]
Sum of Years Digits [Table]
See Also: Depreciation Calculator
Top
Display
1,233,000.00Original Cost
14.00Expected Life (Years)
635,000.00Salvage Value
Declining Balance
200.00Factor%
The table appears
The table appears
The table appears
Interest Rate Conversions
Different types of investments have different compounding periods. For example, bank accounts
generally pay interest monthly or daily; most bonds pay interest semiannually; stocks pay dividends
quarterly; and many loans pay interest annually. In some cases banks will even pay interest
compounded continuously. These various rates are knows as nominal interest rates and are
compounded periodically. An interest rate of 15% per year compounded monthly (12 times per year) is
an example of a nominal interest rate. If you want to compare investments with different compounding
periods you must convert them to a common basis. You can do this by converting the nominal interest
rates to an effective interest rate.
Converting interest rates
The interest rate conversion buttons on the business calculator may be used to convert between
nominal and effective interest rates, using either periodic or continuous compounding. To convert
between nominal and effective interest rates:
1. Select the compounding period Per for periodic -or- Con for continuous.
If Con is selected, the [P/Yr] will not appear.
2. Key in the nominal (or effective) interest rate, and press [Nom%] (or [Eff%]).
3. For periodic compounding only, key in the number of periods per year, and press [P/Yr].
4. Press [Eff%] (or [Nom%]) to calculate the effective (or nominal) annual interest rate.
Example: What bank do I use?
It is your lucky day! You just inherited a considerable amount of money and you must decide what
bank to put it in. You have found three different savings account plans.
Bank #1: 5.22% annual interest, compounded quarterly.
Bank #2: 5.17% annual interest, compounded monthly.
Bank #3: 5.15% annual interest, compounded continuously.
Which one should you put the money in?
Solution: You will need to convert all three interest rates to an effective rate.
Enter
Per (button)
4 [P/Yr]
5.22 [Nom%]
[Eff%]
12 [P/Yr]
5.17 [Nom%]
[Eff%]
Con (button)
5.15 [Nom%]
[Eff%]
Display
4.00P/Yr
5.22Nom%
Eff%
5.32
12.00P/Yr
5.17Nom%
Eff%
5.29
5.15Nom%
Eff%
5.28
You can see that Bank #1 is the best value because it has the highest effective rate at 5.32%.
See Also: Business Calculator
Top
Anatomy of a Bond
A bond is a long-term promissory note issued by a business or governmental unit. A bond will often
contain many of the the following attributes:
Par Value
Maturity Date
Call Provisions
Coupon Interest Rate
Bond Pricing
Yield To Call
Durations
Zero Coupon Bonds
See Also: Bond Calculator, Bonds and Notes Overview
Top
Bond Pricing
Bond pricing: a bond's market price is determined primarily by its coupon interest payments. Generally
the higher the coupon, other things held constant, the higher the market price of the bond. At the time a
bond is issued, the coupon is generally set at a level that will force the market price of the bond to equal
its par value. If a lower coupon were set, investors simply would not be willing to pay $1,000 for the bond;
conversely, if a higher coupon were set investors would quickly bid its price over $1,000. Investment
bankers can judge quite precisely the coupon rate that will cause a bond to sell at its $1,000 par value.
Once the bond has been issued, the price will fluctuate with changing economic conditions. Generally,
when the market interest rate is higher than the bond's coupon interest rate, the bond will sell at a
discount. On the other hand when the market rate is lower than the bond's coupon rate, the bond will sell
at a premium. Since bond prices almost always fluctuate from the original par value, you must calculate
the return using yield to maturity. Yield to maturity takes into consideration all present and future cash
flows of the bond to determine the return.
Par Value
The stated face value of the bond; it is usually set at $1,000 and generally represents the amount of
money the firm borrows and promises to repay at some future date.
Maturity Date
The date on which the par value must be repaid. Any maturity is legally permissible, although most
bonds have original maturities of from 10-40 years.
Call Provisions
A provision which allows the issuer to pay the bond off prior to maturity. If a bond is callable, and interest
rates decline, it is possible for the issuer to "call" the bond and refinance it with lower cost money. The
call price will always be higher than the par value, thus the issuer must pay a premium for the privilege of
being able to call the bond. The bond refinancing works very similar to the way you would refinance your
house.
Coupon Interest Rate
A rate which requires the issuer to pay a specific number of dollars of interest every six months to a year.
This payment is referred to as the coupon payment. The term is reminiscent of the early days when a
bond literally had several small dated coupons attached to them. On the payment date, the owner would
clip off the coupon and send it to the paying agent, who then mailed back the check for the interest.
Today most bonds are registered, and the interest check is automatically mailed when due. The coupon
interest rate may be determined by dividing the coupon by the par value.
Yield To Call
When a bond is purchased with a call option, and current interest rates are below the coupon rate there is
a high chance the bond will be called. In this case, it is wise to calculate your expected rate of return by
solving for yield to call. If xyz company issues a bond at 15% interest, and rates decline to 10%, xyx
company will probably want to call the bonds and refinance with lower cost money. This will save xyz
company $50 per bond per year.
Top
Durations
Most bonds pay coupon interest in addition to a final (par) payment at maturity. Depending on the relative
magnitudes of these payments, a bond may be more or less like others with the same maturity date. A
measure of the average time prior to receipt of payments is duration. In PentaCalc Pro duration (D) is
calculated using the following equation:
Where N is the life of the bond in years, C is the cash receipt at the end of year n-equal to the annual
coupon except for the last year, when it is equal to the annual coupon plus the maturity value-and i is the
yield to maturity.
Zero Coupon Bonds
A bond that pays no interest until it matures. Zeros are offered at substantial discounts when first issued.
Top
Bonds and Notes Overview
PentaCalc Pro's bond calculator may be used to determine price, yield to maturity, yield to call, and
accrued interest. It may also be used to calculate duration. When performing bond calculations, you
must select one option from each of the following two parameters:
Semiannual -OR- annual coupon payments.
Semiannual coupon (interest) payments are typically made on U.S. bonds.
Actual/Actual (days per month/days per year) -OR- 30/360 -or- Actual/360.
U.S. Treasury bonds are Actual/Actual, most municipal, state and corporate bonds are 30/360 and
most discounted notes such as US Treasury bills are Actual/360.
See Also: Anatomy of a Bond, Bond Calculations
Top
Notes
A note or bill is a written agreement to pay to the buyer of the note a sum of money, plus interest and
has the following qualities:
Notes do not have periodic coupons, since all interest is paid at maturity. A discounted note is
purchased below its face value.
By definition, no bill has a maturity at issue that is in excess of one year. A common example of a
discounted bill is the U.S. Treasury bill.
Bills of 13, 26, and 52 week maturities are sold on a discount basis in minimum $10,000
denominations.
Treasury bill prices and yields are quoted somewhat uniquely among fixed-income securities, as a
percentage discount from face value. The larger the percentage price quote, the larger the
discount from face value.
PentaCalc Pro allows you to calculate the price per $100 of par value and the annualized bond
equivalent yield.
See Also: Bonds Overview
Top
Bond Calculations
Example: Let's buy some bonds.
Part 1: Your company is currently going through a major downsizing. The CFO (Chief Financial
Officer) and pension fund manager were told to hit the road. The next thing you know, you are
promoted out of the mail room and put in charge of buying bonds. Since you graduated magna cum
laude in Underwater Basket Weaving, you feel up to the task. After all, how hard could it be?
After reading some of the files the pension manager left behind, you decide that you need to maintain a
7.25% yield on the bonds you buy. It turns out Weavers, Inc. (you are familiar with this company
because you bought a lot of weaving material from them in college) has an issue on the market with a
coupon rate of 9.75% and a maturity date of April 1, 2007. The calendar basis is 30/360 and coupon
payments are semiannual. Today is March 14, 1994. What are you willing to pay for this darling of the
bond market?
Solution: Part 1. Select the 30/360 calendar basis and the semiannual coupon payments by clicking
the appropriate radio buttons. Enter 3/14/1994 in the Settlement edit box, and 4/1/2007 in the Maturity
edit box.
Enter
Display
7.25 [Yield Mat%]
9.75 [Coupon%]
[Price]
[Accrued Int]
[Total]
Description
7.25Yield Mat%
9.75Coupon%
120.86Price
4.41Accrued Int
125.27Total
rate of return
coupon rate
computes price
interest
total amount
Part 2: You discover that Weavers, Inc. has a call provision clearly outlined in the prospectus. The call
price is 107 and is callable July 1, 1995. It is still March 14, 1994. What is your yield to call?
Solution: Part 2. Enter 7/1/1995 in the Call Date edit box.
Enter
107 [Call]
[Yield Call%]
Display
107.00Call
-0.80%Yield Call%
Description
call to price
yield to call
You really blew it this time since the bonds will get called and you will lose .80% while you hold them.
Example: Maybe it's time for a Treasury.
Your ego got a good sting after the little episode in the last example. However, being the resilient
person you are, it was simply chalked up as one of life's lessons and you pressed forward. You decide
to try something backed by the good faith and credit of the U.S. Government. You notice April 1, 2007
U.S. Treasury bonds with a 63/4% coupon are selling for 91. U.S. Treasury bonds pay interest on a
semiannual actual/actual basis. Today is July, 1, 1995 (you just got your money from the Weavers, Inc.
bonds that were called from the previous example). What is your yield to maturity with this bond?
Solution: Select the Actual/Actual calendar basis and the semiannual coupon payments by clicking
the appropriate radio button. Enter 7/1/1995 in the Settlement edit box and 4/1/2007 in the Maturity edit
box.
Enter
91.00 [Price]
6.75[Coupon%]
[Yield Mat%]
Display
91.00Price
6.75Coupon%
7.94Yield Mat%
Example: Let's float some "zeros".
Description
market price
coupon rate
yield to maturity
After the recent success in buying Treasuries, your company has given you the added responsibility of
raising capital. The first fund raising project involves the development of a large shopping center. Your
company will need 80 million dollars to build and develop the center. At the end of five years, the
center should be fully developed and leased. Your company doesn't expect any major cash flows from
the project until the end of the fifth year when the shopping center is sold. Currently, "zeros" are
yielding 7%. What can you expect to sell your 5 year bonds for each? They accrue interest annually
and are on a 30/360 basis.
Solution: Select the 30/360 calender basis and the annual coupon payments by clicking the
appropriate radio buttons. You will issue the bonds on July 17, 1995. They will mature July 18, 2000.
Enter 7/17/1995 in the Settlement edit box and 7/18/2000 in the Maturity edit box.
Enter
7 [Yield Mat%]
0 [Coupon%]
[Price]
Display
7.00Yield Mat%
0.00Coupon%
71.29Price
Description
enters yield
coupon rate
sell price
You need to sell 112,226 bonds, each at $712.85 to raise the money.
Example: What do I do with all this cash?
Your company, on occasion, has large amounts of cash on hand for relatively short periods of time
(less than one year); you need to find a safe place to "store" this cash while getting the highest return
possible, with the lowest possible risk. You decide to stash some of it in U.S. T-bills. Today is July 23,
1994. December 15, 1994, T-bills are trading at a 5.55% discount. What is the price per $100 par
value and annualized treasury bill yield?
Solution: Select the A/360 option on the bond calculator. Enter 7/23/1994 in the Settlement edit box
and 12/15/1994 in the Maturity edit box.
Enter
5.55 [Coupon%]
[Price]
[Yield Mat%]
Display
5.55Coupon%
97.76Price
5.68Yield Mat%
See Also: Bond Calculator, Bonds and Notes Overview, Anatomy of a Bond
Top
Annual / Semi Annual
Semi Annual
Sets coupon payments on a semi-annual basis.
Annual
Sets coupon payments on an annual basis.
Calendar Basis Buttons
30/360
Sets the calendar basis to a 30-day month, 360-day year.
A/A
Sets the calendar basis to the actual calendar month and year.
A/360
Sets the calendar basis to the actual calendar month, and a 360 day year. This setting is
used for calculations involving debt instruments of one year or less, such as U.S. T-Bills.
Settlement
Date of purchase.
Maturity
Date on which the par value must be repaid.
Yield to Maturity
Computes or stores the yield to maturity expressed as an annual percentage.
Price
Stores or computes the price per $100 face value.
Coupon
Stores the annual coupon rate as a percentage.
Interest Accrued
Computes the interest accrued from the last coupon payment date until the settlement date per $100 face
value.
Bond Total
Computes the interest accrued from the last coupon payment date until the settlement date per $100 face
value.
Top
Duration
Computes the bond duration.
Yield To Call
Computes or stores the yield to call expressed as an annual percentage. See Also: Anatomy of a Bond
Call Price
Stores the call price per $100 face value.
Call Date
Date at which the bond may be called.
Top
Statistics Overview
PentaCalc Pro is capable of performing statistical calculations with both one and two variables. You
can enter tables of data directly, or copy and paste from other applications. With a data pair entered in
the X and Y registers, it is possible to calculate the various sums and products necessary for statistical
calculations. Click on one of the following:
Entering Data
Importing Data
Regression Analysis
Single Variable Statistics
Top
Entering Data
PentaCalc Pro performs calculations on statistical tables, which can be imported from other
applications or entered directly into the tape. Statistical operations are performed on the last statistical
table above the current insertion point. If you have, for example, three different statistical tables in the
tape, and you want to perform statistical operations on the second table, you must have the tape
insertion point between the second and third table. PentaCalc Pro will now "look" above the insertion
point, "find" the nearest statistical table, and perform the calculations you request. When making
statistical entries, the tape is divided into the following four segments:
The comment field
The line number
The X register
The Y register
You may enter either x or y data points by first entering the data, then pressing either [X] or [Y]. The
data points will be numbered on the left hand side for quick reference. If you desire to only enter a set
of x data, then you must click the [X] button after each data point is entered. Conversely, you may also
enter only y values by clicking only the [Y] button after entering the data.
See Also: Importing Data, Single Variable Statistics.
Top
Importing Data
It is possible to import a set of data from another application, and paste it into PentaCalc Pro. You
may use standard Windows cut, copy, and paste conventions, including pasting over the top of
highlighted sections from the clipboard. For example, if you have one or two columns of numbers in a
spreadsheet and would like to use PentaCalc Pro to perform statistical analysis on the numbers, you
may import the numbers by following these steps:
1. Press [New] on the statistics calculator to start a new list.
2. Copy one or two columns to the clipboard from another Windows application.
3. Select Paste from the Edit menu on PentaCalc Pro.
If you copied one column from another application, it will be pasted into the x column on PentaCalc
Pro.
If you copied two columns, they will be pasted into the X and Y column of PentaCalc Pro.
If you copy three columns to the clipboard, they will fill the comment field, X and Y columns
respectively.
It is also possible to insert data in the middle of a data table by setting the insertion point in the table
and pasting the contents from the clipboard.
See Also: Entering Data, Single Variable Statistics.
Top
Viewing and Editing the List
Editing a number
All statistical data are stored in a list on the tape. You may edit individual numbers by using standard
Windows editing conventions of highlighting, inserting or deleting text. Once you have made the
desired changes, you may press enter on your keyboard and the new value will be calculated.
Inserting a data point
To insert a new data point:
1. Select Set Insertion Point from the Edit menu.
2. Use the cursor to click between the two data points where you want to insert the new data.
-ORSet the insertion point by clicking on the right mouse button with the cursor on the line where you
would like the new insertion point to appear below.
3. Enter your data using [X] and [Y].
4. Return the insertion point to the bottom of the tape by selecting Restore Insertion Point from the
Edit menu.
-ORRight click the mouse on the bottom entry of the tape.
Deleting a data point
You may delete an entire data point by using the cursor to highlight the data point line, and pressing
delete on your computer keyboard.
-ORYou may select Delete from the Edit menu. It is also possible to delete several lines using the above
method.
See Also: Statistics Overview, Entering Data, Single Variable Statistics.
Top
Single Variable Statistics
PentaCalc Pro can calculate many one variable statistics. Many of these statistics such as Sum of x
and Sum of x squared are useful for other statistical calculations. Other one variable statistics are
useful by themselves, such as the mean and standard deviation.
Using standard deviation
There are two types of standard deviation PentaCalc Pro is capable of calculating. [sx] or [sy]
calculates the sample standard deviation and [œx] or [œy] calculates the population standard
deviation. The sample standard deviation assumes that the data you have entered are a sample of a
large population for which you are trying to estimate the standard deviation.
The population standard deviation assumes that the data you have entered are the entire population.
In the case of the car mileages (from the following example), the population standard deviation is the
one you would want to calculate, because you own only 10 cars and those 10 cars are all you are
interested in (they are the entire population). If your calculations were for the benefit of the EPA (to
estimate the mileage for a certain model car based on a sample of 10 road tests) the sample standard
deviation would be your deviation of choice, because the EPA would take your results and apply them
to all cars of that model.
using single variable statistics
Example: A fleet of cars.
You are the fleet manager for your company motor pool of ten cars. You keep detailed records of the
gas mileage by dividing the total miles driven by the number of gallons of gasoline consumed. The
mileage figures are as follows:
Car Number
Mileage
1
23.68
2
19.56
3
25.45
4
21.96
5
22.12
6
23.56
7
24.62
8
23.42
9
21.56
10
19.96
You wish to calculate the mean and standard deviation of the mileage for your fleet of cars.
Solution: To enter the data:
1. Select Statistics from the Scientific subgroup of the Calc menu.
2. Enter the first data point (23.68) and press [X].
PentaCalc Pro will create a new data list and display the first data point on your screen.
3. Follow step two for the remainder of the data points.
4. Select the various buttons to make the statistical calculations as shown below. We have also
added range, sort, median, sum, and sum of X squared.
Enter
Display
[ ²]
[›x]
[›x]
22.59
1.91
225.89
[›x»]
[Mdn x]
[Min x]
[Max x]
[Rng x]
5,135.52
23.56
19.56
25.45
5.89
See Also: Statistics Overview, Entering Data.
Top
Regression Analysis
Regression analysis shows the relationship between an independent variable (X) and a dependent
variable (Y). For example, you may want to determine how gasoline prices affect national park usage,
or how temperature affects sales of ice cream. The relationship between dependent and independent
variables may be a linear estimate. PentaCalc Pro will generate a regression analysis with an
equation in the form y = mx + b, where b is equal to the y intercept, m is the slope or X Coefficient, and
x is the independent variable.
The regression outputs
When you select [Regression Analysis], the following data is displayed:
Statistic
Explanation
Constant (Y-intercept)
Standard Error of Y Estimate
r Squared
No of Observations
X Coefficient (slope)
The y-axis intercept of the regression.
The estimated standard error of the y values.
A statistic that shows the strength of the relationship between the
independent and dependent variables.
The total number of X or Y variables.
The coefficients of the independent (x) variables in the model or the
slope of the regression line.
Using regression analysis
Example: The mosquito smashers.
Part 1: Your boss has put you in charge of the annual company party and mentioned that something
must be done about the large number of mosquito that were present at last years party. He also
mentioned, as he walked out of your office, that you are not allowed to use the little blue light machines
that electrocute the creatures. You come up with the bright idea to turn the employees' children into
mosquito smashers, but how do you give them an incentive and still stay within budget?
Solution: Part 1. You decide to conduct a test to find out what kind of correlation exists between
"mosquito smasher pay" and productivity, and use the results to predict how many mosquito will get
smashed with various pay rates. The results of the test are as follows:
"mosquito smasher"
average mosquito
hourly pay
smashed per hour
$0.50
15
$0.75
22
$1.00
32
$1.25
52
$1.50
65
$1.75
70
$2.00
85
$2.25
98
$2.50
110
$2.75
124
Enter the information from the mosquito smasher table into PentaCalc Pro. The hourly pay is the
independent variable (x) and the number of mosquitoes smashed per hour is the dependent variable
(y).
Enter
Displa
y
[New]
.5 [X] 15 [Y]
.75 [X] 22 [Y]
Row#
1
2
XY
0.515
0.7522
1.00 [X] 32 [Y]
3
1.25 [X] 52 [Y]
4
1.50 [X] 65 [Y]
5
1.75 [X] 70 [Y]
6
2.00 [X] 85 [Y]
7
2.25 [X] 98 [Y]
8
2.50 [X] 110 [Y]
9
2.75 [X] 124 [Y]
10
[Regression Analysis]
1.0032
1.2552
1.5065
1.7570
2.0085
2.2598
2.50110
2.75124
-12.71
3.05
0.99
10.00
49.24
1.34
Regression Analysis
Constant (Y-intercept)
Std Err of Y Est
R Squared
No. of Observations
X Coefficients (slope)
Std Err of Coef
It appears you have found a very good correlation between pay and productivity. Now all you will need
to do if the mosquitoes get too annoying is announce a "mosquito smasher" pay increase over the PA
system and the little folks will spring into action.
Part 2. Calculate how much you will need to spend to smash 78 bugs per hour and how many bugs
you will get smashed if you spend $2.37 per hour.
Solution: Part 2. You already have the regression information you need from Part 1. From here it is a
few quick steps to forecast information.
Enter
78. [X']
2.37 [Y']
Display Explanation
1.84 required hourly pay
103.98 mosquitoes smashed
See Also: Statistics Overview, Entering Data, Single Variable Statistics.
Top
X
Enters an x-value.
New
Creates a new statistical data table.
Y
Enters a y-value.
Sum of X
Displays the sum of the x-values.
Sum of Squares of X
Displays the sum of squares of the x-values.
Sum of Product of x and y
Displays sum of products of x and y values.
Sum of y
Displays the sum of the y-values.
Sum of y Squared
Displays the sum of squares of the y-values.
Mean of x
Displays the mean (arithmetic average) of the x-values.
Sample Standard Deviation of x
Displays the sample standard deviation of the x-values.
Standard Error
Displays the standard error of the y estimate.
Top
Mean of y
Displays the mean (arithmetic average) of the y-values.
Sample Deviation of y
Displays the sample standard deviation of the y-values.
Mdn of x
Displays the median of the x values. (The median is the number halfway down the list if the list were
ranked smallest to largest. If there is an even number of data points then the median is the arithmetic
average of the middle two numbers.)
Population Standard Deviation of x
Displays the population standard deviation of the x-values.
r
Displays the correlation coefficient of the x and y values.
Mdn x
Displays the median of the y values. (The median is the number halfway down the list if it were ranked
smallest to largest. If there is an even number of data points then it is the arithmetic average of the
middle two numbers.)
Population Standard Deviation of y
Displays the population standard deviation of the y-values.
Min x
Displays the smallest (minimum) number of the x-values.
Max x
Displays the largest (maximum) number of the x-values.
Slope
Displays the slope of the regression line.
Top
Min y
Displays the smallest (minimum) number of the y-values.
Max y
Displays the largest (maximum) number of the y-values.
Rng x
Displays the difference between the largest and smallest x-values.
Sort x
Reorders the x-values from smallest to largest.
Y Intp
Displays the y intercept of the regression line.
Rng y
Displays the difference between the largest and smallest y-values.
Sort y
Reorders the y-values from smallest to largest.
X'
Predicts an x value for a given y value.
Regression Analysis
Performs a regression analysis on the x and y values, and outputs a table of the data.
Y'
Predicts a y value for a given x value.
Top
Programming Overview
The programming calculator can be set up to various bases, word sizes, and flag settings, allowing you
the flexibility of calculating almost any computer operation for double-checking, coding, and debugging.
Perform bitwise operations on signed and unsigned binary, octal, decimal, and hexadecimal
numbers.
Use 8, 16, or 32 bit word sizes.
Perform logical operations, such as AND, OR, NOT, and XOR.
Use several shifting and rotating functions, such as arithmetic shifting and rotating with carry.
Perform miscellaneous operations like modulus, extend, reverse, and swap.
IMPORTANT: Before performing calculations, you should set up the programming calculator. You can
set:
Numeric Base
Word Size
Signed or Unsigned numbers
Preset or Clear the Carry and Overflow Flags
All of these settings can be made directly on the programming calculator
Top
Programming: Basic Operations
With PentaCalc Pro, you may perform several logical, shifting, rotating, and other miscellaneous
operations. These operations are illustrated below.
Converting Between Bases
Logical Operations: AND, OR, NOT and XOR
Shifting and Rotating
Modulus
Extend
Reverse
Swap
Top
Word Size
With PentaCalc Pro, you have the option of working in three different word sizes: 8 bit, 16 bit, and 32
bit. PentaCalc Pro limits the range of numbers you can use in your calculations, depending on the bit
size you choose, and the status of the Sign check box.
The following is a table of the valid ranges in hexadecimal:
Mode
Word Size
Range
Unsigned
8 Bits
0...FF
Unsigned
16 Bits
0...FFFF
Unsigned
32 Bits
0...FFFFFFFF
Signed
8 Bits
80...7F
Signed
16 Bits
8000...7FFF
Signed
32 Bits
80000000...7FFFFFFF
Octal and binary bases have similar limitations, but the decimal base does not. The decimal base
ignores the word size and Sign check box because this base is used by all other calculators in addition
to the programming calculator. You may still use the decimal base with the programming calculator, but
if you enter a decimal number and then convert it to another base, it will truncate the number, if
necessary, to fit into the current word size.
Top
Programming Bases
PentaCalc Pro supports 7 different bases, however, only four of them are useful to the programming
calculator:
Base
Explanation
Binary
Is base-2, and allows numbers comprised of digits 0 and 1.
Octal
Is base-8, and allows numbers comprised of digits 0 - 7.
Decimal
Is base-10, and allows numbers comprised of digits 0 - 9.
Hexadecimal
Is base-16 and allows numbers comprised of digits 0 - 9 and A - F.
Numbers can be entered in any base, and then converted to any of the other bases easily.
See Also: Programming: Overview
Top
Programming Sign
You have the option of working in either signed or unsigned mode. You can select signed mode by
clicking on the Sign check box at the upper right corner of the programming calculator. When the box
is not checked, PentaCalc Pro performs programming operations in unsigned mode. In unsigned
mode, negative numbers cannot be represented. In signed mode, the most significant bit (of binary
notation) is the sign bit. When the most significant bit is one, the number is negative. When the most
significant bit is 0, the number is positive. For example, in the binary base and 8-bit word size, you
may enter the number 10000001. If you are in unsigned mode, this represents the decimal number
129. If you are in signed mode, this represents the decimal number -127.
The signed or unsigned mode will not affect most of the operations you perform, just how they are
interpreted. However, there are two exceptions to this. The first exception is converting between any
base and decimal. If the most significant bit is 1 when you convert to decimal in signed mode, the
result will be negative; in unsigned mode, the result will be positive. Another exception is left and right
shifting. When the Sign box is not checked, the [SL/ASL] (shift left / arithmetic shift left) and [SR/ASR]
(shift right / arithmetic shift right) buttons perform an unsigned shifting operation. When the Sign box is
checked, the [SL/ASL] and [SR/ASR] buttons perform a signed shifting operation. Arithmetic shifts are
signed shifts. They will preserve the most significant bit or sign bit of the number. More information on
shifting and arithmetic shifting can be found in the Shifting and Rotating topic.
See Also: Programming: Basic Operations, Programming: Overview
Top
Carry and Overflow Flags
Most microprocessors have a flag register which is affected almost every time the microprocessor
executes an instruction. The flag register is affected by such occurrences as zero result, signed result,
carry, and overflow. In order to better emulate the computer, we have included two of these flags:
overflow and carry. The overflow flag will be affected by such occurrences as computing a result which
does not fit in the specified word size, and the carry flag will be affected by such occurrences as the
value which is shifted out of one end of a number.
An "O" in one of the boxes at the upper-left corner of the programming calculator indicates an overflow.
This usually means that after a multiplication, division, addition, or subtraction the result is too large to
fit within the specified word size; however, the remainder of the result will still be displayed in the entry
display.
A "C" in one of the boxes at the upper-left corner of the programming calculator indicates a carry. This
usually means you have added two numbers together which are too large to fit within the current word
size or you have subtracted a large number from a smaller one. Although the carry flag is set, the
remainder of the calculation will still be displayed in the entry display. The carry flag is also set every
time you rotate or shift a bit which is set out of the left or right side of a number.
You may clear or preset either of these flags by simply clicking on them. This will toggle them between
on and off. This may occasionally come in handy, such as when you want to do rotating with carry and
need to force the carry flag to be set at the start.
See Also: Programming: Basic Operations, Programming: Overview
Top
Converting Between Bases
With PentaCalc Pro, you can convert quickly between binary, octal, decimal, and hexadecimal bases.
You can switch bases by either clicking on one of the four radio buttons on the far left side of the
programming calculator
-orBy selecting one of the bases from the Option menu.
Example: Converting between bases.
Part 1: Convert FF from hexadecimal to decimal.
For this example, make sure you are in hexadecimal, 8-bit word size, and unsigned mode.
Enter
Display
Description
FF
Dec
FFh
255
enters the hex number
displays the decimal number
Part 2: Now convert the decimal number to binary.
Enter
Display
Description
Bin
11111111b
displays the binary number
In Algebraic or 10-key notation, only the number in the entry display will be changed when you switch
bases. In RPN notation, only the current entry and the entire stack will be converted when you switch
bases. The tape will not record the conversion between bases unless you press [=] after each number.
Example: Convert FF from hexadecimal to decimal with a tape record.
For this example, make sure you are in hexadecimal, 8-bit word size, and unsigned mode.
Enter
Display Description
FFh enters the hex number
FF
FFh puts it on the tape
[=]
255 displays the decimal number
Dec
255 puts it on the tape
[=]
See Also: Programming: Basic Operations, Programming: Overview
Top
Logical Operations
This section covers the logical operations of AND, OR, NOT and XOR. Logical operations are very
useful for boolean testing, and conditional statements. AND, OR, and XOR are binary operators,
meaning that two operands are required to complete the calculation. NOT is a unary operator, meaning
that only one operand is required to complete the calculation. All calculations below are assumed to be
performed in 8-bit word size.
Example: Compute 101101 AND 111.
Enter
Bin
101101
[AND]
111 [=]
Display
0010 1101bAND
0000 0111b=
0000 0101b
Description
sets binary base
enters first operand
enters AND operator
enters second operator
computes result
Example: Compute 101101 OR 111.
Enter
Bin
101101
[AND]
111 [=]
Display
0010 1101bOR
0000 0111b=
0010 1111b
Description
sets binary base
enters first operand
enters OR operator
enters second operator
computes result
Example: Compute NOT 101101.
Enter
Bin
101101 [NOT]
Display
0010 1101bNOT
1101 0010b
Description
sets binary base
enters operand
computes result
Example: Compute 101101 XOR 111.
Enter
Bin
101101
[XOR]
111 [=]
Display
0010 1101bXOR
0000 0111b=
0010 1010b
Description
sets binary base
enters first operand
enters XOR operand
enters second operand
computes result
Example: Compute 2D AND 7.
Enter
Hex
2D
[AND]
7 [=]
Display
2DhAND
7h=
5h
Description
sets hexadecimal base
enters first operand
enters XOR operand
enters second operand
computes result
All of these calculations can be performed in any of the other bases as well.
See Also: Programming: Basic Operations, Programming: Overview
Top
Shifting and Rotating
This section covers the shifting and rotating operations of the programming calculator. Shifting and
rotating are very fast and convenient ways for computers to do multiplication and division by factors of
2, and various other bit manipulations. The programming calculator allows 8 different kinds of shifting
and rotating, including signed and unsigned shifting and rotating, with and without carry. Note [SL/ASL]
and [SR/ASR] behave as signed or unsigned shifts, depending on whether or not the Sign box is
checked. Remember, there is no functional difference between shift-left and arithmetic shift-left.
Below, when we refer to the least significant bit, we mean the first bit, or bit 0. When we refer to the
most significant bit, we mean the last bit, or bit 7 in 8-bit word size, bit 15 in 16-bit word size, and bit 31
in 32-bit word size. When we say a bit is shifted into the carry flag, we mean the "C" appears in the box
if the bit was 1, and the box is empty when the bit was 0.
All calculations below are done in the 8-bit word size. Although all calculations below are done in
binary, they could just as easily be done in one of the other bases such as hexadecimal.
Shift-Left
[SL] shifts every bit one position to the left. The most significant bit is shifted into the carry flag and 0 is
shifted into the least significant bit.
Example: Shift 11100111 left once.
Make sure the Sign box is not checked.
Enter
Bin
11100111
[SL/ASL]
Display Description
sets binary base
1110 0111b enters the operand
1100 1110b shifts left one
The carry flag will be set, indicating that a 1 was shifted out of the most significant bit.
Shift-Right
[SR] shifts every bit one position to the right. The least significant bit is shifted into the carry flag and 0
is shifted into the most significant bit.
Example: Shift 11100111 right once.
Make sure the Sign box is not checked.
Enter
Bin
11100111
[SR/ASR]
Display Description
sets binary base
1110 0111b enters the operand
0111 0011b shifts right one
The carry flag will be set, indicating that a 1 was shifted out of the least significant bit.
ARITHMETIC Shift-Left
[ASL] is identical to the operation of [SL]. See "Shift-Left" above for more information.
ARITHMETIC Shift-Right
[ASR] shifts every bit one position to the right arithmetically. The least significant bit is shifted into the
carry flag and the most significant bit remains the same.
Example: Shift 11100111 right once arithmetically.
Make sure the Sign box is checked.
Enter
Display Description
Bin
11100111
[SR/ASR]
sets binary base
1110 0111b enters the operand
1111 0011b shifts right once arithmetically
The carry flag will be set, indicating that a 1 was shifted out of the least significant bit.
ROTATE-Left
[ROL] rotates every bit one position to the left. The most significant bit is copied into the least
significant bit, and into the carry flag.
Example: Rotate 11101110 left once.
Enter
Display Description
Bin
11101110
[ROL]
sets binary base
1110 1110b enters the operand
1101 1101b rotates left once
The carry flag will be set, indicating that a 1 was rotated out of the most significant bit.
ROTATE-Right
[ROR] rotates every bit one position to the right. The least significant bit is copied into the most
significant bit, and into the carry flag.
Example: Rotate 11101110 right once.
Enter
Display Description
Bin
11101110
[ROR]
sets binary base
1110 1110b enters the operand
0111 0111b rotates right once
The carry flag will be clear, indicating that a 0 was rotated out of the least significant bit.
ROTATE-Left WITH CARRY
[ROLC] rotates every bit one position to the left, using the carry flag as an extended bit. The carry flag
is rotated into the least significant bit, and the most significant bit is rotated into the carry flag.
Example: Rotate 11101110 left once with carry.
Enter
Display
Description
Bin
11101110
[ROLC]
1110 1110b
1101 1100b
sets binary base
enters the operand
rotates left once with carry
The carry flag will be set, indicating that a 1 was rotated out of the most significant bit. If another ROLC
were done at this point, the least significant bit would be 1 since the carry flag is now set.
ROTATE-Right WITH CARRY
[RORC] rotates every bit one position to the right, using the carry flag as an extended bit. The carry
flag is rotated into the most significant bit, and the least significant bit is rotated into the carry flag.
Example: Rotate 11101110 right once with carry.
Enter
Display Description
Bin
11101110
[RORC]
sets binary base
1110 1110b enters the operand
0111 0111b rotates right one with carry
The carry flag will be clear, indicating that a 0 was rotated out of the least significant bit.
Miscellaneous Operations
The programming calculator provides a few other programming operations which may be of use to you:
modulus, extend, reverse, and swap.
See Also: Programming: Basic Operations, Programming: Overview
Top
Modulus
[Mod] computes the integer remainder of a division of two operands.
Example: Compute 6C Mod 10.
Enter
Hex
6C
[Mod]
10 [=]
Display
6ChMod
10h=
Ch
Description
sets hexadecimal base
enters the Mod operator
enters the second operand
computes results
See Also: Programming: Basic Operations, Programming: Overview
Top
Extend
[Ext] copies the most significant bit of an operand until it fills the remaining bits of the specified word
size under certain conditions. [Ext] is intended to allow you to enter or compute a smaller number than
the specified word size and then fill the remaining empty bits so that the number is in proper two's
complement format. It is implied that when you use this function, the operand is a signed number and
hence the sign bit is being extended. In the 8-bit word size, it does nothing. In the 16-bit word size, it
will copy bit 7 throughout bits 8 - 15 if bits 8 - 15 are all 0. In the 32-bit word size, it will copy bit 7
throughout bits 8 - 31 if bits 8 - 31 are all 0, and it will copy bit 15 throughout bits 16 - 31 if bits 16 - 31
are all 0.
Example: Extend 11100111 into 16 bits.
Select the 16 Bits word size.
Enter
Bin
11100111
[Ext]
Display
0000 0000 1110 0111bExt
1111 1111 1110 0111b
Description
sets binary base
enters the operand
computes result
Example: Extend 11100 into 32 bits.
Select the 32 Bits word size.
Enter
Display
Description
Bin
sets binary base
0000 0000 0000 0000 0000 0000 0001 1100b Ext
11100
enters the operand
[Ext]
0000 0000 0000 0000 0000 0000 0001 1100b
computes the result
Notice that the result is the same as the operand since bits 8-31 are 0, and bit 7 is 0.
Example: Extend CCC7 into 32 bits.
Select the 32 Bits word size.
Enter
Hex
CCC7
[Ext]
Display
FFFF CCC7hExt
FFFF CCC7h
Description
sets the binary base
enters the operand
computes the result
See Also: Programming: Basic Operations, Programming: Overview
Top
Reverse
[Rev] exchanges the bits around the middle of the specified word size. The most significant and least
significant bits are exchanged. The second most significant and second least significant bits are
exchanged, and so forth.
Example: Reverse 11001001.
Select the 8 Bits word size.
Enter
Bin
11001001 [Rev]
Display
Description
1100 1001b
1001 0011b
sets binary base
enters the operand
computes the result
Example: Reverse 1111000010100101.
Select the 16 Bits word size.
Enter
Bin
1111 0000 1010 0101 [Rev]
Display
1111 0000 10100 101b
1010 0101 0000 1111b
See Also: Programming: Basic Operations, Programming: Overview
Top
Swap
[Swap] exchanges the upper half of the specified word size with the lower half. All bits in each half will
maintain their orientation with respect to each other. They will only be moved to the opposite half.
Example: Swap 11001010.
Select the 8 Bits word size.
Enter
Bin
11001010 [Swap]
Display
Description
1100 1010b
1010 1100b
sets binary base
enters the operand
computes the result
Example: Swap 1111000010100101.
Select the 16 Bits word size.
Enter
Bin
1111 0000 1010 0101 [Swap]
Display
1111 0000 1010 0101b
1010 0101 1111 0000b
See Also: Programming: Basic Operations, Programming: Overview
Top
And
Obtains the logical product (AND) of two operands.
Carry
When the Carry check box is checked, the carry flag is set. See Also: Carry and Overflow flags
Overflow
Shows the state of the overflow flag.
Sign
Sets the calculator to signed or unsigned mode.
Word Size
Sets the word size.
OR
Obtains the logical sum (OR) of two operands.
NOT
Obtains the negation (NOT) of an operand within the specified word size.
XOR
Obtains the exclusive logical sum (XOR) of two operands.
SL/ASL
Shifts the displayed value one bit to the left. In the case of shifting left, the operations of SL and ASL are
identical. The status of the Sign check box does not matter.
ROL
Rotates the displayed value one bit to the left.
ROLC
Rotates the displayed value one bit to the left, but uses the carry flag as an extended bit.
Top
SR/ASR
Shifts the displayed value one bit to the right. [SR/ASR] performs an arithmetic shift-right if the Sign box
is checked.
ROR
Rotates the displayed value one bit to the right.
RORC
Rotates the displayed value one bit to the right, but uses the carry flag as an extended bit.
Mod
Obtains the integer remainder of a division of two operands. See Also: Modulus
Ext
Extends the most significant bit of a number into the remaining bits until the specified word size is filled.
See Also: Extend
Rev
Reverses the bits of a number around the center of the number.
Swap
Swaps the upper-half bits with the lower-half bits of a number.
Bases
Bin:
Oct:
Dec:
Hex:
Binary base (base 2)
Octal base(base 8)
Decimal base (base 10)
Hexadecimal base (base 16)
See Also: Programming Bases.
Top
Units Overview
PentaCalc Pro's unit calculators are very simple to use. Smart Units have unprecedented power. You
may quickly convert between hundreds of different units, and even make calculations using
combinations of different units. You can perform calculations using kg, feet, and seconds, having the
results always cancel down to the most simple unit.
To use a unit conversion calculator, select the type of unit you wish to use from the Unit Conversions
subgroup on the Calc menu. You, of course, may run several unit conversion calculators at the same
time, or drag and drop buttons from any of them to another calculator.
Converting Between Two Units of the Same Type
Using Units in Calculations
Top
Converting Between Two Units of the Same Type
To convert between two units of the same type:
1. Select the type of unit you wish to convert between from the Unit Conversions subgroup on the
Calc menu. For example, if you wish to convert between meters and feet, select the Length
calculator.
2. Enter the first value, and select the unit button you wish to convert from.
3. Select a unit button of the same type to which you wish to convert.
Example: Convert 1.3 yards to centimeters.
Select the Length calculator from the Unit Conversions subgroup on the Calc menu.
Enter
1.3 [yd]
[cm]
Top
Display
1.30yd
118.87cm
Using Units in Calculations
We all know that one cannot add apples and oranges; we must add like units. When the numbers in a
formula are manipulated correctly, their units cancel out to leave the final answer in the appropriate
units. If the problem is set up incorrectly, the units will not cancel properly, and there will be no doubt
that a mistake has been made. Smart Units take the work out of keeping track of units. As you perform
calculations, Smart Units will automatically cancel units and output the answer in its simplest form.
The use of a unit button in a calculation is optional. If you wish to use a unit in a calculation, simply
enter the number, assign a unit by pressing a unit button, and then press an operator.
Example: A metal plate needs a coat of paint 1.00 mm thick, and the area covered is 36.0 square
inches. How many pounds of paint are required to coat the plate? (The paint has a density of .805
g/cm¼.)
Solution: The mass of paint needed can be calculated from the product of the thickness, area, and
density. Normally, this would create a problem since the dimensions are in different units. However,
with Smart Units your concerns about unit dimensions are eliminated. The answer to this problem is as
simple as multiplying the three dimensions together: 1.00 mm x 36 inches » x .805 g/cm¼. You will
need to open the length, area, mass and density calculators. The output for this problem assumes that
you have selected Smart Unit level three from the Configure... item on the Option menu. You will also
need to set your output to four decimal places by selecting Fixed... from the Option menu. We decided
to create a new calculator called "Metal Plate" and drag and drop the various buttons onto it.
Enter
Display
1 [mm] [˜]
36 [in»]
[˜] 0.805 [g/cm¼] [=]
[lb]
1.0000mm
36.0000in»
0.187kg
0.0412lbs
Notice the volume units cancel each other and the final answer comes out in kilograms. We needed to
see the answer in pounds so we selected [lb].
Top
Creating Units
PentaCalc Pro's Smart Units is a complex method of evaluating units. Most of this complexity is
transparent to you as the user. However, occasionally, you may need to "lift the hood" and create your
own units. Fortunately, creating new unit conversion buttons and configuring Smart Units is a rather
straight forward process. To create a new unit, you must first understand what makes Smart Units
"tick."
Smart Units are composed of a hierarchal structure: type, base, and unit. Each base and unit must be
composed of atomic units. Atomic units are units which have been reduced to their elemental form.
Atomic units can be found in ten calculators we ship with PentaCalc Pro: Temperature, Length, Mass,
Time, Substance, Luminance intensity, Currency, Current, Angle and Solid angle.
Within each of these ten calculators, there is one unit that is unique and has earned membership in the
Special ten group. (All other units within these ten calculators are both special and atomic, but they are
not as special as the Special ten.) The Special ten consist of a modified S.I. base. In addition to the
seven base S.I. units ( Length-meters, Mass-kilograms, Thermodynamic temperature-kelvin, Electric
current-amperes, Luminous intensity-candela, Amount of substance-moles and Time-seconds) we have
included the supplementary S.I. base units (Plane angle-radian and Solid angle-steradian). Finally, we
added a non S.I. unit (Currency-US dollar).
The base must be composed of a combination of Special ten units only, while a unit may be composed
of any atomic unit (meaning a unit must be composed of units from any of the ten calculators mentioned
previously in this section). In general, bases provide a way to separate units into systems such as S.I.
and English. There will generally be one base per system in each unit type.
Bases exist for two reasons:
They allow more accurate conversions. For example, 12 inches = 1 foot and 3 feet = 1 yard
exactly. Instead of listing all units in terms of the Special ten unit, meters, where the conversion
factors are often long and imprecise, they are listed in terms of their base where the conversion
factors are usually exact. Conversions between units of the same base will often be more precise
than if you cross bases.
It is easier and more convenient to create units in terms of a base because the conversion factors
are better know. For example, you know how many feet are in a yard, but generally you don't know
how many meters are in a yard.
Unit Composition
Creating a Unit Button
Editing a Unit Conversion Factor
Creating a New Base
Top
Unit Composition
PentaCalc Pro's Smart Units are designed to allow you to "mix apples and oranges" when performing
calculations involving units. However, when you dig a little deeper into Smart Units, you find that
eventually the old axiom is still true and you really do need to compare apples to apples. This is
accomplished by defining the composition of each unit. When you enter a composition for a unit, you
are essentially describing how the unit is derived. If you would like to create your own units, you must
understand how the composition is used. It is used in three ways:
The composition allows PentaCalc Pro to simplify the unit when numbers involving units are
combined by multiplications or divisions. If two or more units are combined which match the
composition exactly of another unit, PentaCalc Pro will output the name of the matching unit
instead of the combination of units. For example, if you multiply pounds by feet and divide by
seconds squared, the combination of units will be "lb*ft/s^2". This matches the composition of
pound-force (lbf) exactly, so the simplified unit of "lbf" will be used instead.
The composition allows PentaCalc Pro to break units down to their fundamental parts and
combine or cancel them when performing multiplication and division calculations involving units.
For example, if you divide newtons by m/s », the result will be output in a single mass unit.
PentaCalc Pro must know that newtons consists of mass multiplied by length divided by seconds
squared.
The composition also allows PentaCalc Pro to associate units of like type. When you are trying to
convert directly between units or indirectly by performing mathematical operations on numbers
involving units, PentaCalc Pro must first determine if they are compatible units, and then make the
appropriate conversions. For example, if you convert from inches to feet, PentaCalc Pro first
checks to see that feet are composed of meters, it discovers that inches are based on feet, which
are composed of meters. Only when the meters to meters relationship is discovered, can the
conversion take place.
Top
Creating a Unit Button
To create a new unit button, follow these steps:
1. From the File menu, select New Button...
The Button Properties dialog box will appear:
2. Enter a unit name. This name will appear on the button, and will be printed in the operator field of
the tape interface when the newly created button is pressed.
3. You may specify a hot-key which can be used to quickly execute your new button.
4. Select "Unit" for the type of button you would like to create.
The Button Properties dialog box will transform to a Button Properties dialog box specific to the
creation of unit buttons.
5. Enter the long name for the unit.
The long name will appear on the comment display of the tape interface when the newly created
button is pressed.
6. Enter a conversion factor, and select a base. If a base is not listed, press [Edit Base], and follow
the instructions in the "Creating a new base" section below.
7. If the conversion factor is an exact factor, select the Exact Factor option.
When this option is checked, all conversions involving this unit will be performed to an infinite
degree of precision. If this option is not checked, the conversions will be performed to the number
of significant digits entered.
8. Enter the composition of the new unit.
The composition must consist of atomic units. When entering compositions, all numerator units
must be to the left of the "/" and all denominator units must be to the right of the "/". Otherwise,
units must be separated by an "*". Each unit may have an exponent between 2 and 9. The
exponent must be positive. Smart Units will not accept any other operator or parenthesis. Smart
Units will only accept unit names, * (multiply), / (divide), and ^ (for exponents). For example, you
may enter: kg*m^2/s^2. You may not however enter two units of the same type. For example,
ft^2/m is not allowed, since feet and meters are of the same unit type.
9. Select [OK], and the mouse cursor will change to the outline of a button. Place the new button
outline on one of PentaCalc Pro's calculators and click the left mouse button. The new button will
be placed. You can reposition a button by clicking and holding down the left mouse button while
dragging it into a new position and releasing the mouse button.
Top
Editing a Unit Conversion Factor
Occasionally, you will want to edit a unit conversion factor, such as when currency conversion rates
change. The example below illustrates this procedure:
Example: The Canadian dollar is now worth .7538 U.S. dollars. You need to change this conversion
factor in the currency conversion calculator.
Solution:
1. Select Currency from the Unit Conversion... submenu on the Calc menu.
2. Double click on the Canadian dollar button with the right mouse button.
-orClick on the Canadian dollar button with the right mouse button, and select Button Properties...
from the File menu.
The Button Properties dialog box will appear.
3. Replace the current conversion factor with .7538.
4. Select [OK].
You may now make calculations with the button.
Top
Creating a New Base
Each unit type has one or more bases to which units are linked. In turn, each base is linked to all other
bases in terms of the Special ten units. For example, you have three lists of conversion factors for
mass. One list has conversion factors in terms of pounds, another list has conversion factors in terms
of grains, and the final list is in terms of kilograms. When creating the new units, you will create three
bases: grains, pounds, and kilograms. As you create each base, it must be equated to the other bases
in terms of the Special ten unit. In this case, the mass Special ten unit is kilograms. Thus, once you
have created the three bases, they will all be equated to each other in terms of the Special ten unit
kilograms.
PentaCalc Pro ships with a very comprehensive set of units. Chances are you will never need to
create a new base, unless you create an entirely new unit type.
To create a new base:
1. Select Configure... from the Option menu.
The Configure dialog box will appear.
2. Select "Edit Base".
The Edit Base dialog box will appear.
3. Enter the new base, or select a base from the list.
Bases must be in terms of the Special ten units.
4. Enter the conversion factor in terms of one or more Special ten units.
5. If the conversion factor is an exact factor, select the Exact Factor option.
When this option is checked, conversions will be performed to an infinite degree of precision. If it is
not checked, the conversions will be performed to the number of significant digits entered.
6. Enter the composition for the new base.
The rules for entering the composition of a new base are exactly the same as entering the base for
a new unit, except only Special ten units may be used.
7. Select [OK].
Example: A two headed what?
Part 1: Create a new system of length consisting of the following units: toes, elbows, knees, fingers,
wrists, heads, and spinal columns.
Solution: Part 1. This example should provide a comprehensive illustration of how to create new units
by creating a new calculator, units, and a base. You will need to create a new calculator named "Body
Parts". "Body Parts" will be a length unit type. The button name, long name, conversion factor, base,
and composition for this new system is located in the table below. To solve this example, follow these
steps:
1. Create a new calculator called "Body Parts", and place it in the Unit Conversions subgroup. For
more information, see Creating a Calculator.
2. Since all of your units are in terms of toes, you will want to create a new base called toe. Since
bases must be in terms of a Special ten unit and the Special ten unit for length is meters, your toe
base must be expressed in meters. We have measured 1 toe to equal exactly .03048 meters
according to a sampling of 100,000 men and women in the US at the age of 25. To create the new
base:
a. Select Configure... from the Option menu.
b. Select [Edit Base].
The Edit Base dialog box will appear.
c. Enter "toe" for base, ".03048" for the conversion factor and "m" for the composition as shown
in the dialog box below and select Exact Factor.
d. Select [OK].
3. Create the "toe" button, and place it on the "Body Parts" calculator. (You may do this by selecting
New Button... from the File menu)
4. Select "Unit" for the type of button.
The Button Properties dialog box will transform to a box specifically for creating unit buttons.
5. Enter the information directly from the table into the Button Properties dialog box.
Button
Title
toe
finger
knee
wrist
head
spinal
Hot
key
t
f
k
w
h
s
Long Name
Conversion Factor
Base
Composition
toes
fingers
knees
wrists
heads
spinal columns
1 toe = 1 toe
1 finger = 2 toe
1 knee = 4 toe
1 wrist = 8 toe
1 head = 15 toe
1 spinal column = 27 toe
toe
toe
toe
toe
toe
toe
toe
finger
toe
finger
head
head
6. Select [OK].
The cursor will change to the form of a button and you may place it on the "Body Parts" calculator.
7. Follow steps 3-6 for the knee, finger, wrist, head, and spinal buttons.
When finished, you should have a calculator similar to the one below.
Part 2: Let's use our new calculator to find out how many spinal columns are in a meter?
Solution: Part 2. You will need to bring up the length calculator from the Unit Conversions subgroup on
the Calc menu.
Enter
1 [m]
[spinal]
Display
meters 1.0000 m
spinal columns 1.2151 spinal
If you wish to delete the "Body Parts" calculator you must first delete each button on the calculator, and
then select Delete Calculator from the Edit menu.
Top
Configuring Smart Units
PentaCalc Pro's Smart Units were designed with a high level of customization in mind. You may
determine exactly how you would like the result of your unit calculations output.
Preferred Smart Unit Output
There are instances when several units will have the same composition. For example, two unit types
(Torque and Energy) have the units Newton meter (Nm) and Joule (J) respectively. Each of these units
have the composition, kg*m^2/s^2.
PentaCalc Pro allows you to specify which unit to output when it arrives at the composition of kg *
m^2/s^2. If you work in torque units most of the time, you will probably select Nm; if you work in
energy, you will probably select J. You may access [Preferred Smart Unit Output] from the
Configure... item on the Option menu.
In the example cited above, you may either enter the unit name Nm, or J
-orthe composition kg*m^2/s^2. When you select [Search], the current preferred output will appear in the
Preferred Output combo box. You may view all possible outputs by clicking on the combo box. Click
on the new preferred unit output, and press [Accept]. When you are finished specifying preferred unit
outputs, select [Exit].
Preferred Smart Unit level
With Smart Units, you may specify exactly what level of simplification you would like the results of your
calculations to be. This feature is to help specify what form your answer will be in when you deal with
units which are combined by multiplication and division.
To access the Smart Units Level dialog box:
1. Select Configure... from the Option menu and press [Smart Units Level].
The Smart Units Level dialog box will appear.
2. Choose a Smart Unit level:
Don't convert at all, display as a combination. There will be no simplification or canceling of
units. For example, if you perform a calculation in the form kg x m /s » the output will come out
exactly in that form. It will not simplify to the S.I. unit of Newtons.
Level 1: Convert if they match the composition of another unit. This option will only search for
an exact match to the units as entered. For example, if you perform a calculation in the form; lb x ft
/ s» the output will be in lbf (pound force). This is because it is an exact match. If you were to
substitute inches in the place of feet, Smart Units would output in lb x in/ s » which is the
unsimplified version since there is no match.
Level 2: Try to find a match by converting units to their bases. If Smart Units doesn't find an
exact match it will systematically convert each unit to its base until it finds a match. For example, if
you perform a calculation in the form lb x in/s», Smart Units will first check for an exact match using
the method outlined in level one. Since it wouldn't find a match. Smart Units will then check lb and
confirm it is in its base of lb already. It will then check inches, discover it needs to be in feet and
convert it. It will then search for a match and this time will find one with lbf (pound force) and output
the result in lbf.
Level 3: Try harder to find a match by converting bases to their S.I. compositions. If Smart
Units doesn't find an exact match using the logic outlined in the previous levels, it will start
converting units to their S.I. bases. For example, if you perform a calculation in the form kg x in /
s», Smart Units will first check kg and see that it is in terms of its S.I. base. It will then check
inches and convert it to the S.I. base, meters and then check for an exact match and will find one
with the S.I. unit of Newtons.
3. Select [OK].
Top
Sin
Computes the sine of an angle. To compute the sine of an angle, first enter the angle in degrees,
radians, or grads (depending on what mode you have selected), and then select [Sin].
Cos
Computes the cosine of an angle. To compute the cosine of an angle, first enter the angle in degrees,
radians, or grads (depending on what mode you have selected), and then select [Cos].
Tan
Computes the tangent of an angle. To compute the tangent of an angle, first enter the angle in degrees,
radians, or grads (depending on what mode you have selected), and then select [Tan].
Angle Mode Box
Shows which of the following angle modes PentaCalc Pro is calculating:
degrees (1/360 of a circle)
radians (1/2Pi of a circle)
grads (1/400 of a circle)
Pi
The transcendental number Pi cannot be represented in a finite decimal form. In general, PentaCalc
Pro's approximation yields results accurate to 15 digits, which is sufficient for most applications.
Sin€ (Inverse Sin)
Computes the arc sine (inverse of sine) of the displayed number.
Cos€ (Inverse Cos)
Computes the arc cosine (inverse of cosine) of the displayed number.
Tan€ (Inverse Tan)
Computes the arc tangent (inverse of tangent) of the displayed number.
n!
Computes the factorial of the displayed number.
Top
Conj
Displays the complex conjugate of a complex number.
Ln
Computes the natural logarithm of the displayed number.
Log
Computes the common logarithm of the displayed number.
y to the xth power
Raises the base number y to the x power. For example, if you want to raise 6 to the 4th power, you
would enter 6, select [y•], enter 4, and select [=] or any other operator. 1,296.00 will be displayed.
Im
Computes the imaginary part y of its complex number argument (x,y). y is also the vertical coordinate of
the point (x,y).
Re
Computes the real part x of its complex argument (x, y). x is also the horizontal abscissa coordinate of
the point (x,y).
e• (Natural Exponent)
Computes the natural exponential to base e.
10° (Antilogarithm)
Computes 10 to the x power. [10°] is also the common antilogarithm.
xth root of y
Computes the xth root of the number y. For example, to calculate the 4th root of 16, enter 16, select
[†‡], enter 4, then press [=] or another operator. 2 will be displayed.
R->P
Converts a complex number in rectangular notation (x,y) to polar notation (r, ø).
Top
P->R
Converts a complex number in polar notation (r, ø) to rectangular notation (x,y).
Sinh
Computes the hyperbolic sine of the displayed number.
Cosh
Computes the hyperbolic cosine of the displayed number.
Tanh
Computes the hyperbolic tangent of the displayed number.
Abs
Computes the absolute value of the displayed number. If the number is complex [Abs] displays the
magnitude of the complex number (x,y).
Arq
Computes the polar angle ø of a complex number (x,y). ø is expressed in degrees, radians or grads
depending upon what angle mode is selected from the Option menu.
Sinh€ (Inverse Sinh)
Computes the inverse hyperbolic sine of the displayed number.
Cosh€ (Inverse Cosh)
Computes the inverse hyperbolic cosine of the displayed number.
Tanh€ (Inverse Tanh)
Computes the inverse hyperbolic tangent of the displayed number.
Sign
Computes the unit vector in the direction of (x, y) for a complex number argument (x,y).
,
The comma separator for entering rectangular or polar numbers.
Top
Trigonometric functions
PentaCalc Pro is capable of calculating the trigonometric functions and their inverses using degrees,
radians, or grads. The default mode is degrees. To change the angular mode, make the selection from
the Option menu.
Example: Let the flag fly.
Your company recently erected a new flagpole, and the city engineer has just informed you that it is too
high and in violation of city ordinances. He said the maximum height for a flagpole is 75 feet. When you
asked him how he knows your flagpole is over 75 feet, he curtly replies, "I know my flagpoles." You are
sure it is under 75 feet, but how can you prove it?
Note: If we have offended any city engineers with this example, we apologize.
Solution: This is a simple trigonometry problem. If you know one angle and one side of a right
triangle, you can solve for any other angle or side. You know a spot in the parking lot that is exactly
125 feet away from the flagpole. You also have an inclinometer (an instrument with a sighting device
used to measure the angle between the horizon and some point above the horizon). A quick check with
the inclinometer shows the angle between the spot in the parking lot and the top of the flagpole is 27.5 °.
You may now use the tangent function to solve the equation: (Tan 27.5 °)(125 ft) = the height of the
flagpole. Make sure PentaCalc Pro is in degrees mode before calculating this example.
Enter
27.5 [Tan]
[˜] 125 [=]
Display Description
0.52 computes tangent of 27.5°
65.07 height of flagpole
Thus you are able to prove that the flagpole will comply with the ordinance and have 10 feet to spare.
Top
Rectangular and Polar Conversions
A point in a plane can be described by either polar or rectangular coordinates. Polar coordinates are r
(magnitude) and o (angle); rectangular coordinates are x (horizontal) and y (vertical). PentaCalc Pro
provides two buttons, [RŒP] and [PŒR], for converting between rectangular and polar coordinates.
You must pay attention to which angle mode (ie. Deg, Rad, and Grad) you are in before you convert
because the answer will be different with each mode.
All operators and functions in PentaCalc Pro assume complex numbers to be in rectangular format, not
polar. For example, if you enter the number (5,53.13), thinking to yourself that this represents a polar
coordinate with absolute value 5 and angle 53.13°, and then compute the sine, you will get an incorrect
result because PentaCalc Pro assumed the number (5,53.13) meant x coordinate 5 and y coordinate
53.13. See the following example for the correct way to perform this operation.
Example: Computing the sine of the polar complex number (5,53.13) and display the result as a polar
complex number.
Make sure that your angle mode is set to Degrees from the Option menu.
Enter
Display
5 [ , ] 53.13 [PŒR]
[Sin]
[RŒP]
(3,4)
(3.85,-27.02)
(27.29,-81.88)
Example: The hike
Part 1: You have decided to go on a little hike. You start out on a bearing of 15 ° and walk for 1.5
miles; you then change course to a bearing of 45 ° and walk for another 2.2 miles. Where does your trip
end relative to your starting position? Express your answer in rectangular coordinates.
Make sure that angle mode is set to Degrees from the Option menu.
Enter
Display
1.5 [,] 15 [P‘R] [+]
2.2 [,] 45 [P‘R] [=]
(1.45,.39)
(3.00,1.94)
Your trip has landed you 1.94 miles straight ahead and 3.00 miles to the right.
Part 2: Where does your trip end? Express your answer in polar coordinates?
Enter
[R‘P]
Display
(3.58,32.90)
Since the shortest distance between two points is a straight line, your hike would have been faster had
you walked 3.58 miles at a bearing of 32.90°.
Top
10-key Overview
PentaCalc Pro has a powerful 10-key style tape calculator which emulates the 10-key style calculator
you may be used to. PentaCalc Pro has all the features of a regular adding machine such as autodecimal place, tax, GPM, totals, item counters; 5/4, up, or down rounding, and red negative entries.
PentaCalc Pro offers some strong reasons to put the adding machine away for good:
Since PentaCalc Pro keeps a detailed tape of your calculations you can edit numbers or
operators, and then easily recalculate the tape.
You can make annotations to each numerical entry.
You may save the tape as a file or print a copy for future reference.
You will save room on your office desktop by getting rid of your adding machine.
You can transfer numbers between PentaCalc Pro and other applications in a snap using
Quick/Copy Paste.
Selecting the 10-key calculator
For a detailed description of the 10-key notation see 10-key Notation. You may access the 10-key
calculator by selecting 10-key from the Financial subgroup on the Calc menu. You will also need to
select 10-key Notation from the Option menu.
Top
Configuring the 10-key Calculator
This topic contains a detailed explanation of how to configure and use PentaCalc Pro's 10-key
calculator.
Any time you are in 10-key mode, all negative numbers will be displayed in red.
Setting the Item counter and rounding
To set the item counter or rounding options:
1. Select Configure... from the Option menu.
2. Select [10-key].
3. The Configure 10-key dialog box will appear.
If you are in 10-key notation, each time you press either [Sub] or [Total] an item count will appear to
the left of the total. You have the option of having the item count increment by one each time you press
[+] or of having it increment by one each time you press [+] and decrease by one each time you press
[-]. You may select Increment every add only or Increment on every add and decrement on every
subtract, by selecting the appropriate radio box.
You may also specify what type of rounding options you would like:
Option
Result
Up
Results are rounded up to the number of significant digits indicated by selecting
Fixed... from the Option menu.
5/4
Results are rounded up or down depending on the value. For example, if the number
of significant digits is set to 2, a result is rounded up if the value in the third decimal
position is 5 or more, or rounded down if 4 or less.
Down
Results are rounded down to the number of significant digits indicated by selecting
Fixed... from the Option menu.
Top
Calculating Totals
The total keys are very useful when you need to keep track of separate totals especially those that are,
in turn, grouped together to form other totals.
Button
Function
[Sub]
Prints the current subtotal. However, [Sub] will not clear the running total.
[Total]
Prints the total and resets the display to zero. However, the total of totals remains in
the grand total register.
[GT]
Prints the grand total register, which is a total of all totals previously performed on the
current tape. You may clear the grand total register by pressing [GT] twice or [AC]
once.
Example: You run a small business and would like to add your monthly and quarterly expenses with a
monthly subtotal of utilities. If you have not already done so, select 10-key Notation from the Option
menu. This will switch you to 10-key entry notation.
January
February
Utilities
Gas
Elec
Rent
Telephone
Utilities
Gas
Elec
Rent
Telephone
Enter
January
89 [+]
35 [+]
[Sub]
750 [+]
102 [+]
[Total]
February total
79 [+]
27 [+]
[Sub]
750 [+]
106 [+]
[Total]
March Total
64 [+]
29 [+]
[Total]
750 [+]
115 [+]
[Total]
Quarter Total
[GT]
$89
$35
$750
$102
Display
Utilities
$79 Gas
$27 Elec
$750 Rent
$106 Telephone
Tape Display
89.00
124.00
124.00
874.00
976.00
976.00
89.00+
35.00+
(2 Items) Subtotal 124.00s
750.00+
102.00+
(4 items) Total 976.00t
79.00
106.00
106.00
856.00
962.00
962.00
79.00+
27.00+
(2items) Subtotal 106.00s
750.00+
106.00+
(4 items) Total 962.00t
64.00
93.00
93.00
853.00
958.00
958.00
64.00+
29.00+
(2 items) Subtotal 93.00s
750.00+
115.00+
(4 items) Total 958.00t
2,896.00
2,896.00g
See Also: 10-key calculator
Top
March
$64
$29
$750
$115
Memory Functions
The memory features on the 10-key, function as the equivalent of an adding machine inside an adding
machine. They are perfect for times when you need to make intermediate non-related calculations
while using the 10-key calculator. You can use the memory buttons ( [MT], [MS], [M+], and [M-] ) to
store one result while calculating another. If you create a new tape, the tape is clear, or you have
selected [AC], the memory running total will be set to zero.
Example: You work as a staff accountant for a local CPA firm, and are in the process of adding
several numbers (12.28, 22.89, 163.55, 92.25, 117.35, 62.41) when a co-worker walks into your office.
This co-worker suddenly requests that you add a new list of numbers together (296.16, 23.37, 32.92).
You know you can add your co-worker's numbers using PentaCalc Pro's memory function, thus
preventing you from having to reenter the numbers you were adding before your co-worker walked in.
Part 1: Begin adding the list of numbers.
Enter
12.28 [+]
22.89 [+]
163.55 [+]
Display
Tape Display
12.28
35.17
192.72
12.28+
22.89+
163.55+
Part 2: Add your co-workers numbers.
296.16 [M+]
296.16
23.37 [M+]
23.37
32.92 [M+]
32.92
[MT]
352.45
296.16M+
23.37M+
32.92M+
352.45MT
Part 3: Complete adding your list of number.
92.25 [+]
290.97
117.35 [+]
408.32
62.41 [+]
470.72
92.25
+
117.35
+
62.41
+
Example: This example shows how [M+], and [M-] are used. You need to purchase the following: 5
items at $12.37, 3 items at $8.62, and 9 items at $4.75. At the end of the calculation, you change your
mind, and decide not to purchase the last 9 items at $4.75 each.
Solution: You decide to use the memory for this calculation because you do not want to disturb a
current calculation in the independent add register.
Enter
Display
Tape Display
[MT]
5 [x] 12.37 [M+]
0.00
61.85
00.00MT
6.00X
12.37=
61.85
61.85M+
3 [x] 8.62 [M+]
25.86
3.00X
8.62=
25.86
25.86M+
9 [x] 4.75 [M+]
42.75
9.00X
4.75=
42.75
42.75M+
[MS]
9 [x] 4.75 [M-]
[MT]
Top
130.46
42.75
87.71
130.46MS
9.00X
4.75=
42.75
42.75M87.71MT
Calculating Percentages (10-key)
Example: Calculate the add-on percentage, $1,450 + 15%
Enter
1450 [x] 15 [%+]
Display
1,667.50
Tape Display
1,450.00x
15.00%+
217.50=
1,667.50
Example: Calculate the discount percentage, $69.00 - 10%
Enter
69 [x] 10 [%-]
Display
69.00
See Also: 10-key calculator
Top
Tape Display
69.00x
10.00%6.90=
62.10
Calculating Tax
You may store a tax rate by entering the new tax rate as a percentage, and pressing [Tax Rate]. The
rate will be stored until a new tax rate is entered. To look at the current tax rate, press [Tax Rate], and
the tax rate will be displayed in the entry display. Tax is computed on the current running total.
To calculate tax, press [Tax]. The amount of tax is displayed on the tape, but then you must press
either [+] or [-] to have it added to or subtracted from the current running total. You may also calculate
tax on only one item in a list. This is illustrated in the first example below. The default tax rate is
6.25%.
Example: You have purchased two items for $859.35, and $28.49. The tax rate will be 7.29%. You
only need to compute tax on the $859.35 item. What will be the tax amount and the total purchase
price?
Enter
7.29 [Tax Rate]
28.49 [+]
859.35 [+]
858.35 [Tax][+]
Display
0.00
28.49
887.84
950.49
Tape Display
7.29Tax Rate
28.49+
859.35+
859.35tax
62.65
62.65+
Example: You have purchased three items for $1.38, $2.59, and $9.99.
What will be the tax amount and the total purchase price?
Enter
8.25 [Tax Rate]
1.38 [+]
2.59 [+]
9.99 [+]
[Tax][+]
See Also: 10-key calculator
Top
Display
0.00
1.38
3.97
13.96
15.11
Tape Display
8.25Tax Rate
1.38+
2.59+
9.99+
13.96tax
1.15
1.15+
The tax rate will be 8.25%.
Calculating Gross Profit Margins
The terms markup and margin are often confused. Markup refers to the profit resellers make as a
function of the dollars added to the price they pay for the product. Margin refers to the profit dollars as
a function of the price the customer pays for the product. [GPM] calculates the margin as a function of
the selling price.
Example: To calculate the gross profit margin:
1. Enter the cost of the item.
2. Press [GPM].
3. Enter the profit (or loss) margin. Be sure to enter a loss margin as a negative value.
4. Press [=].
An item cost you $31.00 and you would like to earn 35% profit margin when selling the item. Calculate
the selling price.
Enter
Display
31 [GPM] 35 [=]
See Also: 10-key calculator
Top
Tape Display
47.69
31.00GPM
35.00%
16.69P/L
47.69Sell
Viewing a Graph
The graph window consists of a Cartesian coordinate system, with the horizontal line representing the
independent variable x, and the vertical line representing the dependent variable. The tick marks on
both axes represent variable intervals, depending on what scale factor you have selected. Once a
graph is created, you can zoom in and out, resize and rescale, print, or copy it to the clipboard.
Scaling
There are two methods of scaling a graph:
Use the [Scale_+] and [Scale_-] button to zoom in and out on the graph.
-ORUse [Xmin], [Xmax], [Ymin] and [Ymax] to specify the maximum and minimum values of x and y
you want to appear on the graph.
Sizing
It is possible to resize the graph by using standard Windows conventions for resizing a window.
Changing the size of the window only affects how much of the graph you are able to view; it will not
change the scale of the graph.
See Also: Graphing Calculator, Creating a Graph
Top
Locking/Unlocking a Button
The Locked feature is recommended for buttons that will rarely be changed. It is possible to unlock or
re-lock a button at any time. Locking a button will prevent you from inadvertently changing its function.
We recommend that storage buttons be left unlocked, since the purpose will be to frequently enter new
information in the button. If you decide you would like to change the function or contents of a "locked"
button, follow these steps:
1. Bring up the Button Properties dialog box for the button you would like to modify.
2. Deselect the Locked option and click [OK].
3. Store the new number or operator in the button. See Also...
4. If you would like to re-lock the button, bring Button Properties up again, select the Locked option
and click [OK].
Top
Using Operator Buttons
An operator button is used to automate a task you may perform quite often. You may want to think of it
as performing some of the same functions as a "macro" on other computer applications, with some
unique twists. An operator may contain a combination of numbers entered directly, number buttons,
unit buttons, or other operators such as +, -, x or %. In fact, you may use operator buttons within an
operator button.
Creating Operator Buttons
Editing Operator Buttons
Practice Using Operator Buttons
Top
Creating Operator Buttons
To create and use an operator button, follow these steps:
1. From the File menu, select New Button...
The Button Properties dialog box will appear.
2. In the Title edit box, enter the name of the button.
3. Using your mouse, click on Operator.
This will indicate to PentaCalc Pro that you want to create an operator button.
4. Select [OK].
The cursor will become the outline of a button.
5. Use the cursor to position the button where you want it on a calculator, and click the left mouse
button.
The button will now be a part of the calculator.
6. Once you have created the new button, you may create an operator by delimiting the operation
with [{ }].
7. To store the operation press, [Sto] followed by the newly created button.
This will store the operator "in" the button.
8. If you want to prevent yourself from accidentally altering your operator button, you may want to lock
the button by selecting Button Properties... from the File menu, and selecting the Locked option.
If Locked is checked and you desire to edit the contents of the button, you must first unlock the
button.
9. To perform the operation, press the newly created button at the appropriate point in your
calculation.
Example: Create a button called "New Operator" which will add 375 ™24 to the number in the display.
Enter 45 in the display and add it to the contents of [New Operator].
Solution: Clear some space on any calculator for [New Operator].
You can assign the function by using [{ }] to signify the start of the operation and [{ }] to signify the end.
Enter
[{ }] [+] 375 [™] 24 [=] [{ }] [Sto] [New Operator]
45 [New Operator]
Top
Display
0
60.63
Editing Operator Buttons
After creating your own buttons, it is possible that your more complex operator calculations will not work
the first time exactly as you had hoped. If this happens, you may need to find your mistake by
debugging the button. To view the contents of an operator button, do the following:
1. Select [Rcl] followed by the button you are trying to debug.
The contents of the button will be displayed on the tape.
2. Edit the operator by marking a section of the tape and deleting it, changing individual numbers, or
moving the insertion point and making modifications. After you have completed the editing
process, you will need to make sure the insertion point is located below the right curly brace ( } ).
PentaCalc Pro will look "up" the tape for the first right curly brace and will store every thing
between it and the first left curly brace in the operator button.
3. After you have finished editing your operator button, select [Sto] then the button you want to store
the modified operator "in".
The new operation will be saved in the button.
See Also: Creating a Button.
Top
Practice Using Operator Buttons
Example: How Deep are the wells.
Part 1:
You work for Water Well, Inc. and you have been given the assignment to determine the depth of one
hundred water wells. You decide to hire someone to drop a rock in each well and time how long it
takes to hear the splash. Galileo has determined that the acceleration of objects in a free fall is a
constant if you neglect air resistance. The formula for the acceleration of gravity (g) is as follows:
g = 32.2 ft/s»
Once you know g and the time it takes to hear the splash t, you can calculate the depth of the well
distance with the following formula.
dist = (gt») / 2
You want to be able to enter the time of the fall in seconds then press an operator button called
[DISTANCE], and have PentaCalc Pro calculate the distance in feet. You may want to create room for
your new button by extending one of the sides on the standard calculator or possibly create your own
calculator with the name "Wells". Next create an operator button and create a button called
[DISTANCE].
We won't bother to run through the steps to calculate the depth of all one hundred wells. However, we
will calculate the depths of the first four wells in the following example. The time in seconds for the
rock to hit the water in the first four wells were as follows: 2.8, 1.7, 3.5, and 2.24.
Enter
[{ }] [x»] [˜] 32.2
[™] 2 [=] [{ }]
[Sto] [Distance]
2.8 [Distance]
1.7 [Distance]
3.5 [Distance]
2.24 [Distance]
Display
32.2
2
0
126.22
46.53
197.23
80.78
Part 2: Create an operator button which holds a variation of the above equation. You discover your
rock dropper is more of a rock thrower; and the rocks all started with an initial velocity of 4 feet per
second. You will need to alter your previous equation to reflect the change made for initial velocity,
(VÃ).
dist = (gt») / 2 + VÃt
First, create the following two new number buttons: [INT VELOCITY] and [Time]. The [Time] button
will be used temporarily during the distance calculations. Notice in the keystrokes below that the fall
time is stored in [Time] so it may be used later in the calculation. After the distance operation is stored
in [DISTANCE] and the initial velocity of 4 feet per second is stored, we will calculate the distance for
the four times of 2.8, 1.7, 3.5 and 2.24 seconds.
The complete keystrokes for solving the second part of this problem are located below.
Enter
[{ }] [Sto] [Time] [Time] [x»] [˜] 32.2
[™] 2 [+] [Time] [˜]
[INT_VELOCITY] [=] [{_}]
[Sto] [DISTANCE]
Display
32.2
Time
Int Velocity
0.00
4 [INT VELOCITY]
2.8 [DISTANCE]
1.7 [DISTANCE]
3.5 [DISTANCE]
2.24 [DISTANCE]
See Also: Creating an Operator Button
Top
0.00
137.42
53.33
211.23
89.74
Activate / Deactivate Dialog
Click on the part of the calculator where the
See Also: Using the Keyboard
Top
appears for a brief description.
Button Text Colors Dialog
Each kind of button (Numbers, Operators, Units, and other text) can be set to one of the colors shown
above each button. Click on the color to set that color for the respective button.
See Also: Changing Button Text Colors
Top
Configure Warning Messages Dialog
Click on the part of the dialog where the
See Also: Setting Warning Messages.
Top
appears for a brief description.
Configure Fractions Dialog
Click on the part of the dialog where the
See Also: Using Fractions.
Top
appears for a brief description.
Configure 10-key Dialog
Click on the part of the calculator where the
See Also: 10-key calculator
Top
appears for a brief description.
Configure Dialog
Click on the part of the dialog where the
Top
appears for a brief description.
Edit Base Dialog
Click on the part of the dialog where the
See Also: Unit Conversions
Top
appears for a brief description.
Preferred Smart Unit Output Dialog
Click on the part of the dialog where the
appears for a brief description.
See Also: Configuring Smart Units, Creating Units, Unit Composition
Top
Smart Units Level Dialog
Click on the part of the dialog where the
appears for a brief description.
See Also: Unit Conversions, Configuring Smart Units
Top
Calculator Properties Dialog
Click on the part of the dialog where the
appears for a brief description.
See Also: Creating a Calculator, Creating Custom Calculators, Button Properties, Button Properties
(Units)
Top
List of Calculators
Calculator
Features
Programming
•
•
•
•
•
Quickly switch between binary, octal, decimal, and hexadecimal bases.
Works in bit sizes 8, 16, and 32.
Does all basic math functions with signed or unsigned numbers.
Perform the following logical operations: AND, OR, NOT, and XOR.
Includes modulus, sign extend, reverse, swap, shifting (signed and unsigned), rotating
(with and without carry).
•
•
•
Has all trigonometric, hyperbolic, exponential, and logarithmic functions
Includes Pi, factorial, rectangular-polar conversions, degrees, radians and grads.
Performs all basic arithmetic operations and most advanced scientific operations, such
as sine and cosine of complex numbers.
Performs several special operations on complex numbers such as: real part, imaginary
part, conjugate, absolute (modulus or magnitude), argument and sign.
Scientific
•
Time Value of Money
•
•
•
Can generate, print or save an amortization table.
Calculate all time value of money problems involving compound interest calculations
such as: savings accounts, mortgages, pension funds, leases, and annuities.
Includes amortization calculations for determining the amounts applied toward
principal and interest in a payment or series of payments.
Cash Flow
•
•
Analyze cash flows of uneven amounts that occur at regular intervals.
Calculate internal rate of return (IRR%), net present value (NPV), net uniform series
(NUS), and net future value (NFV).
•
Calculates the yield to maturity, price, yield to call, accrued interest and duration of a
bond.
You can specify the calender basis between 30/360, actual/actual (days per
month/days per year) or Actual/360.
You can also specify the coupon payments as semiannual or annual.
Bond
•
•
Depreciation
•
Calculates a full depreciation table using declining balance, sum-of-the-years'-digits
and straight line methods.
•
•
Calculates interest rate conversions between nominal and effective interest rates using
either periodic or continuous compounding.
Calculates percent change, percent total, markup as a percent of cost, and markup as a
percent of price.
•
Calculates mean, median, total, standard deviation, min, max, sort and range for both
Business
Statistics
•
•
one and two variable statistics.
Calculates sum of x and y squared, and the sum of the of xy.
Calculates standard error of the mean and linear regression analysis.
Unit Conversions
•
•
•
Top
Converts between hundreds of units including currency, length, mass, temperature,
momentum, and over forty other unit types.
Use Smart Units to help you perform dimensional analysis.
You can even create your own units.
Loading a Custom Calculator
When you build a custom calculator with PentaCalc Pro, all of the information integral to the operation
of that calculator is automatically saved to a file using the first eight letters of the calculator name with a
.cal extension. (If the first eight letters are the same as another calculator, then the seventh and eighth
digits will be replaced with a number.) Once a calculator is created, it is saved to the PCALCPRO
directory, or to the directory in which PentaCalc Pro is stored.
To load a calculator:
1. Choose Import Calculator... from the File menu.
The "Open" dialog box will appear.
2. To see a list of files of a particular type, select the type of file you want from the File type dropdown box. PentaCalc Pro can only load a file with the .cal extension.
3. Enter the filename, including the complete path, into the File Name text box -or- select the file
name from the drive, tree, and file list boxes.
4. Select [OK].
The Calculator Properties dialog box will appear.
5. You may change the title, hot-key, menu group or locked status for the new calculator.
6. Select [OK]. The new calculator will appear in the Calc menu.
See Also: Creating a Calculator
Top
Interface Overview
PentaCalc Pro is made up of two basic components:
The tape display interface, which has the appearance of the display on a handheld calculator.
Calculator interfaces, which have the appearance of the keyboard on a handheld calculator.
Any PentaCalc Pro interface is both resizable and scalable. Interfaces can be attached to each other
by dragging the edge of one interface close to the edge of another. The interfaces will have a tendency
to "snap" together and may be joined anywhere on a horizontal or vertical edge. Once two or more
interfaces are attached, they may be moved as an entire unit by moving the interface that is highest on
the screen and if they are the same height, the left most interface will have movement control. The best
way to learn how this works is to move several interfaces around on the screen and experiment with
how they interact with each other.
See Also: Calculator Appearance
Top
About the Tape
If you are in RPN notation, the entry display is no longer fixed to one line in height and it takes on the
additional task of serving as the stack. The RPN entry display/stack may be resized and has a vertical
scroll bar.
The display interface may be stretched as wide or as tall as you can fit on your screen. In fact, the tape
interface is the only interface that is required to be on the screen in order to keep PentaCalc Pro
running. You may close down all the calculators and control PentaCalc Pro completely from the
keyboard with a small tape interface on your screen. When resizing the display interface, the tape
display will expand or contract in the vertical or horizontal direction. The entry display is not resizable in
height (unless you are in RPN mode), but will expand or contract horizontally. If you wish to change the
vertical size of the tape display, the control points are the bottom, top or corners of the entry display.
See Also: Using the Tape Display
Top
Creating a New Tape
1. Select New Tape from the File menu. One of the following will happen:
If you have not made changes to the tape, a new tape will be created and you may continue
making calculations.
If you made changes to the tape a dialog box will appear asking if you want to save the current
tape and you will move to step 2.
2. Select a response.
If you select [No], all current calculations on the tape will be erased and a new tape will start.
If you select [Yes], the "Save as" dialog box will appear.
3. Enter the tape filename, including the complete path, into the file text box -OR- select the file name
from the drive, tree, and file list boxes.
4. Select [OK].
See Also: Tape Overview.
Top
Opening the Tape
To open a tape:
1. Choose Open Tape... from the File menu.
The "Open" dialog box appears.
2. Enter the tape filename into the file text box
-orUse the drive, tree, and file list boxes to select the tape filename. Any entries on the existing tape
will be lost.
3. Select [OK].
See Also: Tape Overview.
Top
Saving the Tape
Saving the tape as a new file
1. Select Save As... from the File menu.
The "Save as" dialog box will appear.
2. Enter the tape filename, including the complete path, into the file text box -or- select the file name
from the drive, tree, and file list boxes.
3. Select [OK].
Saving changes to a tape file
Select Save Tape from the File menu. The tape will be saved with the new changes to the current
name. If no name has been selected, the "Save As" dialog box will appear.
See Also: Tape Overview.
Top
Printing the Tape
To print the current tape:
1. Choose Print Tape... from the File menu.
The "Print" dialog box will appear, showing a combo box with the default printer selected.
2. To print to a printer other than the one currently displayed, select the drop down button and then
select the new printer.
3. To change various configurations on the current printer such as the number of copies and
landscape or portrait format, select the [Setup] button.
4. When you have selected the printer and setup, or if the current settings were already what you
want, select [OK].
See Also: Tape Overview.
Top
Resizing the Interface
PentaCalc Pro has almost infinite flexibility with its ability to be resized to any dimension. You may
resize PentaCalc Pro by using standard Windows window resizing conventions, i.e. the cursor changes
to a two-headed arrow.
It is possible to enlarge the dimensions of a calculator to expose an area without buttons, making it
easy to add your own. You may also desire to resize the calculator to "hide" buttons you don't use very
often in order to conserve screen space.
See Also: Changing the Scale, Tape Overview.
Top
Using the Tape Display
Click on the part of the calculator where the
calculator for detailed information.
appears for a brief description or read below the
PentaCalc Pro includes a running tape that displays a record of your calculations regardless of what
mode you are in. When a new tape is created or PentaCalc Pro is started, the tape will show the
current default settings for such options as base, angle mode, operating logic, and display format.
The tape not only keeps a record of what numbers and operators you have entered, but any status
changes you make as well. For example, if you change to 10-key notation in the middle of a tape, the
tape will display 10-key Notation on the tape at the point the change was made. This provides the
benefit of always having a record of where you have been. If you suddenly discover you made a
mistake 25 lines up you can simply scroll up the tape, make your change and the tape will recalculate.
By setting a new insertion point, you may make calculations from any point in the tape. You can also
make memo notations next to any entry so you will be able to remember what that calculation was for.
The tape display may also be printed, and saved as a file.
See Also: Tape Overview.
Top
Adding Memos
The comment field is where you can add text memos to your numerical entries. This is very helpful
when you have a lot of entries on the tape and you need a convenient method of keeping track of them.
To add a memo to the comment field:
1. Click to the left side of the tape display on the same line where you would like to make your
comment.
2. The "I" beam cursor will appear in the field where text may be entered. You may enter any
alphanumeric character.
3. To terminate the text entry, just click on another part of the calculator
-ORpress enter on your computer keyboard.
See Also: Tape Overview.
Comments Field
This field (the left field) is for comments (or memos). See Adding Memos.
Numbers Field
This field (the middle field) is for numbers. See Entering Numbers
Operators Field
This field (the right field) is for operators. See Also: Creating Operator Buttons.
Top
Entering Numbers
To practice entering a number in the number field:
1.Key in several digits and, if desired, change the sign by using the change sign button [±] .
The width of the number field will grow depending on the size of your largest numerical entry.
2. Follow the number with an operator to move the number onto the tape from the display register.
See Also: Tape Overview.
Top
Editing Memos
To edit any entry in the comment field, click in the field of the comment you would like to edit and use
standard Windows text handling conventions to make changes. You may also add whole-line
comments by clicking the [Line Feed] button on the 10-key calculator -or- you may select Line feed
from the Edit menu. Then click anywhere on the blank line.
See Also: Tape Overview.
Top
Editing Numbers
You may edit the numerical entries at any time by clicking in the number field and using standard
Windows methods of backspacing, inserting, deleting, cutting, pasting, etc.
The number field is perfect for doing "what if" analysis, such as changing interest rates and
recalculating an amortization table. You may terminate your editing session by pressing enter on the
keyboard, clicking in another display field or clicking on a PentaCalc Pro button. After each change
has been made, all affected numbers will be recalculated to reflect your changes.
See Also: Tape Overview.
Top
Using and Editing the Operator Field
When you select a function, an operator symbol will appear to the right of the numerical display. By
changing an operator in the operator field, you can easily recalculate the tape. However, you may only
change an operator to another like operator. For example, + may be changed to -, or x may be
changed to ™. If you desire to make other changes you must first delete and enter the new line.
To edit an operator:
1. Click on the operator with the mouse to highlight it.
2. Type the new operator in the field.
3. Recalculate the tape by pressing enter on the keyboard, clicking on another field in the tape display
or clicking on another PentaCalc Pro button.
See Also: Tape Overview.
Top
Changing the Insertion Point
Normally each number or operator is added to the bottom of the tape. However, you may need to make
calculations at another position in the tape instead of this default position. For example, if you are
adding a long series of numbers together and decide you would like to go "up" in the tape and insert a
subtotal at various locations, you must use the insertion feature to do this.
To change the insertion point:
1. From the Edit menu select Set Insertion Point.
The cursor will change once you move it to the tape.
2. Click between the entries where you would like the new insertion point to be.
3. Enter numbers and operators the way you normally would.
All entries will be entered at the new insertion point.
4. To return the insertion point to the bottom of the tape select Restore Insertion Point from the Edit
menu or click the right mouse button on the last line of the tape.
-ORYou may also set a new insertion point by clicking the right mouse button anywhere in the tape.
The new insertion point will start directly below the line where you click the right mouse button
See Also: Tape Overview.
Top
Calculator Appearance
Just for fun, we have included the ability to add different texture bitmaps to PentaCalc Pro's interfaces
and buttons. We have included several bitmaps for you to use.
To access the custom calculator background and button textures, select the Custom option. If you
select the Standard option, PentaCalc Pro will change to its default gray on gray colors. You may
modify the text colors in both Custom and Standard modes.
Select from one of the following:
Background Bitmaps
Button Bitmaps
Button Text Colors
Changing the Size of PentaCalc Pro
Top
Background Bitmaps
To load a new background bitmap:
1. Choose Configure... from the Option menu.
The Configure dialog box will appear.
2. Select [Background Bitmap].
The "Open" dialog box will appear with the .bmp extension entered in the List Files of Type box.
You will need to open a file with the .bmp extension since this is the only graphic file format
PentaCalc Pro supports.
3. Enter the file name, including the complete path, into the file text box
-orSelect the file name from the drive, tree, and file list boxes.
4. Select [OK].
The background bitmap will change to the selected bitmap.
Top
Button Bitmaps
The button bitmap is selected using the same steps as you would for the background bitmap except
you select [Button Bitmap] in instead of [Background Bitmap].
Top
Changing Button Text Colors
To change the color of the button text:
1. Choose Configure... from the Option menu.
The Configure dialog box will appear.
2. Select [Button Text Colors].
The "Button Text Colors" dialog box will appear.
You have the option of changing the text on buttons to one of 16 different colors. The four types of
buttons follow:
Numbers
consist of number buttons you create, 0-9 on the standard calculator, constants, and
memory.
Operators
consist of operator buttons you create and most other buttons on PentaCalc Pro.
Units
consist of specific unit buttons you create and every unit button shipped with
PentaCalc Pro.
Other text
consists of menus, radio buttons (such as Beg and End options on the time value of
money calculator) and the text for entry fields such as Sett and Mat on the bond
calculator.
You may click on any color above the four types of buttons to change the color of that button type. To
save changes, select [OK].
Top
Changing the Scale
PentaCalc Pro has four possible sizes to which it may be scaled. This differs from sizing PentaCalc
Pro. Scaling PentaCalc Pro will change the actual size of the entire calculator, including buttons and
text. It has the same effect as changing the screen resolution of your monitor. If you have PentaCalc
Pro set to "Small" scale it will take up a smaller portion of your monitor screen; the opposite of this is
true if you select the "X-large" scale.
To set the scale of PentaCalc Pro:
1. Select Configure... from the Option menu.
The Configure dialog box will appear.
2. Click on the scale you prefer: Small, Medium,Large, or X-Large.
See Also: Tape Overview.
Top
Other Bases
With PentaCalc Pro you can quickly convert between binary, octal, decimal or hexadecimal numbers
by selecting the new base you wish to convert to from the Option menu. The base you are currently in
will be noted by a lower case "b" for binary, "o" for octal, and "h" for hexadecimal at the end of the
number. Decimal bases have no letter designator. For more information on conversions between
decimal, hexadecimal, octal and binary please see the Programming Calculator.
Example: Convert the hexadecimal number 7FFFFFFF to decimal.
From the Option menu, select Hexadecimal. For this example,You must also select 32 bit wordsize
on the Programming calculator.
Enter
Display
Description
7FFFFFFF
7FFFFFFFh
enters hex number
From the Option menu, select Decimal. The decimal number 2,147,483,647 will be displayed.
See Also: Standard Calculator, Base Conversion, Feet/Inches Base, Time Bases
Top
Feet / Inches Base
With the fractions capabilities of PentaCalc Pro, you can work with fractional feet/inch measurements
at the same time. When you select the Feet/Inches base, the Standard calculator changes as shown
below.
The new buttons that appear on the Standard calculator are explained in the following table:
Button
Function
[sq]
Used for making calculations involving square feet or square inches.
[cu]
Used for making calculations involving cubic feet or cubic inches.
[feet]
When selected after a number, will enter that number as feet for the calculation.
[inch]
When selected after a number, will enter that number as inches for the calculation.
Practicing with the Feet/Inches base
To use the Feet/Inches base, select Feet/Inches from the Option menu. The Standard calculator will
change as previously described. Notice in the following examples it isn't necessary to follow [feet] with
[inch] when making calculations that involve feet. PentaCalc Pro automatically assumes that any
number following [feet] is inches. [inch] is reserved for calculations involving inches only.
Calculate
Enter
1' 3" + 3' 11"
3' 3/16" - 7' 7/16"
3 1/2' + 1 3/4' 2 3/16"
3"+7 5/8"
3.5' ™ 4"
1 [feet] 3 [+] 3 [feet] 11 [=]
3 [feet] 3 ['] 16 [-] 7 [feet] 7 ['] 16 [=]
3 ['] 1 ['] 2 [feet] [+] 1 ['] 3 ['] 4 [feet] 2
['] 3 ['] 16 [=]
3 [inch] [+] 7 ['] 5 ['] 8 [inch] [=]
3.5 [feet] [™] 4 [inch] [=]
Display
5' ˜ 9
5 [feet] [˜] 9 [=]
45' 0"
5' ˜ 9'
5 [feet] [˜] 9 [feet] [=]
45sq'
25 in2 ˜ 2
25 [sq] [inch] [˜] 2 [=]
50sq"
25 in2 ˜ 2'
25 [sq] [inch] [˜] 2 [feet] [=]
39 in3 ™ 7
39 [cu] [inch] [™] 7 [=]
5' 2"
4' 0 1/4"
5' 5 3/16"
0' 10 5/8"
10.5
600cu"
5.57142857142857cu"
0.464285714285714sq"
39 [cu] [inch] [™] 7 [feet] [=]
39 in3 ™ 7'
With PentaCalc Pro you may also quickly convert between square or cubic feet and inches.
Example: Calculate 50 ft» x 2 then convert to square inches.
Enter
50 [sq] [feet] [˜] 2 [=]
[inch]
Display
100 sq'
14400 sq"
See Also: Standard Calculator, Base Conversion, Other Bases, Time Bases
Top
Time Bases
PentaCalc Pro allows calculations in two different time bases:
Base
Explanation
H:M:S
Where you can perform calculations between hours, minutes, and seconds.
Dates
Where you can calculate days between dates, or find out what day of the week your
birthday will fall on next year
To work in the Hours-Minutes-Seconds base:
1. From the Option menu select Hours-Minutes-Seconds.
[.] will change to a colon [:] button to facilitate entry of this type of number.
2. Perform calculations.
While in the Hours-Minutes-Seconds mode you must enter time in the H:M:S format. However, you
may enter more than 60 seconds or minutes and PentaCalc Pro will automatically reformat for you.
For example, if you enter 100 seconds it will reformat to 1 minute 40 seconds (1:40) when an operation
is performed on the number. The H:M:S base may also be used for Degrees:Minutes:Seconds
calculations.
Example: Add 4 hours 23 seconds to 3 hours 75 minutes 106 seconds.
From the Option menu select Hours-Minutes-Seconds. You may execute [:] by pressing the decimal
point or period on your computer keyboard. The decimal point automatically changes on the keyboard
when you change to the Hours-Minutes-Seconds base.
Enter
Display
Description
[AC]
4 [:] 0 [:] 23 [+]
3 [:] 75 [:] 106 [=]
00:00:00
04:00:23
08:17:09
clears display
enters time
displays result
To work in the Dates base:
1. From the Option menu, select Dates.
[.] will change to [/].
2. Perform calculations.
Note: You must enter dates in the MM/DD/YYYY format. The MM/DD/YY convention may be used if
you are performing calculations in the last 50 years of the 20th Century or the first 50 years of the 21st
Century. For example 10/15/50 would be interpreted as 10/15/1950 and 10/15/49 would be interpreted
as 10/15/2049.
To separate dates, use the period or decimal point key on the computer keyboard or [/] on PentaCalc
Pro's keyboard [/] is located where the decimal point button used to be. It is not necessary to lead
each field with a zero.
For example, to enter January 3, 1675 press 1 [/] 3 [/] 1675. Only dates between January 1, 1600 and
December 31, 9999 are valid because of the lack of standardization prior to 1600.
Example: Make several calculations involving dates.
Part 1: Find what day of the week your birthday will be on in 1995. Your birthday is September 23.
Part 2: Add 42 days to your birthday to find what day of the week your friend's birthday will be. Your
friend was born 42 days after you.
Part 3: Calculate how many days between your friend's birthday and Christmas 1995.
From the Option menu select the Dates base. The decimal point button will change to a slash to
facilitate entry of this type of number. Select [AC] to clear the display.
Enter
Solution: Part 1
Display
9 [/] 23 [/] 95 [=]
Sat, Sep. 23, 1995
Solution: Part 2
[+] 42 [=]
Sat, Nov 4, 1995
Solution: Part 3
[-] 12 [/] 25 [/] 95 [=] -51
The number -51 appears as a negative because you have subtracted a larger number (12/25/1995)
from a smaller number (11/14/1995).
See Also: Standard Calculator, Base Conversion, Feet/Inches Base, Other Bases
Top
Algebraic Notation
Algebraic notation is activated by selecting Algebraic from the Option menu. With Algebraic notation
the operator always comes between the two numbers and the operation is always followed by the equal
sign.
Example: Calculate 2+2
Enter:
Display
2 [+] 2 [=]
4
Using Parentheses with Algebraic Notation
Algebraic notation also makes use of the parentheses buttons. Parentheses are used when you want
PentaCalc Pro to postpone calculating until you've finished entering numbers and operators.
Example: Calculate 26 / (13 - 7) ˜ 12
If you were to enter 26 [™] 13 [-] 7, PentaCalc Pro would calculate the intermediate result, -5. To
delay the division until the subtraction is complete, use parentheses:
Enter
26 [™] [(] 13 [-] 7 [)] [x] 12 [=]
See Also: 10-key Notation, RPN
Top
Display
52
Reverse Polish Notation (RPN)
Reverse Polish Notation dictates that the operators be specified after the numbers or variables. The
purpose of this rearrangement of operators is to make digital computation much more efficient. Except
for this section, all examples in the manual are written using Algebraic logic. RPN logic only affects
binary operations such as addition, subtraction, division, multiplication, and exponential functions.
Unary operations work the same in Algebraic, RPN, and 10-key notations.
Practicing RPN calculations
Using RPN logic, try a few example calculations. You must first select RPN from the Option menu.
When you select RPN mode, the [=] button turns into [ENTER]. You do not need to use [ENTER]
before an operator, only between keyed in numbers. Key in both numbers (separated by [ENTER])
before pressing the operator button.
Calculate
Enter
Display
5 + 10
10 - 3
10 ˜ 5
12 ™ 3
10»
„10
5 [ENTER] 10 [+]
10 [ENTER] 3 [-]
10 [ENTER] 5 [˜]
12 [ENTER] 3 [™]
10 [X»]
10 [„]
15.00
7.00
50.00
4.00
100.00
3.16
10¼
10 [ENTER] 3 [y•]
100.00
Using the Stack
When PentaCalc Pro is in RPN mode, it uses an automatic memory stack. The memory stack consists
of many storage locations, called registers. The number of registers is limited only by the amount of
available RAM in your computer; therefore, it is doubtful you will ever run out of registers. The registers
are arranged in such a manner that the numbers move up and down the stack sequentially. The most
"recent" number is in the R1 register. This is the bottom number in the display. R1... Rx are listed
vertically from the bottom. The vertical scroll bars let you review the contents of the stack by shifting
the contents upward or downward.
Another feature of RPN mode is the ability to use [SWAP]. Selecting this button will exchange the
contents of the R1 and R2 registers without affecting the rest of the stack. [SWAP] is used primarily to
exchange the order of numbers in a calculation.
Example: calculate 5 ™ ( 3 ˜ 7 )
Enter
Display
3 [ENTER] 7 [˜] 5 [SWAP] [™]
0.24
Clearing the RPN display
Selecting [DROP] will eliminate the value in the R1 register and shift all other registers down one. In
other words R1, will take on the value of R2, R2 will take on the value of R3, and so forth. In RPN, you
will use [DROP] until all registers are cleared or press [AC] to clear the stack and all other registers
(such as those found in the time value of money calculator).
Chain calculations using RPN
The automatic lifting and dropping of the stack's contents let you retain intermediate results without
storing or reentering them, and without using parentheses. This is an advantage the RPN stack has
over algebraic calculator logic. Other features of RPN include the following:
You never work with more than two numbers at a time.
[ENTER] separates two numbers which are entered sequentially.
Selecting an operator key executes that operation immediately.
Intermediate results appear as they are calculated, so you can check each step as you go.
Intermediate results are automatically stored. They reappear automatically as they are needed for
the calculation-the last result is the first to come back out.
You can calculate in the same order as you would with pencil and paper, meaning from the
innermost parentheses outward.
Example: Calculate 9 ™ (10 + (5 ˜ 2 ) - 2)
Enter
5 [ENTER] 2 [˜] 10 [+] 2 [-] 9 [SWAP] [™]
Top
Display
0.50
10-key Notation
The 10-key mode is designed to be used with the keypad at the right of most desktop keyboards. In
order for the numeric keypad to work, numlock must be on. numlock will be turned on automatically
when PentaCalc Pro is activated. When PentaCalc Pro is deactivated, numlock will be returned to its
original state. Entries are displayed in floating point mode until you terminate the entry by an operator
or function key, then the number is displayed in the current decimal setting. If the number entered has
more decimal places than the current setting, it is rounded in the display and on the tape. However, the
full number is shown on the tape, stored internally and will be used in all operations. For a detailed
description, please see 10-Key.
Entering Numbers and Operators
The 10-key mode has some characteristics similar to both RPN and Algebraic notation, and is designed
to function exactly like a Tape/10-key adding machine. The display consists of two sections:
The entry display, which is analogous to the electronic display on an adding machine. The entry
display is where data is entered and a running total is displayed. A normal entry consists of a number
and an operator. After each numerical entry is completed, selecting one of the operator or function
buttons such as [+], [=], or [Total] will scroll the entry up on the tape and the entry display will show the
running total.
The tape display, which is analogous to the paper tape on an adding machine. The tape display shows
a record of every calculation or mode change previously made.
Terminating Data Entries
Addition and subtraction entries are automatically terminated when you press the addition and
subtraction buttons. Multiplication and division calculations can be terminated one of two ways:
Use the [=] button to keep the results separate from the independent add register.
Use the addition or subtraction button to add or subtract the results from the independent add
register.
You may total entries by selecting [Sub] for subtotal, [Total] for total and, [GT] for grand total.
Button
Function
[Sub]
Will print a subtotal of the running total and annotate it with an item count.
[Total]
Will print a total of the tape, annotate it with an item count, and start the independent
add register over at zero.
[GT]
Will compute a total of all previous totals, not including the current running total.
Top
Using PentaCalc with Any Windows Application
With PentaCalc Pro it is possible to specify what hot-key or hot-key combination will bring PentaCalc
Pro to the top of your desktop. This option is also used to set up the Quick Copy/Paste feature. To set
the Activate/Deactivate key:
1. Select Configure... from the Option menu.
The Configure dialog box will appear.
2. Click [Activate/Deactivate Key].
The Activate/Deactivate Key dialog box will appear.
3. Select one of the following options.
None. No hot key will be specified.
Always on top. Whenever PentaCalc Pro is running it will stay on top of any application(s) you
are running.
Custom. The default hot-key is F11; however, you may select any combination of keys by entering
them in this field.
4. If you chose to have a Custom hot-key, you may also select and use the last section:
Copy number from, and paste number to, previous application with Activate/Deactivate key. If this
option is selected, you will be able to copy highlighted numbers from a previous application into
PentaCalc Pro's display when you select the Activate/Deactivate hot-key, you will also be able to
copy a number from PentaCalc Pro's display and paste it directly to your previous application.
5. Select a Copy/Paste standard.
PentaCalc Pro's Quick Copy/Paste function relies on other Windows application's Paste hot-key. This
present a problem since there are two standards and some applications only support one of these
standards. The good news is most applications support both standards, however there are some
application that only support one and it isn't always the same. The two hot-key standards are:
Paste using shift + insert
Paste using ctrl + v
PentaCalc Pro has a default setting of Paste using ctrl + v.
An example of when you may use Quick Copy/Paste is when you are working in your word processor
and need to make a calculation and paste it back at the cursor position of your word processor.
1. Press the F11 key (or other hot-key as defined above.)
PentaCalc Pro will instantly appear.
2. Make the calculation.
3. Press the hot-key.
The number will be copied from PentaCalc Pro's display and pasted at the cursor position of your
word processor
4. Continue typing in your word processor.
See Also: Clipboard Support.
Top
Setting Warning Messages
PentaCalc Pro has several warning messages designed to alert you when a change is being made that
may affect the data in PentaCalc Pro. To turn these messages off:
1. Select Configure... from the Option menu.
The "Configure" dialog box will appear.
2. Select [Warning Messages].
The Configure Warning Messages dialog box will appear:
3. Select which warning messages you would like to turn off.
Warn of data changes when switching bases. When switching from the decimal base to other
bases it is possible to lose numbers to the right of the decimal place.
Warn of lost stack when switching to Algebraic mode. If you are in RPN mode and switch to
Algebraic mode the stack will be lost.
Are you sure you want to delete the button. If you decide to delete a button, this message will
appear confirming your request.
Warn of unsaved data when closing the tape. This message can become a real pain in the
neck if you frequently select New Tape from the File menu.
Top
Using the Keyboard
Although PentaCalc Pro is designed to be similar to the handheld calculator you are used to, it takes
advantage of the power your PC has to offer. The purpose of this section is to describe the operation of
the many PentaCalc Pro features that are common to all calculators as well as those unique to the PC.
Accessing PentaCalc Pro's functions
PentaCalc Pro is easy to use with either a mouse or keyboard. Mouse users can use the calculator
buttons by clicking on the button with the mouse cursor. Clicking on the button once automatically
enters a number or performs the selected operation. Several keys on your computer keyboard have a
special function they are:
Keys
Function
ctrl + tab
Moves from one interface to another on PentaCalc Pro.
tab
Toggles between buttons on a particular interface. tab will also move the cursor
from field to field in the tape interface.
Arrow keys
Will move you up or down a line or left or right one character while in the tape
interface.
Underlined letters To operate the calculator with the keyboard, select the underlined letter in the
function's name. For example, notice that the "T" on [TAN] is underlined.
Pressing the "T" on your keyboard will serve the same purpose as clicking [TAN]
with your mouse.
spacebar
Reveals the hot-key for all buttons which don't have an underlined letter.
One example is [„…]. When spacebar is pressed, [„…] changes to a "q". Thus
to take the square root of the number in the display, you may click on [„…] with
your cursor or press the "Q" key on your keyboard.
There are several rules that govern how hot-keys for keyboard control are used with PentaCalc Pro
they are:
Due to the unlimited and changing number of buttons possible on PentaCalc Pro, a system has
been devised for handling how hot-keys are assigned to various buttons. At all times the display
interface and the standard calculator will be active. Since these two calculators are always active
they are referred to as global calculators. It is also possible to have one other calculator active at
the same time as the global calculators. This means you may use the button hot-keys on the
display interface, the standard calculator and one other calculator at the same time.
When creating buttons and assigning hot-keys, PentaCalc Pro will automatically check for conflicts
with the global calculators and your new button. If the hot-key is already in use on one of the three
calculators or a menu you will be prompted to select a new hot-key.
If you have the global calculators and more than one other open at the same time, only one nonglobal calculator can be active. You may change which calculator is active by clicking on a
different calculator or pressing it's hot-key. For example, lets assume that in addition to the global
calculators you have the scientific and statistics calculators running. If scientific is active and you
click on the statistics calculator it will become active and the title bar of the scientific calculator will
become dim.
It is possible to change which calculator is active by selecting the hot-key shown to the right of the
title on the title bar. This makes it possible to switch between calculators very quickly. If a
calculator doesn't have a hot-key, you may assign one by activating that calculator and then
selecting Calculator Properties... from the File menu.
Changing a button hot-key
PentaCalc Pro ships with a hot-key for every button. If you wish to change any of these hot-keys
follow these steps:
1. Highlight the button you would like to edit by clicking on it with the right mouse button. -OR- press
ctrl + tab then tab. Then do one of the following to bring up the button properties box:
Click on the button again with the right mouse button.
-ORFrom the File menu select Button Properties...
The Button Properties dialog box will appear.
2. Once the "Button Properties" dialog box appears, you may select a new hot-key. If the hot-key you
select is already being used by another button on the calculator or one of the two global
calculators, you will be prompted to select another hot-key.
3.After making the desired changes, select [OK].
Top
Changing the Decimal Point
PentaCalc Pro offers four different display options which are found in the Option menu:
Standard
Fixed
Scientific
Engineering
If you select either Fixed, Scientific, or Engineering, a dialog box will appear requesting the number of
decimal places between 0 and 15. By rounding only in the display, PentaCalc Pro minimizes rounding
errors throughout your calculations.
Using Standard display
The number of decimal places changes with each number entered depending upon how many digits
you enter after selecting the decimal point. PentaCalc Pro will always use the maximum number of
digits in its calculations.
Using Fixed display
PentaCalc Pro will always show the number of digits to the right of the decimal place as specified. For
example, if you have entered 4 digits in the fixed dialog box and then enter 2.3 it will be displayed
2.3000.
Using Scientific display
Scientific notation is useful when you are working with very large or very small numbers. Scientific
notation writes these numbers concisely by using a smaller number (called a mantissa) multiplied by 10
raised to a power. Large numbers are raised to positive powers and small numbers are raised to
negative powers. There are two ways of entering large numbers. The first is to enter a number as
usual and PentaCalc Pro will automatically convert it to scientific notation if the answer to the operation
cannot be displayed with 15 or fewer digits.
The second method involves entering a mantissa and exponent:
1. Enter the mantissa. If the mantissa is negative, select [±].
2. Select [EE] to start the exponent.
3. Enter the exponent. If the exponent is negative, select [±].
Example: Enter Avogadro's number, 6.02 X 10²³
Enter
Display
6.02 [EE] 23
6.02 e+23
Using Engineering display
Engineering notation is very similar to scientific notation except all exponents are in multiples of three
and PentaCalc Pro adjusts the exponent to keep the mantissa between 1,000 and -1,000. This form of
notation is very useful for scientific and engineering calculations that are specified in multiples of 103
(such as micro-, milli-, and kilo- units).
Example: Enter Avogadro's number, 6.02 X 10²³
Enter
6.02 [EE] 23
Display
602.00 e 21
Top
Doing Arithmetic
This section covers the basic methods of clearing data and performing arithmetic correctly.
Clearing the Tape and correcting errors
Two buttons are provided for clearing registers and correcting errors in the display:
Button
Explanation
[‹ ]
allows you to backspace incorrect digits from the number you are currently entering.
You may also use the backspace key on your computer keyboard
[AC]
clears everything but the memory registers, this includes such registers as all the TVM
registers. [AC] will not clear the tape, however. To clear the entire tape, you must
select New Tape from the File menu.
Entering Data in the correct order
Since division and subtraction operations are noncommutative (you can't change the order of the
numbers without affecting the answer), it is important that you enter the numbers in the correct order to
get the correct answer. It doesn't matter what order the numbers are in for multiplication and addition
calculations. Please examine the following examples which illustrate this principle.
Example: Calculate 983.34-345.98
Enter
Display
983.34
[-]
345.98
[=]
983.34
983.34
345.98
637.36
Example: Calculate 21™5.25
Enter
Display
21
[™]
5.25
[=]
21.00
21.00
5.25
4.00
Notice that the reverse order of the previous calculations doesn't produce the same result.
Using parentheses
Parenthesis are used when you want to postpone calculating with an intermediate result until you've
entered more numbers.
Example: Calculate 26 ™ (13 - 7) ˜ 12
If you were to enter 26 [™] 13 [-] 7, PentaCalc Pro would calculate the intermediate result, -5.
However, that is not what you want. To delay the division until the subtraction is complete, use
parentheses:
Enter
Display
26 [™] [(] 13 [-] 7 [)] [˜] 12 [=] 52.00
Changing the sign of a number
To change a number from positive to negative or vice versa, select the [ ±] button.
Example: Calculate: 25 ˜ -2
Enter
25 [˜] 2 [±] [=]
Top
Display
-50.00
Clipboard Support
You can quickly transfer the results of a calculation between PentaCalc Pro and other Windows
applications through the clipboard. The first method and the one we recommend is to use the Quick
Copy/Paste feature which will make copying and pasting numbers much quicker. You can copy your
final answer from PentaCalc Pro and paste it directly into another Windows application or copy a
number from another Windows application and then paste it into PentaCalc Pro for final computation.
To copy numbers from PentaCalc Pro to another Windows application
1. Enter a number into the display.
2. From the Edit menu select Copy. The contents of PentaCalc Pro's display are automatically
copied to the clipboard. If you are in RPN mode, the number at the bottom of the stack will be
copied.
3. Activate your Windows document (open the application, if necessary.)
4. Position the cursor where you want the answer to be placed.
5. Select Paste from the Edit menu of your document's application.
To Paste numbers from a windows application into PentaCalc Pro
1. From another Windows application, highlight the number to be copied.
2. From the Edit menu, select Copy.
3. Open or activate PentaCalc Pro.
4. From the Edit menu, select Paste. The number will appear in the display of PentaCalc Pro.
Quick copy/paste
Quick Copy/Paste is one of the most useful features of PentaCalc Pro. To setup Quick Copy/Paste:
1. Select Configure... from the Option menu.
The Configure dialog box will appear.
2. Select [Activate/Deactivate Key].
The Activate/Deactivate Key dialog box will appear.
3. Check the Copy number from, and paste number to, previous application with Activate/Deactivate
key option.
If this option is selected you will be able to copy highlighted numbers from an application into
PentaCalc Pro's display when you select the Activate/Deactivate hot-key. You will also be able to
copy a number from PentaCalc Pro's display and paste it directly to your previous application.
4. Select a Copy/Paste standard.
PentaCalc Pro's Quick Copy/Paste function relies on other Windows application's Paste and Copy hotkeys. This may present a problem since there are two standards. The good news is most applications
support both standards, however there are some application that only support one and it isn't always
the same. The two hot-key standards are:
Paste using shift + insert
Paste using ctrl + v
PentaCalc Pro has a default setting of Paste using ctrl + v.
To use Quick Copy/Paste from any Windows application:
1. Press the F11 key (or other hot-key as defined above) and PentaCalc Pro will instantly appear.
2. Make any calculation.
3. Press the F11 key (or other hot-key as defined above) and the number will be copied from
PentaCalc Pro's display and pasted at the cursor position of your previous application ready for
you to start typing again.
Top
Fractions
If you need to make calculations using fractional numbers, you will find PentaCalc Pro's fraction
capabilities very useful. PentaCalc Pro will accept fractional numbers as the input and produce a
fractional number as the output. If a mix of fractions and decimal numbers are used in a calculation the
results will be displayed in decimal form. A fraction is entered using ['] and is only available in Decimal
or Feet/Inches bases.
Configuring fractions
You have several ways to configure the output of fractions based on how you would like the
denominator to appear. PentaCalc Pro will always compute the fraction with the least common
denominator unless you would like the output in a different form. To configure the output of fractions:
1. Select Configure... from the Option menu.
The Configure dialog box will appear.
2. Select the [Fractions] button.
The Configure Fractions dialog box will appear.
3. You may enter a Base Denominator which will be used in the last two options. For example, if you
enter 32 in the Base Denominator text box your calculations will be displayed in terms of 1/32. You
have three ways to Display Fractions...
Exactly, disregarding Base Denominator. The results of your calculations will be displayed as an
exact fraction to the closest 1/32,768 of a unit. For example:
Calculate
Enter
Result
1/2 + 1/2
25/8 - 7/8
3/32 x 5/64
3/15 - 0.8245
22/7 + 19/467
1 [Ÿ] 2 [+] 1 [Ÿ] 2 [=]
2 [Ÿ] 5 ['] 8 [-] 7 ['] 8 [=]
3 [Ÿ] 32 [˜] 5 [Ÿ] 64 [=]
3 [Ÿ] 15 [-] 0.8245 [=]
22 [Ÿ] 7 [+] 19 [Ÿ] 467 [=]
1.00
1 3/4
15/2048
-0.6245
3 600/3269
Exactly, with denominators no larger than the Base Denominator. This result is useful if you
work with a certain minimum fraction. For example, if you are building a new deck for your house
and you only want to measure the wood to a dimension of 1/8 of an inch or larger you would enter 8
as the Base Denominator and all of your fractions would come out not more precise than 1/8 of an
inch.
Before calculating the following example, set the Base Denominator to 8.
Calculate
Enter
Result
11/9 - 10/9
1/8 + 1/16
11 [Ÿ] 9 [-] 10 [Ÿ] 9 [=]
1 [Ÿ] 8 [+] 1 [Ÿ] 16 [=]
1/8
1/4
Always in terms of the Base Denominator. Select this option if you would like your output to
always be in a multiple of the Base Denominator. For example, if you have 5 as the Base
Denominator, your fractional numbers will be rounded to the nearest 1/5. The possible fractional
output will be: 1/5, 2/5, 3/5, or 4/5. If you input 64 as the Base Denominator then you will have 63
possible fractional numbers starting with 1/64 as the smallest and 63/64 as the largest.
Before calculating the following example, set the Base Denominator to 16.
Calculate
Enter
Result
1/4 + 1/4
1/7 + 1/9
1 [Ÿ] 4 [+] 1 [Ÿ] 4 [=]
1 [Ÿ] 7 [+] 1 [Ÿ] 9 [=]
8/16
4/16
Top
New
Stores or calculates the new number.
%Chg
Stores or calculates as a percentage the change between the old and new number.
Total
Stores or calculates the total.
Part
Stores or calculates the part.
%Total
Stores or calculates the percentage portion that the part is to total.
Cost
Stores or calculates cost of item.
Mrk%
Stores or calculates markup as a percent of cost, or price based on %Cst or %Sel being checked.
Sell
Stores or calculates selling price of item.
Nom%
Stores or calculates the nominal interest rate.
Eff%
Stores or calculates the effective interest rate.
P/Yr
Stores the periods per year. This button only appears if the Per option is checked. Con should be
selected of you desire to calculate continuous compounding.
Top
%Cst and %Sel
Click one of these buttons to determine markup as a percentage of cost or as a percentage of selling
price
Per and Con
Periodical or continuous calculations.
Item Counter
If you are in 10-key notation, each time you press either [Sub] or [Total] an item count will appear to the
left of the total. You have the option of having the item count increment by one each time you press [+] or
of having it increment by one each time you press [+] and decrease by one each time you press [-]. You
may select Increment every add only or Increment on every add and decrement on every subtract,
by selecting the appropriate radio box.
Rounding
You may also specify what type of rounding options you would like:
Up
Results are rounded up to the number of significant digits indicated by selecting
Fixed... from the Option menu.
5/4
Results are rounded up or down depending on the value. For example, if the number
of significant digits is set to 2, a result is rounded up if the value in the third decimal
position is 5 or more, or rounded down if 4 or less. See Also: Fractions
Down
Results are rounded down to the number of significant digits indicated by selecting
Fixed... from the Option menu.
Straight line
Selects the straight line depreciation method.
Sum of years digits
Selects the sum of years digits depreciation methods.
Declining Balance
Selects the Declining Balance depreciation method. When this method is
selected, [Factor%] will appear.
Original Cost
Stores the depreciable-cost basis of the asset at acquisition.
Salvage factor
Stores the salvage value of the asset at the end of its useful life.
Top
Expected Life (Years)
Stores the working life of the asset.
Table
Generates a depreciation table of the asset.
Hot-key
None:
No keystroke will bring PentaCalc to the top. You must bring it to the top some
other way.
Always on Top:
PentaCalc remains on top of all other non-"Always on top windows" (such as the
clock.) Therefore, no hot-key is necessary to activate PentaCalc.
Custom:
Specifies the key which will activate and deactivate PentaCalc.
Clipboard
Select the check box if you want the hot-key to cut and paste selected text when activating and
deactivating PentaCalc.
Select one of the two radio buttons to indicate you preferred method of cutting and pasting to the
clipboard.
Factor%
When using the Declining Balance method, you must enter the declining balance factor as a percentage
of the straight-line rate.
Ÿ
The fraction delimeter is used for entering fractions. See Also: Fractions
Top
Using the H:M:S for Angle Calculation Calculations
The Hours-Minutes-Seconds (HMS) base may be used for higher precision angle calculations which
are often needed by surveyors, architects, and engineers, Using this base, hours represent full
degrees, minutes represent 1/60th of a degree, and seconds represent 1/60th of a minute. For
example, 45:30:00 is equal to 45.5 degrees. To do calculations with H:M:S angles, you must first
change to the H:M:S base by selecting Hours-Minutes-Seconds from the Options Menu, enter the
angle into the entry display, perform the calculation and change back to the Decimal base if you want
the result in decimal.
Example: Computer 500 x Tan( 35:25:47)
Make sure that you are in the Decimal base by selecting Decimal from the Option menu.
Enter
Display
Description
500 [x]
Hours-Minutes-Seconds
35:25:47
[Tan]
[=]
Decimal
500.00
500:00:00
35:25:47
00:42:41
355:43:19
355.72
enter 500 and multiply
change to HMS base
enter the HMS angle
result of Tan
result of multiplication
result in decimal
If you do a lot of this type of calculation, you may find it inconvenient to have to switch between HoursMinutes-Seconds and Decimal using the Option menu. One solution is to create a couple of buttons to
make switching between HMS and decimal base faster:
1. Create two operator buttons name HMS and DEC.
2. Create an operator to switch to decimal with the following keystrokes:
[{}]
Decimal
[{}]
[Sto] [DEC]
3. Press [DEC] at any time to change to the decimal base the process for creating the HMS operator
is similar. For more information on creating operator buttons, See Creating Operator buttons..
Top
Button Properties
Click on the part of the calculator where the
appears for a brief description
See Also: Calculator Properties, Creating a New Button, Creating an Operator Button, Button
Properties (units)
Button Title
Enter the name you want to appear on the button.
Hot-key
Specifies a key which can be used to quickly execute your new button.
The hot-keys for buttons are limited to any key on the keyboard except extended keys such as F1-F12,
INSERT, DELETE, etc. PentaCalc Pro will also accept CTRL + any key not on the extended keyboard as
a hot-key.
Number:
Used for constant buttons and storage registers
Operator:
Used to assign a series of numbers and operators. The button becomes an operator
like [+] and [Tan]
Unit:
Used for unit conversions. See Unit Conversions.
Button Locked
Check this box to lock a button. Locking a button will prevent you from inadvertently changing its
function. We recommend that storage buttons be left unlocked, since the purpose will be to frequently
enter new information in the button.
Title
The name of the calculator.
Top
Hot-key
The key which will make the calculator active when PentaCalc is running.
Locked
This option prevents you from adding buttons to the calculator. See Also: Editing a Calculator
Menu
The selected box determines under which menu the calculator will appear.
Display
Exactly, disregarding Base Denominator. The results of your calculations will be displayed as an
exact fraction to the closest 1/32,768 of a unit. For example:
Exactly, with denominators no larger than the Base Denominator. This result is useful if you
work with a certain minimum fraction. For example, if you are building a new deck for your house
and you only want to measure the wood to a dimension of 1/8 of an inch or larger you would enter 8
as the Base Denominator and all of your fractions would come out not more precise than 1/8 of an
inch.
Always in terms of the Base Denominator. Select this option if you would like your output to
always be in a multiple of the Base Denominator. For example, if you have 5 as the Base
Denominator, your fractional numbers will be rounded to the nearest 1/5. The possible fractional
output will be: 1/5, 2/5, 3/5, or 4/5. If you input 64 as the Base Denominator then you will have 63
possible fractional numbers starting with 1/64 as the smallest and 63/64 as the largest.
Base Denominator
Determines the base of the fraction. For example, entering 32 will result in a base in terms of 1/32.
Messages
Warn of data changes when switching bases. When switching from the decimal base to other
bases it is possible to lose numbers to the right of the decimal place.
Warn of lost stack when switching to Algebraic mode. If you are in RPN mode and switch to
Algebraic mode the stack will be lost.
Are you sure you want to delete the button. If you decide to delete a button, this message will
appear confirming your request.
Warn of unsaved data when closing the tape. This message can become a real pain in the neck
if you frequently select New Tape from the File menu.
Top
Button Properties (Units)
Click on the part of the dialog where the
appears for a brief description.
See Also: Calculator Properties, Creating a New Button, Creating an Operator Button, Button
Properties
Long Name
The long name will appear on the comment display of the tape interface when the newly created button is
pressed. See Also: Creating a Unit Button
Conversion
Conversion Factor
Comp
The composition of the unit, which must consist of atomic units. When entering compositions, all
numerator units must be to the left of the "/" and all denominator units must be to the right of the "/".
Otherwise, units must be separated by an "*". Each unit may have an exponent between 2 and 9. The
exponent must be positive. Smart Units will not accept any other operator or parenthesis. Smart Units
will only accept unit names, * (multiply), / (divide), and ^ (for exponents). For example, you may enter:
kg*m^2/s^2. You may not however enter two units of the same type. For example, ft^2/m is not allowed,
since feet and meters are of the same unit type. See Also: Creating a Unit Button
Exact factor
Check this box if you know that multiplying the composition by the conversion will produce exactly one of
the base unit. If the box is not checked, the conversion will be performed to the number of significant
digits.
Conversion
Enter the value that, when multiplied by the composition, will equal one base unit. The base unit is
entered in the Base combo-box above.
Base
Name of the base to configure.
Composition
Defines the base in term of special pre-defined units that PentaCalc understands.
Level 3: Try harder to find a match by converting bases to their S.I. compositions.
If Smart Units doesn't find an exact match using the logic outlined in the previous levels, it will start
converting units to their S.I. bases. For example, if you perform a calculation in the form kg x in / s »,
Smart Units will first check kg and see that it is in terms of its S.I. base. It will then check inches and
convert it to the S.I. base, meters and then check for an exact match and will find one with the S.I. unit of
Newtons.
Level 2: Try to find a match by converting units to their bases.
If Smart Units doesn't find an exact match it will systematically convert each unit to its base until it finds a
match. For example, if you perform a calculation in the form lb x in/s », Smart Units will first check for an
exact match using the method outlined in level one. Since it wouldn't find a match. Smart Units will then
check lb and confirm it is in its base of lb already. It will then check inches, discover it needs to be in feet
and convert it. It will then search for a match and this time will find one with lbf (pound force) and output
the result in lbf.
Level 1: Convert if they match the composition of another unit.
This option will only search for an exact match to the units as entered. For example, if you perform a
calculation in the form; lb x ft / s» the output will be in lbf (pound force). This is because it is an exact
match. If you were to substitute inches in the place of feet, Smart Units would output in lb x in/ s » which
is the unsimplified version since there is no match.
Top
Don't convert at all, display as a combination.
There will be no simplification or canceling of units. For example, if you perform a calculation in the form
kg x m /s» the output will come out exactly in that form. It will not simplify to the S.I. unit of Newtons.
[Xmin][Xmax]
Used to specify the minimum and maximum values of x for a particular graph.
Grid On/Off
Used to turn the graphing background grid on or off.
[Ymin] [Ymax]
Used to specify the minimum and maximum values of y for a particular graph.
[‹] [•] [Œ] [Ž]
Control buttons for scrolling left, right, up and down within a graph.
Scale +/Used to zoom a graph in and out.
Print
Prints the current graph.
Copy
Copies the graph to the clipboard as a bitmap image.
Unit Name
Name of the unit for which to search. See Also: Creating Units, Unit Composition
Composition
Specifies the composition of the selected unit. See Also: Creating Units, Unit Composition
Search
Searches for either the given Unit Name or Composition. See Also: Creating Units, Unit Composition
Preferred
Specifies the preferred units output. See Also: Creating Units, Unit Composition
Main Menu
The main menu. See Menu Items for more information.
Tape Display
A running record or your calculations, regardless of the mode you are in. See Also: Using the Tape
Display.
Entry Display
Top