1
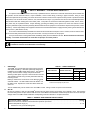
ANTI-PLUG REVERSING MODULE (APRM®-PC) WITH DYNAMIC BRAKING
KB PART NO. 9378
FOR USE WITH KBPC-240D SPEED CONTROL
INSTALLATION AND OPERATING INSTRUCTIONS
See Safety Warning on page 1
The information contained in this manual is intended to be accurate. However, the manufacturer retains the right to make
changes in design which may not be included herin.
A COMPLETE LINE OF MOTOR DRIVES
© 1997 KB Electronics, Inc.
PATENTED
TABLE OF CONTENTS
Section
Page
i.
Safety Warning . . . . . . . . . . . . . . . . . . . . . . . . . . . . . . . . . . . . . . . . . . . . . . . . . . . . . . . . . . . . . . . . . . . . . . . . . . . . . . . . . . . . . . . . 1
I.
Operation . . . . . . . . . . . . . . . . . . . . . . . . . . . . . . . . . . . . . . . . . . . . . . . . . . . . . . . . . . . . . . . . . . . . . . . . . . . . . . . . . . . . . . . . . . . . 2
II.
Setup . . . . . . . . . . . . . . . . . . . . . . . . . . . . . . . . . . . . . . . . . . . . . . . . . . . . . . . . . . . . . . . . . . . . . . . . . . . . . . . . . . . . . . . . . . . . . . . 2
III. Mounting . . . . . . . . . . . . . . . . . . . . . . . . . . . . . . . . . . . . . . . . . . . . . . . . . . . . . . . . . . . . . . . . . . . . . . . . . . . . . . . . . . . . . . . . . . . . . 3
IV. Wiring . . . . . . . . . . . . . . . . . . . . . . . . . . . . . . . . . . . . . . . . . . . . . . . . . . . . . . . . . . . . . . . . . . . . . . . . . . . . . . . . . . . . . . . . . . . . . . . 4
V. Limited Warranty . . . . . . . . . . . . . . . . . . . . . . . . . . . . . . . . . . . . . . . . . . . . . . . . . . . . . . . . . . . . . . . . . . . . . . . . . . . . . . . . . . . . . . 10
TABLES
1.
APRM® Operation . . . . . . . . . . . . . . . . . . . . . . . . . . . . . . . . . . . . . . . . . . . . . . . . . . . . . . . . . . . . . . . . . . . . . . . . . . . . . . . . . . . . . . 2
2.
General Performance Specifications . . . . . . . . . . . . . . . . . . . . . . . . . . . . . . . . . . . . . . . . . . . . . . . . . . . . . . . . . . . . . . . . . . . . . . . . 2
3.
APRM® to PC Connections . . . . . . . . . . . . . . . . . . . . . . . . . . . . . . . . . . . . . . . . . . . . . . . . . . . . . . . . . . . . . . . . . . . . . . . . . . . . . . . 5
4.
Parts List . . . . . . . . . . . . . . . . . . . . . . . . . . . . . . . . . . . . . . . . . . . . . . . . . . . . . . . . . . . . . . . . . . . . . . . . . . . . . . . . . . . . . . . . . . . . 7
1.
2.
3.
4.
5.
6.
7.
ii
FIGURES
APRM® Mounted in the KBPC-240D . . . . . . . . . . . . . . . . . . . . . . . . . . . . . . . . . . . . . . . . . . . . . . . . . . . . . . . . . . . . . . . . . . . . . . . .
KBPC-240D Jumper Removal . . . . . . . . . . . . . . . . . . . . . . . . . . . . . . . . . . . . . . . . . . . . . . . . . . . . . . . . . . . . . . . . . . . . . . . . . . . . .
Switch Mounting . . . . . . . . . . . . . . . . . . . . . . . . . . . . . . . . . . . . . . . . . . . . . . . . . . . . . . . . . . . . . . . . . . . . . . . . . . . . . . . . . . . . . . .
Remote Relay Contacts . . . . . . . . . . . . . . . . . . . . . . . . . . . . . . . . . . . . . . . . . . . . . . . . . . . . . . . . . . . . . . . . . . . . . . . . . . . . . . . . .
Internal Wiring Diagram . . . . . . . . . . . . . . . . . . . . . . . . . . . . . . . . . . . . . . . . . . . . . . . . . . . . . . . . . . . . . . . . . . . . . . . . . . . . . . . . .
Schematic . . . . . . . . . . . . . . . . . . . . . . . . . . . . . . . . . . . . . . . . . . . . . . . . . . . . . . . . . . . . . . . . . . . . . . . . . . . . . . . . . . . . . . . . . . . .
Mechanical Specifications . . . . . . . . . . . . . . . . . . . . . . . . . . . . . . . . . . . . . . . . . . . . . . . . . . . . . . . . . . . . . . . . . . . . . . . . . . . . . . . .
3
4
5
5
6
8
9
i. SAFETY WARNING! — PLEASE READ CAREFULLY
This product should be installed and serviced by a qualified technician, electrician or electrical maintenance person familiar with
its operation and the hazards involved. Proper installation, which includes wiring, mounting in proper enclosure, fusing or other
overcurrent protection and grounding, can reduce the chance of electric shocks, fires or explosions in this product or products used with
this product, such as electric motors, switches, coils, solenoids and/or relays. Eye protection must be worn and insulated adjustment
tools must be used when working with control under power. This product is constructed of materials (plastics, metals, carbon, silicon,
etc.) which may be a potential hazard. Proper shielding, grounding and filtering of this product can reduce the emission of radio
frequency interference (RFI) which may adversely affect sensitive electronic equipment. If information is required on this product, contact
our factory. It is the responsibility of the equipment manufacturer and individual installer to supply this safety warning to the ultimate user
of this product. (SW effective 11/92)
This control contains Start/Stop and Inhibit circuits that can be used to start and stop the control. However, these circuits are never
to be used as safety disconnects since they are not fail-safe. Use only the AC line for this purpose.
The input circuits of this control (potentiometer, Start/Stop, Inhibit) are not isolated from AC line. Be sure to follow all instructions
carefully. Fire and/or electrocution can result due to improper use of this product.
This product complies with all CE directives pertinent at the time of manufacture. Contact factory for detailed
installation instructions and Declaration of Conformity.
1
I.
OPERATION.
The APRM®-PC provides anti-plug instant reverse and solid
state dynamic braking. It has been specifically designed for
installation into the KBPC-240D speed control. The patented
circuitry senses armature voltage and permits armature
switching to take place only when current levels are near zero.
This eliminates contact arcing normally associated with relay
reversing circuits.
Braking is achieved via an electronic circuit utilizing an SCR
and brake resistor. An LED indicates when the APRM® is in
the brake mode. Operation is made via a SPDT switch with
center off.
TABLE 1 – APRM® OPERATION
Output Polarity
Switch Position
Switch Connection
A1
A2
-
Forward (FWD)
S1, S2
+
Brake (BRK)
None (Center off)*
0
0
Reverse (REV)
S2, S3
-
+
*Note: If no connection is made to S1, S2 and S3, the APRM® is in the brake
mode which will rapidly stop the motor.
The unit installs easily into the inside cover of the KBPC control. Wiring is made via quick-connect terminals.
II.
SET UP.
Be sure the Jumpers J1 and J2 on the APRM® are both set to the proper AC line input voltage, 115 or 230VAC. Note: This should be
the same setting as the Jumpers J2A and J2B are set for on the KBPC main board which should correspond to the correct AC line input
voltage. Refer to the KBPC-240D Installation and Operating Instruction Manual for complete information.
TABLE 2 – GENERAL PERFORMANCE SPECIFICATIONS
Input AC line voltage – 50/60 Hz . . . . . . . . . . . . . . . . . . . . . . . . . . . . . . . . . . . . . . . . . . . . . . . . . . . . . . . . . . . . . . . . . . . 115/230
Maximum number of run/brake or forward/reverse operations per minute* . . . . . . . . . . . . . . . . . . . . . . . . . . . . . . . . . . . . . . . . 4
Ambient temperature range (°C). . . . . . . . . . . . . . . . . . . . . . . . . . . . . . . . . . . . . . . . . . . . . . . . . . . . . . . . . . . . . . . . . . . . . 0 – 50
*Based on a one (1) minute braking time.
2
III.
MOUNTING.
1. Mount the APRM®-PC on the 4 bosses located on the inside cover
of the KBPC-240D using the four (4) # 6-32 screws provided.
Position the APRM so that the brake resistor is toward the bottom of
the cover. Be sure not to trap any wires under the APRM mounting
bracket. (See fig. 1.)
FIG. 1 – APRM® MOUNTED IN THE KBPC-240D
2. To mount the FWD-BRK-REV switch in the KBPC first remove the
rubber plug in the FWD-BRK-REV position by unscrewing the retainer
nut on the inside cover. (See fig. 3 p. 5.)
3. Install the FWD-BRK-REV switch assembly into the front cover
making sure the key in the hole lines up with the keyway in the switch
bushing. Be sure the hex nut supplied is installed at the base of the
switch bushing before inserting switch into the KBPC cover.
4. Install the rubber switch boot with integral hex nut over switch lever.
Switch should be in the stop position to facilitate installation. Also,
the switch bushing threads should protrude no more than .25"
(6.4mm) or no less than .10" (2.6mm) through the front cover for
proper installation. Tighten the switch boot so that the bottom seals
against the cover label. Do not overtighten.
3
5. FWD-BRK-REV switch remote mounted. It is possible to operate the control with a remote FWD-BRK-REV
switch or with a remote relay. Carefully remove the three switch wires:
S1, S2, S3 from the APRM®. Wires
may be extended for remote operation,
but it is suggested that a shielded
cable be used. (See table 1 APRM ®
Operation, p. 2.)
IV.
WIRING.
Do not wire control
with AC line connected.
1. Carefully remove from the KBPC main
PC board the 2 jumpers, J8A (connects A1A and A1B) and J8B (connects A2A and A2B). Note: Use long
nose pliers and rock terminal back
and forth to facilitate removal. (See
fig. 2.)
2. Install the wires from the APRM onto
the following terminals on the KBPC
main board. Refer to the internal wiring
diagram provided. (See fig. 5, p. 6.)
4
FIG. 2 – KBPC-240D JUMPER REMOVAL
FIG. 3 – SWITCH MOUNTING
TABLE 3 – APRM® TO PC CONNECTIONS
APRM® Wire Color
Terminal Position on KBPC
PC Board
Red
A1A
Orange
A1B
HEX FACENUT
Black
A2A
SWITCH BODY
White
A2B
Gray
I1
White / Black
I2
Yellow
F1*
RUBBER BOOT
COVER
FIG. 4 – REMOTE RELAY CONTACTS
*Note:
Newer models contain a connector on the yellow APRM® lead.
Observe correct polarity and insert the plug onto the mating
connector just behind terminal block TB2. (See fig. 5, p. 6)
5
FIG. 5 – INTERNAL WIRING DIAGRAM
To avoid erratic operation do
not bundle AC line and motor
wires with reversing, potentiometer, voltage following, enable, inhibit or other signal
wiring. Use shielded cables
on all signal wiring over 12"
(30 cm) – Do not ground
shield.
Note:
Reversing switch can be remotely mounted.
6
FIG. 7 – MECHANICAL SPECIFICATIONS
INCHES
[mm]
7
V – LIMITED WARRANTY
For a period of 18 months from date of original purchase, KB will repair or replace without charge devices which our examination
proves to be defective in material or workmanship. This warranty is valid if the unit has not been tampered with by unauthorized
persons, misused, abused, or improperly installed and has been used in accordance with the instructions and/or ratings supplied.
The foregoing is in lieu of any other warranty or guarantee, expressed or implied, and we are not responsible for any expense,
including installation and removal, inconvenience, or consequential damage, including injury to any person, caused by items of
our manufacture or sale. Some states do not allow certain exclusions or limitations found in this warranty so that they may not
apply to you. In any event, KB's total liability, under all circumstances, shall not exceed the full purchase price of this unit. (rev
4/88)
KB ELECTRONICS, Inc.
12095 NW 39th Street, Coral Springs, FL 33065 • (954) 346-4900 • Fax (954) 346-3377
Outside Florida Call TOLL FREE (800) 221-6570
www.kbelectronics.com
(A40265) – Rev. B – 6/97