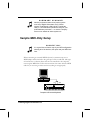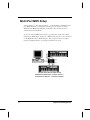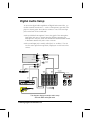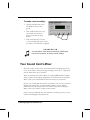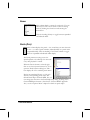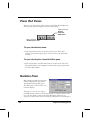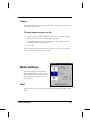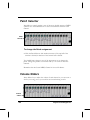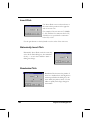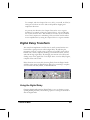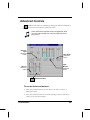
1
Digital
Orchestrator™
Pro
MIDI Sequencer and Digital
Audio Multitrack
Recorder/Editor
It is important that you copy the Product ID number
to the line below.
You will need this number when you install the software
and if you contact Technical Support.
Product ID Number:
____________________________
This software and documentation are copyright ©1995-2002 by Voyetra Technologies Inc. All rights reserved. No part of this publication may be reproduced
in any form or for any purpose without prior written authorization from Voyetra
Technologies Inc.
Digital Orchestrator, Digital Sound Gallery, MIDI Music Gallery, MIDI Orchestrator, Voyetra, the Voyetra logo, Turtle Beach Systems, MultiSound, Pinnacle
Project Studio, Fiji, the Turtle Beach logo, Sound Banks and the phrase “Multimedia Sound Specialists” are all trademarks or registered trademarks of Voyetra
Technologies Inc.
Microsoft and Windows are registered trademarks of Microsoft Corporation.
Video for Windows is a trademark of Microsoft. Sound Blaster and SoundFonts
are trademarks or registered trademarks of Creative Technology Ltd. Adobe and
Acrobat are registered trademarks of Adobe Systems Incorporated. All other
trademarks are the properties of their respective companies and are hereby
acknowledged.
Use of this software is subject to the terms and conditions of the Voyetra
End-User Software License Agreement.
Voyetra Technologies Inc.
5 Odell Plaza
Yonkers, NY 10701-1406 USA
Sales
Fax
Website
800-233-9377 (inside USA)
914-966-0600 (outside USA)
[email protected]
914-966-1102
http://www.voyetra.com
November 2002 • VT-530-4560-05
ii
Voyetra Technologies Inc.
The Power of Digital
Orchestrator Pro
Digital Orchestrator™ Pro makes professional desktop music production
easy and affordable. With this software and your multimedia PC, you have a
multitrack digital audio and MIDI recording system equal to that found in
professional recording studios! With Digital Orchestrator Pro you can:
Record and edit digital audio and MIDI tracks in one environment — record drums and keyboard tracks in MIDI format. Record
vocal, guitar and other acoustic sounds in digital audio format. Then
edit them using standard Windows® drag-and-drop techniques.
Edit MIDI and digital audio with sophisticated on-board effects
— like Digital Delay and a Compressor/Limiter completely in the software and a robust set of MIDI transforms including Humanize, Swing,
Quantize, Tap Tempo, Fit Time, Accelerando and more.
Navigate quickly to specified sections — in your compositions with
Markers. Place Markers in the Ruler Bar to label parts of your songs.
Then use either the Goto Marker button or the Jump to Previous and
Next Marker buttons to locate the defined section.
Draw in Controller data — with the Graphic Controller Editor Pane.
Using the Graphic Controller Editor Pane’s Pencil Tool, data can be
drawn in freehanded to quickly edit pans, pitch bends, tempo and
volume changes or any MIDI controller data.
Synchronize with external devices — such as multitrack tape decks
and video equipment. Digital Orchestrator Pro supports MTC (MIDI
Time Code), SMPTE in all frame rates, SPP (Song Position Pointer)
and MIDI clocks.
The Power of Digital Orchestrator Pro
iii
Navigating Digital Orchestrator Pro
Here’s a roadmap to let you know where helpful information can be found:
For an overview of the features in Digital Orchestrator Pro, click the
Help menu to access the Quick Tour.
On the CD-ROM, there is a series of online video tutorials. These videos provide a great introduction to Digital Orchestrator Pro’s commonly used features and functions so you can begin creating music
quickly. And, best of all, you can watch them right on your PC’s
monitor!
Demonstration files, also included on the CD-ROM, let you hear samples of what can be created using Digital Orchestrator Pro.
This User’s Guide was designed to help you get started using Digital
Orchestrator Pro as quickly as possible.
If MIDI and digital audio are new to you, refer to the “Overview of
MIDI and Digital Audio” Appendix at the back of this book. This will
acquaint you with important concepts and terms.
The “Basics” chapters, located in the beginning of this book, take you
step-by-step through many of the essential techniques you will be using
in Digital Orchestrator Pro.
To locate information about specific controls, menu items or dialog
boxes, refer to the extensive Table of Contents at the front of the book
or the comprehensive Index at the back.
The Appendices at the back of this book contain useful information on
MIDI and digital audio, hardware and diagnostics, and tips and techniques on making recordings. Be sure to check them out!
A list of Keyboard Shortcut Keys, the General MIDI Patch Set,
General MIDI Drum Note Map and General MIDI Controller Types
are also located in the Appendices at the back of the book.
Digital Orchestrator Pro opens the door to new levels of musical creativity
and freedom. You will get more done in less time — and you’ll have a
whole lot of fun along the way. So let’s get started…
iv
Voyetra Technologies Inc.
Table of Contents
Chapter 1 – Installing Digital Orchestrator Pro
Before You Begin, Remember to Register!
System Requirements
Sample MIDI-Only Setup
Multi-Port MIDI Setup
Digital Audio Setup
Making a Test Recording
Your Sound Card’s Mixer
Installing Digital Orchestrator Pro
VCTL.DLL Errors
README File
Configuring Digital Orchestrator Pro
Sample Files
Working with Windows
Uninstalling Digital Orchestrator Pro
Chapter 2 – Covering the Basics
Menu Bar
Toolbar
Status Bar and Quick View Buttons
Workspace
Active Window
Quick Tour
Menu Selections
Getting Help
Song Position Pointer
Loading and Playing a File
Playing a Range and Looping
Solo and Mute
MIDI Recording
Multitrack Recording Techniques
Saving Your Recording
Closing Digital Orchestrator Pro
Table of Contents
1
1
2
3
4
5
6
7
8
9
9
10
11
11
12
13
14
14
15
15
16
16
18
19
20
21
23
25
26
28
29
30
v
Chapter 3 – Editing Basics
31
Track/View Window
Selecting the Data
Copy-and-Paste the Drums Part
Copying the Bass Line with the Mouse
Copying Multiple Tracks
Orchestration
Setting the Patch
Transposing a Track
Printing Music
32
33
34
35
36
37
37
39
39
Chapter 4 – Basics of Digital Audio Recording &
Editing
42
Before You Begin
Getting Ready to Record
Making the Recording
Range Punch In Recording
Adjusting Recording Volume
Editing Digital Audio
Editing Out Recorded Silences
Setting DC Offset
Chapter 5 – Toolbar and Status Bar
The Toolbar
Transport Controls
Understanding the Transport Controls
Range Controls
Transform Buttons
Status Bar
Chapter 6 – Track/View Window
Here’s How to Get Here…
Quick Tour
Track Pane
Track Number
Channel (Chn)
Volume (Vol.)
Bar Pane
Cutting, Copying, and Pasting
Cutting Bars vs. Deleting Bars
Markers
vi
42
43
44
45
47
47
48
50
52
52
53
54
59
65
66
70
69
71
72
73
77
77
82
84
87
88
Voyetra Technologies Inc.
Chapter 7 – Piano Roll Window
Here’s How to Get Here…
Overview
Piano Roll Toolbar
Note Duration Controls
Articulation
Tuplet Numerator and Denominator
Snap-to-Grid
Zoom Buttons
Markers
Piano Roll Quick Menu
Step Recording
Piano Roll Panes
Notation Pane
Graphic Controller Editor Pane
Graphic Controller Editor Pane Display Modes
Selecting a MIDI Controller Type
Graphic Controller Editor Quick Menu
Cursor Tools
Fill Rate
Piano Roll Window Keyboard Shortcuts Keys
Chapter 8 – Event Editor
Here’s How to Get Here…
Overview
Getting Familiar with the Event Editor
Event Editor Toolbar
Inserting a New Event
Copying and Pasting in the Event List
Deleting Events
Changing Events
Summary
Embedding Patch Changes
Filtering Events
Editing the Conductor Track from the Event Editor
Chapter 9 – Conductor Editor
Here’s How to Get Here…
Overview
Conductor Editor Toolbar
Tempo Settings
Table of Contents
90
90
91
93
95
95
95
96
99
100
101
104
106
106
108
109
110
111
111
116
117
118
118
119
120
121
122
123
124
124
128
129
130
131
132
132
133
134
134
vii
Meter Settings
Key Signature Settings
Filtering Events
Chapter 10 – Mixer Window
Here’s How to Get Here…
Quick Tour
Channel Info
MIDI Density Meter
Controller A/Controller B Settings
Solo
Mute
Pan
Patch Selector
Volume Sliders
Port
Track Name
Chapter 11 – Digital Audio Window
Here’s How to Get Here…
Quick Tour
Digital Audio Window Toolbar
Tuplet Numerator and Denominator
Zoom Buttons
Editing Digital Audio
Markers
Chapter 12 – Notepad
Here’s How to Get Here…
Quick Tour
Using the Notepad
Notepad Right-Click Menu
Chapter 13 – Notation Window
Here’s How to Get Here…
Quick Tour
Notation Window Toolbar
Quick Start Printing
Transcription Settings Dialog Box
Fine Tuning Notation
Notating Triplets
viii
135
137
137
138
138
139
140
142
142
143
144
145
146
146
147
147
148
148
149
149
150
152
153
157
158
158
159
159
159
160
160
161
162
163
165
170
170
Voyetra Technologies Inc.
Chapter 14 – System Exclusive Bank Editor
Here’s How to Get Here…
Quick Tour
SysEx Overview
The SysEx Toolbar
SysEx Window Layout
Chapter 15 – File Menu
New
Open
Save
Save As…
Merge
Export WAVE
Sound Selection Dialog Box
Exit
1,2,3,4...
Chapter 16 – Edit Menu
Selecting Data
Undo
Redo
Cut
Copy
Paste
Select All
Move Command
Clear Clipboard Contents
Insert Bars
Delete Bars
Chapter 17 – Transforms Menu
Quick Tour
Transform Buttons
Pitch Transforms
On Velocity Transforms
Off Velocity Transforms
Note Duration Transforms
Start Time Transforms
MIDI Transforms
Tempo Transforms
Table of Contents
172
172
173
174
175
181
184
184
185
186
186
188
189
190
193
193
194
195
195
196
196
196
196
197
197
198
199
199
200
201
202
203
205
207
208
210
216
221
ix
Digital Audio Transforms
Compressor/Gate
Using the Compressor/Noise Gate
Effects
Presets
Considerations When Using the Gate
Considerations When Using the Limiter
Considerations When Using the Compressor
Digital Delay Transform
Presets
Pitch Shifting
Time Compress/Expand
Graphic Equalizer
Convert Sample Rate Transform
Mixdown Audio
Chapter 18 – Options Menu
MIDI Thru
Save Settings on Exit
Metronome Settings
Sync Settings
MIDI Port Setup
MIDI Options
Patch Map Setup
Digital Audio Port Setup
Digital Audio Options
Controllers
MIDI Reset
Pinnacle Sound Banks
AWE SoundFonts Banks
Bank Presets
Default Bank Presets
Playing SoundFonts
Selection Is Play Range
Auto Rewind
Chapter 19 – Window Menu
Audio System Mixer
New
Big Time Window
Cascade
Tile
x
223
225
225
226
230
231
232
232
233
234
239
240
241
246
247
250
251
251
251
254
261
261
264
265
265
268
269
269
271
272
273
274
274
274
275
276
276
277
277
277
Voyetra Technologies Inc.
Arrange Icons
1, 2, 3, 4...
Chapter 20 – Help Menu
Contents
Quick Tour
One Line Help
Tool Tip
Voyetra Website
About Digital Orchestrator Pro
277
278
279
280
280
280
280
280
280
Chapter 21 – Synchronization
281
Overview
Sync Formats
Syncing to SMPTE
Synchronizing with an External Tape Deck
MTC/SMPTE Offset
Synchronizing with Another MTC Device
Synchronizing Using Song Position Pointer
282
283
284
285
285
286
287
Chapter 22 – PC Audio Mixer
289
Sound Sources
Audio System Mixer Button
Volume Controls
Advanced Controls
Customizing the Mixer Icons
System Menu
Configuring the PC Audio Mixer
Changing the Order of the Mixer Controls
290
290
290
293
294
294
295
297
Appendix A – Overview of MIDI and Digital Audio299
Early Problems with MIDI
General MIDI
Digital Audio
Data Formats
Appendix B – Hard Disk Recording
What You Will Need to Use Digital Orchestrator Pro for Recording
MIDI vs. Digital Audio Recording
Digital Audio Performance Issues
Steps You Can Take to Help
Table of Contents
301
302
302
303
305
305
306
306
307
xi
Predicting the Size of Digital Audio Files
Quick Reference Charts for Disk Space Consumption
Appendix C – Troubleshooting
311
Media Player
Setting the Windows 95 Mixer
Possible Mixer Problems
Troubleshooting MIDI
Troubleshooting WAV (Digital Audio)
312
313
313
314
318
Appendix D – The Recording Process Tips &
Techniques
Planning the Recording
Drum Part
Bass Part
Rhythm Guitar Part
Synthesizer and Keyboard Parts
Lead Vocal Part
Background Vocals
Lead Instruments: Guitar, Sax, Etc.
Mixdown
Appendix F – Shortcut Keys
Keyboard Shortcut Keys
Appendix G – Technical Support
319
320
321
321
322
323
323
324
325
325
Appendix E – General MIDI Instrument Sets
General MIDI Patch Set
General MIDI Drum Note Map
General MIDI Controller Types
308
309
327
327
330
332
333
333
337
Appendix H – End-User Software License Agreement
338
Index
xii
340
Voyetra Technologies Inc.
Chapter 1
Installing Digital
Orchestrator Pro
Before You Begin, Remember to
Register!
There are many benefits to registering your software, including:
Update Notifications — to keep you informed of software updates
and new Voyetra/Turtle Beach products.
Upgrade Plan — to provide you with discounts on our full-featured
PC sound products.
Technical Support — to receive technical support you must be a
registered user.
You can register on the Web at http://www.voyetra.com.
Installing Digital Orchestrator Pro
1
Our Website
When you are “surfing the net,” be sure to visit the Voyetra website for the
latest information on new products and upgrades. You’ll find us at
www.voyetra.com. There is also a section where you can exchange tips
and techniques with other Digital Orchestrator users and purchase
products in our Company Store.
System Requirements
Listed below are the minimum system requirements to run Digital Orchestrator Pro. To get the best digital audio recording performance, we highly
recommend a Pentium system running at 90 MHz or more.
IBM PC or compatible computer with a 486DX2 or higher microprocessor, running at 66 MHz or faster
8 MB of RAM
Minimum of 10MB hard disk space (Refer to the Appendix for specific
information on “Predicting the Size of Digital Audio Files” and “Quick
Reference Charts for Disk Space Consumption”)
Windows 3.1 or Windows 95
VGA monitor
Sound card
Headphones and/or an amplification system
To use all of the features in Digital Orchestrator Pro, you need to have
both sound and MIDI hardware. Specifically:
Sound card with a MIDI interface onboard or a digital audio card plus
a MIDI interface
External MIDI synthesizer, keyboard or other MIDI controller
Microphone and/or external sound source for recording digital audio
2
Voyetra Technologies Inc.
♫
HARDWARE UPGRADE?
Need to purchase a better sound card to get the
most out of Digital Orchestrator Pro? Contact
Voyetra Turtle Beach 1-800-233-9377 (inside the
USA) or 1-914-966-0600 (outside the USA) for your
audio hardware purchases — or visit the Company
Store on our website at www.voyetra.com
Sample MIDI-Only Setup
♫
SUGGESTION!
It is a good idea to draw a map of your MIDI configuration
showing all of the devices, their ports and your MIDI interface.
When connecting an external MIDI keyboard, a common setup uses a
MIDI adapter cable attached to the game port of the sound card. This type
of interface has a software driver that must be installed so the computer
can recognize MIDI data. Follow the instructions that came with the MIDI
cable kit you are using to make certain everything is setup properly.
In
Out
Computer with external keyboard
Installing Digital Orchestrator Pro
3
Multi-Port MIDI Setup
A less common — but more powerful — setup includes a dedicated, multiport MIDI interface. A multi-port interface gives the option of which
MIDI IN and MIDI OUT Digital Orchestrator Pro should access for
selected tracks and channels.
To use an external MIDI device such as a synthesizer, keyboard or drum
machine for MIDI input, the device’s MIDI OUT port has to be connected
to the MIDI interface’s MIDI IN port. This setup can involve complex
routing if multiple devices or multi-port interfaces are used.
This MIDI setup uses two MIDI devices.
Keyboards are shown here, but other devices —
such as a drum machine — could be connected.
4
Voyetra Technologies Inc.
Digital Audio Setup
To access the digital audio capabilities of Digital Orchestrator Pro, you
need an external sound source — such as a microphone, tape deck, CD
player or electric guitar. These devices connect to one of the two input
jacks on the back of the sound card:
The jack labeled “microphone” boosts the signal of the microphone
input. This jack uses a 1/8-inch mini plug. Before connecting the
microphone to this jack, check the sound card’s documentation manual
to determine whether the jack is stereo or mono.
The second input jack is usually called “line” or “auxiliary.” Use this
one for stereo input from tape decks, CD players or other stereo line
sources.
Mic In
Line In
Aux In
Sound card
Line Out
MIDI In/Out
MIDI Out
To Joystick
(optional)
MIDI In
MIDI In
Audio
Out
Channel
Out or
Inserts
MIDI Tone Modules
MIDI Enabled Effects
MIDI
Out
Stereo
Tape/
Aux In
Stereo Main
or Aux Out
Power Amp
Audio
Out
MIDI Keyboard
This diagram displays a sample studio setup
with both MIDI and digital audio
Installing Digital Orchestrator Pro
5
Making a Test Recording
Before installing Digital Orchestrator Pro, make a test recording either with
the software that came with your sound card or with the Windows Sound
Recorder. This will confirm that your hardware is working properly.
If you are using your sound card software, refer to the instructions
provided with the sound card.
If you are using the Windows Sound Recorder applet, refer to the
instructions that follow.
When making a test recording:
A microphone must be plugged into the microphone input of your
sound card.
The speaker output of your sound card must be connected to speakers
or headphones.
If you are using speakers, they need to have their own amplification,
since the output from the sound card is too low to power them.
Speakers with built-in amps are powered by either battery or AC.
♫
6
CAUTION!
Do NOT have the headphones on your ears during the initial
test! Sound card volume settings vary, and loud sounds could
damage your ears!
Voyetra Technologies Inc.
To make a test recording:
1. Open Sound Recorder from
the Windows Accessories
group.
2. Click the Record button, say a
few words into the microphone, then click the Stop
button.
3. Click the Play button to listen
to the recording and make certain
the audio is not distorted or clipped.
♫
Play
Stop
Record
SUGGESTION...
You may want to make several recordings, adjusting the
record level each time, to find the correct settings.
Your Sound Card’s Mixer
Since the overall volume of the sound card and the recording input levels
are set in the Mixer, when producing recordings on the PC, it is important
that the Mixer levels be set correctly.
Most sound cards come with a Mixer for setting MIDI and WAV (digital
audio) volumes for recording and playback. For information on using this
Mixer, refer to the documentation that came with your sound card.
Even if your sound card came with its own Mixer, once you have installed
Digital Orchestrator Pro, you will probably prefer to use the Digital
Orchestrator Pro PC Audio Mixer. For more information on using this
Mixer, refer to the “Mixer” chapter in this manual.
Once you have confirmed that your hardware is working correctly, you are
ready to install Digital Orchestrator Pro.
Installing Digital Orchestrator Pro
7
Installing Digital Orchestrator Pro
VSEQPTCH.INI File
If you have been running an earlier version of Digital Orchestrator and
have customized the patch mappings (in the VSEQPTCH.INI file) and
want to preserve those settings, you need to move this file out of the
\DOP directory while installing the new version of the software. Then,
following installation, you can copy this file back into the \DOP directory.
To install the software:
1. Place either the CD in your computer’s CD-ROM drive or “Disk #1”
in your computer’s 3.5-inch drive.
2. For Windows® 3.1, choose Run from the Program Manager’s File
menu. For Windows 95, choose Run from the taskbar’s Start menu.
3. In the Run dialog box, type the letter name of the drive followed by
\setup. If your CD-ROM drive is d:, type d:\setup.
4. Follow the on-screen instructions.
♫
8
PRODUCT ID NUMBER
To install the software, you will need the Product ID number.
We recommend that you write the Product ID Number on the
first page of this manual, so you will have it handy should
you need to contact Tech Support.
Voyetra Technologies Inc.
VCTL.DLL Errors
If you receive an error message that Digital Orchestrator Pro requires a different version of the VCTL.DLL, you have an older version of this DLL
on your system.
To fix a VCTL.DLL error:
1. Search your hard drive to find the newest version of the VCTL.DLL
file (by checking the date) and place it in your
C:\WINDOWS\SYSTEM directory.
2. Delete any older versions of the VCTL.DLL file.
3. Search your hard drive(s) to be certain that there is only one copy of
the VCTL.DLL on your system.
README File
A README file containing important information not available when this
manual was printed may be installed. Be sure to read this information
before you proceed. You might also want to print this file and keep handy
it for future reference.
To view the README file:
1. Double-click the README icon.
2. In Windows 3.1, Windows Write will open and display the file.
In Windows 95, WordPad will open and display the file.
3. To print the README file, choose Print from the File menu of
either Windows Write or WordPad.
Installing Digital Orchestrator Pro
9
Configuring Digital Orchestrator Pro
To configure Digital Orchestrator Pro:
1. Click the Digital Orchestrator Pro icon and start
the program.
2. Select MIDI Port Setup
from the Options menu.
The MIDI Port Setup
dialog box displays.
3. Select Port 1 and choose
the MIDI Input for your
sound card and/or MIDI
interface. If you have
more than one physical
MIDI input device, select
the others accordingly
for the additional input ports. We recommend that instead of using
the Windows MIDI Mapper, you select whichever of the available
output ports you intend to use as individual ports. This will make
your routings easier to use and all channels will be available for each
of the ports.
4. Click OK to return to the main screen.
5. Choose Digital Audio Port Setup from the Options menu.
6. Click the Options button to open the Digital Audio Options dialog
box.
7. For now, deselect both the “Stereo Playback” option in this box. This
will make it easier to evaluate your system setup. After you have
recorded and played back MIDI and digital audio files with Digital
Orchestrator Pro, return to this box and select the options
appropriate for your sound card.
If your sound card supports “Full duplex,” you may want to select
“Device Can Playback and Record Simultaneously.”
If it supports stereo, select “Stereo Playback.”
10
Voyetra Technologies Inc.
Sample Files
Digital Orchestrator Pro comes with a variety of sample drum tracks and
MIDI files. These can be accessed directly from the CD-ROM.
Working with Windows
Digital Orchestrator Pro works with Microsoft Windows — both Windows
3.x and Windows 95. To effectively use Digital Orchestrator Pro, you need
to have certain Windows skills including:
How to use the mouse to move the cursor, select items, click, doubleclick and drag-and-drop.
How to work buttons, drop-down lists and other controls that appear
on Windows screens.
How to find, open name, save and close files.
If any of these techniques are unfamiliar to you, we recommend that you
refer to the Windows help files or work through the tutorials included with
Windows before you proceed.
Installing Digital Orchestrator Pro
11
Uninstalling Digital Orchestrator Pro
Should you decide to remove Digital Orchestrator Pro from your hard
drive, the Uninstall utility enables you to do so easily.
To uninstall Digital Orchestrator Pro:
Double-click the Uninstall icon and follow the onscreen instructions.
12
Voyetra Technologies Inc.
Chapter 2
Covering the Basics
Menu bar
Toolbar
Workspace
Status bar
This chapter provides an overview of the Workspace, the center area of the
screen where all of the editing windows can be opened. The Menu bar,
Toolbar and Status bar are three constant components that appear on all
Digital Orchestrator Pro screens.
Covering the Basics
13
Menu Bar
At the top of the screen, there is a standard Windows Menu bar.
Clicking a menu title drops down its menu list, where you can choose
from the available commands.
Toolbar
Tempo and Meter controls
Transport controls
Range
Transform
The Toolbar is comprised of:
Transport controls — for controlling recording and playback and for
locating sections of a song.
Range controls — for defining a section in a song for recording and
playback.
Tempo and Meter controls — for adjusting a song’s time signature
and speed.
Transform buttons — for quickly accessing five MIDI and five
digital audio transforms.
14
Voyetra Technologies Inc.
Status Bar and Quick View Buttons
Quick View buttons
Status
display
Available Temp
Space indicator
Audio
System
Sample
Rate
MIDI
Activity
The Status bar, at the bottom of the screen, includes the Quick View
buttons. Clicking on these provides fast, easy access to the different
windows in Digital Orchestrator Pro.
Other indicators on the Status bar include a hard disk monitor which
displays the available space for digital audio recording, a MIDI activity
indicator and the current digital audio sample rate display.
Workspace
Title bars
Active window
Inactive window
Workspace
Covering the Basics
15
Digital Orchestrator Pro’s editing windows are opened in the Workspace
— the center area of the main screen. Each window provides a different
view of the data in your music. The commands and controls in the menus,
the Toolbar and the Status Bar affect the data in the currently-active editing
window.
Active Window
Although you can have many editing windows open at once, only one can
be the Active window. When you have several windows open, you can tell
which is active by looking at their Title Bars. Whenever you click on a
window, its Title Bar becomes highlighted. This shows that it is the active
window.
For more information on opening several windows, refer to the “Multiple
Windows” section later in this chapter.
Quick Tour
Let’s take a quick tour of the major features of Digital Orchestrator Pro.
1. Open the program from Windows. The first time you open Digital
Orchestrator Pro, you see the Track/View editing window maximized
inside the Workspace. This is the default setting.
2. Change the Track/View window to a sizable window by clicking the
Maximize (Restore to Window) button in the upper right-hand corner
of the window.
3. Notice that the Track/View now occupies only a portion of the
Workspace. The menus, Toolbar and Status Bar controls remain the
same. These controls are always available, regardless of which editing
window(s) are open.
16
Voyetra Technologies Inc.
Main program
window with
Track/View and
Piano Roll
windows open
Minimized editing
4. Click one or two of the Quick View buttons at the bottom of the
screen. These buttons open different editing windows. The windows
you have just opened will overlap the Track/View window.
5. Minimize some of the windows you have just opened by clicking the
Minimize Window buttons in the upper right-hand corners of the
windows. Notice that the windows shrink down (minimize) and
arrange themselves at the bottom of the Workspace. This lets you
keep a number of windows accessible without clutter.
Multiple Windows
You can have different copies — or instances — of the same window open
at the same time. Multiple instances of a window can make editing large
files easier. With several different views on screen, you can cut-and-paste
data from one screen to another. However, only similar data can be copied.
This means that MIDI can only be copied to another MIDI screen. For
example, data from the Piano Roll can be copied to the Event Editor, not
to the Digital Audio window.
Covering the Basics
17
♫
You can open only single instances of the Conductor
Editor, Track/View, Notepad and SysEx windows.
To open multiple instances of a window:
1. Open the Piano Roll Window by clicking the Quick View button with
the piano symbol on it. (It is third from the left in the row of Quick
View buttons at the bottom of the screen.)
2. Click the Restore to Window button in the upper right-hand corner
of the Piano Roll window. The Piano Roll window becomes a
smaller, sizable window in the Workspace.
3. Select New from the Window menu at the top of the screen and click
Piano Roll. A second instance of the Piano Roll window opens and
overlaps the first. You can open multiple instances of the Piano Roll,
Digital Audio, Event Editor and Mixer windows. Refer to the
“Window Menu” chapter for full details on Digital Orchestrator Pro’s
Multiple View windows.
4. Click the Maximize button in the upper right-hand corner of the
Track/View window so that the Track/View window again fills the
Workspace.
5. Use either the Quick View buttons or the Window menu to open
Editing windows in Digital Orchestrator Pro. The Quick View
buttons are faster, but if you prefer to use the keyboard, you can use
the menus. Note that multiple views of windows can only be opened
from the Window menu.
Menu Selections
As you have seen, the Menu Bar, the Toolbar above the Workspace and the
Status Bar below it are all part of the main screen. All of these controls and
menus work globally. They affect any active window in the Workspace.
However, not all of the menu selections apply to all of the windows. When
a menu selection is not applicable to the active window or the data in it, the
command is unavailable and displays as grayed out type.
18
Voyetra Technologies Inc.
To see this, with the Track/View window open as the Active window, open
the Transforms menu. Most of the menu selections are grayed out. This is
because no data has been selected.
Transform
menu with
grayed out
(unavailable)
commands
Getting Help
Digital Orchestrator Pro offers several forms of on-screen help.
Context-Sensitive Help
If you have a Digital Orchestrator Pro window open — for example,
the Track/View window, Piano Roll window, Notepad, etc. — pressing F1 displays the Help Contents screen from which you can click on
or search for specific help topics.
If a dialog box is open or if you click on a menu item, pressing F1
displays context-sensitive help that directly corresponds to the feature
or menu item you presently are accessing.
To obtain help on using Help, press the F1 key twice.
Covering the Basics
19
One Line Help
As you move the mouse around the screen, One Line Help presents a
single-line definition of the screen areas and controls. This help information is displayed in the Title Bar at the top of the screen.
This feature can be turned on and off by selecting “One Line Help” in
the Help menu. A check mark indicates that One Line Help is active.
Tool Tip Help
Move the mouse so that the pointer rests atop a button or other onscreen control. After a second or two, a small, yellow window pops up
to identify the name of the button or control on which the mouse
pointer is resting. This is known as “Tool Tip” help.
This feature can be turned on and off by clicking on the words “Tool
Tip Help” in the Help menu. A check mark indicates that Tool Tips is
active.
Song Position Pointer
The Song Position pointer ▼ poised above the MIDI data boxes and waveforms shows at which measure the music will start when the Play button is
clicked.
The waveforms represent digital audio data. The higher the amplitude
(volume) the greater the distance between the peaks of the waveform.
The rectangles represent the MIDI data. MIDI data boxes with no
shading do not contain data; those with heavy shading contain a lot of
MIDI data.
20
Voyetra Technologies Inc.
Loading and Playing a File
Now that you know how to navigate through Digital Orchestrator Pro’s
screens, let’s load and play a file.
Play button on
the Toolbar
Song Position
pointer
MIDI
data
boxes
Digital
Audio
waveform
Track pane
Bar
To load and play a file:
1. Track/View should be maximized. If it is not already the active
window, switch to Track/View and maximize it by clicking the
Maximize/Restore button at the upper right-hand corner of the
screen.
2. Open the File menu by using the mouse or by pressing the ALT and
F keys (ALT+F) simultaneously on the computer keyboard.
3. Select Open from the File menu. The File Open dialog box appears.
This is the standard Windows dialog box with one addition — an
Audition button at the lower right. As the name suggests, this button
lets you listen to a file before opening it in the program.
4. If you are not already there, locate the Digital Orchestrator Pro
directory and open the SAMPLE.ORC file by double-clicking it.
5. You will notice that when the file loads into Digital Orchestrator Pro,
data appears in the numbered rows at the left. This side of the screen
Covering the Basics
21
is called the Track Pane and the numbers correspond to the tracks of
the same names.
6. The right side of the screen is called the Bar Pane. The small rectangles (MIDI data boxes) represent bars of recorded MIDI music for
the four tracks in this piece.
7. To play the file, click the Play button on the Toolbar or press the
Spacebar on your keyboard. While the music plays, you will notice a
number of things happening. The numbers in the box labeled
Bar:Beat:Click increase, as does the time in the Current Time indicator box next to it. The red triangle ▼, the Song Position Pointer, and
its playback highlighting bar move left to right, from bar to bar,
indicating which bar is currently being played.
8. If you don’t hear anything when you press Play, re-check the connections and the sound card mixer settings.
9. To stop playback, press the Spacebar or press the Stop button.
Song Position pointer positioned to
start at the beginning of the piece
MIDI
data
boxes
MIDI data boxes with heavy shading (black) contain a lot of
data.
22
Voyetra Technologies Inc.
To play SAMPLE.ORC from a different starting point:
1. Click the right mouse button at the number 8 just above the MIDI
data boxes. This moves the Song Position Pointer to the eighth bar
of the song.
2. Press the Spacebar and the song will start playing from the eighth bar.
3. Press the Spacebar again to stop playback.
Playing a Range and Looping
Suppose you want to play just a particular segment of music and have playback stop automatically at a particular point. Instead of using the Song
Position Pointer, you can use the mouse to select just the section of music
you want to hear. The selected area is called a range. Traditional Windows’
drag-and-select techniques are use to select a range.
Play From
Play Range
Play Thru
Loop button
Set Play
Range to
Selected
Range
SAMPLE.ORC with the range of bars 5 through 12
selected for all tracks. The From and Thru boxes show
the range if you click the Set Play Range to Cursor
Position buttons.
Covering the Basics
23
Selecting a range is useful for practicing a part that is going to be overdubbed or for Record Punch In, when you want to record over only the
specified range. Refer to the “Toolbar and Status Bar” chapter for more
information about Record Punch In.
Now suppose that once you have selected this range, you want to hear it
over and over again. To loop (repeatedly play) the range, use Digital Orchestrator Pro’s Loop button.
To select a range and loop it:
1. Click the mouse cursor just to the left of the fifth MIDI data box of
the top row in the Bar pane.
2. Hold down the left mouse button and drag the mouse diagonally until
you reach the end of bar 12 and you are at the bottom of the MIDI
data boxes.
3. Notice that the bars that have been selected appear highlighted. This
is the basic technique for selecting a range of a file. You will use this
technique throughout Digital Orchestrator Pro.
4. Now that you have selected a range, locate the box labeled “From” in
the Toolbar. Click the Set Play Range to Cursor Position button.
Notice that the numbers in the From box change to 5:01:000. This
shows that play starts at the beginning of the fifth bar.
5. Click the Set Play Range to Cursor Position button for the Thru box
as you did in the From box. The numbers in the Thru box change to
12:04:479, showing that the entire 12th bar is played last.
6. Now you can click the Play Range button next to the From box. The
Play Position pointer moves to bar 5 and only the selected portion of
the file (those eight measures) play.
7. Click the Loop button (next to the Thru box) to loop (repeatedly
play) the range. When you have heard enough, press the Spacebar to
stop playback.
24
Voyetra Technologies Inc.
Solo and Mute
Solo lets you hear one track. Mute lets you hear all of the tracks except those
tracks that have been muted.
♫
SUGGESTION!
If you want to Mute all tracks except one, it’s more
convenient to use the Solo feature for that individual
track than to Mute numerous tracks!
By Ctrl-clicking on the Solo column, several tracks can
be Soloed.
If you want to hear just one of the SAMPLE.ORC tracks — for instance
the Bass track — use Digital Orchestrator Pro’s Solo feature. As you can
see from the Track name, Track 6 has been recorded as the Bass line.
Name column
Solo column
Mute column
Doubleclick the
doubleheaded
arrow
above
the
Number
column
to open
the
Expand/
Shrink
All
Bass track
Clicking the double-headed arrow above the Number
column displays a mini-menu from which you can Expand
or Shrink All columns at once.
Covering the Basics
25
To Solo a track:
Click the S (Solo) column in the desired track. (In this case, Track 6.)
The letter S appears. Now only the Bass line plays as SAMPLE.ORC
continues to loop.
If you can’t read all of the information in the Track Name
column:
Click the word Name (at the top of the column) to expand the column.
Click again to shrink the column’s width.
To Expand or Shrink All columns at once:
Click the double-headed arrow at the top of the Number column. This
opens the Expand/Shrink All mini-menu.
Drag the Pane divider to reveal more of the bars or track parameters.
To Mute a track:
Unsolo any track you have soloed by clicking its Solo column again.
Then, click the Mute column. In a multitrack recording, you can use
Mute to silence as many tracks as you want.
MIDI Recording
Now that you have loaded and played the sample file, you can use your
synth to play along with it and record new tracks — adding to the song as
you go.
Before you begin recording, make sure everything is hooked up correctly. If
you were able to play the sample file, chances are your system is working
properly.
26
Voyetra Technologies Inc.
To record a new track:
(The Track/View window should be opened with SAMPLE.ORC loaded.)
1. Click the mouse in the Record column for Track 9. The letter R
appears, indicating that recorded data will go to this track. You could
choose any track without data on it for recording. However, choosing
the next available free track makes it easier to display and work on
your songs.
Digital waveform
MIDI plug symbol
2. Click at the top of the Type column box for Track 9. On the first
click, you will see a MIDI symbol. Click again and a digital waveform
appears. On a subsequent click, the box clears. Click until the MIDI
symbol is displayed in the Type box for Track 9.
Stop button
Record button
Click
this
column
to
enable
Type column
Covering the Basics
27
3. You are now ready to record MIDI on this track. Click in the
Channel column to select a new channel number. This can be done
by directly typing in the number, by using the spin arrows, or by
pressing the + or – key on the numeric keypad. Be sure that the
Channel number you select is different from the other Channel
numbers listed; otherwise, you will be recording with the same Patch
(instrument) as another channel.
4. Click in the Patch Column and select the instrument sound you
would like to record with.
5. Click the Record button on the Toolbar. With SAMPLE.ORC
loaded, you will hear a four-beat count-in from the Metronome
before recording actually starts. During the count-in, the Transport
Status indicator, the box at the far left of the Status Bar, reads “Rec
Ready.” After the count-in, the display changes to the word
“Recording” and recording actually begins.
6. Record to the end of the sample file — or beyond it if you wish. To
end the recording, click the Stop button or press the Spacebar on
your keyboard.
7. Click the Play from the Beginning button to listen to the results.
8. In the Name column, type in a name for Track 9, the track you just
recorded. You can do this by clicking the mouse in the column or by
using the arrow keys on your computer keyboard to move the Selection rectangle over it and then type in a name.
Multitrack Recording Techniques
When the Overdub/Replace button is set to Replace, and data is recorded
on a track that already contains information, Digital Orchestrator Pro
replaces the existing data with the newly-recorded material.
It is generally a better idea to record new material to new tracks.
In the previous example, for instance, you could have recorded the new
material to Track 10, leaving the earlier music you recorded on Track 9
undisturbed. Then, during editing you could merge parts of the two tracks.
You will see how this is done in later chapters.
28
Voyetra Technologies Inc.
♫
SUGGESTION!
A good multitrack recording technique is to record multiple
"takes" of a given part on different tracks. Each time you
record the part, Mute the previous takes. Then, cut-andpaste the best parts of the various recordings to assemble
your final part.
However, when recording multiple digital audio tracks, you
may need to limit how many tracks you record. This is
because each digital audio track can take up considerable
hard disk space.
You can use the Mixdown Audio transform to help reduce
the amount of space your digital audio recordings consume.
Saving Your Recording
You will want to save your recording under a new name — without overwriting the original SAMPLE.ORC file. You will need the complete original
SAMPLE.ORC file for the examples that follow.
♫
.O R C F O R M A T
We suggest that you save your files in .ORC file format.
.ORC files can contain both MIDI and digital audio tracks.
This means you can record, edit and play back both types of
data at the same time! Saving in .ORC format preserves all
the settings in the Track/View window, such as Mute, Solo,
Transpose, etc.
To save your recording with a new name:
1. From the File Menu, choose Save As. This opens the File Save dialog
box. You’ll notice that the File Type at the lower left is set to Orchestrator.
2. The .ORC file is Digital Orchestrator Pro’s native file format. .ORC
files are, however, proprietary to Voyetra and can only be used by
Digital Orchestrator Pro and other Voyetra programs. To exchange
data with programs from other manufacturers, Digital Orchestrator
Pro lets you save your files in standard MIDI (.MID), RIFF (.RMI) or
digital audio (.WAV) format.
Covering the Basics
29
3. For now, we suggest that you save your files in .ORC format. .ORC
files can contain both MIDI and digital audio tracks. This means you
can edit and play back both types of data at the same time.
4. Enter a new name for the file. (If you want to use the name of an
existing file, use the Audition button to listen to that file before overwriting it..)
5. Click OK to save the file under the new name.
Closing Digital Orchestrator Pro
Before closing Digital Orchestrator Pro, open the Options menu and select
Save Settings on Exit. (A check mark appears to the left of the name when
this feature is enabled.) When you use this option, Digital Orchestrator Pro
saves the setup of the editing windows you have opened — including the
last four files you worked on — and a number of other configuration
settings.
There are several ways to exit the program:
Double-click the Control box in the upper left-hand corner of the
Main Program Title Bar.
Click the Close button in the upper right-hand corner of the Main
Program Title Bar (Windows 95 only).
Select Exit from the File menu.
Press the ALT+F4 keys simultaneously.
If you have not saved the file you are working on, Digital Orchestrator Pro
will prompt you to do so before closing.
♫
30
SUGGESTION!
If you have been running Digital Orchestrator Pro with many
windows open, you may want to close some before exiting.
With Save Settings on Exit enabled, all of the currently
open windows will be opened again the next time you start
the program. This can drain valuable Windows resource
memory.
Voyetra Technologies Inc.
Chapter 3
Editing Basics
The Track/View Window
Now that you are familiar with Digital Orchestrator Pro’s windows, menus
and controls, it is time to do some editing. We are going to use Digital Orchestrator Pro’s cut-and-paste features to create a repeating drum track. We
will be working in the Track/View window, so open it now and maximize
it, if it is not already open.
Editing Basics
31
Track/View Window
The Track/View window is divided into two sections — or panes. You can
move between these panes with the mouse or the Tab key on the keyboard.
Track pane
Bar pane
The Track pane, at the left, displays all of the control and parameter
settings for each track.
The Bar pane, at the right, shows each measure of MIDI music as a box.
These boxes are more heavily shaded when more MIDI data is present.
Opening SAMPLE.ORC
We will be working with SAMPLE.ORC again. Since we worked with this
file in the preceding chapter, it should appear in the list of most-recently
opened files when we click the File menu (or use ALT+F from the keyboard) to open the menu list.. This list is displayed at the bottom of the File
menu and has the numbers “1, 2, 3, 4” preceding the filenames. To open
SAMPLE.ORC, type the number corresponding to the file SAMPLE.ORC
— or, if it is not there, choose Open and locate the file in the Digital
Orchestrator Pro directory.
32
Voyetra Technologies Inc.
Locating the Drums Track
When SAMPLE.ORC loads, you see twelve shaded boxes — for twelve
MIDI bars — in Track 5, the first data track. If you look at the Name
column in the Track pane, you see that Track 5 is the Drums track.
Selecting the Data
To create the repeating drum track, we need to copy four bars in Track 5
and paste them to the empty area later in the track. We start by selecting
data from measures 5 through 8.
To select the data:
1. Click the mouse in the Bar pane to the left of the 5th bar in Track 5,
the Drums track.
2. Hold down the left mouse button and drag to the right stopping at
the end of the 8th measure. (This is the same technique used in the
first lesson to select a range for looping.) As you do this, the bars are
highlighted in reversed color to show that they have been selected.
(You can also select bars using the keyboard. To do so, press the Tab
key to move the cursor into the Bar pane, hold down the Shift key
and move the cursor with the right arrow key. Each time the right
arrow key is pressed, a bar is selected and highlighted.)
3. Release the mouse button at the 8th MIDI bar box. (If you are using
the arrow key, release it at the 8th MIDI bar box.)
4. Click the Set Play Range to Cursor Position buttons for the From and
Thru boxes, as you did in the previous chapter. You will see that the
selected range starts at bar 5 and ends at bar 8.
♫
Editing Basics
If “Selection is Play Range” is active, the selected range is
automatically placed into the From and Thru boxes.
33
Copy-and-Paste the Drums Part
You copy-and-paste MIDI data in much the same way you copy-and-paste
text in a Windows-based word processor.
To copy-and-paste:
1. Once you have selected the data, from the Edit menu select Copy.
This puts the data into Digital Orchestrator Pro’s internal Clipboard.
(If you prefer, use the keyboard combination Ctrl+C.)
2. Move the insertion point to bar 13 in Track 5. You can do this by
clicking the mouse in the Bar pane (or by moving the cursor with the
arrow key on the keyboard).
3. Select Paste from the Edit menu (or paste from the keyboard by
pressing Ctrl+V). The four-bar drum part is pasted in.
4. Click the Play button (or press the Spacebar) to hear the results.
Bars 5-8 are selected
♫
34
When you cut, copy and paste data in Digital Orchestrator
Pro, you use the same mouse skills as when you cut, copy
and paste text in a Windows®-based word processor. The
main difference is that here, the data is stored in Digital
Orchestrator Pro’s internal Clipboard, rather than in the
Windows Clipboard.
Voyetra Technologies Inc.
Copying the Bass Line with the Mouse
Now we want to extend the Bass part on Track 6 so it follows the Drums
part. To do this, we use the mouse to drag-and-drop measures 5 through 8.
If you hold down the Ctrl key on the computer keyboard while moving
data, the data being moved remains intact. This is equivalent to using the
Copy command in the Edit menu.
To copy using drag-and-drop:
1. Select bars 5 through 8 of Track 6 using the mouse as you did for the
drum part.
2. Move the mouse over the highlighted area. Notice that the mouse
pointer turns into a four-way arrow.
3. With the mouse over the selection, press-and-hold the Ctrl key on the
keyboard, then click-and-hold the left mouse button.
4. Now, while holding down the left mouse button and the Ctrl key,
drag the four bars to bar 13 in Track 6.
5. Release the mouse button and then the Ctrl key to drop the data into
position. If you accidentally drop the data in the wrong place, use
Undo Drag Edit on the Edit menu (or press Ctrl+Z) to undo what
you have done and try again. Digital Orchestrator Pro lets you undo
your last 12 actions.
6. Click Play (or press the Spacebar) to hear the rhythm tracks you have
just copied.
♫
Editing Basics
As you can see, drag-and-drop editing is much faster than
editing using the pull-down menus. You can use drag-anddrop editing for most of the editing you do in Digital
Orchestrator Pro.
35
Copying Multiple Tracks
To finish cutting-and-pasting into the empty spaces in the arrangement, we
want to copy our two rhythm tracks out another four bars. The process is
the same as for copying a single track — except that we will copy two
tracks at the same time.
To copy multiple tracks:
1. Click the mouse cursor just to the left of bar 13 in Track 5.
2. Hold down the left mouse button and drag the mouse to the right
and down into Track 6.
3. Stop dragging when you reach the 16th bar of Track 6. Now both
Tracks 5 and 6 should be highlighted from bars 13 through 16.
4. Hold down the Ctrl key and drag the selection to the right so that the
track rows line up, then drop the selection at the beginning of bar 17.
5. Now copy bars 5 through 19 of Track 5 and paste them over to bar
20. This will fill out the repeating drum track.
1. Play the music (press the Play button) to hear the results.
Press the
Play
button to
hear the
♫
36
Bars 13-16
in Tracks 5
and 6 are
selected.
S U G G E S T I O N!
When you want to select ALL of the tracks in a song, use the
Select All command on the Edit menu.
Voyetra Technologies Inc.
Orchestration
You have probably noticed that the demonstration file has several different
instruments playing. In order to play more than one instrument sound at a
time, your synthesizer or sound card needs to be able to play more than
one channel at a time. When a device can play more than one channel at a
time it is called a multi-timbral MIDI device.
You can think of a MIDI device as a television set which can receive a
number of different channels. Multi-timbral MIDI devices differ from a
television set in that they can play all the channels they are receiving at the
same time. The MIDI standard allows for 16 different data channels to be
sent and received simultaneously.
You can set up your MIDI tracks in Digital Orchestrator Pro so each track
will send its data on a different MIDI channel. Our drum track is set to
Channel 10 because this channel is reserved for drum sounds in General
MIDI. But any of the other MIDI channels your synth or sound card can
play can be set to play other instrument sounds.
In MIDI terminology, these different instrument sounds are known as
patches. This name comes from the early days of synthesis where different
sounds were created by patching different synthesis modules together using
wires called patch cords.
MIDI patches are numbered 1 through 128. For a complete listing of the
“General MIDI Patch Set,” refer to the Appendix at the back of this manual. Digital Orchestrator Pro allows you to select any of these instrument
patches, as well as an appropriate channel for any track.
Setting the PatchLet’s use the patch assignment feature to change the
sound of the track named Melody from vibraphone to trumpet.
To set the patch:
1. With SAMPLE.ORC loaded, click the top of the Patch column (Pch)
for Track 7. Notice that up and down arrows appear to the right of
the box; these enable you to located the right number.
2. Click on Pch at the top of the Patch column to expand it. In this
view, Digital Orchestrator Pro gives you the instrument name for
each of the patches and spin arrows to select the instrumental voice.
Editing Basics
37
3. Click the Patch name in Track 7 and the spin arrows are restored.
4. By clicking back and forth between the expanded and contracted
Patch column view, you can see the patch number for each name.
Clicking F3 also expands and contracts the Patch column, when it is
highlighted.
5. There are a number of ways to change the patch assignment to
trumpet:
You can click the arrow until the name appears — or the number
if you know it.
You can use the + and – keys on the numeric keyboard to move
up and down in the list.
You can type in the name or number. If the name is correct,
Digital Orchestrator Pro will set the patch.
You can right-click in the Patch box to bring up a visual dialog
box for patch selection.
To select a trumpet patch in the Patch Selection dialog
box:
1. Right-click in the Patch box of Track 7
or press the F2 button when the box is
highlighted. This brings up the Patch
Selection dialog box.
The Patch Selection dialog box lists all of
the instruments that can be assigned to
your synth.
In this screen, the Brass instruments are
shown with the Trumpet patch selected.
2. Double-click the icon in the left column
labeled Brass. This will expand the listing
in the box to show all the brass instrument voices available.
3. Double-click Trumpet.
38
Voyetra Technologies Inc.
Transposing a Track
Once you have changed the patch to trumpet, play the song again. Does it
sound a little low in the trumpet’s range? Would it sound better an octave
higher? You can easily change the pitch and find out.
To transpose a track:
1. Click in the Trans column to the right of the Patch column.
2. Click the up arrow in the spin box. The pitch is raised a half-step each
time you click the arrow. Keep clicking the up arrow until the display
reads 1:0^.
3. You also can type 1 to raise the pitch an octave, or type -1 to lower it
an octave. Similarly, typing 2:1 raises it up two octaves and a semitone.
4. Play the song again.
As you can see, besides Patch and Transpose, you can set a number of
parameters from the Track Pane. These are discussed in more detail in the
“Track/View Window” chapter.
Printing Music
Digital Orchestrator Pro lets you transcribe and print out sheet music for
any one or all of the tracks you have been working with.
Transcribing and printing music is covered in full detail in the “Notation
Window” chapter. For now let’s see how this feature works.
To print your music:
Open the Notation window by clicking its Quick View button. (It’s the
second button from the left on the Status Bar at the bottom of the screen.)
Maximize the Notation window if it isn’t already maximized.
Editing Basics
39
1. Click the Transcribe button
on the Notation window
control bar. This opens the
Transcription Settings
dialog box with the
SAMPLE.ORC tracks
already loaded in. All of the
settings in this box are
covered in the “Notation
Window” chapter. For now
we are just going to select
the tracks we want to see
notated.
2. Click the Show column for
the Bass and Keyboard tracks to select them for transcription.
A check mark appears in the columns you selected.
3. Click the OK button. After a few seconds, Digital Orchestrator Pro
displays your song as standard musical notation. Each part is identified at the top of the first bar.
4. Now you can print these parts. Click the Print button on the Notation window control bar. This opens the Print dialog box from which
you can choose the printer, paper size and other settings.
5. Make sure your printer is connected and on-line and that the page
size and paper orientation are set the way you want them. You will
probably want to set the page size to standard letter (8½ x 11 in) in
portrait orientation.
6. When you click OK your score begins printing.
If you have problems printing from Digital Orchestrator Pro, go back to
the Windows Control Panel and make sure that your printer is set up
correctly.
40
Voyetra Technologies Inc.
Chapter 4
Editing Basics
41
Basics of Digital
Audio Recording &
Editing
It is time to add a vocal track to SAMPLE.ORC. As you sing, Digital Orchestrator Pro records your voice on a separate track. Don’t worry if you
stray off the beat or drift from the tune; you can use Digital Orchestrator
Pro’s editing features to cut-and-replace pieces of your song as necessary.
Before You Begin
Before you start, your sound card must be set up correctly to record and play
digital audio. Make a test recording if you haven’t already. (Refer to the
“Installing Digital Orchestrator Pro” chapter for instructions.)
♫
42
Recording from the beginning of a song, before it is actually
necessary, is not advisable, since it adds noise and uses up
precious disk space. For example, a two-minute, 16-bit
recording at a 22 kHz sample rate requires 10 MB of disk
space! To get an idea of how quickly digital recording can
eat up hard disk space, refer to the “Hard Disk Recording”
Appendix.
Voyetra Technologies Inc.
Getting Ready to Record
1. Make sure SAMPLE.ORC is loaded
with the Track/View window open.
Also check that the Digital Audio
Options are set correctly for your
sound card.
2. Verify that your microphone is connected to the Mic In plug on the sound
card and that there is a good
connection.
3. Click the Sample Rate box at the
bottom of the screen to open the Digital Audio Options dialog box.
You need to tell Digital Orchestrator Pro whether your sound card is
stereo and if it supports full-duplex (if it can record and play back at the
same time). If you are not sure of the capabilities of your sound card,
do the following:
Disable Stereo Playback
Disable Device Can Play and Record Simultaneously
Choose the lowest available value from the Default Sample Rate list
box. Setting the options this way ensures that you can run the rest
of the recording lesson. You can change the settings later if
necessary. See the “Options Menu” chapter for information on
how to change digital audio settings.
4. Confirm that the Temp Directory shown in the Digital Audio Options
box Temp Directory exists and the Available Temp Space Indicator, on
the Status Bar, has enough storage space available. Twenty megabytes
(20 MB) is a reasonable amount, although you can make a brief test
recording with as little as 5 MB available. Digital recordings can eat up
disk space very quickly.
1. Click the Audio System Mixer button to open the PC Audio Mixer and
select the microphone as your input source. The input is usually labeled
Line or Mic.
Available Temp Space Indicator
showing available hard drive space
Basics of Digital Audio Recording & Editing
43
Making the Recording
Before you begin recording, you have to tell Digital Orchestrator Pro which
type of data to expect — digital audio or MIDI. Since you will be adding a
vocal track, select digital audio.
To make a recording:
1. Select the next available track, Track 9, in the Track/View Window.
Place the mouse pointer in Track 9’s Type column and click several
times. As you click, the icon changes from a MIDI plug symbol to a
digital audio waveform. Click until the digital audio icon is displayed.
Digital waveform symbol
MIDI plug symbol
1.
2. Click the Record column of Track 9. The letter R indicates that the
track has been enabled for recording.
1. After you clear your throat and are ready to begin, click the Record
button on the Transport Bar. After the four beat count-in, start singing
into the microphone. Don’t worry about the lyrics — you can make
them up as you go!
Record button
Stop button
Play button
4. To end the recording, click the Stop button or press the Spacebar.
Digital Orchestrator Pro draws a waveform of the audio you have
recorded.
5. Playback the recording. You should hear your voice included in the
recording.
44
Voyetra Technologies Inc.
If the recording light went off by itself after you began recording, if the
waveform is a flat line or if you don’t hear the track you just recorded, check
your digital audio setup. If you need assistance, return to the “Installing
Digital Orchestrator Pro” chapter.
Range Punch In Recording
Sometimes, you may want to begin recording from a certain point in the
song. This is called Punch In recording. For example, if you made a mistake
as you were recording, you can go back and punch in record where the
mistake was made. Punch in recording records only the bars that you specify
(in this case, the bad part), leaving the other (good) sections alone.
To record from the middle of a song (Punch In
Recording):
1. Reload SAMPLE.ORC from the File menu. It is in the list of most
recently accessed files at the bottom of the drop-down menu list. Click
No when prompted to save the copy of SAMPLE.ORC that is now
loaded. (This restores the original version of SAMPLE.ORC without
the material that we just recorded.)
1. We want to set the From and Thru controls to the range from bar 8 to
bar 40. One way to do this is to click the From and Thru controls and
then type in the numbers.
Record Punch In
Bars 8-40
are
selected
for digital
recording
Basics of Digital Audio Recording & Editing
45
Another way of selecting a range for recording uses the same method as
selecting a range for looping. We can click-and-drag in the Track pane
to select the range and then click the Set Play Range from Cursor
Position buttons for the From and Thru boxes.
2. With the Range selected, click the Record Punch In button on the
Transport Bar. The button turns black to show it is activated.
3. As you did in the “Making the Recording” section earlier in this
chapter, select Track 9 for digital audio recording. With Record Punch
In activated, your recording will begin after the intro and end just
before the two-bar ending phrase of the song.
2. When you record using the Punch In feature, the record count-in works
differently. Digital Orchestrator Pro plays a number of bars before the
selected range to cue you in to start recording.
Recording begins
when the Song
Position Pointer
enters the range
you have selected.
In this case, it
begins at bar 8.
By default, the
number of lead-in
bars is one. If you
want a longer lead-in, you can change this value in the Metronome
Settings dialog box. Open this dialog by clicking the Options menu and
selecting Metronome Settings.
3. Now you can begin recording by clicking the Record button on the
Transport Bar. You don’t have to click Stop; Digital Orchestrator Pro
automatically stops recording when you reach the end of the selected
range.
4. Click the Play button to check the new recording. If you don’t like what
you hear, click the Undo command in the Edit menu and try again.
5. When you are happy with your recording, save your song under the
filename MYFIRST.ORC.
46
Voyetra Technologies Inc.
Adjusting Recording Volume
Remember that the recording input volume level can be set with the PC
Audio Mixer. Experiment with different volume levels until you achieve the
correct one for your recording needs. Refer to the “Mixer” chapter for more
information about using the PC Audio Mixer.
Editing Digital Audio
Your new sample file, MYFIRST.ORC, contains both digital audio and MIDI
tracks. You have already done some editing with MIDI files, so let’s move on
to digital audio editing. You’ll see that the process of editing digital audio
tracks is very similar to the MIDI editing we did in the “Editing Basics”
chapter.
Drag-and-Drop Editing
As you saw in the chapter on editing MIDI, moving data around with the
mouse — drag-and-drop editing — is the simplest and fastest way to edit
musical files. For close-up drag-and-drop editing of digital tracks, Digital
Orchestrator Pro provides a separate Digital Audio Editing window.
Switching to the Digital Audio Editing Window
Let’s open Digital Orchestrator Pro’s Digital Audio Editing window. This is
where you will be editing your sample file, MYFIRST.ORC.
To switch to the Digital Audio Editing window:
1. In the Track/View window, double-click on the vocal track, Track 9,
just to the left of the 4th bar. This opens the Digital Audio Editing
window with bar 4 at the left of the screen.
Basics of Digital Audio Recording & Editing
47
2. Another way to do this is to position the cursor over the track you want
to edit and click the Digital Audio Quick View button at the bottom of
the screen. If Track 9, the audio track you recorded, is not displayed in
the Digital Audio Editing window, click in the Current Track Box and
choose Track 9. For an even closer look at the digital audio waveform,
use the Zoom buttons.
Current
track
Zoom
button
Digital Audio
Quick View button
Editing Out Recorded Silences
MYFIRST.ORC now has music and vocal tracks. The vocal track that you
recorded begins after the four-bar intro. Looking at the waveform in close-up
view, however, you might see that the recorded material does not begin or
end at the precise range endpoints.
Any recorded material at the beginning and end that is silent uses unnecessary
disk space. While this may not be crucial to MYFIRST.ORC, keeping file size
to a minimum becomes important when you are working with complex multitrack recordings.
Let’s edit MYFIRST.ORC so the digital audio track, Track 9, no longer has
any unnecessary recorded silences at the beginning or end of the selection.
48
Voyetra Technologies Inc.
To edit out silences:
1. In the Digital Audio Editing window, select a small amount of data in
the area of the bar 8 line.
2. Now click the Zoom In (+) button to get a detailed view of the section
of the waveform you want to edit.
Select the area
of silence
shown by the
The recorded silence you want to cut out is shown
as a flat black line without any waveform contour.
In contrast, unrecorded areas of silence
are shown as a flat red line.
Unrecorded silences do not use disk space.
3. Select any silent data beginning at bar 8 and continuing until the
recorded waveform begins. This indicates the point at which you began
to sing.
4. Choose the Cut command from the Edit menu to delete the unwanted
area of silence you have selected.
5. After you have cut the data, you may want to use the Zoom Out (–)
button to see an overview of the waveform.
6. Select the data around bar 40. Cut any area of silence from the point
where you stopped singing to the end of bar 40.
7. Press the Spacebar or click the Play button to hear MYFIRST.ORC
with a leaner digital track.
Basics of Digital Audio Recording & Editing
49
Setting DC Offset
On the left of the Digital Audio Editing window is an Amplitude Scale. The
baseline or center of the scale is 0. The portion of the waveform beneath this
baseline is said to have negative amplitude and the portion above it positive
amplitude. Different recording devices will cause digital data to line up
differently relative to the line.
A
m
p
l
I
t
u
d
e
S
c
a
l
e
Baseline
at 0 %
Absolute silence, which should always have an amplitude of zero, can be shifted
above or below the baseline by variations in microphone electronics or by
your sound card’s digital-to-analog circuitry. This shift is known as the DC
Offset.
It is important to eliminate DC Offset before using any of the Digital Transforms, since the transforms use the waveform’s amplitude as a starting point
for re-shaping the sound.
If a waveform has a DC Offset and you add reverberation, you will add
reverb to every part of the waveform that has a numerical value other than
zero. If silences are offset above or below the baseline, they will get reverb
too, creating an unwanted “wah-wah” sound. Even worse, waveforms that
have a DC offset tend to click loudly when they open and close. To avoid
these problems, Digital Orchestrator Pro includes a DC Offset feature for
eliminating unwanted DC Offsets.
50
Voyetra Technologies Inc.
To use the DC Offset feature:
1. Return to the Track/View window by clicking the Track/View Quick
View button on the Status bar.
2. Click the number 9 at the left of the Bar Pane. This selects the entire
digital audio track, Track 9. Choose Digital Audio from the Transforms
menu. The Digital Audio submenu displays.
Digital Audio
submenu
Track/View
window Quick
View button
3. Choose the DC Offset command from this menu. This opens the
DC Offset dialog box.
4. When you click Suggest, the dialog box displays the recommended
value for changing the distribution of data around the baseline.
3. Digital Orchestrator Pro calculates all
of the negative and positive amplitudes
in the file and averages them to set the
baseline correctly. This eliminates DC
Offset in almost all cases — the exception is when you use a selection that is
too short to provide a correct average
value.
4. Click OK to accept the suggested
value and remove the unwanted DC Offset.
Basics of Digital Audio Recording & Editing
51
Chapter 5
Toolbar and Status
Bar
Digital Orchestrator Pro’s main window displays two control bars — the
Toolbar and the Status bar.
The Toolbar and the Status Bar provide information about data and control
settings in the currently-active editing window. These features are available
at all times, regardless of which windows are open.
The Toolbar
The Toolbar, at the top of the Digital Orchestrator Pro screen, is separated
into four sections:
Transport controls
Range controls
Tempo and Meter controls
Transform buttons
52
Voyetra Technologies Inc.
Close-up Look at the Toolbar
Transport controls
Tempo and Meter controls
Transform buttons
Range controls
Transport Controls
The Transport Controls are similar to the buttons on a tape deck or CD
player. These are used for recording and playback..
Recor
Play
Play from the
Beginning
Current song
position in
time format Current song
Jump to Next
Marker/End
Stop
position in
Bar:Beat:Click
Jump to
Previous
Move Song
Position Back
Set sync type
Song Position
Slider
Overdub/Replace Record
Move Song
Position
Forward
Toolbar and Status Bar
Goto Marker
53
Operating the Transport Control Buttons
The Transport Control buttons can be operated with the mouse or the
keyboard.
To operate the Transport Control buttons with the
mouse:
1. Place your mouse pointer on the desired button.
2. Click the left mouse button to “press” the button.
To operate the Transport Control buttons with the
keyboard:
Each Transport Control button has been assigned a function key:
Press the Function key or the Spacebar for the desired Transport
Control.
F9 Spacebar F6 Spacebar F7
Jump to Stop Play Play
Previous
from
Marker/
BeBeginning
ginning
♫
F10
Record
Jump to
Next
Marker/
End
THE SPACEBAR
Pressing the Spacebar toggles between Stop and Play.
Understanding the Transport Controls
54
Voyetra Technologies Inc.
Here is a quick overview of the Transport Control buttons.
Jump to Previous Marker/Beginning Button
Click this button — or press the F9 key —to move the Song
Position Pointer to a previous Marker.
Stop Button
Click this button — or press the Spacebar — to halt playback or
recording.
Play from the Beginning Button
Click this button — or press the F6 key — to begin playback from
the beginning of the song.
Play
Click the this button — or press the Spacebar — to begin playback
from the current position, as specified in the Bar:Beat:Click display.
Record
Click this button — or press the F7 key —to start recording a new track.
After clicking the Record button, you hear a count-in interval before
recording actually begins. The length of this count-in can be adjusted in the
Metronome Settings dialog box.
During the count-in period, the Record button’s red LED blinks; once
recording begins, the LED remains solid red.
Toolbar and Status Bar
55
Jump to Next Marker/End Button
Click this button — or press the F10 key — to move the Song
Position Pointer to the next Marker.
Overdub/Replace Button
There are two recording modes: Overdub and Replace. Click the Overdub/
Replace button to toggle between these two modes. The name of the active
mode displays next to the button.
Overdub adds to an existing part. Use it to add an additional
part to the same track, such as a snare over a bass drum.
Replace overwrites an existing part. Use replace to replace a
part or fix a mistake by overwriting it.
Internal Button
Click this button to open the Sync Settings dialog box and
select which clock Digital Orchestrator Pro synchronizes to.
Refer to the “Synchronization” chapter for more
information.
Song Position Slider
The Song Position slider provides a visual
indication of the current song position.
Slider
Thumb
56
Click-and-drag the slider thumb to move the
Song Position Pointer to the desired location in
a song.
Voyetra Technologies Inc.
Move Song Position Back/ Forward Buttons
Move Song
Position
Back/Forward
buttons
The Move Song Position buttons are
located to the left and right of the Song
Position Slider. Use these buttons to
scroll quickly through a song. Doubleclicking these buttons brings the songs to
either the beginning or ending of a song,
respectively.
Goto Marker
Clicking the Goto Marker button opens a drop-down list box that
displays all the markers that have been inserted. Clicking a Marker’s
name moves the Song Position Pointer immediately to that section.
Current Time
The Current Time indicator displays the current amount
of time elapsed from the beginning of the song.
The Current Time value for a given position in the song depends on the
song’s tempo.
Generally, the format in the Current Time box will be Hours: Minutes:
Seconds: Frames: Hundredths or Bits. The format displayed depends upon
the settings chosen in the Show Hours section of the Sync Settings dialog
box, which is accessible from the Options menu or by clicking the Internal
button.
Time information can come in handy when creating songs for a timecritical application such as a film, video, or multimedia presentation.
Toolbar and Status Bar
57
To illustrate,
If Show Hours is selected in the Sync Settings dialog, Hours will be
displayed in this indicator.
If Show Hours is deselected in the Sync Settings dialog, Hours will not
be shown.
If Hundredths or Bits has been selected in the SMPTE Sub Frame
Display section of the Sync Settings dialog, the Current Time will
display in Hundredths or Bits.
If you are uncertain of the current settings, rest your mouse pointer on the
Current Time box and Tool Tip help displays the format.
You can enter data free-form, from the keyboard, using the symbols : ; , . as separators. To do so, click the box and enter the desired numbers.
You can also use the spin buttons in conjunction with the Shift and Ctrl
keys to change the values in the Current Time box. Refer to the “Changing
Numericals” Appendix for a listing of these key combinations.
Current Song Position Indicator
This indicator displays the current song position in the
format Bar:Beat:Click.
By default, the timing resolution (clicks) is set at 480 pulses per quarter note.
Think of timing resolution as the sampling rate of a MIDI sequencer.
To change the data in this box, use the keyboard or the spin buttons.
When using the keyboard, press Ctrl+B to highlight the box, and enter the
desired numbers for Bar:Beat:Click in free-form fashion, using the symbols
; : , . - as separators. For example:
4
5-2
2.2.3
58
would be
would be
would be
Bar 4
Bar 5, Beat 2
Bar 2, Beat 2, Click 3
Voyetra Technologies Inc.
The values in this box also can be changed using the spin buttons in conjunction with the Shift and Ctrl keys. Refer to the “Changing Numericals”
Appendix for a listing of these key combinations.
Range Controls
Set Play Range
to Cursor
Play Range
Play
Record Punch
Play Thru
Loop
Set Play Range
to Cursor
The Range controls are used for selecting a designated area (range) of a
song for recording or playback.
Set Play Range to Cursor Position Buttons
When a range is selected in the Bar pane of the Track/View window, clicking the Set Play to Cursor Position buttons inserts the selected range in the
Play From and Play Thru controls. Ranges can also be inserted by Ctrlclicking in the From and Thru controls.
By activating Selection is Play Range from the Options menu, when a
selection is made, the range is automatically placed in the From and Thru
windows.
Even if a range is not selected, the current cursor position can be entered
by clicking the Set Play Range to Cursor Position buttons. This is useful
when you need to adjust one of the positions in the selected range.
Toolbar and Status Bar
59
Play From Control
Use the Play From control to set the starting point of a
range within a song or digital audio file. Play From uses
the format Bar:Beat:Click.
When used in conjunction with the Play Thru control, the Play From
control sets a precise range for auditioning, looping or recording a file.
You can enter data free-form, from the keyboard, using the symbols : ; , . as separators. To do so, click the box and enter the desired numbers.
The current cursor position can be entered into the Play From control by
clicking the Set Play Range to Cursor Position button.
The values in the Play From Control also can be changed by using the spin
buttons in conjunction with the Shift and Ctrl keys. Refer to the “Changing
Numericals” Appendix for a listing of these key combinations.
Play Thru Control
The Play Thru control sets the ending point of a
selected range within a song or digital audio file in the
format Bar:Beat:Click.
When used in conjunction with the Play From control, the Play Thru
control sets a precise range for auditioning, looping or recording a file.
As in the Play From control, you can enter data free-form, from the keyboard, using the symbols : ; , . - as separators. To do so, click the box and
enter the desired numbers.
The current cursor position can be entered into the Play Thru control by
clicking the Set Play Range to Cursor Position button.
The values in the Play Thru control also can be changed by using the spin
buttons in conjunction with the Shift and Ctrl keys. Refer to the “Changing
Numericals” Appendix for a listing of these key combinations.
60
Voyetra Technologies Inc.
Play Range Button
The Play Range button plays just the range of measures set in the
Play From and Play Thru controls. To Play a selected range click
this button or use the keyboard shortcut key: F8.
Loop Button
The Loop button repeatedly plays the range of measures that has
been set in the Play From and Play Thru controls.
To loop a selected range:
1. Select the portion of the file to be looped (This can be done in any of
Digital Orchestrator Pro’s windows.)
2. If Selection is Play Range is On, the Start and End times of the range
are entered automatically. To manually enter the Start and End times
of the range, click the Set Play Range to Cursor Position buttons on
the From and Thru controls.
3. Click the Loop button or press Ctrl+F8 to play the selected range
repeatedly.
4. Click the Stop button or press the Spacebar to halt playback.
Record Punch In Button
The Punch In button toggles between normal and Punch In
recording modes.
Use Punch In recording to record a specific region of the song, as defined
by the Bar:Beat:Click values in the From/Thru controls.
Toolbar and Status Bar
61
Once the desired range is set and the Record Punch In and the Record
buttons have been pressed, the music begins recording at the time set in the
From indicator. Recording ends with the time set in the Thru indicator, and
then stops automatically.
For more information about recording, see the “Track/View” chapter.
♫
OVERDUB or REPLACE?
Remember to check the Overdub/Replace button to see
which mode is selected.
If Overdub is selected, data will be added to the range on
which you are recording.
If Replace is selected, the new data will overwrite the
range on which you are recording.
To record a range:
1. Set the range you want to record using the From and Thru controls.
2. Set the track type — MIDI or digital audio.
3. Click the R column to enable a track for recording.
4. Click the Record Punch In button or Ctrl+F7.
5. Click the Record button. You will hear a lead-in passage before the
selected range. The number of bars in the lead-in can be adjusted
using the Metronome Settings command in the Options menu.
6. Record the new music. The recording will automatically stop at the
end of the selected range.
62
Voyetra Technologies Inc.
Tempo and Meter Controls
The Tempo and Meter controls appear in every Digital Orchestrator Pro
window. They are a convenient way of quickly viewing and changing the
speed and time signature of a file.
Current Meter
Current Tempo
Tempo Offset Slider
Tempo Offset
Current Tempo
Current Tempo displays the current tempo of a MIDI
song with a resolution of 1/100th of a beat per minute.
Tempo can be set to any value between 16 and 500 beats per minute using
the spin buttons, clicking the numerical panel and entering a value, or
pressing Ctrl+T and then using the + and – keys on numeric keypad.
The Shift and Ctrl keys can also be used in conjunction with the spin buttons to change the values in the Current Tempo. Refer to the “Changing
Numericals” Appendix for a listing of these key combinations.
Use the fractional tempo feature to precisely loop a .WAV file. For
example, if you imported a one-bar audio drum loop, you can adjust the
fractional tempo until the loop plays smoothly.
♫
DIGITAL AUDIO and TEMPO
You cannot change the Tempo settings of a digital audio track.
Toolbar and Status Bar
63
Current Meter
Current Meter displays the time signature of the loaded file. If the
meter of the song changes, the Current Meter updates.
Clicking Current Meter opens the Event Edit dialog box with the meter
event selected. Refer to the “Event Editor” chapter for more information
about changing the time signature.
Tempo Offset
Tempo Offset displays the amount by which a
MIDI song’s tempo will be increased or
decreased in beats per minute.
The Tempo Offset is useful because it lets you adjust the overall tempo of
a song without effecting the relative tempo events in the Conductor Track.
Like Current Tempo, Tempo Offset is calibrated to a resolution of 1/100th
of a beat per minute. You can set the Tempo Offset to any value between
-100.00 and 100.00 using the spin buttons, clicking the Tempo Offset box
and entering a value, or using the Tempo Offset Slider.
Setting Tempo Offset
Whenever the tempo in a song is changed, a MIDI message is sent that
establishes a new tempo. The tempo change message sets a value that
remains in effect until another tempo change occurs — or until the end of
the song. Most MIDI files contain at least one tempo change message —
and often more. Together, these messages form a tempo map for the song.
Tempo Offset changes all of the tempos in the tempo map by the amount
specified. For example, if a song’s tempo map is 120, 125, then 131 and the
tempo offset is set to +10, the new tempo map will be 130, 135, and 141.
If the song is saved as a standard .MID file, the offset will be incorporated into the tempo map.
If the song is saved in Digital Orchestrator Pro’s .ORC file format, the
tempo and tempo offset are saved as independent values.
64
Voyetra Technologies Inc.
Tempo maps let you incorporate tempo changes to speed up or slow down
the tempo. You can use a series of small tempo changes to construct
gradual increases (accelerandos) or decreases (ritardandos) in the tempo.
An easy way to achieve smooth changes in tempo is to use the Graphic
Controller Editor in the Piano Roll window. Refer to the “Piano Roll
Window” chapter for more information.
Tempos, time signatures, and key changes are treated as separate events and
are assembled in the Conductor track. These are discussed in the chapter
on the “Conductor Editor.”
Transform Buttons
The Transform buttons provide quick access to the most commonly used
MIDI and digital audio transforms.
The top row of the Transform buttons contains the MIDI transforms.
The bottom row contains the digital audio transforms.
The Transform buttons are only available when the appropriate data is
selected.
For more information on using the Transforms, refer to the “Transforms
Menu” chapter.
♫
SCREEN RESOLUTION
You must be at a screen resolution of 800 × 600 or greater
to see the Transform buttons. If you need to change your
screen resolution, refer to Windows Help. If you are running
in a resolution lower than 800 × 600, the same functions are
available in the Transforms menu.
Toolbar and Status Bar
65
Offset Velocity
Offset Start
Quantize
Note Start
Time
Transpose
Humanize Note
Start Time
Digital
Audio Delay
Digital Audio
Crescendo/Fad
Digital Audio
Compression
Digital
Audio
Digital Audio
Normalize
♫
Each of the Transform buttons opens the corresponding
dialog box except for Normalize . Normalize immediately
normalizes the selected data.
Status Bar
Like the Toolbar at the top of the screen, the Status bar at the bottom of
Digital Orchestrator Pro’s main window is available at all times. Status bar
indicators and controls are tied to the data in the currently active editing
window.
Quick View buttons
Status
66
Available Temp
Space indicator
Audio Mixer
button
Sample Rate
MIDI Activity
indicator
Voyetra Technologies Inc.
Status
This indicator displays the current status of the transport. The possible
status options are: Stopped, Playing, Rec Ready or Recording.
Quick View Buttons
The fastest way to get around Digital Orchestrator Pro is with the Quick
View buttons. These buttons are located at the bottom of the main screen.
There is one Quick View button for each of Digital Orchestrator Pro’s
editing windows. A single click on any button quickly displays the corresponding window.
Piano
Roll
Track/
View
Notation
♫
Conductor
Editor
Notepad
Mixer
Event
Editor
Digital
Audio
System
Exclusive
Bank
Editor
QUICK VIEW BUTTONS
The Quick View buttons CANNOT be used to open
multiple instances of an editing window. Use the New
command in the Window menu to open additional
views of an editing window.
When more than one editing window is open, press
the Ctrl+Tab keys together to jump from window to
window.
Toolbar and Status Bar
67
Available Temp Space Indicator
While recording digital audio, Digital Orchestrator Pro
writes the data to a file in your Temp directory.
When you save the file — or exit Digital Orchestrator Pro without saving
— the temp file is deleted from your hard drive. The Available Temp Space
indicator tells you how many kilobytes are available to create this file. Only
space on the drive where the Temp directory is located is shown.
Changing the Temp Directory
By default, temp files are written to the Temp directory created by
Windows. However, you can change this to the drive or directory of your
choice from the Digital Audio Options dialog box. To open the Digital
Audio Options dialog box, click the Sample Rate box.
Whichever directory you use, make sure there is enough space for the
material you plan to record. See the “Hard Disk Recording” Appendix for
information on how to estimate the file size of a digital recording.
C A U T I O N!
DO NOT assign the Temporary directory to a network or
to any disk drive that has been compressed. Drive
Compression utilities like DriveSpace,™ Stacker™ or
DiskDoubler™ slow down data throughput and disrupt
digital playback and recording.
Sample Rate Box
The Sample Rate box displays the currently selected
sample rate in the Digital Audio Options box.
Since Digital Orchestrator Pro only records in 16-bit resolution, only the
sample rate and whether the file is stereo or mono is displayed in this box.
68
Voyetra Technologies Inc.
Click the Sample Rate box to open the Digital Audio Options dialog box.
Refer to the “Options Menu” chapter for more information about using
the Digital Audio Options dialog box.
Audio System Mixer Button
The Audio System Mixer button launches the PC Audio Mixer.
Use the PC Audio Mixer to control the volume levels of all the
multimedia components on your system.
MIDI Activity Indicator
This indicator contains two LEDs, the top one shows MIDI
input, the bottom one shows MIDI output, as indicated by the
in and out arrows.
When recording, the input indicator will flash green to show that valid
MIDI data is being received by Digital Orchestrator Pro.
The output indicator will flash green when MIDI data is being
transmitted by Digital Orchestrator Pro.
The LED will flash red if invalid MIDI data is received.
Toolbar and Status Bar
69
Chapter 6
Track/View Window
Here’s How to Get Here…
Click the Track/View Quick View button at the bottom of the screen.
Select Track/View from the Window menu. You can open only one
instance of the Track/View window.
The Track/View window is Digital Orchestrator Pro’s default window
and opens automatically when you first run the program.
70
Voyetra Technologies Inc.
Quick Tour
Track/View is the window you will use most often. This window provides
a “track sheet” that condenses a large amount of information into a small
area, showing you all of the MIDI and digital audio data in your song in a
single view.
The Track/View window is divided into two separate sections or panes: the
Track pane and the Bar pane.
The vertical border between the two panes can be dragged left or right with
the mouse to resize the panes.
Pane divider
Doublearrow
Track pane
Track/View Window
Bar pane
71
In the Track/View window, you can:
Move around within the Track pane using the mouse, the arrow keys,
the PgUp and PgDn keys or the scroll bars.
Use the Tab key to move between the Track and Bar panes.
Use the spin buttons in many of the columns to change values. Press
the + and – keys on the numerical keypad — or click the mouse — to
change these values. Up and Down spin arrows appear when you click
the column.
Click the column heading in the Name, Patch, Port and Volume
columns to toggle between expanded and reduced width views.
Click the double-headed arrow in the column above the track numbers
to open a menu from which you can resize the Track/View window.
Click-and-drag the name of a column to the left or right to rearrange
the order in which the columns appear in the Track pane.
Track Pane
♫
The controls in the Track pane are static. That is, once they
are set they do not change. If a controller setting is altered in
the song — such as Pan or Volume — you will hear the
change but it will not be reflected in the Track pane. If there
are no controller changes, the values set in the Track pane
remain in effect for the duration of the song.
Expand/Shrink All
Clicking the double-arrow button at the upper left of
the Track pane displays a menu from which you can
quickly re-size the Track/View window to one of three
configurations: Expand All, Shrink All or Bar View.
72
Voyetra Technologies Inc.
Expand All — maximizes the Track pane with all of the adjustable
columns set to expanded width.
Shrink All — minimizes each column in the Track pane with all of the
adjustable columns set to the reduced width.
Bar View — maximizes the Bar pane, leaving only the Track pane’s
track numbers and the first column in view.
Track/View window showing the Shrink (on the left) and Expand
Track Number
In the column beneath the double-headed arrow, a number is
displayed for each track. A total of 1,000 tracks are available. If
you need to change the number of available tracks, see the
VSEQINI.WRI file.
Use the track numbers to:
Move a track by clicking its track number box and dragging it up or
down to the desired location. Once the track is dropped in its new
location, the other tracks are shifted down and renumbered.
Copy an entire track by holding down the Ctrl key while dragging the
track.
Delete a track by clicking-and-holding its track number box and
pressing the Delete key.
If you move or delete a track accidentally, select Undo from the Edit menu.
Track/View Window
73
Record On/Off (R)
Click in the R column to enable a track for recording. The letter R
displays, signaling that any recorded material will be sent to that track.
Clicking a second time turns off recording for that track.
By Ctrl-clicking the Record On/Off column, more than one track can be
enabled for multitrack recording. Use multiple tracks to simultaneously
record on multiple MIDI channels or to record digital audio in stereo.
When a single digital audio track is recorded, it is in mono. To hear
playback in stereo, two digital audio tracks need to be recorded
simultaneously; one track panned hard-left and the other hard-right. To
record a stereo digital a track, Ctrl-click on two tracks.
You CANNOT record MIDI and digital audio simultaneously!
Type
Click the Type control to select the type of data — MIDI or
digital audio — to be sent to the track. With repeated clicks, the
icons cycle from MIDI to digital audio and blank (none).
Digital waveform symbol
MIDI plug symbol
♫
74
Clicking towards the top of the Type box selects MIDI
first.
Clicking towards the bottom of the Type box selects
digital audio first.
Voyetra Technologies Inc.
Name
This column displays a name for each track. You can
enter any text for a track’s name or edit an existing
name by clicking the Name box and entering the
desired text.
Click the heading (Name) to toggle between expanded
and reduced width.
Patch (Pch)
This column displays the patch — the sound that you want the track
to use — as either a patch number (reduced width) or a patch name
(expanded width). Click the heading of the Patch column to toggle
between expanded and reduced width display.
The Patch parameter setting causes the
specified patch to be called up for that track
every time playback is started.
When the Patch column is selected, rightclick or use the keyboard shortcut key F3 to
open the Patch Selection dialog box. This
box displays all of the available patch names.
Patches are numbered from 1 to 128, each
with the corresponding patch name. The
default Patch Map is General MIDI, but you
can change the selection in the Patch Map Setup dialog. A listing of the
General MIDI patch names is listed in the “General MIDI” appendix.
Also, see the “Options Menu” chapter for details on patch maps.
Track/View Window
75
Port
The Port column displays the MIDI or digital audio output port or
device the track is assigned to. This column displays either a port
number (reduced width) or name (expanded width). Click the
heading of the column to toggle between expanded and reduced
width display.
Right-clicking the Port column displays the Port Selection dialog box which
provides a complete listing of all port selections.
Multi-port MIDI Setup
If you have a multi-port MIDI setup, this
box can make it easier to switch between
ports and drivers. For example, if you have
a MIDI interface that has 2-In/2-Out
capabilities, you can set up different MIDI
devices for your MIDI Out. You might
have a General MIDI synth on one output
port (port 1) and an a dedicated piano
sound module on the other (port 2). You
can make sure that your piano tracks go to the piano
sound module by setting each of those tracks to output port 2.
Digital Audio Setup
When you right-click on the Port column for
a digital audio track, the Port Selection dialog
box displays the available digital audio ports
on your system.
If you have multiple digital audio ports, you
can select the port you want to send digital
audio out through.
For more information on setting up the digital audio port, refer to the
“Options Menu” chapter.
76
Voyetra Technologies Inc.
Channel (Chn)
The Chn (Channel) column shows which MIDI channel (1-16) the
MIDI events in a track will be routed to. Each different instrumental
patch (voice) used in your music needs to be set to a different
channel.
You can change the channel assignment for a track by clicking this column
and entering a new value or by using the spin buttons to cycle through the
channels available.
For each output port you have defined in your port setup, you have 16
channels to choose from. This makes it possible to have elaborate
arrangements with more than 16 channels.
♫
REMINDER!
Don’t forget that in General MIDI, Channel 10 is reserved
for percussion. For a complete listing of the “General
MIDI Patch Set,” refer to the Appendix at the back of this
book.
Volume (Vol.)
The Vol (Volume) column shows a track’s MIDI volume setting as
either a numerical value between 1 and 128 (reduced width) or a
horizontal slider (expanded width). Click the heading of this column
to toggle between the expanded and reduced width displays.
When the volume is to 0:
In the reduced width setting, two dashes are displayed.
In expanded width setting, the horizontal slider becomes grayed out.
The Volume parameter transmits a MIDI volume message on the specified
channel whenever playback is started or this setting is changed.
Track/View Window
77
The Velocity On value can also affect the volume of a note, so if the value
in the Velocity Offset column is increased, the volume on playback is also
increased.
The transmission of a MIDI Volume message can be disabled by
decreasing the track’s Volume parameter to its minimum setting.
These controls also scale the volume of digital audio. Note that changing
the volume as digital audio is playing requires a lot of processing power.
Transpose (Trans)
The Trans (Transpose) column contains the track’s transposition
setting in the format Octaves:Semitones. An arrow indicates
whether the track is being transposed up or down. A track can be
transposed up or down by as much as 10:7, ten octaves and a
fifth.
To Transpose down, use negative numbers
To Transpose up, use positive numbers.
For example:
-2
1:1
transposes down two octaves
transposes up one octave and one semitone
Pressing the + or – keys on the numeric keypad increases or decreases the
Transpose parameter by one semitone, respectively. For example, 1:0^ is
one octave up, 0:7^ is up a perfect fifth, etc. The spin buttons can also be
used to change these settings.
If the track that is transposed has recording enabled, the notes played on
your MIDI controller will also be transposed. To clarify this, if transposition is set to 0:7^ and you play a “C” on your controller, you will hear a
“G.” This is because the “C” has been transposed up seven semitones to a
“G.”
This feature can be useful when you have a score that contains transposing
instruments. You can play the transposed part as written in the score and
set the Transpose column so the part sounds correct.
78
Voyetra Technologies Inc.
For example, if you want to enter a clarinet part (which is a transposing
instrument in the key of B-flat) you would set the Transpose column to
0:2v (down two semitones) and play the part as written. You would hear the
note two semitones lower.
Solo (S)
The S column displays the track’s Solo status. When a track
is soloed, as indicated by the letter S in the Solo box, all
other tracks will be muted.
Click a track’s Solo box to toggle Solo on or off.
To Solo multiple tracks, hold down the Ctrl key and click.
Mute (M)
The M column displays the track’s Mute status. When a track is
muted, as indicated by the letter M in the Mute box, it will not trigger
any notes or transmit any other type of MIDI data.
Click a track’s Mute box to toggle Mute on or off.
To Mute multiple tracks, hold down the Ctrl key and click.
You can Mute as many tracks as you want.
Pan
Panning affects the relative left and right volume levels for stereo
playback.
The Pan column contains the track’s left/right pan positioning as a
numerical value, with an arrow indicating left or right panning.
Negative numbers are interpreted as pan left; positive numbers are
interpreted as pan right.
Track/View Window
79
Pan values are defined as:
<64 = full left
<0> = center
63> = full right
The Pan setting will transmit a MIDI Pan message on the specified channel
whenever you start playback or change its value.
When “Stereo Playback” is unavailable in the Digital Audio
Options dialog box, Pan settings will have no effect on
digital audio tracks.
Controller A/Controller B
These two controls let you set a value between 1 and 128
for any two different MIDI Controllers, such as Reverb or
Chorus.
The controls send a MIDI Controller message on the specified channel
whenever you start playback or change the controller value. If your sound
card or MIDI device does not support the selected MIDI Controller, the
parameter will have no effect.
The name or number of the assigned MIDI Controller appears in the title
box at the top of the column after it has been assigned in the Controllers
dialog box. (This dialog box is accessed from the Options menu.) Clicking
this control pops up spin buttons to facilitate cycling through the range of
controller numbers.
Like volume, changing the Controller setting does not affect the underlying
MIDI data but only sets up a MIDI Controller event that globally affects
the way the song sounds on playback.
For a list of “General MIDI Controller Types,” refer to the Appendix at
the back of this book.
80
Voyetra Technologies Inc.
Transpose Mode (D)
The D column is for Diatonic Transpose. When you transpose a
MIDI track, you can do so “diatonically” by clicking this column. The
letter D shows that you have chosen the diatonic feature.
With diatonic transposition, you transpose notes up or down according to
the transposition value you have selected in the Transpose column, but you
keep transposed notes within the key signature selected in the Conductor
Editor of the piece. This effectively removes any additional accidentals
from the transposed notes.
Track Looping (L)
The L column is where you designate any tracks that you wish to
loop. The letter L appears, indicating that the track is selected for
looping.
Tracks selected for looping will play repeatedly until you press the Stop
button. All other tracks will play in the normal fashion; that is, they will play
once and then stop.
Track looping repeats however many bars there are at the beginning of a
piece of music. For example, a drum part that begins with a two-bar rest,
then has a four-bar rhythm, will loop as a six-bar repeating phrase.
Real Time Velocity Offset (Vel)
The Vel column lets you increase or decrease the Note-On
Velocities of all MIDI notes in the track. The resulting velocity
cannot be more than 127 or less than 1. Very low velocities can
make a note inaudible.
Velocity Offset settings add or subtract from the velocity values of the
underlying MIDI data.
If a file is saved in .MID format, the original velocity plus the offset are
combined into a single value, and that new value is saved.
Track/View Window
81
If a file is saved in .ORC format, the original note velocity and the
offset value are saved independently.
Bank Select High & Low, (BkMsb - BkLsb)
The MIDI standard supports up to 16,384 banks of 128
different instrument sounds or patches. Some keyboards
and sound cards that respond to Bank Select messages
allow you to access sets of patches stored in their memory.
If your keyboard or sound card supports this feature, you can use the
BkMsb (Most Significant Byte) and BkLsb (Least Significant Byte) columns
to send such messages to your device. Refer to your MIDI device’s manual
for meaningful numbers.
Left-click to display spin buttons for changing the patch number.
Right-click to open the Patch Selection dialog box for selecting a patch
by name.
Bar Pane
Song Position
Click-and-drag
the Add Marker
Flag to insert a
new Marker
Marker
Ruler bar
Track Numbers
The Bar pane displays the measures (bars) that make up each track of
MIDI or digital audio.
At the top of the Bar pane is a scale — the Ruler Bar — that indicates the
bar numbers and contains the Markers. The Song Position Pointer, a red
triangle, shows the current location within the song.
82
Voyetra Technologies Inc.
Displaying MIDI Data
When displaying MIDI tracks, the Bar pane consists of rows of boxes.
Each row of boxes represents the bars in a particular track. The shading of
each box represents the relative density of notes and other MIDI events
within that bar. A white box contains no MIDI events, but may contain the
tail end of notes from the previous measure.
Displaying Digital Audio Data
Tracks that contain digital audio data display a waveform in the Bar pane.
Portions of the digital audio file can be selected for editing or transforming
in this view.
Navigating the Bar Pane
To move around within the Bar pane, you can use the mouse, the arrow
keys, the PgUp and PgDn keys or the scroll bars.
In the Bar pane, if you:
Double-click a waveform, the Digital Audio window opens and
displays the waveform in magnified detail, at the bar clicked on.
Double-click a MIDI track, the Piano Roll window opens with the
track displayed, at the bar clicked on.
Ctrl-double-click a MIDI track, the Event List window appears with
the track displayed, at the bar clicked on.
Click a Track number, the entire track will be selected.
Open the Edit menu and click Select All (or use the key combination
Ctrl+A), all of the tracks will be selected.
Click-and-drag across the Ruler Bar, all of the tracks in the measures
you have moved the mouse across will be selected.
♫
To move the Song Position pointer, position the mouse
arrow at the desired location in the Ruler Bar and click
the right mouse button.
Track/View Window
83
Cutting, Copying, and Pasting
The techniques for cutting, copying and pasting data in Digital Orchestrator Pro are similar to the techniques for cutting, copying and pasting text in
a Windows®-based word processor.
Cutting Data
You can select areas and events, highlight them by dragging the mouse over
them and then cut them using the Cut command in the Edit menu.
When you Cut data, the selected region is removed from the location of the
cut and stored in Digital Orchestrator Pro’s Clipboard. An interval of
silence equal to the data that has been cut replaces it.
Cut data can be pasted at another location in the window, into another
instance of the window, into a different Digital Orchestrator Pro window
or even into a different .ORC or .MID file.
Keyboard Shortcut Key: Ctrl+X
Copying MIDI Tracks, Digital Audio Data or Both
The Copy command works similarly to the Cut command. However, in
Copy, no interval of silence replaces the selected data. Here, a copy of the
selected data is placed in Digital Orchestrator Pro’s Clipboard, while the
original data remains behind.
Keyboard Shortcut Key: Ctrl+C
To copy data using the Copy command:
1. Load the SAMPLE.ORC file and switch to the Track/View window.
2. Highlight a range of MIDI data, a digital audio waveform or both.
3. From the Edit menu select Copy. This copies the data into Digital
Orchestrator Pro’s Clipboard.
84
Voyetra Technologies Inc.
Pasting Data from the Clipboard
Once you have either Cut or Copied data to Digital Orchestrator Pro’s
internal Clipboard, you can paste it to a new location with the Paste
command in the Edit menu.
If you put the data into the Clipboard by dragging it, then you Paste it
simply by dropping it at the new location. Refer to “Using Drag-and-Drop”
later in this chapter.
Keyboard Shortcut Key: Ctrl+V
To paste data in the Track/View window:
1. Use the Cut or Copy techniques, previously described in the chapter,
to place the selected data in the Clipboard.
2. Select a range beginning at the point where you wish to place the
contents of the Clipboard.
When you issue the Paste command, Digital Orchestrator Pro
replaces the data you selected at the site of the paste with the data
in the Clipboard.
If you want the data to merge with the existing material, do not
select any data at the area of the paste. Instead, click the mouse at
the point where you want the data to be pasted in.
3. Choose Paste from the Edit menu or use the shortcut key Ctrl+V to
paste in the data.
Merge or Replace
Here is how to determine if the MIDI or digital audio data being pasted will
merge with or replace the existing data in the selection:
If you want the data being pasted to replace the data at the site of the
paste, select the data at the site before pasting.
If you want the data being pasted to merge with data at the site of the
paste, place the cursor at the beginning of the range you wish to merge
into, then paste.
Track/View Window
85
Merging Digital Audio Data
The results of merging data are different for digital audio than for MIDI.
When you paste and merge two digital audio data samples, the volumes are
added together, or summed. If the summed volume is too high to be played,
the peaks of the signal are chopped off or clipped. Along with signal loss,
clipping produces a distortion of the sound at the highest volumes that can
actually be heard.
Before merging two digital audio tracks, use the Scale Digital Audio
Transform to halve their volume.
♫
CLEAR CLIPBOARD COMMAND
To delete the contents of the Clipboard and any Undo
information, use the Clear Clipboard command on the
Edit menu. But be careful — this action CANNOT be
undone! Once the contents of the Clipboard have been
cleared, this information is gone forever!
Using Drag-and-Drop
If you want the data on the Clipboard to merge with the data at the site of
the paste — or if you are pasting data to the end of a track — you can use
drag-and-drop:
1. Select a range with the mouse.
2. Place the cursor anywhere in the range. The cursor becomes the
Move cursor.
3. Drag the data to the new location.
An interval of silence replaces the data you dragged to the new
location.
Hold the down the Ctrl key as you drag if you prefer to leave a
copy of the data behind,.
4. Release the mouse button. The data is pasted into the new location,
beginning at the cursor position. Unless you are pasting data at the
end of a track, the data you drop merges with the existing data.
86
Voyetra Technologies Inc.
Cutting Bars vs. Deleting Bars
The two similar commands in the Edit menu, Cut Bars and Delete Bars,
both remove data from a file, but there are important differences in the way
each works.
Cut Bars
Cut Bars removes the data from the selected area and leaves empty
measures behind.
Cut data is placed in the Clipboard and can be pasted to another
location if desired.
Delete Bars
Delete Bars removes both the data and the measures.
Delete Bars does not place the deleted material in the Clipboard nor
does it leave empty measures behind. Instead it shifts subsequent
measures to the left to fill in the gap left by the deleted material.
You can also delete bars by placing the
cursor at the desired start location and
choosing the Delete Bars command from
the Edit menu. From the Delete Bars
dialog box, you can select the range of
bars to be deleted. If you choose a single
track in the Delete Bars dialog box, data is
removed only from that track.
Track/View Window
87
Insert Bars
You can insert any number of blank bars in
the middle of a song by selecting the Insert
Bars dialog box from the Edit menu.
If you want data to move ahead in time
when you are pasting material, use Insert
Bars to create empty measures and then
merge the data into those measures. In this
way, you can add data to the middle of a
song without merging it with the existing
data or replacing the existing data. This is
something you cannot do using traditional
Cut, Copy and Paste methods.
Markers
Marker
Click-anddrag the
Add
Marker
Flag to the
location you
want to add
a Marker
Markers are a convenient way of identifying and navigating to the different
sections in a composition. Markers are placed in the Ruler Bar of the
Track/View window and they draw a vertical blue line to indicate a section.
(Markers are also available in the Piano Roll and Digital Audio widows.)
There are three marker location controls on the Toolbar: the Goto Marker,
the Jump to Previous and the Next Marker buttons.
88
Voyetra Technologies Inc.
Markers Dialog Box
Use the Markers Dialog box to
insert markers at a specific
locations in a song.
To Insert a Marker:
1. Click-and-drag the Add Marker Flag to the location where you want
to add a new marker. The Markers dialog box opens.
2. Enter the name of the marker or click the Marker text drop-down list
box to select a preset name. Then, click OK.
~or~
1. Click the Goto Marker button. A drop-down list box opens.
2. Click the Add marker command. The Markers dialog box opens.
3. In the Marker Time dialog box enter the time where you want the
marker in Bar:Beat:Click format.
4. In the Marker Text dialog box, enter the name of the Marker or click
the Marker text drop-down list box to select a preset name. Click
OK.
Goto Marker Button
Click the Goto Marker button on the Toolbar to
open a drop-down list box showing all of the markers
that have been inserted. Click the name of a marker to
be brought directly to that section.
Markers can also be added from this drop-down list
box.
Click the Add Marker command to display the
Markers dialog box from which a new marker can
be inserted at the current cursor location.
Track/View Window
89
Chapter 7
Piano Roll Window
Here’s How to Get Here…
Double-click any MIDI bar in the Bar Pane of the Track/View
window; this opens the Piano Roll window at the bar position you
clicked.
Click the Piano Roll Quick View button at the bottom of the screen.
To open multiple instances of the Piano Roll window, select New and
then Piano Roll from the Window menu.
90
Voyetra Technologies Inc.
Overview
In the Piano Roll window, MIDI and controller data can be edited. Using
the mouse to move and resize the notes that appear in the Piano Roll
pane, you can add or delete notes and change their duration or pitch.
The Piano Roll window can be split horizontally into the Piano Roll pane
(top) and Notation pane or Graphic Controller Editor pane (bottom).
The Notation Pane displays the tracks of a song in standard musical
notation.
The Graphic Controller Editor pane graphically displays the MIDI
data.
Each time a change is made in the Piano Roll pane, the musical score is
updated in the Notation or Graphic Controller Editor pane.
The Piano Roll window has its own Toolbar where the editing tools and
most of the indicators and controls are located.
Piano Roll
Toolbar
Keyboard
Notes
Piano
Roll
Editor
pane
Notation
pane
Piano Roll Window
91
Notes in the Piano Roll editing window are represented as thin rectangles.
A note’s length corresponds to its duration.
The vertical axis represents pitch.
The horizontal axis represents time.
The Ruler bar at the top of the editing area indicates the bar numbers
and the beat divisions within each bar.
A vertical line separates bars.
To highlight a series of measures, click-and-drag the mouse horizontally
across the Ruler Bar.
To highlight a series of notes, click-and-drag the mouse vertically across
the piano keys on the left side of the window.
The graphical piano keyboard
at the left edge of the window
shows the pitch and octave
number for the note to its
right.
C5 = Middle C
This keyboard works just like a
miniature piano keyboard; you
can play notes by clicking on
them.
To select all of the data in the current track, use the Select All command
from the Edit menu or press Ctrl+A.
By clicking and holding the right mouse button in the Ruler bar at the top
of the window and dragging the cursor line over the notes, you can play
— or scrub — any of the notes recorded on the Piano Roll.
The Piano Roll allows you to quickly edit the pitch, start time or duration
of existing notes as well as move or copy notes. When editing notes, there
are several ways to audition them. These are explained later in this chapter.
92
Voyetra Technologies Inc.
Piano Roll Toolbar
Pencil Tool
Click the Pencil button and the cursor changes to a pencil. Use
the Pencil tool to insert new notes by clicking at the desired
location in the editing area.
Clicking inserts and plays a note with the current Note Duration
parameters.
Double-clicking displays the Event Edit dialog box from which you
can select the parameters for the note you are inserting.
Click-and-drag to draw any length note with the Pencil.
Eraser Tool
Click the Eraser button and the cursor changes to an eraser. Use
the Eraser tool to delete notes. Any note you click on with the
eraser tool is deleted.
Click individual notes to delete them.
Click-and-drag the Eraser tool over an area to delete a series of notes.
Piano Roll Window
93
Arrow
Click the Arrow button and the cursor is set to the normal arrow
shape. The Arrow is the default editing tool.
Use the arrow tool to:
Graphically edit the Start Time, Pitch or Duration of existing notes by
clicking-and-dragging.
Edit an existing note by double-clicking on it and adjusting its parameters in the Event Edit dialog box.
Insert new notes by double-clicking at the desired location in the editing area. The note will play when inserted.
Highlight an area to be edited by Cut, Copy or any of the Transforms
commands.
Click the right-mouse button on the piano keys to play them without
highlighting.
Select the location at which notes will be pasted with the Paste
command.
Click any existing note causing the note to sound and verify its pitch.
Scrub notes, making them sound, by clicking-and-holding the right
mouse button in the Ruler Bar and dragging the cursor line over the
notes.
Audition notes with the arrow by clicking the left mouse button in the
piano keyboard area and dragging to highlight. This causes each
musical half-step to sound the arrow is moved.
Step Record
Clicking the Step Record button places Digital Orchestrator Pro
into Step Record mode.
From this mode each note’s pitch and duration can be accurately inserted.
94
Voyetra Technologies Inc.
♫
These cursor modes also can be selected from the Piano
Roll Quick menu. To access this menu, click the right
mouse button anywhere in the Piano Roll window.
Note Duration Controls
When inserting a note in a track, you need to determine the
note’s duration (how long the note will last). The Note duration
controls display notes from a whole note to a sixty-fourth note.
Click the Arrow to open the drop-down list box. From the list, select the
duration for the note you are inserting.
Articulation
Articulation lets you vary the duration of the inserted note
between 10% and 110%.
An articulation value greater than 100% causes adjacent notes to overlap.
Although most MIDI devices respond correctly to overlapping notes,
some do not. Check the documentation for your MIDI device if you
encounter problems at high Articulation settings.
Use a lower articulation setting for a shorter (staccato) playing style.
Use a higher articulation setting for a smooth, connected (legato) style.
Tuplet Numerator and Denominator
This control lets you specify a non-standard duration —
such as a tuplet, triplet or quintuplet — for the note being
inserted.. This control is used when a tuplet note value is
selected in the Note Duration or the Snap Value controls.
Piano Roll Window
95
The Tuplets ratio is defined as x notes in the space of y durations. For
example, to insert a quarter note triplet, select a quarter note triplet duration and set the Tuplets ratio to 3:2. This allows you to insert three quarter
notes (a triplet) in the space normally taken by two quarter notes.
These controls also set the Quantize Grid space to a tuplet when a tuplet
duration is selected in the controls.
Snap-to-Grid
The Piano Roll window includes a Snap-to-Grid feature that allows for
easier, more precise placement of inserted or edited notes. The Snap-toGrid feature automatically quantizes (rounds off) the Start Times of inserted notes and Start Time and Durations of edited notes, to the nearest
interval on an imaginary grid.
The grid treats inserted notes differently from notes that already exist.
When a new note is inserted, any grid setup will only affect the
starting position of the note. The duration of the note is determined
by the note type and the value entered for its Articulation.
When editing this same note, however, different rules apply.
Dragging the entire note keeps its duration, but snaps its new starting
position to a grid interval.
Adjusting its duration will snap the duration to a grid interval.
Snap On/Off
This button toggles the Snap-to-Grid feature on and off. When
the grid is on, the selected notes are snapped (pulled) to the grid
lines.
96
Voyetra Technologies Inc.
Snap Value
Snap Value displays the selected value for the snap feature and,
therefore, the interval of the grid. The Snap Value can be set
from a quarter note through a sixty-fourth note triplet by
clicking the arrow to open the drop-down list box.
A Snap Value of an eighth note causes the Start Time and Duration of
any edited notes to snap to one of eight grid points in a 4/4 bar.
A Grid interval of an eighth note triplet causes the Start Time and
Duration of any edited note to snap to one of 12 grid points in a 4/4
bar (three triplets per beat, multiplied by four beats in a measure).
Quantize Grid
Quantize Grid inserts a vertical grid using the note value specified
in the Snap Value box. Use Quantize Grid as a reference point
when inserting data.
Quantize Grid
button.
Vertical lines are
inserted when the
Quantize Grid
button is
selected.
To display vertical grid lines:
1. Select the desired note value by clicking the arrow next to the Snap
Value box. You can change the value of the grid lines at any time.
2. Click the Quantize Grid button to display the grid lines.
Piano Roll Window
97
♫
If a triplet value is selected in the Snap Value box, you can
change the Tuplets ratio to see a tuplets grid.
Solo Button
Sometimes, when editing a track, you want to hear only that track
to make sure the edits were done properly. Clicking the Solo
button plays only the track being edited. When Solo is enabled and
you change tracks, the next track continues to be soloed.
Track
Displays the track name and number.
Click this control to jump to any other
track.
Insert Pitch
number.
Displays the current position of the cursor in
the editing area, or the pitch of the note
being edited, as a note name and octave
Insert Point
Displays the current position
of the cursor in the editing area
or the note being edited in the
format Bars:Beats:Clicks and
Current Time.
98
Voyetra Technologies Inc.
Insert Length
Displays the Duration of the Note Duration or the
note being edited in the format Bars:Beats:Clicks.
On Vel
Displays the MIDI On Velocity of the note being
inserted .
Off Vel
Displays the MIDI Off Velocity of the note being
inserted.
Zoom Buttons
Use the Zoom buttons to Zoom In on a selected area to make precise
edits or Zoom Out to get a global view of a song. Each time a Zoom
button is clicked, the zoom increases or decreases by a measure.
Click to Zoom
In
Click to Zoom Out
To Zoom In:
Click the Zoom button with the + (plus sign).
Piano Roll Window
99
To Zoom Out:
Click the Zoom button with the – (minus sign).
To Zoom In on a selected range:
1. Use the Arrow tool to select the area to be Zoomed In on.
2. Click the Zoom In button.
♫
The Zoom buttons are unavailable when you are at the
maximum viewing range.
The F12 Function key serves as a keyboard shortcut
for Zooming Out.
The F11 Function key serves as a keyboard shortcut
for Zooming In.
Markers
Markers
Markers can be inserted in the Piano Roll windows in the same way they
are inserted in the Track/View and Digital Audio windows. Use Markers
as a convenient way of locating and describing sections of a song.
Markers that have been set in either the Track/View or Digital Audio
window also appears in the Piano Roll window.
For more information on using Markers, refer to the “Track/View
Window” chapter.
100
Voyetra Technologies Inc.
Piano Roll Quick Menu
Clicking the right mouse button anywhere in the
Piano Roll window pops up a Quick Menu with
several of the same items which appear on the
Piano Roll Toolbar.
For more detailed explanations of the Arrow,
Pencil and Eraser Tools and Step Recording
mode, refer to the sections on these icons earlier
in this chapter.
Chase Notes
This option lets you configure the editing area so that notes which start to
the left of the display extend into the editing area.
When scrolling backwards and forwards in the Piano Roll window, you
will find that some notes that cross bar lines do not appear until you look
at the measure where the note begins. If this is a problem, turn on Chase
Notes. This tells Digital Orchestrator Pro to display any notes that are
being held across from a previous measure into the measure that is being
viewed.
Because of the convenience of this feature, chances are you will want
Chase Notes set to On all the time.
Once selected, Chase Notes will stay on if you have checked “Save
Settings on Exit” in the Options menu.
♫
When Save Settings on Exit in the Options menu is
checked, Digital Orchestrator Pro saves the current screen
and configuration settings when the program is closed.
These are then restored the next time the program is
opened. If you have many windows open, to save on
resources, you may want to close some before exiting.
Piano Roll Window
101
Draw Rounded Notes
When Draw Rounded Notes is enabled, notes will be displayed with
rounded corners.
Rounded corners make it easier to see the meeting point between two
adjacent notes.
Square corners make it easier to see precisely where a note begins and
ends.
Clip All
Clip All allows you to cut, copy and paste both notes and MIDI controller
data. When Clip All is inactive, a check does NOT appear next to it and
only notes will be affected when editing.
If you wish to cut a note at the same point where a MIDI controller
event is embedded, but you want to keep the MIDI controller event,
Clip All mode should be inactive.
If you want to cut or copy a MIDI controller event and any other
MIDI data, Clip All should be enabled.
Next Track/Prev Track
These commands allow you to easily switch to the next or previous track.
♫
102
SUGGESTION!
Use the following Keyboard Shortcut Keys to jump to the
Next and Previous tracks in the Piano Roll window:
Ctrl+N
jumps to the Next track
Ctrl+P
jumps to the Previous track
Voyetra Technologies Inc.
Quantize Last Clicked
The Quantize Last Clicked option sets the Note Duration to the value of
the last note clicked. This is useful when you want to insert a group of
notes all with the same length. This option is turned On when a check
mark appears to the right of it.
To turn the Quantize Last Clicked option On/Off:
1. In the Piano Roll window, click the right mouse button. The Quick
Menu appears.
2. Click Quantize Last Clicked to add (turn on) or remove (turn off)
the check mark.
To use the Quantize Last Clicked option:
1. Make sure the Quantize Last Clicked option is On.
2. On the Piano Roll, click the Pencil Tool to select it.
3. Move the cursor over the note you want to get the value from.
4. When the cursor changes to either of the double arrows or a single
arrow pointing to the right, click the note. Notice that the value is
entered into the Insert Length dialog box and the previously selected
Note Duration button is de-selected.
5. With the Pencil Tool, click the location — Time and Pitch — where
the note should be inserted. A note of the new length is inserted.
♫
If you change the length of a note and the Quantize Last
Click option is selected, all of the following notes will be
the same length as the altered note.
Piano Roll Window
103
Step Recording
Step Recording is the process of entering notes one step at a time (in nonreal time). This technique allows for precise timing and rhythm on
playback. If a complex part needs to be played, Step Recording is a big
advantage. There is no worrying about a player’s skills — parts can be
played-in slowly and accurately. Many musicians use Step Recording to
achieve clean and precise rhythm patterns in their drum parts.
Since Step Recording is not dependent on the sequencer’s clock, it is
sometimes called non real-time recording. This is different from real-time
recording, where notes are entered as the sequencer’s clock is running.
Entering Notes in Step Record
A MIDI controller — such as a MIDI keyboard or drum machine — is
required for Step Recording. The MIDI controller is used for entering the
note pitches; the note values are selected from the Note Duration
controls.
When entering notes by Step Recording, the insert point and duration are
already determined, but the pitch and velocity are not. As notes are
entered — if your MIDI controller supports On Velocity — the velocity
or speed at which notes are played is recorded along with the note.
Therefore, all of the notes may be in the correct time with the correct
pitch, but the velocities may change drastically from note to note. This can
produce a strange sounding playback, with largely varying dynamics.
Although, if done carefully, the precisely entered velocity values may give a
more human feel to the music.
As notes are entered, the Input Cursor advances according to the value set
in the Note Duration box.
To see what the velocities are as they are being entered, keep the Graphic
Controller Editor pane open, with Velocity selected. As each note is
entered, the velocity is displayed graphically in this pane.
If undesirable results occur, use the Graphic Controller Editor to change
the velocities after the music has been entered. For more information on
104
Voyetra Technologies Inc.
using the Graphic Controller Editor, refer to the “Graphic Controller
Editor” section later in this chapter.
To enter notes by Step Recording:
1. Open the Track/View window. Select MIDI as the Track Type.
Select the Channel, Port and Patch that you will use for Step
Recording.
2. Open the Piano Roll window.
3. Click the Step Record button to enable Step Record mode — or
click Step Record from the Quick Menu. The Input Cursor, a
flashing vertical black line that indicates where the next note will be
placed, displays.
4. Click the location where the first note should be input. The Input
Cursor moves to that location.
5. From the Note Duration controls — or using the Keyboard
Shortcut Keys — select the note value.
6. Play the note on a MIDI controller. The note is inserted and the
Input Cursor advances to the next position.
7. Continue inserting notes by changing the durations and pitches as
desired.
♫
The Input Cursor does not move to the next note until
the key currently being pressed is released. Holding
down one key while pressing others is useful for entering
chords. Until the first key is released, all of other notes
are entered as a chord.
Press the Right-Arrow key to advance the Input Cursor
without entering a note. The Input Cursor advances
according to the value set in the Note Duration box,
which enters a rest for that value.
Step Record only overdubs previously recorded material,
it does not replace it.
Piano Roll Window
105
Piano Roll Panes
There are two panes in the lower portion of the Piano Roll window: the
Notation pane and the Graphic Controller Editor pane.
Click to open the
Graphic
Controller
Editor pane.
Click to open the
Notation pane.
To open the Notation pane:
Click the Notation button at the bottom left of the Piano Roll
window. The Notation pane opens at the bottom of the Piano Roll
window.
To open the Graphic Controller Editor pane:
Click the Graphic Controller Editor button at the bottom left of the
Piano Roll window. The Graphic Controller Editor pane opens below
the Piano Roll window.
Notation Pane
Right-clicking anywhere in the Notation pane displays the Piano Roll’s
Transcription Settings dialog box.
This dialog lets you control the way
notation displays.
Although you can see your song in
standard musical notation in the Notation pane, you cannot edit the notes
here. All note editing is done in the Piano Roll pane. However, any
changes you make to the notes are instantly reflected in the Notation pane.
106
Voyetra Technologies Inc.
Bar Toggles bar numbering On or Off. When On, the
Numbering number of each bar is printed along the topmost staff.
Split Point Displays the split point for the bass and treble clefs in a
Grand Staff. The split point is shown as a note name and
octave number. Notes at or above this pitch are placed in
the treble clef; notes below this pitch are placed in the
bass clef.
Zoom Sets the size at which notation appears on the screen.
Percent
Clef Lets you choose the clef in which the notation appears.
Selecting Auto tells Digital Orchestrator Pro to
determine the best clef for notating the MIDI data.
Suppress Choose one of three values telling Digital Orchestrator
Rests Pro how to display rests: Off, Normal or Fill.
Quantize Choose the level of quantization for the displayed score.
This will not affect the MIDI data, only the displayed
notation.
Enable
Triplets
Toggles triplets On or Off. When On, the number “3”
appears in the notation over the appropriate notes.
For additional information on these features, refer to the “Notation”
chapter.
Piano Roll Window
107
Graphic Controller Editor Pane
The Graphic Controller Editor pane is used for inserting and modifying
non-note events such as Pitch Bend, Tempo, Volume, Panning or any of
the 128 MIDI controller events.
Click-anddrag the
Split bar to
resize the
panes.
Piano Roll
pane
Controller
Value
Scale
Graphic
Controller
Editor
pane
Once the Graphic Controller Editor pane is opened, it can be resized.
To resize the Graphic Controller Editor pane:
1. Move the mouse over the split between the Piano Roll window and
the Graphic Controller Editor pane. The mouse pointer changes to
an Up/Down arrow.
2. Click-and-hold on the Split Bar and move it up or down to the desired location. Depending on the MIDI controller selected, the
numbers on the left-hand scale may change. This provides a
reference point for entering or changing MIDI data.
108
Voyetra Technologies Inc.
Graphic Controller Editor Pane Display
Modes
There are two display modes for viewing MIDI controller data.
Click to display
Block mode.
Click to display
the Line mode.
Line Mode displays each event as a single pixel strip.
Block Mode displays a solid block for each event that extends
until the next event or until the end of the song.
This lets you view events that may not be in the
current viewing area but are still affecting the
music. Some examples are Volume, Tempo,
Pitch Bend and Modulation.
When viewing On Velocity MIDI data, the Block mode is unavailable.
This is because the event only affects a single note.
To change the display mode:
Click the button for the display mode you wish to see. If you have
MIDI events in the pane, you should notice the difference between
the two modes.
Piano Roll Window
109
Selecting a MIDI Controller Type
You can choose any of the 128 MIDI Controller types. The most
common ones — Tempo, Velocity, Pitch Bend, Main Volume, Pan and
Modulation — are listed in the drop-down menu.
Controller
Type button.
Displays current
Value of the
Fill Rate
Displays the current
Cursor position.
To select a MIDI controller type:
1. Click the Controller Type button. A drop-down menu opens.
2. Click the desired Controller type.
3. If you do not see the Event type you want, move the mouse pointer
over More>. A submenu opens containing all the MIDI controllers.
4. Click the desired Controller.
5. Use the Pencil, Line or Curve Tools to draw in or replace the data.
110
Voyetra Technologies Inc.
Graphic Controller Editor Quick Menu
Use the Graphic Controller Editor quick menu to select any
of the five drawing tools.
To select a tool from the Quick menu:
1. Right-click in the Graphic Controller Editor pane.
2. Select the tool you want by clicking on it.
Cursor Tools
There are five cursor tools in the Graphic Controller Editor pane. These
cursor tools only affect events in the Graphic Controller Editor pane; they
do not change events in the Piano Roll window.
The cursor tools are: the Arrow Tool, Pencil Tool, Line Tool, Curve Tool,
and the Eraser Tool.
Arrow Tool
The Arrow Tool selects the current event for modification. Use
this tool to select events to change or make very precise adjustments to data.
To cut or copy an area:
1. Click the Arrow tool.
2. Click the Controller Type button to choose the MIDI controller you
want to cut or copy.
3. Click-and-drag over the area you want to cut or copy.
4. Select the Cut or Copy command from the Edit menu. The selected
data is placed in the Clipboard.
Piano Roll Window
111
To paste a selection:
1. The data you want to paste must first be cut or copied to the Clipboard. (See the previous instructions.)
2. Use the Arrow tool to click the area where you want to paste the
data.
3. Select Paste from the Edit menu to paste the selection.
To use the Arrow tool to change the value of an event:
1. Click the Arrow tool.
2. Click the Controller Type button to choose the MIDI controller you
want to change.
3. Move the Arrow over the event until it changes to an Up/Down
arrow.
4. Click-and-drag the event to the desired value. Notice that the
numbers in the Value Box change to show the current position.
5. Release the mouse button to set the value.
♫
112
SUGGESTION!
Use the Zoom buttons to get a closer view when editing
data.
Voyetra Technologies Inc.
Pencil Tool
The Pencil tool lets you draw in MIDI controller data freehand.
The Pencil tool can also be useful for adjusting existing data.
To use the Pencil tool:
1. Click the Pencil tool.
2. Click the Controller Type button to select the MIDI controller you
want to draw.
3. While clicking-and-holding the Pencil tool, move the mouse to draw
the controller. As the mouse moves, the numbers in the Value Box
change according to the location in the Graphic Controller Editor
pane.
4. If you want to change some of the data you have already drawn,
move backwards before releasing the mouse button. The line you
have drawn will lift up, allowing you to re-draw the data.
♫
You cannot insert events that rely on previouslyentered data. For example, if there are no notes in the
Piano Roll, you cannot insert controller data such as
On Velocity.
The Pencil Tool allows editing of previously entered
events. Just draw over the events to replace them with
new data.
If you change the Fill Rate and draw over existing data,
the data will be replaced with the new Fill Rate.
If you do not want to input the drawing you just made,
press the ESC key before releasing the mouse button.
Piano Roll Window
113
Line Tool
The Line Tool draws in events of the currently-selected type as a
straight line. Use this tool when you want to produce even crescendos and decrescendos with the Main Volume controller or get
a smooth panning effect with the Pan controller.
To use the Line tool:
1. Click the Line tool.
2. Click the Controller Type button to choose the MIDI controller you
want to draw.
3. Click-and-hold the mouse button at the location where you want to
start the line. Use the Value Box as a reference for the starting point.
4. As you drag the mouse, a line is drawn attaching the starting point to
the current mouse position.
5. Release the mouse button at the desired end location.
♫
• To replace exiting data, draw a line over or under it. If
you change the Fill Rate and draw over existing data,
the data will be replaced with the new Fill Rate.
• If you do not want input the line you just created, press
the ESC key before releasing the mouse button.
Curve Tool
The Curve Tool lets you draw a Bezier curve, so that emphasis
can be placed anywhere in the curved line. For example, use this
tool to add a contour to the Volume controller and create a
smooth crescendo.
114
Voyetra Technologies Inc.
To use the Curve tool:
1. Click the Curve tool.
2. Click the Controller Type button to choose the MIDI controller you
want to draw.
3. Click-and-hold the mouse button at the location where you want to
start the curve. Use the Value Box as a reference for the starting
point.
4. Drag the mouse to the point where you want to end inputting or
changing the data.
5. Release the mouse button. The line remains so you can draw the
curve.
6. Move the pencil to the point where you want the emphasis of the
curve. The line curves to match the point you are at with the pencil.
7. When you are satisfied with the curve, click the mouse button. The
curve is drawn.
Eraser Tool
The Eraser Tool erases any events, except On Velocity, in the
Graphic Controller Editor pane.
To use the Eraser tool:
1. Click the Eraser tool.
2. Click the Controller Type button to select the MIDI controller you
want to erase. It is not necessary to be at the numerical value of the
event to erase it.
3. Click on a single event or drag across several events to erase them.
Piano Roll Window
115
Fill Rate
Fill Rate determines the number of events per beat that
are inserted by the Pencil, Line and Curve tools. The
lower the number, the greater the amount of events that
are inserted.
The default Fill Rate is 120. If this rate is changed, the new rate is saved so
that the next time the software is opened, the new Fill Rate will be used.
To change the Fill Rate:
Click the scroll arrows to raise or lower the Fill Rate
~or~
Click in the Fill Rate box and enter a new Fill Rate.
The Fill Rate uses Digital Orchestrator Pro’s click rate. So, for example:
If the Fill Rate is set to 480, the events will be inserted with a spacing
of a quarter note.
If the Fill Rate is set to 240, the events will be inserted with a spacing
of an eighth note.
♫
116
• If you change the Fill Rate and draw in new MIDI
controllers, the data will be replaced with the new Fill
Rate.
• The lines between each event represent the number of
clicks selected in the Fill Rate box. When a larger Fill
Rate is selected, it may appear as many vertical
boxes.
Voyetra Technologies Inc.
Piano Roll Window Keyboard Shortcuts
Keys
Ctrl+1
Selects a whole note
Ctrl+2
Selects a half note
Ctrl+3
Selects a quarter note
Ctrl+4
Selects an eighth note
Ctrl+5
Selects a sixteenth note
Ctrl+6
Selects a thirty-second note
Ctrl+7
Selects a sixty-fourth note
.
Adds a dot to the current note value
]
Toggles tuplets on and off for the current note
→
Moves to the right by the current note duration
←
Moves to the left by the current note duration
Ctrl+→
Moves to the beginning of the next measure
Ctrl+←
Moves to the beginning of the current measure or
to the previous measure if it is already at the
beginning
Piano Roll Window
117
Chapter 8
Event Editor
Here’s How to Get Here…
Click the Event Editor Quick View button at the bottom of the screen.
To open multiple instances of the Event Editor, select New and then
Event Editor from the Window menu.
118
Voyetra Technologies Inc.
Overview
The Event Editor displays MIDI data in a single track in the form a sequential list of individual MIDI events. These can be note events, with
information about start, velocity, pitch and duration, or non-note events,
containing data such as MIDI Controller, Pitch Bend or Patch Change
messages.
Event Editor
Toolbar
The Event Editor window shows MIDI data as a series of note and nonnote events. Each event can be edited individually.
Unlike most displays in Digital Orchestrator Pro, which use a left-to-right
orientation to indicate time, the Event Editor window’s Event List is arranged vertically and sequentially, with earlier events at the top of the list.
Using the Event List, you can edit any kind of event including notes,
patches, pitch wheel, aftertouch, velocities and controllers on a micro-level.
Each row in the Event Editor represents a specific MIDI event. The first
column tells you the Type of event, the next two columns give you the
Position of that event in the song, the fourth column gives the Channel
assignment and the last column lists the Parameters that control the event.
As you play through a song, the list scrolls from top to bottom, the highlight moving to show the event currently being played.
Event Editor
119
Getting Familiar with the Event Editor
1. Select Open from the File menu to load a MIDI file.
2. Open the Event Editor by clicking its Quick View button in the
Status Bar. Make sure the track you are viewing has MIDI data in it.
3. Click Play on the Transport Controls to begin playing the file. As the
file plays, you will see a highlight bar sliding down the page very
quickly. This highlight shows every event as it occurs.
4. You can stop the highlight at a particular event and select it by
clicking the Stop button as that event occurs.
In addition to using the mouse, there are several ways to move around the
Event List:
Move forward or backward using the vertical scroll bar’s up or down
arrows
Press the PgUp or PgDn keys.
Jump to a different track — including the Conductor track — at any
time by clicking on the Track select box in Event Editor’s toolbar.
♫
120
SUGGESTION!
Use the following Keyboard Shortcut Keys to jump to the
Next and Previous tracks in the Event Editor window:
Ctrl+N
jumps to the Next track
Ctrl+P
jumps to the Previous track
Voyetra Technologies Inc.
Event Editor Toolbar
Selecting a Track
The Track Select list box on the Event Editor toolbar lets you select any of
the tracks in your song. Once you select a track, the Event Editor fills with
the list of the events in that track.
When you first
open the Event
Editor window,
you see the events
for the currentlyselected track, that
is, the track you
were last working
with.
If the Event Editor opens with a blank list, it usually means that a track that
contains no MIDI data, for example a digital audio track, has been
activated. Use the Track Select list box to the right of the Filter button to
switch to a different track.
You will notice that the
first track shown in the
Track Selection list box
is the Conductor Track.
This track contains
Tempo, Meter, and Key
Signature events for the
entire song which are
separated from the other
types of events.
Event Editor
121
You can open the Event Edit dialog box in Conductor mode by selecting
this track in the Event Editor. You can also open the Conductor Editor
window from its Quick View button or from the New submenu in the
Window menu.
See the “Conductor Editor” chapter for more information this feature.
Inserting a New Event
Before you insert MIDI events in your score, you have to position the
highlight at the location where you want the insertion to occur.
To insert a new event:
1. Select the appropriate track from the
Track Select list box. Then, play the
file to locate the insertion point in
either Bar:Beat:Click or Current Time.
This can be done by playing the file
and clicking Stop to stop it at or near
the insertion point.
2. Click the Insert button. The Event
Edit dialog box displays.
3. If the Start value of the note is not the
same in Bar:Beat:Click as the desired insertion point, change this
setting in the dialog box so the event is inserted at precisely the right
location.
4. At the left edge of the Event Edit dialog is a window from which you
can select the type of event to insert. Select the Note icon if it isn’t
already selected.
5. Use the parameter boxes to the right to set the other note parameters
— Pitch, Velocity and Duration. See the section on the Event Edit
dialog box later in this chapter for details on how to set these
parameters.
6. Click OK. The new event is entered at the selected location with the
values listed in the Insert dialog box.
122
Voyetra Technologies Inc.
Copying and Pasting in the Event List
You can move events around in the Event List using the Edit menu’s Cut,
Copy and Paste commands.
To cut or copy an event
or group of events, the
events first must be
highlighted by clickingand-dragging the
mouse.
Once the events are
highlighted, choose the
desired command from
the Edit menu.
Paste Where? Dialog Box
Once events have been cut or copied to the Clipboard, they can be pasted
to a new location by placing the cursor at the desired location and choosing
the Paste command from the Edit menu.
The Paste Where? dialog box lets you choose
the exact location of the paste and whether
the events at that location should be replaced.
To delete the contents of the Clipboard and any Undo
information, use the Clear Clipboard command on the Edit
menu. But be careful—this action CANNOT be undone!
Once the contents of the Clipboard have been cleared, this
information is gone forever!
♫
Event Editor
123
Deleting Events
There are two ways to delete an event:
Select and highlight the row displaying the event and click the Delete
button on the Event Editor toolbar.
Highlight the event and press the Delete key on the keyboard.
Unlike the Cut command, the Delete button does not place the deleted
event in the Clipboard, so a deleted even cannot be pasted back after it has
been deleted. However, a delete can be undone with the Undo command in
the Edit menu — unless the contents of the Clipboard have been cleared.
Changing Events
There are seven main types of events that can be edited or inserted:
Channel Aftertouch
Controller
Key Aftertouch
Note
Patch Change
Pitch Bend
124
Voyetra Technologies Inc.
SysEx Event Edit Dialog Box
The Event Edit dialog box is used to change an event in a score. There are
several ways to display this dialog.
If you are editing an existing event:
Click the Change button. The dialog will open with the event type
highlighted.
Double-click on the row for the event.
Highlight the row and press the Enter key on the keyboard.
To insert a new event:
Click the Insert button. Select the type of event to be inserted by
clicking one of the events in the list at the left of the box.
Every MIDI event has different parameters
that control what is heard. These parameters
change depending upon what type of event
is being edited or inserted. As the different
events are clicked, the parameters displayed
in the right portion of the dialog box change.
When editing an event, the parameters for
the event can be changed, but the event type
for an existing event cannot be changed.
Changing an Event’s Starting Position
By editing the Start entry in the Event Edit dialog box, any event’s starting
position can be changed or the correct starting position for a new event can
be chosen. This entry, or field, is measured in Bar:Beat:Click and Current
Time.
When the Event Edit dialog box is opened to change an event, the
Start field displays the current song position of that event.
Event Editor
125
When the Event Edit dialog box is opened to insert a new event, the
Start field shows the song position of the last event highlighted. This
value may need to be edited to set the correct insertion point.
Setting the Channel Assignment
This is a display of the channel assignment of a particular event. If a MIDI
channel was set in the Track/View window, all events in the track are
forced to that channel, regardless of the settings that appear in the Event
Edit dialog box. To allow an event’s unique channel setting to prevail,
switch to the Track/View window and set the track’s channel to — (no
channel).
Setting Parameters in the Event Edit Dialog
The Event Edit dialog box contains editable listings for each event’s
parameter settings. The following parameters can be set:
Parameters for Note Events
Pitch the note’s pitch as a note name and octave number.
(C5 = Middle C)
Velocity the note’s Note On and Note Off velocities.
Length the note’s duration expressed in Bar:Beat:Click.
Parameters for Controller Events
Type a drop-down list of the 128 MIDI Controller types.
Select the type of controller event to be added.
Value the numerical value of the controller event (from 0 to
127). A listing of the “General MIDI Controller Types”
appears in the Appendix.
126
Voyetra Technologies Inc.
Parameters for Patch Change Events
The MIDI standard supports up to 16,384 banks of 128 different instrument sounds, or patches. Some keyboards and sound cards respond to Bank
Select messages that allow you to access different sets of patches stored in
their memory. If your keyboard or sound card supports this feature, you
can use the BkMsb (Most Significant Byte) and BkLsb (Least Significant
Byte) columns in the Track/View window to send your device such
messages.
Patch the patch number.
Bank MSB the High Bank number for use with multi-bank synths.
Bank LSB the Low Bank number for use with multi-bank synths.
Name to show the illustrated patch selection dialog box.
If you are not sure whether there is a patch map available for your MIDI
device, see the “Options Menu” chapter for information.
Parameters for Key Aftertouch
Note the note number that the aftertouch will affect.
Value the amount of aftertouch (from 0 to 127).
Parameters for Pitch Bend
Bend the amount of pitch bend that is applied to notes in a
Value track at a given song position on a scale from -8192 to
8191. This value can also be set from the slider.
Event Editor
127
Parameters for Channel Aftertouch
Value the numerical value of the aftertouch event (from 0 to
127).
Parameters for SysEx
Bank the name of the bank, synth, or device to which the SysEx
message is sent. SysEx messages can be edited in the
SysEx window. For more information about SysEx, refer
to the “System Exclusive Bank Editor” chapter.
Summary
This table summarizes the parameters for MIDI events:
EVENT TYPE
Note
Controller
Pitch, On and Off Velocity,
Duration
Controller Name or Number, Value
Patch Change
Patch Name or Number
Key Aftertouch
Pitch, Pressure Amount Value
Pitch Bend
Channel Aftertouch
SysEx
128
PARAMETERS
Value
Pressure Amount Value
Name of the Bank, Synth or Device
to which the SysEx message is
sent
Voyetra Technologies Inc.
♫
You may not be able to hear some of the edits you make
because not all synthesizers support all Controller
messages. (Refer to your synthesizer’s manual for
additional information.)
Embedding Patch Changes
Embedding a patch change lets you change instrument sounds at any point
in a song automatically. For example, you can change an electric bass sound
to a fretless bass sound on the same track and channel at a specified point
in the song. Embedding a patch event can make better use of the channels
you have by letting you use the same channel to call up different patches.
This can be handy if you have a single port, 16 channel MIDI device and
you have used up the available channels in your composition.
Check your synth or sound card manual to determine which patches are
available and what their numbers are. If you have a GM compatible device,
the General MIDI names are already listed in the parameter box.
To embed a patch change:
1. Click the Insert button. The Event Editor dialog box opens.
2. Click the Patch Change icon.
3. Enter the location where you want the event inserted in
Bar:Beat:Click.
4. Open the patch list and highlight a patch. Click OK.
5. A new patch change event will appear in the list at the position you
selected. Now, when you play the file from the beginning, you will
hear the patch change to the new instrument when it encounters the
embedded patch change event.
Inserting (embedding) a patch in the Event list overrides the patch shown
in the Track/View, until you start the song from the beginning. The
Track/View patch plays from the beginning of the song and remain in
effect until the embedded patch comes along again.
Event Editor
129
If you don’t want to use the Track/View patch, leave the Patch Parameter
box blank.
The patches you can select will depend on the sound card or module you
are using. If you are using a GM (General MIDI) card or module, Digital
Orchestrator Pro uses the GM patches automatically.
Filtering Events
Locating or editing certain kinds of events can be difficult if they are mixed
together with many other events of different types. The Event Filter limits
the items displayed in the list; you see only those events you want to find or
change. The filter affects only the display of events in the list. All events,
whether filtered or not, remain in the file.
For example, if you wanted to remove all pitch bends from a track, you
could filter everything but pitch bend, then cut the pitch bend messages.
The LED on the Filter button lights when any event is being filtered.
Clicking on the Filter button brings up the Filter Events dialog box.
♫
If the Event Editor shows a blank list and you are certain
that the track contains data, check the Filter Box to be sure
you haven’t inadvertently filtered out all the data in the
track.
To delete, cut or copy filtered events:
1. Click the Filter button. Turn off
all the Event buttons except the
button of the event you wish to
edit. Click OK.
2. To select one or more events for
editing, click an event or clickand-drag to highlight the desired
events.
130
Voyetra Technologies Inc.
3. Click the Delete button or use Cut/Copy/Paste commands.
You can refine the filtering even further for MIDI controller events by
limiting the display to a single controller type. For example, you might wish
to thin out excessive volume changes (controller 7), mod wheel (controller
1) or other controller messages.
To filter controller types:
1. Click the Filter button. Turn off all Event buttons except the
Controller button.
2. Open the Controller dialog box and select the controller type you
wish to edit. Click OK.
3. Edit or delete the desired events.
Editing the Conductor Track from the
Event Editor
When a new song is created, Digital Orchestrator Pro automatically sets it
to a default Time Signature (4/4), Tempo (120 bpm) and Key Signature (C)
by inserting the appropriate events at the very beginning of the Conductor
track. These settings can be changed as needed by selecting the Conductor
track and opening the Event Edit dialog box.
For information on Conductor settings, refer to the chapter on the
“Conductor Editor.”
Event Editor
131
Chapter 9
Conductor Editor
Here’s How to Get Here…
Click the Conductor Editor Quick View button at the bottom of the
screen.
From the Window menu, select New and then Conductor Editor from
the submenu. Only one instance of the Conductor Editor window can be opened.
132
Voyetra Technologies Inc.
Overview
When the Conductor Quick View button is clicked, the Conductor Editor
window opens with the Conductor track selected.
There are three types
of events that can be
edited in the
Conductor Editor
window:
Tempo
Meter
Key Signature.
When a new song is created, Digital Orchestrator Pro automatically sets a
default Time Signature (4/4), Tempo (120 beats per minute) and Key Signature (C Major) by inserting these events at the very beginning of the
Conductor track. Additional events can be included by entering them at
different Bar:Beat:Click or Current Time settings.
A song’s initial settings can be changed by selecting the Conductor track
and editing these events in the Event Editor window. However, initial
events cannot be deleted from a song.
The initial settings in the song affect printed notation — the Key Signature
and Meter — and in which key a Diatonic Transpose. transform places the
transformed data.
♫
Conductor Editor
For information on changing the values in boxes which
accept numerical data, refer to the “Changing
Numericals” Appendix.
133
Conductor Editor Toolbar
To open the Conductor Editor Event Edit dialog box:
Click Insert or Change on the Conductor Editor Toolbar
Double-click an event.
There are three different dialog boxes, one for each type of event: Tempo,
Meter and Key Signature. All three dialog boxes have a similar appearance.
The controls for the Conductor Editor window are the same as those for
the Event Editor window. See the chapter on the “Event Editor Window”
for additional information.
Tempo Settings
The Tempo selection in the Conductor
Event Edit dialog box displays the
Start Time, Tempo and Tempo Maps
settings.
Start
Displays the Tempo event’s position in
Bar:Beat:Click and Current Time.
134
Voyetra Technologies Inc.
Tempo
The tempo in beats per minute ranges from 16 to 500, with a resolution of
1/100th beat per minute.
To insert tempo changes in a file:
1. In the Conductor Editor window, click the Insert button to display
the Insert dialog box for Tempo, Meter and Key.
2. Click the Tempo icon, select a new tempo value and Start location
in Bar:Beat:Click and Current Time.
3. Click OK.
The new Tempo Change Event will be inserted in the Event List. Tempo
changes can be inserted anywhere in a song.
Meter Settings
The Meter setting in the Conductor
Event Edit dialog box shows the Start
Time, Numerator, Denominator and
Clicks per Bar settings for a music’s
time signature.
Start
Displays the Start Time of the Meter change in Bar:Beat:Click and Current
Time.
Conductor Editor
135
Numerator
The Numerator is the number of beats a measure contains.
Denominator
The Denominator is the note value that a beat gets. For example, 2 represents half notes; 4 represents quarter notes; 8 represents eighth notes; etc.
To illustrate, in the time signature 2/4, there are two beats in a measure and
a quarter note counts the beat. In the time signature 6/8, there are six beats
in a measure and an eighth note counts the beat.
Clicks per Bar
Clicks per Bar determines the number of metronome clicks in a measure, as
well as the number of division lines per bar in the scale at the top of the
Piano Roll window. This value must divide evenly into the numerator value.
For example: the time signature is 3/4, set the Numerator to 3, the
Denominator to 4, and the Clicks per Bar to either 3 (if you want to hear
each beat) or 1 (if the tempo is very fast and you only want to hear each full
measure clicking by).
These settings also affect the Notation window and how it groups notes.
For instance, if a song is in 6/8 time and Clicks per Bar is set to 2, the
notes are grouped in two sets of three. If, in the same time signature, Clicks
per Bar is set to 3, the notes are grouped in three sets of two. Refer to the
“Notation Window” chapter for more information.
When the first Meter setting in the Event Edit dialog box is changed, the
values for the entire song are changed. Any number of new time signatures
can be inserted by using the Insert button.
136
Voyetra Technologies Inc.
Key Signature
Settings
The Key Signature Settings in the
Conductor Event Edit dialog box
shows the Key Signature and Minor
Keys for a song, as well as its Start
Time.
Start
Displays the Start Time in
Bar:Beat:Click and Current Time for any key changes you make to the song.
Key
Shows the value for the Key Signature, as a key name. In Digital Orchestrator Pro, the Key Signature affects the way tracks are displayed in the Notation window. Whatever key is set here is the basis for the Diatonic Transpose.. Refer to the chapter on “Notation” for additional information.
Minor Key Button
The Minor Key button, when set to on, changes the Key Signature list to
display the minor keys.
Filtering Events
Filtering events in the Conductor Editor works in exactly the same way as
in the Event Editor window. However, in the Conductor window, only
Tempo, Meter and Key Signature data can be viewed.
Refer to the “Event Editor” chapter for additional information.
Conductor Editor
137
Chapter 10
Mixer Window
Here’s How to Get Here…
Click the Mixer Quick View button at the bottom of the screen.
To open multiple instances of the Mixer window, from the Window
menu select New and then Mixer from the submenu.
138
Voyetra Technologies Inc.
Quick Tour
The Mixer window makes it easy way to balance volumes and try out
different patch and controller settings.
The Mixer window has the appearance of a professional mixing console,
with sliders and pots for adjusting settings including volume, pan, solo and
mute for each of the 16 channels on a single MIDI port.
Right-click in
this area to
display MIDI
Output Port
settings
The Mixer window’s graphical interface
helps to identify and orchestrate
the individual parts of a song.
Mixer Window
139
Use the Mixer window to:
Create an optimum mix by fine-tuning the relative volumes of the
instruments.
Audition different sounds (patches) for a particular part.
Optimize an existing song file for playback on your sound card or
MIDI setup.
Adjust controller settings such as reverb and chorus.
The Track/View and Mixer windows share many of the same controls.
When you change a setting in one window, both will change.
♫
The Mixer does not control digital audio tracks.
It only changes the volume on MIDI tracks.
Channel Info
Click on a channel module’s Info
button to display its Channel Info
dialog box.
Channel Info Dialog Box
Tracks, the Selected Track, Patch and Transpose settings can be displayed
and changed in the Channel Info dialog box:
140
Voyetra Technologies Inc.
Tracks
Tracks lists the names of all of the tracks assigned to the MIDI channel for
the selected channel module. From here, you can select tracks for naming
or transposing.
Since any single channel can have more than one track assigned to it, you
can use the Tracks box to check channel assignments for the Mixer’s
settings. Click a track to select it.
Selected Track
In this box, the Track Name can be edited. When OK is clicked to close
the Channel Info dialog box, the new track name appears in the TkName
area at the bottom of the window. This name then becomes the new name
for the track throughout the application and appears in all of Digital
Orchestrator Pro’s windows and lists.
Patch
Choose any of the 128 available MIDI patches for the selected track in this
list box. For more information on Patches see the “Track/View” chapter.
Transpose
Use this setting to transpose (change key) on a selected track by semitones
or octaves. For example, 1:0^ is equal to going up one octave, 0:7^ is up a
perfect fifth, etc.
For more details on transposing see the “Track/View” chapter.
Mixer Window
141
MIDI Density Meter
MIDI
density
meters
These LED meters indicate the relative density
of MIDI activity on each channel — including both
notes and MIDI controller data.
As a song plays, the MIDI density meters blink to show which channels
MIDI data is being sent through. The number of LEDs lit gives a relative
indication of how much MIDI data is being played on the track.
Controller A/Controller B Settings
Just above the row of Solo buttons are two rows of knobs labeled Chorus
and Reverb. Further down, there is another row of knobs labeled Pan.
These knobs operate MIDI controllers, the non-note MIDI messages that
affect the operation of the synthesizer.
♫
142
MIDI CONTROLLER TYPES
For a listing of General MIDI Controller Types, refer to the
Appendix at the back of this book.
Voyetra Technologies Inc.
Controllers
By selecting Controllers from the Options menu, the two controller knobs
can be reassigned so they operate the MIDI controllers used most
frequently.
Note that the Pan knob is permanently assigned to the Pan Controller and
cannot be reassigned.
If your sound card or MIDI device does not
support the selected MIDI Controller, this
parameter has no effect.
Controller A defaults to Reverb, Controller
B defaults to Chorus.
Solo
There are many situations where it is helpful to concentrate on a single part
of the arrangement and to temporarily silence the rest. Use the Solo buttons to solo a particular MIDI channel. This silences all the other channels.
When a channel is soloed, its LED lights.
Mixer Window
143
To use the Solo buttons:
To Solo a track, click its Solo button. All the other channels become
silent.
To Solo more than one channel, hold down the Ctrl key as you click
the channels you wish to hear.
To Solo a group of channels, Ctrl-click the Solo buttons for each of the
desired channels.
The LED indicators always show which of the buttons is active.
Solo
button
Mute
buttons
Mute
Use the Mute buttons to mute (silence) a particular MIDI channel on playback without affecting the underlying data. When a channel is muted, its
LED lights. Several channels can be muted simultaneously, if desired.
To use the Mute buttons:
Click the Mute button to mute a channel.
Click the Mute button again to turn the sound back on.
♫
144
SUGGESTION!
If you want to Mute all tracks except one, it is more
convenient to use the Solo feature for that individual track
than to Mute numerous tracks!
Voyetra Technologies Inc.
Pan
The Pan parameter transmits a MIDI Pan message on the specified channel
whenever playback is started or its value is changed. Used for stereo playback, the Pan control sets the channel’s left/right positioning.
Pan
knob
To use the Pan knobs:
Turn the knob to the left or right with the mouse to set that channel’s
position in the stereo field.
If the sound card or MIDI device being used for playback does not support
MIDI Pan — or if the song is being played back through a mono sound
system — the Pan parameter has no effect.
♫
Mixer Window
Pan settings in the Mixer have no effect on digital audio
tracks.
145
Patch Selector
The ability to control patches is one of the most valuable aspects of MIDI
synthesis. Use the Patch Selector to select an instrument sound for each
channel.
Patch
Selector
To change the Patch assignment:
Click the Patch Selector. The number increases if the top half of the
window is clicked; it decreases if the bottom half is clicked.
You should hear a change in one of the instruments as you change the
patch. Change the patch a several times and try it on some of the other
channels.
Remember that in General MIDI, Channel 10 is used for drums.
Volume Sliders
These sliders let you adjust the volume of each channel so you can create a
mix for your song, just as you would on an external mixing console.
Volume
sliders
146
Voyetra Technologies Inc.
To use the volume sliders:
Drag the volume sliders up or down with the mouse to raise or lower
the playback volume of each channel independently.
As a song plays, experiment with volume changes to find a mix you like.
Port
Use the Port control to select the output
port to be controlled with the Mixer window.
A check mark appears beside the active Port.
Each Port controls 16 MIDI channels, one per module in the Mixer
window.
To display the MIDI Output Port box:
Click the right mouse button in the right side of the Mixer window.
Track Name
This display shows a Track Name for each channel. If more than one track
is assigned to a channel, TkName displays the name of the first track
assigned to the channel according to track number.
Track
Name
To use the Track Name feature:
Click on the module’s Info button at the top of the channel column to
select a different track name to be displayed here or to change the
name of any of the tracks assigned to the channel. Switching momentarily to the Track/View screen gives a quick overview of Track and
Channel assignments.
Mixer Window
147
Chapter 11
Digital Audio
Window
Here’s How to Get Here…
Double-click a waveform in the Track/View window. This opens the
Digital Audio window at the bar position clicked.
Click the Digital Audio Quick View button.
To open multiple instances of the Digital Audio window, from the
Windows menu select New and then Digital Audio from the submenu.
148
Voyetra Technologies Inc.
Quick Tour
The Digital Audio window provides an enlarged view of a digital audio
track’s waveform. This view facilitates precise editing of digital audio tracks.
Use the Zoom buttons for an even more closely-detailed view of a portion
of a digital audio track.
Bar:Beat:Click and Current
Time position of cursor
Track
Solo
buttons
Zoom
buttons
Digital Audio
waveform
Digital Audio Window
Digital Audio Window Toolbar
The Digital Audio window has its own Toolbar with controls for Current
Track List, Cursor Position, Tuplet Numerator and Denominator, Snap
Grid On/Off button, Quantize Grid, Snap Value drop-down list and Solo
button.
Digital Audio Window
149
Current Track List
The Current Track indicator shows the
number and name of the track currently
being edited.
Cursor Position Indicator
The Cursor Position indicator displays
the exact location of the mouse cursor
in Bar:Beat:Click and Current Time.
Tuplet Numerator and Denominator
These controls set the Quantize Grid space to a tuplet
when a tuplet duration is selected in the Snap Value
controls. This feature lets you specify a non-standard
duration for the Quantize Grid.
The Tuplets ratio is defined as: x notes in the space of y durations. For
example, to manually place digital audio sounds in triplet timing, select a
quarter-note triplet from the Snap Value box and set the Tuplets ratio to
3:2. This provides a visual representation for lining-up the digital audio.
Snap Grid On/Off Button
This button toggles the Snap-to-Grid feature on and off. When
the grid is On, selected digital audio are pulled, or snapped, to the
grid lines.
150
Voyetra Technologies Inc.
Quantize Grid
Quantize Grid displays a vertical grid using the note value
specified in the Snap Value drop-down list box. Use the Quantize
Grid feature as a reference point when inserting or moving data.
To insert vertical grid lines:
1. Select the desired note value by clicking the Snap Value drop-down
list box. The value of the grid lines can be changed at any time.
2. Click the Quantize Grid button to display the grid lines.
♫
If a triplet value is selected in the Snap Value drop-down
list box, you can change the Tuplets ratio to view a tuplets
grid.
Vertical lines are
inserted when the
Quantize Grid
button is
selected.
Digital Audio Window
151
Snap Value
The resolution of the editing grid can be changed by selecting different notes in the Snap Value drop-down list box. Click on the
control to choose quarter notes, eighth notes and so on.
For example, a Snap Value of an eighth note will cause the Start Time of
any digital audio you move to snap to one of the eight grid points in a 4/4
bar.
If the time signature is set to 3/4 time and Snap Value is set to quarter
notes, the grid will divide each measure into three sections.
Solo Button
Occasionally, when editing a track, it is necessary to hear only that
track to make sure the edits were done properly. Clicking the Solo
button allows only the track being edited to play. When Solo is
enabled and you change tracks, the next track will be Soloed.
Zoom Buttons
Use the Zoom Buttons to Zoom In on a selected area to make precise edits
or Zoom Out to get a global view of a song. Each time a Zoom button is
clicked, the zoom increases or decreases by a measure.
Click to Zoom In
Click to Zoom Out
To Zoom In:
Click the Zoom button with the + (plus sign).
152
Voyetra Technologies Inc.
To Zoom Out:
Click the Zoom button with the – (minus sign).
To Zoom In on a Selected Range:
1. Use the Arrow tool to select the area to Zoom In on.
2. Click the Zoom In button.
♫
Each Zoom button becomes unavailable when it is
at its maximum viewing range.
The F12 Function key serves as a keyboard
shortcut for Zooming Out.
The F11 Function key serves as a keyboard
shortcut for Zooming In.
Editing Digital Audio
The following sections provide a quick reference to all of Digital
Orchestrator Pro’s digital audio editing functions.
Merging vs. Replacing Data
Digital Orchestrator Pro works the same way with digital audio data as it
does with MIDI when determining whether a selection merges with existing data it is pasted:
If you want the data being pasted to replace the data at the site of the
paste, select the data at the site before pasting.
If you want the data being pasted to merge with data at the site of the
paste, instead of selecting the data at the site of the paste, place the
cursor at the beginning of the range to be merged into and then paste.
Digital Audio Window
153
When you paste and merge two digital data samples, the volumes are added
together, or summed. If the summed volume is too high to be played, the
peaks of the signal are said to be chopped off or clipped. Along with signal
loss, clipping produces a distortion of the sound at the highest volumes
that can actually be heard.
Moving Digital Data with the Mouse
The quickest way to move data is to drag it with the mouse.
A selected segment
of data can be
dragged to a new
location in the
Digital Audio
window.
To move (merge) data:
1. Select a range with the mouse.
2. Place the cursor anywhere in the range.
3. Drag the data to the new time location.
4. An interval of silence replaces the data that was dragged to the new
location. To leave a copy of the data behind, hold the down the Ctrl
key as the data is dragged.
5. Release the mouse button. The data is pasted into the new location,
beginning at the cursor position The data being pasted will be merged
with existing data. Copying or moving digital data in this fashion
always results in merged data.
154
Voyetra Technologies Inc.
Editing Digital Audio Data with the Edit Menu
Commands
To replace the existing data — instead of merging the data — the Cut,
Copy and Paste commands on the Edit menu must be used. The commands on the Edit menu can also be used to merge data when pasting. The
difference is whether you the data is selected before the operation or if the
cursor is just positioned where the paste should begin.
To place digital audio data in the Clipboard:
1. Select the range of the file to be removed.
2. Choose Cut from the Edit menu. The selected range is deleted from
the file and copied to the Clipboard. An interval of silence of equal
duration replaces the deleted data. To leave the original data
undisturbed, choose Copy instead of Cut.
To paste and merge the Clipboard’s contents into a
track:
1. Click the mouse at the point the data should be pasted.
2. Choose the Paste command from the Edit menu.
Since a range was not selected, the data will merge beginning at the point
where the mouse was clicked. Use the Cursor Position indicator above the
waveform to get an exact reading of this position in Bar:Beat:Click or
Current Time.
To paste and replace the Clipboard’s contents into a
track:
1.
Select a range beginning at the point where the contents of the
Clipboard should be placed.
2. Choose Paste from the Edit menu. The contents of the Clipboard
replace the selected data beginning, at the start point of the selected
Digital Audio Window
155
range and continuing for the entire length of the data in the Clipboard.
Digital Editing Tips and Cautions
When data is pasted, Digital Orchestrator Pro places a reference to the
data — rather than the data itself — into the file. If you are repeating a
single selection (like a drum part) throughout the piece, this keeps the
file size to a minimum and boosts performance. For this reason, whenever possible, use the Copy and Paste commands, rather than transforming or merging a digital audio segment.
Remember that during drag-and-drop editing, when pasted data is
merged with existing data, the amplitude of the waveform will increase.
In some cases this can produce signal loss, or clipping. If this happens,
Undo the edit, use the Scale transform to reduce the amplitude of the
data to be merged to -50%, then redo the drag edit.
Certain editing operations destroy the synchronization between MIDI
and digital audio. If the overall tempo of a song is changed — or if
MIDI is transposed — the digital audio will be out of sync and out of
tune with the MIDI data. Whenever possible, arrange the MIDI data to
your satisfaction before recording digital audio.
♫
156
SUGGESTION!
Use the following Keyboard Shortcut Keys to jump to the
Next and Previous tracks in the Digital Audio window:
Ctrl+N
Ctrl+P
jumps to the
jumps to the Previous track
Voyetra Technologies Inc.
Markers
Marker
Use Markers as a convenient way of locating and describing section of a
song.
Markers can be inserted into the Digital Audio window the same way they
are inserted into the Track/View and Piano Roll windows — and they
work in the same way. A Marker that has been set in either the Track/View
or Piano Roll windows also appears in the Digital Audio window.
For more information about Markers, refer to the “Track/View Window”
chapter.
Digital Audio Window
157
Chapter 12
Notepad
Here’s How to Get Here…
Click the Notepad Quick View button at the bottom of the screen.
From the Window menu, select New and then Notepad. You can open
only one instance of the Notepad window.
158
Voyetra Technologies Inc.
Quick Tour
The Notepad is a handy
place to store such textbased information as a
file’s name, author and
copyright, tempo or
other settings, song
lyrics and any comments you want to have
on hand when you are
working with the song.
Enter text in Digital
Orchestrator Pro’s Notepad the same way as in Windows. The difference is
that the text here is added to and saved along with the song file.
Using the Notepad
Use the Notepad to cut, copy and paste text between Digital Orchestrator
Pro and other Windows applications. When a file is saved as an .ORC or
.MID file, anything typed into the Notepad window will be saved along
with it. The next time the file is opened, you can open the Notepad window
to review your comments.
Notepad Right-Click Menu
Use the Right-click menu when making edits to text in
the Notepad window. Some of the options in the rightclick menu are available only when text is selected or
when there is text data in the Clipboard.
To open the Right-Click menu:
Click the right-mouse button.
Notepad
159
Chapter 13
Notation Window
Here’s How to Get Here…
Click the Notation Quick View button.
From the Window menu, select New and then Notation from the
submenu. Only one instance of the Notation Editor can be opened.
160
Voyetra Technologies Inc.
Quick Tour
Use the Notation window to transcribe, view and print MIDI tracks as
standard musical notation. This window incorporates a number of
sophisticated features, including: angled beaming, rest suppression,
quantization options, selectable clef, split point and variable zoom.
The Notation window displays and prints music in standard musical
notation. The Notation window provides very fast and accurate staff
printouts that can be used when copyrighting or distributing songs.
Should you want to edit the transcription, you must edit the underlying
MIDI data from another window, such as Piano Roll window.
Current page
Click to print
a score
Zoom button
Click to transcribe
a track
Click to update
score
Use the page control buttons or the scroll bars to move around within the
Notation window. During playback, a red pointer indicates the current bar.
This feature lets you follow along in the Notation window as a song plays.
Digital Orchestrator Pro can only transcribe MIDI tracks.
Notation Window
161
Notation Window Toolbar
The Notation window has its own Toolbar controls for transcribing music,
refreshing (updating) the window, printing scores, moving from page to
page and zooming in on the screen.
Transcribe
Click this button to access the Transcription Settings
dialog box and transcribe your music. This dialog box
provides complete options on how you want your
musical score to appear. (This dialog is covered in
detail later in this chapter.)
Refresh
Click this button to update the Notation window after
making any changes to the underlying MIDI data in the
tracks. The Refresh button remains grayed-out unless
changes have been made to the track.
Print
Click this button to print a score.
Page
Use this control to move between pages.
162
Voyetra Technologies Inc.
Zoom
Click this button to open the Notation Zoom menu.
Choose one of the pre-set values — 35%, 70%
and 100% — or X% to open the Zoom Percentage dialog box and set a value from 10% to
200%.
Changing the magnification of the screen image lets you to see how the
whole page will look when printed or check the details of particular parts of
a score.
A good general-purpose setting is usually 70%.
A setting of 35% lets you to view an entire page at a glance.
Quick Start Printing
If you want to test the transcribing and printing functions quickly, use the
following procedures to get a fast printout:
Notation Window
163
To open the Notation window:
1. If you are working in a different editing window, click the Notation
Quick View button at the bottom of the screen. The Notation
window opens on a blank screen until tracks are selected in the
Transcription Settings dialog box.
2. To display music in the Notation window, click the Transcribe
button. The Transcription Settings dialog box appears and gives
access to a number of parameters, but, for now, just click in the Show
column for a MIDI track. Then, click OK.
3. After a brief pause, a staff and notes appears on the screen.
To print out a score:
1. Click the Transcribe button.
2. In the Transcription settings dialog box, enter the name of the song
in the Title dialog box.
3. Select the Track(s) that contain the parts to be printed and enter any
other information, if applicable, in the appropriate boxes.
4.
Leave the rest of the settings at their defaults. Then, click OK.
5. Click the Print button. Make any necessary adjustments to the printer.
Then, click OK.
6. Check the resulting printout. You may want to adjust the Notation
parameters to produce a more refined score.
♫
164
If you are experiencing any problems printing your score,
open the Windows Font Manager and make sure the
Digital Orchestrator Pro notation font, SPW.TTF, is loaded.
This font was installed with Digital Orchestrator Pro but
changes to your system might have affected Windows’ font
loading.
Voyetra Technologies Inc.
Transcription Settings Dialog Box
Digital Orchestrator Pro gets its transcription
parameters from the entries in this box.
The Transcription Settings dialog box lets you
select the track(s) you want to transcribe and
configure a number of other settings.
Track
The Track column displays the number for each of the tracks in the
song.
Name
The Name column displays the track name for each track.
Show
Use the Show column to select the track(s) to be transcribed into
notation.
When a column is clicked, a check mark appears to show that the
track is being transcribed.
Notation Window
165
Clef
Use the Clef box to select the clef into which the music will be
transcribed. When set at Auto (the default), Digital Orchestrator Pro determines the best clef for transcription.
There are seven available clef options: Auto, Treble, Bass, Alto, Tenor,
Grand Staff and Drums.
Most likely, you will use Treble, Bass and Grand Staff (Treble and Bass
clefs) most often.
Split
Split displays the split point for the bass and treble clefs as a
note name and octave number. If you have music with a wide
range that should be displayed in a Grand Staff, you need to
choose a split point.
The split point is the note value that determines the staff in which the notes
will appear. For example, using a Grand Staff and setting a split point of C5
(Middle C) means that any notes below Middle C will appear in the bass
clef, while Middle C and any higher notes will appear in the treble clef.
If Grand Staff or Auto is not the selected clef, the split point values will be
ignored.
Voices
In much piano and orchestral music, more than one musical idea
occur at the same time. There may be two flutes playing imitative
music, but they are both recorded to the same track. This can be
expressed in notation by including more than one voice per
musical staff.
Digital Orchestrator Pro lets you choose between one-voice and two-voice
transcription for each track. The voice with upward stems represents one
musical idea; the voice with downward stems represents another. If you
create music with this level of complexity, you will appreciate this feature.
166
Voyetra Technologies Inc.
Triplets
If your music contains triplets (three notes played in the space
of two), activate the triplet sensing feature by clicking this
column. With the Triplets icon displayed, the number 3
appears in the score over the appropriate notes.
Combining triplet sensing with the correct quantization and rest
suppression values yields a more accurate musical score.
Note that the Triplets feature works with eighth note triplets only.
Transpose
Transposing music notation track-by-track is crucial when
printing out parts for transposing instruments (instruments
that are not pitched in C).
When a score is created in MIDI, the composer is working in
concert pitch and assuming that every instrument will produce a Middle C
when the score calls for it. But this is not the case.
Imagine a score which uses strings, timpani, trumpet and alto saxophone. If
a trumpet player is asked to play Middle C, you will actually hear a B-flat.
This is because the trumpet is pitched in B-flat. To hear the trumpet play a
Middle C, a score is needed where everything is raised a Major second. Additionally, the alto sax part needs to be transposed up a Major sixth because
it is keyed in E-flat. The strings and timpani would not need transposition.
The Transpose function affects the way the music is notated only — not
the MIDI data itself.
Notation Window
167
Title
Use this box to
insert a title at the
top of the score.
Author
Type your name or
the author’s name
in this box.
Copyright
Type the word
copyright and the
date in this box.
Use ALT+0169 to print the © character. (Use the Windows Character Map
utility to enter other non-standard characters.)
Suppress Rests
The Suppress Rests options offer control
over how silences will be notated.
In many cases, if you let Digital Orchestrator Pro notate the rests exactly to
the level of quantization that has been set, the score will be littered with
lots of very small rest values.
168
Voyetra Technologies Inc.
In order to tidy up the score, you can add one of two levels of rest
suppression:
Normal Normal rest suppression extends note values over rests with small
durations, thereby eliminating the rest.
Fill Fill also suppresses rests but goes further than normal by
filling note durations all the way to the beat as represented
by the time signature in the music.
To disable rest suppression, set the control to Off.
Quantize
Use the Quantize control to set the level of quantization for the transcription of the score. This will not
affect the MIDI data at all; it merely cleans and
tightens up the look of the score.
Begin by choosing the smallest significant rhythmic value to be notated —
from quarter notes through sixty-fourth notes — and select that value from
the control. When the Transcribe button is clicked again, all note start times
and lengths are shifted and lengthened to the nearest multiple of the
selected quantization value.
Digital Orchestrator Pro rounds-off the start times and durations of all
notes to the nearest multiple of the selected Quantize value.
Transcription settings do not quantize or otherwise change
the actual notes in the song file; they affect only the display
of notes in the Notation window.
♫
Notation Window
169
Bar Numbering
This control toggles bar numbering On or Off.
The Bar Numbering button lets you choose whether to include small bar
numbers in the score. When bar numbering is selected, a small bar number
is displayed above each measure along the topmost staff of the score.
Fine Tuning Notation
Getting a computer to capture and display musical notation in an accurate
and readable way can be a formidable task. The difficulty arises when you
try to get the computer to convert a musical performance full of human
“feel” directly into notation from a MIDI file.
Using the Quantize function can help, but too coarse a quantization value
may not represent the source file accurately. However, too fine a quantization value can make the score impossible to read, cluttering the staff with
an overabundance of notes and rests.
The trick is to find a balance between representing the performance precisely and making the score look good. Quantization only solves part of this
problem, but we can use another Digital Orchestrator Pro tool — Suppress
Rests.
In the same way that quantization pulls a note to the nearest quantize level,
rest suppression looks at a note’s duration and decides when a note should
be scored with a duration longer than actually played. This is where rest
suppression comes in.
If Suppress Rests is turned Off, a rest is placed after every note that
has been played a little too short.
With rest suppression set to Fill, the notes are lengthened, the rests are
hidden and the score becomes much more readable.
To allow some rests to be displayed, choose the Normal setting. This
gives a compromise between Off and Fill.
170
Voyetra Technologies Inc.
The beaming of notes is set by the Clicks per Bar value in the Conductor
Track. For example, if you want to beam two sets of eighth notes in 6/8
time — where three notes are beamed together — set the Clicks per Bar to
two. To beam three sets of eighth notes in the same time signature, set the
Clicks per Bar to three — now two notes are beamed together. By
experimenting with different Clicks per Bar values, odd beamings can be
made. Refer to the “Conductor Editor” chapter for more information on
Clicks per Bar.
Notating Triplets
Generally, computers have a difficult time recognizing triplets — and it is
sometimes necessary to “fine tune” a performance for the triplets to be
read correctly. For this reason, we have included the following steps to help
you notate triplets accurately.
To notate triplets:
1. In a window that contains MIDI data — Track/View, Piano Roll or
Event List— highlight the section you want to view as triplets.
2. From the Transforms menu, select Start Time and then Quantize
Note from the submenu.
3. In the Quantize Note Start Time window, set the Quantize Value to
an eighth note and click the Tuplet button.
4. Click OK to apply the transform.
5. Make sure the MIDI data is still highlighted and from the Transforms
menu, select Note Duration and then Set from the submenu.
6. In the Set Note Duration dialog box set the Note Value to a eighth
note and click the Tuplet button.
7. Click OK to apply the transform.
8. Click the Notation Quick View button to open the Notation window.
9. Click the Transcribe button.
10. In the Transcription Settings dialog box, click in the Show and
Triplets columns for the track(s) to be notated.
11. Click OK. The notation now displays triplets.
Notation Window
171
Chapter 14
System Exclusive
Bank Editor
Here’s How to Get Here…
Click the Quick View button at the bottom of the screen.
From the Window menu, select New and then SysEx. Only one instance of
the System Exclusive Bank Editor window can be opened.
172
Voyetra Technologies Inc.
Quick Tour
Most modern synthesizers are capable of generating and transmitting a
special class of MIDI messages called System Exclusive (SysEx) messages.
Among other things, these messages contain information about patch
settings, MIDI configuration parameters and special effects settings such as
reverb and delay.
Digital Orchestrator Pro lets you upload these messages from your synthesizer, save the data as files and send the messages back to the synthesizer so
that they will be available to the synth the next time the song plays.
You can also load existing SysEx files provided by your synth manufacturer, then Save and Send them along with the song.
SysEx messaging functions can be extremely useful for:
Creating custom patch settings. If the patches are saved in System Exclusive
messages along with the song, they will be available to download to the
synth the next time the song is played.
Synths that use effects that can only be programmed with SysEx data. On such
synths, you can, for example, send SysEx messages that set specified
reverb settings or delay effects.
Older synthesizers that send real time control information as System Exclusive
messages. Some older synthesizers also use SysEx messages to switch
banks of programs.
Not all synthesizers use SysEx. Be sure to consult your
hardware documentation before you try to work with these
functions.
♫
System Exclusive Bank Editor
173
SysEx Overview
SysEx
Toolbar
SysEx
Data
Banks
The Basic Steps in Using the SysEx Function:
Receive Downloads data from the synth into the SysEx window.
Set Auto To upload (send) the SysEx data to the synth when the
song is loaded, click the Auto column for the data.
Save Saves a bank of SysEx data.
Send If Auto was clicked, this is done automatically when the
song loads. To send the SysEx data manually, click this
button.
174
Voyetra Technologies Inc.
The SysEx Toolbar
Load
If you have already saved SysEx data files — or if you have
SysEx files from the manufacturer of your synth — you can
load these files and send them to the synth when the song
plays.
Clicking the Load button on the Toolbar opens the standard Windows File
Open dialog box, from which one or more data files can be brought into
the SysEx window. SysEx files commonly use the file extension .SYX.
The data is loaded into the row that has been selected — or into the first
available row if a row has not been selected. To select a row, click any of its
columns — or use the arrow keys to move the selection box into place.
To load SysEx files from disk:
1. In the SysEx window, click the
row for the bank in which the
data should appear. If there is
already SysEx data in this bank,
you are asked whether to append
the new data to the existing data
or overwrite it.
2. Click the Load button. This opens the standard Windows File Open
dialog box.
3. Follow normal Windows procedures to select and load the file.
You can repeat the process for as many files as you want to load into the
window, or you can combine data into a single file by loading all the data
into the same row.
System Exclusive Bank Editor
175
Edit
Clicking the Edit button on the SysEx Toolbar opens the Edit
SysEx Data dialog box. From here, a maximum of 10 Kilobytes of SysEx data can be edited directly.
To edit SysEx files, you must
know how to notate Hexadecimal numbers and the
specific commands for your
synthesizer.
You can edit raw SysEx data in
this dialog — BUT BE CAREFUL! Digital Orchestrator Pro
simply sends the data to your synth, it does not verify it!
♫
WARNINGS!
Be EXTREMELY CAREFUL when sending edited data
to your synth!
If the beginning and ending numbers are correct,
Digital Orchestrator Pro transmits the messages
without verifying the data.
Sending invalid SysEx messages can destroy preconfigured patch settings!
Save any edited SysEx files under a new name and
retain the original so that you can restore your synth’s
settings if necessary.
Editing specific SysEx messages is beyond the scope of this manual.
However, the following general procedure is included for advanced users.
176
Voyetra Technologies Inc.
To edit SysEx data:
1. Click the bank to be edited. To create a new bank of data, click an
empty bank.
2. Click the Edit button. A box opens showing the SysEx data in Hex
format. This data can be edited directly in the box.
3. When you click OK, the data entered is scanned to make sure that the
SysEx message begins with F0 and ends with F7. The kind of data
displayed between these two numbers depends on your hardware.
Save
Clicking the Save button on the SysEx Toolbar opens the
Save dialog box. Here, a filename for the data can be entered
and the data can be saved to disk.
To save SysEx files to disk:
1. In the SysEx window, click the row for the bank to be saved to disk.
2. Click the Save button. This opens a standard Windows File Save
dialog box.
3. Follow normal Windows procedures to name, rename or save the file.
By default, files are given the extension .SYX.
System Exclusive Bank Editor
177
Send
Clicking the Send button on the SysEx Toolbar opens the
Send SysEx Data dialog box showing a Progress Bar of the
data being sent to the synthesizer.
The instructions below describe how to send SysEx data. However, if you
are in the midst of editing a song and want to change the synth setup while
editing, refer to the steps in the second procedure, “Sending Data from the
Middle of a Song.”
To send SysEx data:
1. Click the row in the SysEx window for the bank of SysEx data to be
sent.
2. Click the Send button. The Send SysEx Data Progress Bar displays,
showing the progress of the transmission.
To send a bank of data automatically, click the Auto column for the
bank to be sent. A check mark appears. Now, whenever that song is
loaded, the bank will be sent to the synth.
♫
CAUTION!
If you save your data in .MID format, rather than .ORC format,
after sending SysEx data, the following will occur:
Bank names and port assignments will be lost.
A single bank of data may be split into several smaller
banks.
If a bank is not set to Auto and does not have an event
associated with it, it will not be saved at all!
To avert these problems, we highly recommend saving song
as .ORC files.
178
Voyetra Technologies Inc.
Sending data from the middle of a song:
1. Make sure that the data to
be sent is loaded into one of
the banks in the SysEx
window.
2. Change to the Event Editor
window using the Quick
View button at the bottom
of the screen.
3. In the Event Editor
window, select the track
where the SysEx data should
be inserted.
4. Click Insert or press the Insert key on the computer keyboard to call
up the Event Edit dialog box.
5. From the Bank drop-down list box, select the bank to be inserted,.
6. Click OK to insert the event.
Note that when data is sent through the Event Edit dialog box, a reference
is inserted to the SysEx bank — not to the data itself.
If a different SysEx file is loaded into the same bank later in the session —
or if the data in the bank changes — the original data is lost. Only the data
currently in the bank is sent.
System Exclusive Bank Editor
179
Receiving SysEx Data
Clicking the Receive button opens the Receive SysEx Data
dialog box. This box enables you to bring SysEx data from
your synthesizer into the SysEx window. The data can be
saved along with the song and the synth will automatically
configure each time you play it.
To receive a SysEx data dump:
1. Click the row in the SysEx window to
position the cursor on the bank from
which you want to receive the data.
2. Click the Receive button. The
Receive SysEx Data dialog box
displays.
3. To receive data automatically, choose
your synth from the Macro dropdown list box.
Macros for all MIDI devices could not be included in this list, so you
may have to use Manual Receiving if your synth’s model does not
appear in the list. Or, you could write your own Macro, as
documented in the included VSEQINI.WRI file.
If you are receiving manually, choose “<You start dump on
instrument>” from the Macro selection box.
4. You may need to change the Input and Output selections in the
dialog box, depending on the configuration of your MIDI system.
If you select manual receive, you do not need to set an Output Port.
If you need to make a change, refer to your MIDI hardware manual
for the correct settings.
180
Voyetra Technologies Inc.
5. Click OK. If you are using one of the macros, it executes and your
MIDI device automatically sends the data to Digital Orchestrator
Pro.
In manual mode, the Receiving Data dialog box displays and you can
now begin transferring SysEx from the front panel of your MIDI
device. The procedure for doing this varies with each device, so refer
to the appropriate hardware manual for information.
6. As data is received, the count of bytes shown in the Receiving Data
dialog box increases. When the transfer is complete, the number
display stops increasing and your MIDI device will probably provide
a visual indication that it has finished transmitting.
7. Click the Done button to accept the received data.
Deleting Data
Clicking the Delete button on the SysEx Toolbar removes the
selected SysEx data file from the window. However, this does
not delete the file from the hard drive.
SysEx Window Layout
The SysEx window is built around a
row-column structure so that the files
and data received can be easily
located and edited.
The window is divided into the
following columns: Bank Number,
Name, Port, Length and Auto.
Bank Number
The column at the far left of the SysEx window numbers the SysEx
messages in order. A virtually limitless number of SysEx messages
can be loaded into a SysEx window - there are 1,000 numbered
rows.
System Exclusive Bank Editor
181
Name
If your SysEx data already has a filename, it will
show up here.
If you are receiving data from your synth, rather
than loading it from a file, you can name the
bank.
Port
This column displays the port on which your synth sends and
receives data.
You can change the port assignment for your setup by typing in
the number of the port or by right-clicking this column.
Length
This column displays the length of the SysEx file in bytes.
182
Voyetra Technologies Inc.
Auto
Clicking the Auto column toggles the Auto Send feature On and
Off.
A check mark appears in the column when the Auto setting is
toggled to On.
With the Auto feature set to On, the SysEx data loaded in the row is sent
to the synth automatically each time the song is loaded.
If a song is saved with the Auto feature checked, this becomes a permanent
addition to the song file — until it is changed by toggling the feature Off.
When Auto is set to Off, the data must be sent manually to the synth by
clicking the Send button before playing the song.
System Exclusive Bank Editor
183
Chapter 15
File Menu
Most of the commands in the File menu bring up familiar Windows dialog
boxes for opening and saving files.
New
Select the New command when you want to create a file from scratch. This
clears all of the data from Digital Orchestrator Pro’s windows.
184
Voyetra Technologies Inc.
Open
The Open command
opens an existing file
for playing or
editing.
Digital Orchestrator
Pro can open many
file formats including .ORC, .MID,
.RMI, .WAV and
.SNG file formats
.If the file you want to open is one of the four most recently worked on,
you can use the 1,2,3,4... listing at the bottom of the File menu and avoid
navigating through the directories.
Digital Orchestrator Pro adds an Audition button to the standard commands in this dialog box, so that you can listen to a file (audition it) before
you commit to opening, saving or renaming it.
Audition
The Audition button is located in the Open dialog box. When a file is
highlighted, click the Audition button hear it. This plays the file but does
not load it into Digital Orchestrator Pro. Auditioning is a convenient way
to preview a file without opening it.
The Audition button also appears on the Merge dialog box.
To audition a file:
1. Select Open from the File menu.
2. Navigate to the directory where the file to be auditioned is located.
3. In the box on the left, click the filename to highlight it.
4. Click the Audition button.
File Menu
185
Save
This command saves the currently-loaded file under its current name.
If you are saving an untitled file, the Save As dialog box displays and
prompts you to enter a name for the file.
Save As…
Use Save As to
save the current
file under a new
name or to a
different drive
or directory.
Only .MID,
.RMI and .ORC
files can be
saved.
An .ORC file saves parameters such as Transpose, Solo, Mute and
Controller A and B settings.
Digital audio data can be exported in .WAV format. For more information,
see the “Export WAVE” section later in this chapter.
FILE FORMATS
If you save your file in MIDI format, rather than as an .ORC
file, be careful!
If you save a .MID file with tracks muted, those tracks
will be deleted.
If you save a file as a .MID file with tracks soloed, all the
unsoloed tracks will be deleted.
Note that you cannot save digital audio in .MID file format.
186
Voyetra Technologies Inc.
If you plan to do most or all of your work in Digital Orchestrator Pro, the
.ORC format is the one to choose. You can save virtually all of your MIDI
settings — including SysEx data — in this format and you can have both
MIDI and digital audio data in the same file.
If the choice is between .ORC or one of the MIDI formats, consider the
following:
*.ORC
This is the only format that saves both MIDI and digital
audio data in the same file. If you plan to use your file
only with your own system or applications that support
.ORC files — such as Voyetra’s MIDI Orchestrator —
save your song in Voyetra’s proprietary .ORC format.
This format preserves all of the file’s settings independently, just as you see them on the screen.
*.MID
MIDI format does not save digital audio data. For
compatibility with most other PC MIDI applications,
use the standard .MID format. When you save a file in
this format, settings for Tempo, Tempo Offset and
Transpose are combined and the resulting new values
are saved. Muted and un-soloed tracks are deleted.
*.RMI
Files in this format include a header with identifying
information which certain MIDI devices may require. In
other respects, .RMI files are identical to standard MIDI
files.
When in doubt, use the .ORC format. You can always re-open a file and
save it again in either of the other formats.
♫
File Menu
CAUTION!
Be sure to check all of the Mute and Solo settings before
saving a file in MIDI or RIFF format. Any tracks that have
been turned off with the Solo or Mute buttons will be
deleted during the Save operation. MIDI and RIFF formats
do NOT save digital audio.
187
Merge
Digital Orchestrator Pro lets you
merge files to
combine a number
of different files
and file types in a
single musical
composition.
Selecting Merge from the File menu displays a dialog box through which
you can navigate to any directory and select a file. When you click OK,
Digital Orchestrator Pro adds the data to the currently open file.
Use the Audition button to hear a file before merging it into the currentlyopened song.
If a there is no cursor point in the Bar pane, the new file is placed at
the first available track.
If there is a cursor point in the Bar pane, the new file is merged starting
at the cursor point indicated. Be careful, this can produce strange results if tracks are combined together.
Files can be merged in any format that Digital Orchestrator Pro reads.
When a stereo WAV file is merged, the data is split onto two tracks.
Because you can have only one Conductor Track per file, the Merge
command always retains the Conductor track from the currently-opened
file and discards the Conductor track settings from the new (incoming) file.
For more information on the Conductor Track see the “Conductor Editor”
and “Event Editor” chapters.
188
Voyetra Technologies Inc.
To merge files:
1. Open the file you want to merge data into. This file contains the
Conductor Track settings you wish to keep.
2. Place the cursor in the position where the incoming file should be
added.
3. From the File menu, select Merge.
4. In the Merge dialog box, select the file you wish to insert into the
current file.
5. Click OK. A copy of the file selected merges into the existing file.
WHEN MERG ING...
If a cursor point position is selected in the Bar Pane, the
incoming file will be merged at that point.
♫
If no cursor point position is selected, the imported file
begins at the first measure of the first available track,
below the original file.
Export WAVE
The Export WAVE command opens the Save As
dialog box which lets you
save — or export — the
digital audio tracks in
.WAV format.
You can use Export
WAVE to make a digital
mixdown of your digital
audio tracks to create a
single WAV file. Any MIDI tracks in the original file are ignored.
Once you name the new file for export, click OK to open the Sound
Selection dialog box.
File Menu
189
To export a .WAV file:
1. From the File menu, select Export WAVE.
2. In the Save As dialog box, choose a directory and filename for the
new file.
3. Click OK. The Sound Selection dialog box opens.
4. From the Name drop-down list box, select a preset — or choose the
type of compression in the Format box and the sample rate in the
Attributes box that you would like to export the file as.
5. Click OK.
♫
TIP:
If you would like to include MIDI tracks in the exported mixdown, first record them as digital tracks in Digital
Orchestrator Pro.
Sound Selection Dialog Box
After naming a .WAV file for
export, the Sound Selection
dialog box opens.
Here settings for the Format
(type of compression) and
Attributes (sample rate) are
selected.
Presets of the Format and Attributes can be saved in the Name drop-down
list box.
From the Name drop-down list box, select one of the presets — CD
Quality, Radio Quality or Telephone Quality — or use the Format and
190
Voyetra Technologies Inc.
Attributes drop-down list boxes to select the type of compression and
sample rate you wish to export the file as.
Note that if you export digital audio, all of the digital tracks in the file will
be merged and output as a single WAV file. Whether the file is stereo or
mono depends on the choice made in the Attributes drop-down list box.
Note that some Formats only have one available sample rate.
Only playable digital audio tracks are mixed into the .WAV file created.
Muted tracks are not included and MIDI data is ignored. Pan and volume
information for the digital audio tracks is included in the exported file.
In some cases, you may notice that after exporting a .WAV file, the size of
the exported file has changed in comparison to the original ORC file. This
change occurs if you have cut-and-paste a number of bars because outside
of Digital Orchestrator Pro, each instance of the repeating segment, rather
than just a reference to it, becomes part of the file.
If, on the other hand, you export multitrack digital audio, the file size will
shrink as all of the tracks are merged into one .WAV file.
Name
In the Name drop-down list box, presets of often used Formats and Attributes can be saved for easy access when exporting .WAV files. Three
commonly used presets — Telephone Quality, Radio Quality and CD
Quality — are installed with Digital Orchestrator Pro.
To add a preset:
1. Open the Sound Selection dialog box by selecting Export WAVE
from the File menu, entering a name for the file to be exported and
clicking OK.
2. Set the Format and Attributes of the file to be exported.
3. Click the Save As button.
4. In the dialog box, type in a name for the new preset.
5. Click OK. The preset is now available from the Name drop-down list
box.
File Menu
191
To load a preset:
1. Open the Sound Selection dialog box by selecting Export WAVE
from the File menu, entering a name for the file to be exported and
clicking OK.
2. In the Name drop-down list box, click the arrow to display a list of
the available presets.
3. Click the name of the desired preset. The Format and Attributes
boxes change to the preset selected.
To remove a preset:
1. Open the Sound Selection dialog box by selecting Export WAVE
from the File menu, entering a name for the file to be exported and
clicking OK.
2. In the Name drop-down list box, click the arrow to display a list of
the available presets.
3. Click the name of the desired preset.
4. Click the Remove button.
♫
The Remove button is unavailable for the three presets —
Telephone Quality, Radio Quality and CD Quality — that
are installed with Digital Orchestrator Pro.
Format
Use the Format drop-down list box to select the type of compression to
export the .WAV file with. You can only choose from the codecs available
on your system.
Codec, an acronym for Compression/DECompression, is a technology that
compresses data. The codecs available when exporting a WAV file
compress digital audio data.
192
Voyetra Technologies Inc.
Although Digital Orchestrator Pro can export digital audio with any codec
installed on your system, it can only read PCM compression.
♫
If you export a .WAV file with a format other than PCM,
Digital Orchestrator Pro will not be able to reload the file.
Attributes
Use the Attributes drop-down list box to select the sampling rate — which
includes Hertz, Bit and Stereo/Mono — that you want to export the WAV
file with.
This box also displays the amount of disk space, in Kilobytes per second,
that each sample rate takes up.
Exit
Use the Exit command to end a Digital Orchestrator Pro session.
1,2,3,4...
The four most recently accessed files are listed here, making it simple to reopen the files you have been working with. You can also use this feature to
quickly revert to the original saved version of a file. To use this feature,
simply click on the number of the file you want to load.
File Menu
193
Chapter 16
Edit Menu
Use the commands in the Edit menu to edit MIDI and digital audio tracks.
Selected areas and events can be highlighted and then Cut or Copied into
the Digital Orchestrator Pro Clipboard. This buffer is similar to the
Windows Clipboard, but because it is internal to Digital Orchestrator Pro,
it cannot be used to exchange data with other Windows programs.
Only Digital Orchestrator Pro’s Notepad can be used to Cut, Copy and
Paste information between Digital Orchestrator Pro and other Windows
applications.
194
Voyetra Technologies Inc.
Selecting Data
Before data can be edited, it must be selected. This can be done with the
mouse, by clicking or clicking-and-dragging, or with the keyboard.
Click — In windows with rows and columns, click a row or column to
select it. (The row or track need not have data in it.) In certain
instances, such as recording to a new track or loading SysEx data,
the data is sent to the selected row. Clicking the Track Number in
the Bar Pane of the Track/View window selects the entire track.
Click-and-Drag — Select an area of data by clicking the mouse, holding down the left mouse button and dragging diagonally across the
material to be selected. The area between the beginning and the
ending points of the drag is highlighted, showing it is selected.
From the Computer Keyboard — In some windows, the arrow keys
can be used to move the cursor or highlight data. By holding down
the Shift key while moving the cursor, data can be selected.
Undo
Use the Undo command to reverse the effects of up to 12 of the most
recent editing commands. The available command on the menu depends
upon the last command executed. If that command was Undo then Redo
becomes available. In this way, you can toggle between and audition the
edited and unedited versions of a file and undo up to 12 levels of edits.
For example, if you perform a drag edit, delete a note and then decide you
should not have done either, you can undo both actions. Select Undo
Delete Note from the Edit menu, then select Undo Drag Edit from the
Edit menu and you are back where you started.
You can change the number of available Undo levels from the default of 12
by editing the DOP.INI file with a text editor. However, increasing the
number of Undo levels demands additional memory. For more information, read the VSEQINI.WRI file.
Keyboard Shortcut Key: Ctrl+Z
Edit Menu
195
Redo
Use this command to Redo an Undo. Like the Undo command, it operates
up to 12 levels deep. The Redo you see is based on the edits and Undos
that have been executed. Multiple Redos are performed in the same way as
Undos: just keep selecting the available Redo from the Edit menu.
Keyboard Shortcut Key: Ctrl+R
Cut
Use Cut to remove a selected area or event and place it in Digital Orchestrator Pro’s Clipboard where it can be pasted to another location. By dragselecting across tracks, MIDI and digital audio data can be cut at the same
time. The Cut command does not leave a copy of the data behind.
Keyboard Shortcut Key: Ctrl+X
Copy
The Copy command sends a copy of any selected data to Digital Orchestrator Pro’s Clipboard. Unlike Cut, the Copy command makes a duplicate
of the selected data, leaving the original data behind unaltered. Copied data
can then be pasted into another location in the window, into another
Digital Orchestrator Pro window or into another instance of a window.
Keyboard Shortcut Key: Ctrl+C
Paste
Use Paste to paste the contents of Digital Orchestrator Pro’s Clipboard to
a new location defined by the current cursor position or a highlighted area.
Data can be pasted into another location in the same window or it can be
cut-and-paste between windows or between separate instances of the same
window. For example, a note can be selected in the Piano Roll window and
pasted into the Event Editor window. When pasting data in the Event List,
a pop-up dialog box asks for the location of the desired paste.
196
Voyetra Technologies Inc.
The same segment of data can be pasted into many locations. This keeps
file size to a minimum only when digital audio tracks are edited. Digital
Orchestrator Pro places a reference to the data — rather than the data itself
— into the file when it is cut-and-pasted or copied-and-pasted.
To replace the data with existing material at the location of the paste, select
an area of a MIDI or digital audio file before using the Paste command.
When Pasted, the contents of the Clipboard replace existing data, beginning
at the starting point of the selection. If a range was not selected, the data
merges, beginning at the point where the mouse was clicked.
Keyboard Shortcut Key: Ctrl+V
Select All
This is the command to use to select all of the data in the currently-opened
editing window. Select All is much faster than highlighting the entire song!
Keyboard Shortcut Key: Ctrl+A
Move Command
Use the Move command to relocate a group of data. This command is
useful when you need to accurately move data to a new location. You can
specify a location to a single click.
To use the Move command:
1. In any of the windows, highlight the data to be moved.
2. From the Edit menu select Move.
3. Click the Offset drop-down list box and choose either an Earlier or
Later location — from the current point — to move the data.
4. In the Bar:Beat:Click box, enter the amount of time you want to
move the data away from the current location.
5. Click OK.
Edit Menu
197
Clear Clipboard Contents
When a selected area or event is Cut or Copied and placed in Digital
Orchestrator Pro’s Clipboard, it remains there indefinitely — until something else is Cut or Copied.
Once the contents of the Clipboard have been Pasted to a new location and
this data is no longer needed, there is no need to retain this data. Clearing
the contents of the Clipboard can help speed up processing.
The Clear Clipboard Contents command serves two functions:
It clears the contents of the Clipboard. This frees up memory from
previous edits.
It clears any Undo information being stored. (You may recall that
Digital Orchestrator Pro holds up to 12 levels of Undo — unless this
default setting has been changed — so that the effects of up to 12 of
the most recent editing commands can be reversed.)
One word of caution, however. Clear Clipboard Contents cannot be
undone! Once the command is executed, the Clipboard’s contents and the
Undo information are gone for good!
Clicking Clear Clipboard Contents displays a warning box to confirm that
you want to proceed with this command. Click OK if you are certain that
you will not require the Clipboard Contents and the Undo information
being retained.
♫
198
CAUTION!
This command clears BOTH the Contents of the Clipboard
and the Undo information being stored. Be careful — this
action CANNOT be undone! Once the contents of the
Clipboard and Undo information have been cleared, they
are gone forever!
Voyetra Technologies Inc.
Insert Bars
This command opens the Insert Bars dialog box so that blank bars can be
inserted into a specified location. Insert Bars shifts existing data to the right
and is useful for making room in a song for a new section.
Before Bars Use this field to set the starting position for the bars to
be inserted. When the Insert Bars dialog box is opened,
the current cursor position is shown as the Before Bars
setting.
Number of Enter the number of bars to be inserted.
Bars
Track Insert bars in any one track — or all the tracks at once.
Time Signature
You can set the Numerator, Denominator and Number of Beats per bar
for the bars you are inserting. For more information, see the “Conductor
Editor” and “Piano Roll Window” chapters.
Delete Bars
Choosing this command opens the Delete Bars dialog box from which bars
(blank or otherwise) can be deleted. When bars are deleted, data is shifted
to the left to fill in the deleted area.
To delete data and replace it with an interval of silence, use Delete Bars to
remove the data and then add blank bars using the Insert Bars command
— or cut the data using the Edit menu’s Cut command.
Number of Enter a value or, if a range is highlighted, it appears as the
Bars Number of Bars setting when the dialog box is opened.
Track Any number of tracks — or All tracks — can be selected.
Edit Menu
199
Chapter 17
Transforms Menu
Digital Orchestrator Pro includes a collection of MIDI and digital audio
transforms for modifying existing data. With transforms, you can, for example, adjust the volume over a range of bars, adjust the timing accuracy of
the rhythm part of a track, and add effects such as echo and flange. Using
the Mixdown Audio transform, all unmuted digital audio tracks can be
blended into a two-track stereo or one track mono track mix to free
processing resources.
200
Voyetra Technologies Inc.
Quick Tour
To use a transform, you select and change a portion of a song file in a
single operation. Transforms work on a selected portion of a file so, if you
select across tracks, the transform is applied to all the data throughout the
selected ranges.
The changes made by the transform are permanent. However, if the effects
of the transform are not to your liking, use Undo to reverse any these
changes and try other settings. By alternating between Undo and Redo, it is
easy to compare the sounds with and without the transform.
All of the available transforms and their parameter settings are described in
this chapter. To apply a transform, follow the steps below.
To apply a transform:
1. From any window that is convenient, select the MIDI notes, MIDI
measures or digital audio data to be changed.
2. From the Transforms menu or the Transform buttons on the
Toolbar, select the desired transform. (Depending on the type of data
that has been selected, some of the transforms may appear grayed out
(not available).)
3. If a dialog box displays, enter or adjust the parameters as needed.
(The effects of the various Transform options are explained in this
chapter.)
4. Click OK.
5. Listen to the file to check the results.
6. If the results are not to your liking, use the Undo command to
restore the file to its original state, run the transform again and adjust
the settings.
♫
Transforms Menu
You cannot modify MIDI and digital audio data
simultaneously.
201
Transform Buttons
The Transform buttons provide quick access to the most commonly used
MIDI and digital audio transforms.
MIDI transforms are located on the top row.
Digital audio transforms are located on the bottom row.
Offset Start
Offset
Transpose
Quantize Note
Start Time
Humanize Note
Start Time
Digital Audio Delay
Digital Audio
Crescendo/Fad
Digital Audio
Compression
Digital Audio
Normalize
Digital Audio
Graphic EQ
The Transform buttons are only available when the appropriate data is
selected. Clicking on a Transform button opens the appropriate dialog box,
except in the case of Digital Audio Normalize, which Normalizes the
selected digital audio data.
♫
202
To see the Transform buttons, your monitor’s screen
resolution must be set to 800 × 600 or greater. To change
the screen resolution, refer to Windows Help.
Voyetra Technologies Inc.
1,2,3,4...
Digital Orchestrator Pro remembers the four most recently used Transforms, including the parameters selected for each. To use this feature:
Select a section of a song and choose a Transform from the list.
This provides a convenient way to make the same change to several musical
passages.
Pitch Transforms
Transpose Pitch
Transpose Pitch moves all of the selected
notes up or down in pitch.
Choose Up to raise the pitch.
Choose Down to lower the pitch.
Enter the desired change in Octaves and
Semitones.
Diatonically Transpose Pitch
Diatonic Transpose is a special type of pitch
transposition. It transposes the pitch of the
notes but maintains the current key — as set in
the Conductor Track — during the change.
The settings for Diatonically Transpose Pitch
are the same as in the Transpose Pitch dialog
box.
Transforms Menu
203
Invert Pitch
Use Invert Pitch to move selected notes to
the same relative position on the opposite
side of an Axis note.
For example, if the axis note is C5 (Middle
C), G5 (which is five semitones above C5)
would move to a position five semitones
below C5, to G4.
Use the spin buttons or the keyboard to set the value of the Axis note.
Diatonically Invert Pitch
Diatonically Invert Pitch works the same way
as the Invert Pitch dialog box, but maintains
the key — as set in the Conductor Track —
during the change.
Randomize Pitch
Randomize Pitch scatters the pitches of
notes on a random basis. The higher the
amount specified in the dialog box, the
more widely the pitches scatter. Use the
slider to quickly make large changes in
the number.
204
Voyetra Technologies Inc.
On Velocity Transforms
This category of Transforms affect a note’s On Velocity. On Velocity is a
measure of how powerfully a key was struck when the note was played.
Values can range from 1 (a very gentle touch) to the maximum of 127 (a
very hard hit). At playback, On Velocity usually controls the loudness, or
dynamics, of the piece. Depending on the synthesizer, it may also affect
brightness or other musical qualities.
By changing On Velocity values, the dynamics of individual notes or
groups of notes can be changed.
Note that some synthesizers cannot transmit velocity information and
simply assign the same value to every note. A particular synthesizer may or
may not respond to velocity messages during playback. Refer to your
synthesizer’s documentation to learn more about velocity messages.
♫
ON VELOCITY
If the On Velocity is zero, the note won’t play at all.
At very low velocities, notes may be inaudible.
Set Velocity
Use Set Velocity to set the On Velocity for
all selected notes to the same value. Use the
slider or the Set value box to enter the
desired value, from 1 to 127.
Transforms Menu
205
Offset Velocity
Use Offset Velocity to increase or decrease
the existing On Velocity of notes in a selected range by the Offset value chosen. This
can preserve the dynamics with which the
music was originally played, while adjusting
the overall velocities.
Scale Velocity
Use Scale Velocity to increase or decrease
existing On Velocity as a percentage of
the current setting.
Humanize Velocity
The Humanize function randomizes the On
Velocity of the selected notes, making the
passage more natural-sounding.
Higher values in the Amount box allow a
wider range of change.
♫
206
All of the Humanize transforms favor smaller amount
settings. Most of the MIDI notes will receive small changes,
while relatively few get large changes.
Voyetra Technologies Inc.
On Velocity Crescendo
On Velocity Crescendo sets the velocity of
the first note in the range to the Start value
that has been entered, sets the last note to the
End value, and successively increases the
velocities of the notes in between.
To create a decrescendo, simply set the End
velocity value to a number lower than the
Start.
The Keep Relative setting preserves the original dynamics during the Crescendo transform.
Off Velocity Transforms
Off Velocity is similar to On Velocity, except that it measures how quickly
a key has been released.
Off Velocity values can range from 1 to 127. Although many synthesizers
do not respond to Off Velocity, the following functions are included for
those that have the capability.
Set Note Off Velocity
The value assigned in Set Note Off Velocity
sets the Off Velocity of all selected notes.
Transforms Menu
207
Offset Note Velocity
Use the Offset function to increase or
decrease the existing Off velocities of the
notes in the range by the Offset value that
you select.
Use the spin buttons or the keyboard to set
the Offset value.
Scale Note Off Velocity
Use Scale Note Off Velocity to increase or
decrease existing Off Velocity by a
percentage of the current Note Off
Velocity.
Humanize Note Off Velocity
Humanize Note Off Velocity makes random
adjustments to the Off Velocity of the
selected notes.
Higher values in the Amount box allow a
wider range of change.
Note Duration Transforms
The duration of any note is expressed in Bar:Beat:Click. A click is a fraction
of a quarter note; the default is 1/480th. The actual time interval of a note
depends on the song’s current meter and the tempo.
208
Voyetra Technologies Inc.
Transforming the duration of a group of notes can be used to simulate
different types of musical articulation, drawing out the notes in a violin
track, for example, to produce a legato effect.
Note duration transforms can also be used to tighten up a recording where
notes hang too long or are cut off too quickly.
Set Note Duration
Set Note Duration quantifies the duration of all selected notes at the same
value.
Quickly choose a value by selecting a
note; use the parameter boxes to make
more precise adjustments.
To set the note duration to a dotted
note, click the Dotted button.
To set the note duration to a tuplet,
click the Tuplet button. Once the
Tuplet button is On, set the ratio for
the tuplet.
For more information about tuplet ratios, refer to the “Tuplet Numerator
and Denominator” section of the “Piano Roll Window” chapter.
Offset Note Duration
Use Offset Note Duration’s spin buttons
to increase or decrease the duration of
selected notes by the Offset value that
you select.
Transforms Menu
209
Scale Note Duration
Use Scale Note Duration to increase or
decrease the existing duration of a note by
the percentage factor you select.
Humanize Note Duration
Use Humanize Note Duration to make
random adjustments to the duration of
selected notes. Higher values in the Amount
box allow a wider range of change.
Quantize Note Duration
Quantize Note Duration sets the duration of
notes to the nearest even multiple of a
selected interval. If, for example, a quarter
note is chosen as the interval, each note is
converted to a quarter note.
The Quantization Value can be an interval
from a 64th note to a quarter note in length.
Dotted notes or tuplets can also be selected.
The Intensity of the quantization effect also can be controlled. For example, if the intensity is set to 75%, each note’s duration will move only
three-quarters of the way to its target.
Start Time Transforms
Start Time transforms affect the rhythm of a song by changing the start
times of notes. With Offset Start Time, MIDI non-note data can also be
changed.
210
Voyetra Technologies Inc.
The Start Time of a MIDI note is the moment when the note commences,
in Bar:Beat:Click. The Start Time transforms help tighten up rough musical
passages or create clean, consistent rhythm parts. They also can be used to
make step entered parts looser.
Offset Start Time
Offset Start Time shifts the start
times of all the selected notes and
non-note data backward or
forward in time.
Non-note parameters that can be
transformed by Offset Start Time
are: Pitch Bend, Channel Aftertouch, Key Aftertouch, Patch
Changes and any data set by the
Controllers.
Decrease the start time by choosing Earlier in the Offset list box.
Increase the start time by selecting Later.
Control the amount offset increases or decreases by changing the value set
in the Bar:Beat:Click numerical box.
Humanize Note Start Time
Humanize Note Start Time adds a series of
random time offsets to the selected notes,
making the passage more natural-sounding.
Higher settings in the Amount box permit
larger shifts in time.
Humanize Note Start Time makes MIDI sounds that have been draw-in
note-by-note or step recorded in the Piano Roll window sound more
natural.
Transforms Menu
211
Scale Time
The Scale Time box has a slider with values
in percentages and a box to select whether
durations should be scaled.
For example, if there are four quarter notes
in a measure and Scale Start Time is set
down 50% without scaling the durations of
the notes, the four quarter notes remain as
quarter notes, but take up 50% less space.
The result is four overlapping quarter notes on the first four eighth notes
of the measure. If durations was also scaled down 50%, the result would be
four eighth notes.
If the four quarter notes were scaled up 200% without scaling the durations
of the notes, the result would be two measures with quarter notes on every
other beat. If durations was scaled, there would be two measures of half
notes.
Quantize Note Start Time
Use Quantize Note Start Time
to adjust the start times of the
selected notes so they begin
only at certain points in the
measure.
For example, if a series of
notes is played off the beat, the
notes’ start times can be
quantized so they begin
precisely on the beat.
A variety of options permit detailed control over which notes are affected
and the quality of the results.
212
Voyetra Technologies Inc.
These include:
Quantize This is a timing interval, expressed as a musical note from
Value a 64th note to a quarter note in length. It may help to
imagine a grid superimposed on the measure. Notes are
moved toward lines of the grid. The quantize value
establishes the interval between grid lines.
If, for example, an eighth note is selected as the interval,
the beginning of each selected note will move to the
nearest eighth note division within the measure.
Dotted This control adjusts the start times of notes to the
nearest dotted note value. This option is most suitable
for time signatures with numerators that are divisible by
three, such as 3/4 or 6/8. When measures cannot be
divided evenly into dotted note intervals, the grid is realigned at the beginning of each measure.
Tuplet When selected, this control divides the measure into
tuplet intervals. Use Tuplets to specify a non-standard
duration for a note, such as a triplet or a quintuplet. For
example, to insert a quarter note triplet, select a quarter
note in the box above the tuplet control and set the
Tuplets ratio to 3:2. This sets the grid to three notes in
the space normally taken by two quarter notes.
Intensity Intensity controls the degree of quantization. This guards
against your music becoming overly precise and mechanical. If the intensity is set to 75%, each note moves only
three-quarters of the way to the nearest grid point.
Swing This creates a swing feel by moving every other grid
point to an earlier or later position. Try a setting between
55% and 66% as a starting point. 66% generates a jazz
swing.
Percentages greater than 50% move every other grid
point to a later position.
Percentages less than 50% moves every other grid
point to an earlier position.
Transforms Menu
213
Percentages of 50% yields no change.
Sensitivity Use this control to quantize notes that already lie near a
grid point, while leaving other notes unchanged. This
feature is useful, for example, to clean up a passage without disturbing tuplets. The sensitivity zone is expressed
as a percentage of the grid interval; if set to a low value
such as 2%, only notes that lie very close to a grid line are
quantized. This feature is helpful when quantizing a track
containing triplets that you need to preserve while
modifying the remaining notes.
Offset The Offset control moves the entire grid forward (later)
in time, so notes can be quantized to points between beat
divisions. This is very helpful when music is played
consistently before or after the beat. Moving the grid
helps to keep a quantized track in sync with a nonquantized track.
Inside When activated, this function quantizes notes that lie
Range within the Sensitivity tolerance. In the example above,
notes lying within 2% of a grid line would be quantized.
When turned Off, only notes lying outside the Sensitivity
range are quantized, that is, the notes lying in the other
98% of the interval.
Preserve When selected, this function moves both the start and
Duration end points of the note by the same amount, thus
preserving the note’s total duration. When turned Off, it
moves only the start time of the note, which lengthens or
shortens its duration.
214
Voyetra Technologies Inc.
This shows how quantization settings affect notes. Notice that only notes whose
start times lie within the sensitivity range (gray) are aligned with the grid (broken
lines). Also, the Preserve Duration option was not selected, so end times of notes
do not change — the quantized notes become longer or shorter.
CAUTION!
Playback can be disrupted by moving note events without
moving corresponding non-note events such as Patch or
Controller changes. In general, when moving note events,
move the non-note events following them as well. To be
sure all non-note data is being moved with the note data,
make sure the Clip All option is selected in the Piano Roll
Quick Menu. Refer to the “Piano Roll Window” chapter for
more information.
Transforms Menu
215
MIDI Transforms
Use the MIDI transforms to change the settings of non-note MIDI events
like pitch bend or patch assignment. Pick the types of MIDI messages the
transforms should act upon from the dialog boxes that open from the
MIDI Transforms menu. Like the other transforms, MIDI changes are
applied to the range of the track or tracks that are selected.
To use the MIDI transforms, select a range of MIDI data in either the
Track/View, Piano Roll or Event Editor windows. When working in the
Piano Roll, right-click in the Piano Roll pane to open the Quick Menu and
select the Clip All option. When turned On, non-note as well as note
specific MIDI transforms will be applied to the data that has been selected.
When a range is selected in the Track/View window, the MIDI transforms
can be applied across more than one track.
Offset MIDI Value
Use Offset MIDI Value to
change the value(s) for the
MIDI event(s) chosen —
Patch Changes, Key
Aftertouch, Channel
Aftertouch, Pitch Bend,
Controller — by the
amount(s) selected.
Use the sliders to quickly
make changes to the values.
216
Voyetra Technologies Inc.
Scale MIDI Value
Scale MIDI Value
changes the value of the
selected non-note
MIDI event(s) by the
factor(s) selected.
Values can be increased
or decreased
independently for each
type of event.
Select a range in the
Event Edit, Piano Roll
or Track/View window,
then apply this transform.
Invert MIDI Value
This transform inverts MIDI
values, using the midpoint of the
allowed range as an axis.
Most MIDI messages assign a
value from 0 to 127. The midpoint
of that range lies midway between
63 and 64. The Invert transform
moves the value to the opposite
side of the midpoint.
For example, the value 127 would become 0; 0 would become 127; 64
becomes 63; 84 becomes 43.
Transforms Menu
217
Humanize MIDI Value
Humanize MIDI Value
adjusts the values of
selected non-note
MIDI events on a
random basis, making
the passage more
natural-sounding.
The degree of allowable change can be
controlled independently for each type of
event.
Eliminate Dupe
In a series of MIDI events of
the same type with the same
value, only the first in the series
will actually have any effect on
the music.
Eliminate Dupes finds and
eliminates redundant MIDI
events of the type(s) selected.
218
Voyetra Technologies Inc.
Thin MIDI
Some editing operations and
input devices can generate
dozens or even hundreds of
MIDI events, each creating a
change too small to detect.
Often, the same musical result
can be achieved with fewer,
larger changes.
Use Thin MIDI to reduce the
density of the selected classes
of MIDI events.
Like Eliminating Dupes, thinning cuts out unnecessary messages and generates a smaller file, reducing the burden on the synthesizer.
The Thin MIDI dialog box offers two ways to control the degree of
thinning. Use either one or both:
Within Click — eliminates all messages of the same type that occur
closely to one another. The maximum value allowed is 480 clicks,
or one full quarter note.
For example, if a pitch bend message occurs at 005:02:270, and the
Within Click value is set to 20, the next pitch bend message that
would be permitted to remain would be at 005:02:290.
To explain it another way, if the Within Click value is set to 240,
this would limit the density of the messages to two per quarter
note, since a quarter note is typically 480 clicks.
Within Value — eliminates messages that trigger relatively small
changes. For example, setting a Within Value at 10, if a particular
key aftertouch message sets a value of 27, the next key aftertouch
message must increase or reduce that value by at least 10 to 37 or
more, or to 17 or less. Anything smaller than that change is
eliminated.
Transforms Menu
219
Fill MIDI
The Fill MIDI transform
fills in — or adds —
controller, channel
aftertouch, key
aftertouch, and pitch
bend MIDI events.
Input parameters are
starting and ending
values, curvature, and
minimum clicks between.
Curvature describes the type of change. Curvature values can range from
-10 to +10.
A curvature value of 0 is linear change. This means a steady rate of
change.
A curvature value of +10 yields more change more quickly, the later in
the range you are. This value is the most commonly used for all events
except pitch.
A negative value yields more change in the beginning and less change
the later in the range you are. This value is particularly effective on
pitch change data.
The Fill MIDI transform helps achieve very accurate changes in MIDI data.
To obtain a more human sound, try drawing-in the data with the Graphic
Controller Editor in the Piano Roll window.
220
Voyetra Technologies Inc.
Tempo Transforms
Fit Time
This transform scales tempos so that the
selected passage will take x amount of
time.
For example, if you have a 50-second
piece of music which needs to fit into a
60-second segment, this transform cab
adjust the tempo — in this case slow it
down — so that the piece now lasts 60seconds.
Tap Tempo
Occasionally, it is desirable to record a
piece of music without following a
metronome. An example of this would be
a solo piano sonata. Removing the
constraints of a metronome’s steady
tempo allows the performer to be more
musically expressive.
If a song is recorded in free-time (not played in time with a metronome),
the bars of music performed will not be aligned with the bars and beats in
Digital Orchestrator Pro. The performance may also contain variations in
the tempo. The Tap Tempo transform aligns the bars of music recorded in
free-time to the bars in Digital Orchestrator Pro by adding tempo change
controller messages to the song.
To use this transform, a tempo reference track must first be recorded. This
is a separate MIDI track of quarter notes that the Tap Tempo transform
can use as a reference to line up the bars.
Transforms Menu
221
To create a tempo reference track:
1. Enable a new MIDI track to record.
2. Play quarter notes on any note of the keyboard (or MIDI controller)
as you listen to the free-form performance.
Note that the first note of the Reference Track must be exactly on the
first beat boundary (clicks=0) in the selected region. (You may need
to adjust this manually using the Event Editor window and the
Reference track is recorded.) Record this reference track for the
entire length of the song.
3. When the reference track is complete, run the Tap Tempo transform
and select the track of quarter notes as the reference track. The
tempos will adjust so that it appears that the piece was recorded to a
strict tempo, while the song still retains the original performance
tempo changes.
Accelerando
The Accelerando transform is used to change
tempos in either direction — faster or slower
— over a given period of time within the
selected range.
Parameters include starting and ending
tempos, curvature, and minimum clicks
between.
Curvature can range from -10 to +10.
Curvature describes the type of change.
A curvature value of 0 is linear change. This means a steady rate of
change.
A curvature value of +10 yields more change more quickly, the later in
the range you are.
A negative value yields more change in the beginning and less change
later in the range.
222
Voyetra Technologies Inc.
The Graphic Controller Editor, in the Piano Roll window, can also be used
for drawing in accelerandos and ritardandos.
Digital Audio Transforms
Once a segment of a digital audio track for editing has been selected in the
Track/View or Digital Audio window the Digital Audio transform functions can be accessed from either the Transforms menu or the Transform
buttons. Use these transforms to control changes to the amplitude of a
waveform and to produce effects such as delay, echo and reverb.
To apply any of these transforms:
1. Select a portion of the waveform
2. Pick the desired transform from the Digital Audio submenu choices
in the Transforms menu. (Two of these choices — Compressor
Limiter and Delay — open dialog boxes with a great number of
features and controls. Each of these dialogs is given a separate section
in this chapter.)
Scale Digital Audio
Digital audio scaling increases or decreases
amplitude by adding or removing a percentage of the original amplitude.
The Scale Digital Audio transform is very
useful for balancing volumes when cuttingand-pasting between different files.
A maximum of 500% can be added to the
original amplitude.
Selecting a percentage of -100% subtracts all of the original amplitude,
resulting in silence.
Transforms Menu
223
When Suggest is clicked in the Scale Digital Audio dialog box, Digital
Orchestrator Pro calculates a “normalized” value for scaling the amplitude
of the selection. The effect is the same as selecting the Normalize
transform.
Normalize
Normalize increases the
amplitude of a selected segment
of a digital audio file to the
maximum possible level
without chopping off, or
clipping the peaks of the signal.
Digital Orchestrator Pro calculates this value on its own, so there is no
dialog box needed for input.
Audio Crescendo/Fade
Audio Crescendo/Fade increases or
decreases amplitudes gradually over the
selected range, creating fade-ins and fadeouts. For example, to create a “fade out,”
select the end region of the track and set the
Start Level to 100% and the End Level to
0%.
Using this transform always produces amplitudes less than or equal to the
original values.
224
Voyetra Technologies Inc.
Reverse
The Reverse transform causes the selected range to play in reverse. This is
primarily useful as a special effect. This command opens a box which
shows the progress of the Reverse transform.
Since no user-defined values need to be input to perform this transform, a
dialog box is not presented.
Compressor/Gate
Selecting Compress/Gate from the Digital Audio submenu opens the
Compressor/Noise Gate dialog box. The transforms available from this
dialog box affect the relative volume or dynamics of a digital recording and
operate in three distinct modes:
Gate
Limiter
Compressor
Using the Compressor/Noise Gate
Changing digital audio with the Compressor is easy as selecting a range,
opening the Compressor/Noise Gate and choosing a preset or setting the
controls to alter the digital audio.
Transforms Menu
225
To use the Compressor/Noise Gate:
1. Select the range in the file to be changed.
2. From the Transforms menu, select Compressor/Gate.
3. Choose a preset.
4. Press the Audition button.
5. If the effect is not satisfactory, adjust the settings or try a different
preset.
6. When you are satisfied with the auditioned effect, click OK.
Effects
The controls in the Compressor/Noise Gate dialog box
have different effects on the sound depending on which
mode — Gate, Limiter or Compressor — has been
selected from the drop-down list box.
Gate
The Gate function lowers the volume of quiet sounds. It is often used to
completely cut off sound when recording levels drop. For example, a track
of guitar music might have parts where the guitarist is not playing at all.
During these parts, hum and hiss can become audible. The Gate transform
removes the signal during these quiet sections, leaving the rest of the
recording unaltered.
Limiter
The Limiter is used to lower the volume of loud sounds. In narrative recordings, volume levels can jump rapidly, particularly on hard consonants.
The Limiter brings down the volume of these occasional speech bursts,
making the recording smoother and more professional-sounding.
226
Voyetra Technologies Inc.
Compressor
The Compressor is similar to the Limiter, except it raises the level of quiet
sounds. This is useful when the notes on an acoustic instrument should
ring out longer. Instead of allowing notes to decay (fade out) normally, the
compressor “pumps up the volume” and holds the notes longer.
The Compressor works in essentially the same way as the Limiter except
that the Compressor’s overall output volume can be increased to compensate for loss of volume brought about by the Limiter.
Use the Compressor to bring up volume globally after the Limiter has
trimmed the peaks on louder sounds. This technique can create a more
balanced recording.
Audition Effect
This is the topmost of the three buttons located directly to the left
of the OK and Cancel buttons.
When this button is clicked, a small amount of the selected sound data is
played back. Use this button to audition the setting before committing to
transforming all of the data selected.
When using Audition Effect, select a portion of the data in which sound
changes are readily audible since, even at the maximum duration, only a
short interval is auditioned.
Audition Dry
Located beneath the Audition Effect button, this control auditions
the same selected segment of the audio file without effects.
Switch back and forth between the Audition Effect and Audition Dry
buttons to compare the sound both with and without the effect being
considered.
Transforms Menu
227
Audition Duration
Use the Audition Duration dialog box to adjust the length of the
audition in seconds. The maximum audition length is 10 seconds.
Note that an audition duration that approaches the maximum (10 seconds)
can take a long time to process, particularly at higher sample rates.
Threshold
The Threshold control, located at the extreme left of the
Compressor/Noise Gate dialog box, sets the volume level at
which an effect becomes active.
With the Gate mode selected, signals below the Threshold are made
quieter; signals above it are unaffected.
With the Limiter mode selected, signals above the Threshold are made
quieter.
With the Compressor mode selected, all signals are made louder.
Signals below the Threshold are boosted but retain their original
dynamics, while signals above the Threshold are boosted and their
dynamic range reduced or compressed.
Attack
The Attack control, located to the right of the Threshold
controls, determines how fast an effect responds to an increase
in volume.
For example, when using this transform in Limiter mode, the Attack
control determines how quickly the Limiter brings down the volume when
the signal level goes above the Threshold.
228
Voyetra Technologies Inc.
Release
The Release control, to the right of the Attack control,
determines how fast an effect responds to a decrease in volume.
For example, in Gate mode, the Release control determines how quickly
the Gate brings down the volume when the signal level goes below the
Threshold.
Amount
The Amount control determines how
strong an effect will be.
At 0, the effect does nothing
At 100, the effect is at its most pronounced.
With the Gate effect selected, Amount determines how much quieter
the signals below the Threshold are made. With Gate, the Amount is
normally set to 100%.
With the Limiter or Compressor selected, Amount determines to what
degree the signals above the Threshold are quieted.
You can either enter a number a precise amount or use the slider to select
the Amount.
Output Gain
The Output Gain control sets the final volume of the
effect.
A setting of 0% yields no boost in output level.
A setting of 100% produces the maximum possible Output
Gain.
If a setting causes a distorted output, try reducing the Output Gain.
Transforms Menu
229
Presets
This displays a list of preset effects.
When a Preset is selected, all of the necessary delay parameters are automatically entered.
Use a preset effect setting as is, or as a starting point to create your own
effects.
Add Preset
The Add Preset button adds the current dialog settings to the preset
list.
Custom effect can be saved under a new name and added to the list of
presets. Any changes made to Digital Orchestrator Pro’s pre-configured
presets remain in effect until the preset is deleted.
To add a Preset:
1. Once all of the parameters to be saved have been set, click the Add
Preset button. The Save Setting dialog box displays.
2. In this dialog box, enter a name for the settings.
3. Click OK. The settings will be saved and the new name will be added
to the list of presets.
To load a Preset:
1. Click the Presets drop-down list box. The preset names display.
2. Click the name of the desired preset. The sliders and gain levels move
to the saved settings.
230
Voyetra Technologies Inc.
Delete Preset
This control deletes the currently-selected preset from the presets
list.
This will delete the custom effects provided with Digital Orchestrator Pro
for the current session only.
To delete a Preset:
1. Click the Presets drop-down list box. The preset names display.
2. Click the name of the preset desired. The preset loads.
3. Click the Delete Preset button..
Considerations When Using the Gate
Be sure to set the Threshold correctly. If the Threshold is too high, you
will end up cutting out audio that you want. If you set it too low, you
will not eliminate the noise you are trying to get rid of. Try out a
number of different settings to determine the correct Threshold level.
You will almost always want to use Gate with the Amount set to 100%.
After all, the point of a noise gate is to remove noise altogether. If
there is so much noise that no clear threshold separates the signal from
the noise, then a setting of 50% might work. Rather than chopping out
everything below the Threshold, this will just make it quieter. Some of
the signal may get attenuated along with the noise, but it will not be
completely lost.
It is very important to set the Attack as fast as possible with a Gate.
Otherwise, when a new signal comes along, the Gate will stay closed
and you will not hear the new note. It can be worthwhile to experiment
with attacks shorter than you would normally use (3 to 10 millisecond
range). You will also want the Release to be relatively fast so that the
Gate will chop off the noise quickly.
Do not set the Attack to 0. If you do, the gain will change infinitely
fast, causing a loud pop. The Attack and Release should always be at
least a few milliseconds long.
Transforms Menu
231
Considerations When Using the Limiter
Look at the waveform in the audio editing window and see where the
peaks are that you want to get rid of. Use this information to set the
Threshold so the peaks will be flattened.
The Attack and Release settings are not as critical as with the Gate
transform. If the Attack is a little too long, the initial part of the peak
will be through, but it will get silenced quickly enough.
If you set the Amount to 100%, any signals above the Threshold will
be reduced to the Threshold level. Lower the Amount settings to reduce peaks without completely flattening them. For a more natural
sound, try a setting between 50% and 75%.
Considerations When Using the
Compressor
A wide variety of effects is available, depending on the Threshold and
Amount settings. In general, the higher the Amount and the lower the
Threshold, the more effect you will get. For example, with the Amount
set to 100 and Threshold set to 10, all signals will be amplified to the
maximum volume. This intensifies and brings forward the sound of
percussive instruments like piano, guitar and drums.
When amplitudes go above the range in which sound can be played,
part of the signal is lost or clipped. Along with signal loss, clipping
produces a distortion of the sound at the highest amplitudes that are
actually heard. When you combine high Amount and low Threshold
settings, you can easily get clipping. To avoid this, either set the Output
Gain to a negative value or the Attack to very fast, or both.
The Output Gain works as post-amplification on the Gate, Limiter and
Compressor. Each transform performs its function and then the Output Gain adds amplification to it. Concerning the Compressor, this is
especially important.
The Compressor, after limiting the waveform, then maximizes it to
100%. So, if you leave the Output Gain at 0%, the waveform will be at
maximum. If the Output Gain is raised to anything above 0%, it will
increase the volume of the waveform even higher.
232
Voyetra Technologies Inc.
For example, with the Output Gain set to 20%, you would, in effect, be
raising the waveform to 120%. This could produce clipping and
unpleasant distortion.
To prevent this distortion, the Output Gain can be set to negative
numbers. For example, setting the Output Gain to -10% would bring
the overall volume to 90%. This number is arrived at by the combination of the Compressor’s maximizing of the waveform and the reduction in amplification by setting the Output Gain to a negative number.
Digital Delay Transform
This transform implements an effect that is usually created with an outboard effects signal processor called a digital delay. By adjusting the
parameters correctly, a wide variety of effects are possible. These effects
include echo, chorus, slapback, doubling, reverb and resonance, and are
achieved through signal delay. By changing the amount of the delay and
feeding some of the signal back to the input where it can be delayed again,
complex effects can be built.
Delay functions are accessed by choosing Delay from the Digital Audio
submenu. This opens the Digital Delay dialog box containing a complete
set of controls for delay effects, as described below:
Using the Digital Delay
Changing digital audio with the Digital Delay is easy as selecting a range,
opening the Digital Delay and choosing a preset or setting the controls to
alter the digital audio.
Transforms Menu
233
To use the Digital Delay:
1. Select the range in the file to be affected by the change.
2. From the Transforms menu, select Delay.
3. Choose a Delay effect from one of the presets.
4. Press the Audition button. If the effect is not satisfactory, adjust the
settings or try a different preset.
5. When you are satisfied with the auditioned effect, click OK.
Presets
This displays a list of preset effects. When a preset is
selected, all of the necessary delay parameters are automatically entered.
Use a preset effect setting as is, or as a starting point to create your own
effects.
Add Preset
Add Preset adds the current delay dialog settings to the preset list.
Save any custom effect under a new name and add it to the list of
presets.
For Digital Orchestrator Pro’s pre-configured presets such as Reverb,
Chorus or Slap Back, any changes made will remain in effect unless the
preset is deleted.
Refer to the Presets section earlier in this chapter for information on
adding Presets.
Delete Preset
This control deletes the currently-selected preset from the presets
list.
234
Voyetra Technologies Inc.
This deletes the custom effects provided with Digital Orchestrator Pro for
the current session only.
Refer to the Presets section earlier in this chapter for information on
deleting Presets.
♫
DELETING PRESETS
Deleting one of the standard presets is actually the way to
restore it to its original value! All default presets are
restored the next time the Digital Delay dialog box is
opened.
Audition Effect
Audition Effect processes a small amount of the selected data with
the current effect settings and plays it back, so the setting can be
auditioned before you commit to transforming the selected data.
Audition Dry
Use this control to audition the selected segment of a file without
the effect.
Switching back and forth between Audition Effect and Audition Dry
provides a quick way of comparing sounds with and without effects added.
Audition Duration
This control displays the Audition Settings dialog box. The length of
the auditioned segment can be adjusted to a maximum of 10
seconds.
As this maximum is approached, the amount of time necessary to process
the segment can become quite long.
Transforms Menu
235
Delay Time
The Delay Time control sets the amount of time between
echoes. Fairly long delays, 200 milliseconds to a second or
more, create a distinct echo. Very short delays act more like a
filter — certain frequencies will be boosted and others will be
cut.
The Delay Time function contains Multiplier buttons. These buttons add a
factor of either 1, 10 or 100 to the number in the Delay Time box. For
example, if 50 is the selected Delay Time and the x10 button is pressed, the
Delay Time would actually be 500 milliseconds.
Delay Depth
Delay Depth controls how much of the delayed signal is heard
mixed with the un-delayed signal.
At 0, only the original signal is heard.
At 100% only the delayed signal is heard.
When creating an echo effect with a long delay time, normally a depth
somewhat below 50% is used so that the initial sound is louder than the
echo. To add layering, depth and shifting intensity to the sound and create
effects called flange or resonance, use 50% for maximum filtration. For even
more unusual effects, set Delay Depth to 100% so that none of the original
sound is used.
Delay Feedback
The Delay Feedback control determines how much of the output
of the delay is fed back into the input. If the delay is long, the
feedback control will determine how many echoes are heard.
At 0%, a single echo is heard.
At 100%, the echo effect lasts for several seconds.
There are a wide range of echo effects in between.
236
Voyetra Technologies Inc.
Modulation Rate
The time between each delay echo can be varied, or
modulated. At higher settings, the time between echoes will
sweep up and down in frequency, producing the kind of
shifting resonance effect called flanging. Lower settings
typically produce effects more closely resembling vibrato.
The Modulation Rate function contains Multiplier buttons. These buttons
add a factor of either 1, 10 or 100 to the number in the Modulation Rate
box. For example, if 42 was the selected rate and the x100 button was
pressed, the rate would actually be 42000.
Modulation Depth
Modulation Depth controls how much modulation is used.
When set to 0, there is no modulation.
When set to 100, you get the maximum amount.
Invert Samples
The Invert control inverts the phase of the delay unit’s
output before it is fed back. This subtle effect is most useful
when doing flange and resonant effects.
Frequency Rolloff
The Frequency Rolloff control can be used to cut some of
the high frequencies from the delay. This is useful for
simulating a natural echo where each echo is a bit duller
than the previous one.
Transforms Menu
237
Input Gain
Input Gain increases the amplitude, or volume of the
digital data transformed by the Delay effect.
Output Gain
Output Gain increases or decreases the total amplitude of
the segment of sound affected by the Delay transform.
If you experience clipping when using Digital Orchestrator Pro’s delay
effects, the Output Gain might be too high. You may need to adjust both
Input and Output Gain controls to get a distortion-free effect.
DC Offset
Some sound cards do not correctly align the audio to the digital zero point
when recording. This can create an annoying
popping sound which is usually audible at the
beginning or end of a recording. Digital
Orchestrator Pro’s DC Offset feature can
correct this problem by:
Centering the display for an audio file
that was recorded with a DC Offset.
Matching offsets of audio files after
cutting-and-pasting material from different files.
Value Use the slider to set the degree of offset. .A positive number
shifts the range up, a negative number moves it down.
Suggest Analyzes the selected data and enters a suggested offset value
that will center the data vertically.
238
Voyetra Technologies Inc.
♫
This feature should be used AFTER you have finished
recording an entire track and should be applied to all of the
data at once. Otherwise, Offset will be uneven in different
sections of a piece.
Pitch Shifting
Use Pitch Shifting to change the pitch of a
digital audio track — without altering the
speed of the recording. This can be useful
for adding harmonies, altering melodies or
changing the tuning on recorded material.
The following is a list of the options
available in the Pitch Shift dialog box:
Semitones chooses the amount of semitones the pitch will
be altered by. Each semitone is a half-step. For
example, to lower a tune by a fifth, change the
value in the Semitone box to -7.
Cents chooses the number of cents the pitch will be
altered by. There are 100 cents in each semitone;
therefore 50 cents would be a quarter-tone. This
is useful for fine-tuning digital audio.
Crossfade sets the quality of the Pitch Shift. The Pitch Shift
transform processes the data in small windows.
This data is then re-strung back together. The
smoother it is placed back together, the better
the Pitch Shift sounds. The amount of Crossfade
selects how much data from each window is
faded into the next window.
Transforms Menu
239
Feedback sets the amount of mix between the original and
pitch-shifted file. In most cases, the feedback
level should be left at 0. Raising the amount can
yield to some interesting effects.
To use the Pitch Shift transform:
1. Select the digital audio to be transformed.
2. From the Transforms menu, select Digital Audio.
3. Select Pitch Shifting from the submenu.
4. Select the values for Semitones, Cents, Crossfade and Feedback.
5. Click Audition Effect to hear a small portion with the transform
applied.
6. Make adjustments to the settings, if necessary.
7. When you are satisfied with the results, click OK.
♫
• When using Pitch Shift, it is preferable to apply the
transform in small increments, rather than perform a
single large shift in pitch. This gives the pitch-shifted
data a cleaner sound.
• Experiment with the Crossfade settings to achieve the
best results for your compositions.
• Generally, lower frequency sounds sound better with a
higher Crossfade amount and higher frequency
sounds sound better with a lower Crossfade amount.
• When raising the pitch, select a lower Crossfade
number; when lowering the pitch, select a higher
Crossfade number.
• In most cases, it is advisable not use a Crossfade
setting lower than 10.
Time Compress/Expand
240
Voyetra Technologies Inc.
The Time Compress/Expand
transform changes the amount of time
digital audio fits into without altering
its pitch.
The Length box displays the amount
of time the data currently takes up and
what the finished transform will
produce.
To use the Time Compress/Expand transform:
1. Select the digital audio to be transformed.
2. From the Transforms menu, select Digital Audio.
3. Select Time Compress/Expand from the submenu.
4. Use the slider, click the scroll buttons or enter a number in the
Percentage box to select the amount of time to compress or expand
the selection. As the slider is moved, the numbers in the Length box
change to fit the selected percentage.
5. Click one of the Accuracy buttons to choose how precisely Digital
Orchestrator Pro should process the digital audio data.
6. Click Audition Effect to hear a small portion with the transform
applied. Make adjustments to the settings, if necessary.
7. When you are satisfied with the results, click OK.
♫
Although selecting a higher Accuracy produces better
results, it takes longer to process.
Selecting 50% doubles the speed of the digital audio;
selecting 200% slows it to half the speed.
• The Length box contains two measurements of time —
Bar:Beat:Click and Minutes:Seconds:Hundredths. This
provides a reference point to see the amount of time
the processed data will take up.
Graphic Equalizer
Transforms Menu
241
When you want to attenuate (reduce) or boost a particular frequency, add a
specialized sound or adjust the overall quality on a digital audio track, the
Graphic Equalizer is very useful.
Current decibel
amount
Equalizer sliders
Resets the
Graphic Equalizer
Presets
Sets the
Input Gain
Sets the
Output Gain
Represents the center
frequency of the range
the slider equalizes
The Graphic Equalizer can adjust ten separate frequency ranges — 31Hz,
65Hz, 125Hz, 250Hz, 500Hz, 1kHz, 2kHz, 4kHz, 8kHz and 16kHz. The
frequency indicated by the number at the bottom of the slider represents
the center of the range that the slider equalizes.
For all of the frequencies to be adjusted, Digital Orchestrator Pro’s sampling rate must be at 44kHz. This is due to the Nyquist Theorem which states
that the sampling rate must be greater than or equal to twice the frequency
of the incoming signal. This means at a sampling rate of 44kHz, the highest
frequency that can be sampled is 22kHz. At a sampling rate of 22kHz, the
highest frequency that can be sampled is 11kHz.
At a sampling rate of 22kHz, the 16kHz slider is unavailable. This is
because the slider encompasses the range above 11kHz. At a sampling rate
of 22kHz, any frequency above 11kHz cannot be reproduced.
This means that at a sampling rate of 11kHz, both the 8kHz and16kHz
sliders are unavailable. To use all of the sliders, make sure Digital
Orchestrator Pro is set to a sampling rate of 44kHz.
242
Voyetra Technologies Inc.
The following chart further clarifies this:
Sampling Rate
Sliders Available
44kHz
All
22kHz
All except 16k
11kHz
All except 16k and
8k
To use the Graphic Equalizer:
1. Select the digital audio to be equalized.
2. Click the Digital Audio Graphic EQ Transform button on upper
right of the screen.
~or~
1. From the Transforms menu, select Digital Audio and click Graphic
Equalizer from the submenu. The Graphic Equalizer opens.
2. Adjust the sliders as desired. The decibel amount by which the slider
changes the frequency range’s volume is reflected at the top of the
slider.
3. Adjust the Input and Output gains, as appropriate. Lower the Input
Gain to reduce clipping or raise the Output Gain to adjust the overall
volume of the equalized audio.
4. Click the Audition Effect button to hear the effect of the digital
audio. Make any changes as necessary.
5. Click OK when you are done.
Presets
After a setting has been made in the Graphic Equalizer, it can be saved as a
preset. For more information on adding, loading and deleting Presets, refer
to the “Presets” section earlier in this chapter.
Transforms Menu
243
Input Gain
Input Gain adjusts the volume level of digital audio before
running it through the equalizer. As the gain is raised or
lowered, the amount of change in decibels is reflected
above the Gain box.
If the volume of the frequencies is going to be raised with the Sliders, it is a
good idea to lower the Input Gain. Otherwise, clipping may occur and the
resulting output will be distorted.
To achieve the best results, experiment with different gain settings and use
the Audition Effect button to test the results.
Output Gain
Output Gain adjusts the volume level of digital audio after
it has been equalized. As the gain is raised or lowered, the
amount of decibels is reflected above the Gain box.
If the volume of the frequencies is going to be lowered with the sliders, it is
a good idea to raise the Output Gain. This is to make sure that the volumes
are not reduced too greatly.
To achieve the best results, experiment with different gain settings and use
the Audition Effect button to test the results.
Equalizer Slider
The Equalizer sliders adjust the gain for ten separate frequency
ranges. By raising or lower the sliders, different frequencies are
made more or less prominent and thereby change the sound of the
selected digital audio.
The decibel level is displayed above each slider. As the slider is
raised or lowered, the decibel amount changes. This is handy for
getting precise results when equalizing digital audio.
244
Voyetra Technologies Inc.
The decibel markings on the left of the Equalizer range from –60 dB to
6dB. The volume on a frequency can be doubled, when it is set to 6dB or
reduced to an almost inaudible level, when it is set to –60dB.
♫
Due to the frequency ranges associated with different
sample rates, all of the sliders are only available at a
sampling rate of 44kHz.
To use the Equalizer Slider:
1. Select the digital audio to be equalized.
2. From the Transforms menu select Digital Audio.
3. From the submenu select Graphic Equalizer
~or~
1. Click the EQ Transform button.
2. Click-and-drag the slider to the desired level.
Transforms Menu
245
Resetting the Equalizer
All the sliders and gain settings can be reset to zero
simply by clicking the Reset button.
Convert Sample Rate Transform
The Convert Sample command
changes the sample rate of all of the
tracks in a digital audio file. This is
particularly useful if, during multitrack recording, your computer seems
to be bogged down or you encounter
otherwise inexplicable errors in playback and recording.
Converting from a higher to a lower Sample Rate lowers the quality of the
recording, but it increases performance and allow more tracks to be
recorded.
♫
When making a new recording, use the Digital Audio
Options dialog box to change the default sample rate. Open
this dialog box by clicking the Sample Rate window on the
Status Bar.
File size, hard disk space and overall system performance are important
considerations when choosing a sample rate.
For a more detailed discussion of performance and hard drive storage
issues, refer to the “Hard Disk Recording” Appendix.
246
Voyetra Technologies Inc.
♫
WARNING!
You CANNOT use the Undo feature to reverse changes
to Sample Rate!
Before converting the sample rate, you may want to
save a copy of the file with its original settings
Then, if you don’t like the way the file sounds with the
new Sample Rate, you can re-load the original .
Converting Sample Rate
Converting the sample rate of a digital audio file is a global operation. All of
the digital audio tracks in the file will be affected.
1. Choose Convert Sample Rate from the Transforms menu. The
Convert Sample Rate dialog box displays. The current sample rate of
the file can be seen in the drop-down list box.
2. Choose another sample rate setting from this box, then click OK.
Digital Orchestrator Pro converts the file to the new sample rate.
Mixdown Audio
The Mixdown Audio feature blends all
unmuted digital audio tracks into a twotrack stereo or a single mono track mix.
This frees processing resources so that
additional digital audio tracks can be
recorded.
When Mixdown Audio is selected, a dialog box offers these options:
Transforms Menu
247
Stereo/Mono Choose from Stereo output (produces two new
tracks, one panned hard right, the other hard left)
or Mono output (produces one new track).
Normalize Output Scales the tracks before combining them to
eliminate distortion. It is generally a good idea to
use this feature, though it increases the time
required to perform a Mixdown.
Preview Lets you hear a short preview of the Mixdown
before processing the entire song.
Preview Length Sets the length of the preview.
To use Mixdown Audio:
1. Set the volume and panning for each of the digital audio tracks. The
settings you select are reflected in the Mixdown.
2. From the Transforms menu, click Mixdown Audio.
3. Select either Stereo or Mono from the dialog box. (Stereo produces
two tracks; Mono produces a single track.)
4. Select Normalize Output to have the tracks’ volume scaled to the
highest possible level without clipping (distortion).
When tracks are mixed down, the combination of the merged tracks
may cause distortion. When Normalize Output is selected the tracks
are scaled before they are combined. This helps to reduce any distortion. However, when Normalize Output is selected, processing time
is increased.
5. Click Preview to hear a preview of the Mixdown. The length of the
Preview can be changed with the spin buttons.
6. Click OK when you are satisfied with the Mixdown.
♫
248
When MIDI tracks are soloed, Mixdown Audio is
unavailable.
Voyetra Technologies Inc.
Mixdown Audio, an Illustration
The panning and volume settings of the digital audio tracks are reflected in
the Mixdown. To illustrate,
If a stereo Mixdown is made from six digital audio tracks:
Three vocal tracks panned hard to the left.
Three piano tracks panned hard to the right.
The result will be two stereo tracks:
The left track contains the combined vocal tracks.
The right track contains the combined piano tracks.
If the panning is not set all the way to the left or right, that, too, will be
reflected in the final Mixdown.
The relative volumes are also combined in the Mixdown.
In Summary
Use Mixdown Audio to combine several digital audio tracks into one or
two tracks, to help free up processor power so additional tracks can be
recorded.
Mixdown Audio only works with digital audio tracks.
Muted digital audio tracks are not included in the Mixdown.
When the Mixdown is performed, the original tracks are automatically
muted. You may want to keep the original tracks for future Mixdowns.
(Digital Orchestrator Pro’s performance is not affected by muted
tracks.)
Before making a final Mixdown, use the Preview button to get an idea of
what the Mixdown will sound like. Then, if any changes are needed, they
can be made before the Mixdown is begun.
Transforms Menu
249
Chapter 18
Options Menu
The Options menu could also be called the “configuration” or “setup”
menu, since this menu lets you customize Digital Orchestrator Pro
according to the hardware installed on your system and your personal
preferences.
250
Voyetra Technologies Inc.
♫
The Pinnacle Sound Banks option is only available if
you have a Turtle Beach™ MultiSound® Pinnacle™
sound card.
The AWE SoundFonts option is only available if you
have a Creative Labs Sound Blaster® sound card
that supports SoundFonts.
If both cards are installed and working, both options
are displayed.
MIDI Thru
When MIDI Thru is set to On (the default), MIDI data is echoed to the
MIDI Out port. A check mark shows that MIDI Thru is enabled. When
using MIDI Thru with a keyboard that plays through the sound card, the
sound is heard through the computer’s speakers or headphones.
Save Settings on Exit
When Save Settings on Exit is set to On, the current screen and configuration settings are saved when Digital Orchestrator Pro is closed. These
settings are then restored when the program is reopened. A check mark
indicates that this option is enabled.
Metronome Settings
Use the Metronome Settings dialog box to
set a variety of Metronome-related options.
These options are described on the pages
that follow.
Options Menu
251
Click Output
Use Click Output to set whether a MIDI device, the PC
speaker or both will be used to sound the Metronome’s click.
Click During
Use the Click During options to choose whether the Metronome sounds during Count In, Recording or Playback. Select
none, any two or all three.
Count In
Use Count In to choose whether the Metronome Count In
will be heard during Playback, Recording or both.
No. of Bars
No. of Bars sets the number of measures for the Count In. The
beats per measure and the accent click are determined by the
time signature chosen in the Conductor Track.
Port
Use the Port box to select the output port for the metronome’s MIDI click. The default is Port 1; this is the port
to which your MIDI device is most likely to be connected.
252
Voyetra Technologies Inc.
Channel
Use the Channel box to select the output channel for the
MIDI metronome note. The default is channel 10, the
General MIDI percussion channel.
Accented and Unaccented Click
This section of the dialog box is where the Pitch, Velocity and Duration of
the Accented and Unaccented Click are set.
The Accented Click is the louder click, which corresponds to the
downbeat of each measure.
The Unaccented Click is the quieter click and corresponds to the other
beats in the measure.
You will probably want to use the same percussion note for both Accented
and Unaccented metronome clicks. A short percussive sound is usually
better than a longer sound or a melodic instrument.
The default for this box is the Side Stick (C#3), but the closed Hi-Hat
sound (F#3) also works well.
Refer to the Appendix for a complete listing of MIDI percussion sounds.
Options Menu
253
Sync Settings
Use the Sync Settings dialog box to synchronize Digital Orchestrator Pro files with
other devices, such as a video tape recorder
or multitrack tape deck. (This dialog box can
also be accessed by clicking the Internal
Button on the Toolbar.)
Synchronization (sync) lets you to add complex audio overdubs to video productions or
use a multitrack tape deck with Digital
Orchestrator Pro to provide additional audio
tracks for recording.
When using sync, one device must be designated as the master while all
other devices are designated as slaves. For additional information on
enabling Digital Orchestrator Pro’s SMPTE functions, refer to the chapter
on “Synchronization.”
The Sync Settings command opens the dialog box in which the sync
settings are made. There are several different sync formats. These are
represented by the acronyms MTC, SPP and SMPTE: is
MTC a series of MIDI messages that synchronizes MIDI
(MIDI Time with absolute time (hours, minute, seconds and
Code) hundredths). These messages are sent 24 times per
quarter note.
SPP is a MIDI message which tells the slave(s) where in the
(Song Position song the master is, so that the master and slave conPointer) tinue to be aligned at the same place in the song. SPP
uses MIDI clocks to keep time. These messages, too,
are sent 24 times per quarter note.
SMPTE
(Society of
Motion
Picture and
Television
Engineers)
254
is an audio signal containing a time code in the format
Hours: Minutes: Seconds: Frames: Subframes (in
hundredths or bits). This standard was defined by the
Society of Motion Picture and Television Engineers.
Voyetra Technologies Inc.
♫
Digital Orchestrator Pro does NOT read the SMPTE audio
signal directly. Rather, it reads MTC (MIDI Time Code), a data
stream that must be translated from SMPTE tone by a special
piece of hardware such as Voyetra’s V-24s multi-port
MIDI/SMPTE interface.
Clock Source
The Clock Source section of this dialog box has four options:
Internal Specifies that the computer will use its own internal clock
for playback.
MIDI/SPP Uses MIDI clocks to determine the current time. Drum
machines, workstations, and hardware sequencers most
commonly send and sync to SPP (Song Position Pointer).
MTC/SMPTE Specifies that the computer will sync to MTC (MIDI Time
Code) either directly over a MIDI port or MTC translated
by an external SMPTE-to-MIDI converter.
Input Port Designates the port on which Song Position Pointer (SPP)
or MIDI Time Code (MTC) will be received.
When using a software-based Time Code converter, it is
necessary to set the correct input port in the MIDI Port
Setup dialog box, which also is accessible from the
Options Menu.
Options Menu
255
♫
Clock messages are not sent Thru by Digital Orchestrator
Pro or many hardware sequencers. Consequently, chaining
several devices together may not work.
If you are using Voyetra’s V-24s, then one of Digital
Orchestrator Pro’s MIDI input ports must be set to the V24s driver’s SMPTE input. On the V-24s connector box, the
SMPTE In RCA jack is the SMPTE Input port. For
additional information, see the “MIDI Port Setup” section
later in this chapter.
Sync Output
The Sync Output section of this dialog box has four options:
None designates that no sync will be sent out during
playback.
MIDI/SPP designates that Song Position pointer and MIDI
clocks will be sent out to whatever Output port has
been selected.
MTC/SMPTE designates that MTC will be sent out to whichever
Output port has been selected.
Output Port specifies which port the sync information should be
sent, if Sync Output has been enabled.
256
Voyetra Technologies Inc.
SMPTE Frame Rate
SMPTE Frame Rate sets how many frames per
second Digital Orchestrator Pro should expect to
sync to.
The SMPTE Frame Rate section of this dialog box has five settings:
24 fps is used in film only.
25 fps is used in European TV and video.
29.97 fps is easier to work with than 30 Drop. However, it will
drift from the wall clock by a small amount. It is
generally used for color video work (other than
network features) in the United States.
30 Drop is used in network television and color video work
when SMPTE time must match the wall clock.
30 Non Drop is used for black-and-white television and general
music.
Digital Orchestrator Pro automatically detects whatever frame rate comes
in, but it is a good idea to set this option correctly anyway.
There is one difference here worth noting — 29.97 coming in will look like
30 Non Drop to Digital Orchestrator Pro. Therefore, Digital Orchestrator
Pro assumes that if you have set the Frame Rate to 29.97 and it sees 30
Non Drop coming in, 29.97 is really the Frame Rate you are working with.
♫
Options Menu
Unlike Voyetra’s Sequencer Pro Gold, you cannot generate
SMPTE directly from Digital Orchestrator Pro. If you have a
SMPTE generator in your computer, refer to your SMPTE
hardware’s manual for instructions on generating SMPTE
code.
257
SMPTE Sub Frame Display
Use the SMPTE Sub Frame Display to choose
whether the time display shows units smaller than a
frame in the Current Time and Big Time windows.
Off
Hundredths
Bits
turns this option off.
designates hundredths of a frame.
is equal to 80ths of a frame.
If your multitrack tape deck synchronizer uses bits, set the SMPTE Sub
Frame Display to Bits.
If your multitrack tape deck synchronizer uses hundredths of frames,
set the SMPTE Sub Frame Display to Hundredths.
When in question, refer to the documentation manuals for these
devices.
Time Display
The Time Display options include:
SMPTE Display Off turns off the SMPTE display.
Absolute Time displays Hours: Minutes: Seconds plus SMPTE
offset.
Relative Time displays Hours: Minutes: Seconds since the
beginning of the song.
Show Hours changes the format in the Current Time and Big
Time windows. When this option is selected,
Hours are displayed; when deselected they are
258
Voyetra Technologies Inc.
not.
SMPTE Options
The SMPTE Options include:
SMPTE/MTC sets how long after the first SMPTE time the
Offset song should begin. SMPTE/MTC Offset time is
displayed in:
Hours: Minute: Seconds: Frames: Sub Frames.
For additional information on Sub Frames, see
the previous section, “SMPTE Sub Frame
Display.”
Auto Stop Delay sets the number of milliseconds Digital Orches(ms) trator Pro continues after the SMPTE time code
has stopped. For example, if Auto Stop Delay is
set for 250ms, when Stop is pressed on the
device sending SMPTE, Digital Orchestrator Pro
continues for an additional 250 milliseconds after
receiving the Stop signal.
Big Time Window
The Big Time Window is a dedicated display window of variable size which displays either current
SMPTE time or current song time, depending upon
the Time Display setting. This window is accessed
from Digital Orchestrator Pro’s Window menu.
Options Menu
259
♫
260
For additional information on Synchronization — with stepby-step, real-life examples of how to implement this feature
—
refer to the “Synchronization” chapter.
Voyetra Technologies Inc.
MIDI Port Setup
MIDI data is sent and received among MIDI
devices through connections called MIDI
ports.
In order for a MIDI port to work, the device
driver for the sound card or MIDI interface
must be installed according to its manufacturer’s directions.
The MIDI Port Setup command opens the MIDI Port Setup dialog box
where any one of the installed drivers for each input and output port can be
selected.
MIDI Options
The Options button in the MIDI Port Setup dialog
box opens a nested dialog, the MIDI Options
dialog box.
Use the MIDI Options dialog box to configure
Digital Orchestrator Pro for parallel port interfaces
or to select a clock speed.
The four MIDI Options are: Close Drivers While Printing, Keep MIDI
Drivers Open While Inactive, Send Reset Controllers on Stop and Close
MIDI In While Using Wave.
Close Drivers While Printing
MIDI interfaces that connect to the computer’s parallel port — such as
Voyetra’s VP-11 — usually disable the parallel port when Digital
Orchestrator Pro is running. This makes it impossible to print musical
notation. Use Close Drivers While Printing to enable printing.
Options Menu
261
To enable printing with parallel port MIDI interfaces:
1. From the Options menu, select MIDI Port Setup.
2. In the MIDI Port Setup dialog box, click the Options button.
3. Select Close Drivers While Printing, then click OK.
4. Click OK to close the MIDI Port Setup dialog box.
Keep MIDI Drivers Open While Inactive
Whenever you are working in Digital Orchestrator Pro, your MIDI drivers
are open. This allows you to play and record songs. However, you might
want to open another program while Digital Orchestrator Pro is running
and take advantage of Windows’ ability to multitask.
The Keep MIDI Drivers Open While Inactive setting determines how your
system’s MIDI configuration changes when you switch from Digital Orchestrator Pro to a different Windows program.
When Keep MIDI Drivers Open While Inactive is deselected, MIDI
Thru is turned Off. This means that when you play your MIDI controller and Digital Orchestrator Pro is inactive, you will NOT hear MIDI
coming through the computer. Digital Orchestrator Pro has closed
down the MIDI drivers, including those for MIDI In and MIDI Thru.
When KEEP MIDI Drivers Open is selected, MIDI Thru is turned
On. This means that when you play your MIDI controller and Digital
Orchestrator Pro is inactive, you will be able to hear MIDI coming
through your computer. This may cause conflicts and system instability
if different MIDI programs try to access the drivers at the same time.
Send Reset Controllers on Stop
If your MIDI scores involve many controller change events, you will
probably want to select this option. If, for example, you have the Volume
and Pan controllers changing to simulate the motion of a musician moving
around a stage and you stop the song, rewind, then play it back, Volume
and Pan will still be set to the values at the stop playback position.
262
Voyetra Technologies Inc.
Enabling Send Reset Controllers on Stop prevents this type of subtle error.
When enabled, Digital Orchestrator Pro resets all of the controllers so that
every song starts out clean, with no controller remnants from a previous
song or playback session.
Close MIDI In While Using Wave
Some sound card drivers will report “Wave Device Already in Use” if you
try to record .WAV files while simultaneously using external MIDI. If you
encounter this problem, select the Close MIDI In While Using Wave
option when you are recording digital audio tracks. This closes the MIDI In
port, enabling you to simultaneously play MIDI tracks and record digital
audio.
Clock Rate
Clock Rate sets the number of clicks per quarter note. This is the “click”
shown in Digital Orchestrator Pro’s Bar:Beat:Click controls.
If Digital Orchestrator Pro appears to start playing but halts immediately
— before any note is played — the Clock Rate may need to be adjusted.
To set the Clock Rate:
1. From the Options menu, select MIDI Port Setup.
2. In the MIDI Port Setup dialog box, click the Options button.
3. From the Clock Rate list, select the desired Clock Rate, then click
OK.
4. If you are not using Windows NT, try the Medium setting.
5. Use the fastest clock speed that works for your system.
Options Menu
263
Patch Map Setup
This command opens the Patch Map Setup
dialog box. Choose from one of the installed
patch maps, customized for popular MIDI
modules and synthesizers.
The Channel (Chn) and Patch Map settings
show which Patch Map is being used on
which channel for the selected driver.
To select a patch map:
1. From the Patch Map Setup dialog box, click the Chn 1 patch map
box. A drop-down list box opens when the arrow at the right of the
patch map box is clicked.
2. Click the name of your MIDI synthesizer or module.
3. To assign patch maps individually for different channels, repeat the
procedure above for each channel.
4. To set all 16 channels to use the same patch map, activate the Same
button (the green light will come on), then select a patch map for any
channel.
After the desired patch maps have been selected, click with the right mouse
button on the Patch box in the Track/View window. This brings up a
dialog box from which any of the available patch names or numbers can be
selected.
264
Voyetra Technologies Inc.
Digital Audio Port Setup
Use the Digital Audio Port Setup dialog box.
To set digital audio routings.
The choices in the Device Drivers’ dropdown list boxes depend on your sound
card’s drivers.
In most cases Microsoft Sound Mapper will also be a choice to send digital
audio out through. The Microsoft Sound Mapper routes digital audio to the
device selected in the Preferred device drop-down list box. This routing can
be changed in Multimedia Properties, in the Windows Control Panel.
To change the Digital Audio Port:
1. Click Digital Audio Port Setup from the Options menu. The Digital
Audio Port Setup dialog box opens.
2. In the Digital Audio Input section, select a Digital Audio Input from
the drop-down list box.
3. In the Digital Audio Output section, select a Digital Audio Output
from the drop-down list box.
4. Click OK when finished.
Digital Audio Options
Use the Digital Audio Options dialog box to
make a number of choices for setting up your
sound hardware and Digital Orchestrator Pro’s
operating parameters.
Options Menu
265
To open the Digital Audio Options dialog box:
1. Select Digital Audio Port Setup from the Options menu.
2. Click the Options button.
~or~
Click the Sample Rate box on the Status bar.
Stereo Playback
Activate this option if you have a stereo sound card and want to hear playback in stereo. Note that this affects the performance of digital audio playback. If your system slows down noticeably or if the sound breaks up, you
should probably turn this feature off, reduce the number of tracks or lower
the sample rate.
If Stereo Playback is deselected, thereby setting playback to Mono, the Pan
control for digital tracks in Track/View window will have no effect.
Device Can Play and Record Simultaneously
Some sound cards can play and record digital audio files simultaneously.
This is known as full-duplex. If your sound card has this feature, you may
want to activate it.
Note that simultaneous record/playback can place heavy demands on a
computer. If you receive an error message saying the “Wave device is busy”
or telling you to expect “poor performance” while recording and playing
simultaneously, turn off the Device Can Play and Record Simultaneously
option.
266
Voyetra Technologies Inc.
Enable Wave Sync
Enabling Wave Sync causes Digital Orchestrator Pro to use the sound
card’s digital audio driver as a clock source, rather than the computer’s
internal clock.
Since sound card drivers take longer to do their job than it takes to process
MIDI, by using the sound card’s driver as a clock source, MIDI and digital
audio will stay in sync much better and far longer.
♫
Not all sound cards support the Enable Wave Sync feature.
If you Enable Wave Sync and your MIDI drifts out of sync
from your digital audio, your sound card probably does not
support this feature. Should this occur, turn Wave Sync off.
Play Buffer
When digital audio is played, Digital Orchestrator Pro sets aside a buffer, a
portion of the system’s RAM, to momentarily hold data and prevent
bottlenecks.
If you experience difficulties on playback, increasing the size of the Play
Buffer may help to solve the problem.
Record Buffer
The Record Buffer works in the same manner as the Play Buffer.
If you encounter trouble in recording, try increasing the size of this buffer.
Options Menu
267
Default Sample Rate
This is the sample rate at which new recordings will be made by Digital
Orchestrator Pro. Recording at higher sample rates generally results in
better sound fidelity, but also consumes more memory and disk space. The
“Hard Disk Recording” Appendix contains a useful chart showing how
much disk space is used in recording at different sample rates.
If file size is a consideration, Digital Orchestrator Pro lets you change the
sample rate of a recorded piece. See the “Convert Sample Rate” section in
the “Transforms Menu” chapter.
Temp Directory
The Temp Directory is where digital audio data is initially recorded and
where Undo information may be stored during certain operations. Make
sure the directory listed here is valid and that there is at least enough disk
space available for the largest file you are likely to record.
See the “Hard Disk Recording” Appendix for information on determining
how large a recorded digital file will be.
Controllers
This option lets you assign two MIDI Controllers of your choice to the knobs in the Mixer
window and to the corresponding boxes in the
Track window.
The available Controllers are listed in the
Appendix at the back of this book.
Check the documentation for your MIDI device to see if it will respond to
the Controller you wish to use.
The default Controllers are 091 (Reverb) and 093 (Chorus).
268
Voyetra Technologies Inc.
MIDI Reset
Occasionally, MIDI information may continue to be sent to a MIDI device,
even after the Stop button is pressed. When this happens, notes may sound
as if they are stuck or controllers may not be released. If this problem
occurs, use the MIDI Reset option to reset all of the MIDI parameters on
your MIDI device. The MIDI Reset signal will be sent to all of the devices
set in the MIDI Options box.
To reset a MIDI device:
From the Options menu, select MIDI Reset. A processing box appears
and shows that of the devices are being reset.
Pinnacle Sound Banks
The Turtle Beach™ MultiSound®
Pinnacle™ sound card has the capability
to load customized banks into its synth’s
memory. These banks can be accessed
through Digital Orchestrator Pro and
used in MIDI compositions.
The Sound Banks feature is only available if you have a Turtle Beach MultiSound Pinnacle sound card installed.
To load a Pinnacle Sound Bank:
1. From the Options menu, click Pinnacle Sound Banks.
2. Click the Browse button to the right of the Current Bank.
3. Navigate to the directory where the Pinnacle Sound Bank is located.
4. Click the name of the bank to be loaded.
5. Click OK. The name of the bank now appears under Current Bank.
6. Click OK. A processing box shows that the bank is being loaded.
Options Menu
269
Autoload
Pinnacle Sound Banks can be linked with
Digital Orchestrator Pro’s ORC files by using
the Autoload with ORC File command.
By enabling Autoload with ORC File, each time an ORC file is loaded, the
associated bank is loaded as well. This is useful when customized patches
are used in MIDI compositions.
To toggle Autoload with ORC File On/Off:
1. From the Options Menu, click Pinnacle Sound Banks.
2. Click Autoload with ORC File to toggle it On or Off.
When this option is On, the box is lit and the currently-loaded
bank is linked to the ORC file.
When this option is Off, the box is not lit and a bank is not
attached to the ORC file.
Librarian
Clicking the Librarian button opens the Pinnacle Patch
Librarian. From here you can create, save and load
customized banks into the Pinnacle’s onboard synthesizer.
To open the Pinnacle Patch Librarian:
1. From the Options menu, click Pinnacle Sound Banks.
2. On the Pinnacle Sound Bank dialog box, click the Librarian button.
The Pinnacle Patch Librarian opens.
270
Voyetra Technologies Inc.
AWE SoundFonts Banks
SoundFonts are collections of sounds that can
be loaded into the RAM on Creative Labs
Sound Blaster® AWE sound cards. To use the
AWE SoundFonts Banks, a Sound Blaster
AWE sound card that supports this feature
must be installed on your system.
After loading in SoundFonts, use them with
Digital Orchestrator Pro to produce unique
and original compositions.
To load an AWE SoundFonts Bank:
1. From the Options menu, click AWE SoundFonts.
2. Under Banks Currently Loaded, click the number of the bank where
the SoundFont should be loaded.
3. Click Add.
4. Navigate to the directory where the SoundFont is located.
5. Click the name of the SoundFont to be loaded.
6. Click OK. The name of the SoundFont now appears under Banks
Currently Loaded. The amount of Bank Memory Available left on the
AWE appears at the bottom of the dialog box.
7. Click Close.
To remove a Bank:
1. From the Options menu, click AWE SoundFonts.
2. Click to highlight the name of the bank to be removed.
3. Click Remove. Notice that more memory is now available in the Bank
Memory Available message.
Options Menu
271
♫
CAREFUL...
Be sure that the SoundFont being loaded in is not larger
than the amount of memory available on the AWE sound
card!
Bank Presets
After loading several banks of SoundFonts, save them as a Preset to
customize the sounds of your songs.
To save a Bank Preset:
1. From the Options menu, click AWE SoundFonts.
2. Load a few Banks into memory. Remember to check the Bank
Memory Available to be sure there is enough memory to load in
multiple Banks.
3. Click Add Preset.
4. Enter in a name for the Preset.
5. Click OK.
To load a Bank Preset:
1. From the Options menu, click AWE SoundFonts.
2. Click the Bank Preset drop-down list box.
3. Scroll through the list and locate the bank to load.
4. Click the Bank’s name.
5. Click the Download button.
6. Click Close to load the Bank into memory.
272
Voyetra Technologies Inc.
To remove a Bank Preset:
1. From the Options menu, click AWE SoundFonts.
2. Click the down-arrow in the Bank Presets drop-down list box.
3. Locate the Bank to remove.
4. Click Delete Preset.
Default Bank Presets
When a Bank as the default, each time Digital
Orchestrator Pro is launched, this Bank is
loaded.
Any of the Presets can be used as a default
bank.
To select a Default Bank:
1. From the Options menu, click AWE SoundFonts.
2. Click the Default Bank Preset drop-down dialog box.
3. Scroll through the list and locate the Bank to use as the default.
4. Click the Bank’s name.
5. Click Close. The next time Digital Orchestrator Pro is launched, this
Bank is loaded into memory.
♫
Options Menu
• If you always want the default Bank to be General MIDI,
select [None] as the Default Bank Preset.
• Even thought a Bank is automatically loaded into
memory, you still need to select the appropriate Bank
Number in the BkMsb column.
273
Playing SoundFonts
After loading in SoundFonts, use them with your musical compositions.
To play SoundFonts with Digital Orchestrator Pro:
1. From the Options menu, click AWE SoundFonts.
2. Load a SoundFonts bank. (Make a mental note of the Bank Number.)
3. Click Close.
4. In the Track/View window, on the appropriate track, change the
BkMsb column to correspond with the Bank you want to play.
5. Choose the Patch you want.
♫
• Some SoundFont banks do not contain all 128 MIDI
instruments.
• Different Banks can be used on different tracks.
Selection Is Play Range
When Selection Is Play Range is enabled and a selection is made — either
by the mouse or keyboard — its range is automatically placed into the
From and Thru range boxes.
When Selection is Play Range is active, a check appears next to it. When
there is no check mark, it is inactive. Clicking this command toggles it On
and Off.
Auto Rewind
When Auto Rewind is checked, whenever Stop is pressed, the song
automatically rewinds to the location set in the Bar:Beat:Click box.
274
Voyetra Technologies Inc.
Chapter 19
Window Menu
Use the Window menu to open individual editing windows, to open additional instances of editing windows that support multiple views and to
arrange the windows in the Workspace.
Window Menu
275
Audio System Mixer
Clicking the Audio System Mixer opens the PC Audio Mixer. Use this
Mixer to control the recording and playback volumes of the multimedia
devices on your system.
For more information on using this Mixer, refer to the “PC Audio Mixer”
chapter.
New
Clicking New opens multiple instances (additional copies) of the editing
windows.
Multiple instances can be opened for the:
Digital Audio window
Event Editor window
Mixer window
Piano Roll window
Only a single instance can be opened for the:
Conductor Editor window
Notepad
SysEx window
Track/View window
In general, it is easier to use the Quick View buttons if you only require a
single instance of a window.
276
Voyetra Technologies Inc.
Big Time Window
Located in the New submenu, the Big Time
Window is a dedicated display which shows either
the current SMPTE time or the current song time,
depending upon the time display setting designated
in the Sync Settings dialog box in the Options
menu. The Big Time Window is resizable.
For additional information on Synchronization — with stepby-step, real-life examples of how to implement this feature
— refer to the “Synchronization” chapter.
Cascade
Cascade arranges all open editing windows — except those that are
minimized — in the familiar overlapping fashion.
Tile
Tile arranges all open editing windows — except those that are minimized
— without overlapping them.
Arrange Icons
Arrange Icons arranges the minimized editing windows starting at the
bottom left of the Workspace.
Window Menu
277
1, 2, 3, 4...
This list shows all current editing windows, including any that are
minimized. A check mark shows which window is active.
To bring any window to the foreground, click its name in the list or type its
number on the keyboard.
278
Voyetra Technologies Inc.
Chapter 20
Help Menu
In Digital Orchestrator Pro, there are many ways to obtain help:
Select Contents from the Help menu to display an extensive On-Line
Help system.
Press F1 to open Context-Sensitive Help, which displays information
about the currently-selected command or control.
Click the Help button (available in most dialog boxes) to view the Help
screen for that topic.
Let the cursor remain over a control for a second or two to display
One Line Help messages in the Main window’s Title Bar.
Let the mouse remain over a control for a few seconds to display Tool
Tips which identify the name of the control. Tool Tips also appear,
after a brief delay, over column headings in the Track/View window.
Help Menu
279
Contents
Opens the Help file at the Table of Contents page.
Quick Tour
Opens the Quick Tour which presents an overview of the software.
One Line Help
One Line Help provides a single-line definition of screen areas and controls
as the mouse pointer passes over them. This information is displayed in the
Title Bar at the top of the screen. On is the default setting for this feature.
A check mark indicates that One Line Help is active.
Tool Tip
When the mouse pointer is moved over a control or a column heading and
pauses for a moment, a small box identifies the control or heading. Like
One Line Help, this feature can be toggled On and Off by selecting it in the
menu. A check mark indicates that this feature is active.
Voyetra Website
Click this option to contact Voyetra’s website. You must have a working
Web browser and be logged into an internet service provider for this
feature to work properly.
About Digital Orchestrator Pro
Click this menu item to display the version and release date of the Digital
Orchestrator Pro software you are using.
280
Voyetra Technologies Inc.
Chapter 21
Synchronization
This chapter explains how to enable SMPTE and provides several
synchronization applications.
Sync (synchronization) can be used to:
Add audio tracks such as voice, sound effects and music to video
productions.
Add more multitrack recording capability by synchronizing Digital
Orchestrator Pro with a multitrack tape deck.
Utilize the capabilities of an external hardware device such as a keyboard sequencer or drum machine by synchronizing it with Digital
Orchestrator Pro.
♫
Synchronization
We recommend that if you are new to MIDI multitrack recording, you first become well-acquainted with your MIDI
hardware and the basic features of Digital Orchestrator
Pro before using the advanced feature of sync.
281
Overview
With synchronization:
One device is designated as the master. This device uses its internal
clock as the reference for timing.
All other MIDI devices are its slave(s). These devices use their external
MIDI clocks as the reference for timing.
The master then sends real-time messages from its MIDI Out port to its
slave(s)’ MIDI In ports so the master and slave(s) are always synchronized
with each other.
The Sync feature is enabled through the Sync command on the Options
menu.
For specific information on the Sync Settings dialog box, refer to the
“Options Menu” chapter.
282
Voyetra Technologies Inc.
Sync Formats
There are several different sync formats — MTC, SPP and SMPTE.
MTC
MTC is a series of MIDI messages which informs the slave(s) of the
current time. These messages are sent 24 times per quarter note.
SPP (Song Position Pointer)
SPP is a MIDI message which tells the slave(s) where in the song the
master is located, so the master and slave(s) remain aligned at the same
location. SPP uses MIDI clocks to keep time. These messages are also sent
24 times per quarter note.
SMPTE
SMPTE stands for the Society of Motion Picture and Television
Engineers, the organization that established this format of synchronization.
SMPTE refers to an audio signal containing a time code in the format:
Hours:Minutes:Seconds:Frames:Subframes (in hundredths or bits).
There are several different SMPTE frame rate options:.
24 fps is used in film only.
25 fps is used in European TV and video.
29.97 fps is easier to work with than 30 Drop; however, it will
drift from the wall clock by a small amount. It is
generally used for color video work (other than network
features) in the United States.
30 Drop is used in network television and color video work when
SMPTE time must match the wall clock
30 Non Drop is used for black-and-white television and general music
Synchronization
283
♫
Digital Orchestrator Pro does not read the SMPTE
audio signal directly. It reads MTC (MIDI Time
Code), a data stream that must be translated from a
SMPTE tone by a special piece of hardware such as
Voyetra’s V-24s multi-port MIDI/SMPTE interface.
Digital Orchestrator Pro does not output SMPTE, but
it does output MTC.
Syncing to SMPTE
For most applications, you will want to use Digital Orchestrator Pro as the
master clock source. However, to synchronize Digital Orchestrator Pro to
an external clock source, SMPTE must first be properly enabled.
To enable SMPTE:
1. From the Options menu, choose MIDI Port Setup.
2. Set one of the MIDI Input ports for Sync In.
3. Choose the port that the SMPTE to MTC converter sends MTC
on.
4. Click OK.
5. From the Options menu choose Sync Settings.
6. Under Clock Source in the Sync Settings dialog box, set the Input
port to match the port number selected in the MIDI Port Setup
window.
7. Then choose MTC/SMPTE (or SPP if applicable) as the source.
This allows Digital Orchestrator Pro to receive and sync to an
external source.
284
Voyetra Technologies Inc.
Synchronizing with an External Tape
Deck
A common application of the sync feature is to lock up (synchronize) Digital
Orchestrator Pro with a tape deck. This could either be a video deck, where
Digital Orchestrator Pro is used to add voice, sound effects and
background music to the video, or a multitrack tape recorder.
In this scenario, Digital Orchestrator Pro is the slave and the tape deck
is the master.
One track of the tape deck gets striped with SMPTE time code.
A SMPTE to MIDI converter — such as Voyetra’s V-24s interface —
reads the SMPTE time code and transmits MTC to Digital Orchestrator Pro.
Once the devices are synchronized, playback of Digital Orchestrator
Pro is controlled by the transport controls on the tape deck.
MTC/SMPTE Offset
This function serves two purposes, depending on whether the computer is
reading or writing SMPTE.
When reading (syncing to) MTC/SMPTE, the offset determines
what SMPTE time triggers the sequence. Therefore, if the offset time is
set to 15 seconds (00:00:15:00:00) in the Sync Settings dialog box, the
song begins when it receives that SMPTE time.
When writing (generating) MTC/SMPTE, the offset determines
the first SMPTE time generated. If the tape is striped with an offset of
10 seconds (00:00:10:00:00), the stripe starts with that SMPTE time.
It is recommended that the song start later than the first SMPTE time on
the tape. This gives the sequencer time to process the synchronization data.
If a tape is striped beginning at 10 seconds (00:00:10:00:00) and the
start time (tape offset in the sync window) is set to 15 seconds
(00:00:15:00:00), then Digital Orchestrator Pro starts five seconds after
Synchronization
285
the beginning of the time code on the tape.
♫
SYNCING TO A TAPE DECK
To sync to a tape deck, it is necessary to have a
SMPTE generator/converter — such as Voyetra’s V24s — and a multitrack tape deck on which one track
at a time can be recorded without erasing the
previously-recorded track.
To synchronize Digital Orchestrator Pro with a tape
deck:
1. Record SMPTE time code to one track of the tape. (Follow the
instructions with the SMPTE read/write hardware being used.)
2. Once the tape has successfully been striped with SMPTE, make
certain that the Digital Orchestrator Pro SMPTE functions are
enabled. (See “To enable SMPTE” earlier in this chapter.)
3. Make sure the audio output of the multitrack tape deck is connected
to the SMPTE In of the SMPTE-to-MIDI converter.
4. When the tape is started, the Current Time counter in Digital Orchestrator Pro starts to move. When it reaches the offset time setting, the
song file starts to play. The Transport Controls in Digital Orchestrator Pro are not operational during this time.
Synchronizing with Another MTC Device
There are occasions when you may need Digital Orchestrator Pro to be a
slave to an external MTC device, such as an external hard disk recorder or
another computer running a sequencer or hard disk recorder.
To use MTC Sync with Digital Orchestrator Pro as the
slave:
1. From the Options menu, open the Sync Settings dialog box and set
the Clock Source to MTC.
2. Set the master (drum machine, keyboard sequencer or other MIDI
device) to send MTC. (Refer to the manual for the MIDI device for
information on how to do this.)
286
Voyetra Technologies Inc.
3. Connect the master’s MIDI Out to the MIDI In on the PC MIDI
interface.
4. Press Play on the external device and Digital Orchestrator Pro begins
playing in sync.
Synchronizing Using Song Position
Pointer
Another common sync application is to synchronize an external hardware
sequencer — such as a drum machine — with Digital Orchestrator Pro.
This is done using a different type of sync called Song Position Pointer
(SPP).
In this case, Digital Orchestrator Pro is the master and the external
sequencer is the slave.
To use SPP Sync with Digital Orchestrator Pro as the
master:
1. From the Options menu, open the Sync Settings dialog box and set
Sync Output to MIDI/SPP.
2. Set the slave (drum machine, keyboard sequencer or other MIDI
device) to sync to SPP. (You will need to refer to the manual for the
MIDI device for information on how to do this.)
3. Connect the slave’s MIDI In to the MIDI Out on the PC MIDI
interface.
4. Press Play on Digital Orchestrator Pro’s Transport Controls. Digital
Orchestrator Pro sends a start message to the external device and all
the devices play in sync.
Synchronization
287
To use SPP Sync with Digital Orchestrator Pro as the
slave:
1. From the Options menu, open the Sync Settings dialog box and set
the Clock Source to MIDI/SPP.
2. Set the master (drum machine, keyboard sequencer or other MIDI
device) to send SPP. (You will need to refer to the manual for the
MIDI device for information on how to do this.)
3. Connect the master’s MIDI Out to the MIDI In of the PC MIDI
interface.
4. Press Play on the external device and Digital Orchestrator Pro begins
to play in sync.
288
Voyetra Technologies Inc.
Chapter 22
PC Audio Mixer
The PC Audio Mixer automatically detects the components on the sound
card and configures the display accordingly. Use the PC Audio Mixer for
setting recording and playback levels.
♫
PC Audio Mixer
CAUTION!
Do NOT use headphones the first time you use the PC
Audio Mixer! Some sound cards generate audio signals
strong enough to cause hearing problems and/or
discomfort.
289
Sound Sources
Your computer generates sound in a number of ways:
CD Audio
Your computer can play a music (audio) CD
similar to the way a CD would play in your
home stereo system.
MIDI Music Synthesis Your computer’s internal synthesizer generates music for games and multimedia applications.
Digital Audio Your computer can play and record digital
(WAV) audio files.
The Mixer has individual controls to adjust CD, MIDI, and WAV volumes,
as well as the volumes for the Microphone, Line and Auxiliary inputs.
Use the PC Audio Mixer when setting and adjusting the volumes of the
different multimedia components for recording in Digital Orchestrator Pro.
Audio System Mixer Button
The Audio System Mixer button, which is available on every screen,
launches the PC Audio Mixer.
To launch the PC Audio Mixer:
Click the Audio System Mixer button, located on the Status Bar.
~or~
From the Window menu, select Audio System Mixer.
Volume Controls
290
Voyetra Technologies Inc.
The PC Audio Mixer automatically detects and configures itself to the
sound card installed on your system. Therefore, the Mixer pictured here
may differ in appearance from the one installed on your machine.
These Volume controls effect the
volume level for the sound card’s output.
Advanced
button —
opens a
dialog box for
Advanced
Controls.
Mute
buttons —
each slider
has a button
that silences
the selected
source’s
volume.
Mute buttons
— each slider
has a button
that silences
the selected
source’s
volume.
Advanced
button —
opens a
dialog box for
Advanced
Controls.
These Volume
controls effect the
volume level for the
sound card’s input.
PC Audio Mixer
291
Operating the Volume Controls
Use the volume slider controls to
adjust the volume for recording
and playback.
Up increases the volume.
Sliders
Advanced
button
Down decreases the volume.
Mute
button
To control the volume sliders with the mouse:
1. Place the mouse pointer on the desired slider.
2. Click-and-hold the left mouse button and drag the slider up or down.
If you click-and-hold the mouse pointer above or below the slider,
the slider moves toward the pointer.
To move the left and right sliders simultaneously:
1. Place the mouse pointer between the two sliders.
2. The pointer changes to an up/down arrow. Click-and-drag to move
both sliders together.
If you prefer to use the keyboard:
1. Press the Tab key to select each button.
2. Then use the Spacebar to activate the selected control.
3. Use the arrow keys on the keyboard to move the sliders up or down.
To operate the Mute button:
Click the Mute button at the bottom of the slider. The slider is muted
when the button is lit.
To toggle the sound back on, click the Mute button again.
292
Voyetra Technologies Inc.
Advanced Controls
Additional features are available by clicking the Advanced buttons at
the bottom of the device’s volume controls.
♫
Since each sound card has its own configuration, what
you see in this manual may vary from what you see on
your screen.
Auxiliary
Input
Advanced
button
Main Synth
Advanced
button
Input
Monitor
Advanced
button
CD/Line
Advanced
button
Advanced button
To use the Advanced buttons:
1. Click the Advanced button for the device you wish to control. A
dialog box opens.
2. Turn the Advanced item On or Off by clicking its button. When the
option is On, the button lights.
PC Audio Mixer
293
♫
To move the PC Audio Mixer, just click-and-drag the
Title Bar and move the PC Audio Mixer to a convenient
location on the screen.
Customizing the Mixer Icons
The icons on the PC Audio Mixer can be
changed to suit your personal tastes.
Note that you are only changing the icon —
not the device the volume slider is
controlling!
To change an icon under a slider:
1. Move the mouse pointer over the icon to be changed and click the
right mouse button. A dialog box with several icons displays.
2. Use the scroll bar or the arrows to find an icon that best represents
the volume slider control.
3. Click the icon you want, then click OK. The old icon is replaced.
System Menu
Click the icon at the top left of the PC Audio
Mixer to display a menu with information about
the Mixer.
The options in this menu offer control over the
Mixer’s appearance.
294
Voyetra Technologies Inc.
The System menu includes the following options:
Restore
Move
Size
Restores the PC Audio Mixer after minimizing.
Moves the PC Audio Mixer to any location on the
screen.
Is not used with the PC Audio Mixer.
Minimize
Minimizes the PC Audio Mixer.
Maximize
Is not used with the PC Audio Mixer.
Close
About…
Help…
Configure Mixer…
Always On Top
Exits the PC Audio Mixer.
Displays information about the version number, date,
and Product ID number.
Opens Help for the PC Audio Mixer.
Opens the Configure Mixer dialog box to change the
appearance of the PC Audio Mixer.
Keeps the PC Audio Mixer on top of Digital
Orchestrator Pro and any other opened windows.
Configuring the PC Audio Mixer
Click Configure Mixer on the System menu to open the Configure dialog
box. From this dialog, the appearance of the PC Audio Mixer can be
changed, the order in which the controls display can be reorganized and
controls can be added or removed — as long as these controls are available
on your system.
PC Audio Mixer
295
To open the Configure Mixer dialog box:
1. Click the System Menu to open it. It is the icon on the top left of the
PC Audio Mixer.
2. Click Configure Mixer to open the Configure dialog box.
3. When the box opens, on the right side of the Mixer box, a list of
controls currently on the PC Audio Mixer is displayed.
4. The button of the Mixer you are currently working with — Play or
Record — will be lit.
Click to select
the Playback
Mixer
controls.
Click to select
the Record
Mixer controls.
Click to Add the
highlighted
control.
Click to Remove
the highlighted
control.
The
highlighted
control you
want to
add.
The
highlighted
control you
want to
remove.
To add a Mixer control:
1. In the Driver box on the left, click to highlight the name of the
control to be added.
2. Click the Add button. The control is added to the list in the Mixer
box.
3. Click OK. You will notice that the control has been added to the PC
Audio Mixer.
296
Voyetra Technologies Inc.
♫
• You can only add one instance of each control to
the PC Audio Mixer.
• Controls are always added to the end of the list.
To remove a Mixer control:
1. In the Mixer box on the right, click to highlight the name of the
control to be removed.
2. Click the Remove button. This removes the control from the Mixer
box.
3. Click OK. You will notice that the control is no longer on the PC
Audio Mixer.
♫
Removing controls from the PC Audio Mixer does not
remove them from your system — it only removes them
from the PC Audio Mixer. You can always add the
controls back to the Mixer at a later date.
Changing the Order of the Mixer
Controls
In the Configure dialog box, the order of the list, from top to bottom,
corresponds to the PC Audio Mixer controls from left to right.
When adding controls, their names are added to the end of the list — a
control cannot be inserted in the middle of the list. Therefore, the topmost
control listed in the Mixer box is the first control on the left of the PC
Audio Mixer.
It is easy to change the order in which the controls appear on the Mixer. If,
for example, you have three controls — MIDI, WAV and CD — and want
them to appear in reverse order (CD, WAV, MIDI), you would take the
following steps.
PC Audio Mixer
297
To change the order of the PC Audio Mixer controls:
1. Click a control to highlight it. Then click the Remove button.
2. Repeat for each of the controls. (There should now be no controls in
the Mixer box.)
3. In the Drivers box, click CD, then click Add. (This makes CD the
first control in the list.)
4. Click WAV, then Add. (This makes WAV the next control.)
5. Click MIDI, then Add. (This makes MIDI the last control.)
The order should now appear as CD, WAV and MIDI — the reverse of
the original order.
Adjusting the order can be useful when locating the controllers on the PC
Audio Mixer.
298
Voyetra Technologies Inc.
Appendix A
Overview of MIDI
and Digital Audio
MIDI, an acronym for Musical Instrument Digital Interface, is a system for
encoding, sending and receiving electronic messages that control MIDI
devices. Anything that generates or responds to MIDI messages is a MIDI
device.
Common MIDI devices are electronic musical synthesizers (synths),
keyboards, and drum machines. MIDI commands can also control more
specialized devices, such as theatrical lighting systems. A sound card
installed in a computer can also be programmed to respond to MIDI
commands.
MIDI is not a product or a tangible object. It is a specification — a widely
accepted system of rules — introduced in the early 1980s by the MIDI
Manufacturers Association. These rules specify how MIDI data should be
encoded and sent among MIDI devices. They also govern hardware issues
such as the design of the cables and connectors used by MIDI devices.
A series of MIDI commands can be organized in a deliberate way to
instruct a MIDI synthesizer to play a musical passage. This series of
commands is called a sequence and a hardware device or computer software
program that creates and edits sequences is called a sequencer. With
Overview of MIDI and Digital Audio
299
sequencer software, a computer can record, edit, or play MIDI sequences
and save them as files on a disk. The collection of commands in a file —
the sequence — then instructs a synthesizer to play the music.
A single MIDI sequence can control a number of MIDI devices — virtually
an entire synthesized orchestra. This requires certain procedures to keep
things organized. To ensure, for example, that each command reaches the
correct device, each MIDI command includes an instruction that assigns it
to a MIDI port. If a command is assigned to port 1, only the MIDI device
attached to port 1 receives the command.
Each command routed to a given port is also assigned one of 16 MIDI
channels. Like a television, a MIDI device can receive incoming signals on
all channels, but respond only to selected channels. A synth differs from a
TV, however, in that it can “tune in” more than one channel at a time.
Each channel is assigned a patch — an instruction that tells the synthesizer
to generate a particular type of instrumental sound for that channel. So, for
example, if you have assigned an oboe patch to port 2, channel 4, any note
directed to port 2, channel 4 will sound like an oboe — until you change
the patch assignment.
MIDI commands can trigger two kinds of events: note events and non-note
events.
A note event is the equivalent of pressing a piano key. It instructs the
synthesizer to play a particular pitch at a precisely defined time. The
command can convey musical nuances as well, such as how abruptly or
hard a piano key is struck, held down and released. However, not all
MIDI devices are designed to respond to this type of information.
Non-note events (sometimes called controller events or simply controllers)
manage other functions of the MIDI device. They may, for example,
adjust the volume or assign a new patch to one of the channels.
MIDI files do not actually contain sound. Instead. They are a set of instructions that tell a synthesizer which sounds to make and when to make them.
In this sense, a MIDI device is like a player piano and a MIDI sequence is
like the perforated paper roll that controls it. If one of the holes instructs
the piano to play the middle C key, the piano will do so.
300
Voyetra Technologies Inc.
The ultimate result, however, depends on the quality and condition of the
piano. If the middle C string is tuned to E-flat, you’ll hear E-flat. The
potential for this sort of problem is greater with synthesizers, since they can
simulate so many different instruments.
Early Problems with MIDI
When it was first released, the MIDI specification attempted to strike a
balance between standardization and versatility. MIDI manufacturers,
software programmers, and composers agreed on certain basic commands,
but other parts of the specification were less rigidly defined. With everyone
free to play by their own rules, fundamental problems soon emerged:
File Format — Though MIDI software programs could send and
receive MIDI commands, each developed its own way of storing
sequences on computer disks, so a MIDI file could be played only by
the program that created it.
Patches — The commands that tell the synthesizer which patches
(instrument sounds) to use are really just numbers. Standardizing a
numbering scheme was simple enough — patch numbers run from 1
to 128. But no rules governed which sound went with which number.
Consequently, the part composed for violin on one synthesizer might
sound like a trumpet when played on another.
Capabilities of the Synthesizer — All hardware has inherent limits; a
synthesizer can only make a certain number of sounds, and more
importantly, it can only play a limited number of notes at once. These
capabilities vary widely. A sequence created on a relatively powerful
synthesizer — one that can simultaneously generate many notes and
instruments — can overwhelm a lesser synthesizer.
These problems multiplied as the market grew. Patch and drum maps
varied from one synthesizer manufacturer to another, or even among
different models from the same manufacturer. The initial goal of MIDI —
making a device-independent MIDI file, one that would play on any MIDI
synthesizer — began to fade from view.
Overview of MIDI and Digital Audio
301
General MIDI
To help composers create device-independent MIDI files, the Japanese
MIDI Standards Committee (JMSC) and the American MIDI
Manufacturers Association (MMA) agreed to a set of specifications called
General MIDI. General MIDI standardized, among other things, the patch
number of instrument and drum sounds on a MIDI device. This way when
a General MIDI file is created it will sound similar on any General MIDI
synthesizer.
Digital Audio
Digital Audio differs from MIDI in that it records sound, not a sequence of
commands.
The hard drive is the storage medium; it serves the same function as tape
does in a conventional tape recorder, but with one major difference: Sound,
which occurs in nature as a series of waves, must be converted to a series of
numbers that your computer can read.
To do this, most PC-based digital audio hardware uses a technique called
Pulse Code Modulation, or PCM. That is why digital audio is sometimes
referred to as PCM audio.
Incoming electrical signals in the form of waves (analog signals), such as
those from a microphone, are turned into numbers by a circuit called an
Analog to Digital Converter (ADC) and saved in computer memory. These
numbers can be saved in a file, and you can manipulate this data as easily as
you would text in a word processor.
When you play the file, a Digital to Analog Converter (DAC) converts the
numbers back into analog electrical signals. Audio equipment then
amplifies these signals and sends them to speakers or headphones, where
you hear them as sound.
302
Voyetra Technologies Inc.
Data Formats
The digital audio files most commonly used by Windows are called Wave
files, identified by the .WAV file extension. Another type is the .VOC file,
originally developed by Creative Labs for their Sound Blaster® products,
and widely supported by other manufacturers. Among digital audio files
there are various data formats available.
Each data format has four defining characteristics — sample rate, bit
length, compression and mono/stereo.
Sample Rate
To record sound, the ADC must select and measure a sample (a discrete
instant in the sound wave), and store its amplitude (a measure of its loudness) as a number in your computer. To capture a sustained interval of
sound, this process must be repeated very rapidly. The sample rate is the
frequency with which the sampling process occurs.
Sample rates are generally expressed in Kilohertz, or thousands of cycles per
second. A typical digital audio recording might be sampled at 11,025 Hz
(samples per second), or 11.025 kHz. Generally, higher sample rates
produce better sound fidelity, but a high sample rate can generate so much
data that it can outpace the processor of your computer or overrun the
capacity of your hard disk.
Bit Length
The amplitude of each sample is expressed as a number and, like all values
stored in a computer, these are binary numbers. The electronic “digits” that
represent numbers are called bits. Bit resolution (also called “bit length” or
“sample size") is the number of binary digits that make up each sample.
Eight bits can represent a range of values from 0 to 255, while sixteen bits
can represent values from 0 to 65,535. Most digital audio programs,
including Digital Orchestrator Pro, use 16 bits as a standard.
With the larger bit lengths, digital audio data can be measured more precisely. To illustrate, imagine two tape measures. Both are 10 feet long, but
one is marked with 255 divisions, the other with 65,535. Although both
Overview of MIDI and Digital Audio
303
may be perfectly accurate, the latter is more precise. The larger bit lengths
provide better sound fidelity, but again, there’s a price — your system must
process more data.
Data Compression
To speed processing of large amounts of data, many sound cards use data
compression to reduce the size of the data files. Before the data is stored,
some of it is removed and, on playback, this data is artificially restored.
Because you cannot edit compressed data, Digital Orchestrator Pro does
not support this feature. However, if you export recorded data as a Wave
file you can use compression software on the resulting data. Your system
— and any others on which the file will be played — must have the
necessary hardware and software to work with the compression format you
select.
Mono or Stereo
Stereo digital audio consists of two sets of data working together, one
assigned to the left channel, the other to the right. Thus, at a given sample
rate and bit length, a stereo file requires twice as much data as its mono
equivalent. Again, you face the issues of computer system speed and hard
disk storage capacity when working with stereo files.
304
Voyetra Technologies Inc.
Appendix B
Hard Disk Recording
What You Will Need to Use Digital
Orchestrator Pro for Recording
Listed below necessary hardware for using Digital Orchestrator Pro for
hard disk recording:
A microphone with an eighth-inch mini plug or adapter.
A sound card that will record and play back digital audio and that can
function as a MIDI interface.
You may want to use a tape deck to record the results of your work.
You might consider a large and fast hard drive, possibly one reserved
exclusively for digital audio.
For more information on making connections to record digital audio, refer
to the “Installing Digital Orchestrator Pro” chapter.
Hard Disk Recording
305
MIDI vs. Digital Audio Recording
It is important to remember that MIDI and digital audio are two very
different ways of creating and recording sound.
When you record MIDI, you are actually recording a series of commands —
the keystrokes that you made, the instruments you selected and so on. Each
time you play back the file, your sound card or MIDI synth re-creates the
music by replaying these commands. You change a song by changing its
commands.
Digital audio is more like recording with a tape deck. You record actual
sounds, not commands and store them on your computer’s hard disk
(instead of on audio tape). The advantage of digital audio is that you aren’t
limited to the sounds that your sound card or synthesizer can create. You
can record anything that a microphone can pick up, from your voice to an
electric guitar.
Digital Audio Performance Issues
By default, Digital Orchestrator Pro makes 16-bit, mono recordings at a
resolution of 22,050 samples per second (22KHz). Recorded at this setting,
one minute of digital audio recording will take up 2.5 megabytes on your
hard drive.
There is a tradeoff between sound quality and file size. Depending on your
computer’s processor and hard disk drive, you may find that you cannot
successfully record several, long digital audio tracks at high resolutions, or
that sound breaks up on playback. These problems are caused by the
limitations of your computer system.
306
Voyetra Technologies Inc.
Steps You Can Take to Help
When you record digital tracks, be prepared for very large file sizes.
Make sure your disk drive has enough room.
Choose lower Sample Rate settings for recording when possible.
Close all other software programs to make the maximum computer
power available for recording.
Remember that recorded silence uses memory — so, whenever
possible — cut the silences out of your recording. Refer to the section
on “Editing Out Silences” in the chapter on Digital Audio Recording.
Deselect stereo playback in the Digital Audio portion of the Options
menu.
Defragment your hard disk. This will optimize overall system
performance.
If you have multiple hard disks, set your Temp directory (in Digital
Audio Options dialog box) and save your files to the fastest one.
Increase the size of the Record and Playback Buffers in the Digital
Audio Options dialog box. This increases the amount of memory
available to start playback and recording, and can improve overall
performance.
If your system BIOS supports multiple hard disk sector read/write,
you may want to disable this feature as it can interfere with playback.
Use the Mixdown Audio transform to decrease the number of tracks in
a file. This results in a smaller file size and lowers the demand on your
system.
Close any window containing a waveform. This will eliminate any extra
strain on the system, since the system will no longer have to redraw the
waveform.
The faster and better your computer system, the faster and better
Digital Orchestrator Pro performs!
Hard Disk Recording
307
Predicting the Size of Digital Audio Files
The formula below will help you predict the approximate amount of disk
storage space a Digital Audio file will require. You must know four things
about the file you want to create:
B — Bits
The length of a single sample — Digital Orchestrator Pro’s digital
files are always 16-bit
C — Number of Channels
1 for mono, 2 for stereo
T — Time
The length of recording, in seconds
R—Sample Rate in Hertz (samples per second)
Digital Orchestrator Pro defaults to 22,050
To predict digital audio file size:
1. The following equation predicts digital audio file size.
(B/8) x C x T x R = File size, in bytes
For example, consider an 8-bit stereo recording, 14 seconds long,
made at a sample rate of 11.025 kHz. In this example, you must
multiply 11.025 Kilohertz by 1,000 to arrive at 11,025 Hertz.
2. Place the following values into the formula:
B = 16 (bits)
C = 1 (Mono)
T = 14 (seconds)
R = 22,050 (samples per second)
3. Solve the equation:
(16/8) x 1 x 14 x 22,050 = 617,400 bytes
4. To convert this answer from bytes to kilobytes, divide the
result by 1024.
308
Voyetra Technologies Inc.
617,400 ÷ 1024 = 602.929, or about 603KB
This answer is still an approximation. A file header must be added to the
file, which adds bytes, and, of course, you have to multiply by the number
of tracks you wish to record.
Quick Reference Charts for Disk Space
Consumption
The charts that follow show approximate file sizes (in megabytes) generated
when recording 16-bit digital audio at different sample rates.
File Size at 11.025 kHz Sample Rate
Tracks
Song Length in Minutes
1 min
2 min
3 min
4 min
5 min
1
1.3MB
2.5
3.8
5.1
6.3
2
2.5
5.1
7.6
10.1
12.7
3
3.8
7.6
11.4
15.2
19.0
4
5.1
10.1
15.2
20.2
25.3
File Size at 22.05 kHz Sample Rate
Tracks
Song Length in Minutes
1 min
2 min
3 min
4 min
5 min
1
2.5MB
5.1
7.6
10.1
12.7
2
5.1
10.1
15.2
20.2
25.3
3
7.6
15.2
22.8
30.3
37.9
4
10.1
20.2
30.3
40.4
50.5
Hard Disk Recording
309
File Size at 44.1 kHz Sample Rate
Tracks
310
Song Length in Minutes
1 min
2 min
3 min
4 min
5 min
1
5.1 MB
10.1
15.2
20.2
25.3
2
10.1
20.2
30.3
40.4
50.5
3
15.2
30.3
45.5
60.6
75.7
4
20.2
40.4
60.6
80.8
101.0
Voyetra Technologies Inc.
Appendix C
Troubleshooting
Fortunately, the situations that cause the most multimedia problems are
among the easiest to fix. Start your troubleshooting journey with the
general suggestions below. If you still have problems, look up the specific
symptoms you are experiencing.
Throughout the troubleshooting process, remember another valuable
resource — the hardware manuals that came with your sound card and
other peripherals.
First, confirm that your sound card is connected to a working output
device such as headphones, speakers or an amplifier with speakers. If you
are using speakers, make certain that they:
Are plugged into the correct port on your sound card.
Are turned on and have the volume set to an adequate level.
Have their own sources of power. Most sound cards can supply
enough power for headphones, but not for external speakers.
Depending on the type, your speakers will need to be plugged into a
wall outlet or an amplifier, or will be powered by batteries.
If the speakers are not the problem, then you will have to check your
multimedia devices. To do so, use the Windows® Media Player.
Troubleshooting
311
Media Player
There are three devices you can test using the Windows Media Player: the
MIDI Sequencer, digital audio (sound), and video.
To open the Media Player in Windows 3.1:
1. Double-click the Accessories program group.
2. Double-click the Media Player icon.
To open the Media Player in Windows 95:
1. Click Start.
2. Point to Programs. Point to Accessories. Point to Multimedia.
3. Click Media Player. Media Player opens.
To test multimedia devices with Media Player:
1. Click Device to display the multimedia devices on your system. If
you do not see Sound, Video for Windows or MIDI Sequencer
listed in the menu, they are not properly installed on your system.
Refer to your user’s manual or contact your hardware manufacturer for assistance.
2. Click the name of the device — Sound, Video for Windows, or
MIDI Sequencer — you want to test.
3. Locate a file of the type of media you want to test and click Open.
4. Click the Play button. If you hear the sound or MIDI or see the
video, the drivers are installed and working properly. If any of
these multimedia devices fail to operate correctly, contact your
hardware manufacturer.
312
Voyetra Technologies Inc.
Setting the Windows 95 Mixer
Some of the basic problems that occur with multimedia applications can
easily be remedied by checking the Windows 95 Mixer. With the Mixer, you
can control the volume of the different components on your computer’s
sound system.
To open the Mixer in Windows 95:
1. Click Start.
2. Point to Programs. Point to Accessories. Point to Multimedia.
3. Click Volume Control. Make any necessary changes from the
Volume Control Panel.
Possible Mixer Problems
❝The sound is too low or I don’t hear any sounds at all. ❞
❝Some of my components work, but others do not. For example, I can hear
MIDI but I cannot hear WAV (digital audio).❞
Possible Problem
The Mixer settings are too low or some of the components are muted.
Possible Solution
Check the Mixer to make sure all of the components’ volumes are at least
half way to the top. Also, check that none of the components are muted. In
particular, check the Master volume setting if there is one.
Troubleshooting
313
Troubleshooting MIDI
❝I can’t find the connectors to hook my sound card and my MIDI keyboard
together. ❞
Possible Problem
Your keyboard is not a MIDI device. Not all synthesizers or electronic
keyboards support MIDI.
Possible Solution
Look for round MIDI plugs labeled MIDI In, MIDI Out or MIDI Thru.
They are usually found on the back panel of the MIDI keyboard. If your
keyboard is not equipped with these plugs, you will not be able to hook
your keyboard to your computer.
Possible Problem
Your sound card did not come with a MIDI connector cable.
Possible Solution
Most sound cards don't have MIDI connectors. A special adapter cable that
connects to the joystick port is used instead. The manufacturer of your
sound card can probably provide you with a MIDI connector cable or you
can purchase one from Voyetra Technologies Inc. (See the front of the
manual for information on contacting Voyetra Technologies Inc.)
❝I'm getting sound, but there is interference with it. ❞
Possible Problem
A hum, hissing or other constant undertone of noise usually indicates
electrical interference or a hardware malfunction.
314
Voyetra Technologies Inc.
Possible Solution
Increase the sound card’s output level and lower the amplifier’s volume. If
that doesn’t help, try it the other way around. If you are not able to resolve
this problem, contact the hardware manufacturer.
❝I cannot record from my MIDI keyboard. ❞
❝I do not hear anything when I play my MIDI keyboard. ❞
Possible Problem
Your sound card isn’t connected to an output.
Possible Solution
Be sure your sound card is connected to a working output device such as
headphones, speakers or an amplifier with speakers — and that you are
using self-powered speakers. The sound card’s amp isn’t designed to power
external speakers.
Possible Problem
Your MIDI cables are not plugged in correctly.
Possible Solution
Make sure that the MIDI cable runs from the MIDI keyboard’s MIDI Out
to the computer’s MIDI In and vice versa.
Possible Problem
Your synthesizer is not set up to transmit MIDI.
Possible Solution
Some MIDI instruments send and/or receive MIDI data automatically, or
can be configured to do so. Others require that take specific steps are taken
to transmit MIDI each time the synthesizer is turned On. Check your
MIDI instrument’s instructions to find out how to set it up to transmit
MIDI. The salesperson who sold you the MIDI instrument may also be
Troubleshooting
315
helpful.
Possible Problem
Your synthesizer and computer are set to different MIDI ports and/or
channels.
Possible Solution
Make sure that the MIDI Input, which can is set in the MIDI Port Setup
dialog box, is set to the same input that your MIDI instrument is connected
to.
Possible Problem
There is no power to the MIDI keyboard.
Possible Solution
Check to make sure the MIDI keyboard is plugged in and turned on.
❝I can hear music when I play my MIDI keyboard, but I can’t
record. ❞
Possible Problem
You have not selected a track for recording.
Possible Solution
Be sure that there is an “R” in the “Record” column.
Possible Problem
Your synthesizer is sending on one channel and/or port and the software is
set to receive on another.
Possible Solution
Be sure you know which port and channel your synth is using to send
MIDI data and that the track you’ve selected for recording has the same
settings. Check the settings in the MIDI Port Setup dialog box to make
316
Voyetra Technologies Inc.
sure the MIDI data is being properly routed.
❝When I play the MIDI keyboard, I hear a strange echo or the notes sound
doubled-up — thicker. Sometimes I run out of voices and not all the notes
sound. ❞
Possible problem
The MIDI data arriving at the MIDI In is echoed to the MIDI Out.
Possible solution
From the Options menu, try turning MIDI Thru off. If it stops, you have
found the problem. If you are using a keyboard controller, try turning the
local control off. See the documentation for the keyboard controller to do
this.
❝It sounds as if tracks are missing from my MIDI file. Also, other parts
sound very strange and there are no drum sounds. ❞
Possible Problem
The MIDI Configuration in Windows 95 is not set up properly.
Possible Solution
In Windows 95, check that the MIDI configuration is set up correctly for
your sound card.
Possible Problem
The file could just be too complex for your synth.
Possible Solution
Edit the file so it doesn’t demand as many simultaneous notes and/or
instruments from your synth.
Troubleshooting
317
Troubleshooting WAV (Digital Audio)
❝I cannot hear any digital audio. ❞
Possible Problem
You do not have the correct drivers installed.
Possible Solution
Contact your sound card manufacturer to make certain you have the latest
drivers for your sound card.
Run Media Player and test the device labeled Sound. If Sound does not
work, contact your sound card manufacturer.
❝The sound sometimes stutters and/or stops. ❞
❝The sound is garbled. ❞
Possible Problem
Your system may be too slow. The demands of recording and editing digital
audio can tax many computer components, particularly older, slower ones.
Possible Solution
Close any open applications.
Check to make sure you have the latest drivers for your sound card.
318
Voyetra Technologies Inc.
Appendix D
The Recording
Process Tips &
Techniques
Although there is no right or wrong way to record a piece of music, most
professional producers would agree that there is a common format for
creating a pop song.
A pop recording usually includes drum, bass, rhythm, lead vocal, background vocal and lead instrument parts.
If you are new to recording, this section will help you understand the steps
commonly used to create a song from these parts.
For those with more experience, tips are provided for getting the most out
of your desktop recording system.
The Recording Process Tips & Techniques
319
Planning the Recording
Before you begin recording, it is best to determine which format — digital
audio or MIDI — you will use for each of the tracks you plan to record.
Some instruments lend themselves to MIDI recording; for others,
recording digitally is more suitable. Keyboard synthesizer parts, for
example, will almost always be recorded as MIDI tracks.
With the advent of wavetable synthesizers and samplers, drums, horns, bass
and other instruments now sound very realistic when played back in MIDI
format. Other instruments may not always be accurately reproduced by a
synthesizer and are best recorded as live instruments to digital tracks.
Vocals, of course, must be recorded as digital tracks.
Digital Orchestrator Pro provides more than 1000 MIDI tracks on which
to record your synthesizer parts. You can record as many tracks as your
synthesizer has voices to play them back. However, the maximum number
of digital audio tracks that can be recorded and played back is dependent
on the capabilities of your computer system.
You can overcome your hardware limitations somewhat by setting the
sample rates to a lower value. This increases the number of tracks you can
work with, but you’ll pay a cost in sound quality. Recordings made at low
sample rates do not reproduce high frequencies well. The lower the sample
rate, the more high-end loss.
If you don’t need more tracks, setting the sample rate to a higher number
produces better quality recordings. It is recommended that you make some
test recordings before beginning an important project to determine the
number of tracks your computer can record at a given sample rate. Once
you know the capabilities of your machine, you can finish planning how
your song will be recorded. Other tips for “saving” digital tracks are
discussed later in this section.
♫
320
TIP!
You have probably heard the phrase “save early, save
often.” It is always a good idea to save multiple revisions of
your song under different file names, especially before
merging digital tracks.
Voyetra Technologies Inc.
Drum Part
Most often, the recording process begins with the drum part. Laying down
a drum track early in the recording process provides you and your
musicians with a groove to play over.
There are a number of ways to lay down a drum part: you can play the part
in from a MIDI controller such as a keyboard or MIDI drum pad
controller, insert the drum notes manually, or use the Step Record feature
in Digital Orchestrator Pro’s Piano Roll window. Then using the copy-andpaste technique to lengthen the part.
By assigning the same drum channel to more than one track, you can create
multitrack drum recordings. This allows you to layer the drum parts using
different recording techniques for each track. You could, for example, load
a drum file to provide the basic groove, then record a conga part from your
keyboard on another track as a drum fill. For additional texture you could
add a quarter note cowbell part by inserting four quarter notes on a
separate track in the Piano Roll window, then loop the track.
Bass Part
Now that you have laid down the drum part, you’ll need some bass to help
hold down the groove and give the song structure. As you did in setting up
the drum part, you can insert notes from the Piano Roll window or record
them from your keyboard to create the bass part.
Since most pop songs repeat phrases, it’s usually a good idea to record a
phrase once and then lengthen the part by copying-and-pasting it in Digital
Orchestrator Pro’s Track/View screen. This helps speed up the creative
process and ensure that you don’t get bogged down in the recording
process. Once you have completed the arrangement of your song, you can
go back and re-record the part to a new track to give it a “played live” feel.
The Recording Process Tips & Techniques
321
Rhythm Guitar Part
After completing the drum and bass parts, most musicians lay down a
rhythm guitar part as the next step in recording. This can be a simple
acoustic guitar “strumming” part or a multitrack heavy distortion electric
guitar part.
Like the bass part you may want to take advantage of Digital Orchestrator
Pro’s copy-and-paste features to quickly assemble recordings of phrases. If
you need to add different parts — such as an ending or a bridge — don’t
forget that you can record them on different tracks and merge them later.
♫
TIP!
Multiple digital tracks can be organized so that they use the
same amount of system playback resources as a single
track. As long as the tracks aren’t playing at the same time,
the demands on your system will be the same as if you
recorded everything to a single track. For example, you
might consider putting the rhythm verse parts of your song
on one track and the chorus parts on another.
Very often producers “double track” rhythm parts (record the same material on two different tracks) giving the recording a full, lush sound. Since
one of the attributes of digital recording is the ability to merge tracks without acquiring noise, a good production technique is to double track the
rhythm parts by recording them on two separate tracks and then merge
them. The Mixdown Audio transform is an easy way to do this. This gives
the richness of two tracks but uses the playback resources of only one.
♫
322
TIP!
Use Digital Orchestrator Pro’s Digital Compressor after
making your recording. This should be done with most
digital recordings that use a microphone as a source.
Because the Compressor increases the level of the soft
parts and decreases the peaks, this technique creates a
smoother signal.
Voyetra Technologies Inc.
Synthesizer and Keyboard Parts
The term keyboard part is ambiguous. For our purposes, it means any
musical embellishment which would typically be played from the keyboard
including: a piano rhythm part, brass stabs, string lines, orchestra hits etc.
Like the rhythm guitar parts, keyboard parts often sound better doubled up.
Try recording a piano part, then copying the part to another track. Assign
the second track to a different channel and assign it a different piano patch.
Lastly, use the pan control to pan one track hard left and the other hard
right.
Doubling up parts creates a full and rich sound. Experiment with transposing the second of two parts an octave up or down, or try using the Humanize Time transform to randomize the second part.
♫
This technique doubles the number of voices your
synthesizer uses, which can cause notes to “choke out” in
the more densely played sections of a track. Make sure
your synth has enough voices available.
Lead Vocal Part
Okay, you’ve put together the basic tracks of a song. It’s now time to add
the melody in the form of a vocal part. Hopefully, you have written some
inspiring lyrics to sing over your musical creation. Creating a melodic vocal
part with just the right phrasing is a challenging task.
One of the problems when trying to track a good vocal part is that singers
“tense up” when they are being recorded. They think “they have to get it
right the first time so they’re stressed and the vocal part sounds it.
To help avoid the “freeze up” syndrome, try recording multiple takes of the
same part. This encourages the singer to try different phrasings, and allows
him or her to relax. To do this, simply record a take then mute it and go on
The Recording Process Tips & Techniques
323
to another track. Once you have the take that you want, delete the bad
takes, save the file and move on.
A good way to create a vocal melody is to record it one phrase at a time. Each
phrase should be on a different track or set of tracks. This ensures that you
don’t accidentally record over a good part. Once the vocal part is
completed, you can Mixdown the different tracks to create a composite
vocal track.
Very often even the best singers may sing out of tune in certain parts. For
short “sour” parts, you should go back and re-record those sections on
another track, then carefully replace them by cutting the out-of-tune section
and inserting the new one.
For those of us who are out of tune most of the time, a good solution is to
double track the lead vocal.
1. First, record the entire vocal part from beginning to end twice.
2. Use Digital Orchestrator Pro’s Volume Scale control to lower the
volume of one of the tracks by approximately 50%.
3. Play back the two tracks together. You should notice that the part
sounds much more in tune.
4. Adjust the relative volumes of the tracks with the Scale function to
get the balance you want, then merge the tracks.
5. Compress the final vocal part with the Digital Compressor transform.
6. Finally, use the Digital Delay transform to add echo or reverb to the
track. You will be surprised at how much better the track will sound
after you have applied these transforms.
Background Vocals
Background vocal parts can be anything from a simple, one track harmony
part to a lush multi-voice choir. Since Digital Orchestrator Pro allows you
to layer vocal parts easily by recording on different tracks, it is very simple
to create your own choir:
Simply record a harmony part. If this is the chorus section of your
song, record just one chorus, not every chorus in the entire song.
324
Voyetra Technologies Inc.
Record the same part on a different track, then record it a third time on
a third track.
Use the Mixdown Audio transform to combine the harmony parts. If
you have enough computer power for additional tracks, you may want
to merge tracks to create two “sets” of harmony parts, then pan them
hard right and left to create a true “stereo chorus.”
Once you have completed the chorus background vocal, you can simply
copy-and-paste it to the different chorus locations in the song.
Lead Instruments: Guitar, Sax, Etc.
Most pop songs include a bridge or break where a solo instrument plays a
melody. Typically, this is a screaming guitar or a wailing sax. This part
should be recorded in the same way a vocal part is recorded. Try
developing the part one phrase at a time on different tracks. Make multiple
takes. Try different ideas. When you’ve recorded enough material, use the
copy-and-paste commands to assemble the part.
♫
TIP!
Use the Digital Delay transforms to put echo, chorus,
reverb and other effects on the lead track. This is a good
place to experiment with different special effects that can
add character to your song.
Mixdown
By now you should have all the production elements at hand. It’s time to
make a final product: a mix-down. This is actually quite simple:
First, you’ll need to connect the line output of your sound board to a
tape recorder (cassette, DAT, etc.).
Set the volumes, pan, etc. in Digital Orchestrator Pro to get the desired
mix for your song.
The Recording Process Tips & Techniques
325
Set the tape deck to record/pause mode and play back the song.
Set the record levels on the tape deck. (See your tape deck
documentation if you need more information on how to do this.) Once
you have achieved a good level, you’re ready to record.
Finally, record the song: release the pause on the tape deck and play the
song from the beginning.
326
Voyetra Technologies Inc.
Appendix E
General MIDI
Instrument Sets
General MIDI Patch Set
The General MIDI Patch Set was designed to ensure compatibility between
files by defining a common set of instrument names and MIDI numbers.
This means, for example, that if you set a track to Patch #4, “Honky-tonk
Piano,” it should sound pretty much the same when played on any other
General MIDI synthesizer or sound card.
These instrument sounds correspond to the numbers in the Patch column
of Digital Orchestrator Pro’s Track/View screen.
For more information on setting patches, refer to the “Editing Basics,”
“Track/View Window,” “Event Editor” and “Options Menu” chapters.
General MIDI Instrument Sets
327
PIANO
1 Acoustic Grand Piano
2 Bright Acoustic Piano
3 Electric Grand Piano
4 Honky-tonk Piano
5 Rhodes Piano
6 Chorused Piano
7 Harpsichord
8 Clavinet
BASS
33 Acoustic Bass
34 Electric Bass (finger)
35 Electric Bass (pick)
36 Fretless Bass
37 Slap Bass 1
38 Slap Bass 2
39 Synth Bass 1
40 Synth Bass 2
REED
65 Soprano Sax
66 Alto Sax
67 Tenor Sax
68 Baritone Sax
69 Oboe
70 English Horn
71 Bassoon
72 Clarinet
PERCUSSION
9 Celesta
10 Glockenspiel
11 Music box
12 Vibraphone
13 Marimba
14 Xylophone
15 Tubular Bells
16 Dulcimer
STRINGS
41 Violin
42 Viola
43 Cello
44 Contrabass
45 Tremolo Strings
46 Pizzicato Strings
47 Orchestral Harp
48 Timpani
PIPE
73 Piccolo
74 Flute
75 Recorder
76 Pan Flute
77 Bottle Blow
78 Shakuhachi
79 Whistle
80 Ocarina
ORGAN
17 Hammond Organ
18 Percussive Organ
19 Rock Organ
20 Church Organ
21 Reed Organ
22 Accordion
23 Harmonica
24 Tango Accordion
ENSEMBLE
49 String Ensemble 1
50 String Ensemble 2
51 SynthStrings 1
52 SynthStrings 2
53 Choir Aahs
54 Voice Oohs
55 Synth voice
56 Orchestra Hit
SYNTH LEAD
81 Lead 1 (square)
82 Lead 2 (sawtooth)
83 Lead 3 (calliope lead)
84 Lead 4 (chiff lead)
85 Lead 5 (charang)
86 Lead 6 (voice)
87 Lead 7 (fifths)
88 Lead 8 (bass + lead)
GUITAR
25 Acoustic Guitar (nylon)
26 Acoustic Guitar (steel)
27 Electric Guitar (jazz)
28 Electric Guitar (clean)
29 Electric Guitar (muted)
30 Overdriven Guitar
31 Distortion Guitar
32 Guitar Harmonics
BRASS
57 Trumpet
58 Trombone
59 Tuba
60 Muted Trumpet
61 French Horn
62 Brass Section
63 Synth Brass 1
64 Synth Brass 2
SYNTH PAD
89 Pad 1 (new age)
90 Pad 2 (warm)
91 Pad 3 (polysynth)
92 Pad 4 (choir)
93 Pad 5 (bowed)
94 Pad 6 (metallic)
95 Pad 7 (halo)
96 Pad 8 (sweep)
328
Voyetra Technologies Inc.
SYNTH EFFECTS
97 FX 1 (rain)
98 FX 2 (soundtrack)
99 FX 3 (crystal)
100 FX 4 (atmosphere)
101 FX 5 (brightness)
102 FX 6 (goblins)
103 FX 7 (echoes)
104 FX 8 (sci-fi)
PERCUSSIVE
113 Tinkle Bell
114 Agogo
115 Steel Drums
116 Woodblock
117 Taiko Drum
118 Melodic Tom
119 Synth Drum
120 Reverse Cymbal
ETHNIC
105 Sitar
106 Banjo
107 Shamisen
108 Koto
109 Kalimba
110 Bagpipe
111 Fiddle
112 Shanai
SOUND EFFECTS
121 Guitar Fret Noise
122 Breath Noise
123 Seashore
124 Bird Tweet
125 Telephone
126 Helicopter
127 Applause
128 Gunshot
General MIDI Instrument Sets
329
General MIDI Drum Note Map
Like the General MIDI Patch Set, the General MIDI Drum Note Map
ensures that the drums you designate in your MIDI file will sound the same
when played back on other General MIDI sound cards or synthesizers.
The drum sounds correspond to the piano keys on the vertical keyboard in
the Piano Roll screen. If you have a General MIDI (GM) instrument and
set the track to Channel 10, these drum sounds play when you insert notes
in the Piano Roll screen.
In the following table, the left-most columns indicate the MIDI numbers,
the middle columns represent the keys in the Piano Roll window or on your
MIDI instrument and the right columns display the corresponding drum
sounds.
For additional information on creating drum tracks, refer to the section on
“Editing Basics” and the section on Drum Tracks in “Recording Tips and
Techniques” in the Appendix.
MIDI
#
330
KEY/
Octave
Drum
Sound
35
B2
Acoustic Bass Drum
36
C3
Bass Drum 1
37
C#3
Side Stick
38
D3
Acoustic Snare
39
D#3
Hand Clap
40
E3
Electric Snare
41
F3
Low Floor Tom
42
F#3
Closed Hi-Hat
43
G3
Hi Floor Tom
44
G#3
Pedal Hi-Hat
45
A3
Low Tom
46
A#3
Open Hi Hat
47
B3
Low-Mid Tom
48
C4
High-Mid Tom
49
C#4
Crash Cymbal 1
50
D4
High Tom
Voyetra Technologies Inc.
MIDI
#
KEY/
Octave
Drum
Sound
51
D#4
Ride Cymbal 1
52
E4
Chinese Cymbal
53
F4
Ride Bell
54
F#4
Tambourine
55
G4
Splash Cymbal
56
G#4
Cowbell
57
A4
Crash Cymbal 2
58
A#4
Vibraslap
59
B4
Ride Cymbal 2
60
C5
High Bongo
61
C#5
Low Bongo
62
D5
Mute High Conga
63
D#5
Open High Conga
64
E5
Low Conga
65
F5
High Timbale
66
F#5
Low Timbale
67
G5
High Agogo
68
G#5
Low Agogo
69
A5
Cabasa
70
A#5
Maracas
71
B5
Short Whistle
72
C6
Long Whistle
73
C#6
Short Guiro
74
D6
Long Guiro
75
D#6
Claves
76
E6
High Wood Block
77
F6
Low Wood Block
78
F#6
Mute Cuica
79
G6
Open Cuica
80
G#6
Mute Triangle
81
A6
Open Triangle
General MIDI Instrument Sets
331
General MIDI Controller Types
General MIDI Controller Types are specified with numbers from 0-127
and control various instrument parameters such as pitch bend, effects
depth, and volume. For additional information on using these controller
types, refer to the “Parameters for Controller Events” section in the
“Event Editor” chapter and “Controller A/Controller B Settings” in the
“Track/ View Window” and “Mixer Window” chapters.
332
#
NAME
POSSIBLE VALUES
0
BANK SELECT MSB
0 - 127
1
MOD WHEEL
0 - 127
2
BREATH
0 - 127
4
FOOT PEDAL
0 - 127
5
PORTAMENTO TIME
0 - 127
6
DATA SLIDER
0 - 127
7
MAIN VOLUME
0 - 127
8
CONTINUOUS RELEASE
0 - 127
10
PAN
0 - 127
11
EXPRESSION CONTROL
0 - 127
64
SUSTAIN
0 = off/127 = on
65
PORTAMENTO SWITCH
0 = off /127 = on
66
SUSTENUTO SWITCH
0 = off /127 = on
67
SOFT SWITCH
0 = off /127 = on
68
2ND RELEASE SWITCH
0 = off /127 = on
84
PORTAMENTO
0 - 127
91
EFFECTS 1 DEPTH
0 - 127 (Normally Reverb)
92
EFFECTS 2 DEPTH
0 - 127
93
EFFECTS 3 DEPTH
0 - 127 (Normally Chorus)
94
EFFECTS 4 DEPTH
0 - 127
95
EFFECTS 3 DEPTH
0 - 127
96
DATA PLUS
0 = off/127 = on
97
DATA MINUS
0 = off/127 = on
121
RESET ALL CONTROLLERS
normally 0
123
ALL NOTES OFF
normally 0
124
OMNI MODE OFF
normally 0
125
OMNI MODE ON
normally 0
126
MONO MODE ON
0/all voices to mono
127
POLY MODE ON
normally 0
Voyetra Technologies Inc.
Appendix F
Shortcut Keys
Keyboard Shortcut Keys
Many of the commands in Digital Orchestrator Pro have been assigned
keystrokes.
KEY
Shortcut Keys
FUNCTION
F1
Help
F2
Opens the Patch or Port selection dialog box when
their columns are selected
F3
Expands or shrinks the width for the Name, Port,
Patch and Volume columns when selected
F4
F6
F7
F8
Opens the Marker menu
Plays from beginning
Record
Plays the selected range
333
F9
F10
Ctrl+Tab
Tab
Goes to the next marker
Jumps to any Digital Orchestrator Pro window
Toggles between the Track pane and the Bar pane
Ctrl+x
Cut
Ctrl+c
Copy
Ctrl+v
Paste
Ctrl+d
Delete
Ctrl+a
Select All
Ctrl+z
Undo
Ctrl+r
Redo
Ctrl+n
Go to the Next Track in Piano Roll, Event Editor and
Digital Audio windows
Ctrl+p
Go to the Previous Track in Piano Roll, Event Editor
and Digital Audio Windows
Ctrl+t
334
Goes to the previous marker
Sets focus to Tempo
Ctrl+o
Open File
Ctrl+s
Save File
Voyetra Technologies Inc.
Alt+F4
Spacebar
Exits the Program
Starts/Stops Playing Selection
Ctrl+F1
Opens the About Box
Ctrl+F8
Loops Play Range
Ctrl+F7
Toggles Punch Record On/Off
Ctrl+F
Sets focus to the From box
Ctrl+U
Sets focus to the Thru box
Ctrl+B
Sets focus to the Bar:Beat:Click box
Shortcut Keys
335
Piano Roll Window Keyboard Shortcuts Keys
336
Ctrl+1
Selects a whole note
Ctrl+2
Selects a half note
Ctrl+3
Selects a quarter note
Ctrl+4
Selects an eighth note
Ctrl+5
Selects a sixteenth note
Ctrl+6
Selects a thirty-second note
Ctrl+7
Selects a sixty-fourth note
.
Adds a dot to the current note value
]
Toggles tuplets on and off for the current note
→
Moves the Input Cursor to the right by the current note
duration
←
Moves the Input Cursor to the left by the current note
duration
Ctrl+→
Moves the Input Cursor to the beginning of the next
measure
Ctrl+←
Moves the Input Cursor to the beginning of the current
measure or to the previous measure if it is already at the
beginning
Voyetra Technologies Inc.
Appendix G
Technical Support
The information in this manual, the extensive online help included with the
software, the video tutorials and the Quick Tour should provide the
necessary information to help you quickly get up to speed using Digital
Orchestrator Pro.
If you have tested your installation and hardware connections, have read
the “Troubleshooting” Appendix and find you are still having problems, we
are here to help. Voyetra’s Technical Support department can be reached in
a variety of ways — by telephone, fax, bulletin board, email or the Internet.
To contact Technical Support:
Email [email protected]
Internet ...............................http://www.voyetra.com
Technical Support
337
Appendix H
End-User Software
License Agreement
By installing this Software you acknowledge that you have read, understood and
agree to abide by the terms and conditions of this Agreement. If you do not agree
with the terms of this Agreement, promptly contact the seller of this Software to
arrange an appropriate remedy.
SOFTWARE LICENSE: This is a legal agreement (Agreement) between you
(either an individual or an entity) and Voyetra Technologies (Voyetra) that sets
forth the license terms and conditions for using the enclosed software (Software)
and updates of the Software. In this Agreement, the term “Use” means loading the
Software into RAM, as well as installing it onto a hard disk or other storage device.
The Software is owned by Voyetra and is protected under United States
copyright laws as well as international treaty provisions. You must treat the
Software as you would any other copyrighted material. Voyetra retains title and
ownership of the Software. The purchase price for the Software grants you a nonexclusive license to use one copy of the Software on a single computer. You may
make copies of the Software solely for archival purposes. You may not make copies
of any written material accompanying the Software. You may not allow third parties
to use the Software by time-sharing, networking or any other form of multi-user
participation. You may not rent, sell, lease, sub-license, time-share or lend the
Software to a third party or otherwise transfer this License without written
permission from Voyetra. You may not decompile, disassemble, reverse-engineer or
modify the Software.
338
Voyetra Technologies Inc.
This Agreement is effective until terminated by the destruction of the Software
—all of the CD-ROMs and/or diskettes — and documentation provided in this
package, together with all copies, tangible or intangible. If you fail to comply with
any of the terms and conditions of this Agreement, this License will be terminated
and you will be required to immediately return to Voyetra, the Software —
CD-ROMs and/or diskettes — and documentation provided in this package,
together with all back-up copies. The provisions of this Agreement which protect
the proprietary rights of Voyetra will continue in force after termination.
LIMITED LIABILITY: You assume responsibility for the selection of the
Software to achieve your intended results, and for the installation, use and results
obtained from the Software.
VOYETRA MAKES NO REPRESENTATIONS OR WARRANTIES WITH
REGARD TO THE SOFTWARE AND DOCUMENTATION, INCLUDING
BUT NOT LIMITED TO THE IMPLIED WARRANTIES OF
MERCHANTABILITY AND FITNESS FOR A PARTICULAR PURPOSE.
Voyetra shall not be liable for errors or omissions contained in the Software or
manuals, any interruption of service, loss of business or anticipatory profits and/or
for incidental or consequential damages in connection with the furnishing,
performance or use of these materials. The Software and documentation are sold
AS IS.
This Limited Warranty gives you specific legal rights and you may also have other
rights which vary from state to state. Some states do not allow the limitation or
exclusion of implied warranties or of consequential damages, so the above
limitations or exclusions may not apply to you. You agree that this is the complete
and exclusive statement of the Agreement between you and Voyetra which
supersedes any proposal or prior agreement, oral or written, and any other
communications between us regarding the subject matter of this Agreement. This
Agreement shall be construed, interpreted and governed by the laws of the State of
New York, except the federal laws which govern copyrights and registered
trademarks. If any provision of this Agreement is found unenforceable, it will not
effect the validity of the balance of this Agreement, which shall remain valid and
enforceable according to its terms. the validity of the balance of this Agreement,
which shall remain valid and enforceable according to its terms.
339
Index
1
1,2,3,4... · 185, 193, 203, 278
A
About · 294
absolute silence · 50
Absolute Time · 258
accelerando · 65, 222
Accelerando transform · 222
Accented Click · 253
active window · 16
ADC · 302
Add Marker Flag · 82, 88, 89
Add Preset button · 230, 234
Advanced button
PC Audio Mixer · 291
Advanced controls
PC Audio Mixer · 293
alto clef · 166
American MIDI Manufacturers
Association (MMA) · 302
Amount control · 229
amplitude · 303
negative · 50
positive · 50
Analog to Digital Converter · 302
angled beaming · 161
Arrange Icons · 277
Arrow tool · 94, 111, 112
340
arrow, double-headed · 26, 71, 72
articulation · 96
Articulation control · 95
Attack control · 228
Attributes box · 193
Audio Crescendo/Fade transform ·
224
Audio System Mixer · 276
Audio System Mixer button · 15, 69,
290
Audition button · 185, 188
Audition Dry · 227, 235
Audition Duration · 235
Audition Duration dialog box · 228
Audition Effect · 227, 235
auditioning · 185
Author box · 168
Auto clef · 166
Auto column · 183
Auto Rewind · 274
Auxiliary input jack · 5
Available Temp Space indicator · 15,
68
AWE SoundFont Banks · 271
Axis note · 204
B
Bank names · 178
Bank Number · 181
Bank Select · 127
Bank Select High & Low · 82
Bar Numbering · 107
Bar Numbering button · 170
Voyetra Technologies Inc.
Bar pane · 21, 24, 51, 71, 72, 82, 90,
195
navigating · 83
Bar Pane · 22, 32
Bar View · 72
Bar-Beat-Click · 58, 61, 89, 149
Bar-Beat-Click indicator · 53
bars
cutting · 87
deleting · 87, 199
inserting · 88, 199
bass clef · 166
bass part
recording · 321
Beaming · 171
Bezier curves · 114
Big Time Window · 258, 259, 277
Bit Length · 303
Bits · 58, 258, 308
BkMsb/BkLsb · 82
Block mode · 109
brightness · 205
Byte
Least Significant · 82
Most Significant · 82
C
C5=Middle C · 92
Cascade · 277
CD audio · 290
CD Quality preset · 191, 192
cents · 239
Channel · 211, 253
Channel 10 · 77
Channel Aftertouch · 128, 211
Channel Assignment
setting · 126
Channel Info · 140, 141
Channel Info dialog box · 140
Index
Chase Notes · 101
Chn column · 77
Chorus · 80, 142
Clear Clipboard Contents · 86, 123,
198
Clef · 107
Clef column · 166
clef options · 166
clef, selectable · 161
click · 208
Click During · 252
Click Output · 252
click rate · 116
click-and-drag · 195
Clicks per Bar · 136, 171
Clip All · 102
Clip All option · 215, 216
Clipboard · 84, 85, 87, 112, 155, 197
Clear Contents · 86, 123, 198
clipping · 154, 156, 224, 232
Clipping · 86
Clock Rate · 263
clock source · 255
Close · 294
Close Drivers While Printing · 261
Close MIDI In While Using Wave ·
263
codec · 192
columns
expanding · 26
shrinking · 26
Compress/Noise Gate transform ·
225
compression utilities · 68
compression, PCM · 193
compression/decompression · 192
Compressor · 227, 228, 229, 322
considerations when using · 232
Compressor/Noise Gate dialog box ·
226
Compressor mode · 227, 228
Gate mode · 226, 228
341
Limiter mode · 226, 228
Compressor/Noise Gate transform
dialog box · 225
using · 225
Conductor Editor window · 132, 276
Filtering Events · 137
meter settings · 135, 137
Quick View button · 67
tempo settings · 134
Toolbar · 133, 134
Conductor Event Edit dialog box ·
134, 135, 137
Conductor Track · 121, 131
Configure Mixer · 294
configuring the software · 10
Context-Sensitive help · 19
Controller A/Controller B
settings · 142
Controller A/Controller B columns ·
80
Controller Events · 128, 300
Controller messages · 129
Controller Type button · 110
Controller Types
General MIDI · 332
Controller Value Scale · 108
Controllers · 80, 143, 211, 268
Convert Sample Rate transform · 246,
247
Copy command · 34, 85, 86, 155, 196
Copy Command · 154
copying
data · 35
multiple tracks · 36
Copyright box · 168
Count In · 252
Creative Labs · 303
Crescendo transform · 207
crossfade · 239
Ctrl+A · 83, 92
Ctrl+B · 58
Ctrl+F7 · 62
342
Ctrl+N · 102, 120, 156
Ctrl+P · 102, 120, 156
Ctrl+Tab · 67
Ctrl+V · 85
Current Meter indicator · 64
Current Song Position indicator · 58
Current Tempo indicator · 63
Current Time · 149
Current Time indicator · 53, 57, 258
Current Track List · 149, 150
cursor position · 86
Cursor position · 149
Cursor Position · 154
Cursor Position indicator · 150, 155
curvature · 220, 222
Curve tool · 114
Cut Bars command · 87
Cut command · 84, 85, 155, 196
D
D column · See Transpose Mode
column
DAC · 302
data
compression · 304
copying · 35, 84
cutting · 84
cutting between Windows
applications · 194
formats · 303
merging · 85
pasting · 85
replacing · 85
selecting · 33, 195
data boxes · 20
DC Offset · 50, 51, 238
decibel level · 244
decrescendo · 207
Default Sample Rate · 268
Delay Depth · 236
Voyetra Technologies Inc.
Delay Feedback · 236
Delay Time control · 236
Delete Bars command · 87, 199
Delete Bars dialog box · 87
Delete button · 181
Delete Preset button · 231, 234
Device Can Play and Record
Simultaneously · 266
diatonic transpose · 81
Diatonic Transpose · 133, 137
Diatonically Transpose Pitch
transform · 203
Diatonically Invert Pitch transform ·
204
digital audio · 290
copying · 84
editing · 47, 153
file size · 309
file size, predicting · 308
overview · 302
recording · 306
recording, performance issues · 306
recording, suggestions · 307
stereo · 304
symbol · 27
tracks
merging · 308
Digital Audio
transforms · 223
Digital Audio Compression button ·
202
Digital Audio Crescendo/Fade
button · 202
digital audio data
cutting data to Clipboard · 155
displaying · 83
editing · 155
editing tips and cautions · 156
file formats · 303
merging · 86, 155
merging vs. replacing · 153
Index
moving with a mouse · 154
pasting and merging · 155
pasting and replacing · 155
Digital Audio Delay button · 202
Digital Audio Editing Window · 47
digital audio files, exporting · 191
Digital Audio Graphic EQ · 243
Digital Audio Graphic EQ button ·
202
Digital Audio Normalize button · 202
Digital Audio Options · 265
Digital Audio Options dialog box ·
69, 246, 307
Digital Audio Quick View Button ·
48
digital audio setup · 5, 76
Digital Audio submenu · 51
digital audio waveform · 149
Digital Audio window · 148, 149, 276
Current Position indicator · 150
Current Track List · 150
Markers · 157
opening · 83
Quick View button · 67
Snap On/Off button · 150
Snap Value · 152
Toolbar · 149
Digital Delay dialog box · 233, 235
digital delay transform · 325
Digital Delay transform · 233
using · 233
Digital Delay, using · 234
digital mixdown · 189
Digital Orchestrator Pro
Clipboard · 84, 85, 86
closing · 30
configuring the software · 10
help screens · 19
overview of features · 16
Quick Tour · 280
sample files · 11
uninstalling the software · 12
343
Version and Release Date · 280
Digital to Analog Converter · 302
digital waveform symbol · 44, 74
DiskDoubler · 68
DOP.INI file · 195
Dotted · 213
Dotted button · 209
drag-and-drop · 35, 85, 86
editing · 47
Draw Rounded Notes · 102
DriveSpace · 68
drums clef · 166
drums track
creating · 32
recording · 321
duration · 208
Duration · 128
dynamics · 205
E
Echo · 236
Edit button · 176
Edit menu · 85, 155, 194
editing basics · 31
editing silences · 48
Eliminate Dupes transform · 218
Enable Triplets · 107
Enable Wave Sync · 267
Eraser tool · 93, 94, 115
Event Edit dialog box · 93, 94, 124
Event Editor window · 118, 120, 133,
134, 276
Channel Aftertouch parameters ·
128
Channel Assignment, setting · 126
Conductor Mode · 122
Conductor Track, editing · 131
Controller Event parameters · 126
Controller Types, filtering · 131
Event List, copying · 123
344
Event List, pasting · 123
event types, summary · 128
events, changing · 125
events, changing starting point: ·
125
events, deleting · 124
events, filtering · 130
Filter Box · 130
Filtered Events · 130
Key Aftertouch parameters · 127
new event, inserting · 122
Note Event parameters · 126
Paste Where? dialog box · 123
Patch Change event parameters ·
127
patch changes, embedding · 129
Pitch Bend parameters · 127
Quick View button · 67
selecting a track · 121
SysEx parameters · 128
Toolbar · 119, 121
Event List · 119
Event List window
opening · 83
Exit · 193, 251, 335
exiting · 30, 101
Expand All · 72
Expand/Shrink All menu · 25
Export WAVE command · 189, 190
F
F1 (for online help) · 279
F10 · 54, 56
F6 · 54, 55
F7 · 54, 55
F8 · 61
F9 · 54, 55
feedback · 240
file format
MID · 29, 30, 178, 186, 187
Voyetra Technologies Inc.
ORC · 29, 178, 186, 187, 190, 198,
256, 257, 267, 272, 273, 274, 320,
322, 323, 325
RMI · 186, 187
SYX · 175
VOC · 303
WAV · 29, 30, 186
WAV · 303
File menu · 184, 189, 190
File Open dialog box · 175
files
auditioning · 185
exporting · 190, 191
loading · 21
looping · 23
merging · 189
playing · 21
playing a range · 23
playing from a different starting
point · 23
saving · 29, 186
size · 309
Fill MIDI transform · 220
Fill Rate · 110, 116
Filter · 130, 131
Filter Events · 130
Filtering Events · 137
Fit Time transform · 221
flange · 236, 237
font, for notation · 164
Format box · 192
fps · 283
Frequency Rolloff · 237
Full-Duplex Sound Card · 266
G
Gate · 226, 228, 229
considerations when using · 231
GE (Graphic Equalizer) · 242
Index
General MIDI · 302
Controller Types · 332
Drum Note Map · 330
Patch Set · 37, 327
General MIDI Patch Set · 77
Goto Marker · 53
Goto Marker button · 57, 89
Grand Staff · 166
Graphic Controller Editor pane · 65,
91, 106, 220
Arrow tool · 111
cursor tools · 111
Curve tool · 114
display modes · 109
Eraser tool · 115
Pencil tool · 113
Quick menu · 111
resizing · 108
Graphic Controller pane · 108
Graphic Equalizer · 242
Equalizer slider · 244, 245
frequency ranges · 242
Input Gain · 244
Output Gain · 244
Presets · 243
resetting · 246
using · 243
Grid button · 152
grid lines
inserting · 97, 151
H
hard disk recording · 305
hardware requirements
screen resolution · 202
hardware, purchasing · 2
headphones, using · 289
Help · 19, 294
Contents · 280
345
One Line Help · 280
Help button · 279
Help menu · 279
Hours-Minutes-Seconds-FramesHundredths or Bits · 57
Humanize MIDI Value transform ·
218
Humanize Note Duration transform ·
210
Humanize Note Off Velocity
transform · 208
Humanize Note Start Time button ·
202
Humanize Note Start Time
transform · 211
Humanize transforms · 206
Humanize Velocity transform · 206
Hundredths · 58, 258
I
inactive window · 16
Input cursor · 105
Input Gain · 238, 244
input jacks · 5
Insert Bars · 199
Insert Bars command · 199
Insert Bars dialog box · 88
Insert Length control · 99
Insert Note · 93, 95, 99
Insert Pitch control · 98
Insert Point control · 98
Inside Range · 214
instances
multiple · 17, 18
single · 17
Instances
multiple · 276
single · 276
instrument, lead
recording · 325
346
Intensity · 213
Internal button · 56
Internal Button · 254
internal clock · 255
Invert MIDI Value transform · 217
Invert Pitch transform · 204
Invert Samples · 237
J
Japanese MIDI Standards Committee
· 302
JMSC · 302
Jump to Next Marker/End button ·
53, 56
Jump to Previous Marker/Beginning
button · 53, 55
K
Keep MIDI Drivers Open While
Inactive · 262
Key Aftertouch · 128, 211
Key Signature · 131, 133, 134
Minor Key button · 137
settings · 137
keyboard part, recording · 323
keyboard shortcut keys · 333
Piano Roll window · 117
Kilohertz (kHz) · 303
L
L column · See Track Looping
column
Least Significant Byte · 82, 127
legato · 95
Length · 126
Voyetra Technologies Inc.
Librarian · 270
License Agreement · 339
Limiter · 226, 228, 229
considerations when using · 232
Line input · 5
Line mode · 109
Line tool · 114
Load button · 175
loading files · 21
lock-up · 285
Loop button · 23, 59, 61
looping · 23, 81
M
M column · See Mute column
Main Program window · 16, 18
Markers · 57, 88, 100, 157
Flag · 89
Goto Marker button · 89
inserting · 82, 89
Markers dialog box · 89
master · 282
Master · 254
Maximize · 294
Maximize Window button · 16
Media Player · 312
Menu bar · 13, 14
Merge
conductor track · 188
stereo WAV file · 188
Merge command · 188, 189
Merge dialog box · 185, 188
Meter · 133, 134
Meter Settings · 135
Clicks per Bar · 136
denominator · 136
numerator · 136
metronome clicks · 136
Metronome Settings · 251
Index
Metronome Settings dialog box · 46,
55
MID files · 29. See file format
Middle C · 92, 166, 167
MIDI
channels · 300
compatibility · 302
Controllers · 268
copying · 84
data boxes · 20, 22, 32
early problems · 301
events · 119
input · 69
multi-port setup · 76
multi-timbral MIDI device · 37
Options · 261
output · 69
overview · 299
plug symbol · 27
Port Setup · 261, 262, 263
recording · 306
setup · 4
synchronizing with another MTC
device · 286
MIDI Activity indicator · 15, 69
MIDI Clocks · 254
MIDI controller · 104
MIDI Controller Types · 126
selecting · 110
MIDI data boxes · 21
MIDI data, displaying · 83
MIDI density meters · 142
MIDI Mapper · 10
MIDI music synthesis · 290
MIDI Output Port settings · 139
MIDI plug symbol · 44, 74
MIDI recording · 26
MIDI Reset · 269
MIDI setup · 3
multi-port · 4
MIDI Thru · 251
MIDI Time Code · 254, 256, 283
347
Sync · 286
MIDI transforms · 216
MIDI/SPP · 255, 256
Minimize · 294
Minimize Window button · 17
Minor Key button · 137
mixdown · 325
Mixdown Audio · 247, 322, 324
soloed MIDI tracks · 248
using · 248
Mixdown Audio transform · 29, 307
mixer
setting · 7
Mixer · See PC Audio Mixer
Mixer window · 138, 276
Channel Info · 140
Controllers · 143
MIDI density meters · 142
MIDI Output port settings · 139
Mute buttons · 144
Patch Selector · 146
Port control · 147
Quick View button · 67
selected tracks · 141
Track Name · 147
Tracks on Channel · 141
Volume sliders · 139, 146
MMA · 302
Modulation Depth · 237
Modulation Rate · 237
mono · 308
Most Significant Byte · 82, 127
Move command · 197
Move Song Position Back button ·
53, 57
Move Song Position Forward button
· 53, 57
MTC · 254. See MIDI Time Code
multimedia devices, testing · 312
multiple instances · 67
multiple tracks
copying · 36
348
multiple windows · 17
multitrack recording · 28
music notation · 161
Mute · 25, 187
Mute button · 144
PC Audio Mixer · 291
Mute column · 25, 79
MYFIRST.ORC file · 46
MYFIRST.ORC File · 47
N
Name box · 191
Name column · 25, 75, 165, 182
New command · 184, 276
Next · 120
Next track · 156
Next track · 102
No. of Bars · 252
Non Drop · 283
non-note events · 119, 300
non-note parameters
transforming · 211
non-real time recording · 104
Normalize transform · 224
notation font · 164
Notation pane · 91, 106
Notation window · 40, 160, 164
Author box · 168
Copyright box · 168
fine tuning notation · 170
printing · 163
printing score · 164
Quick View button · 67
Title box · 168
Toolbar · 162
Transcription Settings dialog box ·
165
note duration controls · 95
Note Duration transforms · 208
note events · 119, 300
Voyetra Technologies Inc.
Note Events · 128
Notepad · 158, 194, 276
right-click menu · 159
using · 159
Notepad window · 158
Quick View button · 67
Number column
double-headed arrow · 26
Number of Channels · 308
numeric keypad · 72
Nyquist theorem · 242
O
Off Vel control · 99
Off Velocity · 128
Off Velocity transforms · 207
Offset MIDI Value transform · 216
Offset Note Duration transform ·
209
Offset Note Velocity transform · 208
Offset Start Time button · 202
Offset Start Time transform · 210,
211
Offset value · 238
Offset Velocity button · 202
Offset Velocity transform · 206
On Vel control · 99
On Velocity · 128, 205
On Velocity Crescendo transform ·
207
On Velocity transforms · 205
One Line help · 20, 279
Open command · 185
ORC files · 29. See file format
orchestration · 37
Output Gain · 238, 244
Output Gain control · 229
Overdub button · 56, 62
Overdub/Replace button · 53, 56, 62
Index
P
Page control · 162
Pan · 80, 142, 143, 145, 191, 262, 266
digital audio · 145
Pan column · 79
Pan knobs · 145
Pane divider · 71, 72
Paste command · 34, 85, 112, 155,
196
patch · 300
Patch · 141
Patch Assignment, changing · 38, 146
Patch Change · 128
embedding · 129
Patch Change events · 127
Patch column · 75
patch cords · 37
Patch Map · 127
selecting · 264
Patch Map Setup dialog box · 264
Patch Name · 128
Patch Number · 128
Patch Selection dialog box · 38, 75
Patch Selector · 146
patches · 37, 127
setting · 37
Pause · 280
PC Audio Mixer · 47, 69, 289
Advanced button · 291
configuring · 295
controls, adding · 296
controls, rearranging order of · 297
controls, removing · 297
icons, customizing · 294
Mute buttons · 291
volume controls · 291
Pch · 37
Pch column · 75
PCM · 302
PCM compression · 193
349
Pencil tool · 93, 113
PgDn · 72
PgUp · 72
Piano Roll pane · 91, 108
Piano Roll window · 90, 276
auditioning notes · 94
clicking right mouse button · 95
Clip All option · 215
Graphic Controller Editor pane ·
91, 106
grid lines, inserting · 97
inserting notes · 93
keyboard · 91
keyboard shortcut keys · 117, 336
keyboard, right-clicking · 94
Markers · 100
Notation button · 106
Notation pane · 91, 106
note duration controls · 95
notes · 92
opening · 83
piano keys · 92
Piano Roll pane · 91
Quick menu · 95, 101
Quick View button · 67
right mouse button, clicking · 92
Ruler bar · 92
scrubbing notes · 94
Toolbar · 91
Zoom buttons · 99
Piano Roll Window
Toolbar · 93
Pinnacle Sound Banks · 269
Current Bank · 269
Default Bank · 269
Pitch · 128, 211, 219
Pitch Bend · 128, 211
Pitch Shift transform · 239
using · 240
Pitch transforms · 203
Play Buffer · 267
Play button · 21, 44, 53, 55
350
Spacebar · 54
Play From · 23
Play From control · 59, 60
Play From the Beginning button · 53,
55
Play Range button · 22, 23, 59, 61
Play Thru · 23, 60
Play Thru control · 59, 60
playing files · 21
port assignments · 178
Port column · 76, 182
Port control · 147
Port Selection dialog box · 76
Preserve Duration · 214
preset
adding · 191
loading · 192
removing · 192
Preset · 226, 234
Presets · 230, 234
adding · 230, 234
deleting · 231, 235
loading · 230
Pressure Amount Value · 128
Previous track · 120, 156
Previous Track · 102
Print button · 162
Print Dialog Box · 40
printing · 39, 163
score · 161
Product ID number · 8
Pulse Code Modulation · 302
Punch In · See Record Punch In
Punch In button · 61
Punch In recording · 45
Q
quantization options · 161
Quantization Value · 210
quantize · 96
Voyetra Technologies Inc.
Quantize · 107
Note Start Time transform · 212
Quantize control · 169
Quantize function · 170
Quantize Grid button · 96, 97, 151
Quantize Last Clicked · 103
Quantize Note Duration transform ·
210
Quantize Note Start Time button ·
202
Quantize Offset · 214
Quantize Value · 213
Quick Tour · 280
Quick View buttons · 15, 17, 18, 67,
276
R
R column · See Record column
R Column · 62
Radio Quality preset · 191, 192
Randomize Pitch transform · 204
range · 23
recording · 62
selecting · 23, 24
Range
looping · 61
Range controls · 14, 52, 59
Range Punch In recording · 45
README file · 9
Real Time Velocity Offset · 81
Receive · 266
Record Buffer · 267
Record button · 27, 44, 53, 55
Record column · 74
Record enable · 27
Record Punch In button · 46, 59, 62
recording · 42, 44
adjusting volume · 47
bass part · 321
Index
digital tracks, multiple · 322
drum part · 321
file size · 306
from the middle of a song · 45
getting ready for · 43
hard disk · 305
hardware requirements · 305
keyboard parts · 323
lead instruments · 325
MIDI · 26
MIDI vs. digital audio · 306
mixdown · 325
multitrack · 28
naming · 29
non-real time recording · 104
range · 62
rhythm guitar part · 322
saving · 29
sound quality · 306
suggestions for improving · 307
synthesizer parts · 323
test recording · 6
tips and techniques · 319
vocals, background · 324
vocals, lead · 323
Redo · 334
Redo command · 156, 195, 196, 201
reference track · 221
Refresh button · 162
registering software · 1
Relative Time · 258
Release control · 229
Replace button · 56, 62
Replace/Overdub button · 53
Reset Controllers · 262, 263
resonance · 236, 237
rest suppression · 161
Rest Suppression · 170
rests · 168
Rests · 105, 107
Reverb · 80, 142
Reverse transform · 225
351
rhythm guitar part
recording · 322
ritardando · 65, 135, 223
RMI files · See file format
Ruler bar · 82, 83
S
S column · See Solo column
sample files · 11
Sample Rate · 247, 268, 303, 307, 309
Sample Rate box · 68, 69
Sample Rate display · 15
Sample Rate in Hertz · 308
Sample Rate, converting · 247
SAMPLE.ORC · 21, 23, 32, 42
samples per second · 308
Save As command · 186
Save button · 177
Save command · 186
Save Settings on Exit · 30, 101, 251
saving files · 29
Scale Digital Audio dialog box · 224
Scale Digital Audio transform · 223
Scale MIDI Value transform · 217
Scale Note Duration transform · 210
Scale Note Off Velocity transform ·
208
Scale Time transform · 212
Scale transform · 156
Scale Velocity transform · 206
score
printing · 161
printing, problems · 164
updating · 161
screen resolution · 65, 202
Screen Resolution · 65
scrubbing notes · 92
Select All command · 36, 197
Selection is Play Range · 274
semitones · 239
352
Send button · 178
Send Reset Controllers on Stop · 262,
263
Sensitivity · 214
Sensitivity tolerance · 214
separator symbols · 58, 60
sequence · 299
sequencer · 299
Set Note Duration transform · 209
Set Note Off Velocity transform ·
207
Set Play Range to Cursor Position
button · 59, 60
Set Play Range to Cursor Position
buttons · 23
Set Play to Cursor Position button ·
59
Set sync type · 53
Set Velocity transform · 205
sheet music · 39
shortcut keys · 333
Show column · 165
Show Hours · 58, 258
Shrink All · 72
silences
editing out · 48, 307
Size · 294
slave · 282
Slave · 254
SMPTE · 254, 283
Big Time Window · 259
Display Off · 258
enabling · 284
Frame Rate · 257
frame rate options · 283
MTC Offset · 286
Options · 259
Sub Frame Display · 258
syncing to · 284
SMPTE/MTC
reading (syncing to) · 285
writing (generating) · 285
Voyetra Technologies Inc.
Snap Grid On/Off button · 96, 150
Snap Value · 152
Snap Value box · 96, 97
Snap Value drop-down list box · 151
Snap-to-Grid · 96, 150
Society of Motion Picture and
Television Engineers · 283
Solo · 25, 79, 143, 144, 187
Solo button · 98, 142, 143, 144, 149,
152
Solo column · 25, 79
Song Position pointer · 20, 21, 22, 82
moving · 83
Song Position Pointer · 254, 283
Song Position slider · 53, 56
Sound Banks · 269
Sound Blaster sound cards · 303
Sound Selection
Name · 191
Sound Selection dialog box · 189,
190, 191
sound sources · 290
SoundFonts
Bank Presets · 272
Default Bank Presets · 273
playing · 274
Spacebar
Transport controls · 54, 55
Split bar · 108
split point · 161, 166
Split Point · 107
SPP (Song Position Pointer) · 254,
283
syncing · 287
SPW.TTF · 164
staccato · 95
Stacker · 68
Start Time transforms · 210
Status bar · 13, 15, 16, 51, 52, 66, 290
Status display · 15
Status indicator · 67
Step Record · 321
Index
Step Recording · 104
button · 94
Entering Notes · 105
input cursor · 105
MIDI controller · 104
rests · 105
stereo · 304, 308
Stereo Playback · 266
Stop button · 27, 53, 55
Spacebar · 54
Stop Button · 44
Subframes · 254
Suppress Rests · 107, 170
Suppress Rests option · 168
Swing · 213
Sync
Enable Wave Sync · 267
MIDI Time Code · 255, 256
MIDI/SPP · 255, 256
Output · 256
Settings · 254
SMPTE · 254
SMPTE Frame Rate · 256
SPP (Song Position Pointer) · 254
SPP (Song Position Pointer) · 287
Sync Settings dialog box · 56, 58
Synchronization · 281
formats · 283
MIDI Time Code · 283
overview · 282
SMPTE · 283
SPP (Song Position Pointer) · 283
syncing to SMPTE · 284
syncing with an external tape deck ·
285, 286
syncing with another MTC Device
· 286
synth · See synthesizer
synthesizer · 299
synthesizer parts
recording · 323
SysEx
353
Data Banks · 174
data dump · 180
data, deleting · 181
data, editing · 176, 177
data, receiving · 180
data, sending · 178
data, sending from middle of a
song · 179
files, loading from disk · 175
files, saving to disk · 177
overview · 174
SYX files · 175
Toolbar · 174, 175
window layout · 181
SysEx Events · 128
SysEx messages · 173
SysEx window · 276
System Exclusive Bank Editor
window
Quick View button · 67
System menu · 294
system requirements · 2
SYX files · See file format
T
Tab key · 72
Tap Tempo transform · 221
Tape
striping · 285
tape deck
synchronizing with · 286
Tape Offset · 259
technical support · 1
contacting · 337
Telephone Quality preset · 191, 192
Temp directory
changing settings · 68
Temp Directory · 268
Tempo · 133, 134
354
Tempo and Meter controls · 14, 52,
63
tempo maps · 64
Tempo Offset · 64
setting · 64
Tempo settings
tempo changes, inserting · 135
Tempo Settings · 134
Tempo transforms · 221
tenor clef · 166
test recording · 6
Thin MIDI dialog box · 219
Thin MIDI transform · 219
Threshold control · 228
Thru control · 60, 62
Tile · 277
Time · 308
Time Compress/Expand transform ·
241
using · 241
Time Display · 258
Time Signature · 131, 133, 199
timing resolution · 58
Title bar · 16
Tool Tips · 20, 279, 280
Toolbar · 13, 14, 16, 21
Toolbar · 52
track
soloing · 26
transposing · 39
Track column · 165
Track Looping column · 81
Track Name · 147
Track Name column
expanding · 26
Track Name control · 98
Track Number · 195
Track Number column · 73, 82
Track pane · 21, 32, 71, 72
Track Pane · 22
Track/View window · 16, 70, 276
Quick View button · 67
Voyetra Technologies Inc.
rearranging columns · 72
tracks
deleting · 83
muted · 186, 191
muting · 26
selecting · 83
soloed · 186
tracks, merging · 322
Trans · 78
transcribe · 39
Transcribe button · 162, 164
transcribing, MIDI tracks · 161
Transcription Settings dialog box ·
106, 165
Transform buttons · 14, 52, 65, 201,
202
screen resolution · 202
Transform Buttons
Screen Resolution · 65
transforms · 200
Transforms · 203, 268
applying · 201
Diatonic Transpose · 133, 137
Transforms menu · 200
Transport controls · 14, 52, 53
operating · 54
Spacebar · 54
using Function keys to operate · 54
transpose · 141
Transpose column · 78, 167
Transpose Mode column · 81
Transpose Pitch button · 202
Transpose Pitch transform · 203
transposing · 167
diatonically · 81
down · 78
up · 78
transposing a track · 39
treble clef · 166
Triplets column · 167
triplets, notating · 171
Troubleshooting · 311
Index
digital audio · 318
MIDI problems · 314
mixer problems · 313
Tuplet · 213
numerator · 150
Tuplet button · 209
Tuplet controls · 95, 150
Type column · 27
Type control · 74
U
Undo · 35, 46, 156, 195, 196, 201,
247, 334
Clear Clipboard Contents · 86
Clear Clipboard Contents · 198
uninstalling the software · 12
update notifications · 1
V
V-24s · 255, 256, 283, 285, 286
VCTL.DLL · 9
Vel · 81
Velocity On · 78
vibrato · 237
vocals
recording, background · 324
recording, lead · 323
Voices · 166
Vol. · 77
volume · 191, 232
setting · 7, 77
Volume column · 77
Volume controls
operating · 292
PC Audio Mixer · 291
Volume sliders · 139, 146
Voyetra
355
contacting · ii
End-User Software License
Agreement · ii, 339
website · ii, 280
VSEQINI.WRI file · 73, 195
VSEQINI.WRI File · 180
VSEQPTCH.INI file · 8
W
WAV files · 29. See file format
exporting · 190
waveform · 27, 44, 149
website · ii, 280
Window menu · 18, 275
windows
active · 16
inactive · 16
multiple · 17
opening several · See instances
Windows 3.1
356
installing the software · 8
README file · 9
troubleshooting · 312
Windows 95 · 317
Exit button · 30
installing the software · 8
Mixer, setting · 313
README file · 9
troubleshooting · 312
Windows applications, cutting data
between Digital Orchestrator Pro
and · 194
Windows techniques · 11
Workspace · 13, 16
Z
Zoom buttons · 48, 99, 149, 152, 163
Zoom Percent · 107
Zoom Percentage dialog box · 163
Voyetra Technologies Inc.