1
9. Use the Misc tab to specify which files will be buffered in the cache. Files
that are on slow media (floppy disks and network drives) and are very small
are moved to the cache by default. You specify the location of the cache on
the Cache tab in the File menu (Preferences option).
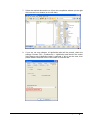
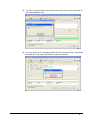
10. Once you have selected your settings, click the New button on the right. You
will now see the empty compilation window for a Video CD. The large window
is for the videos and pictures, the small window for other filetypes. These
may be text files or even a software player for your PC. If a File Browser is
not open yet you can open one by selecting New File Browser from the
View menu or clicking the appropriate 'File Browser' icon. To specify that
Nero is started with an open File Browser, check ‘Start with File Browser’ in
the ‘General’ section on the File Browser tab (File -> Preferences).
Compile the files for the CD using Drag&Drop editing by simply clicking on
the required files in the File Browser and dragging them into the appropriate
compilation window.
Clicking the right mouse button opens a context menu where you can
selectively add or omit certain file types. In addition there are a number of
commands that you will also find in Windows Explorer, such as 'Copy', 'Open‘
and 'Cut'.
Note:
If an MPEG file does not have the correct characteristics of a VCD, Nero
detects the incorrect format and the user has three options: 'Ignore
Compatibility', 'Re-Encode the File' or 'Cancel'.
Ignoring compatibility burns the file to the CD with no changes. This option is
specifically aimed at experienced users.
Re-encoding decodes the existing file, converts it to the correct resolution
and Framerate and encodes it again. (Re-encoding is done before burning.
This process requires both time and temporary memory space.
Canceling interrupts the addition of the video file, i.e. it is not added to the
compilation.
Important: If you do not drag an MPEG file into the video section, it will not
be written as a video track and will need more space on the CD.
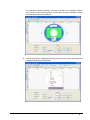
Double-clicking a video file opens the 'MPEG Information' dialog box.
'Properties' tab
This tab displays basic information about the selected video. You can also
specify the length of the pause after the video.
Click OK to confirm your choice and close the dialog box.
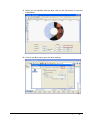
'Menu' tab
This tab is only available when you have enabled the checkbox on the Menu
tab.
You can change the title of the video and extract a picture from the video for
use as a thumbnail. Use the slider to view the video frame by frame.
Click OK to confirm your choice and close the dialog box.
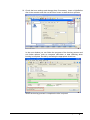
Note: If you have highlighted several video files, the 'Video Properties' dialog
box will open. This box displays information about the videos you have
highlighted. You can also specify the pause between the files.
Click OK to confirm your choice and close the dialog box.
Nero
Creating a CD/DVD • 75