1
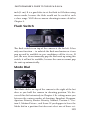
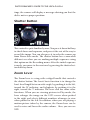
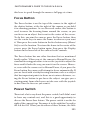
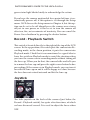
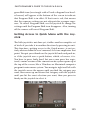
PHOTOGRAPHER’S GUIDE TO THE LEICA D-LUX 4
Chapter 6
Advanced Topics — Other Controls
N
ot all of the settings that affect the recording process
are located in the Recording menu. Several important functions are controlled by physical buttons and
switches on the camera. We have already discussed some of
these, but in order to make sure all of the information about
these controls is included in one place, we’ll go through each
physical control, some in greater detail than others.
Aspect Ratio Switch
This switch, located on top of the lens barrel, has three possible settings: 4:3, 3:2, and 16:9, representing the ratio of the
width of a horizontal image to its vertical height. This setting
does not affect just the shape of the image; it also determines
how many megapixels an image can contain. When the aspect
117
PHOTOGRAPHER’S GUIDE TO THE LEICA D-LUX 4
ratio is set to 4:3, the maximum resolution of 10 MP is available; when the aspect ratio is set to 3:2, the greatest possible
resolution is 9.5 MP; at 16:9, the greatest possible is 9. Also, the
very lowest possible resolution, 0.3 MP, is possible only at the
4:3 aspect ratio. So if for some reason you need to take thousands of pictures and don’t care if the quality is low, you may
need to set the aspect ratio to 4:3 to achieve the lowest possible resolution and the highest possible number of recordable
images. If you want your image to use the entire area of the
LCD screen, choose 3:2, which is the aspect ratio of the screen.
With 4:3, there will be black bars at the sides of the screen as
you compose your shot; with 16:9, there will be black bars at
the top and bottom of the screen.
Autofocus Switch
The Autofocus switch is located on the left side of the lens barrel as you hold the camera in shooting position. Its three selections are Autofocus, Autofocus Macro, and Manual Focus.
We have previously discussed Autofocus and Manual Focus.
The third setting, Autofocus Macro, needs some additional
discussion. When you move the switch on the lens to select
this mode, the focusing range changes to a macro range. So,
instead of the normal focusing range of 1.64 feet (50 cm) to
infinity at wide angle, the lens can focus down to as close as 0.4
118
PHOTOGRAPHER’S GUIDE TO THE LEICA D-LUX 4
inch (1 cm). It is a good idea to set the flash to Off when using
macro mode, because the flash would not be useful at such
a close range. We’ll discuss macro shooting in more detail in
Chapter 9.
Flash Switch
The flash switch is on top of the camera at the far left. It has
only one function -- to unlatch the flash mechanism so it can
pop up and be available in case conditions call for its use. If
you, the user, do not manually pop the flash unit up using this
switch, it will not be available, because the camera cannot pop
the unit up automatically.
Mode Dial
The Mode dial is on top of the camera to the right of the hot
shoe as you hold the camera in shooting position. We discussed this dial extensively in Chapter 4. Its settings move you
between the various modes of shooting: Snapshot, Program,
Aperture Priority, Shutter Priority, Manual, Custom 1, Custom 2, Motion Picture., and Scene. If you happen to leave the
Mode dial in a position that does not select one of those set119
PHOTOGRAPHER’S GUIDE TO THE LEICA D-LUX 4
tings, the camera will display a message advising you that the
dial is not in a proper position.
Shutter Button
This control is quite familiar by now. You press it down halfway
to check focus and exposure, and press it the rest of the way to
record the image. You can also press it to wake the camera up
from Power-Save mode. The shutter button has a somewhat
different use when you are making multiple exposures using
that option on the Recording menu. After the initial exposure
is made, you move to the next one by pressing the shutter button halfway down.
Zoom Lever
The Zoom lever is a ring with a ridged handle that encircles
the shutter button. The lever’s basic function is to change the
lens’s focal length between wide-angle, by pushing it to the left,
toward the W indicator, and telephoto, by pushing it to the
right, toward the T indicator. The lever also has some other
functions. When you are viewing pictures in Play mode, the
lever enlarges the image on the LCD screen when pushed
to the right, and selects different numbers of images to view
when pushed to the left. In addition, when you are playing a
motion picture taken by the camera, the Zoom lever can be
used to raise and lower the audio volume. Also, you can use
120
PHOTOGRAPHER’S GUIDE TO THE LEICA D-LUX 4
this lever to speed through the menus a full page at a time.
Focus Button
The Focus button is on the top of the camera to the right of
the shutter button, at the far right of the camera as you hold
it in shooting position. As we discussed earlier, this button is
used to move the focusing frame around the screen, so you
can focus on an object that is not in the center of the screen.
To do this, you aim the camera, press the Focus button, then
use the cursor keys to move the frame to wherever you want
it. Then press the center button in the five button array (Menu/
Set) to set the location. To return the frame to the center of the
screen, press the Focus button again, then press the Display
button on the lower left of the camera back’s controls.
The Focus button has one other function that we mentioned
briefly earlier. When you set the camera to Manual Focus, the
standard focusing procedure is to use the joystick to adjust the
focus until it looks the way you want it on the screen. However, even with the camera set to Manual Focus, if you press the
Focus button the camera will attempt to focus automatically. If
you are faced with a tricky focusing situation, such as a subject
that has important points to focus on at various distances, using the Focus button to pre-focus the subject can give you a
starting point, from which you can take over with the joystick
to fine-tune the focus as you want it.
Power Switch
There isn’t a lot to say about the power switch, but I didn’t want
to leave any controls out, and this is a good opportunity to
discuss the Power-Save feature. The power switch is on the far
right of the camera’s top. You move it to the right for On and to
the left for Off. When you do either of these actions, the little
121
PHOTOGRAPHER’S GUIDE TO THE LEICA D-LUX 4
green status light blinks briefly to acknowledge the action.
If you leave the camera unattended for a period of time, it automatically powers off, if this option is set through the Setup
menu. We’ll discuss the Setup menu in Chapter 8, but this option can be set to be off altogether so the camera never turns
off just to save power, or it can be set to turn the camera off
after two, five, or ten minutes of inactivity. You can cancel the
Power-Save shutdown by pressing the shutter button.
Record - Playback Switch
This switch is located directly to the right of the top of the LCD
screen. In the up position, the switch puts the camera into Recording mode; in the down position, it puts the camera into
Playback mode. I find that it can sometimes be a good idea to
leave the switch in Playback mode to avoid the situation when
you turn the camera on in recording mode without taking off
the lens cap. When you do that, the camera balks and tells you
to remove the lens cap and press the right cursor button before
proceeding. If the camera is in Playback mode, you can turn it
on with the lens cap on and it will be happy as a clam, because
the lens does not extend outward and hit the lens cap.
Joystick
The little joystick on the back of the camera (just below the
Record - Playback switch), has quite a few functions, of which
we have discussed several. It is used to adjust the focus when
122
PHOTOGRAPHER’S GUIDE TO THE LEICA D-LUX 4
the camera is in Manual Focus mode. It is used to adjust shutter speed and/or exposure when the camera is in Aperture Priority, Shutter Priority, or Manual Exposure mode. But it has
many other duties as well, described below.
Exposure Compensation with Joystick
The joystick can be used as an alternative way to adjust exposure compensation. The standard way to dial in exposure
compensation is to press the up button in the five-button array on the back of the camera, the button that is marked with
the dark plus sign and white minus sign. Then you use the left
and right cursor keys to set the amount of positive or negative
exposure for the image.
To use the joystick for the exposure compensation adjustment,
you start by moving the joystick to the left. At that point the
joystick navigation icon, a circle with protruding arrows in the
bottom right corner of the screen, will have its arrows turn
red and point up and down, indicating that you can now adjust exposure compensation by moving the joystick up and
down. You will also see the little icon for exposure compensation, with the plus and minus signs, in the lower left corner of
the screen. Moving the joystick up and down at this point will
raise and lower the level of exposure compensation.
Program Shift with Joystick
Here is a function of the joystick that is not immediately obvious. I don’t think you’d find this one without reading the
manual (or this book), unless you are a very thorough experimenter. Program Shift is available only in Program mode.
What this function does is let you take the camera’s automatic
settings for aperture and shutter speed and reset them to a different combination that yields the same exposure. That is, you
123
PHOTOGRAPHER’S GUIDE TO THE LEICA D-LUX 4
can “shift” both settings the same amount in opposite directions. For example, if the camera computes the correct settings
as f/2.0 at 1/100 second, you can shift those settings to any
equivalent pair that would yield the same exposure, such as
f/2.2 at 1/80 second, f/2.5 at 1/60 second, f/2.8 at 1/50 second,
or f/3.2 at 1/40 second.
Why would you want to do this? You might want a slightly
faster shutter speed to stop action better, or a wider aperture
to blur the background more, or you might have some other
creative reason. Of course, if you really are interested in setting a particular shutter speed or aperture, you probably are
better off using Aperture Priority mode or Shutter Priority
mode. However, having the Program Shift capability available
is a good thing for a situation in which you’re taking pictures
quickly using Program mode, and you want a quick way to
tweak the settings somewhat.
Here’s how to use Program Shift. When you’re about ready to
take a picture, press the shutter button halfway to calculate
the exposure. You will see a yellow rectangle that outlines the
values for shutter speed and aperture at the bottom of the LCD
screen. Within a few seconds, press the joystick up or down to
shift the values.
You will see the new values within the rectangle, and the Pro124
PHOTOGRAPHER’S GUIDE TO THE LEICA D-LUX 4
gram Shift icon (a rectangle with a P and a diagonal two-headed arrow) will appear at the bottom of the screen to indicate
that Program Shift is in effect. If that icon is red, that means
that the exposure settings are not adequate for a proper exposure. To cancel Program Shift, use the joystick to change the
settings until the Program Shift icon disappears. Also, turning
off the camera will cancel Program Shift.
Getting Access to Quick Menu with the Joystick
The little joystick is not done yet; it offers another complete set
of tricks if you take it in another direction by pressing in on it.
This function—getting access to the Quick menu—is not entirely obvious from the user’s manual, so let me emphasize that
point. You put your thumb on the joystick’s knob and push in,
as if the joystick were a push-button, which, of course, it is.
You have to press fairly hard, but once your press has registered, a mini-version of the camera’s menu system opens up at
the top of the screen, like a Windows or Macintosh computer
program’s main menu system. You navigate right and left with
the joystick across the menus until you find the category you
want, then move up and down that category with the joystick
until you hit the exact selection you want, then you press in
firmly on the joystick to select it.
125
PHOTOGRAPHER’S GUIDE TO THE LEICA D-LUX 4
The options that are available through the Quick menu vary
according to what mode the camera is in. Not surprisingly,
the Quick menu offers the largest variety of choices when the
camera is in Program, Aperture Priority, Shutter Priority, or
Manual mode. It offers the smallest variety in Snapshot mode:
only AF Tracking on or off, and Picture Size. There are a moderate number of choices in Scene mode and Motion Picture
mode. (The Quick menu is not available at all in Playback
mode.)
Is the Quick menu better or easier than using the Recording
menu system? It’s a matter of personal choice. You may find
the Quick menu to be a good way to choose certain options,
such as ISO or White Balance. It’s a good idea to experiment
a bit.
AF/AE Lock Button
The AF/AE Lock button is located just to the right of the
joystick on the camera’s back. As we discussed in Chapter 5,
through the Recording menu’s settings you can select whether this button locks both autofocus (AF) and auto-exposure
(AE), or only one or the other. You just press the button to
126