1
Excel VBA Introduction – Course Exercise
Excel VBA Course Exercises
“For use in Classroom”
Electronic version to be sent to students
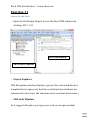
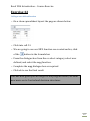
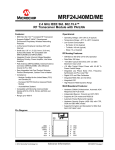
Before starting to use the exercises we need to configure excel for
use, by default Excel does not show the developer tab, to turn it
on go to the file menu, select options, then select customize
Ribbon, place a tick in the developers tab.
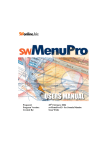
On the developers tab make sure that use relative cell references
is highlighted, on the developer tab click on the macro security
button. For the purpose of the course we shall take security off.
1
Excel VBA Introduction – Course Exercise
Terminology used in recording macros
Macro Name
The recorded name for the macro, cannot start with numbers
and have no spaces.
Save a macro as Type
Personal Work Book Stores a local copy of the macro at
application level allowing it to be used with all open work
Books
New Work Book creates a new workbook and captures
whatever you've done in the workbook in which you started
recording. The resulting code is stored in a module in the
"New" workbook.
Could be used in a testing type environment, where you don't
necessarily want to clutter up existing projects.
This Work Book as the name suggests the macro is saved in
the work Book you have open the macro can be only used in
other workbooks if the work Book it was created in is open.
Description This description is places inside the macro as a
comment, these are inside a single quote at the beginning of the
text and are coloured green, comments are used to aid the
developer to identify the code they are using
2
Excel VBA Introduction – Course Exercise
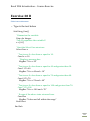
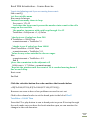
Save macros to This Work Book Option
Exercise 1
5 mins
Type your name into cell A1drag down to A10 then across to
column H10
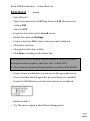
Select cell D4
From the status bar Select record macro
Define the name as Headings
Create keyboard shortcut CTRL+H
Save in this workbook
Click Ok to continue
Change the font colour to Green
Click Stop recording on the status bar.
Press CTRL+Z to undo changes.
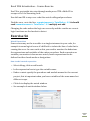
If the developer tab is not displayed do so now.
Select Macros from the developer Tab or ALT+F8 to launch the
macros dialog box.
Select cell E6 press keystroke CTRL+H to run the macro.
Repeat the above steps on cells G1 and G9
3
Excel VBA Introduction – Course Exercise
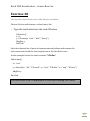
Save macros to This Work Book Option
Exercise 2
5 mins
Select Cell D1
From the status bar select record macro
Define the name as Bestfit (no space)
Create keyboard shortcut CTRL+B
Save in this workbook
Click Ok to continue
From the home tab on the ribbon on the right side select
format, AutoFit column width
Click Stop recording on the status bar.
Select cell F3 press CTRL+B to run the best fit macro, try on
two other cells only (do not format the entire workbook at this
point.)
4
Excel VBA Introduction – Course Exercise
Save macros to This Work Book Option
Exercise 3
5 mins
Select Cell B1
From the status bar select record macro
Define the name as Patterns
Create keyboard shortcut CTRL+P
Save in this workbook
Click Ok to continue
Change the cell colour to Yellow
Click Stop recording on the status bar.
Select cell C1 press CTRL+P to run the Patterns macro, try on
two other cells only (do not format the entire workbook at this
point.)
5
Excel VBA Introduction – Course Exercise
Save macros to This Work Book Option
Exercise 4
2 mins
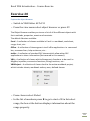
Select Cell E10 use the shortcut keys to format the cell
Please note the recordings that you have made so far have been
relative recordings, macros that apply the recorded formats to
cells that you select relative to the cursor position. Care has to be
taken when recording relative macros because you can cause an
error by trying to access areas outside the work sheet, the next
example is set up to do that deliberately.
Save macros to This Work Book Option
Exercise 5
8 mins
Select Cell H1
Switch to the developer tab make sure relative cells is
highlighted before we proceed.
Click record macro
Define the name as Error
Create keyboard shortcut CTRL+E
Save in this workbook
Click Ok to continue
Change the cell colour to green
Select Cell E1
Change the cell colour to Red
Click Stop recording on the status bar.
6
Excel VBA Introduction – Course Exercise
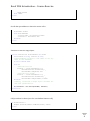
Select Cell D1 Run the macro
The macro changes the colour of both cells
Select Cell C1 Run the macro
A Run time dialog Box opens giving you an error
Note run time errors are not that informative searching the web
for error 1004 will bring back many answers if you are lucky you
may find an answer for this example we shall click on debug.
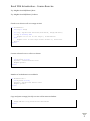
Click on the debug button on the error dialog Box
The VBA Editor Window opens Highlighted in yellow is the
problem area in this case we can see that the offset command
has a negative number that will take us outside the
spreadsheet. So we can modify the negative number to a
positive number.
Click the reset button in the VBA tool bar and close the VBA
editor we shall look in more detail later.
Now run the macro again this time the colour cell is to the
right.
In the next exercise we shall save a macro to your personal macro
work book and explore where it is stored as to edit or modify.
7
Excel VBA Introduction – Course Exercise
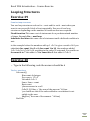
Exercise 6
10 mins
Select Sheet 2
Type your name into cell A1drag down to A10 then across to
column H10
Select Cell E5
From the status bar select record macro
Define the name as shadings
Create a shortcut Ctrl + S save into personal workbook
Click ok to continue
Change the cell colour to Blue
Click Stop recording on the status bar.
Note you will have to display hidden folders to locate the folder
through windows explorer this is for win 7 office 2010.
C:\Users\mouse\AppData\Roaming\Microsoft\Excel\XLSTART
From various worksheets you can access the personal macro,
close excel then launch again the personal macro is available
From the VBA Editor locate the personal macro workbook
Delete module 1
Try The macro Again it should have disappeared
8
Excel VBA Introduction – Course Exercise
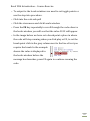
So far you have run macros from shortcuts and the macro dialog
box, next we shall set up an icon in the Ribbon, UAT and add a
button to the excel Worksheet
9
Excel VBA Introduction – Course Exercise
Exercise 7
5 mins
Add a macro shortcut to the UAT(user access toolbar)
From the end of the UAT click the down arrow
Click on more commands
From choose commands select macros
Select the appropriate macro
Click Add
From the macro on the right select it, select modify
Choose the relevant Icon
Click on ok
Click on Ok
The new icon appears on the UAT
Click the icon to run the macro.
10
Excel VBA Introduction – Course Exercise
Exercise 8
5 mins
Add a macro shortcut to the Ribbon Bar
Select the file menu.
Chose options.
Select customise ribbon.
From choose commands select macros.
From the list select the required macro.
On the right select a tab to add your macro.
Click Create a new group.
Click rename, rename to my macro.
With the macro and the group highlighted select add.
With the macro highlighted rename it first macro and select an
icon you would like to use.
Click ok, then click ok again.
The icon is now on the ribbon.
Click to try out.
11
Excel VBA Introduction – Course Exercise
Exercise 9A
Add a button to the spread sheet Form Controls
Form Controls
On the developer tab from the controls group select Insert
Select first icon from form controls Button (form Control)
The cursor changes to a cross hair, click with the left button on
the mouse to draw a rectangular button.
On release of the mouse you now select a macro from the
assign macro box highlight the required macro and click OK.
You can now edit the text on the button click away when
completed.
Click the button to run the macro.
To Re Edit text right click on the button select edit text
Click away from the button to complete the task.
12
Excel VBA Introduction – Course Exercise
Exercise 9B
Add a button to the spread sheet Active X Controls
Active X Controls
On the developer tab from the controls group select Insert
Select first icon from Active X controls Button (Command
Button) 2nd group
The cursor changes to a cross hair, click with the left button on
the mouse to draw a rectangular button.
This places a command button on the page
and places excel in a state of design mode.
Double click the button to launch the VBA window the code
below is displayed.
Private Sub CommandButton1_Click()
End Sub
Modify the code adding the Call Function as shown below whee
as macroxyz represents the name of the macro you want to
run.
Private Sub CommandButton1_Click()
Call macroxyz
End Sub
Close The VBA Window
13
Excel VBA Introduction – Course Exercise
Open the properties window for the button from either the
ribbon bar on from right clicking on the mouse.
In the properties dialog box navigate to caption, type in My
first X Control.
Close the properties box
Click the design view button to enter real time you can now
click on your button to run the macro.
14
Excel VBA Introduction – Course Exercise
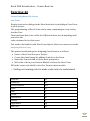
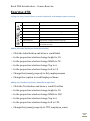
Exercise 10
Delegate exercise
Close and open Excel
Enter random numbers from A1 to H9
Record a macro to format numbers as currency
Record a macro to change cell colour to blue
Record a macro to change Text colour to white
Assign the three macros to the toolbars UAT and Ribbon
Create a new macro using a command button Use the call
button to run the macros
Create a new form button and assign macros
Create a macro in your personal work book to format dates in
the dddd dd mmmm yyyy format. Assign to your toolbar
Use logic to see if you can assign all three macros to the
command button.
At the end of this section you can now record a macro in both
absolute and relative Mode, Know the difference between
personal workbooks and macros stored in work Books. launch
macros from either the dialog box, short cut key, toolbar, Form
button or active X button and have had exposure to the VBA
window we can see that recorded macros are powerful but are
limited in their use relying on user activation. Using VBA we can
introduce data validation, actions on events and automaton.
15
Excel VBA Introduction – Course Exercise
What is VBA?
In short Microsoft Programming language to control actions of a Microsoft
product, whilst All VBA has some basic fundamentals it differs for each
Product . VBA is a subset of VB, IN VBA all the hard work is done we
manipulate what is available to us in VB you start from scratch.
VBA Terminology
Procedures
A procedure is a statement of computer instructions
Object
In VBA an object could be a Worksheet, a Cell, arrange of cells, a
command button, a text Box, and so on
Property
Each object in VBA has its own properties that control its
appearance typical properties – column width, row height, font,
text, value, formula, borders
Method
If an object has an action, A Command Button has on_click
this is referred to as a method
Comment
A Line of text in a procedure that can be used to describe what
is occurring, no code that executes
16
Excel VBA Introduction – Course Exercise
Module
Is a file where you write your procedures
Execute
In programing we say execute this means run/play
Collections
Collections are a set of related objects having the same
properties
Containers
Containers are used to store and manipulate collections of data
objects.
More about all of the terminology used as we progress through
the course.
17
Excel VBA Introduction – Course Exercise
The Excel Object Model
The full Excel Object Model has over 200 objects and is too detailed to show
on one
page. However you tend to only use certain objects on a regular basis and
the following
diagram shows the relationship between the most commonly used objects.
Search for "Microsoft Excel Objects" in VBA Help to see the full
diagram.
Object references: Cells, Sheets and Workbooks
The macro recorder will show you what your object references are but it
will not show
you the variety of different expressions that can be used to access common
Excel
objects.
Non-specific Object References
Selection
The current selection
ActiveCell
The current active cell
ActiveSheet
The current worksheet
ActiveWorkbook
The current workbook
ThisWorkbook
Workbook containing the
procedure
Specific Object References, various styles
18
Excel VBA Introduction – Course Exercise
Range("A1")
Cell A1
Range("A1:F50")
Range A1:F50
[A1]
Cell A1
[A1:F50]
Range A1:F50
ActiveCell.Range("A2")
The cell below the active cell
Cells(1)
Cell A1
Range(Cells(1,1),Cells(50,6))
Range A1:F50
Range("NamedRange").Cells(1,1)
The first cell in the named range
Range("A:A")
Column A
[A:A]
Column A
Columns(1)
Column A
Range("5:5")
Row 5
[5:5]
Row 5
Rows(5)
Row 5
Sheets("Sheet1")
The Sheet called Sheet1
Worksheets("Sheet1")
The Worksheet called Sheet1
Sheets(2)
The second Sheet in the Workbook
Worksheets(3)
The third Worksheet in the
Workbook
Worksheets("Sheet1").Range("A1") Cell A1 on Sheet1
[Sheet1].[A1]
Cell A1 on Sheet1
ActiveSheet.Next
The sheet after the active sheet
Workbooks("Basic")
The Workbook file, Basic.xls
19
Excel VBA Introduction – Course Exercise
Square brackets
The full object reference to the worksheet cell A1 is Range("A1"). If you are
typing-in cell
references rather than recording, it is easier to use the shortcut notation
using square
brackets, [A1]. You can use the same style of referencing on other objects as
well, such
as worksheets but there are a number of rules and restrictions.
It is usually best to restrict the square bracket notation to cell references
only, where it is entirely definitive and reliable.
With…End With
The With statement is used so the object reference can be made and then
retained so that multiple actions may be carried out without having to
repeat the same object reference in each statement.
You can keep the With reference open for as long as you like in the same
procedure, just pointing to it using the dot operator. Every With requires
an End With. You can have
multiple With pointers. When you are reading code that uses multiple With
pointers, the rule is simple; the dot points to the nearest With.
With Object
.Property
With .Child Object
.Method
.Method
End With
End With
20
Excel VBA Introduction – Course Exercise
Exercise 11
Explore The VBA Editor
Open the file Budget Report Access the Excel VBA window by
clicking ALT + F11
VBA Code window
VBA Project explorer
Project Explorer
VBA Navigation window displays a project for each work book or
template that is open, note that the excel objects(worksheets are
referenced in two ways, the tab name and a constant sheet name.)
VBA Code Window
As it suggests the place you type your code on an open module
21
Excel VBA Introduction – Course Exercise
Properties window
Lists all the properties of the selected object
Immediate Window
The immediate window is Most useful for executing VBA
statements directly, testing statements and helping to debug your
code The two main functions are to and to Send output to be
viewed during execution Execute commands immediately. Let’s
you run any VBA statement, manually while a program is running.
This is extremely powerful as it allows you to test and execute
small parts of code. has the shortcut key (Ctrl + G).
There are two ways to print to the immediate window, either by
including Debug.Print statements in the actual code or by
entering print statements directly.
A.
Debug.Print Range("A1").Value
B.
? Range("A1").Value
Locals Window
Lists the values of all the variables currently in scope.
Watch Window
A watch is a variable or expression that has been placed in the
window to enable you to monitor its value. Let’s you watch the
values of variables and expressions as your code executes.
22
Excel VBA Introduction – Course Exercise
Exercise 12
properties window
In the project sheet explorer verify that (sheet 1) is selected
In the properties window double click Name Not! (Name)
Edit the value to read purchase sales 2012
Press the enter button
Double click standardwidth
Enter a value of 12
Now for a little Fun
In the scroll area type the following values and then switch
windows to see the effect
$A$1
$E$16
$A$1:$E$16
23
Excel VBA Introduction – Course Exercise
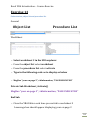
Exercise 13
Code window, object list and procedure list
General
Object List
Procedure List
WorkSheet
Select worksheet 2 in the VBA explorer
From the object list select worksheet
From the procedure list select activate
Type in the following code as to display as below
MsgBox "your on page 2", vbInformation, "PAGE INDICATOR"
Private Sub Worksheet_Activate()
MsgBox "your on page 2", vbInformation, "PAGE INDICATOR"
End Sub
Close the VBA Editor each time you switch to worksheet 2
A message box should appear displaying your on page 2
24
Excel VBA Introduction – Course Exercise
Exercise 14
Identify the colours in the code Window
Blue – indicates keywords that are reserved by VBA
Black Indicates Normal VBA Code Text
Red – indicates Errors in the code or procedure
Green Indicates a Comment
Type in the following text
Sub showingcolours()
' this text will display the colours used
MsgBox "rot"
Call macro3
End Sub
25
Excel VBA Introduction – Course Exercise
Exercise 15
Using Methods
Every object can perform certain actions are defined by methods. Some
methods need a value as input to complete their actions. For example, the
open method of the workbook object takes a file name as input so it knows
specifically what workbook to open. The input value is called an argument.
An argument is a variable, constant or expression that provides additional
information to a method, so that it can execute properly. To use a method
in VBA code, you would use the following syntax.
Object.method argument1, argument2, argument3Select Cell
For example Sheet1.protect “mypassword”
Add password Protection to sheet 2 in a Workbook
Sub password_on( )
Sheet2.protect “password”
End Sub
Remove password Protection to sheet 2 in a Workbook (A)
Sub password_off( )
Sheet2.unprotect “password”
End sub
Remove password Protection to sheet 2 in a Workbook (B)
Sub password_off( )
Sheet2.unprotect
End sub
Note if you use option B you are prompted for your password in
the form of a dialogue box
26
Excel VBA Introduction – Course Exercise
Exercise 16
Responding to an Event
On the developer tab from the controls group select Insert
Select first icon from Active X controls Button (Command
Button) 2nd group
The cursor changes to a cross hair, click with the left button on
the mouse to draw a rectangular button.
This places a command button on the page
and places excel in a state of design mode.
Double click the button to launch the VBA window the code
below is displayed.
Private Sub CommandButton1_Click()
Sheet2.Unprotect2
End Sub
In the properties sheet for the button under name type
“unprotect Sheet”
In the code window select worksheet 2
From the object list select worksheet
From the procedure list select activate
Type in the following code
Private Sub Worksheet_Activate()
Sheet2.Protect "password"
End Sub
Each time you select sheet 2 the worksheet is locked click the
button unprotect and enter the password “password” to unlock.
27
Excel VBA Introduction – Course Exercise
Exercise 17
Add a message box to the code
Add password Protection to sheet 3 in a Workbook with a
message Box
Sub password_on( )
Sheet3.protect “password”
Msgbox “Protected worksheet. You cannot edit data in this list
End Sub
Exercise 18
Delegate Exercise
Try the code below assigned to a command button
Private Sub CommandButton2_Click()
Sheet3.protect
MsgBox "worksheet locked", vbInformation, "File Locked"
End Sub
Exercise 19
Use row and column references
Sub Calculate()
ActiveCell.FormulaR1C1 = "=Product(rc[-2]:rc[-1])"
End Sub
Replace ActiveCell.FormulaR1C1 = "=Product(rc[-2]:rc[-1])"
With
ActiveCell.FormulaR1C1 = "=sum(rc[-2]:rc[-1])"
Try
ActiveCell = "=sum(a1:a5)"
28
Excel VBA Introduction – Course Exercise
Exercise 20
Explore the object browser
Switch to VBA Editor ALT+F11
From the view menu select object browser or press F2
The Object Browser enables you to see a list of all the different objects with
their methods, properties, events and constants.
The default libraries available:
Excel – A collection of classes available in Excel i.e. workbook, worksheet,
range, chart, etc…
Office – A collection of classes generic to all office applications i.e. command
bar, command icon, help assistance, etc…
stdole – A collection of standard OLE classes which allow other OLE
applications to share information (Not covered in this manual).
VBA – A collection of classes which allow generic functions to be used i.e.
MsgBox, InputBox, conversion functions, string functions, etc…
VBAProject – A collection of classes local to the active workbook project,
which includes sheets, workbook and any user, defined classes
From classes select Global
In the list of members press R to go to start of R in list select
range, the box at the bottom displays information about the
range property.
29
Excel VBA Introduction – Course Exercise
Right click on range and copy
Open the immediate window and paste range into this window
Type each of the lines of code below one at a time then press
enter, remember to switch to excel to see the effect the code is
making.
Range("b2:b4").Select
Range ("a1,b2,c3,d4,e5").Select
Range("A1:A5,B4,d7:d11").Select
It may be easier to have the VBA window and Excel window
displayed side by side to see the actions happen in real Time
30
Excel VBA Introduction – Course Exercise
Programming Basics
Data
Programs receive data as input then process the data as output, a good
example is a calculator where you input numbers and instruct it which
operator to use, when inputting data the program uses a temporary storage
area called a variable, variables can be defined as different types a full
listing on page 14 of the user manual.
Exercise 21
Implicit Variables (not declared prone to errors)
Close excel and Restart the application
Switch to the VBA editor ALT+F11
Select VBA Project workbook 1, Insert Module
Make sure Module 1 is selected Check the title bar
Type the following code
Sub calc ( )
Answer = 100 + 100
Msgbox(anser)
End Sub
Run the code press the play button or press F5
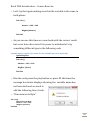
A message box opens displaying nothing, the reason the
variable names differ causing the problem. Click OK to return
to the VBA screen.
31
Excel VBA Introduction – Course Exercise
Let’s try that again making sure that the variable is the same in
both places.
Sub calc ( )
Answer = 100 + 100
Msgbox(Answer)
End Sub
As you can see this time we come back with the correct result
but as we have discovered it is prone to mistakes let’s try
something different type in the following code
Variable option explicit (the name for the variable has to be declared)
Option Explicit
Sub calc()
Answer = 100 + 100
MsgBox (Anser)
End Sub
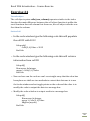
Run the code press the play button or press F5 this time the
message box below displays showing the variable name has
not been declared we need to
add the following line of code.
“Dim answer As Byte”
Sub calc()
Dim answer As Byte
answer = 100 + 100
MsgBox (answer)
End Sub
32
Excel VBA Introduction – Course Exercise
Run the code again and the code runs fine
Change one value in the argument to 200
Option Explicit
Sub calc()
Dim answer As Byte
answer = 100 + 200
MsgBox (answer)
End Sub
Run the code again, this time you will get an overflow error
Change the data type to remedy this problem, try integer -32,768 to
32,767 Integer stores whole numbers only.
Option Explicit
Sub calc()
Dim answer As integer
answer = 100 + 200
MsgBox (answer)
End Sub
33
Excel VBA Introduction – Course Exercise
Exercise 22
Variable Constant (a variable that doesn’t change)
In the code window type the following
Option Explicit
Const vat = 0.20
Sub calc()
Dim answer As Integer
answer = (100 + 100) * vat
MsgBox (answer)
End Sub
Replace MsgBox (answer) with MsgBox "£ " & (answer)
Let’s make some more changes to the code
Change the vat rate to the following
Option Explicit
Const vat = 0.21
Sub calc()
Dim answer As Integer
answer = (100 + 120) * vat
MsgBox "£ " & (answer)
End Sub
The answer is returned as a whole number rounded down, let’s make
one more change, change the data type to currency
Option Explicit
Const vat = 0.21
Sub calc()
Dim answer As Currency
answer = (100 + 120) * vat
MsgBox "£ " & (answer)
End Sub
34
Excel VBA Introduction – Course Exercise
Exercise 23
understanding Expressions and operators
Expressions
An expression is a combination of operators, constants, procedures and names
of controls and properties that is evaluated to obtain a result. When you use
an expression in code it returns a value in one of the data types provided by
VBA.
Operators
Operators are arithmetic symbols
Arithmetic Operators
Comparison Operators
+
Addition
<
Less than
-
Subtraction
>
Great than
/
Division
=
Equal to
*
Multiplication
<>
Not equal to
A comparison operator returns a Boolean value because the result of any
comparison is always true or false
35
Excel VBA Introduction – Course Exercise
Exercise 24
The cells object
The cell object syntax cells (row, column) operates similar to the index
function the main difference between the cell object function is unlike the
excel functions that call column first then row, the cell object calls the row
first then the column.
Push or Pull
In the code window type the following code this will populate
the cell D2 with 2012
Sub push()
Cells(2, 4).Value = 2012
End Sub
In the code window type the following code this will retrieve
information from cell D2
Sub pull()
Dim myvar As Integer
myvar = Cells(2, 4).Value
End Sub
Now we have run the code we can’t see straight away that the value has
been place we shall use two methods to extract that data one is to use
the locals window and set toggle points on the code and the other is to
modify the code to output the data to a message box.
Modify the code as below to output results to a message box.
Sub pull()
Dim myvar As Integer
myvar = Cells(2, 4).Value
MsgBox (myvar)
End Sub
36
Excel VBA Introduction – Course Exercise
To output to the locals windows we need to set toggle points or
use the step into procedure.
Click into the code sub pull
Click the view menu and click Locals window
Press the F8 key repeatedly to scroll through the code observe
the locals window you will see that the value 2012 will appear
In the image below we have set a break point a place in where
the code will stop running when you click play or F5, to set the
break point click in the grey column next to the line of text you
require the break. In the example
shown the value is displayed in
the locals window before the
message box launches, press F5 again to continue running the
code.
37
Excel VBA Introduction – Course Exercise
Message Boxes and Input Boxes
Message boxes output data, input boxes trap Data
Exercise 25
In the code window type the following
Sub inbox()
'sets the variable to hold the data
Dim employee As String
'opens a input box and passes to variable
employee = InputBox("Enter Name")
'takes the information from the variable and passes to cell D2
Cells(2, 4).Value = employee
'opens a message box and joins text to a variable then joins to text and
displays an information button
MsgBox "you have placed the text " & (employee) & " in cell D2",
vbInformation
End Sub
As you can see you are building up your use of knowledge and little by little
building on what you learn at each stage.
38
Excel VBA Introduction – Course Exercise
User Defined Functions Delegate Exercise
Exercise 26
Create the following example you are going to collect the following
information
Name
Surname
Job
Salary
Date of birth
Calculate age
place each answer trapped onto the spreadsheet starting at cell A2
across to E2, in cell F2 you will calculate the age.
Display a message to show
your name is " first name and surname
"you have applied for job of " XYZ " and require a salary of " £ XYZ
"your current age is " XYZ
"thank you for your time we will contact you shortly"
After you complete the information your screen should look like below
By the end of the course you would have learnt how to go to the
next available blank row and use a form rather than input boxes
to enter the data.
39
Excel VBA Introduction – Course Exercise
Exercise 26 Answer
Sub job()
Dim name As String
Dim surname As String
Dim job As String
Dim salary As Currency
Dim birth As Date
Dim age As Double
curdate = Date
name = InputBox("enter your first name")
surname = InputBox("enter your Surname name")
job = InputBox("enter your required Job")
salary = InputBox("enter required salary")
birth = InputBox("enter date of birth dd/mm/yy")
Cells(2, 1).Value = name
Cells(2, 2).Value = surname
Cells(2, 3).Value = job
Cells(2, 4).Value = salary
Cells(2, 5).Value = birth
age = Int(((curdate) - (birth)) / 365.25)
Cells(2, 6).Value = age
MsgBox "your name is " & (name) & " " & (surname)
MsgBox "you have applied for job of " & (job) & " and require a salary of " &
"£" & (salary)
MsgBox "your current age is " & (age)
MsgBox "thank you for your time we will contact you shortly"
End Sub
40
Excel VBA Introduction – Course Exercise
Exercise 27
Concatenating text (joining cells text and variables)
To combine variables with text use the concatenation operator, ampersand (&)
In the code window type in the following
Sub join()
Dim Amount As Integer
Amount = InputBox("enter a value")
MsgBox "The Amount is:" & "£" & amount
End Sub
The code above takes the value you enter in an input box, then
displays that as The amount is £90 that is on the assumption
you have typed 90 into the input box.
In the code window type in the following
Sub usingfunctions()
Dim saleseast As Integer, saleswest As Integer, sum As
Integer
MsgBox "please enter whole numbers only"
saleseast = InputBox("enter the total sales for the east")
saleswest = InputBox("enter the total sales for the west")
sum = saleseast + saleswest
Cells(2, 4).Value = sum
MsgBox "total sales for east and West: £" & sum
End Sub
The above code displays a message box showing a total having
adding two variables together.
41
Excel VBA Introduction – Course Exercise
Exercise 28
Object variables
In the code window type the code below
Sub changewkstabcolour()
Dim wks As Worksheet
Set wks = ThisWorkbook.Worksheets("sales2011")
wks.Tab.Color = vbRed
Set wks = ThisWorkbook.Worksheets("sales2012")
wks.Tab.Color = vbGreen
End Sub
The code above sets variable WKS as a worksheet object, worksheets are a
member of the workbook family, and inside the parentheses we define the
worksheet name. The property of the tab is changed by referencing the
object variable and setting the property to the appropriate colour.
Sub changetabsales ()
ThisWorkbook.Worksheets ("sales").Tab.Color = vbBlue
ThisWorkbook.Worksheets ("sales2011").Tab.Color = vbGreen
ThisWorkbook.Worksheets ("sales2012").Tab.Color = vbRed
End Sub
In the code above we use this workbook.worksheets to change directly the
tab color
Sub changecol ()
Sheets (ActiveSheet.Name).Select
ActiveWorkbook.Sheets (ActiveSheet.Name).Tab.ColorIndex = 21
End sub
The code above changes the tab colour of the active sheet
42
Excel VBA Introduction – Course Exercise
Exercise 29 Explanation
Declarations section
The top of the code window includes a declaration section; variables placed here can be
used by all procedures within the module remember option explicit is also set in this area.
Scope of variables
Three types of scope are available in VBA as already stated the scope of a
variable is determined by the way you declare it.
Procedure-level, when you declare a variable within a procedure it is not
accessible outside of the procedure. A procedure level variable is only available
within the procedure it is written.
Private module-Level, when declaring a variable in the declaration section of a
module using Dim or Private keyword the variable is known as a private
module-level variable, the variable can be used by any procedure within the
module but cannot be accessed by a procedure outside the module.
Public Module Level, when a variable is declared in the declaration section
with the prefix keyword public, the variable is called a public module-level
variable these variables can be called from any procedure or module
Scope of procedures
You may have a procedure that performs a general function like multiplying
the value of two numbers; this procedure can be included in different modules
by giving it the relevant scope. You can also specify a type for the procedure it
can be one of the following, Sub, function or property function procedure is
similar to a sub function but whereas the sub procedure executes code the
function procedure returns a value.
43
Excel VBA Introduction – Course Exercise
Exercise 29
Calling a sub procedure
In the code window set up a public function that takes
information from Cell D5 and multiply it by .08
Option explicit
Public Function CalculateSalesTax() As Currency
'CalculateSalesTax = Cells(5th row, 4th column)=D5.Value * 0.08
CalculateSalesTax = Cells(5, 4).Value * 0.08
End Function
In the code window set up the code below this calls the
function calculatesalestax
Public Sub CallFunc()
Dim ST As Currency
'Set st as a currency variable
ST = CalculateSalesTax()
'st is the results of a public function calculate sales tax
Cells(5, 5).Value = Cells(5, 4).Value + ST
'cell E5 value = D5 value + ST
End Sub
Exercise 30
Function procedure
Similar to sub procedures in the way that are written but a
function returns a value. The value that the function produces
is stored in a predefined variable. The scope of the function will
be either private or public.
Select Cell
44
Excel VBA Introduction – Course Exercise
In excel there is no function called mpg below we have created
that function, inside the brackets we have created three
variables , line 2 of the code indicates the way the mpg function
uses those variables. Remember the rules of BODMAS still
apply.
Type the following code to create a User Defined function MPG
Function mpg (start_miles, End_miles, Fuel) As Integer
mpg = (End_miles - start_miles) / Fuel
End Function
Syntax Components
Function and End function specify the start and finish of the
function procedure
Function <procedure Name>, this gives the function its name,
the name has to be unique and cannot be a VBA keyword.
As <data type>. Though optional if not declared the variables
are set to variant remember we said earlier code is more
efficient when specified.
<Procedure Body> the lines of code within the function that
make up the function and that are executed in sequential steps.
45
Excel VBA Introduction – Course Exercise
Exercise 31
Calling function procedures
Below we have a function called sales, this function is called from
a subroutine called main. The key word call is used to run the
function sales
Call a function From Code
Option Explicit
Public Gtotal As Currency
Public Function sales () As Currency
Gtotal = Cells (8, 2).Value + Cells (8, 3).Value
Cells (8, 5).Value = gtotal
End Function
PublicSub main ()
Call sales
End Sub
Select Cell
46
Excel VBA Introduction – Course Exercise
Exercise 32
Calling a user defined function
On a clean spreadsheet layout the page as shown below
Click into cell C4
We are going to use our MPG function we created earlier, click
of the
button in the formula bar
From the dialogue box from the or select category select user
defined, and select the mpg function.
Complete the mpg dialogue box as required
Click ok to see the final result
This has now given you an insight to the program basics, we shall
now move on to Control and decision structures
47
Excel VBA Introduction – Course Exercise
Control Structures
Exercise 33
Control Structures
Overview
Exercise 34
If..then…else construction
Getting to Grips with Logic
If...Then...Else constructions allow you to test for one or more
conditions and run one or more statements depending on each
condition. You can test conditions and take actions in the
following ways:
Run one or more statements if a condition is True
Run one or more statements if a condition is False
Run some statements if a condition is True and others if it is False
Test an additional condition if a prior condition is False
The control structure that offers all these possibilities is the If...Then...Else
Statement in (VBA). You can use a single-line version if you have just one
test and one statement to run. If you have a more complex set of conditions
and actions, you can use the multiple-line version.
48
Excel VBA Introduction – Course Exercise
If..then…else construction cont…
Sub test ()
If condition Then
[statements]
ElseIf elseifcondition Then
[ elseifstatements ]
Else
[ else statements ] ]
End If
End sub
Alternative Known as in line
Sub test ()
If condition Then [ statements ] [ Else [ else statements ] ]
End Sub
Syntax property Terminology
Condition
Required. Expression. Must evaluate to True or False, or to a data type
that is implicitly convertible to Boolean.
Then
Required in the single-line form, optional in the multiple-line form.
Statements
Optional. One or more statements following If...Then that are executed if
condition evaluates to True.
Elseif condition
Required if ElseIf is present. Expression. Must evaluate to True or False,
or to a data type that is implicitly convertible to Boolean.
Elseif statements
Optional. One or more statements following ElseIf...Then that are
executed if elseifcondition evaluates to True.
Else statements
Optional. One or more statements that are executed if no previous
condition or elseifcondition expression evaluates to True.
End If
Terminates the If...Then...Else block.
49
Excel VBA Introduction – Course Exercise
Exercise 35
In this procedure we check cell reference A1 to check to see if the vale is
Less than 100 if the cell evaluates less than 100 the function is deemed as
true and places the message Low otherwise no action taken
If then statement
In to a new module type the code below
Using the cells reference row, column
Sub testa()
If Cells(1, 1).Value < 100 Then
MsgBox "low"
End If
End Sub
Alternative Code
Sub testb()
If Cells(1, 1).Value < 100 Then
Cells(1, 2).Value = "poor"
End If
End Sub
Using the cell reference letter ,number
Alternative Code
Sub testc()
If [a1] < 100 Then
MsgBox "low"
End If
End Sub
Alternative Code
Sub testd()
If [a1] < 100 Then
[a2]=”poor”
End If
End Sub
50
Excel VBA Introduction – Course Exercise
Exercise 36
In this procedure we check cell reference E4 to check to see if the vale is
greater than 100 if the cell evaluates greater than 100 the function is
deemed as true and places the message “very high mpg” in cell E4 at the
end if it breaks out and continues to run the remainder of the procedure, in
this case places "Very Low MPG" value in cell f4
If then else statement
Type the code below into the code window
Using the cells reference row, column
Sub teste()
If Cells(4, 5).Value > 100 Then
Cells(4, 6).Value = "Very high MPG"
Else
Cells(4, 6).Value = "Very Low MPG"
End If
End Sub
Alternative Code
Using the cell reference letter ,number
Sub testf()
If [e4] > 100 Then
[f4] = "Very high MPG"
Else
[f4] = "Very Low MPG"
End If
End Sub
51
Excel VBA Introduction – Course Exercise
Exercise 37
If then elseif else statement
With the previous examples this has the same effect as using an if
statement in a formula in the spreadsheet, in the next example we
look at what we consider to be a nested if, using the
Using the cells reference row, column
Sub testg()
If Cells(4, 5).Value <= 10 Then
MsgBox "change car"
ElseIf Cells(4, 5).Value <= 40 Then
MsgBox "Expensive to run"
ElseIf Cells(4, 5).Value <= 80 Then
MsgBox "average mpg achieved"
ElseIf Cells(4, 5).Value <= 90 Then
MsgBox " above average mpg your now saving"
Else
MsgBox "well done you have gone Electric"
End If
End Sub
Alternative Code A
Using the cell reference letter ,number
Sub testh()
If [E4] <= 10 Then
MsgBox "change car"
ElseIf [E4] <= 40 Then
MsgBox "Expensive to run"
ElseIf [E4] <= 80 Then
MsgBox "average mpg achieved"
ElseIf [E4] <= 90 Then
MsgBox " above average mpg your now saving"
Else
MsgBox "well done you have gone Electric"
End If
End Sub
52
Excel VBA Introduction – Course Exercise
Alternative Code B
Using the cells reference row, column
Sub testi()
If Cells(4, 5).Value <= 10 Then
Cells(4, 6).Value = "change car"
ElseIf Cells(4, 5).Value <= 40 Then
Cells(4, 6).Value = "Expensive to run"
ElseIf Cells(4, 5).Value <= 80 Then
Cells(4, 6).Value = "average mpg achieved"
ElseIf Cells(4, 5).Value <= 90 Then
Cells(4, 6).Value = " above average mpg your now saving"
Else
Cells(4, 6).Value = "well done you have gone Electric"
End If
End Sub
Alternative Code c
Using the cell reference letter ,number
Sub testj()
If [E4] <= 10 Then
[f4]="change car"
ElseIf [E4] <= 40 Then
[f4]= "Expensive to run"
ElseIf [E4] <= 80 Then
[f4]="average mpg achieved"
ElseIf [E4] <= 90 Then
[f4]=" above average mpg your now saving"
Else
[f4]= "well done you have gone Electric"
End If
End Sub
53
Excel VBA Introduction – Course Exercise
Exercise 38 A
Select case statement
Type is the text below
Sub case1()
x = [A1]
Select Case x
Case Is <= 100
y = "Small"
Case 101 To 250
y = "medium"
Case Else
y = "large"
End Select
[a2] = y
End Sub
54
Excel VBA Introduction – Course Exercise
Exercise 38 B
Select case statement
Type is the text below
Sub Using_Case()
' Dimension the variable.
Dim x As Integer
‘Cell A1 populates the variable X
x = [A1]
' Start the Select Case structure.
Select Case x
' Test to see if x less than or equal to 10.
Case Is <= 10
' Display a message box.
MsgBox "X is <=10"
' Test to see if x less than or equal to 40 and greater than 10.
Case 11 To 40
MsgBox "X is <=40 and > 10"
' Test to see if x less than or equal to 70 and greater than 40.
Case 41 To 70
MsgBox "X is <=70 and > 40"
' Test to see if x less than or equal to 100 and greater than 70.
Case 71 To 100
MsgBox "X is <= 100 and > 70"
' If none of the above tests returned true.
Case Else
MsgBox "X does not fall within the range"
End Select
End Sub
55
Excel VBA Introduction – Course Exercise
Exercise 38 C
Sub Using_Case()
' Dimension the variable.
Dim x As Integer
‘Cell A1 populates the variable X
x = [A1]
' Start the Select Case structure.
Select Case x
' Test to see if x less than or equal to 0.
Case Is <= 0
MsgBox "X is out of range"
' Test to see if x less than or equal to 10.
Case Is <= 10
' Display a message box.
MsgBox "X is between 1 and 10"
' Test to see if x less than or equal to 40 and greater than 10.
Case Is <= 40
MsgBox "X is between 11 and 40"
' Test to see if x less than or equal to 70 and greater than 40.
Case Is <= 70
MsgBox "X is between 41 and 70"
' Test to see if x less than or equal to 100 and greater than 70.
Case Is <= 100
MsgBox "X is between 71 and 100"
' If none of the above tests returned true.
Case Else
MsgBox "X does not fall within the range"
End Select
End Sub
56
Excel VBA Introduction – Course Exercise
Exercise 38
Two functions that can be used in VBA, Choose and Switch
Choose Selects and returns a value from a list
Type the text below into the code Window
Sub main()
x=1
y = Choose(x, "tom", "dick", "harry")
MsgBox y
End Sub
Switch evaluates list of pairs of expressions and values and returns the
value associated with the first expression in the list that is true.
In the example below the value returns "$ Dollar"
Sub maina()
x = "usa"
y = Switch(x = "uk", "£ Pound", x = "usa", "$ Dollar", x = "esp", "€ Euro")
MsgBox y
End Sub
You now have a full complement of decision making structures
57
Excel VBA Introduction – Course Exercise
Looping Structures
Exercise 39
Examine Loop structures
You use loop structures such as for… next and for each …next when you
want to run a specific block of text repeatedly. Use one of two loop
structures depending on the number of iterations that are required.
Fixed iteration This runs a set of statements for a predetermined number
of times. Example For… next loop
Indefinite Iteration this runs a set of statement until a defined condition is
met.
in the example below the numbers add up 1 +2+3 to give a result of 6 if you
substitute for count 1 to 3 with for count 1 to 10 the numbers added
1+2+3+4+5+6+7+8+9+10 resulting in the value 55 returned. You could run
for count 6 to 7 this adds 6+7 for count 6 to 9 this adds 6+7+8+9.
Exercise 40
Type in the following code the answer should be 6
The for…next loop
Sub count()
Dim count As Integer
For count = 1 To 3
'this adds 1+2+3
Sum = Sum + count
Next count
'places answer in a cell
Cells(2, 2).Value = "the sum of the amount " & Sum
'you could use this if the value added to a worksheet is not
visible to the user
MsgBox ("the sum of the amount " & Sum)
End Sub
58
Excel VBA Introduction – Course Exercise
Exercise 41
Type in the following code the answer should be 60
The for…next loop
Sub countb()
Dim count As Integer
For count = 10 To 14
'this adds 10+11+12+13+14
Sum = Sum + count
Next count
'places answer in a cell
Cells(2, 2).Value = "the sum of the amount " & Sum
'you could use this if the value added to a worksheet is not
visible to the user
MsgBox ("the sum of the amount " & Sum)
End Sub
59
Excel VBA Introduction – Course Exercise
Exercise 42
consider a nested if function and how we can convert it into code.
=IF(A1<500,A1*0,IF(A1<=1000,A1*10%,A1*30%))
The for…next loop
Sub count2()
‘set the variable name
Dim count As Integer
‘instruct how many times to loop
For count = 1 To 20
'each time the loop runs it passes the number into count in the cells
range on the next line
'the number increases with each loop through 1 to 20
totalsales = Cells(count, 1).Value
‘checks to see if value less than 500
If totalsales <= 500 Then
commisionamnt = totalsales * 0
‘checks to see if value less than 10000
ElseIf totalsales < 1000 Then
commisionamnt = totalsales * 0.1
‘Value for any value outside the above ranges
Else
commisionamnt = totalsales * 0.3
End If
‘place the commision in the adjacent cell
Cells(count, 2).Value = commisionamnt
‘Repeats the process until the count of 20 is reached moving down 1
line on each loop
Next count
End Sub
60
Excel VBA Introduction – Course Exercise
Exercise 43
The for… each next loop
Code attached to a command button (addition)
Sub CommandButton1Click()
‘sets I and j as variables
Dim i, j As Integer
'will run for 20 rows
For i = 1 To 20
'will run for 12 columns
For j = 1 To 12
'accepts number position from cells above and preforms the calculation
Cells(i, j).Value = i + j - 1
'instructs the code to loop until criteria is met
Next j
Next i
End Sub
Code attached to a command button(multiplication)
The for… each next loop
Sub CommandButton2Click()
‘sets I and j as variables
Dim i, j As Integer
'will run for 20 rows
For i = 1 To 20
'will run for 12 columns
For j = 1 To 12
'accepts number position from cells above and preforms the calculation
Cells(i, j).Value = i * j
'instructs the code to loop until criteria is met
Next j
Next i
End Sub
61
Excel VBA Introduction – Course Exercise
Exercise 44 A
Do while loop
Now we introduce you to Conditional Loops Repetition while a certain
condition is satisfied or until a certain condition is satisfied.
Type the code below into the VBA code window this sets x as a
variable do while x<40 sets the criteria
Take the value of X and add 7 to it
Display message box until criteria is met
Sub doloopwhile()
x = 10
Do While x < 40
x=x+7
MsgBox x
Loop
End Sub
Try the code below as an alternative
Sub doloopuntil()
x = 10
Do Until x > 40
x=x+7
MsgBox x
Loop
End Sub
62
Excel VBA Introduction – Course Exercise
Exercise 44 B
Do while loop
Use the code below each number in a cell will be doubled text
will be cleared.
Sub ForEachCollectionLoop2()
For Each cell In Range("A1:G50")
If IsNumeric(cell) Then
cell.Value = cell.Value * 2
Else
cell.Clear
End If
Next
End Sub
Exercise 45
The for… each next loop
Use the code below I want you to write comments to explain
what is happening.
Sub CommandButton1_Click()
Dim i, j As Integer
For i = 1 To 20
For j = 1 To 12
Cells(i, j).Value = i * j
Next j
Next i
End Sub
63
Excel VBA Introduction – Course Exercise
Exercise 46
Custom Dialog Boxes The Process
User Forms
Display interactive dialogs in the Excel interface by including a User Form
in your project.
The programming of User Forms can be time-consuming as every action
that the User
Form performs has to be coded, the OK button does not do anything until
you write the
code contained in its click event.
You need to be familiar with User Form objects, there is no macro recorder.
Designing the User Form
The general methodology for designing User Forms is as follows:
Insert a User Form into your Project.
Create the visual image by adding Controls to the Form.
Name the Controls and set their static properties.
Write the code in your General Module to show the User Form.
Fill in the event code shells in the User Form’s object module.
Setting out naming rules to make code easier to understand.
Check Box
chk
Combo Box
cbo
Command Button
cmd
Frame
Fra
Label
lbl
List Box
Lst
Option Button
opt
Text Box
txt
Toggle Button
Tog
User Form
frm
64
Excel VBA Introduction – Course Exercise
Exercise 47A
Adding a user form, we are going to take steps to create the form below to accept
new data and paste it to the next available row.
First of all we need to open the user form design interface
Open a new excel work book
Save the workbook as my user form 1, as excel macro enabled
Switch to the VBA Editor
From the insert menu, select user form
Make sure the properties form is open F4 or view properties
window either way to display your choice.
Change the (name) property to frmemployeeinfo
Change the caption to read Employee Information
65
Excel VBA Introduction – Course Exercise
Exercise 47B
Laying out user Controls (user controls explained) and change property settings
Control Name
Description
Label
Displays a text label on a form
Text Box
Accepts data from users
CommandButton
Performs actions such as saving data
ListBox
User can select from a list of values
CheckBox
Yes or no true or false
Optionbutton
Represents a single option in a group
ComboBox
Displays a list of values, the user can select or add to
the combo box list.
Adding the Label Employee Name(description)
Click the Label button and draw a small label
In the properties window change height to 18
In the properties window change Width to 78
In the properties window change Top to 6
In the properties window change Left to 15
Change the (name) property to lbl_employeename
Change the caption to read Employee Name
Adding the Text Box Employee_Name(Data Input Box)
Click the Text button and draw a small Text Box
In the properties window change height to 18
In the properties window change Width to 108
In the properties window change Top to 6
In the properties window change Left to 125
Change the (name) property to TXT_employee_name
66
Excel VBA Introduction – Course Exercise
Adding the Label Department(description)
Click the Label button and draw a small label
In the properties window change height to 18
In the properties window change Width to 78
In the properties window change Top to 42
In the properties window change Left to 15
Change the (name) property to lblDepartment
Change the caption to read Department
Adding the Text Box Department(Data Input Box) List Box
Click the Text button and draw a small List Box
In the properties window change height to 18
In the properties window change Width to 108
In the properties window change Top to 42
In the properties window change Left to 125
Change the (name) property to txt_department
We shall populate the list box later!
67
Excel VBA Introduction – Course Exercise
Adding the Label Earnings(description)
Click the Label button and draw a small label
In the properties window change height to 18
In the properties window change Width to 78
In the properties window change Top to 78
In the properties window change Left to 15
Change the (name) property to lbl_property
Change the caption to read Earnings
Adding the Text Box Earnings(Data Input Box)
Click the Text button and draw a small Text Box
In the properties window change height to 18
In the properties window change Width to 108
In the properties window change Top to 78
In the properties window change Left to 125
Change the (name) property to txt_earnings
68
Excel VBA Introduction – Course Exercise
Adding the Label Job Title(description)
Click the Label button and draw a small label
In the properties window change height to 18
In the properties window change Width to 78
In the properties window change Top to 114
In the properties window change Left to 15
Change the (name) property to lbl_job
Change the caption to read Job Title
Click the Text button and draw a small label
Adding the Text Box Job_Title(Data Input Box)List Box
Click the Text button and draw a small List Box
In the properties window change height to 18
In the properties window change Width to 108
In the properties window change Top to 114
In the properties window change Left to 125
Change the (name) property to txt_jobtitle
We shall populate the list box later!
69
Excel VBA Introduction – Course Exercise
Adding the D.O.B Title (description)
Click the Label button and draw a small label
In the properties window change height to 18
In the properties window change Width to 78
In the properties window change Top to 150
In the properties window change Left to 15
Change the (name) property to lbl_dob
Change the caption to read D.O.B
Adding the Text Box DOB Title(Data Input Box)
Click the Text button and draw a small Text Box
In the properties window change height to 18
In the properties window change Width to 108
In the properties window change Top to 150
In the properties window change Left to 125
Change the (name) property to txt_dob
70
Excel VBA Introduction – Course Exercise
Adding the Command button(submit Data)
Click the button icon in the tool palate
Click on the page to place
In the properties window change caption to Submit
Adding the Command button (Reset)
Click the button icon in the tool palate
Click on the page to place
In the properties window change caption to Reset
Adding the Command button (calculate)
Click the button icon in the tool palate
Click on the page to place
In the properties window change caption to Calculate
Adding the Command button(Close)
Click the button icon in the tool palate
Click on the page to place
In the properties window change caption to Close
The Design of the form is now complete Now let us see what it
looks like in real time mode
Switch to the excel spread sheet
From the developer button add a command button
Double click on the command button and add the following
code in the VBA editor window
71
Excel VBA Introduction – Course Exercise
Command buttons to correspond to action required
Show user form
Private Sub CommandButton1_Click()
frmemployeeinfo.Show
End Sub
In the caption section of the properties window for the
command button type in the following text. Show Form
Click the button to show the form.
Close user form
Switch back to the form view in the VBA editor
Double click on the close button add the following code
Private Sub CommandButton2_Click()
frmemployeeinfo.Hide
End Sub
You have added some events to your buttons we shall now explore events
even more throughout the following exercises
72
Excel VBA Introduction – Course Exercise
Understanding Events
VBA is based around event – driven programming. In other words the code
doesn’t follow a predetermined path, instead it responds to events that a
user or condition that occurs. For example the click of a button generates
an event, the on_click event. Procedures are executed when an event is
triggered. User forms and their controls respond to the events that are
associated with them. Below is a list of events and their triggers.
User Form Objects
Event
Triggers
Activate
When a user form comes active
Deactivate
When a user form becomes inactive
Click
When a user clicks on any part of a form
DblClick
When a user double clicks any part of a form
Initialize
When a user form is loaded into memory
Terminate
When a user form is unloaded into memory
Control Events
Event
Triggers
Change
A Controls data is changed
Click
A control is clicked
DblClick
A control is double clicked
BeforeUpdate
A controls value is updated through the user form and is
about to lose focus. Focus is the ability of a control, user
form or window to receive a click or keyboard input
AfterUpdate
A controls value is updated through the user form and loses
its focus
73
Excel VBA Introduction – Course Exercise
Exercise 48
Event handling code
Attach an event handler to a control
Double click on the command button Submit Data the code window opens
as below.
Private Sub CommandButton1_Click()
End Sub
Add the following code to read as below this stores the data from the form
to the spread sheet in the following Cells A1 ,B1, C1, D1,E1
Private Sub CommandButton1_Click()
Cells(1, 1).Value = frmemployeeinfo.txt_employee_name.Value
Cells(1, 2).Value = frmemployeeinfo.txt_department.Value
Cells(1, 3).Value = frmemployeeinfo.txt_earnings.Value
Cells(1, 4).Value = frmemployeeinfo.txt_job.Value
Cells(1, 5).Value = frmemployeeinfo.txt_dob.Value
End Sub
Click on the open form button in the main excel spreadsheet
add data and submit.
Exercise 49
Adding a combo box for department
From the form delete the text box txt_department
Add a combo box
In the properties window we shall name it txt_department so
we do not need to change the code, strictly speaking we should
name it cmb_department and change the code to reflect this
In the Row source type Z1:Z7
74
Excel VBA Introduction – Course Exercise
Adding a combo box for Job Grade
From the form delete the text box txt_department
Add a combo box
In the properties window we shall name it txt_job so we do not
need to change the code, strictly speaking we should name it
cmb_job and change the code to reflect this
In the Row source type y1:y7
Close the form and return to excel
Type the following values in Z1 to z7
Marketing, HR, IT Support, It Helpdesk, Banking, Sales, Finance
Type the following values in y1 to y7
grade 1, grade 2, grade 3, grade 4, grade 5, grade 6, grade 7
Click on show form in the excel window, enter data and click
submit, the data should be entered onto the spreadsheet.
Exercise 50
Use the code below to add data to the next line in a spreadsheet
Private Sub CommandButton1_Click()
nextrow = Application.WorksheetFunction.CountA(Range("a:a"))
Range("a1").Offset(nextrow, 0).Value = txt_employee_name.Value
Range("a1").Offset(nextrow, 1).Value = txt_department.Value
Range("a1").Offset(nextrow, 2).Value = txt_earnings.Value
Range("a1").Offset(nextrow, 3).Value = txt_job.Value
Range("a1").Offset(nextrow, 4).Value = txt_dob.Value
frmemployeeinfo.Hide
End Sub
75
Excel VBA Introduction – Course Exercise
Exercise 51
Data validation
If a user accidently enters the wrong data or data is missing we want to be
able to set in place some rules of checking that information, this is known
as validation. Navigate to the VBA Editor window we are going to set
up the following validations.
sets 2 values in the drop down list as soon as you start typing in to employee name.
“select from list”
Private Sub txt_employee_name_Change()
txt_department.Value = "select from List"
txt_job.Value = "select from List"
End Sub
Checks to see if there is text in Employee Name if not a message box is displayed ,
when you click ok on the message box, focus is placed back to the cell to re-enter
the data
Private Sub txt_employee_name_Exit(ByVal Cancel As
MSForms.ReturnBoolean)
If IsNumeric(txt_employee_name) = True Then
MsgBox "text entry only"
Cancel = True
End If
End Sub
Checks to see if text in “Department” equals “select from list” if yes a message box
is displayed “select from list” , when you click ok on the message box, focus is
placed back to the cell to re-enter the data
Private Sub txt_department_Exit(ByVal Cancel As MSForms.ReturnBoolean)
If txt_department.Value = "select from List" Then
MsgBox "Please select item from list"
Cancel = True
End If
End Sub
76
Excel VBA Introduction – Course Exercise
Set validation on earnings
Private Sub txt_earnings_Exit(ByVal Cancel As MSForms.ReturnBoolean)
If Val(txt_earnings.Value) <= 0 Then
MsgBox "Numeric Data Only"
cancel = True
End If
End Sub
Set validation on job description
Private Sub txt_job_Exit(ByVal Cancel As MSForms.ReturnBoolean)
If txt_job.Value = "select from List" Then
MsgBox "Please select item from list"
Cancel = True
End If
End Sub
77
Excel VBA Introduction – Course Exercise
Exercise 52
Form check List
Before you unleash your UserForm, give it one final check using the
following checklist.
Are the controls aligned with each other?
Are similar controls the same size?
Are controls evenly spaced?
Is the dialog box too overwhelming? If so, you may want to use a series
of dialogs (like a Wizard), or use a Multipage control.
Can every control be accessed with an accelerator key?
Are any of the accelerator keys duplicated?
Are the controls grouped logically (by function)?
Is the tab order set correctly? The user should be able to tab through
the dialog box and access the controls sequentially.
If the UserForm will be stored in an add-in, did you test it thoroughly
after creating the add-in? It's important to remember that an add-in
will never be the active workbook.
Will your VBA code take appropriate action if the UserForm is
cancelled, or if the user presses Esc?
Are there any misspellings in the text? Excel's spelling checker doesn't
work with UserForms.
Does the UserForm have an appropriate caption?
If applicable, will your UserForm fit on the screen in lower screen
resolutions?
If your UserForm will be used in multiple versions of Excel, have you
tested the application on all versions?
If you use help, is the help topic correct? And does it explain all the
controls?
78
Excel VBA Introduction – Course Exercise
Exercise 53
Debugging and Error Handling
Errors
When you execute a programme, procedure you may get an incorrect result
or the execution of the code causes a permanent stop. This can be because a
mistake in the code, called a bug or if a statement in the code tries to call an
invalid operation.
Examples of this can be a misspelt variable that will cause an error. When
an error occurs VBA will either display an error message or refer you to the
help file.
VBA provides you with a set of tools for debugging your code these include,
toggle or break points, and the watch window.
Error Types
There are three types of programming error, compile time, run time and
logical. The following table describes the type of error.
Compile Time error
A compile-time error happens when the program is being compiled.
Generally, compile-time errors are syntax errors; and they are caught by
the compiler.
Compile Time error This is because no Endif Present
Sub calculationbonus()
Dim bonus As Currency, earnings As Currency
earnings = InputBox("enter earnings")
If earnings > 40000 Then
bonus = earnings * (12 / 100)
MsgBox "the bonus is " & bonus
End Sub
79
Excel VBA Introduction – Course Exercise
Run Time error
Run-time errors occur at at run-time; generally, the program compiles but
does not run correctly. An example of a compile-time error might be
leaving out a semi-colon in C. An attempt to read past (dereference) a null
pointer in C would be an example of a run-time error.
Run Time Error
This is a run time error the code executes and creates a divide by Zero
Error because the (6 / 0)
Sub bonus()
Dim bonusamt As Currency, salesamt As Currency
salesamt = 10
bonusamt = salesamt * (6 / 0)
MsgBox "bonus is " & bonusamt
End Sub
Logical Error
a logic error is a bug in a program that causes it to operate incorrectly, but
not to terminate abnormally (or crash). A logic error produces unintended
or undesired output or other behaviour, although it may not immediately
be recognized as such.
Logic errors occur in both compiled and interpreted languages. Unlike a
program with a syntax error, a program with a logic error is a valid
program in the language, though it does not behave as intended. The only
clue to the existence of logic errors is the production of wrong solutions.
Logical Error
This is a logical error the + has been used instead of the*
Sub bonus()
Dim bonusamt As Currency, salesamt As Currency
salesamt = 10
bonusamt = salesamt + (6 / 100)
MsgBox "bonus is " & bonusamt
End Sub
80
Excel VBA Introduction – Course Exercise
Exercise 54
Debugging overview
Debugging
To create an error free application you need to be able to trace an correct
errors when they occur, the process is called debugging. VBA provides the
following tools to help you debug your code these are located on the debug
toolbar.
Debugging tools
The following table describes the tools available to you in VBA to view
values of variables and expressions and trace the execution of a program.
Tool
Used To
Break Point
Pause the execution of code at a specified
statement. You can insert a breakpoint in the
first line of code segment that you suspect to
be the cause of the error. You can then
monitor the execution of the code
Watch Window
Monitor values of specified variables and
expressions while the code is running
Immediate Window
Test your output by assigning different
values to variables or expressions
Locals Window
Monitor all the declared variables of the
procedure currently running
Exercise 55
Debugging
Break mode and Breakpoint
Whenever a run time is detected in VBA the execution of the
program pauses and the program enters what’s called break
mode. At this point in time the line of code causing the problem
81
Excel VBA Introduction – Course Exercise
is displayed and highlighted in yellow, this helps you trace and
debug the error. When you’re in break mode you can examine also the
variables and properties by pointing to them.
You can set your own breakpoint in the code to pause at a specific place,
when the executed code reaches the breakpoint VBA switches into break
mode. Breakpoints are temporary markers and are not saved along with
the code.
To insert or remove a breakpoint place the insertion point in the code
you want to insert the break point and use one of the following methods.
Choose debug, toggle breakpoint
Press F9
Click the toggle breakpoint button on the debug toolbar ( if not open
then, view, toolbars, debug.
Click in the margin indicator bar adjacent to the code click again to
remove it.
82
Excel VBA Introduction – Course Exercise
Setting a Breakpoint
Open a new work book and layout the data as shown below
Save as my debugging tools, or open my debugging tools macro enabled
workbook
Mouse Training
Performance Report Excel
salesperson
jackie Whetstone
Glenda Eaton
Lynda hompson
Jane Goodman
Sylvia Myres
Krystyna Ludlow
John Baker
Tony Shaw
Andy Lee
Mary Smith
Laura Philips
Adam Short
Ken Austin
Caroline Watson
Shaun Roberts
Qtr 1
£ 2,500.00
£ 3,456.00
£ 5,676.00
£ 2,345.00
£ 2,500.00
£ 6,754.00
£ 1,789.00
£ 1,314.00
£ 2,234.00
£ 6,754.00
£ 2,345.00
£ 2,234.00
£ 1,314.00
£ 1,789.00
£ 2,234.00
Qtr 2
£ 2,750.00
£ 3,121.00
£ 6,754.00
£ 1,234.00
£ 1,234.00
£ 5,674.00
£ 2,234.00
£ 2,500.00
£ 2,345.00
£ 1,234.00
£ 1,234.00
£ 6,754.00
£ 1,234.00
£ 1,314.00
£ 6,787.00
Qtr 3
£ 3,000.00
£ 1,323.00
£ 8,765.00
£ 5,674.00
£ 2,345.00
£ 1,323.00
£ 1,789.00
£ 1,789.00
£ 1,323.00
£ 2,500.00
£ 6,754.00
£ 1,789.00
£ 2,500.00
£ 2,500.00
£ 1,314.00
Qtr 4
£ 3,250.00
£ 4,565.00
£ 5,674.00
£ 6,754.00
£ 6,754.00
£ 6,754.00
£ 6,754.00
£ 2,234.00
£ 1,234.00
£ 1,323.00
£ 6,754.00
£ 1,234.00
£ 2,500.00
£ 1,323.00
£ 2,500.00
Total Sales Commission
£ 11,500.00
£ 12,465.00
£ 26,869.00
£ 16,007.00
£ 12,833.00
£ 20,505.00
£ 12,566.00
£ 7,837.00
£ 7,136.00
£ 11,811.00
£ 17,087.00
£ 12,011.00
£ 7,548.00
£ 6,926.00
£ 12,835.00
83
Excel VBA Introduction – Course Exercise
Type in the following code if you are creating from scratch
Sub count2()
'set the variable name
Dim count As Integer
'instruct how many times to loop
For count = 1 To 15
'each time the loop runs it passes the number into count in the cells
range on the next line
'the number increases with each loop through 1 to 15
TotalSales = Cells(count + 1, 6).Value
'checks to see if value less than 500
If TotalSales <= 5000 Then
commisionamnt = TotalSales * 0
'checks to see if value less than 10000
ElseIf TotalSales < 10000 Then
commisionamnt = TotalSales * 0.1
'Value for any value outside the above ranges
Else
commisionamnt = TotalSales + 0.3
End If
'place the commision in the adjacent cell
Cells(count + 1, 7).Value = commisionamnt
'Repeats the process until the count of 20 is reached moving down 1
line on each loop
Next count
End Sub
Click the calculate button the code emulates the formula below
=IF(F2<5000,F2*0%,IF(F2<10000,F2*10%,F2*30%))
However we seem to have a few problems we need to sort out
Click in the column border to set the break point to the left of ElseIf
TotalSales < 10000 Then
Press the F5 or play button to run to break point or press f8 to step through
the code, make sure you have the locals window open, we can monitor the
changes as the code executes.
84
Excel VBA Introduction – Course Exercise
Use F8 to go straight into step through mode press CTRL+Shift+F8 to
escape out of the executing code.
Use shift and F8 to step over code this avoids calling subprocedures
Find the error note the line commisionamnt = TotalSales + 0.3 it should
read commisionamnt = TotalSales * 0.3 multiply not add
Changing the code makes the logic run correctly and the results are correct
logic functions are the hardest to detect
Exercise 56
Watch Expressions
Some errors may not be traceable to a single statement in your code, for
example in some logical errors it’s difficult to isolate the line of code that is
causing the error. In cases such as this you need to monitor the behaviour
the expressions and variables of the entire procedure. Each expression or
variable you monitor is known as a watch, watch expressions can be
defined in either break mode or design time.
How to add a watch expression
Select debug, click on add watch
In the expression box to type the variable name
Under context specify the procedure and module names for the current
project, this is important when you have variables of the same name but
different scope.
Click ok to display the watch window
See example of watch window below
85
Excel VBA Introduction – Course Exercise
Consider the following, using the file you have already created make
sure you are in the VBE window
Select debug then add watch
In the expression box type totalsales, the variable to watch, in the
context region make sure the procedure list refers to commision and the
module list states sheet1 then set watch type to watch expression
Click ok
Repeat the procedure this time add CommissionAmt
Update the code
Now these watches are in place we shall now use stepping through code to
see how they work.
Press the F5 or play button to run to break point or press f8 to step through
the code, make sure you have the locals window open, we can monitor the
changes as the code executes.
Use F8 to go straight into step through mode press CTRL+Shift+F8 to
escape out of the executing code.
86
Excel VBA Introduction – Course Exercise
Exercise 57
The immediate Window
The immediate window helps monitor values assigned to variables and
expressions, change the values of variables and expressions and test the
results of expressions based on these new values. You can use the print
method or use a (?) mark followed by the variable name to view the current
value of a variable.
To view , immediate window click the immediate window on the debug
window.
Copy the following code into the code window pane
Option Explicit
Dim Percentage As Single
Dim Earnings As Currency, TotalEarnings As Currency, Bonus As Currency
Public Sub NetEarnings()
Percentage = 6
Earnings = Cells(4, 6).Value
Bonus = Earnings * (Percentage / 100)
TotalEarnings = Earnings + Bonus
Cells(4, 7) = TotalEarnings
End Sub
In the procedure net earnings insert a break point at
Bonus = Earnings
Run the procedure NetEarnings, the code enters break mode
Point your cursor art the first procedure as shown note the variable
percentage as 6
87
Excel VBA Introduction – Course Exercise
Click
on the debug toolbar to launch the immediate pane
In the immediate pane type Percentage = 15, press the enter key
Point your cursor art the first procedure as shown note the variable
percentage as 15
Press F8 to run the line that calculates the bonus amount and move to
the next line
In immediate window type Print Bonus to view the bonus amount in the
immediate window
Press the Enter Key to display the bonus amount.
On the next line of the immediate window type percentage = 20
Press the Enter Key
Drag the arrow back to the break point
Press F8 to run the line that calculates the bonus
In the immediate window type ?Bonus press the Enter Key
The bonus is now displayed in the immediate window.
Remove the Breakpoint
Close the immediate window
Update code and run procedure
Switch back to Excel.
Save your work
88
Excel VBA Introduction – Course Exercise
Exercise 58
Locals Window
The locals window helps you monitor the values of variables within the
current executing procedure or function
The Locals Window
VBA provides one way to access the objects from which Excel is composed.
Start to examine these objects by writing a short routine to change the
value of a variable. Activate the VB Editor, select Insert/Module and enter
the following subroutine in the code window:
Sub SampleVariable()
Dim aval As Variant
aval = 200
aval = 123.123
aval = "Cat"
aval = True
aval = #12/1/1998#
End Sub
Now select the Locals Window command from the View menu and then use
the F8 key to step through the subroutine.
You will see the entries in the Locals Window change as each line is
executed with the contents and type of each variable displayed in turn.
89
Excel VBA Introduction – Course Exercise
Exercise 59
Error handling
The goal of well-designed error handling code is to anticipate potential
errors, and correct them at run time or to terminate code execution in a
controlled, graceful method. Your goal should be to prevent unhandled
errors from arising.
Below we show one example
Sub errortest()
'On Error GoTo ErrHandler:
Worksheets("NewSheet").Activate
' the reason for the error is there is no sheet called new sheet
Exit Sub
'if you un-comment on go to error the following error handler will
create a new sheet
ErrHandler:
If Err.Number = 9 Then
' sheet does not exist, so create it
Worksheets.Add.Name = "NewSheet"
' go back to the line of code that caused the problem
Resume
End If
End Sub
A Note Of Caution
It is tempting to deal with errors by placing an On Error Resume
Next statement at the top of the procedure in order to get the
code to run without raising an error. This is very bad coding
practice. Remember that using On Error Resume Next does not
fix errors. It merely ignores them
90
Excel VBA Introduction – Course Exercise
Code Examples
Used range of cells - worksheet protection by value type
This sub procedure looks at every cell on the active worksheet and if the
cell does not have a formula, a date or text and the cell is numeric; it
unlocks the cell and makes the font blue.
For everything else, it locks the cell and makes the font black. It then
protects the worksheet.
This has the effect of allowing someone to edit the numbers but they
cannot change the text, dates or formulas.
Sub SetProtection()
On Error GoTo errorHandler
Dim myDoc As Worksheet
Dim cel As Range
Set myDoc = ActiveSheet
myDoc.Unprotect
For Each cel In myDoc.UsedRange
If Not cel.HasFormula And _
Not TypeName(cel.Value) = "Date" And _
Application.IsNumber(cel) Then
cel.Locked = False
cel.Font.ColorIndex = 5
Else
cel.Locked = True
cel.Font.ColorIndex = xlColorIndexAutomatic
End If
Next
myDoc.Protect
Exit Sub
errorHandler:
MsgBox "Error"
End Sub
91
Excel VBA Introduction – Course Exercise
Basic calculation (Sum) in a range of cells
Enters a value into 10 cells in a column and then sums the values (range)
using the sum function.
Sub SumRange()
Dim i As Integer
Dim cel As Range
Set cel = ActiveCell
For i = 1 To 10
cel(i).Value = 100
Next i
cel(i).Value = "=SUM(R[-10]C:R[-1]C)"
End Sub
Other functions can be used as well as changing the range and values to
suit.
Another way to write a formula:
Sub CalculateFormula()
Dim s As String
ActiveCell.Formula = "=" & _
ActiveCell.Offset(0, -3).Address(False, False) & "/6"
s = ActiveCell.Offset(0, -16).Address(False, False) _
& ":" & ActiveCell.Offset(0, -5).Address(False, False) _
ActiveCell.Formula = "=SUM(" & s & ")/12"
ActiveCell.Formula = s
End Sub
92
Excel VBA Introduction – Course Exercise
Nested For...Next with an If statement
This sub checks values in a range of 10 rows by 5 columns moving left to
right, top to bottom, switching the values ‘X’ and ‘O’.
Set a range of 10 x 5 cells with a mixture of ‘X’s and ‘O’s.
Sub ToggleValues()
Dim rowIndex As Integer
Dim colIndex As Integer
For rowIndex = 1 To 10
For colIndex = 1 To 5
If Cells(rowIndex, colIndex).Value = "X" Then
Cells(rowIndex, colIndex).Value = "O"
Else
Cells(rowIndex, colIndex).Value = "X"
End If
Next colIndex
Next rowIndex
End Sub
Loop through worksheets in a workbook for set ranges
Loops through all worksheets in a workbook and reset values in a specific
range(s) on each worksheet to zero where it is not a formula and the cell
value is not equal to zero. Change the ranges using a comma separator for
each union range.
Modify the condition and its returning value to suit.
Sub SetValuesAllSheets()
Dim wSht As Worksheet
Dim myRng As Range
Dim allwShts As Sheets
Dim cel As Range
Set allwShts = Worksheets
For Each wSht In allwShts
Set myRng = wSht.Range("A1:A5, B6:B10, C1:C5, D4:D10")
For Each cel In myRng
If Not cel.HasFormula And cel.Value <> 0 Then
cel.Value = 0
End If
Next cel
Next wSht
End Sub
93
Excel VBA Introduction – Course Exercise
Worksheet - hidden and visible properties
The distinction between Hide(False) and the xlVeryHidden constant.
Visible = xlVeryHidden - Sheet/Unhide is greyed out. To unhide sheet, you
must set the Visible property to True.
Visible = Hide(or False) - Sheet/Unhide is not greyed out
To hide specific (second) worksheet
Sub HideSheet()
Worksheets(2).Visible = Hide 'you can use Hide or False
End Sub
To make a specific (second) worksheet very hidden
Sub VeryHiddenSheet()
Worksheets(2).Visible = xlVeryHidden 'menu item is not available
End Sub
To unhide a specific worksheet
Sub UnHideSheet()
Worksheets(2).Visible = True
End Sub
To toggle between hidden and visible
Sub ToggleHiddenVisible()
Worksheets(2).Visible = Not Worksheets(2).Visible
End Sub
94
Excel VBA Introduction – Course Exercise
Toggle opposite visibility (error will happen as all worksheets cannot be hidden, at
least one must be visible in a workbook).
Sub ToggleAllSheets()
On Error Goto errorHandler
Dim wSh As Worksheet
For Each wSh In Worksheets
wSh.Visible = Not wSh.Visible
Next
Exit Sub
errorHandler:
End Sub
To set the visible property to True on all sheets in a workbook.
Sub UnHideAll()
Dim wSh As Worksheet
For Each sh In Worksheets
wSh.Visible = True
Next
End Sub
95
Excel VBA Introduction – Course Exercise
Inserting worksheets avoiding duplicate names, naming & validations
Checks to see if sheet already exists with the name ‘MySheet’ and does not add it
again as Excel cannot store duplicate worksheet names in a workbook.
Validation if name already exists or no name stored or if it is a number as its name.
Sub AddUniqueSheet()
Dim ws As Worksheet
Dim newSheetName As String
newSheetName = "MySheet" 'Substitute your name here
For Each ws In Worksheets
If ws.Name = newSheetName Or newSheetName = "" Or _
IsNumeric(newSheetName) Then
MsgBox "Sheet '" & newSheetName & "' already exists _
or name is invalid", vbInformation
Exit Sub
End If
Next
Sheets.Add Type:="Worksheet"
With ActiveSheet 'Move to last position
.Move After:=Worksheets(Worksheets.Count)
.Name = newSheetName
End With
End Sub
Adds new worksheet with the month and year as its name and sets the
range("A1:A5") from Sheet1 to new worksheet.
This can only be executed once for the same period due to excel not allowing
duplicate worksheets names.
Make sure you have a worksheet called ‘Sheet1’ and that its range ‘A1:A5’ has some
content which to copy across.
Sub AddSheet()
Dim wSht As Worksheet
Dim shtName As String
shtName = Format(Now, "mmmm_yyyy") 'current month & year
For Each wSht In Worksheets
If wSht.Name = shtName Then
MsgBox "Sheet already exists...Make necessary corrections _
and try again."
96
Excel VBA Introduction – Course Exercise
Exit Sub
End If
Next wSht
Sheets.Add.Name = shtName
Sheets(shtName).Move After:=Sheets(Sheets.Count)
Sheets("Sheet1").Range("A1:A5").Copy _
Sheets(shtName).Range("C1") 'range("C1") = starting point
End Sub
Copies the contents of the first positioned worksheet to a new worksheet
(‘NewSheet’) validating if sheet exists first.
Sub CopySheet()
Dim wSht As Worksheet
Dim shtName As String
shtName = "NewSheet" 'change the name if required
For Each wSht In Worksheets
If wSht.Name = shtName Then
MsgBox "Sheet already exists...Make necessary " & _
"corrections and try again."
Exit Sub
End If
Next wSht
Sheets(1).Copy Before:=Sheets(1)
Sheets(1).Name = shtName
Sheets(shtName).Move After:=Sheets(Sheets.Count)
End Sub
Index number for a sheet can be used instead of the actual string name. This is useful if
name is not known or you want to control the order position of the sheet in question.
Back to top
InputBox and Message Box examples
Sub CalcPay()
On Error GoTo HandleError
Dim hours
Dim hourlyPay
Dim payPerWeek
97
Excel VBA Introduction – Course Exercise
hours = InputBox("Please enter number of hours worked", "Hours Worked")
hourlyPay = InputBox("Please enter hourly pay", "Pay Rate")
payPerWeek = CCur(hours * hourlyPay)
MsgBox "Pay is: " & Format(payPerWeek, "£##,##0.00"), , "Total Pay"
HandleError: 'any error - gracefully end
End Sub
No communication with Excel is required for this example and can be started from within
the VB Editor.
To split a single line of execution into multiple lines, use the underscore character ( _ ).
What impact will this have if you use the integer function (Int()) instead of the currency
functions (CCur)?
Other functions: CDbl (double) and CSng (single).
Date Entry & Formula with InputBox which prompts the user for the number of times
to iterate, creates heading and calculates gross values with final totals at the
end of the columns.
Sub ProcessTransactions()
ActiveCell.Value = "NET"
ActiveCell.Offset(0, 1).Value =
"GROSS" ActiveCell.Offset(1, 0).Select
y = InputBox("How Many transactions?", , 5)
For counter = 1 To y
x = InputBox("Enter Net")
ActiveCell.Value = x
ActiveCell.NumberFormat = "#,##0.00"
ActiveCell.Offset(0, 1).FormulaR1C1 = "=RC[-1]*1.175"
ActiveCell.Offset(0, 1).NumberFormat = "£ 0.00"
ActiveCell.Offset(1, 0).Select
Next counter
ActiveCell.FormulaR1C1 = "=SUM(R[-" & y & "]C:R[-1]C)"
'Variable y concatenated to formula (Sum)
ActiveCell.Offset(0, 1).FormulaR1C1 = "=SUM(R[-" & y & "]C:R[-1]C)"
ActiveCell.Range("A1:B1").Select
Selection.Font.Bold = True
With Selection.Borders(xlEdgeTop)
.LineStyle = xlContinuous
.Weight = xlThin
.ColorIndex = xlAutomatic
End With
With Selection.Borders(xlEdgeBottom)
98
Excel VBA Introduction – Course Exercise
.LineStyle = xlDouble
.Weight = xlThick
.ColorIndex = xlAutomatic
End With
End Sub
The above is A For Next Example with InputBox Function, With Block and Offset
method
Back to top
Printing examples
To control orientation and defined name range - 1 copy.
Sub PrintReport1()
Sheets(1).PageSetup.Orientation = xlLandscape
Range("Report").PrintOut Copies:=1
End Sub
To print several ranges on the same sheet -1 copy
Sub PrintReport2()
Range("HVIII_3A2").PrintOut
Range("BVIII_3").PrintOut
Range("BVIII_4A").PrintOut
Range("HVIII_4A2").PrintOut
Range("BVIII_5A").PrintOut
Range("BVIII_5B2").PrintOut
Range("HVIII_5A2").PrintOut
Range("HVIII_5B2").PrintOut
End Sub
To print a defined area, centre horizontally, with 2 rows as titles, in portrait orientation and
fitted to page wide and tall - 1 copy.
Sub PrintReport3()
With Worksheets("Sheet1")
.PageSetup
99
Excel VBA Introduction – Course Exercise
.CenterHorizontally = True
.PrintArea = "$A$3:$F$15"
.PrintTitleRows = ("$A$1:$A$2")
.Orientation = xlPortrait
.FitToPagesWide = 1
.FitToPagesTall = 1
End With
Worksheets("Sheet1").PrintOut
End Sub
To print preview, control the font and to pull second line of header (“A1”) from first worksheet.
Sub PrintHeaderPreview()
ActiveSheet.PageSetup.CenterHeader = "&""Arial,Bold Italic""&14 _
My Report" & Chr(13) & Sheets(1).Range("A1")
ActiveWindow.SelectedSheets.PrintPreview
End Sub
"&""Arial,Bold Italic""&14 = fields used in page set-up of header/footer
Back to top
General application commands
Using the shortcut approach to assign a cell with an Excel function.
Sub GetSum()
[A1].Value = Application.Sum([E1:E15])
End Sub
Can use an absolute reference: Range("A1") = Application.Sum([E1:E15])
Other functions - AVERAGE, MIN, MAX, COUNT, COUNTBLANK, COUNTA, VLOOUKP etc…
Enables the use of events if disabled (worksheet/workbook).
Sub EnableEventReset()
Application.EnableEvents = True
End Sub
10
0
Excel VBA Introduction – Course Exercise
To display the full path and filename of the current workbook (Function)
Sub FormatHeader()
With ThisWorkbook
.Worksheets("MySheet").PageSetup.LeftHeader = .FullName
End With
End Sub
Capture object (chart) into as separate file
Sub ExportToJPG()
ActiveChart.Export FileName:="c:\Mychart.jpeg", FilterName:="JPG"
End Sub
Make sure chart is selected first
Add a custom button to the ‘Chart’ quick access toolbar.
Assign and un-assign a function key to a procedure
Sub Set_FKeys()
Application.OnKey "{F3}", "MySub"
End Sub
Sub Restore_FKeys()
Application.OnKey "{F3}"
End Sub
Can be assigned to the event of when a workbook opens a closes.
Cursors
Sub ShowHourGlass()
Application.Cursor = xlWait
End Sub
10
1
Excel VBA Introduction – Course Exercise
Sub ResetCursor()
Application.Cursor = xlNormal
End Sub
Can also be xlNorthwestArrow and xlIBeam.
Some more to finish off with...
With ActiveWindow
.DisplayGridlines = Not .DisplayGridlines
.DisplayHeadings = Not .DisplayHeadings
.DisplayHorizontalScrollBar = Not .DisplayHorizontalScrollBar
.DisplayVerticalScrollBar = Not .DisplayVerticalScrollBar
.DisplayWorkbookTabs = Not .DisplayWorkbookTabs
End With
With ActiveWindow
.DisplayFormulaBar = Not .DisplayFormulaBar
.DisplayStatusBar = Not .DisplayStatusBar
End With
Selection.Clear 'clears all attributes
Selection.ClearFormats 'clears only formats
Selection.ClearContents 'clears only content (DEL)
Active cell moves I row, 1 column in for selection
Sub ActiveCellInRange()
Range("A11:D15").Select
Selection.Offset(1, 1).Activate
End Sub
Back to top
10
2
Excel VBA Introduction – Course Exercise
Ranges - various examples
To add a range name for known range
Sub AddName1()
ActiveSheet.Names.Add Name:="MyRange1", RefersTo:="=$A$1:$B$10"
End Sub
To add a range name based on a selection.
Sub AddName2()
ActiveSheet.Names.Add Name:="MyRange2", RefersTo:="=" & _
Selection.Address()
End Sub
To add a range name based on a selection using a variable.
Sub AddName3()
Dim rng As String
rng = Selection.Address
ActiveSheet.Names.Add Name:="MyRange3", RefersTo:="=" & rng
End Sub
To add a range name based on current selection.
Sub AddName4()
Selection.Name = "MyRange4"
End Sub
Deletes all named ranges
Sub DeleteAllRanges()
Dim rName As Name
10
3
Excel VBA Introduction – Course Exercise
For Each rName In ActiveWorkbook.Names
rName.Delete
Next rName
End Sub
Scrolls the spreadsheet to where the active cell is.
Sub ScreeTopLeft()
ActiveCell.Select
With ActiveWindow
.ScrollColumn = ActiveCell.Column
.ScrollRow = ActiveCell.Row
End With
End Sub
Function to return a range object.
Function LastCell(ws As Worksheet) As Range
Dim LastRow As Long, LastCol As Long
'Error-handling is here in case there is not any
'data in the worksheet
On Error Resume Next
With ws
'Find the last row
LastRow = .Cells.Find(What:="*", _
SearchDirection:=xlPrevious, _
SearchOrder:=xlByRows).Row
'Find the last column
LastCol = .Cells.Find(What:="*", _
SearchDirection:=xlPrevious, _
SearchOrder:=xlByColumns).Column
End With
'Finally, initialize a Range object variable for
'the last populated row.
Set LastCell = ws.Cells(LastRow, LastCol)
End Function
Call procedure for above (not for a worksheet function call)
Sub ShowLastCell()
MsgBox LastCell(Sheet1).Address(False, False)
End Sub
10
4
Excel VBA Introduction – Course Exercise
Try MsgBox LastCell(Sheet1).Row
Try MsgBox LastCell(Sheet1).Column
Check to see if active cell is in range A1:A10.
Sub CheckRange()
Dim rng As Range
Set rng = Application.Intersect(ActiveCell, Range("A1:A10"))
If rng Is Nothing Then
MsgBox "It is not in the range.", vbInformation
Else
MsgBox "It's in the range called 'A1:A10'!", vbCritical
End If
End Sub
Current selected rows or cells in a column.
Sub MyCount()
Dim myCount As Long
myCount = Selection.Rows.Count
MsgBox myCount
End Sub
Number of worksheets in a workbook.
Sub MySheetCount()
Dim myCount As Long
myCount = Application.Sheets.Count
MsgBox myCount
End Sub
Copy and paste a range (A1:A3) to active cell in same worksheet.
Sub CopyRange1()
Range("A1:A3").Copy Destination:=ActiveCell
End Sub
10
5
Excel VBA Introduction – Course Exercise
Copy and paste a range (A1:A3) to active cell from ‘Sheet3’.
Sub CopyRange2()
Sheets("sheet3").Range("A1:A3").Copy Destination:=ActiveCell
End Sub
Show current active cell position (address) – co-ordinate
Sub MyPosition()
Dim myRpw, myCol
myRow = ActiveCell.Row
myCol = ActiveCell.Column
MsgBox myRow & "," & myCol
End Sub
Specific Range references
Range(“A1”)
Cell A1
Range(“A1:E10”)
Range A1 to E10
[A1]
Cell A1
[A1:E10]
Range A1 to E10
ActiveCell.Range(“A2”)
The cell below the active cell
Cell(1)
Cell A1
Range(Cells(1,1),Cell(10,5))
Range A1 to E10
Range(“A:A”)
Column A
[A:A]
Column A
Range(“5:5”)
Row 5
[5:5]
Row 5
Sheets(“Sheet1”)
Sheet called Sheet1
10
6
Excel VBA Introduction – Course Exercise
Worksheets(“Sheet1”)
Worksheets called Sheet1
Sheets(2)
Second worksheet in workbook
Worksheets(3)
Third worksheet in workbook
Worksheets(“Sheet1”).Range(“A1”)
Cell A1 in Sheet1
[Sheet1].[A1]
Cell A1 in Sheet1
ActiveSheet.Next
The sheet after the active sheet
Workbook(“Test”)
Workbook file called Test.xls
Back to top
Navigation in a worksheet using Offset
Sub MoveDown()
ActiveCell.Offset(1, 0).Select
End Sub
Sub MoveUp()
ActiveCell.Offset(-1, 0).Select
End Sub
Sub MoveRight()
ActiveCell.Offset(0, 1).Select
End Sub
Sub DownLeft()
ActiveCell.Offset(0, -1).Select
10
7
Excel VBA Introduction – Course Exercise
End Sub
Sub LastCellInRange()
Range(ActiveCell.Address).End(xlDown).Select
Range(ActiveCell.Address).End(xlToRight).Select
End Sub
Back to top
Read Window documents
Calling sub procedure passing a string argument.
Use the Private keyword, which is local and invisible via Excel application.
Private Sub ReadFiles(Path As String)
Dim FileName As String
'Initialize a string variable for the first file
'in a specified directory. This sets the Dir( )
'function to that directory.
Select Case Right(Path, 1)
Case "\":
FileName = Dir(Path)
Case Else:
FileName = Dir(Path & "\")
End Select
'Loop through the specified directory until the
'Dir( ) function returns an empty string, indicating
'there are not any more contents to be evaluated.
Do While Len(FileName) > 0
'Print each file name to the immediate (debug) window
Debug.Print FileName
'Re-initialize the string variable to the next
'file in the directory
FileName = Dir()
Loop
End Sub
Call the above in a separate procedure
10
8
Excel VBA Introduction – Course Exercise
Sub ListFiles()
ReadFiles "c:\winnt"
End Sub
General function examples
Displays the period quarter.
Function Qtr(dtOrig As Date) As String
Dim qtrNo As Integer
Dim sQtr As String
Select Case Format(dtOrig, "q")
Case Is = 1
sQtr = "1st Qtr"
Case Is = 2
sQtr = "2nd Qtr"
Case Is = 3
sQtr = "3rd Qtr"
Case Is = 4
sQtr = "4th Qtr"
Case Else 'assume 1
sQtr = "1st Qtr"
End Select
Qtr = sQtr
End Function
In a worksheet, enter the formula: =Qtr(“01/01/2010”)
Show full path and file name in a worksheet.
Function FileName()
FileName = Application.Caller.Parent.Parent.FullName
End Function
In a worksheet, enter the formula: =FileName()
Return the difference in percentage terms of two values (increase/decrease).
Function PChange(OrigVal As Double, NewVal As Double) As Single
If OrigVal = 0 Then
PChange = ""
Else
PChange = ((NewVal - OrigVal) / Abs(OrigVal))
End If
End Function
enter the formula: =PChange(100,150) = 50%
(0.5 for unformatted)
In a worksheet,
Gross Price (inc)
10
9
Excel VBA Introduction – Course Exercise
Function TotalValue(Qty As Double, UPrice As Double) As Double
TotalValue = Format((Qty * UPrice * 1.175), "£#,##0.00")
End Function
Age (simple)
Function Age2(DOB)
Age2 = Int((Now() - DOB) / 365.25) & " Years old"
End Function
Age (alternative)
Function Age(DOB)
If Month(DOB) > Month(Now) Then
Age = Year(Now) - Year(DOB) - 1
ElseIf Month(DOB) < Month(Now) Then
Age = Year(Now) - Year(DOB)
ElseIf Day(DOB) <= Day(Now) Then
Age = Year(Now) - Year(DOB)
Else
Age = Year(Now) - Year(DOB) - 1
End If
End Function
Returns the cell in range which is underline (single style) or the word “unknown”
Public Function GetUnderlinedCell(CellRef As Range) As String
Dim c As Integer
Dim sResult As String
'Force Running when Recalculating Since Formatting Only
Application.Volatile True
'Assume Unknown
sResult = "Unknown"
'Loop Thru Each Column and Test for Underline
For c = 1 To CellRef.Columns.Count
If CellRef.Columns(c).Font.Underline = xlUnderlineStyleSingle Then
sResult = CellRef.Columns(c).Value
End If
Next c
'Return Results
GetUnderlinedCell = sResult
End Function
11
0
Excel VBA Introduction – Course Exercise
Visual Basic Functions - Choose (Lookup).
Sub LookupExample()
Dim strMonth As String
Dim bytCurMonth As Byte
bytCurMonth = Month(Date)
strMonth = Choose(bytCurMonth, "Jan", "Feb", "Mar", "Apr", _
"May", "Jun", "Jul", "Aug", "Sep", "Oct", "Nov", "Dec")
MsgBox "Current month is " & strMonth
End Sub
Also, take a look at the Switch() function using VBA Help.
Creates a new word document
Creates a new word document and populates the contents of cell “B1” along with
some basic formatting.
You need create a reference to the Word Object Library (8.0/9.0/10.0/11.0) in the VB
Editor
Sub CreateMSWordDoc()
On Error GoTo errorHandler
Dim wdApp As Word.Application
Dim myDoc As Word.Document
Dim mywdRange As Word.Range
Set wdApp = New Word.Application
With wdApp
.Visible = True
.WindowState = wdWindowStateMaximize
End With
Set myDoc = wdApp.Documents.Add
Set mywdRange = myDoc.Words(1) 'index range?
With mywdRange
.Text = Range("B1") & vbNewLine & "This above text is _
stored in cell 'B1'."
.Font.Name = "Comic Sans MS"
.Font.Size = 12
.Font.ColorIndex = wdGreen
.Bold = True
End With
11
1
Excel VBA Introduction – Course Exercise
errorHandler:
Set wdApp = Nothing
Set myDoc = Nothing
Set mywdRange = Nothing
End Sub
11
2