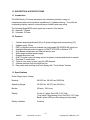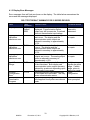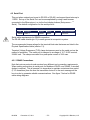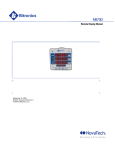
1
M350 3-Phase Ammeters & Voltmeters
User Manual
December 15, 2011
ML0038 Document Revision D
© 2011 by Bitronics, LLC
ML0038
December 15, 2011
2
Copyright 2011 Bitronics, LLC
TABLE OF CONTENTS
50 SERIES MANUAL SET ............................................................................................................................. 5
VERSION HISTORY (ABRIDGED) ................................................................................................................ 5
CERTIFICATION ............................................................................................................................................ 6
INSTALLATION AND MAINTENANCE ......................................................................................................... 6
WARRANTY AND ASSISTANCE .................................................................................................................. 6
AUTHORIZED REPRESENTATIVE IN THE EUROPEAN UNION ................................................................ 7
COPYRIGHT NOTICE .................................................................................................................................... 7
TRADEMARKS ............................................................................................................................................... 7
SAFETY SECTION ......................................................................................................................................... 8
Health and safety ........................................................................................................................................... 8
Explanation of symbols and labels ................................................................................................................ 8
WARNING: EMISSIONS – CLASS A DEVICE (EN55011) ........................................................................ 10
DECOMMISSIONING AND DISPOSAL ....................................................................................................... 10
1.0 DESCRIPTION & SPECIFICATIONS .................................................................................................... 11
1.1
1.2
1.3
1.4
Introduction ........................................................................................................................................... 11
Features ................................................................................................................................................ 11
Specifications ........................................................................................................................................ 11
Environment .......................................................................................................................................... 15
2.0 PHYSICAL CONSTRUCTION & MOUNTING....................................................................................... 16
2.2
2.3
2.4
2.5
2.6
2.7
Initial Inspection .................................................................................................................................... 18
Protective Ground/Earth Connections .................................................................................................. 18
Overcurrent Protection.......................................................................................................................... 18
Supply/Mains Disconnect ..................................................................................................................... 18
Instrument Mounting ............................................................................................................................. 18
Cleaning ................................................................................................................................................ 19
3.0 BACK PANEL & WIRING...................................................................................................................... 20
3.1 Auxiliary Power ..................................................................................................................................... 21
3.1.1 Specifications ................................................................................................................................ 21
3.2 M350 V3 VT Inputs (See Appendix A1) ............................................................................................... 21
3.3 M350 A3 CT Inputs (See Appendix A1) ............................................................................................... 21
3.4 Serial Ports (See section 4.2) ............................................................................................................... 21
3.5 Ethernet ................................................................................................................................................ 21
3.5.1 Network settings ............................................................................................................................ 22
3.5.2 Indicators – Ethernet (ACT) & Serial LEDs ................................................................................... 24
3.5.3 Firmware upgrades – Ethernet service port .................................................................................. 24
4.0 OPERATION .......................................................................................................................................... 27
4.1 Display .................................................................................................................................................. 27
4.1.1 Overview – Buttons Functions ........................................................................................................ 31
4.1.2 Keypad Functions for Display Mode............................................................................................... 32
ML0038
December 15, 2011
3
Copyright 2011 Bitronics, LLC
4.1.3 Display Error Messages ................................................................................................................. 33
4.2 Serial Port ............................................................................................................................................. 34
4.2.1 RS485 Connections....................................................................................................................... 34
5.0 FUNCTIONAL DESCRIPTION .............................................................................................................. 37
5.1 Configuration ......................................................................................................................................... 37
5.2 HTML Web Server ................................................................................................................................ 37
5.3 Passwords ............................................................................................................................................. 37
5.4 Navigating the M350’s setup menu from the front panel ...................................................................... 39
5.5 Performing set-up through the web page interface .............................................................................. 42
6.0 MEASUREMENTS................................................................................................................................. 56
6.1 Changing Transformer Ratios............................................................................................................... 56
6.2 Current (M350 A3) ................................................................................................................................ 56
6.3 Voltage Channels (M350 V3) ............................................................................................................... 56
6.4 Demand Measurements ....................................................................................................................... 57
6.4.1 Ampere Demand (M350 A3) ......................................................................................................... 58
6.4.2 Volt Demand (M350 V3) ................................................................................................................ 58
6.4.3 Demand Resets ............................................................................................................................. 58
6.4.4 Demand Interval ............................................................................................................................ 58
6.5 Heartbeat and Health Check ................................................................................................................ 59
6.6 List of Available Measurements & Settings .......................................................................................... 59
6.7 Calibration ............................................................................................................................................. 60
6.8 Instantaneous Measurement Principles ............................................................................................... 60
7.0 ANALOG (TRANSDUCER) OUTPUT OPTION .................................................................................... 61
7.1 Introduction ........................................................................................................................................... 61
7.2 Specifications ........................................................................................................................................ 61
7.3 Connections .......................................................................................................................................... 61
APPENDIX .................................................................................................................................................... 64
A1 CT/VT Connection Diagrams ................................................................................................................. 64
A2 Ethernet Troubleshooting ...................................................................................................................... 67
A3 M350 Display Screens – Visual Representations ................................................................................. 69
ML0038
December 15, 2011
4
Copyright 2011 Bitronics, LLC
50 SERIES MANUAL SET
ML0035
ML0036
ML0037
ML0038
ML0039
ML0040
M650 Family User Manual
50 Series DNP3 Protocol
50 Series Modbus Protocol
M350 Family User Manual
M651 Family User Manual
M653 Family User Manual
VERSION HISTORY (ABRIDGED)
V1.010
V1.030
V1.040
V1.050
V1.060
V1.070
V1.090
V2.010
V3.000
V3.020
V3.030
2010-03-25
2010-05-14
2010-06-17
2010-07-14
2010-07-20
2010-08-03
2010-10-27
2011-02-18
2011-09-08
M650M3x51x models with firmware download capability
Add 0-1mA, add per-phase power demands to protocols
Add M350 models, add configurable display screens
Add secondary volts screens, more info to front panel menu
Add support for B3 models
Add support for 1A input and 4-20mA output
Add support for M651 models
Add support for configurable points/registers
Add support for M653 models, split-core CTs, passwords,
DNP3 events/Class 1, 2, 3 Reads, Primary Units
2011-09-28 Production support changes
2011-12-13 Modbus and DNP serial address settings configurable in
front panel menu; error reporting on front panel display
ML0038
December 15, 2011
5
Copyright 2011 Bitronics, LLC
CERTIFICATION
Bitronics LLC certifies that the calibration of our products is based on measurements
using equipment whose calibration is traceable to the United States National Institute
of Standards Technology (NIST).
INSTALLATION AND MAINTENANCE
Bitronics LLC products are designed for ease of installation and maintenance. As with
any product of this nature, installation and maintenance can present electrical hazards
and should be performed only by properly trained and qualified personnel. If the
equipment is used in a manner not specified by Bitronics LLC, the protection provided
by the equipment may be impaired.
In order to maintain UL recognition, the following Conditions of Acceptability shall
apply:
a) After installation, all hazardous live parts shall be protected from contact by
personnel or enclosed in a suitable enclosure.
WARRANTY AND ASSISTANCE
This product is warranted against defects in materials and workmanship for a period of
thirty-six (36) months from the date of their original shipment from the factory.
Products repaired at the factory are likewise warranted for eighteen (18) months from
the date the repaired product is shipped, or for the remainder of the product's original
warranty, whichever is greater. Obligation under this warranty is limited to repairing or
replacing, at our designated facility, any part or parts that our examination shows to be
defective. Warranties only apply to products subject to normal use and service. There
are no warranties, obligations, liabilities for consequential damages, or other liabilities
on the part of Bitronics LLC except this warranty covering the repair of defective
materials. The warranties of merchantability and fitness for a particular purpose are
expressly excluded.
For assistance, contact Bitronics LLC at:
Telephone:
Fax:
Email:
Website:
610.997.5100
610.997.5450
[email protected]
www.novatechweb.com/bitronics
Shipping:
261 Brodhead Road
Bethlehem, PA 18017-8698
USA
ML0038
December 15, 2011
6
Copyright 2011 Bitronics, LLC
AUTHORIZED REPRESENTATIVE IN THE EUROPEAN UNION
NovaTech Europe BVBA
Kontichsesteenweg 71
2630 Aartselaar
Belgium
T +32.3.458.0807
F +32.3.458.1817
E [email protected]
COPYRIGHT NOTICE
This manual is copyrighted and all rights are reserved. The distribution and sale of
this manual is intended for the use of the original purchaser or his agents. This
document may not, in whole or part, be copied, photocopied, reproduced, translated or
reduced to any electronic medium or machine-readable form without prior consent of
Bitronics LLC, except for use by the original purchaser.
The product described by this manual contains hardware and software that is
protected by copyrights owned by one or more of the following entities:
Bitronics, LLC, 261 Brodhead Road, Bethlehem, PA 18017
Schneider Automation, Inc., One High Street, North Andover, MA 01845
Triangle MicroWorks, Inc., 2213 Middlefield Court, Raleigh, NC 27615
Freescale Semiconductor, Inc., 6501 William Cannon Drive West, Austin, TX 78735
gzip inflation uses code Copyright 2002-2008 Mark Adler
inarp uses WinPcap, which is Copyright 1999-2005 NetGroup, Politecnico di Torino
(Italy), and 2005-2010 CACE Technologies, Davis (California).
TRADEMARKS
The following are trademarks or registered trademarks of Bitronics, LLC:
Bitronics logo
Bitronics
PowerPlex
Triplex
Triple-II
MultiComm
PowerServe
SubCycle Technology
SubCycleStuf
The following are trademarks or registered trademarks of the DNP User's Group:
DNP
DNP3
The following are trademarks or registered trademarks of Schneider Automation, Inc.:
MODSOFT
Modicon
Modbus Plus
Modbus
Compact 984 PLC
ML0038
December 15, 2011
7
Copyright 2011 Bitronics, LLC
SAFETY SECTION
This Safety Section should be read before commencing any work on the equipment.
Health and safety
The information in the Safety Section of the product documentation is intended to
ensure that products are properly installed and handled in order to maintain them in a
safe condition. It is assumed that everyone who will be associated with the equipment
will be familiar with the contents of the Safety Section.
Explanation of symbols and labels
The meaning of symbols and labels that may be used on the equipment or in the
product documentation is given below.
Installing, Commissioning and Servicing
Equipment connections
Personnel undertaking installation, commissioning or servicing work on this equipment
should be aware of the correct working procedures to ensure safety. The product
documentation should be consulted before installing, commissioning or servicing the
equipment.
Terminals exposed during installation, commissioning and maintenance may present a
hazardous voltage unless the equipment is electrically isolated.
ML0038
December 15, 2011
8
Copyright 2011 Bitronics, LLC
If there is unlocked access to the equipment, care should be taken by all personnel to
avoid electric shock or energy hazards.
Voltage and current connections should be made using insulated crimp terminations to
ensure that terminal block insulation requirements are maintained for safety. To
ensure that wires are correctly terminated, the correct crimp terminal and tool for the
wire size should be used.
Before energizing the equipment, it must be grounded (earthed) using the protective
ground (earth) terminal, or the appropriate termination of the supply plug in the case of
plug connected equipment. Omitting or disconnecting the equipment ground (earth)
may cause a safety hazard.
The recommended minimum ground (earth) wire size is 2.5 mm2 (#12 AWG), unless
otherwise stated in the technical data section of the product documentation.
Before energizing the equipment, the following should be checked:
Voltage rating and polarity
CT circuit rating and integrity of connections
Protective fuse rating
Integrity of ground (earth) connection (where applicable)
Equipment operating conditions
The equipment should be operated within the specified electrical and environmental
limits.
Current transformer circuits
Do not open the secondary circuit of a live CT since the high voltage produced may be
lethal to personnel and could damage insulation.
Insulation and dielectric strength testing
Insulation testing may leave capacitors charged up to a hazardous voltage. At the end
of each part of the test, the voltage should be gradually reduced to zero, to discharge
capacitors, before the test leads are disconnected.
Do not attempt to perform installation, maintenance, service or removal of this device
without taking the necessary safety precautions to avoid shock hazards. De-energize
all live circuit connections before work begins.
ML0038
December 15, 2011
9
Copyright 2011 Bitronics, LLC
Fiber optic communication
Where fiber optic communication devices are fitted, these should not be viewed
directly. Optical power meters should be used to determine the operation or signal
level of the device.
WARNING: EMISSIONS – CLASS A DEVICE (EN55011)
This is a Class A industrial device. Operation of this device in a residential area may
cause harmful interference, which may require the user to take adequate measures.
DECOMMISSIONING AND DISPOSAL
1.
Decommissioning
The auxiliary supply circuit in the equipment may include capacitors across the supply
or to ground (earth). To avoid electric shock or energy hazards, after completely
isolating the supplies to the meter (both poles of any dc supply), the capacitors should
be safely discharged via the external terminals before decommissioning.
2.
Disposal
It is recommended that incineration and disposal to watercourses is avoided. The
product should be disposed of in a safe manner. Any products containing batteries
should have them removed before disposal, taking precautions to avoid short circuits.
Particular regulations within the country of operation may apply to the disposal of
lithium batteries.
ML0038
December 15, 2011
10
Copyright 2011 Bitronics, LLC
1.0 DESCRIPTION & SPECIFICATIONS
1.1 Introduction
The M350 family of 3-phase ammeters and voltmeters provides a range of
measurement and communications capabilities for 3-phase metering. They offer an
outstanding display, superior communications flexibility and easy setup.
The following Model M350 meter types are covered in this manual:
A3 - Ammeter, 3-Phase
V3 - Voltmeter, 3-Phase
1.2 Features
1.
2.
3.
4.
5.
6.
7.
8.
9.
10.
11.
12.
3-phase amps/amp demand (A3) or 3-phase voltages with min/max/avg (V3).
Updates every 100ms
DNP3 or Modbus protocol available via configurable RS-232/RS-485 serial port
Available Ethernet protocol support for DNP3 TCP/UDP or Modbus TCP
Web Based configuration via Ethernet service port
Wide-range universal power supply
Rugged aluminum case
One V3 model covers all wiring options for phase-to-phase and phase-to-neutral
Standard 4” round meter
3-line at once, easy-to-read, long-life LED displays
Ultimate precision with five digits per line
Easy setup and scrolling from front display with “Touch-Sense” buttons
1.3 Specifications
Power Supply Input Voltage
Nominal:
48-250V dc, 69-240V ac (50/60Hz)
Operating Range:
36-300V dc, 55-275V ac (45-65Hz)
Burden:
5W max, 10VA max
Display:
3 lines of 5 digits, Red LED, 0.56” High
1 line backlit, Engineering Units, Red LED, 0.20” High
Backlit yellow LEDs provide category during setup
Display Interface:
4 buttons
ML0038
December 15, 2011
11
Copyright 2011 Bitronics, LLC
Input Signals
CT Current
Inputs (A3)
VT (PT)
Voltage Inputs
(V3)
Configuration
Nominal
Range
Overload
Isolation
Burden
Frequency
Configuration
Nominal
Range
System Voltage
Common Mode
Input Voltage
Impedance
Voltage Withstand
Frequency
Sampling System
Sample Rate
Data Update Rate
Number of Bits
3 Inputs. 3 Phase Currents (IA, IB, IC).
5A ac
0 to10A rms continuous at all rated temperatures.
Withstands 30Aac continuous, 400Aac for 2 seconds.
2500V ac, minimum.
0.04VA @ 5A rms, 60Hz (0.0016ohms @ 60Hz).
45-65 Hz
4 Inputs, Measures 1 Bus, 3 or 4 Wire.
120V ac
0 to 150V rms
Intended for use on nominal system voltages up to 208 V rms, phase-to-phase
(120V rms, phase-to-neutral).
Reads to 400V peak, any input-to-case (ground)
>12M ohms, input-to-case (ground)
2.5kV rms 1min, input-to-case (ground)
2kV rms 1min, input-to-input
45-65 Hz
64 samples per cycle
Amps, Volts
Available every 100 ms
16
ML0038
December 15, 2011
12
Copyright 2011 Bitronics, LLC
Accuracy
Accuracies are specified at nominal Frequency and 25C, (unless otherwise noted). Unless noted, all values are true RMS
and include Harmonics to the 63rd (minimum).
Voltage
AC: Better than 0.1% of reading (20 to 150 V rms, input-to-case). (+/- 25ppm/DegC)
Current
Better than 0.1% of reading +/- 100uA (>0.5A to 10.0A, -20C to 70C)
Better than 0.1% of reading +/- 250uA (0.05A to 0.5A, -20C to 70C)
Communication Ports
Serial (option*)
RS-232, RS-485, Software configurable ports
Baud rate: 9600 bps to 115.2 kbps
Single port; copper 10/100 Base-TX (standard)
Single port; MT-RJ fiber 100 Base-FX (option)
Refer to section 7.0 for specifications
Ethernet
Analog Transducer
Outputs (option*)
*Either the serial port or analog output may be ordered as an option, but not both
Environmental
Operating Temperature
Relative Humidity
Installation Category
Pollution Degree
Enclosure Protection
(to IEC60529: 2001)
Altitude
Intended Use
-40C to 70C
0-95% non-condensing
IC III (Distribution Level)
Refer to definitions below.
Pollution Degree 2
Refer to definitions below.
Front Panel: IP 20, Rear: IP 20
When equipment is mounted in an appropriately rated protective enclosure to NEMA or IP
protection classifications, as required for the installation. Ratings are applicable for enclosure
category 2 (see definitions)
Up to and including 2000m above sea level
Indoor use; Indoor/Outdoor use when mounted in an appropriately rated protective enclosure to
NEMA or IP protection classifications, as required for the installation.
Class 1 equipment to IEC61140: 2001
ML0038
December 15, 2011
13
Copyright 2011 Bitronics, LLC
Physical
Connections Current
(CT)
Model A3
Only
Voltage
(VT) &
(AUX
PWR)
Serial
Port
10-32 Studs for current inputs. Recommended Torque: 12 In-Lbs, 1.36 N-m
Terminal Block accepts #22-10 AWG (0.35 to 5mm2) wire, or terminal lugs up to 0.375"
(9.53mm) wide. Precautions must be taken to prevent shorting of lugs at the terminal block.
A minimum distance of 1/8" (3mm) is recommended between uninsulated lugs to maintain
insulation requirements. Recommended Torque: 9 In-Lbs, 1.02 N-m
6 position removable terminal block, accepts 26-14AWG solid or 26-12 AWG stranded wire.
Recommended Torque 7 in-lbs, 0.79 N-m.
Ethernet
Weight
(typical)
Size
RJ45, 8 position modular jack, Category 5 for copper connection; 100m (328 ft.) UTP
(unshielded twisted pair) cable.
1.8 lbs (.8 kg)
Industry standard 4” round case, 7.0 inches long
ML0038
December 15, 2011
14
Copyright 2011 Bitronics, LLC
Definitions:
Enclosure Category 2: Enclosures where no pressure difference relative to the
surrounding air is present.
Installation Category (Overvoltage Category) III: Distribution Level, fixed
installation, with smaller transient overvoltages than those at the primary supply level,
overhead lines, cable systems, etc.
Pollution: Any degree of foreign matter, solid, liquid, or gaseous that can result in a
reduction of electric strength or surface resistivity of the insulation.
Pollution Degree 2: Only non-conductive pollution occurs except that occasionally a
temporary conductivity caused by condensation is to be expected.
1.4 Environment
Surge Withstand Capability Test For Protective Relays and Relay Systems
ANSI/IEEE C37.90.1: 2002 (2.5kV oscillatory wave and 4kV EFT)
ML0038
December 15, 2011
15
Copyright 2011 Bitronics, LLC
2.0 PHYSICAL CONSTRUCTION & MOUNTING
The M350 meters are packaged in rugged aluminum case specifically designed to
meet the harsh conditions found in utility and industrial applications.
The Front panel view of the V3 3-phase voltmeter is shown in Figure 1. The A3 3phase ammeter is not shown, but would look similar indicating Amps for engineering
units. The mechanical dimensions of the M350 are shown in Figure 2.
Figure 1 – M350 V3 3-Phase Voltmeter Front View
ML0038
December 15, 2011
16
Copyright 2011 Bitronics, LLC
Figure 2 - Mounting and Overall Dimensions M350
ML0038
December 15, 2011
17
Copyright 2011 Bitronics, LLC
2.1 Installation
WARNING - INSTALLATION AND MAINTENANCE SHOULD ONLY BE
PERFORMED BY PROPERLY TRAINED OR QUALIFIED PERSONNEL.
2.2 Initial Inspection
Bitronics instruments are carefully checked and "burned in" at the factory before
shipment. Damage can occur however, so please check the instrument for shipping
damage as it is unpacked. Notify Bitronics LLC immediately if any damage has
occurred, and save any damaged shipping containers.
2.3 Protective Ground/Earth Connections
The device must be connected to Protected Earth Ground. The minimum Protective
Ground wire size is 2.5 mm2 (#12 AWG). Bitronics LLC recommends that all
grounding be performed in accordance with ANSI/IEEE C57.13.3-1983.
2.4 Overcurrent Protection
To maintain the safety features of this product, a 3 Ampere time delay (T) fuse must
be connected in series with the ungrounded/non-earthed (hot) side of the supply input
prior to installation. The fuse must carry a voltage rating appropriate for the power
system on which it is to be used. A 3 Ampere slow blow UL Listed fuse in an
appropriate fuse holder should be used in order to maintain any UL product approval.
2.5 Supply/Mains Disconnect
Equipment shall be provided with a Supply/Mains Disconnect that can be actuated by
the operator and simultaneously open both sides of the mains input line. The
Disconnect should be UL Recognized in order to maintain any UL product approval.
The Disconnect should be acceptable for the application and adequately rated
for the equipment.
2.6 Instrument Mounting
The instrument may be mounted into a standard 4” round panel opening as shown in
Figure 2. The unit will mount through the 4-inch round panel opening from the front.
Align the four #10-32 studs attached to the flange with their appropriate mounting
holes, as shown by the panel hole pattern. Use four #10-32 nuts with lock washers
applied onto the studs from the back side of the panel. Make sure that any paint or other
coatings on the panel do not prevent electrical contact.
WARNING – DO NOT over tighten the nuts on the mounting studs, HAND tighten with
a standard nut driver, 12 inch-pounds is recommended, MAXIMUM torque is 15 inchpounds.
ML0038
December 15, 2011
18
Copyright 2011 Bitronics, LLC
Several instruments may be mounted on a 19" Rack panel if desired. Three units will
fit side by side on a standard 5.25" high panel. Figure 2 indicates the dimensions of
the panel hole cutout. Leave adequate space surrounding the instrument when
determining mounting arrangements.
2.7 Cleaning
Cleaning the exterior of the instrument shall be limited to the wiping of the instrument
using a soft damp cloth applicator with cleaning agents that are not alcohol based, and
are non-flammable and non-explosive.
ML0038
December 15, 2011
19
Copyright 2011 Bitronics, LLC
3.0 BACK PANEL & WIRING
The rear view of the M350 A3 with optional serial port is shown in figure 3. Please
note that voltage terminals 3 – 6 are not active on model A3 ammeter, only the V3
voltmeter. Current terminals are not present on model V3 voltmeter. See Appendix A1
for detailed wiring diagrams.
Figure 3 – Rear View M350 A3
ML0038
December 15, 2011
20
Copyright 2011 Bitronics, LLC
3.1 Auxiliary Power
The M350 meters are powered by connections to L1(+) and L2(-). A Green LED
Power (PWR) indicator is provided on the rear panel to indicate that the unit is
powered ON. It is located on the right of the rear panel.
3.1.1 Specifications
Input (Auxiliary) Voltage
Nominal:
48-250V dc, 69-240V ac (50/60Hz)
Operating Range:
36-300V dc, 55-275V ac (45-65Hz)
3.2 M350 V3 VT Inputs (See Appendix A1)
The M350 V3 meter voltage (VT) signal inputs are connected to terminals 3-6 (see
Appendix A1 for specific wiring configurations). Voltage signals are measured using a
12M ohm resistor divider with a continuous voltage rating of 7kV. This ideal
impedance provides a low burden load for the VT circuits supplying the signals.
Grounding of VT signals per ANSI/IEEE C57.13.3-1983 is recommended. The polarity
of the applied signals is important to the function of the instrument.
3.3 M350 A3 CT Inputs (See Appendix A1)
The M350 A3 can be connected directly to a current transformer (CT). The Current
(CT) signal inputs are connected to terminals 7-12. These current inputs feature 1032 terminals to assure reliable connections. This results in a robust current input (CT)
connection with negligible burden to ensure that the user’s external CT circuit can’t
ever open-circuit, even under extreme fault conditions. Grounding of CT signals per
ANSI/IEEE C57.13.3-1983 is required.
3.4 Serial Ports (See section 4.2)
The M350 meters are equipped with an optional serial port. The port is software
(user) configurable for RS-232 or RS-485. The RS-232 drivers support full and half
duplex modes. See Figures 7-8 for signal assignments.
3.5 Ethernet
ML0038
December 15, 2011
21
Copyright 2011 Bitronics, LLC
The M350 Ethernet port meets or exceeds all requirements of ANSI/IEEE Std 802.3
(IEC 8802-3:2000) and additionally meets the requirements of part 8-1 TCP/IP Tprofile for physical layer 1 (Ethernet copper interface).
M350 meters are offered with a standard Ethernet 10/100 Megabit (Mb) RJ45 (copper)
interface (10BASE-T and 100BASE-TX) which automatically selects the most
appropriate operating conditions via auto-negotiation. This interface is capable of
operating either as half-duplex (compatible with all Ethernet infrastructure) or fullduplex interfaces (which allow a potential doubling of network traffic). Note that the
meters come with the port setup as a service port, with Modbus TCP/IP or DNP3
TCP/IP or UDP software offered as an option. An option to replace the standard RJ45
port with a MT-RJ 100BASE-FX fiber port also exists operating at 1300 nm (far infrared), full-duplex. If needed, adapters are available to convert the MT-RJ to ST
connectors, the same that are used in the Bitronics 70 Series.
3.5.1 Network settings
The M350 meters come preconfigured for interconnection to an HTML web server with
default settings for IP address, SUBNET mask, and ROUTER (GATEWAY) address.
Network Default (Preconfigured) Settings
IP Address
Subnet mask
192.168.0.171
255.255.255.0
Router (Gateway) Address
192.168.0.1
It is very important that the network have no duplicate IP addresses, so an IP address
conflict is NOT created for your network. It is recommended to perform your initial
setup for network addresses using the front buttons on the meter, unless it is known
that the default (preconfigured) IP address is not already an assigned address on your
network. Changing the stored Configuration of these network addresses may be
accomplished by using one of the following methods
Enter Network addresses using the meter’s front buttons:
Refer to the section in this manual on “Navigating the M350’s setup menu from the
Front panel” for further instruction regarding the button sequence you will use to scroll
through the menu structure. This will provide a handy menu tree.
Activate the setup mode using the front buttons on the meter by pressing the Up +
Toggle (Exit) buttons simultaneously. Scroll to menu selection “1.3”, “NET” (Network),
in order to change the Network settings. Enter an IP address that you know is an
unassigned address for your network. You can ping the IP address to make sure it is
not already in use on your network. You may also want to check with your network
administrator to make sure the IP address you plan on using is available to use on
your network. After entering the Network addresses exit out of the menu, and when
prompted to save the new configuration settings, press the button directly under the
ML0038
December 15, 2011
22
Copyright 2011 Bitronics, LLC
SAVE prompt identified as “Y” (Yes). Reboot the meter for the configuration changes
to take effect.
Enter the IP Address for the meter through a standard web browser:
Before entering an IP address with this method make sure the current IP address and
the new IP address to be assigned to the meter will not cause IP address conflicts on
your local network. To connect to the web server enter the meter’s current IP Address
in your web browser’s address bar. When the web server screen appears click on the
“Settings” tab. Type the new Network settings (IP address, Subnet mask, Gateway) in
the appropriate fields and click the “Apply” button to send the new network settings to
the meter. Reboot the meter for the configuration change to take effect.
The M350 use the following port numbers for each type of protocol:
Protocol
DNP3
HTML
Modbus
Port Number
20000 (TCP, UDP)
80 (TCP)
502 (TCP)
Determining the IP Address if unknown:
Although the IP address can be obtained via the display, for the M651 which does not
have a display, Bitronics has created a utility program to request the IP address for a
specific MAC address on an Ethernet network. This program can be used with the
M650 as well. The program is available on the company website
(http://www.novatechweb.com/download.cfm?filename=%2fftp%2fdocuments%2fpremium%2fBitro
nics+Software%2finarp.zip). The program uses the Inverse Address Recognition Protocol
to perform the lookup and thus is called inarp. The InARP protocol definition can be
found at www.apps.ietf.org/rfc/rfc2390.htm. The inarp utility can also scan an
Ethernet network for a range of MAC addresses, printing the IP address for any
devices which respond.
Currently, the only Bitronics devices which respond to inarp are 50 Series
products with a release code >= 2.00.0.
The general form of inarp is defined below, followed by some usage examples.
inarp usage:
inarp [-i <if_ipaddr>] [-n <cnt>] [-p <ms>] [-v] <mac-spec>
where
<if_ipaddr> := interface ip address (default is 1st Ethernet interface)
<cnt> := count of addresses to poll (default 1)
<ms> := period between polls (100ms)
ML0038
December 15, 2011
23
Copyright 2011 Bitronics, LLC
<mac-spec> := <6ByteMac> | <[3-5]ByteMac> | <macRangeName>
<6ByteMac> := xx:xx:xx:xx:xx:xx - <cnt> can specify a range to scan
<5ByteMac> := xx:xx:xx:xx:xx - default <cnt> is 256
...
<3ByteMac> := xx:xx:xx - default <cnt> is 16,777,216
<macRangeName> := "50series"
50Series MAC base (00:d0:4F:03), default <cnt> is 65,536
-v := request verbose information
CTRL-C stops a scan.
The inarp utility requires the WinPcap and Packet libraries which are bundled in the
WinPcap "Installer for Windows." This can be downloaded from www.winpcap.org.
Installation requires Administrator privileges.
Examples:
to poll the 1st IPv4 interface,
inarp -v 50series
CTRL-C stops the scan
to poll the IPv4 interface associated with 192.168.1.1, use
inarp -v -i 192.168.1.1 50series
or to poll a specific mac, use
inarp -v -i 192.168.1.1 00:D0:4F:03:00:15
The inarp utility is Copyright (c) 2011 by Bitronics, LLC. All rights reserved.
Portions of inarp are
Copyright (c) 1999 - 2005 NetGroup, Politecnico di Torino (Italy), and
Copyright (c) 2005 - 2010 CACE Technologies, Davis (California)
3.5.2 Indicators – Ethernet (ACT) & Serial LEDs
There are 2 LEDs on the rear panel to indicate activity is occurring on the
communication ports. These LEDs are useful in determining that there is activity
occurring on the ports. The "ACT" LED will flash to indicate there is activity on the
Ethernet port. It will also indicate that a link has been established. The Serial LED
flashes to indicate there is activity occurring for the serial port.
A troubleshooting guide is found in Appendix A2, which may be useful in establishing
Ethernet connections.
3.5.3 Firmware upgrades – Ethernet service port
ML0038
December 15, 2011
24
Copyright 2011 Bitronics, LLC
New versions of firmware may be released by Bitronics from time to time, either to add
new functionality or to correct errors in code that may have escaped detection prior to
commercial release. Consult the factory for detailed information pertaining to the
availability of firmware upgrades. In cases such as this, it is desirable to support a
mechanism for new firmware to be installed remotely. The ability to upgrade Firmware
is done over the Ethernet port. The M350 family utilizes a page in the Web Server
interface to upload and install new firmware. A password protected hyperlink is
provided from the Configuration Settings Page that navigates to the Firmware Upload
page.
First obtain a copy of the firmware image. The firmware image is a binary file, less
than 1 MB in length, that can be attached to email, distributed on a CD, or downloaded
from an FTP site as circumstances dictate. Place a copy of the firmware image on
your computer then access the upload page from the Firmware Upload link on the
Configuration Settings page.
This will take you to the firmware upload page, which looks like the screen capture in
Figure 4.
Figure 4 – Bitronics M350 Firmware Upload Page
Once the Firmware Upload page is visible, use the Browse button to locate the
firmware image on your computer. Next use the Submit button to initiate the file
transfer and installation process. The instrument must be rebooted to make the new
firmware active. At the completion of the file transfer and installation process, the
ML0038
December 15, 2011
25
Copyright 2011 Bitronics, LLC
instrument will prompt you to reset the instrument remotely by displaying the dialog
box below after the firmware has been successfully installed.
It is strongly recommended that you clear your web browser’s cache (delete the
temporary internet files) after updating the firmware so that the new content will be
loaded into your browser. Please refer to your browser’s help file on how to clear the
cache. A useful keyboard shortcut common to Internet Explorer, Firefox and Chrome
is CONTROL + SHIFT + DELETE, which will take you directly to the relevant dialog
panel. Carefully select the items to be cleared. Be sure to check the boxes that clear
“temporary internet files”, “cache” or “website data” and uncheck any boxes that
preserve data.
ML0038
December 15, 2011
26
Copyright 2011 Bitronics, LLC
4.0 OPERATION
4.1 Display
The M350 meters can display several per-phase quantities for the circuit being
monitored. In order to make all quantities available, the display scrolls from quantity to
quantity approximately every 5 seconds. The quantities are refreshed once a second.
The backlit display at the bottom of the instrument indicates to the user what quantity
is being displayed (volts in V3, amps in A3) as well as the primary engineering units
(Kvolts in V3) . Listed on the following pages are standard screens available in the
M350. Configurable screen enable settings are provided through the web server,
allowing the user to enable or disable each of the display screens, in order to view
only a selected subset of all the measurements the meter is capable of displaying.
The following screens are enabled by default:
A3 Ammeter
Amps A,B,C (default home screen)
Demand Amps A,B,C
V3 Voltmeter
Volts AN,BN,CN (default home screen)
Volts AB,BC,CA
ML0038
December 15, 2011
27
Copyright 2011 Bitronics, LLC
DISPLAY SCREENS
A3
Format
Quantity
1.
00000
00000
00000
Amps
Phase A Amperes
Phase B Amperes
Phase C Amperes
2.
000.00
Phase A Amps Demand
000.00
Phase B Amps Demand
000.00
Phase C Amps Demand
Amps (LED to right of the middle line will light up the AVG legend)
3.
00000
Phase A Maximum Amperes Demand
00000
Phase B Maximum Amperes Demand
00000
Phase C Maximum Amperes Demand
Amps (LED to right of the top line will light up the MAX legend)
V3
1.
00000
00000
00000
X Volts
Phase A Volts1
Phase B Volts
Phase C Volts
2.
00000
00000
00000
X Volts
Phase A-B Volts2
Phase B-C Volts
Phase C-A Volts
3.
000.00
Phase A Average Voltage1
000.00
Phase B Average Voltage
000.00
Phase C Average Voltage
X Volts (LED to right of the middle line will light up the AVG legend)
4.
00000
Phase A Maximum Average Volts1
00000
Phase B Maximum Average Volts
00000
Phase C Maximum Average Volts
X Volts (LED to right of the top line will light up the MAX legend)
5.
00000
Phase A-B Maximum Average Volts2
00000
Phase B-C Maximum Average Volts
00000
Phase C-A Maximum Average Volts
X Volts (LED to right of the top line will light up the MAX legend)
ML0038
December 15, 2011
28
Copyright 2011 Bitronics, LLC
6.
000.00
Phase A-B Average Voltage2
000.00
Phase B-C Average Voltage
000.00
Phase C-A Average Voltage
X Volts (LED to right of the middle line will light up the AVG legend)
7.
00000
Phase A Minimum Average Volts1
00000
Phase B Minimum Average Volts
00000
Phase C Minimum Average Volts
X Volts (LED to right of the bottom line will light up the MIN legend)
8.
00000
Phase A-B Minimum Average Volts2
00000
Phase B-C Minimum Average Volts
00000
Phase C-A Minimum Average Volts
X Volts (LED to right of the bottom line will light up the MIN legend)
9.
00000
00000
00000
SecVolts
10. 00000
00000
00000
SecVolts
Phase A Secondary Volts1
Phase B Secondary Volts
Phase C Secondary Volts
Phase A-B Secondary Volts2
Phase B-C Secondary Volts
Phase C-A Secondary Volts
1
- WYE meters only
- DELTA meters only
X - indicates blank, (k)ilo
2
ML0038
December 15, 2011
29
Copyright 2011 Bitronics, LLC
Enable/Disable Display Mode Screens via the Web Server:
The screens that are displayed in the scrolling mode can be programmed
(ENABLED/DISABLED) by the user. This programming can be done through the web server.
(Refer to section 5.5) From the web page, select the Settings tab then click on Screen
Enable in the menu list.
ML0038
December 15, 2011
30
Copyright 2011 Bitronics, LLC
4.1.1 Overview – Buttons Functions
Figure 5 – Button functions for Display Mode
Figure 6 – Button functions in Set-up Mode
ML0038
December 15, 2011
31
Copyright 2011 Bitronics, LLC
4.1.2 Keypad Functions for Display Mode
Measurements screens may be stepped through manually by pushing the up and down arrow
keys. Pushing the Toggle (Exit) key turns the scroll function off and on. When the scroll
function is activated, the measurement screens will automatically step through the userdefined screens. Auto scroll state (ON/OFF) is stored in non-volatile memory. Pressing the
Home (Enter) key will bring up the home screen. The factory default home screen will be
Amps A, B, C for M350 A3. If a user enables or disables screens via the front display buttons
from Setup Mode - 1.6 Scrn Ena, then the home screen will automatically become the 1st
enabled screen. The home screen can be setup as any one of the enabled screens by
simultaneously pressing the Home (Enter) and Toggle (Exit) buttons when on the desired
screen and can also be done through the web server Settings tab.
Table 1 – Button Functions
Button
Up Arrow
Display Mode Function
Next measurement/value
Setup Mode Function
Next menu item
Down Arrow
Previous
measurement/value
Home (Enter)
Scroll to designated home
screen
Previous menu item
or
Y (Yes) when prompted
Enter selected submenu (or
configuration item), or
increments the highlighted
digit when entering number,
or IP address, or
N (No) when prompted
Exits current menu
selection and moves up to
next higher menu level.
Enter
Toggle (Exit)
Toggle Auto Scroll On/Off
EXIT
Combination Up and
Exit keys
Combination Up and
Down Keys
Combination Home
(Enter) and Toggle
(Exit) keys
Enter Setup Mode
Returns to display mode on
exit from main setup menu
(Resets and configuration
setting are done in the
setup menu)
Resets Demand Values
Designate the displayed
screen as “Home Screen”
Resets are found in setup menu.
ML0038
December 15, 2011
32
Copyright 2011 Bitronics, LLC
4.1.3 Display Error Messages
Error messages from self test are shown on the display. The table below summarizes the
errors and the messages displayed:
SELF TEST RESULT SUMMARY FOR 50 SERIES DEVICES
Fault
Display Oveflow
Fault
Indication
Display
flashes
9999
Input gain
calibration
checksum error
G CAL
Input phase
calibration
checksum error
P CAL
Analog outputs
calibration
checksum error
A CAL
Input OverRange
CLIP
Protocol
Configuration
Error
Firmware
Download in
Progress
P CFG
ML0038
FLASH
Effects of Fault
Corrective Action
Measured quantity is too large to be
displayed. Communication option
output may still be accurate, if overload
does not exceed meter input ratings
Calibration constants for the input gain
are in error. The display and the
communication option output are
reduced in accuracy to approximately
+/-3%.
Calibration constants for the phase are
in error. The display and the
communication option output are
reduced in accuracy to approximately
+/-3%.
Calibration constants for the analog
outputs are in error. The analog output
option is reduced in accuracy to
approximately +/-3%.
Peak input quantity exceeds the range
of the instrument. Both display and
communication option output accuracy
reduced by an amount depending upon
the degree of over-range.
Instrument protocol configuration may
be corrupted and inaccurate. This may
cause communication errors.
Will be displayed during download and
will disappear shortly after user reboots
meter
Correct fault
external to
instrument.
December 15, 2011
33
Return to factory
for repair
Return to factory
for repair
Return to factory
for repair
Verify input
signals are within
range. If within
range, return to
factory for repair.
Reset
configuration.
Reboot meter
when prompted.
Copyright 2011 Bitronics, LLC
4.2 Serial Port
This port when ordered can be set to RS-232 or RS-485, and support baud rates up to
115200. Set-up of the Serial Port can be accomplished by using a web browser
connected to the Ethernet port, or via the front display buttons (Setup menu - 1.4
Serial). The default configuration for the serial ports is:
Serial Port Default Setting
Port
Protocol
Parity
Serial DNP 3
None
Baud
9600
IED
1
Physical Media
RS-232
Serial cable requirements for RS485 connection:
Tie RS-485 cable shields (pin 15) to earth ground at one point in system.
The recommended torque ratings for the terminal block wire fasteners are listed in the
Physical Specifications table (section 1.3).
Transient Voltage Suppressor (TVS) clamp devices are used on the serial port as the
method of protection. The serial port is clamped to a voltage of 16.7-18.5V nominal,
24.46V max. The clamps are rated for a peak pulse current of 24.6 max.
4.2.1 RS485 Connections
Note that various protocols and services have different port connection requirements.
When making connections to serial ports for Modbus or DNP3 over RS485, 2-wire half
duplex is required. This is because it is imperative to maintain a minimum time period
(3 1/3 characters) from the time the transmitter shuts off to the next message on the
bus in order to guarantee reliable communications. See figure 7 below for RS485
cable wiring diagrams.
ML0038
December 15, 2011
- 34 -
Copyright 2011 Bitronics, LLC
Figure 7 - Typical RS-485 Cable Wiring
ML0038
December 15, 2011
35
Copyright 2011 Bitronics, LLC
Figure 8 – RS-232 Cable Wiring Diagram
ML0038
December 15, 2011
36
Copyright 2011 Bitronics, LLC
5.0 FUNCTIONAL DESCRIPTION
5.1 Configuration
Setup of the M350 meters is most easily performed using the web interface via the
Ethernet service port. Basic configuration can also be handled from the front display
by entering the setup mode.
5.2 HTML Web Server
The M350 incorporates an internet-compatible HTML web page.
5.3 Passwords
Passwords can be setup through the web interface in the 50 Series for use in
controlling access to configuration and other functions available through the Ethernet
port or the front panel display. Passwords may be comprised of the 95 printable
ASCII characters as defined by
http://en.wikipedia.org/wiki/ASCII#ASCII_printable_characters which includes 0-9, a-z,
A-Z, and special characters. Passwords may have maximum length of 20 characters
and a minimum of 1 character. Passwords prompts may be disabled by leaving the
new password field blank and clicking the 'Change Password' button. The default
password from the factory is 'aaaa'.
The password is used to authenticate a session when prompted. The session
authentication will last until the user clicks the 'Log Out' link on the upper right corner
of the Web Interface or after five minutes elapses. Authentication will be required
when attempting the following actions:
•
•
•
•
•
Resetting demand and energy values on the Web Interface Resets page
Applying changes to any settings on the Web Interface Settings tab
Uploading new firmware on the Firmware Upload page
Changing the password on the Password Security page
Rebooting the IED
The Password Security page includes the Front Panel Configuration Lock, which may
be used to prevent access to the following actions:
•
•
•
Setup Mode on the Front Panel (see section 5.4)
Demand Resets from the Front Panel (section 6.4.3).
Home Screen selection from the Front Panel (section 4.1.2)
If these options are attempted while the lock is enabled, the message 'Locked' will be
briefly displayed on the front panel alphanumeric display for M65x or 'LOC' on the
middle seven segment display for M350.
ML0038
December 15, 2011
37
Copyright 2011 Bitronics, LLC
ML0038
December 15, 2011
38
Copyright 2011 Bitronics, LLC
5.4 Navigating the M350’s setup menu from the front panel
ML0038
December 15, 2011
39
Copyright 2011 Bitronics, LLC
ML0038
December 15, 2011
- 40 -
Copyright 2011 Bitronics, LLC
How to Enter an Integer:
Increment highlighted digit by 1.
ENTER
Highlight Previous/Next digit.
Exit to menu
EXIT
How to Enter a Floating Point Number:
Increment highlighted digit by 1.
ENTER
Shifts decimal point one place to right. Decimal moves to
left-most digit when right-most digit is passed.
Highlight Next digit. Highlights left-most digit when rightmost digit is passed.
EXIT
Exit to menu
How to Enter an IP address:
Increment highlighted digit by 1.
ENTER
Highlight Previous/Next digit. Numbers scroll left
and right to follow highlighted digit.
Exit to Network menu
EXIT
ML0038
December 15, 2011
- 41 -
Copyright 2011 Bitronics, LLC
5.5 Performing set-up through the web page interface
This section will assume you are able to use the factory default IP address of
192.168.0.171 to connect to the web page using an HTML web server. If this is not
the case you may need to refer to section 3.5.1 (Network settings) and the previous
section (Navigating the M350’s setup menu from the Front panel) to change your
network configuration settings.
Enter the M350’s IP address into your internet browser to connect with the M350 web
page interface. Internet browsers supported are Firefox, Internet Explorer, Safari and
Google Chrome. The Home page screen should appear as shown below.
Home page (M350 V3):
From the home screen you can select from the following tabs:
Data – This page displays current data measurements
Resets – This page allows certain quantities to be reset
Settings – This page allows the user to change the configuration settings. Making
M350 configuration changes require the unit to be rebooted.
Configuration settings for the M350 are stored in flash memory.
Contact – This page indicates how to contact Bitronics
NOTE: Some screen shots shown below may not exactly match the appearance of
those from your actual meter.
ML0038
December 15, 2011
42
Copyright 2011 Bitronics, LLC
Data page (M350 V3): Two Views, Instantaneous and Demands
ML0038
December 15, 2011
43
Copyright 2011 Bitronics, LLC
Data page (M350 A3): Two Views, Instantaneous and Demands
Resets page (M350 A3):From this page select the quantity to be reset and click apply
ML0038
December 15, 2011
44
Copyright 2011 Bitronics, LLC
Settings page: Click on one of the settings categories (Identity, Input, Network, Serial
Port, Protocol, Screen Enable, Load/Store Settings, Password Security, or Firmware
Upload) to be taken to the next page.
Contact Page:
ML0038
December 15, 2011
45
Copyright 2011 Bitronics, LLC
Settings Page Selections:
From the Settings page screen you can select one of the following selections:
Identity– This page allows the user to enter information that is necessary to identify
the meter. It gives an identity to a particular M350. Each M350 should have
different information entered for its identity.
Input – This page allows for the selection of wiring configuration, setup of CT and
PT ratios, demand intervals, and TDD denominator.
Network – This page allows the user to change the network configuration settings
for IP address, gateway and router address.
Serial Port – This page allows user configuration for the serial port settings. Note
that if no serial port is ordered this setting won’t appear and if the transducer output
option is selected then that setting will replace serial.
Protocol – This page allows user configuration of the protocols – DNP or Modbus
Screen Enable - Allows the screens shown on the M350 display (front panel) to be
enabled or disabled by the user. The webpage must be used in order to enable
screens on the M350.
Load/Store Settings – This page allows you to save and retrieve settings for the
M350 meter
Password Security – This page allows the user to set a password and to enable or
disable access to front display configuration
Firmware Upload – This page allows the user an interface to browse for or type in
the location on their PC of new firmware for purposes of uploading to the unit.
Screen shots showing the selections to be made for each of the above selections
follow on the next few pages. Default values are shown.
M350 configuration changes require the unit to be rebooted. Configuration settings
for the M350 are stored in flash memory.
ML0038
December 15, 2011
46
Copyright 2011 Bitronics, LLC
Identity:
Input (M350 A3 Shown):
ML0038
December 15, 2011
47
Copyright 2011 Bitronics, LLC
Network:
ML0038
December 15, 2011
48
Copyright 2011 Bitronics, LLC
Serial Port (if option ordered):
Protocol Selection (if Option ordered):
First select between Modbus or DNP3. You will then select Optimal Resolution
(default) or Primary Units. Next you will choose a session. Under Type, there will be
4 different selections for Modbus and 3 for DNP3. Under Modbus the options are
Disabled, TCP, ASCII, or RTU. For DNP3 the selections are Disabled, Serial, TCP, or
UDP. Under DNP3, clicking on the Advanced button reveals more advanced functions
that may or may not need to be changed. Clicking on the Basic button hides the
advanced functions. A detailed description of the setup parameters for Modbus and
DNP3 can be found in the Appendix of the respective protocol manuals.
There are both fixed and configurable register/point lists. Please refer to the
appropriate protocol manual for more information regarding how to view or edit the
register/point list.
ML0038
December 15, 2011
49
Copyright 2011 Bitronics, LLC
Modbus
ML0038
DNP3
December 15, 2011
50
Copyright 2011 Bitronics, LLC
DNP Serial
ML0038
December 15, 2011
DNP TCP
51
Copyright 2011 Bitronics, LLC
Modbus RTU
Modbus TCP
ML0038
December 15, 2011
52
Copyright 2011 Bitronics, LLC
Screen Enable (M350 V3 Shown):
Analog Output (if option ordered; M350 V3 Shown):
ML0038
December 15, 2011
53
Copyright 2011 Bitronics, LLC
Load/Store Device Settings:
Password Security Settings:
ML0038
December 15, 2011
54
Copyright 2011 Bitronics, LLC
Firmware Upload:
ML0038
December 15, 2011
55
Copyright 2011 Bitronics, LLC
6.0 MEASUREMENTS
Basic measurement quantities are calculated and updated every 100ms. These
quantities include RMS Amperes and RMS Volts, and some average or demand
values.
Note: For all of the following measurements, it is important to keep in mind that the
specific protocol used to access the data may affect the data that is available, or the
format of that data. No attempt is made here to describe the method of accessing
measurements - always check the appropriate protocol manual for details.
6.1 Changing Transformer Ratios
The M350 has the capability to store values for Current Transformer (CT) in the A3 or
Potential Transformer (VT) turns ratios in the V3. The CT and VT values are factory
set to 1:1 CT or 1:1 VT depending upon the model. These values can be entered into
the M350 over the network or via front display buttons or web page, and will be stored
in internal non-volatile memory. All measurements are presented in primary units,
based on these ratios. Please note that the value entered via the front display should
be the result of the division of the primary value by 5. For example for a ratio of
6000:5, you would enter a value of 1200 through the front display. The web interface
allows you to choose either 1A or 5A for the denominator, and the primary value is
entered directly. The PT ratio is to 1 when entering through the front display. The
web allows other denominators (110, 115, or 120) to be used. Refer to the
appropriate protocol manual for more information on changing transformer ratios.
6.2 Current (M350 A3)
The M350 A3 has three current inputs, with an internal CT on each channel. These
inputs can read to 2x nominal (2ARMS for 1A input, 10ARMS for 5A input (symmetrical)
under all temperature and input frequency conditions. No range switching is used,
allowing a high dynamic range.
The current signals are transformer coupled, providing a true differential current signal.
Additionally, a continuous DC removal is performed on all current inputs. Instrument
Transformer Ratios can be entered for each current input, as described above.
6.3 Voltage Channels (M350 V3)
All voltage inputs are measured relative to a common reference level (essentially
panel ground). See Appendix 1 for input connection information. Common mode
signals can be removed by signal processing algorithms, instead of the more
traditional difference amplifier approach. This greatly simplifies the external analog
circuitry, increases the accuracy, and allows measurement of the Neutral-to-Ground
voltage at the panel. The 7kV input divider resistors are accurate to within +/25ppm/DegC, and have a range of 400V PEAK, from any input to panel ground. Each
ML0038
December 15, 2011
56
Copyright 2011 Bitronics, LLC
sample is corrected for gain using factory calibration values stored in non-volatile
memory on the board. Additionally, a continuous DC removal is performed on all
inputs.
The advantages of this method of voltage measurement are apparent when the M350
V3 is used on the common 2, 2½, and 3 element systems (refer to Section 6.5). The
M350 V3 is always calculating Line-to-Neutral, and Line-to-Line voltages with equal
accuracy. On 2 element connections, any phase can serve as the reference phase.
On 2½ element systems, one of the phase-to-neutral voltages is missing, and the
M350 V3 must create it from the vector sum of the other two phase-to-neutral
voltages. In order to configure the M350 V3 for 2½ element mode and which phase
voltage is missing, select one of the following: 2.5 element - A, 2.5 element - B, or 2.5
element – C.
6.4 Demand Measurements
The traditional thermal demand meter displays a value that represents the logarithmic
response of a heating element in the instrument driven by the applied signal. The
most positive value since the last instrument reset is known as the maximum demand
(or peak demand) and the lowest value since the last instrument reset is known as the
minimum demand. Since thermal demand is a heating and cooling phenomenon, the
demand value has a response time T, defined as the time for the demand function to
change 90% of the difference between the applied signal and the initial demand value.
For utility applications, the traditional value of T is 15 minutes, although the M350 can
accommodate other demand intervals (Section 6.4.4).
The M350 generates a demand value using modern microprocessor technology in
place of heating and cooling circuits, it is therefore much more accurate and
repeatable over a wide range of input values. In operation, the M350 continuously
samples the basic measured quantities, and digitally integrates the samples with a
time constant T to obtain the demand value. The calculated demand value is
continuously checked against the previous maximum and minimum demand values.
This process continues indefinitely, until the demand is reset or until the meter is reset
(or power removed and reapplied). The demand reset and power-up algorithms are
different for each measurement. These routines are further described in following
paragraphs. The maximum and minimum demand values are stored in non-volatile
memory on the Host Processor module.
NOTE:
zero.
Changing VT or CT ratios does NOT reset demand measurements to
Meter Type
Demand Quantity
Phase Reference
Function
M350 A3
Amperes
Phase
Present, Max
ML0038
December 15, 2011
57
Copyright 2011 Bitronics, LLC
Meter Type
Demand Quantity
M350 V3
Volts
Phase Reference
Phase - Neutral,
Phase - Phase
Function
Present, Max, Min
6.4.1 Ampere Demand (M350 A3)
Present Ampere Demands are calculated via the instantaneous measurement data
used to calculate the per-phase Amperes.
Upon power-up, all Present Ampere Demands are reset to zero. Maximum Ampere
Demands are initialized to the maximum values recalled from non-volatile memory.
Upon Ampere Demand Reset, all per-phase Present and Maximum Ampere Demands
are set to zero.
6.4.2 Volt Demand (M350 V3)
Present Volt Demands are calculated via the instantaneous measurement data used
to calculate the per-phase Volts. Upon power-up all Present Volt Demands are reset
to zero. The Maximum Volt Demands and Minimum Volt Demands are initialized to the
minimum and maximum values recalled from non-volatile memory. In order to prevent
the recording of false minimums a new Minimum Volt Demand will not be stored
unless two criteria are met. First, the instantaneous voltage for that particular phase
must be greater than 20Vrms (secondary). Second, the Present Demand for that
particular phase must have dipped (Present Demand value must be less than previous
Present Demand value). Upon Voltage Demand Reset, all per-phase Maximum
Voltage Demands are set to zero. Minimum Voltage Demands are set to full-scale.
6.4.3 Demand Resets
All demand values for current or voltage are reset simultaneously. This can be
accomplished via the front display or from a web browser.
6.4.4 Demand Interval
The M350 uses 900 seconds (15 minutes) as the default demand interval for current in
the A3. The default for average volts and average power measurements is 60
seconds in the V3. The range of demand intervals is 10 to 9999 seconds. These
settings can be accomplished by using the front display or web server setup.
ML0038
December 15, 2011
58
Copyright 2011 Bitronics, LLC
6.5 Heartbeat and Health Check
M350 meters provide a Heartbeat State Counter Register that allows the user to
determine the time between successive polls. This counter will increment by the
number of milliseconds that have elapsed since the last time the data was updated.
Another use of this register is as a visual indicator that the data is changing; it allows
users of certain MMIs to identify disruption in the polling of the instrument. The
Heartbeat State Counter is a full 32-bit counter that rolls over at 4,294,967,295
(4,294,967 seconds). The counter starts at zero on power-up, and is NOT stored in
non-volatile memory.
M350 meters have several self-tests built in to ensure that the instrument is performing
accurately. The results of these self-tests are available in the Health Check register
which is a simple 16-bit binary value. Each bit represents the results of a particular
self-test, with "0" indicating the test was passed, and "1" indicating the test was failed.
If Health status failures occur, the meter may have experienced an operational failure.
The table below provides a reference of error codes. The Health Check value shown
in the M350 web live data page is a hexadecimal representation of the binary value.
For example, a Health Check value of 0000 0014 is the equivalent of the binary value
000000000010100. The “1” shown in bit 2 and bit 4 represents a failed test in those
bits which indicates a checksum error for both the gain and phase on the calibration.
Contact the factory for further instructions.
Bit
0
2
4
12
Health Check Error Codes
Description
Checksum error on analog output (either 0-1mA or 4-20mA) calibration
constants
Checksum error on gain calibration of inputs
Checksum error on phase calibration of inputs
Indicates firmware download in progress and measurements are offline
6.6 List of Available Measurements & Settings
Please note that not all measurements are available in every M350 model.
Available Measurements
A3
Amps A, B, C
Class 0 Response Setup
CT Scale Factor
CT Scale Factor Divisor
Demand (Max.) Amps A, B, C
Demand Amps A, B, C
ML0038
December 15, 2011
V3
Average Volts AN, BN, CN, AB, BC, CA
Average (Max.) Volts AN, BN, CN, AB, BC, CA
Average (Min.) Volts AN, BN, CN, AB, BC, CA
Class 0 Response Setup
Factory Version Hardware
Factory Version Software
59
Copyright 2011 Bitronics, LLC
Available Measurements
Factory Version Hardware
Factory Version Software
Health
Heartbeat
Meter Type
Protocol Version
Health
Heartbeat
Meter Type
Protocol Version
PT Scale Factor
PT Scale Factor Divisor
Volts AN, BN, CN, AB, BC, CA
6.7 Calibration
Routine re-calibration is not recommended or required. A field calibration check every
few years is a good assurance of proper operation.
6.8 Instantaneous Measurement Principles
The M350 measures all signals at an effective rate of 64 samples/cycle,
accommodating fundamental signal frequencies from 45 to 65Hz depending on model.
Samples of all bus signals are taken using a 16-Bit A/D converter, effectively creating
64 "snapshots" of the system voltage or current per cycle.
ML0038
December 15, 2011
60
Copyright 2011 Bitronics, LLC
7.0 ANALOG (TRANSDUCER) OUTPUT OPTION
7.1 Introduction
The Transducer Output options (0 -1 mA or 4-20 mA) feature 3 separate outputs each
with two terminals, one which provides a unique return path for each output.
7.2 Specifications
Outputs:
3 bi-directional,
0-1mA (active) or 4-20mA (loop powered, passive)
0 – 1mA Current Range
Output Range:
0 to +/-1mA into 10K ohms or less; Overload to
+/-2.1mA into 5K ohms or less.
Resolution:
0.22uA
Output Resistance: 500 ohm
4 – 20mA Current Range
Output Range:
Resolution:
Max Loop Voltage:
Max Voltage Drop:
4 to 20mA
1.1uA
40Vdc
2.3V @ 20mA
4 – 20mA Internal Loop Supply
Max Output Voltage:
6V @ 60mA,
Accuracy
0.25% of Full Scale Input
Data Update Rate (poll rate):
100ms minimum
7.3 Connections
The connections for the 0-1mA output option are shown in figure 9, while the
connections for the 4-20 mA with external and internal loop are shown in figure 10.
ML0038
December 15, 2011
61
Copyright 2011 Bitronics, LLC
Figure 9 – 0-1mA Transducer Output Connections (A3 Shown)
ML0038
December 15, 2011
62
Copyright 2011 Bitronics, LLC
Figure 10 – 4-20mA Transducer Output Connections (A3 Shown)
ML0038
December 15, 2011
63
Copyright 2011 Bitronics, LLC
APPENDIX
A1 CT/VT Connection Diagrams
Figure 11 – Voltage Signal Connections – M350 V3
ML0038
December 15, 2011
64
Copyright 2011 Bitronics, LLC
Figure 11 – Voltage Signal Connections – M350 V3
ML0038
December 15, 2011
65
Copyright 2011 Bitronics, LLC
Figure 12 – Current Signal Connections – M350 A3
ML0038
December 15, 2011
66
Copyright 2011 Bitronics, LLC
A2 Ethernet Troubleshooting
If the Link LED fails to illuminate, this is an indication that there is trouble with the
connection and communication will not proceed without solving the problem. If a
copper connection is used between the M350 and the hub/switch, check the following
items:
1.
2.
Verify that the connectors are fully engaged on each end.
Verify that the cable used is a "straight-through" cable connected to a "normal"
port. Alternatively, a "cross-over" cable could be connected to an "uplink" port
(this could later cause confusion and is not recommended).
3. Verify that both the M350 and hub/switch are powered.
4. Try another cable.
5. If a long CAT-5 cable is used, verify that is has never been kinked. Kinking can
cause internal discontinuities in the cable.
6. If a copper connection is used to an external fiber converter:
7. Verify that the LINK LED on the converter is lit on at least one side. Both sides
need to be lit for a valid connection to be established.
8. At least one brand of converters will not output an optical idle unless it receives a
forced 10 Mb copper link pulse (for some reason, auto-negotiation pulses
confuse it). Some hubs/switches will not output an optical idle unless they
receive an optical idle. This then inhibits the converter from outputting a copper
link pulse enabling the M350 to link. In this condition, no device completes the
link.
9. Verify that the fiber converter(s) and/or fiber hub/switch are matched for the
same type of fiber connections. A 100BASE-FX port will NEVER inter-operate
with the 10BASE-FL port (fiber auto-negotiation does not exist).
10. On the fiber connection, try swapping the transmit and receive connector on one
end.
11. Verify that the fiber converter(s) and/or fiber hub/switch use the proper optical
wavelength (100BASE-FX should be 1300 nm).
ML0038
December 15, 2011
67
Copyright 2011 Bitronics, LLC
ML0038
December 15, 2011
68
Copyright 2011 Bitronics, LLC
A3 M350 Display Screens – Visual Representations
M350 A3
ML0038
December 15, 2011
69
Copyright 2011 Bitronics, LLC
M350 V3
ML0038
December 15, 2011
70
Copyright 2011 Bitronics, LLC
ML0038
December 15, 2011
71
Copyright 2011 Bitronics, LLC
Revision
A
B
Date
6/21/10
2/24/11
C
D
9/27/11
11/15/11
E
12/15/11
ML0038
Changes
Original Issue
Many model specific and general 50
Series related changes – see
Version History in this manual or
M650 User Manual Revision History
for more detail
Passwords, primary units added
Corrected setup menu map (5.4) and
changed front panel IP rating to IP20
New screen shot for serial port,
added 4.1.3 Display Error Messages
December 15, 2011
72
By
E. DeMicco
E. DeMicco
E. DeMicco
E. DeMicco
E. DeMicco
Copyright 2011 Bitronics, LLC
ML0038
December 15, 2011
73
Copyright 2011 Bitronics, LLC
Bitronics, LLC 261 Brodhead Road, Bethlehem, PA. 18017
(610) 997-5100 Fax (610) 997-5450
www.novatechweb.com/bitronics