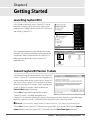
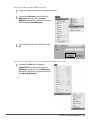
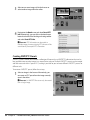
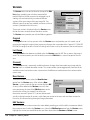
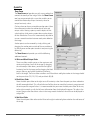
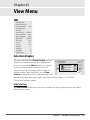
1
SOFTWARE
User's Manual
En
Notices
© 2008 Nik Software, Inc. All rights reserved. No part of this manual may be reproduced, transmitted, transcribed, stored
in a retrieval system, or translated into any language in any form, by any means, without Nik Software, Inc.’s prior written
permission.
Nikon reserves the right to change the specifications of the hardware and software described in these manuals at any
time and without any prior notice.
Neither Nik Software, Inc. nor Nikon will be held liable for any damages resulting from the use of this product.
While every effort has been made to ensure the information in these manuals is accurate and complete, we would
appreciate it were you to bring any errors or omissions to the attention of the Nikon representative in your area
(addresses are provided separately).
Protected by U.S. patents. Patents pending in the U.S. and/or other countries.
© 2006-2008 NIKON CORPORATION
© 2006-2008 Nik Software, Inc.
All Rights Reserved.
Trademark Information
U Point is a registered trademark of Nik Software, Inc. Nik and the Nik logo are trademarks of Nik Software, Inc.
Macintosh and Mac OS are registered trademarks of Apple Inc. Microsoft and Windows are registered trademarks of
Microsoft Corporation. Intel, Pentium, Xeon, and Core are either trademarks or registered trademarks of Intel
Corporation. Adobe and Photoshop are registered trademarks of Adobe Systems, Inc. All other trade names mentioned
in this manual or in the other documentation provided with your Nikon products are trademarks or registered
trademarks of their respective holders.
Chapter 2
Chapters at a Glance
Chapter 1
Chapter 2
Chapter 3
Chapter 4
Chapter 5
Chapter 6
Chapter 7
Chapter 8
Chapter 9
Chapter 10
Chapter 11
Chapter 12
Chapter 13
Chapter 14
Chapter 15
Chapter 16
Chapter 17
Chapter 18
Chapter 19
Chapter 20
Chapter 21
Chapter 22
Chapter 23
Chapter 24
Chapter 25
Chapter 26
Chapter 27
Chapter 28
Chapter 29
Chapter 30
Notices & Trademark Information
Chapters at a Glance . . . . . . . . . . . . . . . . . . . . . . . . 1
Table of Contents . . . . . . . . . . . . . . . . . . . . . . . . . . . 3
Introduction . . . . . . . . . . . . . . . . . . . . . . . . . . . . . . . . 9
System Requirements & Installation . . . . . . . 11
Getting Started . . . . . . . . . . . . . . . . . . . . . . . . . . . . 15
Preferences . . . . . . . . . . . . . . . . . . . . . . . . . . . . . . . . 37
Interface . . . . . . . . . . . . . . . . . . . . . . . . . . . . . . . . . . . 55
The Browser . . . . . . . . . . . . . . . . . . . . . . . . . . . . . . . 67
The Folders Palette . . . . . . . . . . . . . . . . . . . . . . . . 79
The Metadata Palette . . . . . . . . . . . . . . . . . . . . . . 81
Activity Toolbar . . . . . . . . . . . . . . . . . . . . . . . . . . . . 87
The Toolbar . . . . . . . . . . . . . . . . . . . . . . . . . . . . . . . . 89
Bird’s Eye . . . . . . . . . . . . . . . . . . . . . . . . . . . . . . . . . 119
Edit List . . . . . . . . . . . . . . . . . . . . . . . . . . . . . . . . . . . 121
Photo Info . . . . . . . . . . . . . . . . . . . . . . . . . . . . . . . . 151
The Color Picker . . . . . . . . . . . . . . . . . . . . . . . . . . 155
File Menu . . . . . . . . . . . . . . . . . . . . . . . . . . . . . . . . . 159
Edit Menu . . . . . . . . . . . . . . . . . . . . . . . . . . . . . . . . . 169
Adjust Menu . . . . . . . . . . . . . . . . . . . . . . . . . . . . . . 181
Filter Menu . . . . . . . . . . . . . . . . . . . . . . . . . . . . . . . 209
Batch Menu . . . . . . . . . . . . . . . . . . . . . . . . . . . . . . . 217
View Menu . . . . . . . . . . . . . . . . . . . . . . . . . . . . . . . . 227
Window Menu . . . . . . . . . . . . . . . . . . . . . . . . . . . . 237
Help Menu . . . . . . . . . . . . . . . . . . . . . . . . . . . . . . . . 239
Appendix: Short-cuts . . . . . . . . . . . . . . . . . . . . . 241
Appendix: Supplied Color Profiles . . . . . . . . 247
Appendix: Additional Notices . . . . . . . . . . . . . 251
Index . . . . . . . . . . . . . . . . . . . . . . . . . . . . . . . . . . . . . 261
Contact Information . . . . . . . . . . . . . . . . . . . . . . 265
Chapter 2 — Chapters at a Glance
1
2
Chapter 2 — Chapters at a Glance
Chapter 3
Table of Contents
Chapter 1
Notices & Trademark Information
Notices
Trademark Information
Chapter 2
Chapters at a Glance
Chapter 3
Table of Contents
Chapter 4
Introduction
RAW File Format Benefits . . . . . . . . . . . . . . . . . . . . . . . . . .9
Camera Relationship . . . . . . . . . . . . . . . . . . . . . . . . . . . . 10
U Point® Technology. . . . . . . . . . . . . . . . . . . . . . . . . . . . . 10
Chapter 5
System Requirements & Installation
System Requirements . . . . . . . . . . . . . . . . . . . . . . . . . . . 11
Windows. . . . . . . . . . . . . . . . . . . . . . . . . . . . . . . . . . . . . . 11
Macintosh . . . . . . . . . . . . . . . . . . . . . . . . . . . . . . . . . . . . 11
Installation . . . . . . . . . . . . . . . . . . . . . . . . . . . . . . . . . . . . . . 12
Windows. . . . . . . . . . . . . . . . . . . . . . . . . . . . . . . . . . . . . . 12
Macintosh . . . . . . . . . . . . . . . . . . . . . . . . . . . . . . . . . . . . 12
Color Management Options. . . . . . . . . . . . . . . . . . . 13
Running Capture NX 2 in Trial Mode or Activating
Product . . . . . . . . . . . . . . . . . . . . . . . . . . . . . . . . . . . . . 13
Upgrading From Capture NX Version 1 . . . . . . . . 14
Nikon User Support Information (U.S.A.). . . . . . . . . . 14
Chapter 6
Getting Started
Launching Capture NX 2. . . . . . . . . . . . . . . . . . . . . . . . . 15
Convert Capture NX Version 1 Labels. . . . . . . . . . . . . 15
Welcome Screen . . . . . . . . . . . . . . . . . . . . . . . . . . . . . . . . 16
Open Recent Image . . . . . . . . . . . . . . . . . . . . . . . . . . . 16
Open Recent Folder . . . . . . . . . . . . . . . . . . . . . . . . . . . 16
Don’t Show Again . . . . . . . . . . . . . . . . . . . . . . . . . . . . . 16
Drag an image here to open it (Macintosh Only)
. . . . . . . . . . . . . . . . . . . . . . . . . . . . . . . . . . . . . . . . . . . . . 16
Browsing and Opening Images . . . . . . . . . . . . . . . . . . 17
Using the Browser. . . . . . . . . . . . . . . . . . . . . . . . . . . . . 17
Using Open Image . . . . . . . . . . . . . . . . . . . . . . . . . . . . 17
Using ViewNX . . . . . . . . . . . . . . . . . . . . . . . . . . . . . . . . . 18
Using Nikon Transfer . . . . . . . . . . . . . . . . . . . . . . . . . . 18
File Format Differences . . . . . . . . . . . . . . . . . . . . . . . . . . .19
NEF . . . . . . . . . . . . . . . . . . . . . . . . . . . . . . . . . . . . . . . . . . . .19
TIFF . . . . . . . . . . . . . . . . . . . . . . . . . . . . . . . . . . . . . . . . . . . .19
JPEG . . . . . . . . . . . . . . . . . . . . . . . . . . . . . . . . . . . . . . . . . . .20
Workflow Suggestions . . . . . . . . . . . . . . . . . . . . . . . . . . .20
Printing. . . . . . . . . . . . . . . . . . . . . . . . . . . . . . . . . . . . . . . . . .22
Printing a Single Image . . . . . . . . . . . . . . . . . . . . . . . .22
Printing contact sheets. . . . . . . . . . . . . . . . . . . . . . . . .26
Batch Processing . . . . . . . . . . . . . . . . . . . . . . . . . . . . . . . . .28
Applying a series of enhancements to a folder of
images . . . . . . . . . . . . . . . . . . . . . . . . . . . . . . . . . . . . . . .28
Adding XMP/IPTC data to a series of images using
an XMP/IPTC preset . . . . . . . . . . . . . . . . . . . . . . . . . .31
Converting NEF RAW files into JPEG or TIFF files . . .33
To convert a folder of files from NEF RAW to JPEG
or TIFF . . . . . . . . . . . . . . . . . . . . . . . . . . . . . . . . . . . . . . .33
To convert selected files from the Browser. . . . . .35
Chapter 7
Preferences
General . . . . . . . . . . . . . . . . . . . . . . . . . . . . . . . . . . . . . . . . . .38
Open With Application. . . . . . . . . . . . . . . . . . . . . . . . .38
Place Open With TIFF File In . . . . . . . . . . . . . . . . . . . .38
D1X RAW Default . . . . . . . . . . . . . . . . . . . . . . . . . . . . . .38
Default Units. . . . . . . . . . . . . . . . . . . . . . . . . . . . . . . . . . .38
Default Save As . . . . . . . . . . . . . . . . . . . . . . . . . . . . . . . .39
Keep all Steps Active in Edit List . . . . . . . . . . . . . . . .39
Folder for Temporary Data . . . . . . . . . . . . . . . . . . . . .39
Color Management . . . . . . . . . . . . . . . . . . . . . . . . . . . . . .40
Default RGB Color Space . . . . . . . . . . . . . . . . . . . . . . .40
Use This Instead of Embedded Profile . . . . . . . . . .40
CMYK Separation profile . . . . . . . . . . . . . . . . . . . . . . .40
Printer Profile . . . . . . . . . . . . . . . . . . . . . . . . . . . . . . . . . .40
Use This Profile when printing. . . . . . . . . . . . . . . . . .40
Intent . . . . . . . . . . . . . . . . . . . . . . . . . . . . . . . . . . . . . . . . . .41
Use Black Point Compensation . . . . . . . . . . . . . . . . .41
Levels & Sampling . . . . . . . . . . . . . . . . . . . . . . . . . . . . . . .42
Levels & Curves . . . . . . . . . . . . . . . . . . . . . . . . . . . . . . . .42
Dropper Sample Size. . . . . . . . . . . . . . . . . . . . . . . . . . .43
Display . . . . . . . . . . . . . . . . . . . . . . . . . . . . . . . . . . . . . . . . . .44
Grid. . . . . . . . . . . . . . . . . . . . . . . . . . . . . . . . . . . . . . . . . . . .44
Selection Overlay . . . . . . . . . . . . . . . . . . . . . . . . . . . . . .45
Image . . . . . . . . . . . . . . . . . . . . . . . . . . . . . . . . . . . . . . . . .45
Chapter 3 — Table of Contents
3
Cache Settings. . . . . . . . . . . . . . . . . . . . . . . . . . . . . . . . . . . 46
Browsing Cache . . . . . . . . . . . . . . . . . . . . . . . . . . . . . . . 46
Editing Cache . . . . . . . . . . . . . . . . . . . . . . . . . . . . . . . . . . 46
XMP/IPTC Presets . . . . . . . . . . . . . . . . . . . . . . . . . . . . . . . . 48
Available Presets . . . . . . . . . . . . . . . . . . . . . . . . . . . . . . . 48
Field Editor . . . . . . . . . . . . . . . . . . . . . . . . . . . . . . . . . . . . 48
New . . . . . . . . . . . . . . . . . . . . . . . . . . . . . . . . . . . . . . . . . . .49
Duplicate . . . . . . . . . . . . . . . . . . . . . . . . . . . . . . . . . . . . . . 49
Delete . . . . . . . . . . . . . . . . . . . . . . . . . . . . . . . . . . . . . . . . . 49
Import . . . . . . . . . . . . . . . . . . . . . . . . . . . . . . . . . . . . . . . . . 49
Export . . . . . . . . . . . . . . . . . . . . . . . . . . . . . . . . . . . . . . . . . 49
Labels . . . . . . . . . . . . . . . . . . . . . . . . . . . . . . . . . . . . . . . . . . . 50
Label Compatibility . . . . . . . . . . . . . . . . . . . . . . . . . . . . 50
Available Labels. . . . . . . . . . . . . . . . . . . . . . . . . . . . . . . . 51
Manage Settings. . . . . . . . . . . . . . . . . . . . . . . . . . . . . . . . . 51
Add. . . . . . . . . . . . . . . . . . . . . . . . . . . . . . . . . . . . . . . . . . . . 51
Delete . . . . . . . . . . . . . . . . . . . . . . . . . . . . . . . . . . . . . . . . . 51
Workspaces. . . . . . . . . . . . . . . . . . . . . . . . . . . . . . . . . . . . . . 52
Default Workspaces . . . . . . . . . . . . . . . . . . . . . . . . . . . . 52
My Workspaces . . . . . . . . . . . . . . . . . . . . . . . . . . . . . . . . 52
Reset Shortcuts . . . . . . . . . . . . . . . . . . . . . . . . . . . . . . . . 52
Add. . . . . . . . . . . . . . . . . . . . . . . . . . . . . . . . . . . . . . . . . . . . 52
Delete . . . . . . . . . . . . . . . . . . . . . . . . . . . . . . . . . . . . . . . . . 53
Chapter 8
Interface
Overview . . . . . . . . . . . . . . . . . . . . . . . . . . . . . . . . . . . . . . . . 55
Editor . . . . . . . . . . . . . . . . . . . . . . . . . . . . . . . . . . . . . . . . . . 55
Menu Bar . . . . . . . . . . . . . . . . . . . . . . . . . . . . . . . . . . . . . . 55
Browser. . . . . . . . . . . . . . . . . . . . . . . . . . . . . . . . . . . . . . . . 55
Folders . . . . . . . . . . . . . . . . . . . . . . . . . . . . . . . . . . . . . . . . 56
Metadata . . . . . . . . . . . . . . . . . . . . . . . . . . . . . . . . . . . . . . 56
Toolbar . . . . . . . . . . . . . . . . . . . . . . . . . . . . . . . . . . . . . . . . 56
Bird’s Eye. . . . . . . . . . . . . . . . . . . . . . . . . . . . . . . . . . . . . . . 56
Edit List . . . . . . . . . . . . . . . . . . . . . . . . . . . . . . . . . . . . . . . . 56
Photo Info . . . . . . . . . . . . . . . . . . . . . . . . . . . . . . . . . . . . . 56
Image Window . . . . . . . . . . . . . . . . . . . . . . . . . . . . . . . . 56
Workspaces. . . . . . . . . . . . . . . . . . . . . . . . . . . . . . . . . . . . . . 57
Browser. . . . . . . . . . . . . . . . . . . . . . . . . . . . . . . . . . . . . . . . 57
Metadata . . . . . . . . . . . . . . . . . . . . . . . . . . . . . . . . . . . . . . 58
Multi-Purpose. . . . . . . . . . . . . . . . . . . . . . . . . . . . . . . . . . 58
Edit . . . . . . . . . . . . . . . . . . . . . . . . . . . . . . . . . . . . . . . . . . . . 58
Creating Custom Workspaces . . . . . . . . . . . . . . . . . . 58
Working with Multiple Screens . . . . . . . . . . . . . . . . . . . 60
Additional screen Sub-Menu . . . . . . . . . . . . . . . . . . . 60
Desktop . . . . . . . . . . . . . . . . . . . . . . . . . . . . . . . . . . . . . . . 61
Swap Workspaces. . . . . . . . . . . . . . . . . . . . . . . . . . . . . . 61
Image Window . . . . . . . . . . . . . . . . . . . . . . . . . . . . . . . . . . 62
Image Name . . . . . . . . . . . . . . . . . . . . . . . . . . . . . . . . . . . 62
4
Chapter 3 — Table of Contents
Zoom Ratio. . . . . . . . . . . . . . . . . . . . . . . . . . . . . . . . . . . . 62
File Size. . . . . . . . . . . . . . . . . . . . . . . . . . . . . . . . . . . . . . . . 62
Color Profile . . . . . . . . . . . . . . . . . . . . . . . . . . . . . . . . . . . 62
Soft Proof. . . . . . . . . . . . . . . . . . . . . . . . . . . . . . . . . . . . . . 63
Window & Palette Functionality . . . . . . . . . . . . . . . . . . 65
Minimizing & Maximizing Palettes. . . . . . . . . . . . . . 65
Docking & Undocking Palettes. . . . . . . . . . . . . . . . . 65
Grip Edge. . . . . . . . . . . . . . . . . . . . . . . . . . . . . . . . . . . . . . 65
Resize Control . . . . . . . . . . . . . . . . . . . . . . . . . . . . . . . . . 65
Finding Palettes . . . . . . . . . . . . . . . . . . . . . . . . . . . . . . . 66
Chapter 9
The Browser
Browser Overview . . . . . . . . . . . . . . . . . . . . . . . . . . . . . . . 67
Opening a Folder of Images in the Browser . . . . . . . 68
Using the Folders Palette . . . . . . . . . . . . . . . . . . . . . . 68
Using Open Folder in Browser . . . . . . . . . . . . . . . . . 68
Using Nikon Transfer . . . . . . . . . . . . . . . . . . . . . . . . . . . 69
Navigating Within the Browser . . . . . . . . . . . . . . . . . . . 70
Filtering Tools . . . . . . . . . . . . . . . . . . . . . . . . . . . . . . . . . . . 70
Filter by Label. . . . . . . . . . . . . . . . . . . . . . . . . . . . . . . . . . 70
Filter by Rating . . . . . . . . . . . . . . . . . . . . . . . . . . . . . . . . 71
File Type to Display . . . . . . . . . . . . . . . . . . . . . . . . . . . . 71
Sorting Tools . . . . . . . . . . . . . . . . . . . . . . . . . . . . . . . . . . . . 72
Sort By . . . . . . . . . . . . . . . . . . . . . . . . . . . . . . . . . . . . . . . . 72
Then Sort By. . . . . . . . . . . . . . . . . . . . . . . . . . . . . . . . . . . 72
Labeling and Rating Toolbar . . . . . . . . . . . . . . . . . . . . . 73
Add Label . . . . . . . . . . . . . . . . . . . . . . . . . . . . . . . . . . . . . 73
Add Rating . . . . . . . . . . . . . . . . . . . . . . . . . . . . . . . . . . . . 73
Browser Header . . . . . . . . . . . . . . . . . . . . . . . . . . . . . . . . . 74
Browser View Selector . . . . . . . . . . . . . . . . . . . . . . . . . . . 74
Thumbnail Grid. . . . . . . . . . . . . . . . . . . . . . . . . . . . . . . . 74
Thumbnail List. . . . . . . . . . . . . . . . . . . . . . . . . . . . . . . . . 76
Opening Images from the Browser . . . . . . . . . . . . . . . 78
Chapter 10
The Folders Palette
Favorite Folders Section . . . . . . . . . . . . . . . . . . . . . . . . . 80
Adding Favorites. . . . . . . . . . . . . . . . . . . . . . . . . . . . . . . 80
Deleting Favorites . . . . . . . . . . . . . . . . . . . . . . . . . . . . . 80
Folder Structure Section . . . . . . . . . . . . . . . . . . . . . . . . . 80
Chapter 11
The Metadata Palette
File & Camera Information Section . . . . . . . . . . . . . . . 81
XMP/IPTC Information Section . . . . . . . . . . . . . . . . . . . 82
Adding Image Information. . . . . . . . . . . . . . . . . . . . . 82
Copying and Pasting IPTC Information . . . . . . . . . 83
Creating XMP/IPTC Presets . . . . . . . . . . . . . . . . . . . . . 84
Loading XMP/IPTC Presets . . . . . . . . . . . . . . . . . . . . . 86
Managing XMP/IPTC Presets. . . . . . . . . . . . . . . . . . . 86
Chapter 12
Activity Toolbar
Workspace Selector . . . . . . . . . . . . . . . . . . . . . . . . . . . . . 87
Launch Nikon Transfer . . . . . . . . . . . . . . . . . . . . . . . . . . . 87
Print . . . . . . . . . . . . . . . . . . . . . . . . . . . . . . . . . . . . . . . . . . . . 88
Chapter 13
Selection Gradient Tools . . . . . . . . . . . . . . . . . . . . . . . 116
Linear Gradient Tool. . . . . . . . . . . . . . . . . . . . . . . . . . 116
Radial Gradient Tool. . . . . . . . . . . . . . . . . . . . . . . . . . 116
Gradient Range . . . . . . . . . . . . . . . . . . . . . . . . . . . . . . 117
Fill / Remove Tools . . . . . . . . . . . . . . . . . . . . . . . . . . . . . 118
Chapter 14
Bird’s Eye
Chapter 15
Edit List
The Toolbar
Tool Options Bar . . . . . . . . . . . . . . . . . . . . . . . . . . . . . . . . 89
Direct Select Tool. . . . . . . . . . . . . . . . . . . . . . . . . . . . . . . . 89
Hand Tool . . . . . . . . . . . . . . . . . . . . . . . . . . . . . . . . . . . . . . . 90
Zoom Tool . . . . . . . . . . . . . . . . . . . . . . . . . . . . . . . . . . . . . . 90
Rotate Tool. . . . . . . . . . . . . . . . . . . . . . . . . . . . . . . . . . . . . . 91
Straighten Tool . . . . . . . . . . . . . . . . . . . . . . . . . . . . . . . . . . 91
Crop Tool . . . . . . . . . . . . . . . . . . . . . . . . . . . . . . . . . . . . . . . 93
Crop Method . . . . . . . . . . . . . . . . . . . . . . . . . . . . . . . . . 94
Show Crop Assistance Grid . . . . . . . . . . . . . . . . . . . . 94
Black Control Point . . . . . . . . . . . . . . . . . . . . . . . . . . . . . . 95
Black Control Point Method . . . . . . . . . . . . . . . . . . . 96
Advanced . . . . . . . . . . . . . . . . . . . . . . . . . . . . . . . . . . . . . 97
Neutral Control Point . . . . . . . . . . . . . . . . . . . . . . . . . . . . 98
Neutral Control Point Method . . . . . . . . . . . . . . . . 100
Show Selection . . . . . . . . . . . . . . . . . . . . . . . . . . . . . . 100
Color Picker . . . . . . . . . . . . . . . . . . . . . . . . . . . . . . . . . . 100
Advanced . . . . . . . . . . . . . . . . . . . . . . . . . . . . . . . . . . . . 101
White Control Point . . . . . . . . . . . . . . . . . . . . . . . . . . . . 101
White Control Point Method. . . . . . . . . . . . . . . . . . 102
Advanced . . . . . . . . . . . . . . . . . . . . . . . . . . . . . . . . . . . . 103
Color Control Point . . . . . . . . . . . . . . . . . . . . . . . . . . . . . 103
Color Control Point Mode . . . . . . . . . . . . . . . . . . . . 105
Show Selection . . . . . . . . . . . . . . . . . . . . . . . . . . . . . . 106
Protect Details . . . . . . . . . . . . . . . . . . . . . . . . . . . . . . . 106
Color Picker . . . . . . . . . . . . . . . . . . . . . . . . . . . . . . . . . . 106
Method . . . . . . . . . . . . . . . . . . . . . . . . . . . . . . . . . . . . . . 106
Red-Eye Control Point . . . . . . . . . . . . . . . . . . . . . . . . . . 107
Auto Retouch Brush . . . . . . . . . . . . . . . . . . . . . . . . . . . . 108
Size . . . . . . . . . . . . . . . . . . . . . . . . . . . . . . . . . . . . . . . . . . 109
Selection Control Point . . . . . . . . . . . . . . . . . . . . . . . . . 110
Lasso and Marquee Tools . . . . . . . . . . . . . . . . . . . . . . . 111
Lasso Tool . . . . . . . . . . . . . . . . . . . . . . . . . . . . . . . . . . . . 111
Polygon Lasso Tool . . . . . . . . . . . . . . . . . . . . . . . . . . . 111
Rectangle Marquee Tool . . . . . . . . . . . . . . . . . . . . . 111
Oval Marquee Tool . . . . . . . . . . . . . . . . . . . . . . . . . . . 111
Edge Softness . . . . . . . . . . . . . . . . . . . . . . . . . . . . . . . . 112
Selection Brush Tool. . . . . . . . . . . . . . . . . . . . . . . . . . . . 113
Brush Hardness . . . . . . . . . . . . . . . . . . . . . . . . . . . . . . 114
Opacity . . . . . . . . . . . . . . . . . . . . . . . . . . . . . . . . . . . . . . 115
Pressure Controls. . . . . . . . . . . . . . . . . . . . . . . . . . . . . 115
Introduction to the Edit List . . . . . . . . . . . . . . . . . . . . 122
Show/Hide Triangles . . . . . . . . . . . . . . . . . . . . . . . . . 123
Apply Checkbox . . . . . . . . . . . . . . . . . . . . . . . . . . . . . 123
Reset Button . . . . . . . . . . . . . . . . . . . . . . . . . . . . . . . . . 123
Delete Button . . . . . . . . . . . . . . . . . . . . . . . . . . . . . . . . 123
Version . . . . . . . . . . . . . . . . . . . . . . . . . . . . . . . . . . . . . . . . 124
Original . . . . . . . . . . . . . . . . . . . . . . . . . . . . . . . . . . . . . . 124
Last Saved . . . . . . . . . . . . . . . . . . . . . . . . . . . . . . . . . . . 124
(Current) . . . . . . . . . . . . . . . . . . . . . . . . . . . . . . . . . . . . . 124
New Version…. . . . . . . . . . . . . . . . . . . . . . . . . . . . . . . 124
Edit Versions . . . . . . . . . . . . . . . . . . . . . . . . . . . . . . . . . 124
Batch Menu. . . . . . . . . . . . . . . . . . . . . . . . . . . . . . . . . . . . 125
Develop Section . . . . . . . . . . . . . . . . . . . . . . . . . . . . . . . 126
Camera Settings . . . . . . . . . . . . . . . . . . . . . . . . . . . . . 127
Quick Fix . . . . . . . . . . . . . . . . . . . . . . . . . . . . . . . . . . . . . 137
Camera & Lens Corrections. . . . . . . . . . . . . . . . . . . 139
Adjust Section . . . . . . . . . . . . . . . . . . . . . . . . . . . . . . . . . 143
Selection Information . . . . . . . . . . . . . . . . . . . . . . . . 143
Adjust & Filter pull-down menu . . . . . . . . . . . . . . 145
Link Icon . . . . . . . . . . . . . . . . . . . . . . . . . . . . . . . . . . . . . 145
Enhancement Controls. . . . . . . . . . . . . . . . . . . . . . . 145
Opacity Mixer . . . . . . . . . . . . . . . . . . . . . . . . . . . . . . . . 146
Working with the Edit List . . . . . . . . . . . . . . . . . . . . . . 148
Deleting Steps and Enhancements . . . . . . . . . . . 148
Copying and Pasting Steps and Enhancements
. . . . . . . . . . . . . . . . . . . . . . . . . . . . . . . . . . . . . . . . . . . . 148
Linking Enhancements. . . . . . . . . . . . . . . . . . . . . . . 149
Swapping Enhancements . . . . . . . . . . . . . . . . . . . . 149
New Step Button. . . . . . . . . . . . . . . . . . . . . . . . . . . . . . . 150
Chapter 16
Photo Info
Histogram . . . . . . . . . . . . . . . . . . . . . . . . . . . . . . . . . . . . .
Channels . . . . . . . . . . . . . . . . . . . . . . . . . . . . . . . . . . . .
Double Threshold. . . . . . . . . . . . . . . . . . . . . . . . . . . .
Clear. . . . . . . . . . . . . . . . . . . . . . . . . . . . . . . . . . . . . . . . .
Watch Points. . . . . . . . . . . . . . . . . . . . . . . . . . . . . . . . . . .
Add Watch Point Button . . . . . . . . . . . . . . . . . . . . .
Color Model . . . . . . . . . . . . . . . . . . . . . . . . . . . . . . . . .
151
152
152
153
153
154
154
Chapter 3 — Table of Contents
5
Sample Size. . . . . . . . . . . . . . . . . . . . . . . . . . . . . . . . . . .154
Chapter 17
The Color Picker
Color Wheel . . . . . . . . . . . . . . . . . . . . . . . . . . . . . . . . . .156
Color Triangle . . . . . . . . . . . . . . . . . . . . . . . . . . . . . . . . .156
RGB Selection Boxes . . . . . . . . . . . . . . . . . . . . . . . . . .156
HSB Selection Boxes . . . . . . . . . . . . . . . . . . . . . . . . . .156
LAB Selection Boxes. . . . . . . . . . . . . . . . . . . . . . . . . . .156
Last Selected & Previous Picks . . . . . . . . . . . . . . . . .157
Color Eyedropper . . . . . . . . . . . . . . . . . . . . . . . . . . . . .157
Swatches Show/Hide Triangle. . . . . . . . . . . . . . . . .157
Swatches Section . . . . . . . . . . . . . . . . . . . . . . . . . . . . .157
Chapter 18
File Menu
Open Image… . . . . . . . . . . . . . . . . . . . . . . . . . . . . . . . . . .159
Open With… . . . . . . . . . . . . . . . . . . . . . . . . . . . . . . . . . . .159
Open Folder in Browser… . . . . . . . . . . . . . . . . . . . . . . .160
Open Recent. . . . . . . . . . . . . . . . . . . . . . . . . . . . . . . . . . . .160
Launch Nikon Transfer… . . . . . . . . . . . . . . . . . . . . . . . .160
Launch Camera Control Pro… . . . . . . . . . . . . . . . . . . .160
Save . . . . . . . . . . . . . . . . . . . . . . . . . . . . . . . . . . . . . . . . . . . .160
JPEG . . . . . . . . . . . . . . . . . . . . . . . . . . . . . . . . . . . . . . . . . .160
Save As…. . . . . . . . . . . . . . . . . . . . . . . . . . . . . . . . . . . . . . .161
NEF . . . . . . . . . . . . . . . . . . . . . . . . . . . . . . . . . . . . . . . . . . .161
TIFF. . . . . . . . . . . . . . . . . . . . . . . . . . . . . . . . . . . . . . . . . . .161
JPEG . . . . . . . . . . . . . . . . . . . . . . . . . . . . . . . . . . . . . . . . . .162
Revert . . . . . . . . . . . . . . . . . . . . . . . . . . . . . . . . . . . . . . . . . .163
Protect File . . . . . . . . . . . . . . . . . . . . . . . . . . . . . . . . . . . . .163
Close . . . . . . . . . . . . . . . . . . . . . . . . . . . . . . . . . . . . . . . . . . .163
Page Setup… . . . . . . . . . . . . . . . . . . . . . . . . . . . . . . . . . . .163
Print… . . . . . . . . . . . . . . . . . . . . . . . . . . . . . . . . . . . . . . . . .164
Page Display and Page Forward and Back Buttons
. . . . . . . . . . . . . . . . . . . . . . . . . . . . . . . . . . . . . . . . . . . . .164
Copies . . . . . . . . . . . . . . . . . . . . . . . . . . . . . . . . . . . . . . . .164
Page Setup . . . . . . . . . . . . . . . . . . . . . . . . . . . . . . . . . . .164
Metadata . . . . . . . . . . . . . . . . . . . . . . . . . . . . . . . . . . . . .165
Page Layout Tab . . . . . . . . . . . . . . . . . . . . . . . . . . . . . .166
Color Management Tab . . . . . . . . . . . . . . . . . . . . . . .167
Print to File . . . . . . . . . . . . . . . . . . . . . . . . . . . . . . . . . . .168
Exit . . . . . . . . . . . . . . . . . . . . . . . . . . . . . . . . . . . . . . . . . . . . .168
Chapter 19
Edit Menu
Undo . . . . . . . . . . . . . . . . . . . . . . . . . . . . . . . . . . . . . . . . . . .169
Redo . . . . . . . . . . . . . . . . . . . . . . . . . . . . . . . . . . . . . . . . . . .169
Cut . . . . . . . . . . . . . . . . . . . . . . . . . . . . . . . . . . . . . . . . . . . . .170
Copy . . . . . . . . . . . . . . . . . . . . . . . . . . . . . . . . . . . . . . . . . . .170
Paste . . . . . . . . . . . . . . . . . . . . . . . . . . . . . . . . . . . . . . . . . . .170
6
Chapter 3 — Table of Contents
Duplicate. . . . . . . . . . . . . . . . . . . . . . . . . . . . . . . . . . . . . . . 171
Delete. . . . . . . . . . . . . . . . . . . . . . . . . . . . . . . . . . . . . . . . . . 171
Rename . . . . . . . . . . . . . . . . . . . . . . . . . . . . . . . . . . . . . . . . 171
Select All . . . . . . . . . . . . . . . . . . . . . . . . . . . . . . . . . . . . . . . 172
Deselect All . . . . . . . . . . . . . . . . . . . . . . . . . . . . . . . . . . . . 172
Flip. . . . . . . . . . . . . . . . . . . . . . . . . . . . . . . . . . . . . . . . . . . . . 173
Rotate. . . . . . . . . . . . . . . . . . . . . . . . . . . . . . . . . . . . . . . . . . 173
90 Degrees CW . . . . . . . . . . . . . . . . . . . . . . . . . . . . . . .174
90 Degrees CCW. . . . . . . . . . . . . . . . . . . . . . . . . . . . . .174
Straighten . . . . . . . . . . . . . . . . . . . . . . . . . . . . . . . . . . . .174
Size / Resolution . . . . . . . . . . . . . . . . . . . . . . . . . . . . . . . . 176
Resample Image. . . . . . . . . . . . . . . . . . . . . . . . . . . . . .176
Don’t Resample Image. . . . . . . . . . . . . . . . . . . . . . . .176
Fit Photo . . . . . . . . . . . . . . . . . . . . . . . . . . . . . . . . . . . . . . . 177
Chapter 20
Adjust Menu
Light > Levels & Curves . . . . . . . . . . . . . . . . . . . . . . . . . 181
Channel Selector . . . . . . . . . . . . . . . . . . . . . . . . . . . . .183
Curve Editor . . . . . . . . . . . . . . . . . . . . . . . . . . . . . . . . . .183
Black and White Output Sliders . . . . . . . . . . . . . . .184
Black, Mid Point, and White Sliders . . . . . . . . . . . .184
Show Before / After Histogram. . . . . . . . . . . . . . . .185
Auto Contrast . . . . . . . . . . . . . . . . . . . . . . . . . . . . . . . .185
Set White Point . . . . . . . . . . . . . . . . . . . . . . . . . . . . . . .185
Set Neutral Point. . . . . . . . . . . . . . . . . . . . . . . . . . . . . .185
Set Black Point . . . . . . . . . . . . . . . . . . . . . . . . . . . . . . . .186
Add Anchor Point. . . . . . . . . . . . . . . . . . . . . . . . . . . . .186
Reset Current Channel . . . . . . . . . . . . . . . . . . . . . . . .186
Reset All Channels . . . . . . . . . . . . . . . . . . . . . . . . . . . .186
Temporary Cancel . . . . . . . . . . . . . . . . . . . . . . . . . . . .186
Light > Contrast / Brightness . . . . . . . . . . . . . . . . . . . . 186
Contrast . . . . . . . . . . . . . . . . . . . . . . . . . . . . . . . . . . . . . .186
Brightness . . . . . . . . . . . . . . . . . . . . . . . . . . . . . . . . . . . .187
Light > Auto Levels . . . . . . . . . . . . . . . . . . . . . . . . . . . . . 187
Auto Levels Method . . . . . . . . . . . . . . . . . . . . . . . . . .187
Correct Contrast . . . . . . . . . . . . . . . . . . . . . . . . . . . . . .187
Correct Color Cast . . . . . . . . . . . . . . . . . . . . . . . . . . . .188
Light > D-Lighting . . . . . . . . . . . . . . . . . . . . . . . . . . . . . . 188
Faster (HS) Method . . . . . . . . . . . . . . . . . . . . . . . . . . .188
Better Quality (HQ) Method . . . . . . . . . . . . . . . . . . .188
Color > LCH . . . . . . . . . . . . . . . . . . . . . . . . . . . . . . . . . . . . 189
Master Lightness . . . . . . . . . . . . . . . . . . . . . . . . . . . . .190
Color Lightness . . . . . . . . . . . . . . . . . . . . . . . . . . . . . . .193
Chroma . . . . . . . . . . . . . . . . . . . . . . . . . . . . . . . . . . . . . .194
Hue . . . . . . . . . . . . . . . . . . . . . . . . . . . . . . . . . . . . . . . . . .195
Color > Color Balance . . . . . . . . . . . . . . . . . . . . . . . . . . . 197
Brightness . . . . . . . . . . . . . . . . . . . . . . . . . . . . . . . . . . . .197
Contrast . . . . . . . . . . . . . . . . . . . . . . . . . . . . . . . . . . . . . .197
Red . . . . . . . . . . . . . . . . . . . . . . . . . . . . . . . . . . . . . . . . . . 197
Green . . . . . . . . . . . . . . . . . . . . . . . . . . . . . . . . . . . . . . . . 197
Blue. . . . . . . . . . . . . . . . . . . . . . . . . . . . . . . . . . . . . . . . . . 197
Color > Color Booster. . . . . . . . . . . . . . . . . . . . . . . . . . . 198
Protect Skin Tones. . . . . . . . . . . . . . . . . . . . . . . . . . . . 198
Level . . . . . . . . . . . . . . . . . . . . . . . . . . . . . . . . . . . . . . . . . 198
Color > Saturation / Warmth . . . . . . . . . . . . . . . . . . . . 198
Saturation. . . . . . . . . . . . . . . . . . . . . . . . . . . . . . . . . . . . 198
Warmth . . . . . . . . . . . . . . . . . . . . . . . . . . . . . . . . . . . . . . 198
Focus > Gaussian Blur . . . . . . . . . . . . . . . . . . . . . . . . . . 199
Radius . . . . . . . . . . . . . . . . . . . . . . . . . . . . . . . . . . . . . . . 199
Opacity . . . . . . . . . . . . . . . . . . . . . . . . . . . . . . . . . . . . . . 199
Focus > High Pass . . . . . . . . . . . . . . . . . . . . . . . . . . . . . . 199
Radius . . . . . . . . . . . . . . . . . . . . . . . . . . . . . . . . . . . . . . . 199
Focus > Unsharp Mask. . . . . . . . . . . . . . . . . . . . . . . . . . 200
Color. . . . . . . . . . . . . . . . . . . . . . . . . . . . . . . . . . . . . . . . . 201
Intensity . . . . . . . . . . . . . . . . . . . . . . . . . . . . . . . . . . . . . 202
Radius . . . . . . . . . . . . . . . . . . . . . . . . . . . . . . . . . . . . . . . 202
Threshold . . . . . . . . . . . . . . . . . . . . . . . . . . . . . . . . . . . . 202
Delete . . . . . . . . . . . . . . . . . . . . . . . . . . . . . . . . . . . . . . . 202
Correct > Distortion Control . . . . . . . . . . . . . . . . . . . . 202
Correction . . . . . . . . . . . . . . . . . . . . . . . . . . . . . . . . . . . 202
Fill Color . . . . . . . . . . . . . . . . . . . . . . . . . . . . . . . . . . . . . 203
Correct > Color Aberration Control. . . . . . . . . . . . . . 203
Red — Cyan . . . . . . . . . . . . . . . . . . . . . . . . . . . . . . . . . 203
Blue — Yellow . . . . . . . . . . . . . . . . . . . . . . . . . . . . . . . 203
Noise Reduction. . . . . . . . . . . . . . . . . . . . . . . . . . . . . . . . 204
Intensity . . . . . . . . . . . . . . . . . . . . . . . . . . . . . . . . . . . . . 204
Sharpness. . . . . . . . . . . . . . . . . . . . . . . . . . . . . . . . . . . . 205
Method . . . . . . . . . . . . . . . . . . . . . . . . . . . . . . . . . . . . . . 205
Edge Noise Reduction. . . . . . . . . . . . . . . . . . . . . . . . 205
Color Profile. . . . . . . . . . . . . . . . . . . . . . . . . . . . . . . . . . . . 206
Apply Profile . . . . . . . . . . . . . . . . . . . . . . . . . . . . . . . . . 206
Convert to Profile . . . . . . . . . . . . . . . . . . . . . . . . . . . . 207
Chapter 21
Filter Menu
Photo Effects . . . . . . . . . . . . . . . . . . . . . . . . . . . . . . . . . . . 209
Enhance Photo. . . . . . . . . . . . . . . . . . . . . . . . . . . . . . . 209
Black and White . . . . . . . . . . . . . . . . . . . . . . . . . . . . . . 210
Sepia. . . . . . . . . . . . . . . . . . . . . . . . . . . . . . . . . . . . . . . . . 211
Tinted. . . . . . . . . . . . . . . . . . . . . . . . . . . . . . . . . . . . . . . . 212
Add Grain / Noise . . . . . . . . . . . . . . . . . . . . . . . . . . . . . . 213
Grain Strength . . . . . . . . . . . . . . . . . . . . . . . . . . . . . . . 213
Grain Color. . . . . . . . . . . . . . . . . . . . . . . . . . . . . . . . . . . 213
Grain Type . . . . . . . . . . . . . . . . . . . . . . . . . . . . . . . . . . . 213
Contrast: Color Range . . . . . . . . . . . . . . . . . . . . . . . . . . 213
Hue . . . . . . . . . . . . . . . . . . . . . . . . . . . . . . . . . . . . . . . . . . 213
Contrast. . . . . . . . . . . . . . . . . . . . . . . . . . . . . . . . . . . . . . 213
Brightness . . . . . . . . . . . . . . . . . . . . . . . . . . . . . . . . . . . 214
Colorize . . . . . . . . . . . . . . . . . . . . . . . . . . . . . . . . . . . . . . . 214
Color . . . . . . . . . . . . . . . . . . . . . . . . . . . . . . . . . . . . . . . . 214
Opacity . . . . . . . . . . . . . . . . . . . . . . . . . . . . . . . . . . . . . . 214
Blending Mode . . . . . . . . . . . . . . . . . . . . . . . . . . . . . . 214
Black and White Conversion . . . . . . . . . . . . . . . . . . . . 214
Filter Hue . . . . . . . . . . . . . . . . . . . . . . . . . . . . . . . . . . . . 215
Color Filter Strength. . . . . . . . . . . . . . . . . . . . . . . . . . 215
Brightness . . . . . . . . . . . . . . . . . . . . . . . . . . . . . . . . . . . 215
Contrast . . . . . . . . . . . . . . . . . . . . . . . . . . . . . . . . . . . . . 216
Third-Party Plug-Ins . . . . . . . . . . . . . . . . . . . . . . . . . . . . 216
Chapter 22
Batch Menu
Run Batch Process. . . . . . . . . . . . . . . . . . . . . . . . . . . . . . 217
Batch Process . . . . . . . . . . . . . . . . . . . . . . . . . . . . . . . . 217
Watched Folder . . . . . . . . . . . . . . . . . . . . . . . . . . . . . . 219
File Naming Dialog. . . . . . . . . . . . . . . . . . . . . . . . . . . 221
Processing Queue. . . . . . . . . . . . . . . . . . . . . . . . . . . . 222
Copy Adjustments . . . . . . . . . . . . . . . . . . . . . . . . . . . . . 224
Paste Adjustments . . . . . . . . . . . . . . . . . . . . . . . . . . . . . 224
Save Adjustments . . . . . . . . . . . . . . . . . . . . . . . . . . . . . . 225
Load Adjustments . . . . . . . . . . . . . . . . . . . . . . . . . . . . . 225
Copy IPTC Info . . . . . . . . . . . . . . . . . . . . . . . . . . . . . . . . . 226
Paste IPTC Info . . . . . . . . . . . . . . . . . . . . . . . . . . . . . . . . . 226
Save XMP/IPTC Preset . . . . . . . . . . . . . . . . . . . . . . . . . . 226
Load XMP/IPTC Preset . . . . . . . . . . . . . . . . . . . . . . . . . . 226
Chapter 23
View Menu
Selection Display. . . . . . . . . . . . . . . . . . . . . . . . . . . . . . . 227
Hide Selection . . . . . . . . . . . . . . . . . . . . . . . . . . . . . . . 227
Show Overlay . . . . . . . . . . . . . . . . . . . . . . . . . . . . . . . . 228
Show Mask . . . . . . . . . . . . . . . . . . . . . . . . . . . . . . . . . . 228
Show All Control Points . . . . . . . . . . . . . . . . . . . . . . . . 228
Show Active Selection. . . . . . . . . . . . . . . . . . . . . . . . . . 228
Show Watch Points. . . . . . . . . . . . . . . . . . . . . . . . . . . . . 228
Show Grid . . . . . . . . . . . . . . . . . . . . . . . . . . . . . . . . . . . . . 229
Show Focus Point . . . . . . . . . . . . . . . . . . . . . . . . . . . . . . 229
Show Lost Highlights. . . . . . . . . . . . . . . . . . . . . . . . . . . 229
Show Lost Shadows . . . . . . . . . . . . . . . . . . . . . . . . . . . . 230
View at 100% . . . . . . . . . . . . . . . . . . . . . . . . . . . . . . . . . . 231
Fit to Screen . . . . . . . . . . . . . . . . . . . . . . . . . . . . . . . . . . . 231
Zoom In . . . . . . . . . . . . . . . . . . . . . . . . . . . . . . . . . . . . . . . 231
Zoom Out . . . . . . . . . . . . . . . . . . . . . . . . . . . . . . . . . . . . . 232
Full Screen . . . . . . . . . . . . . . . . . . . . . . . . . . . . . . . . . . . . . 232
Presentation . . . . . . . . . . . . . . . . . . . . . . . . . . . . . . . . . . . 232
Hide Palettes. . . . . . . . . . . . . . . . . . . . . . . . . . . . . . . . . . . 233
Compare Images. . . . . . . . . . . . . . . . . . . . . . . . . . . . . . . 234
Compare in Browser . . . . . . . . . . . . . . . . . . . . . . . . . 234
Chapter 3 — Table of Contents
7
Compare in Editor . . . . . . . . . . . . . . . . . . . . . . . . . . . .235
Compare with Original . . . . . . . . . . . . . . . . . . . . . . . .236
Chapter 24
Window Menu
Workspace. . . . . . . . . . . . . . . . . . . . . . . . . . . . . . . . . . . . . .237
Reset Workspace. . . . . . . . . . . . . . . . . . . . . . . . . . . . . . . .237
Browser . . . . . . . . . . . . . . . . . . . . . . . . . . . . . . . . . . . . . . . .237
Folders . . . . . . . . . . . . . . . . . . . . . . . . . . . . . . . . . . . . . . . . .237
Metadata . . . . . . . . . . . . . . . . . . . . . . . . . . . . . . . . . . . . . . .237
Toolbar . . . . . . . . . . . . . . . . . . . . . . . . . . . . . . . . . . . . . . . . .238
Bird’s Eye . . . . . . . . . . . . . . . . . . . . . . . . . . . . . . . . . . . . . . .238
Edit List. . . . . . . . . . . . . . . . . . . . . . . . . . . . . . . . . . . . . . . . .238
Photo Info . . . . . . . . . . . . . . . . . . . . . . . . . . . . . . . . . . . . . .238
Cascade . . . . . . . . . . . . . . . . . . . . . . . . . . . . . . . . . . . . . . . .238
Tile . . . . . . . . . . . . . . . . . . . . . . . . . . . . . . . . . . . . . . . . . . . . .238
Chapter 25
Help Menu
Contents . . . . . . . . . . . . . . . . . . . . . . . . . . . . . . . . . . . . . . .239
Technical Support . . . . . . . . . . . . . . . . . . . . . . . . . . . . . .239
Show Welcome Screen . . . . . . . . . . . . . . . . . . . . . . . . . .240
Update Capture NX 2 . . . . . . . . . . . . . . . . . . . . . . . . . . .240
About Capture NX 2. . . . . . . . . . . . . . . . . . . . . . . . . . . . .240
Chapter 26
Appendix: Supplied Color Profiles
Standard RGB Profiles Supplied in Capture NX 2
. . . . . . . . . . . . . . . . . . . . . . . . . . . . . . . . . . . . . . . . . . . . . . .247
Profiles with a Gamma Value of 1.8 . . . . . . . . . . . .247
Profiles with a Gamma Value of 2.2 . . . . . . . . . . . .247
Technical Data for RGB Profiles Supplied with
Capture NX 2 . . . . . . . . . . . . . . . . . . . . . . . . . . . . . . . . . .249
Capture NX 2 and Adobe Photoshop Color
Profiles . . . . . . . . . . . . . . . . . . . . . . . . . . . . . . . . . . . . . .250
8
Appendix: Additional Notices
General . . . . . . . . . . . . . . . . . . . . . . . . . . . . . . . . . . . . . . . . 251
Nikon Message Center Agent . . . . . . . . . . . . . . . . . . . 251
Installation . . . . . . . . . . . . . . . . . . . . . . . . . . . . . . . . . . . . . 251
Camera Adjustments . . . . . . . . . . . . . . . . . . . . . . . . . . . 252
White Balance . . . . . . . . . . . . . . . . . . . . . . . . . . . . . . . . . . 252
Color Mode. . . . . . . . . . . . . . . . . . . . . . . . . . . . . . . . . . . . . 253
Exposure Compensation . . . . . . . . . . . . . . . . . . . . . . . . 253
Image Dust Off . . . . . . . . . . . . . . . . . . . . . . . . . . . . . . . . . 254
Vignette Control . . . . . . . . . . . . . . . . . . . . . . . . . . . . . . . . 255
Opening Images. . . . . . . . . . . . . . . . . . . . . . . . . . . . . . . . 255
Saving Images . . . . . . . . . . . . . . . . . . . . . . . . . . . . . . . . . . 256
Printing . . . . . . . . . . . . . . . . . . . . . . . . . . . . . . . . . . . . . . . . 256
Size / Resolution . . . . . . . . . . . . . . . . . . . . . . . . . . . . . . . . 257
Color Management Preferences (Windows). . . . . . 257
Color Management Preferences (Macintosh). . . . . 257
Levels & Curves . . . . . . . . . . . . . . . . . . . . . . . . . . . . . . . . . 258
D-Lighting . . . . . . . . . . . . . . . . . . . . . . . . . . . . . . . . . . . . . 259
Unsharp Mask . . . . . . . . . . . . . . . . . . . . . . . . . . . . . . . . . . 259
Color Aberration Control. . . . . . . . . . . . . . . . . . . . . . . . 259
Batch Processing . . . . . . . . . . . . . . . . . . . . . . . . . . . . . . . 259
Chapter 29
Index
Chapter 30
Contact Information
Appendix: Short-cuts
The Browser . . . . . . . . . . . . . . . . . . . . . . . . . . . . . . . . . . . .241
The Toolbar . . . . . . . . . . . . . . . . . . . . . . . . . . . . . . . . . . . . .242
Photo Info . . . . . . . . . . . . . . . . . . . . . . . . . . . . . . . . . . . . . .242
File Menu . . . . . . . . . . . . . . . . . . . . . . . . . . . . . . . . . . . . . . .243
Edit Menu . . . . . . . . . . . . . . . . . . . . . . . . . . . . . . . . . . . . . .243
Adjust Menu . . . . . . . . . . . . . . . . . . . . . . . . . . . . . . . . . . . .244
Filter Menu . . . . . . . . . . . . . . . . . . . . . . . . . . . . . . . . . . . . .244
Batch Menu. . . . . . . . . . . . . . . . . . . . . . . . . . . . . . . . . . . . .244
View. . . . . . . . . . . . . . . . . . . . . . . . . . . . . . . . . . . . . . . . . . . .244
Window Menu . . . . . . . . . . . . . . . . . . . . . . . . . . . . . . . . . .245
Help . . . . . . . . . . . . . . . . . . . . . . . . . . . . . . . . . . . . . . . . . . . .245
Apple Specific Shortcut . . . . . . . . . . . . . . . . . . . . . . . . .245
Chapter 27
Chapter 28
Chapter 3 — Table of Contents
Life-Long Learning . . . . . . . . . . . . . . . . . . . . . . . . . . . . . 265
Chapter 4
Introduction
Capture NX 2 contains a wide range of improvements designed to make it an even more complete and
powerful photo editing application specifically designed for photography. The interface and tools in
Capture NX 2 provide you with a new intuitive approach to the art and science of image editing that saves
you valuable time and effort. Capture NX 2 is the latest version in a long line of quality tools from Nikon
designed to speed up workflow for photographers. With Capture NX 2 you will work with industry leading
tools that deliver quality and performance you expect from a photo editing application.
RAW File Format Benefits
Unique among image editing software, Capture NX 2
provides you with the ability to achieve the highest quality
results for processing NEF (Nikon Electronic Format) RAW
files as well as powerful tools that can enhance any image.
Shooting RAW has a number of distinct advantages over
shooting and saving processed files such as JPEG and TIFF
files. The RAW format records important archival
information about the conditions under which the image
was captured. This information can be used by
Capture NX 2 to make unique adjustments to enhance the
image after capture. The following are some of the camera
settings and RAW adjustments that can be controlled
within the Develop section of the Edit List palette:
• Color mode or Picture control (depending on the camera model)
• White balance
• Tone compensation
• Saturation
• Sharpening
• Exposure compensation
• Hue adjustment
• Color moiré reduction
• Image Dust Off
• Auto color aberration
• Active D-Lighting (depending on the camera model)
Chapter 4 — Introduction | RAW File Format Benefits
9
Camera Relationship
Capture NX 2 was designed to support JPEG and TIFF files and to provide unique features that fully support
Nikon digital cameras, allowing you to change many of the settings selected in your camera. After opening
a NEF RAW file within Capture NX 2, you can view the shooting, camera, and exposure information of the file
within the Metadata palette.
U Point® Technology
A key feature in Capture NX 2 is U Point technology. The controls powered by U Point technology enable
you to modify sections of a photograph directly or control where an enhancement is being applied
selectively, all without having to go through the time-consuming process of creating a selection normally
required in other software applications.
U Point technology has been widely recognized as one of the most revolutionary technologies in the
market today and now that technology powers even more tools in Capture NX 2. U Point technology
provides precise and direct control to a variety of tools within Capture NX 2, providing powerful yet simple
photographic manipulation. U Point technology powers Capture NX 2’s series of control points: the color
control point, the black, neutral, and white control points, the red-eye control point, and the new selection
control point. These control points provide you with the ability to create color and tonal enhancements, fix
issues, or selectively apply photographic enhancements within any image, all being applied directly to the
image and with immediate feedback.
The U Point-powered control points found within Capture NX 2 enable you to work with your images
without the need to perform a complicated series of operations in a particular order.
Control points work by identifying an object based on a number of criteria. When you place your first
control point, U Point technology identifies the unique elements of the object on which you place a control
point, including its position, color, saturation, and texture. By identifying these elements, and in conjunction
with the Size slider, the control point can determine the boundaries of the object in order to affect only that
object and objects with like elements. With every control point that you apply to the image comes greater
control over specific objects in the image. The additional control points ensure that the adjustments you
make are being applied to the current object only, and placing a control point on an object with default
settings prevents other control points from affecting that object. Through a unique mixing function, the
effects of the control points are applied throughout the image so as to create a natural-looking, professional
result.
U Point technology powered tools are designed to make enhancements fast, professional, and of the
highest quality. The results will be nothing short of amazing.
10
Chapter 4 — Introduction | Camera Relationship
Chapter 5
System Requirements & Installation
System Requirements
Windows
OS
Preinstalled versions of Windows Vista 32-bit Home Basic/Home Premium/
Business/Enterprise/Ultimate editions (Service Pack 1) or Windows XP Home
Edition/Professional (Service Pack 2)
Processor
Pentium 4 or better
RAM
768 MB minimum (1 GB recommended)
Hard-disk space
200 MB required for installation
Screen resolution
1024 × 768 pixels (1280 × 1024 or higher recommended) with 16-bit color (32-bit
color recommended)
Macintosh
Mac OS X (version 10.4.11 or 10.5.2)
OS
A Please note: Capture NX 2 is not compatible with the Case Sensitive or Case Sensitive,
Journaled disk formats.
Processor
PowerPC G4, PowerPC G5, Intel Core Duo, Intel Core 2 Duo, Intel Xeon, or better
RAM
768 MB minimum (1 GB recommended)
Hard-disk space
200 MB required for installation
Screen resolution
1024 × 768 pixels (1280 × 1024 or higher recommended) with 16-bit color (32-bit
color recommended)
For the latest information on this application, visit the following sites:
For users in the U.S.A.: http://www.nikonusa.com
For users in Europe and Africa: http://www.europe-nikon.com /support
For users in Asia, Oceania and the Middle East: http://www.nikon-asia.com
Chapter 5 — System Requirements & Installation | System Requirements
11
Installation
Windows
To install Capture NX 2 into the Windows operating system, follow these steps:
1
Place the Capture NX 2 setup CD into your computer’s CD or DVD drive. Open the CD through the
My Computer icon on your desktop, and double-click on the setup icon that appears within the
window that is displayed to begin the setup wizard.
If you downloaded Capture NX 2, locate and double-click on the setup file that was saved to your
computer to begin the setup wizard. (Product keys can only be purchased over the Internet in some
countries and regions.)
2
3
4
5
Capture NX 2 will check to see if the Microsoft .NET Framework is installed and available on your
computer. If not, the Capture NX 2 setup wizard will attempt to download and install the
appropriate version of the .NET Framework, which is required for Capture NX 2.
Follow the steps in the installer to select the appropriate location to install Capture NX 2 to.
Once the software has been installed, follow the steps for color management found in the “Color
Management Options” section later in this chapter.
At the last screen, select which file types to associate with Capture NX 2. Those file types associated
with Capture NX 2 that are then opened from within the Windows Explorer will be opened directly
into Capture NX 2.
Macintosh
To install Capture NX 2 into the Macintosh operating system, follow these steps:
1
Place the Capture NX 2 setup CD into your computer’s CD or DVD drive. Double-click on the CD icon
that appears on your desktop and double-click on the setup icon that appears within the window
that is displayed to begin the setup wizard.
If you downloaded Capture NX 2, locate and double-click on the setup file that was saved to your
computer to begin the setup wizard. (Product keys can only be purchased over the Internet in some
countries and regions.)
2
3
4
12
Follow the steps in the installer to select the appropriate location to install Capture NX 2 to.
Once the software has been installed, follow the steps for color management found in the “Color
Management Options” section later in this chapter.
Complete the installation process.
Chapter 5 — System Requirements & Installation | Installation
Color Management Options
Once the setup wizard has installed the files onto your computer, you will be provided with options to set
up your color management preferences. The color management settings provided within the setup wizard
enables you to set the default functionality for Capture NX 2 and can be later changed within the
“Preferences” dialog.
To determine how Capture NX 2 manages the color of opened images, follow these steps:
1
Select how the working color space is determined when a file is opened in Capture NX 2. You are
provided with two options to set the working color space:
Use the color space of the file to be opened as the working color space
When selected, Capture NX 2 will always use the profile embedded in the image that is opened as
the working color space.
If Capture NX 2 cannot determine the profile of the embedded image, the profile identified as the
default RGB color space will be used as the working space for that image.
Always use the default RGB color space as the working color space
When selected, Capture NX 2 will automatically convert the image from the color profile embedded
in the image to the color profile selected in the Default RGB Color Space pull-down menu.
2
Select the color space to be used as the default working color space.
Click on the Default RGB Color Space pull-down menu and select the desired color space to be
used either if Capture NX 2 cannot determine the embedded profile or if the Always use the
default RGB color space as the working color space option is selected.
Complete the installation process of Capture NX 2.
Running Capture NX 2 in Trial Mode or Activating Product
Upon first launching Capture NX 2 after completing the setup process, you are presented with the
Capture NX 2 splash screen. The Capture NX 2 splash screen presents you with the options of either running
Capture NX 2 for 60 days with full functionality in trial mode or entering your product key.
To run Capture NX 2 in trial mode, click on the Continue Trial button from the Capture NX 2 splash screen.
The Continue Trial button will be accessible for the entire 60 days of the trial mode. At the end of the 60
day trial, you will only be able to access the Purchase Product Key, Enter Product Key, and Exit buttons.
To activate Capture NX 2, click on Enter Product Key and enter your name, company (optional), and
product key. You may enter a product key and active Capture NX 2 at any point.
If you purchased Capture NX 2 from a camera store or retailer, the product key may be found on the CDROM case. If you purchased Capture NX 2 as an electronic download, the product key will be found in the
email you received as a receipt of the purchase. Do not lose this key. It is required when installing or
upgrading this software and cannot be replaced if lost. (Product keys can only be purchased over the
Internet in some countries and regions.)
Chapter 5 — System Requirements & Installation | Installation
13
Upgrading From Capture NX Version 1
When upgrading from Capture NX version 1, follow the installation instructions as listed previously in this
chapter. Both Capture NX version 1 and Capture NX 2 can be installed on the same computer at the same
time.
When activating an upgrade version, your Capture NX version 1 product key will be requested. First, enter
your name, company (optional), and Capture NX 2 product key. You will then be prompted to enter your
Capture NX version 1 product key.
After entering both the Capture NX 2 and Capture NX version 1 product keys, your copy of Capture NX 2 will
be activated and the application will open.
Nikon User Support Information (U.S.A.)
Thank you for choosing Nikon, and welcome to our family of digital imaging products.
We are confident your Nikon product will meet and exceed the high level of quality, reliability, and
innovative design you have come to expect from Nikon.
Please contact us if you have any questions or suggestions. We value your feedback and want to be sure you
are completely satisfied with your purchase. To assist us in serving you better, we ask that you please register
your product on-line at www.prodreg.com/nikon.
If you have any questions or suggestions about Nikon Digital Imaging products, please call the Nikon Digital
Imaging Hotline:
1-800-NIKON-UX (1-800-645-6689)
Technical Support - 24hours a day, 7 days a week
Other Services - Monday through Friday, 10am to 10pm EST.
Technical support for your Nikon Digital Imaging product is free. Support for computer related issues is free
for either six or twelve months from the date of your first call to Nikon, depending on your product. Please
ask our customer service representative for details. Also, visit6 our technical support web site at
www.nikontechusa.com for FAQs, software updates, manuals, and solution forums. Information on other
exciting Nikon products is available at www.nikonusa.com.
Technical support and repair services are only available in the United Sates, the Caribbean, and South and
Central America. If you are in this service area but cannot reach our toll-free number, please call 1-631-5474311. Software and other items cannot be shipped outside of this service area.
Thank you for choosing a Nikon Digital Imaging product.
14
Chapter 5 — System Requirements & Installation | Nikon User Support Information (U.S.A.)
Chapter 6
Getting Started
Launching Capture NX 2
In the Windows operating system, Capture NX 2 can be
opened by navigating to the start menu, selecting the
programs menu, rolling over the Capture NX 2 menu item,
and selecting Capture NX 2.
In the Macintosh operating system, double-click on the
Macintosh HD icon on your desktop and navigate to the
“Applications” folder. Double-click on the Capture NX 2
folder, and then double-click on the Capture NX 2
application icon.
Convert Capture NX Version 1 Labels
If you labeled images on your computer using Capture NX
version 1, Capture NX 2 provides you with the opportunity
to convert those labels to the system used by Capture NX 2
and ViewNX. When Capture NX 2 is launched, it will check
for any existing Capture NX version 1 labels stored on your
system. If Capture NX version 1 labels are found, the
Convert Labels dialog is displayed.
Click on Yes to begin converting the labels used by
Capture NX version 1 into labels compatible with
Capture NX 2 and ViewNX. Selecting this option will not remove the labels from your system and images
labeled by Capture NX version 1 will continue to be accessible within Capture NX version 1.
A Please note: If you have many images labeled by Capture NX version 1, this process may take some time.
Click on No to prevent Capture NX 2 from converting your labels. If you do not wish to see the Convert
Labels dialog the next time Capture NX 2 is launched, check the Don’t Show Again checkbox.
Chapter 6 — Getting Started | Launching Capture NX 2
15
Welcome Screen
Upon launching, Capture NX 2 will display the “Welcome” screen, which lists the last files and folders that
you accessed.
Windows
q
Macintosh
w
q
w
r
e
e
q Open Recent
Image
The Open Recent Image section contains a list of the most recent images that
were opened within Capture NX 2. The last image edited can be found at the top of
the list, with the remaining images you have edited listed in chronological order.
Click on the image name to open the image within Capture NX 2.
w Open Recent
Folder
The Open Recent Folder section contains a list of the most recent folders
accessed within the Browser palette, with the most recent folder displayed at the
top. Click on one of the displayed folders to open that folder within the Browser
palette.
e Don’t Show
Again
The Don’t show again checkbox enables you to prevent the “Welcome” screen
from being displayed after launching Capture NX 2. Check this box to prevent the
“Welcome” screen from appearing when Capture NX 2 is launched. To access the
“Welcome” screen again, navigate to the Help menu and select Show Welcome
Screen. You can then uncheck the Don’t show again checkbox in order to
display the “Welcome” screen whenever Capture NX 2 is launched.
The Drag an image here to open it section is available only in the Macintosh
version and enables you to open an image by dragging it from the Macintosh
r Drag an image
here to open it
Finder onto this section. In the Windows operating system, you can drag an image
(Macintosh Only) from the Windows Explorer into the Capture NX 2 window to open the image
within Capture NX 2.
16
Chapter 6 — Getting Started | Welcome Screen
Browsing and Opening Images
Capture NX 2 provides you with a number of ways of locating and opening images in order to enhance
them.
Using the Browser
To open an image using the browser, follow these steps:
1
2
Open the Folders palette, the Browser palette will
automatically open. Click on the folder within the
Folders palette that you wish to display within the
browser.
Locate and double-click on the image that you wish to open.
Using Open Image
To open an image using Open Image…, follow these steps:
1
Navigate to the File menu and select Open
Image….
Chapter 6 — Getting Started | Browsing and Opening Images
17
2
Within the dialog that is displayed, locate an image
to open, and click on the Open button.
Using ViewNX
To open an image from ViewNX, follow these steps:
1
2
Select one or more images to open into Capture NX 2.
Click on the Open with Capture NX button within the ViewNX interface.
Using Nikon Transfer
To open a folder of images transferred to your computer using Nikon Transfer, follow these steps:
1
2
3
4
Within Nikon Transfer, navigate to the “Preferences” tab.
Click on the pull-down menu for the Open destination folder with other application after
transfer option.
Select Browse….
Select Capture NX 2 from the displayed “Select program” window and click OK.
After the next transfer is completed, the folder identified in the primary destination folder will be displayed
within the Capture NX 2 browser. You can then open one or more images by double-clicking on them
within the browser.
18
Chapter 6 — Getting Started | Browsing and Opening Images
File Format Differences
Capture NX 2 supports three different file formats: NEF, TIFF, and JPEG.
NEF
The NEF, or Nikon Electronic Format, was designed as the archive file format for your images. The NEF file
format saves the complete contents of the Edit List palette along with the original image. All changes
made to the image are stored separately within the file, enabling a non-destructive image editing workflow.
NEF allows for relatively small file sizes with no loss in image quality. Within Capture NX 2, NEF images
remain nearly the same size as the original image file, regardless of the number of enhancements that are
applied within the image.
A Please note: The file size of NEF files may increase slightly after being saved in Capture NX 2 due to the inclusion
of a full resolution, high quality JPEG preview. This JPEG preview ensures that other applications can accurately
display the current state of the image. This file size increase will occur only after the first save within Capture NX 2,
while subsequent saves may cause small file size variations due to the inherent nature of the JPEG compression
used on the embedded JPEG preview or due to the size of the JPEG preview having been changed with the Crop
or Size / Resolution tools.
There are two different types of NEF files: NEF RAW files and converted NEF files. NEF RAW files are created by a
camera using the RAW file type option. Converted NEF files are files that started off as either TIFF or JPEG files, but
were saved as NEF using Capture NX 2 or a previous Nikon Capture application.
Both NEF RAW files and converted NEF files benefit from the ability to store enhancements separate from the
original image details.
A Please note: Only NEF RAW files support changes to settings made within the camera and other RAW specific
enhancements.
NEF RAW File Support
NEF RAW files are generated by all Nikon Digital SLR cameras as well as some COOLPIX cameras.
Capture NX 2 provides support for NEF RAW files from the entire line of Nikon digital cameras that produce
NEF RAW files.
For the latest information on supported digital cameras, visit the Nikon website for your area.
For users in the U.S.A.: http://www.nikonusa.com
For users in Europe and Africa: http://www.europe-nikon.com/support
For users in Asia, Oceania, and the Middle East: http://www.nikon-asia.com
TIFF
TIFF is commonly used as a standard for high-quality image reproduction. Saving your image in TIFF will
result in a file that contains the final state of your image as shown within Capture NX 2, with full image
quality. Once an image is saved in TIFF and closed, you will not be able to change the edits previously
applied to the image within the Edit List palette.
Chapter 6 — Getting Started | File Format Differences
19
JPEG
The JPEG file format is one of the most widely used file formats. This file format enables you to save a greater
number of images using the same amount of hard disk space as the other file formats. To create such a small
file size, a form of compression is used that irreversibly affects the quality of the image. Because of this
compression, it is recommended that you only use the JPEG file format when a small file size is required.
Workflow Suggestions
While there is no single workflow optimized for every image, there are some basic guidelines to consider.
When using Capture NX 2 to edit images, the following order is recommended:
1
20
Start with characteristics that affect the entire image, such as removing digital noise, fixing color
casts, and reducing tonal issues (such as brightness of contrast issues).
Chapter 6 — Getting Started | Workflow Suggestions
2
Next, modify elements that affect only localized areas, such as blemishes and small distracting
elements.
3
Then, apply effects that add a style or mood to the image.
4
Finally, prepare the image for output by resizing and sharpening.
Following these simple guidelines can help improve the quality of your images and provide a more
structured approach to enhancing your images.
Chapter 6 — Getting Started | Workflow Suggestions
21
Printing
Capture NX 2 provides you with a full range of printing options. The print function is both easy and
powerful, enabling you to create high quality, fully color managed prints. You can select Print… from the
File menu at any time to print the current image, or you can select multiple images from within the
Browser palette to create a print package. Print packages are essentially a collection of images printed at
the same time, often with more than one image appearing on the same page. Print packages make the
most of your printer and paper, enabling you to create proof sheets so that you can review and select
images based on the output, rather than the computer screen.
Printing a Single Image
Capture NX 2 provides you with a variety of different printing options for a single image.
Printing an Image to Fill the Current Page
To print an image so that it fills the entire page, follow these steps:
22
1
Navigate to the File menu and select Print….
2
Ensure the Use Output Resolution checkbox is
unchecked.
Chapter 6 — Getting Started | Printing
3
4
5
Click on the Select Layout option and choose 1
Photo on Page.
If the image’s orientation is different from the paper
you will print to (such as when you print a landscape
oriented picture), check the Rotate to Fit option.
If desired, check the Crop Photos to Fit option to
ensure the entire printable surface is utilized. If the
image’s aspect ratio is different from that of the
paper, some image detail may be cropped away.
Chapter 6 — Getting Started | Printing
23
6
Review the settings within the “Color Management”
tab and then click Print.
Printing an Image Using the Settings Found Within the Size / Resolution Dialog
To print an image using the size and resolution settings made with the Size / Resolution tool, follow
these steps:
1
2
24
Ensure that the appropriate size and resolution are
set for the image by navigating to the Edit menu
and selecting Size / Resolution…. If necessary,
modify the settings and click OK.
Navigate to the File menu and select Print….
Chapter 6 — Getting Started | Printing
3
4
5
Check the Use Output Resolution option. If the
image is larger than the page, click on the Page
Setup button and select the appropriate paper size
that the image will fit upon.
If the image’s orientation is different from the paper
you will print to (such as when you print a landscape
oriented picture), check the Rotate to Fit option.
Review the settings within the “Color Management”
tab and then click Print.
Chapter 6 — Getting Started | Printing
25
Printing contact sheets
To print a series of images as a contact sheet, follow these steps:
1
26
Open the Browser palette and select the images you
would like to print. To select multiple files, hold
either the Shift key and click on the first and last
images of a range, or hold the Ctrl (Windows) or
command (Macintosh) keys while single-clicking on
each additional file you want to add. To select all of
the images in the current folder, navigate to the Edit
menu and click on the Select All option, or use the
shortcut Ctrl + A (Windows) or command + A
(Macintosh).
2
Navigate to the File menu and select Print….
3
Ensure the Use Output Resolution option is not
selected.
Chapter 6 — Getting Started | Printing
4
5
6
7
Click on the Select Layout option, and then in the
provided pull-down menu, choose the number of
images you would like to display on a single page.
Alternatively, you can use the Select Picture Size
option and select the size of each picture.
Capture NX 2 will automatically tile the available
images to fit onto one or more pages.
Click on the page backward or page forward buttons
to review the available pages.
To add information about each picture, such as the
file name, shooting data, or date shot, click on the
Metadata… button.
Review the settings within the “Color Management”
tab and then click Print.
For more information on the various options available in the “Print layout” window, please see “Print…” in
Chapter 18, “File Menu”.
Chapter 6 — Getting Started | Printing
27
Batch Processing
Batch processing is the automatic application of one or more enhancements to a series of images. Typically,
a photographer will use a batch process to apply a predefined series of adjustments to several images at
once. Capture NX 2 contains even more methods of batch processing than before. You can select a folder of
images and select a series of enhancements to apply to those images, you can add an XMP/IPTC preset to a
series of images, you can set up a live edit batch process, or you can set up a watched folder.
Applying a series of enhancements to a folder of images
1
2
3
28
Enhance an image that is representative of the images that you would like to apply a batch process
to.
Navigate to the Batch menu and select Save
Adjustments…. This will call up the “Save
Adjustments” dialog and let you create a settings
file.
Check each of the checkboxes for the enhancements
that you would like to apply in the batch process and
provide a name for the settings file. Click OK.
Chapter 6 — Getting Started | Batch Processing
4
5
6
Navigate to the Batch menu and select Run Batch
Process…. You will then be presented with the
Batch Process dialog.
Click on the Browse… button in the Source section
and locate the folder of images you wish to process.
Check the Apply Settings checkbox, ensure that
Use Settings File is selected, and click on the
Browse… button. Locate the settings file created in
step 3 and click OK.
Chapter 6 — Getting Started | Batch Processing
29
7
Check the Rename box if you would like to change
the name of the processed files. Click on the Edit…
button to call up the File Naming dialog and
determine the naming convention for the processed
images.
8
Use the Select File Format pull-down menu to
select the file format for the processed images.
9
In the Destination section, select the folder that the
processed images should be placed in and click OK.
The Processing Queue will be displayed and the batch
process will start. To pause the batch process, click on the
Pause button within the Processing Queue. To prevent
an image from being processed, highlight the image in the
queue and then click on the Clear from list button under
the queue. To cancel the process, click on the button to
stop the batch process and close the Processing Queue.
30
Chapter 6 — Getting Started | Batch Processing
Adding XMP/IPTC data to a series of images using an XMP/IPTC preset
1
2
Open an image within Capture NX 2, open the
Metadata palette, and add the desired XMP/IPTC
data to an image.
Navigate to the Batch menu and select Save XMP/
IPTC Preset…. Within the dialog that is displayed,
select the checkboxes for each of the XMP/IPTC
fields that you would like to apply to additional
images, add a name for the XMP/IPTC preset, and
click OK.
Chapter 6 — Getting Started | Batch Processing
31
3
4
Open the Browser palette and select the images you
would like to apply the XMP/IPTC information to. To
select all of the images in the current folder, navigate
to the Edit menu and choose Select All.
Navigate to the Batch menu, click on the Load XMP/
IPTC Preset menu, and then locate the XMP/IPTC
preset that you saved in step 2.
The XMP/IPTC information you added to the XMP/IPTC preset will then be added to all of the selected
images.
32
Chapter 6 — Getting Started | Batch Processing
Converting NEF RAW files into JPEG or TIFF files
Capture NX 2 can quickly and easily convert NEF RAW files that are produced by your Nikon digital camera
into JPEG or TIFF files, which can then be opened and used by other applications. To convert your NEF RAW
files into JPEG or TIFF files, follow these steps:
To convert a folder of files from NEF RAW to JPEG or TIFF
1
2
3
4
Navigate to the Batch menu and select Run Batch
Process….
Within the Source section, click on the Browse…
button to select the folder you wish to convert from
NEF into JPEG or TIFF.
Next, ensure that the Apply settings checkbox is
not checked.
Check the Rename box if you would like change the
name of the files as they are converted from NEF to
JPEG or TIFF.
Chapter 6 — Getting Started | Converting NEF RAW files into JPEG or TIFF files
33
5
6
7
8
From the Select File Format pull-down menu, select
the file format to convert the images to, either TIFF
or JPEG.
Click on the Advanced show/hide triangle to control
the options for the selected file format.
For the Destination option, choose where the new
JPEG or TIFF files should be placed by using the
Select folder option to place them in a new folder or
using the Use source folder option to place them in
the same folder as the original NEF files.
Click OK to add the files into the Processing Queue
and start converting the files.
You can check the status of the conversion process in the
Processing Queue and you can pause the process by
clicking on the Details show/hide triangle in the
Processing Queue and clicking on the Pause button. To
cancel the process, click on the button to stop the batch
process and close the Processing Queue.
34
Chapter 6 — Getting Started | Converting NEF RAW files into JPEG or TIFF files
To convert selected files from the Browser
1
2
3
Open the Browser palette and select the files you
want to convert from NEF RAW to JPEG or TIFF. To
select multiple files, either hold the Shift key and
click on the first and last images of a range, or hold
the Ctrl key (Windows) or command key (Macintosh)
while single-clicking on each additional file you
want to add.
Navigate to the File menu and select Save As….
Alternatively, you can use the keyboard shortcut of
Ctrl + Shift + S (Windows) or command + shift + S
(Macintosh).
In the Destination section, select either the Select
folder option to choose a new folder to place the
converted image files into or Use source folder to
place the image files into the same folder as the
original NEF files.
Chapter 6 — Getting Started | Converting NEF RAW files into JPEG or TIFF files
35
4
In the File name section, select the file format to
convert the images to, either TIFF or JPEG.
5
The Advanced section provides you with options for
the selected file format.
Click Start to begin converting the files.
36
Chapter 6 — Getting Started | Converting NEF RAW files into JPEG or TIFF files
Chapter 7
Preferences
Preferences modify the default behavior of Capture NX 2. Preferences can be found either under the Edit
menu in Windows or the Capture NX 2 menu in Macintosh. There are nine different categories of
preferences:
• General
• Color Management
• Levels & Sampling
• Display
• Cache Settings
• XMP/IPTC Presets
• Labels
• Manage Settings
• Workspaces
Shortcut
Ctrl + K (Windows)
command + K (Macintosh)
If Capture NX 2 displays unexpected behavior, the preferences may be damaged. Restoring preferences to
their defaults may resolve this issue. To restore the preferences to the default settings, click on the Reset
button within the Preferences dialog.
Chapter 7 — Preferences
37
General
Open With Application
Choose this option to select the application you wish to use when opening files with the Open With…
command in the File menu.
Place Open With TIFF File In
The Place Open With TIFF file in option allows you to determine where to place the TIFF files created by
the Open With… command in the File menu.
Check the Same as File checkbox to place the TIFF file created by the Open With… command in the same
folder as the source file.
D1X RAW Default
Use this option to set the default size of NEF RAW images taken with the D1X. This option utilizes a unique
resizing algorithm to resize D1X images to a 10 megapixel equivalent image.
Default Units
Choose from inches and millimeters.
38
Chapter 7 — Preferences | General
Default Save As
Use this option to determine the default file type in the “Save As…” dialog. The following options are
available:
• Same as original file
Select the Same as original file option to set the default file type in the “Save As” dialog to the file type
of the image being saved.
• Previous file format
Select the Previous file format option to set the default file type in the “Save As” dialog to the file type of
the image that was last saved.
• NEF
• TIFF
• JPEG
Keep all Steps Active in Edit List
Use this option to control how the editing of steps in the Edit List palette is handled. When this option is
turned off, the editing of a step in the Edit List palette causes any following step to be temporarily disabled.
When this option is turned on, steps will not be temporarily disabled, and you will be able to see the impact
of the changes made with all steps being considered.
Please note, when this option is turned on, additional processing will be required as all enhancements will
be processed in real time. Turning this option on is only recommended for computers with powerful
processors.
Folder for Temporary Data
This option enables you to set the location where temporary data is stored. If possible, set this option to use
a folder on a disk other than the primary startup disk.
Chapter 7 — Preferences | General
39
Color Management
Default RGB Color Space
Use this option to set the default RGB space that is used for your images.
Use This Instead of Embedded Profile
This option causes Capture NX 2 to automatically convert the image from the embedded profile to the
profile as defined in the Default RGB Color Space option. This option is automatically enabled if you
selected the Always use the default RGB color space as the working color space option during
installation.
CMYK Separation profile
This preference enables you to set the default separation profile to be used when saving CMYK TIFF files.
Printer Profile
This preference enables you to set the default profile to use for your printer as well as within the soft proof
feature.
Use This Profile when printing
Check this option to automatically change the color profile within the color management section of the
print dialog to the profile set with the Printer Profile option.
40
Chapter 7 — Preferences | Color Management
Intent
Use this preference to set the default rendering intent for the various color management features
throughout Capture NX 2. The different rendering intents control how colors from your image are made to
fit into the colors that your printer can produce as indicated by the printer profile.
A Please note: different printer and paper combinations, as well as the different software used to create printer
profiles, benefit from different rendering intents. Experiment with the different rendering intents within your
workflow to find the option that works best.
The four options are:
Perceptual
This rendering intent maintains the relationships of colors so that the printed image appears natural to the
human eye. While this intent maintains the relationship of colors, the actual color values will be changed.
Saturation
This rendering intent produces highly saturated colors, but it may not produce accurate colors in a
photograph.
Relative Colorimetric
This rendering intent maps all of the colors that fall outside of the gamut of the target profile to the closest
reproducible color. This profile reproduces accurately all of the colors that are within the range of colors
reproducible by your printer. This option preserves as many natural colors as possible and is often the best
choice for printing photographs.
Absolute Colorimetric
This rendering intent is very similar to relative colorimetric, except that it maps the white point of the
image to the white point of the destination profile. It is recommend that you use absolute colorimetric
only if you want to proof your images for a specific print device other than your printer, since this
rendering intent will attempt to reproduce the results of the output device, including the effect of a
different paper color.
Use Black Point Compensation
Check this box to set the default state of the various color management options throughout Capture NX 2
to utilize black point compensation. Black point compensation ensures that the black point from the image
is mapped to the black point of your printer, ensuring that the full color range of the printer is used. If your
print contains either gray shadows or too little detail, try turning this option off. It is recommended that you
always use this option, except when you notice problems with a specific printer and profile combination.
Chapter 7 — Preferences | Color Management
41
Levels & Sampling
Levels & Curves
The options within the “Levels & Curves” section enable you to set the default values for controls found
within the “Levels & Curves” step.
Set Black Point
Use this option to set the black point to a different color other than the default of 0, 0, 0 when setting a
black point within the “Levels & Curves” step.
Set Neutral Point
Use this option to set the neutral point to a different color other than the default of 128, 128, 128 when
setting a neutral point within the “Levels & Curves” step.
Set White Point
Use this option to set the white point to a different color other than the default of 255, 255, 255 when
setting a white point within the “Levels & Curves” step.
Black Auto-Contrast Clip
Set this number to determine the percentage of the darkest pixels to exclude when using the AutoContrast option in the “Levels & Curves” step.
White Auto-Contrast Clip
Set this number to determine the percentage of the lightest pixels to exclude when using the AutoContrast option in the “Levels & Curves” step.
42
Chapter 7 — Preferences | Levels & Sampling
Dropper Sample Size
Use this option to set the sample size of the droppers used within the “Color Picker”, “Levels & Curves”, and
“Watch Point” elements of Capture NX 2. When Point Sample is selected, a single pixel will be sampled
when a dropper is used. With the 3 x 3 Average and 5 x 5 Average options, the average of the pixels
sampled will be used. Choosing a large sample size reduces precision, but also minimizes the effects of
noise; choosing a small sample size has the opposite effect.
Chapter 7 — Preferences | Levels & Sampling
43
Display
Grid
The options within the “Grid” section enable you to control what is displayed when the Show Grid option is
turned on from the View menu.
Grid Color
Click on the color patch to bring up the color picker and select the color for the gridlines displayed on top
of the image when the Show Grid option is enabled.
Gridline Every
Use this option to set the frequency of and the unit of frequency of the gridlines when the Show Grid
option is enabled.
Subdivisions per Line
This option enables you to set the subdivisions, or smaller gridlines, that are displayed between the major
gridlines defined by the Gridline Every preference.
44
Chapter 7 — Preferences | Display
Selection Overlay
The options within the “Selection Overlay” section enable you to control the appearance of the overlay
displayed when Selection Display > Show Overlay is selected in the View menu. The options selected
within this section will determine how the current step’s selection is superimposed on top of the image.
Color
Click on the color patch to bring up the color picker and select the color of the overlay that is used to
represent the current step’s selection.
Opacity
Use this option to determine the opacity of the overlay that is displayed on the image. A value of 100% will
completely obscure the image’s detail, with lower values allowing more and more of the original image’s
detail to be visible.
Image
Auto-Hide On-Image Elements
Use this option to automatically hide elements that appear on top of the image whenever the mouse exits
the image window. Active selections, control points (that are not currently selected), watch points, and the
grid will automatically be hidden when the mouse cursor exits the image window to give you a clear view
of your image. These items will reappear when the mouse cursor returns into the image window. Turn this
option off to always see those on-image elements.
Chapter 7 — Preferences | Display
45
Cache Settings
Capture NX 2 utilizes two caching systems: a browsing cache and an editing cache. Both cache systems
speed up the interaction of Capture NX 2 by storing processed information on the hard disk, enabling
Capture NX 2 to use the cached information instead of reprocessing the files.
The browsing cache is used for the thumbnails created and displayed in the Browser palette, while the
editing cache is used for NEF files saved during editing.
Browsing Cache
In order to increase the speed of displaying thumbnails, Capture NX 2 utilizes a thumbnail cache for the
Browser palette. This cache is created after the image is first processed, making subsequent browsing of
the same folder significantly faster. You can view the amount of space used by the browsing cache as well as
clear the cache to reclaim disk space using the Clear Cache button. After clearing the cache, you will not
lose any image data, however thumbnails will need to be recreated, taking additional time.
Editing Cache
The Editing Cache option enables NEF images (both NEF RAW and converted NEF files) that were
previously opened within Capture NX 2 to open more quickly. Capture NX 2 provides you with different
options to control how NEF images are cached, as well as how much hard disk space is dedicated to the
cache files.
While the Editing Cache option is enabled, saving NEF files will automatically create a cache file in the
folder specified by the Cache Location option. This cache file contains information that Capture NX 2 can
use to greatly accelerate the opening of this file in the future.
46
Chapter 7 — Preferences | Cache Settings
With the default settings, Capture NX 2 will utilize up to 2 gigabytes of hard disk space to store cache files. If
all 2 gigabytes of allocated space are utilized by cache files, Capture NX 2 will begin to replace the oldest
cache files with new cache files. In this manner, the files you interacted with most recently will open the
fastest. It is important to note that no unique information is stored within these cache files, and if a cache file
is replaced, your image will not lose any information or quality. It will simply require additional processing in
order to open, which will take additional time.
You can alter the cache settings to change when cache files are created, where the cache files are placed,
and how much hard disk space should be utilized for these cache files.
After a file has been added to the editing cache, a lightning bolt icon will be placed next in the image
window and next to the image in the Browser palette. This icon indicates that the file is currently within the
editing cache.
Use Image Cache
Check this box to enable Capture NX 2 to utilize cache files to increase the speed of opening NEF files.
Cache files saved within the Editor
Check this box to enable Capture NX 2 to cache files when an image is saved using the Save or Save As…
options in the File menu.
Cache Files created in a Batch Process
Check this box to enable Capture NX 2 to cache files whenever a batch process is used to save images
using the NEF file format. This includes both batch processes and watched folders.
Clear Cache
Click on this button to delete all editing cache files created by Capture NX 2.
Cache Location
Click on the Browse button to select a new location to place cache files.
Limit Cache Size
Check this box in order to set a limit to the amount of disk space Capture NX 2 will use for cache files.
You can then use the slider to change the amount of space available for the editing cache system. Next to
the slider you will see the amount of space currently allocated to the editing cache system, along with an
approximate number of images that can be stored within that space.
Chapter 7 — Preferences | Cache Settings
47
XMP/IPTC Presets
XMP/IPTC presets enable you to create different sets of XMP/IPTC data that can then be applied to either a
single image or to a group of images.
Available Presets
Presets that you create or save within Capture NX 2 will be displayed within the “Available Presets” window.
You can click on any of the available presets to display the contents in the field editor, duplicate the preset
using the Duplicate button, or delete the preset using the Delete button. To create a new preset, either
save a preset using the Save XMP/IPTC Preset option in the Batch menu, or click on the New button at
the bottom of the “Available Presets” window.
Field Editor
The field editor displays all of the available fields and contents for an XMP/IPTC preset. Enter the values you
would like to automatically apply through the XMP/IPTC preset. After entering a value, the checkbox for that
field as well as for the section will be turned on. Only those fields with a checkbox next to them will be
added to an image when the XMP/IPTC preset is applied to an image or group of images.
To prevent a field from being modified by the XMP/IPTC preset, uncheck the box for that field.
To clear a field in an image or group of images, delete the content of that field in the field editor and check
the box. This will result in a blank field with a checkbox next to it, indicating that when this XMP/IPTC preset
is applied to an image, that image will have a blank field for the corresponding field. This is helpful if you
would like to clear away one or more XMP/IPTC fields in an image or group of images.
48
Chapter 7 — Preferences | XMP/IPTC Presets
New
The New button creates a new, empty XMP/IPTC preset. After clicking on this button, you will be provided
with a dialog to enter the name for the XMP/IPTC preset. This name will be displayed in the Load XMP/IPTC
Preset sub-menu of the Batch menu.
After creating a new XMP/IPTC preset, enter the values for that preset in the fields displayed in the field
editor.
Duplicate
Clicking on this button will duplicate the contents of the XMP/IPTC preset selected in the “Available Presets”
list and provide you with a window to enter the name for the new XMP/IPTC Preset.
Delete
Click on the Delete button to permanently delete the XMP/IPTC preset selected in the “Available Presets”
list.
Import
Click on the Import button to import an XMP/IPTC preset from a file on your computer. You will be
prompted for the location and name of the file for the XMP/IPTC preset that you wish to load. XMP/IPTC
preset files use the file extension “.XMP”.
Export
Click on the Export button to create an XMP/IPTC preset as a file with the extension “.XMP”. You will be
prompted for the location and name of the file for the XMP/IPTC preset that you wish to save.
Chapter 7 — Preferences | XMP/IPTC Presets
49
Labels
Label Compatibility
Use the Label Compatibility pull-down menu if you use
another digital asset management software application to
tag and sort your images. Capture NX 2 supports a number
of digital asset management software applications. If you
select the appropriate option from the pull-down menu,
Capture NX 2 will be able to read the label and rating
information added by that application.
Each option controls the maximum and default number of
labels available, along with their color and label name.
The Default Settings option shows all nine labels, however you may choose to display fewer than nine
labels.
The Custom option lets you determine not only the number of labels available, but also the names for each
label to be used.
For example, if you use only one label to determine those images to keep, use the Custom option to select
only one label and name that label accordingly.
Alternatively, if you prefer to create a variety of labels based on different types of images, use the Custom
option to select the number of labels you wish to use and then name each label accordingly.
A Please note: Changing the label names can reduce compatibility with other applications, including ViewNX.
50
Chapter 7 — Preferences | Labels
Available Labels
The maximum number of labels available depends on the selection in the Label Compatibility pull-down
menu. You can choose the number of labels to display by clicking on the radio button next to the desired
number of labels.
Manage Settings
The Manage Settings section enables you to determine which settings are displayed within the Load
Adjustments sub-menu of the Batch menu. Use this dialog to identify which settings files to display within
the Load Adjustments sub-menu or to add or delete available settings files.
To learn more about creating settings files, please see the “Save Adjustments” section in Chapter 22, “Batch
Menu”.
Add
Clicking on the Add button will open a file browsing window, enabling you to navigate and locate a
settings file that resides on your computer. If you use the Add option, the settings file that you selected will
automatically be copied to the Capture NX 2 “Settings” folder and added to the list of available settings files
both in the “Manage Settings” tab as well as in the Load Adjustments sub-menu of the Batch menu.
Delete
The Delete button will delete the highlighted setting from within the “Manage Settings” tab as well as from
the Capture NX 2 “Settings” folder.
Chapter 7 — Preferences | Manage Settings
51
Workspaces
The “Workspaces” section of the preferences enables you to modify the workspaces provided within
Capture NX 2.
By default, Capture NX 2 provides you with four different workspaces. Within this tab, additional workspaces
can be added or removed and you can determine the shortcuts to assign each available workspace.
Default Workspaces
The workspaces listed under “Default Workspaces” are the default workspaces provided by Capture NX 2,
and are always available.
To change the shortcut to use for a specific workspace, click on the pull-down menu next to the name of
the workspace and select the new shortcut to use. If you select a shortcut that is already in use by another
workspace, that other workspace’s shortcut will automatically be set to None.
My Workspaces
Any workspaces that you create will be listed under “My Workspaces”. To change the shortcut to use for a
specific workspace, click on the pull-down menu next to the name of the workspace and select the new
shortcut to use. If you select a shortcut that is already in use by another workspace, that other workspace’s
shortcut will automatically be set to None.
Reset Shortcuts
Clicking on the Reset Shortcuts button will reset the shortcuts used for the “Default Workspaces” to the
default shortcuts.
Add
Clicking the Add button will create a new workspace based on the current palette and screen arrangement.
A dialog will be displayed enabling you to enter a name for the new workspace.
52
Chapter 7 — Preferences | Workspaces
Delete
Clicking the Delete button will remove the highlighted workspace from in the “My Workspaces” section.
Please note that, you cannot delete a default workspace.
Chapter 7 — Preferences | Workspaces
53
54
Chapter 7 — Preferences
Chapter 8
Interface
Capture NX 2’s interface was designed to put all of the important tools for enhancing a digital photograph
right at your fingertips. This section contains a brief overview of each of the main elements that make up
the Capture NX 2 interface, as well as information about the new workspaces, working with multiple
screens, using the image window, and working with palettes and menus.
Overview
q
w
y
u
r
i
t
o
e
!0
q Editor
The main window of Capture NX 2, the editor, is the window you see when you are
editing images. Within the editor, you can open and close images as well as access
each of the different control palettes.
w Menu Bar
The menu bar provides access to nearly all of the features and enhancements
within Capture NX 2. Please see chapters 18 through 25 for information on the
features located within each menu.
e Browser
Capture NX 2’s browser enables you to browse, sort, and organize your images, as
well as to rotate or apply batch processes to multiple images simultaneously.
Images can be opened from the browser into the editor to provide additional
control. For more information, please see Chapter 9 “The Browser”.
Chapter 8 — Interface | Overview
55
r Folders
The folders palette provides you with an easy-to-access palette which displays the
content of an entire folder in the browser. For more information, please see Chapter
10, “The Folders Palette”.
t Metadata
The Metadata palette displays information about the image provided
automatically by the camera as well as XMP/IPTC data of the image. With this
palette, you can review camera, lens, flash, and exposure information unique to the
selected image as well as review and add XMP/IPTC data to one or more images.
For more information, please see Chapter 11, “The Metadata Palette”.
y Toolbar
The toolbar provides access to the various tools available within Capture NX 2. You
can use these tools to perform various edits, from zooming to rotating the image,
to applying enhancements selectively. For more information, please see Chapter
13, “The Toolbar”.
u Bird’s Eye
The Bird’s Eye shows a portion of the image that is visible in the active image
window, providing the ability to navigate through the image while zoomed in.
For more information, please see Chapter 14, “Bird’s Eye”.
The Edit List palette is the master control list for the features and enhancements of
Capture NX 2. Anything that affects your image will have an entry in the Edit List
palette. Every entry can be removed, altered, or duplicated from this list.
i Edit List
The Edit List palette automatically organizes each entry by steps in chronological
order. This provides you with the ability to turn on or off one or more steps at any
time to monitor the effect on your image. You can selectively apply steps with the
selective tools found in the toolbar, you can place multiple enhancements within
one step by linking enhancements, and you can create batch processes based on
the contents of the steps. You can also manually create new steps using the New
Step button.
For more information, please see Chapter 15, “Edit List”.
56
o Photo Info
The Photo Info palette combines the Histogram and Watch Points functionalities
into a single palette. The Histogram section shows a live histogram that reflects the
statistical makeup of the image. The Watch Points section enables you to monitor
the effects of the changes you make to the color values in the image. For more
information, please see Chapter 16, “Photo Info”.
!0 Image Window
Image windows display images within Capture NX 2, along with important
information and controls for the images. For more information, please see the
section “Image Window” later in this chapter.
Chapter 8 — Interface | Overview
Workspaces
Workspaces are new in Capture NX 2, enabling you to quickly change tasks while displaying only the
palettes and windows necessary for that task. Capture NX 2 comes with four different default workspaces
and provides you with the ability to create custom workspaces. Selecting a particular workspace will arrange
all of the palettes and windows according to the stored settings for that workspace including the position,
state of the palette (maximized or minimized), as well as other settings that affect what is displayed within a
palette or window.
The settings for the default workspaces were created based on the tools used in typical tasks. Custom
workspaces however can be created to meet your specific workflow needs.
To change workspaces, navigate to the Window menu, select the Workspaces menu, and then select the
workspace to which you would like to switch. Alternatively, use the workspace selector found within the
activity toolbar, or use the corresponding shortcut.
Browser
Use the browser workspace to browse and sort through your images. In this workspace, the browser fills the
screen, the Folders palette is open, and all other palettes are closed.
While in this workspace, use the folders palette to find the folder you wish to work on and then use the
tagging and filtering tools to rate and label your images and then filter and sort your images to find only
those images you want to work further on in Capture NX 2’s editor.
When the browser workspace is used on a single screen, opening an image or group of images from the
browser will automatically toggle the edit workspace.
Shortcut
Alt + 1 (Windows)
option + 1 (Macintosh)
Chapter 8 — Interface | Workspaces
57
Metadata
The metadata workspace is designed to provide you with optimum workspace to review and add metadata
to your images. Within this workspace only the Browser and Metadata palettes are displayed.
The Metadata palette displays both information about the camera and exposure along with XMP/IPTC
information. Use the browser to select the image or group of images you want to review or add XMP/IPTC
information to.
When the metadata workspace is used on a single screen, opening an image or group of images from the
browser will automatically toggle the edit workspace.
Shortcut
Alt + 2 (Windows)
option + 2 (Macintosh)
Multi-Purpose
The multi-Purpose workspace is best used on high resolution monitors and was designed to enable you to
browse and edit images simultaneously. Selecting this workspace opens the Browser palette to reduced
size and displays the Bird’s Eye, Edit List, and Photo Info palettes. Any images that are currently being
worked on are displayed between the Browser and Edit List palettes.
Opening images from the browser in the multi-purpose workspace will not toggle the edit workspace;
instead, the multi-purpose workspace will be maintained.
Shortcut
Alt + 3 (Windows)
option + 3 (Macintosh)
Edit
The edit workspace is typically used when editing images. Only the Toolbar, Bird’s Eye, Edit List, and
Photo Info palettes and the images currently open in the editor are displayed, ensuring that maximum
space is available for editing images without distractions.
Shortcut
Alt + 4 (Windows)
option + 4 (Macintosh)
Creating Custom Workspaces
Capture NX 2 provides you with the ability to create your own custom workspaces. Use these custom
workspaces to save the position and state of all of the palettes and windows for use in the future. This can
help you save time and ensure that the palettes and windows are arranged in a way that best fits your
workflow.
Custom workspaces save the current state on all active screens, enabling you to create a single workspace
that controls the position and state of palettes across multiple screens.
58
Chapter 8 — Interface | Workspaces
To create a custom workspace, follow these steps:
1
2
3
Arrange the palettes and windows according to your taste.
Navigate to the Window menu and select the
Workspaces sub-menu, then select Save
Workspace. Alternatively, click on the workspace
selector and select Save Workspace.
Type in the name of the new workspace and click
OK.
You can then assign a shortcut to this new workspace by following these steps:
1
Navigate to the Edit menu (Windows) or
Capture NX 2 menus (Macintosh), select the
Preferences sub-menu, and select Workspaces.
Alternatively, click on the workspace selector and
select Manage Workspaces.
Chapter 8 — Interface | Workspaces
59
2
In the “Workspaces” tab of the “Preferences” dialog,
click on the pull-down menu next to the name of the
workspace you created and select the shortcut you
would like to use. If you select a shortcut already in
use by another workspace, the shortcut for that
other workspace will automatically be set to None.
To access your custom workspaces, navigate to the Window menu and select the My Workspaces submenu, then select the desired workspace to apply. Alternatively, click on the workspace selector, select the
My Workspaces sub-menu and select the desired workspace.
Working with Multiple Screens
Capture NX 2 has been improved to better support multiple screens. Palettes and windows can be freely
placed on any available screen. Furthermore, you can set workspaces independently on each connected
screen. Custom workspaces can also be created, capturing the state of multiple screens, enabling you to
quickly and easily switch between single screen and multiple screen configurations.
When working with multiple screens, Capture NX determines which screen is the primary screen and which
screen is the additional screen differently for the different operating systems.
For the Windows operating system, the primary screen is the screen where the application window is
placed. You can move the application window by clicking on the Restore button, moving the application
window to another screen, and then clicking on the Maximize button. The remaining screen will be the
additional screen.
For the Macintosh operating system, the primary screen is the screen that contains the Menu Bar and Dock.
The screen that does not have the Menu Bar and Dock will be the additional screen.
Additional screen Sub-Menu
Capture NX 2 continuously checks for the presence of additional screens. As soon as an additional screen is
found, a new sub-menu called the Additional Screen sub-menu is added to the Workspaces sub-menu
of the Window menu as well as to the Workspaces selector menu.
The Workspaces sub-menu will continue to control the workspace of the primary screen. The Additional
Screen sub-menu will control the workspace to be applied to the additional screen.
To use the default workspaces in a multiple screen configuration, follow these steps:
1
2
60
Navigate to the Window menu, select the Workspaces sub-menu, and select the workspace you
would like to use on your primary screen.
Navigate back to the Window menu, select the Workspaces sub-menu, select the Additional
Screen sub-menu and then select the workspace to use on the additional screen.
Chapter 8 — Interface | Working with Multiple Screens
A Please note: Only default workspaces can be applied in this manner. Custom workspaces always are applied to
all available screens.
A Please note: Some workspaces cannot be used in conjunction with another. The following table shows the
available combinations.
Browser
Metadata
Multi-Purpose
Edit
Primary
Screen
Desktop
Additional Screen
Browser
✔
—
—
—
✔
Metadata
✔
—
—
—
✔
Multi-Purpose
✔
—
—
—
—
Edit
✔
✔
✔
—
—
Desktop
The desktop workspace provided within only the Additional Screen sub-menu, hides all palettes on the
additional screen, letting you see either the operating system’s desktop or other running applications.
Swap Workspaces
The Swap Workspaces option is available in the Additional Screen sub-menu and exchanges the
contents of both screens. Use this function to swap the contents of the primary screen for the contents of
the additional screen and vice versa.
Chapter 8 — Interface | Working with Multiple Screens
61
Image Window
Image windows are the frames that contain your images and provide you with important data which can
help you enhance the image. Image windows are displayed as long as Capture NX 2 is not in the full screen
or presentation modes.
Shortcut
Cycle through open image windows:
Ctrl + Tab
q
w e
r
t
Each image window displays important information about the image:
62
q Image Name
This is the file name you have given the current image.
w Zoom Ratio
The zoom ratio is the current zoom ratio of the image. A value of 100% means you
are looking at the actual image data, while anything lower than 100% is showing
you only a portion of the image. A zoom ratio over 100% is showing you an
enlarged view of the individual pixel details. You can zoom in and out using the
zoom tool, Bird’s Eye palette, or the zoom controls in the Window menu.
e File Size
This shows you the size in megabytes of the current image you are working on.
r Color Profile
The color profile area shows you the profile that is currently applied to your image.
You can change the color profile with the Color Profile option in the Adjust
menu. For more information about the Color Profile option, please see the
section “Color Profile” in Chapter 20, “Adjust Menu”.
Chapter 8 — Interface | Image Window
t Soft Proof
The soft proof feature enables you to preview the effect of
an output profile on your image, approximating the results
you can expect from your printer. The soft proof function
provides you with controls to preview the use of different
profiles. It also allows you to set different parameters for the
color management system to use.
To turn soft proofing on, follow these steps:
1
Click on the pull-down menu next to the soft proof
status area in the image window.
2
In the “Soft Proof” window that appears, click the
Soft Proof On option.
3
Select the appropriate Target Profile, Intent, and
Use Black Point Compensation state options and
then click OK.
You can turn soft proof off by repeating step 1 and selecting the Soft Proof Off option in the “Soft Proof”
window.
Chapter 8 — Interface | Image Window
63
Soft proof offers the following options:
Target Profile
Select the color profile from the list to view the result of the color management system and to preview
how the different color management settings will affect your image.
Intent
Choose from four different rendering intents. The different rendering intents control how colors in your
image are mapped to the colors that your printer can produce (as indicated by the printer profile).
A Please note: Different printer and paper combinations, as well as the different software used to create printer
profiles, benefit from different rendering intents. Experiment with the different rendering intents within your
workflow to find the option that works best.
Capture NX 2 provides the following intents:
❏ Perceptual
This rendering intent maintains the relationships of colors so that the printed image appears natural to
the human eye. While this intent maintains the relationship of colors, the actual color values will be
changed.
❏ Saturation
This rendering intent produces highly saturated colors, but it may not produce accurate colors in a
photograph.
❏ Relative Colorimetric
This rendering intent maps all of the colors that fall outside of the gamut of the target profile to the
closest reproducible color. This profile reproduces accurately all of the colors that are within the range of
colors reproducible by your printer. This option preserves as many natural colors as possible and is often
the best choice for printing photographs.
❏ Absolute Colorimetric
This rendering intent is very similar to relative colorimetric, except that it maps the white point of the
image to the white point of the destination profile. It is recommend that you use absolute colorimetric
only if you want to proof your images for a specific print device other than your printer, since this
rendering intent will attempt to reproduce the results of the output device, including the effect of a
different paper color.
Use Black Point Compensation
Check this box to utilize black point compensation. This ensures that the black point from the image is
mapped to the black point of your printer, enabling the full color range of the printer to be used. If your
prints contain either gray shadows or too little detail, try turning this option off. Unless you are having
problems with a specific print and profile combination, it is recommended that you always use this option.
Shortcut
Toggle Soft Proof on and off:
Ctrl + Y (Windows)
command + Y (Macintosh)
64
Chapter 8 — Interface | Image Window
Window & Palette Functionality
Each palette within Capture NX 2 provides you with a number of different controls for that palette.
q
w
e
r
q Minimizing &
Maximizing
Palettes
w Docking &
Undocking
Palettes
Clicking on the Minimize / Maximize button either expands or collapses a palette.
In some situations, the palette cannot be collapsed until the operation within that
palette has been completed.
Alternatively, you can click on the palette’s title bar to switch between the
maximized and minimized states.
Clicking the dock button enables you to either dock or undock a palette. When
undocked, the palette will float freely and can then be positioned anywhere. This
can be handy if you utilize two screens and you want to place a palette on the
additional screen. Clicking the dock button on an undocked palette will cause that
palette to become docked in its default position.
The position of undocked palettes are recorded when a custom workspace is
created, enabling you to position the palettes where you want and then recall that
position at any time in the future.
e Grip Edge
Click and drag on the grip edge to reposition a palette. Click the dock button to
reposition the palette in its default position.
r Resize Control
The resize control is found in the bottom corner of a palette that can be resized and
enables you to resize the palette to suit your needs. Simply click and drag the resize
control to change the palette’s size. Some palettes have a maximum or minimum
size.
Chapter 8 — Interface | Window & Palette Functionality
65
Finding Palettes
Undocking many palettes can sometimes make it difficult to locate that palette. All palettes and windows
can be located using the Window menu. The most frequently used palettes and windows are listed directly
in the Window menu, while less frequently used undocked palettes and windows are listed in the
Undocked Palettes section of the Window menu.
Click on the palette or window that you want to locate and it will be brought to the front of whichever
screen it is positioned on, on top of other floating palettes and windows.
66
Chapter 8 — Interface | Window & Palette Functionality
Chapter 9
The Browser
Browser Overview
The browser has been greatly updated for Capture NX 2 to provide even more control over browsing and
sorting through your images. The Browser palette now contains enhanced tagging and rating
functionality, new filtering and sorting functions, as well as compatibility with other organizational software
applications. Additionally, the labels utilized by Capture NX 2 are based on the XMP standard. Depending on
the application and the options selected with the Capture NX 2 preferences, utilizing the XMP standard can
help ensure that labels added by other applications that also utilize the XMP standard can be seen in
Capture NX 2. For example, as both ViewNX and Nikon Transfer utilize the XMP standard, labels and ratings
can be shared between all three applications.
To open the Browser palette, either click the maximize button in the browser title bar or select the
Browser workspace from the Workspaces sub-menu of the Window menu.
Chapter 9 — The Browser | Browser Overview
67
Opening a Folder of Images in the Browser
The browser provides you with a number of ways of displaying a folder of images. By default, the browser
displays the “My Pictures” (Windows) or “Pictures” (Macintosh) folder. To open a folder of images in the
browser, double-click the folder icon in the browser or use the Folders palette, the Open Folder in
Browser command in the File menu, or Nikon Transfer.
Using the Folders Palette
To select a folder to display using the Folders palette, follow these steps:
1
Click on the maximize button for the Folders palette
to display your computer’s folder hierarchy.
2
Navigate to the folder you want to display in the browser and click on that folder.
Using Open Folder in Browser
Another way to display a folder in the browser is to use the Open Folder in Browser command in the File
menu. To use this technique, follow these steps:
68
1
Navigate to the File menu and select the Open
Folder in Browser command.
2
In the navigation dialog that appears, navigate to the appropriate folder and click on that folder to
highlight it.
Chapter 9 — The Browser | Opening a Folder of Images in the Browser
3
Click OK to open the folder in the browser.
Using Nikon Transfer
You can also use Nikon Transfer to open a folder of images transferred to your computer. To open a folder in
the browser after the transfer operation has completed, follow these steps:
1
2
3
4
Within Nikon Transfer, navigate to the “Preferences” tab.
Click on the pull-down menu for the Open destination folder with other application after
transfer option.
Select Browse….
Select Capture NX 2 from the displayed “Select Program” window and click OK.
After the next transfer is completed, the folder identified in the primary destination folder will be displayed
within the Capture NX 2 browser. You can then open one or more images by double-clicking on them
within the browser.
Chapter 9 — The Browser | Opening a Folder of Images in the Browser
69
Navigating Within the Browser
At the top-left of the Browser palette are three buttons that help you choose which folder to display within
the browser.
q we
q Previous Folder
Click on the “Previous Folder” button to navigate to the last folder that you opened
within the browser. You can view the folder history by holding this button down,
and can jump to a folder by selecting it. This button is not accessible when viewing
the first folder of that editing session.
w Next Folder
The “Next Folder” button navigates back to the last folder that you viewed before
using the “Previous Folder” button. This button is not accessible until you use the
“Previous Folder” button once.
e Folder Up
Use the “folder up” button to navigate to the parent folder of the currently
displayed folder within the browser.
Filtering Tools
Capture NX 2 contains new filtering tools to help you display only images according to label, rating, or file
type.
q
w
e
q Filter by Label
The filter by label tool lets you choose which images to display within the browser based on labels that you
applied previously, either within Capture NX 2 or within one of the software applications with which
Capture NX 2 provides compatibility. Capture NX 2’s compatibility mode can be set with the Label
Compatibility option of the “Labels” tab of the “Preferences” dialog.
To use the filter by label tool, follow these steps:
1
2
70
Click on one of the labels to display only images that have that label applied to them. Click on
additional labels to display images with those additional labels as well.
After clicking on more than one label, you can hide images with specific labels by clicking on that
label again, turning the filtering for that label off.
Chapter 9 — The Browser | Navigating Within the Browser
3
To display all images again, click on the checkmark next to the filter by label tool.
Shortcut
To show only images with a specific label
(multiple shortcuts can be performed):
Shift + label number (0 through 9)
w Filter by Rating
The filter by rating tool lets you choose which images to display within the browser based on the ratings
that you applied previously, either within Capture NX 2 or within one of the software applications with
which Capture NX 2 provides compatibility.
To use the filter by rating tool, follow these steps:
1
2
3
To display only images with a specific rating, click once on the corresponding icon to display only
images with that rating.
To display images that fall within a range of ratings, click and drag on the filter by rating tool to
describe the range of ratings. For example, if you would like to see all images that have two, three,
or four stars, click on the two-star icon and drag to the four-star icon, then release the mouse
button.
To display all images again, click on the checkmark next to the filter by rating tool.
Shortcut
To show only images with a specific rating:
Ctrl + Shift + rating number (1 through 5
and 0) (Windows)
control + shift + rating number (1 through
5 and 0) (Macintosh)
e File Type to Display
The filter by file type tool lets you show only images with a specific file type. Click on the pull-down menu
and select one of the available options. You are provided with the following options:
NEF + JPEG | TIFF
The NEF + JPEG | TIFF option shows all images within a specific folder, but only
displays the NEF image in each NEF + JPEG pair.
NEF | JPEG | TIFF
The NEF | JPEG | TIFF option shows all images within the current folder, including
the JPEG image in each NEF + JPEG pair.
NEF only
The NEF only option displays only NEF files within the current folder.
JPEG only
The JPEG only option displays only JPEG files within the current folder.
TIFF only
The TIFF only option displays only TIFF files within the current folder.
Chapter 9 — The Browser | Filtering Tools
71
Sorting Tools
The “Sorting Tools” let you choose the order that images are displayed in within the current folder.
Sort By
The Sort section determines the primary sorting method for the
current folder. After selecting the primary sorting method,
choose to have the images sorted in either ascending or
descending order using the Ascending and Descending
options.
Then Sort By
The Then Sort By section determines the secondary sorting
method for the current folder. This is helpful if there are many
images grouped together after the Sort option has been
selected.
72
Chapter 9 — The Browser | Sorting Tools
Labeling and Rating Toolbar
The labeling and rating toolbar can be found at the bottom of the browser palette and provides you with
tools to add labels and/or ratings to your images.
Add Label
The add label section of the labeling and rating toolbar displays the available labels based on the Label
Compatibility option of the “Labels” tab in the “Preferences” dialog. To add a label to your image or group
of images, follow these steps:
1
2
Select one or more images in the browser.
Click on the desired label.
Shortcut
label number (keys 0 through 9)
Add Rating
The add rating section of the labeling and rating toolbar enables you to add a rating to one or more images.
To add a rating to your image or group of images, follow these steps:
1
2
Select one or more images in the browser.
Click on the desired rating.
Shortcut
Ctrl + rating number (keys 1
through 5) (Windows)
command + rating number (keys 1
through 5) (Macintosh)
Chapter 9 — The Browser | Labeling and Rating Toolbar
73
Browser Header
Displayed at the top of the browser is the browser header. This section provides information about the
current folder as well as control over the size of the thumbnails displayed within the folder.
On the left side of the browser header is the number of images within the current folder and the number of
selected images.
On the right side of the browser header is the thumbnail size selector, which enables you to determine the
size of the thumbnails displayed within the browser. To the left and right of the thumbnail size selector are
the smaller thumbnails and larger thumbnails buttons. Clicking on either of these buttons will make the
thumbnails one size smaller or one size larger.
Browser View Selector
The top and right-most button in the browser is the browser view selector. This pull-down menu lets you
switch between the two browser views available in Capture NX 2: thumbnail grid and thumbnail list.
Thumbnail Grid
The thumbnail grid is the default browser view. Images are displayed in a grid format; resizing the browser
causes the images to be resorted.
In thumbnail grid view, the thumbnail size selector offers a choice of seven thumbnail sizes.
Thumbnail Information Overlay
❏ Label Icon
The label icon displays the label currently applied to the image and can be adjusted either by clicking
on this icon and selecting the appropriate label from the pull-down menu or by clicking on the desired
label in the labeling and rating toolbar.
74
Chapter 9 — The Browser | Browser Header
❏ Name
The image’s file name and extension are displayed under the thumbnail. To rename the current file, click
once on the file name to highlight it and a second time to change the file name. You will not be able to
change the file’s extension in this manner. To change the file’s extension, use the Save As… command
in the File menu.
To rename more than one file, select multiple files in the browser, right-click (Windows) or control-click
(Macintosh) and in the displayed contextual menu, select Rename. This will call up the “File Naming”
dialog and enable you to change the names of more than one file. For more information on the “File
Naming” dialog, please see “File Naming Dialog” in Chapter 22, “Batch Menu”.
❏ Edited Icon
This icon is displayed on NEF images whenever that image has been edited and saved using the
Capture NX 2 editor or by ViewNX.
❏ Rating Icon
The rating icon displays the rating currently applied to the image. To set the rating for an image, click on
the desired rating on the rating icon underneath the thumbnail or in the ratings and labels toolbar.
❏ XMP/IPTC Data Icon
The XMP/IPTC data icon is displayed whenever the current image has XMP/IPTC data added to it. XMP/
IPTC data can be added either by the camera, with another image editing application, or using the
Metadata palette within Capture NX 2.
❏ Voice Memo Icon
The voice memo icon is displayed for images that have a voice memo attached to them.
❏ Hi-Speed Crop Icon
This icon is displayed on images shot using the camera hi-speed crop option.
❏ NEF + JPEG Pair Icon
The NEF + JPEG pair icon is displayed for images that were shot using the camera “NEF + JPEG” image
quality option.
❏ Protected Icon
Images with the protect icon displayed cannot be edited in Capture NX 2 until they are unlocked.
Images can become locked either using the camera protect button or by turning the Protect File
option on in the Capture NX 2 File menu.
To remove the protect icon, navigate to the File menu and select the Protect File item.
In the thumbnail grid display, information about each image is shown beneath its thumbnail.
Chapter 9 — The Browser | Browser View Selector
75
Thumbnail List
The thumbnail list places important information about each image in a column and enables you to sort by
each of the columns.
In thumbnail list view, the thumbnail size selector offers a choice of three thumbnail sizes.
The available columns in the thumbnail list are:
❏ Label
The Label column displays the label for each image.
❏ Name
The Name column displays the image's file name and extension. To rename a file, click once on the file
name to highlight it and then click a second time to change the file name.
To rename more than one file, select multiple files in the browser, right-click (Windows) or control-click
(Macintosh) and in the displayed contextual menu, select Rename. This will call up the “File Naming”
dialog and enable you to change the names of more than one file. For more information on the “File
Naming” dialog, please see “File Naming Dialog” section of Chapter 22, “Batch Menu”.
❏ Rating
The Rating column displays the rating. To set the rating for an image, click on the desired rating on the
rating icon underneath the thumbnail or within the ratings and labels toolbar.
❏ Status
The Status column displays an edited icon for NEF images that have been edited and saved within the
Capture NX 2 editor or by ViewNX. If the file contains versions, the number of versions contained within
the image will be displayed in this column. For more information on version, please see Version in
Chapter 15, “Edit List”.
❏ Date Shot
The Date Shot column displays the date the image was created.
❏ Date Modified
The Date Modified column displays the date the image was last modified.
❏ Size
The Size column displays the size of the file, in KB or MB.
❏ Type
The Type column displays the image’s file type.
76
Chapter 9 — The Browser | Browser View Selector
❏ Extras
The Extras column displays additional information about the image. You cannot sort images by this
column.
XMP/IPTC Data Icon
The XMP/IPTC data icon is displayed whenever the current image has XMP/
IPTC data.
Voice Memo Icon
The voice memo icon is displayed for images that have a voice memo attached
to them.
Hi-Speed Crop Icon
This icon is displayed on images shot using the camera hi-speed crop option.
NEF + JPEG Pair Icon
The NEF + JPEG pair icon is displayed for images that were shot using the
camera “NEF + JPEG” image quality option.
Protected Icon
Images with the protect icon displayed cannot be edited in Capture NX 2 until
they are unlocked. Images can become locked either using the camera protect
button or by turning the Protect File option on in the Capture NX 2 File
menu.
To remove the protect icon, navigate to the File menu and select the Protect
File item.
Chapter 9 — The Browser | Browser View Selector
77
Opening Images from the Browser
Images in the browser can be opened in the editor either by double-clicking on the desired image, or
selecting multiple images and use the Open Image command from the File menu. Alternatively, you can
press the enter key on your keyboard to open the selected images.
If the Capture NX 2 is open on a single screen, opening an image will cause the browser to automatically
minimize. To prevent this from happening, either position the browser on another screen (by manually
undocking and repositioning the browser or using the additional screen workspace option) or use the
multi-purpose workspace.
78
Chapter 9 — The Browser | Opening Images from the Browser
Chapter 10
The Folders Palette
The Folders palette displays the folders on your hard disk in the same manner as the operating system.
Capture NX 2’s Folders palette is now split into two sections: the “Favorite Folders” section and the “Folder
Structure” section.
Chapter 10 — The Folders Palette
79
Favorite Folders Section
The “Favorite Folders” section provides quick access to the
most often used folders and enables you to add and
remove folders to and from this section.
Adding Favorites
To add a folder to the “Favorite Folders” section, click and
drag a folder from the “Folder Structure” section into the
“Favorite Folders” section.
Deleting Favorites
To delete a folder from the “Favorite Folders” section, rightclick (Windows) or control-click (Macintosh) on the folder
you wish to delete and select Delete from the displayed contextual menu.
A Please note: Deleting a favorite will not delete the folder or its contents from your hard disk. Only the link to that
folder will be removed from your computer.
Click and drag on the bar that divides the “Favorite Folders” section and the “Folder Structure” section to
adjust the amount of space dedicated to either section.
Folder Structure Section
The “Folder Structure” section displays a hierarchical view of
the folders available on your computer. Use this section to
locate a specific folder and display the contents of that
folder within the browser. Double-click on a folder to open
the browser and display the contents of that folder.
80
Chapter 10 — The Folders Palette | Favorite Folders Section
Chapter 11
The Metadata Palette
The Metadata palette contains a list of information regarding the current image as well as access to the
IPTC information for that image. Use this palette to review the image’s camera and exposure information as
well as to add XMP/IPTC information to one or more images.
File & Camera Information Section
Within the “File & Camera Information” section, you can see
information regarding the camera, the time and date the
image was shot, the exposure data, as well as the settings
used within the camera that affected the current image.
When more than one image is selected, information that is
shared between images will be displayed while information
that is different in each image will be identified with a “–”.
Click on the show/hide triangle next to a section’s header to
expand or collapse that section.
Click and drag on the bar that divides the “File & Camera
Information” section and the “XMP/IPTC Information”
section to adjust the amount of space dedicated to either
section.
Chapter 11 — The Metadata Palette | File & Camera Information Section
81
XMP/IPTC Information Section
The “XMP/IPTC Information” section contains a
standardized list of text fields that can be used to indicate
the copyright and usage requirements of your images. The
contents of the “XMP/IPTC Information” section was
originally designed to simplify and clarify information
needed when sharing photographs with different
publications.
These fields enable you to add important information by
attaching labels such as Creator, Headline, Keywords,
Categories, and Origin to the image. For more
information about IPTC and how it is used, please visit the
following web page:
http://www.iptc.org.
Adding Image Information
You can view and change the contents of the different IPTC fields on images within both the browser and
the editor.
To add IPTC information to one or more images, follow these steps:
1
2
3
82
Open the Metadata palette and expand the “IPTC
Information” section.
Select one or more images in the browser.
Alternatively, you can add IPTC information to the
current image open within the editor.
Enter information for each field that you would like to contain IPTC information. It is not necessary
to enter a value in every field.
Chapter 11 — The Metadata Palette | XMP/IPTC Information Section
4
Click on the Apply button.
When more than one image is selected, information that is shared between images will be displayed while
information that is different in each image will be identified with a “–”. You can replace the different contents
of each image with the same information by replacing the “–” with the desired text. You can also clear out
different information by simply deleting the “–”.
If you make a mistake and want to revert back to the original IPTC contents, click the Reset button before
clicking Apply. Please note that after you click the Apply button, you will not be able to reset the contents
of the “XMP/IPTC Information” section.
Copying and Pasting IPTC Information
The contents of the “XMP/IPTC Information” section can be copied from one image and pasted to one or
more additional images. To copy and paste IPTC information, follow these steps:
1
Select an image in the browser. Alternatively, you
can copy ITPC information from the image currently
open in the editor.
A Please note: IPTC information can be copied only
from a single image.
2
Navigate to the Batch menu and select Copy IPTC
Info. Alternatively, you can click on the batch menu
located to the left of the labeling and rating toolbar
and select Copy IPTC Info.
Chapter 11 — The Metadata Palette | XMP/IPTC Information Section
83
3
4
Select one or more images within the browser or
select another image within the editor.
Navigate to the Batch menu and select Paste IPTC
Info. Alternatively, you can click on the batch menu
located to the left of the labeling and rating toolbar
and select Paste IPTC Info.
A Please note: IPTC information can be copied to
multiple images; however, existing IPTC content will be
overwritten by the copied IPTC information.
Creating XMP/IPTC Presets
XMP/IPTC presets enable you to create a collection of frequently used XMP/IPTC information that can be
later applied to one or more images in a more efficient manner. Multiple XMP/IPTC presets can be created
and later accessed within Capture NX 2, making it possible for you to create different XMP/IPTC presets for
different tasks.
To create an XMP/IPTC preset, follow these steps:
1
Select an image in the browser. Alternatively, you
can create an ITPC preset from the image currently
open in the editor.
A Please note: An XMP/IPTC Preset can only be created
from a single image.
84
Chapter 11 — The Metadata Palette | XMP/IPTC Information Section
2
3
4
5
Navigate to the Batch menu and select Save XMP/
IPTC Preset. Alternatively, you can click on the batch
menu located to the left of the labeling and rating
toolbar and select Save XMP/IPTC Preset.
In the “Save XMP/IPTC Preset” dialog that appears,
type in the name for the new XMP/IPTC Preset. This is
the name that will be displayed in the Load XMP/
IPTC Preset sub-menu.
Next, review the fields that will be created in the XMP/IPTC preset. Fields that contain a checkmark
in the box to the right will be added to the preset. Fields that contain information within them are
automatically checked, while fields that are empty will not be automatically checked.
Change any of the text within the fields if necessary and check or uncheck any additional fields that
you would like to add or remove from the XMP/IPTC preset. Checking a blank field will cause that
XMP/IPTC preset, when loaded, to clear out any text found within that field in the images that the
XMP/IPTC preset is applied to.
Chapter 11 — The Metadata Palette | XMP/IPTC Information Section
85
6
Click OK.
Loading XMP/IPTC Presets
After creating one or more XMP/IPTC presets using the Save XMP/IPTC Preset option, you can load an
XMP/IPTC preset to one or more images. To use an XMP/IPTC preset to load XMP/IPTC information to one or
more images, follow these steps:
1
2
Select one or more images within the browser.
Alternatively, you can add ITPC information to an
image open within the editor.
Navigate to the Batch menu and select the Load
XMP/IPTC Preset sub-menu, and select the XMP/
IPTC preset you would like to load into your images.
Alternatively, you can select an XMP/IPTC preset
from the Load XMP/IPTC Preset sub-menu of the
batch menu located to the left of the labeling and
rating toolbar.
Managing XMP/IPTC Presets
XMP/IPTC presets are managed from the “Preferences” dialog. Use the “XMP/IPTC Presets” tab of the
“Preferences” dialog to add, delete, modify, import, and export XMP/IPTC Presets.
For more information on managing XMP/IPTC presets, see “XMP/IPTC Presets” in Chapter 7, “Preferences.”
86
Chapter 11 — The Metadata Palette | XMP/IPTC Information Section
Chapter 12
Activity Toolbar
The activity toolbar provides access to three of the most often accessed functions within Capture NX 2:
workspaces, importing images, and printing images.
Workspace Selector
Use the workspace selector to access the different workspaces available within Capture NX 2. For more
information on workspaces, please see the Workspaces section of Chapter 8, “Interface”.
Launch Nikon Transfer
The launch Nikon Transfer button will cause Nikon Transfer to load in a separate application window. Use
Nikon Transfer to transfer images from an attached camera or compact flash card, with the ability to
automatically add XMP/IPTC information, create backup copies of images, as well as automatically opening
the Capture NX 2 browser to display the transferred images.
Chapter 12 — Activity Toolbar | Workspace Selector
87
Print
Click the print button to open the Capture NX 2 “Print Layout” dialog and begin printing your images. For
more on the Capture NX 2 “Print Layout” dialog, please see the “Print” section in Chapter 18, “File Menu”.
88
Chapter 12 — Activity Toolbar | Print
Chapter 13
The Toolbar
Tool Options Bar
The tool options bar can be found directly beneath the toolbar and provides access to controls specific to a
tool. The crop tool, auto retouch brush, lasso and marquee tools, selection brush, selection gradient, and
fill / remove tools all utilize the tool options bar to display additional controls.
Direct Select Tool
The direct select tool enables you to select many of the different objects within Capture NX 2.
• Multiple objects can be selected by holding down the Ctrl key (Windows) or command key (Macintosh)
when selecting additional objects.
• A range of objects can be selected by clicking on the first object of the desired range and then holding
down the Shift key and clicking on the last object of the desired range.
• Control points within an image window as well as thumbnails within the browser can be selected by
clicking and drawing a bounding box around the Control points or thumbnails that you want to select.
The following object types can be selected:
• Control points
• Images in the browser
• Steps in the Edit List palette
A Please note: Only one type of object can be selected at a time.
Shortcut
A key
Chapter 13 — The Toolbar | Tool Options Bar
89
Hand Tool
The hand tool enables you to move within an image. Select this tool when viewing an image that does not
fit in the image window. Click and drag to reposition the contents of the window.
Double-click this tool to fit the current image to the editor so that the entire image fits into the space
available.
Shortcut
H key
Temporarily switch to the hand tool when
any other tool is active: Spacebar
Zoom Tool
The zoom tool is used to zoom into and out from an image. Select this tool and click on the image to zoom
in. Hold the Alt key (Windows) or option key (Macintosh) and click to zoom out.
Double click on the zoom tool to zoom the current image to 100%.
Shortcut
Z key
Zoom in when any other tool is active:
Ctrl + spacebar keys (Windows)
command + spacebar keys (Macintosh)
Zoom out when any other tool is active:
Ctrl + Alt + spacebar keys (Windows)
command + option + spacebar keys
(Macintosh)
90
Chapter 13 — The Toolbar | Hand Tool
Rotate Tool
The rotate tool is used to rotate images 90° clockwise or
counter-clockwise. Click on this button to rotate the image
90° in the direction indicated. Hold the Alt key (Windows) or
option key (Macintosh) and click on this button to rotate the
image 90° other direction. To choose the direction of
rotation, click and hold this icon.
Multiple images can be rotated simultaneously by selecting
multiple images in the browser and then clicking on this
button.
Rotating an image within the editor will cause a step to be
created within the Edit List palette, enabling you to remove the rotation at any point in the future. When
you save your images with the NEF file format, you can remove the rotation after the image has been saved
or closed. Rotating an image found in the browser will be applied in a non-destructive fashion, however
there will not be a rotation step added to the Edit List palette.
Shortcut
Rotate the image 90° clockwise:
Ctrl + R (Windows)
command + R (Macintosh)
Rotate the image 90° counter clockwise:
Ctrl + Shift + R (Windows)
command + shift + R (Macintosh)
Straighten Tool
Select this button to add a Straighten step to the Edit List
palette. In the Straighten step, you can rotate an image
incrementally clockwise or counter-clockwise, or you can
trace a line within your image that should be either
horizontal or vertical and allow the straighten tool to
automatically straighten your image.
Chapter 13 — The Toolbar | Rotate Tool
91
To straighten your image using the straighten tool, follow these steps:
1
2
3
4
92
With an image open within the editor, click the straighten tool in the toolbar.
Locate a line within the image that should be either
vertical or horizontal and click on the start of the
line. Holding the mouse button down, draw the
entire length of the line, letting go when you have
reached the end of that line. The straighten tool will
then calculate the direction and degree of the
rotation to apply to the image to make the line you
described either horizontal or vertical.
If you made a mistake while drawing the line, you can click on the line you added to the image and
adjust one of the two anchor points found at either end of the line, or you can re-draw the line by
clicking and dragging within the image window again.
By default, Capture NX 2 will automatically crop the
image using the same aspect ratio to hide all areas of
the image where there is no image information.
These areas that lack information are created when
the image is rotated, and are represented by pure
white pixels. To prevent Capture NX 2 from
automatically cropping the image, check the
Include areas without image data option in the
Straighten step of the Edit List palette.
Chapter 13 — The Toolbar | Straighten Tool
5
If you are satisfied with the straightening effect,
continue editing your image using the other tools
available within Capture NX 2 or perform a save. The
straightening effect is now applied to your image. To
cancel the straightening effect, click on the Delete
button found at the bottom of the Straighten step
within the Edit List palette or click on the
Straighten step and press the delete key on your
keyboard.
Crop Tool
The crop tool enables you to remove areas from the margins
of your image or to change the aspect ratio of your image.
To add a crop to your image, follow these steps:
1
2
3
4
Click on the crop tool in the toolbar.
Within the tool options section of the toolbar,
determine the crop method you would like to use.
Click and drag the mouse over the image in the active image window to make a selection. The area
outside of the selection will be masked to enable you to focus on the result of the selection.
Click on any of the edges or corners of the crop selection to modify the size and shape of the crop.
Chapter 13 — The Toolbar | Crop Tool
93
5
Double-click within the crop or press the enter key
to apply the crop. This will cause the image
information outside of the crop to be hidden and a
new Crop step to be added to the Edit List palette. If
the image is saved in the NEF format, you will be able
to remove the Crop step to display the hidden
information again. The hidden information will be
discarded if the image is saved in JPEG or TIFF.
A Please note: If the crop is not applied with the enter
key or by double-clicking within the crop, the crop will
be discarded.
The crop tool offers the following tool options:
Crop Method
Choose from one of three different cropping methods.
❏ Free Crop
This crop method enables you to freely draw a cropping rectangle.
❏ Fixed Aspect Ratio
Choose from one of the predetermined aspect ratios or select Custom to enter the desired aspect ratio.
This cropping method limits the crop tool to describing rectangles that match that aspect ratio.
Show Crop Assistance Grid
Select Show Crop Assistance Grid to display a grid of nine
equally-sized rectangles superimposed on the image within
the crop rectangle. The crop assistance grid is designed to
assist you in cropping the image. Based on the
photographic “rule of thirds”, the crop assistance grid helps
guide your crop so that the main points of interest lie close
to the points where the lines intersect. It also draws your
attention to the natural horizontal or vertical lines in the
image, such as a horizon or a large building, which often
benefit from being placed close to one of the four lines.
You can also choose to temporarily superimpose this grid
onto your image by holding down the Alt key (Windows) or
option key (Macintosh) while you are in the crop mode.
Shortcut
C key
94
Chapter 13 — The Toolbar | Crop Tool
Black Control Point
The black control point enables you to place a control point directly on your image, and to cause that
targeted color to not only become black, but also to neutralize the dark tones of your image. Black control
points are normally set on what should be the darkest point of the image and are used to set one end of the
dynamic range of the image. The Double Threshold option in the “Histogram” section of the Photo Info
palette is designed specifically to help you locate the darkest and lightest sections of your image.
Original Image
Final Image
To add a black control point to your image, follow these steps:
1
2
Click on the black control point icon in the toolbar. The cursor will change to a crosshair.
Identify the object you would like to be the darkest
object in the image and click on that object to place
a black control point. A B / W / N Control Point step
will be added to the Edit List palette, with a black
control point sub-step. You can reposition the black
control point by clicking and dragging it. Please note
that you may only add one black control point to
each B / W / N Control Point step.
Chapter 13 — The Toolbar | Black Control Point
95
3
Adjust the effect of the black control point by either
clicking and dragging the luminosity slider or by
entering a value directly into the text box in the
black control point sub-step of the B / W / N Control
Point step in the Edit List palette.
After a black control point is added to the image, the following options will be available in the B / W / N
Control Point step of the Edit List palette:
Black Control Point Method
Use the black control point method pull-down menu to
switch between controlling only the luminosity of the Black
Control Point or the individual red, green, and blue values.
Luminosity Method
The Luminosity method of the black control point always
changes the color that you have targeted by setting the
black control point to a neutral black. This is often the
most efficient mode to use, as most calibrated printers
work best when the image contains a neutral black. Within
this mode, you are presented with only a luminosity slider
on the black control point and only a Luminosity setting
within the black control point sub-step in the Edit List
palette.
RGB Method
The RGB method of the black control point enables you to set the individual red, green, and blue values of
the darkest color in the image. This option is helpful if your printer requires a non-neutral black. Within this
mode, you are presented with individual red, green, and blue sliders on the black control point and red,
green, and blue entries within the black control point sub-step in the Edit List palette.
96
Chapter 13 — The Toolbar | Black Control Point
Advanced
Click on the Advanced show/hide triangle to display the
additional controls for the black control point. The values set
for the selected black control point are displayed enabling
you to enter a new value directly to adjust the effect of the
control point.
Chapter 13 — The Toolbar | Black Control Point
97
Neutral Control Point
Neutral control points enable you to correct a color cast in your photograph by forcing the targeted color to
become neutral. In its default operation, the neutral control point will change the color values in the
targeted color so that the red, green, and blue values for that color are equal. Equalizing the red, green, and
blue values for a specific color causes that color becomes neutral, or without a specific color or hue. Neutral
control points are often most helpful if the image contains a neutral point of reference, for example, a gray
card. By selecting an object that is established as neutral, Capture NX 2 is able to calculate the difference
between that object and the color that is currently representing that object. The neutral control point will
remove the difference in color from the targeted object, as well as from the entire image. This results in a
color shift that affects the entire image.
One of the unique features of the neutral control points found in Capture NX 2 is that multiple neutral
control points can be added to the same image. This feature enables you to identify different objects and
neutralize more than one color cast that may appear in the image. When you use multiple neutral control
points, each control point will communicate with the other neutral control points in the same B / W / N
Control Point step of the Edit List palette to affect the entire image, correcting different objects and in the
process removing multiple color casts.
Original Image
98
Chapter 13 — The Toolbar | Neutral Control Point
Final Image
To add a neutral control point to your image, follow these steps:
1
2
3
Click on the neutral control point icon in the toolbar. The cursor will change to a crosshair.
Identify an object that should be neutral and click on
that object to place a neutral control point. A B / W /
N Control Point step will be added to the Edit List
palette, with a neutral control point sub-step. You
can reposition the neutral control point by clicking
and dragging it. Please note that you may add
multiple neutral control points.
Adjust the effect of the neutral control point by
either clicking and dragging the red, green, and blue
sliders, or by entering values directly into the text
boxes in the neutral control point sub-step of the B /
W / N Control Point step in the Edit List palette.
After a neutral control point is added to the image, the following options will be available in the B / W / N
Control Point step of the Edit List palette:
Chapter 13 — The Toolbar | Neutral Control Point
99
Neutral Control Point Method
Use the neutral control point method pull-down menu to
switch between controlling only the color balance of the
Neutral Control Point or affecting the luminosity, or
brightness, as well.
RGB Method
The RGB method of the neutral control point affects only
the color balance within the image while maintaining the
same brightness.
Affect Luminosity Method
The Affect Luminosity method of the neutral control
point adds an additional slider, the Luminosity slider, and
allows you to change both the color balance as well as the brightness.
Show Selection
The Show Selection checkbox enables you to see where
the current neutral control point is affecting the image.
Areas inked in white are being affected by the neutral
control point, while areas inked in black are not being
affected by the neutral control point. You can quickly access
the Show Selection option by right-clicking (Windows) or
control-clicking (Macintosh) on the neutral control point
and selecting Show Selection.
Color Picker
The Color Picker color swatch indicates the current color that is being used as the basis for the neutral
control point’s effect. Clicking on the Color Picker color swatch displays the Capture NX 2 color picker and
enables you to select a color to set the object selected by the neutral control point to. One of the best ways
to use the neutral control point is to place the control point on an object that is represented by a memory
color, and select the corresponding memory color range from the color picker. Capture NX 2 provides three
of the most common memory colors that represent colors that you see on a regular basis, such as the color
of the sky, the color of a person’s skin, or the color of foliage. You might, for example, place a neutral control
point on the sky, click on the Color Picker color swatch, open the “Swatches” section of the color picker,
and then select a color from the “Sky Tones” memory color range. This will remove any color cast from the
image by removing the difference between the targeted color of the sky and the defined sky memory color
from the entire image.
100
Chapter 13 — The Toolbar | Neutral Control Point
Advanced
Click on the Advanced show/hide triangle to display the
additional controls for the neutral control point. The values
set for the selected neutral control point are displayed
enabling you to enter a new value directly to adjust the
effect of the control point.
Click on the Reset button to reset the selected color control
point to the default values.
White Control Point
The white control point enables you to place a control point directly onto your image, causing the targeted
color to become white, which is an important first step in removing a color cast from the light tones in your
image. White control points are normally set on what should be the lightest point of the image and are used
to establish one end of the dynamic range of the image. The Double Threshold option in the “Histogram”
section of the Photo Info palette is designed specifically to help you locate the darkest and lightest
sections of your image.
Original Image
Final Image
Chapter 13 — The Toolbar | White Control Point
101
To add a white control point to your image, follow these steps:
1
2
3
Click on the white control point icon in the toolbar. The cursor will change to a crosshair.
Identify the object you would like to be the lightest
object in the image and click on that object to place
a white control point. A B / W / N Control Point step
will be added to the Edit List palette, with a white
control point sub-step. You can reposition the white
control point by clicking and dragging it. Please
note, you may only add one white control point to
each B / W / N Control Point step.
Adjust the effect of the white control point either by
clicking and dragging the luminosity slider or by
entering a value directly into the text box in the
white control point sub-step of the B / W / N Control
Point step in the Edit List palette.
After a white control point is added to the image, the following options will be available in the B / W / N
Control Point step of the Edit List palette:
White Control Point Method
Use the white control point method pull-down menu to
switch between controlling only the luminosity of the white
control point or the individual red, green, and blue values.
Luminosity Method
The Luminosity method of the white control point
always changes the color that you have targeted by
setting the white control point to a neutral white. This is
often the most efficient mode to use, as most calibrated
printers work best when the image contains a neutral
white. In this mode, you are presented with only a
luminosity slider on the white control point and only a
Luminosity setting within the white control point substep of the Edit List palette.
102
Chapter 13 — The Toolbar | White Control Point
RGB Method
The RGB method of the white control point enables you to set the individual red, green, and blue values of
the lightest color in the image. This option is helpful if your printer requires a non-neutral white. Within this
mode, you are presented with individual red, green, and blue sliders on the white control point and red,
green, and blue entries within the white control point sub-step of the Edit List palette.
Advanced
Click on the Advanced show/hide triangle to display the
additional controls for the white control point. The values
set for the selected white control point are displayed
enabling you to enter a new value directly to adjust the
effect of the control point.
Color Control Point
Color control points represent a unique way of adjusting the color and light in an image. Each color control
point enables you to perform advanced color changes in a selective fashion, without the need to create
selections or masks.
Original Image
Final Image
Chapter 13 — The Toolbar | Color Control Point
103
Each color control point that is placed on an object in your image identifies the characteristics of the color
as well as the level of detail of that object, enabling you to make adjustments to the color of that object.
With the use of the size slider, you are able to increase the reach or scale of the current color control point so
that it affects similar colors of the objects which are farther away from the color control point. Each new
color control point works together with other color control points in the same step to affect more and more
specific objects. Using additional color control points ensures that the adjustments that you make are being
applied to the current object only. Placing a color control point on an object with default settings prevents
other color control points from affecting that object.
To add a color control point to enhance your image, follow these steps:
1
2
3
104
Click on the color control point icon in the toolbar. The cursor will change into a crosshair.
Click on an object within the active image window
that you want to enhance. A color control point will
be placed upon the image and a Color Control
Point step with a single color control point sub-step
will be added to the Edit List palette.
Adjust the size slider to determine the reach the
current color control point has on the image. The
greater the value for the size slider, the more objects
with similar colors and values as selected by the
color control point will be affected.
Chapter 13 — The Toolbar | Color Control Point
4
Adjust the remaining sliders connected to the color control point to adjust the color and light of the
selected object.
Additional color control points can be added to the image by repeating the steps listed above.
To delete a color control point, click on the color control point in the image or in the Edit List palette and
press the delete key on the keyboard.
After a color control point is added to the image, the following options will be available in the Color
Control Point step of the Edit List palette:
Color Control Point Mode
The color control point mode pull-down menu enables you
to determine which elements of the current object to affect
with the color control point. Alternatively, click on the
triangle displayed beneath the last slider of the control
point. This will enable you to toggle between the current
mode and the All mode.
BCS
The BCS mode is the default mode and provides you with
size, brightness, contrast, and saturation sliders.
HSB
The HSB mode provides you with size, hue, saturation, and
brightness sliders.
RGB
The RGB mode provides you with size, red, green, and blue
sliders.
All
The All mode provides you with all available sliders: size, hue, saturation, brightness, contrast, red, green,
blue, and warmth.
Chapter 13 — The Toolbar | Color Control Point
105
Show Selection
The Show Selection checkbox enables you to see where the current color control point is affecting the
image. Areas inked in white are being affected by the color control point, while areas inked in black are not
being affected by the color control point. You can quickly access the Show Selection option by rightclicking (Windows) or control-clicking (Macintosh) on the color control point and selecting Show
Selection.
To see the selection of multiple color control points, select more than one color control point by holding the
Ctrl key (Windows) or command key (Macintosh), clicking on more than one color control point with the
direct select tool, and then selecting Show Selection. This will display the combined selection of the
selected control points. To hide the selection for multiple color control points, select the same color control
points again and select Show Selection again. Alternatively, you can disable the Show Selection option
for each color control point individually.
Protect Details
The Protect Details checkbox limits the controls of a Color Control Point so that it only has a Size slider
and prevents any Color Control Point from affecting the object identified by the Color Control Point with
Protect Details turned on. A Color Control Point with Protect Details turned on acts in the same way as a
Color Control Point with all sliders set to the default values. Use this feature to ensure that a Color Control
Point is protecting the values of the targeted object.
Color Picker
The Color Picker swatch enables you to select a color from the Color Picker and change the currently
selected object to that color.
Method
The Method pull-down menu determines how all of the
color control points in the current step are applied to the
image. Each method utilizes different algorithms optimized
for different types of images. Each step utilizing color
control points contains one Method pull-down menu
where you can choose from one of the available methods.
To utilize more than method on an image you must create a
new step color control point step for each different method.
The different methods are:
Basic
The Basic method is the fastest and most direct method to
apply the color control points from the current step to
your image. This method is recommended for web
graphics and illustrations.
Normal
The Normal method provides the best balance of speed and detail protection. This method is
recommended for the majority of images.
106
Chapter 13 — The Toolbar | Color Control Point
Advanced
The Advanced method provides superior results when lightening shadows or working with images with a
high level of noise or grain.
Click on the Advanced show/hide triangle to display the additional controls for the color control point step.
The values set for the selected color control point are displayed enabling you to enter a new value directly
to adjust the effect of the control point.
Shortcut
Add a Color Control Point:
Ctrl + Shift + A (Windows)
command + shift + A (Macintosh)
Duplicate a Color Control Point: Hold the Alt button while selecting and dragging a color control point to
duplicate and place the duplicated color control point in a new location
(Windows)
Hold the option button while selecting and dragging a color control point
to duplicate and place the duplicated color control point in a new location
(Macintosh)
Click on the Reset button to reset the selected color control point to the default values.
Red-Eye Control Point
The red-eye control point enables you to manually remove
the red-eye effect sometimes caused by flash photography.
To remove red-eye from an image using the red-eye control point tool, follow these steps:
1
2
3
Click on the red-eye control point icon in the toolbar. The cursor will change into a crosshair.
Click on the red portion of the eye that contains red-eye to place a Red-Eye Control Point.
Control the red-eye control point’s effect using the
size slider.
Chapter 13 — The Toolbar | Red-Eye Control Point
107
Auto Retouch Brush
The auto retouch brush enables you to automatically repair
unwanted details found within the image. Use this tool to
remove dust spots, blemishes, or distracting objects, with a
unique blending algorithm that matches the surrounding
structure, color, and tonality.
To use the auto retouch brush, follow these steps:
1
2
3
4
108
Click on the auto retouch brush icon in the toolbar. The cursor will change into a brush cursor and
the auto retouch brush controls will be displayed within the tool options bar.
Modify the Size option within the tool options bar.
Click and paint on top of the entire object that you would like to automatically replace. Ensure that
all parts of the object that should be replaced are painted over before releasing the mouse button.
Do not worry about being precise when painting out the object, as a small amount of painting
outside of the object can yield better results.
If you made any mistakes, use the Undo command
in the Edit menu or click on the Reset button in the
Auto Retouch Brush step that was added in the
Edit List palette.
Chapter 13 — The Toolbar | Auto Retouch Brush
The auto retouch brush provides you with the following controls:
Size
Changing the Size option increases or decreases the size of the brush.
Shortcut
R key
Decrease brush size: [
Increase brush size: ]
Chapter 13 — The Toolbar | Auto Retouch Brush
109
Selection Control Point
Selection control points utilize U Point technology to selectively apply the effect of an enhancement. You
can use a selection control point to selectively apply any enhancement found in either the Adjust or Filter
menus.
To use a selection control point, follow these steps:
1
2
Add an enhancement to the image from the Adjust or Filter menus. Use the enhancement’s
controls to achieve the desired result.
Click on the selection control point icon in the
toolbar.
a. If you click the (+) icon for the selection control
point, the Base Mask slider in the Selection
section of the Edit List palette will
automatically move to 0% after adding the first
selection control point, hiding the effect of the
current enhancement. Click on the image to
add a selection control point with the opacity
slider automatically set to 100%. This will result
in the current enhancement’s effect only
applied to the area selected by the control
point.
b. If you click the (–) icon for the selection control
point, click on the image to add a selection
control point with the opacity slider
automatically set to 0% to the image. The
enhancement will be applied to the entire
image, except for the area selected by the
control point.
3
4
Adjust the size and opacity sliders to achieve the desired result. The higher the size value, the more
objects similar to the object selected by the control point will be selected as well. The higher the
opacity slider, the more the current enhancement will be applied to the objects selected by the
control point.
Add additional selection control points, or use the selection brush tool to further modify where the
current enhancement is being applied to the image.
Shortcut
Ctrl + Shift + C (Windows)
command + shift + C (Macintosh)
110
Chapter 13 — The Toolbar | Selection Control Point
Lasso and Marquee Tools
The lasso and marquee tools enable you to create a selection on your images that will limit where an
enhancement affects your image. The selection created by the lasso and marquee tools will also limit the
effect of the selection brush as well as the selection gradient and fill / remove tools. You can use the lasso
and marquee tools to limit the placement of any enhancement found within the Adjust or Filter menus, as
well as the color, black, neutral, and white control points.
There are four lasso and marquee tools to choose from. You can select among
these four tools by holding the mouse down on the lasso and marquee icon in the
toolbar and selecting from the tools that appear.
Lasso Tool
The lasso tool is the default lasso and marquee tool and enables you to freely draw
a selection on the image.
Polygon Lasso Tool
The polygon lasso tool enables you to draw a selection by connecting anchor points with straight lines.
These anchor points can be moved to alter the selection while still retaining straight lines to the other
anchor points.
A Please Note: Any additional selections made will remove these anchor points.
Rectangle Marquee Tool
The rectangle marquee tool enables you to draw a rectangular selection.
Hold down the Shift key while drawing the selection to constrain the selection to a square.
Hold down the Alt key (Windows) or option key (Macintosh) while drawing the selection to draw the
selection from the center instead of the corner.
Oval Marquee Tool
The oval marquee tool enables you to draw a round selection.
Hold down the Shift key while drawing the selection to constrain the selection to a circle.
Hold down the Alt key (Windows) or option key (Macintosh) while drawing the selection to draw the
selection from the center instead of the corner.
To make a selection using the lasso and marquee tools, follow these steps:
1
Click on the lasso and marquee icon in the toolbar. Selecting the (+) icon next to the lasso and
marquee icon will let you create a selection in which only the objects contained within the selection
will be affected. Selecting the (–) icon next to the lasso and marquee icon will let you create a
selection in which only the objects outside of the selection will be affected.
Chapter 13 — The Toolbar | Lasso and Marquee Tools
111
2
3
4
5
6
7
Click and draw a selection around the objects that you want to affect in the active image window.
To add to the selection, ensure that the (+) icon is selected and click and draw outside of the
selection.
To subtract from the selection, select the (–) icon and draw within the selection.
To move the selection, ensure the (+) icon is selected and click on the selected area to reposition
the selection.
After you have finished modifying the selection,
select an enhancement from the Adjust or Filter
menus. That enhancement will only be applied
within the area identified by your selection. If you
created a selection in a step that already contains an
enhancement, you can use the selection brush,
selection gradient or fill / remove tools to add or
remove the current enhancement to or from the
image only within the selection.
To remove the selection, either double-click within the active image window or navigate to the Edit
menu and select Deselect All.
The lasso and marquee tools provide you with the following
options in the tool options bar:
Edge Softness
The Edge Softness option enables you to soften the edge of the selection that is being made by the lasso
and marquee tools.
Shortcut
Lasso tools: L key
Marquee tools: M key
112
Chapter 13 — The Toolbar | Lasso and Marquee Tools
Selection Brush Tool
The selection brush enables you to selectively paint in or
paint out the enhancements found in the current step. You
can use the selection brush to selectively apply any
enhancement found within the Adjust or Filter menus, as
well as the color, black, neutral, and white control points.
A Please note: If you start painting a selection without an
enhancement active or in an empty new step, the selection
display will automatically be set to overlay mode. While in
overlay mode, the selection will be displayed as a semitransparent color superimposed on your image. After an
enhancement is selected from the Adjust or Filter menus, the
selection display will automatically revert to “None”, ensuring
that you see only the selected enhancement applied where you painted with the selection brush.
To use the selection brush, follow these steps:
1
2
Select an enhancement to be applied to your image
either from the Adjust or the Filter menus.
Click on the selection brush icon in the toolbar. Click on the (+) icon if you would like to apply the
current enhancement only to the area you will paint, or click on the (–) icon if you would like to
apply the current enhancement to the entire image, except for where you paint.
A Please note: If you first click on the (+) icon, the base selection slider in the selection section of the
current step in the Edit List palette will automatically move to 0% after the first paint stroke, enabling
you to add the enhancement only to where you paint. You may at any point adjust the base selection
slider and place it at a different value.
3
In the tool options bar, adjust the Size, Brush
Hardness, and Opacity of the brush.
Chapter 13 — The Toolbar | Selection Brush Tool
113
4
5
6
Click and draw within the active image window to
add or remove the effect, depending on if you
selected the (+) or (–) icon.
At any point, switch to the opposite mode by clicking on either (+) or (–) to add to or remove from
the selection drawn. You can temporarily switch to the opposite mode by holding down the Alt key
(Windows) or Option key (Macintosh).
To delete a selection created by the selection brush tool, click on the delete button found in the
current step’s selection information section next to the “Paint & Fill Mask” section. Alternatively,
ensure that the image window is active by clicking on the image window’s title bar and press the
delete key.
The selection brush provides you with the following options in the tool options bar:
Brush Hardness
Changing the Brush Hardness option affects the shape of the brush, ranging from a soft-edged brush to a
hard-edged brush.
Shortcut
Decrease brush hardness: Shift + [
Increase brush hardness: Shift + ]
114
Chapter 13 — The Toolbar | Selection Brush Tool
Opacity
Changing the Opacity option increases or decreases the opacity of the brush strokes that are applied.
Increase this value and the brush will either add more of the current step’s enhancements to the image
when using the (+) mode of the selection brush or it will remove more of the current step’s enhancements
from the image when using the (–) mode of the selection brush.
Shortcut
Each number 0 through 9 sets the brush’s opacity to a 10% increment, i.e. 1 = 10%, 2 = 20%, etc. 0 = 100%.
Pressing another number key after the first number key will modify the opacity further giving control in 1%
increments, i.e. pressing 55 in close succession will result in 55%, while pressing 06 in close succession will
result in 6%.
Pressure Controls
The Pressure Controls pull-down menu enables you to control the different brush elements when using a
pressure-sensitive input device, such as a pen tablet.
The different options available within the Pressure Controls pull-down menu are:
Size
The Size option enables you to control the size of the brush using the pressure of the pressure-sensitive
input device. Applying more pressure makes the brush larger, while less pressure makes the brush smaller.
The maximum size of the brush is based on the Size option.
Opacity
The Opacity option enables you to control the opacity of the brush using the pressure of the pressuresensitive input device. Applying more pressure provides more opacity, while less pressure provides less
opacity. The maximum opacity of the brush is based on the Opacity option.
Opacity and Size
The Opacity and Size option enables you to control both the size and the opacity of the brush using the
pressure of the pressure-sensitive input device. Applying more pressure provides a larger brush with
greater opacity, while less pressure provides a smaller brush with lower opacity. The maximum size and
opacity of the brush are based on the Size and Opacity options.
None
The None option ensures that neither the size nor the opacity are affected when using a pressuresensitive input device.
Shortcut
B key
Chapter 13 — The Toolbar | Selection Brush Tool
115
Selection Gradient Tools
The selection gradient tools enable you to gradually blend
between applying and removing the current step’s effects
on your image. You can use the selection gradient tools to
selectively apply any enhancement found within the
Adjust or Filter menus, as well as the color, black, neutral,
and white control points.
A Please note: If you start applying a selection without an
enhancement active or in an empty new step, the selection
display will automatically be set to overlay mode. While in
overlay mode, the selection will be displayed as a semitransparent color superimposed on your image. After selecting an enhancement from the Adjust or Filter
menus, the selection display will automatically revert to “None”, ensuring that you see only the selected
enhancement applied where you indicated with the selection gradient tool.
There are two selection gradient tools to choose from. You can select among these tools by holding the
mouse down on the selection gradient icon in the toolbar and selecting from the tools that appear.
Linear Gradient Tool
The linear gradient tool adds the current effect to the image with a gradual transition from applying to
hiding the effect in a straight line, with the direction and start and end points determined by the line drawn
when applying this tool.
Radial Gradient Tool
The radial gradient tool adds the current effect to the image in a circular pattern, with a gradual transition
from applying to hiding the effect radiating from a central point, with the center, start, and end points
determined by the line drawn when applying this tool.
To use a selection gradient tool to selectively apply the current step's enhancements to your image, follow
these steps:
1
2
116
Select an enhancement to be applied to your image either from the Adjust or the Filter menus.
Click on the selection gradient icon in the toolbar. Click on the (+) icon if you would like to
determine first where the enhancement starts, or click on the (–) icon if you would like to determine
first where the enhancement ends.
Chapter 13 — The Toolbar | Selection Gradient Tools
3
4
5
Click and draw a line within the active image
window. Depending on if you chose the (+) or the
(–) icons, the point where you start the line will
either be the part where the effect is added at 100%
to the image or where the effect is removed entirely
from the image. If you use the linear gradient tool,
the enhancement will be applied in a straight line,
following the direction of the line you created. If you
use the radial gradient tool, the enhancement will be
applied in a circular pattern, radiating from the point
that you selected by first clicking on the image.
After drawing the gradient, the line that you created will still be visible, along with start, mid, and
end anchor points. Click on an anchor point to reposition the gradient and control the gradient's
effect on the image.
At any point, switch to the opposite mode by clicking on either (+) or (–) to add another gradient.
Each additional gradient will blend with the previously drawn gradients. You can mix different
gradient types (linear and radial) as well as (+) and (–).
A Please note: Once you have added an additional gradient, the anchor points for the previously drawn
gradient will no longer be accessible.
6
To delete a selection created by a gradient tool, click
on the delete button found in the current step’s
selection information section next to the “Paint & Fill
Mask” section.
The following controls for the selection gradient tools are
provided to you within the tool options bar:
Gradient Range
The gradient range slider enables you to change the values of the next gradient that will be drawn on the
image. The values represent the percent of opacity, and allow you to set the maximum, minimum, and
midpoint values of the gradient. By moving the midpoint, you can force the transition of the gradient to
shift more quickly on one side of the midpoint and more gradually on the opposite side.
Chapter 13 — The Toolbar | Selection Gradient Tools
117
Fill / Remove Tools
The fill / remove tools enable you to either fill the current step’s enhancements or clear the selections made
by the selection brush, gradient tools, or fill tool, either in the entire image or the area within a selection
created by the lasso and marquee tools.
To fill or remove the current step’s enhancements, follow these steps:
1
2
3
118
Click on the fill / remove tools icon within the toolbar. Click on the (+) icon to fill the current step’s
enhancements or click on the (–) icon to clear the selection previously made by a selection brush,
gradient tool, or fill tool. The cursor will change.
Click within the active image window to either fill or remove the current step’s enhancements,
depending on in you chose the (+) or (–) icons. If there is a selection made by one of the lasso or
marquee tools, click within a selected area to fill or remove the effect from within that area.
To delete a selection created by the fill or remove tool, click on the delete button found in the
current step’s selection information section next to the “Paint & Fill Mask” section. Alternatively,
ensure that the image window is active by clicking on the image window’s title bar and press the
delete key.
Chapter 13 — The Toolbar | Fill / Remove Tools
Chapter 14
Bird’s Eye
The Bird’s Eye always displays the entire image, even if the active image window only displays a zoomed-in
portion of the image. When zoomed-in, the areas visible within the active image window are shown as a
rectangle superimposed on top of the entire image. Drag the rectangle to change what is displayed within
the active image window.
Displayed to the right of the thumbnail within the Bird’s Eye is a zoom control along with a readout that
displays the current zoom ratio. You can change the current zoom ratio by either clicking on the icon,
icon, moving the slider, or typing in the desired zoom ratio directly.
The Bird’s Eye can be hidden or displayed by clicking on the maximize/minimize button.
Chapter 14 — Bird’s Eye
119
120
Chapter 14 — Bird’s Eye
Chapter 15
Edit List
The Edit List palette is the central location for all of the controls provided within Capture NX 2. The Edit
List palette was greatly improved, with the position of many tools and features moved to provide better
access. Additionally, the workflow when using the Edit List palette has been updated by improving the
interaction with steps and enhancements.
Chapter 15 — Edit List
121
Introduction to the Edit List
The Edit List palette stores all of the enhancements that have been applied to your image in chronological
order. The Edit List palette can be used as a history that allows you to go back and modify any of the
adjustments that you have previously made to your images.
Every enhancement that you apply to your images within Capture NX 2 will be recorded within the Edit
List palette. The contents of the Edit List palette are saved when you save the file as an NEF file.
Since the Edit List palette shows a chronological description of the enhancements that have been applied
to your image, you can use the Edit List palette to return to any previous enhancement and adjust the
settings. To do this, either double-click on the step or enhancement that you want to modify, or single-click
on the show/hide triangle next to that step or enhancement to display the contents. Once you have
displayed the contents of an enhancement, you can modify the settings that were applied.
By modifying a previous step, you will temporarily disable all of the steps that occur after the current step
you are modifying. Once you have completed any modification to that step, click on the “Apply” checkbox
next to the last step that you want to reapply. Capture NX 2 will automatically apply all of the steps between
the step you have just modified and the last step that you checked. To prevent this from happening, enable
the Keep All Steps Active in Edit List (Requires Fast Processor) option in the “General” section of the
“Preferences” dialog.
The following controls are common throughout the Edit List palette and provide you control over the
functionality and enhancements that are presented within the Edit List palette:
q
w
er
122
Chapter 15 — Edit List | Introduction to the Edit List
q Show/Hide
Triangles
The show/hide triangle shows and hides the contents of the section or
enhancement. Click on the triangle to toggle between showing and hiding the
contents of the associated section or enhancement.
w Apply Checkbox
Apply checkboxes are used to turn enhancements on or off. Adjustments to an
enhancement automatically enable the corresponding Apply checkbox; to turn
the enhancement off, simply remove the check.
The Reset button is provided for each section within the “Develop” section and
provided for each enhancement within the “Adjust” section.
e Reset Button
r Delete Button
The Reset button reverts the active section or enhancement to the last state prior
to the current interaction. Clicking the Reset button within one of the sections of
the “Develop” section causes the settings within that section to revert back to their
enhancements prior to the changes you just made.
The Delete button is provided only for enhancements within the “Adjust” section.
Clicking on the Delete button will remove that enhancement from the “Adjust”
section or will remove the selection created within the “Selection Information”
section of a step within the “Adjust” section.
Chapter 15 — Edit List | Introduction to the Edit List
123
Version
The Version menu can now be found at the top of the Edit
List palette, providing you with direct control of this
powerful feature. Versions represent an advanced way of
working with and maintaining a number of different
versions of the same image within one image file. Two
different types of versions are available, and access to these
versions is provided within this menu.
The current version is displayed within the Version menu,
click on the menu to access one of the other versions.
The Version menu provides you with the following options:
Original
The Original version is always present within the Version menu and provides you with a quick way of
reverting the image to its original state, prior to any changes that were made within Capture NX 2. With NEF
RAW files, the original version will revert all settings to the state as set by the camera at the time of capture.
Last Saved
The Last Saved version becomes available within the Version menu for NEF files as soon as the image is
saved. This version provides you with the ability to revert the Edit List to its state at the point of the last
save.
(Current)
The (Current) version is temporarily available whenever changes have been made to an image and the
Version menu is switched to another version. This version enables you to toggle quickly from one of the
available versions back to the current state to review the differences made between that version and the
current state.
New Version…
To create a custom version, select the New Version…
option from the Version menu. After selecting New
Version…, enter a name for the new version and click OK.
An entry will be added to the Version menu with that
name containing the state of the Edit List palette at the
time that the version was created. Due to the nondestructive nature of Capture NX 2, you are able to create
virtually unlimited number of versions, switch from one version to the next, and save those versions for
future use, all without altering the original image information.
Edit Versions
You can also edit the custom versions that were added, providing you with the ability to rename or delete
the custom versions listed in the Version menu. Select the Edit Versions option from the Version menu,
highlight the version you would like to alter, and then select either the Rename or Delete button.
124
Chapter 15 — Edit List | Version
Batch Menu
The batch menu within the Edit List provides you with
quick access to tools that can be used to copy and paste
adjustments and XMP/IPTC information, and create and
load settings files for batch processing.
Chapter 15 — Edit List | Batch Menu
125
Develop Section
The “Develop” section, formerly the Base Adjustments step in Capture NX version 1, has been greatly
improved for Capture NX 2. This section provides you with camera and RAW specific enhancements as well
as a new “quick fix” mode that can be used on any file format.
A Please note: Enhancements within “Develop” section cannot be deleted or applied selectively.
To use the “Develop” section, follow these steps:
1
2
3
4
5
126
Click on the show/hide triangle next to the
“Develop” section to display its contents.
For NEF RAW files, click on the show/hide triangle
next to Camera Settings to adjust the various
settings available within your camera.
For both NEF RAW files as well as JPEG and TIFF files,
you can use the “Quick Fix” section to make
adjustments to access often used enhancements for
images.
Finally, click on the show/hide triangle next to the
Camera & Lens Corrections section to use the
special enhancements available for NEF RAW files as
well as lens specific controls.
After making adjustments to the “Develop” section, you can then add steps into the “Adjust”
section by selecting enhancements from the Adjust and Filter menus or using the various tools
from the Toolbar.
Chapter 15 — Edit List | Develop Section
The “Develop” section provides you with the Camera
Settings section, the Quick Fix section, and the Camera &
Lens Corrections sections.
Camera Settings
RAW ONLY
The Camera Settings section provides you control over options set within the camera at the time the
image was captured. Within this section, you can modify White Balance, Picture Control settings, NonPicture Control settings, and Active D-Lighting settings.
White Balance
The White Balance feature is designed to enable you to
change the white balance that was set within your image.
Changing the white balance enables you to not only
correct the white balance setting that was originally
chosen, but also to alter the white balance in order to
introduce a cold or warm cast into the image.
Within the White Balance dialog, you can either select a
color temperature for the white balance, or you can set a
gray point from within the image.
❏ Set Color Temperature
In this mode, you can allow Capture NX to automatically
calculate the white balance, or you can set the white
balance manually by using one of the available presets.
• Camera WB
This displays the white balance set by the camera
when the image was captured.
• New WB
This pull-down menu provides you with a number of controls for setting a new white balance value.
Use Gray Point
Selecting this option will use the white balance values selected in the Set
Gray Point mode.
Recorded Value
Selecting this value will set the white balance to the setting recorded by the
camera.
Calculate
Automatically
When you select this value, Capture NX will determine the best white balance
setting to provide neutral colors throughout the image.
Chapter 15 — Edit List | Develop Section
127
Incandescent
Select this value if the lighting in your photograph’s scene was provided by
an incandescent or tungsten light source. You can further modify the setting
with the Fine Adjustment slider.
Select this value if the lighting in your photograph’s scene was provided by
the sun. You can further modify this setting with the Daylight sub-menu and
the Fine Adjustment slider.
• Daylight Sub-Menu
This sub-menu enables you to choose from three different daylight
situations.
• Direct Sunlight
This option sets the color temperature to 5,200K and is suited for
photographs taken in direct sunlight.
Daylight
• Cloudy
This option sets the color temperature to 6,000K and is suited for
photographs taken under overcast skies.
• Shade
This option sets the color temperature to 8,000K and is suited for
photographs taken in open shade.
Standard
Fluorescent/
High Color
Rendering
Fluorescent
128
Choose these options if the image was taken under fluorescent lighting. If
you are unsure of which type of light bulb was used, experiment with the
different settings until the image appears natural to you. You can further
modify these settings with the Fluorescent sub-menu and the Fine
Adjustment slider.
• Standard Fluorescent/High Color Rendering Fluorescent SubMenu
This sub-menu enables you to choose between the most commonly
available fluorescent light bulb temperatures.
• Warm White (3000K)
• 3700K
• Cool White (4200K)
• 5000K
• Daylight (6500K)
• High Temperature Mercury Vapor (7200K)
Chapter 15 — Edit List | Develop Section
Select this option if your image was shot using a Nikon Speedlight as the light
source. You can further modify this setting with the Fine Adjustment slider.
If the image was taken with a color filter from a Nikon Color Filter Set attached
to the flash, choose from the following options:
• None
Flash
• FL-G1
• FL-G2
Choose FL-G1 or FL-G2 if the image was taken with an FL-G1 or FL-G2
filter for fluorescent light.
• TN-A1
• TN-A2
Choose TN-A1 or TN-A2 if the image was taken with a TN-A1 or TN-A2
filter for incandescent light.
Sodium Vapor
Lamps
Select this option when shooting under mixed lighting in sports venues that
use sodium vapor lamps.
Settings other than Set Gray Point and Recorded Value can be further modified using the Fine
Adjustment and Tint sliders.
Fine Adjustment
Slider
This slider enables you to shift the selected color temperature by up to ± 50
Mired.
The Tint slider provides you with the ability to remove either a green or
magenta cast from the image.
Tint Slider
Move the Tint slider to the left to remove green from the image (by adding
magenta) or move the slider to the right to remove magenta from the image
(by adding green).
Chapter 15 — Edit List | Develop Section
129
❏ Set Gray Point
In this mode you can identify an object within your photograph that was neutral gray in the scene and
base the white balance off that object, or you can take an average of a section of your photograph and
calculate the white balance off that section.
By selecting this option and clicking start, you will be able to identify a single
point that should be neutral gray. This is best used on an image that contains
a Gray card illuminated by the main light source.
To choose a point, select Use Single Point and click Start. The cursor will
change to an eyedropper when moved over the active image. Click a neutral
gray point to set the white balance.
Use a single point
You will notice that the Red and Blue sliders may have moved, and that these
changes may have also been reflected in the small graph. You can further
modify the white balance settings by moving the Red and Blue sliders
manually. The Red slider enables you to shift the image’s white balance from
cyan to red, adjusting the gain for the Red Channel. The Blue slider enables
you to shift the image’s white balance from yellow to blue, adjusting the gain
for the Blue Channel. Click on the reset button at any time to return the values
to the default settings.
By selecting this option and clicking start you will be able to draw a marquee
on the image to identify a section for Capture NX to use as the basis for
setting the white balance. Use this option when the scene was illuminated by
a number of different light sources. Select a section that was illuminated by
the light source you want to set the white balance to.
Marquee Sample
To choose a section, select Use Marquee Sample and click Start. The cursor
will change to an area-selection eyedropper when moved over the active
image; drag to select an area. White balance will be set to the average for the
selected area.
You will notice that the Red and Blue sliders may have moved, which may
have also been reflected in the small graph. You can further modify the white
balance settings by moving the Red and Blue sliders manually. The Red slider
enables you to shift the image’s white balance from cyan to red, adjusting the
gain for the Red Channel. The Blue slider enables you to shift the image’s
white balance from yellow to blue, adjusting the gain for the Blue channel.
Click on the reset button at any time to reset the values to the default
settings.
130
Chapter 15 — Edit List | Develop Section
Picture Control
Images from cameras that use the color mode system can
use either the Non-Picture Control mode or the Picture
Control mode. Images from cameras that use the Picture
Control system can only use the Picture Control mode.
The Picture Control options are available for cameras
that use both the color mode and Picture Control systems.
The controls provided within the Picture Control option
are:
❏ Picture Control Mode
Nikon’s unique Picture Control system makes it possible
to share image processing settings among compatible
devices and software. Picture Controls adjust image
processing settings, or enable you to make
independent adjustments to sharpening, contrast,
brightness, saturation, and hue. These settings can be
saved under new names as custom Picture Controls to
be recalled or edited at will.
Custom Picture Controls can also be saved to a memory
card for use in compatible software, and softwarecreated Picture Controls can be loaded into the camera. Any given set of Picture Controls will produce
nearly the same results on all cameras that support the Nikon Picture Control system.
The Picture Control option provides five different modes to choose from. Choose between:
Unchanged
This is available only for cameras that utilize the Picture Control system and
allows you to select the settings set within the camera at the time the image
was captured.
Standard
Standard processing for balanced results.
Neutral
Minimal processing for natural results.
Vivid
Pictures are enhanced for a vivid, photoprint effect.
Monochrome
Convert pictures to monochrome photographs.
D2XMODE 1
D2XMODE 2
D2XMODE 3
A set of three optional Picture Controls that produce results similar to the
corresponding “Color mode” settings for the D2X and D2XS.
A Please note: In Picture Control mode, you can add optional Picture Controls downloaded from Nikon
websites. Note that any optional Picture Controls used on the camera must also be installed on the computer.
If you attempt to open an image containing a Picture Control that has not been installed, a dialog will be
displayed warning that the Standard Picture Control will be applied. Click OK to open the image.
Chapter 15 — Edit List | Develop Section
131
❏ Quick Adjust
The Quick Adjust slider adjusts the Sharpening, Contrast, and Saturation sliders to recommended
values that match the enhancement created by the Picture Control.
Move this slider to the left to decrease the Sharpening, Contrast, and Saturation sliders. Move this
slider to the right to increase these sliders.
The Quick Adjust slider is not available with neutral and monochrome Picture Controls.
❏ Manage Picture Control Menu
The Manage Picture Control menu provides you with options to save, load, and manage customized
Picture Control options. Clicking on this icon will present you with the following options:
This option lets you create a new custom Picture Control option to use on
additional images. Once you create a new custom Picture Control, it will be
Save as a new Custom
added to the Picture Control pull-down menu and become a selectable
Picture Control
option. Please note, the Quick Adjust slider for any custom Picture Control
options is not accessible.
Load Custom Picture
Control Settings
Select this option to load a previously created custom Picture Control settings
file. Once the custom Picture Control settings file is loaded, it will be added to
the list of options. Please note, the Quick Adjust slider for any custom
Picture Control options is not accessible.
Launch Picture
Control Utility
This option will launch the Picture Control Utility application. The Picture
Control Utility can create and modify custom Picture Control settings as well
as import and export custom settings to a memory card.
❏ Sharpening
The Sharpening section enables you to adjust the amount of sharpening that will be applied to the
image.
Turn on the Auto option in order to allow Capture NX 2 to determine the appropriate amount of
sharpening for the current image. The Sharpening slider is not accessible while the Auto option is
turned on.
You may also adjust the amount of sharpening added to the image manually using the Sharpening
slider. Move this slider to the left to decrease the amount of sharpening added to the image or move it
to the right to increase the amount of sharpening.
❏ Contrast and Brightness
The Contrast and Brightness options enable you to control the tonality of the current image. The
results created by the Contrast and Brightness section are dependent on the Picture Control option
selected.
Enable the Auto checkbox in order to allow Capture NX 2 to determine the appropriate amount of
contrast for the current image. The Contrast slider is not accessible while the Auto option is turned on.
The Contrast slider enables you to manually adjust the amount of contrast added to the image. Move
this slider to the left to decrease the amount of contrast added or move the slider to the right to
increase contrast.
132
Chapter 15 — Edit List | Develop Section
The Brightness slider enables you to control the brightness within the image. Move the slider to the
left to darken the image or move the slider to the right to brighten the image.
❏ Saturation and Hue Adjustment
The Saturation and Hue options enable you to control characteristics of the color of the image. The
results of the Saturation and Hue section are also dependent on the Picture Control option selected.
Turn on the Auto option to enable Capture NX 2 to determine the appropriate amount of saturation, or
color intensity, for the current image. The Saturation slider is not accessible while the Auto option is
turned on.
Use the Saturation slider to adjust the amount of saturation for the current image. Move this slider to
the left to reduce the saturation and make the colors less vibrant, or move the slider to the right to
increase the saturation and make the colors more vivid.
The Hue slider enables you to alter the hue of your entire image without affecting brightness or
saturation. Moving this slider to the left will cause skin tones to become increasingly red while moving
this slider to the right will produce more yellow skin tones.
❏ Filter Effects Monochrome ONLY
The Filter Effects pull-down menu enables you to change the contrast within monochrome images by
emulating the use of different colored filters used in traditional black and white photography. Each filter
changes the relationship of objects found within the image based on their color.
You are provided with the following options:
Off
This option provides a default black and white conversion.
Yellow
The Yellow filter emulates the use of a yellow filter in front of the lens at the
time of capture and causes yellow objects to become lighter and blue objects
to become darker. Use this option to optimize contrast for brighter skin tones.
Orange
The Orange filter emulates the use of an orange filter in front of the lens at the
time of capture and causes orange objects to become lighter and darkens blue
and violet objects. Use this option to optimize contrast for landscape shots
featuring blue skies.
Red
The Red filter emulates the use of a red filter in front of the lens at the time of
capture and causes red objects to become lighter and darkens cyan objects.
Use this option to create strong contrasts in sunny scenes.
Green
The Green filter emulates the use of a green filter in front of the lens at the
time of capture and causes green objects to become lighter and magenta
objects to become darker. Use this object to create lighter foliage and for more
restrained tones in skin and lips.
Chapter 15 — Edit List | Develop Section
133
❏ Toning Monochrome ONLY
The Toning options enable you to emulate the use of toners found in traditional photography, or to
add a tint to the image.
Choose from:
Black-and-White
This toning option will result in a black and white image without any additional
tint or tone.
Cyanotype
The Cyanotype toning option emulates the appearance of images created
using the traditional cyanotype process. Images created with the Cyanotype
toning option will have a characteristic blue tone.
Sepia
The Sepia toning option emulates the use of sepia toner, a popular traditional
black and white toning process. Images created using the Sepia toning option
will appear with a dark-brown tint applied to them.
Red
The Red toning option will tint the image with a red tint.
Yellow
The Yellow toning option will tint the image with a yellow tint.
Green
The Green toning option will tint the image with a green tint.
Blue Green
The Blue Green toning option will tint the image with a turquoise tint.
Blue
The Blue toning option will tint the image with a cyan tint.
Purple Blue
The Purple Blue toning option will tint the image with a violet tint.
Red Purple
The Red Purple toning option will tint the image with a magenta tint.
❏ Toning Saturation Monochrome ONLY
The Toning Saturation slider controls the vividness of the effect or color selected in the Toning pulldown menu. Move this slider to the left to create a more subtle toning effect, or move the slider to the
right to create a very strong, vibrant effect.
Non-Picture Control
The Non-Picture Control options are available for
cameras that use the Color Mode system.
❏ Color Mode
The Color Mode feature enables you to choose
between the same color modes as those that you can
set in your camera. By allowing you fine control over
chroma, brightness, and color gamut, the Color Mode
feature creates subtle enhancements for your images.
134
Chapter 15 — Edit List | Develop Section
❏ Sharpening
The Sharpening feature enables you to adjust the amount of sharpening that was set in the camera.
Choose from the following options:
• Unchanged
This will revert to the sharpening set in the camera.
• None
• Low
• Medium Low
• Normal
• Medium High
• High
❏ Tone Compensation
The Tone Compensation feature enables you to adjust the image contrast that was set in the camera.
Choose from the following options:
• Unchanged
This will revert to the contrast set in the camera.
• Low Contrast
• Medium Low
• Normal
• Medium High
• High Contrast
• User Defined Custom Curve
This will set the contrast to a user-defined custom curve.
❏ Saturation
The Saturation feature enables you to adjust the saturation that was set in the camera.
Choose from the following options:
• Unchanged
This will revert to the saturation set in the camera.
• Moderate
• Normal
• Enhanced
❏ Hue Adjustment
The Hue Adjustment feature enables you to alter the hue of your entire image from (–9° to +9°)
without affecting brightness or saturation. Skin tones will become increasingly yellow as the value is
raised above 0°. Values below 0° produce redder skin tones.
Chapter 15 — Edit List | Develop Section
135
Active D-Lighting
Active D-Lighting, available only for cameras that
provide this functionality within the camera itself, was
designed for photographing subjects where it is difficult to
capture detail in both highlights and shadows. If Active DLighting is enabled ion the camera when a photograph is taken, the image will be underexposed to
preserver highlight information. If that image is later processed in Capture NX 2, Active D-Lighting will be
applied to brighten the shadows and create the appropriate levels of tonality throughout the image,
resulting in an image in which details are present in both highlights and shadows.
This functionality is provided in addition to the D-Lighting functionality found in the Adjust menu.
You can use the provided pull-down menu to modify the amount of Active D-Lighting applied to your
image. Choose from the following options:
❏ Unchanged
This option reverts back to the setting used within the camera when the image was captured.
❏ Off
This option prevents any Active D-Lighting from being applied to the image.
❏ Low
This option applies a low level of Active D-Lighting to the image and is recommended for images shot
with very high ISO.
❏ Normal
This option applies a moderate level of Active D-Lighting to the image and is recommended for the
majority of images.
❏ High
This option applies a high level of Active D-Lighting to the image and is recommended for images shot
with low ISO.
136
Chapter 15 — Edit List | Develop Section
Quick Fix
Tone Curve
The Tone Curve tool provides you with a curve editor that
controls the tonality of the image. Within the Tone Curve
tool, you are presented with a curve that enables you to
control the relationship of input luminosity values to
output luminosity values.
Click anywhere on the curve to add an anchor point. Move
the anchor point to alter the relationship of input and
output values. Moving a point up makes objects of that
value brighter, while moving a point down makes objects
of that value darker. The curve is automatically adjusted to
ensure a smooth transition between each point added to
the image.
Anchor points can be removed by simply clicking and
dragging the anchor point outside of the curve editor or
by clicking on an anchor point to select it and pressing the
delete key.
The Tone Curve tool provides you with the following
additional controls:
❏ White and Black Output Slider
These two sliders enable you to set the maximum and
minimum brightness levels of the image. By dragging
the white output slider down, you darken the lightest
luminosity level in the image, and by dragging the black
output slider up, you lighten the darkest luminosity
level in the image. These two sliders are often used if the darkest and lightest colors in the image should
not be pure white (255, 255, 255) and pure black (0, 0, 0).
❏ Black Point Slider
Move the black point slider to the right to set all luminosity values from the point you have selected to
the left to complete black. This will redistribute all of the values to stretch the luminosity range to match
the entire possible range of values. It is recommended that you move the black point slider all the way
to the right to match up with the left-most information from the displayed histogram. This adjusts the
current image so that the darkest values in the image match the darkest value that can be displayed in
a digital file.
❏ Mid-Point Slider
Move the mid-point slider either to the left or to the right in order to lighten or darken the mid-tones of
the image.
Chapter 15 — Edit List | Develop Section
137
❏ White Point Slider
Move the white point slider to the left to set all luminosity values from the point you have selected and
to the right to complete white. This will redistribute all of the values to stretch the luminosity range to
match the entire possible range of values. It is recommended that you move the white point slider all
the way to the left to match up with the right-most information from the displayed histogram. This
adjusts the current image so that the lightest values in the image match the lightest value that can be
displayed in a digital file.
Exposure Compensation
The Exposure Compensation slider provides control over the tonality of the image. Move this slider to
the left to darken the entire image or move it to the right to lighten the entire image.
Contrast
The Contrast slider provides control over the contrast of the image. Move this slider to the left to reduce
the contrast of the entire image or move it to the right to increase the contrast of the entire image.
Highlight Protection
The Highlight Protection slider recovers detail in highlights. While this slider works for both NEF RAW as
well as JPEG and TIFF files, it is much more successful in NEF RAW files. This is because additional highlight
information is stored within an NEF RAW file that the Highlight Protection slider can use when
recovering highlight details. Move this slider to the right to reveal additional detail in highlight areas.
Shadow Protection
The Shadow Protection slider recovers details in shadows. Move this slider to the right to reveal
additional detail in shadow areas.
Saturation
The Saturation slider provides you with control over the saturation of the entire image. Move this slider to
the left to decrease saturation or move this slider to the right to increase saturation throughout the image.
138
Chapter 15 — Edit List | Develop Section
Camera & Lens Corrections
Color Moiré Reduction
RAW ONLY
The Color Moiré Reduction tool enables you to apply a
noise reduction process available only on RAW images.
To apply color moiré reduction, click on the show/hide
triangle and select one of the options from the pull-down
menu. This process can reduce color moiré artifacts (color
interference caused by regular overlapping patterns). You
can control the strength of this feature from Off, to Low,
Medium, or High.
Image Dust Off
RAW ONLY
The Image Dust Off tool can reduce artifacts in the image
created by dust which was present on the low pass filter,
located behind the camera’s lens. Because these dust
particles create artifacts at consistent locations on the
sensor, the Image Dust Off tool can register their location
on the sensor in a reference image. The noise in
subsequent images are compared to that profile and
minimized.
A Please note: The position as well as amount of dust on the low-pass filter may change. It is recommended that
you take reference images regularly and use a reference image that was taken within one day of the photograph
you wish to treat.
To apply Image Dust Off, click on the Change button to locate an Image Dust Off reference photo to apply
to the current image.
For certain cameras that create Image Dust Off reference photos with the .NDF extension, such as the D2H and
D2X, Capture NX 2 will attempt to identify a reference photo located within the same folder as the current image.
• If Capture NX 2 locates an Image Dust Off reference photo in the current folder, you will be presented
with the option of using that photo for the Image Dust Off process.
If you select Yes, Capture NX 2 will apply the Image Dust Off effect using that reference photo.
If you select No, you will be presented with a folder search window to enable you to locate on your
computer’s hard drive a folder that contains an Image Dust Off reference photo.
• If Capture NX 2 locates more than one Image Dust Off reference photo within the same folder, you will
be presented with an options dialog to select which image to use. It is recommended that you select the
image that was taken as close to the time of the current image as possible.
• If Capture NX 2 does not locate an Image Dust Off reference photo within the same folder as the current
image, you will be presented with a folder search window to enable you to locate on your computer’s
hard drive a folder that contains an Image Dust Off reference photo.
If Capture NX 2 locates more than one Image Dust Off reference photo within the same folder, you will
be presented with an options dialog to select which image to use. It is recommended that you select
the image that was taken as close to the time of the current image as possible.
Chapter 15 — Edit List | Develop Section
139
For all other cameras, you will be presented with a folder search window to enable you to locate on your
computer’s hard drive a folder that contains an Image Dust Off reference photo.
• If Capture NX 2 locates more than one Image Dust Off reference photo within the same folder, you will
be presented with an options dialog to select which image to use. It is recommended that you select the
image that was taken as close to the time of the current image as possible.
Once you have located the correct Image Dust Off reference photo, click OK to apply the Image Dust Off
effect to your image.
If you would like to remove the Image Dust Off effect at any time, simply uncheck the “Apply” checkbox
next to Image Dust Off.
A Please note: If a large amount of dust is detected in the current image, Capture NX 2 will display a warning
stating that the results of Image Dust Off cannot be guaranteed. Click Yes to proceed.
Auto Color Aberration
Use the Auto Color Aberration tool to automatically reduce color aberrations (colored fringes or halos).
By default, this feature is automatically applied to RAW (NEF) images but not to TIFF and JPEG images. Use
the “Apply” checkbox next to Auto Color Aberration in the Develop > Camera & Lens Corrections
section to toggle auto color aberration reduction on or off.
Auto Red-Eye
The Auto Red-Eye tool automatically locates and removes red-eye from the current image.
Auto red-eye is applied immediately when the “Auto Red-Eye” dialog is displayed. Click Reset or uncheck
the “Apply” checkbox to prevent auto red-eye from changing your image.
Vignette Control
D-SLR ONLY
The Vignette Control tool can be used on NEF, JPEG, and
TIFF files and is used to correct for loss of marginal
lumination, a phenomenon associated with camera lenses
that causes a drop in brightness at the edges of a
photograph. Vignette control is most effective when
performed on images taken at maximum aperture.
If the picture in the active image window is a RAW image
taken with a lens equipped to transmit distance
information (a type G or D lens) mounted on a camera that
can record this information, Capture NX 2 will use the lens
information recorded with the image to automatically select an optimal range for the Intensity slider.
140
Chapter 15 — Edit List | Develop Section
When this lens information is not available, the Intensity slider’s range will be based on default lens
characteristics. To determine whether a given combination of lens and camera will record distance
information, see the table below.
Camera
Type G or D lens
Any other type of lens
D40, D40X, D50, D60, D70, D70S, D80, D100, Distance information
D2H, D2HS, D2X, D2XS, D200, D3, D300
recorded
Distance Information
not recorded
D1X/D1H
(firmware version 1.10 or later)
Distance Information
recorded
Distance Information
not recorded
D1X/D1H
(firmware version 1.01 or earlier)
Distance Information
not recorded
Distance Information
not recorded
D1
Distance Information
not recorded
Distance Information
not recorded
To apply vignette control to your image, follow these steps:
1
2
Click on the show/hide triangle next to Camera &
Lens Corrections.
Drag the Intensity slider to the right to brighten the
edges of the currently active photo, or drag the
Intensity slider to the left to darken the edges of the
photo.
If the image was taken under any situation in which
the distance information was not recorded, please
take care when adjusting the vignette control
settings so as to not over apply vignette control.
If you would like to remove the vignette control effect, click on the Reset button or uncheck the “Apply”
checkbox next to Vignette Control.
Chapter 15 — Edit List | Develop Section
141
Fisheye Lens
The Fisheye Lens tool is only displayed when the active
image was shot with either the AF DX Fisheye-Nikkor
10.5mm f/2.8G ED or AF Fisheye-Nikkor 16mm f/2.8D
lenses. This feature enables you to modify an image taken
with a compatible fisheye lens to make that image appear
to have been taken with a wide-angle rectilinear lens.
The Fisheye Lens tool provides you with the following
controls:
❏ Include Areas Where There is No Image Data
By default, the Include Areas Where There is No
Image Data option will be turned off, cropping off any area where image information is not present.
Turn the Include Areas Where There is No Image Data option on to display the full image, including
areas where there is no image data. This shows you the full image after the fisheye-to-rectilinear
transformation. You will notice that parts of the image have been curved to transform the image into a
rectilinear image. Due to the process employed by the fisheye-to-rectilinear transformation, there is
more information along the longest side of the image.
❏ Fill Color
The Fill Color pull-down menu is only available when the Include Areas Where There is No Image
Data option is turned on. Use this option to select the color to fill areas of the image that are displayed
and do not contain any image information due to the transformation process.
142
Chapter 15 — Edit List | Develop Section
Adjust Section
e
q
w
r
t
All enhancements added to the Edit List palette using one of the tools or features from the menus are
added as adjustment steps to the “Adjust” section.
Each adjustment step can contain the following elements:
q Selection Information
The selection information area is displayed whenever a step has been selectively applied and provides
information and control for selections made to the current adjustment step. Whenever you use a selection
control point, selection brush, lasso tool, marquee tool, or the fill or remove tools, the selection information
area is added to the step and reflects the selection made. Controls are provided to help you make any
necessary adjustments to those selections.
Only enhancements selected from the Adjust or Filter menus, or color, black, neutral, or white control
points can be modified with one of the selection tools.
At any time, click on the reset button to revert the selection to the last state or click on the delete button to
remove all selection information.
The following information and controls are provided within the selection information area:
Selection Display Control
Use the selection display control pull-down menu to select how to display the current selection made
within the image window.
Chapter 15 — Edit List | Adjust Section
143
Choose from the following options:
❏ Hide Selection
The Hide Selection option prevents the current selection from being displayed in the image window,
showing only the image.
❏ Show Overlay
The Show Overlay option displays the selection as a semi-transparent color overlay, superimposed on
top of your image. Anywhere this color overlay is displayed, the current step’s adjustment is being
applied. Anywhere the image is displayed, no enhancement is being applied. You can control the color
and opacity of the overlay within the “Preferences” dialog.
❏ Show Mask
The Show Mask option displays the current selection as a black and white mask; black areas indicate
that no enhancement is being applied to that area while white areas are being affected by the current
step’s enhancements.
Base Mask
The Base Mask slider provides control over the amount of application the current step is providing on the
image. At 0%, the current step will not affect the image, while at 100%, the current step will have full affect
on the image.
When using the (+) option for one of the selection tools, such as a Selection Control Point or Selection
Brush, the Base Mask slider will automatically move to 0%. This enables the selection tool to create a mask
whose effect is visible in the image. You may at any point move that slider back to another value.
The effect of the Base Mask slider is considered in combination with the other types of selective control
provided within an adjustment step. The effects of the other selection tools will be considered before
displaying the final image.
Selection Control Points Section
The “Selection Control Points” section displays a list of the selection control points added to the current
step. Clicking on the show/hide triangle for any of the selection control points listed here will display the
Size and Opacity settings for that selection control point. Click on the numerical readout to enter a new
value for that selection control point, or click on the selection control point label to highlight the selection
control point. You can then delete the selection control point to prevent it from affecting the application
of the current step’s enhancement.
The effect of the “Selection Control Points” section is considered in combination with the other types of
selective control provided within an adjust step. The effect of the selection control points is applied on top
of the Base Mask slider. That is, selection control points set to a higher opacity value than the Base Mask
slider will apply more of the current step’s enhancement to the area selected by that Selection Control
Point. Selection Control Points set to a lower opacity value than the Base Mask slider will apply less of the
current step’s enhancement to the area selected by that selection control point.
To remove a selection control point, click on the delete button next to the control point that you would
like to remove.
144
Chapter 15 — Edit List | Adjust Section
Paint & Fill Mask Section
The “Paint & Fill Mask” section controls the effect made by a selection brush, selection gradient, or the fill
and remove tools.
The effect of the “Paint & Fill Mask” section is considered in combination with the other types of selective
control provided within an adjust step. The effect of the “Paint & Fill Mask” section is applied on top of both
the Base Mask slider and selection control points. Selections made with the selection brush, selection
gradient, and fill and remove tools will be made to the current step, regardless of the selection made in the
Base Mask slider and by selection control points.
To remove the effect of a brush, selection gradient, or the fill and remove tools, click on the delete button
next to the “Paint & Fill Mask” section.
Feather
The Feather slider enables you to soften the edges of selections made by the selection brush, lasso, or
marquee tools.
Move the Feather slider to the right to increase the amount of softening that is applied to the edges of
the selection.
w Adjust & Filter pull-down menu
An adjustments and filters pull-down menu is displayed for
any step that was created by selecting an enhancement
from either the Adjust or Filter menus, or by selecting the
New Step button.
You can use the adjustments and filters pull-down menu to
gain access to any of the enhancements that are available
within the Adjust or Filter menus.
Additionally, you can use this pull-down menu to perform a
swap enhancement function, which is discussed later in this
chapter.
e Link Icon
A link icon indicates whether the current step contains
linked enhancements. Please see the “Linking
Enhancements” section later in this chapter for more
information on linked enhancements.
r Enhancement Controls
Controls for the enhancement added to an adjustment step are displayed within the Edit List palette,
within that adjustment step. Use the provided controls to adjust the effect of the enhancement, or use the
reset button to revert the enhancement’s controls or delete button to remove the enhancement.
Chapter 15 — Edit List | Adjust Section
145
t Opacity Mixer
The opacity mixer provides you with the ability to blend the
current enhancement with the rest of the image.
The opacity mixer becomes available as soon as you add
any features from the Adjust or Filter menus, or a color,
black, neutral, or white control point to the image. Click on
the Opacity show/hide triangle of the adjustment step to
display the opacity mixer controls.
The opacity mixer provides you with the following control:
Channels
The channels pull-down menu enables you to select the channels against which you control the opacity
of the current enhancement. Each option within this pull-down menu provides you with different sliders
with which to control the opacity of the current enhancement. Choose from the following options:
❏ All
The All option applies the current enhancement to all of the channels of the image. You are provided
with the following sliders to control the effect on the image:
• Opacity
Use this slider to control the entire opacity of the current effect. Move the slider to the left to reduce
the opacity of the effect.
❏ Luminance & Chrominance
The Luminance & Chrominance option enables you to control the current effect on either the
luminance (lightness) or chrominance (color) portions of your image. You are provided with the
following sliders to control the effect on the image:
• Opacity (Luminance Channel)
Use this slider to control the current effect on the luminance portion of the image. Move this slider to
the left to reduce the current effect on the luminance aspect of the image. This can be done to ensure
that the current enhancement is being applied only to the color aspects of the image.
• Opacity (Chrominance Ch.)
Use this slider to control the current effect on the chrominance portion of the image. Move this slider
to the left to reduce the current effect on the chrominance aspect of the image. Reduce this slider to
0% to apply the current enhancement to the luminance portions of the image only so that no effects
to the color portions are being made.
❏ RGB
Selecting this option from the channels pull-down menu provides you with the ability to control the
current enhancement’s effect on the red, green, and blue channels separately using the following
sliders:
• Opacity (Red Channel)
This slider controls the current effect on the red channel of the image. You can move this slider to the
left to prevent the current effect from being applied to the red channel, or you can reduce the other
two sliders to ensure the current effect is being applied to the red channel only.
146
Chapter 15 — Edit List | Adjust Section
• Opacity (Green Channel)
This slider controls the current effect on the green channel of the image. You can move this slider to
the left to prevent the current effect from being applied to the green channel, or you can reduce the
other two sliders to ensure the current effect is being applied to the green channel only.
• Opacity (Blue Channel)
This slider controls the current effect on the blue channel of the image. You can move this slider to the
left to prevent the current effect from being applied to the blue channel, or you can reduce the other
two sliders to ensure the current effect is being applied to the blue channel only.
Blending Mode
You may also select different blending modes from the Blending Mode pull-down menu available for
each of the channels options.
The blending mode determines how the image created by the current enhancement blends with the
image prior to that enhancement. Using blending modes provides you with an advanced way of applying
the current enhancement to your image. The different blending modes are:
❏ Normal
The Normal blending mode is the default blending mode for applying enhancements. When all
channels for the enhancement are applied at 100%, the result is considered a normal enhancement.
❏ Lighten
The Lighten blending mode is achieved by applying the effects of the enhancement only if those
elements are lighter than the corresponding area in the original image. That is, only areas that are
brighter due to the enhancement will be applied to the image.
❏ Screen
The Screen blending mode is achieved by increasing the pixel values of the resulting image with the
pixel values of original image. The resulting image is always brighter than the original image prior to the
enhancement.
❏ Overlay
The Overlay blending mode is achieved by either adding or subtracting the pixel values of the
resulting image from the original image. Capture NX 2 determines whether to add or subtract based on
the value of the resulting image. Values above 128 make the final image brighter in the corresponding
area; values below 128 make the final image darker in the corresponding area, while the value of 128
does not change the final image.
❏ Multiply
The Multiply blending mode is achieved by subtracting the pixel values of the resulting image from
the pixel values of the original image. The resulting image is always darker than the original image prior
to the enhancement.
❏ Darken
The Darken blending mode is achieved by applying the effects of the enhancement only if those
elements are darker than the corresponding area in the original image. That is, only areas that are darker
due to the enhancement will be applied to the image.
Chapter 15 — Edit List | Adjust Section
147
Working with the Edit List
Deleting Steps and Enhancements
Steps and enhancements can be deleted independently of each other. Clicking on a step or enhancement
will cause it to become highlighted within the Edit List palette. You can then press the delete key on your
keyboard or select Delete from the Edit menu to clear that step or enhancement from the image.
Copying and Pasting Steps and Enhancements
Steps and enhancements can be copied directly from the Edit List palette and pasted into another image,
a series of images found in the browser, or into the original image.
To copy and paste steps and enhancements, follow these steps:
1
2
3
4
148
Select one or more steps or enhancements within
the Edit List palette by clicking and highlighting
them.
Navigate to the Batch menu and select Copy
Adjustments. Alternatively, you can click on the
batch menu icon located at the top of the Edit List
palette and select Copy Adjustments.
Select another image open within the editor or select one or more images within the browser.
Navigate to the Batch menu and select Paste
Adjustments. Alternatively, you can click on the
batch menu icon located at the top of the Edit List
palette and select Paste Adjustments. If you
selected images from within the browser, the Batch
palette will be displayed, enabling you to choose the
location and file format for the processed images,
and start a batch process.
Chapter 15 — Edit List | Working with the Edit List
Linking Enhancements
Linking enhancements within the Edit List palette enables you to apply the selective controls that are used
within one step to more than one enhancement. By default, each enhancement is applied to a separate
step. By linking two or more enhancements together in the same step, each of those enhancements can
benefit from the same selective controls that were applied to that step.
To link enhancements, follow these steps:
1
2
3
Select the first enhancement from either the Adjust
or Filter menus. Adjust the controls for the first
enhancement to suit your taste.
While holding down the Shift key, select the second enhancement from either the Adjust or Filter
menus. This will cause another enhancement to be added to the same step. You can then modify
the second enhancement’s controls to suit your taste.
If desired, use one of the selection tools to determine where to apply both enhancements to the
image.
A Please note: You may link any number of enhancements together within the same step, but please note that the
greater the number of enhancements that are applied within the same step, the slower Capture NX 2 may be in
displaying the results of those adjustments.
Swapping Enhancements
Enhancements from the Adjust and Filter menus may be swapped or substituted by selecting another
available item from the adjustments and filters menu.
To swap one enhancement for another, follow these steps:
1
2
Click on the adjustments and filters pull-down menu in the step that contains the enhancement
you would like to swap.
Select a different enhancement from the adjustments and filters pull-down menu. The selected
enhancement will not be used in place of the previous enhancement within this step.
This is especially useful if you have made a selection, applied an enhancement to a step, and then want to
see how a different enhancement will affect the image within the area identified by your selection.
Chapter 15 — Edit List | Working with the Edit List
149
New Step Button
Clicking on the New Step button will create a new, empty
adjustment step within the “Adjust” section of the Edit List
palette. Click on this button if you want to manually
generate a new step within the Edit List palette to start a
new series of enhancements.
A Please note: Capture NX 2 will automatically create a new
step whenever an enhancement is selected from the menu or
toolbar; the New Step button can be useful in certain
situations.
150
Chapter 15 — Edit List | New Step Button
Chapter 16
Photo Info
The Photo Info palette display combines the histogram and the watch points functionalities into a single
palette. The “Histogram” section shows a live histogram that reflects the statistical makeup of the image. The
“Watch Points” section enables you to monitor the effects of the changes you make to the color values in
the image.
Each section can be hidden or displayed by clicking on the show/hide triangle next to that section.
Histogram
The “Histogram” section displays a real-time updated histogram, representing a bar graph of the total
number of pixels that appear at different levels. The horizontal axis represents the luminosity level, while the
vertical axis represents the number of pixels at each luminosity level found within the current image. The
left side of the horizontal axis represents the darkest tones within the image, while the right side represents
the lightest tones within the image.
A Please note: Values for the different channels range from 0 to 255, with values for 12 and 16-bit images being
scaled to fit in this range.
You can select an area of the histogram which will cause the pixels from the selected range to blink within
the image window. To select a range, simply drag the mouse over the histogram display. Click the Clear
button to cancel the current selection.
Chapter 16 — Photo Info | Histogram
151
This “Histogram” section provides you with the following controls:
q
w
e
q Channels
The channels pull-down menu enables you to select the channel you wish to have displayed within the
“Histogram” section.
The following channel options are available:
RGB
The RGB option displays the red, green, and blue histograms, superimposed over one another. Where the
individual histograms overlap, secondary colors are displayed. Areas that are white contain pixel values of
all three colors at that value.
Red
The Red option displays only the red channel within the histogram window.
Green
The Green option displays only the green channel within the histogram window.
Blue
The Blue option displays only the blue channel within the histogram window.
w Double Threshold
The Double Threshold option enables you to determine the darkest and lightest colors within the current
image. By turning this option on, two additional sliders will be added to the bottom of the Histogram
display and the entire image will become neutral gray. The left-hand slider is the Shadows slider while the
right-hand slider is the Highlights slider. By dragging the Shadows and Highlights sliders towards the
center of the histogram window, you will begin displaying pixel values within the image. Black pixels
represent the darkest pixels in the image while white pixels represent the lightest pixels in the image.
152
Chapter 16 — Photo Info | Histogram
To use the Double Threshold feature, follow these steps:
1
2
3
4
Enable the Double Threshold checkbox within the “Histogram” section of the Photo Info palette.
If no black pixels appear in the image, slowly drag the shadows slider to the right. Once you notice
black pixels appearing, release the mouse button. If large groups of black pixels are displayed, try
moving the slider back to the left slightly. It is recommended that you find a value for the shadows
slider as close as possible to where the first black pixels appear.
Then, if no white pixels appear in the image, slowly drag the highlights slider to the left. Once you
notice white pixels appearing, release the mouse button. If large groups of white pixels are
displayed, try moving the slider back to the right slightly. It is recommended that you find a value
for the highlights slider as close as possible to where the first white pixels appear.
Your image now shows the lightest and darkest pixels. This feature is typically used to assist you
with finding those pixels for placing white and black points (either control points or points from
within the Levels & Curves feature). After placing white and black points, disable the Double
Threshold checkbox to continue working on your image.
Shortcut
Toggle the Double Threshold option on
and off: Shift + T
e Clear
Press the Clear button to clear ranges added to the histogram or the values set for the shadows and
highlights sliders of the Double Threshold option.
Watch Points
The “Watch Points” section of the Photo Info palette displays the position and color of the pixel under the
mouse pointer.
A Please note: Values for the different channels range from 0 to 255, with values for 12 and 16-bit images being
scaled to fit into this range.
Chapter 16 — Photo Info | Watch Points
153
Within the “Watch Points” section, you are provided with the following controls:
w
q
e
q Add Watch Point Button
By clicking on this button, you can add up to four watch points to your image. When you click on this
button, the mouse cursor will change to a crosshair and enable you to place a watch point directly on the
image. A watch point icon will be placed on the image displaying where you placed a watch point and an
entry will be added to the “Watch Points” section that continually monitors the colors of the selected pixel
or area.
You can move and reposition any of the watch points by clicking and dragging that point using the direct
select tool. You can delete a watch point by clicking on the Delete Watch Point button next to that watch
point.
w Color Model
This pull-down menu enables you to select the color model used to describe the colors within the “Watch
Point” section. You can choose between RGB (red, green, and blue) and HSB (hue, saturation, and
brightness) color models.
e Sample Size
Use this option to change the number of pixels which are used in sampling for both the current color under
the mouse cursor as well as for each of the watch points. The default value for this option can be selected
within the “Levels & Sampling” section of the “Preferences” dialog, or you can override the default and select
from one of the following available options:
Point Sample
The Point Sample option samples only a single pixel. This is helpful if you want to be very precise when
selecting a color and are able to target a pixel of a specific color.
3 x 3 Average
The 3 x 3 Average option samples a total of nine pixels in a grid of three pixels by three pixels and
averages the colors of each pixel before displaying the result. Since areas within a photograph are
generally made up of small variations of color, selecting this option provides a more accurate rendition of
the color of the targeted area.
5 x 5 Average
The 5 x 5 Average option samples a total of twenty-five pixels in a grid of five pixels by five pixels and
averages the colors of each pixel before displaying the result. This option is recommended for higher
resolution images.
154
Chapter 16 — Photo Info | Watch Points
Chapter 17
The Color Picker
The color picker is available in specific enhancements and provides you with the ability to select any color
within the RGB, HSB, or LAB color spaces. The fisheye lens, neutral control point, color control point,
distortion control, colorize, and certain Color Efex Pro plug-ins from Nik Software can utilize the color picker
for their enhancements.
You are also provided with preselected colors that consist of common swatches as well as memory colors.
To select a color within the color picker, follow these steps:
1
2
3
Click on the desired color’s hue within the color wheel to immediately move to that color or click
and drag the outside gripper edge to slowly change the color’s hue.
Click on the section of the color triangle to determine the saturation and brightness of the color.
Once you have selected the color you would like to use in the current enhancement, click OK.
Chapter 17 — The Color Picker
155
y
u
q
w
o
i
e r t
The color picker provides you with the following controls:
156
q Color Wheel
The color wheel enables you to select the targeted hue for the color. When you
click within the color wheel, the hue will immediately change to the color that you
clicked on. By clicking and dragging on the gripper edge along the outside edge of
the wheel, you can precisely rotate the hue to modify the current selected color.
The top of the color triangle points to the hue of the color that is selected. The
color triangle will then be updated with the range of saturation and lightness that
you can affect for that newly selected color.
w Color Triangle
The color triangle provides you with control over the saturation and lightness of
the hue of the color that was selected with the color wheel. The top of the color
triangle represents 100% saturation of the targeted hue. The left edge of the color
triangle provides you with control over the lightness of the color as the color
approaches white, while the right edge of the color triangle provides you with
control over the lightness of the color as the color approaches black. The bottom
edge contains neutral colors, with the middle of the bottom edge presenting
middle gray.
e RGB Selection
Boxes
The RGB selection boxes display the current color’s red, green, and blue values. You
can change the targeted color by entering different values directly into the RGB
selection boxes.
r HSB Selection
Boxes
The HSB selection boxes display the current color’s hue, saturation, and brightness
values. You can change the targeted color by entering different values directly into
the HSB selection boxes.
t LAB Selection
Boxes
The LAB selection boxes display the L channel (luminosity), the a channel (green
through red), and the b channel (blue through yellow) values. You can change the
targeted color by entering different values directly into the LAB selection boxes.
Chapter 17 — The Color Picker
y Last Selected &
Previous Picks
The Last Selected and Previous Picks color swatches provide you with access to
the last five selected colors. The Last Selected color swatch shows you the color
that was last selected, while the Previous Picks color swatches show you the four
previous colors selected prior to the color shown in the Last Selected swatch.
u Color
Eyedropper
The color eyedropper enables you to select any color from any image currently
displayed within the Capture NX 2 editor. Simply select the color eyedropper
button and then use the cursor to select a color from any image currently
displayed within Capture NX 2. The color displayed within the color picker will be
updated with the color selected by the color eyedropper.
i Swatches Show/
Hide Triangle
Clicking on the Swatches show/hide triangle will display the swatches section of
the color picker, which contains a selection of present swatches and four memory
color ranges.
o Swatches
Section
The swatches section contains two additional sections that provide you with even
more control in selecting a color to use with the current enhancement.
• Preset Swatches
The preset swatches section provides you with a predetermined selection of
color swatches. Simply select the swatch that contains the appropriate color for
the current enhancement and then click OK within the color picker.
• Memory Color Ranges
The memory color ranges represent three different ranges of color that can be
classified as memory colors. Memory colors represent colors that you see on a
regular basis, such as the color of the sky, the color of a person’s skin, or the
color of foliage. Additionally, a neutral color range is displayed in order to
provide you with quick access to a range of completely neutral tones, which are
colors without saturation or hue.
Chapter 17 — The Color Picker
157
158
Chapter 17 — The Color Picker
Chapter 18
File Menu
Open Image…
The Open Image… option provides you with a “File Open”
dialog, allowing you to locate an image to open and edit.
A Please note: Images saved in the Grayscale and CMYK color
modes cannot be opened within Capture NX 2.
Shortcut
Ctrl + O (Windows)
command + O (Macintosh)
Open With…
The Open With… command enables you to open the current image with all of the current enhancements
applied to it in a separate application. You can select the alternative application with will open the image
within Capture NX 2’s “Preferences” dialog.
Chapter 18 — File Menu | Open Image…
159
Open Folder in Browser…
Select this option to locate a folder to open within Capture NX 2’s browser.
Shortcut
Ctrl + Alt + O (Windows)
command + option + O (Macintosh)
Open Recent
This area displays the most recent ten images opened within Capture NX 2. Simply click on any of the items
displayed in this list to open it again within Capture NX 2.
Launch Nikon Transfer…
Select this option to launch Nikon Transfer.
Shortcut
Ctrl + Alt + T (Windows)
command + option + T (Macintosh)
Launch Camera Control Pro…
Select this option to launch Camera Control Pro. This option is only available if Camera Control Pro is
installed on your computer.
Save
Use the Save feature to save the changes to the image.
When using the Save feature on JPEG files, a dialog box will be displayed if the compression settings found
in the original image cannot be determined. Saving NEF or TIFF files will use the same settings found in the
original file.
JPEG
Quality
Choose from Highest Compression Ratio, Good
Compression Ratio, Good Balance, Good Quality, or
Excellent Quality settings. The higher the quality, the
larger the file size. The higher the compression, the smaller
the file but the greater the chance of image degradation.
The Quality slider provides you with more control over
the level of compression that is used when saving the
image in the JPEG format.
160
Chapter 18 — File Menu | Open Folder in Browser…
Embed ICC Profile
Check this box if you would like to embed the current profile in your image. It is recommended that you
leave this box checked unless your printer requests that you do not embed the color profile in the image.
Shortcut
Ctrl + S (Windows)
command + S (Macintosh)
Save As…
The Save As… feature enables you to save the current image into a different file, with the ability to change
the location, the file name, and the file format.
Each file format provides you with different options when saving:
NEF
Use Compression
Choose whether or not you want to compress your NEF
RAW file. You are provided with the following options:
❏ Compressed
Files are compressed using a non-reversible algorithm,
reducing file size by about 40 to 55 percent with
negligible loss of image quality.
❏ Lossless compressed
Files are compressed using a reversible algorithm,
reducing file size by about 20 to 40 percent with no loss of quality.
A Please note: This option is only accessible if the NEF if the file created within your camera was not compressed.
TIFF
Color Model
Choose from two different color models to save your
image data in:
❏ RGB
This color model saves your image information with red,
green, and blue color channels, and is recommended
for most images.
❏ CMYK
This color model saves your image information with cyan, magenta, yellow, and black color channels,
and is recommended only if you will be saving your images for printing with a device that requires a
CMYK image.
Chapter 18 — File Menu | Save As…
161
Compression
Choose from two different compression options:
❏ None
This option does not compress the image information.
❏ LZW
This option employs a lossless compression scheme based on the LZW compression algorithm.
Bit Depth
Choose to save your image either as an 8 or 16-bit per channel image.
A Please note: The 16-bit option is not available for CMYK TIFF images, and you may only save the image as a 16bit image if the original image was 16-bit.
Embed ICC Profile
Check this box if you would like to embed the current profile in your image. It is recommended that you
leave this box checked unless your printer requests that you do not embed the color profile in the image.
JPEG
Quality
Choose from Highest Compression Ratio, Good
Compression Ratio, Good Balance, Good Quality, or
Excellent Quality settings. The higher the quality, the
larger the file size.
❏ Quality
The Quality slider provides you with more control over
the level of compression that is used when saving the
image in the JPEG Format.
Embed ICC Profile
Check this box if you would like to embed the current profile in your image. It is recommended that you
leave this box checked unless your printer requests that you do not embed the color profile in the image.
The higher the compression, the smaller the file but the greater the chance of image degradation.
Shortcut
Ctrl + Shift + S (Windows)
command + shift + S (Macintosh)
162
Chapter 18 — File Menu | Save As…
Revert
Select the Revert option to remove any changes from the file that were made since the last Save or Save
As operation.
Protect File
Protected images cannot be edited within Capture NX 2. Protection can be turned on within the camera or
within another Nikon image editing application. To turn off protection and enable the image to be edited
by Capture NX 2, select the Protect File item to uncheck it.
Close
The Close option closes the current image. If there are any unsaved changes made to the image, you will be
provided with an option of saving those changes.
Shortcut
Ctrl + W (Windows)
command + W (Macintosh)
Page Setup…
The “Page Setup” dialog provides you with controls for setting up your printer and print environment. With
this option, you can set the paper size, paper source, and orientation, as well as other options which depend
on the printer and operating system. It is recommended that you open and adjust the settings within the
“Page Setup” dialog prior to selecting Print.
Shortcut
Ctrl + Shift + P (Windows)
command + shift + P (Macintosh)
Chapter 18 — File Menu | Revert
163
Print…
q
w
e
r
t
y
u
The “Print Layout” dialog enables you to set all of the necessary parameters in order to print your image.
Additionally, a number of options are presented to enable you to create print packages, add metadata, and
color manage your prints.
You can print the active image by selecting Print from the File menu, or you can select a range of pictures
to print by highlighting multiple images within the browser and selecting Print. By selecting multiple
images within the browser, you can create print packages, contact sheets, or print multiple images.
After Print is selected from the File menu, the “Print Layout” dialog will appear. Within the “Print Layout”
dialog you will see a preview of the current image as well as options to alter the orientation and display of
that image.
The following controls are provided within the Print dialog:
q Page Display and Page Forward and Back Buttons
The page display shows you how many pages will be sent to your printer based on the number of images
you have selected. The page forward and page back buttons enable you to preview the different pages that
will be sent to the printer. Generally these options are only applicable when you have selected multiple
images from the browser to print.
w Copies
This option enables you to select the number of copies of the current pages that will be sent to the printer.
e Page Setup
Click on this button to bring up the “Page Setup” dialog.
164
Chapter 18 — File Menu | Print…
r Metadata
Clicking on this button will open the “Metadata” dialog, where you can choose the metadata, such as file
and camera information, you want printed around the image.
Print Information
The options within the “Print Information” section place specific information regarding your image
beneath each image. You can choose from three different sets of information:
❏ Basic Information
The basic information section contains the file name and date shot of the image.
❏ Additional Information
Checking the Additional Information checkbox will also add the camera name, shutter speed,
aperture, image size, exposure mode, and white balance for the image.
❏ Detail Information
This option adds the metering mode, exposure compensation, focal length, AF mode, and sensitivity
(ISO) to the image.
❏ Font
The font that will be used to display the Metadata is indicated here. Click on the Change button to
adjust the settings.
Imprint Date Shot over Image
The options within this section enable you to superimpose either the date or the date and the time onto
the image itself.
❏ Font
The font that will be used to imprint the date and time is indicated here. Click on the Change button to
adjust the settings.
Chapter 18 — File Menu | Print…
165
t Page Layout Tab
The options within the “Page Layout” tab enable you to
identify the size and layout of your image as well as any print
package settings that you may want to apply.
Use Output Resolution
This option will prevent any size or resolution changes
from being made to the image due to the settings in the
“Print Layout” dialog. This will ensure that the size of the
image is determined based on the parameters within the
“Size / Resolution” dialog. This option will disable all of the
options except for Rotate to Fit, Print a Picture
Multiple Times, and Use Thumbnail Data.
Select Layout
This mode of printing enables you to select from a list of
potential print packages. Select the desired number of
images to print on each page from the pull-down menu
and the print preview will be updated accordingly.
Select Picture Size
This mode of printing enables you to set up different print packages based on the desired size of the
images. Select this option and then choose from the desired print size from within the pop-up menu.
A Please note: The contents of the pull-down menu change based on the units of measurement set up within
the “Preferences” dialog.
Rotate to Fit
Click on this checkbox to rotate the current image if the orientation of the image does not match the
orientation of the paper.
Crop Photos to Fit
Check this option to automatically crop the images so that your prints do not contain any wasted space. If
your images do not match the aspect ratio of the paper, portions of the image may be cut off. For example,
most images produced by a digital camera have between a 1:1.334 and 1:1.5 aspect ratio, meaning that
their longest side is 1 1/3 to 1 1/2 times larger than the shortest side. Most paper sizes have between a
1:1.25 and 1:1.5 aspect ratios. Printing an image with an aspect ratio of 1:1.5 onto a paper size with an
aspect ratio 1:1.25 will require some cropping of the image’s data to achieve a borderless print.
Print a Picture Multiple Times
This option enables you to indicate how many times each image should be printed within a print package.
Simply identify the number of times to print each image in the pull-down menu, and the print package
will be updated accordingly.
Use Thumbnail Data
This option uses only the data contained within the image’s thumbnail to print the image. This results in a
faster print, but with significantly lower quality, and is recommended for drafts or proof sheets only.
166
Chapter 18 — File Menu | Print…
y Color Management Tab
The “Color Management” tab enables you to set the color
management options for the images when they are printed.
The settings within the “Color Management” tab default to
the settings indicated within the “Preferences” dialog.
A Please note: If you assign color management within the print
dialog, it is very important that you turn off color management
within your printer driver. Refer to your printer's documentation
on how to disable color management within your printer.
Image Profile
This displays the current profile assigned to the image.
Printer Profile
Use this menu to select the correct profile to use with your
printer. If you are unsure of which profile to use, simply
select the Image profile option at the top of the list.
Intent
The Intent option lets you choose one of four different
rendering intents to apply to your image. The different rendering intents control how colors from your
image are made to fit into the colors that your printer can produce as indicated by the printer profile.
A Please note: Different printer and paper combinations, as well as the different software used to create printer
profiles, benefit from different rendering intents. Experiment with the different rendering intents within your
workflow to find the option that works best.
Capture NX 2 provides the following intents:
Perceptual
This rendering intent maintains the relationships of colors so that the printed
image appears natural to the human eye. While this intent maintains the
relationship of colors, the actual color values will be changed.
Saturation
This rendering intent produces highly saturated colors, but it may not produce
accurate colors in a photograph.
Relative
Colorimetric
This rendering intent maps all of the colors that fall outside of the gamut of the
target profile to the closest reproducible color. This profile reproduces accurately
all of the colors that are within the range of colors reproducible by your printer.
This option preserves as many natural colors as possible and is often the best
choice for printing photographs.
Absolute
Colorimetric
This rendering intent is very similar to relative colorimetric, except that it maps
the white point of the image to the white point of the destination profile. It is
recommend that you use absolute colorimetric only if you want to proof your
images for a specific print device other than your printer, since this rendering
intent will attempt to reproduce the results of the output device, including the
effect of a different paper color.
Chapter 18 — File Menu | Print…
167
Use Black Point Compensation
Check this box to utilize black point compensation. This ensures that the black point from the image is
mapped to the black point of your printer, enabling the full color range of the printer to be used. If your
prints contain either gray shadows or too little detail, try turning this option off. Unless you are having
problems with a specific print and profile combination, it is recommended that you always use this option.
u Print to File
If the Print to File box is checked, the Print button will change into a Save button. Click the Save button,
to save the current layout displayed within the print preview area as a JPEG file. You can select the location
and the quality of the JPEG file that is created.
Shortcut
Ctrl + P (Windows)
command + P (Macintosh)
Exit
Select this option to quit Capture NX 2.
Shortcut
Ctrl + Q (Windows)
command + Q (Macintosh)
A Please note: Within the Macintosh operating system, this feature is called Quit and can be found under the
Capture NX 2 menu.
168
Chapter 18 — File Menu | Exit
Chapter 19
Edit Menu
Undo
The Undo command enables you to take one step backward and remove changes that were made to the
image or that were made within the current dialog. You can undo an unlimited number of changes within
the same step, and nearly all changes you make on your image are undoable. Due to the non-destructive
editing model that Capture NX 2 uses, you can also undo an enhancement by removing it or altering the
settings within the Edit List palette without any loss of image quality.
Shortcut
Ctrl + Z (Windows)
command + Z (Macintosh)
Redo
The Redo command becomes available after the Undo command has been used and enables you to
reapply anything that was undone with the Undo command.
Shortcut
Ctrl + Shift + Z (Windows)
command + shift + Z (Macintosh)
Chapter 19 — Edit Menu | Undo
169
Cut
The Cut command clears an object and places it within Capture NX 2’s clipboard, making that object
accessible to paste. The Cut command can be used on the following objects:
• Text within a text box
• Selected control points
• Images within the browser
Shortcut
Ctrl + X (Windows)
command + X (Macintosh)
Copy
The Copy command takes the selected object and places a copy of that selected object within
Capture NX 2’s clipboard, making that object accessible to paste. The Copy command can be used on the
following objects:
• Text within a text box
• Selected control points
• Images within the browser
• Enhancements selected within the edit list
Shortcut
Ctrl + C (Windows)
command + C (Macintosh)
Paste
The Paste command takes the last object placed within Capture NX 2’s clipboard and places it within the
current active area. The Paste command can be used on the following objects:
• Text when a text box is active
• Selected control points when an image window is active
• Images when the browser is active
• Enhancements when the edit list is active
Shortcut
Ctrl + V (Windows)
command + V (Macintosh)
170
Chapter 19 — Edit Menu | Cut
Duplicate
The Duplicate command makes an immediate copy of the currently selected object. The Duplicate
command can make a copy of the following objects:
• The current image when the image window is active and no control points are selected
• Images within the browser
• Control points
Shortcut
Ctrl + D (Windows)
command + D (Macintosh)
Delete
The Delete command removes the currently selected object. The Delete command can be performed on
the following objects:
• Selected text
• Selected control points
• Selected images within the browser
• Selected steps or enhancements within the Edit List palette
• Selection created by the selection brush, selection gradient, fill or clear tools within an image window
Shortcut
Delete key
Rename
The Rename function is only available while in the browser. Select this function to rename the currently
selected image or group of images. When a single image is selected, you can enter the new name for the
image directly within the browser. When selecting a group of images, selecting Rename will bring up the
“File Naming” dialog, enabling you to select the options for renaming that group of images.
For more information on the “File Naming” dialog, please see the “File Naming Dialog” section of Chapter 22,
“Batch Menu”.
Shortcut
F2
Chapter 19 — Edit Menu | Duplicate
171
Select All
The Select All option highlights all of the objects within the active area. Use Select All within:
• A text box to select all of the text
• An image to select all of the control points currently displayed on the image
• The Edit List palette to select all of the steps
• The browser to select all of the images currently displayed
Shortcut
Ctrl + A (Windows)
command + A (Macintosh)
Deselect All
The Deselect All option deselects the currently active selection. Use Deselect All within:
• A text box to deselect any selected text
• An image to deselect all selected control points or to remove any selection created by a lasso or marquee
tool
• The Edit List palette to deselect any selected steps
• The browser to deselect any selected images
Shortcut
Ctrl + Alt + A (Windows)
command + option + A (Macintosh)
172
Chapter 19 — Edit Menu | Select All
Flip
Use the Flip command to mirror the image across one of
two axes:
• Choose Horizontal to mirror the image across the vertical
axis.
• Choose Vertical to mirror the image across the horizontal
axis.
Original
Horizontal Flip
Vertical Flip
Rotate
The Rotate sub-menu provides you with options to rotate
your image 90° clockwise or counter-clockwise or to
straighten your image.
Rotating an image within the editor will cause a step to be
created within the Edit List palette, enabling you to remove
the rotation at any point in the future. When you save your
images with the NEF file format, you can remove the
rotation after the image has been saved or closed. Rotating
an image found in the browser will be applied in a nondestructive fashion, however there will not be a rotation
step added to the Edit List palette.
Original
You are provided with the following options within the
Rotate sub-menu:
Rotate Right
Rotate Left
Chapter 19 — Edit Menu | Flip
173
90 Degrees CW
Selecting 90 Degrees CW will cause your image to be rotated 90° clockwise.
Shortcut
Ctrl + R (Windows)
command + R (Macintosh)
90 Degrees CCW
Selecting 90 Degrees CCW will cause your image to be rotated 90° counter-clockwise.
Shortcut
Ctrl + Shift + R (Windows)
command + shift + R (Macintosh)
Straighten
Select Straighten to add a straighten step to the Edit List palette. In the Straighten step within the Edit
List palette, you can rotate an image incrementally clockwise or counter-clockwise, or you can trace a line
within your image that should be either horizontal or vertical and allow the straighten tool to automatically
straighten your image.
To straighten your image using the straighten tool, follow these steps:
1
2
3
174
With an image open within the editor, click on the straighten tool in the toolbar.
Locate a line within the image that should be either
vertical or horizontal and click on the start of the
line. While holding the mouse button down, draw
the entire length of the line, letting go when you
have reached the end of that line. The straighten tool
will then calculate the direction and degree of the
rotation to apply to the image to make the line you
described either horizontal or vertical.
If you made a mistake while drawing the line, you can click on the line you added to the image and
adjust one of the two anchor points found at either end of the line, or you can re-draw the line by
clicking and dragging within the image window again.
Chapter 19 — Edit Menu | Rotate
4
5
By default, Capture NX 2 will automatically crop the
image using the same aspect ratio to hide all areas of
the image where there is no image information.
These areas that lack information are created when
the image is rotated, and are represented by pure
white pixels. To prevent Capture NX 2 from
automatically cropping the image, click on the
Include areas without image data checkbox within
the Straighten step of the Edit List palette.
If you are satisfied with the straightening effect,
continue editing your image using the other tools
available within Capture NX 2 or perform a save. The
straightening effect is now applied to your image. To
cancel the straightening effect, click on the Delete
button for the Straighten step within the Edit List
palette or click on the Straighten step and press the
delete key on your keyboard.
Chapter 19 — Edit Menu | Rotate
175
Size / Resolution
Size / Resolution changes the size of your image, with
control over either redistributing the image data or
interpolating the image data.
Within the “Size / Resolution” dialog, you can choose
between one of two resize modes:
Resample Image
The Resample Image option enables you to change the
file to match a specific output size and resolution. Enter the
desired Width, Height, and Resolution, or pixel
dimensions, and the image will be interpolated using a bicubic interpolation method. Image data is either created or
discarded so that the image fits within the newly set
parameters.
Don’t Resample Image
The Don’t Resample Image option enables you to redistribute the image information without changing
image data. While in this mode, image detail cannot be either created or discarded. Entering either the new
Width or Height or the new Resolution will automatically adjust the other set to match. For example,
changing the height of an 8 inch by 10 inch image at 300 dpi to 4 inches will result in a 4 inch by 5 inch
image at 600 dpi.
A Please note: Images cannot be made to have any one side larger than 21600 pixels.
After you have chosen the new size and resolution for your image, click on the Apply button to accept the
changes.
Shortcut
Ctrl + Alt + S (Windows)
command + option + S (Macintosh)
176
Chapter 19 — Edit Menu | Size / Resolution
Fit Photo
The Fit Photo command enables you to fit a series of
images to a maximum size. This is especially helpful if you
want to batch resize a number of images that may each
have mixed orientations, some portrait and some landscape
orientation. The Fit Photo command will ensure that each
image is set to the appropriate size, regardless of their
orientation.
The Fit Photo command can be used to create a settings file to be used in a batch process by following
these steps:
1
Navigate to the Edit menu and select Fit Photo.
Chapter 19 — Edit Menu | Fit Photo
177
2
3
178
Select the appropriate units of measurement. If the
images will be printed, it is best to use inches,
centimeters, or millimeters. If the images will be
displayed on a web page or other electronic display
medium, select pixels.
Enter the largest value of the image size into both
the Width and Height boxes. For example, if you
want to resize a folder of images of mixed
orientations to 4" × 6", enter 6 inches into both
Width and Height boxes. This will ensure that all
images have their longest size set to 6 inches, with
the remaining side determined automatically based
on the aspect ratio of the processed image.
4
Click Apply.
5
Navigate to the Batch menu and select Save
Adjustments.
Chapter 19 — Edit Menu | Fit Photo
6
In the “Save Adjustments” dialog, ensure that the Fit
Photo step is checked, enter an appropriate name
for the new settings file, and click OK.
You now have a settings file available that can be used in a batch process to apply the Fit Photo command
to a series of images.
A Please note: In order to change an image with the Fit Photo command, you must click on the Apply button.
Chapter 19 — Edit Menu | Fit Photo
179
180
Chapter 19 — Edit Menu
Chapter 20
Adjust Menu
A Please note: Tools that apply only to RAW images do not appear in the menus. Tools specific to RAW images are
available in the Develop step of the Edit List palette.
Light > Levels & Curves
The Levels & Curves tool combines two of the most often used tonal enhancing features into one easy-touse editor. The Levels & Curves tool enables you to adjust contrast, tone levels (brightness), and color
balance to make maximum use of the tone range and color gamut offered by a particular output device,
such as a printer or monitor.
The Levels & Curves tool provides you with controls to make tonal adjustments to specific portions of the
active image’s tone range for either the entire image or to specific color channels, making it possible to
enhance the image while preserving detail.
Chapter 20 — Adjust Menu | Light > Levels & Curves
181
To use the Levels & Curves tool to edit your images, follow these steps:
1
2
3
4
182
Navigate to the Adjust menu, select the Light submenu, and select Levels & Curves.
Select the channels to be adjusted using the channel
selector. Typically, the RGB option is used when
editing images.
Click directly on the curve to add an anchor point
that can be moved and adjusted. By increasing the
slope of the curve you will increase the contrast in
the image. Decreasing the slope of the curve will
decrease the contrast in the image. The anchor
points may also be set to minimize the amount of
change that occurs to a tonal range of the image.
Delete any unwanted anchor points by clicking and dragging the anchor point outside of the curve
editor.
Chapter 20 — Adjust Menu | Light > Levels & Curves
The Levels & Curves tool provides you with the following controls:
q
t y u i o !0 !1 !2 !3
e
w
r
q Channel Selector
The channel selector lets you select which channel, or portion of colors, you want to affect. The default is to
edit all three channels, red, green, and blue, simultaneously. Click on this pull-down menu to select an
individual channel to edit.
Shortcut
(while a Levels & Curves step is active):
RGB Channels: Ctrl + ~ (Windows)
command + ~ (Macintosh)
Red Channel:
Ctrl + 1 (Windows)
command + 1 (Macintosh)
Green Channel: Ctrl + 2 (Windows)
command + 2 (Macintosh)
Blue Channel: Ctrl + 3 (Windows)
command + 3 (Macintosh)
w Curve Editor
The curve editor is where the majority of enhancements are made within the Levels & Curves tool. Within
the curve editor, you are presented with a histogram that presents the total luminosity values within your
image. Superimposed above this histogram, a curve is displayed that enables you to control the relationship
of input luminosity values to output luminosity values.
Chapter 20 — Adjust Menu | Light > Levels & Curves
183
The luminosity histogram displays a bar graph representing the total number of pixels that appear at
different levels of luminosity. The horizontal axis represents the luminosity level, while the vertical axis
represents the number of pixels found at each luminosity level within the current image. The left side of the
horizontal axis represents the darkest tones in your image, while the right side represents the lightest tones
in the image, based on the active channel selected.
When the channel selector is set to the RGB option, the histogram represents lightness from black to white.
When editing an individual channel, the histogram represents lightness from the absence of that color to
the maximum brightness of that color. The histogram is very helpful in determining how to adjust the
settings within the Levels & Curves step.
Click anywhere on the curve to add an anchor point. Move the anchor point to alter the relationship of input
and output values. Moving a point up makes objects of that value brighter, while moving a point down
makes objects of that value darker. The curve is automatically adjusted to ensure a smooth transition
between each point added to the image.
Anchor points can be removed by simply clicking and dragging the anchor point outside of the curve
editor.
e Black and White Output Sliders
These two sliders enable you to set the maximum and minimum brightness levels of the image. By dragging
the white output slider down, you darken the lightest luminosity level in the image, and by dragging the
black output slider up, you lighten the darkest luminosity level in the image. These two sliders are often
used if the darkest and lightest colors in the image should not be pure white (255, 255, 255) and pure black
(0, 0, 0).
r Black, Mid Point, and White Sliders
The black, mid-point, and white sliders will automatically adjust the curve for you.
Black Point Slider
Move the black point slider to the right to set all luminosity values from the point you have selected to the
left to complete black (or to the absence of the channel’s color when working on an individual color
channel). This will redistribute all of the values to stretch the luminosity range to match the entire possible
range of values. It is recommended that you move the black point slider all the way to the right to match
up with the left-most information from the displayed histogram. This adjusts the current image so that the
darkest values in the image match the darkest value that can be displayed in a digital file.
Mid-Point Slider
Move the mid-point slider either to the left or to the right in order to lighten or darken the mid-tones of
the image.
184
Chapter 20 — Adjust Menu | Light > Levels & Curves
White Point Slider
Move the white point slider to the left to set all luminosity values from the point you have selected and to
the right to complete white (or to the maximum lightness of the channel's color when working on an
individual color channel). This will redistribute all of the values to stretch the luminosity range to match the
entire possible range of values. It is recommended that you move the white point slider all the way to the
left to match up with the right-most information from the displayed histogram. This adjusts the current
image so that the lightest values in the image match the lightest value that can be displayed in a digital
file.
t Show Before / After Histogram
This button toggles back and forth between before and after histograms. The before histogram always
remains the same and represents the histogram before any adjustments have been made to the image by
the current channel. The after histogram always updates itself based on the changes made in the Levels &
Curves step.
y Auto Contrast
Click on this button to automatically distribute the colors of each individual channel by modifying the white
and black points within each individual channel. Ctrl-click (Windows) or option-click (Macintosh) to affect
the current selected channel only.
Capture NX 2 automatically selects white and black points that exclude a certain percentage of the
brightest and darkest pixels in the image, steepening curves for enhanced contrast. The exact percentage of
pixels excluded can be specified in the “Preferences” dialog. By default, 0.5% of the brightest and darkest
pixels are excluded, producing a curve that makes optimal use of the output tone range, while preserving
details in shadows and highlights.
u Set White Point
Clicking on this button will change the mouse cursor into a white point dropper cursor. By then clicking on
your image, you will set the white point sliders for all three color channels to the value of the color selected
by the white point dropper. Use this tool along with the Double Threshold option of the image
information overlay control within the “Histogram” section of the Photo Info palette to identify the lightest
value in the image that you want to be white. The select white point button will affect both the tonality of
the active image as well as the color balance.
i Set Neutral Point
Clicking on this button will change the mouse cursor into a neutral point dropper cursor. When you click on
your image, Capture NX 2 will attempt to make the selected color neutral without affecting the tonal values
by setting the mid point sliders for all three color channels. The select neutral point button affects only the
color balance of the image; however, if the targeted color contains a significant amount color, this feature
will affect the tonality of the image.
Chapter 20 — Adjust Menu | Light > Levels & Curves
185
o Set Black Point
Clicking on this button will change the mouse cursor into a black point dropper cursor. By then clicking on
your image, you will set the black point slider for all three color channels to the value of the color selected
by the black point dropper. Use this tool along with the Double Threshold option of the image
information overlay control within the Histogram section of the Photo Info palette to identify darkest value
in the image that you want to be black. The select black point button will affect both the tonality of the
active image as well as the color balance.
!0 Add Anchor Point
Clicking on this button will change the mouse cursor into an eyedropper cursor. By then clicking on your
image, you will add an anchor point to the curve at the location on the curve that represents the color that
your mouse is hovering over. You can then use the newly created anchor point to enhance your image. Ctrlclick (Windows) or option-click (Macintosh) to affect the current channel only.
!1 Reset Current Channel
Clicking on this button will reset only the current channel to the default values.
!2 Reset All Channels
Clicking on this button will reset all channels within the Levels & Curves step to their default values.
!3 Temporary Cancel
As long as you hold this button down, the effect of the Levels & Curves step will be temporarily hidden.
Shortcut
Ctrl + L (Windows)
command + L (Macintosh)
Light > Contrast / Brightness
The Contrast / Brightness step was designed specifically
to provide you with an efficient method of adjusting both
the contrast and brightness elements of your images while
maintaining a high level of quality. The Contrast /
Brightness step is a perfect way to produce quick contrast
or brightness effects that you can selectively add to your
image using one of the selection tools.
The Contrast / Brightness tool provides you with the
following controls:
Contrast
The Contrast slider provides you with the ability to affect the contrast of your image. The contrast
algorithm was designed to prevent unwanted color shifts from occurring. Moving this slider to the left will
decrease the contrast throughout the image, while moving the slider to the right will increase contrast.
186
Chapter 20 — Adjust Menu | Light > Contrast / Brightness
Brightness
The Brightness slider provides you with the ability to either brighten or darken your image without
creating unwanted color shifts. Move this slider to the left to darken the image, or move the slider to the
right to brighten the image.
Shortcut
Ctrl + Alt + Shift + C (Windows)
command + option + shift + C
(Macintosh)
Light > Auto Levels
The Auto Levels tool enables Capture NX 2 to analyze your
image in order to determine the correct adjustments to
spread the available color information across the entire
range of tonal possibilities. While similar to the auto contrast
button within the Levels & Curves step, the Auto Levels
tool provides you with additional controls.
The Auto Levels tool provides you with the following
controls:
Auto Levels Method
Click on the auto levels method pull-down menu to select
between one of the two possible methods:
Auto
The Auto method results in a redistribution of the
individual color channels, similar to stretching each color
channel within the Levels & Curves tool to the entire
range of the histogram.
Advanced
The Advanced method begins with the same results as the Auto method, but provides you with access
to the Correct Contrast and Correct Color Cast sliders.
Correct Contrast
The Correct Contrast slider is provided by selecting the Advanced method in the auto levels method
pull-down menu. Use this slider to either increase or decrease the amount of contrast that is applied to your
image. A value of 50 is equivalent to the contrast effect of the Auto method.
Chapter 20 — Adjust Menu | Light > Auto Levels
187
Correct Color Cast
The Correct Color Cast slider is provided by selecting the Advanced method in the auto levels method
pull-down menu. This slider either increases or decreases the degree to which the color cast is reduced
within the image. A value of 50 is equivalent to the color cast reduction result of the Auto method.
Light > D-Lighting
The D-Lighting tool reveals details in shadows and highlights, correcting for underexposure, backlighting,
or insufficient flash, all without harming the properly exposed areas of the image or introducing unwanted
artifacts. D-Lighting can also help reveal detail in overexposed areas in brightly lit scenes.
The D-Lighting tool provides you with the following controls:
Faster (HS) Method
The Faster (HS) method of D-Lighting enables you to
quickly enhance the shadow areas and reveal additional
detail in the highlights of the active image as well as to
boost the colors of the entire image to produce a naturallooking effect.
Adjustment
Move the Adjustment slider to the right to bring out
details in the shadows and highlights of the active image.
Color Boost
Move the Color Boost slider to the right to increase
saturation throughout the entire image.
Better Quality (HQ) Method
The Better Quality (HQ) method enables you to take
additional control over the shadows and highlights in the
image, producing a better quality enhancement than the
Faster (HS) method.
Shadow Adjustment
Move the Shadow Adjustment slider to the right to
bring out additional details in the shadows of the active
image.
Highlight Adjustment
Move the Highlight Adjustment slider to the right to
reveal additional detail in the highlight areas of the active
image.
Color Boost
Move the Color Boost slider to the right to increase saturation throughout the entire image.
188
Chapter 20 — Adjust Menu | Light > D-Lighting
Color > LCH
The LCH tool enables you to individually control the
luminosity, color lightness, chroma, and hue of the active
image using individual editor dialog.
To use the LCH tool to edit your images, follow these steps:
1
Navigate to the Adjust menu, select the Color submenu, and select LCH.
2
Select the first channel to be adjusted using the
channel pull-down menu.
Chapter 20 — Adjust Menu | Color > LCH
189
3
4
Click directly on the curve for the selected channel to add an anchor point that can be moved and
adjusted. Depending on the channel selected, the adjustments made to the curve will have
different effects on the image.
After making adjustments to the first channel, you
may make additional adjustments by selecting
another option from the channel pull-down menu.
The enhancements made within each editor will
remain, enabling you to make adjustments to
different channels within the same LCH
enhancement.
The LCH tool provides four different channels, each channel providing controls unique to that method. Use
the channel pull-down menu to select which channel to use. The available channels are:
Master Lightness
The Master Lightness channel is similar to the Levels & Curves tool, but it affects only the lightness of the
image without affecting the color. This is a great way to affect the tonality for your image without
introducing unwanted color casts.
Shortcut
(while a LCH step is active):
Ctrl + ~ (Windows)
command + ~ (Macintosh)
190
Chapter 20 — Adjust Menu | Color > LCH
The Master Lightness channel provides you with the following controls:
yu
i o !0 !1
t
q
w
e
r
The curve editor is where the majority of the enhancements are made within the
LCH feature. Within the curve editor, you are presented with a histogram that
represents the total luminosity values within your image. A luminosity curve
superimposed above this histogram enables you to control the relationship of
input luminosity values to output luminosity values.
q Curve Editor
The histogram displays a bar graph representing the total number of pixels that
appear at different levels of luminosity. The horizontal axis represents the
luminosity level, while the vertical axis represents the number of pixels at each
luminosity level found within the current image. The left side of the horizontal axis
represents the darkest tones of your image, while the right side represents the
lightest tones in the image. The histogram is very helpful in determining how to
adjust the settings within the Master Lightness channel.
Click directly on the luminosity curve to add an anchor point that can be moved
and adjusted. By increasing the slope of the curve, you will increase the contrast in
the image. Decreasing the slope of the curve will decrease the contrast in the
image. The anchor points may also be set to minimize the amount of change that
occurs to a tonal range of the image.
Anchor points can be removed by simply clicking and dragging the anchor point
outside of the curve editor.
Chapter 20 — Adjust Menu | Color > LCH
191
Move the black point slider to the left to set all luminosity values from that point
and to the right to complete black, while redistributing all of the values to stretch
the luminosity range to match the entire possible range of values. It is
w Black Point Slider recommended that you move the black point slider all the way to the right to
match up with the left-most information from the displayed histogram. This adjusts
the current image so that the darkest values in the image match the darkest value
that can be displayed in a digital file.
192
e Mid Point Slider
Move the mid-point slider either to the left or to the right to lighten or darken the
mid-tones of the image.
r White Point
Slider
Move the white point slider to the left to set all luminosity values from that point
and to the right to complete white, while redistributing all of the values to stretch
the luminosity range to match the entire possible range of values. It is
recommended that you move the white point slider all the way to the left to match
up with the right-most information from the displayed histogram. This adjusts the
current image so that the lightest values in the image match the lightest value that
can be displayed in a digital file.
t Black and White
Output Sliders
The black and white output sliders enable you to set the minimum and maximum
brightness levels of the image. By dragging the black output slider up, you lighten
the darkest luminosity level in the image, and by dragging the white output slider
down, you darken the lightest luminosity level in the image. These two sliders are
often used if the darkest and lightest colors should not be black and white.
y Show Before /
After Histogram
This button toggles back and forth between before and after histograms. The
before histogram always remains the same and represents the histogram before
any adjustments have been made to the image in the Master Lightness channel.
The after histogram is updated in real time, based on the changes made in the
Master Lightness channel.
u Auto Contrast
Click on this button to automatically move the black and white point sliders to
match the darkest and lightest values of the luminosity histogram.
i Add Anchor
Point
Click on this button and then click on the active image to select a color to place an
anchor point on the luminosity curve.
o Reset Current
Channel
Click on this button to reset only the Master Lightness channel to the default
values.
!0 Reset All
Channels
Click on this button to reset all channels within the LCH step to their default values.
!1 Temporary
Cancel
Hold this button down to temporarily hide the effect of the Master Lightness
channel.
Chapter 20 — Adjust Menu | Color > LCH
Color Lightness
The Color Lightness channel enables you to control the brightness of colors in the image without
affecting chroma or hue. You can use this channel to target and brighten specific colors, such as lightening
a person’s skin tone, or darkening the sky of a landscape without affecting other objects.
Shortcut
(while a LCH step is active):
Ctrl + 1 (Windows)
command + 1 (Macintosh)
The Color Lightness channel provides you with the following controls:
wert
q
The hue map represents the full spectrum of colors on the horizontal axis, with the
brightness of the colors on the vertical axis. A color lightness curve, superimposed
on the hue map, can be used to isolate and adjust the lightness of individual colors.
q Hue Map
Clicking on the curve will create an anchor point. Moving that anchor point
upward makes colors in the affected portion of the color range brighter. Taking
that same anchor point and moving it downward makes the affected colors darker.
Using the width slider increases or decreases the range of similar colors affected by
the color identified with the anchor point.
Anchor points can be removed by simply clicking and dragging the anchor point
off of the hue map or by clicking on an anchor point to select it and pressing the
delete key.
Chapter 20 — Adjust Menu | Color > LCH
193
w Add Anchor
Point
Clicking on this button will enable you to click on the active image and select a
color to place an anchor point on the curve within the hue map.
e Reset Current
Channel
Clicking on this button will reset only the Color Lightness channel to the default
values.
r Reset All
Channels
Clicking on this button will reset all channels within the LCH step to their default
values.
t Temporary
Cancel
Hold this button down to temporarily hide the effect of the Color Lightness
channel.
Chroma
The Chroma channel enables you to edit the chroma, or saturation, of the entire image or of specific colors
within the active image without affecting luminosity or hue.
Shortcut
(while the LCH enhancement is active):
Ctrl + 2 (Windows)
command + 2 (Macintosh)
The Chroma channel provides you with the following controls:
erty
q
w
194
Chapter 20 — Adjust Menu | Color > LCH
The hue map represents the full spectrum of colors on the horizontal axis, with the
chroma of the colors on the vertical axis. Superimposed on this hue map, you are
provided with a chroma curve that can be used to isolate and adjust the chroma of
individual colors.
q Hue Map
Clicking on the curve will create an anchor point. Moving that anchor point
upward makes colors in the affected portion of the color range more saturated.
Taking that same anchor point and moving it downward makes the affected colors
less saturated.
Anchor points can be removed by clicking and dragging the anchor points out of
the hue map or by clicking on an anchor point to select it and pressing the delete
key.
Use the width slider to increase or decrease the range of similar colors affected by
the color identified within the anchor point.
The output slider affects the saturation of all of the colors throughout the image
evenly. Moving this slider up will increase the saturation of all colors, while moving
this slider down will decrease the saturation of all colors.
w Exclude Gray
Check this box to prevent any saturation increases from affecting neutral colors in
the image. This is helpful as neutral colors may seem oversaturated when chroma is
raised.
A Please note: The Exclude Gray option has no affect when chroma is lowered below
the value in the original image.
e Add Anchor
Point
Click on this button and then click on the active image to select a color to place an
anchor point on the chroma curve.
r Reset Current
Channel
Click on this button to reset only the Chroma channel to the default values.
t Reset All
Channels
Click on this button to reset all editors within the LCH step to their default values.
y Temporary
Cancel Button
Hold this button down to temporarily hide the effect of the Chroma channel.
Hue
The Hue channel enables you to edit the hue of the entire image or of specific colors within the active
image without affecting luminosity or chroma. This channel enables you either to completely change the
color of an object within the active image, or to provide a subtle shift in color to ensure that the object has a
more natural hue.
Shortcut
(while the LCH enhancement is active):
Ctrl + 2 (Windows)
command + 2 (Macintosh)
Chapter 20 — Adjust Menu | Color > LCH
195
The Hue channel provides you with the following controls:
wert
q
y
q Hue Map
The hue map represents the full spectrum of colors on a rotated horizontal axis. By
default, the hue map is rotated by 60 degrees. Additional rotational values can be
selected within the hue map rotation pull-down menu. Superimposed on this hue
map, you are provided with a hue curve that can be used to isolate and adjust the
hue of individual colors.
w Add Anchor
Point
Click on this button and then click on the active image to select a color to place an
anchor point on the hue curve.
e Reset Current
Channel
Click on this button to reset only the Hue channel to the default values.
r Reset All
Channels
Click on this button to reset all editors within the LCH step to their default values.
t Temporary
Cancel Button
Hold this button down to temporarily hide the effect of the Hue channel.
y Hue Map
Rotation
Use this pull-down menu to select one of the available hue map rotations, from 60°
to 120° to 180°.
Shortcut
Ctrl + Shift + L (Windows)
command + shift + L (Macintosh)
196
Chapter 20 — Adjust Menu | Color > LCH
Color > Color Balance
The Color Balance tool provides you with simple controls
for adjusting the overall brightness, contrast, and color
balance of the entire image.
Move any of the sliders within the Color Balance step to
alter that slider’s effect on the image.
The Color Balance tool provides you with the following
controls:
Brightness
Adjust the Brightness slider to the left to decrease the
brightness of the entire image or to the right to increase the
brightness of the entire image.
Contrast
Adjust the Contrast slider to the left to decrease the contrast of the entire image or to the right to increase
the contrast of the entire image.
Red
Adjust the Red slider to the left to remove red from the image, causing the image to become more cyan.
Adjust this slider to the right to add red to the image, removing cyan from the image.
Green
Adjust the Green slider to the left to remove green from the image, causing the image to become more
magenta. Adjust this slider to the right to add green to the image, removing magenta from the image.
Blue
Adjust the Blue slider to the left to remove blue from the image, causing the image to become more yellow.
Adjust this slider to the right to add blue to the image, removing yellow from the image.
Shortcut
Ctrl + B (Windows)
command + B (Macintosh)
Chapter 20 — Adjust Menu | Color > Color Balance
197
Color > Color Booster
The Color Booster tool you to optimally adjust the
saturation, or vividness, of colors. Use the Color Booster
tool to increase the saturation of colors of the active image.
The Color Booster tool provides you with the following
controls:
Protect Skin Tones
When the Protect Skin Tones checkbox is enabled, you are
able to boost the colors in your image without affecting skin
tones.
Level
Move the Level slider to the right to boost the saturation of colors in the active image.
Color > Saturation / Warmth
The Saturation / Warmth tool was designed specifically to
provide you with an efficient method of adjusting both the
saturation and warmth of colors within your images. The
Saturation / Warmth tool is a perfect way to produce
quick saturation or warming effects by painting in
selectively with one of the selective tools.
The Saturation / Warmth tool provides you with the
following controls:
Saturation
The Saturation slider controls the vividness of colors throughout your image. Move this slider to the right
to make colors more brilliant, or move the slider to the left to decrease the amount of color in the image.
Moving the slider all the way to the left, will result in a grayscale image.
Warmth
The Warmth slider controls the overall mix of cool and warm tones throughout the image. Moving the
slider to the left causes all colors throughout the image to become cooler, or bluer. Moving the slider to the
right will warm all of the colors within the image to contain more red-orange.
Shortcut
Ctrl + U (Windows)
command + U (Macintosh)
198
Chapter 20 — Adjust Menu | Color > Color Booster
Focus > Gaussian Blur
Use the Gaussian Blur tool to dramatically reduce the
appearance of detail throughout the image. This
enhancement is often used selectively to reduce the visual
impact of objects or areas within an image in order to draw
the viewer’s eye away from that object or area. Alternatively,
you can use it to add a smoothing effect, such as on skin
tones, by adjusting the Opacity slider within this
enhancement.
The Gaussian Blur tool provides the following controls:
Radius
The Radius slider controls the intensity of the blur being applied to the image.
Opacity
The Opacity slider blends the blur effect with the details in the image to provide you with control over the
balance of detail. Combining a high radius with a low opacity creates a hazy, soft-focus effect, while
combining a low radius with a medium opacity produces a dream-like mood.
Focus > High Pass
The High Pass tool blocks all image details, apart from
those details that contain very strong edge definitions. This
results in a neutral gray image with only the edges of the
original image appearing. This enhancement is often used
with the opacity mixer set to Luminance & Chrominance
mode with the Opacity (Chrominance Ch.) slider set to
0% and Blending Mode set to the Overlay option.
The High Pass tool provides you with the following
controls:
Radius
The Radius controls the size of the edge to display in the resulting image. Settings for this slider are
dependent on the size of the image, so a radius setting that works well for one image may not be sufficient
for an image with a higher resolution.
Chapter 20 — Adjust Menu | Focus > Gaussian Blur
199
Focus > Unsharp Mask
The Unsharp Mask tool increases the apparent sharpness
of your images by enhancing the edges of objects in your
image. The Unsharp Mask tool in Capture NX 2 is unique in
that it always applies its sharpening to the luminosity of the
image, which prevents any unwanted color shifts.
A Please note: It is recommended that you zoom your image to
100% while determining the amount of sharpening to apply.
To use the Unsharp Mask tool, please follow these steps:
1
2
200
Navigate to the Adjust menu, select the Focus submenu and select Unsharp Mask.
Use the Color pull-down menu to select the areas
within the image to sharpen. The color selected will
determine the areas that are sharpened based on
their color. To sharpen the entire image, select RGB.
Chapter 20 — Adjust Menu | Focus > Unsharp Mask
3
4
5
Adjust the Intensity, Radius, and Threshold sliders
to achieve the desired sharpening result.
If desired, additional colors can be selected to
sharpen with different values. Select a different
option from the Color pull-down menu and adjust
the Intensity, Radius, and Threshold sliders again
to determine the sharpening to apply to the
additional color.
You can then adjust the order in which the
sharpening affect is applied by selecting a color from
the list and then pressing either the up or down
arrow provided next to the list. Additionally, you can
delete the sharpening affect applied to a color by
highlighting that color from the list and clicking the
delete button.
The Unsharp Mask tool provides you with the following controls:
Color
Use the Color pull-down menu to choose the areas in the image to sharpen based on their color. Select
RGB to sharpen the entire image.
Chapter 20 — Adjust Menu | Focus > Unsharp Mask
201
Intensity
The Intensity slider controls the amount of sharpening that will be applied to the color selected by the
Color pull-down menu. The higher the sharpening intensity, the more pronounced the sharpening effect
will be on your image. If the intensity setting is set too high, it can create an over-sharpened and artificial
looking image.
Radius
The Radius slider enables you to increase the reach of the sharpening effect. The higher the radius setting,
the wider the edges will appear in the sharpen image. A radius setting that is too high will produce visible
halo artifacts, which can appear as white outlines around objects.
Threshold
The Threshold slider is designed to limit where sharpening is applied with the current settings. The higher
the threshold setting, the less that objects in the image will be sharpened. This slider works to indicate how
much of a difference between one pixel and its neighbors is necessary in order to apply sharpening. This
slider is helpful in preventing smooth areas from picking up noise artifacts, such as when sharpening skin
areas or landscapes with large amounts of sky. Too high a threshold setting will prevent any objects from
being sharpened in the image, so it is important to find a good balance.
Delete
Use the delete button to delete the sharpening effect that is applied to a color. First select the color to
highlight it in the displayed list and then click on the delete button.
Correct > Distortion Control
The Distortion Control tool provides controls to reduce
both pincushion and barrel lens distortions. Pincushion
distortion normally affects images shot with telephoto
lenses and results in image details appearing as though
they are being pulled into the center of the image. Barrel
distortion, the opposite of pincushion distortion, normally
affects images shot with wide-angle lenses and results in an
image that appears to have details that bow outward away
from the center of the image. Pincushion and barrel
distortion are more apparent at the edges of the images.
The Distortion Control tool provides you with the following controls:
Correction
Use the Correction slider to reduce lens distortions from the image. Move this slider to the left to reduce
pincushion distortion or move the slider to the right to reduce barrel distortion.
202
Chapter 20 — Adjust Menu | Correct > Distortion Control
Fill Color
The Fill Color patch enables you to determine the color to use in the areas that lack image detail created
when correcting for pincushion distortions. Click on this patch to access the color picker or click on the eye
dropper to sample any color within an image open within Capture NX 2’s editor.
Correct > Color Aberration Control
The Color Aberration Control tool can be used to adjust
and control potential color fringes that can occur in
photographs. Color aberration is caused by the various
angles at which the different color wavelengths are
refracted when traveling through a lens element. The result,
called a color aberration, appears as a color halo on the side
of an object that is positioned away from the center of the
image.
It is recommended that you view the image at 100% while
making color aberration adjustments. It is important to
review the results of the changes, especially around the corners of the image, to balance the effect.
The Color Aberration Control tool provides you with the following controls:
Red — Cyan
The Red — Cyan slider contracts and expands the red channel to reduce either red or cyan fringing.
Moving the slider to the left reduces red fringes, while moving the slider to the right reduces cyan fringes.
Blue — Yellow
The Blue — Yellow slider contracts and expands the blue channel to reduce either blue or yellow fringing.
Moving the slider to the left reduces blue fringes, while moving the slider to the right reduces yellow fringes.
Chapter 20 — Adjust Menu | Correct > Color Aberration Control
203
Noise Reduction
The Noise Reduction tool enables you to reduce the
effects of digital noise that sometimes appear in images
taken with digital cameras.
A Please note: It is recommended that you zoom your image to
100% while determining the amount of noise reduction to
apply to your image.
To use the Noise Reduction tool to reduce noise throughout your image, follow these steps:
1
2
3
4
5
6
Navigate to the Adjust menu and select Noise Reduction.
Select the Method to use on your image, either Faster or Better Quality.
Increase the Intensity slider until noise artifacts are no longer displayed within your image.
Increase the Sharpness slider until any image details that may have become softer after increasing
the Intensity slider are visible again.
Adjust both the Intensity and Sharpness sliders until you reach a good balance of noise reduction
and detail retention.
Check the Edge Noise Reduction checkbox if noise is visible along the edges of details within the
image.
The Noise Reduction tool provides you with the following control:
Intensity
Move the Intensity slider to the right to increase the amount of noise reduction that is applied to the
image. Be careful to not apply too much noise reduction, as high levels of noise reduction may cause loss of
detail.
204
Chapter 20 — Adjust Menu | Noise Reduction
Sharpness
The Sharpness slider helps counter the loss of detail that can occur at high noise reduction levels. Move
this slider to the right to increase the amount of sharpening that is applied to your image.
Method
Choose between the Faster or Better Quality methods in the Method pull-down menu. Select Faster for
faster processing or Better Quality for a more precise noise reduction effect.
Edge Noise Reduction
When you check the Edge Noise Reduction checkbox, Capture NX 2 will reduce noise artifacts around the
edges of objects within the image, resulting in more distinct outlines.
Chapter 20 — Adjust Menu | Noise Reduction
205
Color Profile
The Color Profile tool provides you with image-specific color management options within Capture NX 2.
Use these options to apply a profile, or convert the current profile to prepare the image for your specific
color managed workflow.
Capture NX 2 utilizes the default color profile folder for your operating system. If you add or create
additional profiles on your system, please ensure that the new profiles are placed in this default location.
Locations typically used for storing color profiles in are:
Windows Vista: Windows\System32\Spool\Drivers\Color
Windows XP: Windows\System32\Spool\Drivers\Color
Mac OS X: Library : ColorSync : Profiles
The Color Profile tool displays the current profile embedded within the image. Choose between the two
different methods of altering the profile to color manage your image.
The Color Profile tool provides you with two different methods for altering the current profile, with each
method providing different controls. The two available methods are:
Apply Profile
Choose the Apply Profile method to assign a profile to the
current image. This option is most often used when you
would like to assign an input profile, such as a profile you
created for your camera, to the image.
A Please note: When you apply a profile, your image may
change on your monitor, but the color values will not change.
This is because you have just identified the meaning of the
colors throughout your image based on the profile created for
the input device.
Use the following controls to use the Apply Profile
method:
Profile Selector
Use the profile selector pull-down menu to select one of
the input profiles available and apply that profile to your
image.
206
Chapter 20 — Adjust Menu | Color Profile
Convert to Profile
The Convert to Profile method enables you to convert the
profile space of the current image to the profile space of the
output device. The result is that the actual color values
change, but the appearance of those colors does not
change on your monitor. This is due to the fact that you
have simply changed the values to ensure that the output
device will produce the same colors that you see within the
limitations of that output device.
The Convert to Profile method results are the same as
when you use the color management option within the “Print Layout” dialog. Since an image may be
printed on different printers, or in different situations on the same printer, it is often recommended that you
do the profile conversion at the point of printing. Using the Convert to Profile feature is normally
recommended only if you intend to have the image printed elsewhere, and only when that service has
provided you with their output device’s color profile.
Use the following controls to use the Convert to Profile method:
Profile Selector
Use the profile selector to select one of the output profiles available on your computer to convert the
image’s colors profile to.
Intent
The Intent option lets you choose between four different rendering intents to apply to your image. The
different rendering intents control how colors from the image are made to fit into the colors that your
printer can produce (as indicated by the printer profile).
A Please note: Different printer and paper combinations, as well as the different software used to create printer
profiles, benefit from different rendering intents. Experiment with the different rendering intents within your
workflow to find the option that works best.
Chapter 20 — Adjust Menu | Color Profile
207
Capture NX 2 provides the following intents:
Perceptual
This rendering intent maintains the relationships of colors so that the printed
image appears natural to the human eye. While this intent maintains the
relationship of colors, the actual color values will be changed.
Saturation
This rendering intent produces highly saturated colors, but it may not produce
accurate colors in a photograph.
Relative
Colorimetric
This rendering intent maps all of the colors that fall outside of the gamut of the
target profile to the closest reproducible color. This profile reproduces accurately
all of the colors that are within the range of colors reproducible by your printer.
This option preserves as many natural colors as possible and is often the best
choice for printing photographs.
Absolute
Colorimetric
This rendering intent is very similar to relative colorimetric, except that it maps
the white point of the image to the white point of the destination profile. It is
recommend that you use absolute colorimetric only if you want to proof your
images for a specific print device other than your printer, since this rendering
intent will attempt to reproduce the results of the output device, including the
effect of a different paper color.
Use Black Point Compensation
Check this box to utilize black point compensation. This ensures that the black point from the image is
mapped to the black point of your printer, enabling the full color range of the printer to be used. If your
prints contain either gray shadows or too little detail, try turning this option off. Unless you are having
problems with a specific print and profile combination, it is recommended that you always use this option.
A Please note: Each color profile change will create a new step within the Edit List palette. You may at any time
remove or change the color profile change within the current image editing session. If you save the image as an
NEF file, you will also be able to go back to the Edit List palette and remove any of these changes without any loss
of color detail.
After you have updated the color profile information for your image, click on the Apply button to accept
the changes.
208
Chapter 20 — Adjust Menu | Color Profile
Chapter 21
Filter Menu
Photo Effects
The Photo Effects tool enables you to take more creative control of your image. With this tool, you can
convert your image to a black and white, sepia, or tinted image. You can also control the tonality of the
image, enhance dark tones, and control the color balance.
The Photo Effects tool provides four different methods, each method providing controls unique to that
method. The available methods are:
Enhance Photo
Enhance Photo is the default method available to you
when you open the Photo Effects tool. This mode enables
you to control the tonality in your image, enhance dark
tones, and control the color balance of the entire image.
The following controls are provided within the Enhance
Photo method:
Brightness
The Brightness slider enables you to control the tonality
throughout your image. Move this slider to the left to
darken your image or to the right to brighten the image.
Enhance Dark Tones
The Enhance Dark Tones checkbox brings out additional
detail in the shadows of the active image.
Auto
When you click on the Auto button, Capture NX 2 will analyze the image and determine a recommended
setting for the Brightness slider. It will also determine automatically if the Enhance Dark Tones option
will be applied.
Chapter 21 — Filter Menu | Photo Effects
209
Cyan — Red
The Cyan — Red slider enables you to shift the colors of your image from cyan to red. Moving this slider to
the left removes red from the image, which will cause the image to become more cyan. Adjusting this
slider to the right adds red to the image, removing cyan from the image.
Magenta — Green
The Magenta — Green slider enables you to shift the colors of your image from magenta to green.
Moving this slider to the left removes green from the image, which will cause the image to become more
magenta. Adjusting this slider to the right adds green to the image, removing magenta from the image.
Yellow — Blue
The Yellow — Blue slider enables you to shift the colors of your image from yellow to blue. Moving this
slider to the left removes blue from the image, which will cause the image to become more yellow.
Adjusting this slider to the right adds blue to the image, removing yellow from the image.
Black and White
The Black and White method converts the current image
to black and white, while providing you with controls over
how the image is converted to black and white.
The following controls are provided within the Black and
White method:
Brightness
The Brightness slider enables you to control the tonality
throughout your image. Move this slider to the left to
darken your image or to the right to brighten the image.
Enhance Dark Tones
The Enhance Dark Tones checkbox brings out additional
detail in the shadows of the active image.
Auto
When you click on the Auto button, Capture NX 2 will analyze the image and determine a recommended
setting for the Brightness slider. It will also determine automatically if the Enhance Dark Tones option
will be applied.
Cyan — Red
The Cyan — Red slider enables you to alter the black and white effect on your image. When you move
this slider to the right, objects that contain cyan become lighter, while objects containing red become
darker. Moving this slider to the left causes objects that contain cyan to become darker and objects
containing red to become brighter.
210
Chapter 21 — Filter Menu | Photo Effects
Magenta — Green
The Magenta — Green slider enables you to alter the black and white effect on your image. When you
move this slider to the right, objects that contain magenta become lighter, while objects containing green
become darker. Moving this slider to the left causes objects that contain magenta to become darker and
objects containing green to become brighter.
Yellow — Blue
The Yellow — Blue slider enables you to alter the black and white effect on your image. When you move
this slider to the right, objects that contain yellow become lighter, while objects containing blue become
darker. Moving this slider to the left causes objects that contain yellow to become darker and objects
containing blue to become brighter.
Sepia
The Sepia method emulates the darkroom effect of
applying a sepia tone to a black and white print.
The following controls are available within the Sepia
method:
Brightness
The Brightness slider enables you to control the tonality
throughout your image. Move this slider to the left to
darken your image, or to the right to brighten the image.
Enhance Dark Tones
The Enhance Dark Tones brings out additional detail in
the shadows of the active image.
Auto
When you click on the Auto button, Capture NX 2 will
analyze the image and determine a recommended setting for the Brightness slider. It will also determine
automatically whether to enable the Enhance Dark Tones option or not.
Chapter 21 — Filter Menu | Photo Effects
211
Tinted
The Tinted method emulates the effect of printing a black
and white negative on color paper, while using different
colored filters to change the overall hue of the image.
The following controls are provided within the Tinted
method:
Brightness
The Brightness slider enables you to control the tonality
throughout your image. Move this slider to the left to
darken your image or to the right to brighten the image.
Enhance Dark Tones
The Enhance Dark Tones checkbox brings out additional
detail in the shadows of the active image.
Auto
When you click on the Auto button, Capture NX 2 will analyze the image and determine a recommended
setting for the Brightness slider. It will also determine automatically whether to enable the Enhance
Dark Tones option or not.
Cyan — Red
The Cyan — Red slider enables you to control the amount of cyan or red in the filter being used. Moving
this slider to the left removes red from the filter, causing the filter and the image to become more cyan.
Adjusting this slider to the right adds red to the filter and the image.
Magenta — Green
The Magenta — Green slider enables you to control the amount of magenta or green in the filter being
used. Moving this slider to the left removes green from the filter, causing the filter and the image to
become more magenta. Adjusting this slider to the right adds green to the filter and the image.
Yellow — Blue
The Yellow — Blue slider enables you to control the amount of yellow or blue in the filter being used.
Moving this slider to the left removes blue from the filter, causing the filter and the image to become more
yellow. Adjusting this slider to the right adds blue to the filter and the image.
212
Chapter 21 — Filter Menu | Photo Effects
Add Grain / Noise
The Add Grain / Noise tool enables you to add the stylistic
effect of either grain or noise to your image. The grain
feature emulates different sizes of film grain within your
image, while the noise feature applies random detail to your
image to approximate digital camera noise.
The Add Grain / Noise tool provides you with the
following controls:
Grain Strength
Move this slider to the right to increase the amount of grain
or noise that is applied to your image.
Grain Color
Use this feature to control whether or not the grain or noise is made up of color or black and white details.
Grain Type
Use this feature to choose the method of grain or noise to apply to your image. Choose from Small grain,
Medium grain, Large grain, and Noise.
Contrast: Color Range
The Contrast: Color Range tool enables you to control the
contrast between selected colors within an image without
introducing a color cast to the entire image. Using this tool
isolates and identifies specific colors and color relationships
in much the same way that black and white tones are
controlled using colored filters while shooting black and
white film.
The following controls are provided within the Contrast:
Color Range tool:
Hue
The Hue slider selects the targeted color range to apply contrast to. The color that is selected will be
lightened in the image, while the complementary color will be darkened. For example, select the red
portion of the spectrum to emulate a red filter, which will lighten reds and darken cyan, red’s
complementary color.
Contrast
The Contrast slider controls the amount of contrast that is affected between the color selected in the Hue
slider and that color’s complementary color. Moving this slider to the left will decrease this effect, while
moving this slider to the right will increase the effect by making the selected color lighter and the
complementary color darker.
Chapter 21 — Filter Menu | Add Grain / Noise
213
Brightness
The Brightness slider controls the overall luminosity of the image. Move this slider to the left to darken the
entire image or move this slider to the right to brighten the entire image.
Colorize
The Colorize tool enables you to add a color to your image.
The Colorize tool provides you with the following controls:
Color
Click on the Color patch to access the color picker or click
on the eye dropper to sample any color within an image
open within Capture NX 2’s editor to select the color to add
to the image.
Opacity
The Opacity slider controls the intensity of the color that is being added to the image. A value of 100% will
completely obscure the image’s detail, with lower values allowing more and more of the original image’s
detail to be visible.
Blending Mode
The Blending Mode pull-down menu lets you select how the color is mixed with the colors from the
image, using the same blending modes provided within the opacity mixer. For more information on the
opacity mixer, see the “Opacity Mixer” section in Chapter 15, “Edit List”.
Black and White Conversion
The Black and White Conversion tool transforms a color
image to a black and white version of the original while
providing control over the highlights, shadows, and the
relationship of tonal ranges throughout the image. This
feature provides controls similar to controls used in
traditional black and white photography, with the added
power of digital image manipulation.
214
Chapter 21 — Filter Menu | Colorize
To use the Black and White Conversion tool, follow these steps:
1
2
3
Navigate to the Filter menu and select Black and
White Conversion.
Adjust the Filter Hue and Color Filter Strength
sliders to control the relationship of colors
throughout the image and provide greater
separation of tonal values.
Adjust the Brightness and Contrast sliders in order
to create the desired tonality of the image.
The Black and White Conversion tool provides you with the following controls:
Filter Hue
The Filter Hue slider enables you to choose the hue of the filter that is used to convert the image from
color to black and white. Objects that are the color of the selected hue will become lighter while objects
that are the opposite, or complementary color, of the hue selected will become darker.
Color Filter Strength
Use the Color Filter Strength slider to control the intensity of the filter used in the black and white
conversion. The higher the strength set in this slider, the more different objects of the color selected by the
Filter Hue slider and objects that are the opposite of the color selected by the Filter Hue slider will be.
Brightness
The Brightness slider controls the overall luminosity of the image. Move this slider to the left to darken the
entire image or move this slider to the right to brighten the entire image.
Chapter 21 — Filter Menu | Black and White Conversion
215
Contrast
Use the Contrast slider to change the contrast of your image. Moving this slider to the left will decrease the
contrast throughout the image, while moving the slider to the right will increase contrast.
Shortcut
Ctrl + Shift + B (Windows)
command + shift + B (Macintosh)
Third-Party Plug-Ins
Capture NX 2 supports third-party plug-ins. After the plug-in is installed, additional entries are available in
the Filter menu. Additional information can be found online.
216
Chapter 21 — Filter Menu | Third-Party Plug-Ins
Chapter 22
Batch Menu
Run Batch Process
Select Run Batch Process to call up the Batch Process dialog in order to begin applying a batch process.
Within the Batch Process dialog, you are presented with two different methods of applying a batch process:
Batch Process and Watched Folder.
Batch Process
The Batch Process option enables you to run select a source
folder of images, a settings file containing edits to apply to
the images, the destination to place the processed images,
and file name and file format options for the processed
images.
Source
❏ Browse
Click on the Browse button within the source section
to locate the folder that contains the images you wish
to apply a batch process to.
❏ Include Subfolders
Check the Include Subfolders checkbox if you would
like to process the contents of the folder along with the
contents of any folders within the targeted folder.
❏ Delete files from this folder after they are processed
The Delete files from this folder after they are
processed option will delete the original files after the batch process has been completed.
Chapter 22 — Batch Menu | Run Batch Process
217
Apply Settings
Check this box if you would like to apply a settings file to your image or if you would like to revert any NEF
files to their original state. Unchecking this box will ensure that the enhancements found within the image
are not changed from their last saved state.
❏ Batch Mode
Use Settings File
By selecting this option, you will be able to select a settings file to apply to
the images identified in the “Source” section.
• Browse
Click on the Browse button within the Apply Settings section to locate
a settings file to apply to the images.
Use Original Settings
By selecting this option, Capture NX 2 will revert any NEF processed through
the batch process to the state prior to when any enhancements were made
to it through Capture NX 2. This includes both RAW NEF files, which will be
processed to the original settings created by the camera, or Converted NEF
files, which will remove all enhancements made within Capture NX 2.
Conflict Management
The Conflict Management pull-down menu enables you to choose how Capture NX should resolve
potential conflicts that may arise while performing a batch process on NEF images. You can choose from
the following options:
❏ Append New Settings
The Append New Settings option is the default option when applying a batch process. This option
will automatically add the enhancements from the settings file to all of the images affected by the batch
process.
❏ Replace Current Settings
The Replace Current Settings option will apply the enhancements from the settings file to all images
and will overwrite any enhancements that may already be contained with the images affected by the
batch process.
❏ Show Differences
The Show Differences option enables you to interact with the “Show Differences” dialog for any
images that already contain enhancements. With this process, you can choose which enhancements to
replace and which enhancements to keep within the images affected by the batch process.
Rename
By checking the Rename checkbox, Capture NX 2 will rename the images using the naming system found
within the File Naming dialog. Click on the Edit button to display the File Naming dialog. For more
information, please see the “File Naming Dialog” section later in this chapter.
Select File Format
Choose a file format for processed images from the Select File Format pull-down menu. The following
options are available:
218
Chapter 22 — Batch Menu | Run Batch Process
❏ NEF:
Choose a compression setting in the Advanced section.
❏ TIFF:
In the Advanced section, choose a color model (RGB or CMYK), bit depth (Always 8 bit or 16 bit if
possible), and compression type (None or LZW).
❏ JPEG:
Use the pull-down menu to choose from Highest Compression Ratio, Good Compression Ratio,
Good Balance, Good Quality, and Excellent Quality, or select the desired balance between image
quality and compression using the slider.
Check Embed ICC Profile to embed an ICC color profile in each image.
Destination
The Destination section enables you to identify the location to use when saving processed images.
❏ Select Folder
By selecting Select Folder, you can manually identify the folder that the processed images should be
placed in. Click on the Browse… button to identify the location to place the processed images.
❏ Use Source Folder
The Use Source Folder option will place the processed files in same folder as the source image.
After you have identified all of the parameters for the batch process, click OK. This will call up the
Processing Queue and enable you to begin the batch process. For more information about the Processing
Queue, please see the section “Processing Queue” later in this chapter.
Watched Folder
Watched folders enable you to create ongoing batch
processes. Once a watched folder process has been started,
Capture NX 2 will continually monitor for new images
within the watched folder and process the images until the
process is canceled. This is especially helpful when you send
your images directly from your camera to a specific folder
on your computer rather than using a flash card. The
watched folder feature contains the following controls:
Watched Folder
❏ Browse
Click on the Browse button to locate the folder that you
would like Capture NX 2 to monitor for new images
process.
❏ Include Subfolders
Check the Include Subfolders checkbox if you would
like Capture NX 2 to monitor the contents of any
subfolders within the watched folder.
Chapter 22 — Batch Menu | Run Batch Process
219
❏ Run Process Immediately
Select Run Process Immediately to continually monitor the watched folder for new images and
process any new images as soon as they are placed within the targeted folder.
❏ Run Process Every
Enter a number to determine how frequently, in hours, Capture NX 2 should review the watched folder
for new images.
Apply Settings
Check this box if you would like to apply a settings file to your image or if you would like to revert any NEF
files to their original state. Unchecking this box will ensure that the enhancements found within the image
are not changed from their last saved state.
❏ Batch Mode
Use Settings Files
By selecting this option, you will be able to select a settings file to apply to
the images placed within the watched folder.
• Browse…
Click on the Browse… button within the “Apply Settings” section to
locate a settings file to apply to the images.
Use Original Settings
By selecting this option, Capture NX 2 will revert any NEF processed through
the watched folder to the state prior to when any enhancements were made
to it through Capture NX 2. This includes both RAW NEF files, which will be
processed to the original settings created by the camera, or Converted NEF
files, which will remove all enhancements made within Capture NX 2.
Conflict Management
The Conflict Management pull-down menu enables you to choose how Capture NX 2 should resolve
potential conflicts that may arise while performing a batch process on NEF images. You can choose from
the following options:
❏ Append New Settings
The Append New Settings option is the default option when applying a watched folder. This option
will automatically add the enhancements from the settings file to all of the images processed by the
watched folder.
❏ Replace Current Settings
The Replace Current Settings option will apply the enhancements from the settings file to all images
and will overwrite any enhancements that may already be contained within the images processed by
the watched folder.
❏ Skip & Continue
The Skip & Continue option will automatically skip any image in which a conflict was identified
without processing that image. An error entry will be created within the log file informing you the name
of the image and the time that the conflict was identified.
220
Chapter 22 — Batch Menu | Run Batch Process
Rename
By checking the Rename checkbox, Capture NX 2 will rename the images using the naming system found
within the File Naming dialog. Click on the Edit button to display the File Naming dialog. For more
information, please see the “File Naming Dialog” section later in this chapter.
Select File Format
Choose a file format for processed images from the Select File Format pull-down menu. The following
options are available:
❏ NEF:
Choose a compression setting in the Advanced section.
❏ TIFF:
In the Advanced section, choose a color model (RGB or CMYK), bit depth (Always 8 bit or 16 bit if
possible), and compression type (None or LZW).
❏ JPEG:
Use the pull-down menu to choose from Highest Compression Ratio, Good Compression Ratio,
Good Balance, Good Quality, and Excellent Quality, or select the desired balance between image
quality and compression using the slider.
Check Embed ICC Profile to embed an ICC color profile in each image.
Destination
The Destination section enables you to identify the location to use when saving processed images.
❏ Select Folder
By selecting Select Folder, you can manually identify the folder that the processed images should be
placed in. Click on the Browse… button to identify the location to place the processed images.
❏ Use Source Folder
The Use Source Folder option will place the processed files in same folder as the source image.
Once you have identified the parameters to use for the Watched Folder, click OK. This will bring up the
Processing Queue, indicating that the current process is a watched folder. You are able to minimize the
Processing Queue and continue working on other images while the watched folder process continues in
the background.
File Naming Dialog
The File Naming dialog provides you with options for setting up a file naming convention to use when
batch processing multiple images. You are provided with three sections to identify the file name, and can
control how those different sections are separated. This dialog is accessible when setting up a batch process
or watched folder using the Run Batch Process… command from the Batch menu, within the
Processing Queue, or when selecting multiple images in the browser and selecting Rename… from the
Edit menu.
Prefix
The contents of this section will be applied to the beginning of the file name. You can choose from:
Chapter 22 — Batch Menu | Run Batch Process
221
❏ Original Name
This option will place the original file name at the beginning of the new file name.
❏ New Name
This option will enable you to type in a new name to enter at the beginning of the new file name.
❏ None
This option will prevent a prefix from being added to the beginning of the new file name.
Middle
The middle section can contain a sequential number, the date the image was shot, or the time and date
the image was shot.
Suffix
The contents of this section will be applied to the end of the file name. You can choose from:
❏ Original Name
This option will place the original file name at the end of the new file name.
❏ New Name
This option will enable you to type in a new name to enter at the end of the new file name.
❏ None
This option will prevent a suffix from being added to the end of the new file name.
Processing Queue
The Processing Queue provides you with the status of the
current batch process and enables you to start and pause
the batch process. Additionally, you are presented with the
queue of images still waiting to be processed, along with a
log that contains a list of all of the images that have already
been processed, and the ability to change the destination,
file name, and file format of the images.
The Processing Queue can be minimized and you can
continue to work on other images while the Processing
Queue processes your images in the background.
A Please note: While the process is ongoing, you cannot modify
any of the additional controls within the Processing Queue. If
you wish to modify the settings at any time, click on the pause
button. After you have modified the settings, click on the start
button.
To display the full list of controls within the Processing
Queue, click on the Details show/hide triangle. You will be
presented with an additional progress bar that will show
you the current task being applied as well as a thumbnail of
the current image being processed, along with the
following controls:
222
Chapter 22 — Batch Menu | Run Batch Process
Queued
The Queued tab shows a list of images that are currently waiting to be processed. If you do not wish a
particular image to be processed, uncheck the box for that image.
Log
The Log tab contains a list of all of the images that have already been processed along with any possible
errors that have occurred.
Clear From List
The Clear From List button enables you to clear the highlighted image from the queue window. This is
helpful if you do not want to process an image with the current batch process.
Destination
The Destination section enables you to identify the location to use when saving processed images.
❏ Select Folder
By selecting Select Folder, you can manually identify the folder that the processed images should be
placed in. Click on the Browse… button to identify the location to place the processed images.
❏ Use Source Folder
The Use Source Folder option will place the processed files in same folder as the source image.
File Name
The File Name section enables you to identify the naming convention to use when saving the images.
❏ Rename
Selecting Rename to have Capture NX 2 rename the images using the naming system found within the
File Naming dialog. Click on the Edit button to display the File Naming dialog. For more information on
the File Naming dialog, please see the section “File Naming Dialog” earlier in this chapter.
❏ Use Source File Name
Select Use Source File Name to save the processed image with the original file name.
Select File Format
Use the File Format pull-down Menu to select the file format to use for the processed images.
Bit Depth
Use the Bit Depth selector to identify the bit-depth to set the images to.
A Please note: Capture NX 2 will always use the setting identified here, but any images that originated as 8-bit
files will remain as 8-bit files and will not be converted to 16-bit if the 16-bit option is selected.
Compression
The Compression pull-down menu enables you to choose what type of compression to apply to the
images. The contents of this menu depend on the file format chosen.
Embed ICC Profiles
The Embed ICC Profiles checkbox is only available when you have selected JPEG or TIFF as the file format
to use. Enable this setting to embed the current profile in the image while saving.
Chapter 22 — Batch Menu | Run Batch Process
223
Close When Done
Check the Close When Done checkbox to cause the Processing Queue window to close when the batch
process has completed.
Notify When Complete
When this option is selected, a message box will be displayed to notify you that the batch process has
completed.
Shortcut
Ctrl + Alt + Shift + B (Windows)
command + option + shift + B
(Macintosh)
Copy Adjustments
The Copy Adjustments command enables you to copy to Capture NX 2’s clipboard either the entire series
of settings from the current image or only the highlighted steps or enhancements from the Edit List
palette. Once the enhancements are on the clipboard, you can paste them into a different image, a group of
images, or back into the same image.
To copy the entire series of settings from the current image, ensure that no steps are selected in the Edit
List palette using the Deselect All command in the Edit menu and then select Copy Adjustments from
the Batch menu.
To copy only selected enhancements, select one or more steps or enhancements and then select Copy
Adjustments from the Batch menu.
C Hint: You can copy more than one step at a time. Hold the control key (Windows) or command key (Macintosh)
and click to highlight multiple steps or enhancements. You can also select a range of steps or enhancements by
clicking on the first step or enhancement in the range that you want to copy, and while holding the Shift key
down, selecting the last step or enhancement in the range that you want to copy.
Paste Adjustments
The Paste Adjustments command enables you to paste any settings that are currently within
Capture NX 2’s clipboard into the active image in the editor or into selected images within the browser.
To use Paste Adjustments, ensure that you have previously copied adjustments using the Copy
Adjustments command, and then select this option. You can paste settings into the current image either
in the editor or in the browser, or you can paste settings into a series of images selected in the browser. The
pasted settings will be appended onto the end of the Edit List palette for the selected images.
Due to the unique nature of the “Develop” section within the Edit List palette, copying and pasting the
contents of the “Develop” section will replace the contents with the pasted settings in the images that were
pasted into. To prevent the “Develop” section from being replaced, ensure that you select only steps from
the “Adjust” section when performing the Copy Adjustments command.
224
Chapter 22 — Batch Menu | Copy Adjustments
Save Adjustments
Select the Save Adjustments command to open the “Save
Adjustments” dialog. It is within the “Save Adjustments”
dialog that you create settings files that will be used for
batch processes in the future.
When the “Save Adjustments” dialog opens, you are
presented with a representation of the current image’s Edit
List palette. It is from this list that you can select and identify
which enhancements will be saved into the settings file.
The “Save Adjustments” dialog can be used to save all
enhancements applied to the current image, or only
selected steps and enhancements. Click on the checkboxes
of the enhancements or adjustments that you wish to save
into the settings file. By clicking and highlighting steps and
enhancements within the Edit List palette prior to
selecting Save Adjustments, you can cause the “Save Adjustments” dialog to open with the checkboxes
for those adjustments and enhancements already checked.
Enter the name of that you would like to use for the settings file. The name you enter here will be displayed
within the Load Adjustments sub-menu of the Batch menu.
Capture NX 2 will then create the settings file in the Capture NX 2 settings folder. To specify a different
location, click on the Browse button and select an alternative location to store the settings file.
When saving to the default Capture NX 2 settings folder, Capture NX 2 will automatically place the settings
file within a folder depending on the contents of the settings file. Settings files that contain only a single
enhancement will be placed into a folder named after that enhancement. Settings files with multiple
enhancements will be placed into a folder labeled “Multiple Settings”. In this manner, your settings files will
be organized enabling you to quickly locate a settings file that contains a specific type of enhancement.
Load Adjustments
The Load Adjustments sub-menu provides you with a list
of settings files that are currently available within
Capture NX 2. You can add additional settings files to this list
using the “Manage Settings” section of the “Preferences”
dialog.
Selecting a settings file while in the editor will apply those
settings to the current image.
Selecting a settings file from the Load Adjustments submenu after selecting images in the browser will open the
Processing Queue and enable you to start a batch process immediately.
Chapter 22 — Batch Menu | Save Adjustments
225
Copy IPTC Info
The Copy IPTC Info command will copy only the IPTC fields from the current image that contain entries to
Capture NX 2’s clipboard. You will then be able to use the Paste IPTC Info command to add those copied
IPTC fields to one or more images.
Paste IPTC Info
Use the Paste IPTC Info command to apply the IPTC fields copied using the Copy IPTC Info command to
one or more images.
Selecting Paste IPTC Info while working in the editor adds the copied IPTC fields to the active image. IPTC
information already found within the current image will be overwritten by the IPTC information in the
Capture NX 2 clipboard.
Selecting Paste IPTC Info while working in the browser adds the copied IPTC fields to the selected images.
IPTC information already found within the selected images will be overwritten by the IPTC information in
the Capture NX 2 clipboard.
Save XMP/IPTC Preset
The Save XMP/IPTC Preset option enables you to create an XMP/IPTC presets, a set of XMP/IPTC data that
can then be applied to either a single image or to a group of images.
After selecting this option, a “Save XMP/IPTC Preset” dialog will be displayed, with the XMP/IPTC data found
in the current image displayed. You can then modify the values displayed or enter values into the remaining
fields. When a value is entered into a field, the checkbox for that field as well as for the section will be turned
on. Only those fields with an active checkbox next to them will be added to an image when the XMP/IPTC
preset is applied to an image or group of images.
To prevent a field from being modified by the XMP/IPTC preset, uncheck the box for that field.
To clear a field in an image or group of images, delete the content of that field in the field editor and check
the box. This will result in a blank field with a checkbox next to it, indicating that when this IPTC preset is
applied to an image, that image will have a blank field for the corresponding field. This is helpful if you
would like to clear away one or more IPTC fields in an image.
Enter the name for the XMP/IPTC preset and click OK. The XMP/IPTC preset will then be accessible through
the Load XMP/IPTC Preset sub-menu of the Batch menu.
Load XMP/IPTC Preset
The Load XMP/IPTC Preset sub-menu lets you select one of the available XMP/IPTC presets to load to one
or more images.
Selecting an XMP/IPTC preset while in the editor will add the XMP/IPTC information to the current image,
overwriting the content of any fields in the image that the XMP/IPTC preset is loaded into.
Selecting an XMP/IPTC preset while in the browser will add the XMP/IPTC information to the selected
images, overwriting the content of any fields in the images that the XMP/IPTC preset is loaded into.
226
Chapter 22 — Batch Menu | Copy IPTC Info
Chapter 23
View Menu
Selection Display
The options provided in the Selection Display sub-menu
duplicate the selection display control pull-down menu
found in a step within the Edit List palette. These options
enable you to determine how to display the current
selection made within the image window. To show the
selection made by Color Control Points, use the Show
Selection checkbox found within a color control point step.
For more information, please see the Color Control Point section of Chapter 13, “The Toolbar”.
Choose from the following options:
Hide Selection
The Hide Selection option prevents the current selection from being displayed in the image window,
showing only the image.
Chapter 23 — View Menu | Selection Display
227
Show Overlay
The Show Overlay option displays the selection as a semi-transparent color overlay, superimposed on top
of your image. Anywhere this color overlay is displayed, the current step’s adjustment is being applied.
Anywhere the image is displayed, no enhancement is being applied. You can control the color and opacity
of the overlay within the “Preferences” dialog.
Shortcut
Toggle Show Overlay on and off:
Shift + O
Show Mask
The Show Mask option displays the current selection as a black and white mask; black areas indicate that
no enhancement is being applied to that area while white areas are being affected by the current step’s
enhancements.
Shortcut
Toggle Show Mask on and off:
Shift + M
Show All Control Points
The Show All Control Points option is selected by default whenever you are working on a step that
contains any of the control points, either black, white, neutral, color, red-eye, or selection control points. By
selecting this option, all control points will be hidden so that you can see the image without any of the
control point icons appearing on top of the image.
Show Active Selection
The Show Active Selection option is selected by default whenever a selection is created with the lasso or
marquee tools. By selecting this option, the active selection can be hidden.
A Please note: The active selection will continue to affect your image until you cancel the selection by either
selecting Deselect All from the Edit menu or double-click within the image with one of the lasso or marquee
tools selected.
Shortcut
Ctrl + H (Windows)
command + H (Macintosh)
Show Watch Points
The Show Watch Points option is enabled by default. When this option is enabled, any watch points
added through the Photo Info palette are displayed. By disabling this option, watch points can be hidden.
228
Chapter 23 — View Menu | Show All Control Points
Show Grid
Select this option to impose a grid pattern over the current
image.
The color and spacing of the grid can be set within the
“Preferences” dialog.
Show Focus Point
When working with images captured by a Nikon camera,
you can display the focus area used when capturing the
image by selecting Show Focus Point from the View
menu.
A Please note: Use Show Focus Point only on images that
have not been enhanced. Using the Show Focus Point feature
after the image has been rotated, straightened, cropped, or
after applying the Fisheye Lens or Distortion Control steps
may result in the focus area being displayed incorrectly.
A Please note: The focus area will not be displayed if the image
was created using a COOLPIX-series camera, a non-CPU lens, or a manual focus lens.
Show Lost Highlights
The Show Lost Highlights option identifies areas in which
detail may have been lost in the highlights by locating pixels
with the maximum values for one or more channels. This
information can be used when adjusting the tonality of the
image, such as when applying white points, to ensure that
the optimal amount of detail is retained within the image.
When you enable the Show Lost Highlights option, the
entire image will become black while displaying any areas
that contain maximum values for one or more channels.
Only those areas that contain maximum values will be
displayed within the image window when this option is
enabled. That is, only the pixels that contain a value of 255 will be displayed for each of the three channels.
Chapter 23 — View Menu | Show Grid
229
The resulting image will contain white, primary, and secondary colors only. The following table describes
values these colors represent:
White
This area contains values of 255 for the red, green, and blue channels.
Yellow
This area contains values of 255 for the red and green channel.
Magenta
This area contains values of 255 for the red and blue channels.
Cyan
This area contains values of 255 for the green and blue channels.
Red
This area contains values of 255 for the red channel.
Green
This area contains values of 255 for the green channel.
Blue
This area contains values of 255 for the blue channel.
With this display on, you can adjust the settings of one of the enhancements that have already been applied
to reduce the brightening effect and prevent details from becoming blown out.
Shortcut
Shift + H
Show Lost Shadows
The Show Lost Shadows option identifies areas in which
detail may have been lost in the shadow areas by locating
pixels with the minimum value of one or more channels.
This information can be used when adjusting the tonality of
the image, such as when applying black points, to ensure
that the optimal amount of detail is retained within the
image.
By enabling the Show Lost Shadows option, the entire
image will become white while displaying any areas that
contain minimum values for one or more channels. Only
those areas in which the channels contain a minimum value
will be displayed within the image window when this option is enabled. That is, only the pixels that contain
a value of 0 will be displayed for each of the three channels.
The resulting image will contain black, primary, and secondary colors only. The following table describes
values these colors represent:
230
Black
This area contains values of 0 for the red, green, and blue channels.
Blue
This area contains values of 0 for the red and green channel.
Green
This area contains values of 0 for the red and blue channels.
Red
This area contains values of 0 for the green and blue channels.
Cyan
This area contains values of 0 for the red channel.
Magenta
This area contains values of 0 for the green channel.
Yellow
This area contains values of 0 for the blue channel.
Chapter 23 — View Menu | Show Lost Shadows
With Show Lost Shadows enabled, you can modify any enhancements that may make the image too dark.
Shortcut
Shift + S
View at 100%
Select this option to set the zoom ratio for the current
image to 100%.
Shortcut
Ctrl + Alt + 0 (Windows)
command + option + 0 (Macintosh)
Fit to Screen
Select this option to set the zoom ratio for the current image so that the entire image fits into the space
available on your monitor.
Shortcut
Ctrl + 0 (Windows)
command + 0 (Macintosh)
Zoom In
Select this option to zoom one step into the active image.
Shortcut
Ctrl + ‘+’ (Windows)
command + ‘+’ (Macintosh)
Chapter 23 — View Menu | View at 100%
231
Zoom Out
Select this option to zoom one step out of the active image.
Shortcut
Ctrl + - (Windows)
command + - (Macintosh)
Full Screen
The full screen display mode is useful for maximizing the space used by Capture NX 2. Use this display mode
when editing images to minimize distractions and enable you to focus entirely on the image that is being
edited. The full screen display mode places your images against a medium-gray background, ensuring that
the decisions you make while editing your image are not influenced by the area surrounding your image. To
return to the normal display mode, select this option again.
When working with multiple displays, the full screen mode will be placed upon the display that contains the
active image. Additionally, all open images will be moved to that display.
To toggle between the currently open images, use the forward and back arrows found along the bottom
edge of the screen. These will cycle between the images that are open within Capture NX 2.
Shortcut
The F key toggles from the full screen
display mode to the normal display mode
The Esc key exits the full screen display
mode
Presentation
The presentation display mode is useful for presenting your images or to work on your images against a
black background. In this mode, the menu bar and taskbar or system dock are hidden. Additionally, all
docked palettes are also hidden. To access a specific palette, move your cursor to the edge of the screen
where that palette typically resides. The palette will slide out from the edge of the screen and become
accessible as long as your mouse is over it. Undocking a palette will cause that palette to always be visible.
To return to the normal display mode, select this option again.
When working with multiple displays, the presentation mode will be placed upon the display that contains
the active image. Additionally, all open images will be moved to that display.
To toggle between the currently open images, use the forward and back arrows found along the bottom
edge of the screen. These will cycle between the images that are currently open within Capture NX 2.
Shortcut
The P key toggles from the presentation
display mode to the normal display mode
The Esc key exits the presentation display
mode
232
Chapter 23 — View Menu | Zoom Out
Hide Palettes
Select this feature to quickly hide all of the palettes in the work area.
Shortcut
Tab key
Chapter 23 — View Menu | Hide Palettes
233
Compare Images
The three different compare images modes of Capture NX 2 provide you with different options for
comparing images. The first two options, Compare in Editor and Compare in Browser, are only
accessible from within the browser and provide you with the ability to compare two different images. The
Compare with Original option is only available while working on an image within the editor and enables
you to compare the current state of the image with the original state of that same image.
The different compare modes are:
Compare in Browser
Use this option to compare between two, three, or four images in the browser. Simply select the images in
the browser and select Compare in Browser from the View menu. This will display as many as four
equally-sized images within the browser side by side.
Double-click on an image to open it within the editor.
To exit the Compare in Browser mode, either reselect the Compare in Browser option from the View
menu or click anywhere outside of the compared images.
234
Chapter 23 — View Menu | Compare Images
Compare in Editor
Use this option to compare two different images in the editor. Select two different images in the browser
and select Compare in Editor from the View menu. This will open both images within the editor and
zoom the images so that they fit within the available space of your screen. While you are comparing these
two images, you can use the zoom tool or the hand tool to zoom in and pan on one image, creating the
identical effect on the other image. This enables you to zoom in and out quickly while comparing details in
similar images. To exit the Compare in Editor mode, simply close one or both images.
Chapter 23 — View Menu | Compare Images
235
Compare with Original
Use this option to compare the original with the current state of the active image within the editor. Select
this option from the View menu when you are working on an image in the editor, and Capture NX 2 will
automatically open a duplicate window of the same image and resize it so that the two windows fit within
the available space of your screen. The image either on the left or on the top, depending on the orientation
of the image and the available space on your screen, represents the original state of the image, while the
image on the right or on the bottom displays the current state of the image. While you are comparing these
two images, you can zoom and pan in one image and the identical effect will occur on the other image. To
exit the Compare With Original mode, simply reselect the Compare With Original option from the
View menu.
236
Chapter 23 — View Menu | Compare Images
Chapter 24
Window Menu
Workspace
The Workspaces sub-menu provides you with an alternative location to select a workspace to use to
arrange Capture NX 2’s palettes and windows. For more information about the different options provided
within the Workspaces sub-menu, please see the “Workspaces” section in Chapter 8, “Interface”.
Reset Workspace
Selecting the Reset Workspace option will reset all of the palettes and windows to their default locations,
based on the current active workspace.
Browser
Selecting the Browser option from the Window menu will display the browser.
Shortcut
Ctrl + Alt + B (Windows)
command + option + B (Macintosh)
Folders
Selecting the Folders option from the Window menu will display the Folders palette.
Metadata
Selecting the Metadata option from the Window menu will display the Metadata palette.
Chapter 24 — Window Menu | Workspace
237
Toolbar
Selecting the Toolbar option from the Window menu will show the toolbar.
Bird’s Eye
Selecting the Bird’s Eye option from the Window menu will display the Bird’s Eye palette.
Edit List
Selecting the Edit List option from the Window menu will display the Edit List palette.
Photo Info
Selecting the Photo Info option from the Window menu will show the Photo Info palette.
Cascade
The Cascade option resizes (if necessary) and arranges all of
the currently opened image windows over the top of one
another so that each window is the same size and all of the
windows appear within the space available on your screen.
Tile
The Tile option resizes and arranges all of the currently
open image windows so that they all appear on the screen
in a grid.
238
Chapter 24 — Window Menu | Toolbar
Chapter 25
Help Menu
Contents
The Contents option brings up the help contents within
your default Internet browser. Navigate through the help to
access the information from this user’s manual in a
searchable format.
Shortcut
F1 key (Windows)
command + ? (Macintosh)
Technical Support
The Technical Support option will launch your Internet browser and provide you with links to the different
technical support options available for Capture NX 2. Follow one of those links to reach the online technical
support options.
A Please note: These options require an Internet connection.
Chapter 25 — Help Menu | Contents
239
Show Welcome Screen
Selecting the Show Welcome Screen option from the
Help menu will display the welcome screen. This is helpful if
you have selected the Don’t show again checkbox and
you want to access the welcome screen again.
Update Capture NX 2
Use this option to check for updates to Capture NX 2. Selecting this option will open the Nikon Message
Center which will automatically check for any available updates and provide you with an option to
download that update.
About Capture NX 2
The About Capture NX 2 option shows you the version
number of Capture NX 2, which can be helpful when
contacting technical support.
A Please note: Within the Macintosh operating system, the
About Capture NX 2 option can be found under the
Capture NX 2 menu.
240
Chapter 25 — Help Menu | Show Welcome Screen
Chapter 26
Appendix: Short-cuts
The Browser
Tool
Windows
Macintosh
Open Browser
Ctrl + Alt + B
command + option + B
Label image(s) with label 1
1
1
Label image(s) with label 2
2
2
Label image(s) with label 3
3
3
Label image(s) with label 4
4
4
Label image(s) with label 5
5
5
Label image(s) with label 6
6
6
Label image(s) with label 7
7
7
Label image(s) with label 8
8
8
Label image(s) with label 9
9
9
Remove label from image(s)
0
0
Rate image(s) with 1 star
Ctrl + 1
command + 1
Rate image(s) with 2 star
Ctrl + 2
command + 2
Rate image(s) with 3 star
Ctrl + 3
command + 3
Rate image(s) with 4 star
Ctrl + 4
command + 4
Rate image(s) with 5 star
Ctrl + 5
command + 5
Clear image(s) rating
Ctrl + 6
command + 6
Filter by Label 1
Shift + 1
shift + 1
Filter by Label 2
Shift + 2
shift + 2
Filter by Label 3
Shift + 3
shift + 3
Filter by Label 4
Shift + 4
shift + 4
Filter by Label 5
Shift + 5
shift + 5
Filter by Label 6
Shift + 6
shift + 6
Filter by Label 7
Shift + 7
shift + 7
Filter by Label 8
Shift + 8
shift + 8
Filter by Label 9
Shift + 9
shift + 9
Filter by Label 0 (Unlabeled)
Shift + 0
shift + 0
Chapter 26 — Appendix: Short-cuts | The Browser
241
Tool
Windows
Macintosh
Filter by Rating: 1 Star
Ctrl + Shift + 1
control + shift + 1
Filter by Rating: 2 Stars
Ctrl + Shift + 2
control + shift + 2
Filter by Rating: 3 Stars
Ctrl + Shift + 3
control + shift + 3
Filter by Rating: 4 Stars
Ctrl + Shift + 4
control + shift + 4
Filter by Rating: 5 Stars
Ctrl + Shift + 5
control + shift + 5
The Toolbar
Tool
Windows
Macintosh
Direct Select Tool
A
A
Hand Tool
H
H
Zoom Tool
Z
Z
Temporary Zoom Tool (in)
Ctrl + Space
command + space
Temporary Zoom Tool (out)
Ctrl + Alt + Space
command + option + space
Crop Tool
C
C
Color Control Point
Ctrl + Shift + A
command + shift + A
Auto Retouch Brush
R
R
Selection Control Point
Ctrl + Shift + C
command + shift + C
Lasso Tool
L
L
Marquee Tool
M
M
Selection Brush
B
B
Decrease brush size
[
[
Increase brush size
]
]
Decrease brush hardness
Shift + [
shift + [
Increase brush hardness
Shift + ]
shift + ]
Gradient Tool
G
G
Fill
Alt + Backspace
option + delete
Photo Info
Tool
Double Threshold (toggle on/off)
242
Chapter 26 — Appendix: Short-cuts | The Toolbar
Windows
Shift + T
Macintosh
shift + T
File Menu
Tool
Windows
Macintosh
Open Image
Ctrl + O
command + O
Open Folder in Browser
Ctrl + Alt + O
command + option + O
Launch Transfer
Ctrl + Alt + T
command + option + T
Save
Ctrl + S
command + S
Save As
Ctrl + Shift + S
command + shift + S
Close
Ctrl +W
command +W
Page Setup
Ctrl + Shift + P
command + shift + P
Print
Ctrl + P
command + P
Exit
Ctrl + Q
command + Q
Edit Menu
Tool
Windows
Macintosh
Undo
Ctrl + Z
command + Z
Redo
Ctrl + Shift + Z
command + shift + Z
Cut
Ctrl + X
command + X
Copy
Ctrl + C
command + C
Paste
Ctrl + V
command + V
Duplicate
Ctrl + D
command + D
Delete
Delete
del
Rename
F2
F2
Select All
Ctrl + A
command + A
Deselect All
Ctrl + Alt + A
command + option + A
Rotate Clockwise 90°
Ctrl + R
command + R
Rotate Counter-Clockwise 90°
Ctrl + Shift + R
command + shift + R
Size / Resolution
Ctrl + Alt + S
command + option + S
Preferences / Options in Capture NX 2 Ctrl + K
command + K
Chapter 26 — Appendix: Short-cuts | File Menu
243
Adjust Menu
Tool
Windows
Macintosh
Levels & Curves
Ctrl + L / Ctrl + M
command + L / command + M
Contrast / Brightness
Ctrl + Alt + Shift + C
command + option + shift + C
LCH
Ctrl + Shift + L
command + shift + L
Color Balance
Ctrl + B
command + B
Saturation
Ctrl + U
command + U
Filter Menu
Tool
Black and White Conversion
Windows
Ctrl + Shift + B
Macintosh
command + shift + B
Batch Menu
Tool
Run Batch Process
Windows
Ctrl + Alt + Shift + B
Macintosh
command + option + shift + B
View
Tool
Windows
Show Selection Overlay (toggle on/off) Shift + O
shift + O
Shift + M
shift + M
Show Selection Mask (toggle on/off)
Show Active Selection (toggle on/off) Ctrl + H
244
Macintosh
command + H
Show Lost Highlights
Shift + H
shift + H
Show Lost Shadows
Shift + S
shift + S
Show Focus Area
Ctrl + Shift + F
command + shift + F
Zoom to 100%
Ctrl + Alt + 0
command + option + 0
Fit to Screen
Ctrl + 0
command + 0
Zoom In
Ctrl + +
command + +
Zoom Out
Ctrl + -
command + -
Full Screen
F
F
Presentation
P
P
Hide Palettes
Tab
tab
Chapter 26 — Appendix: Short-cuts | Adjust Menu
Window Menu
Tool
Windows
Macintosh
Browser Workspace
Alt + 1
option + 1
Metadata Workspace
Alt + 2
option + 2
Muti-purpose Workspace
Alt + 3
option + 3
Edit Workspace
Alt + 4
option + 4
Cycle between open images
Ctrl + Tab
control + tab
Help
Tool
Windows
F1
Contents
Macintosh
command + ?
Apple Specific Shortcut
Tool
Hide application
Windows
—
Macintosh
control + command + H
Chapter 26 — Appendix: Short-cuts | Window Menu
245
246
Chapter 26 — Appendix: Short-cuts
Chapter 27
Appendix: Supplied Color Profiles
Standard RGB Profiles Supplied in Capture NX 2
Profiles with a Gamma Value of 1.8
Apple RGB: NKApple.icm (Windows)/ Nikon Apple RGB 4.0.0.3000 (Macintosh)
This profile is used in desk-top publishing applications and in Adobe Photoshop versions 4.0 or earlier, and
is the typical RGB profile for Macintosh monitors. The corresponding RGB setting in Adobe Photoshop is
“Apple RGB”. This profile is suitable for working with images displayed on the Macintosh.
ColorMatch RGB: MKCMatch.icm (Windows)/ Nikon ColorMatch RGB 4.0.0.3000 (Macintosh)
The ColorMatch profile is native to Radius PressView monitors. It has a wider gamut than Apple RGB, with a
particularly wide area devoted to the reproduction of blues. The corresponding RGB setting in Adobe
Photoshop is “Color Match RGB”.
Profiles with a Gamma Value of 2.2
sRGB: NKsRGB.icm (Windows)/ Nikon sRGB 4.0.0.3001 (Macintosh)
This RGB profile is used in the majority of Windows monitors. It closely resembles the RGB commonly used
in color television, and is also used in the digital television broadcasting system that is on its way to
becoming the industry standard in the United States of America. Software and hardware manufacturers
use it as a default color profile and guarantee operation when it is used. It is also on its way to becoming
the standard for images on the web. This profile is suited to users who plan to use their digital images “as
is”, without editing or printing them. It however suffers from the drawback of a narrow gamut with a
limited area available for reproducing blues. The corresponding RGB setting in Adobe Photoshop 5.0 and
5.5 is “sRGB”, the corresponding setting in Adobe Photoshop 6.0 “sRGB IEC61966-2.1”.
Bruce RGB: NKBruce.icm (Windows)/ Nikon Bruce RGB 4.0.0.3000 (Macintosh)
This color profile expands on the ColorMatch RGB gamut by defining the chromaticity for G as lying
between the values for G in the Adobe RGB and ColorMatch color-space profiles. It was proposed by Bruce
Fraser, who claims that it includes most of the colors in the SWOP CMYK gamut. The R and B used in the
Bruce RGB and Adobe RGB color-space profiles match.
NTSC (1953): NKNTSC.icm (Windows)/ Nikon NTSC (1953) 4.0.0.3000 (Macintosh)
This is the color space for video defined by the National Television Standards Committee (NTSC) in 1953
and used in early color televisions. This color space is also used in some Far-East newspaper and printing
organizations. The corresponding RGB setting in Adobe Photoshop is “NTSC (1953)”.
Chapter 27 — Appendix: Supplied Color Profiles | Standard RGB Profiles Supplied in Capture NX 2
247
Adobe RGB (1998): NKAdobe.icm (Windows)/ Nikon Adobe RGB (1998) 4.0.0.3000 (Macintosh)
A color-space profile defined in Adobe Photoshop 5.0. It has a wider gamut than sRGB and includes the
colors found in most CMYK gamuts, making it suitable for users involved in desktop publishing. The
corresponding RGB setting in Adobe Photoshop 5.0 is “SMPTE-240M”, the corresponding setting in Adobe
Photoshop 5.5 or later “Adobe RGB (1998)”.
CIE RGB: NKCIE.icm (Windows)/ Nikon CIE RGB 4.0.0.3000 (Macintosh)
A video color-space profile established by the Commission Internationale de l’Éclairage (CIE). While it
boasts a fairly wide gamut, it suffers from the drawback that the area devoted to the reproduction of cyan
is relatively small. The corresponding RGB setting in Adobe Photoshop is “CIE RGB”.
Adobe Wide RGB: NKWide.icm (Windows)/ Nikon Adobe Wide RGB 4.0.0.3000 (Macintosh)
This color-space profile, designed by Adobe, incorporates most of the visible colors. This however has the
consequence that most of the colors it can express cannot be reproduced on standard monitors and
printers. The corresponding RGB setting in Adobe Photoshop 5.0 or later is “Adobe Wide RGB”. The gamut
of colors that can be expressed in the above color-space profiles is shown in the following chromaticity (x,
y) graph. The greater the area enclosed by the triangle that represents the color-space profile, the wider its
gamut.
Gamut
248
Chapter 27 — Appendix: Supplied Color Profiles | Standard RGB Profiles Supplied in Capture NX 2
Technical Data for RGB Profiles Supplied with Capture NX 2
The following table shows the gamma values for profiles supplied in Capture NX 2, together with the
chromaticity values for the white point and for red, green, and blue.
White point
Profile
Color
temperature
Apple RGB
6500 K (D65)
Color Match RGB
5000 K (D50)
sRGB
6500 K (D65)
NTSC (1953)
Std
Illuminant C
Bruce RGB
6500 K (D65)
Adobe RGB
(1998)
6500 K (D65)
CIE RGB
Std
Illuminant C
Adobe Wide RGB
5000 K (D50)
Default Windows
monitor
6500 K (D65)
Default
Macintosh
monitor
5000 K (D50)
Value
x 0.3127159
y 0.3290015
x 0.3457029
y 0.3585386
x 0.3127159
y 0.3290015
x 0.3101
y 0.3162
x 0.3127159
y 0.3290015
x 0.3127159
y 0.3290015
x 0.3333333
y 0.3333333
x 0.3457029
y 0.3585386
x 0.3127159
y 0.3290015
Gamma
value
Chromaticity (x, y)
Name
1.8
Trinitron
1.8
P22-EBU
2.2
HDTV
(CCIR 709)
2.2
NTSC (1953)
R
G
B
x 0.625
0.28
0.155
y 0.34
0.595
0.07
x 0.63
0.295
0.155
y 0.34
0.605
0.077
x 0.64
0.3
0.15
y 0.33
0.6
0.06
x 0.67
0.21
0.14
y 0.33
0.71
0.08
x 0.64
0.28
0.15
y 0.33
0.65
0.06
x 0.64
0.21
0.15
y 0.33
0.71
0.06
x 0.735
0.274
0.167
y 0.265
0.717
0.009
2.2
Bruce RGB
2.2
Adobe RGB
(1998)
2.2
CIE RGB
2.2
700/525/
450 nm
x 0.735
0.115
0.157
y 0.265
0.826
0.018
2.2
HDTV
(CCIR 709)
x 0.64
0.3
0.15
y 0.33
0.6
0.06
2.2
Trinitron
x 0.625
0.28
0.155
x 0.3457029
y 0.3585386
Chapter 27 — Appendix: Supplied Color Profiles | Technical Data for RGB Profiles Supplied with Capture NX 2
249
Capture NX 2 and Adobe Photoshop Color Profiles
Capture NX 2 output profile
250
Adobe Photoshop profile
sRGB
(Nikon sRGB 4.0.0.3001)
sRGB
Apple RGB
(Nikon Apple RGB 4.0.0.3000)
Apple RGB
Color Match RGB
(Nikon Color Match RGB 4.0.0.3000)
Color Match RGB
Bruce RGB
(Nikon Bruce RGB 4.0.0.3000)
—
NTSC (1953)
(Nikon NTSC (1953) 4.0.0.3000)
NTSC (1953)
Adobe RGB (1998)
(Nikon Adobe RGB (1998) 4.0.0.3000)
Version 5.5 or later: Adobe RGB (1998)
Earlier versions: SMPTE-240M
CIE RGB
(Nikon CIE RGB 4.0.0.3000)
CIE RGB
Adobe Wide RGB
(Nikon Adobe Wide RGB 4.0.0.3000)
Version 5.5 or later: Wide Gamut RGB
Earlier versions: Adobe Wide RGB
Chapter 27 — Appendix: Supplied Color Profiles | Technical Data for RGB Profiles Supplied with Capture NX 2
Chapter 28
Appendix: Additional Notices
General
❏ Make Backup Copies
Make backup copies of important pictures before processing. Nikon will not be held liable for damages
or lost profits that may result from product malfunction.
C WARNING!:Do not play the Capture NX 2 installer CD on audio CD equipment. Playing a CD-ROM on an audio
CD player could cause hearing loss or damage the equipment.
Nikon Message Center Agent
❏ The Opt-in / Opt-out Dialog
The first time Nikon Message Center starts, a dialog allowing you to opt in or out of Nikon mailings will be
displayed. Select the desired options and click OK to display the Nikon Message Center window.
❏ Downloading Updates
An Internet connection is required to download updates. The user bears all applicable fees charged by
the phone company or Internet service provider.
❏ Dial-up Connections
When using a dial-up connection, be aware that the connection is not automatically terminated when
download is complete. Be sure to terminate the connection manually.
❏ Privacy
Information provided by the user as part of this service will not be given to third parties without the
user’s permission.
Installation
❏ Windows Vista, XP Home Edition/Professional, Mac OS X
When installing, using, or uninstalling Capture NX 2 under the above operating systems, log on to an
account with administrator privileges.
Chapter 28 — Appendix: Additional Notices | General
251
Camera Adjustments
❏ Non-Picture Control Based Adjustments
When images taken with D1-series, D2-series, D100, D200, D80, D70S, D70, D60, D50, D40, or D40X
cameras are edited with the Non-Picture Control option selected in the Camera settings step in the
“Develop” section of the Edit List palette, the sharpening, tone compensation, color mode, and
saturation settings in effect at the time the photograph was taken are marked with an asterisk (no
asterisk will be displayed if “Auto” was selected for sharpening, tone compensation or saturation). Choose
Unchanged for results identical to those obtained with the camera; other settings may not produce the
same results.
White Balance
❏ “Mired”
Any given change in color temperature produces a
Change in Color Temp.
Mired
greater difference in color at low color temperatures than
4000 K – 3000 K = 1000 K
83 mired
it would at higher color temperatures. For example, at a
7000 K – 6000 K = 1000 K
24 mired
color temperature of 6000 K, a change of 1000 K
produces almost no change in color, while a change of
the same amount at 3000 K would produce a large difference in color. Mired, calculated by multiplying
the inverse of the color temperature by 106, is a measure of color temperature that takes such variation
into account, and as such is the unit used in color-temperature compensation filters.
❏ Gain
The values for red and blue gain chosen in the “White Balance” section are multiples of the value set for
gain when the photograph was taken.
❏ Choosing a Value for Gain
Very large and small values for gain can result in a drop in image quality.
252
Chapter 28 — Appendix: Additional Notices | Camera Adjustments
Color Mode
❏ Color Mode
If Use this instead of embedded profile is selected in the “Color Management” tab of the
“Preferences” dialog, the default RGB color profile selected in the “Preferences” dialog will be used as the
working color space for all images, regardless of the mode selected. If Use this instead of embedded
profile is not selected, Adobe RGB will automatically be chosen as the working color space for Mode II
images. The working color space for Mode I, Ia, III, and IIIa images will either be the color space selected
with the camera (D2X and D2XS only) or sRGB (all other cameras). The working color space for NTSC
images (D1 only) will be NTSC. Modes I and Ia, which are adapted to the sRGB color space, are suited to
portraits that will be printed or used “as is” with little or no modification. Mode II is adapted to the Adobe
RGB color space. This color space is capable of expressing a wider gamut of colors than sRGB, making it
the preferred choice for pictures that will be extensively processed or retouched. Modes III and IIIa, which
are adapted to the sRGB color space, are suited to nature or landscape shots that will be printed or used
“as is” with little or no modification.
Exposure Compensation
Highlights in images saved in Nikon Capture 4.4 or earlier with a negative value selected for exposure
compensation may display differently when opened in Capture NX 2.
Chapter 28 — Appendix: Additional Notices | Color Mode
253
Image Dust Off
❏ Cameras That Support Image Dust-Off
The following cameras support Image Dust Off: the D3, D2-series cameras, D300, D1X / D1H (firmware
version 1.10 or later), D200, D100, D80, D70S, D70, D60, D50, D40, and D40X. Image Dust Off is not supported
with COOLPIX cameras, D1 cameras, or with earlier versions of the camera firmware for the D1X and D1H.
❏ Creating Image Dust Off Reference Photos
To create a Image Dust Off reference photo for cameras other than the D3, D2 series, D300, D200, D80,
D70S, D70, D60, D50, D40, or D40X:
1
2
Select a CPU lens
Mount a CPU lens on the camera. It is recommended that you use a lens with a focal length of at
least 50 mm. If you are using a zoom lens, zoom in to the maximum telephoto position.
Adjust the camera settings
Choose the following settings in the order shown below:
a. Sensitivity (ISO equivalency): choose the minimum setting
b. Image quality: choose NEF (RAW)
c. Exposure mode: choose aperture-priority auto (A)
d. Aperture: choose the minimum aperture (largest f/-number)
e. Focus: choose manual focus and set focus to infinity
3
4
Take a photograph
With the lens about 4 inches (10 cm) from a featureless white object, such as a wall, frame the object
so that it fills the viewfinder and take a photograph. The resulting Image Dust Off reference photo
will be recorded as an NEF (RAW) image.
Transfer the photograph to the computer
❏ Creating Image Dust Off Ref Photos (D1-Series and D100 Cameras)
In addition to D3, D2-series, D300, D200, D80, D70S, D70, D60, D50, D40, and D40X cameras, Image Dust
Off ref photos can be taken with the D1X / D1H (firmware version 1.10 or later), and D100. Image Dust Off
ref photos cannot be created with the D1 or with earlier versions of the camera firmware for the D1X and
D1H. Image Dust Off ref photos taken with the D100, D1X, or D1H have the extension “.nef”; do not
change this extension.
❏ Camera Shake
A slight amount of blurring caused by camera shake will not affect Image Dust Off ref photos.
❏ Image Dust Off
Image Dust Off only affects relatively featureless areas of the image.
❏ Reusing Image Dust Off settings
Before pasting or loading Image Dust Off settings for another image, be sure that the image was created
with the same camera used to record the Image Dust Off reference file. If the reference file was created
with a different camera, a warning will be displayed.
254
Chapter 28 — Appendix: Additional Notices | Image Dust Off
Vignette Control
Vignette control cannot be used to correct vignetting caused by PC Nikkor lenses or flash photography.
Opening Images
❏ RAW Images Created with the D1X
The default size for RAW images created with the D1X when opened in the Capture NX 2 editor can be
chosen using the D1X RAW Default option in the “Preferences” dialog. Choose from six megapixels
(3,008 × 1,960 pixels) and ten megapixels (4,016 × 2,616).
❏ TIFF (CMYK) Images
Images saved in TIFF format with CMYK image data cannot be reopened in Capture NX 2.
Chapter 28 — Appendix: Additional Notices | Vignette Control
255
Saving Images
❏ Images Saved in Capture NX 2
Images saved in Capture NX 2 cannot be viewed on a camera.
❏ NEF Files (Nikon Capture 4 or Earlier)
NEF files created with Capture NX 2 cannot be opened in earlier versions of Nikon Capture. Capture NX 2
can however be used to open NEF images created with earlier versions of Nikon Capture.
❏ TIFF CMYK Images
Images saved in TIFF format with CMYK image data cannot be reopened in Capture NX 2.
❏ LZW Compression
File size may sometimes increase when images are saved in TIFF (16- bit) format using LZW compression.
❏ JPEG
Image quality may drop when images are saved in JPEG format. No drop in image quality occurs when
images are saved in NEF.
❏ “Lost” Highlights and Shadows
Before saving images in a format other than NEF, adjust settings to avoid “losing” highlights or shadows in
large areas of the image. Information lost through editing cannot be recovered once an image is saved in
a format other than NEF.
❏ Versions
Versions for NEF images are saved with the image and recalled whenever the image is opened in
Capture NX 2. Versions for JPEG and TIFF images are lost when the image window is closed.
❏ Size / Resolution
A Please note: When an image is saved in NEF format, the entire image will be saved together with information
on resolution and the size and dimensions of the current crop.
❏ File Naming Conventions
Windows: File names may not contain quotes or any of the following characters: “\” “/” “:” “.” “*” “?” “<“ “>”
and “|”.
Macintosh: File names may not contain colons (“:”) and if the file is to be shared with a user of Microsoft
Windows, the file may not contain quotes or any of the following characters: “\” “/” “:” “.” “*” “?” “<“ “>” and
“|”.
Printing
❏ Setting up Your Printer
Note that the printer must be properly connected and the printer drivers correctly installed.
A Please note: If the image will not fit in the printable area at the current printer and paper size settings when
you click the Print button to begin printing, a message will be displayed warning that the image will be
cropped to fit the printable area. Choose a larger paper size or reduce the size of the image using the Size/
Resolution tool.
256
Chapter 28 — Appendix: Additional Notices | Saving Images
Size / Resolution
A Please note: The units for size and resolution are lost when settings are saved using the Save option.
Color Management Preferences (Windows)
❏ Multiple Displays
In a multiple display environment, choose a single profile suited to all displays.
❏ Supported Color Profiles
Capture NX 2 supports only ICC (International Color Consortium) monitor and CMYK profiles. Particular
care should be exercised when choosing a CMYK profile, as the profile supplied by the manufacturer of
your output device may not be an ICC profile.
A Please note: See “Appendix: Supplied Color Profiles” (pg. 247) for more information on the default RGB colorspace profiles.
A Please note: The “NKCMYK.icm” (Windows) and “Nikon CMYK 4.0.0.3000” (Macintosh) CMYK profiles provided
with Capture NX 2 are general-purpose, almost neutral profiles that are not based on a specific ink set, making
them suited for use where output conditions are not known.
Color Management Preferences (Macintosh)
❏ Default Color-Space Profiles
See “Appendix: Supplied Color Profiles” for more information on the default RGB color-space profiles. The
“NKCMYK.icm” (Windows) and “Nikon CMYK 4.0.0.3000” (Macintosh) CMYK profiles provided with
Capture NX 2 are general-purpose, almost neutral profiles that are not based on a specific ink set, making
them suited for use where output conditions are not known.
A Please note: See “Appendix: Supplied Color Profiles” (pg. 247) for more information on the default RGB colorspace profiles.
Chapter 28 — Appendix: Additional Notices | Size / Resolution
257
Levels & Curves
❏ The Levels & Curves and the LCH Tools
The Levels & Curves tool controls the distribution of tones in the red, green, and blue channels and in
the RGB master channel, and provides visual feedback on the amount of tone information lost through
editing. The LCH tool is a better suited to making fine adjustments to luminosity (brightness), color
saturation, and hue; note, however, that changes to these settings may produce results that exceed the
dynamic range of the RGB channels.
❏ Auto Contrast Settings
Auto contrast, shadow, and highlight settings can be adjusted in the “Levels & Sampling” tab of the
“Preferences” dialog.
❏ The Curve Edit Display
Although values for input and output in the Levels & Curves tool range from zero to 255 (eight-bit
precision, familiar to users of other image editing software), the results of any changes to curves are
calculated at a precision of sixteen bits. This allows twelve-bit RAW data to be modified without lowering
the quality of the output.
❏ The Histogram (RAW / 16-Bit TIFF Images Only)
To reduce display times when dealing with large amounts of image data, Capture NX 2 may display a
histogram containing vertical lines.
❏ Sampling White Point or Black Point for the Current Channel
By default, sampling sets the white point or black point for all channels and displays the master channel.
To set the white or black point for the current channel only, sample the image while pressing Ctrl
(Windows) or command (Macintosh). Mid-point cannot be sampled for a single channel; regardless of
the channel currently selected, sampling the image for mid-point always sets the mid point for all
channels and displays the master channel.
❏ Gamma
Gamma (also written “γ”) is a fundamental property of video systems which determines the intensity of
the output signal relative to the input. When calculating gamma, the maximum possible input intensity
is assigned a value of one, and the minimum possible intensity (no input) is assigned a value of zero.
Output is calculated by raising input to a power that is the inverse of the gamma value (output = input
(1/ γ)). In practical terms, raising the gamma value has the same effect as moving the midpoint slider to
the left, raising mid-tone output values and brightening the image while leaving the maximum and
minimum values untouched. Lowering the gamma value has the same effect as moving the midpoint
slider to the right, lowering mid-tone output values and darkening the image. The default value for
gamma is one, which produces a linear curve in which input and output values are the same. Gamma
can be set to any value between 0.05 and 6.00.
❏ Opening NEF Files Saved in Nikon Capture 3.5x or Earlier
In Capture NX 2, changes to color balance apply before changes to curves. In Nikon Capture 3.5 and
earlier, changes to curves were applied before changes to color balance, with the result that settings may
change when the images saved in Nikon Capture 3.5x or earlier are opened in Capture NX 2.
258
Chapter 28 — Appendix: Additional Notices | Levels & Curves
D-Lighting
❏ Digital DEE
D-Lighting replaces the Digital DEE tool available in earlier versions of Nikon Capture. Note that Digital
DEE settings are ignored when joint settings files created with earlier versions of Nikon Capture 4 are
loaded into Capture NX 2, while Digital DEE settings saved with NEF images in earlier versions of
Nikon Capture 4 are lost when these images are opened in Capture NX 2. Digital DEE settings files
(extension “.ndd”) cannot be loaded into Capture NX 2.
❏ Lack of Gradation
D-Lighting will not have the desired effect on images which show complete lack of gradation (i.e., are
completely black or completely white) in shadows or highlights.
Unsharp Mask
❏ Unsharp Mask
Unsharp Mask sharpens edges without affecting color balance by making adjustments only to
luminosity (brightness). The effect is the same as performing Unsharp Mask with the Luminosity
channel selected in the Adobe Photoshop Lab color model. If Unsharp Mask is applied to a single
channel, such as red, the values for ab (chrominance) are used to determine what points in the image are
red, and masking applied to the Luminosity channel for those points only. An intensity of around 20% in
Capture NX 2 is roughly equivalent to 100% in Adobe Photoshop. No sharpening will be applied if
Intensity is set to zero. Intensity must be set to at least 1% if sharpening is to apply.
Color Aberration Control
❏ Lateral Chromatic Aberration
The refractive index of the lens varies slightly with the wavelength (color) of light. This results in changes
in image magnification towards the edges of the image, producing a phenomenon known as lateral (or
transverse) chromatic aberration.
Batch Processing
❏ Before Using Batch Processing
To ensure that desired results are achieved, we recommend processing a test image before beginning
batch processing. Batch processing will apply the same adjustments to each image selected, and cannot
be used to adjust settings separately for each image; instead, the images must be opened one at a time
in order to make separate adjustments manually for each image.
❏ Error Messages
If an invalid file name or other error is identified while creating a batch process, a message will be
displayed. Review the message and adjust the batch settings as directed in the message.
Chapter 28 — Appendix: Additional Notices | D-Lighting
259
260
Chapter 28 — Appendix: Additional Notices
Chapter 29
Index
A
About Capture NX 2 240
Active D-Lighting 136
Activity Toolbar 87
Adjust & Filter pull-down menu
Adjust Menu 181
Adjust Section 143
Apply Checkbox 123
Auto Color Aberration 140
Auto Levels 187
Auto Red-Eye 140
Auto Retouch Brush 108
145
B
Base Mask 144
Batch Menu 125, 217
Batch Process 217
Batch Processing 28
Bird’s Eye 56, 119
Black & White 210
Black & White Conversion 214
Black Control Point 95
Black Point Compensation 41, 64, 168, 208
Blending Mode 147, 214
Browser 55, 57, 67, 68, 70, 78, 160, 237
Browser View Selector 74
Browsing and Opening Images 17
Brush 113
C
Cascade 238
Checkbox 123
Chroma 194
Color Aberration 203, 259
Color Balance 197
Color Booster 198
Color Control Point 103
Color Management 13, 40, 167, 257
Color Mode 134, 253
Color Moiré Reduction 139
Color Picker 100, 106, 155
Color Profile 62, 206, 247, 257
Colorize 214
Compare 234
Compare in Browser 234
Compare in Editor 235
Compare with Original 236
Contrast 138
Contrast / Brightness 186
Contrast and Brightness 132
Contrast: Color Range 213
Copy IPTC Info 226
Copying and Pasting IPTC Information
Crop Tool 93
83
D
Delete Button 123
Develop Section 126
Camera & Lens Corrections 139
Camera Settings 127
Picture Control 131
Quick Fix 137
Direct Select Tool 89
Distortion Control 202
D-Lighting 188, 259
Dock button 65
Docking & Undocking Palettes 65
Double-Threshold 152
Dust Off 139, 254
E
Edit List 56, 121, 238
Edit Menu 169
Enhance Photo 209
Enhancement Controls 145
Exit 168
Exposure Compensation 138, 253
F
Favorite Folders 80
Feather 145
File & Camera Information Section
File Format 19
File Menu 159
Fill / Remove Tools 118
Filter 133
Filter Menu 209
Filtering Tools 70
File Type to Display 71
Filter by Label 70
Filter by Rating 71
Finding Palettes 66
Fisheye Lens 142
81
Chapter 29 — Index
261
Nikon Message Center Agent
Noise 213
Noise Reduction 204
Non-Picture Control 134
Fit Photo 177
Fit to Screen 231
Flip 173
Focus Point 229
Folder 68, 160
Folders 56, 237
Full Screen 232
O
Opacity Mixer 146
Oval Marquee Tool 111
Overlay 45, 228
G
Gaussian Blur 199
Gradient Tools 116
Grain 213
Grid 44, 229
Grip Edge 65
P
Paint / Fill 145
Paste IPTC Info 226
Photo Effects 209
Photo Info 56, 151, 238
Picture Control 131
Polygon Lasso Tool 111
Preferences 37
Cache Settings 46
Color Management 40
Display 44
General 38
Labels 50
Levels & Sampling 42
Manage Settings 51
Workspaces 52
XMP/IPTC Presets 48
Pressure Controls 115
Print 164
Print Information 165
Printing 22, 256
H
Hand Tool 90
Help Menu 239
Hide Palettes 233
High Pass 199
Highlight Protection 138
Highlights 229
Histogram 151
Hue Adjustment 135
I
Image Window 56, 62
Installation 12, 251
Interface 55
IPTC Info 226
IPTC Information Section
82
J
JPEG
Q
20, 33, 160, 162
Quick Adjust 132
Quick Fix 137
L
Label 50, 73
Lasso Tool 111
Launching Capture NX 2 15
LCH 189
Levels & Curves 42, 181
Link Icon 145
Load XMP/IPTC Preset 226
Luminosity 96, 102
R
Rating 73
RAW 9, 33
Rectangle Marquee Tool 111
Red-Eye Control Point 107
Reset Button 123
Resize Control 65
Revert 163
RGB 146, 156
Rotate 173
Rotate Tool 91
Run Batch Process 217
M
Manage Settings 51
Marquee Tools 111
Menu Bar 55
Metadata 237
Minimizing & Maximizing Palettes
N
NEF 19, 33, 161
Neutral Control Point 98
New Step Button 150
262
Chapter 29 — Index
251
65
S
Saturation 138
Saturation / Warmth 198
Saturation and Hue Adjustment
Save 160
JPEG 160, 256
133
NEF 256
TIFF 256
Save As 161
JPEG 162
NEF 161
TIFF 161
Saving Images 256
Selection Brush Tool 113
Selection Control Point 110
Selection Display 227
Selection Gradient Tools 116
Selection Information 143
Selection Overlay 45
Sepia 211
Shadow 230
Shadow Protection 138
Sharpening 132, 135
Short-cuts 241
Show Active Selection 228
Show Focus Point 229
Show Grid 229
Show Lost Highlights 229
Show Lost Shadows 230
Show Selection 100, 106
Show Welcome Screen 240
Show/Hide Triangles 123
Size / Resolution 24, 176, 256, 257
Soft Proof 63
Sorting Tools 72
Straighten 174
Straighten Tool 91
System Requirements 11
Vignette Control
140
W
Warmth 198
Watch Points 153
Watched Folder 219
Welcome Screen 16
White Balance 127, 252
White Control Point 101
Window Menu 237
Workspace Selector 87
Workspaces 52, 57
X
XMP/IPTC Presets
48, 226
Z
Zoom In 231
Zoom Out 232
Zoom Tool 90
T
Technical Support 239
TIFF 19, 33, 161
Tile 238
Tinted 212
Tone Compensation 135
Tone Curve 137
Toning 134
Toning Saturation 134
Tool Options Bar 89
Toolbar 89
U
U Point® Technology 10
Unsharp Mask 200, 259
V
Version 124
View at 100% 231
View Menu 227
Chapter 29 — Index
263
264
Chapter 30
Contact Information
Life-Long Learning
As part of Nikon’s “Life-Long Learning” commitment to ongoing product support and education,
continually-updated information is available on-line at the following sites:
❏ For users in the U.S.A.:
http://www.nikonusa.com
❏ For users in Europe and Africa:
http://www.europe-nikon.com/support
❏ For users in Asia, Oceania and the Middle East:
http://www.nikon-asia.com
Visit these sites to keep up-to-date with the latest product information, tips, answers to frequently-asked
questions (FAQs), and general advice on digital imaging and photography. Additional information may be
avail-able from the Nikon representative in your area. See the URL below for contact information:
http://nikonimaging.com
Chapter 30 — Contact Information | Life-Long Learning
265
No reproduction in any form of this manual, in whole or in part (except for brief quotation in critical articles or
reviews), may be made without written authorization from NIKON CORPORATION.
Printed in Europe
SB8D02(11)
6MS54911-02