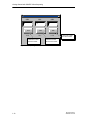
1
Preface, Contents SIMATIC MicroComputing User Manual Getting Started with SIMATIC MicroComputing 1 Product Overview 2 Setting Up the SIMATIC MicroComputing Software 3 Accessing the Process Data with the Data Control 4 User Controls 5 Designing Process Forms with the SoftContainer 6 Elekt Appendices Memory Areas of the S7-200 Controllers A Properties and Methods B Events C Using SIMATIC MicroComputing with DCOM D Guidelines for Programming with SIMATIC MicroComputing E Using the Computing Configuration Tool F Index Edition 08/2000 A5E00077133-01 Safety Guidelines This manual contains notices which you should observe to ensure your own personal safety, as well as to protect the product and connected equipment. These notices are highlighted in the manual by a warning triangle and are marked as follows according to the level of danger: ! ! ! Danger indicates an imminently hazardous situation which, if not avoided, will result in death or serious injury. Warning indicates a potentially hazardous situation which, if not avoided, could result in death or serious injury. Caution used with the safety alert symbol indicates a potentially hazardous situation which, if not avoided, may result in minor or moderate injury. Caution used without the safety alert symbol indicates a potentially hazardous situation which, if not avoided, may result in property damage. Notice NOTICE used without the safety alert symbol indicates a potential situation which, if not avoided, may result in an undesirable result or state. Qualified Personnel The device/system may only be set up and operated in conjunction with this manual. Only qualified personnel should be allowed to install and work on this equipment. Qualified persons are defined as persons who are authorized to commission, to ground, and to tag circuits, equipment, and systems in accordance with established safety practices and standards. Correct Usage Note the following: ! Warning This device and its components may only be used for the applications described in the catalog or the technical description, and only in connection with devices or components from other manufacturers which have been approved or recommended by Siemens. This product can only function correctly and safely if it is transported, stored, set up, and installed correctly, and operated and maintained as recommended. Trademarks Siemensand SIMATIC are registered trademarks of SIEMENS AG. STEP 7 , S7 , and MicroMaster are trademarks of SIEMENS AG. Microsoft, Windows, Windows 95, Windows 98, and Windows NT are registered trademarks of Microsoft Corporation. Underwriters is a registered trademark ofDisclaimer Underwritersof Laboratories, Copyright Siemens AG 2000Laboratories All rights reserved Liability Inc. The reproduction, transmission or use of this document or its contents is not permitted without express written authority. Offenders will be liable for damages. All rights, including rights created by patent grant or registration of a utility model or design, are reserved. Siemens AG Bereich Automatisierungs- und Antriebstechnik Geschaeftsgebiet Industrie-Automatisierungssysteme Postfach 4848, D- 90327 Nuernberg Siemens Aktiengesellschaft We have checked the contents of this manual for agreement with the hardware and software described. Since deviations cannot be precluded entirely, we cannot guarantee full agreement. However, the data in this manual are reviewed regularly and any necessary corrections included in subsequent editions. Suggestions for improvement are welcomed. Siemens AG 2000 Technical data subject to change. A5E00077133 Preface The SIMATIC MicroComputing software uses the ActiveX (also known as OLE) technology of Microsoft to provide you with access to the data provided by your control engine. The MicroComputing software consists of the following: • A set of SIMATIC controls, which are ActiveX or OCX (OLE custom controls) controls for accessing control engines (such as an S7-200 CPU 222) • An OLE container (SoftContainer) for creating process forms with the SIMATIC controls MicroComputing can also operate with an optional SIMATIC S7-200 OPC (OLE for Process Control) Server that allows other OPC applications to access the data stored in the control engine. Note As used by the MicroComputing software, the term “control engine” applies to a processor that manages and manipulates data which is used to control a process or machine, such as an S7-200 CPU 222. Audience This manual is intended for engineers, programmers, and maintenance personnel who have a general knowledge of S7-200 programmable logic controllers (PLCs). Scope of the Manual This manual describes the features and the operation of version 1.0 of the SIMATIC MicroComputing software. How to Use This Manual This manual provides information focused for different audiences. If you plan to use the ActiveX (OCX) controls in a container application such as Visual Basic, refer to Getting Started (Chapter 1) and Product Overview (Chapter 2). To use the controls in Computing SoftContainer, refer to Designing Process Forms with the SoftContainer (Chapter 6). Chapter 3 describes how to install MicroComputing. Chapters 4 and 5 explain how to configure the SIMATIC controls. Appendix B describes the properties and methods for the controls, and Appendix C describes the events. MicroComputing A5E00077133-01 iii Preface Other Manuals You can find information in the online help for the MicroComputing software. For additional information, refer to the following manuals: Title Content S7-200 Programmable This manual provides basic information about installing and Controller System programming the S7-200 Micro PLCs. Use this manual when Manual creating a user program with the STEP 7-Micro/WIN programming software. OPC Server Interface Manual This manual describes the browsable OPC server interface provided with the Computing software. Additional Assistance If you have any questions not answered in this or one of the other SIMATIC manuals, if you need information on ordering additional documentation or equipment, or if you need information on training, please contact your Siemens distributor or sales office. To contact Customer Service for Siemens in North America: • Telephone: – (609) 734-6500 – (609) 734-3530 • E-mail: – [email protected] – [email protected] • Internet: – http://www.aut.sea.siemens.com/winac/ – http://www.aut.sea.siemens.com/simatic/support/index.htm – http://www.ad.siemens.de/support/html_76/index.shtml – http://www.sea.siemens.com/industrialsoftware/ To contact Customer Service for Siemens in Europe: iv • Telephone: ++49 (0) 911 895 7000 • Fax: ++49 (0) 911 895 7001 • E-mail: [email protected] • Internet: http://www.ad.siemens.de/simatic-cs MicroComputing A5E00077133-01 Contents 1 2 3 4 5 6 Getting Started with SIMATIC MicroComputing . . . . . . . . . . . . . . . . . . . . . . . . . . . 1-1 1.1 Overview . . . . . . . . . . . . . . . . . . . . . . . . . . . . . . . . . . . . . . . . . . . . . . . . . . . . . . 1-2 1.2 Creating a Sample I/O Panel . . . . . . . . . . . . . . . . . . . . . . . . . . . . . . . . . . . . . . 1-4 1.3 Connecting Third-Party Controls to a Data Control . . . . . . . . . . . . . . . . . . . 1-13 1.4 Using MicroComputing with Microsoft Excel . . . . . . . . . . . . . . . . . . . . . . . . . 1-16 1.5 Using the SoftContainer with the Sample Program . . . . . . . . . . . . . . . . . . . 1-20 Product Overview . . . . . . . . . . . . . . . . . . . . . . . . . . . . . . . . . . . . . . . . . . . . . . . . . . . . . . 2-1 2.1 Product Overview . . . . . . . . . . . . . . . . . . . . . . . . . . . . . . . . . . . . . . . . . . . . . . . 2-2 2.2 Using an ActiveX Control to Access the Process Data . . . . . . . . . . . . . . . . 2-4 Setting Up the SIMATIC MicroComputing Software . . . . . . . . . . . . . . . . . . . . . . . . 3-1 3.1 Installing and Uninstalling the MicroComputing Software . . . . . . . . . . . . . 3-2 3.2 Authorization .................................................. 3-4 3.3 Connecting MicroComputing to a Communications Processor (CP) Card 3-6 Accessing the Process Data with the Data Control . . . . . . . . . . . . . . . . . . . . . . . . 4-1 4.1 Connecting the SIMATIC Controls to the Control Engine . . . . . . . . . . . . . . 4-2 4.2 Configuring the Connection Properties for the Data Control . . . . . . . . . . . 4-3 4.3 Selecting the Control Engine for the Data Control . . . . . . . . . . . . . . . . . . . 4-4 4.4 Connecting the ActiveX Controls to the Control Engine . . . . . . . . . . . . . . . 4-6 4.5 Filtering the Properties for the ActiveX Controls . . . . . . . . . . . . . . . . . . . . . 4-9 4.6 Configuring Custom Events . . . . . . . . . . . . . . . . . . . . . . . . . . . . . . . . . . . . . . . 4-11 4.7 Creating a Connection Table . . . . . . . . . . . . . . . . . . . . . . . . . . . . . . . . . . . . . . 4-12 4.8 Sample Program for Responding to Events ........................ 4-15 4.9 Sample Programs for Reading and Writing Data . . . . . . . . . . . . . . . . . . . . 4-20 4.10 Sample Program for Reading and Writing Boolean Data . . . . . . . . . . . . . . 4-25 4.11 Properties, Methods, and Events of the Data Control . . . . . . . . . . . . . . . . 4-26 User Controls . . . . . . . . . . . . . . . . . . . . . . . . . . . . . . . . . . . . . . . . . . . . . . . . . . . . . . . . . . 5-1 5.1 Connecting the User Controls to the Process Data . . . . . . . . . . . . . . . . . . 5-2 5.2 Configuring the Property Pages of the Button Control . . . . . . . . . . . . . . . . 5-4 5.3 Configuring the Property Pages of the Edit Control . . . . . . . . . . . . . . . . . . 5-12 5.4 Configuring the Property Pages of the Label Control ................ 5-22 5.5 Configuring the Property Pages of the Slider Control ................ 5-28 Designing Process Forms with the SoftContainer . . . . . . . . . . . . . . . . . . . . . . . . . 6-1 6.1 6-2 MicroComputing A5E00077133-01 Starting the SoftContainer ....................................... v Contents A B vi 6.2 Creating a Process Form . . . . . . . . . . . . . . . . . . . . . . . . . . . . . . . . . . . . . . . . 6-4 6.3 Switching from Design Mode to Run Mode . . . . . . . . . . . . . . . . . . . . . . . . . . 6-6 6.4 Saving Your Process Form . . . . . . . . . . . . . . . . . . . . . . . . . . . . . . . . . . . . . . . 6-8 Memory Areas of the S7-200 Controllers . . . . . . . . . . . . . . . . . . . . . . . . . . . . . . . . . A-1 A.1 Memory Areas of S7-200 Controllers . . . . . . . . . . . . . . . . . . . . . . . . . . . . . . A-2 A.2 Accessing the Data in the S7-200 Micro PLC . . . . . . . . . . . . . . . . . . . . . . Using the Memory Address to Access Data . . . . . . . . . . . . . . . . . . . . . . . . . . . . . . . . . A-4 A-4 A.3 Address Descriptions of the Memory Areas . . . . . . . . . . . . . . . . . . . . . . . . . Addressing the Process-Image Input Register (I) . . . . . . . . . . . . . . . . . . . . . . . . . . . . . Addressing the Process-Image Output Register (Q) . . . . . . . . . . . . . . . . . . . . . . . . . . Addressing the Analog Inputs (AI) . . . . . . . . . . . . . . . . . . . . . . . . . . . . . . . . . . . . . . . . . . Addressing the Analog Outputs (AQ) . . . . . . . . . . . . . . . . . . . . . . . . . . . . . . . . . . . . . . . Addressing the Variable (V) Memory Area . . . . . . . . . . . . . . . . . . . . . . . . . . . . . . . . . . . Addressing the Bit Memory (M) Area . . . . . . . . . . . . . . . . . . . . . . . . . . . . . . . . . . . . . . . Addressing the Special Memory (SM) Bits .............................. Addressing the Timer (T) Memory Area . . . . . . . . . . . . . . . . . . . . . . . . . . . . . . . . . . . . . Addressing the Counter (C) Memory Area . . . . . . . . . . . . . . . . . . . . . . . . . . . . . . . . . . . Addressing the High-Speed Counters (HC) . . . . . . . . . . . . . . . . . . . . . . . . . . . . . . . . . . Addressing the Sequence Control Relay (S) Memory Area . . . . . . . . . . . . . . . . . . . . A-8 A-8 A-8 A-8 A-9 A-9 A-9 A-10 A-10 A-11 A-12 A-12 Properties and Methods . . . . . . . . . . . . . . . . . . . . . . . . . . . . . . . . . . . . . . . . . . . . . . . . . B-1 B.1 AboutBox Method .............................................. B-1 B.2 Activated Property . . . . . . . . . . . . . . . . . . . . . . . . . . . . . . . . . . . . . . . . . . . . . . B-1 B.3 Alignment Property ............................................. B-2 B.4 Appearance Property ........................................... B-3 B.5 AutoConnect Property .......................................... B-3 B.6 AutoConnectTimeout Property ................................... B-4 B.7 BackColor Property . . . . . . . . . . . . . . . . . . . . . . . . . . . . . . . . . . . . . . . . . . . . . B-5 B.8 BorderStyle Property ........................................... B-5 B.9 Caption Property ............................................... B-6 B.10 Connect Method ............................................... B-7 B.11 ConnectName Method . . . . . . . . . . . . . . . . . . . . . . . . . . . . . . . . . . . . . . . . . . . B-7 B.12 ConnectObject Method ......................................... B-9 B.13 ControlEngine Property ......................................... B-10 B.14 DataFormat Property ........................................... B-10 B.15 DefaultDeadband Property B.16 DefaultUpdateRate Property B.17 Direction Property ...................................... B-12 ..................................... B-12 .............................................. B-13 B.18 Disconnect Method . . . . . . . . . . . . . . . . . . . . . . . . . . . . . . . . . . . . . . . . . . . . . B-13 B.19 DisplayValue Property B-14 .......................................... MicroComputing A5E00077133-01 Contents B.20 Enabled Property .............................................. B-15 B.21 Factor Property . . . . . . . . . . . . . . . . . . . . . . . . . . . . . . . . . . . . . . . . . . . . . . . . . B-15 B.22 FalseCaption Property .......................................... B-16 B.23 FalseColor Property ............................................ B-17 B.24 FalsePicture Property . . . . . . . . . . . . . . . . . . . . . . . . . . . . . . . . . . . . . . . . . . . B-17 B.25 Font Property . . . . . . . . . . . . . . . . . . . . . . . . . . . . . . . . . . . . . . . . . . . . . . . . . . B-18 B.26 ForeColor Property ............................................. B-18 B.27 KnobHeight Property ........................................... B-19 B.28 KnobPicture Property ........................................... B-19 B.29 KnobWidth Property ............................................ B-19 B.30 LargeChange Property . . . . . . . . . . . . . . . . . . . . . . . . . . . . . . . . . . . . . . . . . . B-20 B.31 Locked Property ............................................... B-20 B.32 Max and Min Properties . . . . . . . . . . . . . . . . . . . . . . . . . . . . . . . . . . . . . . . . . B-21 B.33 MultipleEngines Property . . . . . . . . . . . . . . . . . . . . . . . . . . . . . . . . . . . . . . . . B-22 B.34 Offset Property ................................................ B-22 B.35 PCName Property . . . . . . . . . . . . . . . . . . . . . . . . . . . . . . . . . . . . . . . . . . . . . . B-23 B.36 Picture Property . . . . . . . . . . . . . . . . . . . . . . . . . . . . . . . . . . . . . . . . . . . . . . . . B-24 B.37 Precision Property . . . . . . . . . . . . . . . . . . . . . . . . . . . . . . . . . . . . . . . . . . . . . . B-24 B.38 PropertyChangedName Method . . . . . . . . . . . . . . . . . . . . . . . . . . . . . . . . . . B-25 B.39 PropertyChangedObject Method ................................. B-25 B.40 PushButton Property ........................................... B-26 B.41 RawMax and RawMin Properties ................................. B-27 B.42 ReadMultiVariables Method . . . . . . . . . . . . . . . . . . . . . . . . . . . . . . . . . . . . . . B-27 B.43 ReadVariable Method . . . . . . . . . . . . . . . . . . . . . . . . . . . . . . . . . . . . . . . . . . . B-28 B.44 ScaleMode Property . . . . . . . . . . . . . . . . . . . . . . . . . . . . . . . . . . . . . . . . . . . . B-29 B.45 ShowErrorBoxes Property . . . . . . . . . . . . . . . . . . . . . . . . . . . . . . . . . . . . . . . B-30 B.46 ShowMinMax Property . . . . . . . . . . . . . . . . . . . . . . . . . . . . . . . . . . . . . . . . . . B-30 B.47 SmallChange Property .......................................... B-31 B.48 StretchMode Property .......................................... B-32 B.49 Style Property ................................................. B-33 B.50 Text Property .................................................. B-33 B.51 Ticks Property ................................................. B-34 B.52 TrueCaption Property B.53 TrueColor Property B.54 MicroComputing A5E00077133-01 ........................................... B-34 ............................................. B-34 TruePicture Property . . . . . . . . . . . . . . . . . . . . . . . . . . . . . . . . . . . . . . . . . . . . B-35 vii Contents C D E F B.55 Value Property . . . . . . . . . . . . . . . . . . . . . . . . . . . . . . . . . . . . . . . . . . . . . . . . . B-36 B.56 WriteMode Property ............................................ B-37 B.57 WriteNow Method .............................................. B-38 B.58 WriteMultiVariables Method . . . . . . . . . . . . . . . . . . . . . . . . . . . . . . . . . . . . . . B-38 B.59 WriteVariable Method ........................................... B-39 B.60 Zeropad Property .............................................. B-40 Events . . . . . . . . . . . . . . . . . . . . . . . . . . . . . . . . . . . . . . . . . . . . . . . . . . . . . . . . . . . . . . . . . C-1 C.1 Change Event . . . . . . . . . . . . . . . . . . . . . . . . . . . . . . . . . . . . . . . . . . . . . . . . . . C-1 C.2 Click Event . . . . . . . . . . . . . . . . . . . . . . . . . . . . . . . . . . . . . . . . . . . . . . . . . . . . . C-1 C.3 ConnectionError Event . . . . . . . . . . . . . . . . . . . . . . . . . . . . . . . . . . . . . . . . . . . C-2 C.4 DblClick Event . . . . . . . . . . . . . . . . . . . . . . . . . . . . . . . . . . . . . . . . . . . . . . . . . . C-2 C.5 Error Event . . . . . . . . . . . . . . . . . . . . . . . . . . . . . . . . . . . . . . . . . . . . . . . . . . . . . C-3 C.6 KeyDown Event . . . . . . . . . . . . . . . . . . . . . . . . . . . . . . . . . . . . . . . . . . . . . . . . . C-4 C.7 KeyPress Event . . . . . . . . . . . . . . . . . . . . . . . . . . . . . . . . . . . . . . . . . . . . . . . . . C-5 C.8 KeyUp Event . . . . . . . . . . . . . . . . . . . . . . . . . . . . . . . . . . . . . . . . . . . . . . . . . . . C-5 C.9 MouseDown Event . . . . . . . . . . . . . . . . . . . . . . . . . . . . . . . . . . . . . . . . . . . . . . C-7 C.10 MouseMove Event . . . . . . . . . . . . . . . . . . . . . . . . . . . . . . . . . . . . . . . . . . . . . . C-8 C.11 MouseUp Event . . . . . . . . . . . . . . . . . . . . . . . . . . . . . . . . . . . . . . . . . . . . . . . . . C-9 C.12 ValueChanged Event . . . . . . . . . . . . . . . . . . . . . . . . . . . . . . . . . . . . . . . . . . . . C-10 Using SIMATIC MicroComputing with DCOM . . . . . . . . . . . . . . . . . . . . . . . . . . . . . D-1 D.1 Using DCOM to Provide Remote Access . . . . . . . . . . . . . . . . . . . . . . . . . . . D-2 D.2 Configuring the Permissions for the Server Computer . . . . . . . . . . . . . . . . D-3 D.3 Configuring the Permissions for the Client Computer . . . . . . . . . . . . . . . . . D-13 D.4 Troubleshooting . . . . . . . . . . . . . . . . . . . . . . . . . . . . . . . . . . . . . . . . . . . . . . . . . D-19 Guidelines for Programming with SIMATIC MicroComputing . . . . . . . . . . . . . . E-1 E.1 Guidelines for Third-Party Containers . . . . . . . . . . . . . . . . . . . . . . . . . . . . . . E-2 E.2 Programming Guidelines . . . . . . . . . . . . . . . . . . . . . . . . . . . . . . . . . . . . . . . . . E-3 E.3 Guidelines for Creating Custom ActiveX Controls . . . . . . . . . . . . . . . . . . . . E-5 E.4 Using a Custom ActiveX Control with a Data Control . . . . . . . . . . . . . . . . . E-6 E.5 Known Problems for MicroComputing . . . . . . . . . . . . . . . . . . . . . . . . . . . . . . E-9 Using the Computing Configuration Tool . . . . . . . . . . . . . . . . . . . . . . . . . . . . . . . . . F-1 F.1 Selecting the Language . . . . . . . . . . . . . . . . . . . . . . . . . . . . . . . . . . . . . . . . . . F-2 F.2 Accessing the PG/PC Interface . . . . . . . . . . . . . . . . . . . . . . . . . . . . . . . . . . . F-3 F.3 Connecting to Your Process with the Optional OPC Server . . . . . . . . . . . . F-4 Index . . . . . . . . . . . . . . . . . . . . . . . . . . . . . . . . . . . . . . . . . . . . . . . . . . . . . . . . . . . . . . . . Index-1 viii MicroComputing A5E00077133-01 Getting Started with SIMATIC MicroComputing 1 Chapter Overview The SIMATIC MicroComputing software provides you with a variety of ways to access and to use data from a control engine, such as an S7-200 CPU 222. This chapter provides some easy programming examples to help you become familiar with the power and flexibility that can be achieved by using the ActiveX controls provided by SIMATIC MicroComputing. You can find the sample programs in the following directory on the drive where you installed the MicroComputing software: [C:]\Siemens\WinAC\Examples ! Warning After you assign a variable to the Value property of a SIMATIC or a third-party ActiveX control, the control is able to access process data. When you change the value that is displayed in the control, you are changing the value in the actual process. Do not connect this example to a control engine that is connected to equipment. Altering process data can cause unpredictable process operation, and unpredictable process operation could result in death or serious injury to personnel, and/or damage to equipment. Exercise caution to ensure that you do not access any data that could cause process equipment to operate erratically. Always install a physical emergency stop circuit for your machine or process. Section MicroComputing A5E00077133-01 Description Page 1.1 Overview 1-2 1.2 Creating a Sample I/O Panel 1-4 1.3 Connecting Third-Party Controls to a Data Control 1-13 1.4 Using MicroComputing with Microsoft Excel 1-16 1.5 Using the SoftContainer with the Sample Program 1-20 1-1 Getting Started with SIMATIC MicroComputing 1.1 Overview MicroComputing allows you not only to access the data in the control engine, but also allows you flexibility in how you access the data and what you can do with the data. The examples in this chapter show some of the ways you can use the ActiveX controls provided by MicroComputing. As shown in Figure 1-1, this chapter provides samples of subroutines for the following applications: • Create a user interface: You can use a SIMATIC control with a third-party container (such as Microsoft’s Visual Basic) to create an I/O interface panel. See Section 1.2. (You can use this panel to test the other sample programs in this chapter.) • Use a standard ActiveX control: You can also use a standard control (such as a Label control from Visual Basic) to access data in the control engine. See Section 1.3. • Load data from the control engine into standard software packages: You can load data into a Microsoft Office application (such as Microsoft’s Excel). See Section 1.4. Instead of using the third-party container (Section 1.2), you can use the SoftContainer provided by MicroComputing to create a simple I/O panel. See Section 1.5. You can find the sample programs in the following directory on the drive where you installed the MicroComputing software: [C:]\Siemens\WinAC\Examples I/O Panel Control engine (S7-200) Interface Panel QB0 Example (Section 1.2). 0 QB1 0 QB2 0 OFF OFF OFF I 0.0 I 0.1 I 0.2 Standard ActiveX Control Label Control Example (Section 1.3) Excel Third-party Application Example (Section 1.4) Figure 1-1 1-2 Using MicroComputing to Access Data in the Control Engine MicroComputing A5E00077133-01 Getting Started with SIMATIC MicroComputing Sample Program Used with the Application Examples Figure 1-2 shows the sample program used by the S7-200 application example. The program uses the following logic: • If Input bit 0.0 (I 0.0) is on, the program increments a value stored in MB1 and moves the new value to QB0. • If Input bit 0.1 (I 0.1) is on, the program decrements a value stored in MB3 and moves the new value to QB1. • If Input bit 0.2 (I 0.2) is on, the program increments a value stored in MB5 and moves the new value to QB2. Use STEP 7–Micro/WIN to create and download this program to the control engine. OB1 : Sample program “Counters” for S7-200 The application examples in the Getting Started chapter use this program. Create a STEP 7–Micro/WIN project, enter the program, and download it to the control engine. Network 1 : Add 1 If I0.0 is ON, increment MW0 by 1 and transfer the output to QB0 ADD_I I0.0 EN ENO MW0 IN1 OUT +1 IN2 MOV_B MW0 MB1 EN ENO IN OUT M6.0 QB0 Network 2 : Subtract 2 If I0.1 is ON, decrement MW2 by 2 and transfer the output to QB1 SUB_I I0.1 EN ENO MW2 IN1 OUT –2 IN2 MOV_B MW2 MB3 EN ENO IN OUT M6.1 QB1 Network 3 : Add 3 If I0.2 is ON, increment MW4 by 3 and transfer the output to QB2 ADD_I I0.2 Figure 1-2 MicroComputing A5E00077133-01 EN ENO MW4 IN1 OUT +3 IN2 MOV_B MW4 MB5 EN ENO IN OUT M6.2 QB2 Sample Program (“Counters”) for the Application Examples for the S7-200 1-3 Getting Started with SIMATIC MicroComputing 1.2 Creating a Sample I/O Panel The Data control allows any ActiveX container (such as Visual Basic 5.0) to access data in the control engine. You can use the SIMATIC controls provided by MicroComputing with Visual Basic to create a simple I/O panel that interacts with a program running on a control engine. To create this sample application, you need the following items: • Microsoft Visual Basic 5 or higher • SIMATIC controls from MicroComputing • Control engine (such as an S7-200 CPU 222) • Sample program (see Section 1.1) • STEP 7–Micro/Win (to download the program to the S7-200) ! Warning Using the timer function improperly or using breakpoints in Visual Basic with MicroComputing can cause problems that could potentially cause your computer or application to crash or lock up. Depending on the configuration, this could cause the application to lose communication with the control engine. This could cause unpredictable process operation, which could result in death or serious injury to personnel, and/or damage to equipment. Always install a physical emergency stop circuit for your machine or process. Concerning VB timers: The Timer function in Visual Basic version 5 allows a timer to interrupt code in progress within the same thread, which can cause problems with potentially serious consequences. If you use VB timers with MicroComputing, observe the following guidelines: 1-4 Always kill (disable) the timers in the Form_Unload subroutine. Otherwise, a timer can trigger an event while the VB program is shutting down; this condition could cause your computer or your application to crash, lock up, or to continue running invisibly. If you start your timer in the Form_Load subroutine, the timer event could occur before the other objects have been instantiated. In order to ensure that the objects have been properly instantiated, always start a timer in the Form_Load subroutine with a large interval (such as 1 or 2 seconds) to allow the objects to be properly instantiated. Subsequent timer intervals can be set to shorter intervals. MicroComputing A5E00077133-01 Getting Started with SIMATIC MicroComputing Inserting the SIMATIC Controls into the Toolbox for Visual Basic Use the following procedure to create the sample I/O panel: 1. Open a standard Visual Basic project: – Select the File > New Project menu command to display the New Project dialog box. – Select the Standard EXE icon and click on the OK button. 2. Select the Project > Components menu command to display the Components dialog box. 3. As shown in Figure 1-3, select the following SIMATIC controls in the Components dialog box: – Data control (Siemens SIMATIC Data control) – User controls (Siemens SIMATIC User Controls). The icons for Button, Label, Slider, and Edit appear in the Icon tab. 4. Click on the Apply button. The SIMATIC controls that you selected appear in the toolbox for Visual Basic. Click on the OK button to close the Components dialog box. Components Controls Designers Insertable Objects • Click on the Data control and the User controls. Siemens S7Wcinbx Control Siemens SIMATIC Data Control • Click on the Apply button to add the control to the VB toolbox. Siemens SIMATIC User Controls Third-Party Control... Third-Party Control... Third-Party Control... Third-Party Control... • Click on the OK button to close the Components dialog box. Browse... Selected Items Only Siemens SIMATIC Data Control Location: C:\SIEMENS\Common\OCX\S7WCPC3X.OCX OK Figure 1-3 MicroComputing A5E00077133-01 Cancel Apply Adding SIMATIC Controls to the VB Toolbox 1-5 Getting Started with SIMATIC MicroComputing Creating the VB Form for the Sample I/O Panel 1. Insert one Data control, three Edit controls and three Button controls onto the Visual Basic form. See Figure 1-4. 2. Create standard VB label controls to indicate the address that you have assigned for each of the controls. See Figure 1-4. I/O Panel QB0 QB1 0 0 OFF I 0.0 QB2 0 OFF I 0.1 VB Label controls Edit controls OFF I 0.2 Button controls VB Label controls Data control Figure 1-4 Sample I/O Panel Created in Visual Basic Assigning Variables in the Control Engine to the SIMATIC Controls In order to connect the SIMATIC or third-party controls to the process data in the control engine, you must assign a variable (memory location in the control engine) to the Value property (or to other properties) for each control. To assign variables in the control engine, you use the Connection tab of the Properties dialog box for the Data control. You cannot assign a variable to the Value property of a control by using the property list of the control itself. Use the following procedure to assign variables to the SIMATIC controls: 1. Select the Data control and click the right mouse button to bring up the pop-up menu. From the pop-up menu, select the Properties menu command to display the Properties dialog box for the Data control. 2. Select the Connections tab. Click on the plus (+) symbol to expand the list of controls. 1-6 MicroComputing A5E00077133-01 Getting Started with SIMATIC MicroComputing 3. As shown in Figure 1-5, select the control and click on its plus (+) symbol to expand its properties list. Siemens SIMATIC DataControl Properties General Engine Connections Controls: Events Name Assigned Variable: Button1 Alignment Appearance Enabled Border Style FalseCaption FalseColor FalsePicture Font ForeColor Locked PushButton StretchMode Style TrueCaption TrueColor TruePicture Value Add... Figure 1-5 Delete Browse... Update rate (ms): 100 Dead ban 0 Automati Filter... Apply OK Cancel Apply Help Displaying the Expanded List of Properties 4. As shown in Figure 1-6, click on the Filter button. Siemens SIMATIC DataControl Properties General Engine Connections Controls: Events Name Assigned Variable: S7Soft1 Click on the Filter button to select the properties to be displayed. S7Data1 Button1 Alignment Appearance Enabled Border Style FalseCaption FalseColor FalsePicture Font ForeColor Locked PushButton Add... Delete MicroComputing A5E00077133-01 100 Dead band: 0 Automatic write mode: Filter... OK Figure 1-6 Update rate (ms): Apply filter to properties Cancel Apply Help Using the Filter Button 1-7 Getting Started with SIMATIC MicroComputing 5. As shown in Figure 1-7, click on the Add button to enter additional properties to display. Use the Edit button to correct entries and the Delete button to remove entries. 6. As shown in Figure 1-8, select the “Apply filter to properties” check box to display only the properties listed in the filter. You can use the check box to toggle the filter on and off. Siemens SIMATIC DataControl Properties General Engine Controls: Connections Name Property Filter S7Soft1 Visible Properties: S7Data1 Click on the Add button to add a property to the filter. Enabled Button1 Alig App Ena Bor Fal Fal Fal Fon F t or Loc Pu Value 100 0 Add... Edit Delete mode: OK Add... OK Figure 1-7 Events Cancel Cancel properties Apply Help Adding Properties to the Filter Siemens SIMATIC DataControl Properties General Engine Connections Controls: Events Name Assigned Variable: S7Soft1 S7Data1 Browse... Button1 Enabled Value Button2 Update rate (m Dead band: Edit1 Edit1 Add... Delete Automatic write mode: Filter... OK Figure 1-8 1-8 Click on the check box to toggle the property filter on and off. Apply filter to properties Cancel Apply Help Applying the Filter to the Property List MicroComputing A5E00077133-01 Getting Started with SIMATIC MicroComputing 7. As shown in Figure 1-9, select the Value property of the control. Siemens SIMATIC DataControl Properties General Engine Connections Controls: Select the Value property. Events N Assigned Variable: S7Soft1 i0.0 S7Data1 Browse... Button1 Enabled Value Button2 Update rat Dead band Edit1 Edit1 Add... Automatic write mode Delete Filter... OK Figure 1-9 Enter the memory location of the variable to be assigned to that property. Apply filter to properties Cancel Apply Help Assigning a Variable in the Control Engine to a Property in a Control 8. Refer to Table 1-1 to assign the variables (memory addresses in the control engine) to the SIMATIC controls. 9. Click on the Apply button to enter the assigned variables. Table 1-1 Assigning Sample Addresses to the SIMATIC Controls Control Address Description Edit1 QB0 Output value of first counter Edit2 QB1 Output value of second counter Edit3 QB2 Output value of third counter Button1 I 0.0 Enable bit for first counter Button2 I 0.1 Enable bit for second counter Button3 I 0.2 Enable bit for third counter MicroComputing A5E00077133-01 1-9 Getting Started with SIMATIC MicroComputing Selecting a Control Engine Use the following procedure to configure the Data control for communicating with the control engine: 1. Select the Engine tab to configure the control engine. See Figure 1-10. 2. Select the Direct Connect option and enter the control engine (for example, wcS7=2). Click on the Apply button to enter the data, and then click on the OK button to close the dialog box. Siemens SIMATIC DataControl Properties General Engine Connections Events Name Select the option for a direct connection. Connect via Tag Source Tag Source Browse Direct Connect Enter wcS7=2 as the type of control engine. PC Name Control Engine wcS7=2 OK Figure 1-10 1-10 Cancel Apply Help Connecting the Data Control to a Control Engine MicroComputing A5E00077133-01 Getting Started with SIMATIC MicroComputing Operating the I/O Panel Program Before you run the I/O Panel program, make certain that the control engine is running the sample program “Counters”, and that you have configured the access point “Computing” ( see Section 3.3) and selected the control engine in the Data control (Figure 1-10). Note If the S7-200 control engine is not in Run mode, the Data control cannot make a connection. Before setting Visual Basic into Run mode, ensure that the control engine is running. 1. Select the File > Save Project menu command to save the program before switching Visual Basic from Design mode to Run mode. 2. Click on the Start icon or select the Run > Start menu command to switch Visual Basic from Design mode to Run mode to run the I/O panel program. 3. Click on the Button control for I 0.0 to start the first counter. See Figure 1-11. – The Button control changes color to show the state of I 0.0. – The Edit control for QB0 displays the counter value. 4. Click on the Button control for I 0.1 to start the second counter. See Figure 1-11. – The Button control changes color to show the state of PI 0.1. – The Edit control for QB1 displays the counter value. 5. Click on the Button control for I 0.2 to start the third counter. See Figure 1-11. – The Button control changes color to show the state of I 0.2. – The Edit control for QB2 displays the counter value. MicroComputing A5E00077133-01 1-11 Getting Started with SIMATIC MicroComputing I/O Panel QB0 QB1 0 0 OFF I 0.0 Figure 1-11 0 OFF OFF I 0.1 Click here to start the first counter. 1-12 QB2 I 0.2 Click here to start the third counter. Click here to start the second counter. Operating the Sample I/O Panel MicroComputing A5E00077133-01 Getting Started with SIMATIC MicroComputing 1.3 Connecting Third-Party Controls to a Data Control You can use the Data control to connect any ActiveX control (such as a VB Label control) to data in the control engine. To create this sample application, you need the following items: • Microsoft Visual Basic 5 or higher • Data control from MicroComputing • Control engine (such as an S7-200 CPU 222) • Sample program (see Section 1.1) • STEP 7–Micro/WIN (to download the program to the control engine and to turn on the input bits of the sample program) You can also use the I/O Panel application to turn on the input bits of the sample program running in the control engine. See Section 1.2 for information about the I/O Panel application. Creating a VB label that Displays a Value in the Control Engine Use the following procedure to connect a Data control with a Label control: 1. Open a standard Visual Basic project: Use the File > New Project menu command to display the New Project dialog box, then select the Standard EXE icon and click on the Open button. 2. Add the Data control to the VB toolbox. For information about adding controls to the VB toolbox, see Section 1.1 and Figure 1-12. Components Controls Designers Insertable Objects Siemens SIMATIC Data Control Siemens SIMATIC User Controls Third-Party Control... Third-Party Control... Third-Party Control... Third-Party Control... Third-Party Control... Third-Party Control... Third-Party Control... • Click on the Data control. • Click on the Apply button to add the control to the VB toolbox. • Click on the OK button to close the Components dialog box. Browse... Selected Items Only Siemens SIMATIC Data Control Location: C:\SIEMENS\Common\OCX\S7WCDATX.OCX OK Figure 1-12 MicroComputing A5E00077133-01 Cancel Apply Adding the Data Control to the Visual Basic Toolbox 1-13 Getting Started with SIMATIC MicroComputing 3. Insert a Data control onto the VB form. (For information about inserting controls onto the VB form, see Section 1.1.) 4. Insert a VB label on your form. Change the Border Style property to 1–Fixed Single. 5. Select the Data control and click the right mouse button to bring up the pop-up menu. From the pop-up menu, select Properties to display the Properties dialog box for the Data control. 6. From the Properties dialog box, select the Connections tab. Click on the plus (+) symbol to expand the list of controls. 7. Select the Label1 control and click on its plus (+) symbol to expand its properties list. 8. Select the Caption property and enter QB0 in the Assigned Variable field. See Figure 1-13. Click on the Apply button to enter the data. Siemens SIMATIC DataControl Properties General Engine Connections Controls: qb0 Browse... Alignment Appearance BackColor BorderStyle Caption Enabled Font ForeColor Delete 1-14 Update rate (ms): 100 Dead ban 0 Automati Filter... OK Figure 1-13 Name Assigned Variable: Label1 Add... Events Apply Cancel Select the Caption property and enter the QB0 in the Assigned Variable field. Apply Help Assigning a Variable to the Caption Property of a VB Label Control MicroComputing A5E00077133-01 Getting Started with SIMATIC MicroComputing Running the Sample Program for the Label Control Save the program before switching Visual Basic from Design mode to Run mode. When the sample program runs, the caption of the label displays the value of QB0 in the control engine. Note If the control engine is not in Run mode, the Data control cannot make a connection. Before setting Visual Basic into Run mode, ensure that the control engine is running. Use the following procedure to configure the Data control for communicating with the control engine and for running the sample program. 1. In the Data Control dialog box, select the Engine tab to configure the control engine. See Figure 1-14. Siemens SIMATIC DataControl Properties General Engine Connections Events Name Select the option for a direct connection. Connect via Tag Source Tag Source Browse Direct Connect Enter wcS7=2 as the type of control engine. PC Name Control Engine wcS7=2 OK Figure 1-14 Cancel Apply Help Connecting to the Control Engine (Label Control Example) 2. Select the Direct Connect option and enter wcS7=2 for the control engine. Click on the Apply button to enter the data, and then click on the OK button to close the dialog box. 3. Switch Visual Basic from Design mode to Run mode to run the sample program. MicroComputing A5E00077133-01 1-15 Getting Started with SIMATIC MicroComputing 1.4 Using MicroComputing with Microsoft Excel Using the Data control in an Excel spreadsheet allows you to access the values in the control engine. To create this sample application, you need the following items: • Microsoft Excel 97 or Excel 2000 • Control engine (such as an S7-200 CPU 222) • Sample program (see Section 1.1) • STEP 7–Micro/WIN software to download the program to the control engine and to turn on the input bits of the sample program This example shows how to use events to call code to update your Excel cells. Events are a means of linking changing data to code within a VBA form. Note You can also use the I/O Panel application to turn on the input bits of the sample program running in the control engine. See Section 1.2 for information about the I/O Panel application. Creating a Command Button in Excel The first step in creating the sample Excel application is to create a command button. Use the following procedure to create a command button: 1. Start the Excel application. (If prompted about whether to enable or disable macros, select the Enable Macros option.) 2. In the following cells of the spreadsheet, enter the following labels: – In cell A1, enter: qb0 – In cell A2, enter: qb1 – In cell A3, enter: qb2 3. Select the View > Toolbars > Control Toolbox menu command to display the Control toolbox. 4. Click on the Design Mode icon in the Control toolbox to put the spreadsheet into Design mode. 5. Insert a Command Button control onto the spreadsheet by clicking on the Command Button icon in the Control toolbox and then clicking the left mouse button in an empty area of the spreadsheet. 6. Move or size the Command Button control as required. 1-16 MicroComputing A5E00077133-01 Getting Started with SIMATIC MicroComputing Using the Visual Basic Editor to Configure the Command Button After you have created the command button, you use the Visual Basic Editor in Excel to configure the command button for starting and stopping the program. Use the following procedure to configure the command button: 1. Select the command button (CommandButton1). 2. Select the Tools > Macro > Visual Basic Editor menu command to display the Visual Basic editor. 3. In the Properties window, select the Caption property of CommandButton1 and enter the following caption: Start Counting 4. Display the Code window by selecting the View > Code menu command. Select CommandButton1 from the drop-down list for the Object field. Enter the following code for the CommandButton1_Click() event: UserForm1.show 5. Close the Code window for CommandButton1. Creating a SIMATIC Data Control 1. Create a new user form by selecting the Insert > UserForm menu command. 2. In the Toolbox window, click the right mouse button to bring up a pop-up menu and select the Additional Controls... menu command. (To display the Toolbox window, select the View > Toolbox menu command.) 3. Scroll through the list of controls and select the Siemens Data control (by selecting the check box). Click on the OK button to insert the Data control onto the toolbox. 4. Select the Data control icon in the Toolbox window and insert a Data control onto UserForm1. 5. Select the Data control and click the right mouse button to bring up the pop-up menu. From the pop-up menu, select the Properties menu command to display the properties for the Data control (S7Data1) in the Properties window. 6. In the Properties window for S7Data1, select the (Custom) property field and then click on the expansion button to display the Properties dialog box for the Data control. Adding Events for the Data Control 1. In the Properties dialog box for the Data control, select the Events tab. In the list under the Keys heading, select S7Data1. 2. Click on the Add button to add a new event key. See Figure 1-15. In the Add dialog box, enter QB0 in the Add a new key field. After you click on the OK button, the event key is added to the S7Data1 control. MicroComputing A5E00077133-01 1-17 Getting Started with SIMATIC MicroComputing Siemens SIMATIC DataControl Properties General Engine Connections Keys: S7Soft1 Select the Data control and click on the Add button to display the Assigned Varia Add dialog box. Enter QB0 in the Add new key field and click on the OK button. Events Name S7Data1 Add Add a new key: QB0 Add... Cancel OK OK Figure 1-15 Cancel Apply Help Adding an Event Key to the Data Control 3. In the Properties dialog box, enter memory address QB0 in the Assigned Variable field. See Figure 1-16. 4. Click on the Apply button to accept the assigned variable. Notice that the event key QB0 appears in boldface under S7Data1. 5. Enter new event keys for QB1 (memory address QB1) and QB2 (memory address QB2) by selecting S7Data1 again and repeating steps 2. and 3. Siemens SIMATIC DataControl Properties General Engine Connections Events Name Keys: Assigned Variable: S7Soft1 QB0 S7Data1 Browse... QB0 Update rate (ms): 100 Dead band: 0 Select the event key (QB0). Add... Delete OK Figure 1-16 1-18 Enter QB0 in the Assigned Variable field and click on the Apply button. Cancel Apply Help Assigning a Variable to an Event Key MicroComputing A5E00077133-01 Getting Started with SIMATIC MicroComputing Configuring the Control Engine for the Data Control 1. In the Properties dialog box for the Data control, select the Engine tab to configure the control engine. 2. Select the Direct Connect option and enter wcS7=2 (for an S7-200 CPU 2xx) as the control engine. Click on the Apply button to enter the data, and then click on the OK button to close the dialog box. Entering a Sample Program for the Data Control 1. Select the Data control in UserForm1. 2. Select the View > Code menu command to display the code window for the Data control. 3. Select S7Data1 from the drop-down list of the Object field. 4. For the S7Data1_ValueChanged event, enter the following program: Select Case Property Case ”QB0” Worksheets(”Sheet1”).Range(”B1”).Value = Value Case ”QB1” Worksheets(”Sheet1”).Range(”B2”).Value = Value Case ”QB2” Worksheets(”Sheet1”).Range(”B3”).Value = Value End Select 5. Close the Code window for the Data control and close UserForm1. Running the Sample Program 1. Select the File > Close and Return to Microsoft Excel menu command to return to the spreadsheet. 2. Exit Design mode by clicking on the Exit Design Mode icon in the Toolbox window. 3. Connect the Excel spreadsheet to the control engine by clicking on the Start Counting command button. 4. Use the sample I/O panel (see Section 1.2) to start and stop the sample program in the control engine. Note To exit Excel or to activate the Excel menus, you must first close UserForm1. MicroComputing A5E00077133-01 1-19 Getting Started with SIMATIC MicroComputing 1.5 Using the SoftContainer with the Sample Program MicroComputing provides a simple OLE container application (SoftContainer) for displaying and modifying the data from the control engine. Using this container, you can quickly insert the SIMATIC controls into a process form. (A process form is the SoftContainer document, or file, with the various controls.) No code can be written with this tool. In order to run this sample process form, you need to have downloaded the sample program (see Section 1.1) to the control engine. Inserting SIMATIC Controls into the Process Form To start the MicroComputing software, select the Simatic > PC Based Control > Computing Softcontainer menu command from the Start menu. The SoftContainer opens with the default process form (S7Soft1). You will insert the SIMATIC controls into this process form. See Figure 1-17. 1. In the toolbar, click on the icon for the Data control. (Moving the arrow pointer over an icon and then keeping it stationary for a second will display a tooltip for identifying the icon.) 2. Move the arrow pointer to the open process form. Notice that once the cursor moves inside the process form, the arrow pointer changes to a cross-hair pointer. 3. Click the left mouse button to insert the Data control. S7SoftContainer – S7Soft1 File Edit View Mode Options Window Help ÉÉÉÉÉÉÉÉÉÉÉÉÉÉÉÉÉÉÉÉ ÉÉÉÉÉÉÉÉÉÉÉÉÉÉÉÉÉÉÉÉ ÉÉÉÉÉÉÉÉÉÉÉÉÉÉÉÉÉÉÉÉ ÉÉÉÉÉÉÉÉÉÉÉÉÉÉÉÉÉÉÉÉ ÉÉÉÉÉÉÉÉÉÉÉÉÉÉÉÉÉÉÉÉ ÉÉÉÉÉÉÉÉÉÉÉÉÉÉÉÉÉÉÉÉ ÉÉÉÉÉÉÉÉÉÉÉÉÉÉÉÉÉÉÉÉ ÉÉÉÉÉÉÉÉÉÉÉÉÉÉÉÉÉÉÉÉ S7Soft1 Select the control from the toolbar. The arrow pointer changes to a cross-hair pointer within the container. Click the left mouse button to insert the control. Ready Figure 1-17 1-20 Design Data1 24 x 26 Inserting a SIMATIC Control into the SoftContainer MicroComputing A5E00077133-01 Getting Started with SIMATIC MicroComputing Repeat these steps to insert three Button controls and three Edit controls. (For more information about inserting controls into the SoftContainer, see Section 6.2.) Figure 1-18 shows a sample layout for the controls in the process form (S7Soft1). ÉÉÉÉÉÉÉÉÉÉÉÉÉÉÉÉÉÉÉÉ ÉÉÉÉÉÉÉÉÉÉÉÉÉÉÉÉÉÉÉÉ ÉÉÉÉÉÉÉÉÉÉÉÉÉÉÉÉÉÉÉÉ ÉÉÉÉÉÉÉÉÉÉÉÉÉÉÉÉÉÉÉÉ ÉÉÉÉÉÉÉÉÉÉÉÉÉÉÉÉÉÉÉÉ ÉÉÉÉÉÉÉÉÉÉÉÉÉÉÉÉÉÉÉÉ ÉÉÉÉÉÉÉÉÉÉÉÉÉÉÉÉÉÉÉÉ ÉÉÉÉÉÉÉÉÉÉÉÉÉÉÉÉÉÉÉÉ S7Soft1 Data control 0 0 OFF Figure 1-18 0 OFF Edit controls OFF Button controls Using the SoftContainer to Create a Sample I/O Panel Configuring the Properties for the SIMATIC Controls You use the Properties dialog box of the Data control to connect the other SIMATIC controls to the control engine. To assign a variable (memory location in the control engine) to a SIMATIC control, select the Data control and click the right mouse button (“right-click”) to display the shortcut menu. From the shortcut menu, select the Properties menu command for the Data control to display the Properties dialog box. Configuring the the Control Engine for the Data Control This example presumes that you have installed a control engine (Figure 1-19). For more information about connecting to control engines, see Section 4.3. Use the following procedure to connect the Data control to the control engine: 1. Select the Engine tab of the Properties dialog box for the Data control. 2. Select the Direct Connect option and enter wcS7=2 as the control engine. 3. Click on the Apply button to enter this data. MicroComputing A5E00077133-01 1-21 Getting Started with SIMATIC MicroComputing Siemens SIMATIC DataControl Properties General Engine Connections Events Name Select the option for a direct connection Connect via Tag Source Tag Source Browse Direct Connect Enter wcS7=2 as the type of control engine PC Name Control Engine wcS7=2 OK Figure 1-19 Cancel Apply Help Connecting to the Control Engine (SoftContainer Example) Assigning a Variable (Memory Location) to a Property The Data control establishes a connection between the individual SIMATIC controls and the control engine. In the Properties Dialog box for the Data control, you assign variables (memory locations in the control engine) to the individual properties of the controls. Refer to Table 1-2 and assign the variables (memory addresses in the control engine) to the SIMATIC controls. Table 1-2 Assigning Sample Addresses to the SIMATIC Controls Control 1-22 Address Description Edit1 QB0 Output value of first counter Edit2 QB1 Output value of second counter Edit3 QB2 Output value of third counter Button1 I 0.0 Enable bit for first counter Button2 I 0.1 Enable bit for second counter Button3 I 0.2 Enable bit for third counter MicroComputing A5E00077133-01 Getting Started with SIMATIC MicroComputing Use the following procedure to connect the Value property of Button control Button1 to I 0.0 in the control engine: 1. Select the Connections tab of the Properties dialog box for the Data control. 2. Click on the “+” beside SIMATIC Data1 (or double-click on SIMATIC Data1) to display the listing of the controls in the container. 3. Click on the “+” beside Button1 (or double-click on Button1) to display the properties for the Button control. See Figure 1-20. 4. Scroll down to and select (click on) the Value property. Notice that when you select the Value property, the “Assigned Variable” field becomes active. 5. As shown in Figure 1-20, enter “i0.0” in the “Assigned Variable” field. (You can use either upper case or lower case for designating memory locations.) 6. Click on the Apply button. Repeat this procedure for the other Button controls and the three Edit controls, entering the variables listed in Table 1-2. After you have configured the connections for all of the controls, click on the OK button to confirm the changes and close the Properties dialog box. Siemens SIMATIC DataControl Properties General Engine Connections Controls: i0.0 Alignment Appearance Enabled Border Style FalseCaption FalseColor FalsePicture Font ForeColor Locked PushButton StretchMode Style TrueCaption TrueColor TruePicture Value Figure 1-20 Name Assigned Variable: Button1 Add... Events Delete Browse... Update rate (ms): 100 Dead ban 0 Automat Filter... Apply OK Cancel After you select the property from the hierarchy, enter the memory location of the variable to be assigned to that property. Apply Help Assigning the Value Property to a Variable Configuring the Edit Control for Binary Data The Edit control is able to display data in a variety of formats. For this example, you will configure the Edit controls to display the byte of data (QB0, QB1, or QB2) in decimal format. MicroComputing A5E00077133-01 1-23 Getting Started with SIMATIC MicroComputing Note The “Data Format” field of the Edit control determines the size of the data to be displayed. Use the following procedure to configure the Edit control: 1. Select the Edit control (Edit1) and click the right mouse button (“right-click”) to display the shortcut menu. From the shortcut menu, select the Properties menu command for the Edit control to display the Properties dialog box. 2. Click on the arrow beside the “Data Format” field to display the drop-down menu. 3. Scroll to the entry for decimal and click on “2 – wDecimal” to display the value in binary format (0 or 1). See Figure 1-21. 4. Click on the Apply button to enter the data and click on the OK button to close the Properties dialog box. Repeat this procedure for the other Edit controls (Edit2 and Edit3). Siemens_SIMATIC_UserControls.Edit Properties General Scaling Font Color Name Enabled Alignment: Data Format: 2 – wDecimal Locked Precision: 3 Zer Appearance: 1 – wThreeD Borderstyle: 1 – wFixedSingle WriteMode: 0 –wAutomatic OK Figure 1-21 1-24 Cancel Select “Decimal” from the dropdown list box for “Data Format”. Apply Help Configuring the Display Properties of the Edit control MicroComputing A5E00077133-01 Getting Started with SIMATIC MicroComputing Connecting the SIMATIC Controls to the Control Engine If the control engine is not active, your controls have no process to monitor. When you are ready to use the controls to view or modify data, the control engine must be running. Use the following procedure to connect the controls in the container to the control engine: 1. Click on the Run icon (or select the Mode > Run menu command) to switch the container from Design mode to Run mode. See Figure 1-22. 2. Click on the Button controls to start (or stop) the counters in the sample program. Notice that when the Button control changes state, the value displayed in the corresponding Edit control changes. 3. Click on the Design icon (or select the Mode > Design menu command) to switch the container from Run mode to Design mode (disconnecting the controls from the control engine). S7SoftContainer – S7Soft1 File Edit View Mode Options Window Help ÉÉÉÉÉÉÉÉÉÉÉÉÉÉÉÉÉÉÉÉ ÉÉÉÉÉÉÉÉÉÉÉÉÉÉÉÉÉÉÉÉ ÉÉÉÉÉÉÉÉÉÉÉÉÉÉÉÉÉÉÉÉ ÉÉÉÉÉÉÉÉÉÉÉÉÉÉÉÉÉÉÉÉ ÉÉÉÉÉÉÉÉÉÉÉÉÉÉÉÉÉÉÉÉ ÉÉÉÉÉÉÉÉÉÉÉÉÉÉÉÉÉÉÉÉ ÉÉÉÉÉÉÉÉÉÉÉÉÉÉÉÉÉÉÉÉ ÉÉÉÉÉÉÉÉÉÉÉÉÉÉÉÉÉÉÉÉ ÉÉÉÉÉÉÉÉÉÉÉÉÉÉÉÉÉÉÉÉ Click on the Run button to switch the container from Design mode to Run mode. S7Soft1 0 0 OFF 0 OFF OFF Click on the Button control to change bit I 0.0 from “0” to “1” . The Edit control shows changing counter value in QB0. Ready Figure 1-22 MicroComputing A5E00077133-01 Run Placing the Container into Run Mode 1-25 Getting Started with SIMATIC MicroComputing 1-26 MicroComputing A5E00077133-01 2 Product Overview Chapter Overview SIMATIC MicroComputing provides a method for other software applications to access the process data of your application. MicroComputing provides ActiveX controls that can be inserted in any software application that is an OLE control container, like Visual Basic or Visual C++. While the SIMATIC controls provided by MicroComputing have been tested with other containers provided by other vendors, some third-party containers may not function as described in this document. Refer to Appendix E for guidelines about third-party containers and about using custom ActiveX controls with the Data control. ! Warning When you change the value that is displayed in an ActiveX control, whether from MicroComputing or from a third-party software application, you are changing the value in your actual process. Altering process data can cause unpredictable process operation, which could result in death or serious injury to personnel, and/or damage to equipment. Exercise caution to ensure that you do not modify, nor permit unauthorized persons to access any data that could cause process equipment to operate erratically. Always install a physical emergency stop circuit for your machine or process. Section MicroComputing A5E00077133-01 Description Page 2.1 Product Overview 2-2 2.2 Using an ActiveX Control to Access the Process Data 2-4 2-1 Product Overview 2.1 Product Overview The MicroComputing software application allows you to access the control engine of your process to monitor and modify the process data. As shown in Figure 2-1, MicroComputing provides standard ActiveX controls that access the process data through the Data control. You can use them with the SoftContainer provided by the MicroComputing software, or you can insert these controls into OLE containers of other software packages. You can use a PC/PPI cable or a communications processor (CP) card to connect to the S7-200 control engine. (Windows NT does not support the PC/PPI cable.) Depending upon the CP card in your computer, you can access an S7-200 control engine over an MPI, PROFIBUS-DP, or Industrial Ethernet network. Refer to the S7-200 Programmable Controller System Manual for information about the CP cards supported by S7-200 PLCs. OPC Client (optional) Third-party control OPC Server (optional) Button control Edit control Label control Slider control Data control MicroComputing Communications Processor (CP) or PC/PPI Cable S7-200 Control Engine Figure 2-1 2-2 Accessing the Process Data with MicroComputing MicroComputing A5E00077133-01 Product Overview System Requirements To run the SIMATIC MicroComputing software, it is recommended that your computer meet the following criteria: • A personal computer (PC) with the following: – Pentium processor running at 166 MHz or faster (recommended) – 64 Mbytes RAM – Microsoft Windows NT version 4.0 with Service Pack 5 (or higher) or Windows 95/98 • A color monitor, keyboard, and mouse (or other pointing device) which are supported by Microsoft Windows NT, or Windows 95/98 • A hard drive with 20 Mbytes of free space • At least 1 Mbyte free memory capacity on drive C for the Setup program (Setup files are deleted when the installation is complete.) To connect MicroComputing to an S7-200 control engine, you must have either a PC/PPI cable or a CP card supported by the S7-200 controllers. Refer to the S7-200 Programmable Controller System Manual for more information. Special Notes for Using a PC/PPI Cable with Windows 95/98 If you are using a PC/PPI cable with Windows95/98, set the size of the receive buffer to minimum on the serial port to which the cable is connected. Refer to Section E.5 for directions. Note Windows NT does not support the PC/PPI cable. If you are running MicroComputing on a computer with Windows NT, you must use a CP card. Refer to Section 3.3 for directions on configuring the CP card as the access point for MicroComputing. MicroComputing A5E00077133-01 2-3 Product Overview 2.2 Using an ActiveX Control to Access the Process Data MicroComputing provides access through the Data control to the process data being controlled by an S7-200 control engine. You can use the standard SIMATIC controls provided with the MicroComputing software (see Table 2-1), or you can connect any other ActiveX control to the Data control. MicroComputing does not allow you to write data to timers. You can only read the timer values. Table 2-1 Standard Controls Provided by MicroComputing Representation Control Description Data The Data control provides the connection to the S7-200 control engine. Without the Data control, none of the other controls have access to the process data. Button The Button control provides access to individual memory bits in the control engine. The Button control accesses only bits and has two values: OFF • Off = 0 (default color: red) • On = 1 (default color: green) Changing the state of the Button control changes the state of the variable in your process that is associated with the control. If you configure the Button control to be read-only, then it functions like a lamp or LED. If you configure the button to be a pushbutton, it functions like a toggle switch. Edit The Edit control provides access to memory locations in the control engine. You can access bytes, words, or double-words, and you can manipulate individual bits of this data. 0 Entering a new value in the Edit control changes the data in the control engine. Label Slider The Label control allows you to display a constant string. It is also possible to connect the Caption property of the Label control with any process value. The process value is converted into a string and displayed. 0 100 The Slider control provides access to memory locations in the control engine. You can access bytes, words, or double-words. Adjusting the value of the Slider control changes the data in the control engine. 2-4 MicroComputing A5E00077133-01 Setting Up the SIMATIC MicroComputing Software 3 Chapter Overview This chapter provides the following information: • Section 3.1 describes how to install and uninstall the SIMATIC MicroComputing software. • Section 3.2 lists the authorization requirements for installing and running the MicroComputing software and describes how to install the authorization. • Section 3.3 describes how to use the PG/PC Interface to connect MicroComputing to a CP card. Section MicroComputing A5E00077133-01 Description Page 3.1 Installing and Uninstalling the MicroComputing Software 3-2 3.2 Authorization 3-4 3.3 Connecting MicroComputing to a Communications Processor (CP) Card 3-6 3-1 Setting Up the SIMATIC MicroComputing Software 3.1 Installing and Uninstalling the MicroComputing Software The SIMATIC MicroComputing software includes a Setup program that executes the installation automatically. Prompts on the screen guide you step by step through the installation procedure. Note You must have administrator (“ADMIN”) privileges to install the MicroComputing software. Starting the Installation Program The Setup program guides you step by step through the installation process. You can switch to the next step or to the previous step from any position. Use the following procedure to install the MicroComputing software: 1. Insert the CD-ROM in your computer. 2. Use the Windows Start menu (select the Start > Run menu command) to open the Run dialog box. 3. Click on the Browse button on the Run dialog box and select the installation program (Setup.exe) on the CD-ROM. 4. Click on the Open button to enter the Setup.exe program into the Run dialog box. 5. Click on the OK button to start the installation program. 6. Follow the instructions displayed by the installation program. 7. Install the Authorization for MicroComputing. See Section 3.2. Once the installation has completed successfully, a message to that effect is displayed on the screen. 3-2 MicroComputing A5E00077133-01 Setting Up the SIMATIC MicroComputing Software If an Older Version of MicroComputing Is Already Installed If the installation program finds another version of the MicroComputing software on the programming device, the program reports this and prompts you to decide how to proceed by offering the following choices: • Abort the installation so that you can uninstall the older version of the MicroComputing software and then start the installation again. • Continue the installation and overwrite the older version with the new version. Your software will be better organized if you uninstall any older versions before installing the new version. Overwriting an old version with a new version has the disadvantage that if you then uninstall, any remaining components of the old version are not removed. If you uninstall the older version of MicroComputing, you must reboot your computer before installing the new version. Troubleshooting Any Errors That Occur During Installation The following errors may cause the installation to fail: • Initialization error immediately after starting Setup: The Setup.exe program was probably not started under Windows. • Not enough memory: You need at least 20 Mbytes of free space on your hard disk. • Bad disk: Verify that the disk is bad, then call your local Siemens representative. • Operator error: Start the installation again and read the instructions carefully. Uninstalling the MicroComputing Software Use the following procedure to remove the MicroComputing software from your computer: 1. Start the dialog box for installing software under Windows by double-clicking on the Add/Remove Programs icon in the Control Panel. 2. Select the MicroComputing entry in the displayed list of installed software. Click on the Add/Remove... button to uninstall the software. MicroComputing A5E00077133-01 3-3 Setting Up the SIMATIC MicroComputing Software 3.2 Authorization SIMATIC MicroComputing requires a product-specific authorization (or license for use). The software is therefore copy-protected and can be used only if the relevant authorization for the program or software package has been found on the hard disk of the computer. The MicroComputing software has two types of authorization: • The unlimited authorization allows an unrestricted number of connections for each Data control. • The limited authorization restricts the Data control to five connections. The Data control can access up to five memory locations. Note If you remove the authorization, MicroComputing continues to operate; however, after the first 30 minutes, a notification message appears every two minutes to alert you that the authorization is missing. Authorization Disk An authorization diskette is included with the software. It contains the authorization and the program (AUTHORSW) required to display, install, and remove the authorization. There are separate authorization diskettes for each of the SIMATIC automation software products. You must install the authorization for each product as part of the installation procedure for that software. ! Caution If improperly transferred or removed, the authorization for MicroComputing may be irretrievably lost. The Readme file on the authorization diskette contains guidelines for installing, transferring, and removing the authorization for MicroComputing. If you do not follow these guidelines, the authorization for MicroComputing may be irretrievably lost. Read the information in the Readme file on the authorization diskette, and follow the guidelines in regard to transferring and removing the authorization. 3-4 MicroComputing A5E00077133-01 Setting Up the SIMATIC MicroComputing Software Installing the Authorization When you install your software for the first time, a message prompts you to install the authorization. Use the following procedure to install the authorization for MicroComputing. 1. When prompted, insert the authorization diskette in drive A. 2. Acknowledge the prompt. The authorization is transferred to the hard drive (C), and your computer registers the fact that the authorization has been installed. Note Always enter drive C as the destination drive for the authorization for MicroComputing. If you attempt to start MicroComputing and there is no authorization available for the software, a message informs you of this. If you want to install the authorization, use the AUTHORSW program on the authorization diskette. This program allows you to display, install, and remove authorizations. Removing an Authorization If you should need to repeat the authorization, for example, if you want to reformat the drive on which the authorization is located, you must remove the existing authorization first. You need the original authorization diskette to do this. Use the following procedure to transfer the authorization back to the authorization diskette: 1. Insert the original authorization diskette in your floppy disk drive. 2. Start the program AUTHORSW.EXE from the authorization diskette. 3. From the list of all authorizations on drive C, select the authorization to be removed. 4. Select the menu command Authorization > Transfer.... 5. In the dialog box, enter the target floppy drive to which the authorization will be transferred and confirm the dialog box. 6. The window with the list of authorizations remaining on the drive is then displayed. Close the AUTHORSW program if you do not want to remove any more authorizations. You can then use the diskette again to install an authorization. You must use the authorization diskette to remove any existing authorizations. If you need to remove MicroComputing completely, you must remove the DP authorization. If a fault occurs on your hard disk before you can back up the authorization, contact your local Siemens representative. MicroComputing A5E00077133-01 3-5 Setting Up the SIMATIC MicroComputing Software 3.3 Connecting MicroComputing to a Communications Processor (CP) Card In order for MicroComputing to use a communications processor (CP) card for connecting to the S7-200 control engine, you must configure the CP card as the access point for MicroComputing. Use the following procedure to configure the CP card as the access point for MicroComputing. 1. From the Windows Start menu, select Start > Simatic PC Based Control > Computing Configuration. 2. In the Computing Configuration dialog box, select the Connection tab. 3. Click the Setting PG/PC Interface button to access the Set PG/PC Interface dialog box (Figure 3-1). 4. From the Access Point of Application drop-down list, select Computing. 5. In the Interface Parameter Assignment Used field, select the entry that corresponds to your card and network type. ✂ Set PG/PC Interface Access Path Access Point of the Application: ✂ Computing --> CPU5611[PPI] Setting the PG/PC Interface Access Path Access Point of Application: Interface Parameter Assignment Micro/WIN Used: -->PC/PPI cable (PPI) (Standard for Micro/WIN) Properties... CP416-2 DP ISA (local) Interface Parameter set used: MPI-ISA PC/PPI on board (MPI) Properties... cable (PPI) CP5611[MPI] MPI-ISA on board (PPI) CP5611 (PPI) MPI-ISA Card (PROFIBUS) Copy... CP5611 (PROFIBUS)PC Adapter (MPI) Delete PC Adapter (PROFIBUS)PC/ PC/PPI cable (PPI) (Assigning Parameters to a PC/PPI CableCopy... PPI cable (PPI) for a PPI Network) Interfaces Delete Install... (Standard for STEP 7) Communication with WinAC components in this OK PG/PC) Cancel Help Interfaces Add/Remove: OK Figure 3-1 3-6 Select... Cancel Help Setting the PG/PC Interface MicroComputing A5E00077133-01 Accessing the Process Data with the Data Control 4 Chapter Overview The Data control provides the connection between your ActiveX controls and the control engine. You can configure the properties for the Data control: • For the SoftContainer provided by SIMATIC MicroComputing: double-clicking on the Data control displays the Properties dialog box. • For other container applications (such as Microsoft Visual Basic): access the properties as for any other control in that container (for example, by using the right mouse button). Open the context menu for the Data control by clicking the right mouse button and selecting the Properties menu command. Section MicroComputing A5E00077133-01 Description Page 4.1 Connecting the SIMATIC Controls to the Control Engine 4-2 4.2 Configuring the Connection Properties for the Data Control 4-3 4.3 Selecting the Control Engine for the Data Control 4-4 4.4 Connecting the ActiveX Controls to the Control Engine 4-6 4.5 Filtering the Properties for the ActiveX Controls 4-9 4.6 Configuring Custom Events 4-11 4.7 Creating a Connection Table 4-12 4.8 Sample Program for Responding to Events 4-15 4.9 Sample Program for Reading and Writing Data 4-20 4.10 Sample Program for Reading and Writing Boolean Data 4-25 4.11 Properties, Methods, and Events of the Data Control 4-26 4-1 Accessing the Process Data with the Data Control 4.1 ! Connecting the SIMATIC Controls to the Control Engine Caution Failing to disable the timers in your program could cause timer-generated connections to remain connected, allowing these connections to continue to write data to the control engine. This could cause the control engine to operate erratically, which could potentially cause damage to equipment and injury to personnel. To ensure that all connections are disconnected when your program closes, always disable all timers before the End statement in the Form_Unload subroutine. In order to access process data, the SIMATIC controls provided by MicroComputing (Button, Edit, Label, and Slider) must first establish a connection through the Data control. Figure 4-1 shows the relationship between the Data control and the other SIMATIC controls. You use the Connections tab of the Data control to assign a variable (the memory location) to the Value property of each control. The Data control configures the control engine to check the memory locations of the assigned variables at a specified rate (in milliseconds). If there is a change in the value, the new value is written to the Data control. The Data control then writes the new value to the other controls. OPC Client (optional) Third-party control Button control Edit control Label control Slider control Data control MicroComputing OPC Server (optional) Control engine (S7-200) Figure 4-1 4-2 Using the Data Control for Connecting to a Control Engine MicroComputing A5E00077133-01 Accessing the Process Data with the Data Control 4.2 Configuring the Connection Properties for the Data Control As shown in Figure 4-2, the General tab allows you to configure the following parameters for the connection to the control engine: • AutoConnect (automatic connection): When this option is enabled, the Data control automatically connects to the memory locations in the control engine. When this option is disabled, the Data control connects to the memory locations only when instructed by the program code (using a Connect method) that you associated with the control. • AutoConnect Timeout (time-out in milliseconds for the automatic connection): This option specifies the amount of time that the Data control waits between connecting to the control engine and writing data. Some containers may not provide a mechanism for telling the Data control to write to the control engine. After the time-out that you specify, the Data control starts writing data. • Default Update Rate (ms): This option specifies the rate (in milliseconds) that the control engine checks the memory locations to see if change has occurred. • Default Dead Band: This option specifies to the control engine the amount of change that must occur in a value before the control engine writes the new value to the Data control. For example: if the dead band is 10 and the value in the control engine is 22, then the control engine does not write a new value until the value becomes either 33 or 11. • Show Error Boxes: This option specifies whether to display the default error boxes when there is a user-generated error. MicroComputing provides error messages in English only. If you want to display messages in other languages, you must deselect this option and write program code to react on the error event. Siemens SIMATIC DataControl Properties General Engine Connections Events Name AutoConnect: AutoConnect Timeout (ms): 100 Default Update Rate (ms): 100 Default Dead Band: 0 Show Error Boxes: OK Figure 4-2 MicroComputing A5E00077133-01 Cancel Apply Help Data Control Properties (General Tab) 4-3 Accessing the Process Data with the Data Control 4.3 Selecting the Control Engine for the Data Control As shown in Figure 4-3, you can use the Data control to connect your program to a control engine residing either on a local computer or on a remote computer. Direct Connection on a Local Computer Other ActiveX controls <local> Data control S7-200 Direct Connection on a Remote Computer Other ActiveX controls PC 2 PC 1 Data control DCOM S7-200 Figure 4-3 Direct Connection for a Local or a Remote Computer Use the following procedure to configure the Data control for connecting to a control engine: 1. Double-click on the Data control (or use the Edit Properties menu command) to display the Properties dialog box for the Data control. 2. Click on the Engine tab to display the configuration choices. 3. Select the “Direct Connection” option. See Figure 4-4. 4. To connect to a control engine on a remote computer, enter the network name of the remote computer (for example, “PC_2”) in the “PC Name” field. If the control engine is connected to the local computer, leave the field blank. 5. In the “Control Engine” field, enter wcS7=2 as the name of the control engine. 6. Click on the Apply button to configure the Data control. 4-4 MicroComputing A5E00077133-01 Accessing the Process Data with the Data Control Siemens SIMATIC DataControl Properties General Engine Connections Events Name Select “Direct Connection” and enter the name of the remote computer and the control engine. Connection via Tag Source Tag Source Browse Direct Connection PC Name PC_2 Control Engine wcS7=2 OK Figure 4-4 Cancel Apply Help Configuring DCOM for a Control Engine Note To connect to a remote computer using LAN, you must have configured the different computers for DCOM. See Sections D.2 and D.3 for information about configuring computers for DCOM. MicroComputing A5E00077133-01 4-5 Accessing the Process Data with the Data Control 4.4 Connecting the ActiveX Controls to the Control Engine The Connections tab shows the ActiveX controls (whether they are SIMATIC controls or third-party) that can be connected to the control engine. ! Caution Using the timer function improperly or using breakpoints in Visual Basic with MicroComputing can cause problems that could potentially cause your computer or application to crash or lock up. Depending on the configuration, this could cause the application to lose communication with the control engine. This could cause unpredictable process operation, which could result in death or serious injury to personnel, and/or damage to equipment. Always install a physical emergency stop circuit for your machine or process. Concerning VB timers: The Timer function in Visual Basic version 5 allows a timer to interrupt code in progress within the same thread, which can cause problems with potentially serious consequences. If you use VB timers with MicroComputing, observe the following guidelines: 4-6 Always kill (disable) the timers in the Form_Unload subroutine. Otherwise, a timer can trigger an event while the VB program is shutting down; this condition could cause your computer or your application to crash, lock up, or to continue running invisibly. If you start your timer in the Form_Load subroutine, the timer event could occur before the other objects have been instantiated. In order to ensure that the objects have been properly instantiated, always start a timer in the Form_Load subroutine with a large interval (such as 1 or 2 seconds) to allow the objects to be properly instantiated. Subsequent timer intervals can be set to shorter intervals. MicroComputing A5E00077133-01 Accessing the Process Data with the Data Control Assigning a Variable to a Property of a Control To define a connection in the control engine, you assign a variable (memory location) in the control engine to a property of a control. See Figure 4-5. Note MicroComputing does not allow you to write to timers in the control engine. Use the following procedure to assign a variable in the control engine to a property of the control: 1. On the Connections tab of the Data control, select (click on) the name of the property (Figure 4-5). Figure 4-5 shows the property listing with a filter applied to display only the Enabled and Value properties. (For more information about filtering the property listing, see Section 4.5.) Siemens SIMATIC DataControl Properties General Engine Connections Controls: Events Name Assigned Variable: S7Soft1 M0.0 S7Data1 Browse... Button1 Enabled Value Update rate (ms): Button2 100 Dead band: After you 0 select the property from the Edit1 hierarchy, enter the memory location Automatic w of the variable to be assigned to that Add... Delete Filter... OK Figure 4-5 Apply fil Cancel property. Apply Help Browsing to a Symbol in the Tag File 2. In the “Assigned Variable” field, enter the memory address in the control engine, and enter the absolute address (such as M0.0) for the memory location in the control engine (Figure 4-5). See Appendix A for information about the data types and memory areas of the S7-200 controllers. 3. Click on the Apply button to assign the variable to the property. MicroComputing A5E00077133-01 4-7 Accessing the Process Data with the Data Control Adding a Connection If you want to configure a connection for an ActiveX control before you place the control into your ActiveX container, you can use the Add button to add an instance of the control to the Controls list. Click on the Add button to specify the instance that you want to connect to the Data control. After you have added the ActiveX control instance to the Controls list, you can select the instance from the list, choose the Add button again and add any additional properties. For example, you could add an Edit control instance to the connections list, and then add the Value property to the Edit control in order to assign a variable to the Edit control. Deleting a Connection If you remove a control from the ActiveX container, the connection remains configured in the Data control. This means that the next time you place a control of the same name into the container, the connection that you configured for the previous control of that name is automatically applied to the new control. For instance, if you remove a control called Edit1, and later insert a new Edit control, the default name for the new control is Edit1, and the new control inherits the existing Edit1 connection. Use the Delete button if you want to prevent new controls from inheriting a previously configured connection: from the Controls list, select the instance whose connection you want to delete, and click on the “Delete” button. Note If you remove a control, or change your mind about adding a control after you have already configured a connection for it using the Add button, you can only delete the connection to it if there is no control in the ActiveX container that uses the name specified in the connection. Delete the connection before you add any other control that uses the name that is specified in the connection. You cannot use the Delete button to remove a connection to a control that is present in the ActiveX container. 4-8 MicroComputing A5E00077133-01 Accessing the Process Data with the Data Control 4.5 Filtering the Properties for the ActiveX Controls The Data control provides a filter that allows you to display a subset of the properties for the controls. For example, you may want to display only the Enabled and Value properties and avoid scrolling through all of the other properties for each control. Use the following procedure for filtering the properties: 1. Access the Properties dialog box for the Data control. 2. Click on the Filter button (see Figure 4-6). Siemens SIMATIC DataControl Properties General Engine Connections Controls: Events Name Assigned Variable: S7Soft1 Click on the Filter button to select the properties to be displayed. S7Data1 Button1 Button2 Update rate (ms): 100 Dead band: 0 Edit1 Edit2 Automatic write mode: Add... Delete Filter... OK Figure 4-6 Apply filter to properties Cancel Apply Help Selecting the Properties to Filter 3. As shown in Figure 4-7, enter the properties to display and click on the Add button. Use the Edit button to correct entries and the Delete button to remove entries. 4. As shown in Figure 4-8, select the “Apply filter to properties” check box to display only the properties listed in the filter. Use the “Apply filter to properties” check box to toggle the filter on and off. MicroComputing A5E00077133-01 4-9 Accessing the Process Data with the Data Control Siemens SIMATIC DataControl Properties General Engine Connections Events Name Property Filter Controls: S7Soft1 Visible Properties: S7Data1 Click on the Add button to enter a property to the filter. Enabled Value But But 100 Edi Edi 0 Add... Edit Delete OK Add... Cancel OK Figure 4-7 mode: properties Cancel Apply Help Entering a Property to the Filter Siemens SIMATIC DataControl Properties General Engine Connections Controls: Events Name Assigned Variable: S7Soft1 S7Data1 Browse... Button1 Enabled Value Button2 Update rate (m Dead band: Edit1 Edit1 Add... Delete Automatic write mode: Filter... OK Figure 4-8 4-10 Click on the check box to toggle the property filter on and off. Apply filter to properties Cancel Apply Help Toggling the Property Filter MicroComputing A5E00077133-01 Accessing the Process Data with the Data Control 4.6 Configuring Custom Events As shown in Figure 4-9, the Events tab allows you to add custom events that are triggered by the Data control. You enter a key (string) and assign that key to a memory location (variable). If that variable changes, then the Data control generates an event with a parameter that contains the string that you entered in the “Key” field. Your program can then react to this event. See Section 4.8 for a sample program that responds to events in the CPU. Siemens SIMATIC DataControl Properties General Engine Connections Events Name Keys: Assigned Variable: S7Soft1 m17.3 S7Data1 Browse... OverflowWarning Add... 100 Dead band: 0 Delete OK Figure 4-9 Update rate (ms): Cancel Apply Help Data Control Properties (Events Tab) Adding an Event The Add button allows you to add user-specified events for controller value changes. You can write your own code to handle the event by handling the ValueChanged event of a Data control. Select a Data control from the expandable list under the “Keys” field and click on the Add button; then type any name you choose for the event (for example, OverflowWarning). Next, type a variable in the “Assigned Variable” field to identify the process value that causes the event to be fired. Figure 4-9 shows an sample event that has been added. A change in the value of M17.3 calls the event handler for the Data control. The input to the event handler is the text string OverflowWarning. Deleting an Event To delete a user-specified event, expand the list under “Keys,” select the desired event, and click on the Delete button. MicroComputing A5E00077133-01 4-11 Accessing the Process Data with the Data Control 4.7 Creating a Connection Table The Data control uses a connection table for determining which properties of the various controls are connected to specific memory locations of the control engine. Each connection table contains an entry for each connection. Each entry contains the following information: • Property name: this field identifies the property that has an assigned variable. • Data source: this field identifies the memory location in the control engine for the connection. • Update rate: this field defines the update rate for the connection. If no value is entered in this field, the Data control uses the default update rate (which is the value stored in the DefaultUpdateRate property). • Dead band: this field defines the dead band for automatically writing to the control engine or the control. If no value is entered in this field, the Data control uses the default update rate (which is the value stored in the DefaultDeadBand property). When you use the Properties dialog box to configure the Data control, the Data control automatically creates a connection table. You can also create a program to manually create connection tables. Creating a Sample Connection Table You can create a connection table to assign a variable in the control engine to a specific control. The connection table corresponds to the Connections tab on the Properties dialog box of the Data control. For each element in the connection table, you must define the property in the control for the connection, the source (memory location of the assigned variable in the control engine), the update rate, and the dead band value. In order to change connections with a connection table, you must first disconnect the Data control (ending all connections) before you can reassign connections and reconnect the Data control. Note Instead of creating a connection table, consider using the read and write methods for the Data control (ReadVariable, ReadMultipleVariables, WriteVariable, and WriteMultipleVariables). These methods allow you to access more data with just one line of code. 4-12 MicroComputing A5E00077133-01 Accessing the Process Data with the Data Control Table 4-1 shows sample Visual Basic code for a Label control called lblChange in your form to MW2 in the control engine. The value stored in MW2 displays as the caption in the Label control. Table 4-1 Sample Program for Manually Creating a Connection Table Visual Basic Code Dim ControlTable (4) As String ’Define a ControlTable ControlTable ControlTable ControlTable connection table for Label1 (0) = ”Caption” ’Property (1) = ”MW2:WORD” ’Source (memory location) (2) = ”100” ’Update rate (3) = ”0.0” ’Dead band ’Attach the connection table to S7Data1’ S7Data1.ConnectObject Label1, ControlTable ’Connect to the control engine S7Data1.Connect MicroComputing A5E00077133-01 ’Connects to the control engine 4-13 Accessing the Process Data with the Data Control Creating a Sample Event Table You can also create an event table to define events for the control engine. The event table corresponds to the Events tab of the Properties dialog box of the Data control. Table 4-2 provides the sample Visual Basic code for creating an event table. Section 4.8 provides a sample program that responds to events. This sample program uses an event table to define the events for control engine. Table 4-2 Sample Program for Manually Creating an Event Table Visual Basic Code Dim controlTable(4) AS String ’Define the event keys ControlTable(0)=”M0_0” ControlTable(1)=”M0.0” ControlTable(2)=”500” ControlTable(3)=”0” IResult=S7Data1.ConnectName(””,ControlTable) ’Event Name ’Process Variable ’Update Rate ’DeadBand ControlTable(0)=”M0_1” ControlTable(1)=”M0.1” ControlTable(2)=”500” ControlTable(3)=”0” IResult=S7Data1.ConnectName(””,ControlTable) ’Event Name ’Process Variable ’Update Rate ’DeadBand ControlTable(0)=”M0_2” ControlTable(1)=”M0.2” ControlTable(2)=”500” ControlTable(3)=”0” IResult=S7Data1.ConnectName(””,ControlTable) ’Event Name ’Process Variable ’Update Rate ’DeadBand ControlTable(0)=”M0_3” ControlTable(1)=”M0.3” ControlTable(2)=”500” ControlTable(3)=”0” IResult=S7Data1.ConnectName(””,ControlTable) ’Event Name ’Process Variable ’Update Rate ’DeadBand ControlTable(0)=”M0_4” ControlTable(1)=”M0.4” ControlTable(2)=”500” ControlTable(3)=”0” IResult=S7Data1.ConnectName(””,ControlTable) ’Event Name ’Process Variable ’Update Rate ’DeadBand ControlTable(0)=”M0_5” ControlTable(1)=”M0.5” ControlTable(2)=”500” ControlTable(3)=”0” IResult=S7Data1.ConnectName(””,ControlTable) ’Event Name ’Process Variable ’Update Rate ’DeadBand ControlTable(0)=”M0_6” ControlTable(1)=”M0.6” ControlTable(2)=”500” ControlTable(3)=”0” IResult=S7Data1.ConnectName(””,ControlTable) ’Event Name ’Process Variable ’Update Rate ’DeadBand ControlTable(0)=”M0_7” ControlTable(1)=”M0.7” ControlTable(2)=”500” ControlTable(3)=”0” IResult=S7Data1.ConnectName(””,ControlTable) ’Event Name ’Process Variable ’Update Rate ’DeadBand End 4-14 MicroComputing A5E00077133-01 Accessing the Process Data with the Data Control 4.8 Sample Program for Responding to Events You can create a program that responds to events in the control engine. In this sample program, eight lights correspond to the eight events which are defined in a connection table. (See Figure 4-10.) The events are connected to the status of memory location MB0: a change in the value stored in MB0 generates a set of events (named for each bit in the byte). As shown in Figure 4-10, the program also contains the following elements: • Data control (S7Data1) for connecting to the control engine • Timer (Timer1) that increments the value stored in MB0 (which then causes the control engine to generate the events) • Command button (cmdStartEvent) for starting or stopping the timer (thereby starting or stopping the generation of events) VB5 Programming Example Light(0) to Light(7): These VB objects change color to display the events stored in MB0 Start Events cmdStartEvent: This command button starts (or stops) the events S7Data1: Connects these elements to the control engine Timer1: generates a ReadVariable and WriteVariable at fixed intervals Figure 4-10 ! Sample Program for Responding to Events in the Control Engine Caution Failing to disable the timers in your program could cause timer-generated connections to remain connected, allowing these connections to continue to write data to the control engine. This could cause the control engine to operate erratically, which could potentially cause damage to equipment and injury to personnel. To ensure that all connections are disconnected when your program closes, always disable all timers before the End statement in the Form_Unload subroutine. MicroComputing A5E00077133-01 4-15 Accessing the Process Data with the Data Control Creating a Connection Table for Responding to Events Your program can create an event table to define specific events in the control engine. Table 4-3 lists the code for creating a connection table for defining event keys for a control engine. Table 4-3 Sample Program for Creating a Connection Table for Responding to Events Visual Basic Code Dim controlTable(4) AS String ’Define the event keys ControlTable(0)=”M0_0” ControlTable(1)=”M0.0” ControlTable(2)=”500” ControlTable(3)=”0” IResult=S7Data1.ConnectName(””,ControlTable) ’Event Name ’Process Variable ’Update Rate ’DeadBand ControlTable(0)=”M0_1” ControlTable(1)=”M0.1” ControlTable(2)=”500” ControlTable(3)=”0” IResult=S7Data1.ConnectName(””,ControlTable) ’Event Name ’Process Variable ’Update Rate ’DeadBand ControlTable(0)=”M0_2” ControlTable(1)=”M0.2” ControlTable(2)=”500” ControlTable(3)=”0” IResult=S7Data1.ConnectName(””,ControlTable) ’Event Name ’Process Variable ’Update Rate ’DeadBand ControlTable(0)=”M0_3” ControlTable(1)=”M0.3” ControlTable(2)=”500” ControlTable(3)=”0” IResult=S7Data1.ConnectName(””,ControlTable) ’Event Name ’Process Variable ’Update Rate ’DeadBand ControlTable(0)=”M0_4” ControlTable(1)=”M0.4” ControlTable(2)=”500” ControlTable(3)=”0” IResult=S7Data1.ConnectName(””,ControlTable) ’Event Name ’Process Variable ’Update Rate ’DeadBand ControlTable(0)=”M0_5” ControlTable(1)=”M0.5” ControlTable(2)=”500” ControlTable(3)=”0” IResult=S7Data1.ConnectName(””,ControlTable) ’Event Name ’Process Variable ’Update Rate ’DeadBand ControlTable(0)=”M0_6” ControlTable(1)=”M0.6” ControlTable(2)=”500” ControlTable(3)=”0” IResult=S7Data1.ConnectName(””,ControlTable) ’Event Name ’Process Variable ’Update Rate ’DeadBand ControlTable(0)=”M0_7” ControlTable(1)=”M0.7” ControlTable(2)=”500” ControlTable(3)=”0” IResult=S7Data1.ConnectName(””,ControlTable) ’Event Name ’Process Variable ’Update Rate ’DeadBand End 4-16 MicroComputing A5E00077133-01 Accessing the Process Data with the Data Control Responding to the Events Generated by the Sample Program Table 4-4 provides sample Visual Basic code for responding to different events from the control engine. Table 4-4 Sample Program for Responding to Events in the Control Engine Visual Basic Code Private Sub S7Data4_ValueChanged(ByVal Property As String, ByVal VarName As String, ByVal Value As Variant, ByVal Quality As Integer) ’Evaluates which event occurred Select Case Property Case ”M0_0” If Value = True Then Light(0).FillColor = vbGreen Else Light(0).FillColor = vbRed End If ’Event M0_0 turns Light(0) green Case ”M0_1” If Value = True Then Light(1).FillColor = vbGreen Else Light(1).FillColor = vbRed End If ’Event M0_1 turns Light(1) green Case ”M0_2” If Value = True Then Light(2).FillColor = vbGreen Else Light(2).FillColor = vbRed End If ’Event M0_2 turns Light(2) green Case ”M0_3” If Value = True Then Light(3).FillColor = vbGreen Else Light(3).FillColor = vbRed End If ’Event M0_3 turns Light(3) green Case ”M0_4” If Value = True Then Light(4).FillColor = vbGreen Else Light(4).FillColor = vbRed End If ’Event M0_4 turns Light(4) green Case ”M0_5” If Value = True Then Light(5).FillColor = vbGreen Else Light(5).FillColor = vbRed End If ’Event M0_5 turns Light(5) green Case ”M0_6” If Value = True Then Light(6).FillColor = vbGreen Else Light(6).FillColor = vbRed End If ’Event M0_6 turns Light(6) green MicroComputing A5E00077133-01 4-17 Accessing the Process Data with the Data Control Table 4-4 Sample Program for Responding to Events in the Control Engine, continued Case ”M0_7” If Value = True Then Light(7).FillColor = vbGreen Else Light(7).FillColor = vbRed End If ’Event M0_7 turns Light(7) green End Select End Sub Running the Sample Program (Generating the Events in the Control Engine) Table 4-5 provides sample Visual Basic code for changing the value stored in MB0. Changing the value of MB0 then causes the control engine to generate the events defined in the connection table (Table 4-3). • The command button (cmdStartEvents) starts or stops the timer (Timer1). • The timer (Timer1) reads the value stored in MB0 of the control engine, increments the value, and writes the new value back to the control engine. The changed value of MB0 causes the control engine to generate the events. ! Caution Failing to disable the timers in your program could cause timer-generated connections to remain connected, allowing these connections to continue to write data to the control engine. This could cause the control engine to operate erratically, which could potentially cause damage to equipment and injury to personnel. To ensure that all connections are disconnected when your program closes, always disable all timers before the End statement in the Form_Unload subroutine. 4-18 MicroComputing A5E00077133-01 Accessing the Process Data with the Data Control Table 4-5 Other Subroutines for Running the Sample Program Visual Basic Code Private Sub cmdStartEvents_Click() If cmdStartEvents.Caption = ”Start Events” Then Timer1.Enabled = True cmdStartEvents.Caption = ”Stop Events” Else Timer1.Enabled = False cmdStartEvents.Caption = ”Start Events” End If End Sub Private Sub Timer1_Timer() Dim mb0 As Variant Dim my_state As Long S7Data1.ReadVariable ”MB0”, mb0, my_state, 0 If mb0 < 254 Then mb0 = mb0 + 1 Else mb0 = 0 End If Label2.Caption = mb0 S7Data1.WriteVariable ”MB0”, mb0, 0 End Sub MicroComputing A5E00077133-01 4-19 Accessing the Process Data with the Data Control 4.9 Sample Programs for Reading and Writing Data You can write a program that initiates access to data (reading or writing) in the control engine. You can read or write single variables, multiple variables or arrays of variables. For information about the memory areas of the S7-200 controllers, see Appendix A. ! Warning Using the timer function improperly or using breakpoints in Visual Basic with MicroComputing can cause problems that could potentially cause your computer or application to crash or lock up. Depending on the configuration, this could cause the application to lose communication with the control engine. This could cause unpredictable process operation, which could result in death or serious injury to personnel, and/or damage to equipment. Always install a physical emergency stop circuit for your machine or process. Concerning VB timers: The Timer function in Visual Basic version 5 allows a timer to interrupt code in progress within the same thread, which can cause problems with potentially serious consequences. If you use VB timers with MicroComputing, observe the following guidelines: 4-20 Always kill (disable) the timers in the Form_Unload subroutine. Otherwise, a timer can trigger an event while the VB program is shutting down; this condition could cause your computer or your application to crash, lock up, or to continue running invisibly. If you start your timer in the Form_Load subroutine, the timer event could occur before the other objects have been instantiated. In order to ensure that the objects have been properly instantiated, always start a timer in the Form_Load subroutine with a large interval (such as 1 or 2 seconds) to allow the objects to be properly instantiated. Subsequent timer intervals can be set to shorter intervals. MicroComputing A5E00077133-01 Accessing the Process Data with the Data Control Reading a Single Variable in the Control Engine Table 4-6 provides sample Visual Basic code for using the ReadVariable method of the Data control to read a single variable in the control engine. Table 4-6 Reading a Single Variable from the Control Engine Visual Basic Code Private Sub ReadSingleRealVariable Dim rc As Long Dim name_s As String Dim value_v As Variant Dim state_l As Long Dim timeout_l As Long ’Read one Real (floating point) value name_s = ”MD0:REAL” timeout_l = 0 rc = S7Data1.ReadVariable(name_s, value_v, state_l, timeout_l) ’Display the value and return code in a List Box ListBox1.Clear ListBox1.AddItem ”RetCode = ” & Hex(rc) ListBox1.AddItem ” – ” & name_s & ” = ” & value_v ListBox1.AddItem ” – State = ” & Hex(state_l) End Sub Writing a Single Variable to the Control Engine Table 4-7 provides sample Visual Basic code for using the WriteVariable method of the Data control to write a single variable to the control engine. Table 4-7 Writing a Single Variable to the Control Engine Visual Basic Code Private Sub WriteSingleRealVariable Dim rc As Long Dim name_s As String Dim value_v As Variant Dim timeout_l As Long ’Write one Real (floating point) value name_s = ”MD0:REAL” value_v = (Rnd * 1000) timeout_l = 100 rc = S7Data1.WriteVariable(name_s, value_v, timeout_l) ’Display the value and return code in a List Box ListBox1.Clear ListBox1.AddItem ”Wrote ” & name_s & ” = ” & value_v ListBox1.AddItem ”Return Code = ” & Hex(rc) End Sub MicroComputing A5E00077133-01 4-21 Accessing the Process Data with the Data Control Reading an Array in the Control Engine Table 4-8 provides sample Visual Basic code for using the ReadVariable method of the Data control to read an array of data in the control engine. Table 4-8 Sample Program for Reading an Array of Variables Visual Basic Code Private Sub ReadArrayOfReals Dim rc As Long Dim name_s As String Dim value_v As Variant Dim state_1 As Long Dim timeout_l As Long Randomize ’Read an array of Real (floating point) values name_s = ”MD0:Real[3]” timeout_l = 0 rc = S7Data1.ReadVariable(name_s, value_v, state_1, timeout_l) ’Display the values ListBox1.Clear ListBox1.AddItem ListBox1.AddItem value_v(2) ListBox1.AddItem and return codes for the array in a List Box ”Return Code = ” & Hex(rc) ” – name_s & “ = ” & value_v(0) & “ “ & value_v(1) & “ “ – ” – State = ” & Hex(state_1) End Sub Writing an Array to the Control Engine Table 4-9 provides sample Visual Basic code for using the WriteVariable method of the Data control to write an array of data to the control engine. 4-22 MicroComputing A5E00077133-01 Accessing the Process Data with the Data Control Table 4-9 Sample Program for Writing an Array of Variables Visual Basic Code Private Sub WriteArrayOfReals Dim rc As Long Dim name_s As String Dim timeout_l As Long Dim value_b(2) As Byte ’ for byte write Dim value_w(2) As Integer ’ for word write Dim value_r(2) As Single ’ for real write ’Read an array of Real (floating point) values name_s = ”MD0:REAL[3]” value_r(0) = (Rnd * 1000) value_r(1) = (Rnd * 1000) value_r(2) = (Rnd * 1000) timeout_l = 100 rc = S7Data1.WriteVariable(name_s, value_r, timeout_l) ’Display the values ListBox1.Clear ListBox1.AddItem ListBox1.AddItem ListBox1.AddItem ListBox1.AddItem and return codes for the array in a List Box ”Return Code = ” & Hex(rc) ” – Wrote MD0:REAL[0] = ” & value_r(0) ” – Wrote MD0:REAL[1] = ” & value_r(1) ” – Wrote MD0:REAL[2] = ” & value_r(2) End Sub Reading Multiple Variables in the Control Engine Table 4-10 provides sample Visual Basic code for using the ReadMultiVariables method of the Data control to read multiple variables in the control engine. Table 4-10 Reading Multiple Variables in the Control Engine Visual Basic Code Private Sub ReadMultiReals Dim i As Integer Dim rc As Long Dim names_array(2) As String Dim values_v As Variant Dim states_v As Variant ’Read three Real (floating point) values For i = 0 To 2 names_array(i) = ”MD” & i * 4 & ”:REAL” Next i rc = S7Data1.ReadMultiVariables(names_array, values_v, states_v) ’Display the value and return code in a List Box ListBox1.Clear ListBox1.AddItem ”RetCode = ” & Hex(rc) For i = 0 To 2 ListBox1.AddItem ” – ” & names_array(i) & ” = ” & values_v(i) & – vbTab & ” State = ” & Hex(states_v(i)) Next i End Sub MicroComputing A5E00077133-01 4-23 Accessing the Process Data with the Data Control Writing Multiple Variables to the Control Engine Table 4-11 provides sample Visual Basic code for using the WriteMultiVariables method of the Data control to write several variables to the control engine. Table 4-11 Writing Multiple Variables to the Control Engine Visual Basic Code Private Sub cmdWriteMultVar_Click(Index As Integer) Dim i As Integer Dim rc As Long Dim names_array(2) As String Dim values_v(2) As Variant Dim states_v As Variant ’Write three Real (floating point) values For i = 0 To 2 names_array(i) = ”MD” & i * 4 & ”:REAL” values_v(i) = (Rnd * 1000) Next i rc = S7Data1.WriteMultiVariables(names_array, values_v, states_v) ’Display the values and return codes in a List Box lstReal.Clear lstReal.AddItem ”RetCode = ” & Hex(rc) For i = 0 To 2 lstReal.AddItem ” – ” & names_array(i) & ” = ” & values_v(i) & vbTab & – ” State = ” & Hex(states_v(i)) Next i End Sub 4-24 MicroComputing A5E00077133-01 Accessing the Process Data with the Data Control 4.10 Sample Program for Reading and Writing Boolean Data For reading and writing Boolean data, you can use the following sets of methods: • ReadVariable and Write Variable methods • ReadMultiVariables and WriteMultiVariables methods Table 4-12 provides a sample program for reading and writing arrays of Boolean data using the ReadMultiVariables method and the WriteMultiVariables method. Table 4-12 Reading and Writing Boolean Data Visual Basic Code Private Sub Read_Booleans() Dim mybools(7) As String Dim vals_v As Variant Dim states_v As Variant Dim rc As Long mybools(0) mybools(1) mybools(2) mybools(3) mybools(4) mybools(5) mybools(6) mybools(7) = = = = = = = = ”m0.0” ”m0.1” ”m0.2” ”m0.3” ”m0.4” ”m0.5” ”m0.6” ”m0.7” rc = S7Data1.ReadMultiVariables(mybools, vals_v, states_v) End Sub Private Sub Write_Booleans() Dim mybools(7) As String Dim myvals(7) As Variant Dim states_v As Variant Dim rc As Long mybools(0) = ”m0.0” mybools(1) = ”m0.1” mybools(2) = ”m0.2” mybools(3) = ”m0.3” mybools(4) = ”m0.4” mybools(5) = ”m0.5” mybools(6) = ”m0.6” mybools(7) = ”m0.7” myvals(0) myvals(1) myvals(2) myvals(3) myvals(4) myvals(5) myvals(6) myvals(7) = = = = = = = = False False False False False False False False rc = S7Data1.WriteMultiVariables(mybools, myvals, states_v) End Sub MicroComputing A5E00077133-01 4-25 Accessing the Process Data with the Data Control 4.11 Properties, Methods, and Events of the Data Control You use the properties and methods listed in Table 4-13 to manipulate the Data control. Table 4-13 Properties and Methods of the Data Control Description Page Activated property Specifies whether or not all connections are activated B-1 AutoConnect property Specifies whether or not the configured connections are established at runtime B-3 AutoConnectTimeout property Specifies a timeout value B-4 Connect method Establishes all configured connections B-7 ConnectName method Establishes connections for the object that is specified by name B-7 ConnectObject method Establishes connections for a specified object B-9 ControlEngine property Specifies the control engine for the connection DefaultDeadband property Specifies the dead band used by the Data control, if no dead band is specified in the connection table B-12 DefaultUpdateRate property Specifies the update rate used by the Data control, if no update rate is specified in the connection table B-12 Disconnect method Releases all established connections B-13 MultipleEngines property (S7-300/S7-400 only) Specifies whether the connection is to one specific control or to several control engines B-22 PCName property Specifies the network identification for a remote computer (for connecting over a network) B-23 PropertyChangedName method Notifies the Data control that the value of a property of a connected control, referenced by Name, has changed B-25 PropertyChangedObject method Notifies the Data control that the value of a property of a connected control, referenced by Object, has changed B-25 ReadMultiVariables method Reads the status of several variables in the control engine B-27 ReadVariable method Reads the status of one specific variable in the control engine B-28 ShowErrorBoxes property Specifies whether to display the default error boxes when there is a user-generated error B-30 WriteMultiVariables method Writes new values to several variables in the control engine B-38 WriteVariable method Writes a new value to a specific variable in the control engine B-39 Property or Method The Data control responds to the events listed in Table 4-14. 4-26 MicroComputing A5E00077133-01 Accessing the Process Data with the Data Control Table 4-14 Events of the Data Control Description Event Page ConnectionError Occurs when an error on a connection occurs C-2 ValueChanged Occurs when the value of a connected variable changes and no connected event was specified on the call to the Connect method C-10 Error Codes for the Data Control (ConnectionError Event) When an error occurs in the Data control, the control generates a ConnectionError event. Your program can capture this ConnectionError event and respond to specific situations. The ConnectionError event can detect standard OLE errors, such as E_FAIL or E_OUTOFMEM. Table 4-15 lists some of the error codes. Table 4-15 Data Control Error Codes Description Error Code 0x80004005 General OLE failure 0x8007000E Out of available memory 0x80070057 Invalid variable syntax 0xC0040004 Invalid or unknown data type 0xC0040007 Invalid variable type 0xC0040008 Invalid syntax for the item definition 0xC004000B Value passed to WRITE is out of range MicroComputing A5E00077133-01 4-27 Accessing the Process Data with the Data Control 4-28 MicroComputing A5E00077133-01 5 User Controls Chapter Overview SIMATIC MicroComputing provides ActiveX User controls for accessing process data. The Properties dialog box of the Data control establishes a connection between the user control and the control engine. The properties dialog box of each control defines the performance of the control. • Button control allows you to turn individual bits of memory on and off. • Edit control provides access to the memory locations of the control engine. • Label control allows you to display a constant string. • Slider control provides an interface for monitoring and modifying analog variables. Section MicroComputing A5E00077133-01 Description Page 5.1 Connecting the User Controls to the Process Data 5-2 5.2 Configuring the Property Pages of the Button Control 5-4 5.3 Configuring the Property Pages of the Edit Control 5-12 5.4 Configuring the Property Pages of the Label Control 5-22 5.5 Configuring the Property Pages of the Slider Control 5-28 5-1 User Controls 5.1 Connecting the User Controls to the Process Data To establish a connection between a Button, Edit, or Slider control and your process data, you assign a single-bit variable to the Value property of the control. To establish a connection between the Label control and your process data, you assign a single-bit variable to the Caption property of the Label control. The variable cannot be assigned within the Properties dialog box of the control. Instead, use the Properties dialog box of the Data control and select the button from the expandable list of controls under the Connections tab. See Figure 5-1. To set properties for anything other than the Value property, use the Properties dialog box of the control itself. Use the Edit menu or right-click the mouse button and select the Properties command for the control. Note In order to connect the control to actual process data, you must establish a connection through the Data control. Siemens SIMATIC DataControl Properties Engine General Connections Controls: Events Name Assigned Variable: S7Data1 m0.0 Button1 Browse... Alignment Appearance Enabled Border Style FalseCaption FalseColor FalsePicture Font ForeColor Locked PushButton StretchMode Style TrueCaption TrueColor TruePicture Value Add... Delete 5-2 100 Dead band: 0 Automatic write mode: Filter... OK Figure 5-1 Update rate (ms): Apply filter to properties Cancel Apply Help Assigning Variables for a Button Control MicroComputing A5E00077133-01 User Controls Specifying Variables and Data Types As an option, MicroComputing allows you to specify a data type when you assign a variable to one of the properties of a SIMATIC control. You define the data type by entering the absolute address for the memory location, followed by a colon (:) and then the data type (Figure 5-2). Be careful in assigning data types. If you are connecting an Edit control, the values for some S7-200 data types will not display properly unless the data type you assign matches the Data Format field in the Edit Control properties box. For example, you can define an assigned variable as a REAL data type by entering “MD10:real” when you assign the variable, but you must be sure to set the Data Format field in the Edit Control properties box to Real. Siemens SIMATIC DataControl Properties General Engine Connections Events Name Assigned Variable: Controls: md10:real S7Data1 Edit1 Alignment Appearance BackColor BackStyle BorderStyle DataFormat DisplayValue Enabled Factor Font ForeColor Locked Browse... Value Add... Delete 100 Deadband: 0 Automatic write mode: Filter... OK Figure 5-2 Update rate (ms): Apply filter to properties Cancel Apply Help Assigning Variables for the Edit Control Note While MicroComputing allows you to specify a data type when you assign a variable to one of the properties of a control, remember that the Button control can be assigned only to an individual bit in the control engine. The only valid data type for a Button control is BOOL. MicroComputing A5E00077133-01 5-3 User Controls 5.2 Configuring the Property Pages of the Button Control The Button control allows you to associate a button display with a data bit from your process. You associate the button with your process by assigning a variable (namely, the desired bit location) to it. You can then toggle the button display to change the state of the bit; the button color also changes automatically as the state of the bit changes within the process. The Button control provides access to individual memory bits in the control engine and has two states of animation: 0 (off) or 1 (on). Clicking on the Button control changes the data in the control engine. The Button control reads and writes Boolean (single bit) values. Defining the Caption and Enabling the Button Control The General tab of the Properties dialog (Figure 5-3) allows you to define the two captions for the Button control: • Alignment determines the alignment of the text (left, center, or right). • TrueCaption: Enter the text to be displayed in the control when the bit is true (equal to 1 or on). • FalseCaption: Enter the text to be displayed in the control when the bit is false (equal to 0 or off). • Style determines the style (standard or graphical) for the control. Graphical style means that a bitmap is used. • Appearance: If you set this property to 3D, the control will have a three-dimensional appearance. (You must also set the BorderStyle to Fixed Single to enable the three-dimensional appearance.) The other option is Flat, which displays a two-dimensional, rectangular border around the control. • BorderStyle: If you set this property to Fixed Single, the control is displayed with a rectangular border; if you set the property to None, no border will be displayed. 5-4 MicroComputing A5E00077133-01 User Controls • StretchMode: Determine the resize mode of the graphical element for the Button. • Enabled: Determine whether the Button responds to events. It does not generate events while disabled. The default setting for this option is enabled (selected). • Locked: Determine whether the control is in a read only state. In locked state, you cannot change any values. • Pushbutton: Determine whether or not the control functions like a pushbutton. It determines the operation mode of the control: if set to True or 1, the True value is retained as long as the Button control is pressed (MouseDown event). Siemens_SIMATIC_UserControls.Button Properties General Picture Font Color Name Alignment: TrueCaption: ON FalseCaption: OFF Style: 1 - wGraphical Enabled: Appearance: 0 - wFlat Locked BorderStyle: 0 - wNone StretchMode: 1 -wResizeImage OK Figure 5-3 MicroComputing A5E00077133-01 PushButton Cancel Apply Help Button Control Properties (General Tab) 5-5 User Controls Defining the Appearance of the Button Control The Picture tab of the Properties dialog (Figure 5-4) allows you to browse to a picture for the two states of the Button control. Select the Off state (FalsePicture) or the On state (TruePicture) and then click on Browse to select the picture to be displayed for that state. You can use any pictures for the On and Off states, but graphics are only allowed if “1 - wGraphical” is selected in the Style field of the General tab. MicroComputing provides additional bitmaps. Browse to the WinAC\WinCP\ bitmap directory. Siemens_SIMATIC_UserControls.Button Properties General Picture Font Color Properties: Name Preview: FalsePicture TruePicture Browse... OK Figure 5-4 5-6 Cancel Clear Apply Help Button Control Properties (Picture Tab) MicroComputing A5E00077133-01 User Controls Defining the Typeface of the Button Control The Font tab of the Properties dialog (Figure 5-5) allows you to define the typeface and size for the text on the Button control: • Font: Select the typeface for the text from a list of standard typefaces. • Size: Select the point size or enter a specific point size for the text. • Effects: Select other typographical options (boldface, italic, underline, or strike-through). The Sample Text field displays the selection of the Font property. Siemens_SIMATIC_UserControls.Button Properties General Picture Font Color Properties: Font Name Font: Size: MS Sans Serif 8.25 Effects Bold Underline Italic Strikeout Sample Text: MS Sans Serif OK Figure 5-5 MicroComputing A5E00077133-01 Cancel Apply Help Button Control Properties (Font Tab) 5-7 User Controls Defining the Color of the Button Control The Color tab of the Properties dialog (Figure 5-6) allows you to define the colors for the two states, and for the text of the Button control. You can choose from a palette of standard colors, or you can create custom colors. • Select the Off state (FalseColor) or the On state (TrueColor) and then select the color to be displayed for that state from the color palette. • You can also define the ForeColor which is the color used to display text in an object. Note FalseColor and TrueColor can be changed only if you have selected Style: Standard on the General tab, but ForeColor (Text color) can be changed for both Style: Standard and Style: Graphical. Siemens_SIMATIC_UserControls.Button Properties General Picture Font Color Properties: Name Color Set: FalseColor Standard Colors ForeColor Color Palette: Gray TrueColor Green Magenta Red Edit Custom Color... OK Figure 5-6 5-8 Cancel Apply Help Button Control Properties (Color Tab) MicroComputing A5E00077133-01 User Controls Assigning a Name to the Button Control The Name tab of the Properties dialog (see Figure 5-7) allows you to assign more meaningful names to the control you have inserted into the container. This tab appears only when you are using controls in the Computing Container. Type the new name in the “Control Name” field, and click on Apply or OK. The new name appears in the Select Control list in the toolbar. To open the control Properties dialog box, double-click on the desired control. Siemens_SIMATIC_UserControls.Button Properties General Picture Control Name: Font Color Button1 OK Figure 5-7 MicroComputing A5E00077133-01 Name Cancel Apply Help Button Control Properties (Name Tab) 5-9 User Controls Properties and Methods of the Button Control Use the properties and methods listed in Table 5-1 to manipulate the Button control. Table 5-1 Properties and Methods of the Button Control Property or Method 5-10 Description Page AboutBox method Displays the About message box for the control B-1 Alignment property Determines the alignment of the text B-2 Appearance property Determines if the control is displayed with 3D effects B-3 BorderStyle property Selects the border style (fixed single, or none) B-5 Enabled property Determines whether the control reacts to changes of the Value property and fires events B-15 FalseCaption property Determines the text that is displayed in the control when the Value property is False (equal to 0, or Off) B-16 FalseColor property Determines the color of the control when the Value property is False (equal to 0, or Off) B-17 FalsePicture property Determines the graphic element that is displayed by the control when the Value property is False (equal to 0, or Off) B-17 Font property Returns a Font object for the main font of the control B-18 ForeColor property Determines the foreground color used to display the text of the control B-18 Locked property Sets the control to a read-only state. By default, the control is not in locked mode, so the user can enter numbers. B-20 PushButton property Determines the operation mode of the control: if set to True or 1, the Value property is inverted as long as the Button control is pressed (MouseDown event) B-26 StretchMode property Determines the resize mode of the graphical element for the control B-32 Style property Determines the style (standard or graphical) for the control B-33 TrueCaption property Determines the text that is displayed in the control when the Value property is True (equal to 1, or On) B-34 TrueColor property Determines the color of the control when the Value property is True (equal to 1, or On) B-34 TruePicture property Determines the graphic element that is displayed by the control when the Value property is True (equal to 1, or On) B-35 Value property Contains the value that is linked to the control engine B-36 MicroComputing A5E00077133-01 User Controls Events of the Button Control The control responds to the events listed in Table 5-2. Table 5-2 Events of the Button Control Event Description Page Change event Occurs when the value of the Value property changes C-1 Click event Occurs when a mouse button is pressed and released while the mouse cursor is over the control C-1 Error event Occurs when a property is set to an illegal value C-3 KeyDown event Occurs when the user presses a key while the control has the focus C-4 KeyPress event Occurs when an ANSI key is pressed and released while the control has the focus C-5 KeyUp event Occurs when a key is released while the control has the focus C-5 MouseDown event Occurs when a mouse button is pressed while the mouse cursor is over the control C-7 MouseMove event Occurs when the mouse cursor moves over the control C-8 MouseUp event Occurs when a mouse button is released while the mouse cursor is over the control C-9 MicroComputing A5E00077133-01 5-11 User Controls 5.3 Configuring the Property Pages of the Edit Control The Edit control allows you to display process data in a numeric format and to modify that data. You associate the number display with your process by assigning a variable (the process value) to it. You can type a new value into the display; the display also updates automatically when the variable associated with it changes within the process. The Edit control provides access to the memory locations of the control engine. Entering a new value in the control changes the data in the control engine. Note MicroComputing does not allow you to write to timers. Defining How the Data is Displayed The fields on the General tab (Figure 5-8) allow you to define the following properties concerning how the data will be displayed: • Alignment: Define how the value will be displayed in the Edit control: aligned to the left side of the field, centered in the field, or aligned to the right side of the field. • Data format: Define the storage type used for converted values. If you are using a data type for displaying a value which is too large, the value will be truncated. The data type specified in this field (shown in Figure 5-8) must match any data type specified in the Assigned Variable field of the Data Control Properties dialog box (see Figure 5-2). Table 5-3 shows the data type sizes for the Edit control. • Precision: Define the decimal place for the real (floating-point) number. Enter the number of digits to the right of the decimal. The default value is three digits. This field is enabled only for the Real data type. • Appearance: Define the way the control looks. If you set this property to 3D, the control will have a three-dimensional appearance. (You must also set the border style to Fixed Single to enable the three-dimensional appearance.) The other option is Flat, which displays a two-dimensional, rectangular border around the control. • BorderStyle: Define whether a border is displayed. If you set this property to Fixed Single, the control is displayed with a rectangular border; if you set the property to None, no border will be displayed. • WriteMode: Determine how the control responds when the user enters a new value. If the write mode is set to Automatic (0), the value (if valid) is written automatically into the Value property (and to the control engine). If the write mode is Manual (1), the value is not written to the value property unless your program code calls the method “Write” at the control. 5-12 MicroComputing A5E00077133-01 User Controls Use the check boxes on the General tab (shown in Figure 5-8) to define other operations for the control: • Enabled: Determine whether the control responds to events. It does not generate events while disabled. The default setting for this option is enabled (selected). • Locked: When you enable this option, the control becomes a read-only display: you can view the value in the memory location of the control engine, but you cannot change the values from this control. The default setting for this option is disabled (not selected). • Zero Pad: When you enable this option, the Edit control fills out the data type by inserting zeroes (0) to the left of the value. The default setting for this option is disabled (not selected). Siemens_SIMATIC_UserControls.Edit Properties General Scaling Font Color Name Alignment: Enabled Locked Data Format: 6 - wReal Precision: 3 Appearance: 1 - wThreeD BorderStyle: 1 - wFixedSingle WriteMode: 0 - wAutomatic Zeropad OK Figure 5-8 Table 5-3 Cancel Apply Help Edit Control Properties (General Tab) Size of Data Types for the Edit control Data Type Setting Size Description Boolean 0 1 bit Single bit value Byte 1 1 byte Unsigned single-byte value Word 2 2 byte Unsigned two-byte value Integer 3 2 bytes Signed two-byte integer value Double Word 4 4 bytes Unsigned four-byte value (default) Double Integer 5 4 bytes Signed four-byte integer value Real 6 4 bytes Signed four-byte real (floating-point) value Timer 7 2 bytes Unsigned two-byte value Counter 8 2 bytes Unsigned two-byte value MicroComputing A5E00077133-01 5-13 User Controls Defining a Scale for Displaying Values The Scaling tab of the Properties dialog box (Figure 5-9) allows you to define a scale for displaying the value in the memory location. This scaling factor is used both in reading a value from and writing a value to the control engine. You can select one of three scaling options: • No scaling of the data (default) (0-wNoScaling) • Scaling by formula (1-wByFormula) • Scaling by range (2-wByRange) Siemens_SIMATIC_UserControls.Edit Properties General Scaling Scale mode: Font Color Name 0 -wNoScaling Display Value Scaling Formula Max: 255 Min: 0 Value x Factor: 1 + Value = RawMax: 100 RawMin: 0 Display Value OK Figure 5-9 0 Offset: Cancel Apply Help Edit Control Properties (Scaling Tab) No scaling If you choose the default (0-wNoScaling), the Display Value shows a Max of 100 and a Min of 0. 5-14 MicroComputing A5E00077133-01 User Controls Scaling by Formula If you choose to scale by formula (1-wByFormula), enter the following information: • Factor represents a percentage of change (scaling factor) from the value in the control engine to the value in the Edit control. • Offset represents a fixed value to be added to the scaled result before being displayed. The Edit control uses the following formula to calculate the scaled value: (Value Factor) + Offset = Display Value where: Value = the value stored in the control engine Factor = the scaling factor Offset = the offset factor Display Value = the value displayed in the Edit control When the Edit control writes data to the control engine, the inverse of the formula is used to scale the value. Scaling by Range If you choose to scale by range transformation (2-wByRange), specify the upper (RawMax) and lower (RawMin) values for a source range (for the value in the control engine) and for a destination range (for the value displayed in the Edit control or Display). The Edit control then transforms the value from one range into the equivalent value for the other range. These ranges define only the relationship between the data in the control engine and the data in the Edit control: if the value is above or below the ranges entered for the transformation, the transformation uses the formula to extrapolate the scaled value. The upper and lower limits are not minimum and maximum values for the data: there is no limit checking with the scaling factors. MicroComputing A5E00077133-01 5-15 User Controls Defining the Typeface of the Text The Font tab of the Properties dialog (Figure 5-10) allows you to define the typeface and size for the text of the Edit control: • Font: Select the typeface for the text from a list of standard typefaces. • Size: Select the point size or enter a specific point size for the text. • Effects: Select other typographical options (boldface, italic, underline, or strikeout) for the text. The Sample Text field displays the selection of the Font property. Siemens_SIMATIC_UserControls.Edit Properties General Scaling Font Color Properties: Font Name Font: Size: MS Sans Serif 8.25 Effects Bold Underline Italic Strikeout Sample Text: MS Sans Serif OK Figure 5-10 5-16 Cancel Apply Help Edit Control Properties (Font Tab) MicroComputing A5E00077133-01 User Controls Defining the Color of the Edit Control The Color tab of the Properties dialog (Figure 5-11) allows you to define the colors for the two states, and for the text of the Edit control. Select the Property (BackColor or ForeColor) and then select the color to be displayed for that property from the color palette. You can choose from a palette of standard colors, or you can create custom colors. Note BackColor and ForeColor can be changed only if you have selected Style: Standard on the General tab, but ForeColor (Text color) can be changed for both Style: Standard and Style: Graphical. Siemens_SIMATIC_UserControls.Label Properties General Scaling Font Color Properties: Name Color Set: BackColor Standard Colors ForeColor Color Palette: Magenta Red White Yellow Edit Custom Color... OK Figure 5-11 MicroComputing A5E00077133-01 Cancel Apply Help Edit Control Properties (Color Tab) 5-17 User Controls Assigning Names to the Edit Control The Name tab of the Properties dialog (Figure 5-12) allows you to assign more meaningful names to the control you have inserted into the container. This tab appears only when you are using controls in the SoftContainer. Type the new name in the “Control Name” field, and click on Apply or OK. The new name appears in the “Select Control” list in the toolbar. To open the control Properties dialog box, double-click on the desired control. Siemens_SIMATIC_UserControls.Edit Properties General Scaling Color Font Control Name: Edit1 OK Figure 5-12 Name Cancel Apply Help Edit Control Properties (Name Tab) Properties and Methods of the Edit Control Use the properties and methods listed in Table 5-4 to manipulate the Edit control. Table 5-4 Properties and Methods of the Edit Control Property or Method 5-18 Description Page AboutBox method Displays the About message box for the control B-1 Alignment property Specifies the alignment of the number in the control B-2 Appearance property Specifies whether the control is displayed as 3D or flat B-3 BackColor property Returns or sets the background color B-5 BorderStyle property Selects the border style (fixed single, or none) B-5 DataFormat property Defines the storage type used for converted values B-10 DisplayValue property Returns the scaled value for the control B-14 Enabled property Determines whether the control reacts to changes of the Value property and fires events B-15 MicroComputing A5E00077133-01 User Controls Table 5-4 Properties and Methods of the Edit Control, continued Property or Method Description Page Factor property Specifies the scaling factor used when the scale-by-formula option has been enabled (used with ScaleMode property) B-15 Font property Returns a Font object for the main font of the control B-18 ForeColor property Returns or sets the foreground color used to display text and graphics B-18 Locked property Sets the control to a read-only state. By default, the control is not in locked mode, so the user can enter numbers. B-20 Max property Returns/sets the maximum scaled value of the control if the ScaleMode property is wByRange or wScaleNone B-21 Min property Returns/sets the minimum scaled value of the control if the ScaleMode property is wByRange or wScaleNone B-21 Offset property Specifies the offset used when the scale-by-formula option has been enabled (used with ScaleMode property) B-22 Precision property Selects the precision of the Real number B-24 RawMax property Defines the upper value of the source range for scaling a value. The ScaleMode property must be set to wByRange. B-27 RawMin property Defines the lower value of the source range for scaling a value. The ScaleMode property must be set to wByRange. B-27 ScaleMode property Specifies the scaling mode to be used for scaling the values B-29 Value property Contains the value that is linked to the control engine B-36 WriteMode property Selects whether to write new values automatically or manually B-37 WriteNow method Writes the value of the Value property B-38 ZeroPad Determines whether the displayed number is padded with zeroes (to the left of the value) to the size of the data type B-40 MicroComputing A5E00077133-01 5-19 User Controls Events of the Edit Control The Edit control responds to the events listed in Table 5-5. Table 5-5 Events of the Edit Control Event 5-20 Description Page Change event Occurs when the value of the Value property changes C-1 Click event Occurs when a mouse button is pressed and released while the mouse cursor is over the control C-1 DblClick event Occurs when a mouse button is double-clicked while the cursor is over the control C-2 Error event Occurs when a property is set to an illegal value C-3 KeyDown event Occurs when the user presses a key while the control has the focus C-4 KeyPress event Occurs when an ANSI key is pressed and released while the control has the focus C-5 KeyUp event Occurs when a key is released while the control has the focus C-5 MouseDown event Occurs when a mouse button is pressed while the mouse cursor is over the control C-7 MouseMove event Occurs when the mouse cursor moves over the control C-8 MouseUp event Occurs when a mouse button is released while the mouse cursor is over the control C-9 MicroComputing A5E00077133-01 User Controls Error Codes for the Edit Control When an error occurs in the Edit control, the control generates an Error event. Your program can capture this Error event and respond to specific situations. Table 5-6 lists the error codes for the Edit control. Table 5-6 Error Codes for the Edit Control Error Code C0040002 Description The scaling cannot proceed because of an error in the formula used. This error only appears if you are using the Edit control with range scaling. In this case it is possible that you have specified a raw value range (RawMin)(RawMax) of the length of zero (min equal to max). This would lead to a division by zero, which means the scaling is impossible. To correct the error, specify a raw value range in which RawMin is not equal to RawMax. C0040003 The set value at the Value property is invalid. The value which came from the control engine or from a script that is accessing the Value property is not interpretable. To correct the error, check the values that you have written to the control. C0040004 The set value at the Text property is invalid. This is a common error, which occurs if the user enters an incorrect value in the control. Normally, it means that the entered text contains characters that are not allowed. The allowed characters are dependent on the DataType used. To correct the error, reenter a value that is allowed. C0040005 The other OLE components could not be found. An error occurred in the installation of MicroComputing or of Windows itself. The control is unable to access the other necessary parts that are needed for the software to work properly. To correct the error, check the installation and the access point “Computing”. C0040006 The Microsoft standard controls could not be created. Something went wrong with the installation of MicroComputing or Windows itself. The control is unable to access the other necessary parts that are needed for the software to work properly. To correct the error, check the installation. C0040010 The limit check cannot proceed, because the RawMin is greater than the RawMax. This error can only appear if you are using the Edit control with limit checking (checking for upper and lower limit). In this case it is possible that you’ve specified a lower limit (RawMin) that is greater than the upper limit (RawMax). To correct the error, specify a valid range for limit checking. The lower limit has to be less than the upper limit. MicroComputing A5E00077133-01 5-21 User Controls 5.4 Configuring the Property Pages of the Label Control The Label control allows you to display a constant string. You can also connect the Caption property of the Label control to any process value. The process value is converted into a string and displayed. The Label control cannot be used for input. Defining the Label and Enabling the Control The General tab of the Properties dialog (Figure 5-13) allows you to define the presentation of the Label control. • Alignment: Define how a value is displayed in the Label control: aligned to the left side of the field, centered in the field, or aligned to the right side of the field. • Caption: Specify the text that is displayed by the control. If the caption is attached to a process value, the process value is displayed instead. • Style: Determine the style (standard or graphical) for the control. • Appearance: Define the way the control looks. If you set this property to 3D, the control has a three-dimensional appearance. (You must also set the border style to Fixed Single.) The other option is Flat, which displays a two-dimensional, rectangular border around the control. • BorderStyle: Define whether a border is displayed. If you set this property to Fixed Single, the control is displayed with a rectangular border; if you set the property to None, no border is displayed. • StretchMode: Determine the resize mode of the graphical element for the control. • Enabled: Determine whether the Label responds to events. It does not generate events while it is disabled. The default setting for this option is enabled (selected). Siemens_SIMATIC_UserControls.Label Properties General Picture Font Color Name Alignment: Caption: Label Style: 1 - wGraphical Appearance: 0 - wFlat BorderStyle: 0 - wNone StretchMode: 1 -wResizeImage OK Figure 5-13 5-22 Enabled: Cancel Apply Help Label Control Properties (General Tab) MicroComputing A5E00077133-01 User Controls Defining the Appearance of the Label Control The Picture tab of the Properties dialog (Figure 5-14) allows you to browse to a picture for the Label control. Select the Picture tab and then click on Browse to select the picture to be displayed for that state. Note You can select the Picture property only if you have also configured the Style property (on the General tab) as graphical. MicroComputing provides additional bitmaps. Browse to the WinAC\WinCP\Bitmap directory. Siemens_SIMATIC_UserControls.Label Properties General Picture Font Color Properties: Name Preview: Picture Text Browse... OK Figure 5-14 MicroComputing A5E00077133-01 Cancel Clear Apply Help Label Control Properties (Picture Tab) 5-23 User Controls Defining the Typeface of the Label Control The Font tab of the Properties dialog (Figure 5-15) allows you to define the typeface and size for the labels of the Label control: • Font: Select the typeface for the label from a list of standard typefaces. • Size: Select the point size from a list of standard point sizes, or enter a specific point size for the label. • Effects: Select other typographical options (boldface, italic, underline, or strike-through) for the label. The Sample Text field displays the selection of the Font property. Siemens_SIMATIC_UserControls.Label Properties General Picture Font Color Properties: Font Name Font: Size: MS Sans Serif 8.25 Effects Bold Underline Italic Strikeout Sample Text: MS Sans Serif OK Figure 5-15 5-24 Cancel Apply Help Label Control Properties (Font Tab) MicroComputing A5E00077133-01 User Controls Defining the Color of the Label Control The Color tab of the Properties dialog (Figure 5-16) allows you to define the colors for the background (BackColor) and for the text (ForeColor) of the Label control. Select the property (BackColor or ForeColor) and then select the color to be displayed for that property from the color palette. You can choose from a palette of standard colors, or you can create custom colors. Note ForeColor (Text color) can be changed for both Style: Standard and Style: Graphical, but the background color (BackColor) may be hidden by the bitmap picture of the label in certain stretchmodes. Siemens_SIMATIC_UserControls.Label Properties General Picture Font Color Properties: Name Color Set: BackColor Standard Colors ForeColor Color Palette: Gray Green Magenta Red Edit Custom Color... OK Figure 5-16 MicroComputing A5E00077133-01 Cancel Apply Help Label Control Properties (Color Tab) 5-25 User Controls Assigning a Name to the Label Control The Name tab of the Properties dialog (Figure 5-17) allows you to assign more meaningful names to the control you have inserted into the container. This tab appears only when you are using controls in the SoftContainer. Type the new name in the “Control Name” field, and click on Apply or OK. The new name appears in the “Select Control” list in the toolbar. To open the control Properties dialog box, double-click on the desired control. Siemens_SIMATIC_UserControls.Label Properties General Picture Control Name: Font Color Label1 OK Figure 5-17 5-26 Name Cancel Apply Help Label Control Properties (Name Tab) MicroComputing A5E00077133-01 User Controls Properties and Methods of the Label Control Use the properties and methods listed in Table 5-7 to manipulate the Label control. Table 5-7 Properties and Methods of the Label Control Description Property or Method Page AboutBox method Displays the About message box for the control B-1 Alignment property Determines the alignment of the text B-2 Appearance property Determines if the control is displayed with 3D effects B-3 BackColor property Determines the background color for the control B-5 BorderStyle property Selects the border style (fixed single, or none) B-5 Caption property Determines the text that is displayed by the control B-6 Enabled property Determines whether the control reacts to changes of the Value property and fires events B-15 Font property Returns a Font object for the main font of the control B-18 ForeColor property Determines the text color of the control B-18 Picture property Determines the graphic used for the control B-24 StretchMode property Determines the resize mode of the graphical element for the control. B-32 Style property Determines the style (standard or graphical) for the control B-33 Events of the Label Control The Label control responds to the events listed in Table 5-8. Table 5-8 Events of the Edit Control Event Description Page Change event Occurs when the value of the Value property changes C-1 Click event Occurs when a mouse button is pressed and released while the mouse cursor is over the control C-1 DblClick event Occurs when a mouse button is double-clicked while the cursor is over the control C-2 Error event Occurs when a property is set to an illegal value C-3 MouseDown event Occurs when a mouse button is pressed while the mouse cursor is over the control C-7 MouseMove event Occurs when the mouse cursor moves over the control C-8 MouseUp event Occurs when a mouse button is released while the mouse cursor is over the control C-9 MicroComputing A5E00077133-01 5-27 User Controls 5.5 Configuring the Property Pages of the Slider Control The Slider control allows you to display and modify process data in a visual format as a sliding indicator. You associate the slider with your process by assigning a variable (the process value) to it. You can then adjust the slider indicator in order to modify the process value; the slider also changes its indicator position automatically as the variable associated with it changes within the process. The Slider control provides access to the memory locations of the control engine. Entering a new value in the control changes the data in the control engine. Note MicroComputing does not allow you to write to timers. Defining How the Data is to be Displayed The General tab of the Properties dialog box (Figure 5-19) allows you to define the presentation of the data accessed by the Slider control. The fields on the General tab allow you to define the following properties: • Style: Determine the style (standard or graphical) for the control • Direction: Set the orientation (horizontal or vertical) of the control. See Figure 5-18. • StretchMode: Determine the resize mode of the graphical element for the control. • Ticks: Define the number of interim units between the minimum and maximum values • SmallChange and LargeChange: Determine the amount that the value displayed by the Slider control increases or decreases when you press an arrow key (SmallChange) or press the Page Up and Page Down keys (LargeChange). • KnobHeight and KnobWidth: Determine the height and width of the indicator displayed by the control. 100 Horizontal 0 Vertical 100 0 Figure 5-18 5-28 Orientation of the Slider Control MicroComputing A5E00077133-01 User Controls Using the check boxes on the General tab, you can define other operations for the control: • Show Min and Max Value: Determine whether the minimum and maximum values are displayed. • Enabled: Determine whether the control responds to events. It does not generate events while disabled. The default setting for this option is enabled (selected). • Locked: Determine whether the control is in a read-only state. In locked state, you cannot change any values. Siemens_SIMATIC_UserControls.Slider Properties General Scaling Picture Color Name Style 1 - wGraphical Ticks: Direction 0 - wHorizontal SmallChange: 1 StretchMode: 1 - wResizeImage Show Min and Max Value Enabled LargeChange: 5 KnobHeight: 450 KnobWidth: 195 Locked OK Figure 5-19 MicroComputing A5E00077133-01 10 Cancel Apply Help Slider Control Properties (General Tab) 5-29 User Controls Defining a Scale for Displaying Values The Scaling tab of the Properties dialog box (Figure 5-20) allows you to define a scale for displaying the value in the memory location. This scaling factor is used both in reading a value from and writing a value to the control engine. Select one of three scaling options: • No scaling of the data (default) (0-wNoScaling) • Scaling by formula (1-wByFormula) • Scaling by ranges (2-wByRange) Siemens_SIMATIC_UserControls.Slider Properties Scaling General ScaleMode: Picture Color Name 0 - wNoScaling Display Value Scaling Formula Max: 255 Min: 0 Value x Factor: 1 + Value Offset: RawMax: 100 RawMin: 0 Display Value OK Figure 5-20 1 = Cancel Apply Help Slider Control Properties (Scaling Tab) No Scaling If you choose the default (0-wNoScaling), the Display Value shows a Max Value of 100 and a Min Value of 0. 5-30 MicroComputing A5E00077133-01 User Controls Scaling by Formula If you choose to scale by formula (1-wByFormula), enter the following information: • Factor represents a percentage of change (scaling factor) from the value in the control engine to the value in the Slider control. • Offset represents a fixed value to be added to the scaled result before being displayed. The Slider control uses the following formula to calculate the scaled value: (Value Factor) + Offset = Display Value where: Value = the value stored in the control engine Factor = the scaling factor Offset = the offset factor Display Value = the value displayed in the control When the Slider control writes data to the control engine, the inverse of the formula is used to scale the value. Scaling by Range If you choose to scale by range transformation (2-wByRange), specify the upper (RawMax) and lower (RawMin) values for a source range (Value fields) and for a destination range (Display Value field ). The Slider control then transforms the value from one range into the equivalent value for the other range. These ranges define only the relationship between the data in the control engine and the data in the Slider control: if the value is above or below the ranges entered for the transformation, the transformation uses the formula to extrapolate the scaled value. The upper and lower limits are not minimum and maximum values for the data: there is no limit checking with the scaling factors. Figure 5-21 shows the display values of the Slider control. Ticks (unit markings) Min 0 Figure 5-21 MicroComputing A5E00077133-01 Max 100 Elements of the Slider Control 5-31 User Controls Defining the Appearance of the Slider Control The Picture tab of the Properties dialog (Figure 5-22) allows you to select the pictures for the Slider control. In the Properties field, select KnobPicture and then click on the Browse button to select the picture (graphic) used for the indicator on the control. Next, select Picture and click on the Browse button to select the picture (graphic) used for the control. MicroComputing provides additional bitmaps. Browse to the WinAC\WinCP\ bitmap directory. Note Picture can be changed only if you have selected Style: Graphical on the General tab, but KnobPicture can be changed for both Style: Standard and Style: Graphical. Siemens_SIMATIC_UserControls.Slider Properties General Scaling Picture Color Properties: Name Preview: KnobPicture Picture Browse... OK Figure 5-22 5-32 Cancel Clear Apply Help Slider Control Properties (Picture Tab) MicroComputing A5E00077133-01 User Controls Defining the Color of the Slider Control The Color tab of the Properties dialog (Figure 5-23) allows you to define the two colors (BackColor and ForeColors) of the Slider Control. Select the Property (Back Color or ForeColor) and then select the color to be displayed for that property from the color palette. You can choose from a palette of standard colors, or you can create custom colors. • BackColor: Define the background color of the control. • ForeColor: Define the color used to display text and graphics in an object. Siemens_SIMATIC_UserControls.Slider Properties General Scaling Picture Color Properties: Name Color Set: BackColor Standard Colors ForeColor Color Palette: Gray Green Magenta Red Edit Custom Color... OK Figure 5-23 Cancel Apply Help Slider Control Properties (Color Tab) Note BackColor can be changed only if you have selected Style: Standard on the General tab, but ForeColor can be changed for both Style: Standard and Style: Graphical. MicroComputing A5E00077133-01 5-33 User Controls Assigning a Name to the Control The Name tab of the Properties dialog (Figure 5-24) allows you to assign more meaningful names to the control you have inserted into the container. This tab appears only when you are using controls in the SoftContainer. Type the new name in the “Control Name” field, and click on Apply or OK. The new name appears in the Select Control list in the toolbar. To open the control Properties dialog box, double-click on the desired control. Siemens_SIMATIC_UserControls.Slider Properties General Picture Font Control Name: Color Slider1 OK Figure 5-24 Name Cancel Apply Help Slider Control Properties (Name Tab) Properties and Methods of the Slider Control Use the properties and methods listed in Table 5-9 to manipulate the Slider control. Table 5-9 Properties and Methods of the Slider Control Property or Method 5-34 Description Page AboutBox method Displays the About message box for the control B-1 BackColor property Determines the background color for the control B-5 Direction property Sets the orientation (horizontal or vertical) B-13 Display Value property Returns the scaled value for the control B-14 Enabled property Determines whether the control reacts to changes of the Value property and fires events B-15 Factor property Specifies the scaling factor used when the scale-by-formula option has been enabled (used with ScaleMode property) B-15 ForeColor property Determines the foreground color for the control B-18 MicroComputing A5E00077133-01 User Controls Table 5-9 Properties and Methods of the Slider Control, continued Property or Method Description Page KnobHeight property Determines the height of the indicator displayed by the control B-19 KnobPicture property Determines the graphical element (picture) to be used as the indicator for the control B-19 KnobWidth property Determines the width of the indicator displayed by the control B-19 LargeChange property Determines how far the slider indicator moves when the control has focus and you press the Page Up or Page Down key B-20 Locked property Sets the control to a read-only state. By default, the control is not in locked mode, so the user can enter numbers. B-20 Max property Returns/sets the maximum scaled value of the control if the ScaleMode property is wByRange or wScaleNone B-21 Min property Returns/sets the minimum scaled value of the control if the ScaleMode property is wByRange or wScaleNone B-21 Offset property Specifies the offset used when the scale-by-formula option has been enabled (used with ScaleMode property) B-22 Picture property Determines the graphical element (picture) to be used for the control B-24 RawMax property Determines the maximum raw value of the control (if the ScaleMode property is set to wByRange) B-27 RawMin property Defines the lower value of the source range for scaling a value. The ScaleMode property must be set to wByRange. B-27 ScaleMode property Specifies the scaling mode to be used for scaling values B-29 ShowMinMax property Specifies whether the control displays the range (minimum and maximum) of values B-30 Style property Determines the style (standard or graphical) of the control B-33 SmallChange property Determines how far the slider indicator moves when the control has focus and you press the up/down or right/left arrow keys B-31 StretchMode property Determines the resize mode of the graphical element for the control. B-32 Ticks property Sets the number of ticks (unit markers) B-34 Value property Contains the value that is linked to the control engine B-36 MicroComputing A5E00077133-01 5-35 User Controls Events of the Slider Control The control responds to the events listed in Table 5-10. Table 5-10 Events of the Slider Control Event 5-36 Description Page Change event Occurs when the value of the Value property changes C-1 Click event Occurs when a mouse button is pressed and released while the mouse cursor is over the control C-1 DblClick event Occurs when a mouse button is double-clicked while the cursor is over the control C-2 Error event Occurs when a property is set to an illegal value C-3 KeyDown event Occurs when the user presses a key while the control has the focus C-4 KeyPress event Occurs when an ANSI key is pressed and released while the control has the focus C-5 KeyUp event Occurs when a key is released while the control has the focus C-5 MouseDown event Occurs when a mouse button is pressed while the mouse cursor is over the control C-7 MouseMove event Occurs when the mouse cursor moves over the control C-8 MouseUp event Occurs when a mouse button is released while the mouse cursor is over the control C-9 MicroComputing A5E00077133-01 Designing Process Forms with the SoftContainer 6 Chapter Overview SIMATIC MicroComputing provides an OLE container application (SoftContainer) for receiving and displaying the data from the control engine. Using this container, you can insert your own third-party controls or the SIMATIC controls into a process form. This chapter provides information about inserting and positioning the controls in the container. For more information about the specific SIMATIC controls, refer to the following chapters: • For information about the Data control, see Chapter 4. • For information about the other SIMATIC controls (Button control, Edit control, Label control and Slider control), see Chapter 5. Section MicroComputing A5E00077133-01 Description Page 6.1 Starting the SoftContainer 6-2 6.2 Creating a Process Form 6-4 6.3 Switching from Design Mode to Run Mode 6-6 6.4 Saving Your Process Form 6-8 6-1 Designing Process Forms with the SoftContainer 6.1 Starting the SoftContainer MicroComputing includes a container for the various SIMATIC controls. To create a container, select the Simatic > PC Based Control > Computing SoftContainer menu command from the Start menu. You can also double-click on the icon for MicroComputing. Figure 6-1 shows a sample container, which includes the following elements: • The toolbar contains buttons for accessing common functions (such as for opening a process form, or for cutting and pasting). It also contains the icons for the SIMATIC controls provided by MicroComputing. • The toolbar also contains a field that contains the name of the selected control. You can use the drop-down list box to select the controls in the process form. • The status bar contains information about the operating mode of S7Soft container (Design or Run). The status bar also provides information about which control has been selected, including its size and location within the process form. • A default process form (S7Soft1) to contain the controls. S7SoftContainer – [S7Soft1] Toolbar File Edit View Mode Options Window Help ÎÎÎÎÎÎÎÎÎÎÎÎÎÎÎÎÎÎÎÎ ÎÎÎÎÎÎÎÎÎÎÎÎÎÎÎÎÎÎÎÎ ÎÎÎÎÎÎÎÎÎÎÎÎÎÎÎÎÎÎÎÎ ÎÎÎÎÎÎÎÎÎÎÎÎÎÎÎÎÎÎÎÎ ÎÎÎÎÎÎÎÎÎÎÎÎÎÎÎÎÎÎÎÎ ÎÎÎÎÎÎÎÎÎÎÎÎÎÎÎÎÎÎÎÎ ÎÎÎÎÎÎÎÎÎÎÎÎÎÎÎÎÎÎÎÎ ÎÎÎÎÎÎÎÎÎÎÎÎÎÎÎÎÎÎÎÎ ÎÎÎÎÎÎÎÎÎÎÎÎÎÎÎÎÎÎÎÎ S7Soft1 Controls that you can insert An empty process form (named S7Soft1) Displays the name of the selected control Allows you to select a specific control from a list of controls in the process form Status bar Ready Figure 6-1 6-2 Design Container with the Default Process Form MicroComputing A5E00077133-01 Designing Process Forms with the SoftContainer Using the Snap Grid and the Status Bar The container provides a snap grid to help position or size the controls. As shown in Figure 6-2, the status bar provides information about the selected control: • Position information. The status bar shows the current coordinates of the snap grid for the control. (This information is displayed even when the snap grid is disabled.) • Size information. The status bar shows the size of the control (width x height). By selecting several controls, you can use the information in the status bar to adjust the size or position of the controls. You can turn the status bar and the snap grid on or off: • To display the status bar, select the View > Status Bar menu command. The status bar is displayed when the menu displays a check mark. • To enable the snap grid, select the View > Snap Grid menu command. The snap grid is enabled when the menu displays a check mark. Coordinates for positioning the control Design Data1 Name of the control selected Figure 6-2 MicroComputing A5E00077133-01 248, 109 24 x 26 Size of the control Elements of the Status Bar 6-3 Designing Process Forms with the SoftContainer 6.2 Creating a Process Form A process form is a document or file created with the SoftContainer. It contains the ActiveX controls used for monitoring and modifying data in the control engine. Inserting a SIMATIC Control in the Process Form Refer to Figure 6-3 and use the following procedure to insert a SIMATIC control into your process form: 1. In the toolbar, select the control to be inserted by clicking on the icon for the control. (Figure 6-3 shows a Data control being inserted into the process form.) 2. Use the mouse to move the arrow pointer to the open process form. Inside the process form, the arrow pointer changes to a cross-hair pointer. 3. Click the left mouse button to insert the control that you selected. S7SoftContainer – [S7Soft1] File Edit View Mode Options Window Help ÎÎÎÎÎÎÎÎÎÎÎÎÎÎÎÎÎÎÎÎ ÎÎÎÎÎÎÎÎÎÎÎÎÎÎÎÎÎÎÎÎ ÎÎÎÎÎÎÎÎÎÎÎÎÎÎÎÎÎÎÎÎ ÎÎÎÎÎÎÎÎÎÎÎÎÎÎÎÎÎÎÎÎ ÎÎÎÎÎÎÎÎÎÎÎÎÎÎÎÎÎÎÎÎ ÎÎÎÎÎÎÎÎÎÎÎÎÎÎÎÎÎÎÎÎ ÎÎÎÎÎÎÎÎÎÎÎÎÎÎÎÎÎÎÎÎ ÎÎÎÎÎÎÎÎÎÎÎÎÎÎÎÎÎÎÎÎ ÎÎÎÎÎÎÎÎÎÎÎÎÎÎÎÎÎÎÎÎ S7Soft1 Select the control from the toolbar. The arrow pointer changes to a cross-hair pointer within the container. Click the left mouse button to insert the control. Ready Figure 6-3 6-4 Design Data1 248, 109 24 x 26 Inserting a Control from the Toolbar MicroComputing A5E00077133-01 Designing Process Forms with the SoftContainer Inserting Third-Party Controls into the Process Form You can use other ActiveX controls than the SIMATIC controls in your process form. Use the following procedure to insert a custom or a third-party control into your process form: 1. Select the Edit > Insert Control menu command to display the Insert Control dialog box. 2. As shown in Figure 6-4, select the custom or third party control to be added to the process form. (You can add the control to the toolbar of the SoftContainer by selecting the “Add control to toolbar” check box. This allows you to use the icon in the toolbar for inserting the control into the process form.) 3. Click on the OK button and insert the control into the process form. Insert Control Siemens S7DataControl Siemens_SIMATIC_UserControls.Butto Siemens_SIMATIC_UserControls.Edit Siemens_SIMATIC_UserControls.Label Siemens_SIMATIC_UserControls.Slide Third-Party Control... Select (click on) the third-party or custom control. Select the check box to add the control to the toolbar of the SoftContainer. Click on the OK button to insert the control. Add control to toolbar OK Figure 6-4 Cancel Inserting a Third-Party Control into the Process Form Configuring the Data Control Before you can connect to the control engine, you must configure the Data control for communicating with a control engine. To configure the Data control, see Chapter 4. MicroComputing A5E00077133-01 6-5 Designing Process Forms with the SoftContainer 6.3 Switching from Design Mode to Run Mode When you switch the SoftContainer from Design mode to Run mode, you connect the controls to the control engine. These operating modes define the operation of the SoftContainer only and do not apply to the operating modes for the control engine. ! Warning After you connect a SIMATIC or a third-party control to your process data by assigning a variable to its Value property, any changes that you make to the value displayed in the control are immediately applied to your process data. Altering process data can cause unpredictable equipment operation, which could result in death or serious injury to personnel, and/or damage to equipment. Do not perform the exercises in this chapter when your control engine is connected to a real process. These exercises are for practice only. Do not modify any data that could cause process equipment to operate erratically. Always install a physical emergency stop circuit for your machine or process. Changing the Operating Mode of the SoftContainer The SoftContainer provides two operating modes that are not related to the operating modes of the control engine: • Design mode allows you to insert and modify the controls in the process form. You can change the properties in Design mode. • Run mode connects the controls to the control engine. You can modify values in the control engine, but you cannot move or modify the properties for the controls. Note The controls must have a control engine that is running in order to access the process data. Be sure that the control engine is running before you switch the SoftContainer from Design mode to Run mode. 6-6 MicroComputing A5E00077133-01 Designing Process Forms with the SoftContainer Use the following procedure to change the operating mode of the container: 1. Make certain that the S7-200 control engine is running. For information about starting the S7-200, refer to the S7-200 Programmable Controller System Manual. 2. Click on the Run button to change from Design mode to Run mode (Figure 6-5). The status bar shows that the container is in Run mode. Notice that the Data control becomes invisible in Run mode. In Run mode, you can use the controls to monitor or to modify the values stored in the control engine. To return to Design mode, click on the Design button. S7SoftContainer – [S7Soft1] File Edit View Mode Options Window Help ÎÎÎÎÎÎÎÎÎÎÎÎÎÎÎÎÎÎÎÎ ÎÎÎÎÎÎÎÎÎÎÎÎÎÎÎÎÎÎÎÎ ÎÎÎÎÎÎÎÎÎÎÎÎÎÎÎÎÎÎÎÎ ÎÎÎÎÎÎÎÎÎÎÎÎÎÎÎÎÎÎÎÎ ÎÎÎÎÎÎÎÎÎÎÎÎÎÎÎÎÎÎÎÎ ÎÎÎÎÎÎÎÎÎÎÎÎÎÎÎÎÎÎÎÎ ÎÎÎÎÎÎÎÎÎÎÎÎÎÎÎÎÎÎÎÎ ÎÎÎÎÎÎÎÎÎÎÎÎÎÎÎÎÎÎÎÎ S7Soft1 Click on the Run button to change to Run mode. OFF 0 Ready Figure 6-5 MicroComputing A5E00077133-01 100 24 Run Changing the Container to Run Mode 6-7 Designing Process Forms with the SoftContainer 6.4 Saving Your Process Form You can save the process forms you create under any name in any directory that is convenient. Use the following procedure to save your process form: 1. Select the File > Save As menu command to display the Save As dialog box. See Figure 6-6. 2. Enter the name for the process form. 3. Choose a directory for storing the process form. The default directory for storing process forms is in the MicroComputing directory (WinCP). 4. Click on the Save button. Save As Save in: WinCP Enter the name for the process form. File name: S7Soft1 Save as type: S7Soft Files (*.ctr) Figure 6-6 6-8 Save Cancel Saving a Process Form for MicroComputing MicroComputing A5E00077133-01 Memory Areas of the S7-200 Controllers A Overview SIMATIC MicroComputing provides access to the process data within the control engine. Using the Data control, you identify the memory area to be accessed. For more information about S7-200 memory areas, refer to the S7-200 Programmable Controller System Manual or to the online help for STEP 7-Micro/WIN. Section MicroComputing A5E00077133-01 Description Page A.1 Memory Areas of S7-200 Controllers A-2 A.2 Accessing the Data in the S7-200 Micro PLC A-4 A.3 Address Descriptions of the Memory Areas A-8 A-1 Memory Areas of the S7-200 Controllers A.1 Memory Areas of S7-200 Controllers Table A-1 lists the memory areas (including both the International and SIMATIC mnemonics) of the S7-200 controllers. For more information about S7-200 memory areas, refer to the SIMATIC S7-200 Programmable Controller System Manual. Note MicroComputing does not allow you to write to timers. A-2 MicroComputing A5E00077133-01 Memory Areas of the S7-200 Controllers Table A-1 Memory Areas of the S7-200 Controllers Memory Area Process-image input I (International) E (SIMATIC) Analog input AI (International) AE (SIMATIC) Process-image output Q (International) A (SIMATIC) Analog output AQ (International) Description At the beginning of each scan cycle, the controller samples the physical input points and writes the values to this memory area. You can access the process-image input register as bits, bytes, words, or double words. The controller converts physical analog values such as temperature into word-length digital values. Analog inputs are read-only words. At the end of each scan cycle, the controller copies the values stored in this memory area to the physical output points. You can access the process-image output register as bits, bytes, words, or double words. The controller converts a word-length digital value into an analog value. Analog outputs are write-only words. AA (SIMATIC) Variable Memory V (International and SIMATIC) Bit memory M (International and SIMATIC) Special memory SM (International and SIMATIC) Timers T (International and SIMATIC) Counters C (International) Z (SIMATIC) High Speed Counters HC (International and SIMATIC) Sequence control relays (SCR) S MicroComputing A5E00077133-01 (International and SIMATIC) V memory stores intermediate data for the program. V memory is global; any program entity can access it. You can configure V memory to be retentive (saved permanently to EEPROM if power fails). You can access L memory as bits, bytes, words, or double words. This memory area provides storage for interim results calculated in the program. You can configure MB0 to MB13 to be retentive. You can access M memory as bits, bytes, words, or double words. This memory area allows you to monitor and control specific controller functions. You can access SM memory as bits, bytes, words, or double words. SMB0 to SMB29 are read-only; SMB30 and higher are read-write. This memory area provides the timers used by the program. You can access the timer bit or current value (word). MicroComputing allows you to only read timers. You cannot write data to timers. This memory area provides the counters used by the program. You can access the counter bit or current value (word). You can use high-speed counters to count very high speed events independent of the controller scan. The current value of the high-speed counter is a double-word read-only value. You can use S bits to organize machine operations or steps into program segments. You can access S memory bits as bits, bytes, words, or double words. A-3 Memory Areas of the S7-200 Controllers A.2 Accessing the Data in the S7-200 Micro PLC The S7-200 Micro PLC stores information in different memory locations that have unique addresses. You can explicitly identify the memory address that you want to access. This allows your program to have direct access to the information. Using the Memory Address to Access Data To access a bit in a memory area, you specify the address, which includes the memory area identifier, the byte address, and the bit number. Figure A-1 shows an example of accessing a bit (which is also called “byte.bit” addressing). In this example, the memory area and byte address (I = input, and 3 = byte 3) are followed by a period (“.”) to separate the bit address (bit 4). MSB I 3 . 4 LSB 7 6 5 4 3 2 1 0 Bit of byte, or bit number: bit 4 of 8 (0 to 7) Period separates the byte address from the bit number Byte address: byte 3 (the fourth byte) Area identifier (I = input) MSB = most significant bit LSB = least significant bit Figure A-1 A-4 I I I I I I I I I I I I I I I I 0 1 2 3 4 5 6 7 8 9 10 11 12 13 14 15 Accessing a Bit of Data in the Memory (Byte.bit Addressing) MicroComputing A5E00077133-01 Memory Areas of the S7-200 Controllers You can access data in many S7-200 memory areas (V, I, Q, M, S, L, and SM) as bytes, words, or double words by using the byte-address format. See Figure A-2. V B 100 MSB 7 VB100 LSB 0 Byte address Access to a byte size VB100 Area identifier (V memory) Least significant byte Most significant byte MSB 15 VW100 8 Byte address Access to a word size LSB 0 7 VB100 V W 100 VB101 Area identifier (V memory) Most significant byte MSB 31 VD100 24 VB100 Least significant byte 23 16 VB101 15 LSB 0 8 7 VB102 VB103 V D 100 MSB = LSB = Figure A-2 most significant bit least significant bit Byte address Access to a double word size Area identifier (V memory) Comparing Byte, Word, and Double-Word Access to the Same Address To access a byte, word, or double word, you must specify the address in a way similar to specifying the address for a bit. This includes an area identifier, data size designation, and the starting byte address of the byte, word, or double-word value, as shown in Table A-2. Data in other memory areas (such as T, C, HC, and the accumulators) are accessed by using an address format that includes an area identifier and a device number. MicroComputing A5E00077133-01 A-5 Memory Areas of the S7-200 Controllers Note MicroComputing does not allow you to write to timers. Table A-2 Addressing S7-200 Data Types and Memory Areas Address Memory Area Ex.y (SIMATIC) Valid Data Type BOOL (default) I x.y (International) EBx (SIMATIC) BYTE (default) IBx (International) Input EWx (SIMATIC) WORD (default), INT IWx (International) EDx (SIMATIC) DWORD (default), DINT, REAL IDx (International) Analog Input (read only) AEWx (SIMATIC) AIWx (International) WORD (default), INT (Analog input available for all models except CPU 221) Ax.y (SIMATIC) BOOL (default) Qx.y (International) ABx (SIMATIC) BYTE (default) QBx (International) Output AWx (SIMATIC) WORD (default), INT QWx (International) ADx (SIMATIC) DWORD (default), DINT, REAL QDx (International) Analog Output (write only) Variable Memory Bit Memory S ecial Special Memory (SMB0 to SMB29 are read-only) A-6 AAWx (SIMATIC) AQWx (International) WORD (default), INT (Analog output available for all models except CPU 221) Vx.y BOOL (default) VBx BYTE (default) VWx WORD (default), INT VDx DWORD (default), DINT, REAL Mx.y BOOL (default) MBx BYTE (default) MWx WORD (default), INT MDx DWORD (default), DINT, REAL SMx.y BOOL (default) SMBx BYTE (default) SMWx WORD (default), INT SMDx DWORD (default), DINT, REAL MicroComputing A5E00077133-01 Memory Areas of the S7-200 Controllers Table A-2 Addressing S7-200 Data Types and Memory Areas, continued Memory Area Timer Address Valid Data Type Tx BOOL or INT, WORD Zx (SIMATIC) BOOL or INT, WORD (read-only) Counter High-speed Counter Sequence control relays ! Cx (International) HCx DWORD (default) Sx.y BOOL (default) SBx BYTE (default) SWx WORD (default), INT SDx DWORD (default), DINT, REAL Warning Using the timer function improperly or using breakpoints in Visual Basic with MicroComputing can cause problems that could potentially cause your computer or application to crash or lock up. Depending on the configuration, this could cause the application to lose communication with the control engine. This could cause unpredictable process operation, which could result in death or serious injury to personnel, and/or damage to equipment. Always install a physical emergency stop circuit for your machine or process. Concerning VB timers: The Timer function in Visual Basic version 5 allows a timer to interrupt code in progress within the same thread, which can cause problems with potentially serious consequences. If you use VB timers with MicroComputing, observe the following guidelines: • Always kill (disable) the timers in the Form_Unload subroutine. Otherwise, a timer can trigger an event while the VB program is shutting down; this condition could cause your computer or your application to crash, lock up, or to continue running invisibly. • If you start your timer in the Form_Load subroutine, the timer event could occur before the other objects have been instantiated. In order to ensure that the objects have been properly instantiated, always start a timer in the Form_Load subroutine with a large interval (such as 1 or 2 seconds) to allow the objects to be properly instantiated. Subsequent timer intervals can be set to shorter intervals. MicroComputing A5E00077133-01 A-7 Memory Areas of the S7-200 Controllers A.3 Address Descriptions of the Memory Areas Addressing the Process-Image Input Register (I) The S7-200 samples the physical input points at the beginning of each scan cycle and writes these values to the process-image input register. You can access the process-image input register in bits, bytes, words, or double words. Format: Bit Byte, Word, Double Word I[byte address].[bit address] I0.1 I[size][starting byte address] IB4 Addressing the Process-Image Output Register (Q) At the end of the scan cycle, the S7-200 copies the values stored in the process-image output register to the physical output points. You can access the process-image output register in bits, bytes, words, or double words. Format: Bit Byte, Word, Double Word Q[byte address].[bit address] Q1.1 Q[size][starting byte address] QB5 Addressing the Analog Inputs (AI) The S7-200 converts a real-world, analog value (such as temperature or voltage) into a word-length (16-bit) digital value. You access these values by the area identifier (AI), size of the data (W), and the starting byte address. Because analog inputs are words and always start on even-number bytes (such as 0, 2, or 4), you access them with even-number byte addresses (such as AIW0, AIW2, or AIW4), as shown in Figure A-3. For unipolar input data use the data format WORD (default); for bipolar input data, use the data format INT. For example, use AIW8: INT for bipolar data, and AIW6: WORD for unipolar data. Analog input values are read-only values. Format: AIW[starting byte address] AI W 8 MSB LSB 15 AIW8 8 byte 8 Most significant byte Figure A-3 A-8 AIW4 7 0 byte 9 Least significant byte Byte address Access to a word-size value Area identifier (analog input) Accessing an Analog Input MicroComputing A5E00077133-01 Memory Areas of the S7-200 Controllers Addressing the Analog Outputs (AQ) The S7-200 converts a word-length (16-bit) digital value into a current or voltage, proportional to the digital value (such as for a current or voltage). You write these values by the area identifier (AQ), size of the data (W), and the starting byte address. Since analog outputs are words and always start on even-number bytes (such as 0, 2, or 4), you write them with even-number byte addresses (such as AQW0, AQW2, or AQW4), as shown in Figure A-4. Analog output values are write-only values. Format: AQW[starting byte address] MSB LSB 15 AQW10 8 0 byte 10 Most significant byte Figure A-4 7 byte 11 Least significant byte AQW4 AQ W 10 Byte address Access to a word-size value Area identifier (analog output) Accessing an Analog Output Addressing the Variable (V) Memory Area You can use V memory to store intermediate results of operations being performed by the control logic in your program. You can also use V memory to store other data pertaining to your process or task. You can access the V memory area in bits, bytes, words, or double words. Format: Bit Byte, Word, Double Word V[byte address].[bit address] V10.2 V[size][starting byte address] VW100 Addressing the Bit Memory (M) Area You can use the bit memory area (M memory) as control relays to store the intermediate status of an operation or other control information. While the name “bit memory area” implies that this information is stored in bit-length units, you can access the bit memory area not only in bits, but also in bytes, words, or double words. Format: Bit Byte, Word, Double Word MicroComputing A5E00077133-01 M[byte address].[bit address] M26.7 M[size][starting byte address] MD20 A-9 Memory Areas of the S7-200 Controllers Addressing the Special Memory (SM) Bits The SM bits provide a means for communicating information between the CPU and your program. You can use these bits to select and control some of the special functions of the S7-200, such as: • A bit that turns on for the first scan cycle • Bits that toggle at fixed rates • Bits that show the status of math or operational instructions For more information about the SM bits, see the Appendix on SM bits in the S7-200 Programmable Controller System Manual. While the SM area is based on bits, you can access the data in this area as bits, bytes, words, or double words. Format: Bit Byte, Word, Double Word SM[byte address].[bit address] SM0.1 SM[size][starting byte address] SMB86 Addressing the Timer (T) Memory Area In the S7-200, timers are devices that count increments of time. The S7-200 timers have resolutions (time-base increments) of 1 ms, 10 ms, or 100 ms. There are two variables that are associated with a timer: • Current value: this 16-bit signed integer stores the amount of time counted by the timer. • Timer bit: this bit is set or cleared as a result of comparing the current and the preset value. The preset value is entered as part of the timer instruction. You access both of these variables by using the timer address (T + timer number). Access to either the timer bit or the current value is dependent on the instruction used: instructions with bit operands access the timer bit, while instructions with word operands access the current value. As shown in Figure A-5, the Normally Open Contact instruction accesses the timer bit, while the Move Word (MOV_W) instruction accesses the current value of the timer. For more information about the S7-200 instructions, see the S7-200 Programmable Controller System Manual. Format: A-10 T[timer number] T24 MicroComputing A5E00077133-01 Memory Areas of the S7-200 Controllers Timer Bits (Read/Write) Current Value T3 Timer number (bit address) Area identifier (timer) MSB 15 MOV_W EN I2.1 T3 IN OUT T0 T1 T2 T3 T0 T1 T2 T3 Current Value of the Timer (Read/Write) VW200 Timer number (current value address) T0 T1 T2 T3 LSB 0 Timer Bits T0 T1 T2 T3 Area identifier (timer) Figure A-5 Accessing the SIMATIC Timer Data Addressing the Counter (C) Memory Area In the S7-200, counters are devices that count each low-to-high transition event on the counter input(s). The CPU provides three types of counters: one type counts up, one type counts down, and one type counts both up and down. There are two variables that are associated with a counter: • Current value: this 16-bit signed integer stores the accumulated count. • Counter bit: this bit is set or cleared as a result of comparing the current and the preset value. The preset value is entered as part of the counter instruction. You access both of these variables by using the counter address (C + counter number). Access to either the counter bit or the current value is dependent on the instruction used: instructions with bit operands access the counter bit, while instructions with word operands access the current value. As shown in Figure A-6, the Normally Open Contact instruction accesses the counter bit, while the Move Word (MOV_W) instruction accesses the current value of the counter. For more information about the S7-200 instruction set, see the S7-200 Programmable Controller System Manual. Format: MicroComputing A5E00077133-01 C[counter number] C20 A-11 Memory Areas of the S7-200 Controllers Counter Bits (Read/Write) C3 Current Value MOV_W EN ENO I2.1 C3 IN MSB 15 OUT C0 C1 C2 C3 C0 C1 C2 C3 Counter number (bit address) Area identifier (counter) VW200 Counter number (current value address) Current Value (Read/Write) C0 C1 C2 C3 LSB 0 Counter Bits C0 C1 C2 C3 Area identifier (counter) Figure A-6 Accessing the SIMATIC Counter Data Addressing the High-Speed Counters (HC) High-speed counters are designed to count very high-speed events independent of the CPU scan. High-speed counters have a signed, 32-bit integer counting value (or current value). To access the count value for the high-speed counter, you specify the address of the high-speed counter, using the memory type (HC) and the counter number (such as HC0). The current value of the high-speed counter is a read-only value and, as shown in Figure A-7, can be addressed only as a double word (32 bits). Format: HC[high-speed counter number] HC1 MSB 31 LSB 0 HC2 Most significant Byte 3 Least significant Byte 2 Byte 1 Byte 0 HC 2 High-speed counter number Area identifier (high-speed counter) Figure A-7 Accessing the High-Speed Counter Current Values Addressing the Sequence Control Relay (S) Memory Area Sequence Control Relay bits (S) are used to organize machine operations or steps into equivalent program segments. SCRs allow logical segmentation of the control program. You can access the S bits as bits, bytes, words, or double words. Format: Bit Byte, Word, Double Word A-12 S[byte address].[bit address] S3.1 S[size][starting byte address] SB4 MicroComputing A5E00077133-01 Properties and Methods B.1 B AboutBox Method Applies to: Button, Edit, Label, Slider This method displays the “About” message box for the control. Syntax: object.AboutBox The AboutBox method has these parts: B.2 Part Description object An object expression that evaluates to an object in the Applies To list. Activated Property Applies to: Data This property allows you to specify whether or not all connections are activated. Syntax: object.Activated [= value] The Activated property has these parts: Part Description object An object expression that evaluates to an object in the Applies To list. value A Boolean expression that specifies whether object can respond to user-generated events. MicroComputing A5E00077133-01 B-1 Properties and Methods The settings for value are: Setting Description True (Default) All connections are activated. False All connections are deactivated. Note The connections remain established, even if they are deactivated. B.3 Alignment Property Applies to: Button, Edit, Label This property specifies the alignment of the text of the control. Syntax: object.Alignment [= value] The Alignment property has these parts: Part Description object An object expression that evaluates to an object in the Applies To list. value A value or constant that determines the alignment. The settings for value are: B-2 Setting Description 0 or Left (Default for Edit Control) Left-aligned. 1 or Right Right-aligned. 2 or Center (Default for Button and Label Controls) Centered. MicroComputing A5E00077133-01 Properties and Methods B.4 Appearance Property Applies to: Button, Edit, Label If this property is set to ThreeD (1) and the BorderStyle property is set to “Fixed Single” (1), then the Appearance property draws controls with three-dimensional effects. If the property is set to Flat (0), a flat border will surround the rectangle of the control. Note This property only has an effect if the BorderStyle property is set to “Fixed Single” (1). Syntax: object.Appearance [= value] The Appearance property has these parts: Part Description object An object expression that evaluates to an object in the Applies To list. value A value or constant that determines the appearance of object (as described in settings). The settings for value are: B.5 Setting Description 0 or Flat Paints the controls and forms without visual effects. 1 or ThreeD (Default) Paints the controls with three-dimensional (3-D) effects. AutoConnect Property Applies to: Data This property allows you to specify whether or not the configured connections are established at runtime. Syntax: object.AutoConnect [= value] MicroComputing A5E00077133-01 B-3 Properties and Methods The AutoConnect property has these parts: Part Description object An object expression that evaluates to an object in the Applies To list. value A Boolean expression that specifies whether object can respond to user-generated events. The settings for value are: Setting Description True (Default) All configured connections will be established at runtime. False The connections will be established with a call to the Connect method. Note If you explicitly call the Connect method within your program, disable the AutoConnect property for the Data control. This helps to ensure that the Data control does not connect unexpectedly to the control engine. B.6 AutoConnectTimeout Property Applies to: Data This property allows you to specify a timeout. After the time specified, the Data control issues a call to its Connect method if the AutoConnect property is set to True. The value can also be specified at the General Property Tab. Syntax: object.AutoConnectTimeout [= value] The AutoConnectTimeout property has these parts: B-4 Part Description object An object expression that evaluates to an object in the Applies To list. value A value of the type Long, which states the timeout in milliseconds. MicroComputing A5E00077133-01 Properties and Methods B.7 BackColor Property Applies to: Edit, Label, Slider This property returns or sets the background color of the control. Syntax: object.BackColor [= color] The BackColor property has these parts: Part Description object An object expression that evaluates to an object in the Applies To list. color A value or constant that determines the background color of an object. The settings for color are: B.8 Setting Description Standard Colors Colors specified by using the RGB Color palette Windows System Colors Colors specified by system color constants (depending on the container); for example, colors listed in the Visual Basic (VB) object library in the Object Browser BorderStyle Property Applies to: Edit, Button, Label If the property has the value “1–Fixed Single”, the control is surrounded by a rectangular border. If the property has the value “0–wNone”, no border will be displayed. Note This property determines whether the Appearance property has any effect. Syntax: object.BorderStyle [= value] MicroComputing A5E00077133-01 B-5 Properties and Methods The BorderStyle property has these parts: Part Description object An object expression that evaluates to an object in the Applies To list. value A value or constant that determines the border style (as described in settings). The settings for value are: B.9 Setting Description 0 or None (Default) No border or border-related elements 1 or FixedSingle A fixed, single-line border Caption Property Applies to: Label This property specifies the text that is displayed by the control. Syntax: object.Caption [= value] The Caption property has these parts: B-6 Part Description object An object expression that evaluates to an object in the Applies To list. value A String value that specifies the text of the label. MicroComputing A5E00077133-01 Properties and Methods B.10 Connect Method Applies to: Data This method establishes all configured connections. Note If your subroutine accesses the Data control programmatically, always disconnect from the control engine (using a Disconnect method) in the Form_Unload subroutine. In addition, disable the AutoConnect property for the Data control if you explicitly call the Connect method within your program. This helps to ensure that the Data control does not connect unexpectedly to the control engine. Syntax: result = object .Connect The Connect method has these parts: Part Description object An object expression that evaluates to an object in the Applies To list. result A long value that indicates whether an error has occurred. The result is zero if no error occurs. B.11 ConnectName Method Applies to: Data This method establishes connections for the object that is specified by the name of the object on the form. If your subroutine accesses the Data control programmatically, always disconnect from the control engine (using a Disconnect method) in the Form_Unload subroutine. In addition, disable the AutoConnect property for the Data control if you explicitly call the Connect method within your program. This helps to ensure that the Data control does not connect unexpectedly to the control engine. MicroComputing A5E00077133-01 B-7 Properties and Methods Note A programmer who uses Visual Basic (or a similar programming language) would use the ConnectName method, while a programmer who uses Visual C (or a similar programming language) would use the ConnectObject method. Syntax: result = object.ConnectName ConnectedObject, ConnectionTable The ConnectName method has these parts: Part Description object An object expression that evaluates to an object in the Applies To list. result A long value that indicates whether an error has occurred. The result is zero if no error occurs. ConnectedObject A String expression that evaluates to the name of an object that should be connected. If this parameter is set to an empty String, the control generates the ValueChanged event if a connected variable changes. ConnectionTable (optional) Specifies a connection table. If this parameter is omitted, the control reads the ConnectionTable property of the ConnectedObject. The connection table is declared as an array. Each element in the array has the following parts: • • • • Name of the element (such as “Value”) Memory location (such as MW100) Update rate or time-out value (in ms) Deadband value For more information about the connection table, see Section 4.7. Note If the ConnectedObject and ConnectionTable parameters are both omitted, an error is reported. B-8 MicroComputing A5E00077133-01 Properties and Methods B.12 ConnectObject Method Applies to: Data This method establishes connections for a specified object which was declared in the program. If your subroutine accesses the Data control programmatically, always disconnect from the control engine (using a Disconnect method) in the Form_Unload subroutine. In addition, disable the AutoConnect property for the Data control if you explicitly call the Connect method within your program. This helps to ensure that the Data control does not connect unexpectedly to the control engine. Note A programmer who uses Visual Basic (or a similar programming language) would use the ConnectName method, while a programmer who uses Visual C (or a similar programming language) would use the ConnectObject method. Syntax: result = object.ConnectObject ConnectedObject, ConnectionTable The ConnectObject method has these parts: Part Description object An object expression that evaluates to an object in the Applies To list. result A long value that indicates whether an error has occurred. The result is zero if no error occurs. ConnectedObject A String expression that evaluates to the name of an object that should be connected. If this parameter is set to an empty String, the control generates the ValueChanged event if a connected variable changes. ConnectionTable (optional) Specifies a connection table. If this parameter is omitted, the control reads the ConnectionTable property of the ConnectedObject. The connection table is declared as an array. Each element in the array has the following parts: • • • • MicroComputing A5E00077133-01 Name of the element (such as “Value”) Memory location (such as MW100) Update rate or time-out value Deadband value B-9 Properties and Methods Note If the ConnectedObject and ConnectionTable parameters are both omitted, an error is reported. B.13 ControlEngine Property Applies to: Data This property stores the pathname or identification of the control engine connected to the control. Syntax: object.ControlEngine [= value] The ControlEngine property has these parts: B.14 Part Description object An object expression that evaluates to an object in the Applies To list. value A String that specifies the pathname or identification of the control engine to be accessed by object. DataFormat Property Applies to: Edit This property defines the storage type used for converted values. If you are using a data format for displaying a value which is too large, the value will be truncated. Note This property determines whether the Precision property has any effect. Syntax: object.DataFormat [= value] B-10 MicroComputing A5E00077133-01 Properties and Methods The DataFormat property has these parts: Part Description object An object expression that evaluates to an object in the Applies To list. value A value or constant that determines the data format, as described in Table B-1. Table B-1 Settings for the Data Format Property Constant Setting Description wBoolean 0 Bit value wBinary 1 Any BIT, BYTE, WORD, DWORD, INT or DINT value wOctal 2 Any BYTE, WORD, DWORD, INT or DINT value wHexadecimal 3 Any BYTE, WORD, DWORD, INT or DINT value wUnsignedDecimal 4 Any BYTE, WORD, DWORD, INT or DINT value wSignedDecimal 5 Any BYTE, WORD, DWORD, INT or DINT value wReal 6 4-byte floating-point value wTimer 7 2-byte signed integer value wCounter 8 2-byte signed integer value wTime* 9 Signed integer value (IEC Time) wDate* 10 Signed integer value (IEC Date) wTimeOfDay* 11 Signed integer value (IEC Time) wChar* 12 1–byte ASCII character wString* 13 String of characters * Applies only to S7-300, S7-400, and WinLC control engines. Note If the data size configured to be accessed in the control engine is larger than the data being displayed in the Edit control and the value of the data from the control engine is larger than can be displayed by the data format, the value is displayed with ‘‘...’’ preceding it. Before the value can be changed from the Edit Control, the ‘‘...’’ preceding the value must be deleted. When a value is written from the Edit Control to the control engine, the amount of data written to the control engine corresponds to the data size configured in the Data Control. Always ensure that memory locations are not changed inadvertently. MicroComputing A5E00077133-01 B-11 Properties and Methods B.15 DefaultDeadband Property Applies to: Data This property allows you to specify the dead band used by the Data control, if no dead band is specified in the connection table. Note If you specify a dead band (such as 10) for a bit variable (such as M15.5), the control engine will not transmit a changed value for that bit. Syntax: object.DefaultDeadBand [= value] The DefaultDeadband property has these parts: B.16 Part Description object An object expression that evaluates to an object in the Applies To list. value A value of the type Single, which must not be negative. DefaultUpdateRate Property Applies to: Data This property allows you to specify the update rate used by the Data control, if no update rate is specified in the connection table. Syntax: object.DefaultUpdateRate [= value] The DefaultUpdateRate property has these parts: Part Description object An object expression that evaluates to an object in the Applies To list. value A value of type Long. The settings for value are: B-12 MicroComputing A5E00077133-01 Properties and Methods B.17 Part Description 0 All changes of the connected variable are reported immediately. >0 Changes of the connected variable are reported after this timeout. Direction Property Applies to: Slider This property sets the orientation (horizontal or vertical) of the SIMATIC control. Default is 0 – wHorizontal. Syntax: object.Direction [= value] The Direction property has these parts: Part Description object An object expression that evaluates to an object in the Applies To list. value A value or constant that determines the orientation. The settings for value are: B.18 Setting Description 0 (Default) wHorizontal 1 wVertical Disconnect Method Applies to: Data This method releases all established connections. MicroComputing A5E00077133-01 B-13 Properties and Methods Note If your subroutine accesses the Data control programmatically, always disconnect from the control engine (using a Disconnect method) in the Form_Unload subroutine. In addition, disable the AutoConnect property for the Data control if you explicitly call the Connect method within your program. This helps to ensure that the Data control does not connect unexpectedly to the control engine. Syntax: result = object.Disconnect The Disconnect method has these parts: B.19 Part Description object An object expression (identifier for the specific SIMATIC control) that evaluates to an object in the Applies To list. result A long value that indicates whether an error has occurred. The result is zero if no error occurs. DisplayValue Property Applies to: Edit, Slider This property is a variant which returns the scaled value for the control. Syntax: object.DisplayValue [= value] The DisplayValue property has these parts: B-14 Part Description object An object expression that evaluates to an object in the Applies To list. value A Variant that specifies the value of the control. MicroComputing A5E00077133-01 Properties and Methods B.20 Enabled Property Applies to: Button, Edit, Label, Slider When this property is True, the control reacts on changes of the Value property and fires events. If this property is False, then the control is disabled and does not react on changes in the Value property and does not fire any event (except the error event). Syntax: object.Enabled [= boolean] The Enabled property has these parts: Part Description object An object expression that evaluates to an object in the Applies To list. boolean A Boolean expression that specifies whether object can respond to user-generated events. The settings for boolean are: B.21 Setting Description True (Default) Allows the object to respond to events False Prevents object from responding to events Factor Property Applies to: Edit, Slider The Factor and Offset properties specify the scaling factor and the offset used when the scale-by-formula option has been enabled. Note The ScaleMode property must be set to “wByFormula” (1) for the Factor and Offset properties to have any effect. MicroComputing A5E00077133-01 B-15 Properties and Methods You can use a formula to scale the value. In the following formula, “Value” is similar to the contents of the Value property if the control is connected to the control engine; “Factor” is the value of the Factor property; “Offset” is the value of the Offset property; and “DisplayValue” is also the contents of the Text property. Value * Factor + Offset = DisplayValue Syntax: object.Factor [= value] The Factor property has these parts: Part Description object An object expression that evaluates to an object in the Applies To list. value A floating-point value that defines the factor for the scaling formula. Note The default value of the factor is 1.0, and the default value of the offset is 0.0. B.22 FalseCaption Property Applies to: Button This property determines the text that is displayed in the control when the Value property is False (equal to 0, or Off). Syntax: object.FalseCaption [= string] The FalseCaption property has these parts: B-16 Part Description object An object expression that evaluates to an object in the Applies To list. string Text that determines the active or inactive text of the control MicroComputing A5E00077133-01 Properties and Methods B.23 FalseColor Property Applies to: Button This property determines the color of the control when the Value property is False (equal to 0, or Off). Syntax: object.FalseColor [= color] The FalseColor property has these parts: Part Description object An object expression that evaluates to an object in the Applies To list. color A value or constant that determines the background or foreground colors of an object. The settings for value are: B.24 Setting Description Standard Colors Colors specified by using the RGB Color palette Windows System Colors Colors specified by system color constants (depending on the container); for example, colors listed in the Visual Basic (VB) object library in the Object Browser FalsePicture Property Applies to: Button This property returns or sets the inactive (off, false, etc.) picture displayed on the control. Syntax: object.FalsePicture [= picture] The FalsePicture property has these parts: Part Description object An object expression that evaluates to an object in the Applies To list. picture A picture that determines the image of an object. MicroComputing A5E00077133-01 B-17 Properties and Methods B.25 Font Property Applies to: Button, Edit, Label This property returns a Font object for the main font of the control. Syntax: object.Font [= font] The Font property has these parts: B.26 Part Description object An object expression that evaluates to an object in the Applies To list. font A value that returns or sets the font used for the control. ForeColor Property Applies to: Button, Edit, Label, Slider This property returns or sets the foreground color used to display text and graphics in an object. Syntax: object.ForeColor [= color] The ForeColor property has these parts: Part Description object An object expression that evaluates to an object in the Applies To list. color A value or constant that determines the foreground colors of object. The settings for color are: B-18 Setting Description Standard Colors Colors specified by using the RGB Color palette Windows System Colors Colors specified by system color constants (depending on the container); for example, colors listed in the Visual Basic (VB) object library in the Object Browser MicroComputing A5E00077133-01 Properties and Methods B.27 KnobHeight Property Applies to: Slider This property determines the height of the indicator displayed by the control. Syntax: object.KnobHeight [= single] The KnobHeight property has these parts: B.28 Part Description object An object expression that evaluates to an object in the Applies To list. single A value that determines the height of the indicator. KnobPicture Property Applies to: Slider This property determines the picture (graphic) used for the indicator on the control. Syntax: object.KnobPicture [= picture] The KnobPicture property has these parts: B.29 Part Description object An object expression that evaluates to an object in the Applies To list. picture A picture that determines the image for the indicator. KnobWidth Property Applies to: Slider This property determines the width of the indicator displayed by the control. Syntax: object.KnobWidth [= single] MicroComputing A5E00077133-01 B-19 Properties and Methods The KnobWidth property has these parts: B.30 Part Description object An object expression that evaluates to an object in the Applies To list. single A value that determines the width of the indicator. LargeChange Property Applies to: Slider This property determines how far the slider indicator moves when the control has focus and you press the Page Up or Page Down key. The Value property is increased by LargeChange if you press the Page Up key or click to the right of (above) the indicator. It is decreased by LargeChange if you press the Page Down key or click to the left of (below) the indicator. Syntax: object.LargeChange [= value] The LargeChange property has these parts: B.31 Part Description object An object expression (identifier for the specific SIMATIC control) that evaluates to an object in the Applies To list. value A value or constant that determines the amount of change. Locked Property Applies to: Button, Edit, Slider If the control is locked it is in a read-only state. The user is unable to change any values, but the current value is still displayed. By default the control is not in locked mode, so you can enter numbers. Syntax: object.Locked [= boolean] B-20 MicroComputing A5E00077133-01 Properties and Methods The Locked property has these parts: Part Description object An object expression that evaluates to an object in the Applies To list. boolean A Boolean expression that specifies whether the control can be edited. The settings for boolean are: B.32 Setting Description True You can scroll and highlight the text in the control, but you cannot edit it. Changes to the Value property are reflected. This means that the control still shows values in the control engine, but the user is unable to change them. False (Default) You can edit the text in the control. Max and Min Properties Applies to: Edit, Slider If the ScaleMode property is wByRange or wScaleNone, these properties return/set the maximum/minimum scaled value of the control. Syntax: object.Max [= value] object.Min [= value] The Max and Min properties have these parts: Part Description object An object expression (identifier for the specific SIMATIC control) that evaluates to an object in the Applies To list. value A value or constant that specifies maximum/minimum scaled value of the control. MicroComputing A5E00077133-01 B-21 Properties and Methods B.33 MultipleEngines Property Note This property applies only to S7-300, S7-400, and WinLC control engines. It has been disabled for SIMATIC MicroComputing. Applies to: Data This property specifies whether the control connects to a specific control engine or connects to several control engines. Syntax: object.MultipleEngines [= value] The MultipleEngines property has these parts: Part Description object An object expression that evaluates to an object in the Applies To list. value A Boolean expression that specifies whether object connects to one or to several control engines. The settings for value are: B.34 Setting Description True object connects to more than one control engine simultaneously. False (Default) object connects only to the control engine specified in the ControlEngine property. Offset Property Applies to: Edit, Slider The Factor and Offset properties specify the scaling factor and the offset used when the scale-by-formula option has been enabled. Note The ScaleMode property must be set to “wByFormula” (1) for the Factor and Offset properties to have any effect. B-22 MicroComputing A5E00077133-01 Properties and Methods You can use a formula to scale the value. In the following formula, “Value” is similar to the contents of the Value property if the control is connected to the control engine; “Factor” is the value of the Factor property; “Offset” is the value of the Offset property; and “DisplayValue” is also the contents of the Text property. Value * Factor + Offset = DisplayValue Syntax: object.Offset [= value] The Offset property has these parts: Part Description object An object expression that evaluates to an object in the Applies To list. value A floating-point value that defines the factor or the offset for the scaling formula. Note The default value of the factor is 1.0, and the default value of the offset is 0.0. B.35 PCName Property Applies to: Data This property selects the name of a remote computer (PC) in order to connect to a control engine over a network, such as a local area network (LAN). Syntax: object.PCName [= value] The PCName property has these parts: Part Description object An object expression that evaluates to an object in the Applies To list. value A String that specifies the pathname or identification of the remote computer (PC) for the connection. MicroComputing A5E00077133-01 B-23 Properties and Methods B.36 Picture Property Applies to: Slider, Label This property determines the picture (graphic) used for the control. Syntax: object.Picture [= picture] The Picture property has these parts: B.37 Part Description object An object expression that evaluates to an object in the Applies To list. picture A picture that determines the image of the object. Precision Property Applies to: Edit This property is available if the DataFormat is set to “Real” (6) (data type with precision). In that case you can change the precision (number of digits behind the decimal point) of the number. The number will be rounded at the specified precision. Note The DataFormat property must be set to “Real” (6) before this property can have an effect. Syntax: object.Precision [= value] The Precision property has these parts: B-24 Part Description object An object expression that evaluates to an object in the Applies To list. value An integer value that defines the precision of the number. The default precision is 3. The valid range is from 0 to 7. MicroComputing A5E00077133-01 Properties and Methods B.38 PropertyChangedName Method Applies to: Data This method notifies the Data control that the value of a property of a connected control, referenced by the name of the object in the form, has changed. The Data control reads the value from the property and writes it to the data source. Note A programmer who uses Visual Basic (or a similar programming language) would use the PropertyChangedName method, while a programmer who uses Visual C (or a similar programming language) would use the PropertyChangedObject method. Syntax: result = object.PropertyChangedName ConnectedObject, Property The PropertyChangedName method has these parts: B.39 Part Description object An object expression that evaluates to an object in the Applies To list. result A long value that indicates whether an error has occurred. The result is zero if no error occurs. ConnectedObject A String expression that evaluates to the name of the connected control whose property has changed. Property A String value with the name of the property that has changed. PropertyChangedObject Method Applies to: Data This method notifies the Data control that the value of a property of a connected control (an object which was declared in the program) has changed. The Data control reads the value from the property and writes it to the data source. Note A programmer who uses Visual Basic (or a similar programming language) would use the PropertyChangedName method, while a programmer who uses Visual C (or a similar programming language) would use the PropertyChangedObject method. MicroComputing A5E00077133-01 B-25 Properties and Methods Syntax: result = object.PropertyChangedObject ConnectedObject, Property The PropertyChangedObject method has these parts: B.40 Part Description object An object expression that evaluates to an object in the Applies To list. result A long value that indicates whether an error has occurred. The result is zero if no error occurs. ConnectedObject A String expression that evaluates to the name of the connected control whose property has changed. Property A String value with the name of the property that has changed. PushButton Property Applies to: Button Determines the operation mode of the control: if set to “True” or 1, the Value property is inverted as long as the Button control is “pressed” (MouseDown event) Syntax: object.PushButton [= boolean] The PushButton property has these parts: B-26 Part Description object An object expression that evaluates to an object in the Applies To list. boolean An Boolean expression that specifies the operation mode of the control. Setting Description True The button is pressed; the Value property is inverted. False (Default) The button is not pressed. MicroComputing A5E00077133-01 Properties and Methods B.41 RawMax and RawMin Properties Applies to: Edit, Slider These properties define the ranges for scaling a value: • RawMax specifies the maximum raw value of the control if the ScaleMode is wByRange or wScaleNone. • RawMin specifies the minimum raw value of the control if the ScaleMode is wByRange or wScaleNone. Note The ScaleMode property must be set to “wByRange” or “wScaleNone” before these properties can have an effect. When you use a range transformation to scale the value, you specify a source range (for the values in the control engine) and a destination range (for the values that are displayed by the control). The values of one range will be transformed to the other range. The source and destination ranges define a ratio for the transformation; they do not define upper or lower limits. A value can be larger or smaller than the range; the transformation will use the two ranges to extrapolate the other value. Syntax: object.RawMax [= value] object.RawMin [= value] The RawMin and RawMax properties have these parts: B.42 Part Description object An object expression that evaluates to an object in the Applies To list. value A value or constant that determines the maximum or minimum raw value of the control. ReadMultiVariables Method Applies to: Data This method reads the status of the connected variables in the control engine. Syntax: result = object.ReadMultiVariables (VarNames, VarValues, States) MicroComputing A5E00077133-01 B-27 Properties and Methods The ReadMultiVariables method has these parts: B.43 Part Description object An object expression that evaluates to an object in the Applies To list. VarNames A Variant that specifies the array of variables (memory locations) to be read from the control engine. VarValues A Variant that contains an array of the corresponding values of the specified variables in the control engine. The Variant should be empty. States A Variant that contains an array of the quality code (Long) for each of the variables. result A Long value that indicates whether an error has occurred. The result is zero if no error occurs. ReadVariable Method Applies to: Data This method reads the status of one specific variable in the control engine. Syntax: result = object.ReadVariable (VariableName, Value, State, TimeOut) The ReadVariable method has these parts: B-28 Part Description object An object expression that evaluates to an object in the Applies To list. VariableName A String expression that specifies the variable (memory location) in the control engine to be read. Value A Variant value containing the content of the specified variable in the control engine. The Variant should be empty. State A Long value that provides the quality code for the variable. TimeOut A Long value that determines the length of time (in ms) before generating a time-out error. (Not applicable for this release). For the current release, this value should always be 0. result A Long value that indicates whether an error has occurred. The result is zero if no error occurs. MicroComputing A5E00077133-01 Properties and Methods B.44 ScaleMode Property Applies to: Edit, Slider This property specifies the scaling mode to be used for scaling values. The values can also be specified at the Scaling property tab. If you choose to use scaling, there are two choices for scaling mode: • Scaling by formula (1–wByFormula): Value * Factor + Offset = DisplayValue where: Value is similar to the contents of the Value property if the control is connected to the control engine; Factor is the value of the Factor property; Offset is the value of the Offset property; and DisplayValue is the contents of the Text property. • Scaling by range transformation (2–wByRange): you specify a source range (of control engine values) and a destination range (of displayed values), and the values of the one range are transformed to the other range. Note The Scale Mode property determines whether the RawMax, RawMin, Factor, and Offset properties have any effect. Syntax: object.ScaleMode [= value] The ScaleMode property has these parts: Part Description object An object expression that evaluates to an object in the Applies To list. value A value or constant that determines the kind of scaling. The settings for value are: Setting Description wNoScaling (0) (Default) No scaling wByFormula (1) Use the formula containing the factor and offset to scale the value wByRange (2) Use the range transformation method to scale the value MicroComputing A5E00077133-01 B-29 Properties and Methods B.45 ShowErrorBoxes Property Applies to: Data This property specifies whether to display the default error boxes when there is a user-generated error. Every time an error occurs, an Error event will be generated. If the ShowErrorBoxes property is enabled (selected), a default error message box will be displayed. All errors on connections are reported by the Connection Error event. Note MicroComputing provides error messages in English only. If you want to display messages in other languages, you must disable (deselect) the ShowErrorBoxes option and write program code to react to an error return code. Syntax: object.ShowErrorBoxes [= value] The ShowErrorBoxes property has these parts: Part Description object An object expression that evaluates to an object in the Applies To list. value A Boolean expression that specifies whether the control displays error boxes. The settings for value are: B.46 Setting Description True (Default) The control shows the default error boxes. False The error boxes are hidden. ShowMinMax Property Applies to: Slider This property specifies whether the control displays the range (minimum and maximum) of values. Syntax: object.ShowMinMax [= boolean] B-30 MicroComputing A5E00077133-01 Properties and Methods The ShowMinMax property has these parts: Part Description object An object expression that evaluates to an object in the Applies To list. boolean A Boolean expression that specifies whether the control displays the range of values. The settings for boolean are: B.47 Setting Description True (Default) The control displays the minimum and maximum vales. False The control does not display the range of values. SmallChange Property Applies to: Slider This property determines how far the indicator moves when the control has focus and you press the up/down or right/left arrow keys. The Value property is increased by SmallChange if you press the right (or up) arrow key. It is decreased by SmallChange if you press the left (or down) arrow key. Syntax: object.SmallChange [= value] The SmallChange property has these parts: Part Description object An object expression that evaluates to an object in the Applies To list. value A value or constant that determines the amount of change MicroComputing A5E00077133-01 B-31 Properties and Methods B.48 StretchMode Property Applies to: Button, Slider, Label This property returns or sets the stretch mode (centered, resize image, resize frame, smart tile or tile) of the control. This property can only be used if the Style property is set to 1 – wGraphical. Syntax: object.StretchMode [= value] The StretchMode property has these parts: Part Description object The identifier for the specific control value A constant that determines the stretch mode, as described in Settings The settings for value are: B-32 Setting Description 0 wCentered: The bitmap is centered in the control. 1 wResizeImage: (Default) The bitmap is resized (stretched or shrunk) to fit the control. 2 wResizeFrame: The frame of the control is resized to the size of the bitmap. 3 wSmartTile: The bitmap is expanded to fit the control by replicating adjacent rectangles. This setting works best with a single-color bitmap with a border. 4 wTile: The bitmap, if smaller than the control, is duplicated and tiled to fill the control. MicroComputing A5E00077133-01 Properties and Methods B.49 Style Property Applies to: Button, Slider, Label This property returns or sets the style (standard or graphical) of the control. Syntax: object.Style [= value] The Style property has these parts: Part Description object The identifier for the specific control value A constant that determines the style, as described in Settings The settings for value are: B.50 Setting Description 0 wStandard (uses internal drawing methods) 1 wGraphical (Default) (uses bitmaps) Text Property Applies to: Edit This property determines the text displayed by the control. Syntax: object.Text [= value] The Text property has these parts: Part Description object An object expression that evaluates to an object in the Applies To list. value A String value that specifies the text to be displayed by the control. MicroComputing A5E00077133-01 B-33 Properties and Methods B.51 Ticks Property Applies to: Slider This property sets the number of ticks, or unit markers, of the control. For example, if Ticks = 10, the scale of the control will be divided into 10 sections. Syntax: object.Ticks [= value] The Ticks property has these parts: B.52 Part Description object An object expression that evaluates to an object in the Applies To list. value A value or constant that determines the number of unit markers to be displayed. TrueCaption Property Applies to: Button This property determines the text that is displayed in the control when the Value property is True (equal to 1, or On). Syntax: object.TrueCaption [= string] The TrueCaption property has these parts: B.53 Part Description object An object expression that evaluates to an object in the Applies To list. string Text that determines the active or inactive text of the control TrueColor Property Applies to: Button This property determines the color of the control when the Value property is True (equal to 1, or On). B-34 MicroComputing A5E00077133-01 Properties and Methods Syntax: object.TrueColor [= color] The TrueColor property has these parts: Part Description object An object expression that evaluates to an object in the Applies To list. color A value or constant that determines the background or foreground colors of an object, as described in Settings The settings for value are: B.54 Setting Description Standard Colors Colors specified by using the RGB Color palette Windows System Colors Colors specified by system color constants (depending on the container); for example, colors listed in the Visual Basic (VB) object library in the Object Browser TruePicture Property Applies to: Button This property returns or sets the active (on, true, etc.) picture displayed on the control. Syntax: object.TruePicture [= picture] The TruePicture property has these parts: Part Description object An object expression that evaluates to an object in the Applies To list picture A picture that determines the image of an object MicroComputing A5E00077133-01 B-35 Properties and Methods B.55 Value Property Applies to: Button, Edit, Slider This property should be linked to a value in the control engine, using the Data Control. It is bindable. Edit Control – The Value property is a a variant which returns/sets the (unscaled) value of the control. Button Control – The Value property reflects the state of the button. Slider Control – The Value property reflects the position of the Slider Control indicator. Note If the value of the Value property changes, the Change event will be generated. Syntax: object.Value [= value] The Value property has these parts: B-36 Part Description object An object expression that evaluates to an object in the Applies To list. value A Variant that specifies the value of the control. MicroComputing A5E00077133-01 Properties and Methods B.56 WriteMode Property Applies to: Edit This property determines how the control responds when the user enters a new value. If the write mode is set to Automatic (0), the value (if valid) is written automatically into the Value property (and to the control engine). If the write mode is Manual (1), the value is not written to the value property unless your program code calls the method “Write” at the control. Syntax: object.WriteMode [= value] The WriteMode property has these parts: Part Description object An object expression that evaluates to an object in the Applies To list. value A value or constant that specifies whether the control automatically passes entered values to the Value property. The settings for value are: Setting Description Automatic (0) (Default) Automatically passes the new (input) value to the Value property Manual (1) Does not write the new (input) value unless the control processes a Write method MicroComputing A5E00077133-01 B-37 Properties and Methods B.57 WriteNow Method Applies to: Edit This method issues a “value changed” for the Value property of the control. You must use this method only if the WriteMode property is set to Manual (1). Syntax: object.WriteNow The WriteNow method has these parts: B.58 Part Description object An object expression that evaluates to an object in the Applies To list. WriteMultiVariables Method Applies to: Data This method writes new values for several variables in the control engine. Syntax: result = object.WriteMultiVariables (VarNames, VarValues, States) The WriteMultiVariables method has these parts: B-38 Part Description object An object expression that evaluates to an object in the Applies To list. VarNames A Variant that specifies the array of variables (memory locations) in the control engine. VarValues A Variant that contains an array of the corresponding values to be written to the specified variables. States A Variant that contains an array of the quality code (Long) for each of the variables. result A Long value that indicates whether an error has occurred. The result is zero if no error occurs. MicroComputing A5E00077133-01 Properties and Methods B.59 WriteVariable Method Applies to: Data This method writes a new value to a specific variable in the control engine. Syntax: result = object.WriteVariable (VariableName, Value, TimeOut) The WriteVariable method has these parts: Part Description object An object expression that evaluates to an object in the Applies To list. VariableName A String expression that specifies the variable (memory location) in the control engine. Value A Variant value that contains the content to be written to the specified variable in the control engine. TimeOut A Long value that determines the length of time (in ms) before generating a time-out error. (Not applicable for this release). For the current release, this value should always be 0. result A Long value that indicates whether an error has occurred. The result is zero if no error occurs. MicroComputing A5E00077133-01 B-39 Properties and Methods B.60 Zeropad Property Applies to: Edit This property determines whether the number displayed by the control is padded with zeros (to the left of the value) to the size of the data type. Syntax: object.Zeropad [= value] The ZeroPad property has these parts: Part Description object An object expression (identifier for the specific SIMATIC control) that evaluates to an object in the Applies To list. value A Boolean expression that specifies whether or not the displayed number is filled with leading zeros. The settings for value are: B-40 Part Description True Fills the number with leading zeros to the size specified by the DataType property. False (default) Does not fill the number with leading zeros. MicroComputing A5E00077133-01 Events C.1 C Change Event Applies to: Button, Edit, Label, Slider This event occurs when the value of the Value property changes. The control engine can change the value in the Value property. Syntax: Change() C.2 Click Event Applies to: Button, Edit, Label, Slider This event occurs when a mouse button is pressed and released while the mouse cursor is over the control. Syntax: Click() Note To distinguish between the left, right, and middle mouse buttons, use the MouseDown and MouseUp events. If there is code in the Click event, the DblClick event will never trigger, because the Click event triggers first. MicroComputing A5E00077133-01 C-1 Events C.3 ConnectionError Event Applies to: Data This event occurs when an error on a connection occurs. Syntax: ConnectionError(State As Long, ConnectedObject As Object, _ Property As String, Variable As String) The ConnectionError event has these parts: C.4 Part Description State A long value with the state of the connection ConnectedObject An object expression that evaluates to the connected object Property A string value with the name of the property Variable A string value with the name of the connected variable DblClick Event Applies to: Edit, Label, Slider This event occurs when a mouse button is double-clicked while the cursor is over the control. Syntax: DblClick() Note To distinguish between the left, right, and middle mouse buttons, use the MouseDown and MouseUp events. If there is code in the Click event, the DblClick event will never trigger, because the Click event triggers first. C-2 MicroComputing A5E00077133-01 Events C.5 Error Event Applies to: Button, Edit, Label, Slider This event occurs when the control encounters an error. Syntax: Error(long SCode, BSTR lpszDescription, BSTR IpszHelpFileName, _ long nHelpId) The Error event has these parts: Part Description SCode See Table C-1 lpszDescription String with a description of the error condition IpszHelpFileName Name of the Help file in which the error is described nHelpId Help topic ID with a description of the error Table C-1 SCodes (Error Event Codes) Name Value Description wFACTOR_ZERO 0xC0040002 Factor: Must not be zero. wRAWMINMAX 0xC0040006 RawMin must be less than RawMax. wMINMAX 0xC0040009 Min must be less than Max. wLARGECHANGE_ZERO 0xC004000A Large Change: Must be greater than zero and less than... wTICKS_ZERO_100 0xC004000C Ticks: Must be a number between 1 and 100. wKNOBHEIGHT_ZERO 0xC004000E Knob Height: Must be greater than zero. wKNOBWIDTH_ZERO 0xC0040010 Knob Width: Must be greater than zero. wSMALLCHANGE_ZERO 0xC0040012 Small Change: Must be greater than zero and less than... wRAWMIN_SCALEMODE 0xC0040014 RawMin may only be set if ScaleMode is wByRange. wRAWMAX_SCALEMODE 0xC0040015 RawMax may only be set if ScaleMode is wByRange. wEDIT_OUT_OF_RANGE 0xC0040016 Value out of range. wEDIT_WRONGVALUE 0xC0040017 A wrong value has been set. wBIGFONT 0xC0040018 Warning: Font size is too big. wPREC_RANGE 0xC004001A Precision: Must be a number between 0 and 7. MicroComputing A5E00077133-01 C-3 Events C.6 KeyDown Event Applies to: Button, Edit, Slider This event occurs when the user presses a key while the control has the focus. See also the KeyUp Event. Syntax: KeyDown(long KeyID, long Shift) The KeyDown event has these parts: Part Description KeyID Key code, such as vbKeyF1 (the F1 key) or vbKeyHome (the HOME key) To specify key codes, use the constants in the Visual Basic (VB) object library in the Object Browser. Shift An integer that corresponds to the state of the SHIFT, CTRL, and ALT keys at the time of the event The shift argument is a bit field with the least-significant bits corresponding to the SHIFT key (bit 0), the CTRL key (bit 1), and the ALT key (bit 2). These bits correspond to the values 1, 2, and 4, respectively. Some, all, or none of the bits can be set, indicating that some, all, or none of the keys have been pressed. For example, if both CTRL and ALT are pressed, the value of shift is 6. Use the KeyDown and KeyUp event procedures if you need to respond to both the pressing and releasing of a key. KeyDown and KeyUp interpret the uppercase and lowercase of each character by means of two arguments: keycode, which indicates the physical key (thus returning A and a as the same key) and shift, which indicates the state of shift+key and therefore returns either “A” or “a”. If you need to test for the shift argument, you can use the shift constants that define the bits within the argument. The constants have the following values: • vbShiftMask (1): SHIFT key bit mask • vbCtrlMask (2): CTRL key bit mask • vbAltMask (4): ALT key bit mask The constants act as bit masks that you can use to test for any combination of keys. You test for a condition by first assigning each result to a temporary integer variable and then comparing Shift to a bit mask. Use the And operator with the Shift argument to test whether the condition is greater than 0, indicating that the modifier was pressed. C-4 MicroComputing A5E00077133-01 Events C.7 KeyPress Event Applies to: Button, Edit, Slider This event occurs when an ANSI key is pressed and released while the control has the focus. Syntax: KeyPress (long keyAscii) The KeyPress event has these parts: C.8 Part Description keyAscii ASCII key code of the pressed key, such as vbKeyF1 (the F1 key) or vbKeyHome (the HOME key) KeyUp Event Applies to: Button, Edit, Slider This event occurs when a key is released while the control has the focus. Syntax: KeyUp(long KeyID, long Shift) The KeyDown event has these parts: Part Description KeyID Key code, such as vbKeyF1 (the F1 key) or vbKeyHome (the HOME key) To specify key codes, use the constants in the Visual Basic (VB) object library in the Object Browser. Shift An integer that corresponds to the state of the SHIFT, CTRL, and ALT keys at the time of the event The shift argument is a bit field with the least-significant bits corresponding to the SHIFT key (bit 0), the CTRL key (bit 1), and the ALT key (bit 2). These bits correspond to the values 1, 2, and 4, respectively. Some, all, or none of the bits can be set, indicating that some, all, or none of the keys have been pressed. For example, if both CTRL and ALT are pressed, the value of shift is 6. Use KeyDown and KeyUp event procedures if you need to respond to both the pressing and releasing of a key. MicroComputing A5E00077133-01 C-5 Events KeyDown and KeyUp interpret the uppercase and lowercase of each character by means of two arguments: keycode, which indicates the physical key (thus returning A and a as the same key) and shift, which indicates the state of shift+key and therefore returns either “A” or “a”. If you need to test for the shift argument, you can use the shift constants which define the bits within the argument. The constants have the following values: • vbShiftMask (1): SHIFT key bit mask • vbCtrlMask (2): CTRL key bit mask • vbAltMask (4): ALT key bit mask The constants act as bit masks that you can use to test for any combination of keys. You test for a condition by first assigning each result to a temporary integer variable and then comparing Shift to a bit mask. Use the And operator with the Shift argument to test whether the condition is greater than 0, indicating that the modifier was pressed. C-6 MicroComputing A5E00077133-01 Events C.9 MouseDown Event Applies to: Button, Edit, Label, Slider This event occurs when a mouse button is pressed while the mouse cursor is over the control. Syntax: MouseDown(short Button, short Shift, OLE_XPOS_PIXELS x, _ OLE_YPOS_PIXELS y) The MouseDown event has these parts: Part Description Button An integer that identifies the button that was pressed to cause the event The button argument is a bit field with bits corresponding to the left button (bit 0), right button (bit 1), and middle button (bit 2). These bits correspond to the values 1, 2, and 4, respectively. Only one of the bits is set, indicating the button that caused the event. Shift An integer that corresponds to the state of the SHIFT, CTRL, and ALT keys when the button specified in the button argument is pressed or released A bit is set if the key is down. The shift argument is a bit field with the least-significant bits corresponding to the SHIFT key (bit 0), the CTRL key (bit 1), and the ALT key (bit 2). These bits correspond to the values 1, 2, and 4, respectively. The shift argument indicates the state of these keys. Some, all, or none of the bits can be set, indicating that some, all, or none of the keys are pressed. For example, if both CTRL and ALT were pressed, the value of shift would be 6. x, y MicroComputing A5E00077133-01 Returns a number that specifies the current location of the mouse pointer C-7 Events C.10 MouseMove Event Applies to: Button, Edit, Label, Slider This event occurs when the mouse cursor moves over the control. Syntax: MouseMove(short Button, short Shift, OLE_XPOS_PIXELS x, _ OLE_YPOS_PIXELS y) The MouseMove event has these parts: Part Description Button An integer that identifies the button that was pressed to cause the event The button argument is a bit field with bits corresponding to the left button (bit 0), right button (bit 1), and middle button (bit 2). These bits correspond to the values 1, 2, and 4, respectively. Only one of the bits is set, indicating the button that caused the event. Shift An integer that corresponds to the state of the SHIFT, CTRL, and ALT keys when the button specified in the button argument is pressed or released A bit is set if the key is down. The shift argument is a bit field with the least-significant bits corresponding to the SHIFT key (bit 0), the CTRL key (bit 1), and the ALT key (bit 2). These bits correspond to the values 1, 2, and 4, respectively. The shift argument indicates the state of these keys. Some, all, or none of the bits can be set, indicating that some, all, or none of the keys are pressed. For example, if both CTRL and ALT were pressed, the value of shift would be 6. x, y C-8 Returns a number that specifies the current location of the mouse pointer MicroComputing A5E00077133-01 Events C.11 MouseUp Event Applies to: Button, Edit, Label, Slider This event occurs when a mouse button is released while the mouse cursor is over the control. Syntax: MouseUp(short Button, short Shift, OLE_XPOS_PIXELS x, _ OLE_YPOS_PIXELS y) The MouseUp event has these parts: Part Description Button An integer that identifies the button that was pressed to cause the event The button argument is a bit field with bits corresponding to the left button (bit 0), right button (bit 1), and middle button (bit 2). These bits correspond to the values 1, 2, and 4, respectively. Only one of the bits is set, indicating the button that caused the event. Shift An integer that corresponds to the state of the SHIFT, CTRL, and ALT keys when the button specified in the button argument is pressed or released A bit is set if the key is down. The shift argument is a bit field with the least-significant bits corresponding to the SHIFT key (bit 0), the CTRL key (bit 1), and the ALT key (bit 2). These bits correspond to the values 1, 2, and 4, respectively. The shift argument indicates the state of these keys. Some, all, or none of the bits can be set, indicating that some, all, or none of the keys are pressed. For example, if both CTRL and ALT were pressed, the value of shift would be 6. x, y MicroComputing A5E00077133-01 Returns a number that specifies the current location of the mouse pointer C-9 Events C.12 ValueChanged Event Applies to: Data This event occurs when the value of a connected variable changes and no connected event was specified on the call to the Connect method. A ValueChangedEvent can also be configured using the Events Property Tab. Syntax: ValueChanged(Property As String, Variable As String, Value as _ Variant, Quality as Integer) The ValueChanged event has these parts: C-10 Part Description Property A string value with the name of the property Variable A string value with the name of the connected variable Value A variant with the new value of Variable Quality Returns an integer with the quality of the new value MicroComputing A5E00077133-01 Using SIMATIC MicroComputing with DCOM D Chapter Overview SIMATIC MicroComputing allows you to communicate across networks using the Microsoft Distributed Component Object Model (DCOM). You can use DCOM to integrate distributed applications by way of a network. A distributed application consists of multiple processes or different computers that cooperate to accomplish a single task. DCOM is a set of Microsoft concepts and program interfaces in which client program objects can request services from server program objects on other computers in a network. The Component Object Model (COM) provides a set of interfaces that allow clients and servers to communicate within the same computer (running Windows 95/98 or Windows NT). Note The control engine must be installed on the server computer. If you plan to use the SIMATIC controls provided with MicroComputing to access the control engine, install the MicroComputing software on both the server computer and the client computer. Section MicroComputing A5E00077133-01 Description Page D.1 Using DCOM to Provide Remote Access D-2 D.2 Configuring the Permissions for the Server Computer D-3 D.3 Configuring the Permissions for the Client Computer D-13 D.4 Troubleshooting D-19 D-1 Using SIMATIC MicroComputing with DCOM D.1 Using DCOM to Provide Remote Access You can use Microsoft’s DCOM technology to create a network of computers that cooperate to provide the control system for a machine or process. Figure D-1 shows how one computer running an application that uses ActiveX controls from MicroComputing can use DCOM to communicate with a different computer to control a process. The Windows operating system provides a configuration tool (dcomcnfg) for setting up your DCOM network. Use this tool to configure the server and client computers. For information about configuring the server computer, see Section D.2; for information about configuring the client computer, see Section D.3. ActiveX controls SIMATIC Data control PC 1 DCOM Components Client Network DCOM Components PC 2 CP Card Server S7-200 Figure D-1 D-2 Using SIMATIC MicroComputing over DCOM MicroComputing A5E00077133-01 Using SIMATIC MicroComputing with DCOM D.2 Configuring the Permissions for the Server Computer The DCOM network consists of a server computer (where the control engine resides) and one or more client computers. Windows provides a configuration tool for setting up the network parameters, such as security and access privileges. For the server application, you must specify the user account that will have permission to access or start the application, and the user accounts that will be used to run the application. This protects your process from unauthorized access. Figure D-2 lists the basic tasks required for configuring the server. ! Caution Granting permission to access applications on a computer allows other users to start and stop programs or to access files on your computer. Granting unlimited access to everyone on the network could cause problems from either innocent or malicious interference. Always limit access to those users who are required to use the applications or files on the computer. Configure the default properties for DCOM Configure the permissions for accessing the server Configure the permissions for launching applications on the server Configure the access permissions for the running class Configure the identity permissions for the running class Figure D-2 Tasks for Configuring the DCOM Server Starting the DCOM Configuration Editor To configure the DCOM server, you must run the DCOM configuration tool on the computer that will function as the server. Use the following procedure to start the DCOM configuration tool: 1. Select the Start > Run... menu command from the Windows Start menu. 2. In the Run dialog box, enter dcomcnfg and click on the OK button. The DCOM configuration tool displays the Distributed COM Configuration Properties dialog box. MicroComputing A5E00077133-01 D-3 Using SIMATIC MicroComputing with DCOM Configuring the Default Properties for DCOM Communication Use the Distributed COM Configuration Properties dialog box to configure the properties of the computer for DCOM. See Figure D-3. 1. Click on the Default Properties tab. 2. Select the “Enable Distributed COM on this computer” option. 3. Set the “Default Authentication Level” to the Connect option. 4. Set the “Default Impersonation Level” to the Identify option. ! Caution Granting permission to access applications on a computer allows other users (such as “Everyone”) to start and stop programs or to access files on your computer. Granting unlimited access to everyone on the network could cause problems from either innocent or malicious interference. Always limit access to those users who are required to use the applications or files on the computer. Distributed COM Configuration Properties Applications Default Properties Default Security Default Enable DCOM on this computer Enable Distributed COM on this computer Enable COM Internet services on this computer Default Distributed COM communication properties The Authentication Level specifies security at the packet level. Configure the authentication level to “Connect” Default Authentication Level: Connect The Impersonation Level specifies whether applications can determine who is calling them, and whether the application can do operations using the client’s identity. Configure the impersonation level to “Identify” Default Impersonation Level: Identify Provide additional security for reference tracking OK Figure D-3 D-4 Cancel Apply Distributed COM Configuration Properties MicroComputing A5E00077133-01 Using SIMATIC MicroComputing with DCOM Configuring the Permissions for Accessing Software on the Server 1. Click on the Default Security tab to display the security options for DCOM (Figure D-4). 2. Click on the Edit Default button for “Default Access Permissions” to display the Registry Value Permissions dialog box. 3. Click on the Add button to display the Add Users and Groups dialog box and change the security settings for access to the server (Figure D-5). 4. From the “Names” field, select “Everyone” (or the appropriate subset of users) and click on the Add button. Distributed COM Configuration Properties Click on the Edit Default Applications Default Properties Default Security Default button to allow remote users to access the computer Default Access Permissions You may edit who is allowed to access applications that do not provide their own settings. Edit Default... Registry Value Permissions Default L You may provide th Registry Value: DefaultAccessPermission Owner: NDS1910 (M Duchamp) Name: Default C You may configurat and adjus Click on the Add button to change the security settings Type of Access: Access: Type of OK Figure D-4 MicroComputing A5E00077133-01 Cancel Add... Remove Remove Help Configuring the Default Access Permissions for DCOM D-5 Using SIMATIC MicroComputing with DCOM ! Caution Granting permission to access applications on a computer allows other users (such as “Everyone”) to start and stop programs or to access files on your computer. Granting unlimited access to everyone on the network could cause problems from either innocent or malicious interference. Always limit access to those users who are required to use the applications or files on the computer. 5. Select “INTERACTIVE” and click on the Add button. 6. Select “SYSTEM” and click on the Add button. 7. Click on the OK button to enter these changes to the Registry Value Permissions dialog box. 8. Click on the OK button of the Registry Value Permissions dialog box to enter the changes to the default access permissions. The Registry Value Permissions dialog box closes and displays the Distributed COM Configuration Properties dialog box (Figure D-4). Add Users and Groups List Names From: NTnet Select the user groups to be allowed access, such as Everyone, Interactive, and System. Names: Domain Admins Designated adm Ó Ó Domain Guests All domain guest Click on the Add button to add the groups to the permission list. Domain Users All domain users Everyone All users INTERACTIVE Users accessing this object locally SYSTEM The operating system Add Add Show Users Members... Members... Search... Add Names: Type of Access: Allow Access OK Figure D-5 D-6 Cancel Help Changing the Access Permissions for Users or Groups MicroComputing A5E00077133-01 Using SIMATIC MicroComputing with DCOM Configuring the Permissions for Launching Software on the Server 1. Click on the Edit Default button for “Default Launch Permissions” to display the Registry Value Permissions dialog box. See Figure D-6. 2. Click on the Add button to display the Add Users and Groups dialog box and change the security settings for access to the server. See Figure D-7. 3. In the “Names” field of the Add users and Groups dialog box (Figure D-7), select “Everyone” (or the appropriate subset of users) and click on the Add button. Distributed COM Configuration Properties Applications Default Properties Default Security Default Protocols Default Access Permissions You may edit who is allowed to access applications that do not provide their own settings. Ed Click on the Edit Default button to allow remote users to launch applications on this computer Default Launch Permissions You may edit who is allowed to launch applications that do not provide their own settings. Edit Default... Registry Value Permissions Default Configuration Permissions Registry Value: DefaultAccessPermission You may Owner: NDS1910 (M Duchamp) configura and adjus Name: Click on the Add button to change the security settings Type of Access: Access: Type of OK Figure D-6 MicroComputing A5E00077133-01 Cancel Add... Remove Remove Help Configuring the Default Launch Permissions for DCOM D-7 Using SIMATIC MicroComputing with DCOM ! Caution Granting permission to access applications on a computer allows other users (such as “Everyone”) to start and stop programs or to access files on your computer. Granting unlimited access to everyone on the network could cause problems from either innocent or malicious interference. Always limit access to those users who are required to use the applications or files on the computer. 4. Select “INTERACTIVE” and click on the Add button. 5. Select “SYSTEM” and click on the Add button. 6. Click on the OK button to enter these changes to the Registry Value Permissions dialog box. 7. Click on the OK button of the Registry Value Permissions dialog box to enter the changes to the default access permissions. The Registry Value Permissions dialog box closes and displays the Distributed COM Configuration Properties dialog box. Add Users and Groups List Names From: NTnet Names: Domain Admins Designated adm Ó Ó Domain Guests All domain guest Select the user groups to be allowed access, such as Everyone, Interactive, and System. Click on the Add button to add the groups to the permission list. Domain Users All domain users Everyone All users INTERACTIVE Users accessing this object locally SYSTEM The operating system Add Add Show Users Members... Members... Search... Add Names: Type of Access: Allow Access OK Figure D-7 D-8 Cancel Help Changing the Launch Permissions for Users or Groups MicroComputing A5E00077133-01 Using SIMATIC MicroComputing with DCOM Configuring the Properties for the Running Class Use the following procedure to configure the properties of the running class for the server: 1. Click on the Applications tab of the Distributed COM Configuration Properties dialog box. See Figure D-8. 2. Select “Running Class” from the list of applications. 3. Click on the Properties button to display the Running Class Properties dialog box. Distributed COM Configuration Properties Applications Default Properties Default Security Default Protocols Applications:: Running Class S7Soft Document OPC Server Select “Running Class” and click on the Properties button to configure the properties of the running class Properties OK Figure D-8 MicroComputing A5E00077133-01 Cancel Apply Selecting the Running Class for DCOM D-9 Using SIMATIC MicroComputing with DCOM Configuring the Access Permissions for the Running Class Use the following procedure to configure the access permissions for the running class: 1. Click on the Security tab of the Running Class Properties dialog box. 2. Select “Use custom access permissions” and click on the Edit button. See Figure D-9. 3. If “Everyone” (or the appropriate subset of users) is not shown in the Permissions dialog Name list, click on the Add button to display the Add Users or Groups dialog box. See Figure D-10. Running Class Properties General Security Identity Use default access permissions Use custom access permissions You may edit who can access this application. Select “Use custom launch permissions“ and click on the Edit button to ensure that the correct set of users is allowed access to the server Use default launch permissions Use custom launch permissions You may edit who can launch this application. Edit... Use default configuration permissions Use custom configuration permissions You may edit who can change the configuration information for this application. Edit... OK Figure D-9 D-10 Cancel Apply Configuring the DCOM Access Permissions for the Server MicroComputing A5E00077133-01 Using SIMATIC MicroComputing with DCOM ! Caution Granting permission to access applications on a computer allows other users (such as “Everyone”) to start and stop programs or to access files on your computer. Granting unlimited access to everyone on the network could cause problems from either innocent or malicious interference. Always limit access to those users who are required to use the applications or files on the computer. 4. Use the Add Users and Groups dialog (Figure D-10) to add users/groups as required. 5. Click on the OK button to return to the Running Class Properties dialog box. Add Users and Groups List Names From: NTnet Names: Ó Ó Domain Admins Designated administrators of the domain Domain Guests All domain guests Domain Users All domain users Everyone All users INTERACTIVE Users accessing this object locally SYSTEM The operating system Add Add Show Users Members... Members... Search... Add Names: Ensure that the correct groups of users are allowed access to the server Type of Access: Allow Access OK Figure D-10 MicroComputing A5E00077133-01 Cancel Help Changing the Access Permissions for Users or Groups D-11 Using SIMATIC MicroComputing with DCOM Configuring the Identity Permissions for the Running Class Use the following procedure to configure the identity permissions for the running class: 1. Click on the Identity tab and select the “The Interactive User”. See Figure D-11. 2. Click on the OK button to enter the identity permissions for the running class. Running Class Properties General Security Identity Select “The interactive user” Which user account do you want to use to run this application? The interactive user The launching user This user User: NTnet/NDS1910 Browse... Password: Confirm Password: The The System System Account Account (services (services only) only) OK Figure D-11 D-12 Cancel Apply Apply Configuring the DCOM Identity Permissions for the Server MicroComputing A5E00077133-01 Using SIMATIC MicroComputing with DCOM D.3 Configuring the Permissions for the Client Computer Before you can use MicroComputing with DCOM, you must use DCOM configuration to set application properties, such as security and location. On the computer running the client application (the application which initiates a request to a server application), you must specify the location of the server application (the application that responds to requests from a client) that will be accessed or started. Figure D-12 lists the basic tasks required for configuring the server. Note You do not configure the running class properties for the client computer. You define the running class on the server computer. See Figure D-8. Configure the default properties for DCOM Configure the permissions for accessing the software on the client Configure the permissions for launching applications on the client Figure D-12 ! Tasks for Configuring the DCOM Client Caution Granting permission to access applications on a computer allows other users (such as “Everyone”) to start and stop programs or to access files on your computer. Granting unlimited access to everyone on the network could cause problems from either innocent or malicious interference. Always limit access to those users who are required to use the applications or files on the computer. Starting the DCOM Configuration Editor To configure the DCOM client, you must run the DCOM configuration tool on the computer that will function as the client. Use the following procedure to start the DCOM configuration tool: 1. Select the Start > Run... menu command from the Start menu. 2. In the Run dialog box, enter dcomcnfg and click on the OK button. The DCOM configuration tool displays the Distributed COM Configuration Properties dialog box. MicroComputing A5E00077133-01 D-13 Using SIMATIC MicroComputing with DCOM Configuring the Default Properties for DCOM Communication Use the Distributed COM Configuration Properties dialog box to configure the properties of the computer for DCOM. 1. Click on the Default Properties tab. See Figure D-13. 2. Select the “Enable Distributed COM on this computer” option. 3. Set the “Default Authentication Level” to the Connect option. 4. Set the “Default Impersonation Level” to the Identify option. Distributed COM Configuration Properties Applications Default Properties Default Security Default Enable DCOM on this computer. Enable Distributed COM on this computer Default Distributed COM communication properties The Authentication Level specifies security at the packet level. Default Authentication Level: Configure the authentication level to Connect. Connect The Impersonation Level specifies whether applications can determine who is calling them, and whether the application can do operations using the client’s identity. Configure the impersonation level to Identify. Default Impersonation Level: Identify Provide additional security for reference tracking OK Figure D-13 D-14 Cancel Apply Distributed COM Configuration Properties MicroComputing A5E00077133-01 Using SIMATIC MicroComputing with DCOM Configuring the Permissions for Accessing Software on the Client 1. Click on the Default Security tab to display the security options for DCOM. See Figure D-14. 2. Click on the Edit Default button for “Default Access Permissions” to display the Registry Value Permissions dialog box. 3. Click on the Add button to display the Add Users and Groups dialog box and change the security settings for access to the server. See Figure D-15. 4. From the “Names” field, select “Everyone” (or the appropriate subset of users) and click on the Add button. 5. Select “INTERACTIVE” and click on the Add button. 6. Select “SYSTEM” and click on the Add button. Distributed COM Configuration Properties Click on the Edit Default Applications Default Properties Default Security Default button to allow remote users to access the computer Default Access Permissions You may edit who is allowed to access applications that do not provide their own settings. Edit Default... Default Launch Permissions You may Registry Value Permissions provide th Registry Value: DefaultAccessPermission Owner: FrM2001 (F Marc) Name: Default C You may e configurat and adjus Click on the Add button to change the security settings Type of Access: Access: Type of OK Figure D-14 MicroComputing A5E00077133-01 Cancel Add... Remove Remove Help Configuring the Default Access Permissions for DCOM D-15 Using SIMATIC MicroComputing with DCOM 7. Click on the OK button to enter these changes to the Registry Value Permissions dialog box. 8. Click on the OK button of the Registry Value Permissions dialog box to enter the changes to the default access permissions. The Registry Value Permissions dialog box closes and displays the Distributed COM Configuration Properties dialog box (Figure D-14). ! Caution Granting permission to access applications on a computer allows other users (such as “Everyone”) to start and stop programs or to access files on your computer. Granting unlimited access to everyone on the network could cause problems from either innocent or malicious interference. Always limit access to those users who are required to use the applications or files on the computer. Add Users and Groups List Names From: NTnet Names: Domain Admins Designated administrators of the domain Ó Ó Domain Guests All domain guests Domain Users All domain users Everyone All users INTERACTIVE Users accessing this object locally SYSTEM The operating system Add Add Show Users Members... Members... Search... Add Names: Select the user groups to be allowed access, such as “Everyone”, “Interactive”, and “System”. Click on the Add button to add the groups to the permission list. Type of Access: Allow Access OK Figure D-15 D-16 Cancel Help Changing the Access Permissions for Users or Groups MicroComputing A5E00077133-01 Using SIMATIC MicroComputing with DCOM Configuring the Permissions for Launching Software on the Client 1. Click on the Edit Default button for “Default Launch Permissions” to display the Registry Value Permissions dialog box. See Figure D-16. 2. Click on the Add button to display the Add Users and Groups dialog box and change the security settings for access to the server. See Figure D-17. 3. In the “Names” field of the Add users and Groups dialog box (Figure D-17), select “Everyone” (or the appropriate subset of users) and click on the Add button. Distributed COM Configuration Properties Applications Default Properties Default Security Default Protocols Default Access Permissions You may edit who is allowed to access applications that do not provide their own settings. Ed Click on the Edit Default button to allow remote users to launch applications on this computer Default Launch Permissions You may edit who is allowed to launch applications that do not provide their own settings. Edit Default... Default C Registry Value Permissions You may configurat and adjust Registry Value: DefaultAccessPermission Owner: FrM2001 (F Marc) Name: Click on the Add button to change the security settings Type Type of of Access: Access: OK Figure D-16 MicroComputing A5E00077133-01 Cancel Add... Remove Remove Help Configuring the Default Launch Permissions for DCOM D-17 Using SIMATIC MicroComputing with DCOM ! Caution Granting permission to access applications on a computer allows other users (such as “Everyone”) to start and stop programs or to access files on your computer. Granting unlimited access to everyone on the network could cause problems from either innocent or malicious interference. Always limit access to those users who are required to use the applications or files on the computer. 4. Select “INTERACTIVE” and click on the Add button. 5. Select “SYSTEM” and click on the Add button. 6. Click on the OK button to enter these changes to the Registry Value Permissions dialog box. 7. Click on the OK button of the Registry Value Permissions dialog box to enter the changes to the default access permissions. The Registry Value Permissions dialog box closes and displays the Distributed COM Configuration Properties dialog box. Add Users and Groups List Names From: NTnet Names: Domain Admins Designated administrators of the domain Ó Ó Domain Guests All domain guests Domain Users All domain users Everyone All users INTERACTIVE Users accessing this object locally SYSTEM The operating system Add Add Show Users Members... Members... Search... Add Names: Select the user groups to be allowed access, such as Everyone, Interactive, and System. Click on the Add button to add the groups to the permission list. Type of Access: Allow Access OK Figure D-17 D-18 Cancel Help Changing the Launch Permissions for Users or Groups MicroComputing A5E00077133-01 Using SIMATIC MicroComputing with DCOM D.4 Troubleshooting This section provides suggestions for some of the problems that could occur with DCOM. For more information, refer to the Microsoft online product support (www.microsoft.com). Problems with Reading and Writing Data between Two Computers over DCOM Situation: you are running MicroComputing on the client computer (PC1) and are connected over DCOM to a server (PC2) that is connected to an S7-200. You expect to read and write data between the two computers, but data updates from the server on PC2 do not occur. Note The users must be members of the same workgroup, or domain. Possible explanation: PC1 was not configured to allow PC2 to send update messages to PC1. Possible solution: 1. Run the DCOM configuration tool (dcomcnfg) on PC1. 2. Click on the Default Security tab. 3. Click on the Edit Default button for “Default Access Permissions” to display the Registry Value Permissions dialog box. 4. Click on the Add button to display the Add Users and Groups dialog box and change the security settings for access to the server. 5. From the “Names” field, select “Everyone” and click on the Add button. 6. Click on the OK button to enter these changes to the Registry Value Permissions dialog box. 7. Click on the OK button to enter the changes to the default access permissions. MicroComputing A5E00077133-01 D-19 Using SIMATIC MicroComputing with DCOM D-20 MicroComputing A5E00077133-01 Guidelines for Programming with SIMATIC MicroComputing E Chapter Overview The Data control can be used not only with other SIMATIC controls, but also with other third-party or custom ActiveX controls. To work with a custom ActiveX control, the Data control requires that the control provide a minimum of code to respond to changes in the assigned variable. When you write programs that use the SIMATIC controls provided by the MicroComputing software to access the control engine, be aware of the programming guidelines, especially those in regard to the use of timers in your code. The MicroComputing software provides a container (SoftContainer) for the SIMATIC controls and other ActiveX controls. You can also use other containers, such as Visual Basic, with the SIMATIC Controls. In order to use the SIMATIC controls in another container, the container must support the extended controls. If the container does not support these functions, you must supply program code to perform these functions. Section MicroComputing A5E00077133-01 Description Page E.1 Guidelines for Third-Party Containers E-2 E.2 Programming Guidelines E-3 E.3 Guidelines for Creating Custom ActiveX Controls E-5 E.4 Using a Custom ActiveX Control with a Data Control E-6 E.5 Known Problems for MicroComputing E-9 E-1 Guidelines for Programming with SIMATIC MicroComputing E.1 Guidelines for Third-Party Containers For the SIMATIC Data control to work within a third-party container, the container must support the property browsing functions of the Data control. To do this, the container must support the functions for “extended controls” (as defined by Microsoft for containers). An extended control is a partial control that wraps around another control to support container-specific properties, methods and events. (Refer to Microsoft’s on-line documentation for more information about containers and extended controls.) To provide the extended control functions, the container must support the following methods: • IOleClientSize::GetContainer • IOleContainer::EnumObjects • IOleControlSite::GetExtendedControl The extended control of the container must also support a Name property. The SoftContainer provided with the MicroComputing software supports extended controls, as does Microsoft’s Visual Basic. Containers from other vendors (such as Borland’s Delphi version 3.0) do not support extended controls. The Siemens customer support center can help determine if your container supports the extended control functions. If your container does not support the extended control functions, you must provide program code to perform these functions. Contact the Siemens customer support center for sample code that performs the extended control functions. OLE Containers MicroComputing is an open system that may be used with OLE containers and controls from a variety of vendors. The SIMATIC controls have been tested with the following containers: • Microsoft Visual Basic 5.0 • Microsoft Visual Basic 6.0 (recommended) • Microsoft Visual Basic for Applications (VBA) for the Microsoft Office 97 applications • Microsoft Visual C++ of Microsoft Visual Studio 5.0 and 6.0 • SoftContainer installed with the MicroComputing software. Some other containers from other vendors (such as Borland Delphi 3.0) do not support all the necessary ActiveX interfaces to support the property browsing functions of the Data control to other controls. For these containers, you must write additional code in your program to support the Microsoft extended controls functions for containers. E-2 MicroComputing A5E00077133-01 Guidelines for Programming with SIMATIC MicroComputing Refer to the Documentation (Especially to the List of Known Problems) for Any Third-Party OLE Container When using the SIMATIC controls within a third-party container, please refer to the list of known problems for that container. For example: under some conditions, Visual Basic 5.0 can cause an exception when closing. This will not affect the operation of MicroComputing. E.2 Programming Guidelines The following guidelines relate specifically to Visual Basic; however, they can also apply to other programming languages. ! Warning Using the timer function improperly or using breakpoints with your subroutines that access MicroComputing can cause problems that could potentially cause your computer or application to crash or lock up. Depending on the configuration, this could cause the application to lose communication with the control engine. This could cause unpredictable process operation, which could result in death or serious injury to personnel, and/or damage to equipment. Always install a physical emergency stop circuit for your machine or process. Using Timers in Your Program The Timer function in Visual Basic version 5 allows a timer to interrupt code in progress within the same thread, which can cause problems with potentially serious consequences. If you use VB timers with MicroComputing, observe the following guidelines: • Always kill (disable) the timers in the Form_Unload subroutine. Otherwise, a timer can trigger an event while the VB program is shutting down; this condition could cause your computer or your application to crash, lock up, or to continue running invisibly. • If you start your timer in the Form_Load subroutine, the timer event could occur before the other objects have finished being instantiated. In order to ensure that the objects have been properly instantiated, always start a timer in the Form_Load subroutine with a large interval (such as 1 or 2 seconds) to allow the objects to be properly instantiated. Subsequent timer intervals can be set to shorter intervals. MicroComputing A5E00077133-01 E-3 Guidelines for Programming with SIMATIC MicroComputing Using a Separate Data Control to Access Critical Data The performance of your program can be improved by using a separate SIMATIC Data control to access frequently changing, critical data. Disconnecting from the Control Engine If your subroutine accesses the Data control programmatically, always disconnect from the control engine (using a Disconnect method) in the Form_Unload subroutine. In addition, disable the AutoConnect property for the Data control if you explicitly call the Connect method within your program. This helps to ensure that the Data control does not connect unexpectedly to the control engine. Determining the Order of AutoConnects for Multiple Data Controls If you use multiple Data controls in your program, the order in which the different Data controls automatically connect to the control engine(s) cannot be determined. If the order in which the Data controls connect to the control engine(s) is critical, disable the AutoConnect property for the Data control and use the Connect and Disconnect methods for the individual Data controls. E-4 MicroComputing A5E00077133-01 Guidelines for Programming with SIMATIC MicroComputing E.3 Guidelines for Creating Custom ActiveX Controls In order to create a custom ActiveX control that can be used with the SIMATIC Data control, the custom control must provide a property to which data can be written. For example, your custom control might have a Value property: when the Value property changes, then the control reacts. Reading Data from the Data Control If the container supports extended controls (see Section E.1), the Data control automatically finds the custom control and its properties. You use the Properties dialog box of the Data control to assign a variable in the control engine to the property of the custom control. (For information about assigning variables to properties, see Section 4.4.) Whenever the value of the variable in the control engine changes, the Data control updates the value of the property for the custom control. The custom control should include a subroutine for handling the data written from the Data control. Table E-1 provides a sample subroutine for a property (Value) that reads the data written by the Data control. Writing Data to the Data Control For the custom control to generate (write) a change to the variable in the control engine, you must include a subroutine for handling a change in the property. Table E-1 provides a sample subroutine for writing the new value to the Data control. Table E-1 Reading and Writing a Changed Value of a Property Visual Basic Code Public Property Get Value() As Long Value = Object1.Value End Property Public Property Let Value(ByVal New_Value As Long) Object1.Value() = New_Value PropertyChanged “Value” End Property Private Sub Value_Change() PropertyChanged “Value” End Sub MicroComputing A5E00077133-01 E-5 Guidelines for Programming with SIMATIC MicroComputing E.4 Using a Custom ActiveX Control with a Data Control You can create a custom ActiveX control that communicates through the Data control to access the control engine. To create this sample application, you need the following items: • Microsoft Visual Basic 5 or higher • SIMATIC Data control from MicroComputing • Control engine: an S7-200 CPU 212 or higher • Sample program (see Section 1.1) • STEP 7 Micro/WIN (to download the program to the control engine and to turn on the peripheral input bits of the sample program) You can also use the I/O Panel application to turn on the input bits of the sample program running in the control engine. See Section 1.2 for information about the I/O Panel application. Creating a Custom ActiveX Control for Accessing the Control Engine Use the following procedure to use a standard VB horizontal scrollbar (HScrollBar control) to create a custom ActiveX control: 1. Open a Visual Basic project for creating an ActiveX control: Use the File > New Project menu command to display the New Project dialog box, then select the “ActiveX Control” icon (not the “ActiveX EXE” icon) and click on the Open button. 2. Add a User Control to the project: Select the Project > Add User Control menu command, then select the User Control icon from the “Add User Control” dialog box. Click on the Open button to add the User Control to the project. 3. Select the horizontal scrollbar control (HScrollBar) in the toolbox and insert it onto the UserControl1 form. 4. Select the scrollbar control. In the Properties window, select the Max property for this control (HScroll1) and enter the following value: 255 5. Display the Code window for UserControl1 by selecting the View > Code menu command. In the Code window, enter the program listed in Table E-2. 6. Close both the code window and the Object window. Visual Basic adds this ActiveX control (UserControl1) to the toolbox. Table E-2 Sample Program for an ActiveX Control Used with MicroComputing Visual Basic Code Public Property Get Value() As Integer Value = HScroll1.Value End Property E-6 MicroComputing A5E00077133-01 Guidelines for Programming with SIMATIC MicroComputing Table E-2 Sample Program for an ActiveX Control Used with MicroComputing, continued Public Property Let Value (ByVal New_Value As Integer) HScroll1.Value = New_Value PropertyChanged ”Value” End Property Public Sub HScroll1_Change() Value = HScroll1.Value End Sub Adding the Custom Control to a Program Using the SIMATIC Data Control 1. Open a new VB project: Use the File > Add Project menu command to display the Add Project dialog box, then select the Standard EXE icon and click on the Open button. Visual Basic opens a new project with an empty form in the Object window. The Project directory area now lists two projects: Project1 contains UserControl1, and Project2 contains Form1. 2. Select the UserControl1 icon in the toolbox and insert it onto Form1 of Project2. 3. Add the Siemens SIMATIC Data control to the toolbox. For information about adding controls to the VB toolbox, see Section 1.1 and Figure 1-12. 4. Select the Data control icon in the toolbox and insert it onto Form1 of Project2. 5. Select the Data control and click the right mouse button to bring up the pop-up menu. From the pop-up menu, select Properties to display the Properties dialog box for the Data control. 6. From the Properties dialog box, select the Connections tab. Click on the “+” symbol to expand the list of controls. 7. Select the UserControl1 control and click on its “+” symbol to expand its properties list. 8. Select the Value property and enter QB0 in the Assigned Variable field. See Figure 1-13. Click on the Apply and OK buttons to enter the data and close the Properties dialog box. MicroComputing A5E00077133-01 E-7 Guidelines for Programming with SIMATIC MicroComputing Running the Sample Program Save the program before switching Visual Basic from Design mode to Run mode. When the sample program runs, the custom scrollbar control that you created reflects the changing value stored in QB0. Note If the control engine is not running, the Data control cannot make a connection. Before setting Visual Basic into Run Mode, ensure that the control engine is running. Use the following procedure to configure the Data control for communicating with the control engine and for running the sample program. 1. Select the Engine tab to configure the control engine. See Figure E-1. 2. Select the “Direct Connect” option and enter wcS7=2 (case sensitive) for an S7-200 PLC. Click on the Apply button to enter the data, and then click on the OK button to close the dialog box. 3. Switch Visual Basic from Design mode to Run mode to run the sample program. Siemens SIMATIC Data Control Properties General Engine Connections Events Name Select the option for a direct connection Connect via Tag Source Tag Source Browse Direct Connect Enter wcS7=2 as the type of control engine PC Name Control Engine wcS7=2 OK Figure E-1 E-8 Cancel Apply Help Connecting to the Control Engine (Scrollbar Control Example) MicroComputing A5E00077133-01 Guidelines for Programming with SIMATIC MicroComputing E.5 Known Problems for MicroComputing Detecting the Loss of an MPI Connection The Data control does not detect the loss of an MPI connection. Use the following procedure to detect a loss of connection: 1. Include a timer in your program. 2. At a periodic interval (such as 1 second), use the ReadVariable method of the Data control to read a specific variable (such as MB0). 3. If you receive an error message that the ReadVariable method failed, you have lost the MPI connection. Your program can then respond to the lost connection. No PPI Connection In order to use a PC/PPI cable with SIMATIC MicroComputing running on Windows 95/98, you must decrease the size of the receive buffer for the COM port. Use the following procedure: 1. From the Windows desktop, right click the My Computer icon and choose the Properties menu item. 2. From the System Properties dialog box, select the Device Manager tab. 3. From the Device Manager tab, locate and double-click the Ports icon. 4. From the expanded Ports branch, locate and double-click the Communication Port icon for the specific COM port. 5. From the Communication Port Properties dialog box, choose the Port Settings tab. 6. From the Port Settings tab, click ”Advanced”. 7. Examine the slider for Receive Buffer. If it is not at the lowest possible setting (1), move it to the lowest setting. 8. Choose OK to confirm your selections and close the open dialog boxes. MicroComputing A5E00077133-01 E-9 Guidelines for Programming with SIMATIC MicroComputing Using Control Arrays in VB to Connect to the Control Engine If you programmatically create a connection table (using the ConnectObject method in the code in your Visual Basic program to connect the objects) and then use this connection table to connect the elements of a control array to the control engine, any value changed by an element of the control array is not written automatically to the control engine. While the Data control automatically updates changes made by the control engine (by automatically reading the changed values to the elements of the control array), it does not automatically write any changed values made with the control array to the control engine. • If you require that changes made with the control array utilize the “Automatic Update” option of the Data control to automatically write the change to the control engine: Use the Properties dialog box of the Data control to create the connections for the control array (instead of writing code using the ConnectObject method in your VB program to make the connections). When you use the Properties dialog box of the Data control to browse to the elements of the control array and assign variables in the control engine, changes made with the elements of the control array are automatically written to the control engine. (Ensure that the Automatic Update option for the Data control is selected.) • If you do not require that changes made with the control array be written automatically to the control engine: You can implement code in your VB program (for example, in the code for a Button control) to write the changed value to the control object, using the WriteVariable method or the WriteMultiVariables method to manually update the value in the control engine. Troubleshooting: Delayed Responses of Software Using COM Your DCOM configuration can affect local COM operations. For example, setting the “Default Authentication Level” to “None” (instead of to “Connect”) can delay the connections to software applications for up to 6 minutes as the Windows NT operating system performs its security checking. This affects not only MicroComputing products, but other software applications that use COM (such as Microsoft Word). When configuring your computer for DCOM, please use the entries detailed in Appendix D. E-10 MicroComputing A5E00077133-01 Using the Computing Configuration Tool F The Computing Configuration tool allows you to direct communications to an S7-200 control engine. You can also use the tool to choose a language for the MicroComputing Software or to set up the optional OPC server. Section MicroComputing A5E00077133-01 Description Page F.1 Selecting the Language F-2 F.2 Accessing the PG/PC Interface F-3 F.3 Connecting to Your Process with the Optional OPC Server F-4 F-1 Using the Computing Configuration Tool F.1 Selecting the Language SIMATIC MicroComputing provides two languages for the software and help: German and English. The menus and help are displayed in the language selected. Use the following procedure to change the language for SIMATIC MicroComputing: 1. Select the Simatic > PC Based Control > Computing Configuration menu command from the Start menu to display the Computing Configuration dialog box. 2. In the Computing Configuration dialog box, select the Language tab. 3. Select the language for the CPU panel (German or English). See Figure F-1. 4. Click on the Apply button to change the language. 5. Click on the OK button to close the dialog box. Computing Configuration OPC Language Connection Language Select the language for the menus and help files of the SIMATIC MicroComputing applications. english deutsch english OK Figure F-1 F-2 Cancel Apply Help Selecting the Language for the CPU Panel and Help Files MicroComputing A5E00077133-01 Using the Computing Configuration Tool F.2 Accessing the PG/PC Interface This tab provides access to the Setting the PG/PC Interface dialog box, which you use to set up communications across MPI, PROFIBUS–DP, and Ethernet networks. 1. Use the Start menu (Start > Simatic > PC Based Control > Computing Configuration) to open the Computing Configuration tool (Figure F-2). 2. Click the Connection tab. 3. Click the Setting the PG/PC Interface button. Refer to Section 3.3 for information about using the Setting the PG/PC Interface to configure the CP card as an access point for MicroComputing. Computing Configuration OPC Language Connection Setting the PG/PC Interface OK Figure F-2 MicroComputing A5E00077133-01 Cancel Apply Help Accessing the PG/PC Interface Application F-3 Using the Computing Configuration Tool F.3 Connecting to Your Process with the Optional OPC Server The optional OPC (OLE for Process Control) server for SIMATIC MicroComputing provides a standard mechanism for communicating to numerous data sources. You can use the optional OPC server to communicate with the S7-200 control engine and to provide access to the process data. Note The S7-200 OPC Server optional software package provides a server that allows any OPC client application to access data in the S7-200 control engine; MicroComputing does not provide any OPC client application. MicroComputing implements only the mandatory interfaces as defined in the version 2.0 specification from the OPC Foundation. The interfaces defined in that specification as “custom” may be implemented at a later date. OPC allows you to access data from the plant floor and integrate the data into your existing business systems. You can use off-the-shelf tools (such as SCADA packages, databases, spreadsheets) to assemble a system that meets your needs. As shown in Figure F-3, OPC provides an open and effective communication architecture which concentrates on data access and not the types of data. Application X OPC Client Interface OPC Server A Figure F-3 F-4 Application Y OPC Client Interface Optional MicroComputing OPC Server OPC Server C Applications Working with Many OPC Servers MicroComputing A5E00077133-01 Using the Computing Configuration Tool Your OPC client connects to the OPC server object provided as an option by MicroComputing. This connection allows you to create and manipulate OPC group objects, which organize the data to be accessed. You can activate or deactivate a group as a unit, or you can “subscribe” to the list in a group of items so that you can be notified when the data change. (A group is a collection of items, like MB0.) Figure F-4 shows the connection from the OPC client application through the optional MicroComputing OPC server to the process data. Third-party OPC client application OPCServer.MicroComputing S7-200 Control engine Figure F-4 Using the Optional OPC Server to Access Your Process Data To access the OPC server and its contents, you must provide your OPC client with the name (ProgID, or programmatic identifier) of the server object. The name of the OPC server object that is provided as an option by MicroComputing is: OPCServer.MicroComputing The OPC option for MicroComputing is based on the OLE/COM technology from Microsoft. For more information about OPC, refer to the OPC specification OLE for Process Control Data Access Standard, version 2.0 from the OPC Foundation. For more information about the SIMATIC OPC server, refer to the OPC Server Interface Manual. MicroComputing A5E00077133-01 F-5 Using the Computing Configuration Tool Configuring the OPC Connection You can use the optional OPC application to connect to a control engine over a network, such as a local area network (LAN). The Direct Connection option (Figure F-5) allows you to connect to a specific control engine on a specific computer. Use the following procedure to configure the OPC connections: 1. Select the Simatic > PC Based Control > Computing Configuration menu command from the Start menu to display the Computing Configuration dialog box. Select the OPC tab. See Figure F-5. 2. Select the Direct Connection option and enter the name of the control engine. For example: As shown in Figure F-5, wcS7=2 is the S7-2xx with a node address of 2. 3. Click on the Apply button to enter the data, and click on the OK button to close the dialog box. Computing Configuration OPC Language Connection Connection Connection via Tag Source Browse.. Tag Source Direct Connection Computer Name Control Engine wcS7=2 OK Figure F-5 Cancel Apply Help Configuring the OPC Connection Note You can have only one control engine active at a time. Instead of reconfiguring the Data control in your program, you can use the configuration tool to change the control engine for the connection. F-6 MicroComputing A5E00077133-01 Using the Computing Configuration Tool OPC Error Codes Table F-1 lists the error codes for the optional OPC interface. OPC methods return error codes in a HRESULT (a long variables, in hexadecimal format). For Visual C, error conditions are handled with the HRESULT. For Visual Basic, error handling is written to the VB error object (ERR). You must add code to your VB program to access the error codes from the OPC interface. Table F-1 OPC Error Codes Error Code Error Description 0x80070057 E_INVALIDARG The value of one or more parameters was not valid. This is generally used in place of a more specific error where it is expected that problems are unlikely or will be easy to identify (for example. when there is only one parameter). 0x8007000E E_OUTOFMEMORY There is not enough memory to complete the requested operation. This can happen any time the server needs to allocate memory to complete the requested operation. 0x0004000D OPC_E_UNSUPPORTEDRATE The server does not support the requested data rate, but will use the closest available rate. 0x0004000E OPC_E_CLAMP A value passed to WRITE was accepted, but was clamped. 0xC0040001 OPC_E_INVALIDHANDLE An invalid handle was passed. 0xC0040002 OPC_E_DUPLICATE A duplicate parameter was passed where one is not allowed. 0xC0040003 OPC_E_UNKNOWNLCID The server does not support the specified local ID. 0xC0040004 OPC_E_BADTYPE The server cannot convert between the passed or requested data type and the canonical data type for this item. 0xC0040005 OPC_E_PUBLIC The requested operation cannot be performed on a public group. 0xC0040006 OPC_E_BADRIGHTS The access rights for the item do not allow the operation. 0xC0040007 OPC_E_UNKNOWNITEMID The item definition does not exist within the address space of the server. This can also occur on an exiting item if the item is deleted “on-line” from the server address space by some external operation. 0xC0040008 OPC_E_INVALIDITEMID The item definition does not conform to the syntax of the server. 0xC0040009 OPC_E_INVALIDFILTER The filter string is not valid. 0xC004000A OPC_E_UNKNOWNPATH The access path of the item is not known to the server. 0xC004000B OPC_E_RANGE A value passed to WRITE is out of range. 0xC004000C OPC_E_DUPLICATE_NAME A group with a duplicate name already exits in the server. MicroComputing A5E00077133-01 F-7 Using the Computing Configuration Tool F-8 MicroComputing A5E00077133-01 Index A AboutBox method, B-1 Accessing data connect/disconnect, B-4, B-7, B-9, B-14, E-4 separate Data control, E-4 Accessing memory areas ActiveX controls Button, 5-4–5-8 Edit, 5-12–5-23 Label, 5-22–5-26 Slider, 5-28–5-30 OPC controls, F-5–F-7 S7-200 controllers, A-2 SIMATIC controls, 4-1–4-12 Accessing process data ActiveX controls Button, 5-4–5-8 Edit, 5-12–5-23 Label, 5-22–5-26 Slider, 5-28–5-30 memory areas of S7-200 controllers, A-2 OPC controls, F-5–F-7 SIMATIC controls, 4-1–4-12 Accessing the OPC server, F-5 Activated property, B-1 ActiveX controls Button, 5-4–5-8 Button control description, 5-4 toolbar button, 5-4 connecting to control engine, 4-6 creating custom control, E-5–E-9 creating process form, 6-4–6-6 custom controls, E-6–E-9 Data control description, 4-1 error codes, 4-27 events, 4-26 toolbar button, 4-1 MicroComputing A5E00077133-01 Edit control description, 5-12 toolbar button, 5-12 filtering properties, 4-9 Label, 5-22–5-26 Label control description, 5-22 toolbar button, 5-22 properties Button control, 5-2–5-6 Data control, 4-26–4-27 Label control, 5-12 Slider control, 5-28 sample program I/O panel, 1-4–1-10 Microsoft Excel, 1-16–1-20 other controls (VBScrollbar), 1-13–1-16 SoftContainer, 1-20–1-26 STEP 7-Micro/WIN program, 1-3 sample uses, 1-2 sharing data among applications, 2-4 Slider control, description, 5-28 SoftContainer operating mode, 6-6–6-8 overview, 6-2–6-4 with SIMATIC controls, 4-1–4-12 Adding connection, to Data control, 4-8 Addressing S7-200 memory analog inputs, A-8 analog outputs, A-9 bit memory area, A-9 byte:bit addressing, S7-200 memory areas, A-4 counter memory area, A-11 high-speed counter memory area, A-12 memory areas, A-4, A-6 process-image input register, A-8 process-image output register, A-8 sequence control relay memory area, A-12 special memory bits, A-10 Index-1 Index timer, A-10 variable memory, A-9 Alignment property, B-2 Analog inputs, addressing, A-8 Analog outputs, addressing, A-9 Appearance property, B-3 Assigning a variable, from Visual Basic, 1-6 Authorizing the MicroComputing software, 3-4–3-6 procedure, 3-5 See also README.TXT on the authorization disk guidelines, 3-5 removing the authorization, 3-5 running without authorization, 3-5 transferring the authorization, 3-5 AUTHORS.EXE installation (MicroComputing), 3-2 MicroComputing authorization, 3-4–3-6 removing the MicroComputing authorization, 3-5 transferring the MicroComputing authorization, 3-5 AutoConnect property, B-3 AutoConnectTimeout property, B-4 B BackColor property, B-5 Bit access, S7-200 memory areas, A-4 Bit memory addressing, A-9 S7-200 memory area, A-4 BorderStyle property, B-5 Button control, 2-4 description, 2-4, 5-4 events, 5-11 Change, C-1 Click, C-1 Error, C-3 KeyDown, C-4 KeyPress, C-5 KeyUp, C-5 MouseDown, C-7 MouseMove, C-8 MouseUp, C-9 methods, AboutBox, B-1 Index-2 properties, 5-2–5-6 Alignment, B-2 Appearance, B-3 BorderStyle, B-5 Enabled, B-15 FalseCaption, B-16 FalseColor, B-17 FalsePicture, B-17 Font, B-18 ForeColor, B-18 Locked, B-20 PushButton, B-26 StretchMode, B-32 Style, B-33 TrueCaption, B-34, B-35 TrueColor, B-34 Value, B-36 properties and methods, 5-10 toolbar button, 5-4 Byte access, S7-200 memory areas, A-4 Byte address format, S7-200, A-4 Byte memory, A-4 C Caption properties, B-6 Change event, C-1 Connect method, B-7 Changing the language, F-2 Click event, C-1 Client application (OPC), 2-3, F-5–F-7 connecting to MicroComputing, F-5–F-6 server interfaces, F-5 server name, F-5 Communicating, local and remote (DCOM), client and server, D-1–D-21 Communications processor card, configuring for MicroComputing, 3-6 Component Object Model (COM), client and server, D-1–D-21 Computer requirements, 2-3 Connecting to a local computer, 4-4 to a remote computer, 4-4 Connecting to data using Data control, 2-4 Connecting to data using OPC, F-5–F-7 MicroComputing A5E00077133-01 Index Connection table Data control, 4-12 sample program, 4-12 ConnectionError event, C-2 error codes (Data control), 4-27 ConnectName method, B-7 ConnectObject method, B-9 Control engine access, 2-4 addressing memory areas, A-6 connecting ActiveX controls, 4-6 connecting over DCOM, 4-4 connecting SIMATIC controls, 4-2 connecting to CP card, 3-6 data types, A-6 memory areas, A-6 OPC access, F-5 OPC connection, F-6 OPC controls, F-5–F-7 selecting for Data control, 4-4 SIMATIC controls, 4-1–4-12 Button, 5-4–5-8 Edit, 5-12–5-23 Label, 5-22–5-26 Slider, 5-28–5-30 Control engine strings, PG/PC Interface, 4-4 ControlEngine property, B-10 Controller. See Control engine Copy-protection, 3-4–3-6 removing the authorization, 3-5 transferring the authorization, 3-5 Counters addressing memory area, S7-200 controllers, A-11 S7-200 memory area, A-2 types, A-11 variables, A-11 CP card, configuring for MicroComputing, 3-6 Custom events, 4-11 Customize, changing the language, F-2 D Data, 2-4 ActiveX control objects, Button, 5-2–5-6 OPC controls, F-5–F-7 SIMATIC controls, 4-1–4-12 Button, 5-4–5-8 Edit, 5-12–5-23 Label, 5-22–5-26 MicroComputing A5E00077133-01 Slider, 5-28–5-30 Data control, 2-3 adding an event, 4-11 configuring connection properties, 4-3 configuring for single control engine, 4-4 connection table, 4-12 connections, 4-6 containers, E-2 custom ActiveX controls, E-5–E-9 description, 2-4, 4-1 error codes, 4-27–4-29 events, 4-26 ConnectionError, C-2 ValueChanged, C-10 methods, 4-26 Connect, B-7 ConnectName, B-7 ConnectObject, B-9 Disconnect, B-13 PropertyChangedName, B-25 PropertyChangedObject, B-25 properties, 4-26–4-27 Activated, B-1 AutoConnect, B-3 AutoConnectTimeout, B-4 ControlEngine, B-10 DefaultDeadband, B-12 DefaultUpdateRate, B-12 MultipleEngines, B-22 PCName, B-23 ReadMultiVariables, B-27 ReadVariable, B-28 ShowErrorBoxes, B-30 WriteMultiVariables method, B-38 WriteVariable method, B-39 sample program I/O panel, 1-4–1-10 Microsoft Excel, 1-16–1-20 other controls (VBScrollbar), 1-13–1-16 SoftContainer, 1-20–1-26 STEP 7-Micro/WIN program, 1-3 selecting control engine, 4-4 SoftContainer operating mode, 6-6–6-8 overview, 6-2–6-4 process form, 6-4–6-6 toolbar button, 4-1 Data types, S7-200 controllers, A-6 Databases, sharing data using OPC, F-5 DataType property, B-10 Index-3 Index DblClick event, C-2 DCOM client and server, D-1–D-21 configuration editor, D-3, D-13 client configuuration, D-13–D-18 server configuuration, D-3–D-12 troubleshooting, D-19 DefaultDeadband property, B-12 DefaultUpdateRate property, B-12 Deinstall, 3-3 See also Uninstalling Deleting a connection, 4-8 Direction property, B-13 Disconnect method, B-13 DisplayValue property, B-14 Distributed applications (DCOM), configuring server and client, D-1 Distributed Component Object Model (DCOM), client and server, D-1 E Edit control, 2-4 description, 2-4, 5-12 error codes, 5-21 events, 5-20 Change, C-1 Click, C-1 DblClick, C-2 Error, C-3 KeyDown, C-4 KeyPress, C-5 KeyUp, C-5 MouseDown, C-7 MouseMove, C-8 MouseUp, C-9 methods, AboutBox, B-1 properties Alignment, B-2 Appearance, B-3 BackColor, B-5 BorderStyle, B-5 DisplayValue, B-14 Enabled, B-15 Factor, B-15 Font, B-18 ForeColor, B-18 Index-4 Locked, B-20 Max and Min, B-21 Offset, B-22 Precision, B-24 RawMax, B-27 RawMin, B-27 ScaleMode, B-29 Text, B-33 Value, B-36 WriteMode, B-37 WriteNow method, B-38 Zeropad, B-40 properties and methods, 5-18 toolbar button, 5-12 Emergency stop circuit, 1-1, 2-1, 6-6 Enabled property, B-15 English, changing to, F-2 Error codes Data control, 4-27 Edit control, 5-21 Error event, C-3 Event table, sample program, 4-14 Events adding to Data control, 4-11 Button control, 5-11 Change, C-1 Click, C-1 ConnectionError, C-2 Data control, 4-26 DblClick, C-2 Edit control, 5-20 Error, C-3 KeyDown, C-4 KeyPress, C-5 KeyUp, C-5 Label control, 5-27 MouseDown, C-7 MouseMove, C-8 MouseUp, C-9 sample program, 4-15–4-18 Slider control, 5-36 ValueChanged, C-10 MicroComputing A5E00077133-01 Index Examples connection table program, 4-12 custom ActiveX control, E-6–E-9 event response program, 4-15–4-18 event table program, 4-14 I/O panel, 1-4–1-10 Microsoft Excel, 1-16–1-20 other controls (VBScrollbar), 1-13–1-16 read/write Boolean data, 4-25 read/write data, 4-20 read/write with Data control, E-5 sample program, 1-2 SoftContainer, 1-20–1-26 STEP 7-Micro/WIN program, 1-3 F Factor property, B-15 FalseCaption property, B-16 FalseColor property, B-17 FalsePicture property, B-17 Font property, B-18 ForeColor property, B-18 G German, changing to, F-2 Guidelines connect/disconnect, B-4, B-7, B-9, B-14, E-4 containers, E-2 custom ActiveX controls, E-6–E-9 Data control for critical data, E-4 emergency stop circuit, 1-1, 2-1, 6-6 MicroComputing authorization, 3-4 See also README.TXT on the authorization disk sample programs I/O panel, 1-4–1-10 Microsoft Excel, 1-16–1-20 other controls (VBScrollbar), 1-13–1-16 SoftContainer, 1-20–1-26 STEP 7-Micro/WIN program, 1-3 using Visual Basic timers, A-7, E-3 H High-Speed Counter, memory area, addressing, A-12 MicroComputing A5E00077133-01 I Inputs and outputs, S7-200 controllers, A-2 Installation authorization, 3-4–3-6 copy-protection, 3-4–3-6 removing the authorization, 3-5 transferring the authorization, 3-5 installation and removal, 3-2–3-4 installing the MicroComputing authorization, 3-5 guidelines, 3-5 See also README.TXT on the authorization disk removing the authorization, 3-5 system requirements, 2-3 transferring the authorization, 3-5 Integrating distributed applications (DCOM), client and server, D-1 K KeyDown event, C-4 KeyPress event, C-5 KeyUp event, C-5 KnobHeight property, B-19 KnobPicture property, B-19 KnobWidth property, B-19 L Label control description, 5-22 events, 5-27 Change, C-1 Click, C-1 DblClick, C-2 Error, C-3 MouseDown, C-7 MouseMove, C-8 MouseUp, C-9 methods, AboutBox, B-1 properties Alignment, B-2 Appearance, B-3 BackColor, B-5 BorderStyle, B-5 Caption, B-6 Enabled, B-15 Font, B-18 ForeColor, B-18 StretchMode, B-32 Index-5 Index Style, B-33 properties and methods, 5-27 toolbar button, 5-22 Language selection, F-2 LargeChange property, B-20 Locked property, B-20 M Max and Min properties, B-21 Megahertz (MHz), system requirements, 2-3 Memory areas, SIMATIC controls Button, 5-4–5-8 Edit, 5-12–5-23 Label, 5-22–5-26 Slider, 5-28–5-30 Memory areas of S7-200 controllers, A-2 accessing data, A-4 bit memory, A-4 byte memory, A-4 OPC controls, F-5–F-7 SIMATIC controls, 4-1–4-12 Memory bits, S7-200 memory area (M), A-2 Memory requirements, 2-3 Methods AboutBox, B-1 Connect, B-7 ConnectName, B-7 ConnectObject, B-9 Data control, 4-26 Disconnect, B-13 examples, 4-21–4-27 PropertyChangedName, B-25 PropertyChangedObject, B-25 ReadMultiVariables, B-27 ReadVariable, B-28 WriteMultiVariables method, B-38 WriteNow, B-38 WriteVariable method, B-39 MHz, system requirements, 2-3 MicroComputing Button control description, 5-4 properties, 5-2–5-6 toolbar button, 5-4 computer requirements, 2-3 Data control description, 4-1 error codes, 4-27 events, 4-26 properties, 4-26–4-27 toolbar button, 4-1 Index-6 Edit control description, 5-12 toolbar button, 5-12 error codes, Data, 4-27 events, Data, 4-26 installation authorization, 3-4–3-6 copy-protection, 3-4–3-6 procedure, 3-2–3-4 removing the authorization, 3-5 system requirements, 2-3 transferring the authorization, 3-5 Label control description, 5-22 toolbar button, 5-22 memory requirements, 2-3 OPC controls, F-5–F-7 server object, F-5 operating system requirements, 2-3 options, language, F-2 product overview, 2-1–2-8 properties Button, 5-2–5-6 Data, 4-26–4-27 Edit, 5-12 Label, 5-22 Slider, 5-28 removing the authorization, 3-5 S7-200 memory areas, A-6 SIMATIC controls Button, 5-4–5-8 Data control, 4-1–4-12 description, 2-4–2-6 Edit, 5-12–5-23 Label, 5-22–5-26 Slider, 5-28–5-30 Slider control, description, 5-28 SoftContainer, 6-1 system requirements, 2-3 transferring the authorization, 3-5 Monitoring and modifying data memory areas of S7-200 controllers, A-2 OPC controls, F-5–F-7 SIMATIC controls, 4-1–4-12 Button, 5-4–5-8 Edit, 5-12–5-23 error codes (Data), 4-27 events (Data), 4-26 Label, 5-22–5-26 Slider, 5-28–5-30 MouseDown event, C-7 MouseMove event, C-8 MicroComputing A5E00077133-01 Index MouseUp event, C-9 MultipleEngines, B-22 N Name of the OPC server object, F-5 Network communications, local and remote, client and server, D-1–D-21 O Off-the-shelf applications, OPC controls, F-5 Offset property, B-22 OLE OPC controls, F-5–F-7 OPC specification, F-5 SIMATIC controls, 4-1–4-12 Button, 5-4 Edit, 5-12–5-23 Label, 5-22 Slider, 5-28–5-30 SoftContainer, 6-1 OPC, F-5–F-7 client application, 2-3, F-5 group object, interfaces, F-5 interfaces of the group object, F-5 interfaces of the server object, F-5 name of the server object, F-5 OPC specification, F-5 server object, 2-3 interfaces, F-5 name, F-5 sharing data among applications, F-5 used with MicroComputing, F-5 using the Data control, 2-3 Operating system requirements, 2-3 Overview, OPC controls, 2-3 PG/PC Interface accessing through Computing Configuration, F-3 configuring the CP card, 3-6 Picture property, B-24 Precision property, B-24 Procedures accessing the OPC server object, F-5 authorizing the MicroComputing software, 3-5 See also README.TXT on the authorization disk adding an authorization, 3-5 guidelines, 3-5 authorizing the software, removing an authorization, 3-3 authorizing the WinLC software, removing an authorization, 3-5 installing the MicroComputing software, 3-2 removing the authorization, 3-5 uninstalling the software, 3-3 Process data OPC, F-5–F-7 SIMATIC controls, 4-1–4-12 Button, 5-4–5-8 Data, 4-1–4-13 Edit, 5-12–5-23 Label, 5-22–5-26 Slider, 5-28–5-30 Process-image input register, addressing, S7-200 controllers, A-8 Process-image output register, addressing, S7-200 controllers, A-8 Processor (CPU), PC requirements, 2-3 Product overview, OPC (Ole for Process Control), F-5–F-7 ProgID, F-5 Programmable Logic Controller (PLC). See Control engine Programmatic identifier, F-5 P PCName property, B-23 Pentium, system requirements, 2-3 Performance connect/disconnect, B-4, B-7, B-9, B-14, E-4 Data control for critical data, E-4 Personal computer (PC), system requirements, 2-3 MicroComputing A5E00077133-01 Index-7 Index Programming connect/disconnect, B-4, B-7, B-9, B-14, E-4 container guidelines, E-2 custom ActiveX controls, E-6–E-9 Data control for critical data, E-4 sample programs I/O panel, 1-4–1-10 Microsoft Excel, 1-16–1-20 other controls (VBScrollbar), 1-13–1-16 SoftContainer, 1-20–1-26 STEP 7-Micro/WIN program, 1-3 timers, E-3 Properties AboutBox method, B-1 Activated, B-1 Alignment, B-2 Appearance, B-3 AutoConnect, B-3 AutoConnectTimeout, B-4 BackColor, B-5 BorderStyle, B-5 Caption, B-6 Connect method, B-7 ConnectName method, B-7 ConnectObject method, B-9 ControlEngine, B-10 DataType, B-10 DefaultDeadband, B-12 DefaultUpdateRate, B-12 Direction, B-13 Disconnect method, B-13 DisplayValue, B-14 Enabled, B-15 Factor, B-15 FalseCaption, B-16 FalseColor, B-17 FalsePicture, B-17 Font, B-18 ForeColor, B-18 KnobHeight, B-19 KnobPicture, B-19 KnobWidth, B-19 LargeChange, B-20 Locked, B-20 Max and Min, B-21 MultipleEngines, B-22 Offset, B-22 PCName, B-23 Picture, B-24 Precision, B-24 PropertyChangedName method, B-25 Index-8 PropertyChangedObject method, B-25 PushButton, B-26 RawMax, B-27 RawMin, B-27 ReadMultiVariables method, B-27 ReadVariable method, B-28 ScaleMode, B-29 ShowErrorBoxes, B-30 ShowMinMax, B-30 SIMATIC control properties Button, 5-2–5-6 Data control, 4-26–4-27 SmallChange, B-31 StretchMode, B-32 Style, B-33 Text, B-33 Ticks, B-34 TrueCaption, B-34, B-35 TrueColor, B-34 Value, B-36 WriteMode, B-37 WriteMultiVariables method, B-38 WriteNow method, B-38 WriteVariable method, B-39 Zeropad, B-40 Properties and methods Button control, 5-10 Edit control, 5-18 Label control, 5-27 Slider control, 5-34 PropertyChangedName method, B-25 PropertyChangedObject method, B-25 PushButton property, B-26 R RAM, system requirements, 2-3 RawMax property, B-27 RawMin property, B-27 Readme file, guidelines for MicroComputing authorization, 3-4 ReadMultiVariables method, B-27 ReadVariable method, B-28 Removing the MicroComputing authorization, 3-4–3-6 guidelines. See README.TXT on the authorization disk Removing the MicroComputing software, 3-3 Requirements, computer, 2-3 Design mode, 6-7 SoftContainer, 6-6–6-8 MicroComputing A5E00077133-01 Index Run mode (SoftContainer), 6-6–6-8 Run mode (SoftContainer), appearance of the Data control, 4-1–4-3 S S7-200 controllers configuring connection to CP card, 3-6 data types, A-6 memory areas, A-2 OPC controls, F-5–F-7 SIMATIC controls Button, 5-4–5-8 Edit, 5-12–5-23 Label, 5-22–5-26 Slider, 5-28–5-30 Sample programs custom ActiveX control, E-6–E-9 I/O panel, 1-4–1-10 Microsoft Excel, 1-16–1-20 other controls (VBScrollbar), 1-13–1-16 read/write with Data control, E-5 SoftContainer, 1-20–1-26 STEP 7-Micro/WIN program, 1-3 ScaleMode property, B-29 Sequence control relays, addressing memory area, A-12 Client configuration (DCOM), D-13–D-18 Server configuration (DCOM), D-3–D-12 Server object (OPC), 2-3, F-5–F-6 interfaces, F-5 server name, F-5 Setting the language, F-2 Setting the PG/PC Interface, 3-6 Setup program authorization, 3-4–3-5 memory requirements, 2-3 Sharing data among applications OPC controls, F-5–F-7 OPC specification, F-5 SIMATIC controls, 4-1–4-12 ShowErrorBoxes property, B-30 ShowMinMax property, B-30 SIMATIC controls Button, 5-4–5-8 Button control description, 5-4 toolbar button, 5-4 MicroComputing A5E00077133-01 Data description, 4-1 toolbar button, 4-1 Data control, 4-1 Edit, 5-12–5-23 Edit control description, 5-12 toolbar button, 5-12 Label, 5-22–5-26 Label control description, 5-22 toolbar button, 5-22 properties, Activated, B-1 Slider control, description, 5-28 Slider control, 2-4, 5-28–5-36 description, 2-4, 5-28 events, 5-36 Change, C-1 Click, C-1 DblClick, C-2 Error, C-3 KeyDown, C-4 KeyPress, C-5 KeyUp, C-5 MouseDown, C-7 MouseMove, C-8 MouseUp, C-9 methods, AboutBox, B-1 properties BackColor, B-5 Direction, B-13 DisplayValue, B-14 Enabled, B-15 Factor, B-15 ForeColor, B-18 KnobHeight, B-19 KnobPicture, B-19 KnobWidth, B-19 LargeChange, B-20 Locked, B-20 Max and Min, B-21 Offset, B-22 Picture, B-24 RawMax, B-27 RawMin, B-27 ScaleMode, B-29 Index-9 Index ShowMinMax, B-30 SmallChange, B-31 StretchMode, B-32 Style, B-33 Ticks, B-34 Value, B-36 properties and methods, 5-34 SmallChange property, B-31 SoftContainer, 6-1–6-7 creating a process form, 6-2–6-4 icons, 6-2–6-4 operating mode, 6-6–6-8 overview, 6-2–6-4 process form, 6-4–6-6 sample program, 1-20–1-26 toolbars, 6-2–6-4 Software installation installing and uninstalling, 3-2–3-4 MicroComputing authorization, 3-4–3-6 removing the MicroComputing authorization, 3-4–3-6 transferring the MicroComputing authorization, 3-4–3-6 Software PLC. See Control engine Special memory bits, addressing, A-10 Specifications OLE for Process Control, F-5 system requirements, 2-3 Spreadsheets, sharing data using OPC, F-5 StretchMode property, B-32 Style property, B-33 Switching SoftContainer modes, 6-7 System requirements, 2-3 Troubleshooting DCOM, D-19 no valid authorization, 3-4 TrueCaption property, B-34, B-35 TrueColor property, B-34 U Uninstalling the MicroComputing software, 3-3 V Value property, B-36 ValueChanged event, C-10 Variable memory area, addressing, A-9 Visual Basic connect/disconnect, B-4, B-7, B-9, B-14, E-4 container guidelines, E-2 custom ActiveX controls, E-5–E-9 sample program, E-6–E-9 Data control for critical data, E-4 sample programs I/O panel, 1-4–1-10 Microsoft Excel, 1-16–1-20 other controls (VBScrollbar), 1-13–1-16 SoftContainer, 1-20–1-26 STEP 7-Micro/WIN program, 1-3 timers (guidelines), A-7, E-3 Visual Basic example, read/write data, 4-20 W T Warnings emergency stop circuit, 1-1, 2-1, 6-6 Visual Basic timers, A-7, E-3 Word access, S7-200 memory areas, A-4 WriteMode property, B-37 WriteMultiVariables method, B-38 WriteNow method, B-38 WriteVariable method, B-39 Technical information, OLE for Process Control, F-5 Text property, B-33 Third-party ActiveX control, 2-3, 2-4, 6-5–6-7 OPC controls, F-5–F-7 Third-party containers, E-2–E-4 Ticks property, B-34 Timers Z addressing, A-10 Zeropad property, B-40 S7-200 memory area, A-2 Transferring the MicroComputing authorization, 3-4–3-6 See also README.TXT on the authorization disk Index-10 MicroComputing A5E00077133-01 To SIEMENS ENERGY & AUTOMATION INC ATTN: TECHNICAL COMMUNICATIONS M/S 519 3000 BILL GARLAND ROAD PO BOX 1255 JOHNSON CITY TN USA 37605–1255 From Name: _ _ _ _ _ _ _ _ _ _ _ _ _ _ _ _ _ _ _ _ _ _ _ _ _ _ _ _ _ _ _ Job Title: _ _ _ _ _ _ _ _ _ _ _ _ _ _ _ _ _ _ _ _ _ _ _ _ _ _ _ _ _ _ _ Company Name: _ _ _ _ _ _ _ _ _ _ _ _ _ _ _ _ _ _ _ _ _ _ _ _ _ _ _ _ _ _ _ Street: _ _ _ _ _ _ _ _ _ _ _ _ _ _ _ _ _ _ _ _ _ _ _ _ _ _ _ _ _ _ _ City and State: _ _ _ _ _ _ _ _ _ _ _ _ _ _ _ _ _ _ _ _ _ _ _ _ _ _ _ _ _ _ _ Country: _ _ _ _ _ _ _ _ _ _ _ _ _ _ _ _ _ _ _ _ _ _ _ _ _ _ _ _ _ _ _ Telephone: _ _ _ _ _ _ _ _ _ _ _ _ _ _ _ _ _ _ _ _ _ _ _ _ _ _ _ _ _ _ _ Please check any industry that applies to you: Automotive Pharmaceutical Chemical Plastic Electrical Machinery Pulp and Paper Food Textiles Instrument and Control Transportation Non-electrical Machinery Other ___________________________ Petrochemical MicroComputing A5E00077133-01 1 Remarks Form Your comments and recommendations will help us to improve the quality and usefulness of our publications. Please take the first available opportunity to fill out this questionnaire and return it to Siemens. Please give each of the following questions your own personal mark within a range from 1 (very good) to 5 (very poor). 1. Do the contents meet your requirements? 2. Is the information you need easy to find? 3. Is the text easy to understand? 4. Does the level of technical detail meet your requirements? 5. Please rate the quality of the graphics and tables. Additional comments: _ _ _ _ _ _ _ _ _ _ _ _ _ _ _ _ _ _ _ _ _ _ _ _ _ _ _ _ _ _ _ _ _ _ _ _ _ _ _ _ _ _ _ _ _ _ _ _ _ _ _ _ _ _ _ _ _ _ _ _ _ _ _ _ _ _ _ _ _ _ _ _ _ _ _ _ _ _ _ _ _ _ _ _ _ _ _ _ _ _ _ _ _ _ _ _ _ _ _ _ _ _ _ _ _ _ _ _ _ _ _ _ _ _ _ _ _ _ _ _ _ _ _ _ _ _ _ _ _ _ _ _ _ _ _ _ _ _ _ _ _ _ _ _ _ _ _ _ _ _ _ _ _ _ _ _ _ _ _ _ _ _ _ _ _ _ _ _ _ _ _ _ _ _ _ _ _ _ _ _ _ _ _ _ _ _ _ _ _ _ _ _ _ _ _ _ _ _ _ _ _ _ _ _ _ _ _ _ _ _ _ _ _ _ _ _ _ _ _ _ _ _ _ _ _ _ _ _ _ _ _ _ _ _ _ _ _ _ _ _ _ _ _ _ _ _ _ _ _ _ _ _ _ _ _ _ _ _ _ _ _ _ _ _ _ _ _ _ _ _ _ _ _ _ _ _ _ _ _ _ _ _ _ _ _ _ _ _ _ _ _ _ _ _ _ _ _ _ _ _ _ _ _ _ _ _ _ _ _ _ _ _ _ _ _ _ _ _ _ _ _ _ _ _ _ _ _ _ _ _ _ _ _ _ _ _ _ _ _ _ _ _ _ _ _ _ _ _ _ _ _ _ _ _ _ _ _ _ _ _ _ _ _ _ _ _ _ _ _ _ _ _ _ _ _ _ _ _ _ _ _ _ _ _ _ _ _ _ _ _ _ _ _ _ _ _ _ _ _ _ _ _ _ _ _ _ _ _ _ _ _ _ _ _ _ _ _ _ _ _ _ _ _ _ _ _ _ _ _ _ _ _ _ _ _ _ _ _ _ _ _ _ _ _ _ _ _ _ _ _ _ _ _ _ _ _ _ _ _ _ _ _ _ _ _ _ _ _ _ _ _ _ _ _ _ _ _ _ _ _ _ _ _ _ _ _ _ _ _ _ _ _ _ _ _ _ _ _ _ _ _ _ _ _ _ _ _ _ _ _ _ _ _ _ _ _ _ _ _ _ _ _ _ _ _ _ _ _ _ _ _ _ _ _ _ _ _ _ _ _ _ _ _ _ _ _ _ _ _ _ _ _ _ _ _ _ _ _ _ _ _ _ _ _ _ _ _ _ _ _ _ _ _ _ _ _ _ _ _ _ _ _ _ _ _ _ _ _ _ _ _ _ _ _ _ _ _ _ _ _ _ _ _ _ _ _ _ _ _ _ _ _ _ _ _ _ _ _ _ _ _ _ _ _ _ _ _ _ _ _ _ _ _ _ _ _ _ _ _ _ _ _ _ _ _ _ _ _ _ _ _ _ _ _ _ _ _ _ _ _ _ _ _ _ _ _ _ _ _ _ _ _ _ _ _ _ _ _ _ _ _ _ _ _ _ _ _ _ _ _ _ _ _ _ _ _ _ _ _ _ _ _ _ _ _ _ _ _ _ _ _ _ _ _ _ _ _ _ _ _ _ _ _ _ _ _ _ _ _ _ _ _ _ _ _ _ _ _ _ _ _ _ _ _ _ _ _ _ _ _ _ _ _ _ _ _ _ _ _ _ _ _ _ _ _ _ _ _ _ _ _ _ _ _ _ _ _ _ _ _ _ _ _ _ _ _ _ _ _ _ _ _ _ _ _ _ _ _ _ _ 2 MicroComputing A5E00077133-01