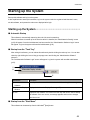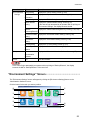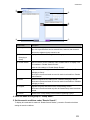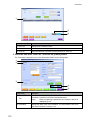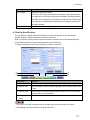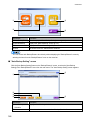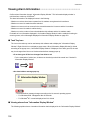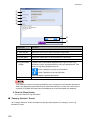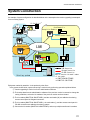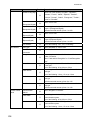
1
Administration Software
User's Manual
BM-ES330
BM-ES330E
Model Nos.
Before attempting to connect or operate this product,
please read these instructions carefully and save this manual for future use.
Caution ·························································································
We recommend the administration by system administration personnel.
These operating instructions describe how to operate the access control system and the leakage of operating
procedures may cause the loss of security. We shall not guarantee you for any trouble caused by using the
administration.
Trademarks ··················································································
●
Microsoft® Windows®, Windows® 2000 and Windows® XP are either registered trademarks of Microsoft
Corporation in the United States and/or other countries.
●
Adobe Acrobat is either a registered trademark or trademark of Adobe Systems Incorporated in the United
States and/or other countries.
●
Pentium® is a trademark or registered trademark of Intel Corporation or its subsidiaries in the United
States and other countries.
●
Other company names and product names appearing in these operating instructions are registered
trademarks or trademarks of the company concerned.
Limitation of liability····································································
This Product is used to recognize an individual person by using Iris data, and is not designed to protect against
"theft" or "crime" independently.
IN NO EVENT SHALL MATSUSHITA ELECTRIC INDUSTRIAL CO., LTD. BE LIABLE TO ANY PARTY OR
ANY PERSON, EXCEPT FOR REPLACEMENT OR REASONABLE MAINTENANCE OF THE PRODUCT,
FOR THE CASES, INCLUDING BUT NOT LIMITED TO BELOW:
(1) ANY DAMAGE AND LOSS, INCLUDING WITHOUT LIMITATION, DIRECT OR INDIRECT, SPECIAL,
CONSEQUENTIAL OR EXEMPLARY, ARISING OUT OF OR RELATING TO THE PRODUCT;
(2) PERSONAL INJURY OR ANY DAMAGE CAUSED BY INAPPROPRIATE USE OR NEGLIGENT
OPERATION OF THE USER;
(3) UNAUTHORIZED DISASSEMBLE, REPAIR OR MODIFICATION OF THE PRODUCT BY THE USER;
(4) INCONVENIENCE OR ANY LOSS ARISING OUT OF NON-RECOGNITION WHEN IRIS DATA IS
ALREADY ENROLLED, DUE TO ANY REASON OR CAUSE OTHER THAN ANY FAILURE OR
PROBLEM OF THE PRODUCT;
(5) ANY PROBLEM, CONSEQUENTIAL INCONVENIENCE, OR LOSS OR DAMAGE, ARISING OUT OF
THE SYSTEM COMBINED BY THE DEVICES OF THIRD PARTY;
(It might be a case that the entrance-gate control system, for example, combining the Product and the
electric lock devices, does not open/close the door properly because of before-mentioned reasons or
other causes of such system except for the Product.)
(6) ANY LOSS OR DAMAGE, OR CLAIMS ARISING OUT FROM LOSS OR LEAK OF PC DATA
INCLUDING IRIS DATA IN THE IRIS SERVER PC;
(Iris data is nature of privacy. The customer shall be responsible for any Iris data stored in the iris server
PC.)
2
OUTLINE OF ADMINISTRATION SOFTWARE
Outline ··························································································
Administration Software (hereafter referred to as this software) can be installed on a personal computer that
is commercially available.
This software allows users to set operations, enroll the recognition data for individual recognition, and deliver
the recognition data to the specific iris reader with regard to the iris reader (product No. BM-ET330 <BMET330E>) that can identify an individual by use of unique iris data of his/her pupil.
This software also provides functions to monitor the operating state of iris readers, notify the system
administrator of errors, and manage log data and etc.
This manual describes how to operate this software. A personal computer with this software installed is
called an Iris Server.
For details on how to set up the iris reader, refer to BM-ET330 <BM-ET330E> Setup Manual. For details on
the recognition function of the iris reader, refer to the operating instructions supplied with the iris reader.
3
CONVENTIONS USED IN THIS MANUAL
How This Manual Is Organized···················································
The table below describes the content of the four sections of this manual.
Section
Meaning
ABOUT THIS SOFTWARE
This section explains precautions when using this software, summary of this
software, and system construction. (p.9)
SYSTEM INTRODUCTION This section explains the system connections and setup of the system. (p.19)
OPERATION
This section explains user information, iris reader data, various setups,
references, operations, and the like. (p.47)
SYSTEM VERSION
This section explains the procedure of upgrading from previous version to this
UPGRADING
software. (p.176)
APPENDICES
These sections describe error messages and the CSV file format. (p.191)
Target Reader and Presumed Knowledge·································
Readers of this manual are required to know the following:
・Basic knowledge of Windows® operating systems.
・How to operate a Reader.
Symbols Used In This Manual ····················································
Symbol
Meaning
This symbol describes important details or prohibited actions when using this software.
Be sure to read!
This symbol provides hintful information when performing a setting or operating this
software. Refer to them as necessary.
The symbols in the table below are used to describe the operator’s authorities. For details on the operator’s
authorities, refer to Operator’s Privilege on page 59.
4
Operators without any symbol listed below can only refer to information basically.
Symbol
Meaning
This symbol indicates the functions that can be performed only by operators with
“User Information” authority.
This symbol indicates the functions that can be performed only by operators with
“Reader Setting/Maintenance” authority.
This symbol indicates the functions that can be performed only by operators with “Log
Information” authority.
This symbol indicates the functions that can be performed only by operators with
“Backup/Restore” authority.
This symbol indicates the functions that can be performed only by operators with
“Environment Settings” authority.
This symbol indicates the functions that can be performed only by operators with
“Operator's Information” authority.
Abbreviations Used In This Manual ···········································
This manual refers to Microsoft® Windows® 2000 Professional, Microsoft® Windows® 2000 Server and
Microsoft® Windows® XP Professional collectively as "Windows®".
Screen Shots and Displayed Messages ····································
General screen shots and displayed messages that appear in this manual are from a Windows® 2000
installed computer. These screen shots and messages may vary for a computer running Windows® XP.
The displayed screen is a screen that is called up when a fully authorized operator logs in to the system.
The displayed screen varies with operator’s authorities.
Terminology ·················································································
The following table lists the special terms used in this manual.
Term
Description
IC card
It is also called the smart card.
IC card writer
This device writes user information and iris data on an IC card. You can operate
the writer by use of this software after connecting to the iris server.
Iris on card
This is a recognition method in which the relationship between iris data on an IC
card and the iris of its owner is one-on-one.
Wiegand
This is a communication method used as the interface of the access control
system.
5
Term
Description
Card reader
This is a device that reads user information, iris data, and the like from an IC card.
This will be connected to the iris reader or the access control panel.
In this manual, the card ceader (standard type) that is connected in the Wiegand
method is referred to as a card reader (W). Then, the card reader (Iris on card type)
that is connected in the RS-485 method is referred to as a card reader (I).
Operator
This is an account to log in to, operate, and set up this software.
Available functions depends on the specified authorities.
This differs from the user account to operate Windows®.
Operator’s authority
In this software, the functions of registering, updating, and deleting various types of
information and data are subdivided. Operator’s authority is the settings required
individually to perform these subdivided functions.
For example, administrators only with “User Information” authority allow the user to
enroll, edit, and delete user information, but do not allow the user to enroll, edit,
and delete iris reader data. Reader data can only be referred with the operators
with “User Information” authority.
Administration Software This indicates product No. BM-ES330 or the application installed on the iris server.
In this manual, Administration Software is referred to as this software.
Iris reader
Product No. BM-ET330 <BM-ET330E>. In this manual, this is referred to as iris
reader.
Iris server
This is a generic term for PCs on which this software and the User Licence
Software (product No. BM-EU30000 series) are installed.
Iris data
This is specifically-coded data of the iris pattern extracted from an eye photo.
Iris recognition
This is an recognition method by making use of individual-specific iris patterns.
Setup software
This is a tool to initialize an iris reader.
For details, refer to the operating instructions (BM-ET330 <BM-ET330E> setup
manual) for the iris reader.
Enrollment reader
This is the iris reader used for registration.
Access control system
This is a system to manage people in and out of rooms with combinations of iris
reader, iris server, access control panel, card reader, electric lock, etc. under iris
recognition technology.
Recognition iris reader
This is the iris reader used for identification.
User Licence Software
Generic term for product No. BM-EU30100, BM-EU31000, BM-EU33000, and BMEU35000
6
CONTENTS
Caution······················································································ 2
Trademarks ··············································································· 2
Limitation of liability ··································································· 2
OUTLINE OF ADMINISTRATION SOFTWARE················· 3
Target Reader and Presumed Knowledge ·································4
Symbols Used In This Manual····················································4
Abbreviations Used In This Manual············································5
Screen Shots and Displayed Messages·····································5
Terminology ···············································································5
Outline······················································································· 3
CONVENTIONS USED IN THIS MANUAL ························ 4
How This Manual Is Organized ················································· 4
ABOUT THIS SOFTWARE ···························································
Precautions When Using This Software ···································· 9
System Construction ························································ 11
Iris Server ················································································17
Applicable Equipment ······························································18
System Construction ······························································· 11
Recognition Mechanism ·························································· 12
SYSTEM INTRODUCTION ···························································
Introduction ············································································· 19
Connection/setup of Each Device············································ 20
Setup of the Iris Server···························································· 20
Installing This Software ··························································· 21
Enrolling as the Administrator·················································· 25
Reader Data Registration················································· 28
Reader Data Registration·························································38
Turning on the Power of the Reader ································ 41
Confirmation of Registered Reader Data ·································41
Downloading Software to the Reader·······································43
Enrollment Iris Reader Setting ·················································44
System Selection According to Conditions ······························ 28
Reader Initial Setting ······························································· 30
OPERATION ·················································································
Introduction ············································································· 47
Updating and Deleting Groups ···············································105
Starting up the System ····················································· 49
Enrolling Users ······························································· 107
Starting up the System ···························································· 49
Logging into the System·························································· 50
"Administration Software" Screen············································ 53
"Environment Settings" Screen ··············································· 55
Exiting the System··································································· 56
"About Administration Software" Screen·································· 57
"User Information" Screen······················································107
Enrolling Users·······································································113
Updating and Deleting Users ·················································122
Exporting User Information to File··········································125
Moving User Information ························································126
Enrolling Operators ·························································· 59
Operator’s Privilege································································· 59
"Operator's Information" Screen ·············································· 60
Enrolling Operators ································································· 62
Updating and Deleting Operators ············································ 64
Editing Reader Information··············································· 67
"Reader Setting/Maintenance" Screen ···································· 67
Registering Reader Information··············································· 78
Updating and Deleting Readers ·············································· 80
Outputting Reader Information to File······································ 88
Changeover Operation from an Enrollment Iris Reader to a
Recognition Iris Reader··························································· 89
Checking & Operating Readers········································ 91
Checking Reader Status ························································· 91
Confirmation of Iris Reader Users ··········································· 92
Resetting Readers··································································· 93
Starting and Stopping Readers ··············································· 94
Updating Reader Software ······················································ 94
Downloading the Audio File to the Reader ······························ 95
Expanding the Reader Functions ············································ 96
Registering Groups ························································ 100
Iris Capturing ·································································· 128
Capture ··················································································128
Distributing Iris Data to Readers ···································· 135
Automatic Distribution ····························································135
Manual Distribution ································································136
Operational Settings······················································· 138
Reader Monitoring Settings····················································138
Periodically Change Encryption Code Setting ························139
Auto Reboot Setting ·······························································141
E-Mail Setting·········································································143
Backup/Restore ·····································································145
Status Display Settings ·················································· 155
Information about Operation in This Software ························155
Viewing Alarm Information ·····················································156
Viewing Log Information·························································159
IC Card Setting······························································· 172
IC Card Setting ······································································172
Key Updating·································································· 174
Key Updating ·········································································174
Group Setting Screen···························································· 100
Registering Groups ······························································· 102
7
SYSTEM VERSION UPGRADING················································
System Construction ······················································ 177
Importing the User Information Export File ·····························182
Version Upgrading for the Administration Software ··············· 178
Cautions Needed to Install the User Licence Added Software
Ver.1.21 or Former ································································ 178
Setting the Readers of the Previous Version ················· 184
Reader Information Setting ····················································184
Reader Operation ··································································189
Movement of Data ·························································· 179
Data That Can Be Moved ······················································ 179
Restoring Backup Files ························································· 179
APPENDICES ···············································································
List of Error Messages ··················································· 192
Error Messages Displayed during Installation························ 192
Error Messages Displayed by This Software ························· 193
Messages Displayed in Information Display Window············· 203
File Format ····································································· 204
Descriptions of the CSV File To Be Handled in This Software
······························································································ 204
8
Reader Information CSV File ·················································204
User Information CSV File ·····················································209
Log Information CSV File ·······················································211
Troubleshooting······························································ 213
ABOUT THIS SOFTWARE
ABOUT THIS SOFTWARE
Precautions When Using This Software····································
Pay attention to the following points when installing this software on the iris server for use.
・Individuals' information is saved on the iris server. Make sure the Server is located in a secure location.
・Individuals' information will appear on screen while the iris server is being operated. Prevent this
information from being viewed by unauthorized people.
・Be careful when operating the iris server as an incorrect setting may cause the iris reader to malfunction.
Make sure that this iris server is located in a secure location. In particular, do not use the Power Schemes
or System Standby mode of Windows®.
・Individuals' information is distributed between the iris server and iris readers over a LAN. Make sure the
LAN cables are located in a secure location. To ensure higher security, we recommend operating this
software on a dedicated LAN independent from a LAN shared with other systems. Additionally, iris image
capturing or iris data distribution may not be completed successfully when your LAN environment is
affected by broadcasting packets, which are sent by other iris readers or devices. In that case, establish
your LAN to control the amount of broadcasting packets not more than 500 packets a second between the
iris readers and the iris server. Contact your network administrator for further details on network settings.
・Operation of this software may become unstable if other Software is run on the iris server. Do not install
other software on this iris server.
・We recommend periodically rebooting the iris server. This software provides the user with a function for
automatically rebooting the iris server. In regard to the method of setting, refer to Auto Reboot Setting on
page 141.
・Individuals' iris data and other information is encrypted during transmission between the iris server and iris
readers. This software also provides users with a function for periodically changing encryption code that
are used for encrypting information. In regard to the method of setting, refer to Periodically Change
Encryption Code Setting on page 139.
・The following resources are used for iris server and iris reader(s) communication.
─
Protocol:
TCP/IP
─
Port direction:
Set for transmission and reception
─
Port number:
8030
・This software cannot be used in a dialup network environment.
・In case the iris reader power is not turned on or administration software operation as reader registration,
reader operation or iris data distribution within 5 minutes after turning the iris reader power on, iris reader
operations are not executed with the message as "Reader connection failed."
─
Updating and Deleting Readers(p.80)
─
Checking & Operating Readers(p.91)
─
Distributing Iris Data to Readers(p.135)
9
ABOUT THIS SOFTWARE
Perform the actions above more than 5 minutes after turning on the iris readers.
・Performing any of the following operations on the iris server will temporarily stop an iris reader's
recognition functionality. Make sure you consider the system's current operating status before performing
the following:
─
Distributing Iris Data to Readers(p.135)
─
Updating and Deleting Readers(p.80)
─
Updating Reader Software(p.94)
─
Downloading the Audio File to the Reader(p.95)
─
Starting and Stopping Readers(p.94)
─
Resetting Readers(p.93)
・Should the iris server fail for any reason, as a precautionary measure it is recommended to regularly
backup any stored data. This software provides such a function to regularly backup any stored data. For
information on how to set this function, refer to Backup/ Restore on page 145. Also, make sure to store
this software's CD and product key in safekeeping, as they are required when reinstalling this software.
・The system backup data and export files (cab format) of user information originated from the previous
version of the administration software (BM-ES300 <BM-ES300E>, BM-ES300A <BM-ES300AE>) can be
restored and imported by this software, but not the other way around. Data cannot be imported from the
export files (csv format) of user information and iris reader data originated from the previous version of the
administration software.
・The previous version of iris reader (BM-ET300 <BM-ET300E>) is not operable with this software.
・In a VPN environment, the communication between iris readers and the iris server may not be achieved
successfully. A dedicated line and exclusive equipment should be provided, operation check should be
performed carefully before real operation, and management and operation should be carried out by the
administrators who are expert and able to deal with troubles.
・This software manages information to handle the delivery of iris data and other jobs even under the
conditions of complicated settings resulting from associating user information, iris reader data and Group
information. Therefore, when handling selected jobs all at once in each information or data, the iris server
may look frozen depending on the specifications of the server. In some cases, it takes hours (in the case
of handling maximum quantity in each information and data).
・You can use this software equipped with the User Licence Software version 1.21 or former after installing
the additional software. The number of total licences is understated by 25 in the file copy screen called up
when installing the User Licence Software. This is because the User Licence Software does not acquire
the 25 licences that are added when installing this software. However, the number of “licences (25) +
licences installed with User Licence Software” is displayed on the version information screen of this
software. You can register user information until up to the displayed number is used.
■ For the users of previous version
If you use our previous version of the administration software (BM-ES300A <BM-ES300AE>) and iris
readers (BM-ET300A <BM-ET300AE>), you can update the system structured by this software.
For further details, refer to SYSTEM VERSION UPGRADING on page 176.
10
ABOUT THIS SOFTWARE
System Construction
System Construction ··································································
The following figure is an example of a facility showing its configured access control system implementing
this software along with iris readers and other devices.
- Example of Connection (RS-485 Connection) Card Reader(I)*
Iris Server
Recognition Reader
△2
Access Control Panel*
IC Card
DB
IC Card Writer*
Recognition Reader△1
Administration
Software
※1
DB
IC Card
Card Reader(I)*
Enrollment Reader△1
Electric
Lock*
Access Control Server*
LAN
Card Reader(W)*
Enrollment Reader△1
DB
Recognition Reader△1
※2
※1
Electric Lock*
Access Control Panel*
DB
Recognition Reader△1
Card Reader(W)*
- Example of Connection (Wiegand Connection) Notational descriptions in the figure
LAN Connection
Wiegand Connection
RS-485 Connection
*The use of Server PC is not evaluated by UL.
*The use of Access Control Panel is not evaluated by UL.
*The use of Card Reader is not evaluated by UL.
*The use of Electric Lock is not evaluated by UL.
Mark △ denotes the type of iris reader software.
△1:Standard
△2:Iris on Card
11
ABOUT THIS SOFTWARE
※1: Not all people can use iris recognition system. When the card reader is connected to the access control
panel, either iris recognition or card recognition can be used for personal recognition. Card recognition
can be an alternative way to the case when iris recognition cannot be used.
※2: The card reader can also be connected to iris reader directly. In this case, authentication by both iris and
card is required for personal recognition. This double authentication improves the total system security
level more.
The following explains how the doors control the system in the above figure:
● For Card Reader (W)
1.Using the enrollment iris reader, capture the iris of a user and enroll it to this software.
2. This software distributes the individual's information and iris data to the recognition iris readers
based upon setting information.
3. If a person stands and faces the recognition iris reader near the door, or stands and faces the IC
card toward the Reader, the recognition iris reader captures his or her iris, and compares it with the
pre-distributed iris data.
4. If the iris data matches, then the ID Data▲1 assigned to that individual is sent to the access control
panel.
5. The access control panel and the access control server control the Electric Lock based upon the ID
Data sent from the recognition iris reader.
● For Card Reader (I)
1.Using the enrollment iris reader, capture the iris of a user and enroll it to this software.
2. The iris data, card ID, etc. of the user are written on the IC card with this software.
3. Iris data is loaded into the recognition iris reader after facing the IC card toward the card reader.
4. An iris is captured by the recognition iris reader and the result is compared with the iris data on the
IC card.
5. If the iris data matches, then the ID Data▲1 assigned to that individual is sent to the access control
panel.
6. The access control panel and the access control server control the electric lock based upon the ID
data sent from the recognition iris reader.
▲1
ID Data is the information used for recognition sent to the access control panel and the access control
server by the recognition iris reader to control the electric lock.
・Readers are not equipped with an electric lock control function.
Recognition Mechanism ·····························································
■ Management by Group
・Setting of groups is not applicable if Iris on Card is used.
12
ABOUT THIS SOFTWARE
This software incorporates the concept of Groups in the management of Readers and Users. As a result,
iris readers and users can now be managed more easily.
As shown in the figure below, there are two entrances for entering the Laboratory. In this example,
individuals must be subject to iris recognition to enter the Laboratory. The following describes the three
concepts of Readers, Groups and Users.
Laboratory group
Reader A
Reader B
Laboratory
User 1
・Laboratory group
The iris readers installed at the two entrances to the Laboratory are registered to this software as Reader A
and Reader B, respectively.
Next, a Laboratory group is made for batch-managing the iris readers (Reader A and Reader B) for allowing
individuals to enter the Laboratory by registering both Reader A and Reader B to the Laboratory group.
This Laboratory group is then registered to User 1 to allow User 1 access to the Laboratory.
This system allows User 1 to enter the Laboratory after being subject to iris recognition on either Reader A
or Reader B.
・If the number of users allowed to access the Laboratory increases, these users can be allowed access by
simply enrolling them to the Laboratory group.
・Likewise, if you wish to add more iris readers to the Laboratory group, the iris readers can be registered in
a similar manner.
Below follows a brief description of another example.
The following figure shows a Laboratory and a Records Room that are located in a Research Institute,
where two users have different access privileges.
13
ABOUT THIS SOFTWARE
Laboratory group
Reader A
Reader B
Reader E
Laboratory
Records Room group
Reader C
Reader D
User 1
・Records Room group
Records Room
User 2
・Laboratory group
・Records Room group
Research Institute
Separate settings can be made to distinguish the two users, allowing User 1 to enter the Records Room but
not the Laboratory, as he or she is only subject to iris recognition by Readers C, D and E.
User 2 can enter both the Laboratory and Records Room, as he or she is subject to iris recognition by all
five iris readers.
■ Server Certification
・Setting of server certification is not applicable if Iris on Card is used.
The number of users that can be enrolled to a single iris reader is limited to a 1000. However, the number
of users that can be enrolled to this software (iris server) varies according to the user licence.
Thus, a user may be enrolled to the iris server but not to the iris reader. In such a case, if the "Server
Certification" function is "Yes" or "Only", the iris server will receive an inquiry regarding the iris data that is
REJECT (not enrolled) by the iris reader. A recognizing method can be determined depending on each
user.
The following figure explains the differences between the setting of server certification for iris readers and
user recognition method when the iris data for 1500 individuals is enrolled on the iris server.
Readers A, B and C are registered in the group, Group 1. Group 1 is provided for users 1-1500.
14
ABOUT THIS SOFTWARE
Group 1
Distribute
(User 1 to 1000)
User 1 to 1000
Reader A
(Server Certification : Yes)
ACCEPT
User 1001 to 1500
Server Certification ACCEPT
Reader B
(Server Certification : Only)
User 1 to 1500
Server Certification
ACCEPT
Iris Server
Reader C
(Server Certification : No)
User 1 to 1500
ACCEPT
User 1001 to 1500
Distribute
(User 1 to 1000)
ACCEPT
REJECT
Reader D
(Server Certification : Yes)
REJECT
Distribute
User 1 to 1500
REJECT
The iris data of higher 1000 users (users 1-1000) is distributed to Reader A and Reader C out of the iris
readers registered in the Group, Group 1. Because Reader B is set to “Server Certification: Only”, server
certification is activated if Reader B is used whoever operates it. Iris data is not distributed.
Users 1-1500 are not recognized because Reader D does not belong to Group 1.
A thousand individuals whose iris data is distributed by Reader A can be recognized by the iris reader.
Remaining users (users 1001-1500) whose iris data is not distributed are recognized with server
certification when the user recognition method is set to either “Enable Reader Recognition” or “Enable
Server Certification Only”.
Because Reader C is set to “Server Certification: No”, the iris data distributed users (users 1-1000) can be
exclusively recognized.
When the user recognition method is set to “Disable” regardless of reader settings, recognition cannot be
executed with the iris reader.
15
ABOUT THIS SOFTWARE
■ Iris on Card
"Iris on Card" is a method to identify iris data on an IC card with iris data of an eye photograph besides the
recognition method using distributed iris data and server certification method.
A higher level of security-enhanced environment can be constructed with the use of the Iris on Card
recognition method. That is because the user iris data on an IC card that is read by a card reader must
match with the iris data from an eye photograph of the IC card holder.
The information and iris data of enrolled users can be written on the IC card with this software.
To use Iris on Card, it is required to equip an IC card writer and an IC card reader separately for exclusive
use.
・Iris on Card is available only when an exclusive card reader is connected to the iris reader.
・It is required to set up the IC card writer to execute IC card writing. For further details, refer to IC Card
Setting on page 172.
・For details on how to connect, set up and operate the IC card writer, refer to the operating instructions
provided with your IC card writer.
■ Security Level of Reader
One of iris reader functions to be set up is "Security Level". This is a function with which you can choose
to "Normal" (hold) or "High" (delete) distributed iris data when turning off the power of the iris reader.
When the security level is set to “High”, necessary iris data is automatically distributed after connecting to
the iris server on iris reader startup. When resetting the iris reader, or turning on or off the power of the iris
reader, iris data is not distributed if connection with the iris server is not achieved. Recognition is not
performed because the iris reader is in the initialized state and cannot start up.
On the other hand, when the security level is set to “Normal”, the iris reader starts up and recognition is
performed as usual even if the connection to the iris server is not achieved under the conditions that the
iris data of one or more individuals has been already distributed.
However, when the security level is set to “Normal”, iris data may leak in the case of trouble such as iris
reader stealing because distributed iris data is not deleted even after turning off the power. To prevent iris
data leakage in such troubles, set the security level to “High” in normal conditions.
For Iris on Card, recognition cannot be performed when the security level is set to “High” because the
system cannot start up if the iris server is not connected at iris reader startup. For “Normal” setting, the
system starts up and recognition can be performed even if the iris server is not connected at iris reader
startup.
16
ABOUT THIS SOFTWARE
Iris Server ·····················································································
■ Main Specifications
The following table summarizes the main specifications of this software.
Item
Specification
Max. Number of Enrollable Users
5025
Max. Number of Registerable
256
Readers
Max. Number of "Log Information" "System Log": 5000
Management Records
"Access Log": 20000
Max. Number of Alarm Information 1000
Management Records
Max. Number of Auto Backup File 3
Generations
Max. Number of Distributed Iris
For 1000 users (2000 eyes) (Per reader)
Data
Network Communication
Protocol: TCP/IP
Port direction: Transmission and reception
Port number: 8030
・The maximum number of users that can be enrolled to this software varies according to the user licence.
This number is 25 until the User Licence Software is installed. To install a user licence, you must
purchase one of the following "User Licence Software": BM-EU30100E, BM-EU31000E, BM-EU33000E,
or BM-EU35000E.
・The oldest information is automatically deleted when log information and alarm information, and auto
backup files exceed their limit. Refer to the above table.
■ System Installation Requirements
The following table summarizes environment and system requirements to install this software.
Item
Specification
Personal Computer
CPU: Pentium 4 (1. 3 GHz, or faster)
RAM: 256 MB or more (384 MB recommended)
Hard disk: At least 20 GB of free disk space
LAN card (10/100 Base-T): 1
CD-ROM drive: 1
IC card writer port: RS-232C port or USB port
・When an IC card writer is connected and a USB-RS-232C conversion
connector is used, the system may not operate normally.
17
ABOUT THIS SOFTWARE
Item
Specification
Display
High-resolution display of 1024 x 768 (65000 colours) dots or larger
Supporting OSes
Windows® 2000 Professional Service Pack 4,
Windows® 2000 Server Service Pack 4,
Windows® XP Professional Service Pack 2
・Each operating system should be the English version.
・When Windows® XP Professional Service Pack 2 is used, open the windows
Firewall setup screen from the control panel and add Port number 8030 of the
TCP protocol by the use of the Exception tab.
Network Protocol
TCP/IP (for communication between readers and this software)
SMTP (for communication with the mail server)
・If you are using Windows® 2000 operating system, set "System Locale" to "English". If you are using
Windows® XP, set "Language for non-Unicode programs" to "English". This software does not support
other settings.
For details on the setting procedure, refer to the manual supplied to the operating system.
Applicable Equipment ·································································
This software supports the following equipment.
Applicable products
Manufacturer
IC Card Writer
HID Corporation Ltd. RWK400、RW400、RWKL550
RFIDeas, Inc.
Card
Product/product No.
RFID1356i (USB and RS-232)
HID Corporation Ltd. 2001, 2011, 2021, 2031, 2041, 2051, 2061
・In regard to details of the IC card writer and the IC card, refer to the respective instruction manuals
attached to merchandise.
・When a card writer is connected and a USB-RS-232C conversion connector is used, the system may not
operate normally.
・The USB connections are applicable to Windows® XP only. Operation is impossible with Windows® 2000.
18
SYSTEM INTRODUCTION
SYSTEM INTRODUCTION
Introduction··················································································
This section explains how to perform interconnections among the iris server, iris readers, the card reader to
be connected to iris readers, the access control panel, etc. System Construction on page 11 and how to
communicate after enrolling iris reader data on this software.
■ Use of This software
The following explains how to connect the system component devices, how to execute settings, and how
to start up the system.
Operation flow to start up the system
Connection/setup of Each Device
・Reader Initial Setting:p.30
Installing this software
・Setup of the Iris Server:p.20
・Installing This Software:p.21
・Enrolling as the Administrator:p.25
Reader Data Registration
・System Selection According to Conditions:p.28
・Reader Initial Setting:p.30
・Reader Data Registration:p.38
Turning on the Power of the Reader
・Confirmation of Registered Reader Data:p.41
・Downloading Software to the Reader:p.43
・Enrollment Iris Reader Setting:p.44
Checking & Operating Readers
・Checking & Operating Readers (p.91).
19
SYSTEM INTRODUCTION
Connection/setup of Each Device··············································
Interconnect the system component devices.
For details on each device, refer to the operating instructions for each device.
■ Reader Initial Setting
Use the BM-ET330 setup software to set up the iris reader if the iris reader state is the same as the one at
shipment. For details on how to use the BM-ET330 setup software, refer to BM-ET330 <BM-ET330E>
Setup Manual.
Reader settings should be executed according to the specifications of the card reader and access control
panel. Be sure to observe the specifications of the card reader and access control panel before iris reader
settings.
・The following are default settings if the iris reader state is the same as the one at shipment.
─
"Reader ID": 1
─
"IP Address": 192.168.0.3
─
"Server IP Address": 192.168.0.2
─
"Subnet Mask": 255.255.255.0
─
"Gateway IP Address": 192.168.0.1
・If the settings in your network environment such as "IP Address" are already made, use BM-ET330
setup software to change the settings. In case of wrong settings, communication with the iris server is
not normally established. Consult your network administrator for network environment settings.
・"Reader ID", "IP Address", etc. are changeable with this software after normally establishing the
communication with the iris server. You can set up the network of the iris server according to the iris
reader conditions and change the "Reader ID", "IP Address", etc. after registration.
Setup of the Iris Server ·······························································
Set up the iris server as follows:
【Procedure】
1. Connect the LAN cable.
Use a LAN cable to connect the iris server and iris reader(s).
2. Set the IP Address, Subnet Mask and Default Gateway.
The IP address, subnet mask, and default gateway set up in the iris server are automatically acquired
when calling up the “Default Reader Setting” screen after installing this software. If you complete these
settings before installing this software, you can execute iris reader settings and the like without any
difficulty.
20
SYSTEM INTRODUCTION
・The "Server IP Address", "Subnet Mask", and "Gateway IP Address" cannot be acquired if the
LAN cable does not connect to the iris server.
・Consult your network administrator when setting the IP address, subnet mask, and default
gateway. Depending on your LAN environment, other settings may be required. Perform the
settings according to the operating environment after consulting your network administrator.
Installing This Software ······························································
When this software is installed on the iris server for the first time, the number of enrolled users is 25.
Installation of the User Licence Software after installing this software results in increasing the maximum
number of enrollable users according to your licence.
Follow the procedure below to install this software.
・Login the user account with Windows® Administrator privileges or similar level privileges.
・For details on how to install the user licence, refer to the User's Manual provided with your purchased the
User Licence Software.
【Procedure】
1. Insert the installation CD-ROM
2. Execute [setup.exe]
Double click these items in the following order [My Computer] → [CD-ROM drive] → [ES330] →
[setup.exe].
This displays the "Welcome to the InstallShield Wizard for Administration Software" screen.
3. Click the [Next] button.
This displays the "Customer Information" screen.
4. Enter the Customer information
21
SYSTEM INTRODUCTION
①
②
③
⑤
④
⑥
Screen Item
Description
① User Name
Used to enter the user name.
② Company Name
Used to enter the company name.
③ Product Key
Used to enter the product key. It is located on a seal attached to the CDROM case of the administration software.
④ Back
Goes back to the previous screen.
⑤ Next
Proceeds to the next screen.
⑥ Cancel
Cancel the installation.
5. Click the [Next] button.
This displays the "Choose Destination Location" screen.
6. Check the destination folder
Check the destination folder where this software is to be installed.
①
22
SYSTEM INTRODUCTION
Screen Item
Description
① Destination
Displays the folder where this software will be installed.
Folder
To change the folder, click the [Browse] button.
※For details of screen items not described above, see Procedure 4.
・Do not install this software into a folder including ";" in the folder name. This software may not run
properly.
7. Click the [Next] button.
This displays the "Select Program Folder" screen.
8. Click the [Next] button.
Since "Administration Software" will automatically appear under "Program Folders". Click the [Next]
button.
①
②
Screen Item
Description
① Program Folders
Used to create a new programme folder (Administration software will
appear automatically) and add a new icon to the Start menu.
② Existing Folders
Used to add this software to an existing folder which uses an existing icon
on the start menu.
9. Click the [Next] button.
This displays the "Start Copying Files" screen.
23
SYSTEM INTRODUCTION
10. Click the [Next] button.
This starts copying of files. When copying is completed, the "InstallShield Wizard Complete" screen
will appear.
11. Select whether or not you want to restart the Iris Server
Select whether or not you want to restart the iris server, and click the [Finish] button.
①
②
Screen Item
Description
① Yes, I want to restart
This restarts the iris server and completes the installation.
my computer now.
② No, I will restart my
computer later.
Select this item after this software has been installed to exit the installer
programme but not restart the iris server. The installation of this
software will be completed once the server has been restarted.
・Reboot the system after installation is complete.
■ Uninstalling This Software
The following is the procedure to uninstall this software. Follow the procedure if necessary.
・Login the user account with Windows® Administrator privileges or similar level privileges and uninstall this
software. Uninstallation of this software may not be normally performed if you use a user account other
than the one to which you log in to install this software.
・Note that after uninstalling this software, the licence information will not be deleted from the system. You
must uninstall the User Licence Software separately. For details on how to uninstall the User Licence
Software, refer to the User's Manual that is provided with the User Licence Software.
24
SYSTEM INTRODUCTION
【Procedure】
1. Exit this software
For details on how to exit this software, refer to Exiting the System on page 56.
2. Display the Task Operator
Display the Task Operator, and exit the "Information Display Window".
3. Display the Control Panel
Display the Control Panel and double click [Add/Remove Programs] to display the "Add/Remove
Programs".
4. Select "Administration Software"
To uninstall the administration software, select "Administration Software" and click the [Change/
Remove] button.
This displays the "Confirm Uninstall" screen.
5. Click the [OK] button.
This starts uninstallation. When uninstallation is completed, the "InstallShield Wizard Complete"
screen will appear.
6. Select whether or not you want to restart the Iris Server
Select whether or not you want to restart the iris server, and click the [Finish] button.
・Reboot the system after uninstallation is complete.
・Delete the folders below manually after uninstallation.
(The notation below is applicable when this software is installed in the C Drive. It may be different
from the notation of the different Drive ahead.)
─ C:\IrisMngSrv
Enrolling as the Administrator ···················································
When starting up this software for the first time after it has been installed the "Administrator's Setting" screen
will appear. Follow the procedure below to enroll as the Administrator.
・All privileges are given to the administrator enrolled in the initial administrator registration.
【Procedure】
1. Enter the name and password of the Administrator
On the "Administrator's Setting" screen, enter the name and password of the Administrator.
25
SYSTEM INTRODUCTION
①
②
③
⑤
④
Screen Item
Description
① Administrator's
Used to enter the name of the Administrator to be enrolled.
Name
You can use up to 16 of the following alphanumeric characters: 0-9, a-z. All
entries must be 1-byte characters. Upper and lower case letters are not
distinguished.
② Password
Used to enter the password of the Administrator to be enrolled.
Up to 16 1-byte characters can be entered.
The password distinguishes between upper and lower case letters.
③ Reenter Password
Used to verify the password that was entered above.
④ Enroll
Used to enroll the Administrator. The Main Menu screen will appear after
this button is clicked.
The [Enroll] button becomes activated only after all essential entry items
have been entered.
⑤ Exit
Used to exit this software without enrolling the Administrator. When this
software is next started up, the "Administrator's Setting" screen will
reappear.
2. Click the [Enroll] button.
This enrolls the Administrator. The main menu screen will appear.
26
SYSTEM INTRODUCTION
■ Screen Transition at Reader Registration
This section explains screen transition to be required at iris reader data registration.
This is a reference for the operation of Reader Data Registration on page 28 and Turning on the Power of
the Reader on page 41 to be described later.
"Main Menu" Screen
①
②
The "Environment Settings" screen
will appear by clicking
the [Environment Settings] button
on the "Main Menu" screen.
"Environment Setting" Screen
③
④
Screen Item
Description
① Reader Setting/
Click to display the "Reader Setting/Maintenance" screen (p.41).
Maintenance
② Environment Settings
Click to display the "Environment Settings" screen.
③ Default Reader Setting
Click to display the "Default Reader Setting" screen (p.31).
④ Enrollment Reader Setting
Click to display the "Enrollment Reader Setting" screen (p.45).
・For the execution of the following operation Reader Data Registration on page 28, it is necessary to set up
the “Reader Setting/Maintenance” authority for the operator. For the operation of Turning on the Power of
the Reader on page 41 also, the privilege of “Reader Setting/Maintenance” must have been set up for the
operator.
27
SYSTEM INTRODUCTION
Reader Data Registration
You can register iris reader data. You should execute appropriate settings according to your system
configuration.
System Selection According to Conditions ······························
You can construct various types of systems by changing the combination of iris readers, card readers, and
access control panels or changing the settings depending on recognition methods, mounting conditions, etc.
■ Connection Selection
The settings at iris reader data registration vary with the combination of an iris reader, a card reader, and
an access control panel.
According to the diagram shown below, select the connection pattern to be used and confirm the method
of setting for each connection pattern indicated on the next page. Since then, carry out operation of
Reader Initial Setting on page 30.
Connection type ①
Card Reader(W)
Connection type ③
Iris Server
Wiegand
Card Reader(I)
RS-485
IC Card
Wiegand
RS-485
Reader△1
Reader△2
Access Control Panel
Access Control Panel
Reader△1
Wiegand
Access Control Panel
Connection type ②
LAN
Connection type ④
Card Reader(W)
Card Reader(I)
Wiegand
RS-485
RS-485
Wiegand
IC Card
Reader△1
Access Control Panel
Reader△1
RS-485
Access Control Panel
28
Reader△2
Access Control Panel
LAN connection
Wiegand connection
RS-485 connection
Mark △ denotes the type
of iris reader software.
△1:Standard
△2:Iris on Card
SYSTEM INTRODUCTION
・Connection types shown above are classified roughly by connection of a card reader and an access
control panel. All configurations in the system to be constructed are not always the same type.
・To set up multiple connection patterns, refer to Editing Reader Information on page 67 and Registering
Reader Information on page 78 described in Updating and Deleting Readers on page 80.
Connection type ①
A card reader (W) and an access control panel with Wiegand interface are connected to an iris reader and
operated. You can also operate the system without a card reader (W).
For the Connection Pattern ①, it is necessary to make settings shown below, in Reader Initial Setting on
page 30 and thereafter.
Procedure 3: Select [Standard] in ① “Card Type” of the “Card Reader” tabscreen (p.34). It is also
necessary to set up all the items of ④ to ⑧ in “Wiegand Settings”.
Procedure 4: Select [Wiegand] in ① “Communication Method” of the “Access Control Panel” tabscreen
(p.36). It is also necessary to set up all the items of ② to ⑦ in “Wiegand Settings”.
Connection type ②
A card reader (W) and an access control panel with RS-485 interface are connected to an iris reader and
operated. You can also operate the system without a card reader (W).
For the Connection Pattern ②, it is necessary to make settings shown below, in Reader Initial Setting on
page 30 and thereafter.
Procedure 3: Select [Standard] in ① “Card Type” of the “Card Reader” tabscreen (p.34). It is also
necessary to set up all the items of ④ to ⑧ in “Wiegand Settings”.
Procedure 4: Select [RS-485] in ① “Communication Method” of the “Access Control Panel” tabscreen
(p.37). It is also necessary to set up all the items of ② to ⑧ in “RS-485 Settings”.
Connection type ③
A card reader (I) and an access control panel with RS-485 interface are connected to an iris reader and
operated.
For the Reader Software, it is necessary to download ”Iris on Card” (p.43).
For the Connection Pattern ③, it is necessary to make settings shown below, in Reader Initial Setting on
page 30 and thereafter.
Procedure 3: Select [Iris on Card] in ①”Card Type” on the “Card Reader” tabscreen (p.34). When [Iris on
Card] is selected, ② “Card Reader Connection” is automatically set up at “Yes”. No
modification is possible. The setup item in the column of “Wiegand Settings” is disabled.
・ When [Iris on Card] is selected, ③ “Server Certification” of the “Operation Info” tabscreen
becomes invalid.
Procedure 4: Select [RS-485] in ① “Communication Method” of the “Access Control Panel” tabscreen
(p.37). It is also necessary to set up all the items of ② to ⑧ in “RS-485 Settings”.
29
SYSTEM INTRODUCTION
Connection type ④
A card reader (I) and an access control panel with Wiegand interface are connected to an iris reader and
operated.
For the Reader Software, it is necessary to download ”Iris on Card” (p.43).
For the Connection Pattern ④, it is necessary to make settings shown below, in Reader Initial Setting on
page 30 and thereafter.
Procedure 3: Select [Iris on Card] in ① “Card Type” of the “Card Reader” tabscreen on page 34. When
[Iris on Card] is selected, ② “Card Reader Connection” is automatically set up at “Yes”. No
modification is possible. The setup item in the column of “Wiegand Settings” is disabled.
・When [Iris on Card] is selected, ③ “Server Certification” of the “Operation Info” tabscreen (p.32)
becomes invalid.
Procedure 4: Select [Wiegand] in (1) “Communication Method” of the “Access Control Panel” tabscreen
(p.36). It is also necessary to set up all the items of ② to ⑦ in “Wiegand Settings”.
Reader Initial Setting ···································································
In the procedure of Default Reader Setting, you can execute the initial settings (default values) of iris reader
data. Reader initial setting allows you to register data of two or more iris readers efficiently.
Click the [Default Reader Setting] button on the "Environment Settings" screen. Otherwise, click
[Environment Settings] tab → [Default Reader Setting] tab with the menu bar on the main menu screen. The
“Default Reader Setting” screen appears.
・You can also register iris reader data without Default Reader Setting. In this case, every item should be
manually entered.
・At Default Reader Setting, required settings should be executed voluntarily. Unexecuted setting items
should be manually entered at iris reader data registration.
【Procedure】
1. Set up the registration information.
Set up a server IP address to be assigned to the iris reader.
If Default Reader Setting is not executed, the IP address, subnet mask, and default gateway of the
TCP/IP property set to the iris server are automatically assigned to “Server IP Address”, “Subnet
Mask”, and “Gateway IP Address” respectively and displayed. Revise the values if necessary.
30
SYSTEM INTRODUCTION
①
②
③
④
⑤
Screen Item
Description
① Server IP
Set up the IP address of the iris server to be assigned to the iris reader.
Address
The IP address is automatically acquired from the TCP/IP property of the iris
server before default reader setting.
② Subnet Mask
Set up a subnet mask to be assigned to the iris reader.
The subnet mask is automatically acquired from the TCP/IP property of the
iris server before default reader setting.
③ Gateway IP
Address
Set up a gateway IP address to be assigned to the iris reader.
The default gateway is automatically acquired from the TCP/IP property of
the iris server before default reader setting.
④ OK
Saves the settings and closes the "Default Reader Setting" screen.
⑤ Cancel
Closes the "Default Reader Setting" screen without saving the settings.
2. Click the [Operation Info] tab and set up the iris reader management
information.
Set the operating information of the iris reader. The setting of operating information is mainly
associated with operations at recognition.
31
SYSTEM INTRODUCTION
②
①
③
④
⑤
⑥
⑧
⑦
⑨
⑩
Screen Item
Description
① Security Level
Sets the security level of the iris reader (p.16).
② Access Log
You can select “High” or “Normal”.
Decides whether or not to notify the iris server of the recognition result (OK
or NG) with the iris reader. You can select “Yes” or “No”.
If you select “Yes”, the iris server is notified of the result. In this case, you
can observe the recognition result of log information notified with “Access
Log”.
If you select “No”, the iris server is not notified of the result. In this case,
there is no result displayed at “Access Log” of log information.
③ Server
Certification
Sets up server certification. (p.14)
Setup is made with any one of [Yes], [No], and [Only].
When [Iris on Card] is selected in “Card Type” of the “Card Reader”
tabscreen, setting becomes impossible for server certification because “No”
is automatically selected. (For connection types ③ and ④)
④ Audio Mode
Sets up the iris reader audio mode (audio output).
You can select “Mute”, “Simple”, or “Full”.
Mute
There is no audio output.
Simple
An audio output of “Identification completed” or “Sorry you were
not identified” is generated based on the result of shutter sound
recognition.
Full
There are a shutter sound and voice guidances giving
instructions such as "Please move a little closer" or "Please
⑤ Guidance
Language
move to the left a little" etc. as well as recognition results.
Selects the guidance language of the iris reader.
You can select one of the following: "English", "Japanese", "German",
"French", "Italian", "Spanish", "Russian", "Chinese", "Korean", "Arabic",
"Portuguese", "Turkish", "Dutch", and "Swedish".
32
SYSTEM INTRODUCTION
Screen Item
Description
⑥ Output 1
Decides whether or not to send out a pulse signal from the Output 1
(Recognized
(Recognized Signal) terminal at successful recognition.
Signal)
Either “Yes” or “No” is selected for setting.
⑦ Output Width
Setup becomes possible when “Yes” is selected with ⑥ "Output 1
(Recognized Signal)". The width range is 1-600. The selected output width
after multiplied by 100 ms as a pulse signal is sent out from the "Output 1
(Recognized Signal)" terminal at successful recognition.
⑧ Output 2
Decides whether or not to send out a pulse signal from the Output 2
(Rejected Signal) (Rejected Signal) terminal at unsuccessful recognition. Either “Yes” or “No” is
selected for setting.
⑨ Output Width
⑧ Setup becomes possible when “Yes” is selected with ⑧ "Output 2
(Rejected Signal)". The width range is 1-600. The selected output width after
multiplied by 100 ms as a pulse signal is sent out from the "Output 2
⑩ Live Indicator
(Rejected Signal)" terminal at unsuccessful recognition.
Selects the state of the iris reader live indicator.
You can select “Off”, “Blinking”, or “On”.
・For setting the output widths of recognition result "Output 1 (Recognized Signal)" and recognition
result "Output 2 (Rejected Signal)", execute setting according to the specifications of the devices
connected to the output 1 and 2 terminals.
3. Click the [Card Reader] tab to set up the communication information between
the iris reader and the card reader.
“Card Reader” sets up the communication configuration in which a card reader type and the card ID
read through the card reader are transmitted to an iris reader. This setting should be executed
according to your card reader.
・In the case of usage without connecting the card reader to the iris reader, set “Card Type” at
[Standard] and “Card Reader Connection” at “No”.
33
SYSTEM INTRODUCTION
①
②
③
④
⑥
⑧
⑤
⑦
Screen Item
Description
① Card Type
Selects a card reader type to be used.
Either [Standard] or [Iris on Card] is selected for setting.
To use the card reader (W), [Standard] is selected. In the case of usage
without connecting the card reader to the iris reader, [Standard] is selected.
(For the connection patterns ① and ②)
To use the card reader (I), [Iris on Card] is selected. In this case, ② “Card
Reader Connection” is automatically set at “Yes”. This item cannot be
changed. (For connection types ③ and ④)
・The card type of each iris reader data varies with the Reader Software that
is downloaded to the iris reader. When communication is exchanged
between the iris reader and the iris server, the type is acquired for the
Reader Software that has been downloaded to the iris reader. [Standard]
is automatically selected in the case of the standard Reader Software. [Iris
on Card] is automatically selected in the case of the Reader Software for
the Iris on Card.
② Card Reader
Connection
Selects the presence or absence of the card reader connection.
“Yes” or “No” can be set.
To use the card reader (W), “Yes” is selected. The setup item in the column
of “Wiegand Settings” is enabled.
For operation without the card reader (W), “No” is selected. (For the
connection patterns ① and ②)
If the card reader (I) is used, “Yes” is automatically set up. This item cannot
be changed. (For connection types ③ and ④)
34
SYSTEM INTRODUCTION
Screen Item
Description
③ Recognition
Selects a recognition method when the card reader is connected to the iris
Mode
reader.
Selection only if the ② “Card Reader Connection” is “Yes”.
[Card and Iris Recognition] is the recognition with the card ID and the iris
information. The iris reader starts recognizing operation after presentation of
the card to the card reader.
[Card Recognition Only] is the recognition to be done only with the card ID.
Recognition is executed only with presentation of the card to the card reader.
The iris reader does not capture an iris image.
④ Pulse Width*
Selects the Wiegand pulse width.
You can select from among 30, 40, and 50 µs.
⑤ Pulse Interval*
Selects the Wiegand pulse interval.
You can select from among 1.0, 1.5, and 2.0 ms.
⑥ Total Bit Length*
Displays the total bit length ⑦ “Site Code” + ⑧ “Card Number” + parity bit
(2 bits). This must be set within a range from 26 to 128 bits.
⑦ Site Code*
Sets the bit length from 0 to 125 bits.
⑧ Card Number*
Sets the bit length from 1 to 126 bits.
The screen items with asterisk marks * in the table can be set up only if the card reader (W) is used
(when ① “Card Type” is set at [Standard] and ② “Card Reader Connection” is set at “Yes”). (For
connection types ① and ②)
When “Card Reader Connection” is set at “Yes” in the Connection Pattern ① , the values are
automatically reflected if the Wiegand settings of “Access Control Panel” are changed in Procedure
4.
4. Click the [Access Control Panel] tab to set up the communication information
between the iris reader and the access control panel.
This Procedure sets up the communication configuration to transmit recognition results from the iris
reader to the access control panel or receive the starting signal of recognition operation from the
access control panel. This setting should be executed according to the specifications of the access
control panel to be used. To use the access control panel in the RS-485 connection, refer to For the
use of an Access Control Panel with RS-485 interface on page 37. (For connection types ② and ③)
35
SYSTEM INTRODUCTION
For the use of an Access Control Panel with Wiegand interface
This section explains how to use an access control panel with Wiegand interface. (For connection
types ① and ④)
Select [Wiegand] in ① “Communication Method” of the “Access Control Panel” tabscreen. Setting
becomes possible for the items ② to ⑦ in the columns of “Wiegand Settings”.
・If the contents of the Items ④ to ⑨ have been set already in regard to “Wiegand Settings” in the
“Card Reader” tabscreen for Procedure 3, the values will be reflected on the items corresponding
to the Items ② to ⑦ in “Wiegand Settings” when [Wiegand] is selected as per ①
“Communication Method”. If you modify these items, the modifications are reflected in the
corresponding items on the “Card Reader” tabscreen. (For connection type 1)
①
③
②
④
⑥
⑦
⑤
Screen Item
Description
① Communication
Selects “Wiegand”. Setting is enabled for the items in “Wiegand Settings”.
Method
② Pulse Width*
Selects the Wiegand pulse width.
③ Pulse Interval*
You can select from among 30, 40, and 50 µs.
Selects the Wiegand pulse interval.
You can select from among 1.0, 1.5, and 2.0 ms.
36
④ Total Bit Length*
Displays the total bit length ⑤ “Site Code” + ⑥ “Card Number” + parity bit
(2 bits). This must be set within a range from 26 to 128 bits.
⑤ Site Code*
Sets the bit length from 0 to 125 bits.
⑥ Card Number*
Sets the bit length from 1 to 126 bits.
SYSTEM INTRODUCTION
Screen Item
⑦ Reject ID*
Description
If the recognition result is NG, the data sent out to the access control panel is
entered in a decimal number in the Site Code – Card Number form.
This excludes parity bit (2 bits).
For example, set Reject ID to 24 bits when the bit length is 26 bits.
・Actual Reject ID can be sent to the access control panel even if only Site
Code is empty.
・Set Reject ID after checking the specifications of the access control panel
to be connected to the iris reader.
In regard to the asterisk-marked screen items in the above table, setting is possible when the access
control panel is used in the Wiegand communication and [Wiegand] is set as per ①
“Communication Method”. (For connection types ① and ④)
For the use of an Access Control Panel with RS-485 interface
This section explains how to use an access control panel with RS-485 interface. (For connection types
② and ③)
Select [Wiegand] in ① “Communication Method” of the “Access Control Panel” tabscreen. Setting
becomes possible for the items ② to ⑧ in the columns of “RS-485 Settings”.
①
②
③
④
⑦
⑤
⑥
⑧
Screen Item
Description
① Communication
Select [RS-485]. Setting is enabled for the items in “RS-485 Setting”.
Method
② Baud Rate*
Selects a baud rate in RS-485 communication.
You can select from among 2 400 bps, 4 800 bps, 9 600 bps, 19 200 bps,
and 38 400 bps.
37
SYSTEM INTRODUCTION
Screen Item
③ Parity
Description
Sets up parity check in RS-485 communication.
④ Stop Bit*
You can set [NONE], [ODD], or [EVEN].
Selects a stop bit in RS-485 communication.
⑤ Character
You can select "1" bit or "2" bits.
Selects a character length in RS-485 communication.
Length*
⑥ Digits*
You can select "8" bit or "7" bits.
Displays the total number of digits consisting of ⑦ “Site Code Digits” and
⑧ “Card Number Digits”. The digit numbers of Site Code and Card Number
should be set up so that the total number of digits become 1-38 bits.
⑦ Site Code Digits* Sets the digit number of Site Code from 0 to 37.
⑧ Card Number
Sets the digit number of Card Number from 1 to 38.
Digits*
In regard to the asterisk-marked screen items in the above table, setting is possible when the access
control panel is used in the RS-485 communication and [RS-485] is set as per ① “Communication
Method”. (For connection types ② and ③)
5. Click the [OK] button.
This saves the settings and closes the "Default Reader Setting" screen.
The iris reader data are registered in the next item, “Reader Data Registration”.
Reader Data Registration····························································
Reader data is registered after completion of Default Reader Setting. The "Reader Setting/Maintenance"
screen can be displayed by clicking the [Reader Setting/Maintenance] button on the "Administration
Software" screen, or by selecting “Reader Setting/Maintenance” from the menu bar.
①
38
SYSTEM INTRODUCTION
Screen Item
Description
① New
Displays the "New Reader Registration" screen (p.39).
【Procedure】
1. Click the [New] button on the "Reader Setting/Maintenance" screen.
The "New Reader Registration" screen appears.
2. Set up the iris reader data.
Enter “Reader ID”, “Reader Name”, and “IP Address”. “Reader ID” and “IP Address” must be unique.
“Server IP Address”, “Subnet Mask”, and “Gateway IP Address” automatically become the same ones
that have been set up at Default Reader Setting. Revise the values if necessary. For each item of
“Operation Info”, “Card Reader”, or “Access Control Panel” tabscreen, Default Reader Setting values
are automatically entered. Revise the values if necessary.
When “Reader ID”, “Reader Name”, and “IP Address” are entered, the [Register] button becomes
allowed to be clicked.
・If there is undecided items at Default Reader Setting, entry should be manually executed. When
all the required input items are entered, the [Register] button becomes to be clicked.
①
②
③
④
⑤
Screen Item
① Reader ID
⑥
Description
Enters the assigned ID for the iris reader.
A 1-byte numerical value within the range 1 to 99999 can be registered.
② Reader Name
Note, however, that the same value as the Reader ID cannot be set.
Enters the Reader Name.
③ IP Address
Up to 20 1-byte characters can be entered.
Enters the assigned IP address for the iris reader.
The same IP address of an existing iris reader cannot be used.
39
SYSTEM INTRODUCTION
Screen Item
Description
④ Network Setting
The values that have been set up at Default Reader Setting are
⑤ Register
automatically acquired.
Registers iris readers.
This button becomes activated only after all essential entry items have been
⑥ Cancel (Close)
entered.
The screen returns to "Reader Setting/Maintenance".
If you have clicked the [Register] button, this button will appear as the
[Close] button.
3. Click the [Register] button.
The registration of the iris reader is completed, and “Reader ID”, “Reader Name”, and “IP Address” are
cleared to proceed to next iris reader registration. (Repeat from Procedure 2.)
If you complete registration, proceed to Procedure 4.
4. Click the [Close] button.
The screen returns to "Reader Setting/Maintenance".
Turn on the power of the iris reader to check communication after completion of iris reader registration.
Refer to Turning on the Power of the Reader on page 41.
40
SYSTEM INTRODUCTION
Turning on the Power of the Reader
Turn on the power of the iris reader to check the communication between the iris reader and the iris server
after completion of iris reader registration. The MAC address (p.82) of the iris reader is acquired if the
communication between the iris reader and the iris server is successfully established. Once the MAC
address of the iris reader is acquired, you can acquire the status of the iris reader and change the settings of
the iris reader from the iris server.
Confirmation of Registered Reader Data ··································
After establishing the communication between registered reader data and the iris server, confirm that the
reader data and settings are correct.
The "Reader Setting/Maintenance" screen can be displayed by clicking the [Reader Setting/Maintenance]
button from the "Administration Software" screen, or by selecting “Reader Setting/Maintenance” → [Reader
Setting/Maintenance] from the menu bar.
①
②
④
③
Screen Item
Description
① Search
Displays the iris reader in “Reader List”.
② Reader List
③ Reset
Displays the enrollment iris readers.
Resets iris readers.
④ Download
This button becomes activated only after selecting an iris reader from “Reader List”.
Download the Reader Software to the iris reader of "Download".
Software
This button becomes activated after selecting the iris reader with "Operating",
"Stopped", "Enrollment Reader (Operating)", "Download" from "Reader List".
41
SYSTEM INTRODUCTION
■ Turning on the Power of the Reader
【Procedure】
1. Turn on the power of the iris reader.
Turn on the power of the iris reader.
2. Wait for a while to start up the iris reader after completion of the
communication between the iris reader and the Iris Server.
It takes some time to start up the iris reader. The procedure of the communication between the iris
reader and the iris server varies with the timing of turning on the iris reader. Perform operations
depending on the situation.
● When the iris reader is ON before registration of iris reader data
Wait for a while until iris reader startup after completion of iris reader data registration.
At that time, an alarm of “Unregistered reader is connected.” is displayed at the “Information Display
Window” (p.157). Log data is saved in the "System Logs" (p.160) as well.
● When turning ON the iris reader after registration of iris reader data
Wait for a while until iris reader startup after turning on the iris reader.
3. Click the [Search] button on the "Reader Setting/Maintenance" screen.
This operation displays the iris reader data registered in “Reader List” on the “Reader
Setting/Maintenance” screen.
4. Check the Reader Status to be displayed in “Reader List”.
According to the “Reader List”, confirm the contents of each iris reader displayed in “Status”. Follow
the operations below depending on the displayed contents.
“Download” ························This indicates normal communication established. “Download” appears in
purple because the iris reader conditions are in the factory setting.
Execute Downloading Software to the iris reader.
“Reset”·······························This indicates that the iris reader is in the process of reset. Wait until iris
reader startup, and click the [Search] button again.
“- -”·····································Wait until iris reader startup, and click the [Search] button again. After
confirming that the iris reader is ON, click the iris reader data in “Reader
List” to select it and click the [Reset] button if the reader status remains “-”. If the Reader Status is still “- -” and not updated, check iris reader
settings.
・Reader statuses other than the above may appear when establishing the communication with an
iris reader whose conditions are not factory setting.
・The following resources are used for the communication between the iris server and iris readers.
Consult your network administrator about the availability of the following resources when
communication with the enrollment iris reader fails.
─ Protocol: TCP/IP
─ Port direction: transmission, reception
42
SYSTEM INTRODUCTION
─ Port number: 8030
Downloading Software to the Reader ········································
Download the Reader Software to the iris reader of “Download” indicated in purple in the “Status” column of
the “Reader List”.
It is required that the Reader Software has been installed using the CD-ROM for installation before
downloading this software to the iris reader.
・Be sure to perform this operation if the reader status is “Download”. Otherwise, the iris reader will not
function normally.
・For installation of the Reader Software, refer to Installation Guide.pdf in the ET330 folder on the CDROM for installation.
・The iris reader restarts after downloading. Recognition with the iris reader is not available in this period.
【Procedure】
1. Call up the "Reader Setting/Maintenance" screen.
Call up the "Reader Setting/Maintenance" screen (p.41).
2. Click the [Search] button to call up iris reader data.
Click the [Search] button to call up the iris reader to which the Reader Software is downloaded in the
“Reader List”.
3. Select the iris reader from “Reader List”, and click the [Download Software]
button.
The "Select Download File" screen is displayed. More than one iris reader is selectable.
・A download cannot be performed if the iris reader selected from “Reader List” shows the following
status: "Reset", "Status unknown", or "- -".
4. Select a download file.
Select the download file in the download select screen.
The download file can differ according to the type of the card reader to be connected with the iris
reader.
When the system is used with the card reader (W) or without any card reader (p.28 Connection type
① and ②), the "standard" Reader Software "ET330_XXYY.bin" should be downloaded.
When the system is used with the card reader (i) (p.28 Connection type ③ and ④), the "Iris on Card"
iris reader software "ET330i_XXYY.bin" should be downloaded.
The download file should be selected from the folder where the Reader Software has been installed.
It is the download file name and XXYY denotes the version number of the software.
43
SYSTEM INTRODUCTION
・When the Reader Software has been installed by default setting, this software becomes
"\IrisMngSrv\ET330" of the drive where this software is installed.
5. Click the [Open] button.
This displays the "Software download is in progress." screen and starts the download. If you click the
[Cancel] button, the download will be cancelled.
When the download ends, the "Software download to iris reader is complete." message will appear.
The iris reader is automatically reset after downloading.
・The confirmation message will appear if you have selected multiple iris readers on the "Reader
Setting/Maintenance" screen that include an iris reader that not in a downloadable status. Click
the [Yes] button to continue downloading to the remaining iris readers.
・The [Cancel] button is not displayed on the "Software download is in progress." screen when the
number of iris readers to which iris data is being downloaded to is 10 or less.
6. Click the [OK] button for the displayed message.
The screen returns to "Reader Setting/Maintenance".
Enrollment Iris Reader Setting ···················································
Set up the enrollment iris reader to capture iris images. Select the enrollment iris reader from registered iris
reader data.
More than one enrollment iris reader is selectable. Note that this selected iris reader will no longer be able to
be used as a recognition iris reader.
・It is required to select a enrollment iris reader in order to log into this software (p.51) with the administrator
name and iris recognition.
・It is required to select a enrollment iris reader in order to capture iris images.
【Procedure】
1. Click the [Enrollment Reader Setting] button on the "Environment Settings"
screen.
This displays the "Enrollment Reader Setting" screen.
44
SYSTEM INTRODUCTION
①
②
③
④
⑤
⑥
⑦
Screen Item
Description
① Selected
Displays the iris readers that have been set up and will be set up as an
Readers
enrollment iris reader.
② Reader Search
Searches the unregistered iris readers.
③ Reader Search
Displays the iris readers that have been set up as the enrollment iris readers
Results
④ Add
searched by “Reader Search”.
Moves an iris reader selected from “Reader Search Results” to “Selected
Readers”.
⑤ Delete
Moves an iris reader selected from “Selected Readers” to “Reader Search
Results”.
⑥ OK
The iris readers with the display of “Selected Readers” are set up as the
enrollment iris readers.
⑦ Cancel
Cancels the settings of selected enrollment iris readers, and calls up the
previous screen.
2. Search for an iris reader after entering search conditions in “Reader Search”.
In regard to the method of iris reader search, refer to the Procedures 2 and 3 of Search by Designating
the Reader on page 111. The iris readers are displayed, which have not been set up as the enrollment
iris readers searched by “Reader Search Results”.
3. Select an iris reader from “Reader Search Results” and click the [Add] button.
The iris reader selected from “Reader Search Results” moves to “Selected Readers”.
・If there is an iris reader of which status is in “Reset” or “Download” among the selected iris
readers, “Reader ID: xx is in the process of resetting” or “Reader ID: xx is in the process of
downloading” appears when clicking the [Add] button, and the iris reader is not added in “Selected
Reader”.
45
SYSTEM INTRODUCTION
4. Click the [OK] button.
The selected recognition iris reader changes to an enrollment iris reader after clicking the [OK] button.
A message “Changed Recognition Iris Reader/Enrollment Reader settings” is displayed then.
・The iris reader that has been added in “Selected Reader” and has acquired a MAC address is
changed from the recognition iris reader to enrollment iris reader. The reader status becomes
“Status unknown” under the condition of no communication such as power-off state or during
resetting. When the communication is successfully established between the iris reader and the iris
server, the iris reader starts up as an enrollment iris reader.
5. Click the [OK] button for the displayed message.
The “Enrollment Iris Reader Setting” screen is closed and the previous screen is called up.
46
OPERATION
OPERATION
Introduction··················································································
This section explains how to set up this software, how to operate each registered data, how to operate iris
readers, etc.
■ Use of this software
The matters that can be done by this software can be divided into two categories; Operation to set up this
software and Operation to manage this software after the completion of various settings.
Operation to set up this software:
Starting up the System, p.49
Operation to manage this software:
Operational Settings, p.138
Status Display Settings, p.155
IC Card Setting, p.172
Enrolling Operators, p.59
(Iris Capturing, p.128)
Editing Reader Information, p.67
Checking & Operating Readers, p.91
Registering Groups, p.100
Enrolling Users, p.107
(Iris Capturing, p.128)
Distributing Iris Data to Readers, p.135
47
OPERATION
■ Basic Operations
The user interface of this software allows users to perform operations more simply under the conditions of
familiar environment because basic operations are the same as Windows®.
The explanation of such basic operations are omitted from the main body of this book.
・Double-clicking on targeted information allows users to access detailed information quickly and change
settings.
・You can change settings together after multiple selection with the use of the [Ctrl] key, [Shift] key, or
mouse dragging. You can also use drag-and-drop to change settings.
・Right clicking on targeted information allows users to call up pop-up menu to select operations. The
items in the pop-up menu have the same functions as the buttons on the screen.
・By clicking the data item column titles displayed in a list, it is possible to rearrange the order of tracing
up and down.
■ Requisite Entry Items
Be sure to fill in the items with blue characters on the screen shown at running this software when
executing setting and registration. When the indispensable input items displayed in blue letters are
entered and selected, the [Register] button, the [OK] button, etc., become possible to be clicked.
Example of Screen
Requisite
Entry Items
■ Error Messages
Error messages are displayed when this software is operated incorrectly, or when an error occurs in the
system.
In regard to error messages, refer to List of Error Messages on page 192.
■ Troubleshooting
This section explains treatment samples for troubles caused by misoperation during using this software.
Refer to Troubleshooting on page 213.
48
OPERATION
Starting up the System
Start up this software and log in to the system.
It also explains how to start up this software, log into the system under the registered administrator’s name,
exit this software, and operate the main menu displayed after login.
Starting up the System ·······························································
■ Automatic Startup
This software is automatically started up when the iris server is started up.
When this software is started up for the first time after it is installed, the "Administrator's Setting" screen
(p.26) will appear. Once the Administrator has been enrolled, the "Administration Software Login" screen
will appear. Log into the system with enrolled administrator (p.50).
■ Startup from the "Task Tray"
After exiting this software, you can reboot this software by double clicking the task tray icon. You can also
reboot by right clicking the icon to bring up a popup menu and clicking the “Administration Software”
submenu.
The "Administration Software Login" screen will appear. Log into the system with enrolled administrator
(p.50).
①
②
③
Screen Item
Description
① Administration
Starts up this software and the “Administration Software Login” screen appears.
Software
② Information Display
Displays the Information Display Window (p.157).
Window
③ Icon
Represents this software. It is fixed on the task tray and can be used to startup
this software. If an error occurs, a message appears and its colour changes
from blue to red.
■ Startup from the "Start Menu"
This software can be started up from the Windows® [Start] button.
49
OPERATION
Click “Program” → “Administration Software” → “Administration Software” in this order. The
"Administration Software Login" screen appears. Log into the system with enrolled administrator (p.50).
Logging into the System·····························································
Once the Administrator to this software has been enrolled, the "Administration Software Login" screen will
appear after startup.
From this login screen, the Administrator, or any enrolled Operator can then use this screen to log into this
software.
Login comes in the two cases of Login by Operator Name and Password Entry and Login by Operator Name
and Iris Recognition on page 51.
・Once the Administrator has been enrolled to this software, this Administrator can then enroll other
Operators to use this software. For details on how to enroll an Operator, refer to Enrolling Operators on
page 59.
■ Login by Operator Name and Password Entry
This explains how to log into this software by name and password.
【Procedure】
1. Enter the Operator's Name and Password on the "Administration Software
Login" screen.
①
③
②
④
Screen Item
⑤
Description
① Operator's Name Enters the operator's name.
Enters the operator's password.
② Password
The password distinguishes upper and lower case letters.
③ Recognition
Used for login in the case of iris recognition. The “Select Recognition” screen
(p.51) appears.
It can be clicked when an operator name is entered in the state that the
enrollment iris reader has been set up.
50
OPERATION
Screen Item
④ Login
Description
If the Operator's Name and Password are correct, the "Administration
Software" screen appears.
The [Login] button becomes activated only after an “Operator's Name” and
“Password” have been entered.
⑤ Exit
Exits this software without logging in.
2. Click the [Login] button.
If the Operator's Name and Password are correct, the "Administration Software" screen (p.53) will
appear.
■ Login by Operator Name and Iris Recognition
The operator with iris data registered can login by iris recognition. When the operator name coincides with
the iris data, login is possible into this software.
・Login by iris recognition is possible only for the operator whose iris data have been registered on the
“Operator’s Information” screen (p.60).
・To login with the operator name and iris recognition, it is necessary to have set up the enrollment iris
reader. For details on the enrollment iris reader settings, refer to Enrollment Iris Reader Setting on page
44.
【Procedure】
1. Enter the Operator's Name on the "Administration Software Login" screen.
For details of the screen items, refer to Login by Operator Name and Password Entry on page 50.
2. Click the [Recognition] button.
The “Select Recognition Reader” screen appears.
3. According to “Reader Name”, select an iris reader to be used for recognition.
For the iris reader to be used for recognition, select one out of the reader names in the list.
①
②
③
51
OPERATION
Screen Item
① Reader Name
Description
Displays the Reader Name that is set in the enrollment iris reader.
According to the enrollment iris reader displayed, select one iris reader unit
intended for iris recognition.
② Yes
Starts the iris recognition.
③ No
The screen returns to the "Administration Software Login" without executing
iris recognition.
・The Reader Name is displayed for the iris reader that has been set as an Enrollment Iris Reader
as per Enrollment Iris Reader Setting on page 44. However, no iris reader in the status of
“Download” is displayed.
・The iris reader once selected for “Select Recognition Iris Reader” or “Select Reader” is selected
again by default at the time of capturing during the next recognition.
4. Click the [Yes] button to perform iris recognition.
When a message of “The reader will capture one iris image. Recognition is in progress.” is displayed,
try to gaze at the iris reader until its shutter functions.
①
Screen Item
Description
① Cancel
Cancels recognition.
・For details on how to display iris reader guidance during capture, refer to the Operating
Instructions provided with the iris reader.
● If Iris Recognition succeeds
If the captured iris data matches, the "Administration Software" screen appears.
● If Iris Recognition fails
If the captured iris data doesn't match, the message "Operator's name or iris data does not match."
appears.
52
OPERATION
"Administration Software" Screen·············································
The "Administration Software" screen appears when you have successfully logged into this software.
Click each button on the “Administration Software” screen, or select each item to work with the menu bar.
■ "Administration Software" Screen
①
⑤
②
⑥
③
⑦
④
Screen Item
Description
① Menu Bar
Refer to Menu Bar on page 54.
② User Information
Displays the "User Information" screen (p.107).
③ Reader
Displays the "Reader Setting/Maintenance" screen (p.67).
Setting/Maintenance
④ Log Information
Displays the "Log Information" screen (p.159).
⑤ Backup/Restore
Displays the "Backup/Restore" screen (p.146).
In the case of login attempted by an operator with no privilege of “Backup/
Restore”, the button becomes invalid.
⑥ Environment Settings Displays the "Environment Settings" screen (p.55).
⑦ Exit
Exits this software.
・The contents of "Administration Software" screen will vary according to the Operator's privilege level.
This manual describes the use of screens when an operator having all privileges performs login. In
regard to operator privileges, refer to Operator's Privilege on page 59.
・If there is no screen operation with a keyboard and a mouse for approximately one minute in the state
that the “Administration Software” screen is displayed, a standby screen is automatically displayed. If
there is screen operation with a keyboard or a mouse in the state that the standby screen is displayed,
the “Administration Software” screen is automatically displayed.
53
OPERATION
■ Menu Bar
The following describes the menus and submenus that can be accessed from the Menu Bar.
①
②
③
④
⑦
⑥
⑤
Screen Item
Submenu
Description
① User
User Information
Displays the "User Information" screen (p.107).
User Information
Displays all of the user information on the "User Information"
(Search All)
User Information
screen (p.107).
Displays the "New User Enrollment" screen (p.114).
(New)
In the case of login attempted by an operator with no privilege of
Information
“User Information", the display becomes invalid.
② Reader
Reader Setting/
Displays the "Reader Setting/Maintenance" screen (p.67).
Setting/
Maintenance
Maintenance
Reader Setting/
Displays all of the iris readers on the "Reader
Maintenance
Setting/Maintenance" screen (p.67).
(Search All)
③ Log
④ Backup/
Restore
54
Reader Setting/
Displays the "New Reader Registration" screen (p.39).
Maintenance
In the case of login attempted by an operator with no privilege of
(New)
“Reader Setting/Maintenance”, the display becomes invalid.
System Logs
Displays "System Logs" on the "Log Information" screen (p.159).
Access Log
Displays "Access Log" on the "Log Information" screen (p.159).
Auto Backup
Displays the "Auto Backup Setting" screen (p.146).
Setting
Manual Backup
Displays the "Manual Backup" screen (p.151).
Restore
Displays the "Restore" screen (p.153).
OPERATION
Screen Item
Submenu
Description
⑤ Environment
Group Setting
Displays the "Group Setting" screen (p.100).
Operator's
Displays the "Operator's Information" screen (p.60).
Settings
Information
E-Mail Setting
Displays the "E-Mail Setting" screen (p.144).
Default Reader
Displays the "Default Reader Setting" screen (p.32).
Setting
In the case of login attempted by an operator with no privilege of
“Environment Settings”, the display becomes invalid.
Network
Displays the "Network Monitoring/Security" screen (p.138, 140).
Monitoring/Security
Enrollment Reader Displays the "Enrollment Reader Setting" screen (p.45).
Setting
Auto Reboot
Displays the "Auto Reboot Setting" screen (p.142).
Setting
IC Card Setting
Displays the "IC Card Setting" screen (p.172).
Reader Expansion Displays the "Select Reader" screen (p.96).
Feature
⑥ Help
About
Displays the "About Administration Software" screen (p.57).
Administration
Software
⑦ Exit
Exit
Exits this software.
・In the case of login attempted by an operator with no privilege of “Backup/Restore”, the display
becomes invalid for “Backup/Restore” of the menu bar.
"Environment Settings" Screen ·················································
The "Environment Settings" screen will appear by clicking the [Environment Settings] button on the
“Administration Software” screen.
Click the button for the task you want to perform.
⑤
③
⑦
①
⑨
④
②
⑩
⑥
⑧
55
OPERATION
Screen Item
Description
① Group Setting
Displays the "Group Setting" screen (p.100).
② Operator's Information
Displays the "Operator's Information" screen (p.60).
③ E-Mail Setting
Displays the "E-Mail Setting" screen (p.144).
④ Default Reader Setting
Displays the "Default Reader Setting" screen (p.32).
In the case of login attempted by an operator with no privilege of “Environment
Settings”, the button becomes invalid.
⑤ Network
Displays the "Network Monitoring/Security" screen (p.138, 140)
Monitoring/Security
⑥ Enrollment Reader
Displays the "Enrollment Reader Setting" screen (p.45).
Setting
⑦ Auto Reboot Setting
Displays the "Auto Reboot Setting" screen (p.142).
⑧ IC Card Setting
Displays the "IC Card Setting" screen (p.172).
⑨ Reader Expansion
Displays the "Select Reader" screen (p.96).
Feature
⑩ Back
The screen returns to "Main Menu".
Exiting the System ······································································
Exits this software.
【Procedure】
1. Complete the system operation according to the main menu screen.
To complete the system operation, use any one of the methods ① to ③ in the diagram below, based
on the main menu screen.
③
②
①
56
Screen Item
Description
① Exit
This is the button intended to close this system.
② Menu Bar
Select "Exit" → [Exit].
③ Window button
This is the button
to close the window.
OPERATION
2. The confirmation message "Are you sure you want to exit the system?"
appears.
The confirmation message "Are you sure you want to exit the system?" appears.
3. Click the [Yes] button.
This exits this software.
・You can also exit before logging into this software.
─ From the "Administration Software Login" screen, click the
[Exit] button or the Window
button.
─
From the "Administrator's Setting" screen, click the
[Exit] button or the Window button.
・If screens other than the "Administration Software", “Administration Software Login” and
“Administrator’s Setting” screens are displayed, you can continue clicking the Window button
for each screen until you exit the system.
"About Administration Software" Screen ·································
Click “Help” to display a pulldown menu on the menu bar and select “About Administration Software”. The
“About Administration Software” screen appears. On this screen, you can display this software's version
number and check the installed the User Licence Software.
①
②
③
④
⑤ ⑥
⑦
Screen Item
① About
Administration
Description
Displays the version number of this software.
X.XX represents the version number.
Software
57
OPERATION
Screen Item
Description
② Administration
XXXXX-XXXXX-XXXXX-XXXXX represents the product key. Displays a product key
Software
③ Licence
in the section of XXXXX-XXXXX-XXXXX-XXXXX. The licence of 25 in ( ) is the one
to be added at the time of the installation of this software.
Displays the licence and its product key installed by the added software of the user
licence.
Displays a product key in the section of XXXXX-XXXXX-XXXXX-XXXXX. Displays
④ Total Licences
the number of registered licences in ( ).
Displays the total number of registered licences.
XX25 denotes the total number of the licences, i.e. this software (25 licences) + the
⑤ Used Licences
number of licences installed by the added software of the user licence.
Indicates the total number of the users enrolled in this software.
⑥ Remaining
Indicates how many users are remaining to be enrolled in this software.
Licences
⑦ OK
The screen returns to “Administration Software”.
・The 25 licences are added at the time of the installation of this software. If this software is uninstalled,
these 25 licences are also deleted.
58
OPERATION
Enrolling Operators
A description is given in regard to the operator’s information needed to perform login for this software.
Explanations for the operator and the reference of enrolled operator’s information are presented here. For the
operator whose privilege of “Operator’s Information” has been set up, descriptions are concerned with the
registration of operator’s information such as the operator name, password, and iris data as well as the
modification and deletion of enrolled operator’s information.
Operator’s Privilege ····································································
For the operator who intends to use this software, the Privileges are set up.
These privileges are used to restrict the information that can be manipulated. Operation of registration,
updating, and deletion in this software is classified into small items of user information, iris reader
information, and others.
For an operator whose privilege of “User Information” only is set up, for example, enrollment, updating, and
such operation of user information can be carried out. For other information, however, registration and
updating cannot be carried out. According to the privilege of the logged-in operator, the screens to be
displayed (button display, etc.) can change. Any operator who has no relevant privilege is basically allowed
to obtain information for reference.
Privilege
Major possible operation items
User Information
According to the “User Information” screen and the “User Information Details" screen,
it is possible to carry out the enrollment, updating, and deletion of user information, iris
capturing, IC card writing, and others.
Reader
According to the “Reader Setting/Maintenance” screen and the “Reader Setting
Setting/Maintenance Details” screen, it is possible to carry out the registration, updating, and deletion of iris
reader information. In addition, Software downloading, audio file downloading, iris data
distribution, and others can be carried out through iris reader operation.
Log
Based on the “Log Information” screen, it is possible to delete the log information.
Backup/Restore
It is possible to carry out manual backup setting, automatic backup setting, and
Environment
backup file restoration.
Environment settings can be made with the screens shown below:
Settings
“Group Setting” screen, “E-Mail Setting” screen, “Network Monitoring/Security” screen,
“Auto Reboot Setting” screen, “IC Card Setting” screen, and “Reader Expansion
Feature” screen.
Operator's
In the “Operator’s Information” screen, it is possible to carry out the registration,
Information
updating, and deletion of operator’s information plus the editing of iris capturing, etc.
・All privileges are given to the administrator registered in the initial administrator registration.
59
OPERATION
"Operator's Information" Screen ···············································
The "Operator's Information" screen can be displayed by clicking the [Operator's Information] button on the
"Environment Settings" screen. Or, select “Environment Settings” from the “Administration Software”
screen’s menu bar. The “Operator's Information” screen appears.
The “Operator’s Information” screen is composed of the “Information/Privilege” screen used to display
operator’s setup data and others, and the “Operator’s Image” screen intended to display the captured iris
images, etc. Each screen display is changed over with the [Information/Privilege] tab and the [Operator’s
Image] tab.
■ [Information/Privilege] Tab
The operator’s information and privilege are displayed. At the time of login for this software, the status of
enrollment is displayed in regard to the operator name, password, and iris data.
①
③
②
④
⑦
⑥
⑤
⑧
⑨
Screen Item
Description
① [Information/
When this tab is clicked, the “Information/Privilege” screen and the “Operator’s
Privilege],
Image” screen are changed over.
[Operator’s
Image]
② Information
The operator’s information enrolled is changed over.
③ Privilege
For further details, refer to the “Operator's Information” screen (p.63).
The privilege of the enrolled operator is displayed.
④ Iris
⑤ New*
For further details, refer to the “Operator's Information” screen (p.63).
Displays the status of the enrolled operator's iris data.
・No Image Captured (background: red) Iris data are not registered.
・Enrolled (background: blue) Iris data are enrolled.
The registered iris images can be confirmed with the “Operator's Image” screen.
This button is used to enroll a new operator.
To enroll an operator, refer to Enrolling Operators on page 62.
This button becomes activated by selecting an operator from the "Operator List"
screen.
60
OPERATION
Screen Item
Description
⑥Update*
The operator’s information is updated (enrolled).
If an operator is selected and displayed according to the “Operator List” screen, the
[Update] button is used. In the case of new registration of the operator’s information,
however, the [Enroll] button is used.
This button becomes activated only after all essential entry items have been entered.
To update the operator’s information, refer to Updating and Deleting Operation on
page 64. To enroll an operator, refer to Enrolling Operators on page 62.
⑦ Select
Displays the "Operator's Information" screen (p.63).
⑧ Delete*
Deletes the displayed operators.
To delete the operator’s information, refer to Updating and Deleting Operators on
page 64.
⑨ Close
Closes the "Operator's Information" screen.
The screen items with asterisk marks * in the table can be used only for the operators for whom the
privilege of “Operator’s Information” has been set up.
■ [Operator's Image] Tab
When the [Operator’s Image] tab is clicked, the screen is changed over to the “Operator’s Image” screen.
In this case, the registered iris images are displayed.
①
②
③
Screen Item
Description
① Operator's Name Displays the operator's name.
Displays the enrolled iris image.
② Iris Image
Where registration is made with the iris images, the captured iris image is
displayed. In case when no iris images are available, a picture of the eye is
presented as illustrated above. The colour of the image frame represents the
quality of the captured results. (Green: high, Yellow: regular)
③ Time and Date
Displays the time and date of the captured iris image.
■ Displaying Operator’s Information
61
OPERATION
Information of the enrolled operator is selected and displayed.
【Procedure】
1. Click the [Select] button on the “Operator’s Information” screen.
The "Operator List" screen appears.
2. Select the operator.
The names of the enrolled operators displayed in the “Operator List” are selected.
①
②
③
Screen Item
Description
① Select Operator
Displays a list of enrolled operators. Select the desired operator to display on
the "Operator's Information" screen. Only one Operator can be selected at a
② OK
time.
Displays the selected operator on the "Operator's Information" screen.
This button becomes activated by selecting an operator from “Select
Operator”.
③ Cancel
Cancels the selected operator name in the list. The screen return to
"Operator's Information".
3. Click the [OK] button.
The screen returns to "Operator's Information", and the operator’s information selected in Procedure 2
is displayed.
Enrolling Operators ·····································································
The following explains how to enroll new operators. If the registration of operator’s information is carried out,
login is possible with the enrolled operator when login is performed with this software secondly.
62
OPERATION
【Procedure】
1. Displays the "Operator's Information" screen.
2. Each item of operator information is set up.
The selection of “Operator’s Name”, “Password”, “Reenter Password”, and “Privilege” of “Information”
is an indispensable item for information registration. For the “Privilege” item, the enrolling operator
makes operation setup with this software.
To use the mail transmission function (p.143) of alarm information, the mail address is set up.
⑤
①
②
③
④
⑦
⑧
⑥
Screen Item
Description
Enters
the name of the operator to be enrolled.
① Operator's Name
Registration is possible for a maximum of 16 characters, in half-sized
alphanumeric letters (0 to 9, a to z). For the half-sized alphanumeric letters of
② Password
a to z, there is no distinction between capital and small letters.
Enters the password of the administrator to be enrolled.
Registration is possible for a maximum of 16 characters, in half-sized letters.
For passwords, there is a distinction between capital and small letters.
③ Reenter
Reenters the same password for verification.
Password
④ E-mail Address
Enters the e-mail address.
A maximum of 80 characters can be registered, with half-sized alphanumeric
letters plus “-”, “_”, “.” and “@”.
For the setting to permit the transmission of alarm information to this mail
address, refer to E-Mail Setting on page 143.
63
OPERATION
Screen Item
⑤ Privilege
Description
The privilege of an operator is set up.
According to the privilege selected, the functions to be executed by this
software can change. For further details, refer to Operator’s Privilege on
page 59.
According to “User Information”, “Reader Setting/Maintenance”, “Log”,
“Backup/Restore”, “Environment Settings”, and “Operator’s Information,” turn
ON the check box for the privilege to be set up for the enrolled operator.
Single, Multiple, or All can be selected. If nothing is selected, reference only
is possible for all the functions.
⑥ Iris Data
Data Displays the capture status of the iris data. The background colour
varies according to the capture status.
・No Image Captured (background colour: red): Iris data are not captured.
・Image Captured/unenrolled (background colour: yellow): Iris data are
captured, but not enrolled for the operator’s information. If the [New]
button, the [Select] button, or the [Close] button is clicked, the iris data
will be abandoned.
・Enrolled (background colour: blue): Iris data are enrolled.
The captured iris image can be viewed from the “Operator's Image”
⑦ Capture
tabscreen. (p.61).
Captures the iris image.
In regard to the method of iris capturing, refer to Iris Capturing on page 128.
The [Capture] button becomes activated only if the enrollment iris reader is
set (p.44).
⑧ Clear
Deletes the iris data that have been captured or enrolled.
・If an operator is selected and displayed according to the “Operator List” screen, a new enrollment
is possible by clicking the [New] button.
3. Click the [Capture] button.
The operator’s iris is captured and enrolled. In regard to the method of iris capturing, refer to Iris
Capturing on page 128. If no iris capturing is carried out, proceed to Procedure 4.
4. Click the [Enroll] button.
The operator’s information is registered. In the case of the registration of another operator in
succession, repeat the operation from Procedure 2 and thereafter.
5. Click the [Close] button.
The “Operator’s Information” screen is closed.
Updating and Deleting Operators ··············································
The following explains the procedure to update or delete the information of enrolled Operators.
64
OPERATION
【Procedure】
1. The operator’s information to be updated or deleted is displayed.
According to the procedures of “Displaying Operator’s Information” (p.61), the operator to be updated
or deleted is displayed on the “Operator’s Information” screen。
2. The operator’s information is updated or deleted.
・To change the operator’s information, edit the items of operator’s information displayed.
However, the operator name cannot be changed. To capture, enroll, or delete the iris data, refer to
Iris Capturing on page 128.
・To delete an operator, click the [Delete] button.
When a confirmation message is displayed, click the [Yes] button. Then, the operator is deleted and
the displayed data are cleared. To continue updating or deletion, repeat the operation from
Procedure 1.
①
②
Screen Item
Description
① Operator's Name Displays the operator's name. This item cannot be changed.
② Privilege
・To change an operator's name, first delete, then re-enroll the operator.
The privilege set for the operator is displayed.
According to the situation of the enrolled operators, it may be impossible to
perform modification. For further details, refer to the “NOTE” shown below.
For details of screens items not described above, refer to the “Information/Privilege” (p.63) tabscreen
in the "Operator’s Information" screen.
65
OPERATION
・According to the situation of the enrolled operators, it may be impossible to delete the operator’s
information or change the privilege. Under any one of the conditions below, take remedial
measures such as the establishment of another operator. According to the situation, adequate
actions should be taken.
─ Operator in login mode
The operator’s information in login mode cannot be deleted and the privilege cannot be
modified. In such a case, the system should be closed once and login should be started from
the beginning for another operator.
─ When only one operator has been enrolled, for whom all privileges are set up
If there is only one operator out of all the enrolled operators for whom all the privileges have
been set up, it is impossible to delete such an operator and modify the privileges.
If another operator is enrolled with all the privileges set up, it is possible to delete or modify
these privileges. An operator established on the operator’s initial registration screen can be the
operator for whom all the privileges are set up by default.
3. Click the [Update] button.
The operator’s information is updated, and "Updated successfully." is displayed.
4. Click the [OK] button.
To continue updating the information of a different Operator, repeat the procedure from Procedure 1.
5. Click the [Close] button.
The “Operator’s Information” screen is closed.
66
OPERATION
Editing Reader Information
This section describes the information of the iris reader for the operation and control of the iris reader where
the iris reader setting data are edited.
The iris reader setting data already registered in this software are reviewed through the iris reader setting
screen and the iris reader setting details screen. For the operator to whom the privilege of “Reader
Setting/Maintenance” is admitted, explanations are given in regard to the registration, modification, and
deletion of the iris reader setting data.
"Reader Setting/Maintenance" Screen ······································
The "Reader Setting/Maintenance" screen can be displayed by clicking the [Reader Setting/Maintenance]
button from the "Administration Software" screen, or by selecting “Reader Setting/Maintenance” → [Reader
Setting/Maintenance] from the menu bar.
①
②
③
④
⑤
⑥
⑫
⑨
⑩
⑪
⑦
⑭
⑧
⑬
Screen Item
Description
① Reader Search
② Reader List
Sets the search conditions for the iris readers to be displayed in “Reader List”. (p.70)
Displays a list of searched iris readers.
③ Delete*
For further details, refer to Reader List on page 68.
Deletes the information of the iris reader selected from “Reader List”.
For further details, refer to Updating and Deleting Readers on page 80.
④ Details
Displays the information of the iris reader selected from “Reader List”. Refer to
Reference to and Display the Reader Information on page 69.
⑤ New *
Registers another iris reader newly.
For further details, refer to Registering Reader Information on page 78.
67
OPERATION
Screen Item
Description
⑥ Reset
Restarts the iris reader selected from “Reader List”. (p.93)
Multiple iris readers can be selected.
⑦ Start
Starts the iris reader selected from “Reader List”. (p.94)
⑧ Stop
Stops the recognition operation of the iris reader selected from “Reader List” (p.94)
⑨ Download
Downloads new Software to the iris reader selected from “Reader List”.
Software *
⑩ Download
Audio file *
⑪ Distribute*
For further details, refer to Updating Reader Software on page 94.
Performs audio file download for the iris reader selected from “Reader List”.
For further details, refer to Downloading the Audio File to the Reader on page 95.
Distributes the iris data to the iris reader selected from “Reader List”.
For further details, refer to Manual Distribution on page 136.
⑫ Import*
Imports iris reader information from CSV files to batch register the information.
For further details, refer to Importing Reader Files to Registered Readers on page 79.
⑬ Export*
Writes the iris reader information to CSV file.
For further details, refer to Outputting Reader Information to File on page 88.
⑭ Close
The screen returns to "Administration Software".
In regard to the asterisk-marked screen items in the above table, operation is possible for the operator to
whom the privilege of “Reader Setting/Maintenance” is admitted.
・When multiple iris readers are selected from “Reader List”, the [Start] and [Stop] buttons cannot be clicked.
・Buttons will be activated or deactivated according to the status of the iris readers that are selected or
unselected from “Reader List”.
■ "Reader List"
According to the entered search results, the "Reader ID", "Reader Name", "Status", "Operation Mode",
"Enrollment" that are displayed for “Reader List” on "Reader Setting/Maintenance" screen reflects the
latest information acquired by "Get status" of the searched iris readers. Note that colour varies according
to the iris reader's status.
68
OPERATION
Screen Item
Description
Reader ID
Displays the previous iris reader's information.
Reader Name Displays the Reader Name.
Status
Displays the status of the iris readers registered to this software for the iris readers that
matched the search conditions. Note that colour varies according to the iris reader's status.
Status
Colour Description
Operating
Black
Enrollment Reader Black
Recognition iris reader is normal.
Enrollment iris reader is normal
(Operating)
Reset
Red
Stopped
Status unknown
Reader is being reset.
Reader operation has stopped.
Yellow When the reader status is unknown due to a connection error,
etc.
Download
Purple When the iris reader requires a Software download. Note that the
[Start], [Stop], [Download Audio File], or [Distribute] functions are
disabled.
― ―
Grey
When the iris reader has not received a MAC address. Note that
the [Start], [Stop], [Download Software], [Download Audio File],
[Download] or [Distribute] functions are disabled.
Operation
Displays the setting for “Recognition Mode” under the “Card Reader” tabscreen on the
Mode
"Reader Setting Details" screen.
No Card Reader
An iris reader with which no card reader is connected.
Card and Iris Recognition
An iris reader with which a card reader is connected and the
method of recognition is “Card and Iris Recognition”.
Card Recognition Only
Enrollment
An iris reader with which a card reader is connected and the
method of recognition is “Card Recognition only”.
Displays “No. of Persons (having iris readers) to whom the Iris Data are Actually
Distributed/No. of Persons to whom the Iris Data are Distributed” at the searched iris reader.
Displays “0/0” when the iris reader setting is for “Server Certification Only” or “Iris on Card”.
・The actual reader status may differ from the status saved in this software (iris server). Refer to Checking
Reader Status on page 91 for details on how to get an iris reader's current status.
■ Reference to and Display the Reader Information
Retrieves the information of the enrollment iris reader and displays the detailed data.
【Procedure】
1. Set the search conditions under “Reader Search” on the "Reader
Setting/Maintenance" screen.
69
OPERATION
To display all iris readers in “Reader List”, proceed to Procedure 2 without setting the search
conditions. Or, select “Reader Setting/Maintenance” → [Reader Setting/Maintenance(Search All)] from
the menu bar. All iris readers are displayed on “Reader List”.
③
①
②
④
⑤
⑦
⑥
Screen Item
Description
① Reader ID
Used to enter the Reader ID. The Reader ID is searched in a forward
direction.
For example, if you enter "1", all iris readers having a Reader ID starting with
② Reader Name
"1" is displayed in the list.
Used to enter the Reader Name. The Reader Name is searched in a forward
direction.
For example, if you enter "BM-ET", all iris readers having a Reader Name
③ IP Address
starting with "BM-ET" is displayed in the list.
Enters the assigned IP address for the iris reader. IP addresses are
searched as perfect matches in each entry field.
For example, if "10" is entered in the first field, and "2" is entered in the
second field, then iris readers set with an IP address such as 10.2.1.1 or
10.2.200.200 will be displayed in the list.
④ Group
Click the [Select] button to display the "Group Selection" screen (p.73), and
select a group. Readers included in the selected group are searched.
For example, if multiple groups such as "group A" and "group B" are
selected, "iris readers included in group A" or "iris readers included in group
B" are displayed in “Reader List”.
When you have selected multiple groups, click
and check the groups.
・If you have already entered a user name as the search condition, a group
name cannot be used as a search condition.
70
OPERATION
Screen Item
Description
⑤ User
Click the [Select] button to display the "User Selection" screen (p.76) to
select the user. Readers that are subject to recognition by the selected user
are searched.
For example, when multiple users such as "user A" and "user B" are
selected, the "iris readers subject to recognition by user A" or "iris readers
subject to recognition by user B" are displayed in “Reader List”.
When you have selected multiple users, click
and check the users.
・If you have already entered a group name as the search condition, a user
name cannot be used as a search condition.
⑥ Search
Displays a list of iris readers matching the search conditions you set under
“Reader List”.
⑦ Clear
Clears the search conditions you set.
2. Click the [Search] button.
This displays a list of iris readers matching all search conditions set in Procedure 1.
If the search did not find any iris readers matching the search conditions, the message "Requested
reader is not available." will appear. Click the [OK] button, and modify the search conditions you
entered in Procedure 1.
①
②
③
Screen Item
Description
① Reader List
Displays a list of searched iris readers.
Displays the results of the "Status", "Operation Mode", and "Enrollment" last
registered by communication (gets reader status, iris reader operation or
connection from iris readers, etc.) of this software and the iris reader. (p.68).
For details of the procedure for updating to the latest information, refer to
Checking Reader Status on page 91.
② Select All
Selects all iris readers currently displayed in “Reader List”.
71
OPERATION
Screen Item
Description
③ Clear All
Clears the selection of all iris readers currently selected in “Reader List”.
3. Select an iris reader from “Reader List” and click the [Details] button.
Displays the "Reader Setting Details" screen. Each setting item of the reference data can be checked
by selecting the screen with the screen selector tab. It is also possible to obtain the status data (p.91).
①
②
⑤
④
③
Screen Item
Description
① Screen Selector
Selects the screen by clicking the reference data tab.
Tab
Registered Data: Presented in the above-mentioned screen. For further
details, refer to page 81.
Operation Info: For further details of the screen, refer to page 82.
Card Reader: For further details of the screen, refer to page 84.
Access Control Panel: For further details of the screen, refer to page 86.
② Reader Data
Display
Reader Status: For further details of the screen, refer to page 91.
The iris reader data displayed in the “Reader Setting/Maintenance” screen of
“Reader List” are displayed in “Readers Displayed/No. of Readers Displayed
in Reader List”.
button: Displays the previous iris reader's information.
button: Displays the next iris reader's information
Sequential display is possible with buttons.
③ Get Status
Obtains the status of the iris reader.
Refer to Checking Reader Status on page 91.
・Possible only with the iris reader that has already acquired the MAC
address (p.82).
72
OPERATION
Screen Item
Description
④ Get Users
Used to acquire the users distributed to iris readers. Refer to page 92.
This function is available only for the recognition iris readers in operating or
stopped.
⑤ Close
The screen returns to "Reader Setting/Maintenance".
4. Click the [Close] button.
The screen returns to "Reader Setting/Maintenance".
■ Search by Designating the Group
Select the designated Group under the searching condition. Searching for the Group is possible only for
the iris reader that is registered in the Group and for the user who can get iris recognition with this iris
reader.
【Procedure】
1. Display the “Group Selection” screen.
The "Group Selection" screen can be displayed from the following screens by:
・Clicking the [Select] button for "Group" on the "Reader Setting/Maintenance" screen. (p.70))
・Clicking the [Select] button for "Group" on the "User Selection" screen. (p.77)
・Clicking the [Select] button for "Group" on the "User Information" screen. (p.108)
・Clicking the [Select Group] button for "Group" on the "User Information Details" screen. (p.122)
・Clicking the [Select Group] button for "Group" on the "New User Enrollment" screen. (p.114)
①
②
③
④
⑤
Screen Item
⑥
Description
① Selected Groups Displays a list of the selected groups.
73
OPERATION
Screen Item
Description
② Group Search
Group Used to enter the search conditions for Search Group with the results
displayed in “Group Search Results”.
③ Add
Select a group from “Group Search Results”.
Moves the group selected from “Group Search Results” to “Selected
Groups”.
This button becomes activated after selecting a group from “Group Search
Results”.
④ Delete
Removes the selected group from “Selected Groups”.
⑤ OK
Saves the selected group. The previous screen is displayed.
⑥ Cancel
The previous screen is displayed without selecting a group.
2. Set up the searching conditions in “Group Search” of unselected groups.
Enter the searching group conditions in “Group Name”. The group name is searched in a forward
direction.
To display all groups in “Group Search Results”, proceed to Procedure 3 without setting the search
conditions.
①
②
Screen Item
① Group Name
③
④
Description
Used to enter the group name. The group name is searched in a forward
direction.
For example, if you entered "Laboratory", a list of groups whose group name
starts with "Laboratory" will appear.
② Search
The groups that match the set search conditions that are not displayed in
“Selected Groups” are displayed in “Group Search Results”.
③ Clear
74
Clears the search conditions you set.
OPERATION
Screen Item
Description
④ Group Search
Displays a list of searched groups.
Results
3. Click the [Search] button.
The groups that match the set search conditions in Procedure 2 that are not displayed in “Selected
Groups” are displayed in “Group Search Results”.
If the search did not find any groups matching the search conditions, the message "Requested group
for data distribution is not available." will appear. Click the [OK] button, and modify the search
conditions you entered in Procedure 2.
4. Select a group from “Group Search Results”.
Select the group name from “Group Search Results”.
5. Click the [Add] button.
This moves the selected group to “Selected Groups”.
To select a different group, repeat the procedure from Procedure 4 or Procedure 2.
6. Click the [OK] button.
The groups are selected, and the previous screen is displayed.
■ Search by Designating the User
Select the designated user in the searching conditions. The item that can be searched by the user is the
iris reader for which the designated user can be recognized.
【Procedure】
1. Open the "User Selection" screen.
The "User Selection" screen can be displayed from the following screens by;
・Clicking the [Select] button for "User" on the "Reader Setting/Maintenance" screen. (p.70)
・Clicking the [Select] button for "User Name" on the "Log Information" (Access Log) screen. (p.164)
75
OPERATION
①
②
③
④
⑤
⑥
Screen Item
Description
① Selected Users
Displays a list of the selected users.
② User Search
Used to enter the search conditions under “User Search” to display a list of
users in “User Search Results”.
Select a user from “User Search Results”.
③ Add
Moves a user selected from “User Search Results” to “Selected Users”.
This button becomes activated after selecting a user from “User Search
Results”.
④ Delete
Removes a selected user from “Selected Users”.
This button becomes activated after selecting a user from “Selected Users”.
⑤ OK
Saves the selected user. The screen returns to "Reader
Setting/Maintenance".
⑥ Cancel
The previous screen is displayed without selecting a user.
2. Set up the searching conditions of unselected user in “User Search”.
Enter the conditions of the searched user in each item of “User Search”. The user name is searched in
a forward direction.
To display all unselected users in “User Search Results”, proceed to Procedure 3 without setting the
search conditions.
76
OPERATION
④③② ①
⑤
⑥
⑦
⑧
Screen Item
Description
① User ID
Enter the user ID. The user ID is searched in a forward direction.
For example, if you enter "1", all users having the user ID starting with "1"
are searched in the list.
② Name
Used to enter the user name. The user name is searched in a forward
direction.
For example, if you enter "Matsushita", all users having a user name starting
with "Matsushita" are searched in the list.
③ Card ID
Used to enter the card ID. The card ID is searched in a forward direction.
For example, if you enter "10", all users having a card ID starting with "10"
are searched in the list.
④ Group
Click the [Select] button to display the "Group Selection" screen (p73), and
select a group. Users to which the selected group is set are searched.
For example, when multiple groups are selected such as "group A" and
"group B", "users to which group A is set" or "users to which group B is set"
are searched in the list.
When you have selected multiple groups, click
⑤ Department
and check the results.
Used to enter the user's department. The Department is searched in a
forward direction.
For example, if you enter "General Affairs", all users whose dept. starts with
"General Affairs" are searched in the list.
⑥ Search
The users that match the set search conditions that are not displayed in
“Selected Users” are displayed in “User Search Results”.
⑦ Clear
Clears the search conditions you set.
⑧ User Search
Displays a list of searched users.
Results
77
OPERATION
3. Click the [Search] button.
The users that match the set search conditions set in Procedure 2 that are not displayed in “Selected
Users” are displayed in “User Search Results”.
If the search did not find any users matching the search conditions, the message "A matched user
cannot be found." will appear. Click the [OK] button, and modify the search conditions you entered in
Procedure 2.
4. Select a user with “User Search Results”.
Select the user (blue reversal by clicking the mouse) displayed with “User Search Results”.
5. Click the [Add] button.
This moves the selected user to “Selected Users”.
To select a different user, repeat the procedure from Procedure 4 or Procedure 2.
6. Click the [OK] button.
The user is selected, and the previous screen is displayed.
Registering Reader Information ·················································
In this section, the procedures for adding the iris reader data newly to the system in cases when an iris
reader is additionally installed and so on. Descriptions are based on the assumption that the initialize setup
has been finished for the iris reader according to the Chapter of Reader Introduction, Reader Initial Setting
on page 30.
【Procedure】
1. Click the [New] button on the "Reader Setting/Maintenance" screen.
Click to display the "New Reader Registration" screen (p.39).
2. Enter the iris reader information.
Enter “Reader ID”, “Reader Name”, and “IP Address” with the registered data screen of the new iris
reader data registration screen. For other setting items, the setting values are entered with the
"Default Reader Setting" screen.
If any editing is needed for the iris reader data setup values, refer to Procedures 3 to 6 of Updating
and Deleting Readers on page 80 and edit the screen items.
・“Reader ID” and “IP Address” cannot be registered in duplication with other iris readers.
3. Click the [Register] button.
The iris reader data are registered.
・When the iris reader data have been registered, turn on the iris reader power supply and start
communication between the iris reader and the iris server. For further details, refer to Turning on
the Power of the Reader on page 41.
78
OPERATION
■ Importing Reader Files to Registered Readers
You can batch process the import of reader information CSV file (p.204) to this software. For details on
how to create an import file for the reader information (CSV file), refer to Outputting Reader Information to
File on page 88.
・If the imported iris reader data CSV file should contain a record that cannot be analyzed, or if
indispensable items are not entered yet, or if there are the Reader ID and the IP address already
registered, such information is output to the screen and as the log data. In such a case, the
corresponding iris reader is not registered.
・When an iris reader is imported for which Groups are already set up, Group setup is not imported.
・Shortly after the iris reader data CSV file has been imported, the condition is such that the MAC
addresses are not acquired yet. In such a case, reset the iris reader or turn on the iris reader power
supply.
【Procedure】
1. Click the [Import] button on the "Reader Setting/Maintenance" screen.
The "Select Import File" screen is displayed.
2. Select the import file.
According to the import file select screen, designate the folder where the importing iris reader data
CSV file is stored, and then select the iris reader data CSV file.
3. Click the [Open] button.
When normal import is finished for the iris reader data, “Import of reader information is complete” is
displayed and batch registration of the iris reader data is accomplished. If any iris reader data cannot
be imported, there will be a display of “Some reader information could not be imported. Check the log
for details.”.
4. Click the [OK] button for the displayed message.
The screen returns to "Reader Setting/Maintenance".
・When the iris reader data have been registered, turn on the iris reader power supply and start
communication between the iris reader and the iris server. For further details, refer to Turning on
the Power of the Reader on page 41 of the Chapter of Reader Introduction.
■ Software Downloading to the Reader
If the enrollment iris reader is in the state of shipment from the factory, it is necessary to download the
Reader Software to the iris reader. The operational procedures for Software downloading to the iris reader
are obtainable from “Downloading Software to the Reader” (p.43) of the Chapter of System Introduction.
79
OPERATION
Updating and Deleting Readers ·················································
The following describes how to update or delete information in a registered Reader.
【Procedure】
1. Search and display the iris reader data.
According to the procedures of “Reference to and Display the Reader Information” (p.69), the iris
readers to be updated or deleted are displayed in the iris reader list.
2. Select an iris reader(s) in “Reader List”.
● For updating, click the [Details] button.
The "Reader Setting Details" screen appears.
● For deleting, click the [Delete] button.
To delete the iris reader data, click the [Delete] button of the “Reader Setting/Maintenance” screen.
“Are you sure you want to delete it?” is displayed. Click the [Yes] button.
The iris reader information is deleted and the screen returns to "Reader Setting/Maintenance".
・When deleting multiple iris readers at the same time, select these multiple iris readers in the iris
reader list and click the [Delete] button of the “Reader Setting/Maintenance” screen.
3. Change/Delete iris reader information
● For updating
For the “Registered Data” tabscreen of the "Reader Setting Details" screen, make network setup
between the iris reader and the iris server. Modify and/or amend the necessary information
displayed in the screen.
● For deleting
To delete the iris reader data, click the [Delete] button. “Are you sure you want to delete it?” is
displayed. Click the [Yes] button. The iris reader data are then deleted and the next iris reader data
are displayed. When all iris reader data have been deleted, the “Reader Setting/Maintenance”
screen is recovered.
80
OPERATION
①
②
③
④
⑤
⑥
⑦
⑧
⑩
⑨
For details of screen items not described above, see the table explaining the “Registered Data”
tabscreen (p.72).
Screen Item
Description
① Reader ID
Enters the assigned ID for the iris reader.
The valid values are 1 to 99999 in half-sized characters. Note, however, that
the same value as the Reader ID cannot be set.
② Reader Name
Used to enter the Reader Name.
The valid values are regular or half-sized characters in less than 20 letters.
③ IP Address*
Displays the assigned IP address for the iris reader.
The valid values are 0 to 255 in half-sized characters in the
[XXX.XXX.XXX.XXX] mode. (XXX is a numeral from 0 to 255.)
④ Server IP
Address*
The same IP address of an existing iris reader cannot be used.
Displays the assigned server IP address for the iris reader.
The valid values are 0 to 255 in half-sized characters in the
[XXX.XXX.XXX.XXX] mode. (XXX is a numeral from 0 to 255.)
⑤ Subnet Mask*
Displays the assigned server subnet mask for the iris reader. The valid
values are 0 to 255 in half-sized characters in the [XXX.XXX.XXX.XXX]
mode. (XXX is a numeral from 0 to 255.)
⑥ Gateway IP
Displays the assigned gateway IP address for the iris reader. The valid
Address*
values are 0 to 255 in half-sized characters in the [XXX.XXX.XXX.XXX]
mode. (XXX is a numeral from 0 to 255.)
⑦ Group
The group name is displayed, where the iris reader is registered.
81
OPERATION
Screen Item
⑧ MAC Address
Description
Displays whether the MAC address of the iris reader is loaded or unloaded.
If a MAC address is loaded, it can be used for iris reader and iris server
communication (from a enrollment iris reader, if connected). To clear the
MAC address, mark the [Clear MAC address] checkbox and click the
[Update] button.
・If the "Access from an unidentified iris reader. Unidentified iris reader's
MAC address: xxxxxx" message appears in the "Information Display
Window", identify the location of the iris reader. If the iris reader
malfunctions and must be replaced clear the MAC address. If the iris
reader is not malfunctioning, disable, remove, or replace the iris reader to
prevent it from accessing the iris server.
⑨ Update
Updates the information of the iris reader.
・This button is inactive if an iris reader shows one of the following status
messages: "Reset" or "Status unknown". In such case, click the [Get
Status] button to acquire the latest reader status. After acquiring the latest
status, if it changes to a status other than any of the above mentioned, the
[Update] button will become activated.
⑩ Delete
Deletes the iris reader information.
When the asterisked screen item is changed in the above table and the [Update] button is clicked, the
iris reader is reset, for which the MAC address has been acquired.
4. Click the [Operation Info] tab.
The “Operation Info” tabscreen is displayed. In the “Operation Info” tabscreen, setting is carried out,
related mainly to the operation for iris reader recognition. Modify and/or amend the necessary
information displayed in the screen.
①
②
③
④
⑤
⑥
⑧
⑦
⑩
82
⑨
OPERATION
For details of screen items not described above, see the table explaining the “Registered Data”
tabscreen (p.72).
Screen Item
Description
① Security Level
Displays the security level of the reader (p.16).
Either “High” or “Normal” is selected for setting.
② Access Log
Displays whether or not the result of recognition (OK, NG) with the Access
Log iris reader should be reported to the iris server. Either “Yes” or “No” is
selected for setting.
For setting with “Yes”, the result is reported to the iris server. In this case, it
is possible to check the result of recognition reported by the Access Log of
the log data.
For setting with “No”, the result is not reported to the iris server. In this case,
no data are displayed at the Access Log of the log data.
③ Server
Certification
Displays Server Certification (p.14).
Setup is made with any one of [Yes], [No], and [Only].
・If the Reader Software downloaded to the iris reader is for Iris on Card or
when [Iris on Card] is selected with ① “Card Type” of the “Card Reader”
④ Audio Mode
tabscreen, “No” is automatically selected. No modification is possible.
Select the iris reader audio mode.
Any one of “Mute”, “Simple”, and “Full” is selected for setting.
Mute
No audio output is generated.
Simple
An audio output of “Identification completed” or “Sorry you were
not identified” is generated based on the result of shutter sound
recognition.
Full
Shutter sound and voiced guidance giving instructions such as
"Please move a little closer" or "Please move to the left a little"
etc. to assist in the recognition test.
⑤ Guidance
Language
Displays the audio language of the iris reader.
Select one of the following: "English", "Japanese", "German", "French",
"Italian", "Spanish", "Russian", "Chinese", "Korean", "Arabic", "Portuguese",
"Turkish", "Dutch" or "Swedish".
⑥ Output 1
(Recognized
Displays whether or not to output a recognized signal (Iris data match).
Either “Yes” or “No” is selected for setting.
Signal)
⑦ Output Width
Setup becomes possible when “Yes” is set with ⑥ Output 1 (Recognized
Signal). Setting is made with a numeral from 1 to 600. When certification is
successful, a pulse signal output of Setting × 100 ms is generated from
Output 1 (Recognized Signal) terminal of the iris reader.
83
OPERATION
Screen Item
Description
⑧ Output 2
Displays whether or not to output a rejected signal (Matching Iris Data Not
(Rejected Signal) Found).
Either “Yes” or “No” is selected for setting.
⑨ Output Width
When certification fails, a pulse signal output of Setting × 100 ms is
generated from ⑧ Output 2 (Rejected Signal) terminal of the iris reader.
Setting is made with a numeral from 1 to 600. When certification is
unsuccessful, a pulse signal output of Setting × 100 ms is generated from
Output 2 (Rejected Signal) terminal of the iris reader.
⑩ Live Indicator
Displays the function of the iris reader operation status indicator lamp.
Select "Off", "On", or "Blinking".
・The output width of Output 1 (Recognized Signal) and that of Output 2 (Rejected Signal) should
be set up according to the specification of the output destination equipment.
5. Click the [Card Reader] tab.
The “Card Reader” tabscreen is displayed. In the “Card Reader” tabscreen, communication setup is
made between the iris reader and the card reader so that the card ID read from the card reader can be
transmitted to the iris reader.
Modify and/or amend the necessary information displayed in the screen.
①
②
③
④
⑥
⑧
⑤
⑦
For details of screen items not described above, see the table explaining the "Registered Data"
tabscreen (p.72).
84
OPERATION
Screen Item
Description
① Card Type*
Displays the card type to be read by the card reader.
The “Card Type” can change with the Reader Software downloaded to the
iris reader. When communication is exchanged between the iris reader and
the iris server, the type is acquired for the Reader Software that has been
downloaded to the iris reader. [Standard] is automatically selected in the
case of the standard Reader Software. [Iris on Card] is automatically
selected in the case of the Reader Software for the Iris on Card.
When the MAC address is of the iris reader info not acquired yet, either
[Standard] or [Iris on Card] is used for setting.
・If the type of Reader Software at the time of “Card Type” setting is different
from that acquired during communication, the card type is selected for the
Reader Software that is downloaded to that iris reader.
② Card Reader
Connection*
Displays whether or not the card reader connection has been made.
When [Standard] is selected for ① “Card Type”
To use the card reader (W), “Yes” is selected. The setup item in the column
of “Wiegand Settings” is enabled.
For operation without the card reader (W), “No” is selected. (For the
connection patterns ① and ②)
If the card reader (I) is used, “Yes” is automatically set up. No modification is
possible. (For the connection patterns ③ and ④)
③ Recognition
Mode
The method of recognition is set up when a card reader is connected to the
iris reader.
Selection only if the ② “Card Reader Connection” is “Yes”.
[Card and Iris Recognition] is the recognition with the card ID and the iris
data. When the card is shown to the card reader, the iris reader begins to
operate for recognition.
[Card Recognition Only] is the recognition to be done only with the card ID.
Recognition is performed simply when the card is shown to the card reader.
Iris imaging is not performed with the iris reader.
④ Pulse Width*
The pulse width is set up for Wiegand communication.
⑤ Pulse Interval*
Select one of the following: “30 µs”, “40 µs”, or “50 µs”.
The pulse interval is set up for Wiegand communication.
Select one of the following: “1.0 ms”, “1.5 ms”, or “2.0 ms”.
⑥ Total Bit Length*
Displays the total bit length ⑦ Site Code + ⑧ Card Number + Parity Bit (2
bits). This must be set within a range from 26 to 128 bits.
⑦ Site Code*
Set the bit length from 0 to 125 bits.
⑧ Card Number*
Set the bit length from 1 to 126 bits.
In regard to the asterisk-marked screen items in the above table, setting is possible only if the software
downloaded to the iris reader is [Standard] or when [Standard] is set for ① “Card Type” with the iris
85
OPERATION
reader data not acquiring the MAC address yet and for ② “Card Reader Connection” already set at
“Yes”.
6. Click the [Access Control Panel] tab.
The “Access Control Panel” tabscreen is displayed. In the “Access Control Panel” tabscreen,
communication setup is made so that the result of recognition can be transmitted from the iris reader
to the access control panel or that the recognition start info can be received from the access control
panel. Necessary data are modified or amended with the values indicated on the screen.
When the Access Control Panel is used with the Wiegand connection:
To use the access control panel with the Wiegand connection, select [Wiegand] as per ①
“Communication Method” from the screen items. Setting becomes possible for the items ② to ⑦ in
the columns of “Wiegand Settings”.
・If the contents of the Items ④ to ⑨ have been set already in regard to “Wiegand Settings” in the
card reader connection screen for Procedure 5, the values will be reflected on the items
corresponding to the Items ② to ⑦ in “Wiegand Settings” when [Wiegand] is selected as per ①
“Communication Method”. When this item is edited, the result will be reflected on the item
corresponding to the “Card Reader” tabscreen.
①
②
④
⑥
⑦
③
⑤
For details of screen items not described above, see the table explaining the “Registered Data”
tabscreen (p.72).
Screen Item
Description
① Communication
Select “Wiegand”. Setting is enabled for the items in “Wiegand Settings”.
Method
② Pulse Width*
The pulse width is set up for Wiegand communication.
Select one of the following: “30 µs”, “40 µs”, or “50 µs”.
86
OPERATION
Screen Item
Description
③ Pulse Interval*
The pulse interval is set up for Wiegand communication.
Select one of the following: “1.0 ms”, “1.5 ms”, or “2.0 ms”.
④ Total Bit Length * Displays the total bit length ⑤ Site Code + ⑥ Card Number + Parity Bit (2
bits). This must be set within a range from 26 to 128 bits.
⑤ Site Code*
Set the bit length from 0 to 125 bits.
⑥ Card Number*
Set the bit length from 1 to 126 bits.
When the result of recognition is NG, the output data to the access control
panel are entered in a decimal number in the mode of Site Code –
Card Number.
For setting, the parity bits (2 bits) should be avoided.
In case when the bit length is 26 bits, for example, set the Reject ID with 24
bits.
⑦ Reject ID*
The Site Code can be left void.
・In regard to the Reject ID setup values, confirm the specification of the
access control panel to be connected to the iris reader.
In regard to the asterisk-marked screen items in the above table, setting is possible when the access
control panel is used in the Wiegand communication and [Wiegand] is set as per ①
“Communication Method”.
When the Access Control Panel is used with the RS-485 connection:
To use the access control panel with the RS-485 connection, select [RS-485] as per ①
“Communication Method” from the screen items. Setting becomes possible for the items ② to ⑧ in
“RS-485 Settings”.
①
②
③
④
⑤
⑦
⑥
⑧
For details of screen items not described above, see the table explaining the “Registered Data”
tabscreen (p.72).
87
OPERATION
Screen Item
Description
① Communication
Select [RS-485]. Setting is enabled for the items in “RS-485 Settings”.
Method
② Baud Rate*
Makes baud rate setup for RS-485 communication.
Select one of the following: “2400bps”, “4800bps”, “9600bps”, “19200bps” or
“38400bps”.
③ Parity*
Makes parity check setup for RS-485 communication.
Select any one of [NONE], [ODD], or [EVEN].
④ Stop Bit*
Makes stop bit setup for RS-485 communication.
Select either of “1” bit or “2” bits.
⑤ Character
Length*
⑥ Digits (1-38)*
Makes character length setup for RS-485 communication.
Select either of “8” bits or “7” bits.
The total of the bits of ⑦ “Site Code Digits” + ⑧ “Card Number Digits” is
displayed. The number of site code digits and that of card number bits are
set up until 1 to 38 bits are secured.
⑦ Site Code Digits* The number of site code bits is set up with 0 to 37 bits.
⑧ Card Number
The number of card number bits is set up with 1 to 38 bits.
Digits*
In regard to the asterisk-marked screen items in the above table, setting is possible when the access
control panel is used in RS-485 connection and [RS-485] is set as per ① “Communication Method”.
7. Click the [Update] button.
This updates the information of the iris reader. To update other iris reader information, select the iris
reader by the switch display button, and repeat the procedure for Procedure 3.
8. Click the [Close] button.
The screen returns to "Reader Setting/Maintenance".
Outputting Reader Information to File·······································
The iris reader info registered in this software is output to the reader information CSV file (p.204). The output
reader information CSV file can be imported (p.79) again in this software.
【Procedure】
1. Search and display the reader data.
Following the procedures of “Reference to and Display the Reader Information” (p.69), the iris readers
are displayed in the “Reader List”, from which outputs are sent to the reader information CSV file.
2. Select an iris reader from “Reader List” and click the [Export] button.
The "Save As" screen is displayed.
88
OPERATION
3. Set the export file name.
Specify the folder to export the iris reader information CSV file on the “Save As” screen and set a file
name. The file name can be registered in 1-byte characters. \,/,:,,,;,*,?,",<,> and | are not allowed in file
names. No files can be designated, other than those of the CSV type.
4. Click the [Save] button.
The iris reader info CSV file is saved. The message "Export of reader information is complete." will
appear.
5. Click the [OK] button for the displayed message.
The screen returns to "Reader Setting/Maintenance".
Changeover Operation from an Enrollment Iris Reader to a
Recognition Iris Reader ······························································
The enrollment iris readers are set up in this software, chosen from the enrollment iris readers. Changeover
operation from an enrollment iris reader to a recognition iris reader is explained. Multiple enrollment iris
readers can be set up. With the enrollment iris readers, however, operation for recognition cannot be carried
out.
・You must select an enrollment iris reader in order to log into this software by iris recognition.
・For iris capturing, an enrollment iris reader has to be selected.
【Procedure】
1. Click the [Enrollment Reader Setting] button on the "Environment Settings"
screen.
Click to display the "Enrollment Reader Setting" screen (p.45).
2. Set the Enrollment Iris Reader.
Select an enrollment iris reader through operation for Procedures 2 and 3 of Enrollment Iris Reader
Setting on page 44.
Proceed to Procedure 4 if the preset enrollment iris reader is changed to the recognition iris reader.
3. Change the setting from the Enrollment Iris Reader to the Recognition Iris
Reader.
According to the enrollment iris readers displayed in “Selected Readers”, select an enrollment iris
reader to be changed into the recognition iris reader and click the [Delete] button. Moves an iris reader
selected from “Selected Readers” to “Reader Search Results”.
・If there is any iris reader of “Reset” or “Download” in the selected iris readers, there will be a
display of “Reader ID: xx Reset is in progress” or “Reader ID: xx requires a download” when the
89
OPERATION
[Delete] button is clicked. In this case, the corresponding iris reader cannot be moved to the
“Reader Search Results”.
4. Click the [OK] button.
When the [OK] button is clicked, the corresponding iris reader is changed over from the recognition iris
reader to the enrollment iris reader, or from the enrollment iris reader to the recognition iris reader. A
message of “Changed Recognition Reader/Enrollment Reader settings.” is displayed then.
・For the iris readers added to “Selected Readers” or deleted from the “Reader Search Results” and
for those with the MAC address acquired, a changeover action is taken between the recognition
iris reader and the enrollment iris reader. In the state that communication is impossible in the
middle of resetting due to power OFF or for such a reason, the reader status will become “Status
Unknown”. If the iris reader can maintain normal communication with the iris server, the iris reader
will be started under the preset conditions.
5. Click the [OK] button for the displayed message.
Close the “Enrollment Reader Setting” screen and recover the previous screen.
90
OPERATION
Checking & Operating Readers
The reader status is checked during operation and remote operation is carried out.
Explanations of the method of operation are given below in cases when an alarm is reported from an iris
reader, or when periodic operation check or iris reader reset is carried out, or when start and stop operation for
recognition is performed.
Checking Reader Status ·····························································
The status is checked for the iris readers in operation. This checking is carried out by picking up the iris
reader data, such as “Network Status”, “Reader Status”, “Number of Enrolled Iris Data”, “Reader Software
Version”, “Audio Ffile Version”, and so on. Alarm data can also be obtained in such a case when an iris
reader is faulty.
【Procedure】
1. Search and display the iris reader data.
According to the procedures of “Reference to and Display the Reader Information” (p.69), details of
the iris reader for status check are displayed.
2. Select an iris reader from “Reader List” and click the [Details] button.
The “Registered Data” tabscreen on the “Reader Setting Details” screen appears.
3. Click the [Get Status] button.
The reader status is obtained from the iris reader and the data are displayed on the “Reader Status”
screen.
①
②
③
For details of screen items not described above, see the table explaining the “Registered Data”
tabscreen (p.72).
91
OPERATION
Screen Item
Description
① Last Acquired
Displays the time and date the reader status was last acquired by clicking
the [Get Status] button.
② Status List
Click the [Get Status] button to display the reader status. Displays "Network
Status", "Reader Status", and "Number of Enrolled Iris Data", "Reader
Software Version" and "Audio File Version".
③ Alarm
Information
Displays information when an error occurs. Check the details from the error
message list and contact your sales representative, or place of purchase.
4. Click the [Close] button.
The screen returns to "Reader Setting/Maintenance".
Confirmation of Iris Reader Users ·············································
Users enrolled in an iris reader are acquired from that iris reader in operation. Then, a list of users is
displayed.
【Procedure】
1. Search and display the iris reader data.
According to the procedures of "Reference to and Display the Reader Information" (P.69), details of
the reader for Confirmation of Iris Reader Users are displayed.
2. Select a reader from "Reader List" and click the [Details] button.
The “Registered Data” tabscreen on the "Reader Setting Details" screen appears.
3. Click the [Get Users] button.
The user status is obtained from the iris reader and the data are displayed on the "Get Users" screen.
①
④
⑤
⑥
②
③
⑦
⑧
92
OPERATION
Screen Item
Description
① User Search
Sets the search conditions for the iris readers to be displayed in "User List".
② User ID
Enter the user ID. The user ID is searched in a forward direction.
For example, if you enter "1" all users having the user ID starting with "1" are
searched in the list.
③ Name
Used to enter the user name. The user name is searched in a forward
direction.
For example, if you enter "Matsushita", all users having a user name starting
with "Matsushita" are searched in the list.
④ Card ID
Used to enter the card ID. The card ID is searched in a forward direction.
For example, if you enter "10", all users having a card ID starting with "10" is
displayed in the list.
⑤ Search
The users that match the set search conditions are displayed in "User List".
⑥ Clear
Clears the search conditions you set.
⑦ User List
Displays a list of searched users.
Out of the enrolled users acquired from the iris reader, those not the
objectives for distribution are indicated in red. The user ID and the user
name are not displayed for the user who is not enrolled in the iris control
server.
⑧ Close
"Get Users" screen is closed and the previous screen is recovered.
4. Click the [Close] button.
The screen returns to "Reader Setting Details".
Resetting Readers ·······································································
Resets an iris reader. To start the iris reader again, operation should be attempted from the “Reader
Setting/Maintenance” screen.
【Procedure】
1. Search and display the iris reader data.
According to the procedures of “Reference to and Display the Reader Information” (p.69), details of
the iris reader for status check are displayed.
2. Select the iris reader(s) from “Reader List” and click the [Reset] button.
“Are you sure you want to reset the reader?” is displayed.
Multiple iris readers can be selected from the “Reader List”. Irrespective of the reader status,
execution is possible for all the iris readers.
93
OPERATION
・If multiple iris readers are selected and reset for an iris reader that is not present actually or for an
iris reader that is not connected to the LAN, a considerable amount of time may be needed until
the completion of iris reader reset transaction.
・Iris data may be automatically distributed by resetting an iris reader.
3. Click the [Yes] button.
When the [Yes] button is clicked for the message, the message "A reset was requested" appears, click
the [OK] button to close the message.
4. Click the [Close] button.
The screen returns to "Reader Setting/Maintenance".
Starting and Stopping Readers ··················································
Start the iris reader that has stopped its recognition service or stop the iris reader that has already started
recognition. To start or stop the iris reader’s recognition service, make operation based on the “Reader
Setting/Maintenance” screen.
【Procedure】
1. Search and display the iris reader data.
According to the procedures of “Reference to and Display the Reader Information” (p.69), display the
iris reader that performs start and stop of recognition.
2. Select the iris reader from “Reader List” and click the [Start] or [Stop] button.
If you clicked the [Start] button, the message of “Are you sure you want to start operation?” appears.
If you clicked the [Stop] button, the message of “Are you sure you want to stop operation?” appears.
・An iris reader that displays an "Status unknown", "Reset", "Download", "- -" or “Enrollment Reader
(Operating)” status under “Reader List”, can't be started or stopped.
3. Click the [Yes] button.
The "Reader operation has stopped" or "Reader operation has started" message appears.
4. Click the [OK] button.
This returns you to the "Reader Setting/Maintenance" screen.
Updating Reader Software··························································
Upgrades the software currently downloaded to the iris readers. Follow the procedure in "Downloading
Software to the Reader" (p.43) to download the software to the iris reader.
94
OPERATION
・The confirmation message will appear if you have selected multiple iris readers on the "Reader
Setting/Maintenance" screen that include an iris reader that not in a downloadable status. Click the [Yes]
button to continue downloading to the remaining iris readers.
・The [Cancel] button is not displayed on the "Software download is in progress." screen when the number
of iris readers to which software is being downloaded to is 10 or less.
・The alarm "A newer version of the software is already downloaded. Do you still want to execute the
download?" will be displayed if you attempt to download an older version software.
・The software used for downloading into the iris reader can differ according to the type of the IC card
reader to be connected with the iris reader. Check the IC card reader being used and then download the
corresponding software.
Downloading the Audio File to the Reader ·······························
Download the Audio File to the Reader.
The audio file is used to specify the AUDIO_XXYY.bin file of a folder where the Reader Software has been
installed. XXYY is the version number of the audio file.
【Procedure】
1. Search and display the iris reader data.
According to the procedures of “Reference to and Display the Reader Information” (p.69), search the
iris reader.
2. Select the iris reader(s) from “Reader List” and click the [Download Audio
File] button.
The "Select Audio File" screen is displayed. Specify the folder that the audio file is stored and select
the audio file.
・The download of the audio file cannot be performed if the iris reader selected from “Reader List”
shows the following "Reset", "Status unknown", "- -" or “Download”.
3. Click the [Open] button.
This displays the "Audio file download is in progress." screen and starts the download. If you click the
[Cancel] button, the download will be cancelled.
When the download ends, the "Download of Audio File is complete." message appears.
・The confirmation message will appear if you have selected multiple iris readers on the "Reader
Setting/Maintenance" screen that include an iris reader that not in a downloadable status. Click
the [Yes] button to continue downloading to the remaining iris readers.
・The [Cancel] button is not displayed on the "Audio file download is in progress." screen when the
number of iris readers to which software is being downloaded to is 10 or less.
95
OPERATION
4. Click the [OK] button for the displayed message.
This returns you to the "Reader Setting/Maintenance" screen.
Expanding the Reader Functions···············································
Take setup actions so that the access control panel can make ON-OFF judgment of the electronic lock
according to the result of iris reader recognition, or that the start of iris reader recognition can be controlled
with a trigger signal from external equipment.
【Procedure】
1. Click the [Reader Expansion Feature] button on the "Environment Settings"
screen.
The “Select Reader” screen appears.
①
②
③
④
Screen Item
Description
① Reader Search
Sets the search conditions for the iris readers to be displayed in “Reader
Search Results”.
② Reader Search
Displays a list of searched iris readers.
Results
・If the reader status is “Status Unknown” or “Download”, such an iris reader
is not displayed in the iris reader list.
③ Details
Displays the information of the iris reader selected from “Reader Search
Results” on the “Reader Expansion Feature” screen.
④ Close
Close the “Select Reader” screen and recover the previous screen.
2. Set the search conditions under “Reader Search”.
96
OPERATION
To display all iris readers in “Reader Search Results”, proceed to Procedure 3 without setting the
search conditions.
①
②
③
④
⑤
In regard to the screen items, refer to the “Select Reader” (p.96) screen of Procedure 1.
Screen Item
Description
① Reader ID
Used to enter the reader ID. The reader ID is searched in a forward direction.
For example, if you enter "1", all iris readers having a reader ID starting with
"1" is displayed in the list.
② Reader Name
Used to enter the Reader Name. The reader name is searched in a forward
direction.
For example, if you enter "BM-ET", all iris readers having a reader name
starting with "BM-ET" is displayed in the list.
③ IP Address
Enters the assigned IP address for the iris reader. IP addresses are
searched as perfect matches in each entry field.
For example, if "10" is entered in the first field, and "2" is entered in the
second field, then iris readers set with an IP address such as 10.2.1.1 or
10.2.200.200 will be displayed in the list.
④ Search
Displays a list of iris readers matching the search conditions you set under
“Reader Search Results”.
⑤ Clear
Clears the search conditions you set.
3. Click the [Search] button.
This displays a list of iris readers matching all search conditions set in Procedure 2.
If the search did not find any iris readers matching the search conditions, the message "Requested iris
reader is not available." will appear. Click the [OK] button, and modify the search conditions you
entered in Procedure 2.
97
OPERATION
4. Select an iris reader from “Reader Search Results” and click the [Details]
button.
The "Reader Expansion Feature" screen appears.
5. Update the reader expansion function.
The setting values of “Access Control Panel controls the Accept/Reject LED” and “External Trigger
Input/Buzzer” are changed, as required.
①
②
③
④
⑤
⑥
⑦
Screen Item
Description
① Reader ID
Displays the reader ID.
② Reader Name
Panel controls the
Displays the reader name.
The access control panel determined whether the accept/reject LED
should be controlled.
Accept/Reject LED.
Select either "Yes" or "No".
③ Access Control
④ External Trigger
Input/Buzzer
When [External Trigger Input] has been selected, operation of recognition
is started with an input from the outside. This function is effective only if
the card reader is not connected.
When "Card Reader Connection" is set at “Yes” for "Card Reader" on the
“Reader Setting Details” screen, [External Trigger Input] cannot be
selected.
When [Buzzer] has been selected, it is possible to cause the buzzer to
sound with an external input. While the buzzer keeps sounding, it is
impossible to carry out recognition. In regard to the method of making a
camera connection with external equipment and the specifications of the
input signals, please refer to the instruction manual that is attached to the
camera.
98
OPERATION
Screen Item
Description
⑤ Reader Data Display In regard to the iris reader data displayed in the “Reader Search Results”
of the "Select Reader” screen, information about the n-th iris reader is
displayed with Reader being displayed/total number of “Reader Search
Results”.
button: Displays the previous iris reader's information.
button: Displays the next iris reader's information.
Sequential display is possible with buttons.
⑥ Update
Saves the setting of the preset iris reader expansion function.
⑦ Close
The screen returns to “Select Reader”.
6. Click the [Update] button.
The message “Updated successfully.” appears. Click the [OK] button to close the message.
7. Click the [Close] button.
The screen returns to “Select Reader”.
99
OPERATION
Registering Groups
Registers multiple iris readers to a group for batch-processing to this software. For the multiple groups,
multiple iris readers can be registered. Therefore, batch control is enabled for these iris readers.
・When an iris reader is used with an Iris on Card, Group setting is not applicable.
Register these groups.
Laboratory group
Reader A
Reader A
Laboratory
User 1
・Laboratory group
Group Setting Screen··································································
Click the [Group Setting] button from the "Environment Settings" screen, or select “Environment Settings” →
[Group Setting] from the main menu bar. The "Group Setting" screen appears.
①
②
④
⑤
⑥
③
Screen Item
Description
① Search Group
Sets the conditions for the group to be displayed in “Group List”. (p.101).
100
OPERATION
Screen Item
Description
② Group List
Displays a list of searched groups.
③ New
Registers a new group.(p.103)
④ Details
Displays the detailed information of the iris readers belonging to the selected group
name under “Group List”. Information can also be updated. (p.105)
This button becomes activated only after a group is selected from “Group List”.
⑤ Delete
Deletes the group currently selected in “Group List”.
You can select and delete multiple groups in a single operation.
This button becomes activated only after a group is selected from “Group List”.
⑥ Close
This closes the "Group Setting" screen.
If changes have been made to a group, the user's iris data is distributed automatically
to the changed iris reader when this button is clicked. (p.136)
■ Reference to and Display the Group
Information about the registered group is searched.
【Procedure】
1. Set a Group Name for the search conditions on the "Group Setting" screen.
To display all groups in “Group List”, proceed to Procedure 2 without setting the search conditions.
①
②
③
Screen Item
Description
① Group Name
Used to enter the group name. The group name is searched in a forward
direction.
For example, if you entered "Laboratory", a list of groups whose group name
starts with "Laboratory" will appear.
② Search
Displays groups matching the search conditions you set under “Group List”.
③ Clear
Clears the search conditions you set.
101
OPERATION
2. Click the [Search] button.
This displays a list of groups matching the search conditions set in Procedure 1 in “Group List”.
If the search did not find any groups matching the search conditions, the message "Requested group
for data distribution is not available." will appear. Click the [OK] button, and modify the search
conditions you entered in Procedure 1.
3. Select the group in “Group List” and click the [Details] button.
The "Group Details" screen appears.
①
②
④
⑤
③
Screen Item
Description
① Group Name
Displays the group name.
② Readers
Displays a list of iris readers registered to the group.
Belonging to
Group
③ Update*
Used to update the group information.
④ Delete*
Used to delete the group information.
⑤ Close
The screen returns to "Group Setting".
In regard to the asterisk-marked screen items in the table, such items are applicable only if login is
performed by a operator for whom the privilege of “Environment Settings” has been set up.
Registering Groups ·····································································
Register these groups.
【Procedure】
1. Click the [New] button on the “Group Setting” screen.
The "New Group Registration" screen appears.
102
OPERATION
①
②
③
④
⑤
⑥
⑦
Screen Item
Description
① Group Name
Used to enter the group name.
Up to 20 1-byte characters can be entered. Note, however, that the same
name as the registered group cannot be set.
② Readers
Displays a list of iris readers registered to the group.
Belonging to
Group
③ Reader Search
Used to enter the search conditions under “Reader Search” to display a list
of iris readers in “Reader Search Results”.
Select the iris reader(s) in “Reader Search Results”.
④ Add
Registers the iris reader(s) selected in “Reader Search Results” to “Readers
Belonging to Group”.
This button becomes activated once an iris reader is selected from “Reader
⑤ Delete
Search Results”.
Removes a registered iris reader(s) from “Readers Belonging to Group”.
This button becomes activated once an iris reader is selected from “Readers
⑥ Register
Belonging to Group”.
Registers the group and returns to the "Group Setting" screen.
This button becomes activated only after all essential entry items have been
entered.
⑦ Cancel
Returns to the "Group Setting" screen without registering a group.
2. Enter the name of the group to “Group Name”.
3. Set the search conditions under “Reader Search”.
To display all unselected iris readers in “Reader Search Results”, proceed to Procedure 4 without
setting the search conditions.
103
OPERATION
①
②
③
④
⑤
⑥
Screen Item
Description
① Reader ID
Used to enter the reader ID. The reader ID is searched in a forward direction.
For example, if you enter "1", all iris readers having a reader ID starting with
"1" is displayed in the list.
② Reader Name
Used to enter the Reader Name. The reader name is searched in a forward
direction.
For example, if you enter "BM-ET", all iris readers having a reader name
starting with "BM-ET" is displayed in the list.
③ IP Address
Enters the assigned IP address for the iris reader. IP addresses are
searched as perfect matches in each entry field.
For example, if "10" is entered in the first field, and "2" is entered in the
second field, then iris readers set with an IP address such as 10.2.1.1 or
10.2.200.200 will be displayed in the list.
④ Search
Displays the list of iris readers matching the search conditions set under
“Reader Search” in “Reader Search Results”.
⑤ Clear
Clears the search conditions you set.
⑥ Reader Search
Displays a list of searched iris readers
Results
4. Click the [Search] button.
The iris readers matching all search conditions set in Procedure 3 are displayed in “Reader Search
Results”.
If the search did not find any iris readers matching the search conditions, the message "Requested iris
reader is not available." will appear. Click the [OK] button, and modify the search conditions you
entered in Procedure 3.
5. Select an iris reader(s) in “Reader Search Results”.
Select an iris reader(s) displayed in “Reader Search Results”.
104
OPERATION
6. Click the [Add] button.
This moves the selected iris reader to “Readers Belonging to Group”.
To select a different iris reader, repeat the procedure from Procedure 5 or Procedure 3.
7. Click the [Register] button.
This registers the group and returns you to the "Group Setting" screen.
Updating and Deleting Groups···················································
Updates or deletes the information of registered groups.
【Procedure】
1. Search the group information and display it.
According to the procedures of “Reference to and Display the Group” (p.101), display the updating or
deleting group data in the group list.
2. Select a group from “Group Search Results”.
・To update the data, click the [Details] button.
The "Group Details" screen appears.
・To delete an iris reader, click the [Delete] button.
To delete the group information, click the [Delete] button on the “Group Setting” screen.
A confirmation message will appear. Click the [Yes] button.
This deletes the group and returns you to the "Group Setting" screen.
3. Change/Delete Group information
・For updating:
After changing a group's information, click [Update] button.
・For deleting:
To delete a group, click the [Delete] button. A confirmation message will appear. Click the [Yes]
button. This deletes the group, and returns you to the "Group Setting" screen.
①
②
③
105
OPERATION
Screen Item
① Update
Description
Updates the group information and returns to the "Group Setting" screen.
This button becomes activated only after all essential entry items have been
entered.
② Delete
Deletes the group information.
③ Close
Returns to the "Group Setting" screen.
For details of items not described above, refer to the table explaining the "New Group Registration"
screen (p.103).
4. Click the [Update] button.
This updates the group information and the message "Updated successfully" will appear. Click the
[OK] button to close the message.
5. Click the [Close] button.
Returns to the "Group Setting" screen.
・If changes have been made to a group, the user's iris data is distributed automatically to the
changed iris reader when [Close] button is clicked on the "Group Setting" screen. (p.136)
106
OPERATION
Enrolling Users
User data are registered for the recognition in the access control system established in this software.
In this section, descriptions are given in regard to the method of searching the user data enrolled in this
software and the method of the registration, updating, and deletion of user data for the operator for whom the
privilege of “User Information” has been set up.
“User Information Screen” ·························································
Click the [User Information] button on the "Administration Software" screen, or select “User Information” →
[User Information] from the menu bar. The "User Information" screen will appear.
①
②
⑤
④
③
⑨
⑦
⑩
⑧
⑥
Screen Item
Description
① User Search
Sets the search conditions for the users to be displayed in “User List”. (p.108)
② User List
Displays a list of searched users.
③ New
Enrolls new users.
④ Details
Displays detailed information of the users currently displayed in “User List”.
Information can also be updated. (p.122)
⑤ Register Group
For all the users selected in the “User List”, batch registration (deletion) is carried out
(p.123) for the group that has been selected in the “Register Group” screen.
⑥ Delete
Deletes the user selected in “User List”. (p.122)
⑦ Import
Imports user information from files to batch register the information. (p.121)
This function is also used to import user information from other iris servers. (p.127)
⑧ Export
Exports user information to a file. (p.125)
This function is also used to import user information to other iris servers. (p.126)
107
OPERATION
Screen Item
Description
⑨ Iris data auto-
When user information is updated and automatic message distribution is needed, an
matic distribution announcement of automatic distribution is displayed (p.135).
message
⑩ Close
Returns to the "Administration Software" screen.
Iris data may be automatically distributed (p.135).
■ Reference to or Display the User Information
The registered user information is searched and displayed.
【Procedure】
1. Set the search conditions under “User Search” on the "User Information"
screen.
To display all users in “User List”, proceed to Procedure 2 without setting the search conditions.
③
④
①
②
⑤
⑥
⑧
⑦
Screen Item
Description
① User ID
Enter the user ID. The User ID is searched in a forward direction.
For example, if you enter "1", all users having a user ID starting with "1" are
searched in the list.
② Name
Used to enter the user name. The user name is searched in a forward
direction.
For example, if you enter "Matsushita", all users having a user name starting
with "Matsushita" are searched in the list.
③ Card ID
Used to enter the card ID. The Card ID is searched in a forward direction.
For example, if you enter "10", all users having a card ID starting with "10"
are searched in the list.
108
OPERATION
Screen Item
④ Group
Description
Click the [Select] button to display the "Group Selection" screen (p.73), and
select a group. Users to which the selected group is set are searched.
For example, when multiple groups are selected such as "group A" and
"group B", "users to which group A is set" or "users to which group B is set"
are displayed in the list.
and check the results.
When you have selected multiple groups, click
・If you have already selected a "Reader" as the search condition, a "Group"
cannot be used as a search condition.
⑤ Department
Used to enter the user's department. The department is searched in a
forward direction.
For example, if you enter "General Affairs", all users whose dept. starts with
"General Affairs" are searched in the list.
⑥ Reader
Click the [Select] button to display the "Reader Selection" screen (p.111) and
select an iris reader. Users that are subject to recognition by the selected iris
reader are searched.
For example, when multiple iris readers are selected such as "iris reader A"
and "iris reader B", "users that are subject to iris recognition on iris reader A"
or "users that are subject to iris recognition on iris reader B" are displayed in
the list.
When you have selected multiple readers, click
and check the selected
reader.
・If you have already selected a "Group" as the search condition, a "Reader"
cannot be used as a search condition.
⑦ Search
Displays a list of users matching the search conditions set in “User List”.
⑧ Clear
The preset searching conditions are deleted.
2. Click the [Search] button.
This displays a list of users matching all search conditions set in Procedure 1.
If the search did not find any users matching the search conditions, the message "A matched user
cannot be found." will appear. Click the [OK] button, and modify the search conditions you entered in
Procedure 1.
109
OPERATION
①
②
③
Screen Item
Description
① User List
Displays a list of searched users.
② Select All
Selects all users currently displayed in “User List”.
③ Clear All
Clears the selection of all users currently selected in “User List”.
3. Select the user from “User List”, and click the [Details] button.
The “Information” tabscreen on the "User Information Details" screen is displayed.
①
②
③
④
⑤
Screen Item
① Screen Selector
Tab
② Information
Description
Selects the screen by clicking the reference screen tab.
Information: Presented in the above-mentioned screen.
Image:
When iris capturing is performed, an iris image or the like is
displayed. (p.116)
Displays the items of the user information. For further details, refer to the
“New User Enrollment” screen (p.114).
110
OPERATION
Screen Item
Description
③ Iris
Displays the capture status of the iris data. For further details, refer to the
“New User Enrollment” screen (p.114).
④ User Information
Display
In regard to the user information displayed in the “User List” of the “User
Information” screen, information about the n-th data is displayed with Users
being displayed/total number of “User List”.
button: displays the previous user's information.
button: displays the next user's information.
Sequential display is possible with buttons.
⑤ Close
The screen returns to "User Information".
4. Click the [Close] button.
The screen returns to "User Information".
■ Search by Designating the Reader
Select the designated iris reader in the searching conditions. Searching by an iris reader is possible if it is
an iris reader registered in the specified group or a user who can get iris recognition by that iris reader.
【Procedure】
1. Display the “Reader Selection” screen.
The "Reader Selection" screen can be displayed by:
・Clicking the [Select] button for "Reader" from the "User Information" screen.(p.108)
・Clicking the [Select] button for "Reader Name" from the "Log Information" screen. (p.160)
①
②
③
④
⑤
⑥
111
OPERATION
Screen Item
Description
① Selected
Displays a list of selected iris readers.
Readers
② Reader Search
Used to enter the search conditions under “Reader Search” to display a list
of iris readers in “Reader Search Results”.
Select the iris reader(s) in “Reader Search Results”.
③ Add
Moves an iris reader selected from “Reader Search Results” to “Selected
Readers”.
This button becomes activated once an iris reader is selected from “Reader
Search Results”.
④ Delete
Removes a selected iris reader from “Selected Readers”.
This button becomes activated once an iris reader is selected from “Selected
Readers”.
⑤ OK
Saves the selected iris reader within “Selected Readers”. The previous
screen is displayed.
⑥ Cancel
The previous screen is displayed without selecting an iris reader.
2. Set the search conditions under “Reader Search”.
Enter the conditions of the searching iris reader in “Reader ID”, “Reader Name”, and “IP Address” for
iris reader search. According to the input values, searching is carried out in a forward direction.
To display all unselected iris readers in “Reader Search Results”, proceed to Procedure 3 without
setting the search conditions.
①
②
③
④
112
⑤
⑥
OPERATION
Screen Item
Description
① Reader ID
Used to enter the reader ID. The reader ID is searched in a forward direction.
For example, if you enter "1", all users having a user ID starting with "1" are
searched in the list.
② Reader Name
Used to enter the Reader Name. The reader name is searched in a forward
direction.
For example, if you enter "BM-ET", all iris readers having a reader ID starting
with "BM-ET" is searched in the list.
③ IP Address
Enters the assigned IP address for the iris reader. IP addresses are
searched as perfect matches in each entry field.
For example, if "10" is entered in the first field, and "2" is entered in the
second field, then iris readers set with an IP address such as 10.2.1.1 or
10.2.200.200 will be displayed in the list.
④ Search
This button displays the iris readers to “Reader Search Results” that match
the set search conditions but are not displayed to “Selected Readers”.
⑤ Clear
The preset searching conditions are deleted.
⑥ Reader Search
Displays a list of searched iris readers.
Results
3. Click the [Search] button.
This displays the iris readers to “Reader Search Results” that match the set search conditions but are
not displayed to “Selected Readers”.
If the search did not find any iris readers matching the search conditions, the message "Requested iris
reader is not available." will appear. Click the [OK] button, and modify the search conditions you
entered in Procedure 2.
4. Select an iris reader(s) in “Reader Search Results”.
5. Click the [Add] button.
This moves the selected iris reader to “Readers Belonging to Group”.
To select a different iris reader, repeat the procedure from Procedure 4 or Procedure 2.
6. Click the [OK] button.
The iris reader is selected, and the previous screen is displayed.
Enrolling Users ············································································
Enrollment of user information is carried out.
【Procedure】
1. Click the [New] button on the "User Information" screen.
The "New User Enrollment" screen appears.
2. Set the user information.
113
OPERATION
①
⑥
②
⑦
③
⑧
⑨
⑩
④
⑪
⑬
⑫
⑭
⑮
⑯
⑰
⑤
Screen Item
① User ID
Description
Enter the user ID.
Up to 16 1-byte alphanumerical characters can be entered. \,/,:,,,;,*,?,",<,>
and | are not allowed in file names.
Also, the same ID cannot be used if it's already been assigned to an enrolled
② Name
user."1" and "01" can be used as separate IDs.
Used to enter the user name.
Up to 20 1-byte characters can be entered.
③ Group
Displays the group set for the user.
④ Select Group
Displays the "Group Selection" screen (p.73).
The method of user recognition is selected.
⑤ Recognition
Setting
Enable Reader Recognition, Enable Server Certification Only, and Disable is
selected.
Method of
Description
Recognition
Enable Reader
Iris recognition can be performed with an iris reader that
Recognition
is registered in the group preset as a user.
Enable Server
When recognition is intended with the registered iris
Certification Only
reader in the group as a user, host recognition is carried
out in all cases. There is no iris data distribution.
Disable
114
Iris recognition with an iris reader is not performed.
OPERATION
Screen Item
Description
⑥ Card ID
Enter the card ID. Use the same number of digits to the "Site Code" and
"Card Number" as shown under the “Card Reader” tabscreen or the “Access
Control Panel” tabscreen.
Registration is possible with half-sized alphanumeric characters of 0 to 9, a
to z, and A to Z. Registration can be performed even though the site code
only is left void. Note, however, that the same values as the card ID of an
enrolled user cannot be set.
・For numbers 1-9. If "0" is entered to the left side, it will not be recognized
(automatically deleted). For example If "01" is entered, it will be recognized
as "1".
・When the site code is 0 or void, it is recognized as the same value.
・When the communication system is Wiegand for the access control panel
and the card reader to be connected to the iris reader, designate the card
ID with a numeral of 0 to 9. If alphanumeric setup has been made by the
Wiegand communication system, recognition is impossible to carry out.
・Make sure to check the Site code and Card Number values when entering
the Card ID. (p.85, 87).
⑦ Department
Used to enter the user's department.
Up to 80 1-byte characters can be entered.
⑧ Telephone
Used to enter the user's telephone number.
Up to 15 1-byte characters from 0 to 9, -, (and) can be used.
⑨ Facsimile
Used to enter the user's facsimile number.
Up to 15 1-byte characters from 0 to 9, -, (and) can be used.
⑩ E-mail Address
Used to enter the user's e-mail address.
⑪ Memo
Up to 80 1-byte alphanumerical characters, -, _, ., and @ can be entered.
Used to enter memo about the user.
Up to 160 1-byte characters can be entered.
⑫ Guidance
Language
For recognition with an Iris on Card, select the language that is output from
the iris reader.
Select one of the following: "English", "Japanese", "German", "French",
"Italian", "Spanish", "Russian", "Chinese", "Korean", "Arabic", "Portuguese",
"Turkish", "Dutch" or "Swedish".
115
OPERATION
Screen Item
Description
⑬ Iris Data
Displays the capture status of the iris data. The background colour varies
according to the capture status.
・No Image Captured (background: red): The iris image has not yet been
captured.
・Image Captured/Unenrolled (background: yellow): The iris image has been
captured but not yet enrolled to the User Information. Iris image is
discarded if the "User Information" screen is returned to.
・Enrolled (background: green): An iris image has been captured and also
enrolled to User Information.
Check the iris image on the “Image” tabscreen.
⑭ Capture
Captures the iris image. (p.128)
・The [Capture] button becomes activated only if the enrollment iris reader is
set (p.44).
⑮ Clear
Deletes only the captured iris data.
⑯ Enroll
Enrolls the user. This button becomes activated only after all essential entry
items have been entered.
⑰ Cancel (Close)
The screen returns to "User Information".
If you have clicked the [Enroll] button, this button will appear as the [Close]
button.
3. Click the [Image] tab.
The “Image” screen is displayed. This can be used to view the captured iris images.
①
②
③
④
116
Screen Item
Description
① User ID
Displays the user's ID.
② Name
Displays the user's name.
OPERATION
Screen Item
Description
③ Iris Image
Displays the captured iris image.
The colour of the image frame represents the quality of the captured results.
If you right click an iris image a popup menu will appear. Selecting [Capture]
will enable you to recapture the iris image for the selected eye. When [Clear]
is selected, the iris data is deleted. When [Delete Iris Image] is selected, the
iris image is deleted.
④ Time and Date
Displays when the iris image capture was taken.
4. Click the [Enroll] button.
The user data are enrolled. When this information is enrolled, writing into the IC card becomes
possible. However, editing is disabled for each item of the user.
When IC card writing is not performed and the enrollment of another user is intended subsequently,
click the [New] button and repeat the same operation from Procedure 2.
To close the enrollment of new user information, proceed to Procedure 7.
②
①
③
④
Screen Item
Description
① New
Clicked when another user is enrolled subsequently.
② Write IC Card
User information of card ID, guidance language, and iris data is written in the
IC card.
③ Verify IC Card
Verifies whether correct information has been written in the IC card through
matching with the user information.
④ Clear IC Card
All data written in the IC card are deleted.
Data
・The maximum number of users that can be enrolled varies according to the User Licence.
・Valid iris data of the same individual can be enrolled once.
117
OPERATION
・To carry out IC card writing, it is necessary to set up the conditions such that the IC card writer
has been set up and this writer is already connected to the iris server.
5. When IC card writing is intended, click the [Write IC Card] button.
Then, the user information is written in the IC card.
6. To verify the IC card, click the [Verify IC Card] button.
The contents of IC card writer data are examined.
7. Click the [Close] button.
The screen returns to "User Information".
■ IC Card Writing
・To carry out IC card writing, it is necessary to set up the conditions such that the IC card setting has been
finished and this writer is already connected to the iris server.
・When IC card writing is intended, iris data photographing is required to have been finished and registered.
・In regard to the method of IC card writer connection and that of card setup, refer to the instruction manual
attached to the IC card writer.
【Procedure】
1. Set an IC card in the IC card writer and click the [Write IC Card] button.
Click the [Write IC Card] button on the “New User Enrollment (User Information Details)” screen. The
message “Proceed to IC card write?” is displayed.
・Until IC card writing is finished, do not move the IC card from the predetermined position in the IC
card writer. Otherwise, this may be the cause of an error. According to the instruction manual for
the IC card writer, set the IC card so that normal IC card writing can be accomplished.
In regard to the method of IC card setup and others, refer to the attached instruction manual for
the IC card writer.
2. Click the [Yes] button.
IC card writing is executed. When writing is finished, “IC card write is complete” is displayed.
3. Click the [OK] button.
The previous screen appears. After the completion of IC card writing, verify the contents of writing with
the IC card, without fail.
・If normal IC card writing cannot be finished, there may be some errors such as failure in
recognition, recognition rejected, no door open, etc.
118
OPERATION
■ IC Card Verifying
Compare the user data with the data written in the IC card as a result of IC card writing.
・In cases when no enrollment iris reader is set up, or when the IC card writer is not set up, it is impossible
to click the [Verify IC Card] button.
・In regard to the method of IC card writer connection and that of card setup, refer to the operating
instructions attached to the IC card writer.
【Procedure】
1. Set an IC card in the IC card writer and Click the [Verify IC Card] button.
Click the [Verify IC Card] button on the “New User Enrollment (User Information Details)” screen.
“Carry out IC card verification” is displayed.
Click the [OK] button to display the “Select Verification Reader” screen.
2. According to “Select Verification Reader”, select an iris reader to be used for
verification.
Select a reader name from the list, intending to use it for verification.
①
②
③
Screen Item
Description
① Reader Name
Selects an iris Verification Reader according to the displayed enrollment iris
readers.
② Yes
Starts capturing for iris verification.
③ No
Recovers the original screen without performing IC card verification.
・The Reader Name is displayed for the iris reader that has been selected as per Enrollment Iris
Reader Setting on page 44. However, no display is presented for the iris reader the status of
which is “Download”.
119
OPERATION
・The iris reader once selected by Verification Reader selection will be selected again for the next
verification with a default at the time of capturing.
3. Click the [Yes] button to use the iris reader for iris verification.
When a message of “The reader will capture one iris images. Verifying.” is displayed, gaze at the iris
reader until the shutter functions.
①
Screen Item
Description
① Cancel
Cancels verification.
・For details on how to display iris reader guidance during capture, refer to the Operating
Instructions provided with the iris reader.
4. The result of verification is displayed.
The result of IC card recognition is displayed in a message of “Verified”, “Could not be verified”,
“Verified left iris data only”, or “Verified right iris data only”.
To raise the recognition accuracy, repeat this confirmation until “Verified” is displayed. If there is no
display of “Verified” even though IC card recognition has been repeated several times, try to undergo
iris imaging to register the iris data again.
5. Click the [OK] button.
The previous screen appears.
■ Clear IC Card Data
Delete (format) the data written in the IC card.
In regard to the method of IC card writer connection and that of card setup, refer to the operating
instructions attached to the IC card writer.
【Procedure】
1. Set an IC card in the IC card writer and click the [Clear IC Card Data] button.
A message of “Clear IC card data?” is displayed.
2. Click the [Yes] button.
Clear the IC card data. A message of “IC card has been cleared.” is displayed.
120
OPERATION
・If the card ID of the IC card data does not coincide with that of the user data displayed in the
screen, a message of “Card ID is incorrect. Are you sure you want to clear IC card data?” is
displayed. When the [Yes] button is clicked, the IC card data are cleared.
3. Click the [OK] button.
The previous screen appears.
■ Importing User Files to Enrolled Users
Make user information CSV files (p.209) for importing, and batch-enroll users to this software.
・The maximum number of users that can be enrolled varies according to the User Licence.
・If the user ID or card ID of users in the user information CSV file are already enrolled to this software,
those users will not be enrolled to this software.
・When the group of the imported users is a group not registered to this software, the group of users will not
be set.
・If the CSV file contains records that cannot be interpreted or are already enrolled to a user ID or card ID, a
message indicating this will be output on screen and to the log.
・Iris data cannot be enrolled by importing in CSV file format. Enrolled users' iris data after batch-enrolling
the users. For details on the procedure for enrolling iris data, see "Updating and Deleting Users" (p.122).
【Procedure】
1. Click the [Import] button on the "User Information" screen.
The "Select Import File" screen is displayed.
2. Select the import file.
In the Select Import File screen, designate the folder where the importing file is saved, and select
“Without iris data (*.csv)” for the file type. Click the user information CSV file.
3. Click the [Open] button.
This imports the file selected in Procedure 2, and batch-enrolls users.
When batch enrollment ends, the import results are displayed.
4. Click the [OK] button.
The screen returns to "User Information".
121
OPERATION
Updating and Deleting Users······················································
Updates or deletes the information of enrolled users.
【Procedure】
1. Search the user information and display it.
According to the procedures of “Reference to or Display the User Information” (p.108), the user
information to be updated or deleted is displayed in the “User List”.
2. Select the user in "User List”.
・To update the user information, click the [Details] button.
The "User Information Details" screen is displayed.
・To delete the user information, click the [Delete] button.
To delete the user, click the [Delete] button on the “User Information” screen.
A confirmation message will appear. Click the [Yes] button.
The user information is deleted, and the screen returns to “User Information”.
3. Change/Delete user information.
・For updating
Edit the items in the data column of the “User Information Details” screen, as required. For iris data
capturing, clear, etc., refer to Iris Capturing on page 128.
・For deleting
To delete the user information, click the [Delete] button. A confirmation message will appear. Click
the [Yes] button. The user information is deleted and the next user information is displayed. When
all the user information is deleted, the user information screen is recovered.
①
③
②
122
OPERATION
Screen Item
Description
① User ID
Displays the user ID. This item cannot be changed.
・To change a user ID, you must first delete the user, then re-enroll the user.
② Update
Updates the user information.
③ Delete
Deletes the user information.
・When users have been deleted and "0/0" will appear as the user order, the
"User Information" screen is automatically returned to.
For the screen items other than the above, refer to the “User Information” screen (p.110) and the “New
User Enrollment” screen (p.114).
4. Click the [Update] button.
This updates the user, and displays the message "Updated successfully."
・The [Update] button becomes activated only when all essential entry items have been entered.
・Valid iris data of the same individual can be enrolled once.
5. Click the [OK] button.
To update other user information, select the user by the switch display button, and repeat the
procedure for Procedure 3.
6. Click the [Close] button.
The screen returns to "User Information".
■ Batch Registration (Deletion) of User Groups
For all the users selected with “User List” on the “User Information” screen, the selected groups are
registered on the “Register Gruop” screen. When [Delete] is selected on the “Register Group” screen, the
selected groups are deleted from the selected users. It is possible to select multiple users and register
(delete) them at the same time.
【Procedure】
1. Search the user information and display it.
According to the procedures of “Reference to or Display the User Information” (p.108), the user
information is displayed in the “User List”.
2. According to the “User List”, select a user of group registration (deletion).
Multiple users can be selected.
3. Click the [Register Group] button on the "User Information" screen.
The "Register Group" screen appears.
123
OPERATION
②
①
③
④
⑥
⑤
Screen Item
⑦
Description
① Selected Groups Displays a list of the selected groups.
② Group Search
Used to enter the search conditions for “Group Search” with the results
③ Select
displayed in “Group Search Results”.
Moves the group selected from “Group Search Results” to “Selected
Groups”.
This button becomes activated after selecting a group from “Group Search
④ Remove
Results”.
Removes the selected group from “Selected Groups”.
This button becomes activated after selecting a group from “Selected
Groups”.
⑤ Add
Registered a group selected from “Selected Groups” for the user selected on
the “User Information” screen.
⑥ Delete
For a group selected from “Selected Groups”, delete this group from the user
selected on the “User Information” screen.
⑦ Close
The screen returns to "User Information" without registering a group.
4. Enter a Group Name for the search conditions on the "Group Search" screen.
In regard to the method of search condition setup, refer to Procedures 2 to 5 of Search by Designating
the Group on page 73.
To display all groups in "Group Search Results", proceed to Procedure 5 without setting the search
conditions.
5. Click the [Search] button.
Out of the groups matching all the search conditions of Procedure 4, those not displayed in “Selected
Groups” are displayed in a list of “Group Search Results”.
124
OPERATION
If the search did not find any groups matching the search conditions, the message "Requested group
for data distribution is not available." will appear. Click the [OK] button, and modify the search
conditions you entered in Procedure 4.
6. Select a group from “Group Search Results”.
Multiple groups can be selected.
7. Click the [Select] button.
This moves the selected group to “Selected Groups”.
To select a different group, repeat the procedure from Procedure 6. When selecting a group by
changing the search conditions, repeat operation of Procedure 4 and thereafter.
8. Click the [Add] or [Delete] button.
When the [Add] button is clicked, a group is registered for the user who has been selected in “User
List” of the “User Information” screen.
When the [Delete] button is clicked, the selected group is deleted from the user.
・When an adding group is already registered for the user, such a corresponding group is not added.
If there is another adding group, only the non-duplex group is registered. Similarly, if a deleting
group is not registered for the user, only the groups not belonging to such a corresponding groups
are deleted.
9. Click the [Close] button.
The screen returns to "User Information". According to the type of a group being added or deleted,
distribution of the iris data may be required. In this case, the iris data are automatically distributed as
soon as the “User Information” screen has been closed.
Exporting User Information to File·············································
Outputs the information of the user selected in “User List” on the "User Information" screen to user
information CSV files (p.209).
【Procedure】
1. Search the user information and display it.
According to the procedures of “Reference to or Display the User Information” (p.108), the user
information is displayed in the “User List”.
2. Select the user that is to be exported to the file in “User List”.
Multiple users can be selected.
3. Click the [Export] button.
The "Save As" screen is displayed.
4. Set the export file.
125
OPERATION
In the “Save As” screen, designate a folder for exporting the user information CSV file and select the
type of file “Without iris data (*.csv)”. Set a file name.1-byte characters can be entered. \,/,:,,,;,*,?,",<,>
and | are not allowed in file names.
5. Click the [Save] button.
This outputs the information of the user selected at Procedure 2 to the user information CSV file, and
the message "Export of user information is complete" will appear.
6. Click the [OK] button.
The screen returns to "User Information".
Moving User Information ····························································
The information of users selected from “User List” in the "User Information" screen can be moved to a
different iris server. Iris data is also output when user information is output to file.
■ Exporting User Information Appended with Iris Data to File
Outputs the information of the user selected from “User List” on the "User Information" screen to a user
information CAB file appended with iris data to a different iris server.
【Procedure】
1. Search the user information and display it.
According to the procedures of “Reference to or Display the User Information” (p.108), the user
information is displayed in the “User List”.
2. Select the user that is to be exported to the file in “User List”.
Multiple users can be selected. Users without iris data registration can also be selected.
3. Click the [Export] button.
The "Save As" screen is displayed.
4. Set the export file.
In the “Save As” screen, designate a folder for exporting the user information CAB file and select the
type of file “With Iris data (*.cab)”. Set a file name.1-byte characters can be entered. \,/,:,,,;,*,?,",<,>
and | are not allowed in file names.
5. Click the [Save] button.
This outputs the information of the user selected at Procedure 2 to the user information CAB file, and
the message "Export of user information is complete" will appear.
6. Click the [OK] button.
The screen returns to "User Information".
126
OPERATION
■ Importing User Information CAB Files Appended with Iris Data
User information CAB files appended with iris data that were previously output can be imported to a
different iris server.
・The maximum number of users that can be enrolled varies according to the number of Licence.
・If the user ID, card ID or iris data of users in the user information CAB file are already enrolled to this
software, those users will not be enrolled to this software.
・When the group of the imported users is a group not registered to this software, the group of users will
not be set.
・If the CAB file contains records that cannot be interpreted or have already enrolled a user ID, card ID or
iris data, a message indicating this will be output on screen and to the Error Log.
【Procedure】
1. Click the [Import] button on the "User Information" screen.
The "Select Import File" screen is displayed.
2. Select the import file.
Specify the folder that you wish to load the import file on the “Select Import File” screen and select the
files of type “With iris data (*.cab)”. Click the user information CAB file.
3. Click the [Open] button.
This imports the file selected in Procedure 2, and batch-enrolls users.
When batch-enrollment ends, the import results are displayed.
4. Click the [OK] button.
The screen returns to "User Information".
127
OPERATION
Iris Capturing
Capture ·························································································
For the operator and user information, it is possible to register the iris data captured with iris readers.
The method of iris capturing will be described below, in regard to iris capturing performed at the time of new
enrollment and updating of operator information as well as new enrollment and updating of user information.
■ Capturing Irises
Procedures of iris capturing are described below, starting with the step for clicking the [Capture] button.
・The enrollment iris reader must be set in order to capture the iris image. For details on how to set the
enrollment iris reader, refer to Enrollment Iris Reader Setting on page 44.
【Procedure】
1. Click the [Capture] button.
The “Select Reader” screen appears.
2. Select an iris reader to be used for iris capturing, and determine whether the
iris image should be saved.
According to the result of capturing iris reader selection, select the "Reader Name" used for iris
capturing.
Change over the ON/OFF switch of the check box for iris image saving and determine whether the iris
image should be saved.
①
②
③
④
Screen Item
Description
① Reader Name
According to the enrollment iris reader displayed, select the iris reader
intended for iris capturing.
128
OPERATION
Screen Item
Description
② Save this iris
When an iris image need be saved, set the check box at ON. When the
image.
check box at OFF, no iris image is saved.
③ Yes
Starts the Capture.
④ No
The original screen is recovered without performing iris capturing.
・The Reader Name is displayed for the iris reader that has been selected as per Enrollment Iris
Reader Setting on page 44. However, no display is presented for the iris reader the status of
which is “Download”.
・The iris reader once selected on the “Select Reader” screen will be selected again for the next
recognition with a default at the time of iris capturing.
3. Click the [Yes] button, and face the reader to capture the iris image.
After the message "The reader will capture four iris images. Please wait for a while." appears, face the
reader to capture the iris image. Iris capturing is continuously repeated four times. Gaze at the iris
reader until the shutter functions 4 times.
①
Screen Item
Description
① Cancel
Stops the capture.
・For details on how to display iris reader guidance during capture, refer to the Operating
Instructions provided with the iris reader.
・It takes about 7 seconds (when not saving the iris image) or about 10 seconds (when saving the
iris image) for the captured iris image results to appear.
4. After the completion of iris capturing, the result is displayed on the “Iris
Image Capturing” screen.
Check the captured iris image. If the capture was successful, the iris image can be enrolled.
● When "Capturing of the iris image is complete. (excellent)" (green) for only one eye appears
The iris image of a single eye can be captured and enrolled. When the message "Can't
Capture"(black) appears for the other eye, the capture is unsuccessful. Until the massage "Capturing
of the iris image is complete. (excellent)" (green) for both eyes appears, click the [Recapture] button to
recapture the iris image. Return to Procedure 3.
129
OPERATION
①
②
③
④
⑥
⑦
⑤
⑧
Screen Item
Description
① Iris Data
Displays the quality (3 grades) of the captured iris image by colour code.
Excellent (green), fair (yellow), and poor (black).
② Capture Failed
May display why the capture failed. If so, one of the following messages will
appear:
・Please open your eyes wider.
・Please adjust your position.
・Please make sure that your eye is reflected into the mirror.
③ Iris Image
When an iris image is captured with an iris image, this iris image is
displayed. The iris image is displayed irrespective of whether the result of iris
capturing is successful or not.
④ Description
Describes the result of iris capturing.
⑤ Enroll
Enrolls the iris data. For accurate recognition, make sure that the quality of
both iris data is excellent (green) before clicking this button. If after several
attempts, you cannot get satisfactory results, click the button and continue.
⑥ Recapture
This button is used to recapture the iris image. Not enabled if both iris
images have been successfully captured.
⑦ Verify
Verify whether recognition is possible with the iris data obtained from
successful iris capturing.
⑧ Cancel
Stops the capture.
・When iris capturing is successful only for the right eye, the right-eye iris data and the iris image
are held and another photo-taking is carried out when the [Recapture] button is clicked. When the
result of recapturing indicates that iris capturing for the left eye only has been successful, the
saved right-eye iris data, the left-eye iris data obtained through successful iris capturing together
with an iris image, and the iris image are displayed as the result of iris capturing.
130
OPERATION
● When "Can't Capture" for both eyes appears
If the capture of both eyes failed, the reason for the failure will appear. Return to Procedure 3 and
follow the screen instructions to recapture the iris images.
● When "Capturing of iris image is complete.(excellent)" for both eyes appears
If the capture of both eyes was successful, proceed to Procedure 5.
Proceed to Procedure 7 in the case of registration without verifying.
5. When "Capturing of iris image is complete. (excellent)" for both eyes appears,
click the [Verify] button.
When a message of “The reader will capture one iris image. Verifying.” is displayed, keep gazing at
the iris reader until the shutter functions.
①
Screen Item
Description
① Cancel
Stop verification.
6. The result of verification is displayed on the “Iris Image Capturing” screen.
The result of verification of capture is “Verified”.
“Verified right (left) iris data only.” is displayed when only the single eye has been verified.
①
131
OPERATION
Screen Item
① Result
Description
Displays the verified results.
According to the contents of display, the following operation is carried out:
Displayed messages
Description
“Verified.”
Indicates the status that iris capturing is successful for
both eyes and the both eyes can be verified. Proceed to
Procedure 7 for registration.
“Verified right (left) iris
data only.”
● When iris capturing is successful for both eyes
In this case, iris capturing is successful for both eyes, but
only a single eye has been verified. Click the [Verify]
button to carry out another verification. Continue this
verification until both eyes have been “Verified”.
If both eyes cannot have been “Verified” even after
another verification, click the [Recapture] button for
simultaneous display and proceed to another iris
capturing. To perform another iris capturing, repeat
operation of Procedure 3 and thereafter.
● When iris capturing is successful only for the right (left)
eye
In this case, iris capturing is successful only for the right
(left) eye, and this eye has been verified. Proceed to
Procedure 7 when enrollment of a single eye only is
acceptable. If both eyes need to be enrolled, click the
[Recapture] button and proceed to another iris capturing.
To perform another iris capturing, repeat operation of
Procedure 3 and thereafter.
“Could not be verified.” ● When iris capturing is successful for both eyes
In this case, iris capturing is successful for both eyes, but
both eyes have failed to be verified. Continue this
confirmation until both eyes have been “Verified”. If both
eyes cannot have been “Verified” even after another
verification, click the [Recapture] button for simultaneous
display and proceed to another iris capturing. To perform
another iris capturing, repeat operation of Procedure 3 and
thereafter.
132
OPERATION
Screen Item
Description
● When iris capturing is successful only for the right (left)
eye
In this state, iris capturing is successful only for the right
(left) eye, and this eye has failed to be verified. In such a
case, since the [Recapture] button is displayed at the
same time, click it and proceed to another iris capturing.
To perform another iris capturing, repeat operation of
Procedure 3 and thereafter.
7. When the result of verification indicates that both eyes have been “Verified.”,
click the [Enroll] button.
There will be a message of “Capturing of the iris image is complete.”.
・If the image quality is poor (black) the image may not be enrolled. If the quality is excellent (green),
continue with the enrollment process.
・If the message "Can't Capture" appears, the image cannot be enrolled.
8. Click the [OK] button.
The screen returns to the screen on which [Capture] button is clicked, and "Image
Captured/Unenrolled" (background: yellow) message will appear at “Iris Data”. Click the [Enroll] (or
[Update] button) to enroll the iris image. The "Enrolled"(background: green) message will appear.
■ To Recapture One Eye Only
After enrollment is complete, it's possible to recapture/re-enroll the iris image of an eye (one eye only).
From the "Image" tabscreen, right click directly on the iris image to bring up a popup menu and select
[Capture]. Repeat the procedure from Procedure 2 of Iris Capturing on page 128.
①
①
②
②
③
133
OPERATION
Screen Item
Description
① Capture
Recaptures the specified image only.
② Clear
Deletes the specified iris image and iris data only.
③ Delete Iris Image
According to the iris data, only the iris image of a single eye is deleted.
・When iris capturing is finished with an iris image, [Capture], [Clear], and [Delete Iris Image] are
displayed in the pop-up menu. If iris capturing is finished without an iris image, then [Capture] and
[Clear] only are displayed.
■ To Delete Iris Data
To delete the captured iris data, click the [Iris Clear] button or right click directly the [Clear] button on the
popup menu. A confirmation message will appear. Click the [Yes] button.
To cancel deletion of iris image, either click the [No] button at the confirmation message, or click the
[Close] button (or [Cancel] button) before you click the [Enroll] button (or [Update] button) on the
"Operator's Information" screen.
■ To Delete Iris Image Only
When an iris image only is deleted according to the captured iris data, make a direct right click of the iris
image display on the “Image” screen and select [Delete Iris Image] from the pop-up menu. A confirmation
message will appear. Click the [Yes] button.
After the deletion of the iris image, pictures of eyes begin to be displayed.
134
OPERATION
Distributing Iris Data to Readers
To enable iris recognition for users by an iris reader, the iris data of users enrolled to this software must be
distributed to the iris reader(s).
There are two ways of distributing iris data: 1) Automatic distribution (performed by this software) and 2)
“Manual Distribution”. (p.136)
Automatic Distribution ································································
New iris data must be distributed to iris readers when a user's iris data has been recaptured. When the iris
data must be redistributed, this software automatically distributes it to the required iris readers.
The "Iris data distribution is in progress" screen will appear while the iris data is being distributed.
①
Screen Item
Description
① Cancel
This button cancels distribution of iris data.
・The [Cancel] button is not displayed when the number of iris readers to which iris data is
automatically distributed is ten or less.
・Iris data is automatically distributed when the iris data currently registered to an iris reader has been
changed and when an iris reader is started up. To redistribute iris data to a specified iris reader, distribute
the iris data manually. (p.136)
■ Automatic Distribution with New User Information
When user iris data has been changed, the iris data is automatically distributed when the [Close] button is
clicked on the "User Information" screen.
However, this iris data is not always distributed to all iris readers. When the operation below is carried out,
the iris data are distributed only to the iris readers that require the data.
・When new user iris data has been enrolled
・When a user has been deleted
135
OPERATION
・When enrolled iris data has been deleted, and new iris data has been captured
・When enrolled iris data has been deleted
・When a user group has been changed
・When a card ID has been changed
・When the user recognition method has been changed
When the user information is changed in the “User Information” screen and automatic distribution is
required, an announcement of automatic distribution is displayed at the bottom right of the screen. (⑨ Iris
data automatic distribution message on p.107)
According to the setting condition of the iris reader in regard to the destination of distribution, information
changes about data distribution to this iris reader.
If the security level of the distribution iris reader is set at “High”, information about the changed user only
is distributed. For the iris reader the security level of which is “Normal”, information about all users is
distributed.
Distribution is not performed under the following conditions:
・When the Iris on Card is used
・When the iris reader's Server Certification is set to [Only]
・When the method of certification is disable
■ Automatic Distribution with New Group Settings
If a group's information has been changed, the iris data is automatically distributed to the iris readers by
clicking the [Close] button.
However, this iris data is not always distributed to all iris iris readers. When the operation below is carried
out, the iris data are distributed only to the iris readers that require the data.
・an iris reader(s) has been deleted/added to the group
・a new group has been created
・a group has been delete
■ Automatic Distribution after Reader Reset
When an iris reader is restarted, the iris data is distributed when the iris reader is ready.
・Note that the "Iris data distribution is in progress." screen will not be displayed.
Manual Distribution ·····································································
User iris data can be manually distributed to specified iris readers.
【Procedure】
1. Search and display the iris reader data.
136
OPERATION
According to the procedures of “Reference to and Display the Reader Information” (p.69), the iris
readers to be distributed are displayed in the iris reader list.
2. Select the iris reader from “Reader List” and click the [Distribute] button.
The confirmation message "Are you sure you want to distribute the iris data?" appears.
3. Click the [Yes] button.
This displays the "Iris data distribution is in progress" screen, and starts distribution of iris data. When
distribution of the iris data ends, the message "Distribution of iris data is complete" appears.
4. Click the [OK] button.
The screen returns to "Reader Setting/Maintenance".
・Error may occur during iris data distribution caused by LAN environment or other reasons. Iris
data in the iris reader that has an error during iris data distribution is not updated and recognition
operation may be stopped. Select the iris reader from “Reader List” in "Reader
Setting/Maintenance" screen and distribute iris data manually after getting the reader status. If
error still exists even after manual distribution, click [Reset] button and restart that iris reader. Iris
data will be distributed to that iris reader automatically after iris reader restarting. Refer to
Checking Reader Status on page 91 for details on how to get an iris reader's status, and Resetting
Readers on page 93 for details to start the iris reader again.
137
OPERATION
Operational Settings
Make settings such as iris reader monitoring settings, auto backup, etc. to ensure normal operation of this
software and iris readers.
Reader Monitoring Settings························································
The status of the network between the iris readers and the iris server, and the number of users enrolled to
iris readers can be monitored. You can check whether or not the number of users distributed to iris readers
matches the number of users enrolled on this software. Any error (alarm information) can be displayed in
"Information Display Window". (p.157)
The operator, for whom the privilege of “Environment Settings” is not set up, cannot set up or edit the items
displayed on the screen in the procedure specified below. The button displayed on the screen is “Close” only.
【Procedure】
1. Click the [Network Monitoring/Security] button.
The “Network Monitoring” tabscreen on the "Network Monitoring/Security" screen is displayed.
2. Set the network monitoring information of the iris reader.
①
②
③
④
⑤
⑥
⑦
⑧
Screen Item
Description
① Patrol Function
This enables [On]/[Off] the Patrol function, which issues the PING command
to check the network status between the iris readers and the iris server.
138
OPERATION
Screen Item
Description
② Interval
Displays the interval that the PING command is executed.
Set a 1-byte numerical value within the range 30 to 9999. The unit comes in
minutes.
This can be entered only when the “Patrol Function” is set to [On].
③ Output to
Selects whether or not to display alarm information in "Information Display
Information
Window" (p.157) when there is no response from the iris reader in response
Display Window
to the PING command.
(If No Response) Select either [Yes] or [No].
This can be selected only when “Patrol Function” is set to [On].
④ Number of
Enrolled Users
Select whether or not [On]/[Off] to check the number of users distributed to
iris readers matches the number of users enrolled on the iris server.
Check Function
⑤ Interval
Sets the interval for the above check function.
Set a 1-byte numerical value within the range 30 to 9999. The unit comes in
minutes.
This can be entered only when “Number of Enrolled Users Check Function”
is set to [On].
⑥ Output to
Selects whether or not to output this information to the "Information Display
Information
Window"(p.157) when the number of users distributed to iris readers does
Display Window
not match the number of users enrolled to the iris server.
(If Mismatch)
Select either [Yes] or [No].
This can be selected only when “Number of Enrolled Users Check Function”
is set to [On].
⑦ OK
Registers the settings and closes the "Network Monitoring/Security" screen.
It can be clicked when all the items have been entered in regard to network
monitoring or checking the number of enrolled users.
⑧ Cancel
Closes the "Network Monitoring/Security" screen without registering the
settings.
3. Click the [OK] button.
This registers the settings and the closes the "Network Monitoring/Security" screen.
Periodically Change Encryption Code Setting ·························
Iris data is encrypted before it is distributed to iris readers from this software to ensure security. The
encryption code used when iris data is encrypted and decrypted can be periodically changed automatically.
Periodically changing the encryption code will enhance the security.
The operator, for whom the privilege of “Environment Settings” is not set up, cannot set up or edit the items
displayed on the screen in the procedure specified below. The button displayed on the screen is [Close] only.
139
OPERATION
【Procedure】
1. Click the [Network Monitoring/Security] button on the “Environment Settings”
screen.
The “Network Monitoring” tabscreen on the "Network Monitoring/Security" screen is displayed.
2. Click the [Security] tab.
The “Security” tabscreen is displayed.
3. Set the periodical change encryption code.
①
②
③
④
⑤
⑥
⑦
⑤
Screen Item
Description
① Keep Same
Set this radio button if you don't want the encryption code to be exchanged
Encryption Code
② Periodically
Change
periodically.
Set this radio button if you want the encryption code to be exchanged
periodically.
Encryption Code
③ Monthly
Set this radio button if you want the encryption code to be exchanged at a
specified date once per month.
This button will become activated only if the [Periodically Change Encryption
Code] setting is selected.
④ of the month
Used to set the day that the encryption code is to be exchanged.
The date can only be entered if the [Monthly] radio button is selected.
⑤ Time
Used to set the time that the encryption code is to be exchanged.
The time can be set in 5-minute increments.
140
OPERATION
Screen Item
Description
⑥ Weekly (Daily
Set this radio button if you want encryption code to be exchanged on a
Change
specified day of every week.
Possible)
This button will become activated only if the [Periodically Change Encryption
Code] setting is selected.
⑦ Day of the Week
Mark the checkbox for the day of the week you want the encryption code to
be exchanged.
The days can only be entered if the [Weekly (Daily Change Possible)] radio
button is selected.
For details of items not described above, refer to the table explaining the “Network Monitoring”
tabscreen in Reader Monitoring Settings on page 138.
・Recognition functions on iris readers will be suspended several times while the encryption code
information is being exchanged. When exchanging the encryption code avoid a time zone when
users will be performing iris recognition on iris readers.
4. Click the [OK] button.
This registers the settings and the closes the "Network Monitoring/Security" screen.
Auto Reboot Setting ····································································
Iris server can be automatically rebooted periodically.
The operator, for whom the privilege of “Environment Settings” is not set up, cannot set up or edit the items
displayed on the screen in the procedure specified below. The button displayed on the screen is [Close] only.
・When Auto Reboot setting is made, count-down begins before 3 minutes before auto rebooting. If you are
in the middle of working, save the data in the work in order to be ready for auto rebooting.
・While the iris server is being restarted, “Automatic Backup Function” and “Security Function” are not
available. Avert the Automatic Backup time and the Encryption Code Exchange time when the Auto
Reboot time is set up.
・While the iris server is being restarted, it takes about 30 seconds for initializing processing such as
database structuring, etc. In this period, iris reader's Server Certification is not performed even though
setting has been made at [Yes] or [Only].
【Procedure】
1. Click the [Auto Reboot Setting] button on the "Environment Settings" screen.
The "Auto Reboot Setting" screen appears.
2. Set the iris server auto reboot information.
141
OPERATION
①
②
③
④
⑤
⑥
⑦
⑤
⑧
⑨
Screen Item
Description
① No Auto Reboot
Set this radio button when the iris server is not to be periodically rebooted.
② Set Auto Reboot
③ Monthly (Max. 5
Set this radio button when the iris server is to be periodically rebooted.
Set this radio button if you want iris server to automatically reboot. It can be
Reboots/Mo.)
rebooted a maximum of five times per month. This button can only be set if
the “Set Auto Reboot” function is selected.
④ of the month
Used to set the day that iris server will be rebooted.
The date can only be entered if the [Monthly (Max. 5 Reboots/Mo.)] radio
button is selected.
⑤ Time
Used to set the time that iris server will be rebooted.
The time can be set in 5-minute increments.
⑥ Weekly (Max. 7
Reboots/Wk.)
⑦ Day of the Week
Set this radio button if you want iris server to be rebooted during the week.
This button can only be set if the [Set Auto Reboot] function is selected.
Mark the checkbox for the days of the week you want to reboot.
The days can only be entered if the [Weekly (Max. 7 Reboots/Wk.)] radio
button is selected.
⑧ OK
Registers the settings and closes the "Auto Reboot Setting" screen.
The [OK] button becomes activated only after all items have been entered.
⑨ Cancel
Closes the "Auto Reboot Setting" screen without registering the settings.
3. Click the [OK] button.
This closes the "Auto Reboot Setting" screen.
142
OPERATION
E-Mail Setting···············································································
If an error occurs alarm information can be sent to the Administrator or Operators whose e-mail addresses
have been set in the Operator's Information. Note that the system must be connected to an SMTP server.
For details, contact your network administrator.
The operator, for whom the privilege of “Environment Settings” is not set up, cannot set up or edit the items
displayed on the screen in the procedure specified below. The button displayed on the screen is [Close] only.
・Check with your network administrator for server name, port number, and other information needed to set
the SMTP server.
【Procedure】
1. Click the [E-Mail Setting] button on the "Environment Settings" screen.
The "E-Mail Setting" screen appears.
2. Set the information required for sending e-mails.
Enter the information required for “SMTP Server Setup” and “E-Mail Setup”. In regard to the
“Authentication Required to Access SMTP Server”, make settings, as required.
Select a mailing operator according to “Unselected Operators” in “Send Message to” and click the
[Add] button.
・The operator is displayed in “Send Message to” when the mail address of the “Operator’s
Information” screen (p.63) is set up.
143
OPERATION
①
②
③
④
⑤
⑥
⑦
⑧
⑨
⑩
⑪
⑬
⑫
⑭
Screen Item
Description
① Server Name
Used to enter the IP address or host name of the SMTP server.
Up to 40 1-byte characters can be registered.
② Port Number
Used to enter the port number of the SMTP server. Default is "25".
③ Authentication
Check this checkbox if you want to execute SMTP server authentication
Required to
when sending e-mail.
Access SMTP
Make settings, as required.
Server
④ User Name
Used to enter the SMTP server user name (account name).
⑤ Password
Used to enter an SMTP server password.
⑥ Subject
Used to enter the subject name for the alarm information e-mail. Enter
information in full-size characters or half-size alphanumerical characters.
Mail is sent with this subject name
・The subject name of message is not always displayed correctly because
of sender’s or receiver’s mail server.
⑦ From
Used to enter the sender's e-mail address of the alarm information e-mail.
Up to 80 1-byte alphanumerical characters, -, _, ., and @ can be entered.
⑧ Selected
Displays a list of selected Operators that will receive alarm messages.
Operators
⑨ Unselected
Displays a list of Operators preset with an e-mail address.
Operators
⑩ Add
Moves Operators selected in “Unselected Operators” to “Selected
Operators”.
144
OPERATION
Screen Item
Description
⑪ Delete
Removes a selected Operator from “Selected Operators”.
⑫ OK
Registers the settings and closes the "E-Mail Setting" screen.
The [OK] button becomes activated only after all essential entry items have
been entered.
⑬ Test
Sends a test e-mail using the settings you have made. When all the
necessary items are entered and the operator is added to “Selected
Operators”, it becomes possible to click the [Test] button.
⑭ Cancel
This button closes the "E-Mail Setting" screen without registering the
settings.
3. Click the [Test] button.
The confirmation message will appear.
4. Click the [Yes] button.
A test e-mail is sent. Check that the test e-mail has arrived at the e-mail address of the intended
Operator.
5. Click the [OK] button.
This registers the settings and closes the "E-Mail Setting" screen.
Backup/Restore ···········································································
If you make backups of the user information, setup information and log information of this software, you can
restore the system to a normal state if trouble occurs.
・The “Backup/Restore” function can be set or checked only by the operator whose privilege of
“Backup/Restore” has been set up.
■ "Backup/Restore" Screen
The "Backup/Restore" screen will appear by clicking the [Backup/Restore] button on the "Administration
Software" screen. Click the button for the task you want to perform.
145
OPERATION
①
③
②
④
Screen Item
Description
① Auto Backup Setting Click to display the "Auto Backup Setting" screen (p.146).
② Manual Backup
Displays the "Manual Backup" screen (p.151).
③ Restore
Displays the "Restore" screen (p.153).
④ Back
The screen returns to "Administration Software".
・You can access each Backup/Restore item directly without displaying the "Backup/Restore" screen by
selecting the items from the “Backup/Restore” menu on the menu bar.
■ "Auto Backup Setting" screen
Click the [Auto Backup Setting] button on the "Backup/Restore" screen, or select the [Auto Backup
Setting] of the "Backup/Restore" menu from the main menu. The "Auto Backup Setting" screen appears.
⑥
①
②
③
④
⑤
Screen Item
Description
① Auto Backup
Displays a list of backup schedules.
Schedule
② Delete
146
Deletes the schedule selected in “Auto Backup Schedule”.
OPERATION
Screen Item
Description
③ Details
Displays the "Auto Backup Details" screen (p.150).
④ New
Displays the "New Auto Backup Schedule" screen (p.148).
⑤ Close
This closes the "Auto Backup Setting" screen.
⑥ Select
Displays the “Browse for Folder” screen.
Set the destination of backup data storage.
■ Auto Backup Data Storage Setting
When the Auto Backup function is executed, set the destination of backup data storage.
【Procedure】
1. Click the [Select] button on the "Auto Backup Setting" screen.
The “Browse for Folder” screen appears.
①
②
③
Screen Item
Description
① Please select a
Specify a default folder to store the backup data from the tree display.
default folder.
The specified folder is required to be the folder that is located in the iris
server.
② OK
Confirms the default folder and returns to the "Auto Backup Setting"
screen.
③ Cancel
The screen returns to "Auto Backup Setting".
・This software is not applicable to the backup data output toward the common folder in the network
and the network drive. Do not make backup data setting through the network. Otherwise, this will
be a cause of system problem in case when a normal backup transaction is not accomplished.
2. Specify the default folder and click the [OK] button.
The screen returns to "Auto Backup Setting".
147
OPERATION
3. Make sure the default folder's path in “Backup Folder” on the "Auto Backup
Setting" screen is displayed
■ Registering Auto Backup Schedules
In regard to the user information of this software, various setting information, and log data, the schedule
for backup execution is registered. Backup files are made for each generation under the backup folder in
the folder in which this software is installed.
【Procedure】
1. Click the [New] button on the "Auto Backup Setting" screen.
The "New Auto Backup Schedule" screen appears.
2. Set the schedule information.
①
②
③
④
⑤
⑥
⑦
⑧
⑨
⑦
⑩
⑪
Screen Item
Description
① Name
Used to enter the name of the auto backup setting.
Up to 20 1-byte characters can be entered. Note, however, that the same
name as the registered schedule cannot be set.
② User Information
and Setup
Mark this checkbox if you want to back up user information and setup
information.
Information
③ Log information
Mark this checkbox if you want to back up log information.
④ Delete Log
Sets whether or not to delete log information from this software when log
information is backed up.
Select either of [Yes] or [No].
⑤ Monthly
Set this radio button if you want automatic backup performed once per
month.
⑥ of the Month
148
Used to set the day that the backup is made.
OPERATION
Screen Item
Description
⑦ Time
Sets the time that the backup is made.
The time can be set in 5-minute increments.
⑧ Weekly (Daily
Set this radio button if you want to make a backup every week.
Backup Possible)
⑨ Day of the Week
Mark the checkbox for the day of the week that you want the backup to be
made.
⑩ Register
Registers the schedule, and returns to the "Auto Backup Setting" screen.
This button becomes activated only after all essential entry items have been
entered.
⑪ Cancel
Returns to the "Auto Backup Setting" screen without registering the
schedule.
・The auto backup schedule cannot be registered in the following instances:
─ When the name of the schedule you entered already exists
─ When the date and time you entered are already registered under a different schedule name
・The backup file to be established by Auto Backup setting lasts for a maximum of three
generations, which is put in an output folder set as per “Auto Backup Data Storage Setting”
(p.147). The file name is established by “backupdata_0 to 2”.
When 4 or more effective backup schedules have been set up, the backup file of the first
execution schedule is replaced by that of the last execution schedule. Take measures of file
rename, etc., as required.
3. Click the [Register] button.
This registers the schedule and the screen returns to "Auto Backup Setting". To continue registering
different schedules, repeat the operation from Procedure 1.
4. Click the [Close] button.
This closes the "Auto Backup Setting" screen.
■ Updating and Deleting the Auto Backup Schedule
Update or delete the registered backup schedules.
【Procedure】
1. Select the schedule from “Auto Backup Schedule” on the "Auto Backup
Setting" screen.
・To update the data, click the [Details] button.
The "Auto Backup Details" screen is displayed.
・To delete the auto backup schedule, click the [Delete] button.
To delete the auto backup schedule, click the [Delete] button on the "Auto Backup Setting" screen.
A confirmation message will appear. Click the [Yes] button. After the auto backup setting is deleted,
the screen returns to "Auto Backup Setting".
149
OPERATION
The backup schedules can be selected in multiple.
2. Change or delete the auto backup setting.
・For updating
Necessary data are modified or amended with the values indicated on the screen.
・For deleting
To delete a schedule, click the [Delete] button and a confirmation message will appear. A
confirmation message will appear. Click the [Yes] button. This deletes the schedule, and the screen
returns to "Auto Backup Setting".
①
③
②
④
Screen Item
Description
① Switch Set
Displays the setup data displayed in the list of the “Auto Backup Settings”
Information
screen, in the order of “Display Settings/Total Number of Settings Displayed
in the List of Auto Backup Settings”.
button: Displays the previous schedule.
button: Displays the next schedule.
Sequential display is possible with buttons.
② Update
This updates the schedule, and the message "Updated successfully." will
appear.
This button becomes activated only after all essential entry items have been
entered.
③ Delete
Deletes the schedule. If there is another schedule after deletion, the next
schedule is displayed. If there is no schedule, the “Auto Backup Settings”
screen is recovered.
④ Close
The screen returns to "Auto Backup Setting".
For details of items not described above, refer to the table explaining the "New Auto Backup
Schedule" screen (p.148).
150
OPERATION
3. Click the [Update] button.
This updates the schedule, and the message "Updated successfully." will appear.
・The auto backup schedule cannot be updated in the following instances:
─ When the name of the schedule you entered already exists
─ When the date and time you entered are already registered under a different schedule name
4. Click the [Close] button.
This closes the "Auto Backup Setting" screen. To continue updating different schedules, repeat the
operation from Procedure 1.
■ Manually Backing Up Files
The user information, various setup data, and log data are backed up by manual operation.
【Procedure】
1. Click the [Manual Backup] button on the "Backup/Restore" screen.
The "Manual Backup" screen is displayed.
2. Set the backup information.
①
②
③
④
⑤
⑥
⑦
Screen Item
Description
① File Name
Displays the file name that was set in the storage destination folder in "Save
As".
② Browse
The "Save As" screen is displayed.
・The output destination folder set by “Auto Backup Data Storage Setting”
(p.147) is selected by default.
③ User Information
and Setup
Mark this checkbox if you want to back up user information and setup
information.
Information
④ Log Information
Mark this checkbox if you want to back up log information.
151
OPERATION
Screen Item
Description
⑤ Delete Log
Sets whether or not to delete log information from this software when log
Information After information is backed up.
Backup
⑥ Execute
Select either of [Yes] or [No].
Executes the backup, and the closes the "Manual Backup" screen.
This button becomes activated only after all essential entry items have been
entered.
⑦ Close
Closes the "Manual Backup" screen without executing the backup.
3. Click the [Browse] button.
The "Save As" screen is displayed.
4. Specify the storage folder.
Specify the folder to save the backup file on the “Save As” screen and set a file name. The file name
can be registered in 1-byte characters. \,/,:,,,;,*,?,",<,> and | are not allowed in file names.
・This software is not applicable to the backup data output toward the common folder in the network
and the network drive. Do not make backup data setting through the network. Otherwise, this will
be a cause of system problem in case when a normal backup transaction is not accomplished.
5. Click the [Save] button.
This screen return to "Manual Backup". Make sure that the destination path for the "Manual Backup"
screen is displayed in the “File Name”.
6. Click the [Execute] button.
The confirmation message will appear.
7. Click the [Yes] button.
This executes the backup, and the message "Backup completed" will appear.
8. Click the [OK] button.
This screen return to "Manual Backup".
9. Click the [Close] button.
The previous screen appears.
■ Restoring Backup Files
Restore this system to its previous state based upon backup files made automatically or manually.
【Procedure】
1. Click the [Restore] button on the "Backup/Restore" screen.
The "Restore" screen is displayed.
152
OPERATION
①
③
②
④
⑤
Screen Item
Description
① Backup File
Displays the name of the backup file stored in the default backup folder.
Name
② Browse
Used to search for the backup file.
③ Backup Data
The backup related information is displayed.
・File Created: Displays the date that the backup was made.
・User Information and Setup Information: Displays a check mark when the
user information and setup information is backed up.
・Log Information: Displays a check mark when the log information is
backed up.
④ Execute
Executes the restore, and closes to the "Restore" screen.
This button becomes activated only after a backup file has been set to
“Backup File Name”.
⑤ Cancel
The screen returns to "Backup/Restore" without executing the restore.
2. Click the [Browse] button and select the backup file folder.
The "Select Backup File" screen appears. The default folder of the where the backup files are stored
will be automatically displayed.
3. Click the [Open] button.
The screen returns to "Backup/Restore". Make sure that the full path is displayed in “Backup File
Name”.
4. Click the [Execute] button.
The confirmation message will appear.
5. Click the [Yes] button.
Restore is running. When the restore ends, the "Restore completed" message will appear.
6. Click the [OK] button.
The “Backup/Restore” screen is finished and the original screen is recovered.
・After the restoring operation, the operation specified below should be carried out, without fail.
Modification of various setting data should also be carried out, as required.
153
OPERATION
─ After the restoration, the status of all the iris readers is [- -] (MAC address not acquired). Select
the iris reader in the “Reader Setting/Maintenance” screen to make resetting.
154
OPERATION
Status Display Settings
Information about Operation in This Software ·························
The log data and alarm information are recorded in case any alarming condition is sensed by the iris server
and iris readers in the middle of system operation, such as operation by this software, iris reader operation
from this software, and recognition by iris readers.
・Alarm Information ·· Displays an alarm condition sensed by the iris server and iris readers. Confirmation
and deletion are possible through “Information Display Window”. Refer to Viewing
Alarm Information on page 156.
・System Logs·········· Records operation in this software and iris reader operation from this software. This
confirmation is made by system log in the “Log Information” screen. Refer to Viewing
Log Information (System Logs) on page 160.
・Access Log ············ Records the result of certification when the recognition by iris readers has been
performed. This confirmation is made by access log in the “Log Information” screen.
Refer to Viewing Log Information (Access Log) on page 163.
■ Display Time for Alarm and Log Information
The time displayed on the screen for alarm and system log information is based on the internal clock in
the iris server. The time is recorded when there is an alarm report from any iris reader.
In regard to the time for log information displayed on the screen for Access Log information, the time of iris
reader’s internal clock is recorded. When an iris reader is started, the time is synchronized with the iris
server. Since then, time synchronization is carried out at the intervals of one hour.
If there is no communication with the iris server when the iris reader is started, time synchronization is
impossible to carry out, and therefore date counting is started with "2005/01/01 00:00:00".
The recorded alarm and log information is controlled in the time serial mode, and it is retrieved and
displayed. For this reason, the recorded time is not always accurate if the system is used in any of the
following cases:
・In the case of an Access Log announcement when communication is not normal between the iris reader
and the iris server, or if time synchronization is impossible for the iris server and the iris reader.
・When the time is incorrect at the iris server.
・If the summertime system (Daylight Saving system) is adopted and the time system of the iris server
has been adjusted.
・When communication is not normal between the iris reader and the iris server and iris reader’s time
counting is started with "2005/01/01 00:00:00". In such a case, if a connection to the iris server is made
after the recognition or the like, the log data before the connection to the iris server is placed in front of
the overall log data. If the log data overflows, such excessive log data may be deleted immediately.
155
OPERATION
Viewing Alarm Information ·························································
Confirm alarm information through “Information Display Window”. This information display window is
minimized into a task tray of Windows®.
The alarm information to be displayed comes in the following:
・Whether or not there have been requests from iris readers not registered to this software
・Whether or not an iris reader has been switched
・Whether or not an error has occurred in the network between the iris server and the iris readers
・Whether or not an iris reader is malfunctioning
・Whether or not the number of users downloaded to this software and the iris readers match
For details of error information displayed in “Information Display Window” and the method of treating the
occurring errors, refer to Messages Displayed in Information Display Window on page 203.
■ Task Tray Icon
The icon on the task tray can be used startup this software and to display the "Information Display
Window". Right click this icon to display a popup menu. When [Information Display Window] is clicked
according to the popup menu, “Information Display Window” is displayed. If an alarm goes off, the task
tray icon changes from blue to red. And an alarm balloon message pops up.
● If an alarm goes off the icon changes from blue to red.
For the restoration of a blue icon, all alarms not checked yet should be turned into “Checked” in
“Information Display Window”.
● An alarm balloon message pops up.
・The alarm balloon message changes according to the iris server's operating system.
─ For Windows®2000: it disappears after 30 seconds
─ For Windows®XP: it remains displayed until it is clicked
■ Viewing alarms from "Information Display Window"
The following explains how to view alarm information that is displayed in the "Information Display Window".
156
OPERATION
【Procedure】
1. Right click the task tray icon to display a popup menu and click the
[Information Display Window] button.
The "Information Display Window" is displayed.
①
②
⑤
⑥
④
③
Screen Item
Description
① Unchecked/Total
This displays the number of alarm information items separately as
unchecked alarm information and all alarm information.
When there is unchecked alarm information, the number of unchecked
alarm information will appear in red."0" will appear when there is no
unchecked alarm information.
② Alarm Information
List
Displays a list of alarms.
Unchecked alarms appear in red.
Checked alarms appear in blue.
・If the display order of alarms is changed in list, new alarms are added to
the bottom of the list.
・Up to 1000 alarms can be displayed in list. When the total number of
alarms exceeds this limit (1000 items), the oldest checked alarm is
deleted from the list. When all alarm information is unchecked, the oldest
unchecked alarm is deleted from the list.
③ Details
Displays the "Detailed Information" screen.
④ Check
Restores any unchecked alarms to a previously checked status.
You can select to check multiple alarms in a single operation.
⑤ Unchecked
Restores any previously checked alarms to an unchecked status.
You can select to restore multiple alarms to an unchecked status in a
single operation.
⑥ Delete
Deletes a selected alarm from the list.
You can select to delete multiple alarms in a single operation.
157
OPERATION
2. Select an alarm from the alarm information list, and click the [Details] button.
The "Detailed Information" screen appears.
3. Check the contents of selected alarm.
④
⑤
①
②
③
⑥
Screen Item
Description
① Time
Displays the date and time that the alarm occurred.
② Place
Displays the device (reader name or iris server) that notified alarm
information.
③ Detailed
Displays the details of alarm information.
Information
④ Checked
Mark this checkbox if you want to set the currently viewed alarm to a
"checked" status.
⑤ Previous, Next
Displays the details of the previous or next alarm.
⑥ Close
The screen returns to "Information Display Window".
4. Click the [Close] button.
The screen returns to "Information Display Window".
5. Click the
button.
“Information Display Window” is minimized and accommodated in the task tray
■ Deleting Alarm Information
Alarm information is manually deleted. If the maximum number of items (1000 items) is exceeded, alarm
information is deleted in the order of the most obsolete date and time. In case when unnecessary
information is present, alarm information should be deleted manually.
158
OPERATION
【Procedure】
1. According to the list of alarm information in “Information Display Window”,
select the alarm logs.
The alarm logs can be selected in multiple.
2. Click the [Delete] button.
“Are you sure you want to delete it?” is displayed.
3. Click the [Yes] button.
Alarm information is deleted.
Viewing Log Information·····························································
In cases when this software is operated, an iris reader is operated from this software, there is
communication from an iris reader, recognition is performed with the iris reader, and so on, such information
is recorded as log information.
Log information is classified into the system log and the access log.
According to the “Log Information” screen, various operation is carried out, such as confirmation of system
log and the access log, sending an output to the log information CSV file (p.211), log information reading out
of a backup file, and so on. The operator having the privilege of “Log Information” is allowed to delete log
information.
■ "Log Information" Screen
From the main menu screen, click the [Log Information] button. Otherwise, select “Log Information” →
[System Logs] (or [Access Log]) from the menu bar to display the "Log Information" screen.
①
②
③
④
⑤
⑥
159
OPERATION
Screen Item
Description
① Displayed Log
Displays the type of log information that is the object of present display.
Current Log
The real-time log information is the object of display.
This information is updated each time the [Search] button is
clicked.
Backup File
The log information read from a backup file is the object of display.
② Log Search
Sets the conditions for the log information to be displayed in “Log List”.
③ Log List
Displays a list of searched logs.
④ Display Current
Returns the object of display from the log information read out of the backup file to the
Logs
latest log information. It can be clicked if the information has been read out of the
backup file.
⑤ Display Backup
Displays the list of backed up logs in the selected backup file. (p.171)
Logs
⑥ Close
The screen returns to main menu.
■ Viewing Log Information (System Logs)
System’s log information is searched and displayed on the “Log Information” screen. Details of the
searched system logs are displayed for confirmation.
【Procedure】
1. Select the [System Logs] radio button on the “Log Information” screen.
[System Logs] has been selected for initial setting. If access logs are displayed, however, click the ①
[System Logs] radio button shown in the diagram of Procedure 2.
2. Set the search conditions to “Log Search”.
Specify the search conditions to display the log information you wish to view from “Log List”.
If you wish to have all log information displayed, proceed to Procedure 3 without setting any search
conditions.
①
160
③
②
④
⑤
⑦
⑥
⑧
OPERATION
Screen Item
Description
① System Logs
Displays the system log information.
② Access Log
Displays the access log information.
③ Period
Specifies the period of log information being searched. The method of
designation comes in "Search Starting Day - Search Ending Day", "After the
Search Starting Day", and "Search Ending Day".
To specify the date, click the [Select] button for displaying the Search Starting
Day or the Search Ending Day. When this button is clicked, a calendar for date
selection is displayed. When the date is specified according to the calendar, the
date is displayed for the Search Starting Day or the Search Ending Day.
Search starting day
Search ending day
Calendar for data selection
Time input
Calendar display
When the date is designated, a time input can be entered. For the entry of time
input, a linear input may be entered in each input box in the mode of
"HH:MM:SS" or the UP/DOWN button is clicked for designation.
(Example) "13:05:20" is entered in the case of "1:05, 20 seconds, PM".
- Designation of Search Period ・"Search Starting Day - Search Ending Day"
Both of the Search Starting Day and the Search Ending Day are specified.
From the Search Starting Day, log information recorded during the period of
searching is displayed.
・"After the Search Starting Day"
Only the Search Starting Day is specified. Log information recorded during
the period from the Search Starting Day till the last recording day is displayed.
・"Till the Search Ending Day"
Only the Search Ending Day is specified. Log information recorded during the
period from the first recording day till the Search Ending Day is displayed.
④ Reader Name Click the [Select] button to display the "Reader Selection" screen and select an
iris reader. Log information related to the selected iris reader is searched.
When multiple readers are selected, click
and check the selected reader.
In regard to the method of iris reader selection and operation, refer to Search by
Designating the Reader on page 111.
161
OPERATION
Screen Item
Description
⑤ Category
Click the [Select] button to display the "Category Selection" screen and select a
category. Log information included in the selected category is searched.
When multiple categories are selected, click
and check the selected
category.
To select or operate the category, refer to Category Select Screen on page 167.
⑥ Result
Click the [Select] button to display the "Result Selection" screen and select
“Normal” or “Failed”. Log information corresponding to the selected result is
displayed.
When multiple results are selected, click
and check the selected results.
To select or operate the result, refer to Result Selection Screen on page 168.
⑦ Search
Displays a list of log information matching the search conditions you set in “Log
List”.
⑧ Clear
The preset searching conditions are deleted.
For details of screen items not described above, refer to Log Information Screen on page 159.
3. Click the [Search] button.
This displays a list of log information matching all search conditions set in Procedure 2.
If the search did not find any log information matching the search conditions, the message "Requested
log is not available." appears. Click the [OK] button, and modify the search conditions you entered in
Procedure 2.
①
Screen Item
Description
① Log List
Displays a list of searched system logs.
The [Normal] Log Information classified by [Result] is displayed in black
characters and the [Failed] Log Information is displayed in red characters.
4. Double click a log information in “Log List”.
The "Log Details" screen appears.
162
OPERATION
5. View the log information.
①
②
③
④
⑤
⑥
⑦
Screen Item
Description
① Category
Displays the log category.
② Time and Date
Displays the time and date that the log occurred.
③ Reader ID
Displays the ID of iris readers related to the log.
④ Reader Name
Displays the Reader Name related to the displayed log.
⑤ Detailed
Displays the details of the log information.
⑥ Log Information
In regard to the log information displayed in the "Log List" of the "Log
Display
Information" screen, information about the n-th log is displayed with [Total
Number of Logs being Displayed/Log List].
button: Displays the previous log information.
button: Displays the next log information.
Sequential display is possible with buttons.
⑦ Close
The screen returns to "Log Information".
・If the maximum number of system logs (5000 items) is recorded, the most obsolete data with the
date of the displayed log information may be deleted automatically. In such a case, there will be a
message of “Detailed information cannot be displayed as it has been deleted from database”.
6. Click the [Close] button.
The screen returns to "Log Information".
■ Viewing Log Information (Access Log)
The Access Log information is displayed on the “Log Information” screen. Details of the searched access
logs are displayed for confirmation.
163
OPERATION
・The access logs are sent to the iris server only for the iris readers for which the [Access Log] item has
been set at “Yes” as per [Access Log] (p.82) on the “Reader Setting Details” screen.
【Procedure】
1. Select “Access Log” on the “Log Information” screen.
Click the [Access Log] radio button.
2. Enter the search conditions to the [Log Search] columns.
Specify the search conditions to display the log information you wish to view from “Log List”.
If you wish to have all log information displayed, proceed to Procedure 3 without setting any search
conditions.
①
③
②
④
⑤
⑦
⑥
⑧
Screen Item
Description
① System Logs
Displays the system log information.
② Access Log
Displays the access log information.
③ Period
Specifies the period of log information being searched. For the method of
designation, refer to the descriptions (p.161) of ③ in the “Log Information”
screen of “Log Information Check (System Logs)”.
④ Reader Name Click the [Select] button to display the "Reader Selection" screen and select an
iris reader. Search an iris reader log Information to be selected.
When multiple readers are selected, click
and check the selected reader.
In regard to the method of iris reader selection and operation, refer to Search by
Designating the Reader on page 111).
⑤ User Name
Click the [Select] button to display the "User Selection" screen and select a
user. Log information related to the selected user is searched.
When multiple users are selected, click
and check the selected user.
In regard to the method of user selection and operation, refer to Search by
Designating the User on page 75.
164
OPERATION
Screen Item
Description
⑥ Result
Click the [Select] button to display the "Result Selection" screen and select
“Recognition accepted” or “Recognition rejected”. Log information
corresponding to the selected result is displayed.
When multiple results are selected, click
and check the selected results.
In regard to the method of results selection and operation, refer to "Result
selection Screen" on page 168.
⑦ Search
Displays a list of log information matching the search conditions you set in “Log
List”.
⑧ Clear
The preset searching conditions are deleted.
For details of screen items not described above, refer to Log Information Screen on page 159.
3. Click the [Search] button.
This displays a list of log information matching all search conditions set in Procedure 2.
If the search did not find any log information matching the search conditions, the message "Requested
log is not available." appears. Click the [OK] button, and modify the search conditions you entered in
Procedure 2.
①
Screen Item
Description
① Log List
Lists the matching access log information.
Log information of “Recognition accepted” classified by “Result” is displayed
in black characters and log information of “Recognition rejected” is displayed
in red characters.
4. Double click a log information in “Log List”.
The "Log Details" screen appears.
5. View the log information.
165
OPERATION
①
②
③
④
⑤
⑥
⑦
Screen Item
Description
① Result
The result of recognition is displayed.
② Time and Date
Displays the date and time when certification is performed.
③ Reader ID
Displays the reader ID for which certification is performed.
④ Reader Name
Displays the reader name for which certification is performed.
⑤ Detailed
Displays the details of the access log information.
⑥ Log Information
In regard to the log information displayed in the “Log List” of the "Log
Display
Information" screen, information about the n-th log is displayed with “Total
Number of Logs being Displayed/Log List”.
button: Displays the previous log information.
button: Displays the next log information.
Sequential display is possible with buttons.
⑦ Close
The screen returns to "Log Information".
・If the maximum number of access logs (20000 items) is recorded, the most obsolete data with the
date of the displayed log information may be deleted automatically. In such a case, there will be a
message of “Detailed information cannot be displayed as it has been deleted from database”.
6. Click the [Close] button.
The screen returns to "Log Information".
■ "Category Selection" Screen
The "Category Selection" screen will appear by clicking the [Select] button of "Category” on the "Log
Information" screen.
166
OPERATION
【Procedure】
1. Select the category from the "Category Selection" screen.
①
②
③
④
⑤
Screen Item
Description
① Category
Displays a list of categories.
② Select All
Selects all categories currently displayed in “Category”.
③ Clear All
Clears the selection of all categories currently displayed at “Category”.
④ OK
Saves the selected category, and returns to the "Log Information" screen.
⑤ Cancel
The screen returns to "Log Information" without selecting a category.
2. Click the [OK] button.
The log category is selected and the screen returns to "Log Information".
■ "Result Selection" Screen
When the [Select] button of result is clicked on the “Log Information” screen, the “Result Selection” screen
is displayed.
【Procedure】
1. Select a result from the "Result Selection" screen.
The contents of display in “Result” of the “Result Selection” screen can differ according to the system
logs and the access logs. (See the diagram shown below.)
167
OPERATION
System Logs
Access Log
①
③
②
④
⑤
Screen Item
Description
① Result
Displays the contents of the result of selection in a list.
For system logs, "Normal" or "Failed" is displayed. For access logs,
"Recognition Accepted" or "Recognition Rejected" is displayed.
② Select All
Selects both results displayed in “Select Result”.
③ Clear All
Clear all selected results displayed in “Select Result”.
④ OK
The selected result(s) is confirmed, and the screen returns to "Log
Information".
⑤ Cancel
The screen returns to "Log Information" without selecting a result.
2. Click the [OK] button.
A result is selected, and the screen returns to "Log Information".
■ Deleting Log Information
Delete log information selected according to the “Log List” in the “Log Information” screen. The same
operation is performed for both system logs and access logs.
【Procedure】
1. Set the search conditions under “Log Search” on the "Log Information"
screen.
To display all log information in “Log List”, proceed to Procedure 2 without setting the search
conditions.
168
OPERATION
①
Screen Item
Description
① Delete
Deletes the selected log information.
For details of screen items not described above, refer to "Log Information" Screen on page 159.
2. Click the [Search] button.
This displays a list of log information matching all search conditions set in Procedure 1.
If the search did not find any log information matching the search conditions, the message "Requested
log is not available." appears. Click the [OK] button, and modify the search conditions you entered in
Procedure 1.
3. Select a log information in “Log List”.
Log information displayed in the “Log List” is selected. Log information can be selected in multiple.
4. Click the [Delete] button.
“Are you sure you want to delete it?” is displayed.
5. Click the [Yes] button.
Log information is deleted from the “Log List”.
・If the maximum number of log items (system log: 5000 items, access log: 20000 items) is
recorded, the most obsolete data with the date of the displayed log information may have been
deleted automatically.
■ Outputting Log Information to File
Log information displayed in the “Log List” on the "Log Information" screen is sent to the log information
CSV file (p.211).
169
OPERATION
【Procedure】
1. Set the search conditions under “Log Search” on the "Log Information"
screen.
When all log information is displayed in the “Log List”, do not make the settings of search conditions,
but proceed to Procedure 2.
①
Screen Item
Description
① Output to File
Sends out the data output to the file.
For details of screen items not described above, refer to "Log Information" Screen on page 159.
2. Click the [Search] button.
This displays a list of log information matching all search conditions set in Procedure 1.
If the search did not find any log information matching the search conditions, the message "Requested
log is not available." appears. Click the [OK] button, and modify the search conditions you entered in
Procedure 1.
3. Click the [Output to File] button.
The "Save As" screen is displayed.
4. Set the output file name.
Specify the folder to output the log information CSV file on the “Save As” screen and set a file name.
Enter the CSV file name.1-byte characters can be entered. Otherwise, \,/,:,,,;,*,?,",<,> and | are not
allowed in file names.
5. Click the [Save] button.
Log information displayed in the "Log List" is sent to the log information CSV file and a message of
“Output to file is complete” is displayed.
6. Click the [OK] button.
The screen returns to "Log Information".
170
OPERATION
・If rearrangement is needed in the “Log List” of the “Log Information” screen, a file output is sent
out in the rearranged condition.
■ Viewing Log Information Backups
When backups that contain log information (p.148 and 151) have been made, browse log information
contained in backup files on the "Log Information" screen.
【Procedure】
1. Click the [Display Backup Logs] button.
The "Select Backup File" screen appears.
2. Select the backup file.
Specify the folder that is storing the backup file on the "Select Backup File" screen and select the
backup file with log information.
3. Click the [Open] button.
This loads the log information from the backup file selected in Procedure 2, and the screen returns to
"Log Information". The log information viewed on the "Log Information" screen changes to display the
log information recorded to the backup file, and will appear as a backup file in “Log List”.
4. View the log information.
For the method of confirmation, refer to Viewing Log Information (System Logs) on page 160 and
Viewing Log Information (Access Log) on page 163.
・Log information read out of the backup file can be arranged into a file output (CSV mode). For
further details, refer to Outputting Log Information to File on page 169.
5. When you have finished viewing the log information of the backup file, click
the [Display Current Log] button to check the current log information.
The log information displayed on the "Log Information" screen will change to display the "Current Log"
displays.
171
OPERATION
IC Card Setting
The method of IC card writer setting is described below.
IC Card Setting·············································································
In order to write the user information in the IC card, the IC card writer is set up.
When IC card writer setting is made, it becomes possible to write the enrolled and updated user information
in an IC card to verify it, according to the “New User Enrollment” screen and the “User Information Details”
screen. It is also possible to delete data written in the IC card.
【Procedure】
1. Click the [IC Card Setting] button on the "Environment Settings" screen.
The "IC Card Setting" screen appears.
①
②
③
⑤
④
Screen Item
Description
① IC Card Writer
Selects a required IC card writer according to the pull down list. If no IC
card writer is going to be used, the column is left void.
If an IC card writer made by HID, Inc. is used, "HID" is selected. If an IC
card writer made by RFIDeas, Inc. is used, "RFIDeas" is selected.
② Communication Port Designates the iris server port to make a connection to an IC card writer.
Either of USB, COM1 to 5 is selected.
③ OK
Reserves the setting condition for each item.
④ Write Key
Keys for the IC card, IC card writer, and IC card reader are updated.
⑤ Cancel
The original screen is recovered without performing.
・The IC card writer made by HID, Inc. and intended to be supported by this software is only
equipment that is applicable to "iClass". For further details, refer to the instruction manual that is
attached to the IC card writer or ask your sales agency.
・For COM port communication setting and others, refer to the instruction manual that is attached to
the IC card writer.
172
OPERATION
2. According to the IC card writer being used, make settings for “IC Card Writer”
and “Communication Port”.
3. Click the [OK] button.
When the setting is reserved, “Updated successfully.” is displayed.
4. Click the [OK] button.
Close the “IC Card Setting” screen and recover the previous screen.
173
OPERATION
Key Updating
Keys for the IC card, IC card writer, and IC card reader are updated.
Key Updating ···············································································
To raise the system’s security level, it is possible to update the keys for IC cards, IC card writers, and IC
card readers. If there is no coincidence of keys between an IC card and an IC card writer, it is impossible to
write the user information in the IC card to update the key. If there is no coincidence of keys between an IC
card writer and an IC card reader, it is impossible to read out the user information from the IC card.
【Procedure】
1. Click the [Write Key] button on the "IC Card Setting" screen.
The "Write Key" screen appears.
① ②
③
④
⑥
⑤
Screen Item
Description
① Key
Used to enter input for the setup key.
16 characters can be set up in hexadecimal notation.
② Default Key 1
When the Default Key of Blank Card is used, its check box is turned ON.
③ Default Key 2
When the Default Key of card programmed or configured by HID, Inc. is
used, its check box is turned ON.
④ Key Updating
Destination
Designate the key's updating destination with the radio button. [IC Card],
[IC Card Writer], and [IC Card Reader] can be selected.
⑤ Write Key
Used for key updating.
⑥ Close
The screen returns to "IC Card Writing".
2. Set up the key to be used and specify the key’s updating destination.
3. Click the [Write Key] button.
A confirmation message appears. Click the [Yes] button.
174
OPERATION
4. Click the [Close] button.
The screen returns to "IC Card Setting".
・The iris server reserves 5 key items used in the past. If there occurs a key discrepancy between
the IC card and the IC card writer, these keys are used for IC card writing, key updating, and
others. In such a case, the keys of the IC card and the IC card writer are updated to the latest
ones.
175
SYSTEM VERSION UPGRADING
SYSTEM VERSION UPGRADING
■ Introduction
In regard to the system composed of the administration software of the previous version “Product No.:
BM-ES300A <BM-ES300AE> (to be called hereafter the administration software of the previous version)”
and the iris reader “Product No.: BM-ET300A <BM-ET300AE> (to be called hereafter the iris reader of the
previous version)”, explanations below are given for the version upgrading of system structuring to be
accomplished with the use of this software.
For system structuring with the use of this software, iris readers of the previous versions can be used
immediately. In addition, data can be moved with the use of the administration software of the previous
version.
・This administration software (Product No.: BM-ES300E) can also move data, but only to the backup file
and the user information export file (in cab mode). For the iris readers of the previous version, "Product
No.: BM-ET300E" is not included.
・Readers of the previous version can be used together with the iris reader "Product No.: BM-ET330
<BM-ET330E>". However, the same functions cannot be assured.
■ Flow of Operation
The flow of operation is shown below in regard to system version upgrading.
Flow of operation for system version upgrading
Version Upgrading for the Administration Software
・Data Backup:p.178
・Uninstalling the Administration Software of the Previous Version:p.178
・Installing This Software:p.21
Movement of Data
・Restoring Backup Files:p.179
・Importing the User Information Export File:p.182
Setting the Readers of the Previous Version
・Reader Information Set:p.184
・Reader Operation:p.189
176
SYSTEM VERSION UPGRADING
System Construction
An example of system configuration is described below on the assumption that version upgrading is attempted
from an existing system.
IC Card Writer*
④
①
Card Reader(I)*
Recognition Reader△2
IC Card
②
Backup Data
DB
Iris Server
Access Control Panel*
△1
Enrollment Reader
⑤
Electric Lock*
LAN
Enrollment Reader△2
③
Recognition Reader△2
Recognition Reader△1
DB
DB
Card Reader(W)*
Card Reader(W)*
Access Control Panel*
Existing system
Electric Lock*
Access Control Server*
LAN Connection
Wiegand Connection
RS-485 Connection
Mark △ denotes the model number
of the reader.
△1:BM-ET300A(BM-ET300AE)
△2:BM-ET330 (BM-ET330E)
Equipment marked by asterisks * is the product by other firms.
In the system shown below, system structuring is carried out by performing operation explained below.
①: Version upgrading is carried out for the administration software.
②: The backup data from the administration software of the previous version is restored to change the
setting conditions, so that the iris readers of the previous version can be activated.
③: The iris readers (BM-ET330 <BM-ET330E>) and the card reader (W) are added to the existing
access control panel in Wiegand connection.
④: The iris readers (BM-ET330 <BM-ET330E>), the card reader (I), and the access control panel in
RS-485 connection are added to the existing system.
⑤: Connect the iris readers (BM-ET330 <BM-ET330E>) and set up multiple enrollment iris readers.
177
SYSTEM VERSION UPGRADING
Version Upgrading for the Administration Software ················
For version upgrading for the administration software, it is necessary to uninstall the administration software
of the previous version with the aid of the iris server. When the administration software is uninstalled, all
registration and setup information is deleted. Therefore, as required, measures should be taken through
data backup operation by the administration software of the previous version.
■ Data Backup
To take backup actions for various registration and setup information from the administration software of
the previous version, refer to the relevant instruction manual furnished to the administration software of
the previous version.
The following data can be moved from the administration software of the previous version to this software:
・Backup data (cab file) output in manual or automatic backup mode
・User information export file output in yes (cab file) mode
To restore the output data in this software, refer to Movement of Data on page 179.
The data restored in this software may require some setup change. To edit the restored data, refer to
Setting the Readers of the Previous Version on page 184.
■ Uninstalling the Administration Software of the Previous Version
To uninstalling the administration software of the previous version, refer to the relevant operating
instructions furnished to the administration software of the previous version.
Cautions Needed to Install the User Licence Added Software
Ver.1.21 or Former ·······································································
You can use this software equipped with the User Licence Software Version 1.21 or former installing the
additional software. The number of total licences is understated by 25 in the file copy screen called up when
installing the User Licence Software. This is because the User Licence Software does not acquire the 25
licences that are added when installing this software. However, the number of “licences (25) + licences
installed with User Licence Software” is displayed on the version information screen of this software. You
can register user information until up to the displayed number is used.
178
SYSTEM VERSION UPGRADING
Movement of Data
The method of moving the user information and various setting information from the administration software of
the previous version to this software and various operation needed in this software after the movement of data
are described below.
Data That Can Be Moved ····························································
The data that can be moved from the administration software of the previous version to this software is: the
backup data file (cab file) output in manual backup mode and the user information export file (cab file) in Yes
mode. It is impossible to import the user information export file (CSV file) in No mode and the iris reader
information export file (CSV file).
Restoring Backup Files·······························································
It is possible to restore the backup file output from the administration software of the previous version to this
software. In this case, however, it is necessary to carry out manual setting of the items described below,
because the specifications are different from those of this software.
■ Default Reader Setting
If Default Reader Setting are already set in the restored backup file, such settings are not reflected.
Setting is needed again by this software. For this setting, refer to Reader Data Registration on page 28
and thereafter.
When setting is made again, the iris readers of the previous version may support only the card reader (W)
and the access control panel in Wiegand connection. For this reason, it is necessary to make settings
according to "Connection type ①".
・With the iris readers of the previous version, the card reader (I) and the access control panel in RS-485
connection are not supported.
■ Reader Information
If the iris reader’s information is already set in the restored backup file, the following values are reflected:
In addition, when changing the restored iris reader information, refer to Reader Information Setting on
page 184.
・Reader ID (9-digit application)
・Reader Name
・IP Address
・Group
179
SYSTEM VERSION UPGRADING
・Recognition Mode
・Server Certification
・Audio Mode
・Guidance Language
・Output1 (Recognized Signal)
・Output2 (Rejected Signal)
・Live Indicator
・Pulse Width (Wiegand Settings)
・Pulse Interval (Wiegand Settings)
・Bit Length (Site Code, Card Number) (Wiegand Settings)
・In this software, it is necessary to register a maximum of 5 digits of the Reader ID (half-size value:
1 to 99999). It can be used immediately if the iris reader information in 6 to 9 digits of the Reader
ID has been registered in the backup file, or if there is a connection from the iris reader of the
corresponding Reader ID after the restoration. If the iris reader information only is registered
(MAC address not acquired), it is necessary to set up the Reader ID of up to 5 digits at the time of
iris reader information updating.
・If more than 257 Groups are registered in the restored backup file, the Groups of 257th and
thereafter will be abolished in the order of rising group names. For the iris reader information
belonging to the abolished Groups, the relationship with the Groups is cancelled.
・For the iris readers of the previous version, Output Width of Output 1 (Recognized Signal) and
Output 2 (Rejected Signal) are not supported.
・When the “Japanese” or the “Dutch” is selected for the setting of iris reader's guidance language
by this software, the audio output from BM-ET300A comes in the “Japanese”. If the “Korean” or
the “Swedish” is selected, the audio output from BM-ET300A comes in the “Korean”.
・When the “Dutch” or the “Swedish” is selected as a guidance language for the iris reader
information of the restored backup file, the Japanese is set for the Dutch language and the Korean
is set for the Swedish language in this software. Therefore, manual setting should be carried out
again.
・When the “Japanese” or the “Dutch” is selected for the setting of iris reader's guidance language
by this software, the audio output from BM-ET300AE comes in the “Dutch”. If the “Korean” or the
“Swedish” is selected, the audio output from BM-ET300AE comes in the “Swedish”.
・For replacing the name of the iris reader, BM-ET300A <BM-ET300AE>, with BM-ET330 <BMET330E>, type unspecified items on the “Reader Setting Details” screen.
The values specified below are automatically acquired when communication is maintained with the iris
reader (MAC address acquired). If the iris reader information only is registered (MAC address not
acquired), it is necessary to make manual setting.
‧ Security Level
‧ Access Log
‧ Card Type (Standard only)
‧ Card Reader Connection
‧ Reject ID
180
SYSTEM VERSION UPGRADING
・When you want to use an iris reader of the previous version, you have to use the “Setup Software”
attached to the administration software of the previous version to change the values of the abovementioned “Security Level”, “Access Log”, “Card Reader Connection”, “Reject ID”, “Reader ID”,
and “IP Address”. For details and operation of the iris reader’s initial setup software, refer to the
iris reader’s operating instructions (Setup Manual). Values cannot be modified with the Setup
Software that is attached to this software.
・When communication is maintained with an iris reader (MAC address acquired), the card type is
automatically set at “Wiegand”. With any iris reader of the previous version, the card reader (I) is
not supported.
It is necessary to make manual setting for the values specified below.
・Server IP Address
・Subnet Mask
・Gateway IP Address
・In this software, values cannot be changed with the Setup Software that is attached to the iris
reader.
■ User Information
If the user information is already registered in the restored backup file, the following values are reflected:
・User ID
・Name
・Card ID
・Department
・Telephone
・Facsimile
・E-mail Address
・Memo
・Group (up to 256 groups)
・Iris Data
・For the Groups set in the user information, a maximum of 256 groups can be restored. If 256 or
more Groups are set, the Groups of 257th and thereafter will be abolished in the order of rising
group names.
181
SYSTEM VERSION UPGRADING
The following values need be set up manually.
・Recognition Setting
・Guidance Language
・Recognition setting is made with default “Enable Reader Recognition”.
・With the recognition setting made at “Enable Server Certification Only”, the user may carry out
certification with the iris reader of the previous version. When the result of certification is OK, the
user information is distributed to the iris readers. Therefore, further certification is carried out by
the iris readers.
・Guidance language should be set, as required.
■ Group Information
If the group information is already set in the restored backup file, the relationship with the simultaneously
restored iris reader information and user information are left maintained during registration. If 257 or more
Groups are set, the Groups of 257th and thereafter will be abolished in the order of rising group names.
The relationship of the user information and iris reader information with the abolished Groups is cancelled.
■ Operator's Information
If restoration is carried out with this software in the status that an operator of “Operator Privilege” is
accommodated in the backup file that has been output from the administration software of the previous
version, this operator will be enrolled as the one for whom no privilege is set up.
Importing the User Information Export File ······························
It is possible to import (p.121) a user information export file “With iris data (cab file)” that has been
exported from the administration software of the previous version.
The following values of the imported user information are reflected:
・User ID
・Name
・Card ID
・Department
・Telephone
・Facsimile
・E-mail Address
・Memo
・Iris Data
・In this software, no group setting is reflected for the Groups set in the user information at the time
of importing.
182
SYSTEM VERSION UPGRADING
The values other than the above need be set up manually.
・Recognition Setting
・Guidance Language
・Recognition setting is made with default “Enable Reader Recognition”.
・Guidance language should be set, as required.
183
SYSTEM VERSION UPGRADING
Setting the Readers of the Previous Version
The method of setting is described below on the assumption that an iris reader of the previous version is used
for system structuring to be accomplished with the use of this software.
Reader Information Setting·························································
When an iris reader of the previous version is newly registered in the iris reader information, refer to Reader
Data Registration on page 28 and thereafter in the Chapter of System Introduction, and register the iris
reader information according to the setting of administration software "Connection type ①".
Otherwise, register the iris reader information through the restoration (p.179) of a backup file output from the
administration software of the previous version.
The iris reader information registered in this software is used to identify the iris reader version when the iris
reader’s MAC address is acquired during communication between the iris reader and the iris server. When a
connection is attempted from an iris reader of the previous version, the items without relation to the iris
reader of the previous version cannot be set up on the “Reader Setting Details” screen.
In this section, explanations are given on the assumption that the iris reader’s power supply is turned on
(p.41) and communication is maintained between the iris reader and the iris server (MAC address acquired).
【Procedure】
1. The “Reader Setting/Maintenance” screen is displayed for iris reader
information search.
According to the procedures of “Reference to and Display the Reader Information” (p.69), the iris
readers to be distributed are displayed in the iris reader list. The iris readers of the previous version
displayed in the “Reader List” are indicated as administration software(ET300A) that comes after the
“Reader Name”. (Refer to the diagram shown below.)
2. Select an iris reader from “Reader List” and click the [Details] button.
The “Operation Info” tabscreen on the “Reader Setting Details” screen appears. “Reader ID”, “Server
IP Address”, “Subnet Mask”, and “Gateway IP Address” cannot be edited. To change these values, it
is necessary to delete these values once and register the iris reader information from the beginning or
iris reader setting may be updated again by the use of the Setup Software.
184
SYSTEM VERSION UPGRADING
・For more details, operation, etc., about the setting of “Reader ID”, “Server IP Address”, “Subnet
Mask”, and “Gateway IP Address” with the Setup Software, refer to the iris reader’s instruction
manual. These values can be set up with the BM-ET300 Setup Software that is furnished to the
administration software of the previous version.
①
②
③
④
For the screen items other than the above, refer to the “Registered Data” (p.72 and p.81) tabscreen.
Screen Item
Description
① Reader ID*
Displays the reader ID. No modification is possible.
・To change a Reader ID, you must first delete the reader, then re-register
the reader. At that time, register the Reader ID of up to 5 digits.
② Server IP
Not displayed.
Address*
③ Subnet Mask*
Not displayed.
④ Gateway IP
Not displayed.
Address*
The screen items marked by asterisks * in the above table cannot be edited or updated from this
software.
3. Click the [Operation Info] tab.
The “Operation Info” tabscreen appears. For the “Security Level” and “Access Log”, the values
acquired during communication with the iris reader (MAC address acquired) are displayed. No
modification is possible. No selection is possible either because “Only” of “Server Certification” and the
functions of “Output Width” of “Output 1 (Recognized Signal)” and “Output 2 (Rejected Signal)” are not
available.
185
SYSTEM VERSION UPGRADING
②
①
③
④
⑤
For the screen items other than the above, refer to the "Registered Data" tabscreen (p.72), and the
“Operation Info” tabscreen (p.82).
Screen Item
Description
① Security Level
Displays the Security Level obtained from the iris reader.
② Access Log
Displays the Access Log obtained from the iris reader.
③ Only (Server
Not applicable to the setting of [Only] for the iris readers of the
Certification)
④ Output Width
(Output1(Recognized
previous version.
Not applicable to the setting of “Output Width” of “Output 1” for the iris
readers of the previous version.
Signal))
⑤ Output Width
(Output2(Rejected
Not applicable to the setting of “Output Width” of “Output 2” for the iris
readers of the previous version.
Signal))
・To modify the values of “Security Level” and “Access Log”, it is necessary to use the “Setup
Software” furnished to the administration software of the previous version. For details and
operation of the Setup Software, refer to the iris reader’s operating instructions (Setup Manual).
Values cannot be modified with the iris reader’s initial setup software that is attached to this
software.
4. Click the [Card Reader] tab.
The “Card Reader” tabscreen appears. For “Card Type”, [Standard] is automatically selected. For
“Card Reader Connection”, the values acquired during communication with the iris reader (MAC
address acquired) are displayed. When “Card Reader Connection” is “Yes”, the items can be set in the
columns of “Recognition Mode” and “Wiegand Settings”.
186
SYSTEM VERSION UPGRADING
①
②
③
④
For the screen items other than the above, refer to the "Registered Data" tabscreen (p.72), and the
“Card Reader” tabscreen (p.84).
Screen Item
Description
① Card Type
For an iris reader of the previous version, [Standard] is automatically
selected because it is applicable only to the card reader (W).
② Card Reader
Connection
Displays whether or not the card reader connection acquired from the iris
reader is present.
When “Card Reader Connection” is “Yes”, the items can be set in the
columns of ③ “Recognition Mode” and ④ “Wiegand Settings”.
③ Recognition Mode
The method of recognition is set up when a card reader is connected to the
iris reader. The method of recognition is set up when a card reader is
connected to the iris reader.
④ Wiegand Settings
Used to set up each item of Wiegand communication setting for the iris
reader and the card reader (W). When “Card Reader Connection” is “Yes”,
setting becomes possible.
・The iris reader resets automatically when the “Card Reader” settings are changed. Iris recognition
cannot be done while the iris reader is being reset.
・Match the “Card Reader” settings to those of the card reader (W).
5. Click the [Access Control Panel] tab.
The “Access Control Panel” tabscreen appears. For the “Communication Method”, [Wiegand] is
automatically selected. The items are set up in the column of “Wiegand Settings”. However, “Reject
ID” cannot be selected because this function is not applicable.
187
SYSTEM VERSION UPGRADING
①
②
For the screen items other than the above, refer to the "Registered Data" tabscreen (p.72), and the
“Access Control Panel” tabscreen (p.86).
Screen Item
Description
① Communication
For an iris reader of the previous version, [Wiegand] is automatically
Method
② Wiegand Settings
selected because it is applicable only to the card reader (W).
Used to set up each item of Wiegand communication setting for the iris
reader and the card reader (W). When “Card Reader Connection” is “Yes”,
setting becomes possible. However, “Reject ID” cannot be selected
because this function is not applicable.
・The iris reader resets automatically when the “Access Control Panel” settings are changed. Iris
recognition cannot be done while the iris reader is being reset.
・Match the “Access Control Panel” settings to those of the access control panel.
6. Click the [Update] button.
This updates the information of the iris reader. To update other iris reader information, select the iris
reader by the switch display button, and repeat the procedure for Procedure 2.
・According to the contents of setting, an iris reader may be reset automatically.
7. Click the [Close] button.
The screen returns to "Reader Setting/Maintenance".
188
SYSTEM VERSION UPGRADING
Reader Operation ········································································
When an iris reader of the previous version is operated by this software, the method specified below will be
used.
■ Setting to Enrollment Reader
Refer to Changeover Operation from an Enrollment Iris Reader to a Recognition Iris Reader on page 89.
The enrolled iris reader can be returned to the certification iris reader.
■ Get Reader Status
Refer to Checking Reader Status on page 91.
・In the state of the acquired iris reader, “Audio File Version” is not displayed because this function is not
installed.
■ Resetting Readers
Refer to Resetting Readers on page 93.
■ Reader’s Recognizing Operation Start/Stop
Refer to Starting and Stopping Readers on page 94.
■ Downloading Software to the Reader
Refer to Updating Reader Software on page 94.
・For the iris readers of the previous version, the software (File Name: ET330_XXYY.bin) of the iris
reader (Item No.: BM-ET330 <BM-ET330E>) cannot be downloaded.
・The download file is used to specify the ET300A_XXYY.bin file of a folder where the Reader Software
has been installed. XXYY is the software version number. To install the Reader Software, refer to the
Installation Guide that is located in the ET300 folder of the CD-ROM for administration software
installation of the previous version.
■ Downloading Audio Software
Execution is impossible because this function is not applicable.
■ Reader Expansion Feature
Execution is impossible because this function is not applicable.
Even though the MAC address has been acquired in the “Reader Selection” screen for the reader
extension feature, (BM-ET300A <BM-ET300AE>) is not displayed in the “Reader List”.
189
SYSTEM VERSION UPGRADING
■ RS-485-applied Card Reader Connection
Since the connection terminal mounted on the iris reader is not available, it is impossible to make a
connection.
190
APPENDICES
APPENDICES
191
APPENDICES
List of Error Messages
Error Messages Displayed during Installation··························
Error Message
Description of Error and Action
Write to temporary directory error
Environmental variable TEMP must be set to write to a
temporary directory. Make sure that the temporary folder
exists and that there is enough disk space to store the
setup. Delete the temporary folder if it exists and execute
Setup.exe again.
<file name> extraction to temporary directory
Make sure that the Temp folder is write-enabled. (See
error
"Write to temporary directory error.") If the Temp folder is
write-enabled a probable cause is that the file was
damaged during setup. Check the file to see if it is damaged
and re-execute Setup.exe.
Free disk space of <xxxx> kbytes is required
Not enough free disk space at the target location. Make
in <folder> for setup. Increase free disk
sure that there is at least 10MB of free space on the drive to
space and execute again.
install the setup to.
All users of machines do not have sufficient
Administrator authority is required for completing this
authority for completing this installation. Log
installation on Windows® 2000 and Windows® XP.
in as an administrator and execute this
installation again.
The setup cannot be executed using the
Execute the setup and select another language.
selected language as the ANSI code page for
<language> is not installed on the system.
Execute the setup and select another
language.
Cannot extract file <file name>.
This error occurs when a file compressed by Setup.exe
cannot be extracted. Make sure that there is enough disk
space for the Temp folder (or Windows or WinNT folder) or
that the setup can be written to these folders.
Cannot save file: <file name>
Make sure that the specified file does not already exist or
that there is enough free disk space at the target volume.
192
APPENDICES
Error Messages Displayed by This Software ····························
Error Message
Description of Error and Action
0 cannot be used as a digit in a Card
The entered value is wrong. Enter the correct number.
Number.
A Group search condition has already been
A User Name and Group cannot be specified together at
entered so a User Name search condition
the same time as a search condition. Specify only one of
cannot be entered.
these conditions.
A User Name search condition has already
A User Name and Group cannot be specified together at
been entered so a Group search condition
the same time as a search condition. Specify only one of
cannot be entered.
these conditions.
Access from an unidentified reader.
Access was made from an unidentified iris reader. Make
Unidentified iris reader's MAC address:
sure that the reader status is normal. If a malfunctioning iris
reader has been replaced, use this software to clear the
MAC address.
An error has occurred in Reader ID: XXXX
Communication has failed with the reader for the
from Recognition Reader/Enrollment Reader
reader/enrollment reader changeover actions.
changeover operations.
Check the connection status.
An export file cannot be created.
Normal processing cannot be completed due to the lack of
An unregistered reader is connected.
folder capacity. Check the destination folder.
There is a connection from a reader not registered by this
software. Register the reader if access is not unauthorized.
Audio file cannot be downloaded to a reader
The specified reader cannot operate for reasons that it is in
that has not acquired a MAC address, whose
the middle of resetting or the power is not turned on. Turn
status is unknown or is being reset, requires
the power on, or if resetting is on the way, wait for a
a download, or is BM-ET300A.
moment and retry.
Do you want to download audio file to other
reader?
Auto backup schedule was changed by an
The auto backup schedule has been manipulated from
external operation.
outside this software. Re-register the schedule.
Auto reboot schedule was changed by an
The auto reboot schedule has been manipulated from
external operation.
outside this software. Re-register the schedule.
Backup failed.
Backup processing failed. Check the specified output
destination for any errors.
Backup folder name should be specified by
There is no setting of a path that includes the drive name of
drive and path.
the file specified as the destination. Specify the path that
includes the drive name.
Backup is in progress. Cannot execute
The specified process cannot be executed since a backup
another process simultaneously.
operation is in progress. Wait a while before trying the
operation again.
Cannot create backup file since backup folder
The file cannot be created as a folder specified as the
is Read-only.
backup destination is Read only.
193
APPENDICES
Error Message
Description of Error and Action
Cannot create backup file.
The folder cannot be created as a folder higher up in the
folder hierarchy specified as the backup destination is Read
only. Change the folder attribute.
Cannot enroll users since the number of
An attempt was made to enroll a user beyond the maximum
enrolled users exceeds the licence limit of
number allowed by the licence. Either add another licence
xxxx.
or delete an unnecessary user.
Cannot find auto backup folder.
The folder specified as the backup destination does not
exist. Specify the correct folder.
Can't create file since the designated export
The file cannot be created in the folder specified as the
folder is read-only.
output destination as it's read-only. Specify a different folder
name.
Can't create folder.
Card ID exceeds bit length.
Card ID is incorrect.
Failed to create the specified folder as the output
destination. Specify a different folder name.
The entered value is wrong. Enter the correct number.
The card ID written in the IC card for Iris on Card and the
card ID of the User Information enrolled in the iris server do
not match. Check the User Information.
Data was tampered with during encryption
The encryption code is different for the iris reader and this
code exchange.
software. Make sure that the reader status is normal.
Decryption of encryption code failed.
A connection error occurred with the iris reader. Check the
network status. If the same error message persists after the
iris reader and this software is restarted contact your dealer.
Designated drive may not exist or is not
The designated destination drive cannot be accessed.
ready.
Check the drive.
Detailed information cannot be displayed as it
As new logs are added to "Log List", the detailed
has been deleted from database.
information of older logs is deleted if the number of saved
logs exceeds it limit.
Different IP address notice from the
There is difference in reader IP address between enrolled
connected reader. (IP address :
reader information and connected reader. Check the IP
XXX.XXX.XXX.XXX)
address of the corresponding reader.
Encryption code administration information
The "Periodically Change Encryption Code" settings have
was changed by an external operation.
been changed from outside this software. Re-register the
settings.
Encryption code for reader and server doesn't Reset the iris reader.
match.
Enrolled numbers do not agree. Distribute iris
The number of users enrolled to the iris server and iris
data manually.
reader differ. Manually distribute the iris data.
Enter a Card ID using alphanumeric
The entered value is wrong. Enter the correct number.
characters.
194
APPENDICES
Error Message
Description of Error and Action
Enter a facsimile number within 15
The entered value is wrong. Enter the correct number.
alphanumeric characters.
Enter a mail address using alphanumeric
The entered value is wrong. Enter the correct number.
characters, "-", "_", ".", and "@".
Enter a password using alphanumeric
The entered value is wrong. Enter the correct number.
characters.
Enter a port number.
The entered value is wrong. Enter the correct number.
Enter a Reject ID using alphanumeric
The entered value is wrong. Enter the correct number.
characters.
Enter a User ID within 16 alphanumeric
The entered value is wrong. Enter the correct number.
characters.
Enter an administrator name using
The entered value is wrong. Enter the correct number.
alphanumeric characters.
Enter an operator name using alphanumeric
The entered value is wrong. Enter the correct number.
characters.
Enter the correct Gateway IP Address.
The entered value is wrong. Enter the correct number.
Enter the correct IP address.
The entered value is wrong. Enter the correct number.
Enter the correct Server IP Address.
The entered value is wrong. Enter the correct number.
Enter the correct Subnet Mask.
The entered value is wrong. Enter the correct number.
Enter the telephone number within 15
The entered value is wrong. Enter the correct number.
alphanumeric characters.
Enter the User Name using alphanumeric
The entered value is wrong. Enter the correct number.
characters.
Error during communication with SMTP
An error occurred during E-mail transmission. Check the E-
server.
mail settings and send a test E-mail to the specified SMTP
server.
Error in import file format.
The format of the specified import file is incorrect. Specify
the file using the correct format.
Error in operation environment.
The system environment is in error. If the same message
persists after the iris server is restarted contact your dealer.
Error in SMTP server name.
The SMTP server specified in "E-Mail Setting" cannot be
found. Check that the SMTP server name is correct and
also check the LAN environment settings.
Error occurred during encryption code
A connection error occurred with the iris reader. Check the
exchange.
network status. If the same error message persists after the
iris reader and this software is restarted contact your dealer.
Fail in connection with SMTP server.
Could not connect to the SMTP server specified in "E-Mail
Setting". Check that the SMTP is operating correctly on the
specified server.
Failed to change the reader operation mode.
Reset the iris reader.
195
APPENDICES
Error Message
Description of Error and Action
Failed to restore backup database since the
The number of users enrolled to the backup database
number of enrolled users exceeds the
exceeds the licence limit. Add another licence.
number of licences.
IC card could not be cleared.
IC card formatting has failed. Confirm whether the IC card
and the IC card writer are normal. Refer to IC Card Setting
on page 172 and Key Updating on page 174.
IC card read has failed.
IC card reading has failed. Confirm whether the IC card and
the IC card writer are normal. Refer to IC Card Setting on
page 172 and Key Updating on page 174.
IC card write has failed.
IC card writing has failed. Confirm whether the IC card and
the IC card writer are normal. Refer to IC Card Setting on
page 172 and Key Updating on page 174.
Incorrect reader status when accessed.
There is a connection from the iris reader, however it's
operating status is not normal. Check the reader status.
Insufficient system resources.
The system resources are insufficient. Either stop any
unnecessary processing or add more memory.
Iris data cannot be distributed to an
Iris data cannot be distributed as the specified reader is
Enrollment Reader, or to a reader that is
being reset or its power is turned off. Either turn the reader's
being reset or requires a download. It also
power on, or if the reader is being reset, wait a while before
cannot be distributed to a reader that has not
trying the operation again.
acquired a MAC address, or whose status is
For the iris reader preset for the Iris on Card, it is impossible
unknown, or is Iris on Card.
to distribute any iris information.
Do you want to distribute iris data to other
readers?
It is not a download file.
The specified download file is incorrect. Specify the correct
download file.
It is not an audio file.
The specified audio file is incorrect. Specify the correct
audio file.
Must reboot after changing the product key.
The iris server is not restarted after the installation of the
User Licence Software. Restart it.
Network monitoring error occurred.
The network status of one of the iris readers is not normal.
Check the network status.
No response from reader.
A connection error occurred with the iris reader. Check the
network status. If the same error message persists after the
iris reader and this software is restarted contact your dealer.
196
APPENDICES
Error Message
Description of Error and Action
Number of enrolled users differs between the
The number of enrolled users differs between the iris reader
reader and administration server.
and this software. A probable cause is that user information
reader (number of users: ww, server
could not be distributed. Redistribute the user information.
certification users: xx),
server (number of users: yy, server
certification users: zz)
Number of enrolled users exceeds the limit.
An attempt was made to enroll users beyond the maximum
number allowed by the licence. Either add a licence or
delete any unnecessary users.
Number of enrolled users exceeds the limit.
An attempt was made to enroll users beyond the maximum
Users from user ID: xxxx onward cannot be
number allowed by the licence. Either add a licence or
imported.
delete any unnecessary users.
Operator's name or iris data does not match.
The captured iris data does not match the iris data currently
enrolled to the Operator. Make sure the Operator's name is
correct and that an iris data is enrolled for the Operator.
Operator's name or password does not
The Operator's name or password is incorrect. Reenter the
match.
name and password.
Reader connection failed.
A connection error occurred with the reader. Check the
network status. If the same error message persists after the
reader and this software is restarted contact your dealer.
Reader ID: xxxx reset is in progress.
The specified process cannot be executed as the reader
status is "Reset". Start iris reader operation and specify the
process again.
Reader ID must be a number from 1 to
The entered value is wrong. Enter the correct number.
99999.
Reader is not in Stop status.
The specified process cannot be executed as the reader
status is not "Stopped". Stop reader operation and specify
the process again.
Recognition accepted but the Card ID
Recognition is accepted by the Iris on Card, but the
( XXXX ) for data distribution is not available.
corresponding User Information has been deleted or
changed by the iris server. Confirm the User Information.
Reject ID Card Number exceeds bit length.
The entered value is wrong. Enter the correct number.
Reject ID exceeds bit length.
The entered value is wrong. Enter the correct number.
Reject ID site code exceeds bit length.
The entered value is wrong. Enter the correct number.
Same backup name exists in another backup
The same name exists for an already registered schedule.
schedule.
Change the schedule name.
Same date and time exists in another backup
An attempt was made to set multiple backup schedules
schedule.
using the same schedule. Check the specified date and
time for any errors.
197
APPENDICES
Error Message
Description of Error and Action
Same day of week and time exists in another
An attempt was made to set multiple backup schedules
backup schedule.
using the same schedule. Check the specified day of the
week and time for any errors.
Server certification request. Result:
Recognition was rejected as the ID corresponding to the ID
Recognition rejected, no ID.
notified by Server certification did not exist.
Server certification request. Result:
Recognition was rejected as the iris data corresponding to
Recognition rejected, no iris data.
the ID notified by Server certification did not exist.
Server certification request. Result: Server
A difference in the settings on this software and on the iris
certification mode is not set. Server
readers occurred as Server certification was performed
certification is cancelled.
while the settings were being changed. Check the current
settings.
Server certification request. Result:
A connection error occurred with the iris reader. Check the
Transferred data is incorrect.
network status. If the same error message persists after the
iris reader and this software is restarted contact your dealer.
Set file extension to ".xxx" and execute.
The format of the specified file extension is incorrect.
Specify the correct extension.
Set number of enrolled users check function
The entered value is wrong. Enter the correct number.
interval from 30 to 9999.
Set numeric values to digits between 1-38.
The entered value is wrong. Enter the correct number.
Set the network monitoring interval from 30 to
The entered value is wrong. Enter the correct number.
9999.
Set the output width of output1 to between
The entered value is wrong. Enter the correct number.
100 ms - 60000 ms.
Set the output width of output2 to between
The entered value is wrong. Enter the correct number.
100 ms - 60000 ms.
Since a Reader search condition has already
A Reader search condition and Group search condition
been entered, a Group search condition
cannot be specified together at the same time. Specify only
cannot be entered.
one of these conditions.
Since a Group search condition has already
A Reader search condition and Group search condition
been entered, a Reader search condition
cannot be specified together at the same time. Specify only
cannot be entered.
one of these conditions.
Site Code exceeds bit length set in default
The bit length of the specified Site Code exceeds the value
reader setting. Do you want to continue
set in "Default Reader Setting". Make sure that you did not
processing?
make an input error.
SMTP authentication failed.
Authentication with the specified SMTP server has failed
during mail transmission. Check the server name, user
name, and password.
Software cannot be downloaded to a reader
The downloading software and the reader type do not
is BM-ET330.
match. Specify the correct software.
198
APPENDICES
Error Message
Description of Error and Action
Software cannot be downloaded to a reader
The downloading software and the reader type do not
is BM-ET300A.
match. Specify the correct software.
Software cannot be downloaded to a reader
Software download cannot be executed as the specified iris
that has not acquired a MAC address, whose
reader is being reset or its power is turned off. Either turn
status is unknown, or is being reset.
the iris reader's power on, or if the iris reader is being reset,
Do you want to download software to other
wait a while before trying the operation again.
reader?
Some groups could not be restored since the
The number of distribution groups that can be enrolled is
group limit has been exceeded.
256. Restoration is attempted, exceeding the number of
distribution groups allowed for restoration. No distribution
groups of the 257th and thereafter can be restored.
Some groups have not been imported.
Some groups could not be imported due to duplicating
group names or a format error. Check the log for details.
Some users are not distributed as the
The card ID cannot be specified with the alphanumerical
alphabetical characters are included in the
characters when the access control panel is connected for
card ID. User ID: XXXX.
Wiegand communication. Set up the card ID with numerals.
Some users are not distributed as the
The total bit length of the specified card ID and parity bit (2
number of card ID digits exceed its limit. User
bits when added) exceeds the total bit length set in the iris
ID: xxxx.
reader defaults. Check entries for any errors.
Some users could not be distributed since the
The maximum number of users that can be distributed to a
user limit has been exceeded.
single iris reader is 1000. Some users could not be
distributed as more than 1000 users were specified.
Some users could not be distributed since the
The volume of the iris information that can be distributed to
user limit has been exceeded. User ID:
the readers is for 1000 persons. Distribution is attempted,
XXXX.
exceeding the number of persons allowed for distribution.
Make settings after confirming the User Information and the
Group Information.
Some reader information could not be
Some readers could not be imported due to duplicating IDs
imported. Check the log for details.
or a format error. Check the log for details.
Specified file already exists. Cannot overwrite
The file cannot be overwritten as the specified file already
a Read-only file.
exists in the output destination and is Read-only. Specify a
different file name.
Successfully exchanged encryption code, but
Failed to start operation after exchanging the encryption
authentication process failed to start.
code. Start operation as the iris reader is in a stopped state.
System error (XXXXXXXX)
The system is in error. If the same message persists after
the iris server is restarted contact your dealer.
System error occurred with the reader.
Reset the iris reader. If the same error message persists
after the iris reader and this software is restarted contact
your dealer.
System is already activated.
This software has been started in duplex.
199
APPENDICES
Error Message
Description of Error and Action
The backup file selected does not contain
You have specified the wrong backup file, or one that
any log information.
doesn't contain any log information. Specify a backup file
that contains log information.
The reader doesn't have an encryption code.
Reset the iris reader.
The reader power is not turned on.
Turn the iris reader ON.
The max number of registered groups has
The number of distribution groups that can be enrolled is
been reached. Cannot register another
256. Enrollment is attempted, exceeding the number of
group.
distribution groups allowed for enrollment. Delete
unnecessary distribution groups.
The number of enrolled readers exceeds the
The number of readers that can be enrolled is 256.
limit. Reader ID: XXXX onward cannot be
Enrollment is attempted, exceeding the number of readers
imported.
allowed for enrollment. Delete unnecessary readers.
The number of registered readers exceeds
The maximum number of iris readers that can be registered
the limit.
is 256. An attempt to register iris readers beyond this limit is
being made. Delete any unnecessary iris readers.
The password entered at "Password" and
The entered password and password verification do not
"Reenter Password" do not match.
match. An incorrect entry was made. Retry.
The reboot is cancelled as Automatic Backup
Reboot was cancelled as the auto reboot time overlaps the
is in progress.
auto backup time. Set the schedule so that these times are
not overlapping.
The same card ID data already exists.
The same card ID exists for an already enrolled user.
Change the card ID.
The same card ID data already exists.
The same card ID exists for an already enrolled user.
Update failed
Change the card ID.
The same date is used.
At attempt was made to set multiple auto reboot schedules
on the same date. Check the specified date for any errors.
The same group name already exists.
The same group name exists for an already registered
group. Change the group name.
The same IP address already exists.
The same IP address exists for an already registered Iris
Reader. Check the IP address for any errors.
The same iris data already exists for another
The operator cannot be enrolled as the same iris data is
operator.
already enrolled under a different operator's name. Delete
the enrolled operator.
The same iris data already exists for another
Two (or more) operators having the same iris data cannot
operator.
be enrolled. Delete the enrolled operator.
The same iris data already exists.
The user cannot be enrolled as the same iris data is already
enrolled under a different user's name. Delete the enrolled
user.
The same operator name already exists.
The same operator name exists for an already enrolled
operator. Change the operator's name.
200
APPENDICES
Error Message
Description of Error and Action
The same reader ID already exists.
The same Reader ID exists for an already enrollment iris
reader. Change the Reader ID.
The same user ID data already exists.
The same user ID exists for an already enrolled user.
Change the user ID.
The system resources of a reader are
Check to make sure that you downloaded the correct
insufficient or download data is incorrect.
software. If it's correct, reset the iris reader.
The total bit length must be with a range of
The entered value is wrong. Enter the correct number.
26 - 128.
The User Code bit length cannot be set to
The entered value is wrong. Enter the correct number.
"0".
The user could not be imported. Check the
Due to duplicating IDs or a format error, multiple users
log for details.
could not be imported. Check the details in the log
information.
There are too many search conditions
Cannot process as the search conditions are too complex.
(Reader).
Limit the number of iris readers specified in the search
conditions to 40.
There are too many search conditions
Cannot process as the search conditions are too complex.
(Group).
Limit the number of groups specified in the search
conditions to 40.
There are too many search conditions (User).
Cannot process as the search conditions are too complex.
Limit the number of users specified in the search conditions
to 40.
There is an error in the specified time.
The entered value is wrong. Enter the correct number.
Transmission error occurred.
A connection error occurred with the iris reader. Check the
network status. If the same error message persists after the
iris reader and this software is restarted contact your dealer.
Unable to activate the program since the
The licence information is incorrect. Uninstall the licence,
licence is unauthorized.
then reinstall it. If the same error message persists after this
software was re-installed, contact your dealer.
Update failed.
Information cannot be updated because the input values
have been false or the requisite input items have not been
set yet. Check the input values.
User ID: xxxx belongs to non-existing group.
The user was imported with the settings deleted as the
Import completed without setting user to a
group set to the user in the import file did not exist. Use this
group.
software to set the group.
User ID: xxxx already exists. User ID: xxxx
The import file contains a user specified by an already
cannot be imported.
registered user ID. Change the user ID in the import file.
When you back up to a network computer,
A folder in the network not assigned to the corresponding
assign and specify the network drive.
network drive has been designated as the destination
folder.
201
APPENDICES
Error Message
Description of Error and Action
When you export to a network computer,
A folder in the network not assigned to the corresponding
assign and specify the network drive.
network drive has been designated as the destination
folder.
When you output a log file to a network
A folder in the network not assigned to the corresponding
computer, assign and specify the network
network drive has been designated as the destination
drive.
folder.
You have used an invalid character in the
The entered value is wrong. Enter the correct number.
server name.
YYYY of user ID: xxxx already exists. User
The user cannot be imported as the user ID, card ID or iris
ID: xxxx cannot be imported.
data is in duplication of an already enrolled user. Either
delete the enrolled user or check the import file for any
errors.
A reader part may have failed. (A01 to A07)
If the alarm persists even after turning the power back on,
make note of the error code and contact your dealer.
The reader may be disconnected from the
Make sure the power of the access control panel is turned
Access Control Panel. (A08)
on and check the connection between the iris reader and
the access control panel.
The reader may be disconnected from the
Make sure the power of the card reader is turned on and
Card Reader. (A09)
check the connection between the iris reader and the card
reader.
An unauthorized person may have accessed
There may be continuous access to the iris reader by an
the reader unit. (A10)
unauthorized personnel.
An unauthorized person may have accessed
There may be unauthorized access by using an artificial eye
the reader unit. (A11)
or a photograph of an eye.
The reader unit may have been removed or
Check the iris reader installation status.
the cover may be open. (A12)
The reader tamper-detection function has
Check the iris reader installation status.
been disabled. (A13)
The reader clock may have failed. (A14)
If the alarm persists even after turning the power back on,
make note of the error code and contact your dealer.
202
APPENDICES
Messages Displayed in Information Display Window ··············
Error Message
Description of Error and Action
The MAC address is different.
The MAC address is different. Check the details in the
Details screen.
Alarm received from a reader.
Alarm received from an iris reader. Check the details in the
Details screen.
Error occurred when connecting to the
Error occurred when connecting to the iris reader. Check
reader.
the details in the Details screen.
Error occurred when exchanging the
Error occurred when exchanging the encryption code.
encryption code.
Check the details in the Details screen.
Error occurred during automatic backup.
Error occurred during automatic backup. Check the details
in the Details screen.
Error occurred during server certification.
Error occurred during server certification. Check the details
in the Details screen.
Enrolled number of users doesn't match.
Enrolled number of users doesn't match. Check the details
in the Details screen.
Network monitoring error occurred.
Network monitoring error occurred. Check the details in the
Details screen.
An unregistered reader is connected.
An unregistered iris reader is connected. Check the details
in the Details screen.
Error occurred during E-mail transmission.
Error occurred during E-mail transmission. Check the
details in the Details screen.
Connection from old version reader.
Earlier version of Reader Software is used. The previous
version of the iris reader (model No.: BM-ET300E) is not
operable with this software. Consult your dealer when this
message appears.
When this error message is displayed, contact your dealer.
203
APPENDICES
File Format
This appendix describes the format of CSV files that can be imported and exported by this software.
Descriptions of the CSV File To Be Handled in This Software
■ Requisite Entry Items
When the Reader Information CSV file and the User Information CSV file are imported and their
information is registered in this software, it is necessary to set up the requisite entry items. In the
descriptions below, the symbols specified below are used in “Requisite” of the table so that the requisite
entry items can be indicated.
◎ ··························· Indicates a requisite entry item. If no items have been set up, an error will be
presented at the time of file importing.
○ ··························· Indicates a requisite entry item under the specific condition. When a related host item
is set up, an item requiring entry will be indicated.
△ ··························· Indicates an arbitrary entry item. In the case of entry, the related value will be
reflected.
× ··························· Indicates an item of export only. No values will be reflected at the time of file
importing.
■ Set Value Formatting
When editing a file exported by this software or a CSV file established for importing, character lines may
be wrongly identified as numerals because of functional settings for the editing software being used. If the
User ID of the User Information is set at "001", for example, “001” in a character line may be converted
into a numeral of "1". Therefore, editing should be carried out after completing relevant settings for the
editing software being used.
Reader Information CSV File ······················································
CSV files can be imported (p.79) and exported (p.88) to and from the "Reader Setting/Maintenance" screen.
With this CSV file, the respective setting items can be imported and exported in the “Reader Setting Details”
screen.
204
APPENDICES
Screen
Item
Requisite Entry values, alphanumerical characters, etc.
Registered Data Reader ID
◎
Half-size numerals are set up from 1 to 99999. Since it is
necessary to handle these values as the character lines,
a double quotation mark (“) is attached to the front and
rear of each numeral.
Example: If the Reader ID is 1, “1” is set up.
The same value as that of the registered Reader ID
Reader Name
◎
cannot be set up.
Up to 20 1-byte characters can be entered.
Since the values have to be handled as the character
lines, a double quotation mark (“) is attached to the front
and rear of each character.
Example: If the Reader Name is Reader A, “Reader A” is
IP Address
◎
set up.
In a description system of 255.255.255.255, half-size
numerals are set up from 0 to 255.
Since the values have to be handled as the character
lines, a double quotation mark (“) is attached to the front
and rear of each value.
Example: If the IP Address is 192.168.0.3, "192.168.0.3"
Server IP Address
◎
is set up.
In a description system of 255.255.255.255, half-size
numerals are set up from 0 to 255.
Since the values have to be handled as the character
lines, a double quotation mark (“) is attached to the front
and rear of each value.
Example: If the Server IP Address is 192.168.0.2,
Subnet Mask
◎
"192.168.0.2" is set up.
In a description system of 255.255.255.255, half-size
numerals are set up from 0 to 255.
Since the values have to be handled as the character
lines, a double quotation mark (“) is attached to the front
and rear of each value.
Example: If the Subnet Mask Address is 255.255.255.0,
Gateway IP Address
◎
“255.255.255.0” is set up.
In a description system of 255.255.255.255, half-size
numerals are set up from 0 to 255.
Since the values have to be handled as the character
lines, a double quotation mark (“) is attached to the front
and rear of each value.
Example: If the Gateway IP Address is 192.168.0.1,
“192.168.0.1” is set up.
Operation Info
Security Level
◎
Either "High" or "Normal"
Access Log
◎
Either “Yes” or “No”
Server Certification
◎
One of the following: “Yes”, “No” or “Only”
Audio Mode
◎
One of the following: "Mute", "Simple" or "Full"
205
APPENDICES
Screen
Item
Requisite Entry values, alphanumerical characters, etc.
Guidance Language
Select one of the following: "English", "Japanese",
◎
"German", "French", "Italian", "Spanish", "Russian",
"Chinese", "Korean", "Arabic", "Portuguese", "Turkish",
"Dutch" or "Swedish".
Output 1
(Recognized Signal)
◎
Output Width
(Recognized Signal)
○
Either "Yes" or "No"
This setting is made when "Yes" is selected for the
Output 1 (Recognized Signal).
Half-size numerals are set up from 1 to 600.
Output 2
(Rejected Signal)
◎
Output Width
(Rejected Signal)
○
Either "Yes" or "No"
This setting is made when "Yes" is selected for the
Output 2 (Rejected Signal).
Half-size numerals are set up from 1 to 600.
Card Reader
Live Indicator
◎
One of the following: "Off", "On", or "Blinking"
Card Type
◎
Either "Standard" or "Iris on Card"
Card Reader
Connection
◎
Recognition Mode
◎
Either “Yes” or “No”
This setting is made when “Yes” is selected for the card
reader Connection.
Either "Card and Iris Recognition" or "Card Recognition
○
Only"
This setting is made when "Standard" is selected for the
"Card Type".
○
One of the following: 30 µs, 40 µs or 50 µs
This setting is made when "Standard" is selected for the
card type.
○
One of the following: 1.0 ms, 1.5 ms or 2.0 ms
This setting is made when "Standard" is selected for the
card type.
○
Half-size numerals are set up from 0 to 125.
This setting is made when "Standard" is selected for the
card type.
Pulse Width
Pulse Interval
Site Code
Card Number
Half-size numerals are set up from 1 to 126.
Access Control
Communication
Panel
Method
◎
Either "Wiegand" or "RS-485"
○
This setting is made when "Wiegand" is selected for the
communication system.
○
One of the following: 30 µs, 40 µs or 50 µs
This setting is made when "Wiegand" is selected for the
communication system.
Pulse Width
Pulse Interval
One of the following: 1.0 ms, 1.5 ms or 2.0 ms
206
APPENDICES
Screen
Item
Requisite Entry values, alphanumerical characters, etc.
○
This setting is made when "Wiegand" is selected for the
communication system.
○
Half-size numerals are set up from 0 to 125.
This setting is made when "Wiegand" is selected for the
communication system.
Site Code
Card Number
Reject ID
○
Baud Rate
○
Half-size numerals are set up from 1 to 126.
This setting is made when "Wiegand" is selected for the
communication system.
A decimal number is entered in the Site Code – Card
Number type. The site code can be left void.
This setting is made when "RS-485" is selected for the
communication system.
One of the following: 2 400 bps, 4 800 bps, 9 600 bps,
○
19 200 bps or 38 400 bps.
This setting is made when "RS-485" is selected for the
communication system.
○
One of the following: "NONE", "ODD" or "EVEN"
This setting is made when "RS-485" is selected for the
communication system.
Parity
Stop Bit
Either of “1 bit” or “2 bits”
Character Length
This setting is made when "RS-485" is selected for the
○
communication system.
Either of “8 bits” or “7 bits”
Site Code Digits
This setting is made when "RS-485" is selected for the
○
communication system.
Half-size numerals are set up from 0 to 37.
This setting is made when "RS-485" is selected for the
Card Number Digits
○
communication system.
Half-size numerals are set up from 1 to 38.
Reader Status
Network Status
×
Network status is output.
Reader Status
×
Reader status is output.
Number of Enrolled
Users
Reader Software
Version
Audio File Version
Group
×
×
×
×
Number of enrolled users is output.
The version of the Reader Software is output.
The version of the audio file is output.
The group name, where the iris readers are registered, is
output.
・Network status, reader status, number of enrolled users and Reader Software version, audio file version
and group cannot be imported.
207
APPENDICES
・When an iris reader information CSV file is exported a list of text strings that can be specified to the iris
reader information CSV file is output at the end of the CSV file in addition to iris reader information
registered to this software.
When making a CSV file for importing failures in importing CSV files can be prevented by copying-andpasting text strings from that list.
The list of text strings that can be specified at the end of the import CSV file is not read when the CSV file
is imported.
■ Example of Reader Information CSV File
The following is an example of an iris reader information CSV file.
The first line is the header and the second line onwards is the actual data. In this example lines from the 5
th line onwards are a list of text strings that can be specified at the end of the iris reader information CSV
file.
1st line:
Reader ID, Reader Name, IP Address, Server IP Address, Subnet mask, Gateway
IP Address, Security Level, Access Logs, Server Certification, Audio Mode, Guidance
Language, Output 1 (Recognized Signal), Output Width (Recognized Signal), Output 2
(Rejected Signal), Output Width (Rejected Signal), Live Indicator, Card Type, Card
Reader Connection, Recognition Mode, Pulse Width, Pulse
Interval, Site Code, Card Number, Reject ID, Communication Method, Pulse Width, Puls
e Interval, Site Code, Card Number, Reject ID, Baud Rate, Parity, Stop Bit, Character L
ength, Site Code Digits, Card Number Digits, Network Status, Reader Status, Number
of Enrolled Users,
Reader Software Version, Audio File Version, Group,
2nd line:
"1","reader A","192.168.0.101","192.168.0.2","255.255.255.0","192.168.0.1", High, Yes, Yes,
Mute, English, Yes, 100, Yes, 100, Blinking, Standard, No,,,,,,Wiegand, 30 us,1.0 ms,8,1
6,123-456,,,,,,,Normal, Enrollment Reader(Operating),0/0,"2004/07/23 10:00
Ver00.26 ET330 ","Ver01.02","Research Institute G",
3rd line:
"2","reader B","192.168.0.102","192.168.0.2","255.255.255.0","192.168.0.1", High, Yes, Yes,
Mute, English, Yes, 100, Yes, 100, Blinking, Standard, No,,,,,,Wiegand, 30 us,1.0 ms,8,1
6,123-456,,,,,,,Normal, Enrollment Reader(Operating),0/0,"2004/07/23 10:00
Ver00.26 ET330 ","Ver01.02","Research Institute G",
4th line:
"3","reader C","192.168.0.103","192.168.0.2","255.255.255.0","192.168.0.1", High, Yes,
Yes, Mute, English, Yes, 100, Yes, 100, Blinking, Standard, No,,,,,,Wiegand, 30 us,
1.0 ms,8,16,123-456,,,,,,,Normal, Enrollment Reader(Operating),0/0,"2004/07/23 10:00 Ver0
0.26 ET330 ","Ver01.02","Research Institute G",
5th line:
##,
6th line:
##Import reader information items to file.,,
7th line:
##Reader information items,
8th line:
# Security Level,,High,Normal,
208
APPENDICES
9th line:
# Access Log, , Yes, No,
10th line: # Server Certification, , Yes, No, Only
11e line:
# Audio Mode, , Mute, Simple, Full,
12e line:
#Guidance Language, , English, Japanese, German, French, Italian, Spanish, Russian,
Chinese, Korean, Arabian, Portuguese, Turkish, Dutch, Swedish,
13th line: # Output 1 (Recognized Signal), , No, Yes,
14th line: # Output 1 (Recognized Signal) Output Width, , 1-600,
15th line: # Output 2 (Rejected Signal), , No, Yes,
16th line: # Output 2 (Rejected Signal) Output Width, , 1-600,
17th line: # Live Indicator, , Off, Blinking, On,
18th line: # Card Type, , Standard, Iris on Card
19th line: # Card Reader Connection, , Yes, No,
20th line: # Recognition Mode, , Card and Iris Recognition, Card
Recognition Only,
21st line: # Communication Method, , Wiegand,RS-485,
22nd line: ## Wiegand Settings
23rd line: # Pulse Width, , 30 µs, 40 µs, 50 µs,
24th line: # Pulse Interval, , 1.0 ms, 1.5 ms, 2.0 ms,
25th line: # Site Code, , 0-125,
26th line: # Card Number, , 1-126,
27th line: ## RS-485 Settings
28th line: # Baud Rate, , 2400bps, 4800bps, 9600bps, 19200bps, 38400bps,
29th line: # Parity, , NONE, ODD, EVEN,
30th line: # Stop Bit, , 1bit, 2bits,
31st line: # Character Length, , 8 bits, 7 bits,
32nd line: # Site Code Digits, , 0-37,
33rd line: # Card Number Digits, , 1-38,
User Information CSV File ··························································
CSV files can be imported (p.121) or exported (p.125) to and from the "User Information" screen.
The following information can be imported and exported as CSV files:
209
APPENDICES
Screen
Item
Information
User ID
Requisite Entry values, alphanumerical characters, etc.
Up to 16 1-byte alphanumerical characters can be
◎
entered. Also, the same ID cannot be used if it's already
been assigned to an enrolled user."1" and "01" can be
used as separate IDs.
Name
◎
Card ID
20 1-byte characters
Half-size numerals of 0 to 9 are entered, according to the
iris reader being used (the bit numbers of the site code
and the Card Number preset on the “Card Reader” or
◎
“Access Control Panel” tabscreen of the “Reader Setting
Details” screen). However, the same value as that of the
registered user’s Card ID cannot be set up. Any 0 located
on the left side of the digits 1 to 9 is automatically deleted.
If 01 is entered, it is identified as 1.
Dept
△
80 1-byte characters
Phone
△
Up to 15 1-byte characters from 0 to 9.
Fax
△
Up to 15 1-byte characters from 0 to 9.
Mail
△
Up to 80 1-byte alphanumerical characters, -, _, ., and @
Memo
△
160 1-byte characters
Iris data
(0:Unenrolled,
Presence of iris information is output as either
×
"0"(Unenrolled) or "1"(Enrolled).
1:Enrolled)
Recognition Setting
◎
Certification Only", and "Disable"
One of the following: "English", "Japanese", "German",
Guidance
Language
Any one of "Enable Reader Recognition", "Enable Server
△
"French", "Italian", "Spanish", "Russian", "Chinese",
"Korean", "Arabic", "Portuguese", "Turkish", "Dutch" or
"Swedish".
Group
△
Enter the group name delimited by commas.
・Iris data cannot be imported to or from user information CSV files.
・Information as to whether or not iris data exists for a user cannot be imported.
210
APPENDICES
■ Example of User Information CSV File
The following is an example of a user information CSV file.
The first line is the header and the second line onwards is the actual data.
1st line: UserID, Name, Card ID, Dept, Phone, Fax, Mail, Memo, Iris data (0: Unenrolled, 1:
Enrolled), Recognition, Guidance Language, Group.
2nd line: 1, "Tarou Matsushita", 100 - 10001, "researcher section", ",123-4567-8900,123-4567-8901,
"[email protected]","", 1, Enable Reader Recognition, English, "Laboratory
group", "Records Room group", "Laboratory group",
3rd line: ##,
4th line: ##Import iris reader information items to file.,
5th line: # Recognition Setting, Enable Reader Recognition, Enable Server Certification Only, Disa
ble
6th line: # Guidance Language, , English, Japanese, German, French, Italian, Spanish, Russian,
Chinese, Korean, Arabian, Portuguese, Turkish, Dutch, Swedish,
Log Information CSV File····························································
■ System Logs
This is a CSV file of a system log that can be exported (p.169) from the "Log Information" screen. System
logs can exported as CSV files containing the following information:
Screen
Information Handled in CSV Files
"Log Details" screen
Time and Date
(System Logs)
Category
Reader ID
Reader Name
Operator's Name
Result
Details
■ Example of Log Information CSV File (System Logs)
The following is an example of a log information CSV file for a system log.
The first line is the header and the second line onwards is the actual data.
1st line: Time and Date, Category, Reader ID, Reader Name, Operator's Name, Result, Details
2nd line: 2003/04/28 15:42:49, "Iris Data Distribution Log", 1, "iris reader A", "", "Failed", "Server
Certification requested. Result: Recognition rejected, No iris data present"
3rd line: 2003/04/07 19:02:31, "Iris Data Distribution Log", 1, "iris reader A", "", "Normal", "Server
Certification requested. Result: Recognition accepted, Card ID: (100-10001)"
211
APPENDICES
4th line: 2003/04/07 19:03:11, "Reader Connection Log", 1, "iris reader A ", "", "Normal",
"According to user’s screen operation, iris data is distributed to the iris readers.
■ Access Log
This is a CSV file of an access log that can be exported (p.169) from the "Log Information" screen. The
Access Log CSV file can export the following information:
Screen
Information Handled in CSV Files
"Log Details" screen
Time and Date
(Access Log)
Reader ID
Reader Name
Result
User Name
Card ID
User ID
Details
■ Example of Log Information CSV File (Access Log)
The following is an example of the Access Log information CSV file.
The first line is the header and the second line onwards is the actual data.
1st line: Time and Date, Reader ID, Reader Name, Result, User Name, Card ID, User ID, Details
2nd line: 2003/04/07 19:01:19,1, "iris reader A", "Recognition accepted", "Taro Matsushita",
"100-10001", "1", "Recognition accepted. User_Name:Taro Matsushita, CarD_ID:100-10001,
User_ID:1"
3rd line: 2003/04/07 19:02:32, 1, "iris reader A", "Recognition accepted", "Taro Matsushita",
"100-10001", "1", "Recognition accepted. User_Name:Taro Matsushita, CarD_ID:100-10001,
User_ID:1"
4th line: 2003/04/07 19:03:18,1, "iris reader A", "Recognition rejected",,,,"Recognition rejected. Reas
on:Iris Code Error"
212
APPENDICES
Troubleshooting
Explanations are given below in regard to the actions to be taken against possible problems considered to
occur in the system established with this software.
Problems Occurring When the System Is Installed or Uninstalled:
■ Not Successfully Installed …
・The user account with which you logged in Windows® has no privileges required for installation.
(Refer to p.21.)
This software cannot be installed successfully because the user account with which you logged in
Windows® does not have administrator privileges or similar level privileges.
Perform the installation of this software after logging in Windows® with administrator privileges or
similar level privileges.
■ Failure in Normal Uninstalling …
・The information display window left started. (Refer to p.24.)
“Information Display Window” is displayed in the “Used File” of the “InstallShield Wizard” screen. To
close, click the [End] button of the screen and click the [Finish] button of the InstallShield screen that
will be displayed next. Display the task operator and select the “Information Display Window.” Click the
[End Task] button to close the information display window. Since then, uninstalling becomes possible.
・There is an account logged in, which is different from the user account of Windows® that has been
logged in at the time of the installation of this software. (Refer to p.24.)
Log off this Windows® and log in the user account at the time of installation so that uninstalling job can
be forwarded.
■ No Coincidence of the Number of Licences Displayed …
・In the installing screen for the user licence adding software Ver.1.21 or former, the number of licences
displayed is smaller by 25 less than the actual number. (Refer to p.10.)
In the case of the user licence adding software Ver.1.21 or former, it is impossible to certify 25
licences that will be added at the time of the installation of this SOFTWARE. Therefore, the resultant
display appears in such a style. The number of licences available after the installation is the number of
licences installed plus 25.
213
APPENDICES
Starting/Log-in Screen/Main Menu Screen
■ No Login Screen Displayed …
・This software is not activated.
If you log in this software with the user account that is different from the one used at logging in
Windows® for the installation of this software, this software does not start up.
Use the same user account for startup as the one that you logged in Windows® for the installation of
this software.
・When “System Error (Error in Environment)” is displayed, servicing of this software “IrisMgnSrv” is not
started. Start the control panel, double-click “Administrative Tools” → “Services” in this order, and select
“IrisMgnSrv” from the servicing console to start it. Since then, start the administration software.
■ Garbled Characters on the Screen …
・The system language in the iris server is set to other than English.
If the system language in the iris server is set to other than English, the characters on the windows of
this software may become garbled. Use English exclusively for the system language in the iris server.
■ Failure in Login …
・In some cases such that a backup file output from another iris server has been restored, or that a
backup file output from the administration software of the previous version has been restored, a usually
attending operator may fail to have been enrolled. In such a case, such an operator should be logged in
with his or her name and password enrolled in the backup file. (Refer to p.50.)
■ Failure in Login for Iris Recognition …
・The enrollment iris reader is not set up. (Refer to p.44.)
Proceed to set up the enrollment iris reader.
・The password of the operator name is false, or iris data is not enrolled. (Refer to p.51.)
■ Buttons Getting Invalid …
・Confirm the privilege of the operator being logged in. (Refer to p.59.)
Operator Enrolling/Updating/Deletion
■ Failure in Iris Capturing …
・The [Capture] button is invalid. (Refer to p.44 and p.59.)
To perform iris capturing, it is necessary to have set up the enrollment iris reader. In cases when no
enrollment iris reader is set up, the [Capture] button becomes invalid. In this case, proceed to set up
the enrollment iris reader. If you perform login with the operator whose "Operator's Information"
privileges are not specified, the [Capture] button also becomes invalid. Perform operations after
214
APPENDICES
performing login with the operator whose "Operator's Information" privileges have been already
specified.
■ Impossible to Delete an Operator …
・You perform login with the operator whose “Operator’s Information” privileges are not specified. (Refer
to p.59.)
If you perform login with the operator whose “Operator’s Information” privileges are not specified, you
cannot edit nor delete operator’s information. Perform operations after performing login with the
operator whose “Operator’s Information” privileges have been already specified.
・An action is being taken to delete an operator who is in the middle of being logged in. (Refer to p.64.)
It is impossible to delete any operator who is being logged in.
・An action is being taken to delete an operator for whom the total editing function has been set up.
(Refer to p.64.)
In the state that only one operator is enrolled for whom the total editing function has been set up,
deletion is impossible to carry out. If this deletion is needed, it is necessary to enroll another operator
in advance, for whom the total editing function has been set up.
■ Unable to Change Operator Privileges …
・You perform login with the operator whose “Operator’s Information” privileges are not specified. (Refer
to p.59.)
If you perform login with the operator whose “Operator’s Information” privileges are not specified, you
cannot edit nor delete operator’s information. Perform operations after performing login with the
operator whose “Operator’s Information” privileges have been already specified.
・You try to change the privileges of the operator with which you are now logging in. (Refer to p.64.)
You cannot change the privileges of the operator with which you are logging in.Change the operator
privileges after logging in with another operator whose “Operator’s Information” has been specified.
・You try to change the privileges of the operator to whom all privileges have been granted. (Refer to
p.64.)
If there is only one operator with all privileges registered, the privileges of the operator cannot be
changed. Change the privileges after registration of another operator with all privileges granted.
Reader Registration/Updating/Deletion
■ No Reflection of the IP Address That Is Set in the Iris Server …
・Two or more NICs (Network Interface Cards) are installed in the iris server.
If two or more NICs are installed in the iris server, NIC setup action should be taken to display it in the
top position with the use of command prompt intended for the execution of "IPCONFIG" command.
・No LAN cable is connected to the iris server.
In the state that no LAN cable is connected to the iris server or that the connected LAN cable is not
linked up yet, the result of IP address setting is not correctly reflected.
・IP address has been automatically acquired, but has not been set up yet.
215
APPENDICES
A virtual IP address is set up when a LAN cable is connected and linked up in the state that the
TCP/IP property is “Obtain an IP address automatically” as a result of network setting by the iris server.
In such a case, this software automatically acquires this IP Address.
■ Unable to Enroll, Change or Delete Reader Information …
・You perform login with the operator whose "Reader Setting/Maintenance" privileges are not specified.
(Refer to p.59.)
If you perform login with the operator whose "Reader Setting/Maintenance" privileges are not specified,
you cannot edit nor delete reader data. Perform operations after performing login with the operator
whose "Operator's Information" privileges have been already specified.
・The reader status shows download to be required. (Refer to p.43.)
After you have changed reader data, you can change reader settings by transmitting the data to iris
readers. When the communication is not successfully established between the iris server and the iris
readers, you cannot change the reader settings. In this case, acquire the reader status. If the reader
status becomes “Status unknown”, check the points specified below.
・Is the LAN cable connected correctly?
・Check the IP address of the iris reader failing in communications, using the “PING” command from
command prompt.
・Check the port of the iris server. For communication, the iris server uses the port as specified
below.
─ Protocol:
TCP/IP
─ Port direction: Set for transmission and reception
─ Port number: 8030
・Confirm whether or not the above-mentioned port fails to maintain communication due to settings
of the firewall, router, etc. Also check the setting conditions of virus software or the like.
・There is no coincidence between the card type set with the Reader Setting Details and the iris reader’s
software type downloaded to the iris reader.
The iris reader’s software is in higher preference in either of the following cases:
─ The card type of [Standard] is selected on the "Card Reader" tabscreen of Reader Setting
Details, but the iris reader’s software for the [Iris on Card] has been downloaded to the actual
iris reader.
─ A standard iris reader's software is downloaded to the iris reader for which the card type [Iris
on Card] has been selected.
216
APPENDICES
User Information Enrolling/Updating/Deletion
■ Failure in Iris Capturing …
・The [Capture] button is invalid. (Refer to p.44 and p.59.)
To perform iris capturing, it is necessary to have set up the enrollment iris reader. In cases when no
enrollment iris reader is set up, the [Capture] button becomes invalid. In this case, proceed to set up
the enrollment iris reader. If you perform login with the operator whose "User Information" privileges
are not specified, the [Capture] button also becomes invalid. Perform operations after performing login
with the operator whose "User Information" privileges have been already specified.
■ Unable to Enroll, Change or Delete User Information …
・You perform login with the operator whose “User Information” privileges are not specified. (Refer to
p.59.)
If you perform login with the operator whose “User Information” privileges are not specified, you cannot
edit nor delete operator’s information. Perform operations after performing login with the operator
whose “User Information” privileges have been already specified.
■ IC Card Writing Impossible …
・There is no user information for which iris data enrollment has been finished. (Refer to p.113.)
The [Write IC Card] button becomes effective after the [Enroll] (or [Update]) button has been clicked
on the "User Information Details" screen for the enroll of user information established upon the
completion of iris data capturing.
・IC card writer setting is not finished. (Refer to p.172.)
Click the [IC Card Setting] button on the “Environment Settings” screen in order to display the “IC Card
Setting” screen. After making settings according to the used IC card writer, the [Write IC Card] button
becomes effective for IC card writing.
Reader Operation/Recognition/Iris Data Distribution/Server Certification
■ No Starting of the Reader during Initializing …
・The reader is in the process of startup initialization. (Refer to p.41.)
Communication is established between the iris server and the reader at reader startup in order to
acquire reader setting information and iris data required for personal identification. Therefore, you
should wait for about 5 minutes of initialization to perform certification after turning on the power.
・The reader status shows download to be required. (Refer to p.43.)
If the reader remains factory default setting or reader software is deleted by activation of the
modification detecting switch of the reader, the reader status shows download requirement. If you
acquire the reader status that shows download requirement, download the reader software.
217
APPENDICES
・The network is not successfully established between the iris server and readers.
Communication is established between the iris server and the reader at reader startup. When this
communication is not successfully established, the reader will be in the process of startup initialization
and on standby at the same time. If the reader is still in the process of initialization in a certain time,
check the network setting, status of LAN environment and LAN cable connection.
■ No Starting in Stand Alone Mode …
・The iris reader’s security level is not set at [Normal]. (Refer to p.16.)
Starting is attempted in the state that the iris data distributed to the iris reader is for no person.
Starting is impossible in the state that the iris data distributed to the iris reader is for no person. Try to
make a connection to the iris server and wait for the completion of iris data distribution.
■ No Starting of the Reader Set with an Iris on Card …
・The iris reader’s security level is set at [High]. (Refer to p.16.)
When the iris reader’s security level is set at [High], it is necessary to communicate once with the iris
server even with an Iris on Card that has no need for iris data distribution. On the contrary, if the iris
reader’s security level is set at [Normal], starting is possible in the stand alone mode and certification
can be started.
■ Not Exit Reader Resetting …
・You have reset the reader that is not connected to the network.
If you reset a reader that is not connected to the network or a nonexistent reader of which information
is enrolled, it may take time to reach an error end. Reader resetting is applicable only to the readers
that connected to the network.
■ Not Start Recognition with Reader …
・The reader is in the state in which it cannot perform recognition. (Refer to p.91.)
You cannot perform recognition with the reader when the reader status is in the process of reset, stop,
enrollment reader or download required. Set up the reader so that the reader status is “Operating”.
・“Card Reader Connection”is set to “Yes”.
If "Card Reader Connection” is set to “Yes” on the “Card Reader” tabscreen under the “Reader Setting
Details” screen, certification starts after an IC card is shown to the card reader. If “Recognition Mode”
is set to “Card Recognition Only”, card recognition is not performed.
■ No Recognition Accepted with the Reader …
・No iris data is distributed. (Refer to p.12 and 113.)
Make settings so that user’s iris data can be distributed to the iris reader for certification. Since then
start up the distribution of iris data. There is no distribution of iris data if the method of user information
recognition has been set at “Enable Server Certification Only” or “Disable”.
・The iris data is not enrolled. (Refer to p.128.)
Enroll the user’s iris data for certification.
218
APPENDICES
・The iris data is enrolled only for a single eye.
The iris reader performs certification even when the iris data for a single eye has been acquired for
certification. Certification is regarded as OK if there is any coinciding iris data. In the state that the iris
data for a single eye has been enrolled, however, the system may fail to acquire the enrolled iris data
and certification may be accepted as a result of acquiring the iris data of the eye not enrolled yet. In
such a case, Certification OK is not attained. If Certification NG occurs repeatedly, try to perform iris
capturing again or enroll the iris data for both eyes.
・The IC card data has been destroyed.
If Certification NG occurs many times after the repeated trials with the Iris on Card or when
certification is attempted with “Yes”, you are required to verify your IC card. For an IC card that has
been established by IC card writing from the “User Information Details” and “User Information New
Registration” screens, it is possible to examine the contents of the IC card to be shown on the same
screens.
■ Voice at Recognition is not Spoken in the Language Selected at “Guidance
Language” of User Information.
・Recognition is performed with the reader that is set for standard. (Refer to p.113.)
The language selected at “Guidance Language” on the “User Information Details” screen is used only
if an Iris on Card is used.
■ Failure in Server Certification …
・“Server Certification” is set to “No” on the “Operation Info” tabscreen under the “Reader Setting Details”
screen. (Refer to p.80.)
If “Server Certification” is set to “No” on the “Operation Info” tabscreen under the “Reader Setting
Details” screen, the reader does not perform server certification. Set “Server Certification” to “Yes”.
・“Recognition Setting” is set to “Disable” on the User Information Details screen. (Refer to p.113.)
If “Recognition Setting” is set to “Disable” on the “User Information Details” screen, the user cannot be
certified through the reader. Server certification is not performed, either. Set “Recognition Setting” to
“Enable Reader Recognition” or “Enable Server Certification Only”. If “Server Certification” is set to
“No” at the reader setting, reader setting is prioritized. In such a case, there is no performance of
server certification.
・No group setting has been completed. (Refer to p.100.)
For the certification to be done by server certification, registration of the iris readers for server
certification is needed for the group set up for the users.
・The iris server cannot accept server certification.
While the iris server is in the process of restart, encryption code exchange, iris data distribution, reader
software download, or audio file download caused by automatic reboot or the iris server is not
activated (e.g. hung-up and hibernation), server certification requested from readers cannot be
accepted
219
APPENDICES
Environment Settings
■ Unable to Perform Server Certification after Automatic Reboot, Unable to Record
Log Information …
・Windows® is not running.
If Windows® services are not provided after restarting the iris server with the use of automatic reboot,
the functions of this software are not available. In the following cases, successful startup may not be
acquired after automatic reboot:
─ The startup screen is displayed to wait for key-in because a floppy disc or a CD-ROM is loaded.
─ The OS selection screen waits for an input to decide which OS is selected because two or
more operating systems are installed.
─ In the case of requiring some operations before OS startup owing to setting or the like.
■ Unable to Transmit Backup File …
・You try to transmit the backup file to the drive or folder that is located on the network. (Refer to p.147.)
The backup file cannot be transmitted from this software via the network.
■ Garbled Characters in Alarm Report Mail …
・You put one-byte characters other than ASCII into “Subject” on the E-Mail Setting screen. (Refer to
p.143.)
One-byte characters other than ASCII that are put into “Subject” in a mail may be garbled at the
transmitting side, receiving side, or the SMTP server. If you find that characters are garbled after a
transmission test, do not use one-byte characters other than ASCII for “Subject”.
Log Data/Alarm Data (Information Display Window)
■ No Access Log Announcement …
・The iris reader’s access log is set at [No]. (Refer to p.82.)
Set the access log at [Yes] again.
・Communication is not successfully established between the iris server and readers.
An access log is reported to the iris server every time Recognition is performed with readers. If
communication is not successfully established between the iris server and readers, check the network
setting, status of LAN environment and LAN cable connection.
Miscellany, Unusual Operation, etc.
■ Failure in Normal Management …
・The required system conditions are not satisfied. (Refer to p.17.)
The iris server may fail to perform its normal operation if the system conditions are not satisfied as
stated in this manual.
220
APPENDICES
・The service pack is not applied to the OS of the iris server. (Refer to p.17.)
Normal operation may be impossible to carry out if the service pack is not applied to or not correctly
applied to the OS of the iris server being used.
・You modified the file configuration in the folder (\IrisMngSrv) to which this software has been installed.
If you delete or move a file, modify a file name in the folder ∆1(C:\IrisMngSrv) to which this software
has been installed or modify the folder name, this software does not run properly.
∆1
: In the case of installing this software into the C drive.
221
For U.S. fields:
For European fields:
Panasonic System Solutions Company,
Unit Company of Panasonic Corporation of North America
Matsushita Electric Industrial Co., Ltd.
Security Systems
www.panasonic.com/security
For customer support, call 1.877.733.3689
Osaka, Japan
http://www.panasonic.co.jp/global/
Executive Office: Three Panasonic Way 2H-2, Secaucus, New Jersey 07094
Zone Office
Eastern: Three Panasonic Way, Secaucus, New Jersey 07094
Central: 1707 N. Randal Road, Elgin, IL 60123
Southern: 1225 Northbrook Parkway, Suwanee, GA 30024
Western: 6550 Katella Ave., Cypress, CA 90630
Panasonic Canada Inc.
5770 Ambler Drive,Mississauga,
Ontario, L4W 2T3 Canada (905)624-5010
http://www.panasonic.ca
Panasonic Sales Company
Division of Panasonic Puerto Rico Inc.
San Gabriel Industrial Park 65th Infantry Ave. KM. 9.5 Carolina
P.R. 00985(809)750-4300
© 2005 Matsushita Electric Industrial Co., Ltd. All Rights Reserved.
N1204-2045
3TR002976CAB
Printed in Japan