1
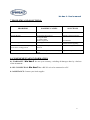
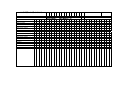
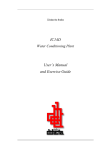
Ctra. Santa Coloma, 7.
E-17176, Sant Esteve de Bas. Girona. Spain.
Tel. + 34 972.69.08.00-Fax. + 34.972.69.00.99
www.spinreact.com
bio bas.1
USER’S MANUAL
bio bas. 1- User’s manual
INDEX
1. INTRODUCTION
1.1 General
1.2 Theory of the instrument functioning
1.3 General description of the instrument
1.4 Functioning criteria and limitations
3
3
3
3
4
2. INSTALLATION
2.1 Recommendations on reception
2.2 Preparation before the installation
5
5
5
3. WORKING
3.1 Samples and reagents
3.2 Measurement
3.3 Switching on
3.4 Prothrombin Time
3.5 Activated Partial Thromboplastin Time
3.6 Fibrinogen
3.7 Time
6
6
6
7
8
10
11
13
4. SPECIAL UTILITIES
4.1 Prothrombin Time
4.2 Activated Partial Thromboplastin Time
4.3 Fibrinogen
4.4 Time
4.5 Language
4.6 By default
15
15
17
18
20
21
21
5. CONSUMABLES
23
6. MAINTENANCE
23
7. PROBLEMS AND SOLUTIONS
24
8. COMPLEMENTARY INFORMATION
24
2
bio bas. 1- User’s manual
1.INTRODUCTION
1.1 GENERAL:
SPINREACT, bio bas.1 coagulometer is an instrument created to determinate the most important
parameters run in plasma coagulation methods:
Prothrombin Time or Quick Time (PT), Activated Partial Thromboplastin Time (APTT), Thrombin
Time (TT), Fibrinogen Concentration (FB), and all coagulation methods whose principle is the
determination of a clotting time.
bio bas.1 stores the calibration curves for Prothrombin Time and Fibrinogen Concentration, which
means no calculation is needed to be done by the user because it gives the result in time, activity,
concentration, RATIO and INR. (different parameters, depending on the method).
1.2 THEORY OF THE INSTRUMENT FUNCTIONING:
bio bas.1 has an optical measurement system which detects a sudden variation of the optical
density when a clot is formed.
The chronometer and the stirring system are activated by a sudden change of the optical density.
This permits the initiation of the time measurement when the starter is added and to stop the
measurement time at the moment the clot is formed.
The continuous mixing guarantees a perfect homogenisation and makes possible the measurement of
low concentrations of Fibrinogen by grouping the fibrin filaments in the centre of the optical path.
The system has a programmable security time during which variations of the optical density, when
the reagent and the plasma are still in the homogenisation phase, can not activate the detection cell.
1.3 GENERAL DESCRIPTION OF THE INSTRUMENT:
Dimensions: 16.5 x 29 x 12.8 cm.
Voltage and frequency: 220 V
50 Hz, 60 Hz
Power data: 100 VA
bio bas.1 has the following elements:
Incubation zone for 10 cuvettes and one reagent.
Reading zone.
Keyboard.
3
bio bas. 1- User’s manual
Description of the keyboard functions:
KEYS:
VAL: used to display the result in Time, Percentage, Ratio, INR, concentration, …
↑: increases the sample identification number.
↓: decreases the sample identification number.
← N: changes the method.
→ Y: changes the method.
OK: validation.
RESET: reset the chronometer to zero.
1.4.FUNCTIONING CRITERIA AND LIMITATIONS
The instrument has an accuracy of 1 tenth of a second. As it is a manual instrument, the influence of
pipetting and the reagents conditions are very important, and to obtain a good repeatability on
results, it is necessary to always follow the manufacturer’s indications and the working method.
4
bio bas. 1- User’s manual
2. INSTALLATION
2.1. RECOMMENDATIONS ON RECEPTION:
bio bas.1 should be stored in a dry place, no extreme temperatures and if it possible not directly
under the sunlight.
During the unpacking, the instrument and all accessories should be checked and in good conditions.
The starter kit accessories are:
2 fuses of 2 amperes
1 plastic cover
1 user’s manual
1 connection cable
1 black cap
50 coagulation cuvettes
50 stirring bars
In case of any anomaly, please contact your distributor and fulfil the return tag included in the box.
Store it in its box.
It is recommended to keep it covered when no working to avoid dust to get into the reading zone.
2.2. PREPARATION BEFORE THE INSTALLATION:
a) Conditions of the installation place:
bio bas.1 should be installed in a place free of vibrations and without direct light, as the
detection system is based on the variation of the absorbance of light and therefore all external
interferences should be avoided.
The surrounding temperature should be between 15 and 35 ºC without excessive humidity.
b) Technical requirements:
The connection to the electrical power should be made with the included connection cable and
only if earth connection exists.
5
bio bas. 1- User’s manual
3. WORKING
3.1 SAMPLES AND REAGENTS:
Samples:
Citrate plasma is used, poor in platelets, obtained from venous puncture. The anticoagulant used
should be Sodium Citrate 3.8%, in a ratio 1 part of citrate and 9 parts of blood. Centrifuge as soon as
possible, for 10’ at 3.000 r.p.m, in polystirene tubes. Quickly prepare the plasma, transfer it into
clean and dry polystirene tubes, for better conservation and homogenisation.
The maximum time recommended from extraction till measurement is 3-4 hours.
Samples could be stored in the fridge, but never frozen.
Reagents:
The thermostatisation time should be well controlled if indicated in the packaging insert. Reagents
must be all at room temperature and well homogenised before using them.
Accessories:
The plastic black cap is used to fix the pipette tip and maintain it in vertical position when adding
the starter. It could not be necessary if pipetting is done in the middle of the reaction cuvette, in
vertical position and without touching the reagent/plasma on the cuvette.
3.2. MEASUREMENT:
Place the reaction cuvettes required for the samples to be run in the thermostat.
Add a stirring bar into every cuvette and wait for the instrument to be at 37ºC (the asterisk indicates
so).
Dispense into the cuvettes the needed volume of reagent or sample. Look the specific packaging’s.
It is very important to avoid air bubbles formation, because they can stop the instrument before the
clotting time.
It is recommended to use a pipetting system that does not introduce bubbles. The cause is very often
the pipetting pressure. That is why it is recommended to pipette AGAINST THE CUVETTES
WALL or use a piston pipette when first reagent/plasma is added and PIPETTE IN A COMPLETE
VERTICAL POSITION when adding the starter . Do not pipette with a disposable tip pipette on the
cuvette bottom, because bubbles will be formed.
In case any air bubble is formed, gently knock the cuvette bottom against any table or any flat
surface, to make the bubbles to reach the surface of the liquid.
When the thermostatisation time is finished, the cuvette is placed on the reading well. Be sure that it
reaches well the bottom. Cover it with the cap, press RESET. The chronometer remains inactive for
some seconds (delay time programmed, on the display it appears ---:-) and then it shows 000:0. At
6
bio bas. 1- User’s manual
this moment the reagent or plasma is added with a disposable tip pipette, leaving the liquid to get
down with one blow and all the reaction starts at the same time.
The addition MUST be done with a disposable tip pipette. DO NOT USE piston pipettes nor glass
ones, because the liquid falls drop by drop, not with a blow, and all the reaction does not start at the
same time.
The addition is done introducing the tip of the pipette through the cap orifice and maintaining the
pipette in vertical position, pipette for the dosage to fall in the central part of the cuvette (a pipette
inclination would make the sample slide on the cuvette wall producing wrong results). The pipetting
MUST NOT BE energetic nor extremely gently. If the cap is lost or it is not wanted to be used, do
always pipette in the CENTRAL PART OF THE CUVETTE AND IN VERTICAL POSITION.
When the reagent and the plasma are in contact a O.D. variation is produced, that automatically
activates the digital chronometer and the magnetic mixer. When the clot starts to be formed, an O.
D. variation is produced and stops the chronometer and the mixer. The clotting time is displayed.
NOTE:
Plasma thermostatisation: The reagents producers indicate the incubation time rules. This time must
not be higher than the established one. If the plasma remains more than 5 minutes on the thermostat,
an evaporation of the aqueous part takes place; often this phenomena can be observed on the cuvette
wall and it makes the times to be shorter due to the plasma concentration. It is also important to
obtain a perfect repeatability. All the plasmas must have the same incubation time, because if one
plasma is thermostated at 3’ and another one at 5’, the results will be different.
In case the working volume makes difficult to follow the incubation standardisation, it is possible to
work with plasmas at room temperature (20 – 25 ºC), after taking the reference at the same
temperature.
3.3. SWITCHING ON:
Place the instrument on a stable place, away from direct light.
Plug it and switch it on using the switch placed on the left rear side.
1 PT
T: ---:-<
The first number (1) indicates the sample identification.
PT indicates the method
T:---:- is the chronometer
When the working temperature is reached, the final signal is an asterisk:
1 PT
T: --- : -*
7
bio bas. 1- User’s manual
3.4 PROTHROMBIN TIME:
Press ← N or Y→ keys till PT is displayed.
1 PT
T: --- : -*
Calibration:
If calibration is wanted, press OK:
CALIBRATE (Y/N)
For an affirmative answer press Y→. The first calibration point (100%) is displayed:
%:
100
1
When pressing OK, the defined time is showed:
TIME: (12.00)
1
The cursor is placed on the first number. With keys↑ and ↓ it can be increased or decreased. The
order is: blank space, decimal point, 0,1, .., 9. To go to next number press Y→. When finished press
OK.
The second calibration point is displayed:
%:
25
2
The cursor is placed in the tens of percentage. To modify it, use the arrows ↑ and ↓. To go to units,
press Y→. To validate press OK. The programmed time is displayed:
TIME: (23.00)
2
8
bio bas. 1- User’s manual
Modify it as done for the first point of calibration. Finally press OK. It goes to the main display of
PT:
1 PT
T: --- : -*
Measuring:
If the sample identification is wanted to be changed, press ↑ to increase it and ↓ to decrease it.
Press RESET to activate the chronometer (If the incubation time was programmed, it will be
displayed. To start the countdown press OK. At 20” left, a bip will sound. When the countdown will
be finished, it will be set to zero). It is displayed:
1 PT
T: 000 : 0*
Dispense the starter reagent for the chronometer to start. When the clot is detected, the chronometer
stops:
1 PT
T: 12.9 *
If result is wanted to be shown as percentage, ratio and INR, the VAL key should be pressed. The
following displays will appear in a consecutive way:
1 PT
% 80.3 *
1 PT
R: 1.07 *
1 PT I: 1.16 *
If a new sample is wanted to be run, press RESET and the chronometer will be activated. The
sample identification is increased in one unit from the previous one.
2 PT
T: 000 : 0*
Once all readings are done, to exit from the PT program, press ← N and Y→.
9
bio bas. 1- User’s manual
3.5 ACTIVATED PARTIAL THROMBOPLASTIN TIME:
Press the keys ← N or Y→ till PTT is displayed:
1 PTT
T: --- : -*
Calibration
If calibration is wanted, press OK:
CALIBRATE (Y/N)
When pressing Y → it is displayed:
REF. T.: (0)
The cursor is placed on the first number. With keys↑ and ↓ it can be increased or decreased. To go to
next number (units) press Y→. When finished press OK. It goes to the PTT main menu:
1 PTT
T: --- : -*
Measuring:
If the sample identification is wanted to be changed, press ↑ to increase it and ↓ to decrease it.
Press RESET to activate the chronometer. (If the incubation time was programmed, it will be
displayed. To start the countdown press OK. At 20” left, a bip will sound. When the countdown will
be finished, it will be set to zero). It is displayed:
1 PTT
T: 000 : 0*
Dispense the starter reagent for the chronometer to start. When the clot is detected, the chronometer
stops:
1 PTT
T: 30.4 *
Pressing VAL, the result is shown as RATIO, if a reference time was introduced:
10
bio bas. 1- User’s manual
1 PTT
R: 1.09 *
If a new sample is wanted to be run, press RESET and the chronometer will be activated. The
sample identification is increased in one unit from the previous one.
2 PTT
T: 000 : 0*
Once all readings are done, to exit from the PTT program, press ← N and Y→.
3.6 FIBRINOGEN:
Press the keys ← N or Y→ till Fibrinogen is displayed:
1 FB T: --- : -*
Calibration
If calibration is wanted, press OK:
CALIBRATE (Y/N)
When answering YES, it is displayed:
CONC: (400) 1
The cursor is placed in the first number (hundreds). Using the keys ↑ and ↓ the value is increased or
decreased. To go to the next number (tens) press Y→. If it is needed, go to the third number. When
finished press OK.
The time is displayed:
TIME:
(8
)
If it is necessary to change the time, use the keys ↑, ↓ and Y→. To finish press OK.
11
bio bas. 1- User’s manual
The second point is displayed:
CONC: (200) 2
It is modified like the first point.
The time for the second calibration point is showed:
TIME:
(15 )
The time is modified as for the first point. Press OK to confirm it, and it goes to the measuring
display.
Measuring:
If the sample identification is wanted to be changed, press ↑ to increase the value or ↓ to decrease it.
Press RESET to activate the chronometer. (If the incubation time was programmed, it will be
displayed. To start the countdown press OK. At 20” left, a bip will sound. When the countdown will
be finished, it will be set to zero). It is displayed:
1 FB
T: 000 : 0*
Dispense the starter reagent for the chronometer to start. When the clot is detected, the chronometer
stops:
1 FB
T: 9.3 *
When VAL is pressed, the result is shown as CONCENTRATION:
1 FB
C: 337.3 *
If a new sample is wanted to be run, press RESET and the chronometer will be activated. The
sample identification is increased in one unit from the previous one.
2 FB
T: 000 : 0*
12
bio bas. 1- User’s manual
Once all readings are done, to exit from the FB program, press ← N and Y→.
3.7 TIME:
Press the keys ← N or Y→ till Time is displayed:
1T
T: --- : -*
Calibration:
If calibration is wanted, press OK:
CALIBRATE (Y/N)
When pressing Y → it is displayed:
REF. T.: (0)
The cursor is placed in the tens of percentage. To modify it, use the arrows ↑ and ↓. To go to units,
press Y→. To validate press OK. The programmed time is displayed:
It goes to the main display for Time:
1T
T: --- : -*
Measuring:
If the sample identification is wanted, press ↑ to increase it or ↓ to decrease it.
Press RESET to activate the chronometer. (If the incubation time was programmed, it will be
displayed. To start the countdown press OK. At 20” left, a bip will sound. When the countdown will
be finished, it will be set to zero). It is displayed:
1T
T: 000 : 0*
Dispense the starter reagent to activate the chronometer. When the clot is detected, the chronometer
stops:
13
bio bas. 1- User’s manual
1T
T: 16.9 *
If a reference time has been previously programmed, the ratio is displayed when pressing VAL:
1T
R: 0.84 *
If a new sample is wanted to be run, press RESET and the chronometer will be activated. The
sample identification is increased in one unit from the previous one.
2T
T: 000 : 0*
Once all readings are done, to exit from the T program, press ← N and Y→.
14
bio bas. 1- User’s manual
4. SPECIAL UTILITIES
Pressing at the same time both arrows (↑ and ↓) from the main menu, it is possible to get into a
technical menu that allows to change certain parameters of the instrument configuration.
It is displayed:
PT
Pressing the key (Y→), the parameters change following this order (it is possible to go back
pressing (← N)):
•
•
•
•
•
•
PT
PTT
FB
T
LANGUAGE
BY DEFAULT
After BY DEFAULT, it goes to the main program.
To choose any of the parameters, press OK when it is displayed.
4.1 PROTHROMBIN TIME:
When PT is chosen, it is displayed:
N. POINTS: (......)
When pressing the keys (↑ and ↓), the number of points is increased or decreased. To accept press
OK. The percentage of first point will appear:
%: (100 )
1
To modify the value use the vertical arrows (↑ and ↓), to change the number press the horizontal
arrow (Y→) and confirm pressing OK.
15
bio bas. 1- User’s manual
The time defined for the first point is displayed:
T.: (12)
1
To modify the value use the vertical arrow (↑ and ↓), to change the number use the horizontal arrow
(Y→) and confirm pressing OK.
The activity percentage for the second point is displayed:
%: (25)
2
To modify the value use the vertical arrows (↑ and ↓), to change the number use the horizontal arrow
(Y→) and confirm pressing OK.
The defined time for the second point is displayed:
T.: (24)
2
To modify the value use the vertical arrows (↑ and ↓), to change the number use the horizontal arrow
(Y→) and confirm pressing OK.
Then the ISI is requested. It is a value given by the reagents manufacturer and it is used to calculate
the INR. To modify the value use the vertical arrows (↑ and ↓), to change the number use the
horizontal arrow (Y→) and confirm pressing OK.
ISI: ( 2)
The security time is requested. It is the time during which optical variations do not stop the
instrument. By default is 5”.
SEF. T.:
( 5 )
To modify the value use the vertical arrows (↑ and ↓), to change the number use the horizontal arrow
(Y→) and confirm pressing OK.
16
bio bas. 1- User’s manual
The delay time is requested. It is the time since RESET is pressed, after placing the cuvette in the
reading position, till the chronometer is set to zero. By default is 3”, but it could be longer if the
reagent presents a high turbidity.
DELAY:
( 3 )
To modify the value use the vertical arrows (↑ and ↓), to change the number use the horizontal arrow
(Y→) and confirm pressing OK.
At the end, the incubation time is requested. In case it is programmed a value different from zero,
the chronometer will make a countdown to indicate the exact moment the starter should be added.
The minimum value that may be introduced is 30 seconds.
INCUB. T.:
(
)
To modify the value use the vertical arrows (↑ and ↓), to change the number use the horizontal arrow
(Y→) and confirm pressing OK. It goes to the initial display where PT is displayed. Pressing several
times Y→ it goes to the main display.
4.2 ACTIVATED PARTIAL THROMBOPLASTIN TIME:
From the PTT display, press OK to get into the configuration parameters to be modified.
PTT
Pressing OK again, the reference time is requested. It is optional and it is used to give the final result
as a RATIO between the sample time and the time of a normal pool of plasmas.
REF.T.: (0
)
17
bio bas. 1- User’s manual
To modify the value use the vertical arrows (↑ and ↓), to change the number use the horizontal arrow
(Y→) and confirm pressing OK.
The security time is requested. It is the time during which optical variations do not stop the
instrument. By default is 5”.
SEF. T.:
( 5 )
To modify the value use the vertical arrows (↑ and ↓), to change the number use the horizontal arrow
(Y→) and confirm pressing OK.
The delay time is requested. It is the time since RESET is pressed, after placing the cuvette in the
reading position, till the chronometer is set to zero. By default is 3”, but it could be longer if the
reagent presents a high turbidity.
DELAY:
( 3 )
To modify the value use the vertical arrows (↑ and ↓), to change the number use the horizontal arrow
(Y→) and confirm pressing OK.
At the end, the incubation time is requested. In case it is programmed a value different from zero,
the chronometer will make a countdown to indicate the exact moment the starter should be added.
The minimum value that may be introduced is 30 seconds.
INCUB.T.:
(
)
To modify the value use the vertical arrows (↑ and ↓), to change the number use the horizontal arrow
(Y→) and confirm pressing OK. It goes to the initial display where PTT is displayed. Pressing
several times Y→ it goes to the main display.
4.3 FIBRINOGEN:
From the FB display, press OK to get into the configuration parameters to be modified.
FB
Then the number of points for the calibration is requested.
18
bio bas. 1- User’s manual
N. POINTS: (......)
When pressing the vertical arrows (↑ and ↓), the number of points is increased or decreased. For
acceptation, press OK. The concentration for the first point appears.
CONC.: (400)
1
To modify the value use the vertical arrows (↑ and ↓), to change the number use the horizontal arrow
(Y→) and confirm pressing OK.
The time defined for the first point is displayed:
TIME: (8)
1
To modify the value use the vertical arrows (↑ and ↓), to change the number use the horizontal arrow
(Y→) and confirm pressing OK.
The concentration for the second point is displayed:
CONC.:(200)
2
To modify the value use the vertical arrows (↑ and ↓), to change the number use the horizontal arrow
(Y→) and confirm pressing OK.
The time defined for the second point is displayed:
TIME: (5)
2
The security time is requested. It is the time during which optical variations do not stop the
instrument. By default is 5”.
SAFE T.:
( 5 )
19
bio bas. 1- User’s manual
To modify the value use the vertical arrows (↑ and ↓), to change the number use the horizontal arrow
(Y→) and confirm pressing OK.
The delay time is requested. It is the time since RESET is pressed, after placing the cuvette in the
reading position, till the chronometer is set to zero. By default is 3”, but it could be longer if the
reagent presents a high turbidity.
DELAY:
( 3 )
To modify the value use the vertical arrows (↑ and ↓), to change the number use the horizontal arrow
(Y→) and confirm pressing OK.
At the end, the incubation time is requested. In case it is programmed a value different from zero,
the chronometer will make a countdown to indicate the exact moment the starter should be added.
The minimum value that may be introduced is 30 seconds.
INCUB.T.:
(
)
To modify the value use the vertical arrows (↑ and ↓), to change the number use the horizontal arrow
(Y→) and confirm pressing OK. It goes to the initial display where FB is displayed. Pressing several
times Y→ it goes to the main display.
4.4 TIME:
From the T display, press OK to get into the configuration parameters to be modified.
T
Pressing OK again, the reference time is requested. It is optional and it is used to present the final
result as a RATIO between the sample time and the time of a normal pool of plasmas.
REF. T. : (0)
20
bio bas. 1- User’s manual
To modify the value use the vertical arrows (↑ and ↓), to change the number use the horizontal arrow
(Y→) and confirm pressing OK.
The security time is requested. It is the time during which optical variations do not stop the
instrument. By default is 5”.
SAFE T.:
( 5 )
To modify the value use the vertical arrows (↑ and ↓), to change the number use the horizontal arrow
(Y→) and confirm pressing OK.
The delay time is requested. It is the time since RESET is pressed, after placing the cuvette in the
reading position, till the chronometer is set to zero. By default is 3”, but it could be longer if the
reagent presents a high turbidity.
DELAY:
( 3 )
To modify the value use the vertical arrows (↑ and ↓), to change the number use the horizontal arrow
(Y→) and confirm pressing OK.
At the end, the incubation time is requested. In case it is programmed a value different from zero,
the chronometer will make a countdown to indicate the exact moment the starter should be added.
The minimum value that may be introduced is 30 seconds.
INCUB.T.:
(
)
To modify the value use the vertical arrows (↑ and ↓), to change the number use the horizontal arrow
(Y→) and confirm pressing OK. It goes to the initial display where T is displayed. Pressing several
times Y→ it goes to the main display.
4.5 LANGUAGE:
It is displayed:
LANGUAGE
21
bio bas. 1- User’s manual
When pressing OK the Spanish option appears:
SPANISH
To see the other options press Y→. The different options are displayed:
ENGLISH
FRENCH
Press OK to accept the wanted option.
When pressing Y→ again, it goes to the main display.
4.6 BY DEFAULT:
Pressing OK to this option, all introduced parameters will be removed and the original values for
calibrations, reference times, incubation times, etc, will be re-installed.
BY DEFAULT
22
bio bas. 1- User’s manual
5. CONSUMABLES:
bio bas.1only requires the reagents and samples needed to run the tests and the accessories to
take the samples, dilute them and make the reading.
Reagents:
P.T.: Calcium Thromboplastin, physiological saline solution and control plasma.
P.T.T.: activator (cephaline-kaolin, ellagic acid, etc...), Calcium Chloride, physiological
saline solution and control plasma.
Fibrinogen: Thrombine reagent, buffer and calibrator.
Accessories:
Automatic micropipettes: to take the required volume of sample and reagents for every
method.
Cuvettes: to read the reaction. Ref FC 5200007
Magnetic stirrers: to homogenise the solution. Ref. FC 5200008
6. MAINTENANCE:
A. Preventive maintenance:
See table enclosed.
B. Cleaning instructions:
When the instrument does not work, should be protected with the plastic cover to avoid dust,
specially in the reading zone. The a.m. cover should be placed some minutes after switching the
instrument off.
Be aware to not pipette any product in the instrument if the cuvette is not placed in the reading zone.
C. Recommended spare parts:
It is recommended to have a couple of fuses.
23
bio bas. 1- User’s manual
7 PROBLEMS AND SOLUTIONS:
PROBLEMS
POSSIBLE CAUSES
SOLUTIONS
Time obtained too short
Air bubbles in the cuvette
Eliminate the air bubbles
Clot not detected
No magnetic stirrer placed
No reagent added
No sample added
RESET not pressed
Pipetting problems
Add the component missing
Press RESET
Review the method and the
material used for pipetting
Chronometer starts when placing the The specified way of work was not Press RESET again
cuvette in the reading position
followed
It does not repeat
The chronometer does not start
RESET was not pressed before adding the Repeat the sample
starter
8. COMPLEMENTARY INFORMATION
8.1 WARRANTY: bio bas.1 has one year warranty, excluding all damages done by a bad use
of the instrument.
8.2 PC CONNECTION: bio bas.1 has a RS 232 exit to be connected to a PC.
8.3 ASSISTANCE: Contact your local supplier.
24
bio bas. 1- User’s manual
NOTES:
25
MAINTENANCE MANUAL
Period month:
LABORATORY
INSTRUMENT:
1
DAILY CONTROL
Read a control.
MONTHLY CONTROL
Read a high control.
Read a low control.
ANNUAL CONTROL
Clean the optical group.
Read a high control.
Read a low control.
Operator
TAS
NOTES
2
3
4
5
6
7
8
9
bio bas.1
Nº:
Year:
INSTALLED:
10 11 12 13 14 15 16 17 18 19 20 21 22 23 24 25 26 27 28 29 30 31