1
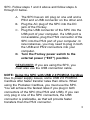
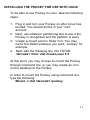
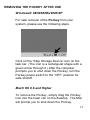
POCKEY USB 2.0 DRIVE
USER’S MANUAL
THE DATA STORED ON THIS HARD DISK IS NOT
GUARANTEED BY POCKETEC.
POCKETEC IS NOT RESPONSIBLE FOR ANY LOSS OF DATA.
ALWAYS BACK UP ALL DATA REGULARLY.
©2002 THE POCKEY IS A REGISTERED TRADEMARK OF POCKETEC ™. ALL OTHER
MARKS ARE PROPERTIES OF THEIR REGISTERED OWNERS.
TABLE OF CONTENTS
Introduction……………………………………………….3
Features and Benefits……………………………….…..4
Your Package Includes………………………………….4
Minimum Systems Requirements……….…………….5
Care and Handling…………………….………………….6
Hardware Installation…………………………………….7
Software Installation for Windows®…….…………….9
Software Installation for Macintosh®………………..10
Installing the Pockey for Use with LINUX………...…11
Removing the Pockey After Use………………...……12
Troubleshooting……...………………………………….13
Warranty Info……………………………………………..17
2
INTRODUCTION
Thank you for your purchase of the Pockey® USB 2.0
Drive by Pocketec™, the leading provider of portable
storage solutions. The pocket-sized Pockey® is the most
exciting portable storage solution available today! The
Pockey® offers massive storage capacity, the fastest
transfer rates, and ultra-portability. The Pockey® is
available in 20GB, 30GB, or 40GB capacities, and you
can stack them to create an almost limitless library of
files. Transferring large amounts of data is a snap with
the USB 2.0 interface which offers transfer rates up to
480 Mbps – that’s 40 times faster than USB 1.1 speed!*
Best of all, the ultra-portable Pockey® does not require
any additional power source (such as batteries or AC
adapter) because all necessary power is drawn through
the USB cable. You can take it ANYWHERE!
The Pockey® is compatible with laptops and desktops,
PC or Mac, so cross-platform file sharing is a breeze.
Plug-N-Play, hot -swappable, and hot-pluggable features
make the Pockey® convenient and easy to use. With
DOS level support, the Pockey® is a powerful tool for
even the most demanding IT manager. The Pockey® -it’s “a new breed of portable hard drives!”™
*Note: To achieve USB 2.0 speeds, your computer must be
USB 2.0 enabled.
3
FEATURES AND BENEFITS
•
•
•
•
•
•
•
•
•
USB 2.0 Certified with transfer rate up to 480
Mbps (40x faster than USB 1.1)
Backwards compatible with USB 1.1
Tiny footprint offers maximum portability
Massive storage capacity
Stackable (multiple Pockeys can be attached to
your computer)
No additional power source required (no
batteries or AC adapter required)
Cross-platform compatible (PC, MAC, and
Linux)
Plug-N-Play (drivers not required for Windows®
XP/2000/Me and Macintosh® OS 10.1)
DOS Level Support
THE POCKETEC™ PACKAGE
TM
Your Pocketec package contains the following:
• Pockey® USB 2.0 Drive
• USB Connection Cable
• Supplemental Power Cord (SPC)
• User’s Manual
• CD ROM Installation Disk
• Slim Line Carrying Case
4
MINIMUM SYSTEM REQUIREMENTS
•
586 or higher processor, Macintosh® systems
•
Microsoft Windows® 98/98SE/Me/2000/XP, Mac
OS 8.6 or higher
•
Available USB port
Note: To achieve USB 2.0 speeds your computer
must be USB 2.0 enabled.
•
CD ROM Drive for driver installation or Internet
connection for driver installation download
Note: Driver not required for Windows®
2000/Me/XP and Mac OS 10.1. Driver required for
Windows® 98/98SE and Mac OS 8.6 to 10.0.
Note: For Macintosh® computers with a frontloading CD ROM, please download drivers from
www.pocketec.net (front-loading CD ROM drives
cannot read mini-CDs). Only use the mini-CD for
CD ROM drives with a slide-out tray.
5
CARE AND HANDLING
•
Please keep the Pockey in the protective
carrying case at all times, even during use, so
as to minimize damage. Always handle your
Pockey carefully.
•
Do not move or disconnect the Pockey from your
computer while the Pockey is reading or writing
data. This may cause loss of data or damage to
the hard drive.
•
Before unplugging the Pockey or turning off your
computer, click the “stop storage device” icon on
the task bar (or for the Mac, drag the Pockey
into the trash can), then turn the Pockey power
switch to the “OFF” position. Failure to do so
may cause loss of data.
•
No formatting is necessary. The Pockey is
already formatted.
•
Do not open the outer case. Opening the case
may damage the Pockey, it’s components, or
the hard drive and will VOID THE WARRANTY.
•
Avoid exposing the Pockey to extreme
temperatures or humidity. Either may cause
damage to the hard drive.
6
HARDWARE INSTALLATION
1.
The Pockey and the USB connection cable are
included in the package. Take the USB cable
and connect the cable to the USB port located
on your computer.
Note: Do not plug the cable into the USB port
located on the keyboard or the monitor as those
ports do not supply sufficient power. Also, if you
are connecting the Pockey to a USB hub, it must
be a POWERED hub in order for the Pockey to
work properly].
2.
Next, connect the other end of the USB cable to
the mini-USB port of the Pockey.
3.
Turn the Pockey power switch to the “USB”
position.
THE HARDWARE INSTALLATION IS
COMPLETE
NOTE: Using the Supplemental Power Cord (SPC)
The USB ports of some computers as well as USB ports
of some PCMCIA Cardbus do not supply enough power
to run the Pockey. If your Pockey is not working properly
because the USB port is not providing sufficient power,
you must use BOTH the USB connection cable and the
7
SPC. Follow steps 1 and 2 above and follow steps A
through D below.
The SPC has an AC plug on one end and a
PS/2 and a USB connector on the other end.
B. Plug the AC plug of the SPC into the DC
jack of the Pockey.
C. Plug the USB connector of the SPC into the
USB port of your computer. If a USB port is
not available, plug the PS/2 connector of the
SPC into the PS/2 port of your computer. In
rare instances, you may need to plug in both
the USB and PS/2 connectors into your
computer.
D. Turn the Pockey power switch to the
external power (“EXT”) position.
A.
REMEMBER: If you are using the SPC, you
must also use the USB connection cable.
NOTE: Using the SPC with USB 2.0 PCMCIA Cardbus
Due to power supply issues, some USB 2.0 PCMCIA
Cardbus offer faster transfer rates than others. When
using the Pocketec Cardbus, you must use the SPC.
You will achieve the fastest rates if you plug in both
connectors of the SPC (the PS/2 and USB). If you can
only plug in one of the SPC connectors, the USB
connector is preferable, as that will provide faster
transfers than the PS/2 connector.
8
SOFTWARE INSTALLATION FOR WINDOWS®
Software drivers are not required for computers
running the following operating systems:
Windows® 2000/Me/XP.
Software drivers must be installed for Windows®
98 and 98SE. For driver installation, follow steps
1 through 7 below.
1.
2.
3.
4.
5.
6.
7.
Insert CD ROM Installation Disk or download
software driver from www.pocketec.net.
Click the “tppinst.exe” icon.
You may be prompted to select a language. If
so, select language and click “OK”.
The Install Shield Wizard window will open up.
Click “Next”.
You will be prompted to select a Set Up. If you
are prompted to choose between “Complete” or
“Custom”, select “Complete” and click “Next”.
Click “Next” to finish the driver installation and
reboot your computer.
Turn the Pockey power switch to the “USB”
position or the “EXT” position if you need
supplemental power (see hardware installation
above). The Pockey will appear as the next
available drive letter.
9
SOFTWARE INSTALLATION FOR MACINTOSH®
The Pockey is compatible with Mac OS 8.6 and
higher. Software drivers must be installed for Mac
OS 8.6 to 10.0. Software drivers are not required for
Mac OS 10.1. For driver installation, please follow
steps 1 through 7 below.
1.
Place the CD ROM installation disk onto the
sliding tray of the CD ROM drive or for frontloading CD ROM drives, download drivers from
www.pocketec.net.
Note: The mini-CD cannot be read by front-loading
CD ROM drives of Macintosh® computers and
may jam the drive. Unless the CD ROM has a tray
that slides out for the CD, do not use the mini-CD
provided in your Pocketec™ package.
2.
3.
4.
5.
6.
7.
Open the “Mac” folder and unzip “Pockey.HQX”
using “Stuffit Expander”.
A new file named “Install ISD USB-IDE Bridge”
will be created.
Double click this file to install the Pockey driver.
You will see the message “Installation was
successful”. Click “OK”.
Connect the Pockey to your computer’s USB
port and turn the power switch to “USB”, or if
your computer requires use of the Supplemental
Power Cord, turn the power switch to the “EXT”
position.
Your computer will recognize the Pockey.
10
INSTALLING THE POCKEY FOR USE WITH LINUX
To be able to use Pockey in Linux, take the following
steps.
1. Plug in and turn your Pockey on after Linux has
booted. You should do this in your “root”
account.
2. Next, use whatever partitioning tool to see if the
Pockey is recognized and the partition is seen.
3. Create a mount point in folder mnt. You may
name this folder whatever you want, “pockey” for
example.
4. Next, add the following line into FSTAB:
/dev/sda1 /misc vfat noauto,user 0 0
At this point, you may choose to mount the Pockey
through command line, or you may create an icon
on the desktop for the Pockey.
In order to mount the Pockey using command line,
type the following:
Mount –t vfat /dev/sda1 /pockey
11
REMOVING THE POCKEY AFTER USE
Windows® 98/98SE/Me/2000/XP
For safe removal of the Pockey from your
system, please use the following steps.
Click on the “Stop Storage Device“ icon on the
task bar. (The icon is a rectangular shape with a
green arrow through it.) After the computer
prompts you to shut down the Pockey, turn the
Pockey power switch to the “OFF” position for
safe shutoff.
Mac® OS 8.6 and Higher
To remove the Pockey, simply drag the Pockey
icon into the trash can on the desktop. The Mac
will prompt you to shut down the Pockey.
12
TROUBLESHOOTING
Question
My computer does not recognize the Pockey.
Answer
• Install or re-install software drivers.
• Make sure the USB cable is connected properly
to your computer and the Pockey.
• Some computers may require the use of the
Supplemental Power Cord in addition to the
USB connection cable (see Hardware
Installation).
• Make sure the USB connection cable is
connected directly into the computer’s USB port
(USB ports on keyboards will not work).
• If you are using a USB hub for the Pockey,
please make sure it is a powered USB hub (nonpowered USB hubs will not work).
• Reboot your computer to confirm the connection
to the Pockey.
• Make sure the Pockey Power Switch is in the
“USB” position if you are not using the
Supplemental Power Cord (SPC), or if you are
using the SPC, make sure the Power Switch is
in the “EXT” position.
• Turn the Pockey “OFF” and then turn it back to
either the “USB” or “EXT” position.
13
Question
My computer is having trouble installing the software
driver.
Answer
• Re-insert CD ROM Installation Disk. Click on
“Tppinst.exe” icon. You will be prompted to
“Modify”, “Repair”, or “Remove”. Click “Modify”
and follow steps.
• If the computer still cannot install the software
driver, re-insert CD ROM install disk and click
“Tppinst.exe”. When prompted, choose “Repair”
and follow steps.
• Install the driver through your computer’s
DEVICE MANAGER using the following steps:
o Plug Pockey into your computer and
turn it on.
o Cancel the InstallShield Wizard
o Right click on “My Computer” and click
on “Properties”
o Click the “Device Manager” tab.
o Scroll down to the “Universal Serial Bus
Controllers”
o Click on the “+” next to the USB
Controllers
o Double click “USB Storage Adaptor V2
(TPP)”
o A box should appear with two tabs –
“General” and “Drivers”
14
o
o
o
o
Go to the “Drivers” tab and click on
“Update Drivers”
You will be asked the location of the
driver. Choose the “Specify” option and
browse until you have found the driver.
Click “Next” and then click “Finish”.
Shut off the Pockey and reboot the
computer.
After the computer has rebooted, turn
the Pockey back on. A box should
appear saying that Windows® is
building a driver database for that
device. Once this has completed, the
Pockey should be accessible and ready
to use.
Question
• My computer is getting an Ikernel.exe Error or a
Kebugchek Error.
Answer
• What is happening is that when you leave the
computer on for an extended period of time but
you are not using the computer, the computer
goes into “stand-by” or “hibernation” mode. After
going into “stand-by” or “hibernation” mode, the
computer cannot rescan the USB bus and
therefore will not recognize the Pockey. To
alleviate this problem, you have the following
options:
15
o
o
o
Turn your Pockey off when not using it
for extended periods of time.
Go to the Power Setting of your
computer and turn off the “hibernation”
mode for the computer.
Right click on your Desktop and scroll
down to “Properties”. Once in
Properties, go to the screensaver tab. In
the screensaver tab, you should see an
option for turning off “Hard Disks”. Set
this option to “Never”.
16
WARRANTY
ONE-YEAR LIMITED WARRANTY
POCKETEC’s warranty obligations are limited to the terms set forth
below : POCKETEC warrants that, subject to the following limitations,
each of its products (“Product”) will be free from defects in material and
workmanship and conform to the Product specifications for a period of
ONE (1) YEAR from the date of original retail purchase. This warranty
applies only to Products manufactured by POCKETEC that contain the
“POCKEY” trademark, trade name, or logo affixed thereon.
POCKETEC will have no liability for any Product returned if
POCKETEC determines that:
•
•
•
•
The Product was not purchased from an authorized reseller.
The person asserting the warranty is the not original
purchaser of the Product.
The asserted defect is attributable to misuse, abuse,
mishandling, improper installation, alteration (including
removing or obliterating labels), or accident while in the
possession of someone other than POCKETEC.
The Product’s external casing was opened or if any of the
internal components were exposed in any way.
Your exclusive remedy for any defective Product is limited to the repair
or replacement of the defective Product. POCKETEC may elect which
remedy or combination of remedies to provide in its sole discretion.
POCKETEC shall have a reasonable time after determining that a
defective Product exists to repair or replace a defective Product.
POCKETEC' replacement Product under its limited warranty will be
manufactured from new and serviceable used parts. POCKETEC'
warranty applies to repaired or replaced Products for the balance of
17
the applicable period of the original warranty or ninety days from the
date of shipment of a repaired or replaced Product, whichever is
longer.
There are no warranties that extend beyond the face of the
POCKETEC limited warranty. POCKETEC disclaims all other
warranties, express or implied, regarding the Products, including any
implied warranties of merchantability, fitness for a particular purpose,
or noninfringement. Some jurisdictions do not allow the exclusion of
the implied warranties.
POCKETEC' entire liability for any defective Product shall in no event
exceed the purchase price of the defective Product. This limitation
applies even if POCKETEC cannot or does not repair or replace any
defective Product and your exclusive remedy fails of its essential
purpose.
POCKETEC has no liability for general, consequential, incidental or
special damages. These include loss of recorded data, the cost of
recovery of lost data, lost profits, downtime, loss of goodwill, damage
to or replacement of equipment and property, the cost of the
installation or removal of any Products, the installation of replacement
Products, and any necessary inspection, testing, or redesign caused
by any defect or by the repair or replacement of Products arising from
a defect in any Product.
In the United States, some states do not allow exclus ion or limitation of
incidental or consequential damages, so the limitations above may not
apply to you. This warranty gives you specific legal rights, and you may
also have other rights that vary from state to state.
18
CONTACT US
For more information or customer service, please reach
us at:
http://www.pocketec.net
E-mail: [email protected]
Customer Service: 877-7-POCKEY
Outside U.S.: 818-717-9556
FCC COMPLIANCE STATEMENT
This device complies with Part 15 of the FCC Rules.
Operation is subject to the following two conditions:
(1) This device may not cause harmful interference,
and
(2) This device must accept any interference
received, including interference that may cause
undesired operation.
19