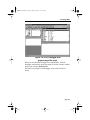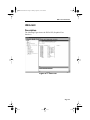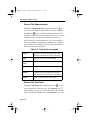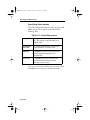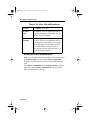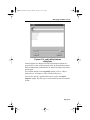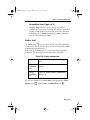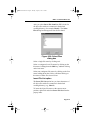
1
IDEAUsersGuide.book Page 1 Monday, August 2, 1999 2:30 PM IDEA Integrated Development Environment for Embedded Applications User’s Manual PC/Windows 95/98/NT Document Version 1.4 June 1999 Copyright © COSMIC Software Inc 1999 All Trademarks are the property of their respective owners IDEAUsersGuide.book Page 2 Monday, August 2, 1999 2:30 PM Page 2 IDEAUsersGuide.book Page i Monday, August 2, 1999 2:30 PM TOC Table of Contents i IDEAUsersGuide.book Page ii Monday, August 2, 1999 2:30 PM This page intentionally left blank. ii IDEAUsersGuide.book Page iii Monday, August 2, 1999 2:30 PM Table of Contents IDEA Overview Who is Cosmic Software? ..................................1-3 What is IDEA? ...................................................1-4 Using IDEA ........................................................ 1-4 Contents of the IDEA User’s Guide ...................1-6 Installing IDEA Preparing for installation ....................................2-3 Installation requirements .....................................2-3 Compiler requirements .......................................2-3 Installation media ................................................2-3 Installation process .............................................2-3 Running the installation program .......................2-4 Running IDEA Starting IDEA .....................................................3-3 Starting a new project .........................................3-5 Building a project ...............................................3-7 Debugging a project ...........................................3-8 Saving and closing a project ..............................3-10 Opening the example project .............................3-10 Specifying the working directory .......................3-11 Setting IDEA options .........................................3-12 Getting Help .......................................................3-13 Exiting IDEA .....................................................3-13 iii IDEAUsersGuide.book Page iv Monday, August 2, 1999 2:30 PM IDEA User Interface IDEA GUI ..........................................................4-3 Description ..........................................................4-3 GUI components .................................................4-4 Main menu ..........................................................4-4 Navigation ...........................................................4-6 Title bar ..............................................................4-8 Program name and version .................................4-8 Window Control menu ........................................4-8 Window Control buttons .....................................4-10 Status bar ............................................................4-10 Main menu ..........................................................4-11 File menu ............................................................4-11 Project menu .......................................................4-12 Tools option ........................................................4-13 Edit menu ............................................................4-14 Options menu ......................................................4-14 Setup menu .........................................................4-15 Window menu .....................................................4-15 Errors menu .........................................................4-16 Help menu ...........................................................4-16 Tool bar ..............................................................4-17 File Management tools ........................................4-17 Project Management tools ..................................4-19 Editing tools ........................................................4-20 Search tools .........................................................4-21 Project Building tools .........................................4-22 System tools ........................................................4-24 Error Management tools .....................................4-26 Project window ...................................................4-28 Description ..........................................................4-28 Navigation ...........................................................4-29 iv IDEAUsersGuide.book Page v Monday, August 2, 1999 2:30 PM Customization .....................................................4-29 Project components .............................................4-30 Managing a project .............................................4-36 File window(s) ...................................................4-37 Description ..........................................................4-37 Navigation ...........................................................4-38 Customization .....................................................4-39 Project file types .................................................4-39 Managing project files ........................................4-40 Errors window .................................................... 4-41 Description ..........................................................4-41 Navigation ...........................................................4-42 IDEA Options & Setup Overview ............................................................5-3 Working directory ..............................................5-3 Default file type .................................................. 5-4 File window display ...........................................5-5 Cascade ...............................................................5-5 Horizontal Tile ....................................................5-5 Vertical Tile ........................................................5-5 Program Options ................................................ 5-6 Syntax Coloring ..................................................5-7 Project Analysis ..................................................5-8 Auto Save before C/asm .....................................5-9 Automatic Errors Toggle ....................................5-9 Force Absolute Names ........................................5-10 Show Sub Processes ............................................5-10 Show Tips ...........................................................5-11 Save Config .........................................................5-11 Save Config on exit .............................................5-11 Program Setup .................................................... 5-12 v IDEAUsersGuide.book Page vi Monday, August 2, 1999 2:30 PM Tab Width ...........................................................5-12 Font .....................................................................5-13 Colors ..................................................................5-14 Key Binding ........................................................5-15 Working Directory ..............................................5-17 Asm Extensions ..................................................5-17 Debugger ............................................................5-18 Errors window ....................................................5-19 Options > Automatic Errors Toggle option ........5-19 Errors > Show Error File option .........................5-19 Managing an IDEA Project Overview ............................................................6-3 Opening a project ...............................................6-3 Project name .......................................................6-4 Project description ..............................................6-6 Project Target File Name ...................................6-6 Project Source Files ............................................6-8 Adding source files to the project .......................6-9 Working with individual source files ..................6-9 Project Directory ................................................6-18 Project Defines ...................................................6-20 Project include paths ..........................................6-21 Include path folders and files ..............................6-22 Project tools ........................................................6-23 Default compiler options ....................................6-23 Default assembler options ...................................6-25 Default linker options .........................................6-26 Project builder utilities ........................................6-32 Object Inspector utility .......................................6-34 Hex Converter utility ..........................................6-36 vi IDEAUsersGuide.book Page vii Monday, August 2, 1999 2:30 PM Debug Info Examiner utility ...............................6-38 Absolute Lister utility .........................................6-40 IEEE695 Converter utility ..................................6-42 Project debugger .................................................6-44 Project documentation ........................................6-44 Building an IDEA Project Overview ............................................................7-3 Compiling ...........................................................7-3 Linking ................................................................7-3 Making ................................................................7-3 Building ..............................................................7-3 Compiling a project ............................................7-4 Specifying compiler options ...............................7-4 Compiling (assembling) a file or a project .........7-17 Linking a project ................................................ 7-18 Specifying linker options ....................................7-18 Editing the linker command file .........................7-21 Changing the linker command file ......................7-30 Linking a project ................................................ 7-31 Marking files .......................................................7-31 Touching files .....................................................7-31 Making a project ................................................ 7-32 Building a project ...............................................7-32 Specifying builder options ..................................7-32 Building a project ................................................7-46 IDEA Command Reference File menu ............................................................8-3 File > New option ...............................................8-3 File > Open option ..............................................8-4 File > Load (read only) option ............................8-5 vii IDEAUsersGuide.book Page viii Monday, August 2, 1999 2:30 PM File > Save option ...............................................8-6 File > Save As option ..........................................8-7 File > Save All option .........................................8-8 File > Compile option .........................................8-8 File > Add to Project option ...............................8-11 File > Remove From Project ...............................8-11 File > Default File Type option ..........................8-11 File > Print option ...............................................8-12 File > Exit option ................................................8-12 Project menu .......................................................8-13 Project > Load option .........................................8-13 Project > New option ..........................................8-15 Project > Save option ..........................................8-16 Project > Save As option ....................................8-16 Project > Add File option ....................................8-17 Project > Compile File option .............................8-17 Project > Make option .........................................8-20 Project > Build option .........................................8-22 Project > Dependencies option ...........................8-24 Project > Close option .........................................8-25 Recent Projects file list .......................................8-25 Tools option ........................................................8-26 Compiler tool ......................................................8-28 Assembler tool ....................................................8-31 Linker tool ...........................................................8-35 Builder tool .........................................................8-48 Object Inspector tool ...........................................8-51 Hex Converter tool ..............................................8-53 Debug Info Examiner tool ..................................8-55 Absolute Lister tool ............................................8-57 IEEE695 Converter tool ......................................8-59 Debugger tool .....................................................8-61 Edit menu ...........................................................8-61 viii IDEAUsersGuide.book Page ix Monday, August 2, 1999 2:30 PM Edit > Cut option .................................................8-61 Edit > Copy option ..............................................8-62 Edit > Paste option ..............................................8-62 Edit > Delete option ............................................8-63 Edit > Replace option .........................................8-63 Edit > Search option ...........................................8-63 Edit > Search Next option ...................................8-64 Edit > Search Previous option ............................8-65 Edit > Insert File option ......................................8-65 Options menu .....................................................8-66 Options > Syntax Coloring option ......................8-67 Options > Project Analysis option ......................8-68 Options > Auto Save before C/asm option .........8-69 Options > Automatic Errors Toggle option ........8-69 Options > Force Absolute Names option ............8-70 Options > Show Sub Processes option ...............8-70 Options > Show Tips option ...............................8-71 Options > Save Config option ............................8-71 Options > Save Config on exit option ................8-71 Setup menu .........................................................8-72 Setup > Tab Width option ...................................8-72 Setup > Font option .............................................8-73 Setup > Colors option .........................................8-74 Setup > Key Binding option ...............................8-75 Setup > Working Directory option .....................8-77 Setup > Asm Extensions option ..........................8-78 Window menu .................................................... 8-79 Window > DOS Shell option ..............................8-79 Window > Cascade option ..................................8-80 Window > Horizontal Tile option .......................8-80 Window > Vertical Tile option ...........................8-80 Window > Open Files list ...................................8-80 Errors menu ........................................................ 8-81 ix IDEAUsersGuide.book Page x Monday, August 2, 1999 2:30 PM Errors > Show Error File option .........................8-81 Errors > Top option .............................................8-81 Errors > Bottom option .......................................8-82 Errors > Next option ...........................................8-82 Errors > Prev option ............................................8-82 Help menu ..........................................................8-83 Help > On C option .............................................8-83 Help > On C Library option ................................8-84 Help > About IDEA... option ..............................8-84 Index x IDEAUsersGuide.book Page 1 Monday, August 2, 1999 2:30 PM CHAPTER 1 IDEA Overview Page 1-1 Who is Cosmic Software? What is IDEA? Using IDEA Contents of the IDEA User’s Guide IDEAUsersGuide.book Page 2 Monday, August 2, 1999 2:30 PM IDEA Overview This page intentionally left blank. Page 1-2 IDEAUsersGuide.book Page 3 Monday, August 2, 1999 2:30 PM IDEA Overview Who is Cosmic Software? Cosmic Software provides highly-optimized target support for Motorola microprocessors, including 68HC05, 68HC08, 6809, 68HC11, 68HC12, 68HC16, CPU32/CPU32+, and M680x0, with others in development. The product line includes complete ANSI/ISO C language cross compilers, macro assemblers, linkers, utilities, ZAP C and assembler source-level cross debuggers, and the IDEA integrated development environment. These products are prepackaged and ready-to-run on PC/Windows and SUN SPARC/HP9000 UNIX workstations. The compilers have been updated toVersion 4 technology, which gives improved code optimization levels and improved language features for developers of embedded systems. The ZAP debugger products are packaged to work off-the-shelf with popular debugging hardware configurations, such as low-cost evaluation boards or In-Circuit Emulators; the simulator versions of ZAP allow application code to be debugged entirely on a PC without access to target hardware, and can therefore simplify the development effort by providing for a “software debugging” phase before hardware/software integration. The IDEA integrated development environment products provide a Windows-based graphical user interface (GUI) for building and managing coding projects. IDEA is fully integrated with all Cosmic tools, including compilers, assemblers, linkers, utilities, and ZAP debuggers. Page 1-3 IDEAUsersGuide.book Page 4 Monday, August 2, 1999 2:30 PM IDEA Overview What is IDEA? IDEA is an integrated development environment and editor for managing coding projects using Cosmic tools. IDEA is supplied in a version specific to the Cosmic tools you are using. For example, IDEA12 is designed for use with the Cosmic Motorola MC68HC12 cross compiler and ZAP debugger. In order to run IDEA you must have the matching cross compiler installed on your system; the ZAP debugger is optional. With IDEA you can define and edit projects; compile, assemble and link C or assembler code; run a Make, run a Build with one or more build utilities; or run a ZAP debugger; all with a few simple mouse clicks in a user-friendly, graphical Windows interface. Using IDEA The IDEA GUI (graphical user interface) provides immediate access to all the tools you need to manage coding projects. Page 1-4 IDEAUsersGuide.book Page 5 Monday, August 2, 1999 2:30 PM IDEA Overview Figure 1-1: IDEA GUI The Project window at the left provides a graphical, tree-structured view of your project. Using just the Project window, you can add or remove files from the project, set compiler options, configure build utilities, and much more. The File windows at the right allow you to open project files for editing and compiling. IDEA provides color-coding of Comments, Preprocessor Keywords, C Keywords, and several other coding items so that you can easily edit source code files. All IDEA functionality is available from the nine drop-down menus under the title bar. The most frequently used options are also available via a single click on the Tool bar. In addition, you can assign custom key bindings to any program option. Page 1-5 IDEAUsersGuide.book Page 6 Monday, August 2, 1999 2:30 PM IDEA Overview Contents of the IDEA User’s Guide This IDEA User’s Guide consists of eight chapters. Chapter 1, IDEA Overview - provides a brief description of IDEA and how it relates to other Cosmic programming tools. Also gives a brief description of each chapter in the IDEA User’s Guide. Chapter 2: Installing IDEA - lists installation requirements and provides instructions for installing IDEA. Chapter 3: Running IDEA - provides information for getting up and running quickly, including: starting IDEA, setting program options, getting help, managing a project, and exiting IDEA. Chapter 4: IDEA User Interface - provides detailed information on the IDEA GUI (Graphical User Interface), including: Title bar, Main menu, Tool bar, Project window, File window(s), Errors window, and Status bar. Chapter 5: IDEA Options & Setup - provides information on configuring IDEA to meet your requirements, including: specifying a working directory, setting the default file type, customizing file window display, setting program options, program setup, selecting a ZAP debugger, and specifying error file display. Chapter 6: Managing an IDEA Project - provides detailed information on all aspects of managing an IDEA project, including: name, description, target file name, source files, directory, Defines, Include Paths, tools, and documentation. Chapter 7: Building an IDEA Project - provides detailed information on the four phases of building a project, including: compiling, linking, making, and building. Chapter 8: IDEA Command Reference - provides an exhaustive description of all IDEA menu commands, including File menu, Project menu, Tools menu, Edit menu, Options menu, Setup menu, Window menu, Errors menu, and Help menu. Page 1-6 IDEAUsersGuide.book Page 1 Monday, August 2, 1999 2:30 PM CHAPTER 2 Installing IDEA Preparing for installation Running the installation program Page 2-1 IDEAUsersGuide.book Page 2 Monday, August 2, 1999 2:30 PM Installing IDEA This page intentionally left blank. Page 2-2 IDEAUsersGuide.book Page 3 Monday, August 2, 1999 2:30 PM Installing IDEA Preparing for installation Installation requirements In order to run IDEA, your system must meet the following minimum hardware and software requirements: • PC with an 80386 or better microprocessor • Microsoft Windows 95/98 or Windows NT operating system • 3 1/2'', 1.44 Mb diskette drive • Hard disk drive with at least 5 Mb of free space • 8 Mb of RAM Compiler requirements IDEA is supplied in several different versions, with each version matched to a specific Cosmic Software C cross-compiler. In order to use IDEA, you must have the matching Cosmic Software C crosscompiler installed. For example, IDEACPU12 requires the Cosmic MC68HC12 compiler. During installation, the software asks you to specify the path to the compiler. Installation media Your IDEA software package consists of the IDEA Integrated Development Environment program and installation script files, and is supplied on a single 3 1/2'', 1.44 Mb floppy diskette. The diskette label identifies the product and the product version number. Installation process In the installation instructions that follow, we assume that your floppy disk drive is designated by the letter “A” and your hard disk partition by the letter “C”. If your system uses different letter designations, change the installation instructions accordingly. Page 2-3 IDEAUsersGuide.book Page 4 Monday, August 2, 1999 2:30 PM Installing IDEA IDEA is installed by the Microsoft Windows Setup utility program. Throughout the installation procedure, there is an assumed default directory in which IDEA is installed. This directory is C:\Cosmic\Ideaxx, where xx stands for the Cosmic Software compiler that you are using (for example, C:\Cosmic\Idea12 for the Cosmic MC68HC12 compiler). If you install IDEA in a different directory or on a different hard disk drive, you must substitute your specified location wherever you see C:\Cosmic\Ideaxx. Running the installation program 1. Insert the IDEA diskette into your floppy disk drive. 2. Open the Windows Explorer and in the left pane double click on “3 1/2 Floppy (A:)”. 3. In the right pane, double click on Setup.exe to run the IDEA installation and setup program. NOTE As an alternative to Steps 2 and 3 you can use the RUN command from the Windows Start Menu and type a:\setup to run the installation program. Page 2-4 IDEAUsersGuide.book Page 5 Monday, August 2, 1999 2:30 PM Installing IDEA 4. The Welcome screen appears. Figure 2-1: Welcome screen Click on Next> when you are ready to proceed. 5. The Software License Agreement screen appears. Figure 2-2: Software License Agreement screen After you read the Software License Agreement, click on Yes to proceed. Page 2-5 IDEAUsersGuide.book Page 6 Monday, August 2, 1999 2:30 PM Installing IDEA 6. The User Information screen appears. Figure 2-3: User Information screen Enter your name and company name and click on Next> to proceed. 7. The Choose Destination Folder screen appears. Figure 2-4: Choose Destination Folder dialog box Page 2-6 IDEAUsersGuide.book Page 7 Monday, August 2, 1999 2:30 PM Installing IDEA Select the destination folder where you want IDEA to be installed. By default, IDEA will be installed in the C:\Cosmic \Ideaxx folder, where xx stands for the Cosmic Software compiler that you are using (for example, C:\Cosmic\Idea12 for the Cosmic MC68HC12 compiler). You can select the default or click on the Browse button to specify a different location. Click on Next> when you are ready to proceed. 8. The Select Program Folder screen appears. Figure 2-5: Select Program Folder screen Specify a program folder for IDEA, and click on Next> to proceed. Page 2-7 IDEAUsersGuide.book Page 8 Monday, August 2, 1999 2:30 PM Installing IDEA 9. The Compiler Directory screen appears. Figure 2-6: Compiler Directory screen Select the folder where your C compiler is installed.You can select the default or click on the Browse button to specify a different location. Click on Next> when you are ready to proceed. 10. The Check Setup Information screen appears. Figure 2-7: Check Setup Information screen Check the setup information that you have provided. Click on <Back to make any changes. Click on Next> when you are ready to proceed. Page 2-8 IDEAUsersGuide.book Page 9 Monday, August 2, 1999 2:30 PM Installing IDEA 11. The IDEA Setup program proceeds with the installation of IDEA. After the installation is complete, the Setup Complete screen appears. Figure 2-8: Setup Complete screen If you want to run IDEA immediately upon exiting the Setup program, select the checkbox “Do you wish to start IDEA now?”. Select Finish to complete the IDEA installation process. Page 2-9 IDEAUsersGuide.book Page 10 Monday, August 2, 1999 2:30 PM Installing IDEA Page 2-10 IDEAUsersGuide.book Page 1 Monday, August 2, 1999 2:30 PM CHAPTER 3 Running IDEA Page 3-1 Starting IDEA Starting a new project Building a project Debugging a project Saving and closing a project Opening the example project Specifying the working directory Setting IDEA options Getting Help Exiting IDEAUsersGuide.book Page 2 Monday, August 2, 1999 2:30 PM Running IDEA This page intentionally left blank. Page 3-2 IDEAUsersGuide.book Page 3 Monday, August 2, 1999 2:30 PM Running IDEA Starting IDEA From the Windows Start menu, select Programs > Cosmic Tools > Idea CPUxx, where xx stands for the Cosmic Software compiler that you are using (for example, Programs > Cosmic Tools > Idea CPU12 if you are using the Cosmic MC68HC12 compiler). The IDEA main window appears: Figure 3-1: IDEA main window After you open a project and some files within the project, the IDEA main window appears as in the following Figure. Page 3-3 IDEAUsersGuide.book Page 4 Monday, August 2, 1999 2:30 PM Running IDEA Figure 3-2: IDEA main window with Project and File windows open The IDEA main window is the principal graphical user interface (GUI) for the program. For complete details on the components of the IDEA main window, refer to Chapter 4, IDEA User Interface. Page 3-4 IDEAUsersGuide.book Page 5 Monday, August 2, 1999 2:30 PM Running IDEA Starting a new project To start a new project, click on the New Project tool on the Tool bar, or select Project > New from the Main menu. The Project window appears with a new project opened. Figure 3-3: IDEA Project window with new project open The Project window displays the various project components as icons in a tree-structured format, similar to Windows Explorer. Each icon in the project tree represents a project component. Page 3-5 IDEAUsersGuide.book Page 6 Monday, August 2, 1999 2:30 PM Running IDEA Table 3-1: Project Components Project Name Project Description Project Target File Name Project Source Files Project Directory Project Defines Project Include Paths Project Tools Project Documentation A sign next to a component icon means that sub-components are hidden below the icon. Click on the sign or double click on the icon to display the sub-components. A sign next to a component icon means that the first level of subcomponents below the icon is displayed. Click on the sign or double click on the icon to hide the sub-components. For additional details on the Project window, refer to Chapter 4, IDEA User interface. For details on project management, refer to Chapter 7, Managing an IDEA Project. Page 3-6 IDEAUsersGuide.book Page 7 Monday, August 2, 1999 2:30 PM Running IDEA Building a project After a project is configured, you need to build the application. There are a three different ways to do this: 1. Right click on the Project Name icon in the Project window and select Make or Build from the pop-up menu. 2. Choose Compile (single, open file), Make, or Build from the Project pull-down menu. 3. Click on one of the following tools on the Tool bar: Table 3-2: Tool bar tools for project building Compile tool - compiles (.c file) or assembles (.s file) an open project source file. Options are specified in the Compiler or Assembler Options dialog box. Link tool - runs the linker (and no other utilities) using the options specified for the project in the Link Configuration dialog box. Project source files are not checked for up-to-date status. Make Project tool - checks source file up-to-date status and dependencies. Selectively compiles or assembles any out-ofdate files and runs the Linker. Build Project tool - performs a Make and then runs any utilities selected in the Builder Configuration dialog box. To have the Build rebuild all files regardless of their up-to-date status, right click on the project name, select Mark All, and then run the Builder. Page 3-7 IDEAUsersGuide.book Page 8 Monday, August 2, 1999 2:30 PM Running IDEA For additional details on the project building tools, refer to Chapter 4, IDEA User interface. For details on building an IDEA project, refer to Chapter 7, Building an IDEA Project. Debugging a project IDEA lets you use a Cosmic ZAP debugger to debug your project. You can open the ZAP Debugger by clicking on the Debugger tool in the Tool bar. NOTE Before you can use the ZAP debugger, you must first specify its location by right clicking on the Debugger tool in the Tool Browser (select Tools from the Main menu to open the Tool Browser). This opens a dialog box that allows you to specify the debugger for the project. Page 3-8 IDEAUsersGuide.book Page 9 Monday, August 2, 1999 2:30 PM Running IDEA Figure 3-4: ZAP Debugger with project target file open When you run the ZAP Debugger from within IDEA, the ZAP Debugger automatically opens the target file for the currently loaded project (for example, demo12.h12). For details on using the ZAP Debugger, refer to the ZAP User’s Guide. Page 3-9 IDEAUsersGuide.book Page 10 Monday, August 2, 1999 2:30 PM Running IDEA Saving and closing a project When you save a project, IDEA creates or updates the project file. When you close a project, IDEA checks to see if there are any unsaved changes to the project. If there are, a dialog box appears asking if you want to save the changes. The Project > Save option lets you save the changes that you have made to a new or existing project. Select the Save option by clicking on Save in the Project menu. Alternatively, type Alt+P+S. You can also select the Save Project tool on the Tool bar. The Project > Save As option lets you save the changes that you have made to an existing project using a different project file name, file extension, or path. Select the Save As option by clicking on Save As in the Project menu. Alternatively, type Alt+P+A. The Project > Close option lets you close the current project. Select the Close option by clicking on Close in the Project menu. Alternatively, type Alt+P+O. For additional details on saving and closing a project file, refer to Chapter 8, IDEA Command Reference. Opening the example project IDEA is supplied with an example project called demoxx.prj, where xx stands for the Cosmic Software compiler that you are using (for example, demo12.prj for the Cosmic MC68HC12 compiler). You can use this example project to become familiar with the principles of managing a project in IDEA. To open the example project, click on the Open Project tool on the Tool bar. In the dialog box that appears, select demo12.prj from the Examples folder. The Project window appears with the demo12.prj project opened. Page 3-10 IDEAUsersGuide.book Page 11 Monday, August 2, 1999 2:30 PM Running IDEA Figure 3-5: Project window with demo12.prj project opened For details on managing an IDEA project, refer to Chapter 6: Managing an IDEA Project. Specifying the working directory When you work on a project, you should store all the project files in a single folder. The Setup > Working Directory option lets you specify the default directory for a project and for locating project files. For example, when you specify File > Open or Project > Load, IDEA initially looks in the working directory for files of the appropriate type. Select the Working Directory option by clicking on Working Directory in the Setup menu. Alternatively, type Alt+S+W. Page 3-11 IDEAUsersGuide.book Page 12 Monday, August 2, 1999 2:30 PM Running IDEA Setting IDEA options To set basic program options, select Options from the Main menu. Alternatively, type Alt+O. An option is set if a check mark appears before its name. To set an unchecked option, click on the desired option in the Options dropdown menu. The next time you open the Options drop-down menu, a check mark appears before that option’s name. An option is not set if no check mark appears before its name. To clear a checked option, click on the desired option in the Options drop-down menu. The next time you open the Options drop-down menu, no check mark appears before that option’s name. The following Table describes the options that you can set. Table 3-3: IDEA Options Syntax Coloring Provides color coding in your project source files to assist you in programming. Project Analysis Adds Function and Variable lists to the project C source files shown under the Files icon in the Project window. Auto Save before C/ asm Automatically saves a C or Assembly source code file before it is compiled or assembled. In addition, it automatically saves before you exit IDEA. Automatic Errors Toggle Automatically opens the Errors window when errors are detected after a compile, link, make, or build operation. If this option is not checked, errors are reported in the IDEA Status bar. Force Absolute Names Adds the full path for all source files to the linked executable. Page 3-12 IDEAUsersGuide.book Page 13 Monday, August 2, 1999 2:30 PM Running IDEA Table 3-3: IDEA Options Show Sub Processes Instructs IDEA to show all subprocesses during a compilation, link, make, or build. Show Tips Shows names for project components in the Project window and Tools in the Tool bar. Save Config Immediately saves the current IDEA configuration. Unlike the other options on the Options submenu, the Save Config option is not a toggle. Save Config on exit Saves the current IDEA configuration when you exit the program. For additional details on these options, refer to Chapter 8, IDEA Command Reference. Getting Help The Help drop-down menu provides help on the C language and on the C Library. You can also view IDEA version information. Open the Help drop-down menu by clicking on Help in the Main menu. Alternatively, type Alt+H. Exiting IDEA To exit IDEA, click on Exit in the File menu. Alternatively, type Alt+F+X. If you have selected Auto Save before C/asm in the Options dropdown menu (Alt+O+A), all changed files are saved prior to exiting. If you have not selected Auto Save before C/asm, a dialog box appears in turn for each changed file and lets you select whether to save the file or not. Page 3-13 IDEAUsersGuide.book Page 14 Monday, August 2, 1999 2:30 PM Running IDEA Page 3-14 IDEAUsersGuide.book Page 1 Monday, August 2, 1999 2:30 PM CHAPTER 4 IDEA User Interface Page 4-1 IDEA GUI Title bar Status bar Main menu Tool bar Project window File window(s) Errors window IDEAUsersGuide.book Page 2 Monday, August 2, 1999 2:30 PM IDEA User Interface This page intentionally left blank. Page 4-2 IDEAUsersGuide.book Page 3 Monday, August 2, 1999 2:30 PM IDEA User Interface IDEA GUI Description The following Figure shows the IDEA GUI (Graphical User Interface). Figure 4-1: IDEA GUI Page 4-3 IDEAUsersGuide.book Page 4 Monday, August 2, 1999 2:30 PM IDEA User Interface The IDEA GUI consists of several components: • Title bar • Status bar • Main menu • Tool bar • Window area • Project window • File window(s) • Errors window Each of the GUI components is described briefly in the following section and in detail later in the chapter. GUI components Title bar The Title bar gives the program name and version (for example, IdeaCPU12). It also provides access to the standard Windows 95 windows controls. For details, refer to “Title bar” on page 4-8. Status bar The Status bar displays helpful information after an IDEA option is executed. For details on the Status bar, refer to “Status bar” on page 4-10. Main menu The Main menu provides access to all IDEA functionality via nine options: File, Project, Tools, Edit, Options, Setup, Window, Errors, and Help. For details, refer to “Main menu” on page 4-11. Also refer to Chapter 8: IDEA Command Reference. Page 4-4 IDEAUsersGuide.book Page 5 Monday, August 2, 1999 2:30 PM IDEA User Interface Tool bar The Tool bar provides one-click access to commonly used functions via seven groups of tools: file management, project management, editing, searching, project building, error management, and system windows. For details, refer to“Tool bar” on page 4-17. Window area The Window area provides space for a Project window, one or more File windows, and an Errors window. Project window The Project window displays the currently open project at the left side of the window area. For details on the Project window, refer to “Project window” on page 4-28. For details on managing a project, refer to Chapter 6: Managing an IDEA Project. File window(s) The File window(s) display one or more open project files at the right side of the window area (if the Project window is displayed at the left). For details on the File window, refer to “File window(s)” on page 4-37. Errors window The Errors window displays the errors found from the most recent compile, link, make, or build at the bottom right of the window area. For details on the Errors window, refer to “Errors window” on page 4-41. Page 4-5 IDEAUsersGuide.book Page 6 Monday, August 2, 1999 2:30 PM IDEA User Interface Navigation You can navigate the IDEA GUI using any combination of mouse operations, predefined keyboard shortcuts, and custom key bindings that you create. Mouse You can use the mouse for most tasks in IDEA including selecting options from the Main menu and tools from the Tool bar, and working with files. All functionality can be accessed via left, right, and double clicks. Keyboard shortcuts and custom key bindings provide a convenient alternative in many repetitive situations. For navigating the Project window and managing a project, the mouse is a much more convenient means of navigation than the keyboard. Keyboard shortcuts All Main menu options, Tool bar tools, and many other IDEA options can be quickly accessed from the keyboard using IDEA’s predefined keyboard shortcuts. Most of the keyboard shortcuts consist of the <Alt> key followed by one or more letter keys. For example, to print a file, press <Alt> to highlight the Main menu, “F” to open the File drop-down menu, and “P” to select the Print option. This key combination is shown in this manual as Alt+F+P. For another example, if you have selected the Files icon in the Project window and right clicked to open the floating menu, you can then press “A” to add a file to the project files list. In addition to the keyboard shortcuts that use the <Alt> key, there are a few “standard” DOS keyboard shortcuts that appear on IDEA’s menus. For example, you can type Ctrl+P to print a file. Page 4-6 IDEAUsersGuide.book Page 7 Monday, August 2, 1999 2:30 PM IDEA User Interface Custom key bindings You can also create your own keyboard shortcuts for nearly all of the menu commands in IDEA by selecting the Key Binding option from the Setup menu. Select the Key Binding option by clicking on Key Binding in the Setup menu. Alternatively, type Alt+S+K. The Key Binding dialog box appears. Figure 4-2: Key Binding dialog box You can use any combination of the Ctrl, Shift, and Function keys to create a new shortcut. Click on your choice(s) in the Key Selection field. As you click, the shortcut definition is built up in the Key field. To remove Ctrl or Shift from the key definition, click on either of them again. To change the Function key in the key definition, click on your new choice. After you specify a key sequence, you must bind it to an action. If the key sequence you have specified is not already in use, the Binding field will be blank. Click on the down arrow to the right of the field and select the action that you want to associate with the key sequence from the action list. Page 4-7 IDEAUsersGuide.book Page 8 Monday, August 2, 1999 2:30 PM IDEA User Interface If the key sequence you have specified is already in use, the Binding field will show the action with which the key sequence is associated. You can either select a new key sequence for the action or click on the Clear button to clear the current action from the Binding field. After you create a keyboard shortcut for a menu option, the shortcut appears after the option name in the drop-down menu. Title bar The Title bar gives the program name and version and provides access to the standard Windows 95 windows controls. Program name and version The program name is followed by the version. For example, if you are using the Cosmic Motorola MC68HC12 Cross Compiler, the Title bar shows “IdeaCPU12”. Window Control menu Click on the Cosmic icon to open a window control menu. Alternatively, press Alt+Spacebar. Figure 4-3: Window control menu Page 4-8 IDEAUsersGuide.book Page 9 Monday, August 2, 1999 2:30 PM IDEA User Interface The following Table describes the options available on the Window Control menu. Table 4-1: Window Control menu options Restore Restores a minimized or maximized window to its previous size. Alternatively, you can type Alt+Spacebar+R or double click in the Title bar of a maximized window. Move Lets you move a window that is not minimized or maximized. Alternatively, you can type Alt+Spacebar+M or click in the Title bar and drag to move the window. Size Lets you resize a window that is not minimized or maximized. Alternatively, you can type Alt+Spacebar+S or click on a window border and drag to size the window. Minimize Minimizes a window to a button on the Windows Task bar. Alternatively, you can type Alt+Spacebar+N. Maximize Maximizes a window. Alternatively, you can type Alt+Spacebar+X. Close Closes the window and exits IDEA. Alternatively, you can type Alt+Spacebar+C or Alt+F4. Page 4-9 IDEAUsersGuide.book Page 10 Monday, August 2, 1999 2:30 PM IDEA User Interface Window Control buttons The following Table describes the window control buttons. Table 4-2: Window Control buttons Minimize Minimizes a window to a button on the Windows Task bar. Maximize Maximizes a window. This button appears only when the window is not maximized. Restore Restores a maximized window to its previous size. This button appears only when the window is maximized. Close Closes the window and exits IDEA. Status bar The Status bar displays helpful information after an IDEA option is executed. It also displays error information after a compile, link, make, or build. Page 4-10 IDEAUsersGuide.book Page 11 Monday, August 2, 1999 2:30 PM IDEA User Interface Main menu The IDEA Main menu provides access to all program functionality via nine drop-down menus: File, Project, Tools, Edit, Options, Setup, Window, Errors, and Help. File menu The File drop-down menu provides options to open, read, save, compile, or print new or existing files. You can also add or remove a file from a project. You can use these options for several different types of file. Open the File drop-down menu by clicking on File in the Main menu. Alternatively, type Alt+F. Figure 4-4: File menu For details on the File menu options, refer to Chapter 8, IDEA Command Reference. Page 4-11 IDEAUsersGuide.book Page 12 Monday, August 2, 1999 2:30 PM IDEA User Interface Project menu The Project drop-down menu provides options to load an existing project or create a new project, and save and/or close an open project. In addition, you can add a file to a project, view its dependencies, and compile the file. You can also initiate a make command for a project and do a project build. Open the Project drop-down menu by clicking on Project in the Main menu. Alternatively, type Alt+P. Figure 4-5: Project menu For details on the Project menu options, refer to Chapter 8, IDEA Command Reference. Page 4-12 IDEAUsersGuide.book Page 13 Monday, August 2, 1999 2:30 PM IDEA User Interface Tools option The Tools option opens a Tool Browser that enables you to set options for the tools and utilities provided with IDEA. Open the Tool Browser by clicking on Tools in the Main menu. Alternatively, type Alt+T. Figure 4-6: Tool Browser The Tool Browser displays the various IDEA tools as icons in a treestructured format, similar to Windows Explorer. For details on the Tool Browser, refer to Chapter 8, IDEA Command Reference. Page 4-13 IDEAUsersGuide.book Page 14 Monday, August 2, 1999 2:30 PM IDEA User Interface Edit menu The Edit drop-down menu provides options to edit the contents of the currently active file. If no file is open and active, the Edit menu options are unavailable. Open the Edit drop-down menu by clicking on Edit in the Main menu. Alternatively, type Alt+E. Figure 4-7: Edit menu For details on the Edit menu, refer to Chapter 8, IDEA Command Reference. Options menu The Options drop-down menu lets you set basic program options. Open the Options drop-down menu by clicking on Options in the Main menu. Alternatively, type Alt+O. Figure 4-8: Options menu For details, refer to Chapter 8, IDEA Command Reference. Page 4-14 IDEAUsersGuide.book Page 15 Monday, August 2, 1999 2:30 PM IDEA User Interface Setup menu The Setup drop-down menu lets you specify a default tab width, set the font and text colors for source files, establish key bindings for common program operations, and set the default working directory. You can also specify assembler file name extensions. Open the Setup drop-down menu by clicking on Setup in the Main menu. Alternatively, type Alt+S. Figure 4-9: Setup menu For details on the Setup menu, refer to Chapter 8, IDEA Command Reference. Window menu The Window drop-down menu lets you arrange all open files in IDEA. In addition, you can open a DOS Shell window. Open the Window drop-down menu by clicking on Window in the Main menu. Alternatively, type Alt+W. Figure 4-10: Window menu For details on the Window menu, refer to Chapter 8, IDEA Command Reference. Page 4-15 IDEAUsersGuide.book Page 16 Monday, August 2, 1999 2:30 PM IDEA User Interface Errors menu The Errors drop-down menu lets you display errors encountered during a compile, link, make, or build. You can navigate through the error list and view the approximate point in the source file where the error occurred. Open the Errors drop-down menu by clicking on Errors in the Main menu. Alternatively, type Alt+R. Figure 4-11: Errors menu For details on the Errors menu, refer to Chapter 8, IDEA Command Reference. Help menu The Help drop-down menu provides on-line help on the C language and the C Library. You can also view IDEA version information. Open the Help drop-down menu by clicking on Help in the Main menu. Alternatively, type Alt+H. Figure 4-12: Help menu For details on the Help menu, refer to Chapter 8, IDEA Command Reference. Page 4-16 IDEAUsersGuide.book Page 17 Monday, August 2, 1999 2:30 PM IDEA User Interface Tool bar The Tool bar provides one-click access to commonly used IDEA functions via seven groups of tools: file management, project management, editing, searching, project building, error management, and system windows. File Management tools There are five file management tools: New File, Open File, Save File, Load File, and Print File. New File tool The New File tool lets you create a new file in any one of several different file types. Selecting the New File tool is equivalent to selecting the New option in the File menu. For details on the File > New option, refer to Chapter 8, IDEA Command Reference. Open File tool The Open File tool lets you open and edit an existing file in any one of several different file types. Selecting the Open File tool is equivalent to selecting the Open option in the File menu. For details on the File > Open option, refer to Chapter 8, IDEA Command Reference. Page 4-17 IDEAUsersGuide.book Page 18 Monday, August 2, 1999 2:30 PM IDEA User Interface Save File tool The Save File tool lets you save the changes that you have made to a new or existing file. You can determine if a file has edits that need to be saved by looking at the window title bar. If “(modified)” appears after the file name, changes have been made to the file and not yet saved. Selecting the Save File tool is equivalent to selecting the Save option in the File menu. For details on the File > Save option, refer to Chapter 8, IDEA Command Reference. Load File (Read Only) tool The Load File (Read Only) tool lets you open an existing file in any one of several different file types. The file is opened in “read-only” mode—you cannot edit it or use the Save File tool. However, you can save the file under a different name using the Save As option in the File menu. Selecting the Load File (Read Only) tool is equivalent to selecting the Load (read only) option in the File menu. For details on the File > Load (read only) option, refer to Chapter 8, IDEA Command Reference. Print File tool The Print File tool lets you print the active file. Selecting the Print File tool is equivalent to selecting the Print option in the File menu. For details on the File > Print option, refer to Chapter 8, IDEA Command Reference. Page 4-18 IDEAUsersGuide.book Page 19 Monday, August 2, 1999 2:30 PM IDEA User Interface Project Management tools There are three project management tools: New Project, Open Project, and Save Project. New Project tool The New Project tool lets you create a new project. Selecting the New Project tool is equivalent to selecting the New option in the Project menu. For details on the Project > New option, refer to Chapter 8, IDEA Command Reference. Open Project tool The Open Project tool lets you open and edit an existing project. Selecting the Open Project tool is equivalent to selecting the Load option in the Project menu. For details on the Project > Load option, refer to Chapter 8, IDEA Command Reference. Save Project tool The Save Project tool lets you save the changes that you have made to a new or existing project. Selecting the Save Project tool is equivalent to selecting the Save option in the Project menu. For details on the Project > Save option, refer to Chapter 8, IDEA Command Reference. Page 4-19 IDEAUsersGuide.book Page 20 Monday, August 2, 1999 2:30 PM IDEA User Interface Editing tools There are three editing tools: Cut, Copy, and Paste. Cut tool The Cut tool lets you cut the highlighted text. The cut text is placed in the Windows Clipboard and is available for a paste operation. Selecting the Cut tool is equivalent to selecting the Cut option in the Edit menu. For details on the Edit > Cut option, refer to Chapter 8, IDEA Command Reference. Copy tool The Copy tool lets you copy the highlighted text. The copied text is placed in the Windows Clipboard and is available for a paste operation. Selecting the Copy tool is equivalent to selecting the Copy option in the Edit menu. For details on the Edit > Copy option, refer to Chapter 8, IDEA Command Reference. Paste tool The Paste tool lets you paste the contents of the Windows Clipboard into the active file at the location of the cursor. You can perform multiple paste operations. The Clipboard contents are not changed until you perform another cut or copy operation. Selecting the Paste tool is equivalent to selecting the Paste option in the Edit menu. For details on the Edit > Paste option, refer to Chapter 8, IDEA Command Reference. Page 4-20 IDEAUsersGuide.book Page 21 Monday, August 2, 1999 2:30 PM IDEA User Interface Search tools There are three search tools: Search String, Search String Forward, and Search String Backwards. Search String tool The Search String tool lets you search for a specified text string in a file. You can search forward or backward from the current cursor position. Selecting the Search String tool is equivalent to selecting the Search option in the Edit menu. For details on the Edit > Search option, refer to Chapter 8, IDEA Command Reference. Search String Forward tool The Search String Forward tool lets you search for the next occurrence of a text string previously specified in the Search dialog box. Selecting the Search String Forward tool is equivalent to selecting the Search Next option in the Edit menu. For details on the Edit > Search Next option, refer to Chapter 8, IDEA Command Reference. Search String Backwards tool The Search String Backwards tool lets you search for a previous occurrence of a text string previously specified in the Search dialog box. Selecting the Search String Backwards tool is equivalent to selecting the Search Previous option in the Edit menu. For details on the Edit > Search Previous option, refer to Chapter 8, IDEA Command Reference. Page 4-21 IDEAUsersGuide.book Page 22 Monday, August 2, 1999 2:30 PM IDEA User Interface Project Building tools There are five project building tools: Compile, Link, Make Project, Build Project. and Debugger. Compile tool The Compile tool lets you compile (.c file) or assemble (.s file) the currently active source file. Selecting the Compile tool is equivalent to selecting the Compile option in the File menu or the Compile File option in the Project menu. For details on the File > Compile and Project > Compile File options, refer to Chapter 8, IDEA Command Reference. Link tool The Link tool runs the linker (and no other utilities) using the options specified in the project. Source files are not checked for up-to-date status. The Link tool does not have a menu equivalent. Make Project tool The Make Project tool checks source file dependencies and their up-to-date status. It then selectively compiles (.c files) and assembles (.s files) out-of-date files and runs the linker. Selecting the Make Project tool is equivalent to selecting the Make option in the Project menu. For details on the Project > Make option, refer to Chapter 8, IDEA Command Reference. Page 4-22 IDEAUsersGuide.book Page 23 Monday, August 2, 1999 2:30 PM IDEA User Interface Build Project tool The Build Project tool performs a Make as described above and then runs all the utilities selected in the Builder Configuration dialog box. For details on the Builder Configuration dialog box, refer to Chapter 8, IDEA Command Reference. To rebuild all files regardless of their up-to-date status, right click on the Project Name icon in the Project window, select Mark All, and then select the Build Project tool. Selecting the Build Project tool is equivalent to selecting the Build option in the Project menu. For details on the Project > Build option, refer to Chapter 8, IDEA Command Reference. Debugger tool The Debugger tool lets you run a Cosmic ZAP debugger with the project target file (for example, demo12.h12) loaded. Selecting the Debugger tool is equivalent to double clicking on the Debugger tool in the Tool Browser. For details on the Tools > Tool Browser option, refer to Chapter 8, IDEA Command Reference. NOTE You must first specify the location of the ZAP debugger by right clicking on the Debugger tool (under the Project Tools icon) in the Tool Browser. This opens a dialog that allows you to specify the debugger for the project. Page 4-23 IDEAUsersGuide.book Page 24 Monday, August 2, 1999 2:30 PM IDEA User Interface System tools There are two system tools: Dos Shell and Windows Explorer. Dos Shell tool The MS-DOS Prompt window is not part of the IDEA GUI, but can be used in conjunction with IDEA to assist you with your programming project. For example, you can use the MSDOS prompt to run the Cosmic compiler directly from the DOS command line. You can open an MS-DOS Prompt window by clicking on the DOS Shell tool in the Tool bar or by selecting the Dos Shell option from the Window drop-down menu. An MS-DOS Prompt window appears. Figure 4-13: MS-DOS Prompt window The default directory for the MS-DOS prompt is the directory that you specified using the Working Directory option in the Setup drop-down menu. Page 4-24 IDEAUsersGuide.book Page 25 Monday, August 2, 1999 2:30 PM IDEA User Interface Windows Explorer tool The Windows Explorer window is not part of the IDEA GUI, but can be used in conjunction with IDEA to assist you with your programming project. For example, you can use the Windows Explorer window to locate files for a project and move them to the project directory. You can open a Windows Explorer window by clicking on the Windows Explorer tool in the Tool bar. The Windows Explorer window appears. Figure 4-14: Windows Explorer window Page 4-25 IDEAUsersGuide.book Page 26 Monday, August 2, 1999 2:30 PM IDEA User Interface Error Management tools If any errors are encountered during a compile, link, make, or build (and if the Automatic Errors Toggle option on the Options submenu is checked), IDEA opens an Errors window and lists the errors. In addition, four Error management tools appear in the Tool bar: • Show First Error • Show Last Error • Show Next Error • Show Previous Error You can use the Error management tools to highlight any error in the Errors window. When you highlight an error in the Errors window, the cursor in the File window moves to the point in the file where the error occurred. Show First Error tool The Show First Error tool moves the highlight to the first error in the Errors window. Selecting the Show First Error tool is equivalent to selecting the Top option in the Errors menu. For details on the Errors > Top option, refer to Chapter 8, IDEA Command Reference. Show Last Error tool The Show Last Error tool moves the highlight to the last error in the Errors window. Selecting the Show Last Error tool is equivalent to selecting the Bottom option in the Errors menu. For details on the Errors > Bottom option, refer to Chapter 8, IDEA Command Reference. Page 4-26 IDEAUsersGuide.book Page 27 Monday, August 2, 1999 2:30 PM IDEA User Interface Show Next Error tool The Show Next Error tool moves the highlight to the next error in the Errors window. Selecting the Show Next Error tool is equivalent to selecting the Next option in the Errors menu. For details on the Errors > Next option, refer to Chapter 8, IDEA Command Reference. Show Previous Error tool The Show Previous Error tool moves the highlight to the previous error in the Errors window. Selecting the Show Previous Error tool is equivalent to selecting the Prev option in the Errors menu. For details on the Errors > Prev option, refer to Chapter 8, IDEA Command Reference. Page 4-27 IDEAUsersGuide.book Page 28 Monday, August 2, 1999 2:30 PM IDEA User Interface Project window Description The Project window displays the currently open project at the left side of the window area. Figure 4-15: IDEA Project window Page 4-28 IDEAUsersGuide.book Page 29 Monday, August 2, 1999 2:30 PM IDEA User Interface When you first run IDEA, the window area is blank. To open a project window for a new project, select New from the Project menu or click on the New Project tool in the Tool bar. To open a project window for an existing project, select Load from the Project menu, select a recently opened project from the bottom of the Project menu, or select the Open Project tool from the Tool bar. Navigation The New Project window displays the various project components as icons in a tree-structured format, similar to Windows Explorer. Each icon in the project tree represents a project component. A sign next to an icon means that sub-components are hidden below the icon. Click on the display the sub-components. sign or double-click on the icon to A sign next to an icon means that the first level of sub-components below the icon are displayed. Click on the sign or double-click on the icon to hide the subcomponents. Customization When you open a project, the Project window is always anchored to the left side of the IDEA window area. You can adjust the width of the Project window (up to the full width of the window area) by clicking and dragging on its right margin. Only one project may be open at a time. After you close a project, the Project window disappears. Page 4-29 IDEAUsersGuide.book Page 30 Monday, August 2, 1999 2:30 PM IDEA User Interface Project components A project is composed of nine different project components: • Project Name • Project Description • Project Target File Name • Project Source Files • Project Directory • Project Defines • Project Include Paths • Project Tools • Project Documentation Each of these components is described briefly in the following sections. For additional details on project components, refer to Chapter 6: Managing an IDEA Project. Project Name The Project Name component lets you specify a name for the project (for example, Demo12). It also represents the parent component for all project sub-components. To specify a name for the project, click on the Project Name icon . A text cursor appears to the right of the icon. Click on the text cursor to open a text box and enter a project name. Right click on the Project Name icon to view a menu of project commands. Page 4-30 IDEAUsersGuide.book Page 31 Monday, August 2, 1999 2:30 PM IDEA User Interface Project Description The Project Description component lets you specify a short description for the project. To specify a description for the project, click on the Project Description icon . A text cursor appears to the right of the icon. Click on the text cursor to open a text box and enter a short project description. Project Target File Name The Project Target File Name component lets you specify a target file name for the project (for example, demo12.h12). This name is used as the root name for the linked executable. To specify a project target file name, click on the Project Target File Name icon . A text cursor appears to the right of the icon. Click on the text cursor to open a text box and enter a target file name. Be sure to include the target file name extension; for example, “.h12” for the Cosmic 68HC12 compiler. Right click on the Project Target File Name icon to view a menu containing target file commands. Project Source Files The Project Source Files component lets you specify the C and Assembly language source files to be included in the project. Right click on the Project Source Files icon to view a menu containing source file management commands. Page 4-31 IDEAUsersGuide.book Page 32 Monday, August 2, 1999 2:30 PM IDEA User Interface Project Directory The Project Directory component is used to set the working directory for the project. This is typically where the source code files for the project are located. Right-click on the Project Directory icon to open the Path Editor dialog box and set the path to the source files. Project Defines The Project Defines component lets you specify #define options for the project. Right-click on the Project Defines icon to open the #defines dialog box and specify up to twenty user-defined preprocessor symbols. Project Include Paths The Project Include Paths component lets you specify include paths for the compiler (-i > option). Right-click on the Project Include Paths icon to open the Include Path Editor and specify up to twenty include paths for the project. Page 4-32 IDEAUsersGuide.book Page 33 Monday, August 2, 1999 2:30 PM IDEA User Interface Project Tools The Project Tools component lets you set project default options for: • Compiler tool • Assembler tool • Linker tool • Builder • Debugger The Builder component lets you configure build utilities for the project, including: • Object Inspector (cobj) • Hex Converter utility (chex) • Debug Info Examiner utility(cprd) • Absolute Lister utility(clabs) • IEEE695 Converter utility(cv695) Double click on the Project Tools icon project tools. to display the Compiler tool The Project Compiler tool lets you set the default compiler options that are used to compile all files for the project. Right click on the Project Compiler icon the Compiler Options dialog box. to open Page 4-33 IDEAUsersGuide.book Page 34 Monday, August 2, 1999 2:30 PM IDEA User Interface Assembler tool The Project Assembler tool lets you set the default assembler options that are used to compile all assembly language files for the project. Right click on the Project Assembler icon the Assembler Options dialog box. to open Linker tool The Project Linker tool lets you set options for the project linker. You can also specify a linker command file and edit the file. Right click on the Project Linker icon menu containing linker commands. to view a Builder tool The Project Builder tool lets you specify utilities for building the project. Right click on the Project Builder icon Builder Configuration dialog box. to open the Object Inspector (cobj) utility The cobj utility lets you inspect relocatable object files or executable output by the assembler or linker. The cobj utility can be used to check the size and configuration of relocatable object files or to output information from their symbol tables. Right click on the Object Inspector icon Options to open the Options dialog box. Page 4-34 and select IDEAUsersGuide.book Page 35 Monday, August 2, 1999 2:30 PM IDEA User Interface Hex Converter (chex) utility The chex utility translates executable images produced by clnk to one of several hexadecimal interchange formats. Right click on the Hex Converter icon and select Options to open the CHEX Configuration dialog box. Debug Info Examiner (cprd) utility The cprd utility extracts and prints information about functions and data objects from an object module or executable image that has been compiled with the +debug option. Right click on the Debug Info Examiner icon and select Options to open the CPRD Configuration dialog box. Absolute Lister (clabs) utility The clabs utility processes relocatable C and Assembly listing files with the associated executable file to produce absolute listings with updated code and address values. Right click on the Absolute Lister icon and select Options to open the CLABS Configuration dialog box. IEEE695 Converter utility The cv695 utility converts a file produced by the linker into IEEE695 format. Right click on the IEEE695 Converter icon and select Options to open the CV695 Configuration dialog box. Page 4-35 IDEAUsersGuide.book Page 36 Monday, August 2, 1999 2:30 PM IDEA User Interface Debugger tool The Debugger tool lets you specify a Cosmic ZAP debugger for the project. Right-click on the Project Debugger icon to open a dialog box that allows you to specify the location of the debugger. After you select a debugger, the path and filename appear after the Project Debugger icon. Project Documentation The Project Documentation component shows all documents that are associated with the project. Right click on the Project Documentation icon and select Add Doc to associate a documentation file with the project. Managing a project You manage an IDEA project by selecting the various components and tools in the Project window and entering information into the associated dialog boxes and fields. For complete details on managing a project, refer to Chapter 6: Managing an IDEA Project. Page 4-36 IDEAUsersGuide.book Page 37 Monday, August 2, 1999 2:30 PM IDEA User Interface File window(s) Description The File window(s) display one or more open project files at the right side of the window area (if the Project window is displayed at the left). If there is no open project, the Project window is closed and the File window(s) occupy the entire window area. Figure 4-16: IDEA File window When you first run IDEA, the window area is blank. To open a file window, select New, Open, or Load (read only) from the File menu or click on the New File, Open File, or Load (Read Only) tools in the Tool bar. If a project is open, double click on the Files component in the Project window to display a list of files included in the project. Right click on a file name to display a pop-up menu from which you can Open or Load (read only) the file. Page 4-37 IDEAUsersGuide.book Page 38 Monday, August 2, 1999 2:30 PM IDEA User Interface Navigation Each open file is displayed in its own file window. The Title bar of the currently active file is colored dark blue. The Title bars of all open but inactive files are colored gray. You can make an open file active by clicking anywhere in the file window if it is visible. You can also make an open file active by selecting it from the list at the bottom of the Window drop-down menu. The Title bar in a file window functions in the same manner as the IDEA Title bar. Refer to “Title bar” on page 4-8 for a description of this functionality. The icon at the left side of the Title bar differs according to the type of file that is open in that window. The file type icons are listed below. Table 4-3: File Type icons C code source file (.c) Assembler source file (.s) Header file (.h) Linker command file (.lkf) “Other” file type (.ls, .la, .lkf, etc.) Page 4-38 IDEAUsersGuide.book Page 39 Monday, August 2, 1999 2:30 PM IDEA User Interface Customization When you open a file, it is displayed in the window area to the right of the project window (if a project is open). If no project is open, the file window occupies the entire window area. As you open more files, they are displayed in one of three ways, depending on the option selected in the Window drop-down menu. The file window display options are: • Cascade • Horizontal Tile • Vertical Tile Project file types A project may be composed of several different file types: • C source file (.c) • Assembler file (.s) • Header file (.h) • Link file (.lkf) • Listing file (.ls) • Absolute listing file (.la) In addition to the above files, several other file types may be created by IDEA: • Project file (.prj) - A project file contains options for a project and is similar in structure to a Windows .ini file. • Project target file (.hxx, where xx stands for the target compiler. For example, .h12) • Project map file (.map) • Object file (.o) • Errors file (.err) - The file idea.err contains the last errors that resulted from a compile, link, make, or build. Page 4-39 IDEAUsersGuide.book Page 40 Monday, August 2, 1999 2:30 PM IDEA User Interface Managing project files Each IDEA project is composed of a series of source files. The project files are listed after the Project Source Files icon in the Project window. Figure 4-17: IDEA Project window Right click on the Project Source Files icon to view a menu containing source file management commands. For complete details on managing source files, refer to Chapter 6, Managing an IDEA Project. Page 4-40 IDEAUsersGuide.book Page 41 Monday, August 2, 1999 2:30 PM IDEA User Interface Adding source files to the project You can add source files to the project using the Add File command or the Windows Explorer. • To add a source file using the Add File command, right click on the Project Source Files icon, select Add File, and select the file to add from the Add File dialog box. • To add a source file using Windows Explorer, select the Windows Explorer icon from the Tool bar. Windows Explorer appears next to the Project pane. Select a file from Windows Explorer and drag it to the Project pane. Using either method, you can select more than one source file at a time using standard Windows conventions for selecting and grouping files. Working with individual source files Each source file included in the project is listed next to a Source File icon . The Source File icon lets you view the source file and its attributes. Right click on the Source File icon to view a menu containing source file commands. For complete details on working with individual source files, refer to Chapter 6, Managing an IDEA Project. Errors window Description If the Automatic Errors Toggle option on the Options sub-menu is checked, the Errors window is opened automatically if any errors are found during a compile, link, make, or build. Page 4-41 IDEAUsersGuide.book Page 42 Monday, August 2, 1999 2:30 PM IDEA User Interface Figure 4-18: IDEA Errors window The Errors window display can be toggled on or off using the Show Error File option on the Errors sub-menu. Navigation If any errors are encountered during a compilation, IDEA opens an Errors window and lists the errors. In addition, four Error buttons appear in the Tool bar. Table 4-4: Error list navigation buttons Go to first error in list Go to last error in list Go to next error in list Go to previous error in list You can use the error list navigation buttons to highlight any error in the Errors window. When you highlight an error in the Errors window, the cursor in the File window moves to the point where the error occurred. Page 4-42 IDEAUsersGuide.book Page 1 Monday, August 2, 1999 2:30 PM CHAPTER 5 IDEA Options & Setup Page 5-1 Overview Working directory Default file type File window display Program Options Program Setup Debugger Errors window IDEAUsersGuide.book Page 2 Monday, August 2, 1999 2:30 PM IDEA Options & Setup This page intentionally left blank. Page 5-2 IDEAUsersGuide.book Page 3 Monday, August 2, 1999 2:30 PM IDEA Options & Setup Overview This chapter explains how to set options and defaults for IDEA. You may want to change some of these prior to working on a project. Working directory You can specify a working directory for your projects and for locating files. IDEA uses the working directory when you select options such as File > Open, Project > Load, etc. Specify the working directory by clicking on Working Directory in the Setup menu. Alternatively, type Alt+S+W. The Path Editor dialog box appears. Figure 5-1: Path Editor dialog box You can specify a working directory by selecting the appropriate drive and double clicking on the appropriate folders. The contents of the currently selected folder appear in the list window at the left. Page 5-3 IDEAUsersGuide.book Page 4 Monday, August 2, 1999 2:30 PM IDEA Options & Setup Default file type You can specify a default file type for many file operations. IDEA uses the default file type when you select options such as File > New, File > Open, etc. The current default file type is shown after the Default File Type option on the File drop-down menu (for example, Default File Type (.c)). To change the default file type, select Default File Type in the File menu. Alternatively, type Alt+F+D. A drop-down list appears with the available file types and associated file extensions: • C source (.c) • Assembler (.s) • Header file (.h) • Link file (.lkf) • Listing file (.ls) • Absolute Listing file (.la) • Undefined (.*, any file extension) Highlight the desired default file type and click on it. Page 5-4 IDEAUsersGuide.book Page 5 Monday, August 2, 1999 2:30 PM IDEA Options & Setup File window display You can have multiple file windows open while managing a project. IDEA lets you arrange the file windows in three ways. Cascade The Cascade option arranges all open file windows in a cascade. Select the Cascade option by clicking on Cascade in the Window menu. Alternatively, type Alt+W+C. After you select this option, a check mark appears before the option name. Horizontal Tile The Horizontal Tile option arranges all open file windows in a horizontal tiling. Select the Horizontal Tile option by clicking on Horizontal Tile in the Window menu. Alternatively, type Alt+W+H. After you select this option, a check mark appears before the option name. Vertical Tile The Vertical Tile option arranges all open file windows in a vertical tiling. Select the Vertical Tile option by clicking on Vertical Tile in the Window menu. Alternatively, type Alt+W+V. After you select this option, a check mark appears before the option name. Page 5-5 IDEAUsersGuide.book Page 6 Monday, August 2, 1999 2:30 PM IDEA Options & Setup Program Options You can set basic program options using the Options drop-down menu. Open the Options menu by clicking on Options in the Main menu. Alternatively, type Alt+O. Figure 5-2: Options menu An option is set if a check mark appears before its name. To set an unchecked option, click on it in the Options drop-down menu. The next time you open the Options drop-down menu, a check mark appears before the option name. An option is not set if no check mark appears before its name. To clear a checked option, click on it in the Options drop-down menu. The next time you open the Options drop-down menu, no check mark appears before the option name. Page 5-6 IDEAUsersGuide.book Page 7 Monday, August 2, 1999 2:30 PM IDEA Options & Setup Syntax Coloring The Syntax Coloring option, if set, provides color coding in your project source files to assist you in programming. The following table lists the type of text that is color coded and the default color. Table 5-1: Syntax default coloring Comments Green Preprocessor Keyword Light Red C Keyword Blue C Library Function Red Assembler Mnemonics Red Assembler Directives Blue Link Directives Red If this option is not set, all source file text is in black. You can change the default color for each item using the Colors option in the Setup menu. Refer to “Colors” on page 5-14 for details. To toggle the Syntax Coloring option, select Syntax Coloring for the Options drop-down menu. Alternatively, you can type Alt+O+Y. Page 5-7 IDEAUsersGuide.book Page 8 Monday, August 2, 1999 2:30 PM IDEA Options & Setup Project Analysis The Project Analysis option adds Function and Variable lists to the project C source files shown under the Files icon in the Project window. The Figure below shows a typical Project window display when the Project Analysis option is set. Figure 5-3: Function and Variable lists Page 5-8 IDEAUsersGuide.book Page 9 Monday, August 2, 1999 2:30 PM IDEA Options & Setup If this option is set, IDEA parses each source file in the project to display all function and variable definitions. This makes it easier to organize a project and monitor function and variable usage. If this option is not set, functions and variables are not shown. To toggle the Project Analysis option, select Project Analysis from the Options drop-down menu. Alternatively, you can type Alt+O+P. Auto Save before C/asm The Auto Save before C/asm option, if set, automatically saves a C or Assembly source code file before it is compiled or assembled via a File > Compile, Project > Compile File, Project > Make, or Project > Build command. In addition, it automatically saves before you exit IDEA. If this option is not set, you are asked whether you wish to save the file. If you select Yes, the file is saved and the compilation or assembly proceeds. If you select No, the file is not saved and the compilation or assembly proceeds using the last saved version of the file, not the current version of the file. To toggle the Auto Save before C/asm option, select Auto Save before C/asm from the Options drop-down menu. Alternatively, you can type Alt+O+A. Automatic Errors Toggle The Automatic Errors Toggle option, if set, automatically opens the Errors window when errors are detected after a compile, link, make, or build operation. If this option is not set, errors are reported by default in the IDEA Status bar. The Errors window can be opened manually using the Show Error File option on the Errors sub-menu. To toggle the Automatic Errors Toggle option, select Automatic Errors Toggle from the Options drop-down menu. Alternatively, you can type Alt+O+U. Page 5-9 IDEAUsersGuide.book Page 10 Monday, August 2, 1999 2:30 PM IDEA Options & Setup Force Absolute Names The Force Absolute Names option, if set, adds the full path for all source files in the project folder to the linked executable. In addition, the full path is shown in the Project Source Files list. If this option is not set, the path for all source files in the project folder is not added to the linked executable and is not shown in the Project Source Files list. NOTE Project files which are not located in the project folder always use the full path. To toggle the Force Absolute Names option, select Force Absolute Names from the Options drop-down menu. Alternatively, you can type Alt+O+F. Show Sub Processes The Show Sub Processes option, if set, instructs IDEA to show all subprocesses during a compilation, link, make, or build. If this option is not set, a simple dialog appears during a compilation. Figure 5-4: Compilation status dialog box If this option is set, in addition to the dialog above, a DOS window appears with details on the compilation subprocesses. To toggle the Show Sub Processes option, select Show Sub Processes from the Options drop-down menu. Alternatively, you can type Alt+O+B. Page 5-10 IDEAUsersGuide.book Page 11 Monday, August 2, 1999 2:30 PM IDEA Options & Setup Show Tips The Show Tips option, if set, shows names for project components in the Project window and tools in the Tool bar. If this option is not set, names are not shown. To toggle the Show Tips option, select Show Tips from the Options drop-down menu. Alternatively, you can type Alt+O+T. Save Config The Save Config option immediately saves the current IDEA configuration. Unlike the other options on the Options submenu, the Save Config option is not a toggle. To save the current IDEA configuration, select Save Config from the Options drop-down menu. Alternatively, you can type Alt+O+S. Save Config on exit The Save Config on exit option, when set, saves the current IDEA configuration when you exit the program. If this option is not set, IDEA will use the last saved configuration when it starts up again. To toggle the Save Config on exit option, select Save Config on exit from the Options drop-down menu. Alternatively, you can type Alt+O+C. Page 5-11 IDEAUsersGuide.book Page 12 Monday, August 2, 1999 2:30 PM IDEA Options & Setup Program Setup The Setup drop-down menu lets you specify a default tab width, set the font and text colors for source files, establish key bindings for common program operations, and set the default working directory. You can also specify assembler file name extensions. Open the Setup drop-down menu by clicking on Setup in the Main menu. Alternatively, type Alt+S. Figure 5-5: Setup menu Tab Width The Tab Width option lets you specify the number of spaces that the tab key moves the cursor in a source file. The default is 8. Select the Tab Width option by clicking on Tab Width in the Setup menu. Alternatively, type Alt+S+T. The Tab Width dialog box appears. Figure 5-6: Tab Width dialog box Specify a tab width in the Width field and click on OK. Page 5-12 IDEAUsersGuide.book Page 13 Monday, August 2, 1999 2:30 PM IDEA Options & Setup Font The Font option lets you specify the default font for viewing and editing source files. Select the Font option by clicking on Font in the Setup menu. Alternatively, type Alt+S+F. The Font dialog box appears. Figure 5-7: Font dialog box The default font is Terminal, Regular style, 9 point size, black. You can select a new font from the Font list and view it in the Sample field. You can also specify font style, size, and color. Page 5-13 IDEAUsersGuide.book Page 14 Monday, August 2, 1999 2:30 PM IDEA Options & Setup Colors The Colors option lets you specify the default font color for certain types of text in your source files. If you have set the Syntax Coloring option in the Options menu, IDEA recognizes several different items in a project file and automatically displays them in a color that you can easily distinguish. IDEA can display the following items in different colors: • Comments • Preprocessor keywords • C Keywords • C Library functions • Assembler mnemonics • Assembler directives • Link directives For details on the Syntax Coloring option and the default colors for these items, refer to “Syntax Coloring” on page 5-7. Select the Colors option by moving the cursor over Colors in the Setup menu. Another menu appears with a list of items for which you can change the color. Click on the appropriate item. Alternatively, type Alt+S+C, move the cursor over the appropriate item, and click again. The Setup Colors menu appears below. Figure 5-8: Setup Colors menu After you click on one of the above items, the Color dialog box appears. Page 5-14 IDEAUsersGuide.book Page 15 Monday, August 2, 1999 2:30 PM IDEA Options & Setup Figure 5-9: Color dialog box You can select a basic color from the Basic colors array or select a custom color from the Custom colors array. The current color for the item is surrounded by a black border. The Custom colors array is initially all black. You can create your own colors by clicking on the Define Custom Colors >> button. This expands the Color dialog box so that you can specify the custom color exactly. After you define a custom color, it appears in the Custom colors array for all items. Key Binding The Key Binding option lets you specify keyboard shortcuts for nearly all of the menu commands in IDEA. Select the Key Binding option by clicking on Key Binding in the Setup menu. Alternatively, type Alt+S+K. The Key Binding dialog box appears. Page 5-15 IDEAUsersGuide.book Page 16 Monday, August 2, 1999 2:30 PM IDEA Options & Setup Figure 5-10: Key Binding dialog box You can use any combination of the Ctrl, Shift, and Function keys to create a new shortcut. Click on your choice(s) in the Key Selection field. As you click, the shortcut definition is built up in the Key field. To remove Ctrl or Shift from the key definition, click on them again. To change the Function key in the key definition, click on your new choice. After you specify a key sequence, you must bind it to an action. If the key sequence you have specified is not already in use, the Binding field will be blank. Click on the down arrow to the right of the field and select the action that you want to associate with the key sequence from the action list. If the key sequence you have specified is already in use, the Binding field will show the action with which the key sequence is associated. You can either select a new key sequence for the action or click on the Clear button to clear the current action from the Binding field. After you create a keyboard shortcut for a menu option, the shortcut will appear after the option name in the drop-down menu. Page 5-16 IDEAUsersGuide.book Page 17 Monday, August 2, 1999 2:30 PM IDEA Options & Setup Working Directory You can specify a working directory for your projects and for locating files. IDEA uses the working directory when you select options such as File > Open, Project > Load, etc. Specify the working directory by clicking on Working Directory in the Setup menu. Alternatively, type Alt+S+W. Refer to “Working directory” on page 5-3 for additional information. Asm Extensions The Asm Extensions option lets you specify additional file extensions that the assembler will recognize. The default file extension for assembler files is .s. Select the Asm Extensions option by clicking on Asm Extensions in the Setup menu. Alternatively, type Alt+S+ A. The Asm Extensions dialog box appears. Figure 5-11: Asm Extensions dialog box Page 5-17 IDEAUsersGuide.book Page 18 Monday, August 2, 1999 2:30 PM IDEA Options & Setup The Asm Extensions dialog box lets you build a list of file name extensions that the assembler will recognize during assembly. The default extension for assembler files is .s. Enter an extension (for example, .asm) in the Item field, and then click on the Add button to add the extension to the Extensions list. To remove an extension from the list, select the extension and then click on the Remove button Debugger You can use the appropriate Cosmic ZAP debugger to debug your project in IDEA. Before you can use the ZAP debugger, you must specify its location. You can do this in one of two ways: 1. From the Main menu, select Tools to open the Tool Browser. Right click on the Debugger tool to open a dialog box that allows you to specify the location of the ZAP debugger. 2. In the Project window under the Project Tools icon, right-click on the Project Debugger icon to open a dialog box that allows you to specify the location of the ZAP debugger. After you select a debugger, the path and filename appears after the Debugger icon. Page 5-18 IDEAUsersGuide.book Page 19 Monday, August 2, 1999 2:30 PM IDEA Options & Setup Errors window IDEA lets you display and scroll through any errors encountered during a compile, link, make, or build. The Automatic Errors Toggle option in the Options drop-down menu and the Show Error File option in the Errors drop-down menu control the display of the Errors window. Options > Automatic Errors Toggle option The Automatic Errors Toggle option, if set, automatically opens the Errors window when errors are detected after a compile, link, make, or build operation. If this option is not set, errors are reported by default in the IDEA Status bar. The Errors window can be opened manually using the Show Error File option on the Errors sub-menu. To toggle the Automatic Errors Toggle option, select Automatic Errors Toggle from the Options drop-down menu. Alternatively, you can type Alt+O+U. Errors > Show Error File option The Show Error File option, when checked, shows the most recent error file generated for a compile, link, make, or build. If the Show Error File option is unchecked, the error file is hidden. Toggle the Show Error File option by clicking on Show Error File in the Errors menu. Alternatively, type Alt+R+S. Page 5-19 IDEAUsersGuide.book Page 20 Monday, August 2, 1999 2:30 PM IDEA Options & Setup Page 5-20 IDEAUsersGuide.book Page 1 Monday, August 2, 1999 2:30 PM CHAPTER 6 Managing an IDEA Project Page 6-1 Overview Opening a project Project name Project description Project target file name Project source files Project directory Project defines Project include paths Project tools Project documentation IDEAUsersGuide.book Page 2 Monday, August 2, 1999 2:30 PM Managing an IDEA Project This page intentionally left blank. Page 6-2 IDEAUsersGuide.book Page 3 Monday, August 2, 1999 2:30 PM Managing an IDEA Project Overview This chapter provides complete details on managing an IDEA project. You can use it to create and build a new project. If you have not created an IDEA project yet, IDEA is supplied with an example project called “demoxx.prj”, where xx stands for the Cosmic Software compiler that you are using (for example, “demo12.prj” for the Cosmic MC68HC12 compiler). You can use this example project to become familiar with the principles of managing an IDEA project. Opening a project To open a new project, click on the New Project tool on the Tool bar. Alternatively, select Project > New or type Alt+P+N. The Project window appears at the left of the window area with a new, untitled project opened. Figure 6-1: Project window with new project opened Page 6-3 IDEAUsersGuide.book Page 4 Monday, August 2, 1999 2:30 PM Managing an IDEA Project To open an existing project, click on the Open Project tool on the Tool bar. Alternatively, select Project > Load or type Alt+P+L. In the dialog box that appears, select the project (for example, demo12.prj) from the folder where it is located. The Project window appears with the selected project opened. A project is composed of nine different project components: • Project Name • Project Description • Project Target File Name • Project Source Files • Project Directory • Project Defines • Project Include Paths • Project Tools • Project Documentation Each of these components is described in detail in the following sections. Project name The Project Name component lets you specify a name for the project. It also represents the parent component for all project subcomponents. To specify a name for the project, click on the Project Name icon . A text cursor appears to the right of the icon. Click on the text cursor to open a text box and enter a project name. Page 6-4 IDEAUsersGuide.book Page 5 Monday, August 2, 1999 2:30 PM Managing an IDEA Project Right click on the Project Name icon to view a menu of project commands. These commands are shown in the following Table. Table 6-1: Project commands Add File Adds a source file to the project. Save Saves the project. Save As Saves the project with a new name. Make Checks source file up-to-date status and dependencies. Then selectively compiles or assembles any out-of-date files and runs the Linker. The icons in the Project Source Files folder are colored yellow. Build Performs a Make as described above and then runs any utilities selected in the Builder Configuration dialog box. To have the Build rebuild all files regardless of their up-to-date status, right click on the project name, select Mark All, and then run the Builder. Mark All Marks all project source files for recompile/assemble without changing the file time/date stamp. The icons in the Project Source Files folder are colored orange. Touch All Marks all project source files for recompile/assemble and updates all project source files with the current system date and time stamp. The icons in the Project Source Files folder are colored red. Documentation Adds a document file to the project. Page 6-5 IDEAUsersGuide.book Page 6 Monday, August 2, 1999 2:30 PM Managing an IDEA Project Project description The Project Description component lets you specify a short description for the project. To specify a description for the project, click on the Project Description icon . A text cursor appears to the right of the icon. Click on the text cursor to open a text box and enter a short project description. Project Target File Name The Project Target File Name component lets you specify a target file name for the project (for example, demo12.h12). This name is used as the root name for the linked executable. To specify a project target file name, click on the Project Target File Name icon . A text cursor appears to the right of the icon. Click on the text cursor to open a text box and enter a target file name. Be sure to include the target file name extension; for example, “.h12” for the Cosmic 68HC12 compiler. Right click on the Project Target File Name icon to view a menu containing target file commands. These commands are shown in the following Table. Page 6-6 IDEAUsersGuide.book Page 7 Monday, August 2, 1999 2:30 PM Managing an IDEA Project Table 6-2: Target File commands Inspect Object Runs the Object Inspector utility (cobj) on the target file. Show Debug Runs the Debug Info Examiner utility (cprd) and opens the project debug file in read-only mode. Produce Hex Records Runs the Hex Converter utility (chex), which translates executable images produced by the clnk linker to one of several hexadecimal interchange formats. Produce Absolute Listings Runs the Absolute Lister utility (clabs) to generate absolute listings. Produce IEEE Output Runs the IEEE695 Converter utility (cv695) to generate IEEE695 debug format. Debug File Runs the selected ZAP debugger and loads the linked executable. Delete Deletes the project target file. A pop-up dialog box asks you to confirm the deletion Page 6-7 IDEAUsersGuide.book Page 8 Monday, August 2, 1999 2:30 PM Managing an IDEA Project Project Source Files The Project Source Files component lets you specify the C and Assembly language source files to be included in the project. Right click on the Project Source Files icon to view a menu containing source file management commands. These commands are shown in the following Table. Table 6-3: Source file management commands Add File Adds a source file to the project. Touch All Updates all project source files with the current system date and time stamp and marks them for recompile/assemble when a Make or Build is executed. The icons in the Project Source Files folder are colored red. Mark All Marks all project source files for recompile/assemble when Make or Build is executed. This option does not change the time-date stamp of the files. The icons in the Project Source Files folder are colored orange. Page 6-8 IDEAUsersGuide.book Page 9 Monday, August 2, 1999 2:30 PM Managing an IDEA Project Adding source files to the project You can add source files to the project using the Add File command or the Windows Explorer. • To add a source file using the Add File command, right click on the Project Source Files icon, select Add File, and select the file to add from the Add File dialog box. • To add a source file using Windows Explorer, select the Windows Explorer tool on the Tool bar. Windows Explorer appears next to the Project window. Select a file from Windows Explorer and drag it to the Project window. Using either method, you can select more than one source file at a time using standard Windows conventions for selecting and grouping files. Working with individual source files Each source file included in the project is listed next to a Source File icon . The Source File icon lets you view the source file and its attributes. Right click on the Source File icon to view a menu containing source file commands. These commands are shown in the following Table. Page 6-9 IDEAUsersGuide.book Page 10 Monday, August 2, 1999 2:30 PM Managing an IDEA Project Table 6-4: Source file commands Load (read only) Opens the source file in read-only mode. Open Opens the source file for editing. Remove Removes the source file from the project. Mark Marks the source file for rebuilding. The Source File icon is colored orange. Touch Updates the source file with the current system date and time stamp and marks it for rebuilding. The Source File icon is colored red and the Source File Time Stamp icon is updated with the new date and time. Compile Compiles or assembles the source file. The source file icon is colored yellow if the Compile is successful. Options Opens the Compiler (or Assembler) Options for Source File dialog box, where you can specify options for the source file. Refer to “Source File Options” on page 6-13. Defines Opens the #defines dialog box, where you can specify compiler define options for the source file. Refer to “Source File Defines” on page 6-14. Documentation Adds a document file for the source file. Refer to “Source File Documentation” on page 6-12. Page 6-10 IDEAUsersGuide.book Page 11 Monday, August 2, 1999 2:30 PM Managing an IDEA Project Each icon in the source file tree represents a source file component. The source file components are described in the following Table. Table 6-5: Source File Components Source File Time Stamp Source File Documentation Source File Options Source File Defines Source File Dependencies Source File Functions Appears only if Project Analysis option is selected in Options sub-menu. Source File Variables Appears only if Project Analysis option is selected in Options sub-menu. Source File Time Stamp The Source File Time Stamp component and icon shows the day, date, and time that the file was last saved or “touched”. Page 6-11 IDEAUsersGuide.book Page 12 Monday, August 2, 1999 2:30 PM Managing an IDEA Project Source File Documentation The Source File Documentation component shows all documents that are associated with the source file. Right click on the Documentation icon and select Add Doc to associate a documentation file with the source file. The Document component lets you view, edit, or remove a document associated with a source file. The appearance of the Document icon varies, depending on the type of document. Right-click on the Document icon to view a menu containing documentation file commands. The documentation file commands are described in the following Table. Table 6-6: Documentation file commands Load (read only) Opens the document in read-only mode. Open Opens the document for editing using the appropriate Windows-registered application. Remove Removes the document from the project. Page 6-12 IDEAUsersGuide.book Page 13 Monday, August 2, 1999 2:30 PM Managing an IDEA Project Source File Options The Source File Options component lets you specify compiler or assembler options for the source file. These options override the default project compiler or assembler options. Right-click on the Source File Options icon to open the Compiler (or Assembler) Options for Source File dialog box. Figure 6-2: Compiler Options for Source File dialog box Page 6-13 IDEAUsersGuide.book Page 14 Monday, August 2, 1999 2:30 PM Managing an IDEA Project The Compiler (Assembler) Options dialog box has five tabs: • General options • Optimizer options • Listings options • Miscellaneous options • User Flags Choose a tab and select the desired options. Selected options are displayed in bold and unselected options are greyed out. To select an option simply click on the option description. To deselect an option click on the option again. For a detailed explanation of compiler and assembler options, refer to Chapter 8, IDEA Command Reference. The source file compiler or assembler options will override the default project compiler or assembler options. Refer to “Default compiler options” on page 6-23 or “Default assembler options” on page 6-25 for details. Source File Defines The Source File Defines component lets you specify compiler #define options for a source file. Right-click on the Source File Defines icon to open the #defines dialog box and specify up to twenty user-defined preprocessor symbols. Page 6-14 IDEAUsersGuide.book Page 15 Monday, August 2, 1999 2:30 PM Managing an IDEA Project Figure 6-3: Source File #defines dialog box To add a symbol to the list, enter the symbol in the Item field and click on Add. To remove a symbol from the list, select the symbol and click on Remove. You can also add project #defines to the source file #define list by clicking on Add Project Defines. Refer to “Project Defines” on page 6-20 for details. After you add #defines, they appear as individual sub-components in the Defines list, each one after a Define icon . The define symbol is shown to the right of the icon. In addition, the day, date, and time that the #defines were last updated is shown next to the Source File Defines icon. Page 6-15 IDEAUsersGuide.book Page 16 Monday, August 2, 1999 2:30 PM Managing an IDEA Project Source File Dependencies The Source File Dependencies component and icon let you view the files that are named in the source file #includes. The File icon shows a file that is named in the source file #includes. If the file name is enclosed in brackets, it is a system include file and is not typically modified in each project. If the file name is enclosed in quotes, it is a user include file and can be modified. Right-click on the File icon to display a menu include file commands. The include file commands are described in the following Table. Table 6-7: Include file commands Open Opens the file with the application in the Windows extension (File Types) Registry Edit Opens the file in IDEA for editing Load (read only) Opens the file in read-only mode. Open Opens the file for editing. Touch Updates the file with the current system date and time and marks it for rebuilding. Delete Removes the file from your system Source File Functions The Source File Functions component and icon let you view the functions in the source file. The Function icon shows a function in the source file and lists all of the variables local to that function. Right-click on the Function icon to open Page 6-16 IDEAUsersGuide.book Page 17 Monday, August 2, 1999 2:30 PM Managing an IDEA Project the source file at the function. Page 6-17 IDEAUsersGuide.book Page 18 Monday, August 2, 1999 2:30 PM Managing an IDEA Project Source File Variables The Source File Variables component and icon view the variables that are local to the source file. The Variable icon source file. let you shows a variable declared with the NOTE Functions and Variables appear in the Project window only if Project Analysis is selected from the Options menu. Project Directory The Project Directory component is used to set the working directory for the project. This is typically where the source code files for the project are located. Right-click on the Project Directory icon to open the Path Editor dialog box and set the path to the source files. Page 6-18 IDEAUsersGuide.book Page 19 Monday, August 2, 1999 2:30 PM Managing an IDEA Project Figure 6-4: Path Editor dialog box The Folder icon shows folders in the project directory. The File icon shows files in the project directory. Right-click on the File icon to display a menu with file commands. The file commands are described in the following Table. Table 6-8: File commands Load (read only) Opens the file in read-only mode. Open Opens the file for editing. Touch Updates the file with the current system date and time and marks it for rebuilding. Page 6-19 IDEAUsersGuide.book Page 20 Monday, August 2, 1999 2:30 PM Managing an IDEA Project Project Defines The Project Defines component lets you specify #define options for the project. Right-click on the Project Defines icon to open the #defines dialog box and specify up to twenty preprocessor symbols. Figure 6-5: Project #defines dialog box To add a symbol to the list, enter the symbol in the Item field and click on Add. To remove a symbol, select it and click on Remove. Symbols defined as project #defines can be imported into source file #defines. Refer to “Source File Defines” on page 6-14 for details. After you add project #defines, they appear as individual sub-components in the Defines list, each one after a Define icon . The define symbol is shown to the right of the icon. In addition, the day, date, and time that the project #defines were last updated is shown next to the Project Defines icon. Page 6-20 IDEAUsersGuide.book Page 21 Monday, August 2, 1999 2:30 PM Managing an IDEA Project Project include paths The Project Include Paths component lets you specify include paths for the compiler (-i > option). Right-click on the Project Include Paths icon to open the Include Path Editor and specify up to twenty include paths for the project. Figure 6-6: Include Path Editor You can specify paths in any desired order. The paths are searched from top to bottom by the compiler. You can use the Drives and Directory fields to specify the include path. Click on Append to add the path to the bottom of the list in the Path field. To position the new path before or after the selected path, select an include path in the Path field and click on Add Before or Add After. After you add include paths, they appear in order next to the Project Include Paths icon and as components in the Project Include Paths list, each one after a Folder icon. Page 6-21 IDEAUsersGuide.book Page 22 Monday, August 2, 1999 2:30 PM Managing an IDEA Project Include path folders and files The Include Path Folder icon paths in the project directory. The Folder icon shows folders for include file shows folders in an include file path. The File icon shows files in an include file path. Right-click on the File icon to display a menu with the following commands: Table 6-9: Include file commands Load (read only) Opens the file in read-only mode. Open Opens the file for editing. Touch Updates the file with the current system date and time and marks it for rebuilding. Page 6-22 IDEAUsersGuide.book Page 23 Monday, August 2, 1999 2:30 PM Managing an IDEA Project Project tools The Project Tools icon lets you set project default options for: • Compiler • Assembler • Linker • Builder • Debugger The Builder component lets you configure build utilities for the project, including: • Object Inspector (cobj) • Hex Converter (chex) • Debug Info Examiner (cprd) • Absolute Lister (clabs) • IEEE-695 Converter (cv695) Default compiler options The Compiler component lets you set the default compiler options that are used to compile all C code (.c) files in a project. Right click on the Compiler icon to open the Compiler Options dialog box. You can also double-click on the Compiler icon to display the Compiler Options icon and then right-click on the Compiler Options icon to open the Compiler Options dialog box. Page 6-23 IDEAUsersGuide.book Page 24 Monday, August 2, 1999 2:30 PM Managing an IDEA Project Figure 6-7: Compiler Options dialog box The Compiler Options dialog box has five tabs: • General options • Optimizer options • Listings options • Miscellaneous options • User Flags Choose a tab and select the desired options. Selected options are displayed in bold and unselected options are greyed out. To select an option, simply click on the option description. To deselect an option, click on the option again. For a detailed description of compiler options, refer to “Compiler tool” in Chapter 8, IDEA Command Reference. The default compiler options can be overridden by setting compiler options for the individual source files. Refer to “Source File Options” on page 6-13 for details. Page 6-24 IDEAUsersGuide.book Page 25 Monday, August 2, 1999 2:30 PM Managing an IDEA Project Default assembler options The Assembler component lets you set the default assembler options that are used to assemble all assembly language ( .s) files in a project. Right click on the Assembler icon to open the Assembler Options dialog box.You can also double-click on the Assembler icon to display the Assembler Options icon and then right-click on the Assembler Options icon to open the Assembler Options dialog box. Figure 6-8: Assembler Options dialog box The Assembler Options dialog box five tabs: • General options • Optimizer options • Listings options • Miscellaneous options • User Flags Page 6-25 IDEAUsersGuide.book Page 26 Monday, August 2, 1999 2:30 PM Managing an IDEA Project Choose a tab and select the desired options. Selected options are displayed in bold and unselected options are greyed out. To select an option, simply click on the option description. To deselect an option, click on the option again. For a detailed description of assembler options, refer to “Assembler Tool” in Chapter 8, IDEA Command Reference. The default assembler options can be overridden by setting assembler options for the individual source files. Refer to “Source File Options” on page 6-13 for details. Default linker options The Linker component lets you set the default clnk utility options that are used to link all files in a project. You can also specify a linker command file and edit the file. Right click on the Linker icon to view a menu containing linker commands. The linker commands are described in the following Table. Table 6-10: Linker commands Options Opens the Link Configuration dialog box. Edit Command File Opens the project link command file for editing. Change Command File Opens the Select Linker Command File dialog box. You can also double-click on the Linker icon to display the Linker Options icon Page 6-26 and the Linker Command File icon . IDEAUsersGuide.book Page 27 Monday, August 2, 1999 2:30 PM Managing an IDEA Project Linker configuration Select Options from the Project Linker menu (or right-click on the Linker Options icon) to open the Link Configuration dialog box. The Link Configuration dialog box lets you specify: • Linker options • Libraries path option • Reporting mode option • Memory banking option Figure 6-9: Link Configuration dialog box Page 6-27 IDEAUsersGuide.book Page 28 Monday, August 2, 1999 2:30 PM Managing an IDEA Project Specifying linker options The Link Configuration dialog box lets you specify clnk utility options. These options are described in the following Table. Table 6-11: Clnk utility options Output file (-o option): writes output to the specified file. This option is required and has no default value. Command file (.lkf) The linker command file. This option is required and has no default value. Map file (-m option): produces map information for the program being built to the specified file. Error file (-e option): logs errors in the text file specified instead of displaying the messages on the screen. After you select any one of these files, you can click on the Find button to specify the file name and path. Page 6-28 IDEAUsersGuide.book Page 29 Monday, August 2, 1999 2:30 PM Managing an IDEA Project Specifying the libraries path Click on the Libs Path button to open the Libraries Path Editor and set a path to the compiler library (-l > option). Figure 6-10: Libraries Path Editor You can specify up to twenty library paths in any order. The paths are searched from top to bottom. After you add paths, they appear in order next to the Libs Path button. Other linker options you can set are described in the following Table. Page 6-29 IDEAUsersGuide.book Page 30 Monday, August 2, 1999 2:30 PM Managing an IDEA Project Table 6-12: Other Clnk utility options Verbose (-v option): be verbose. Symbols Only (-s option): create an output file containing only an absolute symbol table, but still with an object file format. Memory Banking (-bs option): enter the size of the page to be used. The size is translated to the correct -bs option for the linker. For example the default page size for 68HC12 paging is 0x4000 which translates to a -bs14. The default value for most processors is 0 (bank switching disabled). Editing the linker command file Before you can edit a linker command file, you must first check the Command File check box in the Link Configuration dialog box and then specify a linker command file name and path. Select Edit Command File from the Project Linker menu (or right-click on the Linker Command File icon) to open the linker command file for editing. Page 6-30 IDEAUsersGuide.book Page 31 Monday, August 2, 1999 2:30 PM Managing an IDEA Project Figure 6-11: Linker command file for demo12.prj To edit the linker command file, you can make changes directly in the file using the options in the Edit menu. Type Alt+E to view the editing options.You can also right click to view a menu of editing options. For complete details on linker command file editing options, refer to “Edit Linker Command File” in Chapter 8, IDEA Command Reference. Changing the linker command file Select Change Command File from the Project Linker menu to change the linker command file. The Select Linker Command File dialog box lets you specify a file name and path for the new linker command file. After you select a new command file, the Command File check box is checked in the Link Configuration dialog box, and the linker command file name and path are displayed. Page 6-31 IDEAUsersGuide.book Page 32 Monday, August 2, 1999 2:30 PM Managing an IDEA Project Project builder utilities The Project Builder component lets you specify utilities for building the project. Right click on the Project Builder icon to open the Builder Configuration dialog box.You can also double-click on the Project Builder icon to display the Builder Options icon , and then rightclick on the Builder Options icon to display the Builder Configuration dialog box. Figure 6-12: Builder Configuration dialog box The Builder Configuration dialog box contains check boxes that let you specify which builder utilities to run. The builder utilities are described in the following Table. Page 6-32 IDEAUsersGuide.book Page 33 Monday, August 2, 1999 2:30 PM Managing an IDEA Project Table 6-13: Builder utilities Run Object Inspector Runs the cobj utility to examine object modules. If you select Run Object Inspector and then click on the Options button, the Options dialog box appears. Refer to “Object Inspector utility” on page 6-34 for details. Convert to S-Records Runs the chex utility to translate object module format to hexadecimal format. If you select Convert to S-Records and then click on the Options button, the CHEX Configuration dialog box appears. Refer to “Hex Converter utility” on page 6-36 for details. Run Debug Info Examiner Runs the cprd utility to print debugging information about functions and data objects. If you select Run Debug Info Examiner and then click on the Options button, the CPRD Configuration dialog box appears. Refer to “Debug Info Examiner utility” on page 6-38 for details. Run Absolute Lister Runs the clabs utility to generate absolute listings. If you select Run Absolute Lister and then click on the Options button, the CLABS Configuration dialog box appears. Refer to “Absolute Lister utility” on page 6-40 for details Page 6-33 IDEAUsersGuide.book Page 34 Monday, August 2, 1999 2:30 PM Managing an IDEA Project Table 6-13: Builder utilities Run IEEE 695 Converter Runs the cv695 utility to generate IEEE695 format. If you select Run IEEE 695 Converter and then click on the Options button, the CLABS Configuration dialog box appears. Refer to “IEEE695 Converter utility” on page 642 for details. Run User Utility 1 Runs the specified user utility. You can specify a path and filename for the utility. Run User Utility 2 Runs the specified user utility. You can specify a path and filename for the utility. Object Inspector utility The cobj utility lets you inspect relocatable object files or executable output by the assembler or linker. The cobj utility can be used to check the size and configuration of relocatable object files or to output information from their symbol tables. Right click on the Object Inspector icon and select Options to open the Options dialog box.You can also double-click on the Object Inspector icon to display the Options icon and then right-click on it to display the Options dialog box. Page 6-34 IDEAUsersGuide.book Page 35 Monday, August 2, 1999 2:30 PM Managing an IDEA Project Figure 6-13: cobj utility Options dialog box Selected options are displayed in bold and unselected options are greyed out. To select an option simply click on the option description and it is added to the command line. To deselect an option click on the option again. For complete details on the cobj utility options, refer to “Object Inspector tool” in Chapter 8, IDEA Command Reference. You can also specify a path and file name to receive the Object Inspector output. This file may be in relocatable format or executable format. Page 6-35 IDEAUsersGuide.book Page 36 Monday, August 2, 1999 2:30 PM Managing an IDEA Project Hex Converter utility The chex utility translates executable images produced by the clnk utility to one of several hexadecimal interchange formats. Right click on the Hex Converter icon and select Options to open the CHEX Configuration dialog box. You can also doubleclick on the Hex Converter icon to display the Options icon and then right-click on it to display the CHEX Configuration dialog box. Figure 6-14: CHEX Configuration dialog box The following Table describes the formats and options that are available. For complete details on chex utility options, refer to “Hex Converter tool” in Chapter 8, IDEA Command Reference. Page 6-36 IDEAUsersGuide.book Page 37 Monday, August 2, 1999 2:30 PM Managing an IDEA Project Table 6-14: chex utility options Motorola S Records format (-fm option) - produces S1 and S2 records as needed. Motorola S2 Records format (-f2 option) - produces S2 records only. This is the default. Intel Hex format (-fi option) Absolute Start Address (-a option) - the output address of the first byte. Address Bias (-b option) - subtract from any address before output. Max Bytes per line (-m option) - maximum data bytes per line. The default is 32 bytes per line. Do not Output Header (-h option) Output Paged Addresses (-p option) Output by Increasing Addresses (-s option) Output to File (-o option) - the default is STDOUT. Page 6-37 IDEAUsersGuide.book Page 38 Monday, August 2, 1999 2:30 PM Managing an IDEA Project Table 6-14: chex utility options Insert Header Sequence (+h option) Output named segments only (-n option). Up to twenty different named segments can be specified. To add a named segment to the Segments field, enter the named segment in the Item field and click on the Add button. To remove a named segment from the Segments field, select the segment and click on the Remove button. Debug Info Examiner utility The cprd utility extracts and prints information about functions and data objects from an object module or executable image that has been compiled with the +debug option. Right click on the Debug Info Examiner icon and select Options to open the CPRD Configuration dialog box.You can also double-click on the Debug Info Examiner icon to display the Options icon and then right-click on it to display the CPRD Configuration dialog box. Page 6-38 IDEAUsersGuide.book Page 39 Monday, August 2, 1999 2:30 PM Managing an IDEA Project Figure 6-15: CPRD Configuration dialog box The CPRD Configuration dialog box lets you build a list of files and functions for debugging purposes. Enter a file or function name in the Item field, and then click on Add to Files to add the item to the Files list or Add to Funcs to add the item to the Functions list. If you check the Show File List check box, the Item field changes to a File List field, with a drop-down list of the files in the project directory. Select a file from the list and then click on the Add to Files button to add it to the Files list. To remove an item from either list, select the item and then click on the Remove button. Each file in the Files list is processed with the -fl option, which prints debugging information about the file. By default, the cprd utility prints debugging information on all C source files. Page 6-39 IDEAUsersGuide.book Page 40 Monday, August 2, 1999 2:30 PM Managing an IDEA Project Each function in the Functions list is processed with the -fc option, which prints information only about the function. By default, the cprd utility prints debugging information on all functions in a file. You can also specify a path and file name to receive the debugger output. This is equivalent to the cprd utility -o option. By default, the cprd utility writes debugging information to the terminal screen. Absolute Lister utility The clabs utility processes relocatable C and Assembly listing files with the associated executable file to produce absolute listings with updated code and address values. Right click on the Absolute Lister icon and select Options to open the CLABS Configuration dialog box. You can also doubleclick on the Absolute Lister icon to display the Options icon and then right-click on it to display the CLABS Configuration dialog box. Figure 6-16: CLABS Configuration dialog box Page 6-40 IDEAUsersGuide.book Page 41 Monday, August 2, 1999 2:30 PM Managing an IDEA Project The clabs utility options are described in the following Table. Table 6-15: clabs utility options Verbose (-v option) - the name of each module of the application is output to STDOUT. Restrict to Project Directory (-l option) - process files in the project directory only. The default is to process all files of the application. Listing Extension (-r option) - specify the input file extension. The default is “.ls”. Absolute Listing Extension (-s option) - specify the output file extension. The default id “.la” Page 6-41 IDEAUsersGuide.book Page 42 Monday, August 2, 1999 2:30 PM Managing an IDEA Project IEEE695 Converter utility The cv695 utility converts a file produced by the linker into IEEE695 format. Right click on the IEEE695 Converter icon and select Options to open the CV695 Configuration dialog box.You can also doubleclick on the IEEE695 Converter icon to display the Options icon and then right-click on it to display the CV695 Configuration dialog box. Figure 6-17: CV695 Configuration dialog box The cv695 utility options are described in the following Table. Page 6-42 IDEAUsersGuide.book Page 43 Monday, August 2, 1999 2:30 PM Managing an IDEA Project Table 6-16: cv695 utility options Verbose (-v option) - the cv695 utility displays information about its activity. Reverse BitField Numbering (-rb option) - reverses bitfield from left to right. Paging (+page# option) - this option is currently meaningful for the MC68HC12 only. This option specifies the address format for bank-switched code. If you check the Paging check box, three options appear to the right: Physical (+page1) - the application is banked and the cv695 utility outputs physical addresses. This is the default if Paging is checked. Logical (+page2) - the application is banked and the cv695 utility outputs addresses in paged mode: <page><offset_in_page>. This is equivalent to the old +paged flag. data paging (+dpage) - the application uses data paging. Output to File (-o option) - you can specify a path and file name to receive the cv695 utility output. By default, the cv695 utility outputs to the file whose name is obtained from the input file by replacing the filename extension with “.695”. Page 6-43 IDEAUsersGuide.book Page 44 Monday, August 2, 1999 2:30 PM Managing an IDEA Project Project debugger Right-click on the Project Debugger icon to open a dialog box that allows you to specify a debugger for the project. After you select a debugger, the path and filename appears after the Project Debugger icon. Once you have specified a debugger, you can double click on the Debugger icon to run the ZAP debugger with the project target file opened. You can also run the debugger by clicking on the Debugger tool in the Tool bar. Project documentation The Project Documentation component shows all documents that are associated with the project. Right click on the Documentation icon and select Add Doc to associate a documentation file with the project. The Document icon lets you view, edit, or remove a document associated with the project. The appearance of the icon varies, depending on the type of document. Right-click on the Document icon to view a menu containing documentation file commands. These commands are described in the following Table. Table 6-17: Documentation file commands Load (read only) Opens the document in read-only mode. Open Opens the document for editing. Remove Removes the document from the project. Page 6-44 IDEAUsersGuide.book Page 1 Monday, August 2, 1999 2:30 PM CHAPTER 7 Building an IDEA Project Page 7-1 Overview Compiling a file Linking a project Making a project Building a project IDEAUsersGuide.book Page 2 Monday, August 2, 1999 2:30 PM Building an IDEA Project This page intentionally left blank. Page 7-2 IDEAUsersGuide.book Page 3 Monday, August 2, 1999 2:30 PM Building an IDEA Project Overview After a project is set up and configured, you need to build it. There are four processes involved in building a project: • Compiling • Linking • Making • Building Each of these processes is described briefly below and in detail later in the chapter. Compiling The Compile process compiles (.c files) or assembles (.s files) an open project source file. Compiler options are specified in the Compiler Options dialog box. Assembler options are specified in the Assembler Options dialog box. Linking The Link process runs the linker (and no other utilities) using the options specified for the project in the Link Configuration dialog box. Project source files are not checked for up-to-date status. Making The Make process first checks source file up-to-date status and dependencies. It then selectively compiles or assembles any out-ofdate files and runs the Linker. Building The Build process performs a Make and then runs any utilities selected in the Builder Configuration dialog box. To have the Builder rebuild all files regardless of their up-to-date status, right click on the project name, select Mark All, and then run the Builder. Page 7-3 IDEAUsersGuide.book Page 4 Monday, August 2, 1999 2:30 PM Building an IDEA Project Compiling a project The Compile process compiles (.c files) or assembles (.s files) an open project source file. Specifying compiler options Compiler options are specified in the Compiler Options dialog box. Assembler options are specified in the Assembler Options dialog box. You can specify compiler and assembler options for a project and for individual source files. Project compiler options Project compiler options apply to all (.c) source files in a project. You can override the project compiler options for one or more source files by specifying source file compiler options. You can specify project compiler options in one of two ways: 1. If a project is open, double click on the Tools icon in the Project window to show the project tools. Then right click on the Compiler icon and select Options (or double click on the Compiler icon and right click on the Options icon ). 2. Select Tools from the Main menu. In the Tool Browser, right click on the Compiler tool and select Options (or double click on the Compiler tool and right click on the Options icon ). The Project Compiler Options dialog box appears. Page 7-4 IDEAUsersGuide.book Page 5 Monday, August 2, 1999 2:30 PM Building an IDEA Project Figure 7-1: Project Compiler Options dialog box The Title bar says “Compiler Options” and does not show a file name, indicating that these compiler options are for the entire project. The Project Compiler Options dialog box is identical to the Source File Compiler Options dialog box. The available options for both are detailed in “Compiler options” on page 77. Page 7-5 IDEAUsersGuide.book Page 6 Monday, August 2, 1999 2:30 PM Building an IDEA Project Source file compiler options Source file compiler options apply only to a single (.c) source file. They override the project compiler options. You can specify source file compiler options in one of two ways: 1. In the Project window, double click on the Files icon to show the project files. Then right click on the File icon for the appropriate file and select Options from the pop-up menu. 2. In the Project window, double click on the Files icon to show the project files. Then double click on the File icon for the appropriate file to show the file attributes. Finally, right click on the Options icon . The Source File Compiler Options dialog box appears. Figure 7-2: Source File Compiler Options dialog box Page 7-6 IDEAUsersGuide.book Page 7 Monday, August 2, 1999 2:30 PM Building an IDEA Project The Title bar says “Compiler Options for: filename.c”, indicating that these compiler options are for a source file only. The Source File Compiler Options dialog box is identical to the Project Compiler Options dialog box. The available options for both are detailed in the next section. Compiler options The Compiler Options dialog box has five tabs: • General options • Optimizer options • Listings options • Miscellaneous options • User Flags Choose a tab and select the desired options. Selected options are displayed in bold and unselected options are greyed out. To select an option simply click on the option description. To deselect an option click on it again. The default compiler options can be overridden by setting compiler options for the individual source files. Listed below are the available compiler options. For additional compiler options and target-specific options, consult you compiler documentation. Compiler General options Verbose Mode (-v) Be “verbose”. Before executing a command, print the command, along with its arguments, to STDOUT. The default is to output only the names of each file processed. Each name is followed by a colon and new line. Page 7-7 IDEAUsersGuide.book Page 8 Monday, August 2, 1999 2:30 PM Building an IDEA Project Use .text section for literals and constants (+nocst) Output literals and constants in the code section .text instead of the specific section .const. Do not use the .bss section (+nobss) Do not use the .bss section for variables allocated in external memory. By default, such uninitialized variables are defined into the .bss section. This option is useful to force all variables to be grouped into a single section. Align Object to Even Boundary (+even) Align any object larger than one byte on an even boundary. Compiler Optimizer options Do not widen char and float arguments (+nowiden) Do not widen char and float arguments. By default, char arguments are promoted to int before being passed as an argument. Compiler Listings options Generate Listings (-l) Merge the C source listing with assembly language code; the listing output defaults to <file>.ls. Compiler Miscellaneous options Force prototyping (-pp) Tells the parser to enforce prototype declaration for functions. An error message is issued if a function is used and no prototype declaration is Page 7-8 IDEAUsersGuide.book Page 9 Monday, August 2, 1999 2:30 PM Building an IDEA Project found for it. By default, the compiler accepts both syntaxes without any error. Generate Debug Information (+debug) Produce debug information to be used by the debug utilities provided with the compiler and by any external debugger. Number bits from MSB to LSB in bitfields (+rev) Reverse the bitfield filling order. By default, bitfields are filled from the less significant bit (lsb) towards the most significant bit (msb) of a memory cell. If the +rev option is specified, bitfields are filled from the msb to the lsb. Compiler User Flags (-d*^) The User Flags tab allows you to specify up to twenty preprocessor symbols (#define). The form of the definition is -dsymbol[=value]; the symbol is set to 1 if value is omitted. Page 7-9 IDEAUsersGuide.book Page 10 Monday, August 2, 1999 2:30 PM Building an IDEA Project Project assembler options Project assembler options apply to all assembly (.s) source files in a project. You can override the project assembler options for one or more source files by specifying source file assembler options. You can specify project assembler options in one of two ways: 1. If a project is open, double click on the Tools icon to show the project tools. Then right click on the Assembler icon and select Options (or double click on the Assembler icon and right click on the Options icon ). 2. Select Tools from the Main menu. In the Tool Browser, right click on the Assembler tool and select Options (or double click on the Assembler tool and right click on the Options icon ). The Project Assembler Options dialog box appears. Page 7-10 IDEAUsersGuide.book Page 11 Monday, August 2, 1999 2:30 PM Building an IDEA Project Figure 7-3: Project Assembler Options dialog box The Title bar says “Assembler Options” and does not show a file name, indicating that these assembler options are for the entire project. The Project Assembler Options dialog box is identical to the Source File Assembler Options dialog box. The available options for both are detailed in “Assembler options” on page 7-14. Page 7-11 IDEAUsersGuide.book Page 12 Monday, August 2, 1999 2:30 PM Building an IDEA Project Source file assembler options Source file assembler options apply only to a single (.s) source file. They override the project assembler options. You can specify source file assembler options in one of two ways: 1. In the Project window, double click on the Files icon to show the project files. Then right click on the File icon for the appropriate file and select Options from the pop-up menu. 2. In the Project window, double click on the Files icon to show the project files. Then double click on the File icon for the appropriate file to show the file attributes. Finally, right click on the Options icon . The Source File Assembler Options dialog box appears. Page 7-12 IDEAUsersGuide.book Page 13 Monday, August 2, 1999 2:30 PM Building an IDEA Project Figure 7-4: Source File Assembler Options dialog box The Title bar says “Assembler Options for: filename.s”, indicating that these assembler options are for a source file only. The Source File Assembler Options dialog box is identical to the Project Assembler Options dialog box. The available options for both are detailed in the following section. Page 7-13 IDEAUsersGuide.book Page 14 Monday, August 2, 1999 2:30 PM Building an IDEA Project Assembler options The Assembler Options dialog box has five tabs: • General options • Optimizer options • Listings options • Miscellaneous options • User Flags Choose a tab and select the desired options. Selected options are displayed in bold and unselected options are greyed out. To select an option click on the option description. To deselect an option click on it again. The default assembler options can be overridden by setting assembler options for the individual source files. Listed below are the available assembler options. For additional assembler options, consult you compiler documentation. Assembler General options Include Full debug information (-xx) Add debug information in the object file for any label defining code or data. Include line debug information (-x) Add line debug information to the object file. Absolute Assembler (-a) Map all sections to absolute, including the predefined ones. Verbose Mode (-v) Display the name of each file that is processed. Page 7-14 IDEAUsersGuide.book Page 15 Monday, August 2, 1999 2:30 PM Building an IDEA Project Assembler Optimizer options Do not optimize branches (-b) Do not optimize branch instructions. By default, the assembler replaces long branches by short branches wherever a shorter instruction can be used, and short branches by long branches wherever the displacement is too large. This optimization also applies to jump and jump to subroutines instructions. Assembler Listings options Output a listing (-l) Create a listing file. The name of the listing file is derived from the input file name by replacing the suffix with the extension .ls. Use form feed in listing (-ff) Use formfeed character to skip pages in listing instead of using blank lines. Force Title in Listings (-ft) Output a title in the listing (date, file name, page). By default, no title is output. Assembler Miscellaneous options Keep All local symbols (-pl) Put locals in the symbol table. They are not published as externals and will be displayed only in the linker map file. Page 7-15 IDEAUsersGuide.book Page 16 Monday, August 2, 1999 2:30 PM Building an IDEA Project Accept old MOTOROLA syntax (-m) Accepts the old Motorola syntax. That is, the assembler will accept labels starting in the first column without a terminating colon. Also, the assembler will accept “*” as a comment delimiter instead of “;”. Make all symbols Public (-p) Mark all defined symbols as public. This option has the same effect as adding an xdef directive for each label. Make all equates Public (-pe) Mark all symbols defined by an equ directive as public. This option has the same effect than adding a xdef directive for each of those symbols. Output Cross References (-c) Produce cross-reference information. The crossreference information will be added at the end of the listing file; this option forces the -l option. Assembler User Flags (-d*>) The User Flags tab allows you to specify user-defined symbols, up to a maximum of twenty. This option is equivalent to using an equ directive in each of the source files. The form of the definition is -dname=value, where name is defined to have the value specified by value. Page 7-16 IDEAUsersGuide.book Page 17 Monday, August 2, 1999 2:30 PM Building an IDEA Project Compiling (assembling) a file or a project Compiling (assembling) a file You can compile (assemble) a file in one of four ways: 1. If the file is open in a File window, click anywhere on the File window to make the file the currently active file, and then select the Compile tool on the Tool bar. 2. If the file is open in a File window, click anywhere on the File window to make the file the currently active file, and then select File > Compile from the IDEA menu or type Alt+F+C. 3. If the file is open in a File window, click anywhere on the File window to make the file the currently active file, and then select Project > Compile File from the IDEA menu or type Alt+P+C. 4. In the Project window, double click on the Files icon to show the project files. Then right click on the File icon for the appropriate file and select Compile from the pop-up menu. This method lets you compile (assemble) a file that is not open. After the file starts compiling (assembling), a Status box appears showing the progress during compilation. In addition, if you have selected Show Sub Processes from the Options drop-down menu, a MS-DOS window opens and shows all processes during compilation. Compiling (assembling) a project You can compile (assemble) a project by doing a Project Make or Project Build. Refer to “Making a project” on page 7-32 or “Building a project” on page 7-32 for details. Page 7-17 IDEAUsersGuide.book Page 18 Monday, August 2, 1999 2:30 PM Building an IDEA Project Linking a project The Link process runs the linker (and no other utilities) using the options specified for the project in the Link Configuration dialog box. Project source files are not checked for up-to-date status. Specifying linker options You can specify project linker options in one of two ways: 1. Double click on the Tools icon in the Project window to show the project tools. Then right click on the Linker icon and select Options (or double click on the Linker icon and right click on the Options icon ). 2. Select Tools from the Main menu. In the Tool Browser, right click on the Linker tool and select Options (or double click on the Linker tool and right click on the Options icon The Link Configuration dialog box appears. Figure 7-5: Link Configuration dialog box Page 7-18 ). IDEAUsersGuide.book Page 19 Monday, August 2, 1999 2:30 PM Building an IDEA Project The Link Configuration dialog box lets you specify: • Linker options • Libraries path option • Reporting mode option • Memory banking option Linker options After you select any one of these file options, you can click on the Find button to specify the file name and path. Output file option (-o) Writes output to the specified file. This option is required and has no default value. Command file (.lkf) The linker command file. This option is required and has no default value. Map file option (-m) Produces map information for the program being built to the specified file. Error file option (-e) Logs errors in the text file specified instead of displaying the messages on the screen. Libraries path option (-l) Click on the Libs Path button to open the Libraries Path Editor and set a path to the compiler library. Page 7-19 IDEAUsersGuide.book Page 20 Monday, August 2, 1999 2:30 PM Building an IDEA Project Figure 7-6: Libraries Path Editor You can specify up to twenty library paths in any order. The paths are searched from top to bottom. After you add paths, they appear in order next to the Libs Path button in the Link Configuration dialog box. Reporting Mode options Verbose option (-v) Symbols Only option (-s) Create an output file containing only an absolute symbol table, but still with an object file format. Memory Banking option (-bs) Enter the size of the page to be used. The size is translated to the correct -bs option for the linker. For example the default page size for 68HC12 paging is 0x4000 which translates to a bs14. The default value for most processors is 0 (bank switching disabled). Page 7-20 IDEAUsersGuide.book Page 21 Monday, August 2, 1999 2:30 PM Building an IDEA Project Editing the linker command file Before you can edit a linker command file, you must first check the Command File check box in the Link Configuration dialog box and then specify a linker command file name and path. You can open the linker command file for editing in one of two ways: 1. Double click on the Tools icon in the Project window to show the project tools. Then right click on the Linker icon and select Edit Command File (or double click on the Linker icon and right click on the Command File icon ). 2. Select Tools from the Main menu. In the Tool Browser, right click on the Linker tool and select Edit Command File (or double click on the Linker tool and right click on the Command File icon ). The Linker Command File is opened in a File window. Page 7-21 IDEAUsersGuide.book Page 22 Monday, August 2, 1999 2:30 PM Building an IDEA Project Figure 7-7: Linker command file To edit the linker command file, you can make changes directly in the file using the options in the Edit drop-down menu. Type Alt+E to view the editing options. For details on these options, refer to “Edit menu” in Chapter 8, IDEA Command Reference. You can also right click to view a pop-up menu of editing options. Figure 7-8: Linker command file editing options Page 7-22 IDEAUsersGuide.book Page 23 Monday, August 2, 1999 2:30 PM Building an IDEA Project Insert File option The Insert File option lets you insert the name of a single object file (.o) in the linker command file. To insert an object file name at the current cursor position, right click and select Insert File from the pop-up menu. When you select Insert File, IDEA looks for all object files with an .o extension in the default working directory (for example, Idea12). The Add File dialog box that appears lists all files found. Figure 7-9: Add File dialog box Select a file name and then select open to insert the file name at the current cursor position. Insert File from List option The Insert File from List option lets you insert the name of one or more object files (.o) in the linker command file. To insert the object file name(s) at the current cursor position, right click and select Insert File from List from the pop-up menu. When you select Insert File from List, IDEA looks for all object files with an .o extension in the default working directory (for example, Idea12). The Select Files dialog box that appears lists all files found. Page 7-23 IDEAUsersGuide.book Page 24 Monday, August 2, 1999 2:30 PM Building an IDEA Project Figure 7-10: Select Files dialog box Select a single file name by clicking on it. Select a contiguous list of file names by clicking on the first name, holding down the Shift key, and then clicking on the last name. Select multiple non-contiguous file names by clicking on the first name, holding down the Ctrl key, and then clicking on the names of other files in succession. Insert File List option The Insert File List option lets you insert the names of all object files with an .o extension in the default working directory (for example, Idea12). To insert the object file names at the current cursor position, right click and select Insert File List from the pop-up menu. Page 7-24 IDEAUsersGuide.book Page 25 Monday, August 2, 1999 2:30 PM Building an IDEA Project Insert Lib(s) option The Insert Lib(s) option lets you insert the name of one or more library files (.h*) in the linker command file. To insert the library file name(s) at the current cursor position, right click and select Insert Lib(s) from the pop-up menu. When you select Insert Lib(s), IDEA looks for all library files with an .h* extension in the default libraries path(s). Libraries paths are specified in the Link Configuration dialog box. Refer to “Libraries path option (-l)” on page 7-19 for details. The Select Libs dialog box lists all libraries found. Figure 7-11: Select Libs dialog box Select a single library name by clicking on it. Select a contiguous list of library names by clicking on the first name, holding down the Shift key, and then clicking on the last name. Select multiple non-contiguous library names by clicking on the first name, holding down the Ctrl key, and then clicking on other library names in succession. Page 7-25 IDEAUsersGuide.book Page 26 Monday, August 2, 1999 2:30 PM Building an IDEA Project Insert Default Libs option The Insert Default Libs option lets you insert the names of the default libraries for your compiler. The default libraries are: libd.h* (Double-precision library) libi.h* (Integer-only library) libm.h* (Machine library) To insert the default library names at the current cursor position, right click and select Insert Default Libs from the pop-up menu. NOTE Please refer to the Linker chapter in your compiler manual for a complete description of the default libraries. Insert Segment option (+seg <segment> <options>) The Insert Segment option lets you insert a segment in the linker command file. A segment is a logically unified block of memory in the executable image. To insert a segment at the current cursor position, right click and select Insert Segment from the pop-up menu. The Segment Definition dialog box appears. Page 7-26 IDEAUsersGuide.book Page 27 Monday, August 2, 1999 2:30 PM Building an IDEA Project Figure 7-12: Segment Definition dialog box Input option Specifies the segment type (for example, .text, .const, .data, etc.) Segment Name option (-n) Sets the output name of the segment to the value specified. Segment output names have at most fifteen characters; longer names are truncated. Segment Space option (-s) Defines a space name for the segment. This segment will be verified for overlapping only against segments defined with the same space name. Physical Address option (-b) Sets the physical start address of the segment to the value specified. Page 7-27 IDEAUsersGuide.book Page 28 Monday, August 2, 1999 2:30 PM Building an IDEA Project Logical Address option (-o) Sets the logical start address of the segment to the value specified. The default is to set the logical address equal to the physical address. Max Segment Size option (-m) Sets the maximum size of the segment to the number of bytes specified. The default size is 65536 bytes. Insert Segment after another segment option (-a) Makes the current segment follow the segment specified. Options -b (Physical Address) and -o (Logical Address) cannot be specified if this option is specified. Output Symbols Only option (-c) Does not output any code/data for the segment. Do NOT Check Segment Overlay option (-v) Does not verify overlapping for the segment. Automatic Bank Segment Creation option (-w*) Activates automatic bank segment creation and sets the window size for banked applications. Bank Number option (-p) Defines the bank number of the segment. This information will be used in case of bank switching instead of the computation based on the -b Physical Address and bs Window Shift values. Page 7-28 IDEAUsersGuide.book Page 29 Monday, August 2, 1999 2:30 PM Building an IDEA Project Shared segment option (-is) Marks the segment as shared data. Use as Host for data Init option (-it) Uses the segment to host the descriptor and image copies of initialized data used for automatic data initialization. Initialize option (-id) Initializes the segment. Do Not Initialize option (-ib) Does not initialize the segment. Insert Symbol Definition option (+def*) The Insert Symbol Definition option lets you insert a symbol definition in the linker command file. To insert a symbol definition at the current cursor position, right click and select Insert Symbol Definition from the popup menu. The Symbol Definition dialog box appears. Figure 7-13: Symbol Definition dialog box Page 7-29 IDEAUsersGuide.book Page 30 Monday, August 2, 1999 2:30 PM Building an IDEA Project Symbol Type option Specifies the symbol type. The choices available are: • Absolute • Segment End • Symbol Symbol option Specifies the linker-defined symbol. Definition option Specifies the symbol definition. If the symbol type is Segment End, the choices are any defined segments. For example, .text. If the symbol type is Symbol, the choices are any defined symbols. For example, __memory, or __stack. Changing the linker command file You can change the linker command file in one of two ways: 1. Double click on the Tools icon in the Project window to show the project tools. Then right click on the Linker icon and select Change Command File. 2. Select Tools from the Main menu. In the Tool Browser, right click on the Linker tool and select Change Command File. The Select Linker Command File dialog box lets you specify a file name and path for the new linker command file. After you select a new command file, the Command File check box is automatically checked in the Link Configuration dialog box, and the linker command file name and path are displayed. Page 7-30 IDEAUsersGuide.book Page 31 Monday, August 2, 1999 2:30 PM Building an IDEA Project Linking a project You can run the project linker by selecting the Link tool on the Tool bar. A Status box appears showing the progress during linking. In addition, if you have selected Show Sub Processes from the Options drop-down menu, a MS-DOS window opens and shows all processes during linking. Marking files To mark a single file for recompile/assemble without changing the time/date stamp of the file, double click on the Files icon in the Project window to show the project files. Then right click on the File icon for the appropriate file and select Mark from the pop-up menu. The color of the File icon changes from yellow to orange. To mark all files for recompile/assemble without changing the time/ date stamp of the files, right click on the Project Name icon in the Project window and select Mark All from the pop-up menu. The color of all the File icons changes from yellow to orange. Touching files To mark a single file for recompile/assemble and update the time/date stamp of the file to current, double click on the Files icon in the Project window to show the project files. Then right click on the File icon for the appropriate file and select Touch from the pop-up menu. The color of the File icon changes from yellow to red. To mark all files for recompile/assemble and update the time/date stamp of the files to current, right click on the Project Name icon in the Project window and select Touch All from the pop-up menu. The color of all the File icons changes from yellow to red. Page 7-31 IDEAUsersGuide.book Page 32 Monday, August 2, 1999 2:30 PM Building an IDEA Project Making a project The Make process first checks source file up-to-date status and dependencies. It then selectively compiles or assembles any out-ofdate files and runs the Linker. You can selectively mark files for recompile/assemble when a Make is executed using the Mark, Mark All, Touch, and Touch All options. You can run a project make in one of three ways. 1. Select the Make Project tool on the Tool bar. 2. Select the Make option from the Project menu or type Alt+P+M. 3. Right click on the Project Name icon in the Project window and select Make from the pop-up menu. A Make Project box appears showing the progress during the make. In addition, if you have selected Show Sub Processes from the Options drop-down menu, a MS-DOS window opens and shows all processes during the make. Building a project The Build process performs a Make as described in the preceding section and then runs any utilities selected in the Builder Configuration dialog box. You can selectively mark files for rebuilding using the Mark, Mark All, Touch, and Touch All options. Specifying builder options You can specify project builder options in one of two ways: 1. Double click on the Tools icon in the Project window to show the project tools. Then right click on the Builder icon and select Options (or double click on the Builder icon and right click on the Options icon Page 7-32 ). IDEAUsersGuide.book Page 33 Monday, August 2, 1999 2:30 PM Building an IDEA Project 2. Select Tools from the Main menu. In the Tool Browser, right click on the Builder tool and select Options (or double click on the Builder tool and right click on the Options icon The Builder Configuration dialog box appears. ). Figure 7-14: Builder Configuration dialog box The Builder Configuration dialog box contains check boxes that let you specify which builder utilities to run. The following Table describes the builder utilities. Page 7-33 IDEAUsersGuide.book Page 34 Monday, August 2, 1999 2:30 PM Building an IDEA Project Table 7-1: Builder utilities Run Object Inspector Runs the cobj utility to examine object modules. If you select Run Object Inspector and then click on the Options button, the Options dialog box appears. Refer to “Object Inspector utility” on page 7-35 for details. Convert to S-Records Runs the chex utility to translate object module format to hexadecimal format. If you select Convert to S-Records and then click on the Options button, the CHEX Configuration dialog box appears. Refer to “Hex Converter utility” on page 7-38 for details. Run Debug Info Examiner Runs the cprd utility to print debugging information about functions and data objects. If you select Run Debug Info Examiner and then click on the Options button, the CPRD Configuration dialog box appears. Refer to “CHEX Configuration dialog box” on page 7-38 for details. Run Absolute Lister Runs the clabs utility to generate absolute listings. If you select Run Absolute Lister and then click on the Options button, the CLABS Configuration dialog box appears. Refer to “Absolute Lister utility” on page 7-42 for details. Page 7-34 IDEAUsersGuide.book Page 35 Monday, August 2, 1999 2:30 PM Building an IDEA Project Table 7-1: Builder utilities Run IEEE 695 Converter Runs the cv695 utility to generate IEEE695 format. If you select Run IEEE 695 Converter and then click on the Options button, the CV695 Configuration dialog box appears. Refer to “IEEE 695 Converter utility” on page 7-44 for details. Run User Utility 1 Runs the specified user utility. You can specify a path and filename for the utility you wish to run. Run User Utility 2 Runs the specified user utility. You can specify a path and filename for the utility you wish to run. Object Inspector utility If you select Run Object Inspector and then click on the Options button, the Options dialog box appears. Alternatively, you can right click on the Object Inspector icon and select Options to open the Options dialog box.You can also double-click on the Object Inspector icon to display the Options icon and then right-click on it to display the Options dialog box. The Options dialog box lets you specify options for the cobj utility, which lets you inspect relocatable object files or executable output by the assembler or linker. The cobj utility can be used to check the size and configuration of relocatable object files or to output information from their symbol tables. Page 7-35 IDEAUsersGuide.book Page 36 Monday, August 2, 1999 2:30 PM Building an IDEA Project Figure 7-15: Object Inspector Options dialog box Command options Selected options are displayed in bold and unselected options are greyed out. To select an option simply click on the option description and it will be added to the command line. To deselect an option click on it again. The following Table lists the available cobj utility options. For additional cobj utility options, consult you compiler documentation. Page 7-36 IDEAUsersGuide.book Page 37 Monday, August 2, 1999 2:30 PM Building an IDEA Project Table 7-2: cobj utility options Output debug symbols (-x option) - displays the debug symbol table. Display file addresses (-v option) - displays seek addresses inside the object file. Output symbol table (-s option) - displays the symbol table. Output reloc flows (-r option) - outputs the relocation part of each section in symbolic form. Output sections (-n option) - displays the name, size and attribute of each section. Output header (-h option) - displays all the fields of the object file header Output data flows (-d option) - outputs the data part of each section in hexadecimal format. Output file You can specify a path and file name to receive the Object Inspector output. This file may be in relocatable format or executable format. . Page 7-37 IDEAUsersGuide.book Page 38 Monday, August 2, 1999 2:30 PM Building an IDEA Project Hex Converter utility If you select Convert to S-Records and then click on the Options button, the CHEX Configuration dialog box appears. Alternatively, you can right click on the Hex Converter icon and select Options to open the CHEX Configuration dialog box. You can also double-click on the Hex Converter icon to display the Options icon and then right-click on it to display the CHEX Configuration dialog box. The CHEX Configuration dialog box lets you specify options for the chex utility, which translates executable images produced by the clnk linker to one of several hexadecimal interchange formats. Figure 7-16: CHEX Configuration dialog box Page 7-38 IDEAUsersGuide.book Page 39 Monday, August 2, 1999 2:30 PM Building an IDEA Project Table 7-3: chex utility options Motorola S Records (-fm option) - produces Motorola S1 and S2 records as needed. Motorola S2 Records (-f2 option) - produces Motorola S2 records only. This is the default. Intel Hex (-fi option) Absolute Start Address (-a option) - specifies the output address of the first byte. Address Bias (-b option) - subtracts the specified value from any address before output. Max Bytes per line (-m option) - the maximum data bytes per line. The default is 32 bytes per line. Do not Output Header (-h option) - does not output the header sequence if such a sequence exists for the selected format. Output Paged Addresses (-p option) - outputs addresses of banked segments using a paged format <page_number> <logical_address>, instead of the default format <physical>. Output by Increasing Addresses (-s option) - sorts the output addresses in increasing order. Output to File (-o option) - writes the output module to the file specified. The default is STDOUT. Page 7-39 IDEAUsersGuide.book Page 40 Monday, August 2, 1999 2:30 PM Building an IDEA Project Table 7-3: chex utility options Insert Header Sequence (+h option) - inserts the specified value in the header sequence if such a sequence exists for the selected format. Output named segments only (-n option) - outputs only segments whose name is equal to the value specified. Up to twenty different named segments may be specified on the command line. If there are several segments with the same name, they will all be produced. To add a named segment to the Segments field, enter the named segment in the Item field and click on the Add button. To remove a named segment from the Segments field, select the segment and click on the Remove button. Debug Info Examiner utility If you select Run Debug Info Examiner and click on Options, the CPRD Configuration dialog box appears. Alternatively, you can right click on the Debug Info Examiner icon and select Options to open the CPRD Configuration dialog box. You can also double-click on the Debug Info Examiner icon to display the Options icon and then right-click on it to display the CPRD Configuration dialog box. The CPRD Configuration dialog box lets you specify options for the cprd utility, which extracts and prints information about functions and data objects from an object module or executable image that has been compiled with the +debug option. Page 7-40 IDEAUsersGuide.book Page 41 Monday, August 2, 1999 2:30 PM Building an IDEA Project Figure 7-17: CPRD Configuration dialog box The CPRD Configuration dialog box lets you build a list of files and functions for debugging purposes. Enter a file or function name in the Item field, and then click on Add to Files to add the item to the Files list or Add to Funcs to add the item to the Functions list. If you check the Show File List check box, the Item field changes to a File List field, with a list of the files in the project directory. Select a file from the list and click on the Add to Files button to add it to the Files list. To remove an item from either list, select the item and then click on the Remove button. Page 7-41 IDEAUsersGuide.book Page 42 Monday, August 2, 1999 2:30 PM Building an IDEA Project Table 7-4: cprd utility options Print file debugging information (-fl option) - each file in the Files list is processed with the -fl option, which prints debugging information about the file. By default, cprd prints debugging information on all C source files. Print function debugging information (-fc option) - each function in the Functions list is processed with the -fc option, which prints information about the function only. By default, cprd prints debugging information on all functions in a file. Print debugging information to file (-o option) - you can also specify a path and file name to receive the debugger output. By default, cprd writes debugging information to the terminal screen. Absolute Lister utility If you select Run Absolute Lister and then click on the Options button, the CLABS Configuration dialog box appears. Alternatively, you can right click on the Absolute Lister icon and select Options to open the CLABS Configuration dialog box. You can also double-click on the Absolute Lister icon to display the Options icon and then rightclick on it to display the CLABS Configuration dialog box. The CLABS Configuration dialog box lets you specify options for the clabs utility, which processes relocatable C and Assembly listing files with the associated executable file to produce absolute listings with updated code and address values. Page 7-42 IDEAUsersGuide.book Page 43 Monday, August 2, 1999 2:30 PM Building an IDEA Project Figure 7-18: CLABS Configuration dialog box Table 7-5: clabs utility options Verbose (-v option) - echoes processed file names. The name of each module in the application is output to STDOUT. Restrict to Project Directory (-l option) - Processes files in the project directory only. The default is to process all files in the application. Listing Extension (-r option) Specifies the input file extension, including or not the dot ‘.’ character. The default is “.ls”. Absolute Listing Extension (-s option) - Specifies the output file extension, including or not the dot ‘.’ character. The default is “.la”. Page 7-43 IDEAUsersGuide.book Page 44 Monday, August 2, 1999 2:30 PM Building an IDEA Project IEEE 695 Converter utility If you select Run IEEE 695 Converter and then click on the Options button, the CV695 Configuration dialog box appears. Alternatively, you can right click on the IEEE695 Converter icon and select Options to open the CV695 Configuration dialog box. You can also double-click on the IEEE695 Converter icon to display the Options icon and then right-click on it to display the CV695 Configuration dialog box. The CV695 Configuration dialog box lets you specify options for the cv695 utility, which converts a file produced by the linker into IEEE695 format. Figure 7-19: CV695 Configuration dialog box Page 7-44 IDEAUsersGuide.book Page 45 Monday, August 2, 1999 2:30 PM Building an IDEA Project Table 7-6: cv695 utility options Verbose (-v option) - the cv695 utility displays information about its activity. Reverse BitField Numbering (-rb option) - reverses the bitfield order from left to right. Paging (+page# option) - this option is currently meaningful for the MC68HC12 only. This option specifies the address format for bank-switched code. If you check the Paging check box, three options appear to the right: Physical (+page1) - the application is banked and the cv695 utility outputs physical addresses. This is the default if Paging is checked. Logical (+page2) - the application is banked and the cv695 utility outputs addresses in paged mode: <page><offset_in_page>. This is equivalent to the old +paged flag. data paging (+dpage) - the application uses data paging. Output to File (-o option) - you can specify a path and file name to receive the cv695 utility output. By default, the cv695 utility outputs to the file whose name is obtained from the input file by replacing the filename extension with “.695”. Page 7-45 IDEAUsersGuide.book Page 46 Monday, August 2, 1999 2:30 PM Building an IDEA Project Building a project You can run a project build in one of three ways. 1. Select the Build Project tool on the Tool bar. 2. Select the Build option from the Project menu or type Alt+P+B. 3. Right click on the Project Name icon in the Project window and select Build from the pop-up menu. A Build Project box appears, showing the progress during the build. In addition, if you have selected Show Sub Processes from the Options drop-down menu, a MS-DOS window opens and shows all processes during the build. Page 7-46 IDEAUsersGuide.book Page 1 Monday, August 2, 1999 2:30 PM CHAPTER 8 IDEA Command Reference File menu Project menu Tools menu Edit menu Options menu Setup menu Window menu Errors menu Help menu Page 8-1 IDEAUsersGuide.book Page 2 Monday, August 2, 1999 2:30 PM IDEA Command Reference This page intentionally left blank. Page 8-2 IDEAUsersGuide.book Page 3 Monday, August 2, 1999 2:30 PM IDEA Command Reference File menu The File drop-down menu provides options to open, read, edit, save, compile, or print new or existing files. You can also add or remove a file from a project. You can use these options for several different types of file. Open the File drop-down menu by clicking on File in the Main menu. Alternatively, type Alt+F. Figure 8-1: File menu File > New option The New option lets you create a new file in any one of several different file types. Select the New option by clicking on New in the File menu. Alternatively, type Alt+F+N. You can also select the New File tool on the Tool bar. When you create a new file, the file type created depends on the IDEA default file type. You can specify the default file type using the Default File Type option in the File menu. Refer to “File > Default File Type option” on page 8-11. Page 8-3 IDEAUsersGuide.book Page 4 Monday, August 2, 1999 2:30 PM IDEA Command Reference The available file types and associated file extensions include: • C source (.c) • Assembler (.s) • Header file (.h) • Link file (.lkf) • Listing file (.ls) • Absolute Listing file (.la) • Undefined (.*, any file extension) When you create a new file, IDEA opens a new window (initially blank) to display the contents of the file. If other files are open, IDEA cascades or tiles the file windows so that all are visible. You can select cascading or tiled windows from the Window drop-down menu. Click anywhere in a file window to make that file currently active. Initially, “New File” is displayed in the window title bar followed by the default file extension. After you save the file for the first time, the file name and extension appear in the title bar. You can edit the contents of the file using the options in the Edit drop-down menu. Type Alt+E to view the editing options. Refer to “Edit menu” on page 8-61 for details on these options. You can also right click to view a pop-up menu of text editing options. File > Open option The Open option lets you open and edit an existing file in any one of several different file types. Select the Open option by clicking on Open in the File menu. Alternatively, type Alt+F+O. You can also select the Open File tool on the Tool bar. When you open an existing file, IDEA looks for all files of the default file type (for example, .c) in the default working directory (for example, “Idea12”). The Open File dialog box that appears lists all files found of the default file type. Page 8-4 IDEAUsersGuide.book Page 5 Monday, August 2, 1999 2:30 PM IDEA Command Reference Figure 8-2: Open File dialog box You can specify the default file type using the Default File Type option in the File menu. Refer to “File > Default File Type option” on page 8-11. You can specify the default working directory using the Working Directory option in the Setup menu. Refer to “Setup > Working Directory option” on page 8-77. When you open a file, IDEA opens a new window to display the file contents. If other files are open, IDEA displays the file windows so that all are visible. You can select cascading or tiled windows from the Window drop-down menu. You can edit the contents of the file using the options in the Edit drop-down menu. Type Alt+E to view the options. Refer to “Edit menu” on page 8-61 for details on these options. You can also right click to view a pop-up menu of editing options. File > Load (read only) option The Load (read only) option lets you open an existing file in any one of several different file types. The file is opened in “read-only” mode—you cannot edit it or use the Save option in the File menu. However, you can save the file under a different name using the Save As option in the File menu. Select the Load (read only) option by clicking on Load (read only) option in the File menu. Alternatively, type Alt+F+R. You can also select the Load File (Read Only) tool on the Tool bar. Page 8-5 IDEAUsersGuide.book Page 6 Monday, August 2, 1999 2:30 PM IDEA Command Reference When you open an existing file in read-only mode, IDEA looks for all files of the default file type (for example, .c) in the default working directory (for example, “Idea12”). The Open (Read Only) File dialog box that appears lists all files found. You can specify the default file type using the Default File Type option in the File menu. Refer to “File > Default File Type option” on page 8-11. You can specify the default working directory using the Working Directory option in the Setup menu. Refer to “Setup > Working Directory option” on page 8-77. When you open a file in read-only mode, IDEA opens a new window to display the contents of the file. If other files are open, IDEA displays the file windows so that all are visible. You can select cascading or tiled windows from the Window drop-down menu. File > Save option The Save option lets you save the changes that you have made to a new or existing file. You can determine if a file has edits that need to be saved by looking at the window title bar. If “(modified)” appears after the file name, changes have been made to the file and not yet saved. Select the Save option by clicking on Save in the File menu. Alternatively, type Alt+F+S. You can also select the Save File tool on the Tool bar. When you save an existing file, IDEA saves it (without prompting) with its original file name, file extension, and path. When you save a new file for the first time, the Save File As dialog box appears. You can specify a file name, file type, and path for the new file. IDEA initially selects a file type specified by the Default File Type option in the File menu, and a file path specified by the Working Directory option in the Setup menu. Page 8-6 IDEAUsersGuide.book Page 7 Monday, August 2, 1999 2:30 PM IDEA Command Reference File > Save As option The Save As option lets you save the changes that you have made to an existing file using a different file name, file extension, or path. You can determine if a file has edits that need to be saved by looking at the window title bar. If “(modified)” appears after the file name, changes have been made to the file and not yet saved. Select the Save As option by clicking on Save As in the File menu. Alternatively, type Alt+F+A. The Save File As dialog box appears. Figure 8-3: Save File As dialog box You can specify a file name, file type, and path for the file. IDEA initially selects a file type specified by the Default File Type option in the File menu, and the a file path specified by the Working Directory option in the Setup menu. Page 8-7 IDEAUsersGuide.book Page 8 Monday, August 2, 1999 2:30 PM IDEA Command Reference File > Save All option The Save All option lets you save the changes that you have made to all new or existing files that are currently open. Select the Save All option by clicking on Save All in the File menu. Alternatively, type Alt+F+L. IDEA saves all existing files (without prompting) with their original file name, file extension, and path. If any unsaved new files are currently open, the Save File As dialog box appears for each file. You can specify a file name, file type, and path for the new file. IDEA initially selects a file type specified by the Default File Type option in the File menu, and the a file path specified by the Working Directory option in the Setup menu. File > Compile option The Compile option lets you compile (.c file) or assemble (.s file) the currently active file. Select the Compile option by clicking on Compile in the File menu. Alternatively, type Alt+F+C. You can also select the Compile tool on the Tool bar. If you have selected the Auto Save before C/asm option in the Options drop-down menu (Alt+O+A), the file is saved prior to the compile or assemble operation. If you have not selected the Auto Save before C/asm option, a dialog box appears and lets you select whether to save the file or not. Compiler options are specified in the Compiler Options dialog box. Assembler options are specified in the Assembler Options dialog box. You can specify compiler and assembler options for a project and for individual source files. Project compiler (assembler) options apply to all source files in a project. You can override the project compiler (assembler) options for one or more source files by specifying source file compiler (assembler) options. Page 8-8 IDEAUsersGuide.book Page 9 Monday, August 2, 1999 2:30 PM IDEA Command Reference You can specify project compiler (assembler) options by selecting Tools from the Main menu. In the Tool Browser, right click on the Compiler tool or the Assembler tool and select Options. You can specify source file compiler (assembler) options by double clicking on the Files icon in the Project window to show the project files. Then right click on the File icon for the appropriate file and select Options from the pop-up menu. The following Figure shows the Project Compiler Options dialog box. The Source File Compiler Options dialog box would also show the file name in the Title bar. Figure 8-4: Project Compiler Options dialog box As the file is being compiled or assembled, a status box displays the current status of the operation. Page 8-9 IDEAUsersGuide.book Page 10 Monday, August 2, 1999 2:30 PM IDEA Command Reference Figure 8-5: File compilation status dialog box If any errors are encountered during the compilation (and if the Automatic Errors Toggle option on the Options sub-menu is checked), IDEA automatically opens an Errors window and lists the errors. In addition, four Error buttons appear in the Tool bar. Table 8-1: Error list navigation buttons Go to first error in list Go to last error in list Go to next error in list Go to previous error in list You can use the error list navigation buttons to highlight any error in the Errors window. When you highlight an error in the Errors window, the cursor in the File window moves to the point in the file where the error occurred. Page 8-10 IDEAUsersGuide.book Page 11 Monday, August 2, 1999 2:30 PM IDEA Command Reference File > Add to Project option The Add to Project option lets you add the currently active file to the current project. Select the Add to Project option by clicking on Add to Project in the File menu. Alternatively, type Alt+F+D. If you have a project open, the project files appear after the Files icon in the Project window. File > Remove From Project The Remove From Project option lets you remove the currently active file from the current project. Select the Remove From Project option by clicking on Remove From Project in the File menu. Alternatively, type Alt+F+E. If you have a project open, the project files appear after the Files icon in the Project window. File > Default File Type option The Default File Type option lets you specify a default file type for many file operations. IDEA uses the default file type when you select options such as File > New, File > Open, etc. The current default file type is shown after the option on the File drop-down menu (for example, Default File Type (.c)). To change the default file type, select Default File Type in the File menu. Alternatively, type Alt+F+D. Page 8-11 IDEAUsersGuide.book Page 12 Monday, August 2, 1999 2:30 PM IDEA Command Reference A drop-down list appears, with the available file types and associated file extensions listed: • C source (.c) • Assembler (.s) • Header file (.h) • Link file (.lkf) • Listing file (.ls) • Absolute Listing file (.la) • Undefined (.*, any file extension) Highlight the desired default file type and click on it. File > Print option The Print option lets you print the currently active file. Select the Print option by clicking on Print in the File menu. Alternatively, type Alt+F+P or Ctrl+P. You can also select the Print File tool on the Tool bar. File > Exit option The Exit option lets you exit IDEA. Select the Exit option by clicking on Exit in the File menu. Alternatively, type Alt+F+X. If you have selected Auto Save before C/asm in the Options dropdown menu (Alt+O+A), all changed files are saved prior to exiting. If you have not selected Auto Save before C/asm, a dialog box appears for each changed file and lets you select whether to save the file or not. Page 8-12 IDEAUsersGuide.book Page 13 Monday, August 2, 1999 2:30 PM IDEA Command Reference Project menu The Project drop-down menu provides options to load an existing project or create a new project, and save and/or close an open project. In addition, you can add a file to a project, view its dependencies, and compile the file. You can also initiate a project make or build. Open the Project drop-down menu by clicking on Project in the Main menu. Alternatively, type Alt+P. Figure 8-6: Project menu Project > Load option The Load option lets you open and edit an existing project. All projects are given a .prj extension by default. Select the Load option by clicking on Load in the Project menu. Alternatively, type Alt+P+L. You can also select the Open Project tool on the Tool bar. When you open an existing project, IDEA looks for all files of the default project type (.prj) in the default working directory (for example, “Idea12”). The Open Project dialog box that appears lists all projects found. Page 8-13 IDEAUsersGuide.book Page 14 Monday, August 2, 1999 2:30 PM IDEA Command Reference Figure 8-7: Open Project dialog box You can specify the default working directory using the Working Directory option in the Setup menu. Refer to “Setup > Working Directory option” on page 8-77. When you open a project, IDEA opens a Project window on the left side of the IDEA window to display the contents of the project in a “tree-structured” format. Figure 8-8: IDEA Project window Page 8-14 IDEAUsersGuide.book Page 15 Monday, August 2, 1999 2:30 PM IDEA Command Reference You can adjust the width of the Project window by moving the cursor over the right edge of the window and dragging to the desired width. You can work with only one project at a time in IDEA. If you attempt to load a project or create a new project while another project is open, IDEA closes the currently open project after prompting you to save any changes. Project > New option The New option lets you create a new project. Select the New option by clicking on New in the Project menu. Alternatively, type Alt+P+N. You can also select the New Project tool on the Tool bar. When you create a new project, IDEA opens a Project window on the left side of the IDEA window to display the contents of the project in a “tree-structured” format. Figure 8-9: IDEA new project IDEA provides a basic structure for a new project within which you can specify the project details. Refer to Chapter 6, Managing an IDEA Project, for details. Page 8-15 IDEAUsersGuide.book Page 16 Monday, August 2, 1999 2:30 PM IDEA Command Reference Project > Save option The Save option lets you save the changes that you have made to a new or existing project. Select the Save option by clicking on Save in the Project menu. Alternatively, type Alt+P+S. You can also select the Save Project tool on the Tool bar. When you save an existing project, IDEA saves it (without prompting) with its original project name, extension, and path. When you save a new project for the first time, the Save Project As dialog box appears. You can specify a project name and path for the new project. IDEA initially selects a project file path specified by the Working Directory option in the Setup menu. Project > Save As option The Save As option lets you save the changes that you have made to an existing project using a different project file name, file extension, or path. Select the Save As option by clicking on Save As in the Project menu. Alternatively, type Alt+P+A. The Save Project As dialog box appears. Page 8-16 IDEAUsersGuide.book Page 17 Monday, August 2, 1999 2:30 PM IDEA Command Reference Figure 8-10: Save Project As dialog box You can specify a project file name, file type, and path for the project file. IDEA initially selects a project file path specified by the Working Directory option in the Setup menu. Project > Add File option The Add File option lets you select a file to add to the current project. Select the Add File option by clicking on Add File in the Project menu. Alternatively, type Alt+P+D. Select a file to add from the Add File dialog box. The selected file appears after the Files icon in the Project window. Project > Compile File option The Compile File option lets you compile (.c file) or assemble (.s file) the currently active file. To open a project file, right click on the file name below the Files icon in the Project window, and then select Open. Select the Compile File option by clicking on Compile File in the Project menu. Alternatively, type Alt+P+C. You can also select the Compile tool on the Tool bar. Page 8-17 IDEAUsersGuide.book Page 18 Monday, August 2, 1999 2:30 PM IDEA Command Reference If you have selected Auto Save before C/asm in the Options dropdown menu (Alt+O+A), the file is saved prior to the compile or assemble operation. If you have not selected Auto Save before C/ asm, a dialog box appears and lets you select whether to save the file or not. Compiler options are specified in the Compiler Options dialog box. Assembler options are specified in the Assembler Options dialog box. You can specify compiler and assembler options for a project and for individual source files. Project compiler (assembler) options apply to all source files in a project. You can override the project compiler (assembler) options for one or more source files by specifying source file compiler (assembler) options. You can specify project compiler (assembler) options by selecting Tools from the Main menu. In the Tool Browser, right click on the Compiler tool or the Assembler tool and select Options. You can specify source file compiler (assembler) options by double clicking on the Files icon in the Project window to show the project files. Then right click on the File icon for the appropriate file and select Options from the pop-up menu. The following Figure shows the Project Assembler Options dialog box. The Source File Assembler Options dialog box would also show the file name in the Title bar. Page 8-18 IDEAUsersGuide.book Page 19 Monday, August 2, 1999 2:30 PM IDEA Command Reference Figure 8-11: Project Assembler Options dialog box As the file is being compiled or assembled, a status box displays the current status of the operation. Figure 8-12: File compilation status If any errors are encountered during the compilation (and if the Automatic Errors Toggle option on the Options sub-menu is checked), IDEA opens an Errors window and lists the errors. Page 8-19 IDEAUsersGuide.book Page 20 Monday, August 2, 1999 2:30 PM IDEA Command Reference In addition, four Error buttons appear in the Tool bar. Table 8-2: Error list navigation buttons Go to first error in list Go to last error in list Go to next error in list Go to previous error in list You can use the error list navigation buttons to highlight any error in the Errors window. When you highlight an error in the Errors window, the cursor in the File window moves to the point in the file where the error occurred. Project > Make option The Make option checks source file dependencies and their up-todate status. It then selectively compiles (.c files) and assembles (.s files) out-of-date files and runs the linker. Select the Make option by clicking on Make in the Project menu. Alternatively, type Alt+P+M. You can also select the Make Project tool on the Tool bar. Compiler options are specified in the Compiler Options dialog box. Assembler options are specified in the Assembler Options dialog box. You can specify compiler and assembler options for a project and for individual source files. Project compiler (assembler) options apply to all source files in a project. You can override the project compiler (assembler) options for one or more source files by specifying source file compiler (assembler) options. Page 8-20 IDEAUsersGuide.book Page 21 Monday, August 2, 1999 2:30 PM IDEA Command Reference You can specify the linker options by selecting the Tools option from the Main menu, right clicking on the Linker icon, and then selecting Options to display the Link Configuration dialog box. Figure 8-13: Link Configuration dialog box As the project is being compiled, assembled and linked, a status box displays the current status of the operation. Figure 8-14: Project make status Page 8-21 IDEAUsersGuide.book Page 22 Monday, August 2, 1999 2:30 PM IDEA Command Reference If any errors are encountered during the compilation or assembly and linking (and if the Automatic Errors Toggle option on the Options sub-menu is checked), IDEA automatically opens an Errors window and lists the errors. In addition, four Error buttons appear in the Tool bar. Refer to the “Project > Compile File option” on page 8-17 for details on the Error list navigation buttons. Project > Build option The Build option performs a Make as described above and then runs all the utilities selected in the Builder Configuration dialog box. Select the Build option by clicking on Build in the Project menu. Alternatively, type Alt+P+B. You can also select the Build Project tool on the Tool bar. Compiler options are specified in the Compiler Options dialog box. Assembler options are specified in the Assembler Options dialog box. You can specify compiler and assembler options for a project and for individual source files. Project compiler (assembler) options apply to all source files in a project. You can override the project compiler (assembler) options for one or more source files by specifying source file compiler (assembler) options. You can specify the linker options by selecting the Tools option from the Main menu, right clicking on the Linker icon, and then selecting Options to display the Link Configuration dialog box. You can specify the build options by selecting the Tools option from the Main menu, right clicking on the Builder icon, and then selecting Options. The Builder Configuration dialog box appears. Page 8-22 IDEAUsersGuide.book Page 23 Monday, August 2, 1999 2:30 PM IDEA Command Reference Figure 8-15: Builder Configuration dialog box As the project is being compiled or assembled, linked, and built, a status box displays the current status of the operation. If any errors are encountered during the compilation, assembly, linking, make, or build (and if the Automatic Errors Toggle option on the Options sub-menu is checked), IDEA automatically opens an Errors window and lists the errors. In addition, four Error buttons appear in the Tool bar. Refer to the “Project > Compile File option” on page 8-17 for details on the Error list navigation buttons. Page 8-23 IDEAUsersGuide.book Page 24 Monday, August 2, 1999 2:30 PM IDEA Command Reference Project > Dependencies option The Dependencies option analyzes all of the files in the project and then creates a text file listing file dependencies. Select the Dependencies option by clicking on Dependencies in the Project menu. Alternatively, type Alt+P+E. The Save Dependency File As dialog box appears. Figure 8-16: Save Dependency File As dialog box You can specify a file name and path for the dependency file. The default extension is .mak. IDEA initially selects a dependency file path specified by the Working Directory option in the Setup menu. You can view the dependency file by using the File > Open option. Following is the dependency file (demo12.dep) created for the example project (demo12.prj) supplied with IDEA. Page 8-24 IDEAUsersGuide.book Page 25 Monday, August 2, 1999 2:30 PM IDEA Command Reference Figure 8-17: Example project dependency file Project > Close option The Close option lets you close the current project. Select the Close option by clicking on Close in the Project menu. Alternatively, type Alt+P+O. When you close a project, IDEA checks to see if there are any unsaved changes to the project. If there are, a dialog box appears asking if you want to save the changes. Recent Projects file list The Recent Projects file list appears at the bottom of the Project drop-down menu and lists the three most recent projects that were loaded. You can use this file list to quickly load a project that you have worked on recently. Page 8-25 IDEAUsersGuide.book Page 26 Monday, August 2, 1999 2:30 PM IDEA Command Reference Tools option The Tools option opens a Tool Browser that enables you to set options for the tools and utilities provided with IDEA. Open the Tool Browser by clicking on Tools in the Main menu. Alternatively, type Alt+T. Figure 8-18: Tool Browser The Tool Browser displays the various IDEA tools as icons in a treestructured format, similar to the Windows Explorer. Page 8-26 IDEAUsersGuide.book Page 27 Monday, August 2, 1999 2:30 PM IDEA Command Reference Each icon in the Tool Browser represents a tool. Table 8-3: Tool Browser tools Compiler tool Assembler tool Linker tool Builder tool Object Examiner utility (cobj) Hex Converter utility (chex) Debug Info Examiner utility (cprd) Absolute Lister utility (clabs) IEEE695 Converter utility (cv695) Debugger tool A sign next to an icon means that sub-components are hidden below the icon. Click on the sign or double-click on the icon to display the sub-components. A sign next to an icon means that the first level of sub-components below the icon are displayed. Click on the sign or double-click on the icon to hide the subcomponents. Page 8-27 IDEAUsersGuide.book Page 28 Monday, August 2, 1999 2:30 PM IDEA Command Reference Compiler tool The Compiler tool lets you set the default compiler options that are used to compile all .c files in a project. Right click on the Compiler tool icon to open the Compiler Options dialog box. You can also double-click on the Compiler tool icon to display the Compiler Options icon and then right-click on the Compiler Options icon to open the Compiler Options dialog box. Figure 8-19: Project Compiler Options dialog box Page 8-28 IDEAUsersGuide.book Page 29 Monday, August 2, 1999 2:30 PM IDEA Command Reference The Compiler Options dialog box has five tabs: • General options • Optimizer options • Listings options • Miscellaneous options • User Flags Choose a tab and select the desired options. Selected options are displayed in bold and unselected options are greyed out. To select an option simply click on the option description. To deselect an option click on it again. The default compiler options can be overridden by setting compiler options for the individual source files. Following are the available compiler options. For additional compiler options and target-specific options, consult you compiler documentation. Compiler General options Verbose Mode (-v) Be “verbose”. Before executing a command, print the command, along with its arguments, to STDOUT. The default is to output only the names of each file processed. Each name is followed by a colon and newline. Use .text section for literals and constants (+nocst) Output literals and constants in the code section.text instead of the specific section .const. Page 8-29 IDEAUsersGuide.book Page 30 Monday, August 2, 1999 2:30 PM IDEA Command Reference Do not use the .bss section (+nobss) Do not use the .bss section for variables allocated in external memory. By default, such uninitialized variables are defined into the .bss section. This option is useful to force all variables to be grouped into a single section. Align Object to Even Boundary (+even) Align any object larger than one byte on an even boundary. Compiler Optimizer options Do not widen char and float arguments (+nowiden) Do not widen char and float arguments. By default, char arguments are promoted to int before being passed as an argument. Compiler Listings options Generate Listings (-l) Merge the C source listing with assembly language code; the listing output defaults to <file>.ls. Compiler Miscellaneous options Force prototyping (-pp) Tells the parser to enforce prototype declaration for functions. An error message is issued if a function is used and no prototype declaration is found for it. By default, the compiler accepts both syntaxes without any error. Page 8-30 IDEAUsersGuide.book Page 31 Monday, August 2, 1999 2:30 PM IDEA Command Reference Generate Debug Information (+debug) Produce debug information to be used by the debug utilities provided with the compiler and by any external debugger. Number bits from MSB to LSB in bitfields (+rev) Reverse the bitfield filling order. By default, bitfields are filled from the less significant bit (lsb) towards the most significant bit (msb) of a memory cell. If the +rev option is specified, bitfields are filled from the msb to the lsb. Compiler User Flags (-d*^) The User Flags tab allows you to specify up to twenty userdefined preprocessor symbols (#define). The form of the definition is -dsymbol[=value]; the symbol is set to 1 if value is omitted. Assembler tool The Assembler tool lets you set the default assembler options that will be used to assemble all assembly language ( .s) files in a project. Right click on the Assembler tool icon to open the Assembler Options dialog box. You can also double-click on the Assembler tool icon to display the Assembler Options icon and then right-click on the Assembler Options icon to open the Assembler Options dialog box. Page 8-31 IDEAUsersGuide.book Page 32 Monday, August 2, 1999 2:30 PM IDEA Command Reference Figure 8-20: Project Assembler Options dialog box The Assembler Options dialog box has five tabs: • General options • Optimizer options • Listings options • Miscellaneous options • User Flags Choose a tab and select the desired options. Selected options are displayed in bold and unselected options are greyed out. To select an option simply click on the option description. To deselect an option click on it again. The default assembler options can be overridden by setting assembler options for the individual source files. Page 8-32 IDEAUsersGuide.book Page 33 Monday, August 2, 1999 2:30 PM IDEA Command Reference Following are the available assembler options. For additional assembler options, consult you assembler documentation. Assembler General options Include Full debug information (-xx) Add debug information in the object file for any label defining code or data. Include line debug information (-x) Add line debug information to the object file. Absolute Assembler (-a) Map all sections to absolute, including the predefined ones. Verbose Mode (-v) Display the name of each file that is processed. Assembler Optimizer options Do not optimize branches (-b) Do not optimize branch instructions. By default, the assembler replaces long branches by short branches wherever a shorter instruction can be used, and short branches by long branches wherever the displacement is too large. This optimization also applies to jump and jump to subroutines instructions. Assembler Listings options Output a listing (-l) Create a listing file. The name of the listing file is derived from the input file name by replacing the suffix with the extension .ls. Page 8-33 IDEAUsersGuide.book Page 34 Monday, August 2, 1999 2:30 PM IDEA Command Reference Use form feed in listing (-ff) Use formfeed character to skip pages in listing instead of using blank lines. Force Title in Listings (-ft) Output a title in the listing (date, file name, page). By default, no title is output. Assembler Miscellaneous options Keep All local symbols (-pl) Put locals in the symbol table. They are not published as externals and are displayed only in the linker map file. Accept old MOTOROLA syntax (-m) Accepts the old Motorola syntax. That is, the assembler will accept labels starting in the first column without a terminating colon. Also, the assembler will accept “*” as a comment delimiter instead of “;”. Make all symbols Public (-p) Mark all defined symbols as public. This option has the same effect as adding an xdef directive for each label. Make all equates Public (-pe) Mark all symbols defined by an equ directive as public. This option has the same effect than adding a xdef directive for each of those symbols. Output Cross References (-c) Produce cross-reference information. The crossreference information will be added at the end of the listing file; this option forces the -l option. Page 8-34 IDEAUsersGuide.book Page 35 Monday, August 2, 1999 2:30 PM IDEA Command Reference Assembler User Flags (-d*>) The User Flags tab allows you to specify user-defined symbols, up to a maximum of twenty. This option is equivalent to using an equ directive in each of the source files. The form of the definition is -dname=value, where name is defined to have the value specified by value. Linker tool The Linker tool lets you set the default clnk utility options that will be used to link all files in a project. You can also specify a linker command file and edit the file. Right click on the Linker tool to view a menu containing linker commands. The following Table describes these commands. Table 8-4: Linker commands Options Opens the Link Configuration dialog box. Edit Command File Opens the project link command file for editing. Change Command File Opens the Select Linker Command File dialog box. You can also double-click on the Linker tool to display the Linker Options icon and the Linker Command File icon . Page 8-35 IDEAUsersGuide.book Page 36 Monday, August 2, 1999 2:30 PM IDEA Command Reference Linker options Select Options from the Linker tool menu (or right-click on the Linker Options icon) to open the Link Configuration dialog box. Figure 8-21: Link Configuration dialog box The Link Configuration dialog box lets you specify: • Linker options • Libraries path option • Reporting mode option • Memory banking option Linker options After you select any one of these file options, you can click on the Find button to specify the file name and path. Output file option (-o) Writes output to the specified file. This option is required and has no default value. Page 8-36 IDEAUsersGuide.book Page 37 Monday, August 2, 1999 2:30 PM IDEA Command Reference Command file (.lkf) The linker command file. This option is required and has no default value. Map file option (-m) Produces map information for the program being built to the specified file. Error file option (-e) Logs errors in the text file specified instead of displaying the messages on the screen. Libraries path option (-l) Click on the Libs Path button to open the Libraries Path Editor and set a path to the compiler library. Figure 8-22: Libraries Path Editor Page 8-37 IDEAUsersGuide.book Page 38 Monday, August 2, 1999 2:30 PM IDEA Command Reference You can specify up to twenty library paths in any order. The paths are searched from top to bottom. After you add paths, they appear in order next to the Libs Path button in the Link Configuration dialog box. Reporting Mode options Verbose option (-v) Symbols Only option (-s) Create an output file containing an absolute symbol table only (with object file format). Memory Banking option (-bs) Enter the size of the page to be used. The size is translated to the correct -bs option for the linker. For example the default page size for 68HC12 paging is 0x4000 which translates to a -bs14. The default value for most processors is 0 (bank switching disabled). Edit linker command file Before you can edit the linker command file, you must first check the Command File check box in the Link Configuration dialog box and then specify a linker command file name and path. Select Edit Command File from the Linker tool menu (or right-click on the Linker Command File icon) to open the linker command file for editing. Page 8-38 IDEAUsersGuide.book Page 39 Monday, August 2, 1999 2:30 PM IDEA Command Reference Figure 8-23: Linker command file for demo12.prj To edit the linker command file, you can make changes directly in the file using the options in the Edit drop-down menu. Type Alt+E to view the editing options. Refer to “Edit menu” on page 8-61 for details on these options. You can also right click to view a pop-up menu of editing options. Figure 8-24: Linker command file editing options Page 8-39 IDEAUsersGuide.book Page 40 Monday, August 2, 1999 2:30 PM IDEA Command Reference Insert File option The Insert File option lets you insert the name of a single object file (.o) in the linker command file. To insert an object file name at the current cursor position, right click and select Insert File from the popup menu. When you select Insert File, IDEA looks for all object files with an .o extension in the default working directory (for example, Idea12). The Add File dialog box that appears lists all files found. Figure 8-25: Add File dialog box Select a file name and then select open to insert the file name at the current cursor position. Insert File from List option The Insert File from List option lets you insert the name of one or more object files (.o) in the linker command file. To insert the object file name(s) at the current cursor position, right click and select Insert File from List from the pop-up menu. Page 8-40 IDEAUsersGuide.book Page 41 Monday, August 2, 1999 2:30 PM IDEA Command Reference After you select Insert File from List, IDEA looks for all object files with an .o extension in the default working directory (for example, Idea12). The Select Files dialog box that appears lists all files found. Figure 8-26: Select Files dialog box Select a single file name by clicking on it. Select a contiguous list of file names by clicking on the first name, holding down the Shift key, and then clicking on the last name. Select non-contiguous file names by clicking on the first name, holding down the Ctrl key, and then clicking on the names of other files in succession. Insert File List option The Insert File List option lets you insert the names of all object files with an .o extension in the default working directory (e.g., Idea12). To insert the object file names at the current cursor position, right click and select Insert File List from the pop-up menu. Page 8-41 IDEAUsersGuide.book Page 42 Monday, August 2, 1999 2:30 PM IDEA Command Reference Insert Lib(s) option The Insert Lib(s) option lets you insert the name of one or more library files (.h*) in the linker command file. To insert the library file name(s) at the current cursor position, right click and select Insert Lib(s) from the pop-up menu. When you select Insert Lib(s), IDEA looks for all library files with an .h* extension in the default libraries path(s). Libraries paths are specified in the Link Configuration dialog box. Refer to “Libraries path option (-l)” on page 8-37 for details. The Select Libs dialog box that appears lists all libraries found. Figure 8-27: Select Libs dialog box Page 8-42 IDEAUsersGuide.book Page 43 Monday, August 2, 1999 2:30 PM IDEA Command Reference Select a single library name by clicking on it. Select a contiguous list of library names by clicking on the first name, holding down the Shift key, and then clicking on the last name. Select multiple non-contiguous library names by clicking on the first name, holding down the Ctrl key, and then clicking on the names of other libraries in succession. Insert Default Libs option The Insert Default Libs option lets you insert the names of the default libraries for your compiler. The default libraries are: libd.h* (Double-precision library) libi.h* (Integer-only library) libm.h* (Machine library) To insert the default library names at the current cursor position, right click and select Insert Default Libs from the pop-up menu. NOTE Please refer to the Linker chapter in your compiler manual for a complete description of the default libraries. Insert Segment option (+seg <segment> <options>) The Insert Segment option lets you insert a segment in the linker command file. A segment is a logically unified block of memory in the executable image. Page 8-43 IDEAUsersGuide.book Page 44 Monday, August 2, 1999 2:30 PM IDEA Command Reference To insert a segment at the current cursor position, right click and select Insert Segment from the pop-up menu. The Segment Definition dialog box appears. Figure 8-28: Segment Definition dialog box Input option Specifies the segment type (for example, .text, .const, .data, etc.) Segment Name option (-n) Sets the output name of the segment to the value specified. Segment output names have at most fifteen characters; longer names are truncated. Segment Space option (-s) Defines a space name for the segment. This segment will be verified for overlapping only against segments defined with the same space name. Page 8-44 IDEAUsersGuide.book Page 45 Monday, August 2, 1999 2:30 PM IDEA Command Reference Physical Address option (-b) Sets the physical start address of the segment to the value specified. Logical Address option (-o) Sets the logical start address of the segment to the value specified. The default is to set the logical address equal to the physical address. Max Segment Size option (-m) Sets the maximum size of the segment to the number of bytes specified. The default size is 65536 bytes. Insert Segment after another segment option (-a) Makes the current segment follow the segment specified. Options -b (Physical Address) and -o (Logical Address) cannot be specified if this option is specified. Output Symbols Only option (-c) Does not output any code/data for the segment. Do NOT Check Segment Overlay option (-v) Does not verify overlapping for the segment. Automatic Bank Segment Creation option (-w*) Activates automatic bank segment creation and sets the window size for banked applications. Page 8-45 IDEAUsersGuide.book Page 46 Monday, August 2, 1999 2:30 PM IDEA Command Reference Bank Number option (-p) Defines the bank number of the segment. This information will be used in case of bank switching instead of the computation based on the -b (Physical Address) and -bs (Window Shift) values. Shared segment option (-is) Marks the segment as shared data. Use as Host for data Init option (-it) Uses the segment to host the descriptor and image copies of initialized data used for automatic data initialization. Initialize option (-id) Initializes the segment. Do Not Initialize option (-ib) Does not initialize the segment. Insert Symbol Definition option (+def*) The Insert Symbol Definition option lets you insert a symbol definition in the linker command file. To insert a symbol definition at the current cursor position, right click and select Insert Symbol Definition from the pop-up menu. The Symbol Definition dialog box appears. Page 8-46 IDEAUsersGuide.book Page 47 Monday, August 2, 1999 2:30 PM IDEA Command Reference Figure 8-29: Symbol Definition dialog box Symbol Type option Specifies the symbol type. The choices available are: • Absolute • Segment End • Symbol Symbol option Specifies the linker-defined symbol. Definition option Specifies the symbol definition. If the symbol type is Segment End, the choices are any defined segments. For example, .text. If the symbol type is Symbol, the choices are any defined symbols. For example, __memory, or __stack. Change linker command file Select Change Command File from the Linker tool menu to change the linker command file. The Select Linker Command File dialog box lets you specify a file name and path for the new linker command file. Page 8-47 IDEAUsersGuide.book Page 48 Monday, August 2, 1999 2:30 PM IDEA Command Reference After you select a new command file, the Command File check box is automatically checked in the Link Configuration dialog box, and the linker command file name and path are displayed. Builder tool The Builder tool lets you specify utilities for building a project. Right click on the Builder tool to open the Builder Configuration dialog box. You can also double-click on the Builder tool to display the Builder Options icon and then right-click on the Builder Options icon to display the Builder Configuration dialog box. Figure 8-30: Builder Configuration dialog box Page 8-48 IDEAUsersGuide.book Page 49 Monday, August 2, 1999 2:30 PM IDEA Command Reference The Builder Configuration dialog box contains check boxes that let you specify which builder utilities to run. You can specify the following commands: • Run Object Inspector • Convert to S-Records • Run Debug Info Examiner • Run Absolute Lister • Run IEEE 695 Converter • Run User Utility 1 • Run User Utility 2 The following Table provides a description of the builder utilities. Table 8-5: Builder utilities Run Object Inspector Runs the cobj utility to examine object modules. If you select Run Object Inspector and then click on the Options button, the Options dialog box appears. Refer to “The following Table provides a description of the builder utilities.” on page 8-49 for details. Convert to S-Records Runs the chex utility to translate object module format to hexadecimal format. If you select Convert to S-Records and then click on the Options button, the CHEX Configuration dialog box appears. Refer to “Hex Converter tool” on page 853 for details. Page 8-49 IDEAUsersGuide.book Page 50 Monday, August 2, 1999 2:30 PM IDEA Command Reference Table 8-5: Builder utilities Run Debug Info Examiner Runs the cprd utility to print debugging information about functions and data objects. If you select Run Debug Info Examiner and then click on the Options button, the CPRD Configuration dialog box appears. Refer to “Debug Info Examiner tool” on page 8-55 for details. Run Absolute Lister Runs the clabs utility to generate absolute listings. If you select Run Absolute Lister and then click on the Options button, the CLABS Configuration dialog box appears. Refer to “Absolute Lister tool” on page 857 for details. Run IEEE 695 Converter Runs the cv695 utility to generate IEEE695 format. If you select Run IEEE 695 Converter and then click on the Options button, the CV695 Configuration dialog box appears. Refer to “IEEE695 Converter tool” on page 8-59 for details. Run User Utility 1 Runs the specified user utility. You can specify a path and filename for the utility you wish to run. Run User Utility 2 Runs the specified user utility. You can specify a path and filename for the utility you wish to run. Page 8-50 IDEAUsersGuide.book Page 51 Monday, August 2, 1999 2:30 PM IDEA Command Reference Object Inspector tool The Object Inspector tool lets you specify options for the cobj utility, which lets you inspect relocatable object files or executable output by the assembler or linker. The cobj utility can be used to check the size and configuration of relocatable object files or to output information from their symbol tables. Right click on the Object Inspector icon and select Options to open the Options dialog box.You can also double-click on the Object Inspector icon to display the Options icon right-click on it to display the Options dialog box. and then Figure 8-31: cobj Options dialog box Page 8-51 IDEAUsersGuide.book Page 52 Monday, August 2, 1999 2:30 PM IDEA Command Reference Command options Selected options are displayed in bold and unselected options are greyed out. To select an option simply click on the option description and it will be added to the command line. To deselect an option click on it again. The following Table lists the available cobj utility options. For additional cobj utility options, consult you compiler documentation. Table 8-6: cobj utility options Output debug symbols (-x option) - displays the debug symbol table. Display file addresses (-v option) - displays seek addresses inside the object file. Output symbol table (-s option) - displays the symbol table. Output reloc flows (-r option) - outputs the relocation part of each section in symbolic form. Output sections (-n option) - displays the name, size and attribute of each section. Output header (-h option) - displays all the fields of the object file header Output data flows (-d option) - outputs the data part of each section in hexadecimal format. Output file You can specify a path and file name to receive the Object Inspector output. This file may be in relocatable format or executable format. Page 8-52 IDEAUsersGuide.book Page 53 Monday, August 2, 1999 2:30 PM IDEA Command Reference Hex Converter tool The Hex Converter tool lets you specify options for the chex utility, which translates executable images produced by the clnk utility to one of several hexadecimal interchange formats. Right click on the Hex Converter tool and select Options to open the CHEX Configuration dialog box. You can also doubleclick on the Hex Converter tool to display the Options icon and then right-click on it to display the CHEX Configuration dialog box. Figure 8-32: CHEX Configuration dialog box The following Table describes the chex utility options. Page 8-53 IDEAUsersGuide.book Page 54 Monday, August 2, 1999 2:30 PM IDEA Command Reference Table 8-7: chex utility options Motorola S Records (-fm option) - produces Motorola S1 and S2 records as needed. Motorola S2 Records (-f2 option) - produces Motorola S2 records only. This is the default. Intel Hex (-fi option) Absolute Start Address (-a option) - specifies the output address of the first byte. Address Bias (-b option) - subtracts the specified value from any address before output. Max Bytes per line (-m option) - the maximum data bytes per line. The default is 32 bytes per line. Do not Output Header (-h option) - does not output the header sequence if such a sequence exists for the selected format. Output Paged Addresses (-p option) - outputs addresses of banked segments using a paged format <page_number> <logical_address>, instead of the default format <physical>. Output by Increasing Addresses (-s option) - sorts the output addresses in increasing order. Output to File (-o option) - writes the output module to the file specified. The default is STDOUT. Page 8-54 IDEAUsersGuide.book Page 55 Monday, August 2, 1999 2:30 PM IDEA Command Reference Table 8-7: chex utility options Insert Header Sequence (+h option) - inserts the specified value in the header sequence if such a sequence exists for the selected format. Output named segments only (-n option) - outputs only segments whose name is equal to the value specified. Up to twenty different named segments may be specified on the command line. If there are several segments with the same name, they will all be produced. To add a named segment to the Segments field, enter the named segment in the Item field and click on the Add button. To remove a named segment from the Segments field, select the segment and click on the Remove button. Debug Info Examiner tool The Debug Info Examiner tool lets you specify options for the cprd utility, which extracts and prints information about functions and data objects from an object module or executable image that has been compiled with the +debug option. Right click on the Debug Info Examiner tool and select Options to open the CPRD Configuration dialog box.You can also double-click on the Debug Info Examiner tool to display the Options icon and then right-click on it to display the CPRD Configuration dialog box. Page 8-55 IDEAUsersGuide.book Page 56 Monday, August 2, 1999 2:30 PM IDEA Command Reference Figure 8-33: CPRD Configuration dialog box The CPRD Configuration dialog box lets you build a list of files and functions for debugging purposes. Enter a file or function name in the Item field, and then click on Add to Files to add the item to the Files list or Add to Funcs to add the item to the Functions list. If you check the Show File List check box, the Item field changes to a File List field, with a drop-down list of the files in the project directory. Select a file from the list and then click on the Add to Files button to add it to the Files list. To remove an item from either list, select the item and then click on the Remove button. Page 8-56 IDEAUsersGuide.book Page 57 Monday, August 2, 1999 2:30 PM IDEA Command Reference Table 8-8: cprd utility options Print file debugging information (-fl option) - each file in the Files list is processed with the -fl option, which prints debugging information about the file. By default, cprd prints debugging information on all C source files. Print function debugging information (-fc option) - each function in the Functions list is processed with the -fc option, which prints information about the function only. By default, cprd prints debugging information on all functions in a file. Print debugging information to file (-o option) - you can also specify a path and file name to receive the debugger output. By default, cprd writes debugging information to the terminal screen. Absolute Lister tool The Absolute Lister tool lets you specify options for the clabs utility, which processes relocatable C and Assembly listing files with the associated executable file to produce absolute listings with updated code and address values. Right click on the Absolute Lister tool and select Options to open the CLABS Configuration dialog box. You can also doubleclick on the Absolute Lister tool to display the Options icon and then right-click on it to display the CLABS Configuration dialog box. Page 8-57 IDEAUsersGuide.book Page 58 Monday, August 2, 1999 2:30 PM IDEA Command Reference Figure 8-34: CLABS Configuration dialog box The following Table describes the clabs utility options. Table 8-9: clabs utility options Verbose (-v option) - echoes processed file names. The name of each module in the application is output to STDOUT. Restrict to Project Directory (-l option) - Processes files in the project directory only. The default is to process all files in the application. Listing Extension (-r option) Specifies the input file extension, including or not the dot ‘.’ character. The default is “.ls”. Absolute Listing Extension (-s option) - Specifies the output file extension, including or not the dot ‘.’ character. The default is “.la”. Page 8-58 IDEAUsersGuide.book Page 59 Monday, August 2, 1999 2:30 PM IDEA Command Reference IEEE695 Converter tool The IEEE695 Converter tool lets you specify options for the cv695 utility, which converts a file produced by the linker into IEEE695 format. Right click on the IEEE695 Converter tool and select Options to open the CV695 Configuration dialog box.You can also doubleclick on the IEEE695 Converter tool to display the Options icon and then right-click on it to display the CV695 Configuration dialog box. Figure 8-35: CV695 Configuration dialog box The following Table describes the cv695 utility options. Page 8-59 IDEAUsersGuide.book Page 60 Monday, August 2, 1999 2:30 PM IDEA Command Reference Table 8-10: cv695 utility options Verbose (-v option) - the cv695 utility displays information about its activity. Reverse BitField Numbering (-rb option) - reverses the bitfield order from left to right. Paging (+page# option) - this option is currently meaningful for the MC68HC12 only. This option specifies the address format for bank-switched code. If you check the Paging check box, three options appear to the right: Physical (+page1) - the application is banked and the cv695 utility outputs physical addresses. This is the default if Paging is checked. Logical (+page2) - the application is banked and the cv695 utility outputs addresses in paged mode: <page><offset_in_page>. This is equivalent to the old +paged flag. data paging (+dpage) - the application uses data paging. Output to File (-o option) - you can specify a path and file name to receive the cv695 utility output. By default, the cv695 utility outputs to the file whose name is obtained from the input file by replacing the filename extension with “.695”. Page 8-60 IDEAUsersGuide.book Page 61 Monday, August 2, 1999 2:30 PM IDEA Command Reference Debugger tool Right-click on the Debugger tool to open a dialog box that allows you to specify a ZAP debugger for IDEA projects. After you select a debugger, the path and filename appears after the Project Debugger icon. Once you have specified a debugger, you can double click on the Debugger tool to run the ZAP debugger with the project target file (for example, demo12.h12) loaded. You can also run the debugger by clicking on the Debugger tool in the Tool bar. Edit menu The Edit drop-down menu provides options to edit the contents of the currently active file. If no file is open and active, the Edit menu options are unavailable. Open the Edit drop-down menu by clicking on Edit in the Main menu. Alternatively, type Alt+E. Figure 8-36: Edit menu Edit > Cut option The Cut option lets you cut the highlighted text. The cut text is placed in the Windows Clipboard and is available for a paste. If no text is highlighted, the Cut option is unavailable. Page 8-61 IDEAUsersGuide.book Page 62 Monday, August 2, 1999 2:30 PM IDEA Command Reference Select the Cut option by clicking on Cut in the Edit menu. Alternatively, type Alt+E+T. You can also select the Cut tool on the Tool bar. You can also cut highlighted text by pressing Shift+Del or by right clicking and selecting Cut from the pop-up menu. Edit > Copy option The Copy option lets you copy the highlighted text. The copied text is placed in the Windows Clipboard and is available for a paste. If no text is highlighted, the Copy option is unavailable. Select the Copy option by clicking on Copy in the Edit menu. Alternatively, type Alt+E+C. You can also select the Copy tool on the Tool bar. You can also copy highlighted text by right clicking and selecting Copy from the pop-up menu. Edit > Paste option The Paste option lets you paste the contents of the Windows Clipboard into the active file at the location of the cursor. You can perform multiple pastes. The Clipboard contents are not changed until you perform another cut or copy. Select the Paste option by clicking on Paste in the Edit menu. Alternatively, type Alt+E+P. You can also select the Paste tool on the Tool bar. You can paste by pressing Shift+Ins or by right clicking and selecting Paste from the pop-up menu. Page 8-62 IDEAUsersGuide.book Page 63 Monday, August 2, 1999 2:30 PM IDEA Command Reference Edit > Delete option The Delete option lets you cut the highlighted text. If no text is highlighted, the Delete option is unavailable. The deleted text is not placed in the Windows Clipboard and is unavailable for a paste. You can use the Delete option to delete the highlighted text while still maintaining the contents of the Windows Clipboard from a previous copy or cut. Select the Delete option by clicking on Delete in the Edit menu. Alternatively, type Alt+E+D. You can also delete text by right clicking and selecting Delete from the pop-up menu. Edit > Replace option The Replace option lets you replace the highlighted text with the text in the Windows Clipboard. If no text is highlighted, the Replace option is unavailable unless the cursor is at the end of a line. You can use the Replace option to delete and paste in a single step. Select the Replace option by clicking on Replace in the Edit menu. Alternatively, type Alt+E+R. Edit > Search option The Search option lets you search for a specified text string in the file. You can search forward or backward from the current cursor position. Select the Search option by clicking on Search in the Edit menu. Alternatively, type Alt+E+S or Ctrl+F. You can also select the Search String tool The Search dialog box appears. on the Tool bar. Page 8-63 IDEAUsersGuide.book Page 64 Monday, August 2, 1999 2:30 PM IDEA Command Reference Figure 8-37: Search dialog box Specify the text to search for in the String field. The search is casesensitive. For example, a search for “Void” will not find “void”. The search will find embedded text. For example, a search for “obu” will find “iobuf”. You can also specify whether to search backward or forward from the current cursor location. If the search string is found, the cursor is moved to that point in the file with the string highlighted. If the search string is not found, the cursor remains in its current position. Edit > Search Next option The Search Next option lets you search for the next occurrence of a text string previously specified in the Search dialog box. If a string has not been entered in he Search dialog box, the Search Next option is unavailable. Select the Search Next option by clicking on Search Next in the Edit menu. Alternatively, type Alt+E+N. You can also select the Search String Forward tool on the Tool bar. If the search string is found, the cursor is moved to that point in the file with the string highlighted. If the search string is not found, the cursor remains in its current position. Page 8-64 IDEAUsersGuide.book Page 65 Monday, August 2, 1999 2:30 PM IDEA Command Reference Edit > Search Previous option The Search Previous option lets you search for a previous occurrence of a text string previously specified in the Search dialog box. If a string has not been entered in he Search dialog box, the Search Previous option is unavailable. Select the Search Previous option by clicking on Search Previous in the Edit menu. Alternatively, type Alt+E+P. You can also select the Search String Backwards tool on the Tool bar. If the search string is found, the cursor is moved to that point in the file with the string highlighted. If the search string is not found, the cursor remains in its current position. Edit > Insert File option The Insert File option lets you insert the contents of a file at the current position of the cursor. Select the Insert File option by clicking on Insert File in the Edit menu. Alternatively, type Alt+E+I. When you insert a file, IDEA looks for all files in the default working directory (for example, Idea12). The Insert File dialog box that appears lists all files found. Figure 8-38: Insert File dialog box Page 8-65 IDEAUsersGuide.book Page 66 Monday, August 2, 1999 2:30 PM IDEA Command Reference Options menu The Options drop-down menu lets you set basic program options. Open the Options drop-down menu by clicking on Options in the Main menu. Alternatively, type Alt+O. Figure 8-39: Options menu An option is set if a check mark appears before its name. To set an unchecked option, click on it in the Options drop-down menu. The next time you open the Options drop-down menu, a check mark appears before the option name. An option is not set if no check mark appears before its name. To clear a checked option, click on it in the Options drop-down menu. The next time you open the Options drop-down menu, no check mark appears before the option name. Page 8-66 IDEAUsersGuide.book Page 67 Monday, August 2, 1999 2:30 PM IDEA Command Reference Options > Syntax Coloring option The Syntax Coloring option, if set, provides color coding in your project source files to assist you in programming. The following table lists the type of text that is color coded and the default color. Table 8-11: Syntax default coloring Comments Green Preprocessor Keyword Light Red C Keyword Blue C Library Function Red Assembler Mnemonics Red Assembler Directives Blue Link Directives Red If this option is not set, all source file text is in black. You can change the default color for each item using the Colors option in the Setup menu. Refer to “Setup > Colors option” on page 8-74 for details. To toggle the Syntax Coloring option, select Syntax Coloring for the Options drop-down menu. Alternatively, you can type Alt+O+Y. Page 8-67 IDEAUsersGuide.book Page 68 Monday, August 2, 1999 2:30 PM IDEA Command Reference Options > Project Analysis option The Project Analysis option adds Function and Variable lists to the project C source files shown under the Files icon in the Project window. The Figure below shows a typical Project window display when the Project Analysis option is set. Figure 8-40: Function and Variable lists Page 8-68 IDEAUsersGuide.book Page 69 Monday, August 2, 1999 2:30 PM IDEA Command Reference If this option is set, IDEA parses each source file in the project to display all function and variable definitions. This makes it easier to organize a project and monitor function and variable usage. If this option is not set, functions and variables are not shown. To toggle the Project Analysis option, select Project Analysis from the Options drop-down menu. Alternatively, you can type Alt+O+P. Options > Auto Save before C/asm option The Auto Save before C/asm option, if set, automatically saves a C or Assembly source code file before it is compiled or assembled via a File > Compile, Project > Compile File, Project > Make, or Project > Build command. In addition, it automatically saves before you exit IDEA. If this option is not set, you are asked whether you wish to save the file. If you select Yes, the file is saved and the compilation or assembly proceeds. If you select No, the file is not saved and the compilation or assembly proceeds using the last saved version of the file, not the current version of the file. To toggle the Auto Save before C/asm option, select Auto Save before C/asm from the Options drop-down menu. Alternatively, you can type Alt+O+A. Options > Automatic Errors Toggle option The Automatic Errors Toggle option, if set, automatically opens the Errors window when errors are detected after a compile, link, make, or build operation. If this option is not set, errors are reported by default in the IDEA Status bar. The Errors window can be opened manually using the Show Error File option on the Errors sub-menu. To toggle the Automatic Errors Toggle option, select Automatic Errors Toggle from the Options drop-down menu. Alternatively, you can type Alt+O+U. Page 8-69 IDEAUsersGuide.book Page 70 Monday, August 2, 1999 2:30 PM IDEA Command Reference Options > Force Absolute Names option The Force Absolute Names option, if set, adds the full path for all source files in the project folder to the linked executable. In addition, the full path is shown in the Project Source Files list. If this option is not set, the path for all source files in the project folder is not added to the linked executable and is not shown in the Project Source Files list. NOTE Project files which are not located in the project folder always use the full path. To toggle the Force Absolute Names option, select Force Absolute Names from the Options drop-down menu. Alternatively, you can type Alt+O+F. Options > Show Sub Processes option The Show Sub Processes option, if set, instructs IDEA to show all subprocesses during a compilation, link, make, or build. If this option is not set, a simple dialog appears during a compilation. Figure 8-41: Compilation status dialog box If this option is set, in addition to the dialog above, a DOS window appears with details on the compilation subprocesses. To toggle the Show Sub Processes option, select Show Sub Processes from the Options drop-down menu. Alternatively, you can type Alt+O+B. Page 8-70 IDEAUsersGuide.book Page 71 Monday, August 2, 1999 2:30 PM IDEA Command Reference Options > Show Tips option The Show Tips option, if set, shows names for project components in the Project window and Tools in the Tool bar. If this option is not set, names are not shown. To toggle the Show Tips option, select Show Tips from the Options drop-down menu. Alternatively, you can type Alt+O+T. Options > Save Config option The Save Config option immediately saves the current IDEA configuration. Unlike the other options on the Options submenu, the Save Config option is not a toggle. To save the current IDEA configuration, select Save Config from the Options drop-down menu. Alternatively, you can type Alt+O+S. Options > Save Config on exit option The Save Config on exit option, when set, saves the current IDEA configuration when you exit the program. If this option is not set, IDEA will use the last saved configuration when it starts up again. To toggle the Save Config on exit option, select Save Config on exit from the Options drop-down menu. Alternatively, you can type Alt+O+C. Page 8-71 IDEAUsersGuide.book Page 72 Monday, August 2, 1999 2:30 PM IDEA Command Reference Setup menu The Setup drop-down menu lets you specify a default tab width, set the font and text colors for source files, establish key bindings (shortcuts) for common program operations, and set the default working directory. You can also specify assembler file name extensions. Open the Setup drop-down menu by clicking on Setup in the Main menu. Alternatively, type Alt+S. Figure 8-42: Setup menu Setup > Tab Width option The Tab Width option lets you specify the number of spaces that the tab key moves the cursor in a source file. The default is 8. Select the Tab Width option by clicking on Tab Width in the Setup menu. Alternatively, type Alt+S+T. The Tab Width dialog box appears. Figure 8-43: Tab Width dialog box Specify a tab width in the Width field and click on OK. Page 8-72 IDEAUsersGuide.book Page 73 Monday, August 2, 1999 2:30 PM IDEA Command Reference Setup > Font option The Font option lets you specify the default font for viewing and editing source files. Select the Font option by clicking on Font in the Setup menu. Alternatively, type Alt+S+F. The Font dialog box appears. Figure 8-44: Font dialog box The default font is Terminal, Regular style, 9 point size, black.You can select a new font from the Font list and view it in the Sample field. You can also specify font style, size, and color. Page 8-73 IDEAUsersGuide.book Page 74 Monday, August 2, 1999 2:30 PM IDEA Command Reference Setup > Colors option The Colors option lets you specify the default font color for certain types of text in your source files. If you have set the Syntax Coloring option in the Options menu, IDEA recognizes several different items in a project file and automatically displays them in a color that you can easily distinguish. IDEA can display the following items in different colors: • Comments • Preprocessor keywords • C Keywords • C Library functions • Assembler mnemonics • Assembler directives • Link directives For details on the Syntax Coloring option and the default item colors, refer to “Options > Syntax Coloring option” on page 8-67. Select the Colors option by moving the cursor over Colors in the Setup menu. Another menu appears with a list of items for which you can change the color. Click on the appropriate item. Alternatively, type Alt+S+C, move the cursor over the appropriate item, and click again. The Setup Colors menu appears. Figure 8-45: Setup Colors menu After you click on one of the above items, the Color dialog box appears. Page 8-74 IDEAUsersGuide.book Page 75 Monday, August 2, 1999 2:30 PM IDEA Command Reference Figure 8-46: Color dialog box You can select a basic color from the Basic colors array or select a custom color from the Custom colors array. The current color for the item is surrounded by a black border. The Custom colors array is initially all black. You can create your own colors by clicking on the Define Custom Colors >> button. This expands the Color dialog box so that you can specify the custom color exactly. After you define a custom color, it appears in the Custom colors array for all items. Setup > Key Binding option The Key Binding option lets you specify keyboard shortcuts for nearly all of the menu commands in IDEA. Select the Key Binding option by clicking on Key Binding in the Setup menu. Alternatively, type Alt+S+K. The Key Binding dialog box appears. Page 8-75 IDEAUsersGuide.book Page 76 Monday, August 2, 1999 2:30 PM IDEA Command Reference Figure 8-47: Key Binding dialog box You can use any combination of the Ctrl, Shift, and Function keys to create a new shortcut. Click on your choice(s) in the Key Selection field. As you click, the shortcut definition is built up in the Key field. To remove Ctrl or Shift from the key definition, click on them again. To change the Function key in the key definition, click on your new choice. After you specify a key sequence, you must bind it to an action. If the key sequence you have specified is not already in use, the Binding field will be blank. Click on the down arrow to the right of the field and select the action that you want to associate with the key sequence from the action list. If the key sequence you have specified is already in use, the Binding field will show the action with which the key sequence is associated. You can either select a new key sequence for the action or click on the Clear button to clear the current action from the Binding field. After you create a keyboard shortcut for a menu option, the shortcut appears after the option name in the drop-down menu. Page 8-76 IDEAUsersGuide.book Page 77 Monday, August 2, 1999 2:30 PM IDEA Command Reference Setup > Working Directory option You can specify a working directory for your projects and for locating files. IDEA uses the working directory when you select options such as File > Open, Project > Load, etc. Specify the Working Directory by clicking on Working Directory in the Setup menu. Alternatively, type Alt+S+W. The Path Editor dialog box appears. Figure 8-48: Path Editor dialog box You can specify a working directory by selecting the appropriate drive and double clicking on the appropriate folders. The contents of the selected folder appear in the window at the left. Page 8-77 IDEAUsersGuide.book Page 78 Monday, August 2, 1999 2:30 PM IDEA Command Reference Setup > Asm Extensions option The Asm Extensions option lets you specify additional file extensions that the assembler will recognize. The default file extension for assembler files is .s. Select the Asm Extensions option by clicking on Asm Extensions in the Setup menu. Alternatively, type Alt+S+ A. The Asm Extensions dialog box appears. Figure 8-49: Asm Extensions dialog box TheAsm Extensions dialog box lets you build a list of file name extensions that the assembler will recognize during assembly. The default extension for assembler files is .s. Enter an extension (for example, .asm) in the Item field, and then click on the Add button to add the extension to the Extensions list. To remove an extension from the list, select the extension and then click on the Remove button Page 8-78 IDEAUsersGuide.book Page 79 Monday, August 2, 1999 2:30 PM IDEA Command Reference Window menu The Window drop-down menu lets you arrange all open files in IDEA. In addition, you can open a DOS Shell window. Open the Window drop-down menu by clicking on Window in the Main menu. Alternatively, type Alt+W. Figure 8-50: Window menu Window > DOS Shell option The Dos Shell option lets you open a window at the DOS prompt. Select the Dos Shell option by clicking on Dos Shell in the Window menu. Alternatively, type Alt+W+D. The MS-DOS Prompt window appears. Figure 8-51: MS-DOS Prompt window Page 8-79 IDEAUsersGuide.book Page 80 Monday, August 2, 1999 2:30 PM IDEA Command Reference You can use the Dos Shell option to run the compiler or linker, for example, from a command line prompt. The default for the prompt is the directory specified by the Setup > Working Directory option. Window > Cascade option The Cascade option arranges all open file windows in a cascade. Select the Cascade option by clicking on Cascade in the Window menu. Alternatively, type Alt+W+C. After you select this option, a check mark appears before the option name. Window > Horizontal Tile option The Horizontal Tile option arranges all open file windows in a horizontal tiling. Select the Horizontal Tile option by clicking on Horizontal Tile in the Window menu. Alternatively, type Alt+W+H. After you select this option, a check mark appears before the option Window > Vertical Tile option The Vertical Tile option arranges all open file windows in a vertical tiling. Select the Vertical Tile option by clicking on Vertical Tile in the Window menu. Alternatively, type Alt+W+V. After you select this option, a check mark appears before the option name. Window > Open Files list The Open Files list appears at the bottom of the Window drop-down menu and lists all files that are open. The currently active file is preceded by a check mark. To make an open file the currently active file, click on its name in the Open Files list. Page 8-80 IDEAUsersGuide.book Page 81 Monday, August 2, 1999 2:30 PM IDEA Command Reference Errors menu The Errors drop-down menu lets you display errors encountered during a compile, link, make, or build. You can navigate through the error list and view the approximate point in the source file where the error occurred. Open the Errors drop-down menu by clicking on Errors in the Main menu. Alternatively, type Alt+R. Figure 8-52: Errors menu Errors > Show Error File option The Show Error File option, when checked, shows the most recent error file generated for a compile, link, make, or build. If the Show Error File option is unchecked, the error file is hidden. Toggle the Show Error File option by clicking on Show Error File in the Errors menu. Alternatively, type Alt+R+S. You can use the Top, Bottom, Next, and Prev options, described in the following sections, to highlight any error in the Errors window. When you highlight an error in the Errors window, the cursor in the File window moves to the point in the file where the error occurred. Errors > Top option The Top option highlights the first error in the Errors window. Select the Top option by clicking on Top in the Errors menu. Alternatively, type Alt+R+T. You can also click on the Show First Error tool bar. on the Tool Page 8-81 IDEAUsersGuide.book Page 82 Monday, August 2, 1999 2:30 PM IDEA Command Reference Errors > Bottom option The Bottom option highlights the last error in the Errors window. Select the Bottom option by clicking on Bottom in the Errors menu. Alternatively, type Alt+R+B. You can also click on the Show Last Error tool on the Tool bar. Errors > Next option The Next option shows the next error in the Errors window. Select the Next option by clicking on Next in the Errors menu. Alternatively, type Alt+R+N. You can also click on the Show Next Error tool on the Tool bar. Errors > Prev option The Prev option highlights the previous error in the Errors window. Select the Prev option by clicking on Prev in the Errors menu. Alternatively, type Alt+R+P. You can also click on the Show Previous Error tool bar. Page 8-82 on the Tool IDEAUsersGuide.book Page 83 Monday, August 2, 1999 2:30 PM IDEA Command Reference Help menu The Help drop-down menu provides on-line help on the C language and the C Library. You can also view IDEA version information. Open the Help drop-down menu by clicking on Help in the Main menu. Alternatively, type Alt+H. Figure 8-53: Help menu Help > On C option The On C option displays help on the C language. Select the On C option by clicking on On C in the Help menu. Alternatively, type Alt+H+C. The C Help window appears. Figure 8-54: C Help window Click on one of the topics listed. Page 8-83 IDEAUsersGuide.book Page 84 Monday, August 2, 1999 2:30 PM IDEA Command Reference Help > On C Library option The On C Library option displays help on the C Library. Select the On C Library option by clicking on On C Library in the Help menu. Alternatively, type Alt+H+L. The C Library window appears. Figure 8-55: C Library window For specific help, click on one of the functions listed. Help > About IDEA... option The About IDEA... option displays IDEA version information. Select the About IDEA... option by clicking on About Idea... in the Help menu. Alternatively, type Alt+H+I. Page 8-84 IDEAUsersGuide.book Page 1 Monday, August 2, 1999 2:30 PM I Index Page -1 IDEAUsersGuide.book Page 2 Monday, August 2, 1999 2:30 PM Index This page intentionally left blank. Page I-2 IDEAUsersGuide.book Page 3 Monday, August 2, 1999 2:30 PM Index Symbols #defines dialog box 4-32, 6-10 A About IDEA... option 8-84 Absolute Lister icon 4-35, 6-40, 7-42 Absolute Lister tool 8-57 Absolute Lister utility 7-42 Add File option 8-17 Add to Project option 8-11 Asm Extensions dialog box 5-17, 8-78 Asm Extensions option 5-17, 8-78 Assembler icon 6-25, 7-10 Assembler options 7-10 specifying 7-4 Assembler Options dialog box 3-7, 4-34, 6-25, 7-14, 8-8, 8-32 Assembler User Flags (-d*>) 7-16, 8-35 General options 7-14, 8-33 Absolute Assembler (-a) 7-14, 8-33 Include Full debug information (-xx) 7-14, 8-33 Include line debug information (-x) 7-14, 8-33 Verbose Mode (-v) 7-14, 8-33 Listings options 7-15, 8-33 Force Title in Listings (-ft) 7-15, 8-34 Output a listing (-l) 7-15, 8-33 Use form feed in listing (-ff) 7-15, 8-34 Miscellaneous options 7-15, 8-34 Accept old MOTOROLA syntax (-m) 7-16, 8-34 Keep All local symbols (-pl) 7-15, 8-34 Make all equates Public (-pe) 7-16, 8-34 Make all symbols Public (-p) 7-16, 8-34 Output Cross References (-c) 7-16, 8-34 Optimizer options 7-15, 8-33 Do not optimize branches (-b) 7-15, 8-33 Assembler Options for Source File dialog box 6-10, 6-13 Page I-3 IDEAUsersGuide.book Page 4 Monday, August 2, 1999 2:30 PM Index Assembler Options icon 6-25, 8-31 Assembler tool 7-10, 8-9, 8-31 Assembling a file 7-17 Assembling a project 7-17 Auto Save before C/asm option 3-12, 3-13, 5-9, 8-8, 8-12, 8-69 Automatic Errors Toggle option 3-12, 5-9, 5-19, 8-10, 8-69 B Bottom option 4-26, 8-82 Build 7-3 Build option 4-23, 8-22 Build Project tool 3-7, 4-23, 8-22 Builder Configuration dialog box 3-7, 4-34, 6-32, 7-33, 8-23, 8-48 Builder icon 7-32 Builder options specifying 7-32 Builder Options icon 6-32, 8-48 Builder tool 7-33, 8-48 Builder utilities 6-33, 7-34 Convert to S-Records 6-33, 7-34, 8-49 Run Absolute Lister 6-33, 7-34, 8-50 Run Debug Info Examiner 6-33, 7-34, 8-50 Run IEEE 695 Converter 6-34, 7-35, 8-50 Run Object Inspector 6-33, 7-34, 8-49 Run User Utility 1 6-34, 7-35, 8-50 Run User Utility 2 6-34, 7-35, 8-50 Building a project 7-32, 7-46 C C Help window 8-83 C Library window 8-84 Cascade option 5-5, 8-80 Change Command File 7-30 CHEX Configuration dialog box Page I-4 4-35, 6-36, 7-38, 8-53 IDEAUsersGuide.book Page 5 Monday, August 2, 1999 2:30 PM Index chex utility 4-35, 6-33, 6-36, 7-38, 8-53 chex utility options 6-37, 7-39, 8-54 CLABS Configuration dialog box 4-35, 6-40, 7-43, 8-58 clabs utility 4-35, 6-33, 6-40, 7-42, 8-57 clabs utility options 6-41, 7-43, 8-58 clnk utility 6-26 clnk utility options 6-28, 6-30 Close option 3-10, 8-25 cobj Options dialog box 6-35, 8-51 cobj utility 4-34, 6-33, 6-34, 7-35, 8-51 cobj utility options 7-37, 8-52 Color dialog box 8-75 Colors option 8-67, 8-74 Command File 7-21 Compilation status dialog box 5-10 Compile File option 4-22, 7-17, 8-17 Compile option 4-22, 7-17, 8-8 Compile tool 3-7, 4-22, 7-17, 8-8, 8-17 Compiler icon 6-23, 7-4 Compiler options 7-4 specifying 7-4 Compiler Options dialog box 3-7, 4-33, 6-23, 7-7, 8-8, 8-28 Compiler User Flags (-d*^) 7-9, 8-31 General options 7-7, 8-29 Align Object to Even Boundary (+even) 7-8 , 8-30 Do not use the .bss section (+nobss) 7-8, 8-30 Use .text section for literals and constants (+nocst) 7-8, 8-29 Verbose Mode (-v) 7-7, 8-29 Listings options 7-8, 8-30 Generate Listings (-l) 7-8, 8-30 Miscellaneous options 7-8, 8-30 Force prototyping (-pp) 7-8, 8-30 Generate Debug Information (+debug) 7-9, 8-31 Number bits from MSB to LSB in bitfields (+rev) 7-9, 8-31 Optimizer options 7-8, 8-30 Do not widen char and float arguments (+nowiden) 7-8, 8-30 Page I-5 IDEAUsersGuide.book Page 6 Monday, August 2, 1999 2:30 PM Index Compiler Options for Source File dialog box 6-10, 6-13 Compiler Options icon 6-23, 8-28 Compiler tool 7-4, 8-9, 8-28 Compiling 7-3 Compiling a file 7-17 Compiling a project 7-4, 7-17 Copy option 4-20, 8-62 Copy tool 4-20, 8-62 CPRD Configuration dialog box 4-35, 6-39, 7-41, 8-56 cprd utility 4-35, 6-33, 6-38, 7-40, 8-55 cprd utility options 7-42, 8-57 Cut option 4-20, 8-61 Cut tool 4-20, 8-62 CV695 Configuration dialog box 4-35, 6-42, 7-44, 8-59 cv695 utility 4-35, 6-34, 6-42, 8-59 cv695 utility options 6-43, 7-45, 8-60 D Debug Info Examiner icon 4-35, 6-38, 7-40 Debug Info Examiner tool 8-55 Debug Info Examiner utility 7-40 Debugger option 4-23 Debugger tool 3-8, 4-23, 6-44, 8-61 Debugging a project 3-8 Default File Type option 8-3, 8-5, 8-6, 8-11 Defines dialog box 4-32, 6-10 Delete option 8-63 Dependencies option 8-24 Document icon 6-12, 6-44 Documentation file commands 6-12, 6-44 Load (read only) 6-12, 6-44 Open 6-12, 6-44 Remove 6-12, 6-44 Documentation icon 6-12 Dos Shell option 4-24, 8-79 Page I-6 IDEAUsersGuide.book Page 7 Monday, August 2, 1999 2:30 PM Index Dos Shell tool 4-24 Drop-down menus 1-5 E Edit menu 4-14, 8-61 Copy 4-20, 8-62 Cut 4-20, 8-61 Delete 8-63 Insert File 8-65 Paste 4-20, 8-62 Replace 8-63 Search 4-21, 8-63 Search Next 4-21, 8-64 Search Previous 4-21, 8-65 Error list navigation buttons 4-42, 8-10, 8-20 Errors menu 4-16, 8-81 Bottom 4-26, 8-82 Next 4-27, 8-82 Prev 4-27, 8-82 Show Error File 5-9, 8-69, 8-81 Show Error File option 4-42 Top 4-26, 8-81 Errors window 4-5, 4-41, 5-9, 5-19, 8-10, 8-69 description 4-41 navigation 4-42 Exit option 3-13, 8-12 F File assembling 7-17 compiling 7-17 File commands 6-19 Load (read only) 6-19 Open 6-19 Page I-7 IDEAUsersGuide.book Page 8 Monday, August 2, 1999 2:30 PM Index Touch 6-19 File icon 6-16 File menu 4-11, 8-3 Add to Project 8-11 Compile 4-22, 7-17, 8-8 Default File Type 5-4, 8-3, 8-5, 8-6, 8-11 Exit 3-13, 8-12 Load (read only) 4-18, 8-5 New 4-17, 8-3 Open 4-17, 8-4 Print 4-18, 8-12 Remove From Project 8-11 Save 4-18, 8-6 Save All 8-8 Save As 8-7 File Type icons 4-38 file types 4-39 default 5-4 File window 1-5, 4-5, 4-37 adding source files 4-41 customization 4-39 description 4-37 display 5-5 cascade 5-5 horizontal tile 5-5 vertical tile 5-5 File Type icons 4-38 managing project files 4-40 navigation 4-38 project file types 4-39 working with source files 4-41 Files marking 7-31 touching 7-31 Font dialog box 5-13, 8-73 Font option 5-13, 8-73 Page I-8 IDEAUsersGuide.book Page 9 Monday, August 2, 1999 2:30 PM Index Force Absolute Names option 3-12, 5-10, 8-70 Function icon 6-16 Function lists 3-12, 5-8, 8-68 H Help menu 3-13, 4-16, 8-83 About IDEA... 8-84 On C 8-83 On C Library 8-84 Hex Converter icon 4-35, 6-36, 7-38 Hex Converter tool 8-53 Hex Converter utility 7-38 Horizontal Tile option 5-5, 8-80 I IDEA building a project 7-3 Drop-down menu 1-5 Errors window 5-19 exiting 3-13 File window 1-5 getting help 3-13 Graphical User Interface 1-4, 4-3 Errors window 4-5, 4-41 File window 4-5, 4-37 Main menu 4-4, 4-11 Project window 4-5, 4-28 Status bar 4-4, 4-10 Title bar 4-4, 4-8 Tool bar 4-5, 4-17 installation 2-3 main window 3-3, 3-4 navigation 4-6 by keyboard shortcuts 4-6 by mouse 4-6 Page I-9 IDEAUsersGuide.book Page 10 Monday, August 2, 1999 2:30 PM Index custom key bindings 4-7 Options 3-12, 5-6 overview 1-4 Project window 1-5, 8-14 Setup 5-12 starting 3-3 Tool bar 1-5 User’s Guide contents 1-6 versions 2-3 working directory 3-11 IEEE 695 Converter utility 7-44 IEEE695 Converter icon 4-35, 6-42, 7-44 IEEE695 Converter tool 8-59 Include file commands 6-16, 6-22 Load (read only) 6-16, 6-22 Open 6-16, 6-22 Touch 6-16, 6-22 Include Path Editor 4-32, 6-21 Include path folders and files 6-22 Insert File option 8-65 Installation Check Setup Information screen 2-8 Choose Destination Folder screen 2-6 Compiler Directory screen 2-8 compiler requirements 2-3 default directory 2-4 preparing for 2-3 procedure 2-4 Select Program Folder screen 2-7 Setup Complete screen 2-9 Software License Agreement screen 2-5 system requirements 2-3 User Information screen 2-6 Welcome screen 2-5 Page I-10 IDEAUsersGuide.book Page 11 Monday, August 2, 1999 2:30 PM Index K Key Binding dialog box 4-7, 8-75 Key Binding option 4-7, 8-75 key bindings 4-7 keyboard shortcuts 4-6 custom 4-7 L Libraries Path Editor 6-29, 7-20, 8-37 Link Configuration dialog box 3-7, 6-27, 7-18, 8-21, 8-36 Libraries Path option (-l) 7-19, 8-37 Linker options 7-19, 8-36 Command file (.lkf) 7-19, 8-37 Error file option (-e) 7-19, 8-37 Map file option (-m) 7-19, 8-37 Output file option (-o) 7-19, 8-36 Memory Banking option (-bs) 7-20, 8-38 Reporting Mode options 7-20, 8-38 Symbols Only option (-s) 7-20, 8-38 Verbose option (-v) 7-20, 8-38 Link tool 3-7, 4-22, 7-31 Linker command file 7-22 changing 6-31, 7-30, 8-47 editing 6-30, 7-21, 8-38 editing options 7-22, 8-39 Insert Default Libs option 7-26, 8-43 Insert File from List option 7-23, 8-40 Insert File List option 7-24, 8-41 Insert File option 7-23, 8-40 Insert Lib(s) option 7-25, 8-42 Insert Segment option 7-26, 8-43 Automatic Bank Segment Creation option (-w*) 7-28, 8-45 Bank Number option (-p) 7-28, 8-46 Do NOT Check Segment Overlay option (-v) 7-28, 8-45 Do Not Initialize option (-ib) 7-29, 8-46 Page I-11 IDEAUsersGuide.book Page 12 Monday, August 2, 1999 2:30 PM Index Initialize option (-id) 7-29, 8-46 Input option 7-27, 8-44 Insert Segment after another segment option (-a) 7-28, 8-45 Logical Address option (-o) 7-28, 8-45 Max Segment Size option (-m) 7-28, 8-45 Output Symbols Only option (-c) 7-28, 8-45 Physical Address option (-b) 7-27, 8-45 Segment Name option (-n) 7-27, 8-44 Segment Space option (-s) 7-27, 8-44 Shared segment option (-is) 7-29, 8-46 Use as Host for data Init option (-it) 7-29, 8-46 Insert Symbol Definition option (+def*) 7-29, 8-46 Definition option 7-30, 8-47 Symbol option 7-30, 8-47 Symbol Type option 7-30, 8-47 Linker Command File icon 6-26, 8-35 Linker commands 6-26, 8-35 Change Command File 6-26, 6-31, 8-35 Edit Command File 6-26, 6-30, 8-35 Options 6-26, 6-27, 8-35 Linker configuration 6-27 Linker icon 6-26, 7-18, 7-21, 7-30, 8-21 Linker options 8-21, 8-36 specifying 7-18 Linker Options icon 6-26, 8-35 Linker tool 7-18, 7-21, 7-30, 8-35 Linking 7-3 Linking a project 7-18, 7-31 Load (read only) option 4-18, 8-5 Load File (Read Only) tool 4-18, 8-5 Load option 4-19, 6-4, 8-13 M Main menu 4-4, 4-11 Edit option 4-14, 8-61 Errors option 4-16, 8-81 Page I-12 IDEAUsersGuide.book Page 13 Monday, August 2, 1999 2:30 PM Index File option 4-11 Help option 3-13, 4-16, 8-83 Options option 3-12, 4-14, 8-66 Project option 4-12, 8-13 Setup option 4-15, 8-72 Tools option 4-13, 8-26 Window option 4-15, 8-79 Make 7-3 Make option 4-22, 7-32, 8-20 Make Project tool 3-7 , 4-22, 7-32, 8-20 Making a project 7-32 Mark All 6-8 Marking files 7-31 MS-DOS Prompt window 8-79 N New File tool 4-17, 8-3 New option 4-17, 4-19, 6-3, 8-3, 8-15 New Project tool 3-5, 4-19, 8-15 Next option 4-27, 8-82 O Object Inspector icon 4-34, 6-34, 7-35, 8-51 Object Inspector Options dialog box 7-36 Object Inspector tool 8-51 Object Inspector utility 7-35 On C Library option 8-84 On C option 8-83 Open File tool 4-17, 8-4 Open option 4-17, 8-4 Open Project tool 3-10, 4-19, 8-13 Options dialog box 4-34 Options menu 3-12, 4-14, 5-6, 8-66 Auto Save before C/asm 3-12, 3-13, 5-9, 8-8, 8-12, 8-69 Page I-13 IDEAUsersGuide.book Page 14 Monday, August 2, 1999 2:30 PM Index Automatic Errors Toggle 3-12, 5-9, 5-19, 8-10, 8-69 Force Absolute Names 3-12, 5-10, 8-70 Project Analysis 3-12, 5-8, 6-18, 8-68 Save Config 3-13, 5-11, 8-71 Save Config on exit 3-13, 5-11, 8-71 Show Error File 5-19 Show Sub Processes 3-13, 5-10, 7-31, 8-70 Show Tips 3-13, 5-11, 8-71 Syntax Coloring 3-12, 8-67, 8-74 P Paste option 4-20, 8-62 Paste tool 4-20, 8-62 Path Editor dialog box 4-32, 5-3, 6-19, 8-77 Prev option 4-27, 8-82 Print File tool 4-18, 8-12 Print option 4-18, 8-12 Project adding source files 4-41 assembling 7-17 Build 7-3 building 3-7, 7-32, 7-46 closing 3-10 Compile 7-3 compiling 7-17 debugging 3-8 Link 7-3 linking 7-18, 7-31 Make 7-3 making 7-32 opening a new 3-5, 6-3 opening an existing 6-4 opening the example 3-10 Project components 6-4 Project Defines 3-6 Page I-14 IDEAUsersGuide.book Page 15 Monday, August 2, 1999 2:30 PM Index Project Description 3-6 Project Directory 3-6 Project Documentation 3-6 Project Include Paths 3-6 Project Name 3-6 Project Source Files 3-6 Project Target File Name 3-6 Project Tools 3-6 saving 3-10 working with source files 4-41 Project #defines dialog box 6-20 Project Analysis option 3-12, 5-8, 6-18, 8-68 Project Assembler icon 4-34 Project assembler options 7-10 Project Assembler Options dialog box 7-11, 8-19 Project Builder component 6-32 Project Builder icon 4-34, 6-32 Project building Build Project tool 3-7 Compile tool 3-7 Link tool 3-7 Make Project tool 3-7 Project commands 6-5 Add File 6-5 Build 6-5 Documentation 6-5 Make 6-5 Mark All 6-5 Save 6-5 Save As 6-5 Touch All 6-5 Project Compiler icon 4-33 Project compiler options 7-4 Project Compiler Options dialog box 7-5, 8-9 Project components 4-30, 6-4 Project Defines 4-32, 6-20 Page I-15 IDEAUsersGuide.book Page 16 Monday, August 2, 1999 2:30 PM Index Project Description 4-31, 6-6 Project Directory 4-32, 6-18 Project Documentation 4-36 Project Include Paths 4-32, 6-21 Project Name 4-30, 6-4 Project Source Files 4-31, 6-8 Project Target File Name 4-31, 6-6 Project Tools 4-33, 6-23 chex utility 4-35 clabs utility 4-35 cobj utility 4-34 cprd utility 4-35 cv695 utility 4-35 Debugger tool 4-36 Project Assembler tool 4-34 Project Builder tool 4-34 Project Compiler tool 4-33 Project Linker tool 4-34 Project Debugger icon 4-36, 6-44, 8-61 Project Defines component 3-6, 6-20 Project Defines icon 4-32, 6-20 Project Description component 3-6, 6-6 Project Description icon 4-31, 6-6 Project Directory component 3-6, 6-18 Project Directory icon 4-32, 6-18 Project Documentation component 3-6, 6-44 Project Documentation icon 4-36, 6-44 Project Include Paths component 3-6, 6-21 Project Include Paths icon 4-32, 6-21 Project Linker icon 4-34 Project menu 4-12, 8-13 Add File 8-17 Build 4-23, 8-22 Close 3-10, 8-25 Compile File 4-22, 7-17, 8-17 Dependencies 8-24 Page I-16 IDEAUsersGuide.book Page 17 Monday, August 2, 1999 2:30 PM Index Load 4-19, 6-4, 8-13 Make 4-22, 7-32, 8-20 New 4-19, 6-3, 8-15 Save 3-10, 4-19, 8-16 Save As 3-10, 8-16 Project Name component 3-6, 6-4 Project Name icon 4-30, 6-4 Project source files Add File 6-9 adding 6-9 working with 6-9 Project Source Files component 3-6, 6-8 Project Source Files icon 4-31, 4-40, 4-41, 6-8, 6-9 Project Source Files list 5-10 Project Target File Name component 3-6, 6-6 Project Target File Name icon 4-31, 6-6 Project tools 6-23 Assembler component 6-25 Compiler component 6-23 Linker component 6-26 Project Builder component 6-32 Project documentation component 6-44 Project Tools component 3-6 Project Tools icon 4-33, 6-23 Project window 1-5, 3-5, 4-5, 4-28, 8-14 customization 4-29 description 4-28 existing project 6-4 managing a project 4-36 navigation 3-6, 4-29 new project 6-3 project components 3-6, 4-30 R Recent Projects file list 8-25 Page I-17 IDEAUsersGuide.book Page 18 Monday, August 2, 1999 2:30 PM Index Remove From Project option Replace option 8-63 8-11 S Save All option 8-8 Save As option 3-10, 8-7, 8-16 Save Config on exit option 3-13, 5-11, 8-71 Save Config option 3-13, 5-11, 8-71 Save File tool 4-18, 8-6 Save option 3-10, 4-18, 4-19, 8-6, 8-16 Save Project tool 3-10, 4-19, 8-16 Search dialog box 8-64 Search Next option 4-21, 8-64 Search option 4-21, 8-63 Search Previous option 4-21, 8-65 Search String Backwards tool 4-21, 8-65 Search String Forward tool 4-21, 8-64 Search String tool 4-21, 8-63 Segment Definition dialog box 7-27 Select Libs dialog box 7-25, 8-42 Select Linker Command File dialog box 7-30 Setup Colors menu 8-74 Setup menu 4-15, 5-12, 8-72 Asm Extensions 5-17, 8-78 Colors 8-67, 8-74 Font 5-13, 8-73 Key Binding 4-7, 8-75 Tab Width 5-12, 8-72 Working Directory 3-11, 5-3, 8-5, 8-6, 8-77 shortcuts custom 4-7 keyboard 4-6 Show Error File option 4-42, 5-9, 5-19, 8-69, 8-81 Show First Error tool 4-26, 8-81 Show Last Error tool 4-26, 8-82 Page I-18 IDEAUsersGuide.book Page 19 Monday, August 2, 1999 2:30 PM Index Show Next Error tool 4-27, 8-82 Show Previous Error tool 4-27, 8-82 Show Sub Processes option 3-13, 5-10, 7-31, 8-70 Show Tips option 3-13, 5-11, 8-71 Source File #defines dialog box 6-15 Source file assembler options 7-12 Source File Assembler Options dialog box 7-13 Source file commands 6-10 Compile 6-10 Defines 6-10 Documentation 6-10 Load (read only) 6-10 Mark 6-10 Open 6-10 Options 6-10 Remove 6-10 Touch 6-10 Source file compiler options 7-6 Source File Compiler Options dialog box 7-6, 8-9 Source File Components 6-11 Source File Defines 6-14 Source File Dependencies 6-16 Source File Documentation 6-12 Source File Functions 6-16 Source File Options 6-13 Source File Time Stamp 6-11 Source File Variables 6-18 Source File Defines icon 6-14 Source File Dependencies icon 6-16 Source File Documentation icon 6-12 Source File Functions icon 6-16 Source File icon 4-41, 6-9, 6-10 Source file management commands 6-8 Add File 6-8 Mark All 6-8 Touch All 6-8 Page I-19 IDEAUsersGuide.book Page 20 Monday, August 2, 1999 2:30 PM Index Source File Options icon 6-13 Source File Time Stamp icon 6-10, 6-11 Source File Variables icon 6-18 Status bar 4-4, 4-10 Symbol Definition dialog box 7-29, 8-47 Syntax Coloring option 3-12, 8-67, 8-74 Syntax default coloring 8-67 T Tab Width dialog box 5-12, 8-72 Tab Width option 5-12, 8-72 Target File commands 6-7 Debug File 6-7 Delete 6-7 Inspect Object 6-7 Produce Absolute Listings 6-7 Produce Hex Records 6-7 Produce IEEE Output 6-7 Show Debug 6-7 Title bar 4-4, 4-8 program name and version 4-8 Window Control buttons 4-10 Window Control menu 4-8 Tool bar 1-5, 4-5, 4-17 Build Project tool 3-7, 4-23 Compile tool 3-7, 4-22 Copy tool 4-20 Cut tool 4-20 Debugger tool 3-8, 4-23 Dos Shell tool 4-24 Editing tools 4-20 Error Management tools 4-26 File Management tools 4-17 Link tool 3-7, 4-22 Load File (Read Only) tool 4-18 Page I-20 IDEAUsersGuide.book Page 21 Monday, August 2, 1999 2:30 PM Index Make Project tool 3-7 , 4-22 New File tool 4-17 New Project tool 3-5, 4-19, 6-3 Open File tool 4-17 Open Project tool 3-10, 4-19, 6-4 Paste tool 4-20 Print File tool 4-18 Project Building tools 4-22 Project Management tools 4-19 Save File tool 4-18 Save Project tool 3-10, 4-19 Search String Backwards tool 4-21 Search String Forward tool 4-21 Search String tool 4-21 Search tools 4-21 Show First Error tool 4-26 Show Last Error tool 4-26 Show Next Error tool 4-27 Show Previous Error tool 4-27 System tools 4-24 Windows Explorer tool 4-25, 6-9 Tool Browser 4-13, 8-26 Assembler tool 8-31 Builder tool 8-48 Compiler tool 8-28 Debugger tool 8-61 Linker tool 8-35 Tools menu 4-13 Tools option 8-26 Tool Browser 4-23 Top option 4-26, 8-81 Touching files 7-31 V Variable icon 6-18 Page I-21 IDEAUsersGuide.book Page 22 Monday, August 2, 1999 2:30 PM Index Variable lists 3-12, 5-8, 8-68 Vertical Tile option 5-5, 8-80 W Window Control buttons 4-10 Close 4-10 Minimize 4-10 Restore 4-10 Window Control menu 4-8 Close 4-9 Maximize 4-9 Minimize 4-9 Move 4-9 Restore 4-9 Size 4-9 Window menu 4-15, 8-79 Cascade 5-5, 8-80 Dos Shell 4-24, 8-79 Horizontal Tile 5-5, 8-80 Open Files list 8-80 Vertical Tile 5-5, 8-80 Windows Explorer 4-41 Windows Explorer tool 4-25, 6-9 working directory 3-11 Working Directory option 3-11, 5-3, 8-5, 8-6, 8-77 Z ZAP Debugger Page I-22 3-8, 3-9, 6-44, 8-61