1
Customer Management and Portfolio Reporting For Investment Professionals User Manual http://www.BrokersAlly.com NOTICE The software is provided under a license agreement and is protected by copyright. It is unlawful to copy any of this proprietary software through the use of magnetic tape, disk, or any other medium for any purpose other than the user's personal use for the life of the copyright. Information provided in this document is subject to change without notice. Broker’s Ally is a trademark of Scherrer Resources, Inc. Copyright 1985, 2011 Scherrer Resources, Inc. Manual Printing, February 2010 SOFTWARE LICENSE AGREEMENT Use of this software indicates your acceptance of these terms and conditions. 1. LICENSE You have the non-exclusive right to use the enclosed program. The single-user program can only be used on one computer at a time to manage the specific business pertaining directly to you, the licensee. You may not distribute the program to anyone else. The local area network (LAN) version of the program may only be used on one LAN at a time, provided that you have a licensed copy of the software for each computer that can access the software on the LAN. You may not modify the program without prior written consent from Scherrer Resources, Inc. 2. PROPRIETARY RIGHTS You agree to take all necessary steps to ensure that any person under your control or in your service does not violate the provisions of this license. 3. BACKUP You may make copies of the program solely for backup purposes. You must reproduce the copyright notice on each copy. 4. COPYRIGHT The program and its documentation are copyrighted. All unauthorized software copies are in violation of this agreement. Duplication of the written documentation is not permitted. 5. TERM This license shall remain in effect until you terminate it by returning the software, documentation, and all copies thereof to Scherrer Resources, Inc. This license shall be automatically terminated upon the failure of Licensee to comply with all the terms of this License Agreement. 6. WARRANTY This program is provided without warranty as to contents. However, should the distribution diskettes or CD’s be defective, Scherrer Resources, Inc. will replace it within one full year from the date of purchase. Scherrer Resources, Inc. does not warrant, guarantee or make any representation regarding the use of, or results incurred through the use of this software. 7. DISCLAIMER Scherrer Resources, Inc. will in no way be liable for indirect, incidental, or consequential damages, including loss of income, use, or information as a result of using this software. Nor shall the liability of Scherrer Resources, Inc. exceed the amount paid for the software. 8. GOVERNING LAWS This License Agreement shall be governed by the laws of the Commonwealth of Pennsylvania. 9. ACKNOWLEDGMENT You acknowledge that you have read this agreement, understand it, and agree to be bound by its terms and conditions. 2 ACKNOWLEDGMENT Advances in technology often owe their creation to the synergy of ideas shared among a group of people. With over 25,000 users in 36 countries, the popularity and long term success of Broker’s Ally represents a cumulative effort of many individuals over several years. Each feature of the program has been carefully designed and elegantly programmed to provide great utility for the investment professional. I would like to acknowledge the significant contribution of Jim Briggs and the development support and advice of Gary Spivack and Sam Tatnall and the many developers contributing their expertise over time. I also thank our key staff for helpful ideas and support including, most notably Karen Haggerty and Gisela Harkins. Further, the Help Desk services provided by Bill Kinney and his technical team enable our users to experience continuous, uninterrupted service with the product. Many thanks for User Manual and web site design coordinated by Jim Briggs, for marketing and documentation production management by Tim DeMirjian, and for our training services program supported by Karen Haggerty. Special thanks to Sam Frederick, Jason Olim, Jeff Harbison, John Koonz, Steve Christiansen, Mary Evans, Dave Johnson, Mike DiPuppo, Steve Chance and all those who help bring us our future. And, last but not least, I thank my patient and supportive wife, Eliza, and my three daughters Liesl, Sydney and Logan, for their many positive attributes. James S. Scherrer February 2010 TRADE MARKS Agents Ally is a trademark of Scherrer Resources, Inc. Advisor’s Ally is a trademark of Scherrer Resources, Inc. Broker's Ally is a trademark of Scherrer Resources, Inc. WebAlly is a trademark of Scherrer Resources, Inc. Broker's Ally for Windows is a trademark of Scherrer Resources, Inc. Recruiter’s Ally is a trademark if Scherrer Resources, Inc. Realty Ally is a trademark of Scherrer Resources, Inc. Sales Ally is a trademark of Scherrer Resources, Inc. Windows is a trademark of Microsoft Corporation Word for Windows is a trademark of Microsoft Corporation ThinkPad is a trademark of International Business Machines, Inc. IBM is a trademark of International Business Machines, Inc. IBM PC is a trademark of International Business Machines, Inc. Hewlett-Packard is a trademark of Hewlett-Packard Company LaserJet is a trademark of Hewlett-Packard Company Data Direct Drivers is a trademark of Data Direct Corporation Crystal Reports is a trademark of Seagate Corporation 3 TABLE OF CONTENTS NOTICE SOFTWARE LICENSE AGREEMENT ACKNOWLEDGMENT TRADE MARKS TABLE OF CONTENTS PART 1 2 2 3 3 4 INTRODUCTION 7 CHAPTER 1 OVERVIEW 7 1.1 Product Support 1.2 Typographical Conventions 1.3 About Broker’s Ally 1.4 Program Installation, Setup & Startup 1.5 Using Broker’s Ally for Windows 1.6 Backing Up Your Data 1.7 Network Issues CHAPTER 2 UPGRADING 23 2.1 New Features 2.2 Converting data and settings CHAPTER 3 USING BROKER'S ALLY 33 3.1 Add your contacts to the Broker's Ally Database 3.2 Schedule your contacts for Activities 3.3 Working with your Activities calendar 3.4 Campaign lists 3.5 Alerts 3.6 Send your contacts the information they requested 3.7 Keep track of your progress 3.8 Send your contacts marketing letters 3.9 Sales and Marketing Management with Broker’s Ally 3.10 Coordinate your office into a Workgroup CHAPTER 4 WINDOWS FEATURES 51 4.1 The Windows Display 4.2 Mouse 4.3 Resizing Windows 4.4 Menu 4.5 Running Multiple Applications PART 2 REFERENCE 7 8 8 15 15 19 20 23 31 33 33 36 40 43 44 45 47 48 50 51 52 53 55 56 57 CHAPTER 5 FILE MENU 5.1 New Data Source 5.2 Database Operations 5.3 ODBC Settings 5.4 TAPI Settings 5.5 Page Setup 5.6 Print 5.7 Print Preview 5.8 Print Setup 5.9 Exit CHAPTER 6 EDIT MENU 57 57 60 75 75 78 78 78 78 78 79 4 6.1 Undo 6.2 Cut 6.3 Copy 6.4 Paste 6.5 Securities 6.6 User ID 6.7 User Preferences CHAPTER 7 VIEW MENU 7.1 Find Contact 7.2 Add Contact 7.3 Quick Add Contact 7.4 Contact Menu 7.5 Activities Calendar 7.6 Schedule Activity 7.7 Sales Planner 7.8 Campaigns 7.9 Reports CHAPTER 8 PORTFOLIO LEVEL 8.1 The Portfolio Menu 8.2 Portfolio Reports 8.3 Campaign Planner 8.4 Security Types and Asset Classes Setup 8.5 How to Use The Portfolio Version 8.6 Portfolio Terminology CHAPTER 9 ADVANCED PORTFOLIO LEVEL 9.1 Transactions 9.2 Book Page 9.3 Ledger View 9.4 Securities 9.5 Reports CHAPTER 10 MAIL MENU 10.1 Letter Writer 10.2 Marked Letters 10.3 Marked Notes 10.4 Group Letter CHAPTER 11 TOOLS MENU 11.1 Phone Dialer 11.2 Stopwatch 11.3 Calculator 11.4 Calendar 11.5 Scratch Pad 11.6 Sales Scripts 11.7 Palm Pilot Interface CHAPTER 12 WEB AND WINDOW MENUS 12.1 Web Menu 12.3 Arrange Icons 12.4 Close All 12.5 Open Window List CHAPTER 13 HELP MENU 13.1 Index 13.2 Search 13.3 Using Help 13.4 Financial Terms Glossary 5 79 79 79 80 80 82 86 96 96 99 114 115 121 125 127 130 135 139 140 140 145 145 148 149 153 153 154 156 158 160 162 162 172 173 174 175 175 178 178 180 181 181 182 184 184 185 186 186 188 188 190 191 192 PART 3 APPENDIX APPENDIX A - MAIL MERGE WITH MS-WORD APPENDIX B - ODBC SUPPORTED DATABASES APPENDIX C - MARKET DATA CONNECTIVITY APPENDIX D - SYSTEM SPECIFICATIONS APPENDIX E - COMMONLY ASKED QUESTIONS APPENDIX F - SUPPORT PLUS PACK SIGN UP APPENDIX G - ALLIANCE PARTNERS & VENDORS APPENDIX H - TELEPHONE TRAINING SERVICES APPENDIX I - DATA MIGRATION METHODS APPENDIX J - CREATING MAPS APPENDIX K - BENEFITS OF BROKER’S ALLY APPENDIX L - PALM PILOT CONNECTIVITY APPENDIX M - NETWORK INSTALLATION APPENDIX N - PROGRAM FILE STRUCTURE APPENDIX O - PRICING TABLE OF FIGURES INDEX 6 195 195 199 200 202 202 204 205 207 208 209 210 211 212 213 214 216 220 PART 1 INTRODUCTION CHAPTER 1 OVERVIEW This Broker's Ally user manual is divided into three parts. Part 1 contains an introduction and user’s guide to Broker’s Ally. Part 2 contains a feature-by-feature reference section, and Part 3 contains supporting appendices. This chapter contains an explanation of the essential features required to get up and running with Broker’s Ally. We will first describe where to find help in Broker’s Ally, how to read this manual, how to install and setup Broker’s Ally and finally give you a quick tour of its features. Please note that we have included a special chapter for those of you who are converting from a previous release of Broker's Ally. Chapter 3 is a quick start manual describing how to perform your regular Broker's Ally processes in the Windows environment. Chapter 4 is a special reference section for those who are new to Windows. It describes the Windows interface and how to work the program. Part 2 is a complete reference manual for Broker’s Ally, listing each feature in the order it is found in the Main menu. It groups similar features and functions together. In some cases, it might be easier to use the index to find a particular topic. The reference section is labeled by the command name assigned to the feature, but the index contains many logical synonyms. The Appendices located in Part 3 contain technical details, common questions and answers, and some information on the advanced features of Broker’s Ally. 1.1 PRODUCT SUPPORT The first source of product support is the Broker’s Ally Help Menu. While using Broker’s Ally, press F1 to obtain help on the current active window. Most of your questions can be immediately answered somewhere in the Help Menu, in this manual or on the www.BrokersAlly.com web site. Within this manual, you can locate information on a particular function either by locating the menu choice in the reference section, or by looking in the comprehensive index. Telephone & e-mail Support Product support is available by e-mail to [email protected] and by telephone from 9:00 AM to 5:00 PM Eastern time Monday through Friday (except national holidays) at 484-875-1705. Telephone support is free for the first 30 days after the original purchase of the software and is available for a fee thereafter with the Support Plus Pack, Platinum Support Pack or a per incident support fee. Free fax support is always available on a 48-hour turn around basis at 484-875-1704. Support Plus Pack and Platinum Support Pack The Broker’s Ally Client Services Department offers two premium support subscription services for its customers. First, the Support Plus Pack provides you with instant access to toll-free telephone help, e-mail and fax access, and also a newsletter with tips for using Broker’s Ally to its fullest potential. Second, the higher featured Platinum Support Pack provides you with toll free support hotline, e-mail and fax support, the Broker’s Ally newsletter and free bi-annual upgrades or updates to the software. The telephone hotline is your instant pipeline to a qualified support engineer every time you pick up the phone. This newsletter has tips and techniques on how to make the most efficient use of Broker's Ally. It will highlight the powerful (and often overlooked) features of the program. 7 Figure 1 - www.BrokersAlly.com Software Support From the Main Menu Telephone Hotline support, coupled with the e-support found on the Internet accessed at the www.BrokersAlly.com web site, will provide you with an opportunity to make the most of your software purchase and to virtually eliminate costly down time. For more information on the Broker’s Ally Support Plus Pack or the Platinum Support Pack please call the client services department at 484-875-1705 or fax us at 484-875-1704 or for faster service e-mail your requests to [email protected] to the attention of the Client Services Department. 1.2 TYPOGRAPHICAL CONVENTIONS You will interact with Broker’s Ally by typing on your keyboard and by clicking with your mouse. There are two sorts of keyboard entries: one is to type text (e.g., names, addresses and numbers and so on), the other is press specific keys (F3, Alt-F9, Enter, Shift, PgDn and so on). If we want you to type text we shall write the request as follows; ....type the phone number in the phone field.... If we want you to type a specific word or text command, we will show the text to be typed in a mono spaced font as in: Type setup. If we want you to use a specific keystroke we shall write it as follows: ....then press F3....or....then press Enter. When we write press Alt-F3 we mean that you should hold down the Alt key and press the F3 key. When we want you to use your mouse, we will instruct you to click or double click on a menu selection, icon, control button or other object. By this we mean for you to move the mouse until the mouse pointer is located on top of the item to be clicked and then pressing and quickly releasing the left mouse button. Double clicking simply means to repeat the click twice in rapid succession. Occasionally you will be asked to drag an object. Here, you must place the mouse pointer on top of the object, press and hold the left mouse button while simultaneously moving the pointer to the new location. When you arrive at the new location, release the mouse button to insert the object. When we want to emphasize a paragraph that applies to the network version of Broker’s Ally we print the following icon in the margin: 1.3 ABOUT BROKER’S ALLY Broker’s Ally is a full-featured broker and advisor productivity system specifically designed for investment managers. With Broker’s Ally, you can track clients and prospects in the pipeline; track their investments such as stocks, bonds, annuities, mutual funds, asset purchases and sales; manage portfolios and account for changes in positions and track commission and fee-based business, create and send mail; track all contact with your clients including correspondence, telephone calls and meetings. You can use it to create and track promotions, and maintain a record of your client’s instructions and preferences. Broker’s Ally will also help you prioritize and manage your time. It will help you to make sure that you do not miss key dates or appointments and help you 8 manage your business instead of your business managing you. Below, we have listed some of the major features of Broker’s Ally: Figure 2 - Broker's Ally startup screen Tip of the Day As a training aid, every time you run Broker’s Ally, you will be presented with a “Tip of the Day”. These tips will give you specific information related to the software. The tips are designed to help you learn shortcuts to your software. You can view all the tips at once by clicking the Next Tip button or you can read the tips as the are presented to you. Once you have read all of the tips, you can turn them off by unchecking the Show tips at startup box. You can always turn the Tip of the Day back on from the Help Menu. Figure 3 - Tip of the Day dialog Sales Planner There is a multi-step Sales Plan manager incorporated into Broker’s Ally. The Sales Planner is used to create sales and marketing campaigns for individual contacts or a group of contacts meeting specific criteria. You can create multiple Sales Campaigns; each having multiple steps and store them for future use. The Sales Planner is available in the Broker’s Ally Gold level and above. 9 Figure 4 - Sales Planner, Plans User Defined Fields There are forty-eight (48) fields for contact records that you can define and set up to store important information unique to your business. These “User Defined” Fields are useful for prioritizing and selecting records to be included in reports, group mailings or campaign lists. For simplicity we call them User Fields. Figure 5 - User Fields Page Flags, Interests, Rating and Status There are four additional field types in which data specific to each record can be added and used later in the sort or selection process. The Interest classification check boxes allow you to assign one or more of the 28 interest classifications to a contact. You can assign your own meaning to each interest check box. Flags contain key search or identifying words for each contact record. You can assign a Rating to each contact using, for example, a scale ranging from 1 to 9, with 1 being the hottest. The Status field defines where they are in your pipeline; either as an unqualified lead, prospect, or current customer. The data you enter in these four field types as well as the User Defined Fields can be structured to apply to your specific business needs. 10 Figure 6 - Flags and Interests Page Integrated word processor The Letter Writer is a full-featured word processor held within Broker’s Ally and it incorporates both form and custom letters as well as a spelling checker. Having a word processor within Broker’s Ally negates the need for having alternative word processing software on your PC. With this powerful letter writer, you can mark individual contact records to receive a particular letter, and print these letters at the end of the day. You can identify a group of contacts and print a batch of letters using the mail merge capability. Reporting A very powerful feature of Broker’s Ally is its ability to search through the entire database to identify a group of records based on specific criteria. The search criteria can be any field and is frequently zip code, date, address, user field data, flags, interests, and so on. For example, you could select all your customers who are in the state of PA with a particular Zip code or within a range of Zip codes, all of whom have certain investment interests, assuming that you have recorded such data within the database. The more clearly you define the text within the User Field, Flag, Interest and Rating fields the more sophisticated and useful a report you can create. 11 Figure 7 - Reports Import & Export Data If you already have a file of potential customers on a diskette, you can import this file into a Broker’s Ally database. Broker's Ally recognizes several file formats and can import them directly into the program. If necessary, the import utility will ask you exactly where you want the imported data placed in your Broker’s Ally database. When importing from other Broker’s Ally databases, duplicate records can be identified and ignored. Records can also be exported to disk for use on other computers or with other applications. Auto Dialing Broker’s Ally has a fast, time saving feature to automatically dial the phone number within a contact record. You need to have a modem installed in order to use the auto-dialing feature in Broker’s Ally. When you display a contact’s record, you can call the contact by clicking on the button next to the phone number you wish to dial. If you would like to dial the work number of the contact, just click on Work. When the Dialer dialog appears, pick up your handset, and click on Talk after the number is dialed. All calls are tallied, displayed on the status bar at the bottom of the screen, and logged in a history file for future reference. If you do not have a modem installed in you computer, you can track your call progress, calls and contacts made, by using the No Modem feature found in the dialer options. Figure 8 - Auto dialer 12 Notes The Notes page attached to each record allows you to capture a mini transcript of a conversation or meeting. Each note is stamped with the current date and time. Notes are associated with a contact record and you can accumulate an unlimited quantity of note pages. You can track your interaction with a client by reviewing the notes associated with that client’s record. You can review all of the notes associated with a specific contact on a single page by pressing the Review button. Figure 9 - Quick Letter found in the Notes Page As an additional time saving convenience, the Notes page allows you to create a Quick Letter and store it within the note pad. This is ONE OF THE MOST POWERFUL FEATURES OF BROKERS’ ALLY! For example, when completing a client conversation, you may wish to write a follow-up letter while your thoughts are still fresh in your mind. The name and address is automatically presented in letter format for quick access. You can set up a variety of templates for your Quick Letters so that you only have to fill in the details. Finally, you can check the spelling in your quick letter, by pressing the Spell button, print the letter as well as an envelope or mailing label without moving to another area of the program. All of these commands can be found under the Contact, Print menu. Scratch Pad and Sales Scripts The Scratch Pad and Sales Script Tools are designed for accessing categorical information from anywhere within Broker’s Ally. The Scratch Pad allows you to record information which is not specific to any client such as your personal notes, FedEx numbers, or reference topics. The Sales Scripts contain standard or custom telemarketing scripts that improve efficiency and productivity for cold calling and mailing follow-up calls. Calendar, Calculator and Stopwatch By selecting Calendar from the Tools menu or typing Ctrl-E, you can call a pop-up date calendar. This is very handy for quickly selecting the date of future return calls. The Tools menu also has a 13 Calculator (Ctrl-L). The Stopwatch (Ctrl-T) will track time spent on an activity and even convert the time to dollars for billing or expense calculations. Figure 10 - Stopwatch Figure 11 - Pop-up Calendar Help System A Help system is available throughout Broker’s Ally by simply selecting Help from the Main menu or pressing F1. The Help system is a hypertext database of valuable reference information. When you use F1 to activate the Help system, you will see specific information about the current window. Figure 12 - Help Menu 14 1.4 PROGRAM INSTALLATION, SETUP & STARTUP Microsoft Windows 95, 98, 2000, ME, XP, Vista, Windows 7 When inserting the Broker’s Ally CD, the installation program should execute automatically. If the installation program does not start, follow the steps below. 1. 2. 3. 4. 5. Select Start, located in the lower left hand corner of your screen. Put distribution CD into your CD Drive. Choose Run from the file menu. Type D:\SETUP in the run dialog box and click OK. The installation program will ask you for licensing information and to specify the directory where you would like to install Broker’s Ally. We suggest accepting the default directory, C:\BA9. Click OK. Follow the instructions as they appear on your screen. Now you have a new program group within your Program Manager titled Broker’s Ally 9. Run Broker’s Ally by double clicking on the Broker’s Ally icon. For a first time installation, you will need to set up the Broker’s Ally Data source. Click on the OK button in the New Data Source Setup screen when it appears. This will setup your Broker’s Ally data source. 6. 7. 8. 9. 10. You are now ready to start using Broker’s Ally. 1.5 USING BROKER’S ALLY FOR WINDOWS Broker's Ally uses Windows as its operating environment. This allows the program to display multiple windows on the screen simultaneously and use all of the features of Windows. This is called a Multiple Document Interface or MDI. This section will describe the basic elements of Broker’s Ally and how to get around. If you need a basic introduction to Windows, please refer to Chapter 4. 15 Figure 13 - Display with several windows open: Multiple Document Images Fundamentals After starting Broker’s Ally, you see the main application window with a menu at the top and a status bar at the bottom. You can also display an icon toolbar immediately below the menu as shown. See User Preferences to learn how to create or modify a toolbar. As you make selections from the menu, Broker’s Ally will display dialog boxes (windows requesting that you enter specific information) and view windows (windows that show text or data fields that you may or may not be able to alter). Many of these view windows can be resized but most of the dialog boxes are fixed and cannot be resized. Most view windows can be reduced to an icon, tiled or cascaded. Getting around As with most Windows programs, the best way to get around in Broker's Ally is to use your mouse. You can use your mouse to select menu choices, activate specific windows, or click on options and control buttons. Broker’s Ally also has Accelerator keys associated with many of the buttons or commands. Any menu/button with an underlined letter, using your Alt- (letter) will activate the desired word. For example, Alt-V will activate the View Menu. The Menu System The menu is the starting point for Broker’s Ally and displays general headings for you to choose. When you click on one of these options (e.g., File, Edit, View), a pull down menu will list specific commands or features that you can select. 16 Figure 14 - The View Menu Most menu choices send you to a dialog box where you make specific choices or enter information. Dialog boxes use a variety of input techniques including: Input Fields Boxes into which you can type numbers or text as appropriate. Input fields may correspond to the fields of a record or may be used to request specific input for a dialog box. Check Boxes One or more options that can be turned on or off by clicking on the associated box. The option is on when the box is filled with an X. Check boxes are not mutually exclusive. Within the Interest page, the boxes are yes and no check boxes. If your contact is interested the box will be checked. Radio Buttons Like check boxes, radio buttons offer multiple choice options which can be toggled on and off. Unlike check boxes, however, radio buttons are mutually exclusive. Selecting one option automatically turns off all other options. Scroll Boxes Scroll boxes present a list of options which may exceed the height of the display box. The scroll bar along the right edge of the box allows you to scroll the list of options to display the hidden choices. You make a selection from the scroll box by clicking on one or more of the options within the window. The Toolbar In addition to the menu options, Broker’s Ally offers quick access technology in an optional toolbar. The Broker’s Ally toolbar also has “Tool Tips” associated with each button. When you move your mouse across the button, a dialog will drop down to inform you what task the button will complete. When you click on one of the buttons on the toolbar, Broker’s Ally immediately executes the associated command. Using the Edit, User Preferences, Toolbar menu option, you can select from among the many predefined buttons and associated commands. Your selections are displayed in a toolbar located under the main menu. Figure 15 - The Broker's Ally Toolbar with Tool Tips 17 Accelerator keys Some of the most frequently used menu choices have specific accelerator keys associated with them. This allows you to quickly invoke the option by pressing the key combination rather than selecting a command from a menu. For example, you can call up Find Contact and Add Contact typing Ctrl-F or add a contact by typing Ctrl-D. Accelerator keys are displayed on the menus next to the associated commands. Using Help Broker’s Ally has an extensive context-sensitive help system. You can call for help at any time by either clicking on the Help menu option, or by pressing F1. If you press F1, Broker’s Ally will usually display a specific help topic appropriate for the current window. If you select Help on the Main menu, you can go to the table of contents, search through a list of topics, read instructions on how to use the Help system, or look up a topic in the Financial Terms Glossary. Different views As described above, Broker’s Ally can display multiple views or several windows at the same time. If you are displaying one contact’s data and wish to refer to another contact, you do not need to close the current contact window. Instead, simply Find the second contact and Broker’s Ally will display the second contact in a separate window. You can move from one window to the other simply by clicking on the window you wish to activate. Alternatively, you could use the open windows list on the Window menu to select a window by name. Figure 16 - Multiple Contact Screens 18 Contact Records Adding Contacts This is the time to gather together all those dog-eared business cards, small bits of paper, memo notes and your office Rolodex. Select View, Add Contact, and then enter the desired information. Notes The note pad in each contact record allows you to capture a mini-transcript of each conversation or meeting. Every note is date and time stamped. You can accumulate an unlimited number of notes. User Fields, Flags and Interests There are forty-eight (48) fields for each contact record that you can set up to further identify a particular record with information unique to your business. These User Defined Fields are useful when sorting and gathering records into groups for a particular action. You can also assign your own meanings to as many as 28 Interest check boxes. Flags contain key search or identifying words for database sorting. Book Page The Book Page provides for the entry and review of a contact’s security transactions. The number of transactions Broker’s Ally can store is limited only by the available space on your hard disk. Lists A very powerful feature of Broker’s Ally is its ability to search through the entire database to identify a group of records based on specific criteria. The search criteria can make use of the fields in the contact record. These lists can be used to print reports, print merged letters, print labels, place phone calls, etc. Each list and the criteria used to generate the list are stored for future use. After you make changes to your contact database, you can refresh a list using the original criteria by simply pressing the Refresh button in the Group List dialog. For example, you might create a Group list where you specify that the list contain all contacts with a specific status, such as “prospect”. You can use this list to go directly to each contact and make a phone call or mail merge a letter. You could also print a report or send letters to only the selected contacts that are on your list, excluding those that might not meet your criteria perfectly. Maintenance The Maintenance feature, which is found under the File, Database Operations menu can be used to re-index and pack database tables for more efficient operation of Broker’s Ally. If you run into any problems with your database in Broker’s Ally, you should run this maintenance program. This should clean up any bad information that might be found in your Broker’s Ally data files brought about by potential damage to your hard drive through power surges or other sources. 1.6 BACKING UP YOUR DATA We strongly advise you to backup your data files on a regular basis. 19 Broker’s Ally does not provide an internal backup or restore program. We suggest using a backup and restore program provided to you by your operating system. Should you have any questions or problems with your backup or restore program, please contact your product user manual, consult your products help system, or call your products technical support number that can be found in your manual. While the chances are small that your computer will fail and lose data records, you must prepare yourself for the worst possible scenario. To protect yourself and your business, we recommend that you conduct disk backup procedures at the end of every working day. Keep several sets of backup disks so that you do not rely on one set. At the very least, employ two backup sets to use on alternate days. Some users have a different backup set for every day of the week. You should never backup a damaged database onto diskettes containing your last good database. You might destroy your only means of recovery. The Maintenance function found under File Database Operations can rebuild damaged indexes, but sometimes data files are beyond repair. Although re-indexing solves many problems, you should not rely upon this Maintenance feature as your only line of defense against data loss. Your DataBase In this section we will explain only which files to back up. There is a SINGLE file which contains ALL important data = AllyWin.MDB (.MDB means Main DataBase). We make a simple point that you should at least backup that single file every day. (In prior versions this data was distributed among all files with *.DBF, *.MDX, and *.DBT file name extensions found within the Broker’s Ally v8 directory). This one file is the key Broker’s Ally data file; this will save your most important contact data. Your Broker’s Ally letters are all the files with *.BAL file name extensions. 1.7 NETWORK ISSUES The network version of Broker’s Ally is a multi-user system. It requires users to login when running the program and allows multiple users of Broker’s Ally to access a database simultaneously. When installing a Broker’s Ally Network, follow the installation instructions for networks. The Broker’s Ally program should be installed onto each workstation, pointing the data source to the network drive/directory. User ID, Privilege Levels, & Record Ownership After you start Broker’s Ally, you will be required to identify yourself to the program by selecting your User ID from a list shown on the screen. We distribute Broker’s Ally software with one permanently established User ID called MGR (for Manager) that enables all features and functions. We assume the first person to run Broker’s Ally after installation to be the manager of the system. If yours is a single-user system, MGR is the only User ID allowed; you are the manager as well as the sole operator of the program. The Network version of Broker’s Ally allows the manager to create or change User IDs in the User ID dialog accessed from the Edit menu. 20 In the Network version of Broker’s Ally the manager must create a different User ID code for each person using the system. Be sure that only one person uses a given ID at a time. Before assigning User ID codes, you should understand how the Privilege Level associated with each User ID determines how Broker’s Ally will work for that individual. Every User ID code has an associated Privilege Level, list of Broker Numbers, a user's name, and an optional password. Each Privilege Level comprises a set of rights that determine the scope of a user's ability to perform operations in Broker’s Ally. The associated Broker Numbers limit the user’s access to contact records having one of the Broker Numbers in the Owner field or to records with a blank Owner field. Conflicts can arise if two or more people login under the same User ID at the same time. Privilege Levels Broker’s Ally allows the manager to control many of the operations a user can perform such as which fields the user can change in a contact record. The manager can prevent a user from changing User ID information, User Field definitions, scheduled activities, etc. A combination of rights to do certain things in Broker’s Ally is contained in a Privilege Level. Broker’s Ally is shipped with one Privilege Level, Level 3, which has all rights permanently enabled, but the manager can create other Privilege Levels with any combination of rights. The manager then assigns one of these Privilege Levels to each user. Choose the Configure button in the User ID dialog to go to the Broker Numbers dialog. Then choose Edit Levels to create or edit Privilege Levels. To select multiple rights, hold down the Ctrl key while you click on each right. You can also select a group of adjacent rights by holding down the Ctrl key and dragging the mouse across the rights. Level 3 users have access to all records and all operations, which include setting passwords, deleting data sources, and importing or exporting records. It is a suitable mode of operation when only one person uses the program. In network applications, it is the recommended mode for the manager and deputy managers. Broker Numbers The manager can assign to each user one or more Broker Numbers, which is usually the number assigned by a brokerage firm to that broker. When one of the Broker Numbers matches the entry in the Owner field of a contact record, the user may access the contact. Incidentally, a user can access any contact record having a blank Owner field, since it is considered free and available. Choose the Configure button in the User ID dialog to go to the Broker Numbers dialog. Use the Add Broker button to add a Broker Number to the list. Select (highlight) the appropriate Broker Number or Broker Numbers for the user. To select multiple Broker Numbers, hold down the Ctrl key while you click on each Broker Number. You can also select a group of adjacent Broker Numbers by holding down the Ctrl key and dragging the mouse across the Broker Numbers. To select all Broker Numbers in the list (even if the list grows), check the box marked ‘All Broker Numbers’. Access to Info System administrators can allow users access to Lists, Activities, History, and Marked Letters associated with other users. If you do not want the user to see this type of information belonging to others, make sure All Users is not checked and no items are selected in the Users list box. To permit the user access to others' information, explicitly select their user ids in the Users list box or check All Users. If you do not check All Users, you can select at least five users. 21 Figure 17 - User Configuration dialog Passwords & User Names Anyone with the right to edit User IDs can assign a password to a User ID. If you have checked the box marked ‘Enable passwords’ in User Preferences, each user having a password will have to enter his/her correct password to log into the Broker’s Ally system. In the User ID dialog, click on the Edit User button to change the password for a selected User ID. Passwords can be any length and composed from any of the keyboard symbols. However, there is no difference between lower case and upper case letters of the alphabet. For example, H is the same as h. Each User ID also has an associated User Name, which can be referenced with one of the merge codes in the Letter Writer. User Configuration Data Files Broker’s Ally obtains the special setup characteristics for a user by reading a file called BAWIN9.INI. The BAWIN9.INI file contains information concerning the data sources, toolbar, default directories, stopwatch configuration, calculator, last report printed, etc. On a network, this BAWIN9.INI file is located on the workstation in the directory where the application is installed. Each user has a private scratch pad. Activities, marked notes, and marked letters are assigned to specific User ID’s, thus keeping one person’s actions separate from others. If more than one person shares a User ID code, conflicts will arise in these areas. Furthermore, if two users simultaneously operate Broker’s Ally using the same User ID, more serious conflicts will occur. Warning: We strongly advise each person to use a different User ID. Advice for Network Managers You should take responsibility for backing up the database on a daily basis. Ally stores records, notes, transactions and histories for all users in corresponding data files in one main file: AllyWin.MDB. We make a simple point that you should at least backup that single file. (In prior versions these data was distributed among all files with *.DBF, *.MDX, and *.DBT file name extensions). 22 CHAPTER 2 UPGRADING 2.1 NEW FEATURES This chapter is aimed at users who are migrating from previous versions of Broker’s Ally, and you can use this chapter to get up and running quickly with Broker’s Ally v9. Also, within the software itself you can learn all that is new in version 9 under Help, Contents, What’s new in version 9.0. Figure 18 - Help Menu for learning new Broker’s Ally v9 features The Help system provides reference information on all Broker’s Ally tasks. You can jump from one Help topic to a related Help topic quickly and easily. When you’re using Broker’s Ally, Help is just one keystroke away, F1. Use it often to learn about Broker’s Ally. To get help on a specific window, press F1. To see other topics click on Search and then: 1. Type the first few letters of the topic you want to search for. As you type, Help displays new keywords in the list box. 2. Double-click a keyword related to your subject (or select a keyword and press Enter. Help displays the relevant topics for that keyword. 3. Double-click your topic (or select the topic you want and press Enter). 23 Figure 19 - Help Search dialog Executive Overview of New Features 1) Overall we added over 200 new features for ease of use and expanded data capture 2) Expanded Standard Level Features to include Net connectivity, e-mail, and dozens more fields 3) Expanded Gold Level Features to include Palm Pilot data connectivity and fulfillment processing 4) Expanded Portfolio Level Features to include transaction capture, LIFO/FIFO/AC, and cash ledgers 5) Introduced the Advanced Portfolio 4th Level under the new name Advisor’s Ally 6) 4th Level contains Performance Reporting, Fee Based accounting, and Tax lot accounting 7) Now offering Web Broker’s Ally Outsourced or in-house installation. 8) Added www.BrokersAlly.com portal site for quick access to securities industry information and Broker’s Ally software information. Read more detail about these new version 8 features below: Standard Level Feature Enhancements This section describes the detailed features added to the “Standard Level” of Broker’s Ally. User Fields- Tripled the number of User Defined Fields from 16 to 48, thus providing expanded search and sort functionality for marketing and client management functions. Added e-Mail Field and URL Data Fields- Created fields to track a customers’ e-mail address and the URL (universal resource locator) of their web site for quick access to customers for correspondence. Addresses Management- Tracks more than one address per customer and tracks the date they change residence from one address to another (such as summer seasonal address, or business and home addresses, etc.). 24 Quick Web Connect- to launch your browser from within Broker’s Ally and access our help site and the popular www.BrokersAlly.com portal for productivity advice, tools and the web window to Wall Street. Figure 20 - Internet Access from Main Menu; A Quick connect to BrokersAlly.com Figure 21 - User Definable Fields- Expanded up to 48 fields on 3 quick-access pages Additional Phone Number Fields- Added unlimited fields for adding more phone numbers such as beeper, cellular, multiple home and office numbers, and fax and telex numbers. Household Relationships- For tracking other contacts within the economic household such as associates, brother, brother-in-law, business partner, estate, father, father-inlaw, grandparent, nephew, niece, omnibus, sister, sister-in-law & their address, background, income, education and retirement. Track Important Life Events- Field for key events such as: address switch, anniversary, auto purchase, birthday, child birth, distribution, divorce, job change, mortgage payoff, promotion, real estate buy, recognition award, religious occasion, retirement, salary increase, sports event, wedding, etc. Contact Screen enlarged- Widened the contact screen format to enable storage of more data and information and added functionality. Notes Categorization- Added ability to organize the notes based on their content in categories such as: contact, compliance, personal, investment, operation, and others in order to improve understanding. Notes Access Control- Added ability to set control of access to notes such as private, semi-private, public access. Notes Expiration and Printing Dates- Allows the user to set a date that a note and action expires or is printed. Help File Expansion- Help file expanded to describe new functionality including search and glossary functions including descriptions of new version features. 25 Auto Install CD- Created fast and automatic installation routine to install Broker’s Ally on a hard drive from a CD drive without added commands. Gold Level Feature Improvements This section describes the detailed features added to the “Gold Level” of Broker’s Ally. Sending e-mails- Broker’s Ally now allows you to send e-mail using your installed e-mail software and retain the contents of the e-mail message within the contacts notes. Fulfillment Exporting- Created fulfillment house export function which enables a custom programmed connection to your mailing fulfillment house. Figure 22 - New Fields for e-mail, contacts, important dates & addresses Palm Pilot Interface- Created ability to load Broker’s Ally information into the popular Palm Pilot product to enable users to review contact information on their portable Palm device. Interface connectivity specifications are found in the appendix. Palm, Inc. manufacturers of the Palm Pilot 26 Figure 23 - Notes Page Expanded- New fields to categorize notes; send and store e-mail Portfolio Level Feature Improvements This section describes features added to the “Portfolio Level” of Broker’s Ally. General Ledger- Added a holdings general ledger, cash ledger and the ability to track both transactions and positions and to manage alternative accounting and trade methods such as LIFO, FIFO and average cost. Expanded Securities Descriptors- Added the ability to track CUSIP number and the Description extensions of securities. Corresponds to Interactive Data Corporation format; FT IDC. 27 Figure 24 - Security Transaction Ledger and Cash Transaction Ledger Figure 25 - CUSIP and Descriptor Fields Added Sorting Flexibility- Created multiple screen display sorting methods including sorting by description, quantity, price, market value, and gain or loss, in either ascending or descending numeric or alphabetic order for ease of reading and viewing. 28 Figure 26 - Holdings Ledger- New Sort Order- Expansion all functionality Cash Accounting- Expanded cash balance ledger and accounting functions for debit and credit to cash accounts. Connectivity to Clearing Firms- Created data loading utilities to load data from the following back office services with their support: Beta Systems, Pershing, Fiserv, US Clearing, CheckFree APL, TD Waterhouse, Sungard Phase3, and FT Interactive Data Corp for end-of-day market pricing of portfolio. Figure 27 - Tax Lot Selection for Sales 29 Figure 28 - New Screens to Support Trade Methods Our browser-based Version Release can be hosted on our server or yours for corporate installations. You can outsource Broker’s Ally with our browser-based version of Broker’s Ally as a corporate option for multiple user installations using the powerful browser access method. See www.ScherrerResources.com and www.WebAlly.com. Fulfillment Export and Import- If you use a fulfillment house or do bulk mailing, and want to manage a sophisticated multi-step marketing campaign, consider this newly engineered feature for configuration to your firm mailings. Figure 29 - Fulfillment House Export Functionality 30 Back Office Integration- Created universal loading tools to migrate mainframe-based back-office host data for US Clearing, Pershing, Beta, CheckFree APL, Fiserv Securities, TD Waterhouse, Crowell Weedon, Chevy Chase, and others. This functionality offers Timed Data Utilities- Timed triggers to kick off data loading and indexing and Auto Shutdown- Automated application shutdown for data protection. BrokersAlly.com Web Site Portal You will find a wealth of information at your fingertips at the expanded www.BrokersAlly.com portal for investment professionals. Topics addressed there include education and training support. 2.2 CONVERTING DATA AND SETTINGS Broker’s Ally has a convenient upgrade system that performs two key functions: 1st it helps you import your data from previous versions, and 2nd it helps to migrate your settings and configuration information into the new version 9. You can import your data from Broker’s Ally 5, 6, 7 or 8 to Broker’s Ally version 9. The import and conversion process will copy over all User ID information, Class definitions, User Field definitions, scratch pads, letters, quick letters and user information and will import securities, contacts, notes, and postings. When you insert the CD into your CD drive it will run automatically and present questions on the screen regarding your ideal configuration. Upon answering these questions the data migration process will upgrade you from previous versions to the current version 9 of Broker’s Ally. To only import contact, notes, holdings and securities information, follow these directions: 1. Under the File menu select Database Operations. From the popup menu select Import. 2. Select Broker's Ally v6, v7 or v8 Data and press Start. 3. You will be asked to specify the directory for your Broker’s Ally data files. If your data is in a different directory, other than C:\BA6 or C:\BA7 or C:\BA8, please specify the correct directory. 4. Press OK. Figure 30 - Converting and Importing Contacts from earlier versions of Broker’s Ally 31 Data Storage For reference, your database information is stored in ALLYWIN.MDB. (In prior versions, files with file name extensions *.DBF, *.MDX, and *.DBT were the database files). This file retains your contact database, including notes, activities, securities, interests, user fields and postings. Broker’s Ally allows you to create and use several separate Broker’s Ally data sources or databases. For example, you might have one Broker’s Ally data source for active clients and prospects, another for less important prospects, and another for corporate data or lead information. 32 CHAPTER 3 USING BROKER'S ALLY In this chapter, we will discuss the ways that Broker’s Ally makes your workday more efficient. Broker's Ally is a powerful productivity tool that allows you to organize your schedule, keep in contact with your clients, track your progress, manage wealth and create powerful portfolio reports. We have built many features into Broker's Ally to manage a wide range of your activities. 3.1 ADD YOUR CONTACTS TO THE BROKER'S ALLY DATABASE The first thing that you will want to do with Broker's Ally is to add your contacts to the database. There are two ways to add your leads, prospects, and clients to Broker's Ally: Select View, Add Contact, and type your contact information into the contact record window. After you click on Add to save the record, you can add notes, transactions, or schedule the new contact for an activity. Select View, Quick Add Contact, which differs mainly in that it proceeds directly to the next Add Contact screen after you click on Add to save the record. Quick Add can also drop default data into some of the contact fields. To set up the default data, go to User Preferences and click on Quick Add. The Quick Add method is faster for adding a group of contacts but does not allow you to add notes, transactions, or activities while adding basic contact data. Figure 31 - Add Contact Screen 3.2 SCHEDULE YOUR CONTACTS FOR ACTIVITIES Activities are defined in Broker’s Ally as the things you will do with a client or prospect. Activities is the umbrella term under which sub-terms fall; such as calls, actions or meetings. As you add new contacts to your database, you might want to schedule an activity such as a Call, 33 Action or Meeting activity for each record. You could also apply a pre-defined multi-step Sales Plan to a contact. A Call activity is set up as a date in the future that you would like to telephone a contact. You can schedule an Action for any reason that you want to be reminded of in the future. For example, you could create an Action to remind yourself to review a portfolio or send a dividend check. You can also schedule a meeting with a client. While viewing a contact record, you are able to schedule an event by clicking on View, and then on Schedule Activity. While in the schedule dialog box, enter the proposed time and date for the activity and a description of what needs to be done or discussed. 1. To add a Call, Action, or Meeting Activity for a contact you need to have the contact’s record on your screen. 2. Pull up the Schedule Activity dialog, which is accessed through the View menu. Alternatively, you can access the Activity Scheduling dialog through the Agenda button on the Contact’s record. 3. The ‘Action For’ field will automatically be set to your User ID so that this activity will appear only in your Activities Calendar. If you select a different User ID, the activity will appear in that person’s Activities Calendar who is in your work group. Similarly the ‘Entered By’ field will automatically default to your User ID and will register who entered the activity. 4. Description - Enter a short description in the Description box of what you want to accomplish. 5. The name of the contact will appear automatically in the Contact field. 6. Select the Type of activity - Call or Action. You can even create a new activity type by manually entering an appropriate name such as Meeting. Remove the information in the Type field and enter your desired information. 7. Date and Time - Broker’s Ally automatically enters tomorrow’s date and the current time. You may change the date and time. If you double click on a date field or the time field and choose your selection from a popup calendar, or time. You can also click on the light bulb icon for more information on entering the date and time. 8. Duration - To schedule a block of time for an activity, enter the length of time in minutes. Duration is useful only when you have specified a time for the activity. The Daily and Weekly Calendar will show the same activity more than once if the Duration is greater than the Activities Calendar resolution. The Activities Calendar resolution can be changed in User Preferences. 9. Check your other activities for a conflict - If you mark this option, the scheduler looks for conflicts with your other activities when adding or updating an activity. When a Duration is entered, the conflict analyzer looks for overlapping time blocks. If your activity does not have a duration, the conflict analyzer only reports when you have another activity scheduled on the same day at the same time. 34 10. Alarm - If you want the Alert system to notify you when this activity comes due, check the ‘Activate alarm...’ box. If you want to be notified in advance of the event, enter the number of minutes prior to the event time in the ‘Alarm Lead’ time box. Figure 32 - Schedule Call or Action Dialog When you schedule an activity while a contact window is active, the Contact field shows the name of the contact associated with the activity. If you schedule an activity when a contact window does not have focus, the Contact field will show “REMINDER” (and you cannot change this field). Such an activity is not associated with any contact and is called a Reminder Activity. Now that you have created several scheduled activities, you can view your schedule through the Activities Calendar. Sales Planner There is a Sales Planner incorporated into Broker’s Ally. The Sales Planner is used to create sales and marketing campaigns for individual contacts or a group of contacts meeting specific criteria; such as Rating = Hot. You can create multiple Sales Campaigns and store them for future use. The Sales Planner is available in the Broker’s Ally Gold level and above. We suggest you create your own 12 step sales plan as follows: 4 annual portfolio reviews on a quarterly basis, plus 8 telephone calls to check in with your best customers often. Figure 33 - Sales Planner, Plans 35 3.3 WORKING WITH YOUR ACTIVITIES CALENDAR When you have entered activities into your database, you can view your schedule through the Activities Calendar. The Activities Calendar displays the activities you have scheduled or someone has assigned to you. You can display your schedule in Daily, Weekly, Monthly, or Summary views. Select the corresponding radio button at the bottom of the window to change the selected view. When you open the Activities Calendar from the View menu, you will see all of your activities for every contact. Daily, Weekly, Monthly, and Summary views allow you to see the activities in a variety of formats. Activity For is used to see activities assigned to a different user in your work group. Use the Summary view to see all activities in chronological order. To see completed activities, click on the History check box. Daily View When first opened, the Calendar shows today's activities with a resolution of 30 minutes in a format resembling a daily appointment calendar. You can change the view resolution of your Activities Calendar from 30 minutes to another value. (See User Preferences) If several activities are scheduled for the same time slot, you will see only one activity. However, Broker’s Ally will display a number in parentheses equaling the amount of activities scheduled for that time. By clicking on the time slot, a window will appear where you can view all of the activities scheduled for that time slot. You can view activities that do not have an associated time in the No Time field. To examine a different day, select the Calendar Icon located at the bottom of the Activity Calendar window, double click on a different day, and the selected day will be presented. You can quickly print your Activities Calendar by pressing the Printer Icon located at the bottom of the Activities Calendar window. Figure 35 - Activities Calendar shown in Daily View format Weekly View Click on the Weekly button to see your activities for the current week, Monday through Friday. This is an expanded daily view showing 5 days at a time. If several activities are scheduled for the same time slot, you will see only one activity. However, Broker’s Ally shows the number of 36 activities for the time slot in parentheses. You can view activities that do not have an associated time in the No Time field. To examine a different day, select the Calendar Icon located at the bottom of the Activity Calendar window, double click on a different day, and the selected day will be presented. You can quickly print your Activities Calendar by pressing the Printer Icon located at the bottom of the Activities Calendar window. Figure 36 - Activities Calendar shown in Weekly View format Monthly View Click on the Monthly button to see the number of activities scheduled for each day of the current month. The red number in the lower right hand corner of the date shows the number of activities scheduled for that day. Each day is a button and the current day is active (button depressed). Space limitations prevent showing more than the number of events for each day. If you double click on a different day on the Monthly view, you will go back to the Daily view to see the actual activities for the selected day. Use the controls below the calendar to move to a different month or year. Also to examine a different day, select the Calendar Icon located at the bottom of the Activity Calendar window, double click on a different day, and the selected day will be presented. You can quickly print your Activities Calendar by pressing the Printer Icon located at the bottom of the Activities Calendar window. 37 Figure 37 - Activities Calendar shown in Monthly View format Summary View An overall summary listing of Activities is shown under this view. Click on the Summary button to see all of your activities listed in chronological order. If you highlight an activity and go to one of the other views, you will see the same activity in a different context. If you double click on an activity you will display that contact’s record. As an added convenience, you can also get a summary of Historical information by clicking the History check box on the screen. To move to a specific day, select the Calendar Icon located at the bottom of the Activity Calendar window, double click on a different day, and the selected day will be presented. You can quickly print your Activities Calendar by pressing the Printer Icon located at the bottom of the Activities Calendar window. Figure 38 - Activates Calendar shown in Summary View format Buttons and Controls Add Use this button to schedule a new activity. Edit and Delete These buttons are active only when you select (highlight) an activity on the Calendar. You can edit or delete the selected activity. Sweep You can re-schedule one or more activities from the Activities Calendar or Contact's Agenda. When you click on Sweep while viewing the Daily, Monthly, or Summary list of activities the currently selected date is assumed. 38 Figure 39 - Sweep dialog 1. Verify or change the time range for the activities you wish to re-schedule. 2. Verify or change the new activity date. Tomorrow is the default value. See Date and Time Shortcuts. 3. Click on OK to change the schedule date for the selected activities. Accomplish Click on Accomplish to copy the selected activity to the history file and delete it from your list of current activities. Show Type When no items or all items in this list box are selected, the Calendar displays all activity types: CALL, ACTION, MEETING, and other types you may have created with the scheduler. To see only Calls, select CALL in the list box. Similarly, to see only Actions, select ACTION in the list box. History Check this box to see accomplished activities or click this box again to see pending activities. User To see activities assigned to a different user, select a User ID from this scroll box. You will only see those users that your configuration setting will allow you to see. Zoom Press the Zoom button to see the full contact record for the selected activity. Or, double click on an activity to display the contact record. Reschedule To reschedule an appointment, simply highlight and drag the event from one date/time cell to another. You can do this by moving your mouse pointer to the date/time cell that you want to move, press and hold your left mouse button down. While still holding your mouse button, drag the mouse pointer into the new date/time cell and "drop" your event into its new slot by releasing the mouse button. 39 3.4 CAMPAIGN LISTS There are numerous occasions when you would like to make a list of all contacts that have a special significance in order to carry out a business activity. We call these lists Campaign Lists, and when you create one, you can use it over and over again. For example, you might want to create lists for the following purposes: Make a phone call to a special group of people who are holding a specific stock. Produce a report of everyone living in a certain zip code. Follow up a mailing to a special group with a phone call. You can produce a campaign list with specified characteristics. Once you have created such a list, you can save it and reuse it whenever you wish. You can work through the list as time permits and come back to the same place on the list by crossing off the entries as you go. You can categories these campaigns in groups such as calling type campaigns, action type campaigns, big group campaigns and maturing investment campaigns and Broker’s Ally makes it easy to segregate and organize them under these headings. To generate a telephone calling campaign Calls list, choose View from the menu, select Campaigns and Call Lists, click the New List button, and give a descriptive name to the list you are about to create and press the OK button. You can use one of the pre-defined list templates or create your own. List Templates When creating a campaign list, you can choose from a pre-defined list. By selecting one of these list templates, Broker’s Ally will create the search and sort criteria for you. You can change the search and sort criteria before creating your list by pressing the Edit Filter button. Figure 40 - List Templates Edit List You will now come to the Edit List dialog. Because we provide extraordinary flexibility in choosing selection and sort criteria for lists, this dialog seems a little complex when you first encounter it. However, you build all expressions using plain English phrases. You define Search Properties to select contact records and Sort Properties to establish how to order these records. Then, when you Close the dialog, Broker’s Ally creates the list and presents you with a number of contacts that meet your specific criteria. 40 Figure 41 - List Creator Search Properties Click on the Add Filter button to bring up the Search Logic window. You will build a logic expression utilizing one or more database fields to construct the filter for selecting contact records. You can use the fields in one or two of the following files: contacts, activities, histories, or postings1. For example, suppose you want to build a Call list for everyone having a scheduled CALL activity dated March 13, 1997 or before. You will select contacts based solely on activities information. 1. Select Activities - Type from the Field combo box, 2. Select Equal to: (=) from the Operator combo box, 3. Enter CALL in the Value field, 4. and click OK. On returning to Edit List dialog the Search Properties Criteria displays: "Activities - Type Equal to: (=) CALL". Once again click on the Add button adjacent to the Search Properties list box to bring up the Search Logic window. 5. Select AND in the Continue Previous Statement With group, 6. Select Activities - Activity Date from the Field combo box, 7. Select Less than or equal to: (<=) from the Operator combo box, 8. Enter 3/13/2017 in the Value field, 9. and click OK. On returning to Edit List dialog the Search Properties Criteria displays: "Activities - Type Equal to: (=) CALL" "AND Activities - Activity Date Less than or equal to: (<=) 3/13/2017" Notice that the first clause is connected to the second clause with AND, meaning that both clauses must be true in order to select a contact. 1 You can select contacts using contact and activity criteria or contact and posting book criteria but not activity and posting book criteria. 41 Please Note: A Short Cut for creating calls list: 1. Select Activities - Activity Date from the Field combo box, 2. Select Is Past Date or Today; (<=Today) from the Operator combo box, 3. Press the Refresh button every day. The operator will automatically take today’s date from your computer clock and place it into the Date criteria. Network Users If you are running Broker’s Ally on a network, you will want to create a Calls list containing only your calls. You must therefore additionally select activities assigned to you. Once again click on the Add Filter button to bring up the Search Logic window. 10. Select AND in the Continue Previous Statement With group, 11. Select Activities - Activity For User from the Field combo box, 12. Select Equal to: (=) from the Operator combo box, 13. Enter your User ID (assume XYZ for this example) in the Value field, 14. and click OK. On returning to Edit List dialog the Search Properties Criteria displays: "Activities - Type Equal to: (=) CALL" "AND Activities - Activity Date Less than or equal to: (<=) 3/13/17" "AND Activities - Activity For User Equal to: (=) XYZ" . Sort Properties You have finished building the select statement, and now you must create a sort statement. Press the Add Key to bring up the Search Logic window. You now build a logic expression utilizing contact and activity fields to construct the sort statement. For example, suppose you want to sort the Calls list mentioned above by Last Name. Simply select Contacts - Last Name from the Field combo box and click OK. On returning to the Edit List dialog the Sort Properties Criteria displays: "Contacts - Last Name" If you construct a sort statement with several clauses, the clauses will always be ANDed. Working with a List Once you have created a Calls List you can scroll through the list and make your phone calls. To see the full contact record for a member of the list select a list entry and click the Zoom button. If you have a modem, you can click on Work and the computer will dial the work phone number for you. You can take notes, make changes, and call up the Schedule Activity dialog to schedule the next call. Using the right and left arrows on the contact screen, you can scroll through your list. The Actions list and Groups list function exactly the same and we have provided these categories only for your convenience. The Maturity list is designed to create a list based on maturing bonds and selects contacts by examining ranges of Maturity dates in the posting book. 42 Figure 42 - Calls List Dialog The View List dialog has other buttons besides Zoom to a contact. You can use a List to generate reports (or mailing labels) or print letters with the mail merge feature. Figure 43 - List Viewer 3.5 ALERTS The Alert system will keep you on schedule while you are running Broker’s Ally, even if Broker’s Ally is minimized and you are working with another Windows application. The Alert system is Broker's Ally's alarm clock, and it will notify you when a scheduled activity comes due. When the alarm goes off, the Alert dialog pops up and displays the current event along with any other events that may require your attention. You can do one of the following: Click the Zoom button to go directly to the appropriate contact window in Broker’s Ally. Click the Snooze button to delay 10 minutes before issuing the same alarm again. You can change the Snooze delay by clicking on the up/down arrows next to the Snooze button. Click the Edit button to change the scheduled activity. Click the Delete button to remove the alarm event. This does not erase the scheduled activity, only the alarm associated with this activity. 43 Click the Close button to leave the dialog and continue using Broker’s Ally. Figure 44 - Alert Alarm Dialog When you click the Zoom button or double click on a contacts name, the Alert system will take you to the contact record for this activity. The Zoom button will not be active for Reminder events, which are not associated with a contact. For example, Thomas Adams is scheduled for a call at 4:00 PM. When it comes time to give Thomas a call, Broker’s Ally will display an alarm message. By clicking the Zoom button, you can move directly to the contact record for Thomas Adams. You can snooze an alarm, which means putting the message off for another 10 or desired Snooze minutes. If you find the alarms annoying, do not select the Activate alarm option when you schedule an activity or increase the Cycle Minutes setting in User Preferences. 3.6 SEND YOUR CONTACTS THE INFORMATION THEY REQUESTED Marking Note After a phone conversation or meeting where a customer requests additional information, you will want to create and mark a note to insure that you send the correct information. After creating a note in the customer's record, click on the Mark button. The note will automatically be marked for your user ID, MGR if you are a single user. In a network installation, the Mark button will bring up a Mark dialog and you will notice that your User ID is displayed. Click OK to mark the note for your list of marked notes. You can also select another User ID to mark the note and assign it to another user’s list. To unmark a note, simply click the Unmark button. You can print your marked notes on labels at the end of the day by selecting Marked Notes from the Mail menu. The Marked Notes feature will print the customer's name and address on one label, and the note itself on the adjoining label. Mr. & Mrs. John Jones Send information on PXG Growth Fund. Include 1234 Town & Country Road business card and prospectus. Apartment 15b Philadelphia, PA 98765-1234 Figure 45 - Marked Note Report Printed on Mailing Labels At the end of the day, the label containing the note can be used to keep track of what the customer is expecting to receive. For your convenience, the label that displays the customer's name and address can be placed on the envelope for mailing. 44 1. The first thing that you will want to do when a customer requests specific information is to type the information into the Notes section of the contact record. Mark the note by pressing the Mark button. 2. At the end of the day, select the Marked Notes option from the Mail menu and print the marked notes on labels. 3. Finally, use the printed notes and labels to prepare mailings of the requested items. Figure 46 - Marked Note Screen 3.7 KEEP TRACK OF YOUR PROGRESS It is important to know how well you are calling. The Tallies Report, located under View, Reports, provides you with an instant view of your progress on a weekly, monthly and yearly basis. Broker's Ally will report and graph how many calls you have made and how often a call resulted in a contact. Also, in network situations, the manager can evaluate another user's call progress by viewing their tallies information. This is a powerful and useful tool for managers to track the calling activity of their employees. The Tallies Report gives you the opportunity to set goals and track your progress towards them. For example, you might give yourself a goal to contact 50 people a day. Periodically, you can check your tallies. If your tallies report shows that you have exceeded your goal, then adjust your goal higher. If you are having difficulty reaching 50 contacts a day, readjust your goal to a more realistic level. History of Accomplished Activities You can also view your history of Calls via the Activities Calendar. Choose Activities Calendar from the View menu, select Summary view, check the History box, and select CALL in the Show Type list box. You can view the same information using the history report under Standard reports. 45 Figure 47 - History Summary Showing Accomplished Activities A more detailed history report would be the Weekly History Report. This report will show you the number of activities you scheduled and the number of activities you accomplished for each Activity Type, Call, Action, Meeting, etc. The graphical report will process the activity information on the previous week Sunday through Saturday. This report includes Goals that you setup in User Preferences, User Info section. Below is an example of the Weekly History report for the Activities Type, Call. 46 CALL Scheduled Accomplished Sun Sun 10 15 Mon 27 39 Tue 29 41 Wed 15 24 Thu 25 33 Number of Events Sat Total Goal 0 148 100 0 197 100 Fri 42 45 45 40 35 30 25 20 15 10 Mon Tue Wed Accomplished Thu Fri Sat Scheduled Figure 48 - Weekly History Report 3.8 SEND YOUR CONTACTS MARKETING LETTERS The Broker’s Ally word processor, also known as the Letter Writer, is designed to perform a multitude of writing tasks. You can compose new letters, amend old ones, and send individual or group mailings and merge contact record information to produce personalized letters. Let’s say that you are running a campaign to gain a higher level of investment from your clients. You want to target clients who have a net worth of over $250,000 and an interest in high growth funds. Decide that you will begin the campaign by sending a letter detailing certain high yield funds. Using the Letter Writer you can create an attractive marketing letter and generate a personalized mailing to each of your clients that have been marked with an interest in high growth funds and a user field indicating a net worth of $250,000 or greater. 1. To create the group mailing, you must first create your letter. You can use the integrated word processor by selecting Letter Writer from the Mail menu. 2. Instead of entering an impersonal appellation such as: “Dear Client,” or “Dear Prospect,” Use the built in merge codes to allow you to personalize your letter. For example you could enter “Dear ” followed by merge codes for the Salutation and Last Name or Nick Name. Once you have created and saved your letter, you are ready to create your mailing list. Select Mail, Group Letter, New List and enter the criteria into the Edit List dialog. 3. The letter will be merged with the names and addresses from your mailing list and sent directly to the printer. Letters will not be printed for any contact records that have the No Mail option checked unless you select the Ignore No Mail option in User Preferences. 47 3.9 SALES AND M ARKETING M ANAGEMENT WITH BROKER’S ALLY Broker’s Ally contains many sales and marketing support features to help guide brokers to sales opportunities. As a busy broker, you can often find yourself reacting to a crisis, rather than taking proactive actions for your clients. There are many features of Broker’s Ally that were designed to help you to be a good watch-dog (always reviewing the status of products and people) and, in short, being an excellent account manager. Specialized Sales Support Functions Under the View menu you will find many scheduling and list generating features to aid your sales campaign efforts. The pull-down menu depicted below describes each of these functions. As you can see, in addition to the normal Activities Calendar that you use on a daily basis to conduct your business, there are four types of “attack” lists under Campaigns that you can use to support proactive marketing campaigns. Figure 49 - Pull Down Menu showing sales and account management campaigns Attack Lists There are four categories of lists you can create for your sales and account management campaigns. For example, you may want to create a list of all people in a Zip code range to call upon, or possibly a group of people whose bonds are maturing. First you should identify the type of Activity you wish to pursue, such as Calling, Action execution, or Maturity review. Select one of these list categories, create the list, and then attack it! Four Groupings of Contacts from your Database for Targeted Campaigns Call Lists - a list, or many lists, of contacts that you can approach to sell or market new products or services using the telephone as the main tool. Action Lists - a list, or many lists, of contacts for whom you have a certain action in mind. For example, you might create a list of your clients who own a certain stock that you wish them to sell. Group Lists - a list, or many lists, that you can create comprising groups of clients who might share particular characteristics, such as an interest in new offerings and mutual funds. Maturity Lists - a list, or many lists, of clients who have bonds or other products that are maturing on a specific date as specified in the security setup. This is a handy way for brokers to keep track of these people, and see the contact record, take notes, and make calls. 48 Shown in the figure below is the Attack List calling list created by selecting contacts from the database using selection and sorting criteria. Figure 50 - Sample Calls Campaign List Click on View List to see the resulting list of contacts. You can then click on a contact and press the Zoom button (or double click on a contact) to display the Address page for the contact. From here you can dial the phone number and take notes in the usual manner. Figure 51 - List of people you have selected to call in your marketing campaign Targeting clients with Maturing Bonds and CD’s Using the same concept as described above for creating a calls list, you can create a Maturity List campaign. From the View menu, select Campaigns and Maturity List, then select the name of the list your wish to use. Or, to create a new list, click on the New List button and enter the criteria for the maturity dates you wish to track. 49 Figure 52 - Maturity Campaign List When you create a list of client contacts based on the maturity date of their financial products, you will see the dialog box below. Fill in the range of maturity dates and click on the Create button. The Maturity Date for a bond or CD must have been entered along with its other characteristics via the Edit Securities dialog. Figure 53 - Selecting maturing securities 3.10 COORDINATE YOUR OFFICE INTO A WORKGROUP A network version of Broker’s Ally allows many people to use the database simultaneously. This insures that every person in your office has access to the constantly changing contact information. Such a system avoids confusion and facilitates accurate information exchange between the members of your staff. The network version features password protection, restricted user access and shared resources. Additional users can be added to your network by contacting your Broker’s Ally sales representative at 484-875-1710. 50 CHAPTER 4 WINDOWS FEATURES This chapter is designed to give those of you who have never used Microsoft Windows a brief introduction to its features and controls. Microsoft Windows is a powerful, graphics-based operating environment for your personal computer. Its function is to act as an interface between the underlying operating system, and you, the end user. Many programs, including Broker's Ally, have been specifically written to use the Windows interface and its graphical features and controls. Broker’s Ally is designed to run on Windows 95, 98, 2000, ME, XP, Vista, Win7 and beyond. Microsoft Windows, like the Apple Macintosh is an icon driven system. Instead of requiring you to remember and type clumsy text-based commands, Windows presents all your command options as menu choices or picture icons representing programs or groups of files. To execute a command or start a program, you simply point to it and click your mouse. Windows does all the hard work. A second feature of Windows is that it is Event Driven. This means that it will switch from whatever it is currently doing to a new task you select with your mouse. More importantly, by using the event driven model, Windows allows you to start virtually any process at any time. Processes or controls that are incompatible with a current operation are simply not available - shown as grayed out in Windows. Broker’s Ally is a robust Windows application, and unlike more simplistic software, is a MDI (Multiple Document Interface) application. The MDI model allows you to have more than one task in progress at a time. This means that you can open one or more contact windows in Broker’s Ally while displaying a sales script or portfolio report without removing the contact window from the screen. This is in contrast to the Single Document Interface (SDI) model utilized in less robust or less sophisticated Windows applications. With the Broker’s Ally MDI design, you can switch between the windows by clicking on one or the other to make it the active window. You can even start one specific process several times. For example, you could use the Find Contact command in Broker’s Ally to display one contact’s record and then use it again to find a second contact. The two contact displays will appear in two distinct windows, allowing you to compare their entries or move data from one window to another window using drag and drop, or other windows editing tools such as cut, copy and paste. One of the key features of Microsoft Windows and Scherrer’s Broker’s Ally is the consistency of the menus and command controls. The icon used to close an application always appears at the top left corner of the applications main window and always closes the current application. The same concept applies to all Windows programs. Thus, once you have learned a control or function in one Windows application, you have learned it for all. 4.1 THE WINDOWS DISPLAY The Windows display is made up of Menus, Icons, Groups of Icons, Control Buttons and, of course, Windows. The main Windows screen comprising the entire display surface is called the Desktop. The Program Manager is used to display icons representing other programs and the Main Menu. It also controls how other programs interact and allows you to switch between them. The Program Manager is identified by its name in the Title Bar of its primary window. When you close the Program Manager, you close Windows and any program running within Windows. Within the Program Manager’s main window, there are several smaller windows containing groups of program icons as well as several individual icons representing other program groups not currently displayed. The Program Manager’s main window, Group windows and group Icons, demonstrate the three possible states for a window: 1. The Program Manager’s window is Maximized - expanded to utilize the full desktop. 51 2. The group Icons are Minimized - reduced to a single icon. 3. The Group Windows are Resizable - you can expand or contract them to any desired size or shape and place them anywhere within the Program Manager’s main window, their parent window. Figure 54 - Windows display 4.2 MOUSE In Windows, you will use a mouse or another pointing device (i.e., track ball, joystick, or a light-pen) to communicate with your computer system. The mouse controls a screen pointer that usually takes the form of a hollow arrow (). If you do not have a mouse or any other pointing device, it is still possible to use Windows through the keyboard. However, because Windows has been designed to work as efficiently as possible with a mouse, some keyboard commands are awkward and inconvenient to use. In order to get the most out of Microsoft Windows, a mouse, or another pointing device is essential. Using the mouse involves positioning the pointer () on the screen and signaling an action by pressing the left or right mouse button. You can Click, Double Click or Drag & Drop with your mouse. Click: Position the mouse pointer over the desired area of the screen and press, then immediately release, the button. Double-click: Position the mouse pointer over the desired area of the screen and quickly press and release the button twice. Drag & Drop: Position the mouse pointer and press the button without releasing it. Then move the mouse pointer to a new location before releasing the button. Upon release of the button, whatever is being dragged will be moved to the new location. 52 4.3 RESIZING WINDOWS As described, Windows allows you to display windows in one of three states - Maximized, Minimized or Resizable. Maximizing a Window You can resize a window to its maximum size, either determined by the work area of window’s parent window or the desktop depending on the type of window, by clicking on the Up Arrow located at the top right of the window. If a window is of fixed size, the sizing arrows are not displayed. Minimizing a Window To prevent the windows screen from becoming cluttered with open windows, you can temporarily minimize a window. By minimizing windows, you keep the screen display more organized without having to terminate active applications. An appropriate icon represents the program or window. To minimize a window click the Down Arrow located in the upper right corner of the window. Resizing a Window When a window is Maximized, you can reduce it to a Resizable window by clicking on the Double Headed Arrow Tile and Cascade The Tile and Cascade options on the Window menu allow you to systematically resize all active windows. The Cascade option on the Window menu will arrange all open windows in an overlapping stack from top to bottom, left to right. The order of precedence is determined by the order you last accessed the windows, with the most recently accessed displayed on top. Each window is displayed in a standard size, overlapping the other windows as much as necessary. The Cascade option is most useful for displaying a single window among a group of active windows at the same time, while allowing you to switch from one window to another simply by clicking on an overlapping edge. 53 Figure 55 - Cascaded View The Tile option on the Window menu will arrange all open windows in equally sized rectangles set side by side. When the tile option needs to reduce the display area of a window to fit, it will crop the window and display scroll bars to allow you to move the image in the resulting window. The tile option places the most recently activated window in the top left position and then arranges the rest down and to the right in the reverse order of activation. The Tile option is most useful for displaying multiple windows simultaneously. If you want to compare two contact records, the Tile option can display them side-by-side. Closing Windows To close a window and the program it contains, make sure that it is the active window by clicking anywhere within the window and then, click on the control menu box, which is represented by a horizontal dash in the upper left hand corner of the window. This will bring up a control menu. From the control menu choose Close. Alternatively, you could select Exit from the File menu or press the Alt-F4 shortcut key combination. Scroll Bar Some windows may also have a scroll bar. A scroll bar is used when a window is not large enough to display all of its contents at once. The bar will appear along the right side and/or the bottom edge of the window. Figure 56 - Scroll Bar The scroll bar consists of a shaded bar containing a small square called the Thumb, which you can move by clicking on the scrolling arrows located at each end. The scroll bar represents the window’s entire contents, while the Thumb represents the section currently visible in the window relative to the 54 total display. To make large jumps, you can click on the bar just inside the arrow icon or drag the Thumb to the desired position. Icons Windows provide graphical pictures called icons. These icons represent programs as in the figures. Figure 57 - Program Icons Figure 58 - Group Icons The icons are designed to show a graphical image of the program it represents. Most of the icons include a written caption underneath to help you identify its function. If the caption is highlighted, the item is said to be Selected. You select the icons by clicking on them with the mouse pointer. You can also select an icon with a group by pressing the Tab or Shift-Tab keys. You can shift to another group by pressing Ctrl-Tab. Starting a program You can start a program or maximize a group by selecting its icon and pressing Enter or by double clicking on the icon. 4.4 MENU All general Windows commands and options are listed on the Main Menu. Windows is said to be menu driven because you can select its options from menus rather than typing the commands with a keyboard. Figure 59 - Windows Drop Down Menu Example 55 When you click on one of the main menu options, e.g., File, you will see a drop down list of additional options associated with the selected menu headings. To select the feature you want, click the mouse button when the pointer is on the option name. A shortcut key is also available for some of the options. Shortcut (accelerator) keys, when available, are always listed to the right of the features it represents. Pressing these shortcut keys is the same as making the menu selection. 4.5 RUNNING MULTIPLE APPLICATIONS One of the principal advantages of using Windows is the ease in which it allows you to run several applications at once. You can switch between programs without exiting from one application and loading another. Switching between active programs When you are running multiple applications, there are a couple different ways you can switch between the programs. You can use either the mouse or the keyboard to accomplish this task. If several applications are running within Windows, and the applications are visible on the screen, you can use your mouse to click on the window of the application you would like to work on. This makes the application Active. If the desired application’s window is not visible on the screen (it is covered by the current active application’s window), you can use the keyboard to switch to the desired application. To do this, press Alt-Esc. This will bring each of the active programs to the front one at a time. Figure 60 - Active Programs in Windows You may also press the Alt-Tab. The name of the next application will be displayed in a dialog box in the middle of the screen. Hold down the Alt key and continue pressing the Tab key until the desired application name is shown. When the name of the application desired appears, release both keys and you will switch to the application of your choice. This is often faster than Alt-Esc, as it does not need to redraw the screen for each application before you make your selection. Exiting an Application When running multiple applications, you can exit a single application by selecting Exit from the File menu, double clicking on the Control icon at the top left of the program’s window or pressing Alt-F4 when the application is active. If you select any of these options while the Program Manager is the active application, it will shut down all active applications and close Windows. When you are running multiple applications, or when an application displays multiple windows, it is often easy to become confused as to which control button or menu applies to which window or application. It takes some practice to resolve this confusion. Just be careful that you are pointing to the correct icon or menu choice before you click on it. 56 PART 2 REFERENCE CHAPTER 5 FILE MENU Figure 61 - File Menu The File menu contains four fundamental operations: 1) Database selection and manipulation, 2) basic settings for the default Access database, ODBC and TAPI, 3) Print operations and 4) program Exit. The database options allow you to create and select among existing Broker's Ally databases. It also allows you to import and export data from and to other programs. The Global Change function allows you to change information over an entire group of contacts, or the entire database. The Download option specifically imports security prices into Broker’s Ally or security transactions to the Broker's Ally posting book. The Print Setup option gives you the ability to choose the print device, port connection and output options you want to use with the Broker’s Ally Letter Writer. You can preview a letter on the screen with the Print Preview option or print it directly to a local or network printer by selecting the Print option. The Reports function has a separate and distinct Print Setup, Print, and Print Preview controls. Page Setup allows you to setup the page layout within your letter writer. This item is only active when you are using the Broker’s Ally Letter Writer. The Exit option closes down Broker's Ally. 5.1 NEW DATA SOURCE The New Data Source option allows you to create a new Broker's Ally data source; essentially a new database. A data source consists of many individual tables or files but appears to the user as one single database. In this section, we will explain how Broker’s Ally creates data sources and how it manages these databases. While most software programs are extremely limited in the number, type and configuration of its data files, Broker’s Ally is designed to be extremely flexible and powerful. Unfortunately, power and flexibility come with one significant price, a certain amount of complexity. You need to invest a few minutes of your time to understand how Broker’s Ally creates and maintains its data files in order for you to fully utilize its features. If you are a single user (not on a network), we provide default setup values to save you time. You will, however, benefit from an understanding of the Broker’s Ally data structure. 57 Data Structure In Broker’s Ally, a data source is held within the ALLYWIN.mdb file. Some files are unique to a specific Broker’s Ally data source and some are common to all Broker’s Ally data sources. For example, contact data for each data source is stored in a separate file whereas scheduled activities for all data sources are stored in a common file. This allows you to see all activities for the day regardless of which data source the contacts reside in. The single user and default network data source configuration is as follows: Activity.......................................Common Alert ..........................................Common Book..........................................Common Broker Numbers ........................Common Lists ..........................................Common Marked Letters ..........................Common Notes ........................................Unique People .......................................Unique History .......................................Common Remembered Responses ..........Common Securities ..................................Common Tallies........................................Common User Fields ................................Common The logic for this structure is really quite simple. Those files containing data that is unique to an individual users data source is specified as unique. Those files that contain data that can be beneficially shared between users or data sources are defined as common. For example, the people file containing your personal prospects should be unique otherwise all contacts would be in the same data source. On the other hand, the list of broker numbers (rep ID’s) is not likely to differ between users of Broker's Ally or between clients or prospects - clearly a candidate for a shared file. Other files are similarly allocated. Whenever you mark a letter it is stored in a common file so that you can print marked letters for all data sources in one efficient operation. Notes are unique since they apply to individual contacts - already defined as unique. Selecting a Data Source Before you can create a new Broker’s Ally data source, you must first decide to name it with a name of your choosing. Selecting a Default File Location The second step is to select a default file location by specifying a Default Data Path, which you setup via Edit User Preferences as discussed in the Edit chapter. Broker’s Ally uses the default Data Path as the location for creating new data sources unless you specify a different location at the time of creation. When Broker’s Ally is shipped, the Default Data Path is initially set to the same directory you used to install the program (for example C:\BA9). However, you can change it to whatever location best suits your situation. If you are an advanced single user, you may wish to place all the data files on your computer in subdirectories, branching from a single directory called C:\DATA. Thus you might set your Brokers Ally data directory to be C:\DATA\BAWIN. This would allow you to easily backup all of your frequently changing data files by backing up the C:\DATA subdirectory and all its subsidiary directories without needing to back up all your program files that change less frequently. In this case, you would set your Broker’s Ally Default Data Path to C:\DATA\BAWIN. 58 Figure 62 - User Preferences dialog Creating a New Data Source When you select New Data Source, the Create New Data Source dialog appears. The dialog box contains a listing of all previously defined data sources and the input fields for creating a new one. The scroll box showing existing data sources is inactive and displayed for information purposes only. The Scroll box at the top right allows you to select the data source to be used for the new Broker’s Ally data source. If you are a single user, the only available option is Local Data. However, if you are a network user with more than one data source defined, you should select the data source most appropriate for the new data source you are creating. Your system administrator can provide guidance as to the correct data source selection. 59 Figure 63 - New Data Source Dialog Enter a text description of the new Broker’s Ally data source in the input box located at the top left. The text description has no required format but should be short and descriptive. The middle right box is used to enter a unique file name. The file or table name you enter will be used unaltered as the name of the contact file. To maintain order, Broker’s Ally will automatically append an extension appropriate for the data source selected; usually an Access database format. Broker’s Ally data are nearly all in one file entitled BAWIN.MDB. If you want to place the data source files in a directory other than that defined in User Preferences, you can include a drive and path as part of the file name definition. Broker’s Ally will use the specified drive and path as the location for the new data source. For example, if you type C:\DATA\TEST, the contact data file TEST and other related files will be created in the C:\DATA directory. Once you have entered the required file name (with optional path) and text description, and selected the Data Source Type, click on OK to create the data source. 5.2 DATABASE OPERATIONS Figure 64 - Database Operations Menu The Database Operations option on the File menu controls file transfer and file manipulation. The first two options, Import and Export, allow you to move data into and out of Broker’s Ally. Broker’s Ally can import and export data from a variety of file types. The Download option specifically imports security price files (a security master file) and investment trade and/or transactions into Broker’s Ally. The Delete Data Source option allows you to remove a Broker’s Ally data source and all its unique 60 associated data files from the system. It does not remove common data files (e.g., Activities or History) from the system unless you are deleting the last available data source. Finally, the Maintenance option rebuilds database indexes for a selected data source; a handy option used if your files become corrupted through damage to the hard disk drive. Import You can import data from several sources. The ASCII Loader (also known as a CSV file importer), which is available only in the Gold version and above of Broker’s Ally, accepts information in a standard ASCII format (American Standard Code for Information Interchange). The Broker's Ally v5.x upgrade loader copies data from a BA5 database, while the Broker's Ally v6.x loader copies data from another Broker’s Ally v6 database, and so on. To bring data into Version 9, from version 8 or from version 7, select the appropriate Import utility from the dialog. Go to Database Operations on the File menu and select Import from the popup menu. Figure 65 - Import dialog ASCII Import (Gold, Network, and Portfolio only) CSV File Import Broker’s Ally accepts data from an ASCII file in comma-delimited format. The fields may be enclosed within double or single quotes and each record must be terminated with <CR><LF>. The ASCII loader will accept contacts, notes, postings, and securities information. When importing notes and postings, the ASCII loader will only accept 1 note and 1 posting per contact record transferred. 61 Figure 66 - Map ASCII fields to Broker's Ally fields 1. Select ASCII Loader from the Import dialog and press Start. 2. Supply the filename of the ASCII file. 3. The Map Fields dialog presents (on the left) a list of sample fields taken from the first ASCII record. The list box on the right shows the destination fields in Broker’s Ally. You must map every field you wish to import by selecting a sample data field in the left hand list box and a destination field in the right hand list box. Select "<Do not Map>" to unassign an incorrectly mapped field. Figure 67 - ASCII Options 4. If the incoming data is in upper case, we recommend that you check Convert to Mixed Case in the ASCII Options dialog. 5. To add default data to each contact, check Add default data. 6. Start transfer with record # and Number of records to transfer, enables you to transfer a specific number of records at a time. 62 Figure 68 - Add default data to each contact as it is transferred We provide a special field, Full Name, which will accept a contact name in the format Mr. and Mrs. John J. Jones, Jr. If you map an ASCII field to Full Name, we will attempt to identify the various components and load them into the appropriate name fields: Salutation, 2nd Salutation, First Name, Initial, Last Name, Suffix. When loading into the Flags field, commas should separate your flags. You can import one note and/or one activity and/or one posting along with each contact, but you cannot import notes, activities or postings separately. The loader can only import a note, activity or posting if it knows the identity of the contact record. You may also use the ASCII Import module to load security information from other pricing service that can produce an ASCII file with the following record information: S, ALD, S, "Allied Signal, Inc.", 67.75000, 05/26/93 where: Field # 1. must be "S" for security (upper case). 2. ticker symbol (upper case). 3. type (upper case): "S" for stock, "B" for bond, "C" for CD, "M" for mutual fund, "A" for annuity, or "U" for unit trust. 4. name of security (enclose in single or double quotes if the name includes a comma). 5. price. 6. date when priced in MM/DD/YY format. The ASCII Loader saves your setup (file name, field map, and mixed case option) for future use. Broker’s Ally Version 5 or 6 or 7 or 8 Import Broker’s Ally has convenient import utilities that can copy your data from previous Broker’s Ally version 5, 6, 7 or 8 to Broker’s Ally v9 and beyond. The import utility will bring over all User ID information, securities, contacts, notes, postings, Class definitions, User Field definitions, and scratch pads. If you have lots of data, this can take a long time, so please make provision for this needed time. 1. Under the File menu select Database Operations. From the popup menu select Import. 2. Select Broker's Ally v5.x upgrade and click Start. 63 3. Make sure you specify the correct directory for your BA5 data files. 4. Click OK. 5. Go to User ID under the Edit menu, select Configure, and make sure the All Broker Numbers option is checked. 6. For Level0, Level1, or Level2 users, you will have to assign rights because we cannot convert the information in BA5. While in the Configure dialog (step 5) select Edit Levels and assign rights as appropriate. The import process checks the Broker’s Ally database for duplicates before loading any new information. Thus you can run this utility several times without fear of overwriting existing data or making duplicate entries. You can stop the loader at any point and start again at a later time. Broker’s Ally Import utility You can import contacts, notes, activities, history, positions, and security information from another Broker’s Ally database. The common files must be in the same disk directory as the contact and notes files. You can import new contacts (and associated notes, etc.) and/or update existing contacts (and associated notes, etc.). Similarly, you can import new securities and/or update existing securities. Furthermore, you can import information that has been entered or changed as of a specified date. Figure 69 - Import dialog 1. Select the data source type for the import database. 2. Select Import new contacts if you want to import contacts that do not exist in the target database. 3. Select Update existing contacts if you want to update contacts that already exist in the target database. 4. Select Import new securities if you want to import securities that do not exist in the target database. 5. Select Update existing securities if you want to update securities that already exist in the target database. 6. Enter a date for Changes since. BA will import only the data records that have been entered or last changed on this date or more recently. To import all data records, erase the date. 7. Click OK. 8. In the next dialog select the contact file for the import database. 64 Update Rules Every data record has an associated date and time when it was last edited. It will be updated only if the last edit date/time of the import record is more recent than the last edit date/time of the target record. Furthermore, every contact data record has a last edited date for each group of fields. The fields in each group are updated only if the last edit date is the same or more recent in the import record. The field groups are: NAME: All name fields and 2ndName, NickName, SS/TaxId. ADDRESS: Company, Address, City, State, Zip, Country, Carrier Route. PHONE: WorkPhone, WorkExt, HomePhone, AltPhone, AltExt, FaxPhone. ACCT: OpenDate, Status, Owner, Secondary Rec, Account. INFO: Birthday, Flags, Interests, Rating, SourceKind, Source, Comment, NoMail. USERFIELD: User Fields. LINK: Link information. You can minimize the time required to import data by entering the most recent possible date for Changes since and selecting only Import new.... Searching for records to update is slower than searching for new records only. Export Broker’s Ally allows you to export a selected data source (or portion thereof) via the Export menu option in either ASCII or Broker’s Ally format. You may export contacts (and/or related notes, postings, activities, etc.) and/or securities to another Broker’s Ally data source or external database. If you export to an external database, you can transport the information to another computer. Figure 70 - Export Dialog If you have the Gold or above version of Broker's Ally, you may export contact or security information to an ASCII file. You choose the fields to export. 1. Under Data Source select a Broker’s Ally data source to export from. 2. Under Export Type select the export format, either ASCII or Broker’s Ally. 65 3. In the Using group, check List to use a list of selected clients and/or check Last Edit date to export only those records which have been changed as of a certain date. The List option has no relevance when exporting only Security information. If you check List, also select a List Type. If you check Last Edit date, also enter a Changes Since date. 4. In the Data group: Check Contacts to export contact information. Check Related Notes, Postings, etc. to export notes, posting book entries, activities, and history. Check Securities to export security information (Symbol, Description, Price, etc.). When performing an ASCII export, you cannot export related notes, etc., and we do not recommend exporting contacts and securities simultaneously. 5. Click on Start to proceed to other dialogs. ASCII Export ASCII Export writes the contact fields you choose to a text file. When exporting security information, all fields are written to a text file. Every field is enclosed in double quotes (" "), each field is separated from the next field with a comma (,), and each record is terminated with <CR><LF>. After you click on Start, the Open ASCII File dialog allows you select a destination directory and enter a filename for the text file to be created. If you choose an existing file, the export engine will delete the current contents of the file before writing to it. Click on OK to continue. When exporting contacts, the Contact Fields to Export dialog allows you to select the fields to write to the file. To select multiple fields, hold down the Ctrl key and click on as many fields as you wish. To select a group of adjacent fields, hold down the Ctrl key and left mouse button while you drag the mouse pointer over them. You may select FULL NAME to create a single field with a composite name such as Mr. and Mrs. John J. Jones, Jr. Click on OK to start exporting. The order of the fields in the file is the same as the order of selections in the Contact Fields list box, top to bottom. Figure 71 - Choose Broker’s Ally fields to export in ASCII format When exporting securities, the order of fields is: Symbol, Type ("stock", "bond", etc.), Description, Pricing Service, Price, Price Multiplier, Income Multiplier, Share Multiplier, Income, Last Edit Time (minutes from midnight), Date when Priced, Maturity Date, Last Edit Date. The multipliers are used internally by Broker’s Ally to calculate totals. Broker’s Ally Export You may export from one Broker’s Ally data source to another, or you may export to an unregistered data source that can be transported to another computer and merged with one of its Broker’s Ally data sources. 66 You can copy data from one registered Broker’s Ally data source to another by selecting a target data source in the To Data Source list box. All other list boxes are disabled because the file name and directory information are already known to Broker’s Ally. When exporting data to diskette, exporting contacts, related notes and postings, the diskette will hold approximately 300 to 400 contact records. When creating a list for exporting you can limit the number of contacts exported. In order to move data from one computer to another, you should export to an unregistered data source as follows: 1. Under To Data Source, select <Export>. 2. Enter a file name for the contact information such as "export", and select a Drive, Directory, and Data Source Type. Be sure to select a directory where no other Broker’s Ally data files reside. 3. Click on OK to begin exporting. 4. If you would like to delete the contact records after your export, check the box “Delete after export”. 5. After completing the export, backup the files on diskettes. 6. Restore the files to an unused directory on the second computer. 7. On the second computer, use Broker’s Ally Import to merge the data with an existing registered data source. Figure 72 - Broker’s Ally export dialog Download (Portfolio Level only) Various database download modules are being developed through special arrangement with Scherrer Resources, Inc. and the vendors of these databases. Contact your firm or database provider to ensure they are compatible with Broker’s Ally. Your Broker’s Ally Sales Representative can also assist you in determining what downloads have been developed for Broker’s Ally. 67 Figure 73 - Download dialog window The Download option is a specialized import process that captures portfolio data from a special purpose download file. It is designed to link your Broker’s Ally contact data with your client’s financial information from your firm’s back office. It enables you to link your Broker’s Ally files to your current client's portfolio information and update trades, prices and positions for you clients as frequently as desired. Interactive Data Download (IDC) The purpose of the Interactive Data download module is to transfer daily security price information from the Interactive Data server to Broker’s Ally. Security information includes latest price in US dollars, price date, description, maturity date and expected dividend/income. You must have an account with Interactive Data as well as Interactive Data’s DATAFEED software. Interactive Data charges you for each security priced through their service. To inquire about opening an account, call 800-432-5463 and select option 1. In Broker’s Ally you mark each security you want to price through this services and select Interactive Data in the Download dialog. Broker’s Ally also provides the option to price securities for all open positions or every security symbol found in the database. Broker’s Ally contacts the Interactive Data server either through direct dial to a local service provider or through the Internet, fetches the information, and updates your security table. At the end of the transfer you can inspect the data request file (DATAIN.TXT), the data result file (DATAOUT.TXT), the communications log file (DCI.LOG), and the Broker’s Ally download error file (ERRORS.LOG). The Broker’s Ally download utility uses the security Symbol (ticker or CUSIP) to request security information and always requests the latest available prices. If Interactive Data does not recognize a Symbol or information is no longer available, you will see an error message in ERRORS.LOG. If prices are not yet available for the current day, Broker’s Ally warns you and allows you to abort the operation. For more information about the Interactive Data (IDC) Download module, contact Interactive Data at 800-432-5463 and select option 1. See http://www.interactivedata-rts.com Pershing Data Download You must purchase the Pershing download module for a special fee and request the data feed from Pershing. The purpose of the Pershing download (PERSHBA6) module is to transfer (1) client information, (2) posting book data (holdings), (3) security information, and (4) setup definitions from ASCII files to Broker’s Ally. The ASCII files for 1, 2 and 3 are created by InfoDirect, while the definitions file is created manually and distributed separately. Although Version 1 is does not include the ability to download holdings and securities, the next version will do so. 68 This download utility will add or update clients, postings and securities. PERSHBA6 can run InfoDirect to create current ASCII files before loading the data. Pershing may wish to modify InfoDirect in order to totally automate this phase of the download. Pershing stores client name & address information in a free-form data block. PERSHBA6 attempts to identify all relevant components and load them into appropriate Broker’s Ally fields. For example, it must load the individual’s last name or custodian’s last name into the Broker’s Ally LastName field. It must locate the Zip code and load it into the Broker’s Ally Zip field. Etc. We cannot guarantee success in all situations, thus you may have to manually revise some client records in Broker’s Ally following a download. For more information about the Pershing Download module, please contact the Pershing representative for the hardware and software requirements for InfoDirect. Docking Transfer Use this feature to load data to your portable notebook computer that is temporarily “docked” at the network port. After you check the Docking Station option in User Preferences, you can download all of your data from the Main data source located on the network file server to your local computer. This allows you take your laptop PC home and continue using Broker's Ally. Select Docking Transfer and Docking Download from the File Data Operations menu to copy your data from the file server to a dBase data source on your PC. After you disconnect your PC from the network, you can work with the copy of the network data source which will now be located on your local hard drive. You may subsequently use Docking Upload to pass additions and revisions back to the network data source when you come back into the office and connect to your network. Broker’s Ally will asks you "Plugged into a docking station?" on start up after you have checked the Docking Station option and have downloaded a "snapshot" of your network data. Your answer will determine the next course of action. Yes to use the Main data source on the network file server, or No to use the local copy of the Main data source. Docking Download The Docking Download transfers only the data in the Main data source that you have privileges to view. You cannot download private Broker’s Ally data sources located on the file server; only the Main data source can be transferred using this Docking Download feature. Please Note: When undocked, private data sources which reside on your PC will have only contact information and notes. This is because postings, activities, histories, etc. are stored on the file server and are not downloaded. Docking Upload The Docking Upload feature allows you to upload all of your changes back to the network file server. Otherwise, changes you make to the local copy of the Main data source will be lost when you next download from the server. Docking Upload passes changes to Contacts, Notes, Postings, Activities, Histories, Securities, Remembered Responses, Phone Tallies, Alerts, and new User Field information back to the main database located on the network file server. Please Note: Marked Letters and Lists are not uploaded and consequently will be overwritten whenever you perform a docking download. 69 Global Changes Use this feature to change information over the entire database. You can modify the Owner field (thus reassigning the account to another representative), Flags, or Interests held within a selected group of contacts, or the whole database. Furthermore, you can add an Activity or History to a selected group of contacts. Global Changes is found on the File menu under Database Operations. Figure 74 - Global Changes dialog Selecting Contacts Choose a Broker’s Ally data source and select the contacts you wish to affect by: Uncheck List and Owner to change all contacts in the data source. Check List and choose a List Type to use a list of contacts. Check Owner and enter an Owner to change only the contacts with the specified Owner. If you are using a list, you will change only the contacts in the list having the specified Owner. Select Item Click the Owner, Flag or Interest button to enter the change you wish to make. Or click the Activity or History button to add an Activity or History for each contact. Click the Start button to make the changes. Global Changes for changing Owners Select Change to put a new Owner in each contact record. Select Replace to substitute a new Owner for a specified existing Owner. The New value is inserted only when the Old value is found. Select Delete to remove the Owner when the specified Old value is found. 70 Global Changes for changing Flags Select Add to add a new Flag to each contact record. Select Replace to substitute a new Flag for a specified existing Flag. The New value is inserted only when the Old value is found. Select Delete to remove the Flag you specify in the Old value edit box. Global Changes for Interests Select Add to check an Interest in each contact record. Highlight the appropriate Interest in the New Value list box. Select Replace to substitute a new Interest for a specified existing Interest. The New value is checked only when the Old value has been checked. Select Delete to uncheck the Interest you highlight in the Old Value list box. Global Changes for Activities and Histories Use this dialog to enter the information for Global Changes when adding an Activity or History to a group of contacts. In the case shown below, a group of contacts will be assigned a new year call on January 11, 2013. Figure 75 - Global Change - Add Activity Global Changes for Plan (Sales Planner) The Sales Planner is used to create sales and marketing campaigns for individual contacts or a group of contacts. You can create many different sales plans and have them readily available for future selling opportunities. Applying a Sales Plan to a List: Once you have created your Campaign List, click on File, Database Operations, Global Change. 1. Choose a Broker’s Ally data source in which your list exists. 2. Check List and choose the List Type. 3. Click on the Plan button in the Add section of the Global Change dialog. 4. Select the start date of your plan. 5. Highlight the plan you wish to Apply, and press OK 6. At the Global Changes Dialog, press Start 7. Broker’s Ally will display your lists that have been created. Highlight the list you would like the Sales Plan to be applied and press View List. Press the Global Changes button and you plan will be applied to your selected group of contacts. 71 Global Assign/Delete for Lists Use the List button to assign a List to a new owner. Thus, you can assign a List without an owner to a particular user. Furthermore, you can re-assign a List belonging to one user to a new owner. For example, you can assign a prospect list to another representative using this function. Figure 76 - Global Assign/Delete Lists 1. Use Select by Owner to display the Lists belonging to a particular user (or no user). Select a user from the combo box pull down list, or enter a User ID and click on a different edit control. Select <No Owner> to view Lists belonging to nobody. 2. The Lists belonging to the selected owner appear under Lists. Click on the List you wish to reassign and click on the new owner under Owner. The master table will be updated. When you select a List, BA displays the data source on which it is based. Please Note: You must have the User ID Edit right to reach this dialog. The contents of the Select by Owner and Owner controls may not include all valid users unless you have access to all users. Global Assign/Delete for Activities and Histories Use the Activities or Histories button to assign Activities or Histories belonging to one user to another user, or you can delete them for a specified user. The following explanation for Activities applies equally to Histories. To assign Activities or Histories: 1. Select the Assign or Histories button. 2. Select the user who currently owns the Activities or Histories in the from User list box. 3. Select the user to whom you wish to assign the Activities or Histories in the To User list box. 4. To move all types of Activities or Histories, make no selection in the Activity Types list box. Otherwise select one or more activity types. 5. To move all Activities or Histories regardless of the due date, make no entries for the Date Range. If you enter a From date, Activities from this date forward will be moved. If you enter a To date, Activities up to and including this date will be moved. Enter both From and To dates to 72 specify the first and last dates to be included in the move. For Histories, the date range applies to completion date rather than due date. 6. Push the Start button to begin the transfer of selected Activities or Histories from one user to another. To delete Activities: 1. Select the Delete button. 2. Select the user who currently owns the Activities or Histories in the From User list box. 3. To erase all types of Activities or Histories, make no selection in the Activity Types list box. Otherwise select one or more activity types. 4. To erase all Activities or Histories regardless of the due date, make no entries for the Date Range. If you enter a From date, Activities from this date forward will be erased. If you enter a To date, Activities up to and including this date will be erased. Enter both From and To dates to specify the first and last dates to be included in the delete operation. For Histories, the date range applies to completion date rather than due date. 5. Push the Start button to begin the deletion of selected Activities or Histories. Figure 77 – Global Assign/Delete Activities Delete Data Source Delete Data Source removes data source names from the list of data sources and erases their associated unique files from the hard disk. It does not delete data in the common data files such as the posting book or activity files unless you are erasing the last available data source. To delete a Broker’s Ally data source, select Delete Data Source from the Database Operations menu. Broker’s Ally will display the Delete Data Source dialog. Click on the name of the data source to be deleted and then click on the Delete button. Broker’s Ally will ask you to confirm your decision since the deletion is permanent and cannot be reversed. You are advised to backup your data files before you delete them in case your decision proves hasty. 73 Figure 78 - Delete Data Source Dialog Figure 79 - Deletion Confirmation Dialog Maintenance You may use the Maintenance function for re-indexing of dBASE files. The most common cause of a malfunctioning data file is a corrupted index file. If file searches or updates fail or take much longer than expected, you should re-index the file. If you have checked Direct File Access in User Preferences, Maintenance will also pack dBASE data files, i.e., remove deleted records. Maintenance does not remove orphaned records, nor can it recover corrupted files. An orphaned record is one whose parent contact no longer exists because you have deleted a data source. Figure 80 - Maintenance Options 74 No other users may use Broker’s Ally during the repair process since it requires exclusive use of the files. If a file is in use by another user, the Maintenance option will place “(locked)” next to the file name. Select a Broker’s Ally data source, and then choose one or more files belonging to the data source to rebuild. A file in use by you or other users will be marked as “(locked)” indicating that you cannot re-index it. Close all open windows to unlock the files. Broker’s Ally cannot lock the files to prevent other users from intruding on the maintenance process. Thus it is imperative that no one be using the files while Maintenance is in progress. You may click on Rebuild All to re-index all unlocked files for a selected data source. If Direct File Access is enabled, every time you create a new list, such as a Calls List, the list file, GLIST.DBF, is packed and re-indexed. Warning: The index repair feature of Broker’s Ally does not eliminate the need for frequent and regular backups. Many factors beyond the control of Broker’s Ally can cause data contamination or damage (e.g. power failures, inappropriate imports or deletions, and accidental erasures of critical files). We strongly recommend that you establish a routine backup policy and follow it rigorously. At the very minimum, you should maintain three sets of complete system backups. Rotate among them, overwriting the oldest tape or disk set with the new backup. This is called a three generation or grandfather backup scheme. In most cases, you will want to keep even more generations in your backup scheme. Many companies keep a two tiered backup system, recycling daily or weekly backup tapes or disk sets frequently, while maintaining monthly copies for longer periods, often years. With any system, it is imperative that you keep some or all of your backups off site - either in a bank safety deposit box or other secure site to ensure its availability in the case a fire or other disaster that destroys your office. 5.3 ODBC SETTINGS Broker’s Ally database files are in the ACCESS database format in file ALLYWIN.MDB. However, for a custom fee, an Open Database Connectivity (ODBC) data source can be created for database management for your Broker's Ally data sources. An ODBC data source must be registered and configured for Broker’s Ally, and you may use this option to view and change any ODBC settings. Use the Help button in ODBC Data Source dialog for specific instructions. 5.4 TAPI SETTINGS Use the TAPI Settings (Telephony Application Program Interface) command to setup your modem for automatic dialing. You need to: 1. Identify the Communications Port for your modem. 2. Set the Speed to 2400. 3. Enter your Phone Number. 75 Figure 81 - TAPI Setting Furthermore, you should use the Options button in the Dialer dialog to setup dialing prefixes and suffixes for local, long distance, special long distance, and international phone calls. Choose Phone Dialer from the Tools menu, and press the Options button. Dialing Options The Dialer dialog has an Options button where you set up dialing procedures for various types of calls. 76 Figure 82 - Dialer Options It allows you to enter your local area code so that all calls to your area code will be dialed as local numbers. It allows you to enter dialing prefixes and suffixes that will be combined with phone numbers “grabbed” from the contact window. A prefix is what you need to dial to connect to an outside line whereas a suffix is an optional accounting code your firm may require. Broker’s Ally allows you to enter a prefix and a suffix for each type of call: local, long distance, international, and special long distance. A dial prefix string can be a combination of modem commands and dialing codes that precede a phone number, Figure 82 - Dialer Optionsand here is an illustration of typical prefix strings: Local Calls Prefix: “9,” Long Distance Calls Prefix: “9,1” The Local Calls Prefix will dial “9” and pause two seconds to allow for connecting to an outside line. The Long Distance Calls Prefix will dial “9”, pause two seconds, and dial “1”. For more information, see Options under Dialer in the Tools chapter. General Settings Select the No Modem option if you do not have a modem but would like to track your calls, successful contacts, and update Last Contact in a record. Select No Modem and proceed as if you were dialing the phone automatically. Although the Dial button will be inactive, the Contacted button will register the information. Select the Contact History option to update the Last Contact field in a record and add an entry to the history file documenting your phone call. The entry is added to the history file only when you click on Contacted and Hang Up button when using the dial feature. 77 5.5 PAGE SETUP This menu item is only active when you are using the letter writer. Page Setup allows you to change the default Tab positions and Margins. The Height and Width are determined by the printer you have selected. You cannot change these settings. 5.6 PRINT Use the Print option on the File menu to send the current letter displayed in an active Letter Writer window to your Printer. When you select Print from the File menu, you will be presented with a dialog with print options. You can select specific pages and number of copies to be printed, or you can select a different printer. On the other hand, to print a report you will use the Print button in the Reports dialog. 5.7 PRINT PREVIEW While using the Letter Writer, the Print Preview option opens a special window and displays the current letter as it will appear in the final printed form. It has buttons that allow you to page forward or backward and print the current letter. This is a handy feature that allows you to see things before you print them in order to save you from wasting paper and time. The Reports function has a separate Print Preview facility. 5.8 PRINT SETUP The Print Setup option displays the standard Windows Printer Setup dialog. This allows you to specify the Printer to use with the Letter Writer. In Windows, you must highlight your desired printer, click on the File Menu, and select Properties for the printer options. The Setup button brings up a secondary printer setup dialog specific to the currently selected printer, allowing you to select page orientation, paper size, paper source, etc. See your Windows and/or printer user's manual for detailed instruction for setting up your particular printer. There is a separate printer setup for Reports that allows you to temporarily change the printer settings for a particular report. Figure 83 - Print Setup dialog for Windows 5.9 EXIT Use the Exit option to exit Broker’s Ally. The Exit option closes the current session (terminates the application) and returns to the Program Manager or the last application you started. 78 CHAPTER 6 EDIT MENU Figure 84 - Edit Menu The Edit menu contains options for cutting, copying and pasting text within and between data screens in Broker’s Ally. They also allow you to move snippets of text between Broker’s Ally and other Windows programs. You can use the Undo option to reverse changes made to the current document or data screen. The Securities dialog allows you to view and edit information about the securities master file used to price and characterize transactions and holdings. Finally, the User ID and User Preferences options can be used to customize your Broker’s Ally installation. 6.1 UNDO You can select the Undo option for two types of screens: text editing screens, such as the Letter Writer, Notepad and Script editor, or data entry screens such as the Contact view. When you are working with a text-editing screen, the Undo option will reverse the last editing action. For example, if you had just changed the font for selected text, clicking on the Undo option will cause the text to revert to its former font. When you are entering or editing data in a data entry field, the Undo option will restore the previous entry. When Broker’s Ally is unable to Undo the current operation, the Undo option will not be available, signified by its dimmed appearance. To remove all changes to a contact's note since you last saved it, select Undo on the Edit menu. If you have marked a note or changed its date, Broker’s Ally also resets these changes. 6.2 CUT The Cut, Copy and Paste options work in concert with the Windows Clipboard. As such, it is capable of operating within and between Broker’s Ally and other programs. The Cut option removes the selected data from the current screen or document and places it in the clipboard. From there, it can be inserted into the current document in another location or placed in another window or even in another program. If you do not wish to remove the data from the current document or data entry screen, you should use the Copy option instead. 6.3 COPY The Copy option operates exactly as the Cut option, except that it leaves the selected data in position and places a copy of it in the clipboard. 79 6.4 PASTE The Paste option completes the Cut & Paste or Copy & Paste operation. It inserts any data located in the clipboard into the current document or data entry screen at the insertion point. If there is no data in the clipboard, the Paste option will not be available and the menu choice will be dimmed. If you wish to move data between Broker’s Ally and another Windows program, use the Cut or Copy options from the source program and the Paste option from the target program. 6.5 SECURITIES The Edit Securities dialog allows you to look up, add, modify, or delete investment information for the securities master file. All investment securities known to Broker’s Ally appear in the list box on the right. You should enter a security in this master dialog before entering transactions of this security in the ledger. Otherwise, Broker’s Ally will assume the security to be a stock when it performs calculations. Furthermore, the Unrealized Gain/Loss report is only meaningful when current prices are provided for each security appearing in the report. Automated pricing is provided by the IDC electronic download utilities. When adding a security using the Edit | Securities menu item, the Edit Security window is displayed. Clicking on the Add button will display a dialog titled Add Security which asks for the symbol. After entering the symbol and clicking OK, you return to the Edit Security window with the new security record already loaded for editing on the left side of the window. Because it is a new record, all fields will be empty except for Type, Price, and Annual Income which are defaulted to Stock, 0, and 0. The Name and Description fields can be entered. No scrolling is necessary. The list on the right side of the window will automatically scroll to a section of the list that displays the newly added security, but it will not always highlight that security. Disregarding what the list may have highlighted, the input fields on the left side of the window always correspond to the newly added security. Both the name and description fields are available for entry right after the security is added. To manually edit a security you must first select one in the list box. Then you can change the Symbol, Name (description), Type, Price, Maturity Date, etc. When you use an on-line service for automatically pricing a particular security, you will need to enter the name of the service in the Pricing Service field. 80 Figure 85 - Securities Dialog To change the symbol for a security, click the Change Symbol button. Stock splits can be performed with the Split Shares button. Add This dialog allows you to add a new security to the Broker's Ally securities list. Enter the ticker symbol, CUSIP number, or other code representing the security. Enter a Name (description) and select a Type. Broker's Ally can store a Symbol with up to 10 characters. Delete Click the Delete button to remove a security from the list and the database. Warning: You will not be asked to confirm this action. Split Shares Corporate actions, such as Split Shares, change the Quantity and Price in all open transactions for the selected Symbol. To setup a ratio for the split, enter the number of New Shares to substitute for the number of Old Shares. The new share to old share ratio will be used to alter the Quantity and Price in each transaction. If you enter "2" for New Shares and "1" for Old Shares, the Quantity in affected transactions will be multiplied by 2 and the Price will be divided by 2 in order to keep the same total cost. Since this operation requires updating all applicable transactions in the posting book file, you may have to wait a few minutes while Broker’s Ally makes the adjustments. 81 Figure 86 - Split Shares Change Symbol Corporate actions such as symbol changes are accommodated here. This dialog allows you change the symbol for an existing security. Enter the ticker symbol, CUSIP number, or other code representing the security. Broker's Ally can store a Symbol with up to 10 characters. Since this operation requires updating all applicable transactions in the posting book file, you may have to wait a few minutes while Broker’s Ally makes the adjustments. 6.6 USER ID The User ID option sets up the user entry security scheme for the entire Broker's Ally application. Use this option to Add, Delete and Configure the access rights of users in a multi-user installation. Broker’s Ally can restrict users from entering certain areas of the program, limit access to data, and control which fields in contact records a user can change. In a single user installation, the User ID system controls password access to important areas of Broker’s Ally. The User ID dialog serves two purposes: 1. Select a User ID in order to login to Broker's Ally. When you begin a session with Broker’s Ally, you must select a User ID. In single user installations, you should enable the User Preference Automatic login as MGR to avoid this step. Furthermore, you may have to enter a password to continue. In the network version of Broker’s Ally you may at any time login as another user by choosing a different User ID on the Edit menu. 2. Create User ID's, assign passwords, Broker Numbers, and assign Rights. In a network installation, the system administrator will want to control each user's access to information and various features of the program. User IDs and Passwords A User ID is used to identify the person using the software. Each marked note, marked letter and scheduled activity is associated with a particular user. A User ID has an associated user name and optional password. A User ID also has associated rights, which determine the scope of operations the user can perform. Single user installations of Broker’s Ally assume a User ID of "MGR" with all rights enabled. In network installations, the system administrator will create a User ID for each user and assign rights as required. 82 Conflicts can occur if you share a User ID with another person. Individual user preferences, data sources, marked notes, marked letters, scheduled activities, tallies, and histories are associated with each User ID. The network administrator will assign a User ID to each user, which is a code of up to 5 characters such as the initials of the user or the user's broker number. Every User ID has an associated name, the person's name. If the network administrator has selected Enable Passwords in User Preferences and entered a password for a user, the person must type in the password to complete the login process. Use the Add button to create a new User ID or the Edit button to change a person's name or password. Figure 87 - User ID Dialog Adding Users If you have sufficient access rights, you can Add a User ID. To add a User ID, click on the Add button. You can enter the new user’s ID, name, and password. Click on OK to add the User ID to the system. Figure 88 - Edit User dialog Editing Users If you have sufficient access rights, you can edit the Name or Password associated with a User ID. You cannot change the User ID. 83 Deleting Users If you have deletion rights, you can delete users from the system. To delete a user, highlight the user’s name and click on the Delete button in the User ID dialog. You will be asked to confirm the deletion. If you confirm the deletion, the User ID will be removed from the system. You cannot delete user MGR. Configuring Users The Configure dialog is accessed via the Configure button. You must have the Configure right requires to enter this sensitive area. The Configure User dialog is used to assign Broker Numbers and a Privilege Level to each user. Broker Numbers You can assign one or more Broker Numbers or User IDs to each user, and thereby control access to contact records. A user can only access a contact record that has one of these Broker Numbers in the Owner field of the contact record. However, any user can view a contact record with a blank Owner field. Access to Info System administrators can allow users access to Lists, Activities, History, and Marked Letters associated with other users. If you do not want the user to see this type of information belonging to others, make sure All Users is not checked and no items are selected in the Users list box. To permit the user access to others' information, explicitly select their user ids in the Users list box or check All Users. If you do not check All Users, you can select at least five users. Figure 89 - Configure User Dialog Assigning Broker Numbers Broker’s Ally supports multiple broker numbers for each user and allows more than one user to share a broker number. By assigning more than one broker number to a given User ID, you provide 84 access to the contact and activity records associated with each of the broker numbers. Assigning multiple broker numbers allows you to setup a User ID for a sales assistant that supports multiple brokers or a manager that supervises multiple brokers. This permits the user to see the records and activities for all brokers they support or supervise. Before you can assign a broker number, you must first create it by clicking on the Add Broker button. You can then enter a broker number. As you add broker numbers, they appear in the list of available broker numbers in the Configure User dialog and will be selected (highlighted) for the current user. To assign broker number(s) to another user, click OK to return to the User ID dialog. Select a different User ID, click on the Configure User button to bring up the Configure User dialog. While holding down the Ctrl key, click on as many of the broker numbers in the scroll box as are applicable to the selected user. You may also add additional broker numbers. Note: The list box in the Configure dialog supports multiple selections. Hold down the CTRL key while selecting entries with the mouse. You can also drag the mouse (while depressing the CTRL key) to select a group of adjacent entries. Privilege Levels You should assign each user a Privilege Level, which is a set of rights to enter specified areas of the program and perform selected operations. For example, you can control who can change User ID information, who can change certain fields in contact records, who can view the posting book, etc. Initially there is one Privilege Level, Level 3, which has all rights permanently enabled and is always associated with user MGR. You may define other Levels with any combination of rights, and you give each new Level any name you wish (e.g., Broker, Sales Assistant, System Administrator). To assign or change the rights comprising a Level, choose the Edit Levels button in the Configure dialog. You can assign a given Privilege Level to many users. Figure 90 - Edit Security Level Dialog To enable a right you must highlight it (see the note below). The manager of a network installation will want to ensure that normal users cannot change sensitive information or perform system level operations. For example, the manager may create a Privilege Level called "Assistant" with all rights enabled except the following. Delete Data Source Maintenance User ID operations (Add, Edit, Delete, and Configure operations) User Preferences (Interests, User Fields, and Login settings) The easiest way to do this is to hold down the Ctrl key on the keyboard and drag down across all rights to highlight every one. Use the scroll bar to locate each item you wish to disable. Then, while holding down the Ctrl key, click on the item to deselect it. 85 Note: The list box in the Edit Security Levels dialog supports multiple selections. Hold down the CTRL key while selecting entries with the mouse. You can also drag the mouse (while depressing the CTRL key) to select a group of adjacent entries. Contact Edit rights affect which fields a user can change in an existing contact record. While adding a new contact, a user can enter information into any field, including notes and transactions, regardless of whatever edit rights have been assigned. In some cases a single right controls a group of fields: Name controls all parts of the contact name, 2nd Name, and NickName. Address controls Company, Address, City, State, Zip, Country, and Carrier Route. Phone controls all phone and phone extension fields. Comments controls Comments, Flags, Interests, and Secondary Record. History and Schedule rights pertain to the Calls Actions Calendar. View other users allows the operator to examine another user's history or schedule of pending activities. Entries in the rights list preceding a colon ":" are simply headings for the indented topics listed underneath. These headings, such as Securities: User ID:, and User Preferences: are not valid rights. Thus, selecting them has no effect on the behavior of Broker's Ally. Once you have created the desired Privilege Levels, their names will appear in the scroll box at the bottom of the Configure User dialog. To assign a particular user a specific Privilege Level, simply click on the Level’s descriptive name. 6.7 USER PREFERENCES The User Preference dialog is accessed from the Edit menu. With it, you can select or configure many of the features of Broker’s Ally to your liking. 86 Figure 91 - User Preferences Dialog Most user preferences are stored with their associated User ID; therefore it is possible for each user to specify a unique configuration. However, all users share only one set of definitions for Interests, User Fields, and Login settings. Each configuration option has a default value or setting established when you installed Broker’s Ally. In most cases, you will not need to change these defaults. However, there are no default settings for the User Fields and Interests, thus you must define the conceptual meanings and descriptive titles for them. Contact Preferences If you check Enable Exact Find, You will be activating the Broker’s Ally Rapid find mechanism. If you enter an exact value in the Last Name, Account, or Owner fields, you will find a contact or contacts much more rapidly. You will only find those names that exactly match your search criteria. For example, if you are searching for everyone in your data base with the last name of Green, the search will not return contacts with the last name of Greenly. If you check Automatic Save, Broker’s Ally will save the contact records automatically when you leave the contact screen. If this is unchecked, you will be asked if you would like to save the contact. When checking Display find Contact List, a list of all contacts meeting the search criteria will be displayed adjacent to the Contact window. 87 Figure 92 - Contact Record with Contact List If you check Allow Account # changes, an existing Account number can be changed. If this is disabled (unchecked), you cannot edit account numbers in the contact records. Even when disabled, an Account number can be inserted if no account number exists in the record. You must have the Login right to change this setting and it affects all users. Envelopes/Labels Preferences When printing envelops or mailing labels, you can control the content of the address information. Check Include Second Name to include the 2nd Name field on the contact record. Check Include Company to include the Company name on the contact record. Check Include Comma after City to insert a comma (,) after the City and before the State on the last address line. Directory Preferences Specify the Data directory where you normally create new data sources and the Letters directory where you normally store letters for the Letter Writer. Click on Data or Letters to select a directory. Login Preferences If you have installed single user Broker’s Ally, you probably do not wish to bother logging in as MGR every time you begin a session with Broker's Ally. By default, the Automatic login as MGR option is enabled. Network administrators will want to turn off this option and not give other users the Login right to turn it on. The other Login option, Enable passwords, turns on the password system when checked. You should enter passwords through the User ID dialog. You must have the Login right to change this setting. These settings affect all workstations on a network. View Preferences You can control several features of the Broker’s Ally display. The Status Bar lists your total number of Contacts and Calls for the day, the current date and time, and your User ID. The left portion of 88 the status bar displays help messages about highlighted menu choices, buttons or other options. You can hide the Status bar by unchecking this option in the User Preference dialog. This will provide one additional line for the main Broker’s Ally display area. Unchecking the Toolbar check box removes the toolbar from the Broker’s Ally display, freeing up an additional line in the main window. Please note that removing the toolbar from the display does not alter its contents. The toolbar layout is controlled by the Toolbar setup button. You can choose between Normal or Large toolbar buttons. The large icons of the normal icons are twice the size (actual sizes) shown here. Please Note: When creating a Normal toolbar you can choose from 62 available icons, whereas you are limited to 31 available icons for the large icon toolbar. The large toolbar icons are a subset of the normal icons, not different. If you select the Large toolbar option in User Preferences before creating a toolbar, you can later select the Normal toolbar without changing the toolbar contents. However, if you create a normal toolbar and switch to large format, you may see some blank buttons. This is because you only have half of the toolbar selections when choosing the large toolbar selection. Toolbar Setup The Toolbar button activates the Toolbar setup dialog. With this dialog, you can create your own toolbar of selected icons. The dialog consists of three scroll boxes. The top scroll box contains your current selection of buttons. The bottom two boxes contain the inventory of available button icons and list of actions. You can associate an action with an icon by first clicking on the icon on the Available Buttons list and then click on the action you wish to assign to it. To add the new icon to your toolbar, click and hold the left mouse button on the icon in the Available Button list, drag it to the Your Toolbar list, and release the mouse button. You may add as many icon buttons as you wish up to 64 or limited by your ability to remember their meaning. To remove a button from your list, click on it. To reset the default meaning associated with each icon, click on the Reset button. The toolbar appears as a single line under the main Broker’s Ally menu. Figure 93 - Toolbar Setup Dialog 89 Alert Preferences You have two options relating to the alert system. Periodically, Broker’s Ally checks the database to see if you have any current alert events. You can set the elapsed time between checks by changing Cycle Minutes. An interval of 5 minutes or more will prevent too many notifications from intruding on your work. Check Multimedia Sound if you have a multimedia sound board and want to hear something more interesting than a beep when the alert notification dialog appears. Database Preferences Check Ignore No Mail to include all records when printing labels or mail merge letters. The No Mail check box is ignored in contact records. Check Docking Station to allow you to download from the Main data source on the file server to your PC. You can then work with your data when disconnected from the network. Later, you can upload changes to the file server. See Docking Transfer page 69. SQL Server Views - Access Microsoft SQL Server tables through Views. Broker’s Ally implements views for SQL Server to guard against unauthorized access to database records when using other applications. For more information about SQL Server, contact you sales representative at [email protected]. You must have the Login right to change this setting. Check All Data Source/Export/Import Rights if all users in a network situation are able to use all data source types when creating new data sources, exporting, and importing. This function will override the New Data Source/Import/Export privilege level restrictions found in User ID, Configure User, but does not change New Data Source, Import, or Export rights. The default for this option is always on, or checked. You must have the Login right to change this setting. Activity Calendar Preferences The Resolution selection will change the time slot size for the Activities Calendar and Contact's Agenda. You can choose between 10, 15, 20, 30, 60, 120 minutes. This selection will show you more or less information in the Daily and Weekly views of the Activities Calendar. Startup Preferences When you run Broker’s Ally, you can choose one of the following initial views in which Broker’s Ally will startup: Choose Find Contact to display the Find Contact window automatically when you first enter Broker’s Ally. Choose Show last contact to display the last contact you were working on during the previous session. For example, if you exited Broker’s Ally yesterday with the record of John Smith open, when you start the Broker’s Ally program today, you will again be presented with the contact record of John Smith. Choose Activities Calendar to display the Activities Calendar window automatically when you first enter Broker’s Ally. The Activities Calendar will be presented using the same format selected in the previous session. For example, if you last used the Activities Calendar in the Summary view, when you start the Broker’s Ally program today, you will be presented with the Activities Calendar open in the Summary view. 90 Quick Add Preferences Quick Add setup allows you to specify some of the contact fields you want Broker’s Ally to insert for you every time you create a new contact using Quick Add Contact or ASCII Import. If you check Use Defaults for Add Contact, the default data applies to the Add Contact function as well as Quick Add Contact. You can modify the information as you wish before saving the contact. Figure 94 - Quick Add Preference When performing an ASCII import, each default data field is copied to the contact record after the record is created. A default data field is not copied if the target field already contains information. However, Interests, Flags, and Comments will be merged with existing information. Calculator Preference The Calculator button brings up the Calculator program selector. The selected program will run each time you select the Calculator option from the Tools menu, press Ctrl-L, or click on an assigned button on your toolbar. The calculator selection option allows you to select a program other than the Windows calculator, such as your favorite bond calculator. You can even use the Calculator program selector to start any appropriate Windows program via the Calculator option. For example, you could select CHARMAP.EXE to bring up the character map insertion program. 91 Figure 95 - Calculator Selection Dialog E-mail Preference Enter the full path name for the e-mail application of your choice. You may click the Browse button to look up the application or select one of the suggestions in the combo box. Please Note: When the directory path contains a "long name" allowed in Windows 95 and Windows NT, you should click the Browse button to convert it to a DOS directory path. Press OK to accept the DOS representation. Before saving an entry containing long directory names, BA will automatically pop up the Browse dialog. Interests Setup The Interests button brings up the Interests dialog. This dialog allows you to assign the conceptual meaning and text description to each of the 28 Interest check boxes associated with a contact. The descriptions that you assign will appear on the Interests page of the Contact view. These settings apply to all Broker’s Ally data sources and all users of Broker’s Ally. Figure 96 - Interests Dialog 92 In network installations, each Interest label applies to all users unless you check the Local Definition box. A local definition is used only on your PC. The system administrator can restrict access to some or all Interest labels in the setup dialog by selectively assigning Interest setup rights. User Fields Setup The User Fields button brings up the User Fields setup dialog. This dialog allows you to specify the name and type of each of the 3 pages of sixteen, for a total of 48, user definable fields. The name will appear on the User Fields page of the Contact view. The type will be used to validate any data entered by insuring that it conforms to the specified data type, i.e., date fields must contain valid dates and numeric fields must contain only numbers. Furthermore, each User Field has a Remembered Response check box. If you choose to save the history of responses for a field, check the Remem Resp check box. Remembered Responses allow you to choose a previous entry rather than manually enter one for a given field. These settings apply to all Broker’s Ally data sources and all users of Broker’s Ally. Figure 97 - User Fields Dialog In network installations, each User Field definition applies to all users unless you check the Local Definition box. A local definition will be used only on your PC. The system administrator can restrict access to some or all User Fields in the setup dialog by selectively assigning User Field setup rights. User Info Setup This dialog allows you to setup information to be automatically inserted into a letter created by the Letter Writer. You can use these fields for any personal information you wish. The following User merge fields in the Letter Writer utilize these data: Merge Field Name Description Your Name, Title, or Assistance’s Name 93 Company Address1 Address2 Address3 Phone e-mail FI Name FI Branch FI Type FI Officer Customer Type Misc1 Misc2 Information Disclaimer Your Company Your Address 1 Your Address 2 Your Address 3 Your Phone Numbers Your e-mail address Name of your financial institution Name of the branch of your financial institution Financial institution type - Bank, Credit Union, etc. Name of branch manager Target market (“Valued Customer”, “Valued Client”) (unspecified) (unspecified) Personal statement or corporate objectives Disclaimer message (variable length) These merge fields are called 'ghost' fields because they will vanish if no data are available when the letter is printed from the Letter Writer. A ghost field and, more importantly, the line it occupies will disappear in the absence of data to fill it. However, if any other text or merge fields share a line with a ghost field, an empty space will replace the field and the line will remain in the letter. Information and Disclaimer You may enter a line, paragraph, or several paragraphs. There is no practical limit to the amount of text you may insert into this multi-line edit box. When either merge field is printed, it will be formatted exactly as you see it here and will always appear left justified in the letter. Weekly History Report Goals The Weekly History Report displays the number of scheduled and completed activities for the previous week. It also displays goals that you enter in this dialog. To enter goals for an activity type, highlight the type in the list box and enter the values in the Goal edit boxes. These Goals are utilized when printing the Weekly History Report. 94 Figure 98 - User Info setup dialog 95 CHAPTER 7 VIEW MENU Figure 99 - View Menu This Chapter describes the View menu; the core of the program which enables you to find or add new leads, prospects or clients. Here you also view the Activities Calendar, or any of the Campaign lists to manage your sales activities. Your core Activities appointment calendar provides you with detailed daily, weekly and monthly views, or a chronological summary of events to which you must attend. To view specialized campaign Call Lists, Action Lists, Group Lists, and Maturity Lists you select Campaigns. You can also view and print Reports from the View menu. For campaign purposes, when you wish to contact a group of people with a similar profile, you should create a Group list. In this process you will specify the characteristics of the contacts that you want to include in a group and Broker’s Ally will create a list of these contacts. You might use the Group list to create and follow up a mailing to people holding a specific security within a specific state. When you want to create a campaign to contact people holding securities that will mature within a certain range of dates, you should use the Maturity List. Managing activities comprises a great portion of an investment advisor’s workday. Effectively handling calls, actions, group and maturity related activities with Broker’s Ally would vastly increase your production. 7.1 FIND CONTACT In keeping with the user manual organizational scheme of discussing each menu option as it appears in the View menu, we will discuss finding a contact before we discuss adding a contact. However, you can’t find a contact before you have added one. Furthermore, we have reserved the detailed discussion of each of the contact pages and fields for the next user manual section. You may wish to read the Add Contact section below if you are not already familiar with the Contact window and sub-pages of data. 96 Figure 100 - Find Contact Window The Find Contact window is used to locate specific contact records and contains the same pages and field layout as the Add Contact window. Once you have found a single contact or group of contacts that match your search criteria, you can view or edit these contact records. The basic strategy for using the Find Contact option is to first open the Find Contact window then enter whatever criteria you wish to use to find a particular contact into the specific field. To find a contact or group of contacts, enter profile information in one or more fields and press the Find button. Broker’s Ally retrieves the "set" of records fitting the profile, which may only be one record, and then you may use the browse arrow buttons to move back and forth from one contact to the next if the set is greater than one. For example, to view all contacts having a last name starting with A, enter A in the Last Name field. This is called Query By Example (QBE). If you know only the last name of an individual, you would enter it into the Last Name field of the Address page. Click on Find and the system will find all contacts with that last name. If you want to further refine the Find operation, you could enter more details. For example, if you knew the individual’s first name or company name or even his city or state, you could reduce the list of matching records. You can use any field in Broker’s Ally to search the database. If you know of a phone number of an individual, you can type the phone number into the Work, Home, Alt Phone or Fax field and press the Find button. This will return the contact record that matches the Phone number. 97 Figure 101 - Find Contact by Phone Number You can also use Flags, Interests, and User Fields to pull up contacts from the database. Each of these is found on its associated page, accessed by clicking on the button at the bottom of the Find Contact window. For example, if you defined one of the User Fields as ‘Spouse’s First Name’ and you remembered only your prospect’s first name and that of his wife, you could specify the first name field on the Address page and the Spouse field on the User Fields page, finding all couples with the matching first names. Likewise, you could specify a particular Flag or Interest to select contacts. When entering data into Find Contact fields, you need to know how Broker’s Ally uses this information to search the database. By default, Broker's Ally assumes that you want to match the text of each field you have entered. This is called pattern matching. An important feature of pattern matching is that you do not have to enter the complete text to get a match. Broker’s Ally will match as many characters as you enter. For example, if you enter ‘Sm’ in the last name field, Broker's Ally will return all contacts with a last name starting with ‘Sm’. This obviously would include Smith and Smyth as well as Small. It would not include anyone with the last name of Protoplasm. Note that Broker’s Ally is not case sensitive when matching patterns. Once you have found one or more records, Broker’s Ally displays the results in a contact view window described below. In general, you will use the Find Contact window frequently to find a particular client or prospect, or to create a list of clients or prospects having common features. Once you have found your desired contacts, you can view, edit, and browse among them. Next to the contact window you will see a Contact List displaying all the contact names meeting your search criteria. You can use this contact list to scroll through and zoom to another contact that appears on your list. 98 Figure 102 - Contact record with Contact List to the Right Rapid Find If you enter an exact value in the Last Name, Account, or Owner fields, you will find a contact or contacts much more rapidly. For example, if you are looking for contacts named Smith, enter ‘Smith’ (not ‘SMITH’) in the Last Name field of the find contact window. You must enter the name exactly as it appears in the database (same characters and same case) in order to take advantage of the rapid find technology, then press the Enter key or click on find. Broker’s Ally automatically capitalizes the first character for you. The Account and Owner fields also support rapid find if you enter an exact account number or exact Broker Number. These three fields use a database index, but the rapid find process only works when your entry exactly matches the information in the database. 7.2 ADD CONTACT Broker’s Ally displays the New Contact view when you select View, Add Contact from the menu. The New Contact view consists of five separate pages accessed by clicking the left mouse button on the associated button at the bottom of the view. The left most button (and initially foremost screen) is called the Address Page and is displayed above. As the name implies, this screen contains the basic client information including address. Additional information such as account number, telephone numbers, status, rating, and comments are entered here as well. The other pages include Notes, Flags & Interests, User Fields, and Book pages. You cannot use the Notes and Book pages until you have entered the basic contact information in the other three pages and clicked on Add. Data Source On the far right of each page is a list box showing available Broker’s Ally Data Sources, and the one that is highlighted is the currently selected database. You can change the selection of data source simply by clicking on and highlighting your choice. Note: You must select a Data Source before you click on the Add button. The first data source is selected by default. Advanced users might create other data sources. 99 Below the Data Source box are several control buttons. Click on Add to save a new record or click on Cancel to abandon it. Address Page To enter a new contact, select View Add Contact, and enter the contact’s data into the fields of the empty Address page. At a minimum, you should probably enter a Last Name, although Broker’s Ally will accept a record if you enter something in only one field. The Address page of the contact view displays its data in two logical areas - the address on the left and description data on the right with the name running across the top. While you are looking at the name field, note that it is broken into six separate sub-fields corresponding to two Salutations (e.g., Mr. & Mrs.), First Name, Middle Initial, Last Name and Suffix (e.g., Jr.). You can enter a second name or title on the next line followed by a company name and two lines of street address. City, State, and Zip code are broken out into individual fields. This allows the program to sort and select data based on any one of these fields. For this to work, you must not enter the city, state and Zip code on the second line of the street address. If you only need one line for the street address, place it on the first of the two lines and leave the second line blank. A blank line will be ignored when printing labels and envelopes. You can also enter a country for an international address and a carrier route code for bulk rate mailing. While most individuals don’t know their own carrier route code let alone the codes of their clients, it is possible to have the U.S. Postal Service update your addresses at no cost, adding the specific carrier route code to each address. Finally, the Address page accepts up to four telephone numbers - a work number, a home number, an alternate number, and a fax number. Figure 103 - Add Contact Account Number You can enter several fields of descriptive information on the Address page. The first and most logical is the Account number. This field can be used to link the Contact record to other parts of the 100 Broker’s Ally system such as the Portfolio and download systems. The Account number is a free form alphanumeric field that will accept virtually any form of identifier up to 16 characters in length. Owner The Owner field, designed for tracking what advisor is assigned to specific clients, is used in network installations to restrict a user’s access to certain contact records. If you put a broker number or User ID into this field, only the users who are assigned this broker number can access this record. The system administrator assigns Broker Numbers to each user via the User ID dialog on the Edit menu. Last Contact The Last Contact field contains the date when you last contacted this individual. Broker’s Ally will update it automatically each time you contact an individual using the Dialer. You can use this date to select individuals for follow up. Rating You can use the Rating field to specify a quantitative (i.e., 1-10) or a qualitative (e.g., cold, warm, hot) sales pipeline rating or funnel position for each prospect and client. The key is to establish a rating system that is meaningful to your business before you enter large quantities of data, and then rigorously stick to your rating system. Your ability to select individuals for a specific letter or other activity will be dependent on the consistency of your ratings. The Rating field will remember and store previously used responses thus helping you to use a consistent rating scale. See Remembered Responses on page 102. Status The status field defines where this person fits within your database management system. Typically, you will use entries such as ‘Lead’, ‘Prospect’, or ‘Client’ to characterize the status of the person in the traditional 3-step customer relationship hierarchy. A lead is a person about which you may only have a name and phone number, while a prospect is a qualified, profiled lead and you have entered a large quantity of specificity about their investment objectives and risk tolerance. Then, a prospect that opens and account becomes a client. Your ability to select individuals to receive a specific letter or to be the correct target of a campaign activity will be dependent on the consistency of your status assignments. The Status field will remember and display previous responses you’ve used in this field in order to help you use consistent names. See Remembered Responses on page 102. You might consider creating a status called “Other” to list friends, vendors, and such. Comments Use the Comments area to store brief and relatively static information about the contact, e.g., small talk topics, name recognition aids, family history and so on. In contrast to the Comments field, you will use Notes pages to save a summary of each conversation with the contact with a date and time stamp, and you will use Interests field, not the Comments field, to detail their investment objectives. No Mail One of the last fields on the Contact page is a check box for No Mail. You can use this field to specify which clients or prospects should not receive mail. You may want to use it simply to designate those clients who have requested that they not receive prospecting mail or to prevent multiple mailing to clients with multiple recipients such as a husband and wife with separate accounts. As a check box, it works as a simple yes or no toggle - either the account gets mail or it does not. You can, of course, ignore the setting for a particular mailing by selecting Ignore No Mail in User Preferences. 101 Specifically, if you check No Mail, it will prevent letters from being printed for the designated contacts when you do a merge print operation with the Letter Writer. It will prevent mailing labels from being printed for designated contacts when you print the Address Labels report. It has no effect on Marked Letters, Marked Notes, or any other report. Remembered Responses The remembered responses function acts as a memory of data entry, stores it, and presents it to you later if you wish to use it again. Fields such as Salutation, State, Status and Rating are able to remember previous responses and allow you to select an item from an attached list rather than enter it manually. The remembered response list appears when you double click in the field edit box. Simply double click on a field, right mouse click or press Ctrl-R. When the remembered response list appears, double click on the desired entry in the remembered response list to place the entry into the field. To add an item to the remembered response list, type the entry while the response list is visible. When you move the cursor to another field, the entry will be added to the list before the list window closes. Or you can type an entry, open the list window, and move to another field. Figure 104 - Remembered Responses Remembered responses for Comments, Flags and Notes work differently. Responses are not saved automatically and the pick list does not appear until you double click in the edit box. After you call up the response window, you may use the Add button to enter a response into the list. To copy a response from the list, highlight an entry and click on the Paste button. Paste inserts the chosen response at the cursor location in the edit box and does not replace existing information. Notes Page The Notes page is where you enter dynamic text information about the contact, typically notes of conversations. Each note is time and date stamped with the current system time and date, and the sequence of notes for a particular client or prospect shows the history of your dealings with that individual. The time and date stamp is automatic when pressing the New button. You can use the Notes page to enter summaries of phone calls or meetings with your client or prospect. You can 102 even create and print a short business letter called a Quick Letter that is stored along with your other notes. Unlike the Comments field, the text for which remains constant, Notes for a contact generally accumulate over time unless you delete a note that is no longer relevant. The Notes page uses a simple text editor and provides automatic word wrapping. You can use the Cut and Paste commands from the Edit menu or Drag and Drop, but you do not have access to the word processing features of the Letter Writer. When entering a new contact you cannot go to the Notes page until you click the New button. You can then click the Notes button to enter notes. Figure 105 - Notes page for capturing conversations and information You can accumulate an unlimited number of notes for each contact. Each note is automatically stamped with the date and time it was created, and it is labeled with your User ID as originator of the note. To segregate one note from all the rest, and to enable you to quickly print a fulfillment mailing label, you can “mark” a note for printing using either the Marked Notes report or the Marked Notes labels report. When the Notes page is opened, you will see the most recent note (if one exists), otherwise the notepad is ready to accept a new note. Use the scroll bar on the right to browse among the notes. To remove all changes to a note since you last saved it, select Undo on the Edit menu. If you have marked a note or changed its date, Broker’s Ally also resets these changes. A note is automatically saved when you leave the Notes page or browse to another note. You do not need to click the Save button. Buttons New 103 Click the Add button to clear the note display area and prepare to enter a new note. Quick Letter Click on the Quick Ltr button to select a Quick Letter template for creating a brief letter that is saved in the notepad for future reference. After editing the letter, you can print it by selecting Print Quick Letter on the Contact menu. See Quick Letter below. Mark/Unmark Click the Mark button to mark a note (see Marked Notes below). You can print Notes that are marked with your User ID via reports. The Mark Note dialog also allows you to mark the note for another user. When the current note is already marked this button is labeled ‘Unmark’. To remove a mark on a note simply click the Unmark button. Review Click on Review to display all notes for the contact simultaneously. This is a read-only presentation, meaning you cannot make any changes. Click on Review again to return to the normal view/edit mode for individual notes. Delete Click the Delete button to erase a note. Change Date Click the Change Date button to modify the date/time stamp for the note. Spell Check Click the Spell Check button to check the spelling for your note or quick letter. Notes Categorization Added ability to organize the notes based on their content in categories such as: contact, compliance, personal, investment, operation, and others in order to improve understanding. Notes Access Control Added ability to set control of access to notes such as private, semi-private, public access. Notes Expiration and Printing Dates Allows the user to set a date that a note and action expires or is printed. Marked Notes Marked Notes can be used to send additional information to customers with little effort by printing the marked notes report on dual label mailing label paper. To create this fulfillment mailing label, simply type into the note a description of the material to be sent, then mark it for printing at a later time. Then use the Mark button to bring up the Mark dialog. Your User ID appears by default. Click OK to mark the note. This action separates this note from all the others and makes it ready for printing the name and address label in correct format. To unmark a previously marked note, click Unmark. 104 Figure 106 - Marked Notes You can print the marked notes on label stock to produce a mailing label as well as a copy of the note. See Marked Notes under Reports. One label will contain the address while the adjacent label will contain as much of the note as will fit. Once the labels have been printed, you can read the note to remind yourself about what needs to be mailed and then use the address label to address the envelope. In network installations, you can even mark notes for other users. This feature enables you to place the marked note in someone else’s marked note printing queue. A marked note displays "Marked XXX" in the header, where XXX is the User ID of the person for whom the note is marked. In network installations of Broker’s Ally, the User ID ensures that the note appears only in the Marked Notes report for the indicated user. Quick Letter You can create a template (a formatted letter containing merge codes and text) for every situation where you want to send a simple, short business letter. A template is merged with data on the Address Page to create the letter that is placed in the notes database. You can edit the letter, then print it using Print Quick Letter on the Contact menu. Quick Letters are stored with other notes allowing you to review them quickly. However, you should use the Letter Writer for a longer or more polished appearing letter. Select a template and click on Use (or double click on a template) to merge the template with the contact information and insert a Quick Letter into the notepad. Click on New to create a new template or click on Edit to change a selected template. Templates normally have a BAQ extension and are stored in the letters directory, which is specified in User Preferences. Quick Letter Setup 105 In the Quick Letter dialog, click on New or Edit to go to Quick Letter Setup. The large window on the left is a scrollable notepad where you enter the text and merge codes for the Quick Letter template. You can compose a simple, generic letter. Utilize merge codes wherever you want to insert specific contact information such as contact name, address, current date, and your name. Figure 107 - Quick Letter setup dialog A merge code can be entered manually or selected from the list box on the right. Position the cursor in the template, double click on a merge code in the list box, and the merge code will be dropped into the template at the insertion point. You will select a template in the Quick Letter dialog to create a Quick Letter for a specific contact. If the contact record has no data corresponding to a merge code that stands alone on a line, the line will be deleted. Merge Codes {AC} - Account number. {AD} - Address block. This merge code will compose a multi-line address block composed of Address1, Address2, City, State, Zip, and Country. It will create no empty lines and it should always be left justified. {AP} - Alternate Phone number. {AX} - Alternate phone Extension. {CN} - Company Name. {DT} - Current Date. {FN} - Formal Name, such as "Mr. Jones". {FP} - Fax Phone number. {HP} - Home Phone number. {LN} - Long Name, such as "Mr. and Mrs. John J. Jones, Jr." {NN} - Nick Name. If there is no entry for Nick Name in the contact record, {FN} will be used. {SN} - Second Name. {UN} - User's Name. Your name; the name belonging to your login ID. See Setup User IDs. {WP} - Work Phone number. {WX} - Work phone Extension. When you change a template and click on Save As, you can save it under the same or new name. To create a new template similar to an existing one, edit an existing template and enter a new name in the Save As dialog. 106 Printing a Quick Letter The Print Quick Letter command is available on the Contact menu when you are viewing the notes page for a contact. Use this command to send the currently displayed Quick Letter or note to the default Windows printer. Broker’s Ally will reformat the Quick Letter to fit the dimensions of the print area on the page (which is normally much wider than the note edit box). Before printing, you can select a different printer by clicking on the Printer button. You may also select a different font or change the margins. Since laser printers do not use the full width or height of the paper, a 1 inch margin setting produces an effective margin of about 1.25". Flags and Interests Page Flags and Interests are two types of data fields that can be used to characterize your client or prospect. The key difference between them is that Interest fields must be pre-defined before they can be used while Flags are dynamic, allowing you to create new flags on the fly. Interests Interests are general search criteria used to specify a person's investment interests. For example, interests might be defined as Tax Free, Blue Chip, or High Growth. You might also define interests as the types of stock your contacts have expressed an interest in, such as Oil, Computer, Utility. Up to 28 interests can be assigned to each contact record. To apply an interest to the current contact's record, simply click on the check box beside the appropriate interest. If the interest no longer applies, simply click on the check box again and the check mark will disappear. To define your interest classifications, you need to use the User Preferences option from the Edit Menu and select the Interests button. You can assign a name describing the meaning of each of the 28 interest classifications. Figure 108 - Flags / Interest page In network installations, each Interest label applies to all users unless you check the Local Definition box. The system administrator can restrict access to some or all Interest labels in the setup dialog by not assigning Interest setup rights to other users. The Interest definitions apply to all data sources, but every user can have a different set of definitions for those Interests that are defined locally. 107 Figure 109 - Interests Setup dialog The major benefit of the Interest system of classification is that they are easy to check on and off for a given client and they are very fast in selecting contacts for a list view or report. Their limitation is that you can define only 28 interests and they must remain fixed to be consistent. Warning: If you re-define the meaning of an interest classification, all contacts assigned to the prior meaning will be assigned to the new meaning. You must manually remove the check mark for an interest from all contacts assigned that interest to avoid assigning them to the new interest. Investment Objectives It is important to record your client’s investment objectives. Broker’s Ally tracks the specific investment objectives of each of your clients through the use of Interests, Flags, or User Defined fields. Broker’s Ally thus allows you to comply with the SEC “know your client” rulings. The objectives shown below are examples of those you can use and the meanings intended for them are noted. However, you may also add your own investment objectives. Capital Appreciation - A portfolio that aims at maximum capital appreciation, by various means of portfolio turn-over, leveraging, purchasing unregistered securities, purchasing options and other higher risk products. This portfolio may take large cash positions. Growth - A portfolio objective that normally invests in companies whose long-term earnings are expected to grow significantly faster than the earnings of the stocks represented in the major unmanaged stock indexes. Small Company Portfolio - A portfolio that invests in companies based on their size. 108 Growth & Income - A portfolio that invests in companies whose earnings are believed to be growing and whose dividends, being steady or rising, will generate income as well. Equity Income - A portfolio that seeks relatively high current income and growth of income through investing most of its portfolio in equities. Balance - A portfolio whose primary objective is to conserve principal by maintaining at all times a balanced portfolio of stocks and bonds. Income - A portfolio that normally seeks high income and has a specified maximum fixed income commitment and/or a maximum equity exposure. Global - A portfolio that invests at least a certain percentage of its portfolio in securities traded outside the US. International - A portfolio whose objective is to invest in securities traded outside the US. Option Growth - A portfolio that attempts to increase its net asset value by investing at least part of its portfolio in options. Option Income - A portfolio that writes covered options on a certain percent of its portfolio. Fixed Income - A fund that normally has more than a certain percent of its assets in fixed income issues, e.g. money market instruments, bonds, or preferred stocks. Flags Flags are used to further characterize and profile a contact. For example, a contact may have expressed an interest in particular stocks, and you might give them the following flags: TEXACO, INTEL, or PECO. Using this flag or “handle” you could then select all contacts with an interest in Intel for a mailing a letter. You might rather choose to search the database by the security symbols you entered in the Broker's Ally posting book. The number of flags you may enter per contact depends upon how many can fit in the 98 character storage string. Each flag is stored with a separator character. For example, 14 flags with an average length of 6 characters can be entered ((6 + 1) X 14 = 98). You can store an unlimited number of flags per database. Each flag should be placed on a separate line in the Flags edit scroll box. If you have entered more flags than the Flags box can initially display, use the scroll bar to view the others. Please Note: Wildcards are power tools in searching! When finding contacts or building lists, you can use “wildcards” in the search expression for Flags. Underscore (_) is the single character wildcard while percent (%) is the string wildcard. For example, to find all records containing the Flags IRA, IRB, IRC etc., but not the Flags containing IRAQ, IRAN, IRATE, etc., use the search expression “IR_”. Broker’s Ally will look for all 3-character Flags beginning with IR. If you use the search expression “IR%” you will find all Flags of which start with “IR”. Unlike the Interests fields that must be pre-defined to be meaningful, Flags are dynamic and can be created on the fly. However, to be useful, you must be consistent when entering them into your 109 database. Therefore, if you enter IBM for one client, you shouldn’t enter I.B.M. for another. The system cannot see through the haze of periods to associate these individuals as having a common interest in IBM. Use the remembered response capability of Flags to ensure uniformity. Call Interval The call interval is used to suggest a date for a new call activity after completing a call using the dialer. For example, assume you have entered 30 into the Call Interval field. After you use the dialing feature in Broker’s Ally and press the Contacted button, Broker’s Ally will open the scheduler for a new activity with a suggested date of 30 days from now. You must use the Dialer and Contacted button to enable the Call Interval feature. Of course, you can override the suggested date. NickName There is a NickName merge field in the Letter Writer and Quick Letter that uses whatever you type into this field. Source The Source Type and Source fields allow you to save information about how the contact came to your attention. You might use entries such as ”referral”, ”seminar”, or ”previously with” as your Source Type. Since Source Type is a remembered response field, it makes it easy for you to be consistent with the names you use. Type specific information into the Source field such as the name of the person who referred the contact, the particular seminar where you met the contact, or the name of the broker that previously handled this account. Secondary Record If this record is a subsidiary account for the contact, you may wish to check the Secondary Record check box. User Definable Fields The User Fields page contains 3 frame pages of 16 fields (a total of 48) that you can set up for your own special use. Each field can contain up to 15 characters of text, a number, or a date. You could create a field for spouse’s first name, secretary’s name, income, occupation, net worth, or number of children. Once you create a User Field and use it for data entry, you should not change its definition. Categorizing your clients and prospects involves defining their characteristics in such a way as to, at a later date, present them with products that are best suited to their needs. Creating User Field definitions with labels such as Income, Net Worth, Objective, etc., will help you track and manage your clients so they receive the products most suitable to their specific needs. To define one of the User Fields, select the User Fields button from the User Preferences dialog. Specify the descriptive name of the field, it’s type (text string, number, or date), and only check Remem Resp if you want all data entries to be remembered. After you have defined a field, you can enter data into the field for new or existing contacts. 110 Figure 110 - User Field Setup dialog In network installations, each User Field definition applies to all users unless you check the Local Definition box. The system administrator can restrict access to some or all User Fields in the setup dialog by not assigning User Field setup rights to other users. The definitions apply to all data sources, but every user can have a different set of definitions for those User Fields that are defined locally. If you decide to change the meaning of a particular field, you must aware that changing the name only changes the label of the field, not its contents for each contact. To really change its meaning, you will need to erase the prior contents of the field from each record before entering the new data. Book Page Each single line entry within the Book Page ledger shows: Security -- The name of the security. Quantity -- the number of shares traded or the face amount of a bond or CD transaction. Market Price -- current market price, if available, for an open position. Market Value -- market price times quantity. Open Price -- opening price per share or percent of face value for a bond or CD. Price is positive for a buy and negative for a sell. If you double click on the entry in the ledger, or you select View security transactions or View cash transactions you can observe the underlying information related to this entry such as: Open Date -- opening trade date. Action -- the type of action such as purchase, sale, short, etc. Gain/Loss -- Unrealized or realized gain or loss. Symbol -- the ticker symbol, CUSIP number, or other identifier. Close Date -- closing trade date. Close Price -- closing price per share or percent of face value for a bond or CD. Total Value -- market value of an open position if Market Price available. 111 Market Gain/Loss -- market value minus cost for an open position. Figure 111 - Book Page Ledger Buttons Do Trade: to add a new position to the book page, to edit or enter the closing information, to remove and to delete a position. Sort Order: to display description, quantity, price, market value, gain loss in ascending or descending order. View Security Transactions or View Cash Transactions to observe the specific ledgers for these investments. 112 Figure 112 - Sorting the Ledger Valuation Monitors Viewing the lower left of the Posting Book screen shows instant access to portfolio valuation totals for Open Cost, Market Value, Market Gain and Loss, the Cash position, and their Buying Power measures. Transactions- Opening or Closing Positions Transaction dialog allows you to open a new transaction for the Book page for your clients through a purchase, sale, income or split. You select Purchase or Sale and enter an Open Trade Date, Quantity, Symbol, Price and any other pertinent data. Broker’s Ally calculates the total for you. If you enter a Symbol that Broker’s Ally does not recognize, it let’s you know because the calculation cannot be performed properly unless the security type is defined. Further, you can enter cash in, cash out, and short sales and closing sales. The Post Close Transaction dialog allows you to edit an existing transaction (presumably to close an open transaction). Be sure to enter a Close Trade Date, otherwise none of the close information will be saved. Broker’s Ally calculates the Totals and Gain and Losses for you. Figure 113 - Transaction Dialog 113 Figure 114 - Tax Lot Selection for Sales 7.3 QUICK ADD CONTACT The Quick Add Contact function differs from the Add Contact function as follows: 1. 2. You can pre-define the default entry for one or more of the contact fields. This allows you to speed up data entry when you enter contacts with common features such as company, city, and state. After you click the Add button, a new Add Contact window appears. You proceed immediately to enter the next contact. However, this means you cannot add notes or transactions for a contact before proceeding to add the next contact. 114 Figure 115 - Quick Add defaults When you obtain a list of prospects, they generally have one or more common features. If you have defined a Flag or Interest representing this feature, you can preset it for Quick Add. To set a particular value, you must first define it via the User Preferences Quick Add option on the Edit menu. Once you have specified the defaults, you need only select the Quick Add Contact option from the View menu. The new contact data will be pre-filled with the specified defaults. You can change the default values for a particular entry if they don’t apply, or you can skip the defaults entirely by selecting Add Contact instead of Quick Add Contact. This allows you to create a standard set of defaults and use or skip them at will. If you want to alter the defaults for the Quick Add option, you must change them via User Preferences on the Edit menu. 7.4 CONTACT MENU Once you have either added or found a contact record, the Contact option is added to the menu. This menu offers options for Copying, Moving, Deleting, Dialing, Marking, Linking and Printing. It is important to understand that the Contact menu options act on the currently displayed record and not the entire list of found or added records. The specific options are as follows: 115 Figure 116 - Contact Menu Delete The Delete command removes the displayed record from the current data source. It removes all contact information, notes, transactions, activities, history, list entries, and marked letters. This is a permanent deletion and there is no way to ‘undelete’ the contact. Copy Use the Copy option to create a new record utilizing most of the data in the current record as a starting point. Broker's Ally will insert the new record into the current database and copies over all visible information except for Open Date, Last Contact date, notes, transactions, scheduled activities, history, and marked letters. The new record appears in a separate window and is linked to the current record because it is assumed they are associated with each other. Move The Move command copies the current record to another data source and then deletes it from the current data source. It copies all relevant data including notes, transactions, scheduled activities, history, and marked letters. You might use this command to move a contact from a prospecting data source to your main data source or move a contact from your main data source to a data source of inactive contacts. Figure 117 - Move contact dialog Broker’s Ally asks you to identify the target data source, which must be different from the current data source, as in Test data source shown in the Figure above. Dial The dial option prompts you to select the Work, Home or Alternate phone number and then dials the number via the computer’s modem. You may also use one of the accelerator keys to bypass the menu. When viewing a contact, type Ctrl-W to dial the Work number, Ctrl-H to dial the Home number, or Ctrl-A to dial the Alternate number. Furthermore, there are buttons on the Address Page for dialing each of these phone numbers. Mark a Letter There are two ways to send a letter to a particular contact. You can choose to create and send a Quick Letter, discussed above, which allows you to quickly write and send a single letter to the currently displayed individual. Alternatively, you can mark the current record to receive one or more existing letters (usually form letters) associated with the Letter Writer. You can generate these letters in bulk, which greatly facilitates mass mailings. To mark the current record to receive a particular letter, you must have already created and saved the letter with the Letter Writer option on 116 the Mail menu. You select specific letters by their file names. To mark the current record, select the Mark a Letter option that opens the Marked Letters dialog box. Figure 118 - Marked Letters Dialog for an Individual This dialog box lists all letters that have been marked for the current record and waiting for you to print. On a network, these are letters you have assigned or letters another user has assigned for you. If another user has marked a letter for this contact, you will not see the letter in your list. Each user has an independent list of letters. You can Add or Delete letters which are queued up to be printed for this contact. Add When you click on the Add button, the system displays the Add Marked Letter dialog. This enables you to select a letter to be added to the list for the current record. When you add a letter for a contact, it joins your list of marked letters. However, you can transfer it to another user via the Mark For button. Delete The Delete button erases the highlighted entry in the marked letters list box. Delete All To erase all entries in the list box, click the Delete All button. The content of the list box depends on what you choose in the Select scroll box discussed below. Mark For If you wish to transfer a marked letter to another user, i.e., move it from your list to another user's list, click the Mark For button and choose a User ID from the dialog. Select Initially the Select scroll box shows "(all)" and the list box displays all of your marked letters for this contact. You can choose a particular letter in the scroll box in order to display only occurrences of this letter. When you are ready to print the letters you have assigned to contacts, choose the Marked Letters option from the Mail menu. This option presents you with a dialog with four additional buttons, 117 allowing you to print Letters, Labels, Envelopes, or a Report. This dialog now shows the contact name and corresponding letter for all assignments you have made in all data sources. We discuss this further in the Mail Menu chapter. In summary, suppose you had a letter called PROSPECT.BAL that you had created with the Letter Writer. You have identified a prospect that you want to receive this letter and have found and displayed his record on screen. Select Mark a Letter from the Contact menu. Click on Add and select the file PROSPECT.BAL from the Add Marked Letter dialog. The letter will be added to your list for the displayed individual. After you have marked all the letters for every individual you want to receive letters, select the Marked Letters option from the Mail menu. Choose Print Letters to print all letters and then choose Print Labels or Print Envelopes to print corresponding mailing labels or envelopes. That’s all there is to it. Note: It is possible to mail a letter to a selected group of contacts by using the Group Letter option from the Mail menu. See Group Letter in the Mail Menu chapter. Figure 119 - Marked Letter Dialog for Mailing Links Broker’s Ally allows you to create Associate or Household links between individual records in a data source. By linking records, you can rapidly move among related records in the same data source. You can use the Make Link command to create a connection to another contact record or records. You can display linked records, jump to one of the linked records, and destroy links between records. Tom Treadmill Bob Abelson Kathy Worth Patricia Smith Figure 120 - Linked Contacts 118 Frank Tompkins Associate Links Associate links are used to reference other professional contacts that are associated with this person, such as accountants or lawyers representing a client or people who have been referred by the same individual. As a convenience, when you copy a record, the new record is automatically linked to the original contact using an associate link. When the button appears in the contact window, found under the data source dialog window, you have an Associate Link to other contacts. Press this button to view your Associate Links. Household Links Household links are used to reference other contacts records belonging to the same person or other members of the same financial household unit, such as a spouse, children or extended family. When the button appears in the contact window, found under the data source dialog window, you have a Household Link to other contacts. Press this button to view your Household Links. Figure 121 - Contact Screen showing Linked Records Make Link To create a link, you must display a record to which you want to attach a second record. From the Contact menu select Links, Make Link. The system allows you to find another contact and click the Link button to connect them together. Break Link To break a link, you simply find the record you want to free from the connection to another record or other records. From the Contact menu select Links, Break Link to destroy the connection. 119 Find Link To find an individual or individuals linked to the current contact, select Links, Find Link from the Contact menu. The system will generate a list of all contacts linked to the current contact. You can browse the list, highlight a contact, and click Zoom to view the contact’s record. Print There are four options on the popup menu under Print: Envelope, Label, Quick Letter, and Report. Each option refers to the current contact. Envelope The Print Envelope dialog allows you to set up Broker’s Ally to print an envelope for the current contact. You can choose the envelope feed method for your printer, enter the dimensions of the envelope, and select the font you wish to use. Preview illustrates the size, alignment and rotation of the envelope you have chosen. You need to know how envelopes should be fed into your printer. Figure 122 - Envelopes Settings 1. Check Envelope is fed with flap up if an envelope should be placed face down when fed into your printer. Preview displays your selection. 2. In the Dimension area, choose an envelope Type or enter the dimensions of the envelope. If you manually enter the Width and Height, the envelope type will be called 'Custom'. 3. Under Alignment, choose Left if the envelope is to be fed left aligned. Other choices are Center and Right alignment. Preview displays your selection. 4. Under Rotation, experiment with the selections until the envelope in Preview is displayed in the correct orientation for your printer. 5. Click the Font button and select the desired printer font. 6. Click the Print button to print the envelope. 120 Label Choose Label to go to Reports and print a mailing label for the current contact. Quick Letter You must be viewing the Notes Page of a contact in order to select Quick Letter. Click on Quick Letter to choose or create a Quick Letter template. To insert a Quick Letter into the Notes Page, highlight a template and click on Use or simply double click on a template. See Quick Letter on page 105. Report Choose Report to print a specific report for the current contact. Contact’s Agenda The Contact’s Agenda shows all activities you have scheduled for the current contact. It works just like the Activities Calendar described below except that it is a calendar of events for the current contact rather than all contacts. There is also an Agenda button in the contact window that activates the Contact’s Agenda dialog without having to select this option from the menu. 7.5 ACTIVITIES CALENDAR The Activities Calendar displays the activities (Calls, Actions, and possibly other types) that you have scheduled for all contacts. You can display the calendar in one of four views - Daily, Weekly, Monthly and Summary. You can access each page by clicking on the corresponding button. Use the Summary view to see all activities in ascending chronological order. In addition to the various views, you can switch between pending activities and completed activities by clicking on the History check box. The Show Type list box allows you to limit the type of activity displayed. By checking one or more specific activity types, the calendar display will filter out all other activities. If you do not select any activity type(s), the calendar will display all activity types. When you click on the Zoom button, you will see the contact record associated with the currently highlighted activity. You can also double click on an activity to Zoom to the contact window. The Activities For scroll box initially shows your User ID. When running Broker’s Ally on a network, you can select another user’s User ID from this scroll box to view his/her Calendar. Your network administrator must grant you the right to view another user’s Calendar in order to take advantage of this feature. The four views contain the following information: Daily The format is a daily appointment calendar with the time of day on the left followed by the contact name and activity description. The calendar shows all time slots. You can change the view resolution of your Activities Calendar from 30 minutes to a variety of different views. If several activities are scheduled for the same time slot, you will see only one activity. However, Broker’s Ally will display a number in parentheses equaling the amount of activities scheduled for that time. By clicking on the time slot, a window will appear where you can view all of the activities scheduled for that time slot. You can view activities that do not have an associated time in the No Time field. To examine a different day, select the Calendar Icon located at the bottom of the Activity Calendar window, double click on a different day, and the selected day will be presented. You can quickly print your Activities Calendar by pressing the Printer Icon located at the bottom of the Activities Calendar window. 121 Figure 123 - Activities Calendar - Daily View Weekly Click the Weekly button to see the activities for the current week, Monday through Friday. This is an expanded daily view showing 5 days at a time. If several activities are scheduled for the same time slot, you will see only one activity. However, Broker’s Ally shows the number of activities for the time slot in parentheses. You can view activities that do not have an associated time in the No Time field. To examine a different day, select the Calendar Icon located at the bottom of the Activity Calendar window, double click on a different day, and the selected week will be presented. You can quickly print your Activities Calendar by pressing the Printer Icon located at the bottom of the Activities Calendar window. 122 Figure 124 - Activities Calendar - Weekly View Monthly Click the Monthly button to see the number of activities scheduled for each day of the current month. The red number in the lower right hand corner of the date shows the amount of activities scheduled for that day. Each day is a button and the current day is active (button depressed). Space limitations prevent showing more than the number of events for each day. If you double click on a different day on the Monthly view, you will go back to the Daily view to see the actual activities for the selected day. Use the controls below the calendar to move to a different month or year. Also to examine a different day, select the Calendar Icon located at the bottom of the Activity Calendar window, double click on a different day, and the selected day will be presented. You can quickly print your Activities Calendar by pressing the Printer Icon located at the bottom of the Activities Calendar window. 123 Figure 125 - Activities Calendar, monthly view Summary An overall summary listing of activities is shown under this view. Click on the Summary button to see all of your activities listed in chronological order. If you highlight an activity and go to one of the other views, you will see the same activity in a different context. If you double click on an activity you will display that contact’s record. To move to a specific day, select the Calendar Icon located at the bottom of the Activity Calendar window, double click on a different day, and the selected day will be presented. You can quickly print your Activities Calendar by pressing the Printer Icon located at the bottom of the Activities Calendar window. As an added convenience, you can also get a summary of historical information by clicking the History check box on the screen. Figure 126 - Activities Calendar Summary view 124 Using the Activities Calendar You can access and use the Activities Calendar in different ways. For example, you could call it up from the View menu and view all the calls and actions to be performed today. Click on a particular activity to select it and click on Zoom to call up the contact view for that individual. Then you can dial a telephone number or perform any other function appropriate to a found record. Alternatively, you could select an individual contact via the Find Contact option on the View menu and click on the Agenda button. The system will show only your activities associated with that individual. By clicking on the History check box, you can view completed activities. You could farther limit the calendar display to merely Calls by selecting Calls from the Activity Type scroll box. If you want to see if your associate Ellen had ever called this individual and you have been given access to her data, you could click on her User ID in the Activities For scroll box and look at the history of her calls to this contact. In addition to viewing Calls or Actions, you can Add, Edit, Delete, or Accomplish them. When you select Add or Edit, the system displays the Schedule Activity window. If you select Delete, the system deletes the highlighted call or action. To enter the activity into the history file and delete it from your list of activities, click on Accomplish. 7.6 SCHEDULE ACTIVITY An activity is a scheduled CALL, ACTION, or some other created type such as a MEETING. The Schedule Activity dialog box shown is the primary data entry screen for the calendar system. You can display it from the Activities Calendar window by clicking on either Add or Edit. You can also call it directly from the View menu. If you select it from the View menu or Contact’s Agenda when a contact window is active, the activity is assumed to be for that contact and his name is automatically entered into the Contact field. If you call up the Schedule Activity dialog while you are displaying a Calendar (or Agenda) view, Broker's Ally assumes the call or action to be for the Calendar view’s selected date. If you call up the Schedule Activity dialog when no contact window is active, the activity will be called a REMINDER and is not associated with a particular contact. Figure 127 - Schedule Activity Dialog 125 The activity will be assigned to you by default, which means that it will appear exclusively in your Activities Calendar. You must assign a time to the activity to have it appear in the Alert database (see Alarm below). Activity For You can assign the activity to another Broker’s Ally user by selecting a User ID from the Activity For scroll box. By default, the activity will be assigned to you. Entered By Indicate which Broker’s Ally user originated the activity by selecting a User ID from the Entered By scroll box. By default, you are the creator of the activity. Description Enter a statement describing the purpose of the activity. The Activities Calendar, Contact’s Agenda, Alert Ally alarm system, and history will be much more useful if you take the time to enter a description. Contact You cannot edit this field. It shows the contact associated with the activity if you schedule an activity while a contact window is active. When you call up the scheduler while no contact window is active, REMINDER appears in this field. A reminder activity is not associated with a contact. Type Initially, Broker’s Ally recognizes two kinds of activities: CALL and ACTION. You can select one of these from the scroll box or enter a new activity type, such as MEETING, at your discretion. Further, Broker's Ally remembers your previous entries for Type of activity and allows you to quickly select one of them. By default, Broker’s Ally inserts CALL into the Type field. Date and Time You must assign every activity a date, and, in most cases, you should assign a time. You must assign a time to the activity to have it appear in the Alert Ally database. Broker’s Ally usually puts tomorrow's date into the Date field and the current time in the time field. Broker’s Ally offers a shortcut when entering a date or time. Instead of entering a full date you can simply enter the number of days hence. Enter a number and Broker’s Ally will add this number to today's date in order to construct a proper date expression. For example, to enter tomorrow's date, enter 1 (for one day hence). Similarly, if you enter a number in a time field, Broker’s Ally adds this number of minutes to the current time to produce a proper time statement. Double click on a date field to pick a date from a popup calendar. Double click on a day in the calendar to enter the date into the date field. Double click on a time field to pick a time from a popup Edit Time dialog. Click on AM or PM, and then double click on a time in the Edit Time dialog to enter the time into the time field. 126 Duration To schedule a block of time for an activity, enter the length of time in minutes. Duration is useful only when you have specified a time for the activity. The Daily and Weekly Calendar will show the same activity more than once if the Duration is greater than the time slot size. Also see the next paragraph. Check your other activities for a conflict If you mark this option, the scheduler looks for conflicts with your other activities when adding or updating an activity. When a Duration is entered, the conflict analyzer looks for overlapping time blocks. If your activities do not have duration’s, the conflict analyzer only reports when you have another activity scheduled on the same day at the same time. Alarm You may set an alarm to notify you when the activity comes due. Simply click on the check box labeled Activate alarm when activity comes due. You may also set an Alarm Lead in order to notify you a specified number of minutes in advance of the scheduled time. Figure 128 - Broker’s Ally Alert System 7.7 SALES PLANNER A multi-step sales planner is incorporated in Broker’s Ally and can be found under the View menu. The Sales Planner is used to create sales and marketing campaigns for individual contacts or a group of contacts. You can create many different sales plans and have them readily available for future selling opportunities. The Sales Planner is available in the Broker’s Ally Gold level and above. 127 Figure 129 - View Your Sales Plans After you choose Sales Planner on the View menu, you can either View your available Sales Plans or Apply an existing Sales Plan to an individual or a group. To create your own Sales Plan from the View Menu, choose View Sales Plan, Add, then enter a unique description into the Plan Name field. While viewing this dialog, select Add then enter the Activity information. For more information on the Schedule Activity dialog, see Schedule Activity section in this user manual. Figure 130 - Steps in a Multi-step Sales Plan Activity For You can assign the activity to another Broker’s Ally user by selecting a User ID from the Activity For scroll box. By default, the activity will be assigned to you. Contact Shows the Sales Plan associated with the Activity. You cannot edit this field. Description Enter a statement describing the purpose of the activity. The Activities Calendar, Contact’s Agenda, Alert Ally alarm system, and history will be much more useful if you take the time to enter a description. Type Initially, Broker’s Ally recognizes two kinds of activities: CALL and ACTION. You can select one of these from the scroll box or enter a new activity type, such as MEETING, at your discretion. Further, Broker's Ally remembers your previous entries for Type of activity and allows you to quickly select one of them. By default, Broker’s Ally inserts CALL into the Type field. Days From Start Indicates the number of days from the date on which you applied the plan. Please Note: This dated is taken from the computer clock. If the planner does not enter in the correct information, check you computer clock for accessory. Time You must assign a time to the activity to have it appear in the Alert Ally database. You can double click in this field to select a time from the time dialog. 128 Duration To allocate a block of time for an activity, enter the length of time in minutes. Duration is useful only when you have specified a time for the activity. The Daily and Weekly Calendar will show the same activity more than once if the Duration is greater than the time slot size. Alarm You may set an alarm to notify you when the activity comes due. Simply click on the check box labeled Activate alarm when activity comes due. You may also set an Alarm Lead in order to notify you a specified number of minutes in advance of the scheduled time. Once all information has been added to this dialog press the Add button. Press the Add button again to describe and schedule the next step in your plan. The date from start number defaults to one day after the previous activity. This field can be edited. For example, you may delay 5 days after sending out a letter to a prospect. In this case you would put a 6 in the Days From Start dialog. Continue to add steps until your plan is complete. You may edit any previously added Activity, by highlighting the activity, and pressing Edit. Edit the activity and press Update. To delete an activity from your Sales Plan, highlight the activity and press Delete. Once you have created you Sales Plan, press Save. Copy Sales Plans can be copied and use it as a building block for additional sales plans. Press Copy, and your sales plan will by copied to another file. The Broker’s Ally will automatically give the plan a name of “copy of XYZ Plan”. Click on the Edit button to redefine the plan and modify it for a new purpose. Apply Sales Plan to a Contact 1. Once you have found the contact to whom you wish to apply a sales plan, select View, Sales Planner, Apply Sales Plan. Brokers Ally will display the sales plans that you have created. 2. Select the start date of your plan. 3. Highlight the plan you wish to Apply, and press OK Your plan has been applied to that contact. Figure 131 - Select Sales Plan to Apply to Group of Contact Records 129 Apply Sales Plan to a Group List Once you have created your Campaign List, click on File, Database Operations, Global Change. 8. Choose a Broker’s Ally data source in which your list exists. 9. Check List and choose the List Type. 10. Click on the Plan button in the Add section of the Global Change dialog. 11. Select the start date of your plan. 12. Highlight the plan you wish to Apply, and press OK 13. At the Global Changes Dialog, press Start 14. Broker’s Ally will display your lists that have been created. Highlight the list you would like the Sales Plan to be applied and press View List. 15. Press the Global Changes button and you plan will be applied to your selected group of contacts. For More information on the Global Changes functionality, please see Global Changes section found in the File Chapter. 7.8 CAMPAIGNS You may wish to create a list of contacts you would like to call in order to offer a new product. Or you may wish to send a letter to a group of people who have expressed interest in a certain type of security. Perhaps you wish to contact your clients holding a maturing bond. Campaigns allows you to create a list of contacts you want to use for calling, mailing, printing a report, exporting to another application, etc. Since we allow you to create an unlimited number of lists, to provide some organization for all these lists, and to enable you to find them again quickly, we have created list categories for Calls, Actions, Maturing securities, and other miscellaneous Groups. The mechanism for creating a list is identical for Calls, Actions, and Groups whereas a Maturity list is based solely on the securities your clients own. Call Lists As a busy advisor, you know that your time is valuable. Using a Call List campaign is one way to optimize your calling campaigns. You want to spend the most time on those people that currently or potentially will bring you the most business. The Call Lists option allows you to do this by creating a campaign list by some criteria and then sorting them based on one or more common criteria. You can identify those records by such things as income, net worth, Activity Date, Activity Type, Status, City, Rating or other contact and activity fields. In addition, you can sort the list using any field or combination of fields, such as Activity Date, Last Name, and Rating. Now you have a readily accessible group of records that is a subset of your selected data source prioritized in such a way that you are calling your best clients and prospects first. The Call Lists option allows you to create a series of selected lists of individual contacts based on one or more common features. Broker’s Ally doesn’t actually extract the data into a separate database for each list. Rather it maintains a set of identifiers that reference individual records in your data source. This means that if you edit an individual’s address, the change will be reflected in every list in which the individual appears. When you select Call Lists from Campaigns on the View menu, the system displays the Call Lists dialog. It contains two list boxes on the left called Available Lists and Data Sources. You will have a different set of saved lists for each Broker’s Ally data source. To create a new list, select a data source and click the New List button. 130 Figure 132 - Call List Dialog Creating a Call List Your normal calling activities are conducted from the Activities Calendar. However, this Campaign Calling List option is a powerful supplement to the Activities Calendar specifically for managing a calling campaign. To begin the creation of a Calling Campaign List, select New List to go to the Edit List dialog. Broker’s Ally supplies you with list templates but also give you the ability to create a list on any specific criteria you wish. Because we provide extraordinary flexibility in choosing selection and sort criteria for lists, this dialog seems a little complex when you first encounter it. However, you build all expressions using plain English phrases. You define Search Properties to select contact records and Sort Properties to establish how to order these records. Then, when you Close the dialog, Broker’s Ally creates the list. Search Properties Click the Add button adjacent to the Search Properties list box to bring up the Search Logic window. You will build a logic expression utilizing one or more database fields to construct the filter for selecting contact records. You can use the fields in one or two of the following files: contacts, activities, histories, or postings2. For example, suppose you want to build a Call list for everyone having a scheduled CALL activity dated April 1, 1995 or before. You will select contacts based solely on activities information. 1. Select Activities - Type from the Field combo box, 2. Select Equal to: (=) from the Operator combo box, 3. Enter CALL in the Value field, 4. and click OK. On returning to Edit List dialog the Search Properties Criteria displays: "Activities - Type Equal to: (=) CALL". 2 You can select contacts using contact and activity criteria or contact and posting book criteria but not activity and posting book criteria. 131 Figure 133 - Edit List Once again click the Add button adjacent to the Search Properties list box to bring up the Search Logic window. 5. Select AND in the Continue Previous Statement With group, 6. Select Activities - Activity Date from the Field combo box, 7. Select Less than or equal to: (<=) from the Operator combo box, 8. Enter 4/1/15 in the Value field, 9. and click OK. On returning to Edit List dialog the Search Properties "Activities Type Equal to: "AND Activities - Activity Date Less than or equal to: (<=) 4/1/2015" Criteria (=) displays: CALL" Notice that the first clause is connected to the second clause with AND, meaning that both clauses must be true in order to select a contact. Please Note: A Short Cut for creating calls list: Select Activities - Activity Date from the Field combo box, Select Is Past Date or Today; (<=Today) from the Operator combo box, Press the Refresh button every day. The operator will automatically take today’s date from your computer clock and place it into the Date criteria. Network Users If you are running Broker’s Ally on a network, you will want to create a Call list containing only your calls. You must therefore select activities assigned to you alone. Once again click the Add button adjacent to the Search Properties list box to bring up the Search Logic window. 10. Select AND in the Continue Previous Statement With group, 11. Select Activities - Activity For User from the Field combo box, 12. Select Equal to: (=) from the Operator combo box, 132 13. Enter your User ID (assume XYZ for this example) in the Value field, 14. and click OK. On returning to Edit List dialog the Search Properties Criteria "Activities Type Equal to: (=) "AND Activities Activity Date Less than or equal to: (<=) "AND Activities - Activity For User Equal to: (=) XYZ" . displays: CALL" 4/1/2015" Sort Properties Click the Add button adjacent to the Sort Properties list box to bring up the Search Logic window. You now build a logic expression utilizing contact and activity fields to construct the sort statement. For example, suppose you want to sort the Call list mentioned above by Last Name. Simply select Contacts - Last Name from the Field combo box and click OK. On returning to the "Contacts - Last Name" Edit List dialog the Sort Properties Criteria displays: If you construct a sort statement with several clauses, the clauses will always be ANDed. Now click the Close button to create the list. Changing a Call List After you create a list, its members never change. If you add new contacts to your database or schedule new calls, an existing Call List will not change. However, because Broker’s Ally saves the list criteria as well as the members of the list, you can use the existing criteria to recreate the list, i.e., update the contacts comprising the list. Click the Refresh List button in the Call List dialog. If you want to change or add criteria before regenerating the list, click the Edit List button to go to the Edit List dialog. You can select a line in Search Properties or Sort Properties and click the Edit button to change the logic statement. For example, you might want to revise the statement "AND Activities - Activity Date Less than or equal to: (<=) 4/1/2015" to reflect a new value for the date. To add new logic statements, click the Add button. When you Close the Edit List dialog, Broker’s Ally will refresh the list. Remember that you can create as many lists as you want. Therefore, before revising or deleting an existing list, be sure you have no use for the current list before refreshing it. Using a Call List After creating a specialized list, click View List in the Call List dialog. The List view displays the names of all selected individuals and is the gateway to doing something with the list. You can scroll through the list by clicking on the up or down arrows. The List view has buttons for Zoom, Reports, and Mail Merge. An entry can be checked (marked as completed), and checked entries can be functionally removed from the list if you select the Skip Checks option. 133 Figure 134 - List View Zoom To see and work with the full contact record for someone in the list, highlight a member of the list and click the Zoom button. When the contact window appears you can dial a phone number, change contact information, add notes, enter transactions, and so on. You can move to the contact window for the next individual in the list using the browse buttons. Otherwise, click Update or Cancel as appropriate to return to the List View. Reports Since most reports are based on a list, you can launch a report from the List View. In this case you have already selected the list you will use. When you click the Reports button to go to the Reports dialog, you will choose a particular report. Alternatively, you could start with Reports from the View menu, choose the report, and then pick the list. If you want to print mailing labels for everyone in the list choose an appropriate report. Mail Merge You can use any list to print letters. Click Mail Merge from the List View to call the Letter Writer, select an appropriate form letter, and proceed to print a merged letter for everyone in the list. You can print envelopes by clicking the Envelopes button. Check Item Click on Check Item to mark the selected contact as completed. The contact will appear with the strike-thru attribute and your User ID will appear to the left of the name. Checking an item has no effect on any operations performed with the list unless you select the Skip Checks option. Reset Item Click on Reset Item to undo the Checked Item. 134 Skip Checks Select the Skip Checks option to cause any operation using the list to ignore checked entries. When you Zoom to a contact window and use the browse buttons, you will see only unchecked contacts. When you create a report, print mail merge letters, or export data, only unchecked contacts are processed. Actions, Group & Maturity Lists The Action Lists and Group Lists are identical in behavior to the Call Lists. You use the same methods in creating a Call List to build a list for Action and Group Campaigns. We provide these alternative list folders simply to help you categorize your many lists and be able to come back to them over and over again to manage your multiple campaigns. On the other hand, the Maturity List category allows you to generate one of more lists based on the maturity date range of securities owned by contacts; most commonly a CD coming due or bond maturity date. To create a list you merely specify a range of maturity dates and Broker’s Ally will search all contacts for securities with qualifying maturity dates. 7.9 REPORTS The Reports dialog allows you to print or preview a report or mailing labels. 1. Select the report Type (Standard, Labels or Posting Book) by clicking one of the radio buttons located at the right of the Reports dialog. If you choose Labels, you should also select a Label Form (Sheet or Continuous). Choose Sheet for Laser and other page printers, or choose Continuous for sprocket feed impact printers. 2. Select a specific report from the Available Reports box. Although you will probably never need to do so, you can change the directory where the report files are found by clicking on the Browse button. The Browse dialog will appear allowing you to specify a new directory for the RPT files. 3. Select a List or Data Source to use for the report. Most reports use a List that you have created (or will create) in order to determine which contacts are to be included in the report. The report records will appear in List order. Because Marked Notes and Security reports use special Lists, you will not choose a List for these reports. If you do not check Use a List, the report will use all contacts in the data source you choose. 4. Select Print or Preview. Print sends the report to your printer, whereas Preview sends the report to temporary files and then displays the report on your computer screen. If you choose a report that requires a list, Broker’s Ally will send you to the List dialog. At this time select a specific existing list or create a new one, then choose View List. In the View List dialog you can choose Print or Preview to proceed with the report. 135 Figure 135 - Reports Dialog Broker’s Ally comes with many pre-defined reports parceled out into three categories - Standard, Labels, and Portfolio reports. You can produce the Marked Letters report only from the Marked Letters dialog on the Mail menu. The specific reports are as follows: Standard Reports Broker’s Ally comes complete with several pre-designed report formats. Account/Company - Shows Name, Company, and Account number for all records in the list. Activities - This report is the same as the Summary page of the Activities Calendar and shows all of your scheduled activities. You can select activities falling within a range of dates and can produce a report for activities belonging to other users. Activities/Phone Report - This landscape orientation report will show all of your activities for each day selected. Each row includes the name of the contact, three phone numbers, the scheduled activity time, and the activity description. Address/Phone - Shows all important name, address, and phone number information formatted as if they were to appear on a large index card. Company/Status - Shows Name, Company, and Status for all records in the list. Contact/Notes - Shows all contact fields and as many notes (starting with the most recent) that will fit on a single page for each record in the list. 136 Contact Work Sheet - This portrait orientation report is similar to the Contact/Notes report. It displays all information for the contact, as many of the most recent notes that will fit in the middle of the page, and allows space at the bottom of the page for the users to write specific information on this contact. If differs from the Contact/Notes report by not showing Quick Letters in the notes area of the report and providing space for hand written “Notes From Today”. Date Status - This report shows the contact Name, Status, Open Date, Last Contact date, and Birth Date for all records in the list. When you phone someone using the dialer and click on Contacted, the Last Contact field in the contact record is updated. History - This report is the same as the Summary page of the Activities Calendar (when you check History) and shows all of your completed activities. You can select histories falling within a range of dates and produce a report for histories belonging to other users. Marked Notes - While the Notes page of a Contact view is displayed, a note can be "marked" for printing at a later time, typically the end of the day. These marked notes are printed using this report, providing the contact Name together with the Note. Unlike the Marked Note Labels report, which is designed to print on label stock, this report prints the full text of the note. After the report is displayed or printed, you can unmark all marked notes to avoid printing the same notes the next time you run this report. Do not unmark the notes until you print Marked Note Labels, unless you do not intend to print labels. Notes - Shows all notes for each contact in the list. You can select notes by a date range and/or a fragment of text. Phone - Shows Name, Work phone, Work Extension, Home phone, and Fax phone numbers for all records in the list. Phone Tallies - Shows a summary of the number of calls and phone contacts you have made during the past two weeks, months, and years. Includes graphs. Rating/Status - Shows Name, Status, and Rating for all records in the list. Includes a graph. Source - Shows the Source Type and Source information for all contacts in the list. State/Zip - Shows the Name, Status, Zip code, and State for all contacts in the list. Includes a graph. Weekly History Report - Number of activities you scheduled and the number of activities you accomplished for each Activity Type, reporting on the previous week Sunday through Saturday. Includes Goals you setup in User Preferences under User Info. Includes graphs. Label Reports When printing labels, you should select a Label Form (Sheet or Continuous) before selecting a label report. Choose Sheet for Laser and other page printers or choose Continuous for sprocket feed impact printers. You can print labels from many different places within Broker’s Ally. For a specific contact, select Labels from the Contact, Print Menu. For selected contacts, you can use either a List 137 or the entire data source. If you would like to print labels for a list, you must first create the Campaign List. Once the list is created, while viewing the list, click the Reports button and choose labels. Brokers Ally supports several label form layouts: 1" x 4", two across 1" x 2.6", three across 1.33" x 4", two across (laser) 1.4" x 4", two across (dot matrix) POSTNET Barcodes - When printing labels you may add 5 or 9 digit ZIP Code POSTNET barcodes below the address on each label by selecting the POSTNET Barcodes option. In order to make room for the barcode, some address lines may be eliminated. However, Broker’s Ally will retain all address information required by the USPS. 1. Address Labels - Prints mailing labels for the contact records in the list. A contact record which has ‘No Mail’ checked will not appear in the report. 2. Marked Note Labels - Prints a mailing label for each marked note, and prints on an accompanying label as much of the marked note as will fit on the label. Portfolio Reports Commissions - This report will show all posting book commissions. You can select commissions by Trade Date Range. Posting Book - This report will show all posting book entries for each contact in the list. You can select postings by Open Date Range and/or Close Date Range and/or specific Ticker Symbols. Realized Gain/Loss - This report shows closed positions for selected ranges of Open Dates and Close Dates in each contact’s posting book. Leave a date range blank to ignore the constraint. For example, you might enter a date range for Close Date but leave the date range for Open Date blank. The report will include every closed position within the Close Date range regardless of the Open Date. It details Quantity, Symbol, Open Date, Cost, Close Date, Proceeds, and Gain/Loss. It totals all numeric fields at the bottom of each contact’s report. You can also restrict the report to certain Ticker Symbols. Securities - This report will list all Securities, showing Symbol, Description, Type, Price, Pricing Date, and Maturity Date. Unrealized Gain/Loss -. This report shows open positions for selected ranges of Open Dates and Close Dates in each contact’s posting book. Leave a date range blank to ignore the constraint. For example, you might enter a date range for Open Date but certainly leave the date range for Close Date blank. The report will include every open position within the Open Date range. It details Quantity, Symbol, Open Date, Open Price, Open Amount (Cost), Gain/Loss, and %Gain/Loss. It totals all numeric fields at the bottom of each contact’s report. Note: The Unrealized Gain/Loss report depends upon current prices for the securities to calculate Gain/Loss. You can also restrict the report to certain Ticker Symbols. 138 CHAPTER 8 PORTFOLIO LEVEL The Broker’s Ally product is feature differentiated, and these features are encapsulated within “levels”; the Standard, Gold, Portfolio and Advanced Portfolio Level each has a distinct feature set built up from the lower level. This section describes the Broker’s Ally Portfolio level feature set. The Broker’s Ally Portfolio Level is a powerful portfolio management system designed to support the sales process of retail brokers and investment advisors. Whereas, for example, traditional portfolio software might create a Portfolio Valuation Report, the Broker’s Ally Portfolio System can do this and go further to rank portfolios based on value and then contact clients through campaign list management. While this chapter describes all current features of the Portfolio Version, we constantly add new reports and functions as the product evolves, thus your version may have slightly different functions than those described herein. This Basic Portfolio Version represents portfolios in their current market values; while the Advanced Portfolio Level takes this information further to calculate performance and returns on dollars invested. Maximizing Broker Productivity The Broker’s Ally Portfolio System provides specific tools such as campaign planners and reports of broker transactions, large positions, and portfolio ranking by market value. Broker’s Ally creates reports and presentations that can be used as sales tools. Broker’s Ally supports the BAI (Bank Administration Institute) and AIMR (Association for Investment Management Research) reporting standards, and the Advanced Level performance reporting meets these standards as well. The Portfolio System keeps pace with industry trends by not only allowing the user to track commissions and transaction fees, but also assets under management, new accounts opened, and asset allocations both on a client basis and across all client portfolios. Relationship to Broker’s Ally Gold Broker’s Ally was developed using a building block method... one block, or level added to the other. The four versions of Broker’s Ally are Standard, Gold, and Portfolio Level. Most Broker’s Ally users will have previously owned the Broker’s Ally Standard or Gold levels, our flagship versions. The Portfolio Level is an enriched edition of the Gold version, managing current market values of portfolio holdings. You can easily upgrade to the Portfolio Level, and, conversely, if you own the Portfolio Version it automatically includes the Standard and Gold features. The Portfolio menu appears within Broker's Ally Gold as a native part of Broker's Ally. This menu comes alive when you install the Portfolio Version. Thereafter, the menu performs all the functions shown, including the addition of optional tool bar icons specific to portfolio functionality. 139 8.1 THE PORTFOLIO MENU Figure 136 - The Portfolio menu Let’s start our detailed description of how to use the Portfolio version with a look at the Portfolio menu. You will see the most commonly used aspects of the Portfolio version right on the menu; Broker Reports (internal review reports) and Client Reports (those suitable for presenting to clients), Maturing Product Campaigns, and the customization and Setup for security types and asset classes for reporting. We will discuss each menu option in top down order. 8.2 PORTFOLIO REPORTS Figure 137 - Broker Portfolio Reports The first option shown under the Portfolio menu is Broker Reports, a collection of reports for internal use by a broker. These reports can be previewed or printed by selecting a report name from the Reports dialog and clicking on Preview or Print. The names of all the reports are shown in the dialog box above. The second option shown under the Portfolio menu is Client Reports, which give details about specific accounts and are suitable for distribution to clients. The list of Client Reports is shown below. You can select and print them in the same way. 140 Figure 138 - Portfolio Client Reports Portfolio Broker Reports The Commissions and Securities by Symbol reports are carried over from the Standard and Gold versions of Broker’s Ally. The following reports appear only in the Portfolio version. Large Positions - shows up to 100 of the largest open positions for all users sorted by Market Value. All data sources are included in the report, which provides Security Description, Symbol, Quantity, Market Price, Market Value, and number of Accounts Portfolio Rank - shows up to 20 of the largest open accounts belonging to the current user sorted by Market Value. All data sources are included in the report, which provides Account number, Name, Rating, Market Value, and Data Source where the account is located Securities by Type - lists securities sorted by type. You may select a specific security type and/or enter a list of Symbols to limit the scope of the report. Place a comma (,) between Symbols in your list. The report shows the Symbol, Description, Price and other information. Transaction Schedule - shows all transactions for contacts the user has access to in a specified date range. Shows Long Buys, Short Buys, Long Sells, Short Sells in date order. For each transaction we provide the Date, Quantity, Symbol, Cost/Proceeds, Account number, and Name of the account. Client Portfolio Reports The Posting Book, Realized Gain/Loss, and Unrealized Gain/Loss reports are carried over from the Standard and Gold versions of Broker’s Ally. The following reports appear only in the Portfolio version. Bond Maturity Distribution - shows Market Value by maturity year of open bond positions belonging to a user. You can select a date range for this report, which is based on any list of clients you choose Portfolio Valuation Detail - shows all open positions grouped by security type for each client in a list. Information provided: Quantity, Description, Total Cost, Open Price, Market Price, Unrealized 141 gain/loss, % Total portfolio, Income, and Yield. If you have used Portfolio Setup, the security types for this report will be taken from the Asset Classes list and presented in the same order. Portfolio Valuation Summary - shows combined open positions for each security type for every client in a list. Information provided: Description (security type), Cost Basis, Market Value, Unrealized gain/loss, Income, Yield, % Total portfolio. If you have used Portfolio Setup, the security types for this report will be taken from the Asset Classes list and presented in the same order. Disclaimer Message Broker’s Ally gives you the ability to enter a message that can be embedded into any client report. A standard example of using this feature is to add a “disclaimer message”. The disclaimer is used in the normal course of business and encourages your clients to review and verify the accuracy of their portfolio information. Note: DISCLAIMER- Scherrer Resources, Inc. is not responsible for the accuracy of your reports from Broker’s Ally. You are responsible for verifying all contents of the reports. The software licensee shall indemnify and hold Scherrer Resources, Inc. harmless from any claims, demands, liabilities, actions, suits or proceedings asserted or claimed by any third party and agrees to undertake the cost of defending same, including reasonable attorney’s fees, where such claims, demands, liabilities, actions, suits or proceedings arise out of Licensee’s use of the Software. The licensee takes all responsibility for all calculations, usage, and securities traded and entered, and reports and graphs produced by this Software. 142 Samples of Portfolio Reports Figure 139 - Portfolio Rank Report, a Broker Report Figure 140 - Portfolio Valuation Summary Report, a Client Report 143 Figure 141 - Portfolio Valuation Summary Graph Figure 142 - Bond Maturity Distribution Report, a Client Report 144 Figure 143 - Unrealized Gain/Loss Report, a Client Report 8.3 CAMPAIGN PLANNER The purpose of the campaign planner within the Portfolio Menu is organize you to create sales campaigns based on investment product maturity dates and holdings information. A campaign is a collection of lists of contact records that are used over a period of time to achieve some specific trading objective. You can have several different campaigns running concurrently. For example, “Give me a list of everyone who owns a particular stock so that I can call them or mail them an announcement,” or, “make a campaign list of all clients who have money coming due this month.” In addition to the sales Campaigns of Calls, Actions, Groups or Maturities from the Gold Version, the Portfolio version adds an additional Portfolio Campaign, the Portfolio Rank List. This list includes up to 20 of your top largest accounts in terms of current market value for any Broker’s Ally data source. For network users, the accounts in your list are only those for which you have access rights. 8.4 SECURITY TYPES AND ASSET CLASSES SETUP Asset allocation reporting requires that securities be categorized by Asset Classes. Using the Setup dialog you can define new security types, create asset classes, and assign security types to your asset classes. The Portfolio Valuation reports present their data organized by asset classes in the same order as you created the classes. Broker’s Ally allows you to define any classes you wish including such things as equities, debt, cash, technology stocks, and inflation sensitive products. Security Types Broker’s Ally is supplied with 16 Security Types such as stock, bond, cash, and cd. You can create new types, change most attributes of existing types, but you cannot delete any types. The attributes of a Security Type include its name and three multipliers used for the calculation of cost, proceeds, and income amount as explained below. You cannot change the name of a Security Type. Click on Add Type to create a new Security Type or click on Edit Type to change the one you have highlighted (same as double clicking a type). 145 Figure 144 - Edit Security Type When creating a new Security Type, enter its name and multipliers. Broker’s Ally uses three multipliers (Price Multiplier, Quantity Multiplier, Income Multiplier) to perform calculations for cost, proceeds, income amount, and gain/loss. For example: Cost = (Open Price X Price Multiplier) X (Quantity X Quantity Multiplier) Proceeds = (Close Price X Price Multiplier) X (Quantity X Quantity Multiplier) Income Amt = (Income X Income Multiplier) X (Quantity X Quantity Multiplier) The Price Multiplier converts an open or close Price into a dollar value per unit. The Quantity Multiplier converts Quantity into number of units. The Income Multiplier converts Income into a dollar amount per unit. Examples of multipliers: Security Type Price Multiplier stock money market bond option 1 1 10 1 Quantity Multiplier 1 1 0.001 100 Income Multiplier 1 0.01 10 1 The multipliers for a stock are 1 because the price and quantity need no adjustment for computation. Since you enter Income (dividend) as dollar amount per share, the Income Multiplier is 1. Money market securities always have a $1 price and need no price adjustment. Since you enter Income as a percentage, we have to multiply it by 1/100 to obtain a dollar amount per share. Since you enter the face value of $1000 bonds for the Quantity, we must multiply by 1/1000 in order to obtain the number of units. Since you enter the percent of $1000 for the Price, we must multiply by 10 to get the actual price per unit. The Income value is also a percentage, hence we multiply by 10. Options are sold in groups of 100 units, hence we multiply quantity by 100 to get actual number of units. Note: When you edit a Security Type, you may see multiplier values represented in exponential format. For example: 0.1 = 1.e-001, 0.01 = 1.e-002, 0.001 = 1.e-003. You cannot change the name of a Security Type. Asset Classes The Portfolio Valuation reports group results by Asset Class and present Asset Classes in the same order that you created them. You should create Asset Classes and assign Security Types appropriately to each class in order to use these reports effectively. Otherwise Broker’s Ally will use a default order for the original 16 types. For example, you could create the class Equity and insert under it the types stock and option. 146 Assign every Security Type to an Asset Class! Click on Add Class to create a new Asset Class or click on Edit Class to change the one that is highlighted (same as double clicking a class). To erase a class, highlight one and click on Delete Class. To insert a Security Type under an Asset Class heading: 1. Highlight an entry in the Security Types list. 1. Highlight an entry in the Asset Classes list. 1. Click on Insert Type. The selected Security Type will be inserted below the selected entry in the Asset Classes list. You can remove a Security Type from the Asset Classes list by highlighting an entry and clicking on Remove Type. Figure 145 - Security Types and Asset Classes Setup Sample Asset Classes and Associated Security Types Equity: Stock Option Debt: Bond Corporate bond Government bond CD CMO Cash: Cash Money market Security Types in Broker’s Ally Gold Annuity cmo mutual fund 147 Bond bond unit trust Cash Cd closed end fund commodity corporate bond government bond money market municipal bond option stock unit trust 8.5 HOW TO USE THE PORTFOLIO VERSION In order to use the Portfolio version you need to first enter a database of securities either manually or electronically (found under menu items Edit, Securities) and then enter transactions into the Posting Book Ledger for your customer accounts. Users can enter, change, and view all securities under Edit Securities. Each security has a Symbol or CUSIP number, Description, security Type, and Price. For bonds you can enter the Maturity Date. When downloading prices from a service, you will see the source in Pricing Service. Any firm or quote vendor offering a download or Dynamic Data Exchange (DDE) link may move data into Broker’s Ally. Once securities are entered you are ready to post transactions into the Posting Book Ledgers of your clients. To Post transactions you enter the appropriate data for each security transaction, which may include trade date, quantity, symbol, price, fees, commission, and total. If the security is not held in house, you can note its location. You can enter a specific transaction reference number if you wish, and a description attachment. If you attempt to enter a transaction for a security not registered in the securities database, Broker’s Ally will prompt you and assist you in adding it to the database of Securities. Figure 146 - Enter purchases or sales Securities Ledger Securities purchased and sold are entered into the Securities Ledger by “doing a trade” and selecting the action you prefer. Thus, the entries on the ledger increase and can be sorted in many different orders such as by description, quantity, price, market value and gain or loss in ascending or descending order. Using the “radio buttons” on the Ledger screen you can show open positions, closed positions or both open and closed positions sorted in any order. A calculator button is added 148 to the screen for convenience of the user in making quick calculations. Also, quick access to the securities master file is also available in cases where you wish to use securities already entered into the securities master file. Cash Ledger The cash ledger presents cash increases or decreases to and from the account and lists them in order of date of transaction, action, quantity, price, and amount are recorded. The cash ledger tracks cash used to purchase other investments, or the proceeds of investments converted to cash. 8.6 PORTFOLIO TERMINOLOGY Because different software products handle their terminology in different ways, this section describes Broker’s Ally terminology. To keep ambiguity to a minimum for you and your sales assistants, we have described below how Broker’s Ally handles various investment tasks and terms. Please refer to this list if you wish to have complete understanding of the way in which Broker’s Ally uses specialized terms to define actions. Account - In Broker’s Ally, the “account” represents a single account at a brokerage firm, trust company, or bank, etc. A contact may have multiple accounts, and an account may have multiple contacts associated with it. As in a brokerage or advisory firm, the owners of an account are shown in the registration block on the contact screen. Account Executive - In Broker’s Ally, this is tracked as the broker number. Also known as the Registered Representative, advisor or the manager or owner of the account. Annuity - Security Type in Broker’s Ally that is an insurance contract paying at regular intervals. Appraisal - A report or opinion of value about the investment portfolio made by an expert based on facts and professional judgment. Also, depicted as Portfolio Valuation Detail Report. Associated Contact - The contact associated with an account. Association For Investment Management and Research, AIMR - One of the performance reports to appear soon in Broker’s Ally. The AIMR Portfolio Performance Presentation Standards are a set of guiding ethical principals intended to promote full disclosure and fair representation by investment managers in reporting their investment results. Bank Administration Institute (BAI) - The formula used to determine the internal rate of return (IRR) of a portfolio. Also, a professional association that, among other things, has created a set of calculation standards and guidelines for financial instruments. Their standard calculation formula: MVE = Fi (1+R)Wi where F is cash flow, and W i is the proportion of the period that the cash flow was in or out of the portfolio. Basis - The cost and out-of-pocket expenses (e.g., commission) of acquiring an investment asset. In Broker’s Ally the “total” price depicted on the Post Open Position screen that includes fees, commissions, and interest. When the investor sells the asset, the basis is subtracted from the sales price to determine the short-or long-term capital gain (or loss). Basis Point - One-hundredth of a percentage point (0.01%) of yield on a bond or note. Broker’s Ally often depicts yields in hundredths of percentage points. 149 Bearer Bond - A bond that does not have the owner’s name registered on the books of the issuing company and that is payable to the holder. Can be tracked in Broker’s Ally as “Held outside at:” on the Post Open Position screen. Bond - Basically an IOU or promissory note of a corporation. In Broker’s Ally, bonds are tracked on the securities list by name or CUSIP number. A bond is evidence of a debt on which the issuing company promises to pay the bondholders a specified amount of interest and to repay the principal at maturity. A secured bond is backed by collateral; an unsecured bond (debenture) by the full faith and credit of the issuer. Broker’s Ally can track them as either bonds or debentures. Bond rating - Estimate of the financial strength of a bond issuer made to advise investors of the risk of default. The ratings-issued by Standard & Poor’s, Moody’s Investors Service, and Fitch’s Investors Service-range from AAA down to D (in default); bonds rated B or lower are considered speculative. Broker’s Ally tracks bond ratings in the securities file within the “Name”, as in Springville Municipal, BBB. Buy - In Broker’s Ally, the default buy is a purchase of a security and the corresponding sale of cash from the portfolio. Call - An option to buy 100 shares of a certain security at a specified strike price within a given period of time (maturity or expiration date). Handled in Broker’s Ally as a security type. Covered call transactions can combine cost basis with the underlying security by assigning the same lot numbers. Callable bond - In Broker’s Ally, handled as a normal bond. When called, a “bond called” transaction is generated. A bond that may be redeemed by the issuer before the maturity date. Certificate of deposit (CD) - A security type in Broker’s Ally handled as a short term bond. Its asset class may be defined as cash. A receipt issued by a bank for a cash deposit for a specified period of time at a fixed rate of interest. Commission - In Broker’s Ally, this number is entered when opening a position or making a transaction and tracked in a commission table. Fee charged by a broker for executing the purchase or sale of securities. Common stock - One of the standard securities types, a unit of ownership in the assets of a corporation. Convertible security - Handled in Broker’s Ally as normal equity or debt, upon conversion it generates a transaction. A corporate bond or preferred share that may be exchanged for a stated number of shares of the corporation’s common stock. Coupon rate - The rate of interest on a bond expressed in Broker’s Ally as a percent and stored in the securities file. Current yield - In Broker’s Ally this is the annual return on a bond, computed by dividing the annual coupon rate by the market price. Current yield equals the coupon rate for bonds purchased at par, and exceeds it for bonds purchased at discount. CUSIP, Committee on Uniform Securities Identification Procedures - The standard identifying number for each security which is held in the Portfolio System securities set-up file. Tracked alongside of symbol as a unique means of identifying the security. In the case of a security that has no symbol, such as a bond, the CUSIP number is entered in the symbol field. Dividend - Broker’s Ally does not track dividend payments along with the underlying security. However, the dividend can be added as a transaction. The dividend is declared at a certain amount 150 per share to be paid in cash and tracked as a “cash dividend” or in additional shares of stock tracked in Broker’s Ally as a “stock dividend”. Broker’s Ally can track the dividends which are usually declared quarterly or other extra cash dividends on a one-time distribution in this manual method. Plans are underway to make this an automatic process. Earnings per share - Sometimes downloaded with the market data information but not tracked by Broker’s Ally. Tracked as a corporation’s net income after taxes and payments to preferred shareholders and bondholders, divided by the number of outstanding shares of common stock. Front-end load - In Broker’s Ally, a fee or sales charge incurred on the purchase of an investment (annuity, insurance policy, mutual fund shares, limited partnership units). Sales charges incurred upon sale of the investment are called back-end load. Groups - A collection of contacts grouped for a specific sales purpose. Not to be confused with householding. Householding - The process of collecting all accounts in a family household under a single contact. Handled in Broker’s Ally by assigning multiple accounts to one contact. Joint account- One of the account types you can open for your clients. May allow any one individual to make transactions or may require the consent of all co-owners. Linked Contact - In Broker’s Ally, when two or more contacts are linked in a relationship that usually represents an association between two people, as in a client and their attorney. Not to be confused with Joint Account (see Joint Account). Not to be confused with Associated Contact (see Associated Contact). Maturity - The date on which a debt instrument such as a bond, becomes fully payable. Recorded in Broker’s Ally under Securities, Maturity Date. Municipal bond - One of several types of securities tracked by Broker’s Ally as a bond issued by a state, state agency or authority, or a political subdivision such as county, city, town, or village. In general, interest paid on municipal bonds is exempt from federal income taxes and from state and local income taxes within the state of issue. Tracked by name and CUSIP number. Option - A call option is the right to buy 100 shares of a security at a fixed strike price before a given expiration date (maturity). Similarly, a put option is the right to sell 100 shares at a fixed price before a given expiration date. Ordinary income - Any income that does not qualify for special tax treatment (capital gains, special averaging) and is taxed at the prevailing rates and is recorded separately from tax advantaged investments in Broker’s Ally. Original issue discount (OID) - The difference between a bond’s par value and the price at which it is bought at the time of issuance. Par - In Broker’s Ally, the face value or denomination of a bond. For common stock, par value per share is assigned by the company’s charter for accounting purposes but has no relation to market value. Stored in the securities table. Put - Tracked as a security type in Broker’s Ally. An option to sell 100 shares of stock at a definite strike price within a specified period of time. For this right, the buyer pays a premium; if he does not exercise the option before it expires, he forfeits the premium and the option is worthless. 151 Real Estate Investment Trust (REIT) - A default securities handled by the Portfolio System which tracks the characteristics of a real estate investment trust. Registered representative - In Broker’s Ally, tracked as the broker number. Also known as an account executive or customer’s broker. Regulation U - The Federal Reserve Board regulation governing the amount of credit that may be advanced by a “bank” to its customers for the purchase of securities. Return - In Broker’s Ally this is the pretax profit on an investment, expressed as an annual percentage of the investor’s original capital: depicted as the sum of the net change in the investment’s market value and any dividends or interest paid is divided by the purchase price. Return of capital - A distribution to an investor from a source other than net income as determined for tax or accounting purposes. Selling short - Tracked in Broker’s Ally as a short sale. The sale by an investor of stock that he does not own but has borrowed in expectation of a drop in the stock’s value. Stock - Ownership shares of a corporation. Also Common stock or Preferred stock and tracked in Broker’s Ally under the name of the security. Stock dividend - Shown in Broker’s Ally as an income type transaction. A dividend paid in securities rather than cash-either additional shares of the issuing company or shares of another company (usually a subsidiary) held by the issuing company. These dividend shares are not taxable until sold. Tax basis - The original cost of an asset if purchased, or the fair market value of that asset if inherited, less accumulated depreciation. See basis. Tax-exempt security - Tracked in Broker’s Ally as an attribute of a security type. A security whose interest income is exempt from federal income tax; a municipal bond. Yield - In general, the amount of profit on an investment of capital calculated in Broker’s Ally as a percentage. Zero-coupon bond - In Broker’s Ally, another type of bond tracked specifically by CUSIP. A bond that is sold at a deep discount from par value, and therefore appreciates substantially, but makes no payments of interest. 152 CHAPTER 9 ADVANCED PORTFOLIO FEATURES The Portfolio Level extends the portfolio management capabilities of Broker’s Ally. It accomplishes this by increasing the number of transaction types, accounting methods, and reports that are available to the user. This provides for the storage of the price history of securities, creating a view of holdings that are summarized across lots, tracking of available cash, displaying the buying power for each contact, and extending the number and types of portfolio reports available, which include performance reports and performance versus an index. This chapter will describe the features and extensions offered by the Portfolio Level. It will describe the changes to the user interface and the new processes that are taking place within the system to handle this expanded functionality. The enhancements to the Basic Portfolio level are divided into four main categories, Transactions, Book Page, Securities and Reports. Each section below describes one of these features and gives details about the user interface. 9.1 TRANSACTIONS The Advanced Portfolio Level provides the ability to handle an expanded list of transaction types, including many corporate actions. It has also modified how the user looks at the posted transactions. It provides a view of the transaction data that displays positions summarized across all lots for each security. It also allows the user to post a transaction that affects more than one lot at one time. Trade Lots Information about individual trade lots is stored in a separate database file. Each record contains the most up to date state of the trade lot and this is updated each time a transaction is posted. When the quantity of the record is reduced to zero, the trade lot is fully disposed. There is one record per contact in this table that will track the cash available in a contact’s account. This record is automatically updated whenever a transaction has a cash effect. Transaction Types The system now supports an extended list of transaction types with each type defined in terms of how it affects the tax lots. These effects on the tax lots are called the attributes of the transaction. The system defines all transaction types according to a list of attributes. These attributes include cash effect, quantity and cost effect, and lot effect. The attributes of each transaction type listed below. Purchase Sale Stock Split * Dividends Interest Earned Interest Expense Short Term Capital Gains Distribution Long Term Capital Gains Distribution Cash In Cash Out Short Sale Closing Purchase Stock Dividend * Spin Off * Taxable Exchange * Tax Free Exchange * 153 Reinvested Dividends Reinvested Interest Reinvested ST Cap Gains Distribution Reinvested LT Cap Gains Distribution Shares In Shares Out Conversion * Maturity * Redemption * Call * Corporation Name Change * Paydown Return of Capital The transaction types with an asterisk (*) are considered global transaction types because they are corporate actions that affect all holders of the security. The system supports this by providing a way for the transaction to be recorded in the accounts of all contacts owning the security. The system also allows the entry of the transaction on an individual account in case the account was added after the transaction was already recorded for all other accounts. Lot Selection Methods Many sell or closing transactions affect more than one trade lot. Instead of entering a sell or closing transaction for each trade lot individually, the system supports lot selection methods that allow one transaction to dispose of many lots at once. The trade lot selection methods supported and their definitions are listed below. Method Definition . FIFO First In First Out. Lots are selected based upon the trade date of the transaction that created them. The earliest lots are selected first. If a lot is selected, as much of the remaining quantity of the lot is used as necessary to satisfy the disposal amount. LIFO Last In First Out. Lots are selected based upon the trade date of the transaction that created them. The late lots are selected first. If a lot is selected, as much of the remaining quantity of the lot is used as necessary to satisfy the disposal amount. High Cost or Minimum Gain Lots are selected based upon its cost per share. The highest costs per share are selected first. If a lot is selected, as much of the remaining quantity of the lot is used as necessary to satisfy the disposal amount. Low Cost or Maximum Gain Lots are selected based upon its cost per share. The lowest costs per share are selected first. If a lot is selected, as much of the remaining quantity of the lot is used as necessary to satisfy the disposal amount. Average Cost The average cost per share is calculated using all lots remaining in the position. Every lot is selected and the quantity used from that lot is determined by multiplying the disposal amount by the ratio of the lot amount over the total amount of the position. Only for mutual funds are fractional shares allowed. Specific Lots and amounts are selected by the user to satisfy the disposal amount. 9.2 BOOK PAGE The new book page summarizes a contact’s holdings across multiple trade lots. Two new fields, Cash and Buying Power, were added at the bottom of the holdings page. The Cash field displays the available amount of cash for the current contact. The Buying Power field displays the amount of money available to buy securities. This is determined by adding the available cash to the maximum margin value of all securities held. The margin rate can be adjusted for each client by the Broker’s Ally user. 154 There are four buttons on the new Book Page. These buttons, Sort Order, Do Trade, View Ledger, and Cash Ledger will complete the following tasks. The Sort Order button allows the user to change the order of the positions being displayed. Clicking on the Do Trade button pops up a menu with the available trade types. After selecting a type, the appropriate trade type screen is brought up. Clicking on View Ledger brings up the Ledger view described below. Clicking on Cash Ledger brings up the same Ledger view, but with CASH as the security. Figure 147 - Book Page Sort Order The sort order for the holdings page can be changed by clicking on the Sort Order button that brings up the dialog show below. The field to sort on and the direction of that field can be selected. Figure 148 - Sort Order for Holdings 155 9.3 LEDGER VIEW The ledger view displays all of the transactions for the currently selected security. Figure 149 - Ledger view Clicking on the Trade button brings up a drop down menu that provides a selection of transaction types. The Edit button brings up the appropriate transaction type dialog for the highlighted transaction. Delete button deletes the transaction highlighted and reverses its effects on the holdings table. Transaction Type Screens Each transaction type has its own dialog for gathering the appropriate information. The following dialog is a sample of the purchase dialog. 156 Figure 150 - Purchase dialog When disposing of shares through one of the sell or close transaction types, the user has the option of selecting which trade lots to dispose and how much of each lot. Clicking on the LOTS button brings up a dialog where these lots can be selected. Figure 151 - Lot Selection The list box displays the date, price, quantity remaining, and number selected for this disposal. The 5 buttons along the bottom produce a lot selection based upon the method indicated, first in first out, last in first out, maximum gain, minimum gain, or average cost. If none of these methods are desired, clicking on the Use Lot button allows the user to select a specific lot and enter the amount being used from that lot. Clicking on the Clear button wipes out all selections made to that point. 157 Figure 152 - Use Specific Lot dialog 9.4 SECURITIES The Portfolio Level now expands the amount of information recorded about securities. This additional information includes the price history for each security, security sub types, CUSIPs, descriptions, and fields associated with insurance products, such as purchase date, face amount, and expiration date. The price history is used for calculating performance for past periods. Prices associated with securities are stored in a separate table. This allows for the tracking of historical prices that are used in the calculation of historical market values. It should be noted that the latest price for the security is also stored in the security record. The expanded information stored for different security types requires a different security screen for each security type. This has resulted in a different way of displaying and entering securities. Security sub types are used for producing reports with securities grouped by industrial sectors. The security record is keyed and indexed by an independent security ID field rather than the symbol field. However, for users moving from Broker’s Ally versions previous to version 8 who wish to continue to use the symbol as the key or to use the new field CUSIP as the key, the system provides the option to populate the security ID field with either of those fields. This is a one-time selection and can only be changed by an update process. User Interface Changes A new security screen has been added which displays the securities with information that is common to all security types. From this screen, the user can navigate to other windows where a security can be added or edited. Also, a new option has been added to the User Preferences screen that relates to securities. The new option is labeled Security Database and the two choices are Use Ticker as Key or Generate Security ID. The following sections describe the new features and appearance of the user interface related to securities. The new Securities screen displays all of the securities stored in the Securities Master file database and allows for adding, editing, and deleting of these securities. Clicking on the Add button brings up a menu of security type choices. Selecting one of these choices takes the user to the appropriate security screen for entering information. 158 Security Type Screens Each security type has its own screen in which data is entered or edited. From this screen, the user can enter the price history, perform a symbol change, or execute a corporate action. Here is the screen for a common stock: Figure 153 - Security Type dialog Edit Prices Clicking on the Edit Prices button brings up another dialog box which displays all the prices for the selected security, sorted by date from latest to earliest. The ability to add, edit, and delete a price is provided by three buttons, appropriately labeled. 159 Figure 154 - Prices dialog Clicking on the Add or Edit buttons brings up another simple dialog box where the date and price can be entered. When doing an edit, the date field is read only. Figure 155 - Security Pricing dialog 9.5 REPORTS Below you will find a list of the advanced portfolio reports. More reports will be added. If you wish custom reports to be created, please contact Scherrer Resources, Inc. and we will assist you in creating additional reports that meet your specific needs. Report Names Performance Asset Allocation Performance vs. Index Portfolio Diversification What if Scenarios Held/Not Held Realized Gains and Losses Closed Positions and Lot Number Unrealized Gains and Losses Closed Positions by Symbol 160 Unrealized Capital Gains with Annualized Income Cash Balances Income and Dividends Cash Additions and Withdrawals Income and Dividends Forecasts Commissions Monthly Income Schedule Maturity Warning Transactions Reports Turnover Report All of these reports come with the following options: Selectable date range One or more contact accounts, households Subtotals by month, quarter, year, account, security, security types, asset classes, security subtypes. Performance Vs. Index The Advanced Portfolio Level provides the ability to compare the performance of an account against an index. In order to provide this information, the new asset type of Index has been added. The user can associate this asset type with a security to indicate that the security is really an index. Prices can be entered into the database associated with this security to correspond to the value of the index on given dates. With this data, the system can calculate the performance of the index and use that in its comparisons. Commission Allocation The Advanced Portfolio Level provides the ability to track the allocation of commissions on a per trade basis. Commissions can be allocated to the house, another firm, and individual salespeople, or whoever desired. This is important when third party products such as mutual funds or annuities are sold by an advisor. On the View Ledger dialog, there is a button called Allocate Commission, which when clicked brings up the Trade Allocation dialog for the selected trade. This dialog allows the user to enter up to six commission allocations. Allocations can be a dollar amount or percentage of the total commission. 161 CHAPTER 10 MAIL MENU Figure 156 - Mail Menu The Mail menu is the primary resource for creating and printing letters, labels and envelopes. In this section, we will discuss the integrated word processor called the Letter Writer as well as the process for printing Marked Letters, Marked Notes, and mass mailings to selected groups of people using the process of mail merge. 10.1 LETTER WRITER The Letter Writer in Broker’s Ally is a fully integrated, full function word processor. You can open the Letter Writer at any time regardless of what you are doing. It is not necessary to leave the Contact view to start up the Letter Writer. When you start up the Letter Writer, it will occupy its own window positioned on top of the current contact window. Note: You can also use the Letter Writer to create your own customized reports by utilizing the merge fields. To start up the Letter Writer, simply select it from the Mail Menu. The Letter Writer will expect you to open an existing letter or to create a new letter. 162 Figure 157 - Open Letter Writer Dialog The Letter Writer can open files having the extension .BAL (Broker’s Ally Letters), RTF (Rich Text Format files), or plain text files. If you wish, you can also select another directory or drive by double clicking on the desired entry in the appropriate scroll box. First, to select a letter, you can either highlight it and click on the Open button or you can double click on the file name. Once you have selected an existing file or requested a new file, the Letter Writer displays its main window. Figure 158 - Letter Writer Window The Letter Writer window lists the name of the current letter in the title bar. If the Letter Writer contains a new document that has not yet been saved, the document will be assigned the temporary name ‘LetterX’, where X is a sequence number assigned by the system. You can open as many letters as you desire up to the memory limit of your computer. You can cut and paste between letters using the Edit menu, and you can switch between letters by clicking on the corresponding window or using the open window list on the Window menu. The main editing region is bordered by a horizontal ruler that displays inches, a vertical scroll bar, and a horizontal scroll bar. It has a tab bar that displays the left margin and tab settings, and a toolbar for controlling the text in the window. Broker’s Ally provides various sample letters with the Letter Writer. 163 Exit To close a Letter Writer window, double click on the system box in the upper left corner of the Letter Writer window or select Exit from the Letter Writer menu. Letter Writer Menu The Letter Writer has its own menu. You will find the following options: Figure 159 - Letter Writer Menu Save You can save the current letter by selecting Save from the Letter Writer menu. If the letter is a new document, Broker’s Ally will prompt you to enter a name or use the default name ‘LetterX’, where X is an assigned sequence number. If you do not specify an extension, BAL is assumed. If you enter an existing file name, the system will ask you if you wish to over-write the existing file. You can select another Disk drive, directory or file format by clicking on your choice in the appropriate scroll box. If you try to close a letter window and have not saved the changes to the letter, the Save Letter dialog is displayed automatically. If you have changed an existing file, the letter will be saved under the same file name, location and file type without prompting you for these selections. Save As The Save As option displays the same dialog as Save. The subtle difference is that the Save option presumes that you want to save a previously saved file under the same name and location while the Save As option assumes you want to change the file name, type or location. Document Info The Document Information dialog in the Figure below helps you to store additional information about the letter. You can fill in the Title, Subject, Author, Operator, Keywords, and Comments for the 164 document. Broker’s Ally saves the Last Saved, Last Printed, and the Creation dates for the document. It only stores Document Information for letters saved with the Broker’s Ally Letter file format, i.e., with a BAL extension. Figure 160 - Document Information Dialog Format The Format option controls the appearance of the text of your letter and presents a sub-menu containing the following options: Text “ The Format Text option presents the dialog that sets all font attributes for the selected text. To use these options it is necessary to first highlight the text that you want to alter by placing the insertion point at one end of the text, pressing and holding the left mouse button and dragging the highlighted cursor to the opposite end of the text. After highlighting the text to be altered, select the Format Text option, and select the font, style and size of the type. Further, you can add the Underline and Strikeout features if desired and you can set the color if you have a color printer. Figure 161 - Format Text dialog 165 Format Paragraph Broker’s Ally defines a paragraph as the text between two hard returns - locations where you have pressed the Enter key to start a new line. The “paragraph” icon on the toolbar allows you to toggle on or off the display of hard returns. The Format Paragraph dialog allows you to set the spacing before the current paragraph, the indentation, and the alignment of the current paragraph. You must select part of one or more paragraphs before selecting the Format Paragraph option. Figure 162 - Format Paragraph dialog Format Page The Format Page dialog in allows you to format the page layout for all pages in a document. These settings control the printer margins, and the width of the default tab. Figure 163 - Format Page dialog Format Color When you select Format Color from the Letter Writer menu, you can change the color of the selected text. Unlike the Format Text option, you cannot change other font attributes. The Color dialog shows the standard Windows colors. 166 Figure 164 - Format Color Dialog Format Bold When you select Format Bold from the Letter Writer menu, you will change the bold attribute of the selected text. Unlike the Format Text option, you cannot change other font attributes with the Format Bold option. This is a shortcut method for bolding text. Format Italic The Format Italic option changes only the italic feature of the selected text. Format Superscript The Format Superscript option raises the vertical position of the selected text within the current line spacing. Format Subscript The Format Subscript option lowers the vertical position of the selected text within the current line spacing. Search The Search dialog enables you to find multiple occurrences of any combination of characters in a letter. When you type text in the Search for field, the Search button becomes enabled permitting you to begin the search. If Broker’s Ally finds the entered text, it is highlighted within the letter. You can click on the Search button to find the next occurrence or click on Cancel to stop the search. You can fine tune your search by clicking on one or more of the check boxes found on the left side of the Search dialog. The Whole Words option limits the search process to matching the entered text exactly. If you enter search text such as able, it will find the text ‘usable’ as well as ‘able’ unless you specify Whole Words. You can eliminate the distinction between upper and lower case characters by checking the Ignore Case option. By unchecking the Start at cursor position option, you can tell Broker’s Ally to begin each search at the top of the document. You can control the direction of search by clicking on the Forward or Backward radio button. 167 Figure 165 - Search Dialog Search and Replace The Search and Replace dialog works exactly like the Search dialog, with the added capability of the replacing the search text. Figure 166 - Search and Replace When you have entered the Search for text and the Replace with text, the Replace and Replace All buttons will be activated. If you select Replace, the next occurrence of the Search text will be highlighted and a new dialog will appear with four buttons: Find Next, Replace, Replace All, and Cancel. Click on Find Next to skip to the next occurrence of the search text, click on Replace to make this replacement, click on Replace All to replace all occurrences, or click on Cancel to abort Search and Replace. If you select Replace All, all occurrences of the Search text will be replaced according to the setting of the search controls (from beginning or current cursor position, forward or backward, etc.). Insert Use the Insert dialog to insert special data such as dates, merge fields, page breaks, other documents, pictures, or even tables into the current document. It consists of several option buttons to select the type of data to be inserted, and a list box that fills with the choices associated with the selected option. When you select an item from the list box, and click on Insert, the item is inserted into the letter at the current insertion point. The options are: 168 Figure 167 - Insert Dialog Contact When you select the Contact option, the available items are merge fields for the contact record. If you insert a merge field, the field name will be replaced by the corresponding data for each contact during the merge process. Most contact fields are available as merge fields. Furthermore, there is a special merge field for a contact’s full name called FULL NAME. The NICKNAME merge field will substitute Salutation + Last Name, e.g., Mr. Jones, if the NickName field is empty in a contact record. The COMPANY, TITLE (2nd Name), ADDRESS1, and ADDRESS2 merge fields are called “ghost” fields because they will vanish if no data is available when the letter is printed. A ghost field and, more importantly, the line it occupies will disappear in the absence of data to fill it. However, if any other text or merge fields share a line with a ghost field, an empty space will replace the field and the line will remain in the letter. Date When you select the Date option, the available items are: {MM/DD/YY} {MM/DD/YYYY} {NNNNNNNN DD, YYYY} 9/28/2004 9/28/04 September 28, 2004 Items 1 through 3 are three different styles of date merge fields. When you print a letter containing one of these merge fields, the current date replaces the merge field. For example, item 1 produces a result like item 5, item 2 produces a result like item 4, and item 3 produces a result like item 6 when you print the letter. Items 4 through 6 display the current date (whatever it happens to be when you pull up the Insert dialog) as static text strings. They are not merge fields. If you insert one of these items into your letter, it will appear exactly as you see it and it will never change. Document When you select the Document option, the Open Letter Writer dialog will appear with the New button disabled. When you select a document, it will be inserted into the current letter at the insertion point. 169 Page When you select the Page option, the available items are: 1. Page Break, which forces the beginning of a new page. 2. Page Number, a merge field that will be replaced with the page number when the document is printed. User When you select the User option, the available item is merge field for the name of the current user of Broker’s Ally and default user information. See User Preferences. Picture When you select the Picture option, you will be presented with a insert picture dialog window. You have the ability to insert picture in the following formats. Windows Bitmap (*.BMP) Tag Image File Format (*. TIF) Graphics Interchange (*. GIF) Windows Paintbrush (*. PCX) TARGA (*. TFA) Windows Metafile (*.WMF) Graphics can also be added via the Microsoft Windows Cut, Copy and Paste routine. You can preview your selections by checking the Preview check box. Figure 168 - Insert dialog Table When you select the Table option, you will be presented with a dialog window which will ask the number of columns and rows you would like. Merge The Merge menu item on the Letter Writer menu brings up the Mailing List dialog. After you select an existing list or create a new list, Broker’s Ally prints the current letter for each contact in the list, filling in the merge fields appropriately. 170 If No Mail is checked in a contact record, the contact is ignored during the merge print operation. This feature allows you to avoid creating duplicate letters or labels for individuals with more than one contact record. You can turn off this feature by selecting Ignore No Mail in User Preferences. Spell Check Select Spell Check from the Letter Writer menu to check the document for misspelled words. If no misspelled words are found, Broker’s Ally displays the message “Spell Check complete”, otherwise the Spell Check dialog appears. The Spell Check dialog provides suggested replacements for the misspelled word and a default Change To entry. You can choose to Change the misspelled word, Ignore the suggestion, or, if it is a valid word, Add it to the dictionary. The Ignore All option causes the spell checker to ignore the suspect word for the remainder of the document. The Change All option causes the spell checker to automatically replace the suspect word with the suggestion for the remainder of the document. You may edit the Change To replacement word if the spell checker does not provide an appropriate suggestion. Figure 169 - Spell Check Dialog Note: Merge Field Protection: When the spell checker makes a revision on a line containing a merge field, it deletes the merge field. You will have to re-enter the merge field. Letter Writer Toolbar In addition to its pull down menu, the Letter Writer provides a Toolbar that provides instant access to many common functions. Figure 170 - Letter Writer Toolbar Text Font The Font scroll box presents all of the fonts installed with Windows. You can select any font for the currently highlighted text simply by clicking on the font name. You can quickly move to a font name by typing the first couple of letters of the font name into the input portion of the Font scroll box. Text Point Size You can quickly change the point size of selected text by clicking on the Point Size button. You can either enter the exact point size desired or click on one of the preset point sizes. 171 Left , Center, Right & Justify Paragraph The various paragraph alignment options will re-align the currently highlighted paragraph or paragraphs. You can select portions of one or more paragraphs by clicking and dragging your mouse. The entire paragraph (defined as any text lying between hard returns) or paragraphs will be reformatted with the selected alignment. Bold, Italicize, Underline & Strikeout Text The Bold, Italicize, Underline and Strikeout buttons toggle their respective features on and off for the highlighted text. If the highlighted text contains a mixture of both states, e.g., both bolded and unbolded text, clicking on the associated button will first move the entire selected text to one state and then to the other. Therefore, you may have to click the button twice to obtain your desired result. Single, One and a Half, or Double Line Spacing Select Single, One and a Half, or Double line spacing to set the amount of space between the lines of the selected text. Superscript & Subscript The Superscript and Subscript options move the selected text up and down a half line respectively. Show Paragraphs The Show Paragraphs button toggles the display of the paragraph marker at the end of each paragraph as well as other non-printing characters. The Letter Writer inserts a paragraph marker each time you enter a hard return by pressing the Enter key. Text Color You can change the color of the selected text by clicking on the Color button. Changing the color of text will have no affect unless you have a color printer. Letter Writer Ruler Below the Letter Writer toolbar, there is a horizontal ruler and tab bar for showing and setting the left indent and fixed tab positions. Figure 171 - Letter Writer Ruler The “wedge” on the left controls how far the selected text will be offset from the left margin. You can drag it to any location you desire. The Figure above shows two tab markers. To insert a tab marker, click on the tab bar beneath the ruler at an appropriate location. You can drag an existing tab marker anywhere on the tab bar or remove it by dragging it off the tab bar. 10.2 M ARKED LETTERS The marked letter feature is a clever and convenient time-saving feature that allows you, during the course of the work day, to assign unique letters to single individuals one at a time, but batch print them all at once. The Marked Letters dialog shown in the Figure below presents a list of all letters that have been assigned to one or more individuals via the Marked a Letter option on the Contact 172 menu. You can Delete a marked letter or Delete All marked letters from the list by clicking on the appropriate button. To Delete a marked letter, you must first select a letter from the list box. Figure 172 - Marked Letter Dialog The Print buttons located at the bottom of the dialog allow you to merge names into and print letters, labels, envelopes, or produce a report utilizing data in the contact records of every person displayed. The Letters button will merge and print Marked Letters. The Envelopes or Labels buttons will merge and print mailing labels or envelopes for each letter. The Report button will print data into a selected report format using the Marked Letters List of contacts. You can delete individual entries with the Delete button or delete the list that is currently displayed with the Delete All button. The Select scroll box allows you display the entire list or just the contacts for a particular letter. Initially the Select scroll box shows “(all)” and the list box displays all of your marked letters for all contacts. You can choose a particular letter in the scroll box in order to display only the contacts to whom you assigned this letter. Some users like to print one kind of letter in a single batch, change stationary in their printer, and print another kind of letter as a second batch. The print commands operate on the contents of the list box. After you have printed the selected marked letters, you can click on Delete All to remove the people from the marked letters list. Be sure that you have printed the necessary labels or envelopes before you delete marked letters list, because this group is not retrievable again. 10.3 M ARKED NOTES Marked Notes is a handy feature for creating a mailing label for fulfilling mailing requests. After typing a note, you can “mark it” for printing. To print out the label you select the Marked Notes feature from within this Mail Menu. When you select Marked Notes from the Mail menu, you can choose either Report or Labels. The Marked Notes Report produces a report of all marked notes whereas the Marked Notes Labels command produces mailing labels for the marked notes. You can also produce the report or labels from Reports under the View menu. See Notes Page in Chapter 3 for instructions on marking a note. You can use the Marked Notes Report to create a “To Do” list from your contact notes. This feature is great for printing follow-up instructions and its associated mailing label, such as “Send information on Sun Microsystems stock”. The Marked Notes Labels option produces a hybrid label and report. The concept is that this feature will print both a mailing label for the marked contact record together with instructions about what to mail to that contact. The instructions are formatted to fit on the label adjacent to the mailing label. You read the instructions from the note about what to include in the mailing, and then peel the mailing label and affix it to the envelope. 173 10.4 GROUP LETTER This is the mail merge feature of Broker’s Ally; the process of merging contact information into a single letter which is the same for all the contacts. The Group Letter option allows you to create a Mailing list, choose a form letter, and perform a merge print operation with the Letter Writer addressing the letters correctly using the names and addresses of contacts within the group list. The result is the same as choosing the Merge option from the Letter Writer menu (discussed on page 170). You could also use a different list, such as a Calls list, from the View menu and select Mail Merge from the List view. The end result is the same whether you use a Call List, Action List, or Group List; all the selected names will merge into a single letter and print in a single batch. When you select the Group Letter option, Broker’s Ally displays the Mailing List dialog. Choose an existing list or create a new one. Click on the View List button and click on Mail Merge to bring up the Letter Writer’s open file dialog. After you select a letter and click on Open, Broker’s Ally will merge print a letter for every contact in the mailing list. If No Mail is checked in a contact record, the contact is ignored during the merge print operation. This feature allows you to avoid creating duplicate letters or labels for individuals with more than one contact record. You can turn off this feature by selecting Ignore No Mail in User Preferences. 174 CHAPTER 11 TOOLS MENU Figure 173 - Tools Menu The Tools menu provides access to several utility functions including the Phone Dialer, Stopwatch, Calculator, a simple date Calendar, Scratch Pad and the Sales Script viewer. Broker's Ally for Windows uses the standard Windows Calculator. Please note that the Calendar tool is unrelated to the Activities Calendar. 11.1 PHONE DIALER When you select the Phone Dialer from the Tools Menu, the Dialer dialog appears. If you have highlighted a suitable phone number in the current window, the dialer will automatically dial that number for you (assuming you have a modem installed and properly configured). For example, if you highlight a phone number in a contact record and select the Phone Dialer from the Tools menu (or press its hot key - F9), the number will appear in the Phone Number field of the Dialer, and you merely have to click on Dial to initiate the call. For your convenience, we have also placed buttons next to the Work, Home, and Alternate phone numbers on the contact screen so you can quickly pull up the Dialer, fetch the number, and begin dialing. If you have not highlighted a phone number prior to calling the dialer, Broker’s Ally will prompt you to enter a number in the Dialer dialog. Figure 174 - Phone Dialer After a phone number has been entered into the Dialer dialog: 1. Click on the Dial button to dial the phone number. When using one of the contact window dialing procedures, the number is dialed automatically. 2. After the call is dialed, you must pick up the telephone handset and click on the Talk button in the second dialog before beginning a conversation. The second dialog disappears. 175 3. If you make contact with the party, click on Contacted. This will update the number of contacts in the phone tallies on the status bar. When using one of the contact window dialing procedures, it will also update the Last Contact date in the contact record. 4. At the conclusion of your phone call, click on Hang Up. This will hang up the phone and erase the dialog. The Dialer keeps track of the number of calls you make as well as the number of successful contacts (if you use the Contacted button). The total number of Calls and Contacts for today are displayed on the status bar and recorded in the database. Use the Phone Tallies report to display the history of calls and contacts. You can enter a phone number into the Dialer by any of the following methods: 1. Click on the Work, Home, or Alt Phone button next to the corresponding phone number while in the Address page of the contact window. 2. Click on Dial in the Contact menu and click on Work to dial the work phone number, Home to dial to the home phone number, or Alternate to dial the alternate phone number. You can use this method while viewing any page of the contact window. 3. Type Ctrl-W to dial the work phone number, Ctrl-H to dial to the home phone number, or Ctrl-A to dial the alternate phone number. You can use this method while viewing any page of the contact window. 4. Highlight a phone number and click on Dial in the Tools menu (or type F9). Use this method to dial a phone number in any field of any page of the contact window. 5. Click on Dial in the Tools menu (or type F9) and type a phone number into the Phone Number field. Dialing Options The Dialer dialog has an Options button where you set up dialing procedures for various types of calls. Whenever you fetch a phone number from a contact window, additional information can be added to the phone number to dial it properly. The Dialer Options dialog allows you to enter your local area code so that all calls to your area code will be dialed as local numbers. It allows you to enter dialing prefixes and suffixes that will be combined with phone numbers fetched from the contact window. A prefix is what you need to dial in order to connect to an outside line whereas a suffix is an optional accounting code your firm may require you to dial following a phone number. Broker’s Ally allows you to enter a prefix and a suffix for each type of call: local, long distance, international, and special long distance. 176 Figure 175 - Dialer Options A dial prefix string can be a combination of modem commands and dialing codes that precede a phone number. Illustrates typical prefix strings. Local Calls Prefix: “9,” Long Distance Calls Prefix: “9,1” The Local Calls Prefix will dial “9” and pause two seconds to allow for connecting to an outside line. The Long Distance Calls Prefix will dial “9”, pause two seconds, and dial “1”. Local Calls - Enter your local area code in Local Area Code. If you fetch a number containing this area code, the area code is removed to make it a local call. Enter in Prefix whatever you need to dial in order to connect to an outside line, e.g., “9,”. Enter in Suffix whatever accounting code information you might need to dial following a local phone number. Long Distance Calls - Enter in Prefix whatever you need to dial in order to connect to an outside line and initiate a long distance call, e.g., “9,1”. Enter in Suffix whatever accounting code information you might need to dial following a long distance phone number. International Calls - Enter in Access Code the code you need to dial to initiate an international telephone call, e.g., “011”. Enter in Prefix whatever you need to dial in order to connect to an outside line for international calls, e.g., “9,”. Enter in Suffix whatever accounting code information you might need to dial following an international phone number. Special Area Codes - Enter in Area Code the area code that requires a special prefix or suffix, different from the general Long Distance Calls settings. Enter in Prefix whatever you need to dial in order to connect to an outside line for this particular area code. Enter in 177 Suffix whatever accounting code information you might need to dial following the phone number. You may use up to 5 special area codes. Note that when a special area code is found in the phone number you have fetched, the area code is removed. If you wish to retain the area code in the dialing sequence, add it to the Prefix. No Modem - Unless you have a modem, BA cannot dial a phone number for you. If you do not have a modem, you can track calls, successful contacts, and update Last Contact in a record. Select No Modem and proceed as if you were dialing the phone automatically. Although the Dial button will be inactive, the Contacted button will register the information. Contact History - Whenever the Last Contact field is updated in a record, you can also have BA add an entry to the history file documenting your phone call. Select Contact History to enable this feature. The entry is added to the history file only when you click on Contacted and Hang Up. 11.2 STOPWATCH The Stopwatch tracks your time spent on phone calls or any other activity performed at your desk. When you first activate the Stopwatch from the Tools Menu, it resets itself to zero and starts to count. You can reset the Stopwatch yourself by clicking on the Reset button. You can also instruct the Stopwatch to convert time into dollars and cents via the Configure Button. You can set either an hourly or minute by minute rate as well as a minimum charge. You can even set the increment by which the charges are calculated. For example, rather than charge by the minute, you can charge only for full 15 minute blocks of time by setting the minute rate to your desired amount and the increment to 15. Clicking on the Stop button pauses the watch and changes the button label to ‘Start’, which you may use to restart the clock. To close the Stopwatch, click on the Close button. By default, the Stopwatch is placed in the middle of the screen, although you can move it to another position or minimize it without affecting the time. However, closing the Stopwatch will reset it to zero when you reopen it. You can use the accelerator key Ctrl-T instead of the menu to activate the Stopwatch. 11.3 CALCULATOR When you select the Calculator option (or use the accelerator key Ctrl-L), Broker's Ally displays the full function calculator that comes standard with Windows. You can select either the Standard Calculator or the Scientific Calculator from the Calculator’s View menu. You can even substitute another calculator program via the Edit, User Preferences menu. If you have a special calculator that you use for a bond calculator, or another calculator program, you can setup Broker’s Ally to use that calculator program. We will discuss the Standard Windows Calculator. For more information about the Scientific Calculator, see your Windows manual or help messages within the calculator. The basic logic of the calculator is: Enter the first number, enter an operator (+,-,*,/), enter a second number and select the equals sign (=). The result will be shown in the display window. For example, to multiply 152 by 3, you would enter the first value 152 either by clicking on the number buttons on the calculator or by typing the numbers on the keyboard. Next, enter the multiplication operator (*) again by clicking or typing followed by the second number (3). Finally, enter the equals sign by clicking or typing. Note the Enter key is equivalent to the equal sign. The result 456 will appear in the display window. If you make a mistake entering a value, you can click on the Back button or press the BackSpace key on your keyboard to remove a single character. To clear the entire entry, click on the CE (Clear Entry) button or press the Esc key. You can string multiple operations together by simply entering the desired operator followed by the number. 178 Note: Be careful when mixing operators that you enter them in the proper order to achieve your desired results. 1+2*3 evaluates to 7 and is not equal to 3*3. Figure 176 - Standard Windows Calculator You can use the Clipboard to move data to and from the Calculator via the Copy and Paste options from the Edit Menu (Ctrl-C and Ctrl-V). If you need to store an intermediate value, use the memory functions: MC Clear the memory MR Retrieves the value in memory and enters it into the display MS Saves the value in the display to the memory M+ Adds the value in the display to the value in the memory and stores the results in the memory When a value is stored in the calculator memory, the letter M appears in the upper right under the display. 179 Figure 177 - Scientific Calculator 11.4 CALENDAR From the Tools menu, select Calendar to call up a simple monthly date calendarFigure . You can use the accelerator key Ctrl-E instead of the menu to activate the Calendar. The Calendar displays current month’s calendar with today’s date highlighted. You can change the display to other months using various buttons provided. Click on the Close button to remove the Calendar from view. Figure 178 - Calendar 180 11.5 SCRATCH PAD The Scratch Pad is a special document window that allows you to enter and save text. Each user on a network has their own Scratch Pad. This Scratch Pad is automatically presented for the user who is currently signed into Broker’s Ally. Each time you open the scratch pad, you will see the same text that was last saved. This allows you use the scratch pad to keep miscellaneous information close at hand. While the Notepad is linked to each individual contact and displays only notes associated with that record, the Scratch Pad is universal and can be viewed from any screen. You can use the Copy and Paste options from the Edit menu (Ctrl-C and Ctrl-V) to copy text to and from the Scratch Pad. This means that you can use the Scratch Pad as a repository of standard data entries that you can easily paste into any of the data screens. For example, you might want to enter a list of all your broker dealers in the Scratch Pad so that you can easily look them up or copy one of them into an individual contact’s record or note. Figure 179 - Scratch Pad 11.6 SALES SCRIPTS Sales Scripts are text files that you can customize to provide standard scripts for sales calls or any other scripted conversation. You can build as many such scripts as desired and display one or more at any time. This feature allows you to create whole libraries of scripts for specific campaigns or telemarketing efforts. The script files are normally stored in the Letters Directory with the extension BAS (Broker’s Ally Scripts). You can even develop and distribute standard scripts to multiple locations for coordinated marketing efforts. To create a sales script, choose Sales Scripts from the Tools Menu, select New to create a new sales script 181 Figure 180 - Script Editor Here is a sample of a Sales Script. WE'RE NOT INTERESTED 1. Why aren't you interested? 2. I am interested in knowing why you are NOT interested! 3. At first you may feel you are not interested. But, if you give me 30 seconds to explain something, I just may be able to help you with one of your problems. May I proceed? 4. You can't be interested until I do my job, which is to demonstrate how this investment opportunity can help you. Specifically, this investment may help you by ___. Will you give me a moment to further clarify this? 5. You aren't interested? We rarely hear that! 6. You are not interested? I must have gotten your name from the wrong list. Are you in the business of _______________? Then, according to our research, you are a PERFECT candidate for our offering! 7. At first, others felt the same way. Then, after a bit of discussion they felt differently. Would you like to learn what you could gain from this investment? 8. You have made an incorrect assumption about this investment. It is based on a set of ideas that you have gathered from previous experiences. It is my job to show you how your current assumptions are in error in this case. May I proceed? 9. Sometimes people tell me that because they are too busy to deal with this sort of thing right now. Is this a bad time to call? May I schedule an appointment tomorrow (AM or PM)? 10. Have I said something that upset or offended you? I didn't mean to! Let's start this again. Hello, my name is ________________________. I am here to talk to you about __________________________. Do you have a moment to speak with me? 11.7 PALM PILOT INTERFACE Broker’s Ally has the ability to load Broker’s Ally information into the popular Palm Pilot product to enable users to review contact information on their portable Palm device. Connect your palm to the PC using directions for the Palm Pilot. This function will provide you with instructions and procedures to follow for moving data into your Palm Pilot. See Appendix L, for detailed installation instructions. 182 Figure 181 - Palm Data synchronization with Broker’s Ally Palm, Inc. manufacturers of the Pilot 183 CHAPTER 12 WEB AND WINDOW MENUS 12.1 WEB MENU The Web item on the Main menu provides you with Quick Web Connect- to launch your browser from within Broker’s Ally and access either of two sties: 1) our help site for the Broker’s Ally software and 2) the popular www.BrokersAlly.com portal for productivity advice, tools and its web window to Wall Street and finance. The BrokersAlly.com portal provides valuable information and you should check here often for resources you may need in your business practice. Figure 182 - Internet Access from Main Menu Extensions- Quick connect to BrokersAlly.com BrokersAlly.com Web Portal The BrokersAlly.com web portal provides you with valuable information, only a fraction of which is related to the Broker’s Ally software. This rich information site is a portal into Wall Street and is a collection of information organized by categories such as Market News, Commentary, Practice Improvement, Clearing Firms, Broker/Dealers, Mutual Funds, Research Organizations, and others. You can also read information about the Broker’s Ally product line and obtain ordering information. Broker’s Ally e-Support from the Internet This is the site for help desk servcies and to read content online or use e-mail to reach a team of qualified help desk technicians. This area is called Broker’s Ally Software e-Support. Be sure to include your name and serial number when you request e-mail support services. 12.2 Window Menu The Window menu offers a variety of controls for manipulating the window display on the screen. Broker's Ally allows you to open and leave open as many windows as your system’s hardware can support. Sometimes these multi-window displays can become confusing with one window hiding another. You can use the Window menu options to redraw the windows in a cascade or tile view. You can move a selected window to the foreground by selecting it by name from the Open Windows list. The Cascade option on the Window menu will arrange all open multiple display windows such as a Contact view, Letter Writer document, List view, Scratchpad, Sales Script, and Activities Calendar from top to bottom, left to right. The order of precedence is determined by the order you last accessed the windows, with the most recently accessed displayed on top. Each window is displayed in standard size, overlapping the other windows as much as necessary. The Cascade option is most useful for displaying a single window amongst a group of active windows at the same time, while allowing you to switch from one window to another window simply by clicking on a protruding edge of the underlying window. 184 Figure 183 - Window Menu Figure 184 - Cascaded View 12.3 ARRANGE ICONS The Arrange Icons option on the Window menu, will arrange the Icons for all minimized windows in a row along the bottom of the main Broker’s Ally window. The Arrange Icon option is particularly useful for retrieving lost icons that have become overlaid by other windows. 185 Figure 185 - Arranged Icons 12.4 CLOSE ALL The Close All option on the Window menu, will close all open Broker’s Ally windows except the main window. It is particularly useful for ‘clearing the desk’ before beginning a new process. 12.5 OPEN WINDOW LIST The Open Window List is a section of the Window menu that grows every time a new Broker’s Ally window is opened. Each open window is listed on the menu in the order that it was opened, until the window is closed. You can simultaneously move an open window to the front of a cascade display and activate it by clicking on its name in the Open Windows List. This option is particularly useful for finding and displaying windows that have been lost behind other open windows. 186 Figure 186 - Open Windows List 187 CHAPTER 13 HELP MENU Figure 187 - Help Menu The Broker's Ally Help menu provides on-line assistance for all available features and functions. You can access the Help system either by selecting one of the Help menu options or by pressing F1. The Help Index and Search options, as their names imply, allow you to find your topic of interest by looking it up in an index of topics or by searching for it by a key word. The Using Help option provides detailed instructions for using the help system. The Financial Terms option provides a glossary of common financial terms. About Broker’s Ally displays a screen detailing the copyright, version number, and serial number of your installed copy of Broker’s Ally. If you want specific help on the current window, press F1. If you want to search for a topic use Index or Search on the Help menu. 13.1 INDEX The Index option from the Help menu opens the help system in Index mode. You can scan through the table of contents of help topics. By clicking on a particular topic, you will move directly to that topic’s detailed description. The Help system contains its own menus and toolbar. You can switch to search mode by clicking on the Search button. You can move back to a previously viewed help screen by clicking on Back. You can select from among previously displayed help screen by clicking on History. The Contents button displays a Table of Contents for the Help system allowing you to search for a topic by branching from a general topic to a more precise topic. 188 Figure 188 - Broker's Ally Help menu The Help system’s menu offers several additional options for displaying, editing, marking and printing help screens. Figure 189 - Help File Menu Help File The Help File menu allows you to switch to other help files via the open option or to print the current topic. Help Edit The Help Edit menu allows you to copy selected text from the current help screen to the Clipboard. You can then Paste the text into another document. The Annotation option allows you to insert an annotation into the current help screen for future reference. Figure 190 - Help Edit Menu 189 The Bookmark option on the Help menu allows you to define and insert bookmarks with titles of your own choosing. The named bookmarks are listed in an expanding list at the bottom of the menu. You can move immediately to a named bookmark by clicking on it or by pressing the associated number. If you define more than 9 bookmarks, they will be listed in a subsidiary scrolling dialog. Figure 191 - Help Bookmark Menu The final Help menu selection is its own Help menu. The first Option describes how to use the Help system, while the second option allows you to maintain the Help window on top of Broker’s Ally. You can then see both the Help window and the Broker's Ally windows at the same time while you are working on Broker’s Ally. Figure 192 - The Help - Help Menu 13.2 SEARCH The Search option from the Help menu displays the Help window in Search mode. You can enter any word or phrase, and Help will find the appropriate topics in the help file. If the Help system cannot find an exact match, it will still present the closest match, allowing you to scroll to the topic that matches your entry most closely. 190 Figure 193 - Help Search 13.3 USING HELP The Using Help menu option display detailed instruction for using the Help system. 191 Figure 194 - Using Help 13.4 FINANCIAL TERMS GLOSSARY The Financial Terms Glossary is a help file full of industry-specific topics. The file has an alphabetical layout to help you quickly find the topic of choice. Using the Help system’s Edit Copy option, you can copy selected text from the Financial Terms Glossary to the Clipboard. From there, you can paste the text into any other Windows application. Specifically, you can paste the text into a Broker’s Ally letter, note or custom report. 192 Figure 195 - Financial Terms Tip of the Day Every time you run Broker’s Ally, you will be presented with a “Tip of the Day”. These tips will give you specific information related to the software. The tips are designed to help you learn shortcuts to your software. You can view all the tips at once by clicking the Next Tip button or you can read the tips as the are presented to you. Once you have read all of the tips, you can turn them off by unchecking the Show tips at startup box. You can always turn the Tip of the Day back on from the Help Menu. Figure 196 - Tip of the Day What’s New The What’s New menu will present you with installation instructions, an outline of the feature improvements, and information on obtaining technical support from Scherrer Resources. 193 Figure 197 - The “What's New” Read me File under Help Menu About Broker’s Ally The About Broker’s Ally dialog is the standard windows ‘about’ dialog that shows copyright information, the Broker’s Ally version number, your serial number, and the amount of free memory. Figure 198 - About Broker’s Ally dialog 194 PART 3 APPENDIX APPENDIX A - MAIL MERGE WITH MS-WORD The Broker's Ally Mail Merge Wizard for Microsoft is found as a menu item in Microsoft Word. The Wizard will assist you in performing mail merge tasks in Word using your Broker's Ally contact information. The Broker’s Ally Mail Merge Wizard is automatically installed into Microsoft Word when you install Broker’s Ally. Microsoft Word needs to be installed on your computer prior to Broker’s Ally. If the Broker’s Ally menu does not appear in Word, reinstall Broker’s Ally from the original distribution diskettes. Figure 199 - Microsoft Word menu You may merge all contacts in a Broker's Ally data source or merge the contacts in an existing list with a document you create in Word. You can print letters, labels, or envelopes from Word with your merged information from Broker’s Ally. Figure 200 - Broker's Ally Mail Merge Wizard 195 Figure 201 - Mail Merge Wizard Password Information Figure 202 - Choose a Broker's Ally data source or a List for Mail Merge Run the Broker's Ally Mail Merge Wizard found in the MS Word menu: 1. On the first screen of the Mail Merge Wizard, select Letter, Labels, or Envelope. 2. On the second screen, select a Broker's Ally Data Source and either The Whole Database or A List From Broker's Ally 3. Choose your Login ID and enter your password for the Broker’s Ally system 4. If you chose a list, select a type of list and a particular list on the third screen. 5. Click on Finish to create an empty mail merge document. To insert a Broker's Ally merge field into your document, click on Insert Merge Field. 1. To insert a Word merge field into your document, click on Insert Word Field. Other Word merge fields are found on the menu under Insert Field. 2. For a letter, type in the text of your letter. 3. Save the document. The merge fields, text, and data source information are saved in the document. 196 4. To print the merged documents, click on , the Merge to Printer tool bar button. Letter Tutorial Use the following example as a guide. Before starting, we recommend that you select a Word option to help you distinguish merge fields from text when viewing your document. Select Tools from the menu and click on Options View. Select Always for Field Shading. This will cause merge fields to be highlighted in your document. 1. Select Broker's Ally from the menu and click on Mail Merge Wizard. 2. On the first screen, select Letter and click on Next. 3. On the second screen, select a Broker's Ally Data Source and either The Whole Database or A List From Broker's Ally. The Whole Database merges every contact in the Broker's Ally data source with the document you will create. They will be sorted in alphabetical order by last name. A List From Broker's Ally merges every contact in an existing Broker's Ally list with the document you will create. They will be printed in list order. 4. If you chose a list, select a type of list and a particular list on the third screen. 5. Click on Finish to create an empty mail merge letter document. You will see the document in Page Layout view mode. You may wish to select Normal mode from the View menu. 6. Insert a merge field for the current date near the top of the page. Select Insert from the menu, click on Field, click on Date and Time, and click on Date. In the Field Codes edit box, enter \@ "MMMM dd, yyyy" after DATE. Figure 203 - Sample letter showing merge codes 1. Click on Insert Merge Field on the tool bar and select SALTATION (the first salutation field) from the list. Repeat for the other Broker's Ally merge fields as shownFigure . 2. Further down the letter you will add a greeting. Type in "Dear " and follow with SALTATION and LASTNAME merge fields using Insert Merge Field. 3. Type in the body of your letter. You can also use Copy and Paste (Edit menu) to copy parts of an existing Word document to your new document. 4. Save the document. The merge fields, text, and data source information are saved in the document. 5. View the merged data by clicking on , the View Merge Data tool bar button. Click on the Next Record button, to show other examples of the resulting document. , Note: The Previous Record button is very slow to respond because Word uses an early version of ODBC to fetch the data. 1. Print the merged documents by clicking on , the Merge to Printer tool bar button. 197 Hints 1. Each time you create and save a mail merge document, the data source information is bound to the document. To change the data source, you must create a new document using the Broker's Ally Mail Merge Wizard. However, you can save a lot of work in setting up merge fields by copying the name/address section of an existing document to your new document. 2. If you have any problems with the Mail Merge Wizard, please see the Mail Merge Wizard Help found under the Broker’s Ally Menu in Word. Broker’s Ally Mail Merge Wizard Help has tutorials for labels and envelopes as well as advanced techniques for more sophisticated use of merge codes. Note: If you have difficulty with Word's mail merge, consult Word's help system, the Microsoft Word for Windows User's Guide, or call Microsoft. We built the Broker's Ally Mail Merge Wizard using “Word Basic” from Microsoft, thus we utilize existing functionality of Word's mail merge system. Due to some limitations of Word's mail merge system, you should be aware of the following: After creating a document with Broker's Ally Mail Merge Wizard do not select Mail Merge Helper or Edit Data Source from the tool bar. Ignore messages such as "Word could not parse your query options into a valid SQL string" and "The SQL string is too complex for Word to parse". These are invalid messages. Some unnecessary additional documents may be created when the Broker's Ally Mail Merge Wizard constructs your mail merge document. Ignore them. You must select the label form you wish to use before you run the Broker's Ally Mail Merge Wizard to create a labels document. See Labels Tutorial in the Help file. The Broker's Ally technical support staff is not trained to answer questions about Microsoft Word. We can only answer questions relating directly to the Broker's Ally Mail Merge Wizard, not general issues concerning Word's mail merge. 198 APPENDIX B - ODBC SUPPORTED DATABASES Broker’s Ally ODBC Architecture For corporate large installations, we offer an option to plug in other ODBC databases. This is a custom installation and not directly possible with Broker’s Ally. Broker’s Ally was engineered to operate within both a simple and/or a robust environment scaling from single PC to enterprise installations. One of the methods to accomplish this is that Broker’s Ally supports any ODBC (Open DataBase Connectivity) level 2 drivers, thus enabling the configuration of the application to support alternative databases. The normal “shrink wrapped” Broker’s Ally application creates Access tables automatically upon installation and setup. For other databases, contact your sales representative at [email protected]. Scherrer Resources, Inc. is able to incorporate the Open DataBase Connectivity level 2 drivers in instances where you may need more robust database for enterprise installations on wide area networks (WAN’s) or for Browser based access to Web Broker’s Ally on an internet server. Database Installation Support Scherrer Resources, Inc. provides on-site installation support for database installation and configuration. Contact your account representative for a specific price and engineering quote for details on the specific versions of Broker’s Ally that run the following databases: 1. 2. 3. 4. 5. 6. 7. 8. 9. 10. 11. 12. 13. 14. 15. Sybase Allbase Btrieve MS SQL Server DB2 Database Manager INFORMIX INGRES NetWare SQL Oracle Paradox PROGRESS SQLBase Tandem NonStop SQL XDB 199 APPENDIX C - MARKET DATA CONNECTIVITY Scherrer Resources, Inc. has developed electronic links to market data and security price quote vendors for the purpose of providing you with quick updates to security prices, index valuations, corporate actions and other daily, weekly, monthly, quarterly and annually-changing data types. The FT-IDC (Financial Times Interactive Data Corporation) data feed connectivity option is provided within Broker’s Ally under the File, Database Operations, Import Menu. You must contact FT-IDC directly for this data feed subscription. There will be a fee charged by FT-IDC to provide the data you require with the frequency you demand. Other vendors have created other systems and we can accommodate their data formats under specific task order request. Categories of data provided by FT-IDC are equities (including mutual funds), ADR evaluations, Options, corporate and government bonds, FNMA, GNMA, and FHLMC pass-through pools, municipal bonds, commodity and futures contracts, collateralized mortgage obligations (CMO) and Asset-backed securities (ABS). www.FTID.com http://www.interactivedata-rts.com These data feeds are provided to you for the purpose of: Portfolio Reporting- Create current value reports for currently held positions and investments. Performance Reporting- Ability to create performance reports based on dates. Index Performance Reporting- Creating reports depicting portfolio growth with reference to indices such as S&P 500, Dow Jones, Nasdaq, Russell 2000, etc. Load alternative indices to measure performance. Track Tax Lots- Added database extensions to store all historic positions, transactions, and tax lots. Buying Power- To help calculate Cash and Margin account management and measures of buying power as depicted in screen views for the user. Clearing Firm Integration- Connectivity tools to integrate with DST FanMail, other clearing firms and back office servers. We have created universal data loading tools to migrate mainframe-based back-office host data into the Broker’s Ally application for US Clearing, Pershing, Beta, CheckFree APL, Fiserv Securities, TD Waterhouse, Crowell Weedon, Chevy Chase, and others. Market Data Feeds- Connectivity tools to load market data and up date pricing. Financial Times Interactive Data market price data feed connectivity. The data feed utilities load data into the data tables of the securities master file of Broker’s Ally. This data file is a robust file holding several types of data including the security name, type, CUSIP, description, prices including “as of” dates, annual income, maturity date, pricing service that provided the data, corporate action stock split dates and ratio, global change pricing features and many others. 200 Figure 204 - Securities Master File The security master file can be populated with data either electronically, manually or both. The security master file controls the pricing of portfolio valuations. Numerous electronic utilities have been created for use with Broker’s Ally for the purpose of updating these security master files, to create archives of historical prices for performance reports, and to store indexes against which the performance of holdings can be compared. 201 APPENDIX D - SYSTEM SPECIFICATIONS To run Broker’s Ally version 9 for Windows, you need as minimum requirements: Microsoft Windows 32-bit operating system (Windows 95) or higher Personal computer using Pentium II or higher microprocessor Minimum 16MB of memory (64MB or more recommended) Hard disk with at least 100 MB free for the Broker’s Ally program and Data files. The Program requires 25 MB of free hard drive space to install. CD Rom Drive Mouse or compatible pointing device APPENDIX E - COMMONLY ASKED QUESTIONS Q: When I delete a call, contact or groups list in Broker’s Ally, the information does not delete. What’s wrong? How do I correct this problem? Your BAWIN9.INI file did not set up correctly because at time of installation there may have been another program running or file obstructing the installation. To correct this problem click on the File menu and choose ODBC Settings. Click on Broker’s Ally Data (Access files). Next, click on the Setup button. When in the ODBC dBase setup window, click on the OK button. Close the Data Source window, and exit Broker’s Ally. Exit Windows, and reboot your computer system. When you enter back into Windows, the ODBC drivers will be reinitialized. Restart Broker’s Ally. Q: When I start up Broker’s Ally, I get a message on the screen “File locking not available”? What does this mean? Broker’s Ally needs a DOS program called Share to be running before you can work in the program. Share should be loaded automatically in your autoexec.bat file. Exit out of windows, and type SHARE.EXE at the C prompt. This will load the DOS share program. For more information on SHARE.EXE, consult your DOS manual. Q: Do I need to back up my data? YES! Your business depends on it. The Rebuild (Maintenance) function can fix the majority of problems that can occur, but it is possible that a database may become damaged beyond repair. When maintenance is not possible, your only recourse is to restore data files from backup diskettes. Always maintain several sets of backup diskettes which are used in rotation; backup diskettes are not immune to failure. There are numerous backup software products available which are faster and more reliable than the BACKUP and RESTORE programs that accompany DOS. Refer to the Backup in chapter 1. The file to back up is ALLYWIN.MDB. Q: How do I set the date and time within Broker’s Ally? Broker’s Ally gets the date and time from your computer. There are two places where you can set your time and date. First, you can type DATE to set the date and TIME to set the time at the C prompt. The other is to double click on your Control Panel Icon, located in your main window group, then double click on the Icon titled Date/Time. If your date and time become incorrect every time you turn off your computer, your CMOS battery may need to be replaced. Consult a computer technician. Q: I sometimes get a message “out of system resources, try closing some windows”. What does this mean? Every application you run on your computer takes up a certain amount of memory. Broker’s Ally has a protection device built into it to minimize problems on your computer due to low system resources. 202 This protection will not allow you to open more contact records, letters etc., if your system resources, or memory is too low. To resolve this error, close some of your contact windows or other applications that are running on your computer. Q: How do I arrange for training for Broker’s Ally? Training is conducted either on the phone or at your location by appointment in either case. Contact your Broker’s Ally Sales Representative at 484-875-1710 for information and pricing. Q: What is the Platinum Service and Support Plus program that I am hearing so much about? The Broker’s Ally Platinum Service and Support Plus Packs are designed for your long-term support needs. The popularity of Broker’s Ally requires full time staff to be made available to your needs. To relieve this backlog we have developed two special support programs for you. Platinum Service Pack is our highest-level support. Both this and the Support Plus Pack provides you with instant access to a Broker’s Ally support technician and a newsletter with tips and tricks for using Broker’s Ally to its fullest potential. First, the Support Plus Pack provides you with a toll free 800 support hotline. This hotline will be your instant pipeline to a qualified support engineer every time you pick up the phone. Secondly, you will receive the “The Ally Newsletter” which is a detailed newsletter that is full of tips and techniques on how to make the most efficient use of Broker's Ally. It will highlight the powerful (and often overlooked) features of the program. The Support Plus Pack virtually eliminates costly down time due to problems with your Broker’s Ally Program or your computer system itself. Without the instant access to a qualified support engineer, you may lose a couple of hours of productive prospecting. Order the Support Plus Pack and you’ll get unlimited access to our quick response toll-free hotline. This means if you ever have any questions about Broker’s Ally, a friendly and knowledgeable support representative is never more than a free phone call away. Most users who sign up for this service find it absolutely invaluable! Broker’s Ally Support Plus Pack annual fees are dependent on the Broker’s Ally level in which you currently own. See the Support Plus Pack sign up form for the annual subscription fees. 203 APPENDIX F - SUPPORT PLUS PACK SIGN UP Yes! Sign me up! I want the premier Support Plus Pack annual subscription so I can get right through to a qualified support engineer every time I call!! Name Address City, State, Zip Phone # Fax # e-mail : Brokers Ally Serial Number B Brokers Ally Level - Standard - Gold - Portfolio - Network You can find out which level you have by looking on your Broker’s Ally distribution diskettes Payment Method Check or Money Order Visa MasterCard Card Number: Expiration Date: Signature: Amex Discover Broker’s Ally Support Plus Pack annual fees are dependent on the Broker’s Ally level in which you currently own. Support fees are non refundable after initial support service call. Support Plus Fees Standard Level Gold Level Portfolio Level Added Network User $150 $200 $250 $+95 To order, call 484-875-1705 or for faster service fax this order form to: Client Services @ 484-8751704. 204 APPENDIX G - ALLIANCE PARTNERS & VENDORS The contacts listed below can aid you in specific issues you may have with application software and hardware technology related to your use of Broker’s Ally or your PC workstation. These companies will help you, or your Information Systems Department, to obtain market data, securities information, or computer-based tools to use in your advisory business practice. Name AIMR Association for Investment Management & Research PO Box 7947 Charlottesville, VA 22906-7947 804-980-3647 Product . Performance Reporting Thomson Reuters BETA SYSTEMS, INC. Market Data & Securities Processing 350 North Sunnyslope Road Brookfield, WI 53005 414-789-9000 Beta Link CHECKFREE INVESTMENT SERVICES 10 Exchange Place Jersey City, NJ 07302 201-324-5111 Security APL EXAMCO, INC. Computer Based Training 1600 20th Street Kenner, LA 70062 800-955-7055 Broker Test FINANCIAL DATABASE SOLUTIONS 4045 Sorrento Valley Blvd San Diego, CA 92121 858-558-7100 Caesar System FT INTERACTIVE DATA 22 Crosby Drive Bedford, MA 01730 781-687-8800 Market Data Feeds For Broker’s Ally MICROSOFT CORP. One Microsoft Way Redmond, WA 98052-6399 206-637-7098, 206-462-9673, 206-646-5102 Windows, Word, PERSHING Securities Clearance One Pershing Plaza Jersey City, NJ 07399 201-413-3080 Pershing Platform Thomson REUTERS AdvantageAE 205 Market Data Services 77 Water Street, 8th Floor New York, NY 10005 212-898-7003 SCHERRER RESOURCES, INC. Advisor Workstation Software and Web Portal 120 Arrandale Boulevard Exton, PA 19341 484-875-1700 (phone) 484-875-1704 (fax) Broker’s Ally STANDARD & POORS Stock Market Data & Analysis 25 Broadway New York, NY 10004 212-208-8716 S&P 500 Index SUNGARD Market Data Services 201 East Park Drive Mount Laurel, NJ 08054 609-727-2084 FS Partner THESTREET.COM 14 Wall Street, 14th Floor New York, NY 10005 212-321-5000 Market News/Commentary www.BrokersAlly.com 206 APPENDIX H - TELEPHONE TRAINING SERVICES Productivity Improvement: Personal computers can increase the productivity and organization of account representatives and their support staff. However, if users fail to adequately learn important software features, they can be left in a position of weakness... often resulting in a total rejection of the personal computer. Telephone Training For You: In order to help avoid a rejection of your computerization plan, Scherrer Resources, Inc. has developed a Telephone Training Service whereby your advisors can receive software training at the comfort of their desk on their own telephone. By making an appointment with a knowledgeable training representative you and your support staff can learn the proper use of Broker’s Ally and how to run it on your hardware. Objectives: The objective is to raise your productivity by increasing your level of knowledge and facility with Broker’s Ally software on your PC. Telephone Training will help you coordinate the process of selling and supporting accounts with your computer. By obtaining Telephone Training Services, you will be more proficient and comfortable with the technology. Consequently, you can achieve greater productivity and better customer support. Through a discussion with your Telephone Training Service representative, you can set up a onehour, or more, appointment to be trained on the software. Then, you can spend that hour learning anything you wish, from database management, to word-processing, to application functionality. This special “custom” telephone training is very focused and efficient, resulting in quick learning and understanding. Whether you wish to learn about Windows functionality, or special software tools, or desktops, notebooks, or networks your Telephone Training Service- representative can help you. This service is designed to help you be more efficient, better organized, provide advanced account management, and result in greater business profitability. Telephone Training Topics In discussion with your Broker’s Ally sales representative you can tailor a Telephone Training program to fit your needs. It could be one hour in duration, or more depending on your needs. Candidate topics include: 1. Software Installation 2. Adding Records 3. Writing Letters 4. Entering Transactions 5. Teaching Sales Assistants 6. Network Features 7. Importing and Exporting Data 8. Advanced Training Topics Obtaining Telephone Training Simply contact your Broker’s Ally sales representative and discuss a plan that will fit your needs. You may want a single trainer for one hour, a half-day, a full 8-hour day, or you may want to train by conference call. This close, one-on-one training will be very valuable to you. Whatever your needs, simply call your Broker’s Ally sales representative at 484-875-1710 and ask for Telephone Training Services, or contact [email protected]. 207 APPENDIX I - DATA MIGRATION METHODS This section describes the many ways to move data from other software programs into Broker’s Ally. Generally, the ASCII Loader utilities built into Broker’s Ally Gold Level enable you to map and import data from other lists and other software products. However, specialized, high performance utilities have also been built for some other software products. ACT! ACT! users can quickly move their data from ACT! into Broker’s Ally using the “ACT! to Ally” data conversion tools utilized by our software developers. Simply ship your database to Scherrer Resources, Inc. and our development staff will convert the data for a one-time conversion and e-mail the packet back to you. The cost is based on number of records: $100 per 1000 of contacts. We transfer names, address, notes, phone/fax numbers, activity dates, user fields, letters and documents. MS Outlook Users of Outlook wishing the more powerful added functionality offered by Broker’s Ally can quickly migrate data using the ASCII import functions in Broker’s Ally. Simply export the Outlook database into ASCII format, then use the Broker’s Ally File, Database operations, ASCII Import function to load this data into Broker’s Ally. You can map fields to fill the database as you desire. 208 APPENDIX J - CREATING MAPS Custom Maps for Your Business Scherrer Resources, Inc. offers a special service to corporate users of Broker’s Ally who wish to have full-color geographic maps created for customer, prospect and portfolio demographic information. Account representatives create hundreds of transactions and events on a daily basis. This information forms the basis for rigorous mapping and analysis of opportunities. From this extensive firm-wide and nationwide database can come informed decisions regarding sales and marketing opportunities and trends. Firm wide management maps of retail business activity on a city, county, state or national level. Sales Map Examples Client density Transactions per broker, per branch New customer mapping New accounts per month Unserviced territories or regions Sales Representative Ranking Market Map Examples New Product sales opportunities Aggregate corporate client asset analysis Company day and month totals Territory Saturation Corporate Mapping Customer Turnover ratio Reassignment of clients, lost clients Legal and Human Resources reports Telemarketing call constraints Comparison or revenue per region Database Sources Back office servers Middle Office servers Desktop PC’s Data marts Software and Service Fees For Mapping Scherrer Resources, Inc. personnel will come to your corporate headquarters and install the mapping software and configure it for your needs. There is a one-time cost of $15,000 for the mapping software and installation services and this includes a license for 2 users and 3 preformatted maps using your database. Additional maps are $1000 each, and each additional day on your site is $1200. 209 APPENDIX K - BENEFITS OF BROKER’S ALLY Benefits of Using Broker’s Ally Here are some benefits users have derived from implementing the Broker's Ally portfolio management, sales control and CRM system for investment advisors, sales assistants and sales managers. 1. Longevity of Relationship Capturing detailed client and prospect information will help secure a positive client relationship for a longer period of time. 2. Enhance other offerings and cross selling Use of Broker's Ally helps to increase penetration of all products being offered. 3. Compliance Satisfaction Supports consistent, targeted and measurable behavior of account representatives and their assistants with note taking and audit trail reporting. 4. Increase Productivity and Sales Revenue Helps to support more productivity and efficiency in all daily operations. 5. Better Trained and controlled Teams Helps to ensure all advisors and assistants work in a well-defined path following their strategic plan. 6. Increase Assets Under Management Helps to uncover hidden assets by the use of structured data gathering and client questioning and profiling. 7. Open More Accounts Helps to increase sales pipeline conversions from status of lead, to a qualified prospect, then on through to the client status. 8. Do More Trades Enables reps to profile customers and target-marketing appropriate products to appropriate clients. 9. Increase Fees Helps to increase assets under management and corresponding fee billing opportunities. 10. Increase the Value of the Business Practice Helps to increase the market valuation of the business practice itself buy increasing all the valuation measures of the business practice. 210 APPENDIX L - PALM PILOT CONNECTIVITY Palm Pilot Data Synchronization Utility Broker's Ally contains a utility to support the data synchronization features built into the Palm Pilot to move data back and forth from Broker's Ally Gold Level, and above, and the Palm Pilot device. It is compatible with Palm Pilot III, V, and VII. To utilize this function, users must have the Hot Sync Manager (version 1.1, 2.0, 2.1, or 3.0 and above) that comes with the Palm Pilot Desktop software installed. Broker's Ally utilizes the most current synchronization tools for the Palm Pilot. The way the Palm Pilot hot sync works is described in the User Manual that comes with the Palm Pilot. To use the Palm synchronization utility, first install the Hot Sync Manager. Then in Broker's Ally, select Tools / Palm Pilot Sync Options and click on the button labeled "Install Palm Pilot Address Conduit" in Broker's Ally. Select the data source you wish to synchronize. Place the Palm Pilot in the hot sync cradle and press the sync button. The Broker's Ally sync utility will synchronize the data between the Palm Pilot address book and the Broker's Ally contact records. The normal Broker's Ally installation copies the Palm .dll from the Broker's Ally CD onto the hard drive in the directory specified. However, the Palm .dll then has to be installed or "registered" with the Hot Sync manager in order to be used, and that's what the Install Palm Pilot Address Conduit button does. Trouble shooting After the synchronization process occurs, a log of this action is made and a file is created. This log file is presented to the user on the Palm Pilot, and in the log it will list "BA Address Book". If it does not show this file, then there was a problem with the original installation. Alternatively, if it does show this file in the log, then it will say whether the sync was okay or not. If it says it's okay, and no data is viewable, then the sync occurred but no data was transferred. In that case the user needs to check in the Hot Sync Manager to see what the Hot Sync Action was for the BA Address Book. If the log says it wasn't okay, then call our Help Desk for trouble-shooting support. For more information on Palm Pilot, search for www.Palm.com on the Internet. 211 APPENDIX M - NETWORK INSTALLATION Installing Broker's Ally V9 on Network Server and Single PCs This document describes installation procedures for version 9. The Broker's Ally installation is automated, with screen prompts. We suggest you follow the questions one by one and accept the normal suggested installation configurations. So that your installation proceeds quickly, please have your user license information available at time of installation including your license number, name and address so that you may enter it at the screen prompts. Network Installations: The Broker's Ally network version will need to be installed on each workstation. You will need to set up a directory on the network server as a location for your Broker's Ally data files. If you are on the server, create a directory by going into your file manager and creating a new directory. Once the directory is created on the server, you will need to install your new Broker's Ally version 8 on the desktop workstation (called the client in a client/server installation). Insert the CD into the drive and it will auto run. Accept the defaults until you get to the new Data Source Set up screen after the application has been installed. While creating the data source name (usually Main Database or ALLYWIN.MDB), change the file name location to your server location drive and path. For example, F:\ba9\main, where F: is your network server hard drive. This will create, name and configure your Broker's Ally data source. There is a single file which contacts all the database information: ALLYWIN.MDB. (For reference, IN prior versions, all the database files end in one of three extensions: *.dbf, *.mdx and *.dbt). The database files are created at installation time and then filled with data upon importing data from previous versions or typing the data in at the keyboard. Single PC Installations: Please insert the CD in your CD drive and follow the directions that appear on the screen. During the Broker's Ally installation you will be asked several questions pertaining to your specific computer setup: Personal information, the directory you wish to use (ideally C:\ba9), and other tips. The installation program is found as x:\setup, which you can "run" from the Windows Start menu if automated installation fails for some reason. Support by Phone and e-Mail: Should you have further questions, please contact the support group at: 484-875-1705, [email protected] or, Fax at 484-875-1704. 212 APPENDIX N - PROGRAM FILE STRUCTURE This section describes the structure of files within the program, and is provided to assist you or your technical team with more advanced configuration and trouble-shooting tools. In addition, this table shows you the names of the data files that are the focus of your data backup and restore process. Presented are the file name, its extension and purpose. While not all files are listed, the most commonly used main program files are identified. Category Program File Letters “ “ Quick Letters Scripts Setup Files “ Definitions Data Files Reports Reports Error Messages Readable Text Name Bawin.exe Appntmnt.bal Birthday.bal Anything.bal Thanks.baq Badtime.bas Bawin9.ini Adata.ini Defs.dat ALLYWIN.MDB Pxporval.rpt Anything.rpt Imperr.txt Readme.txt Purpose . Main Program executable file Letter within the Broker’s Ally Happy Birthday letter (*.BAL) All files ending with .bal are letters All files ending with .baq are quick letters All files ending with .bas are scripts Initialization file for setting configurations Data Initialization file for configurations Definition files for User Fields, Interests, etc. The Main data file Portfolio Value Report All reports have .rpt exension Text file listing error messages on data import File for you to read to tell you about new features Figure 205 - View of files within Broker’s Ally shown from Windows Explorer 213 APPENDIX O - PRICING Software and Services PricingBroker’s Ally Version 9 Pricing for Initial License: Standard LevelGold LevelPortfolio LevelAdvanced Portfolio- $395 includes all the basic features. $695, plus $300 for each additional network user $995, plus $400 for each additional network user $1995, plus $500 per additional user Upgrade Pricing to version 8 from Previous Versions To Version 8 From V7 Standard to: From V7 Gold Level to: From V7 Network Gold: From V7 Portfolio: From V7 Network Portfolio: Standard 8 $175 N/A N/A N/A N/A Gold 8 $350 $250 $225/user N/A N/A Portfolio 8 $650 $550 $400/user $400 $400/user Advanced 8 $1650 $1350 $750 per user $1050 $575 per user ______________ From Previous version 1,2,3,4,5,6 to version 8; Add $200 per user to each of the above. Telephone Support, fax back & e-mail support and NewsletterPlatinum Support is our highest support level and includes all the features of the Support Plus pack plus software maintenance for Standard, Gold and Portfolio Level software shipments twice yearly. Option: Standard LevelGold LevelPortfolio LevelAdvanced PortfolioNetwork Per Added User Platinum Support Support Plus Pack $305 $150 $355 +$295/network user $200 $405 +$295/network user $250 Included with Maintenance Fees $295 $95 To Order… Call 484-875-1710 or e-mail [email protected] For answers to any of your specific questions and to order, call your dedicated account representative at Broker’s Ally in their Philadelphia regional office at 484-875-1710, or e-mail to: [email protected]. Our Corporate Team is Ready to Support You! 214 Scherrer Resources, Inc. is a Pennsylvania corporation (www.ScherrerResources.com) and our team is led by CEO founder Jim Scherrer, and includes application software developers, web masters, help desk technicians, analysts, and account representatives assigned to each of our licensees. Help Desk Technician can be reached at 484-875-1705, or fax us at 484-875-1704, or contact [email protected]. 120 Arrandale Boulevard, Exton, PA 19341 484-875-1710 www.BrokersAlly.com 215 TABLE OF FIGURES Figure 1 - www.BrokersAlly.com Software Support From the Main Menu ..................................... 8 Figure 2 - Broker's Ally startup screen ................................................................................................... 9 Figure 3 - Tip of the Day dialog ............................................................................................................. 9 Figure 4 - Sales Planner, Plans ........................................................................................................... 10 Figure 5 - User Fields Page ................................................................................................................. 10 Figure 6 - Flags and Interests Page .................................................................................................... 11 Figure 7 - Reports ................................................................................................................................ 12 Figure 8 - Auto dialer............................................................................................................................ 12 Figure 9 - Quick Letter found in the Notes Page ................................................................................. 13 Figure 10 - Stopwatch .......................................................................................................................... 14 Figure 11 - Pop-up Calendar ............................................................................................................... 14 Figure 12 - Help Menu ......................................................................................................................... 14 Figure 13 - Display with several windows open: Multiple Document Images ..................................... 16 Figure 14 - The View Menu.................................................................................................................. 17 Figure 15 - The Broker's Ally Toolbar with Tool Tips........................................................................... 17 Figure 16 - Multiple Contact Screens .................................................................................................. 18 Figure 17 - User Configuration dialog .................................................................................................. 22 Figure 18 - Help Menu for learning new Broker’s Ally v8 features ...................................................... 23 Figure 19 - Help Search dialog ............................................................................................................ 24 Figure 20 - Internet Access from Main Menu; A Quick connect to BrokersAlly.com .......................... 25 Figure 21 - User Definable Fields- Expanded up to 48 fields on 3 quick-access pages..................... 25 Figure 22 - New Fields for e-mail, contacts, important dates & addresses ......................................... 26 Figure 23 - Notes Page Expanded- New fields to categorize notes; send and store e-mail .............. 27 Figure 24 - Security Transaction Ledger and Cash Transaction Ledger ............................................ 28 Figure 25 - CUSIP and Descriptor Fields Added ................................................................................. 28 Figure 26 - Holdings Ledger- New Sort Order- Expansion all functionality......................................... 29 Figure 27 - Tax Lot Selection for Sales ............................................................................................... 29 Figure 28 - New Screens to Support Trade Methods .......................................................................... 30 Figure 29 - Fulfillment House Export Functionality .............................................................................. 30 Figure 30 - Converting and Importing Contacts from earlier versions of Broker’s Ally ....................... 31 Figure 31 - Add Contact Screen .......................................................................................................... 33 Figure 32 - Schedule Call or Action Dialog .......................................................................................... 35 Figure 33 - Sales Planner, Plans ......................................................................................................... 35 Figure 35 - Activities Calendar shown in Daily View format ................................................................ 36 Figure 36 - Activities Calendar shown in Weekly View format ............................................................ 37 Figure 37 - Activities Calendar shown in Monthly View format ........................................................... 38 Figure 38 - Activates Calendar shown in Summary View format ........................................................ 38 Figure 39 - Sweep dialog ..................................................................................................................... 39 Figure 40 - List Templates ................................................................................................................... 40 Figure 41 - List Creator ........................................................................................................................ 41 Figure 42 - Calls List Dialog ................................................................................................................. 43 Figure 43 - List Viewer ......................................................................................................................... 43 Figure 44 - Alert Alarm Dialog.............................................................................................................. 44 Figure 45 - Marked Note Report Printed on Mailing Labels ................................................................ 44 Figure 46 - Marked Note Screen ......................................................................................................... 45 Figure 47 - History Summary Showing Accomplished Activities ......................................................... 46 Figure 48 - Weekly History Report....................................................................................................... 47 Figure 49 - Pull Down Menu showing sales and account management campaigns........................... 48 Figure 50 - Sample Calls Campaign List ............................................................................................. 49 Figure 51 - List of people you have selected to call in your marketing campaign............................... 49 Figure 52 - Maturity Campaign List...................................................................................................... 50 Figure 53 - Selecting maturing securities ............................................................................................ 50 Figure 54 - Windows display ................................................................................................................ 52 216 Figure 55 - Cascaded View.................................................................................................................. 54 Figure 56 - Scroll Bar ........................................................................................................................... 54 Figure 57 - Program Icons ................................................................................................................... 55 Figure 58 - Group Icons ....................................................................................................................... 55 Figure 59 - Windows Drop Down Menu Example................................................................................ 55 Figure 60 - Active Programs in Windows............................................................................................. 56 Figure 61 - File Menu ........................................................................................................................... 57 Figure 62 - User Preferences dialog .................................................................................................... 59 Figure 63 - New Data Source Dialog ................................................................................................... 60 Figure 64 - Database Operations Menu .............................................................................................. 60 Figure 65 - Import dialog ...................................................................................................................... 61 Figure 66 - Map ASCII fields to Broker's Ally fields ............................................................................. 62 Figure 67 - ASCII Options .................................................................................................................... 62 Figure 68 - Add default data to each contact as it is transferred......................................................... 63 Figure 69 - Import dialog ...................................................................................................................... 64 Figure 70 - Export Dialog ..................................................................................................................... 65 Figure 71 - Choose Broker’s Ally fields to export in ASCII format....................................................... 66 Figure 72 - Broker’s Ally export dialog ................................................................................................. 67 Figure 73 - Download dialog window ................................................................................................... 68 Figure 74 - Global Changes dialog ...................................................................................................... 70 Figure 75 - Global Change - Add Activity ............................................................................................ 71 Figure 76 - Global Assign/Delete Lists ................................................................................................ 72 Figure 77 – Global Assign/Delete Activities......................................................................................... 73 Figure 78 - Delete Data Source Dialog ................................................................................................ 74 Figure 79 - Deletion Confirmation Dialog............................................................................................. 74 Figure 80 - Maintenance Options ........................................................................................................ 74 Figure 81 - TAPI Setting ...................................................................................................................... 76 Figure 82 - Dialer Options .................................................................................................................... 77 Figure 83 - Print Setup dialog for Windows ......................................................................................... 78 Figure 84 - Edit Menu .......................................................................................................................... 79 Figure 85 - Securities Dialog................................................................................................................ 81 Figure 86 - Split Shares ....................................................................................................................... 82 Figure 87 - User ID Dialog ................................................................................................................... 83 Figure 88 - Edit User dialog ................................................................................................................. 83 Figure 89 - Configure User Dialog ....................................................................................................... 84 Figure 90 - Edit Security Level Dialog ................................................................................................. 85 Figure 91 - User Preferences Dialog ................................................................................................... 87 Figure 92 - Contact Record with Contact List ...................................................................................... 88 Figure 93 - Toolbar Setup Dialog ......................................................................................................... 89 Figure 94 - Quick Add Preference ....................................................................................................... 91 Figure 95 - Calculator Selection Dialog ............................................................................................... 92 Figure 96 - Interests Dialog.................................................................................................................. 92 Figure 97 - User Fields Dialog ............................................................................................................. 93 Figure 98 - User Info setup dialog ....................................................................................................... 95 Figure 99 - View Menu ......................................................................................................................... 96 Figure 100 - Find Contact Window ...................................................................................................... 97 Figure 101 - Find Contact by Phone Number ...................................................................................... 98 Figure 102 - Contact record with Contact List to the Right.................................................................. 99 Figure 103 - Add Contact ................................................................................................................... 100 Figure 104 - Remembered Responses.............................................................................................. 102 Figure 105 - Notes page for capturing conversations and information ............................................. 103 Figure 106 - Marked Notes ................................................................................................................ 105 Figure 107 - Quick Letter setup dialog............................................................................................... 106 Figure 109 - Interests Setup dialog .................................................................................................... 108 Figure 110 - User Field Setup dialog ................................................................................................. 111 217 Figure 111 - Book Page Ledger ......................................................................................................... 112 Figure 112 - Sorting the Ledger ......................................................................................................... 113 Figure 113 - Transaction Dialog ........................................................................................................ 113 Figure 114 - Tax Lot Selection for Sales ........................................................................................... 114 Figure 115 - Quick Add defaults ........................................................................................................ 115 Figure 116 - Contact Menu ................................................................................................................ 116 Figure 117 - Move contact dialog ...................................................................................................... 116 Figure 118 - Marked Letters Dialog for an Individual ........................................................................ 117 Figure 119 - Marked Letter Dialog for Mailing ................................................................................... 118 Figure 120 - Linked Contacts ............................................................................................................. 118 Figure 121 - Contact Screen showing Linked Records ..................................................................... 119 Figure 122 - Envelopes Settings........................................................................................................ 120 Figure 123 - Activities Calendar - Daily View .................................................................................... 122 Figure 124 - Activities Calendar - Weekly View................................................................................. 123 Figure 125 - Activities Calendar, monthly view.................................................................................. 124 Figure 126 - Activities Calendar Summary view ................................................................................ 124 Figure 127 - Schedule Activity Dialog ................................................................................................ 125 Figure 128 - Broker’s Ally Alert System ............................................................................................. 127 Figure 129 - View Your Sales Plans .................................................................................................. 128 Figure 130 - Steps in a Multi-step Sales Plan ................................................................................... 128 Figure 131 - Select Sales Plan to Apply to Group of Contact Records ............................................. 129 Figure 132 - Call List Dialog............................................................................................................... 131 Figure 133 - Edit List .......................................................................................................................... 132 Figure 134 - List View ........................................................................................................................ 134 Figure 135 - Reports Dialog ............................................................................................................... 136 Figure 136 - The Portfolio menu ........................................................................................................ 140 Figure 137 - Broker Portfolio Reports ................................................................................................ 140 Figure 138 - Portfolio Client Reports ................................................................................................. 141 Figure 139 - Portfolio Rank Report, a Broker Report ........................................................................ 143 Figure 140 - Portfolio Valuation Summary Report, a Client Report .................................................. 143 Figure 141 - Portfolio Valuation Summary Graph.............................................................................. 144 Figure 142 - Bond Maturity Distribution Report, a Client Report ....................................................... 144 Figure 143 - Unrealized Gain/Loss Report, a Client Report .............................................................. 145 Figure 144 - Edit Security Type ......................................................................................................... 146 Figure 145 - Security Types and Asset Classes Setup ..................................................................... 147 Figure 146 - Enter purchases or sales............................................................................................... 148 Figure 147 - Book Page ..................................................................................................................... 155 Figure 148 - Sort Order for Holdings ................................................................................................. 155 Figure 149 - Ledger view ................................................................................................................... 156 Figure 150 - Purchase dialog ............................................................................................................. 157 Figure 151 - Lot Selection .................................................................................................................. 157 Figure 152 - Use Specific Lot dialog .................................................................................................. 158 Figure 153 - Security Type dialog ...................................................................................................... 159 Figure 154 - Prices dialog .................................................................................................................. 160 Figure 155 - Security Pricing dialog ................................................................................................... 160 Figure 156 - Mail Menu ...................................................................................................................... 162 Figure 157 - Open Letter Writer Dialog.............................................................................................. 163 Figure 158 - Letter Writer Window ..................................................................................................... 163 Figure 159 - Letter Writer Menu ......................................................................................................... 164 Figure 160 - Document Information Dialog........................................................................................ 165 Figure 161 - Format Text dialog ........................................................................................................ 165 Figure 162 - Format Paragraph dialog............................................................................................... 166 Figure 163 - Format Page dialog ....................................................................................................... 166 Figure 164 - Format Color Dialog ...................................................................................................... 167 Figure 165 - Search Dialog ................................................................................................................ 168 218 Figure 166 - Search and Replace ...................................................................................................... 168 Figure 167 - Insert Dialog .................................................................................................................. 169 Figure 168 - Insert dialog ................................................................................................................... 170 Figure 169 - Spell Check Dialog ........................................................................................................ 171 Figure 170 - Letter Writer Toolbar ..................................................................................................... 171 Figure 171 - Letter Writer Ruler ......................................................................................................... 172 Figure 172 - Marked Letter Dialog ..................................................................................................... 173 Figure 173 - Tools Menu .................................................................................................................... 175 Figure 174 - Phone Dialer .................................................................................................................. 175 Figure 175 - Dialer Options ................................................................................................................ 177 Figure 176 - Standard Windows Calculator ....................................................................................... 179 Figure 177 - Scientific Calculator ....................................................................................................... 180 Figure 178 - Calendar ........................................................................................................................ 180 Figure 179 - Scratch Pad ................................................................................................................... 181 Figure 180 - Script Editor ................................................................................................................... 182 Figure 181 - Palm Data synchronization with Broker’s Ally ............................................................... 183 Figure 182 - Internet Access from Main Menu Extensions- Quick connect to BrokersAlly.com ....... 184 Figure 183 - Window Menu ................................................................................................................ 185 Figure 184 - Cascaded View.............................................................................................................. 185 Figure 185 - Arranged Icons .............................................................................................................. 186 Figure 186 - Open Windows List ....................................................................................................... 187 Figure 187 - Help Menu ..................................................................................................................... 188 Figure 188 - Broker's Ally Help menu ................................................................................................ 189 Figure 189 - Help File Menu .............................................................................................................. 189 Figure 190 - Help Edit Menu .............................................................................................................. 189 Figure 191 - Help Bookmark Menu .................................................................................................... 190 Figure 192 - The Help - Help Menu ................................................................................................... 190 Figure 193 - Help Search ................................................................................................................... 191 Figure 194 - Using Help ..................................................................................................................... 192 Figure 195 - Financial Terms ............................................................................................................. 193 Figure 196 - Tip of the Day ................................................................................................................ 193 Figure 197 - The “What's New” Read me File under Help Menu ...................................................... 194 Figure 198 - About Broker’s Ally dialog ............................................................................................. 194 Figure 199 - Microsoft Word menu .................................................................................................... 195 Figure 200 - Broker's Ally Mail Merge Wizard ................................................................................... 195 Figure 201 - Mail Merge Wizard Password Information .................................................................... 196 Figure 202 - Choose a Broker's Ally data source or a List for Mail Merge ........................................ 196 Figure 203 - Sample letter showing merge codes ............................................................................. 197 Figure 204 - Securities Master File .................................................................................................... 201 Figure 205 - View of files within Broker’s Ally shown from Windows Explorer.................................. 213 219 INDEX ASCII import functions · 208 Asset Classes · 144 Assigning Broker Numbers · 84 Associate Links Links · 118 Attack Lists · 48 Auto Install CD · 26 Automatic Save · 86 A About Broker’s Ally · 194 Accelerator keys · 18 Access to Info Configuring Users · 83 Accomplish Activities Calendar · 124 Account Number · 99 Report · 135 Actions List · 134 Activities Report · 135 Activities Calendar · 120 Daily View · 36 Monthly View · 37 Schedule Activity · 124 Summary View · 38 Using · 124 Weekly View · 36 Activity Alarm · 35 Conflict · 34 Description · 34 Duration · 34 Type · 34 Add Contact · 98 Users · 83 Add/Create a Sales Plan Sales Planner · 127 Address Labels · 137 Report · 135 Address Page Contact View · 99 Agenda Contact's · 120 Alert Schedule Activity · 35 Alert Preferences · 89 Alerts Using · 43 Apply Sales Plan to a Contact Sales Planner · 128 Apply Sales Plan to a List Sales Planner · 129 Arrange Icons · 185 ASCII · 65 B Backing up · 22 Backup and restore program · 20 Billing Time · 178 Bold Letter Writer · 167 Book Page Contact View · 110 Break Link · 118 Broker Numbers · 83 Assigning · 84 Configuring Users · 83 Buying Power · 29, 112, 153, 160, 200 C Calculator · 178 Setup · 91 Calculator Preference · 91 Calendar Activities · 120 Date · 180 Call Interval · 109 Call List Revise · 132 Sample · 130 Using · 132 Call Lists · 129 Calling Card · 95 Campaign Lists Wildcards · 108 Campaigns · 129 Carrier Route · 99 Cascade Window · 184 Cash Accounting · 29 Change Symbol · 81 Client · 48 Client Suitability · 109 Close All 220 Window · 186 Close Transaction · 112 Color Letter Writer · 166 Comments · 100 Commissions Report · 137 Common Files · 58 Common Files · 58 Company Report · 135 Configuring Users · 83 Connectivity to Clearing Firms · 29 Contact Add · 98 Letter Writer · 169 Report · 135 Contact Menu · 114 Agenda · 120 Copy · 115 Delete · 115 Dial · 115 Links · 117 Mark a Letter · 115 Move · 115 Print · 119 Print Envelope · 119 Contact View Address Page · 99 Book Page · 110 Flags and Interests Page · 106 Notes Page · 101 User Fields Page · 109 Contact Work Sheet Standard Reports · 136 Contact’s Agenda · 120 Conversion · 208 Copy · 79 Contact · 115 Create Data Source · 57 Creating a New Data Source · 59 Customer · 24 Cut · 79 Cycle Minutes · 89 ODBC · 58 Data Structure · 58 Database Operations · 61 Database Preferences · 86 Date Letter Writer · 169 dBASE · 58 dBASE files · 74 Default File Location · 59 Delete Contact · 115 Users · 83 Delete Data Source · 73 Dial Contact · 115 Direct File Access · 89 Directory Preferences · 87 Docking Download Docking Transfer · 69 Docking Transfer · 69 Docking Upload Docking Tranfer · 69 Document Letter Writer · 169 Document Info Letter Writer · 164 Download · 67 E Edit Users · 83 Edit List · 40, 130 E-mail · 91 User Preferences · 91 Enable Exact Find · 86 Enable passwords · 87 Envelopes/Labels Preferences · 87 Exit · 78 Letter Writer · 164 Export · 65 ASCII · 65 F D Fax · 78 Log · 78 FIFO · 24, 27 File Export · 65 Import · 61 Maintenance · 74 Data conversion · 208 Data files · 32, 213 Data Source Broker's Ally · 59 Delete · 73 221 Names · 60 File Menu · 57 Files BAL (Broker’s Ally Files) · 163 Common · 58 dBASE · 74 re-indexing · 74 RTF (Rich Text Format Files) · 163 Unique · 58 Files to back up · 20 Files with the DBF, MDX, DBT extension · 22 Financial Terms Glossary · 192 Find Contact · 95 Rapid Find · 98 Find Contact Wildcards · 108 Find Link · 119 Flags · 108 Flags and Interests Page Contact View · 106 Format Letter Writer · 165 Bold · 167 Color · 166 Italic · 167 Page · 166 Paragraph · 166 Subscript · 167 Superscript · 167 Text · 165 Bookmark · 190 Contents · 188 Edit · 189 Help · 190 History · 188 Index · 188 Print · 189 Search · 190 Using Help · 191 Help Menu · 188 History Report · 136 Household Links Links · 118 I Ignore No Mail · 89 Import · 61 ASCII · 62 Index Help · 188 Insert Contact Letter Writer · 169 Date Letter Writer · 169 Document Letter Writer · 169 Letter Writer · 168 Page Letter Writer · 170 Installation Broker's Ally · 15 Installation procedures for Networks · 212 Interactive Data Download · 68 Interactive Data Download · 68 Interests · 106 Setup · 91 Italic Letter Writer · 167 G General Ledger · 27 Ghost field · 169 Global Changes · 70 Activities · 71 Flags · 71 Histories · 71 Interests · 71 Owners · 70 Group Letter Mail Menu · 174 No Mail · 174 Group List · 19, 134 Group Of People · 48 Groups · 19 L Label Reports · 136, 137 Address Labels · 137 Marked Note Labels · 137 Labels · 136 Last Contact · 100 Report · 136 Lead · 95 Ledger · 155 Letter Writer · 162 H Help Annotate · 189 Back · 188 222 Document Info · 164 Exit · 164 Format Text · 165 Format · 165 Bold · 167 Color · 166 Italic · 167 Page · 166 Paragraph · 166 Subscript · 167 Superscript · 167 Insert · 168 Contact · 169 Date · 169 Document · 169 Page · 170 Menu · 164 Merge · 170 Replace · 168 Ruler · 172 Save · 164 Save As · 164 Search · 167 Search & Replace · 168 Spell Check · 171 Toolbar · 171 Align Paragraph · 172 Bold, Italicize, Underline & Strikeout · 172 Line Spacing · 172 Text Color · 172 Text Font · 171 Text Point Size · 171 Level Priviledge · 84 Level 3 · 21 Life Events · 25 LIFO · 24, 27, 153 Link Break · 118 Find · 119 Make · 118 Links Contact · 117 List · 129 List categories · 129 List Templates · 40 List View · 132 Mail Merge · 133 Reports · 133 Skip Checks · 134 Zoom · 133 Lists · 48 Global Changes · 72 Login · 82 M Mail Menu · 162 Group Letter · 174 Marked Letters · 172 Marked Notes Labels · 173 Marked Notes Report · 173 Mail Merge List View · 133 Microsoft Word · 195 Maintenance · 74 Make Link · 118 Mark a Letter Contact · 115 Marked Letters Mail Menu · 172 Mark a Letter · 115 Marked Notes · 103 Labels · 137, 173 Report · 136, 173 Market data · 29, 200 Maturity List · 42, 134 Menu Contact · 114 File · 57 Help · 188 Letter Writer · 164 Mail · 162 View · 95 Window · 185 Merge Fields · 168 Ghost fields · 169 Letter Writer · 170 No Mail · 171 Microsoft Word · 195 Move Contact · 115 Multimedia Sound · 89 Multiple Document Interface · 15 N Network · 20 Network Installations · 212 New Data Source · 57 NickName · 109 No Mail · 100 Group Letter · 174 Ignore · 89 Merge · 171 Notes Report · 136 Notes Access Control · 25 223 Print · 78 Contact · 119 Envelope · 119 Labels · 136 Preview · 78 Quick Letter · 106 Setup · 78 Privilege Level · 21, 84 Rights · 84 Program Installation · 15 Prospect · 100 Notes Categorization · 25 Notes Expiration · 25 Notes Page Contact View · 101 O ODBC · 58 Data Source · 58 Settings · 75 Open Transaction · 112 Open Windows List · 186 Orphaned records · 74, 75 Owner · 100 Owner Field · 21 Q Quick Add Contact · 113 Quick Add Preferences · 90 Quick Letter · 104 Merge Codes · 105 Print · 106 Setup · 105 P Page Letter Writer · 170 Page Format Letter Writer · 166 Palm Pilot Interface · 26 Paragraph Format Letter Writer · 166 Password · 22 Passwords · 82 Enable · 87 Paste · 80 Pattern Matching · 97 Performance Reporting · 24, 29, 160, 200, 205 Pershing Download · 68 Pershing Data Download · 68 Phone Report · 136 Phone Dialer · 175 Phone Tallies Report · 136 Portfolio Reports Bond Maturity Distribution · 140 Transaction Schedule · 140 Portfolio Reports Large Positions · 140 Portfolio Rank · 140 Portfolio Valuation Detail · 140 Portfolio Valuation Summary · 141 Securities by Type · 140 Postal Service, U.S. · 99 Posting Book Report · 137 POSTNET Barcodes · 137 Preferences User · 86 R Rapid Find · 98 Rating Report · 136 Rating · 100 Realized Gain/Loss Report · 137 Remembered Responses · 101 Reminder Activity · 35 Replace Letter Writer · 168 Reports · 134 Custom · 162 List View · 133 Weekly History · 47 Reschedule · 39 Ruler Letter Writer · 172 S Sales Planner · 9, 35, 126 Sales Scripts · 181 Save Letter Writer · 164 Save As Letter Writer · 164 Schedule Activity · 34, 124 Scientific Calculator · 178 Scratch Pad · 181 224 Search Letter Writer · 167 Search & Replace Letter Writer · 168 Search Logic · 41, 130 Secondary Record · 109 Securities · 80 Change Symbol · 81 Report · 137 Split Shares · 81 Securities Descriptors · 27 Securities Master · 157 Security Types · 144 Sending e-mails · 26 Setup User Preferences · 86 Skip Checks List View · 134 Source · 109 Report · 136 Source Type · 109 Spell Check Letter Writer · 171 Split Shares · 81 SQL Server · 58 Standard Reports · 135 Account/Company · 135 Activities · 135 Address/Phone Card · 135 Commissions · 137 Company/Status · 135 Contact/Notes · 135 History · 136 Last Contacted · 136 Marked Notes · 136 Notes · 136 Phone · 136 Phone Tallies · 136 Posting Book · 137 Rating/Status · 136 Realized Gain/Loss · 137 Securities · 137 Source · 136 State/Zip · 136 Unrealized Gain/Loss · 137 Weekly History Report · 46, 94 State Report · 136 Status · 100 Status Bar · 88 Stopwatch · 178 Subscript Letter Writer · 167 Suitability · 109 Superscript Letter Writer · 167 Support Plus Pack · 7, 204 Sweep · 38 T TAPI Settings · 75 Tax Lots · 29, 160, 200 Telephone · 175 Time Billing · 178 Tip of the Day · 9, 193 Toolbar · 88 Letter Writer Align Paragraph · 172 Bold, Italicize, Underline & Strikeout · 172 Line Spacing · 172 Text Color · 172 Text Font · 171 Text Point Size · 171 Letter Writer · 171 Setup · 88 Tools Menu · 175 Trade methods · 27 Transaction Close · 112 Open · 112 U Undo · 79 Unique Files · 58 Unique Files · 58 Unrealized Gain/Loss Report · 137 URL · 24 User Add · 83 Configure · 83 Delete · 83 Edit · 83 User Fields Setup · 92 User Fields Page Contact View · 109 User ID · 21, 81 User Info User Preferences · 93 User Name · 22 User Preferences · 86 Alert · 89 Calculator · 91 Database · 86 225 Directories · 87 Envelopes/Labels · 87 Quick Add · 90 Quick Add Defaults · 114 User Fields · 109 View · 88 W What’s New · 193 Wildcards · 108 Window Arrange Icons · 185 Cascade · 184 Close All · 186 Menu · 185 Open Windows List · 186 Word Processor · 162 www.BrokersAlly.com · 1, 7, 8, 24, 25, 31, 184, 215, 227, 228 V Valuation Monitors · 112 View Activities Calendar · 120 Add Contact · 98 Call Lists · 129 Campaigns · 129 Find Contact · 95 Menu · 95 Quick Add Contact · 113 Schedule Activity · 124 Z Zip Report · 136 Zoom Activities Calendar · 120, 124 Find Link · 119 List View · 133 226 Customer Management and Portfolio Reporting For Investment Professionals User Manual END 74 Pottstown Pike, Eagle, PA 19480-0207 484-875-1710 [email protected], [email protected], Fax: 484-875-1704 http://www.BrokersAlly.com Broker’s Ally Version for Windows


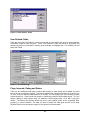

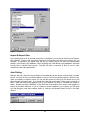
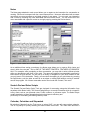


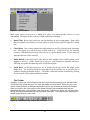


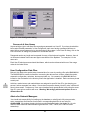
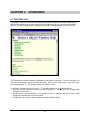
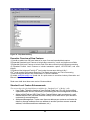
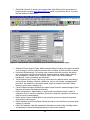
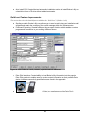
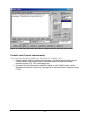


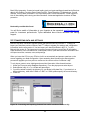


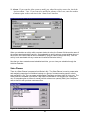

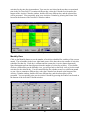
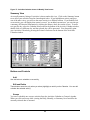

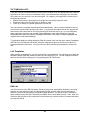

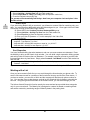

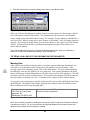
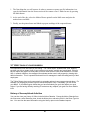


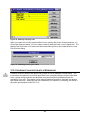

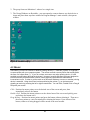

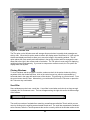


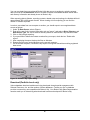
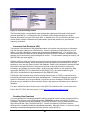
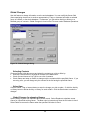
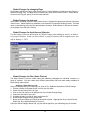

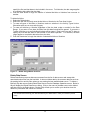
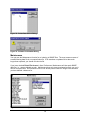


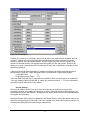


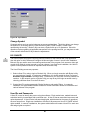


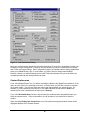

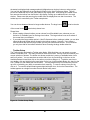

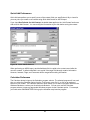
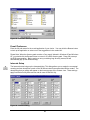


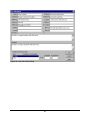


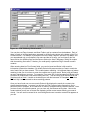
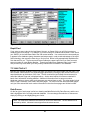
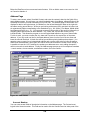


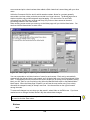


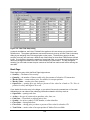

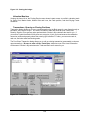

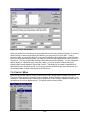
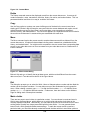
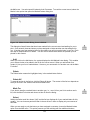
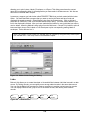
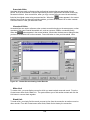


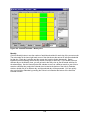
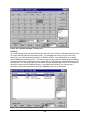


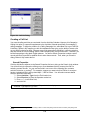
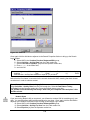

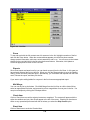


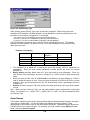
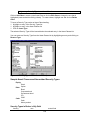

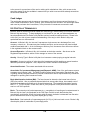


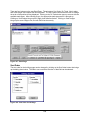

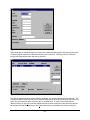


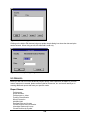


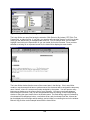
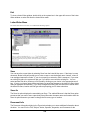

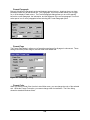
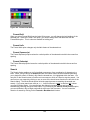


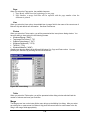
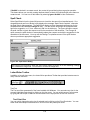


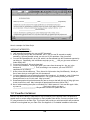

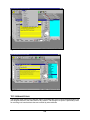


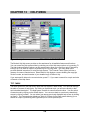

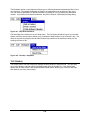


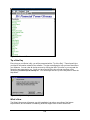


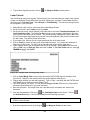


![OverView Control Manager user`s manual - operator [v04]](http://vs1.manualzilla.com/store/data/005659468_1-4c522981c7089838b286d7fbb1120c24-150x150.png)