1
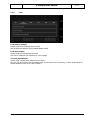
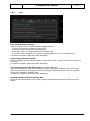
G-Stomper User Manual V.4.5 G-Stomper Studio G-Stomper Rhythm G-Stomper VA-Beast User Manual App Version: Date: Author: 4.5 31/10/2015 planet-h.com Official Website: http://www.planet-h.com/ Contents 7 31/10/2015 Sampler ............................................................................................................................. 2 7.1 Overview ............................................................................................................. 2 7.2 7.2.1 7.2.2 7.2.3 7.2.4 7.2.5 7.2.6 7.2.7 7.2.8 Panel Reference .................................................................................................. 3 Sample / Track Settings............................................................................................... 3 Quick Sample Selector and Info Display ........................................................................ 4 Roll ............................................................................................................................ 6 Roll-internal Accent ..................................................................................................... 7 Fill-In ......................................................................................................................... 8 Filter .......................................................................................................................... 9 Modulation Envelope ................................................................................................. 10 Modulation LFO ......................................................................................................... 13 7.3 7.3.1 7.3.2 7.3.3 7.3.4 7.3.5 7.3.6 7.3.7 Sampler Tracks .................................................................................................. 17 Sampler Track Pads T01 - T24 (various screens) ......................................................... 17 Sampler Track Pad Mode (various screens) ................................................................. 17 Actions for Track Pads in the different Modes .............................................................. 18 Actions for the Track Pad Mode Button in the different Modes ...................................... 19 Sampler Track Pad Instant (on Touch) Mode (Main Drum Machine) .............................. 20 Sampler Drum Pads .................................................................................................. 21 Sampler Mute Groups ................................................................................................ 22 7.4 7.4.1 7.4.2 7.4.3 7.4.4 7.4.5 7.4.6 Sampler Track Menu .......................................................................................... 23 T[..] ......................................................................................................................... 23 Load ........................................................................................................................ 24 Copy ........................................................................................................................ 25 Clear ........................................................................................................................ 26 Export ...................................................................................................................... 26 Automation ............................................................................................................... 27 Page 1 G-Stomper User Manual 7 Sampler 7.1 Overview V.4.5 G-Stomper Studio provides up to 24 Sampler Track, where each is powered by its own Sampler instance. The Sampler has 3 main sections (per track) to tweak/modulate a sound in real-time. Sample / Track Settings Filter (Multi Filter with 8 Filter types) Modulation (1 Modulation Envelope + 1 Modulation LFO) When you edit Sampler related parameters, then you always act on the currently selected Sampler Track (the highlighted one). If you want to change the Pitch of the Sample on T01 for example, first select T01 and then change the Pitch Parameter. Note: The Step Sequencers for the Samplers are monophonic, but for smooth transitions between the steps (in case when new step triggers a sound and the sound of a previous step is still running), the Samplers are of course able to (internally) play multiple sounds at once. If you want true monophony (so that a sound is cut off, when a new trigger is fired on the same Track) then you can enable the “Sampler Monophony (cut sounds when played)” in the Sampler section of the Setup dialog. 31/10/2015 Page 2 G-Stomper User Manual 7.2 V.4.5 Panel Reference 7.2.1 Sample / Track Settings The Sample/Track Settings provide the all basic Parameters to manipulate a sample in real-time. Pan: Sample Panorama Level: Sample Output Level/Volume (the base sample output level, independent from the mixer volume) Note: In Accent Mode the Level fader switches to Acc and controls the Accent amount. Start: Sample Start Point Leng: Sample Length Pitch: Sample Pitch Scale Shuff: Track Shuffle/Swing ON/OFF Roll: Roll OFF/2x/3x/4x (play the Sample 1x, 2x, 3x or 4x per Step) Norm: Normalize Sample to 0dB ON/OFF Normalizing is useful to give Samples a boost, if they’re recorded with low volume. You won’t hear a difference, if the sample file is already normalized. Reverse: Reverse Sample ON/OFF Fill-in: Randomized Fill-Ins at the end of the Pattern OFF / 1/2bar / 1/1bar (for details, see Chapter: Fill-In) 31/10/2015 Page 3 G-Stomper User Manual 7.2.2 7.2.2.1 V.4.5 Quick Sample Selector and Info Display Quick Sample Selector The Quick Sample Selector is very easy way to select samples with a single click rather than going through the regular file browser. ‘<‘ and ‘>‘: Select the previous or next Sample within a particular sample folder. By default, the Quick Sample Selector always adopts the folder of the currently loaded sample of a track. So when you select another track, the ‘<‘ and ‘>‘ buttons always start at the currently loaded sample location to obtain determine the previous or next sample to be loaded. Lock Folder: Adopting the location (as described above) fits very well when changing existing Patterns. But when you start from scratch, it’s often more suitable to lock the sample folder at a specific location, so that you can quick select samples for multiple tracks, all from the same folder. If the folder is locked, you can switch between the tracks and step up and down within the locked folder, regardless what sample was previously loaded at the tracks. More (or short click to the display): Shows up the “Load Sample” menu for the currently selected track, which lets you browse your samples using the regular file browser (loading a sample with the regular file browser updates the current Quick Sample Selector folder location). 31/10/2015 Page 4 G-Stomper User Manual 7.2.2.2 V.4.5 Sample Info Display The Sample Info Display shows the relevant details of the loaded sample. Name: The Sample name (file name without extension) Length: The length in minutes, seconds, milliseconds (+ the sample file size) Format: The sample format (bit rate, sample rate, channels) Short click to the display: Shows up the “Load Sample” menu for the currently selected track, which lets you browse your samples using the regular file browser (loading a sample with the regular file browser updates the current Quick Sample Selector folder location). 31/10/2015 Page 5 G-Stomper User Manual 7.2.3 V.4.5 Roll The Roll function allows you to simulate typical drum rolls or flams. Technically spoken, this means to play a sample multiple times within a single Step. You can play a sample either 1x, 2x, 3x or 4x per step. Short click Roll OFF / 2x / 3x / 4x Roll 2x: The 1st Trigger is fired at the Step position (like a regular trigger) The 2nd Trigger is fired at 50% of the time frame between the current Step and the next Step Roll 3x: The 1st Trigger is fired at the Step position (like a regular trigger) The 2nd Trigger is fired at 33.3% of the time frame between the current Step and the next Step The 3rd Trigger is fired at 66.6% of the time frame between the current Step and the next Step Roll 4x: The 1st Trigger is fired at the Step position (like a regular trigger) The 2nd Trigger is fired at 25% of the time frame between the current Step and the next Step The 3rd Trigger is fired at 50% of the time frame between the current Step and the next Step The 4th Trigger is fired at 75% of the time frame between the current Step and the next Step Long Click 31/10/2015 Roll internal Accent ON/OFF Page 6 G-Stomper User Manual 7.2.4 V.4.5 Roll-internal Accent The Roll internal Accent allows you to apply Accentuation to the Roll internal Triggers, which makes the drum rolls sound much more natural. Long Click Roll internal Accent ON/OFF ON: The Roll generated Triggers are Accent aware, while the Accent Fader (in Accent Mode) controls the Accent amount. The Roll starts at full (Roll-internal) Accentuation and ends with zero (Roll-internal) Accentuation. This means in detail, the first Roll Trigger is always fired at its regular output level, or in other words at full Roll-internal Accentuation. The last Roll Trigger is fired at zero Roll-internal Accentuation. In case of Roll 3x/4x, the Triggers in between are fired at a partial Roll-internal Accentuation to generate a linear level reduction from the first to the last Roll Trigger. OFF: All Roll triggers are played at the same Level. 31/10/2015 Page 7 G-Stomper User Manual 7.2.5 V.4.5 Fill-In The Fill-In function allows you to apply automatically generated, randomized breaks (Fill-Ins) at the end of the Pattern per Track. The Fill-In are (if enabled) always applied to the last Bar of a Pattern. They can be applied either for the half or the full duration of the last Bar. Short click Fill-In OFF / 1/2bar / 1/1bar 1/2 bar: The sequencer creates a randomized break on the last 1/2 Bar of the pattern for the particular Track. (1/2 Bar = 2 beats in a 1/16 Time Signature) 1/1 bar: The sequencer creates a randomized break on the complete last Bar of the pattern for the particular Track. (1/1 Bar = 4 beats in a 1/16 Time Signature) Long Click Fill-In Hold ON/OFF ON: The Fill-In break will be created every time the sequencer passes the last Position (1/2 or 1/1). OFF: The Fill-In break will be created once and turns itself off afterwards. 31/10/2015 Page 8 G-Stomper User Manual 7.2.6 V.4.5 Filter The Sampler provides a Multi Filter (per Track) with 8 Filter types. The filter is applied to the audio signal right after the sample was manipulated by the Sample/Track Settings section. The Filter section offers 8 different Filter Types: LP12 (12dB Low Pass Filter) HP12 (12dB High Pass Filter) LP24 (24dB Low Pass Filter) HP24 (24dB High Pass Filter) BP (12dB Band Pass Filter) NP (12dB Notch/No Pass Filter) MGLP (24dB Moog Low Pass Filter) MGHP (24dB Moog High Pass Filter) Cutoff: Controls the Filter Cutoff Frequency in a range from 1Hz to 14000Hz Res: Controls the Filter Resonance Bandw (BP, NP Filter only): Controls the Filter Bandwidth 31/10/2015 Page 9 G-Stomper User Manual 7.2.7 V.4.5 Modulation Envelope The Modulation section provides an Attack Decay Modulation Envelope (per Track) which can be used to modulate the Amplification, the Filter Cutoff or the Sample Pitch in real-time. 7.2.7.1 Destination (assign to Parameter) You can choose from 3 parameter routings (multiple selections are possible). Amp: Apply the Modulation Envelope to Sample Amplification(Output Level) ON/OFF Filter: Apply the Modulation Envelope to Filter Cutoff ON/OFF Pitch: Apply the Modulation Envelope to Sample Pitch 31/10/2015 Page 10 G-Stomper User Manual 7.2.7.2 V.4.5 Depth Depth: Controls the modulation depth/amount of the assigned parameter(s). 7.2.7.3 Decay The Modulation Envelope offers 2 different Decay types. Linear Logarithmic To choose the Decay Type, simply tap the Decay Type selector button. Decay length: The length of the Envelope is always matching the Sample playback length and therefore depending on the Start, Length and Pitch Parameter in the Sample/Track Settings. 31/10/2015 Page 11 G-Stomper User Manual 7.2.7.4 V.4.5 Reverse Reverse Off: The Envelope starts from its max value (normal direction). Reverse On: The Envelope starts from zero and rises to its max value (reversed direction). 31/10/2015 Page 12 G-Stomper User Manual 7.2.8 V.4.5 Modulation LFO The Modulation section provides a Modulation LFO (per Track) which can be used to modulate the Amplification, the Filter Cutoff or the Sample Pitch in real-time. 7.2.8.1 Waveform The LFO offers 7 different waveforms: Triangle Sawtooth Reversed Sawtooth Pulse (Square wave, fixed at 50% pulse with) Random (similar to Pulse, but with randomized amplitude) Smooth Random (similar to Triangle, but with randomized amplitude) Triple Peak (a combination a smooth Sawtooth approximated Sine and a 3 times faster running Sine wave) To choose one of the waveforms, simply tap the waveform selector button. 31/10/2015 Page 13 G-Stomper User Manual 7.2.8.2 V.4.5 Destination (assign to Parameter) You can choose from 3 parameter routings (multiple selections are possible). Amp: Apply the Modulation LFO to Sample Amplification(Output Level) ON/OFF Filter: Apply the Modulation LFO to Filter Cutoff ON/OFF Pitch: Apply the Modulation LFO to Sample Pitch 7.2.8.3 Depth Depth: Controls the modulation depth/amount of the assigned parameter(s). 31/10/2015 Page 14 G-Stomper User Manual 7.2.8.4 V.4.5 Rate (Tempo) Rate (Sync off): Controls the LFO Rate in Hz in a range from 100s to 50Hz Rate (Sync on): Controls the LFO Rate in Partials 16/1, 8/1, 4/1, 2/1, 1/1, 3/4, 1/2, 3/8, 1/3, 1/4, 3/16, 1/6, 1/8, 1/12, 1/16, 1/32, 1/64 7.2.8.5 Tempo Sync Sync off: The LFO rate is independent. Sync on: The LFO is synchronized with the tempo. Note: Depending on the Sync switch, the LFO Rate is set in Hz or in Partials (see Chapter: Rate (Tempo)). 31/10/2015 Page 15 G-Stomper User Manual 7.2.8.6 V.4.5 Keyboard Sync Long press the Sync button to turn KB Sync on/off. KB Sync off: The LFO will not be re-started when a Sound is triggered. KB Sync on: With every triggered Sound the LFO gets re-started. 31/10/2015 Page 16 G-Stomper User Manual 7.3 7.3.1 V.4.5 Sampler Tracks Sampler Track Pads T01 - T24 (various screens) Track Pads (T[..]) are located on the Drum Machine, Sampler Note Grid, Sampler Track Grid and Sampler Drum Pads. To scroll to the upper 12 Tracks (13-24) simply tap the scroll button right beside the Tracks. Note: The number of available/enabled Tracks depends on the 'Number of Sampler Tracks' setting in the Setup dialog. 7.3.2 Sampler Track Pad Mode (various screens) Depending on the selected Track Pad Mode, the T[..] Buttons have different actions applied. Tap the Track Pad Mode Button to switch between the different modes. Each Mode is defined with two terms. The term before the “/” is the short click action. The term after the “/” is the long click action. 31/10/2015 Page 17 G-Stomper User Manual 7.3.3 V.4.5 Actions for Track Pads in the different Modes The following list describes the actions which are applied to the Track Pads (T[..]) in the different modes. The modes may vary on the different screens due to the different needs on some screens. Play(+Select)/Menu: Click Play Sample (+select Track) Click (while recording) Record Trigger, silent (+select Track) Long Click Show up the Track Menu Select/Mute: Click Long Click Select Track, silent Track Mute ON/OFF Mute/Select: Click Long Click Track Mute ON/OFF Select Track, silent Solo/Select: Click Long Click Track Solo ON/OFF Select Track, silent Play(live)/<no long click>: Click Play Sample instantly, on touch (dedicated for live playing/recording) Click (while recording) Record TAP instantly, silent Long Click No function Rhythm Arp/Select<2-click>: Touch Activate the Rhythm Arpeggio for the particular Track Release Deactivate the Rhythm Arpeggio for the particular Track Long Click No function Double Click Select Track, silent Note: The Rhythm Arpeggio can only be used when the sequencer is running. 31/10/2015 Page 18 G-Stomper User Manual 7.3.4 V.4.5 Actions for the Track Pad Mode Button in the different Modes All Modes: Click Select Mode Play(+Select)/Menu: Long Click Multi-Mute ON/OFF (see Chapter: Programmable Multi-Mute) Select/Mute: Long Click Multi-Mute ON/OFF (see Chapter: Programmable Multi-Mute) Mute/Select: Long Click All Track Mute OFF Solo/Select: Long Click All Track Solo OFF Play(live)/<no long click>: Long Click No function Rhythm Arp/Select<2-click>: Long Click No function 31/10/2015 Page 19 G-Stomper User Manual 7.3.5 V.4.5 Sampler Track Pad Instant (on Touch) Mode (Main Drum Machine) On the Main Drum Machine, you have the possibility to change the main behaviour of the Track Pads from normal click to “on Touch”. Normal behaviour: The Track Pads react to a regular click, which means in fact when you release a Track Pad (a click from a technical point of view is always a combination of touch and release). Instant (on Touch) behaviour: The Track Pads react on touch rather than on release. This is, especially in a live situation, much faster and more direct. Note: In Instant Mode, long click is not possible due to technical reasons To switch between Normal and Instant (on Touch) behaviour, long press the scroll button. Note: This switch is available exclusively for the Track Pads on the Main Drum Machine. On all other screens the Track Pad behaviour is automatically set to the most suitable setting for the particular modes. Sampler Drum Pads All Modes except Play/Menu behave on Touch Track Pads on FX and Master All Modes behave on Touch Sampler Track Grid, Note Grid All Modes except Play(live) and Rhythm Arp behave Normal (on Click) 31/10/2015 Page 20 G-Stomper User Manual 7.3.6 V.4.5 Sampler Drum Pads The Sampler Drum Pads provide 24 Pads to be used for live playing. Since the Drum Pads are in fact a specialized form of the Sampler Track Pads, they can also be used like regular Sampler Track Pads, e.g. to mute/un-mute, solo/un-solo, load samples, etc. (for details see Chapter: Sampler Track Pads T01 - T24) The advantage of the Drum Pads is that you see all 24 Sampler Tracks at once. Furthermore the Drum Pads react “on Touch” in all Track Pad Modes except Play/Menu. (see Chapter: Sampler Track Pad Mode) Reacting “on Touch” is much more direct than the normal “on Click” behaviour and therefore more suitable for Drum Pads. Note: On the Drum Pads, long clicks are only supported in Play/Menu Track Pad Mode. (see Chapter: Sampler Track Pad Mode) 31/10/2015 Page 21 G-Stomper User Manual 7.3.7 V.4.5 Sampler Mute Groups Mute Groups are used to let two or more sounds mute each other when triggered. This is typically used for open and closed high hats to simulate their natural behaviour (when you close the high hat in a real drum set while the open high hat was hit before, then the open high hat gets muted immediately). G-Stomper Studio provides 4 independent Mute Groups for the Drum Samplers. To add a Track (resp. its sound) to a particular group, simply show up the Track Menu (see Chapter: Sampler Track Menu) and enable M Group A, B, C or D. Note: Adding a Track to a Mute Group has only an effect if at least one other Track is in the same Mute Group. Also note that a Track can be in more than one Mute Groups at once. Mute Groups in G-Stomper are stored per Pattern and can be different for each Pattern in a Pattern Set (or on your device storage). 31/10/2015 Page 22 G-Stomper User Manual 7.4 V.4.5 Sampler Track Menu The Sampler Track Menu provides all operations for a particular Sampler Track. Make sure that the Track Pad mode is set to Play/Menu (which is the default). Long click a Track Pad to open to the Track Menu. 7.4.1 T[..] Mute: Track Mute ON/OFF Solo: Track Solo ON/OFF Shuffle: Track Shuffle/Swing ON/OFF MIDI Instrument (Internal Sound Off): Enable this option to control an external MIDI Instrument with this Track, rather than the internal Audio Source. Using a Track as [MIDI Instrument] means, the internal Sound will be disabled and only MIDI events will be fired from the Track. Be sure to configure the MIDI Channels, IN/OUT Interfaces in the G-Stomper Setup before you enable this option. Mute Groups A, B, C. D: Mute Groups are used to let two or more sounds mute each other when triggered. This is typically used for open and closed high hats to simulate their natural behaviour (when you close the high hat in a real drum set while the open high hat was hit before, then the open high hat gets muted immediately). To add the current Track to a particular Mute Group enable M Group A, B, C or D. (see also Chapter: Sampler Mute Groups) 31/10/2015 Page 23 G-Stomper User Manual 7.4.2 V.4.5 Load Load Factory Sample: Load a single Factory Sample into the Track (this includes also Samples from installed Sample Packs) Load User Sample: Load a single User Sample into the Track (this can be a Sample from anywhere on your storage) Currently used Sample: Load a single “already used” Sample into the Track Here you can chose from a List of samples which are currently in use (in Memory), in other words which are already loaded in some other Track or Pattern. 31/10/2015 Page 24 G-Stomper User Manual 7.4.3 V.4.5 Copy Copy Track (Selective Content): Copy the complete Track or selective Content (multiple choice) to .. .. a Track of your choice (in a Pattern of your choice) .. to the same Track in all Patterns in the Pattern Set .. to the same Track in a selection of Patterns in the Pattern Set .. to the same Track in all Patterns in a selection of Pattern Banks (A, B, C, D) in the Pattern Set (for details see Chapter: Data Copy & Clear Framework) Swap Tracks (Selective Content): Swap the complete Track or selective Content (multiple choice) with a Track of your choice in a Pattern of your choice (for details see Chapter: Data Copy & Clear Framework) Copy Track Sequence to VA-Beast Track: (G-Stomper Studio only) Copy the main sequence of the current (Sampler-)Track to a polyphonic VA-Beast Track of your choice When using this function, all Triggers of the source (Sampler-)Track will be copied in form of 1/16 Note Events to the destination VA-Beast Track. (for details see Chapter: Data Copy & Clear Framework) Clone current Bar/Position to all other Bars Clones the current Bar/Position (of this Track) including Parameter Automations to all other bars in the Pattern. 31/10/2015 Page 25 G-Stomper User Manual 7.4.4 V.4.5 Clear Clear Track (Selective Content): Clear the complete Track or selective Content (multiple choice) (for details see Chapter: Data Copy & Clear Framework) 7.4.5 Export Export/Bounce Sample: Export/Bounce the Sample (NOT the Sequence) of the Track including all Parameters (but NOT the EFX chain). The exported file will be located in the folder /gstomper/usersamples/bounced_samples and can be loaded in use of the regular Sample selection. By default, the bounced Sample gets loaded automatically at the end of the bounce process. Export/Bounce complete Track: Export/Bounce the complete Track including the Sequence, all Track and FX Parameters and all Automations. The exported Loop file will be located in the folder /gstomper/usersamples/bounced_tracks and will be loaded automatically at the end of the bounce process. (for details see Chapter: Audio Export & Bouncing) 31/10/2015 Page 26 G-Stomper User Manual 7.4.6 V.4.5 Automation Clear Parameter Automation: Clear the Automation Steps of a specific Track Parameter. The Parameter can be selected in the following Sub Menu. Initialize Parameter Automation: Initialize all Automation Steps of a specific Track Parameter to the current Value. The Parameter can be selected in the following Sub Menu. (On the efx edit and master screen click on the Mod Menu Button) Auto-Complete Parameter Automation: The Auto-Complete Parameter Automation feature is used to create smooth movements just by setting the key steps. To use it, you just have to define at least 2 Automation steps (in use of the Step Edit mode) for the desired parameter. Then call Auto-Complete Parameter Automation and enjoy the magic. The number of key steps is not limited. The Auto-Complete just fills all the gaps between the key steps with a smooth movement. Note: Keep in Mind, that you must set the start step, even if it gets the same value as the already set parameter value. (for details see Chapter: Parameter Automation) 31/10/2015 Page 27