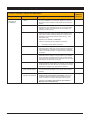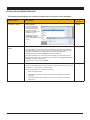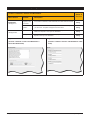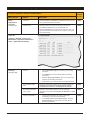
1
IDEXX Cornerstone*
Default and Security Settings Guide
8.3
Proprietary Rights Notice
Information in this document is subject to change without notice. Companies, names and data used in examples
are fictitious unless otherwise noted. No part of this document may be reproduced or transmitted in any form or by
any means, electronic, mechanical or otherwise, for any purpose, without the express written permission of IDEXX
Laboratories. IDEXX Laboratories may have patents or pending patent applications, trademarks, copyrights or other
intellectual or industrial property rights covering this document or subject matter in this document. The furnishing of
this document does not give a license to these property rights except as expressly provided in any written license
agreement from IDEXX Laboratories.
© 2014 IDEXX Laboratories, Inc. All rights reserved. • 06-28873-02
*Compliance Assessment Tool, Cornerstone, IDEXX-PACS, IDEXX SmartOrder, IDEXX VetLab, LabREXX, Patient
Advisor, Patient Clipboard, SmartLink, and VetConnect are trademarks or registered trademarks of IDEXX Laboratories,
Inc. or its affiliates in the United States and/or other countries.
Epson is a registered trademark of the Seiko Epson Corporation. Adobe and Reader are either registered trademarks
or trademarks of Adobe System Incorporated in the United States and/or other countries. DICOM is the registered
trademark of the National Electrical Manufacturers Association for its standards publications relating to digital
communication of medical information. CareCredit is a registered trademark of CareCredit LLC. LifeLearn and ClientEd
Online are registered trademarks of VetLearn, Inc. MWI is a registered trademark of MWI Veterinary Supply, Inc. Antech
Diagnostics is a registered trademark of Veterinary Centers of America, Inc.
All other product and company names and logos are trademarks of their respective holders.
IDEXX Computer Systems
One IDEXX Drive
Westbrook, Maine 04092 USA
idexxcornerstone.com
Table of Contents
Default Settings .............................................................................................................................4
Overview.........................................................................................................................................................4
Practice and Workstation Defaults Window...................................................................................................5
Critical Live Practice Data (Rekeying) Default Settings.................................................................................6
Critical Go Live Default Settings....................................................................................................................35
Advanced Use and Owner/Manager Responsibility Default Settings...........................................................48
Electronic Whiteboard Default Settings.........................................................................................................84
Cornerstone* Imaging Default Settings.........................................................................................................86
DICOM® Imaging Default Settings.................................................................................................................89
IDEXX-PACS* Software Default Settings.......................................................................................................95
Laboratory Default Settings...........................................................................................................................97
Security Settings ...........................................................................................................................104
Cornerstone Security Settings Guide............................................................................................................105
Default Settings
Overview
This document outlines the default settings that must be addressed, and in the order which they must be addressed,
once the database is loaded. The defaults are located on the Cornerstone* Lists and Controls menus.
Use this document to make database decisions prior to establishing default settings. To complete the information listed
in this guide, you will need to set up and use a staff person login with proper security access.
The sequence of the default settings guide follows this order:
1. Defaults critical to set before the Live Practice (Rekeying) phase of a new installation.
2. Defaults critical to set before the Go Live phase of a new installation.
3. Remaining defaults that are important for advanced use and owner/manager responsibilities, including defaults
critical for Appointment Scheduler setup, if appointments will be rekeyed
4. Defaults important for the Electronic Whiteboard.
5. Defaults important for the Imaging and Laboratory modules.
How the tables in this document are organized
This document uses a table format to present the steps that you need to follow to set up Cornerstone. Here’s a key to
how these tables are organized:
• Menu Access lists the selections you need to make, starting at the Cornerstone menu bar. For example, Controls
> User Defined Prompts > Client means to select Controls from the menu bar, then select User Defined
Prompts, and then select Client. In some cases, the last selection may be a tab within a window or dialog box.
• Description tells you about the dialog box, window, or window area and what you should do there.
• Action & Decision gives you an at-a-glance description of the action you need to take:
Set up—You need to specify several pieces of information or set up a number of elements that you will use in the
IDEXX Cornerstone Practice Management System.
Select—You need to set up a specific data element.
Verify—A default selection or value is already entered in the database. Evaluate whether this selection/value is
appropriate for your practice and edit if needed.
Additional information
• Cornerstone Administrator’s Manual— Find reference information and procedural steps for setup and system
configuration in Cornerstone. A shortcut icon is located on your desktop.
• Cornerstone User’s Manual— Find reference information and procedural steps for using Cornerstone to perform
daily tasks. An icon is located on your desktop.
• Cornerstone Help—Additional information about all of windows in Cornerstone is available in the Help. With the
window open, press F1 to open the applicable Help topic.
• Snippet videos—When you see the snippet video icon, a short “how-to” video is available. Go to
idexxlearningcenter.com, click On-Demand Learning, and click the Snippets tab.
Cornerstone 8.3 Default and Security Settings Guide
Practice and Workstation Defaults Window
This window simplifies your initial Cornerstone setup and saves you time when looking for a particular default
setting. A large number of default settings are made on this window.
Accessing Practice and Workstation Defaults
1. Select Controls > Defaults > Practice and Workstation.
2. The left-side navigation pane lists the available properties that you can configure. A plus sign [+] box to the
left of a property indicates that it has one or more associated subproperties; click the [+] box (or the property)
to expand its list of subproperties. Select the property or sub-property to configure. The corresponding
configuration pane displays on the right.
3. Depending on your actions, the following buttons may display on the bottom of the Practice and Workstation
Defaults window:
• Apply—Applies any changes made since the last time Apply was clicked and leaves the Practice
and Workstation Defaults window open so you can continue viewing/changing additional properties as
needed.
• OK—Applies any changes and closes the Practice and Workstation Defaults window.
• Cancel—If any changes have been made, you are prompted to save the changes, and then the
Practice and Workstation Defaults window is closed. (Any previous changes that were applied using the
Apply button are retained, not cancelled.)
• Close—Closes the Practice and Workstation Defaults window (displays in place of the Cancel button if
no changes have been made or if changes have been applied).
• Page 5 •
Cornerstone 8.3 Default and Security Settings Guide
Cornerstone 8.3 Default and Security Settings Guide
Critical Live Practice Data (Rekeying) Default Settings
The following default settings are critical to the Live Practice Data (Rekeying) phase of the installation:
Menu Access
Description
Action &
Decision
Lists > Practice
Practice List window
Verify
Verify that all the practice information is correct. The first phone number is the number that
will print on plain paper estimates, invoices, statements, and prescription labels.
Controls > User
Defined Prompts >
Client Prompts
User Defined Prompts window—Client tab
Set up
Prompts allow you to customize Cornerstone to store information that is gathered for a new
client. A client prompt can be set as an alert to bring certain information to the attention of
your staff. You can further customize alerts by assigning them a color. It is also possible to
require that certain information be put into Cornerstone for every client.
Note: You should never store sensitive client data, such as credit card numbers or Social
Security numbers, in Cornerstone. If you want to use Cornerstone to process payments in
a manner that is PCI PA-DSS (Payment Credit Industry Payment Application Data Security
Standard) certified, be sure to use one of our approved Cornerstone payment processing
integrations.
These fields can be set up to let staff type the information (characters and numbers)
needed. They can also be set up as yes/no fields that allow staff to choose an answer. In
addition, these fields can include custom-designed lists that limit the information staff places
within the field.
C=Character; N=Number; Y/N=Yes/No; L=List
Used in the following manner throughout Cornerstone:
• Page 6 •
•
Client Prompts Report
•
List data types appear in
the Answer field (Lists
> Clients > New or
Update button > Client
Information window >
Prompts/Notes tab) as
list selections.
•
When a prompt is set
up as an alert, the
alert will show on the
Patient Clipboard*,
on the Appointment
Scheduler, at check-in,
on an invoice, and on an
estimate.
Cornerstone 8.3 Default and Security Settings Guide
Cornerstone 8.3 Default and Security Settings Guide
Menu Access
Description
Action &
Decision
Controls > User
Defined Prompts >
Patient Prompts
User Defined Prompts window—Patient tab
Set up
Like the client prompts, patient prompts allow you to create fields to record customized
information about a patient on the Prompts/Notes tab. These prompts can also have alerts
assigned to bring this information to the attention of your staff.
Note: You should never store sensitive client data, such as credit card numbers or Social
Security numbers, in Cornerstone. If you want to use Cornerstone to process payments in
a manner that is PCI PA-DSS (Payment Credit Industry Payment Application Data Security
Standard) certified, be sure to use one of our approved Cornerstone payment processing
integrations.
C=Character; N=Number; Y/N=Yes/No; L=List
Used in the following manner throughout Cornerstone:
Controls > User
Defined Prompts >
Species Prompts
•
Check-in Report
•
Data types appear in the Answer field (List > Patients > New or Update button >
Patient Information window > Prompts/Notes tab) as list selections.
•
When a prompt is set up as an alert, the alert displays on the Patient Clipboard, on
the Appointment Scheduler, at check-in, on an invoice, on an estimate, and on patient
orders. They do not display on the Patient Clipboard. It is optional to display prompts/
alerts on the Patient Clipboard, select the Alerts tab.
User Defined Prompts window—Species tab
Set up
Species prompts show only when a patient is set up under the species with the designated
prompts. These prompts cannot be set as alerts.
C=Character; N=Number; Y/N=Yes/No; L=List
Used in the following manner and in the following places in Cornerstone:
• Page 7 •
•
Initial Patient Setup Report by
species
•
Data types appear in the Answer
field (List > Patients > New
or Update button > Patient
Information window > Prompts/
Notes tab) as list selections..
Cornerstone 8.3 Default and Security Settings Guide
Cornerstone 8.3 Default and Security Settings Guide
This page left intentionally blank.
• Page 8 •
Cornerstone 8.3 Default and Security Settings Guide
Cornerstone 8.3 Default and Security Settings Guide
This page left intentionally blank.
• Page 9 •
Cornerstone 8.3 Default and Security Settings Guide
Cornerstone 8.3 Default and Security Settings Guide
This page left intentionally blank.
• Page 10 •
Cornerstone 8.3 Default and Security Settings Guide
Cornerstone 8.3 Default and Security Settings Guide
This page left intentionally blank.
• Page 11 •
Cornerstone 8.3 Default and Security Settings Guide
Cornerstone 8.3 Default and Security Settings Guide
Menu Access
Description
Action &
Decision
Controls > User
Defined Prompts >
Staff Prompts
User Defined Prompts window—Staff tab
Set up
Staff prompts are for tracking detailed information about your staff. This information can be
secured. These prompts cannot be set as alerts or required fields.
C=Character; N=Number;
Y/N=Yes/No; L=List
Used in the following manner
throughout Cornerstone:
Controls >
Classifications >
Clients
•
Initial Staff Setup Report
•
Staff Defined Prompts Report
Classifications window—Client tab
Set up
Client classifications allow you to sort lists and print reports by a specific classification.
These classifications can be set up as alerts. Client classifications can also be used to
determine whether that client type will receive reminders and/or statements.
Used in the following manner throughout Cornerstone:
Controls >
Classifications >
Patient
•
Client Master Report
•
Initial Client Setup Report
•
Client Information window
•
Activities > Generate Reminders
Classifications window—Patient tab
Set up
Patient classifications allow you to sort lists and print reports by a specific classification.
These classifications can be set up as alerts. Patient classifications can also be used
to classify your patient types and manage data and criteria when using the Compliance
Assessment Tool*.
Used in the following manner throughout Cornerstone:
• Page 12 •
•
Client Master Report
•
Initial Client Setup Report
•
Client Information window
•
Activities > Generate Reminders
Cornerstone 8.3 Default and Security Settings Guide
Cornerstone 8.3 Default and Security Settings Guide
Menu Access
Description
Action &
Decision
Controls >
Classifications >
Staff
Classifications window—Staff tab
Set up
Staff classifications are used for printing a staff report sorted by classification and is used
for performance tracker report, including number of transactions, average transactions, and
gross sales.
Used in the following manner throughout Cornerstone:
Lists > Staff
•
Staff Class Commission %
Report
•
Staff Commission % Report
•
Staff Defined Prompts Report
•
Staff Summary Report
•
End of Month Reports—YTD
Net Sales Reports
•
Time Clock Report
Staff List window
Set up/Verify
This Staff List contains various staff member names, dependent on how the staff members
log into Cornerstone and what functions they perform. Each staff member is required to
have a staff ID and a user name.
This list includes each staff member who will have a password and security to use the
system. It also contains a user name for anyone who will invoice a client (receptionist ID)
and anyone who will use the Time Clock feature (this requires a password).
Each item on an invoice is assigned to a staff member. Any staff member whose ID is
associated with these items is also included in the list.
Other information can also be stored in this area (prompts, notes, and signatures). How
staff should log into Cornerstone should be determined before setting up staff information.
• Page 13 •
Cornerstone 8.3 Default and Security Settings Guide
Cornerstone 8.3 Default and Security Settings Guide
Menu Access
Description
Action &
Decision
Lists > Cashier ID
Cashier ID List window
Set up
Cashier IDs are used to record the staff member who accepts payment. The cashier ID
feature must be activated (Controls > Defaults > Practice and Workstation > Account)
before the list can be created.
Used in the following manner throughout Cornerstone:
Controls > Payment
Types
•
Requires entry of cashier password on payment screen
•
End of Day Reports—Daily Deposit Report
•
End of Day Reports—Daily Payment Register by Cashier by ID
•
End of Day Reports—Daily Payment Register by Cashier by Payment Type
•
End of Month—Monthly Deposit Report
Payment Types window
Verify
Payment types separate daily deposit reports into various forms of payment so that the
cash drawer can be verified. These payment types can also be assigned to credit codes
restricting Cornerstone’s ability to accept a particular payment type with certain credit codes
(e.g., cash only clients cannot pay with a check).
Used in the following manner throughout Cornerstone:
• Page 14 •
•
Can be grouped together for client payment categories
•
End of Day Report: Daily Payment Register—By Payment Type
•
End of Day Report: Daily Payment Register—By Cashier by Payment Type
•
End of Day Report: Daily Audit Trail Report, no payment type totals
Cornerstone 8.3 Default and Security Settings Guide
Cornerstone 8.3 Default and Security Settings Guide
Menu Access
Description
Action &
Decision
Controls > Credit
Codes
Credit Codes window
Verify
Credit codes are used to control the types of payments that are accepted from clients. Each
credit code is tied to the various forms of payment (Controls > Payment Types) that are
allowed for that client. If a payment type is not allowed, staff will not be able to accept that
type of payment from a client. Payment types can be set as alerts.
Used through Cornerstone in the following manner:
Controls > Taxes
•
Used to group
types of
payments that
can be received
from clients
•
Client A/R
Information
Report
Taxes window
Set up
Taxes are assigned to services and inventory to allow Cornerstone to print tax reports
necessary for your business. If you pay different taxes to different agencies, these taxes
should be set up independently. If all taxes collected go to a single agency, a single tax type
may be all that is necessary.
Used in the following manner throughout Cornerstone:
• Page 15 •
•
Selected in the
Invoice Item
Setup window
•
End of Day
Report: Daily
Revenue Report
(totals for each
type of text)
Cornerstone 8.3 Default and Security Settings Guide
Cornerstone 8.3 Default and Security Settings Guide
Menu Access
Description
Action &
Decision
Controls >
Discounts
Discounts window
Set up
The Discounts window is used to assign both automatic and line item discounts to clients.
For automatic discounts, it is necessary to assign the discounts to both service/inventory
items and to clients. To use these discounts by line item, choose them from the list.
Used in the following manner throughout Cornerstone:
•
On the Estimate and
Client Invoice windows
•
Can be selected in the
Client Information window
•
Can be selected in the
Invoice Item Information
window
Controls >
Controlled
Substance
> Controlled
Substance Export
Controlled Substance Export List window
Controls >
Controlled
Substance
> Controlled
Substance Reasons
Controlled Substance Reasons window
• Page 16 •
Set up
Some states’ controlled substance filing forms have been pre-defined and can be selected
from the Controlled Substance Export List. If your state does not appear on this list, you
have the option to create an electronic filing form that is compatible with your state’s
requirements.
Note: To obtain a list of required data, contact your state’s controlled substance agency.
Set up
Some states require practices to document the reason a controlled substance was used
or dispensed. Cornerstone allows you to set up a list of reasons for the use of a controlled
substance. Some common reasons are loaded with your software.
To enable the use of controlled
substance reasons, select the
Use controlled substance
reasons check box in
Controls > Practice and
Workstation Defaults >
Invoice.
Cornerstone 8.3 Default and Security Settings Guide
Cornerstone 8.3 Default and Security Settings Guide
Menu Access
Description
Action &
Decision
Lists > Species
(Breeds are set up
within each species)
Species Information window
Verify
Set up species for each type of patient. The following options must be determined:
Option
Description
Species
type
Small or Large
SpeciesHerd
If this species
is used for
herd records
(for example,
bovine), select
the Herd
check box.
This option
prevents
weight, birth
date, and
patient born
information
in alerts from
displaying on
herd records.
Lab Age
Groups
Lab results that cannot be automatically downloaded into Cornerstone can
be entered manually. Click the Lab Age Grps button to set up age groups
that can be used for manual Lab Results.
Species
Specific
Rabies Tag
Practices that set up their vaccine/vaccination invoice items prior to
Cornerstone 8.1 may have a service-based system in place, where items are
set up as vaccination service items (with no links to vaccine inventory items).
Click the Rabies Default button to open the Species Specific Rabies Tag
window. For more information, with the window open, press F1 to view the
online Help.
Used in the following manner throughout Cornerstone:
• Page 17 •
•
Assigned in Patient Information window
•
Statistics by Species—Closed Invoices Report
•
Activities > Generate Reminders
Cornerstone 8.3 Default and Security Settings Guide
Cornerstone 8.3 Default and Security Settings Guide
Menu Access
Description
Action &
Decision
Lists > Revenue
Center
Revenue Center List window
Set up
Revenue centers are used to sort various reports and allow for tracking of sales based on
broad categories. Revenue centers can be defaulted by item, item classification, and/or staff
members.
Used in the following manner throughout Cornerstone:
•
During invoicing, to determine which revenue center should receive the sale
•
Allows Cornerstone the ability to track “departmental” revenue centers
•
Multiple sales reports
Lists > Staff
Classification
Commission
Staff Commission List window
Lists > Staff
Commission
Staff Commission Information window
Set up
You can set up commission percents for staff members or for an entire staff classification
(for example, all groomers). Percents can be set up by invoice item classification, subclass,
or invoice item. Staff commissions are based on sales totals, not receipts.
Set up
The Staff Commission Information window provides the ability to set up staff commission
percentage by staff classification or by individual staff members.
This window is used only if staff is paid by commission. Commissions can be assigned to
broad categories or specific items with exceptions for special situations/sales.
•
• Page 18 •
Used in End of Day and End of Month staff commission reports
Cornerstone 8.3 Default and Security Settings Guide
Cornerstone 8.3 Default and Security Settings Guide
Menu Access
Description
Action &
Decision
Lists > Invoice Item
Class
Invoice Item Classification List window
Set up
Controls > Invoice
Types
Invoice Types window
• Page 19 •
Classify invoice items to generate more specific information in reports, mark up or mark
down entire groups of similar invoice items, and narrow invoice item searches.
Set up
You can select an invoice type for each invoice. Invoice types allow you to analyze the
productivity of different areas of your practice. You can also use invoice types to prevent
certain invoices (such as boarding) from closing at the end of the month.
Cornerstone 8.3 Default and Security Settings Guide
Cornerstone 8.3 Default and Security Settings Guide
Controls > Defaults > Practice and Workstation
Action &
Decision
Menu Access
Default
Description
Account
See figure A
Payment type
Select a default payment type to appear when a client makes a
payment, if desired.
Select
Calculate change given
Select this check box to automatically calculate the amount of
change to give to the client (after receiving a payment). If you do
not select this option, you must manually type the amount you
return to the client.
Select
Print heading
Select this check the box to print the practice name and address
on your statements if you are using plain paper.
Select
Copies
Enter the default number of payment copies you want to print.
Select
Adjustment comment
Enter a default adjustment comment that will display when you
make an adjustment to an account.
Set up
Use Cashier ID
Select this check box to track which staff members accept
payments. This allows the practice administrator to track who is
taking payments. It will require staff to enter a cashier password
when taking/correcting payments. This information can be located
in several reports.
Set up
Originates from Lists > Cashier ID.
Client
See figure B
Service charge
Enter the service charge amount for a returned check. This
charge is applied automatically when performing the returned
check function. This feature can be overridden if needed.
Set up
Client ID
This is the starting client ID number. Cornerstone will
automatically start the client ID numbering sequence from the
number entered in the Client ID box. Suggestion: Start at 1000 so
that the clients have 4-digit client IDs.
Set up
Auto assign
Select this check box to have Cornerstone automatically assign
client IDs.
Select
Classification
Select a classification to save keystrokes when entering a
new client by automatically assigning new clients to a default
classification. This default can be changed as needed when
entering a client.
Select
Originates from Controls > Classifications.
Used in the following manner throughout Cornerstone:
•
Postal code
Client Setup window, default classification
Enter a ZIP Code/postal code to save keystrokes when entering
a new client by automatically completing a postal code, city, and
state. This default can be changed as needed when entering a
client.
Verify
Originates from Lists > Postal Codes.
Used in the following manner throughout Cornerstone:
•
Area/City code
Client Setup window, default postal code
Enter a phone area/city code to save keystrokes when entering
a new client by automatically completing the information. This
default can be changed as needed when entering a new client.
Verify
Used in the following manner throughout Cornerstone:
•
• Page 20 •
Client Setup window, default area/city code
Cornerstone 8.3 Default and Security Settings Guide
Cornerstone 8.3 Default and Security Settings Guide
Controls > Defaults > Practice and Workstation
Action &
Decision
Menu Access
Default
Description
Client
See figure B
(continued)
Recently accessed
clients
Enter the number of recently accessed clients to be available on
any given workstation (e.g., front desk, reception). To view this
list of clients, press F7 (back) and F8 (forward) in the Client List
window.
Verify
Use most recent client
Select this check box to display the client whose record was last
opened at any given workstation when you access client search,
estimates, invoices, client correspondence, prescriptions, lab
requests, and client account.
Verify
Credit code
A credit code is required by the Cornerstone software when
entering a new client. To save keystrokes when entering a new
client, select a default credit code. Generally, the credit code is
defaulted to one that allows all kinds of payments (e.g., cash/
check/credit card).
Verify
Originates from Controls > Credit Codes.
Used in the following manner throughout Cornerstone:
•
Client Setup window, default credit code
Billing charge
Select this check box if you want new clients to automatically be
assessed a billing charge when carrying a balance and receiving
a printed statement. The selection can be changed in individual
client accounts. Billing charges are applied each time statements
are printed.
Select
Finance charge
Select this check box if you want new clients to automatically be
assessed a finance charge for carrying a balance. The selection
can be changed in individual client accounts. The End of Month
reporting process will assess finance charges. Be sure your state
laws allow you to assess finance charges.
Select
Tax Exempt
Select this check box if you want new clients to automatically be
designated with tax-exempt status. The selection can be changed
in individual client accounts. Be sure you understand and comply
with state laws regulating tax payments and collections.
Select
Show client balances on
trainer reminder reports
Select this check box if you want the account balance to print
on the Trainer Reminder Report. This is usually used in equine
practices.
Select
Omit voided invoices and
payments on statements
Select this check box so that users do not have to select the Omit
voided invoices and payments on statements check box on
the Monthly Statement window each time statements are run.
Users can clear the check box when statements are printed.
Verify
Originates from Reports > End of Period > End of Month >
Monthly Invoices and Statements.
• Page 21 •
Cornerstone 8.3 Default and Security Settings Guide
Cornerstone 8.3 Default and Security Settings Guide
Controls > Defaults > Practice and Workstation
Menu Access
Default
Figure A
Action &
Decision
Description
Figure B
(Controls > Defaults > Practice and Workstation > Account) (Controls > Defaults > Practice and Workstation > Client)
Estimate
See figure C
Staff ID
Number of days to store
unsigned estimates
Finalize estimate
Transfer to Patient Visit
List when finalized
Enter the staff ID to appear on new estimates.
Verify
Both finalized and tentative unsigned estimates will remain in the
system the number of days selected and then will disappear. If an
estimate is finalized and a patient visit list is created, that list will
not be removed until the items are either invoiced or deleted. This
option is only a default setting when saving and can be overridden
when saving an estimate.
Verify
Select this check box to default an estimate’s status to final when
saving estimates. When creating an estimate, you have the option
of changing the selection of the finalize estimate check box.
Finalizing an estimate means that no changes can be made to its
contents. Finalizing also creates a Patient Visit List entry for the
charges listed.
Verify
Verify
Low prices
Select this option to transfer the low prices from an estimate to
the Patient Visit List.
High prices
Select this option to transfer the high prices from an estimate to
the Patient Visit List.
Add invoice items to PVL
Set a practice-wide default specifying if invoice items should
automatically be added to the Patient Visit List from a finalized
estimate.
• Page 22 •
Cornerstone 8.3 Default and Security Settings Guide
Cornerstone 8.3 Default and Security Settings Guide
Controls > Defaults > Practice and Workstation
Menu Access
Estimate
See figure C
(continued)
Default
Action &
Decision
Description
Estimate print
# copies
Enter the number of estimate copies you
want to print. This option is a default setting
only when the user can override printing
when printing an estimate.
Print staff name
Select this check box to print the staff name
on estimates. The name will print as it
displays in the Staff List window.
Print item ID
Select this check box to print invoice item IDs
on estimates.
Use authorizing
signature
Select this check box if you want the option
to have clients provide electronic signatures
on estimates.
Verify
This setting also determines which option
is selected by default on the Save Estimate
dialog box—Preview/Signature (if check
box is selected) or Save and continue (if
check box is not selected).
Estimate print
• Page 23 •
Use witness
signature
Select this check box if you want the option
to capture an electronic witness signature;
a witness signature line is added to the
estimate.
Preview before
printing
This check box is enabled if the Use
authorizing signature check box is cleared.
Select this check box to allow the Print
Preview window for estimates to appear
before printing an estimate. With the Print
Preview window, you can complete the
following estimate processing tasks in a
single window:
•
View the estimate at different zoom
levels.
•
Specify the number of days to keep an
unsigned estimate (signed estimates
are automatically finalized and saved to
patient history).
•
Finalize an estimate.
•
Print an estimate.
•
Email an estimate.
•
Obtain an electronic signature and
optional witness signature on an
estimate (requires a connected
signature capture device or a tablet
PC).
Print prices–Only
low prices
Select this option to print only the low
prices on the estimate.
Print prices–Only
high prices
Select this option to print only the high
prices on the estimate.
Print prices–Both
low and high prices
Select this option to print both high and
low prices on the estimate.
Print–Both detail and
total
Select this option to print the estimate
detail and total.
Print–Only total
Select this option to print only the
estimate total
Verify
Cornerstone 8.3 Default and Security Settings Guide
Cornerstone 8.3 Default and Security Settings Guide
Controls > Defaults > Practice and Workstation
Menu Access
Estimate
See figure C
(continued)
Estimate >
Estimate Address
See figure C-1
Default
Estimate message
Action &
Decision
Description
Combine multiple estimate messages to use as the default
message that prints on the estimate. Estimate messages can be
changed as estimates are created.
Set up
Originates from Controls > Estimate Messages.
Print estimate messages on
separate page
Select this check box to print all estimate messages on a separate
page from the invoice, usually following the last printed page of
the invoice.
Verify
Client Address
To adjust the placement of the client address on the estimate when
using window envelopes, click the Client Address box and use the
arrow keys on your keyboard to adjust the location.
Verify
Print practice address on
estimates
Select this check box to print the practice address on estimates.
Verify
Practice Address
To adjust the placement of the practice address on the invoice
when using window envelopes, click the Practice Address box and
use the arrow keys on your keyboard to adjust the location.
Align Practice Address text
Select an alignment option for the practice address text on
estimates.
Verify
Reset
Click the Reset button to reset the alignment for address text.
Verify
Use address layout for
invoices
Select this check box to use this address layout for invoices.
Verify
Print practice logo on
estimates
Select this check box to print the practice logo on estimates.
Verify
Test Page
Click the Test Page button to print a test page.
Verify
If you are using letterhead or preprinted paper, clear the check box.
Figure C-1
(Controls > Defaults > Practice and Workstation > Estimate > Estimate Address
• Page 24 •
Cornerstone 8.3 Default and Security Settings Guide
Cornerstone 8.3 Default and Security Settings Guide
Controls > Defaults > Practice and Workstation
Action &
Decision
Menu Access
Default
Description
Invoice
See figure D
Staff ID
Enter the staff ID to appear by default on a new invoice. If you
have multiple staff members, it may be best not to default to a staff
member. Not selecting a default staff ID will require staff to choose
the appropriate provider at the time of invoicing.
Invoice type
Select the invoice type to appear by default on a new invoice.
Verify
Verify
Display patient visit
message
Clear the Display patient visit message check box if you want
the Patient Visit List window to automatically appear when items
exist on the Patient Visit List for any patient belonging to the client
that you’re invoicing. If this option is selected, a message will
display, asking if you want to select items from the list.
Verify
Automatically mark
patient as deceased
Select this check box to automatically change a patient’s status
to Deceased when they are invoiced for an item with the Mark as
Deceased special action.
Verify
Apply group item pricing
before dispensing fee and
minimum price
Select this check box if your practice gives discounts on invoice
item groups and you want to exclude dispensing fees from the
discount. This can be changed per item later if necessary.
Select
Prompt for call back note
Select this check box to display a callback note during invoicing.
This option will allow staff to enter specific callback information at
the time of invoicing so it is available to the staff making the call at
a later time. The invoice item must be set to generate a callback
reminder.
Verify
Display below reorder
point warning
Clear this check box to prevent an alert box from displaying when
an item that is below the reorder point is placed on an invoice.
Verify
Omit duplicate special
action documents
Select this check box to prevent duplicate documents from
printing.
Verify
Use controlled substance
reasons
Select this check box to allow the display of items from the
Controlled Substance Reason List on invoices. Items must be
marked as a controlled substance for this feature to work.
Verify
Originates from Controls > Controlled Substance > Controlled
Substance Reasons.
• Page 25 •
Cornerstone 8.3 Default and Security Settings Guide
Cornerstone 8.3 Default and Security Settings Guide
Controls > Defaults > Practice and Workstation
Menu Access
Invoice
See figure D
(continued)
Default
Action &
Decision
Description
Invoice print
Clear this check box if you do not want
your practice information to appear at
the top of invoices.
Print heading
Verify
This is usually done if you are using
letterhead or pre-printed paper instead
of plain paper for printing invoices or
estimates.
Originates from Lists > Practice.
Calculate accounts
receivable by provider
# copies
Enter the number of invoice copies
you want to print.
Print staff name
Select this check box to print the
provider name on invoices. The name
will print as it displays in the Staff List
window.
Print patient
reminders
Select this check box if you want
patient reminders to print on the
invoice.
Number of months to
print appointments
for
Enter the number of months to include
for printing future appointments for a
client's active patients on the bottom
of invoices.
Turn on invoice
receipt options
Select this check box to allow the user
to print 3 1/8" receipts instead of fullpage invoices. The receipt does not
include client information and does
not list invoices items by patient. This
option requires an Epson® TM-T88IV
receipt printer.
If you pay your providers based on collected accounts receivable,
select this check box. If you do not pay your providers this way, do
not activate this option.
Verify
Use this feature if:
Doctors are paid
by commission
If yes, how much?
Doctors are paid
only by production
The percentage the doctor earns on the
money received on production.
Doctors are paid
by money received
on production?
Apply payment to specific
invoices for A/R by
provider
• Page 26 •
Select this check box to always apply payments received to
a specific invoice. We recommend that this check box not be
selected. Then, the payment on the invoice will be applied to
the oldest balance first. Unless you selected the previous option
(Calculate accounts receivable by provider), skip this option. You
must select this option if you want to print an A/R report by provider
as part of your End of Month.
Select
Cornerstone 8.3 Default and Security Settings Guide
Cornerstone 8.3 Default and Security Settings Guide
Controls > Defaults > Practice and Workstation
Menu Access
Invoice
See figure D
(continued)
Default
Action &
Decision
Description
Patient Visit List
Include
recommended
Select this check box if you want items
with a Recommended status to be
automatically selected to transfer to an
invoice and to be included in the total
displayed on the Patient Visit List.
Include accepted
Select this check box if you want
items with an Accepted status to be
automatically selected to transfer to an
invoice and to be included in the total
displayed on the Patient Visit List.
Include
performed
Select this check box if you want
items with a Performed status to be
automatically selected to transfer to an
invoice and to be included in the total
displayed on the Patient Visit List.
Display blue
comment line
Select this check box if you want the blue
comment lines to appear on the Patient
Visit List.
Display duplicate
items warning
Clear this check box if you do not want
this warning window to appear. The items
will still show in a maroon color.
Select
Figure C
Figure D
(Controls > Defaults > Practice and Workstation >
Estimate)
(Controls > Defaults > Practice and Workstation >
Invoice
• Page 27 •
Cornerstone 8.3 Default and Security Settings Guide
Cornerstone 8.3 Default and Security Settings Guide
Controls > Defaults > Practice and Workstation
Action &
Decision
Menu Access
Default
Description
Invoice Item
See figure E
Item ID
To automatically assign item IDs, enter the starting item ID
number.
Set up
Auto assign
Select this check box to automatically assign an item ID when a
new item is added.
Select
Service tax
Select a default service tax rate to be used with any new service
item created.
Select
Originates from Controls > Taxes.
Inventory tax
Select a default inventory tax rate to be used with any new
inventory item created.
Select
Originates from Controls > Taxes.
Dispensing fee
If you have a default dispensing fee, enter it here to add the fee to
any new inventory items that will be dispensed.
Set up
Service discount
Select any service discounts to be used with any new service item
created.
Select
Inventory discount
Select any inventory discounts to be used with any new inventory
item created.
Select
Unit of measure
Select a default unit of measure for any new inventory item
created.
Select
Group item print option
Set a default option for the way groups are displayed when
printed.
Set up
Options are:
•
Print all lines, show line amounts
•
Print all lines, show group total amount
•
Print detail lines only
• Print group line only
This setting can be changed per group when the groups are
created.
Passwords
See figure F
Use Enhanced
Passwords
Password log on
• Page 28 •
Select this check box to set up requirements for password
strength and duration. The following settings are available:
Minimum
password length
Password must meet the specified
minimum character length to be valid.
Password history
Password cannot be the same as the last
[specified number] of passwords used.
Minimum
password age
Password must be [specified number] of
days old before it can be changed.
Maximum
password age
Password must be changed every
[specified number] of days.
Select this check box to allow users to log in with only a password
(instead of user name and password). This option requires the use
of unique passwords for each user name.
Set up
Set up
Cornerstone 8.3 Default and Security Settings Guide
Cornerstone 8.3 Default and Security Settings Guide
Controls > Defaults > Practice and Workstation
Menu Access
Default
Description
Action &
Decision
Figure E
(Controls > Defaults > Practice and Workstation > Invoice Item)
Figure F
(Controls > Defaults > Practice and Workstation > Passwords)
• Page 29 •
Cornerstone 8.3 Default and Security Settings Guide
Cornerstone 8.3 Default and Security Settings Guide
Controls > Defaults > Practice and Workstation
Menu Access
Patient
See figure G
Action &
Decision
Default
Description
Patient ID
To automatically assign patient IDs, enter the starting patient ID
number. Suggestion: Start at 1000 so that the patients have 4-digit
IDs
Verify
Auto assign
Select this check box to automatically assign a patient ID when a
new patient is added.
Verify
Recently accessed
patients
Enter the number of recently accessed clients to be available on
any given workstation (e.g., front desk, reception). To view this
list of clients, press F7 (back) and F8 (forward) in the Patient List
window.
Verify
Classification
To save keystrokes when setting up a new patient, select a default
classification that appears in the Patient Information window. This
default can be changed as needed during setup.
Verify
Originates from Controls > Classifications.
Species
To save keystrokes when setting up a new patient, select a default
species that appears in the Patient Information window. This
default can be changed as needed during setup.
Verify
Originates from Lists > Species.
Staff ID for notes/Dx
To save keystrokes when entering medical notes or diagnoses,
enter the staff ID of the staff member most likely to be entering
patient comments and diagnostic notes. This default can be
changed as needed during data entry.
Verify
Originates from Lists > Staff.
Quick Patient Label
Enter the correspondence document ID that is used for patient
labels.
Verify
Originates from Lists > Documents > Templates.
• Page 30 •
Use most recent patient
Select this check box to display the patient whose record was
last opened when you search for a patient or open windows that
contain patient information, such as the Patient File, Patient Visit
List, Vital Signs/Weight, Patient Reminders, Patient Diagnosis,
etc.
Verify
Show trainer and barn
Select tthis check box if you want to be able to enter a trainer and/
or barn on the Patient Information window when setting up a new
patient.
Verify
Display breed
Select this check box to display the patient breed in the Patient
List window. By default, Cornerstone displays the patient name,
vaccine tag number, patient ID, microchip ID, and owner ID.
Verify
Display owner name
Select this check box to display the owner’s name in the Patient
List window. By default, Cornerstone displays the patient name,
vaccine tag number, patient ID, microchip ID, and owner ID.
Verify
Cornerstone 8.3 Default and Security Settings Guide
Cornerstone 8.3 Default and Security Settings Guide
Controls > Defaults > Practice and Workstation
Menu Access
Prescriptions
See figure H
Default
Action &
Decision
Description
Select
Prescription label/lab
request label
Print
heading
Select this check box to print practice
information on prescription and lab request
labels.
Print staff
license
Select this check box to print the license
number for the veterinarian on the prescription
label. This option may be required when printing
a client address on the label.
Small font
Select this check box to use a smaller font for
the text on prescription labels.
Print client
addr if
controlled
substance
Select this check box to print the client’s
address on prescription labels for controlled
substances. (The Small font check box must
also be selected.)
Select this check box to print the following
identification numbers on the prescription label:
Print
NDC/DIN
Prescription
Warn user
when
quantity is 1
Override
expiration
date
•United States–National drug code number
(NDC)
•Canada—Drug identification number (DIN)
These numbers must be entered on the
Inventory tab on the Invoice Item Information
window. DINs are required on all medications
in Canada. If no NDC/DIN number exists, the
serial number will print in its place.
This warning displays to alert user
that only one of this inventory item
has been included on the prescription
label. It is designed to prevent
staff from incorrectly listing and/
or charging the number of items
dispensed.
Select
Select this check box if you want
to override the expiration date
associated with the physical inventory
with the expiration date determined
by the maximum number of months
(see below).
Select
See
Description
For example, the current date is
4/15/12. The expiration date on the
physical inventory is 6/15/13. The
maximum number of months is set at
12 months.
If this check box is selected, the
maximum number of months will
override the physical inventory
date, and the expiration date on the
prescription label will be 4/15/13.
If no expiration date was entered on
the physical inventory when it was
received, this feature will not work
and the date will have to be manually
entered.
• Page 31 •
Cornerstone 8.3 Default and Security Settings Guide
Cornerstone 8.3 Default and Security Settings Guide
Controls > Defaults > Practice and Workstation
Menu Access
Prescriptions
See figure H
(continued)
Default
Action &
Decision
Description
Maximum
number of
months _____
Some states have maximum
expiration dates for patient
prescriptions. To use this option,
enter the maximum number of
months that a prescription is valid.
Set up
Filled by staff
required
Select this check box if your practice
requires the staff to enter who fills
each prescription.
Set up
Enter printer type
1 description (s)
separated by
semicolons(;)
Enter the printer type 1 description.
(e.g., Front Desk Printer)
Verify
Lower label text
down ___ units
(50 units = 1 line)
Enter the number of units (50 units
equal 1 line) required to lower the
text for the first printer.
Verify
Enter printer type
2 description(s)
separated by
semicolons(;)
Enter the printer type 2 description.
(ex. Front Desk Printer)
Verify
Lower label text
down ___ units
(50 units = 1 line)
Enter the number of units (50 units
equal 1 line) required to lower the
text for the second printer.
Verify
See
Description
Figure G
Figure H
(Controls > Defaults > Practice and Workstation >
Patient)
(Controls > Defaults > Practice and Workstation >
Prescriptions)
• Page 32 •
Cornerstone 8.3 Default and Security Settings Guide
Cornerstone 8.3 Default and Security Settings Guide
Controls > Defaults > Practice and Workstation
Action &
Decision
Menu Access
Default
Description
Vaccine Tag
See figure I
Warn User on Duplicate
Tags
Select this check box to display a warning if a duplicate vaccine
tag number is entered on the Vaccine Tag window when creating
a tag.
Set up
Require expiration date
and lot number
Select this check box to require that a vaccine expiration date
and lot number be provided on the Vaccine Tag window. (If lot
numbers and expiration dates are tracked through Cornerstone
inventory, these settings will be controlled by consumption.)
Set up
Require manner of
administration/years
Requires the manner of administration and number of years
information to be provided on the Vaccine Tag window.
Set up
Custom rabies certificate
To print a document other than the standard Cornerstone rabies
certificate, select this check box and press F2 in the associated
text box to select the custom certificate from a list of documents.
Set up
Originates from Lists > Documents > Templates.
Number of copies
Enter the default number of rabies certificates to print. This setting
can be changed when the certificate is printed.
Set up
Practice
The Tag number prefix, Last used tag number, and Staff for
tag settings can be set up by practice if a Multi-Location Single
Database configuration has been activated.
Select
Multi-Location Single
Database (MLSD)
configuration only
Tag number prefix
MLSD configuration only
Last used tag number
MLSD configuration only
Staff for tag
MLSD configuration only
Select the practice for which to specify these settings.
If you use a prefix with your vaccine tag numbers, enter a default
prefix (up to five characters). This prefix displays on the Vaccine
Tag window when creating a tag, but it can also be changed or
removed at that time. For example, you could automatically attach
a year prefix to every vaccine tag. If the year is 2012 and you
use a prefix of 12, the resultant full tag number would be 12-[tag
number].
Set up
To automatically generate tag numbers, enter the last-used tag
number here. Cornerstone will increment by one for each vaccine
tag created.
Set up
Select the staff ID for the staff member to display by default on the
Vaccine Tag window when creating a tag.
Set up
Figure I
(Controls > Defaults > Practice and Workstation > Vaccine Tag)
• Page 33 •
Cornerstone 8.3 Default and Security Settings Guide
Cornerstone 8.3 Default and Security Settings Guide
Controls > Defaults > Practice and Workstation
Action &
Decision
Menu Access
Default
Description
Vaccine Tag >
Rabies Default
Brand
Enter the brand of the rabies vaccination.
See figure I-1
Producer/Mfr
Enter the producer/manufacturer of the rabies vaccination.
Set up
Lot #
Enter the lot number of the rabies vaccination.
Set up
Expiration date
Enter the expiration date and the number of years the rabies
vaccination is good for.
Set up
Manner of administration
Select the manner in which the rabies vaccination was
administered.
Set up
Vaccine Type
Select the vaccine type of the rabies vaccination.
Set up
Staff ID
Select the staff ID for the staff member to use by default when
creating a rabies tag.
Set up
Set up
Enter the Staff ID used for the rabies tag if a default DVM is used.
# of years
Figure I-1
(Controls > Defaults > Practice and Workstation > Vaccine Tag > Rabies Default)
• Page 34 •
Cornerstone 8.3 Default and Security Settings Guide
Cornerstone 8.3 Default and Security Settings Guide
Critical Go Live Default Settings
The following default settings are critical to set before the Go Live phase of the installation.
Menu Access
Description
Action &
Decision
Controls > Colors
Colors window
Verify
Cornerstone databases
include an extensive list
of colors based on AKCrecognized color lists.
Changes and additions can
be made as needed.
Click New to add a color,
click Update to update a
color, or click Delete to delete
a color.
Controls > Reason for
Visit
Reasons for Visit window
Verify
This feature allows you to associate primary and secondary reasons with a patient's visit
to indicate why the patient is being seen. This information helps staff to better prepare for
scheduled appointments and monitor inpatients on the Electronic Whiteboard.
Click New to add a new reason or Update to edit the selected reason.
On the New/Update Primary or Secondary Reason window, type a description, add any
alert notes, and add any check-in/check-out documents (set up with Lists > Documents >
Templates) associated with the reason.
To delete a reason, select it and click Delete.
Controls > Sex
Patient Sex window
Verify
Sexes are used to defined the patient’s gender and to prompt Cornerstone when a pet’s sex
is modified (e.g., females become spayed females).
Used in the following manner throughout Cornerstone:
• Page 35 •
•
Patient Information window
•
Invoice items in smart groups; invoice item automatically added based on patient
information
•
Invoice item special actions; change sex based on information in sex modification
special action
Cornerstone 8.3 Default and Security Settings Guide
Cornerstone 8.3 Default and Security Settings Guide
Menu Access
Description
Action &
Decision
Controls > Billing
Messages
Billing Messages window
Verify
These messages can be set up to print on the bottom of invoices, statements, and
estimates. Documents can have default messages and/or messages can be selected at the
time documents are printed.
Description
Examples
Message Examples
Holiday Message
The staff of [Your Veterinary Hospital] wants to wish you, your
family, and your pets a very happy and safe holiday season.
Statement Message
There is a 1.5% (minimum $2.00) finance charge applied to all
balances over 30 days.
30 Day Overdue
Statement Message
Your account is 30 days past due. Please remit full balance. If
payment has already been sent, please disregard this notice.
60 Day Overdue
Statement Message
Your account is 60 days past due. Please remit full balance. Your
prompt attention to this oversight would be greatly appreciated. If
payment has been mailed, please disregard this notice.
90 Day Overdue
Statement Message
Your account is 90 days past due. Remit full balance due within 7
days or your account will be turned over to collections.
New Computer
System
We appreciate your patience while we are learning to use our new
computer system. We know this will allow us to better meet the
needs of you and your pets.
Used in the following manner throughout Cornerstone:
Controls > Estimate
Messages
•
Specific invoice message can be selected for an invoice
•
Default messages will be selected from this list for Controls > Defaults > Practice >
Account & Messages tab
•
Initial Practice Setup Report by Billing Messages
Estimate Message List window
Verify
These messages can be set up to print at the bottom of an estimate and/or can be set to
print on a separate page when the estimate is printed.
Description Examples
Message Examples
Estimate Message
This estimate is valid for 30 days and includes only those
items listed. Prices may vary upon services rendered.
Payment will be required when your pet is released from
the hospital.
Authorization____________________
Estimate Deposit
I agree to pay a deposit of __% of the estimate fees,
assume financial responsibility for the remaining fees, and
provide payment via cash, credit card, or check at the time
my pet is discharged from the hospital.
Authorization: ___________________
Used in the following manner throughout Cornerstone:
• Page 36 •
•
Used to create longer estimate messages.
•
Multiple estimate messages can be added to the estimate (in addition to the billing
message).
Cornerstone 8.3 Default and Security Settings Guide
Cornerstone 8.3 Default and Security Settings Guide
Menu Access
Description
Action &
Decision
Controls > Price
Change Reasons
Price Change Reason List window
Verify
Price change reasons are needed by practices that choose to set one or more invoice item
prices to be changed “only with a reason.” When a price is changed, staff members must
use this list to signify why they changed the price. Price change reasons can be listed as an
optional setup by setting as Not Required.
3-character Code Examples
Description Examples
PDJ
Per Dr. Jones
COM
Complimentary
Used in the following manner throughout Cornerstone:
•
Lists > Postal Codes
Used to enter reason for a price change when invoicing is tracked in a Standard Fee
Exception Report.
Postal Code List window
Verify
To save key strokes when setting up new clients, build a postal code list. Cornerstone will fill
in the city and state based on this postal code list.
Used in the following manner throughout Cornerstone:
• Page 37 •
•
Client setup window, default postal code
•
Client Master Report
•
Mailing labels
•
Correspondence bookmarks
Cornerstone 8.3 Default and Security Settings Guide
Cornerstone 8.3 Default and Security Settings Guide
Controls > Defaults > Practice and Workstation
Action &
Decision
Menu Access
Default
Description
Alerts
See figure J
Client alerts
Select the client alert items you want to display as alerts for the client.
Selected items are highlighted in blue.
Verify
Suppress
consecutive client
alerts
Select this check box if you want the alerts to display only once per
client, per day.
Verify
Suppress client
alerts on Patient
Clipboard
Clear this check box to display alerts when a client is accessed from the
Patient Clipboard*.
Verify
Patient alerts
Select the patient alert items you want to display as alerts for the
patient. Selected items are highlighted in blue.
Verify
Suppress
consecutive patient
alerts
Select this check box if you want the alerts to display only once per day.
Verify
Suppress patient
alerts on Patient
Clipboard
Clear this check box to display alerts when a patient record is accessed
from the Patient Clipboard.
Verify
Figure J
(Controls > Defaults > Practice and Workstation > Alerts)
• Page 38 •
Cornerstone 8.3 Default and Security Settings Guide
Cornerstone 8.3 Default and Security Settings Guide
Controls > Defaults > Practice and Workstation
Action &
Decision
Menu Access
Default
Description
Alerts > Compliance
Alerts
See figure K
Compliance alerts
If using the Compliance Assessment Tool*, select protocols for which
you want alerts to display.
Verify
Display predefined
IDEXX protocols
Cornerstone has pre-defined a number of protocols that can be used.
Select this check box to display alerts for these protocols..
Verify
Display
compliance alerts
If using the Compliance Assessment Tool, select where in
Cornerstone you want the alerts to display.
Verify
Reason for visit
Select a default reason for visit to appear in new appointments.
Verify
Check‑in
See figure L
Originates from Controls > Reason for Visit.
Default room
Select a default room to appear in a new appointment.
Verify
Staff ID
Enter a default staff ID that to appear in a new appointment. Leave
blank if you don't want to use a default staff ID.
Verify
Verify check out
Select this check box if you want to be prompted to verify check
out when you click Check-out on the Census List or the Check-in
window.
Verify
Use check-in date
for compliance
Select this check box if you want to use the patient’s check-in date for
compliance within the Compliance Assessment Tool. If this check box
is not selected, all patients will be counted in calculating compliance,
even if they only came in to purchase food.
Verify
Figure K
(Controls > Defaults > Practice and Workstation > Alerts property > Compliance Alerts)
Figure L
(Controls > Defaults > Practice and Workstation > Check-in)
• Page 39 •
Cornerstone 8.3 Default and Security Settings Guide
Cornerstone 8.3 Default and Security Settings Guide
Controls > Defaults > Practice and Workstation
Action &
Decision
Menu Access
Default
Description
Check-in > Checkin Print Options
Information to
print
This window allows you to decide what information will print on the Check–in
Report. For most selected items you can designate a date range (e.g., All,
Last month, Last three months, etc.). See the table below to view the checkin item and any specific date ranges.
Print Option
Date Range
Billing information
Client referrals
Lab results
All, Last 3 (6,
12, 18, 24)
months
Medical notes
Hide Whiteboard
Notes
Departing instructions
Reminders
Weight/Body score
Vital Signs
Diagnostic codes
Appointments
Exams
Check–In Item
Expand lab results
• Page 40 •
N/A
Image cases
N/A
All, Last 3 (6,
12, 18, 24)
months
All, Due in
1 (3, 6, 12)
months
All, Last 3 (6,
12, 18, 24)
months
All, Due in
1 (3, 6, 12)
months
All, Last 3 (6,
12, 18, 24)
months
Patient referrals
Call backs
Hide voided items
N/A
Print birth date as
age
N/A
N/A
All, Last 3 (6,
12, 18, 24)
months
All, Last 3
(6, 12, 18,
24) months
Problems
Print check–in report
Prescriptions
Date
Range
All, Last 3
(6, 12, 18,
24) months
Images
Communications
Patient prompts
Verify
All, Last
month,
Last 3 (6,
12, 18, 24)
months
Always
Ask,
Always
Print, Never
Print
Print history in date
order
N/A
# of lines of history
to print _________
All, 1-100
Cornerstone 8.3 Default and Security Settings Guide
Cornerstone 8.3 Default and Security Settings Guide
Controls > Defaults > Practice and Workstation
Action &
Decision
Menu Access
Default
Description
Imaging
See figure M
Pet picture
image
Enter the compression setting for pet pictures. The range is from 1 (small file
and lower quality) to 99 (larger file and highest possible quality).
Verify
Maximum files
per folder
Enter the maximum number of files allowed in each folder.
Verify
Copy images
to mobile
computer
Select this check box to copy images to your mobile computer. This option is
available only to those using the mobile computing module.
Verify
Activate image
requests
Select this check box to require requests for imaging.
Verify
Use Special
Actions
Select this check box to use special actions for imaging.
Verify
Use billing staff
on a new image
request
Select this check box to include the billing staff member on a new image
request.
Verify
Staff to use
on requests
without Special
Action
Determine if a staff member should appear on requests without a special
actions.
Verify
Default invoice
item class
Select a default invoice item classification for imaging.
If the Specific staff option is selected, enter the staff ID for the staff member
to use on imaging requests without special actions.
Verify
Figure M
(Controls > Defaults > Practice and Workstation > Imaging)
• Page 41 •
Cornerstone 8.3 Default and Security Settings Guide
Cornerstone 8.3 Default and Security Settings Guide
Controls > Defaults > Practice and Workstation
Menu Access
Invoice > Invoice
Address
See figure N
Default
Description
Client Address
To adjust the placement of the client address on
the invoice when using window envelopes, click
the Client Address box and use the arrow keys
on your keyboard to adjust the location.
Print practice address on invoices
Select this check box to print the practice
address on invoices. .
Action &
Decision
Verify
If you are using letterhead or preprinted paper,
clear the check box.
Messages
See figure O
Practice Address
To adjust the placement of the practice address
on the invoice when using window envelopes,
click the Practice Address box and use the
arrow keys on your keyboard to adjust the
location.
Use address layout for estimates
Select this check box to use this address layout
for estimates.
Print practice logo on estimates
Select this check box to print the practice logo
on estimates
Align Practice Address text
Select an alignment option for the practice
address text on estimates.
Reset
Click the Reset button to reset the alignment for
address text.
Test Page
Click the Test Page button to print a test page.
Billing messages
Select default messages that you previously
set up (Controls > Billing > Messages)
for invoices, estimate document footer, and
statements.
Verify
Select this check box if you want to be able to
generate a phone list file.
Verify
•
Invoice
•
Estimate footer
•
Current
•
30 days
•
60 days
•
90 days
Enable phone list file generation
• Page 42 •
Cornerstone 8.3 Default and Security Settings Guide
Cornerstone 8.3 Default and Security Settings Guide
Controls > Defaults > Practice and Workstation
Menu Access
Default
Action &
Decision
Description
Figure N
(Controls > Defaults > Practice and Workstation > Invoice > Invoice Address)
Figure O
(Controls > Defaults > Practice and Workstation > Messages)
• Page 43 •
Cornerstone 8.3 Default and Security Settings Guide
Cornerstone 8.3 Default and Security Settings Guide
Controls > Defaults > Practice and Workstation
Action &
Decision
Menu Access
Default
Report Language
See figure P
Select Language
Select the language (English, Espanol, or Francais) to use for
reports, and customize specific headings that print on the following
types of client documents.
Set up
Customize specific field
names
In the list of field names that can be customized, click in the right
column and type a new field name to correspond to the field listed in
the left column.
Set up
Client data
Select the client data fields that are required to be completed when
working with a client file. Cornerstone requires Name and Credit
Code; these requirements cannot be changed.
Verify
Client prompts
Select the client prompts that are required to be completed when
working with a client file.
Verify
Account data
Select Comments on Account Adjustment and/or Comment on
Write Offs if you require them.
Verify
Patient data
Select the patient data fields that are required to be completed
when working with a patient file. Cornerstone requires Breed, Sex,
and Species; these requirements cannot be changed.
Verify
Patient prompts
Select the patient prompts that are required to be completed when
working with a patient file.
Verify
Required Data
See figure Q
• Page 44 •
Description
Cornerstone 8.3 Default and Security Settings Guide
Cornerstone 8.3 Default and Security Settings Guide
Controls > Defaults > Practice and Workstation
Menu Access
Default
Description
Action &
Decision
Figure P
(Controls > Defaults > Practice and Workstation > Report Language)
Figure Q
(Controls > Defaults > Practice and Workstation > Required Data)
• Page 45 •
Cornerstone 8.3 Default and Security Settings Guide
Cornerstone 8.3 Default and Security Settings Guide
Controls > Defaults > Practice and Workstation
Action &
Decision
Menu Access
Default
Description
Workstation
(Defaults are set per
workstation)
See figure R
Print Patient pictures on
Select the client correspondence items on which to print the
patient’s picture. The patient’s picture can print on the Boarding
Check-in Report, Check–in Report, estimates, invoices,
prescription labels, rabies certificates, and reminders.
Verify
Invoice Print
The Invoice Print list is enabled if the Turn on invoice receipt
check box is selected in Invoice defaults.
Verify
Select the default invoice printing option for this workstation:
Invoice Receipt—Prints 3 1/8" invoice receipts (Epson®
TM-T88IV receipt printer required for printing invoice
receipts).
Verify
_________ is currently
set as the end of period
workstation
This box displays the workstation that is currently set as the End
of Period workstation. This allows you to see which workstation
(computer) is set to run the unattended End of Period processes
from any from any workstation.
Verify
Use this workstation to
run unattended end of
period processes
Select this check box to set the current workstation (the computer
you are currently working on) as the End of Period workstation).
Verify
Whiteboard sort
Select the method for sorting patients on the Electronic
Whiteboard.
Select
The Workstation–All default settings allow you to set a default
workstation inventory location.
Verify
•
Margins
•
Fonts
•
Effects
•
Sort patients by
Workstation
Multi-Location Single
Database (MLSD)
configuration only
Default Practice
MLSD configuration only
Location Group
MLSD configuration only
Location
MLSD configuration only
Print
MLSD configuration only
• Page 46 •
Full Invoice—Prints full-page (8 1/2" x 11") invoices.
•
Set the individual options for margins, fonts (click the Change
Fonts button), and effects to use by default for documents created
on this workstation.
Document Settings
Workstation >
Workstation – All
See figure S
•
The name of the workstation on which you are currently working
is displayed. To change the workstation to which the default
inventory location will apply, select the workstation from the list.
The name of the current practice is displayed. To change the
practice to which the default inventory location will apply, select
the practice from the list.
Verify
Select a location group to filter the items displayed in the
Location list below. This is especially helpful if a workstation is
primary used for a retail area or pharmacy area.
Verify
This option allows each workstation to be set up with a default
location. When depleting inventory, the location selected here is
automatically used for the specified workstations.
Verify
Click the Print button to print a report containing all default
inventory locations by workstation.
Verify
Cornerstone 8.3 Default and Security Settings Guide
Cornerstone 8.3 Default and Security Settings Guide
Controls > Defaults > Practice and Workstation
Menu Access
Default
Description
Action &
Decision
Figure R
(Controls > Defaults > Practice and Workstation >
Workstation)
Figure S
(Controls > Defaults > Practice and Workstation >
Workstation – All)
• Page 47 •
Cornerstone 8.3 Default and Security Settings Guide
Cornerstone 8.3 Default and Security Settings Guide
Advanced Use and Owner/Manager Responsibility Default Settings
The following defaults are important for advanced use and owner/manager responsibility.
Controls > Defaults > Practice and Workstation
Action &
Decision
Menu Access
Default
Description
End of Period
See figure T
Daily reports
Select each report to print by default.
Select
Monthly reports
Select each report to print by default.
Select
Yearly reports
Select each report to print by default.
Select
Monthly closing
Run End of Day before
and after mobile
computer synchronization
Finance charge
percent
Select this check box to include this
charge, and then type the percentage
in the box.
Minimum finance
charge percent
Select this check box to include this
charge, and then type the amount in
the box.
Billing charge
Select this check box to include this
charge, and then type the amount in
the box.
Billing threshold
Select this check box to include this
threshold, and then type the amount
in the box.
Select
Select this check box to run the End of Day process before and
after synchronizing mobile computers.
Verify
Select this check box if mobile computers must be synchronized
before the End of Month process, and then enter the number of
hours within which synchronization must occur.
Verify
These settings allow you to specify how your practice tracks
changes, additions, and deletions of billed lines on the invoice or
the Patient Visit List.
Verify
Mobile Computing only
Computers must be
synchronized within ___
hours before End of
Month
Mobile Computing only
Daily Entries
Report
See figure U
•
Include invoice
entries on report
•
Include Patient Visit
List entries on report
To help you maintain the integrity of your practice data, the Daily
Entries Report audit includes all lines on open or closed invoices
and the user ID of the person who is logged in.
Include invoice entries on report: Select this check box, and
then select the check box for each invoice entry to include.
Options are Item ID, Quantity, Amount, Staff ID, and Revenue
ID.
Include Patient Visit List entries on report: Select this check
box, and then select the check box for each Patient Visit List entry
to include. Options are Status, Item ID, Quantity, Amount, Staff
ID, and Revenue ID.
For practices using the Mobile Computing module, changes
and deletions performed on a mobile computer will not display
on these reports. When synchronization is run, the entries will
display as additions to the reports.
This information can be printed on several reports. The reports
are located under Reports > End of Period > End of Day >
Daily Inv. and PVL Entries.
Number of months to
keep report information
• Page 48 •
Enter the number of months to keep the information for this
report.
Verify
Cornerstone 8.3 Default and Security Settings Guide
Cornerstone 8.3 Default and Security Settings Guide
Controls > Defaults > Practice and Workstation
Menu Access
Default
Description
Action &
Decision
Figure T
(Controls > Defaults > Practice and
Workstation > End of Period)
Figure U
(Controls > Defaults > Practice and
Workstation > Daily Entries Report)
• Page 49 •
Cornerstone 8.3 Default and Security Settings Guide
Cornerstone 8.3 Default and Security Settings Guide
Controls > Defaults > Practice and Workstation
Menu Access
Default
Documents
See figure V
Medical Note options
Description
Display partial
medical note in
correspondence
(classic only)
Select the check box for Display partial
medical notes in Correspondence to
be able to select which information from
your medical note templates to include
in correspondence documents where
medical note bookmarks are being used.
Medical Note must
be finalized before
patient can be
checked out
Select the check box for Medical Note
to be finalized before patient can be
checked out if you want medical notes
to be finalized prior to patient check out.
Auto finalize after
___ days
Select the number of days before the
medical notes will be automatically
finalized.
Ask for weight if
last entry is older
than ___ days
Default templates
Action &
Decision
Verify
Select the number of days for the
computer to prompt for a weight entry.
For new templates
use
Select the Medical Note template you
want to use as a default.
For Medical
Note Quick Text
documents use
Select the Quick Text Medical Note you
want to use as a default.
Verify
Include invoice items
when printing Medical
Notes
Select this check box to include invoice items when printing
medical notes. Select the Also include check box to add the
following options: Declined item, Amount, and Staff ID.
Verify
Include invoice
items when printing
Correspondence
Select this check box to include invoice items when printing
correspondence documents. Select the Also include check box to
add the following options: Declined item, Amount, and Staff ID.
Verify
Documents >
Favorite
Documents
See figure W
Favorite document
templates
In the first empty ID field, enter the document ID of the medical
note or correspondence documents you would like to include on
your Favorites list. (Lists > Documents > Templates).
Set up
Inventory
See figure X
Vendor ID
Enter a default vendor ID for orders placed or received in
Cornerstone inventory.
Verify
Order ID
Enter a default order ID as the starting order number for orders in
Cornerstone inventory.
Verify
Usage tax
Select a default usage tax to be applied to items used internally in
Cornerstone inventory. Please check state laws regarding when or
if usage taxes are assessed.
Verify
Show item history for
____ months
Enter a number of months for an inventory item's history to display
in Cornerstone inventory.
Verify
Receiving location
Select a default location for receiving your inventory into a specific
location in Cornerstone inventory. When you receive inventory, you
will have the option to select which location to receive it into.
Verify
• Page 50 •
Cornerstone 8.3 Default and Security Settings Guide
Cornerstone 8.3 Default and Security Settings Guide
Controls > Defaults > Practice and Workstation
Action &
Decision
Menu Access
Default
Description
Inventory
See figure X
(continued)
Auto confirm adjustments
Select this check box to automatically confirm your adjustments
in Cornerstone inventory. However, you may want to manually
confirm them while learning inventory to verify each adjustment
was done correctly.
Verify
Auto confirm stock
transfer
Select this check box to automatically confirm your stock transfers
in Cornerstone inventory. However, you may want to manually
confirm them while learning inventory to verify each adjustment.
Verify
Delete want items on
completed
Select this check box if you do not want to manually delete items
from the Want List after item is processed.
Verify
Print purchase order
notes
Select this option to automatically print the purchase order notes.
Verify
When inventory details
need to be verified—
Prescriptions
Select one of the following options:
Verify
Not required: You will not be required to enter lot numbers and
expiration dates on the Prescription window for items tracking lot
numbers and expiration dates.
Warn if not verified: A warning will appear if lot numbers and
expiration dates are not entered, giving you the option on the
Prescription window for items tracking lot numbers and expiration
dates.
Required: You will be required to enter lot numbers and expiration
dates on the Prescription window for items tracking lot numbers
and expiration dates.
When inventory details
need to be verified—
Performed PVL items and
Saved Invoices
Select one of the following options:
Verify
Not required: You will not be required to enter lot numbers and
expiration dates on the Patient Visit List or saved invoices on items
tracking lot numbers and expiration dates.
Warn if not verified: A warning will appear if lot numbers and
expiration dates are not entered giving you the option to enter lot
numbers and expiration dates on the Patient Visit List or saved
invoices on items tracking lot numbers and expiration dates.
Required: You will be required to enter lot numbers and expiration
dates on the Patient Visit List or saved invoices on items tracking
lot numbers and expiration dates.
When inventory details
need to be verified—
Performed Document
Items
Select one of the following options:
Verify
Not required: You will not be required to enter lot numbers and
expiration dates at the time that invoice items are sent from the
document to the Patient Visit List on items tracking lot numbers
and expiration dates.
Warn if not verified: A warning will appear if lot numbers and
expiration dates are not entered giving you the option to enter lot
numbers and expiration dates at the time that invoice items are
sent from the document to the Patient Visit List on items tracking
lot numbers and expiration dates.
Required: You will be required to enter lot numbers and expiration
dates at the time that invoice items are sent from the document to
the Patient Visit List on items tracking lot numbers and expiration
dates.
• Page 51 •
Cornerstone 8.3 Default and Security Settings Guide
Cornerstone 8.3 Default and Security Settings Guide
Controls > Defaults > Practice and Workstation
Action &
Decision
Menu Access
Default
Description
Inventory
See figure X
(continued)
Inventory depletion—
Automatically mark
inventory details as
verified when the location
is defaulted in
Select this check box if your inventory items are tracking quantity
on hand, and you will be required to deplete those items from a
specific location and verify that location. If you select this check
box, it will automatically mark inventory details as verified when the
location is defaulted in unless tracking lot number and expiration
date for the selected item. In this case, you will have to select
which lot and expiration date you are depleting.
Verify
Inventory depletion—
Automatically default in
the oldest expiration date
in the location
Select this check box if you want inventory items to default to the
oldest expiration date for a given item in a given location.
Verify
Figure V
(Controls > Defaults > Practice and
Workstation > Documents)
• Page 52 •
Cornerstone 8.3 Default and Security Settings Guide
Cornerstone 8.3 Default and Security Settings Guide
Controls > Defaults > Practice and Workstation
Menu Access
Default
Description
Action &
Decision
Figure W
(Controls > Defaults > Practice and
Workstation > Documents > Favorite
Documents)
Figure X
(Controls > Defaults > Practice and
Workstation > Inventory)
• Page 53 •
Cornerstone 8.3 Default and Security Settings Guide
Cornerstone 8.3 Default and Security Settings Guide
Controls > Defaults > Practice and Workstation
Menu Access
Default
Patient Advisor
See figure Y
Pet Health Report Card—
print options
Treatment Plan—
print options
Save/Post Options
• Page 54 •
Action &
Decision
Description
Print when saving/posting
exam
Select this check box to
automatically print the Pet
Health Report Card when
saving or posting the exam.
Print patient picture
Select this check box to print
the patient's picture on the Pet
Health Report Card.
Print abnormals in red
Select this check box to print
abnormal results in red.
Footer message
Select the exam message that
will print on all physical exams.
Copies
Enter the number of copies to
print.
Print when saving/posting
exam
Select this check box to
automatically print the
treatment plan when saving or
posting the exam.
Print patient picture
Select this check box to print
the patient's picture on the
treatment plan.
Print item id
Select this check box to print
item IDs on the treatment plan.
Print prices
Select this check box to print
prices on the treatment plan.
Print totals
Select this check box to print
totals on the treatment plan.
Header message
Select the message that will
print on the header of the
treatment plan.
Footer message
Select the message that will
appear on the footer of the
treatment plan.
Copies
Enter the number of copies to
print.
Select this check box to update the Patient Visit List once a
treatment plan is posted.
Verify
Verify
Verify
Cornerstone 8.3 Default and Security Settings Guide
Cornerstone 8.3 Default and Security Settings Guide
Controls > Defaults > Practice and Workstation
Menu Access
Default
Description
Action &
Decision
Figure Y
(Controls > Defaults > Practice and Workstation > Patient Advisor)
• Page 55 •
Cornerstone 8.3 Default and Security Settings Guide
Cornerstone 8.3 Default and Security Settings Guide
Controls > Defaults > Practice and Workstation
Action &
Decision
Menu Access
Default
Description
Performance
Tracker
See figure Z
Display hospital goals
Click the Display hospital goals check box if you want to see the
hospital goals in Performance Tracker.
Verify
Staff Classifications/
Doctor Classify
Specify which staff classifications at your practice are “doctors”
by selecting Yes or No in the Doctor Classify field for each staff
classification your practice has set up.
Verify
Summary Display and
Goals
Practices have the ability to set goals by month. In the Summary
display and goals area, select the time period for which you
want to set goals (Current or Next year), and then click to select
options for which you want to set goals and enter the dollar
amounts.
Verify
Figure Z
(Controls > Defaults > Practice and Workstation > Performance Tracker)
• Page 56 •
Cornerstone 8.3 Default and Security Settings Guide
Cornerstone 8.3 Default and Security Settings Guide
Controls > Defaults > Practice and Workstation
Action &
Decision
Menu Access
Default
Description
Performance
Tracker >
Miscellaneous
– Performance
Tracker
See figure AA
Define active client as
seen within # of months
In the Define active client as seen within # of months box,
specify the frequency of office visits (in months) used to determine
your practice’s definition of an active client. For example, if your
practice defines an “active client” as a client that’s visited your
office in the last year, enter 12 months.
Verify
Define active patient as
seen within # of months
In the Define active patient as seen within # of months box,
specify the frequency of office visits (in months) used to determine
your practice’s definition of an active patient. For example, if your
practice defines an “active patient” as a patient that has been
seen in your office in the last two years, enter 24 months.
Verify
Define number of postal
code characters to use
In the Define number of postal code characters to use box,
specify the number of postal code characters by which results
will be sorted (Cornerstone Performance Tracker sorts your sales
by postal code). We recommend the United States users leave
this set at the default of 5 characters. Enter 9 to sort results by
individual ZIP codes. We recommend that Canadian users
enter 6.
Verify
Define Sales Ranges
Sales ranges display on the Client tab in Cornerstone
Performance Tracker. If you want to adjust the default ranges,
in the Define Sales Ranges area, click the sales range number
to change in the Less Than Equal To column and update the
number. For example, if you want your sales range to be
$0–$100, $100–$200, or $200–$300, click the number to change
and enter the new number.
Verify
Figure AA
(Controls > Defaults > Practice and Workstation
> Performance Tracker > Miscellaneous –
Performance Tracker)
• Page 57 •
Cornerstone 8.3 Default and Security Settings Guide
Cornerstone 8.3 Default and Security Settings Guide
Controls > Defaults > Practice and Workstation
Action &
Decision
Menu Access
Default
Description
Performance
Tracker >
Reminders – Performance
Tracker
See figure BB
Select a species
Click to select a species. The reminders and services related to
that species display on the right side of the configuration pane.
Verify
Missing and overdue
reminders by species and
category
Set the following defaults:
Verify
•
Category
•
Search by
description
Service items never
received by species—
Search by description
•
Select the category from the Category list.
•
To create a new reminder category, right-click in the
Category box and select New, and then type the name of
your new category.
•
Use the Search by description box to locate the reminders
you want to place in this category, and then select the
Display check box next to the applicable reminders.
Find the services you want to associate with this species and click
the Display check box next to the service.
Verify
Figure BB
(Controls > Defaults > Practice and Workstation >
Performance Tracker > Reminders – Performance
Tracker)
• Page 58 •
Cornerstone 8.3 Default and Security Settings Guide
Cornerstone 8.3 Default and Security Settings Guide
Controls > Defaults > Practice and Workstation
Action &
Decision
Menu Access
Default
Description
Practice
See figure CC
Health certificate
document
Press F2 to search for and select the document to use as your
health certificate document.
Select
Practice Logo
Select the practice (for multiple practices) for which you want to
add the practice logo.
Set up
Browse to select the practice log file.
Select the Clear button to clear the practice log and select a
different one.
Figure CC
(Controls > Defaults > Practice and Workstation >
Practice)
• Page 59 •
Cornerstone 8.3 Default and Security Settings Guide
Cornerstone 8.3 Default and Security Settings Guide
Controls > Defaults > Practice and Workstation
Action &
Decision
Menu Access
Default
Description
Purging
Your must run three
End of Year processes
before Cornerstone will
activate the Purging
feature.
Number of years to retain –
Client accounts
Setting the purge information here will take effect only
when the Purge Data option is selected in the Tools
menu.
See figure DD
Verify
This information is used to determine a safety margin
when purging data from the system.
Enter the number of years that client account information
should be retained.
Number of years to retain –
Patient billing
Setting the purge information here will take effect only
when the Purge Data option is selected in the Tools
menu.
Verify
This information is used to determine a safety margin
when purging data from the system.
Enter the number of years patient billing information
should be retained.
Number of years to retain –
Boarding
Setting the purge information here will take effect only
when the Purge Data option is selected in the Tools
menu.
Verify
This information is used to determine a safety margin
when purging data from the system.
Enter the number of years that boarding information
should be retained.
Number of months to retain –
Reminder letters
Setting the purge information here will take effect only
when the Purge Data option is selected in the Tools
menu.
Verify
This information is used to determine a safety margin
when purging data from the system.
Enter the number of months that reminder letters should
be retained when data is purged.
Number of months to retain –
Reminder calls
Setting the purge information here will take effect only
when the Purge Data option is selected in the Tools
menu.
Verify
This information is used to determine a safety margin
when purging data from the system.
Enter the number of months that reminder calls should
be retained when data is purged.
Figure DD
(Controls > Defaults > Practice and Workstation >
Purging)
• Page 60 •
Cornerstone 8.3 Default and Security Settings Guide
Cornerstone 8.3 Default and Security Settings Guide
Controls > Defaults > Practice and Workstation
Menu Access
Statement Print
Options
See figure EE
Action &
Decision
Default
Description
Print practice address on
statement
Select this check box to print the practice address on
statements.
Verify
If you are using letterhead or preprinted paper, clear the
check box.
Print practice logo on statement
Select this check box to print the practice logo on
statements.
Verify
If you are using letterhead or preprinted paper, clear the
check box.
Toolbar
See figure FF
Practice Address
To adjust the placement of the practice address on
the statement when using window envelopes, click the
Practice Address box and use the arrow keys on your
keyboard to adjust the location.
Verify
Practice Logo
To adjust the placement of the practice logo on the
statement when using window envelopes, click the
Practice Logo box and use the arrow keys on your
keyboard to adjust the location.
Verify
Client Address
To adjust the placement of the client address on the
statement when using window envelopes, click the
Client Address box and use the arrow keys on your
keyboard to adjust the location.
Verify
Test Page
Click the Test Page button to print a test page.
Verify
Print Primary Practice Address
Select this check box to print the practice‘s primary
address on the client's statement.
Verify
Print Client Home Practice
Address
Print the client‘s home practice address on the client‘s
statement.
Verify
Reset to default position
Reset the practice and client address to the default
position.
Verify
Default patient icon
Select the icon you want to use for your patient icon.
Verify
Options include
Cornerstone Toolbar Icons
(Visible check box)
• Page 61 •
Cat,
Dog,
Horse.
Select the icons to display in the Toolbar on the main
Cornerstone window. These defaults can be changed
for individual users within the staff defaults.
Verify
Cornerstone 8.3 Default and Security Settings Guide
Cornerstone 8.3 Default and Security Settings Guide
Controls > Defaults > Practice and Workstation
Menu Access
Default
Action &
Decision
Description
Figure EE
(Controls > Defaults > Practice and Workstation > Statement Print Options)
Figure FF
(Controls > Defaults > Practice and
Workstation > Toolbar)
• Page 62 •
Cornerstone 8.3 Default and Security Settings Guide
Cornerstone 8.3 Default and Security Settings Guide
Controls > Defaults > Practice and Workstation
Menu Access
Unattended EOP
See figure GG
Default
Action &
Decision
Description
Database
copy script
If necessary, with assistance from Cornerstone software support, make
changes to the database copy script.
Reset
Press the Reset button to change the copy script to the original default.
Settings
– Show
notifications
on the End
of Day
workstation
Select this check box to display any warnings or errors that are
encountered during end of period on only your end of period
workstation. If this option is not selected, warnings or errors will display
on all workstations.
Verify
Figure GG
(Controls > Defaults > Practice and
Workstation > Unattended EOP)
• Page 63 •
Cornerstone 8.3 Default and Security Settings Guide
Cornerstone 8.3 Default and Security Settings Guide
Controls > Defaults > Practice and Workstation
Menu Access
Unattended EOP >
Unattended EOD
See figure HH
Default
When
Action &
Decision
Description
Select an option for how often unattended End of Day processing will be
run. Enter date and time information when needed.
Verify
Select one or both of the following options:
What
Print the
default daily
reports
• Make a copy of the database
• Run End of Day
If you choose to make a copy of the database, the database will be
copied to both the dailycopy folder on the end of period workstation and
the dailycc shared folder on the server. These copies of the database
are overwritten each time a new copy is made. This process does not
replace your normal backup procedure.
Select this check box to automatically print your daily reports.
Displays the current message.
Current end of
day notification
If the unattended EOD process was unsuccessful, messages will
display every 30 minutes in a notification window. If you do not want this
notification message to display, select the Suppress this notification
check box.
Displays the current message.
Current
database copy
notification
Current
database
carbon copy
notification
If the unattended EOD process was unsuccessful, messages will
display every 30 minutes in a notification window. If you do not want this
notification message to display, select the Suppress this notification
check box.
Displays the current message.
If the unattended EOD process was unsuccessful, messages will
display every 30 minutes in a notification window. If you do not want this
notification message to display, select the Suppress this notification
check box.
Figure HH
(Controls > Defaults > Practice and
Workstation > Unattended EOP > Unattended
EOD)
• Page 64 •
Cornerstone 8.3 Default and Security Settings Guide
Cornerstone 8.3 Default and Security Settings Guide
Controls > Defaults > Practice and Workstation
Menu Access
Unattended EOP >
Unattended EOM
See figure II
Default
Action &
Decision
Description
When
Select an option for how often unattended End of Month processing will
be run. Enter date and time information when needed.
What
Select one or both of the following options:
•
Verify
Make a copy of the database
• Run End of Month
If you choose to make a copy of the database, the database will be copied
to both the dailycopy\monthly folder on the end of period workstation
and the dailycc\monthly shared folder on the server. These copies of the
database are overwritten each time a new copy is made. This process
does not replace your normal backup procedure.
Print the
default daily
reports
Select this check box to automatically print your daily reports.
Current end
of month
notification
Displays the current message.
Current
database copy
notification
Displays the current message.
Current
database
carbon copy
notification
Displays the current message.
If the unattended EOM process was unsuccessful, messages will
display every 30 minutes in a notification window. If you do not want this
notification message to display, select the Suppress this notification
check box.
If the unattended EOM process was unsuccessful, messages will
display every 30 minutes in a notification window. If you do not want this
notification message to display, select the Suppress this notification
check box.
If the unattended EOM process was unsuccessful, messages will
display every 30 minutes in a notification window. If you do not want this
notification message to display, select the Suppress this notification
check box.
Figure II
(Controls > Defaults > Practice and Workstation >
Unattended EOP > Unattended EOM)
• Page 65 •
Cornerstone 8.3 Default and Security Settings Guide
Cornerstone 8.3 Default and Security Settings Guide
Controls > Defaults > Practice and Workstation
Action &
Decision
Menu Access
Default
Description
Vaccination
Bookmarks
See figure JJ
Vaccinations to
appear on the
document
Select the vaccinations that you want to appear on your documents, such
as vaccination certificates, health certificates, and other similar documents.
Verify
Vaccination line
pattern
Select the buttons in the order in which you want the information to print on
your document. The pattern will appear in the box below.
Verify
Web Address
Enter a web address that will display the custom description in the Web
Links menu. Repeat to store up to four addresses.
Verify
Description
The description of the web address that displays in the Web Links menu.
Repeat to store up to four addresses.
Verify
Web Links
See figure KK
Figure JJ
Figure KK
(Controls > Defaults > Practice and Workstation >
Vaccination Bookmarks)
(Controls > Defaults > Practice and Workstation > Web
Links)
• Page 66 •
Cornerstone 8.3 Default and Security Settings Guide
Cornerstone 8.3 Default and Security Settings Guide
Menu Access
Description
Controls >
Units Of
Measure
Invoice Item Units of Measure window
Controls >
Problems >
Problem
Categories
Problem Categories window
Controls >
Problems >
Problem List
Problem List window
Action &
Decision
Verify
Cornerstone comes with either a built-in list
of common units of measure (UOM) or
those that were used by your previous
practice management software. New units
can be added. If a unit is not currently used
by an item, it can be deleted. Set up the
most common units of measure for invoice
items.
Verify
The Problem List provides a list of common medical ailments and issues. This list can be used when
entering medical notes on the patient record. You must set up problem categories before setting up
the Problem List.
Verify
Cornerstone provides a list of problems that can be selected as the presenting problem for a particular
visit or used to track problems for the patient over the long term.
Used in the following manner throughout Cornerstone:
• Page 67 •
•
Used to enter problems (pre-diagnosis) in patient’s medical history.
•
Can be used in medical note templates.
Cornerstone 8.3 Default and Security Settings Guide
Cornerstone 8.3 Default and Security Settings Guide
Menu Access
Description
Lists >
Diagnostic
Codes
Diagnostic Codes window
Action &
Decision
Verify
Cornerstone provides a list of diagnoses that can be selected as tentative, ruled out, or final diagnoses
for a patient. Diagnosis can be used for various reports, to set up compliance assessment and/or
within the Patient Advisor* exam
module.
Used in the following manner
throughout Cornerstone:
•
View on a patient’s
Diagnosis (Dx) tab on the
Patient Clipboard
•
Patient Diagnosis Report
•
Diagnostic Code Report
•
To set up Compliance
Assessment Tool compliance
controls within Patient
Advisor (if Patient Advisor has been purchased) to set diagnostic and treatment plans
•
Medical notes
Note: You can link documents to diagnostic codes so that they automatically print when the
diagnosis is entered in a medical note. You can set this up from Links > Diagnostic Codes >
Update.
•
Lists > Vital
Signs/Weight
Document templates
Vital Sign List window
Set up
Cornerstone provides a list of vital signs that your practice can use. With the exception of weight, all
vital signs are inactive upon installation of Cornerstone.
To activate an item, double-click it to open the Vital Sign Setup window and clear the Inactive check
box. If the vital sign you are activating is an alphanumeric or numeric list, you must associate one or
more species with the list; select the list and then select each species to link.
You can also edit items and order them in the way your practice uses them.
• Page 68 •
Cornerstone 8.3 Default and Security Settings Guide
Cornerstone 8.3 Default and Security Settings Guide
Menu Access
Description
Lists > Room
Room List window
Action &
Decision
Set up
Used to designate rooms within the practice. Used in many modules, including Appointment Scheduler
and Electronic Whiteboard.
Lists >
Referrals >
Classification
Doctor Classifications window
Verify
Used to classify the type of hospital
that referred the patient.
Used in the following manner throughout
Cornerstone:
•
Lists >
Referrals >
Doctors
When setting up the referring doctors, select
from this classification list
Doctor List window
Set up
Used to record the doctor who referred the patient. Doctors must be associated with hospitals.
Click the phone icon to open the RDVM Phone Information window, where you can access all
personal and hospital-affiliated phone/fax numbers for the RDVM. The primary contact number for
both personal and
hospital numbers is
indicated.
Used in the following
manner throughout
Cornerstone:
• Page 69 •
•
When setting up the
referring doctors,
select from this
classification list
•
Referral Doctor
Master Report
Cornerstone 8.3 Default and Security Settings Guide
Cornerstone 8.3 Default and Security Settings Guide
Menu Access
Description
Lists >
Referrals >
Hospitals
Hospital List window
Action &
Decision
Verify
Used to record the hospital from which the patient was referred.
Click the phone icon to open the Hospital Phone Information window.
Used in the following manner throughout Cornerstone:
Lists > Patient
Advisor >
System
Templates >
New
• Page 70 •
•
When
setting up
the referring
doctors,
select from
this hospital
list. Use the
text boxes at
the top of the
window to
filter the list.
•
Referral
Hospital
Master
Report
Verify
System Template Setup window
In the Description box, enter a descriptive name for the system template.
Select the Default check box to set this as the default template.
The following setup selections are optional:
•
Select gray box to left of a system to include a body system on the template.
•
Select default observation status: Normal, Abnormal, or Did Not Examine.
•
Use the arrows to arrange systems in the order they will appear on the physical exam and the
Pet Health Report Card.
Cornerstone 8.3 Default and Security Settings Guide
Cornerstone 8.3 Default and Security Settings Guide
Menu Access
Lists > Patient
Advisor > Patient
Advisor Setup >
New (System)
Action &
Decision
Description
Verify
System Setup window
In the Patient Advisor Setup window, click in the left pane, and then click New.
In the System Setup window, in the Description box, type a name for the system.
Select the Vital Sign System check box if applicable.
Lists > Patient
Advisor > Patient
Advisor Setup >
New (Observation)
Verify
Observation Setup window
In the Patient Advisor Setup
window, click the + to the left of
the body
system, click Observations,
and then click New.
In the Observation Setup
window, select the system,
observation type, and species.
If this is the default observation,
select the Default check box.
Enter any observation text in
the box.
List > Partnerships
Set up
Partnership List window
The Split Billing feature uses the percentages in the partnership records to split bills. When a
partnership is listed as the owner of a patient, the percentage of ownership must equal 100%.
Lists > Call Back
Notes
• Page 71 •
Verify
Call Back Notes window
Callback notes are used both to provide additional details to staff members making callbacks as
well as saving keystrokes when charting the results of these calls. Cornerstone provides a list of
notes that can be edited and/or expanded.
Cornerstone 8.3 Default and Security Settings Guide
Cornerstone 8.3 Default and Security Settings Guide
Controls > Defaults > Practice and Workstation
Menu Access
Daily Planner
See figure MM
Default
Diagnostics tab
Action &
Decision
Description
Select the Include posted lab results from the last ___ days
check box and enter the number of days for including posted results
on the Diagnostics tab of the Daily Planner.
Verify
Select each check box to include those results:
Call Back to generate
•
Include posted results
•
Include pending requests
•
Include completed results
•
Include orphan results
•
Include not requested results
•
Include no template results
•
Include rejected results
•
Enter the default invoice item ID you have set up for laboratory
call backs.
•
Enter the default number of days before a laboratory callback
is due.
Verify
Figure MM
(Controls > Defaults > Practice and
Workstation > Daily Planner)
• Page 72 •
Cornerstone 8.3 Default and Security Settings Guide
Cornerstone 8.3 Default and Security Settings Guide
Controls > Defaults > Practice and Workstation
Menu Access
Appointment
Scheduler
See figure NN
Default
Action &
Decision
Description
Set the Appointment
Scheduler screen refresh
rate (in seconds): ____.
Type the number of seconds for refreshing the Appointment
Scheduler window.
Verify
Display appointment detail
Select this check box to display appointment detail on the main
Appointment Scheduler window when you move the mouse over an
appointment slot.
Verify
Turn off scheduler resizing
for this workstation
Select this check box if you do not want the Appointment Scheduler
window to resize based on the workstation window.
Verify
Appointment suite
Select the appointment suite to display by default when accessing
the Schedule for Today window. The default will display unless a
different suite is assigned to the staff member currently logged in.
Verify
Display next appointment
message reminders
Select this check box to display next appointment reminder
messages when clients check out.
Verify
Only display messages
for invoice items in the list
below
If displaying next appointment reminder messages, select this
check box to specify for which invoice items messages should be
displayed. Then, enter item IDs in the list.
Verify
Figure NN
(Controls > Defaults > Practice and Workstation >
Appointment Scheduler)
• Page 73 •
Cornerstone 8.3 Default and Security Settings Guide
Cornerstone 8.3 Default and Security Settings Guide
Controls > Defaults > Practice and Workstation
Menu Access
Default
Holidays –
Appointment
Scheduler
See figure OO
Holiday preferences
Action &
Decision
Description
Select the check box for each holiday that the practice will be
closed: New Year’s Day, Memorial Day, Fourth of July, Labor
Day, Thanksgiving day, Friday following Thanksgiving,
Christmas Eve, and Christmas Day.
Verify
Select the Utilized date-sensitive holidays check box to close the
clinic on a Friday if the holiday is on a Saturday or close the clinic
on a Monday if the holiday is on a Sunday.
Additional holidays
To add more holidays that the clinic will be closed, click the Add
button. Then, in the Name of holiday field, type the name of the
holiday. In the Date field, enter the date. To remove a holiday, click
Delete.
Verify
Figure OO
(Controls > Defaults > Practice and
Workstation > Appointment Scheduler >
Holidays – Appointment Scheduler)
• Page 74 •
Cornerstone 8.3 Default and Security Settings Guide
Cornerstone 8.3 Default and Security Settings Guide
Controls > Defaults > Practice and Workstation
Menu Access
Hours –
Appointment
Scheduler
See figure PP
Default
Action &
Decision
Description
Time units
Select 10 minutes or 15 minutes as the default number of minutes
each appointment should be scheduled.
Verify
Practice hours
Select the check box for each day the practice will be open.
Verify
In the Start and Close boxes, type the applicable time.
Select the Take lunch check If your practice closes for lunch, and
then enter the start and end times of the lunch period, making sure
to include AM or PM.
Figure PP
(Controls > Defaults > Practice and
Workstation > Appointment Scheduler >
Hours – Appointment Scheduler)
Boarding
See figure QQ
General
From the Reservation type list, select the type of boarding
reservation.
•
In the Staff ID box, enter the default staff ID for boarding
reservations.
•
Select the Assign cage numbers check box to require cage
assignments for boarding reservations.
•
Enter default check-in/checkout times in the applicable boxes.
Verify
How to bill for multiple
pets
Select one of the following options for how to bill for multiple pets:
Use primary fee for first pet; Use primary fee for first pet;
multiple fee for all others; or Use multiple fee for each pet.
Verify
Round down reservation
hourly charge
Select one of the following options for how to round down
reservation hourly charge: To 15 minutes, To 30 minutes, or To 60
minutes.
Verify
Grooming appointment
• Page 75 •
•
•
From the Staff classification list, select a default staff
classification for the grooming appointments.
•
In the Check rooms to use for grooming table, select the
Use for Grooming check box next to each room used for
grooming appointments.
Verify
Cornerstone 8.3 Default and Security Settings Guide
Cornerstone 8.3 Default and Security Settings Guide
Controls > Defaults > Practice and Workstation
Menu Access
Default
Action &
Decision
Description
Figure QQ
(Controls > Defaults > Practice and
Workstation > Boarding)
Holiday – Boarding
See figure RR
Enter dates and times for
special hours on holidays
In the Date field, type the date of the boarding holiday.
Verify
In the Description field, type a description for the holiday.
In the Open column, click Yes or No to indicate if the practice is
open or closed.
If the practice will be open, in the Start and Close fields, type the
opening and closing times.
Figure RR
(Controls > Defaults > Practice and
Workstation > Boarding > Holiday – Boarding)
• Page 76 •
Cornerstone 8.3 Default and Security Settings Guide
Cornerstone 8.3 Default and Security Settings Guide
Controls > Defaults > Staff
Menu Access
Controls > Defaults
> Staff > Patient
Clipboard tab
See figure SS
Default
Staff
Action &
Decision
Description
This allows the practice administrator to determine, based on staff
ID or login, what is shown on the Client information and Patient
information tabs on the Patient Clipboard window.
Verify
Enter the staff ID for whom you want to set default settings.
Client information tabs
Patient information tabs
In the Display column, select the check box for each item to display
for this staff member. Use the arrows to order the items.
Verify
Click Reset Defaults to reset the defaults to the original settings.
Figure SS
(Controls > Defaults > Staff > Patient Clipboard)
Controls > Defaults
> Staff > Toolbar
tab
See figure TT
• Page 77 •
Staff ID
This allows the practice administrator to determine, based on staff
ID or login, which toolbar buttons are shown on the toolbar.
Verify
Enter the staff ID for whom you want to set default settings.
Toolbar
Select the Visible check box next to each toolbar button to display
for this staff member.
Verify
Cornerstone 8.3 Default and Security Settings Guide
Cornerstone 8.3 Default and Security Settings Guide
Controls > Defaults > Staff
Menu Access
Default
Action &
Decision
Description
Figure TT
(Controls > Defaults > Staff > Toolbar)
Controls >
Defaults > Staff >
Miscellaneous tab
See figure UU
• Page 78 •
Staff
This allows the practice administrator to determine, based on staff
ID or login, the miscellaneous settings for the staff member.
Verify
Enter the staff ID for whom you want to set default settings.
Miscellaneous tab
Default practice
If your practice has multiple locations, select
the default practice for this staff member.
Login page
Select the default window that opens for this
staff member upon login.
Revenue center
Enter the default revenue center for this staff
member.
Appointment suite
Select the default appointment suite used
in the Appointment Scheduler for this staff
member.
Display backup log
when logging in
Select this check box if you want to display
the backup log when this staff member logs
in.
Imaging - Enable
keyboard shortcuts
Select this check box to allow this staff
member to use keyboard shortcuts.
Imaging - Show
advanced search
on Image Explorer
Select this check box to make advance
search in Image Explorer the default search
type for this staff member.
Verify
Cornerstone 8.3 Default and Security Settings Guide
Cornerstone 8.3 Default and Security Settings Guide
Controls > Defaults > Staff
Menu Access
Default
Description
Action &
Decision
Figure UU
(Controls > Defaults > Staff > Miscellaneous
tab)
• Page 79 •
Cornerstone 8.3 Default and Security Settings Guide
Cornerstone 8.3 Default and Security Settings Guide
Controls > Defaults > Staff
Menu Access
Controls > Defaults
> Staff > Inventory
tab
See figure VV
Default
Staff
Action &
Decision
Description
This allows the practice administrator to determine, based on staff
ID or login, the inventory settings for the staff member.
Verify
Enter the staff ID for whom you want to set default settings.
Inventory tab
Auto save changes
without prompting
If you want a "Do you want to save?"
confirmation prompt to appear if the staff
member switches windows without saving
inventory changes first, clear the check box
(recommended).
Verify
If you want the program to automatically
save inventory changes the staff member
makes without displaying a confirmation
prompt, select the check box.
Auto delete
changes without
prompting
If you want a "Do you want to delete?"
confirmation prompt to appear for this staff
member when Delete button is clicked on
any inventory window, clear the check box
(recommended).
If you want the program to automatically
delete within inventory (when the Delete
button is clicked on any inventory window)
without displaying a confirmation prompt for
this staff member, select the check box.
Inventory location
group
Location
If using a multi-location inventory
configuration, select the default location for
inventory depletion for this staff member
from the list. The Location table displays
information about the selected location.
Figure VV
(Controls > Defaults > Staff > Inventory tab)
• Page 80 •
Cornerstone 8.3 Default and Security Settings Guide
Cornerstone 8.3 Default and Security Settings Guide
Controls > Defaults > Staff
Menu Access
Controls > Defaults
> Staff > My
Favorites tab
See figure WW
Default
Staff
Action &
Decision
Description
This allows the practice administrator to determine, based on staff
ID or login, documents templates that appear in the staff member's
Favorites list on the Document Template List window.
Verify
Enter the staff ID for whom you want to set default settings.
My Favorites tab
To add a document template to the list, double-click in the blank
row at the bottom of the list or press F2 to display the Document
Template List and select the template to add to the favorites list.
Set up
To remove a document template from the list, click on the template’s
ID in the ID column and then press CTRL+D.
Figure WW
(Controls > Defaults > Staff > My Favorites tab)
• Page 81 •
Cornerstone 8.3 Default and Security Settings Guide
Cornerstone 8.3 Default and Security Settings Guide
Action &
Decision
Menu Access
Description
Lists >
Practice >
Update
Practice Information window—Login/Password Management
Set up
Set up login and password information for the following features. When you select a feature, the fields
required for set up appear.
For more information about these features, including prerequisites, see the Cornerstone Help. To
access the Help for this window, press F1 while the window is open.
Antech Reference Lab Results
To set up the Antech® Diagnostics module:
If you already have Antech Diagnostics module set up in
Cornerstone, click Apply Primary Practice Settings. The
account information boxes are automatically completed.
If you don't have existing Antech account information, enter the
information provided by Antech when you set up your account
with.
Click Test. Then, when the Login Settings Passed message
appears, click OK.
Communications – Email
To set up email service:
Select your email service; you can use your desktop email client
or an SMTP (web-based) email service.
If you want to use SMTP mail, you must set it up in the Imaging
Configuration window. Click the link or go to Controls > Defaults
> Imaging and select Email in the menu. Then, enter your email
account information.
Communications – Fax
To activate IDEXX Faxing service:
Select the Use IDEXX Faxing Service check box. Click Accept
in the terms and conditions of use window.
Upon successful activation, the system will log the user who
enrolled the IDEXX Faxing Service. In the Practice Information
window, the name, time/date stamp, and a link to the IDEXX
Faxing terms and conditions are displayed. Note that all practices
in a Multi-Location/Single Database configuration must accept the
terms and conditions.
Vendor – MWI Veterinary
Supply
To activate IDEXX SmartOrder* electronic inventory ordering:
From the Associated Cornerstone Vendor list, select the
practice-specific vendor to use for this service.
In the Customer Number box, type your practice's MWI®
customer number.
Select the Enable Online Ordering check box. Click Accept in
the terms and conditions of use window, and then click OK when
notified that the activation was successful.
Click Test to verify that you have a working Internet connection
and valid login.
• Page 82 •
Cornerstone 8.3 Default and Security Settings Guide
Cornerstone 8.3 Default and Security Settings Guide
Menu Access
Lists >
Practice >
Update
(continued)
Action &
Decision
Description
VetConnect* PLUS
Set up
To activate VetConnect PLUS:
If you are a new IDEXX Reference Laboratories user, select
the VetConnect option, enter your practice’s VetConnect
administrator user name and password, and then click Submit to
Activate VetConnect PLUS.
OR
If you are an existing IDEXX Reference Laboratories user, the
VCAgent option should already be selected and your VetConnect
user name and password should be completed.
Click Submit to Activate VetConnect PLUS.
Read the agreement, and then click Accept. A message states
that IDEXX Reference Laboratories historical data will be
uploaded. Click Next.
IDEXX VetLab* Station only: A message giving you the option
to print instructions on uploading data displays. Click Yes to
open the printable message or No to continue. Click Finish. A
message states that activation is complete and that data upload
will continue. Close the message window.
After you activate VetConnect PLUS from within Cornerstone,
activate VetConnect PLUS from your IDEXX VetLab* Station (if
applicable).
• Page 83 •
Cornerstone 8.3 Default and Security Settings Guide
Cornerstone 8.3 Default and Security Settings Guide
Electronic Whiteboard Default Settings
The following default settings are important for using Electronic Whiteboard.
Menu Access
Action &
Decision
Description
List > Electronic
Whiteboard >
Categories
Verify
Categories are used to identify types of treatments that will be administered to patients while in the
hospital. They will help your staff determine who needs to perform a service and/or the schedule
for these treatments. Verify that existing treatment categories are correct. Set up new categories if
necessary.
List > Electronic
Whiteboard >
Areas
List > Electronic
Whiteboard >
Frequencies
Lists >
Electronic
Whiteboard >
Alerts
Verify
These are areas within the hospital where patients might be receiving treatment. Verify existing areas
and set up new areas as needed.
Verify
Treatment frequencies are used to determine how often and when a treatment is needed. Verify that
existing treatment frequencies are correct. Add new frequencies as needed. You can also change the
order of frequencies so that those you use most often are at the top of the list.
Create a list of commonly used alerts for hospitalized patients that will be displayed on the
Electronic Whiteboard . You can also type alerts for each patient at the time of use; these
alerts are not saved to the Whiteboard Alerts List.
LIsts > Patient
Hospital Status
Verify
Used to designate a patient’s status within the hospital.
Lists > Ward/Loc
Used to designate the physical location of the patient.
• Page 84 •
Cornerstone 8.3 Default and Security Settings Guide
Cornerstone 8.3 Default and Security Settings Guide
Controls > Defaults > Practice and Workstation
Menu Access
Default
Whiteboard auto refresh
timer ____ Minutes
Whiteboard
See figure LL
Length of time to keep
discharged patients on
Whiteboard ____ Hours
Hours to show
Doctor to use on invoice
line
Action &
Decision
Description
Enter a number (in minutes) for how often the Whiteboard should
automatically refresh.
Verify
Enter the number of time (in hours) to keep patients on the
Whiteboard.
Verify
Select one of the following options for how many hours to show on
the Whiteboard:
Verify
•
Current day only
•
Current day with 3 hours for previous and next days
Select a default doctor to use on the invoice line. Options are
Supervising Dr., Current Care Dr., or Who Performed.
Verify
The supervising and current care doctors are determined at the
time orders are written.
Performing staff is determined at the time items are marked
completed.
Use doctor from Patient
Visit List
Invoice when patient is
not at “Ready to go home”
status
Allow invoice if
uncompleted treatments
Future hours to check for
uncompleted treatments
when invoicing ____
Hours
Select this check box if you want the staff from the Patient Visit List
invoice item lines to transfer as the doctor for the patient orders.
Verify
Determines under which circumstances a staff member is allowed
to invoice a client for a patient who is still in the “Not ready to go
home” status on the Whiteboard. Options are Allow, Manager
Override, Stop, and Warn.
Verify
Determines under which circumstances a staff member is able to
invoice a client when a patient has treatment on the Whiteboard
that has not been marked complete. Options are Allow, Manager
Override, Stop, and Warn.
Verify
Enter the number of hours in the future to check for uncompleted
treatments when invoicing.
Select
Figure LL
(Controls > Defaults > Practice and Workstation > Whiteboard)
• Page 85 •
Cornerstone 8.3 Default and Security Settings Guide
Cornerstone 8.3 Default and Security Settings Guide
Cornerstone* Imaging Default Settings
Cornerstone* Imaging contains standard imaging functionality to import, view, and enhance images.
This section covers Cornerstone Imaging (the imaging functionality that is included with Cornerstone software).
• For information on setting defaults for the DICOM® Imaging module, see “DICOM® Imaging Default Settings”
starting on page 89.
• For information on the IDEXX-PACS* module, see “IDEXX PACS* Default Settings” starting on page 95.
For information on Practice and Workstation defaults for imaging (pet picture compression, image storage, and
IDEXX SmartLink* Digital Imaging preferences for image requests), see page 41 in this guide.
To access the Imaging Configuration window, from the menu bar, go to Controls > Defaults > Imaging. Then, click
the item to set up in the navigation pane on the left. The items in the navigation pane vary, depending on what you
have installed.
As you work through the settings, click Apply to save your changes without closing the Imaging Configuration
window, or click Save to save your changes and close the window.
Controls > Defaults > Imaging
Menu Access
Archive
Action &
Decision
Description
Archiving refers to moving images from your computer to another storage location. Archiving is usually
not necessary; however, if you choose to archive images, you can set up the software to alert you
when it is time to archive. You will also be prompted to archive images when your Images folder nears
its storage capacity.
Enable archive alerts
Select this check box to activate archive alerts.
Alert Frequency
Select the Images option to be alerted when a specific number of
images has accumulated, and then type the number of images in the
box.
Verify
Select the Days option to be alerted when a specific number of days
has passed since the last alert, and then type the number of days in the
box.
Archive Location
• Page 86 •
Specify the location where you want to store archived files.
Cornerstone 8.3 Default and Security Settings Guide
Cornerstone 8.3 Default and Security Settings Guide
Controls > Defaults > Imaging
Menu Access
Email
Click the System
tab or the staff
member tab to
update the email
settings.
Action &
Decision
Description
If you set up an email account for a staff member, that account will be used for emails sent from the
Image Explorer, Image Viewer, or the Email tab of the Case Actions pane on the Case Details window
when that staff member is logged in to Cornerstone.
Note: If your practice has set the Communications - Email login on the Practice Information window
(Lists > Practice > select practice and click Update) to use Cornerstone Imaging SMTP email
settings, these email settings will be used for all communications sent from Cornerstone.
Set up
If you do not set up an email account for a staff member, the system-level account is used.
Email Account
SMTP Server Name
Type the name of your email server.
SMTP Port
Type the port number on your computer from which email will be sent.
Enable SSL
Select this check box if your email provider requires the use of SSL
(Secure Socket Layer) ports. Many Internet email providers have this
requirement.
SMTP User Name
SMTP Password
Type the information Cornerstone needs to log in to your server.
Email Defaults
Imaging
Email Attachment File
Type
From the drop-down list, select the type of file for sending images.
This can be changed when sending images.
Default Send Email
Address
Type the sender email address to use.
Reply Email Address
Type the reply email address to use.
Set up
Image Scan Settings
TWAIN Source
From the drop-down list, select the scanner to use.
Horizontal Resolution
From the drop-down lists, select the horizontal and vertical resolution
values in dots per inch (dpi).
Vertical Resolution
Pixel Type
Select the pixel type from the drop-down list. Options are Black and
White, Grayscale, and Color.
Enable TWAIN UI
Select this check box if you want Cornerstone to use your scanner's
user interface when you scan an image.
Image Viewer
Ruler Units
From the drop-down list, select the default unit for the Image Viewer
ruler.
Image Capture Settings and DICOM Compression Settings
Skip these areas and also the Apply Window/Level to Exported Images check box in the Image
Export area.
Note: If you are installing the DICOM Imaging module or IDEXX-PACS*, you will set up these areas
later in this guide.
Image Export
Apply Overlays to
Exported Images
Select this check box if you want images to include the overlay
information displayed in the Image Viewer by default.
Apply Annotations to
Exported Images
Select this check box if you want images to include the annotations
created in the Image Viewer by default.
Capture Sources
Add Capture Source
• Page 87 •
Click the button to add a new line to the Capture Sources list. In the
Description field, type a description for the device.
Cornerstone 8.3 Default and Security Settings Guide
Cornerstone 8.3 Default and Security Settings Guide
Controls > Defaults > Imaging
Menu Access
Keywords
Action &
Decision
Description
When you add an image, keywords (cardiovascular, ears, hematology, etc.) appear in a list box on the
Image Details window, allowing you to choose keyword(s) to associate with the image. You can also
use keywords to search for images with the Advanced Search tab on the Image Explorer window.
Verify
For your convenience, a number of keywords have been preloaded on your system. You can add,
delete, or edit keywords.
Telemedicine
Provider
You can submit a case to a telemedicine provider directly through the telemedicine provider’s website.
The Telemedicine Provider default settings allow you to enter the provider’s website address and
associated information used to reach the telemedicine provider.
Set up
You can add, delete, or edit providers.
After adding a provider, click Apply, click the row in the table, and click Test Tele-provider.
Table Fields
Name
Type the name to display for this provider on the Case window.
Homepage
For future functionality.
API URL
Type the web address for the telemedicine provider. Be sure to start
with http:// or https:// per the instructions of the provider.
Login
Password
Authentication
• Page 88 •
Type the login and password for the telemedicine provider's site.
From the drop-down list, select the password authentication method
specified by the telemedicine provider.
Cornerstone 8.3 Default and Security Settings Guide
Cornerstone 8.3 Default and Security Settings Guide
DICOM® Imaging Default Settings
The DICOM® Imaging module includes more features than Cornerstone* Imaging and is designed to be used with
image and video sources (digital x-ray systems, ultrasound systems, endoscopes, etc.). DICOM Imaging requires an
activation key to use. (Diagnostic Imaging, available with previous versions of Cornerstone, includes a similar set of
features.
For detailed information, see the Cornerstone Help or the IDEXX Cornerstone Diagnostic Imaging User’s Guide,
available within Cornerstone or at idexx.com/cornerstoneresources.
This section covers only those items not covered in the previous section. Before you complete this section,
complete the “Cornerstone Imaging Default Settings” section starting on page 86. If you are also using the IDEXXPACS* module, you will also need to complete the “IDEXX PACS Default Settings” section starting on page 95.
For information on Practice and Workstation defaults for imaging (pet picture compression, image storage, and IDEXX
SmartLink* Digital Imaging preferences for image requests), see page 41 in this guide.
To access the Imaging Configuration window, from the menu bar, go to Controls > Defaults > Imaging. Then, click
the item to set up in the navigation pane on the left. The items in the navigation pane vary, depending on what you
have installed.
As you work through the settings, click Apply to save your changes without closing the Imaging Configuration
window, or click Save to save your changes and close the window.
• Page 89 •
Cornerstone 8.3 Default and Security Settings Guide
Cornerstone 8.3 Default and Security Settings Guide
Menu Access
Activities>
Imaging>
DICOM
Printer>
DICOM
Printer> Select
DICOM Printer
> New
Action &
Decision
Default/Description
Verify
New DICOM Printer window
To select and configure a printer for DICOM printing, you will need to consult the conformance
statement and other documentation for your DICOM printer. If you have questions, contact the
manufacturer of your DICOM printer or contact IDEXX Customer Support at 1-877-433-9948.
If you have already configured a DICOM printer, select the printer from the Printer drop-down list.
Notes:
When you set up your DICOM printer with Cornerstone for the first time, you need to call IDEXX
Customer Support at 1-877-433-9948 to activate the feature.
Some printers require additional setup. See the IDEXX Cornerstone Diagnostic Imaging User’s Guide
for more information.
Controls>
Defaults>
Staff >
Miscellaneous
tab
• Page 90 •
Name
Type the name of the DICOM printer.
Host
Type the host for the printer.
Port
Type the port for the printer.
Called AE Title
Type the called application entity title. This information can be found in
the DICOM printer’s conformance statement.
Note: This is the local server AE title shown on the Imaging
Configuration window when Local Server is selected on the left.
Calling AE Title
Type the application entity for your DICOM server.
Max PDU Length
Type the maximum protocol data unit length. This value can be found in
the DICOM printer’s conformance statement.
Timeout boxes
Unless otherwise specified in the DICOM printer’s conformance
statement, accept the defaults for the Timeout text boxes.
Supports Presentation
LUT
Select this check box if the DICOM printer supports lookup tables.
Verify
Staff Defaults window
Imaging
Enable keyboard
shortcuts
Select this check box to allow keyboard shortcuts on the Image Viewer
for this user.
Show advanced search
on Image Explorer
Select this check box to display advanced search on the Image
Explorer window for the selected staff member.
Cornerstone 8.3 Default and Security Settings Guide
Cornerstone 8.3 Default and Security Settings Guide
Controls > Defaults > Imaging
Action &
Decision
Menu Access
Default/Description
Case
Categories
Category names (cytology, musculoskeletal, dermatology, etc.) appear in a list on the Case Details
window, allowing you to choose a category to assign to the image case. Image cases are created to
send images to specialists for consulting.
Verify
Assign categories to your image cases so you can search for all of the image cases with the same
category designation or to find all cases that match a selected category.
You can add, delete, or edit categories.
DICOM
Services >
Local Server
Verify
Define the local server configuration for DICOM Services.
Note: If you are setting up DICOM services on more than one server, give the servers different names
to avoid confusion.
Common Server Settings
AE Title
Type the application entity (AE) title. This is the name of your local
server.
Port Number
Type the port number.
Transfer Queue Watch
Interval
Type the interval (in seconds) that the DICOM server should wait
before checking the DICOM Queue for images to send.
C-FIND Options
Do not make changes in this area. These advanced features should be changed only with
consultation from IDEXX Customer Support.
DICOM/Network Settings
Maximum Number of
Clients
Type the maximum number of external devices that can access the
local DICOM server for requests at one time.
DIMSE Timeout
Type the time (in seconds) that can elapse before the DICOM
message service element (DIMSE) times out once the DICOM
server has opened a line of communication with an external device.
Socket Close Delay
Type the time (in milliseconds) that can elapse before the socket
between the local device and an external device closes after a line of
communication has ended.
Maximum PDU Length
Type the maximum protocol data unit (PDU) found in the local
DICOM server's conformance statement.
Request Timeout
Type the time (in seconds) that can elapse before the local server
times out when a request is received but no image is received.
Incoming DICOM
Server Registration
Required
Select this check box if you want Cornerstone to accept files only
from servers that are on the remote servers list.
Image Import Settings
• Page 91 •
Watch Directory
Type the directory from which DICOM services should automatically
import images.
Watch Interval
Type the time (in seconds) for how frequently DICOM Services
should check the watch directory. Set the value to 0 if you do not
want DICOM Services to check the watch directory.
Patient Match Level
From the drop-down list, select the method for matching patients.
Options are Patient ID or Patient Name, Sex, Species, DOB,
Client Last Name.
Cornerstone 8.3 Default and Security Settings Guide
Cornerstone 8.3 Default and Security Settings Guide
Controls > Defaults > Imaging
Action &
Decision
Menu Access
Default/Description
DICOM
Services
> Remote
Servers
Remote (external) server settings. You can add, edit, and delete servers. To test a server, select it and
click Test Server.
Remote Servers
Server Name
Type the server name. This name appears in the Configure Servers
drop-down list.
Server Address
Type the external server's IP address.
Port #
Type the port number for the external server.
AE Title
Type the name of the called application entity (AE). This is the
application entity title for the external server.
Support Query
Retrieve
Select this check box to use the DICOM Query/Retrieve feature to
search for images and then import them from this remote server.
Support MPPS
Do not make changes in this area. These advanced features should
be changed only under the guidance of an IDEXX representative.
PACS Server
DICOM
Services >
Manufacturers
Verify
Each DICOM device, local or external, has its own DICOM conformance statement. One component
of this statement defines the device’s fields, which consist of a group number and an element number.
Most manufacturers use a universally defined DICOM-standard group number and element number
for each common tield (e.g., patient name, patient ID, study date, referring doctor name). Occasionally,
however, a manufacturer may assign a different group number and element number to one of these
common fields. Each text box, whether common or device-specific, has a group number and element
number and is defined in the device’s conformance statement.
Verify
You can add, edit, and delete manufacturers.
DICOM
Services >
Manufacturer
Mapping
The IDEXX DICOM Services program contains a list of predefined manufacturers and their specific
modalities (e.g., computed radiography, computed tomography, magnetic resonance). You can
select a specific manufacturer/modality from the lists and then map your local DICOM server’s fields
accordingly.
Verify
New manufacturers/modalities are added when the new device pings the local DICOM server and
a connection is made. The new device sends a DICOM file to the local server; this file contains
the names of the manufacturer and the modality. Cornerstone stores that information and makes it
available in the Manufacturer Mapping window. You can then map your local DICOM server’s fields as
needed to ensure successful communication between the two devices.
You can add, edit, and delete mapped fields.
Manufacturers
From the drop-down list, select the manufacturer.
Modalities
From the drop-down list, select the modality (for example; computer
radiography, magnetic resonance, ultrasound) for which you are
mapping fields.
Use the conformance statements for the local DICOM server and the selected device to add
the following:
• Page 92 •
Group
Type the group number assigned to a selected text box for the local
DICOM server.
Element
Type the element number assigned to a selected text box for the local
DICOM server.
Mfr Group
Type the group number assigned to a selected text box by the devices’
manufacturer.
Mfr Element
Type the element number assigned to a selected text box by the
device’s manufacturer.
Default
Type the default value assigned to a selected text box by the device’s
manufacturer.
Override
Type the value that the local DICOM server will use to replace the
device manufacturer’s default value.
Cornerstone 8.3 Default and Security Settings Guide
Cornerstone 8.3 Default and Security Settings Guide
Controls > Defaults > Imaging
Action &
Decision
Menu Access
Default/Description
Modality
Layout
You can set up how you want images to be displayed on the Image Viewer window based on the
modality of the images.
Verify
Note: When you change these settings, you are changing how all images of that modality are
displayed. For example, if you change the settings for arranging DR images in the viewer, the new
settings will apply any time you look at DR images.
Dental Configuration
Modality
From the drop-down list, select a modality.
Template
If you are using IDEXX-PACS and you selected Intra-oral Radiography
as the Modality, select a template from the drop-down list. The template
is displayed in the Preview area. The remaining areas in this section are
not applicable.
Study Layout
Rows
Columns
To set up how individual series are displayed within a study, type the
number of rows and columns in the boxes. The series are displayed in a
grid layout.
Series Layout
Rows
Columns
To set up how individual images are displayed within a series using a
grid layout, make sure the Stacked check box is cleared, and type the
number of rows and columns in the boxes.
Stacked
To display the images within a series using a stacked display, select this check box. In a stacked
display, one image is visible at a time and you can use the scroll bar to display the other images in
the series.
Export
Formats
From the drop-down list, select the default image file type for exporting a case to a CD or DVD. When
you use the case export feature, you can choose a different file type. You do not have the option to
change the file type at the time an image is exported.
You can set up the ways that dates, phone numbers, and measurements are displayed on imagingrelated windows in Cornerstone.
Verify
Verify
From each drop-down list, select the default format to use.
Imaging
Verify
Image Capture Settings
Distance Units
From the drop-down list, select the default unit for measuring the
distance between the x-ray plate and the x-ray source. Distance can be
measured in feet, inches, meters, centimeters, or millimeters.
Exposure Units
From the drop-down list, select the default unit for measuring the x-ray
exposure time. Exposure time can be measured using AmpSeconds
(As), milliAmpSeconds (mAs), or microAmpSeconds (uAs).
DICOM Compression Settings
DICOM
• Page 93 •
From the DICOM drop-down list, select one of the following
compression types to use when sending files via DICOM:
•
RAW—To send DICOM images that have not been compressed.
•
JPEGlossless—To send DICOM images that are compressed
but have little to no loss of image quality.
Cornerstone 8.3 Default and Security Settings Guide
Cornerstone 8.3 Default and Security Settings Guide
Controls > Defaults > Imaging
Menu Access
Monitor
Preferences
Action &
Decision
Default/Description
You can display a patient’s images on more than one monitor. If you have two monitors, the Image
Explorer window is displayed on one monitor and the Image Viewer window showing the patient’s
image series is displayed on the other. If you have more than two monitors, you can display a separate
Image Viewer on each additional monitor.
Verify
In the Monitor Settings table, all the monitors that are set up for your system are listed in the Monitor
column. Select the check box in the Use Monitor column for each monitor that you want to use.
System Type
Remote
Consult
The System Type options are used to select the IDEXX Digital Imaging system you are using when
the system is first installed. DO NOT change any of the system type options without consulting IDEXX
Digital Imaging Support. For service within the United States or Canada, call 1-877-433-9948.
The Remote Consult button connects you to up to five web addresses for consulting radiology services.
You can add, edit, and delete web addresses.
Verify
Verify
URLs
• Page 94 •
Description
Type the name of the website.
URL
Type or paste (CTRL + V) the URL for the website.
Cornerstone 8.3 Default and Security Settings Guide
Cornerstone 8.3 Default and Security Settings Guide
IDEXX-PACS* Software Default Settings
If you have an IDEXX Digital Imaging system, you have IDEXX-PACS* software with all the Cornerstone* Imaging
and DICOM® Imaging features. In addition, you have the ability to capture radiographs, along with features to make
the image capture process more efficient.
For detailed information, see the Cornerstone Help or the IDEXX Cornerstone Diagnostic Imaging User’s Guide,
available within Cornerstone or at idexx.com/cornerstoneresources.
This section covers only those items not covered in the previous two sections. Before you complete this
section, complete the “Cornerstone Imaging Default Settings” section starting on page 86 and the “DICOM Imaging
Default Settings” section starting on page 89.
For information on Practice and Workstation defaults for imaging (pet picture compression, image storage, and IDEXX
SmartLink* Digital Imaging preferences for image requests), see page 41 in this guide.
To access the Imaging Configuration window, from the menu bar, go to Controls > Defaults > Imaging. Then, click
the item to set up in the navigation pane on the left. The items in the navigation pane vary, depending on what you
have installed.
As you work through the settings, click Apply to save your changes without closing the Imaging Configuration
window, or click Save to save your changes and close the window.
Controls > Defaults > Imaging
Menu Access
Dashboard
Action &
Decision
Default/Description
The Dashboard window contains lists of the most recent clients, patients, and studies you have viewed.
You can specify how many days of each you want displayed.
Verify
Days of Clients to Display
Days of Patients to Display
Type the number of days to display for each item.
Days of Studies to Display
DICOM
Services
Auto-Routing
Exam Trees
The auto-routing feature allows you to automatically send images via DICOM to a destination of your
choice.
Auto-Routing Mode
Select the type of auto-routing (Manual, Semi-Automatic, or
Automatic) that you want to use.
Remote Servers
Select each destination for where images should be sent.
If you want to add customized exam type collections or new individual exam types to the Choose
Exam Type menu that is used during the image capture process, contact IDEXX customer support. For
service within the United States or Canada, call 1-877-433-9948.
Verify
Verify
We strongly recommend that you do not adjust any of the settings on Exam Trees section of the
Imaging Configuration window without consulting IDEXX customer support and backing up your
existing exam tree.
• Page 95 •
Cornerstone 8.3 Default and Security Settings Guide
Cornerstone 8.3 Default and Security Settings Guide
Controls > Defaults > Imaging
Menu Access
Global Settings
Action &
Decision
Default/Description
You can change imaging settings for a variety of features that are applied to Cornerstone for all users.
If you are using the software on a network, these settings are applied to all computers on the network.
Show Plate Handle
Locator
Select this check box to display a marker to show the orientation of
the detector plate for images that you capture. The marker appears as
two small squares next to each other—one black and one white. The
plate handle locator marker appears on the image in the corner where
the cable attaches to the plate—if you are looking at the plate from the
front with the handle on the left side, this would be the upper left corner.
Enable Client Patient
Security
Select this check box to display only images you created (or, if you are
a veterinarian, images that were created for you) on the Image Explorer
and the Imaging Dashboard windows.
Set Single Species Mode
Select this check box to display only one species and the related
breeds as choices when you search for patients from the Image
Explorer or Imaging Dashboard windows.
Search Matching Options
To help ensure confidentiality, you can specify when imaging-related
search functions return results. You can choose to have the search
function return results only when you have typed a full name or only
after you have typed a certain number of characters. This feature
applies to searches on the Image Explorer window, and the Select
Client and Patient window.
Verify
Select one of the following:
None—Return results now matter how many characters are typed in
the search box.
__ Characters— Type a number in the box to return results only when
you type at least that number of characters in the search box.
Exact Match—Return results only when you type the full name.
Presets > New
Verify
Presets Configuration Detail window
You can set up presets to apply new window and level settings to an image in the Image Viewer. These
presets are available when you click the Window/Level Presets tool in the Image Viewer. There are two
kinds of presets—system presets and user presets. All users can use the System Presets, but only the
person who is the Administrator for your Cornerstone software can edit system presets or create new
ones. Each user can create and edit user presets that are available only to that user. Click the System
tab to change system presets or tab with your user name to change user presets.
You can also copy presets to another user, edit presets, and restore factory-setting presets to original
values. See the IDEXX Cornerstone Diagnostic Imaging User’s Guide or the Help in Cornerstone for
more information.
Name
Type a name for the preset.
Modality
Select the type of device used to capture images to which this preset will be applied.
Type
To change window and level values by specifying exact values, select Absolute in
the Type box. Enter the window (contrast) value in the Window box and the level
(brightness) value in the Level box.
Window
Level
Hide
• Page 96 •
To change window and level values relative to their current settings, select Relative
in the Type box.
•
To increase or decrease values in the Window % (contrast) box, enter
percentage values that are greater or less than 100. For instance, type 110 to
increase the window value by 10% and type 90 to lower it by 10%.
•
To increase or decrease values in the Level Shift (brightness) text box, type the
number that you want to be added to or subtracted from the current level value.
For instance, typing 500 will add 500 to the current level value, while typing -500
will subtract 500.
On the Presets window, select this check box if you do not want the preset to be
displayed in the Image Viewer. You cannot hide system presets.
Cornerstone 8.3 Default and Security Settings Guide
Cornerstone 8.3 Default and Security Settings Guide
Laboratory Default Settings
The following settings are for the Laboratory module. Settings may vary depending on the laboratory.
Controls > Defaults > Practice and Workstation
Menu Access
Default
IDEXX VetLab
Settings
See figure VL
Practice
VetLab Station
Use all
Action &
Decision
Description
You can specify default computers to be used for specific
workstations and practice locations. When ordering tests, staff can
always override these defaults and choose from the entire list of
IDEXX VetLab* Station computers.
Set up
Multi-Location Single Database only: To specify a default IDEXX
VetLab* Station for a practice location, select the practice name
from the Practice list, and then select the IDEXX VetLab Station
in the VetLab Station box. Select the Use all check box to use all
VetLab Station computers.
Repeat for other practice locations and workstations as needed.
Note: If practice and workstation settings conflict, the workstation
settings take precedence.
Workstation
VetLab Station
Use all
You can specify default computers to be used for specific
workstations and practice locations. When ordering tests, staff can
always override these defaults and choose from the entire list of
IDEXX VetLab Station computers.
To specify a default IDEXX VetLab Station for a workstation, select
the workstation name (workstation names are displayed on each
IDEXX VetLab Station) from the Workstation drop-down list, and
then select the IDEXX VetLab Station in the VetLab Station box.
Repeat for other workstations as needed.
Note: If practice and workstation settings conflict, the workstation
settings take precedence.
Figure VL
(Controls > Defaults > Practice and
Workstation > IDEXX VetLab Settings)
• Page 97 •
Cornerstone 8.3 Default and Security Settings Guide
Cornerstone 8.3 Default and Security Settings Guide
Controls > Defaults > Practice and Workstation
Menu Access
Labs
See figure LB
Default
Action &
Decision
Description
Use billing staff on a new
lab request
Select this check box to designate that the billing staff on the
Patient Visit List or the invoice should be used as the default staff
ID on the request. If this check box is not selected, the default
staff ID for special action requests is the last staff member who
performed a lab request on the workstation.
Staff to use on requests
without Special Action
Select the staff to use for lab requests not associated with special
actions. Options are No default staff, Last staff used on
workstation, or Specific staff (enter staff ID).
Set up
Figure LB
(Controls > Defaults > Practice and
Workstation > Labs)
• Page 98 •
Cornerstone 8.3 Default and Security Settings Guide
Cornerstone 8.3 Default and Security Settings Guide
Menu Access
Default/Description
Action &
Decision
Activities >
Lab Work >
Laboratories >
New
See figure LI
Lab Information window
Verify
If you use multiple laboratories, you must set up each one.
Lab information
Name
Type the name of the lab.
Lab ID
Type the lab ID. This is the code your practice will use to identify
the lab in Cornerstone.
Address
Enter the address for the lab.
City
State/prov
Postal code
Requisition numbers
Manually enter requisition
IDs
Select this option to manually enter requisition numbers.
Use requisition ID ranges
Select this option to have Cornerstone automatically assign
requisition numbers from ranges you specify.
You must select this option if the lab you are setting up is a
reference lab and you need to enter requisition IDs from preprinted
lab forms.
Recommended setting for IDEXX In-clinic laboratory to ensure
consistent requisition IDs.
Use patient ID for
requisition ID
Select this option if your practice uses LabREXX* forms.
Requisition ID ranges
If you selected Use requisition ID ranges, the boxes in this area
are enabled.
Current range
Next ID
Type the next requisition ID to assign.
Cornerstone will automatically assign
requisition numbers to lab requests in
sequential order, starting with this number.
End ID
Type the last ID to assign in this range of
requisition IDs.
Warning trigger
Type a number near the end of the range
of numbers. When this requisition number
is assigned to a request, Cornerstone will
display a warning on the screen to let you
know that you are almost at the end of the
current requisition number range.
Next range
Begin ID
Type the first requisition ID that you want to
assign after you run out of numbers in the
current range.
End ID
Type the last ID you want to assign in the
next range of requisition IDs.
Note: If you do not specify a range of
numbers in the Next Range fields and you
run out of numbers in the Current Range
fields, you will not be able to request any
more lab profiles until you assign a new
range of numbers.
• Page 99 •
Cornerstone 8.3 Default and Security Settings Guide
Cornerstone 8.3 Default and Security Settings Guide
Menu Access
Action &
Decision
Default/Description
Activities >
Lab Work >
Laboratories >
New
(continued)
Verify
Units
Select Common units or SI units (international). If you are in the
United States, select Common units.
Display color
To display the lab name in a different color when you view
cumulative results, select a color for this lab from the drop-down
list.
See figure LI
Cumulative display
To display cumulative results in a particular order, select the order
from the drop-down list. Options are Ascending (least recent to
most recent) or Descending (most recent to least recent).
Preferences
Use as default tab
If this laboratory is the one most frequently used by your clinic,
select this check box. When making a new lab request, this lab will
display on the request. Generally, your default lab will be your inclinic laboratory.
Review results before
posting
Select this check box if you want to post results manually. Clear
this check box if you want results to post to the Patient Clipboard
automatically.
Note: Orphan results and not requested results are not
automatically posted to a patient’s record, regardless of your
selection here. They may be viewed from the Lab Requests and
Results window.
• Page 100 •
Require sample drawn
by info
Select this check box to make the Sample drawn by field on a lab
request a required field for your clinic.
Use order numbers
An order number is a number assigned by a clinical lab to a profile.
Order numbers must be used for reference laboratories and are not
used with in-clinic work. Select this check box to use order numbers
with this laboratory.
Close partial pending
profiles
Sometimes not all the tests in a particular profile come back. Select
this check box if you want to close partial pending profiles and
consider them finished. This option applies only to your in-clinic
laboratory.
Require requests
Select this check box if you want laboratory results to be
automatically matched to pending requests. If you choose to not
require requests, your practice must remember to manually bill the
client.
Use favorites list
Your favorites list is a quick way to access the profiles you use
frequently. Select this check box if you want to use the favorites list
for this lab.
Use special actions
Select this check box if you want to create special actions that
generate lab requests. Invoice items set up as special action
lab requests automatically generate lab requests when they are
entered on an invoice or Patient Visit List.
Hide request screen if no
special action
If you are using the lab request special action, a lab request will
be automatically created when the item is entered on an invoice or
the Patient Visit List. Select this check box if you are using the lab
request special action and you don’t want to view the lab request
when it is created.
Warn in invoicing if Not
Req results exist
Select this check box if you want a warning message to appear at
invoicing if a patient has not-requested results. This helps prevent
missed lab charges.
Use VetLab Station
SmartLink billing
Select this check box to allow a client to be billed for lab results
returned to Cornerstone from the IDEXX VetLab Station with the
use of the Census List feature. If selected, the Require requests
option must also be selected to avoid missed charges.
Cornerstone 8.3 Default and Security Settings Guide
Cornerstone 8.3 Default and Security Settings Guide
Menu Access
Activities >
Lab Work >
Laboratories >
New
(continued)
See figure LI
Action &
Decision
Default/Description
Verify
Print preferences
Print full page
Select this check box to print full page lab requests. When making
a request, you can override this default.
Enter the default number of copies in the corresponding # Copies
box.
Print label
Select this check box to always print a lab request label. When
making a request, you can override this default.
Enter the default number of copies in the corresponding # Copies
box.
Print tube label
Select this check box to always print a label for tubes. The label
size is 1.187” x 2.218.”
Enter the default number of copies in the corresponding # Copies
box.
Print VetTest barcodes
Select this check box to print barcodes for the patient ID, patient
name, client last name, and the requisition ID. The barcodes may
then be scanned into the VetTest analyzer when processing the
sample.
IDEXX LabREXX
Note: This area appears for IDEXX Reference Laboratories, IDEXX In-clinic Laboratory, or nonIDEXX in-clinic or reference laboratories. See the next page for details of how this area appears
when you set up the Antech Diagnostics® laboratory module.
Create LabREXX test
request forms
Select this check box to allow the use of use barcoded LabREXX
requisition forms.
When this check box is selected, the Print full page print
preferences option is also automatically selected. The full page
option prints the LabREXX barcoded requisition form (the regular
Cornerstone lab request form will not be available for this lab).
This field is only available for IDEXX Reference Laboratories.
Print using InkSaver
Select this check box if you want to print only the requested tests
instead of all tests.
This field is only available for IDEXX Reference Laboratories.
Automatically update
prices
This field is available for all in-clinic and reference laboratories.
Allow prices to go down
This field is available for all in-clinic and reference laboratories.
Select this check box if you want to update Cornerstone reference
laboratory prices automatically whenever the LabREXX test list is
updated.
Select this check box if you want to allow LabREXX invoice item
pricing to be lowered if IDEXX lowered the price for a LabREXX
invoice item in its latest Directory of Services.
• Page 101 •
Cornerstone 8.3 Default and Security Settings Guide
Cornerstone 8.3 Default and Security Settings Guide
Menu Access
Activities >
Lab Work >
Laboratories >
New
(continued)
Action &
Decision
Default/Description
Verify
For creating new lab invoice items
Note: These fields are only active for IDEXX Reference Laboratories.
Do not create items
automatically
Select this check box if you do not want to create new lab invoice
items automatically when a selected lab test contains items that are
not already in your system.
If you clear this check box, the default settings below will be used
to create to create a new lab invoice automatically when you select
a lab test with items that aren’t already in your system.
See figure LI
Class ID
Sub Class ID
Markup percentage
If you want to create new lab invoices items automatically, select
the classification (Class ID) and sub classification (Sub Class ID)
in which you want these new items to be included.
Type the markup percentage that you want to use. This markup will
be applied to the IDEXX price for this test.
Antech online
Note: This area appears in place of IDEXX LabRexx when a laboratory is set up as the Antech
Diagnostics laboratory module.
Markup percentage
Type the markup percentage that you want to use. This markup will
be applied to the Antech price for this test.
Automatically update
prices
Select this check box to automatically recalculate your practice
prices based on the markup percentage you specify whenever new
prices are downloaded from Antech Diagnostics. These prices are
updated in Cornerstone during the next End of Day processing.
Allow prices to go down
Select this check box if you want to allow Antech invoice item
pricing to be lowered if Antech lowered the price for an Antech
invoice item.
Figure LI
(Activities > Lab Work > Laboratories > New)
• Page 102 •
Cornerstone 8.3 Default and Security Settings Guide
Cornerstone 8.3 Default and Security Settings Guide
Action &
Decision
Menu Access
Default/Description
Activities > Lab
Work > Templates
Enter the tests to appear on your template. Use the up and down arrow keys to arrange the order
in which your tests will appear. Click New to add a template or Update to update a template.
Set up
Activities > Lab
Work > Default
Test Ranges
For each kind of result you plan to enter manually, select species, age range, lab, and template.
Then fill in the Defaults table with units, and low and high values (columns) for each test (row).
Set up
• Page 103 •
Note: Before completing this setup step, you need to have already set up lab age ranges as well
as the laboratory and templates for which you want to manually enter results.
Cornerstone 8.3 Default and Security Settings Guide
Cornerstone 8.3 Default and Security Settings Guide
IDEXX Computer Systems
CONFIDENTIAL INFORMATION
Security Settings
Security options addressed in this document are unique to each practice and each practice has different priorities. The following list
provides a general guideline for assigning security settings.
• Method A – Setting security based on individualized logins (recommended)
• Method B – Setting security based on job title
• Method C – Two-tiered administrator/general login
Suggested Security Settings:
Method A – Setting security based on individualized logins:
If everyone in your clinic needs to have their own login, then
this method of setting security is the one you should follow.
You will need to set up each staff member under his or her
name and then set security for each employee based on
their job title using the security setting guide below. Using
this method will allow you to track changes to invoices and
patient visit lists. This is the recommended method.
Method B – Setting security based on job title: This method
consists of setting security based on job titles, such as
receptionist, doctor associates, technicians, office managers,
and administrator. The administrator will have access to
everything in Cornerstone. You will need to set up a staff
login for each job title, and your employees will sign in under
that job title using the appropriate password. You will use the security setting guide below to do this. This method does not allow
you to effectively track changes to invoices or Patient Visit Lists.
Method C – Two-tiered administrator/general login: This method consists of only two types of security. The first is an administrator
login (for one or two people who have access to everything in Cornerstone). The second is a general login that everyone will use.
This method does not allow you to effectively track changes to invoices or patient visit lists.
When you set up security for this type of method, you will not select security settings with these key words for the Dialog tab–
• Set-up
• Purge
• Change Passwords
• Reports
• GL Interface
• Merge Clients/Patients
• Cornerstone
Performance
Tracker
• Staff Class
Commissions
• Cornerstone
Snapshot
• Invoice Void
• Mass Markup
• Unattended Set
• Staff Commissions
• Update Revenue
Centers
• Information
(excluding client
and patient
information)
For the Reports tab – You will need to go through the list and determine if the general login will need access to those listed
reports.
Note: If you are upgrading from Cornerstone 8.2 to 8.3, see Cornerstone 8.3 Getting Started Guide, section 8, "Security and
Setup," for a list of only those dialog and report security settings that have been introduced between 8.2 and 8.3.
1
Exclusive to Multi-Location Inventory
Exclusive to Multi-Practice
3
Indicates a report that is available for multi-location databases
4
Security setting for a purchasable module
2
• Page 104 •
This document contains suggested security settings for General Login
(GEN), Receptionists (REC), Technicians (TECH), Doctors (DR),
and Managers/Owners (M/O). However, it is ultimately the practice’s
decision-maker that decides who needs access to certain areas within
Cornerstone*, and IDEXX shall not be liable for any actions arising
from those security decisions.
Cornerstone 8.3 Default and Security Settings Guide
Cornerstone 8.3 Default and Security Settings Guide
IDEXX Computer Systems
CONFIDENTIAL INFORMATION
Cornerstone Security Settings Guide
Some of these options will not display in your security list if you have not purchased one of these Cornerstone
modules: Boarding and Grooming, DICOM® Imaging (or Diagnostic Imaging), IDEXX-PACS*, In-clinic Laboratory
Module, Patient Advisor*, Mobile Computing, or Pharmacy Formulary.
Key: GEN: General Login under Method C; REC: Receptionists; TECH: Technicians; DR: Doctors; M/O: Managers/Owners
Foundation Dialog Security
Access Suggestions
GEN
REC
DR
TECH
Address Alignment – Estimates
Antech – Lab Item Price Update
X
X
Appointment – Appointment Note
Setup
Appointment – Appointment
Notes
Path to Locate
M/O
X
Controls > Defaults > Practice and Workstation >
Estimate > Estimate Address
X
Activities > Lab Work > Update Antech Lab Item
Prices
X
X
X
X
X
Appointment – Appointment
Purge
X
X
Appointment – Block Out
Appointments
X
X
X
Appointment – Check In/Out
Appointments
X
X
X
X
X
Appointment – Copy/Paste
Appointments
X
X
X
X
X
Appointment – Delete
Appointments
X
X
X
X
X
Appointment – Delete Blocks
X
Appointment – Find
Appointments
X
X
X
X
X
Appointment – Go To
Appointment
X
X
X
X
X
Appointment – Locate
Appointments
X
X
X
X
X
Appointment – Move
Appointments
X
X
X
X
X
X
X
X
Appointment – Practice Setup
–Templates
Appointment – Reason for Visit
X
X
X
X
Appointment – Reason for Visit
Setup
Appointment – Reports
1
X
X
X
Exclusive to Multi-Location Inventory
Exclusive to Multi-Practice
3
Indicates a report that is available for multi-location databases
4
Security setting for a purchasable module
2
• Page 105 •
X
Appointment Scheduler icon > Notes button > New
Appointment Scheduler icon > Notes button
Activities > Appointment Scheduler > Appointment
Purge
Appointment Scheduler icon > Block button
Appointment Scheduler icon > Check-in button
Appointment Scheduler icon > Right-click
appointment > Select Copy
Appointment Scheduler icon > Delete button
Appointment Scheduler icon > Delete button
Appointment Scheduler icon > Find button
Appointment Scheduler icon > Go To button
Appointment Scheduler icon > Locate button
Appointment Scheduler icon > Move button
X
Controls > Appointment Scheduler > Practice Setup
> Template Designs
X
Controls > Appointment Scheduler > Reason for
Visit
X
Controls > Appointment Scheduler > Reason for
Visit > New
X
Reports > Appointment Scheduler > Appointments
Report
This document contains suggested security settings for General Login
(GEN), Receptionists (REC), Technicians (TECH), Doctors (DR),
and Managers/Owners (M/O). However, it is ultimately the practice’s
decision-maker that decides who needs access to certain areas within
Cornerstone*, and IDEXX shall not be liable for any actions arising
from those security decisions.
Cornerstone 8.3 Default and Security Settings Guide
Cornerstone 8.3 Default and Security Settings Guide
IDEXX Computer Systems
CONFIDENTIAL INFORMATION
Foundation Dialog Security
Access Suggestions
Path to Locate
GEN
REC
DR
TECH
M/O
Appointment – Schedule
Appointments
X
X
X
X
X
Appointment – Schedule for
Today
X
X
X
X
X
Appointment – Schedule for
Week
X
X
X
X
X
Appointment – Schedule for
Week Legend
X
X
X
X
X
Appointment Scheduler icon > Weekly button >
Legend button
X
Controls > Appointment Scheduler > Staff Setup >
Goals button
X
Controls > Appointment Scheduler > Staff Setup >
Hours button
X
Controls > Appointment Scheduler > Staff Setup
X
Controls > Appointment Scheduler > Template
Designs > New
X
Controls > Appointment Scheduler > Template
Designs
Appointment Scheduler icon > Tickler button
Appointment – Staff Goals Setup
Appointment – Staff Hours Setup
Appointment – Staff Setup
Appointment – Template Design
Appointment – Template Design
Description
Appointment – Tickler File
X
X
X
X
X
Appointment – Update
Appointments
X
X
X
X
X
Appointment – View
Appointments
X
X
X
X
X
Appointment Scheduler icon > Schedule button
Appointment Scheduler icon > Today button
Appointment Scheduler icon > Weekly button
Appointment Scheduler icon > Update button
Appointment Scheduler icon > View button
Appointments – Suite
Information
X
X
Controls > Appointment Scheduler > Suite Setup >
New or Update
Appointments – Suite Setup
X
X
Controls > Appointment Scheduler > Suite Setup
Assign Client to Practice
X
Tools > Assign Client to Practice
Backup Logs
X
Reports > Back-up Log
Backup Verification Assistant
X
Tools > Backup Verification Assistant
X
Controls > Billing Messages > New
X
Controls > Billing Messages
X
Activities > Boarding > Block Cages
Billing Message Setup
Billing Messages
Boarding Block Cages
X
X
X
X
4
Boarding Cage Information
4
Boarding Cage Type List4
Boarding Delete Reservation
X
X
X
X
X
Activities > Boarding > Cage Type > New
X
X
X
X
X
Activities > Boarding > Cage Type
X
X
X
X
X
Reservation icon > Delete
Boarding Make Reservation4
X
X
X
X
X
Reservation icon > New
Boarding Print Boarding
Documents4
X
X
X
X
X
Boarding Reservation Book4
X
X
X
X
X
Activities > Boarding > Reservation Book
Boarding Reservation List
X
X
X
X
X
Reservation icon
1
4
4
Exclusive to Multi-Location Inventory
Exclusive to Multi-Practice
3
Indicates a report that is available for multi-location databases
4
Security setting for a purchasable module
2
• Page 106 •
Activities > Boarding > Print Boarding Documents
This document contains suggested security settings for General Login
(GEN), Receptionists (REC), Technicians (TECH), Doctors (DR),
and Managers/Owners (M/O). However, it is ultimately the practice’s
decision-maker that decides who needs access to certain areas within
Cornerstone*, and IDEXX shall not be liable for any actions arising
from those security decisions.
Cornerstone 8.3 Default and Security Settings Guide
Cornerstone 8.3 Default and Security Settings Guide
IDEXX Computer Systems
CONFIDENTIAL INFORMATION
Foundation Dialog Security
Boarding Reservation
Recurrence4
Access Suggestions
Path to Locate
GEN
REC
DR
TECH
M/O
X
X
X
X
X
Boarding Reservation Type
Information4
X
Reservation icon > Right-click on reservation
Activities > Boarding > Reservation Type > Update
Boarding Reservation Type List4
X
X
X
X
X
Activities > Boarding > Reservation Type
Boarding View Cage Availability4
X
X
X
X
X
Activities > Boarding > View Cage Availability
Breed List
X
X
X
X
X
Lists > Species > Update
Breed Setup
Call Back Note Information
X
Lists > Species > Update > Add
X
X
Lists > Call Back Notes > Update
Call Back Notes
X
X
X
X
X
Lists > Call Back Notes
CareCredit
X
X
X
X
X
CareCredit icon OR Activities > CareCredit
X
Lists > Cashier ID > Update
Cashier ID Information
Cashier ID List
X
X
X
X
X
Lists > Cashier ID
Census List
X
X
X
X
X
Lists > Census OR F3 key
X
Tools > Change IDs
X
File > Change Password
X
Lists > Invoice Item Class
X
Lists > Invoice Item Class > Update
Change IDs
Change Password
Classifications
X
X
X
X
Classifications Setup
Client Account
X
Client Account icon
Client Account Adjustment
X
Client Account icon > Adjust button
Client Account Comment
X
Client Account icon > Comment button
Client Account Payment
X
X
X
X
X
X
X
X
Client Account icon > Payment button
Client Account Returned Check
X
X
Client Account icon > Rtn Check button
Client Account Transfer
X
Client Account icon > Transfer button
Client Account Write Off/
Reinstate
X
Client Account icon > Write Off button OR
Reinstate button
Client Information
X
X
X
X
X
Client List icon > Update
Client Information A/R Info
X
X
X
X
X
Client List icon > Update > A/R Info
Client List
X
X
X
X
X
Client List icon
Client List – Phone
X
X
X
X
X
Client List icon > Select client > Update button
Client Reports
X
X
X
X
X
Reports > Client
X
Controls > Colors > Update
Color Setup
Colors
X
Controls > Colors
Compliance – Compliance Test
Setup
X
Reports > Compliance Assessment Tool* > Protocol
Setup Wizard
Compliance – Generate
Compliance Results
X
Reports > Compliance Assessment Tool >
Generate Compliance Results
1
X
X
X
Exclusive to Multi-Location Inventory
Exclusive to Multi-Practice
3
Indicates a report that is available for multi-location databases
4
Security setting for a purchasable module
2
• Page 107 •
X
This document contains suggested security settings for General Login
(GEN), Receptionists (REC), Technicians (TECH), Doctors (DR),
and Managers/Owners (M/O). However, it is ultimately the practice’s
decision-maker that decides who needs access to certain areas within
Cornerstone*, and IDEXX shall not be liable for any actions arising
from those security decisions.
Cornerstone 8.3 Default and Security Settings Guide
Cornerstone 8.3 Default and Security Settings Guide
IDEXX Computer Systems
CONFIDENTIAL INFORMATION
Foundation Dialog Security
Access Suggestions
GEN
REC
DR
Path to Locate
TECH
M/O
Compliance – Protocol Group
Setup
X
Reports > Compliance Assessment Tool > Protocol
Group Set up
Compliance – Protocol Setup
Wizard
X
Reports > Compliance Assessment Tool > Protocol
Setup Wizard
X
Controls > Controlled Substance > Controlled
Substance Export
X
Controls > Controlled Substance > Controlled
Substance Export
X
Controls > Controlled Substance > Controlled
Substance Export > New/Update
X
Controls > Controlled Substance Reasons >
Update
Controlled Substance Export
Controlled Substance Export List
Controlled Substance Export
Setup
Controlled Substance Reason
Information
Controlled Substance Reason
List
X
X
X
X
X
Convert between Markup/Margin
Correspondence
X
Controls > Controlled Substance Reasons
X
Tools > Convert Between Markup/Margin
X
X
X
X
X
Activities > Correspondence or Correspondence
icon
X
X
X
X
X
Activities > Correspondence or Correspondence
icon
Create Phone List
X
Only available if the clinic has the auto dialer
Credit Code Setup
X
Controls > Credit Codes > New
Controls > Credit Codes
Correspondence – Finalize
Credit Codes
X
X
X
X
X
Custom Client and Patient
Reports
X
X
X
X
X
Daily Planner
X
X
X
X
Reports > Client and Patient Report Builder
X
Daily Planner icon
Data Services Agreement
X
Tools > Data Services Agreement
Database Purge
X
Tools > Purge Data
Defaults – Password
X
Controls > Practice and Workstation > Passwords
Defaults – Practice
X
Controls > Practice and Workstation
Defaults – Staff
X
Controls > Staff
Defaults – Workstation
X
Controls > Practice and Workstation
Departing Instruction Setup
X
Lists > Departing Instructions > New
Departing Instructions List
X
X
X
X
X
Lists > Departing Instructions
Diagnostic Code List
X
X
X
X
X
Lists > Diagnostic Codes
X
Lists > Diagnostic Codes > New
Diagnostic Code Setup
X
Discount Setup
X
Controls > Discounts > New
Discounts
X
X
X
X
X
Controls > Discounts
Document Template Category
List
X
X
X
X
X
1
Exclusive to Multi-Location Inventory
Exclusive to Multi-Practice
3
Indicates a report that is available for multi-location databases
4
Security setting for a purchasable module
2
• Page 108 •
Lists > Documents > Template Categories
This document contains suggested security settings for General Login
(GEN), Receptionists (REC), Technicians (TECH), Doctors (DR),
and Managers/Owners (M/O). However, it is ultimately the practice’s
decision-maker that decides who needs access to certain areas within
Cornerstone*, and IDEXX shall not be liable for any actions arising
from those security decisions.
Cornerstone 8.3 Default and Security Settings Guide
Cornerstone 8.3 Default and Security Settings Guide
IDEXX Computer Systems
CONFIDENTIAL INFORMATION
Foundation Dialog Security
Access Suggestions
GEN
REC
DR
Document Template Category
Setup
Document Template List
X
X
X
Path to Locate
TECH
X
Document Template Setup
Documents – Void
M/O
X
Lists > Documents > Template > Categories > New
OR Update
X
Lists > Documents > Template
X
Lists > Documents > Template > New OR Update
X
From Patient Clipboard > Double-click on desired
document > Select Void button OR Right-click on
the desired “Title Only” > Select Void
End of Day Closing
X
X
X
X
X
Activities > End of Period > End of Day
End of Day Reports
X
X
X
X
X
Reports > End of Period > End of Day
End of Month Closing
X
Activities > End of Period > End of Month
End of Month Reports
X
Activities > End of Period > End of Month
End of Year Closing
X
Activities > End of Period > End of Year
End of Year Reports
X
Activities > End of Period > End of Year
Estimate
X
X
X
X
X
Activities > Estimate
Estimate Discounts
X
X
X
X
X
Controls > Discounts
X
Controls > Defaults > Practice > Invoice & Estimate
tab > Set Defaults Messages button
X
Controls > Estimate Messages
Estimate Message Defaults
Estimate Messages
X
X
X
Estimate Options
X
Estimate icon > OK on new estimate > Options
Estimate Taxes
X
X
X
X
X
Controls > Taxes
Feeding Guide Profile
X
X
X
X
X
Activities > Feeding Guide > Feeding Guide Profile
X
Activities > Feeding Guide > Feeding Guide Setup
X
Activities > Generate Reminders
GL Interface Manual Extract
X
Controls > General Ledger > Manual Extract
GL Interface Setup
X
Controls > General Ledger > Setup
X
Activities > Feeding Guide > Storage & Handling
Instructions
HL7 – Maintain Transactions
X
Tools
HL7 – Setup
X
Tools
X
Controls > Defaults > Imaging > System Settings >
Archive
X
Activities > Imaging > Archiving
X
Controls > Defaults > Imaging > Exam Trees >
Auto Crop
X
Controls > Defaults > Imaging > Exam Trees >
Auto-Routing
X
Activities > Imaging > DICOM Printer > Batch
Printing
Feeding Guide Setup
Generate Reminders
Hill’s Storage & Handling
X
X
X
X
X
Imaging Archive Settings
Imaging Archiving
X
Imaging Auto-Crop Settings
Imaging Auto-Routing Settings
Imaging Batch Print
1
X
X
Exclusive to Multi-Location Inventory
Exclusive to Multi-Practice
3
Indicates a report that is available for multi-location databases
4
Security setting for a purchasable module
2
• Page 109 •
X
This document contains suggested security settings for General Login
(GEN), Receptionists (REC), Technicians (TECH), Doctors (DR),
and Managers/Owners (M/O). However, it is ultimately the practice’s
decision-maker that decides who needs access to certain areas within
Cornerstone*, and IDEXX shall not be liable for any actions arising
from those security decisions.
Cornerstone 8.3 Default and Security Settings Guide
Cornerstone 8.3 Default and Security Settings Guide
IDEXX Computer Systems
CONFIDENTIAL INFORMATION
Foundation Dialog Security
Access Suggestions
GEN
DR
TECH
M/O
X
X
X
X
Activities > Imaging > Imaging Dashboard >
Capture Image
Imaging Case Window
X
X
X
X
Activities > Imaging > Cases
Imaging Category List
X
X
X
X
Activities > Imaging > Category
X
X
X
Activities > Imaging > Image Explorer > Compare
X
Controls > Defaults > Imaging > Exam Tree
Maintenance > Contrast
Imaging Capture Image
REC
Path to Locate
Imaging Compare Images
Imaging Contrast Settings
Imaging Create Patient CD
Imaging Dashboard
X
X
X
X
X
Activities > Imaging > Image Explorer > Create
Patient CD
X
X
X
X
X
Activities > Imaging > Imaging Dashboard
X
Controls > Defaults > Imaging > System Settings >
Dashboard
Imaging Dashboard Settings
Imaging Delete Images and
Cases
X
Imaging DICOM Modality Types
Imaging DICOM Queue
Imaging E–mail
X
X
X
X
X
X
Activities > Imaging > DICOM Modality Types
X
X
X
Activities > Imaging > DICOM Queue or
Activities > Imaging > Image Explorer > DICOM
Queue
X
X
X
Controls > Defaults > Imaging > System Settings
> E–mail
X
Controls > Defaults > Imaging > System Settings >
Email
X
Controls > Defaults > Imaging > Exam Tree
Maintenance > Exam
X
Controls > Defaults > Imaging > Export
X
Controls > Defaults > Imaging > Exam Tree
Maintenance > Frequencies
X
Controls > Defaults > Imaging > System Settings >
Global Defaults
Imaging Email Settings
Imaging Exams Settings
Imaging Export Settings
Imaging Frequencies Settings
Imaging Global Settings
Imaging Image Explorer
Imaging Import DICOM
Imaging Import Image
X
X
X
X
X
Activities > Imaging > Image Explorer
X
X
X
X
Activities > Imaging > Image Explorer > Import
DICOM
X
X
X
X
Activities > Imaging > Image Explorer > Import
X
Activities > Imaging > Keyword
X
Controls > Defaults > Imaging > DICOM Settings >
Local Server
X
Controls > Defaults > Imaging > DICOM Settings >
Manufacturers Mapping
X
Controls > Defaults > Imaging > DICOM Settings >
Manufacturers
Imaging Keyword List
Imaging Local Server Settings
Imaging Manufacturers Map
Settings
Imaging Manufacturers Settings
1
Exclusive to Multi-Location Inventory
Exclusive to Multi-Practice
3
Indicates a report that is available for multi-location databases
4
Security setting for a purchasable module
2
• Page 110 •
Activities > Imaging > Cases > Delete
This document contains suggested security settings for General Login
(GEN), Receptionists (REC), Technicians (TECH), Doctors (DR),
and Managers/Owners (M/O). However, it is ultimately the practice’s
decision-maker that decides who needs access to certain areas within
Cornerstone*, and IDEXX shall not be liable for any actions arising
from those security decisions.
Cornerstone 8.3 Default and Security Settings Guide
Cornerstone 8.3 Default and Security Settings Guide
IDEXX Computer Systems
CONFIDENTIAL INFORMATION
Foundation Dialog Security
Access Suggestions
GEN
REC
DR
Imaging Monitor Settings
Imaging Orientations Settings
Imaging Presets Settings
Imaging Re–assign Images
X
X
X
Imaging Remote Servers
Settings
Imaging Requests List
Path to Locate
TECH
M/O
X
Controls > Defaults > Imaging > System Settings >
Monitor
X
Controls > Defaults > Imaging > Exam Tree
Maintenance > Orientations
X
Controls > Defaults > Imaging > System Settings >
Presets
X
Activities > Imaging > Image Explorer > Reassign
X
Controls > Defaults > Imaging > DICOM Settings >
Remote Servers
X
X
X
X
X
Activities > Imaging > Imaging Requests and
Results
Imaging Requisitions
X
X
X
X
X
Activities > Imaging > Imaging Requests
Imaging Review
X
X
X
X
X
Activities > Imaging > Image Explorer > Review
X
X
X
X
Activities > Imaging > DICOM Printer > Select
DICOM Printer
X
X
X
X
Activities > Imaging > Image Explorer > Send
DICOM
X
Controls > Defaults > Imaging > System Settings >
Imaging
X
Controls > Defaults > Imaging
X
Activities > Imaging > Telemedicine Queue
X
Controls > Defaults > Imaging > System Settings >
Telemedicine
X
Tools > Import Document Templates
Imaging Select DICOM Printer
Imaging Send DICOM
Imaging Settings
Imaging System Setup
Imaging Telemedicine Queue
X
X
X
X
X
Imaging Telemedicine Settings
Import Document Template
Inventory
X
Inventory
Inventory – Adjustment List
X
Inventory > Adjustment List
Inventory – Adjustment Reason
List
X
Inventory – Adjustment Reason
Maintenance
X
Inventory – Backorder List
X
Inventory – Backorder
Maintenance
X
Inventory – Cost Adjustment
Maintenance
X
Inventory – Cost Center List
X
Inventory – Cost Center
Maintenance
X
Inventory – History Purge
X
Tools > Inventory Purge
Inventory – Internal Stock Use
X
Inventory > Internal Stock Use
1
X
X
X
Exclusive to Multi-Location Inventory
Exclusive to Multi-Practice
3
Indicates a report that is available for multi-location databases
4
Security setting for a purchasable module
2
• Page 111 •
X
Inventory > Adjustment Reasons
Inventory > Adjustment Reasons
Inventory > Backorder List
Inventory > Backorder List
Inventory > Adjustment List > New Cost Adjustment
Activities > Inventory > Settings > Cost Centers
Inventory > Cost Centers
This document contains suggested security settings for General Login
(GEN), Receptionists (REC), Technicians (TECH), Doctors (DR),
and Managers/Owners (M/O). However, it is ultimately the practice’s
decision-maker that decides who needs access to certain areas within
Cornerstone*, and IDEXX shall not be liable for any actions arising
from those security decisions.
Cornerstone 8.3 Default and Security Settings Guide
Cornerstone 8.3 Default and Security Settings Guide
IDEXX Computer Systems
CONFIDENTIAL INFORMATION
Foundation Dialog Security
Access Suggestions
Path to Locate
GEN
REC
DR
TECH
M/O
X
X
X
X
X
Various Locations: Invoice, Patient Visit List,
Whiteboard, Prescriptions, etc.
Inventory – Inventory Reports
X
Reports > Inventory
Inventory – Item History and
Item Information
X
Inventory – Location List
X
Inventory – Location
Maintenance
X
Inventory – Order List
X
Inventory > Order List
Inventory – Order Maintenance
X
Inventory > Order List
Inventory – Purchasing Work List
X
Inventory > Purchasing Work List
Inventory – QOH Adjustment
Maintenance
X
Inventory – Receipt List
X
Inventory > Receipt List
Inventory – Receipt Maintenance
X
Inventory > Receipt List
Inventory – Return to Vendor
X
Inventory > Return to Vendor
Inventory – Vendor List
X
Inventory > Vendors
Inventory – Vendor Maintenance
X
Inventory > Vendors
Inventory – Inventory Details
Inventory > Item History and Item Information tab
Inventory > Locations
Inventory > Locations
Inventory View Quantity on Hand
Inventory – View Quantity on
Hand
X
X
X
X
X
Inventory – Want List
X
X
X
X
X
Inventory > Want List
Invoice
X
X
X
X
X
Invoice icon
Invoice Departing Instructions
X
X
X
X
X
Invoice icon > Departing button
Invoice Discount
X
X
X
X
X
Invoice icon > Discount button
Invoice Discount – Apply to all
lines
X
X
X
X
X
Invoice Item Classification
Information
Invoice Item Classification List
X
X
X
X
X
Invoice Item Information
Invoice Item List
X
X
X
X
Inventory > View Quantity on Hand
Lists > Invoice Item Class > Update
X
Lists > Invoice Item Class
X
Lists > Invoice Item > Update
X
Lists > Invoice Item
Invoice Item Reports
X
Reports > Invoice Item
Invoice Item Setup
X
Tools > Invoice Item Setup
Invoice Item Subclass
Information
X
Invoice Item Subclass List
X
Lists > Invoice Item Class > Update
Invoice icon > Discount button
Invoice Manual Discount
X
X
X
X
X
Invoice Mark Patient as
Deceased
X
X
X
X
X
1
Exclusive to Multi-Location Inventory
Exclusive to Multi-Practice
3
Indicates a report that is available for multi-location databases
4
Security setting for a purchasable module
2
• Page 112 •
Lists > Invoice Item Class > Update > Add
Invoice icon > Special button
This document contains suggested security settings for General Login
(GEN), Receptionists (REC), Technicians (TECH), Doctors (DR),
and Managers/Owners (M/O). However, it is ultimately the practice’s
decision-maker that decides who needs access to certain areas within
Cornerstone*, and IDEXX shall not be liable for any actions arising
from those security decisions.
Cornerstone 8.3 Default and Security Settings Guide
Cornerstone 8.3 Default and Security Settings Guide
IDEXX Computer Systems
CONFIDENTIAL INFORMATION
Foundation Dialog Security
Access Suggestions
Path to Locate
GEN
REC
DR
TECH
M/O
Invoice Patient Sex Modification
X
X
X
X
X
Invoice Patient Update Microchip
ID
X
X
X
X
X
Invoice Patient Visit
X
X
X
X
X
Popup Box to Transfer
Invoice Reminders
X
X
X
X
X
Invoice icon > Special button
Invoice Tax
X
X
X
X
X
Invoice icon > Tax button
X
Control > Invoice Types > New
X
Controls > Invoice Types
X
Invoice icon > Void button
X
X
Activities > Lab Work > Setup Lab Links > Link
Breeds
X
X
Activities > Lab Work > Setup Lab Links > Link
Sexes
X
X
Activities > Lab Work > Setup Lab Links > Link
Species
X
Lab icon > Update
X
Activities > Lab Work > Default Test Range
X
Activities > Lab Work > Import Lab Results by File
X
Activities > Lab Work > Laboratories > Update
Invoice Type Setup
Invoice Types
X
X
X
X
Invoice Void
Lab – Link Lab Breeds
Lab – Link Lab Sex
Lab – Link Lab Species
Lab Change Pending Requests
X
X
X
X
X
X
Lab Defaults Test Ranges
Lab Import Results by File
Lab Information
Invoice icon > Special button
Invoice icon > Special button
Lab List
X
X
X
X
Activities > Lab Work > Laboratories
Lab Manually Enter Results
X
X
X
X
Activities > Lab Work > Manually Enter Results
Lab New Requests
X
X
X
X
Lab icon > New
Lab Not Requested Lab Work
X
X
X
X
X
Lab icon > Results of “Not Requested”
Lab Orphan Lab Work
X
X
X
X
X
Lab icon > Results of “Orphan”
Lab Post Orphans
X
X
X
X
X
Lab icon > Post Orphans button
X
Activities > Lab Work > Profiles > Update
Lab Profile Information
Lab Profile List
X
X
X
X
X
Activities > Lab Work > Profiles
Lab Reports
X
X
X
X
X
Reports > Lab
Lab Requests and Results
X
X
X
X
X
Lab icon
X
Activities > Lab Work > Setup Lab Invoice Items for
New INCLINIC Instruments
X
Activities > Lab Work > Templates > Update
X
Activities > Lab Work > Templates
X
Activities > Lab Work > Communication Status
Lab Set Up Invoice Items
Lab Template Information
Lab Template List
X
X
X
X
Lab View Communication Status
Lab View Cumulative Results
Lab View Detailed Results
1
X
X
X
X
X
Patient File icon > Right-click on result >
Cumulative Results
X
X
X
X
X
Patient File icon > Right-click on Result > Detailed
Results
Exclusive to Multi-Location Inventory
Exclusive to Multi-Practice
3
Indicates a report that is available for multi-location databases
4
Security setting for a purchasable module
2
• Page 113 •
This document contains suggested security settings for General Login
(GEN), Receptionists (REC), Technicians (TECH), Doctors (DR),
and Managers/Owners (M/O). However, it is ultimately the practice’s
decision-maker that decides who needs access to certain areas within
Cornerstone*, and IDEXX shall not be liable for any actions arising
from those security decisions.
Cornerstone 8.3 Default and Security Settings Guide
Cornerstone 8.3 Default and Security Settings Guide
IDEXX Computer Systems
CONFIDENTIAL INFORMATION
Foundation Dialog Security
LabREXX* – Create IDEXX Test
Request Form
Access Suggestions
Path to Locate
GEN
REC
DR
TECH
M/O
X
X
X
X
X
X
X
LabREXX – Lab Item Price
Update
Activities > Lab Work > Create IDEXX LabREXX
Test Request Form
Activities > Lab Work > Update Lab Item Prices
LabREXX – Setup LabREXX
Employee Flag
X
Activities > Lab Work > Setup IDEXX LabREXX >
Set LabREXX Employee Flag
Load LifeLearn® Documents
X
Tools > Load LifeLearn Documents
Mass Markup
X
Tools > Mass Markup
Medical Notes
X
X
X
X
X
Medical Note icon
Medical Notes – Finalize
X
X
X
X
X
Medical Note icon
X
Tools > Merge Clients/Patients
Merge Clients/Patients
Message Center
X
X
X
Mobile Computing – Create
Database
X
X
X
Mobile Computing – Mobile
Computer Checkout Report
X
X
X
Mobile Computing – Mobile
Computer List
X
X
X
Mobile Computing – Sychronize
Mobile Computing
X
X
X
Mobile Computing – Undo
Mobile Computer
X
X
Partnership Information
Partnership List
Patient Advisor – Exam
Patient Advisor – Exam Note
X
X
X
Lists > Partnerships
X
X
X
X
X
Activities > Patient Advisor Exam OR Patient
Advisor Exam icon
X
X
X
X
X
Patient Advisor Exam icon > New > Note
X
X
X
X
X
X
X
X
Patient Advisor – Instruction
Header Setup
X
X
X
X
Patient Advisor – Observation
Setup
X
• Page 114 •
X
X
X
X
X
Exclusive to Multi-Location Inventory
Exclusive to Multi-Practice
3
Indicates a report that is available for multi-location databases
4
Security setting for a purchasable module
2
Tools > Mobile Computing > Undo Mobile Computer
X
X
1
Tools > Mobile Computing > Synchronize
Lists > Partnerships > Update
X
Patient Advisor – Reports
Tools > Mobile Computing > Mobile Computer List
X
Patient Advisor – Instruction
Header Order Setup
Patient Advisor – Observation
Search
Tools > Mobile Computing > Mobile Computer
Checkout Report
X
Patient Advisor – Exam Room
List
Patient Advisor – Instruction
Header List
button on toolbar
Tools > Mobile Computing > Create
X
X
Lists > Room
Lists > Patient Advisor > Instruction Headers
Lists > Patient Advisor > Instruction Header > Order
button
Lists > Patient Advisor > Instruction Header > New
Exam Wizard Page 2 > Search button
X
Lists > Patient Advisor > Patient Advisor Setup >
Observations > New
X
Reports > Patient Advisor
This document contains suggested security settings for General Login
(GEN), Receptionists (REC), Technicians (TECH), Doctors (DR),
and Managers/Owners (M/O). However, it is ultimately the practice’s
decision-maker that decides who needs access to certain areas within
Cornerstone*, and IDEXX shall not be liable for any actions arising
from those security decisions.
Cornerstone 8.3 Default and Security Settings Guide
Cornerstone 8.3 Default and Security Settings Guide
IDEXX Computer Systems
CONFIDENTIAL INFORMATION
Foundation Dialog Security
Access Suggestions
GEN
REC
Patient Advisor – Subsystem
Setup
Patient Advisor – System Setup
Patient Advisor – System
Template
Patient Advisor – System
Templates
X
X
Patient Advisor – Treatment
Template Setup
DR
M/O
X
X
Lists > Patient Advisor > Patient Advisor Setup >
New
X
X
Lists > Patient Advisor > Patient Advisor Setup >
New
X
X
X
X
X
X
X
X
Patient Advisor – Update
Templates by Item Descrip
Patient Check-In/Out
Path to Locate
TECH
X
Lists > Patient Advisor > System Templates > New
Lists > Patient Advisor > System Templates
Lists > Patient Advisor > Patient Advisor Setup
Lists > Patient Advisor > Patient Advisor Setup
X
X
X
X
X
Check–in icon
X
X
X
X
X
Activities > Patient Clipboard OR Patient Clipboard
icon
Patient Diagnosis
X
X
X
X
X
Activities > Diagnosis
Patient File
X
X
X
X
X
Activities > Patient File OR Patient File icon
Patient Clipboard*
Patient Hospital Status
Information
X
X
Lists > Patient Hospital Status
Patient Hospital Status List
X
X
X
X
X
Lists > Patient Hospital Status
Patient Information
X
X
X
X
X
Patient icon > New
Patient List
X
X
X
X
X
Lists > Patient OR Patient icon
Patient List – Owner Info
X
X
X
X
X
Patient icon > Update > Owner box
X
X
X
X
X
Patient icon > Update > Picture box > Right-click >
Update
Patient Reminders
X
X
X
X
X
Patient icon > Update > Reminders tab
Patient Reports
X
X
X
X
X
Reports > Patient
X
X
X
X
X
Patient Clipboard > Patient Information tab > Vital
Sign icon
X
X
X
Patient Clipboard > Tags/Microchip ID tab > rightclick on vaccination > Correct OR Reissue
X
Patient Clipboard > Patient Information tab > Vital
Sign icon
Patient Picture
Patient Vaccine
Patient Vaccine Corrections
Patient Vaccine Modification
Patient Visit List
X
X
X
X
X
Activities > Patient Visit List OR Patient Visit List
icon
Patient Visit List – Invoice
X
X
X
X
X
Controls > Defaults > Practice > Practice tab
Payment – Credit/Debit
Payments
X
X
X
X
Payment Type Setup
Payment Types
X
X
X
Performance Tracker
1
Exclusive to Multi-Location Inventory
Exclusive to Multi-Practice
3
Indicates a report that is available for multi-location databases
4
Security setting for a purchasable module
2
• Page 115 •
X
Client Account icon > Payment button
X
Controls > Payment Types > New
X
Controls > Payment Types
X
Reports > Performance Tracker
This document contains suggested security settings for General Login
(GEN), Receptionists (REC), Technicians (TECH), Doctors (DR),
and Managers/Owners (M/O). However, it is ultimately the practice’s
decision-maker that decides who needs access to certain areas within
Cornerstone*, and IDEXX shall not be liable for any actions arising
from those security decisions.
Cornerstone 8.3 Default and Security Settings Guide
Cornerstone 8.3 Default and Security Settings Guide
IDEXX Computer Systems
CONFIDENTIAL INFORMATION
Foundation Dialog Security
Pharmacy – Dosage Calculator
Pharmacy – Drug Interaction
Matrix
Access Suggestions
GEN
REC
DR
TECH
M/O
X
X
X
X
X
Activities > Pharmacy Formulary > Dosage
Calculator
X
X
X
X
X
Patient Visit List icon > Pharmacy button > Drug
Interaction Matrix
X
Activities > Pharmacy Formulary > Pharmacy
Invoice Item Link Setup
X
Lists > Postal Codes
X
Lists > Postal Codes > New
Pharmacy – Invoice Item Link
Setup
Postal Code List
X
X
X
X
Postal Code Setup
Practice List
X
X
Practice Reports
X
X
X
Lists > Practice
X
X
X
Reports > Practice
X
Lists > Practice > New
Practice Setup
Prescription Information
Prescription Instruction List
X
X
X
X
X
Activities > Prescription Label OR Prescription
Label icon
X
X
X
X
X
Lists > Prescription Instructions
X
Lists > Prescription Instructions > New
Prescription Instruction Setup
Prescription Labels
Prescription Labels – Apply To
Invoice
X
X
X
X
X
Activities > Prescription Label OR Prescription
Label icon
X
X
X
X
X
Activities > Prescription Label > New > Apply to
Invoice check box
Price Change Reason
Information
Price Change Reason List
X
X
X
X
X
Printer Assignment
Problem Categories List
Path to Locate
X
X
Problem Category Information
X
X
X
X
X
X
Controls > Price Change Reason > New
X
Controls > Price Change Reason
X
File > Printer Assignments
X
Controls > Problems > Problem Categories
X
Controls > Problems > Problem Categories > New
X
Controls > Problems > Problem List
Problem List
X
Problem List Information
X
X
Controls > Problems > Problem List > New
Problems for Patient
X
X
X
X
X
Activities > Problems
Reason For Visit
X
X
X
X
X
Controls > Reason for Visit
X
Controls > Reason for Visit > New
Referral Classification List
X
X
X
X
X
Lists > Referrals > Classification
Referral Classification
Information
X
Referral Doctor Information
X
X
X
X
X
Lists > Referrals > Doctor > New
Referral Doctor List
X
X
X
X
X
Lists > Referrals > Doctor
Referral Hospital Information
X
X
X
X
X
Lists > Referrals > Hospital > New
Referral Hospital List
X
X
X
X
X
Lists > Referrals > Hospital
X
Reason For Visit Setup
1
X
Exclusive to Multi-Location Inventory
Exclusive to Multi-Practice
3
Indicates a report that is available for multi-location databases
4
Security setting for a purchasable module
2
• Page 116 •
X
Lists > Referrals > Classification > New
This document contains suggested security settings for General Login
(GEN), Receptionists (REC), Technicians (TECH), Doctors (DR),
and Managers/Owners (M/O). However, it is ultimately the practice’s
decision-maker that decides who needs access to certain areas within
Cornerstone*, and IDEXX shall not be liable for any actions arising
from those security decisions.
Cornerstone 8.3 Default and Security Settings Guide
Cornerstone 8.3 Default and Security Settings Guide
IDEXX Computer Systems
CONFIDENTIAL INFORMATION
Foundation Dialog Security
Access Suggestions
GEN
REC
DR
TECH
Reminder – Bulk Rate Permit
Setup
Reminder Alignment
Reminder Message Setup
Revenue Center Information
Revenue Center List
X
X
X
X
Room Setup
Rooms
X
X
X
X
Setup Daily Entries Report
Sex
X
X
X
X
X
X
X
X
X
X
X
X
Sex Setup
Signature Capture Device
Snapshot
Species List
Species Setup
Split Partnership Invoices
X
X
Path to Locate
X
M/O
X
Activities > Reminder Selection > Reminder Print
Options > Reminder Bulk Rate Permit Setup
X
Activities > Reminder Selection > Reminder Print
Options > Two OR Three OR Four Card Reminder
Alignment
X
Activities > Reminder Selection > Reminder Print
Options > Reminder Message Setup
X
Lists > Revenue Centers > New
X
Lists > Revenue Centers
X
Lists > Room > New
X
Lists > Room
X
Controls > Default > Practice > End of Period tab >
Setup Daily Entries Report
X
Controls > Sex
X
Controls > Sex > Update
X
Tools > Capture Device
X
Reports > Snapshot
X
Lists > Species
X
Lists > Species > Update
X
N/A
Staff Class Commission
X
Lists > Staff Classification Commission
Staff Commission
X
Lists > Staff Commission
Staff Information
Staff List
X
Staff Reports
Switch Logged in Practice
X
Lists > Staff
X
X
X
Reports > Staff
X
X
X
File > Switched Logged in Practice
X
Tools > Synchronize LifeLearn
Documents
Tax Setup
X
Controls > Taxes > New
Taxes
X
Controls > Taxes
Travel Sheet – List/Setup
X
Lists > Travel Sheets > Update
Travel Sheet – Update/Create
Sample
X
Unit of Measure
X
Lists > Staff > New
X
Synchronize LifeLearn®
Documents
2
X
X
X
Tools > Update/Create > Sample Travel Sheet
X
Controls > Units of Measure
Unit of Measure Setup
X
Controls > Unit of Measure > New
Update Revenue Centers
X
Tools > Update Revenue Centers
User Defined Prompt Setup
X
Controls > User Defined Prompts > New
User Defined Prompts
X
Controls > User Defined Prompts
1
X
X
X
Exclusive to Multi-Location Inventory
Exclusive to Multi-Practice
3
Indicates a report that is available for multi-location databases
4
Security setting for a purchasable module
2
• Page 117 •
X
This document contains suggested security settings for General Login
(GEN), Receptionists (REC), Technicians (TECH), Doctors (DR),
and Managers/Owners (M/O). However, it is ultimately the practice’s
decision-maker that decides who needs access to certain areas within
Cornerstone*, and IDEXX shall not be liable for any actions arising
from those security decisions.
Cornerstone 8.3 Default and Security Settings Guide
Cornerstone 8.3 Default and Security Settings Guide
IDEXX Computer Systems
CONFIDENTIAL INFORMATION
Foundation Dialog Security
View Inventory Cost
Access Suggestions
Path to Locate
GEN
REC
DR
TECH
M/O
X
X
X
X
X
Lists > Invoice Item List
X
Lists > Vital Signs/Weight > New
Lists > Vital Signs/Weight > select a vital sign >
Update
Vital Sign – Setup
Vital Sign – Add (>24 hours)
X
X
X
X
X
Activities > Vital Signs/Weight
Vital Sign – Add (within 24 hours)
X
X
X
X
X
Activities > Vital Signs/Weight
Vital Sign – Edit Existing (within
24 hours)
X
X
X
X
X
X
X
X
X
X
Activities > Vital Signs/Weight > Right-click on entry
> Void
X
Lists > Ward/Loc
Vital Sign – Void
Ward/Loc Information
Activities > Vital Signs/Weight
Ward/Loc List
X
X
X
X
X
Lists > Ward/Loc
Whiteboard
X
X
X
X
X
Activities > Electronic Whiteboard > Whiteboard
Whiteboard Alert List
X
X
X
X
X
List > Electronic Whiteboard > Alerts
X
Lists > Electronic Whiteboard > Areas
X
X
X
X
X
Lists > Electronic Whiteboard > Areas
X
Lists > Electronic Whiteboard > Categories
Whiteboard Category List
X
X
X
X
X
Lists > Electronic Whiteboard > Categories
Whiteboard Complete Task
X
X
X
X
X
Lists > Electronic Whiteboard > Categories
Whiteboard Area Information
Whiteboard Area List
Whiteboard Category Information
Whiteboard Frequency
Information
Whiteboard Frequency List
X
X
X
X
X
Lists > Electronic Whiteboard > Frequencies
X
Lists > Electronic Whiteboard > Frequencies
Whiteboard Invoice Posting
Override
X
X
Activities > Invoice (message displays)
Lists > Electronic Whiteboard (to change status)
Whiteboard Orders Override
Defaults
X
X
Controls > Defaults > Practice and Workstation >
Workstation
Whiteboard Orders Override
Frequency
X
X
Controls > Defaults > Practice and Workstation >
Whiteboard
Whiteboard Patient Orders
X
X
X
X
X
Activities > Electronic Whiteboard > Patient Orders
Whiteboard Patient Treatments
X
X
X
X
X
Activities > Electronic Whiteboard
Whiteboard Patient Visit List
(PVL)
X
X
X
X
X
Patient Clipboard > Select Client > Right-click
Patient > Electronic Whiteboard > Patient Orders >
PVL
X
X
X
Whiteboard > Right-click patient > Remove from
Whiteboard
X
Patient Clipboard > Select Client > Right-click
Patient > Electronic Whiteboard > Right-click
Treatment > Select Patient Orders > Right-click
Patient Order > Discontinue treatment
Whiteboard Remove Patient
Whiteboard Undo Treatment
X
1
X
X
Exclusive to Multi-Location Inventory
Exclusive to Multi-Practice
3
Indicates a report that is available for multi-location databases
4
Security setting for a purchasable module
2
• Page 118 •
X
This document contains suggested security settings for General Login
(GEN), Receptionists (REC), Technicians (TECH), Doctors (DR),
and Managers/Owners (M/O). However, it is ultimately the practice’s
decision-maker that decides who needs access to certain areas within
Cornerstone*, and IDEXX shall not be liable for any actions arising
from those security decisions.
Cornerstone 8.3 Default and Security Settings Guide
Cornerstone 8.3 Default and Security Settings Guide
IDEXX Computer Systems
CONFIDENTIAL INFORMATION
Access Suggestions
Foundation Reports Security
GEN
REC
DR
TECH
M/O
Path to Locate
Animal Without Birthdates
X
X
X
X
X
Reports > Patient > Animals Without Birthdates
Animals Without Weight
X
X
X
X
X
Reports > Patient > Animals Without Weight
Appointment – Appointments
Report
X
X
X
X
X
Reports > Appointment Scheduler > Appointments
Report
Appointment – Appointments
Report – Summary
X
X
X
X
X
Reports > Appointment Scheduler > Appointments
Report – Summary
Appointment – Practice and
Staff Hours Report
X
Reports > Appointment Scheduler > Practice & Staff
Hours Report
Appointment – Scheduled vs.
Goal Report
X
Reports > Appointment Scheduler > Scheduled vs.
Goal Report
Appointment – Tickler File
Report
X
X
X
X
X
Reports > Appointment Scheduler > Tickler File
Report
Barn Reminder Letter Report
X
X
X
X
X
Reports > Equine > Barn Reminder Letter Report
Barn Reminder Recall Report
X
X
X
X
X
Reports > Equine > Barn Reminder Recall Report
Barn Reminder Report
X
X
X
X
X
Reports > Equine > Barn Reminder Report
Barn Report
X
X
X
X
X
Reports > Equine > Barn Report
Birthday Report
X
X
X
X
X
Reports > Patient > Birthday Report
Boarding Cancelled List
X
X
X
X
X
Reports > Boarding > Boarding Cancelled List
Boarding Census
X
X
X
X
X
Reports > Boarding > Boarding Census
Boarding Check-in Report
X
X
X
X
X
Reservation List icon > Right-click on a reservation
> Print > Check In Report
Boarding Combination List
X
X
X
X
X
Reports > Boarding > Boarding Combination List
Boarding Exercise List
X
X
X
X
X
Reports > Boarding > Boarding Exercise List
Boarding Expected Check-ins
X
X
X
X
X
Reports > Boarding > Boarding Expected Check-ins
Boarding Expected Check-outs
X
X
X
X
X
Reports > Boarding > Boarding Expected
Check-outs
Boarding Feeding List
X
X
X
X
X
Reports > Boarding > Boarding Feeding List
Boarding Medication List
X
X
X
X
X
Reports > Boarding > Boarding Medications List
Boarding No Shows
X
X
X
X
X
Reports > Boarding > Boarding No Shows
Boarding Occupancy Forecast
Report
X
X
X
X
X
Reports > Boarding > Boarding Occupancy
Forecast Report
Boarding Other Services List
X
X
X
X
X
Reports > Boarding > Boarding Other Services List
Boarding Res Recurrence
Exception Report
X
X
X
X
X
Automatically prints if you double book
Boarding Res Recurrence
Report
X
X
X
X
X
Prompt box during recurring process
Boarding Scheduled
Reservations Report
X
X
X
X
X
Reservation List icon > Right-click on a reservation
> Print > Scheduled Reservation
Census Report
X
X
X
X
X
Reports > Patient > Census Report
Checked-in Census Report
X
X
X
X
X
Reports > Patient > Checked-in Census Report
1
Exclusive to Multi-Location Inventory
Exclusive to Multi-Practice
3
Indicates a report that is available for multi-location databases
4
Security setting for a purchasable module
2
• Page 119 •
This document contains suggested security settings for General Login
(GEN), Receptionists (REC), Technicians (TECH), Doctors (DR),
and Managers/Owners (M/O). However, it is ultimately the practice’s
decision-maker that decides who needs access to certain areas within
Cornerstone*, and IDEXX shall not be liable for any actions arising
from those security decisions.
Cornerstone 8.3 Default and Security Settings Guide
Cornerstone 8.3 Default and Security Settings Guide
IDEXX Computer Systems
CONFIDENTIAL INFORMATION
Access Suggestions
Foundation Reports Security
GEN
REC
DR
TECH
M/O
X
X
X
X
X
Prints when Patient is Checked in
Client A/R Information
X
Reports > Client > Client A/R Information
Client Account History
X
Reports > Client > Client Account History
Client Discounts
X
Reports > Client > Client Discounts
Client Master Report
X
Reports > Client > Client Master Report
Client Prompts
X
Reports > Client > Client Prompts
Client/Patient Master Report
X
Reports > Client > Client/Patient Master Report
Compliance – Client List (Future
Appointments)
X
Reports > Compliance Assessment Tool > Generate
Compliance Results > Future Appointments
Compliance – Client List
(Missing Services)
X
Reports > Compliance Assessment Tool > Generate
Compliance Results > Missing Services
Compliance – Client List
(Services Provided)
X
Reports > Compliance Assessment Tool > Generate
Compliance Results > Service Provided
Compliance – Dollar Value Sold
by Staff Member
X
Reports > Compliance Assessment Tool > Generate
Compliance Results > Dollar Value Sold by Staff
Compliance – Dollar Value Sold
by Staff Member (graph)
X
Reports > Compliance Assessment Tool > Generate
Compliance Results > Dollar Value Sold by Staff
(Graph)
Compliance – Missing
Dependents
X
Reports > Compliance Assessment Tool > Generate
Compliance Results > Missing Dependents
Compliance – Protocol
Summary
X
Reports > Compliance Assessment Tool > Protocol
Setup Wizard > Protocol Summary
Compliance – Services Sold by
Staff Member
X
Reports > Compliance Assessment Tool > Generate
Compliance Results > Services Sold by Staff
Member
Compliance – Services Sold by
Staff Member (graph)
X
Reports > Compliance Assessment Tool > Generate
Compliance Results > Services Sold by Staff
Member (Graph)
Compliance Report
X
Reports > Invoice Item > Compliance Report
Check-in Report
Path to Locate
Controlled Substance Report
X
X
X
X
X
Reports > Invoice Item > Controlled Substance
Report
Deceased Patient Report
X
X
X
X
X
Reports > Patient > Deceased Patient Report
Departing Instructions
X
X
X
X
X
Reports > Invoice Item > Departing Instructions
Diagnostic Code Report
X
X
X
X
Reports > Practice > Diagnostic Code Report
EOD – Charged on Account
Report
X
X
X
Reports > End of Period > End of Day > Charged on
Account Report
EOD – Current Activity Report
X
X
X
Reports > End of Period > End of Day > Current
Activity
EOD – Daily Audit Trail
X
X
X
Reports > End of Period > End of Day > Daily Audit
Trail
1
Exclusive to Multi-Location Inventory
Exclusive to Multi-Practice
3
Indicates a report that is available for multi-location databases
4
Security setting for a purchasable module
2
• Page 120 •
This document contains suggested security settings for General Login
(GEN), Receptionists (REC), Technicians (TECH), Doctors (DR),
and Managers/Owners (M/O). However, it is ultimately the practice’s
decision-maker that decides who needs access to certain areas within
Cornerstone*, and IDEXX shall not be liable for any actions arising
from those security decisions.
Cornerstone 8.3 Default and Security Settings Guide
Cornerstone 8.3 Default and Security Settings Guide
IDEXX Computer Systems
CONFIDENTIAL INFORMATION
Access Suggestions
Foundation Reports Security
GEN
REC
EOD – Daily Deposit Report
X
X
X
Reports > End of Period > End of Day > Daily
Deposit Report
EOD – Daily Discount Report –
By Discount
X
X
X
Reports > End of Period > End of Day > Daily
Discount Report – By Discount
EOD – Daily Discount Report –
By Staff
X
X
X
Reports > End of Period > End of Day > Daily
Discount Report – By Staff
EOD – Daily Inv. and PVL
Entries
X
X
X
Reports > End of Period > End of Day > Daily Inv.
And PVL Entries
EOD – Daily Inv. and PVL
Entries – by Class
X
X
X
Reports > End of Period > End of Day > Daily Inv.
And PVL Entries – by Class
EOD – Daily Inv. and PVL
Entries – by Invoice
X
X
X
Reports > End of Period > End of Day > Daily Inv.
And PVL Entries – by Invoice
EOD – Daily Inv. and PVL
Entries – by Rev, Class
X
X
X
Reports > End of Period > End of Day > Daily Inv.
And PVL Entries – by Rev, Class
EOD – Daily Inv. and PVL
Entries – by Rev, Invoice
X
X
X
Reports > End of Period > End of Day > Daily Inv.
And PVL Entries – by Rev, Invoice
EOD – Daily Inv. and PVL
Entries – by Rev, Staff
X
X
X
Reports > End of Period > End of Day > Daily Inv.
And PVL Entries – by Rev, Staff
EOD – Daily Inv. and PVL
Entries – by Rev, Staff, Class
X
X
X
Reports > End of Period > End of Day > Daily Inv.
And PVL Entries – by Rev, Staff, Class
EOD – Daily Inv. and PVL
Entries – by Staff
X
X
X
Reports > End of Period > End of Day > Daily Inv.
And PVL Entries – by Staff
EOD – Daily Inv. and PVL
Entries – by Staff, Class
X
X
X
Reports > End of Period > End of Day > Daily Inv.
And PVL Entries – by Staff, Class
EOD – Daily Inv. and PVL Totals
– by Class
X
X
X
Reports > End of Period > End of Day > Daily Inv.
And PVL Totals – by Class
EOD – Daily Inv. and PVL Totals
– by Rev, Class
X
X
X
Reports > End of Period > End of Day > Daily Inv.
And PVL Totals – by Rev, Class
EOD – Daily Inv. and PVL Totals
– by Rev, Staff
X
X
X
Reports > End of Period > End of Day > Daily Inv.
And PVL Totals – by Rev, Staff
EOD – Daily Inv. and PVL Totals
– by Rev, Staff, Class
X
X
X
Reports > End of Period > End of Day > Daily Inv.
And PVL Totals – by Rev, Staff, Class
EOD – Daily Inv. and PVL Totals
– by Staff
X
X
X
Reports > End of Period > End of Day > Daily Inv.
And PVL Totals – by Staff
EOD – Daily Inv. and PVL Totals
– by Staff, Class
X
X
X
Reports > End of Period > End of Day > Daily Inv.
And PVL Totals – by Staff, Class
EOD – Daily Invoicing Entries
X
X
X
Reports > End of Period > End of Day > Daily
Invoicing Entries
EOD – Daily Manual Discount
Report – By Client
X
X
X
Reports > End of Period > End of Day > Daily
Manual Discount Report – By Client
EOD – Daily Manual Discount
Report – By Staff
X
X
X
Reports > End of Period > End of Day > Daily
Manual Discount Report – By Staff
1
DR
Exclusive to Multi-Location Inventory
Exclusive to Multi-Practice
3
Indicates a report that is available for multi-location databases
4
Security setting for a purchasable module
2
• Page 121 •
TECH
M/O
Path to Locate
This document contains suggested security settings for General Login
(GEN), Receptionists (REC), Technicians (TECH), Doctors (DR),
and Managers/Owners (M/O). However, it is ultimately the practice’s
decision-maker that decides who needs access to certain areas within
Cornerstone*, and IDEXX shall not be liable for any actions arising
from those security decisions.
Cornerstone 8.3 Default and Security Settings Guide
Cornerstone 8.3 Default and Security Settings Guide
IDEXX Computer Systems
CONFIDENTIAL INFORMATION
Access Suggestions
Foundation Reports Security
GEN
REC
DR
TECH
M/O
Path to Locate
EOD – Daily Patient Visit List
Entries
X
X
X
Reports > End of Period > End of Day > Daily
Patient Visit List Entries
EOD – Daily Payment Register
– By Cashier By Client ID
X
X
X
Reports > End of Period > End of Day > Daily
Payment Register – By Cashier ID
EOD – Daily Payment Register –
By Cashier By Payment Type
X
X
X
Reports > End of Period > End of Day > Daily
Payment Register – By Client By Payment Type
EOD – Daily Payment Register
– By Client Last Name
X
X
X
Reports > End of Period > End of Day > Daily
Payment Register – By Client Last Name
EOD – Daily Payment Register
– By Payment Type
X
X
X
Reports > End of Period > End of Day > Daily
Payment Register – By Payment Type
EOD – Daily Payment Register
– Credit/Debit Payment
Transactions
X
X
X
Reports > End of Period > End of Day
EOD – Daily Revenue Report
X
X
X
Reports > End of Period > End of Day > Daily
Revenue Report
EOD – Daily Staff Commission
Detail Report – Gross
X
X
Reports > End of Period > End of Day > Daily Staff
Commission Detailed Report – Gross
EOD – Daily Staff Commission
Detail Report – Net
X
X
Reports > End of Period > End of Day > Daily Staff
Commission Detailed Report–Net
EOD – Daily Staff Commission
Summary Report – Gross
X
X
Reports > End of Period > End of Day > Daily Staff
Commission Summary Report – Gross
EOD – Daily Staff Commission
Summary Report – Net
X
X
Reports > End of Period > End of Day > Daily Staff
Commission Summary Report – Net
EOD – Daily Staff Commission
Totals Report – Gross
X
X
Reports > End of Period > End of Day > Daily Staff
Commission Totals Report–Gross
EOD – Daily Staff Commission
Totals Report – Net
X
X
Reports > End of Period > End of Day > Daily Staff
Commission Totals Report – Net
EOD – Daily Summary Report3
X
X
X
Reports > End of Period > End of Day > Daily
Summary Report
EOD – Daily Summary Tax
Report
X
X
X
Reports > End of Period > End of Day > Daily
Summary Tax Report
EOD – Daily Voided Invoices
Report by Client ID
X
X
X
Reports > End of Period > End of Day > Daily
Voided Invoices Report by Client ID
EOD – Daily Voided Invoices
Report by Date
X
X
X
Reports > End of Period > End of Day > Daily
Voided Invoices Report by Date
EOD – Daily Voided Invoices
Report by Staff
X
X
X
Reports > End of Period > End of Day > Daily
Voided Invoices Report by Staff
EOD – Deposit Report – Checks
– By Check No./Answer
X
X
X
Reports > End of Period > End of Day > Deposit
Report – Check – By Check No./Answer
EOD – Deposit Report – Checks
– By Client ID
X
X
X
Reports > End of Period > End of Day > Deposit
Report – Checks – By Client ID
1
Exclusive to Multi-Location Inventory
Exclusive to Multi-Practice
3
Indicates a report that is available for multi-location databases
4
Security setting for a purchasable module
2
• Page 122 •
This document contains suggested security settings for General Login
(GEN), Receptionists (REC), Technicians (TECH), Doctors (DR),
and Managers/Owners (M/O). However, it is ultimately the practice’s
decision-maker that decides who needs access to certain areas within
Cornerstone*, and IDEXX shall not be liable for any actions arising
from those security decisions.
Cornerstone 8.3 Default and Security Settings Guide
Cornerstone 8.3 Default and Security Settings Guide
IDEXX Computer Systems
CONFIDENTIAL INFORMATION
Access Suggestions
Foundation Reports Security
GEN
REC
EOD – Deposit Report – Checks
– By Client Last Name
X
X
X
Reports > End of Period > End of Day > Deposit
Report – Checks – By Client Last Name
EOD – GL Batch Report
X
X
X
Reports > End of Period > End of Day > GL Batch
Report
EOD – Invoice Register –
Closed Invoices
X
X
X
Reports > End of Period > End of Day > Invoice
Register – Close Invoices
EOD – Invoice Register – Open
Invoices
X
X
X
Reports > End of Period > End of Day > Invoice
Register – Open Invoices
EOD – Itemized Audit Trail
X
X
X
Reports > End of Period > End of Day > Itemized
Audit Trail
EOD – Itemized Audit Trail for
Revenue Center
X
X
X
Reports > End of Period > End of Day > Itemized
Audit Trail for Revenue Center
EOD – New Client Report – By
Client ID3
X
X
X
Reports > End of Period > End of Day > New Client
Report – By Client ID
EOD – New Client Report – By
Client Last Name3
X
X
X
Reports > End of Period > End of Day > New Client
Report – By Client Last Name
EOD – Patient Documents
Finalized by EOD3
X
X
X
Reports > End of Period > End of Day > Patient
Documents Finalized by EOD
EOD – Patient Visit List By Date
X
X
X
Reports > End of Period > End of Day > Patient Visit
List By Date
EOD – Patient Visit List By Type
X
X
X
Reports > End of Period > End of Day > Patient Visit
By Type
EOD – Returned Check Report
– By Client ID
X
X
X
Reports > End of Period > End of Day > Returned
Check Report – By Client ID
EOD – Returned Check Report
– By Client Last Name
X
X
X
Reports > End of Period > End of Day > Returned
Check Report – By Client Last Name
EOD – Sales Tax Summary – By
Revenue Center
X
X
X
Reports > End of Period > End of Day > Sales Tax
Summary – By Revenue Center
EOD – Serv. and Inv. Sales
– Closed Invoices – By Class
Desc.
X
X
X
Reports > End of Period > End of Day > Serv. And
Inv. Sales – Closed Invoice – By Class Desc.
EOD – Serv. and Inv. Sales –
Closed Invoices – By Class ID
X
X
X
Reports > End of Period > End of Day > Serv. And
Inv. Sales – Closed Invoices – By Class ID
EOD – Serv. and Inv. Sales –
Closed Invoices – By Staff ID
X
X
X
Reports > End of Period > End of Day > Serv. And
Inv. Sales – Closed Invoices – By Staff ID
EOD – Serv. and Inv. Sales
– Closed Invoices – By Staff
Name
X
X
X
Reports > End of Period > End of Day > Serv. And
Inv. Sales – Closed Invoices – By Staff Name
EOD – Serv. And Inv. Sales by
Revenue Center – Class Desc.
X
X
X
Reports > End of Period >End of Day > Serv. And
Inv. Sales by Revenue Center – Class Desc.
EOD – Serv. And Inv. Sales by
Revenue Center – Class ID
X
X
X
Reports > End of Period > End of Day > Serv. And
Inv. Sales by Revenue Center – Class ID
1
DR
X
Exclusive to Multi-Location Inventory
Exclusive to Multi-Practice
3
Indicates a report that is available for multi-location databases
4
Security setting for a purchasable module
2
• Page 123 •
TECH
M/O
Path to Locate
This document contains suggested security settings for General Login
(GEN), Receptionists (REC), Technicians (TECH), Doctors (DR),
and Managers/Owners (M/O). However, it is ultimately the practice’s
decision-maker that decides who needs access to certain areas within
Cornerstone*, and IDEXX shall not be liable for any actions arising
from those security decisions.
Cornerstone 8.3 Default and Security Settings Guide
Cornerstone 8.3 Default and Security Settings Guide
IDEXX Computer Systems
CONFIDENTIAL INFORMATION
Access Suggestions
Foundation Reports Security
GEN
REC
EOD – Serv. And Inv. Sales by
Revenue Center – Staff ID
X
X
X
Reports > End of Period > End of Day > Serv. And
Inv. Sales by Revenue Center – Staff ID
EOD – Serv. And Inv. Sales by
Revenue Center – Staff Last
Name
X
X
X
Reports > End of Period > End of Day > Serv. And
Inv. Sales by Revenue Center – Staff Last Name
EOD – Standard Fee Exception
Report – By Item Description
X
X
X
Reports > End of Period > End of Day > Standard
Fee Exception Report – By Item Description
EOD – Standard Fee Exception
Report – By Item ID
X
X
X
Reports > End of Period > End of Day > Standard
Fee Exception Report – By Item ID
EOD – Standard Fee Exception
Summary
X
X
X
Reports > End of Period > End of Day > Standard
Fee Exception Summary
EOD – Statistics By Species –
Closed Invoices
X
X
X
Reports > End of Period > End of Day > Statistics
By Species – Closed Invoices
EOD – Statistics By Staff –
Closed Invoices
X
X
X
Reports > End of Period > End of Day > Statistics
By Staff – Closed Invoices
EOM – Accounts Receivable
Report – By Client ID3
X
Reports > End of Period > End of Month > Accounts
Receivable Report – By Client ID
EOM – Accounts Receivable
Report – By Client Name
X
Reports > End of Period > End of Month > Accounts
Receivable Report – By Client Name
EOM – Accounts Receivable
Status Report – Closed Invoices
X
Reports > End of Period > End of Month > Accounts
Receivable Status Report – Closed Invoices
EOM – Aged Accounts
Receivable Report by Staff3
X
Reports > End of Period > End of Month > Aged
Accounts Receivable Report By Staff
EOM – Cost of Goods Sold by
Center, Class
X
Reports > End of Period > End of Month > Cost of
Goods Sold by Center, Class
EOM – Cost of Goods Sold by
Center, Class, Item
X
Reports > End of Period > End of Month > Cost of
Goods Sold by Center, Class, Item
EOM – Cost of Goods Sold by
Center, Inv. Location, Class,
Item
X
Reports > End of Period > End of Month > Cost of
Goods Sold by Center, Inv. Location, Class, Item
EOM – Cost of Goods Sold by
Class
X
Reports > End of Period > End of Month > Cost of
Goods Sold by Center, Class
EOM – Cost of Goods Sold by
Class, Item
X
Reports > End of Period > End of Month > Cost of
Goods Sold by Center, Class, Item
EOM – Cost of Goods Sold by
Inv. Location, Class, Item
X
Reports > End of Period > End of Month > Cost of
Goods Sold by Inv. Location, Class, Item
EOM – Finance Charge Report
– By Client ID
X
Reports > End of Period > End of Month > Finance
Charge Report – By Client ID
EOM – Finance Charge Report
– By Client Last Name
X
Reports > End of Period > End of Month > Finance
Charge Report – By Client Last Name
EOM – GL Batch Report
X
Reports > End of Period > End of Month > GL Batch
Report
1
DR
Exclusive to Multi-Location Inventory
Exclusive to Multi-Practice
3
Indicates a report that is available for multi-location databases
4
Security setting for a purchasable module
2
• Page 124 •
TECH
M/O
Path to Locate
This document contains suggested security settings for General Login
(GEN), Receptionists (REC), Technicians (TECH), Doctors (DR),
and Managers/Owners (M/O). However, it is ultimately the practice’s
decision-maker that decides who needs access to certain areas within
Cornerstone*, and IDEXX shall not be liable for any actions arising
from those security decisions.
Cornerstone 8.3 Default and Security Settings Guide
Cornerstone 8.3 Default and Security Settings Guide
IDEXX Computer Systems
CONFIDENTIAL INFORMATION
Access Suggestions
Foundation Reports Security
GEN
REC
DR
TECH
M/O
Path to Locate
EOM – Inventory Sales Report
– Closed Invoices – By Class By
Desc.
X
Reports > End of Period > End of Month > Inventory
Sales Report – Closed Invoices – By Class By
Desc.
EOM – Inventory Sales Report
– Closed Invoices – By Class
By ID
X
Reports > End of Period > End of Month > Inventory
Sales Report – Closed Invoices – By Class By ID
EOM – Inventory Sales Report
by Revenue Center – by Class
by Desc.
X
Reports > End of Period > End of Month > Inventory
Sales Report by Revenue Center – By Class By
Desc.
EOM – Inventory Sales Report
by Revenue Center – by Class
by ID
X
Reports > End of Period > End of Month > Inventory
Sales Report by Revenue Center – By Class By ID
EOM – Monthly Adjustment
Summary – By Client ID
X
Reports > End of Period > End of Month > Monthly
Adjustment Summary – By Client ID
EOM – Monthly Adjustment
Summary – By Client Last Name
X
Reports > End of Period > End of Month > Monthly
Adjustment Summary – By Client Last Name
EOM – Monthly Clients With
Open Invoices – By Client ID
X
Reports > End of Period > End of Month > Monthly
Clients With Open Invoices – By Client ID
EOM – Monthly Clients With
Open Invoices – By Invoice No.
X
Reports > End of Period > End of Month > Monthly
Clients with Open Invoices – By Invoice No.
EOM – Monthly Deposit Report
X
Reports > End of Period > End of Month > Monthly
Deposit Report
EOM – Monthly Discount Report
– By Discount
X
Reports > End of Period > End of Month > Monthly
Discount Report – By Discount
EOM – Monthly Discount Report
– By Staff
X
Reports > End of Period > End of Month > Monthly
Discount Report – By Staff
EOM – Monthly Invoices And
Statements
X
Reports > End of Period > End of Month > Monthly
Invoices and Statements
EOM – Monthly Manual
Discount Report – By Client
X
Reports > End of Period > End of Month > Monthly
Manual Discount Report – By Client
EOM – Monthly Manual
Discount Report – By Staff
X
Reports > End of Period > End of Month > Monthly
Manual Discount Report – By Staff
EOM – Monthly Sales Summary3
X
Reports > End of Period > End of Month > Monthly
Sales Summary
EOM – Monthly Staff
Commission Detail Report –
Gross
X
X
Reports > End of Period > End of Month > Monthly
Staff Commission Detail Report – Gross
EOM – Monthly Staff
Commission Detail Report – Net
X
X
Reports > End of Period > End of Month > Monthly
Staff Commission Detail Report – Net
EOM – Monthly Staff
Commission Summary Report
– Gross
X
X
Reports > End of Period > End of Month > Monthly
Staff Commission Summary Report – Gross
1
Exclusive to Multi-Location Inventory
Exclusive to Multi-Practice
3
Indicates a report that is available for multi-location databases
4
Security setting for a purchasable module
2
• Page 125 •
This document contains suggested security settings for General Login
(GEN), Receptionists (REC), Technicians (TECH), Doctors (DR),
and Managers/Owners (M/O). However, it is ultimately the practice’s
decision-maker that decides who needs access to certain areas within
Cornerstone*, and IDEXX shall not be liable for any actions arising
from those security decisions.
Cornerstone 8.3 Default and Security Settings Guide
Cornerstone 8.3 Default and Security Settings Guide
IDEXX Computer Systems
CONFIDENTIAL INFORMATION
Access Suggestions
Foundation Reports Security
GEN
REC
DR
TECH
M/O
Path to Locate
EOM – Monthly Staff
Commission Summary Report
– Net
X
X
Reports > End of Period > End of Month > Monthly
Staff Commission Summary Report – Net
EOM – Monthly Staff
Commission Totals Report –
Gross
X
X
Reports > End of Period > End of Month > Monthly
Staff Commission Totals Report – Gross
EOM – Monthly Staff
Commission Totals Report – Net
X
X
Reports > End of Period > End of Month > Monthly
Staff Commission Totals Report – Net
EOM – Monthly Voided Invoices
Report by Client ID
X
Reports > End of Period > End of Month > Monthly
Voided Invoices Report by Client ID
EOM – Monthly Voided Invoices
Report by Date
X
Reports > End of Period > End of Month > Monthly
Voided Invoices Report by Date
EOM – Monthly Voided Invoices
Report by Staff
X
Reports > End of Period > End of Month > Monthly
Voided Invoices Report by Staff
EOM – New Client Report – By
Client ID3
X
Reports > End of Period > End of Month > New
Client Report – By Client ID
EOM – New Client Report – By
Client Last Name3
X
Reports > End of Period > End of Month > New
Client Report – By Client Last Name
EOM – Productivity By Staff
X
Reports > End of Period > End of Month >
Productivity By Staff
EOM – Referral Report – by
Staff
X
Reports > End of Period > End of Month > Referral
Report – By Staff
EOM – Referral Report – Doctor
by Hospital
X
Reports > End of Period > End of Month > Referral
Report – Doctor by Hospital
EOM – Referral Report –
Hospital by Doctor
X
Reports > End of Period > End of Month > Referral
Report – Doctor by Hospital
EOM – Referral Revenue Report
by Doctor by Revenue Center
X
Reports > End of Period > End of Month > Referral
Revenue Report by Doctor by Revenue Center
EOM – Referral Revenue Report
by Hospital by Revenue Center
X
Reports > End of Period > End of Month > Referral
Revenue Report by Hospital by Revenue Center
EOM – Referral Revenue Report
by Rev Center by Doctor by
Hospital
X
Reports > End of Period > End of Month > Referral
Revenue Report by Rev Center by Doctor by
Hospital
EOM – Referral Revenue Report
by Rev Center by Hospital by
Doctor
X
Reports > End of Period > End of Month > Referral
Revenue Report by Rev Center by Hospital by
Doctor
EOM – Referral Summary – by
Doctor
X
Reports > End of Period > End of Month > Referral
Summary by Doctor
EOM – Referral Summary – by
Hospital
X
Reports > End of Period > End of Month > Referral
Summary by Hospital
EOM – Referral Summary –
Doctor by Hospital
X
Reports > End of Period > End of Month > Referral
Summary by Doctor by Hospital
1
Exclusive to Multi-Location Inventory
Exclusive to Multi-Practice
3
Indicates a report that is available for multi-location databases
4
Security setting for a purchasable module
2
• Page 126 •
This document contains suggested security settings for General Login
(GEN), Receptionists (REC), Technicians (TECH), Doctors (DR),
and Managers/Owners (M/O). However, it is ultimately the practice’s
decision-maker that decides who needs access to certain areas within
Cornerstone*, and IDEXX shall not be liable for any actions arising
from those security decisions.
Cornerstone 8.3 Default and Security Settings Guide
Cornerstone 8.3 Default and Security Settings Guide
IDEXX Computer Systems
CONFIDENTIAL INFORMATION
Access Suggestions
Foundation Reports Security
GEN
REC
DR
TECH
M/O
Path to Locate
EOM – Referral Summary –
Hospital by Doctor
X
Reports > End of Period > End of Month > Referral
Summary – Hospital by Doctor
EOM – Referral Summary by
Revenue Center – Doctor by
Hospital
X
Reports > End of Period > End of Month > Referral
Summary by Revenue Center – Doctor by Hospital
EOM – Referral Summary by
Revenue Center – Hospital by
Doctor
X
Reports > End of Period > End of Month > Referral
Summary by Revenue Center – Hospital by Doctor
EOM – Returned Check
Summary
X
Reports > End of Period > End of Month > Returned
Check Summary
EOM – Sales Tax Summary – By
Revenue Center
X
Reports > End of Period > End of Month > Sales
Tax Summary – By Revenue Center
EOM – Sales Tax Summary/
Income Reconciliation – Closed
Invoices
X
Reports > End of Period > End of Month > Sales
Tax Summary/Income Reconciliation – Closed
Invoices
EOM – Serv. and Inv. Sales –
Closed Inv. – By Class Desc.
X
Reports > End of Period > End of Month > Serv. And
Inv. Sales – Closed Inv. – By Class Desc.
EOM – Serv. and Inv. Sales –
Closed Inv. – By Class ID
X
Reports > End of Period > End of Month > Serv. And
Inv. Sales – Closed Inv. – By Class ID
EOM – Serv. and Inv. Sales –
Closed Inv. – By Staff ID
X
Reports > End of Period > End of Month > Serv. And
Inv. Sales – Closed Inv. – By Staff ID
EOM – Serv. and Inv. Sales
– Closed Inv. – By Staff Last
Name
X
Reports > End of Period > End of Month > Serv. And
Inv. Sales – Closed Inv. – By Staff Last Name
EOM – Serv. And Inv. Sales by
Revenue Center – Class Desc.
X
Reports > End of Period > End of Month > Serv. And
Inv. Sales by Revenue Center – Class Desc.
EOM – Serv. And Inv. Sales by
Revenue Center – Class ID
X
Reports > End of Period > End of Month > Serv. And
Inv. Sales by Revenue Center – Class ID
EOM – Serv. And Inv. Sales by
Revenue Center – Staff ID
X
Reports > End of Period > End of Month > Serv. And
Inv. Sales by Revenue Center – Staff ID
EOM – Serv. And Inv. Sales by
Revenue Center – Staff Last
Name
X
Reports > End of Period > End of Month > Serv. And
Inv. Sales by Revenue Center – Staff Last Name
EOM – Serv. Sales Report –
Closed Invoices – By Class By
Desc.
X
Reports > End of Period > End of Month > Serv.
Sales Report – Closed Invoices – By Class By Desc
EOM – Serv. Sales Report –
Closed Invoices – By Class By
ID
X
Reports > End of Period > End of Month > Serv.
Sales Report – Closed Invoices – By Class By ID
EOM – Serv. Sales Report by
Revenue Center – By Class by
Desc.
X
Reports > End of Period > End of Month > Serv.
Sales Report by Revenue Center – by Class by
Desc.
1
Exclusive to Multi-Location Inventory
Exclusive to Multi-Practice
3
Indicates a report that is available for multi-location databases
4
Security setting for a purchasable module
2
• Page 127 •
This document contains suggested security settings for General Login
(GEN), Receptionists (REC), Technicians (TECH), Doctors (DR),
and Managers/Owners (M/O). However, it is ultimately the practice’s
decision-maker that decides who needs access to certain areas within
Cornerstone*, and IDEXX shall not be liable for any actions arising
from those security decisions.
Cornerstone 8.3 Default and Security Settings Guide
Cornerstone 8.3 Default and Security Settings Guide
IDEXX Computer Systems
CONFIDENTIAL INFORMATION
Access Suggestions
Foundation Reports Security
GEN
REC
DR
TECH
M/O
Path to Locate
EOM – Serv. Sales Report by
Revenue Center – By Class by
ID
X
Reports > End of Period > End of Month > Serv.
Sales Report by Revenue Center – by Class by ID
EOM – Split Invoices Report
X
Reports > End of Period > End of Month > Split
Invoices Report
EOM – Statistics By Species
Report – Closed Invoices
X
Reports > End of Period > End of Month > Statistics
By Species Report–Closed Invoices
EOM – Statistics By Staff Report
– Closed Invoices
X
Reports > End of Period > End of Month > Statistics
By Staff Report – Closed Invoices
EOM – YTD Net Sales by
Center
X
Reports > End of Period > End of Month > YTD Net
Sales By Center
EOM – YTD Net Sales by
Center, Class
X
Reports > End of Period > End of Month > YTD Net
Sales By Center, Class
EOM – YTD Net Sales by
Center, Class, Item
X
Reports > End of Period > End of Month > YTD Net
Sales By Center, Class, Item
EOM – YTD Net Sales by
Center, Class, Subclass
X
Reports > End of Period > End of Month > YTD Net
Sales By Center, Class Subclass
EOM – YTD Net Sales by
Center, Class, Subclass, Item
X
Reports > End of Period > End of Month > YTD Net
Sales By Center, Class, Subclass, Item
EOM – YTD Net Sales by
Center, Staff
X
Reports > End of Period > End of Month > YTD Net
Sales By Center, Staff
EOM – YTD Net Sales by
Center, Staff, Class
X
Reports > End of Period > End of Month > YTD Net
Sales By Center, Staff, Class
EOM – YTD Net Sales by
Center, Staff, Class, Item
X
Reports > End of Period > End of Month > YTD Net
Sales By Center, Staff, Class, Item
EOM – YTD Net Sales by
Center, Staff, Class, Subclass
X
Reports > End of Period > End of Month > YTD Net
Sales By Center, Staff, Class, Subclass
EOM – YTD Net Sales by
Center, Staff, Class, Subclass,
Item
X
Reports > End of Period > End of Month > YTD Net
Sales By Center, Staff, Class, Subclass, Item
EOM – YTD Net Sales by
Center, Staff, Type, Class
X
Reports > End of Period > End of Month > YTD Net
Sales By Center, Staff, Type Class
EOM – YTD Net Sales by
Center, Staff, Type, Class, Item
X
Reports > End of Period > End of Month > YTD Net
Sales By Center Staff, Type Class, Item
EOM – YTD Net Sales by
Center, Staff, Type, Class,
Subclass
X
Reports > End of Period > End of Month > YTD Net
Sales By Center Staff, Type Class, Subclass
EOM – YTD Net Sales by
Center, Staff, Type, Class,
Subclass, Item
X
Reports > End of Period > End of Month > YTD Net
Sales By Center, Staff, Type, Class, Subclass, Item
EOM – YTD Net Sales by
Center, Type
X
Reports > End of Period > End of Month > YTD Net
Sales By Center, Type
1
Exclusive to Multi-Location Inventory
Exclusive to Multi-Practice
3
Indicates a report that is available for multi-location databases
4
Security setting for a purchasable module
2
• Page 128 •
This document contains suggested security settings for General Login
(GEN), Receptionists (REC), Technicians (TECH), Doctors (DR),
and Managers/Owners (M/O). However, it is ultimately the practice’s
decision-maker that decides who needs access to certain areas within
Cornerstone*, and IDEXX shall not be liable for any actions arising
from those security decisions.
Cornerstone 8.3 Default and Security Settings Guide
Cornerstone 8.3 Default and Security Settings Guide
IDEXX Computer Systems
CONFIDENTIAL INFORMATION
Access Suggestions
Foundation Reports Security
GEN
REC
DR
TECH
M/O
Path to Locate
EOM – YTD Net Sales by
Center, Type, Class
X
Reports > End of Period > End of Month > YTD Net
Sales By Center, Type, Class
EOM – YTD Net Sales by
Center, Type, Class, Item
X
Reports > End of Period > End of Month > YTD Net
Sales By Center, Type, Class, Item
EOM – YTD Net Sales by
Center, Type, Class, Subclass
X
Reports > End of Period > End of Month > YTD Net
Sales By Center, Type, Class, Subclass
EOM – YTD Net Sales by
Center, Type, Class, Subclass,
Item
X
Reports > End of Period > End of Month > YTD Net
Sales By Center, Type, Class, Subclass, Item
EOM – YTD Net Sales by Class
X
Reports > End of Period > End of Month > YTD Net
Sales By Class
EOM – YTD Net Sales by Class,
Item
X
Reports > End of Period > End of Month > YTD Net
Sales By Class, Item
EOM – YTD Net Sales by Class,
Subclass
X
Reports > End of Period > End of Month > YTD Net
Sales By Class, Subclass
EOM – YTD Net Sales by Class,
Subclass, Item
X
Reports > End of Period > End of Month > YTD Net
Sales By Class, Subclass, Item
EOM – YTD Net Sales by Staff
X
Reports > End of Period > End of Month > YTD Net
Sales By Staff
EOM – YTD Net Sales by Staff,
Class
X
Reports > End of Period > End of Month > YTD Net
Sales By Staff, Class
EOM – YTD Net Sales by Staff,
Class, Item
X
Reports > End of Period > End of Month > YTD Net
Sales By Staff, Class, Item
EOM – YTD Net Sales by Staff,
Class, Subclass
X
Reports > End of Period > End of Month > YTD Net
Sales By Staff, Class, Subclass
EOM – YTD Net Sales by Staff,
Class, Subclass, Item
X
Reports > End of Period > End of Month > YTD Net
Sales By Staff, Class, Subclass, Item
EOM – YTD Net Sales by Staff,
Type, Class
X
Reports > End of Period > End of Month > YTD Net
Sales By Staff, Type, Class
EOM – YTD Net Sales by Staff,
Type, Class, Item
X
Reports > End of Period > End of Month > YTD Net
Sales By Staff, Type, Class, Item
EOM – YTD Net Sales by Staff,
Type, Class, Subclass
X
Reports>End of Period>End of Month >YTD Net
Sales By Staff, Type, Class, Subclass
EOM – YTD Net Sales by Staff,
Type, Class, Subclass, Item
X
Reports > End of Period > End of Month > YTD Net
Sales By Staff, Type Class, Subclass, Item
EOM – YTD Net Sales by Type,
Class
X
Reports > End of Period > End of Month > YTD Net
Sales By Type, Class
EOM – YTD Net Sales by Type,
Class, Item
X
Reports > End of Period > End of Month > YTD Net
Sales By Type, Class, Item
EOM – YTD Net Sales by Type,
Class, Subclass
X
Reports > End of Period > End of Month > YTD Net
Sales By Type, Class, Subclass
1
Exclusive to Multi-Location Inventory
Exclusive to Multi-Practice
3
Indicates a report that is available for multi-location databases
4
Security setting for a purchasable module
2
• Page 129 •
This document contains suggested security settings for General Login
(GEN), Receptionists (REC), Technicians (TECH), Doctors (DR),
and Managers/Owners (M/O). However, it is ultimately the practice’s
decision-maker that decides who needs access to certain areas within
Cornerstone*, and IDEXX shall not be liable for any actions arising
from those security decisions.
Cornerstone 8.3 Default and Security Settings Guide
Cornerstone 8.3 Default and Security Settings Guide
IDEXX Computer Systems
CONFIDENTIAL INFORMATION
Access Suggestions
Foundation Reports Security
GEN
REC
DR
TECH
M/O
Path to Locate
EOM – YTD Net Sales by Type,
Class, Subclass, Item
X
Reports > End of Period > End of Month > YTD Net
Sales By Type, Class, Subclass, Item
EOY – Account Write-Off Report
– By Client ID
X
Reports > End of Period > End of Year > Account
Write-Off Report – By Client ID
EOY – Account Write–Off Report
– By Client Last Name
X
Reports > End of Period > End of Year > Account
Write–Off Report – By Client Last Name
EOY – Client Sales Report –
Closed Invoices – By Client ID
X
Reports > End of Period > End of Year > Client
Sales Report – Closed Invoices – By Client ID
EOY – Client Sales Report –
Closed Invoices – By Client
Name
X
Reports > End of Period > End of Year > Client
Sales Report – Closed Invoices – By Client Name
EOY – Finance Charge Report –
By Client ID
X
Reports > End of Period > End of Year > Finance
Charge Report – By Client ID
EOY – Finance Charge Report –
By Client Last Name
X
Reports > End of Period > End of Year > Finance
Charge Report–By Client Last Name
EOY – High/Low Client Sales
Report
X
Reports > End of Period > End of Year > High/Low
Client Sales Report
EOY – Inventory Sales Report –
Closed Invoices – By Class By
Desc.
X
Reports > End of Period > End of Year > Inventory
Sales Report – Closed Invoices – By Class By
Desc.
EOY – Inventory Sales Report
– Closed Invoices – By Class
By ID
X
Reports > End of Period > End of Year > Inventory
Sales Report – Closed Invoices – By Class By ID
EOY – New Client Report – By
Client ID3
X
Reports > End of Period > End of Year > New Client
Report – By Client ID
EOY – New Client Report – By
Client Last Name3
X
Reports > End of Period > End of Year > New Client
Report – By Client Last Name
EOY – Sales Tax Summary By
Revenue Center
X
Reports > End of Period > End of Year > Sales Tax
Summary By Revenue Center
EOY – Sales Tax Summary/
Income Reconciliation – Closed
Invoices
X
Reports > End of Period > End of Year > Sales Tax
Summary/Income Reconciliation – Closed Invoices
EOY – Serv. Sales Report –
Closed Invoices – By Class By
Desc.
X
Reports > End of Period > End of Year > Serv. Sales
Report – Closed Invoices – By Class By Desc.
EOY – Serv. Sales Report –
Closed Invoices – By Class By
ID
X
Reports > End of Period > End of Year > Serv. Sales
Report – Closed Invoices – By Class By ID
EOY – Statistics By Species
Report – Closed Invoices
X
Reports> End of Period > End of Year > Statistics
By Species Report – Closed Invoices
EOY – Statistics By Staff Report
– Closed Invoices
X
Reports > End of Period > End of Year > Statistics
By Staff Report – Closed Invoices
1
Exclusive to Multi-Location Inventory
Exclusive to Multi-Practice
3
Indicates a report that is available for multi-location databases
4
Security setting for a purchasable module
2
• Page 130 •
This document contains suggested security settings for General Login
(GEN), Receptionists (REC), Technicians (TECH), Doctors (DR),
and Managers/Owners (M/O). However, it is ultimately the practice’s
decision-maker that decides who needs access to certain areas within
Cornerstone*, and IDEXX shall not be liable for any actions arising
from those security decisions.
Cornerstone 8.3 Default and Security Settings Guide
Cornerstone 8.3 Default and Security Settings Guide
IDEXX Computer Systems
CONFIDENTIAL INFORMATION
Access Suggestions
Foundation Reports Security
GEN
REC
DR
TECH
M/O
Path to Locate
EOY – Yearly Clients With Open
Invoices – By Client ID
X
Reports > End of Period > End of Year > Yearly
Clients With Open Invoices – By Client ID
EOY – Yearly Clients With Open
Invoices – By Invoice No.
X
Reports > End of Period > End of Year > Yearly
Clients with Open Invoices – By Invoice No.
EOY – Yearly Sales Summary3
X
Reports > End of Period > End of Year > Yearly
Sales Summary
Estimates
X
X
X
X
X
Estimate icon
Feeding Guide Instructions
X
X
X
X
X
Activities > Feeding Guide > Feeding Guide Profile
Grooming Report
X
X
X
X
X
N/A
X
Reports > Invoice Item > Image Request Special
Action Item Report
Image Request Special Action
Item Report
Imaging – Image Only
X
X
X
X
Activities > Images > Patient Images > Print button
Imaging – Image With
Comments
X
X
X
X
Activities > Images > Patient Images > Print button
Imaging – Image Without
Comments
X
X
X
X
X
Activities > Images > Patient Images > Print button
Imaging – Multiple Images
X
X
X
X
X
Activities > Images > Patient Images > Print button
Imaging – Multiple Pages Report
X
X
X
X
X
Activities > Imaging > Image Explorer
Initial Client Setup Report
X
Reports > Client > Initial Client Setup Report
Initial Patient Setup
X
Reports > Patient > Initial Patient Setup
Initial Practice Setup Report By
Billing Messages
X
Reports > Practice > Initial Practice Setup Report
By Billing Messages
Initial Practice Setup Report By
Credit Codes
X
Reports > Practice > Initial Practice Setup Report
By Credit Codes
Initial Practice Setup Report By
Estimate Messages
X
Reports > Practice > Initial Practice Setup Report
By Estimate Messages
Initial Staff Setup Report
X
Reports > Staff > Initial Staff Setup Report
Inventory – Adjustment Report
X
Reports > Inventory > Inventory – Adjustment
Report
Inventory – Audit Open Details
Report
X
Reports > Inventory > Inventory – Audit Open
Details Report
Inventory – Audit Report
X
Reports > Inventory > Inventory – Audit Report
Inventory – Backorder Report
X
Reports > Inventory > Inventory – Backorder
Report
Inventory – Cost Report
X
Reports > Inventory > Inventory – Cost Report
Inventory – Cost Totals Report
X
Reports > Inventory > Inventory – Cost Totals
Report
Inventory – Counts Report
X
Reports > Inventory > Inventory – Counts Report
Inventory – Evaluation Report
X
Reports > Inventory > Inventory – Evaluation
Report
1
Exclusive to Multi-Location Inventory
Exclusive to Multi-Practice
3
Indicates a report that is available for multi-location databases
4
Security setting for a purchasable module
2
• Page 131 •
This document contains suggested security settings for General Login
(GEN), Receptionists (REC), Technicians (TECH), Doctors (DR),
and Managers/Owners (M/O). However, it is ultimately the practice’s
decision-maker that decides who needs access to certain areas within
Cornerstone*, and IDEXX shall not be liable for any actions arising
from those security decisions.
Cornerstone 8.3 Default and Security Settings Guide
Cornerstone 8.3 Default and Security Settings Guide
IDEXX Computer Systems
CONFIDENTIAL INFORMATION
Access Suggestions
Foundation Reports Security
GEN
REC
DR
TECH
M/O
Path to Locate
Inventory – Expiration Date
Report
X
Reports > Inventory > Inventory – Expiration Date
Report
Inventory – Internal Usage
Report
X
Reports > Inventory > Inventory – Internal Usage
Report
Inventory – Item Vendor
Information Report
X
Reports > Inventory > Inventory – Item Vendor
Information Report
Inventory – Items Profit Analysis
Report
X
Reports > Inventory > Inventory – Items Profit
Analysis Report
Inventory – Linked Items Report
X
Reports > Inventory > Inventory – Linked Items
Report
Inventory – On Order Report
X
Reports > Inventory > Inventory – On Order Report
Inventory – Overstock Report
X
Reports > Inventory > Inventory – Overstock Report
Inventory – Partial Receipts
Report
X
Reports > Inventory > Inventory – Partial Receipts
Report
Inventory – Purchase History
Report
X
Reports > Inventory > Inventory – Purchase History
Report
Inventory – Receipt Report
X
Reports > Inventory > Inventory – Receipt Report
Inventory – Reorder Report
X
Reports > Inventory > Inventory – Reorder Report
Inventory – Returns Report
X
Reports > Inventory > Inventory – Returns Report
Inventory – Setup Error Report
X
Report will automatically display when an error
occurs.
Inventory – Turnover Report
X
Reports > Inventory > Inventory – Inventory
Turnover Report
Inventory – Usage Tax Report
X
Reports > Inventory > Inventory – Inventory Usage
Tax Report
Inventory – Vendor Summary
Report
X
Reports > Inventory > Inventory – Inventory Vendor
Summary Report
Inventory – Want List Report
X
Reports > Inventory > Inventory – Want List Report
X
Reports > Invoice Item > Invoice Group Item Setup
Report
X
Reports > Invoice Item > Invoice Item Classification
Setup Report
X
Reports > Invoice Item > Invoice Item Dispensing
Setup Report
Invoice Item Information Report
X
Reports > Invoice Item > Invoice Item Information
Report
Invoice Item Price Information
X
Reports > Invoice Item > Invoice Item Price
Information
Invoice Item Reminder
Information Report
X
Reports > Invoice Item > Invoice Item Reminder
Information Report
Invoice Group Item Setup
Report
X
X
X
Invoice Item Classification
Setup Report
Invoice Item Dispensing Setup
Report
1
X
X
Exclusive to Multi-Location Inventory
Exclusive to Multi-Practice
3
Indicates a report that is available for multi-location databases
4
Security setting for a purchasable module
2
• Page 132 •
X
This document contains suggested security settings for General Login
(GEN), Receptionists (REC), Technicians (TECH), Doctors (DR),
and Managers/Owners (M/O). However, it is ultimately the practice’s
decision-maker that decides who needs access to certain areas within
Cornerstone*, and IDEXX shall not be liable for any actions arising
from those security decisions.
Cornerstone 8.3 Default and Security Settings Guide
Cornerstone 8.3 Default and Security Settings Guide
IDEXX Computer Systems
CONFIDENTIAL INFORMATION
Access Suggestions
Foundation Reports Security
GEN
REC
DR
TECH
M/O
Path to Locate
Invoice Items Sales Information
X
Reports > Invoice Item > Invoice Items Sales
Information
Invoice Item Setup Report
X
Reports > Invoice Item > Invoice Item Setup Report
Invoice Item Tax Setup Report
X
Reports > Invoice Item > Invoice Item Tax Setup
Report
Invoice Receipt
X
X
X
X
X
Reports > Inventory > Inventory – Receipt Report
Invoices
X
X
X
X
X
Patient Clipboard > Select Client & Patient > Rightclick Patient name > Select Invoice
Lab Cumulative Results Report
X
X
X
X
X
Reports > Lab > Lab Cumulative Results Report
Lab Detail Results Report
X
X
X
X
X
Reports> Lab > Lab Cumulative Results Report >
Preview Detailed Report
X
X
Prints automatically when price update fails
Lab Item Price Update Error
Report
Lab Request
X
X
X
X
X
Lab icon (Yellow Beaker) > Click New
Lab Request Label
X
X
X
X
X
Lab icon (Yellow Beaker) > Click New > Insert Lab
Requested Criteria > OK
Lab Request Profiles Report
X
X
X
X
X
Reports > Lab > Lab Request Profiles Report
Lab Request Status Report
X
X
X
X
X
Reports > Lab > Lab Request Status Report
Lab Request Tube Label
X
X
X
X
X
Lab icon (Yellow Beaker) > Click New > Insert Lab
Requested Criteria > OK
Lab Templates Report
X
X
X
X
X
Reports > Lab > Lab Templates Report
Lab Test Defaults Report
X
X
X
X
X
Reports > Lab > Lab Test Defaults Report
X
Lab icon (yellow beaker) > Click New > Insert
Lab Requested Criteria for Reference Lab > Test
List OR Activities > Lab Work > Create IDEXX
LabREXX Test Request Form
X
Reports > Client > Mailing labels
X
Patient Clipboard > Select Client/Patient > Highlight
Patient Name > Click Print button
X
Reports > Client > Merge Clients/Patients Reports
X
Reports > Patient > Microchip ID Report
X
Reports > Equine > Partnership Report
LabREXX Test Request Form
X
X
X
X
Mailing Labels
Medical Notes
X
X
X
X
Merge Clients/Patients Report
Microchip ID Report
X
X
X
Partnership Report
X
Patient Advisor – Diagnosis by
Staff
X
X
X
X
Reports > Patient Advisor > Diagnosis by Staff
Patient Advisor – Diagnosis
Count Report
X
X
X
X
Reports > Patient Advisor > Diagnosis Count Report
Patient Advisor – Diagnosis
Code Report
X
X
X
X
Reports > Patient Advisor > Diagnosis Code Report
Patient Advisor – Instruction
Templates Report
X
X
X
Reports > Patient Advisor > Diagnosis Instructions
Template Report
1
Exclusive to Multi-Location Inventory
Exclusive to Multi-Practice
3
Indicates a report that is available for multi-location databases
4
Security setting for a purchasable module
2
• Page 133 •
This document contains suggested security settings for General Login
(GEN), Receptionists (REC), Technicians (TECH), Doctors (DR),
and Managers/Owners (M/O). However, it is ultimately the practice’s
decision-maker that decides who needs access to certain areas within
Cornerstone*, and IDEXX shall not be liable for any actions arising
from those security decisions.
Cornerstone 8.3 Default and Security Settings Guide
Cornerstone 8.3 Default and Security Settings Guide
IDEXX Computer Systems
CONFIDENTIAL INFORMATION
Access Suggestions
Foundation Reports Security
GEN
REC
DR
TECH
M/O
Path to Locate
Patient Advisor – Observations
Report
X
X
X
Reports > Patient Advisor > Observation Report
Patient Advisor – Open Physical
Exam Report
X
X
X
Reports > Patient Advisor > Open Physical Exam
Report
Patient Advisor – Patient Advisor
System Setup Report
X
X
X
Reports > Patient Advisor > Patient Advisor System
Setup Report
Patient Advisor – Patient
Diagnosis Report
X
X
X
X
X
Reports > Patient Advisor > Patient Diagnosis
Report
Patient Advisor – Patient
Diagnosis Status Report
X
X
X
X
X
Reports > Patient Advisor > Patient Diagnosis
Status Report
Patient Advisor – Pet Health
Report Card
X
X
X
X
X
Patient Advisor icon > Complete Exam > Save or
Post
Patient Advisor – Reminders by
Diagnosis
X
X
Reports > Patient Advisor > Reminders by
Diagnosis
X
Reports > Patient Advisor > System Template Setup
Report
X
Reports > Patient Advisor > Treatment Plan
X
Reports > Patient > Patient By Name Report
X
Reports > Patient > Patient Diagnosis Report
X
Reports > Patient > Patient History Report
X
Reports > Patient > Patient Prompts
X
Patient Advisor – System
Template Setup Report
Patient Advisor – Treatment Plan
X
X
X
X
Patient By Name Report
Patient Diagnosis Report
X
Patient History Report
X
X
X
X
X
Patient Prompts
Patient Visit List Report
X
X
X
X
X
Patient Visit List icon > Print OR Reports > Patient >
Patient Visit List Report
Payment on Account
X
X
X
X
X
Reports > Client > Client Account History
X
Reports > Performance Tracker
Performance Tracker
Pharmacy – Client Information
Sheet
X
X
X
X
X
Prescription icon > Select Drug > Pharmacy button
Pharmacy – Drug Information
Sheet
X
X
X
X
X
Prescription icon > Select Drug > Pharmacy button
Physical Exam – Observations
Report
X
X
X
Reports > Physical Exam > Observations Report
Physical Exam – Open Physical
Exam Report
X
X
X
Reports > Physical Exam > Open Physical Exam
Report
Physical Exam – Physical Exam
System Setup Report
X
X
X
Reports > Physical Exam > Physical Exam System
Setup Report
X
Reports > Physical Exam > System Template Setup
Report
Physical Exam – System
Template Setup Report
Pick Item Setup Report
X
Reports > Invoice Item > Pick Item Setup Report
Prescription History Report
X
X
X
X
X
Reports > Prescription > Prescription History Report
Prescription Instruction Report
X
X
X
X
X
Reports > Prescription > Prescription Instruction
Reports
1
Exclusive to Multi-Location Inventory
Exclusive to Multi-Practice
3
Indicates a report that is available for multi-location databases
4
Security setting for a purchasable module
2
• Page 134 •
This document contains suggested security settings for General Login
(GEN), Receptionists (REC), Technicians (TECH), Doctors (DR),
and Managers/Owners (M/O). However, it is ultimately the practice’s
decision-maker that decides who needs access to certain areas within
Cornerstone*, and IDEXX shall not be liable for any actions arising
from those security decisions.
Cornerstone 8.3 Default and Security Settings Guide
Cornerstone 8.3 Default and Security Settings Guide
IDEXX Computer Systems
CONFIDENTIAL INFORMATION
Access Suggestions
Foundation Reports Security
GEN
REC
DR
TECH
M/O
Prescription Labels
X
X
X
X
X
Activities > Prescription Label
Prescription Refill Log
X
X
X
X
X
Reports > Prescription > Prescription Refill Log
Problem List Setup Report
X
X
X
X
X
Reports > Practice > Problem List Setup Report
X
Reports > Practice > Purge Report
Purge Detail Report
Purge Report
Path to Locate
X
Reports > Practice > Purge Report
Rabies Certificate (Default)
X
X
X
X
X
Lists > Species > Select Species > Rabies Default
Rabies Tags Report
X
X
X
X
X
Reports > Patient > Rabies Tag Report
Radiology (Imaging) Log
X
X
X
X
X
Reports > Practice > Radiology (Imaging) Log
Referral Doctor Master Report
X
Reports > Referral > Referral Doctor Master Report
Referral Hospital Master Report
X
Reports > Referral > Referral Hospital Master
Report
Referral Report
X
Reports > Client > Referral Report
X
X
Reports > Patient > Reminder Letter Report
X
X
Reports > Patient > Reminder Recall Report
X
X
Reports > Patient > Reminder Report
Reminder Letter Report
X
X
Reminder Recall Report
X
X
Reminder Report
X
X
Reminders
X
X
X
X
X
Activities > Reminders
Report Writer – Labels
X
X
X
X
X
Reports > Client and Patient Report Builder
Report Writer – Report
X
X
X
X
X
Reports > Client and Patient Report Builder
Staff Class Commission
Percentage Report
X
Reports > Staff > Staff Class Commission
Percentage Report
Staff Commission Percentage
Report
X
Reports > Staff > Staff Commission Percentage
Report
Staff Defined Prompts Report
X
Reports > Staff > Staff Defined Prompts Report
Staff Phone List
X
Reports > Staff > Staff Phone List
X
Staff Summary Report
X
Reports > Staff > Staff Summary Report
Surgery/Anesthesia Log
X
X
X
X
X
Reports > Practice > Surgery/Anesthesia Log
Tentative Medical Note Report
X
X
X
X
X
Reports > Patient > Tentative Medical Note Report
Trainer Reminder Letter Report
X
X
X
X
Reports > Equine > Trainer Reminder Letter Report
Trainer Reminder Recall Report
X
X
X
X
Reports > Equine > Trainer Reminder Recall Report
Trainer Reminder Report
X
X
X
Reports > Equine > Trainer Reminder Report
X
Reports > Equine > Trainer Report
X
Trainer Report
Travel Sheets
X
X
X
X
X
Lists > Travel Sheets
Treatment Report
X
X
X
X
X
Reports > Equine > Treatment Report
Vaccine Tag Report
X
X
X
X
X
Reports > Patient > Vaccine Tag Report
Voided Documents
X
Reports > Patient > Voided Documents
Voided Invoices Report
X
Reports > Client > Voided Invoice Report
1
Exclusive to Multi-Location Inventory
Exclusive to Multi-Practice
3
Indicates a report that is available for multi-location databases
4
Security setting for a purchasable module
2
• Page 135 •
This document contains suggested security settings for General Login
(GEN), Receptionists (REC), Technicians (TECH), Doctors (DR),
and Managers/Owners (M/O). However, it is ultimately the practice’s
decision-maker that decides who needs access to certain areas within
Cornerstone*, and IDEXX shall not be liable for any actions arising
from those security decisions.
Cornerstone 8.3 Default and Security Settings Guide
Cornerstone 8.3 Default and Security Settings Guide
IDEXX Computer Systems
CONFIDENTIAL INFORMATION
Access Suggestions
Foundation Reports Security
GEN
REC
DR
TECH
M/O
Whiteboard Patient Orders
Report
X
X
X
X
X
Reports > Patient > Whiteboard Patient Orders
Report
Whiteboard Patient Treatments
X
X
X
X
Reports > Patient > Whiteboard Patient Treatments
Practice Explorer Dialog
Security
Path to Locate
Access Suggestions
GEN
REC
DR
TECH
M/O
Path to Locate
Batch Mode
X
File > Run Batch Reports
Change Password
X
Security > Change Password
Export
X
File > Open > Export
Import
X
File > Open > Import
Practice Explorer Preferences
X
File > Preferences
Reports
X
File > New > Report > Open > Canned Reports
Tallies
X
File > New > Tally
Updates
X
File > New > Update
Access Suggestions
Time Clock Dialog Security
GEN
REC
DR
TECH
M/O
Path to Locate
Access All Employees
X
Activities > Time Sheet
Change Password
X
File > Change Password
Data Defaults
X
Activities > Data Defaults
Edit Times
X
Activities > Edit Time
Report Selection
X
Reports > Report Selection
Sick Hours
X
Activities > Sick Hours
Staff List
X
Reports > Report Selection
User Information
X
File > User Information
Vacation Hours
X
Activities > Vacation Hours
Access Suggestions
Time Clock Reports Security
GEN
REC
DR
Staff Hours Report
1
Exclusive to Multi-Location Inventory
Exclusive to Multi-Practice
3
Indicates a report that is available for multi-location databases
4
Security setting for a purchasable module
2
• Page 136 •
TECH
M/O
X
Path to Locate
Reports > Report Selection
This document contains suggested security settings for General Login
(GEN), Receptionists (REC), Technicians (TECH), Doctors (DR),
and Managers/Owners (M/O). However, it is ultimately the practice’s
decision-maker that decides who needs access to certain areas within
Cornerstone*, and IDEXX shall not be liable for any actions arising
from those security decisions.
Cornerstone 8.3 Default and Security Settings Guide