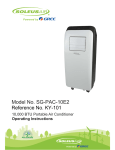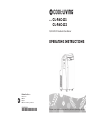
1
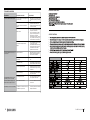
Models
CL-PAC-121
CL-PAC-122
12,000 BTU Portable Air Conditioner
OPERATING INSTRUCTIONS
Printed in Mexico
SC: 06-06-14
BPN: NA
Pags: 8
SHN model: CL-PAC121_CL-PAC122
804105214
*804105214*
Please read instructions carefully before operating
the unit.
CL-PAC-121_122
TROUBLESHOOTING (CONT.)
Thank you for choosing a Cool Living Air Conditioner. This owner’s manual will provide you with
valuable information necessary for the proper care and maintenance of your
new product. Please take a few moments to thoroughly read the instructions and familiarize yourself
with all the operational aspects of your new Portable Air Conditioner.
PROBLEM
POSSIBLE CAUSES
SOLUTIONS
The LCD Display is showing “E5”
Low Voltage Protection
x
Unplug for 10 minutes and then
turn on the unit. If “E5” is still displayed, contact customer service.
The LCD Display is showing “H8”
The backup water tank is full
x
x
Drain the water tank
If the “H8” I still displayed after the
water tank has been emptied, contact customer service.
The LCD Display is showing “F1”,
“F2”, or “F4”
Internal malfunction
x
Contact Customer Service
IMPORTANT INSTRUCTIONS
Before installing and using your portable air conditioner, please read this owner’s manual carefully. Store this
manual in a safe place for future reference.
1) Always place the unit on a level surface.
2) Never use or store gasoline or other flammable vapor or liquid near this unit unless instructed by this manual.
3) Maintain at least 12 inches (50 cm) clearance space around this unit. Do not block or cover air inlet or outlet grilles.
4) The unit must be connected to a correctly grounded power supply.
5) Do not start or stop the unit by inserting or pulling out the power plug.
6) Do not use an adapter plug or extension cord.
7) Do not use the unit in the immediate surroundings of a bath, a shower or a swimming pool.
8) Do not insert anything into the air outlet. Do not obstruct air inlet or outlet grills unless instructed by this manual.
9) Do not let children play near this unit.
10) Always inspect the cord for signs of damage before use. If the power cord is damaged, it must be replaced by the
manufacturer or a qualified service technician.
11) When cleaning the unit, always turn the unit off and unplug the power cord.
15
2
2
CL-PAC-121_122
15
PACKAGE CONTENTS
TROUBLESHOOTING
PROBLEM
POSSIBLE CAUSES
SOLUTIONS
The Air Conditioner will not start
The air conditioner is unplugged or not x
connected well.
x
Check the house fuse/circuit
breaker box and replace the fuse
or reset the breaker.
x
The unit will automatically re-start
when power is restored.
There is a protective time delay
(approx. 3 minutes) to prevent
tripping of the compressor
overload. For this reason, the unit
may not start normal cooling for 3
minutes after it is turned back on.
The fuse is blown/circuit breaker is
tripped.
Power Failure
x
x
The Air Conditioner does not cool
as it should
x
Airflow is restricted
x
Make sure there are no curtains,
blinds, or furniture blocking the
front of the air conditioner
The temperature control may not be
set correctly.
x
Lower the set thermostat temperature
The air filter is dirty
x
Cold air is escaping
The Air Conditioner displays the
Timer hours but does not work
Press the RESET button located
on the power cord plug.
If the RESET button will not stay
engaged, discontinue use of the
air conditioner and contact a
qualified service technician.
The current interrupter device is
tripped.
The room may be too warm
The Dehumidifier function is not
providing cool air as it should
Make sure the air conditioner plug
is pushed completely into the outlet
The Evaporator is frozen
Is the TIMER ON enabled?
x
x
x
x
Portable Air Conditioner
Exhaust Hose (1)
Front Exhaust Hose Adapter (1)
Window Kit Adapter (1)
Rear Exhaust Hose Adapter (1)
Remote Control & AAA Batteries (2 batteries)
Window Kit - 3 Sliding Panels (1 single hose panel, 2 extension panels)
Owner’s Manual
SPECIFICATIONS
x
The cooling capacity is measured at an ambient temperature of DB 86 °F, WB 78 °F.
x
Noise level is measured at a distance of 3.28 ft away from the front of the unit, when the unit is in cooling mode.
x
Power consumption is measured when the fan runs at the highest speed setting.
x
These specifications are for reference only. For actual data, please refer to the rating label on the back of the unit.
x
If the environment temperature is higher than the max operating temperature or lower than the minimum operating
temperature, the air conditioner may not work properly.
x Dehumidifier mode works when ambient temperatures are between 61°F - 86°F
x
Air Conditioner mode operates up to an ambient temperature of 95°F.
Model
Power Supply (Ph/V/Hz)
Clean the filter. See the Cleaning
and Care Section of the manual.
Dehumidifying Capacity (Pints/Day)
Please allow time for the room to
cool down after turning on the air
conditioner.
Rated Heating Capacity (BTU/h)
Check for open furnace registers
and cold air returns
The unit is defrosting and will resume operation when done.
Rated Cooling Capacity (BTU/h)
The batteries are inserted incorrectly
x
Check the position of the batteries.
The batteries may be dead
x
Replace the batteries
CL-PAC-122 (with Heat)
1/115/60Hz
81.6
81.6
12,000
12,000
-
10,500
1465
1465
Heating Power Input (Watts)
-
1200
Rated Current Cooling (Amperage)
13
13
Rated Current Heating (Amperage)
-
10.6
Air Flow - H/M/L (CFM)
Product Dimensions (W” x H” x D”)
Product Weight (Lbs)
The Remote Control is not working
1/115/60Hz
Cooling Power Input (Watts)
Noise Level (dBA) - H/M/L
Cancel the TIMER or wait until the
unit turns on.
CL-PAC-121
Refrigerant Type
55/53/51
55/53/51
235/205/175
235/205/175
17.75 x 33.125 x 17.125
17.75 x 33.125 x 17.125
80
80
R-410A
R-410A
14
3
14
CL-PAC-121_122
3
LCDI POWER CORD AND PLUG
MAINTENANCE
This air conditioner is equipped with an LCDI (Leakage Current Detection and Interruption) power cord and
plug as required by US National Electric Code 440.65. This cord consists of a length of shielded flexible cord
with no termination on the load side and a LCDI attachment plug on the line side.
Note: Make sure power is off and the power cord is not plugged into an electrical outlet prior to
performing any maintenance on the unit.
The LCDI power cord and plug will remove the supply source via electrical disconnect (circuit trip) if the
nominal current leakage between the cord shield and either load conductor exceeds a predetermined value.
The cord will remain de-energized until the devise has been manually reset. This is intended to reduce the risk
of a fire in the power cord or combustible materials nearby. The cord shields are not grounded and they must
be considered a shock hazards if exposed. The cord shield must not be connected to ground or to any exposed
metal.
Clean or replace filter - If the air filter is blocked with a dust, the airflow volume may decrease. It is
recommended to clean the filter once every two weeks, or as needed.
1) Remove the filter from the filter compartment on the back of the unit.
2) Wash the air filter by immersing it gently into warm water with a neutral detergent. Rinse the filter
and dry it thoroughly out of sunlight.
3) Slide the filter back into the filter compartment after it is thoroughly dried.
The test and reset buttons on the LCDI Plug are used to check if the plug is functioning properly. To test:
4) If the filter is torn or unusable, you need to replace the filter.
1. Plug power cord into wall outlet
2. Press TEST Button, circuit should trip, cutting power to the air conditioner
3. Press RESET button for use
Clean the unit Housing
1) Keep the unit from being exposed directly to the sun to prevent color fading.
If a test is performed and the indicator light remains ON, current leakage has been detected. Do not use the air
conditioner or attempt to reset the LCDI Plug. Contact a Service Center.
2) Clean the surface with a damp cloth and dry it with a soft towel.
Storing the Unit for an Extended Period of Time or Transporting the unit
1) Empty any excess water by unplugging the water drainage stop in the back of the unit (located at
the bottom).
RESET
2) Unplug the unit.
TEST
3) The unit should be stored in a cool dry place.
WARNING:
1.
2.
3.
4.
DO NOT press the TEST button while the air conditioner is operating.
The TEST and RESET buttons should not be used as ĀONāand ĀOFFāswitches.
The cord and plug are not intended to offer protection to externally connected loads or supply circuits.
The cord and plug are intended for indoor use only.
DISCLAIMER
ALL INFORMATION AND THE TECHNICAL SPECIFICATIONS PRESENTED IN THIS USER’S MANUAL ARE THE
PRESENTATION OF THE MANUFACTURER. COOL LIVING HAS NOT CONDUCTED INDEPENDENT
TEST TO THE INFORMATION AND THE SPECIFICATIONS PRESENTED HEREWITHIN.
4
4
13
CL-PAC-121_122
13
REMOTE CONTROL OPERATING INSTRUCTIONS
REMOTE CONTROL OPERATING INSTRUCTIONS
PRODUCT DIAGRAM
Air Outlet &
Louvers
Carry Handle
X-FAN
X-FAN BUTTON
Control Panel
REMOTE CONTROL
Press
theX-FAN
X-FANbutton
buttontoto
enable
the X-Fan
function.
Press the
enable
the X-Fan
function.
When
enable,X-Fan
X-Fan
thetofan
to remain
When enable,
willwill
forceforce
the fan
remain
on once on
the unit
powered
down. The
fan stays
on tostays
dry out
once
theisunit
is powered
down.
The fan
onany
to dry
remaining
moisture inmoisture
the unit toin
help
mold minimize
or
out
any remaining
theminimize
unit to help
bacteriaorgrowth.
X-Fan
cannotX-Fan
beset under
Auto,
mold
bacteria
growth.
cannot
beFan,
set or
under
Heat (CL-PAC-122
only)
modes.
Auto,
Fan, or Heat
(CL-PAC-122
only) modes.
LOCK
LOCK FUNCTION
x Press “+” and “-” buttons together at the same time to
lock the remote keyboard. Do this again to unlock.
SLEEP
SLEEP BUTTON
Press
theSLEEP
SLEEP
mode
engage SLEEP
Press the
mode
button button
to engagetoSLEEP
mode..
featurelimits
limits
compressor
mode.. This
This feature
compressor
usageusage
and and enhances
energy
byadjusting
adjusting
enhances
energysavings
savings by
the the
set set temperature
temperature
while
you arePress
sleeping.
the SLEEP
while
you are
sleeping.
thePress
SLEEP
button once
buttontoonce
more to
disable
Sleep Mode.
more
disable
Sleep
Mode.
Sleep Sleep
ModeMode
is not availis not
AutoModes.
or Fan Modes.
able
inavailable
Auto orinFan
LIGHT
Press the LIGHT button to turn the on the display Light.
A small Light bulb icon will light up on the remote control display.
AUTO
InIn Cooling
Dehumidifier
Cooling oror
Dehumidifier
(DRY)(DRY)
modes: modes:
WhensleepWhen
sleep
mode
is selected
the set temperature
will automode is
selected
the set temperature
will automatically
increase 2°F
after 1 hour.
set temperamatically
increase
2°F After
after21hours,
hour.theAfter
2 hours, the
turetemperature
will increase will
another
2°F for aanother
total increase
of 4°F.
set
increase
2°F for
a total
increase of 4°F.
InInHeating
mode(CL-PAC-122
(CL-PAC-122
When sleep
Heating mode
only): only):
Whensleep
mode isisselected
thethe
set temperature
will automatically
mode
selected
set temperature
will automatidecrease
2°F after
1 hour.
2 hours,
the 2sethours,
tem- the set
cally
decrease
2°F
afterAfter
1 hour.
After
perature will decrease
another another
2°F for a total
of intemperature
will decrease
2°F increase
for a total
4°F. of 4°F.
crease
LIGHT BUTTON
Filter
Location
AUTO MODE
Air Exhaust Vent
x Press the MODE button to select Auto Mode. Once
Auto Mode is selected the unit will automatically
choose the operating mode based on the current room
temperature. The temperature will not be displayed on
the LED in this mode.
TEMP
MEASURE
Upper Air Intake
Lower Air Intake
CHANGE BETWEEN F° and C°
xWhen
When the
the unit
is is
off,off,
press
the MODE
and “-”
unit
press
the MODE
andbutton
“-” button
change between
C°.
totochange
betweenF°
F°and
and
C°.
Power Cord
5
12
12
CL-PAC-121_122
5
REMOTE
CONTROL
OPERATINGINSTRUCTIONS
INSTRUCTIONS
REMOTE
CONTROL
OPERATING
PARTS & WINDOW KIT ASSEMBLY
PARTS
TIMER
Auto-on
Timer:When
airconditioner
conditioner isisoff,
Auto
on Timer:
When thetheair
off,it itcan
can
be set
to automatically
minutes
hours
be set
to automaticallyturn
turnon
oninin30 minutes
toto
2424
hours
at the
previous
set
mode
and
fan
setting.
To
set
the
Autoat the previousset mode and fan setting.To set the Autoon Timer,
press
on the
theunit
unitororremote
remote
on Timer,
pressthe
theTIMER
TIMERbutton
buttonon
control.
Each
touch
+/-buttons
buttons
remote
control.
Each
touchof
of the
the+/onon
thethe
remote
willwill
change
the
minute
increments
change
thetimer
timer setting
setting inin3030minute
increments
(.5 (.5
hours).
HOUR
ON/OFF
whenthe
theAutoAutohours).
HOUR
ON/OFFicon
iconwill
willblink
blink when
on on
Timer
Once the
thetimer
timeris is
press
Timeris isbeing
being set.
set. Once
set,set,
press
the the
TIMER
button
once
button
oncemore
moretotosave
savethe
the setting.
setting.
TIMER
Auto-off Timer:When the air conditioner is on, it can
Auto-off Timer: When the air conditioner is on, it can
be set to automatically turn off in 30 minutes to24 hours.
be set to automatically turn off in 30 minutes to 24 hours.
Auto-offTimer,
Timer, press
press the
onon
To To
set set
thethe
Auto-off
the TIMER
TIMERbutton
button
remotecontrol.
control. Each
ofof
thethe
+/- buttons
on the on the
the the
remote
Eachtouch
touch
+/- buttons
remote
willchange
change the
the timer
in in
30 minute
(.5 (.5
remote
will
timersetting
setting
30 minute
hour)
intervals.HOUR
HOURON/OFF
ON/OFF icon
when
the
hour)
intervals.
iconwill
willblink
blink
when
Timer
is being
set. Toset.
cancel
timer,the
presstimer,
the Auto-off
Auto-off
Timer
is being
To the
cancel
ON/OFF
button.
Once
the
timer
is
set,
press
the
the
press the ON/OFF button. Once the timer is set, press the
button
oncemore
more to
to save
save the
Press
thethe
TIMER
TIMER
button
once
thesetting.
setting.
Press
ON/OFFbutton
clear
a time
setting.
ON/OFF
button to to
clear
a time
setting.
EXHAUST HOSE & ADAPTERS
REMOTE CONTROL
Front Exhaust Hose
Adapter
Rear Exhaust Hose
Adapter
Exhaust Hose
HEALTH|SAVE
TIMER BUTTON
HEALTH|SAVE BUTTON
The Health Function is not available on this unit.
Window Kit Adapter
Press
rotate through
through the
Pressthe
theSave
Savebutton
button to
to automatically
automatically rotate
different
speeds.
To To
disable
Save
the different
speeds.
disable
Savemode
modeand
andpick
pick your
yourfan
own
fan speed,
the Save
button
again.
own
speed,
press press
the Save
button
again.
HORIZONTAL SWING BUTTON
Swing
Button
to turnon
Press the
theHorizontal
Horizontal
Swing
Button
to and
turnoffontheand
Horizontal
swing mode.
In horizontal
mode, the swing
off
the Horizontal
swing
mode.swing
In horizontal
louvers the
willlouvers
rotate left
androtate
right to
circulate
moretoair.
mode,
will
left
and right
circulate more air.
TURBO
TURBO BUTTON
Pressthe
theLeft
Leftand
andRight
Right Swing
Swing Button to
Press
to turn
turnon
onand
andoff
thethe
Horizontal
swing
mode.
In horizontal
swingswing
mode,
off
Horizontal
swing
mode.
In horizontal
the louvers
will rotate
left and
right
circulate
more air.
mode,
the louvers
will rotate
left
andtoright
to circulate
more air.
ASSEMBLY & INSTALLATION
INSTALLATION
When the unit is operating as an air conditioner or dehumidifier, the window kit and exhaust hose must be installed.
When the unit is operating in fan mode, the window kit and exhaust hose do not need to be installed .
TEMP
MOUNTING THE EXHAUST HOSE
x Choose a suitable location, near a grounded electrical outlet and suitable window or door. Remove
packaging and locate components.
x Extend both ends of the exhaust hose approximately 6 inches.
x Screw the REAR and FRONT Exhaust Hose Adapters onto each end of the exhaust hose. Once both
adapters are attached, attach the Window Kit Adapter to the REAR Exhaust Hose Adapter.
x Connect the FRONT Exhaust Hose Adapter to the back of your portable air conditioner.
x Attach the Window Kit Adapter to the window kit.
x For maximum efficiency bend the exhaust hose as little as possible once installation is complete.
TEMP BUTTON
Pressthe
the TEMP
thethe
current
set temPress
TEMP button
buttontotodisplay
display
current
set temperature or
actual
room
temperature.
With each
perature
orthe
the
actual
room
temperature.
With each
press of
of the
thethe
display
will cycle
back back
press
theTEMP
TEMPbutton
button
display
will cycle
andforth.
forth.
and
6
11
6
CL-PAC-121_122
11
REMOTE
CONTROL
OPERATING
INSTRUCTIONS
REMOTE
CONTROL
OPERATING
INSTRUCTIONS
-/+
SIGNAL TRANSMITTER
- / + BUTTONS
When
theunit
unitis in
is Air
in Conditioner
Air Conditioner
or(CL-PACHeater (CLWhen the
orHeater
122) mode you
canyou
select
desired
temperature.
PAC-122)
mode
canyour
select
your
desired temperaPress
the
TEMP
SELECT
buttons
(+
or
-)
to
ture. Press the TEMP SELECT buttons (+select
or -) to seyour
desired
temperature
setting.setting.
The temperature
on the
lect
your
desired
temperature
The temperature
LCD
display
on
the
remote
control
will
increase
orincrease
deon the LCD display on the remote control will
accordingly.
Hold the
+/- buttons
two seconds
orcrease
decrease
accordingly.
Hold
the +/- for
buttons
for two
to rapidly increase ordecrease the temperature. Temp.
seconds to rapidly increase or decrease the temperarange is 61°F—86°F.
ture. Temp. range is 61°F—86°F.
FAN
FAN BUTTON
Press the Fan Speed button to change fan speeds.
Fan Speeds:
REMOTE CONTROL
Low Speed
Medium Speed
High Speed
NOTE:When
When the
(DRY)
mode,
NOTE:
theunit
unitis isin Dehumidifier
in Dehumidifier
(DRY)
the fanthe
speed
not adjustable.
mode,
fanisspeed
is not adjustable.
ON/OFF
TEMP BUTTON
ON/OFF BUTTON
Press
ON/OFF(POWER)
(POWER)
button
to manually
Press the
the ON/OFF
button
onceonce
to manually
turn
theunit
uniton.
on.Press
Press
Power
button
onceto
more to
turn the
thethe
Power
button
once more
turn
theunit
unitoff.
off.
turn the
MODE
MODE BUTTON
Press the
the MODE
repeatedly
to cycle
between
the
Press
MODEButton
Button
repeatedly
to cycle
between
the
different
modes.
different
modes.
Press the Up and Down Swing Button to turn on and off
the vertical swing mode. In vertical swing mode, the louvers will rotate up and down to circulate more air.
When
theunit
unit
is off,
the
and Swing
DownButSwing
When the
is off,
presspress
the Up
andUp
Down
Button
“+”
thetime
same
time to
enable swing
stationary
ton and and
“+” at
theatsame
to enable
stationary
swing
mode.
Stationary
Swing
mode
allows
for
mode. Stationary Swing mode allows for more control more
control
overthethe
way swing
the louvers
swingThe
up Swing
and down.
over the way
louvers
up anddown.
The
Swing
icon on
the will
Remote
iconon
the Remote
LCD
blinkLCD
twice will
whenblink
this istwice
when this is
Blinks for 2 Seconds
Stationary Swing
mode,
presspress
the Upthe
andUp
Down
InInStationary
Swing
mode,
and Down
Swing Button
Button to to
change
the swing
pattern per
below:per below:
Swing
change
the swing
pattern
AUTO
COOL
DRY
FAN
HEAT
NOTE: Heat Mode is only
available on CL-PAC-122
Disable Stationary
Swing
ModeMode
by pressing
the Up andthe Up
Disable
Stationary
Swing
by pressing
Down
Swing
ButtonButton
and “+”and
button
the same
and
Down
Swing
“+”atbutton
attime.
the same
The Swing
Iconon the
Remote
will blink
twice
time.
The Swing
Icon
on theLCD
Remote
LCD
will blink
when this is disabled.
twice
when this is disabled.
10
10
CL-PAC-121_122
7
CONTROL PANEL
CONTROL PANEL FUNCTIONS
CL-PAC-121
CONTROL PANEL OPERATING INSTRUCTIONS
1) Power On and Off - Press the POWER button once to manually turn the unit on. Press the POWER
button once more to turn the unit off.
COOL MODE LIGHT DRY MODE LIGHT
BUCKET FULL LIGHT
LED DISPLAY
2) Mode Selection - Press the MODE Button repeatedly to cycle between the different modes:
Air Conditioner, Dehumidifier (DRY), Fan only, and Heater mode (NOTE: Heater mode is only available
on the CL-PAC-122). Each press of the MODE button will light up a different mode icon on the control panel. The exhaust hose and window kit must be installed when the unit is in Air Conditioner,
Dehumidifier (DRY), or Heater (CL-PAC-122 only) mode. When using the unit as a fan, it is not
necessary to keep the exhaust hose and window kit connected to the unit.
FAN MODE LIGHT
POWER BUTTON
MODE BUTTON
3) Temperature - Select the desired temperature by pressing either źorŸkey when using the unit in
Cooling or Heating (CL-PAC-122 only) mode. The digital thermostat will display the set temperature.
4) Bucket Full - When the unit cannot evaporate the collected moisture fast enough, the excess water will
collect in a backup water tank located inside the unit. The Bucket Full icon (CL-PAC-121) or Heat Mode
icon (CL-PAC-122) will light up if this occurs. The unit will then beep 8 times and the LED display
will show “H8”. The compressor will now shut off. You should now drain the excess water from the unit.
To do this, get a small pan and place it under the drain plug on the bottom of the back of the unit. Remove
the plug and slightly tilt the unit backwards to drain the water into the pan.
TEMP SELECT BUTTONS
CL-PAC-122
HEAT MODE LIGHT DRY MODE LIGHT
COOL MODE LIGHT
LED DISPLAY
FAN MODE LIGHT
POWER BUTTON
MODE BUTTON
TEMP SELECT BUTTONS
8
8
9
CL-PAC-121_122
9