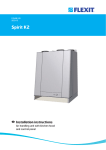
Download FlexIt SPIRIt K2
Transcript
111140E-04
2012-11
ART.NO.:
700010
-700017
+
700024
-700027
Flexit SPIRIT K2
Installation instructions
gp
d.
su
n
w
ay
in
fo
.
co
m
.cn
Air handling unit with kitchen hood
and control panel
Installation instructions K2R
Contents
gp
d.
su
n
w
ay
in
fo
.
co
m
.cn
1Installation/Preliminaries
1.1Inspection/Maintenance
1.2 Space Required
1.3 Location requirements
2 Installation of Flexit SPIRIT K2 R
2.1 Installing the volume hood
2.2Encasing
3 Connection of unit and electrical work
3.1 Connection of unit
3.2 Electrical work
3.3 Automatic Control
3.4 External components
4 Sizes/Physical Dimensions
4.1 Dimensioned sketch Flexit SPIRIT K2 R
5 General Drawings and System Drawings
6 Capacity and sound data
6.1 Capacity diagram, sound data, specifications - K2 R AC
6.2 Capacity diagram, sound data, specifications - K2 R EC
7 Technical data
7.1 Technical data Flexit SPIRIT K2 R
8 Installation of control panel CI 60/600
8.1Content
8.2 Installation of CI60/600
8.3 Concealed installation
8.4 Surface installation
8.5 Finishing off – CI60
8.6 Finishing off – CI600
9 Adjusting EC units
9.1 Adjustment with CI60
9.2 Adjustment with CI600 10 Adjusting AC units
11 Adjusting the Kitchen Hood
11.1 Forced Ventilation
12 Adjustment Curves
12.1 Forced ventilation Flexit SPIRIT K2 R
13 Final checks/first use
14 EC Declaration of Conformity
Our products are subject to continuous development and we therefore reserve the right to make changes.
We also disclaim liability for any printing errors that may occur.
2
4
4
4
4
6
6
7
8
8
8
8
8
9
9
10
11
11
12
13
13
14
14
14
15
15
15
15
16
16
17
18
19
19
19
19
20
21
Installation instructions K2R
!
Important Safety Instructions:
It is the installer's responsibility to carry out a full safety and function assessment of the appliance
To reduce the risk of fire, electric shock or injury, read all the safety instructions and warning texts before
using the appliance.
• This unit is only designed for ventilation air in buildings.
• It must not be used to extract combustible or flammable gases.
• Remove the power plug before commencing any service and maintenance work.
• Before opening the door, current to the unit must be turned off and the fans must have had time to stop (min. 3 mins.).
• The unit contains heating element which must not be touched when it is hot.
• The unit must not be operated without the filters being in place.
• Do not cook substances which could catch fire under the ventilator.
• Do not leave a saucepan or frying pan containing oil or grease unsupervised.
• Follow the instructions in the user manual.
To maintain good indoor air quality, comply with regulations and to avoid condensation damage the unit must never be stopped
apart from during service/maintenance or in connection with an accident.
Symbols Used
m
.cn
These products bear a number of symbols used for
labelling the
and user
6 actual product and in installation
5
documentation.
3
in
ay
DANGER: ELECTRICITY
gp
d.
su
n
w
D
2
fo
.
co
4
DANGER! DO NOT TOUCH
14,0
SAFETY SWITCH
C
35,0
!
CAUTION When a text bears this symbol, it
means that personal injury or serious damage to
the equipment may result if the instructions are
not followed.
NB! When a text bears this symbol, damage to
equipment or a poor utilisation ratio may result if
instructions are not followed.
B
Type:
Material:
EXAMPLE OF NIPPLE LOCATION
(shown as right-hand model)
A
Description
3
6
Opaque
Glossy vinyl
According to IEC/EN 60335-1 Colour:
White
Adhesiv:
Note that the product is not designed
for operation byPermanent
person with impaired
physical, motor or mental abilities. The product must also not be used by
persons who lack experience or knowledge, unless they have received guidance or instructions in operating the product safely by a person responsible
Projection
Date
Drawn
Scale
for safety.
24.03.2009
leif
Approved
Status
2:1
5
4
3
Etikett sikkerhetsbryter
Project
G2-1A
Stocknumber
102732
2
Replace
Installation instructions K2R
1Installation/Preliminaries
1.3Location requirements
See separate documentation for installation of ducts, valves,
etc.
The unit has been designed for location in the kitchen over
the cooker as it contains an integrated kitchen hood. The
unit is available in left or right versions
(exhaust air nipple to the left or right), depending on what is
the most favourable in relation to the duct location.
The unit is designed for indoor installation.
1.1Inspection/Maintenance
The unit must be installed with space for service and
maintenance such as filter replacement and cleaning the
fans and recovery system.
The control cable with plug for automatic control on top of
the unit must be easily accessible.
1.2 Space Required
Type
A
B
C
K2 R
335 mm
2 x 2 mm
215-380 mm
.cn
A: Space in front of unit
B: Space at side of unit
C: Space above unit
w
ay
in
fo
.
co
m
These are minimum requirements and only take service
needs into account. National statutory requirements for
electrical safety may deviate from this. Check which rules
apply in your country.
596mm
596mm
d.
su
n
B=2mm
B=2mm
gp
Cover on top of unit
(optional extra)
C=215-380mm
C=215-380mm
Fig. 1
Filter
Filter
A=335mm
70mm
(volume hood)
(filter)
700mm
(unit)
A=335mm
845mm
4
B=2mm B=2mm
Installation instructions K2R
1.4
Recommended sound attenuation for
wall-mounting
For wall mounting, the (included) wall bracket fixed to the unit
is used.
The unit must not be placed on a wall with rooms on the
other side which are sensitive to noise. The wall must be
sound-insulated. If necessary, use double plasterboards on
the wall.
Interrupted studs must be used.
.cn
Fig. 2
co
m
min 600 mm
gips
fo
.
720 mm
5
spikerslag
40 mm
in
ay
w
su
n
d.
gp
Min. req. 450mm
Recommended
500mm*
min 500(650)
mm
*min. req. 650mm for gas cookers
steinull
Installation instructions K2R
2 Installation of Flexit SPIRIT K2 R
Fig. 5
B=2mm
B=2mm
596 mm
Flexit SPIRIT K2 R is designed for installation in the kitchen
above the cooker, see Fig. 11. The unit is supplied in left and
right-hand versions depending on what suits duct locations
best (Chap. 5.1).
The unit must be wall-hung from a mounting bracket (Fig. 4)
at the top using the enclosed screws. It must also be screwed
to the wall at the bottom edge of the unit. Remove 2 plastic
plugs to access the mounting holes. For secure mounting, it is
necessary to use extra nailing strips (noggins). The location
of these is shown in Fig. 4.
NB! The wall must have good sound insulation, see Chap. 6.4.
The wall must be completely flat behind the ventilation unit.
If the kitchen hood area is tiled, a suitable liner plate must be
mounted behind the unit. The distance between the bottom
of the grease filter and the cooker should be at least 50 cm
for electric cookers and 65 cm for gas cookers. For the
external dimensions of the unit, see the dimensioned drawing
in Chap. 5.1.
2.1 Installing the volume hood
Fig. 6
rockwool
Fig. 3
co
m
gypsum
gips
fixing, top edge
min 600 mm
.cn
steinull
Recommended
min500mm*
500(650) mm
fixing lower edge
Fig. 4
A
1
1
33
*min. req. 650mm for gas cookers
2
2
1. Mount the two sides.
2. Attach the two angles.
3. Fix the glass profile.
6
Min. req. 450mm
gp
720 mm
d.
su
n
w
ay
in
40 mm
fo
.
studs
spikerslag
Installation instructions K2R
2.2Encasing
3. The casing must not be deeper than 270 mm, measured
from the wall on which the unit is installed (dimension B).
When encasing ducts above the unit, make sure that the door
leaves do not collide with the encasing above the unit. The
door will move slightly above the top of the unit when it is put
in place. This can be resolved in at least three ways:
1. The casing must not exceed 597 mm width (dimension A).
2. The casing must not be deeper than 270 mm, measured
from the wall on which the unit is installed (dimension B).
Fig. 7
A
B
gp
d.
su
n
w
ay
in
fo
.
co
m
.cn
C
A = max 597mm
B = max 270mm
C = min 30mm
7
Installation instructions K2R
3 Connection of unit and electrical
work
3.1 Connection of unit
3.3 Automatic Control
• Ensure that the ducts arrive at the right muff coupling. See
the marking on the unit (top/bottom and behind door).
The symbols are explained on page 3 and the location is
shown in the dimensioned drawing in Chap. 5.
• Pull the duct insulation well up to the unit.
• To avoid condensation, it is very important for the outdoor
air duct and the exhaust air duct to have insulation and a
plastic muff pulled right down to the unit.
NB! Use tape to seal the plastic sleeve to the unit
but do not compress the insulation.
• Lay the outdoor air duct with a slight incline towards the
outdoor air cap so that any water that enters drains out
again.
• If there is a short distance between the unit and the
exhaust point, sound insulation must be installed to ensure
that the requirements for the outdoor sound level are met.
• Ducts must have good sound insulation, particularly above
the unit.
The control pack is included in the unit package. The
low-voltage cable must be laid between the unit and the
switch unit. See separate manual for automatic control
included in pack.
The low-voltage cable must be laid minimum
30 cm from the 230 V cable and in the case of
chased mounting be laid in 20 mm electrical
piping.
3.4External components
See wiring diagram enclosed with unit.
.cn
3.2Electrical work
m
Service
w
gp
d.
su
n
The unit must be installed with a separate earth
leakage circuit breaker.
1
ay
in
fo
.
co
All electrical work must be carried out by authorised personnel.
The unit is suppied with a 1.8 m cable with plug.
The cable leaves the top of the unit and is connected to a
230V 50 Hz single-phase earthed power point located within
a convenient distance. The plug must be used as a service
switch.
NB! Make sure the power point for the unit is not boxed in.
See Chap. 13 for fuse sizes.
A low-voltage cable (with connector) leaves the unit for
use on the control panel. It is important to retain easy
access to this plug - in case of any fault or when replacing the unit.
2
8
Installation instructions K2R
4 Sizes/Physical Dimensions
ay
in
fo
.
co
m
.cn
4.1 Dimensioned sketch Flexit SPIRIT K2 R
su
n
w
(Shown as left-hand model)
371
gp
d.
371
(Shown as right-hand model)
129
84
229
229
129
84
227
227
514
514
9
Installation instructions K2R
5 General Drawings and System
Drawings
(Shown as left-hand model. The right-hand version is a mirror image.)
Outdoor Supply Extract Exhaust
air
air air
air
General Diagram (Rotary Wheel-type Heat
Exchanger)
1 (FI2)
Extract filter F 7
2 (FI1)
3 (EB1)
Supply air filter F 7
Heating element
4 (F10-20) Overheating thermostat (heating) (Reset)
5 (M1)
Control unit
10
Kitchen hood
11 Adjustment switch
12
Damper adjustment
1
6
5
12
11
9
10
utdoor O
SupplyExtract
Exhaust
air airairair
d.
B1
Supply air temperature sensor
EB1 Heating element
F10 Overheating thermostat, manual reset
F20 Overheating thermostat, automatic reset
FI1
Supply air filter
FI2 Extract air filter
M1 Supply air fan
M2 Extract air fan
HR-R Rotary wheel-type heat exchanger
M4 Rotor motor
K
Kitchen hood
DA4Damper
gp
System drawing (electric battery)
su
n
w
ay
in
fo
.
co
m
.cn
9
2
8
6 (M2)
Extract air fan
7 (HR-R) Rotary wheel-type heat exchanger
Rotor motor
4
7
Supply air fan
8 (M4)
3
B1
EB1
FI1
FI2
F10
F20
M4
HR-R
M2
M1
DA4
K
10
Installation instructions K2R
6 Capacity and sound data
6.1 Capacity diagram, sound data, specifications - K2 R AC
Supply air side (with F7 filter)
20
40
80
60
400
80
300
60
Power consumption in Watt
Contact resistance (Pa)
l/s 0
230V
200
100
Pa
40
190V
170V
150V
120V
105V
85V
60V
230V
190V
170V
150V
60V
0
85V
120V
105V
50dB(A)
55dB(A)
20
70dB(A)
65dB(A)
60dB(A)
m
300
fo
.
co
200
100 m 3 /h - Pressure correction
Air flow rate,
factor
.cn
m3/h
0
Yellow field: SFP < 1.0 per fan
0 W
ay
40
80
60
su
n
80
Contact resistance (Pa)
gp
d.
400
300
60
230V
200
190V
170V
150V
120V
105V
85V
60V
100
m3/h
40
120V
105V
230V
190V
170V
150V
85V
55dB(A)
60V
50dB(A)
45dB(A)
Pa 0
0
20
64dB(A)
60dB(A)
200
100
Air flow rate,
m 3 /h - Pressure correction
factor
300
Data for supply air is measured in accordance with ISO 5136,
"In-duct method".
Radiated noise is measured in accordance with ISO 9614-2.
Bruel & Kjær measuring equipment, type 2260.
Correction factor for
500
-5
-12
-36
Yellow field: SFP < 1.0 per fan
0 W
Sound data is given at sound power level LwA in the capacity diagrams
and is corrected with the table below for the various octave bands.
Radiated noise produces Lw in the various octave bands and total
LwA. This is read directly from the supply air table.
Hz
63 125250
Supply air 3
2 -2
Extract air 18 14
1
Radiated-46-39-29
Power consumption in Watt
20
w
l/s 0
in
Extract air side (with F7 filter)
Air capacity at various capacity settings in Volt.
Supply air fan power consumption at various capacity settings.
Sound power level LwA, cf. correction table.
1000 20004000 8000 LwA
-5
-6
-13
-29
-14
-28 -37
-43
-40 -44 -54 -58 -33,5
11
Installation instructions K2R
6.2 Capacity diagram, sound data, specifications - K2 R EC
Supply air side (with F7 filter)
0
20
40
80
60
400
80
300
60
100%
200
40
100%
80%
80%
100
60%
40%
Pa
20
Yellow field: SFP < 1.0 per fan
60%
40%
70dB(A)
65dB(A)
60dB(A)
55dB(A)
0
Power consumption in Watt
Contact resistance (Pa)
l/s
0 W
3
300
fo
.
co
200
100
Air flow rate, m 3 /h - Pressure correction factor
m
0
.cn
m /h
60
su
n
80
80
Contact resistance (Pa)
gp
d.
400
300
60
200
40
100%
100%
80%
100
60%
40%
Pa
0
80%
60%
40%
45dB(A)
20
60dB(A)
50dB(A) 55dB(A)
Power consumption in Watt
40
ay
20
w
l/s 0
in
Extract air side (with F7 filter)
63dB(A)
0 W
Yellow field: SFP < 1.0 per fan
m3/h
0
100
300
200
Air flow rate, m 3 /h - Pressure correction factor
Sound data is given at sound power level LwA in the capacity diagrams
and is corrected with the table below for the various octave bands.
Radiated noise produces Lw in the various octave bands and total
LwA. This is read directly from the supply air table.
Data for supply air is measured in accordance with ISO 5136,
"In-duct method".
Radiated noise is measured in accordance with ISO 9614-2.
Bruel & Kjær measuring equipment, type 2260.
Correction factor for Lw
Hz
63 125250
Supply air 3
2 -2
Extract air 18 14
1
Radiated -41-35-33
500
-5
-12
-39
Air capacity at various capacity settings in %
Supply air fan power consumption at various capacity settings.
Sound power level LwA, cf. correction table.
1000 20004000 8000 LwA
-5
-6
-13
-29
-14
-28 -37
-43
-40 -49 -50 -60 -33,5
12
Installation instructions K2R
7
Technical data
7.1Technical data Flexit SPIRIT K2 R
EC
700W
230 V/50 Hz
10 A
3,91 A
EC
350W
230 V/50 Hz
10 A
2,1 A
Rated power, total
846 W
870 W
495 W
Rated power, electric batteries
700 W
700 W
350 W
Output fans
2 x 62 W
2 x 74 W
2 x 74 W
Fan type
B-wheel
F-wheel
F-wheel
Fan motor control
Max. fan speed
Automatic control standard
Filter type (SUP/EXTR)
Transformer
2,500 RPM
CS 50
F7/F7
0-10 V
1,970 RPM
CS 50
F7/F7
0-10 V
1,970 RPM
CS 50
F7/F7
SUP filter dimensions (WxHxD)
130x335x50 mm
130x335x50 mm
130x335x50 mm
EXTR filter dimensions (WxHxD)
Weight
Duct connection
Duct connection kitchen fan
Height
Width
Depth
130x335x50 mm
130x335x50 mm
130x335x50 mm
56 kg
56 kg
56 kg
Dia. 125 mm (sleeve) Dia. 125 mm (sleeve) Dia. 125 mm (sleeve)
su
n
w
ay
in
700 mm*
598 mm
510 mm**
gp
d.
700 mm*
598 mm
510 mm**
fo
.
co
m
.cn
Rated voltage
Fuse size
Rated current, total
AC
700W
230 V/50 Hz
10 A
3,7 A
* without volume hood and duct connection, see Chap. 5
** see Chap. 5
13
700 mm*
598 mm
510 mm**
Installation instructions K2R
8 Installation of control panel CI 60/600
8.1Content
4
1
2
3
5
co
m
.cn
Control panel
Back piece for concealed installation
Back piece for surface installation
Installation instructions
Cable for control panel
fo
.
1. 2.
3.
4.
5.
ay
w
Fig. 8
d.
su
n
CAUTION! The control panel must be connected to the ventilation unit before the ventilation
unit is connected to mains.
gp
!
in
8.2 Installation of CI60/600
Lay the cable for the control panel between the ventilation
unit and the control panel. The control panel is adapted for
concealed installation over a single connection box (use low
back piece, item no. 2) or surface installation on the wall (use
high back piece, item no. 3).
Click the cable into the contact at the back of the control
panel and into the contact on the top of the ventilation unit.
OBS! The low-voltage cable must be at least
30 cm from cables carrying mains voltage or
higher. With concealed installation, the cable is
laid in 20 mm conduit pipes. The cable length must not
exceed 24 meters.
ON
OFF
Configuration
Setting
It is possible to connect two CI60 panels and one CI600
panel to each unit. If several CI60 panels are used, each
panel must have its own identity. This is selected with the
switch on the panel’s printed circuit board (se Fig. 27). Use
the appropriate table settings. The panels can be connected
serially, in arbitrary order.
CI 600 (MASTER)
Automatic
CI60 1 (SLAVE)
OFF
CI60 2 (SLAVE)
ON
CI60 1 (MASTER)
OFF
CI60 2 (SLAVE)
ON
CI 600 (MASTER)
Automatic
OFF = MASTER
ON = SLAVE
CI60 (SLAVE)
Irrelevant
14
Installation instructions K2R
8.3 Concealed installation
8.5 Finishing off – CI60
Lay the cable between the wall box and the ventilation unit in
the preinstalled conduit pipe. Fit the back piece (item no. 2),
over the wall box and click the cable in directly from behind
as in the illustration (se Fig. 9).
Slide the panel off as shown by arrow no. 1 (see Fig. 11) and
fit the control panel straight into the back piece as shown
by arrow no. 2 (see Fig 12) until it clicks into place. Slide the
panel back on.
Fig. 9
Fig. 11
Fig. 12
1
fo
.
co
m
.cn
2
gp
d.
su
n
w
Lay the cable between the back piece (item no. 3), and the
ventilation unit. Cut out the perforation in the corner of the
back piece that is suitable for installation. Screw the back
piece to the wall with suitable screws. Click the cable into
the control panel from below, where there is a socket in the
printed circuit board (se Fig. 10).
ay
in
8.4 Surface installation
8.6 Finishing off – CI600
Fit the control panel over the hooks in the back piece as
shown by arrow no. 1 and then click the panel into place at
the bottom edge as shown by arrow no. 2 (see Fig. 13).
Fig. 13
Fig. 10
2
15
1
Installation Instructions K2R
9 Adjusting EC units
9.1 Adjustment with CI60
Fig. 14
The unit's air supply MUST be adjusted before the
unit is used for the first time. This should be done in
accordance with the projection documents. Adjust the
values based on the projected values.
9.1.1 Adjustment
Only stage 2 (NORMAL) needs to be adjusted. Stages 1
and 3 have fixed settings, while stage 2 has to be adjusted as
required in the individual home.
m
co
Used if there is a need for increased air
supply on account of higher occupancy or
a raised humidity level, for example during
showering or when clothes are being dried.
This setting is normally used for limited
periods.
fo
.
MAX
in
Used under normal conditions. On this
setting the air supply must be adjusted
according to current regulations.
ay
NORMAL
w
Must not be used when the home is in use.
Must not be used in the first two heating
seasons.
su
n
MIN
.cn
The function of the different stages:
gp
d.
The ventilation unit's air supply is adjusted in speed level
NORMAL using the knobs on the back of the cover. Knob 9 is
used for supply air level and knob 8 for extract air level (see
Fig. 14). The adjustment range is 20-100% of the maximum
level according to the scale on the knob.
Factory settings for supply air/extract air:
MIN
50% (fixed)
NORMAL
75% (variable)
MAX
100% (fixed)
9.1.2. Adjusting the temperature
The temperature required for the supply air can be set
with knob 11. The adjustment range is 10 - 30°C. It should
normally be set to around 18°C. Use of the factory setting is
recommended.
If necessary, the ventilation unit's additional heating can
also be switched ON/OFF with switch 10. In this case only
the rotating heat exchanger is used as a source of heat. It is
best to leave it in ON position, as the unit will then respond
automatically when there is a need for additional heating.
16
9
8
10
11
START MENU
REGULATION
TYPE
LANGUAGE
COOLING
LANGUAGE
NEUTRAL
TIMEZONE
AND DATE
EXT.TIME
TEMP. CONTROL
AND DATE
MAIN AIR
MENU
SUPPLY
MIN
EXTRACT AIR
MIN
TIMER
NORMAL
NORMAL
AIR VOLUME
COMP
MAX
>
> OK?
OK?
OK?
>
>>
>
>
MAIN MENU
MAIN MENU
START MENU
TEM
SEN
FIRE
COM
STAR
REST
>
>
OK?
>
OK?
OK?
MAX TIMER
Installation instructions K2RMAX
MAIN MENU MAX TIMER
TEMPERA
MIN
OK?
LANGUAGE
>
NORMAL
TIME AND DATE
>
SETTINGS
>
OK?
MAX
MAIN MENU
>
SETTINGS
9.2 Adjustment with CI600
MAX TIMER
TEMPERATURE
REGULATION
FAN REGULATION
This dialog is identical
for the supply air and extract air fans.
The unit's airSTART
supply
UPMUST
MENUbe adjusted before
MAIN MENU 2
START
UP
MENU
The fans are adjusted
individually
to the desired capacity for
the unit is used for the first time. This should
MAIN MENU 2
the respective speed.
be done in accordance with the projection
>
HEATING
SETTINGS
18
documents. Adjust the values based on the projected
values. REGULATION TYPE
START UP MENU
SUPPLY AIR
MAIN MENU
MIN
SPEED
MAIN
MENU
MAIN
MENU 2
NORMAL SPEED
MIN
MAX SPEEDMIN
NORMAL
NORMAL
MAX
MAX
MAX TIMER
MAIN MENU MAX TIMER
EXTR OK?
35°
15°
REGULATION
9.2.1 Adjustment
MAX SUPPLY AIR TEMP
MIN SUPPLY AIR TEMP
Only stage 2 (NORMAL) needs to be adjusted.
Note that it is also possible to adjusted stages 1 and 3
with a CI600 control panel. This should only be done if a
special need arises, however. This is because it is extremely
important to have adequate air flow rates.
MIN
Must not be used when the home is in use. Must
not be used in the first two heating seasons.
PIN CODE
COOLING
PIN CODE
MIN OUTDOOR TEMP
MIN SPEED
RESTART DELAY
COOLNESS RECOVERY
m
CAL
co
TEMPERATURE REGULATION
EXTRACT AIR
REGULATION TYPE
COOLING
NEUTRAL ZONE
EXT. TEMP. CONTROL
OK?
>
>
OK?
>
FA
FA
SUP
SUP
EXT
EXT
TIM
TIM
AIR
AIR
FAN REG
SUPPLY AIR
EXTRACT A
TIMER
AIR VOLUM
TIMER
USER menu. The fans are selected and
Then go toADVANCED
the "Fan
PINcontrol"
CODE
ADVANCED
USER
configured inTEMPERATURE
this menu screen.
Then go to>adjustment of
REGULATION
>
REGULATION
the extract airTEMPERATURE
fanREGULATION
and supply
air fan.
OK?
FAN
OK?
>
>
>
>
>
>
>
>
FILT
TEMPERATURE
REGULATION
Regulation
type
MAX OK?
STANDARD
SPEED
TEMPERATURE
30 mno further settings can
STANDARD
TIME
If supply
air regulation
is REGULATION
selected,
be set here. If extract air regulation is selected, the max. and
min. supply air temperatures can also be specified.
AV
OK?
18°
MIN
180 s
>
FAN
REGULATION
CONFIGURATION
CONFIGURATION
OPERATING
FAN REGULATION TIME
OPERATING
TIME
FACTORY
ADVANCED
USERSETTINGS
KJØLING >
SUPPLY AIR FACTORY
SERVICE SETTINGS
>>
EXTRACT
AIRSERVICEREGULATION
TEMPERATURE
>OK?
TIMER
FAN REGULATION
OK?
AIR VOLUME
COMP
>
CONFIGURATION
>
OPERATING TIME
>
FACTORY
SETTINGSRECOVERY
COOLNESS
SERVICE
ADVANCED USER>
COOLNESS RECOVERY
ADVANCED USEROFF
DIFF
1°
SU
fo
.
in
ay
w
d.
0 COOLING
0 0 0
OK?
OK?
>
>
>
>
OK?
OK?
>
>
REGULATION TYPE
REGULATION
TYPE
COOLING
COOLING
NEUTRAL ZONE
NEUTRAL
EXT. TEMP.ZONE
CONTROL
EXT. TEMP. CONTROL
gp
0 0 0 0
TYPE 2
0 REGULATION
0 0
HEATING EL
configure the temperature regulation and cooling functions.
TEMPERATURE REGULATION
TEMPERATURE REGULATION
First go to the "Advanced user" menu, enter the PIN and
press OK:
PIN CODE0
HEATING
75%
NORMAL SPEED
In this
menu
100% "Advanced user") you
MAX
SPEEDscreen (located under
su
n
Used if there is a need for increased air supply
on account of higher occupancy or a raised
humidity level, for example during showering
or when clothes are being dried. This setting is
PINnormally
CODE used for limited periods.
PIN CODE
OK?
OK?
50% OK?
MIN MAIN
SPEED MENU 2
9.2.2Temperature
regulation
SUPPL OK?
REGULATION
EXT
OUT
HEA
RETU
HEA
FILT
.cn
NORMAL Used under normal conditions. On this setting
the air supply
must be adjusted according to
REGULATION
TYPE
current regulations.
MAX
50% OK?
75%
100%
MIN
NORMAL
>
SETTINGS
OK?
MAX
>
SETTINGS
MAX
TIMERfor supply air/extract air:
Factory
settings
INLET AIR
MIN
50% MENU
(variable)
MAIN
2
MAIN MENU 2
NORMAL
75% (variable)
>
SETTINGS
MAX
100% (variable)
EXTRACT AIR
The function of REGULATION
the different stages:
TYPE 1
SEN
HE
HE
SUP
SU
SU
REGULATION TYPE
TEMPERATURE
REGULATION
REGULATION TYPE
REGULATION
REGULATION
MAX SUPPLY AIR TEMP
MAX
SUPPLYAIR
AIRTEMP
TEMP
MIN SUPPLY
MIN SUPPLY AIR TEMP
EXTR OK?
EXTR
35° OK?
35°
15°
15°
OK?
MIN
MIN
NO
NO
MA
MA
SUPPLY A
REGULATION TYPE TIMER
REGULATION
MAX SUPPLY AIR TEMP
MIN SUPPLY AIR TEMP
ACT
EXTR OK?
35°
15°
MIN SPEED
NORMAL SP
MAX SPEED
AIR VOLUME COMPENSATION
FIR
REGULATION TYPE MAX
1
OK?
SUPPLY AIR
TYPE MIN
1
EXTRACTREGULATION
AIR
MO
REGULATION TYPE
REGULATIONTYPE
TYPE 1
REGULATION
EX
EX
17
FAN REGULATION
OPERATING
INFORMATION
ADVANCED
USER
OPERATING INFORMATION
Installation Instructions K2R
10 Adjusting AC units
The unit's air supply MUST be adjusted before
the unit is used for the first time. This should
be done in accordance with the projection
documents. Adjust the values based on the projected
values.
Fig. 15
Only stage 2 (NORMAL) needs to be adjusted. Stages 1
and 3 have fixed settings, while stage 2 has to be adjusted as
required in the individual home.
The function of the different stages:
Used if there is a need for increased air
supply on account of higher occupancy or
a raised humidity level, for example during
showering or when clothes are being dried.
This setting is normally used for limited
periods.
SUPPLY AIR
.cn
MAX
m
Used under normal conditions. On this
setting the air supply must be adjusted
according to current regulations.
co
NORMAL
gp
d.
su
n
w
ay
Unlike units with EC fans, AC models are adjusted using
switches in the electrical compartment (see Figure 15).
Adjusting parameters on the CI60 or CI600 control panel will
not affect fan speeds on a unit with AC fans.
fo
.
Must not be used when the home is in use.
Must not be used in the first two heating
seasons.
in
MIN
It is possible to access a wide range of voltages by moving
the cable set's contacts on the transformer and so adjust
the air flow rate for stage 2.
Supply air/extract air setting:
MAX
NORMAL
MIN
230V
190 V (only available by making change on
transformer)
170 V
150 V (factory setting)
120 V
105 V (only available by making change on
transformer)
230 V
18
EXTRACT AIR
Installation instructions K2R
B (1:1)
11 Adjusting the Kitchen Hood
12 Adjustment Curves
If basic ventilation is desired via the kitchen hood, the
damper from the factory must be replaced. Replace it with a
damper with adjustment options. This is not supplied with the
unit.
12.1 Forced ventilation Flexit SPIRIT K2 R
1
2
Max. air volume through kitchen hood in case of forced
air volume
C
3
0
Fig. 16
11.1 Forced Ventilation
The unit has 4 forced ventilation options:
.cn
co
fo
.
in
ay
w
d.
su
n
2. Turn the knob to position 2. This gives a fully open
damper which will allow even more air through the kitchen
hood.
B
m
1. (Switch on front of unit.) This gives a half-open damper
which will increase the air volume passing through the hood.
Measurements have been taken at 2/3 pressure in the
extract air duct and 1/3 pressure in the exhaust air duct
before opening the damper.
gp
3. Turn the knob to position 3. This will give a fully-open
damper which will allow even more air through the kitchen
hood, in that the fans go to speed 3.
4. The air volume through the unit can also be increased by
setting the fans to speed 3 via the control panel (external
panel). See separate instructions.
Projection
Date
Drawn
Scale
18.02.2009
leifagain manually. There is no timer
The damper needs closing
in the damper. Closed
in position O.
Approved
Status
1:5
A
The air entering the unit through the kitchen hood does not
Description
pass through the rotary heat exchanger (by-pass).
Project
Replaces:
G2-1A
351600
Stocknumber
3
Replaced by:
2
1
19
Installation instructions K2R
13 Final checks/first use
13.1 Final Checks
13.2 First use
Check that:
• The duct insulation is in accordance with the manual
and the technical documents. It is very important the
ducts from the unit are also effectively insulated so that
no condensation forms on or in the ducts. It is especially
important to check this if the ducts are to be boxed in.
• Ducts are connected to the right nipples – check against
the unit drawings below.
• Adjustments have been made in accordance with the
manual and project planning documents (documentation
of ventilation data).
• The unit operates normally at all stages.
• Heating switches in.
• The unit has filters for both outdoor air and extract air.
• Tumble dryers must not be connected to the unit.
• Check that the control panel has been connected.
• Plug the unit into the mains supply.
• The unit will now start.
• The unit will automatically perform a start-up procedure
lasting approx. 2 min.
• After the start-up procedure the unit will follow the settings
entered on the control panel.
• If it is wished to check or alter the settings, this can be
done from the control panel.
(See separate documentation for automatic control.)
ay
in
fo
.
co
m
.cn
The installer may be held liable for any incorrect
or defective installation.
gp
d.
su
n
w
Flexit SPIRIT K2 R, Left-hand model
20
Flexit SPIRIT K2 R, Right-hand model
Installation Instructions K2R
14EC Declaration of Conformity
This declaration confirms that the products meet the
requirements in the following Council Directives and
standards:
2004/108/EF Electromagnetic Compatibility (EMC)
2006/95/EFLow-voltage Directive (LVD)
98/37/EEC
Machine Directive (Safety)
Manufacturer:
Ørje, Norway
FLEXIT AS, Televeien 15, 1870
Type:
Ventilation unit
K2 R
EN 50366:2003
EMC standard:
EN 55014-1.2000
EN 61000-3-2:2000
EN 61000-3-3:1995
EN 55014-2:2:1997
m
EMF standard:
co
EN 60335-1:2002
in
fo
.
Safety standard
.cn
Conforms to following standards:
FLEXIT AS 16.02.2011
gp
d.
su
n
w
ay
The product has been CE-marked: 2011
Frank Petersen
CEO
The right to give notice of lack of conformity applies to this product in
accordance with the existing terms of sale, provided that the product is used
and maintained correctly. Filters are consumables.
The symbol on the product shows that this product must not be
treated as household waste. It must be taken to a reception station
for recycling of electric and electronic equipment.
By ensuring the correct disposal of the equipment, you will contribute
to preventing the negative consequences for the environment and
health that incorrect handling may entail. For further information
on recycling of this product, please contact your local authority, your refuse
collection company or the company from which you purchased it.
Notice of lack of conformity as a result of incorrect or defective installation must
be submitted to the installation company responsible. The right to give notice of
lack of conformity may lapse if the system is used incorrectly or maintenance is
grossly neglected.
21
gp
d.
in
ay
w
su
n
.cn
m
co
fo
.
a
22
gp
d.
in
ay
w
su
n
.cn
m
co
fo
.
a
.cn
m
co
fo
.
in
ay
w
su
n
d.
gp
Flexit AS, Televeien 15, 1870 Ørje, Norway
www.flexit.com


