1
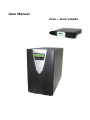
User Manual
1kVA ~ 3kVA 220VAC
User Manual 1-3kVA Rev. 9
Contents
1.1 General Description .............................................................................................. 1
1.2 System Configuration........................................................................................... 2
` Tower .................................................................................................... ……… 2
` Rack-Mount .................................................................................................... 3
1.3 Front Panel ......................................................................................................... 4
1.3.1 Tower .......................................................................................................... 4
LCD .................................................................................... 4
`
`
LED ..................................................................................... 4
1.3.2 Rack-Mount .................................................................................................. 5
1.4 Rear Panel.......................................................................................................... 6
` Tower ............................................................................................................ 6
` Rack-Mount .................................................................................................... 7
` External Battery Bank or Module ....................................................................... 8
2. Installation............................................................................................................. 9
2.1 Unpacking .......................................................................................................... 9
2.2 Installation ....................................................................................................... 11
` Tower .......................................................................................................... 11
` Rack-Mount .................................................................................................. 11
2.3 Connection to communication ............................................................................. 12
2.3.1 Standard.................................................................................................... 12
`
RS-232............................................................................... 12
2.3.2 Optional Interface Cards............................................................................... 13
`
USB Card ............................................................................ 13
`
DB9 Dry Contact Card .............................................................. 13
`
AS400 Card ......................................................................... 14
`
SNMP/HTTP Agent .................................................................. 14
3. Operation ............................................................................................................. 15
3.1 LCD and LED Display.......................................................................................... 15
` LCD ............................................................................................................ 15
` LED............................................................................................................. 17
3.2 Starting up/ Shutting down the UPS ..................................................................... 18
3.3 Operating Modes ............................................................................................... 19
3.4 Configuration Settings........................................................................................ 21
` Output Voltage / Frequency ............................................................................ 21
` Bypass Voltage ............................................................................................. 22
4. Maintenance ......................................................................................................... 23
4.1 General Maintenance ......................................................................................... 23
` Environment................................................................................................. 23
` Storing the UPS and Battery ........................................................................... 23
` Replace the Battery ....................................................................................... 23
4.2 Replacing the New Battery .................................................................................. 24
4.3 Testing the New Battery ..................................................................................... 24
4.4 Recycling the Used Battery ................................................................................. 24
5. Troubleshooting ................................................................................................... 25
`
`
LCD ............................................................................................. 25
LED ............................................................................................. 27
6. Appendix .............................................................................................................. 28
6.1 Specifications.................................................................................................... 28
` General Specification ........................................................................................ 28
` Battery Run Time ............................................................................................. 29
6.2 Contact Information........................................................................................... 30
i
User Manual 1-3kVA Rev. 9
Important Safety Instructions
SAVE THESE INSTRUCTIONS.
This UPS unit operates from utility power and contains a number of high
current back-up batteries, the information is important to all personnel involved. Please read this manual
before installation and operation of the UPS.
Safety of Persons
Î Opening or removing the cover of the unit may expose you to lethal voltage within the unit, even if it is
apparently not in operation and the input wiring is disconnected from the electrical source.
Î Refer all UPS and battery servicing to authorized service personnel from the manufacturer or an agent authorized
by the manufacturer.
Î Do not dispose of the battery in a fire, as the battery may explode.
Î Do not open or damage the battery. Battery acid is toxic and harmful to eyes and skin.
Î The following precautions should be observed when working on batteries:
•
Remove watches, rings, and other metal objects.
•
Use tools with insulated handles.
Product Safety
Î Install the UPS in a clean environment, free from moisture, flammable gases or fumes and corrective
substances.
Î Keep the UPS on a flat, stable surface with a 10cm space around it for proper ventilation.
Î Operate the UPS in an indoor environment only in an ambient temperature range of 32oF to +104oF (0oC to
+40oC).
Î The UPS is designed for data processing equipment. It is not intended for use with life support and other
designated “critical” devices.
Î The maximum load must not exceed that shown on the UPS rating label.
Î Storing magnetic media on top of the UPS may result in data loss or corruption.
Î Once batteries have reached the end of their life, ensure they are disposed of properly. REFER TO YOUR LOCAL
LAWS AND REGULATIONS FOR BATTERY DISPOSAL REQUIREMENTS.
Î The UPS must be handled with care and attention since there is high energy stored within the batteries. It must
always be kept in the position marked on the external packaging and must not be dropped.
Î Please keep the exhaust holes of UPS unobstructed.
Î The battery should be maintained at regular intervals.
Special Precautions
Î The UPS should be installed according to the instructions in this manual. Failure to do so could result in safety
issues. It could also invalidate your warranty.
Î DO NOT CONNECT equipment that could overload the UPS or demand half-wave rectification from the UPS, for
example: electric drills, vacuum cleaners, printers or hair dryers.
Î Adjust only those controls that are listed in the Adjustment Section. If the unit does not operate normally by
following the operating instructions, contact the sales representatives.
Icon Usage
These icons may be found in the contents.
WARNING: Obvious danger to personnel or equipment.
CAUTION: Possible danger to personnel or equipment
Important information
ii
User Manual 1-3kVA Rev. 9
1. Presentation
1.1 General Description
The continuity of electrical power is an essential requirement for critical load operations .The
Uninterruptible Power System (UPS) is a compact and quiet solution for power protection of
computer, server and office equipment.
To choose the UPS as your equipment protector is a wise investment as it supplies reliable, pure and
stable power at an affordable price.
Feature & Benefits:
9
True on-line double conversion
9
PWM technologies w/ IGBTs
9
Wide input voltage range
9
DC Start
9
Battery self-test
9
Microprocessor based control
9
User-friendly LCD or LED
9
Communication ports: Standard RS232 and optional communication slot for either DB9,
USB, AS-400 or SNMP/HTTP card.
9
Light weight unit
9
Optional external battery slot for long runtime requirement
Application:
9
Computers
9
Network Servers
9
Workstations
9
Wireless Communication
9
Other Electronic Peripherals
- Page 1 of Total 30 -
User Manual 1-3kVA Rev. 9
1. Presentation
1.2 System Configuration
`
Tower
1kVA: 160W x 220H x 400D mm / 15 kgs
2kVA: 200W x 352H x 450D mm / 34 kgs
3kVA: 200W x 352H x 450D mm / 35 kgs
- Page 2 of Total 30 -
User Manual 1-3kVA Rev. 9
1. Presentation
`
Rack-Mount
1kVA: 440W x 88H x 465D mm / 15.5 kgs
2kVA: 440W x 88H x 465D mm / 35 kgs
3kVA: 440W x 88H x 465D mm / 36 kgs
- Page 3 of Total 30 -
User Manual 1-3kVA Rev. 9
1. Presentation
1.3 Front Panel
1.3.1 Tower
`
LCD
1234
5
6
7
1. 2-line LCD Display
2. Normal LED (green)
3. Warning LED (yellow)
4. Fault LED (red)
5. Select-up button
6. Select-down button
7. Enter button
5-6. Off button
6-7. On button
5-7. Test/Silence button
`
LED
1
2 34
56
1. Line LED (green)
2. Load & Battery Capacity LEDs
3. Battery LED (yellow)
4. Bypass LED (yellow)
5. Fault LED (red)
6. Inverter LED (green)
7. Select-up button
8. Select-down button
9. Enter button
7-8. Off button
8-9. On button & Test/Silence button
- Page 4 of Total 30 -
7
8
9
User Manual 1-3kVA Rev. 9
1. Presentation
1.3.2 Rack-Mount
1234
1. 2-line LCD Display
2. Normal LED (green)
3. Warning LED (yellow)
4. Fault LED (red)
5. Select-up button
6. Select-down button
7. Enter button
5-6. Off button
6-7. On button
5-7. Test/Silence button
- Page 5 of Total 30 -
5
6
7
User Manual 1-3kVA Rev. 9
1. Presentation
1.4 Rear Panel
`
Tower
1
○
1
○
6
○
2
○
8
○
7
○
2
○
6
○
7
○
1
○
2
○
6
○
7
○
8
○
9
○
9
○
8
○
9
○
10
○
3
○
4
○
4
○
4
○
5
○
5
○
1kVA
5
○
3
○
2kVA
1. Standard RS232 Port
2. Fan
3. External Battery Slot (Option)
4. Input Breaker
5. Inlet
6. Communication ports: DB9, USB, AS400, SNMP/HTTP (Option)
7. Surge Protection: RJ45
8. LCD Remote Control (Option)
9. Outlets (IEC, German)
10. Outlets (Terminal Block for 3kVA only)
- Page 6 of Total 30 -
3
○
3kVA
User Manual 1-3kVA Rev. 9
1. Presentation
`
Rack-Mount
1kVA
1
○
2
○
3
○
7
○
4
○
5
○
8
○
6
○
9
○
2kVA
4
○
3
○
7
○
6
○
1
○
2
○
5
○
9
○
8
○
3/2(long run time)kVA
4
○
3
○
7
○
6
○
1
○
2
○
8
○
5
○
11
○
9
○
10
○
1. External Battery Slot (Option)
2. Outlets (IEC 10A,Germen)
3. Inlet
4. Input fuse
5. Fan
6. Communication Ports:DB9,USB,AS400,SNMP/HTTP (Option)
7. LCD Remote Control (Option)
8. Surge Protection: RJ 45
9. Standard RS232 Port
10. Output Terminal
11. Output fuse
- Page 7 of Total 30 -
User Manual 1-3kVA Rev. 9
1. Presentation
`
External Battery Bank or Module
For Tower Product ranges:
For Rack-Mount product ranges:
- Page 8 of Total 30 -
User Manual 1-3kVA Rev. 9
2. Installation
2.1 Unpacking
You may find the “series number” labeled on both shipping box and UPS
rear panel. If the UPS has a problem please send the number to your
sales representative for tracking and troubleshooting.
The ST Series UPS can be supplied in a varied number of boxes depending upon the
model ordered. The number of boxes provided should be as follows:
BATTERY MODULE (Box 2)
N/A (internal batter
N/A (internal battery)
1 Battery Module
MODEL (Box 1)
ST 3200 Tower
ST 3200R Rack Mount
ST 3200R Rack Mount
TOTAL BOXES
1 Box
1 Box
2 Boxes
ST Series 1kVA ~ 3kVA Tower
Box 1
c
d
e
f
Shipping Box Includes:
1. UPS
2. User Manual
3. Input Power Cord (German, British, Australian)
4. Extension Power Cord (IEC) to PC (for output receptacles “IEC” only)
- Page 9 of Total 30 -
User Manual 1-3kVA Rev. 9
2. Installation
ST Series 1-3kVA Rack Mount
Box 1
c
d
e
f
g
Shipping Box Includes:
1. UPS
2. User Manual
3. Input Power Cord (German, British, Australian)
4. Extension Power Cord (IEC) to PC (for output receptacles “IEC” only)
5. 2pcs 19” rack ears (+screws)
Box 2 (for 2/3kVA Rack Mount and external battery module)
c
d
e
Box 2 Includes:
1. Battery Module
2. 2pcs 19” rack ears (+screws)
3. Battery cable
- Page 10 of Total 30 -
User Manual 1-3kVA Rev. 9
2. Installation
2.2 Installation
`
Tower
Optional Communication Slot
Standard RS232 to PC
RJ45 protection for
Tel/Fax/Modem/DSL
Remote control
AS400
USB
To external battery
cabinet
DB9
To the wall socket
Output to the loads
SNMP/HTTP
`
Rack-Mount
To the wall socket
Optional Communication Slot
Output to the load
To external battery
cabinet
Remote control
Standard RS232 to PC
RJ45 protection for Tel/Fax/Modem/DSL
Keep the UPS on a flat, stable surface with a
10cm space around it for proper
ventilation.
- Page 11 of Total 30 -
User Manual 1-3kVA Rev. 9
2. Installation
2.3 Connection to communication
2.3.1 Standard
`
RS-232
The communication interface (DB9 port) on the back of the UPS may be connected to a host
computer with specific monitoring software installed. (Please contact a sales representative for
further information of monitor software)
The pins of the connector are as following:
PIN #
2
3
5
PIN Definition (UPS)
Transmitted data
Received data
Signal Ground
PIN Definition (PC)
Received data
Transmitted data
Signal Ground
The RS-232 interface settings are as follows:
Baud Rate
Data Length
Stop Bit
Parity
- Page 12 of Total 30 -
2400 bps
8 bits
1 bit
None
User Manual 1-3kVA Rev. 9
2. Installation
2.3.2 Optional Interface Cards
A variety of interface cards can be installed into optional communication slot such as DB9 Dry
Contact Card, USB Card, AS400 Card, and SNMP/HTTP Card.
`
USB Card
`
DB9 Dry Contact Card
Pin Definition of DB9 for NOVELL Interface
PIN # of DB9
Function explanation
1
UPS Fault
3
GND
4
I/O
Output
Input
Remote Shutdown UPS(+12VDC)(work on Battery
Mode)
Input
5
Input 12VDC
Input
6
Bypass Mode
Output
7
Low Battery
Output
8
Normal Mode, Battery Mode
Output
9
Utility Power Fault
Output
- Page 13 of Total 30 -
User Manual 1-3kVA Rev. 9
2. Installation
`
AS400 Card
`
SNMP/HTTP Agent
NetAgent Mini allows a user to obtain the status, and issue commands to the UPS. The
communications protocol includes the MegaTec/ PPC/ SEC 2400 / 9600. Also it is possible to build
in your own protocol. NetAgent Mini provides a simple and easy installation procedure. The user
only needs to install the software from the NetAgent Mini CD on a Windows environment and
configure the IP address.
All the other configurations could be accomplished in a Web browser. NetAgent Mini also
provides shutdown programs for different operating systems. Shutdown commands can be sent
for such events as power failure, low UPS battery condition, UPS overload, UPS overheating and
scheduled shutdowns. All shutdown events are configurable by the user. The shutdown
software provides an orderly shutdown to prevent the abnormal shut-off of clients or servers.
Please refer to the NetAgent Mini installation CD for more
information.
- Page 14 of Total 30 -
User Manual 1-3kVA Rev. 9
3. Operation
3.1 LCD and LED Display
`
LCD
“Select-Down” Key:
y
y
“Select-Up” Key:
The welcome screen only shows for 10 seconds as UPS starts up,
after that the “UPS Status” will show on the display.
The screen should go back to “UPS Status” if you do not push any
buttons for 2 minutes.
Display 1 - Welcome screen
Display 2 - Input/Output Voltage
and Frequency
Identification
Display 3 – UPS Status
AEC Star T3 Series
On-Line UPS
Input:220V 50Hz
Output:220V 50Hz
AC:FAIL BATT:LOW
NO Output
Display 4 – Real Input/Output
Voltage and Frequency
Input Voltage
220 VAC
Output Voltage
220VAC
Input Frequency
50 Hz
Output Frequency
50 Hz
- Page 15 of Total 30 -
User Manual 1-3kVA Rev. 9
3. Operation
Display 5 – Battery Voltage/
Capacity
Battery Voltage
37 VDC
Battery Capacity
100 %
Display 6 – Output Power
Output Power
100 %
Display 7 – Inside Temperature
Display 8 – New Alarm
Inside TEMP
33 ℃ 91 ℉
NEW AC Fail: 1
ALM Overload: 3
Display 9 – Old Alarm
OLD AC Fail:
5
ALM Overload: 9
Display 10 – Bypass Voltage Setting
Display 11 – Output Voltage/
Frequency Setting
Bypass Volt Set
LO= 176V HI=253V
Volt/Freq Set
220 VAC 50 Hz
- Page 16 of Total 30 -
User Manual 1-3kVA Rev. 9
3. Operation
`
LED
1
6 7 8 9 10 2 3 4 5
1. Line LED (green): This indicates the AC power is applied to the UPS input. If the LED blinks, it
means the AC power source is out of tolerance.
2. Battery LED (yellow): This indicates the UPS is in Battery Mode.
3. Bypass LED (yellow): This indicates the UPS is in Bypass Mode.
4. Fault LED (red): This indicates the UPS is in fault condition because of UPS shutdown or
over-temperature
5. Inverter LED (green): This indicates the inverter is working normally.
6-10. Load & Battery Capacity LEDs:
(a) No. 6 to 7 LED is green color, No. 8 to 9 is yellow and No.10 (used as warning LED for
overload or battery low) is red.
(b) These LEDs show the load (%) of the UPS if the AC input is available (in Normal Mode).
LEDs light up to indicate the following information.
No. 6 LED: 0-25 %
No. 6 - 9 LEDs: 76-100 %
No. 6 - 7 LEDs: 26-50 % No. 6 - 10 LEDs: Overload
No. 6 - 8 LEDs: 51-75 %
(c) In the Battery Mode, the LEDs indicate the capacity (%) of the batteries. LEDs light up
to indicate the following information.
No. 10 LED: 0-25 % (battery low level)
No. 9 - 10 LEDs: 26-50 % No. 7 - 10 LEDs: 76-95 %
No. 8 - 10 LEDs: 51-75 % No. 6 - 10 LEDs: 96-100 %
- Page 17 of Total 30 -
User Manual 1-3kVA Rev. 9
3. Operation
3.2 Starting up/ Shutting down the UPS
Starting up the UPS
Step 1. Plug the UPS into an AC wall socket and the UPS will enter Bypass mode.
Step 2. Press the “Select-down” & “Enter” button simultaneously to switch on UPS.
The UPS will begin its start-up process. After entering the Normal Mode, the UPS is
ready for operation.
Shutting down the UPS
Press the “Select-up” & “Select –down” button simultaneously for one second.
turn off.
The UPS will
During shutdown, do not press any buttons. Pressing a button may
cause the UPS to re-energize and deliver output power.
DC Start-up of the UPS
Step 1: Without connecting the UPS into any AC input power.
Step 2: Press the “Select-down” & “Enter” button simultaneously to switch on UPS. The UPS
will begin its start-up process. After entering the Battery Mode, the UPS is ready for
operation.
- Page 18 of Total 30 -
User Manual 1-3kVA Rev. 9
3. Operation
3.3 Operating Modes
Normal Mode
There are two main circuits when AC utility is normal: the AC circuit and the battery charging
circuit. The AC output power comes from AC utility input and passes through AC/DC rectifier,
DC/AC inverter and static switch to support power to load. The battery charging voltage comes
from AC utility input and is converted by AC/DC charger to support battery-charging power.
Battery Mode
The AC output comes from battery, passing through DC/AC inverter and static switch within
the battery backup time.
- Page 19 of Total 30 -
User Manual 1-3kVA Rev. 9
3. Operation
Bypass Mode
Under the following conditions, the bypass will be enabled:
1. Overload.
2. Inverter failure.
3. Over-temperature
- Page 20 of Total 30 -
User Manual 1-3kVA Rev. 9
3. Operation
3.4 Configuration Settings
UPS must be working on Bypass Mode in advance for any setting, because
the setting function can not be available on Normal Mode and Battery
Mode.
`
Output Voltage / Frequency
Step 1. In this screen, press the “Enter” key to proceed to the following steps for output voltage
/ frequency adjustment.
Display 11 – Output Voltage/
Frequency Setting
Volt/Freq Set
220 VAC 50 Hz
Step 2. The cursor (→) will pop up to indicate the output voltage and frequency newly selected.
Display 11 – Output Voltage/
Frequency Setting
Display 11 – Output Voltage/
Frequency Setting
Volt/Freq Set
220 VAC
50 Hz
Volt/Freq Set
220 VAC
50 Hz
Step 3. Use “Select-Up” or “Select-Down” keys to adjust the output voltage (220V, 230V, and
240V ). Press the “Enter” key to confirm voltage and then the cursor will move to frequency
selection. The output frequency (50Hz, 50HzP, 60Hz, 60HzP) can be adjusted by the same key
operation.
Step 4. Once the correct voltage is selected, press the “Enter” key again to save the selection.
There is no output on Bypass Mode if frequency is setting on 50Hz/60Hz, on
the other hand, there is output on Bypass Mode if frequency is setting on
50HzP/60HzP.
Display 11 – Output Voltage/
Frequency Setting
Volt/Freq Set
Save?
NO
- Page 21 of Total 30 -
User Manual 1-3kVA Rev. 9
3. Operation
`
Bypass Voltage
UPS must be working on Bypass Mode in advance for any setting, because
the setting function can not be available on Normal Mode and Battery
Mode.
Step 1. To protect the load, the function of bypass auto-transfer is activated only when the AC
main voltage is within the range of LO (low) and HI (high). In this screen, press the “Enter” key
to enter the following steps for LO/HI voltage settings.
Display 10 – Bypass Voltage Setting
Bypass Volt Set
LO= 176V HI=253V
Step 2. The cursor (→) will pop up to indicate the item newly selected. Press the “Enter” key to
select the item (either HI or LO range) you wish to adjust.
Display 10 – Bypass Voltage Setting
Bypass Volt Set
LO= 176V HI=253V
Display 10 – Bypass Voltage Setting
Bypass Volt Set
LO= 176V
HI=253V
Step 3. Use the “Select-Up” or “Select-Down” keys to adjust the voltage (changing 1V by every
press). LO (low rang):176V+/- 20V, HI (high range):253V+/- 20V).
Step 4. Once the value is confirmed, press the “Enter” key again to save the data.
Display 10 – Bypass Voltage Setting
Bypass Volt Set
Save? NO
- Page 22 of Total 30 -
User Manual 1-3kVA Rev. 9
4. Maintenance
4.1 General Maintenance
The ST Series UPS requires only very simple maintenance. The batteries are sealed,
valve-regulated, maintenance-free and enclosed in a fire-retardant pack. The batteries
should be kept charged to maintain their designed lifetime. When utility power is
supplied to the UPS, it will continuously charge the batteries.
`
Environment
Î For the best preventive maintenance, keep the area around the UPS clean and
dust-free.
Î Please keep the exhaust holes of UPS unobstructed.
Î Operate the UPS in an indoor environment with an ambient temperature range of 32°F
to +104°F (0°C to +40°C).
Î Keep the UPS on a flat, stable surface with a 10cm space around it for proper
ventilation.
Î Do not place the unit near a heat source also avoid placing the unit in direct sunlight.
Î Do not place the unit near water or excessive moisture.
`
Storing the UPS and Battery
When storing the UPS for any length of time, it is recommended to plug in the UPS for at
least 24 hours every four to six months to ensure full battery recharge.
`
Replace the Battery
It is suggested that the battery pack be replaced every two years to ensure that the UPS
provides full backup capacity during a blackout. Batteries should be checked every two to
three months. If the batteries need replacing, please contact your sales representative
to order a new battery.
- Page 23 of Total 30 -
User Manual 1-3kVA Rev. 9
4. Maintenance
4.2 Replacing the New Battery
This UPS contains potentially hazardous voltages. Do not open the UPS.
user-serviceable parts inside.
Î
Î
Î
Î
Î
Î
Î
Î
There are no
When replacing the battery, use the same number and voltage(V)
/capacity(Ah).
Avoid harm to the environment: proper disposal or recycling of the batteries is
required. Refer to local regulations for disposal requirements.
NEVER dispose of the battery in a fire. They may explode.
Do not open or damage the battery. The contents (electrolyte) may be
extremely toxic. If exposed to electrolyte, then wash immediately with plenty
of water.
Avoid charging in a sealed container.
Never short circuit the battery. When working with batteries, remove watches,
rings and other metal objects. Only use insulated tools.
The following precautions should be observed when working on batteries:
• Remove watches, rings, and other metal objects.
• Use tools with insulated handles.
Make sure that there is no voltage before touching the batteries.
4.3 Testing the New Battery
Start up the UPS with load added. Press the “Select-up” & “Enter” buttons for three
seconds to activate the self-test. If the UPS switches back to Normal Mode after 10 seconds,
then the batteries are good. If it does not, then please replace the battery or contact your
sales representative for assistance.
4.4 Recycling the Used Battery
Do not discard the UPS and batteries with normal household/industrial waste. Contact your
local recycling or hazardous waste center for information on proper disposal of used battery
pack and batteries.
Consider all warnings, cautions, and notes before replacing batteries.
Batteries can present a risk of electrical shock and high short circuit
current. The following precautions should be observed when working on
batteries:
Î Remove watches, rings, and other metal objects.
Î Use tools with insulated handles.
Î Do not lay tools or metal parts on top of batteries.
Î Do not attempt to alter any battery wiring or connectors. Attempting
to alter wiring can cause injury.
Î Do not dispose of batteries in a fire. The batteries may explode.
Refer to your local codes for disposal requirements.
Î Do not open or damage the battery or batteries. Released electrolyte
is harmful to the skin and eyes and it is toxic.
- Page 24 of Total 30 -
User Manual 1-3kVA Rev. 9
5. Troubleshooting
LCD
`
LCD & LED Status /
Audible Alarms
AC: OK
BATT: OK
TEMP Fail
Fault
Warning
Normal
y
y
y
y
y
y
Possible Cause
1. Fan fail.
2. Temperature is
higher than
allowed operation
temperature.
UPS in Bypass Mode.
The alarm beeps continuously.
AC: OK
BATT: OK
Inverter Fail
Fault
Warning
Normal
1.
UPS in Bypass Mode.
Fault LED lights up and the
alarm beeps continuously.
AC: OK
BATT: OK
DC_BUS Fail
Fault
Warning
Normal
1.
UPS stop working.
The alarm beeps continuously.
AC: OK
BATT: LOW
Normal Mode
Fault
Warning
Normal
UPS in Normal Mode, but
battery capacity is low.
y
The alarm beeps once every
second for battery low.
Output Power
105 %
Fault
Warning
Normal
2.
Inverter circuit
failed
Output short.
Action
1.
2.
Replace the fan.
Reduce ambient
temperature or O/P load.
1. Please contact with sale
representative.
2. Remove short circuit
condition, restart the UPS.
Power Board
failed.
1.
Restart the UPS first. If
the UPS can not work
normally, please contact
with sale representative.
1. Charger may
break down.
1.
Please replace charger
board.
1.
1. Please reduce the load less
than 100%.
y
y
y
AC utility power is normal but
UPS is overloaded.
Warning LED lights up and the
alarm beeps per 1 second.
- Page 25 of Total 30 -
Overload.
User Manual 1-3kVA Rev. 9
5. Troubleshooting
Fault
LCD & LED Status /
Audible Alarms
Output Power
125 %
Warning
Normal
AC utility power is normal but
UPS is overloaded up to
125%.
y
Warning LED does not fade out
and alarm beeps per 0.5
second.
AC: OK
BATT: OK
Bypass Mode
Fault
Warning
Normal
Possible Cause
Action
1. Overload.
1. Please reduce the load less
than 100%.
1. Overload.
1. Please reduce the load less
than 100%.
1.
AC utility power
fail
Input cable
broken or
disconnect with
UPS.
1.
AC utility power
fail.
Battery power is
discharging
deeply.
1.
UPS will shut down
automatically. Please save
data soon.
AC utility power
fail.
The UPS has
already run out of
battery.
1.
UPS will restart up when
AC utility power is
restored. If AC utility
power failure is more than
6 hours, please charge the
battery for 24 hours to
ensure the battery fully
charged.
y
UPS in Bypass Mode. Output
power is more than 150%.
y
Warning LED lights up and
alarm beeps continuously.
AC: Fail
BATT: OK
Battery Mode
Fault
Warning
Normal
y
y
y
y
y
UPS in Battery Mode.
Alarm beeps every 4 seconds.
AC: Fail
BATT: LOW
Battery Mode
Fault
Warning
Norma
2.
1.
2.
UPS in Battery Mode.
The alarm beeps per 1 second.
1.
Fault
y
2.
If AC utility power fails,
reduce the load in order to
extend backup time.
If it is not power failure,
please check the rated
input or connected power
line.
Warning
Norma
2.
UPS completely shut down.
- Page 26 of Total 30 -
User Manual 1-3kVA Rev. 9
5. Troubleshooting
LED
`
y
y
y
y
y
y
y
y
y
y
y
y
y
LED Status /
Audible Alarms
No indication and
buzzer alarm even
though system is
connected to
mains power
supply.
Line LED flash.
Line LED flash and
Battery LED
illuminate.
Line and Bypass
LED illuminated
even though the
power supply is
available.
Inverter LED
illuminated.
Alarm sounds
every 4 second.
Fault LED
illuminated.
Buzzer alarm
sounds per every
1 second.
Fault LED
illuminated.
Buzzer alarm
sounds
continuously.
UPS completely
shut down.
Fault and Battery
LED illuminated.
The alarm sounds
per every 1
second
Possible Cause
Action
1. No input voltage
1.
Check building wiring
socket outlet and input
cable.
1. Phase and neutral conductor
at input of UPS system are
reversed.
1. Input voltage/frequency are
out of tolerance
1.
1.
Rotate main power socket
by 180 to connect UPS
system.
Check input power source.
1. UPS not turn on.
1.
Please turn on the UPS
1. AC utility power fail.
1. UPS go to battery mode
automatically.
2. As the audible alarms per
every 1 second, battery is
almost empty.
1. Please reduce the load
less than 100%.
1. Overload.
1.
UPS Fault
1.
Please contact with sale
representative.
1.
2.
AC utility power fail.
The UPS has already run out
of battery.
1.
1.
Charger or Battery may break
down.
1.
UPS will restart up when
AC utility power is
restored. If AC utility
power failure is more than
6 hours, please charge the
battery for 24 hours to
ensure the battery fully
charged.
Please contact with sale
representative.
- Page 27 of Total 30 -
User Manual 1-3kVA Rev. 9
6. Appendix
6.1 Specifications
`
General Specification
Specifications
ST3200 (tower)
ST3200R (rack-mount)
Model No.
Topology
ST3200 (tower)
ST3200R (rack-mount)
ST3200 (tower)
ST3200R (rack-mount)
True On - Line , Double Conversion
On- battery Output Waveform
Pure Sine Wave
Number of Phase
Single ( 1 Φ 2W + G )
Input
Maximum Capacity ( VA / W )
1000 VA / 700 W
2000 VA / 1400 W
Nominal Input Voltage
3000 VA / 2100 W
230 VAC
Input Voltage Regulation
160~300 VAC Single Phase w/ Ground
Nominal Input Frequency
50/60 ± 4 Hz
Input PFC
≧ 0.95
Input Short Protection
Circuit Breaker
Output
Nominal Output Voltage
220 / 230 / 240 VAC nominal
Output Voltage Regulation
+/-2%
Output T.H.D
≦3% ( Linear Load)
≦4% THD ( Linear Load)
≦6% ( Non-Linear Load)
≦7% THD ( Non-Linear Load)
High Efficiency Mode ( AC to AC )
85%
85%
88%
High Efficiency Mode ( DC to AC )
83%
83%
83%
Crest Factor
3:1
Start on Battery
Yes
Output Frequency
50 Hz + / - 0.2 Hz
Overload
Sustaining 30 sec @ 125%~150% load; 200ms @ >150% load
Battery
Typical Backup Time ( Full load )
Battery Type
5 minutes
9 minutes
5 minutes
Sealed Lead-Acid maintenance-free 12VDC/7AH per cell
Numbers of Batteries
3 cells
8 cells
Recharge Time to 90%
5 hours
Advance Warning Diagnostics
UPS Status, I/P Voltage & Frequency, O/P Voltage & Frequency, Battery Voltage,
Battery Capacity, Loading %, Temperature, History Alarm.
Normal ( Green ), Warning ( Yellow ), Fault ( Red )
Front Panel Indication - LCD
Front Panel Indication - LED
Audible Alarms
Battery Mode,
Communication Interface
Communication port
SNMP Manageable
Low Battery, Overload, Fault
RS232 (Standard); DB9 or USB or AS400 or SNMP / HTTP(Optional)
Yes
Environmental
Operation Temperature
0-40℃
Storage Temperature
- 15 to 50 ℃
Relative Humidity
20% to 90 % Non-Condensing
Audible Noise
( at 1 meter from surface of unit )
Mechanical
Tower Dimensions ( W x H x D
mm )
< 45 dBA @ 1 meter
160 x 220 x 400
Rack-mount Dimensions
( W x H x D mm )
440 x 88 x 465
( w/ internal battery )
Tower Weight ( Net weight with
Battery ) ( kgs )
Rack Mount Weight ( Net weight
with Battery ) ( kgs )
< 50 dBA @ 1 meter
200 x 352 x 450
200 x 352 x 450
440 x 88 x 465 ( UPS only )
440 x 88 x 465 ( External Battery Module )
15
34
35
15.5
35
36
- Page 28 of Total 30 -
User Manual 1-3kVA Rev. 9
6. Appendix
`
Battery Run Time
Tower
RUN TIME CHART in Minutes
Output load 200 VA
400 VA
600 VA
800 VA
1000 VA 1500 VA 2000 VA 2500 VA 3000 VA
(140 W) (280 W)
(420W)
(560W)
(700 W) (1050 W) (1400 W) (1750 W) (2100 W)
UPS Model
ST3010
60
24
13
8
5
+ 1 EB (6pcs)
243
102
61
42
30
+ 2 EB (12pcs)
451
194
117
81
61
+ 3 EB (18pcs)
675
293
178
124
94
ST3020
210
88
52
36
26
15
9
+ 1 EB (8pcs)
488
210
127
88
66
39
26
+ 2 EB (16pcs)
791
345
210
147
111
66
45
+ 3 EB (24pcs)
1110
488
299
210
159
96
66
ST3030
210
88
52
36
26
15
9
7
5
+ 1 EB (8pcs)
488
210
127
88
66
39
26
19
15
+ 2 EB (16pcs)
791
345
210
147
111
66
45
34
26
+ 3 EB (24pcs)
1110
488
299
210
159
96
66
49
39
Rack Mount
RUN TIME CHART in Minutes
Output load 200 VA
400 VA
600 VA
800 VA
1000 VA 1500 VA 2000 VA 2500 VA 3000 VA
(140 W) (280 W)
(420W)
(560W)
(700 W) (1050 W) (1400 W) (1750 W) (2100 W)
UPS Model
ST3R10
60
24
13
8
5
345
147
88
61
45
+ 2 BM (18pcs)
675
293
178
124
94
+ 3 BM (27pcs)
1029
451
276
194
147
ST3R20
210
88
52
36
26
15
9
+ 1 BM (8pcs)
488
210
127
88
66
39
26
+ 2 BM (16pcs)
791
345
210
147
111
66
45
+ 3 BM (24pcs)
1110
488
299
210
159
96
66
ST3R30
210
88
52
36
26
15
9
7
5
+ 1 BM (8pcs)
488
210
127
88
66
39
26
19
15
+ 2 BM (16pcs)
791
345
210
147
111
66
45
34
26
+ 3 BM (24pcs)
1110
488
299
210
159
96
66
49
39
+ 1 BM (9pcs)
EB: External Battery Bank (for Tower type)
BM: External Battery Module (for Rack Mount type)
Indicates time not calculated, contact sales representative for details.
- Page 29 of Total 30 -