1
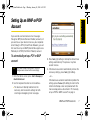
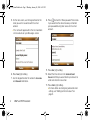
I325_EmailGuide.book Page a Monday, January 14, 2008 6:11 PM
Set Up Your Email
Samsung ACETM
www.sprint.com
© 2008 Sprint Nextel. All rights reserved. SPRINT and other trademarks
are trademarks of Sprint Nextel.
1/14/08
I325_EmailGuide.book Page i Monday, January 14, 2008 6:11 PM
Table of Contents
Setting Up an IMAP or POP Account . . . . . . . . 1
Editing an Email Account . . . . . . . . . . . . . . . . . . . . 5
Setting Up a VPN Account . . . . . . . . . . . . . . . . . . . 6
Setting Up Exchange via ActiveSync . . . . . . . 7
Using the Web Browser to Access Email . . . . 9
Index. . . . . . . . . . . . . . . . . . . . . . . . . . . . . . . . . . . . 10
I325_EmailGuide.book Page ii Monday, January 14, 2008 6:11 PM
I325_EmailGuide.book Page 1 Monday, January 14, 2008 6:11 PM
IMAP/POP Accounts
Setting Up an IMAP or POP
Account
If you want to send and receive email messages
through an ISP (Internet Service Provider) account, or if
you wish to use your device to access your corporate
email through a VPN (Virtual Private Network), you will
first need to set up an IMAP (Internet Message Access
Protocol) or a POP3 (Post Office Protocol) account.
To automatically set up a POP or IMAP
account:
Note
If you have multiple email accounts, you must
configure each account with its own settings.
1. From the Home screen, press Start > Messaging >
New E-Mail Account.
2. Use the keyboard to enter an email address.
䡲
The device will attempt to determine the
necessary communication settings for both
incoming and outgoing email messages.
3. Press Next (right softkey) to attempt to retrieve these
settings automatically. This process may take
several minutes.
4. If the device was able to automatically retrieve the
necessary settings, press Next (right softkey).
– or –
If the device was unable to automatically obtain the
settings, press Previous (left softkey) to return to the
initial E-mail Setup screen and proceed with the
manual setup process described in “To manually
set up a POP or IMAP account:” on page 3.
IMAP and POP Accounts
1
I325_EmailGuide.book Page 2 Monday, January 14, 2008 6:11 PM
5. On the next screen, use the keypad to enter the
name you wish to associate with this email
account.
䡲 This name will appear within the list of available
email accounts on your Messages screen.
8. Press
to check the “Save password” check box
if you would like the device to always remember
your password during later access to this email
account.
9. Press Next (right softkey).
6. Press Next (right softkey).
7. Use the keypad to enter the account’s User name
and Password information.
10. Select the time interval in the Automatic Send/
Receive field that you would like for your device to
send and check for new email.
11. Press Finish (right softkey).
䡲
2
IMAP and POP Accounts
For more details on configuring advanced email
settings, see “Editing an Email Account” on
page 5.
What You Will Need to Set Up Your IMAP or
POP3 Account
If Auto configuration was unsuccessful, or if you need
to access an account using a VPN server connection,
contact your ISP (Internet service provider) or network
administrator for the following information and enter it
manually:
䡲 Account type (IMAP or POP3)
䡲 Incoming and Outgoing Mail Server Names
䡲 Username and Password
䡲 Domain Name
䡲 Special Security Settings (if used)
For more information about configuring email
accounts, go to:
http://www.microsoft.com/windowsmobile/help/smartphone/
default.mspx.
To manually set up a POP or IMAP
account:
1. From the Home screen, press Start > Messaging >
New E-Mail Account.
2. Use the keyboard to enter an email address.
3. Remove the check mark from the ‘Try to get e-mail
settings automatically from the Internet’ field by first
highlighting the field and pressing .
4. Press Next (right softkey).
5. Use the navigation key to select Internet e-mail and
press Next (right softkey).
6. On the next screen, enter your name and a display
name for the account in the ‘Your name’ and
‘Account display name’ fields respectively.
7. Press Next (right softkey).
IMAP and POP Accounts
3
IMAP/POP Accounts
I325_EmailGuide.book Page 3 Monday, January 14, 2008 6:11 PM
I325_EmailGuide.book Page 4 Monday, January 14, 2008 6:11 PM
8. Enter the Incoming mail server information and
select an account type (POP or IMAP).
14. Place a check mark on the appropriate fields by
pressing
䡲
.
Outgoing server requires authentication is used if you
need to use a password for outgoing mail in
addition to incoming mail.
䡲
Use the same name and password for sending
e-mail to use the same user name and password
for outgoing mail as for incoming mail.
15. Press Next (right softkey).
16. Select the time interval in the ‘Automatic Send/
Receive’ field that you would like for your device to
send and check for new email.
9. Press Next (right softkey).
10. Enter your user name and password in the
appropriate fields.
11. Press
to check the “Save password” check box
if you would like the device to always remember
your password during later access to this email
account.
12. Press Next (right softkey).
13. Enter the Outgoing (SMTP) mail server information.
4
IMAP and POP Accounts
17. Press Finish (right softkey).
For more details on configuring advanced email
settings, see “Editing an Email Account” on
page 5.
Editing an Email Account
To edit Advanced Server Settings:
1. From the Home screen, press Start > Messaging.
2. Highlight the account you would like to modify
settings for and press Menu (right softkey) >
Settings.
3. Confirm the email address and press Next (right
Next (right softkey).
5. Confirm the user name and password and press
Next (right softkey).
6. From the SMTP screen, select Advanced Server
.
7. From this page, highlight any settings you wish to
change, and press
settings.
䡲
Require SSL for Outgoing e-mail to enable SSL
encryption of outgoing email (if supported by the
mail server).
䡲 Network connection identifies your connection as
either The Internet (open-no firewall) or Work
(behind a firewall).
8. When you have finished making changes, press
Done (left softkey) and then press Next (right
softkey).
To change message download settings:
softkey).
4. Confirm the account name information and press
Settings and press
䡲
to check or uncheck those
1. Follow steps 1 - 8 from “To edit Advanced Server
Settings:” on page 5. This launches a configuration
screen where you can assign the time length for
the retrieved emails.
2. Use the navigation key to select the age of
messages to download from the server in the
‘Download messages’ field. (The longer the time
period, the more messages will be downloaded.)
3. Highlight the Advanced Settings field and press
.
Require SSL for Incoming e-mail to enable SSL
encryption of incoming email (if supported by the
mail server).
IMAP and POP Accounts
5
IMAP/POP Accounts
I325_EmailGuide.book Page 5 Monday, January 14, 2008 6:11 PM
I325_EmailGuide.book Page 6 Monday, January 14, 2008 6:11 PM
4. Highlight any settings you wish to change, and
press
to check or uncheck those settings.
䡲 Send/receive when I click Send to automatically
check for and download new messages
whenever you Send a message.
䡲
Use automatic send/receive schedule when roaming to
continue to check your email at predetermined
intervals even if you are in a roaming area.
䡲 When deleting messages to choose whether to
automatically delete or retain messages on your
email server when you delete those messages
from your device.
5. Press Done (left softkey) when you have finished
editing advanced settings.
6. Press Next (left softkey) to advance to the next
screen and edit these settings:
䡲 Message Format to view your email messages as
either HTML or plain text documents.
䡲 Message download limit to limit the size and content
of downloaded email.
7. Press Finish (left softkey) to complete the email
setup process.
6
IMAP and POP Accounts
Setting Up a VPN Account
A VPN (virtual private network) is a communications
network tunneled through a secured network. A VPN
allows you to send and receive messages and files
securely over open Internet connections.
To set up a new VPN connection
1. From the Home screen, press Start > Settings >
Connections > More.. > VPN > New....
2. Contact your System Administrator or IT
Professional to obtain the necessary information to
configure this connection type.
3. Press Done (left softkey) to save your new VPN
connection.
I325_EmailGuide.book Page 7 Monday, January 14, 2008 6:11 PM
1. Press Start > More (left softkey) > ActiveSync.
2. Press Menu (right softkey) > Add Server Source.
Wireless Setup
Setting Up Exchange via
ActiveSync
3. Enter the server address and press Next (right
softkey).
Email, Contacts entries, and other information can be
synchronized wirelessly on your device using Microsoft
Exchange Server and ActiveSync.
Getting Started
To synchronize wirelessly using Microsoft Exchange
Server, you must first:
䢇 Activate Sprint Vision Data Services. (For more
information, see “Installing ActiveSync on Your
Computer” in the User Guide.)
䢇 Create an email account as described in “Setting Up
an IMAP or POP Account” on page 1.
䢇 Work with your system administrator to collect the
following information:
䡲 Exchange Server address and domain name.
䡲 Your user name and password.
4. Enter your user name, password, and domain
name. (The password is case-sensitive.)
5. Leave the Save password box checked to avoid
having to enter the password whenever you log on
to this account, and press Next (right softkey).
Exchange ActiveSync
7
I325_EmailGuide.book Page 8 Monday, January 14, 2008 6:11 PM
6. Check the boxes for the types of information you
wish to synchronize with the Exchange Server, and
then press Finish (left softkey).
When the setup is complete, sychronize to retrieve
your email messages. You can also set up a sync
schedule to automatically retrieve messages.
8
Exchange ActiveSync
I325_EmailGuide.book Page 9 Monday, January 14, 2008 6:11 PM
4. Once the page is loaded, you can bookmark the
page by pressing Menu (right softkey) > Add to
Favorites.
Web Mail
Using the Web Browser to
Access Email
5. Enter your login information and follow the
onscreen instructions to access your account.
The Web browser allows you to access your Webbased email accounts on your device. Although you
can log in from the same Web address that you use on
your computer, it is recommended that you use a Web
address. This address can be found on your email
provider’s Web site.
To access your Web-based Email:
1. Press Start > Internet > Internet Explorer.
2. Press Menu (right softkey) > Address Bar.
3. Enter your Web-based email address in the
address window at the top of the screen and press
Go (left softkey).
Some common Web addresses are:
Hotmail: http://mobile.msn.com/hm/folder.aspx
Yahoo: http://mobile.yahoo.com/mail
Gmail: http://m.gmail.com
Accessing Web Mail
9
I325_EmailGuide.book Page 10 Monday, January 14, 2008 6:11 PM
Index
A
ActiveSync
Configuring Outlook 7
B
Browser 9
E
Email
IMAP Account 1, 3
POP Account 1, 3
Exchange Server 7
O
Outlook
Creation via ActiveSync 7
V
VPN 6
Setup 6
10
Index
W
Web Browser 9
Web Mail 9
Access 9