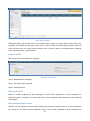
1
Effort User Manual 1 Table of Contents Dashboard.......................................................................................................................................6 Employee........................................................................................................................................8 Actions on Employees...............................................................................................................9 Edit........................................................................................................................................10 Employee customer mapping................................................................................................10 Employee List Mapping........................................................................................................10 Reset Password......................................................................................................................10 Disable/Enable Employees...................................................................................................10 Employee Territory mapping................................................................................................10 Notifications Settings...........................................................................................................10 Manage Employee Cha........................................................................................................10 Device details.......................................................................................................................11 Resend SMS.........................................................................................................................11 Delete web panel account.....................................................................................................11 Create Employee ...................................................................................................................... 11 Employee Groups ..................................................................................................................... 16 Permission Set .......................................................................................................................... 17 Organizational Chart ................................................................................................................ 18 Device Event Logs ................................................................................................................... 19 Import Employee Status ........................................................................................................... 19 Import Customer Mapping ....................................................................................................... 19 Import List Mapping ................................................................................................................ 20 Manage Invalid Locations ........................................................................................................ 20 Territory Management .............................................................................................................. 20 Create Territory ........................................................................................................................ 21 Send Messages ......................................................................................................................... 22 Chat Group ............................................................................................................................... 23 Change Account Admin ........................................................................................................... 24 Customers.......................................................................................................................................24 Create Customer ....................................................................................................................... 25 User defined fields ................................................................................................................... 26 Step 1: Enter custom tag. .......................................................................................................... 26 View Customers ....................................................................................................................... 27 Manage customer fields ........................................................................................................... 27 Manage system defined fields .................................................................................................. 28 Manage user defined fields ...................................................................................................... 28 View customer details .............................................................................................................. 29 Customer Types ........................................................................................................................ 29 Activities .................................................................................................................................. 30 Forms..............................................................................................................................................31 Form Templates ........................................................................................................................ 32 Create blank form Template ..................................................................................................... 33 Create from Existing template.................................................................................................. 34 Actions that can be performed on Form Template ................................................................... 35 Add Forms ................................................................................................................................ 38 View Form ................................................................................................................................ 39 Add Form ................................................................................................................................. 40 Import Forms ............................................................................................................................ 41 Lists .......................................................................................................................................... 41 Actions on list........................................................................................................................... 42 2 Import list ................................................................................................................................. 43 Import List Status ..................................................................................................................... 43 Jobs.................................................................................................................................................44 Create Job ................................................................................................................................. 44 Import Jobs ............................................................................................................................... 45 Job Invitation ............................................................................................................................ 45 Import Job & Form ................................................................................................................... 46 Job Settings .............................................................................................................................. 47 Area Groups ............................................................................................................................. 50 Dispatch .................................................................................................................................... 51 Auto dispatch............................................................................................................................ 52 Works..............................................................................................................................................52 Creating a work Template ........................................................................................................ 53 Actions that can be performed on the work ............................................................................. 54 Add Work ................................................................................................................................. 57 Recurring Work ........................................................................................................................ 58 View Work ................................................................................................................................ 58 Import work .............................................................................................................................. 59 Rejected work ........................................................................................................................... 59 Route Plan......................................................................................................................................60 Activities of a Route plan ......................................................................................................... 60 Creation of Activities ............................................................................................................... 61 Creation of a Route plan ........................................................................................................... 61 Assigning Route plan ............................................................................................................... 62 Locate.............................................................................................................................................63 Knowledge base.............................................................................................................................64 Company........................................................................................................................................66 Mobile Configurations ............................................................................................................. 66 Logos ........................................................................................................................................ 68 App Configurations .................................................................................................................. 69 Modules .................................................................................................................................... 70 Mobile Reports ......................................................................................................................... 70 Settings ..................................................................................................................................... 70 Work Flows....................................................................................................................................71 Manage Roles ........................................................................................................................... 71 Workflows ................................................................................................................................ 72 Role based ................................................................................................................................ 73 Employee Group Based ............................................................................................................ 73 Hierarchy Based ....................................................................................................................... 73 Approval settings ...................................................................................................................... 73 Reports...........................................................................................................................................74 Favourite Reports ..................................................................................................................... 74 My Reports ............................................................................................................................... 75 View Form Activity Report..................................................................................................75 Job Reports ............................................................................................................................... 76 Customer Job Report.............................................................................................................76 Employee Job Report.............................................................................................................77 Job Report..............................................................................................................................78 Job Progress Report...............................................................................................................78 Job TAT Report......................................................................................................................79 Tag Report.............................................................................................................................80 Location Reports ...................................................................................................................... 80 3 Manage Invalid Locations ...............................................................................................80 Time Spent At Customers Report ....................................................................................81 Travel Overview Report ..................................................................................................82 Sign In/Sign Out Report ..................................................................................................83 Multi Day Sign-In/Sign-Out Report ................................................................................83 Track Summary Report....................................................................................................84 Day Wise Distance Travelled Report...............................................................................85 Employee Wise Distance Travelled Report .....................................................................85 Detail Tracking Report ....................................................................................................86 Last Known Locations Report .........................................................................................87 Customer Check in - Checkout Report ............................................................................87 Employee Attendance Report ..........................................................................................88 Customer Reports..................................................................................................................89 Locked customer reports .................................................................................................89 New Customer Report .....................................................................................................90 Customer Activity Report ................................................................................................90 Customer Status Report ...................................................................................................91 Work Report.....................................................................................................................91 Form Reports........................................................................................................................92 Form Report .....................................................................................................................92 Bulk Print Download .......................................................................................................93 Route Plan Report.................................................................................................................93 Day Plan Report....................................................................................................................94 Employee Reports.................................................................................................................94 Leave Quota Report .........................................................................................................94 Employee Leave Report ..................................................................................................95 Employee Activity Report ...............................................................................................95 Employee Activity Summary Report ...............................................................................96 Web User Login Report........................................................................................................97 Device Event logs.................................................................................................................97 Territory................................................................................................................................98 Time Spent In Territory ...................................................................................................98 Time Not spent in Territory .............................................................................................98 Claims........................................................................................................................................99 Approve.................................................................................................................................99 Schedule Reports.................................................................................................................100 Audits..................................................................................................................................100 Employee Audit .............................................................................................................101 Customer Audit ..............................................................................................................101 Job Audits ......................................................................................................................102 Job Invitation Audit .......................................................................................................102 Form Audit .....................................................................................................................103 Form Template Audit .....................................................................................................103 List Audit............................................................................................................................104 Calendars.................................................................................................................................104 Create Calendar..................................................................................................................104 Calendar..............................................................................................................................105 My Calendar.......................................................................................................................105 My Accounts...........................................................................................................................106 Password............................................................................................................................106 Invoice Recipients..............................................................................................................107 Invoice................................................................................................................................107 4 Notifications ........................................................................... ................................................107 Leaves...........................................................................................................................................110 5 Dashboard Dashboard helps user to monitor overall activities done by and yet to be performed by employees. Any lags in activities can be easily identified and can be addressed. Links to various modules are available in menu bar, menu bar gives quick access to jobs, works, routes, forms, locate, dispatch, customers, employees, reports, admin and overflow menu. Notification count is displayed on notification icon. Unassigned jobs Delayed – Unassigned delayed jobs count is displayed, click on count to view list of delayed jobs. Rejected – Unassigned rejected jobs count is displayed, click on count to view list of Rejected jobs. Assigned jobs Delayed – Delayed jobs count is displayed, click on count to view list of delayed jobs. In Progress – In progress jobs count is displayed, click on count to view list of in progress job. To start: Displays the count of jobs that are about to start, when clicked on count displays list of jobs that are about to start. Completed Today: Displays the count of completed jobs, when clicked on count displays list of completed jobs for today. Completed Yesterday: Displays the count of completed jobs, when clicked on count displays list of completed jobs for yesterday. All Scheduled: Displays the count of all schedule jobs, when clicked on count displays list of all schedule jobs. Unassigned works Delayed – Delayed works count is displayed, click on count to view list of delayed works. Rejected – Unassigned rejected works count is displayed, click on count to view list of Rejected works. Assigned works Delayed – Delayed works count is displayed, click on count to view list of delayed works. In Progress – In progress works count is displayed, click on count to view list of in progress works. To start: Displays the count of works that are about to start, when clicked on count displays list of works that are about to start. 6 Completed Today: Displays the count of completed works, when clicked on count displays list of completed works for today. Completed Yesterday: Displays the count of completed works for yesterday, when clicked on count displays list of completed works for yesterday. All Scheduled: Displays the count of all schedule works, when clicked on count displays list of all schedule works. Customer check-ins Today: Displays the count of number of check-ins done for customers by employees for today. Yesterday: Displays the number of check-ins done for customers by employees for yesterday. Pending Approvals Forms: Displays the count for number of forms waiting for action, when clicked on count displays list of pending forms. Leaves: Displays the count for number of leaves waiting for action, when clicked on count view list of pending leaves. Form activities Today: Displays the count for number of forms filled for today, when clicked on count view list of forms. Yesterday: Displays the count for number of forms filled for Yesterday, when clicked on count displays list of forms. Employees On Field: Displays the count for number of employees on field, click on count to view list of employees on field. Not Synced: Displays the count for number of employees not synced, click on count to view list of employees not synced. Activation pending: Displays the count for pendings activation of employees, click on count to view list of activation pendings. Field employees battery status and last known locations are displayed in bottom pane. Feeds are displayed on left pane, feeds are nothing but recent activities done by employees. 7 Figure 1: Dashboard Employee User can create employees in this section and can configure settings for them. Navigation: Menu-bar >>Employees Figure 2: Employee List screen 8 This screen displays the list of employees. User can filter employees by applying filters from left pane. User can filter employees based on employee id, employee name, employee phone number, employee E-mail, IMEI number and employee status. Enter filter values and click on apply for applying filters, click on reset to clear all filters. Export selected This will export only selected employees into Excel sheet. Export All On click exports all employees into Excel sheet. Actions on Employees Figure 3: Actions on employees Below are the list of actions that can be performed on employees. 1) Edit 2) Employee customer mapping 3) Employee List mapping, 4) Reset password 5) Disable/ Enable employees 6) Employee Territory mapping 7) Notifications settings 8) Manage Employee Chat 9) Device Details 10) Resend SMS 9 11) Delete Web-Panel account Edit This is used to edit employee’s details. Employee customer mapping This is used to map Employees with customers. Figure 4: Employee Customer Mapping User can remove mapping by clicking on remove all, individual customers can be removed by selecting customer and click remove selected. User can also map more customers by clicking on map more customers. User can Export customers into Xls by clicking on Export. Click on save to save the mapping for customer. Employee List Mapping Employees can be mapped with list so the mapped list values are assigned to employee. Reset Password This is used to change/reset Password. Disable/Enable Employees This is used to Enable or Disable employees. Employee Territory mapping Employee territory mapping can be done here. Notifications Settings Notification settings can be configured here. Manage Employee Chat Chat settings can be configured here. 10 Figure 5: Manage Employee Chat Step 1: Select employees by selecting the check box against them. Step 2: User can select/unselect all employees at once for chat by selecting select all/ unselect all. Step 3: Click on save. So now user can chat with the selected employees and selected employees can chat with user. Device details Employee device details can be checked here. Resend SMS If the employee is not activated even after all settings click on resend to send activation message to employee’s mobile app and if employee confirms activation message by sending sms, employee will become active. Delete web panel account Click on delete to delete web panel account for employee. Create Employee This will navigate user to create employee screen, where an employee can be created by giving all required details. 11 Employee Details Figure 6: Employee Details Section Employee First name, Last name, Mobile number, E-mail id are mandatory fields and rest are optional fields. User can select roles for Employees from the dropdown. In order to select roles first user has to create roles, refer Manage Roles section under “Workflows section” for creating Roles. User can select time zone for employee that is in which time zone employee has to work. Employee customer mapping can be done in “Auto Map Customer to Employee”. If mapping is set to “No” Customer is not visible to employee who created him/her, for “No Explicit mapping exists” select the option as required. User can select reporting manager for employee. User can create his own required calendar and these calendars will reflect in the calendar dropdown. For creating calendar refer Admin>>calendar section>>Create Calendar. Select the manager check box so that employee is being created will have access to web account. Select employee type. Employees are classified into 2 types Field employees and Back office employees. Field employee performs field works where as back office employee works from web panel i.e. managing field employees tasks such as assigning jobs, works, route plans etc to field employees as per permissions given to him on field employees. 12 App Settings Figure 7: App settings screen User can set lock for mobile app through Mobile pin, to access mobile app user has to enter pin. User can warn or block all activities of employee for altering mobile handset time this can be done by Setting “When device exceeds deviation time” field. User can set the permissible deviation time, if it exceeds user specified actions are imposed. Option to display start/ stop icon in mobile can be configured here by selecting “Show start /stop work” in mobile app. Users call logs and sms logs can be captured in Device Event Logs by clicking on corresponding check boxes. User can choose options Wi-Fi and Mobile data or only Mobile data to upload files which are larger than 500 kb. Note: Mobile handset time should match with actual time zone, a difference of 15 Minutes is acceptable, if it exceeds user specified actions are imposed. 13 Track and Sync settings Figure 8: Track & Sync Settings Select track timing when employee has to be tracked, select the things like track frequency and mode of tracking, sync frequency during working and non working hours and location provider from dropdown. Address Settings Figure 9: Address settings 14 Enter the address and location details, this home location is displayed on map in locate screen. Permissions Figure 10: Permission settings Permissions are classified into 4 types view, add, modify/manage and delete. Permissions are independent to employees and can be given with permissions as per business requirement. Click on save to bring these permissions into affect. User can select view, add, modify/manage, delete permissions for all modules by selecting the check box corresponding to view, add, modify/manage, delete. Import employees This will navigate user to Import employee screen where user can upload employees in bulk. Figure 11: Import Employees screen Step 1: Click on download Template Step 2: Enter details in template and click on save. Step 3: Click on choose file for selecting file and click on import. 15 Employee Groups Navigation: Admin>> Employees>>Employee Groups Employees can be grouped together to form a group, list of employee groups are displayed in this screen, user can create employee group clicking on add employee group. One of the purpose for creating employee group is to give permissions to back office employee on employee group. Figure 12: Employee Group list screen Click on red tick mark Checkbox Figure 13: Assign permission set screen Step 1: To select employee group click on employee group under all and click on right arrow button. Step 2: To unselect employee group click on employee group under selected and click on left arrow button. so back office employee will have selected permissions on the employee group Click on Add Employee group to create an employee group 16 Figure 14: Create Employee Group screen Step 1: Enter Group Name. Step 2: Select type to field/back office as required. Step 3: Select the Employee and click on Right Arrow button. Step 4: To remove employee select the employee and click Left Arrow button. Step 5: Click on save. Permission Set Navigation: Admin>Employees>>Permission set Permission set is usually imposed on an employee group. Permissions are given by selecting the checkbox against the action name. Generally permission set is assigned to back office employee so that back office employee will have permissions on the imposed employee group. Figure 15: Permission set List screen Permissions are classified into 4 types view, add, modify and delete. Click on “Create New Permission set” to create new permission set. 17 Figure 16: Create Permission set Step 1: Enter name. Step 2: Edit permissions by selecting the checkbox. Figure 17: Assign Permission set Step 3: Select the Employee group by selecting group under all and click on right arrow button. Step 4: Click on Save. Organizational Chart Hierarchy of employee structure is displayed in this screen. Click on “Click here for organization chart” button to view the hierarchy of Employees. User can also search for employee by using search bar. Navigation: Admin>>Employees>>Organizational Chart 18 Figure 18: Organization Chart Device Event Logs Navigation: Admin>>Employees>>Device Event Logs This gives details about the mobile device such as number of calls made/received, messages sent/received, GPS status On/Off, Network status On/Off, mode of internet using etc. user can filters device events logs by applying filters from left pane, filters include event types, from and to date, Employee name. Enter filter values and click on apply for applying filters, click on reset to clear all filters. Figure 19: Device event logs Step 1: Select event types Step 2: Select Date Range Step 3: Select Employees Step 4: Click on Apply, click on reset to clear filters. Import Employee Status Employee Bulk Upload status is displayed in this screen. Navigation: Admin>>Employees>>Import Employee Status Import Customer Mapping Navigation: Admin>>Employees>>Import Customer Mapping Bulk Employee customer mapping can be uploaded in a single go. Download template fill details and upload the Document. 19 Import List Mapping Bulk List mapping can be uploaded in a single go. Download template fill details and upload the Document. Navigation: Admin>>Employees>>Import List Mapping Manage Invalid Locations This is used to track both valid and invalid locations of employee for the selected date. Navigation: Admin>>Employees>>Manage Invalid Locations Note: GPRS (Location services) of Mobile must be on. Figure 20: Manage Invalid Locations Step 1: Select Employee Step 2: Select Date Step 3: Select time Range Step 4: Set Location type to All (Preferably) Territory Management This is used to restrict an employee for a particular region this region is selected by user on map and assigned to employee. The purpose of restricting an employee to a specific region is to cater customers’ actions in that specific region. Navigation: Admin>>Employees>>Territory management 20 Figure 21: Territory management User can edit/assign/delete territory. Click on “Create Territory” for creating territory. User can also search for territory by entering territory name in the field provided in left pane. Create Territory Figure 22: Create Territory Step 1: Enter Territory Name Step 2: Select selection type Step 3: Select Location (Latitude and longitude) Step 4: Select Radius Step 5: Click on Save Now territory is created, it has to be assigned to employee. Assign territory to employee Click on Assign button to assign territory to employee. 21 Figure 23: Employee Territory Mapping Step 1: Select employee and click on right arrow button to add the Employee Step 2: Click on Save Send Messages Navigation: Admin>>Employees>>Send Messages (or) click on 3 dots in menu screen>>Send Messages Web-Panel account user (manager/back office/Root employee) can send messages to field employees these messages are displayed in mobile app under messages module. User can filter messages by applying filters from left pane, filters include subject, from and to date. Enter filter values and click on apply for applying filters, click on reset to clear all filters. Figure 24: Send Messages List Screen List of sent messages are displayed here. Click on Send Messages to send message. 22 Figure 25: Send Messages Screen Step 1: Enter Subject Step 2: Enter Body Step 3: Select type either employee or employee group Step 4: Select Employees by using left & right arrow buttons Step 5: Click on Send, to send message Chat Group List of created chat groups are displayed in this screen. User can edit or disable chat groups by clicking on corresponding options. User can create new chat group by clicking on “Add Employee Chat Group”. Figure 26: Chat Group list screen Click on “Add Employee Chat Group” Figure 27: Create Chat Group 23 Step 1: Select employee by clicking on employee and click on Right arrow button. Step 2: Enter name to the chat group Step 3: Click on save Change Account Admin This is used to change root employee for company Navigation: Admin>>Employees>>Change account admin Figure 28: Change Account Admin Step 1: Select employee from dropdown and click on change. Note: Most of settings are reflected when re-login Customers Customers are used to link the task that you do for a person who might generate revenue for your company. Customers can be individuals or corporate. To give more flexibility EFFORT allows categorization of customers and lets you configure up to two contact details. Customers can be used in a variety of places like jobs, forms, route plans etc. Navigation: Menu bar>>Customers Figure 29: Customers list screen 24 User can filter customers by applying filters from left pane. Filters include customer id, customer name, customer phone, customer primary contact, customer primary email and customer address. Enter filter values and click on apply for applying filters, click on reset to clear all filters. Delete User can delete customers by selecting the checkbox against customer name and by clicking on delete button. Export Selected This is used to export only selected customers into Excel sheet. Export All This is used to export all customers into Excel sheet. Assign Selected Customer to Employee This is used to assign customer to employee. Edit User can edit customer details by clicking on edit icon. Create Customer Customers can be created through this create customers, choose customer type, fill all the required details, customers can be tagged with text for easy identification, user can use his own custom tags or system defined tags. User can create hierarchies of customers like an organization having multiple unit branches organisation is the root customer whereas branches are the child customer. Customer is also classified into parent & child. Customer information Figure 30: Customer Information screen 25 Step 1: Fill required details. Step 2: Select customer type. Step 3: User can tag customer with text in custom tags. Step 4: Click on save. Contact Information Figure 31: Contact Information Enter Primary & secondary contact information of customer, such as first name, last name, title, phone, E-mail. User defined fields Figure 32: User Defined fields These are the user defined fields Tags User can set tags for customers Figure 33: Tags screen Step 1: Enter custom tag. Step 2: Select tag for day of week by clicking on + button. Step 3: Select tag for day of month by se 26 View Customers Displays all the customers which are visible to user based on conditions like employee customer mapping, employees created by sub ordinates and superiors. Figure 34: View Customer screen List of customers mapped to employee are displayed in this screen. User can filter customers by applying filters from left pane. Filters include customer id, customer name, customer phone, customer primary contact, customer primary email and customer address. Enter filter values and click on apply for applying filters, click on reset to clear all filters. Import Customers This is used to import customers in bulk. Editing or adding new customers in bulk is possible through this feature. Helpful text for importing customers is displayed in the right pane. Figure 35: Import Customers Manage customer fields This is used to manage customer fields, manage in the sense making fields mandatory or unique etc. User can customize customer fields based on his requirement, user can customize both user defined fields and system defined fields. Navigation: Menu bar>>Customers>>Manage Customer Fields 27 Figure 36: Manage Customer Fields Manage system defined fields User can manage system defined fields, manage in the sense user can edit system defined fields and can make fields mandatory or un mandatory and can change uniqueness of fields. Figure 37: Manage system defined fields Step 1: Select required fields by selecting checkboxes. Step 2: Click on save to reflect selected fields. Manage user defined fields User can manage user defined fields, manage in the sense user can create or edit fields as per requirement. 28 Figure 38: Manage user defined fields Step 1: Add fields/Modify fields as per requirement. Step 2: Click on save to reflect fields. View customer details User can view customer details by clicking on customer name. Figure 39: Customer details screen Click on required section to view those particular details of customer. User can Edit, delete, lock, add activity to customer and can view employees mapped to customer. User can also view mapped employee to the customer by clicking on respective buttons. Import Customer Status The status of bulk uploading customers can be seen here. Whether the entire employees are uploaded or not status can be checked here. Navigation: Admin>>Customers>>Import Customer Status Customer Types User can create customer types, user can select colour for type so customers who belongs to this type will appear in selected colour on map when locating customers on map. 29 Navigation: Admin>>Customer>>Customer Types Figure 40: List of customer types Click on Add New Customer Type. Figure 41: New Customer type Step 1: Enter Type Name Step 2: Select colour Step 3: Click on Save Activities Navigation: Admin>>Customer>>Customer Activities User can define Customer activities these activities are Route Plan activities, if it is assigned to employee he can check it in the Mobile app >>Route Plan. Figure 42: Customer Activities 30 User can manage activities, manage in the sense user can delete or view activities, user can delete activities in multiple or individually by selecting the checkbox and click on delete. Click on create to create new customer activity. User can filter activities by applying filters from left pane, filters include activity name, Enter filter values and click on apply for applying filters, click on reset to clear all filters. Figure 43: Create Customer Activity Step 1: Enter Activity name Step 2: Select the form Step 3: Click on Save Note: Only the forms with Customer Field type will appear in the dropdown. Forms Forms generally represent the gathering of information. Figure 44: Forms list screen By default forms of all templates are displayed in this screen, user can filter forms by applying filters from left pane. Filter set include Form templates list, filled by, filled between, modified by, modified between. User can delete or reassign forms by selecting the forms and by clicking on corresponding buttons. User can create new form template by clicking on “Create Form Template”. All published form templates are displayed in the right pane. User can view/add forms of a template by clicking on view/Add button. User 31 can also search for form templates by clicking on by entering form template name in Search bar which is in right pane. On clicking gear icon user will be navigated to form templates list screen Forms Map View User can view the location of filled forms, Figure 45: Forms Map View Select form by selecting the check box user can also select/unselect all forms by selecting check boxes which at header position beside form search bar, in the same wise user can also select/unselect all employees by selecting checkboxes which are at top header position beside employee search bar. Form filled location is displayed on map and fields which are filled are displayed below map, if location is not captured for form then no location would be shown on map. Form Templates User can create new form template or can use the existing template. Navigation: Menu bar>>Forms>> Gear icon 32 Figure 46: Form Template screen Form templates list is shown in this screen, user can apply filters from left pane, Filters set include title, status, published, created by, created between, Enter filter values and click on apply for applying filters, click on reset to clear all filters. There are 2 Options to create form template. User can create a new template or can create from an existing template. Create blank form Template Click on create blank Form Template Figure 47: Create New Form template Step 1: Enter the Title. Step 2: Click on Add Field for adding fields. Step 3: Enter field name and select field type etc. Step 4: Click on Save to save the form template. 33 User can delete the field by clicking on delete mark. There are certain actions that can be performed on field in a form they are Computed/Default, Barcode, Required, Advanced. Pages: A form can have one more pages. It means that in the mobile app, each page appears as a tab. This is more suited for lengthy forms or if your form needs to have data segregated properly based on business rules. Sections: Sections is used for grouping similar data together. Section is like a mini form. A section can have one more fields and can be made repeatable. This is best used in the case of an invoice form where we would want to capture all items for a single invoice. You could create a section called items and add fields like item name, description, quantity, price per unit and amount to a section. Now this section can be made repeatable to let users add multiple items to the same invoice. Computed field: The use of a computed field is to have it calculate basic arithmetic on numeric fields. For example, in the invoice case above, the formula for the amount will be price per unit X quantity. There could be another field in which you would want to capture what the total amount for the invoice is (ex. Payable amount). This can be done using the SUM function. The formula for this would be SUM (price per unit X quantity). This will add the amount values of each item added in the invoice and give you the result. Computed fields cannot be edited. They are solely derived from their formula. Barcode: If user needs a bar code for the field then set barcode to YES. Required: If the field in the form or list is mandatory then set required to YES. Visibility Restriction: Whether a field and its values should be not visible to certain employee groups. Default is none. (All employees can view that form). Edit Restriction: Whether value of a field cannot be edited by certain employee groups. Default is none (employees who have view permission can view form and can modify it if they have modify form permission). Visibility Dependency: Whether this field needs to be hidden/disabled based on values in other fields. Values Filter: When the value in a field dictates the values in other list fields. Note: This feature is available only for Lists. Ex: If the mode of transport is a car, then another question that should ask users is what manufacturer do they prefer? (Nissan, Ford, Maruthi and Hyundai, etc.) Note: If user wants to use the form he has to publish the form, set published to Yes. Create from Existing template Click on create new from pre-defined Template 34 Figure 48: Create From Existing Step 1: Click on + button Step 2: A popup appears change the name of the form and click on Create Now the form is created, check it in the form templates now user can customize the fields in it. Form Template Helpful Actions When a form template is saved it shows helpful next actions to perform actions on form template. By clicking on “Go back to form template screen”, user will be navigated to form templates list screen. Figure 49: Form template next actions screen Actions that can be performed on Form Template Below listed are the actions that can be performed on a form template. 35 Figure 50: Actions on form template 1. View 2. View Form submission 3. Follow up Job/Work 4. Mobile Print Template 5. Withdraw. 6. Edit 7. Open to customer 8. Employee Group 9. Email to Group 10. Manage Lists 11. Print Template 12. Payment Configuration 13. Assign Work Flow 14. Manage external Data source View To view form, click on form title. View Form Submission It displays the list for number of times the form is filled for. Follow up Job/Work This creates the follow up for job/work. To create a follow up the form must have date field type 36 assigned to form field name. Figure 51:Follow up Job/work Step 1: Select follow up type to work Step 2: Select the checkbox to create follow up for the work Step 3: Select the template for which follow up has to be created Step 4: Select the appropriate form fields corresponding to work fields Step 5: Finally click on save Step 6: Follow up to job can be done when selected job. Mobile Print Template It is used to set the mobile format in which form can be downloaded (Forms>>Click on form id>> click on Save as PDF or Document) now when save as pdf or document is clicked, file will be downloaded in the user defined format instead of default format, this is for mobile format. Withdraw User cannot delete the form he can only withdraw the form so that it can no longer be used. Edit User can edit form fields and settings. Print Template It is used to set the format in which form can be downloaded (Forms>>Click on form id>> click on Save as PDF or Document) now when save as pdf or document is clicked, file will be downloaded in the user defined format instead of default format. Open to Customer By clicking this form will be visible to the customers who are having web panel Account. 37 Employee Group It is used to assign the form the employee group so the form is visible to that employee group only and only that employee group can access the form. Email to Group It is used to Email the form to the employee group. Manage Lists Forms that contains list are shown in this manage list section. Payment configuration This option is available for form templates with currency field, this feature is useful for payment processing, Figure 52: Payment Configuration Step 1: Click on enable payment configuration. Step 2: Select field, only currency fields in template will appear in the dropdown Step 3: Click on save, So when the selected field is filled in a form then payment processing option will be enabled in mobile. Assign Work Flow To assign a workflow first user has to create a work flow. Follow navigation where user can create workflow (admin>>Workflow>>Workflows) and assign it to the form. Manage External Data source This is used to connect Effort with external data source. Add Forms Navigation: Menu bar>>Forms This is used to add forms to Form template. 38 Figure 53: Forms List screen Figure 54: Adding form Enter form details and select assign to if form need to be assigned to employee and click on save. View Form Navigation: Menu bar>>Forms Click on view in right pane 39 Figure 55: Forms screen This displays forms of a particular type that are available to user and user can edit, delete, and export forms. To view form details click on form ID. All fields of form are displayed in column wise. User can filter forms by applying filters from left pane. Filter set include form fields, filled by, modified by, filled between, modified between, etc. Figure 56: View Forms of a template Add Form Click on add form for adding form to the template. Manage Columns User can select which columns to be visible and which columns to be invisible. Show Form Template When clicked navigates user to view form template screen. 40 Import Forms Bulk forms can be uploaded in a single go. Navigation: Menu-bar>>Forms Figure 57: Import Forms Step 1: Download the Template. Step 2: Fill the template and save it. Step 3: Click on choose file to choose the file. Step 4: Click on upload to upload the file. Lists List is a field type, user can add multiple values to a list. Lists acts as a dropdown when used in forms and works. Navigation: Admin>>Form>>List Figure 58: List screen All list templates are displayed in this screen. User can filter list templates by applying filters from left pane. Filter set include title, status. Enter filter values and click on apply for applying filters, click on reset to clear all filters. 41 Create List Figure 59: Create List screen Step 1: Set Title. Step 2: Click on Add Field. Step 3: Enter the Field label, select the data type. Step 4: Click on Save. Note: Only published forms can be used. Actions on list Following are the actions that can be performed on list Figure 60: Actions on List 1. View 2. Click to get all lists to sync 3. View items 4. Withdraw 5. View Items 6. Create New Items 42 7. Map Items View Click on list title to displays list fields. Click to get all list sync It syncs all the list items. View Items It is used to check List items. Withdraw Forms which are withdrawn cannot be used any longer. Create new list It is used to add items to the list. Import list Navigation: Admin>>Form>>Import List Bulk List can be imported in a single go. Figure 61: Import List Step 1: Download the template. Step 2: Fill the details in the template and save it. Step 3: Click on choose file to choose the file. Step 4: Click on upload to upload it. Import List Status Navigation: Configure>>Form>>Import List Status. Import list's status is shown here, while bulk uploading the status can be checked here whether Import list status is successful or not. 43 Jobs Jobs are tasks that need to be performed by your field employees in their field visits to customer, deliver an item, get feedback, take a survey and in a lot more cases. Each Job can be further sequenced into a set of sub tasks that help the employee see it as a checklist of items to be done before he/she can complete the main task at hand. Figure 62: Jobs list screen Jobs of all types are displayed, user can filter jobs by applying filters from left pane, filter set include job types, priority, status, time, when selected manually specify under time date fields will appear, title, employee name, un assigned jobs, customer, address. Enter filter values and click on apply for applying filters, click on reset to clear all filters. User can also filter jobs based on today, delayed, upcoming, completed, by selecting Dropdown in header. User can reassign, delete, export jobs by selecting the jobs and clicking on appropriate buttons. Job invitations can be seen by clicking on View all job invitations. Create Job This explains how to create a job. 44 Figure 63: Create Job screen Step 1: Fill all the required details. Step 2: Click on Save. Import Jobs Bulk jobs can be created at once. Figure 64: Import Jobs Step 1: Download template. Step 2: Fill required fields in the template. Step 3: Upload the document. Job Invitation Job invitations can be sent to employee group, any member of the group can accept invitation. Then job gets created, job is visible only to the employee who accepts job invitation. List of job invitation are displayed. User can filter job invitations by applying filters from left pane. Job types are displayed in the right pane, click on add in right pane to add job for that type user can also search job types using the search bar in right pane. Click on Gear icon to view List of job types. 45 Figure 65: Job Invitation list User can also create new job invitation from create Job option. Create Job Invitation Figure 66: Create Job Invitation Step 1: Fill all the required Fields. Step 2: Enter the pin code you have set for creating the employee group. Step 3: Click on save. Import Job & Form Jobs and forms can be imported by this. 46 Figure 67: Import Job & Form Step 1: Download the template. Step 2: Fill the details. Step 3: Upload the document. Job Settings Navigation: Menu-bar >>Forms Click on gear icon in forms screen to go to job settings, before creating a job its type has to be created and also it's stages has to be created, job type defines what type of job to be performed and job stages defines tasks to be done during the completion of the job. Figure 68: Job Settings Create a job type: Job type can be created in two ways 1) By creating a new job type. 2) Editing the already existing job type. Create a job Stage: Job stage can also be created in two ways. 1) By creating a new job stage. 2) Editing the already existing job stage. Note: It is preferable to create a job stage before you create a job type so that you can use the job stage in your job type. Creating a Job Type: 47 Figure 69: Create Job Type Step 1: Enter the Name Field. Step 2: Select the stage you want to have in your job type this can be done by selecting the stage in left box and click right arrow button. Step 3: To remove the stage select the stage in right column box and click left arrow button. Step 4: Click on save to create job type. User can create follow up job for job type, select check box for follow up and select job type. Editing Job Type Figure 70: Editing Job Type Step 1: Click on edit button in job type. Step 2: Select the required states by selecting forms and press right arrow mark button. Step 3: After completion click on save. Step 4: Select create follow up job if required. Step 5: If create follow up job type is selected, then select the follow up job type. 48 Step 6: Finally click on save. User can create follow up job for job type. Creating a new job stage User can create a new job stage Click on add stage. Figure 71: Creating New Job stage Step 1: Enter Job Type. Step 2: Create your own form template or select from the dropdown. Step 3: Fill all the details and select the stage you created. Step 4: Select “enable form auto fill from job” check box for auto populating forms fields data to job. Step 5: Click on save. Edit Job Stage 49 Figure 72: Edit Job Stage Step 1: Click on edit stage Step 2: Select the Form from the form dropdown Step 3: Select “enable form auto fill from job” check box for auto populating forms fields data to job Step 4: Click on save Form Auto Fill: If enabled corresponding form fields are filled with the job fields, in the sense job fields will be copied to form fields. Step 1: Select the type in the drop down in Job fields section against the form fields Step 2: Click on save or update button Area Groups User can create a job and can assign it to an Employee Group. Employee group is assigned with a pin code. Navigation: Admin>>Jobs>>Area Group Figure 73: list of Area Groups List of area groups are displayed in the screen, click on add new area group. 50 Figure 74: Create Area group Step 1: Enter group Name. Step 2: Select group by clicking on Right Arrow. Step 3: Enter strictly valid pin code. Step 4: Click on Add. Step 5: Click on Save. In Create job>> use this pin code by unselecting address same as customer, this job is now sent to the employee group anyone from the group can accept the job. Dispatch Navigation: Menu bar>>Dispatch All unassigned jobs and works are shown here. Unassigned jobs/works for the day can be assigned to the employees. Employees can be filtered based on city by selecting check box against filter by city and employees who are in leave on the day are shown in red color. User can also include completed jobs and works by selecting checkbox against them. User can drag & drop jobs/works to the time slot against employees, job/work will automatically assign to employee in the dropped time slot. Option to create new job/work is available in left pane. User can also search for employees by using the search bar above employees list in left pane. 51 Figure 75: Dispatch screen Auto dispatch All unassigned jobs are shown here. Unassigned jobs can be assigned to employees. Route to jobs from employee home/work location can be optimized by optimize route. Navigation: Menu bar >>3 dots >>Auto Dispatch Figure 76: Auto Dispatch Works Generally a work can be defined as a step by step procedure for completing a task. Here also same wise, as there will be certain activities to be performed in a step by step manner to complete the work, these activities are defined by the user. 52 Figure 77: Works screen All works & work templates are displayed in this screen, user can filter works by applying filters from left pane. Filter set include work template list, priority, status, starts between, ends between and work template name. User can delete or reassign works by selecting works and clicking on appropriate action button. User can select works for today, upcoming, completed, rejected, delayed. List of all work templates are visible in right pane, user can add/view work of a template. When clicked on gear icon in right pane user will be navigated to list of work templates screen. User can create work template using “Create Work Template” option. Creating a work Template The following below Content describes you how to create a work Template. Navigation: Menu bar>>Works>>Create New Template. Figure 78: Creating work Template Step 1: Enter Work Name and Work Description fields Step 2: Click on Add Action, to add the Activities or Actions that need to be performed in this work Step 3: Enter data in row-wise order, Action title is mandatory 53 Step 4: Select the Form template from dropdown Step 5: Click on Delete row for deleting the particular row Step 6: Finally save the work by clicking on Save Note: In Form Templates Dropdown, the forms which appear are the forms which, user had already created and published, user can select a form of his wish from the dropdown which is required to complete the work. User can select only a single form at a time, the forms which are selected becomes the Activities. Actions that can be performed on the work Figure 79: Work template actions 1. 2. 3. 4. 5. 6. 7. Edit Edit Work Flow Edit work fields. Employee Mapping. Add Work Attachments. Auto Form Fill. Delete. Edit User can edit the Work Template by clicking on the Edit button. Edit work Flow User can set the order for the forms i.e. what should be next activity for the first form. 54 Figure 80: Manage Work Flow Step 1: Select Starting point by selecting the check box in the start action. This will become the first activity Step 2: Click on Edit mark in Next Actions to set the Next action for the first activity Step 3: At the last action or activity select the checkbox in End Action Create Rule: Advance settings can be done here, visibility etc. Next Process: This is to add another work sheet to this work i.e. to link another work with the current work as a Next Process or Next Activity to the current activity. Edit Work Fields By default system creates a form which contains basic form fields; user can use them or add additional fields. Employee Mapping The works which user has created need to be mapped or to be assigned to an employee or Employee group. Figure 81: Employee Mapping Step 1: Select the Employee group on the left side under available groups Step 2: Click on Right arrow mark, it will be selected 55 Step 3: To Unselect, Select the employee group under Selected groups and click on left arrow button. Step 4: Click on Save. Add Work Attachment User can add attachments for the works, these attachments are forms which were created and published by user. Figure 82: Add Work Attachment Step 1: Select form under Available Form templates and click on right arrow button. Step 2: To unselect, select form under selected form templates and click on left arrow button. Step 3: Click on Save to save the attachments. Auto Form Fill Fill the form fields with the appropriate type. Figure 83: Auto Form Fill Step 1: Click on the Auto form fill button 56 Step 2: Now a form appears, select the corresponding type for each field Delete User can delete the work by selecting work and click on delete button. View User can view work by clicking on the work title. Add Work Navigation: Menu bar>>Works Click on add under work template in right pane. Figure 84: Add Work navigating screen Figure 85: Add Work 57 Fields that are shown here are of default, User can alter these fields by Clicking on Edit Work Fields, this is discussed above in “Edit work fields”. Step 1: Fill all the required fields to create the work Step 2: Select the Customer in the dropdown Step 3: Select the employee to assign the work Step 4: If the address is same as customer address then set address same as customer to Yes Step 5: Select the checkbox if the work is a recurring work Recurring Work Recurring works can be done on Daily and Weekly basis. Figure 86: Recurring Work Step 1: Select whether work to be weekly or monthly. Step 2: Select date and no of times work to be recurring. View Work To View created works. Figure 87: View Work navigating screen 58 Figure 88: View Works Submitted works can be seen here in the above figure, option to import works and create work template are available at top right of the screen, user can filter works by applying filters from left pane and also user can select status of works such as today’s works, completed works, delayed work, upcoming work, rejected work . Import work Bulk works can be uploaded at a single go. Figure 89: Import Work Step 1: Download the Template Step 2: Fill all the required fields Step 3: Upload the file Rejected work Work is usually assigned by user (Manager or back office employee) to field employee or employee group, employee can reject the work. Those rejected works appears in this Rejected works page. Work Template Helpful Actions When a work template is saved it shows helpful next actions to perform actions on work template. By clicking on “Go back to work template screen”, user will be navigated to work templates list 59 screen. Figure 90: Work template next actions screen Route Plan Route Plan is defined as the area of customers for which an employee must visit to complete the job. Purpose of Route Plan is for prioritizing of jobs. All assigned Route Plans are displayed in this screen. Figure 91: Route Plan User can filter route plans by applying filters from left pane, filter set include Route plans lists, status, time and employee name. Enter filter values and click on apply for applying selected filters, click on reset to clear all filters. Option to create and assign route plan are available at top right of middle pane. User can delete or can re-assign route plan to employee, user can also sort routes based on today, delayed, upcoming, rejected, completed. List of route plans are displayed in right pane. User can also search for route plans using search bar in right pane. Click on gear icon to view all route plans. User can view or assign route plan by clicking on corresponding view/assign options available in right pane. Activities of a Route plan A Route Plan should have activities, these activities are performed at the customer location to complete the task assigned to the employee, and these activities are forms that are selected as per the Requirement. 60 Creation of Activities Navigation: Admin>>Customer>>Activities Figure 92: List of activities screen List of activities are displayed in this screen, user can filter activites by applying filter from left pane. Click on create to create activites. Create Activites Click on create button Figure 93: Create activity screen Step 1: Set name for Activity, this is Mandatory field. Step 2: Select Form from the dropdown. Step 3: Click on save. Note: Forms which contain Customer data type are only shown in the dropdown. Creation of a Route plan First in order to use Route plan user has to create a Route plan. Navigation: Menu bar>>Routes>>Plans 61 Figure 94: Create Route plan Step 1: Click on Create. Step 2: Name the Route plan. Step 3: Days required completing the Route Plan. Step 4: Minimum customers to be covered if minimum customer’s condition is not met. Then user cannot complete the route plan. Step 5: User can add any number of customers by clicking on Add Customer. It is preferable to have two or more customers. Step 6: Click on Save the Route Plan. Note: Once Route plan is created user has provision to edit or to remove the Route plan. Assigning Route plan Once a route plan is created it has to be assigned to an employee for completion of it. Navigation: Menu-bar>>Route Plans>> Assign Click on assign. 62 Figure 95: Assign Route Plan Step 1: Select Route plan from dropdown. Step 2: Select Employee to whom Route Plan should be assigned Step 3: Select from date. Step 3: Select the check box if it is a route plan needs to be Recurring Step 4: Select the date and finally click on Assign. User can view route plan by clicking on view route plan, now this Route plan will appear in the employee's mobile app, employee may accept or reject route plan. Locate To track and employee location, and to locate customer on map this feature is useful and Route plans are shown here in the map. Navigation: Menu-bar>>Locate. 63 Figure 96: Locate screen User can track employees locations under him, user can search for employee using search bar in left pane under employees, click on employee to track locations, employees home location is displayed on map if employee home location is under selected radius, option to select radius is at top center of map user can select radius in KMs, user can also search for customer by selecting customer from dropdown. Show Actual Travel: The Distance Travelled by the employee on that particular day is shown in the map with blue line. Show Planned Travel: Planned travel of employee is displayed on the map. Show nearby Employees: Displays the employees who are within the selected range. Show nearby Customers: Customer type can be selected here and searching is done on the basis of customer type. Jobs/works for the selected date are displayed in right pane. When clicked on eye icon job/work details are displayed in new tab. User can filter customers based on name and priority by using filter button. Knowledge base Navigation: Menu bar>>3 dots>> Knowledge base Knowledge base acts as a repository for you to store videos, training content, new product offerings, etc. Each article can be shared with a Group of employees. An article can contain a file, a media item or a pdf file. All the Files and folder which have been uploaded and created are displayed in this screen, user can filter files and folders by applying filters from left pane. User can edit or delete files and 64 folders by selecting the check box and clicking on appropriate buttons. User can download files by clicking on download icon. Figure 97: knowledge Base User can create folder or file by clicking on appropriate button Create Folder Figure 98: Create Folder Step 1: Enter Folder Name. Step 2: Select Employee Group by clicking on employee group under all and click on right arrow button. 65 Step 3: To unselect employee group, click on employee group in selected groups and click on left arrow button. Step 4: Click on add folder button. User can add files and folder inside a folder. Create File Figure 99: Create File Step 1: Enter Title. Step 2: Click on choose file to select file. Step 3: Select Employee Group. Step 4: Select make secure this article checkbox if article needs to be secure. Step 5: Click on share article to share article with employee group. Company Mobile Configurations Settings for Mobile App can be done here. Navigation: Admin>>Company>>Mobile Configurations 66 Customer Settings Figure 100: Customer Settings Adjust the settings as per the requirements and click on Save Location settings & Media settings Figure 101: Location settings & Media settings Adjust the settings as per the requirements and click on Save. 67 Update/Reminder/Limits & App Settings Figure 102: Remainder & App settings Adjust the settings as per the requirements and click on Save. Bluetooth Printer Settings Figure 103: Bluetooth Printer settings Logos Logo is a representation or identification of a company, in this section user can change logo for the company. Navigation: Admin >> Company >> Logos Figure 104: Logo settings 68 Step 1: Click on choose file to choose Web logo Step 2: Click on choose file to choose App logo Step 3: Click on Save Note: Check image dimensions on right pane and upload accordingly. App Configurations User can give desired names and icons to menu items these will reflect for entire web account and mobile app. User can alter form templates names, list templates names and can set order for labels and can give images for icons as per requirement. In other words App configurations are used to alter default menu item labels, icons and ordering of labels. List of all app configurations are displayed in this screen. Navigation: Admin>> Company >> Labels Figure 105: App Configuration list screen User can create new app configuration or can use default app configurations. Click on create app configuration for creating new app configuration. Figure 106: Create App Configuration Step 1: Enter text under singular & plural against the field label which need to be changed. Step 2: Enter order for label, order should be in between 0 – 99. Step 3: Click on choose file against label to change default image and to upload custom image. Step 4: Click on save. 69 Modules Navigation: Admin>> Company >> Modules Figure 107: Modules Step 1: Select required module. Step 2: Click on save. Step 3: These saved modules will reflect in works. Mobile Reports This is to give provision for the mobile app user to check for reports like, employee activity summary report, Today’s activity report, Distance travelled report. Navigation: Admin >> Company >>Mobile Reports Figure 108: Mobile Reports Select the reports which should be available for field employee to check in mobile app, these selected reports will appear in mobile app under reports. Settings Navigation: Admin>> Company >>Settings This is used for managing settings of company. 70 Figure 109: Settings Select details as per the requirement and click on save. Work Flows Work flow can be defined here. Manage Roles Roles can be defined here. User can add or delete roles. Highest role starts with digit 1. Navigation: Admin>>Workflow>>Manage roles Figure 110: Role Definitions 71 Step 1: Click on add role to define the role. Step 2: Click on Save. Workflows Work flow list is displayed here. Navigation: Admin>>Workflow>>Workflows Click on Create Work Flow Figure 111: List of Work Flows screen Figure 112: Create Workflow Step 1: Enter the title. Step 2: Enter the Approval level name. Types There are 3 types 1) Role based 2) Employee Group Based 3) Hierarchy Based 72 Role based Approval Flow Mode 1) Everyone in hierarchy up to final approver. 2) Direct to final Approver. 3) Direct After Immediate Manager. Everyone in Hierarchy up to final approver Everyone in hierarchy has to approve in this. Direct to final Approver Only the final Approver has to approve Direct After Immediate manager Only the reporting manager and the immediate manager have to approve. Employee Group Based Any one of them in the Employee group has to accept. Hierarchy Based Approval Flow Mode 1) Only Immediate Manager 2) Every One in hierarchy Up to top level Click on save to save the work flow Note: User accepts the approvals from overflow menu (3 dots) in menu bar, user can accept or reject the approval, and approval status is displayed in “forms>>Approvals” in mobile app. Approval settings User can edit workflow and can alter the status of the work flow. Navigation: Admin>>Workflow>>Approval settings 73 Figure 113:Enable/Disable Workflow After editing click on save to save the work flow. Reports Various reports that are available to user are displayed here reports like customer reports, employee reports, form reports, job reports, location reports, audits, misc reports, my reports, route plan reports etc can be checked here. User can also search for reports using search bar at top right position. Figure 114: Reports Favourite Reports Reports can be made favourite by clicking on the star mark. Frequently accessed reports can be made as favourite for ease of access. These favourite reports are available under quick links in home screen, configure screen and in monitor under favourite reports. 74 Figure 115: Favourite Report Step 1: click on star mark to make the Report as Favourite To un favourite any report click on the same star mark Figure 116: UnFavourite Click on the favourite mark to unfavourite the report My Reports Generates report for form activities. View Form Activity Report This generates the form report activity of the form. This feature is only available to manager who is directly reporting to Root Person. Report can be generated in Xls. Navigation: Reports>>My Reports>>View Form Activity Report 75 Figure 117: Form Activity Report Step 1: Select form from dropdown Step 2: Click on employee in left pane and click on right arrow to select employee Step 3: To unselect, Click on employee in right pane and click on left arrow button Step 4: Select date range Step 5: Click on load Job Reports Job Reports generates various types of reports like customer job report, employee job report, Job report, Job progress report, job TAT report, and tag report. Customer Job Report Customer job report gives details about the list of jobs that were done to the Customer in between a selected date range. Report can be generated into 4 formats PDF, HTML, CSV, and EXCEL. Data is available for last 6 months from current date. Navigation: Reports >> Job Reports >> Customer Job Report 76 Figure 118: Customer Job Report Step 1: Select customer Step 2: Select from and to date between which report has to be generated Step 3: Select format type Step 4: Click on Load Employee Job Report Employee job report list out's the number of jobs assigned to an employee in a time interval. Report can be generated into 4 formats PDF, HTML, CSV and EXCEL. Data is available for last 6 months from current date. Navigation: Report>>Job Reports>>Employee Job Report Figure 119:Employee Job Report Step 1: Select employee Step 2: Select date range in which the report has to be generated. Step 3: Select format 77 Step 4: Click on load Job Report This generates all the jobs that were created and assigned to employees between selected time ranges. Report can be generated into 4 formats PDF, HTML, CSV and Xls. Data is available for last 6 months from current date. Navigation: Reports>>Job Reports>> Job Report Step 1: Select the form and to date range Step 2: Select the format type Step 3: Click on Load Figure 120: Job Report Job Progress Report This generates the progress of the jobs that are assigned to an employee. Report can be generated into 4 formats PDF, HTML, CSV, and EXCEL. Data is available for last 6 months from current date. Navigation: Reports>>Job Reports>> Job Progress Report 78 Figure 121: Job Progress Report Step 1: Select employees by selecting them in left pane and click on right arrow button Step 2: User can remove employees by selecting them in right pane and click on left arrow button Step 3: User can search employees by using search bar in both panes Step 4: Select date range Step 5: Select format type in which report has to be generated in Step 5: Click on Load Job TAT Report This generates the time difference between the job end time and completion time. Report is generated in EXCEL format. Data is available for last 6 months from current date. Navigation: Reports>>Job Reports>> Job TAT Report Figure 122: Job TAT Report Step 1: Select Form 79 Step 2: Click on employee in left pane and click on right arrow to select employee Step 3: Select date range Step 4: Click on load Tag Report This is used to tag employee with customer tags, report is generated for tagged employee. Report can be generated in 2 formats HTML, EXCEL. Navigation: Reports>>Job Reports>>Tag Report Figure 123: Tag Report Step 1: Click on employee in left pane and click on right arrow to select employee Step 2: Select tag by clicking in tag field Step 3: Select the date Step 4: Select the format type Step 5: Click on Load Location Reports Location reports are used to track the employee locations and managing his locations. Manage Invalid Locations Both Valid and Invalid Locations can be managed here. Navigation: Reports>>Location Reports>>Manage Invalid Locations. 80 Figure 124: Manage Invalid Locations Step 1: Select employee by entering first 3 characters of employee Step 2: Select date Step 3: Select date range Step 4: Select Location Type Step 5: Click on Load Figure 125: Managing Locations If location is invalid click on YES or else if location is valid click on NO. Time Spent At Customers Report This generates the report for time spent by the Employee at customer location. Report can be generated in 4 formats HTML, CSV, Xls and PDF. Navigation: Reports>>Location Reports>>Time Spent at customers report 81 Figure 126: Time spent at customer Report Step 1: Select Employee by entering first 3 characters of employee name Step 2: Select customer by entering first 3 characters of customer name Step 3: Select date range Step 4: Select Location source preferably Best Pick from the drop down Step 5: Select report format type Step 6: Click on Load to generate report Travel Overview Report This generates the total distance travelled by an employee in a day, report is generated in Xls. Navigation: Report>>Location Reports>>Travel overview report Figure 127: Travel Overview Report Step 1: Click on employee in left pane and click on right arrow to select employee Step 2: Select customer by entering first 3 characters of employee 82 Step 3: Select tracks and check in- check out as required Step 4: Select date for which report has to be generated Step 5: Select location source as Best Pick preferably Step 6: Select minimum time spent at location Step 7: Click on load to Generate report Sign In/Sign Out Report This generates report for Sign-in/Sign-out of employee for the selected day. Navigation: Reports>>Location Reports>>Sign-in /Sign-out report Figure 128: Sign In/Sign Out Report Step 1: Click on employee in left pane and click on right arrow to select employee Step 2: To unselect, Click on employee in right pane and click on left arrow button Step 3: Select the date, for which report has to be generated Step 4: Click on Load Multi Day Sign-In/Sign-Out Report This generates report for attendance of employee in the selected date range. Report is generated in Xls only. Navigation: Report>>Location Reports>>Multiday Sign-in /Sign-out report 83 Figure 129: Multiday signIn/Sign Out Report Step 1: Click on employee in left pane and click on right arrow to select employee Step 2: To unselect, Click on employee in right pane and click on left arrow button Step 3: Select the date range Step 4: Click on Export to xls Track Summary Report This generates track summary report for the employee’s location, time spent at customer, distance travelled etc. Report can be generated in 4 formats HTML, PDF, CSV, and Xls. Navigation: Report>>Location Reports>>Track Summary Report Figure 130: Track Summary Report Step 1: Select employee by entering first 3 letters of employee name. Step 2: Select customer type 84 Step 3: Select date range Step 4: Select time Spent Step 5: Select location Source Step 6: Select report format type Day Wise Distance Travelled Report This generates report for day wise distance travelled by employees. Report can be generated in 4 formats HTML, PDF, Xls and CSV. Navigation: Reports>>Location Reports>>Day Wise Distance Travelled Report. Figure 131: Day wise distance travelled Report Step 1: Click on employee in left pane and click on right arrow to select employee Step 2: To unselect, Click on employee in right pane and click on left arrow button Step 3: Select date range Step 4: Select location Source Step 5: Select report Format type Step 6: Click on Load Employee Wise Distance Travelled Report This generates report for distance travelled by individual employees. Report is generated in Xls. Navigation: Reports>>Location Reports>>Employee Wise Distance Travelled Report. 85 Figure 132: Employee Wise distance travelled report Step 1: Click on employee in left pane and click on right arrow to select employee Step 2: To unselect, Click on employee in right pane and click on left arrow button Step 3: Select date range Step 4: Select location source as best pick Step 5: Click on load to generate report Detail Tracking Report This generates the report of employee's tracking details like location with latitude and longitude, battery level, how he is connected to internet, etc. Report is generated for only the selected date Report can be generated in 2 formats HTML and Xls. Navigation: Report>>Location Reports>>Detail Tracking Report. Figure 133: Detail Tracking Report Step 1: Select employee by entering first 3 characters of employee 86 Step 2: Select date Step 3: Select location source as best pick Step 4: Select load type Step 5: Click on load to generate report Last Known Locations Report This generates the last known locations report for all employees. Report can be generated in HTML, CSV, PDF, and Xls. Navigation: Report>>Location Reports>>Last Known locations Report. Figure 134: Last Known Locations Report Step 1: Select the load report Format type Step 2: Click on load Customer Check in - Checkout Report This generates the customers check in check out report. Employee on reaching to customer and when about to start the customer work will click on check in the mobile app under customers, after completion of that work he will click on check out, by this user can know how much time employee spend in customer location and how much time employee took to complete the job. Report can be generated in 3 formats HTML, PDF, Xls. Navigation: Reports>>Location Reports>>Customer check in - Checkout Report. 87 Figure 135: Customer Check in check out report Step 1: Click on employee in left pane and click on right arrow to select employee Step 2: To unselect, Click on employee in right pane and click on left arrow button Step 3: Select date range Step 4: Select Load Report format Step 5: Click on load to generate report Employee Attendance Report Employee Attendance details are generated punch- In Punch out time etc. Navigation: Reports>>Location Reports>>Employee Attendance Report. Figure 136: Employee Attendance Report 88 Step 1: Click on employee in left pane and click on right arrow to select employee Step 2: To unselect, Click on employee in right pane and click on left arrow button Step 3: Select required field at “At” Step 4: Select date range Step 5: Select location source preferably best pick Step 6: Select load type Step 7: Click on Load to generate report Customer Reports Reports related to customer activities are described here. Locked customer reports This is to check for the locked customers. Employees can lock customers those locked customers can be seen here under in locked customers. Report of Locked customers report can be generated in 2 formats HTML and Excel. Navigation: Reports>>Customer Reports>>Locked Customers Report Figure 137: Locked customer Report Step 1: Select the employee by clicking on employee and click on right arrow button. Step 2: Select the format which in report has to be generate the report 89 Step 3: Click on Load New Customer Report Report for New Customers is generated here. Report can be generated in 2 formats HTML and Xls. Navigation: Reports>>Customers Report>>New Customer Report Figure 138: New Customer Report Step 1: Select the Date Range Step 2: Select the Report Type to be generated in Step 3: Click on Load Customer Activity Report This generates the report for number of activities done for customer by employees. Report can be generated in 2 formats HTML and Xls. Navigation: Reports>>Customer Reports>> Customer Activity Report. Figure 139: Customer Activity Report 90 Step 1: Select the Form. Step 2: Select the date range. Step 3: Select the format in which report has to be generated. Step 4: Click on Load. Customer Status Report This generates report for status of customer whether the customer is active or Inactive. Report can be generated in 4 types HTML, CSV, PDF and Xls. Navigation: Reports>>Customer reports>> Customer Status Report. Figure 140: Customer Status Report Step 1: Select state, whether Active or Inactive customers Step 2: Select period. Step 3: Select report type in which it has to be generated in. Step 4: Click on load to generate report. Work Report It displays the work fields’ data of the selected template in the selected date range. Report can be generated in 4 formats PDF, CSV, EXCEL and HTML. Navigation: Reports>>Works>>Work Report 91 Figure 141: Work report Step 1: Select work template from dropdown Step 2: Select date range Step 3: Select report type in which report has to be generated Step 4: Click on load Form Reports Form reports are used to generate various form reports like Form report, Saved search report. Form Report Form report loads the field values of the selected form. The report can be generated in 3 formats like PDF, EXCEL, and HTML. Navigation: Reports>>Form Reports>> Form Report Figure 142: Form Report Step 1: Select form template Step 2: Fill details Step 3: Select format type in which report to be generated in 92 Step 4: Click on load Bulk Print Download Navigation: Reports>>Form Reports >>Form Report This is used to download form field values in bulk. Admin will send a mail to user's registered mail. Figure 143: Bulk Print Download Step 1: Select form template Step 2: Select date Step 3: Select format type Step 4: Click on “Request for form bulk download” Route Plan Report Navigation: Reports>> Route Plan Report This generates the progress of Route Plan Report for selected Employees. Report can be generated in 4 formats HTML, CSV, PDF, and Xls. Figure 144: Route Plan Report 93 Step 1: Click on employee in left pane and click on right arrow to select employee Step 2: To unselect, Click on employee in right pane and click on left arrow button Step 3: Select Routes from dropdown Step 4: Select date Range Step 5: Select Load report format type Day Plan Report Navigation: Reports>> Day Plan Report This generates report for day plan created by employee for specific date. Report can be generated in HTML or XLS. Figure 145: Day Plan Report Step 1: Select Employee By clicking on employee and click on right arrow button. Step 2: Enter date and select report format Step 3: Click on load to pull report data. Employee Reports This Generates the Reports of Employee Activities. Leave Quota Report This generates the leave details of employees. Report can be generated in 4 formats HTML, CSV, PDF and Xls. Navigation: Reports>>Employee Reports>>Leave Quota Report 94 Figure 146: Leave Quota Report Step 1: Select the load report format type Step 2: Click on Load Employee Leave Report This generates the leave report of an employee in selected date range. Report can be generated in 4 formats CSV, HTML, PDF, and Xls. Navigation: Reports>>Employee Reports>> Employee Leave report. Figure 147: Employee Leave Report Step 1: Select Employee. Step 2: Select Date Range. Step 3: Select the load report Format. Step 4: Click on Load. Employee Activity Report This generates the Hour wise Employee Activity report. It generates the individual employee activity report in a given time field. Report is generated in Xls. Navigation: Reports>>Employee Reports>> Employee Activity Report 95 Figure 148:Route And Activity Report Step 1: Select employee Step 2: Select date range Step 3: Select Location source preferably best pick Step 4: Click on Load to generate report Employee Activity Summary Report This generates the Activities done by the Employees. Activities like forms, works, routes etc. Report can be generated in 2 formats HTML, Xls. Navigation: Reports>>Employee Reports>> Employee Activity Summary. Figure 149: Employee Activity summary report 96 Web User Login Report Navigation: Reports>>Employee Reports>>Web user login Report Figure 150: Web User Login Report Device Event logs This gives details about the mobile device such as number of calls made/received, messages sent/received, GPS status On/Off, Network status On/Off, mode of internet using etc. user can filters device events logs by applying filters from left pane, filters include event types, from and to date, Employee name. Enter filter values and click on apply for applying filters, click on reset to clear all filters. Navigation: Reports>>Employee Reports>>Device Event logs Figure 151: Device Event logs 97 Territory Territory is as an area selected by the user. Time Spent In Territory It generates the report for the duration of employee in the Assigned Territory Report can be generated into 4 formats HTML, CSV, PDF, and Xls. First a territory has to be created and should be assigned to employee's refer territory mapping under employee's section. Navigation: Reports>>Territory>>Time Spent In Territory. Figure 152: Time spent in Territory report Step 1: Select employee by entering first 3 characters of employee name. Step 2: Select date Range Step 3: Select report load type Step 4: Click on load, Report will be generated Time Not spent in Territory It generates the Report for the duration of employee not spent in the Assigned Territory. Report can be generated in 4 formats HTML, CSV, PDF, and Xls. Navigation: Reports>>Territory>>Time Not Spent In Territory. Figure 153: Time not spent in territory Step 1: Select employee by entering first 3 characters of employee name. Step 2: Select date range Step 3: Select report type in which report has to be generated 98 Step 4: Click on load to generate report Claims User submits claims on behalf of the employees he can accept the claim or reject the claim. Submit Navigation: Menu-bar>>3 dots>>Claims>> Click on submit claims User can submit claims on behalf of employees Figure 154: Submit Step 1: Select employee from dropdown Step 2: Select from & to date Step 3: Click on view Distance travelled by employee for each date is displayed, select mode of transport, user can also delete submission by clicking on delete icon under actions. Mode of transport (Bike, car, etc) is added under Admin>>Claims>>settings. Approve Navigation: Reports>>Claims >>Approve User can approve or reject submitted claims 99 Figure 155: Approve Claims Step 1: Select employee Step 2: Select date range Step 3: Click on view List of claims that needs actions appears, user can approve or reject by selecting on appropriate check box, and user can also enter comments for the approval and click on save to reflect changes. Schedule Reports These Reports are sent to registered mail on the basis of Daily, Weekly and Monthly. Report can be of PDF or Excel Format. Navigation: Reports>>Schedule Reports>> Schedule Report Figure 156: schedule Reports Step 1: Select The Check box as of user requirement Step 2: Select the Report Format type Step 3: Click on Save Audits Changes/modifications that are done on employee, customers, jobs, job invitations, forms, form templates and lists etc can be checked here. 100 Employee Audit This generates report for changes/modifications done on the employee. Report can be loaded in HTML. Navigation: Reports>>Audits>>Employee Audits Figure 157: Employee Audit Step 1: Select employee by entering first 3 characters of employee Step 2: Select modified by (Employee) by entering first 3 characters of employee Step 3: Select date Range Step 4: Click on load Customer Audit This generates report for changes/modifications done on customers, report can be loaded in HTML. Navigation: Reports>>Audits>>Customer Audits. Figure 158: Customer Audit Step 1: Select Customer by entering first 3 characters of customer name Step 2: Select modified by (Employee), by entering first 3 characters of customer name Step 3: Select date range Step 4: Click on Load 101 Job Audits This generates report for changes/modifications that are done on jobs. Report can be loaded in HTML. Navigation: Reports>> Audits>>Job Audits Figure 159: Job Audits Step 1: Select employee by entering first 3 characters of employee name Step 2: Select modified by (Employee), by entering first 3 characters of employee name Step 3: Select date range Step 4: Click on load Job Invitation Audit This generates report for changes/modifications done on job invitations. Report can be loaded in HTML. Navigation: Reports>>Audits>>Job Invitation Audits Figure 160: Job Invitation Audit Step 1: Select employee by entering first 3 characters of employee name Step 2: Select modified by (Employee), by entering first 3 characters of employee name Step 3: Select date Range 102 Step 4: Click on load Form Audit This generates report for changes/modifications done on forms. Report can loaded in HTML. Navigation: Reports>>Audits>>Form Audits Figure 161: Form Audit Step 1: Select Form from dropdown Step 2: Select modified by (Employee), by entering first 3 characters of employee name Step 3: Select date Range Step 4: Click on load Form Template Audit This generates report for changes/modifications done on form templates. Report can be loaded in HTML. Navigation: Reports>>Audits>>Form Template Audit Figure 162: Form Template Audit Step 1: Select Form from dropdown Step 2: Select Modified by (Employee), by entering first 3 characters of employee name Step 3: Select Date Range 103 Step 4: Click on Load List Audit This generates report for changes/modifications done on lists. Report can be loaded in HTML. Navigation: Reports>>Audits>>List Audit. Figure 163: list Audit Step 1: Select list from dropdown Step 2: Select modified by (employee), by entering first 3 characters of employee name Step 3: Select date range Step 4: Click on load Calendars This module gives flexibility to define user specific calendars. Create Calendar This is used to create user defined calendar and to set the working hours of each day etc. This calendar can be selected while creating employee, if user want to use this created calendar then select this calendar in place of “Default Calendar” while creating employee. Navigation: Admin>>Calendars>>Create Calendar 104 Figure 164: Create Calendar Step 1: Enter Title Step 2: Enter description Step 3: Click on Add, to set Title, Start Time and End Time Step 4: Click on delete to delete timings for the day Step 5: When finished click on Save Calendar This is used to set Special days and to alter the behaviour of default calendar. Navigation: Admin>>Calendars>>Calendar Figure 165: Calendar Step 1: Click add new calendar to add new calendar Step 2: Click on Manage working hour’s button (watch mark) to alter the behaviour of default calendar Step 3: Click on Manage holiday and special day’s button (chair mark) to set any special days or holidays My Calendar The purpose of this is to view the calendar details, like its working hours and holidays and special days. 105 Navigation: Admin>>Calendars>>My Calendar Figure 166: My Calendar User can view the details of the calendar in the above Figure. My Accounts Managing account settings Password This is used to reset (or) change password of user. Navigation: Admin>>My Account and Invoice>>Passwords Figure 167: Change Password Step 1: Enter old password. Step 2: Enter new password. 106 Step 3: Confirm new password. Step 4: Click on Save. Invoice Recipients User can configure who can receive invoice recipients by entering their E-Mail Address Navigation: Admin>>My Account and Invoice>>Invoice Recipients. Figure 168: Invoice Recipients Step 1: Enter the mail Id Step 2: Click on Save Invoice Navigation: Admin>>My Account and Invoice>>Invoice Recipients It shows details about total amount to be paid, tax, due date, status, etc. Notifications Navigation: Admin>>My Account and Invoice>>Notifications This schedules the Notifications and alerts the users for selected activities. List of all notifications are displayed in this screen, user can delete selected notifications, user can filter notifications by applying filters from left pane, filter set includes event types, and status, Name, select filter set and click on apply to filter notifications, click on reset to clear all filters. Click on Schedule New Notification to create new notification Figure 169: All Schedule Notification 107 Figure 170: Create Notification Step 1: Select Notification Quality Step 2: Select rule type Step 3: Enter name Step 4: Select when Notification has to fire Rule type is divided 2 categories Time based Event Based Time Based If Time based is selected notify when details can be observed here below 1) Unassigned job is about to Start. 2) Job Not completed within End time. 3) Employees not syncing 4) Employee not at customer location when job starts. 5) Work About to get delayed. 6) Employee not at customer location when work starts These all are the notify items which user can use to notify him. Event Based If Event based is selected Notify details can be observed here understand. 1) Job 2) Form 3) Work 108 4) Work flow 5) Route plan 6) Out of Territories 7) Employee Punch In / Punch Out Notifications about these details will be sent to user when they are 1) Added 2) Modified 3) Deleted 4) Completed 5) Rejected Mode of Notifications Figure 171: Mode of notifications Notifications can be sent by Email, SMS and Web-Notifications. Select appropriate checkbox to receive Notifications. For SMS, Phone Number has to be entered in the text box provided Note: Phone number must suffix with country code. 109 For web-Notifications simply select the check box. For E-Mail Enter the Email Id in the provided Text field and set format of mail Format of E-mail User can set the format of E-mail, he can select the details that should be in mail, and these details will be sent to mail. Figure 172: Format of E-mail Step 1: Enter subject Step 2: Click on the selected mark and Select fields in the pop up Step 3: Click on save. Leaves Leaves applied by employees are displayed in this screen. User (manager/root employee) can approve or reject leave. User (manager) can apply leave by clicking on apply leave and can also check his applied leaves by clicking on my leaves, user can filter leaves by applying filters from left pane, filter set include approved, rejected, applied, cancelled. Select filter set and click on apply to filter leaves, click on reset to clear all filters. Navigation: menu bar >>3 dots>>leaves 110 Figure 173: Leaves User can approve or reject leave by clicking on corresponding approve or reject button. View My Leaves Figure 174: View My leaves Apply Leave Click on Apply Leave 111 Figure 175: Apply Leave Step 1: Select time zone Step 2: Select date and time zone Step 3: Select leave type Step 4: Click on save Reporting manager has to approve leave, he can approve/reject leave, these leaves applications are displayed in leaves section in web panel. 112