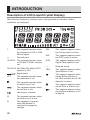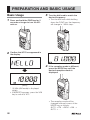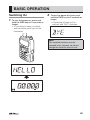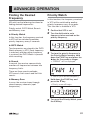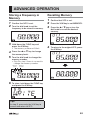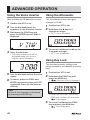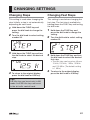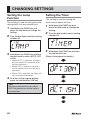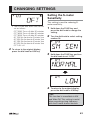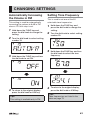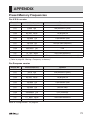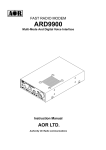
1
COMMUNICATIONS RECEIVER
100 kHz – 1299.995 MHz
COMMUNICATIONS RECEIVER AR-mini
ATT
SEL
V/M
SCAN
MODE
SKIP MW
L.SRCH
TSQ TONE
PWR
DW
PW
V.1.1
Dec.18, 2008
OPERATING MANUAL
FCC WARNING
Changes or modifications not expressly approved by the party responsible for
compliance could void the user’s authority to operate the equipment.
■ Part15 class B
NOTICE:
This equipment has been tested and found to comply with the limits for a Class
B digital device, pursuant to part 15 of the FCC Rules. These limits are designed
to provide reasonable protection against harmful interference in a residential
installation.
This equipment generates, uses and can radiate radio frequency energy and, if
not installed and used in accordance with the instructions, may cause harmful
interference to radio communications. However, there is no guarantee that
interference will not occur in a particular installation. If this equipment does cause
harmful interference to radio or television reception, which can be determined
by turning the equipment off and on, the user is encouraged to try to correct the
interference by one or more of the following measures:
●
●
●
●
Reorient or relocate the receiving antenna
Increase the separation between the equipment and receiver.
Connect the equipment into an outlet on a circuit different from that to which the
receiver is connected.
Consult the dealer or an experienced radio/TV technician for help.
■ Part15 Class C
This device complies with Part 15 of the FCC Rules. Operation is subject to the
following two conditions: (1) this device may not cause harmful interference, and (2)
this device must accept any interference received, including interference that may
cause undesired operation.
2
CONTENTS
FOR SAFETY ........................................5
INTRODUCTION ..................................8
Contents list ..........................................8
Part names and functions.....................9
Description of LCD (Liquid Crystal
Display) ............................................12
PREPARATION AND
BASIC USAGE....................................13
Connect the antenna ..........................13
Attach the belt clip .............................. 14
Tie the hand strap ............................... 14
Install the supplied Ni-MH batteries or
AA batteries .....................................15
Charge the supplied Ni-MH
batteries ...........................................16
Basic usage.........................................18
Quick guide: Scan frequencies
previously saved in a memory bank ......20
Storing a frequency in memory bank ...20
Scanning the memory bank .................20
Options list ..........................................21
Using the DC-mini DC adapter ..........21
Using the CO-mini clone cable ..........22
Using the PC-mini programing
cable ................................................22
Preparations .........................................22
Connecting PC-mini .............................23
Connecting with the AR-mini ................23
Running the PC-mini program .............. 24
BASIC OPERATION ...........................25
Switching on .......................................25
Adjusting the volume ..........................26
Adjusting the frequency ......................27
Adjusting the squelch .........................28
Changing the mode ............................29
Monitoring ...........................................29
Setting the AR-mini .............................30
ADVANCED OPERATION..................31
Finding the desired frequency ............31
Priority watch ......................................31
2VFO watch .........................................32
2VFO watch with 2VFO watch
reception memory ...........................33
Changing the 2VFO watch reception
memory ............................................33
VFO search ........................................34
Skipping the desired frequency in a
search ..............................................34
Limit search ........................................35
Changing the search type ..................36
Changing the search band
memory ...........................................36
Limit link search .................................37
Memory ...............................................38
Storing a frequency in memory ..........39
Recalling memory ...............................39
Returning to VFO with displaying
memory frequency ..........................40
Erasing memory ..................................40
Erasing all memories from the memory
bank .................................................41
Naming memory .................................42
Memory scanning ...............................42
Setting skipped memory when
scanning ..........................................43
Scanning the memory bank................43
Scanning a linked memory bank ........44
Using broadcast facility ......................45
Using preset ........................................45
Using tone squelch (CTCSS) ..............46
Searching tone frequency...................46
Reversed tone squelch function .........47
Using DCS...........................................47
Using the voice inverter ......................48
Using the attenuator ...........................48
Using key lock .....................................48
Searching bug frequencies.................49
Using the bug detector function .........49
Resetting system (system reset) ........50
Resetting all contents (all reset) .........50
CHANGING SETTINGS .....................51
Changing steps ...................................51
Changing fast steps ............................51
Setting the lamp function ...................52
Setting the timer .................................52
Setting the S-meter sensitivity ...........53
Setting the S-meter buzzer.................54
Setting the resumption time ...............54
3
CONTENTS
Setting the search ...............................55
Setting the memory scan ...................56
Setting the limit link search ................57
Setting the memory for a memory
bank link scan ..................................58
Confirming limit search frequencies ...59
Erasing all memory from a memory
bank .................................................59
Erasing VFO skip memory ..................60
Erasing the memory channel’s skip
mark .................................................61
Cancelling muting during a scan ........61
Antenna selection ...............................62
Using the earphone as an antenna.....62
Automatically increasing the volume in
FM ....................................................63
Setting tone frequency .......................63
Selecting reversed tone frequency.....64
Selecting voice inverter carriers .........64
Automatically switching the display
information .......................................65
Setting DCS codes ............................65
Setting the DCS code phases ............66
Turning the beep off ............................66
Changing the battery saving time.......67
Displaying battery voltage ..................67
Charging the Ni-MH battery ...............68
Revising step frequency .....................69
Shifting the microprocessor’s clock
frequency .........................................69
APPENDIX ..........................................70
Broadcast facility frequencies ............70
Bug frequencies ..................................70
Preset memory frequencies ...............71
Shortwave broadcast station list ........72
Tone frequency list (CTCSS)...............73
DCS code list ......................................73
Search band memory list.................... 74
2VFO watch memory list ..................... 74
Setting number list ..............................75
Troubleshooting ..................................78
Specifications .....................................79
4
FOR SAFETY
To ensure proper use of the receiver,
carefully read the “For Safety” section
prior to use.
After you have read it, keep this
operating manual and the warranty
handy in case you need them in the
future.
Icon Labels
WARNING
Prohibition
A variety of icon labels are used in
this operating manual to ensure safe
use of the product, to prevent injury
to yourself and others, and to prevent
property damage. Make sure you fully
understand the meanings of the icon
labels after reading this operating
manual.
WARNING
This label is used in cases
where there may be the
possibility of death or serious
injury.
CAUTION
This label is used in cases where
there may be the possibility of
serious or minor injury.
Icon label examples
Electric
shock
caution
Disassembly
not allowed
Remove
plug from
outlet
A ▲ is used in cases where caution (danger,
warning) is urged. Inside the triangle, the
specific type of caution is indicated (in
the example shown here, the caution is an
electric shock caution).
Remove
plug from
outlet
A ● with a line through it is used in cases
where a particular action is not allowed.
Inside the circle, or near it, the specific type
of action which is not allowed is indicated
(in the example shown here, disassembly is
not allowed).
A ● (black circle) is used to indicate an
action to be performed by the user. In the
example shown on the left, the action shown
is removal of the AC adapter power plug
from the wall outlet.
Disassembly
not allowed
• Do not insert anything metallic or
flammable into the equipment. Doing
so may result in fire or damage to the
equipment.
• Do not place any container filled with
water or other liquids, or small pieces of
metal, on top of or near the AR-mini. In
such cases, fire may result if the liquid
is spilt on the AR-mini or if metal enters
the unit.
• Fire, electric shock, or damage to the
equipment may result if the charger is
used under abnormal conditions (e.g.,
if it is emitting smoke, or strange odors
or noises). In such cases, immediately
remove the AC adapter power plug
from the outlet. Make sure the charger
stops emitting smoke, then contact
your dealer to have it repaired. Never
try to repair the equipment yourself: it is
dangerous to do so.
• If water enters the AR mini or AC
adapter, remove the AC adapter
power plug from the power outlet and
contact your dealer. Using the charger
under such conditions may result in
fire, electric shock, or damage to the
equipment.
• If a foreign object enters the AR mini
or AC adapter, remove the AC adapter
power plug from the power outlet and
contact your dealer. Using the charger
under such conditions may result in
fire, electric shock, or damage to the
equipment.
• If you drop or damage the AR mini or
AC adapter, be sure to remove the AC
adapter power plug from the power
outlet and contact your dealer. Using
the charger under such conditions may
result in fire, electric shock, or damage
to the equipment.
• Do not disassemble or modify the
AR-mini and AC adapter. Doing so
may result in a fire, electric shock, or
damage to the equipment.
5
FOR SAFETY
WARNING
Disassembly
not allowed
Caution
Prohibition
Prohibition
Prohibition
Prohibition
6
WARNING
• Do not disassemble the battery. Doing
so may cause the battery to leak, heat
up, or burst.
• Do not throw used batteries into a
fire. Batteries thrown into a fire may
explode, resulting in uncontrollable fire
or burns.
• Do not short-circuit the battery
terminals. Doing so may result in burns
due to heat buildup. A battery could be
shortcircuited if you carry it by itself.
• Do not use the AC adapter at voltages
other than 100–240 V with an AC
power supply. Doing so may result in
fire, electric shock, or damage to the
equipment.
• Do not use a power strip. Doing so may
result in fire or overheating.
Prohibition
No wet
hands
• Do not remove or insert the AC adapter
power plug with wet hands. Doing so
may result in electric shock.
CAUTION
• Only use the AC adapter that is designed
for use with the AR-mini. Using different
equipment may result in fire, electric
shock, or damage to the equipment.
• Do not modify, excessively bend, twist,
or pull on the AC adapter or DC output
cord. Doing so may result in fire or
electric shock.
• If the AC adapter or DC output cord is
damaged, have the cord replaced by the
dealer. Failure to do so may result in fire
or electric shock.
• Do not short-circuit the DC plug with
metal. Doing so may result in fire or
damage to the equipment.
• Do not charge the AR-mini if there are
any water droplets on the DC plug.
Doing so may result in fire or damage to
the equipment.
• If lightning occurs near the equipment,
remove the AC adapter power plug from
the power outlet. Lightning may cause
fire, electric shock, or damage to the
equipment.
• Do not use the AC adapter as a power
supply for other equipment. Doing so
may result in fire, electric shock, or
damage to the equipment.
• Do not place any heavy object on the
power cord, and do not place the cord
beneath such equipment. Doing so may
damage the cord, resulting in fire or
electric shock. Note: If the cord is placed
under a carpet or the like, someone may
fail to notice the cord and inadvertently
place something heavy on top of it.
Remove
plug from
outlet
• If you are not going to be using the
AR-mini or AC adapter for an extended
length of time (e.g., if you are taking
a vacation), be sure to remove the AC
adapter power plug from the outlet as a
safety precaution.
• Do not use the AR-mini or AC adapter in
humid or dusty locations. Doing so may
result in fire, electric shock, or damage
to the equipment.
• Use and store the AR-mini and AC
adapter in a location that is inaccessible
to small children.
• Do not use the AR-mini or AC adapter
on unstable surfaces. The units may
fall or be tipped over if installed in such
locations, resulting in injury or damage
to the equipment.
• Do not use the AR-mini or AC adapter
in locations subject to significant
vibrations or mechanical shocks.
The units may fall or be tipped over if
installed in such locations, resulting in
injury or damage to the equipment.
• Do not place the DC cord of the AC
adapter near a heater. In such cases,
the cord sheathing may melt, resulting
in fire or electric shock.
FOR SAFETY
CAUTION
Remove
plug from
outlet
Prohibition
• When removing the AC adapter power
plug, be sure to hold the plug as you
remove it. If you pull on the DC cord,
you may damage the cord, resulting in
fire or electric shock.
• Do not wipe the exterior with benzene
or paint thinner based liquid, and do not
apply insecticide near the AR-mini or
the AC adapter.
• Doing so may damage the surface of the
units. To clean them properly, always
wipe the units with a soft, dry cloth.
• Do not use the AC adapter if it
affects nearby televisions, electronic
equipment, medical equipment, or the
like.
• Before moving the unit for charging,
remove the AC adapter power plug from
the outlet and confirm that it has been
disconnected. If this is not done, the
cord may be damaged, resulting in fire
or electric shock.
IMPORTANT
• Remove the AC adapter after approximately 20
hours have passed from the start of charging.
Failure to do so may result in over-charging of
the batteries.
• The AR-mini and AC adapter become warm
during the charging operation and immediately
after charging. This is normal.
• After the charging operation ends, do not
repeatedly charge the Ni-MH batteries. Doing
so may overcharge the Ni-MH batteries, causing
their performance to decline and shortening their
service life.
• Be sure to charge the battery before using it
for the first time, and after not using it for an
extended length of time.
IMPORTANT
• When you charge the Ni-MH batteries after not
using them for an extended length of time, the
charging operation will end before achieving
full charge, resulting in insufficient charge. This
happens because extended storage of the Ni-MH
battery makes it difficult to charge. In such
cases, if you charge and then discharge (use
until the battery has no more charge) the battery
two or three times in a row, the battery will again
charge properly.
• Fully use up the Ni-MH batteries’ charge before
recharging them. If the batteries are recharged
without first being fully depleted, they may not
charge properly even if the charging operation
is performed for a sufficient length of time. In
order to prevent such problems, we recommend
fully using up the batteries’ charge and then
recharging them at least once a month.
• The Ni-MH batteries’ service life under normal
use is approximately one year. If the batteries’
charge depletes quickly under normal use, even
when fully charged, they may be close to the
end of their service life. In such cases, quickly
replace the batteries with new ones.
• If the charging terminals on the Ni-MH batteries
are dirty, it may not be possible to charge the
battery properly. Always clean the charging
terminals before charging the batteries. If the
terminals become dirty, wipe them with a dry
cloth.
7
INTRODUCTION
Contents List
●
Ni-MH Batteries
●
AC Adapter (AA-mini)
●
Hand Strap
●
Belt Clip (hook) with screws
●
Operating Manual
When unpacking the AR-mini, please
check that the box contains the
following items.
If you find any item(s) to be missing,
please contact your dealer.
●
AR-mini Receiver
COMMUNICATIONS RECEIVER AR-mini
ATT
SEL
V/M
SCAN
MODE
SKIP MW
L.SRCH
TSQ TONE
PWR
DW
PW
●
8
Antenna
INTRODUCTION
Part Names and Functions
8
:
2
>
@
CO
ATT
SEL
MM
ICA
TIO
NS
DW
PW
.
SKIP
REC
EIV
V/M
MW
ER
SCAN
L.SR
B
UN
CH
AR
-min
i
MODE
TSQ
TONE
PW
R
;
=
9
INTRODUCTION
: Display
@ c (Up) key
●
●
●
●
Press this key to increase the setting
value.
Hold down this key to set the
attenuator.
Press this key while holding down the
FUNC key to set the VFO, Broadcast
Facility or PRESET.
Hold down this key together with the
FUNC key to store a priority channel
for PRIORITY SCAN.
. v (Down) key
●
●
●
●
Press this key to decrease the setting
value.
Hold down this key to start the 2VFO
watch.
Press this key while holding down the
FUNC key to start the Priority Scan.
Hold down this key together with the
FUNC key to store a channel for the
2VFO watch.
B MODE key
●
●
> SCAN key
●
●
●
●
Press and hold this key to turn the
power on or off.
= External DC jack
●
Remove the external DC jack cover
and insert the DC output plug of an
AA-mini or DC mini for power supply
or charging.
10
Press this key to start a search in
VFO, or to begin a scan in MEMORY.
Hold down this key to search for a
bug frequency.
Press this key while holding down the
FUNC key to store frequencies in the
limit search operation.
Hold down this key together with the
FUNC key to change the band in the
limit search operation.
2 V/M key
●
●
●
; PWR key
●
Press this key to switch between FM,
Wide FM, AM and auto modes.
Press this key while holding down the
FUNC key to select a tone type.
●
Press this key to switch between VFO
and MEMORY.
Hold down this key to assign a skip
channel for search or scan.
Press this key while holding down the
FUNC key to memorize a frequency
and then name the memorised
frequency.
Hold down this key together with
the FUNC key to erase a memory
channel.
INTRODUCTION
8 Dial knob
●
●
●
●
Turn this knob to change the
frequency or memorised channel.
Press this knob to switch the volume
or squelch settings.
Turn this knob while holding down the
FUNC key to change the frequency
more quickly.
Hold down this key together with the
FUNC key to change the settings.
Earphone jack
●
Remove the earphone jack cover and
connect the earphones.
Battery case
●
Remove the battery case lid, and
install the supplied Ni-MH battery or
AA battery.
Battery case lock
●
Unlock this to remove the battery
case lid.
MONI key
●
●
Hold down this key to open the
squelch and monitor.
Press this key while holding down the
FUNC key to lock keys other than the
PWR, FUNC and MONI keys.
FUNC key
●
Press this key together with another
key or dial knob to use the function
operation.
Antenna connector
●
Fix the supplied antenna.
11
INTRODUCTION
Description of LCD (Liquid Crystal Display)
Main Display: Frequency, memory name, setting number or the other various
conditions are displayed.
1:
This segment appears when
the frequency in VFO is 1000
MHz or higher.
.
:
PW:
This segment appears when
the Priority watch is active.
DW:
This segment appears when
the 2VFO watch is active.
DCS:
This segment appears when
Digital Code squelch is set.
—:
Repeater minus
TSQ:
This segment appears when
Tone Squelch is set.
Decimal point
75 50 25: This segment appears when
a 6.25 and 12.5 kHz step are
set.
WFM, FM, AM: FM, Wide FM, AM or AUTO
appears in VFO.
: Signal meter
ATT:
This segment appears when
the attenuator is set.
:
This segment appears when
a battery save is set.
:
:
This segment appears when
the key lock is set.
Low battery indicator.
B:
This segment appears when
the Busy scan is active.
S:
This segment is appears
when Set Number is
selected to change the
settings.
12
:
This segment appears when
the Scrambler function is
set. (Not available for the US
domestic version.)
:
This segment appears when
the off timer or alarm is set.
:
This segment appears when
the skipped frequency is set
to Search.
PREPARATION AND BASIC USAGE
Connect the Antenna
3
Confirm that the antenna is fixed to
the AR-mini.
1
4
To remove the antenna, twist the
antenna counterclockwise.
Press the antenna firmly onto the
antenna connector.
CO
ATT
SEL
MM
UN
ICAT
ION
SR
SKIP
ECE
IVE
V/M
DW
PW
MW
RA
SCAN
L.S
RC
H
CO
ATT
SEL
MM
R-m
ini
MODE
TONE
UN
ICAT
ION
PW
R
SR
ECE
IVE
V/M
SKIP
DW
PW
RA
R-m
ini
SCAN
MW
MODE
L.S
RC
H
TONE
PW
R
2
Twist the antenna clockwise.
CO
ATT
SEL
MM
Note:
AR-mini has a SMA antenna
connector. Never connect any other
type antenna.
UN
ICAT
ION
SR
SKIP
ECE
IVE
V/M
DW
PW
MW
RA
SCAN
L.S
RC
H
R-m
ini
MODE
TONE
PW
R
13
PREPARATION AND BASIC USAGE
Attach the Belt Clip
Tie the Hand Strap
1
1
Push the end of the hand strap
through the hand strap holder.
2
Loop the other end through the
end that has just been pushed
through.
3
Tie the hand strap.
2
Insert the supplied screws through
the screw holes of the belt clip.
Fix the belt clip with the supplied
screws.
Note:
Do not use screws other than those
supplied, as the inside of the ARmini may be damaged or the unit
could easily be dropped.
14
PREPARATION AND BASIC USAGE
Install the Supplied
Ni-MH Batteries or AA
Batteries
1
5
6
Attach the battery lid.
Lock the battery case lock.
Unlock the battery case lock.
Battery case lock
2
Remove the battery lid.
Battery lid
3
Confirm the positive and negative
points of the battery.
4
Correctly install the battery in the
battery case.
Note:
• Never use old batteries together
with new batteries.
• Never use different types of
battery together.
• When disposing of old batteries,
be sure to distinguish them from
other waste products and observe
any local rules regarding correct
disposal.
15
PREPARATION AND BASIC USAGE
Charge the Supplied
Ni-MH Batteries
4
Insert the DC output plug into the
external DC jack on the right side
of the AR-mini.
Caution:
Never charge any other type of
battery.
Attempting to charge other types
(e.g. manganese or alkaline), may
result in fire or explosion.
CO
ATT
SEL
MM
UN
ICA
TIO
NS
The supplied Ni-MH batteries are
charged via the AA-mini AC adapter.
1
2
3
SKIP
REC
EIV
V/M
DW
PW
MW
ER
SCAN
L.SR
CH
AR
-min
i
MODE
TONE
PW
R
Turn the AR-mini off.
Make sure the AR-mini contains
the supplied Ni-MH batteries.
Remove the external DC jack
cover.
CO
ATT
SEL
Insert the AC adapter power plug
into an AC outlet (100 V–240 V).
AT
SET
L
MM
CO
UN
ICA
TIO
NS
SKIP
MW
MM
UN
ICAT
IONS
V/M
REC
EIV
V/M
DW
PW
5
ER
SCAN
L.SR
CH
DW
PW
SK
IP
MW
RE
CE
IVER
SCAN
L.S
RC
AR
H
-min
i
AR
-m
ini
MO
DE
TO
NE
PW
R
MODE
TONE
PW
R
16
6
Press the PWR key to turn the
power on.
7
Press the dial knob while holding
down the FUNC key to change the
setting.
8
Turn the dial knob to select setting
number 30.
9
Hold down the FUNC key and turn
the dial knob to set “CHARG”.
) will blink.
• (
PREPARATION AND BASIC USAGE
10 Press the dial knob to return to
VFO.
11 Approximately 20 hours later,
disconnect the AC adapter from
the AC outlet and then remove the
DC-out plug from the AR-mini.
Tips:
• The charging function is
cancelled when the AC adapter is
disconnected.
• The charging function will be
cancelled automatically after
24 hours have passed. When
recharging, repeat from step 7.
• The charging function continues
even if the power is turned off.
17
PREPARATION AND BASIC USAGE
Basic Usage
1
3
Press and hold the PWR key for 2
seconds or longer to turn the ARmini on.
CO
ATT
SEL
MM
UN
ICAT
ION
CO
SR
SKIP
ECE
IVE
V/M
DW
PW
Turn the dial knob to match the
desired frequency.
• Turn the dial knob while holding
down the FUNC key; the frequency
will change in 1 MHz steps.
MW
L.S
RC
H
MM
ATT
SEL
RA
SCAN
UN
ICAT
ION
SR
R-m
ini
ECE
IVE
V/M
MODE
SKIP
DW
PW
RA
R-m
ini
SCAN
MW
MODE
L.S
RC
H
PW
TONE
R
PW
R
2
Confirm that VFO has appeared in
the display.
4
(VFO)
If the reception mode is different,
press the MODE key until the
desired reception mode is
displayed.
CO
ATT
SEL
MM
UN
ICAT
ION
SR
DW
PW
SKIP
ECE
IVE
V/M
* 10 MHz (AM mode) is displayed
initially.
• If MEMORY appears, press the V/M
key to switch to VFO.
MW
RA
SCAN
L.S
RC
H
R-m
ini
MODE
PW
R
• The reception mode will be
changed with each press of the
MODE key, as follows:
AUTO ➝ FM ➝ WFM ➝ AM ➝
AUTO ➝ ·····
18
PREPARATION AND BASIC USAGE
Note:
The AR-mini is by default initially
set to Auto step and Auto reception
mode functions. These functions
change the frequency step and
reception mode automatically
depending on the band. They can be
cancelled and reset manually.
6
Press the dial knob again, and the
turn it to adjust the squelch.
CO
ATT
SEL
MM
UN
ICAT
ION
V/M
DW
PW
SKIP
SR
ECE
IVE
MW
RA
SCAN
L.S
RC
H
5
R-m
ini
MODE
TONE
Press and turn the dial knob to
adjust the volume.
CO
ATT
SEL
MM
R
UN
ICAT
ION
SR
SKIP
ECE
IVE
V/M
DW
PW
PW
MW
RA
SCAN
L.S
RC
H
R-m
ini
MODE
TONE
PW
R
• Volume can be changed by turning
the dial knob as follows:
00 ➝ 01 ➝ (01) ➝ (01) ➝ 02 ➝ (02)
➝ (02) ➝ 03 ➝ (03) ➝ (03) ➝ 04
➝ (04) ➝ (04) ➝ 05 ➝ ····· ➝ 10
• The squelch level can be changed
by turning the dial knob as follows:
• Increase direction (clockwise)
00 ➝ 01 ➝ (01) ➝ 02 ➝ (02) ➝ 03
➝ (03) ➝ 04 ➝ (04) ➝ 05 ➝ (05)
➝ 06 ➝ 07 ➝ 08 ➝ 09 ➝ 10
• Decrease direction (anticlockwise)
10 ➝ 09 ➝ 08 ➝ 07 ➝ 06 ➝ 05 ➝
(05) ➝ 04 ➝ (04) ➝ 03 ➝ (03) ➝
02 ➝ (02) ➝ 01 ➝ (01) ➝ 00
Note:
Some displayed squelch values will
not be changed, but in reality the
squelch level has changed.
Note:
The displayed volume value will not
be changed for every 2 steps, but in
reality the volume has changed.
19
PREPARATION AND BASIC USAGE
Quick Guide:
Scan Frequencies Previously
Saved in a Memory Bank
Scanning the memory bank
Scanning can be performed within a
specified memory bank.
Storing a frequency in
memory bank
1
2
1
2
3
Turn the dial knob to select setting
number 09.
4
Hold down the FUNC key and turn
the dial knob to select BANK.
Hold down the FUNC key and
press the V/M key.
• The memory bank and number will
blink.
5
Press the dial knob or V/M key to
return to VFO.
Press the c or v key to change
the memory bank.
6
To return to MEMORY, press the
V/M key.
7
Press the c or v key to select the
desired memory bank.
8
Press the SCAN key.
• Scanning will start in the memory
bank.
9
To change the memory bank, hold
down the FUNC key and turn the
dial knob.
3
4
Confirm that VFO is set.
Turn the dial knob to set the
frequency to be stored in memory.
Memory
bank
5
6
20
Memory
number
Turn the dial knob to change the
memory number.
• Skip this step if there is no need to
change the memory number.
To store, hold down the FUNC key
and press the V/M key.
Confirm that VFO is set.
Hold down the FUNC key and
press the dial knob to change the
setting.
10 Press the V/M key to return to
MEMORY.
PREPARATION AND BASIC USAGE
Options List
●
AA-mini
“A” plug type replacement AC adapter
(6 VDC, 500mA for 100 – 240 VAC)
Using the DC-mini DC
Adapter
1
AT
SET
L
Insert the cigar lighter plug into the
cigar lighter receptacle (12 or 24
VDC) of the vehicle.
CO
MM
UN
ICAT
IONS
IVER
SK
IP
RE
CE
V/M
DW
PW
MW
SCAN
L.S
RC
H
AR
-m
ini
MO
DE
TO
NE
PW
R
●
Cigar lighter
receptacle
DC-mini
DC cable with cigar-lighter plug
(6 VDC, 500 mA for 12/24V socket)
EXT DC jack
●
●
CO-mini
Data cloning cable
(AR-mini to AR-mini)
PC-mini
PC cable
(USB only)
Plug
Cigar lighter
plug (DC-mini)
2
Remove the AR-mini EXT DC jack
cap.
3
Insert the DC-mini plug into the
EXT DC jack.
4
To charge the supplied Ni-MH
battery, AR-mini’s settings have to
be changed.
Note:
• Do not remove the plug by
tugging at the cable. The cable
may become disconnected and
thereafter malfunction.
• Never use this unit with wet hands.
Doing so may result in an electric
shock.
• Noise that results from AR-mini
being operated with this unit is not
necessarily a sign of malfunction.
21
PREPARATION AND BASIC USAGE
Using the CO-mini Clone
Cable
Using the PC-mini
Programing Cable
1
Preparations
Turn the AR-mini off.
◆ Installing special software
Plug
: Access the download page on our
web site and download the software
according to the explanation
provided there.
URL: http://www.aorja.com/ar-mini/
Earphone
jack
AT
SET
L
CO
MM
UN
ICAT
AT
SET
L
IONS
IVER
SK
IP
CO
MW
MM
UN
ICAT
RE
CE
V/M
DW
PW
SCAN
L.S
RC
H
IONS
V/M
AR
-m
ini
MO
DE
DW
PW
SK
IP
MW
RE
CE
IVER
SCAN
L.S
RC
H
AR
-m
ini
MO
DE
TO
TO
PW
PW
NE
R
NE
R
2
Remove the AR-mini earphone
jack cap.
3
Turn the power on while holding
down FUNC and c key.
• “RX-TX” will be displayed.
4
Press the receiver’s SCAN key.
(“R” will be displayed.)
5
Press the transmitter’s MODE key.
(“T” will be displayed.)
6
Confirm “PASS” is displayed when
the cloning is completed.
• If “NPASS” is displayed, the cloning
has failed. Repeat the procedure
from step 3.
Note:
• Do not remove the plug by
tugging at the cable. The cable
may become disconnected and
thereafter malfunction.
• Turn the power off before
connecting or removing the cable.
22
@ Run the downloaded file and perform
setup.
Caution:
Although this software is provided
free of charge, do not make any
illegal copies.
◆ Installing the USB driver
PC-mini requires a special USB driver.
Before connecting PC-mini to the PC,
ensure that you have installed the USB
driver.
This USB driver can be downloaded
from the following URL.
URL: http://www.aorja.com/ar-mini/
CP210x_VCP_Win2K_XP_S2K3.
exe
or
URL: http://www.silabs.com/
* Download the VCP Driver kit.
PREPARATION AND BASIC USAGE
Connecting PC-mini
Caution:
Check that the USB driver is
properly installed before connecting
PC-mini to the PC.
Connect PCmini to the
USB terminal
of the PC.
Connect PC-mini’s USB plug to the
USB terminal of the PC.
Note:
Ensure that the USB plug is properly
and firmly connected to the USB
terminal of the PC.
Connecting with the AR-mini
1
Hold down the PWR key of the ARmini for at least 2 seconds to turn
the power off.
2
Hold down the PWR switch for
at least 2 seconds while holding
down the FUNC, v and the dial
knob to turn the power on.
3
Confirm that “PRG-M” is
displayed.
• If “PRG-M” does not appear, repeat
the procedure from step 1.
4
Remove the AR-mini earphone
cap.
5
Firmly insert the PC-mini 3.5 ø
plug into the AR-mini jack.
3.5 ø Plug
Jack
ATT
SEL
CO
MM
UN
ICA
TIO
NS
V/M
DW
PW
SKI
P MW
RE
CE
IVE
R AR
-m
SCA
ini
N
L.S
RCH
MO
DE
TON
E
PW
R
23
PREPARATION AND BASIC USAGE
Running the PC-mini program
Click and run AR-mini.exe that you have
downloaded from the AOR web site.
Tips:
It is recommended that you create a
shortcut on your PC. This will enable
you to run the program quickly on
subsequent occasions.
Refer to the program software manual
for instructions on using the PC-mini
program software.
Display when reading data
PRG-R
Display when writing data
PRG-W
COMMUNICATIONS RECEIVER AR-mini
ATT
SEL
24
V/M
SCAN
MODE
SKIP MW
L SRCH
TSQ TONE
When operation is complete
END
BASIC OPERATION
Switching On
1
2
To turn the power on, press and
hold the PWR key for 2 seconds or
longer.
• A switching-on beep is emitted,
and the display back light will be
illuminated.
CO
ATT
SEL
MM
UN
ICA
TIO
NS
SKIP
REC
EIV
V/M
DW
PW
MW
ER
SCAN
L.SR
CH
AR
-min
i
To turn the power off, press and
hold the PWR key for 2 seconds or
longer.
• A powering-off beep will be
emitted, and “BYE” displayed.
Note:
The supplied batteries are not
charged when shipped, so please
charge the batteries prior to use.
MODE
PW
R
25
BASIC OPERATION
Adjusting the Volume
1
To adjust the volume, press the
dial knob.
(Minimum volume level)
CO
MM
ATT
SEL
UN
ICA
TIO
NS
REC
EIV
V/M
SKIP
DW
PW
MW
ER
AR
-min
i
SCAN
L.SR
CH
MODE
TONE
PW
(Maximum volume level)
R
3
2
To increase the volume, turn the
dial knob clockwise.
CO
ATT
SEL
MM
UN
ICA
TIO
NS
DW
PW
SKIP
REC
EIV
V/M
MW
ER
SCAN
L.SR
CH
AR
-min
i
MODE
TONE
PW
R
26
To decrease the volume, turn the
dial knob counterclockwise.
Note:
• Make sure the volume is not too
great. Decrease the volume when
switching to the earphone after
using the internal speaker.
• In order to maintain safety, take
special care to decrease the
volume while driving or walking.
Tips:
• Volume can be changed by turning
the dial knob as follows:
00 ➝ 01 ➝ (01) ➝ (01) ➝ 02 ➝ (02)
➝ (02) ➝ 03 ➝ (03) ➝ (03) ➝ 04 ➝
(04) ➝ (04) ➝ 05 ➝ ····· ➝ 10
• The displayed volume value will
not be changed for every 2 steps,
but in reality the volume has
changed.
BASIC OPERATION
Adjusting the Frequency
1
Confirm that VFO is set.
• When a memory name is displayed,
press the V/M key to switch to VFO.
2
Press the c or v key to set the
desired band.
• Refer to the band table on this
page.
4
To change the frequency more
quickly, hold down the FUNC key
while turning the dial knob.
ini
ER
EIV
NS
TIO
ICA
UN
MM
N
SCA
CO
ATT
SEL
V/M
SKIP
REC
AR-m
DE
MO
TONE
CH
L.SR
MW
R
PW
DW
PW
CO
ATT
SEL
MM
UN
ICA
TIO
NS
REC
EIV
V/M
SKIP
DW
PW
ER
AR
-min
i
SCAN
MW
MODE
L.SR
CH
PW
R
3
To increase the frequency, turn the
dial knob clockwise.
To decrease the frequency, turn
the dial knob counterclockwise.
Note:
The AR-mini is by default initially
set to the Auto step function. This
function changes the frequency step
automatically depending on the band.
It can be cancelled and reset manually.
Band range table
Displayed frequency
CO
ATT
SEL
MM
UN
ICA
TIO
NS
EIV
V/M
DW
PW
SKIP
REC
MW
ER
SCAN
L.SR
CH
AR
-min
i
Band range (MHz)
0.594 (0.600*)
0.1–1.6200
6.055 (6.030*)
1.6200–51.00
51.000
51.00–76.00
82.500
76.00–108.00
128.800
108.00–142.00
145.000
142.00–170.00
175.750
170.00–336.00
MODE
TONE
PW
R
370.000
336.00–430.00
433.000
430.00–470.00
649.750
470.00–770.00
903.0125
1295.000
(* US version)
770.00–915.00
915.00–1299.995
27
BASIC OPERATION
Adjusting the Squelch
1
3
Stop the dial knob when no noise
is emitted.
To adjust the squelch, press the
dial knob twice.
x2
• This position is called “Threshold”.
4
CO
ATT
SEL
MM
UN
ICA
TIO
NS
REC
EIV
V/M
SKIP
DW
PW
ER
AR
-min
i
SCAN
MW
MODE
L.SR
CH
To cancel the squelch temporally,
press and hold the MONI key
• The squelch will be cancelled while
holding the MONI key.
TONE
PW
R
2
To adjust the squelch, slowly turn
the dial knob clockwise.
CO
ATT
SEL
MM
UN
ICA
TIO
NS
SKIP
REC
EIV
V/M
DW
PW
MW
ER
SCAN
L.SR
CH
AR
-min
i
MODE
TONE
PW
R
28
Tips:
• The squelch level can be changed
by turning the dial knob as follows:
Increase direction (clockwise)
00 ➝ 01 ➝ (01) ➝ 02 ➝ (02) ➝ 03
➝ (03) ➝ 04 ➝ (04) ➝ 05 ➝ (05) ➝
06 ➝ 07 ➝ 08 ➝ 09 ➝ 10
Decrease direction (anticlockwise)
10 ➝ 09 ➝ 08 ➝ 07 ➝ 06 ➝ 05 ➝
(05) ➝ 04 ➝ (04) ➝ 03 ➝ (03) ➝
02 ➝ (02) ➝ 01 ➝ (01) ➝ 00
Some displayed squelch values
will not be changed, but in reality
the squelch level has changed.
• When the squelch volume level is
set at a high level, it may become
impossible to receive weak
signals.
BASIC OPERATION
Changing the Mode
Monitoring
The AR-mini is by default initially set to
the Auto reception mode function. This
function changes the reception mode
automatically depending on the band.
The reception mode can be changed
manually.
1
1
To monitor, press the MONI key.
To change the reception mode,
press the MODE key.
ini
ER
EIV
NS
TIO
ICA
MUN
COM
ATT
SEL
V/M
SKIP
MW
REC
N
SCA
AR-m
DE
MO
TONE
CH
L.SR
R
PW
DW
PW
CO
ATT
SEL
MM
UN
ICA
TIO
NS
SKIP
REC
EIV
V/M
DW
PW
MW
ER
SCAN
L.SR
CH
AR
-min
i
MODE
PW
R
• Voice may be received with noise.
• Even if a tone squelch or DCS is
set, it can be cancelled by pressing
MONI key.
Refer to the tone squelch details on
page 46, and the DCS explanation
on page 72.
• The reception mode will be
changed with each press of the
MODE key, as follows:
AUTO ➝ FM ➝ WFM ➝ AM ➝
AUTO ➝ ·····
29
BASIC OPERATION
Setting the AR-mini
The AR-mini has the following
settings for easy reception of desired
frequencies.
VFO: This is the default AR-mini
setting. In this setting, frequencies are
set directly by turning the dial knob.
MEMORY: Frequencies can be stored
in the memory with specific names.
Recall the memory to receive the
desired frequency.
PRESET: Some frequencies can be
stored as preset numbers. You can
receive the desired frequency via
PRESET.
1
3
To switch to PRESET from VFO,
hold down the FUNC key and press
the c key.
• These settings are categorised as
Broadcast Facility, PRESET and
VFO.
(PRESET)
• Hold down the FUNC key and
press the c key.
To set MEMORY from VFO, press
the V/M key.
(Broadcast Facility)
CO
ATT
SEL
MM
ICA
TIO
NS
SKIP
REC
EIV
V/M
DW
PW
• Hold down the FUNC key and
press the c key.
UN
MW
ER
SCAN
L.SR
CH
AR
-min
i
MODE
PW
R
VFO
Tips:
When there is no memory stored in
step 1, a low pitch tone beep will be
emitted.
2
30
Press the V/M key to return to VFO
from MEMORY.
ADVANCED OPERATION
Finding the Desired
Frequency
AR-mini has the following functions for
finding desired frequencies:
Priority watch, 2VFO Watch, Search
and Memory scan.
◆ Priority Watch
Priority Watch
In this function, the frequency received
in VFO will be switched to another
priority frequency every 5 seconds.
This function is available in VFO.
1
2
In this function, the frequency received
in VFO will be switched to another
priority frequency every 5 seconds.
Confirm that VFO is set.
Turn the dial knob to set a
frequency to be received as the
priority frequency.
◆ 2VFO Watch
Two frequencies are stored in the 2VFO
Watch memory in VFO. Each frequency
is watched, and then either frequency
is received, the 2VFO Watch is paused
while receiving.
3
◆ Search
To store the priority frequency in
the Priority Watch memory, hold
down the FUNC key and press the
c key for 2 seconds or longer.
• “PWM W” will be displayed.
In search, the receiver consecutively
monitors all frequencies between two
frequency limits.
There are three search methods;
VFO search, limit search and limit link
search.
◆ Memory Scan
• Tune to your desired frequency.
4
Hold down the FUNC key and
press the v key.
• Priority scan will begin.
5
To cancel the Priority Watch, press
the V/M key.
In scan, the receiver tunes through
stored memory channels (spot
frequencies).
31
ADVANCED OPERATION
2VFO Watch
5
To store the frequency in the 2VFO
Watch memory, hold down the
FUNC key and press the v key for
2 seconds or longer.
• “DWB W” will be displayed.
6
Press the v key for 2 seconds or
longer to start the 2VFO Watch.
7
To cancel the 2VFO Watch press
the V/M key.
Two frequencies are stored in the 2VFO
Watch memory in VFO. Each frequency
is watched, and then either frequency
can be received, the 2VFO Watch will
be paused while receiving.
1
2
3
4
32
Confirm that VFO is set.
Turn the dial knob to set a
frequency to be stored as the
2VFO Watch memory A.
To store the frequency in the 2VFO
Watch memory, hold down the
FUNC key and press the v key for
2 seconds or longer.
• “DWA W” will be displayed.
Turn the dial knob to set another
frequency to be stored as the
2VFO Watch memory B.
ADVANCED OPERATION
2VFO Watch with 2VFO
Watch Reception Memory
Changing the 2VFO Watch
Reception Memory
10 combinations of frequency are
set beforehand as the 2VFO Watch
Reception Memory. The 2VFO Watch
can be started from this memory.
The 2VFO watch Reception Memory
can be changed.
1
2
3
Confirm that VFO is set.
Press the v key for 2 seconds or
longer to start the 2VFO Watch.
• The 2VFO Watch which is set
previously will be started.
1
Start a normal 2VFO Watch.
• Refer to “2VFO Watch” on page 32.
2
Hold down the FUNC key and
press the v key for 2 seconds or
longer.
3
Turn the dial knob while holding
down the FUNC key to select
the number of the 2VFO Watch
Reception Memory.
4
To store, hold down the FUNC key
and press the v key for 2 seconds
or longer.
Turn the dial knob while holding
down the FUNC key to select
the number of the 2VFO Watch
Reception Memory.
• The 2VFO Watch will start
between the selected 2VFO Watch
Reception Memory.
Tips:
2VFO Watch Reception Memories
are listed on page 74.
33
ADVANCED OPERATION
VFO Search
VFO search consecutively monitors all
frequencies from 0.1 MHz to 1299.995
MHz.
1
2
Confirm that VFO is set.
Hold down the FUNC key and
press the dial knob to change the
setting.
3
Turn the dial knob to select setting
number 08.
4
Hold down the FUNC key and turn
the dial knob to select VFO.
• “VFO” will be displayed initially.
5
Press the dial knob to return to the
VFO.
6
7
Press the SCAN.
To start the VFO search, press the
scan key.
• When VFO search is paused, the
decimal point will blink.
8
34
To cancel VFO search, press the
V/M key or dial knob.
Skipping the Desired
Frequency in a Search
A frequency can be skipped in a search.
This prevents a search from being
stopped when a frequency that should
be cancelled is received. As many as
100 skipped frequencies can be stored.
1
Press the SCAN key to start the
search.
2
Press the V/M key for 2 seconds or
longer when the search is paused
on the frequency to be skipped.
• The skip memory number is
displayed.
3
Turn the dial knob to change the
skip memory number.
• This step can be skipped, but
the skip memory number will not
change.
4
To store frequencies in the skip
memory, press the V/M key for 2
seconds or longer.
5
Repeat steps 2 through 4 to store
other frequencies in the skip
memory.
• As many as 100 frequencies can
be stored.
Tips:
• In VFO, frequencies can be stored
in the skip memory through the
same procedure.
• Skip memory can be returned to
normal memory (refer to “Erasing
VFO Skip Memory” on page 60).
ADVANCED OPERATION
Limit Search
This enables searches to be conducted
within a desired limited range.
1
2
3
Confirm that VFO is set.
9
Hold down the FUNC key and
press the SCAN key.
• “SCHB W” will be displayed and
VFO will be returned to.
10 Press the SCAN key to start the
Limit Search.
Hold down the FUNC key and
press the dial knob to change the
setting.
Turn the dial knob to select setting
number 08.
11 To cancel a Limit search, press the
V/M key or dial knob.
4
Hold down the FUNC key and turn
the dial knob to select LIMIT.
• “VFO” will be displayed initially.
Tips:
Limit search memory can be called
by holding down the FUNC key and
turning the dial knob during a limit
search.
• The limit search is set.
5
To return to VFO, press the dial
knob or V/M key.
6
Turn the dial knob to set a lower
frequency of limit range.
7
Hold down the FUNC key and
press the SCAN key.
• “SCHA W” will be displayed and
VFO will be returned to.
8
Turn the dial knob to set an upper
frequency of limit range.
35
ADVANCED OPERATION
Changing the Search Type
The AR-mini has three searching
method types. These can be changed
when searching.
1
2
36
Start a search.
Press the SCAN key to change the
scan type.
• The scan type will be changed with
each press of the SCAN key, as
follows:
Busy Search ➝ Hold Search ➝
Time Search ➝ Busy Search ➝ ·····
• Busy Search: the “B” icon is lit.
The search will be paused while
receiving a signal. The search will
resume 2 seconds later when the
signal is gone.
• Hold Search: the “B” icon is
blinking.
The search will be stopped when
a signal is received.
• Time Search: No icon is
displayed.
The search will be paused
for 5 seconds when a signal
is received. The search will
resume 5 seconds later even if
a signal is received. If the signal
disappears during the 5 seconds
pause period, the search will be
resumed 2 seconds later. This
pause length can be changed by
setting number 07.
Changing the Search
Band Memory
The search band memory is preset
when the AR-mini is shipped. The
frequency of search band memory can
be changed.
1
2
3
Start a limit search.
Hold down the FUNC key and turn
the dial knob to select the memory
number to be memorised.
Hold down the FUNC key and
press the SCAN key for 2 seconds
or longer.
Tips:
The search band memories are
listed on page 74.
ADVANCED OPERATION
Limit Link Search
7
Hold down the FUNC key and turn
the dial knob to select the search
band memory number (0 to 22) to
be linked.
8
Turn the dial knob to select or
deselect the link number.
• A decimal point will be displayed
when the link number is selected.
• Beware that by default all link
numbers from 00 to 22 are
selected. Unselect the numbers
you don’t need in your scan.
9
Hold down the FUNC key and turn
the dial knob to select the next
limit search number to be linked.
• Repeat steps 8 and 9 as many
times as necessary.
This enables a Linked Limit Search for
easy change of limit ranges.
1
2
3
Confirm that VFO is set.
Hold down the FUNC key and press
the dial knob to change the setting.
Turn the dial knob to select setting
number 08.
4
Hold down the FUNC key and turn
the dial knob to select “LTLNK”.
5
Turn the dial knob to select setting
number 10.
10 To return to VFO, press the dial
knob twice or V/M key twice.
6
Hold down the FUNC key and
turn the dial knob to select the
pattern number (0 to 9) into which
you want to set the Search Band
Memory numbers (L00 to L22,
refer to the list p.74)
pattern number
11 Press the SCAN key to start a Limit
Link Search.
12 Press the V/M key to stop the Limit
Link Search.
37
ADVANCED OPERATION
Example:
The limit search memory 00 is set
from 118.00 to 141.975 MHz.
The limit search memory 01 is set
from 154.95 to 154.61 MHz.
When the memory 00 is linked to
memory 01, the search range is set
as follows:
118.000
MEMORY
As many as 1000 frequencies can be
stored in the memory. Memory data is
banked in blocks of 100.
Memory can be stored according to
memory name, tone squelch or other
statuses.
The memory is used for memory scan.
(Search)
141.975
(Skip)
(Skip)
154.950
(Search)
154.610
38
Tips:
Some shortwave broadcast station
frequencies are memorised (refer to
page 72 for details).
ADVANCED OPERATION
Storing a Frequency in
Memory
1
2
3
Confirm that VFO is set.
Turn the dial knob to set the
frequency to be stored in memory.
Hold down the FUNC key and
press the V/M key.
• The memory number will blink.
4
Press the c or v key to change
the memory bank.
5
Turn the dial knob to change the
memory number.
• Skip this step if there is no need to
change the memory number.
Memory
bank
6
Recalling Memory
1
2
3
4
Confirm that VFO is set.
Press the V/M key to set MEMORY.
Press the c / v key or turn the
dial knob to recall the desired
memory.
To return to the original VFO, press
the V/M key.
Memory
number
To store, hold down the FUNC key
and press the V/M key.
Tips:
In step 3, press only the V/M key to
cancel and return to VFO.
39
ADVANCED OPERATION
Returning to VFO with
Displaying Memory
Frequency
1
2
3
4
Erasing Memory
1
2
Confirm that VFO is set.
Press the V/M key to set MEMORY.
Turn the dial knob to recall the
memory you wish to erase.
3
Hold down the FUNC key and
press the V/M key.
• “CLEAR” will be displayed.
4
To erase the memory, hold down
the FUNC key and press the V/M
key.
• The memory will be erased and
MEMORY will be returned to.
Press the c / v key or turn the
dial knob to recall the desired
memory.
Press the c and v key
simultaneously to return to the
VFO with displaying memory
frequency.
Confirm that the MEMORY is set.
Tips:
In step 3, press only the V/M key to
cancel and return to MEMORY.
40
ADVANCED OPERATION
• Memory stored in the same
memory bank will be erased, and
the next memory bank number will
be displayed.
• If you wish to cancel this
procedure, press the V/M key to
exit.
Erasing All Memories
from the Memory Bank
All memory stored in the same memory
bank can be erased simultaneously.
1
2
3
Confirm that VFO is set.
Hold down the FUNC key and
press the dial knob to change the
setting.
Turn the dial knob to select setting
number 13.
4
Hold down the FUNC key and turn
the dial knob to select “CLEAR”.
• Release the FUNC key to select.
5
Use the dial knob to select the
bank number to be erased.
6
Hold down the FUNC key and
press the V/M key.
7
Repeat from step 4 when erasing
other memory.
8
Press the dial knob to return step
3.
9
To return to the original VFO, press
the dial knob or V/M key.
• “WAIT” will be displayed for 2
seconds, and the memory bank will
then be erased.
41
ADVANCED OPERATION
Naming Memory
Memory Scanning
Memory can be named using up to 6
characters.
How to scan all memories.
1
2
Confirm that MEMORY is set.
Turn the dial knob to recall the
desired memory to be named.
3
Hold down the FUNC key and
press the SCAN key.
• The cursor will blink.
4
Turn the dial knob to select a
character.
5
To change the cursor, hold down
the FUNC key and turn the dial
knob.
6
To store a name, hold down the
FUNC key and press the V/M key.
Tips:
• To change the character, repeat
steps 1 through 3, hold down
the FUNC key and turn the dial
knob to select the character to
be changed. Turn the dial knob to
select a new character and then
hold down the FUNC key and
press the V/M key.
• To check which frequency is
stored under the displayed name:
-Hold down the FUNC key and
press the SCAN key.
-Press the MODE key.
To revert to NAME display, press
the DIAL knob.
42
1
2
Confirm that VFO is set.
Hold down the FUNC key and
press the dial knob to change the
setting.
3
Turn the dial knob to select setting
number 09.
4
Hold down the FUNC key and turn
the dial knob to select ALL.
5
To return to the original VFO, press
the dial knob or V/M key.
6
Press the V/M key to enter
MEMORY.
7
Press the SCAN key to start
Memory Scan.
8
Press the V/M key to return to
MEMORY.
ADVANCED OPERATION
Setting Skipped Memory
when Scanning
Scanning the Memory
Bank
Specified memory can be skipped
when scanning. This prevents a scan
from being stopped when a frequency
that should be cancelled is scanned.
All memory can be set as skipped
memory.
Scanning can be performed within a
specified memory bank.
1
2
3
Confirm that MEMORY is set.
Turn the dial knob to select the
memory number to be skipped.
Hold down the V/M key for 2
seconds or longer to be set.
) will be
• The skip memory mark (
displayed.
Tips:
To return to the normal memory, hold
down the V/M key for 2 seconds or
longer in step 4.
1
2
Confirm that VFO is set.
Hold down the FUNC key and
press the dial knob to change the
setting.
3
Turn the dial knob to select setting
number 09.
4
Hold down the FUNC key and turn
the dial knob to select BANK.
5
Press the dial knob or V/M key to
return to VFO.
6
To return to MEMORY, press the
V/M key.
7
Press the c or v key to select the
desired memory bank.
8
Press the SCAN key.
• Scanning will start in the memory
bank.
9
To change the memory bank, hold
down the FUNC key and turn the
dial knob.
10 Press the V/M key to return to
MEMORY.
43
ADVANCED OPERATION
Scanning a Linked
Memory Bank
8
Turn the dial knob to select or
deselect a memory bank.
• All memory banks are selected by
default! You need to deselect the
banks you don’t need to scan.
9
Hold down the FUNC key and turn
the dial knob to select another
memory bank number to be linked.
A memory bank can be linked to other
memory banks to scanning.
* The AR-mini has 10 memory banks
(0 – 9).
1
2
Confirm that VFO is set.
Hold down the FUNC key and
press the dial knob to change the
setting.
3
Turn the dial knob to select setting
number 09.
4
Hold down the FUNC key and turn
the dial knob to select BKLNK.
• “ALL” will be displayed initially.
5
Turn the dial knob to select setting
number 11.
6
Hold down the FUNC key and turn
the dial knob to select the pattern
number (0 to 9) into which you
want to set the memory banks to
be linked.
memory bank number
pattern number
7
44
Release the FUNC key.
10 Release the FUNC key.
11 Turn the dial knob to select or
deselect a memory bank.
12 Press the dial knob.
13 Press the V/M key twice.
14 Press the SCAN key to start
scanning.
15 Press the V/M key to stop
scanning.
ADVANCED OPERATION
Using Broadcast Facility
Using PRESET
This feature is used for easy tuning of
various pre-programmed ‘broadcast’
bands (e.g. AM & FM radio stations
and TV sound).
12 frequencies are set as Preset
Channel. These frequencies are typical
frequencies from each band.
1
2
3
Confirm that VFO is set.
1
2
Hold down the FUNC key and
press the c key to display the
broadcast radio memory number.
Confirm that VFO is set.
Hold down the FUNC key and
press the c key twice to display
the Preset Number.
Press the c or v key to change
the Broadcast Facility memory
number.
4
Turn the dial knob to change the
frequency from preset channels.
5
To return to VFO, hold down the
FUNC key and press the c key
twice.
Tips:
• In step 3, a frequency is modified
only within the specific range. This
range is depending on each band.
• The memorised broadcast facility
frequencies are listed on page 70.
3
Press the c or v key to change
the Preset Number.
4
To change the frequency from
Preset Channel, turn the dial knob.
5
To return to VFO, hold down the
FUNC key and press the c key.
Tips:
• Preset Number 12 is selected from
among memory numbers 980 to
999.
• Turn the dial knob to go through
channels of preset number 12.
• Preset frequencies are listed on
page 71.
45
ADVANCED OPERATION
Using Tone Squelch
(CTCSS)
A tone squelch is a setting that
prevents the frequency from opening
unless a proper tone frequency is
received on the audio signal. There are
50 selectable tone frequencies.
1
2
This is how to find out the tone
frequency of a CTCSS signal.
1
2
Confirm that VFO is set.
Turn the dial knob to set the
frequency to be searched.
Confirm that VFO is set.
3
Hold down the FUNC key and
press the MODE key twice until
TSQ is displayed.
Hold down the FUNC key and
press the MODE key several times
until “TONSRH” is displayed.
4
Press the V/M key or dial knob.
• The “TSQ” tone squelch icon will
blink.
• The tone frequency will be displayed
when the frequency is matched.
3
Press the V/M key or dial knob.
• “TSQ” tone squelch icon will be
displayed.
4
Hold down the FUNC key and
press the dial knob to change the
setting.
5
Turn the dial knob to select setting
number 20.
6
Hold down the FUNC key and turn
the dial knob to select the tone
frequency.
7
To return to the original display,
press the dial knob or V/M key.
8
To cancel, press the FUNC and
MODE keys several times until VFO
is selected. Press the dial knob or
V/M key.
Tips:
• When AM or Wide FM is set, the
tone squelch is cancelled even if
the tone squelch icon is displayed.
• Tone frequencies are listed on
page 73.
46
Searching the Tone Frequency
• When no tone frequency is
matched, “NO TONE” will be
displayed and “TSQ” will blink.
5
To cancel, press the FUNC and
MODE key (several times) until
VFO is selected. Press the dial
knob or V/M key.
Tips:
A tone frequency may be displayed as
noise when the tone squelch is set to
“00” or the MONI key is pressed, even if
the AR-mini is receiving no signal. This
is not a malfunction. We recommend
that the tone squelch should be set
when this function is used.
ADVANCED OPERATION
Reversed Tone Squelch
Function
This facility reverses operation of ‘tone
squelch’.
It is used when special radio systems
are employing mixed tones with no
voice. When enabled, the squelch
will cancel when normal speech is
transmitted (the squelch will open so
you can hear people talking) and mute
when the tone signal is transmitted.
1
2
3
Using DCS
DCS (Digital Code Squelch) is set to
receive a signal which has been set by
the DCS. The DCS code can be set to
one of 104 codes.
1
2
Press the V/M key or dial knob.
• “T” icon will be displayed.
4
Hold down the FUNC key and
press the dial knob to change the
setting.
5
Turn the dial knob to select setting
number 21.
6
Turn the dial knob to select
REVTSQ.
7
Press the FUNC key and turn
the dial knob to select the tone
frequency.
8
To return to VFO, press the dial
knob or V/M key.
9
To cancel, press the FUNC and
MODE keys several times until VFO
is selected. Press the dial knob or
V/M key.
Hold down the FUNC key and
press the MODE key until DCS is
displayed.
3
Press the V/M key or dial knob.
• “DCS” icon is displayed.
4
Hold down the FUNC key and
press the dial knob to change the
setting.
5
Turn the dial knob to select setting
number 25.
6
Hold down the FUNC key and turn
the dial knob to select a DCS code.
7
To return the original display, press
the dial knob or V/M key.
8
To cancel, press the FUNC and
MODE keys several times until VFO
is selected. Press the dial knob or
V/M key.
Confirm that VFO is set.
Hold down the FUNC key and
press the MODE key several times
until REV TSQ is displayed.
Confirm that VFO is set.
Tips:
When AM or Wide FM is set, the
tone squelch will be cancelled even
if the tone squelch icon is displayed.
Tone frequencies are listed on page
73.
47
ADVANCED OPERATION
Using the Voice Inverter
Using the Attenuator
(Not available for US domestic version)
This function decreases the signal
strength by 15 dB.
1
2
3
Confirm that VFO is set.
Turn the dial knob to set the
frequency to use the voice inverter.
1
2
Hold down the FUNC key and
press the MODE key until V.INV is
displayed.
3
4
Press the dial knob.
• The voice inverter icon will be
displayed along with a voice
inverter carrier frequency.
Confirm that VFO is set.
Hold down the c key for 2
seconds or longer.
• “ATT” icon is displayed.
To cancel, hold down the c key for
2 seconds or longer.
• “ATT” icon disappears.
Using Key Lock
This function prevents settings from
being changed by accidentally pressing
keys.
5
Turn the dial knob to hear the voice
clearly.
6
To cancel, press the FUNC and
MODE keys several times until VFO
is selected. Press the dial knob or
V/M key.
1
2
Tips:
In step 5, the frequency is displayed
by pressing the MODE key.
Hold down the FUNC key and
press the MONI key.
” (Key lock) icon is displayed.
• “
• Except for the FUNC, MONI and
PWR keys, no keys will work while
” is displayed.
“
3
48
Confirm that VFO is set.
To cancel, hold down the FUNC
key and press the MONI key.
” icon disappears.
• “
ADVANCED OPERATION
Searching Bug
Frequencies
Using the Bug Detector
Function
How to scan the 119 pre-installed
(unmodifiable) bug frequencies.
This function indicates signal strength
via a beep tone.
1
2
Confirm that VFO is set.
1
Hold down the SCAN key for 2
seconds or longer.
• “t” icon will displayed.
Search the bug frequency as described
in “Searching Bug Frequencies”.
2
Recall the memorised bug
frequency by turning the dial knob.
3
Hold down the FUNC key and
press the SCAN key for 2 seconds
or longer.
• When a strong signal is found, it will
be displayed.
• Up to 20 received frequency signals
can be memorised. These can be
confirmed by turning the dial knob.
• When no signal is found, “NON” will
be displayed.
• S-meter sensitivity is set to low and
the attenuator function is set.
3
To cancel, press the V/M key or
dial knob.
4
To return to VFO, press the dial
knob or V/M key.
Tips:
• For ease of use, select setting
numbers 04 (S-meter Sensitivity)
and 05 (S-meter Buzzer).
• The searching bug frequencies are
listed on page 70.
4
Press the V/M key to return to
displaying the bug frequency.
5
To return to VFO, press the dial
knob or V/M key.
Tips:
In step 3 the beep tone is changed
as follows:
Slow pitch beep: Weak signal
Middle pitch beep: Medium strength signal
Fast pitch beep: Strong signal
49
ADVANCED OPERATION
Resetting System
(System Reset)
Resetting All Contents
(All Reset)
System Reset initialises all settings
except for the normal memory and skip
memory.
All Reset initialises all of the AR-mini’s
contents.
1
2
Turn the power off.
1
2
Hold down the FUNC and MONI
key and turn the power on.
Turn the power off.
Hold down the FUNC, MONI key
and dial knob and turn the power
on.
3
Confirm that “SYSRST” is blinking.
3
Confirm that “ALLRST” is blinking.
4
To reset the system, press and
hold the dial knob for 2 seconds or
longer.
• System Reset can be cancelled by
pressing the V/M key, and VFO will
then be displayed.
4
To reset all contents, press and
hold the dial knob for 2 seconds or
longer.
• All Reset can be cancelled by
pressing the V/M key, and VFO will
then be displayed.
50
CHANGING SETTINGS
Changing Steps
Changing Fast Steps
This setting is used when changing the
step. Initially, a step is set automatically
depending on each band.
This setting is used when changing the
fast step. The fast step is available by
holding down the FUNC key and turning
the dial knob.
1
2
3
4
Hold down the FUNC key and
press the dial knob to change the
setting.
Turn the dial knob to select setting
number 00.
Hold down the FUNC key and turn
the dial knob to select the desired
step.
To return to the original display,
press the dial knob or V/M key.
1
Hold down the FUNC key and
press the dial knob to change the
setting.
2
Turn the dial knob to select setting
number 01.
3
Hold down the FUNC key and turn
the dial knob to select the desired
fast step.
• The fast step can be set as follows:
10 kHz, 100 kHz, 1 MHz, 10 MHz
and 100 MHz. (The default setting
is 1 MHz.)
4
To return to the original display,
press the dial knob or V/M key.
Tips:
A 9 kHz step can be set only in AM
mode. An 8.33 kHz step can be set
in the air traffic control band.
51
CHANGING SETTINGS
Setting the Lamp
Function
This setting is used for setting the time
during which the lamp should be lit.
1
2
3
4
Hold down the FUNC key and
press the dial knob to change the
setting.
This setting is used for setting the
alarm time or power off time.
1
Hold down the FUNC key and
press the dial knob to change the
setting.
2
Turn the dial knob to select setting
number 03.
3
Hold down the FUNC key and turn
the dial knob to set.
Turn the dial knob to select setting
number 02.
Hold down the FUNC key and turn
the dial knob to select AUTO, OFF
or ON.
• When AUTO is selected, the lamp
will be turned off 5 seconds after
the key operation.
• When OFF is selected, the lamp
will be turned off even if the key is
operated.
• When ON is selected, the lamp will
be constantly illuminated
To return to the original display,
press the dial knob or V/M key.
Tips:
We recommended that you select
AUTO to prevent excessive battery
consumption.
52
Setting the Timer
(Refer to the below for details.)
CHANGING SETTINGS
Setting the S-meter
Sensitivity
This setting is used for reducing Smeter sensitivity.
• The off timer and alarm time can be
set as follows:
OFT 30M: Turns off after 30 minutes
OFT 60M: Turns off after 60 minutes
OFT 90M: Turns off after 90 minutes
ALT 15M: Sets the alarm for 15 minutes’ time
ALT 30M: Sets the alarm for 30 minutes’ time
ALT 45M: Sets the alarm for 45 minutes’ time
ALT 60M: Sets the alarm for 60 minutes’ time
OFT: ALL off
4
1
Hold down the FUNC key and
press the dial knob to change the
setting.
2
Turn the dial knob to select setting
number 04.
3
Hold down the FUNC key and turn
the dial knob to set “LOW”.
4
To return to the original display,
press the dial knob or V/M key.
To return to the original display,
press the dial knob or V/M key.
Tips:
This function is unavailable in AM
and Wide FM. This setting is useful
when searching a bug frequency
with the S-meter buzzer function.
53
CHANGING SETTINGS
Setting the S-meter
Buzzer
Setting the Resumption
Time
This setting is used for emitting a beep
sound as the S-meter’s value.
This setting is used for setting the
resumption time when searching or
scanning.
1
2
3
4
Hold down the FUNC key and
press the dial knob to change the
setting.
1
Turn the dial knob to select setting
number 05.
Hold down the FUNC key and
press the dial knob to change the
setting.
2
Turn the dial knob to select setting
number 07.
Hold down the FUNC key and turn
the dial knob to set “SMBUZ”.
3
Hold down the FUNC key and turn
the dial knob to set the resume
time.
• The resumption time can be set at
1 to 12 seconds.
4
To return to the original display,
press the dial knob or V/M key.
To return to the original display,
press the dial knob or V/M key.
Tips:
This setting is unavailable in AM and
Wide FM. This setting is useful when
searching a bug frequency with the
S-meter sensitivity function
54
Tips:
This setting is effective when
performing a search, scan, Priority
Watch or 2VFO watch.
CHANGING SETTINGS
• Limit Link Search
Select “LTLNK” to search in a
linked limited range.
Setting the Search
This setting is used for switch between
search methods.
1
Hold down the FUNC key and
press the dial knob to change the
setting.
2
Turn the dial knob to select setting
number 08.
3
Hold down the FUNC key and turn
the dial knob to select the search
method.
• VFO Search
Select “VFO” to search between 0.1
MHz and 1299.995 MHz in VFO.
4
To return to the original display,
press the dial knob or V/M key.
• Limit Search
Select “LIMIT” to search in a limited
range.
55
CHANGING SETTINGS
• Bank Link Scan
Select “BKLNK” to scan all memory
within a linked memory bank
Setting the Memory Scan
This setting is used for switching
memory scan methods.
1
Hold down the FUNC key and
press the dial knob to change the
setting.
2
Turn the dial knob to select setting
number 09.
3
Hold down the FUNC key and turn
the dial knob to select the memory
scan method.
• All Scan
Select “ALL” to scan all memory.
• Bank Scan
Select “BANK” to scan all memory
within a bank memory.
56
4
To return to the original display,
press the dial knob or V/M key.
CHANGING SETTINGS
Setting the Limit Link
Search
This setting is used for linking a limit
search.
1
Hold down the FUNC key and
press the dial knob to change the
setting.
2
Turn the dial knob to select setting
number 10.
3
Hold down the FUNC key and turn
the dial knob to select the limit link
number to be linked.
• The setting number will be replaced
with a search band memory
number.
4
Release the FUNC key.
• The search link mark is displayed.
5
Press the dial knob to return step
2.
6
To return to the original display,
press the dial knob or V/M key.
Tips:
When the link limit search is
cancelled, repeat steps 1 through
3 and select the link limit search
number to be cancelled. Then press
the dial knob.
57
CHANGING SETTINGS
Setting the Memory for a
Memory Bank Link Scan
This setting is used for setting memory
banks that are linked for a scan.
1
Hold down the FUNC key and
press the dial knob to change the
setting.
2
Turn the dial knob to select setting
number 11.
3
Hold down the FUNC key and turn
the dial knob to select the memory
bank number to be linked.
4
Press the dial knob.
• The bank link mark will be
displayed.
58
5
Press the dial knob to return to
step 2.
6
To return to the original display,
press the dial knob or V/M key.
Tips:
When the memory bank link is
cancelled, repeat steps 1 through 4
and select the memory bank number
to be cancelled. Erase “.” (bank link
mark) by pressing the dial knob.
CHANGING SETTINGS
Confirming Limit Search
Frequencies
Erasing All Memory from
a Memory Bank
This setting is used for confirming the
frequencies in a set limit search.
This setting is used for erasing all
memory from a memory bank.
The upper frequency and lower
frequency are displayed in alternation
every second.
1
Hold down the FUNC key and
press the dial knob to change the
setting.
1
Hold down the FUNC key and
press the dial knob to change the
setting.
2
Turn the dial knob to select setting
number 13.
2
Turn the dial knob to select setting
number 12.
3
Hold down the FUNC key and turn
the dial knob.
4
Turn the dial to select the bank
number to be erased.
5
Hold down the FUNC key and
press the V/M key.
6
Press the dial knob.
• The memory stored in the memory
bank will be erased, and then next
memory bank number is displayed.
• To cancel this procedure, press the
V/M key to exit.
3
Hold down the FUNC key and turn
the dial knob to confirm.
4
Press the dial knob to return step
2.
5
To return to the original display,
press the dial knob or V/M key.
Tips:
• In step 3, up to 24 pairs of limit
search frequencies can be
confirmed.
• This procedure is only for
confirmation. The setting cannot
be changed.
59
CHANGING SETTINGS
7
Repeat from the step 3 to erase
other memory.
8
To return to the original display,
press the dial knob or V/M key.
Tips:
In step 3, memory banks containing
no memory will not be displayed.
Erasing VFO Skip Memory
This setting is used for erasing VFO
skip memory. The VFO skip memory
enables stored frequencies to be
skipped when searching.
1
Hold down the FUNC key and
press the dial knob to change the
setting.
2
Turn the dial knob to select setting
number 14.
3
Hold down the FUNC key and turn
the dial knob to set “CLEAR”.
4
Press the dial knob.
• The VFO skip memory will be
erased.
• To cancel this procedure, press the
V/M key to exit.
5
Press the dial knob to return step
2.
6
To return to the original display,
press the dial knob or V/M key.
Tips:
In step 3, “CLEAR” will not be
displayed if there is no VFO skip
memory stored.
60
CHANGING SETTINGS
Erasing the Memory
Channel’s Skip Mark
Cancelling Muting during
a Scan
This setting is used for erasing the
skip mark of the memory channel. The
skip mark is stored to skip the marked
channels in the scan function.
By default, the voice is muted during a
scan or search. This setting is used for
cancelling the muting.
1
Hold down the FUNC key and
press the dial knob to change the
setting.
2
Turn the dial knob to select setting
number 15.
3
Hold down the FUNC key and turn
the dial knob to set CLEAR.
4
Press the dial knob (the LCD
shows “WAIT”).
• After approx. 25 seconds the LCD
will show “CLEAR”. At this time the
skip memory will be erased.
5
6
Press the dial knob to return step 2.
To return to the original display,
press the dial knob or V/M key.
Tips:
In Step 3, CLEAR will not be
displayed if there is no skip memory
stored.
1
Hold down the FUNC key and
press the dial knob to change the
setting.
2
Turn the dial knob to select setting
number 16.
3
Hold down the FUNC key and turn
the dial knob to set OFF.
• If you select OFF, the muting will be
cancelled
4
To return to the original display,
press the dial knob or V/M key.
61
CHANGING SETTINGS
Antenna Selection
By default AR-mini is using the built-in
bar antenna for frequencies between 100
kHz and 5 MHz. If you wish to bypass
this setting to use the supplied antenna
or another external antenna between 100
kHz and 5 MHz, proceed as follows:
1
2
3
Hold down the FUNC key and
press the dial knob.
Turn the dial knob to select setting
number 17.
Hold down the FUNC key and turn
the dial knob to set “EXT”.
• To set the built-in antenna, turn the
dial knob to select “BAR”.
4
To return to the original display,
press the dial knob or V/M key.
Tips:
Please note that if the antenna type
is not matched, or the antenna signal
is too strong, AR-mini will overload
and reception sensitivity will be
reduced. In most cases any large
external antenna will NOT improve
reception, but a simple telescopic
whip antenna will.
Special note to TESTERS: This antenna
selection issue is important for someone
who would perform sensitivity, IP3,
etc... measurements. If the setting is
not changed to EXT, test results would
appear extremely bad on shortwave.
62
Using the Earphone as an
Antenna
This setting uses the earphone as an
antenna. This setting is available for all
bands on this receiver.
1
Hold down the FUNC key and
press the dial knob to change the
setting.
2
Turn the dial knob to select setting
number 18.
3
Hold down the FUNC key and turn
the dial knob to set “EARANT” or
“EXT”.
4
To return to the original display,
press the dial knob or V/M key.
Tips:
Under these settings, an earphone
should always be connected to
the receiver. If no earphone is
connected, reception sensitivity will
be reduced.
CHANGING SETTINGS
Automatically Increasing
the Volume in FM
This setting is used for automatically
increasing the volume to 6 dB in FM
when a 12.5 kHz step is set.
1
2
Hold down the FUNC key and
press the dial knob to change the
setting.
Setting Tone Frequency
This is used to set one of the 50
selectable tone frequencies.
1
Hold down the FUNC key and
press the dial knob to change the
setting.
2
Turn the dial knob to select setting
number 20.
3
Hold down the FUNC key and turn
the dial knob to select the tone
frequency.
4
To return to the original display,
press the dial knob or V/M key.
Turn the dial knob to select setting
number 19.
3
Hold down the FUNC key and turn
the dial knob to set ON.
4
To return to the original display,
press the dial knob or V/M key.
Tips:
This setting is available only in FM.
Tips:
Tone frequencies are listed in the
table on page 73.
63
CHANGING SETTINGS
Selecting Reversed Tone
Frequency
Selecting Voice Inverter
Carriers
This setting is used to select the
reversed tone frequency.
1 Hold down the FUNC key and
press the dial knob to change the
setting.
(Not available for US domestic version)
2
3
4
64
Turn the dial knob to select setting
number 21.
This setting is used for selecting the
carrier frequencies of voice inverted
frequencies. Carrier frequencies
can be selected so as to be clearly
audible. There are 16 selectable carrier
frequencies between 3200 Hz and 3500
Hz in 20 Hz steps.
1
Hold down the FUNC key and
press the dial knob to change the
setting.
2
Turn the dial knob to select setting
number 23.
3
Hold down the FUNC key and turn
the dial knob to select the carrier
frequency.
4
To return to the original display,
press the dial knob or V/M key.
Hold down the FUNC key and turn
the dial knob to select the tone
frequency to be reversed.
To return to the original display,
press the dial knob or V/M key.
CHANGING SETTINGS
Automatically Switching
the Display Information
This setting is used for switching the
display from the volume or squelch
display to the frequency display
automatically when the setting time has
passed.
1
Hold down the FUNC key and
press the dial knob to change the
setting.
2
Turn the dial knob to select setting
number 24.
3
Hold down the FUNC key and turn
the dial knob to select the setting
time to be changed.
• The setting time can be set as
follows; 0.5 seconds, 1 second, 2
seconds, 3 seconds, 4 seconds, 5
seconds and OFF
Setting DCS Codes
This is used to set one of the 104
selectable DCS codes.
1
Hold down the FUNC key and
press the dial knob to change the
setting.
2
Turn the dial knob to select setting
number 25.
3
Hold down the FUNC key and turn
the dial knob to select the DCS
code.
4
To return to the original display,
press the dial knob or V/M key.
Tips:
The DCS codes are listed in the
table on page 72.
4
To return to the original display,
press the dial knob or V/M key.
Tips:
In step 3, the display will not be
changed automatically if OFF is
selected.
65
CHANGING SETTINGS
Setting the DCS Code
Phases
This setting is used for the phase of
DCS codes that have been set.
1
2
3
4
Hold down the FUNC key and
press the dial knob to change the
setting.
This setting is used for turning the beep
off.
1
Hold down the FUNC key and
press the dial knob to change the
setting.
2
Turn the dial knob to select setting
number 27.
3
Hold down the FUNC key and turn
the dial knob to set OFF.
4
To return to the original display,
press the dial knob or V/M key.
Turn the dial knob to select setting
number 26.
Hold down the FUNC key and turn
the dial knob to set the phase.
• The DCS code phase will not be
reversed when “NORMAL” is selected.
• When REV is selected, a phase of
the DCS code will be reversed.
To return to the original display,
press the dial knob or V/M key.
Tips:
This function has no icon. Therefore,
the setting status should be
confirmed in this procedure.
66
Turning the Beep Off
CHANGING SETTINGS
Changing the Battery
Saving Time
Displaying Battery
Voltage
This setting is used for changing the
battery saving time.
This setting is used for displaying the
battery voltage.
1
Hold down the FUNC key and
press the dial knob to change the
setting.
1
Hold down the FUNC key and
press the dial knob to change the
setting.
2
Turn the dial knob to select setting
number 28.
2
Turn the dial knob to select setting
number 29.
3
Hold down the FUNC key and turn
the dial knob to set the desired time.
• The battery save time can be
selected as followings:
1 second, 3 seconds, 5 seconds, 7
seconds, 9 seconds and OFF.
3
Hold down the FUNC key and
turn the dial knob to display the
voltage.
4
Press the dial knob to return to
step 2.
5
To return to the original display,
press the dial knob or V/M key.
4
To return to the original display,
press the dial knob or V/M key.
Tips:
In step 3, the battery save function
will be cancelled when OFF is
selected
67
CHANGING SETTINGS
Charging the Ni-MH
Battery
5
To charge the battery, turn the
power off by pressing the PWR key
for 2 seconds or longer.
This setting is only available for the
supplied Ni-MH batteries. Never use
this setting for other batteries.
1
Hold down the FUNC key and
press the dial knob to change the
setting.
2
Turn the dial knob to select setting
number 30.
3
Hold down the FUNC key and turn
the dial knob to set “CHARG”.
4
To return to the original display,
press the dial knob or V/M key.
68
• “CHARG” will be displayed and “
” will blink.
6
Connect the AC adapter AA-mini
or DC adapter DC-mini.
• Refer to page 16, 21 to connect the
AA-mini or DC-mini
Note:
• Disconnect the AA-mini or DCmini after approximately 20 hours
have passed.
• Charging ends automatically after
24 hours in order to maintain
safety.
• In step 5, “CHARG” will be
displayed even if no battery is
installed. Therefore, you should
confirm that the specific batteries
are installed.
• The AR-mini may be turned on by
inserting the AA-mini or DC-mini
when no battery is installed or
when the batteries are depleted.
This is not a malfunction.
CHANGING SETTINGS
Revising Step Frequency
This receiver can automatically revise
step frequencies to match the channel
plan. This setting can also be used for
cancelling any revisions.
1
2
3
4
Hold down the FUNC key and
press the dial knob to change the
setting.
Turn the dial knob to select setting
number 32.
Hold down the FUNC key and turn
the dial knob to set OFF.
To return to the original display,
press the dial knob or V/M key.
Tips:
The step frequency is not revised
automatically while this setting is set
OFF, except for the 6.25 Hz and 12.5
Hz step.
Shifting the
Microprocessor’s Clock
Frequency
This setting is used to prevent
the undesirable influence of the
microprocessor’s clock frequency.
1
Hold down the FUNC key and
press the dial knob to change the
setting.
2
Turn the dial knob to select setting
number 33.
3
Hold down the FUNC key and turn
the dial knob to set ON.
4
To return to the original display,
press the dial knob or V/M key.
Tips:
This setting is cancelled by changing
the channel or turning the power off.
69
APPENDIX
Broadcast Facility Frequencies
For U.S.A. version
Memory No.
Initial frequency
Frequency Range
Remark
r-0
1.6200 AM
0.520 – 1.620
AM radio 10 kHz step
r-1
80.00 WFM
76.0 – 107.9 MHz
FM radio 50 kHz step
r-2
TV 2ch
TV 2ch – 69ch
USA TV
r-3
6.030 AM
3.00 – 11.995
VOA
r-4
WX01
WX01 – WX10
Marine weather channel
For European version
Memory No.
Initial frequency
Frequency Range
Remark
r-0
1.6200 AM
0.531 – 1.620
AM radio 9 kHz step
r-1
80.00 WFM
76.0 – 107.9 MHz
FM radio 50 kHz step
r-2
TV 1ch
TV 1ch – 69ch
CCIR TV
r-3
9.410 AM
3.00 – 11.995
BBC
r-4
PMR 1 FM
PMR 1ch – 8ch
PMR446
Refer to “Using Broadcast Mode” on page 45.
Bug Frequencies
26.0950
136.6000
142.9000
298.9800
395.7500
398.3100
399.4300
27.0000
139.4000
143.2050
299.3200
396.4300
398.4500
399.4500
410.1100
27.1450
139.4500
143.7800
339.0300
396.4400
398.4550
399.4550
410.9700
32.0000
139.6000
143.8500
339.2500
396.6050
398.4600
399.5750
411.8350
34.4500
139.7000
143.8800
339.4500
396.8200
398.6000
399.5900
418.5650
36.6650
139.9000
143.9100
350.1250
397.2400
398.6050
399.6050
428.6350
75.6000
139.9400
143.9400
361.8200
397.2500
398.6400
399.6150
441.1150
76.0000
139.9600
143.9700
361.8250
397.5650
398.6450
399.6400
442.8000
105.8500
139.9750
149.0000
365.0500
398.0100
398.6500
399.6500
442.9000
110.1500
139.9800
149.4500
367.4000
398.0300
398.9500
0
399.7500
444.1150
124.0900
140.0000
149.5050
368.8000
398.0500
399.0000
399.9100
444.8850
134.0000
140.0500
149.8950
380.4250
398.0650
399.0250
399.900
445.6650
600.5000
134.1600
140.4500
153.3500
380.6875
398.1100
399.0300
400.0000
134.9000
140.5000
154.0000
389.6050
398.2150
399.2375
406.5200
135.3650
141.0000
154.5850
390.6400
398.3050
399.2500
407.2100
Refer to “Searching Bug Frequencies” on page 49.
70
407.9050
APPENDIX
Preset Memory Frequencies
For U.S.A. version
Preset No.
Initial frequency
Remark
P00
1.6200 AM
MW Broadcast
P01
6.030 AM
SW Broadcast (VOA)
P02
51.000 FM
Amateur radio
P03
82.500 WFM
FM Broadcast
P04
128.800 AM
Air Band
P05
156.800 FM
Land Mobile radio
P06
145.000 FM
Amateur radio
P07
162.550 FM
Marine radio (Weather)
P08
438.000 FM
Amateur radio
P09
462.5625 FM
FRS
P10
1260.000 FM
Amateur radio
P11
TV 2ch WFM
Television Broadcast
P12
MEM980 FM
Frequencies 980 to 999 stored by user. (*)
(*) Refer to page 39 “Storing a Frequency in Memory”.
For European version
Preset No.
Initial frequency
Remark
P00
1.6200 AM
MW Broadcast
P01
9.410 AM
SW Broadcast (BBC)
P02
51.000 FM
Amateur radio
P03
82.500 WFM
FM Broadcast
P04
128.800 AM
Air Band
P05
156.800 FM
Land Mobile radio
P06
145.000 FM
Amateur radio
P07
156.300 FM
Marine radio
P08
433.000 FM
Amateur radio
P09
446.00625 FM
LPD (PMR446)
P10
1260.000 FM
Amateur radio
P11
TV 33ch WFM
Television Broadcast
P12
MEM980 FM
Refer to “Using PRESET” on page 45.
71
APPENDIX
Shortwave Broadcast Station List
Display
VOA
CANADA
PORTUG
SPAIN
BBC
FRANCE
Memory Frequency
Memory Frequency
Memory Frequency
Memory Frequency
Display
Display
Display
Channel (MHz)
Channel (MHz)
Channel (MHz)
Channel (MHz)
800
6.030
842
6.060
910
9.590
942
801
6.160
843
7.175
911
9.985
943
9.595
802
9.760
844
9.515
912
13.800
944
11.620
803
11.930
845
17.710
913
15.735
945
15.020
805
5.995
848
5.985
916
7.485
948
7.190
806
7.235
849
9.925
917
9.590
949
5.250
807
9.735
850
11.780
918
9.985
808
11.705
851
13.740
919
13.800
ITALY
BELGIU
DENMAR
NORWAY
CHINA
950
9.855
951
11.685
5.975
816
9.780
853
5.955
921
6.065
952
817
11.960
854
6.020
922
9.490
953
7.275
818
15.555
855
9.895
923
13.625
954
9.570
13.670
NEDERL
SWEDEN
KOREA
819
21.655
856
11.655
924
17.505
955
821
7.270
858
6.090
926
6.120
956
6.155
822
9.520
—
—
927
9.630
957
7.200
823
11.920
—
—
928
11.755
958
9.750
824
15.585
—
—
929
9.795
959
11.850
LUXEMB
FINLAN
JAPAN
832
6.195
900
3.955
932
5.940
960
5.995
833
9.410
901
6.075
933
5.920
961
9.580
834
12.095
902
9.545
934
7.205
835
15.310
903
9.735
935
12.030
WELLE
RUSSIA
AUSTRA
962
9.660
963
12.080
837
6.045
905
3.985
937
9.435
—
—
838
9.790
906
6.165
938
11.585
—
—
839
11.670
907
9.885
939
15.615
840
15.525
908
15.220
940
17.545
SWISS
ISRAEL
Refer to “MEMORY” on page 38 and “Recalling Memory” on page 39.
72
INDIA
6.045
—
—
—
—
—
APPENDIX
Tone Frequency List (CTCSS)
Tone frequency (Hz)
67.0
79.7
94.8
110.9
131.8
156.7
171.3
186.2
203.5
229.1
69.3
82.5
97.4
114.8
136.5
159.8
173.8
189.9
206.5
233.6
71.9
85.4
100.0
118.8
141.3
162.2
177.3
192.8
210.7
241.8
74.4
88.5
103.5
123.0
146.2
165.5
179.9
196.6
218.1
250.3
77.0
91.5
107.2
127.3
151.4
167.9
183.5
199.5
225.7
254.1
Refer to “Using Tone Squelch” on page 46.
DCS Code List
023
072
152
244
311
412
466
631
025
073
155
245
315
413
503
632
026
074
156
246
325
423
506
654
031
114
162
251
331
431
516
662
032
115
165
252
332
432
523
664
036
116
172
255
343
445
526
703
043
122
174
261
346
446
532
712
047
125
205
263
351
452
546
723
051
131
212
265
356
454
565
731
053
132
223
266
364
455
606
732
734
054
134
225
271
365
462
612
065
143
226
274
371
464
624
743
071
145
243
306
411
465
627
754
Refer to “Using DCS” on page 47.
73
APPENDIX
Search Band Memory List
Lower
frequency
(MHz)
No.
Upper
frequency
(MHz)
Lower
frequency
(MHz)
No.
Upper
frequency
(MHz)
L00
118.000
141.9750
L12
466.0500
467.3750
L01
154.450
154.6100
L13
466.3500
466.5500
L02
156.025
162.0250
L14
465.0375
465.1500
L03
225.000
382.7000
L15
468.5500
468.8500
809.7500
L04
348.5625
348.7750
L16
797.12500
L05
358.5250
358.9375
L17
851.000
859.9875
L06
322.0250
322.5000
L18
896.000
899.9875
L07
380.2125
381.3125
L19
903.0125
904.9870
L08
422.0500
422.3000
L20
144.000
146.000
L09
450.0125
451.5000
L21
430.000
440.000
L10
453.3000
453.3500
L22
1260.000
1299.9875
L11
458.2500
459.5000
L--
*
*
* The frequencies are depending on “Limit Search” on page 35.
Refer to “Changing the Search Band Memory” on page 36.
2VFO Watch Memory List
2VFO
memory No.
Frequency
(MHz)
MODE
2VFO
memory No.
Frequency
(MHz)
MODE
FM
A00
10.0000
AM
A05
1000.0000
b00
100.0000
WFM
b05
1100.0000
FM
A01
200.0000
WFM
A06
1200.0000
FM
b01
300.0000
AM
b06
1299.9950
FM
A02
400.0000
FM
A07
145.0000
FM
FM
b02
500.0000
WFM
b07
433.0000
A03
600.0000
WFM
A08
433.0000
FM
b03
700.0000
WFM
b08
1295.0000
FM
A04*
800.0000
FM
A--
b04*
902.0000
FM
b--
2VFO Watch**
* Cellular frequencies blocked for US consumer version.
** These memories are set depending on 2VFO watch, detailed on page 32.
Refer to “2VFO Watch” on page 32 and “2VFO Watch with 2VFO Watch Reception Memory”
on page 33.
74
APPENDIX
Setting Number List
Setting
No.
Initial Display
Function
Page
00
Changing steps
P. 51
01
Changing fast steps
P. 51
02
Setting the lamp function
P. 52
03
Setting the timer
P. 52
04
Setting the S-meter sensitivity
P. 53
05
Setting the S-meter buzzer
P. 54
06
(This setting is unavailable for this
product.)
07
Setting the resumption time
P. 54
08
Setting the search
P. 55
09
Setting the memory scan
P. 56
10
Setting the limit link search
P. 57
—
75
APPENDIX
Setting
No.
76
Initial Display
Function
Page
11
Setting the memory for a memory bank link
scan
P. 58
12
Confirming limit search frequencies
P. 59
13
Erasing all memory from a memory bank
P. 59
14
Erasing VFO skip memory
P. 60
15
Erasing the memory channel’s skip mark
P. 61
16
Cancelling muting during a scan
P. 61
17
Antenna selection
P. 62
18
Using the earphone as an antenna
P. 62
19
Increasing the volume automatically in FM
P. 63
20
Setting the tone frequency
P. 63
21
Selecting reversed tone frequency
P. 64
22
(This setting is unavailable for this
product.)
—
APPENDIX
Setting
No.
Initial Display
Function
Page
23
Selecting Voice Inverter Carriers
24
Switching the display information
automatically
P. 65
25
Setting DCS codes
P. 65
26
Setting DCS code phases
P. 66
27
Turing the beep off
P. 66
28
Changing the battery saving time
P. 67
29
Displaying the battery voltage
P. 67
30
Charging the Ni-MH Battery
P. 68
31
(This setting is unavailable for this
product.)
32
Revising the step frequency
P. 69
33
Shifting the microprocessor’s clock frequency
P. 69
(Not available for US domestic version)
P. 64
–
77
APPENDIX
Troubleshooting
Symptom
No power
Cause
The battery is consumed.
Solution
Replace new battery.
Charge the battery.
No reception
No audio
Audio is distorted
The battery polarity is different.
Insert the battery correctly.
Time to press the PWR key is
short.
Press the PWR key for 2
seconds or longer.
The antenna is not correctly
attached.
Attach the antenna correctly.
A frequency is not tuned.
Tune the frequency correctly.
Selected antenna is different.
Select the correct antenna type
with setting number 17 or 18.
Attenuator function is set.
Cancel attenuator function.
Volume setting is too low.
Increase the volume.
A frequency is not tuned.
Tune the frequency correctly.
The reception mode is different.
Set the reception mode.
Squelch value is set too large.
Set the squelch to “Threshold”.
Tone squelch frequency is
different.
Set the tone squelch correctly.
DCS code is different.
Set the code correctly.
A frequency is not tuned.
Tune the frequency correctly.
The reception mode is different.
Set the reception mode.
Noise is emitted
Squelch value is set too small.
Set the squelch to “Threshold”.
Search is not started
Squelch value is set too small.
Set the squelch to “Threshold”.
Specific frequency is
skipped.
Search skip is set.
Cancel the search skip.
Scan is not started
Squelch value is set too small.
Set the squelch to “Threshold”.
Keys do not respond
Key lock function is set.
Cancel key lock function.
78
APPENDIX
Specifications
Frequency range ................................................................100 kHz – 1299.995 MHz (*)
Circuit type ............................................. AM, FM: Triple conversion super-heterodyne
WFM: double conversion super-heterodyne
Receiving modes ..................................................................................AM, WFM, NFM
I.F bandwidth ............................................................ AM/NFM: 15 kHz, WFN: 220 kHz
Memory channels ....................................................... 1000 (10 banks x 100 channels)
Scan speed ..................................................................................................8 steps/sec
Select scan channels ................................................................................................100
Priority channels ...........................................................................................................1
Pass frequencies ......................................................................................................100
Sensitivity (typical)
AM (10 dB S/N) ..................................... 0.2–5 MHz
1.3 μV
5–160 MHz
0.6 μV
160–370 MHz
0.6 μV
370–520 MHz
0.6 μV
520–1300 MHz
0.7 μV
FM (12 dB SINAD) .................................5–160 MHz
0.2 μV
160–370 MHz
0.2 μV
370–520 MHz 0.28 μV
520–1300 MHz 0.35 μV
WFM (12 dB SINAD) ..............................5–160 MHz
0.9 μV
160–370 MHz
0.8 μV
370–520 MHz
1 μV
520–1300 MHz
1 μV
Intermediate frequencies ............................................243.95 MHz, 21.7 MHz, 450 kHz
Tuning steps ..............................5, 6.25, 8.33*, 9*, 10, 12.5, 15, 20, 25, 30, 50, 100 kHz
(* Selectable depending on bands)
Selectivity ................................................................ AM/FM: More than 15 kHz / -6 dB
WFM: More than 110 kHz / -6 dB
Conducted spurious emission..........................................................less than -57 dBm
Frequency stability........................................................................ ±2.5 ppm (by TCXO)
AF output power ......................................100 mW, at 10% distortion with an 8 7 load
External speaker connector......................................................... 3.5 mm jack (MONO)
Antenna connector ......................................................................................SMA (50 7)
Battery requirement ............................................. 2 x AA (LR6) Ni-MH or alkaline cells
Battery life .........................................................Approx. 22 h in normal listening mode
External power supply ...........................................................................6V DC, 500 mA
Current drain .......................................... Approx. 110 mA (Receive, AF output 50 mW)
20 mA (Standby, saver 1:4 on)
65 mA (Standby, saver off)
Operating temperature ........................................................................... -10°C – +50°C
Dimensions (projections excluded) ..................................... 60(W) x 95(H) x 24(D) mm
2.4” x 3.7” x 0.9”
Weight ......................................................... 210 g (with antenna and batteries) 7.4 oz
Specifications are subject to change without notice or obligation.
(*) Cellular frequencies locked in the U.S.A version. Unblocked version available to qualified purchasers.
79
AOR, LTD.
2-6-4 Misuji, Taito-ku, Tokyo,
111-0055, Japan
www.aorja.com
[email protected]
AOR USA, INC.
20655 S. Western Ave, Suite 112
Torrance, CA 90501, U.S.A
Phone: 310-787-8615
Fax: 310-787-8619
www.aorusa.com
[email protected]
© 2008 AOR, LTD. All rights reserved.
Printed in Japan.
00M63AC851012