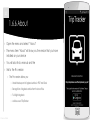
1
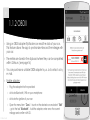
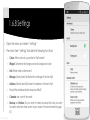
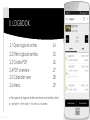
User manual WWW.STEFAN-ZANKL.COM / [email protected] DEVELOPED BY STEFAN ZANKL 2 Index 1/4 I. STOPWATCH 1.1 Generate car pool © Source Castle 6 7 1.1.1 Add Bluetooth/Wifi connection 8 1.1.2 OBDII 9 1.2 Mileage before departure 10 1.3 Add description 11 1.4 Start and stop stopwatch 12 1.5 Explanation of buttons 13 1.6 Menu 14 3 Index 2/4 II. LOGBOOK © Source Castle 23 2.1 Open logbook entries 24 2.2 Filter logbook entries 2.3 Create PDF 2.4 PDF overview 2.5 Calendar view 2.6 Menu 25 26 27 28 29 4 Index 3/4 III. CALENDAR 3.1 Main features 40 3.2 Month-view 41 3.3 Menu 42 IV. GAS LOG 4.1Cost overview © Source Castle 39 48 49 4.1.1 Refuel entry 50 4.1.2 Other car expenses 51 4.1.3 Filter: date, category, car 52 4.2 New refuel 56 4.3 New car expenses 59 4.4 Menu 62 5 Index 4/4 © Source Castle V. DATA-IMPORt from FREE-Version 67 VI. WIDGET 68 Big sister TimeTracker – chronology Contact Details 69 70 6 I. STOPWATCH © Source Castle 1.1 Generate car pool 1.1.1 Add Bluetooth connection 1.1.2 OBDII 7 8 9 1.2 Mileage before departure 1.3 Add description 1.4 Start and stop stopwatch 10 11 12 1.5 Explanation of buttons 1.6 Menu 13 14 7 1.1 Generate car pool Open the menu and select "cars" in order to enter the car pool To create new cars select "New". By touching on a car in this menu, you can edit, delete cars and display informations. Back at the stopwatch you can select a car by using the gray © Source Castle 8 1.1.1 Add Bluetooth/Wifi By using Bluetooth/ Wifi logbook entries start automatically as soon as you get close to the device. You can add device to each car First, open the menu and select "cars“ Insert a new car or touch on an existing one to activate the function Select the + icon and a list of the available devices is displayed. Through touch, you select a device. Your entries automatically start when you are in the vicinity of this device. To clear the ID, use the red X. The entries are stored in the clipboard and can be completed within 24 hours (see page 16) © Source Castle 9 1.1.2 OBDII Using an OBDII adapter TripTracker can read the data of your car . This feature allows the app to synchronize miles and the mileage with your car. The entries are stored in the clipboard where they can be completed within 24 hours ( see page 16 ) You can purchase a suitable OBDII adapter by us. Just contact us by e- mail . Enable adapter : © Stefan Zankl Plug the adapter into the provided Activate Bluetooth / Wifi on your smartphone Activate the ignition of your car Open the menu item " Cars " – touch on the desired car and select " Edit " - go to the tab " Bluetooth " . Add the adapter, enter once the current mileage and confirm with OK. 10 1.2 Mileage before departure Before your departure, you can manually specify the current odometer In the settings you can choose whether the mileage and the address of the last journey should be taken © Source Castle 11 1.3 Add note Add a note to the entry before you start the logbook You can use this field to briefly state the reason for your trip. You can fill in this field even later © Source Castle 12 1.4 Start and stop stopwatch Before pressing START select whether you want to record a path and whether it is a professional / private drive. After you have pressed STOP you can finish the record or save it in the clipboard to finish it within the next 24 hours. To get to the clipboard, open the menu and select "clipboard" (see page 16) © Source Castle 13 1.5 Explanation of buttons "Logbook" opens the logbook. Here are all Logbook entries are listed and can be edited "Fuelbook" opens the fuel log. You can add refuel entries and manage other car expenses © Source Castle 14 1.6 Menu 1.6.1 Calendar 15 1.6.2 Clipboard 16 1.6.3 Known destinations 17 1.6.4 Cars 18 1.6.5 Driver 19 1.6.6 About 20 1.6.7 Rate 21 1.6.8 Settings 22 To access the menu, select the three points or the menu button on your smartphone. © Source Castle 15 1.6.1 Calendar Open the menu and select "Calendar" to switch to the calendar view In the calendar view all logbook entries are displayed. In the calendar view you can use the "Back" button to return to the stopwatch For more information about the calendar go to pages 39-47 © Source Castle 16 1.6.2 Clipboard Open the menu and select "Clipboard“ The clipboard contains all unfinished logbook entries. This include: Entries that are created with the widget Entries that are created with Bluetooth or the OBDII adapter And unfinished logbook entries you saved to the clipboard. You can finish the entries within 24 hours. This restriction is necessary in order to ensure security against forgery. By touching on an entry you can finish or delete it. Your entry is then stored in the logbook or in the recycle bin Touch on an entry and choose “Merge” to link two or more entries. © Source Castle 17 1.6.3 Known destinations Open the menu and select “known destinations“ You can save known locations here. If you are in the vicinity of those locations, they are automatically assigned to logbook entries. Select "New " to add a new location Touch on an existing location to add sub destinations, edit or delete the location. © Source Castle 18 1.6.4 Cars Open the menu and select "cars“ The menu item "Cars" gives you an overview of your car pool. Touch on a car to edit, delete it or to view information. Information are displayed regarding traveled mileages, total costs and costs per mileage. Use the “new” button to add new cars © Source Castle 19 1.6.5 Driver Open the menu and select " Driver " The menu item " drivers " gives you an overview of motorists Touch on a driver in the list to edit or delete these . Use the "New" button to add new drivers © Stefan Zankl 20 1.6.6 About Open the menu and select “About“ The menu item “About" will show you the version that you have installed on your device You will also find a manual and the link to the Pro version © Source Castle The Pro version allows you Unrestricted export of logbook entries in PDF and Excel Recognition of logbook entries from the tax office Full digital logbook Ad-free use of TripTracker 21 1.6.7 Rate Open the menu and select "Rate“ Did you know that TripTracker was developed by just one person? Help us improve the software and give us your feedback by writing a review If you have special requests or suggestions, you can also contact us in English or German by e-mail: © Source Castle [email protected] 22 1.6.8 Settings Open the menu and select “settings“ The menu item “settings" includes the following functions: Colors: What color do you prefer for TripTracker? Widget: Determine the foreground and background color Unit: Prefer miles or kilometers? Mileage: Should take TripTracker the mileage of the last trip? Address: Should take TripTracker the address of the last trip? Should the addresses-fields always be filled? Calendar size, start of the week Backup and Restore: Do you want to make a backup file or do you want to import data from free version to pro version? (more information page 67) © Source Castle 23 II. LOGBOOK 2.1 Open logbook entries 24 2.2 Filter logbook entries 2.3 Create PDF 2.4 PDF overview 2.5 Calendar view 2.6 Menu 25 26 27 28 29 In the logbook all logbook entries are stored and sorted by date. p = private; f = from work; t = to work; b = business © Source Castle 24 2.1 Open logbook entries by touching on an entry you open the context menu Show: You can edit the entry here. Change the entry within 24 hours, he is not provided with a call sign. Change the entry after the expiry of 24 hours, the changes are saved in "History" and the entry gets a call sign. Delete: To delete a logbook entry - deleted logbook entries can restored under the menu item “recycle bin" again (more information on page 38) Show way: shows you the distance traveled on a world map Speed: shows you how fast you were traveling History: Have you changed logbook entries, here are the changes recorded in a history. You can restore the original logbook entry here © Source Castle 25 2.2 Filter logbook entries You can filter the entries by cars and then after months and weeks. Note: if you have many entries you can scroll down to make them visible For the listed entries you can finally create a PDF. For this, use the button "Create Document" © Source Castle 26 2.3 Create PDF First filter logbook entries with the arrow buttons. The displayed entries will be saved in the PDF Select "Create Document" and then decide if the PDF should include private trips and / or business trips. Give the PDF a name and click OK The PDF will appear and can be deleted and sent by using “show documents” Note that only the PRO version creates complete logbooks. In the free version only five entries are displayed. © Source Castle 27 2.4 PDF overview By using the button “show documents" you can open all already created PDF documents. By touchin on a document, you can open it, sign it, send it or delete it. You need Adobe Reader to have a look at the document. To send more than one document tick the boxex and use the “send” button © Source Castle 28 2.5 Calendar view To change to the calendar view, select the first icon above. In the calendar view all logbook entries are displayed. In addition, you can also add a manual entry by touching on an empty area. Note, however, that this is only possible within 24 hours. This restriction is necessary in order to ensure security against forgery. For more information about the calendar go to pages 39-47 © Source Castle 29 2.6 Menu © Source Castle 2.6.1 Clipboard 30 2.6.2 Gaps 31 2.6.3 Verify 32 2.6.4 Add manually 33 2.6.5 Cars 34 2.6.6 Driver 35 2.6.7 Charts 36 2.6.8 Excel Export 37 2.6.9 Recycle bin 38 30 2.6.1 Clipboard Open the menu and select "Clipboard“ The clipboard contains all unfinished logbook entries. This include: Entries that are created with the widget Entries that are created with Bluetooth or the OBDII adapter And unfinished logbook entries you saved to the clipboard. You can finish the entries within 24 hours. This restriction is necessary in order to ensure security against forgery. By touching on an entry you can finish or delete it. Your entry is then stored in the logbook or in the recycle bin Touch on an entry and choose “Merge” to link two or more entries. © Source Castle 31 2.6.2 Gaps Open the menu and select "gaps“ This function allows you to fill the gaps between odometer readings automatically. These gaps are then stored as individual logbook entries. In order to fill the gaps tick the box and then use the button “fill gaps” Under "filled gaps" you can delete or edit the gaps again. Touch a gap and select “delete” or “show”. Deleted gaps appear again in the tab "gaps“. Note that logbook entries that are created with the help of the gap function are not displayed in the calendar and are provided in PDF with a call sign. © Source Castle 32 2.6.3 Verify Open the menu and select " verify “ This function allows you to perform an accurate , seamless logbook detect errors . © Stefan Zankl For example temporal overlaps, gaps , deviations from the mileage etc. 33 2.6.4 Add manually Open the menu and select “add manually“ Here you have the possibility to create manual logbook entries. The entries can be dated up to 1 hour before and up to 24 hours behind. This restriction is necessary in order to ensure security against forgery. If you create manual logbook entries that go beyond the 24 hours these entries are provided with a call sign. © Source Castle 34 2.6.5 Cars Open the menu and select "cars“ The menu item "Cars" gives you an overview of your car pool. Touch on a car to edit, delete it or to view information. Information are displayed regarding traveled mileages, total costs and costs per mileage. Use the “new” button to add new cars © Source Castle 35 2.6.6 Driver Open the menu and select " Driver " The menu item " drivers " gives you an overview of motorists Touch on a driver in the list to edit or delete these . Use the "New" button to add new drivers © Stefan Zankl 36 2.6.7 Charts Open the menu and select "Charts“ You can display logbook entries in bar and pie charts The graphs show you miles and hours The pie chart is also displayed in the PDF to quickly recognize how much percent you made private and business trips. © Source Castle 37 2.6.8 Excel export Open the menu and select "Excel export“ The menu excel export allows you to export the logbook entries for weeks or months in Excel. After that you can edit the entries in excel. Note, however, that many authorities do not recognize logbooks in excel format and that in the free version the entries are limited to five. By upgrading to the Pro version, you can create complete logbooks. © Source Castle 38 2.6.9 Recycle bin Open the menu and select “recycle bin“ All deleted logbook entries are displayed here. By touching on an item it can be restored or deleted "Empty recycle bin" allows you to delete all entries forever © Source Castle 39 III. CALENDAR 3.1 Main features 40 3.2 Month-view 41 3.3 Menu 42 To change to the calendar view, open the menu and select “calendar” OR go to the logbook and select the Calendar icon. © Source Castle 40 3.1 Main features The calendar displays all logbook entries graphically in order to get a better view If you “swipe" in the calendar to the left or to the right you scroll back and forth Touch on an entry to open the context menu 1 Touch on an empty field in the calendar to open context menu 2 (picture at the right) At the top you can see how many hours you have already spent Use the "today" button in the top bar to display the current day © Source Castle 41 3.2 Month view to open the month view, use the first icon at the top press this button again and you will return to the week-view the month view shows the total number of weekly and monthly hours Touch on a day in the month view to open the context menu: add manually an entry, show list of this day or go to day view. © Source Castle 42 3.3 Menu 3.3.1 Days 43 3.3.2 Clipboard 44 3.3.3 Cars 45 3.3.4 Charts 46 3.3.5 Recycle bin 47 To open the Calendar menu, use the three points the menu button of your smartphone. This is usually located to the left or right of the "home" button under the screen. © Source Castle 43 3.3.1 Days Open the menu and select "Days“ Depending on how many days already displayed in the calendar the view changes If the calendar shows one day and you use this button, the calendar will show you three days. Do you use it again there will be displayed five days, then seven days and then one day again. © Source Castle 44 3.3.2 Clipboard Open the menu and select "Clipboard“ The clipboard contains all unfinished logbook entries. This include: Entries that are created with the widget Entries that are created with Bluetooth or the OBDII adapter And unfinished logbook entries you saved to the clipboard. You can finish the entries within 24 hours. This restriction is necessary in order to ensure security against forgery. By touching on an entry you can finish or delete it. Your entry is then stored in the logbook or in the recycle bin Touch on an entry and choose “Merge” to link two or more entries. © Source Castle 45 3.3.3 Cars Open the menu and select "cars“ The menu item "Cars" gives you an overview of your car pool. Touch on a car to edit, delete it or to view information. Information are displayed regarding traveled mileages, total costs and costs per mileage. Use the “new” button to add new cars © Source Castle 46 3.3.4 Charts Open the menu and select "Charts“ You can display logbook entries in bar and pie charts The graphs show you miles and hours Recycle bin The pie chart is also displayed in the PDF to quickly recognize how much percent you made private and business trips. © Source Castle 47 3.3.5 Recycle bin Open the menu and select “recycle bin“ All deleted logbook entries are displayed here. By touching on an item it can be restored or deleted "Empty recycle bin" allows you to delete all entries forever © Source Castle 48 IV. GAS LOG 4.1Cost overview 49 4.2 New refuel 56 4.3 New car expenses 59 4.4 Menu 62 to open the gas log, use the tank icon at the top. The Gas Log allows you to manage all vehicle costs. © Source Castle 49 4.1 Cost overview 4.1.1 Refuel entry 4.1.2 Other car expenses 4.1.3 Filter 4.1.3.1 date 4.1.3.2 categories 4.1.3.3 cars 50 51 52 53 54 55 The cost overview contains all tank expenditure and other costs that are incurred for vehicles. © Source Castle 50 4.1.1 Refuel entry To create a new refuel entry, use the black “refuel symbol" above. By touching a refuel entry in the list, you can edit, delete it or have a look at the picture © Source Castle 51 4.1.2 Other car expenses The cost overview lists not only all tank items but also any other vehicle costs. To add a new cost entry use the black "dollar-symbol" above. Through touching a cost entry you can edit, delete it or have a look at the picture. © Source Castle 52 4.I.3 Filter The cost overview allows you to filter the accounts Use the "filter button" on the bottom left to filter cost entries To reset the filter again use the button "Reset" at the bottom right © Source Castle 53 4.1.3.1 Filter to date With "date" you can search for Yearly Monthly Weekly cost entries If you want to filter also by categories or cars, go to "category" and "cars" and confirm your selection with OK. To reset the filter, use the button "Reset" at the bottom right © Source Castle 54 4.1.3.2 Filter to categories With “category" you can filter cost entries by categories By default, all categories are selected. If you want to do not display a category, remove the check mark in the box If you want to filter also by date or cars, go to “date" and "cars" and confirm your selection with OK. To reset the filter, use the button "Reset" at the bottom right © Source Castle 55 4.1.3.3 Filter to cars With “cars" you can filter cost entries by vehicles By default, all cars are selected. If you want to not display a car remove the check mark in the box If you want to filter also by date or category, go to “date" and “category" and confirm your selection with OK. To reset the filter, use the button "Reset" at the bottom right © Source Castle 56 4.2 New refuel 4.2.1 Data – refuel 53 4.2.2 Picture – Refuel 54 To create a new entry use the black “refuel symbol" above Through a touch to an already existing refuel entry in the list, you can edit or delete it © Source Castle 57 4.2.1 Data - refuel In the "Data" tab, you can 1. 1. Select date and time 2. assign a vehicle to the the tank entry vehicle (by touching on the “car" icon, you can create a new vehicle or edit existing ones) 2. 3. add a description to your tank entry if you want eg on which gas station you have refueled 3. 4. fill in mileage 5. fill in the following fields: © Source Castle $ / l = how much is a liter? l = how many liters do you tank? by touchin on = the total amount will be calculated 4. 5. 58 4.2.2 Picture - refuel In the tab "Picture" you can add a photo to your tank entry eg of the bill You can delete the picture with the red X After confirming the tank entry with OK, it is displayed in the list Touch it to edit or delete it or to have a look and send the picture © Source Castle 59 4.3 New car expenses 4.3.1 Data – car expenses 56 4.3.2 Picture – car expenses 57 To create a new car expense use the black “dollar symbol" above Through a touch to an already existing car expense entry in the list, you can edit or delete it © Source Castle 60 4.3.1 Data – car expenses Im Register „Daten“ können Sie 1. 2. 1. select date and time 2. select a category of costs or by touching on the list icon you can create new categories or edit existing ones 3. assign a vehicle to the cost entry (by touchin on the “car" icon you can create a new vehicle or edit an existing one) 4. add a description to the entry if you want eg why these costs are incurred 4. 5. Add mileage 6. 6. add the expenses of this category © Source Castle 3. 5. 61 4.3.2 Picture – car expenses In the tab "Picture" you can add a photo to your vehicle expenses eg of the bill You can delete the picture with the red X After confirming the vehicle expense with OK, it is displayed in the list Touch it to edit or delete it or to have a look and send the picture © Source Castle 62 4.4. Menu 4.4.1 Categories 4.4.1.1 Create new category 63 64 4.4.2 Cars 65 4.4.3 Export 66 To access the menu, select the three points or the menu button on your smartphone. © Source Castle 63 4.4.1 Categories Open the menu and select “categories“ For faster creation of entries there are already default categories available By touching on a default category you can edit (title, description, icon, color) or delete it To add a new category, use the "New" button © Source Castle 64 4.4.1.1 Create new category To create a new category open the menu and select “categories" and then “new“ In the "Basic" tab you can give the new category a name and a description In the "Icons“ tab you can select an icon for the new category In the "Color“ tab you can choose a suitable color for the new category © Source Castle 65 4.4.2 Cars Open the menu and select "cars“ The menu item "Cars" gives you an overview of your car pool. Touch on a car to edit, delete it or to view information. Information are displayed regarding traveled mileages, total costs and costs per mileage. Use the “new” button to add new cars © Source Castle 66 4.4.3 Export Open the menu and select "Export“ First, you can filter vehicle costs and fuel entries by date, categories and cars (see pages 52-55) and subsequently export them as PDF and Excel file. The document “Refuels.pdf" includes all costs to tank entries The document “Expenses.pdf" includes all costs to other vehicle expenses The document “Expenses.xls" includes all costs to tank entries, and any other vehicle costs. Please note that tank entries and other expenses in Excel have own portfolios - this means that you can scroll between tank expenditures and other costs © Source Castle 67 V. DATA IMPORT from free version Do you want to transfer your records from the free version in the pro version? Proceed as follows: © Source Castle 1. Open the free version switch to the settings and select “Backup and Restore“ select backup remember where the file is saved 2. Open the pro version Switch to the settings and select "Backup and Restore“ select restore Select the backup file 68 VI. WIDGET Trip Tracker offers two widget Widget 3x1 (small widget) 3x3 widget (Big Widget) All entries that you have created with the widget will be saved in the clipboard and can be completed within 24 hours there. This restriction is necessary in order to ensure security against forgery. In addition, you can also change the color of the widget in the settings. © Source Castle 69 Big sister TimeTracker – chronology TripTracker has a big sister called TimeTracker - chronology It is the ALL-IN-ONE package for your mobile time management with 3 functions in one application: TIME TRACKING with an interactive calendar, STOPWATCH and GPS recording. Ideal for self-employed business people, entrepreneurs but also for individuals who want to take their time optimally. www.atimetracker.com https://play.google.com/store/apps/details?id=com.mxp.time © Source Castle 70 Contact details Stefan Zankl software development Mobile Apps, Web Apps, Individualsoftware Judenburgerstraße 181; A - 8580 Köflach [email protected] / www.stefan-zankl.com We are looking forward hearing from you, Your SZ Software-Team © Source Castle