1
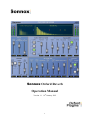
Sonnox Oxford Reverb
Operation Manual
Version 1.1 10th January 2012
1
1.
Introduction
The Sonnox Oxford Reverb plug-in is a highly flexible artificial reverberation generator,
designed to complement existing Sonnox Oxford applications in providing the professional
user with highest technical and sonic performance, coupled with high levels of artistic and
creative capability.
By avoiding fixed algorithms, and providing user control of all parameters including
comprehensive equalisation functions, the Oxford Reverb provides the professional engineer
with a powerful facility to build virtual spaces freely, depending on artistic needs, ranging
from dry reflection ambiences, room and hall simulations, sound effects, all the way to wide
open reverberant spaces with a exceptionally large range of possible texture and spatial
character.
2
2.
Operation
2.1
Principles of Reverberation
Artificial reverberation models tend to fall into two main types, which can best be described
as convolution and reflection simulation modelling. Both processes seek to achieve a degree
of realism and virtual space by modelling room characteristics. The convolution model
achieves this by recording the actual impulse response (due to reflections and dispersion) of
existing spaces, and imposing the resulting transfer characteristic onto the programme to
reproduce the character of the space. However this model does not lend itself easily to the
user interaction required for the artistic creation of reverberation effects that are commonly
needed in production. Another important factor is that the user cannot readily simplify a
convolution model to avoid conflicts that often occur between the recorded ambience and the
simulated reverb.
The Sonnox Oxford Reverb belongs to the reflection simulation type, as this allows the wide
and varied user control intended from this device, in the pursuit of a high degree of artistic
interaction and creative freedom.
3
2.2
Overview
Generally speaking, simulation models employ two sections to generate spatial effects. The
first section produces the Early Reflections (see above) that we use to perceive the
dimensional space of environments, and a Reverb Tail section is used to produce the longer
term diffuse tails that occur in real environments, when the reflection complexity has become
so dense that it is no longer possible to discern discrete events.
It is the combination of the effects of these two sections that create the impression of space,
environmental timbre and texture. One useful way to regard this is that the Early Reflection
section creates a kind of ‘wire frame’ model that we lock on to in order to fix the dimension
of the space, and the Reverb Tail forms the ‘plaster’ that fills in the model and gives the
space volume and long-term character.
4
2.3
Adjustment Procedure
The Sonnox Oxford reverb provides for a very large degree of parameter control so that the
professional user has the facility to produce reverberation ranging from subtle ambience and
dry spaces, all the way up to the creation of dramatic sound effects. To achieve this degree of
user facility, a significant number of controls need to be present on the ‘front panel’.
Although this may seem daunting initially, with experience, the nature of the controls and the
sonic effects they produce should quickly become self-evident. The best method to gain this
experience is to simply operate the plug-in, taking note of the effect that results from varying
control parameters. Indeed, it is intentional in the design of this application that the user
should interact with it freely in order to create exemplary results in the normal course of its
daily use, which uniquely match the artistic requirements of the particular production in
progress at the time.
It is fully appreciated that during the modification of an existing setup or the building of a
new sound from scratch, the dividing line between something that is just ‘ok’ and something
that is exactly ‘perfect’ is often very subtle, and subject to the artistic requirements of the
production and the environment in which it has been recorded or produced. The finer detail of
the setup procedure should therefore remain at the sole discretion of the user, and should not
be limited by existing setups or any particular doctrine.
2.4
Realistic Room Simulation
Most realistic room space simulations will consist of a mixture of appropriate Early
Reflections and Reverb Tail. However, the control set provided in the Sonnox Oxford reverb
allows many ways to achieve a wide range of artistic effects that will suit a great many
situations, many of which may involve almost completely opposing approaches.
Experimentation is the key to mastering these and therefore the following procedures should
be viewed as initial guidelines for familiarisation purposes only.
5
2.4.1
Early Reflection Setup
A good method to achieve the correct balance is to listen to the Early Reflections first by
setting the REVERB MIX fader to its ER position, and adjusting the WET /DRY fader for a
comfortable mix (both these controls are in the plug-in’s OUTPUT section).
Start with a neutral setting, with WIDTH and TAPER in their mid position, FEED ALONG
and FEEDBACK at minimum, and LF ROLL-OFF (in the INPUT section) at minimum
(mostly HF content).
It should now be possible to perceive the space changing when you adjust the SIZE control.
Initially, set this to something appropriate.
Toggle through the SHAPE selection buttons, noting the difference between them, and
decide on one that most suits what you are looking for.
6
At this point the FEED ALONG setting can be increased, noting the effect it has on overall
complexity in the reflections and the timbre of the space. For realistic spaces, settings around
the mid position are often best, but experimentation of the full range is encouraged.
Listening carefully to the resulting reflections, adjust the FEEDBACK fader with the
PHASE SELECT button selected (the default), to introduce some reiteration into the space,
noting that the space becomes more resonant and the reflections more diffuse. Without
feedback, the reflections will end abruptly when they are finished. This is useful for creating
dry spaces often appropriate for percussion tracks. However, for realistic spaces, an amount
of feedback is required to produce a more natural dispersion and timbre. Too much feedback
will result in ringing effects, which can be particularly intrusive for smaller spaces.
To give the space a realistic absorption and frequency response character, start increasing the
LF ROLL-OFF control to tailor the HF response caused by the reflections over time. There
is no fixed rule for what works best, and creative freedom should take precedence. However,
generally speaking, larger spaces require greater absorption settings than small spaces, since a
major cause of absorption in real spaces is the distance that the sound travels in air.
The WIDTH and TAPER controls can now be adjusted to give an appropriate stereo spread
and reflection character to the simulation. Some interplay between the FEED ALONG and
the TAPER controls may be required to arrive at the best overall sound character, as both can
give the effect of increasing the prominence of the reflections.
At this point it is worth adjusting the POSITION fader to determine the listening position
within the virtual space. It should be possible to perceive the effect of entering the space as
the setting moves off the back wall (minimum setting) into the virtual space. It is important to
bear in mind that the primary reflection from the back wall can get quite fast in smaller
spaces if the position is too far forwards, so although the simulation may sound correct when
100% wet, frequency combing effects may occur when it eventually gets combined with the
dry signal in a mix. Generally speaking, simulations with the source and destination at the
back wall (minimum setting) will always survive the addition of the dry signal, but under
some circumstances, forward settings may not. Therefore it is safest to start with the
POSITION at minimum initially, and make any adjustments while using the reverb in a mix
situation.
7
Finally, it’s a good idea to run through all the settings, making final adjustments by offsetting
one parameter against another in order to get precisely the result that sounds best with the
programme material. Bear in mind that very often very small changes can make the
difference between something stunningly good or just average!
At this point you should have an early reflection sound that produces a realistic perception of
space, but may lack long-term reverberation and complexity.
2.4.1.1 Additional Important Points on Early Reflections Processing
It is sometimes useful to use an early reflection model on its own (without any Reverb Tail)
where significant environmental reverberation already exists on the recorded track to be
treated. In this case, the recorded reverb can often be included within the simulated space
without conflict, giving the perception that the track was actually recorded in stereo.
The perception of large spaces can be alternatively constructed with relatively small SIZE
settings, by the application of large amounts of FEED ALONG and FEEDBACK. While
such sounds may produce less faithful emulations of real spaces, great sound effects and very
dense general ambiences may be generated this way.
Moderate duration early reflections built using fairly small SIZE settings and large amounts
of FEED ALONG with no FEEDBACK can be very useful for percussion ambiences, since
they end abruptly and thus avoid creating intrusive ‘hubbub’ from reverb run on.
The effect of very large spaces with long Reverb Tails can be constructed with the Early
Reflection processing alone, by using large SIZE settings, moderate FEED ALONG and
large amounts of FEEDBACK. Although such spaces will be less diffuse than Reverb Tail
models (because they always contain cyclic reflections), they are still very useful for creating
the impression of extremely large spaces and generating rich sound effects.
The STEREO SEPARATION fader mixes left and right signals together at the input of the
processing. This is useful where the virtual space is required to be fixed regardless of input
programme panning. But when the programme is a viable stereo source (either panned or
natural) better placement within the reverb sound field will be achieved with higher
separation settings.
8
2.4.3
Reverb Tail Setup
The major difference between the early reflection processing and the Reverb Tail is that the
latter contains no geometrically based dimensional information. Being constructed of
mutually unrelated terms, it is designed to generate almost characterless spectral diffusion
and spatial dispersion. Therefore its main purpose is to reiterate the sonic character and
spatial cues provided by the input programme and the early reflection processing, with the
minimum of disturbance throughout its decay period.
However, nuances in the way this is achieved play important roles in the resulting texture,
timbre and spatial quality we perceive in the reverberation effect. Rather than providing the
user with either a fixed model or a limited selection of algorithms, the Sonnox Oxford Reverb
offers full control over the parameters that most affect the sonic character of the Reverb Tail.
This provides the user with the maximum creative facility.
2.4.3.1 Tail Mix Section
The first thing is to decide what drives the Reverb Tail section.
Generally there is a mixture of two approaches to driving the Reverb Tail section we can
consider. Either we want to carry the character of the Early Reflections into the Reverb Tail.
Or we want to just add reverberation to the input signal so that the character of the input
programme is carried into the Reverb Tail.
In practice, we almost always need a mixture of both of these depending on the desired result.
The TAIL MIX section of the ‘front panel’ controls this function by providing the ability to
mix the output of the Reverb Tail processing with the input signal, and a delayed version of
the input signal. It is therefore possible to create a mixture of all three signals, any
combination, or just a single source.
The delayed input signal, controlled by the COMP DELAY function, is normally selected to
ER TRACK mode so that the input drive to the Reverb Tail largely coincides with the initial
output signals from the early reflection section.
9
2.4.3.2
Suggested Setup for the Reverb Tail
Set the ER MIX fader to its DRY position, the TAIL INPUT fader to its DLY INP position,
and the COMP DELAY fader to its mid position. This ensures that the input drive to the tail
section is the compensated version of the input signal. This is a good starting point as it is the
character of the input that we need to address first.
Set the REVERB MIX fader to its central position so that you hear an equal contribution
from the Early Reflection and Reverb Tail signals. This is useful because we are initially
concerned with making the overall Reverb Tail match the timing requirements of the early
reflection sound you have already made.
10
Set the OVERALL SIZE, DISPERSION and PHASE DIFF faders to their mid position.
Set the PHASE MOD and ABSORPTION faders to their minimum position and
DIVERSITY to its maximum position. This sets up a neutral starting point where the effect
of controls will be most easily heard when we get to adjust them.
By increasing the REVERB TIME, the tail can be heard to extend to the period set on the
control. Set this to something that matches the sound you are aiming for. At the moment the
tail will sound rather grainy, and its stereo image will be largely in the centre of the sound
field.
Moving the DISPERSION fader in a positive direction will result in increased complexity
and smoothness in the longer term. The higher the setting, the faster the complexity builds
over time. Set this somewhere that provides the required effect, bearing in mind that real
reverberant spaces take a period of time to build complexity, especially if they are large and
reflective.
Adjust the PHASE DIFF control and note that the tail image begins to spread across the
stereo field. The higher the setting the quicker the spread will occur over time. Generally
speaking, large settings are better in mix situations because they produce a wide sound field
quickly. However, for very large spaces or sound effects, a slower spread from middle to
sides can often produce a more realistic effect. The included setup ‘far away’ is a good
illustration of this. It is also worth experimenting with negative PHASE DIFF settings,
noting that the spatial effects build into far wider and more diverse stereo sound fields.
Negative settings are often more effective when you are aiming for greater perceived
immersion within the simulated space.
Increasing the PHASE MOD control will provide a degree of variance for the above settings
(as though you were moving the PHASE DIFF control slowly). This provides a larger degree
of realism to the Reverb Tail because it prevents it from becoming spatially static. It keeps
your attention on the reverberation because it changes subtly over time – much as in real
spaces where natural movement of the air or objects within the space continually modify its
characteristics.
11
To give the space a realistic high frequency profile over time, ABSORPTION should be
applied in the same manner as in the ‘early reflection’ settings. In general, larger spaces
require greater absorption, however some larger spaces can reflect considerable HF from the
their back extremities. It is important to bear in mind that allowing a large HF content in the
Reverb Tail may accentuate unnaturally strident or harsh sounds, particularly if there are
sustained HF components in the programme or there is prominent resonance in the Early
Reflection stages.
The overall spread of the reverb can be adjusted using the DIVERSITY fader. Reducing this
control adds statistical weighting to the centre image, which is often needed to anchor the
sound field to centre stage. It is important to consider the intended speaker layout while
setting this control, since a large degree of left to right mixing occurs acoustically in the
listening environment. It is particularly important to remember that what appears a natural
setting for this control will vary considerably between headphone and speaker listening
methods!
2.4.3.3
Blending Early Reflections and Reverb Tail
Blending the early and late portions of the reverb is basically a matter of taste and suitability
to the programme and mix.
Adjust the REVERB MIX control to fine-tune the contribution from both the sections.
Generally speaking, the application of more late Reverb Tail energy will result in a softer and
more diffuse reverberation at the expense of spatial realism.
Now your effort is to decide what proportion of the Early Reflection mix will be included in
the Reverb Tail input. This is particularly crucial since the whole long-term character of the
reverb is affected. Advancing the TAIL INPUT fader away from DLY INP towards the ER
MIX position will progressively allow more signal drive from the Early Reflection mix
stages into the tail section. Generally, there is normally a need for some Early Reflection
signal in the Reverb Tail, however this is not a ‘rule’ and the amounts required are most often
quite small. Too much early reflection drive to the tail may cause unwanted ringing or
boominess from the Early Reflection section to become intrusive in the longer term. Too little
drive may make the tail lack character. It is all a question of settings, programme source
parameters and artistic taste. Experimentation is everything!
12
Throughout the blending process it is a good idea to go back periodically and adjust the
Reverb Tail OVERALL SIZE parameter in order to get the best timbral blending between
the sections. The overall size parameter can be adjusted all the way from what sounds like a
‘cymbal resonating’ to a wide open space — without affecting the decay time, so there is
great deal of latitude in what can be achieved. In general there is a trend for larger Early
Reflection spaces to most suit larger Reverb Tail overall sizes, because they exhibit a slower
build up of complexity. However this is not a rule — in practice, very subtle changes in the
overall size can result in exemplary realism when resonance within the Early Reflections and
Reverb Tail sections complement each other.
Application of the LF ROLL-OFF control should only be attempted after an overall
reverberation sound has been achieved, as low frequency spatial cues are very important to
our perception of natural spaces. In the event that the reverb produces excess LF energy
(particularly if the simulation space is very small), or an effect is desired which favours only
HF programme content, LF ROLL-OFF can be applied with discretion, depending on the
overall requirement of the programme.
2.4.3.4 Additional Important Points on Reverb Tail Processing
Since the Reverb Tail is essentially neutral, containing no dimensional character, it can be
used by itself with very low reverb times to produce general ambiences and ‘characterless’
Reverb Tail. In particular, with small to moderate OVERALL SIZE settings, effects ranging
from ‘boomy’ drum rooms to vocal double tracking and multiplication can be achieved.
If the programme consists of a stereo source that already contains significant environmental
reflection, the Reverb Tail section can be used on its own to simply adopt the character of the
original recording and extend the natural reverb within the recorded space.
The Reverb Tail processing consists of two separate sections for left and right signals, which
under some conditions can perform entirely independently. If the Reverb Tail processing is
used on its own with stereo panned sources (without any early reflection contribution), care
should be taken to ensure that the STEREO SEPARATION and DIVERSITY controls are
not both set to maximum, as this could result in a left or right only reverb signal if the source
is panned hard to either side.
13
2.5
Equalisation
Equalisation of the reverb signal contribution is included in this comprehensive plug-in to
effect changes in the overall character of the simulation, either in response to artistic need or
to enhance the realism of real space simulations.
Almost all real environments exhibit complex frequency response characteristics that are
generated by the reflection timing of the room spaces and objects within the area. The actual
perceived frequency response is highly dependent on the location of the sound sources and
the position of the listener within the sound space.
A large part of the most complex frequency response character is generated by the Early
Reflections processing within the reverb application, but because simulation models have a
reduced quantity of reflection nodes in comparison to real spaces, much of the overall
resonance and tonal character may be absent from the total simulation.
While the clean, unobtrusive nature and reduced tonal interference of simulated reverb often
blends more effectively in music production, post-production and Foley situations often
require an accentuated realism, and much of this is provided by the overall frequency
character of the simulated spaces. Indeed this partially explains the success of convolution
reverbs in the post-production field.
All of the EQ setup examples contained in the Post-production category (see below) are
examples of combinational reverbs that use equalisation to enhance the realism of spaces by
providing the resonances and response aberrations one would associate with those spaces.
14
2.5.1
Equalisation Setup
Because the response of the reverb section is more unpredictable and fragile than the EQ, it is
generally better to achieve a convincing setup for the main reverb before starting out on any
equalisation. Once you are ready, simply click on the EQUALISER tab to reveal the EQ
controls (see above).
2.5.1.1 Reverb EQ in Music Production
For music production, the role of the EQ is mainly that of subtle modification to the overall
sound. This often entails reducing intrusive low frequencies, providing tonal matching within
the mix or creating effects by accentuating reverberation within various registers of the
musical ranges. Equalisation may also allow the reduction of unwanted artefacts due to the
‘run-on’ of resonances within the programme, particularly in percussive sounds.
As an artistic tool, equalisation can be used to create a wide variety of effects limited only by
the engineer’s imagination, and experimentation is definitely to be encouraged!
15
2.5.1.2 Reverb EQ in Post-Production
For post-production effects and simulation of real spaces, the EQ serves to accentuate or even
insert tonal aberrations that we associate with particular spaces. Often we don’t notice these
aberrations when we are actually in the spaces, but when adding simulations to dry sounds in
a post-production environment, their absence can be a real limitation to effectiveness. There
is no hard and fast way to achieve successful results, as there are several possible approaches
to the problem. The following are presented as helpful hints:
The major room node responses should be obtained using the appropriate room shape
and size within the Early Reflection setup stage. It is important that these match the
overall space characteristic, even if the frequency characteristics are significantly
different — because the EQ will be used to modify these later.
Odd shaped or complex spaces may be initially created using a combination of the
REVERB TAIL and DELAY COMP controls to simulate late reflections from distant
areas of the space, ie. L-shaped spaces, rooms with several distinct areas etc. Reducing
the OVERALL SIZE of the late reverb setting can produce a wide range of resonances
that suit smaller spaces.
Most rooms have a dominant resonance at lower frequencies, and several resonances of
lesser gains in the lower and upper mid ranges. The smaller the space, the higher the
frequency these are likely to be. They may be very large, reaching 10dB or even 20dB,
and they may have high Q values in the 7 to 12 range. Experimentation will reveal
whether the EQ matches natural expectations in the space.
Higher mid frequency resonances and dips are normally associated with near surfaces,
for example, a nearby wall or door. These reflection effects can be initially created
using the POSITION control in the Early Reflection settings section, and added to,
modified or accentuated with EQ if required. For high Q resonances of this type, quite
small gain values are often most appropriate.
Overall gentle response changes often accompany smaller rooms that contain large
amounts of soft furnishings (ie. living rooms etc.). This effect can often be accentuated
by the addition of LF boosting with lower Q values between 0.5 and 1.5, or by
introducing a band-pass low Q cut in the mid ranges.
16
Very large spaces may exhibit a reverberation that focuses mainly in the mid ranges. A
combination of high ABSORPTION settings and LF ROLL-OFF can often simulate
this effect. A small rise of around 1 or 2dB in the mid ranges may also be appropriate.
There is a high degree of response interplay between the resonances produced in the
reverb and the EQ. Very often extremely small changes to reverb SIZE settings and EQ
centre frequencies can produce very significant changes in the overall perception of the
space. It is definitely worth experimenting with this when you reach the final stages of
creating the desired sound.
17
3.
Description of Controls
The control functions are arranged in logical operational sections, comprising the Early
Reflection settings, Reverb Tail settings and a number of contribution mixing functions.
These latter functions are also conveniently split into separate sections, for internal signal
contribution to the Reverb Tail section and overall level control and mixing functions. A
separate Equalisation control area is accessible from the Early Reflections area of plug-in.
Note that the numeric displays provided for all parameter settings may be modified by direct
entry from your keyboard.
3.1
Early Reflections
SHAPE — selects the overall shape of the early reflection space. Four basic space shapes are
provided to allow the application of appropriate overall character to the reverberation.
POSITION — controls the relative back-to-front placement of the listening position within
the virtual room simulation.
18
SIZE — sets the overall size of the simulated space, as measured between front and back
walls. Room shapes remain in proportion with this size.
WIDTH — controls the stereo separation of the room reflections depending on their
particular direction within the stereo field. Normal position placement occurs with the control
at its minimum setting. Increasing the control setting provides wider separation. Increasing
settings beyond 100% produces ultra-wide separation, often useful when adding spatial
effects to single mono tracks.
TAPER — controls the loudness level of the reflections depending on their relative path
lengths. In other words, longer delays are progressively reduced in level because the sound
will have travelled further. Increasing the taper control will proportionally increase the
relative contribution from long paths lengths in relation to short paths. At the control’s
maximum setting, all paths lengths have an equal level contribution.
FEED ALONG — controls the amount of re-injection of distributed sound within the
simulated space. Greater re-injection will result in greater reflection density and echo
complexity, and cause the reflections to continue over a longer period of time.
FEEDBACK — controls the proportion of the reflected signal that is re-circulated within the
room simulation. Increasing feedback will result in longer reflection duration (room reverb
time) and greater room mode frequency response effects (‘boominess’).
FEEDBACK PHASE SELECT — this modifies the phase relationship of the FEEDBACK
control. Modified phase (on position) will result in softer reflections over time, and produce
greater modal and spatial dispersion, synonymous with natural rooms containing objects that
disperse reflections, and tend to break up room behaviour. Normal phase (off position) will
result in harder reflections and greater modal frequency behaviour.
ABSORPTION — controls the high frequency roll-off that naturally occurs over time due to
absorption. Higher settings (greater absorption) relate to rooms containing soft furnishings
and wall coverings, low settings (less absorption) relate to empty spaces with hard reflective
surfaces etc.
19
3.2
Reverb Tail
3.2.1 Reverb Tail Input Mixing
The facility is provided to drive the input of the Reverb Tail processor with a combination of
signals comprising of; the untreated input signal, the delay compensated input signal and the
output of the Early Reflections processing. Two levels of crossfade control are provided for
this mixing function, so that relative contributions can be varied freely without disturbing
overall levels:
DELAY COMP — this control sets the timing of the delay compensated input
contribution to the Reverb Tail processing.
With the ER TRACK button selected, the DELAY COMP input signal tracks the
notional size of the Early Reflection processing section. The available control
adjustment is from zero to 2.0 times the early reflection SIZE setting, with its mid
position (1.0) representing the normalised time alignment setting.
With the ER TRACK button deselected, the DELAY COMP control is uncoupled
from the Early Reflections SIZE setting, and provides an independent delay up to a
maximum of 30 meters.
ER MIX — provides a crossfade between the untreated input signal and the output of
the Early Reflections processor.
TAIL INPUT — this provides a crossfade between a delay compensated versions of
the input signal provided by the DELAY COMP control and the mixed signal resulting
from the ER MIX stage.
Please note that a combination of the input signal and delayed signal together can cause
unwanted frequency combing effects when the ER SIZE is set for smaller spaces. It is
therefore best to arrange the ER MIX and TAIL INPUT controls to predominately use either
a mix of the Early Reflections and the input, or the Early Reflections and the delayed input
when simulating smaller spaces.
TIP: To aid your understanding of the above descriptions, refer to the block diagram at the
start of Section 2 of this manual.
20
3.2.2 Reverb Tail Effect Modification
All parameters in the Reverb Tail section are fully compensated, so that they may be adjusted
in isolation without mutual interaction with other control settings. This means that settings
such as REVERB TIME or LF ROLL-OFF will produce constant results even if other
factors such as DISPERSION or OVERALL SIZE are varied.
REVERB TIME — sets the overall reverberation time in seconds as referred to a
decay of –60dB ref. the input stimulus.
OVERALL SIZE — sets the overall size of the delays within the Reverb Tail section,
providing the means to modify the character of the reverb independently of reverb time
and absorption parameters. Larger size settings generally provide the greatest
impression of space but result in slower density build up in the short term. Shorter size
settings produce faster density build up over time, but exhibit greater tonal artefacts in
the longer term.
DISPERSION — controls the rate and character of the build up of dispersion
behaviour, complexity and sonic texture over time. At the control’s mid position (0) no
extra dispersion is added. Positive values cause increasing dispersion and complexity
over time. Negative values also cause increasing dispersion but the effect is modified to
produce greater differential dispersion between left and right signals.
PHASE DIFF — this operates in conjunction with the DISPERSION setting to
control the build up of phase difference between left and right stereo signals. The
greater the setting, the faster phase differences will build up over time, and cause a
widening and deepening of the stereo sound field.
Positive values will create a build up of left and right difference, which is largely
limited within the same absolute polarity across the soundfield as the original
programme signal. This is most useful for producing natural reverb soundfields that
spread between the confines of the stereo speaker width.
Negative values produce a wider range of phase dispersion that includes components
that have inverse polarity with respect to input programme and left and right outputs.
This is useful for producing soundfields that seem to extend beyond the stereo speakers,
to produce an enhanced sense of immersion within the simulated space.
21
PHASE MOD — controls the application of internal phase modulation to the reverb
algorithm. This adds a very slight variance to the reverb character over time, which
enhances realism and presence under many conditions.
ABSORPTION — controls the high frequency absorption effect within the reverb
section. Higher value settings produce greater overall HF roll-off and faster relative
absorption over time, synonymous with natural spaces containing a variety of
absorption materials, such as wall coverings, curtains or furnishings etc.
DIVERSITY — this provides statistical front centre weighting to the Reverb Tail,
which is often required to anchor the reverb effect to the centre stage of stereo sound
field mixes. Centre weighting is greatest with the diversity control in its minimum
position, where the reverb image will seem narrowest. In the maximum position, no
centre weighting occurs, and the reverb image is therefore equally spread across the
sound stage, producing the greatest spatial diversity and the widest perceived image.
22
3.3
Equaliser Section
The Equaliser section (click on the EQUALISER tab to reveal) comprises five bands with
the upper and lower sections selectable between band-pass, shelving and 12dB/octave
filtering functions. The EQ processing precedes the reverb processing, so the dry signal
remains unaffected by Equalisation settings.
Note that the EARLY REFLECTIONS path display is removed when the Equaliser section
is brought to the foreground.
IN button — toggles that section of the EQ in and out for comparison purposes.
GAIN control — controls the effective gain of that section from –20dB to +20dB
BAND-PASS, FILTER and SHELF buttons — select these additional functions for the LF
and HF sections.
Q control — allows continuous control of the Q value for those sections capable of the bandpass function.
FREQ control — provides continuous control of the centre frequency for band-pass
functions, and the turnover frequency for shelving and filtering functions.
23
Frequency Response Display — an interactive frequency response display is superimposed
on the reverb display area when the equaliser is active. Colour coded grab points on the graph
provide full mouse drag control:
Gain is adjusted by vertical movement, and lateral movement controls frequency.
Pressing the keyboard Alt key prior to dragging the control point vertically provides Q
control.
Sections can be switched in or out by clicking on the drag point while holding down the
Cmd (Apple) key.
For convenience and clarity, a separate colour coded curve displays the response contribution
of each particular section to the overall response. Drag points for disabled EQ sections (ie.
those that are switched out) remain visible for illustration purposes. As soon as you click and
drag a point, that section will be switched in.
3.4
Overall Controls
Graphic Display — this multipurpose area (in the top centre of the plug-in window) is used
to display the action of both the Early Reflection and Reverb Tail sections of the reverb. It
also provides an interactive graph of the equaliser’s frequency response, which is displayed in
more detail when the Equaliser is selected for modification.
EQUALISER Access Tab — clicking in this area flips between the Early Reflection and
Equaliser setting displays.
3.4.1 Input Controls
INPUT GAIN — controls the input level to the reverb.
INPUT meters — these display the peak input level to the reverb processing after the
INPUT GAIN control.
STEREO SEPARATION — controls the degree of left and right signal mixing at the input
of the entire reverberation process. At its minimum setting, the internal input to the reverb is
equivalent to a mono mix.
24
LF ROLL-OFF — this provides the means to reduce the level of LF signal entering the
reverb processing. The control is continuously variable from its minimum position where no
LF roll-off occurs to the maximum LF cut at its highest setting. The frequency response of
the input signal at the WET/DRY mix stage (see below) is unaffected.
3.4.2 Output Controls
REVERB MIX — provides a crossfade between the Early Reflections and Reverb Tail
sections for the final output.
WET/DRY — crossfades between the input signal and the output of all the reverberation
processing.
100% WET button — forces the output to reverb only. This is convenient when used in
mixing applications where the reverb commonly forms part of an auxiliary mix and the dry
signal is present on the main mix buss.
LOCK button — this enables you to lock the wet/dry balance as you desire, and then step
through Preset Manager presets without the presets changing wet/dry balance or turning on
the 100% WET function. This allows you to hear different presets with the wet/dry balance
you are actually working with, and thus greatly speeds up finding the best preset for the given
material. The default setting of this function is determined by an entry in the Options menu
(see next page).
Note that the LOCK button works by preventing the wet/dry parameters from being
loaded into the DSP, and applies only to preset loads initiated by the onboard Preset
Manager (ie. Load, A/B, + and –). Parameter automation, or preset loads initiated by
the host will override the LOCK button; this means that project loads will sound the
same as when you left them.
OUTPUT meters — display the peak output level from the reverb plug-in.
25
3.5
Options Menu
Clicking the Sonnox button produces a
drop-down options menu (see right).
Clip Lights — these options determine
the approximate time that an overload
indicator will stay on for when the
plug-in has detected a full-level sample
at either its input or output.
Enable Sonnox Toolbar — displays or
hides the Sonnox Preset Manager
Toolbar (see Section 4).
Show Preset Name Path — shows the hierarchical directory path for Presets that are stored
in sub-folders of the default Preset folder.
Exclude Wet/Dry from Preset Loads — this replicates the function of the LOCK button
(see previous page), and determines its default setting. When LOCK is active, the setting of
the WET/DRY control will not be altered when Presets are loaded; subsequently deselecting
the LOCK button will deactivate this option. If you mostly use the reverb in an aux send, you
will probably want the default setting of this function to be ‘locked’; if you use the reverb in a
channel, the preferred setting is likely to be ‘unlocked’.
Knob Modes — four options determine how the rotary controls (knobs) behave:
With Circular Knob Mode the control is set to the value at which it is first clicked,
and the value then increases or decreases with circular mouse movement.
In Relative Circular Knob Mode a control’s value increases or decreases with
circular mouse movement relative to its initial value.
26
Linear Knob Mode increases or decreases a control’s value with up and down mouse
movements respectively. Fine adjustments to any control setting can be achieved by
pressing the ‘Apple command’ (Macintosh version) or ‘Shift’ (PC version) key
before clicking on the control to be adjusted and holding this key down during the
operation. This rescales the control rate with the mouse movement, so that very fine
adjustments can be made.
In some host applications the user is given the option to use one of several mouse
modes. Follow Host Mode enables the plug-in to follow the mode selected in the
application.
About Sonnox Oxford Reverb… — displays the date, version and build number of the
plug-in.
27
4.
Preset Manager Toolbar
The Oxford Reverb plug-in
comes equipped with its
own onboard Preset
Manager, which is
displayed as a toolbar at the
top of the plug-in window,
just as if the host created it
(see right). The reasoning
behind this is to allow
increased portability of
your presets across all the
host applications, while
also providing a consistent
and versatile interface.
Although most host platforms allow the creation and loading of presets, those host-created
preset files are not portable between different host applications. With the Oxford plug-ins’
preset manager, you can create a named preset in one host application and load it when using
an alternative application. The Preset Manager ToolBar is enabled via the Sonnox button
Options Menu (see Section 3 Description of Controls).
The Sonnox Preset Manager is fully described in a companion document — ‘Sonnox
Toolbar and Preset Manager Operation Manual’ — available for download on the Support
Documentation page of the Sonnox website: www.sonnox.com
28
5.
Copyright and Acknowledgements
Trademarks and content copyright © 2007-Present Sonnox Ltd. All rights reserved.
This Product is manufactured and supplied by Sonnox Ltd. under licence from Sony UK Ltd.
The following patents protect this Product: GB2330747.
DIGIDESIGN, AVID, and PRO TOOLS are trademarks or registered trademarks of
Digidesign and / or Avid Technology, Inc. All other trademarks are the property of their
respective owners.
All other product and company names are Trademarks or Registered Trademarks of their
respective holders.
6.
Manual Revision History
Version 1.0 date 1st April 2007 — Generic Sonnox version
Version 1.1 date 16th January 2012 — Updated to reflect current software version
29
Platform Specific Supplement
S1. Supported Platforms
Avid Pro Tools (LE, RTAS, M-Powered, Pro Tools HD) and Pro Tools 10 (HDX & Native)
VST Native
Audio Units Native
S2. System Requirements
These requirements are current at this revision of manual. For latest system requirements,
please see the website www.sonnox.com
Pro Tools
Pro Tools 7, 8, 9 & 10
Approved Pro Tools CPU, OS and hardware configuration (see www.avid.com)
Mac OSX 10.4 or higher
Windows XP / Vista 32 & 64 bit / Windows 7 32 & 64 bit
Ram 1GB minimum
iLok USB key with latest drivers
Audio Units
Audio Units compliant host application (e.g. Logic, Digital Performer etc.)
Mac OSX 10.4 or higher
Ram 1GB minimum
iLok USB key with latest drivers
2nd generation iLok required for 64-bit plug-ins
VST
VST compliant host application (e.g. Nuendo, Cubase, WaveLab etc.)
Mac OSX 10.4 or higher
Windows XP / Vista 32 & 64 bit / Windows 7 32 & 64 bit
Ram 1GB minimum
iLok USB key with latest drivers
2nd generation iLok required for 64-bit plug-ins
30