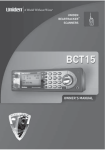
1
AlexB PROGRAMS MANUAL
VERSION 2.3
AlexB - Audio Engineering
Alessandro Boschi
Verbania Italy
www.alessandroboschi.eu
Copyright © 2010-2015 All Rights Reserved
© 2010-2015
1
AlexB Programs Manual
ABOUT US
AlexB Audio Engineering is pleased to be an official 3rd Party Developer for Nebula Pro and independent VST
Acqua programs. AlexB has been a member of the Acustica Audio community since the 2007, and started BetaTesting in 2009. They released their first commercial program libraries for Nebula Pro in 2009. AlexB has made
some of the most highly sought after and rare hardware devices available for use in the digital world while
maintaining virtually all of the analog character that makes recording a true art-form. Every sampled hardware
piece has been refurbished and modified to improve the sonic characteristics, thanks to AlexB's 28+ years of
experience in electronics and audio engineering. With hyper-realistic samplings of pristine mastering equalizers,
top class consoles, the most sought after compressors, and the rarest vintage devices, AlexB is proving to the
audio community that Acustica Audio sets the standard for the finest sound quality in the digital realm by
facilitating a true analog experience with programs that make full use of the VVKT technology.
Please visit their website for more information: http://www.alessandroboschi.eu
AlexB... Audio Renaissance.
© 2010-2015
2
AlexB Programs Manual
NOTICES
Disclaimer
This manual provides general information, preparation for use, installation and operating instructions for the AlexB Programs Libraries. The
information contained in this manual is subject to change without notice. AlexB makes no warranties of any kind with regard to this manual,
or the product(s) it refers to, including, but not limited to, the implied warranties of merchantability and fitness for a particular purpose. AlexB
shall not be liable for errors contained herein or direct, indirect, special, incidental, or consequential damages in connection with the
furnishing, performance, or use of this material or the product(s).
All product names used in this documentation are trademarks of their respective owners, which are in no way associated or affiliated with our
company (AlexB). These trademarks of other manufacturers are used solely to identify the products of those manufacturers.
End User License Agreement (EULA)
By installing the software you confirm your acceptance of the AlexB End User License Agreement, as well as the
AlexB terms of service and privacy policy which can be found at:
http://www.alessandroboschi.eu/html/alexb/termsandconditions.htm http://www.alessandroboschi.eu/html/alexb/privacypolicy.htm
This AlexB End-User License Agreement is between AlexB and you.
IMPORTANT – PLEASE READ THIS LICENSE AGREEMENT CAREFULLY BEFORE INSTALLING THIS SOFTWARE.
By using the AlexB software you accept these terms. If you do not accept these terms, do not use the Software.
1. Limited Use License.
The Software is licensed, not sold, by AlexB or Acustica Audio to the original end user for use only on the terms set forth in the Agreement. If
and only if your Software is purchased through AlexB or Acustica Audio, AlexB, as Licensor, grants you, as an end user Licensee, a non
exclusive license to use the Software. The customer purchases the right to license the use of the programs, not the actual ownership of a
copy of the program. That means no sharing, copy or resell. User can install the software on two computers and he can make a personal
backup copy.
2. Title.
The Software is owned by AlexB and is Software is protected by copyright and other intellectual property laws. AlexB retains title to and
ownership of the Software and all copies, as well as any rights not specifically granted. This Agreement only gives you certain rights to use
the Software and related documentation, which may be revoked if you do not follow these terms.
3. Limited Rights to Install and Use the Software.
You may install the Software into the memory of two computers for your internal business use or your own personal enjoyment, but may not
redistribute or electronically transfer the Software to someone else's computer or operate it in a time-sharing or service-bureau operation.
You may make one copy of the Software for backup purposes only. You may not modify, translate, adapt, reverse engineer, decompile,
create other works from, or disassemble the Software or any portions thereof. Similarly, you may not copy, modify, adapt, transfer, or create
other works based upon the printed materials and "online" or electronic documentation accompanying or published for use with the Software
(the "Documentation"). You are free to edit and save new presets for your own use, and not to distribute to others. If you make an alteration
to a preset that you like and find it useful, please save it as a new preset for your own use. The Software may include technological
measures that are designed to prevent or detect unlicensed use of the Software. Circumvention of these technological measures is
prohibited. Any attempt to circumvent technical limitations may render the Software or certain features unusable or unstable, and may
prevent you from updating or upgrading the Software.
4. Export, Renting and Transfer Restrictions.
You may not export, convey, rent, sublicense, or otherwise distribute the Software or any rights therein to any person or entity. You may not
transfer or resell your Software license.
5. Warranty and Support.
Neither AlexB nor Acustica Audio warrant that the software will meet your requirements or that its operation will be uninterrupted or error free,
in the same way the use or the results of the use of the Software or documentation in terms of their correctness, accuracy, reliability.
Technical support is for customers only. You can ask support via email or web form and receive a reply at least into 24 hours.
Thank you
© 2010-2015
3
AlexB Programs Manual
CONTENTS
1. Documentation, Installation and Support
1.1 Introduction ..........................................................................................................................................
10
1.2 Overview …..........................................................................................................................................
10
1.3 Sampling Process …............................................................................................................................
11
1.4 System Requirements …......................................................................................................................
12
1.5 Installation …........................................................................................................................................
12
1.6 Authorization (MFC MFeQ MFD only) ..........................................................................................................
13
2. General Use
2.1 Parameter Settings …...........................................................................................................................
14
2.2 Off Line Process …...............................................................................................................................
14
2.3 TIMED, FREQD and “Web Tricks” …....................................................................................................
14
2.4 The Skin …............................................................................................................................................
15
2.5 Gain Staging ….....................................................................................................................................
15
2.6 Common Controls ….............................................................................................................................
16
3. Modern Flagship Console
3.1 About the original hardware …..............................................................................................................
17
3.2 Session Setup …...................................................................................................................................
18
3.3 Preset List ….........................................................................................................................................
19
3.6 Controls …............................................................................................................................................
21
4. Modern Flagship eQualizer
4.1 About the original hardware …..............................................................................................................
22
4.2 Session Setup …...................................................................................................................................
23
4.3 Preset List ….........................................................................................................................................
24
4.4 Controls …............................................................................................................................................
24
5. Modern Flagship Dynamics
5.1 About the original hardware …..............................................................................................................
25
5.2 Session Setup …...................................................................................................................................
26
5.3 Preset List ….........................................................................................................................................
27
5.4 Controls …............................................................................................................................................
27
6. Modern Tube Console
6.1 About the original hardware …..............................................................................................................
29
6.2 Session Setup …...................................................................................................................................
30
© 2010-2015
4
AlexB Programs Manual
6.3 Preset List ….........................................................................................................................................
31
6.4 Controls …............................................................................................................................................
33
7. Modern Tube eQualizer
7.1 About the original hardware …..............................................................................................................
34
7.2 Session Setup …...................................................................................................................................
35
7.3 Preset List ….........................................................................................................................................
36
7.4 Controls …............................................................................................................................................
36
8. Modern Tube Dynamics
8.1 About the original hardware …..............................................................................................................
37
8.2 Session Setup …...................................................................................................................................
38
8.3 Preset List ….........................................................................................................................................
39
8.4 Controls …............................................................................................................................................
39
9. Vintage Master eQualizer
9.1 About the original hardware …..............................................................................................................
41
9.2 Session Setup …...................................................................................................................................
42
9.3 Preset List ….........................................................................................................................................
43
9.4 Controls …............................................................................................................................................
43
10. E-mi Broadcast eQualizer
10.1 About the original hardware …............................................................................................................
44
10.2 Session Setup ….................................................................................................................................
45
10.3 Preset List ….......................................................................................................................................
46
10.4 Controls …..........................................................................................................................................
46
11. Orbital eQualizer
11.1 About the original hardware …............................................................................................................
47
11.2 Session Setup ….................................................................................................................................
48
11.3 Preset List ….......................................................................................................................................
49
11.4 Controls …..........................................................................................................................................
49
12. Orbital Dynamics
12.1 About the original hardware …............................................................................................................
50
12.2 Session Setup ….................................................................................................................................
51
12.3 Preset List ….......................................................................................................................................
52
12.4 Controls …..........................................................................................................................................
52
© 2010-2015
5
AlexB Programs Manual
13. Magic Parametric eQualizer
13.1 About the original hardware …............................................................................................................
54
13.2 Session Setup ….................................................................................................................................
55
13.3 Preset List ….......................................................................................................................................
56
13.4 Controls …..........................................................................................................................................
56
14. Vintage American X-citer
14.1 About the original hardware …............................................................................................................
58
14.2 Session Setup ….................................................................................................................................
59
14.3 Preset List ….......................................................................................................................................
60
14.4 Controls …..........................................................................................................................................
60
15. American 16 Console
15.1 About the original hardware …............................................................................................................
62
15.2 Session Setup ….................................................................................................................................
63
15.3 Preset List ….......................................................................................................................................
64
15.4 Controls …..........................................................................................................................................
66
16. American 5A eQualizer
16.1 About the original hardware …............................................................................................................
67
16.2 Session Setup ….................................................................................................................................
68
16.3 Preset List ….......................................................................................................................................
69
16.4 Controls …..........................................................................................................................................
69
17. American 5B eQualizer
17.1 About the original hardware …............................................................................................................
70
17.2 Session Setup ….................................................................................................................................
71
17.3 Preset List ….......................................................................................................................................
72
17.4 Controls …..........................................................................................................................................
72
18. American 5 Dynamics
18.1 About the original hardware …............................................................................................................
73
18.2 Session Setup ….................................................................................................................................
74
18.3 Preset List ….......................................................................................................................................
75
18.4 Controls …..........................................................................................................................................
75
19. American 5 Mastering eQualizer
19.1 About the original hardware …............................................................................................................
77
19.2 Session Setup ….................................................................................................................................
78
© 2010-2015
6
AlexB Programs Manual
19.3 Preset List ….......................................................................................................................................
79
19.4 Controls …..........................................................................................................................................
79
20. Neev 14 Console
20.1 About the original hardware …............................................................................................................
80
20.2 Session Setup ….................................................................................................................................
81
20.3 Preset List ….......................................................................................................................................
82
20.4 Controls …..........................................................................................................................................
84
21. Neev 73 eQualizer
21.1 About the original hardware …............................................................................................................
85
21.2 Session Setup ….................................................................................................................................
86
21.3 Preset List ….......................................................................................................................................
87
21.4 Controls …..........................................................................................................................................
87
22. Neev 64 Dynamics
22.1 About the original hardware …............................................................................................................
88
22.2 Session Setup ….................................................................................................................................
89
22.3 Preset List ….......................................................................................................................................
90
22.4 Controls …..........................................................................................................................................
90
23. Neev 54 Dynamics
23.1 About the original hardware …............................................................................................................
92
23.2 Session Setup ….................................................................................................................................
93
23.3 Preset List ….......................................................................................................................................
94
23.4 Controls …..........................................................................................................................................
94
24. Valve Tech Dynamics
24.1 About the original hardware …............................................................................................................
96
24.2 Session Setup ….................................................................................................................................
97
24.3 Preset List ….......................................................................................................................................
98
24.4 Controls …..........................................................................................................................................
98
25. T95 Program eQualizer
25.1 About the original hardware …............................................................................................................
100
25.2 Session Setup ….................................................................................................................................
101
25.3 Preset List ….......................................................................................................................................
102
25.4 Controls …..........................................................................................................................................
102
© 2010-2015
7
AlexB Programs Manual
26. T361A Dolbee Sys
26.1 About the original hardware …............................................................................................................
103
26.2 Session Setup ….................................................................................................................................
104
26.3 Preset List ….......................................................................................................................................
105
26.4 Controls …..........................................................................................................................................
105
27. Neev 81 Sidecar Console
27.1 About the original hardware …............................................................................................................
106
27.2 Session Setup ….................................................................................................................................
107
27.3 Preset List ….......................................................................................................................................
108
27.4 Controls …..........................................................................................................................................
109
28. Chandly Ltd Germanium
28.1 About the original hardware …............................................................................................................
110
28.2 Session Setup ….................................................................................................................................
111
28.3 Preset List ….......................................................................................................................................
112
28.4 Controls …..........................................................................................................................................
113
29. Vinylizer
29.1 About the original hardware …............................................................................................................
114
29.2 Session Setup ….................................................................................................................................
115
29.3 Preset List ….......................................................................................................................................
116
29.4 Controls …..........................................................................................................................................
117
30. Massive Mix eQ
30.1 About the original hardware …............................................................................................................
118
30.2 Session Setup ….................................................................................................................................
119
30.3 Preset List ….......................................................................................................................................
120
30.4 Controls …..........................................................................................................................................
120
31. 4K Console
31.1 About the original hardware …............................................................................................................
121
31.2 Session Setup ….................................................................................................................................
122
31.3 Preset List ….......................................................................................................................................
123
31.4 Controls …..........................................................................................................................................
124
32. 4K eQ Brown
32.1 About the original hardware …............................................................................................................
125
32.2 Session Setup ….................................................................................................................................
126
© 2010-2015
8
AlexB Programs Manual
32.3 Preset List ….......................................................................................................................................
127
32.4 Controls …..........................................................................................................................................
127
33. 4K eQ Black
33.1 About the original hardware …............................................................................................................
128
33.2 Session Setup ….................................................................................................................................
129
33.3 Preset List ….......................................................................................................................................
130
33.4 Controls …..........................................................................................................................................
130
34. 4K CH Dynamics
34.1 About the original hardware …............................................................................................................
131
34.2 Session Setup ….................................................................................................................................
132
34.3 Preset List ….......................................................................................................................................
133
34.4 Controls …..........................................................................................................................................
133
35. 4K G.Comp
35.1 About the original hardware …............................................................................................................
135
35.2 Session Setup ….................................................................................................................................
136
35.3 Preset List ….......................................................................................................................................
137
35.4 Controls …..........................................................................................................................................
137
© 2010-2015
9
AlexB Programs Manual
1. Documentation, Installation and Support
1.1 - Introduction
Thank you for purchasing the AlexB library programs for Nebula.
Now you have one of the best professional high quality audio software. We have spent countless hours to
develop these no-compromise programs to give you only the best sound and the most realistic “feel” as possible
to the real hardware. We are confident that this plugin will help you make better and more professional mixes
(while enjoying yourself even more)... Because: Sound First !
If you have any trouble with the software please do not hesitate to contact me at: [email protected]
1.2 - Overview
Despite the digital revolution in the pro audio industry, many of today’s top albums are still mixed on analog
consoles and with analog outboard gear. Mixing into an analog desk just sounds better. Everything sits better in
the mix, there is more weight to the bottom, and the overall sound is more three dimensional.
Analog devices produce electrical artifacts that affect frequency response, add harmonics, cause signal clipping
and increase noise. These artifacts, which audio engineers often consider the character of a particular device,
result from a combination of factors such as component grade, technology type (i.e. vacuum tubes, ICs,
transistors), power supply specifications, equipment casing and other variables.
Depending on the circuit characteristics, input signal frequency response varies. Some circuits cut frequencies,
others boost them. This behaviour is part of the overall device character and should not be confused with user
adjustable EQ.
Total harmonic distortion (THD) is based on the levels of the odd and even harmonics of an input signal, usually
at a level much lower than the fundamental level. THD balance and decay are circuit dependent, and thus differ
from device to device.
Cross-Talk and Noise are two elements which every designer tends to avoid to not affect the audio quality. Since
in the analog world they can't be avoided, fortunately in digital domain with Volterra Technology we have reduced
the noise at less of -120dBfs and completely avoided Cross-Talk during the sampling.
The result is an optimum full quality sound from a like-new working condition hardware.
We have recreated these non linearity characteristics into these programs by sampling the units in excellent
condition. Your tracks will become more alive with the classic vibe of a real hardware and you may notice that
your mixes may take on an almost magical quality with punch, glue, and dimension that you didn’t hear with your
other algorithmically based plugins.
© 2010-2015
10
AlexB Programs Manual
1.3 - Sampling Process
I believe that "Vectorial Volterra Kernels Technology" is the path of the future and will enable analog sound to be
implanted into digital DAW environments with real harmonic content and analog vibe. In my creation of these
Nebula Programs, I use only top notch modern and vintage gear, precisely sampled by using my own proprietary
technique with custom converters built specifically for NAT3 which outperforms $20k commercial converters.
High end cables, with particular care to the connections, levels and impedance matching were used to translate
the sonic qualities of this priceless devices into the Nebula software technology. Every volume change, gain
change, frequency change is tested and accurately programmed without destructive digital processing for
optimized sound and then compared to the original device. The result is a virtually indistinguishable digital
replication of this landmark device.
The hardware is sampled at 44.1kHz and 96kHz without introduction of noise or aliasing. The thinking behind
this process is to provide the full quality of the analog behavior, which means placing all emphasis on quality
over cpu resources. The process is extremely efficient and optimized to be used on current computer technology
with a forward thinking to the future of more powerful systems, but this will be a more cpu-intensive device than
your typical software. Consider the value in having even one instance of the original unit in your hardware rack
and choose to see the true value in having the best sound that technology has to offer.
The preset doesn't sound processed, harsh or digital as many plugins do, but instead it sounds like a natural
extension of the original audio, gluing your tracks in the mix with an analog vibe.
Some plugins make your recordings sound like digital.
Some plugins are supposed to make your recordings sound like analog.
THIS plugin helps make recordings sound like MUSIC !
© 2010-2015
11
AlexB Programs Manual
1.4 - System Requirements
•
•
•
Intel or AMD CPU based PC or MAC computer
Free space on Hard Disk or better SDD (library size depending)
Nebula3 with installed commercial license
For the best results and low CPU load it's recommended to use the Nebula3 "reverb" instance.
1.5 - Installation
IMPORTANT : remember to run the installer as administrator (otherwise the .ser file will not be generated).
Run the installer and click “Install” then follow the on screen instruction.
Windows
Mac
NOTE : alternatively you can copy the files manually, *.N2P into \programs folder and *.N2V into \vectors folder.
NOTE 2 : after installation it's recommended to clean the \nebulatemprepository\temp folder.
© 2010-2015
12
AlexB Programs Manual
1.6 – Authorization (MFC – MFeQ – MFD only)
Before you can start using the installed library programs you will need to authorize the library.
You have two (2) authorization/license for program library. This is done in a few simple steps.
1- Run your DAW and open Nebula.
2 - Load one preset of the library installed.
3 - Loading this program will fail and Nebula will load the internal “Init” program instead.
This behaviour is wanted and should be expected. During this process Nebula creates a challenge file named
*.ser in the "Nebulatemprepository" folder. (* = the name of the library).
The location of this particular folder can vary for PC users depending on their individual installation.
For Mac users it is usually: /Library/Audio/Presets/AcusticaAudio/Nebula3.
4 – Send the *.ser file at [email protected] using your email address which you have used to
purchase the library and wait for the reply. This can take until 24 hours since the process is done manually.
5 – Copy the *aut file received in the same location of the *ser file.
Now you are ready to use your new Nebula library!
© 2010-2015
13
AlexB Programs Manual
2. General Use
2.1 - Parameter Settings
Some parameters must to be set into Nebula's MAST Page for better performance and Nebula experience:
1 – set the Mode from SIMPLE to GURU
2 – set the AHEAD to 6ms
3 – set the RATE CNV to 4500ms
4 – click on save and reload Nebula
2.2 - Off Line Process
If your DAW isn't powerful or you want/need to freeze or export processed audio tracks I strongly recommend
the NEBULAMAN by Zabukowski: http://zabukowski.com/software/
Some parameters must to be set into Nebula's MAST Page for better off line performance:
1 – set the QUALITY to 1
2 – click on save and reload Nebula
2.3 – TIMED, FREQD and “Web Tricks”
On the forums you will find many “tricks” which theoretically will improve sound and performance: Please leave
libraries the original conditions! Results from these changes are widely varied and often lead to very undesirable
results.
The presets are programmed to sound close to the original sampled hardware. If you change any parameter the
sound changes and it will be different from the original sampled unit.
© 2010-2015
14
AlexB Programs Manual
2.4 - The Skin
A special skin has been created by Vince Gaitier and included in the library as gift. We will refer at this skin for all
instruction in this manual.
To install the skin:
1 - copy the “AlexB_PRO.N2S” file into “\nebulatemprepository\skins” folder
2 - run your DAW and open Nebula
3 - go into MAST Page
4 - set the Skin to AlexB_SKINPRO
5 - click on save and reload Nebula
GUI design : Vince / Vinz
Contact: [email protected]
2.5 - Gain Staging
GUI's meters show the value in dBfs.
Take care with gain staging since the programs are close to the hardware, as reference 0dBVU on the hardware
corresponds to -18dBFS on your DAW.
We recommend mixing with a VU Meter like this by Klanghelm (www.klanghelm.com/VUMT.html ).
In this way you can easily check the levels on every single track and for the whole mix by inserting the VUMeter
as last instance on the mixbus and by setting the 0dBVU = -18dBfs on it.
© 2010-2015
15
AlexB Programs Manual
2.6 - Common Controls
All programs have some common controls which are detailed below.
Input Gain
The Input Gain control sets the level at the input of the plugin.
The range is from -∞ dB to +6 dB.
Output Gain
The Output Gain control sets the level at the output of the plugin.
The range is from -∞ dB to +6 dB.
NOTE: clicking on the controls while pressing “ctrl” on computer keyboard, the control returns to zero.
Bypass
This switch control sets the plugin operative or bypassed
Meters
Input and Output Meters display the levels at the input and output of the plugin in dBfs.
© 2010-2015
16
AlexB Programs Manual
3. Modern Flagship Console
3.1 - About the original hardware
The Modern Flagship Console has set new standards as the ultimate analogue console and has become the
signature of excellence for the world’s premier engineers, producers and studios.
Professionals throughout the world have chosen the full, clean sound of the Modern Flagship Console. Its high
bandwidth pure audio path, superior dynamics, greater dynamic range and greater control make the Modern
Flagship Console the first choice for recording and mixing the purest high fidelity recordings.
With its 100kHz bandwidth the Modern Flagship Console has been engineered to deliver recordings at the best
conceivable quality onto any format at any sample rate, capturing all the energy and atmosphere of the original
performance as perfectly as possible.
© 2010-2015
17
AlexB Programs Manual
3.2 - Session Setup
Modern Flaghship Console reproduces the sound of Modern British Recording Console by using a library
programs consisting of channels input, group bus and mixbus. To faithfully reproduce into the DAW the analog
console signal chain and workflow, we recommend using the Modern Flagship Console in one of two following
session setup configurations.
1. As a virtual summing box : Input Channel is inserted on the last insert of the DAW audio tracks, like a
direct out routed to a summing box. The MixBus is placed on the first insert of the master track, just as
the stereo return would be routed from the analog console back to the DAW.
2. To simulate a console : Input Channel is inserted on the first insert of the DAW audio tracks, the MixBus
is placed on the last insert of the master track. If you group channels in your DAW, i.e. drums elements,
you can insert the GroupBus as last insert in the submix group bus to achieve the classic bus coloration.
You should set the Pan Law in the DAW at -3dB. You might like to use the analog panner (included in the library)
on some stereo tracks and group bus instead of the DAW panner, the MFC Panner should be the last insert into
DAW's track or group bus leaving the Pan Law in the DAW to 0dB.
TRICK: to emulate the non linearity between the channels of the console, you can set the GDRV control slightly
different on every track into a range of +/-3dB.
© 2010-2015
18
AlexB Programs Manual
3.3 - Preset list:
The Modern Flagship Console library includes 32 different programs:
HQ presets with 10 kernels and LE presets with 3 and 5 kernels displayed into sub-menu “MFC”
MFC Line in : line input channel
MFC MIC Pre : microphone preamplifier
MFC G.Bus Clean : Group Bus clean signal
MFC G.Bus Acoustic : Group Bus with equalizer patched useful for acoustic instruments
MFC G.Bus AmbFX : Group Bus with equalizer patched useful for ambient & FX
MFC G.Bus BG Vox : Group Bus with equalizer patched useful for backing vocals
MFC G.Bus Drum : Group Bus with equalizer patched useful for drums
MFC G.Bus GTR : Group Bus with equalizer patched useful for guitars
MFC G.Bus Percussions : Group Bus with equalizer patched useful for percussions
MFC G.Bus SynthPad : Group Bus with equalizer patched useful for synthesizers and pads
MFC LFE Channel : Channel for low frequency effects as explosions and deep bass
MFC M.Bus Clean : MixBus clean
MFC M.Bus Air&Punch : MixBus with equalizer patched useful for airy & punching sound
MFC M.Bus Modern : MixBus with equalizer patched useful for modern and polished sound
MFC M.Bus Cine : MixBus with wider stereo image useful for soundtrack and symphonic music
MFC Panner : Panner -3dB pan law
MFC Line in
The Modern Flagship Console Line in is the first stage of the console, normally it works as line amplifier and you
should insert it in every track.
MFC MIC in
The Modern Flagship Console microphone preamplifier has more coloration than Line in and you can use it
when more character is needed.
MFC G.Bus Clean
If you send some tracks to a submix bus group in your DAW and you like to have the real sound by Bus Group of
the console, you can insert the G.Bus Clean preset as last insert into DAW's submix bus group.
MFC G.Bus Acoustic
When acoustic instruments are grouped into a submix in your DAW, you might want to have the G.BUS Acoustic
preset as last insert into DAW's submix bus group to give a cohesive colored glue.
MFC G.Bus Amb&FX
When ambients, reverb, echo and other effects are used into an aux-send/return in your DAW, you may like to
have the G.BUS Amb&FX preset as last insert into these DAW's channels to give more spatial dimension.
MFC G.Bus BG Vox
When backing vocals tracks are grouped into a submix in your DAW, try inserting the G.BUS BG Vox preset as
last insert into DAW's submix bus group to push a little in the backward the sound by achieving air and
transparency.
MFC G.Bus Drum
When drum instruments are grouped into a submix in your DAW, you may want to have the G.BUS Drum preset
as last insert into DAW's submix bus group to give a cohesive punching glue.
MFC G.Bus GTR
When guitars are grouped into a submix in your DAW, try using the G.BUS GTR preset as last insert into DAW's
submix bus group to give a cohesive brilliant glue.
© 2010-2015
19
AlexB Programs Manual
MFC G.Bus Percussions
When percussions are grouped into a submix in your DAW, you might like to have the G.BUS Percussions
preset as last insert into DAW's submix bus group to give a cohesive snapping glue.
MFC G.Bus SynthPad
When synthesizers and Pads are grouped into a submix in your DAW, maybe try the G.BUS SynthPad preset as
last insert into DAW's submix bus group to give a cohesive focused glue.
MFC LFE Channel
The Low Frequency Effect Channel is a special channel used for sub frequency effects like explosions, deep
bass, etc. It should be used in parallel with a normal channel since LFE has a low pass filter at 120Hz.
MFC M.Bus Clean
Modern Flagship Console Mix Bus is the final stage of the console, it must be inserted in the mixbus of the DAW.
The M.BUS Clean gives the original clean glue.
MFC M.Bus Air & Punch
When a cohesive punching glued mix is needed, preserving some air, use the M.BUS Air&Punch preset as last
insert into DAW's mixbus.
MFC M.Bus Modern
When a polished glued mix is needed, with a lot of air and punch, try the M.BUS Modern preset as last insert into
DAW's mixbus.
MFC M.Bus Cine
When a wider glued mix is needed, with an improved stereo image, the M.BUS Cine preset as last insert into
DAW's mixbus will do the trick.
© 2010-2015
20
AlexB Programs Manual
3.4 - Controls
The Modern Flagship Console has only a few but intuitive and effective controls which are detailed below.
GDRV
DRIVE
GDrive Control
The “GDRV” control is a unique feature not found in similar products from others brands that
comes from Acustica Audio VVKT proprietary technology and sampling aproach.
It allows you to control the amount of harmonic distortion that is coming from the analog
hardware. The “Input” control acts as the analog signal chain of the device, where reducing
the volume also reduces the harmonic distortion in accordance. The “GDrive” function allows
independent control of this harmonic content, so that the input level can be left alone while
making adjustments to the harmonics. Reducing the harmonics leads to a cleaner signal with
an already clean device. Increasing the harmonics should be done with moderation.
This type of effect is not truly representative of a real console, but it can be useful when you
want more of the console’s nonlinear “vibe” without altering the channel’s levels. The
available range is ±12 dB.
Note that increasing the input signal the internal headroom will be reduced.
Drive Control
The “DRIVE” control affects the harmonic contents in an unnatural way, but suitable if you
look for an effect.
The available range is ±30 dB.
NOTE: clicking on the controls while pressing “ctrl” on computer keyboard, the control returns to zero.
NOTE2: Do not adjust the ATTCK and RELS controls, leave them at stock value (center 12 o'clock).
© 2010-2015
21
AlexB Programs Manual
4. Modern Flagship eQualizer
4.1 - About the original hardware
The Modern Flagship eQualizer has set new standards as the ultimate analogue processor and has become the
signature of excellence for the world’s premier engineers, producers and studios.
This equalizer is very usable and controls most situations effortlessly and musically, with a smooth filters section,
a sweet top-end and powerful lows, with less midrange aggression than a classic British eQ.
Modern Flagship eQualizer manages to sound clean and crystal clear without being weak and characterless.
There is little apparent colouration, just a maturity of tone.
With its 100kHz bandwidth the Modern Flagship eQualizer has been engineered to deliver recordings at the best
conceivable quality onto any format at any sample rate, maintaining all the energy and atmosphere of the
original performance as perfectly as possible.
© 2010-2015
22
AlexB Programs Manual
4.2 - Session Setup
Modern Flaghship eQualizer reproduces the characteristic sound of Modern British Console eQualizer, this kind
of equalizers are used in countless records in the world. To faithfully reproduce this analog sound in the DAW,
we recommend using the MFeQ in all tracks where you need to shape the sound.
1. On single track : Modern Flaghship eQualizer is inserted on the audio tracks as insert in the position at
your taste. It works great on all instruments and voices.
2. On master track : Modern Flaghship eQualizer is inserted on the mixbus, or group bus, as last insert
giving at the whole mix his classic sound.
To emulate the original unit sound you should use both presets HQ and LE by mixing them in this way:
on a single track when a single equalization band only is required you should use the HQ preset, when you need
more than one band of equalization you should use the LE presets and as last band the HQ. This interaction
gives the right color and harmonic contents. However if you want more color and saturation you can use more
HQ bands at your taste.
NOTE: on some frequencies when boosting or cutting, the whole volume can rise up or fall down a little, you can
compensate this with the Output Gain Control.
TRICK: to emulate the non linearity between the tracks, you can set the DRIVE control slightly different on every
instance into a range of +/-5dB.
© 2010-2015
23
AlexB Programs Manual
4.3 - Preset list:
The Modern Flagship eQualizer library includes 20 different programs:
HQ presets with 3 kernels and LE presets with 1 kernel displayed into sub-menu “MFQ”
MFeQ HP Filter : High Pass Filter -12dB/oct from 30 to 300Hz
MFeQ LP Filter : Low Pass Filter -12dB/oct from 1.5k to 18kHz
MFeQ Low Shelf : Low Shelf variable from 33 to 440Hz +/- 20dB
MFeQ Low Peak : Low Peak variable from 33 to 440Hz +/- 20dB variable Q from 0.7 to 2.0
MFeQ Low Mid : Low Mid Bell variable from 120 to 440Hz +/- 20dB variable Q from 0.4 to 10
MFeQ Mid : Mid Bell variable from 440 to 1.3kHz +/- 20dB variable Q from 0.4 to 10
MFeQ Mid High : Mid High Bell variable from 1.3k to 5.6kHz +/- 20dB variable Q from 0.4 to 10
MFeQ Highs : High Bell variable from 5.6k to 9kHz +/- 20dB variable Q from 0.4 to 10
MFeQ High Peak : High Peak variable from 1.5k to 18kHz +/- 20dB variable Q from 0.7 to 2.0
MFeQ High Shelf : High Shelf variable from 1.5k to 18kHz +/- 20dB
4.4 – Controls
The Modern Flagship eQualizer has only a few but intuitive and effective controls which are detailed below.
CUTOF
FREQ
GAIN
Q
DRIVE
Cut Off Control
The “CUTOF” control affects the filter's frequency cut.
Frequency Control
The “FREQ” control sets the frequency to be boosted or attenuated.
Gain Control
The “GAIN” control sets the amount by which the frequency setting is boosted or attenuated.
The available range is ±20 dB.
Q Control
The “Q” control sets the amplitude of the filter selected by FREQ control.
Drive Control
The “DRIVE” control affects the harmonic contents in an unnatural way, but suitable if you
look for an effect.
The available range is ±30 dB.
NOTE: clicking on the controls while pressing “ctrl” on computer keyboard, the control returns to zero.
© 2010-2015
24
AlexB Programs Manual
5. Modern Flagship Dynamics
5.1 - About the original hardware
The Modern Flagship Dynamics has set new standards as the ultimate analogue processor and has become the
signature of excellence for the world’s premier engineers, producers and studios.
This compressor is very usable and controls most situations effortlessly and musically, with a smooth or hard
knee, a sweet top-end and powerful lows, with less aggression than a classic RMS compressor.
Modern Flagship Dynamics manages to sound clean but with character without being weak and harsh. There is
little apparent colouration, just a maturity of tone.
With its 100kHz bandwidth the Modern Flagship Dynamics has been engineered to deliver recordings at the best
conceivable quality onto any format at any sample rate, maintaining all the energy, atmosphere and life of the
original performance as perfectly as possible.
© 2010-2015
25
AlexB Programs Manual
5.2 - Session Setup
Modern Flaghship Dynamics reproduces the characteristic sound of Modern British Console Compressor, this
kind of compressor are used in top records in the world. To faithfully reproduce this analog sound in the DAW, we
recommend using the MFD in all tracks where you need to control dynamically the sound.
1. On single track : Modern Flaghship Dynamics is inserted on the audio tracks as insert in the position at
your taste. It works great on all instruments and voices.
2. On master track : Modern Flaghship Dynamics is inserted on the group bus, as last insert giving at the
whole submix his classic sound.
NOTE: please set the parameters as described into cap.2.1
TRICK: to emulate the original sound closely, you should set the controls DRIVE to +3dB and AHEAD to 5.4ms.
© 2010-2015
26
AlexB Programs Manual
5.3 - Preset list:
The Modern Flagship Dynamics library includes 8 different programs:
HQ presets with 5 kernels and LE presets with 1 kernel displayed into sub-menu “MFD”
MFD H.Knee : Hard Knee compressor with variable controls and HPF on internal sidechain
MFD H.Knee esc : Hard Knee compressor with variable controls and external sidechain
MFD S.Knee : Soft Knee compressor with variable controls and HPF on internal sidechain
MFD S.Knee esc : Soft Knee compressor with variable controls and external sidechain
5.4 – Controls
The Modern Flagship Dynamics has only a few but intuitive and effective controls which are detailed below.
ATT
REL
THR
RAT
AHEAD
DRIVE
© 2010-2015
Attack Control
The “ATT” control defines the attack time of the compressor. Attack time is the duration
between the input signal reaching the threshold and processing being applied.
The range is variable from 1ms to 7ms
Release Control
The “REL” control sets the amount of time it takes for processing to cease once the input
signal drops below the threshold level.
The available range is 10ms to 3s
Threshold Control
The “THR” control defines the input level at which limiting or compression begins. Signals
that exceed this level are processed. Signals below the threshold are unaffected.
The range is variable from 0dB to -48,1dB
Ratio Control
The “RAT” defines the amount of gain reduction to be processed by the module.
When the control is at maximum (10), the ratio is effectively infinity to one, yielding the
limiting effect.
The range is variable from 1,5:1 to 10:1
Ahead Control
The “AHEAD” control sets the look-ahead to control the fast transients.
The range is variable from 0ms to 6ms
Drive Control
The “DRIVE” control affects the harmonic contents in an unnatural way, but suitable if you
look for an effect.
The available range is ±24 dB
27
AlexB Programs Manual
GAIN
Gain Control
The “GAIN” control sets the output level of gain makeup.
The range is variable from 0dB to 25dB
HPF
HPF Control
The “HPF” control sets the cut-off point of a high-pass filter on the internal sidechain.
The range is variable from 0Hz to 500Hz
NOTE: clicking on the controls while pressing “ctrl” on computer keyboard, the control returns to zero.
© 2010-2015
28
AlexB Programs Manual
6. Modern Tube Console
6.1 - About the original hardware
The inclusion of valves in this console is not just a token addition. They form an essential part of the signal path
at several key points within the console: every channel and mic preamp incorporates an ECC83/12AX7A valve
stage, as do the Group and Stereo master MixBus amplifiers.
The original smooth and musical tube sound has been improved for better performance in headroom and
dynamics by cleaning audio path and replacing the stock 12AX7 tubes with 1960 NOS Telefunken, 1980 NOS
Siemens and 1970 NOS Tesla, all hand selected, balanced and matched. Some electrolytic capacitors have
been replaced with Panasonic FM, Nichicon MUSE and BC while other caps have been replaced with Wima.
The power supply has been improved and the sound now has more air, punch and detail with great warmth, rich
harmonic content and natural in-your-face tube compression!
© 2010-2015
29
AlexB Programs Manual
6.2 - Session Setup
Modern Tube Console reproduces the sound of Modern British Recording Console using a library programs
consisting of channels input, group bus and mixbus. To faithfully reproduce into the DAW the analog console
signal chain and workflow, we recommend using the Modern Tube Console in one of two following session setup
configurations.
1. As a virtual summing box : Input Channel is inserted on the last insert of the DAW audio tracks, like a
direct out routed to a summing box. The MixBus is placed on the first insert of the master track, just as
the stereo return would be routed from the analog console back to the DAW.
2. To simulate a console : Input Channel is inserted on the first insert of the DAW audio tracks, the MixBus
is placed on the last insert of the master track. If you group channels in your DAW, i.e. drums elements,
you can insert the GroupBus as last insert in the submix group bus to achieve the classic bus coloration.
You should set the Pan Law in the DAW at -3dB. You might like to use the analog panner (included in the library)
on some stereo tracks and group bus instead of the DAW panner, the MTC Panner should be the last insert into
DAW's track or group bus leaving the Pan Law in the DAW to 0dB.
TRICK: to emulate the non linearity between the channels of the console, you can set the GDRV control slightly
different on every track into a range of +/-3dB.
© 2010-2015
30
AlexB Programs Manual
6.3 - Preset list:
The Modern Tube Console library includes 31 different programs:
HQ presets with 10 kernels and LE presets with 3 and 5 kernels displayed into sub-menu “MTC”
MTC Line in : line input channel
MTC MIC Pre : microphone preamplifier
MTC HPF 90Hz: High Pass Filter 90Hz -12dB/oct
MTC G.Bus Clean : Group Bus clean signal
MTC G.Bus Acoustic : Group Bus with equalizer patched useful for acoustic instruments
MTC G.Bus AmbFX : Group Bus with equalizer patched useful for ambient & FX
MTC G.Bus BG Vox : Group Bus with equalizer patched useful for backing vocals
MTC G.Bus Drum : Group Bus with equalizer patched useful for drums
MTC G.Bus GTR : Group Bus with equalizer patched useful for guitars
MTC G.Bus Percussions : Group Bus with equalizer patched useful for percussions
MTC G.Bus SynthPad : Group Bus with equalizer patched useful for synthesizers and pads
MTC M.Bus Clean : MixBus clean with Electro Harmonix tubes
MTC M.Bus Air: MixBus with Telefunken tubes
MTC M.Bus Punch : MixBus with Siemens tubes
MTC M.Bus Vintage : MixBus with Tesla tubes
MTC Panner : Panner -3dB pan law
MTC Line in
The Modern Tube Console Line in is the first stage of the console, normally it works as line amplifier and you
should insert it in every track.
MTC MIC in
The Modern Tube Console microphone preamplifier has more coloration than Line in and you can use it when
more character is needed.
MTC HPF 90Hz
The High Pass Filter is designed to cut off unwanted LF as rumbles and pops. The filter has a slope of -12dB per
octave and operates at 90Hz.
MTC G.Bus Clean
If you send some tracks to a submix bus group in your DAW and you like to have the real sound by Bus Group of
the console, you can insert the G.Bus Clean preset as last insert into DAW's submix bus group.
MTC G.Bus Acoustic
When acoustic instruments are grouped into a submix in your DAW, you might want to have the G.BUS Acoustic
preset as last insert into DAW's submix bus group to give a cohesive colored glue.
MTC G.Bus Amb&FX
When ambience, reverb, echo and other effects are used into an aux-send/return in your DAW, you may like to
have the G.BUS Amb&FX preset as last insert into these DAW's channels to give more spatial dimension.
MTC G.Bus BG Vox
When backing vocals tracks are grouped into a submix in your DAW, try inserting the G.BUS BG Vox preset as
last insert into DAW's submix bus group to push a little in the backward the sound by achieving air and
transparency.
MTC G.Bus Drum
When drum instruments are grouped into a submix in your DAW, you may want to have the G.BUS Drum preset
as last insert into DAW's submix bus group to give a cohesive punching glue.
© 2010-2015
31
AlexB Programs Manual
MTC G.Bus GTR
When guitars are grouped into a submix in your DAW, try using the G.BUS GTR preset as last insert into DAW's
submix bus group to give a cohesive brilliant glue.
MTC G.Bus Percussions
When percussions are grouped into a submix in your DAW, you might like to have the G.BUS Percussions
preset as last insert into DAW's submix bus group to give a cohesive snapping glue.
MTC G.Bus SynthPad
When synthesizers and Pads are grouped into a submix in your DAW, maybe try the G.BUS SynthPad preset as
last insert into DAW's submix bus group to give a cohesive focused glue.
MTC M.Bus Clean
Modern Tube Console Mix Bus is the final stage of the console, it must be inserted in the mixbus of the DAW.
The M.BUS Clean gives the original clean glue improved with Electro Harmonix selected tubes.
MTC M.Bus Air
When a polished glued mix is needed, with a lot of air, try the M.BUS Air preset as last insert into DAW's mixbus.
MTC M.Bus Punch
When a cohesive punching glued mix is needed, preserving some air, use the M.BUS Punch preset as last insert
into DAW's mixbus.
MTC M.Bus Vintage
When a slightly darker glued mix is needed, with a vintage touch, the M.BUS Vintage preset as last insert into
DAW's mixbus will do the trick.
© 2010-2015
32
AlexB Programs Manual
6.4 - Controls
The Modern Tube Console has only a few but intuitive and effective controls which are detailed below.
GDRV
DRIVE
GDrive Control
The “GDRV” control is a unique feature not found in similar products from others brands that
comes from Acustica Audio VVKT proprietary technology and sampling aproach.
It allows you to control the amount of harmonic distortion that is coming from the analog
hardware. The “Input” control acts as the analog signal chain of the device, where reducing
the volume also reduces the harmonic distortion in accordance. The “GDrive” function allows
independent control of this harmonic content, so that the input level can be left alone while
making adjustments to the harmonics. Reducing the harmonics leads to a cleaner signal with
an already clean device. Increasing the harmonics should be done with moderation.
This type of effect is not truly representative of a real console, but it can be useful when you
want more of the console’s nonlinear “vibe” without altering the channel’s levels. The
available range is ±12 dB.. Note that increasing the input signal the internal headroom will be
reduced.
Drive Control
The “DRIVE” control affects the harmonic contents in an unnatural way, but suitable if you
look for an effect.
The available range is ±30 dB.
NOTE: clicking on the controls while pressing “ctrl” on computer keyboard, the control returns to zero.
NOTE2: Do not adjust the ATTCK and RELS controls, leave them at stock value (center 12 o'clock).
© 2010-2015
33
AlexB Programs Manual
7. Modern Tube eQualizer
7.1 - About the original hardware
No other high end equaliser can offer the same degree of power and flexibility as the Modern Tube eQualizer
which is included in the Modern Tube Console as parametric channel equalizer.
This equalizer is very usable and controls most situations effortlessly and musically, with his warmth,
transparency, smoothness and less midrange aggression than a classic British eQ.
Modern Tube eQualizer manages to sound clean and clear without being weak and characterless. There is little
tube colouration, just a maturity of tone.
With its broad bandwidth the Modern Tube eQualizer has been engineered to deliver recordings at the best
conceivable quality onto any format at any sample rate, maintaining all the energy and atmosphere of the
original performance as perfectly as possible.
© 2010-2015
34
AlexB Programs Manual
7.2 - Session Setup
Modern Tube eQualizer reproduces the characteristic sound of Modern Tube Console eQualizer, this kind of
equalizers are used in countless records in the world. To faithfully reproduce this analog sound in the DAW, we
recommend using the MTeQ in all tracks where you need to shape the sound.
1. On single track : Modern Tube eQualizer is inserted on the audio tracks as insert in the position at your
taste. It works great on all instruments and voices.
2. On master track : Modern Tube eQualizer is inserted on the mixbus, or group bus, as last insert giving at
the whole mix his classic sound.
To emulate the original unit sound you should use both presets HQ and LE by mixing them in this way:
on a single track when a single equalization band only is required you should use the HQ preset, when you need
more than one band of equalization you should use the LE presets and as last band the HQ. This interaction
gives the right color and harmonic contents. However if you want more color and saturation you can use more
HQ bands at your taste.
NOTE: on some frequencies when boosting or cutting, the whole volume can rise up or fall down a little, you can
compensate this with the Output Gain Control.
TRICK: to emulate the non linearity between the tracks, you can set the DRIVE control slightly different on every
instance into a range of +/-5dB.
© 2010-2015
35
AlexB Programs Manual
7.3 - Preset list:
The Modern Tube eQualizer library includes 8 different programs:
HQ presets with 3 kernels and LE presets with 1 kernel displayed into sub-menu “MTQ”
MTeQ Shelf : Low and High Shelf combo at 80 and 12kHz +/- 15dB
MTeQ Low Freq : Low Bell variable from 50 to 600Hz +/- 15dB variable Q from 0.8 to 7
MTeQ Mid Freq : Mid Bell variable from 600 to 7kHz +/- 15dB variable Q from 0.8 to 7
MFeQ High Freq : High Bell variable from 7k to 18kHz +/- 15dB variable Q from 0.8 to 7
7.4 – Controls
The Modern Flagship eQualizer has only a few but intuitive and effective controls which are detailed below.
FREQ
GAIN
Q
DRIVE
Frequency Control
The “FREQ” control sets the frequency to be boosted or attenuated.
Gain Control
The “GAIN” control sets the amount by which the frequency setting is boosted or attenuated.
The available range is ±20 dB.
Q Control
The “Q” control sets the amplitude of the filter selected by FREQ control.
Drive Control
The “DRIVE” control affects the harmonic contents in an unnatural way, but suitable if you
look for an effect.
The available range is ±30 dB.
NOTE: clicking on the controls while pressing “ctrl” on computer keyboard, the control returns to zero.
© 2010-2015
36
AlexB Programs Manual
8. Modern Tube Dynamics
8.1 - About the original hardware
The Modern Tube Dynamics maintains its position as the most flexible, polished sounding high end compressor
on the market today.
This compressor has been heavy modified becoming very usable and it controls most situations effortlessly and
musically, with a smooth tube sound, a sweet top-end and powerful lows, with less aggression than a classic
VCA compressor.
Modern Tube Dynamics manages to sound clean but with character without being weak and harsh. There is little
tube colouration, just a maturity of tone.
With its broad bandwidth the Modern Tube Dynamics has been engineered to deliver recordings at the best
conceivable quality onto any format at any sample rate, maintaining all the energy, atmosphere and life of the
original performance as perfectly as possible.
© 2010-2015
37
AlexB Programs Manual
8.2 - Session Setup
Modern Tube Dynamics reproduces the characteristic sound of Modern British Compressor, this kind of
compressor are used in top records in the world. To faithfully reproduce this analog sound in the DAW, we
recommend using the MTD in all tracks where you need to control dynamically the sound.
1. On single track : Modern Tube Dynamics is inserted on the audio tracks as insert in the position at your
taste. It works great on all instruments and voices.
2. On master track : Modern Tube Dynamics is inserted on the group bus, as last insert giving at the whole
submix his classic sound.
NOTE: please set the parameters as described into cap.2.1
TRICK: to emulate the original sound closely, you should set the AHEAD control to 5.4ms.
© 2010-2015
38
AlexB Programs Manual
8.3 - Preset list:
The Modern Tube Dynamics library includes 12 different programs:
HQ presets with 5 and 8 kernels and LE presets with 1 and 3 kernels displayed into sub-menu “MTD”
MTD Line Amp : Line input Amplifier
MTD Mic Pre : Mic Preamp
MTD DI : Input Amplifier for keyboard and guitars
MTD HPF 90Hz : High Pass Filter 90Hz -12dB/oct
MTD Tube Comp : Compressor with variable controls and HPF on internal sidechain
MTD Tube Comp esc : Compressor with variable controls and external sidechain
8.4 – Controls
The Modern Tube Dynamics has only a few but intuitive and effective controls which are detailed below.
ATT
REL
THR
RAT
AHEAD
DRIVE
© 2010-2015
Attack Control
The “ATT” control defines the attack time of the compressor. Attack time is the duration
between the input signal reaching the threshold and processing being applied.
The range is variable from 0,5ms to 50ms
Release Control
The “REL” control sets the amount of time it takes for processing to cease once the input
signal drops below the threshold level.
The available range is 40ms to 4s
Threshold Control
The “THR” control defines the input level at which limiting or compression begins. Signals
that exceed this level are processed. Signals below the threshold are unaffected.
The range is variable from 0dB to -48,1dB
Ratio Control
The “RAT” defines the amount of gain reduction to be processed by the module.
The range is variable from 1,5:1 to 30:1
Ahead Control
The “AHEAD” control sets the look-ahead to control the fast transients.
The range is variable from 0ms to 6ms
Drive Control
The “DRIVE” control affects the harmonic contents in an unnatural way, but suitable if you
look for an effect.
The available range is ±24 dB
39
AlexB Programs Manual
GAIN
Gain Control
The “GAIN” control sets the output level of gain makeup.
The range is variable from 0dB to 25dB
HPF
HPF Control
The “HPF” control sets the cut-off point of a high-pass filter on the internal sidechain.
The range is variable from 0Hz to 500Hz
GDRV
GDrive Control
The “GDRV” control is a unique feature not found in similar products from others brands that
comes from Acustica Audio VVKT proprietary technology and sampling aproach.
It allows you to control the amount of harmonic distortion that is coming from the analog
hardware. The “Input” control acts as the analog signal chain of the device, where reducing
the volume also reduces the harmonic distortion in accordance. The “GDrive” function allows
independent control of this harmonic content, so that the input level can be left alone while
making adjustments to the harmonics. Reducing the harmonics leads to a cleaner signal with
an already clean device. Increasing the harmonics should be done with moderation.
This type of effect is not truly representative of a real console, but it can be useful when you
want more of the console’s nonlinear “vibe” without altering the channel’s levels. The
available range is ±12 dB.. Note that increasing the input signal the internal headroom will be
reduced.
NOTE: clicking on the controls while pressing “ctrl” on computer keyboard, the control returns to zero.
NOTE2: Do not adjust the ATTCK and RELS controls on Line Amp, Mic Pre and DI presets, leave them at
stock value (center 12 o'clock).
© 2010-2015
40
AlexB Programs Manual
9. Vintage Master eQualizer
9.1 - About the original hardware
Custom designed for the classical mastering division of Teldec Records, these very rare discrete stereo
mastering program equalizers are passive coils. The original circuit has received some modification to make it
suitable for modern mastering purpose by improving the original musicality that makes program audio sound
better and more punchy just by passing through it even when set "flat".
One unit has three bands: low, mid and high while the other unit, even more rare and used to equalize the audio
in the cinema, has two bands only: low and high.
With its broad bandwidth the Vintage Master eQualizer has been engineered to deliver recordings at the best
conceivable quality onto any format at any sample rate, maintaining all the energy and atmosphere of the
original performance as perfectly as possible.
© 2010-2015
41
AlexB Programs Manual
9.2 - Session Setup
Vintage Master eQualizer reproduces the characteristic sound of Vintage Program eQualizer, this kind of
equalizers are used in countless records in the world. To faithfully reproduce this analog sound in the DAW, we
recommend using the VMeQ in all tracks where you need to shape the sound.
1. Mastering : Vintage Master eQualizer is inserted on the audio track as insert in the position at your taste.
2. On master track : Vintage Master eQualizer is inserted on the mixbus, or group bus, as last insert giving
at the whole mix his classic sound.
3. On single track : Vintage Master eQualizer is inserted on the audio tracks as insert in the position at your
taste. It works great on all instruments and voices.
To emulate the original unit sound you should use both presets HQ and LE by mixing them in this way:
on a single track when a single equalization band only is required you should use the HQ preset, when you need
more than one band of equalization you should use the LE presets and as last band the HQ. This interaction
gives the right color and harmonic contents. However if you want more color and saturation you can use more
HQ bands at your taste.
NOTE: on some frequencies when boosting or cutting, the overall volume can increase or decrease a little, you
can compensate this with the Output Gain Control.
TRICK: to emulate the non linearity between the tracks, you can set the DRIVE control slightly different on every
instance into a range of +/-5dB.
© 2010-2015
42
AlexB Programs Manual
9.3 - Preset list:
The Vintage Master eQualizer library includes 8 different programs:
HQ presets with 7 kernels and LE presets with 3 kernel displayed into sub-menu “VMQ”
VMeQ Movie: Low and High Shelf combo at 60Hz and 10kHz +/- 12dB
VMeQ HFs : High Shelf fixed 10k, 20k, 30kHz +/- 10dB
VMeQ LFs : Low Shelf fixed 30, 40, 60Hz +/- 10dB
VMeQ MF : Mid bell fixed 125*, 250, 500, 700, 1k, 1.4K, 2k, 2.8k, 4k, 5.6kHz +/- 10dB
NOTE: * display shows 0.13kHz but the correct working frequency is 0.125kHz i.e. 125Hz.
9.4 – Controls
The Vintage Master eQualizer has only a few but intuitive and effective controls which are detailed below.
FREQ
GAIN
DRIVE
Frequency Control
The “FREQ” control sets the frequency to be boosted or attenuated.
Gain Control
The “GAIN” control sets the amount by which the frequency setting is boosted or attenuated.
The MF bell has broad curve when boosted and narrow curve when it is cut.
The available range is ±10 dB.
Drive Control
The “DRIVE” control affects the harmonic contents in an unnatural way, but suitable if you
look for an effect.
The available range is ±30 dB.
NOTE: clicking on the controls while pressing “ctrl” on computer keyboard, the control returns to zero
© 2010-2015
43
AlexB Programs Manual
10. Em-i Broadcast eQualizer
10.1 - About the original hardware
A Very Rare piece of British Broadcasting history, EBeQ is the rare vintage germanium program equalizer built
for BBC broadcast console in the '70 years. The unit has been totally refurbished and re calibrated since it was
improperly racked into fake Abbey Road case using telephone cables and low quality components.
Now, with audio grade electronics and Mogami premium cables, this fantastic EQ is returned to shine with his
stunning lows, wide midrange and an incredibly airy top end, with the full germanium character and coils
sweetness. This unit share the same circuitry of the Abbey Road mastering console TG12410.
With its broad bandwidth the Em-i Broadcast eQualizer has been engineered to deliver recordings at the best
conceivable quality onto any format at any sample rate, maintaining all the energy and atmosphere of the
original performance as perfectly as possible.
© 2010-2015
44
AlexB Programs Manual
10.2 - Session Setup
Em-i Broadcast eQualizer reproduces the characteristic sound of Vintage Program eQualizer, this kind of
equalizers are used in countless records in the world. To faithfully reproduce this analog sound in the DAW, we
recommend using the EBeQ in all traks where you need to shape the sound.
1. Mastering : Em-i Broadcast eQualizer is inserted on the audio track as insert in the position at your taste.
2. On master track : Em-i Broadcast eQualizer is inserted on the mixbus, or group bus, as last insert giving
at the whole mix his classic sound.
3. On single track : Em-i Broadcast eQualizer is inserted on the audio tracks as insert in the position at
your taste. It works great on all instruments and voices.
To emulate the original unit sound you should use both presets HQ and LE by mixing them in this way:
on a single track when a single equalization band only is required you should use the HQ preset, when you need
more than one band of equalization you should use the LE presets and as last band the HQ. This interaction
gives the right color and harmonic contents. However if you want more color and saturation you can use more
HQ bands at your taste.
TRICK: to emulate the non linearity between the tracks, you can set the DRIVE control slightly different on every
instance into a range of +/-5dB.
© 2010-2015
45
AlexB Programs Manual
10.3 - Preset list:
The Em-i Broadcast eQualizer library includes 4 different programs:
HQ presets with 7 kernels and LE presets with 1 kernel displayed into sub-menu “EBQ”
EBeQ Presence : Mid bell fixed 1.4K, 2.8k, 4k, 5.6kHz + 6dB
EBeQ Shelf: Low and High Shelf combo at 60Hz (Bass) +/- 6dB and 10kHz (Treb) +/- 12dB
10.4 – Controls
The Em-i Broadcast eQualizer has only a few but intuitive and effective controls which are detailed below.
FREQ
GAIN
DRIVE
Frequency Control
The “FREQ” control sets the frequency to be boosted or attenuated.
Gain Control
The “GAIN” control sets the amount by which the frequency setting is boosted.
The available range is ±6 dB for Bass and ±12dB for Treble.
Drive Control
The “DRIVE” control affects the harmonic contents in an unnatural way, but suitable if you
look for an effect.
The available range is ±30 dB.
NOTE: clicking on the controls while pressing “ctrl” on computer keyboard, the control returns to zero
© 2010-2015
46
AlexB Programs Manual
11. Orbital eQualizer
11.1 - About the original hardware
This is an American classics from the 1980's: a quasi-parametric equalizer of high professional quality. The
flexibility offered by the OReQ makes it a particularly powerful tool in nearly all areas of audio: sound
reinforcement, public address, recording studio, broadcasting, motion picture sound, disco, theatre. Equipped
with the optional output transformer and totally refurbished as new, the unit sounds clean, slightly dense with a
nice mojo. The OReQ easily meets the quality, performance, and reliability requirements of the demanding
professionals, and is also well suited for use in semi pro applications.
With its broad bandwidth the Orbital eQualizer has been engineered to deliver recordings at the best conceivable
quality onto any format at any sample rate, maintaining all the energy and atmosphere of the original
performance as perfectly as possible.
© 2010-2015
47
AlexB Programs Manual
11.2 - Session Setup
Orbital eQualizer reproduces the characteristic sound of the classic American eQualizer, this kind of equalizers
are used in countless records in the world. To faithfully reproduce this analog sound in the DAW, we recommend
using the OReQ in all tracks where you need to shape the sound.
1. On single track : Orbital eQualizer is inserted on the audio tracks as insert in the position at your taste. It
works great on all instruments and voices.
2. On master track : Orbital eQualizer is inserted on the mixbus, or group bus, as last insert giving at the
whole mix his classic sound.
To emulate the original unit sound you should use both presets HQ and LE by mixing them in this way:
on a single track when a single equalization band only is required you should use the HQ preset, when you need
more than one band of equalization you should use the LE presets and as last band the HQ. This interaction
gives the right color and harmonic contents. However if you want more color and saturation you can use more
HQ bands at your taste.
NOTE: on some frequencies when boosting or cutting, the whole volume can rise up or fall down a little, you can
compensate this with the Output Gain Control.
TRICK: to emulate the non linearity between the tracks, you can set the DRIVE control slightly different on every
instance into a range of +/-5dB.
© 2010-2015
48
AlexB Programs Manual
11.3 - Preset list:
The Orbital eQualizer library includes 10 different programs:
HQ presets with 3 kernels and LE presets with 1 kernel displayed into sub-menu “ORQ”
OReQ 20-63Hz : Bell variable from 20 to 63Hz +/- 16dB variable Q from 0 to 10
OReQ 63-180Hz : Bell variable from 63 to 180Hz +/- 16dB variable Q from 0 to 10
OReQ 180-440Hz : Bell variable from 180 to 440Hz +/- 16dB variable Q from 0 to 10
OReQ 440-1400Hz : Bell variable from 440 to 1400Hz +/- 16dB variable Q from 0 to 10
OReQ 1.4-4.2kHz : Bell variable from 1.4k to 4.2kHz +/- 16dB variable Q from 0 to 10
OReQ 4.2-8kHz : Bell variable from 4.2k to 8kHz +/- 16dB variable Q from 0 to 10
OReQ 8-20kHz : Bell variable from 8k to 20kHz +/- 16dB variable Q from 0 to 10
OReQ BAX : Low and High Baxandall combo +/- 16dB
OReQ HPF : High Pass Filter -12dB/oct from 20Hz to 2kHz
OReQ LPF : Low Pass Filter -12dB/oct from 2kHz to 20kHz
NOTE: Q is numerical as in the original sampled hardware.
11.4 – Controls
The Orbital eQualizer has only a few but intuitive and effective controls which are detailed below.
CUTOF
FREQ
GAIN
Q
DRIVE
Cut Off Control
The “CUTOF” control affects the filter's frequency cut.
Frequency Control
The “FREQ” control sets the frequency to be boosted or attenuated.
Gain Control
The “GAIN” control sets the amount by which the frequency setting is boosted or attenuated.
The available range is ±16 dB.
Q Control
The “Q” control sets the amplitude of the filter selected by FREQ control.
Drive Control
The “DRIVE” control affects the harmonic contents in an unnatural way, but suitable if you
look for an effect.
The available range is ±30 dB.
NOTE: clicking on the controls while pressing “ctrl” on computer keyboard, the control returns to zero.
© 2010-2015
49
AlexB Programs Manual
12. Orbital Dynamics
12.1 - About the original hardware
Orbital Dynamics are composed by a compressor and a limiter. Both units are a classics American Broadcast
dynamics and they come from an FM Broadcast station located in Texas, they have been refurbished but the
original broadcast setup has been kept (upon customer demand). So the sound sampled is unusual and more on
the FX side with really BIG bottom.
The Compressor (G-Ravity) has program dependent attack and release, the basic preset emulates the original
unit. The Limiter (Co-Smonaut) is a pretty fast limiter at 1kernel with HF control which emphasizes the high
frequency over 3kHz, as G-Ravity the basic Co-Smonaut's preset emulates the original unit.
© 2010-2015
50
AlexB Programs Manual
12.2 - Session Setup
Orbital Dynamics reproduces the characteristic sound of classics American Broadcast Compressor and Limiter,
this kind of compressor are used in top records in the world. To faithfully reproduce this analog sound in the
DAW, we recommend using the ORD in all tracks where you need to control dynamically the sound.
1. On single track : Orbital Dynamics is inserted on the audio tracks as insert in the position at your taste. It
works great on all instruments and voices.
2. On master track : Orbital Dynamics is inserted on the group bus, as last insert giving at the whole
submix his classic sound.
NOTE: please set the parameters as described into cap.2.1
TRICK: to emulate the original sound closely, you should set the AHEAD control to 5.4ms.
© 2010-2015
51
AlexB Programs Manual
12.3 - Preset list:
The Orbital Dynamics library includes 4 different programs:
HQ presets with 5 kernels and LE presets with 1 kernels displayed into sub-menu “ORD”
ORD G-Ravity : Compressor with variable controls and HPF on internal sidechain
ORD G-Ravity esc : Compressor with variable controls and external sidechain
ORD Co-Smonaut : Limiter with variable controls and HPF on internal sidechain
ORD Co-Smonaut esc : Limiter with variable controls and HPF on internal sidechain
12.4 – Controls
The Orbital Dynamics has only a few but intuitive and effective controls which are detailed below.
ATT
REL
THR
RAT
AHEAD
DRIVE
© 2010-2015
Attack Control
The “ATT” control defines the attack time of the compressor. Attack time is the duration
between the input signal reaching the threshold and processing being applied.
The range is variable from 0,5ms to 50ms
Release Control
The “REL” control sets the amount of time it takes for processing to cease once the input
signal drops below the threshold level.
The available range is 40ms to 4s
Threshold Control
The “THR” control defines the input level at which limiting or compression begins. Signals
that exceed this level are processed. Signals below the threshold are unaffected.
The range is variable from 0dB to -48,1dB
Ratio Control
The “RAT” defines the amount of gain reduction to be processed by the module.
The range is variable from 1,5:1 to 30:1
Ahead Control
The “AHEAD” control sets the look-ahead to control the fast transients.
The range is variable from 0ms to 6ms
Drive Control
The “DRIVE” control affects the harmonic contents in an unnatural way, but suitable if you
look for an effect.
The available range is ±24 dB
52
AlexB Programs Manual
GAIN
Gain Control
The “GAIN” control sets the output level of gain makeup.
The range is variable from 0dB to 25dB
HPF
HPF Control
The “HPF” control sets the cut-off point of a high-pass filter on the internal sidechain.
The range is variable from 0Hz to 500Hz
HF
HF Control
The “HF” control emphasizes the high frequency over 3kHz.
The range is variable from 0 to 10 numerical.
NOTE: clicking on the controls while pressing “ctrl” on computer keyboard, the control returns to zero.
© 2010-2015
53
AlexB Programs Manual
13. Magic Parametric eQualizer
13.1 - About the original hardware
Designed in the '70 era, this rare 2 unit rack is a clean parametric equalizer and is greatly revered even today for
its performance and quality, especially on electric bass, synth bass, electric guitars, synthesizers and voice. The
line amp has a drive knob which gives harmonic saturation up to 10dB, the bell filters allow to cut and boost to
over 20dB. The MPeQ easily meets the quality, performance, and reliability requirements of the demanding
professionals.
With its broad bandwidth the Magic Parametric eQualizer has been engineered to deliver recordings at the best
conceivable quality onto any format at any sample rate, maintaining all the energy and atmosphere of the
original performance as perfectly as possible.
© 2010-2015
54
AlexB Programs Manual
13.2 - Session Setup
Magic Parametric eQualizer reproduces the characteristic sound of this classic eQualizer, this kind of equalizers
are used in countless records in the world. To faithfully reproduce this analog sound in the DAW, we recommend
using the MPeQ in all tracks where you need to shape the sound.
1. On single track : Magic Parametric eQualizer is inserted on the audio tracks as insert in the position at
your taste. It works great on all instruments and voices.
2. On master track : Magic Parametric eQualizer is inserted on the mixbus, or group bus, as last insert
giving at the whole mix his classic sound.
To emulate the original unit sound you should use both presets HQ and LE by mixing them in this way:
on a single track when a single equalization band only is required you should use the HQ preset, when you need
more than one band of equalization you should use the LE presets and as last band the HQ. This interaction
gives the right color and harmonic contents. However if you want more color and saturation you can use more
HQ bands at your taste.
NOTE: on some frequencies when boosting or cutting, the whole volume can rise up or fall down a little, you can
compensate this with the Output Gain Control.
TRICK: to emulate the non linearity between the tracks, you can set the DRIVE control slightly different on every
instance into a range of +/-5dB.
© 2010-2015
55
AlexB Programs Manual
13.3 - Preset list:
The Magic Parametric eQualizer library includes 5 different programs:
HQ presets with 3 kernels and LE presets with 1 kernel displayed into sub-menu “MPQ”
MPeQ 31-440Hz : Bell variable from 31 to 440Hz +/- 20dB variable Q from 0,25 to 4
MPeQ 440-3200Hz : Bell variable from 440 to 3.2kHz +/- 20dB variable Q from 0,25 to 4
MPeQ 3,2-16kHz : Bell variable from 3.2k to 16kHz +/- 20dB variable Q from 0,25 to 4
MpeQ Line Clean: line amp clean
MPeQ Line Driven: line amp driven
13.4 – Controls
The Magic Parametric eQualizer has only a few but intuitive and effective controls which are detailed below.
FREQ
HEIGH
WIDTH
DRIVE
GDRV
Frequency Control
The “FREQ” control sets the frequency to be boosted or attenuated.
Height Control
The “HEIGH” control sets the amount by which the frequency setting is boosted or
attenuated.
The available range is ±20 dB.
Width Control
The “WIDTH” control sets the Q amplitude of the filter selected by FREQ control.
Drive Control
The “DRIVE” control affects the harmonic contents in an unnatural way, but suitable if you
look for an effect.
The available range is ±30 dB.
GDrive Control
The “GDRV” control is a unique feature not found in similar products from others brands that
comes from Acustica Audio VVKT proprietary technology and sampling aproach.
It allows you to control the amount of harmonic distortion that is coming from the analog
hardware. The “Input” control acts as the analog signal chain of the device, where reducing
the volume also reduces the harmonic distortion in accordance. The “GDrive” function allows
independent control of this harmonic content, so that the input level can be left alone while
making adjustments to the harmonics. Reducing the harmonics leads to a cleaner signal with
an already clean device. Increasing the harmonics should be done with moderation.
This type of effect is not truly representative of a real console, but it can be useful
when you want more of the console’s nonlinear “vibe” without altering the channel’s
levels. The available range is ±12 dB.. Note that increasing the input signal the internal
headroom will be reduced.
NOTE: clicking on the controls while pressing “ctrl” on computer keyboard, the control returns to zero.
© 2010-2015
56
AlexB Programs Manual
NOTE2: Do not adjust the ATTCK and RELS controls, leave them at stock value (center 12 o'clock).
© 2010-2015
57
AlexB Programs Manual
14. Vintage American X-citer
14.1 - About the original hardware
The Vintage American X-citer brought its distinctive sound by leading recording artists in the middle of 1970. A
true ground-breaker, this unit was highly regarded for its ability to increase and enhance presence, brightness,
and detail on vocal tracks and masters alike. The VAX easily meets the quality, performance, and reliability
requirements of the demanding professionals.
With its broad bandwidth the Vintage American X-citer has been engineered to deliver recordings at the best
conceivable quality onto any format at any sample rate, maintaining all the energy and atmosphere of the
original performance as perfectly as possible.
© 2010-2015
58
AlexB Programs Manual
14.2 - Session Setup
Vintage American X-citer reproduces the characteristic sound of a vintage American Exciter, this kind of Aural
Exciter are used in top records in the world. To faithfully reproduce this analog sound in the DAW, we
recommend using the VAX in all tracks where you need to control dynamically the sound.
1. On single track : Vintage American X-citer is inserted on the audio tracks as insert in the position at your
taste. It works great on all instruments and voices.
2. On master track : Vintage American X-citer is inserted on the group bus, as last insert giving at the
whole submix his classic sound.
TRICK: to emulate the non linearity between the tracks, you can set the DRIVE control slightly different on every
instance into a range of +/-5dB.
© 2010-2015
59
AlexB Programs Manual
14.3 - Preset list:
The Vintage American X-citer library includes 9 different programs:
HQ presets with 10 kernels displayed into sub-menu “VAX”
Vintage American X-Citer: complete emulation with input stage drive and tone controls
VAX Acoustic : Hi-Quality Preset useful for acoustic material
VAX Drum Bus: Hi-Quality Preset to use on Drum Bus
VAX Guitars : Hi-Quality Preset to use with Guitars tracks
VAX Synth : Hi-Quality Preset to use with Synth tracks
VAXVocals : Hi-Quality Preset to use with Vocals tracks
VAX Mastering : Hi-Quality Preset for mastering use
VAX Crisp Mastering : Hi-Quality Preset for mastering use
VAX Dark Mastering : Hi-Quality Preset for mastering use
14.4 – Controls
The Vintage American X-citer has only a few but intuitive and effective controls which are detailed below.
I-DRV
i-Drive Control
The “I-DRV control affects the drive input level at the 1st amplifier stage.
The available range is 0-10 numerical.
TONE
Tone Control
The “Tone” control sets the point where the exciter begins to engage.
The available range is 0-10 numerical.
DRIVE
GDRV
Drive Control
The “DRIVE” control affects the harmonic contents in an unnatural way, but suitable if you
look for an effect.
The available range is ±30 dB.
GDrive Control
The “GDRV” control is a unique feature not found in similar products from others brands that
comes from Acustica Audio VVKT proprietary technology and sampling aproach.
It allows you to control the amount of harmonic distortion that is coming from the analog
hardware. The “Input” control acts as the analog signal chain of the device, where reducing
the volume also reduces the harmonic distortion in accordance. The “GDrive” function allows
independent control of this harmonic content, so that the input level can be left alone while
making adjustments to the harmonics. Reducing the harmonics leads to a cleaner signal with
an already clean device. Increasing the harmonics should be done with moderation.
This type of effect is not truly representative of a real console, but it can be useful
when you want more of the console’s nonlinear “vibe” without altering the channel’s
levels. The available range is ±12 dB.. Note that increasing the input signal the internal
headroom will be reduced.
NOTE: clicking on the controls while pressing “ctrl” on computer keyboard, the control returns to zero.
© 2010-2015
60
AlexB Programs Manual
NOTE2: Do not adjust the ATTCK and RELS controls, leave them at stock value (center 12 o'clock).
© 2010-2015
61
AlexB Programs Manual
15. American 16 Console
15.1 - About the original hardware
This American Company has rightfully earned its place in the music history books, not to mention the hearts of
all kinds of engineers. And this stalwart American console, the A16, deserves its spot in 2520 Op-Amp's
legendary lineage. Here, you get the premium analog circuitry and unmistakable mojo of a straight-from-the-'60s
American console.
Professionals throughout the world have chosen the rich and punching sound of the American 16 Console. Its
high bandwidth pure audio path, superior dynamics and greater control make the American 16 Console the first
choice for recording and mixing Rock, Pop, Jazz and more.
With its 100kHz bandwidth the American 16 Console has been engineered to deliver recordings at the best
conceivable quality onto any format at any sample rate, capturing all the energy and atmosphere of the original
performance as perfectly as possible.
.
© 2010-2015
62
AlexB Programs Manual
15.2 - Session Setup
American 16 Console reproduces the sound of Modern American Recording Console using a library programs
consisting of channels input, group bus and mixbus. To faithfully reproduce into the DAW the analog console
signal chain and workflow, we recommend using the American 16 Console in one of two following session setup
configurations.
3. As a virtual summing box : Input Channel is inserted on the last insert of the DAW audio tracks, like a
direct out routed to a summing box. The MixBus is placed on the first insert of the master track, just as
the stereo return would be routed from the analog console back to the DAW.
4. To simulate a console : Input Channel is inserted on the first insert of the DAW audio tracks, the MixBus
is placed on the last insert of the master track. If you group channels in your DAW, i.e. drums elements,
you can insert the GroupBus as last insert in the submix group bus to achieve the classic bus coloration.
You should set the Pan Law in the DAW at -3dB. You might like to use the analog panner (included in the library)
on some stereo tracks and group bus instead of the DAW panner, the A16 Panner should be the last insert into
DAW's track or group bus leaving the Pan Law in the DAW to 0dB.
TRICK: to emulate the non linearity between the channels of the console, you can set the GDRV control slightly
different on every track into a range of +/-3dB.
© 2010-2015
63
AlexB Programs Manual
15.3 - Preset list:
The American 16 Console library includes 29 different programs:
HQ presets with 10 kernels and LE presets with 3 and 5 kernels displayed into sub-menu “A16”
A16 Line in : line input channel
A16 MIC Pre : microphone preamplifier
A16 DI in : Input Amplifier for keyboard and guitars
A16 G.Bus Clean : Group Bus clean signal
A16 G.Bus Acoustic : Group Bus with equalizer patched useful for acoustic instruments
A16 G.Bus AmbFX : Group Bus with equalizer patched useful for ambient & FX
A16 G.Bus BG Vox : Group Bus with equalizer patched useful for backing vocals
A16 G.Bus Drum : Group Bus with equalizer patched useful for drums
A16 G.Bus GTR : Group Bus with equalizer patched useful for guitars
A16 G.Bus Percussions : Group Bus with equalizer patched useful for percussions
A16 G.Bus SynthPad : Group Bus with equalizer patched useful for synthesizers and pads
A16 M.Bus Clean : MixBus clean
A16 M.Bus Modern : MixBus with equalizer patched useful for modern and polished sound
A16 M.Bus Vintage : MixBus by vintage console for a “vision-ary” sound
A16 Panner : Panner -3dB pan law
A16 Line in
The American 16 Console Line in is the first stage of the console, normally it works as line amplifier and you
should insert it in every track.
A16 MIC in
The American 16 Console microphone preamplifier has more coloration than Line in and you can use it when
more character is needed.
A16 DI in
The American 16 Console D.I. preamplifier has different coloration than Line in and Mic Pre and you can use it
for some instruments which need more shine.
A16 G.Bus Clean
If you send some tracks to a submix bus group in your DAW and you like to have the real sound by Bus Group of
the console, you can insert the G.Bus Clean preset as last insert into DAW's submix bus group.
A16 G.Bus Acoustic
When acoustic instruments are grouped into a submix in your DAW, you might want to have the G.BUS Acoustic
preset as last insert into DAW's submix bus group to give a cohesive colored glue.
A16 G.Bus Amb&FX
When ambients, reverb, echo and other effects are used into an aux-send/return in your DAW, you may like to
have the G.BUS Amb&FX preset as last insert into these DAW's channels to give more spatial dimension.
A16 G.Bus BG Vox
When backing vocals tracks are grouped into a submix in your DAW, try inserting the G.BUS BG Vox preset as
last insert into DAW's submix bus group to push a little in the backward the sound by achieving air and
transparency.
A16 G.Bus Drum
When drum instruments are grouped into a submix in your DAW, you may want to have the G.BUS Drum preset
as last insert into DAW's submix bus group to give a cohesive punching glue.
A16 G.Bus GTR
© 2010-2015
64
AlexB Programs Manual
When guitars are grouped into a submix in your DAW, try using the G.BUS GTR preset as last insert into DAW's
submix bus group to give a cohesive brilliant glue.
A16 G.Bus Percussions
When percussions are grouped into a submix in your DAW, you might like to have the G.BUS Percussions
preset as last insert into DAW's submix bus group to give a cohesive snapping glue.
A16 G.Bus SynthPad
When synthesizers and Pads are grouped into a submix in your DAW, maybe try the G.BUS SynthPad preset as
last insert into DAW's submix bus group to give a cohesive focused glue.
A16 M.Bus Clean
American 16 Console Mix Bus is the final stage of the console, it must be inserted in the mixbus of the DAW.
The M.BUS Clean gives the original clean glue.
A16 M.Bus Modern
When a polished glued mix is needed, with a lot of air and punch, try the M.BUS Modern preset as last insert into
DAW's mixbus.
A16 M.Bus Vintage
When a vintage “Vision-ary” sound is needed, use the M.BUS Vintage preset as last insert into DAW's mixbus.
© 2010-2015
65
AlexB Programs Manual
15.4 - Controls
The American 16 Console has only a few but intuitive and effective controls which are detailed below.
GDRV
DRIVE
GDrive Control
The “GDRV” control is a unique feature not found in similar products from others brands that
comes from Acustica Audio VVKT proprietary technology and sampling aproach.
It allows you to control the amount of harmonic distortion that is coming from the analog
hardware. The “Input” control acts as the analog signal chain of the device, where reducing
the volume also reduces the harmonic distortion in accordance. The “GDrive” function allows
independent control of this harmonic content, so that the input level can be left alone while
making adjustments to the harmonics. Reducing the harmonics leads to a cleaner signal with
an already clean device. Increasing the harmonics should be done with moderation.
This type of effect is not truly representative of a real console, but it can be useful when you
want more of the console’s nonlinear “vibe” without altering the channel’s levels. The
available range is ±12 dB.. Note that increasing the input signal the internal headroom will be
reduced.
Drive Control
The “DRIVE” control affects the harmonic contents in an unnatural way, but suitable if you
look for an effect.
The available range is ±30 dB.
NOTE: clicking on the controls while pressing “ctrl” on computer keyboard, the control returns to zero.
NOTE2: Do not adjust the ATTCK and RELS controls, leave them at stock value (center 12 o'clock).
© 2010-2015
66
AlexB Programs Manual
16. American 5A eQualizer
16.1 - About the original hardware
Designed by the now legendary Saul Walker in the late 60's, this discrete EQ was first used as a modular OEM
equalizer. As the industry rapidly embraced the sonic quality of this unit, it quickly found it's way into many
custom console designs becoming the standard channel module EQ when the company began manufacturing
consoles in 1971.
The combination of Walker's incomparable 2520 op amp and his "Proportional Q" circuitry give the user an
uncomplicated way to generate acoustically superior equalization.
With its 100kHz bandwidth the American 5A eQualizer has been engineered to deliver recordings at the best
conceivable quality onto any format at any sample rate, maintaining all the energy and atmosphere of the
original performance as perfectly as possible.
© 2010-2015
67
AlexB Programs Manual
16.2 - Session Setup
American 5A eQualizer reproduces the characteristic sound of vintage American eQualizer, this kind of
equalizers are used in countless records in the world. To faithfully reproduce this analog sound in the DAW, we
recommend using the A5A eQ in all tracks where you need to shape the sound.
3. On single track : American 5A eQualizer is inserted on the audio tracks as insert in the position at your
taste. It works great on all instruments and voices.
4. On master track : American 5A eQualizer is inserted on the mixbus, or group bus, as last insert giving at
the whole mix his classic sound.
To emulate the original unit sound you should use both presets HQ and LE by mixing them in this way:
on a single track when a single equalization band only is required you should use the HQ preset, when you need
more than one band of equalization you should use the LE presets and as last band the HQ. This interaction
gives the right color and harmonic contents. However if you want more color and saturation you can use more
HQ bands at your taste.
NOTE: on some frequencies when boosting or cutting, the whole volume can rise up or fall down a little, you can
compensate this with the Output Gain Control.
TRICK: to emulate the non linearity between the tracks, you can set the DRIVE control slightly different on every
instance into a range of +/-5dB.
© 2010-2015
68
AlexB Programs Manual
16.3 - Preset list:
The American 5A eQualizer library includes 12 different programs:
HQ presets with 3 kernels and LE presets with 1 kernel displayed into sub-menu “A5A”
A5A Filter : Band Pass Filter at 50Hz / 15k 12dB/octave
A5A Low Shelf : Low Shelf 50, 100, 200, 300, 400Hz +/- 12dB
A5A Low Peak : Low Peak 50, 100, 200, 300, 400Hz +/- 12dB proportional Q
A5A Mid : Mid Bell 400, 800, 1.5k, 3k, 5kHz +/- 12dB proportional Q
A5A High Peak : High Peak 5k, 7k, 10k, 12.5k, 15kHz +/- 12dB proportional Q
A5A High Shelf : High Shelf 5k, 7k, 10k, 12.5k, 15kHz +/- 12dB
16.4 – Controls
The American 5A eQualizer has only a few but intuitive and effective controls which are detailed below.
FREQ
GAIN
Frequency Control
The “FREQ” control sets the frequency to be boosted or attenuated. Stepped
Gain Control
The “GAIN” control sets the amount by which the frequency setting is boosted or attenuated.
The available range is ±12 dB stepped.
NOTE: clicking on the controls while pressing “ctrl” on computer keyboard, the control returns to zero.
© 2010-2015
69
AlexB Programs Manual
17. American 5B eQualizer
17.1 - About the original hardware
Originally conceived for use in American's consoles, this latest version is a continuation of the original 1967
equalizer with one additional filter band and several new frequencies. Incorporating American's exclusive
circuitry and proprietary components (such as the legendary 2520 op-amp), the A5B artfully blends the past with
the present.
Many eQs today offer a huge assortment of complex features, but the A5B provides exactly the right number of
controls to the professional engineer.
With its 100kHz bandwidth the American 5B eQualizer has been engineered to deliver recordings at the best
conceivable quality onto any format at any sample rate, maintaining all the energy and atmosphere of the
original performance as perfectly as possible.
© 2010-2015
70
AlexB Programs Manual
17.2 - Session Setup
American 5B eQualizer reproduces the characteristic sound of Classic American eQualizer, this kind of
equalizers are used in countless records in the world. To faithfully reproduce this analog sound in the DAW, we
recommend using the A5B eQ in all tracks where you need to shape the sound.
5. On single track : American 5B eQualizer is inserted on the audio tracks as insert in the position at your
taste. It works great on all instruments and voices.
6. On master track : American 5B eQualizer is inserted on the mixbus, or group bus, as last insert giving at
the whole mix his classic sound.
To emulate the original unit sound you should use both presets HQ and LE by mixing them in this way:
on a single track when a single equalization band only is required you should use the HQ preset, when you need
more than one band of equalization you should use the LE presets and as last band the HQ. This interaction
gives the right color and harmonic contents. However if you want more color and saturation you can use more
HQ bands at your taste.
NOTE: on some frequencies when boosting or cutting, the whole volume can rise up or fall down a little, you can
compensate this with the Output Gain Control.
TRICK: to emulate the non linearity between the tracks, you can set the DRIVE control slightly different on every
instance into a range of +/-5dB.
© 2010-2015
71
AlexB Programs Manual
17.3 - Preset list:
The American 5B eQualizer library includes 12 different programs:
HQ presets with 3 kernels and LE presets with 1 kernel displayed into sub-menu “A5B”
A5B Low Shelf : Low Shelf 30, 40, 50, 100, 200, 300, 400Hz +/- 12dB
A5B Low Peak : Low Peak 30, 40, 50, 100, 200, 300, 400Hz +/- 12dB proportional Q
A5B Low Mid : Low Mid Bell 75, 150, 180, 240, 500, 700, 1kHz +/- 12dB proportional Q
A5B High Mid : High Mid Bell 800, 1.5k, 3k, 5k, 8k, 10k, 12.5kHz +/- 12dB proportional Q
A5B High Peak : High Peak 2.5k, 5k, 7k, 10k, 12.5k, 15k, 20kHz +/- 12dB proportional Q
A5B High Shelf : High Shelf 2.5k, 5k, 7k, 10k, 12.5k, 15k, 20kHz +/- 12dB
17.4 – Controls
The American 5B eQualizer has only a few but intuitive and effective controls which are detailed below.
FREQ
GAIN
Frequency Control
The “FREQ” control sets the frequency to be boosted or attenuated. Stepped
Gain Control
The “GAIN” control sets the amount by which the frequency setting is boosted or attenuated.
The available range is ±12 dB stepped.
NOTE: clicking on the controls while pressing “ctrl” on computer keyboard, the control returns to zero.
© 2010-2015
72
AlexB Programs Manual
18. American 5 Dynamics
18.1 - About the original hardware
The American 5 Dynamics, originally released in the 70s, is a feedback type compressor with an additional
"Ceiling" fine-tune function which can increase gain reduction and varying the frequency and THD response.
Equally useful as a tracking, mixdown or program compressor/limiter, the A5D utilizes "vintage" dynamics control
and an easy to use multi-function control set. It delivers dynamics control behavior unlike VCA feed forward
compressors so common today. American 5 Dynamics makes use of the 2510 and 2520 op-amps and manages
to sound clean but with character without being weak and harsh.
With its 100kHz bandwidth the American 5 Dynamics has been engineered to deliver recordings at the best
conceivable quality onto any format at any sample rate, maintaining all the energy, atmosphere and life of the
original performance as perfectly as possible.
© 2010-2015
73
AlexB Programs Manual
18.2 - Session Setup
American 5 Dynamics reproduces the characteristic sound of American Vintage Console Compressor, this kind
of compressor are used in top records in the world. To faithfully reproduce this analog sound in the DAW, we
recommend using the A5D in all tracks where you need to control dynamically the sound.
1. On single track : American 5 Dynamics is inserted on the audio tracks as insert in the position at your
taste. It works great on all instruments and voices.
2. On master track : American 5 Dynamics is inserted on the group bus, as last insert giving at the whole
submix his classic sound.
NOTE: please set the parameters as described into cap.2.1
TRICK: to emulate the original sound closely, you should set the AHEAD to 5.4ms.
© 2010-2015
74
AlexB Programs Manual
18.3 - Preset list:
The American 5 Dynamics library includes 16 different programs:
HQ presets with 5 kernels and LE presets with 1 kernel displayed into sub-menu “A5D”
A5D VT Comp : 2:1 compressor with variable controls and HPF on internal sidechain
A5D VT Comp esc : 2:1 compressor with variable controls and external sidechain
A5D FT Comp : 2:1 compressor with fixed attack time and HPF on internal sidechain
A5D FT Comp esc : 2:1 compressor with fixed attack time and external sidechain
A5D VT Lim : 20:1 limiter with variable controls and HPF on internal sidechain
A5D VT Lim esc : 20:1 limiter with variable controls and external sidechain
A5D FT Lim : 20:1 limiter with fixed attack time and HPF on internal sidechain
A5D FT Lim esc : 20:1 limiter with fixed attack time and external sidechain
18.4 – Controls
The American 5 Dynamics has only a few but intuitive and effective controls which are detailed below.
ATT
REL
THR
CLING
AHEAD
GAIN
© 2010-2015
Attack Control
The “ATT” control defines the attack time of the compressor. Attack time is the duration
between the input signal reaching the threshold and processing being applied.
The range is variable from 3ms to 10ms
Release Control
The “REL” control sets the amount of time it takes for processing to cease once the input
signal drops below the threshold level.
The available range is 100ms to 2.5s
Threshold Control
The “THR” control defines the input level at which limiting or compression begins. Signals
that exceed this level are processed. Signals below the threshold are unaffected.
The range is variable from 0dB to -48,1dB
Ceiling Control
The “CLING” can increase gain reduction while simultaneously varying the frequency and
THD response.
The range is variable from 0 to 20:1
Ahead Control
The “AHEAD” control sets the look-ahead to control the fast transients.
The range is variable from 0ms to 6ms
Gain Control
The “GAIN” control sets the output level of gain makeup.
The range is variable from 0dB to 25dB
75
AlexB Programs Manual
HPF
HPF Control
The “HPF” control sets the cut-off point of a high-pass filter on the internal sidechain.
The range is variable from 0Hz to 500Hz
NOTE: clicking on the controls while pressing “ctrl” on computer keyboard, the control returns to zero.
© 2010-2015
76
AlexB Programs Manual
19. American 5 Mastering eQualizer
19.1 - About the original hardware
This musical sounding dual eQualizer embodies more than 40 years of tradition where the original proportional Q
filter design with reciprocal boost and cut is used. It's through this design and sound that all-discrete Class AB
2520 amplifier products have achieved a nearly sacrosanct, if not mythical, status amongst audio engineers.
The new range control broadens the unit's utility to include mastering applications by changing the four bands'
boost/cut steps from the original 2 dB into continuous variable step. This made the unit useful for mixing and
mastering use making audio program sounds better and more punchy and 3D just by passing through it, even
while set "flat."
With its 100kHz bandwidth the American 5 Mastering eQualizer has been engineered to deliver recordings at the
best conceivable quality onto any format at any sample rate, maintaining all the energy and atmosphere of the
original performance as perfectly as possible.
© 2010-2015
77
AlexB Programs Manual
19.2 - Session Setup
American 5 Mastering eQualizer reproduces the characteristic sound of Modern American eQualizer, this kind of
equalizers are used in countless records in the world. To faithfully reproduce this analog sound in the DAW, we
recommend using the A5M eQ in all tracks where you need to shape the sound.
1. Mastering : American 5 Mastering eQualizer is inserted on the audio track as insert in the position at
your taste.
2. On master track : American 5 Mastering eQualizer is inserted on the mixbus, or group bus, as last insert
giving at the whole mix his classic sound.
3. On single track : American 5 Mastering eQualizer is inserted on the audio tracks as insert in the position
at your taste. It works great on all instruments and voices.
To emulate the original unit sound you should use both presets HQ and LE by mixing them in this way:
on a single track when a single equalization band only is required you should use the HQ preset, when you need
more than one band of equalization you should use the LE presets and as last band the HQ. This interaction
gives the right color and harmonic contents. However if you want more color and saturation you can use more
HQ bands at your taste.
NOTE: on some frequencies when boosting or cutting, the whole volume can rise up or fall down a little, you can
compensate this with the Output Gain Control.
TRICK: to emulate the non linearity between the tracks, you can set the DRIVE control slightly different on every
instance into a range of +/-5dB.
© 2010-2015
78
AlexB Programs Manual
19.3 - Preset list:
The American 5 Mastering eQualizer library includes 12 different programs:
HQ presets with 7 kernels and LE presets with 1 kernel displayed into sub-menu “A5M”
A5M Low Shelf : Low Shelf 30, 40, 50, 100, 200, 300, 400Hz +/- 12dB
A5M Low Peak : Low Peak 30, 40, 50, 100, 200, 300, 400Hz +/- 12dB proportional Q
A5M Low Mid : Low Mid Bell 75, 150, 180, 240, 500, 700, 1kHz +/- 12dB proportional Q
A5M High Mid : High Mid Bell 800, 1.5k, 3k, 5k, 8k, 10k, 12.5kHz +/- 12dB proportional Q
A5M High Peak : High Peak 2.5k, 5k, 7k, 10k, 12.5k, 15k, 20kHz +/- 12dB proportional Q
A5M High Shelf : High Shelf 2.5k, 5k, 7k, 10k, 12.5k, 15k, 20kHz +/- 12dB
19.4 – Controls
The American 5 Mastering eQualizer has only a few but intuitive and effective controls which are detailed below.
FREQ
GAIN
Frequency Control
The “FREQ” control sets the frequency to be boosted or attenuated. Stepped.
Gain Control
The “GAIN” control sets the amount by which the frequency setting is boosted or attenuated.
The available range is ±12 dB continuous.
NOTE: clicking on the controls while pressing “ctrl” on computer keyboard, the control returns to zero.
© 2010-2015
79
AlexB Programs Manual
20. Neev 14 Console
20.1 - About the original hardware
One of the classic Neev consoles of the early 70s is the N14. This high quality, Class A desk, was the first of the
"80 series" of legendary top class consoles and it bears "His" name. His preamp modules have established
themselves as the most sought after mic-pres in the history of recording. This is especially true for vocals. The
amazing summing amp gives a rich, warm and fat sound...that "magic Neev sound"!
Professionals throughout the world have chosen the rich and fat sound of the Neev 14 Console. Its high
bandwidth pure audio path, superior dynamics and greater control make the Neev 14 Console the first choice for
recording and mixing Rock, Pop, Jazz and more.
With its 100kHz bandwidth the Neev 14 Console has been engineered to deliver recordings at the best
conceivable quality onto any format at any sample rate, capturing all the energy and atmosphere of the original
performance as perfectly as possible.
© 2010-2015
80
AlexB Programs Manual
20.2 - Session Setup
Neev 14 Console reproduces the sound of Vintage British Recording Console using a library programs
consisting of channels input, group bus and mixbus. To faithfully reproduce into the DAW the analog console
signal chain and workflow, we recommend using the Neev 14 Console in one of two following session setup
configurations.
1. As a virtual summing box : Input Channel is inserted on the last insert of the DAW audio tracks, like a
direct out routed to a summing box. The MixBus is placed on the first insert of the master track, just as
the stereo return would be routed from the analog console back to the DAW.
2. To simulate a console : Input Channel is inserted on the first insert of the DAW audio tracks, the MixBus
is placed on the last insert of the master track. If you group channels in your DAW, i.e. drums elements,
you can insert the GroupBus as last insert in the submix group bus to achieve the classic bus coloration.
You should set the Pan Law in the DAW at -3dB. You might like to use the analog panner (included in the library)
on some stereo tracks and group bus instead of the DAW panner, the N14 Panner should be the last insert into
DAW's track or group bus leaving the Pan Law in the DAW to 0dB.
TRICK: to emulate the non linearity between the channels of the console, you can set the GDRV control slightly
different on every track into a range of +/-3dB.
© 2010-2015
81
AlexB Programs Manual
20.3 - Preset list:
The Neev 14 Console library includes 27 different programs:
HQ presets with 10 kernels and LE presets with 3 and 5 kernels displayed into sub-menu “N14”
N14 Line in : line input channel
N14 MIC Pre : microphone preamplifier
N14 G.Bus Clean : Group Bus clean signal
N14 G.Bus Acoustic : Group Bus with equalizer patched useful for acoustic instruments
N14 G.Bus AmbFX : Group Bus with equalizer patched useful for ambient & FX
N14 G.Bus BG Vox : Group Bus with equalizer patched useful for backing vocals
N14 G.Bus Drum : Group Bus with equalizer patched useful for drums
N14 G.Bus GTR : Group Bus with equalizer patched useful for guitars
N14 G.Bus Percussions : Group Bus with equalizer patched useful for percussions
N14 G.Bus SynthPad : Group Bus with equalizer patched useful for synthesizers and pads
N14 M.Bus Clean : vintage original MixBus
N14 M.Bus Modern : MixBus with modern transformer
N14 M.Bus Fat : MixBus with additional transformer for a more fat sound
N14 Panner : Panner -3dB pan law
N14 Line in
The Neev 14 Console Line in is the first stage of the console, normally it works as line amplifier and you should
insert it in every track.
N14 MIC in
The Neev 14 Console microphone preamplifier has more coloration than Line in and you can use it when more
character is needed.
N14 G.Bus Clean
If you send some tracks to a submix bus group in your DAW and you like to have the real sound by Bus Group of
the console, you can insert the G.Bus Clean preset as last insert into DAW's submix bus group.
N14 G.Bus Acoustic
When acoustic instruments are grouped into a submix in your DAW, you might want to have the G.BUS Acoustic
preset as last insert into DAW's submix bus group to give a cohesive colored glue.
N14 G.Bus Amb&FX
When ambients, reverb, echo and other effects are used into an aux-send/return in your DAW, you may like to
have the G.BUS Amb&FX preset as last insert into these DAW's channels to give more spatial dimension.
N14 G.Bus BG Vox
When backing vocals tracks are grouped into a submix in your DAW, try inserting the G.BUS BG Vox preset as
last insert into DAW's submix bus group to push a little in the backward the sound by achieving air and
transparency.
N14 G.Bus Drum
When drum instruments are grouped into a submix in your DAW, you may want to have the G.BUS Drum preset
as last insert into DAW's submix bus group to give a cohesive punching glue.
N14 G.Bus GTR
When guitars are grouped into a submix in your DAW, try using the G.BUS GTR preset as last insert into DAW's
submix bus group to give a cohesive brilliant glue.
N14 G.Bus Percussions
© 2010-2015
82
AlexB Programs Manual
When percussions are grouped into a submix in your DAW, you might like to have the G.BUS Percussions
preset as last insert into DAW's submix bus group to give a cohesive snapping glue.
N14 G.Bus SynthPad
When synthesizers and Pads are grouped into a submix in your DAW, maybe try the G.BUS SynthPad preset as
last insert into DAW's submix bus group to give a cohesive focused glue.
N14 M.Bus Clean
Neev 14 Console Mix Bus is the final stage of the console, it must be inserted in the mixbus of the DAW.
The M.BUS Clean gives the original clean glue.
N14 M.Bus Modern
When a polished glued mix is needed, try the M.BUS Modern preset as last insert into DAW's mixbus.
N14 M.Bus Fat
When a more fat sound is needed, use the M.BUS Fat preset as last insert into DAW's mixbus.
© 2010-2015
83
AlexB Programs Manual
20.4 - Controls
The Neev 14 Console has only a few but intuitive and effective controls which are detailed below.
GDRV
DRIVE
GDrive Control
The “GDRV” control is a unique feature not found in similar products from others brands that
comes from Acustica Audio VVKT proprietary technology and sampling aproach.
It allows you to control the amount of harmonic distortion that is coming from the analog
hardware. The “Input” control acts as the analog signal chain of the device, where reducing
the volume also reduces the harmonic distortion in accordance. The “GDrive” function allows
independent control of this harmonic content, so that the input level can be left alone while
making adjustments to the harmonics. Reducing the harmonics leads to a cleaner signal with
an already clean device. Increasing the harmonics should be done with moderation.
This type of effect is not truly representative of a real console, but it can be useful when you
want more of the console’s nonlinear “vibe” without altering the channel’s levels. The
available range is ±12 dB.. Note that increasing the input signal the internal headroom will be
reduced.
Drive Control
The “DRIVE” control affects the harmonic contents in an unnatural way, but suitable if you
look for an effect.
The available range is ±30 dB.
NOTE: clicking on the controls while pressing “ctrl” on computer keyboard, the control returns to zero.
NOTE2: Do not adjust the ATTCK and RELS controls, leave them at stock value (center 12 o'clock).
© 2010-2015
84
AlexB Programs Manual
21. Neev 73 eQualizer
21.1 - About the original hardware
First launched in 1970, the N73 modules have established themselves as one of the most sought after mic pres
in the history of recording. This Class-A discrete transistor mic/line amp with 3-band EQ and high-pass filter
epitomizes the Neev "essence", it can add texture and vibe to the music that is unique to the unit. Get the sound
of a real vintage unit, with St.Ives/Marinair transformers and Motorola power transistor. Not a modern reissue or
a clone with cheap electronic components.
The N73 easily meets the quality, performance, and reliability requirements of the demanding professionals.
With its broad bandwidth the Neev 73 eQualizer has been engineered to deliver recordings at the best
conceivable quality onto any format at any sample rate, maintaining all the energy and atmosphere of the
original performance as perfectly as possible.
© 2010-2015
85
AlexB Programs Manual
21.2 - Session Setup
Neev 73 eQualizer reproduces the characteristic sound of the Vintage British eQualizer, this kind of equalizers
are used in countless records in the world. To faithfully reproduce this analog sound in the DAW, we recommend
using the N73 in all tracks where you need to shape the sound.
1. On single track : Neev 73 eQualizer is inserted on the audio tracks as insert in the position at your taste.
It works great on all instruments and voices.
2. On master track : Neev 73 eQualizer is inserted on the mixbus, or group bus, as last insert giving at the
whole mix his classic sound.
To emulate the original unit sound you should use both presets HQ and LE by mixing them in this way:
on a single track when a single equalization band only is required you should use the HQ preset, when you need
more than one band of equalization you should use the LE presets and as last band the HQ. This interaction
gives the right color and harmonic contents. However if you want more color and saturation you can use more
HQ bands at your taste.
NOTE: on some frequencies when boosting or cutting, the whole volume can rise up or fall down a little, you can
compensate this with the Output Gain Control.
TRICK: to emulate the non linearity between the tracks, you can set the DRIVE control slightly different on every
instance into a range of +/-5dB.
© 2010-2015
86
AlexB Programs Manual
21.3 - Preset list:
The Neev 73 eQualizer library includes 8 different programs:
HQ presets with 3 kernels and LE presets with 1 kernel displayed into sub-menu “N73”
N73 Low Cut Filter : High Pass Filter -18dB/oct at 50, 80, 160, 300Hz
N73 Low Shelf : Low Shelf 35, 60, 110, 220Hz +/- 15dB
N73 Mid Freq: Bell Filter 0.36, 0.7, 1.6, 3.2, 4.8, 7.2kHz +/- 18dB
N73 High Shelf: High Shelf +/- 18dB
21.4 – Controls
The Neev 73 eQualizer has only a few but intuitive and effective controls which are detailed below.
CUTOF
Cut Off Control
The “CUTOF” control affects the filter's frequency cut.
FREQ
Frequency Control
The “FREQ” control sets the frequency to be boosted or attenuated.
GAIN
Gain Control
The “GAIN” control sets the amount by which the frequency setting is boosted or attenuated.
DRIVE
Drive Control
The “DRIVE” control affects the harmonic contents in an unnatural way, but suitable if you
look for an effect.
The available range is ±30 dB.
NOTE: clicking on the controls while pressing “ctrl” on computer keyboard, the control returns to zero.
© 2010-2015
87
AlexB Programs Manual
22. Neev 64 Dynamics
22.1 - About the original hardware
Designed in 1974, the Vintage N64 mono Limiter/Compressor unit quickly became a legend by achieving secretweapon status among studio professionals, thanks to its unique sound and functionality. Discrete, Class A/B
design and transformer-coupled circuits used in the input ensured a totally unique sound. This unit is still sought
after, decades after production stopped, and they remain one of the milestone pieces of studio equipment.
Neev 64 Dynamics manages to sound clean but with character without being weak and harsh. There is little
apparent colouration, just a maturity of tone.
With its 100kHz bandwidth the Neev 64 Dynamics has been engineered to deliver recordings at the best
conceivable quality onto any format at any sample rate, maintaining all the energy, atmosphere and life of the
original performance as perfectly as possible.
© 2010-2015
88
AlexB Programs Manual
22.2 - Session Setup
Neev 64 Dynamics reproduces the characteristic sound of Vintage British Console Compressor, this kind of
compressor are used in top records in the world. To faithfully reproduce this analog sound in the DAW, we
recommend using the N64 in all tracks where you need to control dynamically the sound.
1. On single track : Neev 64 Dynamics is inserted on the audio tracks as insert in the position at your taste.
It works great on all instruments and voices.
2. On master track : Neev 64 Dynamics is inserted on the group bus, as last insert giving at the whole
submix his classic sound.
NOTE: please set the parameters as described into cap.2.1
TRICK: to emulate the original sound closely, you should set the controls DRIVE to +3dB and AHEAD to 5.4ms.
© 2010-2015
89
AlexB Programs Manual
22.3 - Preset list:
The Neev 64 Dynamics library includes 8 different programs:
HQ presets with 5 kernels and LE presets with 1 kernel displayed into sub-menu “N64”
N64 Compressor : Compressor with variable controls and HPF on internal sidechain. Fixed attack 3ms.
N64 Compressor esc : Compressor with variable controls and external sidechain. Fixed attack 3ms.
N64 Limiter : Limiter with variable controls and HPF on internal sidechain. Fixed attack 4ms.
N64 Limiter esc : Limiter with variable controls and external sidechain. Fixed attack 4ms.
22.4 – Controls
The Neev 64 Dynamics has only a few but intuitive and effective controls which are detailed below.
REL
THR
RAT
AHEAD
DRIVE
GAIN
© 2010-2015
Release Control
The “REL” control sets the amount of time it takes for processing to cease once the input
signal drops below the threshold level.
The available range is 100ms to 1,5s for the compressor and 50ms to 800ms for the limiter.
Threshold Control
The “THR” control defines the input level at which limiting or compression begins. Signals
that exceed this level are processed. Signals below the threshold are unaffected.
The range is variable from 0dB to -48,1dB
Ratio Control
The “RAT” defines the amount of gain reduction to be processed by the module.
When the control is at maximum (10), the ratio is effectively infinity to one, yielding the
limiting effect.
The range is variable from 1,5:1 to 6:1 for the compressor.
Ahead Control
The “AHEAD” control sets the look-ahead to control the fast transients.
The range is variable from 0ms to 6ms
Drive Control
The “DRIVE” control affects the harmonic contents in an unnatural way, but suitable if you
look for an effect.
The available range is ±24 dB
Gain Control
The “GAIN” control sets the output level of gain makeup.
The range is variable from 0dB to 25dB
90
AlexB Programs Manual
HPF
HPF Control
The “HPF” control sets the cut-off point of a high-pass filter on the internal sidechain.
The range is variable from 0Hz to 500Hz
NOTE: clicking on the controls while pressing “ctrl” on computer keyboard, the control returns to zero.
© 2010-2015
91
AlexB Programs Manual
23. Neev 54 Dynamics
23.1 - About the original hardware
Neev’s Holy Grail of compressors, the vintage N54 began life as a module in Neev’s legendary 1970s mixing
consoles, applying its trademark colored sound to signals fed into it. As you’d expect from a classic Neev
product, it isn’t exactly transparent – instead, think rich, think ‘thick’, and think ’round’. It can do great things on
single track but it excels on stereo bus operation, where the N54’s abilities to glue stereo sub-mixes together are
in a class of their own with buss compression.
Neev 54 Dynamics manages to sound clean but with character without being weak and harsh. There is little
apparent colouration, just a maturity of tone.
With its 100kHz bandwidth the Neev 54 Dynamics has been engineered to deliver recordings at the best
conceivable quality onto any format at any sample rate, maintaining all the energy, atmosphere and life of the
original performance as perfectly as possible.
© 2010-2015
92
AlexB Programs Manual
23.2 - Session Setup
Neev 54 Dynamics reproduces the characteristic sound of Vintage British Console Bus Compressor, this kind of
compressor are used in top records in the world. To faithfully reproduce this analog sound in the DAW, we
recommend using the N54 in all tracks where you need to control dynamically the sound.
1. On single track : Neev 54 Dynamics is inserted on the audio tracks as insert in the position at your taste.
It works great on all instruments and voices.
2. On master track : Neev 54 Dynamics is inserted on the group bus, as last insert giving at the whole
submix his classic sound.
NOTE: please set the parameters as described into cap.2.1
TRICK: to emulate the original sound closely, you should set the controls DRIVE to +3dB and AHEAD to 5.4ms.
© 2010-2015
93
AlexB Programs Manual
23.3 - Preset list:
The Neev 54 Dynamics library includes 8 different programs:
HQ presets with 5 kernels and LE presets with 1 kernel displayed into sub-menu “N54”
N54 Compressor : Compressor with variable controls and HPF on internal sidechain. Fixed attack 5ms.
N54 Compressor esc : Compressor with variable controls and external sidechain. Fixed attack 5ms.
N54 Limiter : Limiter with variable controls and HPF on internal sidechain. Fixed attack 5ms.
N54 Limiter esc : Limiter with variable controls and external sidechain. Fixed attack 5ms.
23.4 – Controls
The Neev 54 Dynamics has only a few but intuitive and effective controls which are detailed below.
REL
THR
RAT
AHEAD
DRIVE
GAIN
© 2010-2015
Release Control
The “REL” control sets the amount of time it takes for processing to cease once the input
signal drops below the threshold level.
The available range is 400ms to 1,5s for the compressor and 100ms to 800ms for the limiter.
Threshold Control
The “THR” control defines the input level at which limiting or compression begins. Signals
that exceed this level are processed. Signals below the threshold are unaffected.
The range is variable from 0dB to -48,1dB
Ratio Control
The “RAT” defines the amount of gain reduction to be processed by the module.
When the control is at maximum (10), the ratio is effectively infinity to one, yielding the
limiting effect.
The range is variable from 1,5:1 to 6:1 for the compressor.
Ahead Control
The “AHEAD” control sets the look-ahead to control the fast transients.
The range is variable from 0ms to 6ms
Drive Control
The “DRIVE” control affects the harmonic contents in an unnatural way, but suitable if you
look for an effect.
The available range is ±24 dB
Gain Control
The “GAIN” control sets the output level of gain makeup.
The range is variable from 0dB to 25dB
94
AlexB Programs Manual
HPF
HPF Control
The “HPF” control sets the cut-off point of a high-pass filter on the internal sidechain.
The range is variable from 0Hz to 500Hz
NOTE: clicking on the controls while pressing “ctrl” on computer keyboard, the control returns to zero.
© 2010-2015
95
AlexB Programs Manual
24. Valve Tech Dynamics
24.1 - About the original hardware
All tube-based Opto compressors from 1985. The number of hit records featuring these compressors is
countless and the number of stars demanding them for their recording and mixing is extreme! Use them for keys,
guitars, vocals, mixbus, mastering, the result is always musical and transparent. Some differences exist between
the two units, the C2A dual compressor has a little more "round" character to the compression and a little
different frequency response compared to C1B mono compressor. Valve Tech Dynamics manages to sound
clean but with character without being weak and harsh. There is little apparent colouration, just a maturity of
tone. The units has been refurbished with BC audio capacitors and NOS Telefunken / Siemens tubes.
The Valve Tech Dynamics has been engineered to deliver recordings at the best conceivable quality onto any
format at any sample rate, maintaining all the energy, atmosphere and life of the original performance as
perfectly as possible.
© 2010-2015
96
AlexB Programs Manual
24.2 - Session Setup
Valve Tech Dynamics reproduces the characteristic sound of Vintage Denmark Compressor, this kind of
compressor are used in top records in the world. To faithfully reproduce this analog sound in the DAW, we
recommend using the VTD in all tracks where you need to control dynamically the sound.
1. On single track : C1B or C2A is inserted on the audio tracks as insert in the position at your taste. It
works great on all instruments and voices.
2. On master track : C2A is inserted on the group bus, as last insert giving at the whole submix his classic
sound.
NOTE: please set the parameters as described into cap.2.1
TRICK: to emulate the original sound closely, you should set the AHEAD to 5.4ms.
© 2010-2015
97
AlexB Programs Manual
24.3 - Preset list:
The Valve Tech Dynamics library includes 8 different programs:
HQ presets with 5 kernels and LE presets with 1 kernel displayed into sub-menu “VTD”
C1B Compressor : Compressor with variable controls and HPF on internal sidechain.
C1B Compressor esc : Compressor with variable controls and external sidechain.
C2A Compressor : Compressor with variable controls and HPF on internal sidechain.
C2A Compressor esc : Compressor with variable controls and external sidechain.
24.4 – Controls
The Valve Tech Dynamics has only a few but intuitive and effective controls which are detailed below.
ATT
REL
THR
RAT
AHEAD
DRIVE
© 2010-2015
Attack Control
The “ATT” control defines the attack time of the compressor. Attack time is the duration
between the input signal reaching the threshold and processing being applied.
The range is variable from 0.5ms to 300ms (C1B) and from 3ms to 60ms (C2A)
Release Control
The “REL” control sets the amount of time it takes for processing to cease once the input
signal drops below the threshold level.
The available range is from 50ms to 10s (C1B) and 60ms to 2s (C2A)
Threshold Control
The “THR” control defines the input level at which limiting or compression begins. Signals
that exceed this level are processed. Signals below the threshold are unaffected.
The range is variable from 0dB to -48,1dB
Ratio Control
The “RAT” defines the amount of gain reduction to be processed by the module.
The range is variable from 2:1 to 10:1 (C1B) and 1.5:1 to 10:1 (C2A)
Ahead Control
The “AHEAD” control sets the look-ahead to control the fast transients.
The range is variable from 0ms to 6ms
Drive Control
The “DRIVE” control affects the harmonic contents in an unnatural way, but suitable if you
look for an effect.
The available range is ±24 dB
98
AlexB Programs Manual
GAIN
Gain Control
The “GAIN” control sets the output level of gain makeup.
The range is variable from 0dB to 25dB
HPF
HPF Control
The “HPF” control sets the cut-off point of a high-pass filter on the internal sidechain.
The range is variable from 0Hz to 500Hz
NOTE: clicking on the controls while pressing “ctrl” on computer keyboard, the control returns to zero.
© 2010-2015
99
AlexB Programs Manual
25. T95 Program eQualizer
25.1 - About the original hardware
Elegant and Natural sounding, this is the first version of super rare pure class-A germanium equalizer by
Telefunken (not to be confused with the next silicon transistor release, the W395, which has different
transformers). T95 delivers a pure heavenly sound for drums, voice, acoustic instruments, guitars, as well as
entire mixes during mixdown and mastering. Two units have been completely refurbished and match-calibrated.
The T95 easily meets the quality, performance, and reliability requirements of any demanding professional.
With its broad bandwidth the T95 Program eQualizer has been engineered to deliver recordings at the best
conceivable quality onto any format at any sample rate, maintaining all the energy and atmosphere of the
original performance as perfectly as possible.
With its broad bandwidth the T95 Program eQualizer has been engineered to deliver recordings at the best
conceivable quality onto any format at any sample rate, maintaining all the energy and atmosphere of the
original performance as perfectly as possible.
© 2010-2015
Manual
100
AlexB Programs
25.2 - Session Setup
T95 Program eQualizer reproduces the characteristic sound of Vintage Germanium Program eQualizer, this kind
of equalizers are used in countless records in the world. To faithfully reproduce this analog sound in the DAW,
we recommend using the T95 in all tracks where you need to shape the sound.
1. Mastering : T95 Program eQualizer is inserted on the audio track as insert in the position at your taste.
2. On master track : T95 Program eQualizer is inserted on the mixbus, or group bus, as last insert giving at
the whole mix his classic sound.
3. On single track : T95 Program eQualizer is inserted on the audio tracks as insert in the position at your
taste. It works great on all instruments and voices.
To emulate the original unit sound you should use both presets HQ and LE by mixing them in this way:
on a single track when a single equalization band only is required you should use the HQ preset, when you need
more than one band of equalization you should use the LE presets and as last band the HQ. This interaction
gives the right color and harmonic contents. However if you want more color and saturation you can use more
HQ bands at your taste.
NOTE: on some frequencies when boosting or cutting, the overall volume can increase or decrease a little, you
can compensate this with the Output Gain Control.
TRICK: to emulate the non linearity between the tracks, you can set the DRIVE control slightly different on every
instance into a range of +/-5dB.
© 2010-2015
Manual
101
AlexB Programs
25.3 - Preset list:
The T95 Program eQualizer library includes 6 different programs:
HQ presets with 7 kernels and LE presets with 3 kernel displayed into sub-menu “T95”
T95 Shelf unit A: Low and High Shelf at 60Hz and 10kHz +/- 12dB
T95 Shelf unit B: Low and High Shelf at 60Hz and 10kHz +/- 12dB
T95 Shelf Combo: A+B units configured in stereo mode, Low and High Shelf at 60Hz and 10kHz +/- 12dB
T95 Mid unit A : Mid bell fixed 700, 1k, 1.4K, 2k, 3kHz + 8dB
T95 Mid unit B : Mid bell fixed 700, 1k, 1.4K, 2k, 3kHz + 8dB
T95 Mid Combo : A+B units configured in stereo mode, Mid bell fixed 700, 1k, 1.4K, 2k, 3kHz + 8dB
25.4 – Controls
The T95 Program eQualizer has only a few but intuitive and effective controls which are detailed below.
FREQ
GAIN
DRIVE
Frequency Control
The “FREQ” control sets the frequency to be boosted or attenuated.
Gain Control
The “GAIN” control sets the amount by which the frequency setting is boosted or attenuated.
The MF bell has broad curve when boosted and narrow curve when it is cut.
Drive Control
The “DRIVE” control affects the harmonic contents in an unnatural way, but suitable if you
look for an effect.
The available range is ±30 dB.
NOTE: clicking on the controls while pressing “ctrl” on computer keyboard, the control returns to zero
© 2010-2015
Manual
102
AlexB Programs
26. T361A Dolbee Sys
26.1 - About the original hardware
The T361A is one of a series of noise reduction systems for use in analog magnetic tape recording. T361A is the
first professionally built broadband noise reduction for recording studios in 1965 by Telefunken. Today this unit is
often used as FX on many audio materials as voice, guitars, and synth. By increasing and enhancing presence,
brightness, and details. The T361A easily meets and exceeds he quality, performance, and reliability
requirements of the demanding professionals.
With its broad bandwidth the T361A has been engineered to deliver recordings at the best conceivable quality
onto any format at any sample rate, maintaining all the energy and atmosphere of the original performance as
perfectly as possible.
© 2010-2015
Manual
103
AlexB Programs
26.2 - Session Setup
T361A reproduces the characteristic sound of a vintage Dolbee Sys, this kind of gears are used in all records in
the world in the tape era. To faithfully reproduce this analog sound in the DAW, we recommend using the T361A
in all tracks where you need to control dynamically the sound.
1. On single track : T361A is inserted on the audio tracks as insert in the position at your taste. It works
great on all instruments and voices.
2. On master track : T361A is inserted on the group bus, as last insert giving at the whole submix his
classic sound.
3. Mastering : T361A is inserted on the audio track as last insert, before the brickwall limiter.
TRICK: to emulate the non linearity between the tracks, you can set the DRIVE control slightly different on every
instance into a range of +/-5dB.
NOTE: in the “Test Tone” folder there are the audio sample of the original D-Tone
© 2010-2015
Manual
104
AlexB Programs
26.3 - Preset list:
The T361A library includes 9 different programs:
HQ presets with 10 kernels displayed into sub-menu “361”
T361A Line Standard: line input (normally the signal comes from the console)
T361A Line Mod1: line input with CAT22 board modified
T361A Line Mod2: line input with CAT22 board modified
T361A Line Mod3: line input with CAT22 board modified
T361A Tape Standard: tape input (normally the signal comes from the tape)
T361A Tape Mod1: tape input with CAT22 board modified
T361A Tape Mod2: tape input with CAT22 board modified
T361A Tape Mod3: tape input with CAT22 board modified
T361A Mastering: your secret-weapon for mastering use!
NOTE: be careful when the Tape Mod* presets are used, these presets can give freak FX ! Please use them
with a low audio level.
26.4 – Controls
T361A has only a few but intuitive and effective controls which are detailed below.
DRIVE
GDRV
Drive Control
The “DRIVE” control affects the harmonic contents in an unnatural way, but suitable if you
look for an effect.
The available range is ±30 dB.
GDrive Control
The “GDRV” control is a unique feature not found in similar products from others brands that
comes from Acustica Audio VVKT proprietary technology and sampling aproach.
It allows you to control the amount of harmonic distortion that is coming from the analog
hardware. The “Input” control acts as the analog signal chain of the device, where reducing
the volume also reduces the harmonic distortion in accordance. The “GDrive” function allows
independent control of this harmonic content, so that the input level can be left alone while
making adjustments to the harmonics. Reducing the harmonics leads to a cleaner signal with
an already clean device. Increasing the harmonics should be done with moderation.
This type of effect is not truly representative of a real console, but it can be useful
when you want more of the console’s nonlinear “vibe” without altering the channel’s
levels. The available range is ±12 dB.. Note that increasing the input signal the internal
headroom will be reduced.
NOTE: clicking on the controls while pressing “ctrl” on computer keyboard, the control returns to zero.
NOTE2: Do not adjust the ATTCK and RELS controls, leave them at stock value (center 12 o'clock).
© 2010-2015
Manual
105
AlexB Programs
27. Neev 81 Sidecar Console
27.1 - About the original hardware
Custom designed and hand-made by AlexB, the sidecar console is based on eight legendary vintage Class AB
mic-preamps and equalizers which come from the 70's era "with a lot of character". The summing amp has a
vintage design of pure Class A with Carnhill transformers which gives that “in your face” Neev sound.
A professional studio requested me to build this sidecar console for their dance-techno production, choosing the
rich, dynamics and fat sound it has. Its high bandwidth pure audio path, superior dynamics and greater control
make the Neev 81 Sidecar Console the first choice for recording and mixing Rock, Pop, Dance and more.
With its 100kHz bandwidth the Neev 81 Sidecar Console has been engineered to deliver recordings at the best
conceivable quality onto any format at any sample rate, capturing all the energy and atmosphere of the original
performance as perfectly as possible.
© 2010-2015
Manual
106
AlexB Programs
27.2 - Session Setup
Neev 81 Sidercar Console reproduces the sound of Vintage British Recording Console using a library programs
consisting of channels input, equalizer and mixbus. To faithfully reproduce into the DAW the analog console
signal chain and workflow, we recommend using the Neev 81 Sidecar Console in one of two following session
setup configurations.
1. As a virtual summing box : Input Channel is inserted on the last insert of the DAW audio tracks, like a
direct out routed to a summing box. The MixBus is placed on the first insert of the master track, just as
the stereo return would be routed from the analog console back to the DAW.
2. To simulate a console : Input Channel is inserted on the first insert of the DAW audio tracks, the MixBus
is placed on the last insert of the master track.
You should set the Pan Law in the DAW at -3dB. You might like to use the analog panner (included in the library)
on some stereo tracks and group bus instead of the DAW panner, the N81 Panner should be the last insert into
DAW's track or group bus leaving the Pan Law in the DAW to 0dB.
TRICK: to emulate the non linearity between the channels of the console, you can set the GDRV control slightly
different on every track into a range of +/-3dB.
© 2010-2015
Manual
107
AlexB Programs
27.3 - Preset list:
The Neev 81 Sidecar Console library includes 23 different programs:
HQ presets with 10 and 3 kernels and LE presets with 5, 3 and 1 kernels displayed into sub-menu “N81”
N81 Input Line : line input channel
N81 Mic Pre : microphone preamplifier
N81 MixBus : MixBus
N81 Panner : Panner -3dB pan law
N81 Low Cut Filter: 18dB/octave slope 27, 47, 82, 150, 270Hz
N81 Hi-Cut Filter: 18dB/octave slope 3.9, 5.6, 8.2, 12, 18kHz
N81 Low Freq Peak : bell filter 33, 56, 100, 180, 330Hz +/-18dB
N81 Low Freq Shelf : shelf filter 33, 56, 100, 180, 330Hz +/-18dB
N81 Low Mid Freq : bell filter 220Hz, 270, 330, 390, 470, 560, 680, 820, 1000, 1200Hz +/-18dB, Low/Hi Q
N81 Hi-Mid Freq: bell filter 1.5, 1.8, 2.2, 2.7, 3.3, 3.9, 4.7, 5.6, 6.8, 8.2kHz +/-18dB, Low/Hi Q
N81 Hi-Freq Shelf : shelf filter 3.3, 4.7, 6.8, 10, 15kHz +/-18dB
N81 Hi-Freq Peak : peak filter 3.3, 4.7, 6.8, 10, 15kHz +/-18dB
N81 Input Line
The Neev 81 Sidecar Console Input Line is the first stage of the console, normally it works as line amplifier and
you should insert it in every track.
N81 Mic Pre
The Neev 81 Sidecar Console microphone preamplifier has more coloration than Line in and you can use it
when more character is needed.
N81 MixBus
Neev 81 Sidecar Console MixBus is the final stage of the console, it must be inserted in the mixbus of the DAW
to give the original clean glue.
© 2010-2015
Manual
108
AlexB Programs
27.4 - Controls
The Neev 81 Sidecar Console has only a few but intuitive and effective controls which are detailed below.
GDRV
DRIVE
CUTOF
FREQ
GAIN
Q
GDrive Control
The “GDRV” control is a unique feature not found in similar products from others brands that
comes from Acustica Audio VVKT proprietary technology and sampling aproach.
It allows you to control the amount of harmonic distortion that is coming from the analog
hardware. The “Input” control acts as the analog signal chain of the device, where reducing
the volume also reduces the harmonic distortion in accordance. The “GDrive” function allows
independent control of this harmonic content, so that the input level can be left alone while
making adjustments to the harmonics. Reducing the harmonics leads to a cleaner signal with
an already clean device. Increasing the harmonics should be done with moderation.
This type of effect is not truly representative of a real console, but it can be useful when you
want more of the console’s nonlinear “vibe” without altering the channel’s levels. The
available range is ±12 dB.. Note that increasing the input signal the internal headroom will be
reduced.
Drive Control
The “DRIVE” control affects the harmonic contents in an unnatural way, but suitable if you
look for an effect.
The available range is ±30 dB.
Cut Off Control
The switchable “CUTOF” control affects the filter's frequency cut.
Frequency Control
The switchable “FREQ” control sets the frequency to be boosted or attenuated.
Gain Control
The “GAIN” control sets the amount by which the frequency setting is boosted or attenuated.
The available range is ±18 dB.
Q Control
The switchable “Q” control sets the amplitude of the filter selected by FREQ control.
NOTE: clicking on the controls while pressing “ctrl” on computer keyboard, the control returns to zero.
NOTE2: Do not adjust the ATTCK and RELS controls, leave them at stock value (center 12 o'clock).
© 2010-2015
Manual
109
AlexB Programs
28. Chandly Ltd Germanium
28.1 - About the original hardware
Chandly Ltd Germanium is a class A compressor with transformers, the compression circuit uses FET gain
reduction element. The compression curve, the knee, can be selected by various diode combination and the
tone can be selected from flat, smooth and driven.
Chandly Ltd Germanium manages to sound with character without being weak and harsh. There is little apparent
colouration, just a maturity of tone. This library programs is the result of more than 300GB of sampled data from
the original hardware.
With its 100kHz bandwidth the Chandly Ltd Germanium has been engineered to deliver recordings at the best
conceivable quality onto any format at any sample rate, maintaining all the energy, atmosphere and life of the
original performance as perfectly as possible.
© 2010-2015
Manual
110
AlexB Programs
28.2 - Session Setup
Chandly Ltd Germanium reproduces the characteristic sound of Germanium Compressor, this kind of
compressor are used in top records in the world. To faithfully reproduce this analog sound in the DAW, we
recommend using the CLG in all tracks where you need to control dynamically the sound.
1. On single track : Chandly Ltd Germanium is inserted on the audio tracks as insert in the position at your
taste. It works great on all instruments and voices.
2. On master track : Chandly Ltd Germanium is inserted on the group bus, as last insert giving at the whole
submix his classic sound.
Some notes on useage:
It is helpful to understand a little about what the different curves are (based on the diode selected, going from
softest to hardest knee)
Resistance - This is the gentlest and most neutral of the knee curves.
Germanium Soft - Uses a single germanium diode. Has a very slightly sharper knee and starts to introduce
some “vibe”.
Germanium Medium - This uses 5 germanium diodes (different type than the other) as well as the diode from
the soft setting. This is even slightly more sharper kneed and more colorful.
Silicon Medium - This uses a single silicon diode and ihas a sharper knee than the other modes. It also has a
different tonal character than the other modes.
Silicon Hard - This uses 2 silicon diodes in combination, sharpening the knee even more, and of course adding
yet more “vibe”.
Zener Hard - This uses a single zener diode, and contributes the sharpest knee character. It also introduces
another different tonal and compression character.
It is important to note here that in the original hardware, the attack and release were tuned by ear to be musical,
and NOT configured using math and ratios. So the numerical settings on the Nebula version are approximates
based on the hardware, they are NOT faithful numerical representations of milliseconds!
Again, I strongly urge you to look up and download the manual and even the “brochure” they offer. In those you
will find much very interesting and useful information that will help you enjoy this library more and understand the
depth of it's usage.
NOTE: please set the parameters as described into cap.2.1
TRICK: to emulate the original sound closely, you should set the AHEAD to 5.4ms.
© 2010-2015
Manual
111
AlexB Programs
28.3 - Preset list:
Chandly Ltd Germanium library includes 72 different programs:
HQ presets with 5 kernels and LE presets with 1 kernel displayed into sub-menu “CLG”
CLG R Flat: Compressor with Resistance (soft) knee and HPF on internal sidechain. Flat tone.
CLG R Flat esc : Compressor with Resistance (soft) knee and external sidechain. Flat tone.
CLG R Smooth : Compressor with Resistance (soft) knee and HPF on internal sidechain. Smooth tone.
CLG R Smooth esc : Compressor with Resistance (soft) knee and external sidechain. Smooth tone.
CLG R Driven : Compressor with Resistance (soft) knee and HPF on internal sidechain. Driven tone.
CLG R Driven esc : Compressor with Resistance (soft) knee and external sidechain. Driven tone.
CLG GS Flat: Compressor with Germanium Soft knee and HPF on internal sidechain. Flat tone.
CLG GS Flat esc : Compressor with Germanium Soft knee and external sidechain. Flat tone.
CLG GS Smooth : Compressor with Germanium Soft knee and HPF on internal sidechain. Smooth tone.
CLG GS Smooth esc : Compressor with Germanium Soft knee and external sidechain. Smooth tone.
CLG GS Driven : Compressor with Germanium Soft knee and HPF on internal sidechain. Driven tone.
CLG GS Driven esc : Compressor with Germanium Soft knee and external sidechain. Driven tone.
CLG GM Flat: Compressor with Germanium Medium knee and HPF on internal sidechain. Flat tone.
CLG GM Flat esc : Compressor with Germanium Medium knee and external sidechain. Flat tone.
CLG GM Smooth : Compressor with Germanium Medium knee and HPF on internal sidechain. Smooth tone.
CLG GM Smooth esc : Compressor with Germanium Medium knee and external sidechain. Smooth tone.
CLG GM Driven : Compressor with Germanium Medium knee and HPF on internal sidechain. Driven tone.
CLG GM Driven esc : Compressor with Germanium Medium knee and external sidechain. Driven tone.
CLG SM Driven esc : Compressor with Silicon Medium knee and external sidechain. Driven tone.
CLG SM Flat esc : Compressor with Silicon Medium knee and external sidechain. Flat tone.
CLG SM Smooth : Compressor with Silicon Medium knee and HPF on internal sidechain. Smooth tone.
CLG SM Smooth esc : Compressor with Silicon Medium knee and external sidechain. Smooth tone.
CLG SM Driven : Compressor with Silicon Medium knee and HPF on internal sidechain. Driven tone.
CLG SM Driven esc : Compressor with Silicon Medium knee and external sidechain. Driven tone.
CLG SH Driven esc : Compressor with Silicon Hard knee and external sidechain. Driven tone.
CLG SH Flat esc : Compressor with Silicon Hard knee and external sidechain. Flat tone.
CLG SH Smooth : Compressor with Silicon Hard knee and HPF on internal sidechain. Smooth tone.
CLG SH Smooth esc : Compressor with Silicon Hard knee and external sidechain. Smooth tone.
CLG SH Driven : Compressor with Silicon Hard knee and HPF on internal sidechain. Driven tone.
CLG SH Driven esc : Compressor with Silicon Hard knee and external sidechain. Driven tone.
CLG ZH Driven esc : Compressor with Zener Hard knee and external sidechain. Driven tone.
CLG ZH Flat esc : Compressor with Zener Hard knee and external sidechain. Flat tone.
CLG ZH Smooth : Compressor with Zener Hard knee and HPF on internal sidechain. Smooth tone.
CLG ZH Smooth esc : Compressor with Zener Hard knee and external sidechain. Smooth tone.
CLG ZH Driven : Compressor with Zener Hard knee and HPF on internal sidechain. Driven tone.
CLG ZH Driven esc : Compressor with Zener Hard knee and external sidechain. Driven tone.
TRICK: using the presets in conjunction with the DRIVE control you can create hundreds of different tones. It's
highly recommended to download and read the manual of the original sampled hardware.
© 2010-2015
Manual
112
AlexB Programs
28.4 – Controls
Chandly Ltd Germanium has only a few but intuitive and effective controls which are detailed below.
ATT
REL
Attack Control
The “ATT” control defines the attack time of the compressor. Attack time is the duration
between the input signal reaching the threshold and processing being applied.
The range is variable from 3ms to 120ms
Release Control
The “REL” control sets the amount of time it takes for processing to cease once the input
signal drops below the threshold level.
The available range is 100ms to 1,2s
THR
Threshold Control
The “THR” control defines the input level at which limiting or compression begins. Signals
that exceed this level are processed. Signals below the threshold are unaffected.
The range is variable from 0dB to -48,1dB
RAT
Ratio Control
The “RAT” defines the amount of gain reduction to be processed by the module.
The range is variable from 1,5:1 to 10:1
AHEAD
DRIVE
Ahead Control
The “AHEAD” control sets the look-ahead to control the fast transients.
The range is variable from 0ms to 6ms
Drive Control
The “DRIVE” control affects the harmonic contents in an unnatural way, but suitable if you
look for an effect.
The available range is ±24 dB
GAIN
Gain Control
The “GAIN” control sets the output level of gain makeup.
The range is variable from 0dB to 25dB
HPF
HPF Control
The “HPF” control sets the cut-off point of a high-pass filter on the internal sidechain.
The range is variable from 0Hz to 500Hz
NOTE: clicking on the controls while pressing “ctrl” on computer keyboard, the control returns to zero.
© 2010-2015
Manual
113
AlexB Programs
29. Vinylizer
29.1 - About the original hardware
This is a little collection of the best vinyl players: from a '40 gramophone, an old '50 player, two vintage '70
players with tube and solid state, two modern players with tube and solid state, and a vintage '60 Jukebox. The
entire signal path was sampled, from the pickup to final amp stage. We even included samples with some with
dust, scratch, hum, motor and noise. The Vinylizer easily meets and exceeds he quality, performance, and
reliability requirements of the demanding professionals.
With its broad bandwidth the Vinylizer has been engineered to deliver recordings at the best conceivable quality
onto any format at any sample rate, maintaining all the energy and atmosphere of the original performance as
perfectly as possible.
© 2010-2015
Manual
114
AlexB Programs
29.2 - Session Setup
Vinylizer reproduces the characteristic sound of vinyl players. To faithfully reproduce this analog sound in the
DAW, we recommend using the Vinylizer in all tracks where you need to add this kind of sound.
1. On single track : Vinylizer is inserted on the audio tracks as insert in the position at your taste. It works
great on all instruments and voices.
2. On master track : Vinylizer is inserted on the group bus, as last insert giving at the whole submix his
classic sound.
3. Mastering : Vinylizer is inserted on the audio track as last insert, before the brickwall limiter.
TRICK: to emulate the non linearity between the tracks, you can set the DRIVE control slightly different on every
instance into a range of +/-5dB.
© 2010-2015
Manual
115
AlexB Programs
29.3 - Preset list:
The Vinylizer library includes 14 different programs:
HQ presets with 7 kernels and LE presets with 3 kernel displayed into sub-menu “VNL”
VNL2 Gramophone: 1940's British Gramophone
VNL2 JukeBox: 1960's German JukeBox
VNL2 Modern Solid State: 2010's American solid state player
VNL2 Modern Tube State: 2010's American tube state player
VNL2 Old: 1950's American player
VNL2 Vintage Solid State: 1970's Japanese solid state player
VNL2 Vintage Tube State: 1970's French tube state player
Samples at 44,1kHz/24bit and 96kHz/24bit
Noise_lift
Noise_motor
Noise_motor_gramophone
Noise_motor_old
Noise_motor_vintage
Noise1
Noise2
Noise3
Noise4
Noise5
Noise6
TRICK: You can use the samples to add a new dimension and effect to your digital music. When properly set
up, these noises will interfere with your songs less than you might expect. To make it sounds realistic, set the
levels so that sample becomes just audible in the quietest passages of your songs.
© 2010-2015
Manual
116
AlexB Programs
29.4 – Controls
Vinylizer has only a few but intuitive and effective controls which are detailed below.
DRIVE
GDRV
Drive Control
The “DRIVE” control affects the harmonic contents in an unnatural way, but suitable if you
look for an effect.
The available range is ±30 dB.
GDrive Control
The “GDRV” control is a unique feature not found in similar products from others brands that
comes from Acustica Audio VVKT proprietary technology and sampling aproach.
It allows you to control the amount of harmonic distortion that is coming from the analog
hardware. The “Input” control acts as the analog signal chain of the device, where reducing
the volume also reduces the harmonic distortion in accordance. The “GDrive” function allows
independent control of this harmonic content, so that the input level can be left alone while
making adjustments to the harmonics. Reducing the harmonics leads to a cleaner signal with
an already clean device. Increasing the harmonics should be done with moderation.
This type of effect is not truly representative of a real console, but it can be useful
when you want more of the console’s nonlinear “vibe” without altering the channel’s
levels. The available range is ±12 dB.. Note that increasing the input signal the internal
headroom will be reduced.
NOTE: clicking on the controls while pressing “ctrl” on computer keyboard, the control returns to zero.
NOTE2: Do not adjust the ATTCK and RELS controls, leave them at stock value (center 12 o'clock).
© 2010-2015
Manual
117
AlexB Programs
30. Massive Mix eQualizer
30.1 - About the original hardware
The Massive Mix eQualizer makes everything sound better. You can expect the best strengths of Pultec-style
equalizers as well as choice console, parametric, and graphic Eqs. All the radical shaping you'll need for the
most demanding of sessions as well as the delicate, subtle shadings needed for vocals and mastering.
Massive Mix eQualizer manages to sound clean without being weak and characterless. There is little apparent
colouration, just a maturity of tone.
With its 100kHz bandwidth the Massive Mix eQualizer has been engineered to deliver recordings at the best
conceivable quality onto any format at any sample rate, maintaining all the energy and atmosphere of the
original performance as perfectly as possible.
© 2010-2015
Manual
118
AlexB Programs
30.2 - Session Setup
Massive Mix eQualizer reproduces the characteristic sound of Modern Passive Tube eQualizer, this kind of
equalizers are used in countless records in the world. To faithfully reproduce this analog sound in the DAW, we
recommend using the MMeQ in all tracks where you need to shape the sound.
4. On single track : Massive Mix eQualizer is inserted on the audio tracks as insert in the position at your
taste. It works great on all instruments and voices.
5. On master track : Massive Mix eQualizer is inserted on the mixbus, or group bus, as last insert giving at
the whole mix his classic sound.
To emulate the original unit sound you should use both presets HQ and LE by mixing them in this way:
on a single track when a single equalization band only is required you should use the HQ preset, when you need
more than one band of equalization you should use the LE presets and as last band the HQ. This interaction
gives the right color and harmonic contents. However if you want more color and saturation you can use more
HQ bands at your taste.
TRICK: to emulate the non linearity between the tracks, you can set the DRIVE control slightly different on every
instance into a range of +/-5dB.
© 2010-2015
Manual
119
AlexB Programs
30.3 - Preset list:
The Massive Mix eQualizer library includes 24 different programs:
HQ presets with 3 kernels and LE presets with 1 kernel displayed into sub-menu “MMQ”
MMeQ HPF : High Pass Filter -18dB/oct from 0 to 220Hz
MMeQ LPF : Low Pass Filter -18dB/oct from 6k to 18kHz
MMeQ B 22-180Hz: Bell variable from 22 to 180Hz +/- 20dB variable Q from 1,5 to 3
MFeQ LS 22-150Hz: Low Shelf variable from 22 to 150Hz +/- 20dB variable overshoot/undershoot
MMeQ B 180-820Hz: Bell variable from 180 to 820Hz +/- 20dB variable Q from 1,5 to 3
MMeQ LS 150-560Hz: Low Shelf variable from 150 to 560Hz +/- 20dB variable overshoot/undershoot
MMeQ B 820-3900Hz: Bell variable from 820 to 3900Hz +/- 20dB variable Q from 1,5 to 3
MMeQ LS 560-3900Hz: Low Shelf variable from 560 to 3900Hz +/- 20dB variable overshoot/undershoot
MMeQ B 3.9-27kHz: Bell variable from 3.9k to 27kHz +/- 20dB variable Q from 1,5 to 3
MMeQ HS 220-1200Hz: High Shelf variable from 220 to 1200Hz +/- 20dB variable overshoot/undershoot
MMeQ HS 1.2-4.7kHz: High Shelf variable from 1.2k to 4.7kHz +/- 20dB variable overshoot/undershoot
MMeQ HS 4.7-27kHz: High Shelf variable from 4.7k to 27kHz +/- 20dB variable overshoot/undershoot
30.4 – Controls
The Massive Mix eQualizer has only a few but intuitive and effective controls which are detailed below.
CUTOF
FREQ
GAIN
Q
DRIVE
Cut Off Control
The “CUTOF” control affects the filter's frequency cut.
Frequency Control
The “FREQ” control sets the frequency to be boosted or attenuated.
Gain Control
The “GAIN” control sets the amount by which the frequency setting is boosted or attenuated.
The available range is ±20 dB.
Q Control
The “Q” control sets the amplitude of the filter selected by FREQ control.
Drive Control
The “DRIVE” control affects the harmonic contents in an unnatural way, but suitable if you
look for an effect.
The available range is ±30 dB.
NOTE: clicking on the controls while pressing “ctrl” on computer keyboard, the control returns to zero.
© 2010-2015
Manual
120
AlexB Programs
31. 4K Console
31.1 - About the original hardware
It's the world's most successful studio production console. Its reputation is built upon excellence of design,
advanced electronic engineering and a sound quality that has produced hundreds of best-selling recordings. A
key element in the sound of many of these recordings is the punch and drive of the mixes created by this classic
'80 console.
This unit has been serviced and upgraded to give serious punch and animal power with unbelievable cleanness.
With its analog punchy sound the 4K Console has been engineered to deliver recordings at the best conceivable
quality onto any format at any sample rate, capturing all the energy and atmosphere of the original performance
as perfectly as possible.
© 2010-2015
Manual
121
AlexB Programs
31.2 - Session Setup
4K Console reproduces the sound of Classic Logic Console by using a library programs consisting of channels
input, group bus and mixbus. To faithfully reproduce into the DAW the analog console signal chain and workflow,
we recommend using the 4K Console in one of two following session setup configurations.
3. As a virtual summing box : Input Channel is inserted on the last insert of the DAW audio tracks, like a
direct out routed to a summing box. The MixBus is placed on the first insert of the master track, just as
the stereo return would be routed from the analog console back to the DAW.
4. To simulate a console : Input Channel is inserted on the first insert of the DAW audio tracks, the MixBus
is placed on the last insert of the master track. If you group channels in your DAW, i.e. drums elements,
you can insert the GroupBus as last insert in the submix group bus to achieve the classic bus coloration.
You should set the Pan Law in the DAW at -4,5dB. You might like to use the analog panner (included in the
library) on some stereo tracks and group bus instead of the DAW panner, the 4KC Panner should be the last
insert into DAW's track or group bus leaving the Pan Law in the DAW to 0dB.
TRICK: to emulate the non linearity between the channels of the console, you can set the GDRV control slightly
different on every track into a range of +/-3dB.
© 2010-2015
Manual
122
AlexB Programs
31.3 - Preset list:
The 4K Console library includes 27 different programs:
HQ presets with 10 kernels and LE presets with 3 and 5 kernels displayed into sub-menu “4KC”
4KC Line in : line input channel
4KC MIC Pre : microphone preamplifier
4KC G.Bus Clean : Group Bus clean signal
4KC G.Bus Acoustic : Group Bus with equalizer patched useful for acoustic instruments
4KC G.Bus AmbFX : Group Bus with equalizer patched useful for ambient & FX
4KC G.Bus BG Vox : Group Bus with equalizer patched useful for backing vocals
4KC G.Bus Drum : Group Bus with equalizer patched useful for drums
4KC G.Bus GTR : Group Bus with equalizer patched useful for guitars
4KC G.Bus Percussions : Group Bus with equalizer patched useful for percussions
4KC G.Bus SynthPad : Group Bus with equalizer patched useful for synthesizers and pads
4KC M.Bus Clean : MixBus clean tone
4KC M.Bus Vintage : MixBus original vintage tone
4KC M.Bus Modern : MixBus with equalizer patched useful for modern and polished sound
4KC Panner : Panner -4,5dB pan law
4KC Line in
The 4K Console Line in is the first stage of the console, normally it works as line amplifier and you should insert
it in every track.
4KC MIC in
The 4K Console microphone preamplifier has more coloration than Line in and you can use it when more
character is needed.
4KC G.Bus Clean
If you send some tracks to a submix bus group in your DAW and you like to have the real sound by Bus Group of
the console, you can insert the G.Bus Clean preset as last insert into DAW's submix bus group.
4KC G.Bus Acoustic
When acoustic instruments are grouped into a submix in your DAW, you might want to have the G.BUS Acoustic
preset as last insert into DAW's submix bus group to give a cohesive colored glue.
4KC G.Bus Amb&FX
When ambients, reverb, echo and other effects are used into an aux-send/return in your DAW, you may like to
have the G.BUS Amb&FX preset as last insert into these DAW's channels to give more spatial dimension.
4KC G.Bus BG Vox
When backing vocals tracks are grouped into a submix in your DAW, try inserting the G.BUS BG Vox preset as
last insert into DAW's submix bus group to push a little in the backward the sound by achieving air and
transparency.
4KC G.Bus Drum
When drum instruments are grouped into a submix in your DAW, you may want to have the G.BUS Drum preset
as last insert into DAW's submix bus group to give a cohesive punching glue.
4KC G.Bus GTR
When guitars are grouped into a submix in your DAW, try using the G.BUS GTR preset as last insert into DAW's
submix bus group to give a cohesive brilliant glue.
© 2010-2015
Manual
123
AlexB Programs
4KC G.Bus Percussions
When percussions are grouped into a submix in your DAW, you might like to have the G.BUS Percussions
preset as last insert into DAW's submix bus group to give a cohesive snapping glue.
4KC G.Bus SynthPad
When synthesizers and Pads are grouped into a submix in your DAW, maybe try the G.BUS SynthPad preset as
last insert into DAW's submix bus group to give a cohesive focused glue.
4KC M.Bus Clean
4K Console Mix Bus is the final stage of the console, it must be inserted in the mixbus of the DAW.
The M.BUS Clean gives a clean glue.
4KC M.Bus Vintage
When the original vintage tone is needed, use the M.BUS Vintage preset as last insert into DAW's mixbus.
4KC M.Bus Modern
When a polished glued mix is needed, with a lot of air and punch, try the M.BUS Modern preset as last insert into
DAW's mixbus.
31.4 - Controls
The 4K Console has only a few but intuitive and effective controls which are detailed below.
GDRV
DRIVE
GDrive Control
The “GDRV” control is a unique feature not found in similar products from others brands that
comes from Acustica Audio VVKT proprietary technology and sampling aproach.
It allows you to control the amount of harmonic distortion that is coming from the analog
hardware. The “Input” control acts as the analog signal chain of the device, where reducing
the volume also reduces the harmonic distortion in accordance. The “GDrive” function allows
independent control of this harmonic content, so that the input level can be left alone while
making adjustments to the harmonics. Reducing the harmonics leads to a cleaner signal with
an already clean device. Increasing the harmonics should be done with moderation.
This type of effect is not truly representative of a real console, but it can be useful when you
want more of the console’s nonlinear “vibe” without altering the channel’s levels. The
available range is ±12 dB.
Note that increasing the input signal the internal headroom will be reduced.
Drive Control
The “DRIVE” control affects the harmonic contents in an unnatural way, but suitable if you
look for an effect.
The available range is ±30 dB.
NOTE: clicking on the controls while pressing “ctrl” on computer keyboard, the control returns to zero.
NOTE2: Do not adjust the ATTCK and RELS controls, leave them at stock value (center 12 o'clock).
© 2010-2015
Manual
124
AlexB Programs
32. 4KeQ Brown
32.1 - About the original hardware
The legendary sonic signature of an early 80 s classic: the Brown 02 which was featured on countless 1980 s
recordings. This punchy EQ has a unique character which sculpts the sound perfectly to fit in the mix.
4KeQ Brown manages to sound clean without being weak and characterless. There is little apparent colouration,
just a maturity of tone.
With its gritty punchy sound, the 4KeQ Brown has been engineered to deliver recordings at the best conceivable
quality onto any format at any sample rate, maintaining all the energy and atmosphere of the original
performance as perfectly as possible.
© 2010-2015
Manual
125
AlexB Programs
32.2 - Session Setup
4KeQ Brown reproduces the characteristic sound of Clasic Logic eQualizer, this kind of equalizers are used in
countless records in the world. To faithfully reproduce this analog sound in the DAW, we recommend using the
4KeQ Brown in all tracks where you need to shape the sound.
6. On single track : 4KeQ Brown is inserted on the audio tracks as insert in the position at your taste. It
works great on all instruments and voices.
7. On master track : 4KeQ Brown is inserted on the mixbus, or group bus, as last insert giving at the whole
mix his classic sound.
To emulate the original unit sound you should use both presets HQ and LE by mixing them in this way:
on a single track when a single equalization band only is required you should use the HQ preset, when you need
more than one band of equalization you should use the LE presets and as last band the HQ. This interaction
gives the right color and harmonic contents. However if you want more color and saturation you can use more
HQ bands at your taste.
TRICK: to emulate the non linearity between the tracks, you can set the DRIVE control slightly different on every
instance into a range of +/-5dB.
© 2010-2015
Manual
126
AlexB Programs
32.3 - Preset list:
The 4KeQ Brown library includes 18 different programs:
HQ presets with 3 kernels and LE presets with 1 kernel displayed into sub-menu “4KQ”
BRN HPF : High Pass Filter -18dB/oct from 20 to 350Hz
BRN LPF : Low Pass Filter -12dB/oct from 3k to 20kHz
BRN Low Shelf: Shelf variable from 30 to 450Hz +/- 15dB variable
BRN Low Bell: Bell variable variable from 30 to 450Hz +/- 15dB variable, fixed Q 0,8
BRN 200-600Hz: Bell variable from 200Hz to 600Hz +/-15dB variable, variable Q from 0.5 to 2,5
BRN 600-3200Hz: Bell variable from 600Hz to 3200Hz +/-15dB variable, variable Q from 0.5 to 2,5
BRN 3200-7000Hz: Bell variable from 3200Hz to 7000Hz +/-15dB variable, variable Q from 0.5 to 2,5
BRN High Bell: Bell variable variable from 1.5k to 16kHz +/- 15dB variable, fixed Q 0,8
BRN High Shelf: Shelf variable variable from 1.5k to 16kHz +/- 15dB variable
32.4 – Controls
The 4KeQ Brown has only a few but intuitive and effective controls which are detailed below.
CUTOF
Cut Off Control
The “CUTOF” control affects the filter's frequency cut.
FREQ
Frequency Control
The “FREQ” control sets the frequency to be boosted or attenuated.
GAIN
Gain Control
The “GAIN” control sets the amount by which the frequency setting is boosted or attenuated.
Q
DRIVE
Q Control
The “Q” control sets the amplitude of the filter selected by FREQ control.
Drive Control
The “DRIVE” control affects the harmonic contents in an unnatural way, but suitable if you
look for an effect.
The available range is ±30 dB.
NOTE: clicking on the controls while pressing “ctrl” on computer keyboard, the control returns to zero.
© 2010-2015
Manual
127
AlexB Programs
33. 4KeQ Black
33.1 - About the original hardware
Famous and rare equalizer from the early eighteen classic console. Cleaner and punchier than the Brown and
also with taller bell curves, it was featured on countless recordings.
4KeQ Black manages to sound clean without being weak and characterless. There is little apparent colouration,
just a maturity of tone.
With its clean punchy sound the 4KeQ Black has been engineered to deliver recordings at the best conceivable
quality onto any format and at any sample rate, maintaining all the energy and atmosphere of the original
performance as perfectly as possible.
© 2010-2015
Manual
128
AlexB Programs
33.2 - Session Setup
4KeQ Black reproduces the characteristic sound of Clasic Logic eQualizer, this kind of equalizers are used in
countless records in the world. To faithfully reproduce this analog sound in the DAW, we recommend using the
4KeQ Black in all tracks where you need to shape the sound.
8. On single track : 4KeQ Black is inserted on the audio tracks as insert in the position at your taste. It
works great on all instruments and voices.
9. On master track : 4KeQ Black is inserted on the mixbus, or group bus, as last insert giving at the whole
mix his classic sound.
To emulate the original unit sound you should use both presets HQ and LE by mixing them in this way:
on a single track when a single equalization band only is required you should use the HQ preset, when you need
more than one band of equalization you should use the LE presets and as last band the HQ. This interaction
gives the right color and harmonic contents. However if you want more color and saturation you can use more
HQ bands at your taste.
TRICK: to emulate the non linearity between the tracks, you can set the DRIVE control slightly different on every
instance into a range of +/-5dB.
© 2010-2015
Manual
129
AlexB Programs
33.3 - Preset list:
The 4KeQ Black library includes 18 different programs:
HQ presets with 3 kernels and LE presets with 1 kernel displayed into sub-menu “4KQ”
BLK HPF : High Pass Filter -18dB/oct from 20 to 350Hz
BLK LPF : Low Pass Filter -12dB/oct from 3k to 20kHz
BLK Low Shelf: Shelf variable from 30 to 450Hz +/- 18dB variable
BLK Low Bell: Bell variable variable from 30 to 450Hz +/- 18dB variable, fixed Q 1.3
BLK 220-680Hz: Bell variable from 220Hz to 680Hz +/-18dB variable, variable Q from 0.5 to 4
BLK 680-2200Hz: Bell variable from 680Hz to 2200Hz +/-18dB variable, variable Q from 0.5 to 4
BLK 2200-7000Hz: Bell variable from 2200Hz to 7000Hz +/-18dB variable, variable Q from 0.5 to 4
BLK High Bell: Bell variable variable from 1.5k to 16kHz +/- 18dB variable, fixed Q 1.3
BLK High Shelf: Shelf variable variable from 1.5k to 16kHz +/- 18dB variable
33.4 – Controls
The 4KeQ Black has only a few but intuitive and effective controls which are detailed below.
CUTOF
Cut Off Control
The “CUTOF” control affects the filter's frequency cut.
FREQ
Frequency Control
The “FREQ” control sets the frequency to be boosted or attenuated.
GAIN
Gain Control
The “GAIN” control sets the amount by which the frequency setting is boosted or attenuated.
Q
DRIVE
Q Control
The “Q” control sets the amplitude of the filter selected by FREQ control.
Drive Control
The “DRIVE” control affects the harmonic contents in an unnatural way, but suitable if you
look for an effect.
The available range is ±30 dB.
NOTE: clicking on the controls while pressing “ctrl” on computer keyboard, the control returns to zero.
© 2010-2015
Manual
130
AlexB Programs
34. 4K Channel Dynamics
34.1 - About the original hardware
Channel Dynamics from the world's most successful studio production console which was the first one to
incorporate dynamics processing with channel, and a master compressor in the console centre section. It's the
first choice of world's best audio engineers to give punch, drive and to glue the mix together, maintaining control
of the dynamics of single tracks.
4K Channel Dynamics manages to sound clean but with character, never weak and harsh. There is little
apparent colouration, just a maturity of tone.
With its punching vintage tone, the 4K Channel Dynamics has been engineered to deliver recordings at the best
conceivable quality onto any format at any sample rate, maintaining all the energy, atmosphere and life of the
original performance as perfectly as possible.
34.2 - Session Setup
© 2010-2015
Manual
131
AlexB Programs
4K Channel Dynamics reproduces the characteristic sound of Classic Logic Console Compressor, this kind of
compressor are used in top records in the world. To faithfully reproduce this analog sound in the DAW, we
recommend using the 4K CH in all tracks where you need to control dynamically the sound.
1. On single track : 4K Channel Dynamics is inserted on the audio tracks as insert in the position at your
taste. It works great on all instruments and voices.
2. On master track : 4K Channel Dynamics is inserted on the group bus, as last insert giving at the whole
submix his classic sound.
NOTE: please set the parameters as described into cap.2.1
TRICK: to emulate the original sound closely, you should set the controls DRIVE to +3dB and AHEAD to 5.4ms.
34.3 - Preset list:
© 2010-2015
Manual
132
AlexB Programs
The 4K Channel Dynamics library includes 8 different programs:
HQ presets with 5 kernels and LE presets with 1 kernel displayed into sub-menu “4KD”
4KD CH Comp : Compressor with variable controls and HPF on internal sidechain
4KD CH Comp esc : Compressor with variable controls and external sidechain
4KD LMC : Listen Mic Compressor with fixed attack and release, HPF on internal sidechain
4KD LMC esc : Listen Mic Compressor with fixed attack and release, external sidechain
34.4 – Controls
The 4K Channel Dynamics has only a few but intuitive and effective controls which are detailed below.
ATT
REL
THR
RAT
AHEAD
DRIVE
© 2010-2015
Manual
Attack Control
The “ATT” control defines the attack time of the compressor. Attack time is the duration
between the input signal reaching the threshold and processing being applied.
The range is variable from 3ms to 30ms
Release Control
The “REL” control sets the amount of time it takes for processing to cease once the input
signal drops below the threshold level.
The available range is 100ms to 4s
Threshold Control
The “THR” control defines the input level at which limiting or compression begins. Signals
that exceed this level are processed. Signals below the threshold are unaffected.
The range is variable from 0dB to -48,1dB
Ratio Control
The “RAT” defines the amount of gain reduction to be processed by the module.
When the control is at maximum (10), the ratio is effectively infinity to one, yielding the
limiting effect.
The range is variable from 1,5:1 to 40:1
Ahead Control
The “AHEAD” control sets the look-ahead to control the fast transients.
The range is variable from 0ms to 6ms
Drive Control
The “DRIVE” control affects the harmonic contents in an unnatural way, but suitable if you
look for an effect.
The available range is ±24 dB
133
AlexB Programs
GAIN
Gain Control
The “GAIN” control sets the output level of gain makeup.
The range is variable from 0dB to 25dB
HPF
HPF Control
The “HPF” control sets the cut-off point of a high-pass filter on the internal sidechain.
The range is variable from 0Hz to 500Hz
NOTE: clicking on the controls while pressing “ctrl” on computer keyboard, the control returns to zero.
© 2010-2015
Manual
134
AlexB Programs
35. 4K G.Comp
35.1 - About the original hardware
Stereo Bus Compressor from the world's most successful studio production console which was the first to
incorporate dynamics processing with every channel, and a master compressor in the console centre section. It's
the first choice of world's best audio engineers to give punch, drive and to glue the mix together, maintaining
control of the dynamics of single tracks.
4K G.Comp manages to sound clean but with character without being weak and harsh. There is little apparent
colouration, just a maturity of tone.
With its characteristic punching glue, the 4K G.Comp has been engineered to deliver recordings at the best
conceivable quality onto any format at any sample rate, maintaining all the energy, atmosphere and life of the
original performance as perfectly as possible.
© 2010-2015
Manual
135
AlexB Programs
35.2 - Session Setup
4K G.Comp reproduces the characteristic sound of Classic Logic Console Stereo Bus Compressor, this kind of
compressor are used in top records in the world. To faithfully reproduce this analog sound in the DAW, we
recommend using the 4K G.Comp in all tracks where you need to control dynamically the sound.
1. On single track : 4K G.Comp is inserted on the audio tracks as insert in the position at your taste. It
works great on some instruments like piano and pads.
2. On master track : 4K G.Comp is inserted on the group bus and/or stereo mixbus, as last insert giving at
the whole submix his classic sound.
NOTE: please set the parameters as described into cap.2.1
TRICK: to emulate the original sound closely, you should set the controls DRIVE to +3dB and AHEAD to 5.4ms.
© 2010-2015
Manual
136
AlexB Programs
35.3 - Preset list:
The 4K G.Comp library includes 8 different programs:
HQ presets with 5 kernels and LE presets with 1 kernel displayed into sub-menu “4KD”
4K G.Comp : Compressor with variable controls and HPF on internal sidechain
4K G.Comp esc : Compressor with variable controls and external sidechain
4K G.Comp A : Compressor with variable controls, auto release and HPF on internal sidechain
4K G.Comp A esc : Compressor with variable controls, auto relese and external sidechain
34.4 – Controls
The 4K G.Comp has only a few but intuitive and effective controls which are detailed below.
ATT
REL
THR
RAT
AHEAD
DRIVE
© 2010-2015
Manual
Attack Control
The “ATT” control defines the attack time of the compressor. Attack time is the duration
between the input signal reaching the threshold and processing being applied.
The range is variable from 0.1ms to 30ms
Release Control
The “REL” control sets the amount of time it takes for processing to cease once the input
signal drops below the threshold level.
The available range is 100ms to 1.2s
Threshold Control
The “THR” control defines the input level at which limiting or compression begins. Signals
that exceed this level are processed. Signals below the threshold are unaffected.
The range is variable from 0dB to -48,1dB
Ratio Control
The “RAT” defines the amount of gain reduction to be processed by the module.
When the control is at maximum (10), the ratio is effectively infinity to one, yielding the
limiting effect.
The range is variable from 2:1 to 10:1
Ahead Control
The “AHEAD” control sets the look-ahead to control the fast transients.
The range is variable from 0ms to 6ms
Drive Control
The “DRIVE” control affects the harmonic contents in an unnatural way, but suitable if you
look for an effect.
The available range is ±24 dB
137
AlexB Programs
GAIN
Gain Control
The “GAIN” control sets the output level of gain makeup.
The range is variable from 0dB to 25dB
HPF
HPF Control
The “HPF” control sets the cut-off point of a high-pass filter on the internal sidechain.
The range is variable from 0Hz to 500Hz
NOTE: clicking on the controls while pressing “ctrl” on computer keyboard, the control returns to zero.
© 2010-2015
Manual
138
AlexB Programs
END
© 2010-2015
Manual
139
AlexB Programs