1
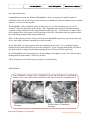
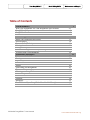
USER MANUAL
USER MANUAL
USER MANUAL
USER MANUAL
Whirlwind RoughRider™ User Manual
Copyright © 2007 by Whirlwind Wheelchair International USER
First Edition, June 2007
MANUAL
Written by
Alida Lindsley & Carol Maddox
Contributions
Chris Howard & Ralf Hotchkiss
Editors
Joan Rogin & Marc Krizack
Whirlwind Wheelchair International, San Francisco State University, 1600 Holloway Avenue, SCI 251, San Francisco, CA 94132-4163 USA
Phone: 415.338.6277, Fax: 415.338.1290, E-mail: [email protected]
Your RoughRider™
Basic Riding Skills
Maintenance and Repair
Dear Wheelchair Rider,
Congratulations on your new Whirlwind RoughRider. Now you are part of a global network of
wheelchair riders who break society’s rules on where we should ride, what we should become, and what
obstacles we can overcome together.
The RoughRider is the culmination of the inventiveness of over 300 wheelchair users, in over 22
countries, who gave direct input on the design. Their imagination was sparked from their own daily
experience using wheelchairs in the rough conditions where they live. From the huts of central Africa,
to the squatter cities of Nicaragua, to the rural plains of the USA, wheelchair riders are getting out into
the world and proving that they can get things done.
This is a chair you can work on. I hope you’ll take your RoughRider apart soon, get to know how easy
it is to work with, and learn to maintain it to last for decades.
In this wheelchair you will go places where most wheelchairs get stuck. You’ve probably already
dreamed of trips to the park and even out to the wild places. If you’re hoping bring home a big fish or
just make it down a rough sidewalk without getting thrown, I’ll bet you’ll have a great trip.
In your RoughRider you’ll go more places, do more things, keep riding for years. We look forward to
hearing about your adventures. Please stay in touch.
Check for pressure sores and keep your wrench in your shirt pocket,
Ralf Hotchkiss
The RoughRider’s design is the culmination of ideas and innovations of wheelchair
builders, users, and experts from around the world who promote the independence of
wheelchair riders.
Thelma Ramos of Chinandega,
Nicaragua
Whirlwind RoughRider™ User Manual
Thelma Ramos of Chinandega,
Nicaragua
www.whirlwindwheelchair.org
USER MANUAL
USER MANUAL
WARNING: DO NOT USE THIS WHEELCHAIR WITHOUT
FIRST
USER MANUAL
READING AND UNDERSTANDING THIS MANUAL –
OTERWISE INJURY AND/OR DAMAGE TO THE USER MANUAL
WHEELCHAIR MAY OCCUR. PLEASE PAY SPECIAL
ATTENTION TO THE BOXES LABLED “WARNING”,
“CAUTION”, AND “IMPORTANT”.
Whirlwind Wheelchair International, San Francisco State University, 1600 Holloway Avenue, SCI 251, San Francisco, CA 94132-4163 USA
Phone: 415.338.6277, Fax: 415.338.1290, E-mail: [email protected]
Your RoughRider™
Basic Riding Skills
Maintenance and Repair
Table of Contents
Your RoughRider
Who is the RoughRider for? And RoughRider Specifications
RoughRider Components
RoughRider Features
Common Modifications
Basic Riding Skills
Know your Capabilities and Limits
Pressure Relief
Pressure Relief Techniques
Moving Around
Riding Techniques
Transfers: Getting in and out of your RoughRider
Traveling with your RoughRider
Maintenance and Repair
Maintenance Schedule
Bearings
Upholstery
Wheel Locks
Spokes
Lubricating your RoughRider
Tires
Cleaning your RoughRider
Routine Inspections
Nuts and Bolts
Footrests
Handgrips
Troubleshoot: If your RoughRider Does Not Roll Straight
Whirlwind RoughRider™ User Manual
1
2-3
4
5
9
11
11
14
16
19
19
20
24
31
32
33
35
40
42
43
45
46
48
49
50
52
53
54
www.whirlwindwheelchair.org
USER MANUAL
USER MANUAL
USER MANUAL
WARNINGS:
USER MANUAL
• DO NOT use an escalator to move a wheelchair
between floors. Serious bodily injury may occur.
• DO NOT lean over the top of the back upholstery to
reach objects from behind as this may cause the
wheelchair to tip over.
• DO NOT shift your weight or sitting position toward
the direction you are reaching as the wheelchair
may tip over backwards or sideways.
• DO NOT tip or wheelie the wheelchair without
assistance, unless you are highly skilled.
• DO NOT attempt to stop a moving wheelchair with
wheel locks. Wheel locks are not brakes.
• DO NOT stand on the frame of the wheelchair.
• DO NOT over-inflate the tires.
• ALWAYS use caution when transferring in or out of
the wheelchair. Every precaution should be taken
to reduce the transfer distance. Also be certain the
wheel locks are engaged to prevent the wheels
from moving.
Whirlwind Wheelchair International, San Francisco State University, 1600 Holloway Avenue, SCI 251, San Francisco, CA 94132-4163 USA
Phone: 415.338.6277, Fax: 415.338.1290, E-mail: [email protected]
Your RoughRider™
Basic Riding Skills
Maintenance and Repair
CAUTIONS:
• Riding over curbs or obstacles can cause tipping
and serious bodily harm. If you have any doubt that
you can safely cross any curb or obstacle, ALWAYS
ASK FOR HELP. Be aware of your riding skills and
personal limitations. Develop new skills only with the
help of a companion.
• Using Anti-Tippers substantially reduces your risk of
falling over backwards, which can cause serious
injury. If you are afraid of tipping over, use the AntiTippers. The Anti-Tippers will keep you from falling
over, but they will limit your ability to be pulled up
curbs and some other maneuvers. Just as children
learn to ride bikes without training wheels, you may
be able to learn to use your wheelchair without AntiTippers. WHIRLWIND STRONGLY RECCOMENDS THAT
YOU USE ANTI-TIPPERS WHILE YOU ARE LEARNING TO
RIDE YOUR WHEELCHAIR. • Always wear your seat positioning strap. Whirlwind
recommends using a seat positioning strap as an
additional safeguard against falling out of your
wheelchair. If your seat positioning strap becomes
lost or worn, contact Whirlwind for a replacement.
• The RoughRider is not designed for weight training
and is unsafe for use as a seat while weight training.
Weight training from the RoughRider substantially
changes the stability of the chair and may cause
tipping.
Whirlwind RoughRider™ User Manual
www.whirlwindwheelchair.org
USER MANUAL
Your RoughRider®
USER MANUAL
USER MANUAL
USER MANUAL
The RoughRider wheelchair’s innovative design helps
you ride more easily and safely:
• Over rough ground without tipping forward.
• Over soft surfaces, without the front wheels getting
stuck.
• Down and across slopes, with minimal effort and
much less risk of tipping.
The RoughRider is compact, tough, and has a comfortable
seat.
The RoughRider’s folding frame makes travel easy on
buses and automobiles. The RoughRider was designed with
few removable components to minimize the loss of parts.
The RoughRider was also designed for easy repair and
maintenance using commonly available parts and tools.
www.whirlwindwheelchair.org
page 1
USER MANUAL
CAUTION
Who is the RoughRider for?
USER MANUAL
USER
To avoid potential injury, the RoughRider should only be used by someone who
can MANUAL
meet the
following criteria:
USER MANUAL
Pressure Management - The single most important criterion. If you have limited or no
sensation (feeling) you must be able to manage the pressure on your body to use the
RoughRider safely (e.g., proper techniques for self care, pressure relief, skin care). A pressure
ulcer can form after only 20 minutes of sitting without pressure relief. You must always have
an appropriate, high quality pressure relief cushion (and know how to care for it) to use with
the RoughRider.
Head and Trunk Control - The RoughRider’s sling-type backrest may not be suitable for you
if you have weak or absent trunk muscles, as you may not have enough muscle support to
maintain a desirable riding position. Using the RoughRider with inadequate trunk control could
lead to the development of scoliosis (curvature of the spine). If you are not able to support your
head independently, you should not use the RoughRider, as it does not provide any head
support.
Size and Fit – The RoughRider is designed for riders with hip widths between 31.5–48.5 cm*
(12.5–19 in.), and an upper leg length longer than 40.7 cm (16 in.). The length measurement is
taken while seated and measures from back of pelvis to back of lower leg. With some standard
modifications however, the RoughRider may be suitable for riders outside of these ranges. See
end of section for more information. *Seat widths may vary depending on manufacturer.
Rider Weight – The RoughRider is designed and rigorously tested for riders up to 220lbs in
weight. Riders who weigh over 220 lbs should not use the RoughRider because the wheelchair
may be unstable and tip over.
WARNING
Where can you go in your RoughRider?
Obstacles and slopes – The RoughRider is designed to perform well on some rough surfaces and
provide for independent navigation of some obstacles. Because of the great variety of surfaces
and obstacles you will encounter, Whirlwind’s does not claim that the RoughRider will be stable
in all circumstances. Whirlwind recommends EXTREME CAUTION when traversing uneven
surfaces and slopes. ALWAYS use an assistant when necessary. Whirlwind is not liable for
bodily injury resulting from use of the RoughRider. Users travel AT THEIR OWN RISK and
Whirlwind recommends using good judgment and caution before traveling over obstacles or on
rough, uneven, sloped terrain. Please be safe and AVOID INJURY.
page 2
www.whirlwindwheelchair.org
Your RoughRider
Basic Riding Skills
Maintenance and Repair
RoughRider Specifications
Effective Seat Widths: *
14 in., 15.7 in., 17.4 in., 19 in.*
Seat Depth:
16 in.
Seat Height:
19 in. at front of seat
Seat Angle:
12 degrees
Seat to Back Angle:
90 degrees
Back Height:
17 in. standard, 15 in. and 19 in. custom
Footrest Height from Front of Seat:
10–14.75 in.
Rear Wheel Dimensions:
24 x 1.75 in. standard
Rear Wheel Camber:
3 degrees
Rear Wheel & Caster Barrel Bearings:
6201 (12mm ID x 32mm OD)
Axles:
1/2 in.
Push Rim Diameter:
19 in.
Front Wheel Dimensions:
4.3 in. diameter x 3.1 in. width
Front Wheel Bearings:
Standard bicycle hub and bearing
Overall Width:
9 in. + Seat width
Overall Length:
Shortest 36 in.; longest 39 in.
Wheelbase (Front to Rear Axle):
Shortest 19 in.; longest 22 in.
Rear Wheel Position Adjustment:
5 positions over 3 in.
Weight:
41 lbs
*seat fabric will be narrower than effective seat width
**RoughRider specifications: numbers are approximate
Whirlwind RoughRider™ User Manual
page 3
USER MANUAL
USER MANUAL
USER MANUAL
RoughRider™ Components
USER MANUAL
Side Frame
Back and Seat
Upholstery
Cushion
Rear Wheel
Push Rim
X-Brace
Wheel Lock
Footrest
Caster Barrel
Caster Fork and
Caster Wheel
IMPORTANT
Upon receiving your RoughRider, please make a note of how the components are adjusted so that
you can easily adjust them in the future. It is recommend that you write down the following
critical measurements and refer to them when performing inspections or maintenance on your
RoughRider:
Seat Width
Seat Height
Footrest Height
page 4
_______________in.
_______________in
Right __________in
Left __________in
(measured between inside edges of side frames)
(measured from floor to front edge of seat)
(measured from front edge of seat to back edge
of foot plate)
www.whirlwindwheelchair.org
Your RoughRider
Basic Riding Skills
Maintenance and Repair
RoughRider™ Features
Long Wheelbase
Small diameter caster wheels fit under the footrests, resulting in
a longer distance between the rear wheels and caster wheels
without making the chair longer overall. The small wheels also
allow you to maintain a low knee height, so that your knees can
fit under tables.
What are the advantages of a longer wheelbase?
• Prevents tipping (better forward stability) when traveling over
uneven terrain, such as rocks or uneven dirt roads.
• Easier to push because more weight is on the rear drive wheels,
and less on your front caster wheels, which gives you better
traction on uneven ground and makes it easier to roll straight on a
side slope.
Foldable X-Brace
Why have a foldable X-brace?
• Chair folds flat for easy storage and
transport. If your chair does not fit
under or behind the rear seat of a van or
bus, you could be charged double or
triple for transport.
• Chair width can be easily changed by
substituting a different size X-brace and
upholstery.
Whirlwind RoughRider™ User Manual
page 5
USER MANUAL
Pneumatic Rear Tires
USER MANUAL
USER
Most RoughRiders come with all terrain pneumatic
tires MANUAL
(mid to
heavy-weight), that fit on standard wheel rims (24 x 1.75 in.)
However, you might prefer light-weight tires and rims
if you
will be
USER
MANUAL
mostly riding indoors or in well-paved urban environments.
Why use pneumatic (air filled) rear tires?
Because wider, sturdier, pneumatic tires provide better:
• Shock absorption - air filled inner tubes absorb bumps
better than standard hospital wheelchair tires that are
made of solid rubber.
• Durability - thicker, knobbier tires last longer on rough
roads than standard wheelchair tires that are thin and have
little tread.
• Repair and replacement options - pneumatic tires are
available wherever bicycle parts are sold and eliminate
the need to search for special wheelchair tires. Solid
rubber tire inserts may be an option to avoid punctures.
Wheel Locks
“Parking Brakes” Stabilize your chair when
it is stopped for easier and safer transfers,
reaching, weight shifting, etc.
Parking brakes should not be used to slow
the chair because it will quickly wear down
the tread of the tires.
“Zimbabwe” Caster Wheels
Why use “Zimbabwe” caster wheels?
• The flexible rubber design provides a
smooth ride over rough ground including
cracks, stones, and other small obstacles.
• The wide wheel “floats” over soft ground
without getting stuck.
• The V-tire profile reduces the sticky
contact area of the tire so that it swivels
easily on hard surfaces.
page 6
www.whirlwindwheelchair.org
Your RoughRider
Basic Riding Skills
Maintenance and Repair
Adjustable Rear Wheel Position
The RoughRider’s rear wheels have five positions.
Why have an adjustable rear wheel position?
An adjustable rear wheel position optimizes stability and
performance for riders of differing abilities.
With your rear wheels further forward:
• Your chair will be easier to push because there is less weight on the
front wheels.
• Your chair will resist turning downhill on a side slope.
• It will be easier to go over obstacles.
• It will be easier to perform wheelies.
With your rear wheels further back the chair will be less likely to tip
backward.
Start with the rear wheel in a position that feels secure to you. As your
skill level increases with practice, the wheel position can be adjusted
forward.
Your Cushion
If you have limited feeling in your buttocks, you should use
a high quality foam cushion that is highly resilient. If you
do not use a suitable cushion you are likely to develop a
pressure sore. You should also perform regular pressure
relieving exercises (see the Basic Riding Skills section for
more instruction and information about limited feeling).
A cushion can also make you feel more comfortable and
can promote good posture. If you use a cushion, make sure
your footrests are well adjusted so that your weight is
evenly distributed on the cushion.
Whirlwind RoughRider™ User Manual
page 7
USER MANUAL
Seat Angle
USER MANUAL
The RoughRider was designed with 12 degrees of seat tilt.
USER MANUAL
Why does the RoughRider have seat tilt?
USER
MANUAL
• Seat tilt makes sitting feel more natural and
comfortable;
the
back-tilted position helps keep your trunk upright.
• Seat tilt helps you resist falling forward out of the chair (e.g. when
you are stopped suddenly by a bump).
Standard
chair
with little seat tilt
RoughRider with
12 degrees seat tilt
Rider
slumps
forward and uses
effort to sit.
Rider can reach
farther back to
push and can sit
upright with less
effort.
Cambered Rear Wheels
Cambered wheels tilt inward at the top of the wheel and
outward at the bottom. The RoughRider has approximately 3
degrees of camber.
Why have cambered wheels?
• More stability side to side because the chair is wider at the
bottom.
• Easier to push the push rims because they are in line with
your shoulders,closer to you, and angle outwards slightly.
Footrests
The RoughRider’s footrests:
• Are adjustable to accommodate users of different
heights.
• Fold out of the way for easier transfer.
page 8
www.whirlwindwheelchair.org
Your RoughRider
Basic Riding Skills
Maintenance and Repair
Common Modifications
For Shorter Riders
Shorter Seat Depth - If your upper legs are shorter than
40.7mm (16 in.), as measured from back of pelvis to back of
lower leg, you can shorten the effective seat length by:
• Asking the manufacturer (or a local metalworker) to
shorten the seat tubes at the front and to make custom seat
fabric to fit the new sized tubes;
• Adding foam behind your back so that you are sitting
further forward (you may also want to move your rear
wheels forward).
Shorter Back Height – Some manufactures may be able to customize
the back height for you, if you prefer a shorter back height.
For Taller Riders
If you are taller than 1.8m (6 ft.), you may need to make some
modifications to make the chair fit better. This is especially
important if you do not have full feeling in your body.
In order to bear more weight under your thighs and less on your
buttocks to prevent pressure sores, you can:
• Adjust footrests to their lowest position.
• Add dense foam under your normal cushion to lift you
up, if your thighs are still not bearing weight.
• Adjust your wheel position backward to stabilize your
higher center of gravity.
• Ask your manufacturer (or local metalworker) to make a
higher backrest for you. A higher backrest may be more
comfortable and support you better.
Whirlwind RoughRider™ User Manual
page 9
USER MANUAL
Optimal Riding for Amputees
If you do not have legs, you may want to:
• Move your rear wheels back to prevent yourself
from tipping backward.
• Remove the footrest(s) to minimize the weight of the
chair, unless you use the footrests to carry loads or
get in and out of the chair.
USER MANUAL
USER MANUAL
USER MANUAL
Calf Strap and Lap Belt
You may want to add a calf strap to your RoughRider to
keep your feet from slipping backward off the footrests.
You can add a calf strap by wrapping a piece of material,
such as webbing or heavy cloth, around the footrest tubes.
A seat positioning belt may be useful to improve your
control and keep your buttocks seated in the wheelchair.
A lap belt can also help you feel more secure when riding
your wheelchair. You can add a lap belt by attaching two
strips of soft material, such as webbing, to the guide tubes
(the inner curved tube on side frame) or to the back tubes
and connecting the strips together with a buckle.
WARNING
Prevent areas of high pressure: It is very important when using both the lap belt and the calf
strap to prevent the strap material from creating areas of high pressure. If you use a calf strap or
lap belt make sure to routinely check the skin of your lap and the back of your legs and feet for
signs of pressure sores. Refer to the Basic Riding Skills section for more instruction and
information about limited feeling and skin checks.
page 10
www.whirlwindwheelchair.org
USER MANUAL
USER MANUAL
Know Your Capabilities and Limits
USER MANUAL
WARNING
USER MANUAL
The first step in learning how to ride your RoughRider wheelchair is to know its capabilities and
limitations. To avoid injury, you also need to know your own capabilities and limitations. This
knowledge will help you decide what you can do on your own and when you will need to ask for
help.
Get a Helper
Have your
helper hold a
strap under
the push
handles
Find someone who can help prevent you from
falling or tipping over while you practice riding
in your new RoughRider. It is recommended that
your helper be with you at all times while you
practice.
The helper should stand where he/she can catch
you or the chair and stop you from falling. The
safest way this can be done is to have your helper
hold a strap or rope looped under the push
handles. This configuration minimizes the stress
on the helper’s back, should he or she need to
catch your chair.
Wear a Safety Helmet
Until you are experienced in using your wheelchair, we
recommend that you wear a safety helmet. The best helmets will
protect the back portion of your head, but do not restrict your
vision.
www.whirlwindwheelchair.org
Page 11
USER MANUAL
Lock Your Wheels
USER MANUAL
Why should you lock your wheels?
Locking your wheels, so they can't move easily, makes it easier and safer to reach,
stretch,
and bend
USER
MANUAL
over. Make sure the tires are fully inflated and the brakes are adjusted to hold the wheels tightly.
1.
2.
3.
USER MANUAL
Unlocked
Locked
How to lock your wheels:
• Grab the wheel lock lever.
• Pull the level up and all the way back (if the wheel locks are adjusted correctly, the brakes
should push in a bit on the tires. If the wheels are properly locked, it will be very difficult, if not
impossible, for the wheels to roll.
• To unlock the wheels, push slightly out and then down on the lever.
Shifting your Weight
It is important for you to know how far you can lean forward in your chair without tipping it over or
falling out of it. You must learn how far you can lean while still being able to return to an upright
sitting position. Try the following exercises with your helper on hand to assist you and keep you
from falling:
1. Lean Forward
2. Lean Backward
3. Lean Sideways
Why lean forward?
Lean forward to prevent tipping backward when you go:
• Up hills/ramps.
• Over curbs or up stairs.
• Over obstacles (such as thresholds).
• Down steps/curbs, in a backward position.
Leaning forward when going uphill
page 12
www.whirlwindwheelchair.org
Your RoughRider™
Basic Riding Skills
Maintenance and Repair
Why lean backward?
Lean backward to prevent falling forward or tipping
forward when you go:
• Downhill.
• Down steps.
1.
• Over curbs.
Leaning backward also distributes more weight on the
rear drive wheels, and less on your front caster wheels,
which:
• Gives you better traction on uneven ground.
• Makes it easier to roll straight on a side slope.
Leaning back when going
downhill
Why lean sideways?
Lean sideways to prevent you and your chair from
tipping over sideways when you:
• Travel across the side of a slope.
• Turn on a hill or ramp.
Leaning sideways when
going across a hill
IMPORTANT
To help you learn how steep a slope (up/down/sideways) you
can handle without tipping over, practice on slopes and
uneven terrain with someone who will help keep you from
falling. Practicing with a helper will give you experience in
knowing when you will need help in the future.
Whirlwind RoughRider™ User Manual
page 13
USER MANUAL
Pressure Relief
This section is for riders who:
• Do not have full feeling in their bodies, or
• Have poor blood circulation in their lower body, or
• Have a history of pressure sores, or
• Are at risk of developing a pressure sore.
USER MANUAL
USER MANUAL
USER MANUAL
IMPORTANT
Why is pressure relief important?
• A pressure sore can develop in as little as 20 minutes if
you have been sitting on the wrong surface.
• Pressure sores can develop on any part of the body.
• Pressure sores can result in infections and complications
that are among the most common causes of death for
wheelchair users worldwide.
• Factors that contribute to the development of pressure
sores include prolonged, unrelieved pressure over bony
areas of the body, shear force, heat, moisture, friction, and
trauma.
Stage 4 Pressure Sore.
At Stage 4, the sore extends into
muscle, tendon, or even the bone.
People with full feeling in their buttocks and legs frequently adjust their sitting position to
relieve the discomfort that can result from pressure after sitting only a few minutes in one
position. If you do not have full feeling in your buttocks and legs, it is important that you
shift your weight while riding, so that you are not seated in the same position for too long.
When you are seated, your pelvic bones put pressure on the muscles, tissues, and skin
underneath them. Skin requires a constant flow of blood, and when too much pressure is placed
on the skin, for example, when a person is seated in the same position for too long, the blood
cannot flow to the skin and without blood the skin can die. This causes pressure sores which
can take a very long time to heal and can even result in death. An infection very similar to a
pressure sore can also develop from a cut or scratch that hasn’t been properly cared for and is in
an area of high sitting or lying pressure. It is very important to take measures to prevent
pressure sores.
page 14
www.whirlwindwheelchair.org
Your RoughRider™
Basic Riding Skills
Maintenance and Repair
How to Prevent a Pressure Sore
Use a pressure relief cushion. If you have limited feeling in your buttocks, you should use a good
quality cushion made from firm foam that is highly resilient and springs back when compressed. Be
sure to replace the cushion when it starts to show signs of wear— signs of wear indicate that your
cushion is not relieving sitting pressure as well as it should.
Do pressure relief exercises. Lift your weight off your seat for 10-60 seconds at least once every
10-20 minutes (see following pages for how to do pressure relief exercises). If you have poor
circulation and/or decreased feeling in your legs and buttocks, you should do longer and more
frequent weight shifts; if you have feeling in your legs and buttocks and/or you are able to move
around while sitting, you can do shorter weight-shifts. Regardless of your current physical
capabilities, if you have had pressure sores in the past, you should perform more frequent and longer
weight shifts. You should also shift position at least every 2 hours while in bed, and make sure your
skin is kept clean and dry.
Do skin checks twice each day (once in the morning and once at night). You can use a mirror to
inspect areas you cannot easily see. If you are not able to see all areas of your skin, you may need to
have a friend or family member check your skin for you. Examine your skin, especially on or around
bony areas, looking for red or dark areas if you are light-skinned, or light, dry, flaky or ashy areas if
you are darker-skinned. Discoloration should go away within 30 minutes after pressure has been
released. Other signs of a pressure sore are skin that is warmer than normal and a hardening under
the skin.
Good Nutrition. You can help keep your skin healthy if you eat a well balanced diet and drink
plenty of water to stay hydrated.
If you see signs that pressure sore damage to the skin has already occurred, KEEP YOUR
WEIGHT OFF THE AREA AND SEEK TREATMENT IMMEDIATELY.
Whirlwind RoughRider™ User Manual
page 15
USER MANUAL
USER MANUAL
Pressure Relief Techniques
USER MANUAL
USER MANUAL
Remember: Shift your weight at least every 10-20 minutes. Each weight shift should last
from 10 to 60 seconds.
Push-Up
If you have good strength in your arms, you
can do a push-up by putting your hands on the
wheels or push rims and then pushing up until
your buttocks are off the cushion.
Forward Weight Shifts
Lean forward so your body rests on your
knees and the weight is lifted off your buttocks.
You can also try putting your feet on the
ground (lock your brakes first!) to allow you
to lean even farther forward and take more
weight off your buttocks.
If you find that when you lean forward you
cannot sit back up without assistance try one of
these alternate techniques.
Push Up
Lean forward
Feet on ground
OR, hook wrists
around back posts
Reach back and hold on to or hook your
wrists around the back posts before leaning
forward.
page 16
www.whirlwindwheelchair.org
Your RoughRider™
Make loops by sewing or tying pieces of
webbing, strong cloth or soft, thick rope (about
30cm or 12" long) to make a circle. Hook one
loop over each push handle, and hook your
wrists through the loops before you lower
your chest down to your lap. With practice,
you might be able to pull yourself back up to
sitting.
Lean forward and rest your arms and upper
body on a table or desk.
If you choose to use this technique, you should
check or have someone else check to make
sure that your weight really is off your
buttocks. It should be possible for you or the
other person to fit a hand between your
buttocks and the cushion of your chair without
too much effort.
Side-to-Side Weight Shifts
Do this once on each side.
Get next to a horizontal surface such as a desk,
table, bed or other surface which is low enough
for you to lean on. Rest your forearm and hand
on the surface and lean on it. Then push with
your other hand against the opposite side
wheel/push rim so you lean farther. This will
lift your buttocks up off the seat slightly.
OR, put your hands on the wheels/push rims
and lean to each side, lifting your buttocks off
the surface first on one side, and then on the
other, OR, just lean as far as possible to either
side.
Whirlwind RoughRider™ User Manual
Basic Riding Skills
Maintenance and Repair
OR, Use extension
straps
OR, lean
forward on a
table
Lean on table and
push up
OR, just lean to
each side
page 17
USER MANUAL
USER MANUAL
Leaning Back Weight Shifts
You can relieve pressure if you are able to lean
back far enough to lift your buttocks up off the
seat, as shown.
If you can wheelie safely, do so with your back
to a chair, bed, or couch. Tip your chair back
so your push handles are resting on the support.
This will take the weight off your buttocks.
When finished, lean forward while you pull
back on your wheels to tip your chair upright
again.
If you can’t wheelie, have someone help you
tip your chair back onto a chair, bed, or sofa.
The easiest way is for a helper to sit on the
chair/bed/sofa and tip you back until your push
handles are resting on the helper's lap.
page 18
Lean back
USER MANUAL
USER MANUAL
Lean back and
rest on a chair
OR, get a helper
to tip you back on
a chair
www.whirlwindwheelchair.org
Your RoughRider™
Basic Riding Skills
Maintenance and Repair
Moving Around
On flat, smooth ground the best way to push your chair is by using the push rims. If you need more
power on hills, ramps, or uneven ground, you can push on the tires or on the tires and push rims
together. Experiment with other techniques as you get used to your RoughRider.
Pushing Forward
1.
1. Grab the push rims with your thumbs along
the inside top edge of the push rim, with your
fingers wrapping around the push rim from the
outside.
2. If you can’t grasp the push rims, you can push
against them with the heels of your hands.
Pushing partly on the tires can help.
2.
Gloves can protect your hands and improve your
grip. You can also wrap inner tubes around the
push rims for better grip. Rubber band material
made for slingshots also provides good grip. If
you don’t have gloves, you can try wrapping
cloth, strong tape or a piece of inner tube around
the palm of your hand. This may help you get a
better grip making it easier to push the chair.
Pushing Uphill
When going up a slope, you may roll backward
when you take your hands off the push rims to take
another stroke. To avoid rolling backward, you can
alternate hands, so that you are always holding one
push rim while your other hand is moving back for
another stroke. You should also be leaning forward
when you are going uphill.
Sometimes it is easier to climb a hill by pushing
backward. Another technique (especially useful on
steep slopes) is to traverse the slope, pushing your
RoughRider across the slope at an angle rather than
straight up.
Whirlwind RoughRider™ User Manual
page 19
USER MANUAL
USER MANUAL
Transfers: Getting in and out of your
USER MANUAL
RoughRider™
USER MANUAL
Practice to figure out the best way for you to get in and out of your RoughRider. These are just
suggestions for how it might work. While you are learning, you should always have a helper
nearby. Practice on a soft surface to avoid injuring yourself if you fall.
The basics
For most people, it is best to have the wheelchair
at a 90 degree angle to whatever surface you are
transferring to or from.
Lock your wheels before attempting to transfer.
This will keep the wheelchair from moving
during your transfer so you won’t fall.
90 degrees
page 20
If you are able to use your legs to support some
of your weight, or if someone is helping you to
transfer, you may want to fold your footrests out
of the way. If you are not able to use your legs,
you might want to leave your footrests in place to
help support your feet during the transfer.
www.whirlwindwheelchair.org
Your RoughRider™
Basic Riding Skills
Maintenance and Repair
Transferring out of your RoughRider
1. Figure out where you want your legs to be.
If you can use your legs to hold some of your weight, you will probably want to keep them in
front of and underneath you so you can stand up and turn in the direction you need to go.
If you can’t use your legs to hold some of your
weight, you might want to move your feet over
so they are in front of where you are transferring
to so you won’t have to drag them when you
move your body.
Push up with your hands/arms (push against
the wheel, the side-frame or the seat cushion)
to lift your buttocks and move yourself
forward to the edge of your seat.
Get your hands set: Put one hand on the far
edge of the seat you are moving TO. Keep
your other hand on the wheelchair you are
moving FROM.
2. Move your
feet first.
3. Scoot yourself
forward to the
edge of the seat.
4. Get your
hands set
5. Lift up and
swing over
Using both hands to lift your body up, swing
yourself over your wheel and onto the other
chair.
6. Readjust
If you land in a bad position, readjust
yourself.
Whirlwind RoughRider™ User Manual
page 21
USER MANUAL
Transferring into your RoughRider
USER MANUAL
USER MANUAL
USER MANUAL
1. Adjust your legs
2. Get your
hands set
3. Lean forward, lift up
and swing over
4. Readjust
Transferring from your RoughRider to the floor
It is easiest to transfer to or from the floor if you have a support other than your chair to hold
onto, such as another chair, bench, step, or bed. Be sure to lock your wheels.
1. Get set
2. Push Up
and move
forward
3. Lower
yourself
4. Move onto
the floor
page 22
Put your chair across from the support with enough
room for your body to fit between your chair and the
support. Put one hand on the support surface. Put the
other hand on your RoughRider cushion, side frame
or wheel to push up and off.
Push up with your hands to lift your buttocks off your
wheelchair seat and move yourself towards the edge
of your wheelchair seat.
Keep supporting yourself with your hands as you
lower yourself towards the footrests.
Once you are sitting on the footrests, you can move
your buttocks off the footrests and onto the floor.
www.whirlwindwheelchair.org
Your RoughRider™
Basic Riding Skills
Maintenance and Repair
Transferring to your RoughRider from the floor
1. Get set
Lock your wheels and put your RoughRider next to
the support, with enough room between them for
your body.
2. Get onto
footrests
3. Push up
4. Slide into
your seat
Whirlwind RoughRider™ User Manual
Lean forward and lift your buttocks up by either
pushing down on the seat as shown in the picture or
by pulling up using the support surface or the
backrest tubes of the wheelchair until you are
sitting on the footrests.
Lean forward and push as shown in the picture
or pull on both the support surface and your
RoughRider seat or frame to lift yourself up to
the seat.
5. And adjust your
position.
page 23
USER MANUAL
USER MANUAL
™
Traveling with your RoughRider
USER MANUAL
Folding the RoughRider
USER MANUAL
1. Flip the footrests up against the side frames.
2. Pull up on the seat fabric until the chair
sides come together.
3. It may be helpful to have a piece of rope or
cord, an old inner tube, a strap, a strip of cloth,
or an elastic shock cord to tie around the side
frames to hold them together so the chair will
stay folded when it is picked up.
page 24
www.whirlwindwheelchair.org
Your RoughRider™
Basic Riding Skills
Maintenance and Repair
Riding Public Transportation / Buses
How to ride: The type of bus will determine how
you ride the bus. To get on the bus, enlist two or
more helpers to carry you on board OR drag
yourself up the stairs. Your chair can be put in
the back of the bus or on the roof of the bus.
Even if it is possible to ride the bus in your chair,
it is better to sit in the bus seat if you can because
it is usually safer. Keep your chair cushion with
you at all times to prevent loss.
A wheelchair rider in Nicaragua gets three helpers
to lift her and her RoughRider in through the back
of the bus. She has to tell them what part of her
chair they should grip
gri to pick her up: “The
“T push
N by the rear wheels or
handles and side frame. Not
I’ll end up on my head!”
“Wheelchair riders always have the right to use public transportation. We also have the
responsibility to help make public transport more accessible. The more we ride, as
difficult as it may be, the sooner public transportation will be truly accessible.”
-Ralf Hotchkiss
For information about how to help make buses and transportation systems more accessible, contact:
Access Exchange International
www.globalride-sf.org
112 San Pablo Avenue
San Francisco, CA 94127-1536 USA
(415) 661-6355
Whirlwind RoughRider™ User Manual
page 25
USER MANUAL
USER MANUAL
Maintenance and Repair
USER MANUAL
IMPORTANT
USER MANUAL
Routine maintenance can:
• Prevent breakdowns and excessive wear making your chair last longer, go farther, and cost
less to repair.
• Prevent injuries or long term damage to your muscles that result from sudden failures.
• Make your chair more comfortable and easier to use.
Some basic maintenance and repairs are explained in this section so that you will be able to keep
your RoughRider rolling as long as possible.
A bicycle mechanic may be able to help you with both maintenance and repair if needed. It is a
good idea to get to know a good mechanic who is close to where you live. Explain to the
mechanic how you use your wheelchair, and use the information in this manual to help your
mechanic understand how a wheelchair works.
After reading this section of the manual it is a good idea to discuss anything that is not clear with
the manufacturer, distributor, or an experienced Whirlwind RoughRider user. They should be
able to show you how to perform different maintenance and repair tasks.
In an emergency situation, you may be able to:
•
Drive the wheelchair with a flat or
completely missing tire by leaning your
weight away from the missing/flat tire
(though this will quickly damage the
wheel rim).
•
Drive the wheelchair without one of the
front casters by leaning your weight
away from the missing wheel.
It is always a good idea to carry an inner tube puncture repair kit and a bicycle pump with
you in case of emergencies. Whenever possible, you should also carry an adjustable wrench
and a screwdriver. You should also keep spare parts and tools available in your home for
easy access. Spare parts should include bearings, tubes, nuts, and cushions. Tools you should
have in your home include a second wrench, a small hammer, a spoke wrench, and a knife.
www.whirlwindwheelchair.org
Page 31
USER MANUAL
USER MANUAL
Maintenance Schedule
USER MANUAL
USER MANUAL
Routine maintenance can help prevent breakdowns and excessive wear. It will make your chair
last longer. Here is a calendar showing when to do basic maintenance tasks. For how to do the
specific maintenance go to the corresponding detailed descriptions.
RoughRider
part
Complete
description
on page
What to do
WEEKLY
Cushion
Tire Pressure
MONTHLY
Check for cleanliness or breakdown of foam and
structure. Clean when needed. Check your skin
condition daily.
Check tire pressure. Add air when needed.
Page 33
Page 44
Bearings
Basic Bearing Maintenance: Lubricate bearings in
caster wheels, caster barrels, and rear wheels with oil*
(see notes on recommended oil to use).
Page 34
Upholstery
Check for damage, wear and dirt. Clean or replace as
necessary.
Page 38
EVERY 2 MONTHS
Lubricate Wheel Locks with oil* (see notes on recommended oil to use).
Adjust to correct position. Lubricate moving parts.
Tighten nuts. Every other month OR when wheel
Wheel locks
locks are not holding chair in position OR when wheel
locks become difficult to lock.
Inspect and tighten spokes to true the wheels.
Every other month OR when spokes are broken or
Spokes
loose OR if wheels wobble when spinning.
Cleaning and
Routine
Inspection
Nuts and Bolts
Clean, lubricate, and inspect your RoughRider for
damage every 2 – 3 months if living in rough rural
environments where you are riding in dirt rather than
on paved roads; 2 - 3 times / year otherwise.
Tighten nuts and bolts.
During Cleaning and Routine Inspections.
2 – 3 TIMES / YEAR
Lubricate footrest pivot, folding stabilizer pivots, spoke threads, X-brace
pivot, and pivot tube with oil* (see notes on recommended oil to use).
Thorough Bearing Maintenance: Clean and repack
with grease* (see notes on recommended grease to
Bearings
use). 2 – 3 times / year if living in rough rural
environments; 1 time / year otherwise.
page 32
Page 43
Page 40
Page 41
Page 46 - 47
Page 48
Page 43
Page 35
www.whirlwindwheelchair.org
Your RoughRider™
Basic Riding Skills
Maintenance and Repair
Bearings
Maintaining your bearings will make them last longer and will help your chair roll more easily.
How to Make Your New Bearings Last Longer
•
Pack bearings with as much bearing
grease as possible. See Thorough
Bearing Maintenance section for how
to pack bearings with grease.
•
Install bearings with a washer made of
felt on outer sides of bearings under a
steel washer to prevent dust and dirt
from entering bearing.
*Recommended oil for basic maintenance: Heavier oil is better. The best oil
to use is 90 or 140 weight gear oil; the next best is 20 weight electric motor oil.
Do NOT use:
• Automotive engine oil. The detergent in automotive engine oil will mix with water.
• Common penetrating household lubricants and degreasers like WD40 should not be used.
Use of penetrating lubricants can damage the seals and remove grease. Bearing life will be
significantly shortened if you use your chair with ungreased bearings. Penetrating oils should
only be used for cleaning. After cleaning with a penetrating lubricant, repack the bearing with
grease (see Thorough Maintenance section).
• Light sewing machine or household oils. These oils are too light and will not stay in the
bearing for long.
Whirlwind RoughRider™ User Manual
page 33
USER MANUAL
Maintaining your Bearings
USER MANUAL
USER
MANUAL
Basic Maintenance (every month OR when you feel your chair slowing down
and you
don’t
have time to do more):
• Lubricate your caster wheel, caster barrel, and rear wheel bearings with oil*.
USER MANUAL
*Recommended bearing grease for thorough maintenance: One of
the best types of bearing grease is water resistant boat trailer ball bearing
grease. Automobile ball bearing grease is very good, but is less water
resistant.
page 34
www.whirlwindwheelchair.org
Your RoughRider™
Basic Riding Skills
Maintenance and Repair
Thorough maintenance for rear hub and caster barrel bearings
(2-3 times / year if in rough environment; 1 time / year otherwise)
•
•
•
•
•
•
To remove the bearings from the hub, remove the wheel from the wheelchair and take the axle
bolt out.
Reinsert the axle bolt at an angle so that the tip of the bolt contacts the inside face (inner race) of
the bottom bearing (see above left picture). Gently tap on the head of the axle bolt as you move
the bolt’s tip around the hole of the bearing until the bearing falls out. Hammer lightly; do NOT
hammer with force. Turn the wheel over and remove the other bearing. The same process can be
used to remove the bearings from the caster barrel. If the bearings will not come out, put some
light oil (not penetrating oil) around the bearings and try again later.
Once the bearings are removed carefully pop the seals off with the tip of a knife.
Clean all parts with kerosene making sure to get all of the dirt out. A brush such as a toothbrush
can also be helpful.
Allow to dry; then repack/reassemble bearings with as much bearing grease as possible.
Replace the seals.
Whirlwind RoughRider™ User Manual
page 35
USER MANUAL
USER MANUAL
Cone
USER MANUAL
Thorough maintenance for front wheel bearings
Axle
and balls
USER Cup
MANUAL
(2-3 times / year if in rough environment; 1 time / year
otherwise)
•
•
•
•
If caster fork has slots: Take the wheel out of the caster fork by loosening nuts until the wheel
drops out of the fork. If the caster fork does not have slots: Take the wheel out of the caster fork
by loosening nuts and screwing cones toward one side until axle is off center enough to pry out
of fork.
To disassemble bearings, unscrew the cones outward/away from wheel until balls fall out.
Clean all parts with kerosene.
Allow to dry; then replace the balls and reassemble bearings with as much bearing grease as
possible. Dipping the balls in grease will hold them in place and make assembly easier.
page 36
www.whirlwindwheelchair.org
Your RoughRider™
Basic Riding Skills
Maintenance and Repair
Repair or Replace your Bearings
If after being cleaned and repacked the bearings still do not move easily, you will have to replace
either the balls or the whole bearing.
Sealed bearings in rear wheel hub and caster barrel: If the bearing still does not move easily after
being thoroughly cleaned, replace the entire bearing.
Front wheel bearings (bicycle bearings):
Replace balls if broken or cracked. If the
wheel still does not move easily, inspect
cup and cone for damage. If the surfaces
that the balls roll on are obviously rough,
these parts should be replaced. If you need
help, a bicycle mechanic should be able to
do this.
Cone
Whirlwind RoughRider™ User Manual
Cup
page 37
USER MANUAL
Upholstery
CAUTION
IMPORTANT
USER MANUAL
USER MANUAL
USER MANUAL
Upholstery that is worn unevenly or otherwise damaged can be dangerous as it:
• Can cause uneven pressure on your buttocks or legs.
• Can cause you to sit in an uncomfortable position.
• Can rip suddenly and cause you to fall out of the chair.
By inspecting your upholstery regularly you will know when you need to replace your
upholstery. Your upholstery will not last as long as the wheelchair and will have to be replaced
over time. Make sure all bolts or screws that hold the upholstery in place are there. Replace any
missing bolts to make your upholstery last longer and prevent injury from upholstery failure.
It is important to keep the upholstery clean and dry because dirt and moisture (sweat, food,
drink, dust, mud, or other substances) can cause the upholstery to wear more quickly or rot. Soil
(dust/mud/etc.) can contain abrasive materials which may wear the upholstery away and cause it
to wear out much more quickly than if it is kept clean. Moisture can cause the upholstery to rot
and the fasteners, which hold the upholstery to the frame, to rust. If the upholstery stays wet it
can also stretch.
Maintaining your Upholstery
Inspect your upholstery 1 time / month and look for tears,
wear, dirt, or any metal parts sticking through the upholstery
that could injure you.
You can clean your upholstery by removing it from the chair.
Wash the upholstery with mild soap and water. Allow the
upholstery to dry thoroughly before putting the fabric back on
the wheelchair. You can also wipe the upholstery down without
removing it from the chair. If you wipe the upholstery, be
careful not to get the seat screws and other movable parts of the
wheelchair wet.
page 38
www.whirlwindwheelchair.org
Your RoughRider™
Basic Riding Skills
Maintenance and Repair
Repair or Replace your Upholstery
Upholstery stretches: The upholstery should be tight when the chair is open. As fabric stretches
over time the RoughRider’s seat will get wider. Your RoughRider should not get significantly
wider than its intended width. If your seat width is wider, you will have to work harder to push
your RoughRider since you will have to reach farther out to grab the push rims. If your seat is
more than 40mm (1.6 in.) wider than the original seat width you may be able to adjust your seat
fabric back to the original size by sewing new seams along the edges to make it narrower or by
moving the holes inward. Use your measurements when you originally received the chair to get
the correct width and height of the seat. If you are not able to correct your seat width it may be
time to replace your seat upholstery.
Holes in the upholstery: Avoid riding in a wheelchair that has holes or tears in the seat because
sitting on an uneven surface can cause bad posture and may increase the pressure on your
buttocks. If there are any holes or tears in your seat or seat back, either repair them or replace
your seat upholstery. If the holes are not too big, it should be possible to patch the holes. It is
best to use the same fabric as the original upholstery. If the holes are very large, or the upholstery
is so worn it cannot be patched (many holes, very faded, thinning, etc) you will probably need to
replace it.
Whirlwind RoughRider™ User Manual
page 39
USER MANUAL
Wheel Locks
USER MANUAL
USER MANUAL
USER MANUAL
WARNING
Loose wheel locks or wheel locks that aren’t adjusted correctly may not fully lock the wheels and
can cause you to fall while getting into or out of your chair, resulting in injury to you or damage to
the chair.
Maintaining your Wheel Locks
It should be very difficult to move your wheels
when they are locked.
• Check that the wheel locks are adjusted so that
they push in slightly on the tire (about ½ cm or
3/16 in.).
• Check that the nuts and bolts are all there and
sufficiently tight.
• Check your tire pressure. If your tires are
under- inflated your brakes may slip.
To adjust your wheel locks:
• Make sure that the wheels are sufficiently inflated
before adjusting.
• Loosen the bolt that holds the tube clamp tight
around the side frame tube.
• Move the wheel lock into a functional locking
position and retighten the clamp.
If the wheel locks are hard to operate and push too
much into the tires, the wheel locks are too close to the
wheel. Move them further away from the center of the
wheel.
page 40
www.whirlwindwheelchair.org
Your RoughRider™
Basic Riding Skills
Maintenance and Repair
Spokes
Loose or broken spokes can cause a wheel rim to bend. A few loose spokes will not necessarily
make riding more difficult; however, they may allow a wheel to collapse when going over a curb
or a big bump and can also make other spokes break more easily since there will be more tension
on them.
Maintaining your Spokes
To check for and tighten loose spokes, go around the wheel squeezing pairs of spokes together
with your fingers.
• If a spoke gives when you pull it gently, it needs to be tightened. Tighten loose spokes at the
nipple, where they meet the wheel rim, with a spoke wrench, turning each one a little bit at a
time.
• If a spoke does not give at all, it may be too tight. Loosen it by turning the spoke nipple the
opposite direction.
Another method for checking for loose spokes is to pluck each spoke with your fingernails. If a
spoke makes a sound noticeably lower in pitch than the other spokes, it should be tightened. If a
spoke makes a sound much higher in pitch than the other spokes, it may be too tight and should be
loosened.
To check the wheel’s alignment, lift the wheel off the ground and spin it while you look across it
from one edge. Your wheel should turn freely and smoothly with no wobble. You can also use a
stationary object (like your frame) to see if the wheel stays the same distance away while spinning.
If the rim is bending or wobbling to one side of the wheel, tighten spokes on the other side of the
bent part of the rim to center the rim. A bicycle mechanic will be able to do this if you need help.
To make sure your rear axle is tight, push sideways on the wheel rim. The wheel should not wobble
around the axle. The wheels should not touch the back tubes or rub against your clothes. Tighten the
nut(s) on your rear axle to eliminate the wobble. Make sure the wheel rotates easily; if the wheel
does not rotate easily the nut is too tight.
You may be able to check the wheel’s alignment while seated in your
chair by taking your weight off the wheel and suspending your wheel
in air while spinning it.
Whirlwind RoughRider™ User Manual
page 41
USER MANUAL
Replacing Broken Spokes
USER MANUAL
USER MANUAL
USER MANUAL
•
•
•
•
•
•
•
Remove tire and tube.
Remove broken spoke and insert the new spoke in the same direction as the broken spoke
(spokes on the same side of the hub should alternate directions).
Weave the new spoke in the same pattern as the other spokes (look very carefully at the
existing pattern to make sure you are doing it the same way).
Insert the threaded end of the spoke through the same hole in the rim that the broken spoke
went through. Thread the small end f the nipple through the hole in the rim and screw it onto
the end of the spoke.
If a spoke of the same length is not available a longer spoke can be used. Make a sharp bend in
the long spoke at the non-threaded end to the length needed. The bend in the spoke will hook
through the hole in the hub (see the above left two pictures). As you begin to tighten the nipple,
bend the hook end of the spoke back against the main shaft of the spoke.
Tighten the new spoke and adjust as many of the spokes around it as necessary to align the
wheel.
A bicycle mechanic will be able to do this if you need help.
page 42
www.whirlwindwheelchair.org
Your RoughRider™
Basic Riding Skills
Maintenance and Repair
Lubricating your RoughRider™
Consistently lubricating your RoughRider will keep all the moving parts operating smoothly and
efficiently. Use medium- to heavy-weight oil. Do not use common penetrating lubricants like
WD40 because they can damage the seals and remove grease. Bearing life will be significantly
shortened if you use your chair with ungreased bearings. Penetrating oils should only be used for
cleaning. After cleaning with kerosene or a penetrating lubricant, repack the bearing with grease
(see Maintaining Your Bearings section).
Apply oil to each of the following parts one drop at a time until the area is saturated and the part moves
smoothly.
X-brace pivot tubes, center pivot,
and folding stabilizer pivots
Bearings: Rear wheel, caster
wheel, and caster barrel
Footrest pivot tubes
Wheel locks
Spokes
Seat tubes and side frame
Put a tiny drop on each spoke
where it enters the nipple.
When chair is folded, rub candle
wax onto the contact surfaces
between seat tubes and side
frame. The wax will make
folding easier and prevent the
paint scraping off.
Whirlwind RoughRider™ User Manual
page 43
USER MANUAL
USER MANUAL
Tires
USER MANUAL
USER MANUAL
Maintaining the correct tire pressure:
• Increases the life of the tires, saving you money;
• Decreases the rolling resistance and saves you energy;
• Keeps your wheel locks working properly.
Check tire pressure by pressing with your thumb across the width of the tire. For average
pressure you should be able to barely depress the tire (about 5mm (3/16 in.)
The correct tire pressure will be different depending on different conditions. Higher pressure
(harder tires) helps the chair move faster, but is less comfortable, is harder to push on uneven
terrain, and can be slippery on wet pavement. Lower pressure (softer tires) is more comfortable
on uneven ground but the tire is more vulnerable to getting flats and can put more strain on your
arms and shoulders. If the tire pressure is not the same in both wheels, your RoughRider will
turn toward the side of the lower pressure tire.
Tool Kit for Tire Repair
Flat tires are inconvenient, but not a major problem as long as you are prepared to fix them. Try
to always carry a complete tire patch kit with you.
Pump
Rubber cement for tire patches
Sandpaper (cloth backed 60 grit
works best)
6 patches with tapered edge
Spare valve cap – metal type with
built-in wrench for valve core
Spare valve core
page 44
www.whirlwindwheelchair.org
Your RoughRider™
Basic Riding Skills
Maintenance and Repair
Repairing or Replacing Tires and Tubes
When tire tread gets very worn, or the tire is brittle or cracked, it is more likely to go flat, so be
ready to replace it.
If tire is not damaged and only the tube needs repairing:
• Remove tire by gently prying it outside the rim using a tire tool or a screwdriver with the edges
filed smooth (or the ends of spoon handles like the picture above). Pull tube out of tire.
• Carefully inspect inside of the tire for the cause of the puncture. The cause of the puncture may
be screws, thorns, glass, or other sharp material that may still be stuck in the tire tread and will
puncture the tire again if it is not removed.
• Find hole in tube by pumping halfway full and squeezing it. You may be able to find the hole
by the sound of escaping air. If not, put the tube under water. Squeeze the tube and watch for
bubbles escaping from the hole. Another way to do this is to rub soapy water on the tube and
watch for bubbles forming in the soap.
• Mark around the hole with a pen or pencil.
• Let any remaining air out of the tire.
• To repair tube, roughen the surface around the hole (about 25 cm (1 in.)) by rubbing the tube
with sandpaper. Make sure the surface is completely clean and dry.
• If there is glue, apply glue and wait about 30 seconds for glue to get tacky.
• Press on patch and let dry. For temporary repairs to torn tires wrap a strip of canvas around
inner tube 2-3 times.
• Replace tube and tire and re-inflate to desired pressure.
Whirlwind RoughRider™ User Manual
page 45
USER MANUAL
USER MANUAL
Cleaning your RoughRider™
USER MANUAL
USER MANUAL
Keeping the chair clean and dry helps keep the metal parts from rusting and the upholstery from
rotting. Cleaning also prevents damage caused by dirt or sand scraping against the chair’s moving
parts.
Clean the frame and upholstery as needed using water with a little
mild soap, making sure to rinse and dry it completely afterward.
Pay special attention to all moving parts, such as the axles, the caster
barrels, pivots where the chair folds, and areas where the upholstery
is fastened to the frame; dirt can be especially damaging to these
areas.
After each cleaning, and only after the chair is completely dry,
apply medium- to heavy-weight oil to all moving parts on the
chair (x-brace pivots, pivot tubes at the bottom of x-brace, folding
stabilizer pivots, wheel lock pivots, and footrest pivots) to prevent
rusting and to keep the moving parts moving smoothly.
page 46
www.whirlwindwheelchair.org
Your RoughRider™
Basic Riding Skills
Maintenance and Repair
Routine Inspections
IMPORTANT
Inspection of the chair’s frame for damage that needs repair is a good thing to do while you are
cleaning it. If tubes are bent, the wheelchair may be out of alignment and will not roll smoothly or
in a straight line. Cracks in the wheelchair’s tubes or joints are indications of where the
wheelchair may break completely and should be repaired as soon as possible.
To do routine inspections, look over your RoughRider
while not sitting in it to make sure there are no holes in
the upholstery, cracks in the welds, bends in the tubes,
loose nuts or bolts, bent axles, uneven footrests, or loose
handgrips. If you find major structural problems like
cracks or bends, you should have your RoughRider
repaired as soon as possible by a capable technical
professional (for example a bicycle mechanic or auto
repair technician) to prevent major failure.
This frame cracked after years of use
and was then repaired and reinforced.
Whirlwind RoughRider™ User Manual
page 47
USER MANUAL
Nuts and Bolts
USER MANUAL
USER MANUAL
USER MANUAL
Although your RoughRider has been designed with a minimum number of nuts and bolts, over
time and miles of travel, your RoughRider will experience vibrations and torque that can cause the
nuts and bolts to loosen. Loose fasteners allow unwanted extra movement in the chair and this
movement makes pushing your chair more difficult. Loose fasteners also make other parts, like the
brakes, hard to use. Tightening loose nuts and bolts will prevent parts from getting lost or broken
and will help your RoughRider roll more easily.
Tightening Nuts and Bolts
Inspect your RoughRider for loose nuts and bolts. If
loose, tighten them with a wrench. The center pivot bolt
of the X-brace should not be tight but the locknut used to
keep the bolt from falling out should be very secure and
hard to turn. You should be able to hold one caster wheel
down and lift the other 2 cm (3/4 in.) above the ground
with little effort.
Lock nuts or split nuts should be repaired if you notice
they are coming loose. See the Split Nut repair section for
a solution.
You should not have to use too much force to tighten a nut. If tightening is difficult, then the nut
may be cross-threaded on the bolt. If you tighten a cross-threaded nut, you can ruin the threads of
the bolt and that might make it difficult to remove the nut later.
page 48
www.whirlwindwheelchair.org
Your RoughRider™
Basic Riding Skills
Maintenance and Repair
Repairing or Replacing Nuts and Bolts
If a bolt cannot be repaired it should be replaced, but some repairs are
possible:
Rounded bolt head or nut? File two opposite sides of the bolt head
or nut until they are flat enough to get a good grip with a wrench. If
the bolt or nut will still not turn then the nut may be rusty.
Rusted nut? Apply a mixture of light oil and kerosene so that it can
flow onto the threads of the bolt and nut, then wait. Try to loosen the
nut periodically over the next few hours. If it is not possible to loosen
the nut, cut the head of the bolt off with a hacksaw, remove the bolt,
and replace it.
Your RoughRider uses lock nuts in multiple locations so they do not come loose from the vibrations
that happen during normal use. A lock nut is harder to turn than a regular nut and should not come
loose by itself. Your chair will come with either standard commercial “nylocks” or with Whirlwind
split nuts. A nylock is a nut with a nylon ring on the inside. If the nylock is easy to turn it has lost
most of its locking capacity and should be replaced. A Whirlwind split nut is a lock nut that can be
easily made with the correct size standard nut and basic tools (hacksaw and clamp/vise). A worn
out nylock can be replaced with a Whirlwind split nut.
To make a split nut:
• Firmly grip the nut on the top and bottom faces (as shown in bottom center photo).
• With your hacksaw blade slightly off center, cut halfway through the nut.
• Squeeze the nut in a vise or clamp or smash it with a hammer to close the slit (as shown in
bottom right photo).
• When putting the nut on your RoughRider place it so the wider slice screws on first.
If the Whirlwind split nut becomes easy to turn it may be able to be repaired.
To repair a Split nut:
• Check that the slit is cut half way through one side of the nut. If it is cut less than half way
through, use a hacksaw to complete the cut to half way.
• Squeeze the nut in a vise or smash it with a hammer to ensure the slit is closed.
Whirlwind RoughRider™ User Manual
page 49
USER MANUAL
USER MANUAL
Footrests
USER MANUAL
USER MANUAL
Footrests must be at the correct height to maintain a good sitting position and pressure relief.
Check to make sure that your footrests are at the proper height for your best sitting posture. You
might want to mark the frame where they should be to make it easy to check their alignment. Your
feet should rest lightly on the footrests when you are sitting in your best position in the seat and you
should have even pressure over the entire surface of your seat.
If your footrests are too low, you will tend to slide forward in your seat to keep your feet on the
footrests. Sliding forward in your seat can cause bad posture, make you uncomfortable, and cause
pressure sores if you have no sensation in your buttocks.
If the footrests are too high there is more pressure on your buttocks which may be uncomfortable
and can cause pressure sores.
Footrest Too Low
Correct Footrest Height
Footrest Too High
Better sitting posture
Knees Up
Moves you
Forward
Feet Low
High
Pressure
To adjust the footrest, loosen the bolt on
the footrest clamp tube. Move the footrest to
the correct position and tighten.
You will have to adjust your footrests while
not in your chair or get someone else to help
you.
page 50
www.whirlwindwheelchair.org
Your RoughRider™
Basic Riding Skills
Maintenance and Repair
Handgrips
CAUTION
Loose handgrips can cause serious injury if they slip off while someone
is pulling the chair; especially pulling up stairs or curbs.
Check to make sure your handgrips are tight by pulling on them as
if you are trying to remove them.
If you can pull the handgrips off, they must be re-glued using
strong glue. A very good glue is heavy duty contact cement that is
made especially for installing automobile weather-stripping.
If strong glue cannot be found, remove the handgrips completely
and be cautious when lifting the chair by the bare handles.
Whirlwind RoughRider™ User Manual
page 51
USER MANUAL
USER MANUAL
Troubleshoot: If your RoughRider™ Does
USER MANUAL
Not Roll Straight
USER MANUAL
If one wheel has more resistance than the others, your chair will turn to the side to which that
wheel is attached. This turning occurs because the wheel is rotating slower on that side, as if you
were braking or pulling on it. This resistance will also make you work harder when pushing
because you will have to compensate for this unevenness.
Check to see if the chair rolls in a straight line. Find a flat area with as few bumps as possible.
Roll your RoughRider at a medium speed while trying to push equally on each wheel. Let go
without shifting your weight and see if your RoughRider drifts to one side. If it does, this is
usually the side that is affected by one of the problems below. After trying any of the solutions
below, check to see if your chair rolls in a straight line.
Observe. Look at the chair on a flat surface and notice what doesn’t look straight. Look at the
caster barrels, caster wheels, rear wheels, and side frame.
Uneven Tire Pressure
A chair will turn toward the tire with the lower pressure.
Solution: Equalize the pressure in the two tires either by pumping up the lower pressure tire or by
releasing some of the pressure in an over inflated tire.
Dirty or Damaged Bearings
A chair will turn toward the side of the chair where the bearing is sticking (like braking on one side).
Solution: Check the bearings in the caster wheel and rear wheel. See Bearings section; Check and
clean or replace bearings as appropriate.
Stuck X-Brace
A chair will turn toward one side if the X-brace pivot does not move easily or is jammed so that one
caster wheel is suspended above the ground. You should be able to see if this is the problem if you
look at how your 4 wheels contact a flat surface when you are seated in the chair.
Solution:
• Loosen X-brace center bolt. The center bolt should not be tight. There should be approximately
0.5 cm between the locknut and the square tube. With a person seated in the chair, you should
be able to hold one caster wheel down and lift the other 2 cm (3/4 in.) above the ground with
little effort.
• Check to make sure that there is a good locknut (nylock or split nut) to keep the X-brace center
bolt from falling out. Another option for a locknut is to use two nuts to make a jam nut. Thread
the first nut onto the bolt. Thread the second nut onto the bolt and tighten it firmly against the
first nut to create a locked nut.
• Lubricate and manipulate the X-brace to loosen the joint.
page 52
www.whirlwindwheelchair.org
Your RoughRider™
Basic Riding Skills
Maintenance and Repair
Rear Axle Out of Alignment
A chair will roll with much greater resistance due to the scuffing on the ground caused by one wheel
pointing in or out (toe-in or toe-out).
Toe-in
Toe-out
Solution: Measure the distance between
the rear wheels at their front and rear
edges. Pick a point half-way up the wheel
(even with the axle) to make the
measurement. If the two distances are
within 6 mm (1/4 in.) of each other, the
wheels are ok.
If the distance of either measurement is
more than 6mm (1/4 in.), then, do the
following:
Measuring the distance between the rear wheels at
front and back of wheel
•
Check to see whether the axle bolt is bent. If it is bent, replace it. If the bend is minor, the axle
can be straightened by hammering it on an anvil. If it is not bent then,
•
Check the fit of the axle in the axle block hole. If the axle bolt fits loosely, the axle hole may
be deformed. You may have to move your wheels to a different axle position.
•
If the axle is straight and fits in the hole but the wheels are still not pointing in the same
direction, the axle block might not be straight. You may need to bend it back into alignment.
Check the angle of the axle block by putting multiple bolts into the block and measuring their
angle by referencing a perpendicular surface. Get the help of a mechanic with a very large
adjustable wrench; clamp the frame close to the axle block. Check very carefully for cracks in
the frame after making any bends. Weld shut and reinforce any cracks.
Check angle by
referencing to a
perpendicular
surface
Whirlwind RoughRider™ User Manual
Clamp frame
close to axle
block
page 53
USER MANUAL
Bent Caster Barrels
USER MANUAL
Have someone sit in the chair or put something nearly equal to your weight in the seat, then look to
USER MANUAL
see if the caster barrels are straight by checking whether the barrel and the side frame are parallel
with each other and at a right angle to the ground.
If a caster barrel is not vertical, the caster wheel will be pulled
in the direction that the barrel is tilted and the chair will turn to
that side.
USER MANUAL
Solution: Re-align the caster barrel. Get the help of a mechanic
with a very large adjustable wrench to bend the caster barrel so
that it is parallel with the side frame and perpendicular to the
ground. Check very carefully for cracks in the frame after
making any bends. Any cracks must be welded shut and
reinforced.
Caster Wheel Rubs on the Fork
A chair will veer to one side if the caster wheel rubs against the fork; friction will act like a brake on
the wheel and your RoughRider will pull to that side.
The caster wheel could be rubbing on the fork for two reasons: the caster fork could be bent or the
caster wheel is not centered in the fork.
The stem of the caster fork is bent – The chair will veer to
one side if the stems of both forks are not precisely at a right
angle to the axle of the caster wheel.
Tube over
caster stem
Solution: If the caster fork is bent at the junction between the
fork and the bolt (stem) get the help of a mechanic with a
large vise to straighten the fork; after making any bends,
check very carefully for cracks in the fork and where the fork
Caster fork in a vice
and stem meet. The angle between the fork and the stem
with
stem pointing up
should be 130 degrees. You can put the caster fork in a vise
with the bolt pointing upward. Be careful not to dent the fork
by clamping it too tight. You can protect the fork from the
jaws of the vise with two scraps of wood or heavy leather.
Put a thick-walled tube over the bolt and pull to change the
angle of bolt.
The caster wheel is not centered in
the fork.
Solution: If the caster wheel is not
centered on the axle, center it by
removing or adding washers.
Replace any missing nuts.
page 54
Remove or add
washers
Center wheel
in fork
www.whirlwindwheelchair.org
Your RoughRider™
Basic Riding Skills
Maintenance and Repair
Rear Wheel Rubs on the Side Frame
Cause 1: Your RoughRider will pull to one side if the axle bolt is loose. If the axle bolt is loose in
the axle block, the weight of the rider on the seat will cause the wheels to lean in at the top. If they
lean far enough, the wheel might rub against the side frame, friction will act like a brake on the
wheel and cause your RoughRider to turn toward that side.
Solution: Tighten the axle bolt. Replace any missing washers or
nuts. If the hole in the axle socket has become too large and too
loose, move your wheels to a different axle position.
Cause 2: The wheel is bent. If the wheel rim is bent, you can usually fix
it by adjusting the spokes.
Solution: Adjust and tighten the spokes as shown in Spokes section. If
the wheel rim is bent a lot, you must straighten it before adjusting the
spokes.
Cause 3: The axle block is bent relative to the frame.
Solution: Re-align axle block as shown in Rear Axle is Out of Alignment section.
Frame is Misaligned
If one of the side frames leans inward while you are riding the chair, the chair may turn away from
that side. The side frame of the chair leans inward when the ends of the seat tube on the same side
of the chair are bent inward.
Reinforcement Welded
Under Seat Tube
Solution: This repair requires two people. Clamp the square tube (cross tube) in a vise . Slide two
long (50-80cm) strong, thick- walled tubes over the ends of the bent seat tube until they are both
touching the square tube. At the same time, both people should carefully push (or pull) in the
opposite direction that the seat tube bent. Continue until the seat tube is straight. Hammering the
ends of the seat tube outward can correct the problem. If the side frame bends inward again, get a
good welder to re-align the entire X-brace and reinforce both seat tubes by welding in reinforcing
rods under the seat tube.
Whirlwind RoughRider™ User Manual
page 55