1
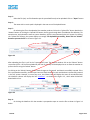
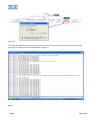
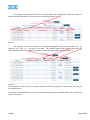
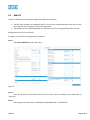
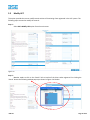
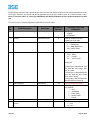
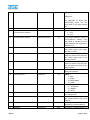
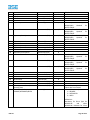
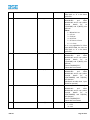
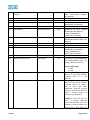
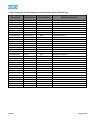
Step 4 :
Select respective Status , i.e, ‘OWN’,’CLIENT’ or ‘INSTITUTION’
Step 5 :
Select appropriate Category. (Client Type, Client Status and Client Category Mapping )
Step 6 :
Enter the Client Code field. Client code is restricted to 11 digits only except. No special characters are
allowed except for DOT(.),ASTERISKS(*),BACK SLASH(\), FRONT SLASH (/) and HYPEN (:)
Step 7 :
Enter all the other details as appropriate.
Step 8 :
After all the details are entered, click on “Submit” button to save the record. The UCC is registered and
“Client Added Successfully” is displayed on the screen.
Step 10 :
To continue to register another UCC, proceed to Step 2.
Step 11 :
The system also provides the option of batch/bulk insertion, where by the member has to upload the
batch file in the format specified below. This upload facility is the same “Upload” option mentioned above at
Figure 3 to 3.5 except for a change in the file format.
Step 12 :
The first column in the pipe separated file indicates the “N” for new record, “M” for modified records
and “I” for ignore records. Hence, when the user has to do insertion of a batch record, then a batch file in .txt
format having the necessary modification with the first column of the .txt file marked as “N” is uploaded
through the UCC->Upload option from the main menu. This file can be generated from the members back
office.
BSE Ltd.
Page 13 of 25