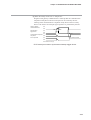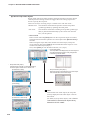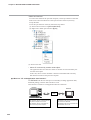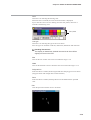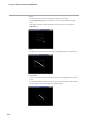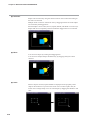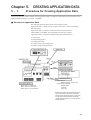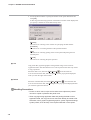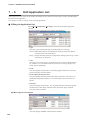
1
No. CP-SP-1088E
SMART TERMINAL
EST-Z Series
User’s Manual
Application Preparation
POW
ER
Thank you for purchasing the AP Editor
for Smart Terminal EST-Z Series.
This manual describes the smart
objects used when using AP Editor to
prepare application data for the EST-Z
Series.
This manual should be read by those
who use AP Editor to prepare EST-Z
Series screens and those in charge of
producing applications that determine
operation.
RESTRICTIONS ON USE
This product has been designed, developed and manufactured for general-purpose
application in machinery and equipment.
Accordingly, when used in applications outlined below, special care should be taken to
implement a fail-safe and/or redundant design concept as well as a periodic
maintenance program.
• Units for concerning to control and safety of transportation vehicles (automobiles, trains and ships, etc.)
• Traffic control systems
• Anti-disaster systems, anti-crime systems
• Safety equipment
• Medical equipment (not specifically designed for life support)
Never use this product in applications which require extremely high reliability, such as
those outlined below.
• Aeronautical machines
• Aerospace machines
• Submersible repeaters
• Nuclear reactor control systems
• Life support systems (medical equipment, etc.)
Never use this product in applications where human safety may be put at risk.
Never use this product as a safety switch or as an emergency stop switch.
Special care should be taken to implement a fail-safe and/or redundant design which
takes into account the possibility of operational delay, unit damage and malfunction of
this product.
REQUEST
Ensure that this User's Manual is handed over to the user before the
product is used.
Copying or duplicating this User's Manual in part or in whole is forbidden. The information and specifications in this User's Manual are subject to change without notice.
Considerable effort has been made to ensure that this User's Manual is
free from inaccuracies and omissions.
If you should find any inaccuracies or omissions, please contact
Yamatake Corporation.
In no event is Yamatake Corporation liable to anyone for any indirect,
special or consequential damages as a result of using this product.
C
2001 Yamatake Corporation ALL RIGHTS RESERVED
The smart terminal R is a registered trademark of Yamatake Corporation.
Other company names and product names listed in this manual are registered
trademarks or trademarks of respective companies.
i
SAFETY PRECAUTIONS
■ About Icons
Safety precautions are for ensuring safe and correct use of this product, and for
preventing injury to the operator and other people or damage to property. You
must observe these safety precautions. The safety precautions described in this
manual are indicated by various icons.
As the following describes the icons and their meanings, be sure to read and
understand the descriptions before reading this manual:
WARNING
CAUTION
Warnings are indicated when mishandling this product might
result in death or serious injury to the user.
Cautions are indicated when mishandling this product might
result in minor injury to the user, or only physical damage to
this product.
■ Examples
Triangles warn the user of a possible danger that may be caused by
wrongful operation or misuse of this product.
These icons graphically represent the actual danger. (The example on
the left warns the user of the danger of electric shock.)
White circles with a diagonal bar notify the user that specific actions are
prohibited to prevent possible danger.
These icons graphically represent the actual prohibited action. (The
example on the left notifies the user that disassembly is prohibited.)
Black filled-in circles instruct the user to carry out a specific obligatory
action to prevent possible danger.
These icons graphically represent the actual action to be carried out.
(The example on the left instructs the user to remove the plug from the
outlet.)
ii
CAUTION
Do not turn OFF the power or remove the CF card from the slot while
accessing the CF card. This may corrupt data in the CF card.
When using the application save function of the CF card on the system
screen of the EST, do not attempt to download or upload data while
accessing the CF card.
When the CF card is used for the recorder smart object, be sure to press the
[STOP] button of the recorder smart object, wait until [BUSY] changes to
[START], and then turn OFF the power or remove the CF card.
Before changing the screen of the EST to the system screen or before
downloading or uploading data when the CF card is used for the recorder
smart object, be sure to press the [STOP] button of the recorder smart object
and make sure that [BUSY] changes to [START].
Improper handling of the CF card may corrupt its data.
Yamatake shall not be held responsible for any defect or trouble arising from
improper operation made by the customer.
Strictly observe the following handling precautions:
• Do not bend or drop the CF card, or apply a strong shock to it.
• Do not splash water onto the CF card or expose it to the direct sunlight.
• Do not disassemble the CF card or insert metallic objects such as a clip into it.
Improper handling of the CF card may corrupt its data.
Yamatake shall not be held responsible for any defect or trouble arising from
improper handling made by the customer.
iii
The Role of This Manual
Outline of EST-Z Series Manuals
The below 9 manuals are provided to cover a range of EST-Z Series-related topics. Use the manual that best fits
your application. In the event such a manual is not available, contact us or your local EST-Z Series dealer.
Smart Terminal EST240Z User's Manual
Manual No.CP-UM-5145E
This manual is packaged with the EST240Z body.
This manual should be read by those who produce units that use the Smart
Terminal.
This manual contains safety precautions when using the Smart Terminal,
installation methods, and descriptions for wiring the power supply and
signal lines.
Smart Terminal EST555Z User's Manual
Manual No.CP-UM-5229E
This manual is packaged with the EST555Z body.
This manual should be read by those who produce units that use the Smart
Terminal.
This manual contains safety precautions when using the Smart Terminal,
installation methods, and descriptions for wiring the power supply and
signal lines.
Smart Terminal EST240Z User's Manual
Installation
Manual No. CP-SP-1065E
This manual should be read by those who use the EST240Z to design units
and those in charge of maintenance.
This manual describes safety cautions when using the Smart Terminal, how
to install for incorporating into units, wiring methods, maintenance and
inspection, troubleshooting, and hardware specifications.
Smart Terminal EST555Z User's Manual
Installation
Manual No. CP-SP-1103E
This manual should be read by those who use the EST555Z to design units
and those in charge of maintenance.
This manual describes safety cautions when using the Smart Terminal, how
to install for incorporating into units, wiring methods, maintenance and
inspection, troubleshooting, and hardware specifications.
iv
Smart Terminal EST-Z Series User's Manual
Application Preparation
Manual No. CP-SP-1088E
This manual.
This manual should be read by those who design screens that are
displayed on the EST-Z Series and operations.
This manual describes the environment of the personal computer on which
AP Editor can be used, installation methods, startup, system settings, file
operations, printing, how to paste smart objects, and other AP Editor
operations.
Smart Terminal EST-Z Series User's Manual
Smart Object Library
Manual No. CP-SP-1089E
Graphic elements that have functions for displaying on the EST-Z Series
are called “smart objects.”
This manual describes the concept of smart objects and the functions of
each smart object.
Smart Terminal EST-Z Series User's Manual
Communications Connection
Manual No. CP-SP-1090E
This manual should be read by those who combine the EST-Z Series with
PLCs made by other manufacturers and dedicated board computers to
build systems. This manual describes how to connect to PLCs, address
maps that correspond to PLCs, how to paste smart objects, drawing, and
other operations and settings required for making applications using PLCs.
Smart Terminal EST240Z User's Manual
DMC10 Package
Manual No. CP-UM-5149E
This package is used when constructing systems by connecting the
EST240Z to Yamatake’s Distributed Multi-channel Controller DMC10.
This manual describes the specifications of the software package, how to
use the package, how to install the software, and how to operate the
software.
Smart Terminal EST555Z User's Manual
DMC10 Package
Manual No. CP-SP-1124E
This package is used when constructing systems by connecting the
EST555Z to Yamatake’s Distributed Multi-channel Controller DMC10.
This manual describes the specifications of the software package, how to
use the package, how to install the software, and how to operate the
software.
v
Organization of This User’s Manual
This manual is organized as follows:
Chapter 1.
AP EDITOR FEATURES
This chapter describes the features of AP Editor functions and the system
configuration required for creating EST application data.
Chapter 2.
AP EDITOR INSTALLATION
This chapter describes the operating environment for AP Editor, and how
to install and uninstall AP Editor.
Chapter 3.
DESCRIPTION OF MAIN FUNCTIONS
This chapter describes the main functions of EST such as the recipe smart
objects (recipe data setting), trend smart objects and dedicated packages,
and the dedicated storage areas use by the recorder smart objects. It also
describes the recorder function and CF cards which are supported by the
EST555Z from the AP editor Ver. 4.0.00.
Chapter 4.
BASIC AP EDITOR OPERATIONS
This chapter describes how to start up and exit AP Editor, basic screens,
and the basic operations when creating applications on AP Editor.
Chapter 5
CREATING APPLICATION DATA
This chapter describes how to make application data using the sample
data provided.
Chapter 6.
TRANSFERRING APPLICATION DATA
This chapter describes how to transfer application data you have created
on AP Editor to EST, and how to transfer application data from EST.
Chapter 7.
EDITING APPLICATION DATA
This chapter describes in detail each of the items in editing of application
data.
Chapter 8.
PRINTING APPLICATION DATA
This chapter describes how to output application data to printers for
printing and how to output application data to file.
Chapter 9.
USING A DEDICATED PACKAGE
This chapter describes an outline of the dedicated package and how to use
the dedicated package.
Chapter 10.
SAVING APPLICATION DATA INTO CF CARD
This chapter describes how to save application data into CF card.
Chapter 11
TROUBLESHOOTING
This chapter describes the contents of error messages and how to remedy
errors. It also describes the troubles on CF cards and how to remedy them.
Appendices
Appendices describe how to confirm and update the IPL version, how to
operate keyboards, the structure of application data and AP Editor file, and
lists of related smart objects.
vi
Contents
SAFETY PRECAUTIONS
The Role of This Manual
Organization of This User’s Manual
Conventions Used in This Manual
Chapter 1.
AP EDITOR FEATURES
1-1 System Configuration and Outline • • • • • • • • • • • • • • • • • • • • • • • • • • • • • • • • • • • • • • • • • 1-1
■ About AP Editor • • • • • • • • • • • • • • • • • • • • • • • • • • • • • • • • • • • • • • • • • • • • • • • • • • • • • • • • 1-1
■ AP Editor Features • • • • • • • • • • • • • • • • • • • • • • • • • • • • • • • • • • • • • • • • • • • • • • • • • • • • • 1-1
■ Environment for Creating Application Data with AP Editor • • • • • • • • • • • • 1-1
1-2 Model Numbers • • • • • • • • • • • • • • • • • • • • • • • • • • • • • • • • • • • • • • • • • • • • • • • • • • • • • • • • • • • • 1-2
Chapter 2.
AP EDITOR INSTALLATION
2-1 Preparation • • • • • • • • • • • • • • • • • • • • • • • • • • • • • • • • • • • • • • • • • • • • • • • • • • • • • • • • • • • • • • • • 2-1
2-2 AP Editor Installation • • • • • • • • • • • • • • • • • • • • • • • • • • • • • • • • • • • • • • • • • • • • • • • • • • • • • • 2-2
2-3 Uninstalling AP Editor • • • • • • • • • • • • • • • • • • • • • • • • • • • • • • • • • • • • • • • • • • • • • • • • • • • • • 2-4
Chapter 3.
DESCRIPTION OF MAIN FUNCTIONS
3-1 Introduction• • • • • • • • • • • • • • • • • • • • • • • • • • • • • • • • • • • • • • • • • • • • • • • • • • • • • • • • • • • • • • • • 3-1
3-2 Dedicated Storage Areas • • • • • • • • • • • • • • • • • • • • • • • • • • • • • • • • • • • • • • • • • • • • • • • • • • 3-2
■ Introduction • • • • • • • • • • • • • • • • • • • • • • • • • • • • • • • • • • • • • • • • • • • • • • • • • • • • • • • • • • • • 3-2
■ Number of Dedicated Storage Areas Used • • • • • • • • • • • • • • • • • • • • • • • • • • • • • 3-2
■ Size of Dedicated Storage Area Used • • • • • • • • • • • • • • • • • • • • • • • • • • • • • • • • • • 3-4
■ Checking Usage Situation of Dedicated Storage Area • • • • • • • • • • • • • • • • • 3-5
3-3 Main Function • • • • • • • • • • • • • • • • • • • • • • • • • • • • • • • • • • • • • • • • • • • • • • • • • • • • • • • • • • • • • 3-6
■ Gateway Functions • • • • • • • • • • • • • • • • • • • • • • • • • • • • • • • • • • • • • • • • • • • • • • • • • • • • 3-6
■ Recipe Functions • • • • • • • • • • • • • • • • • • • • • • • • • • • • • • • • • • • • • • • • • • • • • • • • • • • • • 3-13
■ About Dedicated Package • • • • • • • • • • • • • • • • • • • • • • • • • • • • • • • • • • • • • • • • • • • • 3-20
■ About Recorder • • • • • • • • • • • • • • • • • • • • • • • • • • • • • • • • • • • • • • • • • • • • • • • • • • • • • • • 3-21
■ About Trend • • • • • • • • • • • • • • • • • • • • • • • • • • • • • • • • • • • • • • • • • • • • • • • • • • • • • • • • • • 3-29
■ Alarm Monitoring Information • • • • • • • • • • • • • • • • • • • • • • • • • • • • • • • • • • • • • • • • 3-30
■ About CF Card Application Data Save Function • • • • • • • • • • • • • • • • • • • • • • 3-32
Chapter 4.
BASIC AP EDITOR OPERATIONS
4-1 Starting up and Exiting AP Editor • • • • • • • • • • • • • • • • • • • • • • • • • • • • • • • • • • • • • • • • • • 4-1
■ How to Start up AP Editor • • • • • • • • • • • • • • • • • • • • • • • • • • • • • • • • • • • • • • • • • • • • • • 4-1
■ How to Exit AP Editor • • • • • • • • • • • • • • • • • • • • • • • • • • • • • • • • • • • • • • • • • • • • • • • • • • 4-2
■ How to Start up AP Editor in Other Language • • • • • • • • • • • • • • • • • • • • • • • • • • 4-2
4-2 About the Main Screen• • • • • • • • • • • • • • • • • • • • • • • • • • • • • • • • • • • • • • • • • • • • • • • • • • • • • 4-5
■ Main Screen • • • • • • • • • • • • • • • • • • • • • • • • • • • • • • • • • • • • • • • • • • • • • • • • • • • • • • • • • • • • 4-5
vii
■ Menu Bar • • • • • • • • • • • • • • • • • • • • • • • • • • • • • • • • • • • • • • • • • • • • • • • • • • • • • • • • • • • • • • • 4-5
■ Tool Bar • • • • • • • • • • • • • • • • • • • • • • • • • • • • • • • • • • • • • • • • • • • • • • • • • • • • • • • • • • • • • • • • 4-7
4-3 Basic Operations • • • • • • • • • • • • • • • • • • • • • • • • • • • • • • • • • • • • • • • • • • • • • • • • • • • • • • • • • 4-10
■ Basic Window Operations • • • • • • • • • • • • • • • • • • • • • • • • • • • • • • • • • • • • • • • • • • • • 4-10
■ How to Draw Shapes • • • • • • • • • • • • • • • • • • • • • • • • • • • • • • • • • • • • • • • • • • • • • • • • • • 4-14
■ Combined Key/Mouse Operations • • • • • • • • • • • • • • • • • • • • • • • • • • • • • • • • • • • • 4-19
■ Using Keys to Operate the Cross-hair Cursor • • • • • • • • • • • • • • • • • • • • • • • • 4-19
Chapter 5.
CREATING APPLICATION DATA
5-1 Procedure for Creating Application Data • • • • • • • • • • • • • • • • • • • • • • • • • • • • • • • • • • 5-1
■ Structure of Application Data • • • • • • • • • • • • • • • • • • • • • • • • • • • • • • • • • • • • • • • • • • 5-1
■ Procedure for Creating Sample Applications • • • • • • • • • • • • • • • • • • • • • • • • • • 5-2
5-2 Simple Sample Application Data • • • • • • • • • • • • • • • • • • • • • • • • • • • • • • • • • • • • • • • • • • • 5-3
■ About Sample Data • • • • • • • • • • • • • • • • • • • • • • • • • • • • • • • • • • • • • • • • • • • • • • • • • • • • 5-3
■ Creating New Applications • • • • • • • • • • • • • • • • • • • • • • • • • • • • • • • • • • • • • • • • • • • • • 5-4
■ Creating New Panels • • • • • • • • • • • • • • • • • • • • • • • • • • • • • • • • • • • • • • • • • • • • • • • • • • • 5-5
■ Placing Panel Change Switch Smart Objects • • • • • • • • • • • • • • • • • • • • • • • • • • 5-5
■ Placing Switch Smart Objects• • • • • • • • • • • • • • • • • • • • • • • • • • • • • • • • • • • • • • • • • • 5-8
■ Placing Numeric Indicator Smart Objects • • • • • • • • • • • • • • • • • • • • • • • • • • • • • 5-10
■ Displaying Text • • • • • • • • • • • • • • • • • • • • • • • • • • • • • • • • • • • • • • • • • • • • • • • • • • • • • • • 5-11
■ Drawing Shapes • • • • • • • • • • • • • • • • • • • • • • • • • • • • • • • • • • • • • • • • • • • • • • • • • • • • • • 5-13
■ Saving Application Data • • • • • • • • • • • • • • • • • • • • • • • • • • • • • • • • • • • • • • • • • • • • • • 5-14
■ System Register • • • • • • • • • • • • • • • • • • • • • • • • • • • • • • • • • • • • • • • • • • • • • • • • • • • • • • 5-16
Chapter 6.
TRANSFERRING APPLICATION DATA
6-1 Downloading Application Data to EST (PC to EST) • • • • • • • • • • • • • • • • • • • • • • • • 6-1
■ Communication Configuration • • • • • • • • • • • • • • • • • • • • • • • • • • • • • • • • • • • • • • • • • 6-1
■ Downloading Application Data • • • • • • • • • • • • • • • • • • • • • • • • • • • • • • • • • • • • • • • • • 6-3
■ About the Download Menu • • • • • • • • • • • • • • • • • • • • • • • • • • • • • • • • • • • • • • • • • • • • • 6-3
6-2 Uploading Application Data from EST (EST to PC) • • • • • • • • • • • • • • • • • • • • • • • • 6-5
■ Uploading Application Data • • • • • • • • • • • • • • • • • • • • • • • • • • • • • • • • • • • • • • • • • • • • 6-5
■ Uploading Data with Passwords • • • • • • • • • • • • • • • • • • • • • • • • • • • • • • • • • • • • • • • 6-6
6-3 Using IrDA (infrared communications)• • • • • • • • • • • • • • • • • • • • • • • • • • • • • • • • • • • • • 6-7
■ Operating Environment Required for Operating IrDA • • • • • • • • • • • • • • • • • • 6-7
■ Configuration of the Infrared Monitor • • • • • • • • • • • • • • • • • • • • • • • • • • • • • • • • • • 6-8
viii
Chapter 7.
EDITING APPLICATION DATA
7-1 Outline of Application Data • • • • • • • • • • • • • • • • • • • • • • • • • • • • • • • • • • • • • • • • • • • • • • • 7-1
■ Procedure for Creating Application Data • • • • • • • • • • • • • • • • • • • • • • • • • • • • • • • 7-1
■ Data Description • • • • • • • • • • • • • • • • • • • • • • • • • • • • • • • • • • • • • • • • • • • • • • • • • • • • • • • 7-2
7-2 About the Application Manager • • • • • • • • • • • • • • • • • • • • • • • • • • • • • • • • • • • • • • • • • • • 7-3
■ Application Information • • • • • • • • • • • • • • • • • • • • • • • • • • • • • • • • • • • • • • • • • • • • • • • 7-8
■ Thumbnail • • • • • • • • • • • • • • • • • • • • • • • • • • • • • • • • • • • • • • • • • • • • • • • • • • • • • • • • • • • • 7-9
7-3 Configuration Information • • • • • • • • • • • • • • • • • • • • • • • • • • • • • • • • • • • • • • • • • • • • • • • 7-12
■ Basic Settings • • • • • • • • • • • • • • • • • • • • • • • • • • • • • • • • • • • • • • • • • • • • • • • • • • • • • • • 7-12
■ Recipe Data Configuration • • • • • • • • • • • • • • • • • • • • • • • • • • • • • • • • • • • • • • • • • • • 7-18
■ Gateway Configuration • • • • • • • • • • • • • • • • • • • • • • • • • • • • • • • • • • • • • • • • • • • • • • • 7-24
7-4 Description of "Panel Data" and "Registered Graphic" • • • • • • • • • • • • • • • • • • 7-28
■ Panel Conditions • • • • • • • • • • • • • • • • • • • • • • • • • • • • • • • • • • • • • • • • • • • • • • • • • • • • • 7-28
■ How to Display Panels • • • • • • • • • • • • • • • • • • • • • • • • • • • • • • • • • • • • • • • • • • • • • • • 7-28
■ What is a "Background Panel?" • • • • • • • • • • • • • • • • • • • • • • • • • • • • • • • • • • • • • • 7-29
■ What is a "Registered Graphic?" • • • • • • • • • • • • • • • • • • • • • • • • • • • • • • • • • • • • • 7-30
■ Panel Data Edit Window • • • • • • • • • • • • • • • • • • • • • • • • • • • • • • • • • • • • • • • • • • • • • • 7-30
■ Registered Graphic Edit Window • • • • • • • • • • • • • • • • • • • • • • • • • • • • • • • • • • • • • 7-31
7-5 About Panel Data/Registered Graphic Editing Functions • • • • • • • • • • • • • • • • 7-33
■ Cancelling Operations • • • • • • • • • • • • • • • • • • • • • • • • • • • • • • • • • • • • • • • • • • • • • • • 7-33
■ Data Cut Buffer Operations, Duplicating and Deleting • • • • • • • • • • • • • • • 7-33
■ Selecting All Graphic Elements • • • • • • • • • • • • • • • • • • • • • • • • • • • • • • • • • • • • • • 7-34
■ Enter Graphic Elements • • • • • • • • • • • • • • • • • • • • • • • • • • • • • • • • • • • • • • • • • • • • • • 7-34
■ Changing the Background Color • • • • • • • • • • • • • • • • • • • • • • • • • • • • • • • • • • • • • 7-40
■ Changing the Position and Color of Graphic Elements • • • • • • • • • • • • • • 7-40
■ Edit Graphic Element List • • • • • • • • • • • • • • • • • • • • • • • • • • • • • • • • • • • • • • • • • • • • 7-42
■ Edit Device List • • • • • • • • • • • • • • • • • • • • • • • • • • • • • • • • • • • • • • • • • • • • • • • • • • • • • • 7-44
■ Configuring the Properties of Graphic Elements and Panel Data • • • • 7-46
■ Save Edit Data • • • • • • • • • • • • • • • • • • • • • • • • • • • • • • • • • • • • • • • • • • • • • • • • • • • • • • • 7-46
■ Specify No. and Save Edit Data • • • • • • • • • • • • • • • • • • • • • • • • • • • • • • • • • • • • • • 7-47
■ Changing Graphic Elements • • • • • • • • • • • • • • • • • • • • • • • • • • • • • • • • • • • • • • • • • 7-47
■ Editing Functions for Registered Graphics • • • • • • • • • • • • • • • • • • • • • • • • • • 7-47
7-6 Edit Application List • • • • • • • • • • • • • • • • • • • • • • • • • • • • • • • • • • • • • • • • • • • • • • • • • • • • • 7-48
■ Editing the Application List • • • • • • • • • • • • • • • • • • • • • • • • • • • • • • • • • • • • • • • • • • 7-48
■ Editing Functions • • • • • • • • • • • • • • • • • • • • • • • • • • • • • • • • • • • • • • • • • • • • • • • • • • • • 7-50
■ Sort Function • • • • • • • • • • • • • • • • • • • • • • • • • • • • • • • • • • • • • • • • • • • • • • • • • • • • • • • • 7-52
7-7 Editing Registered Strings • • • • • • • • • • • • • • • • • • • • • • • • • • • • • • • • • • • • • • • • • • • • • • • 7-53
■ Registered String Edit Window • • • • • • • • • • • • • • • • • • • • • • • • • • • • • • • • • • • • • • • 7-53
■ Editing Functions for Registered Strings • • • • • • • • • • • • • • • • • • • • • • • • • • • • 7-53
7-8 Editing Alarm Monitoring • • • • • • • • • • • • • • • • • • • • • • • • • • • • • • • • • • • • • • • • • • • • • • • • 7-55
■ Alarm History Configuration • • • • • • • • • • • • • • • • • • • • • • • • • • • • • • • • • • • • • • • • • 7-55
■ Alarm Block Configuration • • • • • • • • • • • • • • • • • • • • • • • • • • • • • • • • • • • • • • • • • • • 7-56
7-9 Others • • • • • • • • • • • • • • • • • • • • • • • • • • • • • • • • • • • • • • • • • • • • • • • • • • • • • • • • • • • • • • • • • • • 7-58
■ Display • • • • • • • • • • • • • • • • • • • • • • • • • • • • • • • • • • • • • • • • • • • • • • • • • • • • • • • • • • • • • • • 7-58
■ About Display • • • • • • • • • • • • • • • • • • • • • • • • • • • • • • • • • • • • • • • • • • • • • • • • • • • • • • • • 7-58
■ Options • • • • • • • • • • • • • • • • • • • • • • • • • • • • • • • • • • • • • • • • • • • • • • • • • • • • • • • • • • • • • • 7-61
ix
Chapter 8.
PRINTING APPLICATION DATA
8-1 Printing Options • • • • • • • • • • • • • • • • • • • • • • • • • • • • • • • • • • • • • • • • • • • • • • • • • • • • • • • • • • • 8-1
■ Output Options • • • • • • • • • • • • • • • • • • • • • • • • • • • • • • • • • • • • • • • • • • • • • • • • • • • • • • • • 8-1
■ Application Information • • • • • • • • • • • • • • • • • • • • • • • • • • • • • • • • • • • • • • • • • • • • • • • • 8-2
■ Panels/Registered Graphics • • • • • • • • • • • • • • • • • • • • • • • • • • • • • • • • • • • • • • • • • • • 8-3
8-2 Sample Printout• • • • • • • • • • • • • • • • • • • • • • • • • • • • • • • • • • • • • • • • • • • • • • • • • • • • • • • • • • • • 8-5
Chapter 9.
USING A DEDICATED PACKAGE
■
■
■
■
Using Only the Dedicated Package • • • • • • • • • • • • • • • • • • • • • • • • • • • • • • • • • • • • 9-1
Using the Dedicated Package with the User Application • • • • • • • • • • • • • • 9-2
Downloading the User Data of the Dedicated Package • • • • • • • • • • • • • • • • 9-3
Uploading the User Data of the Dedicated Package • • • • • • • • • • • • • • • • • • • 9-3
Chapter 10. SAVING APPLICATION DATA INTO CF CARD
■
■
■
■
■
■
■
■
Cautions for Saving CF Card Application Data • • • • • • • • • • • • • • • • • • • • • • • 10-2
Formatting CF Card • • • • • • • • • • • • • • • • • • • • • • • • • • • • • • • • • • • • • • • • • • • • • • • • • • 10-4
Environment Setup • • • • • • • • • • • • • • • • • • • • • • • • • • • • • • • • • • • • • • • • • • • • • • • • • • • 10-5
CF Card Menu Screen • • • • • • • • • • • • • • • • • • • • • • • • • • • • • • • • • • • • • • • • • • • • • • • • 10-6
Reading Data from CF Card (CF → HDD) • • • • • • • • • • • • • • • • • • • • • • • • • • • • • 10-6
Saving Data into CF Card (HDD → CF) • • • • • • • • • • • • • • • • • • • • • • • • • • • • • • • 10-7
Editing File on CF Card • • • • • • • • • • • • • • • • • • • • • • • • • • • • • • • • • • • • • • • • • • • • • 10-10
Supplemental Description • • • • • • • • • • • • • • • • • • • • • • • • • • • • • • • • • • • • • • • • • • 10-14
Chapter 11. TROUBLESHOOTING
11-1 Error Messages & Remedied Actions• • • • • • • • • • • • • • • • • • • • • • • • • • • • • • • • • • • • • 11-1
This section describes the messages in an alphabetical order.
[A] • • • • • • • • • • • • • • • • • • • • • • • • • • • • • • • • • • • • • • • • • • • • • • • • • • • • • • • • • • • • • • • • • • • • • • • 11-1
[C] • • • • • • • • • • • • • • • • • • • • • • • • • • • • • • • • • • • • • • • • • • • • • • • • • • • • • • • • • • • • • • • • • • • • • • • 11-1
[D] • • • • • • • • • • • • • • • • • • • • • • • • • • • • • • • • • • • • • • • • • • • • • • • • • • • • • • • • • • • • • • • • • • • • • • • 11-2
[E] • • • • • • • • • • • • • • • • • • • • • • • • • • • • • • • • • • • • • • • • • • • • • • • • • • • • • • • • • • • • • • • • • • • • • • • 11-2
[F] • • • • • • • • • • • • • • • • • • • • • • • • • • • • • • • • • • • • • • • • • • • • • • • • • • • • • • • • • • • • • • • • • • • • • • • 11-3
[ I ] • • • • • • • • • • • • • • • • • • • • • • • • • • • • • • • • • • • • • • • • • • • • • • • • • • • • • • • • • • • • • • • • • • • • • • • 11-3
[N] • • • • • • • • • • • • • • • • • • • • • • • • • • • • • • • • • • • • • • • • • • • • • • • • • • • • • • • • • • • • • • • • • • • • • • • 11-3
[O] • • • • • • • • • • • • • • • • • • • • • • • • • • • • • • • • • • • • • • • • • • • • • • • • • • • • • • • • • • • • • • • • • • • • • • • 11-4
[P] • • • • • • • • • • • • • • • • • • • • • • • • • • • • • • • • • • • • • • • • • • • • • • • • • • • • • • • • • • • • • • • • • • • • • • • 11-4
[R] • • • • • • • • • • • • • • • • • • • • • • • • • • • • • • • • • • • • • • • • • • • • • • • • • • • • • • • • • • • • • • • • • • • • • • • 11-4
[S] • • • • • • • • • • • • • • • • • • • • • • • • • • • • • • • • • • • • • • • • • • • • • • • • • • • • • • • • • • • • • • • • • • • • • • • 11-4
[T] • • • • • • • • • • • • • • • • • • • • • • • • • • • • • • • • • • • • • • • • • • • • • • • • • • • • • • • • • • • • • • • • • • • • • • • 11-5
[U] • • • • • • • • • • • • • • • • • • • • • • • • • • • • • • • • • • • • • • • • • • • • • • • • • • • • • • • • • • • • • • • • • • • • • • • 11-8
[W] • • • • • • • • • • • • • • • • • • • • • • • • • • • • • • • • • • • • • • • • • • • • • • • • • • • • • • • • • • • • • • • • • • • • • • • 11-8
[X] • • • • • • • • • • • • • • • • • • • • • • • • • • • • • • • • • • • • • • • • • • • • • • • • • • • • • • • • • • • • • • • • • • • • • • • 11-8
11-2 Troubleshooting about CF Card • • • • • • • • • • • • • • • • • • • • • • • • • • • • • • • • • • • • • • • • • • 11-9
x
Appendices
A-1 About IPL • • • • • • • • • • • • • • • • • • • • • • • • • • • • • • • • • • • • • • • • • • • • • • • • • • • • • • • • • • • • • • App.-1
■ How to Determine the IPL Version• • • • • • • • • • • • • • • • • • • • • • • • • • • • • • • • • • App.-1
■ How to Update the IPL/BIOS• • • • • • • • • • • • • • • • • • • • • • • • • • • • • • • • • • • • • • • • App.-3
A-2 List of Key Operations Used in Editing• • • • • • • • • • • • • • • • • • • • • • • • • • • • • • • • • App.-5
■ Key Operations When Entering Graphic Elements • • • • • • • • • • • • • • • • • App.-5
■ Key Operations When Selecting Graphic Elements • • • • • • • • • • • • • • • • App.-5
A-3 Cursor Operation • • • • • • • • • • • • • • • • • • • • • • • • • • • • • • • • • • • • • • • • • • • • • • • • • • • • • • App.-6
A-4 Files Created by AP Editor • • • • • • • • • • • • • • • • • • • • • • • • • • • • • • • • • • • • • • • • • • • • • App.-7
■ Application Data Representative Files and Data File Groups • • • • • • • App.-7
■ Folder Structure and Auxiliary Data File Groups • • • • • • • • • • • • • • • • • • • App.-7
A-5 Smart Object Tables • • • • • • • • • • • • • • • • • • • • • • • • • • • • • • • • • • • • • • • • • • • • • • • • • • • App.-9
■ Basic Smart Objects• • • • • • • • • • • • • • • • • • • • • • • • • • • • • • • • • • • • • • • • • • • • • • • • App.-9
■ Instrumentation Smart Objects• • • • • • • • • • • • • • • • • • • • • • • • • • • • • • • • • • • • App.-10
Conventions Used in This Manual
The following conventions are used in this manual:
Handling Precautions
: Handling Precautions indicate items that the user should pay attention
to when handling the EST.
Note
: Notes indicate useful information that the user might benefit by
knowing.
(1), (2), (3)
: The numbers with the parenthesis indicate steps in a sequence or
indicate corresponding parts in an explanation.
[Edit], [OK]
: Indicates a button or message displayed on the PC’s screen.
[Shift] key, [↑] key
: Indicates a key on the PC’s keyboard.
[Shift] key + [f•5] key
: Indicates that the [f•5] key is pressed with the [Shift] key held down.
xi
Chapter 1.
1 - 1
AP EDITOR FEATURES
System Configuration and Outline
This chapter describes the features and basic outline of the AP Editor and the required system configuration.
■ About AP Editor
AP Editor runs on Microsoft R Windows R and is used to create applications for
the EST-Z Series (here in after, simply called “EST”) that.
“Application data” is the screen data, prepased to match your particular
requirements, that runs on the EST.
Application data can be created by simple mouse operation on a PC.
■ AP Editor Features
• Windows-compliant editing operation
Various functions can be used simply by selecting the function with the mouse
from pull-down menus or icons.
Shapes can also be drawn on screens by selecting the basic shape (e.g. straight
line, rectangle, circle) with the mouse, then transforming it to create the desired
shape.
• Wide variety of smart objects
Basic smart objects are pre-registered as smart objects. All you need to do is to
select a smart object such as a lamp or switch, set its functions and then position
the smart object.
• Intuitively simple modification of settings
When modifying, for example, operation configuration properties are displayed
by double-clicking the smart object with the mouse. Then, all you have to do is
to change the required items.
• Reading of image data
Photographs, logos and image data can be read in and pasted onto screens.
Bitmap and JPEG image file formats are supported.
• A dedicated package can also be included and used with the application data.
Or the dedicated package can also be downloaded stand-alone.
■ Environment for Creating Application Data with AP Editor
The figure below shows the system configuration for creating application data.
EST
AP Editor and standard
smart object library
Personal computer
Download
Installation
Selection of
smart objects
Pasting of
smart objects
Creation of application data
1-1
Chapter 1. APEDITOR FEATURES
1 - 2
Model Numbers
The model No. of EST software is as follows:
Model No.
1-2
Description
ESTX240SWWJC000
AP editor for Windows
ESTX220D1AE3001
Only for EST240Zs Package for DMC10, floppy disk
ESTX220D5AE3001
Only for EST555Zs Package for DMC10, floppy disk
Chapter 2.
2 - 1
AP EDITOR INSTALLATION
Preparation
The AP Editor must be installed on the hard disk.
Before you install AP Editor, make sure that the PC you are using satisfies the following operating environment:
PC
PC/AT compatible machine
CPU
Pentium 166MHz or faster
OS
Windows 98/Me/2000/XP
Display
SVGA (800 x 600) or higher resolution
Color palette High Color (16bit (65535 color))minimum
Memory
32Mbytes or more
Hard disk drive At least 100Mbytes of free space
CD-ROM drive Required
Mouse
Required
A printer is also required if the printing out of application data is necessary.
Handling Precautions
When using Windows 2000/XP, you must have the administrator privilege
to install or uninstall the AP Editor.
2-1
Chapter 2. AP EDITOR INSTALLATION
2 - 2
AP Editor Installation
This section describes how to install the AP Editor on your PC.
Before you install AP Editor, make sure that the PC you are using satisfies the required operating environment.
1. Insert the AP Editor CD-ROM into the CD-ROM drive, and double-click [My
Computer] to open.
2. Move the mouse cursor to the icon for the CD-ROM drive, click with the right
mouse button, and select [Open] from the pull-down menu.
3. The contents of the CD-ROM are displayed. Double-click Setup.exe on the
CD-ROM.
2-2
Chapter 2. AP EDITOR INSTALLATION
4. The setup screen is displayed.
During the installation process, the screen for entering the serial No. is
displayed. The serial No. is printed on the label affixed to the CD-ROM case.
Enter the serial number, your name and your company's name. AP Editor
cannot be installed unless you enter all of these items.
5. To continue the setup from here on, follow the on-screen instructions.
2-3
Chapter 2. AP EDITOR INSTALLATION
2 - 3
Uninstalling AP Editor
This section describes how to uninstall the AP Editor from a PC.
1. Select [Settings]
[Control Panel] from the [Start] menu.
2. The Control Panel is displayed. Double-click [Add/Remove Programs].
3. The Properties window is displayed. Select [WinAPE], and click
[Add/Remove...].
2-4
Chapter 3. DESCRIPTION OF MAIN FUNCTIONS
3 - 1
Introduction
The EST provides 6 kinds of functions that make it possible to easily implement the customer's applications.
• Gateway
"Gateway" makes it easier to exchange data with external devices such as a
temperature controller and PLC. For details, refer to "■ Gateway Functions"
(page 3-6).
• Recipe
"Recipe" has high-volume data such as SP values and PLC setting values for the
temperature controller, etc. and writes data selected from those values to the
temperature controller and PLC. For details, refer to "■ Recipe Functions"
(page 3-13).
• DMC10 dedicated package
"Dedicated package" can implement functions without the need for the customer
to create applications.
For details, refer to "■ About Dedicated Package" (page 3-20).
• Recorder
"Recorder" samples data from an external device such as the temperature
controller or PLC periodically, and displays changes of data on a trend graph or
displays data in digital form and at the same time saves data in a CF card. For
details, refer to "■ About Recorder" (page 3-21).
• Trend
"Trend" samples data from an external device such as the temperature controller or
PLC periodically and displays changes of data on a trend graph. For details, refer
to "■ About Trend" (page 3-29).
• Alarm monitoring
"Alarm monitoring" monitors a bit device corresponding to alarm contacts of an
external device such as the temperature controller and PLC periodically and
monitors/records alarm numbers, which are ON (alarm generation). For details,
refer to "■ Alarm Monitoring Information" (page 3-30).
A dedicated storage area is available as the mechanism to implement these functions.
• Dedicated storage areas
This is a (dedicated) storage area when using a recipe, dedicated package, recorder
or trend. For details, refer to "3-2 Dedicated Storage Areas" (on the next page).
• CF card application data save
The EST555Z with the CF card option can mutually exchange application data,
dedicated package, and user data with the CF card. For details, refer to
"■ About CF Card Application Data Save Function" (page 3-32).
3-1
Chapter 3. DESCRIPTION OF MAIN FUNCTIONS
3 - 2
Dedicated Storage Areas
■ Introduction
The dedicated storage area is a mechanism to effectively use memory with several
smart objects and functions, and is used to save data of a trend/recipe/recorder/
dedicated package.
The dedicated storage consists of two or more areas, and these functions use one
or more dedicated storage areas.
To effectively use memory, the dedicated storage areas of the EST555Z have
sizes different from one another.
Each dedicated storage area has upper limits to the number of areas and areas size.
Dedicated storage area
Total number of areas
Area size (Word)
Total area size (Word)
EST
240Z
555Z
5
20480
102400
64
Variable length
208000
Hereafter, the respective dedicated storage areas are expressed as TR1, TR2,... in the
explanatory drawings.
■ Number of Dedicated Storage Areas Used
● EST240Z
A dedicated storage area is used by a trend smart object, recipe smart object and
dedicated package. In the case of the EST240Z, a maximum of 5 dedicated
storage areas can be used.
• A dedicated package and recipe smart object each use one dedicated storage area.
• The number of dedicated storage areas used by a trend smart object varies
depending on the number of sampling devices (channels), the number of events
or the number of storage points.
In the case where the number of dedicated storage areas exceeds the maximum
number, it is not possible to paste any smart object that uses the dedicated storage
areas or set any dedicated package.
Examples:
• Trend
Number of channels = 4, number of events = 2
Number of dedicated storage areas used = 3
• Recipe
Number of dedicated storage areas used = 1
• Dedicated package
Number of dedicated storage areas used = 1
In this example, the number of dedicated storage areas used is 3 for the trend smart object,
and one dedicated storage area is divided and used by trend 4 channels and event 2 channels.
The recipe smart object and dedicated package each use one dedicated storage area.
3-2
Chapter 3. DESCRIPTION OF MAIN FUNCTIONS
● EST555Z
A dedicated storage area is used by a recorder smart object, trend smart object,
recipe smart object and dedicated package. In the case of the EST555Z, a
maximum of 64 dedicated storage areas can be used.
• A dedicated package and recipe smart object each use one dedicated storage area.
• A trend smart object uses one dedicated storage area per one trend or one event
(one channel).
• A recorder smart object uses one dedicated storage area per one resampling
device (one channel) and one dedicated storage area per one channel when an
alarm device is set. For the alarm device (bit device), a maximum of 2 dedicated
storage areas can be set per one channel. Moreover, a CF card can be used as a
large-volume storage medium.
When the number of dedicated storage areas exceeds the maximum number, it is
not possible to paste any smart object that uses dedicated storage areas or set any
dedicated package.
Examples:
• Trend
Number of channels = 3, number of events = 1, alarm information sampling = 3,
number of dedicated storage areas used = 7
• Recorder
Number of channels = 4, alarm 1 information sampling = 3, alarm 2
information sampling = 1
Breakdown of alarm information (number of dedicated storage areas used for
alarm information = 3)
CH1 : Alarm 1 information (used) Alarm 2 information (used)
CH2 : Alarm 1 information (used) Alarm 2 information (not used)
CH3 : Alarm 1 information (used) Alarm 2 information (not used)
CH4 : Alarm 1 information (not used) Alarm 2 information (not used)
Number of dedicated storage areas used = 7
• Recipe
Number of dedicated storage areas used = 1
• Dedicated package
Number of dedicated storage areas used = 1
In this example, alarm 1 information sampling and alarm 2 information sampling
are set in channel 1 and alarm 1 information sampling is set in channels 2 and 3.
3-3
Chapter 3. DESCRIPTION OF MAIN FUNCTIONS
■ Size of Dedicated Storage Area Used
● EST240Z
In the case of the EST240Z, the size of the dedicated storage area is fixed to
20480 words. However, when the number of storage points is small, this dedicated
storage area of a trend smart object is divided and shared by two or more dedicated
storage areas and when the number of storage points is large, two or more
dedicated storage areas are used by one channel.
When pasting a trend smart object, check [Points] and [Dedicated storage area]
of the [Trend] dialog box.
● EST555Z
The size of the dedicated storage area varies depending on the usage. The size of
the total dedicated storage area is 208000 words.
• Trend
Variable length
Depends on the number of channels and the number of storage points of
sampling.
The size per one trend channel is calculated by adding the setting data (200
words) to the number of storage points.
[Size used] = (200 + [Points]) x [number of channels] words
• Recipe (AP editor Ver. 3.2.00 or earlier)
Variable length : Calculated by following expression:
Number of recipes : 25 to 200
Recipe data count : 25 to 200
[Size used] = 7100 + [number of recipes] x 26 words
• Large-volume recipe (AP editor Ver. 3.4.00 or later)
Variable length : Calculated by following expression:
Number of recipes : 1 to 200
Recipe data count : 1 to 2000
[Size used] = 100 + [recipe data count] x 10 + [number of recipes] x 26 + ([1-word
data count + [2-word data count] x 2] x [number of recipes] words
• Recorder (AP editor Ver. 4.0.00 or later)
Variable length : Calculated by following expression:
[Size used] = (200 + [buffer]) x [number of channels] words
[Number of channels] = sum of [Number of channels] and alarm devices set
(even if two alarm devices are set for one channel,
these are counted as one).
Note
• The buffer size when a CF card is used is fixed to 1848 words.
The buffer size when no CF card is used corresponds to the number of
storage points.
• The storage period when a CF card is used can be checked from a smart
object dialog box of the recorder.
• Dedicated package
Varies depending on the individual dedicated packages. The value is
approximately 30000 words.
3-4
Chapter 3. DESCRIPTION OF MAIN FUNCTIONS
• Maximum number of recipes/maximum data count
The number of recipes that can be set when the recipe data count is 2000 is a
maximum of 92 and the size of the dedicated storage area used at this time is
206492 words.
The number of recipes that can be set when the recipe data count is 200 is a
maximum of 965 and the size of the dedicated storage area at this time is 207950
words.
(This is the value when all recipe data is one word.)
• Size of dedicated storage area used
The table below shows standards for the dedicated storage areas used according
to the number of recipes and recipe data count.
Number of recipes Recipe data count Size of dedicated storage area used(Word)
50
100
7400
20
200
6620
25
2000
70750
■ Checking Usage Situation of Dedicated Storage Area
Check the usage situation of the dedicated storage area with [Option setting] of
the basic setting. The usage situation can also be checked from the [Usage
situation of dedicated storage area] dialog box, which can be invoked from the
trend smart object dialog/recipe data setting dialog/recorder smart object dialog
boxes.
3-5
Chapter 3. DESCRIPTION OF MAIN FUNCTIONS
3 - 3
Main Function
This section will describe this function and the method of creating this function. For specific operations, refer to
Chapter 7. EDITING APPLICATION DATA.
For smart objects, refer to the SMART TERMINAL EST-Z Series User's Manual Smart Object Library No.
CP-SP-1089E and respective user's manuals of various dedicated packages.
■ Gateway Functions
This item describes the gateway function and its use.
Handling Precautions
AP Editor Ver1.1.00 or later is required to use gateway functions.
● What is a “gateway”
The gateway of the EST facilitates setup operations of data exchange between the
EST and the Yamatake temperature controller and PLC connected to the EST.
The following describes an example where the Yamatake DMC10 temperature
controller and a PLC are connected to an EST:
Gateway functions are independent of panel data operations on the EST, and are
performed in background. For this reason, the only configuration required for
gateway operations are the communications and gateway configuration in the
configuration information. Operations such as pasting of smart objects and editing
of panel data need not be performed.
Data exchange using the gateway functions is divided into the following two types:
(1) Data such as DMC10 PV values and event information are read periodically
into the PLC.
(2) Setting value data on the PLC such as SP values for the DMC10 are written to
the DMC10.
The difference between (1) and (2) is not only the data write direction; (1) and (2)
also differ in the following respect: Though (1) is executed cyclically for
monitoring, writing with (2) is performed only when the need to write occurs. The
gateway functions allow these operations to be easily achieved.
Interlock device to interlock the gateway startup can be configured on the EST555Z.
RS-485
Transmitting side
RS-232C
4
ADR 0
LDR
4
8
C
CH3
ADR 0
PWR
22
23
24
25
CH4
21
22
EST
23
24
25
16
21
17
22
18
23
19
24
20
25
21
21
22
22
23
23
24
24
25
25
CH2
LDR
8
C
CH3
CH1
21
PWR
CH1
16
17
18
19
20
CH4
DMC10
CH2
21
22
SDC
23
24
25
DMC10
DMC10
Receiving side
PLC
Data such as DMC10 PV values and event information is read cyclically to the PLC.
RS-485
Receiving side
RS-232C
4
ADR 0
LDR
4
8
C
CH3
ADR 0
PWR
22
23
24
25
CH4
21
22
EST
23
24
25
16
21
17
22
18
23
19
24
20
25
21
21
22
22
23
23
24
24
25
25
CH2
PWR
CH1
16
17
18
19
20
CH4
DMC10
LDR
8
C
CH3
CH1
21
CH2
21
22
23
24
25
DMC10
SDC
DMC10
Transmitting side
PLC
Setting value data from the PLC, such as SP values for the DMC10, is written to the DMC10.
3-6
Chapter 3. DESCRIPTION OF MAIN FUNCTIONS
● To use gateway
To use the gateway functions, devices, etc. used in the gateway configuration
should be set.
The gateway configuration items include basic configuration items, expanded
configuration items and interlock configuration, and it is possible to set 40
combinations of gateway data.
● Configuring the communications driver
To perform communications, the communications channel on EST and the
communications driver used on that channel must be configured. Communications
configuration is performed in the [General] section of the [Configuration
Information].
When the PLC is to be used on the RS-485 interface, set the PLC communications
driver to channel 2.
Select the CPL (MX, New DIGITRONIK) driver for the channel that is connected to DMC10.
● Basic cofiguration items
There are six basic items to be set for performing this operation.
Interlock can be additionally configured on the EST555Z.
For configuring method, see"● Interlock configuration" (page 3-12).
• Src mode
[Cont]
When the send device is specified for sending a specified number of data items,
the specified number of continuous data items are sent starting from the device
that has been set as the source device.
[Discrete]
This item is used when the source devices are not continuous devices. In this
case, enter the source devices for the required number of data items. Devices
having different communications addresses are allowed as source devices.
Generally, it can be said that it takes less time to complete communications if
[Cont] is set when communicating the same number of data items.
• Src dev
Configure the source devices on the send side. When [Cont] is used, input the start
source device, and when [Discrete] is used, input all devices to be used for sending.
Input the source devices in word units. When using bit devices, input the word
boundary.
• Dest mode
This setting has the same [Cont] and [Discrete] settings as Src mode.
• Dest dev
Configure the destination devices for the receive side. When [Cont] is used,
input the start destination device, and when [Discrete] is used, input all devices
to be used for receiving.
Input the destination devices in word increments. When using bit devices, inpput
the word boundary.
• Word
This item is the number of data items to be sent and received. Communications
is performed in word (16 bits) increments.
Set the number of data items within the range 1 to 99 words.
• Method
Three startup methods are available.
3-7
Chapter 3. DESCRIPTION OF MAIN FUNCTIONS
[Cyclic]
Set within the range 1 to 999s in 1-second increments. The data of the send devices
is written to the receive devices at the cycle time interval that you set here.
[Trigger ON]
The data of the send devices is written to the receive devices when the state of
the specified bit (contact) device turns ON.
When gateway communication is started up, the EST turns the state of the bit
device OFF.
[Trigger OFF]
The data of the send devices is written to the receive devices when the state of
the specified bit (contact) device turns OFF.
When gateway communication is started up, the EST turns the state of the bit
device ON.
Note
EST supports multiple gateway functions. The above configuration items are
taken to be a single gateway block. Up to 40 gateway blocks can be
configured for the gateway. To prevent erroneous configuration, it is
recommend to group gateway settings together as a single block for the same
model of device, and setting the devices on different channels as different
blocks.
Handling Precautions
• If the time interval is set to a too short value when data is transferred
periodically at a fixed period, overall operation such as the EST
screen refresh rate may slow down or communications may no
longer be possible. If this happens, set the time interval to a larger
value.
• When an external trigger (ON/OFF) is used, if the same device is
specified as the external trigger device for two or more gateways,
some of them may not start. Use different devices for different
gateways.
● Configuration example 1(Reading data such as DMC10 PV values and event information to the PLC)
Reading data such as the PV value of the DMC10 and event information to the
PLC requires the following configuration:
• Src mode
Configure the type of source device on the DMC10. When 1 word data is set, [Cont]
may be set, however, normally set [Discrete], since DMC10 address are not continuous.
• Src dev
Configure the data device on the DMC10 to be sent to the PLC.
• Dest mode
Configure the type of destination device on the PLC. Data transmission
efficiency increases when [Cont] is set.
• Dest dev
Configure the device on the PLC to which data arriving from the DMC10 is to be written.
• Method
In this case, monitoring is performed continuously, so the time is set to a fixed
cycle time. The time changes according to the number of devices that are
currently connected. When many devices are connected, use a larger value for
the time interval compared with when only a few devices are connected.
3-8
Chapter 3. DESCRIPTION OF MAIN FUNCTIONS
● Configuration example 2
(Writing configuration data on the PLC such as SP values for the DMC10 to the DMC10)
Writing setting value data such as SP values on the PLC to the DMC10 requires
the following configuration:
• Src mode
Configure the type of device to be sent to the DMC10 from the PLC. When
sending the same number of data items, communications ends earlier if [Cont] is
set instead of [Discrete].
• Src dev
Configure the data device to be sent from the PLC to the DMC10.
• Dest mode
Configure the type of destination device on the DMC10. When 1 word data is
set, [Cont] may be set, however, normally set [Discrete], since DMC10 address
are not continuous.
• Dest dev
Configure the device on the DMC10 to which data arriving from the PLC is to be written.
.• Method
In this case, configuration data such as SP values are written, so set the external
trigger ON (or OFF).
• Trigger device
Configure the bit device to be used as the trigger.
● Extended
In addition to the basic configuration items, extended configuration is also
available for the gateway function.
Normally, the defaults of the PLC communications driver are used. However,
these values can be changed. Extended settings include Output mode, Output
device, Retries, and Time-out.
• Output mode
As a result of executing communications, communications completion output
and communications error output can be output to the specified device. The
communications result output mode has three modes:
[Output OFF]
This is selected as the default.
[Output ON]
This mode sets the communications result output device (state turned to 1).
Note, however, that though the bit device at the output destination is set (state
turned to 1), it is not reset (state turned to 0).
[Initialize]
In this mode, the communications result output device described below is reset
(state turned to 0) before communications is started.
• Output device
This item can not be configured when the communications result output mode is
set to “Do not use communications result output.”Configure a bit device to the
following devices:
[Completion output dev]
This is the device to output to when the communications have been completed.
The target output is set (state turned to 1) even if the communications ends with an error.
3-9
Chapter 3. DESCRIPTION OF MAIN FUNCTIONS
[Error output dev]
This is the device to output to when communications end with an error.
The target output is set (state turned to 1) when communications end with an error.
• Retries
You can select any of the following:
[Use defaults]
Use the default of the PLC communications driver.
This is selected as the default (3 retries).
[No retries]
[Specify number of retries]
You can set the number of retries within the range 1 to 15.
• Time-out
You can select either of the following:
[Use defaults]
Normally, the default is 3.0s, thought this varies according to the PLC
communications driver. This is selected as the default.
[Specify time]
You can set within the range 0.1 to 99.9s.
• Output timing of communications completion notify device and error
notify device
The figures below show the timing of gateway communications startup,
communications completion notify device and error notify device when the
communications notify mode is set to “Output ON” or “Initialized.”
There are two ways of starting up gateway communications, either by an
external startup trigger device (ON/OFF) or by fixed period startup. The
following examples are for startup by external startup trigger device ON:
(1) When the Notify mode is set to “Initialized”
Output of gateway
communications data
ON
OFF
External startup
trigger device
ON
Communications completion
notify device
ON
Error notify device
ON
Start
Clear
OFF
OFF
OFF
End
*
Only when error exists
*
When interlock is OFF(0).
* EST resets (turns state to 0) the external startup trigger device,
communications completion notify device and error notify device
when gateway communications is started up.
3-10
Chapter 3. DESCRIPTION OF MAIN FUNCTIONS
(2) When the Notify mode is set to “Output ON”
Program so that gateway communications is started up after the communications
completion notify device and error notify device are cleared by the user.
Clearing of the communications completion notify device and error notify
device is the same as for example (1) except that it is performed by the user.
Output of gateway
communications data
ON
*
OFF
External startup
trigger device
ON
Start
OFF
Communications completion ON
notify device
OFF
Error notify device
Clear
ON
End
Only when error exists
OFF
When interlock is OFF(0).
* EST resets (turns state to 0) the external startup trigger device.
3-11
Chapter 3. DESCRIPTION OF MAIN FUNCTIONS
● Interlock configuration
This is used when configuring the interlock for the gateway data transmission and
receiving.
Interlock device can be configured on the EST555Z to interlock the gate way
startup.If interlock device is configured, startup judgement can be made as a
gateway startup condition by AND of interlock device and bit inverse. Therefore,
even if gateway data satisfying startup condition exists after interlock bit device is
turned ON (1), this data cannot be started up.When interlock device is OFF(0), the
gateway data satisfying the startup condition can be transmitted and received.
The gateway data which satisfies startup condition after interlock device is turned
ON (1) can be started up if the data satisfies the startup condition when the
interlock device is turned OFF (0).
1. Interlock device ON(1)
After the interlock device is turned ON (1), even if there is a gateway satisfying
the startup condition, the gateway is not started up (transmission/reception).
Output of gateway
communications data
ON
OFF
External startup
trigger device
ON
OFF
AND
ON
Interlock device
OFF
When interlock is ON(1)
2. Interlock device OFF(0)
When the interlock device is OFF (0), the gateway satisfying the startup
condition is started up.
Output of gateway
communications data
ON
OFF
External startup
trigger device
ON
Clear
OFF
ON
Interlock device
Start
AND
OFF
End
Communications completion ON
notify device
OFF
Error notify device
Only when error exists
ON
OFF
When interlock is OFF(0).
3. When external startup trigger is generated during interlock
While the interlock device is ON (1), the gateway satisfying the startup
condition is started up when the interlock is turned OFF if it satisfies the startup
condition at the time at which the interlock is turned OFF (0).
ON
Output of gateway
communications data
OFF
ON
External startup
trigger device
Start
Clear
OFF
ON
AND
OFF
Interlock device
End
ON
Communications completion
notify device
OFF
Error notify device
OFF
ON
Only when error exists
When an external startup trigger is generated while interlocking.
3-12
Chapter 3. DESCRIPTION OF MAIN FUNCTIONS
■ Recipe Functions
This item describes recipe functions and how to use recipes.
Handling Precautions
• AP Editor Ver1.1.00, or later, is required to use recipe functions.
• If an application of the EST555Z recipe data or recipe smart objects
created by Ver. 4.0.00 or earlier is read by Ver. 4.0.00, the recipe data is
updated to a large-volume recipe during editing.
Note
After Ver. 4.0.00, the volume of a recipe that can be created by the EST555Z has
been increased. This is called a "large-volume recipe" and is distinguished from
the EST240Z recipes so far.
● What is a “recipe”
A “recipe,” as its name implies, means a list of instructions to prepare something.
With the EST, a data structure for managing control data such as the SP values for
a Yamatake temperature controller, or PLC settings, is called a “recipe.”
The data comprising the recipe function is divided into five categories: recipe,
recipe data, recipe name, parameter and data name/comment.
[Recipe]
This is a group of recipe data such as SP values for a temperature controller, for
example.
[Recipe data]
This is the control data such as the SP values for a temperature controller.
[Recipe name]
This is the name that the recipe is appended with.
Let’s take a bread production line as an example. The baking temperature and time
vary according to the type and quantity of bread.
The transition between recipe data items is identified by assigning the recipe data
for baking croissants a recipe name and by assigning the recipe data for baking
butter rolls a recipe name.
Recipes facilitate the data management of multiple recipe data and corresponding
recipe names.
Parameters and data names/comments in the figure below are supplementary data
for the recipe data used on EST.
Croissant
Recipe name
Butter roll
Recipe data
DMC10
Temperature 1
Melon pastry
DMC10
Temperature 2
Temperature 1
Timer DMC10
Setting value
DMC10
Temp rature 2
DMC10
Temperature 1
Timer
value
DMC10
rature 2
Timer
value
Recipe
Setting value
Q’ty
Setting value
Q’ty
Q’ty
Setting value
3-13
Chapter 3. DESCRIPTION OF MAIN FUNCTIONS
[Parameters]
Parameters are data for aiding recipe data operation settings and operation
displays. Specify the group (Gr), write destination devices for individual recipe
data, data type (signed binary/unsigned binary/BCD data), data length (1 word/2
word), decimal point position, upper limit value, and lower limit value to these
parameters.
Individual recipe data has group settings.
A “group” is a function that is used when the timing at which the recipe data is
written to an external device differs within the same recipe. Up to four groups can
be set. Also, the write execution device of the data can be specified to each group
when recipe data is to be written by device control on the PLC.
Set group 1 when using recipe smart objects by manual writing.
Groups 2, 3 and 4 can also be used when using recipe smart objects with automatic
writing.
[Data names/comments]
Data names/comment are names (labels) that are appended to individual data items
in the recipe data. Data names/comments are used for displaying the name and
comment instead of displaying the device address of the data. Use of names and
comments simplifies operation when displaying operation settings and monitoring
data on the EST. Up to 32 characters can be used as the data name and up to 64
characters as the data comment. Mainly data names are used on the EST owing to
screen size limitations of the EST.
Recipe data
Group
Write
Device
Binary
Word
Length
Decimal
Point
Max.
Value
Min.
Value
DMC10
DMC10
Timer
Temperature 1
Temperature 2
Setting value
1
1
4:1:010
4:1:012
Binary
Binary
1 word
1 word
0 digit
0 digit
200
240
180
220
Q’ty
Setting value
1
2:1:D123
BCD
1 word
1 digit
10000
2000
● To use recipe
To use recipe functions, follow the procedure shown below.
1. Set data with recipe data setting.
In the recipe data setting, set data such as the number of recipes, recipe data
count, recipe name and parameters which have been explained in "● What is a
"recipe"" (on the previous page).
2. Paste recipe smart object.
Paste the recipe smart object to the panel.
At this time, carry out settings such as "manual write" and "auto write", etc.
For details of smart objects, refer to "4-2 Recipe" in the SMART TERMINAL
EST-Z Series User's Manual Smart Object Library No. CP-SP-1089E.
Handling Precautions
It is possible to use only one recipe smart object per one application.
Note
A recipe uses a dedicated storage area. For details, refer to "3-2 Dedicated
Storage Areas" (page 3-2).
3-14
Chapter 3. DESCRIPTION OF MAIN FUNCTIONS
● Memory size of recipe data
The number of recipes and recipe data count vary depending on the model.
Furthermore, the total volume of recipe data, number of recipes and recipe data
count have the following relationship:
Total volume of recipe data > number of recipes x number of recipe data words used by 1 recipe
Even when the data length is set to 2 words, the maximum recipe data count that
can be set per 1 recipe is smaller than the count set with 1 word.
For example, in the case of the EST240Z, when all data is used with 2 words, if
the number of recipes is set to 25, the recipe data count that can be used per 1
recipe is 100 (200 words).
• Number of recipes, recipe data count of EST555Z
The number of recipes that can be set is 1 to 200 and the recipe data count that
can be set is 1 to 2000.
The total volume of recipe data is 208000 words and is restricted as follows:
When recipe data count is [2000], the maximum number of recipes is [92].
When the number of recipes is [200], the maximum recipe data count is [965].
(When all recipe data is 1-word data)
• Number of recipes, recipe data count of EST240Z
The total volume of recipe data is 5000 words. However, the recipe data per 1
recipe is a minimum of 25 words and a maximum of 200 words. Therefore, when
recipe data of 200 words per 1 recipe is used, data corresponding to up to 25
recipes can be created and when data corresponding to 200 recipes is created,
recipe data of 25 words per 1 recipe is assigned.
3-15
Chapter 3. DESCRIPTION OF MAIN FUNCTIONS
● About recipe smart objects
Recipe smart objects are mainly used for setting the operation of recipes. Recipe
smart objects have settings such as the trigger device for writing recipes and
device to specify the recipe No.
There are two ways of writing recipes: “manual write” and “auto write.”
Manual write:
This method is used when the operator switches recipe data
(product type data) by operating the touch panel.
Auto write:
This method is used when switching of recipe data (product type
data) is performed automatically by the control of an external
PLC, not the operator.
• Manual write
Data is written when the [Write] button for the recipe smart object is touched.
The figure below illustrates operation of a smart object when [Manual write] is
selected.
When writing the recipe data with a manual write smart object, call-up the
recipe selection panel using [Select], then load the data of the recipe No. to be
written to the smart object. (step 1)
Next, select [Write] to write the data to the PLC, etc. (step 2).
• Recipe data setting
The recipe data to be displayed by the smart object is
set under the [Recipe] section of the [configuration
Information] of the AP Editor.
• Recipe data write (step 2)
The data of the recipe No. currently displayed by
the smart object is written to PLC device., etc.
[Confirmation of write]
• Recipe selection panel (step 1)
Select the recipe to be displayed by the smart object
and read that data into the smart object.
[Transmitting]
[Confirmation of write result]
3-16
Note
With manual write smart objects, the recipe No.
curently displayed on the smart object is the one
that written.
For details of recipe smart objects, refer to Smart
Terminal EST-Z Series Smart Object Library
Manual No.CP-SP-1089E.
Chapter 3. DESCRIPTION OF MAIN FUNCTIONS
• Auto write
Data is written when a PLC or other external bit device turns ON.
The figure below illustrates operation of a smart object when [Auto write] is
selected.
With auto write smart objects, the PLC or other external device is used to
specity the writing of the recipe data. The following devices can be instructed:
- Recipe No. specification device (word)
- Write execution device (bit)
- Successful completion notification device (bit)
- Error notification device (bit)
Writing of recipe data is executed by controlling these devices on the PLC, etc.
Recipe data setting
The recipe data to be displayed by the smart object
is set under the [Recipe] section of the
[configuration Information] of the AP Editor.
[Recipe No. specification device]
Set the word device for specifying the number of the recipe to write. When the
write execution device bit is set (bit state changed to 1), the data of the recipe
No. currently set to this word device is written.
[Write execution device]
Set the bit device for controlling the timing when the writing of recipe data will
be performed.
When this bit device is set (bit state changed to 1), writing of recipe data
commences. The EST resets this bit device (bit state changed to 0) when the
writing of recipe data has been completed.
Up to four write execution devices can be set. Recipe data can be written at
different times by assigning recipe data to each of these four groups.
[Successful completion notification device]
Set the bit device for notifying that the writing of recipe data was completed
successfully. The bit device is set (bit state changed to 1) when communications
have been completed successfully.
As the EST does not reset the bit device (bit state changed to 0), reset the state
of the bit device with the external device.
[Error notification device]
Set the bit device for notifying that the writing of recipe data resulted in an error.
The bit device is set (bit state changed to 1) when communications results in an
error.
As the EST does not reset the bit device (bit state changed to 0), reset the state
of the bit device with the external device.
3-17
Chapter 3. DESCRIPTION OF MAIN FUNCTIONS
Note
• The [auto write] recipe data write instruction by can be executed regardless of
the current display state of the panel containing the recipe smart object.
• Recipe data settings are not downloaded if a panel which contains a recipe smart
object does not exist within the application.
• For a detailed description of recipe smart objects, refer to Smart Terminal
EST-Z Series Smart Object Library Manual No.CP-SP-1089E.
● How to write recipes
There are two ways of writing recipes, “manual write” and “auto write.”
• Manual write
Writing of recipe data is executed using the [Write] switch assigned to the smart
object.
With writing of manual write smart objects, only the recipe data set to group 1
of the recipe No. currently displayed on the smart object is written.
Recipe data 1
Execution of writing
Recipe data 2
Group 1
Device 1 Device 2 Device 3
Recipe data n
Writing of recipes (smart objects)
Note
Recipe data currently set to groups 2 through 4 cannot be written, with
“manual write”.
3-18
Chapter 3. DESCRIPTION OF MAIN FUNCTIONS
• Auto write
Writing of recipe data is executed by operating a device on a PLC or other
external device.
In the case of auto write, a single recipe can be divided into a maximum of four
groups. Configure the write execution device for each group of the auto write smart
object, and write the recipe data to each group at the respective write timings.
Write execution device of group 1 is ON
Recipe data 1
Recipe data 2
Group 1
Device 1 Device 2 Device 3
Recipe data m
Recipe data m+1
Write execution device of group 2 is ON
Group 2
Device 4 Device 5
Recipe data n
Recipe data n+1
Write execution device of group 3 is ON
Group 3
Device 6
Write execution device of group 4 is ON
Group 4
Device 7
When there are four recipe write execution devices
Note
Auto write is used to change the recipe data write timing within the same
recipe via by a device. Writing of recipe data during change of product type
can be executed for each control step (process) by assigning recipe data group
settings to each control step (process).
Example) When switching the product type from croissant to butter roll
Butter roll recipe
Writing of group 1
Group 1
Writing of group 2
Group 3 is written when the croissants move from step 3 to step 4
Group 4 is written when the croissant process is completed.
Group 2
Group 3
Group 4
Process step 1
Butter roll
Butter roll
Process step 2
Process step 3
Croissant
Process step 4 Completion of process
Croissant
Croissant
Production line flow
3-19
Chapter 3. DESCRIPTION OF MAIN FUNCTIONS
■ About Dedicated Package
● What is a “dedicated package”
Yamatake provides several applications according to purposes of use and these
applications can implement functions without the need for the user to create
applications. It is possible to use a dedicated package alone or also download this
package together with applications created by the user and invoke and use the
dedicated package from the user application.
A DMC10 dedicated package is provided.
DMC10 dedicated package:
Allows PV input and monitoring or setting of control output SP/control
parameters, etc.
● To use dedicated package
Purchase the dedicated packages separately.
Handling Precautions
It is possible to use only one dedicated package per one application.
Note
A dedicated package uses a dedicated storage area. For details, refer to "3-2
Dedicated Storage Areas" (page 3-2).
3-20
Chapter 3. DESCRIPTION OF MAIN FUNCTIONS
■ About Recorder
Handling Precautions
The recorder is a function of the EST555Z. The AP editor used should be
Ver. 4.0.00 or later.
● What is a “recorder”
The recorder samples data from an external device such as the temperature
controller or PLC periodically, and displays changes of data on a trend graph or
displays data on a digital display panel.
The recorder can also provide lamp display as alarm information of each trend and
display markers on a trend graph.
The sampled data is saved in a dedicated storage area of the EST or a CF card.
One recorder smart object can set 1 to 16 channels regarding a data sampling
device (sampling device) as 1 channel and select up to 8 channels from among
those channels and display them on a screen.
The recorder smart object can use up to a total of 32 channels (when alarm
information sampling is used) per 1 application.
EST555Z
POWER
RS-485
RS-232C
4
4
ADR 0
LDR
ADR 0
C
CH3
PWR
LDR
8
8
C
CH3
PWR
CH1
CH1
21
21
16
22
17
23
18
24
19
25
16
22
17
23
18
24
19
25
20
20
CH4
CH4
CH2
CH2
21
21
22
23
24
25
21
22
23
24
21
22
22
23
23
24
24
25
25
25
DMC10
SDC
DMC10
DMC10
PLC
Recorder display image
•
Data save in CF card/dedicated storage area
The data of the sampling device set by the recorder smart object is sampled in a
sampling cycle and saved in a CF card or a dedicated storage area of the EST.
Using a CF card makes it possible to store large-volume data.
The data sampled is handled as signed binary values.
There are two saving methods when a CF card is used; "linear write" and "ring
write". For details, refer to "● Saving method" (page 3-23).
Note
Whether or not to use a CF card is set from the [Recorder] dialog box.
3-21
Chapter 3. DESCRIPTION OF MAIN FUNCTIONS
•
Alarm information sampling
Alarm information sampling makes it possible to set an alarm device (bit device)
for each channel and display alarms.
It is possible to set up to two alarm devices per one channel; alarm 1 device and
alarm 2 device.
There are two alarm display methods; lamp display and marker display.
• Lamp display
The lamp display is included in trend information of the recorder smart object.
Trend information
When the bit devices turn ON, their respective lamps are lit in orange.
The lamp display indicates the ON/OFF status of the current alarm device.
• Marker
When [Use marker] is selected from the recorder smart object, a marker is
displayed on the corresponding trend graph.
When alarm device is turned ON
When alarm device is turned OFF
The marker sets a pattern to be displayed when the alarm device is turned ON, a
pattern to be displayed when the alarm device is turned OFF and conditions for
displaying the marker (displayed only when the alarm device is turned ON, only
when the alarm device is turned OFF or when ON/OFF is toggled).
This marker can display saved information retrospectively.
Handling Precautions
• The number of markers that can be displayed at a time on a screen is
up to 20 when each channel is turned ON or OFF. Markers older than
the 20 latest ones are not displayed.
• The marker is displayed above the position of alarm generation on the
trend graph. Therefore, if an alarm is generated near an upper limit
value, no marker is displayed on the screen.
In this case, increase the upper limit value and secure the marker
display area.
● To use recorder
As the recorder, a recorder smart object is used.
Two or more recorder smart objects can be used. However, since dedicated storage
areas are used, there are restrictions on the use of recorder smart objects. For
details, refer to "3-2 Dedicated Storage Areas" (page 3-2).
For recorder smart objects, refer to "4-6 Recorder" in the SMART TERMINAL
EST-Z Series User's Manual Smart Object Library No. CP-SP-1089E.
3-22
Chapter 3. DESCRIPTION OF MAIN FUNCTIONS
● Saving method
This section will describe the method for saving a CF card and dedicated storage
area.
There are two methods for saving a CF card; "linear write" and "ring write".
•
Linear write using CF card
• Data is saved as far as there is some space in the CF card.
• When there is no space in the CF card, the sampled data is not saved in the CF
card.
When there is no space in the CF card or no CF card is inserted, a ring write is
performed with 1848 words in the dedicated storage area inside the EST until a
CF card with free space is inserted.
• A write to the CF card is performed when the sampled data grows to a certain
size (786 words).
• When the CF card is used, the dedicated storage area of the EST is used fixed
to 2048 words per one channel.
•
Ring write using CF card
• Data corresponding to the specified number of storage points is saved in a CF
card.
• When sampled data exceeds the specified number of storage points, the data is
overwritten with latest data one by one from oldest to latest.
• A write to the CF card is carried out when the sampled data grows to a certain
size (786 words).
3-23
Chapter 3. DESCRIPTION OF MAIN FUNCTIONS
•
When saving data in EST dedicated storage area of EST without using CF card
When sampled data exceeds the specified number of storage points, the data is
overwritten with latest data one by one from oldest to latest. The size of the
dedicated storage area used varies depending on the number of storage points. For
details, refer to "3-2 Dedicated Storage Areas" (page 3-2).
● Supplementary explanation
•
Display when sampled data is stopped
When data sampling is stopped and sampling is started again, "0" is set in the
sampled data corresponding to the time during which sampling was stopped and
data sampling is restarted.
"0" is set in period of time without
sampling.
stop
start
This event occurs when the following operations are performed:
• Time between power of EST is turned OFF and turned ON again
• During operation from system screen
• Delay in replacement of CF card
If a CF card is replaced or removed to read data, when the CF card is not
inserted even if the dedicated storage area is filled to the capacity.
For example, if data is sampled in a 1-second sampling cycle, when the CF card
is replaced after a lapse of about 30 minutes.
3-24
Chapter 3. DESCRIPTION OF MAIN FUNCTIONS
● When using CF card
CAUTION
Do not turn OFF the power or remove the CF card from the slot while accessing
the CF card. This may corrupt data in the CF card.
When the CF card is used for the recorder smart object, be sure to press the
[STOP] button of the recorder smart object, wait until [BUSY] changes to
[START], and then turn OFF the power or remove the CF card.
Before changing the screen of the EST to the system screen or before
downloading or uploading data when the CF card is used for the recorder smart
object, be sure to press the [STOP] button of the recorder smart object and make
sure that [BUSY] changes to [START].
Improper handling of the CF card may corrupt its data.
Yamatake shall not be held responsible for any defect or trouble arising from
improper operation made by the customer.
Strictly observe the following handling precautions:
• Do not bend or drop the CF card, or apply a strong shock to it.
• Do not splash water onto the CF card or expose it to the direct sunlight.
• Do not disassemble the CF card or insert metallic objects such as a clip into it.
Improper handling of the CF card may corrupt its data.
Yamatake shall not be held responsible for any defect or trouble arising from
improper handling made by the customer.
Handling Precautions
There are certain precautions that should be observed when using the CF
card. Carefully read the following precautions to fully understand the
characteristics of the CF card before using it:
• Cautions when using CF card for the first time
• Use a CF card recommended by Yamatake. Yamatake cannot guarantee the
proper operation of a CF card other than that recommended by Yamatake.
CF card model recommended by Yamatake:
SCF0640 (Card capacity: 64 MB)
• Always format the CF card properly using the CF card format tool (cffmtz.exe)
supplied with the AP Editor or the system screen of the EST system before
using it.
For details, refer to “■ Formatting CF card” (page 10-4).
• The CF card formatted using the system program (F/W Ver.R0015 or later)
supplied with the AP Editor version 4.6.00 or later is not compatible with that
formatted using a system program with the version earlier than the above
version (F/W Ver.R0014 or earlier). In this case, prepare a new CF card or
reformat the existing CF card using the EST555Z you wish to use.
At this time, since the data stored in the CF card is erased when formatting the
CF card, the data must be saved into the personal computer before formatting it
when necessary.
3-25
Chapter 3. DESCRIPTION OF MAIN FUNCTIONS
• Cautions when operating recorder smart object
• About operation when data is sampled newly
When downloading, sampling cycle change, or clear device is executed, the
sampling is started newly. When the sampling is started newly, take the following
precautions:
• The data in a dedicated storage area sampled by the recorder or the trend object
is erased.
• When a CF card is used with the recorder, the data written in the CF card is
retained without being erased. However, this data cannot be read from the EST.
• If the free space of the CF card is insufficient when performing a ring write
using the CF card with the recorder, data storage area may not be kept.
• When creating/downloading application
• When data is sampled using the CF card with the recorder, if data needs to be
saved, be sure to save data into the CF card before starting downloading.
When an application is downloaded (including change or specified panel), the
recorder or the trend smart object starts the sampling newly.
• An application which uses multiple recorder smart objects using the CF card and
which mixes "ring write" and "linear write" cannot be downloaded to the EST.
Select either of two data write methods to use the CF card.
• When a 64-MB CF card is used with the recorder, information attached to the
sampled data is also written in addition to the sampled data.
About 20% of the storage area of the CF card is used for such attached
information. When a new CF card is used, the reference volume of data to be
saved becomes 25 M words (50 MB).
The number of storage points and storage period when using the CF card in the
recorder smart object dialog box of the AP Editor are calculated and displayed
based on this value.
• If an application whose first 8 characters (8 alphanumeric (single-byte)
characters) are the same as those of an existing application is downloaded when
using the recorder, the sampled data is overwritten in the CF card and the
previously saved data can no longer be read. This is because the first 8
characters of an application name are used to identify the data in the CF card.
• The following single-byte characters cannot be used for this application name:
Single-byte KANA characters, space, , : ; + = [ ] < > \ / * ? | "
The following application names cannot be used (single-byte characters):
CON, AUX, COM1 to COM9, LPT1 to LPT9, PRN, NUL
3-26
Chapter 3. DESCRIPTION OF MAIN FUNCTIONS
• When operating recorder smart object
• When a CF card is in use, if the CF card is formatted, an operation such as a
display of the oldest data or a thumbnail display using the recorder smart object
will result in the CF card being read continuously. The CF card cannot be
removed during this period.
In such a case, display the latest data, increase the display magnification, and do
not perform data read from the CF card.
• [STOP] and [START] are the buttons to enable data write to the CF card.
When the display magnification is reduced even while [START] is being
displayed, the data in the CF card is always read. In such status, the CF card
cannot be removed. Before removing the CF card, return the reduction
magnification to “x1” and display the latest data.
• When changing setting
• The sampling cycle of the recorder can be changed from the EST. When the
sampling cycle is changed, the sampling is started newly.
• The clear device of the recorder smart object erases the sampled data saved in
the dedicated storage area of the EST and starts sampling newly.
• When an application is used by multiple EST units, the device addresses of the
respective EST units are used to distinguish the data of the CF card from that of
other cards. Therefore, once this device address is changed, the data sampled up
to now may be regarded as data of another application, and then the currently
saved data cannot be read.
• When the free space of the CF card is insufficient
When the actual free space of the CF card is smaller than the number of storage
points of the CF card kept by a ring write, relevant error message is displayed on
the screen of the EST and the sampling of data of the recorder smart object and
trend smart object is stopped, resulting in incomplete data sampling. To solve this
trouble, insert a new CF card or reformat the card.
• Other
When a recorder smart object using a CF card is used and the CF card is inserted
into the EST, turning ON the power will automatically start writing of the data
sampled by the recorder to the CF card.
If the CF card is inserted after the power has been turned ON, data writing is not
automatically started. In this case, press [START] of the recorder smart object to
start writing.
• CF card access indication
When data is written/read to/from the CF card, the lamp [❍] on the right of [R/W]
at the lower left portion of the recorder smart object screen is lit in orange.
At the same time, the LED on the right of the CF card slot of the EST is lit in red.
3-27
Chapter 3. DESCRIPTION OF MAIN FUNCTIONS
• CF card operation method
Operations such as removal of the CF card, saving data into the CF card, or
operation stop are carried out from the recorder smart object.
To do so, operate relevant button in the [CF CARD] area at the lower left portion
of the recorder smart object screen.
: This indicates a state, in which data is being saved into the card. Do
not remove the card in this state. Press this button and wait until the
indication is changed to [START].
: This indicates a state, in which data is being read/written from/to the
card. Do not remove the card in this state.
: This indicates a state, in which the card can be removed. Press
[START] to start saving data into the CF card. When the data saving
is started, [START] is changed to [STOP].
Note
When data is not saved into the CF card using the recorder smart object, this
button is not displayed.
• Saving data into CF card
This section will describe data saving into the CF card.
The sampled data is saved into the dedicated storage area once and it is written
to the CF card in units of 786 words per one channel. The CF card write time
interval may vary depending on the sampling cycle.
Furthermore, when the CF card is used, the dedicated storage area is used with
a fixed area of 2048 words per one channel.
• Reference storage period
The following shows the reference data save period of one CF card (64 MB):
Number of channels: 16 channels
Cycle: 30s
Storage period: Approximately 417 days
Cycle: 5s
Storage period: Approximately 69 days
3-28
Chapter 3. DESCRIPTION OF MAIN FUNCTIONS
■ About Trend
● What is a “trend”
"Trend" samples data from an external device such as the temperature controller or
PLC periodically and displays changes data on a trend graph.
The data of the sampling device set by the trend smart object is stored in the EST
in a sampling cycle.
Main functions of "trend" include trend/event display, sampling/display of alarm
information and selection of trend device.
• Trend/event display
The trend displays the trend of 1-word data as a line graph. It can also display
events that display ON/OFF of a bit device.
• Sampling/display of alarm information (EST555Z only)
When an alarm bit device corresponding to the trend is specified, the current
value of the corresponding trend can be displayed with a blinking lamp.
• Selection of trend device
The variable trend smart object allows trend devices sampled/displayed by the
EST to be selected from among registered sampling devices.
For trend smart object, refer to "4-3 Trend" in the SMART TERMINAL EST-Z
Series User's Manual Smart Object Library No. CP-SP-1089E.
● To use trend
The trend uses trend smart objects.
Two or more trend smart objects can be used. However, since dedicated storage
area is used, there are restrictions on the use of trend smart objects. For details,
refer to "3-2 Dedicated Storage Areas" (page 3-2).
The following items are set in the trend smart object:
• Trend
Sets a trend sampling device, trend name, display color and type of line.
• Event
When using an event, sets an event sampling device, event name, name color
and line color.
• View
Selects an upper limit value, lower limit value, floating point position, trend
background pattern to specify the range of display data.
• Control
Specifies full-time sampling, control by device or sampling time and controls
the start/stop of trend sampling.
• Alarm
Sets an alarm bit device for the channel for which an alarm is to be displayed.
This function is supported by the EST555Z.
3-29
Chapter 3. DESCRIPTION OF MAIN FUNCTIONS
■ Alarm Monitoring Information
Alarms can be easily monitored with the EST just by pasting smart objects, if
alarm monitoring information has been set in advance.
Any alarm device, alarm name, alarm message on a PLC connected by the host
link can be registered to an alarm No. within the range No.1 to No.512.
When alarm monitoring is started, the registered alarm bit is monitored at all times
while the EST is running.
When alarms occur, the currently occurring alarms are stored in numeric order,
and are stored within special devices of the EST.
The EST also has a function for recording the time of occurrence, time of
recovery and other alarm history information.
The various objects that use this alarm monitoring function are contained in the
standard smart object library.
512 points
PLC
3
2
1 Alarm bit device
Alarm name (16 characters)
Alarm message (64 characters)
EST
Alarm history recording function
No.
Alarm No.
Alarm Data
Time of
Occurrence
Date of
Recovery
Time of
Recovery
● Number of monitorable points
1 to 512 points
Four continuous words (64 points) are taken to be one block, and up to eight
blocks can be monitored.
M080
4-words
64 points
M11F
M160
4-words
64 points
Total 8 blocks
M19F
● Monitorable alarms
Alarms that are occurring (in numberic order)
Alarm history (time of occurrence, time of recovery)
● Monitoring time
At all times whilst EST is running
3-30
Chapter 3. DESCRIPTION OF MAIN FUNCTIONS
● To use alarm monitoring
To use alarm monitoring, follow the steps shown below.
1. Set the history from Alarm History Configuration.
Set whether alarm monitoring history information should be recorded or not.
2. Set data from Alarm Block Setup.
Set an alarm device, alarm name and alarm message from Alarm Block Setup.
3. Paste alarm monitoring smart object.
There are alarm monitoring smart objects such as:
• "Aggregation lamp"
Displays individual alarms.
• "Representative lamp" Displays an alarm as representative.
• "Summary display"
Displays statuses of alarms generated registered in
alarm monitoring information.
• "History display"
Displays statuses of generation/restoration of alarms
registered in alarm monitoring information.
• "Count"
Displays count of alarms generated registered in alarm
monitoring information.
There are also other smart objects such as "Alarm buzzer", "Alarm monitor
start/stop", "Clear alarm info".
These smart objects can be selected or combined to simplify monitoring or history
displays of devices.
For alarm smart objects, refer to "3-11 Alarm Monitor" in the SMART
TERMINAL EST-Z Series User's Manual Smart Object Library No. CP-SP1089E.
3-31
Chapter 3. DESCRIPTION OF MAIN FUNCTIONS
■ About CF Card Application Data Save Function
CAUTION
Do not turn OFF the power or remove the CF card from the slot while accessing
the CF card. This may corrupt data in the CF card.
When using the application save function of the CF card on the system screen of
the EST, do not attempt to download or upload data while accessing the CF card.
Improper handling of the CF card may corrupt its data.
Yamatake shall not be held responsible for any defect or trouble arising from
improper operation made by the customer.
Strictly observe the following handling precautions:
• Do not bend or drop the CF card, or apply a strong shock to it.
• Do not splash water onto the CF card or expose it to the direct sunlight.
• Do not disassemble the CF card or insert metallic objects such as a clip into it.
Improper handling of the CF card may corrupt its data.
Yamatake shall not be held responsible for any defect or trouble arising from
improper handling made by the customer.
This section will describe the CF card application function.
Handling Precautions
• To use the CF card application data save function, it is absolutely required to
prepare the AP Editor Ver4.6.00 or higher.
• Prepare an EST555Z having the CF card option.
• When handling the CF card using the AP Editor, it is necessary to prepare an
appropriate environment, in which the CF card can be connected to the personal
computer before using the CF card.
(Example: USB CF card reader, PCMCIA CF card adaptor)
• Always use a CF card recommended by Yamatake. Yamatake cannot guarantee
the proper operation of a CF card other than that recommended by Yamatake.
CF card model recommended by Yamatake: SCF0640 (Card capacity: 64 MB)
• Always format the CF card properly using the CF card format tool (cffmtz.exe)
supplied with the AP Editor or the system screen of the EST system before using
it. For details, refer to “■ Formatting CF card” (page 10-4).
• The CF card formatted using the system program (F/W Ver.R0015 or later)
supplied with the AP Editor version 4.6.00 or later is not compatible with that
formatted using a system program with the version earlier than the above version
(F/W Ver.R0014 or earlier). In this case, prepare a new CF card or reformat the
existing CF card using the EST555Z you wish to use.
At this time, since the data stored in the CF card is erased when formatting the
CF card, the data must be saved into the personal computer before formatting it
when necessary.
3-32
Chapter 3. DESCRIPTION OF MAIN FUNCTIONS
● Cautions on use of CF card application data save function
• About file name characters
The name of a file to be saved into the CF card must be that the extension is
removed from the name in the Dos format (so called “8.3 format”).
Therefore, single-byte or two-byte characters with a size of up to 8 bytes can be
used for the file name.
However, a single-byte symbol character cannot be used for the 1st character of
the file name.
The following single-byte characters cannot be used for the file name to be saved
into the CF card:
Single-byte KANA characters, space, , : ; + = [ ] < > \ / * ? | "
The following file names cannot be used (single-byte characters):
CON, AUX, COM1 to COM9, LPT1 to LPT9, PRN, NUL
• About comment
A comment can be attached to the application data file on the CF card.
When the list of files is displayed using the system menu of the EST555Z, each
file can be identified using this comment.
The comment attached to the file is different from that attached to the application
data.
The comment attached to the application data to be saved into the CF card is
retained as it is, and then it is restored by executing [CF→EST] on the
EST555Z.
Even though [Read from CF…] is executed using the AP Editor, the comment
attached to the application file to be transferred to the hard disk drive is different
from the comment attached to the file of the CF card.
CF card
Application data file
Application data
Application data comment
System program
Dedicated package
Internal device data
File comment
3-33
Chapter 3. DESCRIPTION OF MAIN FUNCTIONS
• About card removal
To remove the card from the personal computer, use the eject function of the OS.
If the card is removed without use of the eject function of the OS, this may
corrupt the data.
To use the eject function of the OS, follow the steps below.
(1) Select relevant CF drive in [Removable Disk].
(2) Right-click a blank spot and select [Eject].
(3) Remove the card.
• About CF card used by recorder smart object
The application data save function cannot be used for the CF card used by the
recorder smart object.
In this case, the CF card is used after it has been reformatted after necessary
data has been saved into the personal computer.
● What is a "CF card application save function"
The EST555Z with the CF card option can mutually exchange application data,
dedicated package, and user data with the CF card.
This function is called "CF card application data save function".
AP Editor
EST555Z
POWER
CF card
With the AP Editor,
The application data can be downloaded from
the personal computer to the CF card.
The application data can be uploaded from
the CF card to the personal computer.
3-34
With the system screen of the EST555Z,
The application data can be downloaded from
the CF card to the EST555Z.
The application data can be downloaded from
the EST555Z to the CF card.
Chapter 3. DESCRIPTION OF MAIN FUNCTIONS
3-35
Chapter 3. DESCRIPTION OF MAIN FUNCTIONS
● When using CF card save function
• When the application data has been saved into the CF card, such data can be
downloaded to the EST555Z at work site without use of the personal computer
(AP Editor).
This function is convenient if it is difficult to operate the AP Editor at work site.
Additionally, when the application has been saved into the CF card, it is also
possible to directly download the data from the CF card to the EST555Z in the
default shipment state.
• It is not necessary to disconnect the cables even when the EST555Z is installed
in the system.
The application data can be downloaded easily through the CF card slot on the
front of the EST555Z.
• The setup can be performed faster than downloading from the AP Editor to the
EST555Z through the communication cable.
• By saving the application data from the EST555Z at work site into the CF
card, the application data can be backed up.
This application data also includes the recipe data you have set or edited on the
EST555Z.
The data backed up on the CF card can be downloaded to other EST555Z.
EST555Z No.2
EST555Z No.1
POWER
POWER
CF card
Handling Precautions
Only products having date code of “0312” or later can download the
data from the CF card to the EST555Z in the default shipment state.
• Multiple application data can be saved into one CF card.
The control can be performed using the file name or comment even when there
are multiple EST555Z units.
CF card
EST555Z No.1
POWER
EST555Z No.2
POWER
3-36
EST555Z No.3
POWER
Chapter 3. DESCRIPTION OF MAIN FUNCTIONS
● Data to be saved into CF card
• The application data, as well as system programs of the EST555Z can be saved
into the CF card.
Since the environment running on other EST555Z can be saved directly, this
ensures easy control.
Additionally, when downloading the data from the CF card, the system program
of the EST555Z can be updated.
• When saving the application data from the EST555Z into the CF card, the
internal device data of the EST555Z (backup registers, SR00000 to SR32767,
backup contact areas, SM000.0 to SM255.F) is also saved.
This function is convenient when the internal device is used for data saving in
the application.
• The user data of the dedicated package can be saved into the CF card.
For example, the name files and screen setup files of the DMC10 package are
included.
The following shows an example when the application data of two EST555Z
units is saved into the CF card:
CF card
File for EST555Z No. 1
Application data
Application data comment
System program
• Firmware
• Character font
• System screen menu
Dedicated package
Internal device data
(SR, SM)
File for EST555Z No. 2
Application data
Application data comment
System program
• Firmware
• Character font
• System screen menu
Dedicated package
Internal device data
(SR, SM)
User data for EST555Z No. 1
User data for EST555Z No. 2
Handling Precautions
• Start up the system screen of the EST555Z before exchanging the
application data between the EST555Z and CF card.
• The application data to be saved into the CF card does not include the
trend sampling data, data sampled by the recorder smart object, and
alarm log data.
• Since the system program has not been installed in the EST555Z with a
date code of “0308” or earlier at shipment, the application data cannot
be downloaded directly from the CF card in the default shipment state.
In this case, it is necessary to download the application data from the AP
Editor with the communication cable.
The date code means a 4-digit number next to the SER No. stamped on
3-37
Chapter 4.
4 - 1
BASIC AP EDITOR OPERATIONS
Starting up and Exiting AP Editor
This section describes how to start up the AP Editor.
■ How to Start Up AP Editor
To start up the AP Editor, select WinAPE from the [Start] menu
Windows and click.
[Programs] in
The following screen is displayed when AP Editor is started up:
Note
• Up to two AP Editors can be started up at the same time. This is useful for
copying and pasting data between applications.
Pay attention to the following points when two AP Editors are started up
simultaneously:
• Do not use the same communications port for both AP Editors
simultaneously.
• Do not output to the printer simultaneously.
• A large amount of memory is used when two AP Editors are started up
simultaneously. So, quit other applications before starting up the two AP
Editors.
4-1
Chapter 4. BASIC AP EDITOR OPERATION
■ How to Exit AP Editor
To exit AP Editor, select [File]
[Exit].
■ How to Start up AP Editor in Other Language
The application data you can create may vary depending on the language and
regional settings of Windows.
Application data Japanese
Language
environment of OS
Japanese
Chinese Simplified
English
❍
X
X
Chinese Simplified
English
X
❍
X
❍
❍
❍
❍: Can be created.
X: Cannot be created.
With Windows XP, it is possible to create application data in a language other than
that set for Windows.
Handling Precautions
• With Windwos2000, it is not possible to input characters other than
alphanumeric characters even though the regional settings are changed.
(However, such characters can be displayed.)
To use the Chinese Simplified environment in Windows XP, follow the
steps below.
4-2
Chapter 4. BASIC AP EDITOR OPERATION
(1) From the [Start] menu, select [Control Panel].
(2) Click [Date, Time, Language, and Regional Options] in the Control Panel.
(3) Click [Regional and Language Options].
(4) Select the [Regional Options] tab, and then select [Chinese (PRC)] from the
pull-down menu of the [Standards and formats] area.
4-3
Chapter 4. BASIC AP EDITOR OPERATION
(5) Select the [Advanced] tab, and then select [Chinese (PRC)] from the pulldown menu of the [Language for non-Unicode programs] area.
(6) After the regional options have been changed, click [OK].
The system prompts you to restart the computer. Click [Yes].
Note
• If East Asian languages are not displayed in the pull-down menu, install files
for East Asian languages in WindowsXP.
When installing East Asian languages, select [Languages], select [Install files
for East Asian Languages], and then click [OK].
4-4
Chapter 4. BASIC AP EDITOR OPERATION
4 - 2
About the Main Screen
This section describes the basic screen configuration of AP Editor and AP Editor menus.
■ Main Screen
The basic screen or “main screen” of AP Editor is shown below.
Applications are created in this main screen shown below.
A menu bar is located at the top of the screen, and clicking an item on the menu
bar displays a pull-down menu for that item. A tool bar containing various icons is
located under the menu bar. You can perform various operations by clicking these
icons.
Basic operation such as selecting menus or moving smart objects, etc. conforms to
basic Windows operation conventions.
For details, we recommend reading the Windows User’s Manual.
The following shows an example of an AP Editor screen display:
Example of an AP Editor screen
Title bar
Menu bar
Tool bar
Application
Manager
Panel window
Smart object window
Title bar
This item displays the title of the window.
Menu bar
This item displays the operation menu items.
Tool bar
This item displays the operation icons.
Application Manager
The Application Manager is used to call up panels, and displays panels,
registered graphics and other smart objects of the application data in a free view
layout. With the Application Manager, you can also copy two or more of these
smart objects and perform other editing operations.
Panel window
This item is for creating application screens.
Smart object window
This item displays the available smart objects.
4-5
Chapter 4. BASIC AP EDITOR OPERATION
■ Menu Bar
Clicking an item on the menu bar displays a pull-down menu.
Items that have sub-menus are indicated by a triangle mark to the right of the item.
Menu items that are displayed in gray are currently unavailable functions. (e.g.
items such as “Close Application” when application data is not displayed)
The following describes the items in the menu bar:
File
This item is for performing file operations such as creating a new application
data file, or opening and saving application data.
Edit
This item holds mainly editing functions for designing panels, such as, creating
new panels, drawing shapes, and copy/duplication of existing smart objects or
shapes.
View
This item holds functions related to screen display, such as, scaling
(enlarge/reduce) panel displays and displaying the color palette.
Online
This item is for downloading the created applications to the EST, or uploading
data from the EST to the personal computer. It is also used to configure the
communications port, display communications status and start the EST's
operation.
Options
This item is for making environmental settings such as the default folder for
storing the application when AP Editor is started up for or the target model
ESTs for the application data is to be created.
Window
This item is for tidying up multiple windows, for example, Application Manager
and panel windows. You can also switch minimized windows, or windows
hidden in the background, to the front.
Help
This item displays key word search, help index, PLC device ranges and version
information.
The key word search and index are used for displaying descriptions for smart
objects.
4-6
Chapter 4. BASIC AP EDITOR OPERATION
■ Tool Bar
Frequently used functions are displayed on the tool bar in the form of icons. You
can use these functions by simply clicking on the desired icon on the tool bar
without having to open the pull-down menu.
The tool bar has two rows, an upper and a lower row. Functions mainly relating to
file operations and editing are located on the upper row. Functions relating to the
design of panels, such as drawing and placing of smart objects are located on the
lower row.
The following describes the functions of the icons on the tool bar:
New Application
This icon is for creaing a new application data.
Open Application
This icon is for reading and displaying existing application data.
Save
This icon is for saving (overwrite) application data under the existing file
name.
New Panel Data
This icon displays a window for creating a new panel.
New Registered Graphic
This icon displays a window for creating a new registered graphic.
Undo
This icon cancels the last drawing or editing operation, and reverting to
the previous state.
Redo
This icon is for canceling the result of an undo and redoing the operation.
Cut
This icon is for cutting and storing the selected graphic element to the
clipboard buffer in memory.
Only the most recently cut graphic element is stored to the buffer.
Copy
This icon is for copying and storing the selected graphic element to the
clipboard buffer in memory.
Only the most recently copied graphic element is stored to the buffer.
Paste
This icon is for pasting the graphic element stored in the clipboard buffer.
4-7
Chapter 4. BASIC AP EDITOR OPERATION
Delete
This icon is for deleting the selected graphic element(s).
Zoom Up
This icon is for enlarging the panel window display.
Zoom Down
This icon is for reducing the panel window display.
Change ON/OFF State View
This icon is for switching the ON/OFF state display of smart objects for
example, switches, lamps,etc.
Application List Edit
This icon is for batch-editing devices and strings currently used in all
panels of the application.
Element List Edit
This icon is for listing the graphic elements on the panel.
Display Preferences
This icon is for making the various display-related settings such as grid
display interval on the panel window or comments.
Download All
This icon is for downloading all data in the application to the EST unit.
Download Modified Data
This icon is for downloading only changes made in the application.
Select
When this icon is selected, graphic elements currently drawn on the panel
window can be selected.
Point
This icon is for drawing points.
Line
This icon is for drawing straight lines.
Segment lines and polygons can also be drawn by continous drawing.
Box
This icon is for drawing rectangles.
Circle/Oval
This icon is for drawing circles and ellipses.
Circle/Oval arc
This icon is for drawing circle arcs and ellipse arcs.
4-8
Chapter 4. BASIC AP EDITOR OPERATION
Text
This icon is for entering text.
Paint
This icon is for painting graphic elements with the specified color.
Background Color
This icon is for setting the background color of panels.
Smart Objects
This icon is for displaying the smart object window.
The required smart objects can be selected and placed from this window.
Image File Paste
This icon is for displaying the image file selection dialog box.
The required image file can be selected and pasted from this dialog box.
Registered Graphics Paste
This icon is for displaying the registered graphic list window.
The required registered graphics can be selected and placed from this
window.
Registered String Data Paste
This icon is for displaying the registered string list window.
The required registered strings can be selected and placed from this
window.
4-9
Chapter 4. BASIC AP EDITOR OPERATIONS
4 - 3
Basic Operations
This section describes how to operate windows and basic procedures for drawing shapes.
■ Basic Window Operations
● Resizing windows
Windows can be resized so that they can be viewed more easily when multiple
panels are displayed on the AP Editor screen.
Windows can be resized by one of two methods, by clicking buttons or dragging
with the mouse.
• Button operations
Click the resizing buttons at the top right of the window.
This button minimizes the window to the bottom of the main screen.
This button restores the minimized window to its original size.
• Mouse operations
If you move the mouse pointer to the window frame, the pointer changes shape.
Drag the pointer to resize the window.
4-10
Chapter 4. BASIC AP EDITOR OPERATIONS
● Scrolling screens
Windows can be scrolled when panel windows, for example, protrude outside the
window and are hidden from view. There are two ways of scrolling windows, by
dragging the scoll box in the scroll bar, or by clicking the arrows at either end of
the scroll bar.
Scroll box
Scroll bar
Scroll bar
● Moving windows
To move an entire window, drag the title bar.
● Closing windows
To close a window, click the close button
at the top right.
● Tidying up two or more windows
To tidy up multiple displayed windows, select [Window] on the menu bar.
Tile Horizontally
Tile Vertically
4-11
Chapter 4. BASIC AP EDITOR OPERATIONS
Selecting an item from the pull-down menu aligns the windows according to the
selected item as shown below.
• Arrange windows vertically
• Arrange windows horizontally
• Arrange windows cascade
4-12
Chapter 4. BASIC AP EDITOR OPERATIONS
● Configuration with dialog boxes
Dialog boxes are displayed when configurating parameters or options for smart
objects, etc.
A dialog box generally comprises of the following items:
Tab
Radio button
Checkbox
drop-down list
Up/down buttons
• Tabs
Click these tabs to switch setting items.
• Radio buttons
Radio buttons are for switching the selection of options. The clicked item is
selected, and a black dot is displayed in the center of the button.
• Checkboxes
Checkboxes are for selecting options. When a checkbox is marked, a check
mark is displayed in the checkbox to indicate that the checkbox selection is
active (checkbox ON).
A marked checkbox indicates that the option is currently selected.
Clicking the checkbox again clears the check mark to indicate that the checkbox
selection is inactive (checkbox OFF).
Checkbox ON
Checkbox OFF
4-13
Chapter 4. BASIC AP EDITOR OPERATIONS
• Drop-down list
When a selection menu is clicked, the various choices are displayed in the form
of a drop-down list.
Click the desired item. Items can also be selected with the [ ] and [ ] keys.
• Up/down buttons
Clicking these buttons increments or decrements numeric values.
Clicking the [ ] button increments numeric values, while clicking the [
button decrements numeric values.
Numeric values can also be entered directly via the keyboard.
]
■ How to Draw Shapes
Various shape drawing functions are used when making panel screens in the
application data.
The following describes how to draw shapes:
● Drawing
Shapes for panel screens are drawn directly on panels with the mouse by selecting
the desired basic shape from the tool bar.
If you select the shape tool bar, an attribute window such as those shown below is
displayed according to the shape that you selected.
• Shape attribute window
Drawn shape
Drawn shape
An image of the shape to be drawn is displayed.
4-14
Chapter 4. BASIC AP EDITOR OPERATIONS
Color
This item is for selecting the drawing color.
When this item is selected, the color selection window is displayed.
If you click the color to use for drawing from the color palette, that color is
selected as the drawing color.
Color palette
Line type
This item is for selecting the type of line to be drawn.
Four line types are available: solid line, dotted line, dashed line and chain line.
Handling Precautions
The display of dotted lines, dashed lines and chain lines differs
slightly from that on the EST.
Size
This sets the size of dots. Size can be set within the range 1 to 8.
Width
This sets the thickness of lines. Thickness can be set within the range 1 to 15.
Poligonal line
If this checkbox is marked, broken segmented lines and polygons can be drawn.
(Polygons drawn with straight lines cannot be filled.)
Paint
If this checkbox is marked, the shape drawn will be filled with the specified
color.
• Dot
Click the position where the dot is to be drawn.
4-15
Chapter 4. BASIC AP EDITOR OPERATIONS
• Line
Click the start point of the straight line and drag to its end point.
If the [Poligonal line] option is selected, you can continue drawing straight
lines.
End drawing either by double-clicking on the last point or by pressing the
[ENTER] key.
• Box
Rectangles are drawn in the direction that you dragged from the clicked point.
• Circle/Oval
Circles or Ovales are drawn in the direction that you dragged from the clicked
point.
Circles and Ovales are drawn in such a way that they fit inside a square formed
by the opposite corners of the drag start and end points.
4-16
Chapter 4. BASIC AP EDITOR OPERATIONS
• Circle/Oval arc
Circles or ovales are first drawn in the direction that you dragged from the
clicked point.
Circles and ovales are drawn in such a way that they fit inside a square formed
by the opposite corners of the drag start and end points.
A straight line indicating the arc start point is displayed from the center of the
circle. Click the start point of the arc and then the end point.
• Text
Character strings can be designeted in the font size of 8, 16 or 32 dots.
Drag the area for entering the text with the mouse.
Enter the text in the area, and click outside the area to apply the entry.
Handling Precautions
The shape of fonts used to display text differs slightly from that in the EST.
4-17
Chapter 4. BASIC AP EDITOR OPERATIONS
● Selection
Shapes can be selected by using the selection item on the tool bar and clicking on
the item to be selected.
Multiple items can also be selected at once by dragging such that all of the shapes
are enclosed by the dragged area.
Selected shapes can be scaled, moved, copied, deleted, and edited in various ways.
Shapes that are not completely enclosed within the dragged area are not selected.
● Move
You can move shapes by clicking and dragging them.
You can move multiple shapes simultaneously by dragging if they have been
selected .
● Scale
When a shape is selected, square handles are displayed on the periphery of the
shape as shown below. If you move the mouse cursor to these square dots, the
mouse cursor changes shape. You can scale shapes by dragging the handles in this
state.
4-18
Chapter 4. BASIC AP EDITOR OPERATIONS
■ Combined Key/Mouse Operations
Mouse and key operations can be combined as follows when editing screens:
[ALT] + click of left mouse button
[ALT] + drag
Toggles the snap-to-grid function between
enabled and disabled.
(By joint use with keys, the grid can be
ignored when the grid is enabled, and the
grid can be enabled when it is disabled.)
[SHIFT] + click of left mouse button Drawing limited to horizontal, vertical and
[SHIFT] + drag
45° direction
[CTRL] + click of left mouse button Repeated duplication or pastes the content
of the clipboard buffer.
[CTRL] + [C]
Copies the selected range.
[CTRL] + [V]
Pastes the copied or cut range.
[CTRL] + [X]
Cuts the selected range.
Handling Precautions
Using [ALT], [SHIFT] and [CTRL] keys in combination may compete with
the shortcut keys of Windows.
Note
For details on other shortcut key combinations, see the pop-up menu that is
displayed by pressing the right mouse button.
■ Using Keys to Operate the Cross-hair Cursor
The cross-hair cursor can be operated by using the cursor keys when editing
screens.
[
[
[
[
Key
]
]
]
]
Description
Moves the cross-hair cursor up one dot per grid.
Moves the cross-hair cursor down one dot per grid.
Moves the cross-hair cursor to the right one dot per grid.
Moves the cross-hair cursor to the left one dot per grid.
For details, see “A-2 List of Key Operations Used in Editing” (page App.-5).
4-19
Chapter 5.
5 - 1
CREATING APPLICATION DATA
Procedure for Creating Application Data
This section describes a basic example of how application data is configured, and the flow from preparation of the
application data through to its transfer to the EST.
■ Structure of Application Data
The following describes the contents of the application data:
Application data is created on a PC using the “AP Editor” software for editing
application data.
Application data is a collection of data items that are transferred (or
“downloaded”) to the EST, and comprised of several types of data.
Application data is comprised of the following data and information:
(1)
(2)
(3)
(4)
(5)
Panel data
Registered graphics
Registered strings
Alarm monitoring configuration
EST configuration information
Configuration data
M300: Alarm 1: Thermal trip
M301: Alarm 2: Inverter error
M302: Alarm 3: Out of materials
•
•
Supported PLC
Mitsubishi Electric A series, etc.
Communications settings
9600bps 8 bits
2 stop bits
Parity OFF
* Registered graphics and registered strings can
not only be pasted to panels as static shape
elements when designing panels, but they can
also be used as display shapes and display
strings (dynamic elements) on smart objects to
indicate operation.
5-1
Chapter 5. CREATING APPLICATION DATA
■ Procedure for Creating Sample Applications
The following shows the procedure for creating sample applications:
Page 5-4
Creating New Applications
Page 5-5
Creating New Panels
Prepare two new panels, and place
shapes and smart objects in these
panels.
Page 5-5
Placing Panel Change Switch
Smart Objects
Page 5-8
Placing Switch Smart Objects
Page 5-10
Placing Numeric Indicator Smart
Objects
Page 5-11
Page 5-14
Displaying Text
Save Application Data
Page 5-13
Drawing Shapes
For details on the procedure for creating actual data, see “■ Procedure for
Creating Application Data” (page 7-1).
5-2
Chapter 5. CREATING APPLICATION DATA
5 - 2
Simple Sample Application Data
Try making some simple application data with the AP Editor, taking the sample data provided as an example.
■ About Sample Data
To open a sample application, select [File] [Open] from AP Editor.
The following window will be displayed:
Select the drive on which the sample application is installed, and select
[EngSample] from the folder list.
The sample application is installed in “\WinAPE\Application”.
Panel displayed
Folder list
Select [EngSample.APX] and click [Open].
Handling Precautions
If you enter a file name from a keyboard in an OS environment of
Windows Me or higher, a pull-down menu will appear listing all the
existing file names to serve as a complement to the entered file name.
Even if you select a file with an extension other than *.APX, you cannot
open any application. When selecting from the list, make sure to
specify a file with the extension of *.APX.
The sample data is read and displayed in the Application Manager.
Application Manager
Sample panel 1
Sample panel 2
5-3
Chapter 5. CREATING APPLICATION DATA
If you click the “+” mark to the left of the panel, existing panel data will be
displayed.
Double-click each of Sample Panel 1 and Sample Panel 2. The respective
panel windows are displayed.
Text, a numeric smart object, a switch smart object and a panel change switch
smart object are used in sample panel 1.
Rectangles and a panel change switch smart object are used in sample panel 2.
Though the sample panels do not function within the AP Editor, the screens are
designed to be switched by [next panel] on sample panel 1 and [return] on
sample panel 2 at the bottom right of the panel.
Also, the color of the switch on sample panel 1 is designed to change in its ON
and OFF states, and the values of the numeric indicator can be changed by
keyboard entry.
Try making the same data as this sample.
■ Creating New Applications
First, create new application data.
1. Select the new application icon
on the tool bar.
EST model selection window will be displayed.
2. Select the currently used EST and click [OK].
The Application Manager will be displayed as follows:
For details, see "■Options" (page6-70).
5-4
Chapter 5. CREATING APPLICATION DATA
■ Creating New Panels
First, create a new panel.
1. Select the new panel data icon
on the tool bar.
A new panel window will be displayed.
Place the required shapes and smart objects on the panel.
■ Placing Panel Change Switch Smart Objects
Set the button for switching and displaying two panels.
Use panel change switch smart objects to change displays.
1. Click the smart object
icon on the tool bar.
The Select Smart Object window will be displayed.
5-5
Chapter 5. CREATING APPLICATION DATA
2. Select the panel change switch.
Place the panel change switch at the bottom right of the panel.
Select [Panel change switches] from the smart object selection window, and
either double-click or drag [Panel change switches] to the panel window.
The configuration dialog box will be displayed as follows:
3. Set the call panel number.
Call up panel No.2 using this smart object.
Change the [Call panel] field in the configuration dialog to “2”.
5-6
Chapter 5. CREATING APPLICATION DATA
4. Set the button color.
Click the [Design] tab in the setting dialog box.
Click inside the [Color] frame. The color selection window will be displayed.
Select the color green from the color palette.
After selecting green, click [OK] in the color selection window.
Handling Precautions
After selecting the color, be sure to click [OK] in the color selection
window to apply the selected color.
5. Enter text to the button.
Enter text so that the button’s function can be easily understood.
Click the [Disp string] field, and enter [next panel] on the keyboard.
When you have finished making changes, click [OK].
6. Place the panel change selector at the bottom right of the panel.
The smart object is placed at the clicked location.
7. Adjust the size of the button.
Select the button. The frame will be displayed around the button.
Drag the handles with the mouse to adjust the size of the button so that the
text is easier to view.
5-7
Chapter 5. CREATING APPLICATION DATA
■ Placing Switch Smart Objects
Place a switch smart object.
1. Double-click or drag [Switches] to panel 1 from the smart objects window.
The setting dialog box will be displayed.
2. First, set the switch action.
Set the switch action so that the switch bit is reset when the switch is touched.
Click the [Alternate] radio button in the Type field.
3. Place the switch so that it lights when ON.
To turn the switch ON and OFF, set the switch as a lamp device. Click the
[Lamp dev] checkbox in the setting dialog box to mark the checkbox. Enter
“NM000.0” to the device.
5-8
Chapter 5. CREATING APPLICATION DATA
4. Change the graphic.
Click the [Graphic] tab on the setting dialog box.
Click [ ] at Graphic at OFF. The pre-registered graphic will be displayed.
Other graphics can be displayed by using the scroll bar on the right.
Here, select the same graphic as the sample application, and either click [OK] or
double-click to select the graphic.
5. Set the colors for when the smart object is ON and OFF.
Click [Color], and set a bright yellow for the smart object when it is ON and a
dark yellow for the smart object when it is OFF from the color palette.
When you have finished making the settings, click [OK] at the bottom of the
dialog box to complete the settings.
6. Place the smart object slightly below the center of the panel center.
5-9
Chapter 5. CREATING APPLICATION DATA
■ Placing Numeric Indicator Smart Objects
1. Place a numeric smart object.
Double-click or drag [Numeric indicators] to panel 1 from the smart objects
window.
2. Let’s set the numeric indicator so that numeric entry is possible from the
keyboard.
Click the [Num keypad] checkbox to mark the checkbox.
Select [BCD] from the [Format] selection menu.
Here, the smart object is set so that decimal numeric values can be entered from
the numeric keypad of the numeric device.
For details on settings of numeric device and other smart objects, refer to the
Smart Terminal EST-Z Series Smart Object Library Manual
No. CP-SP-1089E.
3. Set the color of the numeric indicator when the numeric keypad is in use with
ON and OFF.
Switch to the Graphic tab, and set the color when numeric keypad is active, ON
to light blue and the color when numeric keypad is not active, OFF to white.
When you have finished setting the colors, click [OK] at the bottom of the
dialog box.
5-10
Chapter 5. CREATING APPLICATION DATA
4. Place the numeric indicator smart object in the center of the screen.
When the smart object is positioned, click the numeric indicator smart object
again to place it.
A frame appears around the smart object. Drag the handles to adjust the size
of the smart object.
■ Displaying Text
Text, such as the title and functionality of panels can be displayed.
1. Click the text
icon on the tool bar.
The attributes dialog box will be displayed.
2. Set the background color.
Click the [Color] field in the dialog box, select the color purple in the color
selection window, and click [OK].
5-11
Chapter 5. CREATING APPLICATION DATA
3. Set the text display alignment.
Set the display alignment so that the text in the display frame is centered.
Select [Center] from the selection menu for both [H] and [V] in the [Align] field
in the dialog box.
4. Determine the position to display the text.
Click the display start position, and drag to set the text frame.
A rectangular entry area will be displayed as shown in the figure.
5. Directly enter the text from the keyboard.
In this example, enter “Sample application”.
When you have finished entering the text, click any point outside the entry area
on the panel.
5-12
Chapter 5. CREATING APPLICATION DATA
■ Drawing Shapes
Create another new panel, and draw a shape in panel 2.
1. Place the [return] button in the other panel.
In the same way as the [next panel] that you made for panel 1, place the
[return] button in the other panel.
Set the call panel number for the [return] button to “1”.
2. Select the rectangle
icon from the tool bar.
The attributes window will be displayed.
3. Align the filled rectangle.
Click the [Paint] checkbox in the attributes window to mark the checkbox.
4. Set the fill color.
Click the [Color] field in the attributes window to display the color selection
window.
5. Click the [64-color display] checkbox in the color selection window.
The 64-color palette will be displayed as follows:
5-13
Chapter 5. CREATING APPLICATION DATA
6. Select the desired color, and draw a square on the panel.
When you have finished drawing one square, continue to select another color
from the palette, and draw another square.
■ Saving Application Data
Save the application data you have prepared.
Select [Edit] [Specify No. and save edit data].
1. The Number Setup window is displayed.
2. Set the number “1” to panel 1 and number “2” to panel 2.
You can enter any comment for the panel in the Cmnt field. The comment you
enter is displayed on Application Manager.
3. Click [OK].
5-14
Chapter 5. CREATING APPLICATION DATA
4. Save the application data.
Select [File] [Save As] or [Save] from the menu bar.
The following save window will be displayed:
Enter the file name in the File name entry field at the bottom of the screen.
The file extension is automatically added.
After you have entered the file name, click [Save]. This will save the
application data.
Handling Precautions
• If you save the application data with name [SAMPLE] or [ENGSAMPLE],
the application data will be deleted when it is uninstalled.
• The sample application data is read-only. When saving the sample
application data, save it under a different name.
• If you enter a file name from a keyboard in an OS environment of
Windows Me or higher, a pull-down menu will appear listing all the
existing file names to serve as a complement to the entered file name.
Even if you select a file with an extension other than *.APX, you cannot
open any application. When selecting from the list, make sure to specify
a file with the extension of *.APX.
• When using Windows2000/XP, you must have the administrator privilege
to save the application data according to the save destination.
5-15
Chapter 5. CREATING APPLICATION DATA
■ System Register
Some of the smart objects employ registers (called "system registers") to be used
in the EST system. Therefore, in case of EST555Z, the number of such system
registers may exceed its maximum number depending on the use of smart objects
and the downloading operation may become unavailable.
The maximum number of system registers which can by used by smart objects is
16,384 words per one application. When you create an application for EST555Z,
take care not to exceed this maximum number.
● When the Maximum Number of the System Registers Exceeded
If the total size of the system registers has exceeded 16,384 words, the following
error message will appear indicating that the downloading operation is not
available:
[System register usage for smart objects exceeds 16K words, operation cancelled.]
•Typical smart objects which consume system registers on a large scale
Name of smart object Number of system registers to be consumed
(guideline)
Recorder smart object
(on EST555Z only)
500
Trend smart object
350
PLC monitor smart object
100
The values listed above are only a guideline. This does not happen on the
EST240Z.
5-16
Chapter 6.
6 - 1
TRANSFERRING APPLICATION DATA
Downloading Application Data to EST (PC to EST)
This section describes how to download the sample application data to the EST.
■ Communication Configuration
Before you download application data, you must first configure the
communication of the PC.
Once these settings have been performed, they are saved. So, they need not be set
each time that application data is downloaded, provided the settings need not be
changed.
1. Select [Online] [Comm Setup] from the menu bar on AP Editor.
The following Communications Setup window will be displayed:
● Com port setup
Mark the radio button of the [COM port] on which the EST is currently connected
to the PC, and click [OK].
Note
When using IrDA (infrared communications) for communicating with EST, see
“6-3 Using IrDA (infrared communications)” (page 6-7).
● Selection of language to be used for EST
Click the combo box of [Language on EST] to select a desired language.
Japanese, English, and Chinese Simplified character can be used for the EST.
When using Japanese Windows, you can select Japanese or English.
6-1
Chapter 6. TRANSFERRING APPLICATION DATA
When using Chinese Simplified character Windows, you can select Chinese
Simplified character or English.
When using other Windows, you can select English.
To use a language other than that set for Windows, it is absolutely necessary to
change the regional settings of [Control Panel] of Windows.
In the EST, the following items are changed according to the selected language:
• System screen:
This screen is displayed in Japanese when Japanese is
selected. When a language other than Japanese is selected,
the screen is displayed in English.
• Smart object:
The smart object is displayed in Japanese when Japanese is
selected. When a language other than Japanese is selected,
the smart object is displayed in English.
• Keyboard:
Japanese keyboard is displayed when Japanese is selected.
When a language other than Japanese is selected, English
keyboard is displayed.
• Character string: Character strings in the application data are displayed
corresponding to the language code you have selected.
If Japanese application data is displayed on the EST having
Chinese Simplified character environment, characters are not
displayed correctly.
Handling Precautions
• After changing the language, the system program is forcibly rewritten in
the language used for the EST when downloading all of data.
• If “IrDA” is set enabled in the infrared monitor settings of the personal
computer you are using, the communication may be failed according to
the model of the personal computer when downloading or uploading IPL,
F/W, or application, causing communication error.
If this occurs, set “IrDA” disabled in the infrared monitor settings of the
personal computer. For details on infrared monitor setting, refer to
"6-3 Using IrDA (infrared communications)" (page 6-7).
6-2
Chapter 6. TRANSFERRING APPLICATION DATA
■ Downloading Application Data
By downloading the application data, the application data currently displayed in
Application Manager is transferred to EST.
If no application data is open within the AP Editor, the window for selecting the
application data will be displayed. Select the application data to be read by the AP
Editor.
1. Select [Online] [Download] [Download All] from the menu bar on AP
Editor.
The Communications Status window will be displayed.
2. Click [OK] to start the download.
■ About the Download Menu
The download menu contains the following items:
• Download All
This item is for batch-downloading all of the application's data such as panel
data, smart object data and registered graphic data to the EST.
• Download Modified Data
This item is for downloading only the differences (parts that have been modified)
between the application data currently loaded on the EST.
This item is for downloading only differences when you have modified several
panels in the past but are not sure of which panel. By this method, the download
time is shorter than the time required when downloading all of the data.
• Download Specfied panel
This item is for downloading only the selected panel data. This item is handy
when you are sure of which panels have been modified.
Handling Precautions
• When downloading modified/specified panels, the remaining size of the
application data sometimes no longer matches that on the EST.
Perform a “Download All” while making the application, if you need to
check the exact removing free memory.
• Data cannot be downloaded via channels CH3 and CH4 of the EST.
6-3
Chapter 6. TRANSFERRING APPLICATION DATA
• If [Cancel] is clicked while performing "Download Modified Data" or
"Download All", the application data on the EST will be lost and it is
necessary to perform "Download All" again.
• If downloading is performed to an EST with the recorder smart object
using a CF card, make sure to write to the CF card the data currently
being sampled prior to downloading. For details, refer to "• CF card
operation method" (page 3-28).
6-4
Chapter 6. TRANSFERRING APPLICATION DATA
6 - 2
Uploading Application Data from EST (EST to PC)
This section describes how to upload data downloaded from the EST to the PC.
Further corrections can be made to the application data using the PC and then downloaded again to the EST.
Handling Precautions
Data cannot be uploaded from channels CH3 and CH4 of the EST.
■ Uploading Application Data
1. Select [Online] [Upload All] from the menu bar in AP Editor.
The Specify Upload Destination Application Name window will be displayed.
Handling Precautions
If you enter a file name from a keyboard in an OS environment of
Windows Me or higher, a pull-down menu will appear listing all the
existing file names to serve as a complement to the entered file name.
Even if you select a file with an extension other than *.APX, you cannot
open any application. When selecting from the list, make sure to
specify a file with the extension of *.APX.
2. Enter the application name, and click [Save].
The Communications Status window will be displayed.
3. Click [OK] to start the upload.
6-5
Chapter 6. TRANSFERRING APPLICATION DATA
■ Uploading Data with Passwords
1. Select [Online] [Upload All] from the menu bar in AP Editor.
If you upload the data after it has been downloaded with Password set to “ON”
in the Application Information, the password confirmation window will be
displayed.
2. Enter the 4-digit password, and click [OK].
The Specify Upload Destination Application Name window will be displayed.
Handling Precautions
• For details, see “■ Application Information” (page 7-8).
• If you enter a file name from a keyboard in an OS environment of
Windows Me or higher, a pull-down menu will appear listing all the
existing file names to serve as a complement to the entered file
name.
Even if you select a file with an extension other than *.APX, you
cannot open any application. When selecting from the list, make sure
to specify a file with the extension of *.APX.
3. Enter the application name, and click [Save].
The Communications Status window will be displayed.
4. Click [OK] to start the upload.
6-6
Chapter 6. TRANSFERRING APPLICATION DATA
6 - 3
Using IrDA (infrared communications)
“IrDA” is a standard for data communications units that use infrared for implementing communications.
By using IrDA, data can be exchanged without requiring the connection of communications cables.
Note
IrDA has been established by the Infrared Data Association for infrared
communications. Officially, the standard is called the “IrDA Standard.” However,
the standard itself is generally referred to as “IrDA.”
■ Operating Environment Required for Operating IrDA
The table below shows the required operating environment when using IrDA.
Personal computer
EST
AP Editor
OS Windows 98
Equipped with communication port
IPL version R0015 or later
Ver. 2.0 or later
For details on confirming the IPL and how to update the IPL, see “A-1 About IPL”
(page App.-1).
Handling Precautions
• Position the EST and IrDA so that they are facing each other.
• Prevent reflected light or other external light disturbances from directly
entering IrDA.
• Keep the distance between the EST and IrDA to within 40cm to 1m.
• When two or more ESTs are located within the same communications
area, the EST that IrDA is to connect to cannot be specified.
• Before performing communications again after communications
has ended in error (e.g. download) , wait at least 30s.
• The EST’s system program cannot be updated by IrDA communications.
The program can be updated only by communications over the RS-232C
interface.
• The IrDA (infrared communications) cannot be used in Windows
Me/2000/XP.
6-7
Chapter 6. TRANSFERRING APPLICATION DATA
Configure as follows before using IrDA:
■ Configuration of the Infrared Monitor
1. Select [Start] [Settings] [Control Panel] on the personal computer.
Double-click [Infrared] if available.
2. Select [Options] tab.
Open the window.
3. Mark the [Enable infrared communication] checkbox.
Match the settings with the COM port setting of [Online]
AP Editor.
6-8
[Comm Setup] in
Chapter 6. TRANSFERRING APPLICATION DATA
4. When you have finished configuring, click [OK].
This enables communications. The infrared monitor icon will be displayed on
the task bar.
Infrared monitor icon
Handling Precautions
If [Infrared] is not displayed on [Control Panel], probable causes are that an
infra-red monitor device is not installed on the personal computer, or that
the [Infrared] cannot be used on the particular model of personal computer
you are using.
To install the infra-red monitor device, double-click [Control Panel] [Add
New Hardware], and then follow the on-screen messages.
6-9
Chapter 7.
7 - 1
EDITING APPLICATION DATA
Outline of Application Data
■ Procedure for Creating Application Data
Follow the procedure below to create application data.
Determine the screen
hierarchy.
Prepare screen migration shapes.
• Determine the number of screens to make.
• Determine the operations on each screen, and name the
screens.
Determine the layout of each
screen.
Prepare the screen specifications.
• Determine the placement of shapes.
• Determine which smart objects are to be used.
• Determine the setting parameters of each smart object.
• Determine the registered graphics and registered strings
as necessary.
Prepare the application data on AP Editor.
7-9 (page 7-58)
• Select the EST model.
Make the various settings.
• Perform environment configuration.
7-3 (page 7-12)
Set the EST configuration information.
7-4 (page 7-28) Perform as required.
Create the panels.
• Draw still images.
• Paste smart objects.
•
•
•
•
Option configuration
Communication channel configuration
Recipe data configuration
Gateway configuration
7-4 (page 7-30)
Create registered graphics.
7-7 (page 7-53)
Create registered strings.
7-8 (page 7-55)
Perform alarm configuration.
Print out the application data
document, and verify against the
screen specifications.
• Correct the application data if necessary.
6-1 (page 6-1)
Download the application data to the
EST.
Connect a PLC or other devices to
check operation of the application
data.
• Correct and download the application data again if
necessary.
Print out the document as a final
reference drawing.
Back up the application data.
7-1
Chapter 7. EDITING APPLICATION DATA
■ Data Description
Applications comprise of the following data:
Application data
Panel data
Configuration
information
Straight lines, circles, rectangles, text
Pasting of registered graphics,
pasting registered strings, etc.
General, Recipe,
Gateway
Registered graphics
Straight lines, squares
Strings, circles, ellipses
Arcs, ellipse arcs, image data
Smart objects
Switches, lamps, etc.
Registered strings
Alarm monitoring
Text strings
Messages, etc.
Dedicated package
DMC10 package, etc.
● Configuration information
This information includes the communications settings for devices corrected to the
EST, gateway and recipe configuration.
• General
This is for general configuration of the EST.
• Recipe data settings
This is for configuration of writing recipe data to multiple devices (temperature
controllers, PLCs) connected to EST.
• Gateway
This is for configuration of the gateway function for automatically executing
data exchange between the multiple devices connected to EST.
● Panel data
Panel data is the basic screen data for EST applications and is for performing
program execution. Depending on the smart objects used, data will be displayed
and it is possible to navigate to other screens.
● Registered graphics
Frequently displayed graphics created by the user are registered in advance.
● Registered strings
Preset strings such as nameplates and operation guidance can be displayed on the
EST.
● Alarm monitoring
Bit devices such as alarm contacts on the PLC connected by the host link are
periodically monitored to monitor the numbers of alarms that are ON (indicating
that an alarm has occurred on the bit).
7-2
Chapter 7. EDITING APPLICATION DATA
7 - 2
About the Application Manager
The Application Manager is displayed by opening application data.
The Application Manager displays and batch-manages the various data (panel data, configuration information, etc.)
contained in applications in the form of a menu tree.
Sub-tree
Sub-tree
The data for panels, registered graphics and registered string items do not exist
when an application is newly created.
The [+] mark in the menu tree indicates that there is data for that item one level
down in the hierarchy in a sub-tree. Clicking the [+] mark displays the sub-tree.
Items for which a sub-tree is displayed are preceded by the [–] mark. Clicking the
[–] mark closes the sub-tree.
Display when panel sub-tree is opened
Size
Date
Time
created created
An asterisk mark “✽” preceding the data name indicates that changes or
corrections have been made to the data, but have not been saved yet.
Information (size, date and time created) that is displayed in Application Manager
is not displayed when [View] [Display Preferences] [Others] [Detailed
Application Manager display] is set to OFF.
7-3
Chapter 7. EDITING APPLICATION DATA
Display when the panel sub-tree is closed
Data items
Double-clicking a data item opens the window for that item or its configuration
dialog box.
Data items in this tree can be selected and copied or deleted.
In the Application Manager, copy operations are performed based on existing data
(panel data, registered graphics and registered strings), then the configuration of
these data can be modified for further use.
● Open
You can open any data in the tree by double-clicking it. Also you can open it by
selecting [View] [Open] from the menu bar.
If there are two or more number of panel data items/registered graphics/alarm
blocks, you may open multiple items simultaneously as long as they are the same
type.
In addition, you can open a panel data item or other item by selecting it first, then
right-clicking it and selecting [Open] from the pop-up menu.
Up to 24 windows of panel data items/registered graphics can be opened.
7-4
Chapter 7. EDITING APPLICATION DATA
● Copy
The following describes how to copy panel data in the Application Manager:
Registered graphics and registered strings can also be copied in the same way.
1. Select existing panel data, and select [Edit] [Copy]
from the menu bar.
Multiple panels can also be selected.
You can also select [Copy] from the pop-up menu displayed when you click the
right mouse button with the panel data selected.
2. Select [Panel data], and select [Edit] [Paste]
from the menu bar.
You can also select [Panel data] and [Paste] from the pop-up menu displayed
when you click the right mouse button.
3. The window for specifying the destination data number will be displayed.
7-5
Chapter 7. EDITING APPLICATION DATA
4. Use the up/down buttons to specify the number of the paste destination and
click [OK].
At this stage, the following operation confirmation window will be displayed if
you specify a number for which data already exists:
[Reenter]
This item is for returning to the window for specifying the data number.
[Overwrite]
This item is for overwriting the data of the specified number.
[Skip]
This item is for canceling pasting of the current panel and pasting the next
selected panel.
[Cancel]
This item is for canceling the paste operation.
● Cut
Only panel data, registered graphics and registered strings can be cut from
Application Data. After data has been cut it can be pasted in the same way as that
in copy operations.
Select the data to cut, and select [Edit] [Cut]
from the menu bar.
You can also select the data, and select [Cut] from the pop-up menu displayed
when you click the right mouse button.
● Delete
from the menu bar.
Select the unwanted data, and select [Edit] [Delete]
You can also select the data, and [Delete] from the pop-up menu displayed when
you click the right mouse button.
Handling Precautions
• Panels on which trend, recipe and recorder smart objects are pasted
cannot be copied or pasted at the panel revel.
• When copying/cutting application data and pasting the data to other
application data, the copy/cut source data must already be saved to file.
Otherwise, some (system registered graphics, system registered strings,
system panels, PLC devices) of the required data will not be copied.
7-6
Chapter 7. EDITING APPLICATION DATA
● Copying/Pasting Configuration Information
This item describes how to copy and paste general, recipe and gateway
configuration in Application Manager.
1. Select the general, recipe or gateway configuration in the Configuration
Information tree, and select [Edit] [Copy] from the menu bar.
You can also select [Copy] from the pop-up menu displayed when you click the
right mouse button with the selection made as described above.
2. Open the other application, and select the item copied in step 1. in the
Configuration Information tree, and select [Edit] [Paste] from the menu bar.
You can also select [Paste] from the pop-up menu displayed when you click
the right mouse button with the same selection as copy made.
3. When recipe and gateway configuration are selected
When making a copy, also the configuration information of the PLC driver used
by the recipe data or gateway is copied at the same time. If the communications
settings of the copy source is not the same as that in the application to which the
information is to be pasted, the following window will appear:
This example indicates that the PLC drivers on channels 1, 2 and 3 are used at the
copy source, and that either the driver communications settings for channels 1,
2 and 3 differ, or are not set on the paste side.
When [Yes] is selected, the displayed communications settings for channels 1,2
and 3 will be updated with the pasted information.
When [No] is selected, paste the communications settings without updating.
Handling Precautions
When you selected [No] in the Communications Setup copy dialog and did not
update the communications settings, make sure to set up the communications
driver just like the communications settings of the copy source. Or if you set up
another driver, change all the devices to those corresponding to the driver.
7-7
Chapter 7. EDITING APPLICATION DATA
Note
Copied data sent to the Clipboard is not text data, and cannot be used in other
applications.
■ Application Information
The Application Information window is opened by double-clicking the application
name field in Application Manager.
This window can also be selected by [File] [Application Information] on the
menu bar.
● Info
• EST model
This item displays the model name of the EST for which the application was
created.
• Name
This item displays the name of the application.
• Folder
This item displays the path of the folder where the application is located.
• Created
This item displays the date and time that the application was created.
• Updated
This item displays the date and time that the application was last modified.
• Download size
This item displays the size of the application, maximum size and the usage rate
to be downloaded to EST.
• Comment
This field is for entering comments for the application.
Enter comments using up to 31 ASCII characters.
• Dedicated pkg
The package name is displayed when a dedicated package is set in the
configuration information.
7-8
Chapter 7. EDITING APPLICATION DATA
• 4-digit password protected
When an application is downloaded, the application can be configured with a
password to restrict uploading.
Mark this checkbox when the application is to be downloaded with a password
set.
Handling Precautions
When you have set a password and downloaded the application, the
application data cannot be uploaded unless you enter the password
[that was set here] when uploading that application data from EST.
• Password
This item is for entering the password when the 4-digit password protected
checkbox is checked.
Enter a 4-digit password in this field.
■ Thumbnail
In addition to the tree view, a thumbnail display is also provided on [Panel
data/Registered graphic].
By clicking the [Panel data] or [Registered graphic] tab, you can select a
desired display method.
Thumbnail display of panel data
Thumbnail display of registered graphic
● Display size selection
Reduced graphic list (Large)
: Clicking this button will change the display to the reduced graphic display
having a size of 160 x 120.
Reduced graphic list (Small)
: Clicking this button will change the display to the reduced graphic display
having a size of 80 x 60.
7-9
Chapter 7. EDITING APPLICATION DATA
● Data selection
To select data, click desired screen data or its title part.
To select multiple data, click data with the [Shift] or [Ctrl] key kept pressed.
To put the operation in the non-selection state, click a portion other than the screen
data or its title part.
● Open
Double-click data or select desired data, and select [View (E)] → [Open (O)]
from the menu bar. The Edit window will be opened.
● Copy
Select desired data, and select [Edit (E)] → [Copy (C)]
from the menu bar or
right-click a blank spot and select [Copy (C)] from the pop-up menu.
● Paste
In the non-selection state, select [Edit (E)] → [Paste (P)]
from the menu bar
or right-click a blank spot and select [Paste (P)] from the pop-up menu.
This command can be executed only when valid data exists in the clipboard after
copying or cutting data.
● Cut
Select desired data, and then select [Edit (E)] → [Cut (T)]
from the menu bar,
or right-click a blank spot and select [Cut (T)] from the pop-up menu.
7-10
Chapter 7. EDITING APPLICATION DATA
● Delete
Select desired data, and then select [Edit (E)] → [Delete (D)]
from the menu
bar, or right-click a blank spot and select [Delete (D)] from the pop-up menu.
● New
In the non-selection state, right-click a blank spot and select [New (N)] from the
pop-up menu.
Handling Precautions
• You cannot copy, paste, or cut panel data in units of panels, to which
trend, recipe, and/or recorder smart object are attached.
• When the application data is copied or cut, and then it is pasted in
another application data, the original data to be copied or cut must be
saved into a file. If this data is not saved, you cannot copy a part of
necessary data (system registered graphic, system registered character
string, system panel, and PLC device).
7-11
Chapter 7. EDITING APPLICATION DATA
7 - 3
Configuration Information
The various parameters for the EST operating environment and external interface settings for serial
communications, etc, are set in the configuration information. Configuration information comprises of : General ,
Recipe and Gateway.
■ Basic Settings
Configure the PLC communications channels of the EST.
1. Open the [Configuration Information] sub-tree in the Application Manager,
and double-click [General].
The EST configuration dialog box is displayed.
2. The tab at the top of the dialog box switches between each of the detailed
dialog boxes for [Operation], [Communications] and [Package/Option].
3. After you have finished configuration, click [OK]. This completes the
configuration.
If you click [Cancel] after you have finished configuration, a message window
asking whether you want to discard the settings will be displayed.
4. Clicking [OK] in the message window discards the settings and closes the
dialog box.
Clicking [Cancel] in the message window closes the message window.
5. Clicking [Defaults] restores the operation settings to their defaults.
The following describes the details of each setting screen:
Handling Precautions
Set the PLC communications driver when performing host communications
with a PLC or other device.
7-12
Chapter 7. EDITING APPLICATION DATA
● Operation
This sheet is for setting EST operation settings.
• Operation at power ON
[Auto start]
This item is for automatically starting operation of EST when the power is
turned ON and EST is started up. Set the auto start time within the range 0 to
60s. Do not mark this checkbox if you require the EST to start up to the EST
system screen when the power is turned ON.
[Background panel]
This item is for setting the number of the background panel when EST is started
up. Set the number within the range 2 to 899. Do not mark this checkbox when
background panels are not set.
• Display control
[Backlight auto OFF]
This item is for setting the time that the backlight will be automatically turned
OFF after a touch switch on the EST screen has not been touched for a fixed
period of time. Set the time within the range 1 to 60min.
Do not mark this checkbox if the backlight auto OFF function is not required.
[Screensaver start]
This item is for setting the time that the screensaver will be started up after a
touch switch on the EST screen has not been touched for a fixed period of time.
Set the time within 1 to 60min. The screensaver function is for preventing image
burn-in on the EST screen through excessive use.
Do not mark this checkbox when the screensaver function is not required.
7-13
Chapter 7. EDITING APPLICATION DATA
• Buzzer / blink
[Blink interval]
This item is for setting the blink interval for the display and buzzer. Set the blink
interval within the range 0.3 to 10.0s. The display or buzzer will be repeatedly
cycled ON and OFF with the interval set here.
[One-shot time]
This item is for setting the one-shot time for the displays and buzzer. Set the
one-shot time within the range 0.3 to 10.0s. The display or buzzer will be held
ON for the time set here and then turned OFF.
[Buzzer tone]
This item is for selecting the tone of the buzzer, for example, when a touch
switch is operated.
• DC out
You can select from the following two DC output methods provided as standard on EST.
[System (SW output)]
DC output turns ON when there is data in the switch communications buffer.
[User setup]
The user can use DC output as the output contact for a switch smart object in the
panel data.
In this case, DC output turns ON when SY00.1 in the output contact area is ON (1).
• Interlock buzzer tone
This item is used to output a buzzer tone to notify the user that the smart object
touched cannot be operated since the interlock function configured to that smart
object is active.
You can select from OFF (buzzer tone not output) and three tones. With this
setting, the output pattern is sounded at the specified tone. When the buzzer tone
is set to OFF, the buzzer does not sound when the interlock is active. Setting the
buzzer tone to High outputs a high-pitched buzzer tone.
• Slave communication
[Slave address]
This item is for setting the device address (node number on the communications
line) in slave communications mode.
Set the device address within the range 1 to 126.
• EST error message
This item is for setting the position of a message, string color and background
color to be displayed by EST at downloading or occurrence of communication
error.
This function is available in the EST555Z.
[System]
Position of a message, string color and background color are EST's defaultes.
Display position: Center of screen
String color: White
Background color: Black
[User setup]
This item is for setting the position of a message (X:0 to 629, Y:0 to 319),
string color,and background color displayed on EST.
7-14
Chapter 7. EDITING APPLICATION DATA
● Communications
The following items are available for the configuration of communications with the
connected slaves CH0 to CH4:
• Driver
This item is for setting the communications driver for the device to be connected
to the EST.
• Baud rate
This item is for setting the baud rate for communications.
Handling Precautions
4800bps can be set to CH0 on AP Editor. However, in actual
communications, this baud rate becomes 9600bps.
• Data format
This item is for setting the number of data bits pariity bit, and stop bit.
• Type
This item displays the type of connection. The type of connection is fixed to
each channel as follows: infra-red communications (IrDA) for CH0, RS-232C
interface for CH1, RS-485 (5-lead) for CH2 and RS-485 (3-lead) for CH3 and
CH4.
7-15
Chapter 7. EDITING APPLICATION DATA
● Package/Option
This sheet is for specifying the name of the dedicated package when a dedicated
package is used. It also displays the number of trend smart objects and recipe
smart objects used.
• Dedicated package name
This item is for specifying the name of the dedicated package when a dedicated
package is used.
A “dedicated package” is an EST application that can be downloaded to the EST
for immediate use when the EST is used in combination with a pre-determined
device.
The “DMC10 dedicated package” is available for combined use of an EST with
DMC10.
For details, see “■ About Dedicated Package (page 3-20)”.
• Dedicated storage area information
This item displays the dedicated storage areas used in the trend/recipe/recorder/
dedicated package.
• Max (No.)
This item displays the maximum number of dedicated storage areas.
• Max (word)
This item displays the maximum size of dedicated storage areas by the number
of words.
• Type
Dedicated storage areas are used for trend/recipe/recorder/dedicated package.
• In use (No.)
This item displays the number of dedicated storage areas used in
trend/recipe/recorder/dedicated package.
• In use (word)
This item displays the size of dedicated storage areas used in
trend/recipe/recorder/dedicated package by the number of words.
• Available
This item displays the unused areas out of dedicated storage areas by the number
of areas/area size (words).
7-16
Chapter 7. EDITING APPLICATION DATA
• Total usage
This item displays the ratio of dedicated storage areas used, by percent.
Handling Precautions
The recorder smart objects can be used on the EST555Z. However, the
EST240Z does not support them.
Note
For the dedicated storage areas, refer to "3-2 Dedicated Storage Areas" (page
3-2).
● CF Card Information
• Information
This item displays the reference value for the CF card used by the recorder.
Handling Precautions
It is a reference value when a new CF card of 64 Mbytes is used.
It differs depending on the remaining areas in the CF card actually
used.
[Available size (word)]
This item displays the maximum size of the CF card in words.
[Type]
A recorder is provided which uses a CF card.
[Write]
This item displays the data writing method to the CF cards containing in all the
recorder smart objects set in the application.
If ring write has been set,
is displayed.
If linear write has been set,
is displayed.
If both ring write and linear write have been set,
is displayed.
[Used size (word)]
This item displays the size of the CF card used in the recorder in words.
7-17
Chapter 7. EDITING APPLICATION DATA
[Note]
When linear write has been set, this item displays the guideline for the storage
period.
When both ring write and linear write have been set, error contents will be
displayed.
[Free]
This item displays the unused areas in the CF card in words.
[Usage rate]
This item displays the proportion of the areas being used in the CF card on a
percentage basis.
• Error
When both ring write and linear write have been set, this item displays the
locations (panel number, smart object number) of each smart object.
Handling Precautions
• CF cards can be used on the EST555Z. However, the EST240Z does
not support them.
• When you use a CF card, make sure to read “● When using CF card"
(page 3-25).
■ Recipe Data Configuration
Set the parameters required for the operation of the recipe function.
Display the sub-tree for [Configuration Information] in Application Manager, and
double-click [Recipe].
The Recipe Data Setup dialog box will be displayed.
Recipes are for batch-changing temperature controller, or PLC, setting data
accompanying a change in the product type to be produced.
The recipe function operates in accordance with data set in the recipe data
configuration. For details on recipe functions, see “■ Recipe Functions” (page
3-13).
7-18
Chapter 7. EDITING APPLICATION DATA
● Basic Configuration
This tab is for configuring the number of recipes, number of recipe data items and
data parameters.
Specify group (Gr), write destination device, data name (32 characters), data
comment (64 characters), data format, number of words, decimal point position,
and upper and lower limit values.
Cut, copy, paste and delete operations are performed on single lines.
Cut and delete operations will return values to their defaults and clear devices.
If you move the mouse to between the columns on the top row of the parameter
settings list, the mouse cursor changes to a
.
You can adjust the width of columns by dragging the
to the left and right.
• Recipe No.
This item is for specifying the number of recipes to be made.
• Data No.
This item is for specifying the number of recipe data items to be made.
Note
For details on the relationship between the number of recipes and number of recipe
data items, see “■ Size of Dedicated Stroge Area Used” (page 3-4).
7-19
Chapter 7. EDITING APPLICATION DATA
• Gr
A “group” is a function that is used when the timing at which the recipe data is
written to an external device differs within the same recipe. Up to four groups
can be set. In addition the write execution device of the data can be specified for
each group when the recipe data is to be written by PLC device control.
Note
Set only group 1 when using recipe smart objects with manual writing. Set
groups 2, 3 and 4 when using recipe smart objects with automatic writing. For
details, see “● How to write recipes” (page 3-18).
• Data name
This item is for editing the name of recipe data. Max. 32 characters.
Note
For details on displayable characters, refer to Smart Terminal EST-Z Series
Smart Object Library Manual No.CP-SP-1089E.
• Write dest device
This item is for setting the device to write the recipe data to. Set word devices as
the write destination devices.
Handling Precautions
The recipe data of recipe data items to which a write destination device
has not been set are ignored, and only recipe data to which a write
destination device has been set are active.
• Upper/lower values
These items are for specifying the recipe data setting range. The default upper
limit value is 32767, and the default lower limit value is –32768. The decimal
point is not entered to the upper and lower limit values.
1 Word
2 Words
Signed Binary
–32768 to +32767
Signed Binary
–2147483647 to +2147483647
Unsigned Binary
0 to 65535
Unsigned Binary
0 to 4294967295
BCD
0 to 9999
BCD
0 to 99999999
• Decimal point
This item is for setting the position of the decimal point. The default is 0.
The specification of the decimal point position is only for display on the EST.
The decimal point is not entered to data that is actually written.
1 Word
2 Words
Signed/Unsigned Binary
0 to 4
Signed/Unsigned Binary
0 to 9
BCD
0 to 3
BCD
0 to 7
• Word
This item is for specifying the word length of the recipe data. Specify either 1
word (default) or 2 words.
• Format
This item is for selecting the format of the recipe data. You can select from
signed binary (default), unsigned binary or BCD. Signed binary is displayed as
S. BIN, and unsigned binary is displayed as U. BIN.
• Data comment
This item is for editing the name of the recipe data. Up to 64 single-byte
characters can be entered.
7-20
Chapter 7. EDITING APPLICATION DATA
Note
• For the number of characters which can be displayed, refer to the SMART
TERMINAL EST-Z Series User's Manual Smart Object Library No.
CP-SP-1089E.
• If you change the upper limit value, lower limit value or the position of the
decimal point of the basic configuration, there is a possibility that the setting
comes off the valid range.
If the entered value is out of the range, the position is displayed in red. Reenter the data so that it falls within the range.
[OK] is not accepted as long as this red display persists. Furthermore, you
cannot set up any other data.
Handling Precautions
• Take care so that the area of the device to which the recipe data
settings are written does not overlap the area of the device to receive
the gateway settings. If they overlap one another, the operations of them
cannot be ensured.
• If you set up the recipe data in two words, take care so that the write
destination devices do not overlap each other. If they overlap, the
operation cannot be ensured.
Write destination device Words
4:1:1000
2
4:1:1001
2
4:1:1002
2
4:1:1004
2
NG Overlapping
OK Not overlapping
● Recipe name configuration
This tab is for configuring the recipe name of recipes.
Up to 50 characters can be used for recipe names.
Handling Precautions
Recipes will not function unless a recipe name has been set.
Note
• For details on displayable characters, refer to Smart Terminal EST-Z Series
Smart Object Library Manual No.CP-SP-1089E.
• Recipe names can also be entered and corrected on the EST.
7-21
Chapter 7. EDITING APPLICATION DATA
● Data configuration
This tab is for configuring the recipe data corresponding to the recipes.
• Recipe name
This item is for displaying the recipe name of the recipe number corresponding
to the column on which the cursor is located. The recipe name is only displayed
and can not be changed here.
• Data name
This item is for displaying the data name entered in the basic configuration. This
name is only displayed and can not be changed here.
• Data entry
Each column is recipe data corresponding to a single recipe, and each line
number corresponds to the data to be written to the write destination device
entered in the basic tab of the parameter settings.
The decimal point is not entered in the data that is input.
Clicking the right mouse button displays the pop-up menu, from which cut,
copy, paste, clear to 0 and fill can be selected.
Fill sets the specified range to the same value.
7-22
Chapter 7. EDITING APPLICATION DATA
Handling Precautions
The values set in the data settings are written by the EST to the write
destination address. Specification of the decimal point position is for
display only on EST, the decimal point is not entered to the data that is
actually written.
The following shows how the data set in the basic settings and in the
data settings are displayed on EST:
Basic configuration
Data configuration
EST
Note
In case of a smart element to display the
recipe data comment
• The column width can be changed in the data configuration tab by the same
method as for basic configuration tab. For details, see “● Basic configuration”
(page 7-17).
• If you change the upper limit value, lower limit value, etc. of the basic
configuration after you have set up data, there is a possibility that the setting
comes off the valid range. If the entered value is greater than the upper limit
value or smaller than the lower limit value, it is displayed in red. Re-enter the
data so that it falls between the upper and lower limit values.
[OK] is not accepted as long as this red/yellow display persists.
• Data configuration can also be entered and corrected on the EST.
● Clear All Data
To clear all recipe data configuration, click [Clear All Data].
Note
If pasted recipe data smart objects are deleted or recipe data settings have been
configured by mistake, the message [Smart recipe object is not used in panel
data. The recipe data configration will not be downloaded.] will be displayed
when that application data is downloaded.
If that happens, clear this setting data, return by clicking [OK] and save the
application data.
Then the message will not be displayed again.
7-23
Chapter 7. EDITING APPLICATION DATA
■ Gateway Configuration
Display the [Configuration Information] sub-tree
in Application Manager, and double-click
[Gateway].
The gateway configuration dialog box will be
displayed.
With the gateway functions, data for a temperature
controller or PLC, etc, connected on different EST
channels can be transferred without the need for a
communications program. When the gateway
functions are used, data such as the DMC10’s PV or event information can be read
to the PLC or alternatively the SP or other configuration values can be written to
the DMC10 from the PLC.
For details, see “■ Gateway Functions” (page 3-6).
● Basic configuration
This tab is for configuring Src/Dest mode, Src/Dest device, number of words,
Method, and Parameter. Cut, copy, paste and delete operations are possible on
these settings. Cut and delete operations will return values to their defaults and
clear devices.
• Src/Dest mode
Configure the device settings of the sending side, device settings of the
receiving side, and their number of words. When “discrete” is specified for the
send and receive type, you can specify multiple non-continuous devices. Note,
however, that it takes longer to execute communications compared with when
“continuous” is specified.
• Src dev/Dest dev
Configure the device of the data sending side and the device of the data
receiving side. Set the device in word increments. When bit devices are used, set
at the word boundary.
• Word
Configure the number of data items to send and receive. You can set up to 99 data
items.
• Method
You can select the external startup trigger device (bit device), how the trigger
device is started up (startup at ON, startup at OFF), or periodic startup at fixed
intervals.
7-24
Chapter 7. EDITING APPLICATION DATA
• Parameter
When a fixed interval is selected for the startup method, set the fixed period
time here. Specify within the range 1 to 999s in 1-second increments.
● Clear All Data
Click [Clear All Data] to clear all settings.
Handling Precautions
• Operation of recipe data and gateway data is not assured if the areas for
the write destination device in the recipe data configuration and the
destination device in the gateway configuration overlap.
• Cutting, pasting of copy and deleting are applied to all tabs in the lines
within the specified areas. For example, if No.4 is deleted, all the No.4
data of basic configuration and Extended (interlock) are deleted.
• When you use an external trigger (ON/OFF), if you specify the same
device as the external trigger device for two or more number of
gateways, a part of the triggers may not operate. Make sure to use
different devices for each trigger.
7-25
Chapter 7. EDITING APPLICATION DATA
● Extended
This sheet is for setting the Retries, Time-out and Output mode.
• Notify mode
This is an option for outputting the communications results.
You can select from three options [Output ON], [Output OFF] and [Initialize].
When [Output ON] and [Initialize] are selected, specify the communications
completion notify device and the error notify device.
The [Initialize] function will clear the output result device before starting
communications.
• Completion notify dev
This is the device to output to when communications are completed. The target
output is set (state turned to 1) even if the communications end with an error.
• Error notify dev
This is the device to output to when communications end with an error.
The target output is set (state turned to 1) when communications end with an
error.
• Retries
Select from default, no retries or from within the range 1 to 15.
When the default is used, the default value (standard: 3 retries) of the
communications driver is enabled.
• Time-out
Set the time-out within the range 0.1 to 99.9s or the default.
When the default is used, the default value (standard: 3s) of the communications
driver is enabled.
When time-out is clicked, a checkbox will be displayed. Marking the checkbox
sets the time-out to three seconds. Specify the desired time-out using up/down
buttons.
7-26
Chapter 7. EDITING APPLICATION DATA
● Interlock configuration
Interlock device can be set on the EST555Z to interlock the gateway startup.
Mainly, this startup method is used when using the gateway " at a certain
intervals" or when stopping for a certain period.
This tab is displayed only when creating the EST555Z applications.
• Interlock
[Use interlock] : Used when interlock device is set.
[Unused]
: Is default. If changed to "Unused", the interlock is cleared.
• Interlock device
The device used for interlock device is a bit device.
• Src dev, Dest dev
This item displays the data sending side device and the data receiving side
device set by basic configuration. Any change cannot be made.
Handling Precautions
If the gateway data of the EST555Z using an interlock device is pasted on
the EST240Z, all the interlock devices are deleted because interlock
device is not yet supported.
7-27
Chapter 7. EDITING APPLICATION DATA
7 - 4
Description of “Panel Data” and “Registered Graphic”
The panel data in application data comprises the following graphic elements (strings, straight lines, rectangles,
circles, smart objects, etc.):
■ Panel Conditions
● Size
Panels can be made at any size in 1-dot increments. The same is said of Registered
graphic.
EST model Data size (Max.)
EST240Z
320 x 240
EST555Z
640 x 480
● Number
Max. 899
The user can make any number of panels within the range 1 to 899.
Panels of No.900 or later are called system panels, are called system panels, they
are special pre-provided panels having functions such as numeric keypads, etc.
(System panels cannot be rewritten.)
● Max. number that can be started up
8 (including background panel)
● Number of switches
160 switches can be used on EST screens. For convenience, the number of
switches is restricted to 160 per panel by the AP Editor.
■ How to Display Panels
● Display position
Panels can be displayed at any position.
● Panel number at startup
Panel No.1 is displayed when AP Editor is started up.
● Panel change display
The active panel is stopped, and a new panel is started up.
Panel change displays are used for switching between major functions.
Either entire screens can be changed, or only partial screens can be changed.
With panel change displays, only one of the panels is active (in this example,
panel B), and the other is stopped (in this example, panel A).
A
B
A
Stopped panel
B
Active panel
Switching of entire screen
Switching of partial screen
● Overlay display
New panels are displayed overlaying other active panels.
Overlay display is used when multiple states need to be monitored simultaneously.
With overlay displays, all of the displayed panels A, B and C are active.
A
B
C
Up to eight active panels can be displayed simultaneously. This allows monitoring
of multiple running states simultaneously, or the simuitaneous operation of one
process while monitoring alarm states, or another process at the save time.
7-28
Chapter 7. EDITING APPLICATION DATA
● Pop-up display
All currently active panels can be stopped, all information saved and new panels
opened.
Handling Precautions
• The panel under the overlapping area does not function. For example,
when alarm representative lamps or switches are displayed overlapped,
they will not function. For this reason, do not display panels such that
they overlap these types of objects.
Alarm
Inactive
• The display of the panel data you have designed sometimes differs.
Slightly between the AP Editor and the EST. This difference is because
EST has a function for updating data. Panel data is displayed in the
order in which it was pasted on AP Editor, since priority is given to ease
of operation during editing.
• When the pop-up display reappears, all the panels functioning (including
the panels overlapped) before the display reappears are made active
again (i.e. the panels are opened again).
■ What is a “Background Panel?”
Up to eight panels can be displayed overlapping. The background panel an active
panel that is at the bottom at all times.
Any panel from panel No.2 through to panel No.899 can be specified as the
background panel.
● What are background panels for?
If you design a panel containing switches, panels and other various display smart
objects that are common to each of the panels as the background panel, you need
not paste these smart objects on each of the panels.
The following smart object comes in useful if contained in the panel that is used as
the background panel:
• Panel change switch (external trigger)
This switch enables changing of panels from the PLC.
● How background panels are used
Configure whether or not to use the background panel when the EST is started up
with the application data configuration information.
When the background panel is to be used, set its panel No. at the same time.
You can also use smart objects with background panel selector to activate or
deactivate background panels, or change panel Nos.
Regular panel change switch smart objects can not operate on the background
panel. Be sure to use smart objects with a background panel selector.
Note
For details, refer to the Smart Terminal EST-Z Series Smart Object Library
Manual No.CP-SP-1089E.
7-29
Chapter 7. EDITING APPLICATION DATA
■ What is a “Registered Graphic?”
A registered graphic is a graphic that can be repeatedly displayed, and has been
prepared and registered in advance by the user.
There are two ways of using registered graphics.
• Use as a graphic element for a panel
When there are graphics that are repeatedly used, make and register the graphic
as a registered graphic. This is useful when you frequently use the same graphics
in multiple panels. You can create registered shapes with registered graphic
editing, then display them by pasting them to panels when editing panel data.
• Use as a shape for a smart object
Graphics such as lamps and switches that are used for smart objects are
available in the smart object library. However, user defined graphics can be
displayed as smart objects by creating and registering them as registered
graphics.
Registered graphics can be created in the sizes 1x1 to the maximum size of graphic.
Panel No.
■ Panel Data Edit Window
This window is for editing panel data.
You can create up to 899 panels (panel No.1 to No.899).
Multiple panel data edit windows can be opened simultaneously.
Note, however, that only one window is active for editing at any time. When
multiple windows are opened, you can edit panel data while viewing the edit
window of other panels, or copy data to other edit windows from a certain edit
window.
Set the size of the panel when creating a new panel in the panel data tab of
[Options] [Environment] [Defaults].
• Panel No.
This displays the No. and name of the panel currently being edited.
When creating a new panel, the panel No. is “0”.
When a panel has been edited, (modified) is displayed to the side of the panel
No.
When creating a new panel, the No. can be set by closing and saving the panel.
7-30
Chapter 7. EDITING APPLICATION DATA
When you close a panel after editing it, the following dialog will be displayed:
To save the panel, click [Yes].
If you click [Yes], the following dialog will be displayed:
Set the panel No. here, and enter a comment if required.
To change the panel No. that has been set, you can cut and paste the panel data
with the Application Manager.
For details, see “7-2 About the Application Manager” (page 7-3).
When a panel has been edited, (modified) is displayed to the side of the panel No.
■ Registered Graphic Edit Window
This window is for editing registered graphic data.
You can create up to 999 panels (panel No.1 to No.999).
Multiple registered graphic edit windows can be opened simultaneously.
Note, however, that only one window is active for editing at any time. When
multiple windows are opened, you can edit registered graphic while viewing the
registered graphic edit window of other panels, or copy data to other edit windows
from a certain edit window.
To make a registered graphic, select [Edit] [New Data]
[Reg. Graphic]
.
Registered graphic number
Set the size of the registered graphic when creating a new graphic in the registered
graphic data tab of [Options] [Environment] [Defaults].
7-31
Chapter 7. EDITING APPLICATION DATA
• Registered graphic number
This displays the No. and name of the registered graphic currently being edited.
When creating a new registered graphic, the registered graphic No. is “0”.
When a registered graphic has been edited, (modified) is displayed to the side of
the panel No..
When creating new registered graphic, the No. can be set by closing and saving
the registered graphic edit window.
When you close a registered graphic after editing it, the following dialog will be
displayed:
To save the registered graphic, click [Yes].
If you click [Yes], the following dialog will be displayed:
Set the registered graphic No. here, and enter a comment if required.
To change the registered graphic No. that has been set, you can cut and paste the
registered graphic with the Application Manager.
For details, see “7-2 About the Application Manager” (page 7-3).
When a registered graphic has been edited, (modified) is displayed to the side of
the registered graphic No.
7-32
Chapter 7. EDITING APPLICATION DATA
7 - 5
About Panel Data/Registered Graphic Editing Functions
Edit functions are displayed in the following pull-down menu by selecting [Edit] from the menu bar:
Cancel operations
Cut buffer operations for data,
duplication and deletion
Select all graphic elements
Enter graphic elements
Change background color
Change the position and color of graphic elements
Edit graphic element list
Edit device list
Set graphic element and panel data properties
Save editing data
■ Cancelling Operations
● Undo
Undo cancels the previously selected and executed edit operation, and reverts to
the previous state.
Undo can also be executed repeatedly. (max. 100 steps)
● Redo
Redo cancels the previously executed undo operation and redoes the edit operation
before that.
Redo can be performed for the number of previously executed undo steps.
Handling Precautions
• If more than 99 graphic elements are changed at a time, this state
cannot revert to the previous state.
• "Undo" and "Redo" operations cannot be performed for 9 trend/recipe
smart objects.
■ Data Cut Buffer Operations, Duplicating and Deleting
● Cut
Deletes the selected data, and copies the data to the Clipboard. Cut data can be
pasted to other edit windows using [Paste].
● Copy
Copies the selected data to the Clipboard with the selected data in its previous
state. Copied data can be pasted to other edit windows using [Paste].
7-33
Chapter 7. EDITING APPLICATION DATA
● Paste
Pastes data cut with [Cut] or copied with [Copy] to the selected edit window.
● Duplicate
Duplicates the selected data on the same edit window.
When you click the paste position with the left mouse button after selecting the
data to duplicate, the selected data is duplicated at that position.
● Reduplicate
Repeats duplication of duplicated data by the same amount of movement in
Duplicate.
● Delete
Deletes the selected data.
■ Selecting All Graphic Elements
● Select all
Batch-selects all shapes or smart objects in the selected edit window.
■ Enter Graphic Elements
● Selection mode
Shapes or smart objects can be selected by selecting [Select mode] during the
drawing of shapes.
● Insert
Inserts shapes or smart objects in the edit window.
A sub-menu is displayed when [Ins] is selected. Select the shape or smart object to
insert.
• Drawing shapes and strings
To draw a shape or string in panel data, select the panel window in which to
draw the shape or string, and click the graphic element icon on the tool bar.
To select the shape or string to place on the panel, either click the icon on the
tool bar, or click the left mouse button to select from the menu.
For details on how to draw shapes or strings, see “■ How to Draw Shapes”
(page 4-14).
• Pasting image files
Image data (BMP or JPEG) can be pasted.
To paste image data, select the panel window, and select [Edit]
[Image File] from the menu bar.
7-34
[Insert]
Chapter 7. EDITING APPLICATION DATA
A window such as follows will be displayed:
When you select the image file to be pasted, the image will be displayed on the
right side of the window.
Check the image. If this image is OK, click [Open].
Paste the image at the desired position in the panel window using the mouse.
Note
Black-and-white, 16-color, 256-color, and 24-bit color BMP format files can
be pasted.
Image files are limited in size to images smaller than the panel in which they
are to be pasted.
When pasting 256-color or 24-bit color image files, select the image data to be
created to either 16 colors or 256 colors.
Setting 16 colors takes up half as much memory as that used by 256 colors.
Handling Precautions
• Black-and-white data created using a color other than black or white
is sometimes displayed in white, or its display is not as intended.
• Some JPEG format files cannot be displayed.
• The display refreshing speed sometimes is reduced when JPEG
format files are pasted (by about five seconds for the entire screen).
7-35
Chapter 7. EDITING APPLICATION DATA
• For the data size of BMP file format, the maximum 98304 bytes can
be pasted. The size of BMP file can be calculated by the following
formula:
(256 color BMP byte size) = (height pixels) x (width pixels)
(16 color BMP byte size) = (height pixels) x (width pixels) / 2
Concrete file sizes are 640 × 307 pixels (16 colors), 640 × 153 pixels
(256 colors), 409 × 480 pixels (16 colors) and 320 × 307 pixels (256
colors) etc..
• For the data size of JPEG file format, the maximum 98304 bytes can
be pasted. The number of bytes for JPEG file format is different
according to the compression method or compression rate. The size
of JPEG file format can be confirmed by opening the related file with
internet explorer and then checking the property of image.
• Pasting registered graphics
To paste a registered graphic to a panel, select the panel window in which to
place the registered graphic, and select [Edit] [Insert]
[Reg. Graphic]
from the menu bar.
A registered graphic paste window such as follows will be displayed:
Graphic
display
[Graphic No.]
This item displays the No. of the currently selected registered graphic.
[Graphic display]
This item displays the contents of the currently selected registered graphic.
[Name]
This item displays the comment that was entered when the registered graphic
was made.
[Bytes]
This item displays the size in bytes (data size) of the registered graphic.
[Graphic Size]
This item displays the image size of the selected registered graphic.
Select the registered graphic to paste, and click [OK].
Next, click the location to paste the registered graphic in the panel window.
If you select [Cancel], the paste registered graphic window will be closed
without the registered graphic being pasted.
7-36
Chapter 7. EDITING APPLICATION DATA
• Pasting registered strings
To paste a registered string to a panel select the panel window in which to place
the registered string, and select [Edit] [Insert] [Reg. String Data]
from the menu bar.
A registered string paste window such as follows will be displayed:
[Color]
This item is for setting the color of the string to be pasted.
Clicking this item displays the color palette for selecting the desired color.
[Align]
This item is for setting at which position in the frame to display the string.
You can select from top, bottom or center for aligning text in the vertical
direction.
You can select from left, right or center for aligning text in the horizontal
direction.
Select the registered string to paste, and click [OK].
Next, click the location to paste the registered string in the panel window.
[Scale]
This item is for setting the scale of the text to be displayed.
You can set the scale to independent settings in the horizontal and vertical
directions, and up to 8X in each direction.
[Font size]
This item is for setting the size of the text.
Two size settings are available: 8 dots and 16 dots.
When 8 dots is selected, the text becomes a font comprising eight dots in both
the horizontal and vertical directions.
When 16 dots is selected, the text becomes a font comprising sixteen dots in
both the horizontal and vertical directions.
[Transparent]
When this checkbox is marked, the background color of the string inside the
string frame is set to transparent.
7-37
Chapter 7. EDITING APPLICATION DATA
[Color]
This item is for setting the text background color inside the string frame.
Clicking this item displays the color palette for selecting the desired color.
If you select [Cancel], the paste registered string window will be closed
without the registered string being pasted.
• Pasting smart objects
To paste a smart object, select the panel window, and click the
smart
object.
The Select Smart Object window will be displayed.
Select the smart object you need by double-clicking it.
The smart object setting dialog box will be displayed.
For details on the setting dialog box, refer to the Smart Terminal EST-Z
Series Smart Object Library Manual No.CP-SP-1089E.
Example of pasting switch smart objects
Double-click the switch smart object in the Select Smart Object window.
Note
You can view help for smart objects by clicking the Help button in the
window for each smart object. To view Help for a smart object, select the
pasted smart object, and press the [f•1] key.
The setting dialog box will be displayed.
7-38
Chapter 7. EDITING APPLICATION DATA
After setting the smart object, click [OK] to paste the smart object to the panel
window.
● Paint
Fill the area inside the specified border color with the specified color.
[Color]
This item is for setting the fill color.
Clicking this item displays the color palette.
Selecting the desired color to be used for the fill displays that color.
[Border Color]
Clicking this item displays the color palette.
Border color
Note, however, that if you select a graphic element that is specified as the
border color and execute [Change color], that graphic element is also filled.
After you have set [Color] and [Border Color], click inside the area to be
filled with the left mouse button. This fills the area.
7-39
Chapter 7. EDITING APPLICATION DATA
■ Changing the Background Color
● Background color
This item is for setting the color of the panel window’s background.
When this item is selected, the Set background color window will be displayed.
• Transparent
Clicking this button sets the background color of the panel to transparent
(displayed black on AP Editor).
• Color
If you click the desired color from the color palette, that color is displayed. After
you have selected the color, either click [OK] or double-click the desired color.
The background color of the panel changes to the selected color.
Background color settings can not be undone by [Undo]
.
■ Changing the Position and Color of Graphic Elements
● Snap to grid
Select whether or not shapes or smart objects are to be snapped to the grid when
they are moved or scaled.
Snap to grid is enabled when the [Snap to Grid] check is marked.
● Arrange
Shapes or smart objects selected on the edit window can be arranged.
When the shape or smart object to arrange is selected, and [Arrange] is selected,
the following dialog box will be displayed.
7-40
Chapter 7. EDITING APPLICATION DATA
● Overlap
The overlap order of overlapping shapes or smart objects can be changed.
The sub-menu is displayed by selecting one of the overlapping shapes or smart
objects, and then selecting [Overlap].
The meaning of items in the sub-menu is as follows:
[Top]:
Brings the selected graphic element to the front.
[To Front]: Brings the selected graphic element one element forward.
[To Back]: Sends the selected graphic element one element back.
[Bottom]: Sends the selected graphic element to the back.
In the above example, let’s bring the circle at the back to the front.
First, select the circle at the back.
Next, click the right mouse button to display the pop-up menu, and select
[Overlap] [Top].
Handling Precautions
Judgment of overlapping of straight lines, circles, arcs, ellipses and
ellipse arcs is performed by a circumscribing rectangular area.
● Rotate/Invert
Currently selected shapes or smart objects can be rotated or inverted.
The sub-menu is displayed by selecting [Rotate/Invert]. Select the rotation
direction or inversion direction in this sub-menu.
You can select from 90°, 180° or 270° as the rotation direction and from vertical
inversion or horizontal inversion as the inversion direction. Smart objects, image
files, strings, pasted registered graphics or pasted registered strings can not be
rotated or inverted.
7-41
Chapter 7. EDITING APPLICATION DATA
● Change color
You can change the color of selected shapes.
Select [Change color] displays the following Change Color en bloc window:
Clicking the Before field displays the color palette.
Select the color to change (color of current shape) from the color palette, and click
[OK] on the palette.
In the same way, click the After field, and select the desired color from the color
palette.
When you have decided on the before and after colors, click [OK] in the Change
Color en bloc window.
■ Edit Graphic Element List
● Editing the list of graphic elements
When the edit window for a panel or registered graphic is opened, the graphic
element list window for the corresponding edit window can be displayed for
editing of graphic elements. The graphic element list window displays a list of
graphic elements currently placed in the panel window or registered graphic
window.
All of the edit commands that are available in the panel/registered graphic edit
window can be used on the graphic elements selected in the graphic element list
window.
Note, however, that for [Paste]
only, pastes are performed before the current
position since the paste position cannot be specified by the mouse.
• Changing the coordinate input method
When selecting [Options (O)] → [Environment (E)] → [Edit (E)] from the
menu bar, the following window will be displayed:
7-42
Chapter 7. EDITING APPLICATION DATA
Select a desired coordinate input method used when editing the list of graphic
elements from two methods shown below.
[Input Left/Top/Right/Bottom] : Input coordinates of 4 corners to determine the
position and size of the graphic element.
[Input Left/Top/Width/Height] : Input coordinates of the start point at the upper
left portion, and the width and height of the
graphic element to determine the position and
size of the graphic element.
• Coordinates
Each line in the table showing the coordinate position of the graphic element
corresponds to a single element. Coordinates are displayed top down in order
from the last inserted graphic element.
In the example, the 6th row indicates from the leftmost side [No.], [Name],
[Left], [Up], [Right] and [Down].
The left, up, right and down coordinates are displayed for each graphic element.
Note, however, that the actual meaning of these coordinates differs according to
the graphic element. The meaning of coordinates is as follows for each of the
graphic elements:
Points, fills :
[Left] and [Up] are used for expressing the
coordinates.
Lines :
[Left] and [Up] are used for expressing the
start coordinate, and [Right] and [Down] are
used for expressing the end coordinate.
Continuous lines :
[Left] and [Up] are used for expressing the
start coordinate, and [Right] and [Down] are
used for expressing the start coordinate (end
coordinate of the 1st line) of the 2nd line.
Circles/ellipses, circle/ellipse arcs : [Left] and [Up] are used for expressing the
center coordinate, and [Right] and [Down]
are used for expressing the radius.
Other (rectangles, smart objects) : [Left] and [Up] are used for expressing the
top left coordinate, and [Right] and [Down]
are used for expressing the bottom right
coordinate.
For this reason, the start point of graphic elements such as straight lines is
expressed by [Left] and [Up] in the coordinate position table even if the start
point is to the right of the end point.
• Coordinates(Left/Top/Width/Height)
There are 6 columns. From the leftmost column, they are [No.], [Name], [Left],
[Up], [Width] and [Height] in that order.
[Left], [Up], [Width] and [Height] show the left and top coordinates, and width
and height of the graphic element, respectively.
The left and top coordinates become the start point of the graphic element.
Additionally, the width and height are those of the minimum circumscribed
rectangle of the graphic element.
7-43
Chapter 7. EDITING APPLICATION DATA
• Changing the drawing order of graphic elements
You can change the drawing order of graphic elements (object execution order)
by clicking the button described below.
Moves the drawing order up.
Moves the drawing order down.
■ Edit Device List
● Editing the list of devices
When a panel is opened, the devices assigned to smart objects pasted to that panel
can be displayed as a list for editing.
Handling Precautions
The list does not show the settings for the devices assigned to trend
smart objects. If you want to check or change their settings, directly
open the property of the smart object or use the Application List Edit
window.
Note
Smart object parameters to which devices are not assigned are not displayed.
• Name
This item displays the name of the smart object.
Double-clicking the name of the smart object opens the properties of the target
smart object so that they can be edited.
• Parameter name
This item displays the name of the smart object parameter.
Double-clicking the parameter name opens the properties of the target smart
object so that they can be edited.
• Device
This item displays the device currently set to the parameter.
Devices can be edited. First, click the device to be edited.
Clicking on the device list with the right mouse button displays the pop-up menu.
7-44
Chapter 7. EDITING APPLICATION DATA
• Undo
Undo cancels the previously selected and executed edit operation, and reverts to
the previous state.
Undo can also be executed repeatedly. (max. 100 steps)
• Redo
Redo cancels the previously executed undo operation and redoes the edit
operation before that.
Redo can be performed for the number of previously executed undo steps.
• Cut
Deletes the selected data, and copies the data to the Clipboard. Cut data can be
pasted to other devices by [Paste].
• Copy
Copies the selected data to the Clipboard with the selected data in its previous
state. Copied data can be pasted to other devices by [Paste].
• Paste
Pastes data cut by [Cut] or copied by [Copy] to the selected device.
• Delete
Deletes the selected data.
• Find
Clicking Find displays a window for entering the device to find, find start point
and find direction.
Clicking [OK] searches for the device according to start point and find direction
settings. To continue searching, press the [f•3] key.
• Replace
Clicking Replace displays a window for entering the device to replace, device
value after replacement, replace start position, replace direction and
confirmation of the replace.
If you click [OK], all devices are replaced without any confirmation inquiry
being displayed on screen if you selected “Replace All”. If you selected
“Confirm Replace”, the following Confirm Replace window will be displayed.
7-45
Chapter 7. EDITING APPLICATION DATA
Clicking [Yes] replaces the device and starts the search for the next device.
Clicking [Next] does not replace the device and starts the search for the next
device.
Clicking [All] replaces all devices.
Clicking [Cancel] quits the replace operation.
■ Configuring the Properties of Graphic Elements and Panel Data
● Properties
This item is for opening the configuration window and dialog box.
Select the shape or smart object whose settings are to be changed, and select
[Properties]. The configuration window or dialog box corresponding to that
graphic element is displayed.
If you select [Properties] with no graphic element selected, the Panel/Registered
Graphic Properties setting window will be displayed.
The Panel/Reg. Graphic Properties configuration window is used for confirming
the size of the data currently used by the panel data, changing the comment
entered to the panel, and changing the size of the window.
The maximum window size is, see "■ Panel Conditions" (page 7-28).
EST model Data size (Max.)
EST240Z
320 x 240
EST555Z
640 x 480
■ Save Edit Data
Data can be saved by selecting this. This item enables the data currently being
edited and saves it to memory.
The No. setup dialog box is displayed if the data currently being edited is a new
panel or registered graphic.
Data can also be saved in the pop-up menu displayed by clicking the right mouse
button during editing.
7-46
Chapter 7. EDITING APPLICATION DATA
■ Specify No. and Save Edit Data
Selecting this item displays the No. setup dialog box so that you can specify the
No. to save the data.
The window currently being edited becomes the No. to which the data was saved.
Data can also be saved in the pop-up menu displayed by clicking the right mouse
button during editing.
Handling Precautions
Nos. cannot be specified for saving editing data when a trend/recipe smart
object has been pasted to a panel.
■ Changing Graphic Elements
The following operations are possible by the combination of mouse and [CTRL],
[ALT] and [SHIFT] keys on the keyboard in the graphic element select mode:
[CTRL] key + drag . . . . . . . . Duplicates the original graphic element at the
position you move the mouse to.
[SHIFT] key + move . . . . . . . Restricts movement of graphic elements to
left/right, up/down or 45°.
[SHIFT] key + scale . . . . . . . Scales graphic elements at fixed aspect ratio.
[ALT] key + drag . . . . . . . . . . Toggles snap to grid between enabled and disabled.
[CTRL] key + cursor key . . . . Scales graphic elements.
Cursor key . . . . . . . . . . . . . . . Moves graphic elements.
For details on mouse and cursor key operations, see “A-2 List of Key Operations
Used in Editing” (page App.-5).
■ Editing Functions for Registered Graphics
Smart objects, registered graphics and registered strings can not be pasted into a
registered graphic edit window.
Drawing of shapes/strings, setting of the background color, paint, and pasting of
image files can be performed in the same way as in the panel edit window.
For details on individual edit functions, see “7-4 Description of “Panel Data”
and “Registered Graphic” (page 7-28).
7-47
Chapter 7. EDITING APPLICATION DATA
7 - 6
Edit Application List
“Edit Application List” refers to the window for editing en bloc the devices and strings currently used throughout
all panels of the application.
This window is used to confirm, or edit, existing applications.
■ Editing the Application List
Select [File] [Application List Edit] on the menu bar with the application
opened.
The following Edit Application List window will displayed:
• Type
This item is for selecting the target to be edited (Device or String).
Device: EST internal devices are targeted for editing by the device address
currently used on the smart object.
String: Strings entered by the user are targeted for editing by the string or smart
object drawn on the panel.
• View
This item is for setting items to be displayed in the list. Items include Display
all, Channels 1 to 4, and Internal device (in the case of strings, Display all,
Smart objects and Strings).
• Panel
This item displays the panel No. to which the graphic elements are currently
pasted. This item cannot be edited.
• Smart object parameter name
This item displays the name of the smart object parameters. This item is not
displayed if the graphic element is not a smart object. This item cannot be
edited.
• Remarks
This item displays the panel No., No. of graphic element in the panel, graphic
element name, smart object parameter name, and smart object comment.
This item cannot be edited.
● When Type is set to device
• CH
This item displays the EST communications channel.
7-48
Chapter 7. EDITING APPLICATION DATA
• Node
This item displays the node address (including the sub-address) for the target
EST.
• Device address
This item displays the device address (including internal devices on EST) of the
target EST.
● When Type is set to string
• Strings
This item displays strings drawn in the panel and strings for the smart object.
Handling Precautions
• The data set in the Edit Application List is registered to each panel.
• When performing operation in Edit Application List, make sure that all
panels have already been registered.
Note
• If the data is in error when an entry is applied, the background of the line in
question will be displayed in red.
• When PLC device [1:1:0000] is entered to one of cells [CH], [Node] or [Device
address], the data “1” “1” “0000” will be set to each of the respective cells.
• Channel, EST address, device address and string data can be changed.
Select the cell to be changed, and enter the new setting with the keyboard. When
you do this, the previously set string will be overwritten with the text that you
entered on the keyboard.
To apply the changes, press the [ENTER] or [TAB] key. To cancel the changs,
press the [ESC] key.
Keyboard entries can also be initiated by either double-clicking the cell or
pressing the [ENTER] key. At this time, the cursor will be located at the end of
the currently set string.
7-49
Chapter 7. EDITING APPLICATION DATA
■ Editing Functions
Clicking on the application list with the right mouse button on the Edit Application
List displays the pop-up menu.
• Undo
Undo cancels the previously executed edit operation, and reverts to the previous
state. (max. 100 steps)
Undo is not possible when a type or display has been changed, when a change
has been made in another edit window, or when a sort has been performed in the
Edit Application List window.
• Redo
Redo cancels the previously executed undo operation and redoes the edit
operation before that.
Redo is not possible when a type or display has been changed, when a change
has been made in another edit window, or when a sort has been performed in the
Edit Application List window.
• Cut
Deletes the selected data, and copies the data to the Clipboard as a string. Cut
data can be pasted to other cells with [Paste].
• Copy
Copies the selected data to the Clipboard as a string with the selected data in its
previous state. Copied data can be pasted to other cells with [Paste].
• Paste
Pastes data previously cut by [Cut] or copied by [Copy] to the currently selected
cell.
• Select All
Selects all cells.
• Find
Clicking [Find] displays a window for entering the string to find, find start point
and find direction.
Clicking [OK] searches for the string according to start point and find direction
settings. To continue searching, press the [f•3] key.
7-50
Chapter 7. EDITING APPLICATION DATA
• Replace
Clicking [Replace] displays a window for entering the string to replace, string
after replacement, replace start position, replace direction and confirmation of
the replace.
If you selected “Replace All” and you click [OK], all strings are replaced
without any confirmation inquiry being displayed. If you selected “Confirm
Replace”, the following Confirm Replace window will be displayed:
Clicking [Yes] replaces the string and starts the search for the next device.
Clicking [Next] does not replace the string, but starts the search for the next
string.
Clicking [All] replaces all strings.
Clicking [Cancel] quits the replace operation.
• Open panel
Clicking Open panel opens the panel corresponding to the currently selected
cell. If the panel is already open, that panel becomes active.
Note
• If the data is judged to be in error as a result of having performed an edit
operation, the background of that column will be displayed in red.
• If you execute a paste to a single cell when the string of PLC device [1:1:0000]
is in the Clipboard, only the data corresponding to the currently selected cell is
set.
Example: “0000” will be set to [device address] if “1:1:0000” is pasted to that
cell. “1” will be set to [Node] if “1:1:0000” is pasted to that cell.
• If you execute a paste to selected multiple columns (selected [CH], [Node],
[Device address]), all devices will be set.
Example: If [4:1:1004] is pasted, “4”, “1” and “0000” are pasted to each of
[CH], [Node] and [Device address] respectively.
• The panel can also be opened by clicking the fixed cell (panel/smart object
parameter column) on the left.
7-51
Chapter 7. EDITING APPLICATION DATA
■ Sort Function
The sort function can be applied to each of the display items.
Clicking the cell column title at the top sorts the strings in columns.
Clicking the cell a second time reverses the sort order.
Cell column title
7-52
Chapter 7. EDITING APPLICATION DATA
7 - 7
Editing Registered Strings
“Registered strings” are strings that can be displayed by specifying their No. in the application data.
Registered strings are handy when displaying strings of a fixed content such as the same message in multiple
panels. Registered strings can be displayed by creating the desired string in advance using edit registered string,
then pasting the registered string having the specified No. to the panel using edit panel data.
■ Registered String Edit Window
Up to 1999 strings can be created as registered strings, and assigned a No. within
the range No.1 to No.1999.
The maximum number of characters that can be included in a single registered
string is 2000.
Registered strings can be created up to approx. 10,000 characters in total.
To register a registered string, double-click [Registered string data] in the
Application Manager.
The following Registered string data window will be displayed:
Click the field of the number you wish to register the string to, and enter the string.
After entering the string, click [OK].
Note
To enter a carriage return, enter [ \ ] [ r .]
■ Editing Functions for Registered Strings
Cut, copy, paste and delete edit operations can be performed on registered strings.
The edit menu can be displayed with [Edit] from the menu bar with the string
selected.
The edit menu can also be displayed with the pop-up menu displayed by selecting
the string field and clicking the right mouse button.
7-53
Chapter 7. EDITING APPLICATION DATA
• Cut
Deletes the selected string, and copies the string to the Clipboard.
• Copy
Copies the selected string to the Clipboard with the selected string in its
previous state.
• Paste
Pastes the cut or copied string.
• Delete
Deletes the selected data.
• Single Edit
Displays the selected registered string in the single edit window. Up to 2000
characters can be entered for each registered string. If only part of the registered
string can be displayed, the entire registered string can be displayed by selecting
the single edit window for that registered string and using the scroll bar in the
window to view the rest of the registered string.
7-54
Chapter 7. EDITING APPLICATION DATA
7 - 8
Editing Alarm Monitoring
The bit devices corresponding to the alarm contact points of the PLC connected by the host link are periodically
monitored to monitor the ON (i.e. the corresponding alarm has occurred) alarm numbers. This section describes the
setup procedure of the alarm monitoring function. For the function, refer to "3-11 Alarm Monitor" in the SMART
TERMINAL EST-Z Series User's Manual Smart Object Library No. CP-SP-1089E.
■ Alarm History Configuration
Set whether or not to record history information for alarm monitoring.
Click [Alarm history] in the Application Manager.
The Alarm History Setup dialog box will be displayed.
• Record alarm history
When this checkbox is marked, the alarm histories registered to the alarm block
settings are recorded.
Up to 400 histories can be recorded.
• Recording method
This item is for selecting the method for recording the alarm history.
Ring . . . . . . . . When the maximum number of histories is exceeded, recording will
continue, with the data of the oldest history being overwritten with
the data of subsequently occurring history information.
Fixed . . . . . . . When the maximum number of history items is exceeded,
subsequent history information will not be recorded.
When you have finished configuring the Alarm History, click [OK].
Clicking [Cancel] closes the dialog box without the settings being applied.
7-55
Chapter 7. EDITING APPLICATION DATA
■ Alarm Block Configuration
Continuous alarm contact areas where alarms are to be monitored can be
registered, max. blocks.
The PLC device address or the internal address (NM000.0 to NM255.F) on the
EST can be specified as the alarm contact.
Up to 64 points (4 words) of alarm contacts can be monitored per block.
To set the alarm block, click [Alarm information] in the Application Manager,
display the block one level down in the menu hierarchy, and double-click the
block to be configured.
The following Alarm Block Setup dialog box will be displayed:
• Name
This item is for entering the block name.
The block name entered here is displayed as the block name in the Application
Manager.
• Start device
This item is for entering the PLC device address of the alarm contact or the
internal address (NM000.0 to NM255.F) of the EST.
• End device
This item displays the address of the last device according to the number of
alarm bits to be monitored.
7-56
Chapter 7. EDITING APPLICATION DATA
• Number of bits in alarm
This item is for selecting the number of bits (contacts) of the alarm to be
monitored.
Selecting “0” disables alarm monitoring for this block.
• No.
This is the No. of the bit.
• Device
This is the address of the device.
• Alarm name
This item is for entering the name of the alarm. Up to 16 characters can be
entered.
• Alarm message
This item is for entering the alarm message. Up to 64 characters can be entered.
The alarm name and alarm message set here are reflected in aggregate lamps,
summary indicators, history indicators, and number of occurrences.
For details on smart objects, refer to Smart Terminal EST-Z Series Smart
Object Library Manual No.CP-SP-1089E.
Note
To enter a carriage return , enter [¥] [r].
When you have finished configuration, click [OK].
Clicking [Cancel] closes the dialog box without the settings being applied.
7-57
Chapter 7. EDITING APPLICATION DATA
7 - 9
Others
Display setters and options are available as other functions.
Mainly, screen display-related settings can be made on display setters, and AP Editor environmental settings can be
made on options.
■ Display
The following pull-down menu is displayed by selected [Disp(D)] from the menu
bar:
• Open
Opens panels or registered graphics.
• Close
Closes the edit window.
• Close All
Closes all edit windows.
• Color palette
Displays the color palette.
• Grid
Switches the grid display ON/OFF.
• Scale
Scales the edit window.
• Display Preferences
Configures how smart objects or grids are displayed.
■ About Display
[View] on the menu bar has the following functions:
• Open
Selecting [Open] with a panel No. or registered string No. selected in the
Application Manager opens the window for the panel No. or registered string
No.
• Close
Selecting [Close] with an opened window selected closes that window.
• Close All
Selecting [Close All] when multiple windows are displayed closes all windows.
• Color palette
Displays the Select Color window.
7-58
Chapter 7. EDITING APPLICATION DATA
Color palette
Color palette
This window is for selecting the color to be used for drawing.
To select a color, click the color by clicking the left mouse button.
To swap the colors on the color palette.
(1) Click the right mouse button. The color in the palette at the clicked
position is swapped with the selected color.
(2) Colors from the 64-color palette can be selected and swapped for the
default 16 colors.
(Hint) Color palette settings are saved for each application data.
Default
This returns the colors in the color palette to their defaults.
64-color display
The 64-color palette is displayed when this checkbox is marked.
The colors of the 64-color palette cannot be changed.
R/G/B
Displays the RGB values of the color selected from the color palette.
Each of the RGB (Red, Green, Blue) values are displayed within the range 0
to 255 corresponding to the selected color.
Color
Displays the currently selected color.
• Grid
Switches the grid display in the edit window ON/OFF.
The grid display is turned ON if [Grid] in the menu is prefixed by a check mark.
To change the grid spacing, refer to [Display Preferences].
• Scale
Scales the edit window.
A sub-menu will be displayed when this item is selected so that you can select
the desired size.
Size options are 60%, 100%, 200%, 400% and 500%. When 60% is selected, the
message “Display may not be rendered correctly if the display scale is less
than 100% .” for the first time only, but the data is scaled to 60%.
7-59
Chapter 7. EDITING APPLICATION DATA
• Display Preferences
This screen is for setting the edit window display preferences and other display
settings.
Clicking [Set disp] displays the following dialog box:
Grid
This item is for setting the grid spacing.
The grid spacing can be set independently in the horizontal and vertical
directions within the range 4 to 100 dots.
Set the grid spacing using the up/down buttons. Numerical values can also be set
directly from the keyboard.
Clicking [default(20x20)] returns the settings in the horizontal and vertical
directions to the default 20 x 20 dot setting.
Smart object disp mode
This item is for setting the display on smart objects placed in panel windows.
Information for which a checkbox is marked will be displayed on smart objects
placed in panel windows.
State display
This item is for specifying whether to display smart objects such as lamps, that
have ON/OFF states, in their ON state, or their OFF state.
Option
This item is for specifying whether or not to display the switch frame, and
whether or not to display the paint point.
Others
[Detailed Application Manager display]
When this checkbox is marked, the data size, creation date and comment are
displayed following the panel No. and registered graphic No. in the
Application Manager.
7-60
Chapter 7. EDITING APPLICATION DATA
■ Options
● Environment
Clicking [Options]
menu.
[Environment] from the menu bar displays the option
• Folder
Sets the AP Editor work folder.
• Defaults
This item is for setting the panel data and the registered graphic data of the
currently editing EST model.
• EST model
This item is for setting the EST model of the application to be creased when
creating a new application. The defaults etc. of the model selection radio button
at the time are configured.
• Edit
Sets the environment related to the edit operation.
• Folder
Specify the folder to which the data file is to be stored when AP Editor is used.
The folder set here is enabled when AP Editor is next started up.
Basically, reading/writing of application data, reading of bitmap data, and setting
of the print output destination are performed on the folder set here.
Select [Option] [Environment] [Folder] from the menu bar.
The Folder configuration dialog box will be displayed.
Enter the application data, bitmap data and storage folder and the print output
destination.
Clicking [Browse] displays the following folder selection dialog box:
Drives and folders can also be selected and set from this dialog box.
7-61
Chapter 7. EDITING APPLICATION DATA
• Defaults
Set the default EST model and the initial the size of edit window.
Select [Option] [Environment] [Defaults] from the menu bar.
The Application Data Defaults dialog box is displayed.
You can select the EST model, panel data and registered graphic defaults using
the tabs in this dialog box.
• Panel data
This sheet is for setting the size of the panel data and background color when
creating new panel data.
To set the size of the panel data, click the up/down buttons. You can also set the
size of the panel data directly from the keyboard.
For details on the background color, see “■ Changing the Background Color”
(page 7-40).
Clicking [Default] returns the settings to their defaults.
• Reg. graphic
This sheet is for setting the size of the registered graphic and background color
when creating new registered graphics.
To set the size of the registered graphic, click the up/down buttons. You can also
set the size of the registered graphic directly from the keyboard.
For details on the background color, see “■ Changing the Background Color”
(page 7-40).
Clicking [Default] returns the settings to their defaults.
Note
For the sizes of the panel data/registered graphics, refer to "■ Panel Conditions"
(page 7-28).
7-62
Chapter 7. EDITING APPLICATION DATA
• EST model
This item is for configuring the EST model defaults of the application to be newly
created.
New application can be created by selecting the model with [File] [New] from
menu bar or by clicking the icon
.
The setting to be made here is the function related with the operation after clicking
theicon.
Select [Options] [Environment] [EST model] from the menu bar.
When creating a new application, the EST model configuration dialogue is
displayed. Setting items are available for model selection, default model and check
box.
• Model
Following two items are available:
•Use the finally opened application data model as a default model.
•Use the below model as a default model.
If the mode selection is for [Use latest application model as default], no
other selection is available.
If the mode selection is for [Use below model as default], both default model
and check box can be selected.
• Default EST model
This item is for specifying the EST model default in model selection window
when creating a new application.
If the check box [Fix default EST model for New Application] is marked,
new application can be created in this "Default EST model" without opening
the model selection window.
If used when the model to be created is only one, new editing can be made
without opening a model selection window.
7-63
Chapter 7. EDITING APPLICATION DATA
• Editing
You may set the environment related to the edit operation in the Panel/Registered
graphic window.
Select [Option] [Environment] [Edit] from the menu bar.
The Edit configuration dialog box will be displayed.
• Enter setting
You may select a line feed/entry setting method used when inputting a character
string in the Panel/Registered graphic window.
• Apply by [ENTER], and new line by [CTRL] + [ENTER]
Enter a new line with [CTRL] + [ENTER], and apply the entered string with
[ENTER].
When entering “Emergency stop” as two lines:
New line by [CTRL] + [ENTER] keys
Apply by [ENTER] key
7-64
Chapter 7. EDITING APPLICATION DATA
• New line by [ENTER], and apply by [CTRL] + [ENTER]
Enter a new line with [ENTER], and apply the entered string with [CTRL] +
[ENTER].
New line by [ENTER] key
Apply by [CTRL] + [ENTER] keys
• Element List Edit
You may select a desired coordinate input method used when editing the list of
graphic elements.
[Input Left/Top/Right/Bottom] : Input coordinates of 4 corners to determine
the position and size of the graphic element.
[Input Left/Top/Width/Height] : Input coordinates of the start point at the
upper left portion, and the width and height of
the graphic element to determine the position
and size of the graphic element.
7-65
Chapter 7. EDITING APPLICATION DATA
● Data conversion
The application for the EST240Z is converted into that for the EST555Z.
After the data has been converted, [‹Newly created application›]is shown on the
application name.
The application data cannot be converted while it is being changed. Before
converting the data, save all changes or cancel the changes. After that, start the
data conversion.
The following operations are performed during data conversion:
• Changing the screen size
The screen size of the panel data is changed so that the data for the full-screen
(320 X 240) of the EST240Z is changed to that for the full-screen (640 X 480)
of the EST555Z.
If you do not wish to change the screen size, you must use the import function.
• Deleting smart objects not used for the EST555Z
The EST555Z provides smart objects different from those of the EST240Z,
and there are smart objects, which cannot be used for the EST555Z. Panel
Nos. including EST240Z smart objects, which cannot be used for the
EST555Z, are displayed during data conversion, and then such smart objects
are deleted.
Target smart objects are recipe, trend, and variable trend smart objects.
• Deleting the package
The dedicated packages used for the EST240Z are different from those used
for the EST555Z.
When using any dedicated package, relevant message is shown, and then it is
deleted.
When such dedicated package is needed, set the dedicated package for the
EST555Z again.
● Tidying up the dedicated storage area
Select [Options] [Tidy Dedicated Storage Area] from the menu bar.
Dedicated storage areas are available for the configuration information of trends,
recipes and dedcated packages.
The following message is sometimes displayed when a trend smart object with two
or more trend buffers per channel is pasted to an application in which multiple
trends, daily/monthly reports, or recipes already exist:
“The dedicated storage area must be tidied up. Save to file, close all
windows other than the Application Manager, and execute Tidy Dedicated
Storage Area in the Option menu.”
When this message is displayed, the trend configuration information that should be
set as a single block in the dedicated storage area is spread over multiple special
storage areas. Each of the trend configuration information can be stored to be a
single block by executing “Tidy Dedicated Storage Area” in the options menu
Before you execute “Tidy Dedicated Storage Area”, save the application to file,
and close all windows other than the Application Manager.
7-66
Chapter 8.
8 - 1
PRINTING APPLICATION DATA
Printing Options
Application data can be output from the AP Editor. Printer output or file output can be selected. To select output,
select [File] [Print] from the menu bar. This displays the Print dialog box.
You can switch between output options, application information and panel/registered graphic settings with the tabs
in the Print dialog box.
After selecting the required options, click [OK]. This outputs the application data to the printer or file.
If you click [Cancel], the application data is not output and the Print dialog box closes.
■ Output Options
● When printer output is selected
Select the options for when application data is output to a printer.
• [Output to]
This item is for specifying a printer or file as the output destination.
• [Printer]
This item displays information about the currently selected printer.
To switch the printer type, select the paper, or make other printer settings, click
[Properties].
• For details of settings at [Properties], refer to the Instruction Manual provided
with the printer you are using.
• [Copies]
This item is for setting the number of copies to output from the printer.
8-1
Chapter 8. PRINTING APPLICATION DATA
● When file output is selected
Make the settings for when application data is to be output to a file.
• [Folder]
This item is for entering the folder of the file output destination.
Document data is output to a text file, and image data is output to a BMP, EMF
or WMF format file.
• Clicking [Browse] displays the folder selection window.
You can also specify the folder by selecting the desired folder from this window.
• [File name]
The application folder name is displayed (default), but can also be changed.
Note
For details on output files, see “● Output of print files” (page App.-8).
■ Application Information
Specify the content to be output.
• Output information of application data
To output information of the application data by text, mark this checkbox.
8-2
Chapter 8. PRINTING APPLICATION DATA
• Application data
Select which application data is to be output.
Mark the checkbox of the items to be output.
The following files are output:
Output data
Management information
Configuration information
Panel data list
Registered graphics list
Registered string data list
Alarm information list
Gateway list
Recipe data list
Output file name
(application file name)_CNF.TXT
• Output smart object list
To output a list of smart objects, mark the checkbox.
Note
Carriage return codes used during entry of text in alarm monitoring of panels
and registered graphics are printed as “¥r”.
Handling Precautions
Smart object information is printed as it is. So, the printed content may
differ from the settings in the smart object dialog box.
• Select All
Clicking this button selects all items.
• Deselect
Clicking this button cancels all currently selected items.
■ Panels/Registered Graphics
Specify the panel and registered graphic images to be output.
8-3
Chapter 8. PRINTING APPLICATION DATA
• Output panel images
To output panel image, mark this checkbox.
• Printing range
[All]
This item is for outputting all panel images.
[Range]
This item is for specifying the range of panel numbers to output.
• Output reg. graphic images
To output registered graphic image, mark this checkbox.
• Printing range
[All]
This item is for outputting all registered graphic images.
[Range]
This item is for specifying the range of registered graphic numbers to output.
• Image format
This item is for specifying the file format when outputting application data to
file. Application data can be output to file in BMP, EMF or WMF format.
• Panel Image setup
[Smart object frame]
This item is for specifying whether or not to output the image data attached with
the smart object’s frame.
[Smart object type]
This item is for specifying whether or not to display the type of smart object.
[Smart object comment]
This item is for specifying whether or not to display the smart object’s comment.
[Dummy numeric display]
This item is for specifying whether or not to output the image data with dummy
numeric values indicated for numeric indicators.
• Smart object state
When outputting images of smart objects, you can select display of [State
1(OFF)] or [State 2(ON)].
Click the radio button of the state you want to output.
• Switch frame
This item is for specifying whether or not to output the image data with the
switch frame displayed.
• Paint point display
This item is for setting whether the painted point is displayed or not.
8-4
Chapter 8. PRINTING APPLICATION DATA
8 - 2
Sample Printout
The following shows a sample of printout:
Sample printout of a sample application
[Management Information]
Application name
Comment
Created date
Last updated date
Target EST model
:EngSample
:
: 1999/09/29 4:20:52
: 2000/10/11 14:51:42
:EST240Z
Gateway data total
:0
Use of dedicated storage area
Smart trend objects :0
Recipe
:No
Dedicated package
:No
[Configuration Information]
Communications setting:
CH , COM port
, communications type (PLC
CH0 Infra-red
Serial driver (slave)
CH1 RS232C
Serial driver (slave)
CH2 RS485 5wire
Serial driver (slave)
CH3 RS485 3wire
Serial driver (slave)
CH4 RS485 3wire
Serial driver (slave)
type) , bps , data format
Ver1.7
9600
8Bit ParityNone 1Stop bit
Ver1.7
9600
8Bit ParityEven 1Stop bit
Ver1.7
9600
8Bit ParityEven 1Stop bit
Ver1.7
9600
8Bit ParityEven 1Stop bit
Ver1.7
9600
8Bit ParityEven 1Stop bit
EST screen protection
Backlight auto OFF :Unused
Wake up screen saver:Unused
Settings at power ON
Start auto run
Background panel
:
:0 Sec
:Unused
Display/sound setting
Blink interval
One-shot interval
Sound tone
Sound at interlock
:0.5 Sec
:0.3 Sec
:Medium
:Peep peep
Slave device address
DC output setting
:1
:System (switch output)
[Panel data List]
No.1:Sample Panel 1
No.2:Sample Panel 2
[Registered Graphics List]
Nothing registered
[Registered Strings List]
Nothing registered
[Alarm information List]
All blocks not used
8-5
Chapter 9.
USING A DEDICATED PACKAGE
A “dedicated package” provides the user with functions equivalent to those of a user application but without the
need for the user to create an application.
A dedicated package need only be downloaded in the same way that an existing application would be, and can be
used immediately.
A dedicated package can be used as a standalone application or downloaded in combination with other user
application data.
The dedicated package consists of the following data:
• Panel data
• Registered graphics
• Registered strings
• EST configuration and management information tables
• User data
(User data is data that can be set or changed by the user on screen within the dedicated package.)
A DMC10 package is available as a dedicated package.
For details, refer to the Instruction Manual for the respective package.
■ Using Only the Dedicated Package
To use only the dedicated package, you must download the package data to the
EST in the same way as when you download the regular user application data
from AP Editor.
Before downloading the application data, quit all open applications.
Next, select [Online]
[Download Dedicated Package] from the menu bar.
The dialog box for selecting the dedicated package opens. Select the dedicated
package to be downloaded, and click [OK].
Note
For details on communications settings, see “■ Communication Configuration”
(page 6-1).
9-1
Chapter 9. USING A DEDICATED PACKAGE
■ Using the Dedicated Package with the User Application
To use the dedicated package together with the user application, specify the
dedicated package at Dedicated package name in the [Package/Option] tab
displayed by [Configuration Information] [General].
After you have set the dedicated package, follow the regular download procedure.
For details on how to download, see “6-1 Downloading Application Data to
EST (PC to EST)” (page 6-1).
The user application is downloaded followed by the dedicated package.
Note, however, when downloading modified data only, the dedicated package will
not be downloaded if the dedicated package is already downloaded and the version
of the package is the same.
Handling Precautions
• Changes cannot be made to special packages.
• The settings of communications channels currently used by the
dedicated package in configuration information cannot be changed. A
message is displayed if you try to change settings.
• If you download the DMC10 package again to an EST-Z Series to which
the DMC10 package is already downloaded, the environmental settings
of the package will be initialized, and the previous settings will be lost.
The settings that are initialized are all of the below setting items
described in,
EST240Z DMC10 Package User’s Manual CP-UM-5149E
EST555Z DMC10 Package User’s Manual CP-SP-1124E
- Device automatic assignments
- Name information
- Screen configuration
- CMC buffering configuration (CMC link version only)
- Alarm definitions
Data currently saved to the DMC10 is not affected.
9-2
Chapter 9. USING A DEDICATED PACKAGE
■ Downloading the User Data of the Dedicated Package
Download user configured data such as screen cofiguration and name cofiguration
to the dedicated package currently loaded in the EST.
Use data items that were uploaded from EST in advance as the user data to be
downloaded.
1. Select [Online] [Download] [Download User Data] from the menu bar.
The dialog box for selecting the user data file opens.
2. Select the user data file to download, and click [OK].
When a file is selected, the dialog box for selecting the user data opens.
3. Select the user data to be downloaded, and click [OK].
Handling Precautions
The user data of the dedicated package cannot be downloaded when the
dedicated package has not been installed.
■ Uploading the User Data of the Dedicated Package
Upload user configured data such as screen configuration and name information
from the dedicated package currently loaded in the EST.
1. Select [Online] [Upload] [Upload User Data] from the menu bar.
The dialog box for selecting the user data opens.
2. Enter the user data and name of the file to upload, and click [OK].
Handling Precautions
• The user data of the dedicated package cannot be uploaded when the
dedicated package has not been installed.
• Edit uploaded data only on EST. Do not edit the data on other devices.
The dedicated package will not function properly when uploaded data
edited on other devices is downloaded.
9-3
Chapter 10. SAVING APPLICATION
DATA INTO CF CARD
CAUTION
Do not turn OFF the power or remove the CF card from the slot while accessing
the CF card. This may corrupt data in the CF card.
When using the application save function of the CF card on the system screen of
the EST, do not attempt to download or upload data while accessing the CF card.
Improper handling of the CF card may corrupt its data.
Yamatake shall not be held responsible for any defect or trouble arising from
improper operation made by the customer.
Strictly observe the following handling precautions:
• Do not bend or drop the CF card, or apply a strong shock to it.
• Do not splash water onto the CF card or expose it to the direct sunlight.
• Do not disassemble the CF card or insert metallic objects such as a clip into it.
Improper handling of the CF card may corrupt its data.
Yamatake shall not be held responsible for any defect or trouble arising from
improper handling made by the customer.
Handling Precautions
• To use the CF card application data save function, it is absolutely
required to prepare the AP Editor Ver4.6.00 or higher.
• Prepare an EST555Z having the CF card option.
• When handling the CF card using the AP Editor, it is necessary to
prepare an appropriate environment, in which the CF card can be
connected to the personal computer before using the CF card.
(Example: USB CF card reader, PCMCIA CF card adaptor)
• Always use a CF card recommended by Yamatake. Yamatake cannot
guarantee the proper operation of a CF card other than that
recommended by Yamatake.
CF card model recommended by Yamatake: SCF0640
(Card capacity: 64 MB)
• Always format the CF card properly using the CF card format tool
(cffmtz.exe) supplied with the AP Editor or the system screen of the EST
system before using it.For details, refer to
“■ Formatting CF card” (page 10-4).
• The CF card formatted using the system program (F/W Ver.R0015 or
later) supplied with the AP Editor version 4.6.00 or later is not
compatible with that formatted using a system program with the version
earlier than the above version (F/W Ver.R0014 or earlier). In this case,
prepare a new CF card or reformat the existing CF card using the
EST555Z you wish to use.
At this time, since the data stored in the CF card is erased when
formatting the CF card, the data must be saved into the personal
computer before formatting it when necessary.
10-1
Chapter 10. SAVING APPLICATION DATA INTO CF CARD
■ Cautions for Saving CF Card Application Data
• About file name characters
The name of a file to be saved into the CF card must be that the extension is
removed from the name in the Dos format (so called “8.3 format”).
Therefore, single-byte or two-byte characters with a size of up to 8 bytes can be
used for the file name.
However, a single-byte symbol character cannot be used for the 1st character of
the file name.
The following single-byte characters cannot be used for the file name to be
saved into the CF card:
Single-byte KANA characters, space, , : ; + = [ ] < > \ / * ? | "
The following file names cannot be used (single-byte characters):
CON, AUX, COM1 to COM9, LPT1 to LPT9, PRN, NUL
• About comment
A comment can be attached to the application data file on the CF card.
When the list of files is displayed using the system menu of the EST555Z,
each file can be identified using this comment.
The comment attached to the file is different from that attached to the
application data.
The comment attached to the application data to be saved into the CF card is
retained as it is, and then it is restored by executing [CF → EST] on the
EST555Z.
Even though [Read from CF…] is executed using the AP Editor, the comment
attached to the application file to be transferred to the hard disk drive is
different from the comment attached to the file of the CF card.
CF Card
Application data file
Application data
Application data comment
System program
Dedicated package
Internal device data
File comment
10-2
Chapter 10. SAVING APPLICATION DATA INTO CF CARD
• About card removal
To remove the card, use the eject function of the OS.
If the card is removed without use of the eject function of the OS, this may
corrupt the data.
To use the eject function of the OS, follow the steps below.
(1) Select relevant CF drive in [Removable Disk].
(2) Right-click a blank spot and select [Eject].
(3) Remove the card.
• About CF card used by recorder smart object
The application data save function cannot be used for the CF card used by the
recorder smart object.
In this case, the CF card is used after it has been reformatted after necessary
data has been saved into the personal computer.
10-3
Chapter 10. SAVING APPLICATION DATA INTO CF CARD
■ Formatting CF Card
Before using the CF card, format it properly using the special tool.
Handling Precautions
• Before using the CF card, always format it using the CF card format tool
(cffmtz.exe) supplied with the AP Editor or the system screen of the
EST.
The CF card formatted using the standard format function provided on
Windows cannot be used for the EST.
• To run the CF card format tool in Windows2000/XP, you must have the
Administrator privilege of the computer, on which the CF card format tool
is executed. For details on Administrator Authority, consult the system
administrator for the computer you are using.
Note
• When formatting the CF card using the CF card format tool (cffmtz.exe), it is
formatted in the format described below.
File system: FAT (FAT16)
Sector size: 512
Allocation unit size (cluster size): 2048
● Formatting procedures
(1) Double-click [cffmtz.exe] located in the directory where the AP Editor has
been installed to start it up.
When using WindowsXP, right-click a blank spot and select [Run as…(A)].
When the Run As window appears, check on [The following user:] and input
as follows:
User name:
Name of computer currently running: Administrator
Password:
Password of Administrator
For details on Administrator privilege, consult the system administrator for the
computer you are using.
10-4
Chapter 10. SAVING APPLICATION DATA INTO CF CARD
(2) Select relevant drive.
(3) Clicking [Format] will start formatting.
(4) Follow the messages that appear on the screen to perform the format operation.
■ Environment Setup
Handling Precautions
Before specifying any setting using [Environment], make sure that the CF
card drive or adaptor is connected to the personal computer firmly.
Specify a drive No. of the CF card connected to the personal computer.
(1) From the menu bar, select [Options] → [Environment] → [Folder].
(2) Display the pull-down menu of the CF card drive and select relevant CF card
drive.
(3) Click [OK] to save the settings.
10-5
Chapter 10. SAVING APPLICATION DATA INTO CF CARD
■ CF Card Menu Screen
The following shows the menus of the CF card application function:
• [Read from CF…] (CF → HDD)
When selecting [Read from CF…], you can transfer the application data and
user data read to the EST onto the hard disk drive in the personal computer.
• [Save to CF…] (HDD → CF)
When selecting [Save to CF…], you can transfer the application data, user
data, and dedicated package from the hard disk drive to the CF card.
• [File operations…]
When selecting [File operations…], you can copy or delete the application
data and user data saved in the CF card, and/or change the name and/or
comment.
■ Reading Data from CF Card (CF → HDD)
The data saved in the CF card is converted into that in the file format, which can
be used for the AP Editor, and then this converted data is saved onto the hard disk
drive.
The application data and user data can be read from the CF card.
● Reading application data
The following describes how to read the application data saved in the CF card:
(1) Put the CF card, in which the application data is saved, in the CF card reader.
(2) From the menu bar, select [File] → [CF card] → [Read from CF…].
The Read from CF card window will be displayed.
(3) Select application data you wish to read in the left portion.
(4) Input a name of the file you wish to save in the right portion and click [Read]
to start reading data from the CF card.
10-6
Chapter 10. SAVING APPLICATION DATA INTO CF CARD
● Reading user data
The following describes how to read the user data, which is used by the dedicated
package, from the CF card:
(1) Put the CF card, in which the user data is saved, in the CF card reader.
(2) From the menu bar, select [File] → [CF card] → [Read from CF…]. The
Read from CF card window will be displayed.
(3) Set “User Data” in the [File type] field.
(4) Select user data you wish to read in the left portion.
(5) Input a name of the file you wish to save in the right portion and click [Read]
to start reading data from the CF card.
■ Saving Data into CF Card (HDD → CF)
The data saved on the hard disk drive is converted into that in the file format,
which can be used for the EST555Z, and then this converted data is saved into the
CF card.
The application data, dedicated package, and user data can be saved into the CF
card.
Handling Precautions
To save data into the CF card, always use the AP Editor.
● Saving application data
The following describes how to save the application data running on the
EST555Z to the CF card:
(1) From the menu bar, select [Online] → [Communications Preferences...].
The Communications Preferences window will be displayed.
10-7
Chapter 10. SAVING APPLICATION DATA INTO CF CARD
(2) In the [Language on EST] field, select a language used for operation of the
EST555Z. The file system for the selected language is saved into the CF card.
(3) Put a formatted CF card in the CF card reader.
(4) From the menu bar, select [File] → [CF card] → [Save to CF…]. The Save
to CF card window will be displayed.
(5) Select application data you wish to save in the left portion.
(6) Input a file name and comment you wish to save in the right portion, and then
click [Save] to start saving data into the CF card.
Note
When saving the application data using the dedicated package, the dedicated
package is also saved into the CF card automatically.
● Saving user data
The following describes how to save the user data used by the dedicated
package into the CF card:
(1) Put a formatted CF card in the CF card reader.
(2) From the menu bar, select [File] → [CF card] → [Save to CF…]. The
Save to CF card window will be displayed.
(3) Set “User Data” in the [File type] field.
(4) Select user data you wish to save in the left portion.
(5) Input a file name you wish to save in the right portion and click [Save] to
start saving data into the CF card.
10-8
Chapter 10. SAVING APPLICATION DATA INTO CF CARD
● Saving dedicated package
The following describes how to save sole dedicated package not including the
application data into the CF card:
The dedicated package is saved into the same place as where the application
data list is saved.
(1) Put a formatted CF card in the CF card reader.
(2) From the menu bar, select [File] → [CF card] → [Save to CF…]. The
Save to CF card window will be displayed.
(3) Set “Package” in the [File type] field.
(4) Select a dedicated package No. you wish to save in the left portion.
By reading the comment, check the contents of the dedicated package.
(5) Click [Save] to start saving the data. The file name shown in the right
portion is fixed. Therefore, you cannot change this file name.
10-9
Chapter 10. SAVING APPLICATION DATA INTO CF CARD
■ Editing File on CF Card
You can delete or copy the file on the CF card, and change the file name or
comment.
Handling Precautions
The application data and user data are composed of a directory and
multiple files. If incorrect file operation is performed, the data may be
corrupted. To edit the file on the CF card, always use the AP Editor.
● Deleting file
The following describes how to delete application data or user data on the CF
card:
(1) Put the CF card, in which the application data or user data is saved, in the CF
card reader.
(2) From the menu bar, select [File] → [CF card] → [File operations…]. The
File operations window will be displayed.
(3) Select “Application” or “User Data” in the [File type] field.
(4) Select a file you wish to delete from the list.
(5) Click [Delete] to start deleting the file.
10-10
Chapter 10. SAVING APPLICATION DATA INTO CF CARD
● Copying file
The following describes how to copy application data or user data on the CF card:
(1) Put the CF card, in which the application data or user data is saved, in the CF
card reader.
(2) From the menu bar, select [File] → [CF card] → [File operations…]. The
File operations window will be displayed.
(3) Select “Application” or “User Data” in the [File type] field.
(4) Select a file you wish to copy from the list.
(5) When clicking [Copy], the file name input window will be displayed.
(6) Input a file name and click [OK]. The file is then copied.
10-11
Chapter 10. SAVING APPLICATION DATA INTO CF CARD
● Changing file name
The following describes how to change the file name of the application data or
user data on the CF card:
(1) Put the CF card, in which the application data or user data is saved, in the CF
card reader.
(2) From the menu bar, select [File] → [CF card] → [File operations…]. The
File operations window will be displayed.
(3) Select “Application” or “User Data” in the [File type] field.
(4) Select a file from the list, the file name of which you wish to change.
(5) When clicking [Edit name], the file name input window will be displayed.
(6) Input a file name and click [OK]. The file name is then changed.
10-12
Chapter 10. SAVING APPLICATION DATA INTO CF CARD
● Changing file comment
The following describes how to change the comment of the application data or
user data on the CF card:
(1) Put the CF card, in which the application data or user data is saved, in the CF
card reader.
(2) From the menu bar, select [File] → [CF card] → [File operations…]. The
File operations window will be displayed.
(3) Select “Application” or “User Data” in the [File type] field.
(4) Select a file from the list, the comment of which you wish to change.
(5) When clicking [Edit comment], the comment input window will be displayed.
(6) Input a comment and click [OK]. The comment is then changed.
Handling Precautions
You cannot change the comment of the sole dedicated package file.
10-13
Chapter 10. SAVING APPLICATION DATA INTO CF CARD
■ Supplemental Description
The following shows the meanings of the icons shown in the file list:
: Application data
: with dedicated package
: User data
: Sole dedicated package
: Illegal file
Note
• Even though an illegal file exists, this does not cause any operational problem.
However, since illegal files may share a certain capacity of the CF card, it is
recommended to delete such files.
• Illegal files may be created in the following cases:
• The original data is not correct.
• The data transfer is aborted.
• The card capacity is insufficient.
10-14
Chapter 11. TROUBLESHOOTING
11 - 1
Error Messages & Remedied Actions
Message is listed in alphabetical order.
[A]
Message
Meaning and Remedied action
A ddress can not be decrement.
This is displayed if an attempt is made to change the value by
decrementing when an address that can not be decremented below the
current value is set, or when an invalid address is set.
A ddress can not be increment.
This is displayed if an attempt is made to change the value by
incrementing when an address that can not be incremented above the
current value is set, or when an invalid address is set.
A maximum of 24 panels/registered
To open a different edit window, close one of the currently open edit
graphics can be opened at once. Please windows.
close any unnecessary items.
A user application is already exists in the
EST. The user application will be deleted
and the dedicated package will be
downloaded in its place. Continue?
An attempt has been made to download a stand alone dedicated
package. However, a user application already exists in the EST. Execute
the download if it is OK to delete the user application and download the
dedicated package in its place.
A value outside of the valid range was
input. The value will be modified to fit
within the range.
The input value was automatically modified to a valid value since it
exceded the valid range.
If necessary, reset the value to a correct value.
An illegal relationship between the
maximum and the minimum.
Set the maximum size to a value larger than the minimum size.
[C]
Message
Meaning and Remedied action
Can not display all of the string text in the
frame. To display all, either expand
frame, reduce the number of characters,
or reduce the text scale.
The entire entered string cannot be displayed fully at the specified scale
since the string frame is too small.
To display the entire string, expand the frame, reduce the text scale or
reduce the number of characters.
Can not display double-byte (Kanji)
characters with 8-dot font. Change font
size, or remove Kanji characters to
ensure correct display.
Though double-byte(Kanji) characters can be entered, they cannot be
displayed correctly on EST if the specified font size is 8-dot font.
Either change Kanji characters to single-byte characters, or select
the 16-dot font size.
Can not duplicate. The element
protrudes from the screen.
The graphic element to be pasted cannot be duplicated as it is too large.
Increase the size of the panel at the duplication destination.
Can not open EST applications of
unsupported EST models.
Can not paste. This JPEG format is not
supported.
An attempt was made to open an application of an EST model different
to those supported by the AP Editor.
The format of the JPEG file you are about to paste is not supported on
the EST.
Change the JPEG format with a different image editor.
Can not rotate. Because the group
contains an element (smart object,
registered graphic, registered string data,
etc.) that can not be rotated.
Only points, straight lines, rectangles, circles/ellipses, arcs/ellipse arcs,
strings and fills can be rotated.
Smart objects, registered graphics and registered strings cannot be
rotated. Deselect these for rotation.
Can not rotate. The element protrudes
from the edit area.
The graphic element cannot be rotated as it will protrude from the edit
window if it is rotated.
Change the graphic element to be rotated.
Can not use Inter-lock device for
Gateway data with this model.
The Inter-lock device has been deleted.
This is displayed when the EST555Z gateway data is pasted on the
EST240Z. In the pasted gateway data, a data using an interlock device
exists. Interlock device can be used only in the EST555Z, and cannot
be used in the EST240Z. In this case, past the data after deleting interlock
device.
11-1
Chapter 11. TROUBLESHOOTING
Message
Meaning and Remedied action
Communication error occurred.
A possible cause is line-noise caused by equipment that generates
strong noise, such as an inverter.
Try executing again.
Could not execute, as there is edited
data that has not been saved. Save to
file and close all windows other than the
Application Manager before executing.
Tidy Dedicated Storage Area in the Options menu cannot be executed
unless the application has been saved to file.
Save the entire application to file, and close all windows other than the
Application Manager before executing.
Could not connect to the EST. Please
check the cable connections and
communications port.
Please check:
•The connecting cable for loose connections
•That the cable is of the recommended type and wired correctly
That the EST is powered ON.
Then try again.
Could not copy to the Clipboard. There
may not be enough free memory or
incorrect communication driver setting.
Although PLC device is used for the data on clipboard, the PLC device
corresponding to the application to which pasting is performed has not
been configured Make communication configuration of the corresponding
channel.
Or, there may not be enough free memory due to some causes. After
closing other applications, repeat the same operation.
Could not open the application data.
A probable cause is that the specified application is already open.
Copy the specified application to a different directory, and try opening
the copied application.
Could not open the COM port. The COM A probable cause is that the COM port is already being used by another
port may already be in use by another
application.
application.
Quit all other applications, and try again.
[D]
Message
Meaning and Remedied action
Data that has an illegal value will not be
reflected in the panel data.
Confirn quit of editing?
Though an attempt was made to quit editing of the application list, some
data was in error.
That data will not be registered to the panel.
To ignore the error data and quit, click [OK].
To continue editing the list, click [Cancel].
Dedicated Package version in unit differs. The version of the Dedicated package in the EST is different to that of
Environment configuraion, etc will be
the AP Editor. If download is continued Environment configuration and
reinitialised, proceed to overwrite?
user settings of the package in the EST will be reinitialized. Cancel and
upload user data if required.Otherwise OK to continue and overwrite.
Delete can not be undone. Confirm
delete?
Delete can not be undone once it has been executed.
To proceed with delete, click [OK].
To cancel the delete, click [Cancel].
Display may not be rendered correctly if If the display scale is 100%, or less, part of the display may appear
the display scale is less than 100%.
clipped.
Data, however, is not affected.
[E]
Message
Meaning and Remedied action
Elements that protrude from the specified The graphic element in the Clipboard is too large, and cannot be pasted
size will be deleted. If you continue, undo to the desired panel.
will not be possible. Continue ?
If you click [OK], the graphic element that protrudes will be deleted, and
only the graphic elements that fit in the panel will be pasted.
To cancel, click [Cancel].
Enter a valid numerical value.
The entered string is not a numeric value.
Please check the entered value.
Error <Unsupported EST. Upgrade the
EST to the latest version.>
Update the IPL or system program of the EST.
11-2
Chapter 11. TROUBLESHOOTING
[F]
Message
Meaning and Remedied action
Failed to allocate memory. There may
not be enough free memory available.
A probable cause is insufficient memory.
Quit AP Editor, reboot Windows, and try starting up only the AP Editor.
Failed to create new application data.
Quit AP Editor, reboot Windows and start up AP Editor.
Failed to create the dialog box. There
may not be enough free memory or
Windows resources.
A probable cause is insufficient memory.
Quit AP Editor, reboot Windows, and try starting up only the AP Editor.
Failed to get the data from the Clipboard. Although PLC device is available in the data to be copied,communication
There may not be enough free memory configuration may be cancelled before making copy.
or incorrect communication driver setting. Check the communication configuration.
Or, there may not be enough free memory due to some causes. After
closing other applications, repeat the same operation.
Failed to read PLC device. After
checking the communications
configuration, reopen the Application list
editing window.
Failed to initialize the Application list edit window as the communications
driver has not been set correctly.
If display is not correct, correctly set the communications
driver, and then re-open the Application list edit window.
Failed to tidy-up dedicated storage area
A probable cause is that rewriting of dedicated storage areas failed.
Quit and start up AP Editor again.
[I]
Message
Meaning and Remedied action
In the case of bit devices, set to the word The bit position of the bit device to be specified as the start device must
boundary.
be “0”.
Set the bit position to “0”.
Incorrect device name
The start device name is not valid on target devices that are specified in
the communications settings of the basic settings.
Either correct the device name, or set the correct driver in the
communications settings.
Incorrect size specified.
Set the correct size.
Invalid end device name
A probable cause is that the start device name is invalid, or the end
device exceeds the valid device range as there are too many bits for the
specified alarm.
Either change the start device, or reduce the number of bits for the
alarm.
[N]
Message
Meaning and Remedied action
NM is the only valid EST device area.
Only NM devices can be used as the start device. Correct the device
name.
Not enough free area in dedicated
storage area. Reduce the number of
trends/recipes used in dedicated storage
area, Then try again.
The dedicated package can not be used since dedicated storage areas
are at maximum use.
To use the dedicated package, reduce the number of dedicated storage
areas used by trends/recipes, and then try again.
Not enough free area in the dedicated
storage area. So the dedicated package
could not be registered.
Either reduce or prevent use of one of the trend/recipe/dedicated
packages to secure dedicated storage area.
11-3
Chapter 11. TROUBLESHOOTING
[O]
Message
Meaning and Remedied action
Only 1 smart recipe object can be used
per application.
Only one recipe smart object can be pasted to an application as recipe
smart objects are paired with recipe data settings.
If you are pasting new recipe smart objects, delete the already pasted
recipe smart object before pasting the new recipe smart object.
Only devices can be set for variable
strings.
A probable cause is that a numerical value was entered even though
only device names can be entered.
Check the device name, and enter the device name correctly.
[P]
Message
Meaning and Remedied action
Panel data, the maximum data size will
be exceeded. Can not add any more
elements.
The maximum data size of a single panel has been exceeded.
No more graphic elements can be added. Reduce the number of graphic
elements.
Panel data, the maximum data size will
be exceeded. Can not change.
The size of the panel data has exceeded the maximum value.
Reduce the number of graphic elements pasted to the panel.
Panels which contain JPEG data take
some time to display.
If you are worried about the refresh rate, either reduce the size of JPEG
screens, or use bitmaps instead of JPEG data.
PLC drivers not installed. Re-installation
is required.
Re-install the PLC drivers.
[R]
Message
Meaning and Remedied action
Registered graphic for a number of states The registered graphic for the set number of states must be set as
have not been specified.
continuous registered graphics.
[S]
Message
Meaning and Remedied action
Saving of this application data canceled. The save was canceled.
To save, execute the save again.
Selected application “xxx” is currently
opened in the AP Editor. Can not delete
while open.
Before deleting the application, close the currently open application.
Set No. (>0).
Set a number greater than “0”
Smart objects can only be pasted to
panel data.
Smart objects can not be pasted to registered graphics.
Smart recipe object is not used in panel
data. The recipe data configuration will
not be downloaded.
Recipe configuration data has been specified for the application being
downloaded. However, the recipe configuration data will not be
downloaded, as the recipe smart object has not been used in the
application.
The download may be continued if recipe functions are not required.
Otherwise, if the recipe function is required, include a recipe smart object
in the application.
Strings which contain ’:’ can not be
replaced.
11-4
If recipe functions are not required, then delete the recipe configuration
data so that this message is no longes displayed.
When performing a replace with the type in Application list edit window
set to “Device”, do not set “:” following the replace string.
Chapter 11. TROUBLESHOOTING
[T]
Message
Meaning and Remedied action
Text is too large to display. Either expand Not even a single character can be displayed at the specified scale as
frame, reduce string length, or reduce
the set string frame is too small.
text scale.
Expand the frame or reduce the text scale.
The active window is not a panel.
Drawing of background will be omitted.
The Clipboard data is incorrect.
The colors before and after the change
are the same.
The configuration information has been
changed but will not be saved.
Continue?
The currently specified system panel
does not exist. Please specify a different
panel.
The decimal point position must be a
value smaller than the number of display
digits.
The dedicated storage area must be
tidied up before the download. Perform
“Save All” before executing Tidy
Dedicated Storage Area in the Options
menu.
The dedicated storage area must be
tidied up. Save to file, close all windows
other than the Application Manager, and
execute Tidy Dedicated Storage Area in
the Option menu.
The background cannot be drawn, since the window that is currently
active is not a panel.
Please select a panel.
The Clipboard contains unusable data.
Review the set color.
This is displayed when one of the operations, communications,
or package/option configurations has been changed, and the [Cancel]
button was pressed.
A non-existent system panel was set.
Change the setting to a system panel that exists.
Set the decimal point position to a value smaller than the number of
display digits.
The settings of the dedicated storage area for the application that you
are trying to download will not function properly on the EST.
Before downloading the application, execute Tidy Dedicated Storage
Area in the Options menu.
After this message has been displayed when pasting trend smart
objects, applications will not run properly on the EST even if they are
saved to file and downloaded.
Save the application to file, close all windows except Application
Manager, and execute Tidy Dedicated Storage Area in the Options
menu.
The dedicated storage area used by the Other items (trends/recipes) are set to the dedicated storage area to
dedicated package is already in use by
which the dedicated package is set.
another application items, Tidy dedicated Clicking [OK] tidies up the dedicated storage area to create free space in
storage area to maximize free area?
the area to be used by the dedicated package.
Clicking [Cancel] does not set the dedicated package.
The end alarm device address has
A probable cause is that the start device name is invalid, or the end
exceeded the valid range. Either reduce device exceeds the valid device range as there are too many bits for the
the number of alarm specification bits, or specified alarm.
change the start address.
Either change the start device, or reduce the number of bits for the
alarm.
The entered numerical value is either
Change the entered numerical value to one within the valid range.
larger than the maximum value or less
than the minimum value.
This EST model is not supported. Please The connected EST model is not supported. Check the EST model and
check the EST model.
wiring.
The EST unit contains an old IPL/BIOS Refer to Appendix, ■ How to Update the IPL/BIOS (page App.-3), or
version, the System Program can not be IPL_Update.html.
updated. The IPL/BIOS needs to be
If you select [No] in the “EST contains old version of system program.
updated. For more information, please
Update system to new version?” window before the message on the left
see IPL_Update.html, or refer to the
is displayed, only the application data will be downloaded.
Appendix of the Application Data
Note, however, that some functions may not be available.
Creation manual.
For details on unavailable functions, read “readme.txt” in the “¥WinAPE”
Current IPL [Rxx.xx.xx] <=> Required
folder.
IPL [Rxx.xx.xx]
11-5
Chapter 11. TROUBLESHOOTING
Message
Meaning and Remedied action
The EST unit contains an IPL/BIOS
The version of the EST IPL/BIOS installed in AP editor is older than the
version older than the minimum
version of EST unit.
recommended. The IPL/BIOS should be Clicking the [OK] updates the system program of the EST and
updated. To update the IPL/BIOS cancel then downloads the application data. (IPL/BIOS is not updated.)
this download and update the IPL/BIOS Pushing the [Cancel] stops the downloading. After that, update the
before downloading again. For more
IPL/BIOS of the EST.
information, please see IPL_Update.html, For more information on updating the IPL/BIOS of the EST, see the
or refer to the Appendix of the Application APPENDICIES "■ How to Update the IPL/BIOS (Page App.-3)" or
Data Creation manual. [OK] Update the "IPL_Update.html".
System, then download the User
Application Data [Cancel] Cancel the
download
The EST unit contains an old version
The version of the EST system program (firmware file) currently installed
of the System Program. Proceed with an to AP Editor is newer than the EST version.
update of the System?
To update the system program as well as the application, select “Yes”.
[Yes] Update the System, then
If you select “No”, the EST system program will not be updated, and only
download the User Application Data
the application data will be downloaded.
[No] Download the User Application
Data, but do not update the System
[Cancel] Cancel the download
Current System[R.xx.xx.xx] ==>
New System[Rxx.xx.xx]
The EST unit contains an newer version The version of the EST system program (firmware file) currently installed
of the System Program. Continue with
to AP Editor is older than the EST version.
the download of User Application Data? Select “Yes” to just download the application data.
Current System [Rxx.xx.xx] <=>
Old system programs cannot be downloaded to EST.
Old System [Rxx.xx.xx]
The EST unit contains an old version
The version of the EST system program (firmware file) currently installed
of the System Program. It is
to AP Editor is newer than the EST version.
recommended that you perform a full
The system program can be updated to the latest version by
download [except via IrDA(CH0)] and
downloading the entire application on a channel other than IrDA(CH0).
update the System Program.
For details on version upgrades, contact your Yamatake agent.
An illegal relationship between the
Set the maximum size to a value larger than the minimum size.
maximum and the minimum.
The image is too large. Can not paste.
Either change the size of the panel to which the image size is pasted in
properties, or reduce the size of the image file and then perform the edit
again.
The maximum number of trend/recipe
There is no free space in the dedicated storage area that is used by
items in the dedicated storage area has trends/recipes/dedicated package.
been reached. No more pastes are
If you are adding new trend/recipe smart objects, you must create free
possible.
space in the dedicated storage area.
To create free space, either reduce the trend buffer of already pasted
trend smart objects, or delete either trend smart objects or recipe smart
objects.
Also, when the dedicated package is used, free space can be created in
dedicated storage area by removing the dedicated package from the
dedicated storage area setting.
The No. before and after the change is
Set a different value to Nos. before and after a change.
the same.
The number of created devices exceeds This is displayed when the number of created devices exceeds the
the number of configured device items.
number of configured device items when data items have been reduced.
“Yes” to delete the excessive devices.
“No” returns to the number of data items before the change.
“No” to change the number of device
items to the number created.
11-6
Chapter 11. TROUBLESHOOTING
Message
Meaning and Remedied action
The recipe data has not been configured. The recipe data for each group (Gr1 in case of manual writing) for the
Paste the smart object, register the panel recipe smart object dialog box has not been set.
data , then configure the recipe data in
Register the panel data, and then configure the recipe data in the recipe
the recipe data sections of the
data section of the configuration information.
configuration information.
The Recipe data in the EST unit is
The recipe data in the EST unit differs from that in the AP Editor.
different to that of the Application Data
Select [Yes] to overwrite the recipe data in the EST during the download.
[Yes]Overwrite the Recipe data in the
Or, select [No] to download data other than the recipe data.
EST unit
[Cancel] will cancel the download, without writing any data to the EST.
[No]Use the Recipe Data in the EST and
continue download
[Cancel]Cancel the download
The registered graphic is too large to
Change the size of registered graphics in the properties.
paste.
The registered graphic to be set is larger If there is a problem in actual EST operation, change the size of the
than (XX x YY), and may not be
registered graphic to (xx,yy) or less.
displayed correctly. Continue?
The registration number range is 1 to
Registered strings within the range No.1 to No.1999 are valid. Check the
1999.
setting value.
The size of the smart object after the
Changes to settings will be disabled as the smart object could not be
property change will exceed the panel
pasted to the panel as it was too big after it its settings were changed.
data size. The property change will be
Either review the smart object settings, or change the panel size.
canceled.
The smart object library does not have
A probable cause is that the smart object library for the AP Editor
the smart object required for editing.
currently in use is short of objects such as special smart objects, or
That smart object has been replaced with there are not enough smart objects in the smart object library.
a dotted square. If you are going to install Install the required smart object library.
the required smart object that was not in DO NOT save the panel before installing the smart object library if you
the library and perform the edit again,
wish to retain the object.
then DO NOT save this panel.
The smart objects are too large.Can not Change the panel size to a size in which smart objects can be pasted,
paste.
with properties.
The specified user graphic does not exist, User shapes cannot be set as they have not been registered.
can not set.
Either register and set the user shapes, or change the setting.
The text size is larger than the screen
Not even one character can be displayed at the maximum string frame
size. Can not paste.
that fits in a panel or registered string screen size as the size of the text
is too large.
Expand the size of the panel or registered string, or reduce the text
scale.
The type of EST unit does not match the The type of the EST unit does not match the model information of
application. Please check the EST model. application to be downloaded. Check the EST unit or the model
information of application.
The window size is too small.
The screen size is smaller than the string frame to be pasted.
Review the string.
There are some characters present that The string contains characters that cannot be displayed on EST. These
cannot be displayed on EST. These
characters will automatically be deleted from the string. If this is a
characters will be deleted.
problem, enter strings that can be displayed on the EST.
For details on characters that can be displayed on EST, see the
appropriate Appendix.
There are some panels/registered
New panels or registered graphic edit windows (windows whose No. is
graphics for which a number has not
0) can not be saved. Until they have been assigned a number.
been set. (No. is 0). The data can not be Save all modified data indindvally and then save the application to file.
saved. Allocate a number by closing
those items individually.
There are some panels/registered
The windows being edited will be is automatically closed without being
graphics for which a number has not
saved even if the window is a new panel or registered graphic edit
been set. (No. is 0). The windows will
windows (windows whose No. is 0)
forcibly be closed, and data lost.
11-7
Chapter 11. TROUBLESHOOTING
Message
There is edited data that has not been
saved. Application Manager will be
closed without saving this data.
Continue?
There is not enough free area in
dedicated storage area to register the
dedicated package. Reduce the number
of trends/recipes used in dedicated
storage area. Then try again.
This application data is being used by
another resource. Can not be used.
This application is currently being edited.
Confirm overwrite and save?
Too many characters in the comment
Meaning and Remedied action
The data of the currently open application has been changed.
To close without saving the changes, click [OK].
To not close, click [Cancel] and then save the edited data.
Reduce the number of dedicated storage areas used for either of
trends/recipes.
Close the application at another resource.
An attempt was made to save to an application that is currently being
edited.
To overwrite, click [OK]. If you do not want to overwrite, click [Cancel].
Limit the number of characters in comments to 32 characters.
[U]
Message
Meaning and Remedied action
Unregistered data, changed during
If the data to be copied contains items that are currently being changed
editing, was not copied to the Clipboard. the data being changed will not be copied.
To copy the data, save the data currently being changed, and copy the
data as changed data.
[W]
Message
Warning <The "ESTFW" folder does not
contain the firmware file for this EST.>
Meaning and Remedied action
The required Firmware files for this model EST were not found. Install
the most recent version of AP Editor for support of newer EST models.
Or simply reinstall the current version if the FW files were deleted by
mistake.
[X]
Message
x:¥ could not be accessed. Drive not
ready.
xxx address incorrect.
Meaning and Remedied action
Specify the correct drive.
The address entry in the xxx item is in error.
A probable cause is that the address name is incorrect, or that the
communications driver in the basic settings is not set correctly in the
case of the address name.
Review the address and settings.
xxx address undefined.
The address is not set to the xxx item.
Enter the address.
xxx already exists. Confirm overwrite?
The specified application file (indicated by xxx) already exists.
To overwrite the application that already exists, click [OK].
If you do not want to overwrite, either click [Cancel] to cancel, or enter a
different file name.
xxx confirm save of modified data?
A change has been made in the xxx edit window.
“Yes” saves the modified data.
“No” does not save the data.
“Cancel” cancels the edit window close operation.
xxx is write protected. Confirm overwrite? Write protection attributes are set to the specified application file
(indicated by xxx).
To ignore write protection and overwrite, click [OK].
If you do not want to overwrite, click [Cancel].
11-8
Chapter 11. TROUBLESHOOTING
11 - 2
Troubleshooting about CF Card
This section will describe phenomena that occur when the recorder smart objects and CF card are used and
remedial actions that should be taken.
Description of trouble
Cause
Remedial action
Data cannot be sampled.
When the actual space of the CF card is smaller than the Insert a new CF card or reformat
number of storage points of the CF card secured by a ring the card or reduce the number of
write, an error message is displayed on the EST screen,
storage points.
data sampling of the recorder smart objects and trend smart
objects is stopped, producing a data sampling omission.
The direct cause may be some remaining data that has
been used by the CF card so far.
Data cannot be saved in CF card.
A CF card other than that manufactured by Yamatake is
used.
Use a Yamatake-recommended
CF card.
Not formatted by the EST.
Before using the CF card, format it
according to the EST system
screen.
The CF card formatted by Windows cannot be used for
the EST.
Format it according to the system
screen of the EST.
The following single-byte characters are used in this
application name:
space , : + = [ ]
When the CF card is used with the
recorder smart object, do not use
the single-byte characters shown on
the left for the application name.
When a CF card is in use, if the CF card is formatted, an
operation such as a display of the oldest data or
a thumbnail display using the recorder smart object will
will result in the CF card being read continuously,
preventing the CF card from being removed.
Display the latest data and set the
display magnification to x1 or
greater.
Access to CF card continues,
preventing CF card from being
removed.
When the display magnification is reduced even when the
[START] button is displayed in the recorder smart object,
this may cause a state in which the data in the CF card is
read all the time.
When there is a period during which the recorder smart
object application using the CF card cannot save data
because of powering OFF, etc., this may cause a state in
which data in the CF card is read all the time.
Data at this time is displayed as 0.
CF card does have enough space,
preventing data sampling.
When the sampling cycle of the recorder is changed by
the EST, sampling is started anew. In this case, the data
written in the CF card before the change remains without
being erased and so the available space of the CF card is
reduced.
When using a previously used
CF card whose data is not
necessary, format the CF card
before use.
The clear device erases the sampled data saved in the
dedicated storage area of the EST.
The data written in the CF card before execution of the
clear device remains without being erased and so the
available space of the CF card is reduced.
When an application is used by two or more ESTs, the
device addresses of the respective ESTs are used to
distinguish data of the CF card from one another.
Therefore, once a device address is changed, the data
sampled so far remains without being erased and so
the available space of the CF card is reduced.
Sampled data is not displayed.
When an application is downloaded (including change,
specified panel), the recorder and trend smart object start
sampling anew.
When the recorder is sampling data
using the CF card, if data needs to
be saved, save the data in the CF
When the sampling cycle of the recorder is changed by
the EST, sampling is started anew.
In this case, the data written in the CF card before the
change remains without being erased. However, the data
cannot be read by the EST.
card before carrying out
downloading, change of the
sampling cycle or change of the
device address.
When the clear device is used, it erases the sampled data
saved in the dedicated storage area of the EST and starts
sampling anew.
Once a device address is changed, the data sampled so
far may be regarded as data of another application,
preventing the existing data from being further read.
11-9
Chapter 11. TROUBLESHOOTING
Description of trouble
Cause
Remedial action
Though another application is used,
sampled data is overwritten.
When an application whose first 8 characters (8 singlebyte characters) are the same as those of an existing
application is downloaded, the sampled data in the CF
card is overwritten. This is because the first 8 characters
are used as an application name to identify the data in the
CF card.
Avoid the first 8 bytes of the
application name from being the
same as those of other application
names.
Marker display disappears.
The marker is displayed above the position of alarm
generation on the trend graph. Therefore, if an alarm is
generated near an upper limit value, no marker is
displayed on the screen.
Increase the upper limit value to
secure the marker display area.
When the recorder smart object is pasted, "Use marker"
is not checked.
Marker display is OFF in the EST.
Check the configuration item of the
recorder smart object "Use marker"
and set "MARKER" to ON by the EST.
The number of markers that can be displayed on the
screen at a time is up to 20 when each channel is ON or
OFF.
As per spec.
In the case where trouble cannot be solved even if the above-described remedial action is taken, the CF card may
be destroyed.
The possible cause may be that the power of the main unit is turned OFF, the CF card in the slot is removed or
inserted, the EST screen is switched to the system screen, downloading or uploading is attempted while the
recorder smart object is writing data in the CF card.
In this case, use a new CF card.
Also carefully read "● When using CF card" (page 3-25) and observe the precautions.
11-10
APPENDICES
A - 1
About IPL
IPL (IPL/BIOS): This program contains the basic functionality of the EST.
It is similar to the BIOS of a Personal Computer.
■ How to Determine the IPL Version
Confirm the IPL version in the following method:
1. Keep an area of 13mm x 7mm at the upper left or lower right corner of the
screen for 5s or longer for the EST240Z. For the EST555Z, keep an area of
13mm x 13mm at the upper left corner of the screen pressed for 5s or longer.
for EST555Z
POWER
for for EST240Z
The System menu will be different by model or version. See the item of System
menu.
2. Make sure update the IPL after reading "■ How to Update the IPL/BIOS"
(page App.-3) below.
● System menu
• EST240Z
The System menu is different for IPL versions prior to R0015.
System menu prior to IPL version R0015
System menu from IPL version R0015 onwards
The version of the IPL is indicated at the bottom of the screen.
Sample screen:
App.-1
Appendices
• EST555Z
The version of the IPL is indicated at the bottom of the screen.
Sample screen:
App.-2
Appendices
■ How to Update the IPL/BIOS
IMPORTANT NOTICE
The IPL Update operation requires care.
All User Application, Data and Firmware will be lost during the update. Please ensure
that you have uploaded your User Application and Data before performing the update.
DO NOT turn off power to the EST, or disconnect the communications cable during the
update.
Otherwise there is a chance that the EST will no longer be able to function.
In this case, please consult your local EST distributor.
Handling Precautions
Upload the application in advance before updating the IPL or system
program.
When a dedicated package is used, also upload the user data. If IPL or
system program is updated, the application of the EST is deleted.
● Procedure for IPL update
If you are running the AP editor, quit the AP editor before continuing.
1. Connect a serial communication cable between the EST and Personal
Computer.
2. Run the "EST IPL Updater.EXE", located in the folder to which you installed
the AP editor.
The following window will be displayed:
3. Ensure that the IPL Updater and personal computer's [Com port] are same.
4. Click <<Update IPL/BIOS >>
The following warning message will be displayed:
App.-3
Appendices
5. Click [Yes] to proceed.
The following IPL version confirmation message will be displayed:
6. Click [Yes] to proceed with the IPL Update.
This will start the transfer of the IPL data to the EST.
After the transfer is complete, the following message will be displayed:
Note
If the IPL version of the EST is same or newer, there is no need to update the
IPL. Simply close the IPL Updater window.
7. Click [OK].
The following window will be displayed:
8. Click [OK].
The IPL/BIOS Update operation has been completed.
Now [close] the IPL Updater window.
9. Then power off the EST, and power on again to run the new IPL/BIOS.
10. Finally, download the F/W (System program) and your application to EST
using the AP editor.
App.-4
Appendices
A - 2
List of Key Operations Used in Editing
■ Key Operations When Entering Graphic Elements
Graphic Elements
Point
Straight line
Polygon
Rectangle
[SHIFT]
Disabled
Limited to straight line
in 45° unit direction
Limited to straight line
in 45° unit direction
Limited to square
[CTRL]
Disabled
Disabled
Disabled
The position when the left mouse button is
pressed becomes the center of the rectangle.
Circle/Ellipse
Limited to circle
The position when the left mouse button is
pressed becomes the center of the circle/ellipse.
Arc/ellipse arc
Limited to circle
When applying
The position when the left mouse button is
circle/ellipse
pressed becomes the center of the circle/ellipse.
When applying the Start/end points limited When pressed, the (ellipse) arc in the clockwise
start and end points to 45° unit
direction is specified from the start point to the
of arc/ellipse arc
end point. (If not pressed, the (ellipse) arc is
specified in the counterclockwise direction.)
String frame limited to The position when the left mouse button is
String
square
pressed specifies the center of the string.
Disabled
Disabled
Paint
Disabled
Disabled
Smart object, registered graphic,
registered string, bitmap
■ Key Operations When Selecting Graphic Elements
Graphic Elements
[CTRL] + drag
[CTRL] + click left mouse
button
When moving selected
element + [SHIFT]
When scaling selected
element + [SHIFT]
Description
Multiple graphic elements can be selected by dragging with the mouse to select the
area. The previous selected area is canceled just by dragging. If you press the [CTRL]
key before starting to drag, selection of already selected graphic elements in the
selected area is canceled, and non-selected elements become selected. (Operation of
the [SHIFT] key during dragging is disabled.)
Scaling by dragging the selected graphic elements
Currently selected graphic elements can be scaled by dragging the handles of the
selected graphic elements by the mouse.
The scaling ratios in the horizontal and vertical directions of the selected graphic
elements becomes independent by pressing the [SHIFT] key.
Moving by dragging the selected graphic elements
Currently selected graphic elements can be moved by dragging the selection target
outside of the area where the handles of the selected graphic elements are displayed.
The move direction of the selected graphic elements is restricted to the horizontal and
vertical directions by pressing the [SHIFT] key.
App.-5
Appendices
A - 3
Cursor Operation
The following table summarizes operations when one or more graphic elements are selected in the Select mode:
Graphic Elements
[→][←][↑][↓] keys
[CTRL]
[SHIFT]
[ALT]
[→][←][↑][↓] keys
App.-6
Description
Graphic elements are scaled when the [CTRL] key is pressed, and moved when
the [CTRL] key is not pressed.
Note, however, that graphic elements can be scaled only when one element is
selected.
When the [SHIFT] key is pressed, the scale and move unit becomes 4 dots
(4 grids when the snap to grid checkbox is marked).
When the [SHIFT] key is not pressed, the scale and move unit becomes 1 dot (1
grid when the snap to grid checkbox is marked).
Note, however, that during movement with the snap to grid function enabled, the
top left coordinate of the selected graphic element moves to a position on the grid
closest to the position to which the cursor moved by four grids.
When the [ALT] key is pressed, the setting becomes opposite to that before the
snap to grid checkbox is marked. In other words, the snap to grid function
becomes disabled if the [ALT] key is pressed when the snap to grid checkbox is
marked. Alternately, the snap to grid function is enabled if the [ALT] key is
pressed when the snap to grid checkbox is not marked.
In the Draw or Selection modes, the mouse cursor moves one dot per grid in the
top, bottom, left or right directions when only the cursor [→][←][↑][↓] keys are
used.
Appendices
A - 4
Files Created by AP Editor
■ Application Data Representative Files and Data File Groups
AP Editor comprises the following files:
Extension
File Name
APX
Application configuration file
CNF
Configuration information file
PNX
Panel data file
FUK
User registered graphic file
SFK
System registered graphic file
User registered string file
System registered string file
Alarm configuration file
Smart object conversion file
STR
SSR
ALM
SYB
32-dot font file
Label/device file
C32
SYX
Remarks
Configuration information data such as EST trend/recipe/gateway
Configuration data such as EST communications settings
Panel data created by the user
Registered graphic created by the user
Registered graphic data created automatically when smart objects are
pasted
Registered string created by the user
String data created automatically when smart objects are pasted
Configuration information data for alarm monitoring
Automatic assignment data created automatically when smart objects
are pasted
Font data created automatically when 32-dot font strings are used
Label/device management data created automatically when smart
objects are created.
■ Folder Structure and Auxiliary Data File Groups
The AP Editor is installed to the default root folder “WinAPE” and comprises the
following sub folders under the WinAPE folder:
The WinAPE root folder contains WinAPE execution files, and other files such as
DLLs and PARTX.DTB required for executing AP Editor.
WinAPE
LIB
Smart object library files
There are JAN(Japanese) and ENG(English) subfolders.
PLCSPRT
PLC device name conversion DLLs
PACKAGE
Dedicated package files
ESTDRV
Executable files for EST download
ESTFW
EST firmware files
There are JAN(Japanese) and ENG(English) subfolders.
APPLICATION
Applications
DOCUMENT
Default folder when the print output destination is set for file
IMAGE
Default folder when pasting bitmaps
App.-7
Appendices
● Output of print files
The following table summarizes the file names corresponding to the application
data when a file is output:
TXT stands for text files, and BMP stands for bitmap files.
Data to be Output
Management information
Configuration information
Panel list
Registered graphic list
User registered string list
System registered string list
Alarm information list
Gateway list
Recipe list
Smart object list
Panel images
Registered graphic images
App.-8
Output File Name
Extension
(application name)_CNF.TXT
TXT
TXT
BMP
BMP
(application name)_PNL.TXT
(application name)_PNL(number).BMP
(application name)_IMG(number).BMP
Appendices
A - 5
Smart Object Tables
■ Basic Smart Objects
Smart object type
Smart object name
Switches
Switch
Function switches
Radio switch
Inching
Clock adjustment
Alarm silence
Word type switches
Word data write
Constant write
Data calculation
Lamps
Bit type 2-state lamp
Bit type 3-state lamp
Bit type multi-value state lamp
Word type 2-state lamp
Word type 3-state lamp
Word type multi-value state lamp
Panel change switches Panel change switch, panel selector
Panel change switch, panel overlay
Panel change switch, open pop-up
Panel change switch, special package selector
Panel change switch, multi-panel selector [others]
Panel change switch, multi-panel overlay [others]
Panel change switch, background panel selector [others]
Panel change switch, background panel close [others]
Panel change switch, panel selector (background change menu) [others]
Panel change switch, panel selector (background close) [others]
Panel change switch, panel close [others]
Panel change switch, panel replace [others]
Panel change switch, panel to front [others]
External, panel selector
External, panel overlay
External, open pop-up
External, special package selector
External, multi-panel selector [others]
External, multi-panel overlay [others]
External, background panel selector [others]
External, background panel close [others]
External, panel selector (background change menu) [others]
External, panel selector (background close) [others]
External, panel close [others]
Numeric indicators
Basic
With calculation
Text display
Registered string data
Variable string data
Message cal
Graphs/meters
Bar graph
Meter
Slide meter
Pie-chart
Line graph
Data setter
Password numeric keypad
UP/DOWN setter
Bit pattern setter
Keyboard call
Numeric keypad
Keyboard
App.-9
Appendices
Smart object type
Smart object name
Alarm monitor
Aggregation display [alarm lamp]
Representative lamp [alarm lamp]
Alarm buzzer
Monitor start/stop
Summary display [alarm information display]
Summary display [alarm information display] (message display)
Summary display [alarm information display] (all display)
History display [alarm information display]
History display [alarm information display] (name display)
History display [alarm information display] (message display)
Number of occurrence display [alarm information display]
Number of occurrence display [alarm information display] (Message display)
Number of occurrence display [alarm information display] (all display)
Alarm information clear
Clock
Digital clock
Analog clock
Digital calendar
External clock adjustment
State control
External backlight control
External backlight ON
External buzzer control
External buzzer OFF
Battery alarm notification
Data write when opening the panel
■ Instrumentation Smart Objects
Smart object type
App.-10
Smart object name
PID controller
SDC10
SDC20/21
SDC30/31
SDC40A (standard/remote SP type)
CB508
DMC10 (2 channel model)
DMC10 (4 channel model)
Recipe
Manual write
Manual write (comment display)
Manual write (all display)
Auto write
Auto write (comment display)
Auto write (all display)
Trend
Trend (EST240Z)
Variable trend (EST240Z)
Trend (EST555Z)
Variable trend (EST555Z)
Graphic movement
Rail movement
Free movement
PLC monitor
MELSEC A C-Link (Word device)
MELSEC A C-Link (Bit device)
MELSEC A CPU (Word device)
MELSEC A CPU (Bit device)
MELSEC FX CPU (Word device)
MELSEC FX CPU (Bit device)
MELSEC Q C-Link (Word device)
MELSEC Q C-Link (Bit device)
Recorder
Recorder
Revision History
Printed
Date
Manual Number
Edition
01-02
01-03
CP-SP-1088E 1st Edition
2nd Edition
Revised pages
6-7
01-10
02-07
02-12
3rd Edition
4th Edition
5th Edition
ii
3-25
3-26
3-27
04-09
6th Edition
Description
Fonts changed.
Screen changed.
All are revised for correspondence in EST555Z.
Overall revision
RESTRICTIONS ON USE changed.
Description of "About Icons" changed.
"About the operation when data is sampled anew"
added.
Description of "When creating/downloading
application" changed, description of "When
setting is changed" changed.
"When replacing CF card" → "When there is
insufficient free space on the CF card" changed.
Overall revision
Specifications are subject to change without notice.
Advanced Automation Company
Totate International Building
2-12-19 Shibuya Shibuya-ku
Tokyo 150-8316 Japan
URL: http://www.yamatake.com
This has been printed on recycled paper.
Printed in Japan.
1st Edition: Issued in Feb., 2001(W)
6th Edition: Issued in Sep., 2004(W)
(02)