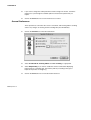
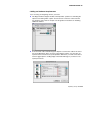
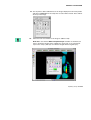
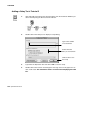
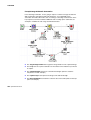
1
Openlab and
Openlab Darkroom
User Reference Manual
Improvision,
Viscount Centre II,
University of Warwick Science Park,
Millburn Hill Road,
Coventry, CV4 7HS
Tel: +44 (0) 24 7669 2229
Fax: +44 (0) 24 7669 0091
e-Mail: [email protected]
Internet: http://www.improvision.com
Printing History
Document
Edition
Edition 1
Edition 2
Edition 3
Edition 4
Edition 5
Edition 6
Edition 7
Software
Version
Openlab 2
Openlab 3
Date
June 1996
August 1996
March 1997
January 1998
September 1998
May 2000
January 2001
About this edition
Now contains four sections to
cater for Openlab Darkroom and
full Openlab.
Improvision believes the information in this manual to be correct at the date of issue.
However, it is subject to change at any time and does not represent a commitment
on the part of Improvision. Improvision shall not be liable for errors contained herein
or for incidental or consequential damages in connection with the furnishing,
performance, or use of this manual. Improvision has a policy of continual
development and reserves the right to change information within this manual without
notice to reflect changes in the system's design and specification.
© 1996-2001 Improvision, Image Processing & Vision Company Limited.
All rights reserved.
Copyright Notice
Apple, Finder and Macintosh are registered trademarks of Apple Computer, Inc.
Other brands or product names are the trademarks of their respective holders.
How to Use this Guide
Openlab Software
From version 3 onwards, there are two levels of Openlab software:
Openlab Darkroom, which includes all the basic core modules and some camera
modules.
Openlab, which has the same features and modules as Openlab Darkroom, but
also includes some additional core modules and Automator Lite—a version of the
Automator that allows you to create and run automations but without support for
variables.
This guide describes how to use all the Openlab core features and modules. It is split
into four sections. Openlab Darkroom users should read sections 1 and 2. Openlab
users should read all sections.
Section 1: Core Features
This section is for all Openlab Darkroom and Openlab users. It describes Openlab
core features and includes information on using Paint Tools, Presentation, Montage,
Layer Manager, HSI Color Spy, Video Manager, Measurements, State Saver and
User Notes.
Section 2: Camera Modules
This section is for all Openlab Darkroom and Openlab users. It describes how to use
the Video Manager with Axiocam, Snapper, PVCAM, SPOT, Dage and JVC cameras.
Section 3: Additional Core Modules
This section is for Openlab users only. It describes how to use Density Calibration,
Profiling, Boolean Ops, Linear Interpretation, Image Arithmetic and Image Filters.
Section 4: Automator Lite
This section is for Openlab users only. It describes how to create and run
automations.
Updated January 2001
Additional modules
There are also a number of optional modules that must be purchased separately.
These modules provide additional features for specialist requirements, such as
hardware control, deconvolution, ratiometric application and experiment automation.
Many modules can be evaluated free of charge for 48 hours. See page 29 for detailed
instructions on evaluating and installing additional modules.
All additional modules have their own user guides, which are provided on the Openlab
CD-ROM in PDF format.
Openlab v.3
Contents
SECTION 1
Introduction ................................................................................... 17
Overview ........................................................................................ 17
What is Openlab?........................................................................... 18
Openlab Core ................................................................................. 18
Openlab Modules ........................................................................... 19
This Manual.................................................................................... 20
Online Help .................................................................................... 20
Customer Support Services............................................................ 20
Installation ..................................................................................... 21
Overview ........................................................................................ 21
System Requirements .................................................................... 22
Installation Instructions................................................................... 22
To install the software .................................................................... 24
Creating an Alias ............................................................................ 27
Installing Openlab Network Server................................................. 27
Upgrading the Core Software......................................................... 29
Evaluating Additional Modules ....................................................... 29
Installing Additional Modules.......................................................... 30
Getting Started .............................................................................. 33
Overview ........................................................................................ 33
Starting Openlab for the First Time ................................................ 34
Starting Openlab ............................................................................ 35
The Document Window .................................................................. 36
The Document Toolbar................................................................... 36
Calibration Bar ............................................................................... 40
Updated January 2001
The Palette Window........................................................................41
Quitting Openlab.............................................................................44
Looking after Your Image Data .......................................................44
Changing the Screen Display .........................................................44
Color and Grayscale Images ..........................................................46
Working with Documents .............................................................47
Overview .........................................................................................47
Creating New Documents ...............................................................48
Resizing an Existing Document ......................................................49
Changing the Default Document Size.............................................50
How to Open Files ..........................................................................51
How to Save Documents ................................................................53
Layers and File Formats .................................................................56
Working with the Layer Manager .................................................57
Overview .........................................................................................57
Layer Properties .............................................................................58
The Layer Manager Palette ............................................................60
Using the Layer Manager Palette ...................................................63
Creating New Layers ......................................................................64
Layer Operations Menu ..................................................................65
Duplicating Layers ..........................................................................66
Deleting a Layer..............................................................................67
Selecting Layers .............................................................................67
Background Subtraction..................................................................69
Creating Overlay and Annotation Layers ........................................71
Merging Layers ...............................................................................71
Openlab v.3
Working with Colors ..................................................................... 77
Overview ........................................................................................ 77
Depth.............................................................................................. 78
Color Tables and the Color Table Icon........................................... 80
Using the Colors Command ........................................................... 81
Contrast Enhancement................................................................... 86
Color Balance................................................................................. 89
HSI Colorspy Palette ...................................................................... 91
Regions of Interest ....................................................................... 93
Overview ........................................................................................ 93
Types of ROI .................................................................................. 94
Creating ROIs................................................................................. 96
Editing ROIs ................................................................................... 97
Saving ROIs ................................................................................. 100
Opening ROIs............................................................................... 100
Calibration Tools......................................................................... 101
Overview ...................................................................................... 101
The Calibration and Measurement Tools ..................................... 102
Line Measurement........................................................................ 103
Spatial Calibration ........................................................................ 103
Measurements ............................................................................. 105
Overview ...................................................................................... 105
The Measurements Window......................................................... 106
Types of Measurement................................................................. 107
Measurement Preferences ........................................................... 109
Recording Measurements ............................................................ 111
Setting Up the Measurement Window.......................................... 112
Overlays ....................................................................................... 114
Exporting Measurements ............................................................. 116
Updated January 2001
Paint Tools ...................................................................................119
Overview .......................................................................................119
Recommendations for Using Paint Tools......................................119
Paint Tools Palette........................................................................120
Paint Tools....................................................................................120
Creating Montages ......................................................................131
Overview .......................................................................................131
The Montage Window...................................................................132
Creating a Montage ......................................................................133
Editing a Montage.........................................................................135
Presentations...............................................................................137
Overview .......................................................................................137
The Presentation Palette ..............................................................138
Setting Presentation Options ........................................................138
Creating and Running a Presentation...........................................140
Preferences ..................................................................................143
Overview .......................................................................................143
Image Document...........................................................................144
Colors ...........................................................................................145
General Preferences.....................................................................146
Palette Preferences ......................................................................147
Time..............................................................................................148
Folder Preferences .......................................................................149
Saving Settings ...........................................................................151
Overview .......................................................................................151
Saving Settings.............................................................................152
Using Saved Settings....................................................................153
Openlab v.3
Video Manager............................................................................. 155
Overview ...................................................................................... 155
Video Setup.................................................................................. 156
Configuring the Video Manager.................................................... 158
Video Icons and Video Controls Palette....................................... 161
Document Size and Camera Frame Size ..................................... 164
Working with the Preview Layer ................................................... 165
Capturing an Image...................................................................... 167
Troubleshooting ........................................................................... 168
Optimising Performance............................................................... 168
State Saver................................................................................... 171
Overview ...................................................................................... 171
The State Saver Palette ............................................................... 172
Setting Up State Saver................................................................. 172
Adding User Notes...................................................................... 177
Overview ...................................................................................... 177
Adding Notes................................................................................ 177
Openlab Menus ........................................................................... 179
Overview ...................................................................................... 179
File Menu ..................................................................................... 180
Edit Menu ..................................................................................... 181
Image Menu ................................................................................. 182
Layers Menu................................................................................. 183
Apple Menu .................................................................................. 184
Windows Menu............................................................................. 185
Special Menu................................................................................ 185
Multi-Users................................................................................... 187
Overview ...................................................................................... 187
Setting Up Users .......................................................................... 188
Managing Users ........................................................................... 190
What the user needs to know....................................................... 192
Updated January 2001
SECTION 2
AxioCam Digital Cameras...........................................................195
Overview .......................................................................................195
Video Manager Setup Panel.........................................................196
Working with the AxioCam Camera ..............................................198
PVCAM Digital Cameras .............................................................201
Overview .......................................................................................201
Video Manager Setup Panel.........................................................203
Optimising Performance ...............................................................207
Hamamatsu Cameras..................................................................209
Overview .......................................................................................209
Hamamatsu C4742-95 Camera ....................................................211
Hamamatsu C4742-95 ER (ORCA ER) Camera ..........................213
SPOT Digital Cameras ................................................................215
Overview .......................................................................................215
Video Manager Setup Panel.........................................................216
Working with the Different Camera Modes ...................................218
Optimising Performance ...............................................................219
Snapper 8 and 24.........................................................................221
Overview .......................................................................................221
Notes on the Setup Dialog............................................................222
Optimising Performance ...............................................................223
Dage Cameras..............................................................................224
JVC Cameras................................................................................226
Openlab v.3
SECTION 3
Working With Filters ................................................................... 229
Overview ...................................................................................... 229
Kernel Filters ................................................................................ 229
Median Filters............................................................................... 233
Boolean Operations.................................................................... 235
Overview ...................................................................................... 235
Using Boolean Operations ........................................................... 235
Density Calibration ..................................................................... 239
Overview ...................................................................................... 239
The Density Calibration Dialog..................................................... 240
Using Density Calibration ............................................................. 241
Using Formulae ............................................................................ 247
Measurements Window................................................................ 248
Saving Calibrations ...................................................................... 248
Profiling Module .......................................................................... 249
Overview ...................................................................................... 249
The Profiling Palette..................................................................... 250
Profiling Window .......................................................................... 251
Profiling menus............................................................................. 251
Using Profiling .............................................................................. 253
Image Arithmetic ......................................................................... 257
Overview ...................................................................................... 257
Image Interpolation ..................................................................... 259
Overview ...................................................................................... 259
Using Image Interpolation ............................................................ 259
Updated January 2001
SECTION 4
Automator Lite.............................................................................262
Overview .......................................................................................262
Automator Tutorial ......................................................................263
Overview .......................................................................................263
The Automator Window ................................................................264
Creating Simple Sequences - Tutorial 1 .......................................266
Adding a Delay Task -Tutorial 2....................................................272
Creating a Loop - Tutorial 3 ..........................................................274
Expressions ..................................................................................277
Automator Reference..................................................................279
Overview .......................................................................................279
Guidelines on Creating an Automation.....................................280
The Automator Window ................................................................280
Creating automations....................................................................280
Saving automations ......................................................................281
Working with links .........................................................................281
Working with expressions .............................................................282
Task Setup Dialogs .....................................................................283
Overview .......................................................................................283
Essential tasks ..............................................................................284
Extra tasks ....................................................................................288
Window Targeting Tasks ..............................................................295
File Tasks .....................................................................................296
Layer Selection Tasks...................................................................298
Layer Tasks ..................................................................................301
Filter Tasks ...................................................................................306
IP Tasks ........................................................................................308
State Saver Tasks.........................................................................312
Openlab v.3
User Notes Task........................................................................... 313
Clipboard Tasks ........................................................................... 313
Video Manager Tasks .................................................................. 314
Density Calibration ....................................................................... 320
Image Arithmetic .......................................................................... 321
Binary Operation Tasks................................................................ 324
Linear Interpolation Task.............................................................. 327
Automator menu commands ..................................................... 329
Overview ...................................................................................... 329
Automator menu........................................................................... 329
View menu commands ................................................................. 330
Options menu commands............................................................. 330
Trace menu commands................................................................ 331
Label menu commands ................................................................ 332
Operators for Automator Expressions ..................................... 333
Number operators ........................................................................ 333
String operators............................................................................ 336
Questions and Answers ............................................................. 337
Trace Messages .......................................................................... 339
General messages ....................................................................... 339
Task-specific messages ............................................................... 342
Updated January 2001
APPENDICES
Macintosh Basics ........................................................................345
Overview .......................................................................................345
Turning the Mac On and Off .........................................................346
The Desktop .................................................................................346
Folders..........................................................................................347
The Mouse....................................................................................347
The Wastebasket ..........................................................................348
Selecting a Printer ........................................................................349
Principles of CCD Theory ...........................................................351
What are CCDs?...........................................................................351
Image Readout with Binning.........................................................353
Blooming.......................................................................................354
Exposure.......................................................................................354
CCD Cooling.................................................................................355
Further Information .......................................................................355
Bibliography ..................................................................................355
Image Formats in Memory..........................................................357
Overview .......................................................................................357
“Classic” image formats ................................................................357
“Deep Gray” image formats ..........................................................358
Openlab v.3
Section 1
Core Features
Introduction
Installation
Getting Started
Working with Documents
Working with the Layer Manager
Working with Colors
Regions of Interest
Calibration Tools
Measurements
Paint Tools
Montages
Presentations
Preferences
Saving Settings
Video Manager
State Saver
User Notes
Multi-Users
INTRODUCTION
Chapter 1
Introduction
Overview
Read this chapter for:
A description of Openlab.
A summary of the main features of Openlab.
Details of additional Openlab modules.
A description of this user reference manual and other sources of help.
Information about Improvision’s Customer Support Services.
If you are ready to install Openlab, go straight to Chapter 2.
Updated January 2001 17
CHAPTER 1
What is Openlab?
Openlab is an innovative product designed specifically for scientific imaging
applications. It consists of a central core, called the Openlab Core, and an extensive
range of optional modules.
The Openlab Core is the ideal tool for scientists wishing to use their images to make
high-quality presentations and publications. The core includes a comprehensive
series of functions for image handling, enhancement, processing, measurement,
calibration, presentation, animation and publication.
Openlab’s unique architecture allows you to extend the functionality of the core
program by purchasing additional modules. These modules are developed for specific
functions and applications. For example, modules are available to control electronic
hardware, such as microscopes and filter assemblies. Other modules are available to
apply deconvolution or ratio images from different wavelengths.
Addition of these modules allows you to construct a unique program which is exactly
tailored to meet both your imaging requirements and the specific requirements of your
research. As your imaging requirements change in the future, Openlab’s powerful
modular architecture allows you to upgrade the program very simply and to make the
most of your investment.
Openlab Core
The core product provides the following image handling tools:
18
Openlab v.3
Opening of images in all standard formats, including TIFF and PICT, as well as its
proprietary LIFF format, and support for 9 to 16 bit grayscale images.
Easy handling of large numbers of images as one multi-layered file, using
Improvision’s proprietary image layering and cacheing system.
Multi-channel imaging for rapid creation of merges, superimpositions or
transparencies.
A complete range of editing and image annotation functions.
Spatial calibration and calibrated image measurements.
Image enhancement and color table editing.
Image processing.
Creation of presentations, as movies or slide shows.
INTRODUCTION
Publication of images.
Openlab is an open, modular environment. How you combine these modules will
depend upon the tasks that you wish to carry out.
Openlab Modules
The optional modules provide additional features for specialist requirements. They
allow you to build up a system which is tailored to your unique requirements and
which adapts easily to your normal method of working. You will also be able to expand
the system at a later date if your needs change, and as more modules are developed.
Some of the modules available for Openlab include:
Deconvolution: out of focus haze removal.
Automator: rapid construction of experiment pathways.
Video capture: from video and digital cameras.
Microscope: computer control of electronic microscopes.
Filter wheels: control of filter positions and shutters.
Shutters: control of electronic shutters.
Some modules have also been developed which, when combined with the Openlab
Core, will produce a product tailored exactly to suit the requirements of a specific
application. Examples of such applications are:
Immunofluorescence.
Time lapse.
GFP.
Deconvolution.
Ion imaging.
Luminescence.
For current information about the range of available modules or applications, please
contact your Supplier or Improvision. Alternatively, you can connect to our Web page
(on http://www.improvision.com) to view or download information.
Updated January 2001 19
CHAPTER 1
This Manual
This manual is your Reference Manual. It contains information about Openlab
Darkroom and Openlab Core and is relevant to all users. If you are a new user, you
may like to read the “Getting Started” chapter (page 33), before you start to use the
system. If you have not used a Macintosh before, the “Macintosh Basics” chapter in
the Appendix provides some general information. You will also find the documentation
and tutorial that came with your Macintosh useful.
Information about any additional modules that you have purchased is provided in
electronic format on the CD-ROM with the software. You can view and print the
relevant documents using Adobe Acrobat Reader.
Online Help
You will also be able to use the online Balloon Help to get information about Openlab
as you use the system. This provides a brief description of an item on the screen.
When you position the mouse button over the item, the description appears in a text
balloon on the screen. You can switch Balloon Help on and off, as required, so that it
is either displayed whenever the mouse button is positioned over an item, or not at all.
Alternatively, if you have an extended keyboard, you can select when you want the
balloon help to be displayed, by positioning the mouse button over the required item
and holding down a pre-defined “hot key”. The “hot-key” is defined in the General
Preferences dialog, as described on page 146.
Customer Support Services
If you have any queries about installing and using the core product, contact
Improvision Support:
Europe:
E-mail:
Telephone:
[email protected]
+44 (0) 24 7669 8121
USA:
E-mail:
Telephone:
[email protected]
+1 (781) 402 0211
You can also get additional information about Improvision and its products from the
Web page: http://www.improvision.com.
20
Openlab v.3
INSTALLATION
Chapter 2
Installation
Overview
Read this chapter for:
A summary of the equipment that you will need to run Openlab.
Instructions on installing the dongle and software.
Instructions on installing Openlab Server.
Instructions on upgrading the core software.
Instructions on evaluating modules after installation.
Instructions on adding and registering modules after installation.
Updated January 2001 21
CHAPTER 2
System Requirements
In order to run Openlab, you will require a Power Macintosh which has sufficient
space on its hard disk to store and work with high-resolution images and video
sequences. We also recommend:
A minimum of 128 MBytes of RAM.
A monitor that supports millions of colors.
Installation Instructions
When you purchase the Openlab Core license, you receive a dongle and a disk
containing the software. The dongle is a security device which protects the software
from unauthorised use. Please ensure that you read the accompanying license before
installing the product.
To install the dongle on a USB port
USB dongles are used with any Mac that has a USB port. They need drivers. Your
installation CD contains a special installer for USB drivers.
1.
Insert the installation disk into the CD drive and double-click on the Install Openlab
USB Support icon, which is found in the 'Other Installers folders' on the CD.
2.
Follow the instructions on the computer screen to install the drivers for the dongle. It
will also tell you when to plug in the dongle. You do not need to turn off the computer
to do this.
Note: Some versions of MacOS will ask if you want to search the web for drivers. It is
quicker to use the CD.
It should not be necessary to restart the computer. However, if the dongle is not
recognized, restart the computer.
You are now ready to install the Openlab software(see page 24).
22
Openlab v.3
INSTALLATION
To install the dongle on an ADB port
1.
Shut down the Macintosh.
2.
Select an ADB port such as the keyboard or mouse port. ADB ports are identified by
the following symbol on the Macintosh:
3.
Disconnect any device that is currently connected to the selected ADB port, for
example the mouse.
4.
Connect the cable end of the Improvision dongle to the port.
5.
Re-connect the device to the socket at the other end of the dongle.
Note: If you already have a dongle attached to your Mac, you can connect the
dongles to each other to form a chain.
6.
Restart your Macintosh.
Updated January 2001 23
CHAPTER 2
To install the software
When you load the Openlab CD, the folder structure will be similar to the following
and you will notice three types of installer.
This installer is for use
with all MACs that have
USB ports.
Double-click to install
the latest version of
the software
Double-click to install
the demo version of
the software
This folder contains
PDF versions of all
the manuals
To install the software
Your installation CD contains the Openlab Core application and any additional
modules that you have purchased. You can also download the software directly from
the Improvision web site (www.improvision.com).
1.
24
Openlab v.3
Insert the installation disk into the CD drive and double-click on the Openlab
application folder.
INSTALLATION
2.
Double-click on the appropriate Installer icon to start the installation process.
Use the Install Openlab (version number) installer to install the latest version of the
software.
Use the Install Openlab Demo (version number) installer to install a demo version
of the software.
The third installer is for use with the any Macintosh that has USB ports. Use the
Install Openlab USB Support installer to install the drivers for the dongle (see
page 22). The grey G3 Macintosh and earlier uses the older style ADB ports and
does not require additional software.
3.
Follow the instructions on the computer screen.
Memory
Once you have installed Openlab, assign as much memory as possible to the
application, but do not exceed 80% of the total memory available as the Macintosh
itself needs a certain amount, for example to run the Finder and give you access to
the Apple menu. We also recommend that you switch Virtual Memory off as this may
prevent some cameras functioning and compromise performance.
Manuals
The Core User’s Guide and Core Automator Guide are provided as a printed
book. The Reference Guides for all other modules are provided as PDF files,
so that you can print those manuals that are relevant to your system.
Double-click on the Manuals folder to display a list of all available documents.
What happens to the files
The Installer copies all the files that you need to run the software to your hard disk. If
you are upgrading the software, it will create a completely new folder for the new
version of the software.
Updated January 2001 25
CHAPTER 2
You will be able to see most of these files in the Improvision Openlab folder, which will
look similar to the following:
Double-click to
start Openlab
Contains disabled
Openlab modules
Contains installed
Openlab modules
Contains Openlab
Color Tables
Contains latest
release
information
Openlab software
license
A selection of
demo images
Provides details
about contacting
Improvision
All the modules are in the Openlab Modules folder. This includes core modules and
additional modules. You will be prompted to enter a registration code for additional
modules whenever you run Openlab. To prevent this happening, you may like to move
any additional modules which you have not purchased into the Disabled Modules
folder. Alternatively, you can run an evaluation version for 48 hours. See page 29 for
more information.
Once you have installed the software and dongle, Openlab is ready for use. You can
run it by double-clicking on the icon in the Openlab folder. However, this means that
you have to locate the folder each time that you want to run the software. You may
find it easier to create an alias for the application and put it:
26
Openlab v.3
Onto the desktop where you can see it all the time.
Into the Apple Menu Items folder. You will then be able to click on the apple in the
menu bar and select Openlab from the list.
Into the Startup Items folder. Openlab will now start automatically each time that
you switch on your Macintosh.
INSTALLATION
The next section describes how to create an alias. Refer to the "Getting Started"
chapter for basic information about running Openlab and a description of what you
can see on the screen.
Creating an Alias
An alias is a way of pointing to a program in another folder without having to create a
copy of the program. It is a shortcut and takes up very little disk space, because it is
only pointing to the location.
To create an alias for Openlab:
1.
Open the Openlab folder and click once on the Openlab program icon to select it.
2.
Select Make Alias from the File menu. An icon appears above the Openlab program
icon. Its name is in italics and ends in alias.
3.
Drag the alias icon to the Apple Menu items or Startup Items folder (or to the Desktop,
if required).
Note: Both the Apple Menu Items and the Startup Items folders are in the System
folder.
Installing Openlab Network Server
What is the Openlab Network Server?
The Openlab Network Server allows Openlab to be used on multiple computers
without purchasing a dongle for every computer. The user purchases a number of
Openlab licenses. Openlab can then be used on as many machines at any one time
as there are licenses.
For instance, if the user has purchased 10 Openlab Core licenses and 2
Deconvolution licenses, up to 10 machines can run Openlab at any one time. Of
these, up to 2 machines can run the Deconvolution modules at any one time.
What do I need for the server machine?
The server machine should be a Mac that is attached to the network and kept
switched on all the time. It must have one free USB port for the dongle. It is possible
to purchase PCI to USB cards for older machines that do not have built-in USB.
Updated January 2001 27
CHAPTER 2
The server machine does not have to be a powerful Mac - an old 7500 with a USB
card would work perfectly.
The server machine does not have to be an Appleshare file server, though a file
server would make a good Openlab Network Server as it is unlikely to be switched off.
How do I install the Openlab Network Server?
To install the server part of the software:
1.
Run the Openlab Network Server installer on the server machine.
2.
Start Program Linking on the server. You do this from the Apple File Sharing control
panel.
To allow any user to connect to the server, go to the Users and Groups control
panel, open the Guest user and make sure the box labelled Allow guests to link to
programs on this computer is checked.
Note: Under MacOS 9, the Users and Groups control panel is part of the File Sharing
control panel.
3.
To restrict who can connect to the server, see the "Security" section in the Openlab
Technical Notes.
4.
Finally, run the Openlab Network Server application.
Note: The installer will place an alias to the Openlab Network Server application in the
Macintosh Startup Items folder so that the server will run automatically on startup.
How do I install Openlab workstations?
To install workstations:
28
Openlab v.3
1.
Run the normal Openlab installer on each workstation machine.
2.
Use the Apple File Sharing control panel to set the computer names for workstations
so that they can be recognised by the server.
3.
When Openlab starts, users must enter their name, organization name and the serial
number of the server. This serial number is written on the server dongle, and is also
displayed in the server application window.
INSTALLATION
Note: Because there is no dongle on the client machine, it is not possible for the
installer to read the key and automatically install the correct mix of modules. It may be
necessary to move some modules to the Disabled Modules folder after installation.
What do I do next?
Before you use Openlab Network Server, refer to our Support web pages for more
information.
Can I have several Openlab Servers on one network?
Yes, each server is identified by its serial number.
Can I run Openlab on the server machine?
No, it is not currently possible to run Openlab on the server computer.
Upgrading the Core Software
As long as you register as an Openlab user, you will receive information about
upgrades to the software automatically.
Upgrades are installed in the same way as the core system. Either download them
from the web site or insert the Installation disk, double-click on the Installer icon and
follow the instructions on the screen. For major upgrades, you may be prompted to
enter a registration code. This is the same process as installing additional modules,
see next section.
All upgrades install the complete software in a new folder on your computer.
If you wish to receive upgrades, please remember to return your Openlab registration
form.
Evaluating Additional Modules
It is very easy to evaluate additional modules after installation. All modules are
provided on the Openlab CD-ROM (or may be downloaded from the Web pages), but
you will need registration numbers to run additional modules.
If you have moved additional modules into a Disabled Modules folder, as suggested
earlier, you will need to move it back into the Openlab Modules folder.
Updated January 2001 29
CHAPTER 2
1.
Make sure the module software is in the Openlab Modules folder.
2.
Start Openlab. The following dialog is displayed.
3.
Select Run as time-limited Demo (48 hours max) and click on OK.
You will be able to run the demo version of the module for 48 hours, but must then
enter the correct registration number if you want to continue using the module.
Installing Additional Modules
All modules are provided on the Openlab CD-ROM (or may be downloaded from the
Web pages), but you will need registration numbers to run additional modules.
If you have moved additional modules into a Disabled Modules folder, as suggested
earlier, you will need to move it back into the Openlab Modules folder. The first time
that you run Openlab after installing an additional module, you will be prompted to
register the module.
1.
30
Openlab v.3
Make sure that the module software is in the Openlab Modules folder.
INSTALLATION
2.
Start Openlab. The following dialog is displayed.
Note: If you want to run the demo version, select Run as time-limited Demo (48
hours max) and click on OK.
3.
Select Register.
4.
Registration codes are provided by mail, fax or email upon receipt of a purchase
order.
Type in the registration number and click on OK. This registers the module with the
Openlab Core and it will now run automatically each time that you launch Openlab.
Note: If you click on Skip, Openlab will not load the new module, but will continue to
load the rest of the software.
Updated January 2001 31
CHAPTER 2
Converting from Demo to Registered User
Demo versions of all modules expire after 48 hours. Once the demo period has
expired, you will get the New Module Registration dialog whenever you run Openlab,
but the Run as time-limited Demo (48 hours max) option will no longer be enabled.
You need to either register the module, or remove it from the Openlab Modules folder
to prevent the New Module Registration dialog from appearing.
Folder Structure
The Openlab Modules folder contains all the modules. You may like to sub-divide it
into a series of folders; each of which contains related modules. For example, if you
have purchased the options that support ion imaging, you could create a separate
folder in the Openlab Modules folder called ion imaging. You may also like to create
aliases for the modules if you are using the multi-user functionality described on page
187.
32
Openlab v.3
GETTING STARTED
Chapter 3
Getting Started
Overview
If you are new to Openlab, we recommend that you read this chapter which describes
how to run the software and the screen layout.
This chapter describes:
How to start Openlab.
The Document Window.
The Document Toolbar.
The Calibration Bar.
The Palette Window.
How to quit Openlab.
How to change the screen display.
How to get the best results with color and grayscale images.
How to get help.
If this is the first time that you have used a Macintosh, you may find the “Macintosh
Basics” chapter in the Appendices useful.
Updated January 2001 33
CHAPTER 3
Starting Openlab for the First Time
1.
Open the application, for example by double-clicking on the Openlab icon.
Openlab searches for the dongle each time that you start the application. When you
run the software for the first time, Openlab asks you to personalise your copy of the
software.
34
Openlab v.3
2.
Enter your Name and Organisation.
3.
Enter your Serial Number. This must match the serial number on the registration card
that was supplied with the software.
4.
Click on OK.
5.
Openlab checks the serial number against the dongle, and if they match runs the
application.
GETTING STARTED
Starting Openlab
Open the application, for example by double-clicking on the Openlab icon.
Openlab searches for the dongle, and opens the application without any further
prompts.
If Openlab cannot find the dongle it will not be able to run the application and will
display a warning message. Click on OK and check that the dongle is connected and
that none of the cables have come loose.
Note: Only the supplied dongle will work.
Openlab carries out various checks as it launches the application. For example, if you
have been running a Demo version of an additional module, it will check whether the
48-hour time limit has expired. It also checks for any additional devices that it expects
to be connected, such as microscopes and other hardware devices. If it finds anything
unusual in these checks, it writes the information to the Session Log, which it displays
immediately after it has finished launching the application.
The Session Log
The Session Log is a useful source of information. For example, it records all of the
modules that are loaded when you run Openlab. If Openlab encounters a problem
when loading, or if one of the expected hardware devices is not turned on, it will
automatically display the Session Log. If you experience problems while using
Openlab, you can select Show Session Log from the File menu and, if necessary,
print it out and send a copy to Improvision’s Support staff. You can also copy the text
of the Session Log to the clipboard when this window is active. Hold down the 'D' key
when you start Openlab for more detailed information in the Session Log.
The Session Log contains three different categories of message:
Warning
Information
Error
What you see on the screen
Within Openlab there are several types of window. The Document Window is the
window in which images are displayed. You use commands from the menu bar, which
appears across the top of the window, to carry out operations on the Document
Window. Some optional modules, such as the Automator, also have windows. If more
than one window is displayed, the top window generally has the focus of the menu
Updated January 2001 35
CHAPTER 3
bar. The smaller windows which you may see provide a variety of additional tools: for
example, the Layer Manager and Paint Tools. Throughout this manual, we refer to
these smaller windows as Palette Windows. Normally, you use menu commands
within the Palette Windows to control them, and not the menu bar.
The Document Window
The Document Window is your experiment which holds your multi-layered image
documents. You use it to display and work with documents.
Zooms between
actual size and fit
to window
Calibration
bar
Collapses the
window
Hides and shows
calibration bar
Document
toolbar
Image display
area
Hides and shows
document toolbar
Image information
The Document Toolbar
The toolbar contains a number of standard items, and a few items that only appear if
you have installed additional modules, for example the video camera icons.
This section describes the icons for the standard tools. The two video capture icons
are described in the “Video Manager” chapter (page 155).
36
Openlab v.3
GETTING STARTED
Many of the standard tools have a number of options.
Note: An
in the lower right-hand corner indicates that the tool has additional
options
ROI tool
Click on the icon that is currently displayed and hold the mouse button down.
You will either see a series of icons displayed across the screen, or you will see a
pop-up menu.
Select the icon or menu command that you require, and release the mouse button.
These are the ROI tools, which you use to create Regions of Interest on an image.
The toolbar shows the one that is currently selected. Click on the icon and hold the
mouse button down to display all the available ROI tools. Select the one that you
require and release the mouse button. The different ROI tools are described in the
“Regions of Interest” chapter (page 93). There are keyboard shortcuts for each ROI
tool, as summarised below.
____________________________________________________________________
Tool
Keyboard
Shortcut
Tool
Keyboard
Shortcut
Tool
Keyboard
Shortcut
____________________________________________________________________
Rectangle
Lasso
Freehand
Circle
Wand
____________________________________________________________________
Updated January 2001 37
CHAPTER 3
Hand tool
Click on this icon if the image is too large to fit in the window display. Now position
the mouse button on the image, it will turn into a hand icon, and you will be able to
move the hand until you can see the part of the image that you require.
Keyboard Shortcut:
Magnification
tool
(Hand)
This is the magnification tool. Click on the icon to select the tool. Click on the image
to zoom in by a factor of 2. Option-click on the image to zoom out by a factor of 2.
You can also click and drag an area with a tool. This defines the zoomed area
exactly.
Click and hold on the icon to display a pop-up menu which contains a list of
magnification commands.
Select the command that you require from the list and release the mouse button.
Click on Other... if you want to specify a different magnification percentage. Doubleclick on the icon to return to the 1:1 zoom ratio.
Keyboard shortcuts
Selects the magnification (zoom) tool.
Zooms in by a factor of two.
Zooms out by a factor of two.
Zooms to 100%.
38
Openlab v.3
GETTING STARTED
Calibration tool
These are the Calibration Tools. The toolbar shows the tool that is currently selected.
Click on the icon and hold the mouse button down to display all the available
calibration and measurement tools. Double-click on the Vernier or on the straight line
icon to display the Calibration dialog. Refer to page 101 for instructions on using the
Calibration Tools and dialog. There are keyboard shortcuts for each Calibration tool,
as summarised below.
___________________________________________________________________
Tool
Keyboard
Shortcut
Tool
Keyboard
Shortcut
Tool
Keyboard
Shortcut
____________________________________________________________________
Vernier
Straight Line
Freehand Line
P oint Counter
Color Tables
tool
This is the Color Tables (CLUT) tool. Click on it to display a list of all available color
tables. Select the table which you require from the list and release the mouse button.
The color table will be applied to the current layer in the Document Window. Refer to
the “Working with Colors” chapter (page 77) for further details about color tables.
Updated January 2001 39
CHAPTER 3
Layer tool
This is the layer tool. Click on it to display a menu of available layers. Select the layer
which you require from the menu and release the mouse button. That layer will be
displayed in the Document Window. Refer to the “Working with the Layer Manager”
chapter (page 57) for further details about layers.
Note: This menu only displays the first 255 layers, but the arrow buttons described
below allow you to display the whole range of layers.
Click on this icon to display the previous layer.
Click on this icon to display the next layer.
Calibration Bar
The measurements on the Calibration Bar show the image size, the mouse button
position and the area of any ROI.
Current pointer
position
The angle
of drag
If you select and drag an ROI,
these values show how far
the pointer has moved from
its original position.
40
Openlab v.3
The area
enclosed
within the ROI
Indicates whether
the image data has
been calibrated
spatially.
GETTING STARTED
The Palette Window
The palettes provide tools for carrying out specific tasks. They are contained in a
Palette Window that is very similar for all palettes. Once you understand how to use
one palette, you will be able to work with any palette.
Palette tools,
common to all
palettes
Palette icons.
Palettes are
docked.
Click on icon to
bring palette
into display area
Palette display
area (Layer
Manager in this
example)
Use the scroll bars to
view other items in the
palette...
...or click and drag to
extend the palette
You can dock several palettes in the same Palette Window. Each palette has its own
icon that appears like an index tab on the left-hand edge of the palette. Just click on
an icon to select the palette. See page 42 for more information about docking and
undocking palettes.
Across the top of the Palette Window, you will find four palette tools. These tools are
common to all palettes, but may be grayed-out if they are not appropriate. You will be
able to extend palettes that contain lists. Just click and drag on the box in the bottom
right-hand corner of the Palette Window until you can see the complete list without
scrolling.
Updated January 2001 41
CHAPTER 3
Palette tools
Click on this arrow to display the palette only, without its icon tab. This saves a little
space on your screen.
Some palettes have items that you can delete by dragging them to this icon. For
example, you may have a layer in the Layer Manager Palette that you wish to delete.
Drag it to the wastebasket icon on the palette; the image layer will be deleted
permanently. (It does not go into the desktop wastebasket.)
Some palettes allow you to create new items by selecting this option. For example, if
you select this option in the Layer Manager Palette, a new image layer is created.
Some palettes, such as the Layer Manager Palette, allow you to drag items to this
button to create new copies of the item.
Click and drag on the box in the bottom right-hand corner to extend the palette so that
you can see all the items without scrolling.
Click on this icon to minimise the palette. This saves space on the screen when you
do not need to have the palette open, but allows you to access the palette again
quickly when necessary.
Displaying palettes
Palettes may be displayed in a number of ways. You can:
Display them in individual Palette Windows on the screen.
Drag and drop them one on top of the other so that all the palettes are contained
in one Palette Window (see next section).
icon in the top rightMinimise them so that they appear as icons. Click on the
hand corner of the window to reduce the palette to an icon. Just click once on the
icon when you want to work with the palette again.
Close them by clicking in the top left-hand corner.
Docking palettes in a single Palette Window
If you find the individual palettes are taking up too much space on the screen, and you
want to put them all into the same Palette Window:
42
Openlab v.3
GETTING STARTED
Click on the palette icon or name, such as Untitled Layers, hold down the mouse
button, and drag the palette until it is over one of the other palettes.
Let go of the mouse button.
You have now docked two palettes in the same Palette Window.
Repeat until you have docked as many palettes as you wish in the Palette
Window.
You will notice a selection of icons that appear in the left-hand column of the
Palette Window. These icons represent the different palettes. Click on an icon to
bring that palette to the front of the Palette Window.
You can also undock a palette and drag it out of the Palette Window so that it is
displayed separately on the screen. Click on the palette icon or title, hold down the
mouse button, drag the palette to the desired position, and release the mouse.
Note: The docking information is retained and docking functions correctly, even if you
iconise palettes.
Palettes menu
You can also use the Palettes menu to control how the palettes are displayed.
Select Palettes from the Windows menu.
Controls how
palettes are
displayed
List of available
palettes
The first three commands apply to all available palettes, and provide a quick way of
iconising, hiding or showing all of them.
The bottom commands allow you to select an individual palette, so that it becomes the
active palette. If you have closed a palette completely (by clicking on the Close box in
the top left-hand corner), you can re-open it by selecting it from the list.
Updated January 2001 43
CHAPTER 3
Quitting Openlab
Select Quit from the File menu.
If you have made changes and not yet saved them, Openlab will prompt you to save
your changes before it quits.
Looking after Your Image Data
A full hard disk impairs performance and is a potential risk to data security if it is the
only place that you store your image documents. You should back up your image
documents on a regular basis, for example by saving them to CD-ROM.
It is also very important that you save your raw image data. Whilst Openlab makes
every effort, wherever possible, not to alter the pixel values of your images, some
processing functions may alter the information content of your images.
If measurements are critical, Improvision recommends that users should either work
on raw image data or should ensure that they validate the effects that each
processing step has on the image data.
Changing the Screen Display
This is a summary of the options that you have for displaying the information on the
screen. Most of them are described in more detail in other sections of this manual.
44
Openlab v.3
Toggle the Calibration Bar and the toolbar on and off by clicking on the
the right of the Calibration Bar and at the bottom of the toolbar).
Select Show Rulers from the Image menu to display horizontal and vertical rulers
on the main window.
Iconise palettes, display them individually or in a single Palette Window, as
described in the previous section.
If you close a Palette Window, select Palettes from the Windows menu and select
the Palette from the list to re-display it.
icon (to
GETTING STARTED
Select Arrange from the Windows menu to control how Document Windows (and
palettes) are displayed.
Arranging windows
You may have several Document Windows open at the same time. You can arrange
the windows on the screen in a number of ways.
1.
2.
Select Arrange... from the Windows menu.
Select the arrangement that you require:
A stack containing multiple documents. The Document Windows will vary
according to the document size.
A stack containing multiple documents. The Document Windows will all be the
same size, regardless of the document size.
Documents tiled horizontally across the screen. The Document Windows will all be
the same size, regardless of the document size.
Documents tiled vertically along the screen. The Document Windows will all be the
same size, regardless of the document size.
Note: If you have more than three windows open, both the horizontal and vertical
tiling options give the same result.
3.
Check the Also Stack Palettes box (so that it has an ‘X’ or tick in it) if you want to
stack the Palette Windows.
4.
Click on Arrange.
Updated January 2001 45
CHAPTER 3
Color and Grayscale Images
Openlab is a full color package that allows you to work with high-quality color and
grayscale images. In order to make the best use of color images, you need to
understand:
The relationship between the color depth of the image and the color depth of your
monitor.
How to use Apple Menu Control Panels to change monitor settings.
Color depths
Each image has its own color depth. This is not necessarily the same as the color
depth of your monitor. Some images may appear to have lost information if you do not
have the correct monitor settings to view your images. (The information is not lost, but
the monitor cannot display it because of its current settings.)
Always set your monitor to millions of colors.
Changing monitor settings
If you need to change your monitor resolution or color depth, please consult the online Macintosh Guide or the manual supplied with your computer.
46
Openlab v.3
WORKING WITH DOCUMENTS
Chapter 4
Working with Documents
Overview
This chapter describes:
How to create a new document.
How to add notes to a document.
How to resize an existing document.
How to change the default document size.
How to open files.
How to save files.
The file formats that Openlab supports.
Updated January 2001 47
CHAPTER 4
Creating New Documents
Select New… from the File menu.
Select Image Document from the sub-menu, to open a new document.
The document that you create has a defined size. To select a different size for your
new documents, you can either resize the one that you have created, or you can alter
the default preferences for all new documents.
If you are using a camera, you may want to ensure that the document size matches
the maximum output of the camera. See page 50 for more information.
48
Openlab v.3
WORKING WITH DOCUMENTS
Resizing an Existing Document
This option allows you to resize the Document Window for the current window. The
size is a property that is shared by all layers, so any changes you make will apply to
all layers in the document.
1.
2.
Select Document Size... from the Image menu.
There are three ways of resizing the document. Use one of the following methods, as
appropriate:
■
Select one of the pre-defined sizes from the Standard Sizes: pop-up menu.
■
Click on the Use: button and type the exact dimensions of the document into the
Width: and Height: boxes.
■
Click on the Scale by: button and type in a % value.
3.
Select Scale Image to New Size or Crop Image to New Size. Scale fits the whole
image to the new document size. Crop crops the image, as appropriate, so that you
either lose the edges or get additional white space around it. If the new document size
is larger, crop is the safer option, as it does not alter the data.
4.
Click on the Resize button.
Updated January 2001 49
CHAPTER 4
Changing the Default Document Size
You can change some of the default values associated with the Document Window.
These values are defined in one section of the Preferences dialogs. Any changes
that you make to the preferences take place as soon as you save them but they will
only affect new documents. Existing documents retain the old preferences.
This section describes how to change the default size of the document. Refer to the
“Preferences” chapter (page 143) for a full description of all the preferences that you
can edit.
1.
Select Preferences... from the Edit menu.
2.
Click on the Image Document icon in the left-hand column, if not already selected.
3.
If you want to use one of the pre-defined document sizes for New documents, click on
the Use: button and choose an appropriate display from the pop-up menu.
Alternatively, you can type in values.
If you want to be able to specify the size each time that you create a new file, click on
the Ask for size when “New... ” is chosen button. You will be prompted to enter the
document’s size whenever you create a new one.
If you are using a camera and want to make sure the document size matches the
maximum output of the camera, click on Use: and select Current Video from the popup menu.
4.
50
Openlab v.3
Click on the Save button to save the Preferences for New Windows.
WORKING WITH DOCUMENTS
How to Open Files
There are two commands for opening a file. Both commands open files as multilayered documents.
Open... allows you to open a single file.
Open Multiple... allows you to open multiple files. You can use this option to
consolidate existing files into new multi-layer documents.
Once you have opened a file, you will also be able to open any saved Regions of
Interest onto the image. See the “Regions of Interest” chapter (page 93) for more
information about ROIs.
1.
Select Open... from the File menu.
2.
A preview of the image appears in the left-hand window.
3.
Select the folder and the file that you require.
Note: Use the Show commands to determine what types of file appear in the file list.
4.
Click on the Open button to open the file.
Updated January 2001 51
CHAPTER 4
Open Multiple
1.
Select Open Multiple... from the File menu.
2.
Select the folder that contains the images and open the folder to display a list of all
images (by double-clicking on the folder name).
3.
Select the file(s) that you require and click on the Add button, or click on the Add All
button to select all the files in the folder.
Use the Show pop-up menu to control which file types appear in the list of files.
52
Openlab v.3
4.
The selected files appear in the right-hand list. You can remove individual files by
selecting them and clicking on the Remove button. Or click on the Remove All button
to remove all the files.
5.
Click on Open to create the Openlab document with multiple layers.
WORKING WITH DOCUMENTS
How to Save Documents
There are three menu commands for saving documents.
Select Save if you want to save the document with the same name.
Select Save As..., as shown below, if you want to give the document a new name
or save another version with changes.
Select Save as Multiple…, as shown below, if you want to save each layer, or
selected layers, to a separate document. This command is particularly useful if you
need to share files between different software applications. For example, you can
create multiple TIFF files from an Openlab multi-layered file.
If you have created Regions of Interest on an image, you can save those separately
for use with other images. See the “Regions of Interest” chapter (page 93) for more
information about ROIs.
Save As… Command
1.
Select Save As... from the File menu.
2.
Select a folder for the saved image and type a name into the Save File As: box.
Note: Use the New button if you want to create a new folder, type in a name for the
folder and click on Create.
Updated January 2001 53
CHAPTER 4
3.
Select a format for the saved file from the Format: pop-up menu. If you intend to use
the image within Openlab, save it as a LIFF file.
Note: Only change the format if you no longer want to use the image within Openlab.
When you select some types of format, for example QuickTime Movie, you may
notice an extra button, labelled Options... This is to allow you to specify Save options
that are relevant to that file format.
4.
Click on Save.
Save As Multiple… Command
This is the only command that ensures true compatibility between software
applications because Openlab multi-layered files can only be opened using Openlab.
Even if you have only selected a single layer, you can still use the Save As
Multiple… command. You need to take into account the image's color depth when
using this command. Openlab supports 9 to 16-bit deep gray images as well as 8-bit
gray and millions of colors, but many other software applications only support 8-bit
gray and millions of colors. If you want to use deep gray image data with other
applications, you may need to reduce the color depth before saving. See page 78.
1.
Select Save As Multiple.. from the File menu.
2.
Select a folder for the saved image.
Note: Use the New button if you want to create a new folder, type in a name for the
folder and click on Create.
54
Openlab v.3
WORKING WITH DOCUMENTS
3.
Type a name into the Base name: box. This name is a common name for all the
layers in the document, and acts as the name stem.
4.
Select a format for the saved file from the Format: pop-up menu.
Note: Some formats do not support all image depths (see Appendices). When you
select some types of format, for example QuickTime Movie, you may notice an extra
button, labelled Options... This is to allow you to specify Save options that are
relevant to that file format
5.
Click on the Naming… button to define further naming conventions so that each layer
can be saved as a separate file with a unique name.
Defines how
the name is
built up
Additional save
options
An example
file name
6.
Define how the layers are to be named. In the example, we are using the base name
followed by a 4-digit number that defines the layer’s position in the Layer Manager
Palette. If you look at the bottom of the dialog, you will see an example which shows
the file name that will be given to Layer 2. This example also appears next to the
Naming... button on the Save As Multiple dialog.
The two additional options allow you to:
Save selected layers only: Check this box if you only want to save selected layers.
Refer to page 57 for information about using the Layer Manager Palette to select
layers.
Updated January 2001 55
CHAPTER 4
Make DOS compatible filenames: Check this box if you need to share or transfer the
files to systems that use DOS. (These are PC systems.)
7.
Click on OK and then click on Save.
Layers and File Formats
Improvision’s LIFF format
Improvision has developed its own format, so that you can save layered images in a
single file, retaining all the individual layers and any associated calibration,
measurements or notes. It also saves the extra data associated with deep gray
images. (See page 78 for further details about color depths.) If you are working with
layered images, we recommend that you save them as layered files. LIFF is the only
format that will preserve all of the layer data. However, you will only be able to open
LIFF files within Openlab.
Reading files
Openlab can read most standard file formats, as well as its proprietary LIFF format.
Standard file formats include:
Improvision LIFF
JPEG
PICS animated graphics
PICT
QuickTime Movies
TIFF
Openlab will also allow you to consolidate existing BioVision and IonVision files into a
new multi-layer document.
Saving files
Once you have created a document with multiple layers, you need to save it in a
format that can handle layered images. Improvision recommends:
56
Openlab v.3
LIFF for all deep gray images and images that will be only be used within
Openlab.
TIFF or PICT for images that you wish to export to other applications.
WORKING WITH THE LAYER MANAGER
Chapter 5
Working with the Layer Manager
Overview
When you are working with layered documents, you need an efficient way of
managing the layers. Openlab’s Layer Manager Palette provides a wide range of
facilities for managing and manipulating layers.
You can also use the Layers Menu to work with layers, but you will find that the Layer
Manager Palette provides the more comprehensive set of options. It also allows you to
make full use of Openlab’s extensive drag and drop facilities. The commands in the
Layers Menu are summarised in the “Openlab Menus” chapter (page 179).
This chapter describes:
Layer properties and layer types.
The Layer Manager Palette.
How to find your way around the Layer Manager Palette.
Drag and drop options.
How to view a layer.
How to select layers and work with them.
How to merge layers.
Updated January 2001 57
CHAPTER 5
Layer Properties
Each document may have one or more layers associated with it. These layers provide
a way of combining a group of associated images that may, or may not, be related to
each other, in a single document. For example, you can use the video capture module
to build up a time elapsed sequence of images. Your document will contain a number
of video frames (or layers), each one taken at a different time interval. All layers will
be identical in size, but each will have a unique time reference. In addition to the size
which is common across all layers in a document, each layer has a set of properties:
58
Openlab v.3
A name.
An ID value.
A time stamp.
A type, as described in the following table.
Layer Type
Description
General Image
This is the standard image. It has no special properties.
Binary
A binary layer is a layer whose pixels can only have one of two
states - 1 or 0, on or off. You can select the color that is to be used
for the On state. Binary layers are particularly useful for analysis and
presentations as they allow you to highlight specific features or
areas on your image which you can overlay on the original image.
Red, Green or
Blue Channel
When you select one of these commands, Openlab shows the Red,
Green or Blue component of the image. It acts as a tint; it does not
change the data, only the display and is not stored with the file.
CMYK Cyan,
Magenta, Yellow
or Black Channel
When you select one of these commands, Openlab shows the Cyan,
Magenta, Yellow or Black component of the image. It acts as a tint;
it does not change the data, only the display and is not stored with
the file.
Luminosity
When you select this command, Openlab displays the brightness of
the image. It does not change the data, only the display and is not
stored with the file.
Annotation
This layer creates an annotation layer. It defaults to a Transparent
state. Use the Paint Tools to add text or draw lines that will appear
as an overlay on the image. (You can also use the Binary layer for
annotation. This uses less memory, but restricts you to one color.)
Darkfield or
Brightfield Bg
When you select one of these commands, Openlab creates a
Darkfield or Brightfield layer for background subtraction.
WORKING WITH THE LAYER MANAGER
Time stamps
Each layer has a time stamp that may be displayed in one of two ways:
As an absolute value based on the Macintosh's clock. This date is the Macintosh’s
standard base date for time calculations, and allows Openlab to provide absolute
timing with a resolution of up to 1 microsecond.
As a relative value, in terms of the other layers in the document. You will be able
to nominate a layer as the zero value. This does not have to be the first layer in
the experiment. For example, you can select a layer where an event occurred as
your base layer. The time stamps on layers either side of the base layer reflect
timings before (- values) and after (+ values) the event.
You use the View menu on the palette to control which time stamp is displayed.
You use the Time Preferences dialog to define the scale for displaying times
(normally milliseconds). Refer to the “Preferences” chapter (page 148) for further
information.
Updated January 2001 59
CHAPTER 5
The Layer Manager Palette
The Layer Manager Palette acts as a catalog or index of all the layers in a document,
allowing you to scroll quickly through the different layers. You may use it in one of two
ways:
To make a layer current so that you can view it in the Document Window, click in
the clickable area to the left of the thumbnail. You will notice an eye icon next to
the thumbnail in the Layer Manager Palette indicating this is the current layer.
To select a layer or layers in the Layer Manager window so that you can apply
some operation to them, click further to the right. For example, you may want to
merge layers. Selected layers are highlighted in the Layer Manager Palette. They
do not affect the current image in the Document Window.
Layer menus
Current layer
(displayed in
Document Window)
Layer name
and details
Clickable area
to make layer
current
Layer Operations
menu
Selected layer
(highlighted in
palette)
Thumbnail
image
Click and drag
to extend list
60
Openlab v.3
WORKING WITH THE LAYER MANAGER
Layer icons
Each individual layer will have certain icons associated with it. The following examples
illustrate the icons that may appear on a layer. Subsequent sections describe how to
work with the layers.
Example 1 - a General Image layer
Layer name
Layer is current (eye icon)
and selected (highlighted)
Layer type
Opacity value
Density calibration
has been applied
Type of background
= transparent background
= not transparent
= partially transparent background
Note: Density calibration is only available with the full Openlab. Refer to Section 3 of
this guide for further details.
Example 2 - a Binary layer
Layer name
Layer type
The current color
for the ON state
Binary color
(click to display
pop-up menu)
Updated January 2001 61
CHAPTER 5
Example 3 – layers with transparent backgrounds
Select Transparent Background
from the Layer Operations menu
Notice the dotted line that
indicates the layers that are
transparent
Example 4 – layers with semi-transparent backgrounds
Select Opacity from the Layer
Operations menu
Notice the dotted line that
indicates the layers that are
transparent
62
Openlab v.3
Use the
slider control
to select an
opacity value
WORKING WITH THE LAYER MANAGER
Using the Layer Manager Palette
The Layer Manager Palette contains all the layers associated with the current
document. When you use Openlab for the first time, you may like to spend a little time
finding your way round the palette.
Click and drag on the box in the bottom right-hand corner to extend the palette, or
use the scroll bar on the right to scroll through the layers if you cannot see them all
on the palette.
Scroll through the layers in the Layer Manager Palette and click once in the lefthand side of the layer that you require. The eye icon appears and the layer is
displayed in the Document Window.
Use the View menu commands to control how layers are displayed in the Layer
Manager Palette and the information that is displayed with them. Note that in
Collapsed View, you can see more layers at once, but the thumbnails are not
visible.
Use the Layers menu commands in the palette to select all, binary or non-binary
layers or to search for specific layers. (The Search command is described in more
detail in the “Selecting Layers: Searching for a layer” section.)
Updated January 2001 63
CHAPTER 5
Use the Move menu commands in the palette to move layers between documents.
Hold down the Option key to change the Move commands into Copy commands.
(The Move/Copy command is described in more detail in the “Duplicating Layers”
section.)
Double-click on the layer name to edit it, or select Set Name from the Layer
.
Operations menu
Click on the Layer Operations menu to edit the layer, by changing its name, its
opacity or its type. There are examples of how to work with the commands in this
menu in later sections of this chapter.
Creating New Layers
You have several options for creating new layers.
If you want to create an empty General Image layer, click on the New button, or
select New Layer from the Layers menu in the Openlab menu bar.
If you want to create an empty Binary layer, hold down the Option key and click on
the New button, or select New Binary Layer from the Layers menu in the
Openlab menu bar.
If you want to create an Annotation layer, hold down the Command key and click
on the New button.
If you want to include another image as a layer in your document, drag the image
icon from the desktop and drop it onto the Document Window. The image must be
single layer. If it is not the same size as the current Document, you will be given
the option of scaling or cropping it.
You will also find that some of the commands from the Layers Menu (on the menu
bar) create a new layer, for example if you merge several layers (see “Merging
Layers” section). The Split RGB command creates three new layers, one for each
color channel.
When you create a new layer, Openlab provides a default name for it. Double-click on
the name and type in an appropriate name for the layer. The layer name may contain
up to 128 characters but you may not be able to see all the characters in the space
available for the name.
64
Openlab v.3
WORKING WITH THE LAYER MANAGER
Layer Operations Menu
Once you have created a layer, you can amend it in various ways.
Change the type of layer, for example to display a particular color channel.
Select Darkfield Bk Layer or Brightfield Bk Layer to create a Darkfield or
Brightfield image for background subtraction.
Select Transparent Background to make the layer’s background transparent.
This will allow you to see other layers behind it, and is particularly useful if you
want to use the layer as an overlay.
Select Annotation Layer to create a layer for annotation.
Select Opacity, and use the slider control to select a value for the opacity. The
selected opacity is applied to all pixels in the background simultaneously.
Select Lock to ensure that the layer cannot be edited or deleted by mistake.
Select Timing Base Layer to select a layer as the base layer for timing. The time
stamps of all other layers in the document are relative to the nominated layer.
You can also use the Paint Tools to annotate or draw on a layer (see Chapter 11),
but this will alter the data content of the layer.
Updated January 2001 65
CHAPTER 5
Duplicating Layers
You can create copies of existing layers by:
Selecting the layer that you want to copy (so that it is highlighted), and selecting
Clone Layers from the Layers Menu.
Clicking once on the layer that you want to copy, and dragging and dropping the
layer onto the New button.
Copying the layer(s) to a different or to a new document, see below.
Once you have copied the layer, you can edit it as appropriate.
Move/Copy Menu
1.
Select the layer(s) that you wish to move or copy.
2.
If you want to move the layer(s), click on the Move menu to display the Move
commands.
If you want to copy the layer(s), hold down the option key and click on the Move menu.
The Move commands become Copy commands.
3.
Select the destination for the moved/copied layers. You can move/copy to a new
document or to another open document. A list of available open documents is
displayed in the bottom part of the pop-up menu.
If you move or copy the layers to an existing document, Openlab will check whether
the layer sizes are the same. If they are not, the following prompt is displayed.
66
Openlab v.3
WORKING WITH THE LAYER MANAGER
4.
Select the appropriate action and click on OK.
Deleting a Layer
Select the layer(s) that you want to delete, and drag and drop it into the Layer
Manager’s trash can.
Click on OK. The layer is deleted immediately. You will not be able to retrieve it.
Alternatively, select the layer(s) that you want to delete, and select Delete from the
Layers menu.
Selecting Layers
Click on the right-hand side of a layer to select it. A single click deselects any other
layer(s) that may have been selected.
If you want to select a range of layers, click once on the first layer in the range.
Hold down the Shift key and click on the last layer in the range.
If you want to deselect a single layer within a range of selected layers, hold down
the command key and click on the layer.
Updated January 2001 67
CHAPTER 5
Use the Select commands in the Layers menu on the palette or the Openlab menu
bar to select specific types of layer.
Layers menu on the palette
Searching for a layer
You may want to search for layers that meet specific search criteria so that you can
group them together and apply a particular operation to them.
1.
Choose Select/Find... from the Layers menu.
Note: You can also choose this command from the Select menu on the Layer
Manager Palette.
2.
Choose the appropriate select parameters from the pop-up menus.
and
Note: You can only search on relative time.
3.
68
Openlab v.3
Type the select criteria into the text box.
WORKING WITH THE LAYER MANAGER
4.
For more advanced searches, you can build up a list of search criteria. Click on the
More Choices button and repeat steps 2 and 3.
Note: The select parameters vary according to the search criterion that is displayed.
5.
Click on the pop-up menu at the end of the selection line to specify whether the
selection must meet all or one of the selection criteria.
6.
Click on the Select button.
7.
Openlab searches for all the layers that meet your selection criteria and selects them.
Background Subtraction
Openlab provides two commands for creating a layer for background subtraction,
depending upon the way your images are backlit when you capture them from the
microscope. It is important that you create the correct type of layer for your experiment
conditions, as it affects the way that the background is subtracted.
Illumination
Requires
Transmissive (for example brightfield
and phase contrast)
Brightfield Bk layer
Reflective (for example fluorescence) Darkfield Bk layer
Once you have created your layer(s) for background subtraction, you can either drag
and drop them over the required image, or you can select Subtract Background from
the Layers menu.
Drag and drop
1.
Select the image layer(s) to which you wish to apply background selection
Updated January 2001 69
CHAPTER 5
2.
Drag the layer(s) over the appropriate Brightfield Bk or Darkfield Bk layer, so that the
mouse pointer is over the thumbnail of the background layer.
3.
When the border of the thumbnail on the background layer is highlighted, release the
mouse button.
4.
A new, subtracted layer is created for each of the original image layers.
Layers Menu
1.
Make sure that the layers are in the correct order in the Layer Manager Palette and
select the layer to which you want to apply background subtraction.
For example, you may need to re-order layers to avoid unexpected results if you have
transparent or semi-transparent layers next to the layer to which background
subtraction will be applied.
2.
Select Subtract Background from the Layers menu. A subtracted layer is created.
This command should only be used if you have a single background layer in the
Layer Manager Palette. If you have several background layers, the command may not
select the correct one, and it displays the following message. We recommend that
you cancel the command and use drag and drop.
70
Openlab v.3
WORKING WITH THE LAYER MANAGER
Creating Overlay and Annotation Layers
You really need to experiment with the Layer Manager Palette in order to get a
thorough understanding of all its features. The following example describes how to
use the Layer Manager to create overlays and annotations.
We are using the Binary option in this example.
1.
Create a New Binary layer and make that transparent. You should now be able to see
the original Image layer through the New layer.
2.
Move the new layer so that it is above the image that you wish to overlay (drag and
drop it at the red insertion line).
3.
Use the Paint Tools (see page 119) to draw on the new binary image, or add text to it.
4.
Select the color of your choice for the binary layer from the binary color pop-up menu.
5.
Now merge using the Merge to Composite command.
Merging Layers
There are three Merge commands under the Layers menu. They only become active
when you have selected two or more layers.
The Merge RGB Planes command which looks at each color component for each
pixel in each layer, and compares them. The brightest component takes
precedence.
The Merge to Average command which looks at each color component for each
pixel in each layer, and averages them.
The Merge to Composite command which looks at each color component for
each pixel in each layer, and applies any opacity factor to them before averaging
them.
Example
In the following example, we are going to use the Merge RGB Planes command on
grayscale images to enhance them for publication. You need to apply a color channel,
or tint, to each layer before you merge them.
Updated January 2001 71
CHAPTER 5
To select and prepare the layers for merging:
Select the first layer and select one of the color channels from the Layer
Operations menu.
Select the second layer and select a different color channel from the Layer
Operations menu.
Make sure that both copies are selected (highlighted).
To merge the layers:
Select Merge RGB Planes from the Layers menu. Or drag the selected layers
and drop them onto the New button on the Layer Manager Palette.
A new, merged layer is created.
The following diagrams illustrate the effect of the different types of Merge commands
on the color components of the merged pixel.
72
Openlab v.3
WORKING WITH THE LAYER MANAGER
Merge RGB Planes
The brightest component takes precedence in the merged pixel.
Pixel colour
components
prior to merging
30%
Blue
80%
Red
60%
Red
50%
Blue
60%
Green
40%
Green
Brightest
Merge RGB
Planes
50%
Blue
80%
Red
Pixel colour
components
after merging
60%
Green
Updated January 2001 73
CHAPTER 5
Merge to Average
The color components are averaged in the merged pixel.
Pixel colour
components
prior to merging
30%
Blue
80%
Red
50%
Blue
60%
Red
60%
Green
40%
Green
Merge to
Average
Average
40%
Blue
70%
Red
Pixel colour
components
after merging
50%
Green
74
Openlab v.3
WORKING WITH THE LAYER MANAGER
Merge to Composite
The opacity value is applied to each component before averaging.
Pixel colour
components prior
to merging
80%
Red
30%
Blue
50%
Blue
60%
Red
40%
Green
60%
Green
50% Opacity
10% Opacity
Merge to
Composite
Average x Opacity
26%
Blue
51%
Red
Pixel colour
components
after merging
37%
Green
Updated January 2001 75
CHAPTER 5
76
Openlab v.3
WORKING WITH COLORS
Chapter 6
Working with Colors
Overview
This chapter describes:
How to use the Depth… menu command to set the color/grayscale depth of an
image.
Color tables and how to use the Color Table icon in the Document Window to
apply them.
How to use the Colors… menu command to edit a color table and create custom
palettes.
How to use the Contrast Enhancement… menu command to define how an
image’s colors are mapped onto the screen.
How to use the Color Balance menu command.
How to use the HSI Colorspy Palette.
Updated January 2001 77
CHAPTER 6
Depth
Each image has a color (or grayscale) depth associated with it. This reflects the
number of colors or grayscales that can be displayed in the image.
You can change the depth of the image and apply the change to either selected layers
or the current layer. When you are using Openlab to work with color depths, you need
to distinguish between four types of color palette:
The system palette, which is the default color table for the current image in the
Document Window.
The grayscale palette, which converts the colors in the table to grayscales of equal
luminance.
The adaptive palette, which adapts the color table to be the best match for the
image. For example, if the original image is millions of colors and of a forest, the
adaptive option will search the image and pick out the best 256 colors for the color
table, which in this example is likely to contain a lot of greens.
The custom palette, which is one that you have created by editing an existing
table. For example, you may have a series of grayscale images and you wish to
highlight a certain band of intensity. You can do this by editing the grayscale color
table to show a particular color, such as red, at a particular intensity (pixel). The
custom palette always reflects the latest changes that you have made. If you want
to create a number of custom tables, you need to save them as PalEdit files from
the Edit Images Color dialog (see page 84). If you store the files in Openlab’s
Color Tables folder, you will be able to select them using the Color Tables icon in
the Document Window.
Changing Depth
You can change any color depth to millions of colors. If you increase color depth,
Openlab will scale the image data. Most software applications support 8-bit gray and
millions of colors. Openlab also supports 9- to 16-bit deep gray. If you decrease a 9to 16-bit deep gray image to 8-bits, data will be discarded. Do not make
measurements of gray levels after increasing or decreasing the color depth.
1.
78
Openlab v.3
Use the Layer Manager to make the required layer current, and to select any other
layers to which you wish to apply the depth.
WORKING WITH COLORS
2.
Select Depth... from the Image menu.
3.
Set the Depth, as appropriate. You will not be able to apply a different palette to
images with a depth of Millions of Colors, Thousands of Colors or 256 Grayscales.
4.
Select System Palette, Grayscale Palette, Adaptive Palette or Custom Palette, as
appropriate. This option is only enabled for certain color depths (see previous step).
The bar at the top of the dialog reflects the full range of the color palette; the image in
the Preview window illustrates the effect of applying the color palette to the current
layer.
5.
Check the Remap Image to new colors and Dither Image options, as appropriate.
Remap Image to new colors - Openlab will look at each pixel in the original and find
the best match in the new table. If you do not select this option, Openlab looks at the
index value of the pixel and maps it to the corresponding index value in the new table.
Dither Image - When you reduce an image from millions or thousands to 256 colors,
the transition from one color to the next becomes less gradual and more noticeable.
The dither option diffuses this effect so that the result looks better to the eye, but it
does also change the image data.
6.
The palette is displayed and you can see the effect that it has on the current image
layer in the Preview window. If required, use the Preview pop-up menu to Scale or
Crop the preview image, or to apply a zoom factor.
Updated January 2001 79
CHAPTER 6
7.
Select one of the Change: options, Current Layer or Selected Layers.
8.
Click on the OK button to apply the depth to the layer(s).
Color Tables and the Color Table Icon
Openlab is supplied with a number of different color tables. You can also create and
add your own. Color tables can be any of the common, popular formats created by
Adobe Photoshop™, PalEdit, Canvas, Klutz and PixelPaint, (FBCT, .HDF, drwC,
PX05, CLUT), as well those created by Openlab and other Improvision software.
As long as the tables are stored in the Color Tables folder, you will be able to use
them with the Color Tables icon in the Document Window toolbar, as described in
this section.
If the current layer uses a color table whose depth is 256 colors or one of the 9-bit to
16-bit grayscales, you will be able to select a different color table for the current layer
from the Color Tables icon’s pop-up menu. If it is not, you will need to use the Depth
menu command to set the depth to 256 colors or to one of the 9-bit to 16-bit
grayscales, so that you can apply a different color table (see previous section).
Click on the Color Tables icon and select the required color table from the pop-up
menu.
You will also be able to see the selected color table in the HSI Colorspy Palette
and the palettes associated with the Paint Tools.
This command is a shortcut. The new table will be applied to the current layer only
(the layer in the Document Window). If you want to apply a new color table to several
layers, use the Layer Manager and Colors menu command, as described in the next
section.
If none of the palettes is suitable, you can use the Colors menu command to edit one
of the existing custom palettes, as described in the next section.
80
Openlab v.3
WORKING WITH COLORS
Using the Colors Command
This section describes how to use the Colors menu command to:
Apply a different color table to selected layers.
To edit a color table so that you can create a custom table.
To save a custom table as a PalEdit file.
To apply a color table
1.
Select a table from the Color Tables folder.
2.
Make sure that your image has a depth of 256 Colors or one of the 9-bit to 16-bit
Grayscales, so that you can edit the table. If the Colors... command is grayed-put,
use the Depth… menu command to change the depth.
3.
Use the Layer Manager to make the required layer current, and to select any other
layers to which you wish to apply the color table.
4.
Select Colors... from the Image menu to display the Edit Image Colors dialog.
Updated January 2001 81
CHAPTER 6
You can either amend the colors of the palette that is currently selected, or you can
open another palette. The Open... and Save... commands are described at the end of
this section.
5.
Select the pixel that you want to edit, by clicking on the square. If you want to select a
range of consecutive pixels, hold down the Shift key and click on the first and last
square in the range.
6.
Use the buttons to apply specific actions. Wavelength... is the most commonly used
command. You must first select a range of pixels. The command applies an intensity
ramp at a specific wavelength to the selected pixels - the ramp goes from light to dark.
You will be able to see the effect of the change in the color bar below the pixels. This
command is useful if you know the wavelength at which the image data was captured.
It displays the following dialog. Either type in the required wavelength or select one of
the wavelengths from the pop-up menu.
Change To..., Lighten, Darken and Invert may be applied to single or groups of
pixels. You must also select a range of pixels if you want to apply the Blend or
Reverse commands. You will be able to see the effect of the change in the color bar
below the pixels.
82
Openlab v.3
Lighten and Darken simply lighten or darken the selected pixel(s).
Invert inverts the color of the selected pixel(s).
Blend takes the colors of the first and last colored pixels and blends the pixels in
between, so that the squares in-between reflect the blend between the color of the
first and the last square.
Reverse reverses the color order of the selected pixels.
WORKING WITH COLORS
7.
If you want to change the color of the selected pixel, click on the Change To... button
(or double-click on the square) to display the New Color dialog.
8.
Select the appropriate color picker by clicking on one of the icons in the scrollable list.
You may find this changes the dialog in the Choose a new color: window, as
illustrated below. All dialogs have color swatches in the top right-hand corner that
show the original color and the new color. When you are happy with the new color,
click on OK.
HLS and HSV Pickers
You can either click on a color in the
color circle or type the values directly
into the Hue Angle and Saturation %
boxes.
Use the Slider control to set the
Lightness (HLS) or Value (HSV) %.
Updated January 2001 83
CHAPTER 6
Crayon Picker
Click on one of the crayons to select
a color.
CMYK, HTML and RGB Pickers
Use the slider controls to set the
value for each color channel (or type
the values in directly). The number of
slider controls varies according to
color model. The HTML picker has an
additional check box that allows you
to Snap to Web Color.
9.
You can edit the whole palette, as required. When you have finished, click on OK to
close the Edit Image Colors dialog. Every time you select Custom palette, you will be
using your edited colors. If you want to make this color palette available to other
images, you need to save it before you close the window. (See next section.)
Saving and Opening Color tables
Once you have edited the colors on a palette, you can save it as a PalEdit file. This
allows you to build up a number of custom palettes that you can select from the Edit
Image Colors dialog. If you want the palette to appear in the Color Tables pop-up
menu in the Document Window, you must save it to the Color Tables folder.
84
Openlab v.3
WORKING WITH COLORS
1.
Edit the colors as described in the previous section and then click on Save....
2.
Choose a folder for the file and type in a file name. If you save the file to the Color
Tables folder, you will be able to select it from the Color Tables icon on the Document
toolbar and from the Palette pop-up menu on the Layer Depth dialog. It will be
available for all documents, not just the document where it was created.
3.
Click on Save.
4.
When you want to select a particular palette, use the Open... button on the Edit Image
Colors dialog. Select the folder and file, and click on Open.
Updated January 2001 85
CHAPTER 6
Contrast Enhancement
Contrast Enhancement can be used with 8-bit color and 8-bit to 16-bit grayscale
images. It cannot be used with full color images, use the Color Balance command
instead (see page 89).
When you capture an image, the image may not always use the full dynamic range of
the display, and the actual pixel values that hold the image data may be concentrated
in a small band of the available display. To improve the contrast with such images,
you can use contrast enhancement to remap values so that they use all the color table
most efficiently.
Contrast Enhancement with 8-bit Images
When you apply contrast enhancement, you will either change the color palette that is
in use, or the image data itself. Take care if you decide to change the image data.
Make sure that you have a backup version of the raw data and save the amended file
to a new file name.
Contrast Enhancement with 9-bit to 16-bit Grayscale Images
Openlab maps 9-bit to 16-bit grayscale images to your display (your computer can
only display 256 gray levels). By default, the mapping shows all the data, but you can
use contrast enhancement to show a particular range only. This is done using a
special, internal lookup table so it does not affect the palette or the data. Use the
dialog to reset the range at any time.
Refer to Appendix B for a more detailed discussion of image formats and bit depths.
86
Openlab v.3
WORKING WITH COLORS
To apply contrast enhancement
1.
Use the Layer Manager to make a layer current and to select any other required
layers.
2.
Select Contrast Enhancement... from the Image menu to display the Contrast
Enhancement dialog.
The Preview window shows the effect of any changes that you make. Use the pop-up
menu to Scale, Crop or Zoom into an area of the preview.
The red line on the chart maps the pixels along the X axis to the display colors in the
Y axis. In our example, the image data is concentrated within a very small range and it
would be useful to apply contrast enhancement.
3.
Click on the Best Guess button. Openlab will work out the best distribution for you.
Note: Although you can adjust the distribution manually, as described on the next
page, we recommend that you use the Best Guess command where possible.
Updated January 2001 87
CHAPTER 6
Notice how the red line is adjusted and how the preview changes. The steeper the
gradient of the line, the greater you will find the contrast over the selected range.
Small red square
Notice also the small red square, where the gradient starts. This acts as a handle,
which you can click on and drag to adjust the gradient manually. You can also add
new handles to the line by clicking on it. In the following example, we have used a
different image and have used contrast enhancement to focus on just two of the major
peaks of image data.
Note: To remove a handle, just click and drag it off the page. If you want to reset the
values, click on the Reset button.
88
Openlab v.3
WORKING WITH COLORS
4.
If you are working with an 8-bit image, click on either the Change Palette or the
Change Data buttons. (Make sure you have a backup of the original data if you
decide to change the data.) These buttons will be grayed out if you are working with 9bit to 16-bit grayscales.
5.
Click on either Current Layer or Selected Layers, and then click on OK.
Saving Settings
You can save these settings if you want to use them on a batch of different images.
Refer to Chapter 15 for further details about saving settings.
Color Balance
The Color Balance command allows you to adjust the contrast, brightness and
individual color channels on an image. It can only be used with 24-bit color images
where contrast enhancement cannot be used. You can apply changes to the current
layer or to all selected layers.
1.
Use the Layer Manager to make a layer current (it appears in the Document Window).
2.
Use the Layer Manager to select any other layers for which you wish to apply color
balance.
Updated January 2001 89
CHAPTER 6
3.
Select Color Balance... from the Image Menu.
4.
Use the slider controls to adjust the contrast, the brightness and the individual color
channels. Press the AWB button (Auto White Balance) to attempt color correction on
the image. Changes are reflected in the Preview window. There is also a histogram for
each of the color channels.
Note: If you make a mistake, use the Reset Levels button to reset all the values.
5.
Click in either Current Layer or on Selected Layers, as appropriate, and click on OK
to apply the changes.
Saving Settings
You can save these settings if you want to use them on a batch of different images.
Refer to page 151 for further details about saving settings.
90
Openlab v.3
WORKING WITH COLORS
HSI Colorspy Palette
The HSI Colorspy Palette allows you to get information about individual pixels in an
image.
Click in the preview window to change the magnification between high and low.
Click a second time to change it back.
Click in the pixel information section to display a pop-up menu that allows you to
change the type of values displayed. Select Index for 8-bit gray images. Select
Intensity for deep gray images.
Area around current pixel.
Click to change
magnification between
high and low
Color of current pixel
Pixel information. Click to
display pop-up menu and
select how information is
displayed
Illustrates current color table
For 8-bit images, you will be
able to see the pixel at the
current pointer position
Updated January 2001 91
CHAPTER 6
92
Openlab v.3
REGIONS OF INTEREST
Chapter 7
Regions of Interest
Overview
Once you have opened an image, you can specify regions of interest (ROIs) on that
image. ROIs are properties of the document, but they apply to the context of the
current layer. This means that you can draw an ROI on one layer, and take it with you
as you move through other layers. However, any operations that you apply to the ROI
are only implemented on the current, active layer. Refer to Chapter 5, “Working with
the Layer Manager”, for information about selecting layers.
Once you have defined your ROIs, you can save them to the disk so that you can use
them with another image, if required.
Openlab also provides the facility to record and save ROI measurements. This is
described in detail in the “Measurements” chapter (page 105).
This chapter describes:
The different types of ROI.
The ROI menu.
How to create ROIs.
How to save ROIs.
How to open ROIs.
Note: You can change the color and pattern of the ROI outline, if required, to achieve
a better contrast with the image. Refer to the “Preferences” chapter (page 143) for
further details.
Updated January 2001 93
CHAPTER 7
Types of ROI
There are five different types of ROI selection tools.
Click on the ROI icon in the toolbar and hold down the mouse button. Select the
appropriate ROI selection tool and release the mouse button.
ROI tools
or
Rectangular
Selection tool
or
Lasso Selection
tool
This is the Rectangular ROI selection tool which allows you to draw rectangles or
squares. You can use the tool with a number of different key combinations to achieve
specific effects, as described in the tables in the “Creating ROIs” section. You may
like to practise using some of these effects on an image. These key combinations
apply to all ROI tools.
The Lasso tool allows you to trace the outline of a selection. As with the Magic Wand
tool, you can select a tolerance value for the shades (see next page). However,
rather than expanding around adjacent pixels, the Lasso tool shrinks around the
pixels that fall outside of the tolerance value.
The initial point clicked sets the color to compare. You can edit the tolerance value in
exactly the same way as you edit the Magic Wand tolerance value.
The Freehand tool allows you to make a freehand selection of an area on the image.
or
Freehand
Selection tool
94
Openlab v.3
REGIONS OF INTEREST
or
Magic Wand
Selection tool
This is the Magic Wand tool. It allows you to select images based upon the color
similarities of adjacent pixels. The initial point clicked sets the color to compare.
You choose how extensive you want the selection to be by specifying how many
shades tolerance are acceptable. Openlab compares the color values of adjacent
pixels and determines whether they are within the specified color range, or tolerance.
This tool has the effect of expanding outwards from the original color. Double-click on
the icon to display the following dialog.
Enter a value for the shades and click on Set.
Note: Values relate to the RGB color cube. The number of shades specify the size of
the cube within the entire RGB color space. This smaller cube is centred on the
clicked color, and the shades set the length of the sides of the cube. The wand
selects adjacent pixels that fall within the color cube. 0 produces an exact match, 127
selects everything. 32 is normally a reasonable compromise.
This is the Elliptical ROI selection tool which allows you to draw ovals or circles.
or
Elliptical
Selection tool
Updated January 2001 95
CHAPTER 7
Creating ROIs
You use the ROI tools to define Regions of Interest on an image. Various key
combinations are possible with the ROI tool, each of which produces a different effect.
Similarly, you have various options for moving an ROI once you have created it. The
key combinations and move options are summarised below in the “ROI Shortcuts”
section.
1.
Open a document as normal.
2.
Click on the appropriate ROI (Region Of Interest) tool in the Tools window.
3.
Position the mouse on the image, click and drag until you have selected the desired
area. Release the mouse.
ROI shortcuts
There are a number of modifier key combinations, that you can use in combination
with all the ROI tools. These are described in the following table.
96
Openlab v.3
Click on the image
Effect
With just the icon
selected
Draws an ROI. The start point is in one corner, the end point
is in the opposite diagonal corner. This will replace any
existing ROI on the image.
+ Ctrl
Draws an ROI but the start point is at the centre of the
region.
+ Shift
Allows you to add more area to an existing ROI.
+ Shift with Option
Subtracts an ROI from an existing ROI.
REGIONS OF INTEREST
Similarly, if you position the pointer within the ROI, you will be able to move the ROI,
and different key combinations will have different effects.
Action
Effect
Move the mouse inside
the ROI.
The pointer changes and you can move the ROI and its
contents, just as you would move a graphic. The background
is erased.
Hold down the Option
key at the same time.
To move the ROI and its contents without erasing the
background.
Hold down the
Command key at the
same time.
To move the ROI without its contents. This does not erase
the background.
Move the mouse inside
the ROI, hold down the
mouse button and drag
the selected region
onto another window.
To move the selected ROI to another document. The ROI
will appear on the current layer of the document, replacing
that document’s ROI. This has the same effect as using
Copy and Paste commands.
Editing ROIs
There are various commands that you can apply to ROIs. Most of these commands
are grouped under the ROI menu, which is accessed from the Edit menu.
The ROI menu commands are described on the following pages.
Updated January 2001 97
CHAPTER 7
The ROI Menu
Note: The command to undo the most recent change to the ROI is under the Edit
menu, Undo R.O.I. Change. You can use this command to undo any of the changes
that you make using the commands in the ROI menu.
Complement
Use this command to invert the selection state of the document. This makes a new
ROI containing everything that is not in the current ROI. For example, you may have
picked out several regions of interest on an image and want to remove the
background. Use the Complement command to select the background as the ROI
and select Clear from the Edit menu to remove it.
Expand
Use this command to expand the ROI region in all directions by 1 pixel, thus selecting
a slightly larger area.
98
Openlab v.3
REGIONS OF INTEREST
Shrink
Use this command to contract the ROI region in all directions by 1 pixel, thus selecting
a slightly smaller area.
Outline
If you have a complex ROI containing many interior holes, use this command to
eliminate the interior holes quickly while retaining the exact existing outline. Such
complex regions can often occur when you use the magic wand tool on an image.
Simplify
Use this command if you want to eliminate small holes within the ROI and make a
complex outline simpler. The command first expands the ROI by a small amount
(currently 4 pixels in every direction) and then shrinks it by the same amount. This can
greatly assist the selection of particular objects, especially in conjunction with the
magic wand tool.
Smooth
Use this command if you want to remove small holes within the ROI and make the
outline smoother than the original. It works in a similar way to the Simplify function,
but the region is first shrunk by a small amount (currently 4 pixels), then expanded
again by the same amount. The command is useful if you want to eliminate any
contribution made to the ROI by very small objects.
Shrink around image
Use this command to contract the ROI region around the image. It has the same effect
as the lasso tool and is particularly useful if you are building up a complex ROI. The
color of the top left point of the ROI is used to determine which pixels to enclose.
Pixels which do NOT match this color within the current lasso tolerance (see “ROI
Tools”) are selected.
Make Binary Layer
Use this command to convert an ROI into a binary layer. It is only available if you have
one of the Measurements modules installed and is most effective when used in
conjunction with the Advanced Measurements module. For example, you can use the
command to create a binary mask that can be applied to several layers and the
Advanced Measurements module to record the change in intensity throughout the
layers. Advanced Measurements is one of the additional modules. It has its own User
Guide.
Updated January 2001 99
CHAPTER 7
Crop Layer
Use this command to crop all layers in the document to the same size as the ROI.
Saving ROIs
1.
Select Save R.O.I As... from the File menu.
2.
Change the destination folder, if required (or create a new folder).
3.
Enter a name for the ROI in the Save R.O.I. As: box and then click on the Save
button.
Opening ROIs
`
`
1.
Select Open... from the File menu and open an image, as normal.
2.
Once the image is displayed, select Open R.O.I ... from the File menu.
3.
Select the ROI from the file list and click on Open. The ROIs that you have saved are
now applied to the new image.
4.
If the saved ROI came from a different-sized image, Openlab will ask you to choose
whether to use the ROI as it is, or whether to scale it to fit the image.
`
100 Openlab v.3
CALIBRATION TOOLS
Chapter 8
Calibration Tools
Overview
This chapter describes:
The Calibration and Measurement tools.
How to measure a line.
How to carry out spatial calibration.
Refer to page 105 for a detailed description of the standard Measurements module
that allows you to record and save measurements.
Updated January 2001 101
CHAPTER 8
The Calibration and Measurement Tools
There are four tools.
Click on the Calibration icon in the toolbar and hold down the mouse button.
Select the appropriate Calibration tool and release the mouse button.
The Calibration tools allow you to carry out several tasks.
or
Allows you to carry out spatial calibration. It is the only calibration tool that can be
used for measuring horizontal lines.
Vernier tool
Allows you to measure a straight line between any two points on an image.
or
Straight line tool
Allows you to measure a freehand line between any two points on an image.
or
Freehand line tool
or
Point counter tool
102 Openlab v.3
Allows you to mark points on an image. This is particularly useful if you need to count
individual cells. Openlab displays a count number next to each point that you select
with the tool. Option-click resets the count to zero. It is also used for manual cell
tracking.
CALIBRATION TOOLS
Line Measurement
1.
Click once on the Calibration icon in the Toolbar and select the type of line
measurement tool that you require.
2.
Click on the image on the start point for your measurement and hold down the mouse.
3.
Drag the mouse to the end point for your measurement and release it.
4.
The distance between the two points is displayed.
Spatial Calibration
1.
Load a reference image that contains an object of a known size, for example a
calibration slide with a graticule of known dimension.
2.
Click on the Vernier icon in the Tools window to display the Calibration tool.
Use the tab to adjust the callipers.
3.
Click on any part of the top of the tool and drag it so that the left-hand calliper abuts
the start point of the graticule.
4.
Click on the tab next to the right-hand arrow and adjust the callipers so that they
enclose the distance that you wish to measure: the left-hand arrow is at the start point
and the right-hand arrow is at the end point.
5.
Select Calibration... from the Image Menu to display the Spatial Calibration dialog.
(You can also double-click on the Calibration tool in the Tools window or use the
shortcut key combination.)
Updated January 2001 103
CHAPTER 8
6.
Check that the correct unit of measurement is displayed. If necessary, select the unit
that is appropriate to your measurement from the Units pop-up menu.
7.
The Vernier tool provides the measured length in the X Dimension box. The Y
Dimension automatically defaults to the same value. (The majority of camera chips
have square pixels. However, you can override this to calibrate an image from a CCD
camera that produces a rectangular pixel. Uncheck the Square Pixel Lock box first.)
8.
Enter the real X Dimension value corresponding to the sample into the right-hand
field. (If the Square Pixel Lock box is unchecked, do the same for the real Y
Dimension value.)
9.
Click on Calibrate to calibrate the image. This calibration will apply to all layers in the
document, and will be retained when you subsequently open the document, as long
as you save it as a LIFF file.
10.
Once you have calibrated an image, all measurements on rulers and Calibration Bars
will be displayed in calibrated units.
Positive Y is up
The Macintosh screen uses the top left-hand corner as the origin of its X and Y axes.
This means that the Y co-ordinate increases as the mouse button moves down the
screen, which is the opposite of most mathematical conventions. If required, you can
invert the Macintosh Y-axis by clicking on the Positive Y is up box. The
measurements will then follow the normal conventions.
Saving Settings
You can save settings if you want to use them on a batch of different images. This
means that you do not need calibration images again, but remember that calibration
will be different for different objectives, optovar settings, C-mounts and binning
settings. Refer to page 151 for further details about saving settings
104 Openlab v.3
MEASUREMENTS
Chapter 9
Measurements
Overview
This chapter describes the standard Measurements module which is provided with the
core system. If you have also purchased the Advanced Measurements module, you
will have additional features. These are described separately in the guide that
accompanies the Advanced Measurements module.
Note: If you are using Openlab to create a set of measurements for comparison,
remember that the results will only be meaningful if the images are equivalent. For
example, they are all calibrated and they all have the same bit depth.
This chapter describes:
The Measurements Window.
Types of measurement.
Measurement preferences.
How to set up the Measurements Window.
How to record measurements.
The Overlay commands and how to work with measurement details.
How to export measurements.
Refer to the “Regions of Interest” chapter (page 93) for a detailed discussion of ROIs.
Updated January 2001 105
CHAPTER 9
The Measurements Window
The Measurements module is part of the core installation, but may be removed if not
required. As long as it is in the Openlab Modules folder, every document that you
open will automatically have a Measurements Window. This window is displayed if
you Start Recording, or if you select Show Measurements from the Image menu.
As with all windows, you can also use the Windows Menu to view a list of all windows
and to select a specific one. You can hide the Measurements Window by selecting
Hide Measurements from the Image menu.
The Measurements Window is split into three main columns, one for each type of
measurement. The columns contain tables of information relevant to the
measurement type.
Hides and shows tables
Menu bar
Recording
controls
Click and
select color
for overlay
Thick black line
indicates table
is selected
Click the
column title
to sort the
column
Use the scroll
bars to scroll
through the
rows in the
table
Drag the splitter
bar to see more
of the table
106 Openlab v.3
MEASUREMENTS
Types of Measurement
There are three types of measurement:
Point measurements, which record the number of times that you click on the image
using the Point Counter Tool.
Line measurements which are created when you use either the straight or curved
line tools for line measurement.
ROI measurements which are created when you use any of the ROI Tools.
Note: ROI tools are at the top of the Document Toolbar. See page 36.
Each type of measurement records different types of information. However, all types
have a count number and a name. Some measurement operations name
measurements automatically, but you can always double-click and enter a name that
provides meaningful, additional labeling for the data. You can sort on any of the
measurement items by clicking once on the appropriate column title.
Point measurements
This is useful if you need to count the number of cells in an image. Each click with the
Calibration Point Tool is given a count number which appears on the image in the
Document Window, and which is recorded in the Point Measurements table in the
Measurements Window. This point count provides a simple method of object tracking
(see page 111 for an example).
The following information is provided for point measurements: number, point name,
the x and y co-ordinates of the point, the units of measurement, the speed and angle
of the point, the name of the layer on which the point was recorded and the time
stamp on the layer.
Option-click clears the points from the Document Window.
Line measurements
The following information is provided for line measurements: number, line name, line
length, angle, the units of measurement, the name of the layer on which the line was
recorded and the time stamp on the layer.
Updated January 2001 107
CHAPTER 9
ROI measurements
The following information is provided for ROI measurements: number, ROI name,
area, perimeter, width, height, shape factor, maximum color index, minimum color
index, mean color index, mode, the units of measurement, and the name of the layer,
on which the ROI was recorded. You will also notice a triangle next to measurements
in the Max, Min, Mean and Mode columns. This indicates the color index of the ROI
for 8-bit images and the grayscale intensity for all other images.
Max, Min, Mode and Mean measurements
The maximum, minimum and mean measurements record the equivalent gray-level
intensity present within the ROI. The equivalent gray-level intensity is the intensity that
would be present if the image was mapped to a grayscale. These values are always
displayed, but there will be different values in these columns if you are using the
Density Calibration module. Density Calibration is part of the Openlab Core (but not
Openlab Darkroom). Refer to Section 3 of this manual for further information.
Shape factor
The shape factor is equal to :
4 A/P2
where :
A = area
P= perimeter
This gives a shape factor of 1.0 for a perfect circle, and becomes much smaller for
irregular shapes.
Perimeter
You define how the values for the perimeter will be calculated when you set up
Measurement Preferences. ROIs may be a number of different shapes, but the
calculations normally treat the ROI as an aggregate of square pixels. This may
produce an unexpected result if your ROI has many diagonal sides. If you require a
more accurate result, you can ask the Measurements Module to smooth the edges
while calculating the perimeter (by checking the More accurate perimeter
calculations box in the Preferences dialog).
Centroid x and Centroid y
These values provide an approximation of the center of the object. The centroid is
marked by a on the ROI. With an ROI this is normally calculated by shrinking the ROI
down to a center point which becomes the centroid. For shapes that shrink to more
than one center point, Openlab calculates an average to establish the centroid.
108 Openlab v.3
MEASUREMENTS
1
1
Perimeter = 8
Perimeter = 4
Pixel
Square-shaped ROI
Perimeter = 36
Diamond-shaped ROI
jagged edges
Normal Perimeter
Calculations
Perimeter = 4 + 16v 2
Diamond-shaped ROI
smoothed edges
More Accurate Perimeter
Calculations
Measurement Preferences
You can change some of the default values that determine how measurements are
calculated and how they are exported to other applications. These values are defined
in one of the Preference windows. This section describes how to change these values.
Refer to the “Preferences” chapter (page 143) for a full description of all the
preferences that you can edit.
Measurement Preferences allow you to control:
Whether measurements are displayed in fixed decimal points or in scientific
notation. If you select fixed decimal points, you will be able to set the number of
decimal places, and numbers will always be displayed to this number, for example
1.000 or 1.101. If you select scientific notation, numbers are displayed using the
scientific form, for example 1.2e-3.
How columns are delimited when you export measurements to a text file or to the
clipboard, and whether headings are included. Columns can be delimited in two
ways, either with a Tab character or with some other character such as a comma
or semicolon. What you select will depend upon the spreadsheet or database to
Updated January 2001 109
CHAPTER 9
which you are exporting. You need to check which format it understands best.
With most spreadsheets, Tab characters are most effective.
110 Openlab v.3
1.
Select Preferences... from the Edit menu.
2.
Click on the Measurements icon in the left-hand column.
3.
Click on the Fixed decimal point or the Scientific notation buttons, as appropriate.
4.
Type in a value for the number of decimal places or significant figures.
5.
Click on the Tab characters or the This text: buttons, as appropriate.
6.
If you select This text:, you will also need to type the appropriate character into the
adjacent box.
7.
Check the Include column headings and the Export time in seconds boxes, if you
want the column headings from the Measurements Window to be included with the
exported measurements, and the time to be recorded in seconds. We recommend that
you enable Export time in seconds if you want to import measurements into
spreadsheets and use the details in calculations or to plot time against some other
element.
8.
Check the More accurate perimeter calculations box, if required. See “Types of
Measurement: ROI measurements” for more information about perimeter calculations.
9.
Click on the Save button to save the preferences.
MEASUREMENTS
Recording Measurements
In the following example, we will use the Point tool to carry out simple object tracking.
1.
When you are ready to start recording measurements, click on the Start Record
button in the Measurements Window.
2.
The red Recording light flashes. (You can also select Start Recording from the
Image menu.)
3.
Select the appropriate measurement tool from the Document Toolbar in the Document
Window. We will use the Point Counter Tool. Double-click on the icon in the toolbar.
Set the start at 1 and increment by 0.
4.
Go to the first layer of the time lapse and click once on the object to record the
measurement on the image in the Document Window. Each measurement is recorded
in the Point Measurement table in the Measurements Window.
Note: You may like to give the measurement a name as you record it, so that you can
identify it easily later. Display the Measurements Window, double-click in the Name
field and type in a name.
5.
Go to the second layer and find the same object in this image. Click once on it.
Repeat until you have marked the point on all the layers in the image document. The
Layer Name is recorded with the measurement.
Note: If you are using Openlab to create a set of measurements for comparison,
remember that the results will only be meaningful if the images are equivalent. For
example, they all have the same bit depth.
6.
If you want to track a second object, repeat steps 3 to 5, but reset the point counter to
start at 2 and increment by 0.
Updated January 2001 111
CHAPTER 9
7.
When you have finished recording measurements, click on the Stop Record button in
the Measurements Window. The red Recording light stops flashing. (You can also
select Stop Recording from the Image menu.)
Now, when you select points in the Measurements Window, you will be able to track
the object through the layers in the Document Window.
Tips
If you forget to start the recording, you can still capture the last measurement.
■
Click on the Camera icon in the Measurements Toolbar.
You can also use the Camera icon to capture the same measurement several times.
For example, you can create an ROI on one layer, and then use the camera icon to
capture the ROI as a measurement on each of several layers by moving through the
layers in turn and clicking the camera icon at each one.
Setting Up the Measurement Window
There are various options for amending the way information is displayed in the
Measurements Window.
Adjusting columns
Hold and drag the splitter bar (to the right of the scroll bar) to adjust the width of a
table.
Hide one or more of the measurement options, by unchecking the boxes, or by
using the commands on the Table menu. You will only be able to hide a maximum
of two tables. (One must always remain visible.)
Lines
112 Openlab v.3
ROIs
Points
Columns within a table can be adjusted by clicking and dragging the gray dividing
lines between the columns.
MEASUREMENTS
Saving the Settings as a Default
Once you have set up the columns, you may like to save the window as a default
for other Measurement Windows.
Select Save as Default from the Table menu.
Selecting items
You can select a single line by clicking on it, a range of lines using Shift-click, or all
lines using Select all from the Edit menu. You will also be able to see the overlay
for the measurements in the selected lines on the Document Window.
Each time that you select a row in the Measurements Window which contains a
measurement, Openlab will display the outline of that measurement on the image
layer in the Document Window.
Click within a table to select it. A thick black line appears under the headings. This
is now the active table. If you use the Export command it will act on this table.
See the “Overlay” section for more details about the Overlay commands.
Deleting items
If you want to delete a measurement, select it and press the Backspace key. (You
can also select Clear from the Edit menu.) This deletes the measurement from the
table, but the count number is not reset. It always reflects the exact number of
measurements that have been recorded, even if some have subsequently been
removed.
Sorting measurements
Click on any of the titles to sort on that column. The Measurements Module sorts
in ascending order, and ignores the case in layer and measure names.
Select Sort in Reverse Order from the Table menu if you want to sort columns in
descending order.
Option-click the column title to reverse the current sort order. For example, if you
have selected Sort in Reverse Order from the Table menu, Option-click will sort
in ascending order.
Updated January 2001 113
CHAPTER 9
Measurement names
Double-click on the Line Name, ROI Name or Point Name column to edit the
name.
Overlays
Once you have captured your measurements, you will find the Overlay feature and its
associated commands a useful tool for providing feedback about specific
measurements.
Each time that you select a row in the Measurements Window which contains a
measurement, Openlab will display the outline of that measurement on the image
layer in the Document Window. You can change the appearance of the overlay, and
you can use Overlay commands to find your way through a multi-layered document
with many measurements.
Overlay appearance
114 Openlab v.3
Use the Overlay pop-up menu on the menu bar to select a different color for the
outline.
Select one of the Set Style... commands from the Overlay menu.
Set Line Style...
Check the Show Line Length box if you want the line length to be displayed on
the image.
MEASUREMENTS
Set ROI Style...
Select one of the buttons to determine where the object number appears. (You
can select either Show object number or Show measurement number. The
object number always has the same value as the measurement number in the
standard Measurements module.) Check the Show Outline and/or Show Box
boxes to achieve the desired effect on the overlay. Click on OK.
If you check the Make ROI box, Openlab will convert the overlays into ROIs and
you will be able to use all the standard ROI commands with them.
Set Point Style...
If you want to Show Velocities or Show Direction Arrows so that you can track
points as they are placed on a layer, check the Show Object Track checkbox
first, and then check the other boxes as appropriate.
Updated January 2001 115
CHAPTER 9
Overlay commands
If you have a multi-layered document with many measurements, you need an
easy way of scanning the measurements and relating the information back to the
layers. Although the layer name does appear in the measurement details, it is
obviously much easier to relate to that information if you can also see the overlay
on the layer.
If you want to bring the layer from which the selected measurement came to the
front of the Document Window, select Switch Layers from the Overlay menu.
Now, whenever you select a row in one of the Measurement tables, the layer on
which the measurement was taken will be displayed in the Document Window.
On the other hand, you may want to identify the measurements in the
Measurement Window that belong to the current layer. Select Show Current
Layer Only. Now whenever you select a measurement in the Measurement
Window, the overlay will only be displayed if the measurement was taken on the
current layer.
You can also use the commands on the Overlay menu to hide all overlays, or to
convert the currently displayed overlay into an annotation layer or an ROI.
Exporting Measurements
Calibration and measurements are an integral part of the image document and are
always saved with it. If you want to have the data separately, you can export
measurements for use in a spreadsheet or database:
Copying them to the clipboard and pasting them into a spreadsheet or database
application.
Saving them as a delimited text file which you can open in your spreadsheet or
database application.
The following instructions assume that you want to export the measurements as a file.
1.
116 Openlab v.3
Make sure that you have set the correct export preferences. These define how the
fields are delimited and whether headings are included.
MEASUREMENTS
2.
Click on the table that you want to export to select it. A thick, black line appears under
the table headings.
3.
Select Save as... from the File menu.
4.
Choose a different folder, if required, and type in a name for the export file.
5.
Click on Save.
6.
You will now be able to open the file, whenever you want to use it, from within your
spreadsheet or database application. (You cannot open this file within Openlab.)
Note: If you use Excel, just double-click on the exported file to open it.
Copying measurements
If you use the Copy command, you must remember to paste the copied table
immediately into your spreadsheet or database application. The clipboard only retains
the last item that was copied. Your table will be overwritten as soon as you copy
something else from any application to the clipboard.
1.
Select Copy from the Edit menu. The table is saved to the clipboard.
2.
Open your spreadsheet or database application and select Paste from its Edit menu.
Updated January 2001 117
CHAPTER 9
118 Openlab v.3
PAINT TOOLS
Chapter 10
Paint Tools
Overview
Openlab provides various Paint Tools which allow you to add shapes, text and other
effects to an image layer. All of these tools apply to the current layer only.
This chapter provides:
A description of the Paint Tools palette.
A brief overview of each tool.
Instructions on how to edit tool features.
Recommendations for Using Paint Tools
Paint Tools change the data content of a layer. Improvision, therefore, recommends
that any work with Paint Tools is done on a separate layer, which can be given a
transparent background and then merged with the data layer to avoid overwriting
image data permanently.
Updated January 2001 119
CHAPTER 10
Paint Tools Palette
Paint tools
Erase colour
Paint colour
Options that can
be edited for the
selected tool
Line colour
Paint Tools
To select a tool, click on its icon in the palette. The parameters for the tool appear
in the lower half of the palette. They vary according to the tool that you have
selected.
If the tool has any additional parameters, you can display them by double-clicking
on the icon.
Use the Shift key to constrain draw tools to horizontal and vertical lines. (This does
not apply to the Spray Can.)
When you use the Paint Tools for the first time, you may like to allow a little time to
experiment with the different effects.
120 Openlab v.3
PAINT TOOLS
Pencil tool
The pencil tool allows you to create freehand or straight lines - a single pixel width.
You can also use this tool to edit individual pixels. We recommend that you magnify
the image before editing pixels, to ensure greater accuracy.
The two pop-up menus in the lower half of the screen allow you to amend the color of
the pencil line and of the erase background.
■
Click on the menu, hold the mouse down.
■
Select a color and release the mouse.
Brush tool
The brush tool paints the foreground color onto the image.
The options in the lower half of the screen allow you to amend the erase color and
the paint color.
You can also control the shape and thickness of the brush stroke.
Click and hold on the
box. Drag to the
required thickness and
release the pointer.
Click on the required
shape to select it.
Updated January 2001 121
CHAPTER 10
Spray tool
The spray tool allows you to lay down a diffused spray of paint on the image.
You can edit the erase color and the paint color. You can also control the pressure of
the paint and the rate at which it is sprayed onto the image, and select various spray
effects.
Click on the box and
hold down the pointer.
Drag to increase or
decrease the spray
area, and release the
pointer.
Click here to display a popup menu of spray effects.
Use the slider control to
change the rate at which
paint is sprayed onto the
image.
Eraser tool
The eraser tool allows you to erase sections of the image. There is a single pop-up
menu which allows you to select the erase color.
Paint bucket tool
The paint bucket tool fills an area with the foreground color. The paint bucket tool fills
pixels that are similar in color.
You can edit the erase color and the fill color. You can also edit the fill effect.
122 Openlab v.3
PAINT TOOLS
Fill menu
Select the fill effect from the Fill pop-up menu in the top right-hand corner.
If you have an ROI selected, you can select Fill ROI from the paint bucket’s Fill
menu. This fills all of the area encompassed in the ROI.
Pattern effect
If you select a pattern fill effect, you will be able to select the appropriate pattern from
the pattern pop-up menu in the lower half of the screen.
Gradient
effect
If you select a gradient fill effect, you can set up various parameters. Select Set
Gradient... or double-click on the Paint Bucket tool.
■
Select a Style from the pop-up menu.
■
Change the Angle, if required, and select the number of colors.
■
Click on OK.
Note: The current paint and erase colors do not affect the fill, if the Set Gradient
command is used.
Updated January 2001 123
CHAPTER 10
Eyedropper tool
The eyedropper tool allows you to select the current foreground color from colors in
an image.
■ A single click sets the foreground (paint) color.
■ Option-click sets the background (erase) color.
■ Shift-click sets the line color.
There are also three pop-up menus in the lower half of the screen, which allow you to
amend the erase color, the paint color and the line color.
You can achieve the same effect as the eyedropper by using the Option key with
other draw tools. For example, Option with the line tool will select the color at the
current pointer position as the line color.
Line tool
The line tool allows you to create straight lines.
The options in the lower half of the screen allow you to select the line color, the line
width and the line style.
Line width
Line style
Line colour
Double-click on the tool to specify a different line size, as a pixel width.
124 Openlab v.3
PAINT TOOLS
Text tool
The text tool allows you to type text onto the image.
The pop-up menus in the lower half of the screen allow you to amend the erase color,
the foreground color and the line color. You can also set text characteristics.
■ Click on the appropriate pop-up menu to select a font, style and/or size.
■ Drag a text box onto the image.
■ Type in the text. You can edit the text as normal, as long as you have not clicked
outside of the text box.
■ Click outside the text to convert it to a selection.
■ Click and drag the selected text into position.
Double-click on the text icon to edit the text drop shadow.
Note: The line color is used to specify the color of the drop shadow for the text.
Color Table Legend
This tool is grayed-out if you do not have the Density Calibration module installed.
See the Density Calibration Reference Guide for further details
Updated January 2001 125
CHAPTER 10
Stamp tool
Improvision provides a number of stamps with Openlab. The stamp tool allows you to
select one of these stamps or create your own stamps which you will then be able to
add to any image.
You will find a list of available stamps in the lower half of the screen.
To select a
stamp
Once you have created and selected a stamp, the currently selected stamp is
previewed for you whenever you select the stamp tool. You will also see a counter
showing you the number of available stamps.
1.
Click on Choose... to select or create a different stamp.
2.
When you select Choose..., the Stamp Tool dialog is displayed.
3.
Select the stamp that you require.
4.
Click on the Set Stamp button.
Note: You can also display this dialog by double-clicking on the Stamp tool.
126 Openlab v.3
PAINT TOOLS
To create a
new stamp
You can create a new stamp by cutting and pasting part of an image, or you can
make a stamp from the current ROI.
With Cut and Paste:
You can cut and paste images from within Openlab or any other application.
■
Select the appropriate image, or part of it.
■
Select Copy from the application’s Edit menu.
■
Select the Stamp tool on Openlab’s Paint Tools palette.
■
Click on the Paste New button.
■
You will notice that the stamp that you have just copied is displayed in the
preview window.
■
Type in a name for the stamp.
■
Click on the Set Stamp button.
From selected ROI:
To apply a
stamp
■
Draw an ROI on the image.
■
Select the Stamp tool and click on the Make New button.
■
You will notice that your ROI is displayed in the preview window.
■
Type in a name for the stamp.
■
Click on the Set Stamp button.
1.
Select the Stamp tool.
2.
Click and hold on the image. The pointer indicates the center of the stamp.
3.
Release the mouse.
Updated January 2001 127
CHAPTER 10
Shape tools
There are two sets of shape tools: one for outline shapes and one for solid shapes.
Outline Shapes
Elliptical
shape
Rectangular
shape
Regular
polygon
Rectangular
shape with
rounded corners
Irregular
polygon
These tools allow you to draw an outline shape on the image.
128 Openlab v.3
Click on the tool that you require.
Click on the image, hold down the mouse button and drag until the shape is the
required size.
Hold down the shift key on rectangular and elliptical shapes to constrain them to
squares and circles.
Once you have created the outline, you can use the Paint Bucket tool, and its
pattern and gradient fill commands to fill it.
With all shapes other than the irregular polygon, you will be able to rotate, enlarge
or reduce the shape around your original start point, until you are happy with the
effect - as long as you do not release the mouse button.
All tools provide a pop-up menu for selecting a new line color for the outline and a
selection of line thicknesses. Click on Other... if you want to specify a line
thickness that is not displayed in the list.
PAINT TOOLS
With rounded shapes, you will be able to specify the degree of rounding.
Click on square and
drag to achieve desired
effect
With regular polygons, you will be able to select the number of sides.
With irregular polygons, you need to click near the origin to complete the shape.
Solid shapes
These tools allow you to draw a solid shape on the image. They work in a similar way
to the Outline Shape tools.
Click on the tool that you require.
Click on the image, hold down the mouse button and drag until the shape is the
required size.
Hold down the shift key on rectangular and elliptical shapes to constrain them to
squares and circles.
As you create the outline, the shape is filled with the currently selected paint color.
You can use the Paint Bucket tool, and its pattern and gradient fill commands to
change the fill.
With all shapes other than the irregular polygon, you will be able to rotate, enlarge
or reduce the shape around your original start point, until you are happy with the
effect - as long as you do not release the mouse button.
Updated January 2001 129
CHAPTER 10
All tools provide a pop-up menu for selecting a new paint color for the interior
color, a new line color for the outline and a selection of line thicknesses. Click on
Other... if you want to specify a line thickness that is not displayed in the list. If you
want to fill the shape with a pattern or gradient, you must use the Paint Bucket
tool.
With rounded shapes, you will be able to specify the degree of rounding.
Click on square and
drag to achieve desired
effect
130 Openlab v.3
With regular polygons, you will be able to select the number of sides.
With irregular polygons, you need to click near the origin to complete the shape.
CREATING MONTAGES
Chapter 11
Creating Montages
Overview
Openlab allows you to generate image montages quickly and easily, ready for
publication. Once you have created a montage, you can save it as a separate
document.
This chapter describes:
The Montage Window.
How to create a montage.
How to edit a montage.
Updated January 2001 131
CHAPTER 11
The Montage Window
Select Montage from the File-New menu.
The Montage Window is displayed.
Montage menu bar
Each tile will
contain one image
Montage display area
(represents the
printed page)
Horizontal
scroll bar
132 Openlab v.3
Vertical
scroll bar
CREATING MONTAGES
Creating a Montage
1.
Open the Openlab image file(s), from which you wish to select images for the
montage.
Note: You can also drag picture clippings onto the Montage Window.
2.
Select Montage from the File-New menu.
3.
Decide how many images you wish to fit on the page and select Tile Dimensions...
from the Options menu.
4.
Enter the number of tiles horizontally and the number of tiles vertically. The page will
divided into the number of squares shown in the preview image on the right.
5.
Click on OK to return to the Montage Window.
6.
If you do not want Openlab to display titles or gridlines on the Montage Window, use
the appropriate commands from the Options menu to hide them.
7.
Click in the appropriate Image Window to bring its associated Layer Manager Palette
to the front. Position the windows so that at least part of the Montage Window can be
seen.
Updated January 2001 133
CHAPTER 11
8.
Select the layer(s) that you require from the Layer Manager Palette, hold down the
mouse and drag the layers across to the Montage Window. The outline of the window
highlights when it is active.
Note: You can also drag an ROI from the Image Window onto the Montage Window.
9.
134 Openlab v.3
Release the mouse. Openlab places the images in the montage, starting at the tile in
the top left-hand corner and moving across the page to the right. If there are too many
images to fit on one page, it will create a new page automatically. Openlab scales the
layers to fit the tiles. It takes the image title from its name in the Layer Manager
Palette, and will display it immediately under the image unless you disable this option
(see step 6).
CREATING MONTAGES
10.
When you have created the montage, select Save from the Openlab File menu.
11.
Select, or create, a folder for the montage file, enter a file name for it, and click on
Save.
Once you have saved a montage file, you can re-open it at any time using the Open
command from the File menu. (You cannot open it in other applications.)
Editing a Montage
You can edit a montage at any time by:
Hiding or displaying the titles.
Changing the appearance of the titles (using the standard format commands under
the Font, Size and Style menus).
Changing the number of tiles/images on the page.
Clearing images from the montage.
Hiding or displaying titles
Select the appropriate command from the Options menu.
Updated January 2001 135
CHAPTER 11
Changing the appearance of titles
Use the standard format commands under the Font, Size and Style menus. These
commands only apply to the titles.
Changing the number of tiles
For best results, you should always set up the montage page before you drag the
layers onto it. However, you can change the number of tiles.
Openlab stores the images in the montage document at their original size. If you want
to scale the images to their tile size, choose Scale Images to Tiles from the Options
menu. Openlab will warn you that this will change the underlying data permanently
and ask you to confirm that it is OK to store the images in the montage document at
their new tile size. Be careful with this command. It is not appropriate if you are likely
to decrease the number of tiles again later, as some data will inevitably be lost in the
scaling process.
Clearing images
Once you have placed an image on a montage, you cannot move it, but you can
delete it. Click on the image to select it and select Clear from the Openlab Edit menu.
136 Openlab v.3
PRESENTATIONS
Chapter 12
Presentations
Overview
Openlab allows you to animate a layered image so that you can create a presentation.
This chapter describes:
The Presentation Palette.
How to set presentation options
How to create and run a presentation.
Updated January 2001 137
CHAPTER 12
The Presentation Palette
The Presentation Palette is part of the core installation, but may be removed if it is not
required. As long as it is in the Openlab Modules folder, it will be available whenever
you run Openlab. If you cannot see the Presentation Palette, use the commands
under Openlab’s Windows menu to bring it to the front of the display.
Check this box to
use the full screen
for the presentation
Click on the clock to change
the format of the time display
Click to display the
Options dialogue
Use the slider to
control the speed
of the presentation
Displays the playback rate
Click to play the
presentation once
Click to play the presentation
indefinitely: forwards then
backwards ‘shuttle’
Click to play the presentation
in a continuous loop
Presentation frame controls
Setting Presentation Options
138 Openlab v.3
1.
Open an Openlab layered file.
2.
Click on the Options button on the Presentation palette.
PRESENTATIONS
3.
Decide whether you want to include all layers in the presentation, or just selected
layers, and click on the appropriate button.
4.
Decide whether you want the clock display to show the Absolute Time or the
Relative Time, and click on the appropriate button.
Select Absolute Time, if you want the clock display to show the actual time at which
each frame was captured.
Select Relative Time, if you want the clock display to show the time for each frame,
relative to the timing base layer.
Note: If the current document is not an image document (for example, an automation)
or there is no current document, the clock shows the current time of day.
5.
If you want to run through the presentation more quickly, check the No related
updates (faster) box. Openlab will run the presentation, refreshing the images, but it
will not flick through the layers on the Layer Manager Palette.
If you enable the Clock Chime checkbox, the clock will chime every hour.
6.
If you are using Full-Screen mode, you have several additional options.
Select Hide menu bar to hide the Openlab menu bar, so that the whole screen is
dedicated to the presentation.
Updated January 2001 139
CHAPTER 12
Select Faster rendering if you want to increase the speed at which Openlab displays
images that are partially or fully transparent. For these images, transparent areas are
ignored for speed if this box is checked. Openlab’s image caching system allows very
large image sequences to be animated, without having to dedicate large amounts of
RAM to Openlab.
Select Manual Advance (Click or Keypress) if you want to be able to step through
the presentation manually. You still have to start playback before using keypress.
If you have more than one monitor, click on the Monitor... button. This allows you to
choose which monitor is used for full screen presentations
7.
Click on OK to close the dialog and save your presentation options..
Creating and Running a Presentation
1.
Open an Openlab layered file, and make sure that the Layer Manager Palette is
visible.
2.
If you want all layers to be included in the presentation, click on the Options button
and make sure that you have selected Play all layers in the Presentation Options
dialog. If you want to choose which layers will be included in the presentation, make
sure that you have selected Play selected layers in the Presentation Options dialog,
and select the appropriate layers in the Layer Manager Palette.
3.
Make any other changes to the presentation options, as appropriate. (See previous
section.)
4.
Use the button controls to control how often the presentation will play.
Click to play the presentation
in a continuous loop
Click to play the
presentation once
Click to play the presentation indefinitely:
forwards then backwards ‘shuttle’
140 Openlab v.3
PRESENTATIONS
5.
Use the slider control bar at the bottom of the Presentation Palette to run the
presentation automatically, or to move manually between frames.
Click to move forward and backward by one
frame, or hold down to play forwards and
backwards manually
Click to start the
presentation
The icon changes
to the Stop button
The marker on the slider control moves
automatically to indicate how far into the
presentation you are.
You can also use the slider control to
move manually to a different frame
6.
If the Layer Manager Palette is visible and you have not enabled No related updates
(faster), you will notice that the eye icon in the Palette is updated to indicate the
current frame and the marker moves across the slider control bar, as the presentation
runs.
7.
The images are presented in the order that they are shown in the Layer Manager
Palette. Images can be re-ordered by clicking and dragging them into the desired
order. Refer to the “Working with the Layer Manager” chapter (page 57) for further
details.
8.
If necessary use the speed slider control to change the speed of the presentation.
9.
If you have selected the continuous or indefinite play options, you will need to stop the
presentation.
Click on the
button on the slider control at the bottom of the palette.
Updated January 2001 141
CHAPTER 12
Saving a presentation
If you only want to run the presentation within Openlab, there is no need to save it, as
it is always available when you open a layered image. However, you may wish to
distribute the presentation independently of the Openlab software. You can do this
quite easily by exporting the presentation as a QuickTime movie. See page 53 for
further details.
142 Openlab v.3
PREFERENCES
Chapter 13
Preferences
Overview
The Preferences dialogs allow you to change certain default values, for example the
dimensions and appearance of a new window. You can use Openlab without
changing any of the preferences described in this chapter.
This chapter describes the purpose of the following Preferences dialogs and how to
edit them:
Image Document
General
Colors
Folders
Time
Palette Preferences
All these dialogs are available from the Preferences command in the Edit menu.
There are a few other dialogs: for Measurement Preferences, Administration
Preferences, User Login Preferences and Serial Port Preferences. The Measurement
Preferences dialog is described in the “Measurements” chapter (page 105). The
Administration and User Login Preferences are applicable to Multi-user
implementations. These are described in the “Multi-Users” chapter (page 179). The
Serial Port Preferences are only applicable if you are connecting an additional
hardware device to your Macintosh. They are described in a separate document,
which you will receive if you have purchased one of the serial device modules.
Updated January 2001 143
CHAPTER 13
Image Document
This dialog allows you to change the default values associated with the Document
Window. Any changes that you make to these preferences take place as soon as you
save them but they will only affect new documents. Existing documents retain the
previous preferences.
1.
Select Preferences... from the Edit menu.
2.
Click on the Image Document icon in the left-hand column, if not already selected.
3.
Decide whether you want to be able to see calibration information, the toolbar and the
ruler on the screen and check the appropriate boxes (so that an ‘X’ appears in them).
4.
Click on either the Ask me when “New...” is chosen button or the Use button. If you
select Use, you will be able to choose an appropriate display from the pop-up menu.
Alternatively, you can type in a value.
Note: If you are using a camera and want to make sure the document size matches
the maximum output of the camera, click on Use: and select Current Video from the
pop-up menu.
144 Openlab v.3
5.
Click on the appropriate Default Colors button. If you decide not to use Same as
Main Monitor (which selects the color options that your monitor is set to), you will be
able to choose an appropriate command from the pop-up menu.
6.
Click on the Save button to save the Preferences for Image Documents.
PREFERENCES
Colors
These Preferences control the background colors for the screen display and the
Toolbar highlight color. Any changes you make to the background colors take effect
immediately.
1.
Click on the Colors icon in the left-hand column.
2.
If you want to change the Background Pattern of the Main Window, click on the
Background Pattern menu in the top half of the screen and select the pattern that
you require for the Background. The pattern in the menu box will change to reflect
your choice. (Making the background window black is very effective with full screen
presentations.)
3.
If you want to change the Backlight Color of the Toolbar, click on the Backlight Color
menu and select the color that you require for the Backlight. The color in the menu
box will change to reflect your choice.
4.
Marching ants mark ROIs. If you want to change the color that marks an ROI, click on
the pop-up menus
in the lower half of the screen and select the color that you
require. The default color is black and white, but you may wish to change this to make
the ROI more visible against particular images. Alternating or contrasting colors are
best.
The color that you choose in the top box for the ROI will also be applied to the
Calibration Line and Point tools. You may want to adjust the color for certain image
types.
Updated January 2001 145
CHAPTER 13
5.
If you want to change the outline pattern that marks a Region of Interest, click in the
pattern box, cycle through the available patterns and select the pattern that you
require.
6.
Click on the Save button to save the Preferences for Colors.
General Preferences
These preferences control how the screen is refreshed, and zooming and live scrolling
effects. Any changes to zooming and live scrolling take place immediately.
146 Openlab v.3
1.
Click on the General icon in the left-hand column.
2.
Select Sound Effects, Zooming Effects and Live Scrolling, as appropriate.
3.
Select Help Hot-Key, if you want to enable the shortcut command for displaying
balloon help for a particular item. (The hot-key will vary according to the type of
keyboard. If present, it is the § key.)
4.
Click on the Save button to save the General Preferences.
PREFERENCES
Palette Preferences
These Preferences allow you to specify where the palette icons will appear on the
screen when you minimise them, and how many separate palettes can be displayed at
any one time. Any changes you make to Palette Preferences take effect immediately.
1.
Click on the Palette Prefs icon in the left-hand column.
2.
Click on one of the buttons in the top half of the window to determine where icons will
appear on the screen.
3.
Click on the Maximum Number of Separate Palettes menu and select a number.
The more palettes you choose to display at any one time, the more memory you will
require.
4.
If you want patterned background for the palette, check the Patterned background
check box and select a pattern from the pop-up menu.
5.
Click on the Save button to save the Palette Preferences.
Updated January 2001 147
CHAPTER 13
Time
These Preferences allow you to specify how the time stamp will be displayed for the
layers. You can display a time that is relevant to the context of your image data. For
example, if you have layers that were captured over a number of days, then a time
stamp in hours may be more meaningful than a time stamp expressed in milliseconds.
Openlab stores time information, in absolute terms, as the number of micro-seconds
since 1st January 1904. Refer to the “Working with the Layer Manager” chapter (page
57) for more information about layers and time stamps.
Any changes you make to Time Preferences take effect immediately, and will affect
the display of time information in the Measurements Window and the Layer Manager
Palette.
148 Openlab v.3
1.
Click on the Time icon in the left-hand column.
2.
Click on one of the buttons to select the time stamp preference, and click on Save.
PREFERENCES
Folder Preferences
These Preferences allow you to specify where Openlab should look for its Modules
folders, and where it should store the image backing file. (This is the temporary work
file that it creates when you open image files.) You should not need to change these
settings. However, if you do change them, you must restart Openlab before these
preferences take effect.
1.
Click on the Folders icon in the left-hand column.
You should not need to change the name of the Openlab Modules Folder. If you do
change it, it must be a folder that is stored in the same folder as the Openlab
application.
2.
3.
Click on either or both of the Search check boxes to make Openlab search those
folders for modules.
Search sub-folders for modules: Make sure this check box is selected if you
have created sub-folders for your modules.
Search Openlab itself for modules: Leave this box checked, unless you are told
to uncheck it by Improvision Technical Support.
Check on one of the buttons to specify where the image backing file is to be stored.
Updated January 2001 149
CHAPTER 13
4.
150 Openlab v.3
In Temporary Items folder: This is the recommended option. The image backing
file is deleted when you exit the application.
In System folder: If you select this option, the file will be visible. It is not deleted
when you exit the application, but will be overwritten when next you use Openlab.
In root of volume: You may have several drives attached to your Macintosh. You
should select the fastest drive for the image backing file. Click on the pop-up menu
to display a list of available drives. You can ask Openlab to Find Fastest.. for
you. This may take a few seconds. The name of the fastest drive is underlined.
Again, the file is not deleted when you exit the application, but it will be overwritten
when next you use Openlab.
Click on the Save button and restart Openlab.
SAVING SETTINGS
Chapter 14
Saving Settings
Overview
You can create a set of customized settings for some Openlab commands. This
chapter describes how to save these settings and apply them.
You can create customized settings for:
Contrast enhancement.
Color balance.
Calibration.
You will also be able to create customized settings within many modules.
Expander icon
We will use the calibration dialog to demonstrate how to save settings. The same
steps apply wherever the expander icon is displayed.
Updated January 2001 151
CHAPTER 14
Saving Settings
152 Openlab v.3
1.
Enter the required settings in the appropriate dialog box and click on the expander
icon to expand the dialog.
2.
Click on the New button to create a new entry in the settings list. It will be called
untitled (1/2/3 etc).
3.
Click in the box above the New button and type in a name for the settings.
4.
If you want to create a number of different settings, change the parameters in the
main dialog as appropriate, and repeat steps 2 and 3.
5.
When you have finished, click on the expander icon again to contract the dialog.
SAVING SETTINGS
Using Saved Settings
1.
2.
If necessary, click on the expander icon to expand the dialog. Click on the Settings
that you require in the scrollable list. The related values are displayed in the main
dialog.
You can update existing entries in the settings list, or delete them.
To update settings, select the appropriate entry in the scrollable list, make the
required changes in the main dialog and click on Update.
To delete settings, select the entry in the scrollable list and then click on the
Backspace key. The entry is deleted immediately from the scrollable list.
Updated January 2001 153
CHAPTER 14
154 Openlab v.3
VIDEO MANAGER
Chapter 15
Video Manager
Overview
The Video Manager allows you to set up and control frame grabbers and digital
cameras directly from your computer. It consists of three main elements:
Two commands under the Special menu which allow you to configure the video
settings and capture time lapses.
A separate palette for controlling and optimising various settings, such as
exposure.
A special layer in the Layer Manager, which allows you to preview the video.
The Video Manager provides support for a wide range of frame grabbers and digital
cameras. This chapter describes how to set up and use the Video Manager for use
with the Snapper DIG-16 frame grabber, and with QuickTime video. For information
about setting up the Video Manager with Axiocam, PVCAM, SPOT, Dage and JVC
cameras and Snapper 8 and 24 frame grabbers, refer to Section 2 of this manual.
Information about using the Video Manager with other cameras will be distributed in
separate documents, as required. You will also find reference information about digital
cameras and the principles of Charge Coupled Devices (CCD) in Appendix A of this
manual.
Note: If your frame grabber card requires a special driver, you may need to install it.
Refer to the instructions that are provided with the card.
Connecting the Video Camera
Refer to the documentation that comes with your camera and to your Macintosh
documentation for precise instructions. If you are connecting directly to the Macintosh:
Plug the video cable into the video-in port on the Macintosh.
Updated January 2001 155
CHAPTER 15
Device-specific Documents
Frame grabber/camera
Refer to:
Snapper frame grabbers
Section 2 of this guide.
Snapper DIG-16
This section contains general set up
information for the three types of Snapper
cards—for digital (DIG-16) and analog (8=black
and white, 24=color) video signals—followed by
specific information for individual makes of
camera.
Hamamatsu
Snapper 8 and Snapper 24
Dage
JVC
PVCAM
Section 2 of this guide.
Axiocam
Section 2 of this guide.
SPOT
Section 2 of this guide
Princeton Instruments
The User Guide for Princeton Instruments
digital cameras.
Image Intensifier
The User Guide for the Image Intensifier.
Argus-20
The User Guide for the Argus-20 image
processing computer.
Video Setup
You must configure the video settings before you start to capture images with the
video camera. The camera will not function correctly until you have configured it.
■
Select Video Manager... from the Special menu.
The Video Manager Setup dialog appears. The choices available will vary according
to the features that are supported by your camera and frame grabber card. If a choice
is not appropriate, it will either not appear or it will be grayed-out.
156 Openlab v.3
VIDEO MANAGER
Video Manager Setup Panel
Settings to identify
the video source
Preview window
These vary
according to video
source (frame
grabber) and input
device (camera)
Camera-specific
settings panel
The Video Manager Setup panel contains a number of menus and choices on the left
side and a preview window, containing a preview copy of the video image, on the right
side. You can also assign video setting to the slider controls in the dialog below the
preview window. Refer to “Video Controls Palette”, for more information about slider
controls.
Preview window
If the camera is not connected, the preview window will display the Openlab logo, a
video camera icon, and the message: “No input source” with an 'X' through it.
With some frame grabbers and cameras the preview window may only display a small
part of the image. Option-click with the mouse button on the image to switch between
scaled and cropped views in the preview window. In the cropped view, you will notice
that the pointer has a hand icon. This means that you can click and drag the image
until you can see the part that interests you in the preview window.
Updated January 2001 157
CHAPTER 15
Configuring the Video Manager
We are using the Hamamatsu Orca (C4742-95) camera to illustrate the configuration
steps. This camera uses the Snapper DIG-16 frame grabber card.
Note: Configuration and operation requirements only apply to use of the camera with
Openlab. Refer to the Supplier’s documentation if you require more detailed
information about any of the camera’s features.
1.
Click on Video Source and select the appropriate driver for your video capture card
from the pop-up menu; Snapper DIG-16 in our example.
Note: The Test Grabber allows you to run capture without the camera switched on. It
is useful for testing automations. No video controls are available.
2.
158 Openlab v.3
Click on Input and select the appropriate camera from the pop-up menu;
VIDEO MANAGER
3.
The Setup dialog now shows the options that are appropriate for the camera
selected. Hamamatsu Orca (C4742-95) in our example.
4.
The Format option is grayed-out. This combination of frame grabber and camera
always uses the Default option.
5.
This option is for video cards that support hardware scaling. Click on Scaling and
select the appropriate scaling value from the pop-up menu. This scales the whole
field into a smaller space.
6.
Click on Binning and select the appropriate value from the pop-up menu. This
increases camera sensitivity but reduces quality. Refer to “Principles of CCD Theory”
in the appendices for a more detailed discussion about binning.
7.
Click on Width check box and select the appropriate value from the pop-up menu.
This option does not apply to all cameras.
8.
Click on the Reset Camera button to reset the camera to its default settings. This
option does not apply to all cameras.
Updated January 2001 159
CHAPTER 15
9
Click on Capture depth and select the appropriate value from the pop-up menu. If
you select Best Quality, the image quality will be the best that the camera or frame
grabber can provide and is the most convenient one to select. If you want to improve
the speed of capture, try Fastest.
The Thousands of Grays option is only appropriate if your camera supports image
capture at a depth of more than 8 bits.
10.
Click on OK to save the settings.
You have now configured the camera and will be able to capture images with it. There
are other settings, such as exposure, that you may want to adjust when you are using
the camera. The Video Manager assigns a control to these video settings, so that you
can adjust them easily and preview the results before you capture the image. This is
done from the Video Controls Palette or from the Video Setup dialog. The main
difference is that you can control all settings at once from the Video Controls Palette,
whereas you can only control one setting from the Video Setup dialog.
Controls for video settings are discussed in more detail in the “Video Controls Palette”
section on the next page.
160 Openlab v.3
VIDEO MANAGER
Video Icons and Video Controls Palette
Once you have defined your video settings, you can start to capture live video on your
Macintosh, using the two camera icons on the Openlab toolbar. These icons appear
automatically once you have loaded the Video Manager module into the Openlab
Modules folder.
You can also use the Video Controls Palette to assign slider controls to up to three
different video settings. This allows you to optimise settings for individual images, and
view the effect in the Preview layer before you capture them. Different video capture
cards enable different video control options.
Video Icons
Makes the video preview layer current so that live video can be
displayed in the Document Window. You can achieve the same effect
by making the video layer current in the Layer Manager Palette.
Captures a frame. Once you have captured a frame, it normally
appears as a general image layer in the Layer Manager Palette.
Video Controls Palette
The Video Controls Palette consists of a number of controls, depending upon the
controls that your camera supports. You can assign video settings to each control,
and then adjust them directly on the palette until you achieve the optimum effect for
the preview image.
Note: Click on the video camera icon in the Document toolbar to display the preview
video image in the Document Window.
Updated January 2001 161
CHAPTER 15
The following example shows the controls for the Hamamatsu Orca camera.
Applies automatic
exposure
Toggles between slider
and digital control
Click to step up and
down in seconds
(minutes or hours)
Use the arrows to
adjust the value up or
down or double-click
and type in required
value
Use the arrows to adjust the
value up or down, as required
Use the slider to adjust the
value, as required
Scrollable list of
controls
k
Click and drag to
extend/contract palette
Exposure Control
The exposure control can be used in a number of ways.
162 Openlab v.3
Click on the AE button to apply automatic exposure if your camera supports this
feature. Openlab estimates the exposure value according to the gray levels
detected.
Click on this button to toggle the control between a slider or digital display.
VIDEO MANAGER
When the slider control is displayed, use the pop-up menu to set the range over which
the control operates.
When the digital control is displayed, either use the arrows to adjust the value up or
down, or double-click on the text box, enter the values directly and click on Set.
You can click on any element of the exposure time—milliseconds, seconds, minutes
or hours—and use the arrows to adjust the values of the selected time element.
More about Video Controls
Different frame grabbers or digital cameras provide different controls. Not all cameras
have all controls. The following table provides a brief description of some of the video
settings. Refer to the device-specific guides for other frame grabber and cameraspecific settings.
Updated January 2001 163
CHAPTER 15
Setting
Description
Exposure
Increases or decreases the exposure time for integrating
cameras. A longer exposure time produces a brighter image and
detects weaker signals. It takes longer to capture the image.
Gain
Adjusts the analogue amplification of the video signal. By
increasing the gain you multiply the signal to produce a brighter,
but noisier image for the same exposure.
Offset
Adjusts the analogue offset of the video signal. This has a similar
affect to contrast enhancement, but can be used on color images.
It makes the overall image darker.
Digital gain
Applies a linear, software gain to the video signal. Increasing the
gain also produces a brighter, but noisier image for the same
exposure.
Binning
With some digital cameras, it is possible to combine the charges
in adjacent pixels so that they form a single pixel (sometimes
called a super-pixel). This process is known as binning. It
reduces readout time and increases sensitivity at the expense of
resolution.
Colorization
Allows you to see whether the image is saturated by coloring the
bottom-most and top-most levels blue and red, respectively.
Document Size and Camera Frame Size
If your document size is smaller than the camera’s frame size, you will only see a
portion of the image in the preview. We will call this portion the view port.
Note: The actual size of the frame is displayed under the preview window. The
dimensions will be affected by any binning or scaling options that you have applied.
For example, if you have selected half-size scaling, both the vertical and the
horizontal dimensions of the image will be halved.
You can work with the image as it is, but you will lose data that is not visible in the
view port when you capture the image (see next section for more information about
moving the view port). Alternatively, you can change the default document size to use
the current video settings.
164 Openlab v.3
VIDEO MANAGER
Similarly, if your document size is too big for the camera's maximum output, the
software will object and not allow you to capture the image because the target layer is
too big. If this occurs, you must change the default document size.
1.
Select Preferences... from the Edit menu.
2.
Click on the Image Document icon in the left-hand column, if not already selected.
3.
Click on Use: and select Current Video from the pop-up menu. This ensures that the
document size matches the maximum output of the camera.
4.
Click on Save.
Working with the Preview Layer
You may want to move the view port so that you can see another part of the image, or
to find out where your view port is located with reference to the whole camera frame.
You can also apply color tables to monochrome and grayscale previews.
Moving the view port
Click on the hand icon in the Openlab toolbar.
Hold down the option key and click anywhere on the preview image in the Document
window. You will notice that the pointer icon now has the hand with a camera
underneath it.
Updated January 2001 165
CHAPTER 15
Hold down the pointer and drag the image until you can see the section of the preview
image which interests you in the Document window.
Comparing your view port with the camera frame
Hold down the option and the command keys and click anywhere on the preview
image in the Document window. You will see the outline of two rectangles on the
screen.
The red outer rectangle illustrates the camera frame (its full chip or maximum output).
The green inner rectangle illustrates what you can see in your view port. Remember
this is all superimposed on your current document, which may be smaller than the
camera's maximum output. You can move the view port, but when you capture the
image, all data outside the view port will be lost.
Applying color tables
For monochrome/grayscale previews, you will be able to apply contrast enhancement
and a color table. The image will be captured with these settings. See page 86 for
more information about contrast enhancement.
166 Openlab v.3
VIDEO MANAGER
Click on the Color Table icon in the Openlab toolbar, and select the appropriate color
table from the pop-up menu.
Capturing an Image
Click on the camera icon to capture a frame. This captures a whole new frame adding it
to the document as a new layer.
Capturing a video sequence
You can use the capture timelapse command to capture a simple sequence of
images.
Note: If you have an electronic shutter and the Filter & Shutters module, you can link
this with the Video Manager so that the shutter operates during the timelapse. See the
Filter & Shutters Guide for further details.
1.
Make sure you have selected a video source in the Video Manager and that an image
document is open and active.
2.
Select Capture Timelapse… from the Special menu.
3.
Enter a value for the number of layers to be captured.
4.
Enter a delay value and select the time measurement from the pop-up menu.
5.
Enter a base name for the captured layers.
Updated January 2001 167
CHAPTER 15
6.
Click on Start.
The Start button changes to Stop and the Cancel button changes to Done. Press on
Stop to interrupt the timelapse. Click Start again to continue. (The stopped time will
affect the final timelapse.)
For more advanced, high-performance frame capture sequencing, use the Automator.
If you have purchased the full version of Openlab, you can use Automator Lite to
capture a sequence of frames. Refer to Section 4 of this guide for further details.
Troubleshooting
If you get unexpected results or the message “No input source”:
1.
Check all the cabling between the Macintosh and the camera, or camera control box.
2.
Check the settings in the Video Manager Setup dialog. If no frame grabber is
available, check for drivers.
3.
Look at the Session Log, and see if there are any warning or error messages that
relate to the Video Manager or driver modules.
4.
Contact Improvision. Make sure that you have a copy of the Session Log available so
that you can provide the Support engineer with detailed information.
Optimising Performance
You have various options for optimising the speed of capture; some of which may
affect the quality of the image. You will need to experiment to determine what is
appropriate for your requirements. The following guidelines may help:
168 Openlab v.3
Set the Capture depth on the Video Manager Setup dialog to Fastest.
Reduce the size of the document. If you are transferring less data, the computer
will require less memory and work faster.
Allocate as much memory as possible to the Openlab application. (In the Finder,
select the application, and select Get Info from the File menu. Adjust the memory
values, as appropriate.)
If you are using video capture as part of an automation, you may want to enable
Allow asynchronous captures in the Video Capture task. This allows Openlab to
capture frames at a higher speed, but the frame grabber and automation are not
VIDEO MANAGER
synchronised. See the “Automator Tasks” section of the Automator User Guide for
more information.
Use the Scaling or Binning options, as appropriate, in the Video Manager Setup
dialog.
Updated January 2001 169
CHAPTER 15
170 Openlab v.3
STATE SAVER
Chapter 16
State Saver
Overview
Openlab allows you to save the state of the system at any given time. Although most
modules allow you to save settings for individual devices, the State Saver provides the
only way of saving a combination of settings. This is particularly useful if you have the
Filter and Shutters module and the Video Manager module because the State Saver
saves the settings of all hardware devices attached to those modules and allows you
to automate the way these modules work together. For example, you can use the
State Saver to set up your system to capture three fluorescent channels, each with
different camera settings and filter positions. Once you have set up and saved these
settings with State Saver, you can use them repeatedly.
You can also use State Saver with the Automator if you have Openlab Core. Refer to
Section 4 of this guide for further details.
Note: State Saver does not save settings for Focus Drive and XY stage because
incorrect set-up could cause damage to hardware and/or samples.
Updated January 2001 171
CHAPTER 16
The State Saver Palette
The following example shows the State Saver Palette after settings have been saved.
Click on New to create
new settings
Drag settings onto trash
can to delete them
Click on Restore button
to apply settings (or
use function key)
Click here to edit settings
Setting Up State Saver
It is important to remember that you must always set up the hardware so that the
system is in the required state before you use the State Saver Palette to save settings
or apply any changes.
172 Openlab v.3
1.
Take the filter wheel to the first position.
2.
Use the relevant hardware control palettes to specify the required settings; for
example the filterwheel in position 3, and camera exposure set to 500 ms.
STATE SAVER
3.
Click on the New button on the State Saver Palette.
4.
Use the Create New State dialog to record the settings.
Items
checked
Text box
records actual
settings
Check the items in the scrollable list that you wish to include. Note how the text
box records the actual settings that belong to this state.
If you want to assign a function key, make sure the Assign F Key checkbox is
selected and enter a number that has not already been assigned as a function key
in the text box. You can specify up to 15 function keys.
Updated January 2001 173
CHAPTER 16
Note: Depending upon the configuration of computer you may need to set up the
function keys from the Apple Control Panel (see below).
If you want to be prompted before the state is restored click on the Ask me before
restoring this state checkbox.
Type a name for the state into the Save as a state called: box.
4.
Click on Save.
5.
Use the relevant hardware control palettes to change the settings, as required. For
example, change the exposure value.
6.
Use the State Saver Palette to record the settings. Click on the New button and repeat
steps 4 and 5.
7.
Repeat steps 5 and 6 until you have created as many settings as required.
Configuring Function Keys
The State Saver uses regular, not hot function keys. If function keys do not seem to
be working with State Saver, you need to check how your keyboard has been set up.
1.
174 Openlab v.3
From the Apple menu, select Control Panels-Keyboard.
STATE SAVER
2.
Click on Function Keys…
3.
Make sure that the Hot Function Key Settings checkbox is disabled (empty) and click
on OK.
Editing Settings on the Palette
1.
Select the required button on the State Saver Palette
2.
Make sure the hardware is in the required state, and make changes to the relevant
hardware control palettes.
3.
Click on the Edit icon. Uncheck the item that has changed and then recheck it to
record the altered state. All other items retain their previous state.
4.
Amend the details on the State Saver Palette, as appropriate, and click on Save, The
text box in the State Saver dialog updates as you save states to help you keep track.
Updated January 2001 175
CHAPTER 16
Deleting Settings on the Palette
Click and hold on the appropriate button in the State Saver Palette and drag it over
the trash icon at the top of the palette.
Applying Settings from the State Saver Palette
176 Openlab v.3
Just click on the button in the palette to toggle between the different states.
Or use the function keys, if you set them up in the palette.
USER NOTES
Chapter 17
Adding User Notes
Overview
Openlab allows you to add user notes to your image document in the same way that
you might write notes in a notebook during an experiment to record points of interest.
The notes are saved with the document and you can access them whenever the
Document Window is open. This increases the overall file size of the document, but
not significantly as you are only saving text.
Adding Notes
1.
Select Show Notes from the Image menu.
.
Updated January 2001 177
CHAPTER 17
2.
Type in the required text. You can highlight text and use the pull-down menus to
change its format, as required.
3.
You can also copy and paste images into notes and print them.
4.
Click in the top left-hand corner to close the Notes dialog or select Hide Notes from
the Image menu.
click here
to close
format
pull-down
menus
The notes are saved with the document. Just click on Show Notes in the Image menu
to display them again.
The User notes module is not available in versions of Openlab prior to version 3.
Previous versions of Openlab cannot access or maintain User Notes created in
Openlab 3. If a document with User Notes is opened and saved on a system running
a previous version User Notes will be lost. Openlab displays a warning when files are
opened if this is a risk.
178 Openlab v.3
OPENLAB MENUS
Chapter 18
Openlab Menus
Overview
This chapter includes a brief description of all the menu commands in the Openlab
menu bar. Most of these commands have been described in more detail earlier in this
User Guide.
You can also use the Balloon Help to display a brief description of each command on
the screen when you are working with Openlab.
This chapter describes the menus that are provided with the Openlab Core. You may
have other menus or extra menu items, if you have additional modules. These are not
described in this chapter. Refer to the manual that is provided with the module for
further information.
Updated January 2001 179
CHAPTER 18
File Menu
Creates a new image
document (Chapter 4) or
montage (Chapter 12)
Opens one or multiple
files into a document
window (Chapter 4)
Opens a file that contains
saved ROIs (Chapter 7)
Closes the current
window
Saves document to a
file of the same name, a
file of a new name, or as
multiple files (Chapter 4)
Saves ROIs as a
separate file (Chapter 7)
Reverts to the last
saved version. You
lose any changes.
Provides information
about the current file
Displays a log of
events (see below)
Allows you change the
page setup
Prints the current
document
Quits from Openlab
The Session Log
The Session Log is a useful source of information. For example, it records all of the
modules that are loaded when you run Openlab. If Openlab encounters a problem
when loading, or if one of the expected hardware devices is not turned on, it will
automatically display the Session Log. If you experience problems while using
Openlab, you can select Show Session Log from the File menu and, if necessary,
print it out and send a copy to Improvision’s Support staff. You can also copy the text
of the Session Log to the clipboard when this window is active.
The Session Log contains three different categories of message:
Warning
180 Openlab v.3
Information
Error
OPENLAB MENUS
Edit Menu
Undoes the last
action, if appropriate
Standard cut and
paste commands.
Selection commands
Duplicates the
selected item(s)
ROI edit menu
(Chapter 7)
Displays the contents
of the clipboard (last
item copied)
Pastes clipboard as
a new document
Undoes the last
change to an ROI
Displays the
Preferences dialogue
(Chapter 13)
Updated January 2001 181
CHAPTER 18
Image Menu
Displays the Resize
dialog (Chapter 4)
Displays the Contrast
Enhancement dialog (Chapter 6)
Displays the Color Balance
dialog (Chapter 6)
Displays rulers on the
Document Window
Displays the Boolean
Operations dialog (Openlab
Core only)
Displays the Measurements
Window and starts
recording (Chapter 9)
Shows/Hides User Notes
Window (Chapter 18)
Rotates the selected ROI
90 degrees in clockwise
or counter clockwise
direction
182 Openlab v.3
Displays the Depth
dialog (Chapter 6)
Displays the Colors
dialog (Chapter 6)
Inverts the image
Displays the
Calibration dialog
(Chapter 8)
Displays the Image
Filter dialog (Full
Openlab only)
Displays the Profiling
Window (Full Openlab
only)
Flips the image or
selected ROI along the
horizontal or vertical axis
OPENLAB MENUS
Layers Menu
Layer creation
commands
Layer copy
command
Layer deletion
command
Layer selection
commands
Layer search
commands
Creates three copies
of the selected
layer: one for each
color channel
Layer merge commands
Subtracts a background
layer from the selected
layer
Refer to Chapter 5 for a detailed discussion of layers and layer commands.
Updated January 2001 183
CHAPTER 18
Apple Menu
Displays an animated
screen about Openlab
Select required module to
display single screen of
information. For example:
184 Openlab v.3
OPENLAB MENUS
Windows Menu
Displays Arrange
Window dialogue
(Chapter 4)
List of open
windows (shows
which is active)
Controls how
palettes are
displayed
List of available
palettes
Special Menu
Displays the Video Manager
dialog (Chapter 15)
Displays the Capture Timelapse
dialog (Chapter 15)
Updated January 2001 185
CHAPTER 18
186 Openlab v.3
MULTI-USERS
Chapter 19
Multi-Users
Overview
Openlab 2.0 (and later) allows you to define different users as well as a “Guest” user.
All users can have their own preferences, and their own mix of modules, color tables
and Automator menu items. Users can also have passwords, which allows you to
prevent unauthorised people from using Openlab.
By default, Openlab is configured for guest access with no password. You can also
configure for guest access with a password, or full multi-user functionality.
This chapter describes:
How to set up users on Openlab.
How to manage users once you have set them up.
What the user needs to know.
Updated January 2001 187
CHAPTER 19
Setting Up Users
1.
Select Preferences... from the Edit menu.
2.
Click on the Administration icon in the left-hand column.
3.
Most of the options will be grayed out. Click on the Unlock... button. The first time that
you use this dialog, this will be sufficient to unlock the other Administration commands,
as the default is no master password. Go to step 5.
If you have set an Administration password, you will get the following prompt:
Type the master password that you have created. Be careful how you type the
password, case is important! (See “Passwords” on the next page for information about
creating passwords.)
188 Openlab v.3
MULTI-USERS
4.
Now the panel is unlocked, you can change the settings. The three access levels are
controlled by the check boxes. In the following example, we have enabled guests and
multiple users.
5.
The guests do not require a password and will now be able to use Openlab, but you
need to use the User Login preferences to set up individual users.
Passwords
You can also use the Administration preferences to:
Change the Administration password. Click on the Set Password button next to
the Organisation box.
Set up a password for the guest user. Click on the With Password... checkbox.
Updated January 2001 189
CHAPTER 19
In both cases, you will see dialog similar to the following:
Type in the new password and then re-type it, in exactly the same format, to confirm.
Click on OK. Be careful how you type the password, case is important!
Managing Users
If you are following the instructions in this chapter in sequence, the Administration
panel will be unlocked. Go to step 2.
When you exit Openlab or close the Preferences dialog, the Administration panel
reverts to locked. You will need to unlock it again before you can set up individual
User Logins.
1.
190 Openlab v.3
Select Preferences... from the Edit menu, and if necessary unlock the Administration
panel.
MULTI-USERS
2.
Click on the User Login icon in the left-hand column.
3.
Click on the New User button to set up a new user. Openlab provides a default name
for the user.
4.
Type in the user’s name. the password defaults to the user’s name, but you can
change it if required. Click on the Password... button. Type in the password and retype it to confirm it. (Be careful how you type the password, case is important!)
Updated January 2001 191
CHAPTER 19
5.
Add as many new users, as required, and then click on the Save button. You now
need to restart Openlab.
User Preferences and Folders
When multiple users are enabled, Openlab does two things:
It makes a new folder for each user in the Openlab Prefs folder within the
Preferences folder. This means that each user can set up individual preferences,
as described in the "Preferences" chapter ( page 143) and these preferences will
be stored in the correct folder.
It also creates a new folder for each user in the same folder as the Openlab
application. When Openlab is looking for the Openlab Modules, Automator
Menu Items or Color Tables folder, it will look first in the user’s folder, and then in
the Openlab folder. This allows you to set up a custom set of modules for each
user by copying the Openlab Modules folder into each user folder and adding or
removing modules.
Deleting Users
If you want to delete users, re-display the User Login preferences, select the user in
the list and click on the Remove User button. You may also like to delete the folders
that were created for the user.
What the user needs to know
If you have turned on Guest with password or Multi-user, you will get a screen at
startup asking for your user id and password. You must enter these correctly, in the
correct format. Case is important!
If you are creating your own color tables or automations, you may like to store them in
your user folder. Openlab will look for these items in your user folder first.
192 Openlab v.3
Section 2
Digital Cameras
AxioCam Digital Cameras
PVCAM Digital Cameras
Hamamatsu Cameras
SPOT Digital Cameras
Snapper 8 and 24 Framegrabber Cards
Dage
JVC
AXIOCAM DIGITAL CAMERAS
AxioCam Digital Cameras
Overview
This guide describes how to set up and use the Video Manager with AxioCam digital
cameras. The Video Manager supports both color and monochrome versions of
AxioCam, which is a high-resolution CCD camera manufactured by Carl Zeiss. The
connection to the Macintosh is via a PCI frame grabber card and a fibre optic cable.
The AxioCam camera head (with built-in, advanced infrared barrier filter) has a
standard c-mount interface for use with microscopes. Carl Zeiss supplies:
the PCI frame grabber card
the camera power supply, power cable and camera head
a fibre optic cable for data transfer between the camera and the PCI card
a CD containing drivers and application software, and an installation guide
Once you have connected the camera physically, you need to make sure the AxioCam
Video and Video Manager modules are installed in the Openlab Modules folder, and
the AxioCam driver and AxioCam library are installed in the System Extensions folder.
The AxioCam Video module is not part of the core product and must be purchased
separately. Refer to Chapter 2 in Section 1 of this guide for instructions on installing
modules.
If you have the Automator, a number of Video Manager tasks will be available. Refer
to Section 4 of this guide for detailed instructions about using the Automator.
Before you set up the Video Manager
1.
Follow the manufacturer’s instructions for installing the PCI frame grabber card and
connecting the camera to the Macintosh and the power supply provided.
2.
The Openlab Installer should automatically put the AxioCam driver and library files
into the System Extensions folder on the Macintosh. Check that they are there. If not,
you can copy them from the CD supplied with the camera.
3.
Check how much memory is allocated to Openlab. The AxioCam camera produces
very large image files (47 MB when scanned at a resolution of 3900 x 3090), so we
recommend a minimum allocation of 256 MB for the Openlab application. If there is
Updated January 2001 195
OPENLAB
insufficient memory available, switch on Virtual Memory. This will allow imaging
although performance may be slow. Without Virtual Memory (or a minimum allocation
of 256 MB), imaging will be impossible.
Video Manager Setup Panel
Select the Video Manager Setup dialog from the Special menu.
If you have an AxioCam camera, a setup dialog similar to the following is displayed,
when you select AxioCam as your video source.
Note: The Depth value specifies the color depth, which may be color or monochrome.
It is only used with color cameras.
196 Openlab v.3
AXIOCAM DIGITAL CAMERAS
Notes on the Setup Dialog
Refer to Chapter 15 of the Openlab User Guide for more information about the Video
Source, Input, Format, Scaling and Capture depth pop-up menus, and for step-bystep instructions on using the Video Manager Setup dialog.
Size
The Size pop-up menu allows you to select a resolution for your image:
1300 x 1030 (fast)
1300 x 1030 (high quality)
1300 x 1030 (scanned)
2600 x 2060 (scanned)
3900 x 3090 (scanned)
The scanned modes allow the user to select real resolution (that is without the
interpolation methods that are used in the fast/high quality modes).
Depth
The Depth pop-up menu allows you to select a depth for your image (color or
monochrome). It is only available if you are using a color camera. The monochrome
option is only available if you have selected a resolution size of 1300 x 1030 fast or
high quality.
Binning
Binning allows you to increase the image intensity. It can only be applied to 1300 x
1030 fast images and valid binning factors vary according to whether the depth is color
or monochrome, as follows:
■
1300 x 1030 fast, color images can have binning factors of x1, x3, or x5.
■
1300 x 1030 fast, monochrome images can have binning factors of x1, x2 or x4.
■
You cannot apply binning to the high quality or scanned images.
White Balance
Click on this button to reset the white balance to the camera's default. The AxioCam is
designed to have the default white balance optimized for the color temperature of
3200 K. The recommended method for white balancing is to use the live image
directly.
Black Ref.
Click on this button to perform black level calibration, which is recommended when
using exposures greater than 3 seconds.
Reset Balance
Click on this button to reset the balance to the camera's default.
Updated January 2001 197
OPENLAB
Video Controls
You can use the Video Controls Palette or the pop-up menu under the Preview image
in the Video Manager Setup dialog to control available video settings.
Exposure allows you to set an exact exposure time.
The Digital Gain level allows you to select a gain factor.
Size allows you to select a resolution.
Depth allows you to select color or monochrome.
Binning allows you to enable binning and set a binning scale.
Sharpen allows you to sharpen the image.
The Colorization level describes the range of pixel intensities to be displayed. See
"How do I identify the brightest and darkest pixels in the image?" on page 198.
Working with the AxioCam Camera
How can I configure the Video Manager for rapid focussing in color?
Select a Size of 1300 x 1030 fast, a Depth of color and a Binning factor of x5.
Reduce the exposure time to a minimum.
You can now use the image in the Preview window for focussing. To help with
focussing, {alt} click in the video preview to crop the image around the cursor insertion
point.
How do I identify the brightest and darkest pixels in the image?
You do this as you would with any monochrome digital camera by using the
colorization option to color the bottom and top-most pixels blue and red respectively.
The colorization level describes the ranges of pixel intensities to be displayed.
Remember to switch the colorization back to 0 before capturing the image.
198 Openlab v.3
AXIOCAM DIGITAL CAMERAS
What are 'sampled' modes?
This is the patented procedure implemented by Zeiss that allows the user to select
real resolution (that is without the interpolation methods that are used in the fast/high
quality modes) in an area 1300 x 1030, 2600 x 2060 and 3900 x 3090. You need to
select one of the scanned resolutions from the Size pop-up menu. The CCD is shifted
physically to a new position depending on the resolution chosen.
Openlab displays an image as millions of colors. How does this compare
with the Zeiss 42-bit color image?
The AxioCam produces 14-bit data for each color channel, resulting in a 42-bit color
image. Openlab does not handle more than 8 bits per channel. the 14-bit data is
scaled to 8 bits in exactly the same way as when using digital gain.
Why can I see a color mosaic pattern in the image even at maximum
resolution?
This is evident if the object has moved during the exposure and is more obvious as
the resolution and hence the time taken to produce the final image increases. The
CCD is 'scanned' to produce the high-resolution image and any object that is moving
will cause differences in the images at different scan positions. When they are
'summed' to produce the final image, any differences appear as a mosaic of different
color pixels.
Updated January 2001 199
OPENLAB
200 Openlab v.3
PVCAM DIGITAL CAMERAS
PVCAM Digital Cameras
Overview
The Video Manager supports a range of PVCAM-compatible digital cameras, such as
COOLSNAP (color) and COOLSNAPfx (black and white). The connection to the
Macintosh may be via a PCI frame grabber card or via a separate SCSI box. The
camera manufacturer provides:
The PCI frame grabber card or SCSI module
The camera controller and camera head
Software drivers and a test application, called 'CamTest'. (Software drivers are
also available from the Openlab Custom Installation dialog.)
This chapter describes how to set up and use the Video Manager with a PVCAM
digital camera. It uses COOLSNAP cameras in the examples.
If you have the Automator, a number of Video Manager tasks will be available. Refer
to Section 4 of this guide for detailed instructions about using the Automator and for
an example Video Manager automation.
Before you set up the Video Manager:
1.
Follow the manufacturer's instructions for installing the PCI frame grabber card or
SCSI module, and connecting the camera to the Macintosh.
2.
Install the software drivers and test application.
3.
Run 'CamTest' to check that the camera has been installed correctly.
Updated January 2001 201
OPENLAB
Using the Openlab Custom Install Dialog
In order to use the camera, drivers and libraries must be installed in both the System
folder and the Openlab folder. It is easiest to load these from the software provided on
the manufacturer's CD by the manufacturer. However, you can also use Openlab's
Custom Install dialog after you have installed Openlab.
Check the required driver, usually Photometrics PCI Model 2 Drivers and click on
Install.
This loads the drivers to the correct location on your hard disk.
202 Openlab v.3
PVCAM DIGITAL CAMERAS
Video Manager Setup Panel
COOLSNAP
Select PVCAM as your video source, a setup dialog similar to the following is
displayed.
This is the PCI
card.
Updated January 2001 203
OPENLAB
COOLSNAPfx
Select PVCAM as your video source, a setup dialog similar to the following is
displayed.
Notes on the Setup Dialog
Refer to Chapter 15 in Section 1 of this guide for more information about the Video
Source, Input, Format, Scaling and Capture depth pop-up menus, and for step-bystep instructions on using the Video Manager Setup dialog.
Input
204 Openlab v.3
The Input pop-up menu allows you to specify which camera you are using. This will be
either the PCI card or the SCSI module with SCSI ID. For example, select PCI-AIA 1 for
the CoolSNAP cameras.
PVCAM DIGITAL CAMERAS
Speed
The Speed pop-up menu allows you to specify the bit depth and speed for video
capture. Speed refers to the speed of read-out to computer. The options that appear in
this menu vary according to the type of camera. Some allow faster read-out, but this
increases noise.
Gain
The Gain pop-up menu allows you to select a gain mode from a list of fixed levels of
amplification. Certain modes are appropriate to specific conditions. The analogue
amplifier boost signals but increases noise. Refer to your camera documentation for
further details.
Binning
The Binning controls allow you to specify independent binning values for the horizontal
and vertical axes of the CCD array, up to a maximum of 32x32. Different cameras
support different levels of binning. Biological applications normally have the same
values for the horizontal and vertical axes. Refer to Appendix A of this guide for more
information about CCD arrays.
Temp
The Temp control allows you to set the temperature of the CCD, and the display shows
you the actual temperature. Refer to Appendix A of this guide for more information
about CCD cooling.
Frame
Transfer
Frame Transfer mode may be always supported, not supported, or optional. If your
camera supports the optional Frame Transfer mode, the Frame Transfer check box will
be enabled. Click in the box to switch Frame Transfer on (a tick is displayed in the box)
or off (the box is empty).
MPP
MPP may be always supported, not supported, or optional. If your camera supports
optional MPP, the MPP check box will be enabled. Click in the box to switch MPP on (a
tick is displayed in the box) or off (the box is empty).
Color
If your camera supports color, the Color check box will be enabled. Click in the box to
switch Color on (a tick is displayed in the box) or off (the box is empty). Color takes
longer to transfer.
Auto white
bal.
This option is enabled if you have selected Color. Click on it to balance white
automatically.
Updated January 2001 205
OPENLAB
Camera Info
Click on this button to display information about your camera specifications. Click on
Close to close the dialog.
Video
Controls
You can use the Video Controls Palette to control available video settings.
These controls
apply to a
color camera
with the Depth
set to color
You can also use the pop-up menu under the Preview image in the Video Manager
Setup dialog to select and control individual settings. The screen shot on page 203
illustrates the Exposure control.
Refer to Chapter 15 in Section 1 of this guide for more information.
206 Openlab v.3
These controls
apply to a black
and white camera
or a color camera
with the Depth set
to monochrome
PVCAM DIGITAL CAMERAS
Optimising Performance
Refer to Chapter 15 in Section 1 of this guide for general guidelines. Your main
options for optimising the video capture rate are:
Select a higher binning rate.
Select the fastest speed available in the Speed menu options.
Switch on Frame Transfer mode, if available.
Set the Capture depth on the Video Manager Setup dialog to Fastest.
Reduce the document size.
Updated January 2001 207
OPENLAB
208 Openlab v.3
HAMAMATSU CAMERAS
Hamamatsu Cameras
Overview
The Video Manager supports the following Hamamatsu cameras:
C4742-95 cameras (Orca).
C4742-95-ER cameras (Orca ER).
*C4880-8x high speed cameras.
*C4742-98 cameras (Orca II).
*C4742-95(SC) single chip color cameras, also called Orca IIIM or Orca Color.
* Detailed setup instructions for these cameras will be provided in the next edition of
this guide.
If you have the Automator, a number of Video Manager tasks will be available. Refer
to Section 4 of this guide for detailed instructions about using the Automator and for
an example Video Manager automation.
Setting up serial communication
All cameras use the Snapper DIG-16 video capture card. In order for the card to work
correctly, you must set the jumper on the Snapper card so that the serial
communications line uses the RS-422 protocol. Refer to the Installation Guide
supplied with the Snapper card for further details.
Updated January 2001 209
OPENLAB
The following screen shot illustrates the Video Manager Setup dialog with the Input
pop-up menu from which you select your camera.
Note: Refer to Chapter 15 in Section 1 of this guide for step-by-step instructions on
using the Video Manager, and to Appendix A for background information about the
Principles of CCD Theory.
210 Openlab v.3
HAMAMATSU CAMERAS
Hamamatsu C4742-95 Camera
The following example illustrates the setup dialog for the Hamamatsu C4742-95
camera.
Notes on the Setup Dialog
Refer to Chapter 15 in Section 1 of this guide for more information about the Video
Source, Input, Format, Scaling and Capture depth pop-up menus, and for step-bystep instructions on using the Video Manager Setup dialog.
Scan
The Scan pop-up menu allows you to enable or disable Binning (2x2). Normal scan
mode does not use Binning.
Width
The Width pop-up menu allows you to specify the pixel width of the readout.
Updated January 2001 211
OPENLAB
Exposure
Sync.
The Exposure Sync. pop-up menu allows you to specify the mode for exposure
synchronisation.
Internal (Async): the camera is free running and will output frames at the camera’s
best capture rate. However, the camera and the computer are not synchronised,
and you may get corrupted frames, for example when using a monochromator.
External (Sync): the camera and the computer are synchronised. This slows the
capture rate slightly, but ensures that everything works correctly.
Video Controls You can use the Video Controls Palette to control the following video settings. You
can also use the slider control on the Video Manager Setup dialog to control one of
the settings:
Exposure
Gain
Offset
Digital Gain
Colorization
Refer to Chapter 15 in Section 1 of this guide for more information.
Reset Camera
212 Openlab v.3
The Reset Camera button allows you to reset the camera so that it sends its current
settings again. Remember to use this button if you need to switch the camera off and
then on again.
HAMAMATSU CAMERAS
Hamamatsu C4742-95 ER (ORCA ER) Camera
The following example illustrates the setup dialog for the Hamamatsu C4742-95 ER
(ORCA ER) camera.
Notes on the Setup Dialog
Refer to Chapter 15 in Section 1 of this guide, for more information about the Video
Source, Input, Format, Scaling and Capture depth pop-up menus, and for step-bystep instructions on using the Video Manager Setup dialog.
Updated January 2001 213
OPENLAB
Video Controls
You can use the Video Controls Palette to control the following video settings. You
can also use the slider control on the Video Manager Setup dialog to control one of
the settings:
Exposure
Gain
Offset
Digital Gain
Colorization
Refer to Chapter 15 in Section 1 of this guide for more information.
However, note the additional Light setting under the Binning control.
214 Openlab v.3
SPOT DIGITAL CAMERAS
SPOT Digital Cameras
Overview
This guide describes how to set up and use the Video Manager with SPOT digital
cameras. The Video Manager supports SPOT 2 and SPOT RT digital cameras from
Diagnostic Instruments. The connection to the Macintosh is via a PCI frame grabber
card and separate control unit. Diagnostic Instruments provide:
The PCI frame grabber card
The camera control unit and camera head
Software driver (SPOTCam.dll)
Once you have connected the camera physically, you need to make sure the SPOT
Video and Video Manager modules are installed in the Openlab Modules folder, and
the SPOTcam.dll file is installed in either the Extensions folder or in the Openlab
application folder. The SPOT Video module is not part of the core product and must
be purchased separately. Refer to Chapter 2 of the Openlab Core Guide for
instructions on installing modules.
If you have the Automator, a number of Video Manager tasks will be available. Refer
to the Automator Reference Guide for detailed instructions about using the Automator,
and for an example Video Manager automation.
SPOT RT Cameras
The SPOT Video module supports the RT live focus mode to give a high speed but
low quality image for easier sample positioning and focusing.
Before you set up the Video Manager
1.
Follow the manufacturer’s instructions for installing the PCI frame grabber card and
connecting the camera to the Macintosh.
2.
Install SPOTCam.dll from the CD supplied with the camera by copying it into either the
System Extensions folder or the Openlab applications folder.
Updated January 2001 215
OPENLAB
Video Manager Setup Panel
If you have a SPOT RT camera, a setup dialog similar to the following is displayed,
when you select SPOT as your video source.
The setup dialog for all
other SPOT cameras is
almost identical, but it does
not have the RT Focus
Mode checkbox in the
Control part of the dialog.
216 Openlab v.3
SPOT DIGITAL CAMERAS
Notes on the Setup Dialog
Refer to Chapter 15 in Section 1 of this guide for more information about the Video
Source, Input, Format, Scaling and Capture depth pop-up menus, and for step-bystep instructions on using the Video Manager Setup dialog.
Image
The Image pop-up menu allows you to select an image type: brightfield, fluorescence
or darkfield. Make sure you select the correct one for your images to ensure the
appropriate calculation is used for auto-exposure.
Reset White Balance
Click on this button to reset the white balance to the camera's default.
Auto Exposure
Click on this button to allow the camera to perform its own auto-exposure, ignoring any
values you have set for Exposure in the Video Controls Palette.
Note: In RT Focus Mode the camera performs its own auto-exposure to allow for the
real-time imaging and any exposure times are not honored in the live Video preview.
Video Controls
You can use the Video Controls Palette to control available video settings.
Exposure allows you to set an exact exposure time.
Binning allows you to enable binning and set a binning scale.
Gain allows you to set a gain factor.
RT Focus Mode enables the RT live focus mode. This option is only available with
SPOT RT cameras. See page 218 for more information.
Color puts the camera into color mode. See page 218 for more information about
color and monochrome mode.
White Balance sets the white balance for the current image.
Auto Exposure allows the camera to calculate exposure times automatically.
Note: You can also use the pop-up menu under the Preview image in the Video
Manager Setup dialog to select and control individual settings.
Updated January 2001 217
OPENLAB
Working with the Different Camera Modes
Color and Monochrome
The image frame rate will be faster in monochrome mode, so if speed is important
select monochrome to focus and then revert to color for image capture.
Make sure that the RGB color slider on the camera is in the appropriate position for
the mode selected. Although Openlab does not recognize the actual position of the
slider, errors will be reported in the Session Log if you try to acquire an image when
the slider is in the wrong position. It will also affect the image in the Video Preview
window. If RT Focus Mode is disabled, you will still see a video preview but the
preview will be updated very slowly. If the camera slider position and the Openlab
Video Controls setting do not match, the preview will display the word "Openlab" and
a camera with a flashing cross through it. To remedy this, either move the slider on
the camera or change the mode in the Openlab Video Controls palette and wait while
the image is restored.
RT Focus Mode
When you check RT Focus Mode on the Video Manager, you may notice that the
video preview image behaves erratically as the camera changes mode internally. It
may disappear or appear corrupted for a short time until it returns in low-quality mode.
You may also notice that the live image appears to be split in half with one side a little
brighter than the other. This is a feature of the way that the SPOT RT camera displays
images in real time and is not representative of the final captured image quality.
In RT Focus Mode, the camera performs its own auto-exposure to allow for real-time
imaging, and any exposure times or gain set for image capture are not honored in the
live Video preview. Similarly, binning will not visibly increase image brightness.
If you are also using color mode, you may see image ghosting with dynamic samples
as the sample moves during the sequential RGB image capture. This effect can be
minimized by increasing the binning to 4. This does not increase image intensity, but
does increase the data rate so that the image is refreshed much faster and the color
ghosting effect is minimized. (Making the image document smaller does not reduce
the effect of ghosting because it does not improve the image frame rate.)
RT Focus Mode and Image Capture
RT Focus Mode allows you to quickly position and focus the sample. When you click
on the image capture tool to capture the image, Openlab applies the settings from the
218 Openlab v.3
SPOT DIGITAL CAMERAS
Video Manager dialog or Video Controls Palette that were set prior to switching to RT
Focus Mode. You can, therefore, use RT Focus Mode in two possible ways:
With RT Focus Mode initially disabled:
Set white balance and exposure on one part of the specimen.
Enable RT Focus Mode.
Capture the images from many different positions (changing focus as necessary),
all using the same initial settings.
Or with RT Focus Mode initially enabled:
Position and focus the sample.
Disable RT Focus Mode.
Check exposure and gain settings before capturing the images.
Optimising Performance
Refer to Chapter 15 in Section 1 of this guide for general guidelines. Your main
options for optimising the video capture rate are:
Select a higher binning rate.
Set the Capture depth on the Video Manager Setup dialog to Fastest.
Reduce the document size.
Updated January 2001 219
OPENLAB
220 Openlab v.3
SNAPPER 8 AND 24
Snapper 8 and 24
Overview
This section contains general set up information for the two analog Snapper cards—
Snapper 8 for black and white, Snapper 24 for color video signals. The Snapper 24
frame grabber card is used with color video cameras with RGB output, such as:
Dage cameras
JVC cameras
*Hamamatsu C5810 three-chip color analogue cameras.
* Detailed setup instructions for this camera will be provided in the next edition of this
guide.
If you have the Automator, a number of Video Manager tasks will be available. Refer
to Section 4 of this guide for detailed instructions about using the Automator and for
an example Video Manager automation.
Updated January 2001 221
OPENLAB
Notes on the Setup Dialog
Refer to Chapter 15 in Section 1 of this guide for more information about the Video
Source, Scaling and Capture depth pop-up menus, and for step-by-step instructions
on using the Video Manager Setup dialog.
Input
The Input pop-up menu allows you to select RGB colour, or monochrome on any
channel. Note that the BNC plug on the card is connected to the Red channel.
Snapper 8: You will only have one monochrome input channel.
Photonic Science options: These are for use with the named cameras.
Dage DC-330: This is for use with Dage Dage-MTI DC-330 three-chip color camera,
see page 224.
JVC KY-55: This is for use with the JVC KY-55 camera, see page 226.
Format
The Format pop-up menu allows you to select NTSC or PAL, depending upon which
video standard is appropriate for your camera.
Sync
The Sync pop-up menu allows you to specify the synchronisation source for the frame
grabber card. You can sync off any channel or from the CSYNC connection on the
card. Many cameras provide the sync signal on the Green channel. Check your camera
documentation.
Snapper 8: You do not have color channels. Select Automatic or CSYNC.
Trigger
222 Openlab v.3
The Trigger pop-up menu allows you to control capture using an external TTL pulse.
Check your camera documentation to establish which option is appropriate.
SNAPPER 8 AND 24
Video
Controls
You can use the Video Controls Palette to control the following video settings.
Alternatively, you can use the slider control on the Video Manager Setup dialog to
control one of the settings:
Black Level
White Level
Clamp Level
Trigger, if supported by your camera
Colorization, if the Input source is one of the monochrome channels.
Specific cameras may enable or add other slider controls. Refer to your camera
documentation for more information about these video control settings. Use the
Reset Levels button to return the settings to their default values.
Snapper 8: The Clamp Level setting is not available.
Optimising Performance
Refer to the “Optimising Performance” section in Chapter 15 in Section 1 of this guide
for general guidelines. Your main options for optimising the video capture rate with the
Snapper 24 and Snapper 8 cards are:
Set the Capture depth on the Video Manager Setup dialog to Fastest.
Enable Half Size scaling in the Video Manager Setup dialog, so that the card will
only capture odd fields. This will increase the speed of image capture, but you may
lose some image quality.
If you are using video capture as part of an automation, you may want to enable
Allow asynchronous captures in the Video Capture task. See the Automator
User Guide for more information about Automator tasks.
Updated January 2001 223
OPENLAB
Dage Cameras
Openlab supports the Dage-MTI DC-330 three-chip color camera. The camera may
be used in two modes: as a brightfield application, when it runs as a standard color
analogue video camera, or as an integrating camera, which provides control over
exposure time. Both modes have Sync set at ‘CSYNC’.
Set to Falling Edge
for integrating
cameras
If you are using the brightfield application mode, frames will be captured at a standard
40 ms video exposure rate, providing 25 frames per second. You will not be able to
control the Exposure value. The Trigger menu option should be set to ‘None’.
If you are using the integrating camera mode, you will be able to control the Exposure
value from the Video Controls Palette. Increasing the exposure time allows the
camera to integrate more frames at 40 ms increments. The Trigger menu option
should always be set to ‘Falling Edge’, unless the exposure rate is 40 ms, in which
case the Trigger menu option should be set to ‘None’. There are additional
requirements for installing and connecting an integrating camera.
224 Openlab v.3
SNAPPER 8 AND 24
Cabling and Software Requirements
If you are using an integrating camera, you need:
The Dage Hardware Support module, which provides a palette for controlling the
exposure rate during video capture. Use the arrows to increase or decrease the
rate in 40 ms steps. Refer to Chapter 2 of this guide for instructions on installing
additional modules.
A serial control cable and USB keyspan adapter to connect the cable to the serial
port on the Macintosh. Once you have connected the camera, you must also set
up the Serial Port Preferences (from Openlab’s Edit menu). You will not be able to
set the Trigger option to ‘Falling Edge’ in the Video Manager, if you have not set
up the preferences.
Updated January 2001 225
OPENLAB
JVC Cameras
Openlab supports the JVC KY-55 cameras.
You cannot control the exposure rate directly from Openlab. Set the Trigger menu
option to ‘None’.
Integrating Cameras
Integration can be done externally, using a manual control unit, which controls the
physical camera shutter. If you have an integrating camera, you need to:
226 Openlab v.3
Set the Trigger menu option to ‘Falling Edge’ on the Video Manager.
Use a serial control cable and USB keyspan adapter to connect the manual control
unit to the serial port on the Macintosh. Once you have connected the camera, you
must also set up the Serial Port Preferences (from Openlab’s Edit menu). You will
not be able to set the Trigger option to ‘Falling Edge’ in the Video Manager, if you
have not set up the preferences.
Section 3
Additional Modules
for Full Openlab
Image Filters
Boolean Ops
Density Calibration
Profiling
Image Arithmetic
Linear Interpolation
WORKING WITH FILTERS
Working With Filters
Overview
Openlab supports two types of filters:
■
Kernel filters that modify or process an image to emphasise some aspect of the
original image. Openlab provides a set of standard filters that allow you to alter an
image, or ROI, to achieve a particular effect, such as smoothing, sharpening, or
blurring the selected area. You can also define your own filters.
■
Median filters that are used for noise reduction.
Kernel Filters
A kernel filter alters each pixel’s value based on its current value and the values of
any neighbouring pixels. The heart of a filter is an array of coefficients called a filter
matrix.
When you apply the filter, each underlying pixel is multiplied by the coefficient in the
corresponding cell in the matrix, all the values are added and the result is applied to
the pixel that corresponds to the central cell in the matrix.
Updated January 2001 229
OPENLAB
Simple Filter Calculation Example
This example is for the purpose of illustration only, it does not contain meaningful
values.
1
0
1
1
2
1
1
0
1
2
0
1
1
2
4
2
0
4
2
6
1
1
0
1
2
1
1
2
0
3
1
0
1
0
11
1
1
1
0
New Target Pixel Value: 11
This combination of multiplication and addition means that if you apply a filter to an
image with only black or white pixels (a binary layer), the result will include shades of
greys.
Use the Normalize button to maintain the balance between pixel values. This
normalizes the result (so that all the coefficients in the filter add up to 1) and ensures
that the filter does not make the image any brighter or darker.
You may like to adapt the filter matrices of the standard filters to create your own
customised filters. Alternatively, matrices that other people have developed appear in
publications from time to time, and you may wish to copy them for use with Openlab
images.
230 Openlab v.3
WORKING WITH FILTERS
Kernel Filter Dialog
Preview of filter
Click to increase or
decrease height of
matrix by 2
Click to increase or
decrease width of
matrix by 2
Click to display
Save Settings
dialogue
Filter matrix.
Click on a cell
to edit it
Use scroll bars if
matrix entries
exceed grid size
Click to
normalize filter
To select a filter
1.
Open an image, as normal, and use the Layer Manager Palette to select the layers to
which you wish to apply the filter. If you want to apply the filter to part of the image,
use the ROI tool to select the area on the image.
2.
Select Filters from the Image menu.
3.
Select Kernel Filters…
The last filter selected is automatically displayed.
Updated January 2001 231
OPENLAB
4.
If you want to select a different filter, click on the Expander icon in the top right-hand
corner and select one of the standard filters. The matrix and preview are updated to
reflect your choice of filter.
These are the default filters. They appear in
italics in the filter list and cannot be deleted or
overwritten.
5.
Click on the Normalize button if you want to modify the filter so that it does not affect
the brightness of the image.
6.
Click on the OK button to apply the filter to the selected layer(s).
To create a kernel filter
You can edit an existing filter to create a new one, and save it to a different name
using Save Settings. See page 151 for more information about “Saving Settings”.
232 Openlab v.3
1.
Open an image, as normal, and use the Layer Palette to select the layers to which you
wish to apply the filter.
2.
Select Filter/Kernel Filters.. from the Image menu.
3.
Click on the Expander icon to display existing filters and select one to edit.
4.
If you want to increase or decrease the number of cells in the matrix, click on the
height and width counters.
5.
Then, just click on any cell in the matrix and type in the new coefficient. You may enter
a maximum of 5 digits, including a decimal point if required.
6.
Use the Preview window to check that the changes are as required.
WORKING WITH FILTERS
7.
Once you have finished editing the filter, you can save the new settings. If you have
edited one of the standard filters, remember to save the settings to a new name. See
Chapter 14 in Section 1 of this guide for more information.
Median Filters
A median filter also uses a matrix to alter each pixel’s value based on its current value
and the values of any neighbouring pixels.
When you apply the filter, the values of all the underlying pixels are sorted from small
to large and the middle value is applied to the pixel that corresponds to the central cell
in the matrix.
Pixel Values
Sorted Values
1
3
4
1
2
2
4
2
4
3
3
4
2
5
3
4
4
5
New Target
Pixel Value: 3
Median filters do not introduce new pixel values to an image. If you apply a filter to a
black and white image (binary layer), the result will be black and white.
To select a filter
1.
Open an image, as normal, and use the Layer Manager Palette to select the layers to
which you wish to apply the filter. If you want to apply the filter to part of the image,
use the ROI tool to select the area on the image.
2.
Select Filters from the Image menu.
Updated January 2001 233
OPENLAB
3.
Select Median Filters…
4.
Enter a value for the Height and Width of the filter matrix. The Preview window is
updated to reflect your choice. This may take a little time, so a progress bar is
displayed.
Note: If you are using a median filter to remove a white line scratch (pixel value = 1),
select height and width values that give you fewer scratch pixels in your matrix and
more pixels with a value that you want to keep.
¦
234 Openlab v.3
Fewer scratch pixels,
the median value
should be significant
X
More scratch pixels,
the median value is not
likely to be significant
5.
Check the appropriate Apply to: and Process: buttons.
6.
Click on the OK button to apply the filter.
BOOLEAN OPERATIONS
Boolean Operations
Overview
This module allows you to apply Boolean operations to binary layers within a
document. For example, you may want to pick out two cell shapes or two intensities. If
you first create a mask for each shape or intensity, you can then use Binary
Operations to combine the two masks (binary layers) and create a new mask that can
be applied to image layers.
Using Boolean Operations
1.
Select two binary layers in the Layer Manager Palette.
2.
Select Boolean Operations… from the Image menu.
Select first layer
(original image)
Select second
layer (binary mask)
Preview of the combined
layers (result)
Select binary
operation
Updated January 2001 235
OPENLAB
3.
The Layer previews automatically show the two layers that you have selected. If you
want to change them, select a new binary layer from the pop-up menus. (Use OptionClick to toggle between the cropped and scaled preview.)
4.
Select a binary operation from the pop-up menu.
AND: For every pixel that is ON in the mask, the corresponding pixel in the result
has the same color. For every pixel that is OFF in the mask, the corresponding
pixel in the result is white.
OR: For every non-white pixel in the original image, the corresponding pixel in the
result has the same color. For every white pixel in the original image, the
corresponding pixel in the result is black if the corresponding pixel in the binary
mask is ON, and white if the corresponding pixel in the binary mask is OFF.
NAND: Carries out the same operation as AND, then inverts the result image.
236 Openlab v.3
BOOLEAN OPERATIONS
NOR: Carries out the same operation as OR, then inverts the result image.
XOR: Carries out the same operation as OR, then, for every pixel that is ON in the
binary mask, inverts the corresponding pixel in the result.
Feature AND: For every feature in the image that contains a pixel whose
corresponding pixel in the binary mask is ON, the result image has a
corresponding feature. This ensures that features (such as cells) do not appear
cut in half in the result image.
Feature NAND: For every feature in the image that contains no pixels whose
corresponding pixel in the binary mask is ON, the result image has a
corresponding feature.
5.
Check the preview window to make sure that the operation has produced the desired
effect and click on Create to create a new binary layer.
Updated January 2001 237
OPENLAB
238 Openlab v.3
DENSITY CALIBRATION
Density Calibration
Overview
Density Calibration is the conversion of a grey level index value into a calibrated
floating-point density value. The Density Calibration Module enables you to perform
pixel or ROI level analysis on all image types, returning calibrated values for selected
areas. For example, in calcium experiments it allows you to convert intensity to ratio
units and then convert ratio units to calibrated calcium units.
Density Calibration is particularly useful in ion imaging applications, where it forms
part of the ratio imaging suite (together with the Ratio, Automator, Graphing and
Digital I/O modules).
Density calibration can be applied in two ways:
By entering a formula in the density calibration dialog.
Empirically, by measuring a series of intensities against known values, for
example against a greyscale wedge; then plotting these values in the density
calibration dialog.
You can apply the resulting calibration to any images, as required, and then extract
the information. Once you have calibrated a layer, you will be able to display the
calibrated units in the HSI Colorspy module and capture ROI values in the
Measurements table. You can also use the Paint Tools palette to stamp a calibration
bar onto the layer, which shows its LUT and the maximum and minimum calibrated
unit values.
Calibrations are applied to and stored with the current or selected layers, so that you
can have a number of different calibrations within the same document. You can also
save calibration settings and apply them to subsequent layers in the same or a
different document.
The Density Calibration module is part of the core product. Refer to Chapter 2 in
Section 1 of this guide for instructions on installing modules.
Updated January 2001 239
OPENLAB
If you have the Automator, you will be able to use the Density Calibration task in your
automations. Refer to Section 4 of this guide for detailed instructions about using the
Automator, and for an example automation.
The Density Calibration Dialog
■
Select one or more layers in the Layer Manager Palette.
■
Select Density Calibration… from the Layers menu.
The Density Calibration dialog allows you to plot known intensity values
against calibrated values. You can enter individual values as points on the
graph, or enter a formula to calculate the points. The resultant line can be
nd
rd
th
fitted to the points as a straight line or 2 , 3 , or 4 order polynomial, and is
displayed in the graph preview window.
Click to select
conversion type
for the calibration
Click and
overtype to edit
name of y axis
Graph preview
shows result of
calibration
Bar showing
selected LUT
Indicates function
used to plot graph
240 Openlab v.3
Choose whether
to enter measured
points or a formula
Enter measured
and calibrated
values in the table
Click to select
plotting function
for graph
Enter a value to
adjust the Y offset
Type in notes, as
required
DENSITY CALIBRATION
Using Density Calibration
In the following examples, we will show you how to:
■
Carry out a greyscale intensity calibration to convert a grey level index value into
a calibrated floating-point density value.
■
Carry out an ion calibration to convert intensity to ratio units, and ratio units to
calibrated calcium images.
Grayscale Calibration
1.
First capture a number of images or areas of an object that varies in intensity, for
example a calibrated grayscale wedge. You must know the calibrated values of each
area of the object.
2.
Measure the mean intensity in each area and record it in one column of a table. (Use
the Measurements Window to find out the mean intensity.) Each measured intensity is
equivalent to a known calibrated value, so you can build up a table similar to the
following (our example is an 8-bit grey image, 0-255 grey levels):
3.
4.
5.
6.
Measured Intensity
Optical Densities
1
2
20
22
40
42
100
102
253
255
Use the Layer Manager to make the required layer current, and to select any other
layers that you wish to calibrate.
Select Density Calibration… from the Layers menu. The only conversion type
available will be Index➔
➔Calibrated.
Make sure that Enter Points is selected and type in the first pair of values from the
table.
Click on the <tab> button on the keyboard, or the Add button on the dialog, and enter
the next pair of values. Continue adding values until you have completed the table. You
will see the points appear on the graph in the preview window.
Updated January 2001 241
OPENLAB
Note: You can enter as few as two values, but you will only be able to plot a straightline graph. If you want to fit the points as higher order polynomials, make sure you
enter enough points.
7.
Select the appropriate function to fit the points. The preview graph will help you
decide which is the best fit. Note how any changes you make are reflected in the
equation under the graph. In this example a straight line graph is required.
8.
Add any Notes as required and, if necessary, enter a value to adjust the Y
Offset.
The Y Offset is used to compensate for differences in the response of a
fluorochrome in a free solution and that of a fluorochrome within a living cell.
9.
If you only want to apply the calibration to the current layer, click on the Current
Layer button. If you want to apply the calibration to several layers, click on the
Selected Layers button.
10. Click on OK to apply the calibration.
242 Openlab v.3
DENSITY CALIBRATION
11. You may like to add a calibration bar to the image. Display the Paint Tools palette
and select a Text Color for the stamp. Do not select white or black. These will not
show up on the image.
12.
Select the LUT tool and click on the image to add the stamp.
Note: Make sure that the Make Transparent Layer checkbox is checked if you
want to protect the integrity of the original layer and create a new, transparent
layer for the stamp. (This layer can then be merged with the original layer.)
Updated January 2001 243
OPENLAB
Ion Calibration (using Fura 2)
In the following example, we will show you how to look at an image and calibrate it in
terms of its calcium content and ratio values.
1.
Using a number of different dilutions of Fura2, prepare a series of slides with just the
Fura2 solution.
2.
Capture two images of the first slide at each of the appropriate wavelengths (one at
340 and one at 380).
3.
Ratio the pair of images to give a new ratioed image.
Note: Use the Ratio-Options dialog to set the maximum threshold values so that they
match the bit depth of the captured images, 8-bit =255, 12-bit =4095, etc. (Refer to the
Ratioing Module User’s Guide for more information about ratioing images.)
4.
244 Openlab v.3
Load the next slide with the next dilution and repeat steps 2 to 3.
DENSITY CALIBRATION
5.
When all dilutions have been imaged and ratioed, draw up a table with two columns,
showing ratio values on the left-hand side and known concentration values on the
right-hand side.
6.
Display the HSI Colorspy palette and make sure that Calibrated is selected, so that
you can view values as ratioed units.
7.
Take a reading for each image and manually record the ratio and intensity values, so
that you build up a table similar to the following:
8.
Ratio Values
Nanomolar Values
(Calibrated)
0.30
172
0.332
200
0.386
265
0.424
311
1.0
1105
4.67
5389
Use the Layer Manager to make the required layer current, and to select any other
layers that you wish to calibrate.
Updated January 2001 245
OPENLAB
9.
Select Density Calibration… from the Layers menu. Select Ratio➔
➔Calibrated as
the conversion type.
10.
Make sure that Enter Points is selected and type in the first pair of values from the
table. Click on the <tab> button on the keyboard, or the Add button on the dialog,
and enter the next pair of values. Continue adding values until you have completed
the table. You will see the points appear on the graph in the preview window.
11.
Select the appropriate function to fit the points. Again the preview graph will help you
decide which is the best fit. Note how any changes you make are reflected in the
equation under the graph.
4th order curve selected
Note: You may like to edit the name of the y-axis. Just click on the text and overtype
to enter a new name.
12. Add any Notes as required, and click on OK to apply the calibration. You now have a
calibrated calcium document, from which you can select ratio or ion values.
246 Openlab v.3
DENSITY CALIBRATION
Using Formulae
If required, you can also enter a formula to generate the points on your graph. Just
select Enter Formula from the pop-up menu and type in the formula for your graph
function.
Select operators from the list provided. Note how the preview graph changes as you
enter the formula, and the equation f(x) is updated.
Note: When you save the document, all calibration settings will be stored with the
layer. This would normally be points or a formula, however, if you enter both, Openlab
will save both. You can also save settings for use with other documents, see “Saving
Calibrations” on page 248.
Updated January 2001 247
OPENLAB
Measurements Window
Once you have applied density calibration to a layer, the calibrated maximum,
minimum, mean and mode values will also be shown in the Measurements Window
whenever you make the calibrated layer current.
Saving Calibrations
Once you have created a density calibration, you can save it and apply it to other
layers in other documents.
Expander icon
248 Openlab v.3
Click on the Expander icon in the top right-hand corner to display the Save Settings
dialog. Refer to Chapter 14 in Section 1 of this guide for detailed instructions on
using the Save Settings dialog.
PROFILING MODULE
Profiling Module
Overview
This module allows you to select an area of interest on an image and preview the
profile in the Profiling Palette or a separate Profiling Window. The resulting profile
may be displayed as a 3D view (regions of interest), a 2D view (straight lines) or as a
histogram. Different rendering schemes may be applied to the profile and you can
control which colour channels are displayed. If required, you can use the palette to
display one view of the profile, and the Profiling Window to display a different view.
The Profiling module is part of the core product. Refer to Chapter 2 in Section 1 of
this guide for instructions on installing modules.
Updated January 2001 249
OPENLAB
The Profiling Palette
Once you have installed the Improvision profiling module, the Profiling Palette will be
available whenever you run Openlab.
The following example shows a 3D profile for a selected ROI on an image.
Profiling menu bar
Preview window
Use the profiling
menus to control how
the profile is displayed
Statistical information
Statistical Information
Statistical information is displayed for each of the channels selected in the Options
menu.
250 Openlab v.3
Max and Min are the maximum and minimum pixel values in the selected ROI or
line.
Mean is the average value of all the pixels in the selected ROI or line.
Mode is the most common value of the pixels in the selected ROI or line
Median is the central value when the values of all the pixels in the selected ROI or
line are placed in order.
PROFILING MODULE
Profiling Window
■
Select Show Profiling from the Image menu.
■
The Profiling window is displayed.
Profiling menus
There are three profiling menus. These menus appear on both the Palette and the
Profiling Window, and contain the same commands. The commands are applied
locally - to the profile in either the Palette or the Window. This allows you to create
different views of the profile and display them simultaneously.
Show menu
■
Select the required rendering command from the Show pop-up menu.
■
You will need to experiment with the different commands to decide which
best suits your requirements.
Updated January 2001 251
OPENLAB
View menu
Option menu
■
Select the required view from the View pop-up menu.
■
The 3D Profile and Histogram commands will be greyed out if you have
not selected a region of interest.
■
The Histogram command shows the frequency distribution of the selected
channels.
■
Select the required command from the Option pop-up menu.
Note: If you cannot see any data on your profile preview, check that all the
colour channels are selected.
252 Openlab v.3
■
The Luminosity channel contains information about the brightness of the
pixels.
■
If you are working with a greyscale image or an 8-bit colour image, the
Red, Green and Blue commands will be greyed out, and the Luminosity
command becomes the Index command.
■
Profiling does not work with 2-bit images.
PROFILING MODULE
Using Profiling
In the following example, we are going to use Profiling with the Presentation palette to
view profiles across multiple layers in an image document. We will select an ROI and
a line for profiling.
1.
Use the Open command to open the image file to which you wish to apply Profiling.
2.
If you are do not want to use all layers in the Presentation, use the Layer Manager
Palette to select the required layers.
3.
Display the Presentation palette and click on the Options button. Make sure that the
No related updates (faster) command is disabled (the check box is blank).
4.
Set up the other presentation options as appropriate and click on OK.
5.
Use the Layer Manager Palette to make a layer current for Profiling.
Updated January 2001 253
OPENLAB
6.
Use the ROI tool to select a region of interest on the current layer.
7.
Use the straight line tool to draw a line on the current layer.
Note: We have used the View menu to change the preview to 2D. You can also
change the background colour for the 2D preview. Just click anywhere on the
background and select a different colour from the colour grid.
254 Openlab v.3
PROFILING MODULE
8.
Select Show Profiling from the Image menu, and use the View menu to display the
3D view in the Profiling Window and the 2D profile in the palette.
9.
Select the Presentation palette and use the play controls on the palette to run the
animated sequence.
10.
If you want to save the profiling settings, save the image document. When you open
the document again, the profiling settings will also be available.
Updated January 2001 255
OPENLAB
256 Openlab v.3
IMAGE ARITHMETIC
Image Arithmetic
Overview
Image Arithmetic is an Automator task that allows you to apply a simple arithmetic
operation to every pixel in the selected layer. In particular, the subtract operation
provides a useful way of applying background subtraction during an automation.
Refer to Section 4 of this guide for more details about Image Arithmetic.
Updated January 2001 257
OPENLAB
258 Openlab v.3
IMAGE INTERPOLATION
Image Interpolation
Overview
Image Interpolation creates additional layers by applying linear interpolation between
adjacent layers in a document. Adjacent layers must have the same image depth.
If you have the Automator, you will be able to use the Linear Interpolation task in your
automations. Refer to Section 4 of this guide for detailed instructions about using the
Automator and for an example automation.
Using Image Interpolation
1.
Select two or more layers with the same image depth in the Layer Manager Palette.
2.
Select Linear Interpolation… from the Layers menu.
3.
Enter the number of images to be inserted and click on OK.
Updated January 2001 259
OPENLAB
4.
Openlab displays a status bar as it creates the required number of interpolated layers.
You can see the interpolated layers in the Layer Manager Palette, and use them as
you would any other layer, for example to build up a presentation.
260 Openlab v.3
Section 4
Automator Lite
for Full Openlab
Automator Tutorial
Automator Reference
OPENLAB
Automator Lite
Overview
The Automator is a visual programming language which allows you to create a
schedule of tasks which you can then run automatically. This schedule is known as an
automation. You use the Automator icons to build up a picture of the task flow in the
Automator Window, and then link the icons together to define the sequence for the
automation.
The Automator combines the visual clarity of a flowchart for planning and structuring
the sequence of an automation, with the power of a programming language for
implementing the automation and controlling the task flow. The Automator is available
as an additional menu command in the Openlab menu bar.
There are two versions of the Automator:
Automator Lite, which supports all the Openlab core modules but does not allow
you to use variables when creating automations. Automator Lite is provided with
the full Openlab software. It is not provided with Openlab Darkroom.
Automator, which provides the same features as Automator Lite plus full support
for variables. This makes it much more powerful than Automator Lite. The
Automator is a separate module, which must be purchased separately.
Note: Automator Lite uses the same dialogs as the full Automator, but it does not
support variables. Therefore, although variable buttons may appear on some of the
dialogs, they will always be grayed out or disabled. You cannot use them.
This is the reference guide for Automator Lite. It is split into two main parts: the
Automator Tutorial and the Automator Reference Manual. We recommend that you
browse both sections before writing automations.
262 Openlab Version 3
The Automator Tutorial is for new users. It provides step-by step examples of
working with the Automator.
The Automator Reference Manual contains reference material and
troubleshooting information. You will find it useful once you start to create your
own automations.
AUTOMATOR TUTORIAL
Automator Tutorial
Overview
The tutorial describes the Automator and includes simple examples of working with
the standard Automator tasks. These examples also illustrate the basic concepts
behind the major programming features. If you are new to the Automator, we
recommend that you work through this section sequentially. If you are already familiar
with programming concepts, you may like to miss out some of the sections which
explain terminology.
The Tutorial part of this manual includes:
A description of the Automator Window.
How to run a simple sequence of tasks.
How to create a loop to repeat a sequence of tasks for a defined number of times.
A detailed explanation of Expressions - you will already have seen how to use
these in the automation examples.
Note: Automator Lite uses the same dialogs as the full Automator, but it does not
support variables. Therefore, although variable buttons may appear on some of the
dialogs, they will always be grayed out or disabled. You cannot use them.
Updated January 2001 263
OPENLAB
The Automator Window
■
Select New Automation from the Automator menu.
■
The Automator Window is displayed.
Local menu bar
Control buttons
Trace area
Task list
Click to expand
task group
Click and drag to
increase/decrease
work area
Option click to
expand all task
groups
Work area
Task information
area
Trace Area
This is the section of the Automator Window where trace messages are displayed.
Trace messages enable you to keep track of the progress of an automation when you
run it. They are particularly useful when you are creating an automation and need to
be able to test that it is working correctly. You can trace different aspects of your
automation, depending upon its complexity. You select Trace options from the Trace
menu.
Work Area
This is the section of the Automator Window where you create your automation. See
the next section for step-by-step instructions on creating an automation.
264 Openlab Version 3
AUTOMATOR TUTORIAL
Task List
These are the tasks that you can include in your automation. You create an
automation by dragging tasks from the Task List, dropping them onto the Automator
Window and linking them together. See the next section for step-by-step instructions.
For ease of use and to make the best use of the available display area, tasks are
displayed in the Task List under task groups. You can expand or collapse the group
by clicking on .
Note: Option-click expands or collapses all task groups. You can also use the
commands under the View menu.
Some tasks are general, others are linked to specific modules, such as the
Microscope or Filter Assembly modules. If you have not purchased the module, the
tasks will not appear in the Task List. We describe the standard tasks in this manual.
Module-specific tasks are described in the manual which accompanies the module.
Control buttons
The control buttons allow you to run the automation. They work in the same way as a
video recorder, allowing you to run, stop, pause and step through an automation.
Runs the
automation
Stops the
automation
Pauses the
automation
Steps through the
automation, task by
task
Task information area
Once you have moved a task from the Task List to the Automator Window, you can
rename it. However, you may still need to know the original name of the task. Move
the pointer over the task icon in the Automator Window. The Task Information area
displays the original name of the task, as it appears in the Task List.
Local menus
The local menus are described in detail in the Reference section of this manual. For
the most part they provide commands which control how information is displayed in
the three main display areas of the Automator Window: the Task List, the Work Area
and the Trace Area. There is also a menu which provides various commands for
adding and editing labels in the Automator Window.
Updated January 2001 265
OPENLAB
Creating Simple Sequences - Tutorial 1
The example in this section illustrates how you can use the Automator to create an
automation which consists of a simple sequence of tasks. When you run the
automation, each task will be completed one after the other.
We will build up the example gradually. Initially we will concentrate on displaying an
alert message and speaking the text of the message. Then we will add a time delay
before the message is spoken.
The description will consist of several stages:
Stage 1 assembles the tasks required to display and speak a message in the
Automator Window.
Stage 2 sets up the contents of the message.
Stage 3 links the tasks.
Stage 4 saves the automation.
Stage 5 runs the automation and checks the contents of the Trace Area.
Stage 6 adds a delay task to the automation.
We recommend that you follow the instructions described below to create the
automation yourself on your Macintosh.
266 Openlab Version 3
AUTOMATOR TUTORIAL
Assembling the tasks
1.
Select New Automation from the Automator menu. Make sure that the Essential
tasks are displayed. (Click on .)
2.
Click and hold on the Start task.
3.
Drag and drop it onto the Automator Window.
Note: When you first move a task into the window, the task’s icon is split down the
middle. This indicates that it has yet not been linked to another task.
4.
Make sure that the Extras tasks are displayed. Click and hold on the Tell task. Drag
and drop it onto the Automator Window.
Note: Look at the border of the Work Area as you move the icon across from the Task
List. You should notice a grey highlight.
5.
Click and hold on the End task. Drag and drop it onto the Automator Window.
6.
You have now assembled all the tasks. Look at the task icons in the Automator
Window. Each one has a jagged line through the middle of it. This indicates that the
task has not yet been linked to another one.
Updated January 2001 267
OPENLAB
Setting up the message content
1.
Double-click on the Tell icon to display the Tell Setup dialog.
Expression box
Start typing here
(between the
quotation marks)
Message display
check boxes
Click on OK to save
the setup
2.
Type the following text into the Expression box, so that it is enclosed within the
quotation marks: Welcome to the Openlab Automator!
3.
We want the message to be displayed in an alert box, and we want the Macintosh to
speak the message. Make sure that the In an alert and Actually say it boxes are
checked and click on OK. Your setup dialog should now look as follows:
Note: If the Speech Manager is missing, the Actually say it feature will be disabled.
See page 289 for more information about non-modal alerts.
268 Openlab Version 3
Click on OK to save the setup.
AUTOMATOR TUTORIAL
Linking the tasks
1.
Hold down the Option key and click on the Start icon. It is highlighted.
2.
Drag the pointer across to the Tell icon. As you do so, you will notice that you are
dragging a line between the two icons. The arrow indicates the direction of the
sequence.
3.
When both the Start and the Tell icons are highlighted, release the mouse.
4.
Look at the Start icon. It is no longer split in half. This is because the link for the Start
task is complete. The links to the Tell task, on the other hand, are not complete. The
jagged line remains through the icon.
5.
Hold down the Option key and click on the Tell icon so that it is highlighted. Drag the
pointer across to the End icon. The links for all the tasks are now complete. Look at
the icons, there should be no jagged lines.
Updated January 2001 269
OPENLAB
Saving the automation
1.
Select Save from the File menu. Enter a name for the automation file in the Save File
As: box, and select a different folder, if required.
2.
Click on the Save button.
Note: We are only creating a very simple automation. If you have a complex
automation, make sure that you save it at regular intervals while you are creating it.
Don’t wait until you are ready to run it!
To open a saved file
1.
Select Open... from the File menu.
2.
Select the required automation file and click on the Open button.
270 Openlab Version 3
AUTOMATOR TUTORIAL
Running the automation
1.
Click on the Run Control button.
2.
The Automation will run quite quickly, but will stop when it displays the Tell message.
This is because we checked the In an alert box. The Macintosh convention is that it
will wait for an alert message to be acknowledged before it allows the application to
continue.
3.
Click on OK to acknowledge the message and allow the automation to complete.
4.
You may like to repeat the automation a few times and look out for the following
features:
5.
As each task is run, the task icon is highlighted with a grey border in the
Automator Window.
The icon in the top right-hand corner of the Automator Window is animated until
the automation finishes.
As each task is run, you will see various messages appearing in the Trace Area.
You may also like to experiment with the Stop, Pause and Step Control buttons.
Updated January 2001 271
OPENLAB
Adding a Delay Task -Tutorial 2
1.
Click and hold on the Delay task. Drag and drop it onto the Automator Window, just
above the link joining the Start task to the Tell task.
2.
Double-click on the Delay icon to display its setup dialog.
Type in the number
of seconds here
Select when the
delay is counted from
Click on OK to save
the setup
3.
Type 5 into the Expression box and click on OK to save the setup.
4.
Double-click on the Tell icon and change the message so that it only appears in an
alert, and it reads: This automation waits 5 seconds before displaying this alert
box.
272 Openlab Version 3
AUTOMATOR TUTORIAL
5.
Click once on the link between the Start and the Tell icon. It is highlighted in red.
6.
Click on the Delete key or the Backspace key to remove the link. Notice what
happens to the Start and Tell icons as you select the link and delete it.
7.
Hold down the Option key and click on the Start icon. Drag the pointer across to the
Delay icon and release it.
8.
Repeat to drag a link between the Delay icon and the Tell icon. You have now
completed the automation, but you may like to tidy up the window before you run the
automation.
9.
Click and hold on the Delay icon, and move the icon down so that it lines up with the
other icons. Notice how the Automator retains the links as you move the icon.
10.
Save the amended automation to a different file and click on the Run Control button
to run it.
Updated January 2001 273
OPENLAB
Creating a Loop - Tutorial 3
Loop sequences are extremely useful if you have a task, or series of tasks, which
must be repeated several times.
You need to know exactly how many times the tasks are to be repeated.
Loop icon
The loop icon is different to the other icons we have looked at so far, because you
need to create two links from it. One link loops back to the task that is to be repeated.
The second link exits the loop and continues with the rest of the task flow.
Option-click here for link that enters loop
Option-click here for link that exits loop
Tutorial 3
In this example we are going to build on our simple sequence, so that the alert
message is shown three times. We are also going to change the text of the message
and include it in the trace.
274 Openlab Version 3
AUTOMATOR TUTORIAL
1.
Click and hold on the Loop task. Drag and drop it onto the Automator Window, just
above the link joining the Start task to the Delay task.
Note: The Loop task must be at the beginning of the loop sequence.
2.
Double-click on the Loop icon to display its Setup dialog.
3.
Type 3 into the Expression box and click on OK to save the setup.
4.
Double-click on the Tell icon and amend its setup so that the message appears in an
alert and in the trace, and it reads: This alert will be shown 3 times.
Updated January 2001 275
OPENLAB
5.
Delete the link between the Start and the Delay icon, and between the Tell and the
End icon.
6.
Create a link between the Start and the Loop icon, and between the Loop and the
Delay icon. Make sure that you select the correct part of the Loop icon for the loop
link. (Note how the pointer changes to indicate which link you are creating.)
Option-click here for link that enters loop
Option-click here for link that exits loop
7.
Create a link between the Tell and the Loop icon. This completes the loop.
8.
Create the exit link from the loop by connecting the Loop icon to the End icon. Make
sure that you select the correct part of the Loop icon for the exit link.
Note: The arrows on the links indicate whether this is a loop or an exit link.
9.
276 Openlab Version 3
Save the amended automation to a different file and click on the Run Control button
to run it. Notice the messages that appear in the Trace Area.
AUTOMATOR TUTORIAL
Expressions
You will have noticed the term Expression box, as you worked through the examples.
These are simply areas on a Setup dialog where you can type in an expression.
The rules for constructing an expression are based upon BASIC syntax. If you are
familiar with programming in BASIC, you may like to miss out this section and go
straight to the next tutorial.
Constructing an expression
An expression may be built up from literals and variables (if you have the full version
of the Automator). A literal is:
A number which is written as a number, for example 10.
A string which is enclosed in quotation marks, for example "hello".
You may also include operators in your expressions. These may be simple arithmetic
operators, such as add, subtract, divide (written as /) or multiply (written as *).
Functions are also operators, for example sin() if you want to find the sine of an
angle.
A Note about Variables
Variables are a powerful feature of all programming languages. They allow you to set
aside a storage area in the computer’s memory to hold a value, which you know will
change. The simplest example is a counter which is incremented, or decremented,
each time a particular action takes place. However, the contents of a variable are not
restricted to numerical values; you can use them to store other information, such as
text strings.
In our previous example, our message tells us how many loops the automation will
execute. It would be useful sometimes if the message also told us which loop the
automation was currently executing. This is quite simple to achieve using variables,
but you must have the full version of the Automator to be able to do this. You can run
the full Automator in demonstration mode if you want to find out more about these
features before purchasing the module. For more information about using variables,
please refer to the Automator Reference Guide.
More about Operators
The following examples may help illustrate how to use literals and operators within an
expression.
Updated January 2001 277
OPENLAB
Expression
⇒
Result
1+5
⇒
6
This adds two numbers.
"Hello " + "world"
⇒
Hello world
This concatenates two strings.
"This is number " + str(5)
⇒
This is number 5
This tells the Automator to treat 5 as a string
and concatenates the two strings.
"This is number " + str(5) + "."
⇒
This is number 5.
(This is similar to the previous example, but
note the syntax for the full stop.)
5 + "items are required."
⇒
NAN (the result of this expression was not a
number)
The Automator cannot evaluate this expression
because you have tried to add a string to a
number.
Arithmetic operators operate on the two elements, each side of the operator. For
example, + can be used to add two numbers or to concatenate two strings. Functions
operate on the next element which is enclosed in brackets, for example str(5).
There is a wide range of operators that you can use within your Openlab expressions.
These are described in more detail in the “Operators for Automator Expressions” in
the Automator Reference section.
As you become more confident about using the Automator, you will find that the
Expression boxes provide you with a great deal of flexibility, particularly when you
include variables within the expressions. For example, the If task allows you to split
the task flow within an automation into two paths by creating a statement which
compares two expressions. The If task is not described in this guide because it uses
variables. If the values of your expressions are never going to change, then there is
no point comparing them.
278 Openlab Version 3
AUTOMATOR REFERENCE
Automator Reference
Overview
This is the Reference section of the Automator Lite Manual. It includes the following
sections:
Guidelines on creating an automation.
Setup tasks.
Automator menus.
A summary of operators for Automator expressions.
Troubleshooting information.
Note: Automator Lite uses the same dialogs as the full Automator, but it does not
support variables. Therefore, although variable buttons may appear on some of the
dialogs, they will always be grayed out or disabled. You cannot use them.
Updated January 2001 279
OPENLAB
Guidelines on Creating an Automation
Refer to the Tutorial section of this manual for step-by-step instructions on creating an
automation. This section summarises the main features that were described in the
tutorial. You may like to use it as a quick reference tool.
The Automator Window
Local menu bar
Control buttons
Trace area
Task list
Click to expand
task group
Click and drag to
increase/decrease
work area
Option click to
expand all task
groups
Work area
Task information
area
Creating automations
1.
Drag tasks from the Task List onto the Work Area. The tasks are represented as icons
on the screen. Each automation must contain a Start task and should contain an End
task. Most tasks also allow you to define setup parameters.
2.
Set up any parameters that are required for each task, by double-clicking on the task
icon to display the Setup dialog. See the “Task Setup Dialogs” chapter for a more
detailed description of the Setup dialogs for each task.
280 Openlab Version 3
GUIDELINES ON CREATING AN AUTOMATION
3.
Link the tasks together by dragging a line between them. Hold down the Option key
and click on an icon. Drag across to the next icon. When both icons are highlighted,
release the mouse. A line links the two icons.
4.
Use the Control buttons to run your schedule. As an automation is executed, the
individual tasks are normally highlighted with a grey border and the animation icon is
activated. (Animation may be disabled for better performance, if required. See
“Automator Menus” section for further details.)
5.
Use the Trace Area to monitor the automation as it runs. You can also print out the
trace, if required.
6.
Hold down the Shift key to select more than one task icon.
Note: You can rename any of the tasks in your automation. Click on the task name to
select it and type in the new name. (You can still see the original name of the task in
the Task Information area.) Similarly, you can use most of the Openlab Edit menu
commands, for example copy, paste and clear.
Saving automations
Once you have created an automation you can save it and open it as you would a
normal file.
If this is an automation that you are likely to run frequently, save it to the “Automator
Menu Items” folder. Any files that you save to this folder will appear as commands at
the end of the Automator menu when you restart Openlab. Select the appropriate
command in the menu to run the automation automatically. To actually open the
automation hold down the Option key when you select it.
Note: The “Automator Menu Items” folder is created for you automatically when you
install the Automator.
Working with links
You can move an icon without breaking existing links. The Automator re-arranges
the linked icons.
Click once on a link to select it. It is highlighted it in red.
Click on the Delete key to remove a highlighted link. You can also use backspace
or Clear from the Openlab Edit menu.
Double-click on a link to select the tasks at either end of the link.
Updated January 2001 281
OPENLAB
Triple-click on a link to select all tasks that are logically linked.
When you link from a Loop task, make sure that you create a loop link and an exit
link. The pointer changes to indicate which link you are creating.
Option-click here for link that enters loop
Option-click here for link that exits loop
Working with expressions
Most of the Setup dialogs contain expression boxes where you can type in an
expression, which may be built from a combination of literals (strings and numbers),
variables (full Automator only) and operators.
282 Openlab Version 3
Strings must be enclosed in quotation marks: "Hello"
Numbers on their own do not require additional syntax: 2
Operators may carry out simple, arithmetic tasks such as add, subtract, divide
(written as /) and multiply (written as *). They operate on the two elements each
side of the operator, for example 5*6.
The + operator can be used to add two numbers or to concatenate two strings.
If you want to concatenate a number onto text, you should first convert it to a
string: "Hello Number "+ str(2)+ "."
Functions are also operators - they operate on the next element which is enclosed
in brackets (), for example sin().
If an expression contains an error, you will get an error message in the Trace
message. Refer to the “Trace Messages” section for further details.
Refer to the “Operators for Automator Expressions” section for a complete listing
of all Openlab operators.
TASK SETUP DIALOGS
Task Setup Dialogs
Overview
Available tasks are displayed in the Task List. Standard task groups include:
Essential tasks, which provide the main process control functions for your
automation. These are the Start, End, If and Loop tasks. They are also described
in some detail in the Tutorial section of this document.
Extra tasks, which provide additional process control functions. There are several
of these tasks, including the Delay and Tell tasks that are also described in the
Tutorial section of this document. The Compact Memory task allows you to
optimise and maintain consistent system performance in your automation when
you are carrying out memory-intensive tasks.
Window tasks, which allow you to define the image window to which a task should
be applied.
Files tasks, which allow you to carry out standard File operations, such as Save.
Layer Selection tasks, which allow you to select Layers by name, type and index
position.
Layer tasks, which allow you to carry out various Layer operations.
IP Tasks, which allow you to merge and subtract layers.
Video tasks, which allow you to set up and control a video camera.
Density Calibration task, which allows you to apply a predefined calibration to the
current layer in the automation.
State Saver task, which allows you to restore a lab state that you have previously
saved.
User Notes task, which allows you to add to the notes that are saved with the
image document that is active at the time the notes task is run.
Filter tasks, which allow you to apply kernel and median filters.
Image Arithmetic tasks, which allow you to apply an arithmetic operation to all
pixels in the current layer.
Updated January 2001 283
OPENLAB
Binary Operations tasks, which allow you to apply a boolean operation to two
layers in the current document.
Linear Interpolation task, which allows you to apply a linear interpolation between
two layers in the current document.
You may have other task groups, if you have additional modules installed. For
example, if you have the Microscope module, you will have a series of tasks that
relate to the functions that are available on the Microscope Palette. These tasks are
described in the manual that accompanies the module.
This section describes the standard tasks and associated setup options. Double-click
on the icon once you have dragged it into the Automator Window to display its Setup
dialog.
Essential tasks
Start Task
The Start task marks the beginning of the automation. Every automation must have a
Start task. There is no Setup dialog.
284 Openlab Version 3
TASK SETUP DIALOGS
End Task
Every automation should have an End task. The End task allows you to mark the end
of an automation by displaying a message or by playing a sound.
■
The sound is the default system beep.
■
The message is an expression that will be displayed when the task completes
and the normal syntax rules apply.
■
If this automation is to be used as a sub-routine, you can also close the
automation. See page 297 for more information about sub-routines.
Check to play a sound
when automation
completes
Check and type in
message for display on
completion
Check to close
automation (used
mainly with subroutines
If Task
The If task requires variables. It requires the full Automator and is not described in this
manual.
Updated January 2001 285
OPENLAB
Loop Task
The Loop task allows you to repeat a sequence of tasks. You use the Setup dialog to
define how long you will wait for the loop to complete.
Type in how many
times you want the
automation to loop
Loop count requires
variables (not used
with Automator Lite)
Make sure that you click over the correct part of the icon to select the loop or the exit
link.
Option-click here for link that enters loop
Option-click here for link that exits loop
286 Openlab Version 3
TASK SETUP DIALOGS
The Loop task should be at the start of the loop, in front of the first task in the loop
task sequence. If it is not, tasks will execute once too often. The Automator allows you
to make two types of link from a Loop task: loop links and exit links. Loop links cause
the automation to repeat the tasks that form part of the loop: exit links define which
task it should execute when the loop is finished. You will find that Loop tasks tend to
form a distinctive pattern in the Automator Window, for example:
Updated January 2001 287
OPENLAB
Extra tasks
Variable Task
This task allows you to assign values to variables. It requires the full Automator and
is, therefore, not described in this manual.
Delay Task
This task allows you to set a time delay so that your automation waits before going on
to the next task. The Setup dialog allows you to specify the delay in seconds
(fractions are allowed). You can type in any sensible expression. You also specify
whether the delay is since the task started or last finished.
Type in the number
of seconds here
Select when the
delay is counted from
Requires variables (not
used with Automator Lite)
Click on OK to save
the setup
288 Openlab Version 3
TASK SETUP DIALOGS
Tell Task
The Tell task allows you to show a message in the trace or in an alert box. If you have
the Speech Manager installed on your Macintosh, you will also be able to set up the
Tell task to actually speak the message.
If the automation shows the message in an alert, you can check Use a nonmodal alert, which allows the user to carry out other tasks on the Macintosh
while the alert is displayed. For example, the user can work with the image in
the Document Window. This is useful if the alert includes an instruction to do
something. If you elect to put the message in an alert box, the automation will
pause until you click on OK or Continue. This is a standard Macintosh feature
with alerts.
If the automation speaks the message, you can make it pause and Wait until
finished speaking.
Type in message
expression
Displays messages in
trace window
Displays alert dialog
and waits for OK
Speaks message
(grayed-out if Speech
Manager not installed
Tell tasks are particularly useful when you create an automation, as they allow you to
include comments so that you can check easily whether the automation is running as
you expected.
Make sure that you apply the correct syntax to message expressions. Text must
always be within quotation marks. If you concatenate a number onto a string, you
must convert the number to a string. For example:
"This is number" +str(5)+ "." ⇒ This is number 5.
Updated January 2001 289
OPENLAB
Input Task
The Input task allows the user to enter something directly from the keyboard in
response to a question that appears on the screen. It requires the full Automator and
is not described in this manual.
Null Task
The Null task does nothing. You can use it to tidy up diagrams by putting “bends” in
the links.
Get Automator Time Task
This task requires variables. It is not described in this guide.
Reset Automator Time Task
This task resets the automator trace time to zero. It is normally used with the Get
Automator Time task.
Start Critical Section Task
This task marks the beginning of a critical section in your automation and allows you
to dedicate all computing resources to the current task. Normally, other activities will
occur, such as the Finder being refreshed. Use this task when you want to carry out
activities, which require maximum speed or where exact, regular timing of tasks is
required. Be aware, however, that certain activities still occur, for example Virtual
Memory and AppleTalk both slow the machine down. You can disable these if
required from the Apple Menu.
There is no setup dialog.
End Critical Section Task
This task marks the end of a critical section in your automation. There is no setup
dialog.
290 Openlab Version 3
TASK SETUP DIALOGS
Keywait Task
This task allows you to pause the automation until the user enters something on the
keyboard. Keyboard input may be any key or a key that you specify in the setup
dialog.
Click on the appropriate button. To select This Key: click on Set… and press the
appropriate key on the keyboard.
Select the appropriate
Wait until: key
To select a specific
key, click on Set…
and press the
required key on the
keyboard
Compact Memory Task
■
This task writes the current contents of RAM directly to the system cache. There
is no setup task.
The Compact Memory task allows you to optimize and maintain consistent system
performance in an automation when you are carrying out memory-intensive tasks,
such as capturing a series of images. The task essentially clears the RAM of all image
data by writing it to the hard disk cache. Your computer uses RAM, RandomAccessed Memory, to process and temporarily hold information. RAM is part of the
electronic circuitry – the chips on the computer’s main circuit board – so RAM
processing is fast, but it can only hold a certain amount of information.
One of the many benefits of Openlab is the disk cache system, which allows the user
to acquire image files larger than the available Random-Accessed Memory (RAM).
Updated January 2001 291
OPENLAB
Image capture is initially carried out to RAM. Therefore, the Openlab capture task
checks the RAM before acquisition to see if there is sufficient space to acquire the
images. If not, the capture task will initiate a cache operation to clear sufficient space
for the RAM. This operation writes the image data to an area on the hard disk. But,
whereas RAM processing is fast because you are not accessing the disk; writing to
disk is relatively slow.
The Compact Memory task allows the user to design an experiment which utilizes the
RAM to best effect whilst taking the hard disk time penalty at a convenient place in the
experiment.
If your experiment requires a consistent, level performance, use the Compact
Memory task to control when the computer writes the contents of the cache to the
hard disk. For example, if available RAM is 100 MB and you are capturing a
series of I MB images, you know that RAM will be full after the hundredth image
and the computer will need to write the contents of RAM to the hard disk cache. If
a level performance is critical, use the Compact Memory task to write the contents
of the cache to hard disk at regular intervals during the experiment, perhaps
every tenth image.
Similarly, if you are just about to start a part of the experiment where performance
is critical, use the Compact Memory task to empty RAM before you start that
stage.
The Compact Memory task is only available within an automation.
292 Openlab Version 3
TASK SETUP DIALOGS
Example Compact Memory Automation
In the following automation, we are capturing a series of fluorochrome images and, to
ensure a consistent performance, we use the compact memory task after every
hundredth image.
Setting up the automation
The automation is set up as follows:
The Target image window task targets the image window for the captured image.
Updated January 2001 293
OPENLAB
294 Openlab Version 3
The Loop task sets up the automation to capture the two fluorochrome images
100 times.
The first Restore Lab State task sets up the hardware for the first fluorochrome.
The Capture Layer task captures the first fluorochrome.
The second Restore Lab State task sets up the hardware for the second
fluorochrome.
The Capture Layer task captures the second fluorochrome.
The Compact Memory task writes the contents of RAM to the hard disk cache.
TASK SETUP DIALOGS
Window Targeting Tasks
Target Image Window Task
When you work on an image window manually, the window to which you apply the
action is always the active window. This is not necessarily the case in an automation.
The currently active window may not contain the image with which you want to work.
You use the Target Image Window task to tell the Automator which image window
you want the following tasks to use. You can also use it to create a new Image
Window. Automations that are to capture layers will not work without at least one
Target Image Window task at the start to tell the software where to put all its images.
Click to create a
new target window
Click and select an
image window from
pop-up menu
Click to select the
image window that is
top-most
Check to bring target
image window to front
when task executes
The Setup dialog allows you to specify whether a new image window should be
created or whether an existing image window should be used - either the top-most
one or a specific one that is already open on the desktop.
Check the Bring the target window to the front box, if you want the target image
window to be brought to the front when the task executes. For example, you may
want to watch each image as it is captured.
Once you have created a target image window, any task that changes an image
window works on the targeted window until you specify another one.
Updated January 2001 295
OPENLAB
File Tasks
Close Image Window Task
This task allows you to close the window that is currently targeted. There is no Setup
dialog.
Save Image Document Task
This task allows you to save the document that is currently targeted. The Setup dialog
allows you to define the file name for the document.
If you choose to use the current name, but none exists, the Automator will prompt you
for a file name at run time. You can also specify that the Automator should always
prompt you for a file name at run time.
You can use the With this name option to specify an exact name.
Click to save under
current name
Click and type in new
name
Click to select folder.
(Only available if With
this name selected.)
Click to prompt for new
name at run time
296 Openlab Version 3
TASK SETUP DIALOGS
Run Subroutine Task
This task allows you to select an automation that you have already created to run as
a subroutine within the current automation. For example, you may already have
created an automation to capture one brightfield image. You could then use this
automation as a subroutine within an automation to capture fluorescence images.
Subroutines should always be complete, free-standing automations that can be run
independently of other routines. They are not just building blocks within a larger
automation.
The setup task allows you to select an automation to run as a sub-routine. Click on
the Choose Automation… button and select the appropriate automation file from the
standard Macintosh File Open dialog.
Click here to select the
automation from the
Open Files dialog
Note: If the subroutine has been created with the full Automator, it may contain
variables. You will not be able to use variables with Automator Lite.
Updated January 2001 297
OPENLAB
Layer Selection Tasks
Select Layers by Type Task
This task allows you to select layers within a document according to layer type. Use
the pop-up menus to specify search criteria for the layer type.
Use the checkboxes to restrict the search to layers currently selected, or to all layers
within the document. These checkboxes allow you to set up multiple searches.
For example, you may want to select all General Image Layers which contain DAPI in
the layer name. You need to create and set up two layer selection tasks—Select
Layers by Type and Select Layers by Name. First create and set up the Select Layers
by Type task to select General Image Layers. Then create and set up the Select
Layers by Name task. You need to set up the task to select layers whose name
contains the text "DAPI" and check the Search only within current selection box.
When the automation runs, the first task will select all General Image Layers and the
second task will select DAPI layers from the original selection.
Select type criteria
from pop-up menus
Check appropriate
box
298 Openlab Version 3
TASK SETUP DIALOGS
Select All Layers Task
This task allows you to select all layers in the document. There is no setup task.
Select Layers by Index Position Task
This task allows you to select layers within a document according to index position.
For example you may want to select the last 3 layers in the document.
Use the pop-up menu to specify search criteria for the layer type and enter the index
position into the expression box.
Use the checkboxes to restrict the search to layers currently selected, or to all layers
within the document. These checkboxes allow you to set up multiple searches, but
you need to set up a separate task for each search. See page 298 for an example.
Select name criteria
from pop-up menu
and enter index
position in expression
box
Check appropriate
box
Updated January 2001 299
OPENLAB
Select Layers by Name Task
This task allows you to select layers within a document according to layer name.
Use the pop-up menu to specify search criteria for the layer type and enter the name
in the expression box.
Use the checkboxes to restrict the search to layers currently selected, or to all layers
within the document. These checkboxes allow you to set up multiple searches, but
you need to set up a separate task for each search. See page 298 for an example.
Select name criteria
from pop-up menu
and enter name in
expression box
Check appropriate
box
300 Openlab Version 3
TASK SETUP DIALOGS
Layer Tasks
Get Layer Info Task
This task allows you to get the layer information from the current layer and store the
information in a variable. It requires the full Automator and is not described in this
manual.
Set Layer Info Task
This task allows you to set the name for the current layer. The Setup dialog allows
you to select a name for the layer.
Check the
boxes to
select the
properties
for the layer
Enter an
expression or
use the popup menus to
define the
property
Delete Current Layer Task
This task allows you to delete the current layer. There is no Setup dialog.
Updated January 2001 301
OPENLAB
Set Layer User Data Task
This task allows you to create your own user data which will be stored with the current
layer. The Setup dialog allows you to enter two expressions: one which will create
the user data and one which will provide a name for the data that is created. The
name of the user data item is stored with the current layer.
Enter the expression
that will create the
user data item
Enter an expression to
create a name for the
user data item
Get Layer User Data Task
This task requires variables. It is not described in this guide.
Get No. of Layers Task
This task requires variables. It is not described in this guide.
302 Openlab Version 3
TASK SETUP DIALOGS
New Layer Task
This task allows you to create a new layer. You use the Setup dialog to select a name
for the new layer and to specify if you want the new layer to become the top-most
layer.
Enter an expression
to create a name for
the layer
Check if you want
Openlab to bring the
layer to the top
ROI To Binary Task
This task converts the current ROI of the targetted document into a new binary layer.
Use the Setup dialog to:
■
Enter an expression for the name of the new binary layer.
Enter an expression for the
name of the new binary layer
Updated January 2001 303
OPENLAB
Apply Wavelength LUT Task
This task applies a color table that corresponds to a particular wavelength to the
current layer of the targeted document. Use the Setup dialog to:
■
Enter an expression for the wavelength.
Enter a numerical value
for the wavelength
Apply Wavelength LUT (Selected) Task
This task applies a color table that corresponds to a particular wavelength to selected
layers of the targeted document. Use the Setup dialog to:
■
Enter an expression for the wavelength.
Enter a numerical value
for the wavelength
304 Openlab Version 3
TASK SETUP DIALOGS
View Layer Task
This task allows you to view a layer. The Setup dialog allows you to specify which
layer you want to view - the first, next or previous layer in the targetted image
document. You can also refine this selection by specifying a property for the layer.
Select the layer that
you want to view
Check the box if you want
to specify a property for
the view layer
Select the property from
the pop-up menu and
enter an expression for
that property
Updated January 2001 305
OPENLAB
Filter Tasks
Median Filter Task
This task allows you to apply a median filter to the current layer or an ROI on the
layer. Use the Setup dialog to:
■
Specify the Height of the matrix.
■
Specify the Width of the matrix.
■
Apply the filter to either the image or an ROI on it.
Enter an expression for the
number of rows in the matrix
Enter an expression for the
number of columns in the
matrix
Click to apply to the whole
image or to an ROI
Median Filter Selected Layers Task
This task allows you to apply a median filter to selected layers or ROI on the layers.
The Setup dialog is identical to the Median Filter task.
Enter an expression for
the number of rows in
the matrix
Enter an expression for
the number of columns in
the matrix
Click to apply to the
whole image or to an
ROI
306 Openlab Version 3
TASK SETUP DIALOGS
Kernel Filter Task
This task allows you to apply a kernel filter to the current layer or an ROI on the layer.
Use the Setup dialog to:
■
Select the required Filter.
■
Apply the filter to either the image or an ROI on it.
Select a filter from the
pop-up menu
Click to apply to the whole
image or to an ROI
Kernel Filter Selected Layers Task
This task allows you to apply a kernel filter to selected layers or ROI on the layers.
The Setup dialog is identical to the Median Filter task.
Select a filter from the
pop-up menu
Click to apply to the
whole image or to an
ROI
Updated January 2001 307
OPENLAB
IP Tasks
Subtract Images Task
This task allows you to apply background subtraction to a single layer. Use the Setup
dialog to specify:
An expression which identifies the background layer.
An expression which identifies the layer to which you want to apply background
subtraction.
Check one of the subtraction type buttons to apply Brightfield Subtraction or
Darkfield Subtraction.
Check one of the result boxes to put the subtracted image into The original
layer or into A new layer.
Identifies the
background layer
Identifies the layer to
which you want to apply
background subtraction
Check buttons to select
type of subtraction and
what to do with the result
If you create a new
layer, define how to
name it
308 Openlab Version 3
TASK SETUP DIALOGS
Subtract from Selected Images Task
This task allows you to apply background subtraction to selected layers. The Setup
dialog is very similar to the Subtract from Image task, but you do not need to specify
the layers to which you want to apply background selection. It will be applied to all
layers that are currently selected.
Identifies the
background layer
Check buttons to select
type of subtraction
Check buttons to select
what to do with result
Define how to name
layers
Updated January 2001 309
OPENLAB
Merge Images Task
This task allows you to select layers for merging during the automation. It creates a
new, merged layer. Use the Setup dialog to specify:
An expression which identifies the first layer for merging.
An expression which identifies the second layer for merging.
If you want to merge a third layer, check the box and enter an expression which
identifies the third layer.
The appropriate merge command. RGB Merge compares each color component
for each pixel in each layer and gives the brightest precedence. Averaging
averages each color component for each pixel in each layer Merge to
Composite also averages, but will first apply any opacity factor to the pixels.
An expression which will be used to name the new, merged layer.
Identify at least two layers
for merging
Check the box and select a
third layer for merging, if
required
Check one button to select
type of merge
Enter an expression for
naming the new, merged
layer
310 Openlab Version 3
TASK SETUP DIALOGS
Merge Selected Images Task
This task allows you to merge selected layers. The Setup dialog is similar to the
Merge Image task, but you do not need to specify the layers for merging. It will be
applied to all layers that are currently selected. (You cannot apply a composite
merge.)
Click one button
to identify type of
merge
Enter an expression to
name the new layer
Updated January 2001 311
OPENLAB
State Saver Tasks
Restore Lab State Task
This task allows you to restore a lab state that you have previously saved.
Select the name of the state from the pop-up menu or type its Function key into
the F key expression box.
If you want the appropriate Restore button in the State Saver palette to be
highlighted when the lab state is restored, click on the check box.
Note: The expression box below the pop-up menu allows you to include variables
with the state name. It is not described in this guide.
Select name of the
state from the pop-up
menu
Or type in its function
key
Check to highlight
Restore button on
palette
312 Openlab Version 3
TASK SETUP DIALOGS
User Notes Task
Write to User Notes Task
This task allows you to add user notes to the targeted document.
Type in the appropriate text.
If you are adding notes at several points in your automation, you may like to
make sure that there is a line between each block of text. To add a line at the end
of the text, make sure that the Append a new line as well box is checked.
Type in text
Check to insert a
blank line at the end
of the text block
Clipboard Tasks
The clipboard tasks support the subroutine feature. They allow you to copy variables
between automations. As the tasks require variables, they are not described in this
guide.
Updated January 2001 313
OPENLAB
Video Manager Tasks
Capture Layer Task
This task allows you to capture a layer frame. The Setup dialog allows you to specify:
An expression which will create a name for the captured layer.
Whether the captured layer should be brought to the top so that you can see it in
the Document Window.
Whether the screen is to be updated. Disable screen updates to make the
automation run more quickly.
Whether asynchronous captures are allowed. This allows Openlab to capture
frames at a higher speed, but the frame grabber and automation are not
synchronised. If you are using any piece of hardware that may affect the
illumination of the image, you may not want to enable asynchronous capture as
this may cause frames to be exposed incorrectly.
That layers are to be numbered automatically. A number is added sequentially to
the layer name. For example, if you are using a loop task to capture images and
want to name them IMAGE:1, IMAGE:2, and so on, you would type "IMAGE:" in
the expression box and check Automatically number layers.
A target layer depth. The default setting is the one that you have set up in the
Video Manager Setup dialog.
Enter an expression to
create a name for the
layer
Check to disable screen
updates
Check to bring new layer
to top
Check to enable
asynchronous captures
Check to number layers
automatically
Select layer depth
314 Openlab Version 3
TASK SETUP DIALOGS
Capture Multiple Layers Task
This task allows you to capture multiple video frames as layers. This is normally faster
than repeatedly capturing a single layer, as long as your camera supports this
function. For some cameras this may be a specific burst mode. The Setup dialog
allows you to specify:
An expression which defines how many layers will be captured.
A depth for the captured layers.
A name stub. This is used as the common name stem for all layers..
A start number for layer naming. Openlab adds a sequential number to the name
stem, ensuring that each layer has a unique name. You can define where the
numbering is to start.
Enter an expression
for the number of
layers to be captured
Select a layer depth
from the pop-up menu
Defines the common
stem to be used in
name for all layers
Define the start number
for layer naming
Get Video Control Task
This task requires variables. It requires the full Automator and is not described in this
manual.
Updated January 2001 315
OPENLAB
Set Video Control Task
This task allows you to assign a specific value to a video control during the
automation. Before you use this task, you must set up the video control on the Video
Control Palette. The Setup dialog allows you to specify:
The name of the video control. You must enter sufficient information to identify
the video control. It is not case sensitive and you can shorten the name, as long
as it is still uniquely identifiable (for example: "Exp", "expos" or "exp").
An expression which will assign a value to the video control. If the control is an
on-off checkbox, such as the Focus Mode video control, set the value to 1 for on
(checked) and 0 for off (unchecked).
Enter the name of
the video control
Enter an expression
to assign a value to
the control
316 Openlab Version 3
TASK SETUP DIALOGS
Synchronise Camera Task
This task allows you to pause the automation while the camera does something, or
until it has finished doing something. The Setup dialog allows you to specify:
Whether the automation is to wait while or until an action is completed.
An appropriate option to qualify the While/Until selection. For example, you
could set up the task so that the automation waits until the camera is idle.
Click on the While
or the Until button
Select one of the
options from the
pop-up menu
The While/Until options are:
The camera is idle
The camera exposes
The camera waits for
an external trigger
The computer reads
the image data from
the camera
Automatic Exposure Task
This task allows you to apply automatic exposure if your camera supports this feature.
The automator estimates the exposure value according to the gray levels detected.
There is no setup task.
Updated January 2001 317
OPENLAB
Example Video Manager Automations
The following example captures layers at two different exposures: 100 ms and 200
ms.
Setting up the automation
The automation is set up as follows:
318 Openlab Version 3
The Target image window task targets the top-most window.
The Loop task sets a value for the number of loops.
The Set 100ms exposure task sets the first exposure value.
The Capture Layer task captures the layer as “100 ms exposure” and
automatically numbers the layer.
TASK SETUP DIALOGS
The Set 200ms exposure task changes the exposure value.
The second Capture Layer task captures the layer as 200 ms exposure and
automatically numbers the layer.
Automator and High-Speed Capture
Some cameras may be quite slow to switch into the mode required to carry out highspeed capture, because the camera takes a little time to set itself up before it captures
the frames. You may like to incorporate the following routine into your automation to
resolve this problem. It captures a ‘dummy’ single frame from the camera. This sets
up the camera so that it is ready to capture a sequence of high-speed images ‘for
real’.
Updated January 2001 319
OPENLAB
Density Calibration
Density Calibration Task
This task allows you to apply a predefined calibration to the current layer in the
automation. Use the Setup dialog to:
■
Select the calibration from the pop-up menu. You can only select from predefined
calibrations. If you need to set up a new calibration for the automation, you must
first use the Density Calibration module.
Select the calibration
320 Openlab Version 3
TASK SETUP DIALOGS
Image Arithmetic
Image Arithmetic is an Automator task that that allows you to apply a simple
arithmetic operation to every pixel in the selected layer. For example, the subtract
operation can be used to subtract a fixed value from all images, thereby carrying out a
form of background subtraction.
Image Arithmetic Task
This task allows you to apply an arithmetic operation to all pixels in the current layer
in the automation. The operation overwrites the current layer, so if you need to save a
version of the image before the arithmetic operation is applied, include the Save
Image Document task in your automation before you apply this one. Use the Setup
dialog to:
■
Select the type of operation:
Add increases each pixel value by a specified number.
Subtract decreases each pixel value by a specified number.
Divide divides each pixel value by a specified number.
Multiply multiplies each pixel value by a specified number.
■
Enter an arithmetic value.
Enter arithmetic
value
Note: The recommended, empirical method is to use images of background and
background subtraction as described in Section 1 of this guide ("Working with the
Layer Manager").
Updated January 2001 321
OPENLAB
Example Image Arithmetic Automation
In the following automation, we are going to capture a number of images at 340 and
380 wavelengths and apply background subtraction. You could build on this
automation to include other tasks, such as ratioing or extracting measurements in the
loop sequence, but there would be additional work in setting up the automation, for
example to establish the ratio range and threshold values.
322 Openlab Version 3
The Target image window task targets the image window for the captured image.
The Loop task sets up the automation for the number of the slides that you intend
to capture.
The Set Wavelength task moves to the 340 wavelength. (We have used the
Polychrome II in this example.)
The Capture Layer task captures the image at the 340 wavelength.
The Image Arithmetic task subtracts a known value from all the pixels in the layer
(10 in our example).
TASK SETUP DIALOGS
The next Set Wavelength task moves to the 380 wavelength.
The Capture Layer task captures the image at the 380 wavelength.
The Image Arithmetic task subtracts a known value from all the pixels in the
layer.
The Tell task asks the user to mount the next slide.
Updated January 2001 323
OPENLAB
Binary Operation Tasks
Boolean Operations Task
This task allows you to apply a Boolean operation to two binary layers in the current
document. Use the Setup dialog to:
■
Enter an expression for the first layer.
■
Select the Boolean operation.
■
Enter an expression for the second layer.
■
Enter an expression for the new layer.
■
Check the Bring new layer to top box if you want the new layer to become the
current layer in the automation.
Enter expression to
select first layer
Select operation
Enter expression to
select second layer
Enter expression for
the new layer
Check to bring new
layer to top
Example Boolean Operation Automation
In the following automation, we are going to use the OR operator to count the nuclei
total for two different cell types on a number of slides. The cell types are stained
differently. If we apply a density slice to identify and select both intensities, the search
will be too wide and will include a lot of background.
Therefore, we need to narrow the search region by selecting the first cell line in a
density slice, and the second cell line in a second density slice. We can then apply the
324 Openlab Version 3
TASK SETUP DIALOGS
OR operator to combine the results of the two density slice operations before
capturing and extracting the measurements.
Setting up the automation
Before you start, you need to find out the values to enter in the two Density Slice
tasks. This is a manual task and not included in the automation. It involves the
following steps:
Capture a layer and draw an ROI that encompasses the first cell.
Density slice, grabbing from the ROI, and make a note of the values.
Now draw a second ROI that encompasses the second cell.
Density slice, grabbing from the ROI, and make a note of the values.
Updated January 2001 325
OPENLAB
The automation can now be set up as follows:
326 Openlab Version 3
The Target image window task targets the image window for the captured image.
The Clear measurements task clears any measurement values that may exist
from previous automations.
The Loop task sets up the loop for the number of slides that you intend to capture.
The Capture Layer task captures the layer.
The Density Slice task picks out the cells at the first intensity and creates a new
binary layer. Use the HSI values that you captured manually before you started the
automation.
The second Density Slice task picks out the cells at the second intensity and
creates a new binary layer. Use the second set of HSI values that you captured
manually before you started the automation.
The Boolean Operations task combines the two new binary layers by applying an
OR operator. This will pick up all pixels that appear in both binary layers, i.e. all
pixels at the two intensities, and creates a new layer.
The Capture One Measurement task captures a measurement from the new
layer.
The Extract Measurements task extracts the number of cells in the captured
measurement.
The Tell task displays the number of cells. We recommend that you put it in the
trace.
The Clear Measurement deletes the measurement.
The Tell task asks the user to mount the next slide.
The Input task prompts the user to enter ‘y’ when the slide has been mounted.
The If task makes the automation pause until the user enters ‘y’.
TASK SETUP DIALOGS
Linear Interpolation Task
Linear Interpolation Task
This task allows you to apply a linear interpolation between two layers in the current
document. Use the Setup dialog to enter three expressions:
■
The first specifies the number of layers that will be inserted between two existing
layers.
■
The second identifies the first layer.
■
The third identifies the second layer.
Enter expression for
number of layers to
be inserted
Enter expression to
select the first layer
Enter expression to
select the second
layer
Updated January 2001 327
OPENLAB
328 Openlab Version 3
AUTOMATOR MENU COMMANDS
Automator menu commands
Overview
There are five sets of Automator menu commands: the Automator menu in the Main
menu bar, and four menus in the Local menu bar of the Automator Window. Any
commands that you choose from the Local menus are only applied to the current
automation.
The Automator commands in the Main menu bar allow you to open a new
Automation Window so that you create a new automation. They also allow you to
run the automation and open specific tasks. Any automations that you save to the
“Automator Menu Items” folder will appear at the bottom of this menu.
The View commands in the Local menu bar allow you to collapse and expand task
groups in the Task List. They also allow you to display the Variables Window.
The Options commands in the Local menu bar relate mainly to the Work Area: for
example, they control whether gridlines and controls are displayed and whether
animation is enabled.
The Trace commands in the Local menu bar relate to the Trace Area. They allow
you to control the amount of trace information that is displayed and provide various
options for saving, copying, printing and clearing the Trace Area.
The Label commands in the Local menu bar allow you to add labels to your
Automation Window, and to edit the text style and foreground and background
colours.
Automator menu
Opens a new Automator Window
Runs the automation
Pauses the automation
Stops the automation
Steps through the tasks
Opens the Setup dialogue for the task
Updated January 2001 329
OPENLAB
There may be additional commands at the bottom of this menu. They are automations
that you have created and saved to the “Automator Menu Items” folder. When you
select one of these commands, Openlab opens the automation and executes it.
You can also:
Use the Control buttons in the Automator Window to run, pause, stop and step
through the automation.
Double-click on any of the task icons in the Automator Window to open the Setup
dialog for that task.
View menu commands
Collapses all task groups
Expands all task groups
Not used with Automator Lite
You can also:
Use Option-click to expand and collapse all task groups.
Note: The Variables Window is not described in this guide.
Options menu commands
Not available in the current version
Snaps task to the grid
Shows or hides gridlines
Shows or hides Control buttons
Disables or enables automation
Stops automation if errors occur
330 Openlab Version 3
Gridlines are useful for positioning icons tidily in your Automator diagram. If you
select Snap to Grid, they will be aligned to the grid.
The animation applies to the animation icon and the task highlighting that become
active during an automation. You can improve the speed at which the automation
runs by disabling the animation. However, you will not be able to see which task is
running.
AUTOMATOR MENU COMMANDS
Trace menu commands
Saves the trace to a file
Copies the trace to the clipboard
Prints the contents of the trace
Clears the contents of the trace
Defines what is included in the trace
Scrolls the trace area so that you always see
the most recent message
The three Trace commands define what level of information you want to include in
your trace. You can improve the speed at which the automation runs by disabling
these commands. However, they are very useful when you are creating your
automation. You may like to disable the trace once you have tested the
automation.
You can also improve the speed at which the automation runs by disabling the
Scroll to new messages command. This means that you will only see messages
from the start of the automation in the Trace Area, and will have to use the scroll
bar to scroll through the messages manually.
Use the Clear command to clear the contents of the Trace Area.
If you are experiencing problems with your automation, you may want to send a
copy of the contents of the Trace Area to Improvision’s Support staff. You can:
Print the contents of the Trace Area to the printer that is currently selected in
the Chooser. Select Print from the Openlab File menu.
Copy the contents to the clipboard where you can paste them into another
application.
Save the contents as a file.
Updated January 2001 331
OPENLAB
Select a folder, or create a new one if required.
Enter a name in the Save File As: box.
Click on Save.
Label menu commands
Creates a new label in the Automation Window
Standard text edit commands
Color commands
332 Openlab Version 3
When you create a new label, you can type text directly into it, as long as
the box is selected. Click on the box to select it. You can resize and move it,
as required.
Use the Font, Size and Style commands to achieve the desired
appearance of the text.
Use the Foreground Colour command to select a colour for the text and
the outline of the label. Use the Background Colour command to select a
colour for the background.
OPERATORS FOR AUTOMATOR EXPRESSIONS
Operators for Automator Expressions
Number operators
x+y
Adds y to x. y is converted to a number if necessary.
Example:
x-y
Subtracts y from x. y is converted to a number if necessary.
Example:
x*y
10^5 ⇒ 100000
Evaluates to the sine of x. The parameter (x) is interpreted as an angle in radians.
Example:
cos(x)
10/5 ⇒ 2
Evaluates to xy.
Example:
sin(x)
10*5 ⇒ 50
Divides x by y. y is converted to a number if necessary.
Example:
x^y
10-5 ⇒ 5
Multiplies x by y. y is converted to a number if necessary.
Example:
x/y
10+5 ⇒ 15
sin(1) ⇒ 0.84147
Evaluates to the cosine of x. The parameter (x) is interpreted as an angle in radians.
Example:
cos(1) ⇒ 0.5403
Updated January 2001 333
OPENLAB
tan(x)
Evaluates to the tangent of x. The parameter (x) is interpreted as an angle in radians.
Example:
asin(x)
Evaluates to the arcsine of x.
Example:
acos(x)
deg(1) ⇒ 57.2958
Converts x from degrees to radians.
Example:
sqrt(x)
atan(1.55741) ⇒ 1
Converts x from radians to degrees.
Example:
rad(x)
acos(0.5403) ⇒ 1
Evaluates to the arctangent of x.
Example:
deg(x)
asin(0.84147) ⇒ 1
Evaluates to the arccos of x.
Example:
atan(x)
tan(1) ⇒ 1.55741
rad(30) ⇒ 0.5236
Evaluates to the square root of x. If x is a negative number, this operator returns a
special marker, which is written as 'NAN'. This indicates that the result is not a
number.
Example:
sqrt(100) ⇒ 10
sqrt(-5) ⇒ NAN
ceil(x)
Returns x rounded up to the nearest whole number.
Example:
floor(x)
Returns x rounded down to the nearest whole number.
Example:
334 Openlab Version 3
ceil(5.6) ⇒ 6
floor(5.6) ⇒ 5
OPERATORS FOR AUTOMATOR EXPRESSIONS
exp(x)
Returns ex.
Example:
abs(x)
exp(1) ⇒ 2.718282
Returns the absolute positive value of x.
Example:
abs(4.5) ⇒ 4.5
abs(-3.5) ⇒ 3.5
log(x)
Returns the natural logarithm of x.
Example:
log10(x)
Returns the base 10 logarithm of x.
Example:
tanh(x)
rand(x)
log10(100) ⇒ 2
Returns the hyperbolic tangent of x.
Example:
str(x)
log(100) ⇒ 4.60517
tanh(1) ⇒ 0.76159
Converts x to string form. Use this operator when you want to make sure that a
number variable is treated as a string.
Example 1:
str(20) ⇒ "20"
Example 2:
To concatenate a number to the end of a string
x=5
"Hello"+str(x) ⇒ "Hello5"
Returns a random number between 0 and x. The result is not necessarily a whole
number.
Example:
rand(10) ⇒ 5.75
Updated January 2001 335
OPENLAB
String operators
x+y
Concatenates y to x. y is converted to a string form if necessary.
Example:
x = "image"
y = "10"
x+y ⇒ "Image10"
upper(x)
Converts x to upper case.
Example:
lower(x)
Converts x to lower case.
Example:
336 Openlab Version 3
upper("shout") ⇒ "SHOUT"
lower("WHISPER") ⇒ "whisper"
QUESTIONS AND ANSWERS
Questions and Answers
This section contains some of the questions we are asked most frequently, and our
answers.
Q
I’ve just opened an automation that someone else created, but some of the
tasks have red crosses through them and it doesn’t seem to do anything.
A
Many of the tasks that the Automator provides require other Openlab modules to
make them work. A red cross through a task icon indicates that the module
required for that task to work is not loaded. Try double-clicking on the offending
task to get more information about which module is required.
Q
I’ve just tried to run an automation that used to work, but now I get lots of
error messages from my external equipment.
A
Automations often depend upon the configuration of other parts of Openlab or of
external equipment such as microscopes and filter wheels. You must make sure
that everything is configured properly before you try and run your automation.
Q
My automation seems to run for a while but then just stops. The Run button
is still down, but nothing is happening.
A
Every task (apart from End tasks) must have an outbound link to at least one
other task. If this link is not present, it can cause the automation to stop without an
error message. Badly connected tasks are indicated by having a “broken” icon.
When using Loop tasks, it is also important to ensure that there are both True and
False (or Loop and End-Loop) outbound links.
Updated January 2001 337
OPENLAB
Q
How can I make my automation run faster?
A
There are several things you can do to significantly improve the performance of
your automation:
338 Openlab Version 3
■
Don’t scroll to new messages in the trace.
■
Turn off tracing of tasks starting.
■
Disable animation in the “Options” menu.
TRACE MESSAGES
Trace Messages
This section lists the messages that the Automator itself can put in the trace.
Additional modules may add their own messages.
In general, important informational messages will be shown in the Trace in bold,
normal informational messages will be in normal text, warnings will be in italics and
errors will be in bold italics.
General messages
Automation started running at <time> on <date>
Indicates when the Automator started running. This message is for information only.
Automation stopped running at <time> on <date>
Indicates when the Automator stopped running. This message is for information only.
Automation paused
Indicates that the Automator is paused. This message is for information only.
Executing task “<task name>“
Indicates that the Automator is executing a task called <task name>. This message is
for information only.
The trace buffer is full. No more messages will be logged.
The trace buffer becomes full after about 10,000 messages. This is the last message
you will see. To clear the trace buffer, select Clear from the Trace menu.
Note: You may wish to clear the trace periodically to save memory.
Updated January 2001 339
OPENLAB
The automation could not run because it has no start task.
Every automation requires a start task. You will see this error message if you do not
have a start task in your automation.
The automation could not run because it has no tasks.
An automation must have some tasks for it to be run.
Evaluation of the expression “<expression>” failed because the variable
“<variable>” was not found.
You are running an automation or sub-routine that uses variables. Automator Lite
does not support variables.
The expression “<expression>” has unmatched brackets.
Every open bracket “(“ in an expression must be matched by a close bracket “)”.
Brackets can be nested, if necessary.
The expression “<expression>” contains a syntax error.
The expression contains an error in its syntax. Expressions must make mathematical
sense in that each operator must have the right number of operands and brackets and
quotes must match.
The operator “<operator>” in “<expression>” is either invalid or is not
appropriate for the type of its operands.
Operators must match the type of their operands. For instance, it is not possible to
subtract two strings or to convert a number to upper case using the upper() function.
An internal error was encountered when processing the expression
“<expression>”.
A fault was encountered while parsing <expression>. This message can be caused by
severe syntactical errors in the expression.
340 Openlab Version 3
TRACE MESSAGES
Evaluation of the expression “<expression>” failed because the variable
“<variable>” was not found. The expression will be treated as a literal string.
You may see this warning message if you type a message into a Tell task without
putting quote marks around the message. The Automator will try and use the
expression as if it did have quote marks around it.
This task requires a target window but none has been specified. To specify a
target window, use a Target task.
You have tried to execute a task that alters an image document without executing a
Target image window task first. Place a Target image window task in your
automation.
The task “<task name>” does not have any tasks leading to it and will never
execute.
You will see this warning message if you have a task that has no inbound links. Tasks
that have no inbound links will never execute (unless they are Start tasks).
The task “<task name>” does not have any outbound links to other tasks.
You will see this warning message if you have a task that has no outbound links. All
tasks (except End tasks) must have outbound links or the automation will stop
unexpectedly at that task.
Updated January 2001 341
OPENLAB
This automation does not appear to end with an End task. Automations that
have no End task will never finish executing.
The Automator could not find an End task in your automation. It is permissible to have
an automation that has no End task, but the automation will never finish executing
until you stop it by using the Stop button or by selecting Stop from the Automator
menu.
Task-specific messages
The target window “<window name>” was not found.
The Target image window task may trace this error message if the window specified in
the setup for that task no longer exists.
The target window could not be created because there is not enough memory
available.
The Target image window task may trace this error message if it could not create a
new window because there was insufficient memory available.
The target window could not be created because of an error
The Target image window task may trace this error message if it could not create a
new window.
The delay time is not a number - it may be infinite or complex. Delay times
must be normal numbers.
The Delay task may trace this error if the delay evaluates to a value that is not a
number.
The specified file name or path is invalid
The Save task may trace this error if you specify an invalid filename or if the folder you
selected no longer exists.
342 Openlab Version 3
Appendices
Macintosh Basics
Principles of CCD Theory
Image Formats in Memory
OPENLAB
344 Openlab Version 3
MACINTOSH BASICS
Macintosh Basics
Overview
Read this chapter if this is the first time you have worked with the Macintosh. It
provides an overview of Mac features and terminology. Refer to your Macintosh
documentation or to the Macintosh on-line tutorial for more comprehensive
information.
This chapter provides information on:
Turning your computer on and off.
The desktop/finder.
The mouse.
Folders.
The wastebasket.
Selecting a printer.
Updated January 2001 345
OPENLAB
Turning the Mac On and Off
The way you power the Mac on/off varies from one model to another. The way you
shut down the Mac is the same for all models. You should always shut down before
you power off.
Power on/off
The on/off switch may be on the front or the back of the computer or you may have
a Power On key on your keyboard.
There may also be a separate on/off switch on your monitor.
Shut Down
1.
Point to the Special menu name in the menu bar.
2.
Press and hold down the mouse button.
3.
Drag through the items in the menu until the Shut Down command is highlighted,
then release the mouse button.
Note: If you have a floppy disk in the disk drive, it will be ejected automatically.
4.
Switch off the power to the computer (and monitor) if you see the message on the
screen indicating that it is safe to do so. Many Macs shut off the power supply
automatically.
The Desktop
The Desktop is what you see on the screen when you first switch on the computer. It
is also known as the Finder.
The Desktop has desk accessories, such as a calculator, alarm clock and notepad.
You will find these under the Apple menu. The Desktop also has a filing cabinet, the
hard disk, to store all your file folders, and a wastebasket so that you can throw away
unwanted files. You can look at the contents of your hard disk or the wastebasket by
double-clicking on their icons.
346 Openlab Version 3
MACINTOSH BASICS
Whenever you quit from an application, Mac automatically takes you back to the
Desktop. If you are not sure whether you are on the Desktop, click on the icon in the
top right-hand corner to see where you are.
Folders
Macintosh uses folders to store your files. You can create as many folders as you
need and you can put folders inside of other folders.
To create a new folder
1.
Hold on File from the Menu Commands at the top left hand side of your screen, and
drag your mouse to the New Folder command. When you release your mouse
button, there will be a new Folder icon on your desk top, it will be named "untitled
folder".
Note: You can also use a short-cut combination of keys to create a new folder. Press
down the and N keys simultaneously to create a new untitled folder.
2.
Click on the folder name to select it and use the computer keyboard to type in an
appropriate name.
3.
Either press [Return] or click somewhere else on the screen. The folder now has a
name.
Note: You can edit the folder name at any time. Just repeat steps (2) and (3).
Once you have created a folder, you can move it around and place it within another
folder simply by holding and dragging the folder icon to the required location.
The Mouse
The mouse controls the movement of the pointer across the screen. You point to an
object on the screen by moving the mouse so that the pointer is positioned on that
object. You may then use the mouse in several ways, as described in the following
table.
Updated January 2001 347
OPENLAB
Single Click: A single click is a quick, light touch on the button of the mouse. It allows
you to select an icon (the icon becomes darkened), or place an insertion point, for
example in text.
Double-click: A double-click must be quick and the mouse must be still, or it will be
interpreted as two single clicks. A double-click may be used to open a file or folder, or
to select a whole word for editing.
Hold: Simply point to something and hold the button down. Use hold on a menu
command to see the commands under that menu, or press on the arrows in a scroll
bar to scroll through the window.
Hold-and-drag: Point to the object or area of your choice, hold/press the mouse
button down, and drag across or down, letting go when you reach your goal. You use
hold-and-drag to choose a menu command, to drag icons across the screen or to
select text.
The Wastebasket
The Wastebasket has two functions. It allows you to ‘throw away’ folders/files and it
allows you to eject floppy disks. Hold-and-drag the appropriate icon over the
Wastebasket, letting go when the Wastebasket icon is darkened.
Note: The Wastebasket may also be called Trash.
Floppy disks
The floppy disk is ejected from the disk drive and the disk’s icon disappears from the
desktop. This process does not do anything to the files on the disk, it just releases the
floppy disk so that you can remove it from the computer.
Note: Although there are other ways of removing a floppy disk, this is the
recommended procedure.
Folders/files
The files are placed in the Wastebasket. You can still retrieve them by double clicking
on the Wastebasket icon and dragging them back. If you want to delete them, select
Empty Wastebasket... from the Special menu.
348 Openlab Version 3
MACINTOSH BASICS
Selecting a Printer
If this is the first time that you are about to print, you will need to let your Mac know
which printer you want to use.
1.
Make sure that the printer is switched on.
2.
Select Chooser from the Apple menu.
Different types
of printer
Printer name
3.
Click on the icon in the left-hand window to select the appropriate driver for your
printer. The printer name should appear in the right-hand window.
4.
Click once on the printer name to select it and close the Chooser window.
The Mac will remember this setting and you will only need to repeat this exercise if
you disconnect your printer or if you want to select a different printer.
Printing
Once you have told the Mac which printer to use, you can use the Print command
from Openlab’s File menu to print the contents of the active window, for example an
image, or the Session Log.
Updated January 2001 349
OPENLAB
Page setup
Once you start to work with applications, you may also need to make sure that the
Page Setup is appropriate. You should check this after installation and set it up for the
Openlab software.
1.
Select Page Setup from the Openlab File menu. The dialog varies depending upon
your printer and the features that it supports. The following example is for a
LaserWriter 8 printer.
2.
Make sure that the Paper Size is correct for your printer. You may still be able to print
with the wrong paper size, but your formatting may not be correct.
3.
Select other options, as appropriate and click on OK.
350 Openlab Version 3
PRINCIPLES OF CCD THEORY
Principles of CCD Theory
What are CCDs?
A Charge-Coupled Device (CCD) can be thought of as a two-dimensional array of
light-sensitive detectors, called pixels. Each pixel is connected to its own charge
storage ‘well’. When a CCD is struck by light, each pixel accumulates a charge
according to the amount of light that falls on it and stores the charge in its associated
‘well’.
This charge is then read and digitised so that the information can be transferred to the
computer. The computer interprets the digital information and represents the pixels
accordingly on the image display.
In the following simplified illustration of a CCD array, the individual cells are the pixels,
the shallow containers represent the wells, and the amount of charge is indicated by
the number of dots. As you can see, the amount of charge varies for individual pixels,
and some pixels accumulate no charge at all, because no light falls upon them.
CCD array (4 x 4 pixels)
CCD Array: A simplified interpretation
Once accumulation has finished, the charges are moved, row by row, into a separate
output array, or readout area, which is protected from further exposure to light.
Updated January 2001 351
OPENLAB
Readout array
Digitising node
CCD array
CCD array: Preparing for readout
From this readout area, individual pixels will be moved, one-by-one, into the digitising
area (a single cell or node) where each will be converted in turn into digital format so
that the information can be transferred to the computer in a format that it can interpret.
Readout array
Digitising node
CCD array
CCD array: Digitising the pixel
Note that the pixels move up in series. In the previous diagram, the left-hand cell of
the readout array is empty. Only after all the pixels in the readout array have been
352 Openlab Version 3
PRINCIPLES OF CCD THEORY
digitised, and it is again completely empty, do the next row of pixels in the CCD array
move up into the readout array.
Image Readout with Binning
With some digital cameras, it is possible to combine the charges in adjacent pixels so
that they form a single pixel (sometimes called a super-pixel). This process is known
as binning. It reduces readout time and increases sensitivity at the expense of
resolution. You need to experiment to establish whether the results meet your
requirements. Some users have found that binning can increase the dynamic range of
the image and improve its contrast, which may be of benefit to later operations such
as deconvolution.
In theory, rectangular groups of pixels of any size may be binned together, but in
practice, you are usually limited to a number of pre-determined options. For example;
many cameras support 2x2 binning, the Hamamatsu high-speed cameras support a
number of options up to 32x32, and the Xillix MicroImager PMI camera allows you to
specify each dimension independently (up to a maximum of 16x16) so that you can
also change the aspect ratio. Refer to individual chapters for more information about
specific cameras.
In the following example, we are using 2x2 binning. The charges from the top two
rows of the CCD array are emptied into the readout array together, so that their
charges are combined.
Readout array
Digitising node
CCD array
CCD array: Preparing for readout with 2x2 binning
Updated January 2001 353
OPENLAB
From the readout array, the first two super-pixels are moved into the digitising area or
node together, so that their charges are combined before being digitised.
Readout array
Digitising Node
CCD array
CCD array: Preparing for readout with 2x2 binning
Blooming
Sometimes, individual pixels can accumulate too much charge which then overflows
into neighbouring pixels. This can result in an effect known as ‘blooming’, where a
bright object in the middle of the image seems to flare over all other objects in the
image.
If this happens you need to reduce the amount of light that falls onto the CCD:
By reducing the exposure time
By disabling or reducing the binning factor.
Exposure
CCD arrays like film and other media are always sensitive to light, therefore they must
not be exposed to light during read-out. For most cameras, exposure to light is
controlled electronically or by a mechanical shutter. The shutter ensures that no light
falls on the CCD array as the charges are transferred to the read-out array.
Some cameras may allow you keep the shutter open, so that exposure continues
while the charges are being transferred to the read-out array. However, this may
result in smearing, where bright objects leave a trail across the image. This effect can
354 Openlab Version 3
PRINCIPLES OF CCD THEORY
be reduced to some extent by making sure that the exposure time is longer than the
readout time.
CCD Cooling
Over time, there will be a thermally induced build up of charge in the CCD. This is
known as dark charge and may bring with it an undesirable noise component. One
way of checking for dark noise is to close the shutter and expose for a long period.
You will see speckles on the preview image. Cooling the CCD eliminates virtually all
the signals generated by thermal energy. With some cameras, you may be able to
control the temperature of cooling.
Dark charge and background images
Although the dark charge looks like noise, it is always constant for a given CCD at a
given exposure. This means that, if you are acquiring an image using a long exposure
time, you can acquire and save a dark charge “background image” and subtract it
from the captured image.
Further Information
This is only a very brief introduction to the principles of CCD. The best place for
further information is often:
Your camera manual
The application notes for your camera, if the manufacturer provides them.
Bibliography
Other recommended sources of reading are:
Inou Shinya, Video Microscopy, Plenum Press, New York.
Shotton David (editor), Electronic Light Microscopy: the principles and practice of
video-enhanced contrast, digital intensified fluorescence and confocal scanning light
microscopy, Wiley-Liss, New York.
The Photonics Design and Applications Handbook, Laurin Publishing, Pittsfield, MA.
Updated January 2001 355
OPENLAB
356 Openlab Version 3
IMAGE FORMATS IN MEMORY
Image Formats in Memory
Overview
Openlab is able to work with a wide variety of image formats, for example 8, 10, 12,
14, 16 bit grayscale images and 16, 24 bit color images. The objective of this chapter
is to explain all of the supported formats so that measurements, on-screen colors and
gray values etc. can be understood and interpreted in the most meaningful way.
“Classic” image formats
Openlab bases all of its “classic” imaging structures on standard Macintosh
QuickDraw structures. These are:
1-bit images. This stores an image in 1 bit per pixel, and can have two states.
This format is used for binary images. Usually the image will be black (the bit is
ON) or white (the bit is OFF), but the ON state can be assigned a different color in
Openlab if desired.
2-bit images. “Four Grays” setting. This format is supported but has little use in
Openlab. 0 is white, 3 is black.
4-bit images. These can be grayscale or color. They are useful for annotation
where some color is desirable but memory requirements need to be kept to a
minimum. With 4-bit grayscale, 0 is white and 15 is black, with the other grays
distributed linearly between the two. The same convention applies to color, but the
intermediate colors are determined by a system-provided color palette.
8-bit images. These can be grayscale or color. Each pixel is stored in 1 byte. 0 is
white, and 255 is black for both grayscale and color images. For grayscale, the
other gray values are distributed evenly over the range. For color, the system
provides a standard look-up table. Custom look-up tables can also be attached to
these images, but it should be noted that the convention of 0 = white, 255 = black
is normally applicable. Note that this is the inverse of what is typically encountered
in other imaging packages. (Some custom color look-up tables may reassign black
and white, but this is beyond the scope of this discussion).
16-bit color. This format provides 5 bits per rgb color component, leaving one bit
per pixel unused. Thus this is properly a 15-bit color format. In this format, r = g =
Updated January 2001 357
OPENLAB
b = 0 is black, and r = g = b = 31 is white. This format can display 32,768 different
colors, but since for grayscale images r = g = b, only 32 different true gray levels
exist.
32-bit color. This format provides 8 bits per rgb color component, leaving 1 byte
per pixel unused. This format is sometimes referred to as 24-bit color for this
reason, but it should be understood to be the same thing. In this format, r = g = b =
0 is black, and r = g = b = 255 is white. This format can display 16,777,216
different colors, and 256 different shades of true gray.
“Deep Gray” image formats
Openlab supports images with more than 8 bits of grayscale data. Specifically, 9, 10,
11, 12, 13, 14 and 16 bit grayscale. 15-bit grayscale is not supported for technical
reasons. All of these formats assign two bytes per pixel, and adopt the convention that
0 = black and all 1’s = white.
The available gray levels for the bit depths are:
9-bit grayscale
512 levels
10-bit grayscale
1,024 levels
11-bit grayscale
2,048 levels
12-bit grayscale
4,096 levels
13-bit grayscale
8,192 levels
14-bit grayscale
16,384 levels
16-bit grayscale
65,536 levels
It should be understood that computer hardware is incapable of displaying greater
than 8-bit grayscale data on the monitor, and in any case the human eye has difficulty
distinguishing more than 8 to 10 bits of grayscale data. In order to display such
images, Openlab uses a special look-up table to create an 8-bit version of the image,
which is built by selecting ranges of bits from the source data. By default, this shows
the full range of values. You can use contrast enhancement to adjust the range that is
displayed (see Chapter 6, “Working with Colors”).
Openlab permits the use of false-color look-up tables on deep grayscale images, but it
should be understood that this look-up table is actually applied only to the 8-bit
representation of the underlying deep grayscale data, and will have no effect on
measurements, etc. made on such images.
As deep gray images are non-standard formats not supported by either Macintosh or
PC graphics conventions special processing is required to deal effectively with these
images. You should note that some standard Macintosh routines will not function with
deep gray data.
358 Openlab v.3
INDEX
Index
automator window
A
alias
creating, 11
modules, 16
what it is, 11
animation
icon, 255
Calibration command, 87
calibration tools, 23
B
capture layer task, 298
capture multiple layers task
annotation layer, 42
creating, 48
apple menu
About commands, 168
background subtraction, 42
apply wavelength LUT task
drag and drop, 53
from Layers menu, 54
apply wavelength LUT, 288
Arrange command, 29
automation
delay task, 256
hints and tips, 321
improving speed of, 322
links, 265
loop sequence, 258
making image window active,
279
opening, 254
pausing, 249
running, 249, 255
saving, 254
stepping through, 249
stopping, 249
troubleshooting, 321
automator
local menus, 249
what it is, 246
automator menu items, 265, 313
show/hide, 28
control buttons, 248
description of, 248, 264
local menus, 248
task information area, 248
task list, 248
trace area, 248
while running, 255
work area, 248
balloon help
description of, 4
shortcut key, 4, 130
binary layer, 42
creating, 48, 83
binning, 337
BioVision files, 35
blooming, 338
Boolean operations, 219
boolean operations task, 308
brightfield layer, 42, 53
brush tool, 105
freehand, 86
point counter, 86
straight line, 86
vernier, 86
capture layer task
description of, 298
setup, 298
description of, 299
setup, 299
capture multiple layers task, 299
CCD arrays, 335
binning, 337
blooming, 338
cooling, 339
exposure, 338
CCD cooling, 339
chooser, 333
clear
trace area, 315
close image window task
setup, 280, 281
close image window task
description of, 280, 281
C
cacheing, 2
calibration bar
preferences, 128
calibration bar
Colour Balance command, 73
colour channels
adjusting, 73
applying, 42
colour images
monitor settings for, 30
description of, 24
Updated January 2001 359
OPENLAB
colour tables
applying from Colour Table
dialogue, 65
applying from document window,
64
opening, 68
saving, 68
colour tables tool, 23
how to use, 64
compact memory task, 313
complement command, 82
connect
video camera, 139
contrast enhancement, 70
control buttons, 249
copy
layers, 50
trace area, 315
create
document, 32
layers, 48
link, 253
montage, 117
new folder, 331
presentation, 124
ROI, 80
stamp, 111
crop
grabber tool, 22
layer to ROI, 84
resized document, 33
Crop
import file as layer, 48
open ROI, 84
crop layer command, 84
custom tables, 64
customer support
web address, 4
D
delay task
description of, 272
setup, 256, 272
delete
files, 332
layers, 51
links, 257, 265
delete current layer info task, 285
delete current layer task
description of, 285
setup, 285
depth command, 62
desktop
getting back to, 331
what it contains, 330
docking, 26
Document Size command, 33
document toolbar
preferences, 128
document toolbar, 20
calibration tool, 23
colour tables tool, 23, 64
grabber tool, 22
layer tool, 24
magnification tool, 22
next layer, 24
previous layer, 24
ROI tools, 21, 78
document window
applying colour table, 64
arranging, 29
description of, 20
preferences, 128
documents
creating, 32
default size, 34
opening, 35
resizing, 33
saving, 37
dongle
not found, 19
darkfield layer, 42, 53
360 Openlab v.3
draw
paint tools, 104–14
Duplicate Layer command, 50
E
edit menu
commands in, 165
ejecting floppy disks, 332
elliptical ROI tool, 79
elliptical shapes, 112, 113
end critical section
description of, 274, 275
setup, 274, 275
end task
description of, 269
setup, 269
eraser tool, 106
expand command, 82
expander icon, 136
exposure, 338
expression box, 252
expressions
constructing, 261
description of, 261
literals, 261, 266
operators in, 261
syntax, 261, 266
variables in, 261
eye icon, 44
eyedropper tool, 108
F
file formats
opening documents, 40
reading documents, 40
saving documents, 38
file menu
commands in, 164
files
deleting, 332
saving, 37
INDEX
fill
gradient, 107
pattern, 107
ROIs, 107
Fill command, 107
filters
creating kernel, 216
kernel, 213
kernel filter window, 215
median, 217
folder preferences, 133
folder structure
modules, 16
Openlab, 10
freehand calibration tool, 86
freehand ROI tool, 78
G
general image layer, 42
creating, 48
general preferences, 130
grabber tool
image arithmetic task, 305
image data
ensuring quality of, 28
Image Document
calibration bar, 128
document toolbar, 128
rulers, 128
Image Document
document size, 128
image formats
deep grey, 342
in memory, 341
image window
bring target to front, 279
closing, 280, 281
making active in automation, 279
improving performance, 322
installation
new modules, 13, 14
software, 8
ionVision files, 35
irregular polygons, 112, 113
completing, 113, 114
how to use, 22
gradient fill, 107
greyscale images
deep grey in memory, 342
monitor settings for, 30
H
hints and tips, 321
HSI Colourspy palette, 75
K
kernel filter task, 291
iconise. (see minimise)
If task
expressions in, 269
icon, 269
links, 265, 269
multiple Ifs, 269
setup, 269
layers menu
commands in, 167
LIFF format
L
label menu
description of, 316
how to use, 316
lasso tool
I
balancing colour of, 73
binary, 42
brightfield, 42
colour channels, 42
copying, 50
creating, 48
creating overlay layers, 55
current layer, 44
darkfield, 42
deleting, 26, 51
displaying available, 24
displaying next, 24
displaying previous, 24
general image, 42
icons, 45
importing from desktop, 48
locking, 49
luminosity, 42
merging, 55
more than 32, 24
naming, 48
properties of, 42
searching for, 52
selecting, 51
types of, 42
shades tolerance, 78
Layer Manager palette, 44
using, 47
layer operations menu, 49
layer tool
how to use, 24
layers
applying tints, 55
and spatial calibration, 88
benefits of, 40
saving as, 38
line measurements
description of, 91
line tool, 108
linking tasks, 253
links
creating, 253
deleting, 257, 265
enter loop, 258
exit loop, 258
If task, 265, 269
loop task, 265, 270
Updated January 2001 361
OPENLAB
moving, 265
outbound, 321
selecting, 265
literals, 261, 266
local menus, 249
label menu, 316
options menu, 314
trace menu, 315
view menu, 314
loop icon, 258
loop task
description of, 270
icon, 258, 270
links, 258, 265, 270
pattern formed by, 272
setup, 259, 270
loopcount, 270
loopcount variable, 261
loopsequence
simple, 258
luminosity layer, 42
M
measurement overlays
changing appearance of, 98
measurements
copying, 101
deleting, 97
exporting, 100
overlays, 98
preferences, 93
recording, 95
sorting, 97
types of, 91
measurements window
adjusting, 96
description of, 90
median filter task, 290, 291, 293,
295
menus
local, 249
desktop, 330
files and folders, 331
mouse, 331
power on/off, 330
printing, 333
shutdown, 330
wastebasket, 332
magic wand tool
shades tolerance, 79
magnification tool
how to use, 22
make binary layer command, 83
measure
freehand lines, 86
horizontal lines, 86
points, 86
straight lines, 86
362 Openlab v.3
multiple Ifs
and, 269
or, 269
N
NAN message, 262, 318
new layer task
description of, 287
setup, 287
new layer task, 287
null task
description of, 274
setup, 274
O
merge images task
description of, 294
setup, 294
merge images task, 294
Merge RGB Planes
command, 55
Mac basics
file formats, 36
opening, 35
messages
NAN, 262, 318
trace, 248
monitor
recommended, 6
monitor settings
changing, 30
colour images, 30
greyscale images, 30
montage
creating, 117
editing, 119
number of tiles, 120
titles, 119
Montage window, 116
mouse
how to use, 332
multiple files
on-line help
balloon, 4
open
automation, 254
custom tables, 68
files, 35
ROI, 84
Open command, 35
Open Multiple command, 35, 36
Openlab
architecture, 2
folder structure, 10, 16
personalising, 18
quitting, 28
running, 18
system requirements, 6
what it is, 2
Openlab core
description of, 2
installing, 8
upgrading, 13
Openlab modules
alias, 16
INDEX
applications, 3
demo version, 14, 15
description of, 3
downloading, 4
folder structure, 16
installing new, 13, 14
registering new, 15
operators, 261, 266
for number variables, 317–19
options menu
description of, 314
how to use, 314
outline command, 83
outline shapes
circles, 112
elliptical, 112
fill options, 112
how to use, 112
irregular polygons, 113
line colour and thickness, 112
rectangular, 112
regular polygons, 113
rounded, 113
squares, 112
overlay commands, 100
overlay layers, 55
overlays
measurements, 98
line, 108
paint bucket, 106, 112, 113
pencil, 105
smudge, 109
spray, 106
stamp, 110
text, 109
Paint Tools palette, 104
how to use, 104
palette preferences, 131
palette tools, 26
palette window, 25
palettes
closing, 27
docking, 26
HSI Colourspy, 75
Layer M anager, 44
number displayed, 131
Paint Tools, 104
Presentation, 122
RAM, 131
re-opening, 27
Video Controls, 146
Palettes menu
how to use, 27
pattern fill, 107
pencil tool, 105
performance
improving, 315, 322
P
Page Setup command, 334
paint bucket tool, 106
with outline shapes, 112
with solid shapes, 113
paint tools
outline shapes, 112
solid shapes, 113
Paint Tools
brush, 105
eraser, 106
eyedropper, 108
point counter tool, 86
point measurements
description of, 91
polygons
outline shapes, 112
solid shapes, 113
Preferences command
document size, 34
folder prefs, 133
general, 130
Image Document, 128
measurements, 93
new windows, 34
palette prefs, 131
time prefs, 132
presentation
options, 122
Presentation palette, 122
presentations
creating, 124
running, 124
print
and page setup, 334
selecting printer, 333
trace area, 315
Print command, 333
Q
quality
colour & greyscale, 30
of rawdata, 28
Quit command, 28
R
RAM
minimum required, 6
palettes displayed, 131
rectangular ROI tool, 78
rectangular shapes, 112, 113
rounded corners, 113, 114
registration
as new user, 13
new modules, 15
regular polygons, 112, 113
number of sides, 113, 114
reset automator time task
description of, 274
setup, 274
ROI measurements
description of, 91
ROI menu, 82
complement command, 82
crop layer command, 84
Updated January 2001 363
OPENLAB
expand command, 82
make binary layer command, 83
outline command, 83
shrink around image command,
83
shrink command, 82
simplify command, 83
smooth command, 83
ROI to binary task, 287
ROI tools, 21, 78
elliptical, 79
freehand, 78
lasso, 78
magic wand, 79
rectangular, 78
ROIs
as stamps, 111
colour of, 130
creating, 80
creating from overlay, 99
fill colour, 107
measurements, 91
opening, 84
outline of, 130
preferences, 130
saving, 84
rulers
preferences, 128
rulers
show/hide, 28
run automation, 255
S
save
automation, 254
automator menu items, 265
batches of images, 280
image document, 280
ROI, 84
settings, 136
trace area, 315
364 Openlab v.3
Save As command, 37
Save command, 37
save image document task
description of, 280
setup, 280
Save ROI As command, 84
scale
open ROI, 84
resized document, 33
scroll
trace area, 315
Select/Find command, 52
session log, 164
Set Gradient command, 107
set video control task
description of, 300
setup, 300
set video control task, 300
setup
close image window task, 280,
281
delay task, 272
end critical section task, 274, 275
end task, 269
If task, 269
loop task, 270
null task, 274
reset automator time task, 274
save image document task, 280
start critical section task, 274
target image window task, 279
tell task, 273
variable task, 272
shrink around image command, 83
shrink command, 82
simplify command, 83
smooth command, 83
smudge tool, 109
solid shapes
circles, 113
elliptical, 113
how to use, 113
irregular polygons, 114
paint, line colour and thickness,
114
pattern and gradient, 113
rectangular, 113
regular polygons, 114
rounded, 114
squares, 113
spatial calibration, 87
save as LIFF, 88
special menu
commands in, 169
Split RGB command, 48
spray tool, 106
stamp
applying, 111
creating, 111
selecting, 110
stamp tool, 110
standard colour tables, 64
start critical section task
description of, 274
setup, 274
straight line tool, 86
how to use, 87
subtract
background, 53
Subtract Background command, 54
subtract images task
description of, 292
setup, 292
subtract images task, 292
synchronise camera task, 301
description of, 301
setup, 301
syntax, 261, 266
system requirements, 6
T
target image window task
description of, 279
INDEX
setup, 279
task information area, 249
task list, 249
tasks
apply wavelength LUT, 288
available, 249
boolean operations, 308
capture layer task, 298
capture multiple layers task, 299
close image window task, 280,
281
compact memory, 313
delay, 256
delay task, 272
delete current layer task, 285
drag and drop, 251
end critical section task, 274, 275
end task, 269
If task, 269
image arithmetic, 305
kernel filter, 291
linking, 253
loop task, 270
median filter, 290, 291, 293, 295
merge images task, 294
new layer task, 287
null task, 274
original name of, 249
red crosses through, 321
repeating, 258
reset automator time task, 274
ROI to binary, 287
save image document task, 280
set video control task, 300
start critical section task, 274
subtract images, 292
synchronise camera task, 301
target image window task, 279
tell task, 273
trace messages, 326
variable task, 272
view layer task, 289
tell task
description of, 273
message syntax, 273
setup, 252, 273
text tool, 109
time preferences, 132
tints, 55
applying, 42, 73
tolerance
number of shades, 78, 79
toolbar
document, 20
trace
disabling, 315
improving performance, 315
trace area
clearing, 315
copying, 315
messages, 248
printing, 315
saving, 315
scrolling, 315
trace menu
description of, 315
how to use, 315
trace messages
general, 323–26
task specific, 326
transparent background, 46
troubleshooting, 321
tutorial 1, 35–36
tutorial 2, 37–40
tutorial 3, 104–14
U
USB installer, 9
setup, 272
variables
in file names, 280
loopcount, 261, 270
operators for number, 317
saving batches of images, 280
vernier tool, 86
spatial calibration, 87
video camera
connecting, 139
Video Controls palette, 146
video manager, 139
binning, 337
blooming, 338
CCD cooling, 339
CCD theory, 335
configuration steps, 142
devices supported, 140
exposure, 338
preview window, 141
setup panel, 140
view layer task, 289
description of, 289
setup, 289
view menu
description of, 314
how to use, 314
W
wastebasket
deleting files, 332
ejecting disks, 332
web address, 4
windows menu
commands in, 169
work area, 248
V
variable task
description of, 272
Updated January 2001 365
OPENLAB
366 Openlab v.3
CUSTOMER SOFTWARE LICENSE (USA)
(a)
by the Licensor upon dispatch/delivery by the Licensor of this
package to the Licensee; and
DO NOT OPEN THIS SEALED PACKAGE UNTIL YOU HAVE
(b)
READ AND ACCEPTED ALL THE TERMS OF THIS LICENSE
by the Licensee by breaking the seal of this sealed package
containing the Software; or
AND WISH TO BECOME THE LICENSEE OF THE SOFTWARE.
ACCEPTANCE SHALL BIND YOU AND ALL OF YOUR
(c)
by the License signing and returning the enclosed warranty
card.
EMPLOYEES TO THE TERMS OF THE LICENSE. YOUR
OPENING OF THIS PACKAGE WILL BE DEEMED TO BE YOUR
ACCEPTANCE OF THE FOLLOWING TERMS. IF YOU DO NOT
2.
Use of the Software
WISH TO ACCEPT THE TERMS, RETURN THIS PACKAGE
UNOPENED TO THE LICENSOR OR ITS AGENT OR OTHER
(a) For the purposes of this License "Use" shall mean and
include:
PARTY FROM WHOM YOU OBTAINED THIS PACKAGE AND
(I) utilization of the Software by copying, transmitting or
ANY LICENSE FEE YOU MAY HAVE PAID WILL BE REFUNDED
TO YOU. IF YOU FAIL TO RETURN THE PACKAGE WITHIN 3
loading the same into the temporary memory (RAM) or
MONTHS OF RECEIVING IT, YOU SHALL BE DEEMED TO
installing into the permanent memory (e.g. hard disk, CD
HAVE ACCEPTED THE TERMS OF THE LICENSE.
ROM or other storage device) of the System for the
processing of the System instructions or statements
contained in such Software
THE LICENSE
(ii) copying the Software which is in machine-readable form for
Image Processing and Vision Company Limited (trading as
Improvision) (the "Licensor", which expression shall include its
Use by the Licensee on the System for the purposes only
subsidiaries, agents, successors and assigns) is authorized to
of understanding the contents of such machine-readable
license the software (the "Software") contained in this package and
material and for back-up provided that no more than three
upon opening the sealed package the Licensee accepts a non-
(3) non-transient copies will be in existence under this
exclusive License to "Use" (as hereinafter defined) the Software on
License at any one time without prior written consent from
a single computer system (the "System") for single use specified
the Licensor or as otherwise permitted by the applicable
below upon the terms and subject to the conditions contained
law;
herein.
(iii) storing the whole or any part of the Software on the
System or other storage unit or disk;
This License entitles the Licensee to:
(a) load, install and Use the Software contained in this package
(iv) utilizing (but not copying) the instructional and/or
on one Central Processing Unit ("CPU") of the System (a
operational manuals relating to the Software.
separate LICENSE fee being required for each CPU upon
(b)
which the Licensee wishes to use the Software)
protected against unauthorized use by means of a dongle
device.
(b) Use the Software in accordance with the provisions of Section
2 of this License;
The Licensee acknowledges and accepts that the Software is
(c)
The Licensee shall also be permitted to Use the Software on
and, where the Licensee signs and returns the warranty card
a portable, lap-top or home computer where the Software is
enclosed with the Software, to:
permanently installed on the hard disk or other storage
device of the System (but not a file server) and the Licensee
(a) receive telephone technical support relating to the Software
or its relevant employee as the case may be is the
during the Licensor's usual business hours;
predominant user of the Software and such Use will not
(b) receive information on upgraded versions of the Software at
breach the concurrent user limit where applicable
such cost (if any) as may be notified to the Licensee.
3.
1.
License Fee
Acceptance of this LICENSE
(a)
The terms and conditions of this License are deemed to be
accepted:
Where the License Fee has not been paid by the Licensee at
the time the Software is obtained from the Licensor or its
agent the License Fee will be payable within the number of
days specified in the Licensor's invoice unless otherwise
the information which it requires for such purposes.
agreed to in writing by the Licensor.
Only when the Licensor has either (a) not responded
within a reasonable time or (b) has not offered to provide
(b) An additional License Fee is payable for each CPU of the
the Licensee with information required under (c) above
System upon which the Licensee wishes to Use the
(for which the Licensor may require payment) shall the
Software. In the event that the Licensee's System is
Licensee be permitted to continue with the
inoperable, the Licensee shall be permitted to Use the
decompilation.
Software on a back-up system at no extra charge, until the
System is operational.
The Licensee undertakes:
4.
(a)
Licensee's Undertakings
(b)
and location of all copies of the Software.
The Licensee undertakes not to perform any of the acts
referred to in this sub-clause (a) except to the extent and only
(c)
(d)
the Software and only then for the specific limited purpose
to ensure that its employees, agents and other duly
authorized parties who will use the Software (including any
stated in such applicable law or hereunder.
transferee of the Software) are notified of this License and
the terms hereof prior to such use.
The Licensee undertakes:
(I) not to copy the Software (other than for normal System
to supervise and control Use of the Software in accordance
with the terms of this License.
to the extent required by the applicable law as applied to the
Licensee as a lawful user (i.e. a party with a right to use) of
to maintain accurate and up-to-date records of the number
(e)
to reproduce and include the copyright notice of the Licensor
operation and as specified in Section 2 above) nor
or such other party as may be specified in or on the Software
otherwise reproduce the same provided that the
(the "Owner") on all and any copies, whether in whole or in
Licensee may copy the Software for back-up or archival
part, in any form, including partial copies or modifications of
purposes or incidentally, in the course of converting the
the Software made herein.
Software in accordance with Section 4(a)(iii) below;
(f)
program listings, object code and source program listings,
source or object code;
object code and source code), in any form to any person
(iiii) subject to subsection (iv) below, without the LicensorÕs
other than the Licensee's employees or as specified in (d)
prior written consent not to disassemble, decompile or
above without prior written consent from the Licensor.
reverse engineer the Software, provided however that in
the case of decompilation, the Licensee may incidentally
not to provide or otherwise make available the Software in
whole or in part (including where applicable, but not limited to
(ii) not to translate, adapt, vary, or modify the Software or its
(g)
within 14 days after the date of termination or discontinuance
decompile the Software only if it is essential to do so in
of this License for whatever reason, to destroy the Software
order to achieve interoperability of the Software with
and all updates, upgrades or copies, in whole and in part, in
another software program (ÒPermitted PurposeÓ)and
any form including partial copies or modifications of the
provided the information obtained by the Licensee
Software received from the Licensor or made in connection
during such decompilation is only used for the Permitted
with this License, and all documentation relating thereto and
Purpose and is not disclosed or communicated to any
certify in writing that the Licensee has complied with this
third party whom it is not necessary to disclose or
subsection.
communicate such information and it is not used to
create any software which is substantially similar to the
Software or the expression of the Software nor used in
any manner which would be restricted by copyright.
(iv) It shall be a condition precedent to the decompilation of
the Software permitted in accordance with the terms
referred to in subsection (iii) above, that the Licensee
shall have notified the Licensor in writing (a) that it
5.
(a)
Warranty
THE LICENSEE ACKNOWLEDGES THAT SOFTWARE IN
GENERAL IS NOT ERROR-FREE AND AGREES THAT THE
EXISTENCE OF SUCH ERRORS SHALL NOT
CONSTITUTE A BREACH OF THIS LICENSE.
(b) IN THE EVENT THAT THE LICENSEE DISCOVERS A
wishes to perform the decompilation; (b) the purposes
MATERIAL ERROR IN THE SOFTWARE WHICH
for which it wishes to perform the decompilation; and (c)
SUBSTANTIALLY AFFECTS THE LICENSEE'S USE OF
THE SAME AND NOTIFIES THE LICENSOR OF THE
TO PACKAGING BUT THE LICENSEE IS SOLELY
ERROR WITHIN 90 DAYS FROM THE DATE OF PAYMENT
RESPONSIBLE FOR VIRUS SCANNING THE SOFTWARE.
OF THE LICENSE FEE (THE "WARRANTY PERIOD") THE
(g)
LICENSOR SHALL, AT ITS SOLE OPTION, EITHER
THE LICENSOR WARRANTS THAT THERE ARE NO
DISABLING PROGRAMS OR DEVICES IN THE
REFUND THE LICENSE FEE OR USE ALL REASONABLE
SOFTWARE OTHER THAN THAT NECESSARY TO
EFFORTS TO CORRECT, BY PATCH OR NEW RELEASE
DETECT THE PRESENCE OF THE APPROPRIATE
(AT ITS OPTION), THAT PART OF THE SOFTWARE
DONGLE.
WHICH IS IN MATERIAL ERROR, PROVIDED THAT SUCH
ERROR HAS NOT BEEN CAUSED BY ANY
(h)
MALTREATED THE LICENSOR UNDERTAKES THAT IN
MODIFICATION, VARIATION OR ADDITION TO THE
THE CASE OF THE FAILURE OF THE DONGLE IT WILL,
SOFTWARE NOT PERFORMED BY THE LICENSOR OR
AT ITS OPTION, AND AT ANY TIME DURING THE
CAUSED BY THE INCORRECT USE, ABUSE OR
CURRENCY OF THIS LICENSE EITHER:
CORRUPTION OF THE SOFTWARE.
(c)
(i)
THE LICENSOR'S WARRANTY IN RELATION TO THE
REPLACE THE DONGLE; OR
(ii) REPLACE THE SOFTWARE WITH A VERSION OF
FUNCTIONING OF THE SOFTWARE (INCLUDING THE
(d)
PROVIDED THAT THE DONGLE HAS NOT BEEN
DONGLE) ON ANY PARTICULAR SYSTEM ONLY APPLIES
IDENTICAL OR ENHANCED FUNCTIONALITY BUT
WHERE THE SYSTEM COMPLIES WITH THE LICENSOR'S
WHICH IS NOT PROTECTED BY THE DONGLE
HARDWARE AND SOFTWARE COMPATIBILITY LIST AS
DEVICE OR IS PROTECTED BY AN ALTERNATIVE
ISSUED FROM TIME TO TIME.
DONGLE.
TO THE EXTENT PERMITTED BY THE APPLICABLE LAW,
AND SUBJECT TO CLAUSE 6 BELOW, THE LICENSOR
6.
Licensor's Limitation of Liability
DISCLAIMS ALL OTHER WARRANTIES WITH RESPECT
TO THE SOFTWARE, EITHER EXPRESS OR IMPLIED,
INCLUDING BUT NOT LIMITED TO ANY IMPLIED
WARRANTIES OF MERCHANTABILITY OR FITNESS FOR
ANY PARTICULAR PURPOSE.
THE LICENSOR SHALL NOT BE LIABLE TO THE LICENSEE
FOR ANY LOSS OR DAMAGE, EXCEPT AS SPECIFICALLY SET
FORTH IN THIS AGREEMENT, ARISING DIRECTLY OR
INDIRECTLY IN CONNECTION WITH THIS LICENSE, THE
SOFTWARE, ITS USE OR OTHERWISE. NOTWITHSTANDING
(e)
THE LICENSEE ACKNOWLEDGES THAT THE SOFTWARE
IS NOT DESIGNED FOR USE IN MISSION- OR SAFETYCRITICAL SITUATIONS. THE ALGORITHMS UPON WHICH
IT IS BASED INVOLVE STATISTICAL AND OTHER
METHODS OF INTERPOLATION AND EXTRAPOLATION
AND VISUAL OR OTHER OUTPUT WHICH IT MAY
PRODUCE ARE THEREFORE LIABLE TO ARTIFACTS
AND ERRORS INHERENT IN THE USE OF THESE
TECHNIQUES. OUTPUT FROM THE SOFTWARE SHOULD
ALWAYS BE CONFIRMED AND VERIFIED IN
ACCORDANCE WITH RECOGNIZED SCIENTIFIC AND
EXPERIMENTAL PRACTICE. THE LICENSOR MAY BE
PREPARED TO CREATE A SPECIALLY MODIFIED OR
REWRITTEN VERSION OF THE SOFTWARE AT EXTRA
COST TO COMPLY WITH ANY SAFETY OR MISSIONCRITICAL REQUIREMENTS.
(f)
THE GENERALITY OF THE FOREGOING, THE LICENSOR
EXPRESSLY EXCLUDES LIABILITY FOR INDIRECT, SPECIAL,
INCIDENTAL OR CONSEQUENTIAL LOSS OR DAMAGE WHICH
MAY ARISE IN RESPECT OF THE SOFTWARE, ITS USE, THE
SYSTEM OR IN RESPECT OF OTHER EQUIPMENT OR
PROPERTY, OR FOR LOSS OF PROFIT, BUSINESS,
REVENUE, GOODWILL OR ANTICIPATED SAVINGS. LIABILITY
OF THE LICENSOR AND ITS SUPPLIERS TO THE LICENSEE,
IF ANY, FOR BREACH OF WARRANTY ARISING OUT OF
CONTRACT, NEGLIGENCE OR STRICT LIABILITY IN TORT, OR
ANY OTHER CLAIM RELATING TO THIS LICENSE, OR IN THE
EVENT THAT ANY EXCLUSION CONTAINED IN THIS LICENSE
SHALL BE HELD TO BE INVALID FOR ANY REASON AND THE
LICENSOR BECOMES LIABLE FOR LOSS OR DAMAGE, SHALL
BE LIMITED TO THE LICENSE FEE PAID BY THE LICENSEE
FOR THE SOFTWARE.
ALTHOUGH THE LICENSOR DOES NOT WARRANT THAT
THE SOFTWARE SUPPLIED HEREUNDER SHALL BE
FREE FROM ALL KNOWN VIRUSES IT HAS USED
COMMERCIALLY REASONABLE EFFORTS TO CHECK
FOR THE MOST COMMONLY KNOWN VIRUSES PRIOR
7.
Copyrights Patents, Trade Marks and Other Intellectual
Property Rights
The Licensee acknowledges that any and all of the copyright, trade
marks, trade names, patents and other intellectual property rights
subsisting in or used or in connection with the Software including
claim and otherwise providing the Licensor with such
all documentation and manuals relating thereto are and remain the
assistance as the Licensor may reasonably require to
sole property of the Licensor and the Owner. The Licensee shall
settle or oppose any such claims.
not during or at any time after the expiration or termination of this
(d)
License in any way question or dispute the ownership by the
The Licensor's liability under this clause shall, at the
Licensor's option, be limited to the License Fee, less an
Licensor and/or the Owner thereof.
equitable proportion thereof, as relates to the period prior to
cessation of the use of the Software by the Licensee because
8.
of such claims of infringement.
Indemnity
(a) The Licensor agrees to indemnify and save harmless and
defend at its own expense the Licensee from and against any
and all claims of infringement of any patent, trade mark,
9.
(a)
industrial design, copyright or other proprietary right affecting
Confidential Information
All information, data, drawings, specifications,
documentation, software listings, source or object code which
the Software provided that (i) the Licensee shall not have
the Licensor may have imparted and may from time to time
done, permitted or suffered to be done anything which was
impart to the Licensee relating to the Software (other than the
not expressly authorized by this License or which may have
ideas and principles which underlie the Software) is
been or become an infringement of any such rights (including
proprietary and confidential. The Licensee hereby agrees that
but not limited to using the Software to perform the
it shall use the same solely in accordance with the provisions
Licensee's or other party's applications or using the Software
of this License and that it shall not at any time during or for a
in combination or merged with other software programs or
period of six years after expiration or termination of this
devices) and (ii) the Licensee shall have exercised a
License, disclose the same, whether directly or indirectly, to
commercially reasonable standard of care in protecting the
any third party without the Licensor's prior written consent.
same; failing which, the Licensee shall indemnify the
Licensor against all actions, proceeding costs, claims and
expenses incurred in respect thereof.
(b)
The Licensee further agrees that it shall not itself or through
any subsidiary, agent or third party use such confidential
information to copy, reproduce, translate, adapt, vary, modify,
(b) In the event that any such infringement occurs or may occur,
the Licensor may at its sole option and expense:
(i) procure for the Licensee the right to continue using the
Software or infringing part thereof; or
(ii) modify or amend the Software or infringing part thereof
so that the same becomes non-infringing; or
decompile, disassemble or reverse engineer the Software nor
shall the Licensee lease, license, sub-license or otherwise
deal with the Software (other than by sale as specifically
referred to in sub-clause (d) below) or any part or parts or
variations, modifications, copies, releases, versions or
enhancements thereof or have any software or other program
written or developed for itself based on any confidential
(iii) replace the Software or infringing part thereof by other
information supplied to it by the Licensor.
software of similar capability; or
(c) The foregoing provisions shall not prevent the disclosure or
(iv) repay to the Licensee the License Fee or balance
thereof relating to the whole or the infringing part of the
Software.
(c) The LicensorÕs obligations under subsection (a) or (b) above
use by the Licensee of any information which is or hereafter,
through no fault of the Licensee, becomes public knowledge
or to the extent required by law.
(d) The Licensee may sell this License provided that:
are expressly conditioned upon and subject to:
(i) all copies of the Software held by the Licensee pursuant
(i) the Licensor have sole control of the defense and/or
settlement or any such infringement claim;
(ii) the Licensee promptly notifying the Licensor in writing of
any claim specified in subsection (a) above that is made
to this License shall either be destroyed or transferred to
the Transferee on completion of the sale;
(ii) the Licensee procures written agreement by the
Transferee accepting the terms of the License;
against the Licensee and providing the Licensor with the
authority to proceed as set forth in (i) above; and
(iii) the Licensee gives prior notice to the Licensor of the
transfer and the identity and address of the Transferee
(iii) the Licensee providing the Licensor with all information
known to the Licensee relating to such infringement
and receives LicensorÕs prior written consent.
10. Force Majeure
The Licensor shall be under no liability to the Licensee in any way
whatsoever for destruction, damage, delay or any other matters of
The Licensee shall not assign or otherwise transfer all or any part
of the Software or this License without the prior written consent of
the Licensor, in accordance with Section 9(d) above.
any nature whatsoever arising out of war, rebellion, civil
commotion, strikes, lock-outs or industrial disputes, fire, explosion,
13. Waiver
earthquakes, acts of God, flood, drought, bad weather or power
outages; the unavailability of deliveries, supplies, software disks or
other media or the requisitioning or other act or order by any
government department, council or other constituted body.
Failure or neglect by either party to enforce at any time any of the
provisions hereof shall not be construed nor shall be deemed to be
a waiver of that party's rights hereunder nor in any way affect the
validity of the whole or any part of this License nor prejudice that
party's rights to take subsequent action.
11. Termination
(a) This License shall terminate and any and all rights granted to
14. Headings
the Licensee hereunder shall revest in the Licensor:
The headings of the terms and conditions herein contained are
(i)
upon thirty (30) days written notice in the event that
Licensee or any of, its directors, officers, employees or
agents is in breach of any term, condition or provision of
inserted for convenience of reference only and are not intended to
be part of or to affect the meaning or interpretation of any of the
terms and conditions of this License.
this License and fails to remedy such breach (if capable
of remedy) within such thirty (30) days; and
(ii) should the Licensee, its successors or permitted
15. Severability
assigns, suspend business, make an absolute
In the event that any of these terms and conditions or provisions
assignment of the bulk of its assets for the benefit of
shall be determined by any competent authority to be invalid,
creditors, consent to the appointment of a trustee,
unlawful or unenforceable to any extent, such term, condition or
custodian or receiver, or be declared insolvent or
provision shall to that extent be severed from the remaining terms,
bankrupt; or if a trustee or custodian or receiver is
conditions and provisions which shall continue to be valid to the
appointed for the Licensee for a substantial part of its
fullest extent permitted by law.
property without its consent and is not discharged within
sixty (60) days of such appointment, or if bankruptcy,
reorganization, rearrangement, insolvency or liquidation
16. Law
proceedings are instituted by or against the Licensee
The parties hereby agree that the License concluded between
and are not dismissed within sixty (60) days of the
them and constituted on these terms and conditions shall be
commencement thereof.
construed in accordance with the law of the State of
(b) Upon termination, the Licensee shall pay to the Licensor all
Massachusetts without regard to its conflict of laws principles.
costs and expenses, including legal and other fees incurred
and all arrearages of fees, charges or other payments arising
17. Jurisdiction
in respect of the Software, this License or otherwise and shall
comply with its undertaking specified in Section 4(g) above.
In any legal action related to this License, the Licensee agrees (a)
to the exercise of jurisdiction over it by a state or federal court in
(c)
Termination of this License shall be in addition to and not in
lieu of any rights and remedies the Licensor may have under
this License or under the applicable law. Notwithstanding the
Boston, Massachusetts and (b) that all legal actions relating to this
License shall be instituted in one of the courts specified in (a)
above.
termination of this License, the provisions of Sections 6, 7, 9
and 13 through 19 shall survive such termination.
18. Export Law Assurances
12. Assignment
The Licensee agrees and certifies that neither the Software nor
any related documentation or product thereof is intended to be
shipped, transferred or reexported, directly or indirectly, into any
country prohibited by the United States Export Administration Act
of 1979 and the regulations thereunder, as amended, nor will be
used for any purpose prohibited by the Act. The Licensee agrees
to comply with all laws and regulations pertaining to the export of
the Software.
19. Restricted Rights
If any Software or related documentation is to be used by the
United States government, it shall be provided with ÒRestricted
Rights.Ó Use, duplication or disclosure by the government is
subject to restrictions set forth in subparagraph (C)(1)(ii) of the
Department of Defense Regulations Supplement (ÒDFARSÓ)
252.227-7013, Rights in Technical Data and Computer Software
(October 1988) and Federal Acquisition Regulation (ÒFARÓ)
52.227-14, Rights in Data-General, including Alternate III (June
1987), as applicable. Supplier: Image Processing and Vision
Company Limited, Viscount Centre II, University of Warwick
Science Park, Millburn Hill Road, Coventry, CV4 7HS, England.
CUSTOMER SOFTWARE LICENCE
(a)
by the Licensor upon dispatch/delivery by the Licensor of
DO NOT OPEN THE SEALED PACKAGE UNTIL YOU HAVE
this package to the Licensee direct or to the Licensor's
READ AND ACCEPTED ALL THE TERMS OF THIS LICENCE
agent as the case may be;
AND WISH TO BECOME THE LICENSEE OF THE SOFTWARE.
by the Licensee by breaking the seal of this sealed
ACCEPTANCE SHALL BIND YOU AND ALL OF YOUR
package containing the Software;
EMPLOYEES TO THE TERMS OF THE LICENCE. YOUR
OPENING OF THIS PACKAGE WILL BE DEEMED TO BE YOUR
by the Licensee signing and returning the enclosed
ACCEPTANCE OF THE FOLLOWING TERMS. IF YOU DO NOT
warranty card.
WISH TO ACCEPT THE TERMS, RETURN THE PACKAGE
UNOPENED TO THE LICENSOR OR ITS AGENT OR OTHER
2.
Use of the Software
PARTY FROM WHOM YOU OBTAINED THE PACKAGE AND
ANY LICENCE FEE YOU MAY HAVE PAID WILL BE REFUNDED
(a)
For the purposes of this Licence "Use" shall mean and
include:
TO YOU. IF YOU FAIL TO RETURN THE PACKAGE WITHIN 3
MONTHS OF RECEIVING IT, YOU SHALL BE DEEMED TO
(i)
HAVE ACCEPTED THE TERMS OF THE LICENCE.
utilization of the Software by copying, transmitting or
loading the same into the temporary memory (RAM)
or installing into the permanent memory (e.g. hard
THE LICENCE
disk, CD ROM or other storage device) of the System
Image Processing and Vision Company Limited (trading as
for the processing of the System instructions or
Improvision) (the "Licensor" which expression shall include its
statements contained in such Software;
subsidiaries, agents, successors and assigns) is authorised to
(ii)
license the software (the "Software") contained in this package and
form for Use by the Licensee on the System for the
upon opening the sealed package the Licensee accepts a non-
purposes only of understanding the contents of such
exclusive Licence to "Use" (as hereinafter defined) the Software on
machine-readable material and for back-up provided
a single computer system (the "System") for single use specified
that no more than three (3) non-transient copies will
below upon the terms and subject to the conditions contained
be in existence under any Licence at any one time
herein.
without prior written consent from the Licensor or as
This Licence entitles the Licensee to:
(a)
copying the Software which is in machine-readable
otherwise permitted by the applicable law;
load, install and Use the Software contained in this
(iii)
package on one Central Processing Unit ("CPU") of the
storing the whole or any part of the Software on the
System or other storage unit or disk;
System (a separate licence fee being required for each
(iv)
CPU upon which the Licensee wishes to use the Software);
utilizing (but not copying) the instructional and/or
operational manuals relating to the Software.
(b)
Use the Software in accordance with the provisions of
Clause 2 of this Licence;
(b)
The Licensee acknowledges and accepts that the Software
is protected against unauthorised use by means of a
and, where the Licensee signs and returns the warranty card
dongle device.
enclosed with the Software, to:
(a)
receive telephone technical support relating to the Software
within the Licensor's usual business hours;
(b)
(c)
The Licensee shall also be permitted to Use the Software
on a portable, lap-top or home computer where the
Software is permanently installed on the hard disk or other
receive information on upgraded versions of the Software
storage device of the System (but not a file server) and the
at such cost (if any) as may be notified to the Licensee.
Licensee or its relevant employee as the case may be is
the predominant user of the Software and such Use will not
1.
Acceptance of this Licence
The terms and conditions of this Licence are deemed to be
accepted by the parties in any one of the following circumstances:
breach the concurrent user limit where applicable.
3.
(a)
(b)
Licence Fee
(iv)
It shall be a condition precedent to the decompilation
Where the Licence Fee has not been paid by the Licensee
of the software permitted in accordance with the
at the time the Software is obtained from the Licensor or its
terms referred to in sub-clause (iii) above that the
agent the licence fee will be payable within the number of
Licensee shall have notified the Licensor in writing
days specified in the Licensor's invoice unless otherwise
(a) that it wishes to perform the decompilation (b) the
agreed in writing by the Licensor.
purposes for which it wishes to perform the
decompilation and (c) the information which it
An additional Licence Fee is payable for each CPU of the
requires for such purposes. Only when the Licensor
System upon which the Licensee wishes to Use the
has either (a) not responded within a reasonable
Software. In the event that the Licensee's System is
time and (b) has not offered to provide the Licensee
inoperable or requires or is under repair, the Licensee shall
with the information required under (c ) above (for
be permitted to Use the Software on a back-up system at
which the Licensee may require payment) shall the
no extra charge, until the System is operational.
Licensee be permitted to continue with the
decompilation.
4.
(a)
Licensee's Undertakings
The Licensee undertakes not to perform any of the acts
referred to in this sub-clause (a) except to the extent and
The Licensee undertakes:
(b)
Licensee as a lawful user (i.e. a party with a right to use) of
the Software and only then for the specific limited purpose
(c)
(i)
(d)
to ensure that its employees, agents and other parties who
will use the Software (including any transferee of the
not to copy the Software (other than for normal
Software) are notified of this Licence and the terms hereof
System operation and as specified in Clause 2
prior to such employee, agent or party using the same.
above) nor otherwise reproduce the same Provided
that the Licensee may copy the Software for back-up
to supervise and control Use of the Software in accordance
with the terms of this Licence.
stated in such applicable law or hereunder. The Licensee
undertakes:
to maintain accurate and up-to-date records of the number
and location of all copies of the Software.
only to the extent permitted by the applicable law to the
(e)
to reproduce and include the copyright notice of the
purposes or incidentally, in the course of converting
Licensor or such other party as may be specified in or on
the Software in accordance with 4(a)(iii) below;
the Software (the "Owner") on all and any copies, whether
(ii)
not to translate, adapt, vary, modify the Software;
(iii)
subject to sub-clause (iv) below not to disassemble,
decompile or reverse engineer the Software
in whole or in part, in any form, including partial copies or
modifications of the Software made herein.
(f)
Provided however that in the case of
to program listings, object code and source program
decompilation,the Licensee may incidentally
listings, object code and source code), in any form to any
decompile the Software only if it is essential so to do
person other than the Licensee's employees or as specified
in order to achieve interoperability of the Software
in (d) above without prior written consent from the Licensor.
with another software program ("Permitted
Purpose") and provided the information obtained by
not to provide or otherwise make available the Software in
whole or in part (including where applicable, but not limited
(g)
within 14 days after the date of termination or
the Licensee during such decompilation is only used
discontinuance of this Licence for whatever reason, to
for the Permitted Purpose and is not disclosed or
destroy the Software and all updates, upgrades or copies,
communicated to any third party whom it is not
in whole and in part, in any form including partial copies or
necessary to disclose or communicate such
modifications of the Software received from the Licensor or
information without the Licensor's prior written
made in connection with this Licence, and all
consent and is not used to create any software
documentation relating thereto.
which is substantially similar to the expression of the
Software nor used in any manner which would be
restricted by copyright.
5.
(a)
Warranty1
(f)
THE LICENSEE ACKNOWLEDGES THAT SOFTWARE IN
FREE FROM ALL KNOWN VIRUSES IT HAS USED
GENERAL IS NOT ERROR-FREE AND AGREES THAT THE
COMMERCIALLY REASONABLE EFFORTS TO CHECK
EXISTENCE OF SUCH ERRORS SHALL NOT
FOR THE MOST COMMONLY KNOWN VIRUSES PRIOR
CONSTITUTE A BREACH OF THIS LICENCE.
(b)
TO PACKAGING BUT THE LICENSEE IS SOLELY
IN THE EVENT THAT THE LICENSEE DISCOVERS A
RESPONSIBLE FOR VIRUS SCANNING THE SOFTWARE.
MATERIAL ERROR WHICH SUBSTANTIALLY AFFECTS
THE LICENSEE'S USE OF THE SAME AND NOTIFIES THE
(g)
SOFTWARE OTHER THAN THAT NECESSARY TO
DATE OF PAYMENT OF THE LICENCE FEE (THE
DETECT THE PRESENCE OF THE APPROPRIATE
"WARRANTY PERIOD") THE LICENSOR SHALL AT ITS
DONGLE.
SOLE OPTION EITHER REFUND THE LICENCE FEE OR
(h)
PROVIDED THAT THE DONGLE HAS NOT BEEN MALTREATED THE LICENSOR UNDERTAKES THAT IN THE
PATCH OR NEW RELEASE (AT ITS OPTION) THAT PART
CASE OF THE FAILURE OF THE DONGLE IT WILL, AT ITS
OF THE SOFTWARE WHICH DOES NOT SO COMPLY
OPTION, AND AT ANY TIME DURING THE CURRENCY OF
PROVIDED THAT SUCH NON-COMPLIANCE HAS NOT
THIS LICENCE EITHER
BEEN CAUSED BY ANY MODIFICATION, VARIATION OR
ADDITION TO THE SOFTWARE NOT PERFORMED BY
THE LICENSOR OR CAUSED BY ITS INCORRECT USE,
(I)
REPLACE THE DONGLE; OR
(ii)
REPLACE THE SOFTWARE WITH A VERSION OF
IDENTICAL OR ENHANCED FUNCTIONALITY BUT
ABUSE OR CORRUPTION OF THE SOFTWARE.
(c)
THE LICENSOR WARRANTS THAT THERE ARE NO
DISABLING PROGRAMS OR DEVICES IN THE
LICENSOR OF THE ERROR WITHIN 90 DAYS FROM THE
USE ALL REASONABLE ENDEAVOURS TO CORRECT BY
ALTHOUGH THE LICENSOR DOES NOT WARRANT THAT
THE SOFTWARE SUPPLIED HEREUNDER SHALL BE
WHICH IS NOT PROTECTED BY THE DONGLE
THE LICENSOR'S WARRANTY IN RELATION TO THE
DEVICE OR IS PROTECTED BY AN ALTERNATIVE
FUNCTIONING OF THE SOFTWARE (INCLUDING THE
DONGLE.
DONGLE) ON ANY PARTICULAR SYSTEM ONLY APPLIES
WHERE THE SYSTEM COMPLIES WITH THE LICENSOR'S
HARDWARE AND SOFTWARE COMPATIBILITY LIST AS
ISSUED FROM TIME TO TIME
(d)
(a)
Licensor's Liability
The Licensor shall not be liable to the Licensee for any loss
TO THE EXTENT PERMITTED BY THE APPLICABLE LAW,
or damage whatsoever or howsoever caused arising
AND SUBJECT TO CLAUSE 6 BELOW, THE LICENSOR
directly or indirectly in connection with this Licence, the
DISCLAIMS ALL OTHER WARRANTIES WITH RESPECT
Software, its use or otherwise, except to the extent that
TO THE SOFTWARE, EITHER EXPRESS OR IMPLIED,
such liability may not be lawfully excluded under the
INCLUDING BUT NOT LIMITED TO ANY IMPLIED
applicable law.
WARRANTIES OF MERCHANTABILITY OR FITNESS FOR
ANY PARTICULAR PURPOSE.
(e)
6.
(b)
expressly excludes liability for indirect, special, incidental or
THE LICENSEE ACKNOWLEDGES THAT THE SOFTWARE
consequential loss or damage which may arise in respect
IS NOT DESIGNED FOR USE IN MISSION- OR SAFETY-
of the Software, its use, the System or in respect of other
CRITICAL SITUATIONS. THE ALGORITHMS UPON WHICH
equipment or property, or for loss of profit, business,
IT IS BASED INVOLVE STATISTICAL AND OTHER
revenue, goodwill or anticipated savings.
METHODS OF INTERPOLATION AND EXTRAPOLATION
AND VISUAL OR OTHER OUTPUT WHICH IT MAY
Notwithstanding the generality of (a) above, the Licensor
(c)
In the event that any exclusion contained in this Licence
PRODUCE ARE THEREFORE LIABLE TO ARTEFACTS
shall be held to be invalid for any reason and the Licensor
AND ERRORS INHERENT IN THE USE OF THESE
becomes liable for loss or damage that may lawfully be
TECHNIQUES. OUTPUT FROM THE SOFTWARE SHOULD
limited, such liability shall be limited to the licence fee paid
ALWAYS BE CONFIRMED AND VERIFIED IN
by the Licensee for the Software.
ACCORDANCE WITH RECOGNISED SCIENTIFIC AND
The Licensor does not exclude liability for death or personal injury
EXPERIMENTAL PRACTICE. THE LICENSOR MAY BE
to the extent only that the same arises as a result of the negligence
PREPARED TO CREATE A SPECIALLY MODIFIED OR RE-
of the Licensor, its employees, agents or authorised
WRITTEN VERSION OF THE SOFTWARE AT EXTRA
representatives.
COST TO COMPLY WITH ANY SAFETY OR MISSIONCRITICAL REQUIREMENTS.
Where the Software is to be used in any state of Australia and it is
(c)
determined by a competent authority that the law of any such
In the event that any such infringement occurs or may
occur, the Licensor may at its sole option and expense:
Australian state law apply to this licence, notwithstanding any other
(i)
provisions contained herein, where any Act of Parliament implies
procure for the Licensee the right to continue using
the Software or infringing part thereof; or
any term into this Licence, and that Act avoids or prohibits
provisions in a contract excluding or modifying such term, that term
(ii)
shall be deemed to be included in this Licence, but the Licensor's
modify or amend the Software or infringing part
thereof so that the same becomes non-infringing; or
liability for breach of that term shall be limited in one or more of the
(iii)
ways (at the Licensor's option) permitted by section 68A(1) of the
(iv)
7.
Copyright, Patents, Trade Marks and Other Intellectual
marks, trade names, patents and other intellectual property rights
repay to the Licensee the Licence Fee or balance
thereof relating to the whole or the infringing part of
Property Rights
The Licensee acknowledges that any and all of the copyright, trade
replace the Software or infringing part thereof by
other software of similar capability; or
Trade Practices Act 1974 (Cth).
the Software.
(d)
The Licensor's liability under this clause shall, at the
Licensor's option, be limited to the Licence Fee less an
subsisting in or used or in connection with the Software including
equitable proportion thereof as relates to the period prior to
all documentation and manuals relating thereto are and remain the
cessation owing to infringement.
sole property of the Licensor and/or the Owner. The Licensee
shall not during or at any time after the expiry or termination of this
Licence in any way question or dispute the ownership by the
Licensor and/or the Owner thereof.
9.
(a)
Confidential Information
All information, data, drawings, specifications,
documentation, software listings, source or object code
8.
(a)
which the Licensor may have imparted and may from time
Indemnity
to time impart to the Licensee relating to the Software
The Licensor agrees to indemnify and save harmless and
(other than the ideas and principles which underlie the
defend at its own expense the Licensee from and against
Software) is proprietary and confidential. The Licensee
any and all claims of infringement of any patent, trade
hereby agrees that it shall use the same solely in
mark, industrial design, copyright or other proprietary right
accordance with the provisions of this Licence and that it
affecting the Software PROVIDED THAT (i) the Licensee
shall{l not at any time during or for a period of six years
shall not have done, permitted or suffered to be done
after expiry or termination of this Licence, disclose the
anything which may have been or become an infringement
same, whether directly or indirectly, to any third party
of any such rights (including but not limited to using the
without the Licensor's prior written consent.
Software to perform the Licensee's or other party's
applications or using the Software incombination or merged
(b)
(b)
Subject only to the specific, limited provisions of Clause
with other software programs or devices) and (ii) the
4(a) above, the Licensee further agrees that it shall not
Licensee shall have exercised a reasonable standard of
itself or through any subsidiary, agent or third party use
care in protecting the same; failing which, the Licensee
such confidential information to copy, reproduce, translate,
shall indemnify the Licensor against all actions,
adapt, vary, modify, decompile, disassemble or reverse
proceedings, costs, claims and expenses incurred in
engineer the Software nor shall the Licensee lease, license,
respect thereof.
sub-license or otherwise deal with the Software (other than
The Licensee undertakes that the Licensor shall be given
prompt notice of any claim specified in (a) above that is
made against the Licensee and the Licensor shall have the
right to defend any such claims and make settlements
thereof at its own discretion and the Licensee shall give
such assistance as the Licensor may reasonably require to
settle or oppose any such claims.
by sale as specifically referred to in sub-clause (d) below)
or any part or parts or variations, modifications, copies,
releases, versions or enhancements thereof or have any
software or other program written or developed for itself
based on any confidentialinformation supplied to it by the
Licensor.
The foregoing provisions shall not prevent the disclosure or use by
the Licensee of any information which is or hereafter, through no
fault of the Licensee, becomes public knowledge or to the extent
validity of the whole or any part of this Licence nor prejudice that
permitted by law.
party's rights to take subsequent action.
The Licensee shall be permitted to sell this licence PROVIDED
14. Headings
THAT:
The headings of the terms and conditions herein contained are
all copies of the Software held by the Licensee pursuant to
inserted for convenience of reference only and are not intended to
this Licence shall either be destroyed or transferred to the
be part of or to affect the meaning or interpretation of any of the
Transferee on completion of the sale;
terms and conditions of this Licence.
the Licensee procures that the Transferee accepts the
terms of the Licence;
15. Severability
In the event that any of these terms and conditions or provisions
the Licensee gives notice to the Licensor of the transfer
and the identity and address of the Transferee.
shall be determined by any competent authority to be invalid,
unlawful or unenforceable to any extent, such term, condition or
provision shall to that extent be severed from the remaining terms,
10. Force Majeure
conditions and provisions which shall continue to be valid to the
The Licensor shall be under no liability to the Licensee in respect
fullest extent permitted by law.
of anything which, apart from this provision, may constitute breach
of this Licence arising by reason of force majeure.
16. Law
The parties hereby agree that the Licence concluded between
11. Termination
(a)
In addition to provisions for termination as herein provided,
them and constituted on these terms and conditions shall be
construed in accordance with English law.
the Licensor may by notice in writing to the Licensee
terminate this Licence if the Licensee is in breach of any
1 U.S.A. NOTE: In all States in the U.S.A. (except Louisiana) all
term, condition or provision of this Licence or required by
disclaimers of warranty of merchantability or warranty of fitness for
the applicable law and fails to remedy such breach (if
any particular purpose must be conspicuous and are usually in
capable of remedy) within 30 days of having received
boldface or uppercase (capital) print or both.
written notice from the Licensor specifying such breach.
JAPAN NOTE: Under the Commercial Code of Japan, the party
(b)
Upon termination, the Licensee shall pay to the Licensor all
costs and expenses, including legal and other fees incurred
and all arrears of fees, charges or other payments arising in
respect of the Software, this Licence or otherwise and shall
comply with its undertaking specified in Clause 4(g) above.
(c)
receiving the goods must inspect them without delay and report
any defect or deficiency to the supplier of the goods otherwise the
party receiving the goods cannot rescind the agreement or
demand a reduction in the sum paid for the goods as
compensation for damages. In the case of a defect not
Termination, howsoever or whenever occasioned shall be
immediately perceptible, there is a six (6) month grace period.
subject to any rights and remedies the Licensor may have
Once this period has passed without notification of a defect, the
under this Licence or under the applicable law.
party receiving the goods cannot rescind the agreement or
demand any reduction in price. The parties may avoid or modify
12. Assignment
such provisions by contract therefore the above clause may remain
as unamended.
The Licensee shall not assign or otherwise transfer all or any part
of the Software or this Licence without the prior written consent of
the Licensor or in accordance with the provisions of clause 9(d)
above.
13. Waiver
Failure or neglect by either party to enforce at any time any of the
provisions hereof shall not be construed nor shall be deemed to be
a waiver of that party's rights hereunder nor in any way affect the