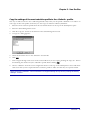
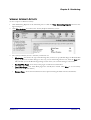
1
User Guide
www.cyberpatrol.com
Protecting An Online Generation
NOTICES
NOTICES
Updates to the CyberPatrol documentation and software, as well as Support
information are available at www.cyberpatrol.com/support.
Copyright ©1998-2005 SurfControl plc. All rights reserved.
No part of this publication may be reproduced, stored in a retrieval system, or
transmitted, in any form or by any means, electronic, mechanical, photocopying,
recording, or otherwise, without the prior permission of the copyright owner.
SurfControl and CyberPatrol are registered trademarks and the SurfControl and
CyberPatrol logos are trademarks of SurfControl plc. All other trademarks are
property of their respective owners.
Version 7.0 printed June 9, 2005.
CyberPatrol 7.0
User Guide
i
CONTENTS
CONTENTS
Notices ............................................................................................................... i
Chapter 1 - Getting Started ............................................................................... 1
What’s new in CyberPatrol 7........................................................................................................................................1
The CyberPatrol Headquarters (HQ) .........................................................................................................................2
Creating/Editing Passwords ........................................................................................................................................3
The <Default> User Profile ........................................................................................................................................3
Blocking Style .................................................................................................................................................................4
Override Mode ...............................................................................................................................................................4
Shutting down CyberPatrol ..........................................................................................................................................6
Further Customization of CyberPatrol.......................................................................................................................6
Chapter 2 - User Profiles .................................................................................... 7
CyberPatrol and Windows User Profiles....................................................................................................................7
Creating Profiles that do not link to Windows User Profiles .................................................................................9
Applying Windows User Name Integration to existing profiles ......................................................................... 13
Creating Profiles using the Duplicate User function............................................................................................. 13
Switching between User Profiles .............................................................................................................................. 14
Automatic Timeout - Switch to <Default> ........................................................................................................... 14
Chapter 3 - Time Management ........................................................................ 16
How does it work?...................................................................................................................................................... 16
Setting up Time Management ................................................................................................................................... 17
Applying Time Management to programs .............................................................................................................. 18
Chapter 4 - Web Filtering ................................................................................ 19
How CyberPatrol filters the Internet ....................................................................................................................... 19
Using the CyberLIST ................................................................................................................................................. 20
Creating a Yes List ...................................................................................................................................................... 21
Accessing sites that are blocked................................................................................................................................ 22
Blocking sites that are being allowed through........................................................................................................ 24
Using keywords to block specific sites .................................................................................................................... 24
Updating the CyberLIST categories......................................................................................................................... 25
Chapter 5 - Filtering Programs ........................................................................ 26
Adding programs to CyberPatrol ............................................................................................................................. 26
What to do if the program you hoped to add is not listed ................................................................................... 27
Managing programs .................................................................................................................................................... 27
The Message Center ................................................................................................................................................... 29
CyberPatrol V7.0
User Guide
ii
CONTENTS
Chapter 6 - Filtering Chat ................................................................................ 30
Adding the program to CyberPatrol ........................................................................................................................ 30
Adding words and phrases for CyberPatrol to remove ........................................................................................ 31
Setting ChatGard to filter the Chat program or website ...................................................................................... 32
Chapter 7 - Newsgroup Filtering ..................................................................... 33
Using CyberLISTs ...................................................................................................................................................... 33
Limiting Newsgroup Access Time ........................................................................................................................... 33
Creating a Newsgroup Yes List ................................................................................................................................ 34
Accessing Newsgroups that are blocked................................................................................................................. 35
Blocking Newsgroups that are being allowed through ......................................................................................... 36
Updating the Newsgroup Category CyberLIST..................................................................................................... 36
Chapter 8 - Monitoring ................................................................................... 37
Setting up monitoring................................................................................................................................................. 37
Viewing Internet Activity........................................................................................................................................... 38
Chapter 9 - Extended Features ........................................................................ 41
Passwords..................................................................................................................................................................... 41
Behavior options ......................................................................................................................................................... 41
Filter settings report ................................................................................................................................................... 42
Event Viewer ............................................................................................................................................................... 43
Internet Proxy Settings............................................................................................................................................... 43
Summary....................................................................................................................................................................... 43
Chapter 10 - Troubleshooting ......................................................................... 44
Chapter 11 - Appendix .................................................................................... 46
Online Safety ............................................................................................................................................................... 46
Glossary........................................................................................................................................................................ 47
Event Viewer ............................................................................................................................................................... 51
CyberPatrol Categories............................................................................................................................................... 53
CyberPatrol V7.0
User Guide
iii
Chapter 1 - Getting Started
CHAPTER 1 - GETTING STARTED
CyberPatrol helps you choose when and how your kids use the Internet by enabling you to:
•
Monitor Internet activity
•
Block harmful sites & images
•
Restrict chat and instant messenging
•
Limit time online & access to programs
•
Control program downloads
•
Protect Privacy
This is all done via an easy to use interface that you can customize to fit your exact filtering needs.
WHAT’S NEW IN CYBERPATROL 7
The following capabilities have been added to CyberPatrol 7:
Windows User Name Integration
CyberPatrol loads the profile that matches your Windows User login. This
enables you to surf with your own profile in place without having to
switch user.
Web Link Analysis
Helps prevent sexually explicit images in search engine results from
reaching computer screens, as even innocent search words and phrases can
return unsuitable content.
Monitoring
CyberPatrol can now monitor Web activity for each User Profile. This
monitored data is securely stored and can be used to produce a report on
Internet access.
Activity Explorer
You can view a summary of all monitored activity and explore detailed
reports for each User Profile. Right-click on the URL/s to visit the Web
page, Allow or Block access to the website and save the list to file.
Real-Time Activity Monitor
Displays all Web activity in real-time including URL, images files, and
active server pages, together with the program that requested it, enabling
you to fine-tune and troubleshoot filter settings. It is a valuable tool for
creating a custom Yes list.
Note: for explanations of the terminology used, see the Glossary in the Appendix at the back of this
guide.
CyberPatrol 7.0
User Guide
1
Chapter 1 - Getting Started
After you have installed CyberPatrol, the first thing you will see is the CyberPatrol HQ Toolbar. Once you have
closed the Toolbar for the first time, it can be accessed again by clicking Start, then Programs, followed by
CyberPatrol Headquarters. This is used to customize CyberPatrol but you need to open the Headquarters
(HQ) before you can do this. The options available on this toolbar are as follows:
Gives you access to details about the
version of CyberPatrol that you have
installed.
Enables an authorized user to access the
computer in Override Mode, providing full
access to the Internet on a temporary
basis.
Shows the User Profile that is being
used to manage Internet access at this
present time. Any restrictions applied
to this User Profile will apply.
Shuts down the CyberPatrol program
completely. No filtering will take place if
you have shut down CyberPatrol. For this
reason, you will be asked for your
Headquarters password before CyberPatrol
will shut down.
Allows users to switch to their own User
Profile for surfing without having to
enter the Headquarters.
Opens the Help system without having to
gain access to the HQ.
Opens the Headquarters so that you can
customize CyberPatrol. You will need to
enter your Headquarters password.
Accesses details about the version of
CyberPatrol and serial number that you
have installed.
THE CYBERPATROL HEADQUARTERS (HQ)
The CyberPatrol Headquarters is password protected so that only those with direct permission can access it.
All the CyberPatrol filter settings can be customized within the Headquarters.
1
Click Open HQ and a password dialog will appear.
2
Enter the Headquarters password that you created during the installation process and click OK.
What to do if you can’t remember your password?
3
Click Open HQ on the CyberPatrol HQ Toolbar to see the CyberPatrol dialog appear.
4
Click Show Hint>>.
5
The dialog will enlarge to show you the hint that you entered during set up. If you can now remember your
password enter it into the password edit field and click OK.
Note: a Hint is a word or sentence that reminds you of the word you have chosen as your Headquarters
or Override Mode password. This hint is accessible to everyone so make sure that it cannot be easily
worked out by other users.
CyberPatrol 7.0
User Guide
2
Chapter 1 - Getting Started
If the hint does not remind you. Visit the Support section of the website www.cyberpatrol.com/
support and follow the current 'Forgotten Password' directions.
Note: failed attempts to access the Headquarters in this manner will be recorded in the Event Viewer.
CREATING/EDITING PASSWORDS
If you want to change your password you can do this by opening the Headquarters and selecting Extended
Features. Once you can see this screen either click the Password link below Extended Features or click the
Change Passwords button in the Extended Features screen itself.
The Change Passwords screen contains two sections: Headquarters Password and Override Mode’s Password
(for changing the Override Mode password see the next section). To change your Headquarters Password:
1
Enter your new password into the New Headquarters password edit field.
2
Enter the same password into the Confirm Headquarters password edit field.
3
In the Headquarters Password Hint pane write something that will help you to remember your password.
THE <DEFAULT> USER PROFILE
If you have not created any User Profiles, CyberPatrol will filter ‘ready-to-go’ with the following settings in
place, using the <Default> profile:
•
Time Management is set to 'On' with a daily surfing limit of 4 hours, a weekly limit of 20 hours. Internet
access will be disabled between 11pm and 7 am.
•
Web Filtering is set to 'Filter'. All of the CyberLIST categories are checked and Web access will be filtered
according to these categories.
•
The Program Restrictions are set to ‘Filter’ but this will only apply to programs that you add to
CyberPatrol after installation.
•
The ChatGard Filtering Option is set to 'Filter'. However, this will only apply to Chat programs that you
have first physically added to CyberPatrol and then added keywords for CyberPatrol to filter out. If you
have not performed these two steps, ChatGard cannot filter any program.
•
Newsgroups will be filtered against the CyberLIST in the same way as the Web Filtering option.
•
Monitoring is set to 'Off', so no monitoring will take place.
Why have the Default User Profile?
The <Default> profile is a ready-made, supplied profile that is included in the product for the following
reasons:
•
There is always a profile available for the computer to use if no other profile is selected.
•
If you don’t set up any profiles at all then this profile will still provide a reasonably safe form of filtering
'out-of-the-box'.
CyberPatrol 7.0
User Guide
3
Chapter 1 - Getting Started
If someone goes online then leaves the connection idle for more than a pre-set time, CyberPatrol can be set to
automatically switch to the <Default> User Profile as a security precaution. This means that a younger child
can’t jump into the computer seat and start surfing using the less restrictive profile.
BLOCKING STYLE
The Blocking Style list box, by default, shows the CyberPatrol shield. This is the default Web page that will
appear when access to a website is blocked. There are a number of styles available for this page, and you can
either choose one to suit each user you are creating a profile for, or even allow them to choose their own:
As well as making the user feel that their profile is more personal to them, having a different picture and
therefore a different icon for each profile makes it easier for you. The icon enables you to easily see at a glance
which profile belongs to which user.
OVERRIDE MODE
Override Mode gives a user unfiltered access to the Internet on a temporary basis. It is particularly useful when
you have someone who needs/wants to use the computer for a short period of time. If you want them to be
able to use the computer without having a profile set up for them, but the <Default> profile is too limiting,
you can ask them to use Override Mode with a password that you have set for them.
Setting a password for Override Mode
First create a password for Override Mode:
Note: for security reasons, if you are using Override Mode to enable another user to use the computer
(rather than to Override Mode filtering for yourself), do not give them your Headquarters password.
Create a new Override Mode password for them to use.
CyberPatrol 7.0
User Guide
4
Chapter 1 - Getting Started
1
Open the Headquarters and select the Extended Features screen. Once you can see this screen either click
the Password link below Extended Features or click the Change Passwords button in the Extended
Features screen itself.
2
The Change Passwords screen contains two sections: Headquarters Password and Override Mode’s
Password. Enter a password into the New Override Mode password: edit field.
3
Enter the same password into the Confirm Override Mode password: edit field. In the Headquarters
Password Hint pane write something that will help you or the person using Override Mode to remember
the password.
Note: everyone has access to the CyberPatrol HQ Toolbar and the Hint that you enter can be seen when
clicking the Open HQ button and then clicking Show Hint. You must be sure that no-one other than
administrators or the person using Override Mode will be able to guess the password by working out
what the Hint actually means.
Switching to Override Mode
To use Override Mode:
1
Create an Override Mode password (see the section above) then click the Override Mode button
the CyberPatrol HQ Toolbar. A dialog will ask you to enter the Override Mode password.
2
Click OK. The Override Mode Settings dialog will appear. This Override Mode Settings dialog has three
settings:
•
Override Mode On - Block All - with this setting in place the user :
•
in
–
Will be unable to access any Web pages.
–
Will be blocked from any programs that have been added to the Program List screen whether they
were set to Allow or Block.
–
Will be blocked from any Chat program that uses a program that is listed in the Chat Programs screen
and has the check box checked to enable it to be filtered.
Override Mode Off - Filter using currently selected User Profile - this switches Override Mode off and
applies the filter that was being used before CyberPatrol was set to Override Mode. The main use for this
setting is so that a Override Mode user can switch CyberPatrol back to filtering when they have finished
using the computer. However, you can use this setting to apply filtering to Override Mode, by first
switching user to the User Profile with the settings that you want to be in place when they use the
computer, then choosing Override Mode Off. For general filtering restrictions it is a good idea to select
the user <Default>.
•
Override Mode On - Allow All - the Override Mode user will be able to access all websites, programs and
Chat programs regardless of the settings within the CyberPatrol profiles.
3
Choose one of these settings then click OK. The user can now use the computer with Override Mode in
place.
Note: if someone other than yourself is using Override Mode, make sure that they know how to switch
CyberPatrol back to filtering once they have finished.
CyberPatrol 7.0
User Guide
5
Chapter 1 - Getting Started
SHUTTING DOWN CYBERPATROL
If you want to switch off filtering completely you can shut CyberPatrol down. This will then enable you to use
the computer without CyberPatrol filtering anything. When you restart your computer CyberPatrol will
automatically start filtering again.
Warning: Shutting CyberPatrol down will return the computer to its unfiltered state meaning
no filtering will take place.
To shut CyberPatrol down:
1
Click the Shutdown button
2
You will see the Password dialog, enter your Headquarters password and click OK.
3
CyberPatrol will shutdown and the CyberPatrol icon will disappear from the system tray on the computer
task bar.
in the CyberPatrol HQ Toolbar.
Note: To restart CyberPatrol select Start>Programs>CyberPatrol.
For more information on any of the aspects of using CyberPatrol, visit the CyberPatrol website
www..cyberpatrol.com and click on the Support tab. Here you will find further information such as FAQs and
How To guides to help you use the product.
FURTHER CUSTOMIZATION OF CYBERPATROL
Carrying out the steps up to this section will make sure that you have CyberPatrol up and ready to go. Once
you have reached this stage you can, however, fine-tune CyberPatrol to give you exact filtering designed for
each user:
•
Creating a User Profile for each user so that they can have filtering applied to them that exactly matches
their surfing needs.
•
Adding certain programs to CyberPatrol so that they can have time limits, in the same way that you can
limit Internet access.
•
Adding specific websites and Newsgroups to CyberPatrol so that they will always be allowed or blocked
(depending on what you have asked CyberPatrol to do with them), regardless or whether of what filtering
is in place.
•
Asking CyberPatrol to launch the correct User Profile when you log into Windows with your Windows
User Name.
How to perform these tasks and others are covered in the following sections.
CyberPatrol 7.0
User Guide
6
Chapter 2 - User Profiles
CHAPTER 2 - USER PROFILES
CyberPatrol is designed to filter your Internet use efficiently as soon as it is installed. You do not have to do
anything to make it do this. However, by changing a few of the settings you can fine-tune it to fit in with your
users’ filtering needs exactly. You can even set it up to allow each user a different level of Internet access and
use of the computer. To apply a different type of filtering to each user you need to have a User Profile for each
of them
CYBERPATROL AND WINDOWS USER PROFILES
If you have CyberPatrol installed on a machine running Windows 2000 or XP, you can take advantage of
CyberPatrol’s Windows User Name Integration facility. This enables CyberPatrol to automatically select your
CyberPatrol User Profile on Windows Login, providing seamless integration that is great for Windows 2000
and XP. If you don’t have 2000 or XP on your computer or do not wish to use this feature then you can create
CyberPatrol User Profiles that are not linked to Windows Profiles.
Creating New Profiles that link to your Windows User Profiles
To create a new User Profile that links to your Windows User Profiles:
1
Click Welcome to CyberPatrol then Manage User Profiles, in the left-hand pane of the CyberPatrol
Headquarters. The Manage User Profiles screen will appear:
CyberPatrol 7.0
User Guide
7
Chapter 2 - User Profiles
2
Click Create User and you will see the following dialog:
This will only be shown in the following circumstances:
•
You have Windows 2000 or XP installed on your computer.
•
You have created Windows profiles for users of this computer.
•
You have not created any independent profiles within CyberPatrol so that the only UserProfile in
existence is <Default>.
3
If you want CyberPatrol to create User Profiles for each of your Windows User Profiles detected click Yes.
4
Once you have clicked Yes a CyberPatrol Windows User Name Integration dialog will appear:
5
Select the boxes for the User Profiles that you want to use the Windows User Name Integration feature
and click Create Users.
6
You will see the following dialog, telling you how many new CyberPatrol User Profiles have been created:
Click OK.
CyberPatrol 7.0
User Guide
8
Chapter 2 - User Profiles
7
The profiles will appear in the ‘User Profiles’ section of the Manage User Profiles screen:
8
It is recommended that you set a password for each of your User Profiles by clicking on the User Profile
and entering the password details. This will enable you to manually switch to another User Profile if you
need to. All of the new User Profiles have the <Default> User Profile settings applied and are ready to go.
Alternatively, you can customize each one to meet each user’s needs.
CREATING PROFILES THAT DO NOT LINK TO WINDOWS USER PROFILES
You can create User Profiles that are independent of your Windows User Profiles which can be useful in the
following circumstances:
•
You are not using Windows 2000 or XP so there are no profiles available for CyberPatrol to link to.
•
You prefer to have just one Windows profile to log into the computer but would like each user to have
their own CyberPatrol User Profile.
•
You want to create a CyberPatrol User Profile on a temporary basis so do not want to have to create a
Windows User Profile at the same time.
1
Click Welcome to CyberPatrol then Manage User Profiles, in the left-hand pane of the CyberPatrol
Headquarters. The Manage User Profiles screen will appear:
CyberPatrol 7.0
User Guide
9
Chapter 2 - User Profiles
2
Click Create User. If you have Windows User Profiles created you will see the following Windows User
Name Integration dialog, click No. If you do not see this dialog go to step 3:
3
The New User Profile dialog will appear:
Enter a name and password for this User Profile. Do not select the check- box in the ‘Windows User
Name Integration section.
4
Click OK.
5
A new icon will appear in the User Profiles pane along with the name of the profile. Choose an image
from the ‘Blocking Style’ list box and click Preview to see what this page will look like when it appears in
front of the user.
6
There is an Automatic Timeout that will set CyberPatrol to the <Default> User Profile after a certain
length of time (10 minutes by default). This is a safety mechanism and will only happen if the computer is
connected to the Internet but you are not actually browsing. Select the User Profile and click the
Additional Options button to change this setting.
7
Click Save. All the new User Profiles have the <Default> User Profile settings applied and are ready to go
or you can customize them to meet each user’s needs.
Why Change the profile <Default>?
It is a good idea to make the profile <Default> as limiting as possible to ensure a better degree of protection,
particularly in the case of Default being used if the computer is unattended as in the example above.
The profile <Default> carries the following restrictions:
•
All Internet access is filtered.
•
Daily automatic update is enabled.
CyberPatrol 7.0
User Guide
10
Chapter 2 - User Profiles
•
•
Certain keywords and Chat Programs are included so these will be blocked. These include a list of the
most common offensive words and the following Chat Programs:
–
AOL Messenger and ICQ
–
mIRC and other IRC based Chat programs
CyberPatrol will block all Internet access after 11.00pm at night until 7.00am the following morning and
there will be a warning 10 minutes before this happens.
Setting <Default> to 'Block All'
The profile <Default> can be set so that it blocks all Internet access along with any programs that are listed in
the Programs screen. There are a number of reasons why you might want to do this:
•
You could prevent your users from just Switching User to the profile <Default> when it is less limiting
than their own profile.
•
If you don’t want to spend time copying the most limiting profile to <Default> you can just ask
<Default> to block all access. This will make it the most limiting profile.
To set the <Default> profile to block everything:
1
Open the Customize Filter Settings screen by clicking the Customize Filter Settings button in the Welcome
to CyberPatrol screen.
2
Click the arrow at the side of each list box to reveal a drop-down list.
3
Change each of the six filtering options to Block All:
4
Click Save. Now if anyone tries to use this profile to access the Internet, use a Chat program or run any
programs that have been added to CyberPatrol, they will be blocked.
Note: when setting the Program Restriction Options to Block All CyberPatrol will only block programs
(including Chat programs) that have been added to the Defined Programs screen.
CyberPatrol 7.0
User Guide
11
Chapter 2 - User Profiles
Copy the settings of the most restrictive profile to the <Default> profile.
One way to make sure that a user is still being filtered safely if they use the profile <Default> is to make it an
exact copy of their own profile. To do this, use the 'Copy To' function within CyberPatrol:
1
Select the most restrictive profile from the User Profile list box at the top of the Headquarters pane.
2
Select the Time Management screen.
3
Click the Copy To... button at the bottom of the Time Management screen.
4
A Copy To... dialog appears:
5
Check the check box next to the <Default> User Profile.
6
Click OK.
7
Now navigate through each screen of the User Profile that you are copying, clicking the Copy To... button
and checking the check box by the <Default> profile before clicking OK.
8
Choose <Default> from the User Configuration list box at the top of the Headquarters screen and check
each screen that you have copied from the restrictive profile to make sure that they are a perfect match.
Note: the profile <Default> can be returned to its original settings at any time by clicking the Factory
Settings... button.
CyberPatrol 7.0
User Guide
12
Chapter 2 - User Profiles
APPLYING WINDOWS USER NAME INTEGRATION TO EXISTING PROFILES
This applies if you have already created CyberPatrol User Profiles and want to link them to your Windows User
Profiles, e.g. you have created a new Windows User Profile and wish to link to a CyberPatrol User Profile that
is already in use:
1
Click Welcome to CyberPatrol then Manage User Profiles in the left-hand pane of the CyberPatrol
Headquarters. You will now see the Manage User Profiles screen.
2
Select a User Profile that you want to be recognized by selecting the user icon in the Manage User Profiles
screen. The details of this user profile will appear beneath.
3
Change the name of this profile so that it exactly matches the Windows User Profile name that you want
CyberPatrol to recognize.
4
Click the Additional Options button at the bottom of the screen.
5
Select the check box in the Windows User Name Integration section. If you want the computer to
automatically switch to the <Default> profile if the computer is left unattended, make sure that the
‘Switch to <Default>’ check box is checked. Alternatively deselect this check-box if you do not want to
use this feature.
6
Click OK.
7
Click Save in the Manage User Profiles screen.
Warning: the CyberPatrol User Name must exactly match the Windows User Name or this will
not work.
CREATING PROFILES USING THE DUPLICATE USER FUNCTION
You can create a new User Profile with the exact settings of another User Profile by using the Duplicate User
function:
1
Click Welcome to CyberPatrol then Manage User Profiles, in the left-hand pane of the CyberPatrol
Headquarters. You will now see the Manage User Profiles screen.
2
Select the User Profile you want to copy the settings from and click Duplicate User.
3
Enter a name and password for this User Profile and click OK. If you want this User Profile linked to a
Windows User Profile then make sure:
•
the User Profile name exactly matches the Windows User Profile name.
•
the check box in the ‘Windows User Name Integration’ section is selected.
4
A new icon along with its name will appear in the top pane of the Manage User Profiles sceen. Choose an
image from the ‘Blocking Style’ list box and click Preview to see what this page will look like when it
appears in front of the user.
5
Click Save.
CyberPatrol 7.0
User Guide
13
Chapter 2 - User Profiles
SWITCHING BETWEEN USER PROFILES
This enables your users to manually switch to their own CyberPatrol User Profile. To change to a different
User Profile:
1
In the CyberPatrol HQ Toolbar click Switch User or right-click the yellow CyberPatrol icon in your taskbar
system tray (next to the time) and select Switch User.
2
A dialog will appear with all of the profiles that you have in place listed. Choose the profile that you wish
to use to access the Internet.
3
Click Switch To...
4
If the Headquarters is not open a dialog will appear asking for this user’s password. Enter the password
and click OK.
There are example profiles on the CyberPatrol Support website which will take you, step-by-step through
setting up of profiles of a particular type. These profiles can be found at https://www.cyberpatrol.com/
support/ in the Online Resources section.
AUTOMATIC TIMEOUT - SWITCH TO <DEFAULT>
This feature is enabled by default for User Profiles that are not using Windows User Name Integration. If the
computer is connected to the Internet but no browsing is taking place, as soon as the time limit set in
Automatic Timeout is exceeded, CyberPatrol will switch the User Profile back to the <Default> User Profile.
If unchanged, this is a fairly limiting profile and will give a high degree of protection.
Automatic Timeout is set within the Manage User Profiles screen. It can be set to any value that you feel is
necessary for your set up at home within a range 1-60 minutes. By default it is set to 10 minutes. It can also be
disabled by un-checking the checkbox.
You can set up a specific automatic timeout for each User Profile. In this way, a less limiting profile can have a
shorter timeout set than a stricter one, resulting in the profile switching taking place sooner if the computer is
left unattended with the less limiting profile in place than if the more restrictive profile was being used. If you
use Automatic Timeout you must also make sure that you set the <Default> User Profile to be the most
restrictive e.g. it blocks all Internet access. This will ensure that the computer is at its most secure when the
switch to <Default> User Profile occurs. It also makes sure that users aren’t tempted to switch from their own
profile to the <Default> one because it allows them more freedom.
Switching to <Default > when you are using Windows User Name Integration
If you use the Windows User Name Integration feature then the ability to switch back to the <Default>
profile will need to be enabled:
1
Click Create User...
2
In the dialog that follows add the User Profile name and password then select the ‘Windows User Name
Integration’ check-box.
3
Click OK.
CyberPatrol 7.0
User Guide
14
Chapter 2 - User Profiles
4
When you see the new User Profile icon appear the User Profiles pane, select it and click the Additional
Options button. You will now see an Additional User Profile Options dialog:
5
Select the ‘Switch to <Default>’ check-box.
6
Click OK.
CyberPatrol 7.0
User Guide
15
Chapter 3 - Time Management
CHAPTER 3 - TIME MANAGEMENT
CyberPatrol enables you to manage the amount of time each user spends online. Surfing limits within
CyberPatrol are all interdependent so when a Web page is requested CyberPatrol runs through a check list,
checking each time limit to see if any of the limits set will restrict access.
HOW DOES IT WORK?
The diagram shows the order in which time limits are checked before Internet access is allowed:
The Daily Limit is set within the list boxes alongside each day of the Time Management graph and is also
dependant to some extent on limitations imposed by the Weekly Limit.
Example
If the weekly limit is 20hrs and each daily limit has been set to 4hrs, a user could:
•
Access the Internet for two hours a day - this would be well within the daily limit and their total surfing
would only add up to 14 hours so they would also be within the weekly limit.
•
Access the Internet for 4 hours on Saturday and for 4 hours on Sunday, 3 hours on Monday and Tuesday
and 2 hours on Wednesday, Thursday and Friday.
What they could not do:
•
Access the Internet for 6 hours on Saturday and 2 hours on each day for the rest of the week. Hours not
used in the week cannot be ‘carried over’. As 6 hours will exceed the daily limit of 4 hours, access will be
blocked as soon as the 4 hour limit is reached on Saturday.
•
Access the Internet for 4 hours every night because this would exceed the twenty hours set in the weekly
limit. Once the limit is reached (in this example, on Friday) then Internet access will be blocked until the
following Monday.
Because of the order in which CyberPatrol checks time limits, no matter how much weekly or daily time there
is available, if the Time Management grid is set to ‘Block’ then no Internet activity can take place.
CyberPatrol 7.0
User Guide
16
Chapter 3 - Time Management
SETTING UP TIME MANAGEMENT
The Time Management screen is where you can set a limit for your user’s surfing. By default CyberPatrol will
allow filtered surfing from 7.00am till 11.00pm. Between 11.00pm and 7.00am, Internet access will be disabled.
To access the Time Management screen:
1
Open the CyberPatrol Headquarters and double-click Welcome To CyberPatrol in the left-hand
naivigation panel.
2
Select Customize Filter Settings then click Time Management.
3
Click Settings. You will now see the Time Management screen:
To change these settings, customize the following options:
Enable Time Management - if this box is checked then the settings within the Time Management screen are
active. If it is unchecked then Internet access will have no time restrictions in place.
Reminder Minutes - a Reminder dialog appears a short-time before access to the Internet is blocked due to the
user either reaching their pre-set limit or a filtered access period is changing to blocked access.
You can set this to any time that you feel is useful within a range of 1-60. Changing the Reminder time value to
0 will switch it off. When a Reminder is set CyberPatrol behaves in the following way:
•
A warning dialog will appear telling the user that Internet access is about to be blocked.
•
CyberPatrol will start to count down the time in minutes till it reaches the timespan set in ‘Reminder’.
•
Internet access will stop.
Weekly Limit - this specifies how much surfing time the user can have access to throughout the week running
from Monday through Sunday. CyberPatrol adds up the time spent surfing on a daily basis and compares this
against the value that is set as the maximum total weekly surfing allowed. Once this maximum is reached
Internet access is blocked. The time is reset at the beginning of the next week.
CyberPatrol 7.0
User Guide
17
Chapter 3 - Time Management
Daily Limit - set a limit of surfing time for each user. The daily limit works within the weekly limit and does not
override the blocked access settings set in the Time management graph.
To set up time management:
1
Ensure that you have the correct User selected in the User Profile list box at the top of the Time
Management screen.
2
Check the ‘Enable Time management’ check box so that you can interact with the time management
screen. This will in effect switch Time Management on. Without this box being checked, no time limits
will be set.
3
Enter a weekly limit of Internet access for the user in the Weekly limit box, this will give them a cumulative
surfing time. Decide how much warning the user will need before their access to the Internet is blocked.
Enter this number into the Reminder Minutes box.
Note: entering 0 or a number less than 5 as a value will, in effect, switch the Reminder off. 5 is the
minimum time value that can be entered into the Reminder Minutes box.
4
Click on the graph and drag the box that appears so that it covers all of the times that you want to set to
filtered or blocked access.
5
If you want to set a daily limit for access to the Internet you can do so by entering a number into the Daily
Limit list box alongside each day shown on the graph.
6
Set the selected area to Filtered or Blocked access by clicking the Set to Filtered Access button or the Set
to Blocked Access button.
7
Click Save.
APPLYING TIME MANAGEMENT TO PROGRAMS
Time Management can also be applied to programs. This is useful if you want to limit the time that users spend
with particular programs such as games and Instant Messenger. For more information on adding programs to
CyberPatrol and applying time management to them see Chapter 5: ‘Filtering Programs’.
CyberPatrol 7.0
User Guide
18
Chapter 4 - Web Filtering
CHAPTER 4 - WEB FILTERING
From the Web Filtering screen you can completely customize Internet filtering in the following ways:
•
Set up a Web Yes List for really safe surfing.
•
Block particular sites to ensure that users can never accessed them.
•
Allow particular sites that are blocked by CyberPatrol's filtering technologies.
•
Allow or block website addresses that contain specific words.
•
Enable or disable categories within the CyberLIST.
•
Switch off the Web Page Analysis and Web Link Analysis dynamic filtering technologies.
HOW CYBERPATROL FILTERS THE INTERNET
CyberPatrol uses a combination of advanced filtering technologies to provide the most effective and powerful
Internet filtering available. Upon installation of the product all of these are on and functioning by default:
•
CyberLIST - a list of websites that have been carefully researched by a global team of professional
researchers and categorized according to type. The CyberLIST is automatically updated on a weekly basis,
representing thousands of new sites a week, making it current, accurate and relevant. You can tell that the
site is blocked because it is in the CyberLIST, and the on screen blocking message will read 'The website is
inappropriate'.
Due to the size and performance constraints on client workstations, it is not possible to rely solely upon a
CyberLIST for Internet filtering. That is why we have developed leading edge dynamic technologies to
ensure even the newest of websites are captured by CyberPatrol. These include:
–
CyberPATTERNS - this is a dynamic filtering technology that analyzes the Web address for keywords
and patterns which are categorized 'on-the-fly'. The CyberPATTERNS are updated in the same way as
the CyberLIST. You can identify whether a site is being blocked by a CyberPATTERN or not, as if it
is, the blocking message will read 'Restricted by CyberPATTERN'.
–
Web Page Analysis - a dynamic neural network filtering technology that uses complex algorithms to
analyze the text contained on a Web page and in its HTML source code. It then uses this information
to apply a category to the page. If this category is a blocked category, access to the page will not be
allowed. A block by Web Page Analysis can be identified by the blocking message 'The website's
content is inappropriate'. You can choose to adjust the filter strengths by disabling this feature from
within the Web Categories screen.
–
Web Link Analysis - is a dynamic filtering technology that analyzes the URLs and links which appear
on a Web page. These are then checked against the CyberLIST and CyberPATTERNS. If there are
several links on the page categorized as Adult/Sexually explicit, access will not be allowed. A website
blocked by this technology will show a message 'The website contains inappropriate links'. You can
adjust the filter strength by disabling this feature within the Web Categories screen.
CyberPatrol 7.0
User Guide
19
Chapter 4 - Web Filtering
USING THE CYBERLIST
Full details of CyberPatrol CyberLIST category criteria can be found in the Appendix or online at
www.CyberPatrol.com. By default all of the categories within the CyberLIST are checked and therefore
blocked. If you want to allow a category you need to un-check that category to unblock it. To un-block a
category:
1
Choose Customize Filter Settings followed by Web then Categories from the left-hand menu.
2
You will see the Web Categories screen. This contains a list of categories with checked check-boxes and
red icons to show they are blocked:
Uncheck the category or categories that you want to allow.
3
The selected icon/s will change to a green allow icon. Click Save.
CyberPatrol 7.0
User Guide
20
Chapter 4 - Web Filtering
CREATING A YES LIST
Creating a Yes List enables you to impose a very restrictive form of filtering on a User Profile. In this way you
can, for example, give a young child access to the Internet without running the risk of them finding something
inappropriate. Then, when the child asks to visit a particular website, you can visit the site to make sure that it
is safe before adding it to the Yes List. The user will then only be able to access sites contained in the Yes List.
To add sites to a Yes List:
1
Open HQ and then from the left-hand menu double-click Welcome To CyberPatrol.
2
Click Customize Filter Settings.
3
Click Web then Sites Allowed.
4
Ensure you have the correct User Profile selected in the User list box at the top of the Sites Allowed
screen.
5
Ask yourself the following question: “Do I want this website to be allowed for this user only or for
everyone who has a profile?” To add a site to a particular profile use the top pane of the Sites Allowed
screen. To add a site to every profile use the bottom pane of the Sites Allowed screen.
6
Click the Add button by the relevant pane.
7
Enter the Web address of the website that you want to allow into the dialog that follows.
8
Click OK.
9
The address of the website will appear in the Sites Allowed screen with a green icon beside it to show that
it is an Allowed website.
10 Click Save.
11 Click the Up Menu button once then click the Web Categories button. You will now see the Web
Categories screen.
12 Choose ‘Use your own Yes List’ from the Select List drop down list.
13 Click Save. Anyone using a profile that this Yes List has been applied to will now only be able to visit those
sites that you have added to your Yes List.
Example Yes List - Allow Disney website
The following instructions show how to set up a Yes List for Disney.com:
1
Open the CyberPatrol Headquarters and click Customize Filter Settings.
2
In the screen that follows click the Customize button alongside Web Filtering.
3
Click Select Web Categories.
4
Click the arrow on the 'Select List' field and choose 'Use your own Web Yes List' from the drop-down list.
5
Click Up Menu then click My Allowed Sites.
6
Click the Add button alongside the pane corresponding to who you want the Yes List to apply to: - just
this profile (User Profile websites) or everyone's profile (All User Profiles).
CyberPatrol 7.0
User Guide
21
Chapter 4 - Web Filtering
7
Enter the website address: www.disney.com
On some websites the Web address changes as you navigate to or through the website (it redirects to a
different site server). Disney is a good example of this so you need to add more than one website address
as an Allowed site. Generally you can just add a Keyword to be allowed rather than a website e.g. add
.disney as an Allowed Keyword.
It is recommended that you identify exactly which Web addresses need to be added as Sites Allowed in
order to be really accurate. The Real-Time Activity Monitor helps make this an easy task to complete (See
'Using the Real-Time Activity Monitor to add URLs’ later in this chapter).
8
Click OK then Save.
ACCESSING SITES THAT ARE BLOCKED
You can set CyberPatrol to allow sites by adding the site URL or keywords. This will make sure that any site
with a particular URL or a URL containing particular words will be allowed through regardless of what filtering
is in place.
Using the site URL to allow blocked sites
If you find that you want to access a site that is blocked by CyberPatrol then you can add the URL of this site
to CyberPatrol as an allowed site.
1
In the Customize Filter Settings screen click the Customize button alongside Web Filtering.
2
Click My Allowed Sites. You should now see the My Allowed Sites screen.
3
Ensure you have the correct User Profile selected in the User list box at the top of the Sites Allowed
screen.
4
Ask yourself the following question: “Do I want this website to be allowed for this user only or for
everyone who has a profile?”
5
To add a site to a particular profile use the top pane of the My Allowed Sites screen. To add a site to every
profile use the bottom pane of the My Allowed Sites screen.
6
Click the Add button by the relevant pane and enter the Web address of the website that you want to
allow.
7
Click OK. The address of the website will appear in the website pane with a green icon beside it to show
that it is an Allowed website.
8
Click Save.
CyberPatrol 7.0
User Guide
22
Chapter 4 - Web Filtering
Using the Real-time Activity Monitor to add URLs
1
Select Monitoring Reports in the left-hand menu of the CyberPatrol HQ.
2
Click the Show Real-time Monitor button that you will see in the right-hand pane.
3
Open a browser and go to the site you want to allow.
4
You will see the URL details of all the data appear in the Real-Time Activity Monitor. Right-click on these
and choose Allow access.
5
Save your changes.
Using keywords to allow blocked sites
Allowed keywords can be added to the My Allowed keywords screen so that any website addresses containing
the word will be allowed through. This is sometimes necessary as with the Disney.com example earlier in the
chapter, the website address can change as you navigate to and through the site.
To add allowed keywords:
1
Open the Keywords Allowed screen within the CyberPatrol Headquarters:
2
Ensure you have the correct User Profile selected in the User list box at the top of the Keywords Allowed
screen.
3
Ask yourself the following question: “Do I want this keyword allowed for this user only or for everyone
who has a profile?”
4
To add a keyword to a particular profile use the top pane of the My Allowed Keywords screen. To add a
keyword to every profile use the bottom pane of the My Allowed Keywords screen.
5
Click the Add button by the relevant pane and enter the keyword that you want to allow into the dialog
that follows.
6
Click OK. The keyword will appear in the ‘User Profile URL Keyword’ pane with a green icon beside it to
show that it is an allowed keyword.
7
Click Save.
Warning: any website address containing this keyword in its Web address will now be allowed for
every user who has had a profile created for them. Great care must be taken when specifying allowed
keywords as these words may be included in websites that you would not normally allow, particularly
if the page was found using a Search Engine.
CyberPatrol 7.0
User Guide
23
Chapter 4 - Web Filtering
BLOCKING SITES THAT ARE BEING ALLOWED THROUGH
If you are aware of sites that you want to be sure will always be blocked regardless of how CyberPatrol would
normally filter them, you can add them to CyberPatrol by entering the site URL or keywords. This will make
sure that any site with a particular URL or a URL containing particular words will always be blocked.
Using the site URL to block specific sites
1
Open the Sites Blocked screen within the CyberPatrol Headquarters:
2
Ensure you have the correct User Profile selected in the User list box at the top of the Sites Blocked
screen.
3
Ask yourself the following question: “Do I want this website to be blocked for this user only or for
everyone who has a profile?”
4
To add a site to a particular profile use the top pane of the My Blocked Sites screen. To add a site to every
profile use the bottom pane of the My Blocked Sites screen.
5
Click the Add button by the relevant pane and enter the Web address of the website that you want to
block into the dialog that follows.
6
Click OK. The address of the website will appear in the website pane with a red icon beside it to show that
it is a Blocked website.
7
Click Save.
USING KEYWORDS TO BLOCK SPECIFIC SITES
You may want to be sure that any website address containing certain words are blocked, alternatively you may
want to be extra sure that any website containing certain information is never allowed even though the
CyberLIST may not classify it as a blocked category. If this is the case then you can use the Keywords Blocked
screen to list these words.
Adding blocked keywords
1
Open the Keywords Blocked screen within the CyberPatrol Headquarters.
2
Ensure you have the correct User Profile selected in the User list box.
3
Ask yourself the following question: “Do I want this keyword blocked for this user only or for everyone
who has a profile?”
4
To add a keyword to a particular profile use the top pane of the My Blocked Sites screen. To add a
keyword to every profile use the bottom pane of the My Blocked Sites screen.
5
Click the Add button by the relevant pane and enter the keyword that you want to block into the dialog
that follows.
6
Click OK. The keyword will appear in My blocked Keywords screen with a red icon beside it to show that
it is a Blocked keyword.
7
Click Save.
CyberPatrol 7.0
User Guide
24
Chapter 4 - Web Filtering
UPDATING THE CYBERLIST CATEGORIES
A global team of professional researchers constantly checks Internet sites, adding them to the relevant
CyberPatrol categories as they appear. This means that your category list will need to be updated on a regular
basis to make sure that you always have the full list of current websites. By default the CyberLISTs will be
updated automatically but you can set the Update to Manual so it will only occur when you want it to. The
Update Categories screen enables you to specify when you want these updates to take place:
•
Daily (recommended) - with this option selected, an update will occur every 24 hours provided the
computer is running and someone is accessing the Internet at this time. If there is no Internet access
within this time span then the Update will take place as soon as possible.
–
Time to wait - this is how long CyberPatrol will wait before starting to download a new list if an
update has not taken place in the last 24 hours.. The ‘Time to wait’ counter starts as soon as someone
accesses the Internet.
•
Weekly - a CyberLIST update will be performed each week at a set time, providing the computer is
connected to the Internet at this time. If the computer is not online when it is time for an update, then the
update will take place as soon as the computer has access to the Internet.
•
Manual only - an update will only be carried out when the Update Now button in the Manual Update
section is clicked. The update process will then start immediately, providing there is a connection to the
Internet.
Note: with both Daily and Weekly updates, the update process waits for 10 minutes before starting,
once the computer accesses the Internet. You will know this happening because you will see a black
arrow in the CyberPatrol shield on the task bar. This time lapse can be changed within the Update
Categories section.
•
Manual update section - if you have selected the ‘Manual only’ option in the Automatic Update section
then in order for updates to take place, the Update Now button must be clicked. The Manual update
section contains this Update Now button.
•
List Information pane - the List Information pane contains information relating to the version of each
of the lists that you have in place. By checking this list you can see whether your lists have updated
successfully.
CyberPatrol 7.0
User Guide
25
Chapter 5 - Filtering Programs
CHAPTER 5 - FILTERING PROGRAMS
You can add specific programs to CyberPatrol to:
•
Stop users from using programs that you don’t want them to have access to.
•
Place restrictions on a Chat or Instant Message program, allowing your users to use this program but at
the same time, making sure that they cannot send out personal information.
•
Apply time management settings to a program or programs.
ADDING PROGRAMS TO CYBERPATROL
1
In the CyberPatrol Headquarters select Customize Filter Settings in the left-hand pane, followed by
Programs. Select List. The Program List screen will appear.
2
Click Add.
3
The Add Programs dialog will appear. If this is the first time that you have added a program to
CyberPatrol the Program List pane will be blank.
4
Click Add New Program. A dialog will ask if you want CyberPatrol to look for installed programs or
whether you want to look for them yourself:
–
if you choose to have CyberPatrol look for them then selecting this option and clicking OK will
populate the dialog with the programs that CyberPatrol has found.
–
if you choose to look for the program/s yourself, after selecting this option and clicking OK you will
see an Explorer dialog where you can navigate to the program/s you want to add.
5
Once you can see a list of programs in the dialog select the program to add and click OK.
6
A dialog will appear asking what User Profile/s to apply the program to. Ask yourself the following
question: “Do I want this program to be added to this user’s profile only or added to everyone’s profile?”
To add a program to a particular profile select the ‘Current User Profile’ option. To add a program to
everyone’s profile select the ‘All User Profiles’ option. If you choose ‘All User Profiles’ you will be able to
specify how filtering will be applied by:
7
–
Allowing access at all times.
–
Restricting access based on Time Management settings.
–
Denying access at all times.
Click OK.
CyberPatrol 7.0
User Guide
26
Chapter 5 - Filtering Programs
WHAT TO DO IF THE PROGRAM YOU HOPED TO ADD IS NOT LISTED
1
If the program that you wish to add is not in one of the default directories that CyberPatrol knows about,
it may not pick it up automatically. You will need to add the program manually. To do this:
2
Click Add New Program.
3
Select the ‘Manually locate an program executable file’ option in the dialog that follows.
4
Click OK.
5
Windows Explorer will now open which will enable you to browse to the file that you wish to add.
Navigate through your program folders to find the program that you are looking for.
6
Highlight the program file that you want to add.
7
Click Open. This will add the program to the Add Programs dialog.
8
Select the program that you wish to add and click OK. If you wish to select more than one program this
can be done by either holding the SHIFT key down to select a group or by holding the CTRL key to select
individual items.
9
When you apply limitations or filtering to an program you can either apply them to one specified profile or
ask CyberPatrol to apply this to every profile you have. Once you have clicked OK a dialog will appear
asking whether you want to apply this to every profile or just the one that you are working with at the
moment. The default is to apply this to just the profile that you are working on at the moment. If you wish
to have this limitation applied to everyone then select the ‘All profiles’ option. This will enable the section
where you can specify whether you want access to the program to be allowed, restricted by time or denied.
MANAGING PROGRAMS
Once you have added a program to CyberPatrol you can block it completely or apply time management
settings to it so that access to it is limited.
Blocking programs
To block a program:
1
Choose Customize Filter Settings then Programs followed by List.
2
If you have added the program that you want to block (see the beginning of this section) you should now
see it in the Program List pane with a green ‘Allowed Icon’ alongside it.
3
Select the program and then click the ‘Deny Access at all times’ option beneath. The green Allow icon will
change to a red Deny one.
CyberPatrol 7.0
User Guide
27
Chapter 5 - Filtering Programs
Setting Time Limits to programs
To apply the time management settings to programs:
1
First select Time Management and check that Time Management is enabled. If you need to edit the
settings see Chapter 3 - ‘Time Management’ for details on how to do this.
2
Go back to the Program List screen and select the program that you want to apply the Time Management
settings to.
3
Click the ‘ Restrict Access based on Time Management settings’ option.
4
Click Save.
Applying Chat Filtering to programs
You can apply Chat filtering to programs so that words can be screened out. This means that no one can get
round the filtering by entering a message into Notepad, for example, and then sending it as an attachment;
1
First add the word that you want to be blocked to CyberPatrol by choosing ChatGard then keywords. Add
the word to the ChatGard keywords list. See Chapter 6, ‘Filtering Chat’ for information on how to add
keywords to ChatGard. This will stop this word from being entered into any program on the computer.
2
Next add any Chat program and Web browser to the program list. These would include programs such as
MSN Messenger, Internet Explorer or Mozilla Firefox. See the beginning of this section for more
information on how to add programs to CyberPatrol.
3
Go to the ChatGard filtering screen and choose Chat Programs. You will see the programs that you added
earlier in the Chat Programs pane alongside a check-box. A green icon will show that they are allowed.
4
Select the check-box alongside each program to change its status to filtered. The icon will change to the
CyberPatrol shield.
5
Click Save.
If a user tries to surf to a site containing these words they will be unable to enter the word into a Search Engine
or a URL containing this word into a browser. If the URL of the site does not contain this word, they will be
able to access the site but any occurrance of the blocked word will be changed to dots. If they click a link
containing this dotted out word it will not work. ChatGard Keywords blocked for Instant Messenger programs
will not be allowed to be sent out or received via the specified ChatGard Programs.
Blocking words in particular programs
You can ask CyberPatrol to block certain words from entering the computer via Chat programs and Internet
Explorer. Once you have entered these words to CyberPatrol, anyone trying to type these words into a
program will also see the word replaced by a line of dots. These could be words entered into:
•
Chat programs
•
Text editors such as Word or Notepad
•
E-mail messages
•
Search Engines such as Google.
•
URLs in Internet Explorer or the like
CyberPatrol 7.0
User Guide
28
Chapter 5 - Filtering Programs
THE MESSAGE CENTER
Once you have set CyberPatrol to completely block a program or applied Time Management to it, whenever
the user tries to launch this program or they have reached their time limit with it they will see a message. This
message appears in the bottom right-hand corner of the screen and gives the following details:
•
How many messages there are and what number this message is.
•
What profile this message is applying to.
•
What program has been blocked.
•
Why the program has been blocked.
The Message Center can store up to 100 messages. Once there are 100 messages stored, it will save space by
deleting the first message so that a new message can be added. This will happen every time a new message is
created as long as the existing messages are not cleared.
Using Message Center
•
When you see the message center appear in the bottom right-hand corner of the window use the direction
keys to navigate through your messages.
•
To clear all of the messages click the Close Window button.
Note: clicking Close Window deletes all messages permanently. You will not be able to retrieve them.
CyberPatrol 7.0
User Guide
29
Chapter 6 - Filtering Chat
CHAPTER 6 - FILTERING CHAT
CyberPatrol’s ChatGard™ enables you to stop users from sending out personal information such as address
details and at the same time filter out bad language from websites and chat messages. This is done by adding
keywords and phrases to the ChatGard Keywords list then adding the relevant programs to CyberPatrol to be
filtered for Chat.
ADDING THE PROGRAM TO CYBERPATROL
Before you can monitor a Chat program, it must be added to the programs that you want to filter. Do this by
selecting Customize Filter Settings followed by Programs then List. For instructions on how to add these
programs once you are at the Program List screen, see Chapter 5 - ‘Filtering Programs’.
Once you have added the program:
1
Navigate to the ChatGard screen by choosing Customize Filter Settings followed by ChatGard.
2
Choose Chat Programs. Inside this screen you should see all of the programs that you have added to
CyberPatrol and set to Allow along with a check box (by default this is unchecked).
3
Check the check-box alongside the program/s that you want to monitor for keywords and phrases. If you
want words to be filtered out of Web pages as well as messages, you must select Internet Explorer as well
as the Chat program.
If you can’t see the program that you wish to monitor ask yourself the following questions:
•
“Have I added the program to CyberPatrol?” - you must add the program to CyberPatrol so that it can
monitor it.
•
“Have I set the Program Access to Allow or applied time restrictions?” - if the Program Access is
set to Deny then it will not run, as the whole point of this setting is to prevent a program from launching
at all. In this case though, you want to filter the program, not deny access to it. Program Access must be
set to Allow.
•
“When I added the programs to CyberPatrol did I save the settings?” - when carrying out any
customization within CyberPatrol you must save the settings regularly.
CyberPatrol 7.0
User Guide
30
Chapter 6 - Filtering Chat
ADDING WORDS AND PHRASES FOR CYBERPATROL TO REMOVE
Next you need to add the words that you wish CyberPatrol to remove:
1
Navigate to the ChatGard screen by choosing Customize Filter Settings followed by ChatGard.
2
Choose Keywords. ChatGard Keywords are the words and phrases that ChatGard can recognize and blank
out before the message is sent or received. You will now see the My ChatGard Keywords screen.
3
You will notice that this screen contains two panes:
–
User Profile ChatGard Keywords - keywords entered into this pane will not be allowed when the user
who uses this profile is using the Internet.
–
Global ChatGard Keywords - these are applied to all User Profiles - keywords entered into this pane
will apply to every user who has a profile set up for them. Applying keywords at this level is a good
way to make sure that no-one can send or receive words that you do not wish them to.
4
Decide how you want the filtering to apply: to one specified profile or to every profile then start to add the
words you want to be filtered out. Once you have done this click the Add button by the pane that matches
the way that you want the filtering to apply.
5
An Add Keyword dialog will appear where you can enter the keywords that you wish to filter out. Words
and phrases that are entered into this dialog must fulfil the following criteria:
–
They must be no less than four characters in length, if you are entering a house number this is best
attached to the street name to make the number of characters meet the specification.
–
An address must be entered as individual words. If you enter the whole address then ChatGard will
not recognize parts of the address if it is sent in sections. This means a user could send their address to
someone by entering single words from the address and sending them one at a time. Names must be
entered as single words for the same reason.
6
Once you have entered all of the words that you wish to be filtered out of any messages sent or received,
click OK and you will see the word appear in the relevant pane of the Chat keywords screen. You can add,
edit or remove any of these words at any time. These words will also be filtered out of websites, see
Chapter 5 ‘Filtering Programs’ for more details.
7
Save your settings.
CyberPatrol 7.0
User Guide
31
Chapter 6 - Filtering Chat
Changing words that you have entered into ChatGard.
You can change any words that you have entered into ChatGard. To do this:
1
Select the word that you wish to edit. This will enable the Edit button.
2
Click Edit to launch the Edit Keyword dialog with the selected word in place.
3
Edit the word.
4
Click OK.
5
Click Save.
You can delete any words that you have entered into ChatGard. To do this:
1
Select the word that you wish to delete and click the Remove button.
2
Click Save.
SETTING CHATGARD TO FILTER THE CHAT PROGRAM OR WEBSITE
Once you have added a program to the CyberPatrol Program List, you can ask CyberPatrol to filter it for
ChatGard Keywords and Phrases:
1
Choose Customize Filter Settings then ChatGard followed by Chat Programs.
2
You will see your Chat program in the Chat Programs pane with a check-box and alongside it.
3
Check the check-box alongside the program to have filtering applied to it.
4
Click Save.
Note: if you want to stop or time restrict the Chat program then you need to first add it to the Program
List. See Chapter 5 - ‘Filtering Programs’ for details on how to do this.
CyberPatrol 7.0
User Guide
32
Chapter 7 - Newsgroup Filtering
CHAPTER 7 - NEWSGROUP FILTERING
CyberPatrol can help you to control your users’ access to Newsgroups by either blocking all access or just
allowing access to those groups that you know are safe.
The default filter settings have all Newsgroup categories set to filter, only blocking access if they contain
information that falls into one of the CyberLIST categories. As with Web Filtering, the Newsgroup Filter
settings are fully customizable and you can:
•
Enable or disable categories within the CyberLIST Newsgroup Categories to fine-tune your filtering.
•
Set time-limits on using Newsgroups.
•
Set up a Yes List to only allow access to Newsgroups that you have checked and know to be safe.
•
Block particular Newsgroups to ensure that they will never be accessed by your users.
•
Allow particular Newsgroups that would normally be blocked by the CyberLIST Newsgroup Categories.
•
Allow or block Newsgroups that contain specific words.
Click any of the rectangular buttons to begin to customize Newsgroup access or use the left-hand menu to
navigate through the different screens.
USING CYBERLISTS
The list of categories used for Newsgroups is exactly the same one as that described in the Web Filtering
chapter. For details of what the CyberLIST is and examples of how it can be used, see Chapter 4 - Web
Filtering.
The ‘Select List’ list box above the CyberLIST gives you access to two types of filtering:
•
Filtering using the CyberLIST Newsgroup categories - the CyberLIST contains a list of categorised
Newsgroups. By default, when someone tries to go to a Newsgroup site, all of the categories contained in
this CyberLIST will be checked.
•
Use your own Newsgroup Yes List - Using the Newsgroups Allowed screen you can create a list of
allowed Newsgroups that you have visited and know to be appropriate. Any user using a profile with a Yes
List can only visit Newsgroups that you have entered. See ‘Creating a Newsgroup Yes List’ for information
on how to use this facility.
LIMITING NEWSGROUP ACCESS TIME
The time restrictions set for Internet access also apply to Newsgroup access, see Chapter 3 - Time
Management for more information on how to set time restrictions.
CyberPatrol 7.0
User Guide
33
Chapter 7 - Newsgroup Filtering
CREATING A NEWSGROUP YES LIST
Creating a Newsgroup Yes List is done in the same way and for the same reasons that you would create a Yes
List for websites (see ‘Creating a Yes List’ in Chapter 4 - Web Filtering ).
To add sites to a Yes List:
1
Open the My Allowed Newsgroups screen within the CyberPatrol Headquarters.
2
Make sure you have the correct User Profile selected in the User Profile list box at the top of the My
Allowed Newsgroups screen.
3
Ask yourself the following question: “Do I want this Newsgroup to be allowed for this user only or for
everyone who has a profile?”
4
To add a Newsgroup to a particular profile use the top pane of the My Allowed Newsgroups screen. To
add a Newsgroup to every profile use the bottom pane of the My Allowed Newsgroups screen.
5
Click the Add button by the relevant pane.
6
Enter the Web address of the Newsgroup that you want to allow into the dialog that follows.
7
Click OK.
8
The Address of the Newsgroup will appear in the My Allowed Newsgroups screen with a green icon
beside it to show that it is an allowed Newsgroup.
9
Click Save.
CyberPatrol 7.0
User Guide
34
Chapter 7 - Newsgroup Filtering
Enabling the Yes List
10 Choose Customize Filter Settings followed by Newsgroups then Categories to see the Newsgroup
Categories screen.
11 Choose ‘Use your own Newsgroup Yes List’ from the ‘Select List’ list box:
12 Click Save. Anyone using a profile that this Yes List has been applied to will now only be able to visit those
sites that you have added to your Newsgroup Yes List.
ACCESSING NEWSGROUPS THAT ARE BLOCKED
You can set CyberPatrol to allow access to particular Newsgroups by adding the Newsgroup address or
keywords. This will make sure that any Newsgroup with a particular address or an address containing particular
words will be allowed through regardless of what filtering is in place.
Using the Newsgroup address to allow blocked Newsgroups
If you find that you want to have access to a Newsgroup that is blocked by CyberPatrol then you can add the
address of the newsgroup to CyberPatrol as an Allowed Newsgroup.
1
In the Customize Filter Settings screen click the Customize button alongside Newsgroup Filtering.
2
Click My Allowed Newsgroups. You should now see the My Allowed Newsgroups screen.
3
Ensure you have the correct User Profile selected in the User list box at the top of the My Allowed
Newsgroups screen.
4
Ask yourself the following question: “Do I want this Newsgroup to be allowed for this user only or for
everyone who has a profile?”
5
To add a site to a particular profile use the top pane of the My Allowed Newsgroups screen. To add a site
to every profile use the bottom pane of the My Allowed Newsgroups screen.
6
Click the Add button by the relevant pane and enter the Newsgroup address or Keywords that you want
to allow.
7
Click OK. The address or keyword of the Newsgroup will appear in the website pane with a green icon
beside it to show that it is an Allowed Newsgroup.
8
Click Save.
CyberPatrol 7.0
User Guide
35
Chapter 7 - Newsgroup Filtering
BLOCKING NEWSGROUPS THAT ARE BEING ALLOWED THROUGH
If you want to be sure that certain Newsgroups will always be blocked you can add them to CyberPatrol by
entering the Newsgroup address. This will make sure that any Newsgroup with this address will be blocked
regardless of what filtering is in place.
Using the site URL to block specific sites
1
Open the My Blocked Newsgroups screen within the CyberPatrol Headquarters.
2
Ensure you have the correct User Profile selected in the User Profile list box at the top of this screen.
3
Ask yourself the following question: Do I want this Newsgroup to be blocked for this user only or for
everyone who has a profile?
4
To add a Newsgroup to a particular profile, use the top pane of the My Blocked Newsgroups screen. To
add a site to every profile, use the bottom pane of the My Blocked Newsgroups screen.
5
Click the Add button by the relevant pane and enter the Newsgroup address or keywords of the
Newsgroup that you want to block into the dialog that follows.
6
Click OK. The address or keyword of the Newsgroup will appear in the website pane with a red icon
beside it to show that it is a Blocked Newsgroup.
7
Click Save.
UPDATING THE NEWSGROUP CATEGORY CYBERLIST
It is important to keep your category lists updated so that you have the most current list of categorized sites
available. This will ensure that your users will have the best protection when using the Internet. Updating your
CyberLIST will automatically update the Newsgroup Category CyberLIST. See ‘Updating your CyberLIST’ in
the Chapter 4 - ‘Web Filtering’ for more details.
CyberPatrol 7.0
User Guide
36
Chapter 8 - Monitoring
CHAPTER 8 - MONITORING
You can keep an eye on the surfing habits of your users with the CyberPatrol Monitoring feature. This enables
you to see a record of up to a 14 days surfing showing, where, when and whether the site was blocked or not.
All recorded data is encrypted and securely stored to prevent unauthorized access.
SETTING UP MONITORING
Set up monitoring in the Monitoring screen:
1
Click Customize Filter Settings in the left-hand pane followed by Monitoring. Alternatively, click the
Customize Monitoring button in the right-hand screen:
2
Select the User Profile that you want to monitor from the User Profile list box.
3
Monitoring is switched off by default so you will need to enable it. From the Monitoring screen select the
‘Enable Monitoring’ check-box to switch monitoring on.
4
Choose how you want the monitoring to be applied:
•
All Web Pages - every Web page that is visited will be monitored and recorded.
•
Blocked Web Pages - only pages that are blocked will be recorded.
5
Click Save.
6
Now choose the next User Profile that you want to monitor from the User Profile list box and carry out
the same steps.
7
Do this for all of the User Profiles that you want to monitor then click Save.
8
Once you have set up monitoring you can click the View Activity Summary button at any time to view a
report. See the next section for information on how to do this.
CyberPatrol 7.0
User Guide
37
Chapter 8 - Monitoring
VIEWING INTERNET ACTIVITY
To view a report on Internet Activity:
1
Click Monitoring Reports in the left-hand pane or click the View Monitoring Reports button in the
right-hand pane.
2
Click View Activity. You will see the Activity Explorer Summary screen:
3
The Activity Summary shows a summary of Internet use:
•
Monitoring - this shows the type of monitoring that you have set up (All Web Pages or Blocked Web
Pages). If you want to make changes to the way you are monitoring Internet use, click the Edit link.
This will take you to the Monitoring Settings screen where you can make changes if necessary.
•
Blocked Web Pages - how many of the pages viewed have been blocked.
•
Total Web Pages - how many Web pages have actually been visited. Click View to see an Activity
Report (see the section below).
•
Browse Time - shows how much time has been spent browsing the Web in hours and minutes.
CyberPatrol 7.0
User Guide
38
Chapter 8 - Monitoring
The Activity Report
The Activity Explorer first shows how much Internet activity has taken place in the last 14 days. Once activity
has been recorded for a particular day, a summary of this information will appear within the day in question:
If you click the button containing this summary a new tab will appear showing details about the sites that have
been visited (this report can be used to add sites to your Yes List or Blocked Sites List. See the following
section ‘Adding a URL to an Allowed / Blocked Website list)’:
1
First choose the day that you want to view from the ‘When’ drop-down list:
2
Next choose what information you want to see from the ‘Filter:’ drop-down list:
•
All URLs - the report will show details of all of the websites that have been visited at the time
specified.
•
Blocked URLs - the report will only show details of websites that have been blocked.
•
Allowed URLs - the report will only show details of websites that have been allowed.
CyberPatrol 7.0
User Guide
39
Chapter 8 - Monitoring
3
4
The Activity Report will show all of the Internet activity that has taken place which fulfills the requested
criteria. Click any of the entries in this report to see the site that was visited. The report shows:
•
Time - the date and time that the site was visited.
•
Access - whether it was allowed or blocked.
•
URL - the URL of the site.
•
Category - the category that the site belongs to. For example: ‘Adult/Sexually Explicit’.
•
Reason - why it was blocked.. For example for an ‘Adult/Sexually Explicit’ site the reason it was
blocked would be ‘Inappropriate website.’
Close the summary by clicking the Exit cross in the top right-hand corner of the window.
Adding a URL to an Allowed/Blocked Websites List
1
Right-click on a specific URL and choose an option from the drop-down list:
•
Visit Web Page - this will take you to the page.
•
Copy URL to clipboard - make a copy of the URL by choosing this option then pasting into a text
editor like Notepad.
•
Allow this Website for This User- add this URL to the Allowed Sites List for this user.
•
Allow this Website for All Users - add this URL to the Allowed Sites List for all users.
•
Block this Website for This User - add this URL to the Blocked Sites List for this user.
•
Block this Website for All Users - add this URL to the Blocked Sites List for all users.
•
Save List to File - save this list onto your computer so that you can print it or store it.
Note: once you have saved this List to your computer it will be available to anyone who wants to read
it. If you want to make it secure you will need to use the Windows security features to do this.
2
You will be taken to the relevant screen within the Headquarters. In the example shown the option ‘Allow
Websites for This User’ was chosen:
3
Click Save.
This website will now be allowed for this User Profile. For more information on allowing or blocking specific
websites see ‘Accessing Sites that are Blocked’ see Chapter 4 - Web Filtering.
CyberPatrol 7.0
User Guide
40
Chapter 9 - Extended Features
CHAPTER 9 - EXTENDED FEATURES
PASSWORDS
If necessary, you can change your Headquarters password in the Password screen. For User Profile password
changes refer to Chapter 2. You can also set an Override Mode password to enable an elected individual, to
have unlimited access to the Internet and all programs. Override Mode can also be set to block all access (see
Chapter 1 - ‘The CyberPatrol Headquarters (HQ)’ for information on password creation and use).
BEHAVIOR OPTIONS
When you have CyberPatrol installed and your subscription has expired, one of two things will happen:
•
All Internet access will be Allowed - access to the Internet will be completely open, everyone will be able
to access anything..
•
All Internet access will be Blocked - access to the Internet will be completely blocked, no-one will be able
to access anything..
By default CyberPatrol is set to Allow All but if you want CyberPatrol to block all Internet access until you
renew your subscription, then you need to change the settings in the Behavior screen:
1
Click Extended Features then click the Behavior Options button in the Headquarters, or double-click
Extended Features in the left-hand pane of the Headquarters then click on Behavior Options beneath it.
2
You will now see the Behavior Options screen of the CyberPatrol Headquarters. Check the Block All
Internet Access option.
3
Click Save.
Note: from this point onwards, when your subscription to CyberPatrol expires then all access to the
Internet will be blocked until you either renew your subscription or uninstall CyberPatrol.
Headquarters Appearance section
The default appearance of the Headquarters is for all of the links in the left-hand pane to be collapsed so that
you only see the main headings. You can set this so that all of the links within this pane are expanded, giving
you access to all of the screens within the Headquarters in one click.
Expanding the Options menu. You can ask CyberPatrol to have the Options menu already
expanded when it opens:
1
Click Extended Features then click the Behavior Options button in the Headquarters.
2
You will now see the Behavior Options screen of the CyberPatrol Headquarters.
3
Check the ‘Expand Options menu on entering the Headquarters' check box in the Headquarters
Appearance section.
4
Click Save.
CyberPatrol 7.0
User Guide
41
Chapter 9 - Extended Features
Hide the CyberPatrol Icon. You can hide the CyberPatrol icon so that it doesn’t show in the system tray
of the Windows Taskbar. You might do this to hide the fact from your users that they are being filtered. This is
useful with a user who has a tendency to spend time trying to visit inappropriate sites to see if they can get by
CyberPatrol’s filtering. To do this:
1
In the Behavior Options screen of the CyberPatrol Headquarters check the ‘Hide the CyberPatrol icon
from the Windows Taskbar’ check box in the Headquarters Appearance section.
2
Click Save.
FILTER SETTINGS REPORT
You can generate a report of all your CyberPatrol filter settings for one user or all users with User Profiles.
Once generated, this report will appear in an Internet browser, where you can study it on screen or print it out.
Having a report of your settings is useful should you ever need to recreate them in future. To create a report:
1
Open the Filter Settings Report screen by clicking Extended Features in the left-hand pane of the
CyberPatrol Headquarters then choosing the Filter Settings Report... button on the Extended Features
screen itself. Alternatively double-click Extended Features then Report directly beneath it.
2
Check the option that applies to the settings that you want to show:
3
–
All User Profiles - this will show all of the settings for each profile that you have customized in
CyberPatrol.
–
User Profile selected above - this will show the settings of the single profile that appears in the User
Profile list box at the top of the Report screen.
Specify which settings you wish to be displayed in the Report:
–
Time Management - shows the time management grid with the settings that you have in place for
this user.
–
Web Filtering - shows the CyberLIST categories and whether they are set to block or allow. It also
shows whether there are any allowed/blocked websites or keywords and displays what they are.
–
Program Restrictions - shows which programs are listed within CyberPatrol and whether any
restrictions apply.
–
Chat Filtering - shows which Inbound programs are listed and monitored within CyberPatrol and
which are not. It also shows what keywords have been added to ChatGard for filtering, if any.
–
Monitoring Level - shows whether Monitoring is switched on and to what level.
–
Newsgroup Filtering - shows the Newsgroup CyberLIST categories and whether they are set to
block or allow. It also shows any allowed/blocked Newsgroups or keywords.
4
Once you have selected which settings you wish to be displayed on the report click Generate Report. The
report will appear inside your default Web browser.
5
The Report screen enables you to obtain a print-out of all of your configuration settings which you can
save a copy as a .html file for future viewing.
CyberPatrol 7.0
User Guide
42
Chapter 9 - Extended Features
EVENT VIEWER
The Event Viewer is a useful tool enabling you to see how CyberPatrol is performing and also whether it has
been tampered with in any way. See the Appendix for more information.
INTERNET PROXY SETTINGS
If you access the Internet through a proxy server then you can change the settings for this connection using
this screen.
Warning: the Internet Proxy Settings screen should only be customized by people who are familiar
with Proxy servers and are sure of the settings of your machine.
A proxy server is a computer that stands between your computer and the Internet. When you ask for a Web
page, your computer connects to the proxy server and it is this computer that actually fetches the Web page
from the Internet for you. If you connect to the Internet via a proxy server, you will need to tell your computer
or a program that runs on it (like CyberPatrol) to connect to this computer rather than the Internet itself. All of
the details that your computer needs are usually contained within Internet Explorer and in the case of a default
installation, the computer simply checks for these details.
If your Internet Service Provider (ISP) gives you information relating to a proxy server then during installation
you must to enter these details into the Internet Proxy Settings dialog. If you have already installed CyberPatrol
then the Internet Proxy Settings screen is where you do this.
Warning: unless you are sure that you connect to the Internet with a proxy server and have all of the
connection details we recommend that you do not alter this screen in any way.
SUMMARY
The Summary screen shows you what settings you have in place for CyberPatrol. Access the Summary Screen
by selecting Customize Filter Settings then select Summary.
If a user is blocked from a site that they should be allowed to access, you can first check the Summary screen to
make sure that CyberPatrol is set to filter before checking other screens to define its filtering level. The same
applies to programs and Chat programs. The Summary Screen can be found by choosing Customize Filter
Settings from the Welcome to CyberPatrol menu.
Note: this screen is just an indication of what settings you have in place for each profile. Any alterations
must be done in the relevant screen within the Headquarters.
CyberPatrol 7.0
User Guide
43
Chapter 10 - Troubleshooting
CHAPTER 10 - TROUBLESHOOTING
If you experience problems with CyberPatrol, try the following solutions. If you are unable to solve your
problem then check the in-depth support online at www.cyberpatrol.com/support. Alternatively you can
contact us: [email protected])
Problem
Step 1
Step 2
Step 3
CyberPatrol
switches from the
current profile in
use to the
<Default> User
Profile.
Select the relevant User
Profile in the Manage
user Profiles screen.
Click the Additional Options
button then either:
Click OK then Save.
OR
Under the
following
conditions:
someone has
switched to their
CyberPatrol User
Profile, opened an
Internet connection
and then left it idle
for 10 minutes.
This is a factory set
safety feature.
which can be
changed:
You have forgetten
the HQ password or
it is not being
accepted
CyberPatrol 7.0
Uncheck the ‘Switch to
<Default> User Profile when
Web activity is idle for’
Leave this check-box selected
but increase the time so that
there is a longer time lag
before the profile switches to
<Default>.
Click the Hint button to
see if this will help you
remember your
password. If the Hint
does not help you or
you are sure you are
entering the correct
password, then it is
possible that the
password file has been
deleted. This could be
because someone has
attempted to bypass
the filtering or in an
attempt to uninstall the
product.
You need a password bypass.
Log into your online
CyberPatrol My Account if you
have a valid subscription. If
you are using a trial version,
check our online FAQs for
'Forgotten your Password'.
If you have a valid subscription,
click the CP Subscription button
within the CyberPatrol My
Account and follow the Reset
HQ instructions.
User Guide
44
Chapter 10 - Troubleshooting
Problem
Step 1
Step 2
Step 3
Access is blocked.
Check the message
shown on screen
and compare it
with those listed in
Step 1. If you find
the message that
you have seen then
follow the
instructions to fix
the problem.
The message tells you
that the site is being
blocked because of a
restricted category or
time of day.
Change your filter settings
Save your settings.
within the HQ to allow access.
The message shows a
white screen with
‘Access Restricted’.
It is likely that a user has
attempted to bypass filtering
by deleting files belonging to
CyberPatrol. You will need to
uninstall and reinstall. If you
cannot uninstall, run the
installation file again, but you
may need a password bypass.
If you need a password bypass,
then log into your online
CyberPatrol My Account if you
have a valid subscription. If you
are using a trial version only,
check our online FAQs for
'Forgotten your Password'.
The message shows a
Time Tampering
message.
This occurs when the system
time is changed, perhaps in
an attempt to bypass filtering.
Shut down CyberPatrol then
check that the system time is
correct.
Restart CyberPatrol and check
your subscription details. You
may need to refresh the Web
page.
A message tells you
that 'Subscription is
Expired.
Open the HQ and click the
About button then click the
View Subscription Details
button.
Click the My Account button to
refresh the license details. Do
not log into My Account.
An 'Internal error has
occurred' message.
This could be a conflict
between CyberPatrol and
another program, or
necessary files have been
deleted.
Uninstall then reinstall. If the
problem re-appears contact
Technical Support via email:
[email protected]
Subscription is showing
as expired!
Open the HQ and click the
About button then click the
View Subscription Details
button.
Click the My Account button to
refresh the license details. Do
not log into My Account.
Check that the details shown
here are correct. If not uninstall
then reinstall.
If your account details are
correct, check your system time
is correct and perform step 2
and 3 again.
If you have transferred your
subscription to another
installation of CyberPatrol this
will cancel the license that was
used on the original installation.
Uninstall while connected to the
internet then reinstall.
CyberPatrol 7.0
User Guide
45
Chapter 11 - Appendix
CHAPTER 11 - APPENDIX
ONLINE SAFETY
CyberPatrol’s powerful filtering tools help you to manage and control whose Internet access is allowed, filtered
or blocked – even when you can’t be there! CyberPatrol enables you to:
•
Monitor Internet activity
•
Block harmful sites & images
•
Restrict chat and instant messenging
•
Limit time online & access to programs
•
Control program downloads
•
Protect Privacy
We have drawn together a range of resources to help you and your users gain the most benefit and enjoyment
from a safe online experience:
Helpful Organizations:
•
Childnet International
(http://www.childnet-int.org/) - a non-profit organization working around the
world to help make the Internet a great place for children.
•
WebWiseKids
•
SafetyEd International
(http://www.childnet-int.org/) - teaches children to make wise choices on the Internet.
(http://www.childnet-int.org/) - a non-profit organization representing children’s
rights in cyberspace.
Hotlines:
•
(http://www.virtualglobaltaskforce.com/) - an international partnership between
law enforcement agencies and industry in the UK, Australia, Canada, the US, and Interpol. It enables you
to report online child abuse to the appropriate law enforcement agencies in any of these countries.
•
National Center for Missing and Exploited Children
Virtual Global Taskforce
(http://www.virtualglobaltaskforce.com/) - handles
leads on the sexual exploitation of children.
•
Childquest (http://www.virtualglobaltaskforce.com/) - dedicated to the protection and recovery of
missing, abused and exploited children.
•
Internet Watch Foundation (http://www.iwf.org.uk/) - operates the only authorized UK 'hotline' to
report illegal content on the Internet.
Resources:
•
GetNetWise (http://www.getnetwise.org/)
- helps ensure that families have safe, constructive, educational
and/or entertaining online experiences.
(http://www.parentscentre.gov.uk/usingtheinternet/parentsonlinemergerarticle/)
highlights the dangers of the Internet and guides parents and children on how to get the best from it.
-
•
Parents
•
(http://www.fkbko.co.uk/) - empowers parents and children with the
knowledge they need to navigate the Internet safely.
Online
FKBKO (For Kids By Kids Online)
CyberPatrol 7.0
User Guide
46
Chapter 11 - Appendix
GLOSSARY
If you do not find the glossary item you were looking for you can find other internet and technology
definitions here:
http://www.webopedia.com/
Activate
Enabling the subscription to a particular product installation.
Activity Explorer
Shows a summary of monitored activity for the past 7 days.
Application
A program that runs on your computer and enables you to carry out specific tasks. For
example, Microsoft Word is a word processing application.
Automatic List
Updates
The updating of your CyberLIST Web Categories is scheduled to occur automatically. If
there is no Internet connection when the update is scheduled to occur, the update will
be carried out after 10 minutes of a user browsing the Internet.
Automatic Timeout
If a connection to the Internet is made then left inactive CyberPatrol will revert to the
Default Profile after a certain span of time. This time is set in the User Profile screen and
can be different for each user. It is only available with profiles that you have created.
Blocking Page Styles
The picture and text that appears in he browser instead of the Web page that the user
has asked for. There are a variety of blocking page styles supplied with CyberPatrol.
ChatGard
The name of the technology that filters Chat.
Copy To
The term given to the act of copying Filter settings from one User Profile to another.
CyberLISTs
The collective name for all category lists supplied by CyberPatrol.
CyberPatrol
The name of the product.
CyberPatrol (or HQ)
Administrator
The Adult/Parent/Guardian who 'owns' the HQ password and can make changes to the
settings within the HQ.
CyberPatrol Online
Resources
Within the CyberPatrol HQ you can click a CyberPatrol Online Resources button which
will take you to a Web page giving information on products, support and news.
CyberPatrol Message
Centre
A message that appears in a small window when a user asks for a program that has
been blocked. The message gives the name of the profile that has just been blocked
and tells them that they are not allowed to run the program.
CyberPATTERNS
Technology within CyberPatrol that looks at the context of a word in the Web address
to decide if or how it should be categorized.
Default profile
The User Profile that is supplied with the product to ensure that CyberPatrol will start
to filter as soon as it is installed. CyberPatrol also switches to this profile if someone has
connected to the Internet then left the connection idle for a while.
<Default>
This refers to the Default Profile as described above.
CyberPatrol 7.0
User Guide
47
Chapter 11 - Appendix
Deputy Mode
This is now called Override Mode (see Override Mode below).
Duplicate User
Creates an exact copy of a User Profile so that the same settings can be applied to
another user or used as a starting point for a new profile.
Encryption /
Encrypted file (s)
Encryption is the conversion of plain text data into ciphertext through the use of
algorithms. This makes the data unintelligible to unauthorized parties.
Event Viewer
A list of events that have taken place within CyberPatrol such as category list updates,
someone trying to open the HQ with the wrong password or other similar occurrences.
Expiry Behavior
By default CyberPatrol will ALLOW unrestricted access to the Internet when your
subscription expires. This can be changed to BLOCK.
Factory Settings
Sets a profile's settings back to the default settings. This will only apply to the screen
that you are actually viewing at the time. It will not affect any other settings within this
profile or any alter the settings in any of the other profiles.
Filtering Status
Whether a setting for Time, Web Access, Program Restrictions, Chat Filtering or
Newsgroup Filtering is set to Block, Allow or Filter.
Hard Allows
These sites are always allowed unless they are on the My Sites or My Keywords lists.
Headquarters
Also known as the HQ this is the part of CyberPatrol where you can customize the
product and the User Profiles within it.
Hint Messages
Message boxes that appear while the HQ Administrator is customizing CyberPatrol.
They carry helpful advice, reminders or warnings depending on the task in hand.
HQ
Also known as the Headquarters. See 'Headquarters' above.
HQ Administrator
The person who has permission to create and manage user profiles as well as
customize CyberPatrol itself.
Internet Browser
The Window in which your websites appear. This window is run by a program such as
Internet Explorer or Netscape Navigator.
Internet Proxy
A computer that sits between your home computer and the Internet acting as a 'gobetween'. When you make a request for a Web page it is this computer which attaches
itself to the Internet and finds the website for you.
IP Address
An IP address is a number that identifies each sender or receiver of information sent
across the Internet. Information is sent in 'packets' and it is these packets that identify
who the information was sent from and who it is going to. An IP address has two
parts: the identifier of a particular network on the Internet and an identifier of the
particular computer within that network. There are two ways in which an IP address
can be used:
CyberPatrol 7.0
•
On a network both the number of the particular network and the computer within
that network are looked at.
•
On the Internet itself - that is, between the router that move packets from one
point to another along the route - only the network part of the address is looked
at.
User Guide
48
Chapter 11 - Appendix
Link Analysis
The 'Web Link Analysis' analyzes the URL's that appear on Web pages and checks them
against our CyberLIST and CyberPATTERNS. If there are several links on the page that
are categorized in a blocked category the page will not be allowed.
Manual List Updates
An immediate updating of the CyberLISTs that is carried out when the Update Now
button is clicked.
Message Center
When a program is blocked, you will see a message saying that the program is blocked
and stating why.
Monitoring
CyberPatrol can keep a record of all surfing that takes place and then produce a report
of this activity. The summary of this activity can be seen in the Activity Explorer.
My Account
A secure area where you can manage your subscription/account details.
My Keywords
A list of words defined by the HQ Administrator to be blocked or allowed.
My Sites
A list of websites defined by the HQ Administrator to be blocked or allowed.
Newsgroups
A Web-based discussion about a particular subject. People post their views on to the
website then other people read them and post replies, opposing views or anything
relevant to the subject in question.
Options menu
The menu in the left-hand pane of the CyberPatrol HQ that gives you an alternative way
in which to navigate around the CyberPatrol screens. It can be used instead of the
buttons in the screens themselves.
Override Mode
A temporary setting to be used in the absence of a user profile. Override Mode can be
set to Allow All to give someone without a user profile, totally unrestricted access to
the Internet or Block All to block all access as a safeguard.
Password
A word that you specify during installation then use to open the HQ. This can be
changed at any time in the HQ itself.
Password Hint
A clue that is entered during installation by the Administrator as a reminder of what
the HQ password is.
Programs
Something that runs on your computer that can usually be interacted with like an
application. It is this type of program that CyberPatrol can restrict. For example a
computer game is an Entertainment program. However, programs can also work in the
background without needing the user to do anything, for example your computer is
full of programs that keep it running correctly which you would normally have nothing
to do with.
Real-Time Activity
Monitor
Shows Internet access in a 'real-time' setting, that is, as it happens. If you launch the
Real-Time Monitor then open a browser and start to surf, you will see each URL that
you visit appear in the Real-Time Monitor as you visit it.
Remote Proxies
A Remote Proxy is a Web server that will return content from another Web server. This
enables you to obtain content from a website without actually having to be in direct
communication with that Web server. These servers may serve you with anexact copy
of the final destination website, or modify the content in some way, such as a
Translation website.
CyberPatrol 7.0
User Guide
49
Chapter 11 - Appendix
Report
A list of all the settings within CyberPatrol for each user profile. This can be printed off
for keeping or just viewed in a Web browser on-screen.
Serial Number
A License key that is unique to each installation.
Shutdown
Closes CyberPatrol and stops all filtering. You must enter the HQ password to Shut
down CyberPatrol.
Spyware
Spyware programs gather information about a person or organization without their
knowledge or consent. It is used to secretly gather information about the user and
relay it to advertisers or other interested parties. Spyware can get into a computer as a
virus or as the result of installing a new program.
Subscription
CyberPatrol is sold on a subscription basis much like a magazine. You subscribe for a
specified time period and renew when that period has ended.
Switch User
Changing to a different user profile. This enables a user to use the Internet with a user
profile that is designed to exactly fit their needs.
Time Management
Enables you to set time periods for Internet access on a daily or weekly basis.
ToolTips
Small labels that appear when buttons on the HQ tool bar are hovered over by the
mouse pointer. They give a brief description of what the button does.
URL
A website address - usually starts with www. and ends with .com or something similar.
User Profile
The collection of filter settings assigned to an individual or group of users.
Web Address
A generic term for website or URL.
Web Categories
A list of URLs that is then put into different groups representing different types of
website, for example, Violence. websites and Newsgroups are checked against these
categories and if the website falls into any of them then it will be blocked or allowed,
depending on the settings within CyberPatrol.
Web Links Analysis
The 'Web Link Analysis' analyzes the URL's that appear on Web pages and checks them
against our CyberLIST and CyberPATTERNS. If there are several links on the page that
are categorized in a blocked category the page will not be allowed.
Web Page Analysis
Functionality within CyberPatrol to analyze and categorize the actual content of a Web
page rather than just the Web address.
Windows Taskbar
The bar at the bottom of your computer screen that carries items such as the Start
button and icons relating to programs that are installed on the computer.
Windows User Name
The name you enter into the Windows Security dialog when you log into Windows XP.
Windows User Name
Integration
When you log into your computer using Windows XP, CyberPatrol can launch the
relevant User Profile to save having to switch user.
CyberPatrol 7.0
User Guide
50
Chapter 11 - Appendix
EVENT VIEWER
The Event Viewer enables you to see how CyberPatrol is performing and also whether anyone has tried to
tamper with it. Each event has a code that can be given to Technical Support, or the administrator can use the
descriptions to identify any problems. Events that are recorded are as follows:
Event
Code
Message
Description
000
HQ Access Denied:
Incorrect Password
An incorrect password was entered into the Open HQ dialog
because:
•
•
001
Override Mode Access
Denied: Incorrect
Password
An incorrect password was entered for Override Mode because:
•
•
•
002
HQ Access Denied:
Incorrect Support
Response
The administrator forgot or mistyped the password.
The user was not an administrator and didn’t know the
password.
No Override Mode password had been set and the administrator
didn’t use the Headquarters password instead.
The person trying to use Override Mode had forgotten the
password and didn’t know the Headquarters password.
Someone tried to use Override Mode who is not allowed to do
so and they didn’t know the password. As Override Mode gives
access to changing the status of CyberPatrol to Allow All this
could be a warning that someone is trying to break through its
security.
Someone has entered the wrong code into the Support Response
dialog. If this is done incorrectly then the failure will be logged.
Failure could be caused by:
•
•
By mistake you have typed a wrong letter or number into the
edit field of the Support Response dialog.
Someone has tried to use the Support Response dialog to enter
the Headquarters. This could be a warning that a user has been
trying to breach the security of CyberPatrol.
003
List Update Failure
A list update was attempted but failed. Failures of this type should
be taken seriously as a failure to update the CyberLIST could mean
that the security provided by CyberPatrol is not as up to date as it
should be.
004
List Update Success
The update of the CyberLIST was successful.
005
Event Viewer cleared
All entries in the Event Viewer have been removed. Clearing the
Event Viewer makes a single entry into the Log file to keep a record
of when this occurred.
CyberPatrol 7.0
User Guide
51
Chapter 11 - Appendix
006
Daily Browse Time
reached
The Daily Browse Time set within Time Management has been
reached so the user can no longer use the Internet for today. This
entry provides a time and date for this occurrence so that you can
see what time a user ran out of browsing time. It is a useful
indication of why a user’s browsing time may be blocked if they are
blocked unexpectedly.
007
Weekly Browse Time
Limit Reached
The Weekly Browse Time set within Time Management has been
reached so the user can no longer use the Internet for this week.
This entry provides a time and date for this occurrence so that you
can see what time a user ran out of browsing time. It is a useful
indication of why a user’s browsing time may be blocked if they are
blocked unexpectedly.
008
Change Active User
Denied: Incorrect
Password
Someone has tried to switch user and entered the wrong password.
This could be for a number of reasons:
•
•
•
009
Time Tampering
Detected
The user has forgotten their password. If this is the case you will
need to access the Headquarters and change their password for
them.
By mistake the user mistyped their password and had to re-enter
it.
Someone has tried to access the Internet using a different user’s
profile and they do not know the password for this user. This
could be a warning that a user is trying to access the Internet
using a less restrictive profile than their own.
Someone has tried to bypass Time Management so that they can use
the Internet for a longer time than that specified. This is usually done
by moving the system clock on the computer forward so that Time
Management (which works from the system clock) will work to the
following day’s settings. However CyberPatrol is aware of this
happening and as soon as the system clock is reset (as it would have
to be if no-one is to discover that the clock has been tampered with)
it will log the fact that this has happened in the Event Viewer. At the
same time all access to the Internet will be blocked. When a new
user attempts to change to their own profile a warning message will
appear
Note:
CyberPatrol 7.0
If Time Management is enabled and a user attempts to
turn the system clock backwards then Internet access
will be blocked.
User Guide
52
Chapter 11 - Appendix
CYBERPATROL CATEGORIES
The CyberLIST is a list of websites that have been carefully researched and categorized according to type.
Each category covers a subject that you may want to be filtered so that you can select a category and know that
any websites of this type will be filtered by CyberPatrol.
Category
Defined Critria
Adult/Sexually
Explicit
•
Adult products including sex toys, CD-ROMs, and videos
•
Child Pornography/Pedophilia*
•
Adult services including videoconferencing, escort services, and strip clubs
•
Erotic stories and textual descriptions of sexual acts
•
Explicit cartoons and animation
•
Online groups, including newsgroups and forums, that are sexually explicit in nature
•
Sexually-oriented or erotic full or partial nudity
•
Depictions or images of sexual acts, including animals or inanimate objects used in a
sexual manner
•
Sexually exploitive or sexually violent text or graphics
•
Bondage, fetishes, genital piercing
•
Naturist sites that feature nudity
•
Erotic or fetish photography, which depicts nudity
Note:
We do not include sites regarding sexual health, breast cancer, or sexually
transmitted diseases (except in graphic examples).
* All child-oriented erotic sites are sent to global advocacy groups, including the
Australian Broadcasting Authority (AU), Bundesministerium f¸r Inneres (AT), Internet
Watch Foundation (UK), Meldpunt (NL) and the NationalCenterfor Missing and Exploited
Children (US).
**Included is the Internet Watch Foundation database of child abuse websites.
Chat
•
Web-based chat
•
Instant Message servers
Note:
Criminal Skills
CyberPatrol 7.0
This category filters HTTP traffic only.
•
Phishing/Fraud
•
Advocating, instructing, or giving advice on performing illegal acts
•
Phone, service theft advice
•
Tips on evading law enforcement
•
Lock-picking, and burglary techniques
•
Plagiarism/cheating, including the sale of research papers
User Guide
53
Chapter 11 - Appendix
Drugs, Alcohol
& Tobacco
•
Glamorizing, encouraging, or instructing on the use of or masking the use of alcohol,
tobacco, illegal drugs, or other substances that are illegal to minors
•
Information on "legal highs": glue sniffing, misuse of prescription drugs or abuse of other
legal substances
•
Distributing illegal drugs free or for a charge
•
Displaying, selling, or detailing use of drug paraphernalia
•
Alcohol and tobacco promotional websites
•
Distributing alcohol or tobacco free or for a charge
•
Recipes, instructions or kits for manufacturing or growing illicit substances for purposes
other than industrial usage
Note:
Gambling
Glamour &
Intimate
Apparel
Hacking &
Spyware
•
Online gambling or lottery websites that invite the use of real or virtual money
•
Information or advice for placing wagers, participating in lotteries, gambling, or running
numbers
•
Virtual casinos and offshore gambling ventures
•
Sports picks and betting pools
•
Virtual sports and fantasy leagues that offer large rewards or request significant wagers
•
Lingerie, negligee or swimwear modeling
•
Model fan pages; fitness models/sports celebrities
•
Fashion or glamour magazines online
•
Beauty and cosmetics
•
Modeling information and agencies
•
Promotion, instruction, or advice on the questionable or illegal use of equipment and/or
software for purpose of hacking passwords, creating viruses, gaining access to other
computers and/or computerized communication systems
•
Sites that carry malicious executables or viruses
•
Sites that provide instruction or work-arounds for filtering software
•
Cracked software and information sites; Warez
•
Pirated software and multimedia download sites
•
Computer crime
•
Sites that provide or promote information gathering or tracking that is unknown to, or
without the explicit consent of, the end user or the organization
•
3rd party monitoring and other unsolicited commercial software
Note:
CyberPatrol 7.0
We do not include sites that discuss medicinal drug use, industrial hemp use, or
public debate on the issue of legalizing certain drugs
We use the most current technical definition for Spyware for this category and
focus on filtering malicious content, not simple adware and cookies.
User Guide
54
Chapter 11 - Appendix
Hate Speech
•
Advocating or inciting degradation or attack of specified populations or institutions
based on associations such as religion, race, nationality, gender, age, disability, or sexual
orientation
•
Promoting a political or social agenda that is supremacist in nature and/or exclusionary of
others based on their race, religion, nationality, gender, age, disability, or sexual
orientation
•
Holocaust revisionist/denial sites and other revisionist sites that encourage hate
•
Coercion or recruitment for membership in a gang* or cult**
•
Militancy, extremist
•
Flagrantly insensitive or offensive material, including lack of recognition or respect for
opposing opinions and beliefs
Note:
We do not include news, historical, or press incidents that may include the
above criteria (except in graphic examples).
*A gang is defined as: a group whose primary activities are the commission of felonious
criminal acts, which has a common name or identifying sign or symbol, and whose members
individually or collectively engage in criminal activity in the name of the group.
**A cult is defined as: a group whose followers have been deceptively and manipulatively
recruited and retained through undue influence such that followers' personalities and
behavior are altered. Leadership is all-powerful, ideology is totalistic, and the will of the
individual is subordinate to the group. Sets itself outside of society.
Multiple
Category
Servers
Websites that host business and individuals’ Web pages (i.e. GeoCities, earthlink.net, AOL)
Remote
Proxies
•
Remote proxies or anonymous surfing
•
Web-based translation sites that circumvent filtering
•
Peer-to-peer sharing
•
Pictures or text advocating the proper use of contraceptives
•
Sites relating to discussion about the use of the Pill, IUDs and other types of
contraceptives
•
Discussion sites on how to talk to your partner about diseases, pregnancy and respecting
boundaries
Sex Education
Note:
Violence
•
Portraying, describing or advocating physical assault against humans, animals, or
institutions
•
Depictions of torture, mutilation, gore, or horrific death
•
Advocating, encouraging, or depicting self-endangerment, or suicide, including eating
disorders or addictions
•
Instructions, recipes or kits for making bombs or other harmful or destructive devices
•
Sites promoting terrorism
•
Excessively violent sports or games (including video & online games)
•
Offensive or violent language, including through jokes, comics or satire
•
Excessive use of profanity or obscene gesticulation
Note:
CyberPatrol 7.0
Not included in the category are commercial sites that sell sexual
paraphernalia. These sites are typically found in the Adult category.
We do not block news, historical, or press incidents that may include the above
criteria (except in graphic examples).
User Guide
55
Chapter 11 - Appendix
Weapons
•
Online purchasing or ordering information, including lists of prices and dealer locations
•
Any page or site predominantly containing, or providing links to, content related to the
sale of guns, weapons, ammunition or poisonous substances
•
Displaying or detailing the use of guns, weapons, ammunition or poisonous substances
•
Clubs which offer training on machine guns, automatics and other assault weapons and/
or sniper training
Note:
CyberPatrol 7.0
Weapons are defined as something (as a club, knife, or gun) used to injure,
defeat, or destroy.
User Guide
56