1
User Manual
Version 12.0
Copyright © 2002-2013, Weird Kid Software LLC
Table of Contents 1 INTRODUCTION ......................................................................................... 4 1.1 FILES THAT EMAILCHEMY CAN READ ......................................................................................................... 4 1.2 FILES THAT EMAILCHEMY CAN WRITE ....................................................................................................... 5 1.3 IMAP SUPPORT .............................................................................................................................................. 6 1.4 TRY BEFORE YOU BUY .................................................................................................................................. 6 2 INSTALLING AND USING EMAILCHEMY FOR THE FIRST TIME ........................... 7 EMAILCHEMY FOR MAC IS A .DMG FILE DOWNLOAD -‐-‐ A MAC DISK IMAGE. IF YOU HAVE SAFARI SETUP TO OPEN FILES AFTER DOWNLOAD, THE DISK IMAGE WILL MOUNT AND OPEN AUTOMATICALLY. OTHERWISE, JUST DOUBLE-‐CLICK THE .DMG FILE. .............................................................................................. 7 SYSTEM REQUIREMENTS .......................................................................................................................................... 7 2.1 LAUNCHING EMAILCHEMY ........................................................................................................................... 7 2.2 REGISTERING EMAILCHEMY ......................................................................................................................... 7 3 USING EMAILCHEMY .................................................................................. 9 3.1 CONVERTING YOUR MAIL FILES ................................................................................................................. 10 3.2 GOOGLE APPS UPLOADER ........................................................................................................................... 18 3.3 MBOX SPLITTER ........................................................................................................................................... 22 3.4 ADDRESS HARVESTER ................................................................................................................................. 22 4 EMAILCHEMY PREFERENCES AND CONVERSION OPTIONS ............................. 23 4.1 GENERAL ........................................................................................................................................................ 24 4.2 FILES/FOLDERS ........................................................................................................................................... 27 4.3 HEADERS ....................................................................................................................................................... 29 4.4 LOGGING ........................................................................................................................................................ 30 4.5 STANDARD MBOX ......................................................................................................................................... 32 4.6 EML FILES .................................................................................................................................................... 33 2
4.7 OUTLOOK (WIN) .......................................................................................................................................... 34 4.8 OUTLOOK (MAC) .......................................................................................................................................... 36 4.9 QUICKMAIL PRO ........................................................................................................................................... 37 4.10 EUDORA ....................................................................................................................................................... 38 4.11 CLARIS ......................................................................................................................................................... 39 5 IMPORTING CONVERTED MAIL ................................................................... 39 5.1 IMPORTING INTO OUTLOOK FOR WINDOWS OR OUTLOOK EXPRESS ................................................. 39 5.2 IMPORTING INTO THUNDERBIRD .............................................................................................................. 42 5.3 IMPORTING INTO EUDORA .......................................................................................................................... 42 5.4 IMPORTING INTO APPLE MAIL .................................................................................................................. 43 5.5 IMPORTING INTO ENTOURAGE AND OUTLOOK 2011 FOR MAC ......................................................... 43 5.6 IMPORTING INTO OTHER APPLICATIONS .................................................................................................. 45 5.7 USING MAILDIR OUTPUT FORMATS ........................................................................................................... 46 5.8 USING THE CSV OUTPUT FORMAT ............................................................................................................ 47 6 TROUBLESHOOTING EMAILCHEMY ............................................................. 47 7 PURCHASING EMAILCHEMY ....................................................................... 48 7.1 REGISTERING YOUR COPY OF EMAILCHEMY ............................................................................................ 48 3
1 Introduction
Emailchemy® reads emails from the closed, proprietary file formats of
the most popular (and many of yesterday's forgotten) email
applications and converts them to standard, portable formats that any
application can use. Emailchemy also includes an embedded IMAP
mail server that allows any IMAP-compatible email application to
download your converted mail.
Emailchemy converts proprietary email formats to many popular
formats based on RFC-2822 (formerly RFC-822). This is the
official Internet/ARPAnet standard for email that has been
around since 1973. Most modern email applications are able to
directly use or import these standard formats.
Things you can do with Emailchemy:
•
•
•
•
•
•
Recover / Export email from an old application or file
format
Import email into your new email application
Convert email to standard formats, for:
o Entry into a database
o Long-term archival
o Forensic analysis (eDiscovery)
Repair or clean mailbox files
Condense/split email files and archives
Make older email Y2K compliant
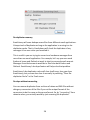
Note: The screenshots in this user manual were taken on a Mac OS X
system. If you are using another operating system, you'll see the
same window but it will look more like the style of the other
applications on your computer.
1.1 Files that Emailchemy can read
Emailchemy can read all standard common formats:
•
•
•
EML (.eml files, one message per file)
mbox (including mboxo, mboxrd, mboxcl mboxcl2)
maildir (including maildir++ and IMAPdir)
Emailchemy can read files from most email programs found
on Windows, Mac or Linux, and it can do this while running on
any of these systems. So, if you don’t have your old
4
computer or old email program anymore but you still have
the email files, Emailchemy can read them anywhere.
Email app
AOL
Windows
Mac
Yes
No
Apple Mail
Yes
Claris Emailer
Compuserve Classic
("CIM")
Yes
Yes
Entourage
Linux/UNIX
the Mail app on
Mac OSX
aka MacCIM or
WinCIM
Database, Cache
and Archive files
Yes
Yes
Eudora
Yes
Yes
Mozilla
Yes
Yes
Yes
Mulberry
Yes
Yes
Yes
Musashi
notes
Yes
Neoplanet
Yes
Netscape
Yes
Yes
Yes
Opera
Yes
Yes
Yes
Outlook
Yes
Yes
Outlook Express
Yes
Yes
Yes
Outspring
Yes
PowerTalk/AOCE
QuickMail
Pro/Internet/LAN
Yes
Yes
Yes
Thunderbird
Yes
Yes
Yes
Windows Live Mail
Yes
Windows Mail
Yes
Yahoo! Mail archives
Yes
Yes
Yes
1.2 Files that Emailchemy can write
The RFC-2822 mailbox, or "Standard mbox File", is the format
that most email programs should be able to import. However,
there may be times when the other formats could be useful. For
example, the Comma-Separated Value File format is widely used
for importing data into most relational and single-user database
applications. The Folders of RFC-2822 Message Files option
separates your mailbox files into separate, human-readable files.
This format could be useful for creating journals or batch
printing. Emailchemy also provides some variations of the mbox
format for easy import into certain mail programs.
5
Emailchemy currently can write email in these formats:
•
•
•
•
•
•
•
•
MBOX, .mbox, the "standard mbox" format
EML, .eml files, individual RFC-2822 email files
Comma-separated value files, .csv files
Maildir, including maildir++ and IMAPdir
Apple Mail (Mac OS X Mail)
Thunderbird
Entourage Archives (.rge files)
Emailchemy’s IMAP server format
1.3 IMAP Support
Emailchemy can host your converted mail in its own IMAP mail
server, providing you with an easy way to import mail into your
new email application.
Emailchemy’s IMAP has been tested to be compatible with:
•
•
•
•
•
•
Apple Mail
Eudora 7 for Windows
Microsoft Outlook
Microsoft Entourage
Microsoft Outlook Express 6
Thunderbird
1.4 Try Before You Buy
Emailchemy is distributed as "trialware". This means that we allow you
to download and try out our software, but some features may be
limited or disabled until Emailchemy is purchased and then registered
with a valid registration key.
However, the disabled features will not prevent you from determining
if Emailchemy can indeed translate your email files. The trial version
treats the email data as throwaway data, and if you delete the original
files you will lose the information. The trial version also replaces
certain mail headers with phrases such as "Please buy me".
Trademark Notice
Emailchemy® is a registered trademark of Weird Kid Software LLC. All
other brands or product names are trademarks of their respective
owners.
6
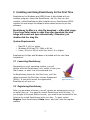
2 Installing and Using Emailchemy for the First Time
Emailchemy for Windows and UNIX/Linux is distributed with an
installer program. Unzip the Emailchemy .zip file, then run the
installer, called Emailchemy-Win-installer.exe or Emailchemy-UNIXinstaller.sh and accept the defaults when asked where to put the
software.
Emailchemy for Mac is a .dmg file download -- a Mac disk image.
If you have Safari setup to open files after download, the disk
image will mount and open automatically. Otherwise, just
double-click the .dmg file.
System Requirements
•
•
•
Mac OS X 10.6 or higher
Windows XP/Vista/7/8, 32bit or 64 bit
Linux, 32 bit or 64 bit, with Sun Java 1.5 or higher
Emailchemy for Mac and Windows is bundled with its own Java
installation.
2.1 Launching Emailchemy
Depending on your operating system, you will
double-click the Emailchemy icon, select it from your
Start menu, or start it at the command line.
As Emailchemy starts for the first time, you'll be
asked to accept the End User License Agreement
(EULA). If you don't accept the agreement,
Emailchemy will not run.
The Emailchemy
Application Icon
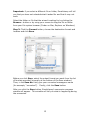
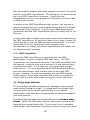
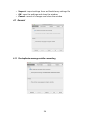
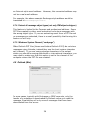
2.2 Registering Emailchemy
After you purchase a license, you will receive an alphanumeric key in
an email from us. You need to unlock Emailchemy with this key. If
you bought a Personal Edition license, you need to be connected to the
Internet to unlock Emailchemy with your key. To start, select
Register from Emailchemy’s Help menu, and you’ll see the register
window.
7
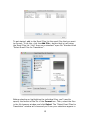
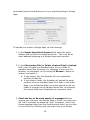
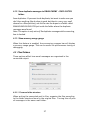
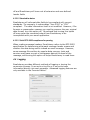
Enter the Name and Key exactly as found in the email you receive
from us; use the copy and paste feature to avoid making typos. Then,
click the Register button. If you make a mistake entering the
registration key, Emailchemy will tell you the key is not valid and ask
you to enter it again.
If you do not want to unlock Emailchemy, click the Demo button to
continue using the Emailchemy Demo.
If you are connected to the Internet behind an HTTP proxy (possible if
you are using Emailchemy at work, but not likely if you are using
Emailchemy at home), you should verify the proxy settings by clicking
the Proxy button.
8
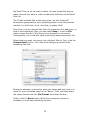
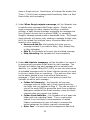
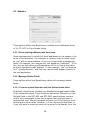
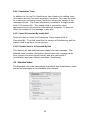
For most situations, the Automatic setting will work, but if not, check
with your network administrator for the proper settings.
After clicking Register, Emailchemy will submit your name, license
key, and a unique number that identifies your computer over the
Internet to a secure database located at Weird Kid Software. This
helps us ensure authenticity of the key.
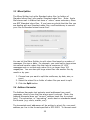
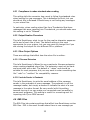
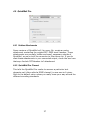
3 Using Emailchemy
Emailchemy has several tools for working with email files. When you
start Emailchemy, you will see the Email Conversion Wizard, because
that’s what most people need to use first. To see the other
Emailchemy tools, click the Tools menu at the top of the screen. .
9
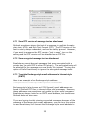
The Emailchemy tools are:
•
•
•
•
•
•
•
Conversion Wizard: walks you through the conversion process
Advanced Conversion: gives you more control over the
conversion
IMAP ImportServer: an IMAP server used for importing email
Google Apps Uploader: upload mbox files to Gmail
Mbox Splitter: split mbox files by date, size, or message count
Address Harvester: find email addresses in mbox files
Clear Deduplicator Cache: Emailchemy will filter out all
messages it has seen since it started up. No repeats. You can
clear the Deduplicator Cache -- the record of which messages it
has converted so far -- by using the "Clear Deduplicator Cache"
menu item in the Tools menu. This cache is also cleared when
you restart Emailchemy.
3.1 Converting your mail files
Emailchemy provides 3 different tools for converting mail between file
formats: the Conversion Wizard, the Advanced Converter, and the
IMAP ImportServer.
Before you get started with your conversion, it will help to know the
following:
Know where your email files are. If you aren’t sure where they
are, read the help that Emailchemy provides in the Conversion Wizard
tool. In most cases, you only need to know the location of your email
application’s data folder, and given that, Emailchemy’s Conversion
Wizard can help locate the files for you. If you are moving your email
files to a different operating system, for example from Mac to Windows
10
or from Windows to Mac, copy your original files over to the new
operating system first and then run Emailchemy there. (An exception
to this rule is when converting Eudora files.)
Know what you want to convert your email for. If you are
moving it to a new email application, see if Emailchemy can write to
that format directly. If not, most email applications can import the
standard MBOX format or use Emailchemy’s embedded IMAP mail
server. If you are converting your email just to have it in a general
format for long term archival, choose the EML format. If you are
converting email files so that other tools can use them, you’ll most
likely want to convert to the standard MBOX format.
Never delete your original email files. Put them somewhere safe,
like on an external hard drive you use for backups or burn them to a
CD or DVD. Emailchemy does not modify your original files while
reading them, but if “never delete” is impractical for you, you should
keep your original files around at least long enough to validate that
Emailchemy converted all your data correctly. Data from the demo
version of Emailchemy is “throwaway”, so if you converted with the
demo and then delete your original files, you will be losing your data.
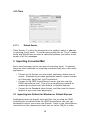
3.1.1 Email Conversion Wizard
The Conversion Wizard works very much like the "Import Wizards" you
may have seen in some email programs. However, Emailchemy's
wizards will also accept alternative locations as long as the basic
structure of your email program's mail folder is left somewhat intact.
In general, just do what the Wizard tells you to do:
11
Step 1: Choose the name of the email program you wish to convert
from and click Next.
Note: If you don't see your email program listed, try using the
Advanced Conversion tool.
Step 2: Read the window for additional instructions or information
about the selected converter, then select the files or folder that
Emailchemy asks for.
12
Important: if you select a different file or folder, Emailchemy will tell
you that you have not selected what it asked for and that it may not
work.
Select the folder or file that the wizard is asking for by clicking the
Browse... button or by using your mouse to drag the file or folder
from your file system browser (Finder on Mac, Explorer on Windows).
Step 3: Click the Convert button, choose the destination format and
location and click Save.
Before you click Save, select the output format you want from the list
of formats provided (normally at the bottom of the Save window).
Then, in the Save As: field, give your converted messages a name
(for example, “converted”). Finally, click the Save button.
After you click the Save button, Emailchemy’s conversion progress
window will appear. This window will tell you what is happening during
the conversion.
13
At times if the progress window appears to have stalled, it could mean
that Emailchemy is converting a very large message, or that it is
scanning a large input file. However, even in extreme cases, if you
don’t see any progress after 30 minutes, chances are that the
conversion has gotten stuck. When this happens, you can click the
Cancel button to stop the conversion. You can also use the Cancel
button to stop the conversion at any time for any reason.
When the conversion is complete, the progress window will say
“Conversion Complete” and give you the option to “Show Folder” or to
“Close.”
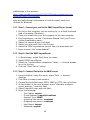
3.1.2 Advanced Conversion
The Advanced Conversion tool gives you more control over the
conversion process. You can select any file and identify it as any
format, compared to the Conversion Wizard where you have to select
a specific file or folder. Converting email using the Advanced Email
Conversion tool works like this:
1.
2.
3.
4.
Add your old email files to the Email Files list
Click the Convert button
Select the destination format and destination
Click the Save button
14
To get started, add to the Email Files list the email files that you want
to convert. To do this, click the Add File... button that is just below
the Email Files list. You'll then see a standard “open file” window titled
"Select Email Files for Translation".
Before selecting or highlighting the individual files, you'll need to
specify the format of the file in the Format box. Then, select the files
in the file browser window and click Select. The "Select Email Files for
Translation" window will close and you'll see your selections appear in
15
the Email Files list on the main window. You can repeat this step as
many times as you want in order to add more selections to the Email
Files list.
Tip: To add multiple files at the same time, use the "select all"
convention appropriate to your operating system in the file selection
window (i.e. shift-click, ctrl-a, ctrl-click, or option-click).
From here, you can remove files from the conversion list, add more, or
clear it out completely. Also, you can select Save... from the File
menu to save the list of files that you've selected for conversion.
Consequently, you could also open a previously saved conversion list.
Select what you want to convert your old email files to. First, click the
Convert Email button. You'll see a file dialog pop-up that looks
something like this:
Browse to wherever you want to save your converted mail, type in a
name for your converted email in the "Name:" field, and then select
the output format from the File Format drop-down list box.
Finally, click the Save button. When the conversion process is
complete, you will see something like this:
16
3.1.3 IMAP ImportServer
The IMAP ImportServer is an IMAP email server that you can use for
importing converted mail into any email program that supports IMAP
(for example, Outlook, Entourage, Mac Mail, and Thunderbird). It is
sometimes an easier and more complete way to import your converted
email, compared to the "import" features of some email programs.
The IMAP ImportServer is particularly helpful when you want to import
mail into Outlook or Lotus Notes.
To get started, you must first use Emailchemy’s email conversion tools
to convert your mail to the IMAP ImportServer format: an .imapserver
folder. After doing so, go to the Tools menu and select IMAP
ImportServer.
The location of your .imapserver folder should be entered
automatically, but if not, click the Browse… button to select it. Then,
click Start Server. If your personal firewall software pops up and
asks if it should block Emailchemy or Java, tell it no.
17
Now you need to configure your email program to connect to an email
account on the IMAP ImportServer. The settings for the email account
are in the IMAP ImportServer’s window. Consult the user
documentation for your email program for instructions on how to add
an IMAP email account.
In setting up the IMAP ImportServer email account, you may see a
warning message from your email program saying that the “localhost”
server could not be contacted. You can ignore these warnings until
you actually start the IMAP ImportServer and try to check mail for the
first time.
In most cases, after configuring the import email account and starting
the IMAP ImportServer, all you should have to do is copy or move the
folders you see on the new IMAP account to a local folder. If you are
unsure how to do this, consult your email program’s user
documentation or contact your system administrator, but usually this
is a “drag and drop” operation.
3.1.3.1 IMAP Compatibility
Though the IMAP ImportServer is compatible with the IMAP
specifications, it is not a complete IMAP mail server. The IMAP
ImportServer only implements the parts of the IMAP specification that
are required in order to allow you to connect to it and view and copy
your converted email. It is a read-only email server with a single
email account. It is not a general-purpose IMAP server and may not
work with administrator tools that are made to work with IMAP
servers. However, it should be compatible with any IMAP-capable
email program. Some have even been able to use it as a means to
import email into web-based email services like Yahoo! and Gmail.
3.2 Google Apps Uploader
The Google Apps Uploader uploads email messages to the specified
email account hosted by Google. To upload email into Google Apps,
you must either be the domain administrator or your domain
administrator must have given you permission to upload messages to
your email account.
The Google Apps Uploader only works with email in standard mbox
format. (Note: Mac Mail folders use the .mbox name extension, but
these are not standard mbox files). If your email is not in standard
mbox format, use Emailchemy’s conversion tools to convert your email
18
to standard mbox format before you try to upload anything to Google
Apps.
To upload your email to Google Apps, do the following:
1. In the Google Apps Email Account field, enter the email
address that you want to upload email into. This must be an
email address belonging to a Google Apps email account.
2. In the Select mbox File (or Folder of mbox Files) to Upload
field, enter the path to a standard mbox file or a folder of
standard mbox files by typing it in, dragging it from your file
browser, cut and paste, or by clicking the Browse… button to
locate it and select it.
a. If you select a file, the Uploader will only upload the
contents of that file.
b. If you select a folder, the Uploader will upload the email
contents of every standard mbox file it finds in the folder.
Keep in mind that the folder you select should be the top
folder of a known set of standard mbox files, for example,
the output folder from Emailchemy’s conversion tools.
3. Check the box to Re-write sender of messages if when
moving your old email into Google Apps or Gmail, you want your
old “sent” messages to appear as “sent” messages. Gmail only
shows messages sent from the Gmail account email, so you have
to trick Gmail into thinking you sent them from your Google
19
Apps or Gmail account. Emailchemy will change the sender (the
“From: “) field of each message that Emailchemy finds in a Sent
Items folder while uploading.
4. Under When Google rejects a message, tell the Uploader how
to handle email messages that Google rejects. Google may
reject a message for many reasons including: a network
problem, a badly formed message, exceeding the message size
limit (Google’s current limit is around 32MB), or exceeding
Google’s message upload speed or bandwidth limits. The Google
Apps Uploader will always retry sending a message at least once,
but if the upload fails multiple times, the action taken will be
based on your selection:
a. Pause and Ask Me: the Uploader will show you the
message and ask if you want to Retry, Skip, Always Skip
or Stop Uploading
b. Skip It: the Uploader will simply skip the failed message
c. Stop Uploading: the Uploader will stop completely
5. Under Add labels to messages, tell the Uploader if you want it
to automatically generate Gmail labels for each message. The
Uploader will always tag each message with an upload event
identifier (i.e. upload-14Sep2007-0143), so you can easily select
all uploaded messages with the Gmail interface should you need
to move or delete them or something. (This and any other label
can be easily deleted at any time without deleting any
messages.) Check the box next to the labels you want the
Uploader to add to each message:
a. Folder: full hierarchy – the Uploader will tag your
messages with the folder path it finds, starting with the
top folder that you selected in Step 2. This can be useful if
you will be using IMAP to access the email from a desktop
application instead of the Gmail interface, since the Gmail
interface does not support true folders.
b. Folder: Each Subfolder – the Uploader will pull apart the
folder path into individual labels. This is a convenient
feature if you find Gmail’s implementation of nested
folders cumbersome but you still want to preserve the
sorted categories the folders originally represented.
c. Date: Year – the year from the message sent date field.
20
d. Date: Year/Month (numeric) – the year and month
from the message sent date field. For example, “2007/09”
for September 2007.
6. Click the Upload button. The Authentication window will pop up
if you’ve filled out all the required information the Uploader has
asked for.
7. Login to your Google Apps account using the Uploader’s
Authentication window. The Authentication window is laid out to
work exactly as if you were logging in using the Google Apps
web page, with one exception: the Use Proxy button. If you
access web sites through a proxy server, you will have to click
the Use Proxy button and enter the details of your proxy
server. If you don’t know these, you may be able to get them
out of your web browser’s connection settings, or just ask your
network administrator.
At this point, if your login is successful, the Uploader will start
uploading your email messages to your Google Apps account. You can
stop the upload process at any time by clicking the Cancel button on
the progress window.
If you have to stop the upload before it is complete, whether it is
because of a network problem, a system crash, or exceeding one of
Google’s quotas, the next time you click the Upload button or start the
Uploader tool, you will be asked if you want to resume the incomplete
upload. However, an upload can only be resumed if the files being
uploaded have not been modified.
21
3.3 Mbox Splitter
The Mbox Splitter tool splits Standard mbox files (or folders of
Standard mbox files) into smaller Standard mbox files. Note: Apple
Mail stores mail in folders that have a “.mbox” name extension; these
are NOT Standard mbox files. If you have any doubt that the files you
are dealing with are Standard mbox files, use Emailchemy to convert
your files to Standard mbox format first.
You can tell the Mbox Splitter to split mbox files based on number of
messages, file size or date. For example, you could split a large mbox
into several smaller mbox files that have a maximum of 1000
messages each or so that each mbox file is no larger than 100
megabytes. You can also split large mbox files into smaller files by
month or by year.
1. Choose how you want to split the mailboxes, by date, size, or
count
2. Select the mbox file or folder of mbox files you want to split
3. Click the Split button
3.4 Address Harvester
The Address Harvester tool extracts email addresses from email
messages, directly from the files where email is stored. (Note: the
Address Harvester does not “convert” address book files or contact
lists.) The extraction, or “harvesting”, works best on standards-based
file formats (e.g. mbox, maildir, eml).
The harvested email addresses will be written to a text file, one email
address per line in the format specified in RFC-2822. To harvest email
22
addresses from multiple files, select the enclosing folder rather than a
specific file after you click the “Browse” button.
Address Harvester can determine duplicate email addresses by
comparing both the real name part and the address part of an email
address record or just the address part. In the example below, “Joe
Blow” is the real name part and [email protected] is the
address part.
“Joe Blow” <[email protected]>
“Joe (work e-mail)” <[email protected]>
If comparing the two addresses above when comparing name part
AND the address part, the two address are not duplicates. If
comparing only the address part, they are duplicates.
4 Emailchemy Preferences and Conversion Options
Emailchemy has some configurable settings that you can modify in the
Preferences dialog. The Preferences dialog is found in the Edit or Tools
menu, and it has a tab for each major category of options. Some
settings may be grayed-out, indicating that they are not available with
the installed license. Mostly, these are settings that are limited to
Emailchemy Forensic Edition.
There are five buttons on the Preferences window:
•
•
Defaults: reset all settings to recommended defaults
Export: export settings to an Emailchemy settings file (only in
Forensic Edition)
23
•
•
•
Import: import settings from an Emailchemy settings file
OK: save the settings and close the window
Cancel: cancel all changes and close the window
4.1 General
4.1.1 De-duplicate messages while converting
24
De-duplication will filter out duplicate email messages during the
conversion process, and it’s really easy to use. All you have to do is just
turn on de-duplication in Emailchemy’s preferences.
That’s really all there is to it, but even though it’s simple, it still is quite
powerful. Here’s a bit more details on its features:
Safe De-duplication
Because we know just how important every last email message is, we built
Emailchemy’s de-dupe (saying de-duplication every time is too much long)
feature to be very, very sure that a message is a duplicate before filtering it
out. It’s not as simple as checking if the message has the same subject,
sender and date. But, because we also understand that even with the best
algorithm there will always be edge cases, we added an option to save all
the duplicate messages to a separate folder. That way, you can verify the
duplicates before deleting them.
You can also see all the messages that were filtered as duplicates in
Emailchemy’s conversion log.
De-duplication stats
When de-duplication is enabled, Emailchemy’s progress window will show
you how many duplicate messages it is filtering out.
25
De-‐duplicator memory Emailchemy will even dedupe across files from different email applications. It keeps track of duplicates as long as the application is running in a de-‐
duplicator cache. That is, Emailchemy will check for duplicates of any messages it has seen since you launched it. This is useful is you are trying to convert and condense messages from more than one email application. For example, let’s say you once used Eudora at home and Outlook at work to check a personal email account. Messages from that account would be in files from both Eudora and Outlook. Emailchemy’s de-‐dupe feature will help solve that problem. Emailchemy’s de-‐duplicator cache will clear itself every time you close Emailchemy, but you can also clear it manually by selecting “Clear De-‐
duplicator Cache” in the Tools menu. De-‐dupe without converting You can remove duplicates from archives of mbox and EML files without doing any conversion of the files if you set the output format of the conversion to be the same as the source format. So, by “converting” from mbox to mbox, you actually would by just removing the duplicates. 26
4.1.2 Save duplicate messages to EMAILCHEMY – DUPLICATES
folder:
Save duplicates: If you want to de-‐duplicate, but want to make sure you don't lose anything (the de-‐dupe is good, but there's a very, very small chance for a false positive), use this to save the dupes to a folder called EMAILCHEMY-‐DUPLICATES just inside the folder where the duplicate messages were found. Note: This option is only active if De-‐duplicate messages while converting box is checked. 4.1.3 Show memory usage gauge
When this feature is enabled, the conversion progress bar will display
a memory usage gauge. This can be useful for performance tuning or
debugging.
4.2 Files/Folders
These options affect how email messages are organized in the
converted output.
4.2.1.1 Preserve folder structure
When writing the converted mail to files, organize the files according
to the folder structure found in the original files. Turning this off puts
all messages in the same mail folder.
27
4.2.1.2 Allow non-English characters in new file and folder names
Turn this on to allow non-English (non-ASCII) characters in the file and
folder names that Emailchemy creates. Most new operating systems
can support non-English characters in file names. If turned off, the file
or folder name will appear as an ISO-encoded string (will look like
random characters) or with non-English characters replaced with “?”.
If turned on, the file names will be written using international
characters if required (using UTF-8). Before turning this on, you
should be certain that your system supports UTF-8 file names. Mac
OS X, Windows 7, and most modern Linux’s do use UTF-8 for encoding
filenames.
4.2.1.3 Replace disallowed file names with a ‘-‘ dash
If you don’t allow non-English characters, then Emailchemy will just
filter them out. Choosing this option replaces non-English characters
with a dash.
4.2.1.4 Save folder structure to X-Folder-Tags header
This takes the path of the current message folder and converts it to an
ordered list of tags or labels. This is convenient if you are moving
your mail to a less structured storage model (like Gmail) or to any
database where “search” is more important than “sort”.
For example, a message stored in this folder: /Personal/1998/Holli
would have this header field added: X-Folder-Tags: Personal,
1998, Holli
Likewise, a message stored in this folder: /Work/1998/March
would have this header field added: X-Folder-Tags: Work, 1998,
March
Then, you could search for the label “1998” and get both messages,
even though they are in different folders.
28
4.3 Headers
These options affect how Emailchemy handles email addresses found
in To, CC, BCC or From header fields.
4.3.1 Derive missing address parts from name
Some messages don’t include full email addresses for the sender or for
some of the recipients. For example, a recipient may be listed simply
as “joe” with no email address. If you try to import this message into
Gmail, for example, the recipient will just appear as “unknown”. To fix
this, turn on this setting and Emailchemy will try to format the name
as a fully-compliant email address. In this example, “joe” will become
“joe” <joe@unknown>, and then the name should appear properly in
the mail application.
4.3.2 Message Header Fields
These options affect how Emailchemy deals with message header
fields.
4.3.2.1 Preserve optional Extension and User Defined header fields
By default, Emailchemy includes non-standard message header fields
in the converted output. These fields are defined as Extension or UserDefined fields in the RFC-822 and RFC-2822 specifications, and are
usually only meaningful to the mail program that originally sent or
received the mail. The mail program to which you’ll be trying to move
should ignore these fields. However, if it isn’t ignoring these fields, or
if you just want to clean out some of the noise in the header, turn this
29
off and Emailchemy will leave out all extension and user-defined
header fields.
4.3.2.2 Standardize dates
Emailchemy will reformat date fields to be compliant with current
standards. For example, it makes dates “Year 2000” or “Y2K”
compliant. The date information itself is not modified. However, if for
forensic or preservation reasons you need to preserve the raw, original
date format, turn this option off. Be advised that turning this option
off may cause the converted output from Emailchemy to be
incompatible with your email application.
4.3.2.3 Strict RFC-2822 compliance for parsing
When reading message headers, Emailchemy refers to the RFC-2822
specification for determining what each message header means and
whether the data being read is indeed an email message. However,
some message files written by popular data recovery tools and
services may leave corrupt or extraneous data at the head of the
message, and turning this option off helps Emailchemy to read them.
4.4 Logging
Emailchemy provides different methods of logging or tracing the
conversion process. It can write a log file or it can write trace
information directly into each message. Advanced logging features are
only available in the Forensic Edition.
30
4.4.1 Conversion Log
Emailchemy can generate a log file of converted emails as it performs
the conversion. By default, the conversion log will be written to the
same folder as your conversion output with the same name as your
output (but with a .log extension).
In the Personal Edition, a line will be written to the log for each file
opened and each message converted. If an error occurs during the
conversion of a file or message, the error will also be written to the
log.
In the Forensic Edition, the conversion log is in standard syslog format
(RFC-5424), for integration with 3rd party log analyzers and forensic
tools. Syslog format prepends each log line with the timestamp of the
logged event and the host and application that created the log
message. For more information, see
http://tools.ietf.org/html/rfc5424.
4.4.1.1 Write Conversion Log
Check this box to turn on the conversion logging feature, using the
default log file location. By default, the conversion log will be written
to the same folder as your conversion output with the same name as
your output (but with a .log extension).
4.4.1.2 Use default log file location
Check this box for Emailchemy to use the default log file location, and
the conversion log will be written to the same folder as your
conversion output with the same name as your output (but with a .log
extension). Uncheck this box if you would rather Emailchemy ask you
where to put the log file for each conversion.
4.4.1.3 Log source file checksums before and after conversion
If this box is checked, Emailchemy will calculate an MD5 checksum of
each file it opens for reading. It will calculate this checksum before
the conversion and after, to validate that Emailchemy did not modify
the file during the conversion. The checksums will be written to the
log, and if there is a difference in the checksums for a particular file,
then Emailchemy will enter a WARN level log message calling it out.
31
4.4.2 Conversion Trace
In addition to the log file, Emailchemy has a feature for adding trace
information directly into each message it converts. This may be useful
for curating or archival of email, because it shows the history of the
message content. The Trace information is added to a single header
field: X-Converted-By. This header field is ignored by email
applications and only exists for informational purposes. It does not
affect the content of the message in any way.
4.4.2.1 Insert X-Converted-By header field
Check this box to insert the Conversion Trace header field, XConverted-By. This field identifies the version of Emailchemy and the
license used to perform the conversion.
4.4.2.2 Detailed trace in X-Converted-By field
This feature will add detailed trace headers to each message. The
detailed trace includes information about where the message came
from (source file and original format) and who converted it
(workstation and user names) and when (timestamp).
4.5 Standard mbox
The Standard mbox tab has settings that affect how Emailchemy reads
and writes messages in the standard mbox format.
32
4.5.1 Compliance to mbox standard when reading
This setting tells the converter how much to follow the standard rules
when looking for new messages. This is defaulted to Strict, but you
should set this to Relaxed if Emailchemy is not finding any messages
in your mbox files.
In particular, when reading mbox files from Thunderbird that have
messages that were imported into Thunderbird, you should make sure
this setting is set to “Relaxed”.
4.5.2 Output Newline Characters
This tells Emailchemy what to use for the newline character sequence
at the end of each line of text. The default setting is the most
appropriate for your system, but you may want to change this if you
are moving the output file to a different OS or platform.
4.5.3 Other Output Options
These are settings that affect how the mbox file is written.
4.5.3.1 Filename Extension
This tells Emailchemy's Wizard to use a particular filename extension
when creating standard mbox files. The extension must not be blank
and must start with a dot. The default is “.mbox” and should be
suitable for most purposes, but you may want to enter something else
like “.mbx” or “.mailbox” for compatibility reasons.
4.5.3.2 Include Sender in Postmark
This tells Emailchemy to write the email address of the message
sender in the postmark of every message. The postmark is not the
message header, but simply a marker to indicate the start of a new
message in the mbox format. Be very careful with this setting,
because turning it on may make your converted email unusable by
some email programs. This setting is useful for converting mail for
importing into Cyrus IMAP servers.
4.6 EML Files
The EML Files tab contains settings that affect how Emailchemy writes
EML files. EML is the email format where there is one message per
33
file, and each message is in the standard RFC-2822 message format.
Most email applications can open EML files directly without having to
import them.
4.6.1 Preserve original file names if possible
By default, Emailchemy will create a name for each EML file based on
the date and subject of the message. But, if the original email format
also had each message in its own file, you can choose to keep the
original file name by checking this box. This is useful for traceability
between original files and the converted files. If the original email
format has multiple messages per file (like in a central database or
mbox file), then this setting is ignored because it’s not possible to
keep the original file name.
4.6.2 Name format for new EML files
This gives Emailchemy a template for creating the filenames. It is
useful to name these files with the date field of the message so that
you can sort the messages by date, simply by sorting them by their
names, in the file browser.
The YYYY is the year, the MM is the month, DD is the day of the
month, hh is the hour and mm is the minute. If more than one
message has the same date and subject, Emailchemy will append a
short (4 character) unique ID to the subject.
4.7 Outlook (Win)
The Outlook tab includes settings for changing how Emailchemy
processes email data in Outlook PST files.
34
4.7.1 Save RTF version of message text as attachment
Outlook sometimes stores the text of a message in multiple formats:
plain text, HTML, and Rich Text Format (RTF). The RTF version of the
text is nearly always redundant, and can be safely ignored. However,
if you want to preserve the RTF version “just in case”, turn on this
setting and the RTF version will be attached as an RTF file.
4.7.2 Save encrypted message text as attachment
Emailchemy cannot decrypt messages that were encrypted with a
private key (as with PGP or other PKI plugin). The encrypted texts will
be attached to the message as a raw binary file instead. Turning this
option off tells Emailchemy to ignore the encrypted message texts.
4.7.3 Translate Exchange-style email addresses to Internet-style
(SMTP)
Here is an example of an Exchange-style address:
/o=Organization/ou=Group/cn=Recipients/cn=Username
Exchange-style (also known as X.500 format) email addresses are
found in Outlook PST files in internal office mail messages. However,
these addresses are sometimes not usable by other email programs.
Emailchemy always looks for an SMTP email address, but sometimes
Outlook does not store one.
If you are having trouble viewing converted messages because of the
presence of Exchange-style email addresses, you can turn this option
on and Emailchemy will convert the Exchange-style email address to
35
an Internet-style email address. However, this converted address may
not be a real email address.
For example, the above example Exchange-style address would be
translated to Username@Organization
4.7.4 Extract all message object types (not only IPM object subtypes)
This feature is limited to the Forensic and professional editions. Some
PST files created by other email extraction tools store messages with
the wrong object type. If you are extracting email from a PST file and
no messages are extracted, there is a small possibility that turning this
feature on will help.
4.7.5 Windows System Charset (“codepage”)
Older Outlook PST files (those used before Outlook 2003) do not store
messages using Unicode; instead they use the local system character
set (charset). If you are seeing strange characters in the output
where you should be seeing diacriticals or international characters, you
may need to make sure that this option is set to the charset of the
computer where the PST file was created.
4.8 Outlook (Mac)
In some cases, typically with Exchange or IMAP accounts, only the
header of a message is downloaded by Outlook unless you read the
message. Emailchemy will only convert messages that have been
downloaded from the server.
36
4.9 QuickMail Pro
4.9.1 Hidden Attachments
Some versions of QuickMail will, for every file, create an extra
attachment containing the original RFC-2822 email headers. These
attachments are normally hidden and aren't necessary outside of
QuickMail, so we've built the converter to filter them out. If you do
want these attachments in your converted output, check the box here
that says Include ‘RFCHeaders.txt’ attachment.
4.9.2 QuickMail Pro Charset
This tells the QuickMail Pro reader to assume a particular text
character set (often called a MIME charset) in case one isn't given.
Stick to the default value unless you really know your way around the
different encoding standards.
37
4.10 Eudora
4.10.1
Eudora Table of Contents
Eudora keeps some information about its mailbox files in .toc files
(table of contents files) that can be useful during conversion.
Referencing the .toc file is not always necessary, but it can be helpful
in situations where the .mbx file is corrupted. Using the .toc file will
however prevent the recovery of deleted messages that may still be in
the .mbx file. We recommend leaving this option on unless you need
to recover deleted messages.
4.10.2
Other Eudora Settings
Eudora typically uses the English system default character set for
writing the messages to disk, but some non-English installations of
Eudora have 3rd-party plugins that change this character set to UTF-8
so that non-English characters are allowed. If your installation of
Eudora uses one of these plugins, you will need to check the box
enabling the UTF-8 Default Storage Charset option.
38
4.11 Claris
4.11.1
Default Sender
Claris Emailer 1.x does not always store the sender's name or address
in outgoing (sent) email. To avoid having email with no “From” header
fields, ask Emailchemy to insert a name and address you define as the
sender of all the messages.
5 Importing Converted Mail
Every email program has its own way of importing email. In general,
there are three methods for importing converted mail into a new email
application:
•
•
•
Convert to the format your new email application knows how to
import. Emailchemy provides application-specific output formats
for Entourage, Apple Mail, and Thunderbird.
Convert to the IMAP ImportServer format, and then use the
IMAP ImportServer tool. This is the most effective method for
importing converted mail into Outlook or Outlook Express.
Convert to the Standard mbox format, and then use the import
feature of your new email application.
5.1 Importing into Outlook for Windows or Outlook Express
Emailchemy does not directly write pst files, but by using the IMAP
ImportServer format and then the IMAP ImportServer tool you can
successfully import your email into Outlook. Refer to the ImportServer
instructions in this manual and check out our online FAQ for a video
39
walkthrough of this process:
http://www.weirdkid.com/blog/2009/02/08/video-walkthrough-forimporting-email-into-outlook/
Here are walk-through instructions on how to import email into
Outlook for Windows.
5.1.1 Step 1: Convert your mail to the IMAP ImportServer format
1. Do this on the computer you are moving to, or at least the same
kind of computer (Windows)
2. Copy your email from your old computer to the new computer
3. Run Emailchemy, use the “Conversion Wizard” tool (you’ll be in
it after Emailchemy starts)
4. Select the source format, click Next
5. Select your old email files, click Convert
6. Select the IMAP importserver format from the drop-down list
7. Enter a name, like “convertedmail”
5.1.2 Step 2: Start the IMAP ImportServer
1. In Emailchemy, select Tools from the menu
2. Select IMAP ImportServer
3. Select the “convertedmail.imapserver” folder — it should already
be in the file box.
4. Click the “Start Server” button
5.1.3 Step 3: Connect Outlook to the IMAP server
1. Launch Outlook, using the menu, select Tools –> Account
Settings…
2. Click New to create a new account
3. Choose Microsoft Exchange, POP3, IMAP or HTTP, then click Next
4. At the bottom of the next window, check “Manually configure
server settings…” and click Next
5. Select Internet E-mail and click Next
6. Enter the following:
o Your Name: import
o E-mail Address: import@localhost
o Account Type: IMAP
o Incoming mail server: localhost
o Outgoing mail server: localhost
o User Name: import
o Password: mymail
40
7. Click “More Settings…”, click the Advanced tab, and enter:
o Incoming server (IMAP): 8143
8. Click OK, then Next, then Finish, then Close (to close the
Account Settings window)
[Note: at this point you should be able to browse your mail on the
server. If you do not see your mail folders inside the mail account
folder in Outlooks navigation pane, then you can right-click on the
account name (import@localhost) and select "Update Folder List"]
5.1.4 Step 4: Force Outlook to download the mail
1. In Outlook, click on a folder in the new account folder, any folder
2. Using the main menu, select Tools –> Send/Receive –>
Send/Receive Settings –> Define Send/Receive Groups
3. Select All Accounts, then click the Edit button
4. Select the option: “Download complete items including
attachments…”
o Optional: uncheck “Send mail items” (turn this back on
after done importing)
5. Click OK, then Close
6. Click Send/Receive in the toolbar
[Note: this part can take some time while Outlook is downloading all
the email from the server.]
When complete, your mail will be in the PST file found by right-clicking
on the account folder, select Properties, then click “Advanced…”. From
this point you can copy your mail to an existing PST file or a new one.
5.1.5 Step 5 Option A: Copy the mail to an existing local PST file
1. Right-click on the server folder you want to copy — all subfolders
will be copied automatically
2. Select “Copy (name of folder you selected)…”
3. A window will popup and ask you to select the folder to copy the
server folder to, or you can create a new folder
4. Click OK
5.1.6 Step 5 Option B: Copy the mail to a new PST file:
1. Select the server folder you want to copy
2. Using the main menu, select File –> Import and Export…
3. Select “Export to a file”, click Next
41
4. Select “Personal Folder File (.pst)”, click Next
5. Double check you have the right folder selected, then click
“Include subfolders”
6. Select where to save the new PST file and what to call it, then
click Finish
At this point you can then open the PST file you just created with File –
> Open –> Outlook Data File
5.2 Importing into Thunderbird
Avoid using the Import feature when importing into Thunderbird.
Instead you’ll copy your Emailchemy files into the profiles folder.
Here’s what to do.
1. Convert your email to the Thunderbird Folder format (page 12).
2. Locate the appropriate Mail folder in which to place your
converted mail. This folder seems to be in a different spot for
each operating system, so just look for folders with names
ending with ".slt".
•
•
•
For Mac OS X users, this directory will be in your Home
directory at ~/Library/Thunderbird/Profiles.
Linux/UNIX users will most likely find this folder in their home
~/.Thunderbird directory.
Windows users will have to do a filename search. If you have
more than one result, pick the one that's inside a directory
named after your user ID.
3. Once inside the ".slt" directory, open the Mail directory and then
the "Local Folders" directory. Copy your converted mail here and
then restart Thunderbird. Important: If you used the
Conversion Wizard, make sure you copy both output files (the
folder and the empty file of the same name) to Thunderbird.
4. After Thunderbird restarts, open the Mail application and you
should see your converted mailbox in the folder list. If you click
on that mailbox, you'll only need to wait a minute while
Netscape creates an index for the new mailbox.
5.3 Importing into Eudora
Convert to Standard mbox format and then use the IMAP ImportServer
or the ImportServer POP3 Edition stand-alone product to import your
email into Eudora.
42
To set the port number for the IMAP ImportServer email account in
Eudora, enter the IMAP server name like this: localhost:8143
However, if you are in a hurry and don’t care about attachments or
special text characters, you can convert to Standard mbox format and
copy the output into your Eudora mail folder.
5.4 Importing into Apple Mail
The IMAP ImportServer (included with Emailchemy) is a great way to
move converted mail into Apple Mail. It is the best way to ensure that
all the status flags of your messages remain intact.
Otherwise, you can use Mail’s import feature. First, convert your email
to the Apple Mail 1.0 format (page 12). Then use Mail’s built-in import
feature to import the converted files. Mail’s import wizard is a bit
quirky in that it will only search 2 folder levels down before giving up if
it does not find an .mbox folder. So, if it says something like “no
mailboxes found for import”, try again but select the folder just above
the first .mbox folder. The import should be quick, but it may take
Mail a few minutes to update its internal indexes.
5.5 Importing into Entourage and Outlook 2011 for Mac
The IMAP ImportServer (included with Emailchemy) is a great way to
move converted mail into Apple Mail. It is the best way to ensure that
all the status flags of your messages remain intact.
Otherwise, convert your email to the Entourage Archive (.rge) format,
then use the Entourage import feature to import an Entourage archive
(page 12).
5.5.1 Moving from Outlook for Windows to Outlook 2011 for Mac
You will want to perform the actual conversion on the Mac, not the PC.
1. In Emailchemy select Step 1 select Outlook (.pst) as the type of
files you want to convert.
2. In Step 2 select the files.
3. In Step 3 click on "Convert" in the bottom left hand corner of the
window.
4. A window will pop up labled "Save Converted Email As. . . "
43
5. Label the file (for example, convertedmail) and save it to a place
you can find it easily.
6. In "Format" select "Entourage Archive (.RGE)
7. Click "Convert"
8. A window will pop up showing you the conversion process
9. Once the conversion process has finished you can close out of
Emailchemy
10. Open Outlook 2011, select File, and in the drop down menu select
"Import"
11. A window will pop-up to walk you through the process
12. Select "Entourage Information from an archive or earlier version
13. In the next window select "Entourage Archive"
14. A window will pop-up for you to select the files you want to
convert.
15. Select the files.
16. The files should import into Outlook 2011, preserving folder
hierarchy. On the Mac, convert the files to Entourage Archive (.rge)
17. Import into Outlook 2011 using Outlook’s Import function.
5.5.2 Importing from Apple Mail into Outlook 2011
The easiest way to import Apple Mail into Outlook 2011 is to convert
the email format to Entourage Archive (.rge) format, and then use the
Import function of Outlook 2011 (go to “File” and select “Import” from
the drop-down menu).
1. Open Emailchemy and in Step 1 select “Apple Mail” from the
drop-down menu. You may need to scroll up in the drop-down
menu.
2. In Step 2 Emailchemy will open up a window with directions on
how to find the file. Specifically it says:
“The Mail folder you need to select is
/Users/YOU/Library/Mail, where "YOU" is your username.
Local messages and your IMAP cache will be converted,
but we still recommend you copy your IMAP messages
down to local folders prior to conversion.
The Apple Mail Wizard will convert all local messages,
preserve attachments within the messages, and maintain
your folder organization.”
44
Do not go further than the “Library” files; i.e., do not select V2, just
select “Mail.”
3. Once you have selected the files click on the “Convert” button
(Step 3).
4. The next Emailchemy window will prompt you to “Save As” the
files you want to convert. Name them and save them in a
location that will be easy for you to locate.
5. Select “Entourage Archive (.RGE)” as the type of file you want to
convert.
6. Click “Save.”
7. A pop-up window will open displaying the conversion process.
8. When the conversion is finished you can close out of
Emailchemy.
9. Open Outlook 2011, select “File” and in the drop-down menu
select “Import.”
10. A pop-up window will open up in Outlook 2011, titled “Begin
Import” and asking you what type of files you want to import.
11. Click on “Entourage information from an archive or earlier
version” and click on the arrow in the lower right-hand corner,
per Outlook 2011’s instructions.
12. In the second window titled “Choose an Application,” select
“Entourage archive (.rge)” and click the arrow in the lower righthand corner.
13. A window will pop-up titled “Import” that says “Choose the
Entourage archive you want to import.”
14. Click on “Import” in the lower right-hand corner.
15. Outlook 2011 will import your email files, preserving file
hierarchy.
5.6 Importing into other applications
The recommended way to import into any other email application is to
use either the IMAP ImportServer or the ImportServer POP3 Edition.
However, you should always try using the import feature of the email
application you are moving to.
If you're not importing into any of the above-mentioned email
applications, try one of the following generic techniques using
Standard mbox files:
•
Simply copy the converted Standard mbox file to the directory
where the other mailbox files are. You may need to make sure
your filename extension is something like "mbx" or "mbox", or if
45
you are moving email to a Macintosh, you may need to also
adjust the file type/creator codes of the output file using a tool
like FileBuddy, FileTyper, or ResEdit.
•
5.7
Most email programs have an import feature that you can access
from the File menu. When asked what type of mailbox file to
import, select "standard", “mbox” or "UNIX".
Using maildir output formats
Maildir and Maildir++ formats use hidden files and folders, so it's likely
you will not see your output in your file browsing tool. You’ll have to
either change your file browser’s settings to show hidden files or use
the command line.
46
5.8 Using the CSV output format
The order of the fields in the CSV format:
1.
2.
3.
4.
5.
6.
7.
sent date
received date
subject
sender
recipients (to, cc, and bcc)
rfc2822 header
message body
6 Troubleshooting Emailchemy
Here are some common tips that should help with the most common
problems that have been reported by users of Emailchemy.
•
Read the online Emailchemy Frequently Asked Questions (FAQ):
http://www.weirdkid.com/blog/category/emailchemy-faq/
•
Make sure you have the correct version of Java installed, as
identified in the System Requirements.
•
•
•
When moving email across platforms (i.e. Windows to Mac), we
recommend you perform the conversion on the target platform.
If that's not possible, then make sure to set the proper newline
sequence option in the Preferences dialog. Otherwise, your mail
may not be recognized properly after moving it.
If the converter completes and says "0 Emails Converted":
o try setting the "mbox compliance" option to "relaxed". This
is often necessary when dealing with Netscape email.
o double check that you've selected the correct email format
for the file you are trying to convert
Make sure you are selecting the correct Email format in the
Select Emails to Convert dialog. Emailchemy isn't smart enough
to determine formats automatically, and if you tell it the wrong
format, Emailchemy likely won't work. In most cases,
Emailchemy will just skip the file, but in some cases Emailchemy
may seem to "stall" or take an exceedingly long time to convert
the file. When this happens, simply close the conversion
progress window.
•
•
Make sure you are selecting a file when Emailchemy is asking for
a file and a folder when Emailchemy is asking for a folder. In
most cases, the file selection windows will try to help you with
this by only letting you select one or the other. So, if you are
finding you cannot select a file because it appears “grayed out”,
double check that you are being asked to select a file. The file
selection dialogs will usually say “Select a File…” or “Select a
Folder…”.
In some cases, if your email files are corrupt, Emailchemy may
not know what to do with them -- causing Emailchemy to stall or
ignore the file completely. Use the Conversion Log feature to
help identify which email message is corrupt. Sometimes you
only need to remove the corrupt email to solve the problem.
Please feel free to contact us to answer any questions or for a quick tip
here or there.
7 Purchasing Emailchemy
Once you are satisfied with the Emailchemy demo version, you can
purchase a fully functional and registered copy of Emailchemy. The
details of how to do so are on the Weird Kid Software web site:
http://www.weirdkid.com.
7.1 Registering your copy of Emailchemy
Once you've purchased an Emailchemy license, you will be sent a
registration key to unlock the full version of Emailchemy. You will need
to enter the registration key into the "Register Emailchemy" dialog.
Look for "Register Emailchemy" in Emailchemy's "Help" menu.
IMPORTANT: Keep this key in a safe place! You may need to re-enter it
after upgrading to subsequent releases of the product.
Thank you for trying Emailchemy!
48