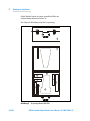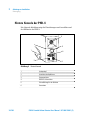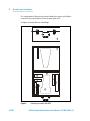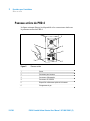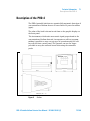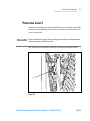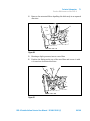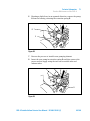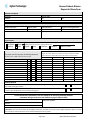
1
PHD-4 Portable Helium Detector Models 969-4600 969-4640 Manuale di Istruzioni Bedienungshandbuch Notice de Mode D’Emploi User Manual 87-900-120-01 (F) 01/2014 Warranty Notices © Agilent Technologies, Inc. 2011 No part of this manual may be reproduced in any form or by any means (including electronic storage and retrieval or translation into a foreign language) without prior agreement and written consent from Agilent Technologies, Inc. as governed by United States and international copyright laws. Manual Part Number Publication Number: 87-900-120-01 (F) Edition Edition 01/2014 Printed in ITALY Agilent Technologies Italia S.p.A. Vacuum Products Division Via F.lli Varian, 54 10040 Leinì (TO) ITALY The material contained in this document is provided “as is,” and is subject to being changed, without notice, in future editions. Further, to the maximum extent permitted by applicable law, Agilent disclaims all warranties, either express or implied, with regard to this manual and any information contained herein, including but not limited to the implied warranties of merchantability and fitness for a particular purpose. Agilent shall not be liable for errors or for incidental or consequential damages in connection with the furnishing, use, or performance of this document or of any information contained herein. Should Agilent and the user have a separate written agreement with warranty terms covering the material in this document that conflict with these terms, the warranty terms in the separate agreement shall control. Technology Licenses The hardware and/or software described in this document are furnished under a license and may be used or copied only in accordance with the terms of such license. Restricted Rights Legend If software is for use in the performance of a U.S. Government prime contract or subcontract, Software is delivered and licensed as “Commercial computer software” as defined in DFAR 252.227-7014 (June 1995), or as a “commercial item” as defined in FAR 2.101(a) or as “Restricted computer software” as defined in FAR 52.227-19 (June 1987) or any equivalent agency regulation or contract clause. Use, duplication or disclosure of Software is subject to Agilent Technologies’ standard commercial license terms, and nonDOD Departments and Agencies of the U.S. Government will receive no greater than Restricted Rights as defined in FAR 52.227-19(c)(1-2) (June 1987). U.S. Government users will receive no greater than Limited Rights as defined in FAR 52.227-14 (June 1987) or DFAR 252.227-7015 (b)(2) (November 1995), as applicable in any technical data. Trademarks Windows and MS Windows are U.S. registered trademarks of Microsoft Corporation. Safety Notices CAUTION A CAUTION notice denotes a hazard. It calls attention to an operating procedure, practice, or the like that, if not correctly performed or adhered to, could result in damage to the product or loss of important data. Do not proceed beyond a CAUTION notice until the indicated conditions are fully understood and met. WARNING A WARNING notice denotes a hazard. It calls attention to an operating procedure, practice, or the like that, if not correctly performed or adhered to, could result in personal injury or death. Do not proceed beyond a WARNING notice until the indicated conditions are fully understood and met. PHD-4 Portable Helium Detector User Manual / 87-900-120-01 (F) PHD-4 Portable Helium Detector PHD-4 Portable Helium Detector PHD-4 Portable Helium Detector User Manual / 87-900-120-01 (F) 3/140 PHD-4 Portable Helium Detector 4/140 PHD-4 Portable Helium Detector User Manual / 87-900-120-01 (F) Contents Contents 1 Procedura per l’installazione Informazioni generali 7 8 Immagazzinamento 9 Preparazione per l’installazione 9 Installazione e utilizzo 13 Manutenzione 15 Smaltimento 2 16 Anleitung zur Installation 23 Allgemeine Informationen 24 Lagerung 25 Installationsvorbereitungen 25 Installation und Gebrauch Wartung 29 31 Entsorgung 32 3 Procédure pour l’installation Indications Generales Stockage 39 40 41 Preparation pour l’installation 41 Installation et utilisation 45 PHD-4 Portable Helium Detector User Manual / 87-900-120-01 (F) 5/140 Contents Entretien 47 Mise au rebut 4 48 Installation procedure 55 General Information 56 Storage 57 Preparation for Installation 57 Installation and Use 61 Disposal 5 64 Technical Information 71 Description of the PHD-4 73 Basic Unit Data and Specification 76 Routine Maintenance of the PHD-4 84 User Interface 96 Electrical Connections 121 Analog Interface Description 122 RS 232 Communication Description 124 Troubleshooting 130 Accessories and Spare Parts 134 6/140 PHD-4 Portable Helium Detector User Manual / 87-900-120-01 (F) PHD-4 Portable Helium Detector User Manual 1 Procedura per l’installazione Informazioni generali 8 Immagazzinamento 9 Preparazione per l’installazione 9 Contenuto dell’imaballo 10 Installazione e utilizzo 13 Manutenzione 15 Smaltimento 16 Pulsanti e led sul pannello anteriore di PHD-4 17 Alimentazione esterna e pacco batteria 18 Pannello posteriore di PHD-4 20 Traduzione delle istruzioni originali 7/140 1 Procedura per l’installazione Informazioni generali Informazioni generali Gli operatori e il personale di manutenzione devono essere consapevoli dei rischi che possono verificarsi utilizzando questa apparecchiatura. Inoltre devono essere in grado di riconoscere le potenziali condizioni di pericolo ed essere in grado di evitarle. Un uso improprio dell’apparecchiatura può comprometterne l’efficienza. Questo prodotto deve essere utilizzato esclusivamente da personale qualificato. L'utilizzatore deve leggere attentamente il presente manuale di istruzioni ed ogni altra informazione addizionale fornita dalla Agilent. Le indicazioni di “Pericolo” o “Attenzione” devono essere lette e rispettate. Per qualsiasi problema, contattare l’ufficio Agilent più vicino. Il presente manuale utilizza le seguenti convenzioni: AVVERTENZA! I messaggi di avvertenza attirano l'attenzione dell'operatore su una procedura o una pratica specifica che, se non eseguita in modo corretto, potrebbe provocare gravi lesioni personali. ATTENZIONE! NOTA 8/140 I messaggi di attenzione sono visualizzati prima di procedure che, se non osservate, potrebbero causare danni all'apparecchiatura. Informazioni che aiutano l’operatore ad ottenere le migliori prestazioni possibili dall’apparecchiatura. PHD-4 Portable Helium Detector User Manual / 87-900-120-01 (F) 1 Procedura per l’installazione Immagazzinamento Immagazzinamento Durante il trasporto e l'immagazzinamento PHD-4, devono essere soddisfatte le seguenti condizioni ambientali: temperatura: da -20 °C a +70 °C umidità relativa: 0 – 95 % (non condensante) Preparazione per l’installazione Il prodotto PHD-4 viene fornito in un imballo protettivo speciale; se si presentano segni di danni, che potrebbero essersi verificati durante il trasporto, contattare l'ufficio vendite locale. Durante l'operazione di disimballo, prestare particolare attenzione a non lasciar cadere il prodotto e a non sottoporlo ad urti. Non disperdere l'imballo nell'ambiente. Il materiale è completamente riciclabile e risponde alla direttiva CEE 85/399 per la tutela dell'ambiente. ATTENZIONE! Non utilizzare mai il PHD-4 ed i componenti accessori in modo diverso e per scopi diversi da quelli illustrati nel presente manuale. PHD-4 Portable Helium Detector User Manual / 87-900-120-01 (F) 9/140 1 Procedura per l’installazione Preparazione per l’installazione Contenuto dell’imaballo PHD-4 è disponibile in due diverse configurazioni: 1. Modello 969-4600 Pacchetto base comprendente: Unità di base (5) Unità di alimentazione – Caricabatterie, 100-240 Vca (50/60 Hz) (4) Cinghia (3) Cavi (2) Connettore per contatore a 15 pin Kit di 3 filtri in lana di vetro Manuale su CD I suddetti moduli sono inseriti in appositi contenitori in schiuma di poliuretano con densità pari a 30. La seguente figura illustra un modello d’imballaggio con la posizione dei vari moduli. 10/140 PHD-4 Portable Helium Detector User Manual / 87-900-120-01 (F) Procedura per l’installazione Preparazione per l’installazione 1 1 5 2 4 3 Figura 1 Modello d’imballaggio 969-4600 2. Modello 969-4640 Pacchetto completo comprendente: Valigetta di trasporto (1) Unità di base (5) batteria supplementare (1 pezzo) (9) Unità di alimentazione – Caricabatterie Cinghia (7) Connettore per contatore a 15 pin per porta seriale I/O (3) Kit di 3 filtri in lana di vetro (4) Manuale su CD (6) Sonde (10) PHD-4 Portable Helium Detector User Manual / 87-900-120-01 (F) 11/140 1 Procedura per l’installazione Preparazione per l’installazione I suddetti moduli sono inseriti in appositi contenitori in schiuma di poliuretano con densità pari a 30. Figura illustrante l’imballaggio. 1 2 2 9 4 8 3 7 6 5 Figura 2 12/140 Modello d’imballaggio 969-4640 PHD-4 Portable Helium Detector User Manual / 87-900-120-01 (F) Procedura per l’installazione Installazione e utilizzo 1 Installazione e utilizzo AVVERTENZA! Il dispositivo è fornito di un cavo di alimentazione a tre fili con una spina di tipo approvato a livello internazionale. Utilizzare sempre questo cavo di alimentazione ed inserire la spina in una presa dotata di appropriato conduttore di messa a terra onde evitare scariche elettriche. All’interno del dispositivo sono generate alte tensioni che possono causare danni fisici gravi o decesso. AVVERTENZA! Non utilizzare il PHD-4 in ambienti dove suano presenti gas o vapori potenzialmente infiammabili. Se si utilizza il PHD-4 in combinazione con dispositivi di sicurezza per il campionamento (solo se marcati EEX ia IIAT4) il PHD-4 stesso deve necessariamente essere posizionato fuori dalla zona a rischio di esplosione. AVVERTENZA! Il prodotto PHD-4 è dotato di una batteria ricaricabile e del relativo caricabatterie. Ricaricare la batteria in un ambiente sicuro, lontano da gas esplosivi o materiali altamente infiammabili. La ricarica o l’utilizzo del dispositivo in luoghi non sicuri può causare gravi danni fisici e materiali. AVVERTENZA! Durante il processo di caricamento del pacco batteria di PHD-4 (cavo di alimentazione collegato) NON spostare l’unità. PHD-4 Portable Helium Detector User Manual / 87-900-120-01 (F) 13/140 1 Procedura per l’installazione Installazione e utilizzo AVVERTENZA! E’ vietato utilizzare il dispositivo in miniere o in sistemi sotterranei. L’utilizzo in un ambiente non conforme alle norme può causare grani danni fisici e materiali. Durante l’utilizzo devono essere soddisfatte le seguenti condizioni ambientali: temperatura: da +5 a +35 °C; umidità relativa: da 0 a 95 % (non condensante). AVVERTENZA! Non coprire o ostruire mai le feritoie di areazione sulla parte superiore del PHD-4 e il condotto di scarico posteriore. Tali ostruzioni potrebbero arrecare danno al PHD-4 o a componenti esterni. 14/140 PHD-4 Portable Helium Detector User Manual / 87-900-120-01 (F) Procedura per l’installazione Manutenzione 1 Manutenzione PHD-4 non richiede alcuna manutenzione (eccetto la campionatura di filtri di pompaggio e batteria). Gli interventi devono essere eseguiti esclusivamente da personale autorizzato. NOTA Qualsiasi operazione che differisca dalle procedure descritte nel presente manuale deve essere eseguita esclusivamente da personale autorizzato. AVVERTENZA! Qualsiasi intervento non autorizzato sul dispositivo può causare grani danni fisici e materiali. In caso di guasto, contattare il servizio riparazione Agilent oppure il “servizio ricambi avanzato della Agilent” che consente di ottenere un dispositivo rigenerato come sostituzione dell’unità guasta. NOTA I processi di pulizia o decontaminazione non sono forniti (vedere il riquadro “Certificato di sicurezza e salute” sul modulo “Richiesta di restituzione”. Per lo smaltimento del dispositivo, rispettare la legislazione nazionale specifica. PHD-4 Portable Helium Detector User Manual / 87-900-120-01 (F) 15/140 1 Procedura per l’installazione Smaltimento Smaltimento Significato del logo "WEEE" presente sulle etichette. Il simbolo qui sotto riportato è applicato in ottemperanza alla direttiva CE denominata "WEEE". Questo simbolo (valido solo per i paesi della Comunità Europea) indica che il prodotto sul quale è applicato, NON deve essere smaltito insieme ai comuni rifiuti domestici o industriali, ma deve essere avviato ad un sistema di raccolta differenziata. Si invita pertanto l'utente finale a contattare il fornitore del dispositivo, sia esso la casa madre o un rivenditore, per avviare il processo di raccolta e smaltimento, dopo opportuna verifica dei termini e condizioni contrattuali di vendita. 16/140 PHD-4 Portable Helium Detector User Manual / 87-900-120-01 (F) Procedura per l’installazione Smaltimento 1 Pulsanti e led sul pannello anteriore di PHD-4 La seguente figura illustra il pannello anteriore di PHD-4 con i principali componenti. Figura 3 Pannello anteriore 1 Pulsanti funzionalità 2 Display grafico 3 Pannello anteriore PHD-4 Portable Helium Detector User Manual / 87-900-120-01 (F) 17/140 1 Procedura per l’installazione Smaltimento Alimentazione esterna e pacco batteria Il PHD-4 è un dispositivo portatile a batteria. Il pacco batteria può essere ricaricato solo ed esclusivamente all’interno del PHD-4, connettendo l’alimentatore Agilent SR03.702888 alla porta di alimentazione 3 (Power Supply connector). ATTENZIONE! Non utilizzare mai alimentatori esterni diversi dall’alimentatore Agilent SR03.702888. La carica della batteria è completamente automatica e parte automaticamente nel momento in cui l’alimentatore viene connesso alla porta 3. ATTENZIONE! I messaggi di attenzione sono visualizzati prima di procedure che, se non osservate, potrebbero causare danni all'apparecchiatura. La batteria PHD-4 può essere caricata sia con il PHD-4 spento che durante la normale operatività. NOTA ATTENZIONE! 18/140 Il tempo necessario alla carica risulterà essere sensibilmente più lungo se la carica è avvenuta con il PHD-4 acceso. Poiché le batterie Ni-MH sono soggette ad un fenomeno di auto scaricamento interno, è necessario eseguire periodicamente un processo di caricamento delle stesse. Eseguire un processo di caricamento completo almeno ogni 3 mesi e prima di un periodo di inutilizzo prolungato. PHD-4 Portable Helium Detector User Manual / 87-900-120-01 (F) Procedura per l’installazione Smaltimento 1 Il pacco batteria è protetto contro i fenomeni di cortocircuito, sovracorrente e surriscaldamento per mezzo di un fusibile, uno switch termico ripristinabile e un fusibile termico non ripristinabile. L’attivazione di uno di questi dispositivi di protezione è segnalata da PHD-4 come descritto di seguito: Unità: OFF Cavo di alimentazione: COLLEGATO Sul display è visualizzato il messaggio “No Battery”. Unità: ON Cavo di alimentazione: COLLEGATO Sul dispay è visualizzata l’icona della batteria sbarrata. Unità: OFF Cavo di alimentazione: NON COLLEGATO Nessun messaggio sul display – non è possibile accendere l’unità Se è stata attivata una delle protezioni del pacco batteria, spegnere l’unità e scollegare il cavo di alimentazione, quindi tenere l’unità spenta per un’ora prima di ricollegare il cavo. Se è nuovamente visualizzato il messaggio “No Battery”, è necessario sostituire il pacco batteria. PHD-4 Portable Helium Detector User Manual / 87-900-120-01 (F) 19/140 1 Procedura per l’installazione Smaltimento Pannello posteriore di PHD-4 La seguente figura illustra i dispositivi e i connettori collocati sul pannello posteriore di PHD-4. 6 5 1 4 HEAD SET I/O-SERIAL 2 Figura 4 20/140 3 Pannello posteriore 1 Sonda 2 Connettore per auricolare 3 Connettore alimentazione 4 Connettore I/O RS232 5 Dispositivo di rilascio rapido della chiusura 6 Scarico del gas PHD-4 Portable Helium Detector User Manual / 87-900-120-01 (F) Procedura per l’installazione Smaltimento 1 Se la carica avviene con il PHD-4 spento sul display compare il messaggio “Battery charge Running”. Il messaggio “Battery Full” evidenzia che la batteria ha raggiunto lo stato di piena carica. Se la carica avviene durante la normale operatività PHD-4 l’icona relativa allo stato di carica della batteria evidenzia il progresso della carica con un continuo incremento del livello. Anche nel caso di carica con PHD-4 operativo il messaggio “Battery Full” evidenzia la conclusione del processo di carica. Collegare il Power Supply ad una presa di corrente con le seguenti caratteristiche: V = 90 – 240 Vac F = 50 – 60 Hz NOTA La spina di alimentazione del lato alta tensione deve essere facilmente accessibile e poter permettere una facile e veloce sconnessione. NOTA L’alimentatore principale deve essere dotato di un contatto di protezione collegato a massa. PHD-4 Portable Helium Detector User Manual / 87-900-120-01 (F) 21/140 1 Procedura per l’installazione Smaltimento 22/140 PHD-4 Portable Helium Detector User Manual / 87-900-120-01 (F) PHD-4 Portable Helium Detector User Manual 2 Anleitung zur Installation Allgemeine Informationen 24 Lagerung 25 Installationsvorbereitungen 25 Inhalt der Verpackung 26 Installation und Gebrauch 29 Wartung 31 Entsorgung 32 Steuerorgane und Anzeigen auf der Frontkonsole der PHD-4 33 Externes Netzteil und Batterie-Einheit Hintere Konsole der PHD-4 36 34 Übersetzung der Originalanleitungen 23/140 2 Anleitung zur Installation Allgemeine Informationen Allgemeine Informationen Bediener und Wartungstechniker müssen alle Risiken beachten, die sich beim Gebrauch des Geräts ergeben. Sie müssen Gefahren und Situationen, aus denen Gefahren entstehen können, erkennen und wissen, wie sie zu vermeiden sind. Falsche und nachlässiger Gebrauch des Instruments können seine Effizienz stark beeinträchtigen. Dieses Produkt darf nur von qualifizierten Technikern benutzt werden. Jeder Bediener oder qualifizierte Techniker muss die Gebrauchs-/Wartungsanleitung und anderes von Agilent geliefertes Informationsmaterial sorgfältig lesen. Mit “Gefahr“ oder “Achtung“ bezeichnete Hinweise müssen genauestens beachtet werden. Bei irgendwelchen Problemen kontaktieren Sie das zuständige Agilent Büro. Dies Handbuch benutzt die folgenden Konventionen: WARNUNG! Dieses Zeichen wird benutzt, wenn ein Nichtbeachten der Anweisung oder Vorsichtsmaßnahme zu Verletzung oder Tod führen kann. VORSICHT! Dieses Zeichen wird benutzt, wenn ein Nichtbeachten der Anweisung Schäden am Gerät verursachen kann. HINWEIS Informationen, die dem Bediener helfen, mit dem Instrument die bestmöglichen Leistungen zu erreichen. 24/140 PHD-4 Portable Helium Detector User Manual / 87-900-120-01 (F) Anleitung zur Installation Lagerung 2 Lagerung Bei Transport und Lagerung der PHD-4 müssen die folgenden Umgebungsbedingungen eingehalten werden: Temperatur: -20 °C bis +70 °C Rel. Luftfeuchtigkeit: 0 – 95 % (nicht kondensierend) Installationsvorbereitungen Die PHD-4 wird in einer speziellen Schutzverpackung geliefert. Wenn Sie irgendwelche Anzeichen von Transportschäden feststellen, kontaktieren Sie Ihr Verkaufsbüro. Beim Auspacken die PHD-4 nicht fallen lassen und gegen Stöße schützen. Die Verpackung nicht einfach wegwerfen. Das Material kann vollständig recycelt werden und entspricht den EU-Richtlinien 85/399 für Umweltschutz. VORSICHT! Die PHD-4 und ihr Zubehör nie anders und für andere Zwecke als die in diesem Handbuch beschriebenen benutzen. PHD-4 Portable Helium Detector User Manual / 87-900-120-01 (F) 25/140 2 Anleitung zur Installation Installationsvorbereitungen Inhalt der Verpackung Die PHD-4 gibt es in zwei unterschiedlichen Konfigurationen: 1. Modell 969-4600 Basispaket mit: Basiseinheit (5) Netzteil – Batterielader, 100-240 V~ (50/60 Hz) (4) Riemen (3) Kabel (2) 15-stiftiger Gegenstecker Kit mit 3 Glaswollefiltern Handbuch auf CD Obige Module liegen in einem speziellen Kasten aus Polyurethanschaum mit Dichte 30. Die folgende Abbildung zeigt die verschiedenen Module in der Verpackung. 26/140 PHD-4 Portable Helium Detector User Manual / 87-900-120-01 (F) Anleitung zur Installation Installationsvorbereitungen 2 1 5 2 4 3 Abbildung 1 Verpackung Modell 969-4600 2. Modell 969-4640 Komplettpaket mit: Tragkoffer (1) Basiseinheit (5) Zusatzbatterie (1 Stück) (9) Netzteil – Batterielader (8) Riemen (7) 15-stiftiger Gegenstecker für seriellen I/O-Port (3) Kit mit 3 Glaswollefiltern (4) Handbuch auf CD (6) Sonden-Set (10) PHD-4 Portable Helium Detector User Manual / 87-900-120-01 (F) 27/140 2 Anleitung zur Installation Installationsvorbereitungen Obige Module liegen in einem speziellen Koffer aus Polyurethanschaum mit Dichte 30. Die folgende Abbildung zeigt die Verpackung. 1 2 2 9 4 8 3 7 6 5 Abbildung 2 28/140 Verpackung Modell 969-4640 PHD-4 Portable Helium Detector User Manual / 87-900-120-01 (F) Anleitung zur Installation Installation und Gebrauch 2 Installation und Gebrauch WARNUNG! Dieses Gerät wird mit einem Batterielader mit einem dreiadrigen Netzkabel und international genormten Stecker geliefert. Verwenden Sie immer dieses Netzkabel und stecken Sie den Stecker in eine geerdete SchutzkontaktSteckdose, um elektrische Entladungen zu vermeiden. Im Gerät werden hohe Spannungen erzeugt, die eine Verletzungs- und Todesgefahr darstellen. WARNUNG! Benutzen Sie die PHD-4 niemals in Umgebungen, in denen brennbare Gase oder Dämpfe vorhanden sind. Wenn Sie die PHD-4 in Kombination mit Stichproben-Geräten ( nur wenn diese mit EEX ia IIAT4 markiert sind) einsetzen, stellen Sie die PHD-4 unbedingt ausserhalb des ExplosionsgefahrBereichs auf. WARNUNG! Die PHD-4 hat eine wiederaufladbare Batterie und einen zugehörigen Batterielader. Die Batterie ist an einem sicheren Ort (weit entfernt von explosiven Gasen oder leicht entflammbarem Material) wieder aufzuladen. Aufladen und Gebrauch des Geräts in einem unsicheren Bereich kann zu Verletzungen und Schaden am Gerät führen. WARNUNG! Während der Aufladevorgang der PHD-4 Batterie-Einheit läuft, (Stromkabel angeschlossen) DARF die Einheit nicht herumgetragen werden. PHD-4 Portable Helium Detector User Manual / 87-900-120-01 (F) 29/140 2 Anleitung zur Installation Installation und Gebrauch WARNUNG! Es ist verboten, dieses Gerät in Bergwerken oder unterirdischen Systemen zu benutzen. Gebrauch in Umgebungen, die von den Normen nicht vorgesehen sind, kann zu Verletzungen und Schaden am Gerät führen. Beim Betrieb müssen folgende Umgebungsbedingungen erfüllt sein: WARNUNG! 30/140 Temperatur: +5 bis +35 °C; Rel. Luftfeuchtigkeit: 0 – 95 % (nicht kondensierend) Die Ventilationsschlitze oben und hinten an der PHD-4 nicht abdecken oder zustellen. Ein Verschließen kann zur Beschädigung der PHD-4 oder externer Komponenten führen. PHD-4 Portable Helium Detector User Manual / 87-900-120-01 (F) Anleitung zur Installation Wartung 2 Wartung Der PHD-4 braucht keine Wartung (außer für den Filter der Probenpumpe und die Batterie). Alle entsprechenden Arbeiten dürfen nur von berechtigten Personen ausgeführt werden. HINWEIS WARNUNG! Jede Anwendung, die von den in diesem Handbuch beschriebenen abweichen, muss von autorisiertem Fachlpersonal ausgeführt werden. Alle nicht genehmigten Arbeiten am Gerät können zu Verletzungen und Schaden am Gerät führen. Bei Defekten den Agilent Kundendienst oder den Agilent Austauschdienst kontaktieren, der das defekte Gerät gegen ein generalüberholtes austauschen kann. Wenn ein Gerät verschrottet werden muss, dabei die spezifischen nationalen Gesetze beachten. HINWEIS Reinigungs- und Dekontaminationsverfahren sind nicht vorgesehen (siehe „Gesundheits-und Sicherheits-Zertifikat“ - Kasten auf dem „ RücksendungsAntrag“-Formular). PHD-4 Portable Helium Detector User Manual / 87-900-120-01 (F) 31/140 2 Anleitung zur Installation Entsorgung Entsorgung Bedeutung des "WEEE" Logos auf den Etiketten. Das folgende Symbol ist in Übereinstimmung mit der EU Richtlinie WEEE (Schrott von elektrischen und elektronischen Geräten) angebracht. Das nur in EU-Ländern gültige Symbol zeigt an, dass das betreffende Produkt NICHT zusammen mit normalem Haushalts- und Industriemüll entsorgt werden darf, sondern einem differenzierten Entsorgungssystem zugeführt werden muss. Der Endabnehmer sollte daher den Lieferanten des Geräts - die Muttergesellschaft oder den Wieder-verkäufer – kontaktieren, um die Abholung und Entsorgung nach Prüfen der Vertrags- und Verkaufsbedingungen einzuleiten. 32/140 PHD-4 Portable Helium Detector User Manual / 87-900-120-01 (F) Anleitung zur Installation Entsorgung 2 Steuerorgane und Anzeigen auf der Frontkonsole der PHD-4 Die folgende Abbildung zeigt die Frontkonsole der PHD-4 mit ihren Hauptkomponenten. Abbildung 3 Fronkonsole 1 Funktionstasten 2 Grafisches Display 3 Frontkonsole PHD-4 Portable Helium Detector User Manual / 87-900-120-01 (F) 33/140 2 Anleitung zur Installation Entsorgung Externes Netzteil und Batterie-Einheit Die PHD-4 ist ein Batterie-betriebenes Traggerät. Die Batterie darf nur und ausschließlich in der PHD-4, geladen werden, indem das Netzteil Agilent SR03.702888 an den Port 3 (Stromversorgung) angeschlossen wird. VORSICHT! Das externe Netzgerät für nichts anderes benutzen als für die Agilent SR03.702888. Die Batterie wird völlig automatisch aufgeladen, wenn das Netzteil an Port 3 angeschlossen ist. VORSICHT! Während der Aufladevorgang der PHD-4 Batterie-Einheit läuft, muss vermieden werden, dass der externe Stromschalter AUS und wieder EIN geschaltet wird. Wiederholt ausgeführte Ladevorgänge können zu einer Überhitzung der BatterieEinheit führen. Die Batterie kann bei abgeschalteter PHD-4 oder während ihres normalen Betriebs geladen werden. HINWEIS Die Zeit zum Aufladen der Batterie ist sehr viel länger, wenn die PHD-4 in Betrieb ist. VORSICHT! Da Ni-MH Batterien sich automatisch wieder entladen, muss die Batterie regelmäßig wieder aufgeladen werden. Die Batterie muss mindestens alle 3 Monate und vor einer Lagerungszeit vollständig aufgeladen werden. 34/140 PHD-4 Portable Helium Detector User Manual / 87-900-120-01 (F) Anleitung zur Installation Entsorgung 2 Die Batterie-Einheit ist gegen Kurzschlüsse, Überspannungen und Überhitzungen durch eine Sicherung, einen wieder verwertbaren Temperaturschalter und eine wieder verwertbaren Schmelzsicherung geschützt. Das Einschalten einer dieser Schutzschalter wird von der PHD-4 besonders hervorgehoben und wie folgt beschrieben: Einheit: OFF Netzanschluss: ANGESCHLOSSEN Die Meldung “No Battery” erscheint auf dem Display. Einheit: ON Netzanschluss: ANGESCHLOSSEN Das Batterie-Icon auf der Hauptseite erscheint als eine durchkreuzte Batterie. Einheit: OFF Es erscheint keine Meldung auf dem – Sie können die Einheit nicht EINschalten. Netzanschluss: NICHT ANGESCHLOSSEN Wenn einer der Sicherungen der Batterie-Einheit eingeschaltet ist, schalten Sie die Einheit AUS und ziehen Sie das Stromkabel heraus. Lassen Sie die Einheit dann eine Stunde lang AUS, bevor Sie den Netzanschluss wieder einstecken. Wenn wieder die Meldung “No Battery” auf dem Display erscheint, muss die Batterie-Einheit ausgetauscht werden. PHD-4 Portable Helium Detector User Manual / 87-900-120-01 (F) 35/140 2 Anleitung zur Installation Entsorgung Hintere Konsole der PHD-4 Die folgende Abbildung zeigt die Einrichtungen und Anschlüsse auf der Rückseite der PHD-4. 6 5 1 4 HEAD SET I/O-SERIAL 2 Abbildung 4 36/140 3 Hintere Konsole 1 Analysekopf 2 Anschluss des Kopfhörers 3 Stromanschluss 4 RS232 E/A-Anschluss 5 Schnellöffnung für das Gehäuse 6 Gasauslass PHD-4 Portable Helium Detector User Manual / 87-900-120-01 (F) Anleitung zur Installation Entsorgung 2 Wenn die Batterie bei abgeschalteter PHD-4 geladen wird, erscheint auf dem Display die Meldung “Battery charge Running …”. Die Meldung “Battery Full” besagt, dass die Batterie voll geladen ist. Wenn die Batterie beim normalen Betrieb der PHD-4 geladen wird, zeigt das Ladestandsymbol den Fortschritt der Operation mit ständigen Anstieg des Ladestands an. Bei Laden im Normalbetrieb der PHD-4 bedeutet die Meldung “Battery Full” auch, dass nicht weiter geladen wird. Das Netzkabel an eine Steckdose mit folgenden Eigenschaften anschließen: V = 90 – 240 V~ F = 50 – 60 Hz HINWEIS Der Stecker auf der HV-Seite des Netzteils muss leicht zugänglich sein und schnelle und leichte Verbindung erlauben. HINWEIS Die Hauptstrom-Zuführung muss über eine Schutzkontakterdung gesichert sein. PHD-4 Portable Helium Detector User Manual / 87-900-120-01 (F) 37/140 2 Anleitung zur Installation Entsorgung 38/140 PHD-4 Portable Helium Detector User Manual / 87-900-120-01 (F) PHD-4 Portable Helium Detector User Manual 3 Procédure pour l’installation Indications Generales 40 Stockage 41 Preparation pour l’installation 41 Contenu de l‘emballage 42 Installation et utilisation 45 Entretien 47 Mise au rebut 48 Boutons et témoins lumineux du panneau frontal du PHD-4 49 Alimentation externe et batterie 50 Panneau arrière du PHD-4 52 Traduction de la mode d’emploi originale 39/140 3 Procédure pour l’installation Indications Generales Indications Generales Les opérateurs et le personnel d'entretien doivent connaître les risques pouvant dériver de l'utilisation de cet appareil. En outre, ils doivent pouvoir reconnaître les éventuelles conditions de danger, et être en mesure de les éviter. Toute utilisation impropre de l'appareil peut compromettre l'efficacité de ce dernier. Ce produit ne doit être utilisé que par du personnel qualifié. L'utilisateur doit lire attentivement ce mode d'emploi, ainsi que toute autre information supplémentaire fournie par Agilent. Les paragraphes "Danger" et "Attention" doivent être lus et respectés scrupuleusement. En cas de problème, contactez le bureau Agilent le plus proche. Ce mode d'emploi utilise les conventions suivantes: AVERTISSEMENT! Les paragraphes "Avertissement" attirent l'attention de l'opérateur sur une procédure ou une manoeuvre spécifique, qui, si elle n'est pas effectuée correctement, risque de provoquer de graves lésions. ATTENTION! NOTE 40/140 Les paragraphes "Attention" sont placés avant certaines procédures, qui, si elles ne sont pas observées, pourraient provoquer de sérieux dommages à l'appareil. Les paragraphes "Note" contiennent des informations qui permettent à l'opérateur d'utiliser l'appareil de façon optimale. PHD-4 Portable Helium Detector User Manual / 87-900-120-01 (F) Procédure pour l’installation Stockage 3 Stockage Durant le transport et le stockage du PHD-4, les conditions ambiantes suivantes doivent être respectées : Température : de -20 °C à +70 °C. Humidité relative : 0 – 95 % (sans condensation). Preparation pour l’installation Le PHD-4 est fourni dans un emballage spécial de protection ; si vous constatez un endommagement de l'appareil, qui pourrait s'être vérifié durant le transport, contactez le bureau de vente local. Lorsque vous déballez le produit, veillez à ne pas le faire tomber et à ne lui faire subir aucun choc. Ne jetez pas l'emballage dans l'environnement. Le matériel d'emballage est entièrement recyclable, et respecte la directive CEE 85/399 en matière de protection de l'environnement. ATTENTION! N'utilisez jamais le PHD-4 et ses accessoires d'une façon différente ou dans un but différent de ceux illustrés dans ce mode d'emploi. PHD-4 Portable Helium Detector User Manual / 87-900-120-01 (F) 41/140 3 Procédure pour l’installation Preparation pour l’installation Contenu de l‘emballage Le PHD-4 est disponible dans deux différentes configurations : 1. Modèle 969-4600 - Contenu de l'emballage : Unité de base (5). Unité d'alimentation - Chargeur de batteries, 100-240 VCA (50/60 Hz) (4). Courroie (3). Câbles (2). Connecteur pour compteur à 15 broches. Kit de 3 filtres en laine de verre. Manuel sur CD. Les composants ci-dessus sont insérés dans des coques spécifiques en mousse de polyuréthane, d'une densité égale à 30. La figure suivante illustre un modèle d'emballage et la position des différents composants. 42/140 PHD-4 Portable Helium Detector User Manual / 87-900-120-01 (F) Procédure pour l’installation Preparation pour l’installation 3 1 5 2 4 3 Figure 1 Emballage du modèle 969-4600 2. Modèle 969-4640 - Contenu de l'emballage : Valise de transport (1). Unité de base (5). Batterie supplémentaire (1 pièce) (9). Unité d'alimentation - Chargeur de batteries (8). Courroie (7). Connecteur pour compteur 15 pin pour port série I/O (3). Kit de 3 filtres en laine de verre (4). Manuel sur CD (6). Sondes (10) PHD-4 Portable Helium Detector User Manual / 87-900-120-01 (F) 43/140 3 Procédure pour l’installation Preparation pour l’installation Les composants ci-dessus sont insérés dans des coques spécifiques en mousse de polyuréthane, d'une densité égale à 30. La figure suivante illustre l'emballage. 1 2 2 9 4 8 3 7 6 5 Figure 2 44/140 Emballage du modèle 969-4640 PHD-4 Portable Helium Detector User Manual / 87-900-120-01 (F) Procédure pour l’installation Installation et utilisation 3 Installation et utilisation AVERTISSEMENT! Le dispositif est fourni avec un câble d'alimentation à trois fils, doté d'un type de fiche approuvé au niveau international. Utiliser toujours ce câble d’alimentation et introduire la fiche dans une prise pourvue d’un conducteur approprié de mise au sol afin d’éviter les décharges électriques. De hautes tensions sont présentes à l'intérieur du dispositif : ces tensions peuvent provoquer de graves lésions physiques, voire la mort. AVERTISSEMENT! Ne pas utiliser le PHD-4 là où sont présents des gaz ou des vapeurs potentiellement inflammables. On utilise le PHD-4 avec des dispositifs de sécurité pour l’échantillonnage (uniquement si marqués EEX ia IIAT4) le PHD-4 même doit nécessairement être positionné hors de la zone à risque d’explosion. AVERTISSEMENT! Le produit PHD-4 est doté d'une batterie rechargeable et du chargeur de batteries correspondant. Recharger la batterie dans une zone sûre, à l’écart de gaz explosifs et de matières hautement inflammables. La recharge ou l'utilisation du dispositif dans des lieux non sûrs peut provoquer de graves lésions physiques ou un endommagement de l'appareil. AVERTISSEMENT! NE PAS transporter l’unité pendant le rechargement de la batterie du PHD-4 (alimentation branchée). PHD-4 Portable Helium Detector User Manual / 87-900-120-01 (F) 45/140 3 Procédure pour l’installation Installation et utilisation AVERTISSEMENT! Il est interdit d'utiliser le dispositif dans une mine ou dans un lieu souterrain. L'utilisation dans un environnement non conforme aux normes peut provoquer de graves lésions physiques ou un endommagement de l'appareil. Durant l’utilisation, les conditions ambiantes suivantes doivent être respectées : Température : de +5 °C à +35 °C. Humidité relative : 0 – 95 % (sans condensation). AVERTISSEMENT! Ne couvrez ou n'obstruez jamais les fentes d'aération situées sur la partie supérieure du PHD-4, ainsi que le conduit d'échappement arrière. Ces éventuelles obstructions pourraient provoquer un endommagement du PHD-4 ou des composants externes. 46/140 PHD-4 Portable Helium Detector User Manual / 87-900-120-01 (F) Procédure pour l’installation Entretien 3 Entretien PHD-4 ne requiert aucun entretien (à l'exception de l'échantillonnage des filtres de pompage et de la batterie). Les interventions doivent être effectuées exclusivement par du personnel agréé. NOTE Toute opérations différente des procédures décrites dans le présent manuel doit être effectuée exclusivement par le personnel préposé. AVERTISSEMENT! Toute intervention non autorisée sur le dispositif peut provoquer de graves lésions physiques ou un endommagement de l'appareil. En cas de défaillance, contactez le service de réparation Agilent ou le "service avancé de pièces de rechange Agilent", qui vous permet d'obtenir un dispositif régénéré en remplacement de l'unité défaillante. Pour la mise au rebut du dispositif, respectez la législation nationale en la matière. NOTE Les processus de nettoyage ou de décontamination ne sont pas fournis (voir l’encadré “Certificat de sécurité et de santé” sur le module “Demande de restitution”. PHD-4 Portable Helium Detector User Manual / 87-900-120-01 (F) 47/140 3 Procédure pour l’installation Mise au rebut Mise au rebut Signification du logo "WEEE" imprimé sur les étiquettes. Le symbole indiqué ci-dessous a été appliqué conformément à la directive CE dénommée "WEEE". Ce symbole (valable uniquement pour les pays de la Communauté européenne) indique que le produit sur lequel il est appliqué NE DOIT PAS être mis au rebut avec les déchets domestiques ou industriels, mais doit être recyclé. Par conséquent, nous invitons l'utilisateur final à contacter le fournisseur du dispositif, qu'il s'agisse de la maison mère ou d'un revendeur, pour entreprendre le processus de mise au rebut, après vérification des termes et conditions du contrat de vente. 48/140 PHD-4 Portable Helium Detector User Manual / 87-900-120-01 (F) Procédure pour l’installation Mise au rebut 3 Boutons et témoins lumineux du panneau frontal du PHD-4 La figure suivante illustre le panneau frontal du PHD-4 et ses principaux composants. Figure 3 Panneau frontal 1 Boutons de fonction. 2 Afficheur graphique. 3 Panneau frontal. PHD-4 Portable Helium Detector User Manual / 87-900-120-01 (F) 49/140 3 Procédure pour l’installation Mise au rebut Alimentation externe et batterie Le PHD-4 est un dispositif portable à batterie. La batterie ne peut être rechargée qu'à l'intérieur du PHD-4, en connectant l'alimentateur Agilent SR03.702888 au port d'alimentation 3 (Power Supply connector). ATTENTION! N'utilisez jamais un alimentateur externe différent de l'alimentateur Agilent SR03.702888. Le chargement de la batterie est entièrement automatique, et démarre dès que l'alimentateur est raccordé au port 3. ATTENTION! Pendant le rechargement de la batterie du PHD-4, éviter de couper puis de rallumer l’alimentation externe. Des rechargements répétés peuvent provoquer une surchauffe de la batterie. La batterie PHD-4 peut être rechargée aussi bien lorsque le PHD-4 est hors tension que durant son fonctionnement normal. NOTE ATTENTION! 50/140 Si vous rechargez la batterie alors que le PHD-4 est sous tension, le délai de chargement est sensiblement plus long. Comme les batteries Ni-MH sont sujettes à un phénomène d’autodéchargement interne, il faut les recharger périodiquement. Exécuter un rechargement complet au mois tous les 3 mois et avant une période d’entreposage. PHD-4 Portable Helium Detector User Manual / 87-900-120-01 (F) Procédure pour l’installation Mise au rebut 3 La batterie est protégée contre les courts-circuits, les surcharges et les surchauffes par un fusible, un thermocontacteur réutilisable et un fusible thermique non réutilisable. Le déclenchement de l’une de ces protections est mis en évidence par le PHD-4 de la manière suivante : Unité : OFF Alimentation : CONNECTEE Le message “No Battery” (Pas de batterie) s’affiche sur l’écran Unité : ON Alimentation : CONNECTEE L’icône de la batterie qui s’affiche sur l’écran principal est barrée d’une croix Unité : OFF Alimentation : NON CONNECTEE Aucun message sur l’écran – vous ne pouvez pas mettre l’unité en marche Si l’une des protections de la batterie s’est déclenchée, éteindre l’unité, débrancher le cordon d’alimentation puis laisser l’unité hors tension pendant une heure avant de rebrancher l’alimentation. Si le message “No Battery” s’affiche de nouveau, il faut remplacer la batterie. PHD-4 Portable Helium Detector User Manual / 87-900-120-01 (F) 51/140 3 Procédure pour l’installation Mise au rebut Panneau arrière du PHD-4 La figure suivante illustre les dispositifs et les connecteurs situés sur le panneau arrière du PHD-4. 6 5 1 4 HEAD SET I/O-SERIAL 2 Figure 4 52/140 3 Panneau arrière 1 Sonde. 2 Connecteur pour écouteur. 3 Connecteur d'alimentation. 4 Connecteur d'E/S RS232. 5 Dispositif de relâchement rapide de la fermeture. 6 Echappement du gaz. PHD-4 Portable Helium Detector User Manual / 87-900-120-01 (F) Procédure pour l’installation Mise au rebut 3 Si vous rechargez la batterie alors que le PHD-4 est hors tension, l'afficheur visualise le message "Battery charge Running…" (Chargement de la batterie en cours...). Le message "Battery Full" (Batterie pleine) indique que la batterie est entièrement chargée. Si vous rechargez la batterie alors que le PHD-4 fonctionne normalement, l'icône relative au chargement indique la progression de ce dernier. En cas de chargement alors que le PHD-4 fonctionne, le même message "Battery Full" indique la conclusion du processus de chargement. Raccordez l'alimentateur à une prise électrique ayant les caractéristiques suivantes : V = 90 - 240 VCA. F = 50 - 60 Hz. NOTE La fiche d'alimentation insérée dans la prise doit être aisément accessible et doit pouvoir être débranchée rapidement et facilement. NOTE L’alimentateur principal doit être pourvu d’un contact de protection relié à la masse. PHD-4 Portable Helium Detector User Manual / 87-900-120-01 (F) 53/140 3 Procédure pour l’installation Mise au rebut 54/140 PHD-4 Portable Helium Detector User Manual / 87-900-120-01 (F) PHD-4 Portable Helium Detector User Manual 4 Installation procedure General Information 56 Storage 57 Preparation for Installation 57 Contents of the Packaging 58 Installation and Use 61 Disposal 64 Controls and Indicators on the Front Panel of the PHD-4 65 External Power Supply and Battery Pack 66 Rear Panel of the PHD-4 68 Original Instructions 55/140 4 Installation procedure General Information General Information Operators and maintenance staff must be aware of all the risks that may arise when using this instrument. They must be able to recognize hazards and potential conditions of danger and know how to avoid these. Improper and negligent use of the instrument may seriously compromise its efficiency. This product must be used only by qualified personnel. Each operator or qualified person must read the user/maintenance manual carefully and also any other information provided by Agilent. “Warning” or Caution” indications must be read and complied with scrupulously. For any problems, contact your nearest Agilent office. The following conventions have been adopted in this manual : WARNING! This term is used when failure to comply with the instructions or precautions indicated in the manual may cause injury or death. CAUTION! Is used when failure to comply with the instructions may cause damage to the equipment. NOTE 56/140 Information that helps the operator to obtain the best possible performance from the instrument. PHD-4 Portable Helium Detector User Manual / 87-900-120-01 (F) Installation procedure Storage 4 Storage The following environmental conditions must be complied with during transportation and storage of the PHD-4: temperature: from -20 °C to +70 °C relative humidity: 0 – 95 % (non condensing) Preparation for Installation The PHD-4 comes in a special protective packaging; if there are any signs of damage during transportation, contact your local sales office. When unpacking the instrument, take care not to drop the PHD-4 and protect it against impacts. Do not dispose of the packaging in the environment. The material is completely recyclable and complies with EEC Directive 85/399 on the protection of the environment. CAUTION! Never use the PHD-4 and accessory components in a different manner and for different purposes from those illustrated in this manual. PHD-4 Portable Helium Detector User Manual / 87-900-120-01 (F) 57/140 4 Installation procedure Preparation for Installation Contents of the Packaging The PHD-4 is available in two different configurations: 1. Model 969-4600 Basic Package that includes: Basic unit (5) Power supply unit –Battery charger, 100-240 Vac (50/60 Hz) (4) Strap (3) Cables (2) 15-pin counter connector Kit of 3 glass wool filters CD manual The above modules are inserted in specific housings in polyurethane foam with density 30. A view of the packaging with the position of the various modules is provided in the figure below. 58/140 PHD-4 Portable Helium Detector User Manual / 87-900-120-01 (F) Installation procedure Preparation for Installation 4 1 5 2 4 3 Figure 1 Packaging Model 969-4600 2. Model 969-4640 Complete Package that includes: Carrying case (1) Basic unit (5) Addition al battery (1 piece) (9) Power supply unit –Battery charger Strap (7) 15-pin connector for I/O serial-port (3) Kit of 5 glass wool filters (4) CD manual (6) Probe set (10) PHD-4 Portable Helium Detector User Manual / 87-900-120-01 (F) 59/140 4 Installation procedure Preparation for Installation The above modules are inserted in specific housings in polyurethane foam with density 30. A view of the packaging is provided in the figure below. 1 2 2 9 4 8 3 7 6 5 Figure 2 60/140 Packaging Model 969-4640 PHD-4 Portable Helium Detector User Manual / 87-900-120-01 (F) Installation procedure Installation and Use 4 Installation and Use WARNING! The device is furnished with a battery charger with three-wire power cord with internationally-approved plug. Always use this power cord and insert the plug in an outlet with a suitable protective earthed conductor in order to avoid electrical discharge. High voltages that may cause serious injury or death are generated inside the device. WARNING! Do not use the PHD-4 in environments containing potentially flammable gases or vapors. If the PHD-4 is used in combination with sampling safety devices (only if marked EEX ia IIAT4), the PHD-4 must be positioned outside the area with a risk of explosion. WARNING! The PHD-4 is complete with a rechargeable battery and related battery charger. Recharge the battery in a safe area far from explosive gases or highly flammable materials. Recharging or use of the device in unsafe areas may cause serious injury and damage. WARNING! While the PHD-4 battery pack charging process is running (power supply connected) DO NOT carry the unit. PHD-4 Portable Helium Detector User Manual / 87-900-120-01 (F) 61/140 4 Installation procedure Installation and Use WARNING! Use of the device in mines or underground systems is forbidden. Use in an environment not envisaged by the standard may cause serious injury and damage. The following environmental conditions must be complied with during functions: WARNING! 62/140 temperature: from +5 to +35 °C; relative humidity: 0 – 95 % (non condensing). Do not cover or obstruct the ventilation slots on the top part of the PHD-4 and the rear discharge duct Obstruction could cause damage to the PHD-4 or to external components. PHD-4 Portable Helium Detector User Manual / 87-900-120-01 (F) Installation procedure Installation and Use 4 The PHD-4 does not require maintenance (except for sampling pump, filters and battery). NOTE WARNING! Any operation different from those described in present user manual must be carried out by authorized personnel. Any unauthorized operation on the device may cause serious injury and damage. In the case of a fault, contact the Agilent repair service or the "Agilent advanced exchange service" which makes it possible to obtain a regenerated device as replacement for the faulty unit. NOTE Cleaning or decontamination processes are not provided for (see "Health and safety certification box on "Request of return" form) If a device is to be scrapped, dispose of this in accordance with specific national legislation. PHD-4 Portable Helium Detector User Manual / 87-900-120-01 (F) 63/140 4 Installation procedure Disposal Disposal Meaning of the "WEEE" logo found in labels. The following symbol is applied in accordance with the EC WEEE (Waste Electrical and Electronic Equipment) Directive. This symbol (valid only in countries of the European Community) indicates that the product it applies to must NOT be disposed of together with ordinary domestic or industrial waste but must be sent to a differentiated waste collection system. The end user is therefore invited to contact the supplier of the device, whether the Parent Company or a retailer, to initiate the collection and disposal process after checking the contractual terms and conditions of sale. 64/140 PHD-4 Portable Helium Detector User Manual / 87-900-120-01 (F) Installation procedure Disposal 4 Controls and Indicators on the Front Panel of the PHD-4 The figure below shows the front panel of the PHD-4 with the main components. Figure 3 Front panel 1 Function buttons 2 Graphic display 3 Front panel PHD-4 Portable Helium Detector User Manual / 87-900-120-01 (F) 65/140 4 Installation procedure Disposal External Power Supply and Battery Pack The PHD-4 is a battery-powered portable device. The battery pack can be recharged only and exclusively inside the PHD-4, connecting the Agilent SR03.702888 power supply unit to the power supply port 3 (Power Supply connector). CAUTION! Never use external power supply units other than the Agilent SR03.702888. Battery charging is fully automatic and starts automatically when the power supply unit is connected to port 3. CAUTION! While PHD-4 battery charging process is running avoid to switch OFF and ON again the external power supply. Repeated charging processes can cause battery pack overheating. The PHD-4 battery can be charged either with the PHD-4 off or during normal functioning. NOTE CAUTION! 66/140 The time required to charge the battery is much longer with the PHD-4 on. As Ni-MH batteries are affected by an internal auto-discharging phenomenon a periodical battery charging process is required. Perform a complete battery charging process at least every 3 months and before a stocking period. PHD-4 Portable Helium Detector User Manual / 87-900-120-01 (F) Installation procedure Disposal 4 The battery pack is protected against shortcuts, overcurrents and overheatings by means of a fuse, a recoverable thermal switch and a non recoverable thermal fuse. The activation of one of these protections is highlighted by the PHD-4 as following described: Unit: OFF Power Supply: CONNECTED The message “No Battery” is showed on the display Unit: ON The battery icon on the main screen appears as a battery Unit: OFF Power Supply: NOT CONNECTED No message on the display – you can’t switch the Power Supply: CONNECTED crossed unit ON If one of the battery pack protections has been activated, switch the unit OFF and disconnect the Power Supply cable, than leave the unit OFF for one hour before connecting the Power Supply again. If the message “No Battery” is showed again, the battery pack have to be exchanged. PHD-4 Portable Helium Detector User Manual / 87-900-120-01 (F) 67/140 4 Installation procedure Disposal Rear Panel of the PHD-4 The figure below shows the devices and connectors on the rear panel of the PHD-4. 6 5 1 4 HEAD SET I/O-SERIAL 2 Figure 4 68/140 3 Rear panel 1 Analysis probe 2 Headset connector 3 Power supply connector 4 RS232 I/O connector 5 Fast release device to remove the enclosure 6 Exhaust gas outlet PHD-4 Portable Helium Detector User Manual / 87-900-120-01 (F) Installation procedure Disposal 4 If charging is performed with the PHD-4 off, the “Battery charge Running” message is shown on the display. The “Battery Full” message indicates that the battery is fully charged. If the battery is charged during normal functioning of the PHD-4, the battery charge status icon highlights progress of the operation with constant increases in level. Also in the case of charging with the PHD-4 in operation, the “Battery Full” message indicates the end of the charging process. Connect the Power Supply to a current outlet with the following characteristics: V = 90 – 240 Vac F = 50 – 60 Hz NOTE The power supply plug of the high voltage side must be easily accessible and permit fast, easy disconnection. NOTE Main power supply must be provided with protective earthed contact. PHD-4 Portable Helium Detector User Manual / 87-900-120-01 (F) 69/140 4 Installation procedure Disposal 70/140 PHD-4 Portable Helium Detector User Manual / 87-900-120-01 (F) PHD-4 Portable Helium Detector User Manual 5 Technical Information Description of the PHD-4 73 Theory of Operation 75 Basic Unit Data and Specification 76 Technical Characteristics of the PHD-4 Basic Module 78 PHD-4 Protection Function 80 Protection Level 1 (Enabled in Factory): Protection Level 2 83 Routine Maintenance of the PHD-4 84 Replacement of the Ni-MH battery pack Management of Filter Elements 88 Management of Sampling Pump 92 82 86 Original Instructions 71/140 5 Technical Information User Interface 96 Self-Test 97 Complete Measurement Screen Page 99 Large Size Measurement Screen Page 101 Screen Icons Table 102 Unit Zeroing 103 Setup Menu 106 Option Menu 108 Communications Menu 110 Set Point Menu 112 Maintenance Menu 114 Security Menu 119 Electrical Connections 121 Analog Interface Description 122 RS 232 Communication Description 124 Communication Format 124 Communication Protocol 124 Troubleshooting 130 Accessories and Spare Parts 134 72/140 PHD-4 Portable Helium Detector User Manual / 87-900-120-01 (F) Technical Information Description of the PHD-4 5 Description of the PHD-4 The PHD-4 portable leak detector permits fully automatic detection of concentrations of helium down to a lower limit of 2 parts for million (ppm). The value of the leak is shown in real time on the graphic display on the front panel. The instrument, which emits an acoustic signal proportional to the concentration of helium detected, incorporates a self-test program, making it possible to carry out any type of operation using the softkeys on the front control panel. The operator can use the straps provided to carry the unit and locate leaks using the extensible probe. Figure 5 Outline PHD-4 Portable Helium Detector User Manual / 87-900-120-01 (F) 73/140 5 Technical Information Description of the PHD-4 Figure 6 74/140 PHD-4 PHD-4 Portable Helium Detector User Manual / 87-900-120-01 (F) Technical Information Description of the PHD-4 5 Theory of Operation The system to be tested is filled with a mixture of helium/air. The probe is passed over areas considered to be critical and, via a sampling pump, the mix of gases around the areas examined is sampled and piped towards the internal sensor. The sensor consists of a pressure detector and of a heated quartz capillary which is highly permeable to the molecules of helium, while permeability for all other atmospheric gases is negligible. While the atmospheric gases are vented to the outside, the molecules of helium reach the pressure detector. The electric signal proportional to the partial pressure of the helium taken from the detector, is processed by the microprocessor of the central unit. This permits direct readout of the concentration of helium on the display (ref. figure below). Exhaust Sniffing gas gas Heater Helium Detector Probe High Voltage Supply Sampling Pump Current Amplifier MICROPROCESSOR Figure 7 Display Keyboard Theory of operation PHD-4 Portable Helium Detector User Manual / 87-900-120-01 (F) 75/140 5 Technical Information Basic Unit Data and Specification Basic Unit Data and Specification The PHD-4 is controlled by a single microprocessor type board and includes: front graphic display and keypad; PCB with the circuits for control of sensor and the pressure measurement circuit; helium sensor for partial pressure measurement with integrated HV board for powering of the sensor. Pneumatic line consisting of the membrane pump for sampling of the environmental gases, of the twin-stage filter system and the backflow valve for protection of the sensor. probe, connected to the basic unit with the spiral tube that can be extended to a length of 1.5 meters. Figure 8 76/140 Basic unit PHD-4 Portable Helium Detector User Manual / 87-900-120-01 (F) 5 Technical Information Basic Unit Data and Specification The figures below show a side view and the rear panel of the PHD-4. 4 10 5 9 8 HEAD SET I/O-SERIAL 6 Figure 9 7 Side and rear panel of the PHD-4 1 Multi-function keypad 2 Graphic display 3 Strap fixing point 4 Identification label 5 Analysis probe 6 Headset connector 7 Power connector 8 RS232-I/O communication connector 9 Enclosure fast release device 10 Exhaust gas outlet PHD-4 Portable Helium Detector User Manual / 87-900-120-01 (F) 77/140 5 Technical Information Basic Unit Data and Specification Technical Characteristics of the PHD-4 Basic Module Tab. 1 Minimum detectable concentration of He from 2 ppm (parts for million) Minimum detectable He leak (mbar l/s) 5x10⁻⁶ Minimum detectable He leak (atm cc/s) 5x10⁻⁶ Minimum detectable He leak (Pa m3/s) 5x10⁻⁷ Reaction time 2 seconds for helium according to AVS 2.1. standard Reading drift max. 10 ppm every 10 minutes Measurement readout Graphic display RS232 Analogue output Acoustic signal Variable frequency Clean-up time Average 30 seconds. Max. 5 minutes (after helium saturation). Self-test procedure and warm-up time 3 minutes Shut-down time Immediate Operating conditions - temperature - humidity +5 °C to +35 °C 90 % RH (non condensing) Jack for headset Diameter 3.5 mm, mono or stereo headset (32 Ohm). Transportability Using adjustable straps Weight 2.6kg (5.73 lb) Dimensions mm (inches) Width Height Depth Power supply in: 100-240 Vac 50/60 Hz 1 A 170 (6.69) 136 (5.35) 290 (11.4) out: 18 Vdc 2.2 A 40W 78/140 Battery operative range 4h Battery auto discharging 0.1 % max. per day at +20 °C PHD-4 Portable Helium Detector User Manual / 87-900-120-01 (F) Technical Information Basic Unit Data and Specification Battery life 5 > 500 charge/discharge cycles (IEC standards) Battery charging conditions: - temperature- humidity +10 °C to +30 °C 90 % (non condensing) Installation Category II Pollution degree 2 Equipment Installation Max altitude 2000 m Compliance with EN 55011 EN 61010-1 EN 61000-4-2 EN 61000-4-3 EN 61000-4-4 EN 61000-4-5 EN 61000-4-6 EN 61000-4-11 Relay contacts: Voltage 24 Vac/cc Max current 1 A (resistive load) 0,3 A (inductive load) Input FZ/AZ: Pin 8: positive Pins 8-1 closed: AZ Pin 1: ground Pins 8-1 open: FZ PHD-4 Portable Helium Detector User Manual / 87-900-120-01 (F) 79/140 5 Technical Information Basic Unit Data and Specification PHD-4 Protection Function The sensor is protected against excess flow of helium by the so-called "protection set-point" (inside the set-point icon , identified by the number "5"). This function can be used to determine the safety threshold above which the sensor is protected (see table below) activating the most suitable type of protection according to the test in progress. Protection set-point levels Tab. 2 Low sensitivity High sensitivity Minimum value (ppm) 200 2 Default value (ppm) 400 100 Maximum value (ppm) 600 250 Each time the protection level is exceeded during measurement, the "protection set-point" is activated and the user is alerted with a message on the display and an acoustic signal (see graphs below). 80/140 PHD-4 Portable Helium Detector User Manual / 87-900-120-01 (F) Technical Information Basic Unit Data and Specification ppm Backflow Valve Reverse 5 Backflow Valve Normal x t Backflow Valve Position Valve Normal Valve Reverse Valve Normal OFF Quartz Heater Status 2 sec ON ON 2 DISPLAY “LEAK !” Figure 10 Tripping of the "protection set-point" may also trigger an active protection at one or two levels. PHD-4 Portable Helium Detector User Manual / 87-900-120-01 (F) 81/140 5 Technical Information Basic Unit Data and Specification Protection Level 1 (Enabled in Factory): The backflow valve fitted in series with the sampling line is activated preventing further pumping of the gases rich in helium and, at the same time, "purging" the entire sampling line with helium-free atmospheric gases (sucked in from the exhaust point or in a heliumfree environment using a dedicated line - see note). Functioning of the backflow valve is showed in the figure below. Probe Outlet 1 > Normal operation 2 > Protection mode 1 2 1 Backflow valve P Sensor Figure 11 Restricting delivery of helium to the sensor, this protection extends its lifetime, also guaranteeing maximum sensitivity. As it restricts the amount of helium conveyed to the sensor, tripping of the backflow device shortens waiting times between one measurement and the next (zeroing time). 82/140 PHD-4 Portable Helium Detector User Manual / 87-900-120-01 (F) Technical Information Basic Unit Data and Specification 5 Protection Level 2 Temporary switching off the heating element of the sensor drastically reduces the permeability of the sensor to helium, increasing the total level of protection. NOTE The line dedicated to suction of the cleaning gas must have a maximum length of 5m and consists of 4x0.75 mm tube. The position of the backflow valve A is shown in the figure below. A Figure 12 PHD-4 Portable Helium Detector User Manual / 87-900-120-01 (F) 83/140 5 Technical Information Routine Maintenance of the PHD-4 Routine Maintenance of the PHD-4 A number of important routine maintenance operations of the PHD-4 can be carried out in field. The components on which routine maintenance operations can be carried out are the Ni-MH battery, the sampling pump and the filter system. To access the components, remove the plastic enclosure following the instructions given below. Removal of the Enclosure Make sure that the device has been switched off following the procedure described in the “user interface” paragraph. 1 Position the PHD-4 on a flat, rigid surface able to support its weight, as shown in the figure below. Figure 13 2 84/140 Press down and at the same time turn the “Quicklock” release device in a counterclockwise direction. PHD-4 Portable Helium Detector User Manual / 87-900-120-01 (F) Technical Information Routine Maintenance of the PHD-4 5 A click and a rotation of a ¼ of turn indicate that the enclosure has been released Figure 14 3 Remove the plastic housing uncovering the internal modules as shown in the figure. Figure 15 PHD-4 Portable Helium Detector User Manual / 87-900-120-01 (F) 85/140 5 Technical Information Routine Maintenance of the PHD-4 Replacement of the Ni-MH battery pack The battery pack that powers the PHD-4 consists of 10 individual elements (Ni-HH technology) managed according to the requirements of the CPU board of the PHD-4. WARNING! Only the Agilent 03.702609 battery can be used on the PHD-4. Never use different battery packs not furnished by Agilent S.p.A., this operation could be dangerous and cause injury to the operator and damage to the PHD-4 and to the surrounding environment. To replace the battery pack, proceed as described below: 1 Remove the plastic enclosure as described above. 2 Position the PHD-4 inside block on a flat surface able to support its weight, placing the device so that the battery pack (located in the lower part of the module) is accessible. 3 Free the battery pack from the two strips of Velcro® A as shown in the figure. A A Figure 16 86/140 PHD-4 Portable Helium Detector User Manual / 87-900-120-01 (F) Technical Information Routine Maintenance of the PHD-4 5 4 Slide out the four-pin electrical connector of the battery exerting a slight pressure on the lever of disconnection B of the connector. 5 Remove the battery pack from its housing. Figure 17 6 Position the fully charged battery pack in the housing provided. 7 Connect the four-pin electrical cable of the new battery pack to battery connector. Figure 18 8 Reposition the edges of the strips of Velcro ® so as to secure the battery pack in its housing. PHD-4 Portable Helium Detector User Manual / 87-900-120-01 (F) 87/140 5 Technical Information Routine Maintenance of the PHD-4 Management of Filter Elements The PHD-4 is fitted with two different filter elements: the internal glass wool filter and the sintered filter. Replacement of the Glass wool filter 1 Remove the housing, as described above. 2 Position the inside block of the PHD-4 on a flat surface able to support its weight, positioning it so that the lower part is accessible (sampling/filter zone). 3 Holding filter A still, turn fitting B fitted on the top by ¼ of turn. B A Figure 19 88/140 PHD-4 Portable Helium Detector User Manual / 87-900-120-01 (F) Technical Information Routine Maintenance of the PHD-4 4 5 Remove the saturated filter A pulling this delicately in an upward direction. A Figure 20 5 Exerting a slight pressure, insert a new filter 6 Position the fitting on the top of the new filter and secure it with a ¼ turn in a clockwise direction. Figure 21 PHD-4 Portable Helium Detector User Manual / 87-900-120-01 (F) 89/140 5 Technical Information Routine Maintenance of the PHD-4 Maintenance of the sintered filter The sintered filter is positioned on the top of the analysis probe and can be accessed removing the sampling nozzle (see figure). This filter is also accessible with the housing fitted. 1 Extract probe A from its housing. B A Figure 22 2 Unscrew the sampling cone B on the top of the probe. B Figure 23 90/140 PHD-4 Portable Helium Detector User Manual / 87-900-120-01 (F) Technical Information Routine Maintenance of the PHD-4 3 5 Using a tool, unscrew the sintered filter C located inside the cone. C Figure 24 4 Clean the filter with a grease remover and dry with dry compressed air. Check the connections and inspect the flexible tube for any damage. 5 Retighten the sintered filter and the sampling cone PHD-4 Portable Helium Detector User Manual / 87-900-120-01 (F) 91/140 5 Technical Information Routine Maintenance of the PHD-4 Management of Sampling Pump The sampling pump is the device that makes it possible to move the gas to be analyzed from the point where a leak is suspected to the sensor inside the PHD-4. This function is afforded by the micromembrane pump which, as it sample the gas required for analysis (leak check), also allows any impurities in the gas (dust, water, oils, etc.) to pass through. These impurities tend to accumulate inside the pumping element with a consequent gradual reduction in performance until a fault is generated. This phenomenon is effectively contrasted by the two filter elements (see glass wool filter and sintered filter) and by the sampling autoadjust cycle (see the chapter on “Sampling auto-adjust”); however, it is important to restrict flow of these materials inside the sampling pump. If sampling pump performance is inefficient (this condition is notified during the initial automatic test) after use in a particularly “dirty” environment or after many hours of operation, the pumping block must be replaced. 92/140 PHD-4 Portable Helium Detector User Manual / 87-900-120-01 (F) Technical Information Routine Maintenance of the PHD-4 5 To replace the pumping block, proceed as follows: 1 Remove the housing as described above. 2 Place the inside block of the PHD-4 on a flat surface able to support its weight, positioning the device so that the lower part (sampling/filter zone) is accessible 3 Disconnect both air tubes A (inlet and exhaust of the sampling pump). A Figure 25 PHD-4 Portable Helium Detector User Manual / 87-900-120-01 (F) 93/140 5 Technical Information Routine Maintenance of the PHD-4 4 To remove the delivery tube, press down ring B so as to free the tube to be removed. B Figure 26 5 Disconnect the two-pin pump power supply connector C. C Figure 27 94/140 PHD-4 Portable Helium Detector User Manual / 87-900-120-01 (F) Technical Information Routine Maintenance of the PHD-4 6 5 Exerting a slight force in an upwards direction, remove the pump D from its housing, releasing the retention spring E. D E Figure 28 7 Reverse the process to install a new pumping element 8 Insert the new pump in retention spring D and then connect the power and air supply using the two non-reversible inlet and exhaust tubes. D Figure 29 PHD-4 Portable Helium Detector User Manual / 87-900-120-01 (F) 95/140 5 Technical Information User Interface User Interface The PHD-4 helium leak detector is designed to operate in different environments and in different applications. The many different functions necessary to operate efficiently in a wide range of different conditions are managed directly by the microprocessor on the CPU control board. The microprocessor guarantees complete control of the capabilities and of the internal components via the HID (Human Interface Device). To start the HID and therefore to switch on the PHD-4, press and hold down for at least 3 seconds the first key A to the right identified by the I symbol. Figure 30 The HID starts and, after a short wait, the automatic check on the internal blocks is started (Self test): Figure 31 96/140 PHD-4 Portable Helium Detector User Manual / 87-900-120-01 (F) Technical Information User Interface 5 Self-Test This automatic procedure is initiated by the HID each time the PHD-4 is started; this process is intended to guarantee that the measurement made with the PHD-4 is effectively valid, checking correct functioning of the components and of internal functions. The self-test cycle comprises the following phases: Test on the heater Test on functioning of the HV power supply unit Battery Pack test Ion sensor starting test Test on functioning of the ion sensor Test on sampling effectiveness The “Heater Test” function checks continuity of the platinum resistor for heating of the permeable area inside the sensor. Positive outcome of this test guarantees that the helium sampled, together with the environmental gases, is able to penetrate inside the sensitive element and can therefore be detected. Efficient functioning of the sensor is verified by a further three tests, the first of which is the “HV test”. During this test, a check is made to guarantee that a correct voltage value is present at the output of the HV power supply unit integrated in the helium sensor. The “Sensitivity test” is useful for checking that the helium detection sensor is able to start and is therefore operative. The last test carried out on the sensor is the “Sensor test” consisting in checking of the effective performance of the sensor. The self-test cycle also includes a “Battery test” which checks that there is a sufficient residual charge for operation of the PHD-4 and the “Sampling test” which is useful for checking correct operation of all the components involved in gas sampling (membrane pump, sintered filter, glass wool filter, sampling line). PHD-4 Portable Helium Detector User Manual / 87-900-120-01 (F) 97/140 5 Technical Information User Interface During running of the various tests, the items forming the list of tests are ticked with a “v” if the test is passed or combined with the “!” symbol in the case of difficulties in running the tests If, in particular conditions, some of the tests have to be repeated, the HID highlights this conditions with the “R” (to be Repeated) symbol combined with an indication of the test concerned. The “PS” (Power Supply) symbol is highlighted on the “Battery test” line if the battery is not present or if the fuse inside the battery has blown. At the end of the test, a summary screen page is shown; if all the tests have been passed, the message “Self-test performed successfully” is displayed; if some of the tests have failed, a list of the problems encountered is displayed for 20 seconds before automatic shut-down of the PHD-4. Figure 32 98/140 PHD-4 Portable Helium Detector User Manual / 87-900-120-01 (F) Technical Information User Interface 5 Complete Measurement Screen Page The “Measurement screen page” is the operator interface provided by the HID. At PHD-4 power-on, the complete measurement screen page is displayed with which it is possible to display the all-round status of the PHD-4. If the operator does not press any key for more than 5 seconds, the HID automatically changes data display mode activating the Large size screen page (see Large size screen). The measurement screen page makes it possible to monitor the main operating parameters of the PHD-4, the status of the digital interface and obviously the leak rate measured, in real time. The leak rate is displayed in the form of a bar whose length is proportional to the leak rate and also by a numeric indication in exponential format followed by the related unit of measurement. Figure 33 A set of variously positioned icons highlights activation and status of the most important functions of the PHD-4. PHD-4 Portable Helium Detector User Manual / 87-900-120-01 (F) 99/140 5 Technical Information User Interface The functions of the 4 soft-keys during the operating phases (measurement screen page ) are as follows: Key 1: (ZERO) Fixed /automatic zero Key 2: ( ). Backlight ON/OFF Key 3: (OFF) PHD-4 OFF Key 4: (MENU) Link to the “Desktop menu”. 1 2 3 4 Figure 34 100/140 PHD-4 Portable Helium Detector User Manual / 87-900-120-01 (F) Technical Information User Interface 5 Large Size Measurement Screen Page The Large size screen page promotes excellent visibility of basic data during leak checks. To return to normal display mode, simply press the “OFF” key or the “MENU” key. The data displayed by the Large Size measurement screen are as follows: Leak rate (large size type) Unit of measurement Measurement Trend (∧) (∨) (=) Zero Status (Az) (Fz) Figure 35 During display of the Large Size measurement screen page, it is possible to modify the zero setting (ZERO key) and to manage backlighting of the display using the key ( ). NOTE Large Size Measurement screen is factory set enabled. To disable this function and use the complete measurement screen un-select “LARGE SCREEN” line in SETUP menu. PHD-4 Portable Helium Detector User Manual / 87-900-120-01 (F) 101/140 5 Technical Information User Interface Screen Icons Table Tab. 3 Icon Function 1 Automatic zero activated 2 Fixed zero activated 3 Low sensitivity activated 4 High sensitivity activated Set-point 5 6 102/140 Normal type: enabled Reverse type: activated Back-flow valve enabled PHD-4 Portable Helium Detector User Manual / 87-900-120-01 (F) Technical Information User Interface 5 Unit Zeroing Two zeroing mode are available use AZ (Automatic Zero) if you operate in an environment where Helium background is variable. NOTE AZ mode continuously compensate the sensor reading bringing it slowly to zero. Keep it in consideration during your leak checking activity with AZ. Use FZ (Fixed Zero) operating in an environment where background of Helium is stable. NOTE As soon as FZ mode is activated the current “leak rate” value is taken as a reference point and considered as zero. PHD-4 Portable Helium Detector User Manual / 87-900-120-01 (F) 103/140 5 Technical Information User Interface Desktop Menu Pressing the menu key from the main screen page, the HID permits access to the main menu, (Desktop menu). Using a set if icons, this menu allows graphic identification of the main functions divided into “families”. The various icons can be scrolled using the central two soft-keys (2 and 3) that are identified by the symbols “∨” and “∧”, selecting the icon required with key 4 (OK). 1 2 3 4 Figure 36 Key 1 performs the “Escape” (ESC) function; if pressed, it causes return to the measurement screen page. The name of each icon (family) can be read in the bottom part of the display during scrolling with the “∨” and “∧” keys. The following submenus can be accessed from the Desktop menu. Tab. 4 104/140 Set-up Setpoints Option Maintenance Communications Security PHD-4 Portable Helium Detector User Manual / 87-900-120-01 (F) 5 Technical Information User Interface Use of the menus Use of the menus is the same for the entire user interface and is based on the following basic rules: Functions of the soft-keys: Key 1 - performs the Escape function (ESC) and is used to exit the menu after viewing the data or making modifications Key 2 – performs the function of moving the cursor down/left (where cursor means selection of the item highlighted in reverse). Key 3 – performs the function of moving the cursor up/right (where cursor means selection of the item highlighted in reverse). Key 4 – performs the function of confirmation (OK) if it is necessary to modify the status of a specific parameter or permits access to the submenus selected previously with the “∨” and “∧” keys. PHD messages: The HID can communicate with the operator through a set of messages of the following type Affirmative, highlighted inside the frame identified with the mark Interrogative, highlighted inside the frame identified by the ? mark. PHD-4 Portable Helium Detector User Manual / 87-900-120-01 (F) i 105/140 5 Technical Information User Interface Setup Menu Figure 37 High Sensitivity The High “Sensitivity” command can be used to set the most suitable degree of sensitivity for the leak detection activity in course. The degree of sensitivity set at power-on of the device is always the Low Level (LS) (“High Sensitivity” not selected). Enabling the “High Sens” command, the minimum detectable concentration changes from 100 ppm (LS) to 2 ppm (HS). Pump on The “Pump on” command allows temporary disabling of intake and analysis of the gases using the probe. When “Gas sampling” is disabled, the PHD-4 is in stand-by status; the screen page displayed is the measurement page where the indication “Ready” replaces that referring to the leak rate measured. To return to operating status, press soft-key 3 (PUMP) or return to the QUICK/Gas sampling/enable menu. Audio on Disabling the “Audio on” command, it is possible to mute the acoustic signal proportional to the leak rate emitted by the PHD-4 in the operating phase. 106/140 PHD-4 Portable Helium Detector User Manual / 87-900-120-01 (F) Technical Information User Interface NOTE The acoustic signal on the rear door “Headset” is never disabled. NOTE The HID features two different acoustic signals to highlight different operating conditions: High tone for user messages Medium tone for leak rate 5 Backlight on Disabling the “Backlight on” command, it is possible to switch off backlighting of the display. Re-enable the “Backlight on” item of the “Set-up” menu in order to switch on display backlighting again permanently. Backlighting of the display can be switched on for a few seconds pressing soft-key 2 in the measurement screen page, identified by the symbol ( ). Large screen On The Large Screen ON command enable the automatic switching to Large Measurement screen mode. If “Large screen on” is not selected Complete Measurement screen will operate. Switch Off! At the end of the work session, the “Switch Off!” command can be used to power off the device. To prevent accidental switch-off, the HID requests confirmation before switching off the PHD-4. A fast link to the same switch-off function is present during the measurement phase on the 3rd key of the front panel. PHD-4 Portable Helium Detector User Manual / 87-900-120-01 (F) 107/140 5 Technical Information User Interface Option Menu Figure 38 The “Option” collects together all the main settings of the PHD-4. The following items can be accessed: Language Using the “Language” menu, it is possible to set the language used by the Human Interface Device to communicate with the operator. There are four possible options English Italiano French Deutsch Unit of measure From this menu, it is possible to set the unit of measurement to be used when tracing leaks. Possible options include: 108/140 PPM mbarL/sec cm3/sec cm3/min PHD-4 Portable Helium Detector User Manual / 87-900-120-01 (F) Technical Information User Interface NOTE TorrL/sec PaL/sec Pam3/sec SCF/year Kg/h R12 g/year R12 5 The sensor fitted inside the PHD-4 is a helium concentration sensor, the unit of measurement proposed automatically by the PHD-4 is PPM (parts for million). Use of the flow unit of measurement requires a conversion that takes into account the flow of gas sampled and the concentration of helium present in the tracer gas. For this reason, as soon as the unit of measurement has been selected, the HID automatically opens the tracer gas selection menu (% Helium). % Helium The “Tracer gas” selection menu makes it possible to insert a factor that takes into account the effective quantity of helium present in the filling gas of the container under test. Mix value display The current setting can be displayed selecting the “Display Mix.” item Mix setting PPM % Through the “Mix setting” item, it is possible to modify the reference to the concentration used (the factory setting is 100 % He). It takes into account the actual Helium concentration in tracer gas. The value can be entered as percentage of helium in nitrogen (%) or as parts of helium per million parts of nitrogen (PPM). PHD-4 Portable Helium Detector User Manual / 87-900-120-01 (F) 109/140 5 Technical Information User Interface NOTE The rules for entering the values are the same to those described in the “Use of the menus” paragraph. Communications Menu Figure 39 The “Communications” menu permits access to the settings of the interface board with external devices. Remote Control Analog Control RS 232 Control Setting remote control mode, it is possible to select the reception channel of the commands from the outside (analog input / command from serial). NOTE 110/140 Readout of PHD-4 data is always possible on both channels (RS232 or Analog port) regardless of selection of “Remote control”. PHD-4 Portable Helium Detector User Manual / 87-900-120-01 (F) Technical Information User Interface NOTE 5 If safety set-point is enabled a “S” is showed in active set point icon on normal size measurement screen beside the number of active set-points (icon 5 in complete measurement screen icons table). As soon as the Back Flow valve is activated the icon 6 appears on complete measurement screen. Baud rate Using the “Baud rate” command, it is possible to modify the communication speed on the serial port between the PHD-4 and external devices. Possible settings are: 1200-2400-4800-9600-19200. PHD-4 Portable Helium Detector User Manual / 87-900-120-01 (F) 111/140 5 Technical Information User Interface Set Point Menu Figure 40 The set-point menu makes it possible to manage enabling of the five set-points of the PHD-4. NOTE When enabled, set points 1 – 4 manage the four relays on the PHD-4 which can be accessed via the rear connector “I/O-SERIAL”. Set-points 1,2,3,4 The set-point selected can be enabled accessing the items of the individual set-points: Enable It is also possible to modify the enable value of each set-point completely independently. 112/140 PHD-4 Portable Helium Detector User Manual / 87-900-120-01 (F) Technical Information User Interface NOTE 5 The factory-set values are: Set-point 1 : 10PPM Set-point 2 : 20PPM Set-point 3 : 30PPM Set-point 4 : 50PPM Safety set-point The fifth set-point made available by the HID is a set-point dedicated to protect the PHD-4 against excessive exposure to high concentrations of helium. Accessing the “Safety Set-point” item, it is possible (as for set-points 1-4) to enable operation and to modify the tripping threshold in the range 2PPM-250PPM in HS and 100PPM-600PPM in LS (factory settings 100PPM in HS and 400PPM in LS). The Safety set-point menu also contains the item: Safety actions Backflow valve (factory setting: active) Heater OFF This menu makes it possible to manage sensor protection actions. Protecting the sensor means restricting the flow of tracer gas (helium) to the amount strictly necessary to trace leaks. Backflow valve – Activation of the backflow valve is part of the factory settings. This device is tripped when the threshold set is exceeded and inverts the flow sampled sampling the gas from the outlet port and then discharging this through the probe normally used for sampling. PHD-4 Portable Helium Detector User Manual / 87-900-120-01 (F) 113/140 5 Technical Information User Interface Backflow functioning makes it possible to use the helium-free gas present at the outlet port to clean the entire pumping line and the helium exchange surface inside the sensor. The device is useful in restricting the flow of helium to the sensor. In addition to maintaining correct operation of the sensor, this device also restricts waiting times between one measurement and the next (zeroing time). Heater OFF – Heater Switching off is a further protection in addition to the Backflow valve as it temporarily reduces the permeability of the helium exchange surface inside the sensor, restricting the flow of helium to the sensitive element and therefore guaranteeing correct operation in time. Maintenance Menu Figure 41 Sensor Clean-up Reading adjustment Sampling auto adjust Battery pack PHD-4 Info The Maintenance menu contains all the management and self.maintenance functions of the PHD-4. 114/140 Sensor Clean-up. PHD-4 Portable Helium Detector User Manual / 87-900-120-01 (F) Technical Information User Interface 5 The “Clean-up” function makes it possible to eliminate any residues of Helium inside the sensor and to obtain fast, safe reset of the PHD-4. Use the “Clean-up” function for faster zeroing after measurement of a large quantity of Helium. WARNING! Do not start the “Clean-up” function in environments with large quantities of helium. Reading adjustment The “Reading adjustment” function makes it possible to eliminate any imprecision in reading. Start the procedure after correctly zeroing the device in a helium-free environment. When requested, provide the PHD-with a known mix of Helium/Nitrogen (possibly calibrated and certified) and correct readout using the “∨” and “∧” keys of the specific screen page. Follow the operating instructions provided by the HID throughout the procedure. PHD-4 Portable Helium Detector User Manual / 87-900-120-01 (F) 115/140 5 Technical Information User Interface Here following the complete reading adjustment procedure is described: 1 Press “MENU” button to enter the main menu screen. 2 Select “MAINTENANCE” icon and press “OK”. 3 Select “ Readind adj.” line and press “OK”. 4 Message “Readind adj. Do you confirm?” will appear. 5 Confirm by pressing “OK” button. 6 Message “Provide N2 or air free of Helium” will be displayed for a few seconds. 7 Provide N2 as requested and wait `until the leak rate value is “0.0 PPM (usually about 10 sec) 8 When displayed value reaches “0.0 PPM” press “OK” button. 9 Message “Provide know mix and correct reading by using “∧” and “∨” button then press “OK” will be displayed for a few seconds”. 10 Provide know mixture (by using calibrated leak or commercial calibrated mixtures <100 PPM) as request and wait for stable reading. 11 Correct the reading value by using “∧” and “∨” buttons in order to reach the nominal value of the helium source, then confirm by pressing “OK” button. 12 Remove the PHD-4 probe from the helium source. 13 As soon as the unit comes back to normal operation, sniff the calibrated mixture/helium source to confirm calibration. NOTE Make sure the unit is in the appropriate sensitivity mode to read the helium source. In the absence of a calibrated mix, it is possible to use the P/N Agilent969-3540 sample leak taking into account that, in this case, reading precision is approximate. 116/140 PHD-4 Portable Helium Detector User Manual / 87-900-120-01 (F) Technical Information User Interface 5 Sampling auto adjust The Sampling autoadjust function offsets the progressive loss of performance of the sampling line. Execution of the function is requested by the user interface every 20 h of operation but can also be started “manually” at any time ( “Sampling auto adjust” command). It is also possible not to start the procedure when requested (SKIP key) by the HID but this procedure is initiated subsequently at each start-up until it is executed. Figure 42 NOTE The “Sampling auto adjust” procedure makes an indirect measurement of the flow sampled; therefore, in some cases, it may take several minutes. PHD-4 Portable Helium Detector User Manual / 87-900-120-01 (F) 117/140 5 Technical Information User Interface Battery Pack The “Battery” menu is the menu used to access battery pack management functions. Battery Maintenance The “Battery Maintenance” function makes it possible to eliminate any reductions in autonomy of the Nickel-Metal-Hydrate battery due to the phenomenon generally known as “Memory effect”. Cancellation of the memory effect is obtained with fast complete discharge of the battery. NOTE Always start the “battery Maintenance” function after connecting the connector to the PHD-4. The “Battery Maintenance” function causes maximum absorption of current through switching on of the heater at maximum temperature and of the sampling pump at maximum speed. During the discharge phase, the flow inversion valve is active. NOTE 118/140 If the PHD-4 is exposed to high concentrations of Helium during discharge, the “battery Maintenance” function is interrupted in order to protect the sensor element from saturation. PHD-4 Portable Helium Detector User Manual / 87-900-120-01 (F) Technical Information User Interface 5 Charge level With the “Charge level” function, it is possible to know the precise percentage residual charge of the battery. With the power supply connected, no data is shown (---%). PHD-4 Info The “PHD-4 Info” menu provides specific information regarding the PHD-4 being used. In particular, it is possible to know: Part Number, Serial Number, Firmware release, Working time. Security Menu Figure 43 The “Locking” menu makes it possible to protect the basic parameters of the PHD-4 against modifications. In particular, the following settings are protected: Sensitivity, Unit of measure, %Helium, Setpoint menu, Reading adjustment. Protection can be enabled/disabled entering the password (default “00000”). PHD-4 Portable Helium Detector User Manual / 87-900-120-01 (F) 119/140 5 Technical Information User Interface The password can be modified by the user with the “Change user password” function. Psw protection 120/140 Enable protection Change User Psw PHD-4 Portable Helium Detector User Manual / 87-900-120-01 (F) Technical Information Electrical Connections 5 Electrical Connections Figure 44 Tab. 5 Pin number Signal 1 Analog out (+) 2 RS232 TX 3 RS232 RX 4 Remote IN 5 RS232 GND 6 Analog out (-) 11 Relay 1 N.O. 12 Relay 2 N.O. 13 Relay 3 N.O. 14 Relay 4 N.O. 15 Relay common PHD-4 Portable Helium Detector User Manual / 87-900-120-01 (F) 121/140 5 Technical Information Analog Interface Description Analog Interface Description The Relay 1-4 are controlled by setpoint 1-4: when the measurement value exceeds the Set Point threshold, the relative Relay is activated. In particular Relay 4 can be controlled by the fourth set point (Set Point 4) or by PHD-4 status when the option “Ready SP ON” is activated (see Menu: Set Point / Set Point 4 / Ready SP ON). As a factory setting the section “Ready Set Point ON” is activated. In the first case (Relay 4 control = Set Point 4) the Relay 4 is activated (closed), when the measurement value exceeds the Set Point 4 threshold. In the second case (Relay 4 control = PHD-4 status) the Relay is activated (closed) only if the unit is in measurement status (open if unit is in self test, reading adj., sensitivity changing, ecc.). In the second case (Relay 4 control = Ready) the Relay 4 is activated when the PHD-4 is ready for the measurement. As a default condition, “Relay 4 control” is set to “Ready”. The output of each relay is present on the auxiliary connector (see the figure "Electrical Connections Table"). A digital input on pin 4 controls the zero function of the PHD-4 from remote: when the input is open the FIXED ZERO mode is activated (indication FZ on the display); when the input is closed the AUTOMATIC ZERO mode is activated (indication AZ on the display). NOTE To use the remote zero control, or analog remote control menu COMMUNICATIONS/REMOTE CONTROL has to be activated. The analog output on pins 1 and 6 provides an analog voltage proportional to the Helium concentration. Its output is from -1.25 V to +5 V according to the following values: 122/140 in HS mode: -1,25 V = -18 ppm +5V = 105 ppm in LS mode: 1.25 V = -1800 ppm +4 V = 106 ppm PHD-4 Portable Helium Detector User Manual / 87-900-120-01 (F) Technical Information Analog Interface Description 5 with a resolution of 0.1 V. For more details see the following figure. NOTE The analog output voltage is always related to the measured concentration in ppm. The information does not change if a different measurement unit is selected from the front panel. Figure 45 Analog Output Value Diagram PHD-4 Portable Helium Detector User Manual / 87-900-120-01 (F) 123/140 5 Technical Information RS 232 Communication Description RS 232 Communication Description The RS 232 interface is available on the connector P2. Communication Format 8 data bit no parity 1 stop bit baud rate: 600/1200/2400/4800/9600 programmable Communication Protocol The communication protocol is a MASTER/SLAVE type where: Host = MASTER Controller = SLAVE The communication is performed in the following way: 1. the host (MASTER) send a MESSAGE + CRC to the controller (SLAVE); 2. the controller answer with an ANSWER + CRC to the host. The MESSAGE is a string with the following format: <STX>+<ADDR>+<WIN>+<COM>+<DATA>+<ETX>+<CRC> Where: NOTE 124/140 When a data is indicated between two quotes (‘...’) it means that the indicated data is the corresponding ASCII character. <STX> (Start of transmission) = 0x02 <ADDR> (Unit address) = 0x80 (for RS 232) <ADDR> (Unit address) = 0x80 + device number (0 to 31) (for RS 485) PHD-4 Portable Helium Detector User Manual / 87-900-120-01 (F) Technical Information RS 232 Communication Description 5 <WIN> (Window) = a string of 3 numeric character indicating the window number (from ‘000’ to ‘999’); for the meaning of each window see the relevant paragraph. <COM> (Command) = 0x30 to read the window, 0x31 to write into the window <DATA> = an alphanumeric ASCII string with the data to be written into the window. In case of a reading command this field is not present. The field length is variable according to the data type as per the following table: Tab. 6 Data Type Field Length Valid Characters Logic (L) 1 ‘0’ = OFF ‘1’ = ON Numeric (N) 6 ‘-‘, ‘.’, ‘0’ . . . ‘9’ right justified with ‘0’ Alphanumeric (A) 10 from blank to ‘_’ (ASCII) <ETX> (End of transmission) = 0x03 <CRC> = XOR of all characters subsequent to <STX> and including the <ETX> terminator. The value is hexadecimal coded and indicated by two ASCII character. The addressed SLAVE will respond with an ANSWER whose structure depends from the MESSAGE type. When the MESSAGE is a reading command, the SLAVE will respond transmitting a string with the same structure of the MESSAGE. NOTE Some error settings are foreseen: PHD-4 Portable Helium Detector User Manual / 87-900-120-01 (F) 125/140 5 Technical Information RS 232 Communication Description Tab. 7 0x15 NACK 0x32 UNKNOWN WINDOW 0x33 BAD DATA TYPE 0x34 OUT OF RANGE 0x35 BAD OPERATION foreseen with Read/Write commands foreseen only with Write commands The PHD-4 can answers with the following response types: Tab. 8 Type Length Value Description Logic 1 byte - After a read instruction of a logic window Numeric 6 bytes - After a read instruction of a numeric window Alphanumeric 10 bytes - After a read instruction of an alphanumeric window ACK 1 byte (0x6) The command execution has been successfully completed NACK 1 byte (0x15) The command execution has been failed Unknown Window 1 byte (0x32) The specified window in the command is not a valid window (0x33) The data type specified in the command (Logic, Numeric or Alphanumeric) is not accorded with the specified Window Data Type Error 1 byte Out of Range 1 byte Win Disabled 126/140 1 byte (0x34) (0x35) The value expressed during a write command is out of the range value of the specified window The specified window is Read Only or temporarily disabled (for example you can’t write the Soft Start when the Pump is running) PHD-4 Portable Helium Detector User Manual / 87-900-120-01 (F) Technical Information RS 232 Communication Description 5 Tab. 9 Win. no. Read/ Write Data Type Win. Name Description Admitted val. 100 R/W N Local/Remote/ Analog Selection Selezione Local/Serial/Analog.: 0-2 0 Serial 1 Local 2 Analog 120 R/W L Backlight Backlight On/Off 130 R/W N Language Language selection: 0-1 0 Italiano 1 English 2 Francais 3 Deutsch 140 R N Measurament Unit Unit of measurement selection: 0-10 0 PPM 1 mbar1/s 2 cm3/s 3 cm3/min 4 TorrL/s 5 PaL/s 6 Pam3/s 7 Kg/h 8 g/y(R12) 9 g/y(R314) 10 SCF/Y 150 R/W L Zero Function Auto zero / Fixed zero selection 0-1 160 R/W N Sensitivity Selection Sensitivity selection: 0-2 0 LS 1 HS 170 R/W L Probe Function Sampling enabling 0-1 180 R/W L Audio Signal Audio signal enabling 0-1 PHD-4 Portable Helium Detector User Manual / 87-900-120-01 (F) 127/140 5 Technical Information RS 232 Communication Description Win. no. Read/ Write Data Type Win. Name Description Admitted val. 190 R/W L CleanUp Function Clean-up enabling 0-1 270 R N Measurament Helium concentration measurement (PPM) 0-900'000 280 R/W L Set Point 1 Enable Enabling Set Point 1 0-1 290 R/W L Set Point 2 Enable Enabling Set Point 2 0-1 300 R/W L Set Point 3 Enable Enabling Set Point 3 0-1 302 R N Working Time Total lifetime (h) 0-100'000 310 R/W L Set Point 4 Enable Enabling Set Point 4 0-1 315 R/W L Safety Set Point Enable Enabling Safety Set Point 0-1 320 R A PHD P/N Part Number of PHD - 322 R A PHD S/N Serial Number of PHD - 324 R A PHD Modific. Level upgrade level of the PHD - 330 R/W L Valve Enable Backflow valve enabling 0-1 340 R/W L Heater enable Heater OFF enabling 0-1 350 R/W N Set Point 1 Value Set point 1 threshold (PPM) 0-900'000 360 R/W N Set Point 2 Value Set point 2 threshold (PPM) 0-900'000 370 R/W N Set Point 3 Value Set point 3 threshold (PPM) 0-900'000 380 R/W N Set Point 4 Value Set point 4 threshold (PPM) 0-900'000 390 R/W N Safety Set Point Value Set point Safety threshold (PPM) 0-900'000 406 R/W A Program Listing Indicates Program Listing code and release - 407 R/W A Parameter Listing Indicates Parameter Listing code and release - 410 R/W N Battery Charge Level Battery pack residual charge (%) 0-100 128/140 PHD-4 Portable Helium Detector User Manual / 87-900-120-01 (F) Technical Information RS 232 Communication Description 5 Win. no. Read/ Write Data Type Win. Name Description Admitted val. 450 R/W N BaudRate Defines serial communication baud rate: 0-4 0 1200 bit/s 1 2400 bit/s 2 4800 bit/s 3 9600 bit/s 4 19200 bit/s 460 R/W N Auto-test alarms It defines the Allarm status: 0-4 0 OK 1 Heater fail 2 Sampling line fail 3 Battery fail 4 Sensitivity fail 570 R/W L PHD-4 ON/OFF It switch PHD-4 ON and OFF 0 (OFF) 1 (ON) PHD-4 Portable Helium Detector User Manual / 87-900-120-01 (F) 129/140 5 Technical Information Troubleshooting Troubleshooting Here following some troubleshooting tables are reported. Refer to the troubleshooting tables to locate and understand fails of your PHD-4. Troubleshooting tables give you information about procedures available to fix the fail occurred to PHD-4 and advices for a good use of PHD-4 and a consequent long operative time without fails. In coloumn “Trouble” are showed issues that could affect your PHD-4. In coloumn “Answer” on right side possible reasons of fail and solutions (if present) are listed. Tab. 10 Trouble Answer Sampling line fault Sensitivity test fault Sensor test fault Unstable reading Reading drift Low sampled flow Short operative range Tab. 11 Troubleshooting table 1 Trouble Answer Sampling line fault Due to clogging of line or fail of diaphragm pump. 1. Check probe line (pipe) 2. Replace glass-wool filter 3. Clean sintered filter 4. Replace Sampling pump Start Sampled flow auto-adjust 130/140 PHD-4 Portable Helium Detector User Manual / 87-900-120-01 (F) Technical Information Troubleshooting Tab. 12 5 Troubleshooting table 2 Trouble Answer Sensitivity test fault Due to difficulties in sensor trigger (sensor too clean) 1. Spray few He near the probe during “Self test” procedure Tab. 13 Troubleshooting table 3 Trouble Answer Sensor test fault Due to saturation of the sensor (High ion current) or large amount of He trapped in the capillary quartz. 1. Provide N2 or air free of He 2. Repeat many times “Self-test” procedure. As a general rule Avoid sniffing large amount of He (concentration, pressure) Use backflow valve protection Start checking in LS PHD-4 Portable Helium Detector User Manual / 87-900-120-01 (F) 131/140 5 Technical Information Troubleshooting Tab. 14 Troubleshooting table 4 Trouble Answer Unstable reading/Reading Drift Due to saturated sensor (spikes) or high room temperature (drift) Operate with environmental temperature between 5 °C and 35 °C - 90 %HR Tab. 15 Troubleshooting table 5 Trouble Answer Low sampled slow Due to clogging of line Check probe line (pipe) Replace glass-wool filter Clean sintered filter Start Sampled flow auto-adjust in addition to periodical start (20h) 132/140 PHD-4 Portable Helium Detector User Manual / 87-900-120-01 (F) Technical Information Troubleshooting Tab. 16 5 Troubleshooting table 6 Trouble Answer Short operative range Due to Ni-MH battery pack memory effect 1. Replace battery pack (if service life >500 cycles) ‘ 2. Start “Battery care” function PHD-4 Portable Helium Detector User Manual / 87-900-120-01 (F) 133/140 5 Technical Information Accessories and Spare Parts Accessories and Spare Parts Tab. 17 134/140 Description Part number Probe Set 9693515 Capillary leak with refillable reservoir and gauge 9693540 Probe with 10 meter (30’) maximum Sampling Line 9693525 Telescopic Extension Probe 9693520 Spare battery SR 03.702609 Transformer/Battery Charger (110 – 220 V) SR 03.702888 Sampling Pump with Fittings SR 03.702513 Probe with Sampling Line SR 03.702538 Tip probe filter SR 28.900012-01 Internal filter (Kit of 5 units) SR 03.702959 Carrying Strap SR 03.702791 15-pin I/O connector SR 03.702794 Travel Case SR 03.702890 PHD-4 Portable Helium Detector User Manual / 87-900-120-01 (F) Vacuum Products Division Dear Customer, Thank you for purchasing an Agilent vacuum product. At Agilent Vacuum Products Division we make every effort to ensure that you will be satisfied with the product and/or service you have purchased. As part of our Continuous Improvement effort, we ask that you report to us any problem you may have had with the purchase or operation of our products. On the back side you find a Corrective Action request form that you may fill out in the first part and return to us. This form is intended to supplement normal lines of communications and to resolve problems that existing systems are not addressing in an adequate or timely manner. Upon receipt of your Corrective Action Request we will determine the Root Cause of the problem and take the necessary actions to eliminate it. You will be contacted by one of our employees who will review the problem with you and update you, with the second part of the same form, on our actions. Your business is very important to us. Please, take the time and let us know how we can improve. Sincerely. Giampaolo LEVI Vice President and General Manager Agilent Vacuum Products Division Note: Fax or mail the Customer Request for Action (see backside page) to Agilent Vacuum Products Division (Torino) – Quality Assurance or to your nearest Agilent representative for onward transmission to the same address. CUSTOMER REQUEST FOR CORRECTIVE / PREVENTIVE / IMPROVEMENT ACTION TO: AGILENT VACUUM PRODUCTS DIVISION TORINO – QUALITY ASSURANCE FAX N°: XXXX‐011‐9979350 ADDRESS: AGILENT TECHNOLOGIES ITALIA S.p.A. – Vacuum Products Division – Via F.lli Varian, 54 – 10040 Leinì (TO) – Italy E‐MAIL: vpd‐qualityassurance_pdl‐[email protected] NAME COMPANY FUNCTION ADDRESS: TEL. N° : FAX N° : E‐MAIL: PROBLEM / SUGGESTION : REFERENCE INFORMATION (model n°, serial n°, ordering information, time to failure after installation, etc.): DATE CORRECTIVE ACTION PLAN / ACTUATION (by AGILENT VPD) LOG N° XXX = Code for dialing Italy from your country (es. 01139 from USA; 00139 from Japan, etc.) Vacuum Products Division Instructions for returning products Dear Customer, Please follow these instructions whenever one of our products needs to be returned. Complete the attached Request for Return form and send it to Agilent Technologies (see below), taking particular care to include the completed Health and Safety declaration Section. No work can be started on your unit until we receive a completed copy of this form. After evaluating the information, Agilent Technologies will provide you with a Return Authorization (RA) number via email or fax, as requested. Note: Depending on the type of return, a Purchase Order may be required at the time the Request for Return is submitted. We will quote any necessary services (evaluation, repair, special cleaning, eg). Product preparation o o o o o o o Remove all accessories from the core product (e.g. inlet screens, vent valves). Prior to shipment and if applicable for your product, drain any oils or other liquids, purge or flush all gasses, and wipe off any excess residue. If ordering an Advance Exchange product, please use the packaging from the Advance Exchange to return the defective product. Seal the product in a plastic bag, and package product carefully to avoid damage in transit. You are responsible for loss or damage in transit. Include a copy of the Health and Safety Declaration in the shipping documentation on the outside of the shipping box of your returning product. Clearly label package with RA number. Using the shipping label provided will ensure the proper address and RA number are on the package. Packages shipped to Agilent without a RA clearly written on the outside cannot be accepted and will be returned. Return only products for which the RA was issued. Shipping o o Ship to the location specified on the printable label, which will be sent, along with the RA number, as soon as we have received all of the required information. Customer is responsible for freight charges on returning product. Return shipments must comply with all applicable Shipping Regulations (IATA, DOT, ADR, etc.) and carrier requirements. RETURN THE COMPLETED REQUEST FOR RETURN FORM TO YOUR NEAREST LOCATION: EUROPE: Fax: Fax Free: Toll Free: 00 39 011 9979 330 00 800 345 345 00 00 800 234 234 00 [email protected] NORTH AMERICA: Fax: Toll Free: 1 781 860 9252 800 882 7426, Option 3 [email protected] Page 1 of 3 PACIFIC RIM: Please visit our website for individual office information http://www.agilent.com Agilent VPD Request for Return Vacuum Products Division Terms and conditions TERMS AND CONDITIONS Please read the terms and conditions below as they apply to all returns and are in addition to the Agilent Technologies Vacuum Product Division – Products and Services Terms of Sale. o Unless otherwise pre-negotiated, customer is responsible for the freight charges for the returning product. Return shipments must comply with all applicable Shipping Regulations (IATA, DOT, etc.) and carrier requirements. o Agilent Technologies is not responsible for returning customer provided packaging or containers. o Customers receiving an Advance Exchange product agree to return the defective, rebuildable part to Agilent Technologies within 15 business days. Failure to do so, or returning a non-rebuildable part (crashed), will result in an invoice for the non-returned/non-rebuildable part. o Returns for credit toward the purchase of new or refurbished Products are subject to prior Agilent approval and may incur a restocking fee. Please reference the original purchase order number. o Units returned for evaluation will be evaluated, and a quote for repair will be issued. If you choose to have the unit repaired, the cost of the evaluation will be deducted from the final repair pricing. A Purchase Order for the final repair price should be issued within 3 weeks of quotation date. Units without a Purchase Order for repair will be returned to the customer, and the evaluation fee will be invoiced. o Products returned that have not been drained from oil will be disposed. o A Special Cleaning fee will apply to all exposed products. o If requesting a calibration service, units must be functionally capable of being calibrated. Page 2 of 3 Agilent VPD Request for Return Vacuum Products Division Request for Return Form Customer information Company : Address: Contact Name: Tel: Email: Fax: Agilent Serial No Original Purchasing Reference Equipment Product description Agilent PartNo Failure description Type of process (for which the equipment was used) Type of return Non Billable Billable Exchange Repair New PO # (hard copy must be submitted with this form): ______________________________________ Upgrade Demo Calibration Evaluation Return for Credit Health and safety Substances (please refer to MSDS forms) The product has been exposed to the following substances: explosive substances or dioxins, PCB’s without written evidence of decontamination. (by selecting ‘YES’ you MUST complete the table to the right) * Agilent will not accept delivery of any product that is exposed to radioactive, biological, Trade name Toxic YES NO Harmful YES NO Corrosive YES NO Reactive YES NO Flammable YES NO Explosive (*) YES NO Radioactive (*) YES NO Biological (*) YES NO Oxidizing YES NO Sensitizer YES NO Other dangerous substances YES NO Chemical name Goods preparation Chemical Symbol CAS Number If you have replied YES to one of the above questions. Has the product been purged? If yes, which cleaning agent/method: YES NO Has the product been drained from oil? I confirm to place this declaration on the outside of the shipping box. YES NOT APPLICABLE I declare that the above information is true and complete to the best of my knowledge and belief. I understand and agree to the terms and conditions on page 2 of this document. Name: Authorized Signature: Position: Date: NOTE: If a product is received at Agilent which is contaminated with a toxic or hazardous material that was not disclosed, the customer will be held responsible for all costs incurred to ensure the safe handling of the product, and is liable for any harm or injury to Agilent employees as well as to any third party occurring as a result of exposure to toxic or hazardous materials present in the product. Page 3 of 3 Agilent VPD Request for Return We've been supplying portable test and measurement equipment to companies of all sizes and industries around the world since 1991. Our aim is to distribute easy-to-use, reliable and effective instruments to engineering, maintenance and facilities departments; and to complement these products with comprehensive advice, training and support. Telephone 01424 858118 E-mail Address [email protected] Postal Address Alpine Components Ltd Innovation Centre, Highfield Drive Churchfields St. Leonards-on-Sea TN38 9UH United Kingdom Website www.alpine-components.co.uk