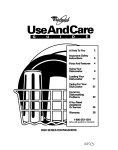
1
OPERATING
GUIDE
FOR YOUR
MAGNUM
ALERT-725
SECURITY
SYSTEM
I
55
NAPCO
Q 1988 NAPCO
WWW.DIYALARMFORUM.COM
Your new MAGNUM ALERT-725 represents
the state of the art in security technology. It is
a sophisticated burglary detection and warning
system with many available features. Your
alarm specialist has tailored this system to
your particular requirements; he’ll go over
it with you and help you fill out the ALARM
PLAN on page 15. And he’ll always be
available should questions concerning system
operation arise.
Please read through these pages carefully
before putting your new system into service.
Familiarize yourself with the features and
operation of your MAGNUM ALERT-725 and
keep this manual handy for reference. While
reading it, you will undoubtedly run across
several new or unfamiliar terms. Check the
GLOSSARY on pages 4 and 5 for explanation
of these terms.
WWW.DIYALARMFORUM.COM
2
1
GENERAL DESCRIPTION
The MA-725 may be used in one of two ways.
It can function as a complete alarm system for
home or office when complemented by an
accessory power source and communicator
(optional) or, when used as part of a larger
system, it may serve as an area arming (and
disarming) device to provide isolated protection of (or access to) only a part of that system.
Typical applications of the latter may be found
in factories, warehouses, shopping malls, and
other large structures or complexes. Regardless of how the MA-725 is utilized, its operation is essentially the same.
As each system is customized to the user’s
particular needs, not all of the features
may have been selected, but all MA-725
systems will have the following capabilities
and components.
Zone Monitoring. Your system will be
monitoring up to four separate circuits on your
premises or within your designated area. For
example, your alarm specialist may have
specified one zone for exit/entry doors;
another for window protection; another for
interior space protection; and still another for
safe and valuables protection. An additional
zone (Panic Zone) is available to manually
signal an immediate alarm in case of an emergency. Each zone may be programmed to react
in a specific manner. You must learn what
each zone protects, how it responds to a violation, and what suitable action must be taken.
The Digital Keypad. The integral digital
keypad allows you to perform the following
functions:
l
l
l
l
l
l
l
l
l
arm and disarm your system,
check the condition (status) of each zone,
check which zones were violated
after an alarm,
temporarily bypass (shunt) one
or more zones,
send a panic alarm,
cancel exit/entry delay,
test the alarm,
reset a Day Zone, and
bypass a Priority Zone with Bypass.
Three lights and a Mini-Sounder on the panel
provide visual and audible alerts.
Alarm Circuits. The alarm circuits are
activated by a zone violation. When the panel
senses an abnormal condition from any
source, it will respond by sounding an audible
alarm and/or alerting a central monitoring
station (optional).
WWW.DIYALARMFORUM.COM
GLOSSARY
Entry Delay:
Alarm History:
A delay that allows you time to enter your
premises after the system is armed without
setting off an immediate alarm.
Hold-down function (2). This will display
the last alarm condition on the ARMED/
MEMORY light.
Exit Delay:
Alarm Plan:
A delay that allows you time to exit your
premises after the system is armed without
setting off an immediate alarm.
Identifies the areas of your premises protected
by each zone location and lists zone features.
To be filled in and explained by your alarm
specialist.
Exit/Entry Follower Zone:
Arm:
A zone that will ignore detection during the
exit delay, and only during entry delay if the
Exit/Entry Zone is entered first. If the Exit/
Entry Zone is not entered first, the Exit/Entry
Follower Zone will go into alarm immediately.
To turn your system on.
Auto-Shunt Zone:
A zone that will automatically be bypassed if in
trouble when arming.
Fsllback Code:
Burglary Zona:
A preprogrammed 4-digit code that may be
used to arm or disarm your system should all
user codes be erased (as after an extended
power failure).
A zone that will detect intrusion while the
system is armed.
Day Zone:
A zone that will cause visual and audible
(optional) indication at the keypad, if in trouble,
when the system is disarmed.
Group Shunt:
Disarm:
Hold-Down Functions:
Removal of a preset group of zones from the
system by pressing Key (S) twice.
To turn your system off.
Secondary keypad functions. Each is activated
by holding down a designated digit for 2
seconds until a beep sounds.
WWW.DIYALARMFORUM.COM
4
Trouble:
An abnormal short circuit or open circuit on a
zone. Trouble on a Burglary Zone will be
indicated by Mini-Sounder beep upon arming
(except for selective- or group-shunted zones).
Trouble on a Day Zone will be indicated by a
flashing green STATUS light and a pulsing
Mini-Sounder (the Mini-Sounder is reset by
holding down Key [9]).
Mini-Sounder:
Sounder that warns that entry delay time is in
progress; exit delay time has expired; or an
attempt is made to arm the system with a zone
in trouble.
Panic Buttons:
Two buttons ([*]) and ([#]) on the keypad that
are used to activate the Panic Zone in an
emergency. Both must be pressed together.
Priority Zone:
A zone which, when in trouble, will prevent
arming.
Preselected areas or locations on your
premises that are protected by independent
circuits in the panel.
Priority Zone With Bypass:
A Priority Zone that will permit arming if the
alarm condition is bypassed by means of Reset
Key [9].
24-Hour Zone:
A zone that is armed at all times, whether or
not the system is armed.
Selective Shunt:
A zone bypass that is selected using the Shunt
Key [S] followed by the zone number.
Shunt Sutton:
Key [S] on the keypad. Allows you to bypass
one or more protective zones from the system.
WWW.DIYALARMFORUM.COM
5
_r
CONTROLS & INDICATORS
@ Panic Buttons [*] and [#]. Signal an
immediate emergency when both buttons are
ooo-
pressed at the same time.
-0
@ Red ARMED/MEMORY Light. Glows
steadily to indicate that the system is armed. A
flashing light when armed warns that the panel
was in an alarm condition. It can also indicate
which zones were violated (also see HoldDown Functions).
.o
0
@ Green STATUS Light. Glows steadily to
indicate that all zones are operating properly
and the system may be safely armed. A flashing light warns which non-24-Hour Zone(s) are
in trouble. (To stop flashing, hold down Key
[3]. See Hold-Down Functions).
0
NOTE: Circled numbers below are keyed to
those in the illustration above. Raise
hinged front panel for zone-coverage
and hold-down function information.
@ Yellow SHUNT Light. Glows steadily to
indicate that one or more zones have been
bypassed and that the system is only partially
armed. The light can flash to indicate which
zones have been bypassed (see Hold-Down
Functions, Key [S]).
Regular Functions
@ Numerical Keys [1] through [9]. Used for
entering arm/disarm code(s) and for selecting
zones to be shunted (bypassed). Also have
special Hold-Down Functions as described in
Hold-Down Functions.
@ Shunt Key [S]. Used for selecting zones to
be shunted (bypassed). Also has a special
Hold-Down Function as described in HoldDown Functions.
@ Mini-Sounder. Sounds an audible
tone whenever:
l an attempt is made to arm the panel
when a zone is in trouble;
l entry delay is in progress, to remind
the user to disarm;
l a Day Zone is in trouble.
A momentary beep when arming indicates that
a zone is being auto-shunted.
WWW.DIYALARMFORUM.COM
6
Disarming When You Return
When you enter through the exit/entry door,
the Mini-Sounder will come on during the entry
period to remind you to disarm. Check the red
ARMED/MEMORY light; if it is flashing, an
alarm occurred while you were out. PROCEED
WITH CAUTION! Using your code, disarm the
system immediately during the entry period
both to prevent an alarm and to silence the
Mini-Sounder.
NOTE:
1. If you enter the wrong code, you must wait
at least 2 seconds before trying again. If there
was an extended power failure and your
system does not respond to your correct code,
enter your preprogrammed fallback code to
disarm. See page 9.
2. If your MAGNUM ALERT-725 is used as an
area arm module that is part of a larger
system, and an alarm occurred on your
premises, silence the alarm by disarming at
your keypad.
L
4
Key [3] - STATUS Flashing Off/On. Hold
down Key [3] to stop the STATUS light flashing. Repeat to turn STATUS flashing back on.
RUN/LOAD Switch (behind hinged front panel,
not shown). Used to load the user arm/disarm
codes. This switch is set to the LOAD position
when entering personal codes (refer to
Loading Personal Codes). The switch must
be returned to the RUN position after all codes
have been entered to resume alarm operation.
The system will not operate with the switch in
the LOAD position.
Key [4] - Instant Protection. This will cancel
the exit/entry delay periods when pressed
before arming. This feature is utilized to sound
an instant alarm on intrusion through the Exit/
Entry Zone(s). If used after arming, only the
entry delay will be cancelled. When selected,
the red ARMED/MEMORY light will flash
rapidly as a reminder that the system is armed
with instant protection. Exit/entry delay is
automatically reinstated on disarming.
Hold-Down Functions
In addition to its regular functions, the keypad
provides a series of dual functions. Note that
these functions are accessed by holding down
the designated key for about 2 seconds, until a
beep sounds from the Mini-Sounder, and are
thus known as “Hold-Down” functions.
Key [5] - Door Chime Off/On. If Zone 1 is
selected as the regular entry door, the MiniSounder will beep upon entry while disarmed.
To enable the Door-Chime feature, hold down
Key [5] until it beeps.
Key [1] - Test. This will momentarily sound
the bell or siren. A weak alarm may indicate
the need for battery replacement. Make this
test weekly.
Key [9] - Reset. This key is used to reset
Door Chime, reset a Day Zone, or bypass a
trouble on a zone designated as Priority Zone
With Bypass. See Priority Zone With Bypass
in the Glossary.
Key (2] - Alarm History. This will flash the
red ARMED/MEMORY light to indicate all
alarm conditions that have occurred. While
holding down Key [2]. count the number of
flashes to determine the zone(s) violated. After
the system is rearmed, the previous alarm history will remain in alarm memory until
automatically reset by a new alarm condition.
Key [S] - Display SHUNT. This will flash the
yellow SHUNT light to indicate the zone(s)
shunted. While holding down Key [S], count
the number of flashes to determine the zone(s)
shunted.
WWW.DIYALARMFORUM.COM
7
rFlOP_, I
UIIW
I’
USING YOUR SECURITY SYSTEM
J
Selecting Your Personal Code
Using the keypad, you may enter up to four
different codes to arm and disarm the panel.
After the user codes have been entered, return
the RUN/LOAD switch to the left (RUN position). Remember: your system will not operate
with the switch in the LOAD position.
NOTE: If your MAGNUM ALERT-725 is used
as an area arm module that is part of a larger
system, do not select a code that is already in
use in the main system.
NOTE: You need not assign all four codes.
Use only as many as you need, and change
them as often as you feel necessary (refer to
Changing or Voiding a Code, page 9).
To program personal user codes, proceed as
follows:
The numbers you have selected become the
only codes recognized by the system. Each
user should be assigned his own dissimilar
code and should be cautioned against divulging that code to anyone else. Thus, should it
become necessary to remove a user from the
system, that one code may be voided without
affecting other codes, and that user would
then be prevented from entry.
Flip up the hinged front panel. Insert a small
screwdriver into the hole between the red and
green lights and slide the RUN/LOAD switch
(behind the subpanel) to the right (LOAD
position).
The three lights on the panel will flash rapidly
and the Mini-Sounder will beep. On the
keypad, enter any combination of up to four
digits (there is no zero) as follows:
Press [S] then [1] then [any 4 digits]:
first user’s code
[S] then [2] then [any 4 digits]:
second user’s code
[S] then [3] then [any 4 digits]:
third user’s code
[S] then [4] then (any 4 digits]:
fourth user’s code
NOTE: In high-security installations, your
alarm specialist may have installed a remote
DISABLE/LOAD switch in addition to or
instead of the RUN/LOAD switch on the
keypad to prevent unauthorized access to user
codes. If your system includes this feature, the
DISABLE/LOAD switch must be set to LOAD
when loading, changing or voiding a code, and
returned to DISABLE when finished.
WWW.DIYALARMFORUM.COM
8
Changing or Voiding a Code
Changing any user’s code is accomplished
using the foregoing procedure and simply
changing the 4-digit combination. Thus, to
change User 3’s code,
1. Set the RUN/LOAD switch to LOAD (lights
flash; Mini-Sounder beeps).
2. Press [S] then [3] then [4 new digits]:
User 3’s new code.
3. Return the RUN/LOAD switch to RUN.
Similarly, User 3’s code may be voided by
merely not entering a 4-digit combination.
Thus, to void User 3’s code,
1. Set the RUN/LOAD switch to LOAD (lights
flash; Mini-Sounder beeps).
2. Press [S] then [3]: User 3’s code erased.
3. Return the RUN/LOAD switch to RUN.
Using Your Code to
Arm and Disarm the System
When you enter your personal code at the
keypad, the red ARMED/MEMORY light will
either come on, indicating that the panel is
armed; or go off, Indicating that the panel is
disarmed. If you enter the wrong code, you will
not be able to arm or disarm the system and the
light will fail to respond. Wait at /east 2 seconds
before attempting to re-enter your code.
Changing or Voiding a Code
In case of an extended power outage, all
personal codes may be erased. Should this
occur, your system will fail to respond to your
personal code. You can then arm or disarm
using your fallback code, a 4-digit code that
is permanently programmed into your system,
until your personal codes can be restored (see
Selecting Your Personal Code on page 8).
Changing any user’s code is accomplished
using the foregoing procedure and simply
changing the 4-digit combination. Thus, to
change User 3's code,
1. Set the RUN/LOAD switch to LOAD (lights
flash; Mini-Sounder beeps).
2. Press [S] then [3] then (4 new digits]:
User 3’s new code.
3. Return the RUN/LOAD switch to RUN.
Be sure you know your fallback code!
NOTE: The fallback code will only function
if all personal codes have been lost.
Similarly, User 3’s code may be voided by
merely not entering a 4-digit combination.
Thus, to void User 3’s code,
1. Set the RUN/LOAD switch to LOAD (lights
flash; Mini-Sounder beeps).
2. Press [S] then [3]: User 3’s code erased.
3. Return the RUN/LOAD switch to RUN.
Using Your Code to
Arm and Disarm the System
When you enter your personal code at the
keypad, the red ARMED/MEMORY light will
either come on, indicating that the panel is
armed; or go off, indicating that the panel is
disarmed. If you enter the wrong code, you will
not be able to arm or disarm the system and the
light will fail to respond. Wait at least 2 seconds
before attempting to re-enter your code.
WWW.DIYALARMFORUM.COM
9
PROTECTING YOUR PREMISES
WHILE YOU ARE AWAY
I
4
Arming the System Before You Leave
If the zone cannot be fixed (green light still
flashing), it may still be possible to arm the
system without the protection of that zone.
Check your Alarm Plan (see page 15). If the
zone in trouble is not designated as a Priority
Zone, you will be able to arm your system anyway. A momentary beep from the Mini-Sounder
will alert you that the system was armed with a
zone automatically bypassed (auto-shunted)
and no alarm will occur. Be sure to have all
zones in trouble repaired as soon as possible!
If you cannot clear the zone yourself, call your
alarm specialist.
Before you attempt to arm the system, check
the STATUS light on the panel. If the light is
on, you may enter your code, but be prepared
to leave immediately. Upon arming, the red
ARMED/MEMORY light will come on and the
green STATUS light will go out. Leave
immediately through the exit/entry door before
the exit delay time runs out. If you take too
long to leave the premises, the Mini-Sounder
will warn you that exit delay time has expired
and entry delay time has started. To avoid
causing an alarm, quickly return to the panel
and enter your code to disarm. You may then
rearm and try to exit again.
You cannot arm your system if a Priority Zone
is in trouble. The Mini-Sounder will come
on, but the ARMED/MEMORY light will not.
To silence the sounder, re-enter your code
to disarm.
Arming with a Zone in Trouble
If the green STATUS light is flashing, at least
one non-24-Hour Zone is in trouble (in an
abnormal open or shorted condition) and
incapable of being armed. Count the number
of flashes to determine zone(s) in trouble. For
example, if your back door is open on Zone 1
and a window is open on Zone 3, the STATUS
lamp will flash once for Zone 1; pause; then
flash three times for Zone 3. Try to clear the
troubled zone(s) yourself. In this example, you
can clear the zones by merely closing the back
door and the window.
Check your Alarm Plan on page 15. If the
Priority Zone in trouble is also programmed for
Selective Shunt (or Group Shunt), press [S],
then the zone number to shunt that zone (or
press [S] twice to shunt all group-shunt
zones), then rearm.
If trouble is encountered on a Priority Zone
With Bypass, enter your code to silence the
Mini-Sounder and hold down Reset Key [9]
until it beeps (this will bypass the trouble condition); then enter your code to arm.
WWW.DIYALARMFORUM.COM
10
RUN/LOAD Switch (behind hinged front panel,
not shown). Used to load the user arm/disarm
codes. This switch is set to the LOAD position
when entering personal codes (refer to
Loading Personal Codes). The switch must
be returned to the RUN position after all codes
have been entered to resume alarm operation.
The system will not operate with the switch in
the LOAD position.
Hold-Down Functions
In addition to its regular functions, the keypad
provides a series of dual functions. Note that
these functions are accessed by holding down
the designated key for about 2 seconds, until a
beep sounds from the Mini-Sounder, and are
thus known as “Hold-Down” functions,
Key [1] - Test. This will momentarily sound
the bell or siren. A weak alarm may indicate
the need for battery replacement. Make this
test weekly.
Key [2] - Alarm History. This will flash the
red ARMED/MEMORY light to indicate all
alarm conditions that have occurred. While
holding down Key [2], count the number of
flashes to determine the zone(s) violated. After
the system is rearmed, the previous alarm history will remain in alarm memory until
automatically reset by a new alarm condition.
7
Disarming When You Return
To identify which zone(s) were violated, hold
down Alarm History Key [2] until a beep
sounds, but do not release it. The red ARMED/
MEMORY light will flash to indicate the last
alarm condition. Count the number of flashes
to determine which zone(s) require attention.
When you enter through the exit/entry door,
the Mini-Sounder will come on during the entry
period to remind you to disarm. Check the red
ARMED/MEMORY light; if it is flashing, an
alarm occurred while you were out. PROCEED
WITH CAUTION! Using your code, disarm the
system immediately during the entry period
both to prevent an alarm and to silence the
Mini-Sounder.
NOTE: If an alarm occurred and the red light
did not flash, a 24-Hour Zone (see your Alarm
Plan) was violated. The cause of the alarm
must be determined and cleared before you
can rearm your panel. Hold down Alarm
History Key [2] to display the zone(s) violated.
NOTE:
1. If you enter the wrong code, you must wait
at least 2 seconds before trying again. If there
was an extended power failure and your
system does not respond to your correct code,
enter your preprogrammed fallback code to
disarm. See page 9.
2. If your MAGNUM ALERT-725 is used as an
area arm module that is part of a larger
system, and an alarm occurred on your
premises, silence the alarm by disarming at
your keypad.
WWW.DIYALARMFORUM.COM
11
PROTECTING YOURSELF
WHILE YOU ARE ON PREMISES
4
-0
I
I
Arming with Selective Zone Shunting
Arming with Group Zone Shunting
Your alarm specialist may have selected one
or more zones with the capability of being
selectively shunted (bypassed) from the
system. Since a shunted zone cannot cause an
alarm, you may wish to use this feature to turn
off the interior areas when arming, while keep
ing your perimeter zones (windows, doors,
etc.) active.
Your alarm specialist may have also opted for
one or more interior zones to be “group
shunted”, that is, bypassed all at the same
time. This group of zones is bypassed by
simply pressing Key [S] twice prior to arming.
The yellow SHUNT light will come on. Enter
your user code to arm the remaining zones.
The green STATUS light will go off and the red
ARMED/MEMORY light will come on. When
the panel is subsequently disarmed, all
shunted zones will automatically revert back
to active zones.
Check your Alarm Plan and note which zones
may be selectively shunted. To utilize the
selective-shunt feature, first check the green
STATUS light to make sure that all zones are
operating properly. Then press the Shunt
Button [S] followed by the number(s) of the
zone(s) to be bypassed. Thus, to bypass Zones
2 and 3, for example, press
[S] then [2] = Zone 2 shunted
[S] then [3] = Zone 3 shunted.
NOTE: The yellow SHUNT light will not come
on if zones are auto-shunted.
Arming with Instant Protection
The yellow SHUNT light will come on whenever one or more zones are shunted. Enter
your user code to arm the remaining zones.
The green STATUS light will go off and the red
ARMED/MEMORY light will come on.
NOTE: When the panel is subsequently
disarmed, all shunted zones will automatically
revert back to active zones.
Pressing Key [4] will cancel both the exit and
entry delays on the exit/entry zone upon
arming. Use this feature when at home (as
when retiring for the evening, for example) to
sound an instant alarm on intrusion through
the exit/entry door. To arm with instant protection, hold down Instant Alarm Key [S] until it
beeps, then enter your code to arm the panel.
(If Key [4] is pressed after the panel is armed,
only entry delay will be cancelled.) The red
ARMED/MEMORY light will flash rapidly to
remind you that you have armed with instant
WWW.DIYALARMFORUM.COM
12
Mini-Sounder:
Sounder that warns that entry delay time is in
progress; exit delay time has expired; or an
attempt is made to arm the system with a zone
in trouble.
Panic Buttons:
Two buttons ([*]) and ([#]) on the keypad that
are used to activate the Panic Zone in an
emergency. Both must be pressed together.
Priority Zone:
A zone which, when in trouble, will prevent
arming.
Priority Zone With B y p a s s :
A Priority Zone that will permit arming if the
alarm condition is bypassed by means of Reset
Key [9].
Selective Shunt:
A zone bypass that is selected using the Shunt
Key [S] followed by the zone number.
Shunt Button:
Key [S] on the keypad. Allows you to bypass
one or more protective zones from the system.
alarm. Should someone open the exit/entry
door, the alarm will sound immediately.
NOTE: When disarming the panel, exit/entry
delays will automatically be reinstated.
Panic Zone
The Panic Zone is always active, whether your
system is armed or not. To activate the Panic
Zone, simultaneously press the two keys [*]
and [#] on the keypad. The Panic Zone may be
programmed to activate an audible alarm, to
send a silent alarm to a central station
(optional), or both.
NOTE: The [*] and [#] buttons must be
pressed at the same time to activate the Panic
Zone. If the Panic Zone is activated, no zone
violation will be indicated at the keypad, but an
alarm condition will be recorded by Alarm
History (see Hold-Down Functions, Key [2]).
WWW.DIYALARMFORUM.COM
13
OPTIONAL DIGITAL COMMUNICATOR
Your Alarm Specialist may have
programmed your security
system to be monitored by a
Central Station. The digital
communicator can transmit
emergency signals to the
Central Station 24 hours a day.
EMERGENCY SERVICES
(Police, Medical, Etc.)
MONITORS YOUR
SYSTEM 24 HOURS
EMERGENCY SERVICES
OTIFIED UPON ALARM
AGNUM ALERT-725 with optional
DIGITAL COMMUNICATOR
PROTECTED
PREMISES
WWW.DIYALARMFORUM.COM
14
ALARM PLAN
ZONE
AREAPROTECTED
FEATURES
CONTACTS
1
ALARM SPECIALIST
TELEPHONE NO.
EXIT TIME
WWW.DIYALARMFORUM.COM
SECONDS
15
ENTRY TIME
SECONDS
NAPC0 LIMITED WARRANTY
hdlmcl, Imidenlat. cons.q”.“tht. or dhamlu .ftJ”g oul d .“y tdlun d
thapmdwt. ~lbhmmnty,u~mln~utfor(h.~ll
ndbew4argad.
dimlnkhad or Hkclad by and IX) obllgalbn or lk.bllk@vall adw w gmwc4
d Wbh mnderlng d tnhnlul adka (I smvim In wnnecllon wtlh Buywh
order of the goods fumlrhad henundu.
NAKO RECOMMENDS THAT THE ENTtRE SYSTEM SE COMPLETELY
bti I b “~4 Ins”- of. “am”,” that the,. .“.nt, ti w.4 -.
CONSEQUENTLY, SELLER St& HAMNOLlASILllYFORANYP
INJURY, PRDf’ERl-Y DAMAGE, OF! OTHER LOSS MSED ON A CtAlM ME
PRODUCT FAJLJZD TO GM WARNING. Thwefom. tha I- should In turn
butt-mIoWu~ud~Ipuullan(orhbor~vhty
tmtudlmr. bu( nc, ltm”ad to. ‘k.lm lh, ,,,.“,I.., .“d ulllm Dolk. or ,I,.
..,a . . . . . . . . . . . . . . . . . . . . %..,
. . . ..AI\. . . . . ..A. . . ..A......... ..A.. /..../.................
. ..A...... I..... I..~....
I...... . . . . . . . . . . . . .
:
.. . . . . . . . . . . . . . . . . . . . . . ......__.............
,,. . . . . . . . .
5. .... > /,...,.,., ,......,.,., I ,.,.,.,.,...,,.. ..~......~..........~.....~... ...., .,.,...,
THE FOLLOWINO STATEMENT IS REQUIRED BY THE FCC.
Thh equlpmwd generaIn and uus mdb-fmquwcy wmfgy and. I( no(
Installed md urd properly, that I,, In 8trkt .ccord.nc. with the
m.“uMtunh Inat”xllonr, may Ca”s. Intwfwww. to radb .nd IelrYlslon
mcep4on. A hss been lypa tested and found to comply with tha limb for.
clut-8 wmpuling d&e In accordance MIh th+ spunkalbm In Subpart
J d Pad IS d FCC Rules, which M designad to pxr.++ mason&h
pmhctlon agalnsl such Intwfennca In. mld.nlW InslsllaIbn.
t+anwar, th,n b no guamnln that Int*rhnna till not occur In .
putlculu Intiatlalbn. ii thh aqulpmrnt don UUI Inlwhnnca lo mdb or
hkdaton mcoptlon. which can ba d.twMmd ty lumln(l ltw aqulprwnt
&and on. lb+ ,,,.r b l ,cw~totryto ~rmcl th. Intmfw.nc. by-
WWW.DIYALARMFORUM.COM
Napco Securil~ Syslems, 333 l3qvlew Avenue, Amflyvllle, NY 11701
011105/90