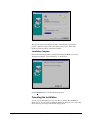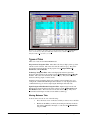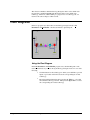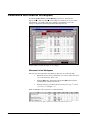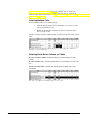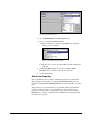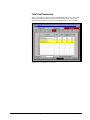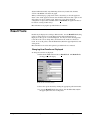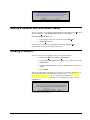
1
Integrated Environmental Control Model
Getting Started
Prepared for the National Energy Technology Laboratory
U. S. Department of Energy
By Michael B. Berkenpas
John J. Fry
Karen Kietzke
Edward S. Rubin
Center for Energy and Environmental Studies
Carnegie Mellon University
Pittsburgh, PA 15213
Version 3.4 — April 2001
(Web and email addresses updated July 2015)
Contents
Introduction
1
The Integrated Environmental Control Model ...........................................................................1
Purpose.......................................................................................................................................1
System Requirements.................................................................................................................1
Uncertainty Features ..................................................................................................................2
Software Used in Development..................................................................................................2
Disclaimer of Warranties and Limitation of Liabilities..............................................................2
Copyright Notices ......................................................................................................................3
User Documentation and Help
4
Getting Started ...........................................................................................................................4
User Manual...............................................................................................................................4
Model Tutorial ...........................................................................................................................4
Technical Manual.......................................................................................................................4
Online Help ................................................................................................................................4
Installing the Model
6
What’s Included in the Model Package......................................................................................6
Installation..................................................................................................................................6
Installation Steps..........................................................................................................7
Canceling the Installation ..........................................................................................13
Errors During Installation ..........................................................................................14
Updating the IECM Software...................................................................................................14
Removing the IECM Software.................................................................................................14
Windows Conventions
15
Microsoft® Windows...............................................................................................................15
Using the Mouse ......................................................................................................................15
Cursors .....................................................................................................................................15
The Arrow..................................................................................................................16
The Cross ...................................................................................................................16
The I-Beam ................................................................................................................16
The Hourglass ............................................................................................................16
The Arrow and Hourglass..........................................................................................16
Keystroke Commands ..............................................................................................................16
Alt Commands ...........................................................................................................16
Ctrl Commands ..........................................................................................................17
IECM Conventions
18
The IECM Window..................................................................................................................18
Menu Bar .................................................................................................................................18
The File Menu............................................................................................................19
Integrated Environmental Control Model: Getting Started
Contents • i
The Edit Menu .......................................................................................................... 21
The View Menu ........................................................................................................ 21
The Window Menu ................................................................................................... 23
The Help Menu ......................................................................................................... 23
The Toolbar............................................................................................................................. 24
The Status Bar ......................................................................................................................... 24
The Session Window............................................................................................................... 25
Tabs......................................................................................................................................... 25
Types of Tabs............................................................................................................ 26
Plant Diagrams ........................................................................................................................ 27
Parameters and Results Workspace......................................................................................... 28
Selecting Cells .......................................................................................................... 29
Highlighting .............................................................................................................. 31
Process Type Pull-Down Menus............................................................................... 32
Running the Model
33
Starting the Model................................................................................................................... 33
Choosing a Session.................................................................................................................. 34
Using the Model ...................................................................................................................... 34
Exiting the Model.................................................................................................................... 34
Configuring the Plant
35
Configure Plant ....................................................................................................................... 35
Configuration Pull-Down Menus ............................................................................................ 36
Invalid Selections .................................................................................................................... 36
Plant Diagram.......................................................................................................................... 37
Setting Parameters
38
Set Parameters ......................................................................................................................... 38
Plant Diagram.......................................................................................................................... 39
Set Parameters Workspace ...................................................................................................... 40
Title........................................................................................................................... 41
Units.......................................................................................................................... 41
Uncertainty (Unc) ..................................................................................................... 41
Value......................................................................................................................... 41
Calculated (Calc) ...................................................................................................... 42
Minimum, Maximum, and Default ........................................................................... 42
Entering Inputs ........................................................................................................................ 43
Input Tools .............................................................................................................................. 44
Calculated Values.................................................................................................................... 44
Uncertain Values ..................................................................................................................... 46
Input Navigation Tabs............................................................................................................. 47
Coal Properties Parameters ..................................................................................................... 48
Getting Results
50
Get Results .............................................................................................................................. 50
Plant Diagram.......................................................................................................................... 51
Viewing Results ...................................................................................................................... 51
Results Navigation Tabs ........................................................................................... 52
Diagrams ................................................................................................................... 52
Capital Cost Summaries............................................................................................ 53
O&M Cost Summaries.............................................................................................. 54
Total Cost Summaries............................................................................................... 55
ii • Contents
Integrated Environmental Control Model: Getting Started
Cost Inputs Summaries ..............................................................................................56
Gas Summaries ..........................................................................................................57
Graphs ......................................................................................................................................58
Result Tools .............................................................................................................................59
Uncertainty Areas ....................................................................................................................60
Working with Sessions
61
Sessions....................................................................................................................................61
Creating a New Session ...........................................................................................................61
Opening an Existing Session....................................................................................................62
Saving a Session’s Results .......................................................................................................62
Saving a Session with a Different Name..................................................................................63
Closing a Session .....................................................................................................................63
Deleting a Session ....................................................................................................................64
Unlocking a Session.................................................................................................................65
Importing and Exporting Data
66
Importing a Session..................................................................................................................66
Exporting a Session..................................................................................................................66
Print Screen ..............................................................................................................................66
Windows Copy, Cut, and Paste................................................................................................66
Printing
68
Print Dialog Box ......................................................................................................................68
Index
Integrated Environmental Control Model: Getting Started
69
Contents • iii
iv • Contents
Integrated Environmental Control Model: Getting Started
Introduction
The Integrated Environmental Control Model
This Integrated Environmental Control Model (IECM) and Interface were developed
for the U. S. Department of Energy’s National Energy Technology Laboratory
(NETL), formerly known as the Federal Energy Technology Center (FETC), under
contract No. DE-AC22-92PC91346 and DE-AC21-92MC29094.
Purpose
The purpose of the model is to calculate the performance, emissions and cost of
employing alternative environmental control methods in a coal-fired power plant.
The model consists of a base plant and various control technology modules; these
modules may be implemented together in any desired combination.
A Graphical User Interface (GUI) facilitates the configuration of the technologies,
entry of data, and retrieval of results.
System Requirements
The current model requires the following configuration:
•
Intel-based computer running Windows 95 (or better) or Windows NT
4.0 (or better) operating system
•
Pentium Processor
•
any SVGA (or better) display—at a resolution of 800x600 (or more)
pixels1
•
at least 40 Megabytes of free hard disk space
•
at least 32 Megabytes of total memory
1
Smaller screen resolution results in the interface screens being scaled smaller. The taskbar, part of the Windows
operating system, reduces the useable resolution of the screen if it is always visible. This may force the IECM interface
to be scaled down slightly. To avoid this situation, select the “Auto Hide” option of the Taskbar properties in Windows.
Integrated Environmental Control Model: Getting Started
Introduction • 1
Uncertainty Features
The ability to characterize uncertainties explicitly is a feature unique to this model.
As many as one hundred input parameters can be assigned probability distributions.
When input parameters are uncertain, an uncertainty distribution of results is
returned. Such result distributions give the likelihood of a particular value, in
contrast to conventional single-value estimates.
The model can run using single deterministic values or uncertainty distributions.
The conventional deterministic form using single values for all input parameters and
results may be used, or probabilistic analyses may be run—for instance, to analyze
advanced technology costs.
Software Used in Development
The underlying engineering models are written in Digital Equipment Corporation's
Fortran. Fortran runtime libraries are included with the IECM Interface software.
This language provides the flexibility to configure many various power plant designs
while also providing the power to conduct probabilistic analyses.
All databases are in Microsoft® Access format and may be viewed in Access, as
long as they are not changed. This format is a software industry standard and
facilitates sharing and updating of information.
To simplify the use of the model, a Graphical User Interface (GUI) has been added.
The interface eliminates the need to master the underlying commands normally
required for model operation. The interface is written in Microsoft® Visual C++, a
standard software development tool for the Windows environment. Visual C++
runtime libraries are included with the IECM Model software and do not need to be
licensed separately.
Wise InstallBuilder was used to generate full and upgrade installer programs. This
product was chosen based on its flexibility and its support of Visual Basic runtime
libraries and Microsoft Data Access Components (MDAC)2. The Visual Basic
runtime libraries provide the support needed to run the database file compactor
program provided with the IECM. MDAC provides the software support needed to
link Microsoft® Access data files to the IECM interface program. Wise
InstallBuilder provides the VB and MDAC installation as an option, rather than
forcing the user to download it from Microsoft and install it prior to installing the
IECM.
Disclaimer of Warranties and Limitation of Liabilities
This report was prepared by the organization(s) named below as an account of work
sponsored or cosponsored by the U.S. Department of Energy National Energy
Technology Laboratory (NETL). NEITHER NETL, ANY MEMBER OF NETL,
ANY COSPONSOR, THE ORGANIZATION(S) NAMED BELOW, NOR ANY
PERSON ACTING ON BEHALF OF THEM:
(A) MAKES ANY WARRANTY OR REPRESENTATION WHATSOEVER,
EXPRESS OR IMPLIED, (I) WITH RESPECT TO THE USE OF ANY
2
The current version of MDAC is 2.6. This is installed with the full installer for the IECM. Any update installers
provided for upgrading the IECM from a previous version to the current version do not upgrade MDAC unless the user
updates MDAC separately.
2 • Introduction
Integrated Environmental Control Model: Getting Started
INFORMATION, APPARATUS, METHOD, PROCESS, OR SIMILAR ITEM
DISCLOSED IN THIS REPORT, INCLUDING MERCHANTABILITY AND
FITNESS FOR A PARTICULAR PURPOSE, OR (II) THAT SUCH USE DOES
NOT INFRINGE ON OR INTERFERE WITH PRIVATELY OWNED RIGHTS,
INCLUDING ANY PARTY'S INTELLECTUAL PROPERTY, OR (III) THAT
THIS REPORT IS SUITABLE TO ANY PARTICULAR USER'S
CIRCUMSTANCE; OR
(B) ASSUMES RESPONSIBILITY FOR ANY DAMAGES OR OTHER
LIABILITY WHATSOEVER (INCLUDING ANY CONSEQUENTIAL
DAMAGES, EVEN IF DOE OR ANY DOE REPRESENTATIVE HAS BEEN
ADVISED OF THE POSSIBILITY OF SUCH DAMAGES) RESULTING FROM
YOUR SELECTION OR USE OF THIS REPORT OR ANY INFORMATION,
APPARATUS, METHOD, PROCESS, OR SIMILAR ITEM DISCLOSED IN THIS
REPORT.
Organization(s) that prepared this report: Carnegie Mellon University
Copyright Notices
DIGITAL Visual Fortran 5.0, Copyright © 1997, Digital Equipment Corporation.
All Rights Reserved.
Spread 3.0, Copyright © 1998, FarPoint Technologies, Inc. All Rights Reserved.
Tab Pro 3.1, Copyright © 2000, FarPoint Technologies, Inc. All Rights Reserved.
Graphics Server 4.5, Copyright © 1996, Bits Per Second Ltd. and Pinnacle
Publishing, Inc. All Rights Reserved.
Microsoft Visual C++ 5.0, Copyright © 1997, Microsoft Corporation. All Rights
Reserved.
InstallBuilder 8.1, Copyright © 2000, Wise Solutions, Inc. All Rights Reserved.
Microsoft Data Access Components 2.6, Copyright © 2000, Microsoft Corporation.
All Rights Reserved.
Integrated Environmental Control Model (IECM) Interface 3.4.5, Copyright © 2001,
Carnegie Mellon University. All Rights Reserved.
Integrated Environmental Control Model (IECM) 3.4.5, Copyright © 2001,
Carnegie Mellon University. All Rights Reserved.
Median Latin Hypercube and Hammersley Sequence Sampling, Copyright © 1997,
Urmila Diwekar, Carnegie Mellon University. All Rights Reserved.
Graphics Server is a trademark of Bits Per Second Ltd.
Microsoft is a registered trademark; Windows, Windows 95,Windows 98, Windows
NT, and Visual C++ are trademarks of Microsoft Corporation.
Spread™ is a trademark of FarPoint Technologies, Inc.
Tab Pro™ is a trademark of FarPoint Technologies, Inc.
DEC, DEC Fortran, and DIGITAL are trademarks of Digital Equipment Corporation.
Integrated Environmental Control Model: Getting Started
Introduction • 3
User Documentation and Help
Getting Started
Getting Started (this document) gives step-by-step instructions for installing the
model software and using the interface. It describes navigating the model, using the
main program areas, working with sessions, and printing or exporting results.
User Manual
The User Manual gives further information on both the interface and the underlying
model. It provides detailed descriptions of plant configurations, parameter settings,
and result screens. It also describes technical details behind the model’s operation
and includes an introduction to uncertainty analysis.
Model Tutorial
The Model Tutorial is a pictorial introduction to the IECM. It presents a graphical
tour of the interface, a case study to follow using the model, and an appendix which
reproduces every screen in the model. These tools help any user to quickly become
more familiar with the interface and model.
Technical Manual
The Technical manual is a detailed engineering description of the technologies and
costing assumptions used in the IECM. This manual is not provided by default with
the IECM software; however, it can be downloaded with any web browser from
http://www.iecm-online.com/.
Online Help
Online help is provided via a Windows Help File containing the text of Getting
Started and the User Manual.
4 • User Documentation and Help
Integrated Environmental Control Model: Getting Started
Accessing the IECM Help file:
If you are not running the IECM interface, click the Help icon inside the IECM
folder on the Start menu. This opens the help file to the table of contents.
If you are running the IECM interface, do any one of the following:
•
Press the F1 key. The IECM supports context-sensitive help and will
open the help file to the topic associated with the item or screen you are
viewing.
•
Pull down the Help menu at the top of the IECM window. Select Help
Topics. This opens the help file to the table of contents. (See “The Help
Menu” on page 23.)
•
Click the Context-Sensitive Help icon on the toolbar on the left side of
the IECM window. The IECM supports context-sensitive help and will
open the help file to the topic associated with the item or screen you are
viewing. (See “The Help Menu” on page 24.)
•
Click the Help Topics icon on the toolbar on the left side of the IECM
window. This opens the help file to the table of contents. If this method
does not work, try one of the other options above (See “The Toolbar”
on page 24.)
The IECM Help File Contents window will display.
The IECM Help File Topics Window
Integrated Environmental Control Model: Getting Started
User Documentation and Help • 5
Installing the Model
What’s Included in the Model Package
The IECM package should contain the following items:
Installation Program: All the software is on one installation program in
compressed form. This file is provided either on a compact disk (CD) or from the
IECM web site ( http://www.iecm-online.com/ ). See “Installation” below for
instructions on how to install the program.
Three pieces of documentation: Getting Started, User Manual, and Model
Tutorial, as described in “User Documentation and Help” on page 4.
Note: A Technical Manual is not distributed with the model package, but can be
downloaded from the IECM web site.
.
Installation
To install the IECM, you must use the installation program, SETUP.EXE, provided
on the IECM compact disk (CD). Program files must be decompressed and installed
in the appropriate directories to run properly through this program.
Copying the contents of the IECM CD to a local hard drive or a network hard drive
can speed the installation process, especially over a network. For more information
and instructions, see the User Manual.
The IECM can also be installed from one installation program that is available on the
worldwide web ( http://www.iecm-online.com/ ) . The installer and update
programs on this web site function similarly to the CD originally shipped with the
IECM. This method of installation is described in more detail in the User Manual.
Note: Update or upgrade installers are only provided on the worldwide web site.
These are used to enhance or correct the full installation of the IECM on your
computer. Send electronic mail to [email protected]
or sign up on our web site if you wish to receive notification of updates.
6 • Installing the Model
Integrated Environmental Control Model: Getting Started
Installation Steps
Running the Setup Program
1.
Place IECM compact Disk (CD) in the CD drive.
2.
Click the Start button.
3.
Choose Run… from the Start menu.
4.
Type “D:\SETUP” (assuming that the CD drive is D:) and press
Enter.
The installation program will begin.
MDAC Installation
Before the IECM Interface can be installed, Microsoft Data Access Components
(MDAC) must be installed. MDAC is provided by Microsoft as a standard
installation package used in conjunction with the IECM installer program. If the
appropriate MDAC software components are not detected on your computer, you
will be notified that MDAC will be installed this by a warning box as shown below.
MDAC is not installed if it the same or a more recent version already exists on your
computer.
Click the OK button to install MDAC.
Once MDAC has been installed, you will be notified that the computer will reboot
by a warning box as shown below.
Click the OK button to reboot the computer to continue with the installation. The
installation of the IECM will resume automatically after the computer has rebooted.
Select Language
The first screen which displays after MDAC is installed is the “Select Language”
screen. Although the IECM itself is written in English, the installer provides several
languages during the installation process. The figure below shows the “Select
Language” screen.
Integrated Environmental Control Model: Getting Started
Installing the Model • 7
The “Select Language” installer screen.
After choosing the language, click the OK button to continue to the next screen.
Click the Cancel button at the bottom of the “Choose Language” screen to exit the
installer program.
Welcome Screen
The next screen which displays is installed is the “Welcome” screen. It introduces
you to the IECM installer and warns you that all Windows programs should be
closed before continuing the installation. The figure below shows the “Welcome”
screen.
The “Welcome” installer screen.
To quit other programs, you should click the Cancel button at the bottom of the
“Welcome” screen first and then proceed to quit all other Windows programs. Once
other programs are closed, you can restart the installation process.
If there are no other programs running, click the Next button to continue to the next
screen.
8 • Installing the Model
Integrated Environmental Control Model: Getting Started
License Agreement
The next screen to appear displays the license agreement. This screen is shown
below. Read the license agreement by scrolling down the window. You cannot
install and run the IECM without agreeing to the license agreement. If you do not
agree, the installer will quit.
The License Agreement screen.
Click the Next button to agree to the license and continue to the next screen.
Choose Destination Location
The “Choose Destination Location” installation screen asks you to specify the
location of the IECM program on your computer. The default location for
installation is “C:\Program Files\IECM_34” as shown in the figure below. This is
different than the default used in previous versions; previous versions will co-exist
on your computer.
The "Choose Destination Location” screen.
For more information on changing the destination location, please refer to the User
Manual. Click the Next button to continue to the next screen.
Integrated Environmental Control Model: Getting Started
Installing the Model • 9
Backup Replaced Files
The “Backup Replaced Files” screen shown below asks if you would like to create
backup copies of all files replaced during the installation. This is useful if you are
installing a new version of the software over a previous version. You must select
Yes on this screen to be able to roll back the software to the previous version.
The "Backup Replaced Files" screen
Click the circle next to Yes to make backups of replaced files, click the circle next to
No to skip this step. Click the Next button to continue to the next screen.
For more information about backing up replaced files and rolling back installations
to a previous version, see the User Manual.
Select Components
The “Select Components” installation screen asks you to specify which portions of
the IECM software to install. This screen is shown below.
The "Select Components" screen.
10 • Installing the Model
Integrated Environmental Control Model: Getting Started
The four components are:
Microsoft MFC 4.2: This includes the Microsoft Foundation Class runtime
libraries. These are required for using the IECM and are installed by a standard
Microsoft installation package as part of the IECM installer.
Microsoft Visual Basic 4.0 Runtime: Visual Basic version 4 runtime libraries are
required by a database compacting program included with the IECM (compact.exe).
These are installed by a standard Microsoft installation package as part of the IECM
installer.
Program Files: These are the program and support files needed to run the IECM.
They are installed into the location specified during the installation process (the
default location is C:\Program Files\IECM).
Documentation: These are the online help files created from the Getting Started
and User Manual printed documents. These can be omitted from the installation.
They are not required for running the IECM software.
Uncheck any of the four options by clicking the checkbox next to its description.
Only checked boxes are installed when you continue the installation. Unchecked
boxes are NOT installed.
The hard disk space required and available for the selected components is shown at
the bottom of the screen. If there is insufficient space to install the software, you
will need to cancel the installation and either install the software onto another hard
drive or clear space on your hard drive. Click the Next button to continue to the next
screen.
WARNING: If you do not install the Microsoft runtime library packages, you may
have difficulty running the IECM. Be sure these library packages are installed by the
IECM installer or your computer support group prior to using the IECM.
Select Program Manager Group
The IECM interface icon is installed on the desktop by default. Icons for the
interface and help file are also provided in a program folder in all versions of
Windows (e.g., in the Programs folder in the Start menu for Windows 95/98). The
“Select Program Manager Group” screen asks you to specify the program folder
group which will contain the icons to launch the IECM interface program and the
online IECM interface help file.
The default Program Manager Group is “IECM Interface 3.4”. You may select
another group by clicking on its name in the scroll box to highlight it or create a new
group by highlighting the text and typing a new name. Click the Next button to
continue to the next screen.
Integrated Environmental Control Model: Getting Started
Installing the Model • 11
The "Select Program Manager Group" screen
Start Installation
The IECM software is now ready to install. The “Start Installation” screen allows
you to go back one last time to check the options you have chosen for installation.
The "Start Installation" screen
Click the Back button to return to any of the previous screens to check or change the
installation options. Click the Next button to continue to install the software.
Installation Progress
The IECM interface setup program now begins copying files onto your hard disk and
preparing it for your use. The progress of the activity is shown on the “Installing”
screen as shown below.
12 • Installing the Model
Integrated Environmental Control Model: Getting Started
The Installation Progress screen
The top pane of the screen displays the name of the file being copied and its
progress. The bottom pane of the screen displays the progress of the entire
installation with an estimate of the time remaining.
Installation Complete
Once the installation program has completed installing the IECM software, the
“Installation Complete” screen will display, as shown below.
The "Installation Complete" screen
Click the Finish button to exit the installation program.
Canceling the Installation
You can stop the installation process at any time by clicking the Cancel button
which appears on each screen, including the Installation Progress screen. Canceling
the process stops all activity and exits the setup program.
Integrated Environmental Control Model: Getting Started
Installing the Model • 13
Errors During Installation
If you receive an error message while running Setup, restart the computer and run the
installation again. If Setup still returns an error message, contact technical support
by electronic mail ( [email protected] ).
Updating the IECM Software
Updating the IECM software from the original CD, full installation program from the
worldwide web site, or update programs downloaded from the worldwide web at
some future date can be done in two ways.
1.
To replace the existing files: Simply install the software as described
under “Installation” on page 6. The software will update the necessary
files and allow you to make backup files so that the installation can be
rolled back to the previous version. This is the recommended method
for updating. User files and data are not effected.
2.
To install a second copy of the IECM software on your hard disk:
Follow the instructions given under Installation above, but choose a
different directory in which to install the files (described in more detail
in the User Manual).
NOTE: Maintaining two copies of the IECM requires more disk space and could lead
to confusion. It is not recommended.
Removing the IECM Software
To remove the IECM software completely, use the uninstall feature of the Windows
95/98 “Add/Remove Software” control panel.
NOTE: Do not just delete the files in the IECM directory, because there are files
elsewhere on your system that should also be cleaned up. Deleting the IECM
directory could also cause a subsequent attempt to uninstall the software correctly to
fail.
Running the Uninstall Program
1.
Click the Start button.
2.
Choose Settings, and then Control Panel.
3.
Double-click Add/Remove Programs in the Control Panel folder.
4.
Highlight IECM Interface on the list of installed software.
5.
Click the Add/Remove… button.
Follow the instructions on the screen.
Uninstalling the software, as well as rolling back an installation to an earlier version,
is described in detail in the User Manual.
14 • Installing the Model
Integrated Environmental Control Model: Getting Started
Windows Conventions
Microsoft® Windows
The Windows operating environment is based on both graphics and text. Although it
is designed to be intuitive, a certain amount of learning is required to use it
effectively. Please review the documentation on Microsoft® Windows that came
with your personal computer if you are new to the Windows environment.
Using the Mouse
Many commands in Windows 95/98/ME and Windows NT/2000 are executed by
moving the mouse cursor (see “Cursors” below) to an item and pressing the left or
right button on the mouse.
In this documentation, the following terms will be used for mouse operations:
Click - Place the mouse cursor onto a menu, button, field, etc. and press the left
button on the mouse.
Right Click - Place the mouse cursor onto a menu, button, field, etc. and press the
right button on the mouse.
Double-Click - Place the mouse cursor onto a menu, button, field, etc. and press the
left button on the mouse two times rapidly.
Click and Drag - Place the mouse cursor onto a menu, button, field, etc., press the
left button on the mouse, and—while holding the button down—move the mouse to
another location.
Cursors
The mouse cursor moves on the screen as you move the mouse. The cursor
displayed changes as it is placed over different objects, or as the software becomes
busy.
Integrated Environmental Control Model: Getting Started
Windows Conventions • 15
The Arrow
The mouse cursor that is most often displayed is the “arrow” cursor, shown at the
left. Use this cursor to pull down menus (see “Menu Bar” on page 18), click buttons
on the toolbar (see “The Toolbar” on page 24), or navigate through the model using
tabs (see “Tabs” on page 25.)
The Cross
If the mouse arrow is moved over an input or result spreadsheet table, it becomes the
“cross” cursor, shown at the left. Use this cursor to click a cell and enter data, or
select a cell or group of cells (see “Parameters and Results Workspace” on page 28).
The I-Beam
If the mouse cross is placed over an input field and double-clicked, an “I-beam” or
editing cursor will display instead of the cross. This cursor is shown at the left.
Clicking again places a typing cursor into the field, so that values can be edited
instead of replaced (see “Editing values” on page 43).
The Hourglass
Some software processes take some time to perform. When the software is busy for
more than a few seconds, an “hourglass” cursor, shown at the left, will display.
Further activity will be delayed until the process is complete.
The Arrow and Hourglass
Sometimes a process works in the background. Rather than the hourglass, an “arrow
and hourglass” cursor, shown at the left, will display. The arrow may still be used,
but the command may be delayed because of the process running in the background.
Keystroke Commands
Many operations in Windows can be executed by a combination of keystrokes as
well as a mouse click. These keystroke combinations involve the Alt key and the
Ctrl key.
NOTE: Once an Alt key combination is active, the Ctrl key combinations will not
work. The Ctrl key combinations are meant to bypass menus.
Alt Commands
When the name of an operation appears on the screen with one letter underlined, you
may execute that operation by holding down the Alt key while pressing the key for
the underlined letter at the same time.
Example: File - hold down the Alt key and press the F key to activate the
File pull-down menu.
In this documentation, instructions for Alt keystrokes are abbreviated in the form
“Press Alt-X” where X is the letter key. (NOTE: While the capital letter is given in
this documentation, do not press the shift key while entering the command.)
16 • Windows Conventions
Integrated Environmental Control Model: Getting Started
Example: “Press Alt-F to activate the File menu”
Ctrl Commands
Some operations have been assigned specific keystroke combinations involving the
Ctrl key. You may execute them by holding down the Ctrl key while pressing the
key for the appropriate letter. Most are listed on the pull-down menu from which the
command is normally selected.
In this documentation, instructions for Ctrl keystrokes are abbreviated in the form
“Press Ctrl-X” where X is the letter key. (NOTE: While the capital letter is given in
this documentation, do not press the shift key while entering the command.)
Some of the more common Ctrl commands are the following:
Ctrl-N – New Session
Ctrl-O – Open Session
Ctrl-S – Save Results
Ctrl-C – Copy
Ctrl-P – Print
Ctrl-V – Paste
Ctrl-F4 – Close Session
Ctrl-F6 – Switch to another window
Integrated Environmental Control Model: Getting Started
Windows Conventions • 17
IECM Conventions
The IECM Window
Once you have started the model , the IECM Window displays. The IECM Window
contains all the screens used by the Interface, as well as the tools for control of the
software described below.
The IECM Window
The IECM Window is initially sized to fill an 800x600 resolution screen. If your
display is set to 800x600 pixels, the IECM window will completely fill the screen.
Menu Bar
The menu bar appears at the top of the IECM window. It consists of four pull-down
menus: File, Edit, View, Window, and Help. These pull-down menus issue
commands to the IECM software.
18 • IECM Conventions
Integrated Environmental Control Model: Getting Started
Choosing an Command from a Pull-Down Menu
1. Activate the pull-down menu by doing one of the following:
•
Place the mouse arrow on the title of the menu you want to pull
down and click.
•
Hold down the Alt key on the keyboard and press the letter in the
menu title which is underlined. Example: To pull down the File
menu, press Alt-F.
The menu will remain visible and active until you choose a command or
move the mouse cursor outside the window.
2. Choose from the menu by doing one of the following:
•
Place the mouse arrow on the action you want to perform and
click.
•
Hold down the Alt key again and press the letter in the action title
which is underlined. Example: To Print, press Alt-P.
The File Menu
The File menu is the left-most pull-down menu on the Menu bar. The File menu is
shown below.
The File menu
You may choose the following commands from the file menu:
New Session – Creates a new session from model defaults. (See “Creating
a New Session” on page 61.)
Open Session – Opens a previously created session. (See “Opening an
Existing Session” on page 62.)
Close Session – Closes the currently active session. (See “Closing a
Session” on page 63.)
Delete Session – Deletes a session. (See “
Integrated Environmental Control Model: Getting Started
IECM Conventions • 19
Deleting a Session” on page 64.)
Unlock Session – Unlocks a session that was not closed normally (e.g.
because of a crash or loss of network connectivity. (See “
20 • IECM Conventions
Integrated Environmental Control Model: Getting Started
Unlocking a Session” on page 64.)
Save Results – Saves the results from a session in an external file. (See
“Saving a Session’s Results” on page 62.)
Save As – Saves a session with a different name. (See “Saving a Session
with a Different Name” on page 63.)
Import – Imports a session from an external database file. (See “Importing
a Session” on page 66.)
Print – Prints configuration settings, inputs or results. (See “Print Dialog
Box” on page 68.)
Exit – Closes the current session and exits the interface. (See “Exiting the
Model” on page 34.)
The Edit Menu
The Edit menu is the second pull-down menu on the Menu bar. The Edit menu is
shown below.
The Edit Menu
You may choose the following commands from this menu:
Cut – Removes text from a workspace. (See “Cut” on page 67)
Copy – Copies text from a workspace. (“Copy” on page 67)
Paste – Pastes text into a workspace. (See “Paste” on page 67)
The View Menu
The View menu is the third pull-down menu on the Menu bar. The View menu is
shown below.
The View Menu
You may choose the following commands from this menu:
Toolbar – Chooses whether or not the Toolbar displays. (See “The
Toolbar” on page 24.)
Status Bar – Chooses whether or not the Status Bar displays. (See “The
Status Bar” on page 24.)
Integrated Environmental Control Model: Getting Started
IECM Conventions • 21
Uncertainty Tools – Displays the Uncertainty Tools floating palette. (See
“
22 • IECM Conventions
Integrated Environmental Control Model: Getting Started
Uncertainty Areas” on page 60.)
Input Tools – Displays the Input Tools floating palette. (See “Input Tools”
on page 44.)
Result Tools – Displays the Result Tools floating palette. (See “Result
Tools” on page 59.)
The Window Menu
The Window menu is the fourth pull-down menu on the Menu bar. The Window
menu is shown below.
The Window Menu
You may choose the following commands from this menu:
Cascade – Arranges all open windows in a cascade from the upper left
corner of the IECM Window.
Tile Horizontally – Arranges all open windows in a tile from the left to the
right of the IECM Window.
Tile Vertically – Arranges all open windows in a tile from the top to the
bottom of the IECM Window.
Arrange Icons – Arranges all minimized windows in the lower left corner
of the IECM Window.
Windows… – Allows you to choose which open window is active.
1, 2, 3 (etc.) – Allows you to choose which open window is active.
The Help Menu
The Help menu is the fifth pull-down menu on the Menu bar. The Help menu is
shown below.
The Help Menu
You may choose the following commands from this menu:
Help Topics – Displays online help. (See “Online Help” on page 4.)
About IECM Interface – Displays the Logo Box. (See “Starting the
Model” on page 33.)
Integrated Environmental Control Model: Getting Started
IECM Conventions • 23
The Toolbar
The toolbar is a row of buttons which runs down the left side of the IECM Window.
Clicking on a button executes a common command. All of the commands can also
be executed from pull-down menus. (See “Menu Bar” on page 18.)
The toolbar buttons: New Session, Open Session, Close Session, Save Results, Print, Cut,
Copy, Paste, Import, Help Topics, and Context-Sensitive Help (note that they appear vertical
in the model).
When the mouse arrow is held over a toolbar button momentarily, a description of
the button’s command displays.
You may choose whether or not the toolbar displays. Pull down the View menu and
select Toolbar. This is a toggle switch which will toggle between displaying the
toolbar and not displaying it. When Toolbar is checked, the toolbar displays, when
it is not checked, it does not display.
The Status Bar
The status bar is displayed at the bottom of the window. Messages about the status
of the interface appear at the left side of the status bar . Normally, “Ready” is
displayed. When the mouse cursor is moved over a toolbar button or pull-down
menu item, the name of the command which is associated with the item is displayed.
At the right of the status bar are three boxes which indicate if the Capital Letters
Lock, Number Lock, or Scroll Lock are turned “on”. If the box is empty, the lock is
turned off. If CAPS, NUM, or SCRL display, the lock is turned on.
The status bar: The interface is ready, and the Number Lock is set to on.
You may choose whether or not the status bar displays: Pull down the View menu
and select Status Bar. This is a toggle switch which will toggle between displaying
the status bar and not displaying it. When Status Bar is checked, the toolbar
displays, when it is not checked, it does not display.
24 • IECM Conventions
Integrated Environmental Control Model: Getting Started
The Session Window
Once you have opened or created a session, a session window displays for the
session you are working with. The session window contains all the screens used by
the session. (See “Sessions” on page 61.)
The Session Window
The session window is initially sized to fill the entire IECM Window at a resolution
of 800x600 pixels. If additional windows are open in the IECM Window, they will
be behind the session window. You may access these windows through the Window
menu on the Menu Bar. (See “The Window Menu” on page 23.)
Tabs
Movement within the interface is accomplished primarily by clicking tabs. Tabs
extend above or below the session’s workspace. Moving between tabs means
moving between program areas, input screens, or result screens.
When a tab is selected, the tab comes forward, its border surrounds the workspace,
its color changes, and its text becomes white. Therefore, it is evident which tabs
have been selected—or made “active”—and therefore which screen is being
displayed. Looking at the tabs above and below the workspace, one can always tell
where one is in the model.
Integrated Environmental Control Model: Getting Started
IECM Conventions • 25
The three sets of tabs are all visible: the Program Area Navigation Tabs (Set Parameters is
active), the Technology Navigation Tabs (Base Plant is active), and the Input/Results
Navigation Tabs (1 Performance) is active.
Types of Tabs
Three sets of tabs are used in the IECM model:
Program Area Navigation Tabs: These three tabs always display at the top of the
current session’s window. The active tab is red, the others are gray. They allow
movement between the model’s main program areas: Configure Plant, Set
Parameters, and Get Results.
Technology Navigation Tabs: These tabs display below the Program Area
Navigation Tabs and above the workspace in the Set Parameters and Get Results
modules. The active tab is dark red, the others are gray. They allow movement
between technology input or results screens.
Technology Navigation Tabs display only currently selected technologies. For
example, the combined SO2/NOx input and result tabs are only displayed when a
combined technology is selected, replacing the SO2 input and results tabs.
Input Navigation Tabs/Results Navigation Tabs: Input Navigation Tabs and
Results Navigation Tabs display below the workspace in the Set Parameters and
Get Results modules. The active tab is brown, the others are gray. They allow
movement between input or results screens within a technology.
Moving Between Tabs
To move from tab to tab, do one of the following:
26 • IECM Conventions
•
Place the mouse arrow on the tab to which you want to move and click.
•
Hold down the Alt key on the keyboard and press the letter in the tab
title which is underlined. Example: to switch to the Set Parameters
tab, press Alt-S.
Integrated Environmental Control Model: Getting Started
The software remembers which Technology Navigation Tab is active within each
Program Area and which Input/Results Navigation Tab is active within each
technology. Therefore, when returning to a program area or technology tab, one
returns to the same workspace which one left.
Plant Diagrams
In the two program areas where there are Technology Navigation Tabs—Set
Parameters and Get Results—the first tab includes a plant diagram.
The Plant Diagram
Using the Plant Diagram
In the Set Parameters and Get Results program areas, the Plant Diagram can be
used as an alternate way to move among Technology Navigation tabs. Do one of the
following:
•
Click the button for the technology for which you would like to provide
inputs or get results and it will activate the corresponding tab for that
technology.
•
Move through the Plant Diagram by pressing the Tab key—a box will
surround the technology selected. Then press the Space bar to activate
the corresponding tab for that technology.
Integrated Environmental Control Model: Getting Started
IECM Conventions • 27
Parameters and Results Workspace
In both the Set Parameters and Get Results program areas, information is
displayed in a common workspace. The workspace is made up one or more tables
which imitate a spreadsheet and can be used like a spreadsheet is used. The
workspace displays between the input and result navigation tabs.
The Base Plant—4. Capital Cost input screen workspace
Movement in the Workspace
One may move throughout the spreadsheet by doing any one of the following:
•
Moving the mouse cursor (it will be the cross cursor): Move the cursor
over a cell and click to select a cell.
•
Using the Enter key on the keyboard: Pressing Enter will select the
cell beneath the currently selected cell.
•
Using the arrow keys on the keyboard: you may move up ( ↑ ), down
( ↓ ), left ( ←), and right ( → ).
When an individual cell is selected, it is outlined in black.
The cell selected is in the Value column for the Engineering & Home Office Fees
28 • IECM Conventions
Integrated Environmental Control Model: Getting Started
Selecting Cells
You may select individual cells (see “
Integrated Environmental Control Model: Getting Started
IECM Conventions • 29
Parameters and Results Workspace” on page 28), multiple cells, or entire rows,
columns, or tables. Once selected, the contents of the cells may be copied to the
windows clipboard for insertion into another application. (See “Windows Copy,
Cut, and Paste” on page 66.)
Selecting Multiple Cells
To select multiple cells, do one of the following:
•
Click and drag the mouse cursor (it will be the cross cursor) over the
cells you would like to select.
•
Hold down the shift key and use the arrow keys on the keyboard to
select a group of cells.
The first cell selected will be outlined in black, all other selected cells will be reverse
video.
The Values for General Facilities Capital, Engineering & Home Office Fees, and Project
Contingency Cost are highlighted
Selecting Entire Rows, Columns, or Tables
To select an entire column: Click the title button (column heading) above the
column.
To select an entire row: Click the numbered button (row heading) to the left of the
row.
To select an entire table: Click the button in the upper left-hand corner of the
spreadsheet.
The entire row for Engineering & Home Office Fees is selected.
30 • IECM Conventions
Integrated Environmental Control Model: Getting Started
Highlighting
On some parameters and results screens, parameters or results are highlighted to
indicate their importance. Parameters are highlighted in blue, results are highlighted
in yellow.
The Base Plant—1. Performance input screen
The Boiler—2. Capital Cost Result Screen
Integrated Environmental Control Model: Getting Started
IECM Conventions • 31
Process Type Pull-Down Menus
Your power plant may have more than one technology for some processes
(especially NOx Control). Therefore, at the bottom of most parameters and results
screens, there is a pull-down menu which indicates which process is addressed.
The Process Type Pull-Down Menu from the NOx Control—1. Config input screen
To change the process for which you are entering inputs or viewing results, click
on the arrow next to the box and choose the appropriate process.
If there is only one technology selected for that process, it will display in gray text
and it will not be possible to change it.
32 • IECM Conventions
Integrated Environmental Control Model: Getting Started
Running the Model
Starting the Model
A program group called IECM Interface is created when the model is installed. It
will display in the Programs group in the Start Menu. The program group contains
several icons—one is for the help file, another for the main program file titled
IECM. The icon for the IECM model is shown to the left. To start the Model, click
this program icon in the Start Menu.
The model will launch, and the IECM Interface Window (see “The IECM Window”
on page 18) and Logo Box will display.
The IECM Logo Box
The Logo Box will disappear in 5 seconds, after which the interface will be ready for
use. You may also click the Close button (x) in the upper right hand corner of the
logo box to begin.
Integrated Environmental Control Model: Getting Started
Running the Model • 33
Choosing a Session
To begin using the IECM Interface, you must first choose a session. A session is a
complete collection of data—configuration, parameters, and results—which
describes one power plant. The model uses the configuration settings and parameters
in a session to calculate the results.
The first time you use the software, you will have to create a new session. (See
“Creating a New Session” on page 61.)
At subsequent startups, you may create a new session or use a previously saved
session. (See “Working with Sessions” on page 61.)
Using the Model
There are eight steps involved in running the model:
1.
Start the Model. (See “Starting the Model” on page 33.)
2.
Open a session (existing or new). (See “Creating a New Session” on
page 61.)
3.
Configure the Plant. (See “Configuring the Plant” on page 35.)
4.
Set Input Parameters. (See “Setting Parameters” on page 38.)
5.
View Results. (See “Getting Results” on page 50.)
6.
Print or Export Results (if desired). (See “Printing” on page 68 or
“Exporting a Session” on page 66.)
7.
Save the session results (if desired). (See “Saving a Session’s Results”
on page 62.)
8.
Exit the model. (See “Exiting the Model” below.)
Exiting the Model
To quit the model, do one of the following:
•
Pull down the File pull down menu and select Exit.
•
Click the Close button (x) in the upper right hand corner of the IECM
window.
•
Press Alt-F4.
A dialog box will ask if you want to save results. (See “Saving a Session’s Results”
on page 62.) To save results, click the Yes button. To exit without saving results,
click the No button. To abandon the procedure, click the Cancel button.
The Save Results at Close dialog box
34 • Running the Model
Integrated Environmental Control Model: Getting Started
Configuring the Plant
Configure Plant
Configure Plant is the first of the three program areas. When you begin working
with a session, the software will display this area. You may also choose this area by
clicking on its tab at the top of the screen. You may return to Configure Plant and
change the configuration settings at any time.
In Configure Plant you choose the technologies implemented by the plant and how
they will operate. Available options are presented via pull-down menus. Detailed
descriptions of each option is given in the User Manual.
Once you have selected the options for the session, you may move on to the Set
Parameters or Get Results program areas.
The Configure Plant Program Area
Integrated Environmental Control Model: Getting Started
Configuring the Plant • 35
Configuration Pull-Down Menus
A series of pull-down menus are displayed on the left side of the screen. Each
corresponds to a plant configuration setting or technology.
The Combustion Controls Pull-Down Menus allow you to choose Furnace Type and NOx
Control settings
Changing Configurations
To change a configuration setting:
Using the Mouse:
1.
Click the arrow button to the right of the setting, and the box pulls
down to display the options possible for that configuration setting.
2.
Click the option you desire and it will be selected and displayed in the
box.
Using the Keyboard:
1.
Move between configuration settings by pressing the Tab key to move
to the next setting, and Shift-Tab to move to the previous setting.
2.
Change the setting by using the arrow keys: Press the up arrow ( ↑ )
key to change the setting to the previous possible option, and the down
arrow ( ↓ ) key to change the setting to the next possible option.
Invalid Selections
Some combinations of options are not available. Certain settings depend on other
configuration settings.
If an option cannot be selected, it will display in gray text and it will not be possible
to choose it.
If an SO2 control technology is selected, combined SO2/NOx controls are not available
36 • Configuring the Plant
Integrated Environmental Control Model: Getting Started
Plant Diagram
A plant at the right side of the screen displays icons for the technology options you
have selected for the plant configuration.
The Plant Diagram
Integrated Environmental Control Model: Getting Started
Configuring the Plant • 37
Setting Parameters
Set Parameters
The second of the three program areas is Set Parameters. Choose this area by
clicking its tab at the top of the screen. You may return to Set Parameters and
change the inputs at any time.
In Set Parameters, you modify the input values for the session. Detailed
descriptions of all inputs are given in the User Manual.
The Overall Plant tab is displayed when Set Parameters is first selected.
The Set Parameters Program Area
38 • Setting Parameters
Integrated Environmental Control Model: Getting Started
Plant Diagram
The first Technology Navigation Tab in the Set Parameters program area is for the
Overall Plant. This screen displays the plant configuration settings on the left side
of the page and a diagram of the plant as configured at the right of the page. (See
“Configuring the Plant” on page 35.) No inputs are entered on this screen.
The Plant Diagram
Using the Plant Diagram
The Plant Diagram can be used as an alternate way to move among input
Technology Navigation tabs. Do one of the following:
•
Click the button for the technology for which you would like to provide
inputs and it will activate the corresponding tab for that technology.
•
Move through the Plant Diagram by pressing the Tab key. A
highlighting box will surround the technology selected. Then press the
Space bar to activate the corresponding tab for that technology.
Integrated Environmental Control Model: Getting Started
Setting Parameters • 39
Set Parameters Workspace
Choosing one of the technology area tabs brings up a workspace for the parameters
for that area. The workspace imitates a spreadsheet (see “Parameters and Results
Workspace” on page 28) with the following columns: Title, Units, Uncertainty,
Value, Calculated, Minimum, Maximum, and Default.
The Base Plant—4. Capital Cost input screen workspace
When a new session is created, the default values are loaded for each parameter.
You may change any or all of the values for any or all of the technologies.
Because default values exist for every parameter, you do not have to visit every
screen, or enter parameters in any particular order.
Movement in the Workspace
One may move throughout the spreadsheet by doing any one of the following:
•
Moving the mouse cursor (it will be the cross cursor): Move the cursor
over a cell and click to select a cell.
•
Using the Enter key on the keyboard: Pressing Enter will select the
cell beneath the currently selected cell.
•
Using the arrow keys on the keyboard: you may move up ( ↑ ), down
( ↓ ), left ( ←), and right ( → ).
The cell which is selected—and in which the cursor will type—is outlined in black.
40 • Setting Parameters
Integrated Environmental Control Model: Getting Started
The cell selected is in the Value column for the Engineering & Home Office Fees
Title
This column displays the name of the parameter to be set in that row. Titles cannot
be changed. Each parameter is described in detail in the User Manual.
Units
This column displays the units in which the parameter will be input. Units may be
changed for inputs; see “Input Tools” on page 44. (Units may also be changed in
results; see “Result Tools” on page 59.)
Uncertainty (Unc)
This button opens the Uncertainty Editor dialog box so that you may input
probabilistic values. Entering uncertainty is described in “Uncertain Values” on
page 46.
Value
This column displays the current value of the parameter. To change the value, see “
Integrated Environmental Control Model: Getting Started
Setting Parameters • 41
Entering Inputs” on page 43.
Calculated (Calc)
This check-box indicates whether the parameter is entered by the user or calculated
by the model using other parameters. If it is checked, the value is calculated, if it is
not checked, the value may be changed. Rows with no check box contain static
values. See “Calculated Values” on page 44.
Minimum, Maximum, and Default
These columns provide the minimum, maximum, and default values for the
parameter. If a value below the minimum or above the maximum is entered, the
interface will display a warning, but the value will be used as entered.
Minimum – the lower limit for the value entered in the Value column.
Maximum – the upper limit for the value entered in the Value column.
Default – the default value which was shipped with the IECM software, in case the
value must be reset to the default. All parameters have a default value.
42 • Setting Parameters
Integrated Environmental Control Model: Getting Started
Entering Inputs
Input values may be entered, or the current values may be edited. In addition, some
values are selected from pull-down boxes.
Entering Values
To enter values:
1.
Select the appropriate cell under the Value column. The selected cell
will be outlined in black.
2.
Type the new value. The value entered will replace the current value.
The Default column displays the default value which was shipped with the IECM for
that parameter, in case the value must be reset to the default.
Editing values
To change a value rather than replacing it:
1.
Use the mouse cursor (the cross cursor) and double-click the cell. The
value will display at the left, highlighted in blue and the I-Beam mouse
cursor will display.
2.
Click again with the cursor next to the number you would like to
change. An editing cursor will display. You may now edit the number
in the cell.
The Default column displays the default value which was shipped with the IECM for
that parameter, in case the value must be reset to the default.
Choices in Pull-Down Boxes
Some cells have fixed choices in the form of pull-down boxes.
The SO2 Control—1. Config (Wet FGD) has two values in pull-pull-down boxes
To change the option in a pull-down box:
Integrated Environmental Control Model: Getting Started
Setting Parameters • 43
1.
Click the arrow button to the right of the cell, and the box pulls down to
display the options possible for that cell.
2.
Click the option you desire and it will be selected and displayed in the
box.
The Default column displays the default choice which was shipped with the IECM
for that parameter, in case it must be reset to the default.
Input Tools
Inputs may be entered in either English or Metric units. Use the Input Tools
floating palette to change the unit system in which inputs will be entered. You may
move this floating palette to the side of the screen, change units, and watch how the
results are altered as a result. To close the palette, click the Close button (x) in the
upper right hand corner of the palette.
More information on various unit options is provided in the User Manual.
Changing the Unit System for Inputs
To change how results are displayed:
1.
Pull down the View menu and choose Input Tools. The Input Tools
floating palette will display.
The Input Tools Floating Palette
2.
Choose the unit system desired by clicking the arrow to the right of the
pull-down menu and choosing English or Metric.
3.
To close the Input Tools floating palette, click the Close button (x) in
the upper right hand corner of the palette.
Calculated Values
Values which are calculated by the program are displayed in blue in the Value
column and the Calc checkbox is checked.
Changing Calculated Values
To change a calculated value:
1.
44 • Setting Parameters
Click the checkbox to remove the check.
Integrated Environmental Control Model: Getting Started
2.
The number will be reset to zero and display in black, and you may
change the value as described under “
Integrated Environmental Control Model: Getting Started
Setting Parameters • 45
Entering Inputs” on page 43.
Uncertain Values
Any input parameter may be assigned a probability distribution. When an input
parameter is uncertain, an uncertainty distribution of results is returned. Such result
distributions give the likelihood of a particular value.
Entering Uncertainty
To enter or edit an uncertain or probabilistic value:
1.
Click the Unc button next to the parameter for which you want to enter
an uncertain value.
2.
The Uncertainty Editor dialog box will display.
The Uncertainty Editor Dialog Box
3.
Select a Distribution type from the Distribution pull-down box. (See
“Distribution Types” on page 47.)
4.
Enter values for the Minimum and Maximum, Mean and Deviation, or
whatever values are needed for the particular Distribution.
5.
Click the Done button.
Once you have entered an uncertainty distribution, a question mark displays on the
Unc button for that parameter on the input screen.
46 • Setting Parameters
Integrated Environmental Control Model: Getting Started
Distribution Types
Distribution types: The distributions are listed in a pull-down box in the
uncertainty editor window. None is initially selected because the default is for no
uncertainty. The following distributions may be used: Normal, Lognormal,
Uniform, Triangular. Each option is described in more detail in the User Manual.
The distribution types Fractiles, Half Normal, and Negative Half Normal will be
available at a future date.
Removing Uncertainty
To remove an uncertainty distributions:
1.
Click the Unc button for which you would like to remove uncertainty.
The Uncertainty Editor will display.
2.
Select None from the list of distributions.
3.
Click the Done button. This will make the None function permanent
and close the uncertainty editor window.
The question mark will no longer display on the Unc button for that parameter on
the input screen.
Input Navigation Tabs
Most technologies have more than one screen of inputs to enter. These are reached
via the Input Navigation tabs at the bottom of the screen.
Input navigation tabs from the Particulate Control input area
Each tab selects a workspace with a spreadsheet for the appropriate inputs.
Integrated Environmental Control Model: Getting Started
Setting Parameters • 47
Coal Properties Parameters
The Coal Properties—1. Coal Prop. input screen is unique within the Set
Parameters program area.
The Coal Properties—1. Coal Prop. input screen
There are two panes, one for the properties of the Current Coal, the other for those
of Favorite Coals. The current coal is the coal with which the model will conduct
its calculations. Favorite coals are those which you use most.
You may use a favorite coal, use a default model coal, or enter a user-defined coal.
Working with coals not provided in the model defaults, entering user-defined coals,
editing the ash properties, and other options are described in the User Manual.
In a future version of the model it will be possible to load external coal databases
created in applications other than the interface.
Using a Favorite Coal
To use one of the Favorite Coals:
1.
Select the name of the coal in the box in the Favorite Coals pane.
2.
Click the Use This Coal button.
Using Model Defaults
To use a coal from the model defaults that is not listed in the Favorite Coals:
1.
48 • Setting Parameters
Click the Browse All Coals button. The Browse All Coals dialog box
will display.
Integrated Environmental Control Model: Getting Started
The Browse All Coals dialog box
2.
Choose Model Defaults in the Select Source Pane.
3.
Choose a coal from the Select Coal Pane:
a. Click the arrow button to the right of the Name: box, and the box
displays a list of coal names.
The Select Coal Name Pull-Down Menu
b. Click the coal you want to use and it will be selected and displayed
in the box.
4.
Click the Use this Coal button to use the coal and the Add to
Favorites button to add the coal the list of favorite coals.
5.
Click the Close button.
Default Ash Properties
Each of the default coals has a full set of default ash properties associated with it.
The properties associated with a coal selected in the Favorite Coals pane can be
viewed by clicking the View Ash Properties button on the lower right corner of the
pane.
Ash properties are associated with every coal specified, whether from the default
coal list, an external coal list, or a user-specified coal. In cases where the ash
properties are not given directly, representative ash properties are selected by the
IECM interface. See the User Manual for more information on ash properties and
how they can be specified.
Integrated Environmental Control Model: Getting Started
Setting Parameters • 49
Getting Results
Get Results
The third of the three program areas is Get Results. Choose this area by clicking its
tab at the top of the screen. You may return to Get Results at any time to look at
results.
In Get Results you view the results for this session. The IECM allows you to view
results for any individual plant technology or for the power plant as a whole.
The 1. Diagram screen of the Overall Plant tab is displayed when you first choose
Get Results.
The Overall Plant—1. Diagram Result Screen
50 • Getting Results
Integrated Environmental Control Model: Getting Started
Plant Diagram
The first Technology Navigation Tab in the Get Results program area is the Overall
Plant. The 1. Diagram screen displays the plant configuration settings on the left
side of the page and a diagram of the plant as configured at the right of the page.
(See “Configuring the Plant” on page 35.) No results are returned on this screen.
The Plant Diagram
Using the Plant Diagram
The Plant Diagram can be used as an alternate way to move among result
Technology Navigation tabs. Do one of the following:
•
Click the button for the technology for which you would like to get
results and it will activate the corresponding tab for that technology.
•
Move through the Plant Diagram by pressing the Tab key—a box will
surround the technology selected. Then press the Space bar to activate
the corresponding tab for that technology.
Viewing Results
Results are displayed in two different kinds of screens: diagrams and spreadsheet
screens. Diagrams provide a schematic of and values for the stream flows into and
out of that technology. Spreadsheet workspaces operate in the same way as the
spreadsheets used in Set Parameters. The workspace imitates a spreadsheet (see “
Integrated Environmental Control Model: Getting Started
Getting Results • 51
Parameters and Results Workspace” on page 28) with appropriate results for that
technology. A detailed description of all results is provided in the User Manual.
The table and diagram results are all deterministic values—uncertainties are not
taken into consideration. Graphs are probabilistic. This is different from previous
versions of the IECM that used Analytica as a calculation engine. Analytica uses the
expected value in table and diagram results, which takes into consideration the
uncertainties defined.
Results Navigation Tabs
Many technologies have more than one screen of results. These are reached via the
Results Navigation tabs at the bottom of the screen. Each tab selects a screen which
displays the appropriate results.
Result Navigation Tabs
Diagrams
Each technology result area has a Diagram result screen. This screen provides a
schematic of and values for the stream flows into and out of that technology.
The Air Preheater—1. Diagram result screen
52 • Getting Results
Integrated Environmental Control Model: Getting Started
Capital Cost Summaries
Some of the technology result areas have a Capital Cost result screen. This screen
displays spreadsheet workspace tables of the direct and indirect capital costs related
to implementation of that technology.
The NOx Control—2. Capital Cost result screen
Integrated Environmental Control Model: Getting Started
Getting Results • 53
O&M Cost Summaries
Some of the technology result areas have a O&M Cost result screen. This screen
displays spreadsheet workspace tables of the variable and fixed operation and
maintenance costs involved in implementation of that technology.
The Particulate Control—3. O&M Cost result screen (ESP)
54 • Getting Results
Integrated Environmental Control Model: Getting Started
Total Cost Summaries
Some of the technology result areas have a Total Cost result screen. This screen
displays spreadsheet workspace tables of annual variable, fixed, capital, and
operation and maintenance costs involved in implementation of that technology.
The NOx Control—4. Total Cost result screen
Integrated Environmental Control Model: Getting Started
Getting Results • 55
Cost Inputs Summaries
Some of the technology result areas have a Cost Inputs result screen. This screen
displays spreadsheet workspace tables of performance and economic inputs used to
calculate total cost values.
The Particulate Control—5. Cost Inputs result screen (ESP)
56 • Getting Results
Integrated Environmental Control Model: Getting Started
Gas Summaries
Some of the technology result areas have a Gas Summary result screen. This
screen displays spreadsheet workspace tables of major flue gas components before
and after passing through the technology.
The SO2 Control—6. Gas Summary result screen
Integrated Environmental Control Model: Getting Started
Getting Results • 57
Graphs
Clicking any result value brings up a graph for that value. While all of the values
displayed in diagrams and tables are deterministic, some have uncertainty in their
calculation. If there is no uncertainty in the value’s calculation, the graph will
display a vertical line.
If uncertainty is present, the graph will display a curve of all possible values.
Boiler Flue Gas Solids Flow Graph (Deterministic Result)
ESP Flue Gas Out Solids Flow Graph (Uncertain Result)
The new IECM plots all samples on the CDF graph. The Analytica results in the
Macintosh IECM version only displayed every fourth value (a value that could be
58 • Getting Results
Integrated Environmental Control Model: Getting Started
adjusted within the model). By eliminating all but every fourth value, the Mac
version of the IECM “smoothed” the graph.
When you first bring up a graph, there will be a short delay as all result graphs are
drawn. Once all the graphs are drawn, there should be little more than a split second
delay when you choose another graph. (However, if you change the plant
configuration or input values and then return to Get Results, the graphs will have to
be redrawn, causing another delay.)
More information on graphs is provided in the User Manual.
Result Tools
Results may be displayed according to different rules. Use the Result Tools floating
palette to change the type of results displayed, the units in which results are
displayed, or the type of cost results displayed. You may move this floating palette
to the side of the screen, change units, and watch how the results are altered as a
result. To close the palette, click the Close button (x) in the upper right hand corner
of the palette.
More information on various unit options is provided in the User Manual.
Changing How Results are Displayed
To change how results are displayed:
1. Pull down the View menu and choose Result Tools. The Result Tools
floating palette will display.
The Result Tools Floating Palette
2. Choose the options desired by clicking the appropriate pull-down menus.
3. To close the Result Tools floating palette, click the Close button (x) in
the upper right hand corner of the palette.
Integrated Environmental Control Model: Getting Started
Getting Results • 59
Uncertainty Areas
Uncertainty may be entered in any or all input parameters (see “Uncertain Values”
on page 46). However, there may be times that you would like to exclude
uncertainty from results for a technology.
You may choose the technologies for which uncertain values are displayed in results
from the Uncertainty Tools floating palette. You may move this floating palette to
the side of the screen, change settings, and watch how the results are altered as a
result. To close the palette, click the Close button (x) in the upper right hand corner
of the palette.
More information on running a Probabilistic analysis is provided in the User
Manual.
Choosing Uncertainty Areas
To Choose Uncertainty Areas:
1. Pull down the View menu and choose Uncertainty Tools. The
Uncertainty Tools floating palette will display.
The Uncertainty Tools floating palette
2. Choose the technology or technologies for which you would like results
with uncertain values by clicking the check box to the left of each
technology.
3. You may select all or none by clicking the buttons at the bottom of the
palette.
4. To close the Uncertainty Tools floating palette, click the Close button
(x) in the upper right hand corner of the palette.
60 • Getting Results
Integrated Environmental Control Model: Getting Started
Working with Sessions
Sessions
A session is a complete collection of data—configuration settings, and input
parameters—which describes one power plant. The model uses the configuration
settings and parameters in a session to calculate the results.
You may run multiple power plant sessions at the same time in order to compare
configurations, results, etc.
NOTE:
A future version of the IECM will enable the user to specify multiple types of
sessions. The current version only supports one power plant simulation. Future
versions will add optimization (optimizing specified parameters for a given plant
flow sheet to optimize an objective such as cost) and synthesis (optimizing a flow
sheet with specified parameters to optimize an objective).
Creating a New Session
To create a new session, do any one of the following:
•
Pull down the File menu and select New Session….
•
Click the New Session button on the toolbar on the left side of the
IECM window. (See “The Toolbar” on page 24.)
•
Press Ctrl-N.
The New Session dialog box will display. Type in the name of the new session and
click the Ok button.
The New Session dialog box
Integrated Environmental Control Model: Getting Started
Working with Sessions • 61
Opening an Existing Session
To open an existing session, do any one of the following:
•
Pull down the File menu and select Open Session….
•
Click the Open Session button on the toolbar on the left side of the
IECM window. (See “The Toolbar” on page 24.)
•
Press Ctrl-O.
The Open Session dialog box will display.
The Open Session dialog box
In the Open Session dialog box:
1.
Choose the session you would like to open from the list.
2.
Click the Ok button.
Sessions that are currently open will display in gray and cannot be opened again.
Saving a Session’s Results
The information stored in a session—configuration settings and input parameters—is
saved as you choose the settings and input data. Results are calculated from that
information and initially stored in memory.
Sometimes it is important to save the session’s results to disk. At this time it is only
necessary if you have multiple sessions open and are comparing results, or if you
want to view results outside the interface. If you only ever run one session at a time,
you may skip this procedure.
To save a session’s results, do any one of the following:
•
Pull down the File menu and select Save session.
•
Click the Save results button on the toolbar on the left side of the
IECM window.
•
Press Ctrl-S.
A dialog box will display which informs you that the process is time-consuming and
often unnecessary. To save results, click the Yes button. To abandon the procedure,
click the No button.
62 • Working with Sessions
Integrated Environmental Control Model: Getting Started
The Save Results dialog box.
Saving a Session with a Different Name
To save a session you are working on with a different name, pull down the File menu
and select Save As…. The Save Session As dialog box will display.
In the Save Session As dialog box,
1.
Type the name of the session in the box next to File name.
2.
Click the Save button.
Once you have saved a session with a different name, all subsequent Save
commands will save the session with the new name.
Closing a Session
To close a session you are working on, do any one of the following:
•
Pull down the File menu and select Close Session.
•
Click the Close this session button on the toolbar on the left side of the
IECM window.
•
Click the Close button (x) in the upper right hand corner of the session
window.
•
Press Ctrl-F4.
A dialog box will display which asks if you want to save results. It will inform you
that saving results is time-consuming and often unnecessary. (See “Saving a
Session’s Results” on page 62.) To save results, click the Yes button. To close
without saving results, click the No button. To abandon the procedure, click the
Cancel button.
The Save Results at Close dialog box
Integrated Environmental Control Model: Getting Started
Working with Sessions • 63
Deleting a Session
To delete an existing session, do one of the following:
•
Pull down the File menu and select Delete Session.
•
Click the Delete Session button on the toolbar on the left side of the
IECM window. (See “The Toolbar” on page 24.)
The Delete Session dialog box will display.
The Delete Session dialog box
In the Delete Session dialog box:
1.
Choose the session you would like to delete from the list.
2.
Click the Ok button.
To exit the Delete Session dialog box without deleting a session, click the Cancel
button or press the Esc key.
Sessions that are currently open will display in gray and cannot be deleted until they
are closed.
NOTE: Once you delete a session, it can no longer be accessed. Use caution when
deleting sessions.
64 • Working with Sessions
Integrated Environmental Control Model: Getting Started
Unlocking a Session
This command allows you to unlock a session that was not closed normally because
of a system problem such as a crash, a loss of network connection, or another cause.
You cannot open such sessions when you start the IECM again because the software
believes that they are already open. Unlocking the session enables you to open the
session again.
NOTE: Choose this command only if you the session was not closed normally the
last time you used it. Do not unlock a session that actually is in use, as it may cause
unpredictable results.
To unlock a session, pull down the File menu and select Unlock Session.
A warning box will display.
The Unlock Session Warning Box
Click the Yes button to proceed.
The Unlock Session dialog box will display.
The Unlock Session dialog box
In the Unlock Session dialog box,
1.
Choose the session you would like to unlock.
2.
Click the Ok button.
You may then open the session. See “Opening an Existing Session” on page 62.
To exit the Unlock Session dialog box without unlocking a session, click the Cancel
button or press the Esc key.
Sessions that are not currently open or locked by the system will display in gray and
cannot be unlocked.
Integrated Environmental Control Model: Getting Started
Working with Sessions • 65
Importing and Exporting Data
Importing a Session
The Import function is not yet available. At a future date, you will be able to import
a database of session data into the interface. Thus, you will be able to exchange data
with other users, load older archive data, and use data assembled in other ways than
by using the interface.
Therefore, the Import option on the File menu and the Import button on the toolbar
are not yet active. Watch for updates of the interface for details about importing.
Exporting a Session
The Export function is not yet available. At a future date, you will be able to export
session data in a standard database format. Thus, you will be able to exchange data
with other users, save older data to archives, and use model data in other ways than
by using the interface.
An Export option will be added to the File menu and an Export button will be
added to the toolbar. Watch for updates of the interface for details about exporting.
Print Screen
Pressing the Print Screen key at the top of the keyboard copies a snapshot of the
entire IECM Window to the clipboard. This snapshot may then be pasted into any
windows application.
Windows Copy, Cut, and Paste
As has been noted, the input and results screens function like spreadsheets (see “
66 • Importing and Exporting Data
Integrated Environmental Control Model: Getting Started
Parameters and Results Workspace” on page 28). Data can be copied from the cells
or pasted into them using the Windows Copy, Cut, and Paste commands.
For information about copying graphs, see the User Manual.
Copy
To copy data from an input or results screen:
1.
Select the cells that you want to copy (see “Selecting Cells” on page
29).
2.
Do any one of the following:
•
Pull down the Edit menu and select Copy.
•
Click the Copy button on the toolbar on the left side of the IECM
window. (See “The Toolbar” on page 24.)
•
Press Ctrl-C.
Cut
The windows Cut command will remove data that is not static—i.e. only data on
input screens in the Value column which is not calculated. If static data (data in
other columns or calculated values) is highlighted and cut, it will be copied—and
thus can be pasted—but it will not be removed from the workspace.
To cut data from an input or results screen:
1.
Select the cells that you want to copy (see “Selecting Cells” on page
29).
2.
Do one of the following:
•
Pull down the Edit menu and select Cut.
•
Click the Cut button on the toolbar on the left side of the IECM
window. (See “The Toolbar” on page 24.)
•
Press Ctrl-X.
Paste
To paste data from a spreadsheet or database into an input screen:
1.
Make sure that the data is in exactly the same format as the input screen
accepts. You will only be able to paste data into cells that accept inputs
(i.e. cells in the Value column that are not calculated).
2.
Select the cells that you want to paste data into (see “Selecting Cells”
on page 29).
3.
Do any one of the following:
•
Pull down the Edit menu and select Paste.
•
Click the Paste button on the toolbar on the left side of the IECM
window. (See “The Toolbar” on page 24.)
•
Press Ctrl-V.
Integrated Environmental Control Model: Getting Started
Importing and Exporting Data • 67
Printing
Print Dialog Box
The IECM has a print option so that you may print the pertinent information from the
screen which is currently displayed. If you are in Configure Plant, the IECM will
print a summary of the plant configuration options you have selected. If you are in
Set Paramters, the IECM will print the input values from the screen which is
displayed. If you are in Get Results, the IECM will print the results values from the
screen which is displayed.
To print data, do any one of the following:
•
Pull down the File menu and select Print. (See “The File Menu” on
page 19.)
•
Click the Print button on the toolbar on the left side of the IECM
window. (See “The Toolbar” on page 24.)
•
Press Ctrl-P.
The Print dialog box will display.
The Print Dialog Box
To Print, click the OK button.
68 • Printing
Integrated Environmental Control Model: Getting Started
H
Help Menu 5, 21
Highlighting 27, 36
Index
A
Alt Commands 16
C
Calculated Values 40, 60
Coal Properties 42
Configure Plant 24, 32
Copy Data 59
Ctrl Commands 17
Cut Data 60
D
Data
copy 59
cut 60
paste 60
2
I
IECM Window 18, 22, 23, 30, 59
Import 20, 22, 59
Input Navigation Tabs 24, 42
Installation 6, 13
canceling 13
destination 9
errors 13
license agreement 8
program folder 11
progress 12
running setup 7
setup type 10
9
welcome 7
K
Keystroke Commands 16
M
Manual
technical 6
tutorial 6
user 6
Menu Bar 16, 18, 19, 20, 21, 23
22
Model Tutorial 4, 6
Mouse 15, 19, 22, 24, 26, 27, 33, 37, 39
Mouse Cursor 15, 16, 19, 39
E
Edit Menu 20, 60
Editing values 16, 39
Entering Uncertainty 38, 41
Entering Values 38
Exiting the Model 20, 31
Export 31, 59
O
Online Help 4, 21
P
File Menu 17, 19, 54, 55, 56, 57, 59, 61
Paste Data 60
Plant Diagram 25, 33, 36, 46
Print 17, 19, 20, 22, 31, 59, 61
Print Screen 59
24
G
R
Get Results 25, 45, 46
Getting Started 4, 6
Graphs 46, 51, 59
Removing Uncertainty 41
Result Tools 21, 38, 52
F
28, 47
45, 47
Integrated Environmental Control Model: Getting Started
Index • 69
O&M Cost 48
save 55
viewing 46
24, 47
W
Window Menu 21, 23
Workspace 16, 25, 26, 36, 37, 46, 59
S
Save Results 55
Selecting Cells 26, 60
Session 19, 20, 22, 31, 54, 55, 56, 59
close 56
delete 19, 56, 57
export 31, 59
import 20, 22, 59
new 17, 19, 22, 31, 37, 54
open 55
save as 56
Set Parameters 25, 35, 36
Software
install 6, 13
uninstall 13
updating 2, 13
Status Bar 20, 22
System Requirements 1
T
Technical Manual 4, 6
24, 25, 36, 46
Toolbar 22
U
Uncertain Values 38, 40, 52, 53
Uncertainty
areas in results 20, 52, 53
entering 38, 41
removing 41
Uncertainty Distributions 41
Uncertainty Editor 38, 41, 42
Uncertainty Tools 20, 53
Uninstalling Software 13
User Manual 4, 6
V
Values
calculated 40, 60
editing 16, 39
entering 38
uncertain 38, 40, 52, 53
View Menu 20, 22, 52, 53
Viewing Results 46
70 • Index
Integrated Environmental Control Model: Getting Started