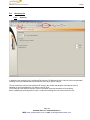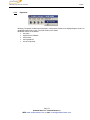
1
FM MONITORING SILVER AND REMOTE CONTROL USER’S MANUAL Edition N°: 2.0 Date : 2008/02 SILVER ® and AUDEMAT-AZTEC ® are registered trademarks of AUDEMAT-AZTEC Company. Audemat-Aztec SA – Audemat-Aztec INC WEB: www.audemat-aztec.com - e-mail: [email protected] FM Monitoring Silver user’s manual 02/2008 CONTENT 1. INTRODUCTION .................................................................................................................................................. 4 1.1. 1.2. 2. PRODUCT PRESENTATION............................................................................................................................... 5 2.1. 2.2. 2.3. 2.4. 3. LIST OF THE INCLUDED ACCESSORIES .................................................................................................. 5 GENERAL SPECIFICATIONS ...................................................................................................................... 5 FRONT PANEL.............................................................................................................................................. 6 REAR PANEL ................................................................................................................................................ 6 GETTING STARTED WITH THE FM MONITORING SILVER............................................................................. 7 3.1. 3.2. 3.3. 3.4. 4. GENERAL INFORMATION ........................................................................................................................... 4 BEFORE YOU START .................................................................................................................................. 4 CONNECTION............................................................................................................................................... 7 INITIALIZING COMMUNICATION (IP).......................................................................................................... 7 CONFIGURATION......................................................................................................................................... 9 INSTALLATION OF THE FM MONITORING SILVER APPLICATION ....................................................... 10 THE INTERNAL WEBSITE ................................................................................................................................ 11 4.1. PRODUCT ID .............................................................................................................................................. 11 4.2. DATE/TIME.................................................................................................................................................. 12 4.3. USERS ........................................................................................................................................................ 12 4.4. NETWORK .................................................................................................................................................. 14 4.5. PPP DIALOUT ............................................................................................................................................. 15 4.6. PPP DIALIN ................................................................................................................................................. 16 4.7. SUPPORT ................................................................................................................................................... 17 4.8. PHONE ALERTS (OPTION)........................................................................................................................ 18 4.8.1. Activation of the option ......................................................................................................................... 18 4.8.2. Page description:.................................................................................................................................. 21 4.9. WEBCAM..................................................................................................................................................... 28 4.10. SMTP MAIL CLIENT ................................................................................................................................... 29 4.11. SNMP AGENT ............................................................................................................................................. 30 4.12. SNMP NOTIFICATIONS ............................................................................................................................. 31 4.13. EVENT LOG ................................................................................................................................................ 33 4.14. ALARMS ...................................................................................................................................................... 34 4.15. I/O LAYOUTS .............................................................................................................................................. 35 4.16. DOWNLOAD................................................................................................................................................ 36 5. CONFIGURATION.............................................................................................................................................. 37 5.1. USING THE FM MONITORING SILVER APPLICATION............................................................................ 37 5.2. ADDING NEW STATIONS TO THE MONITORING LIST........................................................................... 38 5.3. BASIC CONFIGURATION........................................................................................................................... 40 5.3.1. RF Level Configuration......................................................................................................................... 41 5.3.2. Analog Audio configuration .................................................................................................................. 43 5.3.3. MPX Monitoring configuration .............................................................................................................. 44 5.3.4. Stereo Monitoring configuration ........................................................................................................... 45 5.3.5. RDS Monitoring configuration .............................................................................................................. 46 5.3.6. RDS Data Monitoring configuration...................................................................................................... 47 5.4. MONITORING TAB ..................................................................................................................................... 48 5.4.1. Scanning............................................................................................................................................... 48 5.4.2. Recording ............................................................................................................................................. 49 5.5. READINGS .................................................................................................................................................. 51 5.5.1. Analog Radio ........................................................................................................................................ 51 Page 2 Audemat-Aztec SA – Audemat-Aztec INC WEB: www.audemat-aztec.com - e-mail: [email protected] FM Monitoring Silver user’s manual 02/2008 5.5.2. FM Analog Scan................................................................................................................................... 52 5.5.3. FM Market ............................................................................................................................................ 53 5.6. REALTIME................................................................................................................................................... 54 5.6.1. FM Real-time measurements ............................................................................................................... 54 5.6.2. Audio Streaming................................................................................................................................... 55 5.7. “HELP” MENU ............................................................................................................................................. 56 5.7.1. Installation of the Phone Alert option ................................................................................................... 57 5.7.2. Installation of the Full RDS Option ....................................................................................................... 58 5.7.3. Installation of the Script Viewer ............................................................................................................ 59 5.8. “LOOK AND FEEL” MENU .......................................................................................................................... 59 6. SCRIPTEASY: CREATOR MODULE ................................................................................................................ 60 6.1. FUNCTIONALITIES..................................................................................................................................... 60 6.1.1. ScriptEasy ............................................................................................................................................ 60 6.1.2. Scripts................................................................................................................................................... 61 6.1.3. Creating objects ................................................................................................................................... 62 6.1.4. CREATING LINKS ............................................................................................................................... 63 6.1.5. MOVING OBJECTS ............................................................................................................................. 64 6.1.6. COPY / PASTE .................................................................................................................................... 66 6.1.7. SAVE FORMAT.................................................................................................................................... 67 6.1.8. SCRIPT OPENING............................................................................................................................... 67 6.2. SCRIPTEASY MENUS................................................................................................................................ 68 6.2.1. File........................................................................................................................................................ 68 6.2.2. Script .................................................................................................................................................... 68 6.2.3. Tools..................................................................................................................................................... 69 6.2.4. Edit ....................................................................................................................................................... 70 6.2.5. Equipment ............................................................................................................................................ 73 6.3. SCRIPTEASY’S CONTEXTUAL MENUS ................................................................................................... 74 6.3.1. Object contextual menu........................................................................................................................ 74 6.3.2. Script sheet’s contextual menu ............................................................................................................ 75 6.4. SCRIPTEASY’S TOOL BAR ....................................................................................................................... 78 6.4.1. Functions .............................................................................................................................................. 78 6.4.2. Outputs ................................................................................................................................................. 81 6.4.3. Inputs.................................................................................................................................................... 84 6.4.4. Lecture.................................................................................................................................................. 88 6.5. TRANSFERRING SCRIPTS........................................................................................................................ 89 7. FOR MORE INFORMATION .............................................................................................................................. 90 APPENDIX A: SCRIPTEASY VIEWER MODULE (OPTION)................................................................................... 91 A.1 EQUIPMENT CONNEXION:............................................................................................................................ 91 A.2 PRESENTATION: ............................................................................................................................................ 92 A.2.1 Tool bar: .................................................................................................................................................... 92 A.2.2 Selection bar:............................................................................................................................................. 93 A.2.3 I/O event: ................................................................................................................................................... 95 Page 3 Audemat-Aztec SA – Audemat-Aztec INC WEB: www.audemat-aztec.com - e-mail: [email protected] FM Monitoring Silver user’s manual 02/2008 1. INTRODUCTION 1.1. General information Audemat-Aztec produces a complete range of equipment for FM Sub carrier encoding, mobile measurement and monitoring for radio and TV signals. These devices have been designed for network broadcasters, radio and TV broadcasters and the regulations authorities controlling and monitoring Broadcasting transmissions and networks. Since the year 2000, Audemat-Aztec products have received 10 Awards at the NAB show (determined by a committee of Broadcast engineers for innovative products and improvements to existing technologies). All Audemat products have been manufactured according to ISO9001 quality standards. In 2004, this certification was renewed and extended to the whole Audemat-Aztec product line. The registered office of Audemat Aztec is located in Bordeaux Merignac in France. The company also has a subsidiary company, Audemat-Aztec Inc. in the United States located in Miami. 1.2. Before you start Be sure that you can supply the correct AC supply voltage (115/230 V). Page 4 Audemat-Aztec SA – Audemat-Aztec INC WEB: www.audemat-aztec.com - e-mail: [email protected] FM Monitoring Silver user’s manual 2. 2.1. 02/2008 PRODUCT PRESENTATION List of the included accessories Check that all items are present in the box: - 1 power supply cable - 1 straight RJ45 cable (A)* - 1 crossed RJ45 cable (B)* - 1 RS-232 crossed cable (G)* - 1 serial/USB cable and its mini CD (E)* - 1 folder including quick start, satisfaction survey and quality control * Letters correspond to connection points outlined in chapter “rear panel” and in the document included in the bag with the accessories. 2.2. General specifications General features : Dimensions RS-232 USB Port Ethernet 1U 1 console port 4 2 (1 reserved for future expansion) Operating conditions Humidity Temperature 0 to 95% 0° to 45°C; 32° to 113°F Power supply input of the equipment Power supply 115-230VAC – 50-60 Hz Page 5 Audemat-Aztec SA – Audemat-Aztec INC WEB: www.audemat-aztec.com - e-mail: [email protected] FM Monitoring Silver user’s manual 2.3. 02/2008 Front panel ¾ LEDs on the front panel: RUN: normal operation HDD: hard drive activity ON: power indicator of the FM Monitoring Silver 2.4. Rear Panel Secondary interface Primary interface A B Straight RJ45 Ethernet cable: for network OR Crossed RJ45 Ethernet cable: for direct connection to PC Antenna G E RS 232 crossed cable and (if necessary) + Serial/USB cable Page 6 Audemat-Aztec SA – Audemat-Aztec INC WEB: www.audemat-aztec.com - e-mail: [email protected] FM Monitoring Silver user’s manual 02/2008 3. GETTING STARTED WITH THE FM MONITORING SILVER 3.1. Connection 1. Connect the equipment to the power using the power supply cable. 2. Connect the RF input of the equipment to the antenna (not provided). 3. Connect the COM PORT of your PC to the COM1 on the rear panel using the RS-232 crossed cable and if necessary the serial/USB cable. 4. Press the button “power” of the equipment 3.2. Initializing communication (IP) 1/ Open a terminal software session (for example HyperTerminal) using the following parameters: - 9600 bits/second, 8 data bits, no parity, 1 stop bit, no flow control VT100 emulation (for Hyperterminal: menu “properties”, “Parameters”) Page 7 Audemat-Aztec SA – Audemat-Aztec INC WEB: www.audemat-aztec.com - e-mail: [email protected] FM Monitoring Silver user’s manual 02/2008 Note : wait arount 1 minute. 2/ Press “Enter”. You will have the following screen: 3/ Enter the password “admin” to have a screen with the network parameters: } Enter the configuration network parameters 4/ Click on “Submit” to validate all parameters Page 8 Audemat-Aztec SA – Audemat-Aztec INC WEB: www.audemat-aztec.com - e-mail: [email protected] FM Monitoring Silver user’s manual 02/2008 3.3. Configuration 1/ Connect the Ethernet cable to the primary interface of the equipment. Primary interface From now on, you can disconnect the serial cable. Ö Ö The rest of the configuration will be done using Ethernet connection. If you use the crossed cable configure a fixed IP. 2/ Open a Web Browser (Internet Explorer, Mozilla…) and enter the equipment IP address, login and password you have defined in the terminal software session. You will have access to the website’s homepage: The website permits the configuration of the system parameters and the consultation of the event log. For more details see chapter 4. The whole FM part (channels configuration, scanning, streaming…) will be configured using the FM Monitoring Silver application: see below. Page 9 Audemat-Aztec SA – Audemat-Aztec INC WEB: www.audemat-aztec.com - e-mail: [email protected] FM Monitoring Silver user’s manual 02/2008 3.4. Installation of the FM Monitoring silver application You are still on the embedded website: click on the tab “Downloads” in the main menu. Download the application “FM Monitoring Silver application”. Save the application on your desk (install in c:\Program Files\AUDEMAT-AZTEC\FM Monitoring Silver 1.2) Double click on the file “FM Monitoring Silver application” to launch it. Enter you IP address, Login and password (default is Admin/admin). Click “OK” and save your login information for future use. FM Monitoring Silver Application will connect with the unit. Once communication is established, the software will access the data in the unit. Page 10 Audemat-Aztec SA – Audemat-Aztec INC WEB: www.audemat-aztec.com - e-mail: [email protected] FM Monitoring Silver user’s manual 4. 02/2008 THE INTERNAL WEBSITE The quick links on the left side of the page will enable easy navigation to the areas you want to change or analyse as you see on the home page: 4.1. Product ID The ‘Product ID’ page lists the build versions of the various pieces of software and firmware that make the FM Monitoring silver function, and also allow you to give your unit a unique name and description, for your own internal use. Note: click the “Update” button to lock in your changes (for all areas). Page 11 Audemat-Aztec SA – Audemat-Aztec INC WEB: www.audemat-aztec.com - e-mail: [email protected] FM Monitoring Silver user’s manual 02/2008 4.2. DATE/TIME The ‘Date and Time’ link opens the page to set those parameters, click the “Update’ buttons to lock in your changes. On this page you may also configure the FM Monitoring Silver NTP client to link the unit to a Time Server for maintaining accurate time. 4.3. USERS The ‘Users’ link will open the page for configuring access to various parts of the FM Monitoring Silver: Page 12 Audemat-Aztec SA – Audemat-Aztec INC WEB: www.audemat-aztec.com - e-mail: [email protected] FM Monitoring Silver user’s manual 02/2008 There are only two possible user levels on the FM Monitoring Silver: Administrator and Guest A user with a “Guest level access” can look at readings and alarms, but cannot make any command or configuration changes. A user with an “Administrator level” has authority to change anything. Different users may be have an access to the HTML files and Scripteasy software, as desired. ¾ Configuring Web accounts: Administrator: enables any of the system parameters to be changed. Guest: when the user is connected as a “Guest”, he/she may view the parameters but not change them. ¾ Configuring FTP accounts: “Scripteasy” account: authority to download a script into the device using Scripteasy. “Webmaster“ account: access to HTML pages. The user can personalize pages (for example, inserting company logos, etc). He/she must be logged in as “Webmaster”. “Administrator” account: access to the entire system directory. “Update Manager” account: access only to the update directory. Recording: access to the audio/video recording files. Page 13 Audemat-Aztec SA – Audemat-Aztec INC WEB: www.audemat-aztec.com - e-mail: [email protected] FM Monitoring Silver user’s manual 02/2008 4.4. NETWORK Definition of the IP configuration: Ethernet configuration mode Either interface (primary and secondary) can be configured in static or dynamic IP. Static Ethernet configuration If the IP address is a static one, enter the parameters into this window. DNS Servers: DNS configuration. Current network status: displays the network table. Note : clicking help displays a diagram showing primary and secondary interface ports. Page 14 Audemat-Aztec SA – Audemat-Aztec INC WEB: www.audemat-aztec.com - e-mail: [email protected] FM Monitoring Silver user’s manual 02/2008 4.5. PPP DIALOUT Enabling outgoing calls to be configured: ¾ Dialout configuration: enable/disable the outgoing calls function ¾ Calling quotas: number of calls The user can limit to a maximum the number of calls to be sent per day, 0 indicates that there is no limit. The user can limit to a maximum the number of calls to be sent per hour, 0 indicates that there is no limit. The user can reset the call counter to zero. ¾ Dialout accounts: the user can add a new client account. For this, click on “account” and enter the parameters of the new client account (name, number, login, password…), then click on “add”. The system can manage several accounts. Page 15 Audemat-Aztec SA – Audemat-Aztec INC WEB: www.audemat-aztec.com - e-mail: [email protected] FM Monitoring Silver user’s manual 02/2008 4.6. PPP DIALIN Configuring the unit to take incoming calls: ¾ Dialin configuration: enables the incoming calls function. ¾ Account: the user configures login, password and network information. ¾ Modem configuration: the user selects the modem used (if necessary) and its features. The “filtering enabled” function is for filtering incoming calls (the incoming telephone line must be set in this case). ¾ Callers filtering: the user can enter a new account by clicking on “new account” and entering its parameters. This enables both authorized and unauthorized incoming calls to be managed. Page 16 Audemat-Aztec SA – Audemat-Aztec INC WEB: www.audemat-aztec.com - e-mail: [email protected] FM Monitoring Silver user’s manual 02/2008 4.7. SUPPORT Configuring the support system: ¾ System software update: for updating the system with the latest software version. Enter the patch file name into the window and click on “apply”, the update is automatic. ¾ System monitoring: by clicking on “view” the user can check the status of the system (temperature, ramdisk, etc). ¾ STOP/Restart FM Monitoring Silver: “Restart application”: this function enables the application to be started again, to reinitialize the parameters. The user simply clicks on restart. “Reboot equipment”: this function restarts the entire unit. “Power off equipment”: enables the FM Monitoring Silver to be switched off remotely. NOTE: the FM Monitoring silver cannot be switched on remotely. ¾ Default configuration: this function will allow the user to delete the present configuration and to reset the default configuration. Caution: all parameters as well as scripts and log files will be deleted. Page 17 Audemat-Aztec SA – Audemat-Aztec INC WEB: www.audemat-aztec.com - e-mail: [email protected] FM Monitoring Silver user’s manual 02/2008 4.8. Phone Alerts (Option) 4.8.1. Activation of the option 1/ First contact the commercial service to activate this option. Before calling, prepare the MAC ADDRESS of the equipment (in the tab “Network”). They will need it to send you the “.lic” file to activate the option. 2/ Connect the modem: We will find in the packaging the following modem with its accessories. Phone line Serial link Page 18 Audemat-Aztec SA – Audemat-Aztec INC WEB: www.audemat-aztec.com - e-mail: [email protected] Power Supply FM Monitoring Silver user’s manual 3/ Configuration ¾ Go in the tab “I/O Layout” and select “modem” in the COM1: ¾ Go in the tab “PPP Dialin” and select “modem” /”COM1”: Page 19 Audemat-Aztec SA – Audemat-Aztec INC WEB: www.audemat-aztec.com - e-mail: [email protected] 02/2008 FM Monitoring Silver user’s manual 02/2008 Ö Copy the “product key” available on the provided CD-Rom (please contact the commercial service): Phone Alert Ö Go to the menu “Help” of the FM Monitoring Silver application and click on “About”: 2 3 Ö Click on “Get option” on the line “ Phone alert”. 1 Ö Paste or write the « product key ». 2 Ö Then click on “Submit” to upgrade the equipment with this option 3 Ö Close the application and reboot the equipment. The message “yes” appears on the line “Phone Alert” (instead of “Get option”). . Page 20 Audemat-Aztec SA – Audemat-Aztec INC WEB: www.audemat-aztec.com - e-mail: [email protected] FM Monitoring Silver user’s manual 02/2008 6/ The status of the “phone alert” is now “TRUE” in the tab “Phone Alerts” of the embedded website of the FM Monitoring Silver . 4.8.2. Page description: ¾ Phone Alert Availability True: option is activated False: option is not active ¾ Identification Wave File It concerns the identification of the product. Page 21 Audemat-Aztec SA – Audemat-Aztec INC WEB: www.audemat-aztec.com - e-mail: [email protected] FM Monitoring Silver user’s manual ¾ 02/2008 Phone Alert Parameters: The parameters linked to alarm management via the telephone can be modified on this page. You can enable or disable alerts via phone. Enter the telephone number to be dialed in case of an alarm. The ‘Severity threshold’ is used to filter alarms according to their priority. Set the maximum number of retries in case the first attempt does not go through. Set the delay between retry attempts (minutes). The maximum number of retries is 20. Maximum interval between the retries is 60 minutes. It is therefore impossible to receive a voice alarm after 20 hours, this being sufficient considering that voice alarms are designed for emergency situations. The time given in messages is always in relation to the last 24 hours. Phone control parameters Phone alerts parameter 0223689 Don’t forget to click on update after the configuration On the HTML configuration page of the FM Monitoring Silver, activate the dial-out function in alarm and enter the number to be called. Let the other parameters per default. Launch ScriptEasy Software, create a script and send it to equipment (see Scripteasy user manual). Come back on the “Phone alerts” page. Page 22 Audemat-Aztec SA – Audemat-Aztec INC WEB: www.audemat-aztec.com - e-mail: [email protected] FM Monitoring Silver user’s manual Quick use of the creator module : create a new script In order to use following pages, JAVA software is necessary. Launch “Scripteasy”: • menu “File” • menu “New script” TAB EDIT : • Enter site name • Select « FM Monitoring Silver » type Note : Password and login are automatically integrated TAB EDIT : Then, enter “IP address” You can now create a new script and send it to the equipment. Go to the menu “Script”: “Send script to the equipment”. Page 23 Audemat-Aztec SA – Audemat-Aztec INC WEB: www.audemat-aztec.com - e-mail: [email protected] 02/2008 FM Monitoring Silver user’s manual 02/2008 Example: click on the 'ON' button: the alarm is activated and so is the relay. To choose the way the alarm is to be sent: Mail : sends an email Trap : sends an SNMP TRAP Log : writes in the log. In every case, the phone alarm is sent as well. With ‘none’, no alarm will be sent, including the phone alarm. . If necessary, choose whether the alarm should be sent at the beginning (ON), or at the end (OFF) or both at the beginning and end (ON/OFF). Finally, set the same severity as in FM Monitoring Silver dans le FM monitoring Silver (‘Severity threshold’ menu in the ‘Phone Alert Parameters’ section of the “Phone Alert” page). Page 24 Audemat-Aztec SA – Audemat-Aztec INC WEB: www.audemat-aztec.com - e-mail: [email protected] FM Monitoring Silver user’s manual 1) 02/2008 The alarm display in Scripteasy Object list Note : just the alarms are here (no relay). 2) You can associate a wav file to the alarm. Check by listening. 3) Launch ScriptEasy mode play and activate the alarm (by changing the state of the button action). 4) The FM Monitoring Silver should dial the configured number and give the hour and the content of the associated wave file. Deactivate the alarm on ScriptEasy. ¾ Phone Control Parameter As the control system via DTMF and the pppd server use the same module (vgetty) , the working of the control system and of PPP Dialin have to be validated together. 5) Put « Dial in enabled » on “no” and « Dial in DTMF control enabled » on “no”. A Dial out of the FM MONITORING SILVER shoul not work. 6) Put « Dial in enabled » on “no” and « Dial in DTMF control enabled » on “yes”. The DTMF menu shoud be accessible. 7) Put « Dial in enabled » on “yes” and « Dial in DTMF control enabled » on “no”. The connection on the FM MONITORING SILVER is possible via a PPP connection. 8) Put « Dial in enabled » on “yes” and « Dial in DTMF control enabled » on “yes”. The menu DTMF is accessible and the connection on the FM MONITORING SILVER via PPP connection too. Validate the DTMF menu: the number from [0] to [9] and the symbols [*] and [#] are the DTMF signals to use. Page 25 Audemat-Aztec SA – Audemat-Aztec INC WEB: www.audemat-aztec.com - e-mail: [email protected] FM Monitoring Silver user’s manual 02/2008 DTMF menu diagram: DTMF menu process steps DTMF menu diagram Check that an invalid value for the ScriptEasy action object sends a non validity message. Check that the equipment sends a non reception message after waiting or proposes choices again (if no answer after 3 times, the equipment disconnects automatically). Voice messages indicate, by default, the alarm number corresponding to the associated object identification number in ScriptEasy (Script Id) as well as the event time. List and contents of the audio files; these files can be downloaded by an administrator from the FTP server (/spool/voice/prompts): This list corresponds to the different messages in the DTMF menu. "ActionDone.wav" "ActionFailed.wav" "ActionMenu1.wav" "ActionMenu2.wav" "ActionMenu3.wav" "ActionMenu4.wav" "alarm.wav" "AlarmReportGreetings.wav" "blank.wav" "CantConnectScriptEasy.wav" "CommandNotReceived.wav" "EnterInputNumber.wav" "EnterOutputNumber.wav" "EnterScriptEasyIDnumber.wav" The action has been completed The action failed To use an output relay, press 1 To use ScriptEasy action object, press 2 To restart ScriptEasy, press 3 To reboot, press 4 Alarm This is an automatic alarm report from “” Warning, cannot connect to ScriptEasy I’m sorry, I don’t understand that command Enter Input number Enter Output number Enter ScriptEasy ID number Page 26 Audemat-Aztec SA – Audemat-Aztec INC WEB: www.audemat-aztec.com - e-mail: [email protected] FM Monitoring Silver user’s manual "EnterSlotNumber.wav" "Goodbye.wav" "happened_at.wav" "IncomingGreetings.wav" "InputNumber.wav" "InvalidInputSlot.wav" "InvalidNumber.wav" "InvalidOutputSlot.wav" "InvalidScriptEasyID.wav" "IsOff.wav" "IsOn.wav" "MainMenu1.wav" "MainMenu2.wav" "NoAlarm.wav" "NoScriptEasyActionObject.wav" "OnSlotNumber.wav" "OutputNumber.wav" “PressStarToBegin.wav” "RebootingNow.wav" "ReportMenu1.wav" "ReportMenu2.wav" "ReportMenu3.wav" "ToCancelPressStar.wav" "ToListenAgainPress1.wav" "ToListenAgainPressStar.wav" "ToListenMessagePressStar.wav" "ToReturnToMainMenuPress0.wav" "ToSwitchOffOn.wav" "ToValidatePress#.wav" 02/2008 Enter Slot Number Goodbye Happened at Welcome to Input number That is not an input slot Invalid Number That is not an output slot That is not a valid ScriptEasy object ID Is off Is on To go to the report status menu, press 1 To go to the action status menu, press 2 No ScriptEasy alarm object is defined No ScriptEasy action object is defined In slot number Output number press star to begin Rebooting now To hear the ScriptEasy alarm, press 1 To hear the output status, press 2 To hear the input status, press 3 To cancel press star To repeat, press 1. To listen to this menu again, press star To listen to the message, press star To return to the main menu, press 0 To switch off, press 1. To switch on, press 2. To confirm press pound. The audio files are in wav 8000 Hz, 16 bits, mono format. To generate the hours of the alarms, you have to store the audio files of all numbers between 0 and 59 and the numbers between 0 and 23 following by “hours”. Page 27 Audemat-Aztec SA – Audemat-Aztec INC WEB: www.audemat-aztec.com - e-mail: [email protected] FM Monitoring Silver user’s manual 4.9. 02/2008 WEBCAM The webcam support is only compatible with the webcams sold by Audemat-Aztec. The webcam is detected on starting. A re-detection can be forced after a connection by the « Recheck » button. The different options that you can configure are: - Webcam enabled: activate or deactivate the webcam support. - Motion sensitivity: sensitivity). sensitivity of the movement detection from 1000 to 32000 (“1000” is the higher - Mark motion location : circles the zone with a red frame (where the movement has been detected) - Image quality: from 50 to 100 (100 is the best quality). - Time between snapshots: minimum time between 2 savings of snapshots. - Erase snapshots: purge automatically files (in days). Snapshots can be uploaded onto a computer by using a FTP client (File Transfer Protocol), software not supplied by Audemat-Aztec. FTP software needs at least the following information: • IP Address of the FM Monitoring Silver • User name : record (see tab “User” in the embedded website) • Password : record Page 28 Audemat-Aztec SA – Audemat-Aztec INC WEB: www.audemat-aztec.com - e-mail: [email protected] FM Monitoring Silver user’s manual 4.10. 02/2008 SMTP mail client Configuring email parameters ¾ Enables the email account and addresses to be configured. ¾ The “send mail every” function enables the user to send messages in a batch every “X” minutes if desired. When waiting for the time chosen by the user, the system stocks the messages. ¾ Ask the network administrator for the SMTP parameters (note that you must have a valid dns setup if you want to use smtp host name. Instead you can use ‘dotted’ ip address xxx.xxx.xxx.xxx) Page 29 Audemat-Aztec SA – Audemat-Aztec INC WEB: www.audemat-aztec.com - e-mail: [email protected] FM Monitoring Silver user’s manual 4.11. 02/2008 SNMP AGENT ¾ Configuring SNMP parameters. The equipment enables multiple addresses to be configured for notifications. However, only the Main Manager has the authority to acknowledge notifications The user has the possibility of downloading the FM Monitoring Silver’s “MIB”. ¾ Configuring SNMP traps The equipment sends “Informs” traps which permit an automatic acknowledgement from the Manager. Life sign Trap/ Minute between life signs: sending life sign trap every “X” minutes. ¾ SNMP TEST Enables the user to carry out a test according to the trap setting. Page 30 Audemat-Aztec SA – Audemat-Aztec INC WEB: www.audemat-aztec.com - e-mail: [email protected] FM Monitoring Silver user’s manual 4.12. 02/2008 SNMP NOTIFICATIONS . ¾ SNMP Actions You have the possibility to replay the pending traps which don’t have been acknowledged. And you have the possibility to delete all the pending traps to empty the pending list ¾ Trap configuration Permits for each kind of trap to define its own parameters. In the “Action” column: o “Do not send”: no sending. Useful if some sending alerts have to be temporarily suspended. o “Send and Forget”: standard SNMP mode, no acknowledgement expected, notifications are destroyed immediately after being sent o “Resend until acknowledged”: standard mode of the FM Monitoring Silver alarms. Notifications are re-transmitted until acknowledgement has been received. Page 31 Audemat-Aztec SA – Audemat-Aztec INC WEB: www.audemat-aztec.com - e-mail: [email protected] FM Monitoring Silver user’s manual 02/2008 You can define the maximum number of trap transmission and the waiting time of the acknowledgement (only valid in the “resend until acknowledgement” mode). If the acknowledgement does not arrive following <n> attempts, the notification is “frozen”, that-is-to-say, it is put on standby until a new notification of the same type occurs. It can also be manually “unfrozen” using the “Replay Traps” button from the “notifications” page. It is important to note that non transmitted notifications are not lost. They are kept to be re-transmitted when conditions are once again permitting. When a new notification occurs the “frozen” notification is re-activated, and a cycle of sending attempts starts up again. You can associate a level of alarm severity for the trap to have a specific processing from the Manager. Page 32 Audemat-Aztec SA – Audemat-Aztec INC WEB: www.audemat-aztec.com - e-mail: [email protected] FM Monitoring Silver user’s manual 4.13. 02/2008 EVENT LOG Review of events The user can display the data in several different ways: Ö Checking or unchecking the “System” box toggles the display of system alarms, the “ScriptEasy” box does the same for application alarms, likewise the “I/O” box for input-output alarms, and a “Monitoring” box for radio alarms. The number of lines to display can also be selected. Ö The user can also filter the events according to their severity (0 being the highest level of severity). Click on “refresh” display the selection: 0 : urgent 1 : alert 2 : critical 3 : error 4 : caution 5 : note 6 : information Example: if 3 “error” is chosen, for example, the unit will display all the alarms from 0 to 3. The T and M columns permit to see the state of the trap and/or the associated mail. Page 33 Audemat-Aztec SA – Audemat-Aztec INC WEB: www.audemat-aztec.com - e-mail: [email protected] FM Monitoring Silver user’s manual 4.14. 02/2008 ALARMS Green indicates that the alarms are over or not active. Orange indicates the beginning of an alarm. The error condition stays active. ¾ This table shows the current state of the script alarm objects while operating the equipment Details of table fields ScriptEasyAlarmsidScriptObject ScriptEasyAlarmsName ScriptEasyAlarmsseverity ScriptEasyAlarmsValue ScriptEasyEventTime Object identifier in the script Number of alarm associated with this object Severity affected to alarm 1 = INFO,ON 2 = ON/OFF,BEGIN 3 = ON/OFF,END 4 = INFO,OFF Date and time of last event Page 34 Audemat-Aztec SA – Audemat-Aztec INC WEB: www.audemat-aztec.com - e-mail: [email protected] FM Monitoring Silver user’s manual 4.15. I/O LAYOUTS ¾ Motherboard: the user can view the type of boards (relay, digital) and their place on the used slot. ¾ Com port: COM1 is included in the default factory configuration. o Modem: configures serial port to used as modem port. o Console: configures serial port as console port (by default). o Unset: non attributed serial port (inactive). o Support: support port. Only used by Audemat-Aztec. o Tunneling: configures serial port for TCP/IP tunneling. To enable dynamic addition of serial ports, contact Audemat-Aztec for compatibilities. Page 35 Audemat-Aztec SA – Audemat-Aztec INC WEB: www.audemat-aztec.com - e-mail: [email protected] 02/2008 FM Monitoring Silver user’s manual 4.16. DOWNLOAD Ö This page enables you to : o download the portal application for the FM Monitoring Silver : o download the scripteasy creator application (see chapter 6) Page 36 Audemat-Aztec SA – Audemat-Aztec INC WEB: www.audemat-aztec.com - e-mail: [email protected] 02/2008 FM Monitoring Silver user’s manual 02/2008 5. 5.1. CONFIGURATION USING THE FM MONITORING SILVER APPLICATION You are still on the embedded website: click on the tab “Downloads” in the main menu (see chapter 4.16). Download the application “FM Monitoring silver application”. Save the application on your desk: install in c:\Program Files\AUDEMAT-AZTEC\FM Monitoring Silver 1.2. Double click on the file “FM-Monitoring-Silver.exe” to launch the application. Enter you IP address, Login and password (default is Admin/admin). Click “OK” and save your login information for future use. FM Monitoring Silver Application will connect with the unit. Once communication is established, the software will access the data in the unit. Page 37 Audemat-Aztec SA – Audemat-Aztec INC WEB: www.audemat-aztec.com - e-mail: [email protected] FM Monitoring Silver user’s manual 5.2. Adding New Stations to the Monitoring List Click a blank spot in the “Channels” box or use “New Channel” button: Page 38 Audemat-Aztec SA – Audemat-Aztec INC WEB: www.audemat-aztec.com - e-mail: [email protected] 02/2008 FM Monitoring Silver user’s manual 02/2008 This screen will display: You can enter the frequency FM or AM and name of the station you wish to add manually, or by clicking it directly on the scan of the market in the graph above. To add a station to your monitoring list, just click on it and then click ‘Create Channel’. NOTE: If no scan has yet been performed, click ‘rescan’ to initiate a new scan. Page 39 Audemat-Aztec SA – Audemat-Aztec INC WEB: www.audemat-aztec.com - e-mail: [email protected] FM Monitoring Silver user’s manual 5.3. 02/2008 Basic Configuration The General Channel Configuration window is where you enter the basic information about the stations you want the unit to be able to receive and analyze. Input the frequency, and give the channel a name. You may add optional information about the transmitter and network if desired. Once you have the station information entered, you may select which parts of the signal you wish to monitor. For each portion you select, another tab for that part of the signal appears across the top of the window. You may also set the sensitivity to silence on the main audio channel, and assign a priority to the station, which adjusts how often the FM Monitoring Silver will include that station in its scanning. You may also set or change the monitoring status of the station in the ‘Channel Monitoring Control’ section. Ö ‘Active Monitoring’ is a continuous scanning of the station, with alarms for technical personnel. Ö ‘Measure without alarm’ will scan the station and keep track of the readings, but not alert on out-of tolerance conditions. Ö Finally, if you do not want this particular station to be a part of the regular monitoring cycle, select the ‘Standby’ box. This will leave the station configured, so that you may manually monitor when you choose, but the FM Monitoring silver will not generate alarms or automatically scan that station or record its measurements on a regular basis. Click ‘Save Channel’ to store the configuration in memory, and ‘Add’ to configure another station. If, at some point, you wish to delete a station from the configured files, there is a ‘Delete’ button for that purpose. Page 40 Audemat-Aztec SA – Audemat-Aztec INC WEB: www.audemat-aztec.com - e-mail: [email protected] FM Monitoring Silver user’s manual 5.3.1. 02/2008 RF Level Configuration The primary feature of all of the Configuration tabs within FM Monitoring Silver is the interactive graph near the top of the window. This serves a dual function, both displaying the readings gathered for that parameter, and allowing the user to change the settings by dragging the arrows associated with each level to a new value. The main parameter measured is the RF signal. Set the ‘Nominal level’ to the desired value by dragging the line on the chart or entering the appropriate number in the associated data box on the right. Once data has been collected for this particular station, you may also click the ‘Set nominal level to average level’ button to automatically set the nominal level to the average measured value for that station. Set the ‘Low’ value to the desired distance below the nominal level, by dragging the line or entering the value in the data box. This is the threshold that will trigger an alarm or other action by the FM Monitoring Silver. The ‘Hysteresis’ value, indicated by the second, shorter lines within the defined ‘High’ and ‘Low’ limits, establishes a level at which the unit will recover from an alarm state. In other words, if the signal dips below the ‘Low’ threshold, the level must come up above the ‘Low’ threshold plus the Hysteresis differential before the unit will cancel the alarm. This prevents the generation of dozens of alarms and log events by levels that are fluctuating at or near the alarm thresholds. You may also adjust Hysteresis by entering values in the data boxes or dragging the smaller lines to the desired distance from their associated trigger lines. Remember to click ‘Apply’ to save your changes before navigating to another tab or station! Page 41 Audemat-Aztec SA – Audemat-Aztec INC WEB: www.audemat-aztec.com - e-mail: [email protected] FM Monitoring Silver user’s manual 02/2008 The lower portion of the FM Monitoring Silver page concerns intermittent alarms. For each of these parameters, you can decide whether you want an alarm sent or not, and if there is an intermittent or transient excursion beyond the trigger level, you may determine how many such excursions over a given time period would constitute an event, then set whether or not you wanted that event to trigger an alarm. All events may be accessed or analyzed through the ‘Events log’ page of the embedded website, or the ‘Current Alarms’ page of the FM Monitoring Silver application. You may also define a ‘Time out’ which will insert a delay between an out of tolerance reading and the generation of an alarm, which prevents transient and momentary variations from generating nuisance alarms. Click ‘Save Channel’ to save the changes before selecting another tab or station. Page 42 Audemat-Aztec SA – Audemat-Aztec INC WEB: www.audemat-aztec.com - e-mail: [email protected] FM Monitoring Silver user’s manual 5.3.2. 02/2008 Analog Audio configuration Set the trigger levels; establish which conditions will send alarms, and set the event and time parameters for intermittent events. Click ‘Save Channel’ to save the changes before selecting another tab or station. Page 43 Audemat-Aztec SA – Audemat-Aztec INC WEB: www.audemat-aztec.com - e-mail: [email protected] FM Monitoring Silver user’s manual 5.3.3. 02/2008 MPX Monitoring configuration The next tab to configure is MPX Monitoring Configuration: The FM Monitoring Silver can also keep track of a stations modulation: Simply set the high and low levels where you want them, decide whether or not you want to trigger alarms at those levels. Click ‘Save Channel’ to lock your changes before moving on. Page 44 Audemat-Aztec SA – Audemat-Aztec INC WEB: www.audemat-aztec.com - e-mail: [email protected] FM Monitoring Silver user’s manual 5.3.4. Stereo Monitoring configuration This function permits to configure the pilots monitoring and the stereo presence. See chapter 5.3.1 to have more details about Thresholds and Hysteresis. Page 45 Audemat-Aztec SA – Audemat-Aztec INC WEB: www.audemat-aztec.com - e-mail: [email protected] 02/2008 FM Monitoring Silver user’s manual 5.3.5. 02/2008 RDS Monitoring configuration Note : to activate this tab you must first click on the box “RDS Monitoring” in the “Basic Configuration” page. This function permits to configure the signal RDS monitoring. Click ‘Save Channel’ to lock your changes before moving on. Page 46 Audemat-Aztec SA – Audemat-Aztec INC WEB: www.audemat-aztec.com - e-mail: [email protected] FM Monitoring Silver user’s manual 5.3.6. 02/2008 RDS Data Monitoring configuration Note : to activate this tab you must first click on the box “RDS Monitoring” in the “Basic Configuration” page. 1 You can here monitor the transmitted data and the error rate threshold. To monitor the parameters (PI, PS, group..) click on the boxes to activate the function “send alarm”. Then enter the associated parameters. The function “Full RDS parameters” is an option (1) : to activate it please contact the commercial service. You will receive a key to unlock the option (See chapter about the menu “Help”). Here you can set the equipment to ‘notice’ when there is a change in PI code, PS code, PTY, or AID values and whether a station is broadcasting the (TA), or Traffic Announcement flag. You can detect a missing group in the group sequence by selecting that box on the left, then checking which groups you want to monitor in the section near the bottom of the screen. You can monitor the PS in two different ways. If the station uses static PS, you can set the GE HD to alert you if it changes. If the station employs dynamic scrolling PS, you can set the unit to sound an alarm if the PS doesn’t change within a specified time! As with all the other tabs, clicking ‘Apply’ before you navigate to another tab or select another station to configure locks in your changes. Page 47 Audemat-Aztec SA – Audemat-Aztec INC WEB: www.audemat-aztec.com - e-mail: [email protected] FM Monitoring Silver user’s manual 5.4. 02/2008 Monitoring Tab 5.4.1. Scanning In addition to the monitoring of the configured FM channels, FM Monitoring Silver is able to perform an automatic scanning of the local FM base band at a fixed time every day or by time interval. The unit records the minimum and maximum RF levels of the carriers and declares eventually an alarm (if validated) in case of the detection of a change in the RF level. The monitoring of the different channels is never interrupted during the acquisition of the scanning. Before validating the scanning alarm function, a reference scanning has to be carried out by the unit. Page 48 Audemat-Aztec SA – Audemat-Aztec INC WEB: www.audemat-aztec.com - e-mail: [email protected] FM Monitoring Silver user’s manual 5.4.2. 02/2008 Recording This screen allows the following functionalities: • planning of 10 daily recordings • definition of the quality of recording • launching of manual recording • configuration of the automatic erase A folder is automatically created when a record is taken. Folder name is the date (YYYYMMDD). Of course all the records made on the same day are saved in this folder. The format of the name of the audio file is as follow : AB_YYYYMMDD_HHMMSS_TTT_FFFF_Comment.mp3 AB : bitrate Page 49 Audemat-Aztec SA – Audemat-Aztec INC WEB: www.audemat-aztec.com - e-mail: [email protected] FM Monitoring Silver user’s manual 02/2008 AL : low bitrate AH :high bitrate YYYYMMDD : Date of the beginning of recording HHMMSS : Time of the beginning of recording TTT : recording type PER : periodical MAN : manual FFFF: frequency Comment : file’s complementary name. ¾ Uploading recording via FTP : Audio recording can be uploaded onto a computer by using a FTP client (File Transfer Protocol), software not supplied by Audemat-Aztec. FTP software needs at least the following information: • IP Address of the FM Monitoring Silver • User name : record (see tab “User” in the embedded website) • Password : record Page 50 Audemat-Aztec SA – Audemat-Aztec INC WEB: www.audemat-aztec.com - e-mail: [email protected] FM Monitoring Silver user’s manual 5.5. 02/2008 READINGS 5.5.1. Analog Radio In the upper left hand corner of the FM Monitoring Silver application, there is a button marked ‘Readings’. Click that to enter the ‘Readings’ or Viewing mode. You accede to this screen by default. The first screen to appear is the ‘Analog Radio Channel Readings’ page. Simply select the station you wish to view from the list of configured stations on the drop-down menu in the right center part of the screen, and choose to view the last hour or last days worth of readings. The check boxes to the right of the graph allow you to select which measurements to display, and the chart beneath the graph gives you the readings over the time period in text form. You can also drag your cursor over the graph, and the program will highlight the readings recorded for that exact time in the chart below. Page 51 Audemat-Aztec SA – Audemat-Aztec INC WEB: www.audemat-aztec.com - e-mail: [email protected] FM Monitoring Silver user’s manual 5.5.2. 02/2008 FM Analog Scan Selecting the ‘FM Measurements’ tab opens the following window: Simply select the station you wish to view from the list of configured stations on the drop-down menu in the lower left corner of the screen, choose to view the last hour or last days worth of readings and click ‘Refresh’. The check boxes to the right of the graph allow you to select which measurements to display, and the chart beneath the graph gives you the readings over the time period in text form. Page 52 Audemat-Aztec SA – Audemat-Aztec INC WEB: www.audemat-aztec.com - e-mail: [email protected] FM Monitoring Silver user’s manual 5.5.3. 02/2008 FM Market Selecting the ‘FM Market’ tab opens the following window: The FM scanning application for the FM Monitoring Silver is a way to quickly keep tabs on the entire market. You can run a current or reference scanning. Page 53 Audemat-Aztec SA – Audemat-Aztec INC WEB: www.audemat-aztec.com - e-mail: [email protected] FM Monitoring Silver user’s manual 5.6. 02/2008 REALTIME 5.6.1. FM Real-time measurements Selecting the ‘FM Real-time measurements’ tab opens the following window: (1) The difference with “FM Measurements” is that these measurements are instantaneous, which means you can select any frequency on the FM band to measure. Just enter the desired frequency in the data box in the lower left of the screen and click ‘play’ (1). The ‘Lock’ button will hold the tuner on that frequency for better response, but that action will temporarily suspend all of your automatic monitoring. As with the measurements over time windows, you can select or deselect the portions of the signal you want to see, and read the text versions of the graph lines in the chart at the bottom. Page 54 Audemat-Aztec SA – Audemat-Aztec INC WEB: www.audemat-aztec.com - e-mail: [email protected] FM Monitoring Silver user’s manual 5.6.2. 02/2008 Audio Streaming Clicking on the ‘Audio Streaming’ tab in the FM Monitoring silver application will display this screen: (1) Simply enter the frequency you wish to listen and click on “Play”. ¾ ¾ You can use the internal player by clicking on “Play” Or you can use an external player (Winamp…) (1). Your player must be associated to .m3u files. Page 55 Audemat-Aztec SA – Audemat-Aztec INC WEB: www.audemat-aztec.com - e-mail: [email protected] FM Monitoring Silver user’s manual 5.7. “Help” Menu To see the equipment configuration, go to the menu « About » of the application: Options can be updated with a key provided by the commercial service. Contact them to obtain the information. Page 56 Audemat-Aztec SA – Audemat-Aztec INC WEB: www.audemat-aztec.com - e-mail: [email protected] 02/2008 FM Monitoring Silver user’s manual 5.7.1. 02/2008 Installation of the Phone Alert option ª Copy the “product key” available on the provided CD-Rom (please contact the commercial service): Phone Alert ª Go to the menu “Help” of the FM Monitoring Silver application and click on “About”: 2 3 ª Click on “Get option” on the line “ Phone alert”. 1 ª Paste or write the « product key ». 2 ª Then click on “Submit” to upgrade the equipment with this option 3 ª Close the application and reboot the equipment. The message “yes” appears on the line “Phone Alert” (instead of “Get option”). Page 57 Audemat-Aztec SA – Audemat-Aztec INC WEB: www.audemat-aztec.com - e-mail: [email protected] FM Monitoring Silver user’s manual 5.7.2. 02/2008 Installation of the Full RDS Option ª Copy the “product key” available on the provided CD-Rom (please contact the commercial service): FULL RDS ª Go to the menu “Help” of the FM Monitoring Silver application and click on “About”: 2 3 ª Click on “Get option” on the line “Full RDS”. 1 ª Paste or write the « product key ». 2 ª Then click on “Submit” to upgrade the equipment with this option 3 ª Close the application and reboot the equipment. The message “yes” appears on the line “Full RDS” (instead of “Get option”). Page 58 Audemat-Aztec SA – Audemat-Aztec INC WEB: www.audemat-aztec.com - e-mail: [email protected] FM Monitoring Silver user’s manual 5.7.3. 02/2008 Installation of the Script Viewer ª Copy the “product key” available on the provided CD-Rom (please contact the commercial service): Script Viewer ª Go to the menu “Help” of the FM Monitoring Silver application and click on “About”: 2 3 ª Click on “Get option” on the line “Script Viewer”. 1 ª Paste or write the « product key ». 2 ª Then click on “Submit” to upgrade the equipment with this option 3 ª Close the application and reboot the equipment. The message “yes” appears on the line “Script Viewer” (instead of “Get option”). => see appendix A to read the manual of this option. 5.8. “Look and Feel” Menu Enables the user to change the look of the screen. Page 59 Audemat-Aztec SA – Audemat-Aztec INC WEB: www.audemat-aztec.com - e-mail: [email protected] FM Monitoring Silver user’s manual 02/2008 6. 6.1. SCRIPTEASY: CREATOR MODULE Functionalities 6.1.1. ScriptEasy When you launch the software, you obtain the following screen: Double-click on the scripteasy link, you can also define conditions and alarms and enable scripts…. Menu Tool bar Office Status bar ScriptEasy consists of 4 display areas, as represented above. Each one develops according to both the equipment for which the script has been constructed and the running mode (creation or reading). • Menu bar: It enables access to script processing functionalities • Tool bar: It contains all the objects which can be placed on the script sheet • Office: This is the work area in which the script sheets will be created • Status bar: It gives indications concerning the current script. Page 60 Audemat-Aztec SA – Audemat-Aztec INC WEB: www.audemat-aztec.com - e-mail: [email protected] FM Monitoring Silver user’s manual 6.1.2. 02/2008 Scripts 6.1.2.1 Script window / Script sheet Script window Script sheet Several scripts, for various devices, can be opened on the office at the same time. Each internal office window contains a unique sheet of script. That-is-to-say, one window will correspond only to the script of one particular piece of equipment and to no other. Click on the window’s band or on the script sheet to select. Menus are then updated according to the type of equipment and the possibilities which are associated with it. 6.1.2.2 Creating a new script New script Selecting "New Script" from the File menu will activate the creation of a new script. During this creation, a window will appear, enabling the script to be configured so that it is compatible with its destination equipment: Page 61 Audemat-Aztec SA – Audemat-Aztec INC WEB: www.audemat-aztec.com - e-mail: [email protected] FM Monitoring Silver user’s manual 02/2008 Fields concerning the number of available inputs and outputs will no longer be modifiable to avoid risks of incoherence in the scripts. On the other hand, neither the IP address nor the site name, user name or password are essential when creating and compiling the script. "EDIT" and "USER" tabs in the configuration dialogue box are invariant according to equipment; however other configuration tabs may appear or disappear. If, for any reason, the window goes into the background, simply click on the script sheet and it will once again be displayed in the foreground! 6.1.3. Creating objects Available objects are all found in the tool bar. To select one of them, click on it (press, then release button on left of mouse). By moving the mouse on the selected script sheet (the one whose script window has a coloured band), a form representing the outline of this object moves under the mouse’s cursor. To finish placing the object, simply click at the desired place on the sheet. Its image will then be represented. Page 62 Audemat-Aztec SA – Audemat-Aztec INC WEB: www.audemat-aztec.com - e-mail: [email protected] FM Monitoring Silver user’s manual 6.1.4. 02/2008 CREATING LINKS Ö Anchors SORTIE S ENTREES Each object has anchors and a graphical part. There are two types of anchors: input anchors and one output anchor. Ex. : OBJET Ancres d'entrées Sortie Fig. 8 Input anchors can only receive one link! The output anchor can receive several links! Ö Linking 2 objects It will be COMPULSORY for links to be made between one output anchor and one or several input anchors. For this, click on the first anchor to be linked, move the mouse (the link must be drawn), then click on the second anchor to be linked. Page 63 Audemat-Aztec SA – Audemat-Aztec INC WEB: www.audemat-aztec.com - e-mail: [email protected] FM Monitoring Silver user’s manual 6.1.5. 02/2008 MOVING OBJECTS Ö Moving only one object Objects are moved using the standard Windows “drag and drop” mode: holding the mouse’s left button pressed on an object and across the sheet. When the button is released, the object will reappear in its new place. Page 64 Audemat-Aztec SA – Audemat-Aztec INC WEB: www.audemat-aztec.com - e-mail: [email protected] FM Monitoring Silver user’s manual 02/2008 Ö Moving a group of objects To move a group of objects, begin by selecting them. Trace a rectangle around the desired objects with the mouse. Only those which are completely contained within the area will be selected. Once the area has been traced, position the mouse in an empty space within the area (caution: not on an object), then move it, keeping the left button pressed ("drag and drop "). Page 65 Audemat-Aztec SA – Audemat-Aztec INC WEB: www.audemat-aztec.com - e-mail: [email protected] FM Monitoring Silver user’s manual 6.1.6. 02/2008 COPY / PASTE Ö Copy To copy an object or a group of objects, select them in the same way as when moving objects, then click with the mouse’s right button in an empty space within the area; a contextual menu will appear: Now click on "Copy" to copy the objects and links contained in the area. Ö Paste Copied objects can now be pasted either onto the same script sheet or onto a different one. Be careful to note the number of available inputs and outputs on the new script as well as the equipment’s possibilities; nothing is checked at this stage! For example, it is not possible to manage a script containing GoldenEagle alarms in any REMOTE CONTROL SILVER type of equipment. To paste objects, first click with the mouse’s left button where you want to paste them, and then click with the right button to see the contextual menu and select "Paste". Object numbers will be automatically re-allocated according to possibilities. No invalid object or link will be pasted and, if necessary, an information window concerning these errors will appear. Page 66 Audemat-Aztec SA – Audemat-Aztec INC WEB: www.audemat-aztec.com - e-mail: [email protected] FM Monitoring Silver user’s manual 6.1.7. 02/2008 SAVE FORMAT The script’s graphic data are saved in text format. Files created in this way have the «*.sio" extension. They must definitely not be modified manually, as any modification could make them illegible for ScriptEasy. 6.1.8. SCRIPT OPENING Ö Opening a script from local disk This choice will activate the opening of the dialogue box for file selection; the script will be loaded after one of these has been selected. Ö Opening a script from equipment As it is only possible for the equipment to contain one script at one time, all scripts to be saved on i twill have the same name. It is therefore not necessary to select any particular file. Simply indicate the equipment’s IP address, a user’s name and a valid password in the connection window. Downloading will be carried out directly. It is then possible to work on the script and to save it on the hard disk. No modification can be done to the equipment’s script before any reconstruction and transfer have taken place. Once the script has been uploaded, communication between ScriptEasy and the remote site will be closed. Page 67 Audemat-Aztec SA – Audemat-Aztec INC WEB: www.audemat-aztec.com - e-mail: [email protected] FM Monitoring Silver user’s manual 6.2. 02/2008 Scripteasy Menus 6.2.1. File The "File" menu enables any file access to be managed for creating, uploading and saving under a new name ("Save as") or on the same file ("Save"). The "Save" command is only accessible when the script has been previously uploaded from the hard disk or saved on it. The “Import from equipment” function enables scripts to be picked up on the “former generation” equipment to be imported. 6.2.2. Script To create a new script, go to “file/new script” and configure the equipment’s IP address in the property function before sending it to the equipment (“send script to equipment”). Page 68 Audemat-Aztec SA – Audemat-Aztec INC WEB: www.audemat-aztec.com - e-mail: [email protected] FM Monitoring Silver user’s manual 6.2.3. 02/2008 Tools Ö Refresh display When mistaking commands or making other errors, some links or objects may disappear from the display. With this function, the validity of objects, links and their interactions can be controlled, so as to display them again or delete them, thereby guaranteeing their correct running in the script. Ö Simulation With ScriptEasy, changes in input states can be simulated to be able to control the script’s correct running. By default the simulation mode is disabled to accelerate the script design. However, this mode can be activated at any moment and is independent of each opened script. Ö Auto-refresh To avoid moving invalid objects and links over the script, the control mode is activated as a background task. However, in order to accelerate the process during the design of a large script, it can be disabled. Even disabled, the control will have to be carried out during script construction, before sending it into the equipment, so as to avoid any dysfunction. Ö Channel Name Synchronization (CF 5.2.5) Ö Get API objects from equipment This is for picking up objects previously created on the equipment in an API script. Page 69 Audemat-Aztec SA – Audemat-Aztec INC WEB: www.audemat-aztec.com - e-mail: [email protected] FM Monitoring Silver user’s manual 6.2.4. 02/2008 Edit Ö Display Each tool bar can be displayed, or not, simply by selecting from the "Display" menu. The "Frames" menu enables open windows to be viewed on the ScriptEasy office so as to display them, if necessary, in the foreground. There is a difference between script windows and object properties’ windows. Ö Frames This menu enables all the open windows to be listed on the ScriptEasy office. It is possible to go from one Page 70 Audemat-Aztec SA – Audemat-Aztec INC WEB: www.audemat-aztec.com - e-mail: [email protected] FM Monitoring Silver user’s manual 02/2008 Ö Objects "Objects" is for displaying the list of all objects displayed on the scriptsheet as well as their features: It is now possible to filter these objects and their features by ticking or not the suggested options and clicking the "Apply" button. Click “Close” to close the filter window. Page 71 Audemat-Aztec SA – Audemat-Aztec INC WEB: www.audemat-aztec.com - e-mail: [email protected] FM Monitoring Silver user’s manual 02/2008 It is possible to enlarge the window and columns for better legibility. It is also possible to move the columns on the table. Ö Links This menu enables the link list table to be displayed. It contains information on the objects that are linked. Each link can only link two separate objects. Page 72 Audemat-Aztec SA – Audemat-Aztec INC WEB: www.audemat-aztec.com - e-mail: [email protected] FM Monitoring Silver user’s manual 6.2.5. 02/2008 Equipment Selecting "Properties" enables the equipment’s configuration window to be displayed again. Some non modifiable fields will be in grey. The other fields can be edited. Modifiable values are as follows: • site name • equipment’s IP address • user’s name • user’s password • size of script sheet Page 73 Audemat-Aztec SA – Audemat-Aztec INC WEB: www.audemat-aztec.com - e-mail: [email protected] FM Monitoring Silver user’s manual 02/2008 6.3. SCRIPTEASY’S CONTEXTUAL MENUS 6.3.1. Object contextual menu Each object reacts to the mouse. As it goes over them it activates the display of selection angles, as well as changes in anchor colours. When the mouse skims over the object, a right click opens the contextual menu corresponding to the objects: Ö View Objects This displays the list of objects. It is also available through the "Edit" menu. Ö View Links This displays the list of links. It is also available through the "Edit" menu. Ö Delete This deletes the concerned object as well as the links which may link it to other objects. When deleting an object or a link, research for a non valid object is launched. A window giving information on modifications brought to the script may appear if some of the objects are not valid. Ö Properties This displays the properties window for the concerned object. Ö Tags properties This function is used for the viewer. It enables an object or a group of objects to be given a name by selecting this object or this group so as to be able to filter in the viewer. Ö Cancel This closes the contextual menu without any action. Page 74 Audemat-Aztec SA – Audemat-Aztec INC WEB: www.audemat-aztec.com - e-mail: [email protected] FM Monitoring Silver user’s manual 6.3.2. 02/2008 Script sheet’s contextual menu Ö Copy This item is activated when a group of objects has been selected on the script sheet. Ö Paste This item enables previously "copied" objects to be pasted onto the script sheet. Ö Refresh This enables a validity control of objects and links present on the script to be manually activated. Ö Cancel This closes the contextual menu without out any action. Ö Channel Name Synchronization Equipment monitored channels may have a configured explicit name. These names are stocked in MANAGER. To have more legible scripts, ScriptEasy enables channel names to be recovered in two different ways: by MANAGER connection by opening an "ini" file, previously saved on hard disk. Before the station names can be synchronized, it is necessary to check that an IP address has been referenced in script preferences. Page 75 Audemat-Aztec SA – Audemat-Aztec INC WEB: www.audemat-aztec.com - e-mail: [email protected] FM Monitoring Silver user’s manual 02/2008 Ö Events Name Synchronization As for the Channel name synchronization, this function enables names of alarm objects to be synchronized. Synchronization can now be carried out. D Synchronization with MANAGER: MANAGER IP address A specific port can be added to the IP address as follows: 192.168.0.130:90 ScriptEasy will now be connected to port 90. Once synchronization is finished, the data can be saved in an "ini" file, enabling synchronization in non connected mode when other scripts are being created. Extension ".ini"must be specified Page 76 Audemat-Aztec SA – Audemat-Aztec INC WEB: www.audemat-aztec.com - e-mail: [email protected] FM Monitoring Silver user’s manual 02/2008 DSynchronization using an ini file: Simply select the corresponding "ini" file from the file opening dialogue box. Fig. 33 Press the "Apply" button to carry out synchronization. A script can be synchronized with the IP address of identical equipment. Simply modify the IP address in preferences once synchronization is finished. Synchronization data are saved in the script. It is therefore not necessary to redo it each time a script is opened. Page 77 Audemat-Aztec SA – Audemat-Aztec INC WEB: www.audemat-aztec.com - e-mail: [email protected] FM Monitoring Silver user’s manual 6.4. 02/2008 SCRIPTEASY’S TOOL BAR Functions Outputs Reading Inputs Functions 6.4.1. Ö AND, OR, XOR, NOT Gates Inputs Output Inputs Output Logical gate functions can be linked in cascade to create complex scripts. Ö Timer The timer can be used in two different ways: simple or pulse. Simple mode: The logical status of the timer’s input will only be transmitted to its output at the end of the programmed timing on the high or low status changes. Page 78 Audemat-Aztec SA – Audemat-Aztec INC WEB: www.audemat-aztec.com - e-mail: [email protected] FM Monitoring Silver user’s manual 02/2008 Pulse mode: During a (high or low) status change, the timer’s output will go into logic 1 status for the time programmed for each change. Once the time has passed, output will go into 0. Ö Front (edge) counter Icon: It is not compulsory to link the counter’s "Reset" input. If it is not linked, the set n front will change the object’s state, the front (n+1) will reinitialize it. - "Count": defines levels which are to be counted - "True after": contains the value of the number of fronts necessary before output activation. - "Sum delay": 0 if no time limit is desired x seconds to define the time range during which changes in state should take place. - "Reset on": level on which the reset will be activated Page 79 Audemat-Aztec SA – Audemat-Aztec INC WEB: www.audemat-aztec.com - e-mail: [email protected] FM Monitoring Silver user’s manual 02/2008 Ö Actions "Action" enables interaction with the script in reading mode. It can also enable some objects to be initialized at state 1 as its initialization value during the first script execution will be the value that it was indicated when designed. . Clicking on the state of the action (ON / OFF) will display a contextual menu enabling this value to be changed. During script reading in real time, it is possible to change this value; it will be sent to the equipment to be taken into account. . Ö Comments A comment has no action on the script; it is not translated into any machine-destined script language. It has merely an illustrative role. Clicking on the right of the mouse enables a comment to be edited. A new line is created by pressing "Enter", the size of the comment being automatically adapted. To enable comment modifications, click on the mouse’s right button so that the contextual menu will appear and click on "Apply". Comment capture using the mouse is carried out in the same way as for other objects, apart from the fact that the text area is not reactivated. Simply click below the text to go into "moving" mode. Page 80 Audemat-Aztec SA – Audemat-Aztec INC WEB: www.audemat-aztec.com - e-mail: [email protected] FM Monitoring Silver user’s manual 02/2008 Ö Variables "Variable" is for indicating the state of an object anywhere in the script. Several variables can be aimed at the same object. All objects present on the script can be represented by a variable, even another variable. The choice of the object at which the variable must be "aimed" is set in “properties”. Once the properties have been edited and the reference object selected from the offered list, simply validate to complete configuration. . 6.4.2. Outputs Ö Relays Relays activate the devices’ physical relays. Priority: this is for managing priority rules specific to the script, between the traps and the relays. Page 81 Audemat-Aztec SA – Audemat-Aztec INC WEB: www.audemat-aztec.com - e-mail: [email protected] FM Monitoring Silver user’s manual 02/2008 Ö Alarms Alarms are objects whose states are sent to a MANAGER. Sent alarms then become "Alarm TRAPS". It is possible to program sending in the form of TRAPS and/or MAIL for each front: ON and OFF. It is also possible to associate a trap with a channel: Two other parameters can be configured: • • priority: for managing priority rules specific to the script, between the traps and the relays. severity: for sorting with MANAGER during trap reception. Page 82 Audemat-Aztec SA – Audemat-Aztec INC WEB: www.audemat-aztec.com - e-mail: [email protected] FM Monitoring Silver user’s manual Priority 02/2008 Severity Page 83 Audemat-Aztec SA – Audemat-Aztec INC WEB: www.audemat-aztec.com - e-mail: [email protected] FM Monitoring Silver user’s manual 6.4.3. 02/2008 Inputs NOTE: type ENTER to validate and ESC to quit after each action Ö Digital inputs These are the equipment’s logical inputs. Ö Analog inputs Setting analog inputs: Once the calibration curves have been set, "min" and "max" thresholds can be indicated. They will be graphically positioned when the property window’s parameters have been validated. As all the curves may Page 84 Audemat-Aztec SA – Audemat-Aztec INC WEB: www.audemat-aztec.com - e-mail: [email protected] FM Monitoring Silver user’s manual 02/2008 not be linear, a threshold of 25 Liters, displayed on a gauge capable of displaying from 0 to 50 Volts, may not be centered. . The equipment’s analog board is set to receive voltage which can vary from 0 to 25 V: "input range: 0-25 V. The calibration curve of the sensor connected to the board is as follows: It is possible to create 6 points, thereby enabling a 5 curve calibration. It is possible to create only one curve by placing just 2 points on the graph. • • • • Create a point by clicking with the button on the left of the mouse at desired place on graph. Straight lines are automatically plotted each time a point is added or deleted. Clicking a point with the button on the right of the mouse deletes it. Points can be moved with a simple "drag and drop", using the mouse. Page 85 Audemat-Aztec SA – Audemat-Aztec INC WEB: www.audemat-aztec.com - e-mail: [email protected] FM Monitoring Silver user’s manual 02/2008 At least 1 curve is necessary for the object to be calibrated. If an object’s calibration is not valid, a warning message will appear, either during validation of the analog object’s properties, or during script creation. Adjusting thresholds of 10 to 25 Liters will give the following result: Page 86 Audemat-Aztec SA – Audemat-Aztec INC WEB: www.audemat-aztec.com - e-mail: [email protected] FM Monitoring Silver user’s manual Ö 02/2008 GoldenEagle alarms These alarms are only accessible for equipment such as the GoldenEagle small site or Remote Control Silver, the latter functioning when connected to a GoldenEagle. They represent all the alarms useful by channels in the GoldenEagle. For each alarm placed on the script, it is possible to disable what the hierarchy has taken into account, configured in the GoldenEagle, thereby enabling its state to be taken into account independently of the equipment’s internal management. When the channel names have been synchronized they appear in the «Channel" list. Page 87 Audemat-Aztec SA – Audemat-Aztec INC WEB: www.audemat-aztec.com - e-mail: [email protected] FM Monitoring Silver user’s manual 6.4.4. 02/2008 Lecture Lecture Stop Ö Reading Press the green "Reading" button to read the previously sent script. The same connection window as the scriptloading one will appear, requesting IP address, user’s name and a valid password. Once connected, the script is uploaded on the screen and communication between it and the equipment begins. Data are now updated. A script’s reading mode has a blue background, whereas in design mode, a script has a cream background. A blue background indicates a reading mode. A beige background indicates equipment disconnection. Ö Stop Stop cuts communication between ScriptEasy and the equipment. The script’s viewing window is then closed. Page 88 Audemat-Aztec SA – Audemat-Aztec INC WEB: www.audemat-aztec.com - e-mail: [email protected] FM Monitoring Silver user’s manual 02/2008 6.5. TRANSFERRING SCRIPTS When the graphic script is ready, all that remains is to send it to the equipment. For this, check that the window of the script to be transferred has been properly selected.. To be sure, click on the script sheet; the window that contains it will be automatically selected. Now click on “Send script to equipment”. Page 89 Audemat-Aztec SA – Audemat-Aztec INC WEB: www.audemat-aztec.com - e-mail: [email protected] FM Monitoring Silver user’s manual 02/2008 7. FOR MORE INFORMATION Head office : Audemat-Aztec 20, avenue Neil Armstrong - Parc d'Activites J.F. Kennedy 33700 BORDEAUX - MERIGNAC FRANCE Tel: +33 (5)57 928 928 | Fax: +33 (5)57 928 929 Hotline : [email protected] USA : Audemat-Aztec Inc. 1021 Ives Dairy Road - Suite 216 Miami, FL 33179 USA Tel: +1 (305) 249 3110 | Fax : +1 (305) 249 311319501 Hotline: [email protected] And : http://support.audemat-aztec.com Page 90 Audemat-Aztec SA – Audemat-Aztec INC WEB: www.audemat-aztec.com - e-mail: [email protected] FM Monitoring Silver user’s manual 02/2008 APPENDIX A: SCRIPTEASY VIEWER MODULE (OPTION) See chapter 5.7.3 to install this option. A.1 Equipment connexion: Equipment’s IP address User’s name Password For opening a file from the hard disk Failed connexion: Click on ‘ok’ and then on ‘connect’ to come back to the connection page. Page 91 Audemat-Aztec SA – Audemat-Aztec INC WEB: www.audemat-aztec.com - e-mail: [email protected] FM Monitoring Silver user’s manual 02/2008 A.2 Presentation: Menu Tool bar Selection bar Inputs/Outputs I/O events Status bar A.2.1 Tool bar: ¾ Connect: enables equipment connection. ¾ Select: offers possibility of displaying the Selection bar or not. ¾ Events log: offers possibility of displaying I/O events or not. Page 92 Audemat-Aztec SA – Audemat-Aztec INC WEB: www.audemat-aztec.com - e-mail: [email protected] FM Monitoring Silver user’s manual ¾ Start: enables the equipment’s script to be launched. ¾ Stop: enables the equipment’s script to be stopped. A.2.2 Selection bar: Different types of Inputs/Outputs can be represented. These representations enable the I/O to be displayed or masked. ¾ Display: Page 93 Audemat-Aztec SA – Audemat-Aztec INC WEB: www.audemat-aztec.com - e-mail: [email protected] 02/2008 FM Monitoring Silver user’s manual ¾ 02/2008 Mask: Restrict to tag is for displaying only objects which have the tag selected (defined during script creation). If several tags are selected at same time, only objects which have all selected tags will be displayed (intersection). ¾ Inputs/Outputs: • Digital input: High state Low state • Analog input: ¾ Action button: Enable Disable Click to enable or disable and thereby interact with the script. Page 94 Audemat-Aztec SA – Audemat-Aztec INC WEB: www.audemat-aztec.com - e-mail: [email protected] FM Monitoring Silver user’s manual 02/2008 Alarm: ¾ High state Low state High state Low state Relay output: A.2.3 I/O event: Different Inputs/Outputs can be found in the table. Column: o o o o o Type: The representation of event type can be seen in this column. Date: date of event. Severity: level of severity. Origin: origin of event. Info: information on the event. Page 95 Audemat-Aztec SA – Audemat-Aztec INC WEB: www.audemat-aztec.com - e-mail: [email protected]