1
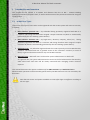
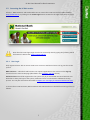
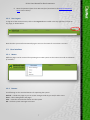
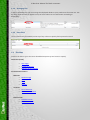
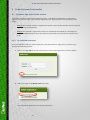
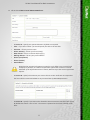
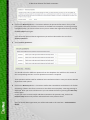
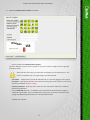
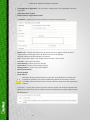
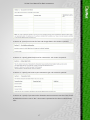
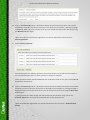
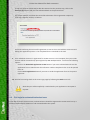
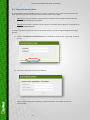
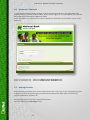
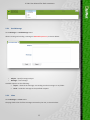
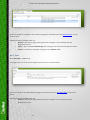
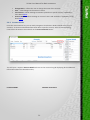
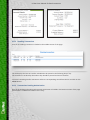
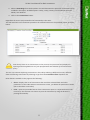
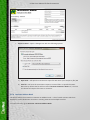
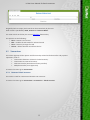
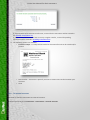
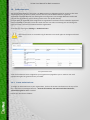
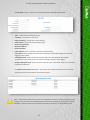
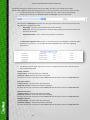
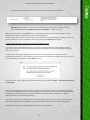
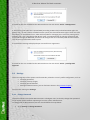
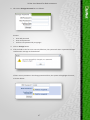
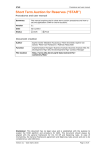
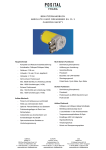
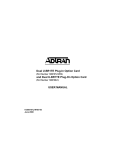
1 Isi Net User Manual for Bank customers Table of Contents 1 Introduction and overview....................................................................................................... 4 1.1 Isi Net User Types .................................................................................................................... 4 1.2 Accessing the Isi Net service.................................................................................................... 5 1.2.1 User Login ........................................................................................................................ 5 1.2.2 User Logout ..................................................................................................................... 7 1.3 1.3.1 Menus .............................................................................................................................. 7 1.3.2 Buttons ............................................................................................................................ 7 1.3.3 Arranging lists .................................................................................................................. 8 1.3.4 Data filters ....................................................................................................................... 8 1.4 2 User Interface .......................................................................................................................... 7 Site Map................................................................................................................................... 8 Isi Net Customer Functionality ............................................................................................... 10 2.1 Customer Sign-up for Isi Net services.................................................................................... 10 2.1.1 For individual customers ............................................................................................... 10 2.1.2 For business customers ................................................................................................. 15 2.2 Request Password Reset ....................................................................................................... 20 2.3 Documents Download ........................................................................................................... 24 2.4 Message Services................................................................................................................... 24 2.4.1 Send Message ................................................................................................................ 25 2.4.2 Inbox .............................................................................................................................. 25 2.4.3 Sent ................................................................................................................................ 26 2.4.4 Archive ........................................................................................................................... 27 2.5 Accounts ................................................................................................................................ 27 2.5.1 List of accounts .............................................................................................................. 27 2.5.2 Account details .............................................................................................................. 29 2.5.3 Standing Transactions ................................................................................................... 30 2.5.4 Transactions Pending Authorization ............................................................................. 30 2.5.5 Account Transactions Review ........................................................................................ 31 2.5.6 Business Address Book .................................................................................................. 34 2.6 Transactions .......................................................................................................................... 35 2.6.1 Between linked accounts .............................................................................................. 35 2.6.2 To external accounts ..................................................................................................... 38 2.7 Settings .................................................................................................................................. 42 2.7.1 Change Password .......................................................................................................... 46 2.7.2 Change security images ................................................................................................. 48 2 Isi Net User Manual for Bank customers 2.7.3 Change security questions............................................................................................. 49 2.7.4 Change details ............................................................................................................... 49 3 Isi Net User Manual for Bank customers 1 Introduction and overview The purpose of this manual is to explain and illustrate how the Isi Net – Internet Banking application’s menus and options work, as well as outline some of the processes involved in using the Isi Net system. 1.1 Isi Net User Types There are 4 main types of users who can be registered with the Isi Net system and access its services, as follows: 1. NBV customer –personal user – any individual having previously registered with NBV as a customer and having therefore been assigned a unique Customer ID (which is automatically generated by the core banking system Abacus). 2. NBV customer –business user – any legal entity –business, company, school, etc., having previously registered with NBV as a customer and having therefore been assigned a unique Customer ID (which is automatically generated by the core banking system Abacus). 3. Authorized user - any individual registered with the Isi Net system by an active NBV business customer. The Authorized user is granted access to the customer’s accounts (or some of them). In general the Authorized user may not be NBV customer. 4. NBV staff users – NBV staff users can be either system administrators or bank staff. As a general rule, the system administrator has access to the full administrative functionality, while other bank staff users will be mainly concerned with managing various customer requests. This manual documents the options available only for NBV customers and Authorized users. Administrative operations and functionality performed by the NBV staff users are not covered by this document. Note that the menus and options available in Isi Net after login are different according to the user type. 4 Isi Net User Manual for Bank customers 1.2 Accessing the Isi Net service All users - NBV customers and Authorized users can access the Isi Net service from NBV’s website http://www.nbv.vu, by clicking on the Isi Net Login button situated in the right-hand pane, as shown below. Note that the Isi Net login page can also be accessed by directly typing the following URL in the browser’s address bar: https://online.nbv.vu. 1.2.1 User Login Only registered users with an active Isi Net user account or Authorized users can log into the Isi Net system. NBV customers – individuals and business can request registration to the service via the Sign-up active link on the main Isi Net page (described in the Customer sign-up section). Authorized users should be registered in the system only by an active NBV customer business user Note that on their first login to the system, authorized users are submitted to additional security process. You can find more about described in Chapter 2.2. First login for activated Authorized users. To access their Isi Net accounts, NBV customers and Authorized users should fill out the login form as follows: 5 Isi Net User Manual for Bank customers 1. Enter Username –the username is the one assigned when the user profile was created. 2. Enter Password – the password (minimum 6 digits) chosen by the customer when he/she requested to be signed-up for the Isi Net service or by the system administrator if the user has requested a password reset; 3. Click on Login button – will open the second security level verification page. Select the 3 images you have chosen throughout the sign-up process. Note: The exact order does not matter. 4. Click on Next button – if the verification succeeds this will log the user in and will open the Isi Net home page, giving access to the Isi Net user or Authorized user specific functionality. Important notice The Isi Net system only allows 3 login attempts with incorrect password input. After 3 incorrect attempts, the system will lock the user’s Isi Net account, preventing any further access. To unlock the account, the users can either: a. Request the system administrator to reactivate their Isi Net user account (keeping the old password); OR 6 Isi Net User Manual for Bank customers b. Reset the password from the Isi Net interface (see details in the Request Password Reset section below). 1.2.2 User Logout To log out of the Isi Net services, click on the Log out button visible in the top right-hand corner on any page, as shown below: Note that the system will automatically log the user out if inactive for more than 5 minutes. 1.3 User Interface 1.3.1 Menus Different pages can be accessed for operating the Isi Net system via the main menu and its submenus (if available) 1.3.2 Buttons The following are the standard buttons for operating the system: Refresh – reloads the page so you can review changes made by you and/or other users Close – closes dialog boxes and pages Save – saves the entered information into the system OK – confirms system messages and notes 7 Isi Net User Manual for Bank customers 1.3.3 Arranging lists In pages containing lists you can arrange the displayed details to your preferences for easier use. Use the drop-down arrow that appears on top of each column to sort information ascending or descending. 1.3.4 Data filters Use the search box (if available) at the top of any column to quickly find a particular record. 1.4 Site Map (Click on the links to go to the more detailed descriptions of each menu or option) HOME PAGE (LOGIN) • • • User Login Customer Sign-up Request Password Reset CUSTOMER FUNCTIONALITY MESSAGES • • • • ACCOUNTS • • Send message Inbox Sent Archive List of Accounts Account Transactions TRANSACTIONS • Linked Accounts • External Accounts 8 Isi Net User Manual for Bank customers SETTINGS • • • • • Change Password Change Security Images Change Security Answers Change Details Manage authorized users 9 Isi Net User Manual for Bank customers 2 Isi Net Customer Functionality 2.1 Customer Sign-up for Isi Net services To be able to access Isi Net services, NBV customers – individuals and business are required to register as Isi Net users first. The customer registration (or sign-up) process consists of two main stages: Step 1: The customer submits a registration request via the Idi Net interface (see this process detailed step-by-step) below. Step 2: The customer’s registration request is reviewed and accepted (or rejected) by an authorized NBV employee. Once the request is processed you will receive a response by email. 2.1.1 For individual customers If you are individual and you want to apply for Isi Net personal user registration, you have to go through the following process: 1. Click on the Sign Up active link at the bottom of the Isi Net Login form, as shown below: 2. Select the Apply for Isi NetPersonal active link: This will load an application form for personal users. 10 Isi Net User Manual for Bank customers 3. Fill out the Isi Net Personal APPLICATION form: - • • • • • • • • In section A – specify your personal details. All fields are required. Title – if you select ‘Other’ you should specify the title in the text box. Surname – fill out your last name. Given Name(s) – fill out your first name(s). Date of birth – fill out in format dd/mm/yyyy Mailing address – fill out your postal address Phone (work/home) Phone (mobile) Email address Note that this personal information section has to be filled out as correctly and truthfully as possible, as it will be verified later against the customer’s records with NBV. If the information doesn’t match, NBV can reject the Isi Net registration request. - In section B – specify the accounts you want to link to Isi Net. Fields are not required as the list could be revised and edited at any moment later by NBV EB department - In section D – specify if you want to be allowed to initiate overseas transfers from Isi Net. By default the choice is set to “No”. The section is optional as the choice could be made later. 11 Isi Net User Manual for Bank customers 4. Click on the Next step button - this button submits the personal information. If any of the information entered in the form is incorrect or the fields are incomplete, a warning message is displayed. After you correct all the errors you can submit the registration form by pressing the Next step button again. Upon successful personal details registration you will be redirected to the next form – Security questions. 5. Select security questions: You should select four different questions from the dropdown list and fill out the answer in the corresponding text box. For each question an answer is required. These questions will be used for additional user verification when in case you contact NBV EB department with queries. 6. Click on the Next step button - this button verifies the entered data and submits it for further processing. If data in the form is incorrect or the fields are incomplete, a warning message is displayed. After you correct all the errors you can submit the form by pressing the Next step button again. In case you want to review and/or edit data entered on the previous step, click on the Previous step button and you’ll be redirected back to the previous form. Upon successful data registration you will be redirected to the next form – Authentication details. 12 Isi Net Userfor Manual Bank customers Isi Net User Manual Bank for customers the authentication 7. Select7.theSelect authentication details asdetails follows:as follows: Select second-level authentication - Select- second-level authentication images images formadisplays a pool of twentyYou images. have 3toimages select from 3 images from(by the grid (by This formThis displays pool of twenty images. have You to select the grid clicking on them). clicking on them). that the they areisselected is meaningless for process. the loginYou process. You Note thatNote the order theyorder are selected meaningless for the login have to remember only images the rightyou images you had selected. have to remember only the right had selected. - Unique you will be identified by for as alogging user forinlogging in the system Username - Username – Unique–name youname will be identified by as a user the system - Password Type the password beaccessing used for accessing Isi Net in the future; Password – Type the– password to be usedtofor the Isi Netthe system insystem the future; minimum password length is 6 digits. minimum password length is 6 digits. - password Confirm password – Enter same as in the “Password” this Confirm – Enter the same the value as invalue the “Password” field; this field; is used foris used for verification. passwordpassword verification. - CAPTCHA Fill out CAPTCHA box – into addition to the second-level authentication Fill out text box –text in addition the second-level authentication images, aimages, a is generated. is an additional security have to complete it by CAPTCHACAPTCHA is generated. This is an This additional security step: you step: have you to complete it by the CAPTCHA in the CAPTCHA typing thetyping CAPTCHA generatedgenerated text in thetext CAPTCHA text box. text box. All fields are required. All fields are required. 13 Isi Net User Manual for Bank customers 8. Click on the Submit application button - this button verifies the entered data and if correct submits the complete application form for further processing by NBV EB department. If data in the form is incorrect or the fields are incomplete, a warning message is displayed. After you correct all the errors you can submit the form by pressing the Submit application button again. In case you want to review and/or edit data entered on the previous step, click on the Previous step button and you’ll be redirected back to the previous form. The system notifies you about the successful submission of the registration request by returning a request number, as follows: An email confirming the successful registration is sent to the e-mail address communicated during the application process. The completed form is attached to the mail. 9. Your individual customer’s registration for Isi Net services is now complete, but your Isi Net account will be activated only upon approval by NBV EB department. You have the following options: - Click on the Download application as PDF button if you want to download and save the application form as PDF file with the reference number completed. Thus it can be printed later. Or - Click on Print application button if you want to send the application form to the printer right now. 10. Exit the form and go back to the main Login page by following the Back active link. Note that you will be notified by e-mail whether your application is accepted or rejected. 14 Isi Net User Manual for Bank customers 2.1.2 For business customers If you are business representative of a legal entity and you want to apply for Isi Net business user registration, you have to go through the following process: 1. Click on the Sign Up active link at the bottom of the Isi Net Login form, as shown below: 2. Select the Apply for IsiNet Business active link: This will load an application form for personal users. 3. Fill out the Isi Net Business APPLICATION form: - In section A – specify your Entity’s details. All fields are required. • Name of business, school, company – fill out the legal entity’s name. 15 Isi Net User Manual for Bank customers • Trading Name (if applicable) – fill out entity’s trading name. If not applicable, fill out its legal name • VIPA registration number • Business license registration number - In section B – specify your personal details as a business representative. • Master user – tick the check box if you are the first user to register within Isi Net as • • • • • • • • representative of this legal entity. By default the box is not checked. All fields related to personal details are required Title – if you select ‘Other’ you should specify the title in the text box. Surname – fill out your last name. Given Name(s) – fill out your first name(s). Date of birth – fill out in format dd/mm/yyyy Mailing address – fill out your postal address Phone (work/home) Phone (mobile) Email address Note that this personal information section has to be filled out as correctly and truthfully as possible, as it will be verified later against the customer’s records with NBV. If the information doesn’t match, NBV can reject the Isi Net registration request. - In section C – specify the accounts you want to link to Isi Net. The section is optional and fields are not required as the list could be revised and edited at any moment later by NBV EB department 16 Isi Net User Manual for Bank customers - In section D - specify an account for fees and charges debit. The section is optional. - In section E – specify global daily limits for transactions. The section is optional. - In section F – specify your limits as per transaction type. The section is optional. - In section G – specify if you want to be allowed to initiate overseas transfers from Isi Net. By default the choice is set to “No”. The section is optional as the choice could be made later. 17 Isi Net User Manual for Bank customers 4. Click on the Next step button - this button submits the personal information. If any of the information entered in the form is incorrect or the fields are incomplete, a warning message is displayed. After you correct all the errors you can submit the registration form by pressing the Next step button again. Upon successful personal details registration you will be redirected to the next form – Security questions. 5. Select security questions: You should select four different questions from the dropdown list and fill out the answer in the corresponding text box. For each question an answer is required. These questions will be used for additional user verification when in case you contact NBV EB department with queries. 6. Click on the Next step button - this button verifies the entered data and submits it for further processing. If data in the form is incorrect or the fields are incomplete, a warning message is displayed. After you correct all the errors you can submit the form by pressing the Next step button again. In case you want to review and/or edit data entered on the previous step, click on the Previous step button and you’ll be redirected back to the previous form. Upon successful data registration you will be redirected to the next form – Authentication details. 18 Isi Net User Manual for Bank customers 7. Select the authentication details as follows: - Select second-level authentication images This form displays a pool of twenty images. You have to select 3 images from the grid (by clicking on them). Note that the order they are selected is meaningless for the login process. You have to remember only the right images you had selected. - Username – Unique name you will be identified by as a user for logging in the system Password – Type the password to be used for accessing the Isi Net system in the future; minimum password length is 6 digits. Confirm password – Enter the same value as in the “Password” field; this is used for password verification. Fill out CAPTCHA text box – in addition to the second-level authentication images, a CAPTCHA is generated. This is an additional security step: you have to complete it by typing the CAPTCHA generated text in the CAPTCHA text box. All fields are required. 8. Click on the Submit application button - this button verifies the entered data and if correct submits the complete application form for further processing by NBV EB department. If data in the form is incorrect or the fields are incomplete, a warning message is displayed. After you correct all the errors you can submit the form by pressing the Submit application button again. 19 Isi Net User Manual for Bank customers In case you want to review and/or edit data entered on the previous step, click on the Previous step button and you’ll be redirected back to the previous form. The system notifies you about the successful submission of the registration request by returning a request number, as follows: An email confirming the successful registration is sent to the e-mail address communicated during the application process. The completed form is attached to the mail. 9. Your individual customer’s registration for Isi Net services is now complete, but your Isi Net account will be activated only upon approval by NBV EB department. You have the following options: - Click on the Download application as PDF button if you want to download and save the application form as PDF file with the reference number completed. Thus it can be printed later. Or - Click on Print application button if you want to send the application form to the printer right now. 10. Exit the form and go back to the main Login page by following the Back active link. Note that you will be notified by e-mail whether your application is accepted or rejected. 2.2 First login for activated Authorized users To be able to access Isi Net services, authorized users should be registered as Isi Net users first by a business representative IsiNet user and activated within the system. 20 Isi Net User Manual for Bank customers Note: More about authorized user’s registration process is described in Chapter 2.8.1 Create Authorized usrers. As registered authorized user, once you are notified by an e-mail that your profile is already activated, you have to follow the steps described below on your first log into IsiNet system: • Change your initial temporary password: Type your new password to be used for accessing the Isi Net system in the futurein the Password field. Note that minimum password length is 6 digits. Then retype the same string in the Retype password field to confirm. • Select second-level authentication security images: This section displays a pool of twenty images. You have to select 3 images from the grid (by clicking on them). Note that the order they are selected is meaningless for the login process. You have to remember only the right images you had selected. • Select security questions and answers: You should select four different questions from the dropdown list and fill out the answer in the corresponding text box. For each question an answer is required. These questions will be used for additional user verification when in case you contact NBV EB department with queries. Click on the Save to record data. 21 Isi Net User Manual for Bank customers 2.3 Request Password Reset This functionality allows the NBV customer to send a request for their Isi Net user password to be reset. The customer password reset process consists of two main stages: Step 1: The customer submits a password reset request via the Isi Net interface (see this process detailed step-by-step) below. Step 2: The customer’s password reset request is reviewed and accepted (or rejected) by an authorized NBV employee. To send a request for password reset to the Isi Net services, you have to go through the following process: 1. Click on the Request Password Reset link at the bottom of the Isi Net Login page, as shown below: 2. Fill out the password reset form as follows: Notes: all three fields are compulsory, new password has to be typed in twice for confirmation. 22 Isi Net User Manual for Bank customers The next steps are identical to the ones described above for customer signup: 3. 4. 5. 6. Click on the Next button to submit the new password information. Select the second-level authentication images. Click on the Next button again to complete the reset password request. The system returns a registration number as confirmation that the request was successfully registered. 7. The process is now complete, but the new selected password will become active only after the password reset request is reviewed and approved by authorized NBV staff. Note that the Reset Password functionality is only available for NBV customers and not for authorized users 23 Isi Net User Manual for Bank customers 2.4 Documents Download In case the user needs to declare changes of any details stated originally in the application form (personal details, linked to Isi Net accounts, limits, specific rights, etc ) an Amendment Form should be completed and submitted to NBV front office . These documents are in DOC format and are available for download from the public section of the IsiNet site. If you are a Personal user – follow the IsiNet Personal Amendment link. If you are a Business user – follow the IsiNet Business Amendment link. 2.5 Message Services Each subscribing customer has a secure mailbox within the Isi Net service. The main purpose of this mailbox is to allow secured and quick communication between the Bank and its customers for various notifications, requests, etc. The Message service works like a classical mail service. To use its options go to Messages menu: 24 Isi Net User Manual for Bank customers 2.5.1 Send Message Go to Messages -> Send Message menu. Allows creating and sending a message to NBV EB department, as shown below: • Subject - specify message subject • Message – text message Available options are the following: • Reject – discards the message, not sending it and not saving it in any folder • Send – sends the message to the specified recipient 2.5.2 Inbox Go to Messages -> Inbox menu. The page loads a list of all the messages received by the user, as shown below: 25 Isi Net User Manual for Bank customers Users can search all messages in their Inbox by typing the searched text in the data filter box on top of the screen. Additional options available here are: • Refresh – Refresh the page checking for new messages. If any received, they are displayed in the list • Reply – opens a new Create Message tab, replying to the selected message from Inbox • Archive – Archive the message, sending it to the Archive folder 2.5.3 Sent Go to Messages -> Sent menu. The page loads a list of all the messages sent by the user, as shown below: Users can search all messages Sent by typing the searched text in the data filter box on top of the screen. Additional options available here are: • Refresh – Refresh the page checking for new messages. If any received, they are displayed in the list 26 Isi Net User Manual for Bank customers 2.5.4 Archive To review all the messages that were archived from the Inbox folder go to Messages -> Archive menu. Users can search all messages in their Archive by typing the searched text in the data filter box on top of the screen. Additional options available here are: • Refresh – Refresh the page checking for new messages. If any received, they are displayed in the list 2.6 Accounts This menu regroups all the options and functionality related to a customer’s accounts with NBV, such as: • viewing all active accounts; • checking detailed information about each account’s terms and conditions; • viewing all transactions posted in an account over a specified period (and exporting the account transactions as an Excel file) • reviewing and cancel all standing transactions • reviewing and authorizing all pending transactions • Maintain an Address Book To access this menu go to Accounts 2.6.1 List of accounts To access this menu go to Accounts ->Accounts List Note: After user login, the page is loaded by default. 27 Isi Net User Manual for Bank customers Isi Net User Manual for Bank customers Isi Net User Manual for Bank customers List of all customer’s ACTIVE and linked to IsiNet accounts is loaded in the upper section of the page. List of all customer’s ACTIVE and linked to IsiNet accounts is loaded in the upper section of the page. Each record is specified by: Each record is specified by: List of all customer’s ACTIVE and linked to IsiNet accounts is loaded in the upper section of the page. • Name – in this field, the customer can assign different names to his/her accounts in • Each Name – in this field, theby: customer can assign different names to his/her accounts in record is specified order to easily identify them in the Isi Net system. By default at subscription, the account order to easily identify them in the Isi Net system. By default at subscription, the account name filed is identical tocustomer the account • Name – in this field, the cannumber. assign different names to his/her accounts in name filed is identical to the account number. order to easily identify them in the Isi Net system. By default at subscription, the account You can change this name by selecting the account and clicking on the Change Name You can change by selecting account and clicking on the Change Name namethis filedname is identical to thethe account number. button or double clicking on the account record. The field becomes editable: button or double clicking on the account record. The field becomes editable: You can change this name by selecting the account and clicking on the Change Name button or double clicking on the account record. The field becomes editable: To save changes click on the Save button and click on Refresh button for reviewing. To To save changes click on the Save button and click on Refresh button for reviewing. To cancel the name edit, select any other record. cancel the name edit, select any other record. To save changes click on the Save button and click on Refresh button for reviewing. To • Account No. – is the number of the account in NBV’s system. • Account No. – is the of the account in NBV’s system. cancel thenumber name edit, select any other record. • Type – designates product in which the account was opened. • Type – •designates which the account was opened. Accountproduct No. – isinthe number of the account in NBV’s system. • Current Balance – is the total account’s balance as of the viewing date and time. Note • Current• Balance is the totalproduct account’s as account of the viewing date and time. Note Type ––designates in balance which the was opened. that loan or overdraft accounts balances (debit) are displayed as negative amounts, while that loan or overdraft accounts balances (debit) are displayed as negative amounts, while savings and current as positive amounts. • Current Balance – isaccounts the total balances account’s(credit) balanceare asdisplayed of the viewing date and time. Note savings and current accounts balances (credit) are displayed as positive amounts. that loan or overdraft accounts balances (debit) are displayed as negative amounts, while • Available Balance – depending on the product, the “available balance” is equal to the • Available Balance depending on the product, the “available balance” is to the savings –and current accounts balances (credit) are displayed asequal positive amounts. current balance minus any blocked or frozen amounts, minus cheques pending clearing. current balance minus any blocked or frozen amounts, minus cheques pending clearing. • Available Balance – depending on the product, the “available balance” is equal to the current balance minus any blocked or frozen amounts, minus cheques pending clearing. Available options are the following: Available options are the following: • Refresh – reloads and updates all the data on the page • Refresh – reloads and updates all the data on the page Available options are the following: • Refresh – reloads and updates all the data on the page 28 Isi Net User Manual for Bank customers • • • • Change Name – allows the user to change the name of the account Save – saves changes to the account’s name Transactions – allows viewing transactions posted on a specific account; explained in more detail below Account Details – allows viewing an account’s terms and conditions; explained in more detail below 2.6.2 Account details From the main accounts list, you can easily navigate to check other details related to any of your accounts. To view more detailed information about a specific account, select its corresponding record from the Account list and click on the Account Details button: This will open a separate Account Details tab next to the account list grid displaying all the additional information about the selected account, LOAN ACCOUNT SAVINGS ACCCOUNT: 29 Isi Net User Manual for Bank customers Isi Net User Manual for Bank customers Isi Net User Manual for Bank customers 2.6.3 Standing Transactions 2.6.3 Standing Transactions A list of all standing transaction is loaded in the middle section of the page: Standing Transactions A list2.6.3 of all standing transaction is loaded in the middle section of the page: A list of all standing transaction is loaded in the middle section of the page: The list displays the last 10 transfers scheduled to be posted in the following days if any. The list displays the last 10 transfers scheduled to be posted in the following days if any. The transfers are ordered by date when they should be posted and time of creation. The transfers are ordered by date when they should be posted and time of creation. The list displays the last 10 transfers scheduled to be posted in the following days if any. To cancel a standing transfer transaction select its corresponding record from the list and click on the The aretransfer orderedtransaction by date when they be postedrecord and time creation. To canceltransfers a standing select itsshould corresponding fromofthe list and click on the Cancel button. Cancel button. To cancel a standing transfer transaction select its corresponding record from the list and click on the 2.6.4 Transactions Pending Authorization Cancel button. 2.6.4 Transactions Pending Authorization A list of all pending and waiting authorization transaction is loaded in the bottom section of the page Transactions Pending Authorization A list2.6.4 of all pending and waiting authorization transaction is loaded in the bottom section of the page (the section is available for business users only): (the section is available for business users only): A list of all pending and waiting authorization transaction is loaded in the bottom section of the page (the section is available for business users only): 30 Isi Net User Manual for Bank customers Available options are the following: • • Authorize – authorize the pending transaction Cancel – cancel the pending transaction 2.6.5 Account Transactions Review This option allows the customer to enquire their account(s) transactions for a specified period and either review the results on screen or print or export them to Excel. There are two ways to access this menu: • Following Accounts ->Account Transactions menu or • From the main Accounts list where you can easily navigate to check detailed transactions posted on any of these accounts. In case the Accounts ->Account Transactions menu is followed, this will open the Transactions – Account page. 31 Isi Net User Manual for Bank customers 1. The user has to specify: • Account –select from the dropdown list where all customer’s accounts are available. This field is mandatory. • Date From and date To – date range determining the period for transactions to be included in the report. Selecting a period you should observe that the report is limited to no more than 90 days period. o By default the last month is loaded. • Transaction filter – the following options are available: All Transactions, Deposits only, Withdrawals Only, Transaction Amount. o By default “All Transactions” is loaded. 2. Click on the Show button. If the second way is followed, to view the account transactions report, the user should follow these steps: 1. Select an account from Accounts list. 32 Isi Net User Manual for Bank customers 2. Select a Date Range from the dropdown- this will determine the period for transactions to be included in the report. Available options: Today, 7 Days, 14 Days, Current Month, Previous Month, User Defined 3. Click on the Transactions button. Regardless the access way hereinafter the functionality is the same. This will load the list of transactions posted on the selected account in the specified period, as shown below: Note that if there are no transactions on the account, the system will only display the opening and closing balances as of the specified start and end date of the transactions query. The user can continue exploring transactions in this tab by selecting a different account, different dates and filtering transactions by selecting a type from the Transaction filter dropdown list. Other buttons available in this page are the following: • Show – displays the list of transactions that match the selected dates and other parameters in the Isi Net Account Transactions screen, just below the parameters section (like in the above screenshot). • Print – opens the printable format of the transactions report in a separate browser tab. From here, the customer can choose to print the statement by using the browser’s printing functionality. 33 Isi Net User Manual for Bank customers • Export to Excel – opens a dialogue box with the following options: a) Open with – will open the transactions report file with Excel (as a temporary file) OR b) Save file – will save the transactions report as an Excel file in a specified location. Note that by default the file will be named “Account statement <date>.xls”; the user can choose to keep this file name or rename it. 2.6.6 Business Address Book The option allows the customer to maintain an Address book – a list of saved accounts which are frequently used as destination accounts in creating external and multiple transfers. To access this menu go to Accounts ->Business Address Book 34 Isi Net User Manual for Bank customers Originally the list is empty and records can be created only by the user. Each record is specified by: Bank, Account and Account Name. For easier search in the list you can use data filter functionality. The options are the following: • New – creates a new record • Edit – enables the edit mode for selected record • Save – saves any changes if made • Delete – delete selected record from the list 2.7 Transactions This menu regroups all the options and functionality related to fund transfers and payment operations, such as: • Transactions between customer’s linked accounts; • Transactions to external accounts; • Overseas transfer (International money transfer) • Multiple transfers (mass payments) To access this menu go to Transactions 2.7.1 Between linked accounts This menu is used for transactions between own accounts. To access this menu go to Transactions ->Transaction – linked accounts 35 Isi Net User Manual for Bank customers This operation is applicable only for a specified range of products 1. The user has to specify: • From Account – select from the dropdown list where all permitted customer’s accounts are • • • • • available. The account number and the available balance of linked accounts are displayed. This field is mandatory. Transaction description – Enter a free text. This text will be displayed on the statement. This field is mandatory. To Account –select from the dropdown list where all permitted customer’s accounts are available. This field is mandatory. Amount Vt – Enter the transaction amount. This field is mandatory. To account description – Enter a free text. This text will be displayed on the receiving account statement. When – you have to choose within the following options: o Transfer now – to execute the transaction right now o Transfer later – to execute the transaction later. If you select this option, you should specify exact transfer date: o Set up a regular transfer – to set up regular standing transactions. If you select this options you have to specify the regular transfer’s parameters: 36 Isi Net User Manual for Bank customers - Period – select from drop down list. Available options are: Daily, Weekly, Monthly, Yearly. Start on – select the start date of the period. End – select within the following options: No end date End after specific number of transfers. If you choose this option, a field No of transfers will be enabled for entering the number of transactions to be executed. End of date. If you choose this option, a field End on will be enabled for entering date until the regular transfers should be executed. 2. Click on the Verify button. This button verifies the entered data and enables the Transfer button. If any of the information entered in the form is incorrect or the fields are incomplete, a warning message is displayed. After you correct all the errors you can precede further form by pressing the Verify button again. 3. Click on the Transfer button if you confirm the transaction. A confirmation message is displayed upon successful operation and a transaction receipt is generated by the system: 37 Isi Net User Manual for Bank customers If you have selected to execute transfer now, a record for the transaction will be created in the Account Transactions list. If you have selected to transfer later or set up a regular transfer, a record for pending transaction will be created in Standing Transactions list. 4. The following options are available: • Print this receipt – a receipt will be loaded as document file and can be saved and/or printed • New transfer – choose this option if you want to create new transfer between your accounts. • Close 2.7.2 To external accounts This menu is used for transactions to external accounts. To access this menu go to Transactions ->Transaction – external accounts 38 Isi Net User Manual for Bank customers 1. The user has to specify: • From Account – select from the dropdown list where all permitted customer’s accounts are • • • • • available. The account number and the available balance of linked accounts are displayed. This field is mandatory. Transaction description – Enter a free text. This text will be displayed on the statement. This field is mandatory. To Account – Select from a dropdown list. Only accounts saved in Business Address Book will be available. This field is mandatory. Amount Vt – Enter the transaction amount. This field is mandatory. To account description – Enter a free text. This text will be displayed on the receiving account statement. When – you have to choose within the following options: o Transfer now – to execute the transaction right now o Transfer later – to execute the transaction later. If you select this option, you should specify exact transfer date: o Set up a regular transfer – to set up regular standing transactions. If you select this options you have to specify the regular transfer’s parameters: 39 Isi Net User Manual for Bank customers - Period – select from drop down list. Available options are: Daily, Weekly, Monthly, Yearly. Start on – select the start date of the period. End – select within the following options: No end date End after specific number of transfers. If you choose this option, a field No of transfers will be enabled for entering the number of transactions to be executed. End of date. If you choose this option, a field End on will be enabled for entering date until the regular transfers should be executed. 5. Click on the Verify button. This button verifies the entered data and enables the Transfer button. If any of the information entered in the form is incorrect or the fields are incomplete, a warning message is displayed. After you correct all the errors you can proceed further form by pressing the Verify button again. 6. Click on the Transfer button if you confirm the transaction. A confirmation message is displayed upon successful operation and a transaction receipt is generated by the system: 40 Isi Net User Manual for Bank customers If you have selected to execute transfer now, a record for the transaction will be created in the Account Transactions list. If you have selected to transfer later or set up a regular transfer, a record for pending transaction will be created in Standing Transactions list. 7. The following options are available: • Print this receipt – a receipt will be loaded as document file and can be saved and/or printed • New transfer – choose this option if you want to create new transfer • Close 41 Isi Net User Manual for Bank customers 2.8 Authorized users The functionality allows the user who is an NBV Customer to delegate rights for access to their own accounts (or some of them) to other persons who may not be NBV customers in general. That means an IsiNet Business user with rights to manage users can manage additional authorized users for his organization, but not having access to his own profile directly. A screen with all registered users assigned to his organization irrelevant of who created or approved them is available for this user. From this screen the user can select an existing user and change his rights or create a new user associated with his organization. To access this screen go to Settings -> Authorized users Note that the menu is accessible only for Business users with rights to manage authorized users. List of authorized users A list of all authorized users assigned to your organization (regardless you or another user with appropriate rights has granted access) is loaded. 2.8.1 Create authorised user To assign an authorised user to your organization, click on the Create User button on the top of the list. A new form consisting43 sections – General information, User Data and Linked Accounts, Transaction rights for user is loaded. Fill out the new form as follows: 42 Isi Net User Manual for Bank customers - In User Data section– specify user’s personal details. All fields are required. • • • • • • • • • Title – select from the drop-down list Surname – fill out user’s last name. Given Name(s) – fill out user’s first name(s). Date of birth – fill out in format dd/mm/yyyy Phone (work/home) Business address Phone (mobile) Email address- user’s email for contacts and notification User Name- Enter unique name the authorized user will be identified by as a user for logging in the system. • Temp password - Enter initial password for login. The password will be verbally announced to him. Later, upon successful first login, the user will change it • Retype temp password - Enter the same value as in the “Password” field; this is used for password verification - In Linked accounts for user section– This section lists all active business user’s account. Specify accounts to be linked to the authorized user Note : All accounts listed in this section are checked for existence, if these are active and if belong to the customer upon adding and if authorization settings for them exists in IsiNet database. If the accounts are not initially assigned for IsiNet use, an amendment form 43 Isi Net User Manual for Bank customers should be printed from the documents and sent to NBV, but that’s not related to the IsiNet functionality. IsiNet just does not allow giving access to account that is not yet set for that customer. • To specify an account as linked to the authorized user, click on the corresponding account record in the list. Account name and Link type are set in edit mode: Select from the Link Type drop-down list, the type of the access to the account the user will be granted to. Possible values are: Not linked – the user will not have access to this account View only – the user can review this account within IsiNet, but will not be allowed to perform transactions Allow transactions – user is allowed to perform transactions. - In Transaction rights for user section– In this section you can configure transaction rights and limits at user level – i.e. set rights and limits applied only to this user regarding transactions. • To specify a specific right as granted, tick the corresponding check box, and set limits in the corresponding field Linked transfers: Create linked – thick the check box if allowed Authorize linked- thick the check box if allowed Set limit amount per transaction in Trx. Limit field and daily limit amount in Daily limit field. External transfers: Create external - thick the check box if allowed Authorize external - thick the check box if allowed Set limit amount per transaction in Trx. Limit field and daily limit amount in Daily limit field. Overseas transfers: Create overseas - thick the check box if allowed Authorize overseas – thick the check box if allowed Set limit amount per transaction in Trx. Limit field and daily limit amount in Daily limit field. Multiple transfers: Create multiple - thick the check box if allowed Authorize multiple – thick the check box if allowed Set limit amount per transaction in Trx. Limit field and daily limit amount in Daily limit field. 44 Isi Net User Manual for Bank customers Isi Net User Manual for Bank Isi Net User Manual forcustomers Bank customers If the user is granted rights for any authorization, additional fields are loaded: If the user is granted rights for any authorization, additional fields are loaded: If the user is granted rights for any authorization, additional fields are loaded: Manage users check-box – tick if the user is allowed to manage other authorized users ManageManage users check-box – tick if the user is allowed towith manage other authorized users users users check-box – tick if the user is allowed to manage other authorized Option User has an existing personal account NBV? – select Yes or No Option User has an existing personal account with NBV? – select Yes or No Option User has an existing personal account with NBV? – select Yes or No When you finish, click on the Submit button - this button verifies the entered data and if correct When you finish, click on click the Submit button -button this the entered data anddata if correct When you finish, on the Submit - this verifies button verifies the entered and if correct submits the complete application form forbutton further processing. submitsIf the complete application form for further processing. submits application form for further processing. data inthe thecomplete form is incorrect or the fields are incomplete, a warning message is displayed. After you If data inIf the form is incorrect or the fields are incomplete, a warning message is displayed. After you data in the form is incorrect or the fields are incomplete, a warning is displayed. After you correct all the errors you can submit the form by pressing the Submit message button again. correct all the errors canyou submit formthe byform pressing the Submit button again. correct all theyou errors can the submit by pressing the Submit button again. Further authorized user’s processing respect the following rules: Further Further authorized user’s processing respect respect the following rules: rules: authorized user’s processing the following 1. If a new user is created with rights to only create transfers or manage users (without rights to 1. If a new is transfers) created with only create transfers or manage users rights 1. Ifuser a new user is created with toand onlyactivated create transfers or manage users (without authorize therights user istorights created immediately, but(without the passed AMLtorights settingtofor authorize transfers) the user is created and activated immediately, but the passed AML setting for authorize transfers) the user is created and activated immediately, but the passed AML setting for him are not set yet. him are him not are set yet. not set yet. A confirmation massage is displayed upon successful user activation and a notification mail A confirmation massage is displayed upon successful user activation and their a notification mail A confirmation massage is displayed upon successful user to activation and a notification mail is sent to containing information for the accounts they have access and user rights and limits containing information for the accounts they have access to and their user rights and limits is sent containing information for the accounts theysection): have access to and their user rights and limitsto is sent to his e-mail address (as specified in User Data his e-mail address (as specified in User Data section): his e-mail address (as specified in User Data section): A record for this user is added to the Authorized users list with status Active – pending security reset A recordon thislogin user is added the Authorized users listusers withlist status pending securitysecurity reset reset Afor record for this user istoadded to the Authorized withActive status –Active – pending next on next on login next login 2. If a new user with authorization right is created a user request is saved in the system (for further 2. If a new with rightand is created a user request is saved system further 2. Ifuser a new user authorization right is created a user request isinsaved intothe system (for processing byauthorization EBwith department) the managing user is given with athe form be(for printed andfurther handled processing by EB department) and the managing user is given with a form to be printed and handled processing by EB department) andadditional the managing user is given to be in printed and handled to NBV branch staff together with documents, whichwith will abeform included the public to NBV branch together with additional documents, which will be included in the public to NBV staff branch stafffor together with additional documents, which will be included in the public download section, standard processing. download section,section, for standard processing. download for standard processing. This form is e-mailed as an attachment to the managing user in case he can’t print it at the moment. This form is e-mailed as an attachment to the user in case can’t print itwithin at theIsiNet This form isapplication e-mailed asform an attachment to the managing user in case he can’t print itmoment. at the moment. This user’s should be managing approved by a NBV EB he staff member system. This user’s form should approved by a NBV staff EB member within IsiNet Thisapplication user’s application formbe should be approved byEB a NBV staff member withinsystem. IsiNet system. A confirmation massage is displayed upon successful user registration: A confirmation massagemassage is displayed upon successful user registration: A confirmation is displayed upon successful user registration: 45 Isi Net User Manual for Bank customers A record for this user is added to the Authorized users list with status Active – NBV approval. 3. If an existing user who hasn’t passed AML (according to NBV rules) and authorization rights are given to him, all user’s data is recorded into the system, but his authorization rights. These are to be only filled in an amendment form, which will be loaded on managing user screen for printing and emailed to him. This is handled to NBV Branch staff, accompanied with all relevant documents and processed through the NBV AML procedure. All changes then are entered by NBV EB staff member into the user’s profile within IsiNet system. A confirmation massage is displayed upon successful user registration: A record for this user is added to the Authorized users list with status Active – pending NBV approval. 2.9 Settings This menu regroups all the options and functionality related to a user’s profile configuration, such as: • Changing password; • Changing security images; • Changing personal details • Manage authorized users (you can find more about in the previous chapter ); To access this menu go to Settings: 2.9.1 Change Password This option allows users (either NBV customers or delegate users) to directly change their password on the Isi Net system without requesting it from the system administrator. To change their Isi Net password, the user should follow the steps below: 1. Go to Settings -> Change Password 46 Isi Net User Manual for Bank customers 2. Fill out the Change Password form as follows: Process: • Enter old password • Enter new password • Confirm new password by re-typing it 3. Click on Change button 4. If all the fields in the form are correctly filled out, the system will return a password change confirmation message as shown below: If there are any mistakes in the change password form, the system will highlight the errors, as shown below: 47 Isi Net User Manual for Bank customers 2.9.2 Change security images This option allows users (either NBV customers or authorized users) to change their second level security authentication images. Go to Settings -> Change Security Images This will load two pools of images: 1. From the first pool (the upper one), select the current three images. 2. From the second pool, select new images that you will use on your next log-in into the system. 3. Click on the Change button. 4. If all the fields in the form are correctly filled out, the system will return a security images change confirmation message as shown below: If the first selected images do not correspond to the current ones, an error message is displayed: 48 Isi Net User Manual for Bank customers 2.9.3 Change security questions This option allows users to change their second level security authentication questions and answers. Go to Settings -> Change Security Answers This will load a list of 4 security questions and corresponding list of answers: You should select four different questions from the dropdown list and fill out the answer in the corresponding text box. For each question an answer is required. Click on Save button to record any changes. 2.9.4 Change details This option allows users (either NBV customers or authorized users) to change their personal details Go to Settings -> Change details This will load the personal details form where in header the user’s name is displayed: 49 Isi Net User Manual for Bank customers The user is allowed to specify: • Date of Birth – can be either filled directly in the field or picked up from the calendar. This field is mandatory • Email – email address. This field dis mandatory • Phone 1- This field dis mandatory • Phone 2 • Phone 3 Click the Save button to save your changes. 50 51 52