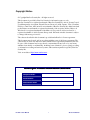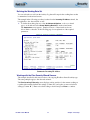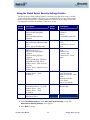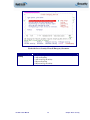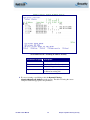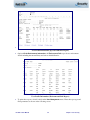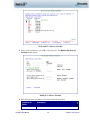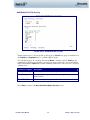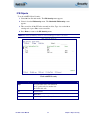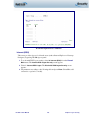
1
Firewall
TM
The Network Security Solution of
User Manual
Version 15
Updated: 05/24/2011
Copyright Notice
© Copyright Raz-Lee Security Inc. All rights reserved.
This document is provided by Raz-Lee Security for information purposes only.
Raz-Lee Security© is a registered trademark of Raz-Lee Security Inc. Action, System Control,
User Management, Assessment, Firewall, Screen, Password, Audit, Capture, View, Visualizer,
FileScope, Anti-Virus, AP-Journal © are trademarks of Raz-Lee Security Inc. Other brand and
product names are trademarks or registered trademarks of the respective holders. Microsoft
Windows© is a registered trademark of the Microsoft Corporation. Adobe Acrobat© is a
registered trademark of Adobe Systems Incorporated. Information in this document is subject
to change without any prior notice.
The software described in this document is provided under Raz-Lee’s license agreement.
This document may be used only in accordance with the terms of the license agreement. The
software may be used only with accordance with the license agreement purchased by the user.
No part of this document may be reproduced or retransmitted in any form or by any means,
whether electronically or mechanically, including, but not limited to: photocopying, recording,
or information recording and retrieval systems, without written permission given by Raz-Lee
Security Inc.
Visit our website at http://www.razlee.com .
Record your Product Authorization Code Here:
Computer Model:
Serial Number:
Authorization Code
Firewall 15 User Manual
i
About This Manual
About This Manual
Who Should Read This Book
This user guide is intended for system administrators and security administrators responsible
for the implementation and management of security on System i. However, any user with
basic knowledge of System i operations will be able to make full use of this product after
reading this book.
Product Documentation Overview
Raz-Lee takes customer satisfaction seriously. Our products are designed for ease of use by
personnel at all skill levels, especially those with minimal System i experience. The
documentation package includes a variety of materials to familiarize the user with Firewall
quickly and effectively.
Printed Materials
This user guide is the only printed documentation necessary for understanding Firewall. It is
available in user-friendly PDF format and may be displayed or printed using Adobe Acrobat
Reader version 4.0 or higher. Acrobat Reader is included on the product CD-ROM.
Firewall includes a single user guide that covers the following topics:
Introduction
Installation
Start-up and Initial Configuration
Using Firewall
This manual contains concise explanations of the various product features as well as step-bystep instructions for using and configuring the product.
Online Help
System i context-sensitive help is available at any time though the F1 key. A help window
appears containing explanatory text relating to the function or option currently in use. Online
help will shortly be available in Windows help format for viewing on a PC with terminal
emulation.
Typography Conventions
Menu options, field names, and function key names are written in Sans-Serif Bold.
References to chapters or sections are written in Italic.
OS/400 commands and system messages are written in Bold Italic.
Key combinations are separated by a dash, for example: Shift-Tab.
Emphasis is written in Times New Roman bold.
Firewall 15 User Manual
ii
About This Manual
Table of Contents
About This Manual ....................................................................................................... ii
Who Should Read This Book .................................................................................................................. ii
Product Documentation Overview ......................................................................................................... ii
Printed Materials ................................................................................................................................... ii
Online Help ............................................................................................................................................ ii
Typography Conventions........................................................................................................................ ii
New Features in Firewall Versions.............................................................................. 1
New Features for Firewall 15.6 ................................................................................................................1
New Features for Firewall 15.5 ................................................................................................................1
New Features for Firewall 15.0 ................................................................................................................1
Chapter 1: Introducing Firewall ................................................................................... 2
What is Firewall? ......................................................................................................................................2
Why is Firewall Necessary?......................................................................................................................2
Feature Overview ......................................................................................................................................3
Top-Down Security Design......................................................................................................................3
Multi Thread Support ..............................................................................................................................4
Firewall Rules and the Best-Fit Algorithm..............................................................................................5
FYI Simulation Mode...............................................................................................................................5
Emergency Override................................................................................................................................5
Rule Wizards ...........................................................................................................................................5
Log...........................................................................................................................................................5
Query Wizard ..........................................................................................................................................6
The “User-Centric” Approach .................................................................................................................6
User Security ...........................................................................................................................................6
User Management ...................................................................................................................................7
Intrusion Detection..................................................................................................................................7
Native OS/400 Text Based User Interface ...............................................................................................8
Other iSecurity Products ........................................................................................................................10
Chapter 2: First Steps .................................................................................................11
Initial Setup and Definition Overview ...................................................................................................11
Starting Firewall for the First Time ......................................................................................................12
Modifying Operators’ Authorities .........................................................................................................12
FYI Simulation Mode..............................................................................................................................14
Enabling Protection for all Servers........................................................................................................16
Using the Rule Wizards ..........................................................................................................................17
Procedural Overview ............................................................................................................................18
Analyzing Historical Activity.................................................................................................................19
Defining the Working Data Set..............................................................................................................21
Working with the Plan Security Wizard Screens ...................................................................................21
Native OS/400 Objects Log ...................................................................................................................23
Update Rules .........................................................................................................................................26
User Groups .............................................................................................................................................27
OS/400 Group Profiles..........................................................................................................................27
Firewall Proprietary User Groups........................................................................................................27
Time Groups ............................................................................................................................................30
Overview................................................................................................................................................30
Using Time Groups as Filter Criteria ...................................................................................................31
Defining and/or Modifying Time Groups ..............................................................................................31
Application Groups .................................................................................................................................32
Firewall 15 User Manual
iv
About This Manual
Overview................................................................................................................................................32
Defining and/or Modifying Application Groups....................................................................................32
Location Groups ......................................................................................................................................34
Overview................................................................................................................................................34
Chapter 3: Basic Security ...........................................................................................37
About Servers & Exit Points ..................................................................................................................37
Working with Server Security Rules .....................................................................................................38
Using the Global Server Security Settings Feature ..............................................................................42
FYI Simulation Mode – Global Setting .................................................................................................44
Using the Emergency Override Feature................................................................................................44
Chapter 4: Dynamic Filtering Security .......................................................................46
IP Address Firewall Rules ......................................................................................................................46
SSL Support:..........................................................................................................................................49
Why Raz-Lee developed the SSL Solution .............................................................................................50
The Customer's Testing Methodology ...................................................................................................50
SNA Firewall Rules .................................................................................................................................51
Chapter 5: User Security.............................................................................................53
Conceptual Framework ..........................................................................................................................53
Verb Support .........................................................................................................................................53
Rule Definition Procedure ......................................................................................................................54
Client Application Security ....................................................................................................................56
User Management ...................................................................................................................................58
Work with Users ....................................................................................................................................58
Reports ..................................................................................................................................................63
Disable Inactive Users .............................................................................................................................65
Restricting User Sign-on Times..............................................................................................................66
User Absence Security.............................................................................................................................68
Password Control Tools..........................................................................................................................70
Analyze Default Passwords ...................................................................................................................70
Password Statistical Report ..................................................................................................................71
Chapter 6: Object Security..........................................................................................73
Procedural Overview ..............................................................................................................................73
Native OS/400 Objects ............................................................................................................................74
Files.......................................................................................................................................................74
Libraries ................................................................................................................................................77
Data Queues..........................................................................................................................................79
Printer Files ..........................................................................................................................................81
Programs...............................................................................................................................................83
Commands.............................................................................................................................................85
Command Exceptions ............................................................................................................................87
Work with Pre-check Library Replacement.........................................................................................88
IFS Objects ..............................................................................................................................................91
Chapter 7: Logon Security..........................................................................................93
Procedural Overview ..............................................................................................................................95
FTP/REXEC (Incoming)........................................................................................................................96
Client FTP (Outgoing) ..........................................................................................................................98
Telnet and Sign-on ................................................................................................................................100
Telnet Logon........................................................................................................................................100
SSL Control in Firewall ......................................................................................................................102
Sign-on ................................................................................................................................................102
Firewall 15 User Manual
v
About This Manual
Internet (WSG) ....................................................................................................................................106
Passthrough.........................................................................................................................................109
Chapter 8: Queries, Reports and Logs ....................................................................111
Query Wizard ........................................................................................................................................111
Procedural Overview ..........................................................................................................................112
Working with Queries..........................................................................................................................112
General Query Parameters (Add/Modify Screen) ...............................................................................113
Defining Output Fields........................................................................................................................117
Sort Criteria ........................................................................................................................................118
Running Queries..................................................................................................................................119
Print Query to Output File and Send Via Email..................................................................................122
Working with the Activity Log.............................................................................................................123
Statistics .................................................................................................................................................127
Group Items for Selection.....................................................................................................................128
Using the Report Scheduler..................................................................................................................131
Overview..............................................................................................................................................131
The Definition Process ........................................................................................................................131
Working with Report Groups...............................................................................................................132
Working with Individual Reports.........................................................................................................136
Running Reports ..................................................................................................................................136
Chapter 9: Advanced Security Features ..................................................................138
DDM, DRDA Security...........................................................................................................................138
Pre-Check User Replacement..............................................................................................................138
DRDA Post-Check User Replacement.................................................................................................140
DHCP Security ......................................................................................................................................140
TCP/IP Port Restrictions ......................................................................................................................142
Work with TCP/IP Port Restrictions ...................................................................................................142
License Management Security..............................................................................................................143
License Management...........................................................................................................................143
Display License Management Log ......................................................................................................145
Chapter 10: Configuration and Maintenance...........................................................146
System Configuration............................................................................................................................146
General Definitions .............................................................................................................................146
Additional Settings ..............................................................................................................................148
User Exit Programs.............................................................................................................................149
Transaction Post-Processing...............................................................................................................151
Intrusion Detection..............................................................................................................................151
Password Exit Programs.....................................................................................................................152
Enable ACTION (CL Script + More) ..................................................................................................153
SYSLOG...............................................................................................................................................154
Log retention .......................................................................................................................................155
Language Support ...............................................................................................................................156
The Maintenance Menu ........................................................................................................................157
iSecurity Part 1 Global........................................................................................................................158
Firewall Specifics ................................................................................................................................160
General................................................................................................................................................162
Purging all data of FIREWALL...........................................................................................................163
*PRINT1-*PRINT9 Setup....................................................................................................................163
Journal Product Definitions ................................................................................................................164
iSecurity Central Administration ........................................................................................................168
Appendix: List of Firewall Exit Points......................................................................172
Firewall 15 User Manual
vi
About This Manual
New Features in Firewall Versions
New Features for Firewall 15.6
New feature “Client Application Security”, option 18
New Features for Firewall 15.5
Inherit in-product IFS authorities from higher directory or file (812)
Skip SQL parsing if accept/reject network access decision was taken at global, IP or user
level (812)
Web application server performance improvements (2111 “Skip Checks” options)
dramatically improve performance when a high volume of requests originate from a well
secured IP that uses SSL.
Streamline rules support for multiple libraries (2161) by using “model libraries” to
define security rules
SQL long names (up to 128) are now support for Table (File) and for Collection/Schema
(Library)
SQL and Wizards performance improvements
In Users and Groups security, for %Group the number of members appears and Group
Profiles are signified by *GRPPRF
New Features for Firewall 15.0
Inherited Authority for IFS objects (optional)
Optional change in IFS object authorization determination
The Best Fit algorithm has new variations: If selected, the change allows getting authority
from the preceding directories, or even from any level of a higher generic name
Enables easier distribution of authorities by directories
Firewall 15 User Manual
1
New Features in Firewall Versions
Chapter 1: Introducing Firewall
What is Firewall?
Firewall is a truly comprehensive network security solution that completely secures your
System i (AS/400) against all known external threats, and also controls what users are
permitted to do after access is granted. Firewall is a robust, cost-effective security solution.
Firewall is the by far the most intuitive and easy-to-use security software product on the
market today. Its top-down functional design and intuitive logic creates a work environment
that even System i novices can master in minutes. Firewall features a user-friendly, Java-based
GUI and a System i Navigator (OpsNav) plug-in, in addition to the traditional green-screen
interface.
Why is Firewall Necessary?
Previously, the System i was used almost exclusively in a closed environment, with host
systems connected to remote data terminals via proprietary technologies. Within this closed
environment, the security features of the OS/400 operating system provided the strongest data
and system security in the world. User profiles, menus and object level security provided all
the tools necessary to control what users were allowed to see and do.
In today’s world of enterprise networks, PCs, distributed databases, Internet and web
technologies, closed computing environments are all but extinct. Technological advances
compelled IBM to open up the System i and its OS/400 operating system to the rest of the
world. This openness brought along many of the security risks inherent in distributed
environments. System administrators need to equip themselves with a new generation of
security tools to combat these evolving threats. Firewall is an advanced security tool which
enhances native OS/400 by controlling access through all known external sources as well as
controlling what users are permitted to do once access is granted.
Firewall 15 User Manual
2
Chapter : Introducing Firewall
Feature Overview
Top-Down Security Design
Top-Down security design means that the process of designing and applying security rules
follows the most efficient logical path possible. In other words, the user has to formulate a
minimal number of rules in order to achieve maximum security and the System i has to
process apply rules to far fewer transactions than many similar products. This saves planning
and maintenance time as well as valuable system resources.
Top down security offers a simple hierarchy of rule types. When a higher level rule type fully
meets a situation's security requirements, the user doesn't have to formulate any more rules for
the said situation. The following drawing illustrates this concept.
Firewall 15 User Manual
3
Chapter : Introducing Firewall
System i security is based on five basic levels:
Server/Exit Point Security
TCP/IP Address Firewall Security
User-to-Service Security
Object Security
Logon Security (provides additional security features once access has been granted)
Simply put, whenever a higher, less specific rule will suffice, you do not need any more
specific rules. For example, if you do not need to use FTP, you simply reject all transactions
at the FTP Server/Exit Point level. You do not need to define any rules that limit FTP access
via specific IP addresses, by specific users, or to specific objects.
Multi Thread Support
Calling programs from a thread that is not the main one forces various limitations on the
called programs. For example, the command Override with Data Base File (OVRDBF) cannot
be used. This requires special programming in the called program.
Firewall secures network access by providing programs to be called by security related exit
points. Firewall modules have been specifically treated to improve their capability to work in
secondary threads. This support is not all-encompassing also because it is related to system
API's abilities to function in such circumstances.
We recommend, when possible, working in single thread mode. Otherwise, perform a check,
such as checking the log, in order to validate proper performance.
Firewall 15 User Manual
4
Chapter : Introducing Firewall
Firewall Rules and the Best-Fit Algorithm
Firewall is a rules-based security product. The user creates a wide variety of rules to cover
many different situations and to counter different kinds of threats. Some rules will likely
apply globally to all or most activity types while others will cover very specific situations.
The user can enable the FYI Simulation Mode globally for all activity regardless of server or
user. The user can also enable FYI individually for specific function servers as a parameter in
server security rules. In this manner, security rules can be tested for specific servers without
affecting rules that apply to other servers.
FYI Simulation Mode
FYI Simulation Mode allows the user to simulate the application of security rules without
physically rejecting any activity. All "rejected" transactions are recorded in the Activity Log
as such but the activity is allowed to proceed without interruption. This feature allows you to
test your rules under actual working conditions without adversely affecting user access.
The FYI Simulation Mode may be enabled globally for all activity or enabled for individual
function servers. In this manner, one can test security rules for specific servers without
affecting rules that apply to other servers.
Emergency Override
The Emergency Override feature allows the user to override all existing security rules
temporarily by allowing or rejecting all activity. This feature is useful in order to respond
quickly to emergencies such as critical transactions being rejected due to problems with
Firewall security rules or a sudden security breach.
Rule Wizards
The unique Rule Wizards feature makes security rule definition a snap, even for non-technical
system administrators. This user-friendly feature allows the user to view historical activity
together with the security rule currently in effect on a single screen. One can even modify the
existing rule or define a new rule without closing the wizard. The Rule Wizards are an
invaluable tool for defining the initial set of rules after installing Firewall for the first time.
Log
The activity log provides complete details for every transaction captured as a result of a
security rule. The user can select the activities to be included in the Activity Log and the
conditions under which they are logged (average of 800 bytes per SQL statement). Users can
display or print selected records from the Activity Log by entering the Display Firewall Log
(DSPFWLOG) on any command line or from numerous locations on Firewall menus and data
screens.
For REJECTS - The log entry shows the first level where the request is a violation to the
Firewall rules.
For ALLOWED – The log entry shows the last test that was taken and found valid.
•
QSECOFR as well as any other user CANNOT update or delete
records from the file that contains the log. This is true even when using
SQL, DFU, and CHGFC command and so on.
Firewall 15 User Manual
5
Chapter : Introducing Firewall
•
Users that are authorized to option 82, 11 as Administrators can
setup the number of days that data is kept online
•
Users that are authorized to option 82, 11 as Administrators can
use STRFW, 82, 51. Work with Collected Data and remove data of full
days.
•
QSECOFR as well as any other user who is authorized, can
change the logging option in Firewall per service (exit point). Type:
STRFW, 1, 1
•
QSECOFR as well as any other user who is authorized can change
the logging option per user in Firewall. Type STRFW, 1, 11
Query Wizard
The powerful Query Wizard allows users to design custom output reports that show exactly
the necessary data without programming or technical knowledge. One can create query
definitions by using a series of simple parameter definition screens. Output may be a printed
report, a screen display or a text file saved on the System i.
Highly detailed filter criteria enables users to select only the necessary records by using
Boolean operators and the ability to combine complex logical conditions. Firewall's flexibility
enables users to specify the sort order according to multiple fields. All reports can run
automatically and be e-mailed to the system administrator as HTML, PDF or CSV files.
The “User-Centric” Approach
Firewall has a “user-centric” approach set in the top-down model, which helps the security
administrator to manage user security easily and efficiently and reduces the number of security
rules.
Raz-Lee Security has created two new user groups in addition to the existing general Firewall
group. Together they form three groups that enable organization of the users: General Groups,
Application Groups, and Location Groups. See Chapter 3: First Steps.
User Security
Firewall offers optimized basic user security. Defining a single user security definition can be
performed as described in the following table (see Chapter 6: User-to-Service Security for
more detail).
Method
%Groups
Services
IP
Device Names
Firewall 15 User Manual
Description
Assign a user to a user group (similar to the option of selecting
members for each of the user groups).
Same as the previous method of user-to-service definitions
Same as the Location group rules, but only applicable to single
users.
Only for Telnet sign on. Same as Location group rules, but only
applicable to single users
6
Chapter : Introducing Firewall
User Management
Originally an Action feature enabling user management abilities, User Management has been
added to Firewall. It contains several powerful security tools that control access permissions.
User Management enhances active system security by allowing users to perform the following
tasks:
View and modify security parameters in user profiles using a convenient wizard
Automatically disable inactive users
Restrict user sign-on to specific hours and days
Prevent user sign-on during planned absences or following termination
Analyze default passwords for effectiveness
See Chapter 5: User-to-Service Security.
Intrusion Detection
This feature enables Firewall to trigger proactive responses (similar to the ones available on
the Action module but less flexible). Those responses, such as notification about intrusions to
the admin by MSGQ and email are general, easy to use, yet important.
See Chapter 10: Maintenance.
Firewall 15 User Manual
7
Chapter : Introducing Firewall
Native OS/400 Text Based User Interface
Firewall is designed from the ground up to be a user-friendly product for auditors, managers,
security personnel and system administrators. The user interface follows standard System i
CUA conventions. All product features are available via the menus, so users are never
required to memorize arcane commands.
Many features are also accessible via the command line, for the convenience of experienced
users.
Menus
Product menus allow easy access to all features with a minimum number of clicks. Menu
option numbering and terminology is consistent throughout this product and with other RazLee products.
To select a menu option, simply type the option number and press Enter.
The command line is available from nearly all product menus. If the command line does not
appear (and your user profile allows use of the command line), press F10 to display it.
Commands
Many Firewall features are accessible from any command line simply by typing the
appropriate commands. Some of the most commonly used commands appear below.
Display Firewall log (DSPFWLOG)
Run a Firewall query (RUNFWQRY)
Run a predefined group of reports (RUNRPTGRP)
Print user profile information report (PRTFWUSRP)
Data Entry Screens
Data entry screens include many convenient features such as:
Pop-up selection windows
Convenient option prompts
Easy-to-read descriptions and explanatory text for all parameters and options
Search and filter with generic text support
The following table describes the various data entry screen options.
Firewall 15 User Manual
8
Chapter : Introducing Firewall
Desired Procedure
Entering data in a field
Moving from one field to another
without changing the contents
Viewing options for a data field together
with an explanation
Accepting the data displayed on the
screen and continue
Required Steps
Type the desired text and then press Enter
or Field Exit
Press the Tab or Shift-Tab keys
Press F4
Press Enter
Function Keys
The following function keys may appear on data entry screens:
Function key
F1 – Help
F3 – Exit
F4 – Prompt
F6 – Add New
F8 – Print
F9 – Retrieve
F12 – Cancel
Firewall 15 User Manual
Description
Display context-sensitive help
End the current task and return to the screen or menu from which the
task was initiated
Display a list of valid options for the current field or command. For
certain data items, a pop-up selection window appears
Create a new record or data item
Print the current report or data item
Retrieve the previously-entered command
Return to the previous screen or menu without updating
9
Chapter : Introducing Firewall
Other iSecurity Products
Assessment checks your ports, sign-on attributes, user privileges, passwords,
terminals, and more. Results are instantly provided, with a score of the current
network security status with its present policy compared to the network if iSecurity
were in place.
Audit is a security auditing solution that monitors System i events in real-time. It
includes a powerful query generator plus a large number of predefined reports. Audit
triggers customized responses to threats via the integrated script processor contained
in Action.
Action automatically intercepts and responds to security breaches, system activity
events, QHST contents, and other message queues. Inquiring messages can be
automatically answered. Alerts are sent by e-mail, SMS, pagers, or the message
queues. Easy-to-use Rule Wizard helps define rules and actions.
Capture silently captures and documents user screens for tracking and monitoring –
without any effects on system performance. Capture can run in playback mode and
can be used to search within texts. It also preserves job logs for subsequent review.
Screen captures can be according to user name, IP address, time of day, and more.
View is a unique, patent-pending, field-level solution that hides sensitive fields and
records from restricted users. This innovative solution hides credit card numbers,
customer names, etc. Restricted users see asterisks or zeros instead of real values.
View requires no modification to existing applications.
Anti-Virus provides virus detection and prevention. Anti-Virus scans, validates, and
checks IFS files as they are enrolled or modified, authenticates them, and
erases/quarantines infected files. Includes an updateable database and a simple
interface.
Screen protects unattended terminals and PC workstations from unauthorized use.
It provides adjustable, terminal- and user-specific timeout capabilities. Screen
locking and signoff periods may be defined according to variable criteria such as
date, time of day or user profile.
Password is a general-purpose password management product that ensures user
passwords cannot be easily guessed or cracked. Password allows the user to manage
a variety of password security parameters and maintains a history log of attempts to
create passwords. This log can easily be displayed or printed.
AP-Journal automatically manages database changes by documenting and
reporting exceptions made to the database journal.
Visualizer is an advanced data warehouse statistical tool with state-of-the-art
technology. It provides security-related analysis in GUI and operates on summarized
files; hence, it gives immediate answers regardless of the security data amount being
accumulated.
Firewall 15 User Manual
10
Chapter : Introducing Firewall
Chapter 2: First Steps
This chapter covers the steps necessary to begin using Firewall for the first time. Also
covered in this chapter are the basic procedures for configuring the product for day-to-day use.
Initial Setup and Definition Overview
Firewall is easy to set up and use right out of the box. The factory default parameters are
adequate for many installations. You will likely need to configure only a few parameters to
meet the specific needs of your organization.
It should be noted that, by default, protection is disabled for all servers, users and objects
following initial installation. You must enable protection and define your security rules in
order to begin enjoying the benefits of Firewall protection.
As with any computer security product, careful consideration should be given to defining
security rules that will maximize protection for your organization against intrusion and user
abuse - without adversely affecting legitimate user access and/or system response time.
Before beginning the steps below, the user should complete the process of identifying which
specific servers and objects are to be protected and which users should be granted access
rights thereto.
This section is intended to help you with the process of configuring Firewall and defining your
first security rules according to your organization's security policies. The process entails the
following steps, in sequential order:
1.
Obtain and enter the authorization code (temporary or permanent) if you have not
already done so.
2.
Start Firewall.
3.
Change the iSecurity product password.
4.
Enable the FYI Simulation Mode on a global basis using the System
Configuration option on the main menu.
5.
Review the basic system configuration parameters and change those necessary to
meet your organizational needs.
6.
Enable protection and logging for all activity on all servers. Make certain that
the security level is set to 1 (Allow All) for all servers.
7.
After a suitable period of activity (several days or weeks), use the Rule Wizards
to analyze the logged activity and to define security rules based upon your
organizational security policies.
8.
Use the Activity Log and the Query Wizard to analyze activities not covered by
the Rule Wizards. Define appropriate rules based on this analysis.
9.
Create User Groups and Time Groups according to your organizational
requirements.
10. After a suitable period of further activity, use the Rule Wizards, Activity Logs
and queries to ensure that your new rules are effectively blocking unauthorized
access, while not preventing legitimate user access.
Firewall 15 User Manual
11
Chapter : First Steps
11. Disable the FYI Simulation Mode. From this point forward unauthorized user
access will be blocked.
Starting Firewall for the First Time
In order to use this product, the user must have the *SECOFR special authority. To start
Firewall, type the STRFW command at the command line. The main menu appears after a
few moments.
An additional product password is also required to access most product features. The default
product password is QSECOFR. We recommend that this password be changed as soon as
possible, using the procedure described below.
Firewall Main Menu
Modifying Operators’ Authorities
The Operators authorities’ management is now maintained from one place for the entire
iSecurity on all its modules.
There are three default groups:
*AUD#SECAD- All users with both *AUDIT and *SECADM special authorities. By
default, this group has full access (Read and Write) to all iSecurity components.
*AUDIT - All users with *AUDIT special authority. By default, this group has only Read
authority to Audit.
*SECADM- All users with *SECADM special authority- By default, this group has only
Read authority to Firewall.
iSecurity related objects are secured automatically by product authorization lists (named
security1P). This strengthens the internal security of the product. It is essential that Work with
Firewall 15 User Manual
12
Chapter : First Steps
Operators be used to define all users who have *SECADM, *AUDIT or *AUD#SECAD
privileges, but don't have all object authority. Work with Operators screen has Ussr (user
management) and Adm for all activities related to starting, stopping subsystems, jobs,
import/export and so on. iSecurity automatically adds all users listed in Work with Operators
to the appropriate product authorization list.
Users may add more operators, delete them, and give them authorities and passwords
according to their own judgment. Users can even make the new operators’ definitions apply to
all their systems; therefore, upon import, they will work on every system.
Password = *BLANK for the default entries. Use DSPPGM GSIPWDR to verify.
The default for other user can be controlled as well.
If the organization wishes to have a the default to be *BLANK than they have to enter:
CRTDTAARA SMZTMPC/DFTPWD *char 10
NOTE: When installing iSecurity for the first time, certain user(s) might not have access
according to the new authority method. Therefore, the first step you need to take after installing
is to edit those authorities.
To modify operators’ authorities, follow this procedure.
1. Select 82. Maintenance Menu from the main menu. The Maintenance Menu
appears.
2. Select 11. Work with Operators from the Maintenance Menu. The Work with
Operators screen appears.
Work with Operators
3. Type 1 next to the user to modify his authorities (or press F6 to add a new user).
The Modify Operator screen appears.
Firewall 15 User Manual
13
Chapter : First Steps
Modify Operator
Option
Description
Password
Name = Password
Same = Same as previous password when edited
Blank = No password
1 = *USE
Read authority only
9 = *FULL
Read and Write authority
3 = *QRY
Run Queries. For auditor use.
4. Set authorities and press Enter. A message is
prompted informing that the
user being added/modified was added to the Authority list that secures the
product's objects; the user carries Authority *CHANGE and will be
granted Object operational authority. The Authority list is created in the
installation/release upgrade process. The SECURITY_P user profile is
granted Authority *ALL whilst the *PUBLIC is granted Authority
*EXCLUDE. All objects in the libraries of the product (except some
restricted special cases) are secured via the Authority list.
FYI Simulation Mode
The FYI Simulation Mode allows users to simulate the application of security rules without
physically rejecting any activity. All "rejected" transactions are recorded in the Activity Log
as such but the activity is allowed to proceed without interruption. This feature allows users to
test your rules under actual working conditions without adversely affecting user access.
Firewall 15 User Manual
14
Chapter : First Steps
Users can enable the FYI Simulation Mode globally for all activity regardless of server or
user. One can also enable FYI individually for specific function servers as a parameter in
server security rules. In this manner, one can test security rules for specific servers without
affecting rules that apply to other servers.
To enable FYI globally for all servers and users, perform the following steps:
1. Select 81. System Configuration from the main menu. The Global Parameters
screen appears.
2. Select 1 from the Global Parameters screen. The General Definitions screen
appears.
Firewall General Definitions
3. Emergency override ALL Security Setting option allow you to override all of the
Firewall security settings. Type 0 for regular Firewall settings.
Option
Description
0=Regular
No override, regular Firewall security definitions. Default setting.
1=Allow
Allow all users/groups for all services. None of the exit points is
locked.
2=Allow+Log
Allow all users/groups for all services and log the activities.
3=Reject
Reject all users/groups from all services. All of the exit points are
locked.
4=Reject+Log
Reject all users/groups from all services and log the activities.
4. Type a 'Y' in the Work in FYI (Simulation) Mode field.
Firewall 15 User Manual
15
Chapter : First Steps
NOTE: You may leave the Work in FYI (Simulation) Mode field as ‘N’, but configure certain
servers to work in FYI (see Modifying Server Security).
5. Select 'Y' at the Check OS/400 Group and Supplemental profile field to make
sure both group profile and the supplemental groups’ authorizations are checked.
It is enough to have permission for a service in one of the groups.
6. Select 'Y' at the Enable Super Speed Processing to leave programs in
memory between system IPLs, which will allow fast performances.
NOTE: Before an upgrade, set Enable Super Speed Processing to ‘N’ and perform an IPL.
7. Hot upgrade is safe: this option will allow performing an update which is
performed without first terminating Firewall. When Enable Super Speed
Processing is set to Y, this may leave programs in memory between system
IPLs. Therefore, a Hot Upgrade should not be attempted if Hot Upgrade is
Safe is set to N.
8. Press Enter twice to return to the main menu.
Enabling Protection for all Servers
In order to gather activity data for subsequent analysis, users should enable protection for all
servers (if only temporarily) and enable logging of all transactions into the Activity Log. To
accomplish this, perform the following steps in order:
1.
Select 1. Activation and Server Setting from the main menu and 1. Work with
Servers. The Work with Server Security screen appears.
2.
Press F22. The Global Server Security Settings screen appears.
3.
Make certain that *ALL appears in the Exit point group field.
4.
Type '*YES' in the Secure field.
5.
Type '*YES' in the Log field.
6.
Press Enter twice to return to the main menu.
7.
Make absolutely certain that the FYI Simulation Mode is enabled as described
above.
Firewall 15 User Manual
16
Chapter : First Steps
Global Server Security Settings
NOTE: In some cases a restart of QSERVER is required for FULL implementation. This can be
delayed until next IPL.
When QSERVER is restarted, NETSERVER will be restarted automatically if it was active.
Using the Rule Wizards
The unique Rule Wizards feature makes security rule definition a snap, even for non-technical
system administrators. This user-friendly feature allows users to view historical activity
together with the security rule currently in effect on a single screen. One can even modify the
existing rule or define a new rule without closing the wizard. The Rule Wizards are an
invaluable tool for defining the initial set of rules after installing Firewall for the first time.
Rule Wizards are available for the following types of rules:
Servers usage
Native OS/400 object security
IFS Object security
Incoming IP Address Firewalls
Outgoing IP Address Firewalls
User-to-Service Security
Firewall 15 User Manual
17
Chapter : First Steps
Procedural Overview
The basic procedure for working with the rule wizards is as follows:
1. Select 41 from the main menu. Several different types of rule wizards are
available, but the basic procedure is the similar for all of them.
Rule Wizards main menu
2. Select a wizard from one of the Rule Wizards to view summarize recent activity
log for that rule type.
Options 1-6 on this screen initiate IBM system commands. Enter new or updated settings
in the R=Revised column.
Options 2. Incoming IP and 3. Outgoing IP on this screen offer a new value, *FAST, for
the Wizard Type option. *FAST automatically brings up the following screen when the
IBM command completes.
The Re-use options (21, 31, 41, 51, and 61) reuse the output of the IBM command
initiated (by options 1-6) to save processing time.
Firewall 15 User Manual
18
Chapter : First Steps
3. Select option 99. Advanced Options, to customize the wizards’ rules
Rule Wizards - Advanced Options
4. Select Display Log to view summarize recent activity log for that rule type.
5. Select Create Working Data Set to define the scope of the historical activity
data to be examined by the wizard.
6. Select Work with Rule Wizard to display the Plan Security screen for the
appropriate wizard. Use this screen to compare historical activity with the
security rule currently in force and to revise this rule if appropriate.
7. Select Update Security Rules to apply the rule changes.
The example in the following procedure is taken from the Servers wizard, but is applicable to
the other wizards as well.
Analyzing Historical Activity
The Rule Wizard enables the user to review the Activity Log as a first step in the process of
analyzing activity. The Activity Log allows users to view details of historical activity. This
step is optional and may be performed at any time during the wizard process.
To display the Activity Log, follow this procedure.
1.
Select option 1. Servers from the wizards menu. The Display User Activity
screen appears.
Firewall 15 User Manual
19
Chapter : First Steps
Display User Activity
2.
Choose the records that you wish to examine from this screen and press Enter to
continue.
The table on the following page describes the record selection and display options
Parameter or Option
User
Display Last n Minutes
Starting Date & Time
Ending Date & Time
Server ID
Output
Firewall 15 User Manual
Description
Filter records by user profile
Select only the records occurring within the previous number
of minutes as specified by the user
Number = Enter the number of minutes
*BYTIME = According the starting and ending time specified
below
Select only the records occurring within the range specified by
the starting and ending date/time combination.
Date or Time = Enter the appropriate date or time
*CURRENT = Today (Current Date)
*YESTERDAY = Previous date
*WEEKSTR/*PRVWEEKS = Current week/Previous week start
*MONTHSTR/ *PRVMONTH = Current month/Previous month
start
*YEARSTR/ *PRVYEARS = Current year/ Previous year start
*SUN -*SAT = Day of week
Filter records by server ID or display the user’s activity in ALL
servers
* = Display
*Print = Printed report *PRINT1-*PRINT9 = select print
option
20
Chapter : First Steps
Defining the Working Data Set
You can select the records from the Activity Log that will comprise the working data set that
is summarized on the wizard screens.
The example in the following procedure is taken from the Incoming IP Address wizard, but
is applicable to the other wizards as well.
1.
To define the working data set, select 99. Advanced Options -> choose a wizard
type to work with and select Create Working Data Set from the wizard menu.
The Summarize screen appears. Samples from two of the wizards are shown
below. Refer to the table on the following page for an explanation of the required
parameters.
Summarize Incoming IP Address
Working with the Plan Security Wizard Screens
The example described in this section refers to the outgoing IP address firewall activity type.
The same principles apply to the other rule wizards.
The Plan Incoming IP Security screen displays activity statistics for the current working set
together with currently defined rule settings (Column “C”) and a place to enter revised rule
settings (Column “R”). Enter revised rule setting as desired and press Enter to continue.
Firewall 15 User Manual
21
Chapter : First Steps
Plan Incoming IP Security
Each line in this screen represents activity for a single IP address. The quantities represent the
number of actual transactions for each activity type for this IP address. Press F11 to display
the statistics for the bottom row of activity types (NDB, RMT, REXEC and WSG).
The "C" column shows the rule currently in effect for activity type on a line. A 'Y' indicates
that transactions will be allowed and a 'N' indicates that transactions will be rejected. The
background color of each letter indicates whether the rule currently in effect is specific to this
line (IP Address) or is "generic", meaning that the current rule applies to more than one line.
For example, the rules for the first line (1.1.1.53) are relevant for this IP address only. The
second line (1.1.1.55) is covered by a "generic" rule that applies to several IP addresses. This
generic rule could be a default rule that covers all IP addresses that are not covered by a
specific rule or it could be single rule that covers multiple IP addresses via the use of the
subnet mask.
Background Color
Rule Source
Green (Black at the white display) or Red
Specific rule
Cyan (Blue at the white display) or Pink
"Generic" rule
Use the "R" column to modify the rule in effect for that line. If the line is covered by a
generic rule, an entry in the "R" column has the effect of creating a new rule specific to that
line.
Firewall 15 User Manual
22
Chapter : First Steps
Option
F8
Description
Display the rule currently in effect for each activity type (column). Refer
to the previous page for a more detailed explanation. 'Y' = allowed. 'N' =
rejected.
Type 'Y' (Allow) or 'N' (Reject) to modify the rule currently in effect for
each activity type. Refer to the previous page for a more detailed
explanation.
4 = Delete this rule
5 = Display the detailed Activity Log for this rule
9 = Create a new rule based on an existing one
Create a new rule covering activity NOT shown on any line. For
example, use F6 to create a new rule for an IP address that does not appear
on this screen.
Print all activity and rules shown in this wizard
F11
Displays additional data for each line with fewer lines per screen
'C' Columns
'R' Columns
Opt
F6
Native OS/400 Objects Log
Options 4, 5 and 6 on Firewall Option 41 screen have a "Group by" parameter for
summarizing log output data.
Value *GRPPRF summarizes by system group profiles plus all users not defined in group
profiles.
Value *USRGRP summarizes by user groups and value *GROUP first causes the product to
attempt to associate the user with a relevant user group and then to attempt to associate the
user with a relevant group profile.
If both fail, the user profile name appears in the report.
1. To see the Summarize Native AS/400 Log, select option 1. Create Working
Data Set from the Native OS/400 Object Security menu.
2. The Summarize Native AS/400 Log (CPRNTVSEC) screen appears
Firewall 15 User Manual
23
Chapter : First Steps
Summarize Native AS/400 Log
Firewall 15 User Manual
24
Chapter : First Steps
Option
Description
Object/Library
Object name and library path (Native object and User wizards only)
Generic* = All objects/libraries beginning with the text string
preceding the *
*ALL = All objects/Libraries
Object Type
Object type ( Native object and User wizards only )
Press F4 to select the object type from a list
User
Enter a user profile or press F4 to select from a list (not on all
wizards)
Group by
Select a group from a list
Value *GRPPRF summarizes by system group profiles plus all
users not defined in group profiles.
Value *USRGRP summarizes by user groups and value *GROUP
first causes the product to attempt to associate the user with a
relevant user group and then to attempt to associate the user with a
relevant group profile.
If both fail, the user profile name appears in the report.
Allowed
*YES = Include allowed transactions only
*NO = Include rejected transactions only
*ALL = Include all transactions
Starting date & time
Selects only the events occurring within the range specified by the
start and end date/time combination
Ending date & time
Date and time = Enter the date and time or one of the following
constants:
*CURRENT = Current day
*YESTERDAY = Previous day
*WEEKSTR/*PRVWEEKS = Current week/Previous week start
*MONTHSTR/ *PRVMONTH = Current month/Previous month start
*YEARSTR/ *PRVYEARS = Current year/ Previous year start
*SUN -*SAT = Day of week
Server ID
Set name
Press F4 to select a server ID from a list window or type *ALL to
include activity for all servers.
Enter a name for this data set or use one of the following constants:
*USER = Use your user profile as the data set name
*SELECT or *S = Select a data set from the pop-up list
Replace or add
records
Wizard type
*ADD = Add records to an existing data set of one exists.
*REPLACE = Replace an existing data set of the same name
*FAST (default) = which allows to initiate a rule wizard
immediately by pressing Enter.
*STD (standard)
*NO
Firewall 15 User Manual
25
Chapter : First Steps
2.
Enter the required parameters and press Enter to begin the selection process and
return to the Wizard menu.
Plan Security for Native Objects
Update Rules
The final step is to apply the new and revised security rules that were created via the wizards.
1. To update rules, select Update Security Rules from the wizard menu. The
Update screen appears. Samples from two of the wizards are shown below.
Refer to the table on the following page for an explanation of the required
parameters.
Native AS/400 Objects Update
Firewall 15 User Manual
26
Chapter : First Steps
2. Enter the required parameters and press Enter to begin the selection process and
return to the Wizard menu.
User Groups
User groups allow you to apply security rules to predefined groups of users. User groups are
also useful as filter criteria for queries and reports. The use of user groups greatly reduces the
number of rules required to implement security policies as well as the time spent defining and
maintaining rules.
Also note that User Groups are defined in Firewall Option 11 and Group Profiles are defined
in the system.
The benefit of this new feature is that instead of the report containing thousands of lines of
user data, user groups, group profiles, and user profiles are listed.
Firewall supports the use of two types of user groups:
OS/400 group profiles
Firewall proprietary user groups
OS/400 Group Profiles
OS/400 group profiles are useful for a variety of System i administration and security tasks.
Use the CRTUSRPRF or WRKUSRPRF commands to create OS/400 group profiles. To
assign other user profiles to the group profile, simply enter the group profile name in the
Group Profile field for each individual user profile that is a member of a group.
Firewall Proprietary User Groups
Overview
Firewall proprietary user groups offer greater flexibility when it comes to grouping users
together for the purpose of minimizing security rules and query filtering. Since OS/400 group
profiles are used for many other administrative tasks, they may not be as efficient for grouping
users together for security purposes.
Firewall proprietary user groups are always identified by the '%' symbol as the first character
(e.g. %SALES). These user groups are defined within Firewall, and they may include both
individual user profiles and OS/400 group profiles.
The following section describes the procedures for defining Firewall user groups.
Defining User Groups
1.
To work with Firewall proprietary user groups, select 11. Users and Groups
from the main menu. The Work with User Security screen appears.
Firewall 15 User Manual
27
Chapter : First Steps
Work with User Security
Option
Description
Opt
1 = Modify user profile or group. The Modify User Security screen
Servers
appears.
3 = Copy user profile or group definitions
4 = Delete user profile or group
5 = Edit the group’s members
Displays the rule status for each server type:
+ = User-to-service rule overrides the global server security rule. Allow a
user the access to a server and check for object authorizations.
V = User-to-service rule overrides with verb (command) support
Blank = Global server security rule governs activity for this server
S = Allow a user to access a server and skip the check for object
authorizations. This simplifies the test for some users (normally for batch
applications, which are playing the role of servers and the desire to save
performance in such cases).
F6
Add a new user. The Add User Security screen appears.
F7
Add a new group. The Add User Group Security screen appears.
F8
Print user group definitions
F3
Return to the main menu
Firewall 15 User Manual
28
Chapter : First Steps
1. To work with an existing rule, type 1 in the Opt field or press F6 to create a new
rule. Use the PageUp and PageDown keys to scroll through the list. Press Enter
to continue.
2. Enter parameters on the Add/Modify Parameters screen and press Enter to
confirm.
Modify User Security
Parameter or Option Description
Displays the user profile or user group name
User
Activity Time
Time Group
= type a time group name or press F4 to select from a
list.
*NEVER
=
Use Group Authorities Y = use a specific group authorities
Authorities and
Locations
N = don’t use any specific group authorities
2. Services= specify authorities and location by Services name
3. IP = specify authorities and location by IP name
4. Device Names = specify authorities and location by Device name
In-product Special
Object Authority
Use this field to define object authority for the user/group for
AS/400 Native and IFS objects.
F8
Print user-to-service security rules
F9
Work with object security rules
F10
Work with Logon security rules
Add User profiles to a Group
The Create/Modify screen allows you to define the users belonging to the group. A user group
may contain individual user profiles or OS/400 group profiles.
Firewall 15 User Manual
29
Chapter : First Steps
1.
To add a user to a group, type 5 to add a member and type in the user profile
name in one of the User fields, or press F4 to select a user profile from a list
window.
Add a Member
2.
Press Enter to accept the profiles and return to the Work with User Security
screen.
NOTE: A user can be in several Firewall user groups simultaneously.
Time Groups
Overview
Many of the Firewall rules and reporting features take advantage of the unique Time Group
feature. Time groups allow users to apply predefined sets of time-based filters to different
queries without having to define complex criteria for each one. Time groups also work with
the report scheduler and the display Activity Log features.
For example, one may be using a number of different queries and reports to audit the activities
of certain employees during normal working hours and a different group of employees during
nights and weekends. This can be accomplished with just one time group using the following
guidelines:
1. Create a time group that defines normal working hours for each day of the week.
2. Use an inclusive time group filter (activities occurring during the time group
periods) for each query or report covering activity during normal working hours.
Firewall 15 User Manual
30
Chapter : First Steps
3. Use an exclusive time group filter (activities not occurring during the time group
periods) for each query or report covering activity outside of normal working
hours.
Using Time Groups as Filter Criteria
One common use of time groups is as filter criteria in security rules, queries and reports. For
example, time groups can be used to restrict application of a rule to specific times and days of
the week.
Time group filters can be either:
•
Inclusive – Including all activities occurring during the time group periods
•
Exclusive – Including all activities not occurring during the time group periods
Generally, an exclusive time group filter is indicated by placing an 'N' (NOT) in the field
immediately preceding the time group name field on the rule definition or query definition
screen.
For example, one can use an exclusive time group filter to apply a rule to any time occurring
outside of days and hours specified in the time group.
Defining and/or Modifying Time Groups
Perform these steps to define a time group.
1. Select 49. Time Groups from the main menu. The Define Time Groups screen
appears.
Define Time Groups
2. Select a time group to modify or press F6 to add a new group.
3. Press Enter to accept the definition and return to the Define Time Groups
screen.
Firewall 15 User Manual
31
Chapter : First Steps
Option
Description
Opt
1 = Modify a time group. The Change Time Group screen appears.
4 = Delete a time group
F6
Add a new time group.
F3
Return to the main menu
Application Groups
Overview
Application Groups consist of users whose access to certain applications is defined to be
identical. The name of the group is the application itself (i.e. %#Excel, %#OPSNAV, etc).
Define which servers are being used by the application and then select its members. Upcoming
releases will include predefined application groups for widely used applications such as
OPSNAV and FILE-SERVER.
Object level rules can be defined for application groups as well.
Defining and/or Modifying Application Groups
Perform these steps to define an application group.
1. Select 12. Applications from the main menu. The Work with Application
Groups screen appears.
Work with Application Groups
Firewall 15 User Manual
32
Chapter : First Steps
Option
Description
Opt
1 = Modify an application group.
3 = Copy an existing application group
4 = Delete an application group
5 = Edit the group members (OS400 Users and Group profiles)
Application
Name of application group
F3
Return to the main menu
F6
Add a new application group.
F8
Print application group definitions
2. Select 1 to modify a group or press F6 to create a new group (as shown below).
Add Application Group Security
Option
Description
Application Group
Application group name
Text
Enter a description of the application group
Services = choose server
Selections = Enter your choice of service
This feature defines the level of authority for both native and IFS
objects.
*OBJAUT = Object authority is subject to object security rules
*EXCLUDE = All object authority is denied for this user
*ALLOBJ = Users are granted *ALLOBJ for IFS object
Return to the main menu
Authorities
In-product Special
Object Authority
F3
Firewall 15 User Manual
33
Chapter : First Steps
3. Press Enter to accept the definition.
Location Groups
Overview
Location Groups are collections of users whose access to certain location is defined by IP and
device name(s). For example, create a Chicago group in which all users have access to the
System i only from the Chicago branch IP range. The location group, which even supports
each Telnet sign-on, may be used only from OS V4R5 and fully complies on all the servers
from OS V5R1.
You can define object level rules in location groups as well.
Perform the following steps to define and/or modify location groups
Defining and/or Modifying Location Groups
1. Select 13. Locations from the main menu. The Work with Location Groups
screen appears as below.
Work with Location Groups
Option
Opt
Location
F3
F6
F8
Firewall 15 User Manual
Description
1 = Modify a location group.
3 = Copy an existing location group
4 = Delete a location group
5 = Edit the group members (OS400 Users and Group profiles)
Location name
Return to the main menu
Add a new location group.
Print location group definitions
34
Chapter : First Steps
Up to two separate time periods can be defined per day. Please note that if the "To" time is
earlier than the "From" time, it will be considered to roll over to the following day. This is
illustrated in the following screenshot.
Modify Location Group Security
Parameter or Option Description
Location Group
Name of location group
Text
Enter descriptive text
Activity Time
Time Group = Select a time group
*NEVER = If this option is selected, members of this group
are disabled and cannot log in
Locations
IP = The IPs that are allowed to be accessed by this Location
group
Device names = Device names which are allowed to be
accessed to telnet sign-on
Selection = Enter which of the above are being defined (IP or
device name)
Firewall 15 User Manual
35
Chapter : First Steps
Firewall 15 User Manual
36
Chapter : First Steps
Chapter 3: Basic Security
Server security is the topmost level, and most basic level of security provided by Firewall.
Server security rules determine how each server is to be protected and what level of access
control is desired. Rules include the following parameters:
Enabling or disabling protection for each server
Specifying the level of access control (allow all activity, reject all activity or allow activity
subject to more specific rules regarding users, objects, or logon parameters)
Determining which transactions are to be recorded in the Activity Log
Determining whether or not Action can respond automatically to specific events by
sending messages to key personnel or running proactive command scripts to prevent
security breaches
Allowing custom user exit programs to perform specific actions
Whether the FYI simulation mode is active for each server
Firewall server security rules control access to the servers on a global basis for all users. You
can also define User-to-Service security rules to control access to the servers for specific
users or groups of users. User-to-Service security rules are discussed in Chapter 5: User-toService Security.
About Servers & Exit Points
Exit Points are components of the OS/400 API that manage the interface with various system
resources. These Exit Points are govern the interface between the System i and various
external access protocols and methodologies, such as FTP, Telnet, ODBC database access,
DRDA database access, etc.
OS/400 employs a variety of logical Servers (sometimes referred to as Function Servers) that
control activity between applications and the exit points. Each server controls one or more
specific exit points.
Exit Programs are scripts or programs that run automatically whenever activity occurs via a
particular exit point. Customized exit programs can provide additional security or
functionality for specific types of activity.
Firewall 15 User Manual
37
Chapter : Basic Security
Working with Server Security Rules
Firewall uses only one security rule for each server. Working with server security consists of
modifying these rules. By default, protection is disabled for all servers and all activity is
allowed.
To work with server security rules:
1. Select 1. Activation and Server Setting from the main menu. Select option 1.
Work with Servers, the Work with Server Security screen appears.
The Work with Server Security screen lists the current rules for each server. The number
of servers available is dependent on the version of OS/400 installed on the system. This
screen displays the current status of each server security rule. One can select one or more
rules for modification. The user can also view an explanation and display the Activity Log
for each server directly from this screen.
2. Set rules according to the following table. To modify a rule, select 1.
3. Press Enter to confirm and return to the Work with Server Security screen.
Work with Server Security
NOTE: In some cases a restart of QSERVER is required for FULL implementation. This
can be delayed until next IPL.
When QSERVER is restarted, NETSERVER will be restarted automatically if it was
active.
Firewall 15 User Manual
38
Chapter : Basic Security
Option
Opt
Secure
Level
Log FYI FW, Action
Description
1 = Select a rule for modification. The Modify Server Security
screen appears
5 = View a description of the server
6 = View the Activity Log for the server
*YES = Secured
*NO = Not secured
This option is not available for exit points that deal with specific
operations (such as Change User Profile and Pre-Power Down
System)
1 = Allow all activity (available for all other exit points)
2 = Reject all activity (available for all other exit points)
3 = Allow activity subject to User-to-Service security rules (not
available for exit points that are supported until the Logon level
i.e. Telnet and Remote Sign-on)
9 = Full security – differs in logon and user-to-object.
Logon activates the logon limitation rules (user to system name,
IP and user name).
User-to-object activates your user limitation rules.
Shows if FYI mode is currently being logged for Firewall and
Action
Server
Name/description of server
User Exit Pgm
Name of custom user exit program for this server
F8
Print all server security rules
F9
Work with object security rules
F10
Work with logon security rules
F11
Work with user-to-service security rules
F22
F23
Define server security rules globally for predefined groups of
servers or for all servers
Enable or disable the FYI simulation mode globally for all servers
F24
Use the Emergency Override feature
Firewall 15 User Manual
39
Chapter : Basic Security
Modify Server Security
Firewall 15 User Manual
40
Chapter : Basic Security
Parameter or Option Description
Server name
Server
Secure
*YES = Secured
*NO = Not secured
Security Level
This option is not available for exit points that deal with
specific operations (such as Change User Profile and Pre-Power
Down System)
1 = Allow all activity (available for all other exit points)
2 = Reject all activity (available for all other exit points)
3 = Allow activity subject to User-to-Service security rules (not
available for exit points that are supported until the Logon level
i.e. Telnet and Remote Sign-on)
9 = Full security – differs in logon and user-to-object.
Logon activates the logon limitation rules (user to system name,
IP and user name).
User-to-object activates your user limitation rules.
1 = Do not log any activity
2 = Log rejected transactions only
4 = Log all activity
1 =No (disables the Firewall real-time detection rules for this
server
2 = Rejects only (will activate Firewall real-time detection rules
only on rejections from this server)
3 = All (will activate Firewall real-time detection rules for all
accesses from this server)
Yes =Run a specific exit program after passing Firewall rules
for this server. The program SMZTMPA/UPyyyyyy will be
called. (yyyyyy is the server short name). Write your own
SMZTMPA/UPyyyyyy program according to the example in
SMZ8/GRSOURCE FWAUT#A.
Information to Log
Allow Action to React
Run Server-Specific
User Exit Program
The program that initiates the call is GRCLUER. This program
runs in USER authority and therefore the user (i.e. every user in
the system) will have the authority to run the program
SMZTMPA/UPyyyyyy
If the program SMZTMPA/UPyyyyyy is not accessible, the
regular security applies.
= If there is a general exit program configured, it will not be
activated for this server.
Blank = global setting
No
Run in FYI Simulation
Mode
1 = Enable FYI Simulation mode for this server only
Blank = Use global parameter for all servers (System
Configuration)
Firewall 15 User Manual
41
Chapter : Basic Security
Using the Global Server Security Settings Feature
The global server security settings feature is a real time-saver that allows users to modify
server security rules quickly for all servers or for predefined server groups. Server groups
include several related servers, enabling definition of rules for all on a single screen. The
following table describes the members of the server groups.
Server
Group
Description
Server
Group
Description
*IP
FTP Server Logon
FTP Server-Incoming Rqst
Validation
FTP Client-Outgoing Rqst
Validation
DDM request access
DRDA Distributed Relational DB
access
Remote sign-on (Passthrough)
Original File Transfer Function
FTP Server Logon (*)
FTP Server-Incoming Rqst
Validation
FTP Client-Outgoing Rqst
Validation
TFTP Server Request Validation
Original Remote SQL Server
Database Server - SQL access &
Showcase
Database Server - data base access
File Server
Database Server – entry
Database Server - object
information
*CMD
REXEC Server Request
Validation
Remote
Command/Program Call
*LICMGT
Original License Mgmt
Server
Central Server - license
mgmt
Central Server - license
mgmt
Central Server conversion map
Central Server - client
mgmt
Network Print Server - entry
Network Print Server - spool file
Database Server – entry
Database Server - object
information
Original Data Queue Server
Data Queue Server
*RMTSGN
*SNA
*FILTFR
*DBSRV
*PRT
*DTAQ
*CNTSRV
*USRPRF
Change User Profile
Create User Profile
Delete User Profile - after
delete
Delete User Profile before delete
Restore User Profile
Remote sign-on
(Passthrough)
To work with server security rules globally:
1. Select F22=Global setting from the Work with Server Security screen. The
Global Server Security Settings screen appears.
2. Press Enter to accept.
Firewall 15 User Manual
42
Chapter : Basic Security
Global Server Security Settings
Parameter or Option Description
Enter an exit point group from the list to the right
Exit point group
Secure
Check
Filter IP/SNA
Log
Allow Action to React
Skip "other" exit
points
*YES = Secured
*NO = Not secured
*ALLOW = Allow all activity
*REJECT = Reject all activity
*MAX = Full security – allow activity subject to
user-to-service,
object and login security rules as appropriate
*YES = Secured
*NO = Not secured
*YES = Log all activity
*REJECTS = Log rejected transactions only
*NO = Do not log any activity
Allow Action to respond automatically to specific events by
sending messages to key personnel or running proactive command
scripts to prevent security breaches.
*YES = Allow Action to respond for this server only
*REJECTS = Allow Action to respond for rejected transactions
only
*NO = Do not allow Action to respond for this server only
An “Other” exit point is one to which an unidentified program is
already assigned. Such an entry is denoted by the word OTHER in
the SECURED column.
*YES = skip
*NO = Do not skip
NOTE: iSecurity Firewall and other Network Security products can
work in parallel. For more information please contact Support.
Firewall 15 User Manual
43
Chapter : Basic Security
FYI Simulation Mode – Global Setting
The FYI Simulation Mode may be enabled or disabled globally for all activity or enabled for
individual function servers. In this manner, users can test security rules for specific servers
without affecting rules that apply to other servers. In addition, administrators can selectively
activate FYI mode for individual function servers.
To change the global setting for the FYI Simulation Mode:
1. Press F23 from the Work with Server Security screen. The Firewall *FYI*
Parameter pop-up window appears.
2. Type 'Y' to enable FYI globally or type 'N' to disable FYI. Press Enter to
continue.
Work with Server Security: Firewall FYI* Parameter
Using the Emergency Override Feature
The Emergency Override feature allows users to override all existing security rules
temporarily by allowing or rejecting all activity. This feature is useful in order to respond
quickly to emergencies such as critical transactions being rejected due to problems with
Firewall security rules or a sudden security breach.
To work with emergency override, follow the following procedure:
1. Press F24 from the Work with Server Security window. The Firewall
Emergency Parameter pop-up window appears.
2. Type a setting according to the below table.
3. Press Enter to confirm and return to the Work with Server Security window.
Firewall 15 User Manual
44
Chapter : Basic Security
Work with Server Security: Firewall Emergency Parameter
Parameter or Option Description
Setting
0 = Disable emergence override – all rules function normally
1 = Allow all activity
2 = Allow and log all activity
3 = Reject all activity
4 = Reject and log all activity
.
Firewall 15 User Manual
45
Chapter : Basic Security
Chapter 4: Dynamic Filtering Security
Firewall rules control activity originating from or outbound to specific IP addresses. Inbound
activity from specific SNA system names may likewise be controlled.
Firewall also supports SSL restrictions on access to FTP, Telnet, Data Base Server (including
ODBC), Sign-on, Remote Access and DDM servers.
IP Address Firewall Rules
IP address firewall rules can apply to outbound and inbound activity. The definition
procedure and data screens are the same for both activity types.
Rules control activity for individual IP addresses or ranges of IP addresses using standard
subnet mask notation. For each address or range of addresses, one can choose to allow or
reject activity for any of the following servers:
FTP/REXEC (includes: FTPLOG, REXLOG)
Telnet
Internet WSG
DB Server (includes: SQLENT, SQL, NDB, OBJINF)
TCP Sign-on Server
Remote Command/Program Call (RMTSRV)
DDM (includes: DDM, DRDA)
To create or modify IP address firewall rules,
1. Select 2 from the main menu. The Work with Dynamic Filtering menu appears.
2. Select 1. Incoming IP Addresses from the Work with Dynamic Filtering menu.
To work with Outgoing activity, select 2 from the Work with Dynamic Filtering
menu. In either case, the Dynamic Filtering screen appears. This screen lists all
existing rules showing which communication protocols are allowed or rejected.
3. Type 1 to select an existing rule or press F6 to create a new rule.
Firewall 15 User Manual
46
Chapter : Dynamic Filtering Security
Work with Firewall – Incoming IP Address Security
Parameter or Option Description
F6
Create a new firewall rule
F8
Print list of firewall rules
F10
Work with Logon security rules
Opt
1 = Modify an existing rule
4 = Delete an existing rule
4. If you are creating or modifying a rule, the Dynamic Filtering
Incoming/Outgoing IP Address screen appears. The table following the screen
examples details the appropriate rule parameters.
Firewall 15 User Manual
47
Chapter : Dynamic Filtering Security
Modify Firewall Incoming IP Address
Parameter or Option
Description
IP Address
Enter an IP address using standard decimal format.
Enter the subnet mask using standard decimal format to define a
range of IP addresses. Refer to the examples or press F4 to
select an appropriate subnet mask range.
Descriptive text
Y=Yes = Type 'Y' to allow activity or leave the field Blank to
reject activity for each individual server.
S=SSL = Type ‘S’ to set SSL restrictions for the various types
of access protocols.
A = Allow always
B = SSL+Skip checks
L = Allow always and log
M = SSL+Skip checks+Log
Use of B and L can dramatically improve performance for
situations such as high volume of requests that come from an
already "confident" (well secured) IP that uses SSL, which
doesn’t require checking of the requests. An example can be a
server connected via SSL which issues many SQL (ODBC)
and/or Program calls.
Displays the range of IP addresses as defined by the subnet
mask.
Work with Logon security rules
Subnet Mask
Text
Secure value
Equivalent IP Range
F10
Firewall 15 User Manual
48
Chapter : Dynamic Filtering Security
SSL Support:
iSecurity Firewall now supports SSL restrictions on access to FTP, Telnet, Data Base Server
(including ODBC), Sign-on, Remote Access and DDM servers.
This feature is unique and unequaled in the System i security network access market.
The benefits of this feature are:
1. Simple, easy to use interface for defining SSL restrictions for the various types of access
protocols (see Figure 1 below).
2. Full integration with iSecurity Firewall's capabilities, providing a "one-stop" solution for
all of your company's security network access requirements (see Figure 2 below).
3. The ability to test SSL connectivity before "live" implementation using FYI (for-your
information) simulation mode (see Figure 3 below).
Secure access protocols with SSL
Firewall 15 User Manual
49
Chapter : Dynamic Filtering Security
Test SSL connectivity while using FYI mode
Why Raz-Lee developed the SSL Solution
A Raz-Lee customer wished to implement "port restriction" (to separate unsecured and SSLand ODBC accesses for a specific IP range).
The customer has subsidiaries with specific IP ranges, some of which are capable of
communicating via SSL, while others are not. The customer wanted to allow normal port
access for specific IP ranges for the subsidiaries which are not capable of using SSL, and
wanted to use SSL ports only for the SSL-capable IP range. All other IP addresses should be
restricted.
The required solution must be implemented at the IP level and not at the user level, and has to
be implemented for ODBC.
In the future, when the entire customer's subsidiaries use SSL, they will want to fully block
unsecured ODBC servers. In short, they are not able to restrict unsecured ODBC on the
OS/400 level at this time.
The Customer's Testing Methodology
In order to define their requirements, the company used iSeries Navigator and Microsoft Excel
with the iSeries Navigator Data Access plug-in.
When Navigator was configured for non-SSL connections and data was imported via Excel,
the customer saw the connections on the i5/OS with NETSTAT connections on ports 8470,
8471, and 8476. These are the normal (non-SSL) ports of host servers.
When Navigator was configured for SSL connections using the same data accessing method,
connections were made on ports 9470, 9471, 9476. The customer understood these to be the
secured ports of the host servers.
Based on these findings, the customer wanted to define IP address ranges that could access
System i data only in secured mode.
Firewall 15 User Manual
50
Chapter : Dynamic Filtering Security
SNA Firewall Rules
SNA firewall rules govern incoming activity from other IBM systems conforming to the SNA
system name protocol. Rules control incoming activity for individual system names. For each
system name, you can choose to allow or reject activity for any of the following servers:
•
DDM
•
DRDA
•
Passthrough
To work with SNA firewall rules:
1. Select 2 from the main menu.
2. Select 11. Incoming Remote System Names from the Work with Dynamic
Filtering menu. The Dynamic Filtering- Incoming Remote System Names
Security menu appears. This screen lists all existing rules showing which
communication protocols are allowed or rejected.
3. Type 1 to select an existing rule or press F6 to create a new rule.
Work with Firewall – Incoming Remote System Names
Parameter or Option
F6
Description
Create a new firewall rule
F8
Print list of firewall rules
F10
Work with Logon security rules
Opt
1 = Modify an existing rule
4 = Delete an existing rule
Firewall 15 User Manual
51
Chapter : Dynamic Filtering Security
If you are creating or modifying a rule, the Dynamic Filtering- Modify Incoming Remote
System Name screen appears. The table following the screen example details the appropriate
rule parameters.
Modify Incoming Remote System Name
Parameter or Option
System
Description
SNA system name
Text
Description of the SNA system
Y=Yes
Type 'Y' to allow activity or leave the field Blank to reject
activity for each individual server.
Work with Logon security rules
F10
Firewall 15 User Manual
52
Chapter : Dynamic Filtering Security
Chapter 5: User Security
Conceptual Framework
User-to-service security rules control the activity of specific users, profiles groups and Firewall user
groups in individual servers. You can also use user-to-service rules to grant or deny users
*ALLOBJ (all objects security) for native OS/400 and IFS objects.
Server security rules, as described in Chapter 4, control activity for each server on a global basis for
all users. User-to-Service security rules allow users to control activity via these servers for
individual users or groups of users. Group-based rules may be defined for OS/400 group profiles or
Firewall User Groups.
User-to-service rules override the global server security rules, providing that the Security Level
parameter is set to 3 or above. For example, if the Security Level parameter in the server security
rule for the FTP server is set to 3 (user-to-service), user-to-server rules may allow activity for
certain users and reject access for others. The *PUBLIC user profile serves (see screen example
below) as a default user-to-server rule for all users not explicitly covered by a rule.
Verb Support
User-to-server rules can also restrict activity on certain servers according to specific remote
commands, known as Verbs in the System i world. This feature enables limiting user ability to
execute specific remote commands. For example, members of the user group %PGMR are not
permitted to execute the SQL delete command as shown in the following screen.
Modify User Security
Verb (command) rule support is available for the FTP, SQL, and Database and DDM servers.
Firewall 15 User Manual
53
Chapter : User Security
Rule Definition Procedure
To work with user-to-service security, select 11. Users and Groups from the main menu. The
Work with User Security screen appears. This screen lists provide a quick glance at the user-toservice rules currently in effect.
3. To work with an existing rule, type 1 in the Opt field or press F6 to create a new rule.
Use the PageUp and PageDown keys to scroll through the list. Press Enter to
continue.
Work with User Security
The following table explains the options and information on Work with User Security screen.
Parameter or Option Description
Opt
1 = Select this rule for modification
3 = Copy this rule for another user/group
4 = Delete this rule
5 = Modify group members
Displays the rule status for each server type:
Servers
+ = User-to-service rule overrides the global server security rule.
Allow a user the access to a server and check for object
authorizations.
V = User-to-service rule overrides with verb (command) support
Blank = Global server security rule governs activity for this
server
S = Allow a user to access a server and skip the check for object
authorizations. This simplifies the test for some users (normally
for batch applications, which are playing the role of servers and
the desire to save performance in such cases).
Firewall 15 User Manual
54
Chapter : User Security
F6
Create a rule for a new User
F7
Create a rule for a new Group
F8
Print user-to-service security rules
4. Enter parameters on the Add/Modify Parameters screen and press Enter to confirm.
Modify User Security
Parameter or Option Description
Displays the user profile or user group name
User
= type a time group name or press F4 to select from a
list.
Use Group Authorities Y = use a specific group authorities
N = don’t use any specific group authorities
2. Services= specify authorities and location by Services name
Authorities and
3. IP = specify authorities and location by IP name
Locations
4. Device Names = specify authorities and location by Device name
Use this field to define object authority for the user/group for
In-product Special
AS/400 Native and IFS objects.
Object Authority
Activity Time
Time Group
F8
Print user-to-service security rules
F9
Work with object security rules
F10
Work with Logon security rules
Firewall 15 User Manual
55
Chapter : User Security
Client Application Security
Client Application Security is an alternative way to set network security.
Until now, most IBM i network access products focused on the Database being accesses,
Commands and Program calls in order to determine if the access should be accepted or rejected.
Client Application Security provides the ability to allow a Client Application to be authorized as a
whole rather than by the ways in which it accesses the Database, Commands and Program calls.
Once the application is verified for use by a specific user (including Group/Supplemental profiles),
from a specific IP, within a specific time frame, etc., all the network access activities of this
application will be considered "authorized", requiring no specific detailed authority to be defined.
Client Access Security is, indeed, a revolution in defining and benefiting from network access
security.
In order to activate the Client Application Security feature, select option 81 3. User Exit
Programs and ensure that the Enable Application Level Security field is set to *STD.
Firewall User Exit Programs
1. To work with Client Application Security go to option 18. Client Application Security
from the main menu
Firewall 15 User Manual
56
Chapter : User Security
Work with Client-Application Security
2. Press F6 to add a new client-application
Add Client-Application Security
Firewall 15 User Manual
57
Chapter : User Security
User Management
This chapter presents several powerful security tools that Firewall shares with Action. These
control the ability of users to sign-on to the system and enhance active system security by allowing
users to perform the following tasks:
View and modify security parameters in user profiles using a convenient wizard interface
Automatically disable inactive users
Restrict user sign-on to specific hours and days
Prevent user sign-on during planned absences or following termination
Analyze default passwords for effectiveness
To work with the user sign-on control tools, select 15. User Management from the main menu.
The User Management Sign-on menu appears. Select the desired function from this menu.
User Management
Work with Users
The Work with Users Wizard enables viewing and modifying several security-related parameters in
the user profile by using a user-friendly wizard interface. One can view and work with many
different users at once and compare settings between different users.
The security officer can use this tool to review all users at-a-glance and immediately disable
suspicious users. One-key access is provided to many of the other user sign-on tools.
To start the Work with Users wizard, follow this procedure.
1. Select 1 from the User Management menu. The Action Work with Users screen
appears, offering you several options to display filtered subsets of users.
Firewall 15 User Manual
58
Chapter : User Security
Action Work with Users
Parameter or Option
Description
User
*ALL = Display all users
Generic* = Display all users beginning with
text preceding
the *
User enabled
Name = Display a specific user profile
*YES = Display enabled users, with passwords,
who can sign-
on
*NO = Display disabled users and those who cannot sign-on
*ALL = Display users irrespective of status
User has password
*YES = Display only users whose password has expired
*NO = Display only users whose password has not expired
*ALL = Display users irrespective of password expiration
Days since last sign-on is GE *Number = Display only users who have not signed on for at
Invalid sign-on attempts is
GE
least the specified number of days
*ALL = Display users irrespective days since last sign-on
*Number = Display only users who have not signed on for at
least the specified number of days
*ALL = Display users irrespective days since last sign-on
2. The Work with Users Wizard consists of three screens – Basic, Sign-on, and
Password. Each containing several related parameters. The same function key
options are available on all screens. On each of these screens, users that cannot signon to the system are displayed in pink. Use F11 to navigate between screens.
Screen 1: Work with User Status - Basic
This screen shows whether individual users can sign-on to the System i. In order to sign-on, users
must be enabled and have a valid, non-expired password.
Firewall 15 User Manual
59
Chapter : User Security
Work with User Status - Basic
Parameter or Option Description
Opt
1 = Display all parameters for the selected user profile (see
below)
3 = Enable user profile
4 = Disable user profile
6 = Reset invalid sign-on attempt counter – prevents
automatic disabling of this user due to excessive sign-on
errors
7 = Set password to ‘expired’ – this user must change
password at next sign-on
Enabled
Blank = User profile is enabled
No = User profile is disabled
Password
Blank = User profile has a valid password and can sign-on
None = No password is associated with this user profile and
he cannot sign-on
F7
Display a subset of user profiles filtered according to status
parameters (available on all screens)
F11
Display the next of the three parameter screens for the
currently displayed user profiles
F14
Temporarily disable users during planned absences (e.g.
vacation, sick, leave of absence), or permanently delete
users leaving the organization
F15
Specify users that should never be disabled automatically,
even if they have not signed on for a long period of time
(inactive user)
F16
Restrict user sign-on to predefined working hours
Firewall 15 User Manual
60
Chapter : User Security
In order to display all the parameters for a single user, type 1 in the Opt field to the left of the
desired user. The following screen appears:
Work with User Status – Details
Use the function keys to modify parameters as shown at the following table:
Parameter or Option Description
F7
Enable user profile
F8
Disable user profile
F9
Reset invalid sign-on attempt counter – prevents automatic
disabling of this user due to excessive sign-on errors
F10
Set password to ‘expired’ – user must change password at
next sign-on
Screen 2: Work with User Status - Sign-on
This screen displays recent sign-on statistics for each user profile. In addition, the scheduled date of
any automatic actions (disable or delete) by the Action absence control feature is displayed.
Firewall 15 User Manual
61
Chapter : User Security
Work with User Status – Sign-on
Parameter or Option Description
Opt
1 = Display all parameters for selected user profile
3 = Enable user profile
4 = Disable user profile
6 = Reset invalid sign-on attempt counter – prevents
automatic disabling of this user due to excessive sign-on
errors
7 = Set password to ‘expired’ – this user must change
password at next sign-on
Previous Sign-on
Date and time of previous sign-on for this user profile
Days Passed
Days since previous sign-on for this user profile
Planned Action
Displays the date of planned absence control actions
(Delete or disable) for this user profile
Screen 3: Work with User Status - Password
This screen displays the number of invalid sign-on attempts and the expiration status of user
passwords. This information makes it possible for the security officer to verify that users change
their passwords in accordance with the security policy.
Firewall 15 User Manual
62
Chapter : User Security
Work with User Status – Password
Parameter or Option Description
Opt
1 = Display all parameters for selected user profile
3 = Enable user profile
4 = Disable user profile
6 = Reset invalid sign-on attempt counter – prevents
automatic disabling of this user due to excessive sign-on
errors
7 = Set password to ‘expired’ – this user must change
password at next sign-on
Invalid Attempts
Blank = User profile is enabled
No = User profile is disabled
Expiration Interval
Number of days between required password changes
Expiration Date
Next password expiration date
Days in Use
Number of days the current password has been in use
Days Left
Number of days before the current password expires
Reports
User Management offers two reports that show user profile information.
Option 5. Print Special Authorities: the Special Authorities report shows details of special
authorities assigned to users individually or as part of a group authority. Another parameter that is
displayed is a user's limited capabilities.
Firewall 15 User Manual
63
Chapter : User Security
User Profile Information (Special Authorities Report)
Option 6. Print Environment Information: the Environment Info report shows environment
details including the current library and various default libraries.
User Profile Information (Environmental Info Report)
To print these reports, select 5 or 6 from the User Management menu. Enter the report type and
filter parameters as shown on the following screen.
Firewall 15 User Manual
64
Chapter : User Security
Print User Profile
Parameter or Option Description
Select by
*SPCAUT = User profiles are selected based on special
authorities
*USRCLS = User profiles are selected based on user class
*MISMATCH = User profiles are selected based on the fact
that their special authorities are not the default values
assigned to their user class
Job description
Date and time of previous sign-on for this user profile
Disable Inactive Users
The presence of valid but inactive user profiles can pose a potentially serious security threat.
Hackers can exploit these profiles to gain access to critical data via FTP, ODBC connectivity or
other methods even without knowing the password.
For this reason, it is always a good idea to periodically audit your system and disable any users who
have not signed on recently. The Work with Users Wizard, discussed in the previous section, is an
excellent tool for performing such a review and manually disabling inactive users.
Action includes the Auto-Disable feature, which allows for disabling of inactive user profiles
automatically after a specified period. Automatic disabling applies to any user who has not signed
on for the specified number of days. One can also designate specific users as exceptions, who
cannot be disabled automatically. OS/400 system-generated profiles (prefixed by the letter ‘Q’) are
never automatically disabled.
To enable the Auto-Disable feature, select 11. Work with Auto-Disable from the User
Management menu. Set the Auto-Disable inactive users parameter to *YES and specify the
number of days of inactivity in the appropriate field.
To disable this feature, set the Auto-Disable inactive users parameter to *NO.
Firewall 15 User Manual
65
Chapter : User Security
Auto-Disable Inactive Users
To define exceptions from the Auto-Disable default, select 15. Exceptions from the User
Management menu. The Auto-Disable Exceptions screen appears. Press F6 and type the user
profile name(s) that should not be disabled automatically.
To delete a user profile from this exception list, type 4 next to the name and press Enter.
Restricting User Sign-on Times
Even valid user profiles have the potential for abuse. A common hacker trick is to obtain a user’s
password and use it to sign-on after the user has left work in order to access programs and data with
that user’s authorities. Using this method, a dishonest employee can bypass object level security
and remain invisible to subsequent audit.
An effective defense against this scenario would be to restrict user sign-on to authorized working
hours. Action includes a user-friendly tool for defining authorized sign-on periods for users, by
time and day of the week.
1. To define authorized sign-on times for users, select 21. Work with Schedule from the
User Management menu. The following screen appears (a table of explanation
follows).
Firewall 15 User Manual
66
Chapter : User Security
Work with Sign-on Schedule
Parameter or Option Description
Opt
1 = Select to modify
4 = Delete the selected user
Position to
Position the cursor at the first item beginning with the text
string typed in this space
F8
Print a report showing sign-on schedules for all users
NOTE: You can create only one sign-on schedule for each user profile.
2. Select a user from the list or press F6 to define a new user schedule. The Create Signon Schedule screen appears.
Firewall 15 User Manual
67
Chapter : User Security
Create Sign-on Schedule
Parameter or Option Description
Enable/Disable
Time of day using a 24-hour format
This rule is in effect
Everyday = Type “Y” to apply schedule to every day of the
week
Apply Schedule to
Specified days = Type “Y” on the desired week days
User profile = Enter user profile name or a generic text
string to create a schedule for all user profiles beginning
with the text string preceding the “ * ” (i.e. R* applies to
all users beginning with the letter R)
All users in group profile = Enter a group profile name to
create a schedule for all users contained in the group
profile
Select users from list = Enter a generic text string to
select user profiles from a list of all user profiles beginning
with the text string preceding the “ * ” (i.e. R* displays all
users beginning with the letter R). You may then select one
or more of them
User Absence Security
Another common security risk occurs when an authorized user is away on temporary leave (e.g.
vacation, sick leave, maternity leave, business trips, etc.) or leaves the organization. Action allows
you make certain that nobody can sign on with specific user profiles during such scheduled
absences by disabling or deleting user profiles automatically on a specific date.
To work with user absence security,
1. Select 41. Work with Schedule from the User Management menu. The following
screen appears.
Firewall 15 User Manual
68
Chapter : User Security
Work with User Absence Schedule
2. Select a user from the list or press F6 to add a new user. The Modify User Absence
Schedule screen appears.
Modify User Absence Schedule
3. Enter the appropriate parameters as described in the following table.
Parameter or
Option
Description
User
User profile to be disabled or deleted
Firewall 15 User Manual
69
Chapter : User Security
Parameter or
Option
Description
Date
Date on which the user profile will be disabled or deleted
Action
1=
2=
Disable user profile
Delete user profile
The following parameters apply to scheduled deletions only
Owned object
action
New owner
New primary group
New primary group
authority
Specify the action to be performed when a user profile
scheduled for deletion owns one or more objects:
*NODLT = If the user profile owns any objects, neither the user
profile nor the objects are deleted
*DLT = Both the user profile and any objects owned by it are
deleted
*CHGOWN = The user profile is deleted and ownership of all
objects is transferred to the alternate user profile specified in
the New Owner parameter
User profile name of the new owner when object ownership is
transferred by the *CHGOWN parameter
Name of the user profile that will become new the primary
group
*OLDPGP = The new primary group inherits the same
authority as the old primary group
*PRIVATE = The new primary group inherits the same private
authority as previously defined for all owned objects
*ALL = The new primary group assumes the *ALL authority
*CHANGE = The new primary group assumes the *CHANGE
authority
*USE = The new primary group assumes the *USE authority
*EXCLUDE = The new primary group assumes the *EXCLUDE
authority
NOTE: Refer to IBM documentation for a complete discussion regarding the concepts of object ownership
and primary groups.
Password Control Tools
This section describes two tools that help you correct potential security risks caused by easy to
guess passwords.
Analyze Default Passwords
A profile is said to have a default password whenever the password is the same as the profile
name. Obviously, this is dangerous because it is so easy to guess. This feature allows users to print a
report of all the user profiles on the system that have a default password and optionally disable
those profiles or expire their passwords.
To perform the analysis, select 61. Analyze Default Passwords from the User Management
menu. The Analyze Action + Default Passwords screen appears.
Firewall 15 User Manual
70
Chapter : User Security
Analyze Default Passwords
The system prints the following report.
User Profiles with Default Passwords
Password Statistical Report
This feature allows users to print a report showing information similar to that displayed on the Work
with Users Wizard.
Firewall 15 User Manual
71
Chapter : User Security
Print User Profile
Parameter or Option Description
Select by
*SPCAUT = User profiles will be selected for the report
based on special authorities
*USRCLS = User profiles will be selected for the report
based on user class
*MISMATCH = User profiles will be selected for this report
only if their special authorities are not the same as the
default authorities assigned to their user class
Job description
Batch job subsystem and library
Special authorities
Filter according to one or more special authority types
User class
Filter according to one or more user class types
Firewall 15 User Manual
72
Chapter : User Security
Chapter 6: Object Security
Object security controls access to objects originating from specific external sources such as
FTP, ODBC, etc. The user can specify the operations an external user is allowed to perform
on these objects. Rules may be defined for the following object types: files, libraries, data
queues, printer files, programs, commands and IFS objects.
Firewall can restrict a user’s ability to perform specific actions, such as read, write, create,
delete, rename, and run, etc., on protected objects.
Firewall offers an efficient system in which the user needs to create only a small number of
general rules restricting the use of commands for all or most users, and then creates a few
exceptions to these rules. This feature is discussed later on in its own section.
Procedural Overview
The basic procedure for defining any of the object security rules is similar. The following
sections provide details and explanations regarding the specific parameters and definitions for
each type of logon security rule.
1.
Select 21 from the main menu. The Native AS/400 Object Security menu
appears.
2.
Choose the object type from the Native AS/400 Object Security menu.
a. Select 1 for files.
b. Select 2 for libraries.
c. Select 3 for data queues.
d. Select 4 print files.
e. Select 5 for programs.
f. Select 6 for commands.
g. Select 7 command exceptions.
3.
The appropriate Work with Object Security screen appears. Refer to the
appropriate rule type section for details regarding that screen.
4.
Type 1 to select an existing rule for editing or press F6 to create a new rule. The
relevant ADD/Modify screen appears.
5.
Enter or modify the parameters for the appropriate rule type. Refer to the
appropriate rule type section for details and explanations regarding the screen
and its parameters
6.
Press Enter to confirm and return to the Work with Object Security screen.
7.
Press Enter to confirm and return to the main menu.
Firewall 15 User Manual
73
Chapter : Object Security
Native OS/400 Objects
This section describes the screens used to work with native OS/400 objects. Select 21. Native
AS/400 Objects from the main menu. The Native AS/400 Object Security menu appears.
Native AS/400 Object Security
The specific details of each object type are discussed in the following sections.
Files
2. From the Native AS/400 Object Security screen, select 1. Files. The Work with
Native AS/400 File Security screen appears. This screen lists all the rules
currently in effect.
3. Type 1 to modify an existing rule or press F6 to create a new rule.
4. Press Enter to return to the Native OS/400 Object Security menu.
Firewall 15 User Manual
74
Chapter : Object Security
Work with Native AS/400 File Security
Parameter or Option
Description
Opt
1 = Select this rule for modification
3 = Copy this rule for another user
4 = Delete this rule
F6
Add new rule
F8
Print rules
Subset
Search a file or library whose names contain the subset
Firewall 15 User Manual
75
Chapter : Object Security
Add/Modify Native AS/400 File Security
Modify Native AS/400 File Security
In the Modify Native AS/400 File Security screen, define permissions for one user profile,
profile group or Firewall user group on each line. Use the PageUp and PageDown keys to
scroll through a long list.
For each activity type, 'Y' = Activity allowed and Blank = Activity rejected. *Public is the
default rule for all users not explicitly covered by an object security rule.
NOTE: Always make certain that the *Public rule contains sufficient permissions to allow access of
ordinary users to objects.
Parameter or Option
Description
File/Library
File name and library path of the file(s) included in this rule.
User, Group
Read
Enter user profile or press F4 to select a user profile or group
name from list.
'Y' = Users may read the specified file
Write
'Y' = Users may write, edit or update the specified file
Create
'Y' = Users may create a new file
Delete
'Y' = Users may delete the specified file
Rename
'Y' = Users may rename the specified file
Other
'Y' = Users may perform other actions on the specified file.
Press Enter to return to the Work with Native Object Security screen.
Firewall 15 User Manual
76
Chapter : Object Security
Libraries
1. From the Native AS/400 Object Security screen, select 2. Libraries. The Work
with Native AS/400 Library Security screen appears. This screen lists all the
rules currently in effect.
2. Type 1 to modify an existing rule or press F6 to create a new rule.
3. Press Enter to return to the Native OS/400 Object Security menu.
Work with Native AS/400 Library Security
Parameter or Option
Description
Opt
1 = Select this rule for modification
3 = Copy this rule for another user
4 = Delete this rule
F6
Add new rule
F8
Print rules
Subset
Search a file or library whose names contain the subset
Firewall 15 User Manual
77
Chapter : Object Security
Add/Modify Native AS/400 Library Security
Modify Native AS/400 Library Security
In the Modify Native AS/400 Library Security screen, define permissions for one user profile,
profile group or Firewall user group on each line. Use the PageUp and PageDown keys to
scroll through a long list.
For each activity type, 'Y' = Activity allowed and Blank = Activity rejected. *Public is the
default rule for all users not explicitly covered by an object security rule. Always make
certain that the *Public rule contains sufficient permissions for ordinary users to access
objects.
Parameter or Option
Description
Library
Shows the libraries covered by the rule
Create
'Y' = Users may create a new file
Delete
'Y' = Users may delete the specified file
Rename
'Y' = Users may rename the specified file
Other
'Y' = Users may perform other actions on the specified file.
Press Enter to return to the Work with Native Object Security screen.
Firewall 15 User Manual
78
Chapter : Object Security
Data Queues
1. From the Native AS/400 Object Security screen, select 3. Data Queues. The
Work with Native AS/400 Data Security screen appears. This screen lists all the
rules currently in effect.
2. Type 1 to modify an existing rule or press F6 to create a new rule.
3. Press Enter to return to the Native OS/400 Object Security menu.
Work with Native AS/400 Data Queue Security
Parameter or Option
Description
Opt
1 = Select this rule for modification
3 = Copy this rule for another user
4 = Delete this rule
F6
Add new rule
F8
Print rules
Subset
Search a data queue or library whose names contain the subset
Firewall 15 User Manual
79
Chapter : Object Security
Add/Modify Object Data Queue Security
Modify Native AS/400 Data Queue Security
Define permissions for one user profile, profile group or Firewall user group on each line. Use
the PageUp and PageDown keys to scroll through a long list.
For each activity type, 'Y' = Activity allowed and Blank = Activity rejected. *Public is the
default rule for all users not explicitly covered by an object security rule. Always make
certain that the *Public rule contains sufficient permissions for ordinary users to access
objects.
Parameter or Option
Description
Data Queue
Shows the data queue(s) included in this rule.
User, Group
Enter user profile or press F4 to select a user profile or group
name from list.
Read
'Y' = Users may read the specified file
Write
'Y' = Users may write, edit or update the specified file
Create
'Y' = Users may create a new file
Delete
'Y' = Users may delete the specified file
Press Enter to return to the Work with Native Object Security screen.
Firewall 15 User Manual
80
Chapter : Object Security
Printer Files
1. From the Native AS/400 Object Security screen, select 4. Printer Files. The
Work with Native AS/400 Print File Security screen appears. This screen lists
all the rules currently in effect.
2. Type 1 to modify an existing rule or press F6 to create a new rule.
3. Press Enter to return to the Native OS/400 Object Security menu.
Work with Native AS/400 Print File Security
Parameter or Option
Description
Opt
1 = Select this rule for modification
3 = Copy this rule for another user
4 = Delete this rule
F6
Add new rule
F8
Print rules
Subset
Search a print file or library whose names contain the subset
Firewall 15 User Manual
81
Chapter : Object Security
Add/Modify Print File Security
Modify Native AS/400 Print File Security
Define permissions for one user profile, profile group or Firewall user group on each line. Use
the PageUp and PageDown keys to scroll through a long list.
For each activity type, 'Y' = Activity allowed and Blank = Activity rejected. *Public is the
default rule for all users not explicitly covered by an object security rule. You should always
make certain that the *Public rule contains sufficient permissions to allow access to objects by
ordinary users.
Parameter or Option
Description
Print File/Library
Shows the print file(s) and library path included in this rule
User, Group
Enter user profile or press F4 to select a user profile or group
name from list.
Open Print file
'Y' = Users may use the specified file
Press Enter to return to the Work with Native Object Security screen.
Firewall 15 User Manual
82
Chapter : Object Security
Programs
1. From the Native AS/400 Object Security screen, select 5. Programs. The Work
with Native AS/400 Program Security screen appears. This screen lists all the
rules currently in effect.
2. Type 1 to modify an existing rule or press F6 to create a new rule.
3. Press Enter to return to the Native OS/400 Object Security menu.
Work withAS/400 Program Security
Parameter or Option
Description
Opt
1 = Select this rule for modification
3 = Copy this rule for another user
4 = Delete this rule
F6
Add new rule
F8
Print rules
Subset
Search a program or library whose names contain the subset
Firewall 15 User Manual
83
Chapter : Object Security
Add/Modify Object Security Screen
Modify Native AS/400 Program Security
Define permissions for one user profile, profile group or Firewall user group on each line. Use
the PgUp and PgDn keys to scroll through a long list.
For each activity type, 'Y' = Activity allowed and Blank = Activity rejected. *Public is the
default rule for all users not explicitly covered by an object security rule. You should always
make certain that the *Public rule contains sufficient permissions for ordinary users to access
objects.
Parameter or Option
Description
Program/Library
Name and library path of the program(s) included in this rule
User, Group
Enter user profile or press F4 to select a user profile or group
name from list.
Run Program
'Y' = Users may run the specified program
Press Enter to return to the Work with Native Object Security screen.
Firewall 15 User Manual
84
Chapter : Object Security
Commands
1. From the Native AS/400 Object Security screen, select 6. Commands. The
Work with Native AS/400 Command Security screen appears. This screen lists
all the rules currently in effect.
2. Type 1 to modify an existing rule or press F6 to create a new rule.
3. Press Enter to return to the Native OS/400 Object Security menu.
Work with Native AS/400 Command Security
Parameter or Option
Description
Opt
1 = Select this rule for modification
3 = Copy this rule for another user
4 = Delete this rule
F6
Add new rule
F8
Print rules
Subset
Search a command or library whose names contain the subset
Firewall 15 User Manual
85
Chapter : Object Security
Add/Modify Command Security
Modify Native AS/400 Command Security
Define permissions for one user profile, profile group or Firewall user group on each line. Use
the PageUp and PageDown keys to scroll through a long list.
For each activity type, 'Y' = Activity allowed and Blank = Activity rejected. *Public is the
default rule for all users not explicitly covered by an object security rule. Always make
certain that the *Public rule contains sufficient permissions to allow ordinary users to access
objects.
Parameter or Option
Description
Command /Library
Name and library path of the command(s) included in this rule
User, Group
Enter user profile or press F4 to select a user profile or group
name from list.
Run Command
'Y' = Users may execute the specified command
Press Enter to return to the Work with Native Object Security screen.
Firewall 15 User Manual
86
Chapter : Object Security
Command Exceptions
When working with command rules, it is easier to define restrictions globally for all users or
for large groups of users. Unfortunately, there are usually only a few users who truly need
permission to execute certain commands. Firewall provides the ability to create one rule that
prevents all or most users from using certain commands and then to create a few exceptions to
that rule for the select few who are authorized to use the relevant commands.
One can define exceptions that will permit commands to be executed via the command line,
within programs, FTP, REXEC (Remote Command Execution), and/or DDM.
The procedure for working with exceptions is quite simple:
1. Define the global or general command security rules as described in the previous
section.
2. Select 9 from the Native AS/400 Object Security menu. The following screen
appears.
3. This screen lists all the rules currently in effect. Type 1 to work with an existing
rule or press F6 to create a new rule.
Work with Command Exceptions
Parameter or Option
Description
Opt
1 = Select this rule for modification
3 = Copy this rule for another user
4 = Delete this rule
4. Press Enter to return to the Native OS/400 Object Security menu.
Firewall 15 User Manual
87
Chapter : Object Security
Modify Command Exception
Modify Command Exception
Define permissions for one user profile, profile group or Firewall user group on each line. Use
the PageUp and PageDown keys to scroll through a long list.
For each activity type, 'Y' = Activity allowed and Blank = Activity rejected. *Public is the
default rule for all users not explicitly covered by an object security rule. You should always
make certain that the *Public rule contains sufficient permissions to allow access to objects by
ordinary users.
Parameter or Option
Description
Command /Library
Name and library path of the command(s) included in this rule
User/User Group
Enter user profile or press F4 to select a user profile from list.
Command
'Y' = Users may execute OS/400 commands
FTP/REXEC
'Y' = Users may execute commands via FTP or REXEC
DDM
'Y' = Users may execute commands via DDM
Press Enter to return to the Native OS/400 Object Security screen.
Work with Pre-check Library Replacement
In case there are many libraries that require the same authorities, select option 61 to create one
library of authorization rules to be applied to the list of libraries.
Firewall 15 User Manual
88
Chapter : Object Security
Work with Pre-check Library Replacement
Press F6 to add a new library of rules. This will be the “Target Library”
Add a new Target Library
Enter the “Source Library” of the objects you wish to apply the authorization rule. Enter a
“Target Library” that will contain a single set of rules to be applied.
Firewall 15 User Manual
89
Chapter : Object Security
In the specific object screen (option 1-9) define the original rules to be applied trough the
“Target Library”.
The massage will appear in the Firewall log as follows:
Firewall 15 User Manual
90
Chapter : Object Security
IFS Objects
To work with IFS Object Security:
1. Select 22 from the main menu. The IFS Security menu appears.
2. Select 1 from the IFS Security menu. The Work with IFS Security screen
appears.
3. This screen lists all the IFS rules currently in effect. Type 1 to work with an
existing rule or press F6 to create a new rule.
4. Press Enter to return to the IFS Security menu.
NOTE: File names for IFS objects may be entered with upper or lower case letters.
Work with IFS Security
Parameter or Option
Description
Opt
1 = Select this rule for modification
3 = Copy this rule for another user
4 = Delete this rule
F6
Add new rule
F8
Print rules
Subset
Search a print file or library whose names contain the subset
Firewall 15 User Manual
91
Chapter : Object Security
Add/Modify IFS Security
Modify IFS Security
Define permissions for one user profile, profile group or Firewall user group on each line. Use
the PageUp and PageDown keys to scroll through a long list.
For each activity type, 'Y' = Activity allowed and Blank = Activity rejected. *Public is the
default rule for all users not explicitly covered by an object security rule. You should always
make certain that the *Public rule contains sufficient permissions to allow access to objects by
ordinary users.
Parameter or Option
Description
File System
Shows the IFS file system to which this rule apples
Directory/File
Shows the file name(s) and directory path(s) included in this rule
User/User Group
Enter user profile or press F4 to select a user profile from list.
Read
'Y' = Users may read the specified file
Write
'Y' = Users may write, edit or update the specified file
Delete
'Y' = Users may delete the specified file
Rename
'Y'' = Users may rename the specified file
Other
'Y' = Users may perform other actions on the specified file.
Press Enter to return to the Work with IFS Object Security screen.
Firewall 15 User Manual
92
Chapter : Object Security
Chapter 7: Logon Security
Logon security rules define logon attributes for specific combinations of IP addresses (or SNA
names) and user profiles. In addition, logon security rules can control what a user is permitted
to do subsequent to logon. For example:
Modify a logon request by automatically assigning an alternate user profile having different,
presumably more restrictive, permissions and authorities
Assign different initial menus, current libraries and initial auto-run programs than those
specified in the user profile (Telnet only)
Rename Telnet terminal names to (and thereby the system job name) in order to facilitate
easy tracking of remote access requests, real time auditing and Action proactive responses.
Overriding default system settings to force the appearance of the sign-on screen.
Logon security rules are available for the following server types:
Incoming FTP requests
Outgoing FTP requests
REXEC (Remote Command Execution)
Telnet
Sign-on requests via the Internet (WSG)
Passthrough
Subsequent sections discuss the options and parameters for each individual rule type.
NOTE: The Security Level parameter in the server security rule must be set to '9' (full) in order to
enable
logon
security
for
the
appropriate
servers.
Refer
to
Firewall 15 User Manual
93
Chapter : Logon Security
Chapter 3: for details.
Firewall 15 User Manual
94
Chapter : Logon Security
Procedural Overview
The basic procedure for defining any of the logon security rules is similar. The following
sections provide details and explanations regarding the specific parameters and definitions for
each type of logon security rule.
3. Choose the logon type from the main menu.
•
Select 31 for FTP and REXEC
•
Select 32 for Telnet and Sign-on
•
Select 33 for Internet logon (WSG)
•
Select 34 Passthrough
4. Set definitions.
•
Each Logon Security menu follows the same principles. Select the definition you
want to set. For example, in the FTP/REXEC Logon Security screen, choose 1 for
Incoming FTP, and 2 for Outgoing FTP. The appropriate Work with Logon Security
screen appears. Refer to the appropriate rule type section for details of the screen.
•
Type 1 to select an existing rule for editing or press F6 to create a new rule. The
Add/Modify screen appears. The screen parameters and options are the same.
•
Enter modify the parameters for the appropriate rule type. Refer to the appropriate rule
type section or for details and explanations regarding the screen and its parameters
•
Press Enter to confirm and return to the Work with Logon Security screen.
5. Choose your desired reporting (logs) option by selecting options 11 (and
optionally 12 and 13) for display logs
6. Press Enter to confirm and return to the main menu.
Basic options for screens are given in the table below.
Option
Opt
Description
1 = Select this rule for modification
3 = Copy this rule for another user
4 = Delete this rule
5 = IP Range (WSG Only)
F6 = Add new rule
F8 = Print rules
F9 = Add new rule
F11 = Alternate view (changes display by reducing the amount of lines on
screen)
Firewall 15 User Manual
95
Chapter : Logon Security
FTP/REXEC (Incoming)
This server is called when clients make requests to connect to the AS/400 by FTP or REXEC
server.
1. To set Logon security rules for FTP/REXEC, select 31. FTP/REXEC from the
main menu.
2. From the FTP/REXEC Logon Security screen, select option 1. The Work with
FTP/REXEC Logon Security screen appears.
3. To add a new rule, press F6. The Add FTP/REXEC Logon User screen appears
(screen and parameters are the same as Modify FTP/REXEC Logon User, seen
on the following page).
4. Set parameters according to the following table and press Enter. FTP rules are
according to user and IP.
Work with FTP/REXEC Logon Security
Parameter or Option
Description
Opt
1 = Select this rule for modification
3 = Copy this rule for another user
4 = Delete this rule
F6
Add new rule
F8
Print rules
Subset
Search a user group/user or IP addresses/authorities whose names
contain the subset
User Group/ User
User and/or user group for whom the rules are set
Firewall 15 User Manual
96
Chapter : Logon Security
IP addresses and
authorities
1 = Allowed
2 = Rejected
3 = Alternative Sign-on (see Alternative Logon in the following
table for more details)
Modify FTP/REXEC Logon User
Parameter
User
Description
Enter the user profile
Time group
Enter IP address and subnet mask in decimal format. You must
enter the IPs from which you allow this user to access or be
denied FTP to your AS/400.
TIP: Press F4 and select the subnet mask from a list.
1 = Allow logon request
2 = Reject logon request
3 = Sign-on automatically if permitted by System i
configuration
Enter time group name or press F4 to select from list.
Text
Enter descriptive text
Alternative Logon
The user can access FTP from this IP but without the usual
authorities. He will be changed into an “alternative” (shadow)
user with limited capabilities. This “alternative” user needs to
be configured in advance (CRTUSRPRF).
This is done without that user’s knowledge.
This is the password used to validate the incoming user profile.
Password = Type the password that is to be required for signon
*NOCHK = password is not checked
IP Address/Subnet
Mask
Logon
Validation Password
Firewall 15 User Manual
97
Chapter : Logon Security
*SYS = Validation performed according to password in user
profile
*PGM = Use password presented by calling program
Alt User
Automatically sign-on with specified replacement user profile
Alt Password
This is the password to be assigned to the alternate user.
Use the specified password for logon instead of that in the user
profile
*Same or Blank = Do not replace password for alternate user
*BYPASS = Bypass password validation at sign-on for
alternate user
*PGM = Use password presented by calling program for
alternate user
Automatically replace the default current library with specified
library
Alt Current Library
Client FTP (Outgoing)
This server is used when the AS/400 issues FTP (sub) commands as a client to another
system.
1. To work with Client FTP Security, select 2. Client FTP (Outgoing) from the
FTP/REXEC Logon Security screen. The Work with Client FTP Security
screen appears.
2. Set parameters according to the following table and press Enter. Select F6 to add
a new rule or option 1 to modify.
Work with Client FTP Security
Firewall 15 User Manual
98
Chapter : Logon Security
Parameter or Option
Description
Opt
1 = Select this rule for modification
3 = Copy this rule for another user
4 = Delete this rule
F6
Add new rule
F8
Print rules
Subset
Search a user group/user or outgoing IP address whose names
contain the subset
IP of the system that the user tries to communicate from your
AS/400.
1 = Allowed
2 = Rejected
Outgoing IP addresses
and authorities
Modify FTP Client User
Parameter
Description
User
Enter the user profile
Enter the outside system IP address and subnet mask in decimal
format. Enter which IPs this user can connect to and which are
to be rejected from your AS/400.
TIP: Press F4 and select the subnet mask from a list.
1 = Allow logon request
2 = Reject logon request
Enter descriptive text
Outgoing IP
Address/Subnet Mask
Allow/Reject
Text
Firewall 15 User Manual
99
Chapter : Logon Security
Telnet and Sign-on
This logon control manages two features
Option
Description
Telnet Logon (option 1) Auto Sign-on configuration as well as IP address and password
type restrictions. This entry is used only on the first time a
device connects the system (for example, when PC emulation
software starts).
Sign-on configurations per user with IP, terminal name, and
Sign-on Validation
number-of-sessions restrictions.
(option 5)
This entry is used for each time a user attempts Sign-On from
the Telnet server (for example, when the "Enter Password"
screen is used).
Telnet Logon
1. To work with Telnet and Sign-on, select 32. Telnet from the Firewall Main
menu. The Telnet Security screen appears.
Telnet Security
2. Select 1. Telnet Logon from the Telnet Security screen. The Work with TELNET
Logon Security screen appears.
Firewall 15 User Manual
100
Chapter : Logon Security
Work with Telnet Logon Security
3. Set parameters according to the following table and press Enter. Select F6 to add
a new rule or option 1 to modify.
Modify Telnet Logon Security Setting
Firewall 15 User Manual
101
Chapter : Logon Security
Parameter
IP Address/Subnet Mask
Incoming Terminal Name
Minimum Pwd Validation
Time group
Logon
Assigned terminal name
Set new
Alt User
Description
IP address and subnet mask in decimal format.
TIP: Press F4 and select the subnet mask from a list.
Terminal name assigned by the System i or emulation software
This is the method used to validate the incoming user profile.
Apply rule according to password validation level:
0 = No password validation
1 = Use password
2= Use encrypted password
3 = Connection is using SSL
Enter time group name or press F4 to select from list.
1 = Accept logon request
2 = Reject logon request
3 = Sign-on automatically if permitted by System i
configuration
4 = Force sign-on even if System i is configured for automatic
sign-on
Enter the name to optionally replace the incoming terminal
name
Generic* = Text before "*" plus sequentially assigned number
*SAME or Blank = Do not replace the income terminal name
*SYSTEM = Use terminal name assigned by OS/400
Define Code page, Character set and Keyboard layout
Alt Program
Automatically sign-on with specified replacement user profile
Automatically replace the default current library with specified
library
Automatically replace the default program to be run at sign-on
Alt Initial menu
Automatically replace the default initial user menu at sign-on
Alt Current Library
SSL Control in Firewall
Firewall can be set up to request SSL on Telnet and FTP session, based on the IP or User.
To set up SSL control in Firewall, follow this procedure.
1. Select 32. Telnet from the Firewall main menu. The Telnet Security screen appears.
2. Select 1. Telnet Logon to access the Work with TELNET Logon Security screen.
3. Press F6 to access the Add TELNET Logon Security Setting screen.
Sign-on
Firewall Telnet Sign-on feature enables limiting a user to sign-on from a specific IP or
terminal name (for each sign-on), as well as limiting the number of sessions the user will be
allowed to work in.
To work with sign-on security, select 15. Display SIGNON Log from the Telnet Security
screen.
Firewall 15 User Manual
102
Chapter : Logon Security
1. Set the parameters and press Enter. The Display Firewall Log screen appears,
with all the transactions that used the Sign-On server.
Display Firewall Log
2. Select F10 for additional message information or F6 to modify the rule.
Additional Message Information
Firewall 15 User Manual
103
Chapter : Logon Security
Work with User Security
3. Type 1=Select to modify the rule
Modify User Security
Firewall 15 User Manual
104
Chapter : Logon Security
Work with Sign-on IP Validation
Parameter
Description
IP Address /Subnet
Mask
IP address and subnet mask in decimal format.
TIP: Press F4 and select the subnet mask from a list.
1=ALLOW = Allow logon request
2=REJECT = Reject logon request
Descriptive text
Allow/Reject
Text
4. Select 4. Device Names from the Modify User Security screen to add or modify
sign-on device names.
Firewall 15 User Manual
105
Chapter : Logon Security
Work with Sign-on Device validation
Internet (WSG)
This server provides sign-on for client browser (such as Internet Explorer or Netscape
Navigator) bypassing AS/400 sign-on panel.
1. To work with WSG logon security, select 33. Internet (WSG) from the Firewall
Main menu. The Internet-WSG Logon Security screen appears.
2. Select 1. Internet-WSG Logon. The Work with WSG Logon Security screen
appears.
3. Set parameters according to the following table and press Enter. Select F6 to add
a new rule or option 1 to modify.
Firewall 15 User Manual
106
Chapter : Logon Security
Work with WSG Logon Security
Parameter or Option Description
IP address and subnet mask in decimal format.
IP Address and
TIP: Press F4 and select the subnet mask from a list.
Subnet Mask
Y = Allow logon request and use auto-sign-on
Logon
User
User profile
Auto-Sign-on
Parameters (only if
Logon is yes)
Program = initial program to be called upon sign-on
Menu = menu to be called upon sign-on that will initialize the
screen
Library = first library to be checked upon sign-on
Firewall 15 User Manual
107
Chapter : Logon Security
Modify WSG Logon Security Setting
Parameter
IP Address/Subnet
Mask
Description
IP address and subnet mask in decimal format.
Time group
Enter time group name or press F4 to select from list.
Logon
Y = Allow logon request and use
Blank = Reject logon request
User (only if Logon is
yes)
Program
Automatically performs sign-on with specified replacement user
profile
Requires the specified password for logon instead of the
password in the user profile (This is the password to be assigned
to the “alternate” user).
*PGM = Use password presented by calling program for alternate
user
Automatically replace the default program to be run at sign-on
Initial menu
Automatically replace the default initial user menu at sign-on
Current Library
Automatically replace the default current library with specified
library
Password
auto-sign-on
NOTE: To work with WSG security, select 11. Display WSG Logon Log from the Internet-WSG
Logon Security screen.
Firewall 15 User Manual
108
Chapter : Logon Security
Passthrough
This server specifies how the outside systems handle remote sign-on requests. It may alter
sign-on information
1. To work with Passthrough security, select 34. Passthrough from the Firewall
main menu. The Passthrough Security screen appears.
2. Select 1. Passthrough Logon. The Work with Passthrough Security screen
appears.
3. Set parameters according to the following table and press Enter. Select F6 to add
a new rule or option 1 to modify.
Work with Passthrough Security
Parameter or Option
Source System
Description
SNA system name of the source (incoming) computer
Source User
User profile of the source system
Target User
User profile for logon at the target system
Automatic Sign-on
1 = Accept logon request
2 = Reject logon request
3 = Force sign-on even if System i is configured for automatic
sign-on
4 = Sign-on automatically with an alternate user profile
Firewall 15 User Manual
109
Chapter : Logon Security
Modify Passthrough Security
Parameter
Description
Source System
SNA system name of the source (incoming) computer
Source User
User profile at the source system
Generic* = Any user profile beginning with the text before the
'*'
*ALL = All users
User profile for logon at the target system
*SAME = Use the source user profile
Generic* = Any user profile beginning with the text before the
'*'
Target user
Time group
Enter time group name or press F4 to select from list.
Automatic Sign-on
1 = Accept logon request
2 = Reject logon request
3 = Force sign-on even if System i is configured for automatic
sign-on
4 = Sign-on automatically with an alternate user profile
User Profiler
Automatically sign-on with specified replacement user profile
Initial Program
Automatically replace the default program to be run at sign-on
Initial menu
Automatically replace the default initial user menu at sign-on
Current Library
Automatically replace the default current library with specified
library
NOTE: To work with Passthrough security, select 11. Display Passthrough Logon Log from the
Passthrough Security screen.
Firewall 15 User Manual
110
Chapter : Logon Security
Chapter 8: Queries, Reports and Logs
This chapter presents the reporting features that are built into Firewall. An effective security
policy relies on queries and reports to provide traceability for system activity. All Firewall
queries and reports work with data contained in the Activity Log.
Firewall offers several powerful, but user-friendly, tools that create output containing only
relevant data, in a useful format. All of this can be accomplished without programming, with
the following tools:
Query Wizard - Selects the events that need to be audited using powerful filter criteria, and
creates screen-based or printed reports that present the data in a customized format
Activity Log - Displays or prints the contents of the Firewall Activity Log quickly and easily
in a standard format using basic filter criteria
Report Scheduler - Automatically runs queries and reports at user-specified times
In addition to these tools, Firewall contains with over 100 predefined reports and queries that
are ready to run at any time. All reporting features are available via the Reporting menu. To
access this menu, select 43. Log, Reports, Queries from the main menu.
Reporting
In addition, the Activity Log display feature is available directly from several screens
throughout Firewall as well as by using the DSPFWLOG command from any command line.
Query Wizard
The powerful Query Wizard allows you to design custom output reports that show only the
necessary data, without programming and with no requirement for technical knowledge.
Firewall 15 User Manual
111
Chapter : Queries, Reports and Logs
Query definitions are created by using a series of simple parameter definition screens. Output
can be a printed report, a screen display or a text file saved on the System i.
Highly detailed filter criteria enable selection of only the required records using Boolean
operators, as well as the ability to combine logical conditions. You have full flexibility to
specify the sort order according to multiple fields.
The wizard allows you to output only the relevant data fields and to specify the order in which
they appear on the report. You can design tabular summary reports showing one line for each
record or detail reports showing record data on multiple lines.
Procedural Overview
The procedure for defining queries consists of the following steps:
1. Select an existing query to work with or create a new query.
2. Define general query parameters specifying the activity type(s) to be included
and the output format.
3. Define the record selection (filter) criteria.
4. Select the data fields to be included in the report and the order in which they
appear.
5. Define the record sort criteria according to one or more data fields.
6. Run the query with the option to specify additional run-time filter criteria.
Working with Queries
1. To work with queries, select 1 from the Reporting menu. The Work with
Queries screen appears.
2. Type the desired option next to a query. Type 1 to modify a query, 3 to copy or
press F6 to create a new query.
3. Press Enter to proceed to the definition screens.
Work with Queries
Firewall 15 User Manual
112
Chapter : Queries, Reports and Logs
The following table lists the selection options.
Option Description
Create a new query.
F6
1
3
4
5
6
7
8
Select a query for modification.
Copy a query. Type the new query name and description in the pop-up
window and press Enter to continue.
Delete a query. Press Enter to confirm deletion when the warning message
appears.
Run the selected query as an interactive job.
Print the selected query to the standard output device and file type (*PDF,
*HTML, *CSV …)
Rename a query. Type the new query name in the pop-up window and press
Enter.
Run the selected query as a batch job.
General Query Parameters (Add/Modify Screen)
This screen contains several basic query definition parameters.
1. To work with query parameters, enter the required parameters and press Enter to
continue.
Modify Query
Firewall 15 User Manual
113
Chapter : Queries, Reports and Logs
Parameter or Option
Query Name
Description
Description
Free text query description
1 = Single server type query or all servers
2 = Multiple server types to be selected on a subsequent screen.
(see below)
N = Select records not included in the specified time group
(Exclusive)
Blank = Select records included in the specified time group
(Inclusive)
Name =Enter the name of the time group to use as a filter
Blank = Do not use a time group
1 = Detailed tabular format with option for multi-line field
display (Fold)
2 = Summary tabular format – one line per record
9 = Log display output format
1 = Sort using all log record fields
2 = Sort using only generic fields
3 = No sorting (time sequence)
Query Type
Not
Time Group
Output Format
Sort Options
Name of query
2. When defining a multiple server type query, it is necessary to select the server
types and to define record selection criteria parameters separately for each server
type. When the Query Type field is set to 2, the following screen automatically
appears, allowing you to add and work with server types.
NOTE: In Multiple server type queries, you can only display the fields that are common to
all server types. You must use a single server type query to display the fields which are
specific to a particular server type.
3. Press Enter from the Modify Query screen to add a server type or select an
existing filter type to modify. You may add the same server type more than once
with different record selection criteria. The Filter Conditions screen appears
immediately afterwards.
You may include multiple filter conditions in your definition. Each filter condition consists of
a comparison test applied to one of the fields in the Activity Log record.
Define filter criteria and press Enter.
NOTE: Filter conditions are optional. If no filter conditions are defined, your query will include all
events for the specified audit type or types.
Firewall 15 User Manual
114
Chapter : Queries, Reports and Logs
Filter Conditions
Parameter or Option
And/Or
Description
A or Blank = And
Field
Data field in the Activity Log
Test
Comparison test type – see table on following page for details
Value to be used as the comparison test
Value
O = Or
Displays explanatory information and/or options applicable to
the data field on the line where the cursor is located
Select another comparison test from a pop-up window and
insert it at the current cursor position
F4
F6
Comparison Test Operators
Several different types of comparison test operators are available as shown in the following
table:
Test
EQ, NE
LT, LE
GT,GE
LIST, NLIST
LIKE, NLIKE
ITME, NITEM
Description
Equal to, Not equal to
Value Field Data
Value
Less than, Less than or equal to
Greater than, Greater than or equal
to
Included in list, Not included in list
Substring search
Value
Value
Item in a group checks if the value
is among the groups’ members. The
General group is an external value
list that can be extended by creating
Firewall 15 User Manual
115
Values separated by a space
Value preceded and/or followed by
%
*USER – Check that the value is a
user in a %GROUP of users
*GRPPRF – Check that the value
is a user in an OS/400 Group
Chapter : Queries, Reports and Logs
Test
Description
new types.
START
Starts with
Value Field Data
Profile
*USRGRP – USER and all user
profiles which are members of
same user groups as USER
*ALL – For both *GRPPRF and
*USRGRP cases
If the TYPE is missing, *USER or
*USRGRP is assumed based on the
appearance of % sign as the first
character in the GROUP.
*SPCAUT – Check that the value
is in the users Special-Authority
Starting characters of string
And/Or Boolean Operators
You may combine multiple filter conditions in one query using Boolean AND/OR operators.
This allows you to create complex queries that produce precise results.
When using ‘Or’ operators in your filter conditions, the order in which each condition appears
in the list conditions is critical. The ‘Or’ operator allows you to group several conditions
together because it includes all the ‘And’ conditions that follow it until the next ‘Or’ operator
or until the end of the list.
The following example illustrates this principle. This query will apply to all events meeting
either the conditions listed in Group 1 or the conditions listed in Group 2. Group 2 includes
the ‘Or’ condition and all of the ‘And’ conditions that follow it.
Group 1
Group 2
Filter Conditions
Firewall 15 User Manual
116
Chapter : Queries, Reports and Logs
Defining Output Fields
The Select Output Fields screen allows selection of the fields from the Activity Log that will
appear in the query output as well as the order in which they should appear from left to right.
Fields appear in ascending order on the screen, with the top field corresponding to the lefthand field in the query report. The second field corresponds to the field located to the right of
the left-hand field, and so on.
The user can change the order of the fields simply by modifying the sequence numbers. Any
field can be deleted from the query report by deleting the sequence number. When pressing
Enter, the new field sequence appears on the screen, with deleted (blank sequence number)
fields appearing at the bottom.
You must select at least one field for output.
Fields shown in pink are part of the generic header and are common to the Activity Log record
for all audit types. Fields shown in green (on the screen) are specific to the Activity Log
record for the currently selected audit type only.
Select Output Fields
Option
F5
Description
Displays field values
F21
Selects all options
F23
Invert selection – All selected items will be deselected and all
Seq.
Firewall 15 User Manual
items that are not selected will become selected
NOTE: You may wish to change the sequence numbers after
using this command.
Enter the sequence in which you wish this field to appear in the
query output. Lower numbers appear toward the left and higher
numbers appear toward the right.
117
Chapter : Queries, Reports and Logs
Sort Criteria
You may sort records in your query output according to any combination of fields in the
Activity Log record. The lowest sequence number (normally 1.0) represents the primary sort
field. The second lowest number (normally 2.0) represents the secondary sort field, and so on.
Fields shown in pink are part of the generic header and are common to the Activity Log
record for all audit types. Fields appearing in green (on the screen) are specific to the
Activity Log record for the currently selected audit type.
Select Sort Fields
Parameter or
Option
Description
F5
Displays field values
F21
F23
Selects all options
Invert selection – All selected items will be deselected and all
items that are not selected will become selected
NOTE: You may wish to change the sequence numbers after
using this command.
Enter a number representing the sort sequence
Seq.
Firewall 15 User Manual
118
Chapter : Queries, Reports and Logs
Running Queries
The final screen in the definition procedure allows you to run your query immediately. If you
do not wish to run your query at this time, press F3 to exit. All query definition parameters
will be preserved.
Firewall provides you with several different options for running queries:
During Query Definition – You can run queries as the final step in the definition procedure.
This is useful for testing and debugging queries.
Work with Queries Screen – Run a query by typing 5 to the left of one or more queries in
the list. This option is especially useful for running several queries sequentially.
Report Scheduler – This powerful feature automatically runs queries according to a pre-
defined schedule. This option is typically used for generating periodic audit reports.
Query Menu – Select one of the following options from the Query menu:
•
11. Display – Display query results on the screen
•
12. Print – Print a hard copy of the query as an interactive job
•
13. Submit as Batch Job – Submit the query as a batch job. This is recommended for
large, resource intensive queries.
Command Line – Enter the Run Firewall Query command (RUNFWQRY) from any
command line. This allows you to run a query at any time, even if you are working on
other tasks.
Display Log – Queries can also be used to filter data when viewing Activity Log data.
This is useful for applying sophisticated filter criteria that are unavailable with the display
log command.
You may specify run-time filter criteria that apply only to the current instance of the query.
Run-time filter criteria allow you to display or print only a subset of the data extracted by the
query definition. For example, if your query definition does not filter records according to
user profile, you may specify run-time criteria that will display activity only for specific user.
However, run-time filter criteria will not return data that is excluded from the actual query
definition. For example, if your query definition includes filter criteria only for the user
profile JOHNKERRY and you enter run-time criteria for the user GEORGEW, no events will
be displayed.
The procedure for running queries is virtually identical for all of the above options. Each
method involves entering several run-time parameters on the Run Audit Query screen.
Firewall 15 User Manual
119
Chapter : Queries, Reports and Logs
Run Firewall Query
Parameter or Option Description
Query
Name = Name of Query
*SELECT = Select from list at run time
Display Last Minutes
Select only the records occurring within the previous number of
minutes as specified by the user
Number = Enter the number of minutes
*BYTIME = According the starting and ending time specified
below
Starting Date & Time
Select only the records occurring within the range specified by
Ending Date & Time
the start and end date/time combination.
Date or Time = Enter the appropriate date or time
*CURRENT = Today (Current Date)
*YESTERDAY = Previous date
*WEEKSTR/*PRVWEEKS = Current week/Previous week start
*MONTHSTR/ *PRVMONTH = Current month/Previous month start
*YEARSTR/ *PRVYEARS = Current year/ Previous year start
*SUN -*SAT = Day of week
Type
Filter records by audit type
*All = All types as specified in the query definition
F4 = Select server type from a list
User* or ‘%Group’
Filter records by a user profile or group name
System to run for
The system to report information from
*CURRENT = the current system
*Name = a group of systems as defined in STRAUD, 83, 1
*ALL
Job Name - User
Job Name - Number
Firewall 15 User Manual
= all the systems defined in STRAUD, 83, 1
Filter records by OS/400 job name.
Filter records by OS/400 job number.
120
Chapter : Queries, Reports and Logs
Parameter or Option Description
Number of Records to Maximum number of records to process
Process
*NOMAX = No maximum (Default)
Output
* = Display
*Print = Printed report
*PDF = Print report to PDF outfile
*HTML = Print report to HTML outfile
*CSV = Print report to CSV outfile
*Outfile = Print report to view from the GUI
User Profile
Filter records by user
Filter by Time Group - Filter records by time group
Relationship
*IN = Include all records in time group
*OUT = Include all records not in time group
*NONE = Do not use time group, even if included in query
definition
*QRY = Use time group as specified in query definition
Type
Filter records by audit type
*All = All types as specified in the query definition
F4 = Select server type from a list
Program Name
Filter records by the name of the program that created the
journal record.
Filter by Time Group - Name = Name of time group
Time Group
*SELECT = Select time group from list at run time
Press Enter to continue. You may press F18 at any time during the data retrieval process to
display a pop-up status window. This window continuously displays the number of records
processed and selected. Press Esc at any time to halt retrieval and immediately display the
query or log.
Firewall 15 User Manual
121
Chapter : Queries, Reports and Logs
Print Query to Output File and Send Via Email
NOTE: To ensure you always receive iSecurity reports emails, please add
[email protected] and [email protected] to your email contact list.
1. Select preferred Output file type (*PDF, *HTML, *CSV …) and press Enter
Run Firewall Query
2. Type *MAIL in the Object field, press Page Down and enter the email address you want
the file to be sent to in the Mail to field.
Run Firewall Query
Firewall 15 User Manual
122
Chapter : Queries, Reports and Logs
3. Press Enter to run the print
Working with the Activity Log
You can use the Display Firewall Log (DSPFWLOG) command to display the contents of the
Activity Log quickly and easily in a standard format using basic filter criteria. You can even
use previously defined queries as filter criteria for the log display. This feature is best suited
for investigating immediate problems such as program failures, errors or suspicious activity.
Firewall includes many ready-to-use log display sets. Just enter a few parameters on a simple
data screen and the specified data appears in seconds. A hard copy of the Activity Log results
can be printed as well.
The “Backward Glance” Feature
This unique feature lets the user view the last several minutes of activity without having to
define specific time or date parameters. The user can specify a period (in minutes), press
Enter, and transactions occurring that period of time quickly appear. Backward Glance really
comes in handy when assisting users with error massages that pop up or verifying that a batch
job has successfully been completed.
Using Time Groups
The Activity Log display makes full use of the convenient time group feature. This
timesaving feature further enhances the ability to get to important data quickly.
Basic Procedure
A few simple steps are all that is necessary in order to view your data:
1. Select 43. Log, Reports, Queries from the main menu. The Reporting menu
appears.
2. Select 19. Select from menu and choose one of the many pre-defined log
display options. Examples of these selections are:
•
1. Entire Log – Display all entries in the Activity Log. This option is useful when
examining all activities over a period of time, perhaps in conjunction with the
Backward Glance feature.
•
2. Rejects Only – Display only activities that have been rejected
•
5. Entire Log – Display only occurrences from the last 5 minutes
3. Enter run-time filter and other parameters on the Display Firewall Log Entries
screen.
Firewall 15 User Manual
123
Chapter : Queries, Reports and Logs
Display Firewall Log
Parameter or Option
Display last n minutes
Starting date & time
Ending date & time
Starting date & time
Ending date & time
(Continued)
IP generic address
Type
Allowed
Number of records to
process
Firewall 15 User Manual
Description
Selects only the events occurring within the previous number of
minutes as specified by the user
Number = Enter the desired number of minutes
*BYTIME = According to starting and ending times specified
below
Selects only the events occurring within the range specified by
the starting and ending date/time combination
Date and time = Enter the appropriate date or time
*CURRENT = Current day
*YESTERDAY = Previous day
*WEEKSTR/*PRVWEEKS = Current week/Previous week start
*MONTHSTR/ *PRVMONTH = Current month/Previous month
start
*YEARSTR/ *PRVYEARS = Current year/ Previous year start
*SUN -*SAT = Day of week
Filter by IP address
Server type
*All = All server types
F4 = Select server type group from a list
*UP = lists all output operations over files: WRITE / CREATE /
MOVE / DELETE / RENAME
*DOWN = lists all Read operations over files
*YES = Allowed
*NO = Rejected
*ALL = All activity
Maximum number of records to process
*NOMAX = No maximum (Default)
124
Chapter : Queries, Reports and Logs
Parameter or Option
Output
Filter by Time Group Relationship
Filter by time group Time group
Filter using query
rules
Description
*PRINT = prints to local printer
*PRINT1= prints to remote printer
*PRINT 2 = prints to both remote and local printers
*PRINT 3-9 = user modifiable
*IN = Include all records in time group (Inclusive)
*OUT = Include all records not in time group (Exclusive)
*NONE = Do not use time group, even if included in query
definition
Name = Name of time group
*SELECT = Select time group from list at run time
Use an existing query to filter Activity Log entries. This is
useful for applying complex filter criteria.
Name = Name of an existing query
*None = Do not use query rules (Default)
4. Press Enter to display the Activity Log.
•
You may press F18 at any time during the data retrieval process to display a pop-up
status window. This window continuously displays the number of records processed
and selected.
•
Press Esc at any time to halt retrieval and immediately display the query or log. An
example of the audit log display appears as follows.
Display Firewall Log
5. Press F6 to modify the applicable rule based on an entry in the log. The rule
definition screen for the applicable rule type opens. This feature allows the user
to respond proactively to a situation discovered while reviewing the log, and
leads the user to the exact screen where modification is required.
Firewall 15 User Manual
125
Chapter : Queries, Reports and Logs
6. To view the details of an individual entry, move the cursor to the desired line and
press Enter or F11. An example of an activity log entry appears below.
Additional Message Information
7. When pressing F1 on a display log entry and viewing the Additional Message
Information screen, displaying 'Decision Level' now informs you how to correct
the problem, for example: Menu option: 2, 1 or 2 means enter 2 from the main
menu, and then enter either option 1 or 2.
Firewall 15 User Manual
126
Chapter : Queries, Reports and Logs
Additional Message Information
Statistics
This option provides statistics on access via a specific server or all servers, for all users.
Activity Summary is for groups of users and User Activity Summary is for a specific user.
The screens are the same.
Select option 62. User Activity Statistics, the Display User Activity screen appears
Display User Activity
Parameter or Option Description
Display last minutes
Selects only the events occurring within the previous number of
minutes as specified by the user
Number = Enter the desired number of minutes
*BYTIME = According to starting and ending times specified
below
Starting date & time
Selects only the events occurring within the range specified by
Ending date & time
the starting and ending date/time combination
Date and time = Enter the appropriate date or time
*CURRENT = Current day
*YESTERDAY = Previous day
Starting date & time
*WEEKSTR/*PRVWEEKS = Current week/previous week start
Ending date & time
*MONTHSTR/ *PRVMONTH = Current month/previous month
(Continued)
start
*YEARSTR/ *PRVYEARS = Current year/ previous year start
*SUN -*SAT = Day of week
Server ID
Choose servers you want to examine. To examine all servers,
choose *ALL.
Firewall 15 User Manual
127
Chapter : Queries, Reports and Logs
Parameter or Option Description
Output
*PRINT = prints to local printer
*PRINT1= prints to remote printer
*PRINT2 = prints to both remote and local printers
*PRINT3-9 = user modifiable
Group Items for Selection
Define assorted groups of reports in line with your requirements, to schedule a particular
group of reports to run as one unit sometime in the future.
%GROUP is used for defining a group of user-profiles that all share the same authorities.
This solution enables defining GROUPS by GROUP-TYPES. These GROUP-TYPES can be
any system entity such as files, libraries, applications, identification numbers, etc.
For each GROUP-TYPE, one can define an unlimited number of GROUPS and within
GROUPS any number of items. For example, all identification numbers of the PCs in the
organization can be defined as one group in the GROUP-TYPE defined as
MACHINE_ADDRESS. Another group in MACHINE_ADDRESS may contain all
identification numbers of the PCs in a sister organization.
In all comparison tables, for defining rules, for generating and selecting queries, or for
defining the items in reports, the ITEM GROUP-TYPE/GROUP syntax can be used to
include only those transactions which contain the GROUP-TYPE/GROUP specified.
Likewise, NITEM GROUP-TYPE/GROUP can be used to include only those transactions
which do not contain the GROUP-TYPE/GROUP defined.
In addition, special GROUPS such as groups of users already defined on the system, all of
which have a common identifying characteristic. For example, the group profile of the system,
group profiles defined in Firewall, and virtual groups of users named *SECADM,
*SAVESYS etc. which are the users who have this particular privilege defined in their special
authority.
1. To define Groups and Items, select option 43. Log, Reports, Queries from the main
menu, and option 41. Group Items for Selection from the Reporting menu. The Work
with Classes of Groups screen appears.
Firewall 15 User Manual
128
Chapter : Queries, Reports and Logs
Work with Classes of Groups
2. Press F6 to add a new class or type 1 to modify an existing class to your needs.
Add Class
3. Press Enter. The Work with Groups screen appears.
Firewall 15 User Manual
129
Chapter : Queries, Reports and Logs
Work with Groups
4. Press F6 to add a new Group or 1 to modify items in existing group to your needs.
Work with Group Items
The supported TYPES are:
*USER – Check that the value is a user in a %GROUP of users
*GRPPRF – Check that the value is a user in an OS/400 Group Profile
Firewall 15 User Manual
130
Chapter : Queries, Reports and Logs
*USRGRP – USER and all user profiles which are members of same user groups as USER
*ALL – For both *GRPPRF and *USRGRPs
NOTE: If the TYPE is missing, *USER or *USRGRP is assumed based on the appearance of the
percentage symbol ("%") as the first character in the GROUP.
Using the Report Scheduler
This section describes the Report Scheduler feature and provides step-by-step instructions for
its use.
Overview
The Report Scheduler allows you to run pre-defined “report groups” automatically according
to a fixed schedule. A report group is comprised of one or more individual queries, reports
or Activity Log inquiries that are executed together at a designated time. Grouping reports in
this manner is more efficient because the scheduling details and other run-time parameters
need to be defined only once for the entire group.
The most common application of the Report Scheduler is automatically running periodic audit
reports based on queries. A schedule can be set up to run reports on a daily, weekly or
monthly basis. Additional schedule parameters are provided to enable the user to specify the
day of the week, day of the month and time of day that your report will run.
The Report Scheduler can print several different types of reports, such as:
Queries
Firewall Activity Logs reports
Action Activity Logs, which contain records of actions actually performed
User Profile Reports
The Report Scheduler is based on the native OS/400 scheduling facility, but with added
support for the report group feature and an improved user interface.
The Definition Process
The Report Scheduler incorporates a wizard-based interface to make the definition process
simple and user friendly.
To define and schedule reports to run automatically, perform the following steps in order:
1. Create any queries to be included in the relevant report group.
2. Create or modify the report group as follows:
•
Assign a report group name and description.
•
Enter schedule data and run-time parameters for the group.
3. Create the individual reports to be included in the report group as follows:
•
Assign a report name and select the report type.
•
Define the run-time parameters for each the report.
Firewall 15 User Manual
131
Chapter : Queries, Reports and Logs
4. Run the report group, if desired.
These steps are explained in detail in the following sections.
Working with Report Groups
The first step in the Report Scheduler definition process is to define the report group. The
report group definition consists of a group name, description and several run time parameters
that apply to each report in the group.
1. Select 51 from the Log, Reports, Queries menu. The Work with Report
Scheduler screen appears.
2. Press F6 to create a new report group or type 1 to select an existing group.
Work with Report Scheduler
Report groups appear on the screen sorted in alphabetical order by the group name. The
individual reports contained in each group appear directly below the group name arranged
according to a user-modifiable sequence.
Parameter or
Option
Description
F6
Opt
Create new report group
1 = Select group for modification
2 = Add a new report to the selected group
3 = Copy the group along with all its reports, or
3 = Copy an individual report from one group to another
4 = Delete the group along with all of its reports, or
4 = Delete an individual report
3. The Modify Report Group screen appears. Assign a name to the report group
and enter a brief description.
Firewall 15 User Manual
132
Chapter : Queries, Reports and Logs
Modify Report Group
Option
Report Group Name
Description
Group Parameters
Description
Enter a name with a maximum of 7 alphanumeric characters. The
name must begin with a letter.
Free text description of the report group
Command string automatically generated by Firewall based on
run-time parameters specified for the report group
4. Press Enter to continue.
This screen allows the user to define run-time filters that apply to all reports in the group.
Run-time filter criteria allow the user to display or print only a subset of the data extracted by
the query definition. For example, if a query definition does not include filter criteria for a
user profile (i.e. includes all user profiles), this screen can be used to print only activity
associated with a specific user profile.
Run-time filter criteria will not extract data that is not included in the query definition itself.
For example, if a query definition includes filter criteria only for the user profile RICH and
one enters run-time criteria for the user GEORGEW, no records will be displayed.
Firewall 15 User Manual
133
Chapter : Queries, Reports and Logs
Define FW Report Group Details
Option
Starting/Ending
Date
Description
Enter a fixed date or use one of the following constants:
*CURRENT = The current date (day the report runs)
*YESTERDAY = The day before the current date
*WEEKSTR = Beginning of the current week
*PRVWEEKS = Beginning of the previous week
*MONTHSTR = Beginning of the current month
*PRVMONTHS = Beginning of the previous month
*YEARSTR = Beginning of the current year
*PRVYEARS = Beginning of the previous year
*MON - *SUN = Day of the current (or previous) week
NOTE: All constants are relative to the day on which the report runs.
Starting/Ending
Time
User* or '%GROUP'
Server ID
System to run for
Output
Print Format
Results
Firewall 15 User Manual
Time of day using the 24 hour clock (HH:MM:SS)
User profile or Group name that instigated the event being audited
Choose servers you want to examine. To examine all servers,
choose *ALL.
The system to report information from
*CURRENT = the current system
*Name = a group of systems as defined in STRAUD, 83, 1
*ALL = all the systems defined in STRAUD, 83, 1
*PRINT = prints to local printer
*PRINT1= prints to remote printer
*PRINT2 = prints to both remote and local printers
*PRINT3-9 = user modifiable
*SHORT = Short format
*FULL = Full report format
*BOTH = display rejected and accepted transactions
134
Chapter : Queries, Reports and Logs
Option
Object/Library
Object Type
Description
*REJECT = display rejected transactions
*ACCEPT = display accepted transactions
Object and library path
One of the available objects types from option 21. Native AS/400
Objects (Firewall Main menu)
5. Press Enter to continue to the Change Job Schedule Entry screen.
Change Job Schedule Entry
Option
Description
Frequency
*SAME = Value does not change
*ONCE = Run the report group once only
*WEEKLY = Run on the same day or days of each week
*MONTHLY = Run on the same day or days of each month
Schedule Date
Date = The specific day on which the report will run
*SAME = Value does not change
*CURRENT = The current date (day the report runs)
*MONTHSTR = First day of the next month
*MONTHEND = Last day of the current month
*NONE = Use day of week value in the Schedule Day field below
Schedule Day
*ALL = Run every day (Overrides frequency parameter)
*MON
*TUE
*WED
*THU
*FRI
*SAT
*SUN
*NONE = Use day of week value in the Schedule Date field above.
Schedule Time
Time of day using the 24 hour clock (HH:MM:SS)
Firewall 15 User Manual
135
Chapter : Queries, Reports and Logs
The Schedule Date and Schedule Day fields are mutually exclusive. If one is used, the other
must be set to the value ‘*NONE’. Other fields may appear on this screen, which is
associated with the OS/400 CHGJOBSCDE command. These fields are not relevant under
most circumstances.
6. Press Enter to complete the definition and return to the Work with Report
Scheduler screen.
Working with Individual Reports
The next step in the definition process is to define the individual reports that are contained in
the report group.
1. To add a new report to a group, type 2 next to the group name, or type 2 next an
individual report to modify it. The Modify Report Definition screen appears.
Modify Report Definition
Option
Report ID
Description
Report Command (F4)
Description
Numeric identification automatically assigned by the Firewall
Free text description of the report
Press F4 to select report type from a pop-up window
2. Define run time parameters for this report. The actual parameters available are
specific to the report type.
3. Press Enter to finish the definition and return to the Work with Report
Scheduler screen.
Running Reports
The Report Scheduler submits all scheduled reports as batch jobs automatically on the day and
time as specified in the definition. A report can be run manually at any time.
Firewall 15 User Manual
136
Chapter : Queries, Reports and Logs
To run a report manually:
1. Select 52 from the Log, Reports, Queries menu. The Run Report Group
screen appears.
2. Set parameters according to the following table.
Run Report Group
Parameters
Report Group
Job Description
Library
Firewall 15 User Manual
Description
Enter the report group name
Your batch job subsystem – normally QBATCH
Name = Library name
*Product = SMZ4 or the default product library
*LIBL = Current library list
*CURLIB = Current Library
137
Chapter : Queries, Reports and Logs
Chapter 9: Advanced Security Features
The Work with Advanced Security Screen enables the user to configure powerful security
settings. To access these settings, select 42. Advanced Security Features from the Firewall
main menu. The Work with Advanced Security screen appears.
Work with Advanced Security
DDM, DRDA Security
Distributed Data Management (DDM) is a function of the operating system that allows an
application program or user on one system to use database files stored on a remote system.
The system must be connected by a communications network, and the remote system must
also use DDM. The term also applies to the underlying communications architecture.
Distributed Relational Database Architecture(TM) (DRDA(R)) is the architecture that defines
formats and protocols for providing transparent access to remote data. DRDA defines two
types of functions: the application requester function and the application server function.
Both of these are integrated into the Firewall advanced security features.
Pre-Check User Replacement
This feature applies to both DDM and DRDA. Firewall performs a “pre-check” whenever a
certain user enters from a certain location. Firewall “invents” an entity that does the checking.
To work with Pre-Check User Replacement:
1. Select 1. Pre-check user replacement from the Work with Advanced Security
screen. The Work with DDM/DRDA Pre-check User Replacement screen
appears.
2. Set the correct parameters and press Enter.
Firewall 15 User Manual
138
Chapter : Advanced Security Features
Work with DDM/DRDA Pre-check User Replacement
Parameters
Source Location
Source User
User to Check
Description
System name of remote server
User profile name of target DDM job
User for which internal check is performed
NOTE: Add DDM/DRDA Pre-check User Replacement and Modify DDM/DRDA Pre-check
User Replacement share the same settings.
Firewall 15 User Manual
139
Chapter : Advanced Security Features
Modify DDM/DRDA Pre-check User Replacement
Parameters
Description
Source location
Source user
System name of remote server
User profile name of target DDM job
Perform internal
checks for user
Name = name of user being checked
F4 for list=press this option to
DRDA Post-Check User Replacement
This is a “post-check” only applicable for DRDA. In this option, Firewall replaces restricted
users with someone who has the correct authority.
1. To work with DRDA Post-Check User Replacement, select 5. DRDA postcheck user replacement from the Work with Advanced Security screen. The
Work with DRDA Post-check User Replacement screen appears.
2. Set your desired parameters and press Enter. To modify, select 1. To add, select
F6.
Work with DDM/DRDA Post-check User Replacement
Parameters
Source location
Source user
Description
System name of remote server
User profile name of target DRDA job
DHCP Security
DHCP (Dynamic Host Configuration Protocol) is a communications protocol that is used to
centrally manage configuration information. For example, DHCP automatically assigns IP
addresses to computers in a network. DHCP is defined by the Internet Engineering Task Force
(IETF).
Firewall 15 User Manual
140
Chapter : Advanced Security Features
The AS/400 may essentially play the role of a DHCP server. If so, it records the activities and
transactions in a log. This option allows the user to view and inspect that log.
1. Select 15. Display DHCP Security Log from the Work with Advanced Security
screen. The Display Firewall Log screen appears.
2. Type options and press Enter.
Display Firewall Log
Parameter or Option
Display last n minutes
Starting date & time
Ending date & time
Starting date & time
Ending date & time
(Continued)
User* or ‘%Group’
Object
Firewall 15 User Manual
Description
Select only the events occurring within the previous number of
minutes as specified by the user
Number = Enter the desired number of minutes
*BYTIME = According to starting and ending times specified
below
Select only the events occurring within the range specified by
the start and end date/time combination
Date and time = Enter the appropriate date or time
*CURRENT = Current day
*YESTERDAY = Previous day
*WEEKSTR/*PRVWEEKS = Current week/Previous week start
*MONTHSTR/ *PRVMONTH = Current month/Previous month
start
*YEARSTR/ *PRVYEARS = Current year/ Previous year start
*SUN -*SAT = Day of week
Filter records by user profile or group
Filter records by object
Name = Specific object by name
Generic* = All objects/libraries beginning with the text string
preceding the *
*ALL = All types as specified in the query definition
141
Chapter : Advanced Security Features
Parameter or Option
Object Type
Type
Allowed
Number of records to
process
Description
Filter records by object type.
Server type
*All = All server types
F4 = Select server type group from a list
*YES = Allowed *NO = Rejected *ALL = All activity
Maximum number of records to process
*NOMAX = No maximum (Default)
Output
*PRINT = prints to local printer
*PRINT1= prints to remote printer
*PRINT2 = prints to both remote and local printers
*PRINT3-9 = user modifiable
Filter by Time Group Relationship
*IN = Include all records in time group (Inclusive)
*OUT = Include all records not in time group (Exclusive)
*NONE = Do not use time group, even if included in query
Additional Parameters
Filter by time group Time group
Filter using query
rules
definition
Name = Name of time group
*SELECT = Select time group from list at run time
Use an existing query to filter Activity Log entries. This is
useful for applying complex filter criteria.
Name = Name of an existing query
*None = Do not use query rules (Default)
TCP/IP Port Restrictions
Work with TCP/IP Port Restrictions
Transmission Control Protocol/Internet Protocol is an industry-standard, non-proprietary set of
communications protocols that provide reliable end-to-end connections between applications
over interconnected networks of different types.
In the world of TCP/IP, an IP address is necessary in order to reach a destination. At the
destination, a port, which serves as a virtual door or window, is required. In today's world, it is
imperative to protect and guard the ports in your system. Thus, Firewall restricts certain users
to certain ports by defining the port range accessible to them.
Port information consists of a list of the ports or port ranges, protocols, and the user profiles.
You need to define port information only if you want to restrict the use of a port or range of
ports to one or more users.
1. To add, display, remove, or print port restrictions, select 21. Work with TCP/IP
Port Restrictions from the Work with Advanced Security screen. The Work
with TCP/IP Port Restrictions screen appears.
2. Enter the parameters according to the following table. To add, select F6.
Firewall 15 User Manual
142
Chapter : Advanced Security Features
Work with TCP/IP Port restrictions
Parameters
Port Range
Description
Specifies the port number or range of port numbers identifying the
port or ports that are being restricted. Valid values range from 1
through 65 535.
NOTE: Ports 1 - 1024 are used by the system-supplied TCP/IP
applications. If the user specifies ports 1 through 1024, this can affect
the operation of those applications.
Lower = lower end of port range
Upper = *ONLY (Used to restrict only a single port)
User = The user profile that will use this port or range of ports.
4 = Delete (deletes the restrictions for a port)
F6 = Add: Use to add a port restriction by typing the port number
Opt.
into the input field at the top of the list. To add more restrictions,
use the Add function again.
License Management Security
Licensed programs can either be unlimited or limited to a group of users.
License Management
This option enables users to supervise, and therefore allow and restrict, the use of licensed
copies of their software.
1. To work with License Security, select 41.License Management from the Work
with Advanced Security screen. The Work with License Security screen
appears.
2. Set parameters according to the following table and press Enter. Select F6 to add
a new user or option 1 to modify.
Firewall 15 User Manual
143
Chapter : Advanced Security Features
Work with License Security
Parameters
Description
User
User working with particular software
Product
Software in question
The feature that the user has access to
*ALL = all features
Y = User is allowed to access this software
Feature
Allowed
Modify License Security
Firewall 15 User Manual
144
Chapter : Advanced Security Features
Display License Management Log
This feature provides information about every transaction generated by the License
Management server.
1. To display the log, select 45. Display License Management Log from the Work
with Advanced Security screen. The Display Firewall Log screen appears.
2. Set parameters according to the table in the DHCP Security section earlier in this
chapter, and press Enter.
Firewall 15 User Manual
145
Chapter : Advanced Security Features
Chapter 10: Configuration and Maintenance
System Configuration
This section reviews the process of setting general configuration for Firewall.
To reach this screen, select 81. System Configuration from the main screen. The iSecurity (part I)
Global Parameters screen appears.
iSecurity (part I) Global Parameters
General Definitions
This option presents general definitions relating to emergency overrides, FYI (Simulation) mode,
Firewall history log, OS/400 Group and Supplemental profiles, and Super Speed processing. Follow
this procedure:
1. Select 1. General Definitions from the iSecurity (part I) Global Parameters screen.
The Firewall General Definitions screen appears.
2. Set parameters and definitions according to the following table and press Enter.
Firewall 15 User Manual
146
Chapter : Configuration and Maintenance
Firewall General Definitions
Parameter or Option
Emergency override
ALL Security setting
Work in FYI
Simulation Mode
Check OS/400 Group
and Supplemental
profile
Enable Super Speed
Processing
Firewall 15 User Manual
Description
This option is explained in full detail in Chapter 4, Using the
Emergency Override Feature.
0 = Disable emergence override – all rules function normally
1 = Allow all activity
2 = Allow and log all activity
3 = Reject all activity
4 = Reject and log all activity
This option is explained in full detail in Chapter 4, FYI
Simulation Mode –Global Setting.
Y = Enable FYI globally
N = Do not enable FYI
Firewall checks permissions the same way the system does.
First, it checks the permissions of the user, and if there are none,
it checks the group profile. If there are still no permissions, it
checks its supplemental group profile. iSecurity follows IBM’s
method of requiring up to 17 checks to examine user
permissions.
NOTE: The more checks Firewall performs, the lengthier the
validation process. The unique algorithm upon which this
product is based guarantees a highly rapid process.
This option configures how you check users for access.
Y = Check user for access; if not allowed, check
group/supplemental profile for access
N = Check user for access; if not allowed, reject access without
checking group/supplemental profile
Super Speed Processing keeps the most useful commands in the
Firewall CPU memory, therefore improving product
147
Chapter : Configuration and Maintenance
Parameter or Option
Description
performance. Disable this feature a week before upgrade, in
order to perform a “hot upgrade” – allowing you to upgrade
product without shutting down.
Y = enable super speed processing
N = disable super speed processing
Additional Settings
Firewall can ensure that a proper password is entered even before performing any other checks, and
before allowing the operating system to validate that password.
If the parameter is set to ‘N’ (recommended) at the Check FTP Logon PWD by product field, the
request might be rejected due to other reasons before ensuring that the password is valid.
The field Inherit In-product DB2 authorities refers to optional Native Object Security inheritance
Skip SQL parsing if final decision was taken at… Eliminate SQL parsing when not needed. This
option can be activated separately based on the level on which the decision was taken and the type of
the decision.
For example: an organization whishes to eliminate parsing of an SQL which was rejected as it has
been received from an unauthorized IP (The request can still be logged for farther review).
Firewall Additional Settings
Firewall 15 User Manual
148
Chapter : Configuration and Maintenance
User Exit Programs
User Exit Programs are an option for the user to access a program after Firewall filters have rejected
a particular authorization attempt.
1. To work with Firewall User Exit Programs, select 3. User Exit Programs from the
iSecurity (part I) Global Parameters screen. The Firewall User Exit Programs screen
appears.
2. Set parameters and press Enter.
Firewall User Exit Programs
Parameter or Option
Allow/Reject Request
Enable Application
Level Security
Pre- Power Down
System
Firewall 15 User Manual
Description
After Firewall determines an action as legitimate or
unauthorized, it can perform an additional check, which can
override the first decision.
Name = name of user exit program
*NONE*= do not call any program. (Use this option when there
is no exit program)
*LIBL = library where program is located
*STD = application security will be checked by the standard
iSecurity Firewall program SMZ8/GSASTDR.
To activate the Application Security feature, ensure that this
field has *STD definition
Name = name of custom-made application security program
*NONE = no application security check
If you want to call a program before “power down” (shutting
down the AS/400), you must do it here.
Name = name of user exit program
149
Chapter : Configuration and Maintenance
Parameter or Option
Description
*NONE* = do not call any program. (Use this option when there
is no exit program.)
NOTE: You may also set exit program “behavior” for each server (see Modifying Server Security).
Firewall 15 User Manual
150
Chapter : Configuration and Maintenance
Transaction Post-Processing
This option informs particular data queues of accepted/rejected transactions. The user can send all
rejected transactions to one data queue, all accepted transactions to another, or send them both to the
same message queue.
1. To use Transaction Post Processing, select 4. Transaction Post Processing from the
iSecurity (part I) Global Parameters screen. The Firewall Transaction Post
Processing Data Queues screen appears.
2. Set correct parameters and press Enter.
Firewall Transaction Post-Processing Data Queues
Intrusion Detection
This option is related to Transaction Post-Processing, but involves message queues instead of data
queues. Intrusion Detection lets particular message queues know of accepted/rejected transactions.
Users can send all rejected transactions to one message queue, all accepted transactions to another, or
send them both to the same message queue.
1. To use Intrusion Detection, select 5. Intrusion Detection from the iSecurity (part I)
Global Parameters screen. The Firewall Intrusion Detection screen appears.
2. Set correct parameters and press Enter.
Firewall 15 User Manual
151
Chapter : Configuration and Maintenance
Firewall Intrusion Detection System
Parameter or Option
Monitoring message
queues
Write rejections to
security audit journal
Description
Name = name of user
Library = location of message queue
Select Y (Yes) or N (No) to send rejections to the Audit journal.
Password Exit Programs
This option provides an additional check for FTP passwords. It is a security risk to code passwords
which are kept for later use. Whenever a password has to be validated, and the *PGM is written as
the validation parameter, the program mentioned here will be called to verify that the entered
password is the correct one.
1. To work with Password Exit Programs, select 6. Password Exit Programs from the
iSecurity (part I) Global Parameters screen.
2. Set correct parameters and press Enter.
Firewall 15 User Manual
152
Chapter : Configuration and Maintenance
Firewall Password Exit Programs
Enable ACTION (CL Script + More)
This feature enables Action to respond automatically to security events generated by Firewall and
Screen. In order for this feature to work, the user must verify that Action is installed and functioning
correctly.
To enable real-time detection:
1. Select 7. Enable ACTION (CL Script + more) from the iSecurity (part I) Global
Parameters screen. The Enable Real-Time Detection screen appears.
2. Select the correct options according to the following table.
3. Select 1. Work with Servers from the Firewall main menu.
4. Choose a server and select option 1 from the Modify Server Security screen.
5. Choose desired option from the Allow Action to React field and press Enter.
Firewall 15 User Manual
153
Chapter : Configuration and Maintenance
Enable Real-Time Detection
Option
Description
Enable Action for
Firewall
1 = Do not use Action
2 = Act only by rejects
3 = Act by all transactions
4 = Act by server. (default)
Enable Action for
Screen
Y = Enable Screen protection
N = Do not enable Screen protection (default)
SYSLOG
This feature sends security-related events from various IBM i facilities (such as logs and message
systems) to a remote Syslog server according to range of severities like: emergency, alert, critical,
error, warning and more.
By using SYSLOG, a user can decide whether he wants the SYSLOG to contain all of Firewall
events (2=All), rejects only (1) or none (0).
Firewall 15 User Manual
154
Chapter : Configuration and Maintenance
SYSLOG
By using Audit -> 81. System Configuration -> 21. Syslog Definitions, a user can define when to
send Syslog messages, to what IP address, from which facility (list of optional facilities below), in
what range of severity (list below) and the format of the message.
Log retention
Determine how many days you want to keep the Firewall log.
The job GS#MNT is used to delete logs regarding the number of retention days. This job is placed as
a job scheduler and is working at a specific time.
99 = *NOMAX (save and do not erase old history logs)
Firewall 15 User Manual
155
Chapter : Configuration and Maintenance
Log & Journal Retention
Language Support
Double-Byte Character Set (DBCS) is a set of characters in which each character is represented by
two bytes. These character sets are commonly used by national languages, such as Japanese and
Chinese, which have more symbols than can be represented by a single byte.
There are two option: the default setting of ‘N’ (do not support DBCS), and ‘Y’ (support DBCS).
Choose an option based on the relevant national language.
1. To work with iSecurity Language Support, select 91. Language Support from the
iSecurity (part I) Global Parameters screen. The iSecurity Language Support screen
appears.
2. Set your desired parameter and press Enter.
Firewall 15 User Manual
156
Chapter : Configuration and Maintenance
iSecurity Language Support
The Maintenance Menu
The Maintenance Menu enables the user to set and display global definitions for Security Part 1. To
access the Maintenance Menu, select 82. Maintenance Menu from the Firewall main menu.
Maintenance Menu
Firewall 15 User Manual
157
Chapter : Configuration and Maintenance
iSecurity Part 1 Global
Export / Import Definitions
This option is useful in transferring configuration settings/definitions from one System i to another,
when you need to distribute definitions between LPARs or different machines.
Firewall will export/import: IP addresses/ System names (SNA)/ Users/ Groups/ Applicant/ Locate/
Native & IFS/ Logon controls FTP-TELNET-Passthrough/ Prechecks DDM-DRDA/ Time groups
and more.
Export iSec Part 1 Definitions (EXPS1DFN)
Firewall 15 User Manual
158
Chapter : Configuration and Maintenance
Import iSec Part 1 Definitions (IMPS1DFN)
Parameter or Option Description
Work library and
SAVF in QGPL
Firewall /Screen
Options
Update remote
systems
Destination of export library.
S1 (Security One) is default setting
Name= name of target library.
Definitions pertaining to these two applications
*ADD = add to a previously imported/exported rule
*REPLACE = replace a previously imported/exported rule
*BYSUBJECT= import/export rules by subject (IP address, etc.)
Systems to update= When exporting Firewall definitions, the
user can choose to export and import at once by preparing the
definitions in a SAVF and send it to a remote system or several
remote systems, and automatically import them into it.
Update type
*UPD = add new records and replace existing
*REPLACE = clear the definition file and copy the new
Keep backup in
library
Name= library where backup definitions are found
Display Definitions
This feature enables the user to display and print iSecurity Part One definitions:
1. To display, select the desired report type from the Display Security I Definitions
screen. After selecting report type, additional parameters appear.
Firewall 15 User Manual
159
Chapter : Configuration and Maintenance
2. Select choices and press Enter.
Display Security 1 Definitions
Parameter or Option
Report type
Format
Output
Description
*ALL = all general definitions
*CFG = per configuration
*SRVR = per server
*IPIN = per IP address
*LIST = Short form
*DETAILS = full form
Select correct print option. See *PRINT1-*PRINT9 Setup at the
end of this chapter for details.
Work with Operators
See Modifying Operators’ Chapter 2: First Steps for a description of this feature.
Firewall Specifics
Save Firewall Log
Allows users to save the daily Firewall log in a SAVF format.
Firewall 15 User Manual
160
Chapter : Configuration and Maintenance
Save Firewall Log
Replace Firewall Users
This option has 2 purposes:
1. Copy and delete the users’ Firewall definitions and rules as defined in options 11, 12, 13, 21, 22,
31, 32, to another user profile.
2. Remove the user definitions and rules from the Firewall, using *REMOVE at the Replace to user
field.
Replace FW user (RPLFWUSR)
Firewall 15 User Manual
161
Chapter : Configuration and Maintenance
General
Work with Collected Data
Administrators can view summaries of Audit, Firewall, and Action journal contents by day, showing
the number of entries for each day together with the amount of disk space occupied. Administrators
can optionally delete individual days in order to conserve disk space.
1. To view summaries of audit journals, select 51. Work with Collected Data. The Work
with Collected Data screen appears.
Work with Collected data
2. Enter 1 (Firewall) and press Enter. The Work with Collected Data – Firewall screen
appears.
Firewall 15 User Manual
162
Chapter : Configuration and Maintenance
Work with Collected Data - Firewall
3. Enter the correct options and press Enter.
Purging all data of FIREWALL
RMVM SMZTMPA/GSCALP *ALL
CLRPFM SMZTMPA/GSSTTSP
*PRINT1-*PRINT9 Setup
Firewall allows the user to define up to nine specific printers for printing output. These may be local
or remote printers. *PRINT1-*PRINT9 are special values which can be entered in the OUTPUT
parameter of any commands or options that support printed output.
Output to any of the nine remote printers is directed to a special output queue specified on the
*PRINT1-*PRINT9 User Parameters screen, which, in turn, directs the output to a print queue on the
remote system. You use the CHGOUTQ command to specify the IP address of the designated remote
location and the name of the remote output queue.
By default, two remote printers are pre-defined. *PRINT1 is set to print at a remote location (such as
the home office). *PRINT2 is set to print at a remote location in addition to the local printer. In
addition:
*PRINT3 creates an excel file.
*PRINT3-9 are user modifiable
To define remote printers, perform the following steps:
1. Select 82 from the main menu.
Firewall 15 User Manual
163
Chapter : Configuration and Maintenance
2. Select 59 from the Maintenance menu. The *PRINT1-*PRINT9 User Parameters
screen appears.
Journal Product Definitions
Add Journal
Select option 71. Add Journal to record the system physical files changes in the data library. The
screen Create Journal – Confirmation appears. Press Enter to confirm.
Create Journal – Confirmation
Remove Journal
Select option 72. Remove Journal to end the journaling of changes in the system physical files. The
End Journal - Confirmation screen appears. Press Enter to confirm.
Firewall 15 User Manual
164
Chapter : Configuration and Maintenance
End Journal - Confirmation
Display Journal
To view journalled files, select option 79. Display Journal.
Display Journal Entries
Firewall 15 User Manual
165
Chapter : Configuration and Maintenance
*PRINT1-*PRINT9 User Parameters
3. Enter the name of the local output queue and library as shown in the above example.
The user may optionally enter a description.
Parameter
* Print
OutQ Name
OutQ Library
Save
Hold
Description
Description
Printer number
Name of the local output queue
Name of the local output queue’s library
Y= yes
N = no
Y= yes
N = no
Optional text description
4. Enter the following command on any command line to direct output to the remote
printer. This assumes that the designated output queue has already been defined.
CHGOUTQ OUTQ('local outq/library') RMTSYS(*INTNETADR)
+ RMTPRTQ('outq on remote') AUTOSTRWTR(1) CNNTYPE(*IP) TRANSFORM(*NO)
+ INTNETADR('IP of remote')
Parameter
QUTQ()
RMTPRTQ()
INTNETADR()
Description
Name of the local output queue
Name of the remote print queue
IP address of the remote system
NOTE: Press F14 for Setup instructions
If the desired output queue has not yet been defined use the CRTOUTQ command to create it. The
command parameters remain the same.
Firewall 15 User Manual
166
Chapter : Configuration and Maintenance
For example, *PRINT1 in the above screen, the following command would send output to the output
queue 'MYOUTQ' on a remote system with the IP address '1.1.1.100' as follows:
CHGOUTQ OUTQ(CONTROL/SMZTMPA) RMTSYS(*INTNETADR)
+ RMTPRTQ(MYOUTQ) AUTOSTRWTR(1) CNNTYPE(*IP) TRANSFORM(*NO)
+ INTNETADR(1.1.1.100)
Uninstall
Choose 91. Uninstall Product from the Maintenance Menu, and follow the directions on the screen.
Uninstall SECURITY1P
Firewall 15 User Manual
167
Chapter : Configuration and Maintenance
iSecurity Central Administration
Option 83. Central Administration allows running reports in 2 different ways:
iSecurity Central Administration – Firewall
1. To get current information from existing report or query. Adjusting the system
parameters only, to collect information from all the groups in the system to output file
that can be sent via email, select option 1. Define Communication Attributes. The
Work with Network Systems screen appears.
2. Press F6 to define a new network system to work with and press Enter to confirm.
Firewall 15 User Manual
168
Chapter : Configuration and Maintenance
Add Network System
3. To run the reports on a copy of data library of a remote system, select option 11. Select
a Copy, run Reports. The Running Locally on a Copy of a Remote System screen
appears displays the system’s information and shows libraries which start with
SMZ4DTA* or SMZTMPA*
Running Locally on a Copy of a Remote System
Note:
Firewall 15 User Manual
169
Chapter : Configuration and Maintenance
NOTE: Running on multiple systems with either of the following:
● Merge data to a single output . MRGDTA(*NO),
● Place output on . . . . . . . . OUTON(*SYSTEM)
valid for *, *PRINT-*PRINT9 only.
Selecting other output types such as *HTML, *PDF… may result in unexpected results.
4. To create a distribution package of the definitions created (export) select options 21.
Create a Distribution Package. The Export iSecurity/Part 1 Defns. (EXPS1DFN)
screen appears
Export iSecurity/Part 1 Defns. (EXPS1DFN)
5. To restore a distribution package of the definitions created (import) select options 22.
Restore a Distribution Package. The Import iSecurity/Part 1 Defns. (IMPS1DFN)
screen appears
Firewall 15 User Manual
170
Chapter : Configuration and Maintenance
Import iSecurityPart 1 Defns. (IMPS1DFN)
Firewall 15 User Manual
171
Chapter : Configuration and Maintenance
Appendix: List of Firewall Exit Points
iSecurity for System i protects all the security-related exit points.
In order to display all the exit points, use command WRKREGINF.
Sign On: iSecurity is the only iSeries security solution that checks all green screen signons,
both by IP address and by screen name.
Following is a list of the 53 security-related exit points covered by iSecurity.
Note that some exit points are interconnected.
1. QIBM_QTF_TRANSFER
Original File Transfer Function- TRAN0100
2. QIBM_QTMF_SVR_LOGON
FTP Server Logon- TCPL0100
3. QIBM_QTMF_SVR_LOGON
FTP Server Logon- TCPL0200
4. QIBM_QTMF_SVR_LOGON
FTP Server Logon- TCPL0300
5. QIBM_QTMF_SERVER_REQ
FTP Server Incoming Request Validation-VLRQ0100
6. QIBM_QTMF_CLIENT_REQ
FTP Client Outgoing Request Validation-VLRQ0100
7. QIBM_QTOD_SERVER_REQ
TFTP Server Request Validation-VLRQ0100
8. QIBM_QTMX_SVR_LOGON
REXEC Server Logon- TCPL0100
9. QIBM_QTMX_SVR_LOGON
REXEC Server Logon- TCPL0300
10. QIBM_QTMX_SERVER_REQ
REXEC Server Request Validation-VLRQ0100
11. QIBM_QRQ_SQL
Original Remote SQL Server- RSQL0100
12. QIBM_QZDA_SQL1
Database Server- SQL Access & Showcase- ZDAQ0100
13. QIBM_QZDA_SQL2
Database Server- SQL Access- ZDAQ0200
14. SC_QUERY_ROW_SEC
Database Showcase- SCRS0100
15. QIBM_QZDA_NDB1
Database Server- data base access- ZDAD0100
16. QIBM_QZDA_NDB1
Database Server- data base access- ZDAD0200
17. QIBM_QZRC_RMT
Remote Command/Program Call- CZRC0100
18. QIBM_QPWFS_FILE_SERV
File Server- PWFS0100
19. QIBM_QTG_DEVINIT
Telnet Device Initialization- INIT0100
20. QIBM_QTG_DEVTERM
Telnet Device Termination- TERM0100
21. QIBM_QWT_JOBNOTIFY
Sign-on Completed- NTFY0100
22. QIBM_QTMT_WSG
WSG Server Sign-On Validation- QAPP0100
23. QIBM_QHQ_DTAQ
Original Data Queue Server- DTAQ0100
24. QIBM_QZHQ_DATA_QUEUE
Data Queue Server- ZHQ00100
25. QIBM_QVP_PRINTERS
Original Virtual Printer Server- PRNT0100
Firewall 15 User Manual
172
Appendix: List of Firewall Exit Points
26. QIBM_QLZP_LICENSE
Original License Mgmt. Server- LICM0100
27. QIBM_QZSC_LM
Central Server- License Mgmt.- ZSCL0100
28. DDM
Network Attribute- DDM Requested Access-DDMACC
29. DRDA
Network Attribute- Display Requested Database Access- DDMACC
30. QIBM_QZSC_NLS
Central Server- Conversion Map- ZSCN0100
31. QIBM_QZSC_SM
Central Server- Client Mgmt.- ZSCS0100
32. QIBM_QNPS_ENTRY
Network Printer Server- entry- ENTR0100
33. QIBM_QNPS_SPLF
Network Printer Server- spool file- SPLF0100
34. QIBM_QMF_MESSAGE
Original Message Server- MESS0100
35. QIBM_QZDA_INIT
Database Server- entry- ZDAI0100
36. QIBM_QZDA_ROI1
Database Server- object information- ZDAR0100
37. QIBM_QZDA_ROI1
Database Server- object information- ZDAR0200
38. QIBM_QSY_CHG_PROFILE
Change User Profile- CHGP0100
39. QIBM_QSY_CRT_PROFILE
Create User Profile- CRTP0100
40. QIBM_QSY_DLT_PROFILE
Delete User Profile- after Delete- DLTP0100
41. QIBM_QSY_DLT_PROFILE
Delete User Profile- before Delete- DLTP0200
42. QIBM_QSY_RST_PROFILE
Restore User Profile- RSTP0100
43. QIBM_QZSO_SIGNONSRV
TCP Signon Server- ZSOY0100
44. QIBM_QWC_PWRDWNSYS
Prepower Down System- PWRD0100
45. QIBM_QTOD_DHCP_ABND
DHCP Address Binding Notify- DHCA0100
46. QIBM_QTOD_DHCP_ARLS
DHCP Address Release Notify- DHCR0100
47. QIBM_QTOD_DHCP_REQ
DHCP Request Packet Validation- DHCV0100
48. QRMTSIGN
System Value- Remote Signon Control
49. QPWDVLDPGM
System Value- Password Validation
50. QIBM_QP0L_SCAN_OPEN
IFS Scan on Open- SCOP0100
51. QIBM_QP0L_SCAN_CLOSE
IFS Scan on Close- SCCL0100
52. QINACTITV
System Value- Inactive Job Timeout
53. QINACTMSGQ
System Value- Inactive Job MessageQ
Firewall 15 User Manual
173
Appendix: List of Firewall Exit Points
Thank you for using iSecurity Firewall.
If you have any questions or problems, please contact:
Emails:
Raz-Lee New York
Raz-Lee Israel
[email protected]
Tel: 1-888-RAZLEE-4
Tel: +972-9-9588860
[email protected]
Tel: 1-888-RAZLEE-2
Firewall 15 User Manual
174
Appendix: List of Firewall Exit Points