1
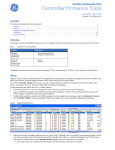
PXNplus CPU Board Firmware
Upgrade Instructions
Introduction
These are the PXNplus CPU Board Firmware Upgrade Instructions
(460638001R) for the following GE Security documents:
•
•
•
•
M5 Controller Installation Manual (460130002G)
Micro/PX-2000, Micro/PXN-2000, and Micro2000PXNplus Installation
Manual (460419001M)
Micro/PX-2000, Micro/PXN-2000, and Micro2000PXNplus Quick
Installation Instructions (460435001N)
M3000 Controller Installation Manual (460630001D)
Copyright © 2009, GE Security Inc. All rights reserved.
This document may not be copied in whole or in part, or otherwise reproduced except as specifically permitted under US
copyright law, without the prior written consent from GE.
Document number/revision: 460638001R (October, 2009).
2
PXNplus CPU Board Firmware
Upgrade Instructions
Verify your PXNplus firmware build
1. In the browser Address field, enter the IP address of the controller.
2. At the Integrated Configuration Tool password screen, log on.
3. Select Micro Info. Use the following table:
Table 1.
Build versions
If this build is installed...
The following displays...
R114
Build Version - PXNP_DIST_R114
PP Version - PP_VER_122
SP Version - SP_VER_7514
R113
Build Version - PXNP_DIST_R113
PP Version - PP_VER_121
SP Version - SP_VER_7013
R112
Build Version - PXNP_DIST_R112
PP Version - PP_VER_120
SP Version - SP_VER_7012
R111
Build version: PXNP_DIST_R111
PP version: PP_VER_119
SP version: SP_VER_7111
R110
Build version: PXNP_DIST_R110
PP version: PP_VER_118
SP version: SP_VER_6118
R106
Build version: PXNP_DIST_R106
PP version: PP_VER_114
SP version: SP_VER_6114
R105
Build version: PXNP_DIST_R105
PP version: PP_VER_113
SP version: SP_VER_6113
3
Upgrade instructions
Upgrade instructions to PXNP_DIST_R114/PP_VER_122/SP_VER_7514
From PXNP_DIST_R111/PP_VER_121/SP_VER_7013 or later
Using the Integrated Configuration Tool: Allocate 15 to 20 minutes per controller.
CAUTION:
DO NOT reset or restart the controller in the middle of the flash process or the controller will become
non-functional.
1. In the browser Address field, enter the IP address of the controller.
2. At the Integrated Configuration Tool password screen, log on.
3. Click Flash Micro and browse to the PXNP7514.efl file.
4. Wait for the file to load. After the upload is complete, you should see a message Uploaded file
processed correctly. When you click OK for the message, an alert will pop up asking if it can
close the window. Select NO, and click on Restart Controller to reboot the controller.
5. Wait for 8 to 10 minutes for the controller to complete its boot sequence and install updates. During
this time, DS7 and DS8 alternate ON while the image is being copied and when the controller is
installing the updates for kernel, web-server, and application. This sequence is repeated three times
while rebooting, once after each update. The normal start of this LED sequence is DS3 solid ON for
several seconds and DS7 solid ON for 30 to 40 seconds.
Once the flash update is complete, the following sequence will occur:
•
•
•
Picture Perfect - DS4 flashes once per second and DS1 turns solid ON.
Secure Perfect/FCWnx - DS4 flashes twice per second and DS1 turns solid ON.
The controller will then come online with the host.
6. Browse back into the controller and verify the build version is
PXNP_DIST_R114/PP_VER_122/SP_VER_7514.
Using eFlash through the Secure Perfect or Picture Perfect host: Allocate about 20 minutes for
upgrading each controller. Refer to eFlash instructions on page 8 and your host user manual for more
information on eFlash.
1. eFlash the PXNP7514.efl file.
2. The controller will reboot automatically after the file is uploaded. Since the controller is going through
the complete boot sequence and installing updates, it will need at least 8 minutes to connect back to the
host.
3. To verify the build upgrade, refer to Verify your PXNplus firmware build on page 2.
4
PXNplus CPU Board Firmware
Upgrade Instructions
Upgrade instructions to PXNP_DIST_R113/PP_VER_121/SP_VER_7013
From PXNP_DIST_R111/PP_VER_119/SP_VER_7011 or later
Using the Integrated Configuration Tool: Allocate 15 to 20 minutes per controller.
CAUTION:
DO NOT reset or restart the controller in the middle of the flash process or the controller will become
non-functional.
1. In the browser Address field, enter the IP address of the controller.
2. At the Integrated Configuration Tool password screen, log on.
3. Click Flash Micro and browse to the PXNP7013.efl file.
4. Wait for the file to load. After the upload is complete, you should see a message Uploaded file
processed correctly. When you click OK for the message, an alert will pop up asking if it can
close the window. Select NO, and click on Restart Controller to reboot the controller.
5. Wait for 8 to 10 minutes for the controller to complete its boot sequence and install updates. During
this time, DS7 and DS8 alternate ON while the image is being copied and when the controller is
installing the updates for kernel, web-server, and application. This sequence is repeated three times
while rebooting, once after each update. The normal start of this LED sequence is DS3 solid ON for
several seconds and DS7 solid ON for 30 to 40 seconds.
Once the flash update is complete, the following sequence will occur:
•
•
•
Picture Perfect - DS4 flashes once per second and DS1 turns solid ON.
Secure Perfect/FCWnx - DS4 flashes twice per second and DS1 turns solid ON.
The controller will then come online with the host.
6. Browse back into the controller and verify the build version is
PXNP_DIST_R113/PP_VER_121/SP_VER_7013.
Using eFlash through the Secure Perfect or Picture Perfect host: Allocate about 20 minutes for
upgrading each controller. Refer to eFlash instructions on page 8 and your host user manual for more
information on eFlash.
1. eFlash the PXNP7013.efl file.
2. The controller will reboot automatically after the file is uploaded. Since the controller is going through
the complete boot sequence and installing updates, it will need at least 8 minutes to connect back to the
host.
3. To verify the build upgrade, refer to Verify your PXNplus firmware build on page 2.
5
ATTENTION: The following information pertains to build versions PXNP_DIST_R112 and earlier.
Upgrade to PXNP_DIST_R112/PP_VER_120/SP_VER_7012
From PXNP_DIST_R111/PP_VER_119/SP_VER_7011
Using the Integrated Configuration Tool: Allocate about 10 minutes for upgrading each controller.
1. In the browser Address field, enter the IP address of the controller.
2. At the Integrated Configuration Tool password screen, log on.
3. From the Flash Controller menu, select Flash Controller.
4. Browse to the PXNP7012.efl and click Save.
5. The upgrade is complete when the status bar displays Done.
Note:
The controller may reboot several times during this process.
Using the eFlash through the Facility Commander Wnx, Secure Perfect or Picture Perfect host:
Allocate about 20 to 45 minutes for upgrading each controller. Refer to eFlash instructions on page 8 and
your host user manual for more information on eFlash.
1. eFlash the PXNP7012.efl file.
2. The controller reboots automatically once the upgrade is successful.
Note:
The controller may reboot several times as the kernel, web server, and application are updated.
3. To verify the build upgrade, refer to Verify your PXNplus firmware build on page 2.
From versions prior to PXNP_DIST_R111/PP_VER_119/SP_VER_7011
The upgrade to R112 from versions prior to R111 should be done only through the host software eFlash. Do NOT
use the Integrated Configuration Tool!
Using the Integrated Configuration Tool: Not supported.
Using eFlash through the Facility Commander Wnx, Secure Perfect, or Picture Perfect host:
Allocate about 20 to 45 minutes for upgrading each controller. Refer to eFlash instructions on page 8 and
your host user manual for more information on eFlash.
1. eFlash the PXNP7012.efl file.
2. The controller reboots automatically once the upgrade is successful.
Note:
The controller may reboot several times as the kernel, web server, and application are updated.
3. To verify the build upgrade, refer to Verify your PXNplus firmware build on page 2.
6
PXNplus CPU Board Firmware
Upgrade Instructions
Upgrade to PXNP_DIST_R111/PXNP7111 from any previous version
The upgrade to R111 should be done only through the host software eFlash. Do NOT use the Integrated
Configuration Tool!
Using the Integrated Configuration Tool: Not supported.
Using eFlash through the Secure Perfect or Picture Perfect host:
Allocate about 20 to 45 minutes for upgrading each controller. Refer to eFlash instructions on page 8 and
your host user manual for more information on eFlash.
1. eFlash the PXNP7111.efl file.
2. The controller reboots automatically once the upgrade is successful.
Note:
The controller may reboot several times as the kernel, web server, and application are updated.
3. To verify the build upgrade, refer to Verify your PXNplus firmware build on page 2.
Upgrade to PXNP_DIST_R110/PXNP6118 from PXNP_DIST_R106/PXNP6114
Using the Integrated Configuration Tool:
Allocate about 5 to 7 minutes for upgrading each controller. Refer to your controller installation manual for
more information about the Integrated Configuration Tool.
1. In the browser Address field, enter the IP address of the controller.
2. At the Integrated Configuration Tool password screen, log on.
3. Click Flash Micro and browse to the PXNP6118.efl file.
4. Wait for the file to load. The message Updated file processed correctly displays.
5. Click Flash Micro and browse to the PXNPK6118.efl file.
The status bar on the browser should say Done.
6. Reboot the controller manually by shorting JP6 on the PXNplus CPU board.
7. Log in to the Integrated Configuration Tool again.
8. Click Flash Micro and browse to the PXNPH6118.efl file.
9. Wait for the file to load. The message Updated file processed correctly displays. The
controller reboots automatically.
10. Clear the cache of your Internet Browser. If using Microsoft Internet Explorer, select Tools > Internet
Options.
•
•
•
•
In the Temporary Internet files section, click Delete Cookies, then OK to confirm.
In the same section, click Delete Files. At the Delete Files dialog, select Delete all offline
content, then click OK.
In the History section, click Clear History, then Yes to confirm.
Click OK to close the Internet Options dialog box.
11. To verify the build upgrade, refer to Verify your PXNplus firmware build on page 2.
7
Using eFlash through the Secure Perfect or Picture Perfect host:
Allocate about 20 to 25 minutes for upgrading each controller. Refer to eFlash instructions on page 8 and
your host user manual for more information on eFlash.
1. eFlash the PXNP6118.efl file.
2. The application restarts automatically after the file is flashed successfully.
3. eFlash the PXNPK6118.efl file.
4. Reboot the controller manually by shorting JP6 on the PXNplus CPU board.
5. eFlash the PXNPH6118.efl file.
6. The controller reboots automatically after the file is flashed successfully.
7. To verify the build upgrade, refer to Verify your PXNplus firmware build on page 2.
Upgrade to PXNP_DIST_R106/PXNP6114 from PXNP_DIST_R105/PXNP6113
Using the Integrated Configuration Tool:
Allocate about 5 to 7 minutes for upgrading each controller. Refer to your controller installation manual for
more information about the Integrated Configuration Tool.
1. In the browser Address field, enter the IP address of the controller.
2. At the Integrated Configuration Tool password screen, log on.
3. Click Flash Micro and browse to the PXNPK6114.efl file.
The status bar on the browser should say Done and the controller should reboot automatically.
4. Log onto the Integrated Configuration Tool again.
5. Click Flash Micro and browse to the PXNPH6114.efl file.
6. Wait for the file to load. The message Updated file processed correctly displays.
7. Reboot the controller manually by shorting JP6 on the PXNplus CPU board.
8. Log onto the Integrated Configuration Tool again.
9. Click Flash Micro and browse to the PXNP6114.efl file.
10. Wait for the file to load. The message Updated file processed correctly displays.
11. To verify the build upgrade, refer to Verify your PXNplus firmware build on page 2.
Using eFlash through the Secure Perfect or Picture Perfect host:
Allocate about 20 to 25 minutes for upgrading each controller. Refer to eFlash instructions on page 8 and
your host user manual for more information on eFlash.
1. eFlash the PXNPK6114.efl file.
2. The controller reboots automatically after the file is flashed successfully.
3. eFlash the PXNPH6114.efl file.
4. Reboot the controller manually by shorting JP6 on the PXNplus CPU board.
5. eFlash the PXNP6114.efl file.
6. To verify the build upgrade, refer to Verify your PXNplus firmware build on page 2.
8
PXNplus CPU Board Firmware
Upgrade Instructions
eFlash instructions
Upgrading to build R112, R113, or R114:
• If the controller is at R111 or later, upgrading to R112, R113, or R114 can be done using the host software
eFlash or the Integrated Configuration Tool.
• If the controller is at R105, R106, or R110, upgrading to R112, R113, or R114 MUST be done using the host
software eFlash. Do NOT use the Integrated Configuration Tool.
For Picture Perfect users
•
For Picture Perfect 4.0 SP2/Picture Perfect 2.0 SP1 users and controller versions later than
R111: When selecting the firmware .efl file to update a PXNplus-based controller, select the .efl
file for PXNplus. There is no need to select the Direct and Network files.
For all other Picture Perfect users and controller versions prior to R111: When selecting the
firmware .efl file to update a PXNplus-based controller, select both Direct Micro File and Network
Micro File regardless of the actual physical communications being used. This means you should select
both Direct Micro File and Network Micro File whether you have a direct-connect, dial-up or
network-based PXNplus controller.
•
•
Because of the existing filter on the file name, the file name PXNPxxxx.efl is not displayed in the
selection list. Manually enter the path to the file on Picture Perfect 2.0 and later versions.
In order to prevent a Flash Timeout Failure (indicated by a red icon), the system administrator needs to
edit the /cas/log/.eflashrc file and enter the following minimum values:
timeout = 60
flashwait = 1440
Note:
For build R111, flashwait should be set to 2880.
Some networks may require higher values for these parameters.
•
•
When the line of controllers has a combination of PXNplus and PX CPU boards, the whole line cannot
be flashed at one time. When flashing PXNplus boards, select PXNPxxxx.efl as the Direct Micro
File. When flashing PX boards, select m5nxxx.hex as the Direct Micro File.
For downstream controllers when the head-of-line controller is Network + Dialup, disable the dial-up
option before starting the eFlash process. Then, eFlash the first downstream controller, then the second
and continue down the line until the process is complete.
For example: If this is the controller line: Head-of-Line Controller
Controller C
Controller A
Controller B
Then flash in this order:
a. eFlash head-of-line controller first. (If the controller is Network + Dial-up, disable the dial-up
option before beginning the eFlash.)
b. eFlash Controller A.
c. eFlash Controller B.
d. eFlash Controller C.
9
For Secure Perfect users
When flashing a line of controllers with a PXNplus controller as the head-of-line controller, only two
downstream controllers should be selected at a time.
10
PXNplus CPU Board Firmware
Upgrade Instructions